HOLIDAY DONATION DRIVE - SUPPORT MSW - DO YOUR PART TO KEEP THIS GREAT FORUM GOING! (Only 20 donations so far - C'mon guys!)
×

guraus
-
Posts
361 -
Joined
-
Last visited
Content Type
Profiles
Forums
Gallery
Events
Everything posted by guraus
-
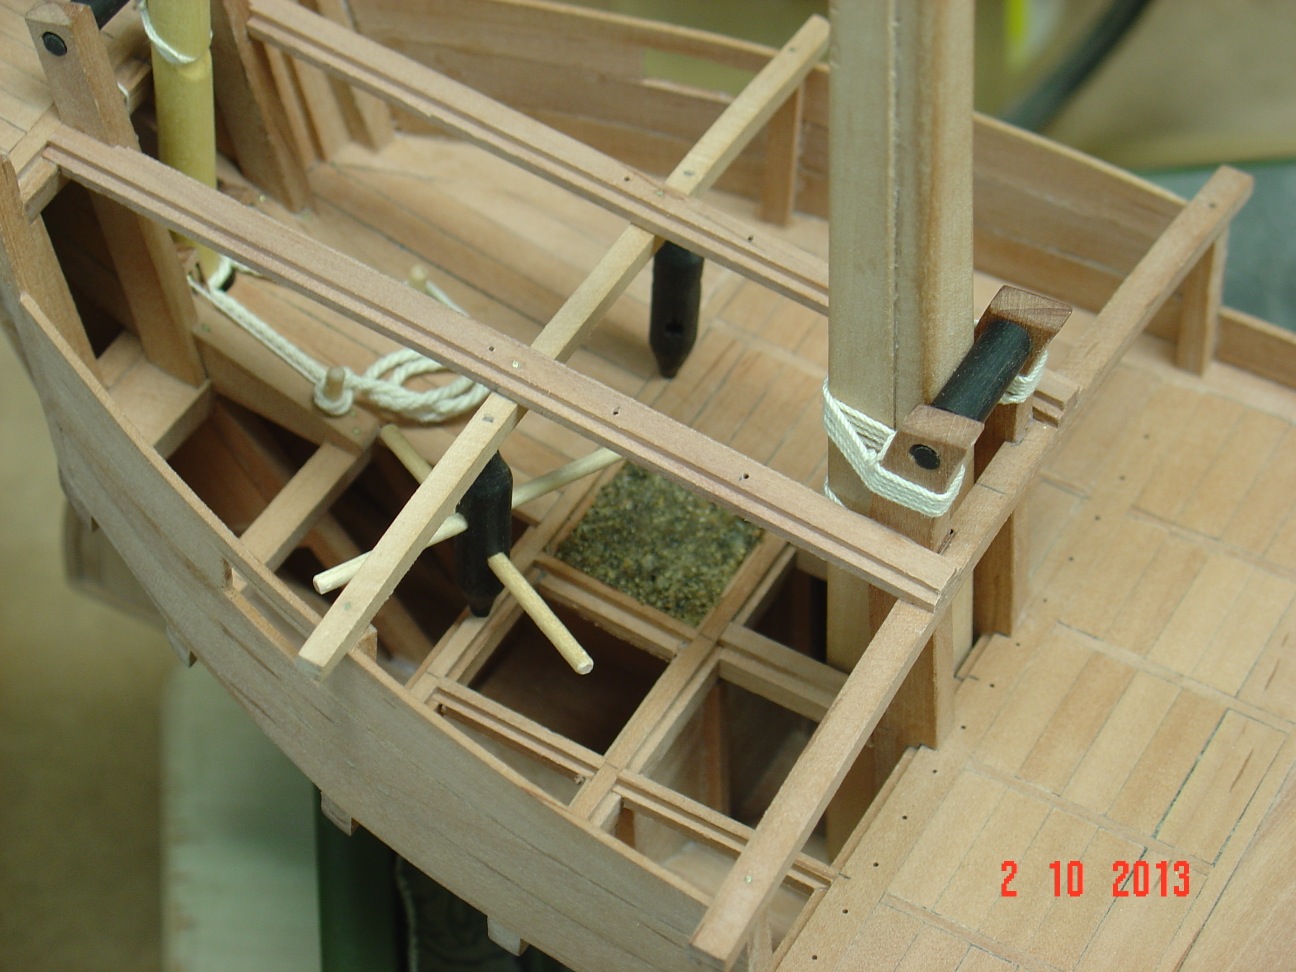
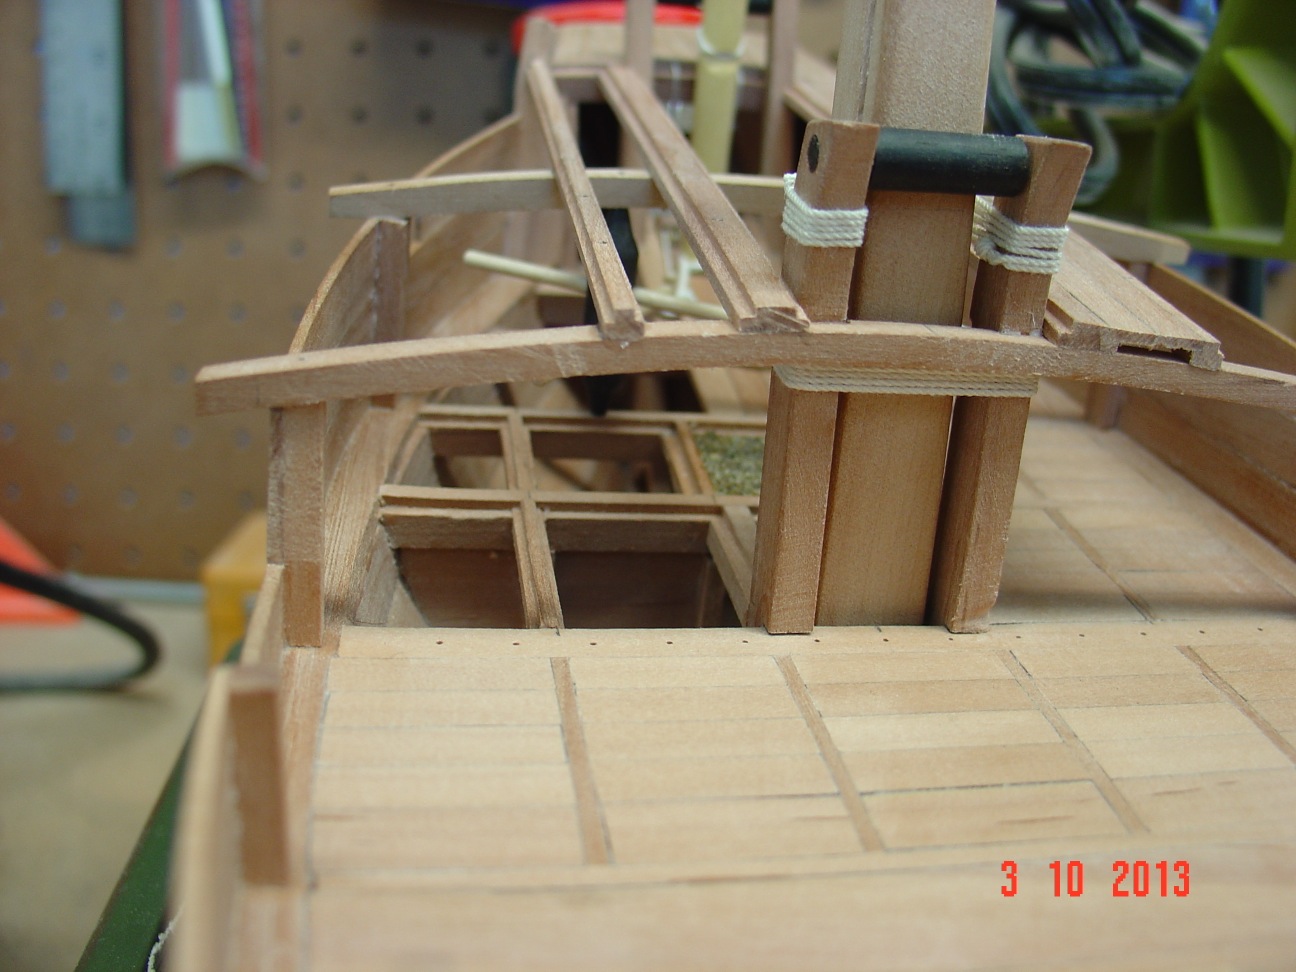
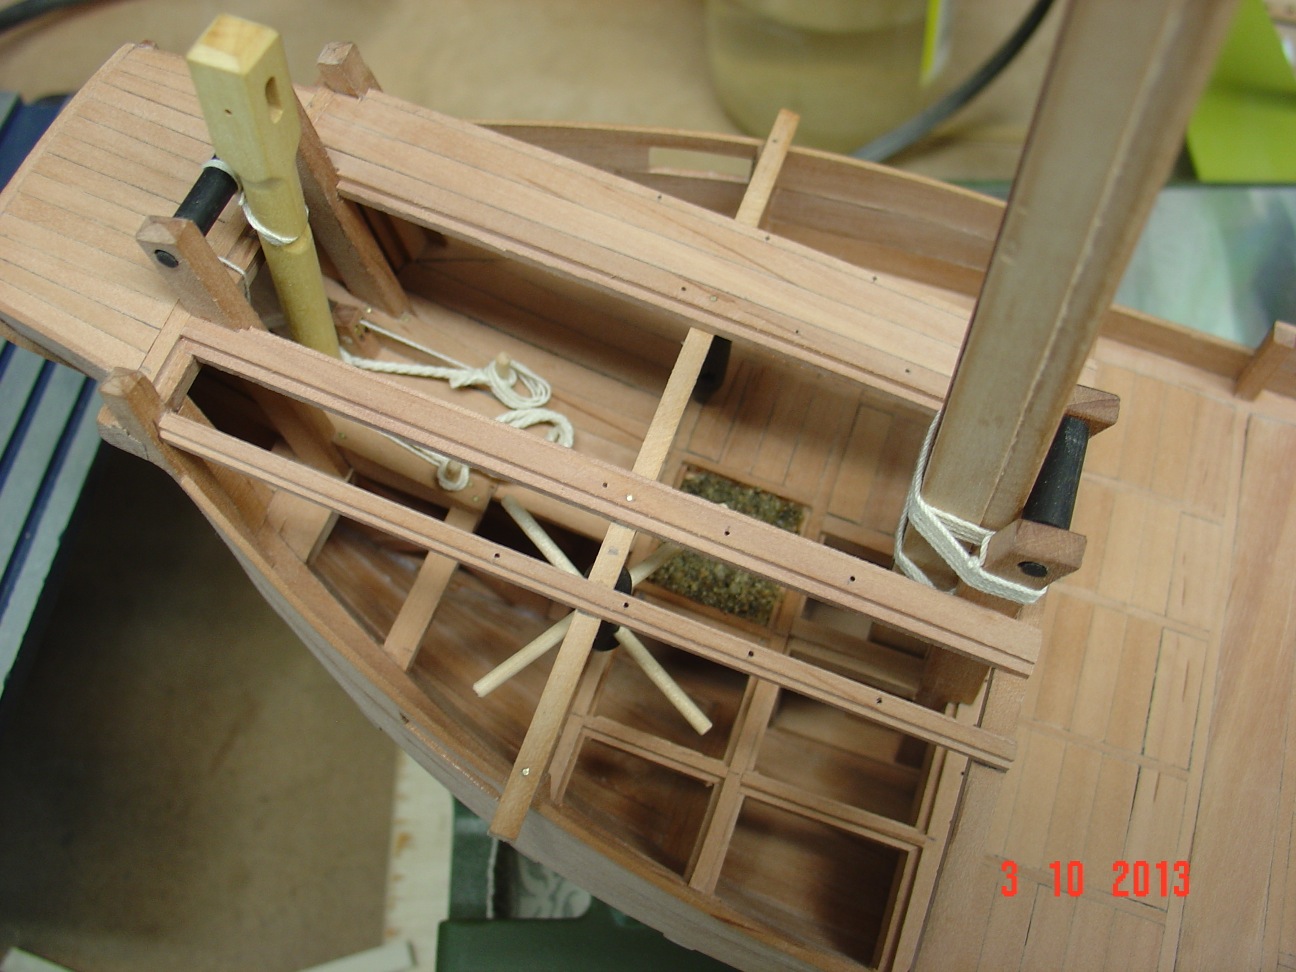
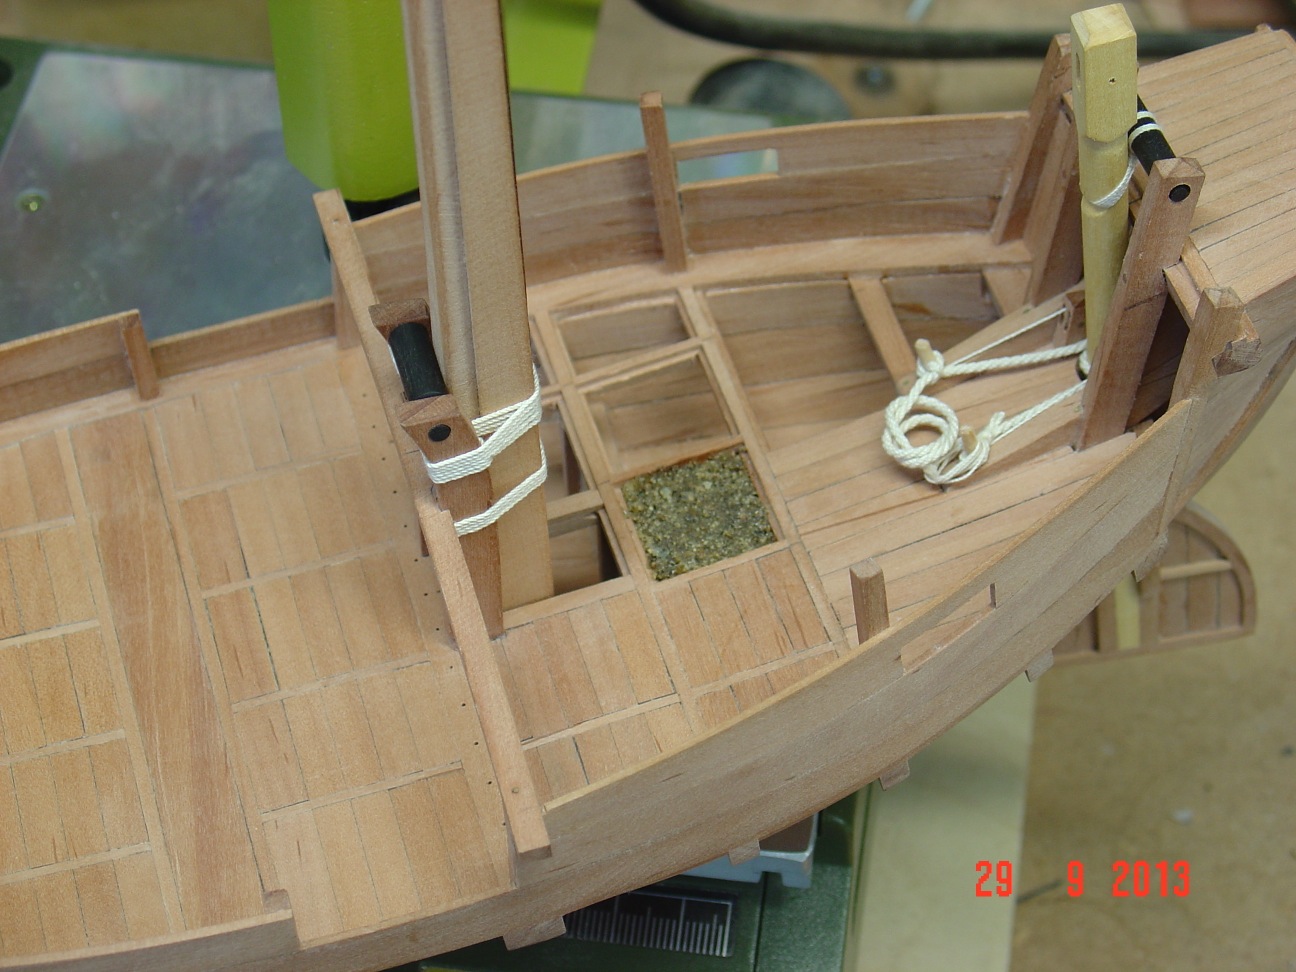
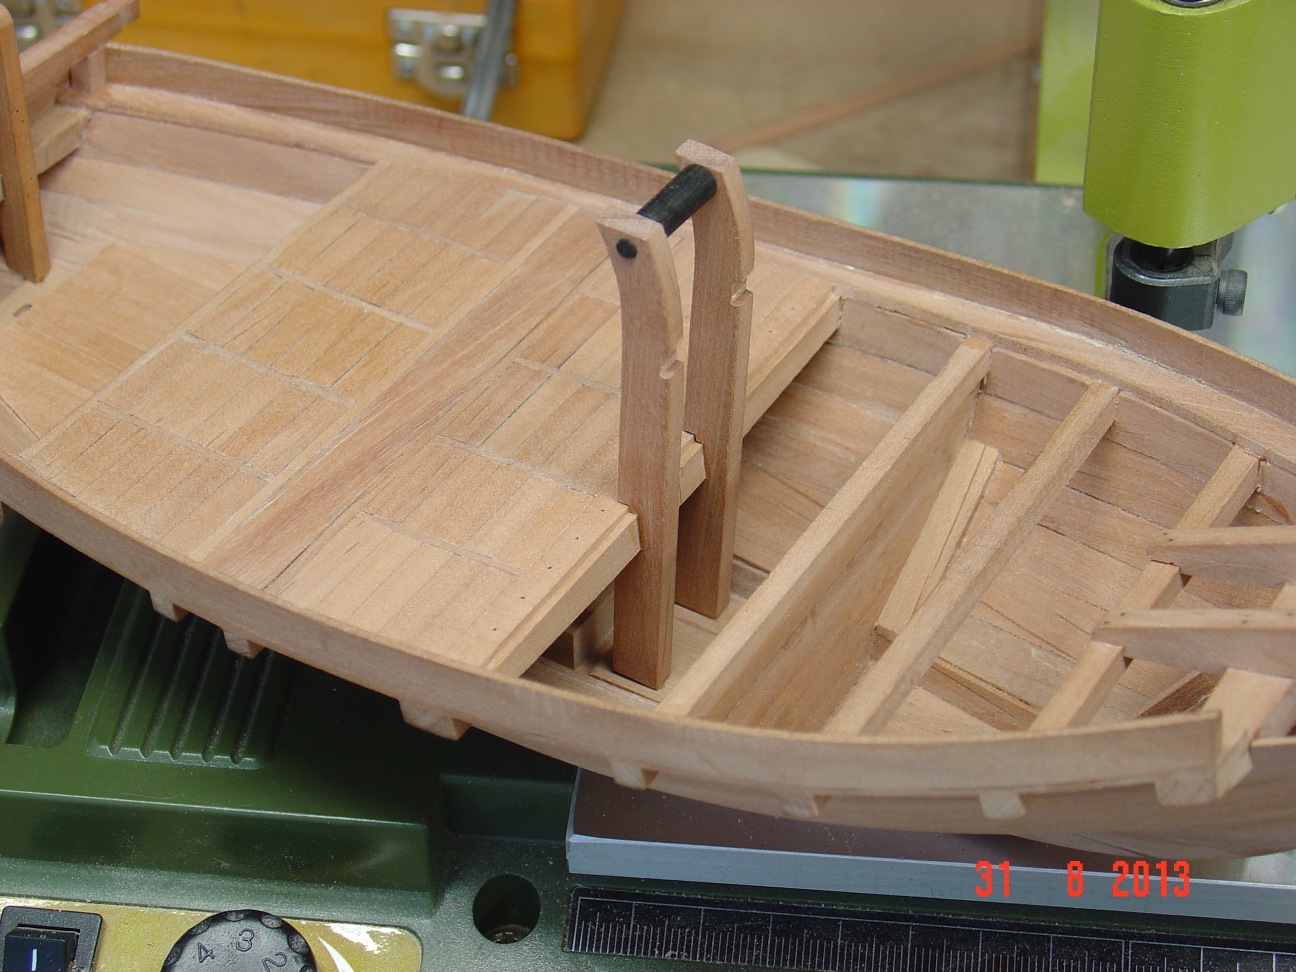
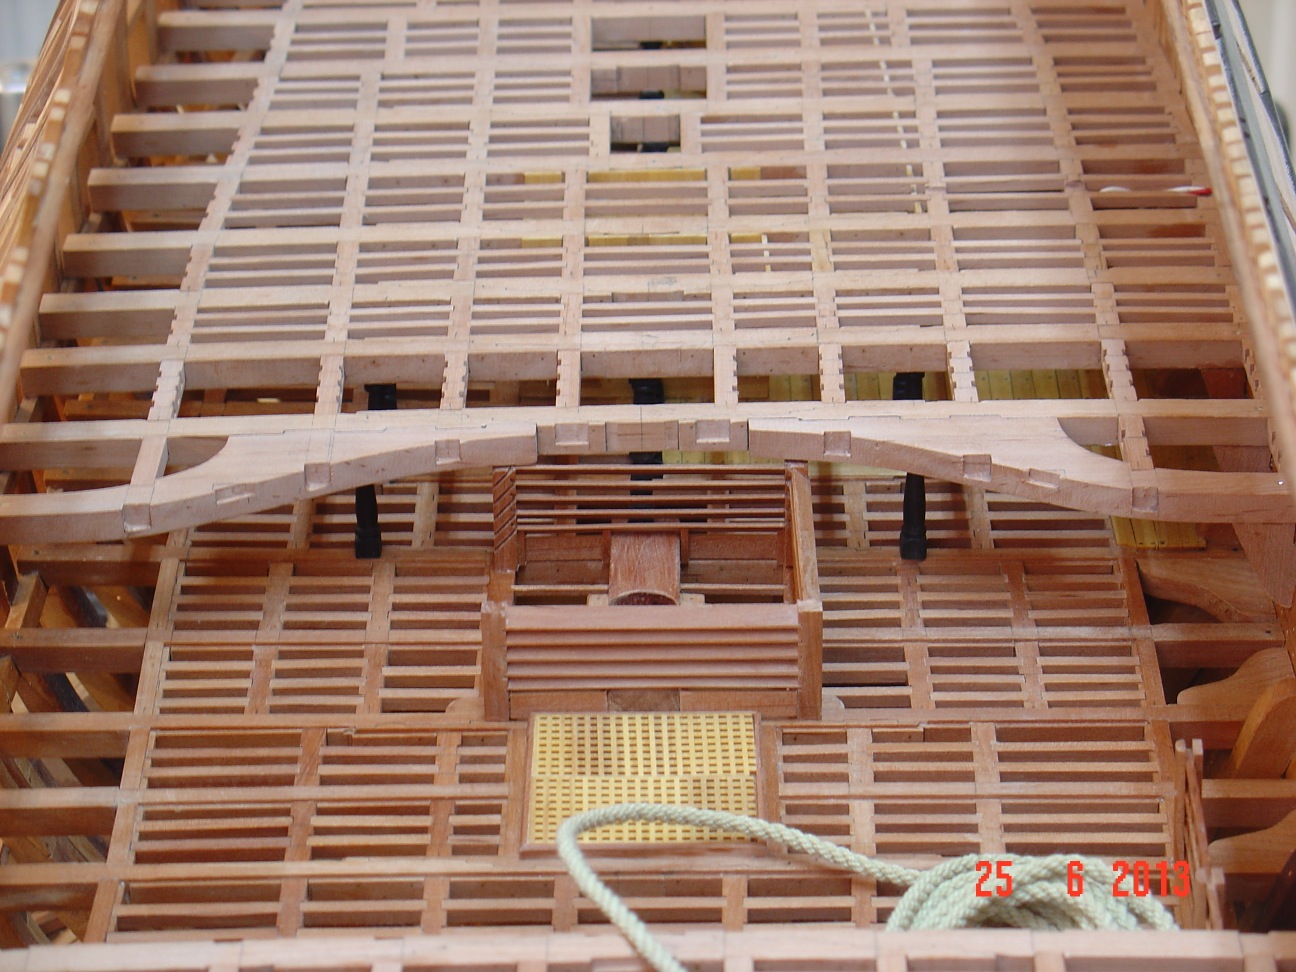
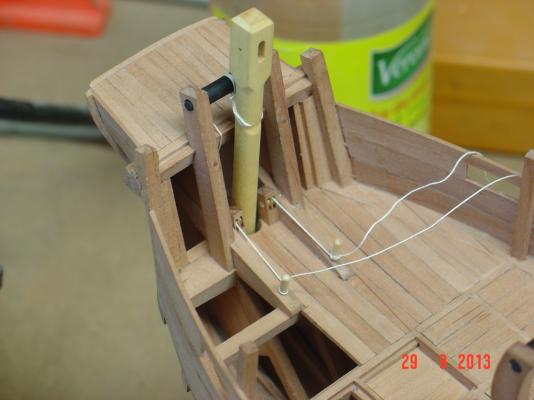
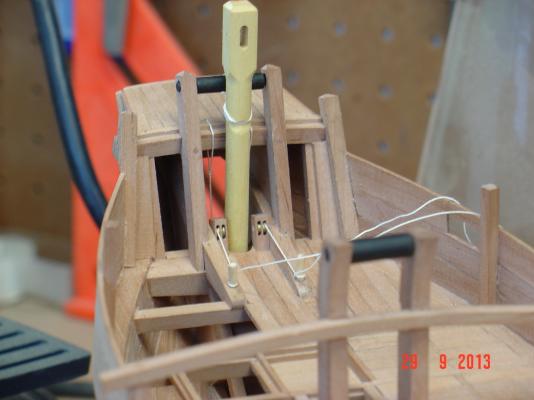
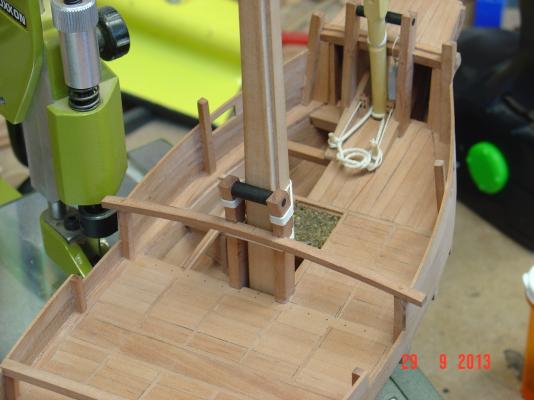
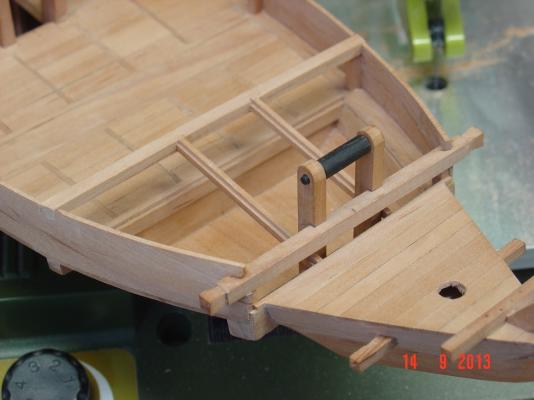
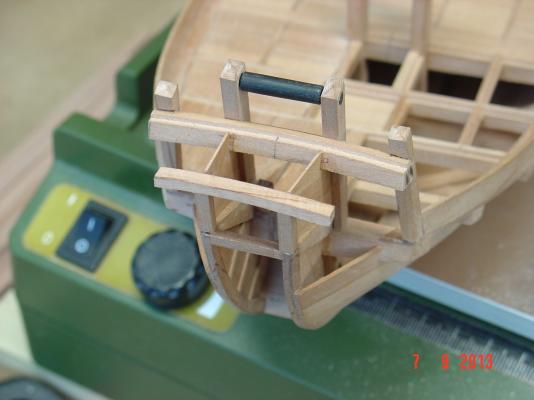
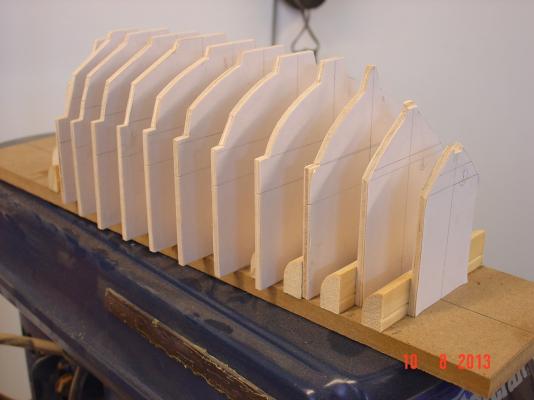
Thank you guys, I am happy that you find this build interesting. Here are some more progress pictures. There are two simple capstans under the quarterdeck which I turned from ebony. They are set between a beam of the main deck below and one of the quarterdeck above. In the middle between them there is a part of the deck that is a bit lower than the rest and is filled with sand to make fire on it for food cooking. The quarter deck is planked with some planks running longitudinally and others athwartship - those in the middle (behind the mast) being mobile the rest were nailed and caulked. Alexandru


-
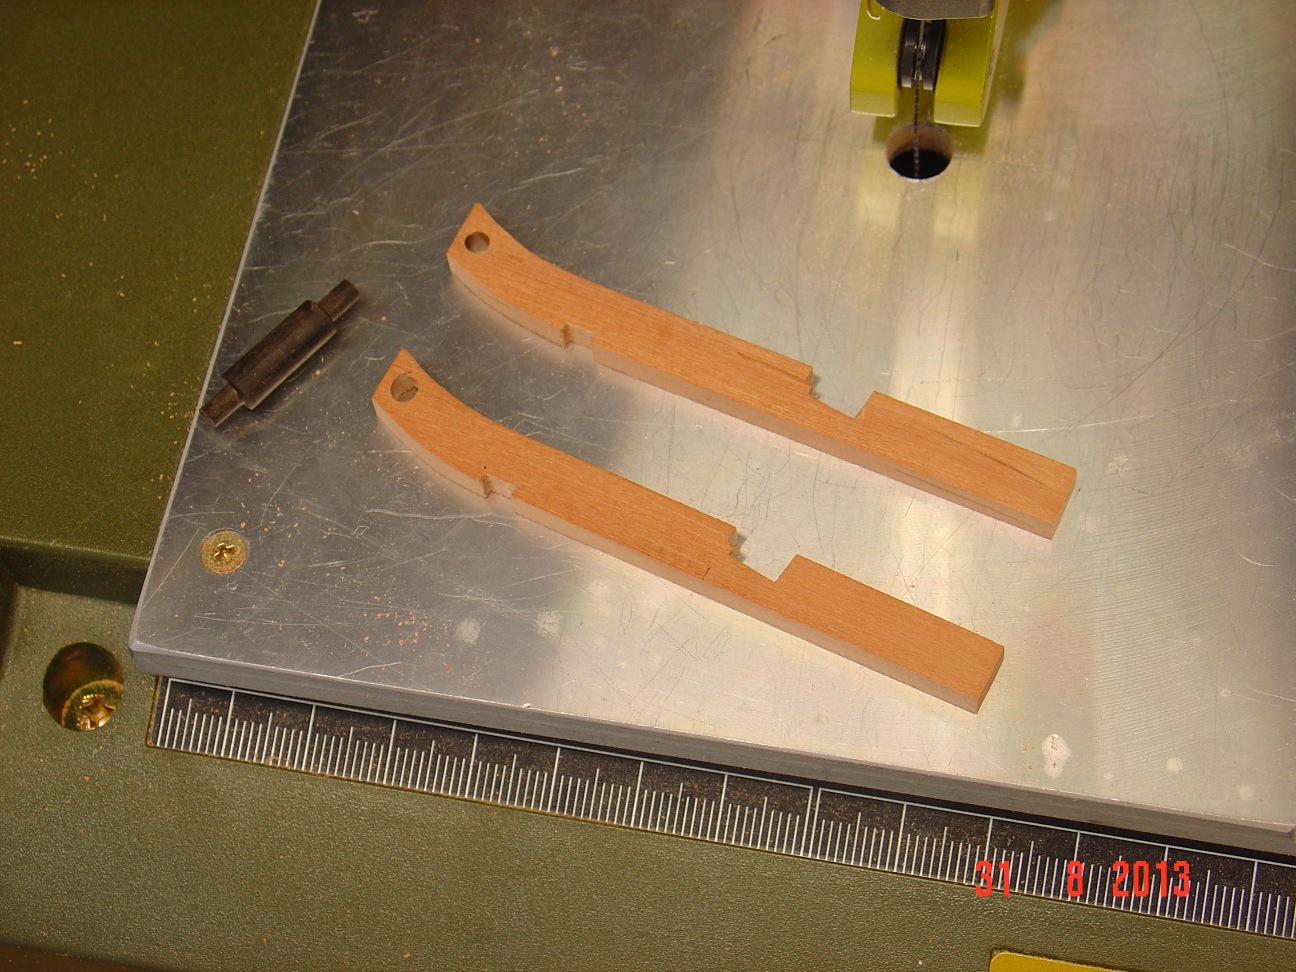
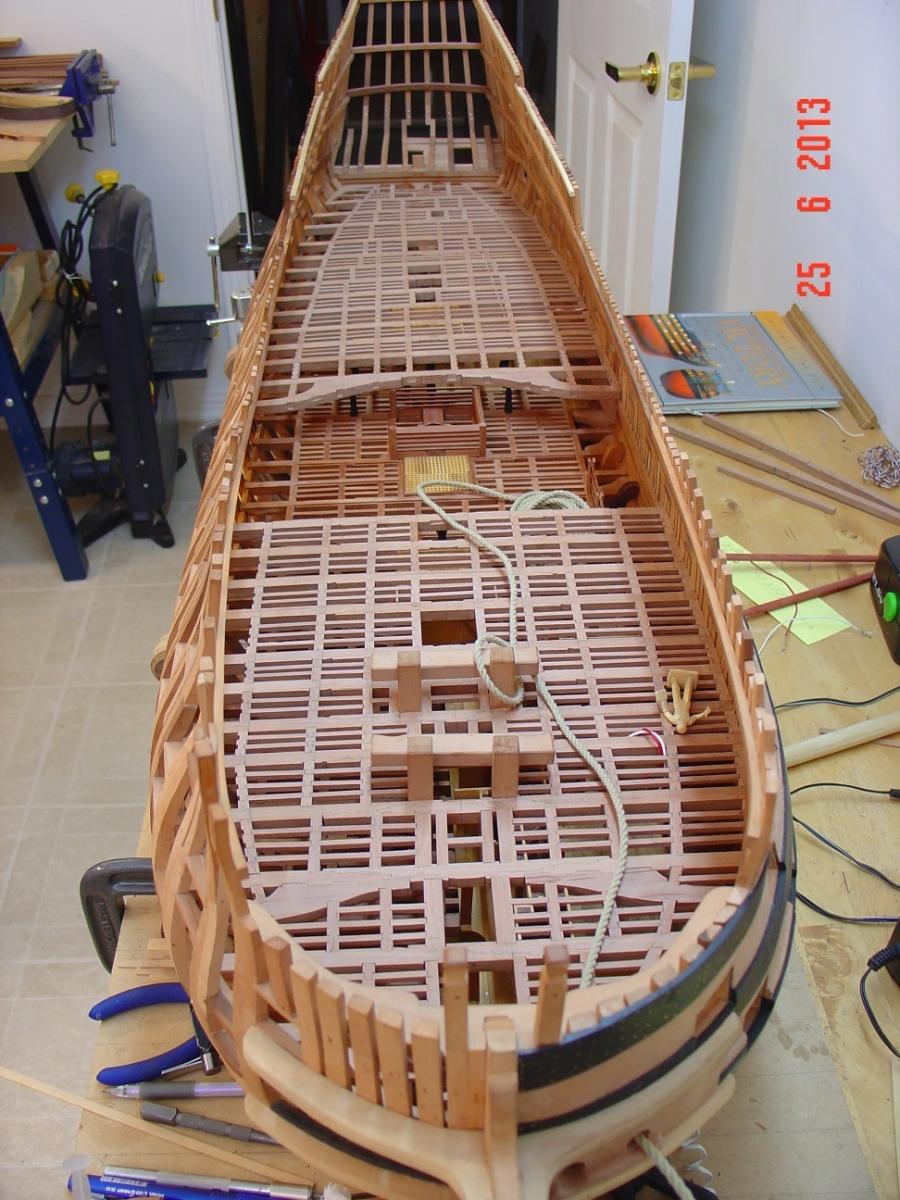
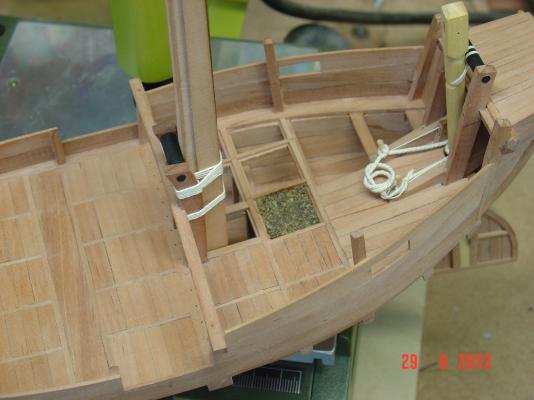
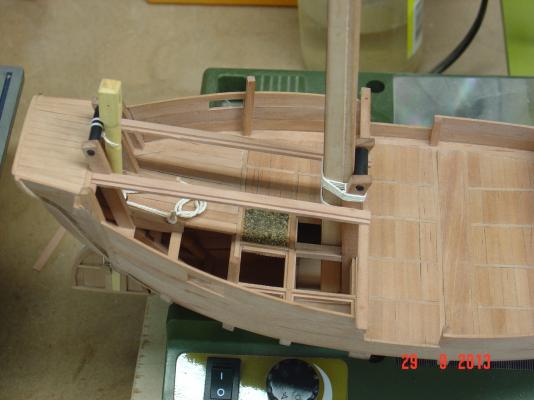
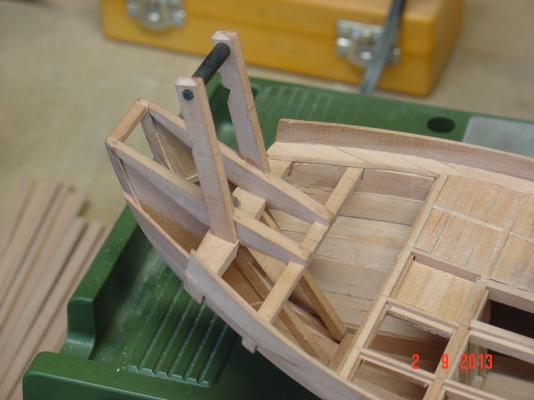
The ruder and the mast are now in place - I can finish the upper deck. Here are some pictures of the progress. Thank you, Alexandru


-
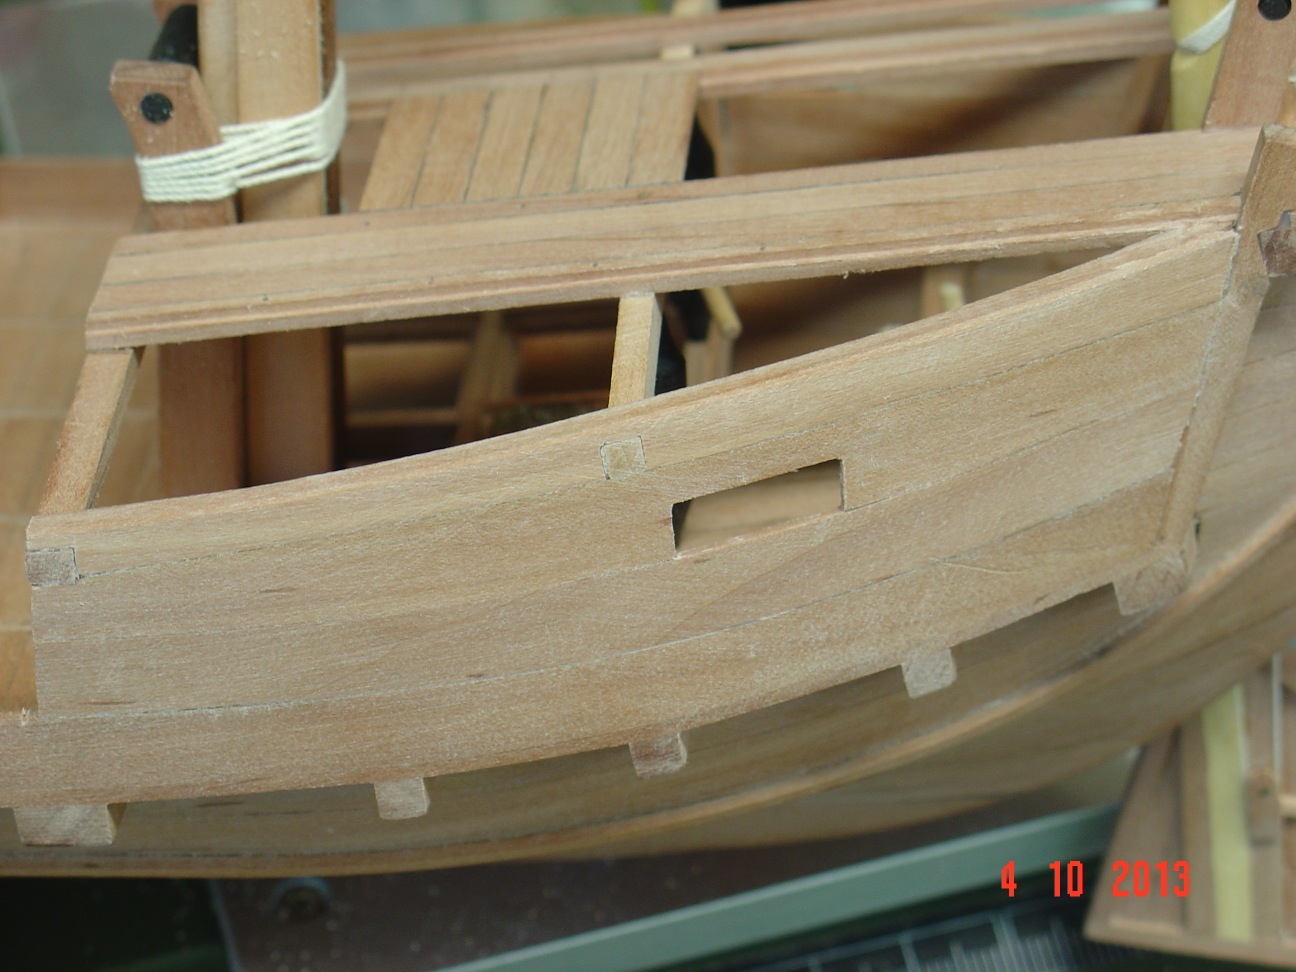
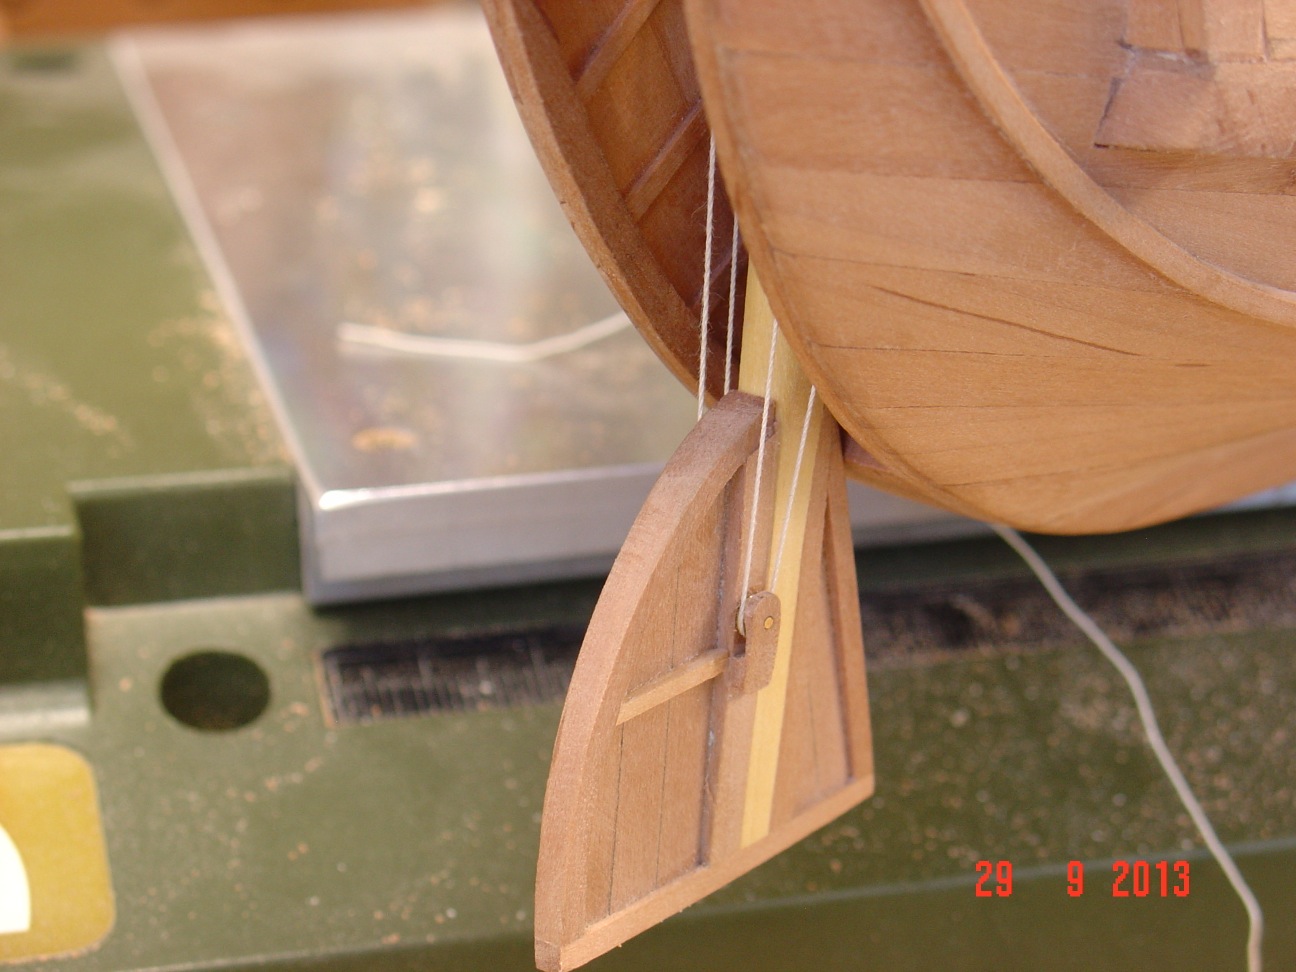
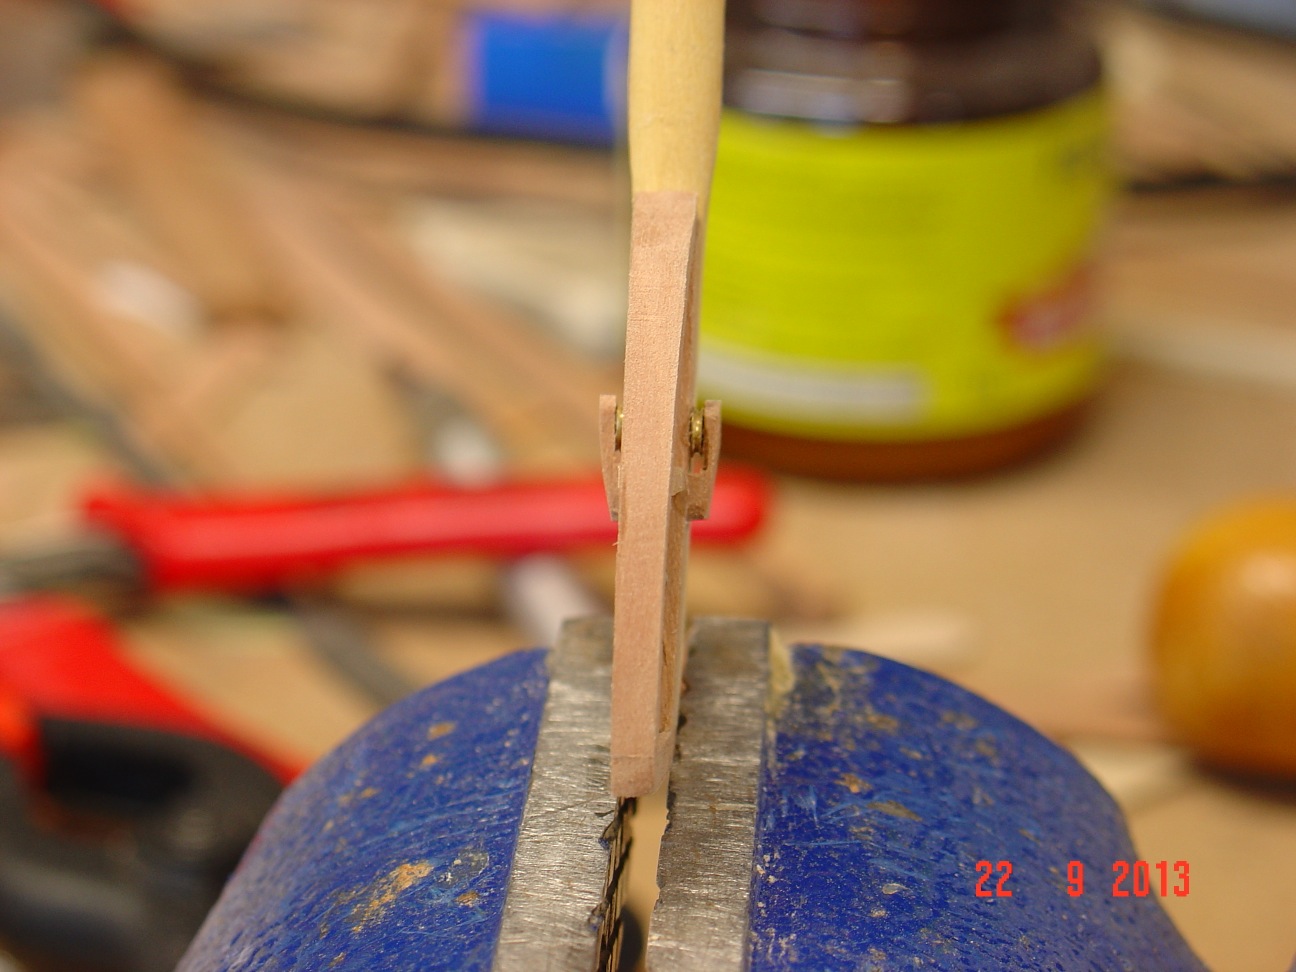
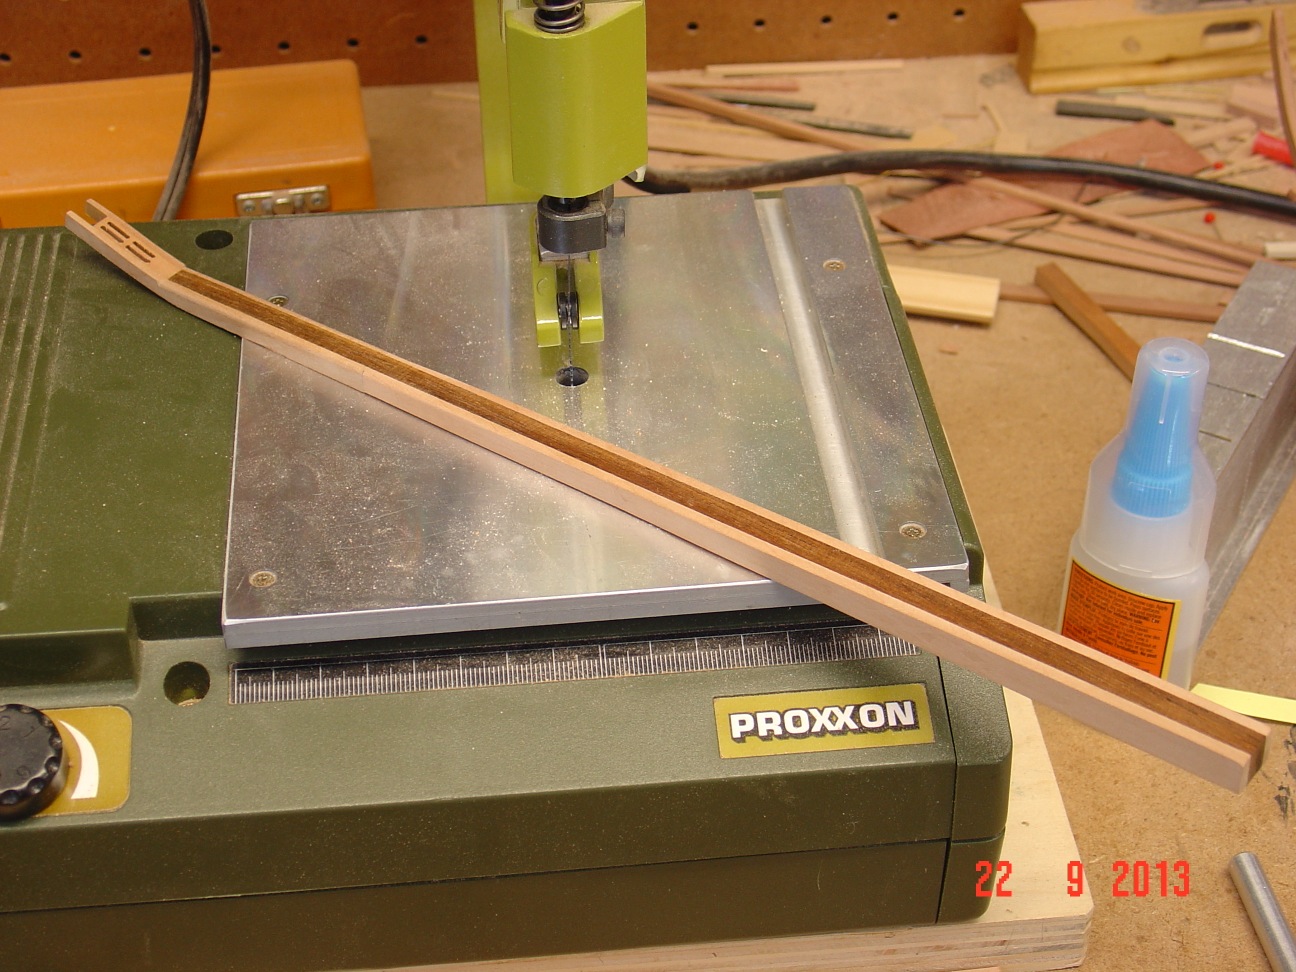
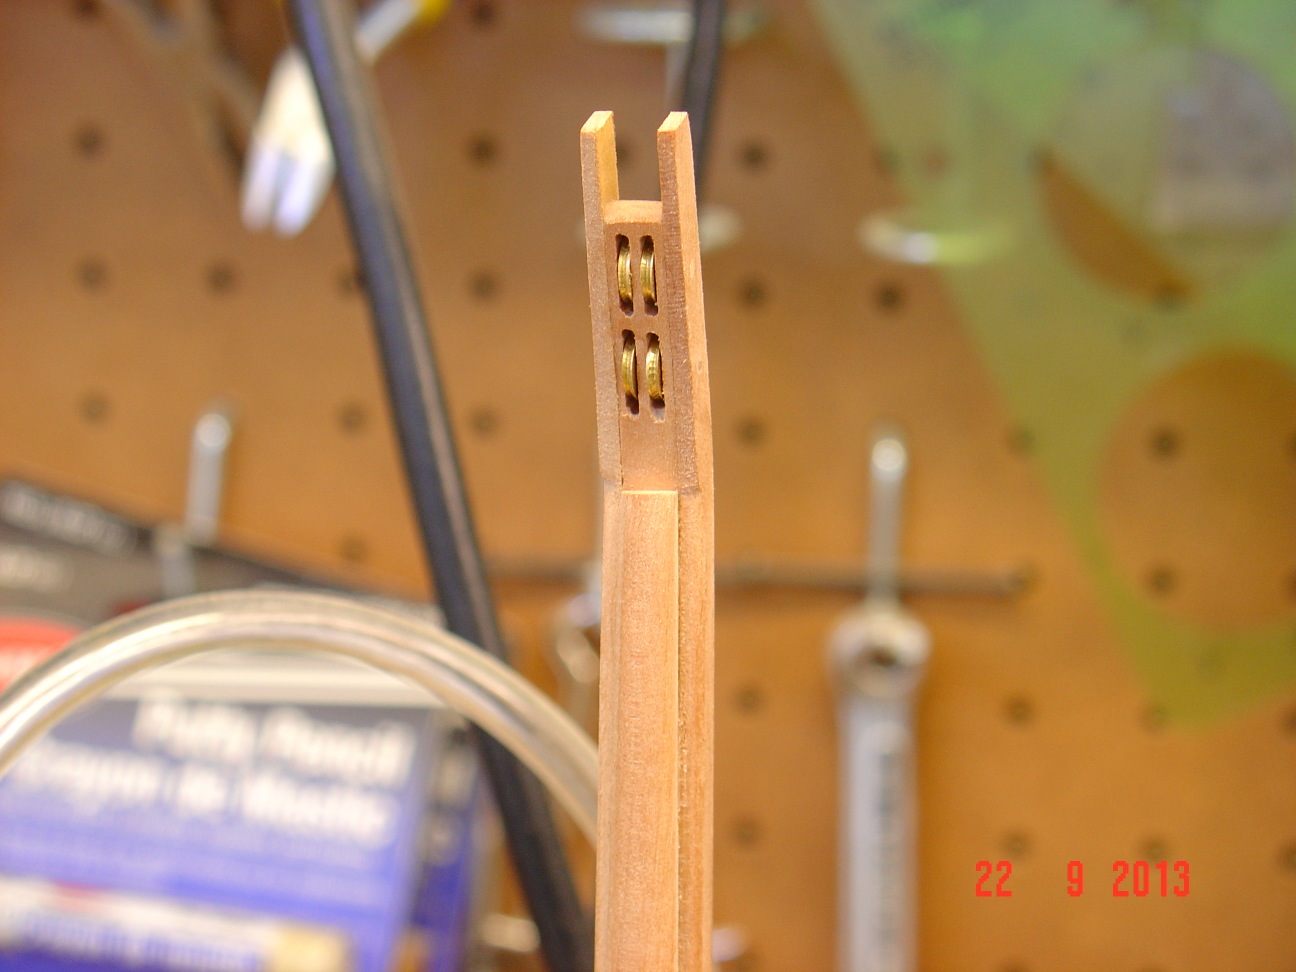
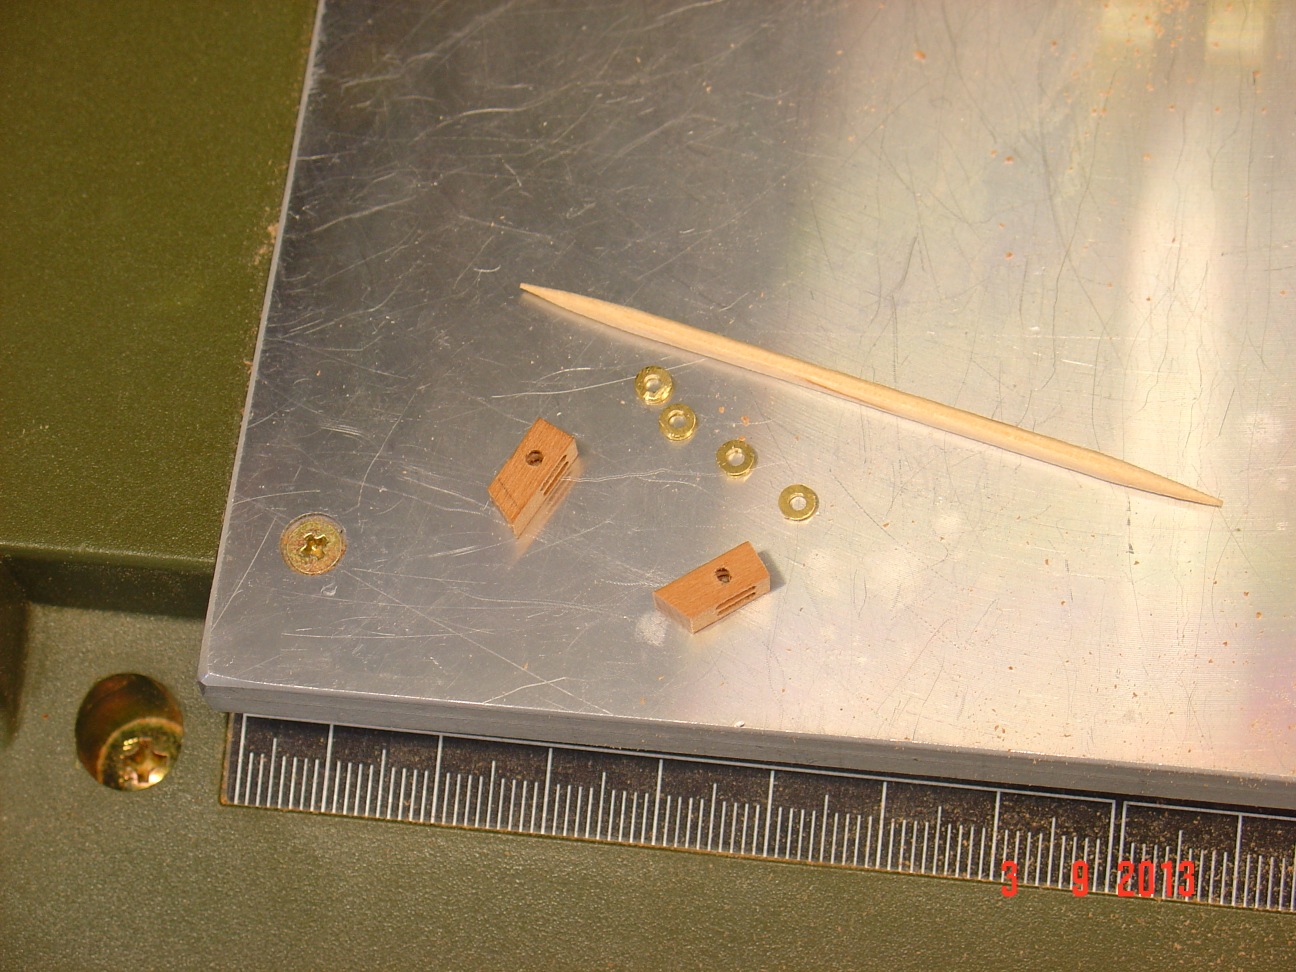
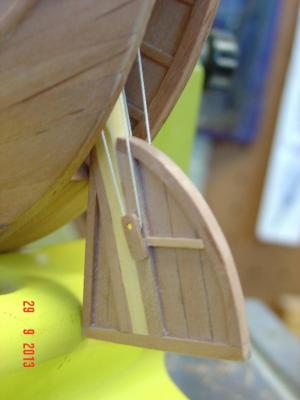
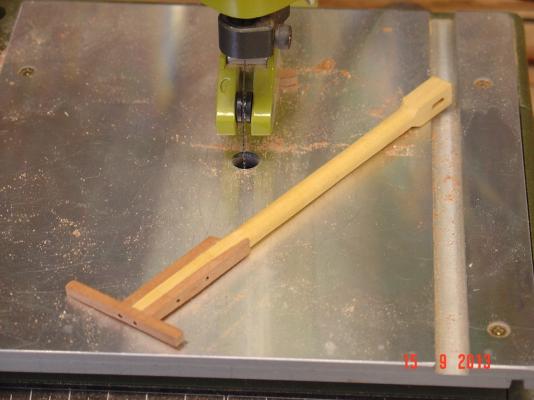
Thank you guys for appreciation. Here are some progress pictures. worked on the ruder and the main mast. They both needed several pulleys which I made from brass. The mast is square in section and assembled from several pieces including a hard wood core. The sides and front are covered with a softer wood pieces with rounded corners. Before finishing the upper deck I have to install the ruder which is kept in place by a system of ropes and pulleys otherwise I won't be able do do it. But before that I have several things to finish on the hull - one of them being the (decorative?) riband you can see in the last two pictures - on one side is done. Thank you for watching. Alexandru


-
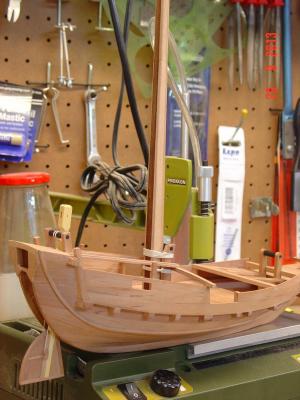
Some progress over the weekend. Alexandru


-
Jack, Can you post some pictures of your bed extension so we can have an idea how it looks? Thank you. Alexandru
-
Some more progress on the Fune...


-
Well, nobody came with any better idea than mine and nobody disagreed with it also so I went on with it. here are the progress pictures. Thank you, Alexandru


-
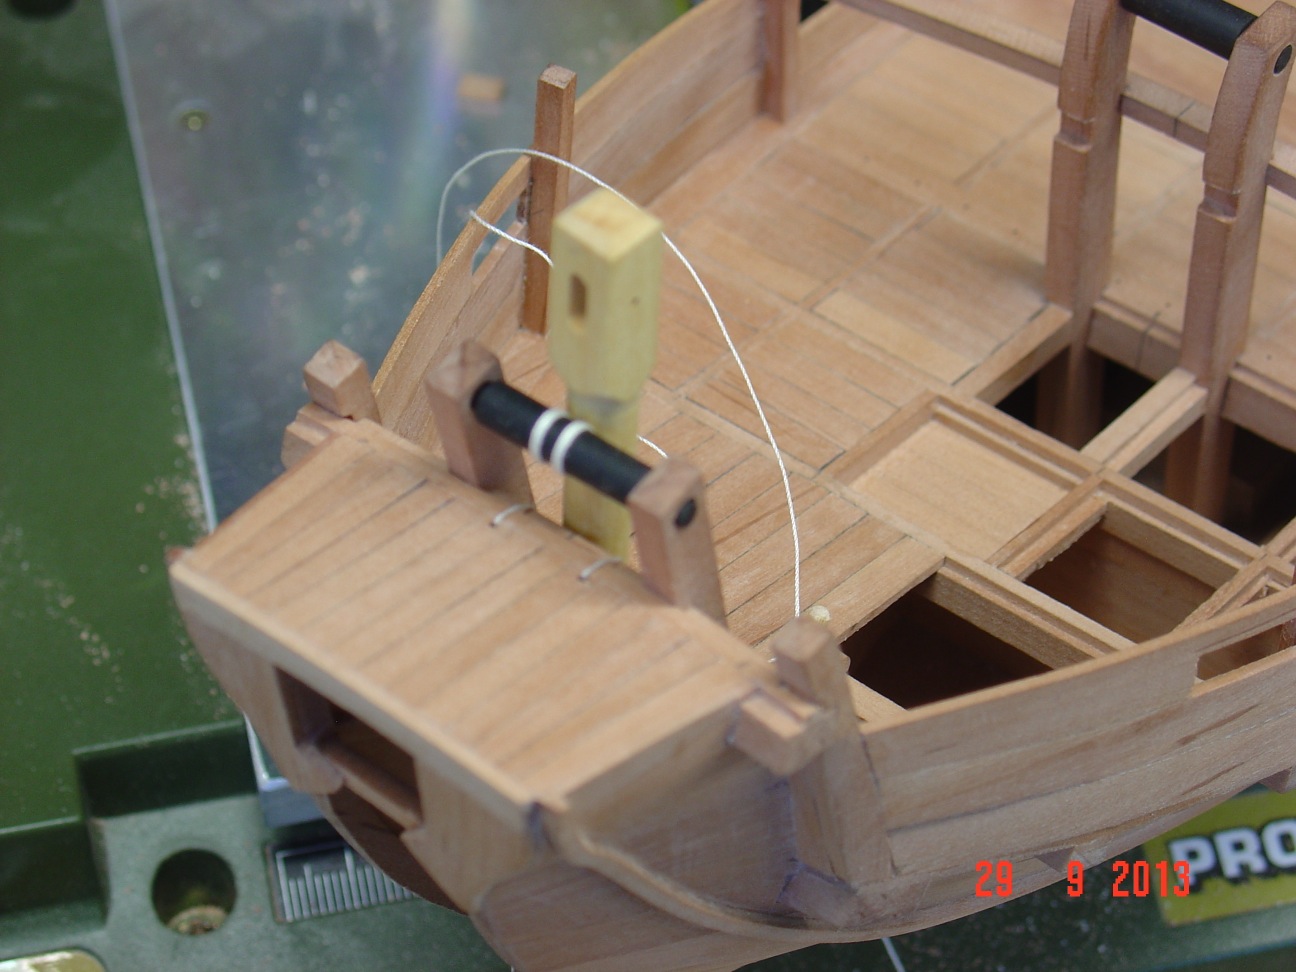
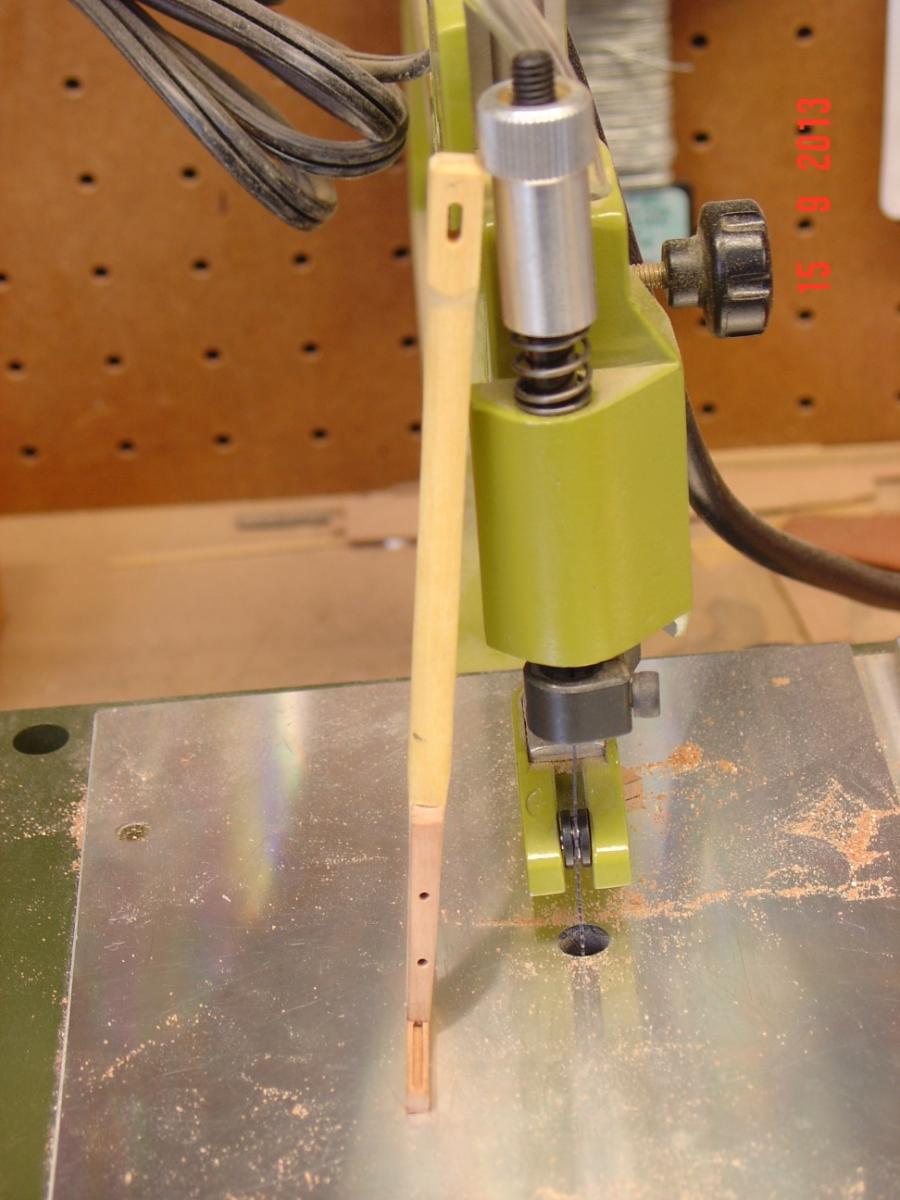
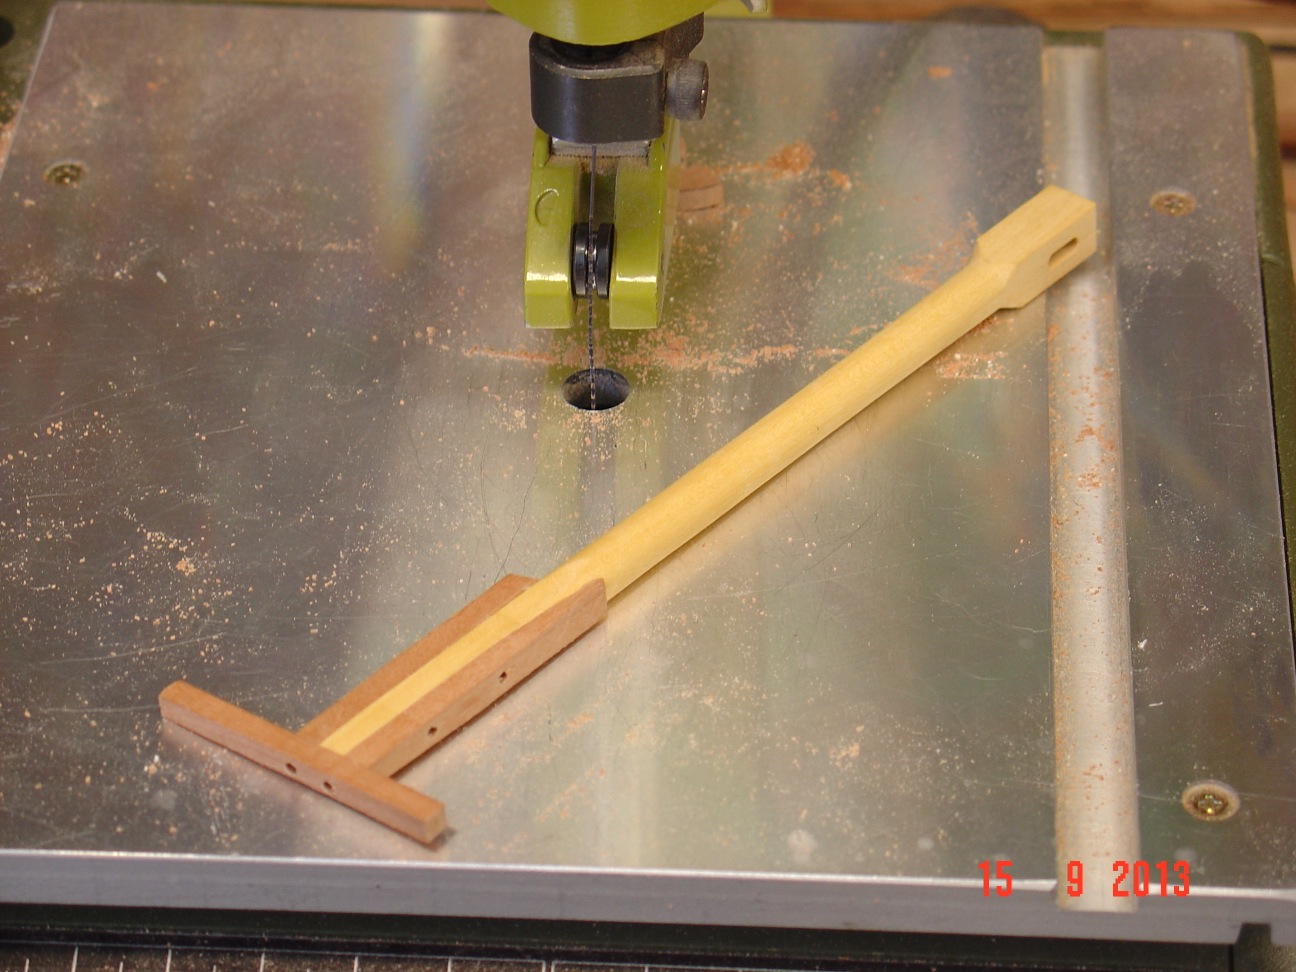
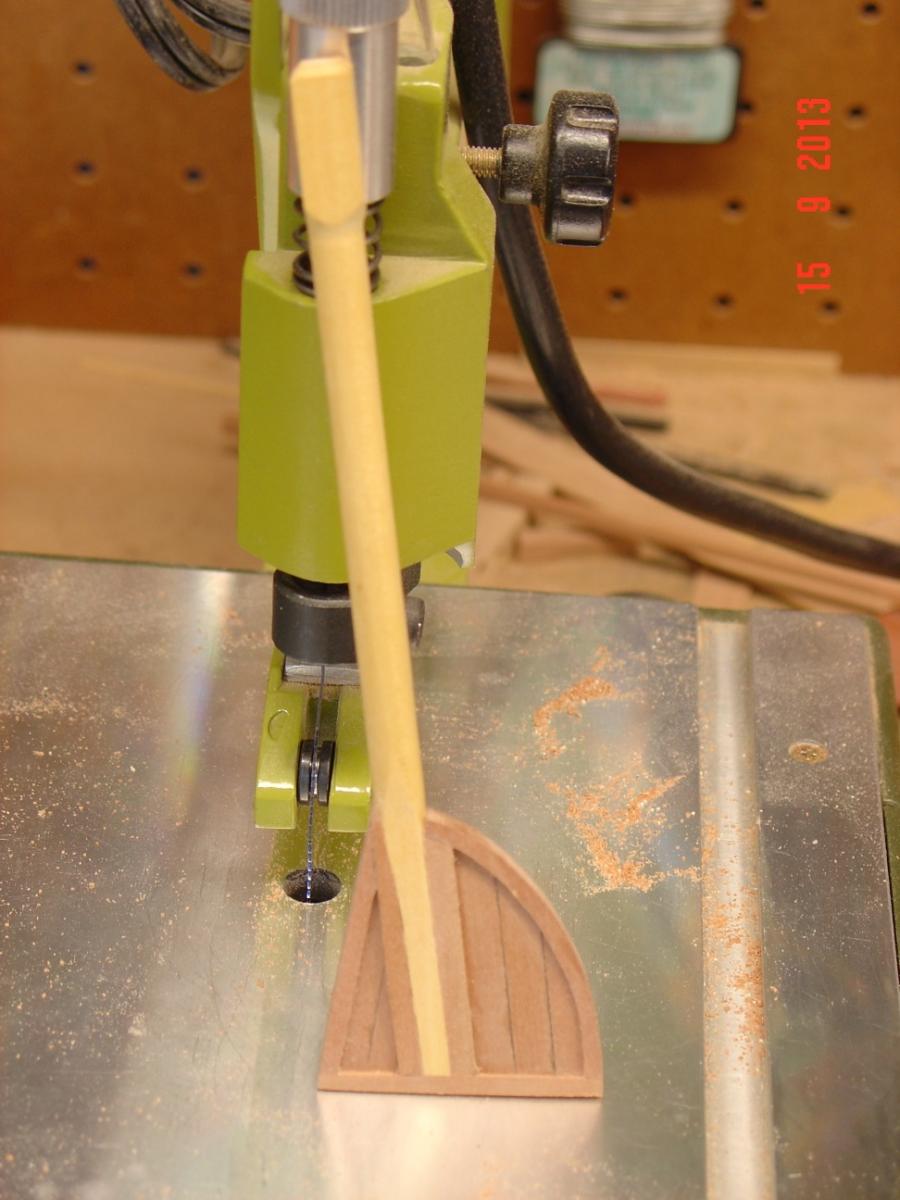
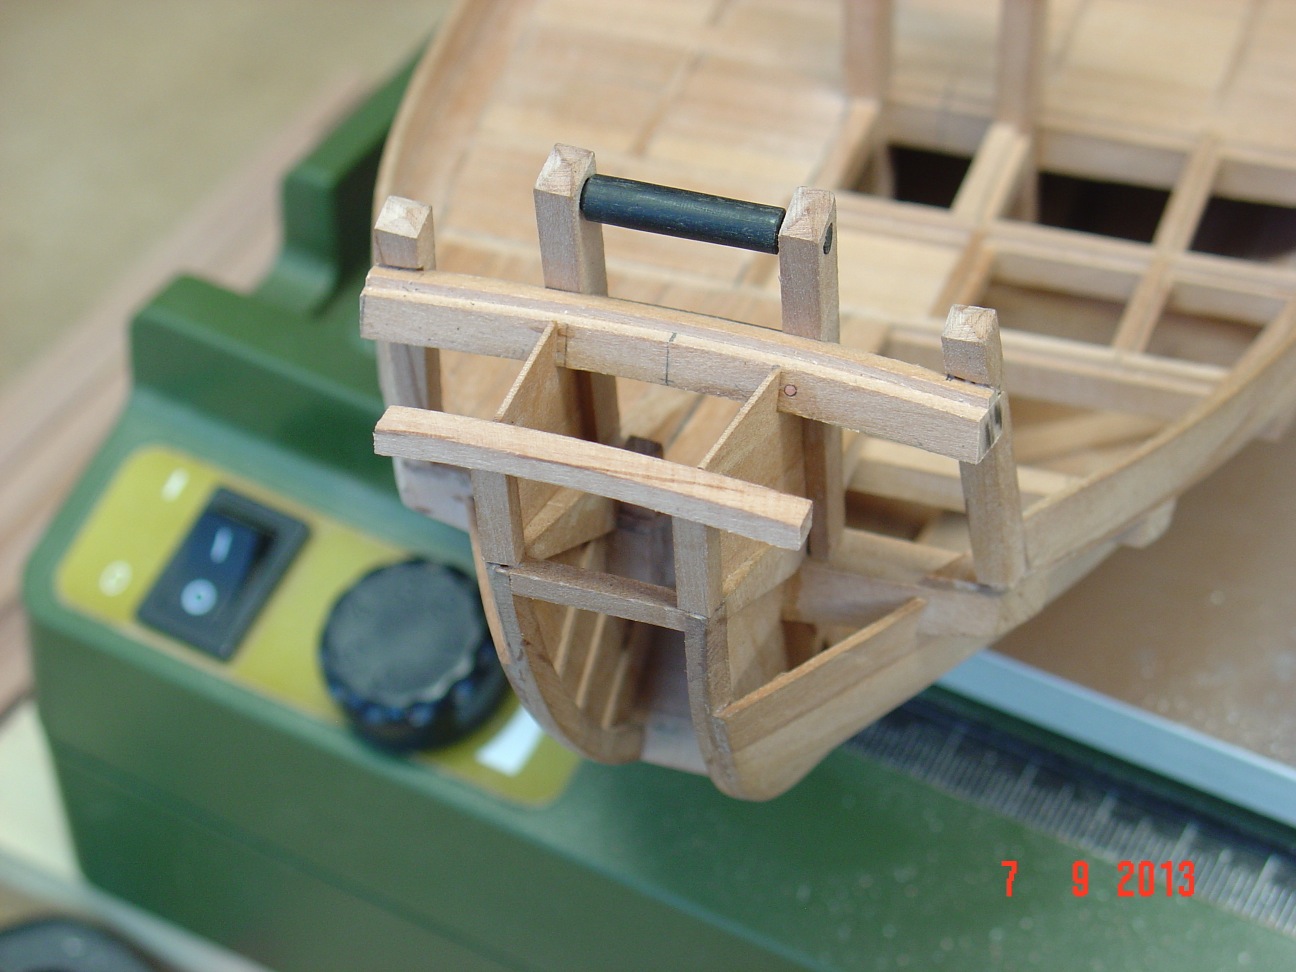
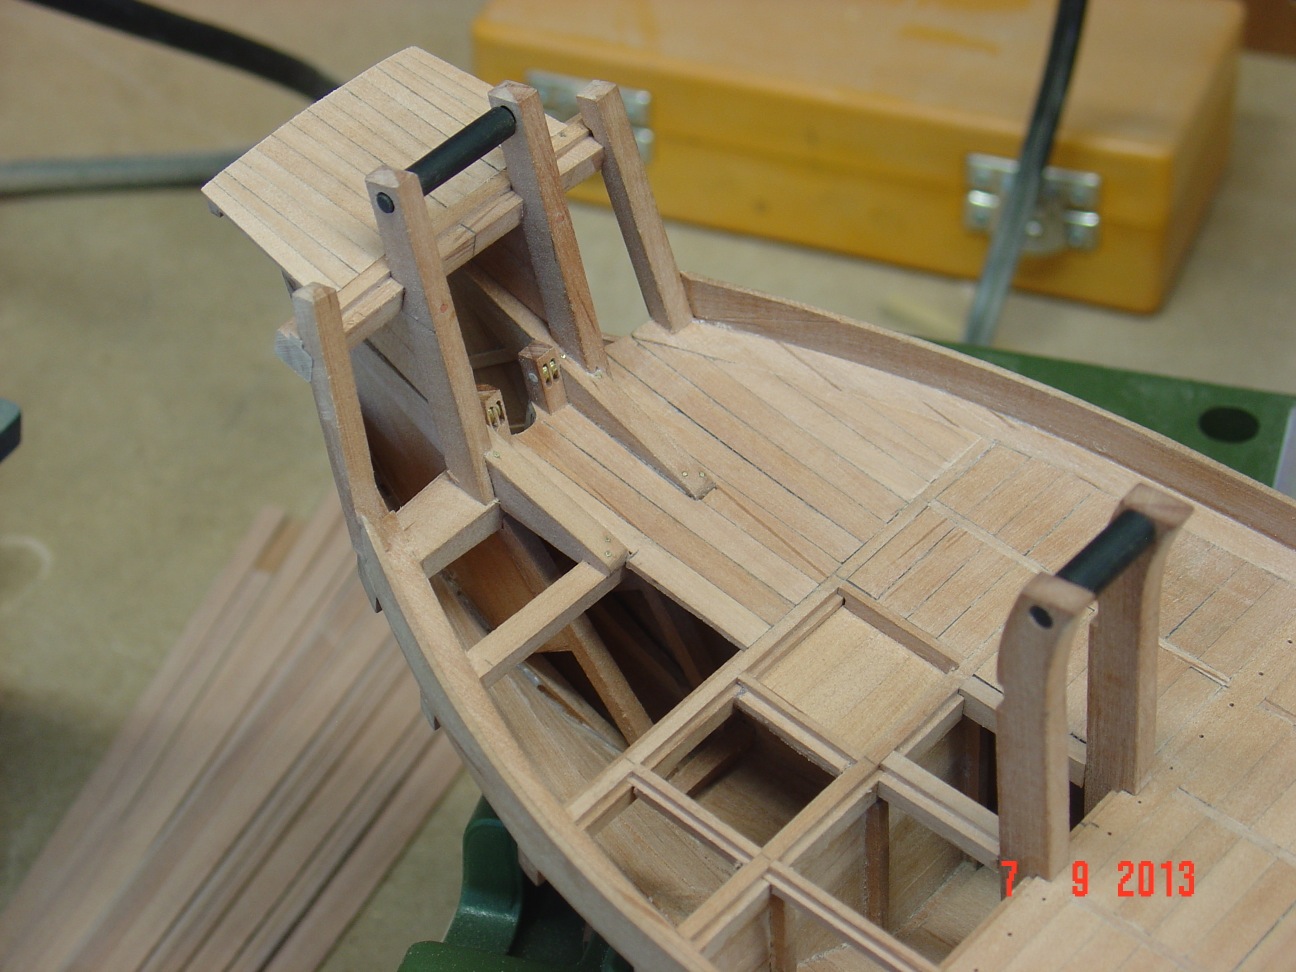
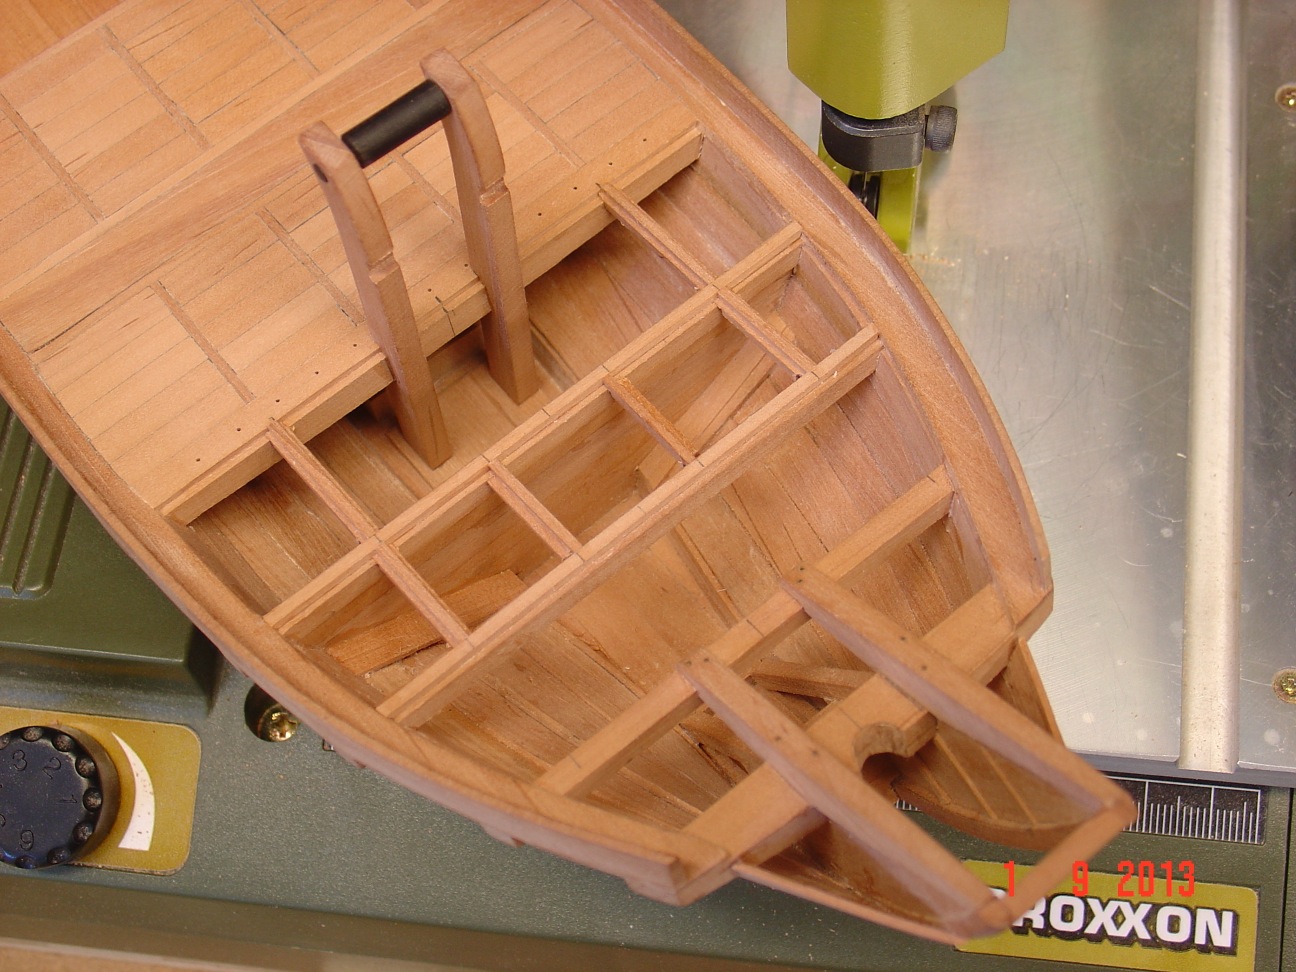
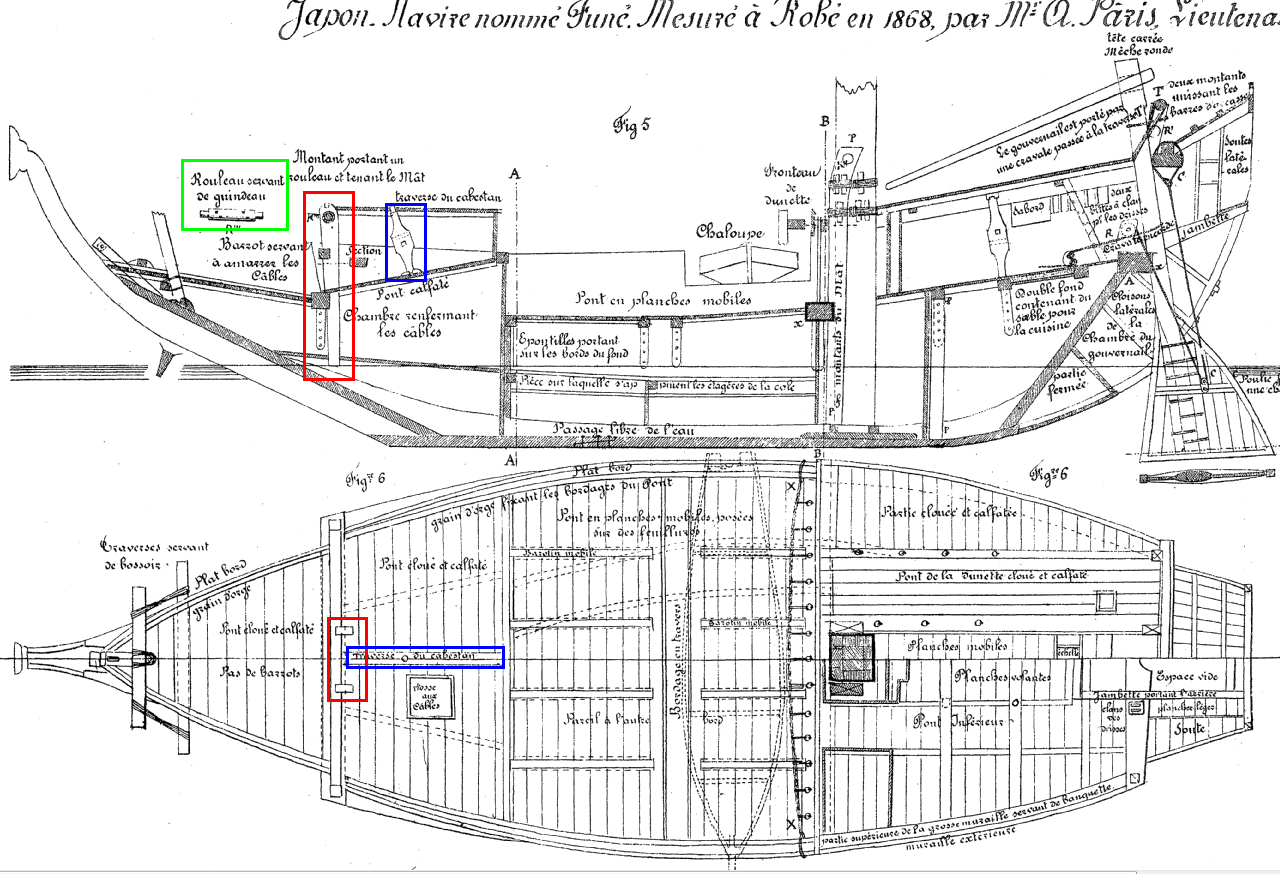
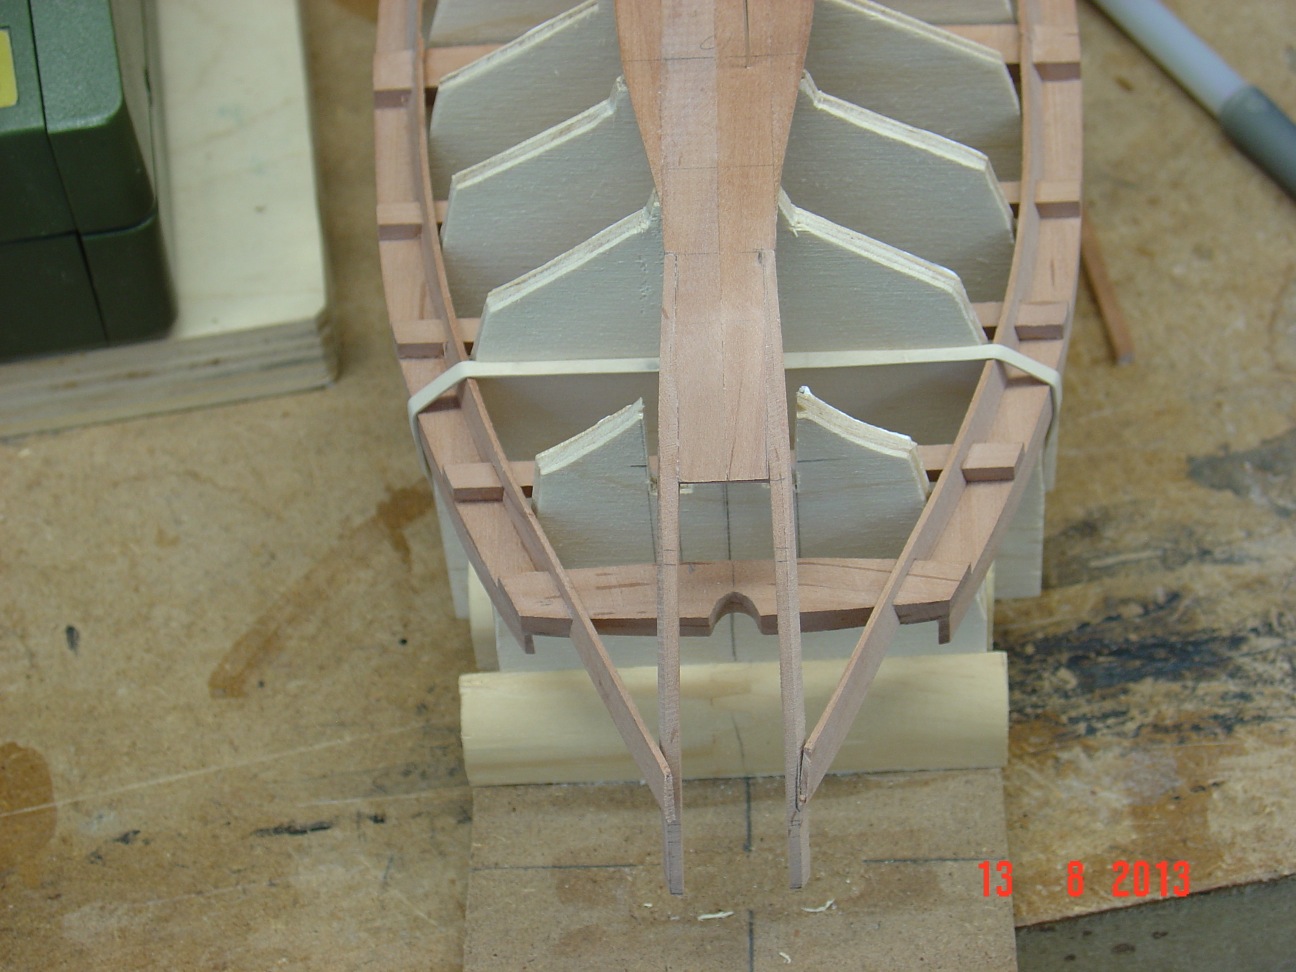
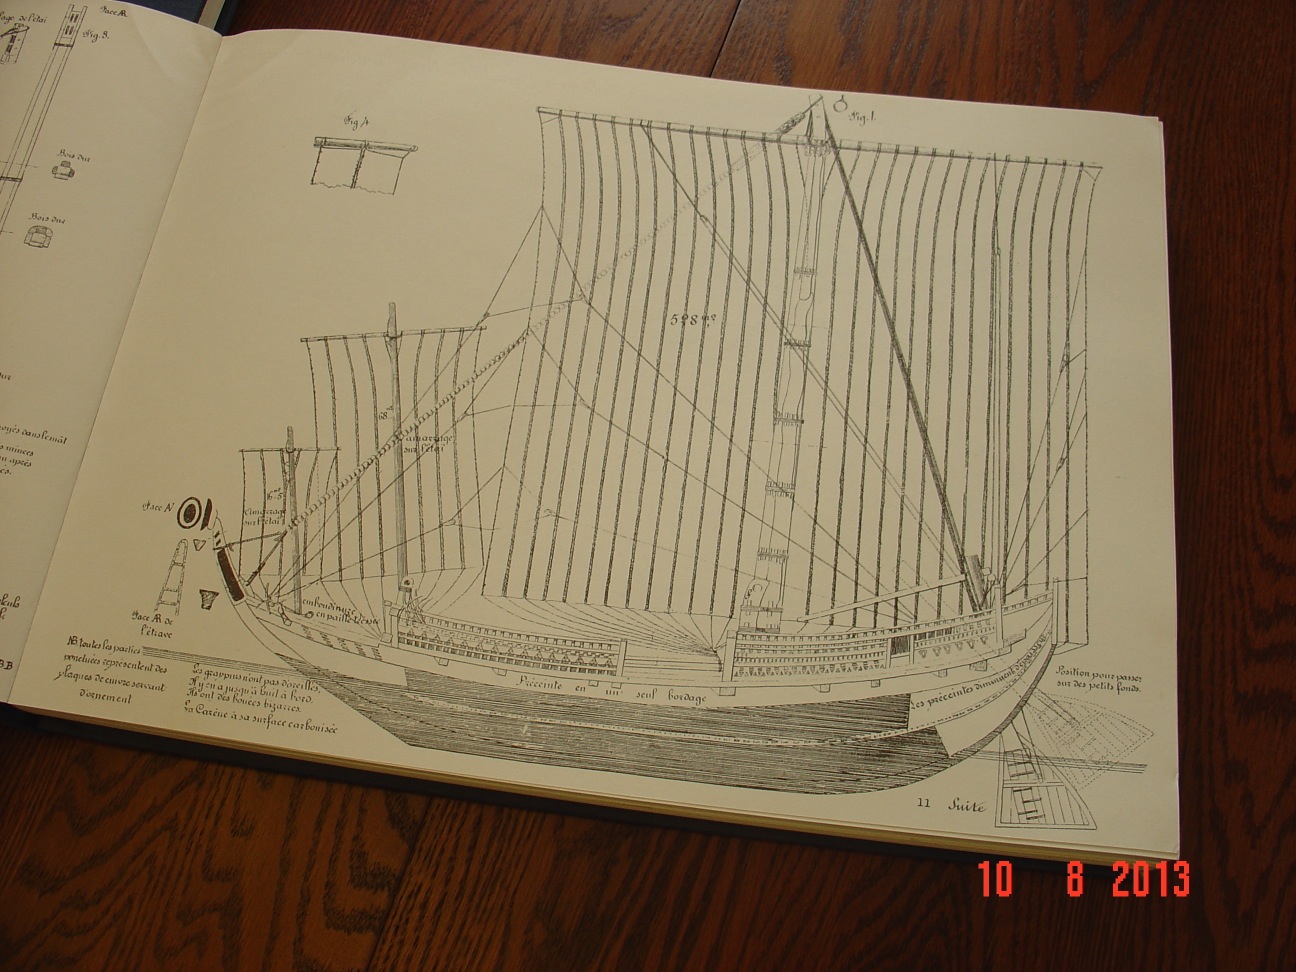
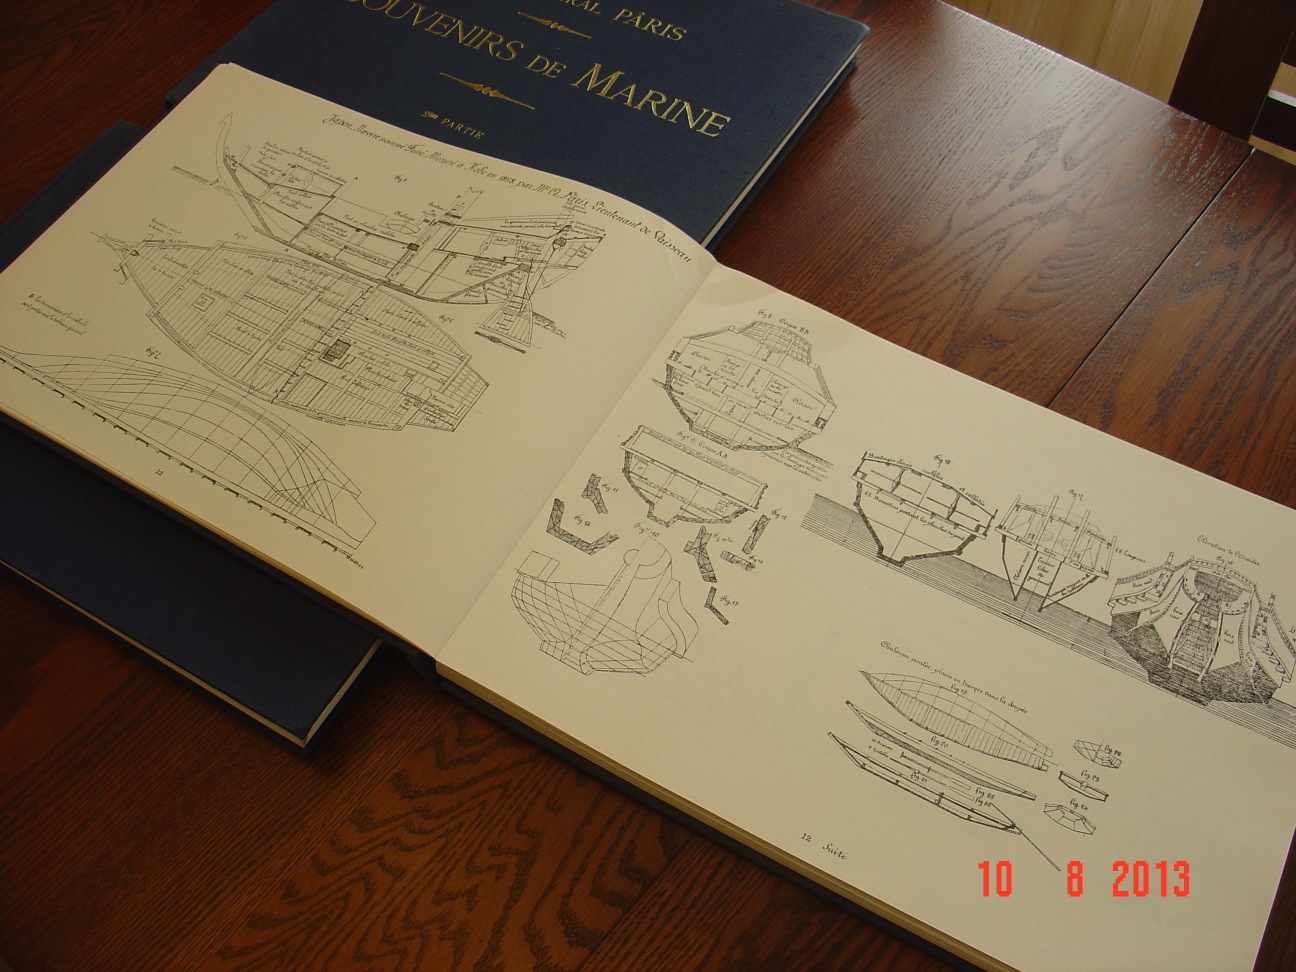
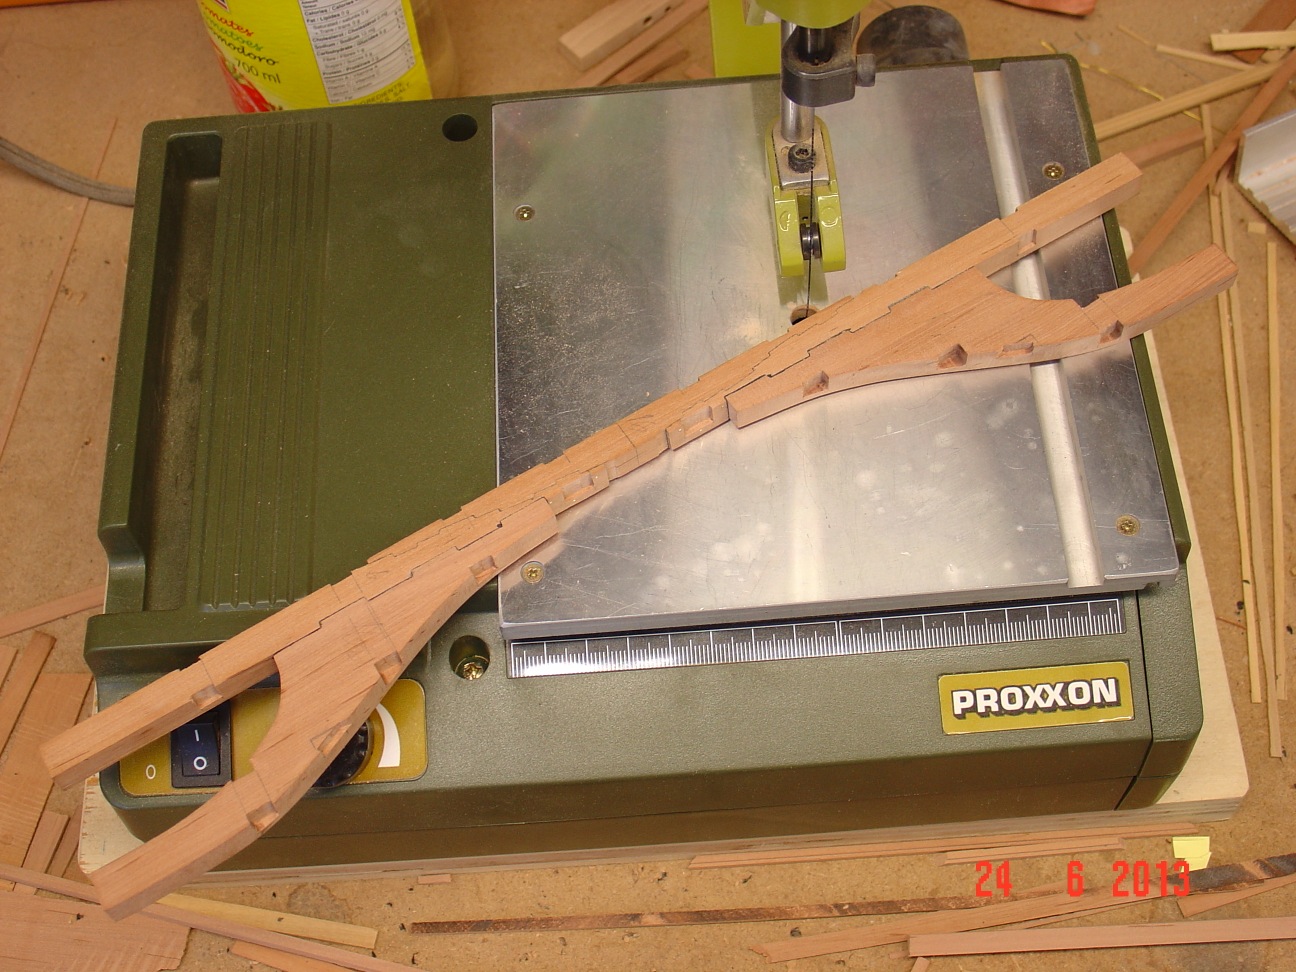
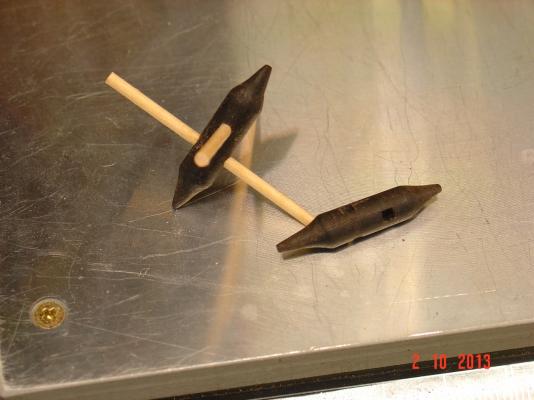
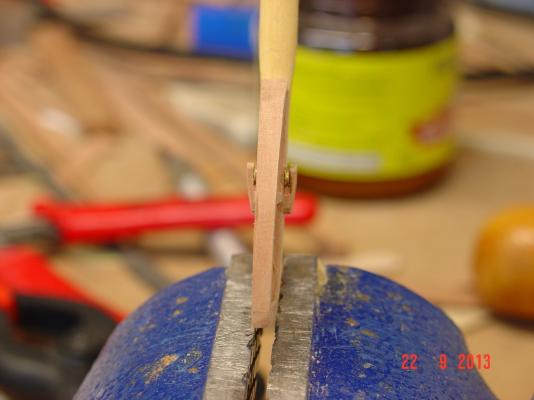
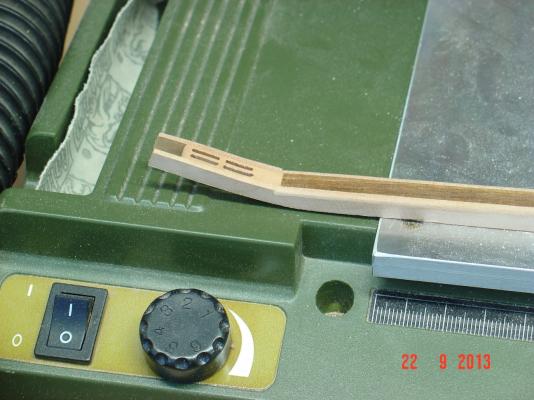
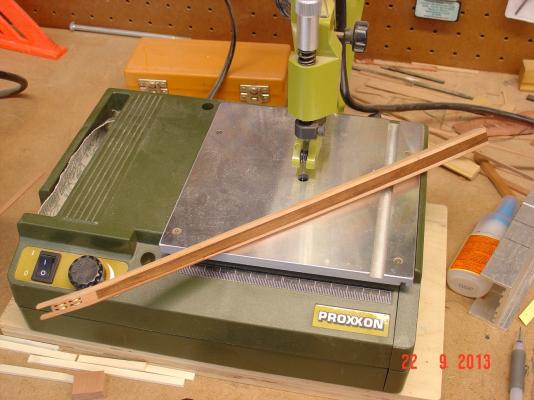
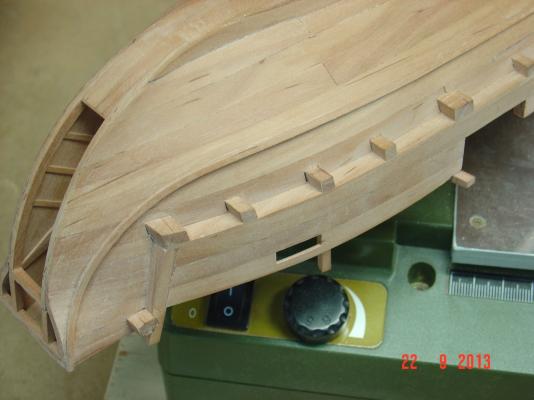
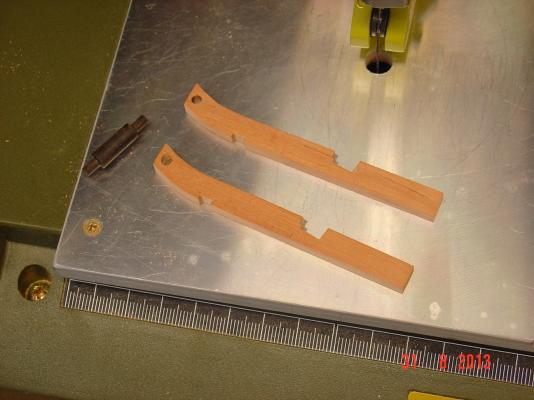
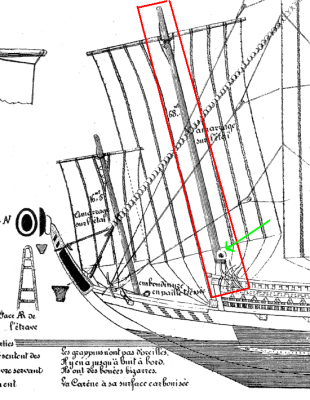
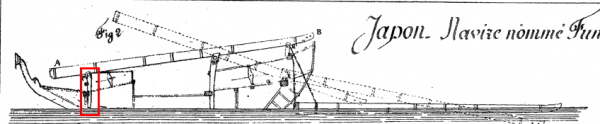
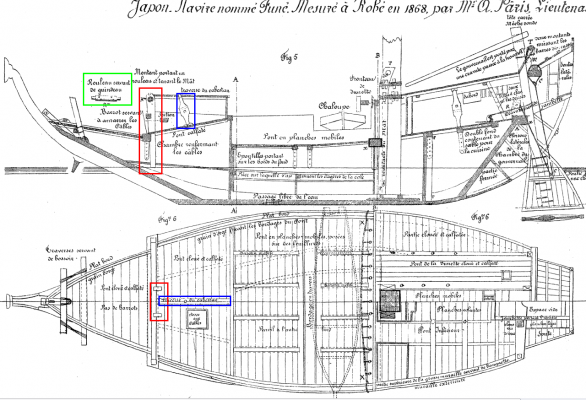
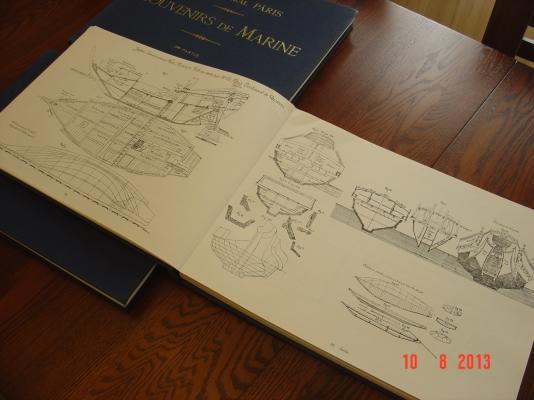
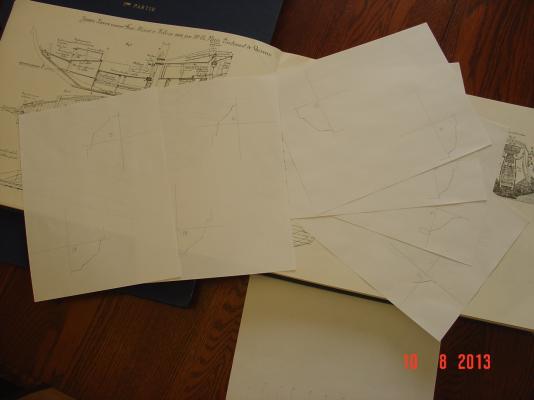
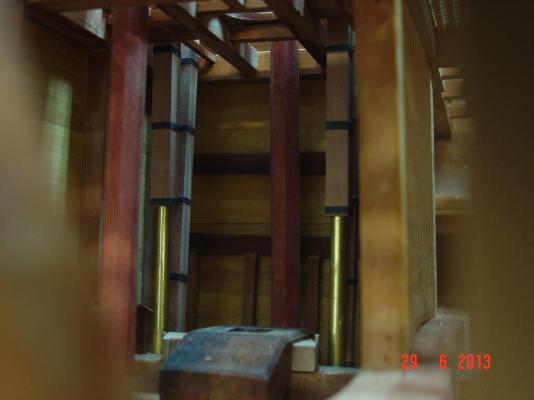
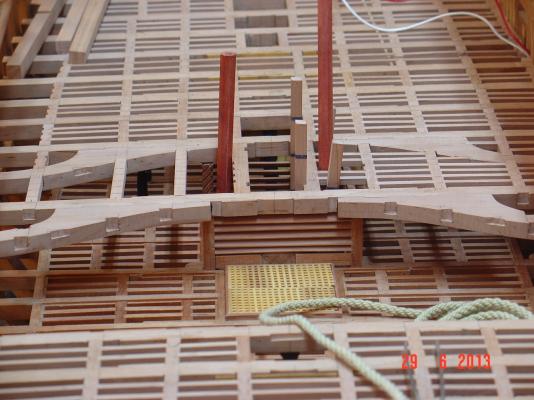
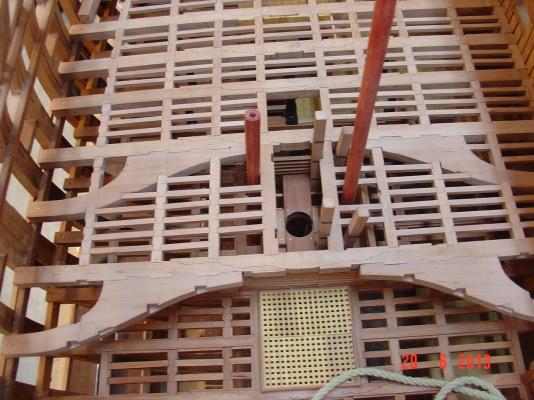
Thank you guys for appreciation. Here are some question for you as I hit the first major roadblock in the construction of this model. Maybe someone can shed some light to overcome the missing information in these plans. Probably accurate information is not available (couldn't find anything on Internet) but at least some ideas of what a real shipbuilder could have done at that time. As you can see in the first picture, there is a second mast on this ship and it is positioned just in front of what the plans'author calls the forecastle (gaillard avant in French in text). This mast passes between two stancions (montants) to which the mast is lashed. These stanchions also have a round hole at the top (green arrow) for a roller used the embark the main mast as can be seen in the second picture but also has some squate holes in it to act as a windlass. Now, if the roller is in place the mast can pass between the stancions in the same position as in figure 1. Then in the third picure showing the longitudinal section and the plan view - the mast is nowere to be seen. Not even the hole through the decks for it. Nor its mast step - there is one for the smaller mast fore. The roller is still there even with a front view detail (green box) described as: roller used as vindlass (rouleau servant de guindeau in French) Additionally the stancions look quite a distance apart: at the plan scale that will be about 1.5 - 2m which would be fine for the roller/windlass but way to far apart to lash the smaller mast placed between them to both of them. So all this explanation for the first question: should there be a second smaller mast? The solutions I've imagined are as follows: 1. There is no mast - I don't really like this option. 2. There is a mast there for which I'll add a mast-step in the hold and holes in the decks above This solution rises several issues: how the roller/windlas is taken out and put back when needed without removing the stanchions? how can a relatively small diameter mast lashed to two stanchions so far apart? how can there be two beams on the ship longitudinal axis to provide suport to the capstan (blue boxes in figure three) as they will be cut by the holes for mast passage? The best scenario I came up with is as follows: have a mast there have a maststep in the hold and holes in the decks keep the roller in place to be used only when the small mast is not there to embark the bigger one roller won't be used as windlass replace the two beams (one below and one above) holding the capstan by two pairs of beams one pair above and one below with a thicker piece of wood between them for capstan support - this way they won't be cut by the mast passage Does all this makes any sense? Well I hope so and hope someone will take the time to read this long post and come with some ideas or suggestions. Thank you, Alexandru
-
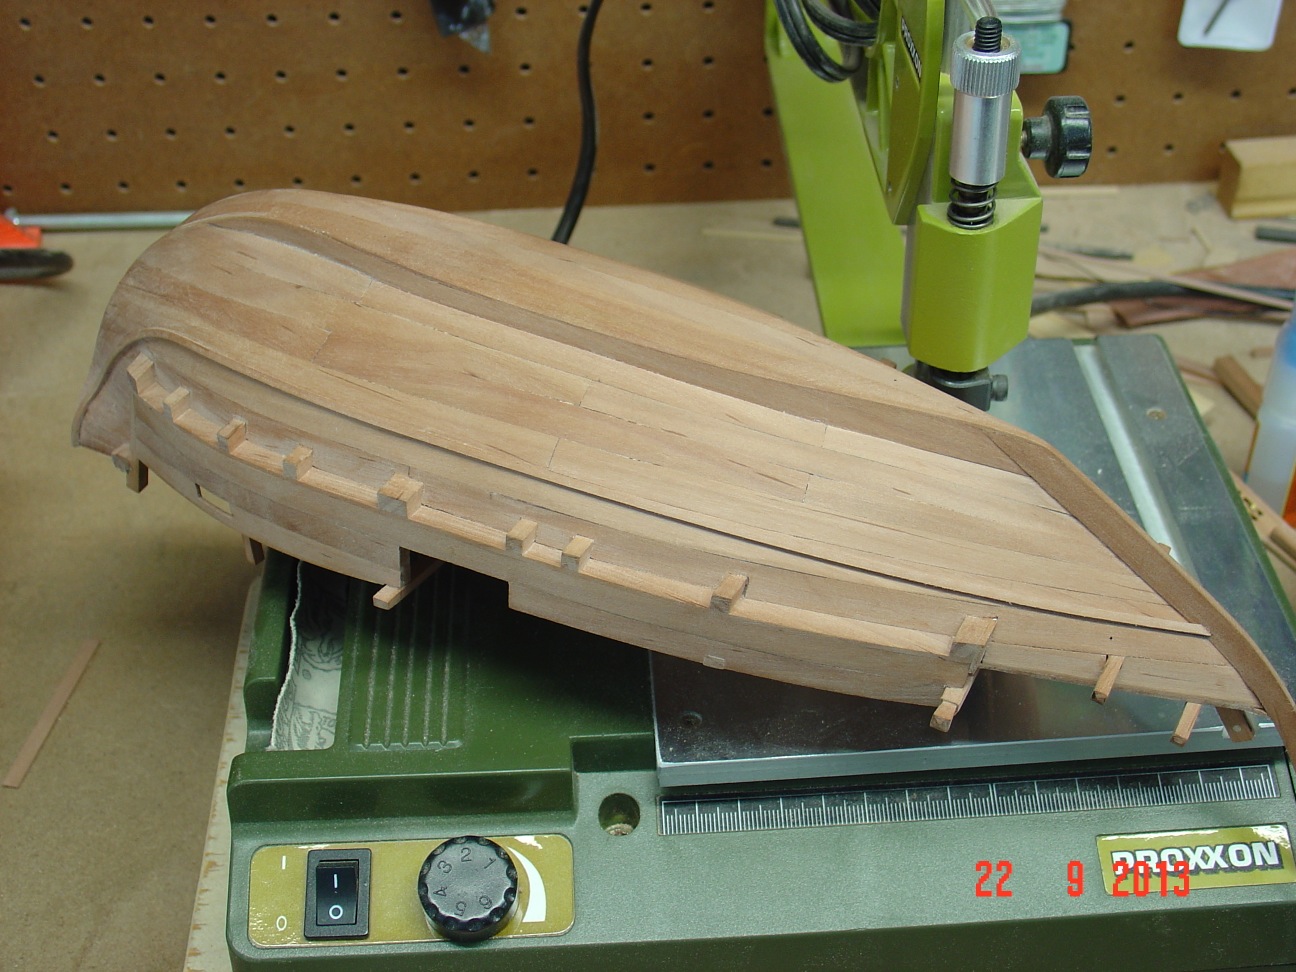
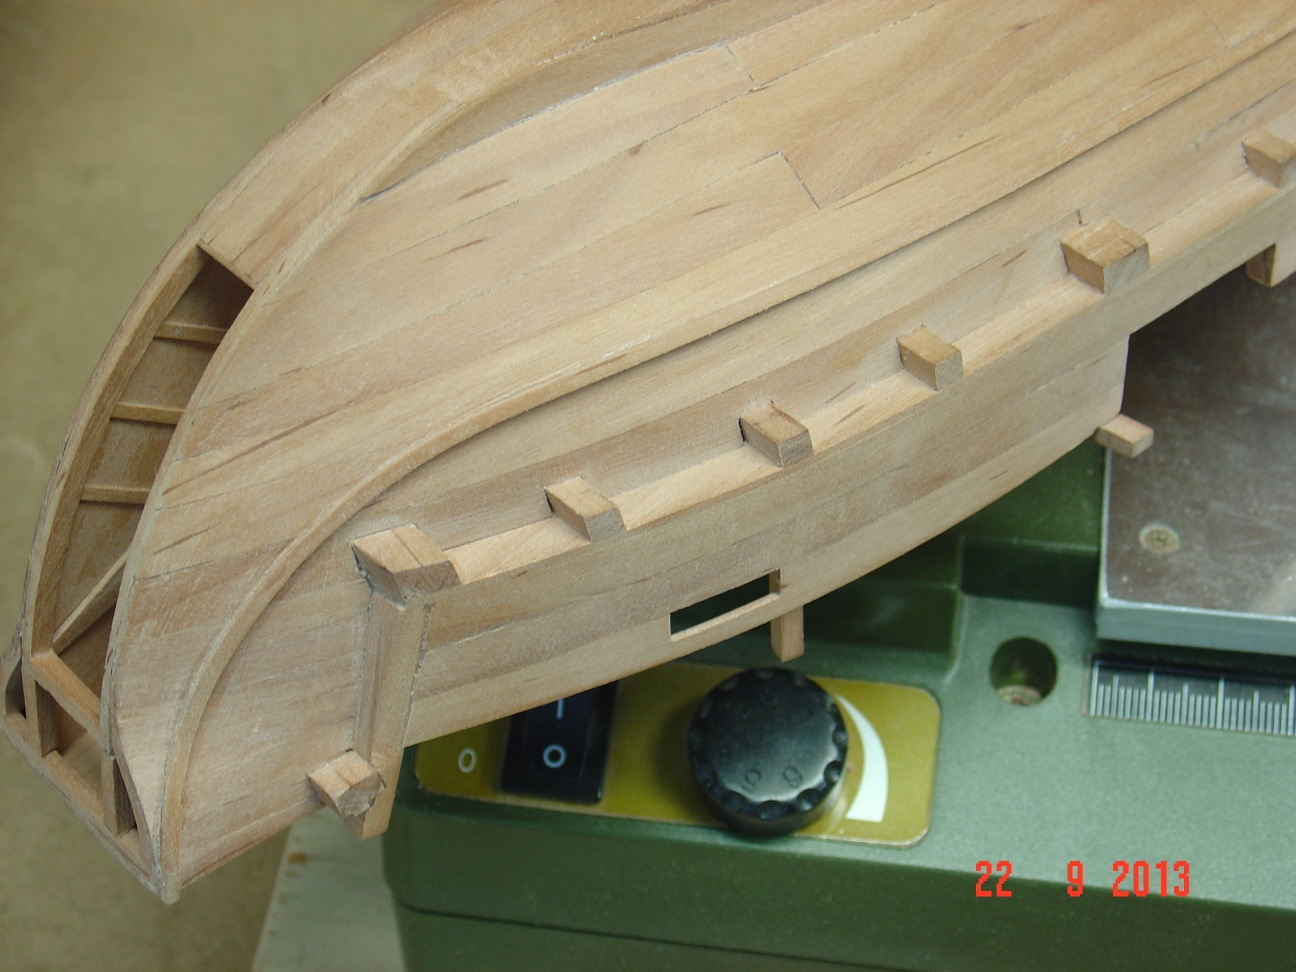
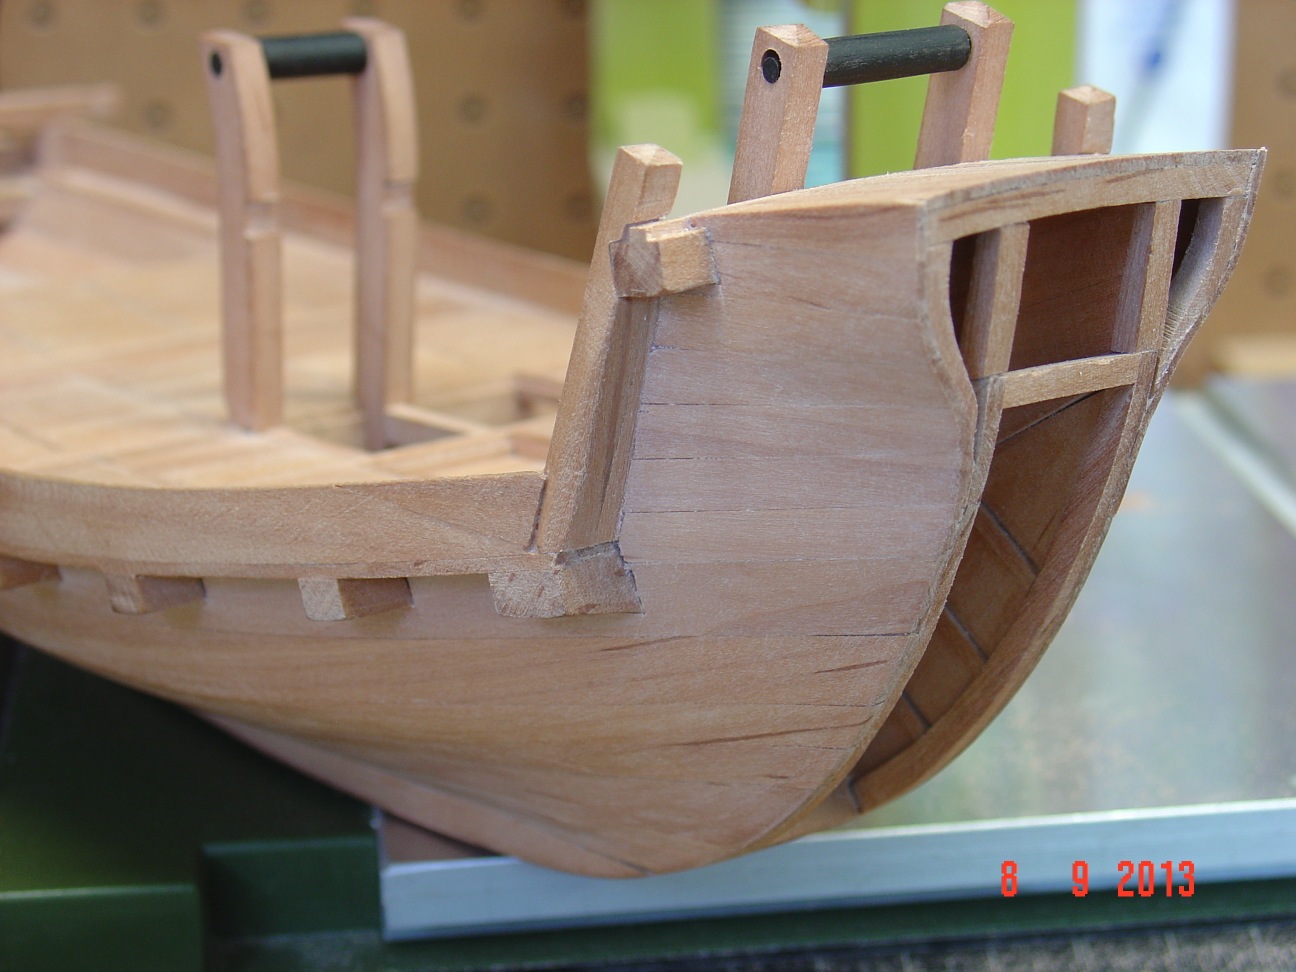
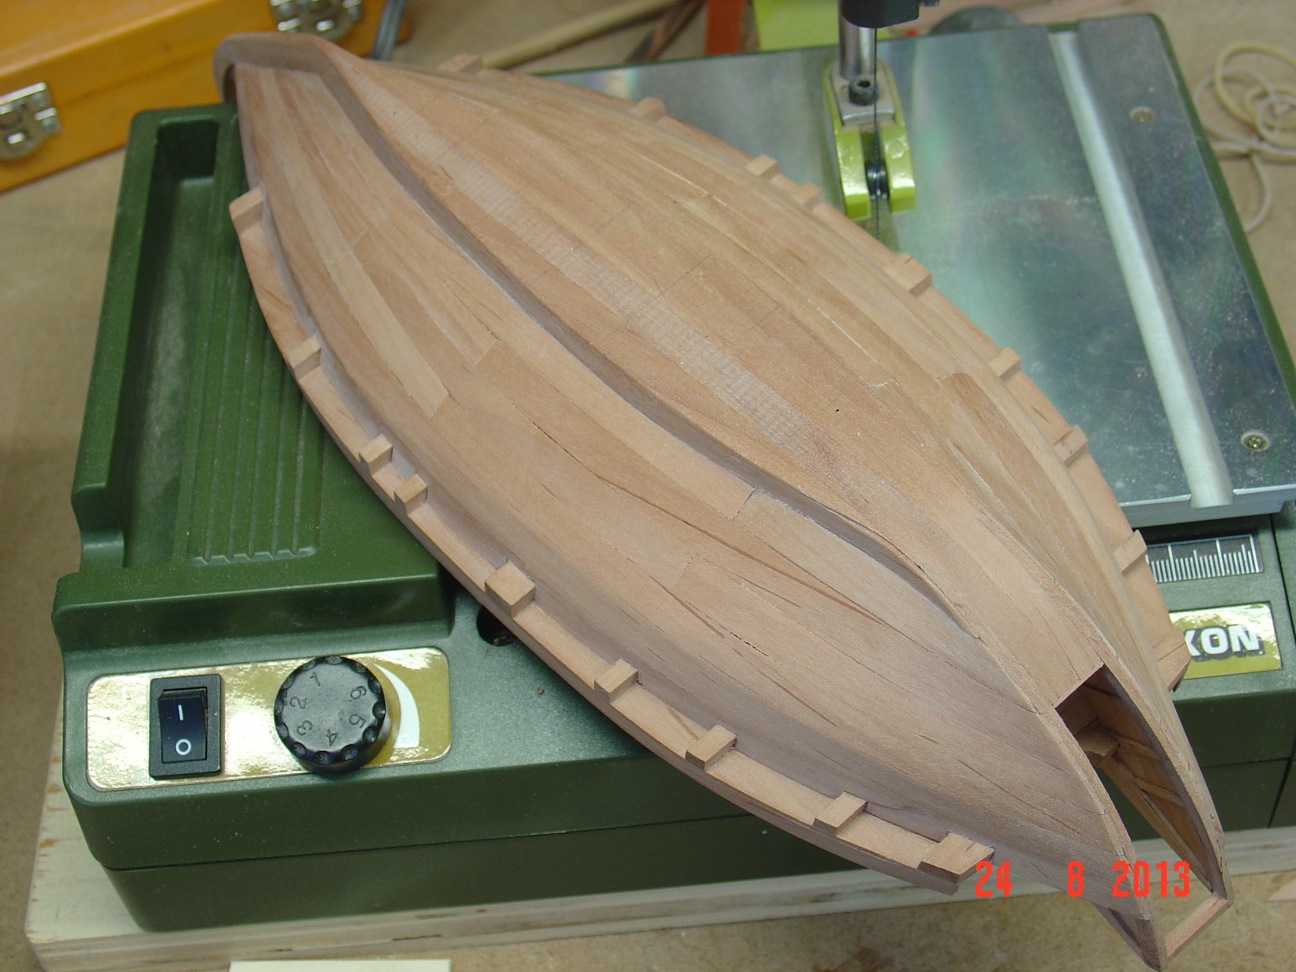
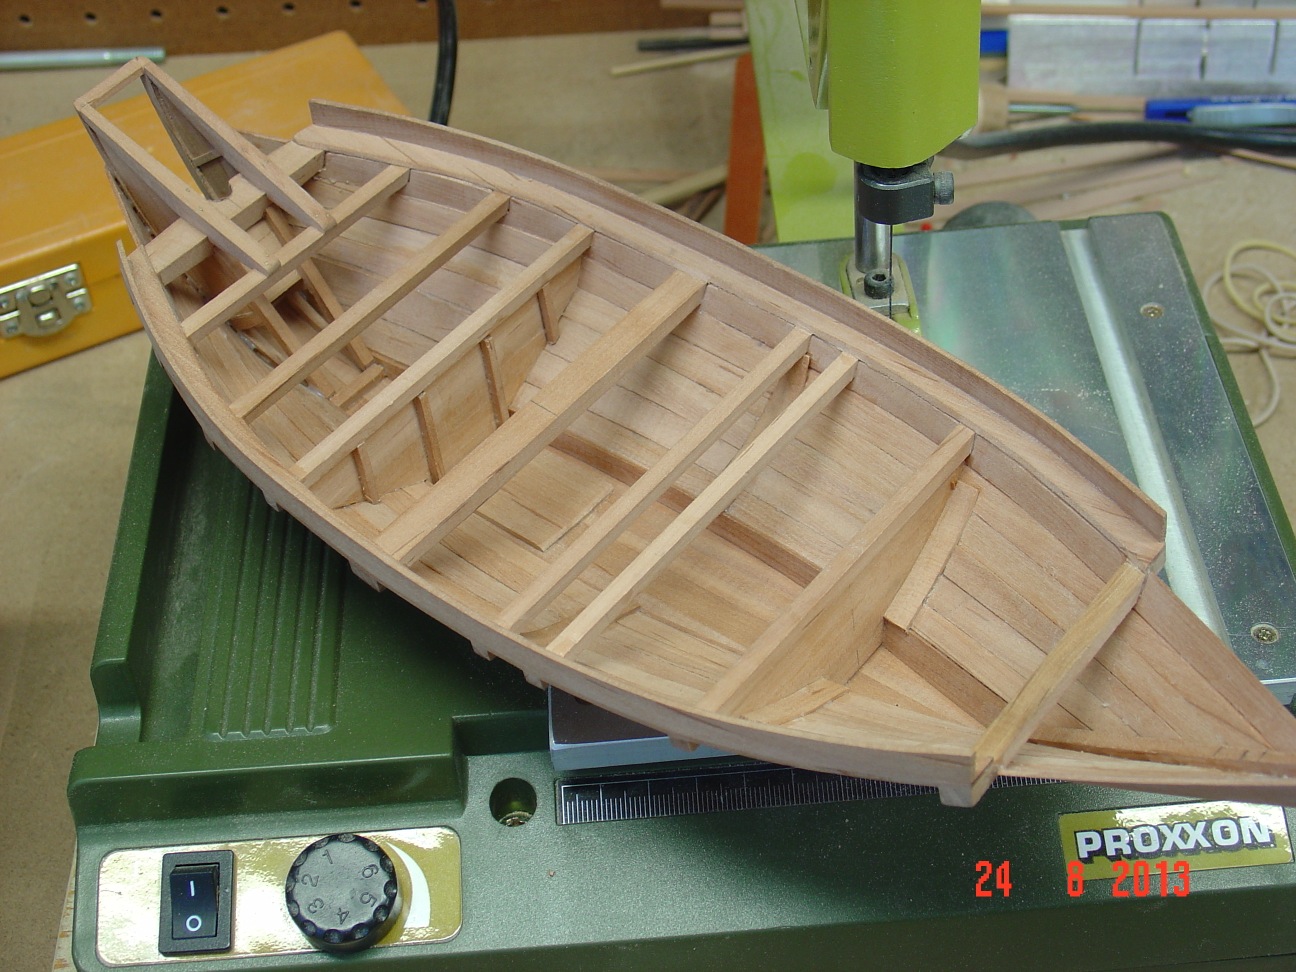
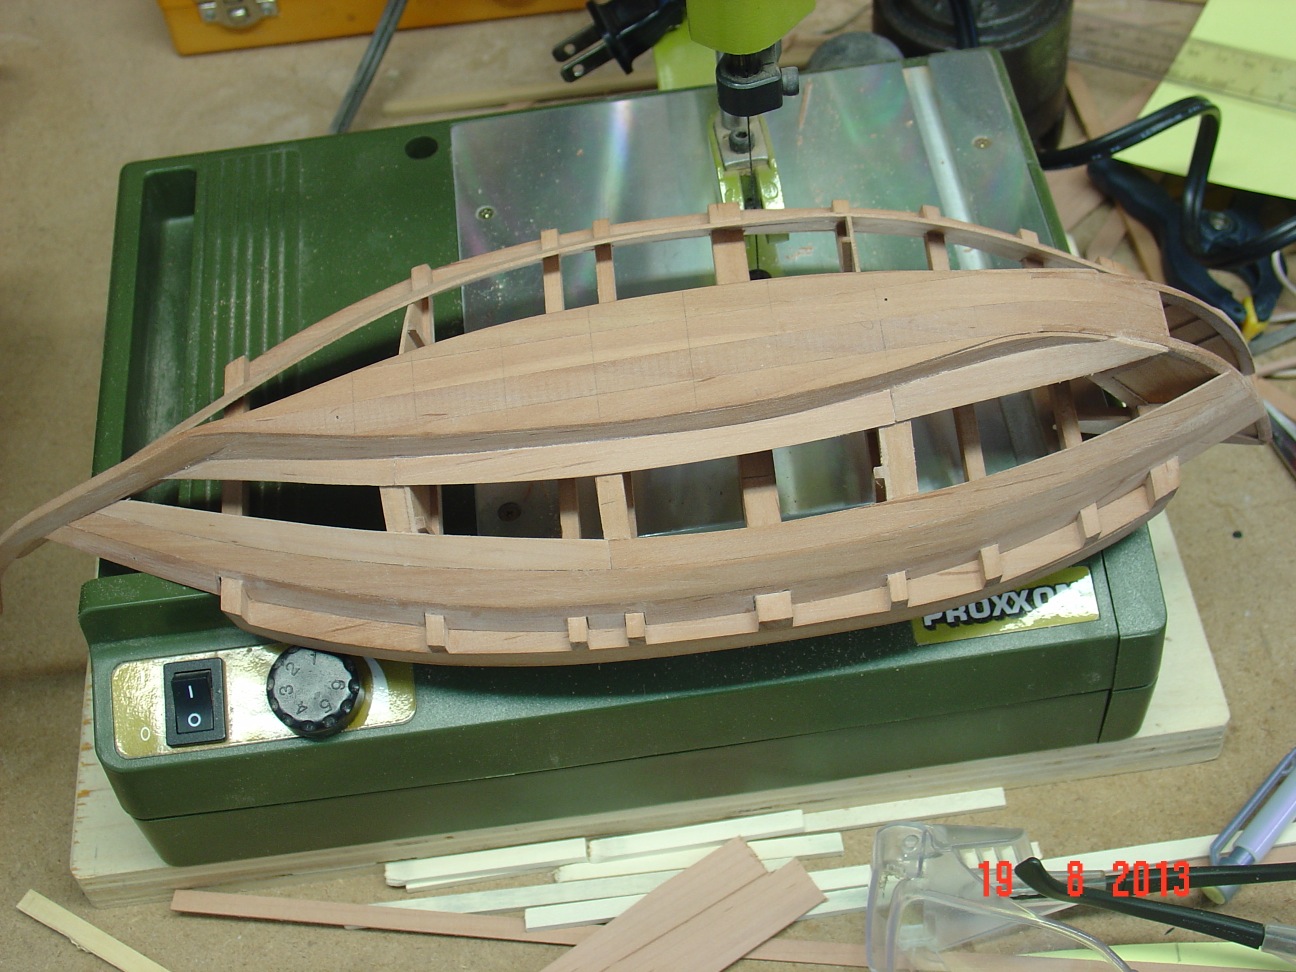
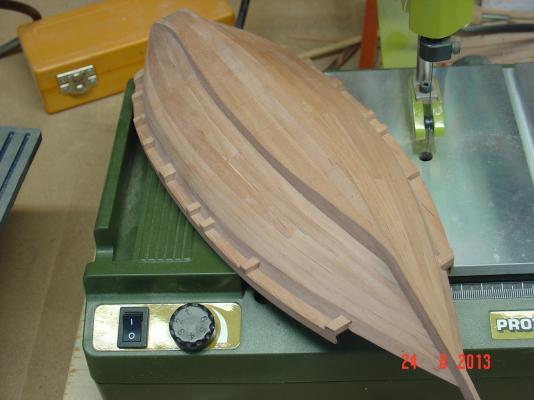
Finally I finished the hull planking and started to work on the deck. Here are some pictures. Alexandru


-
Thank you, Alexandru


-
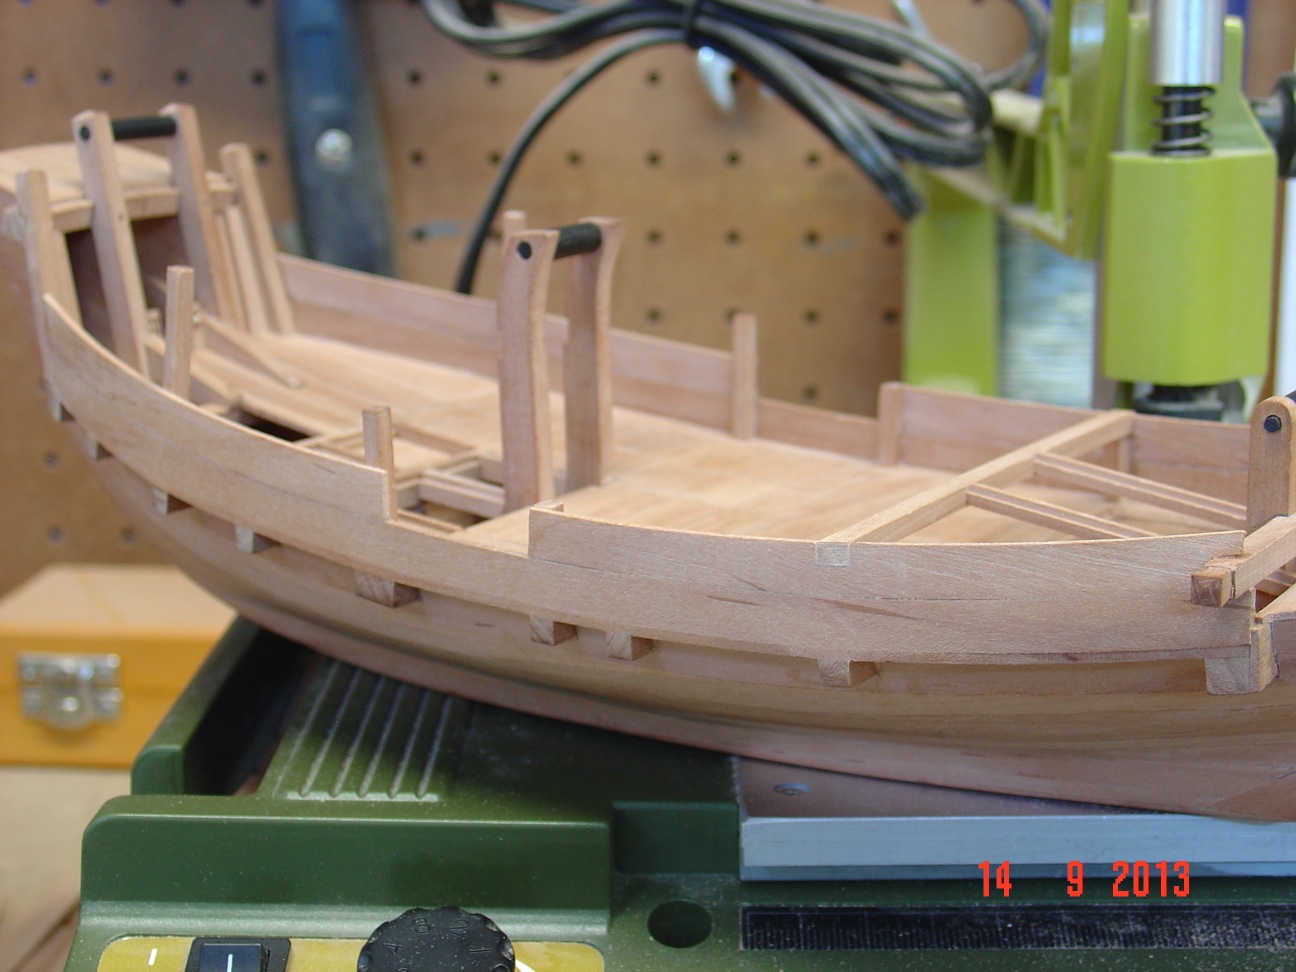
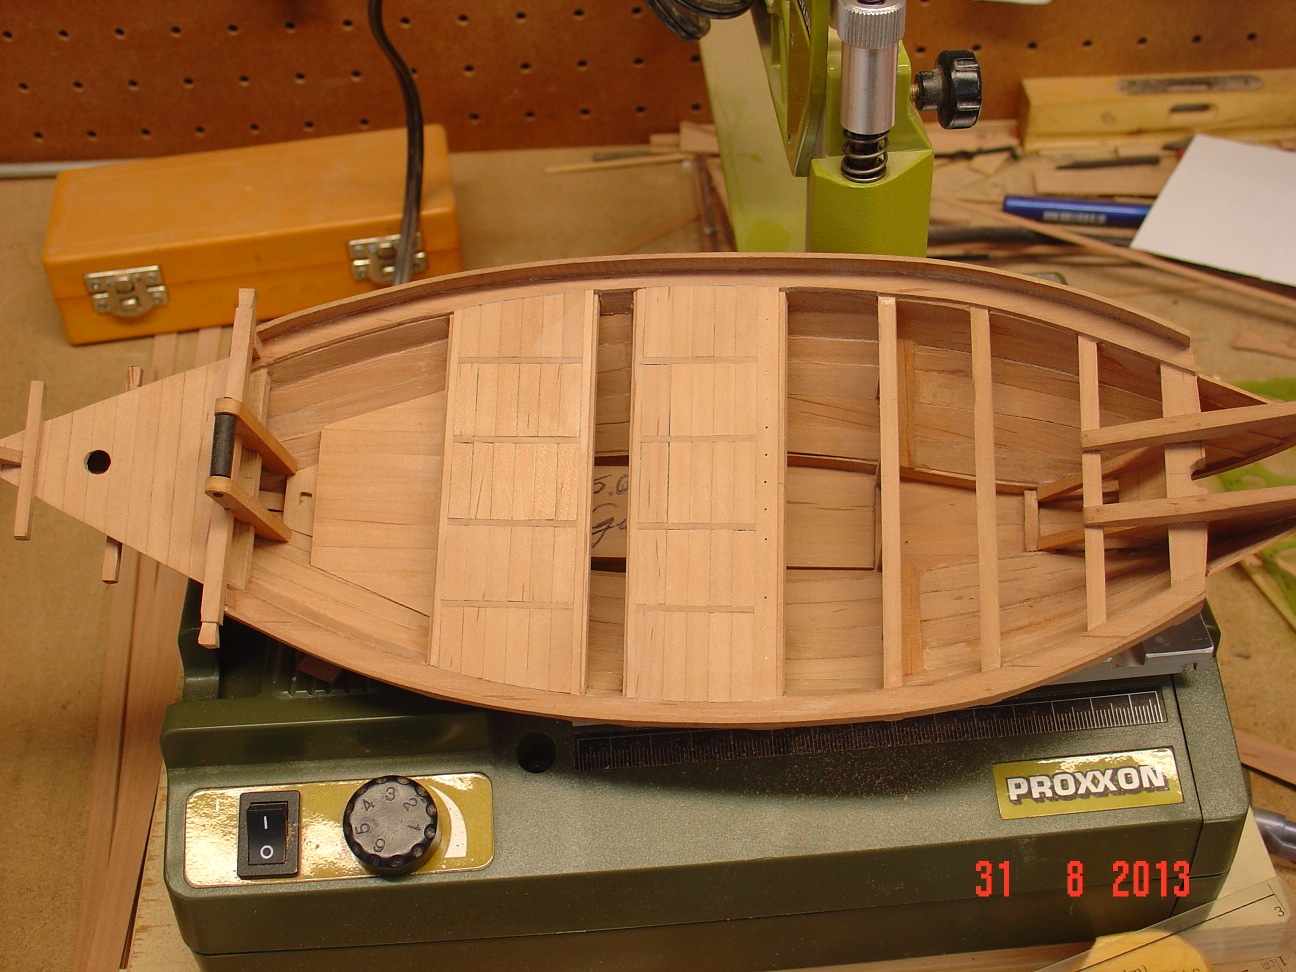
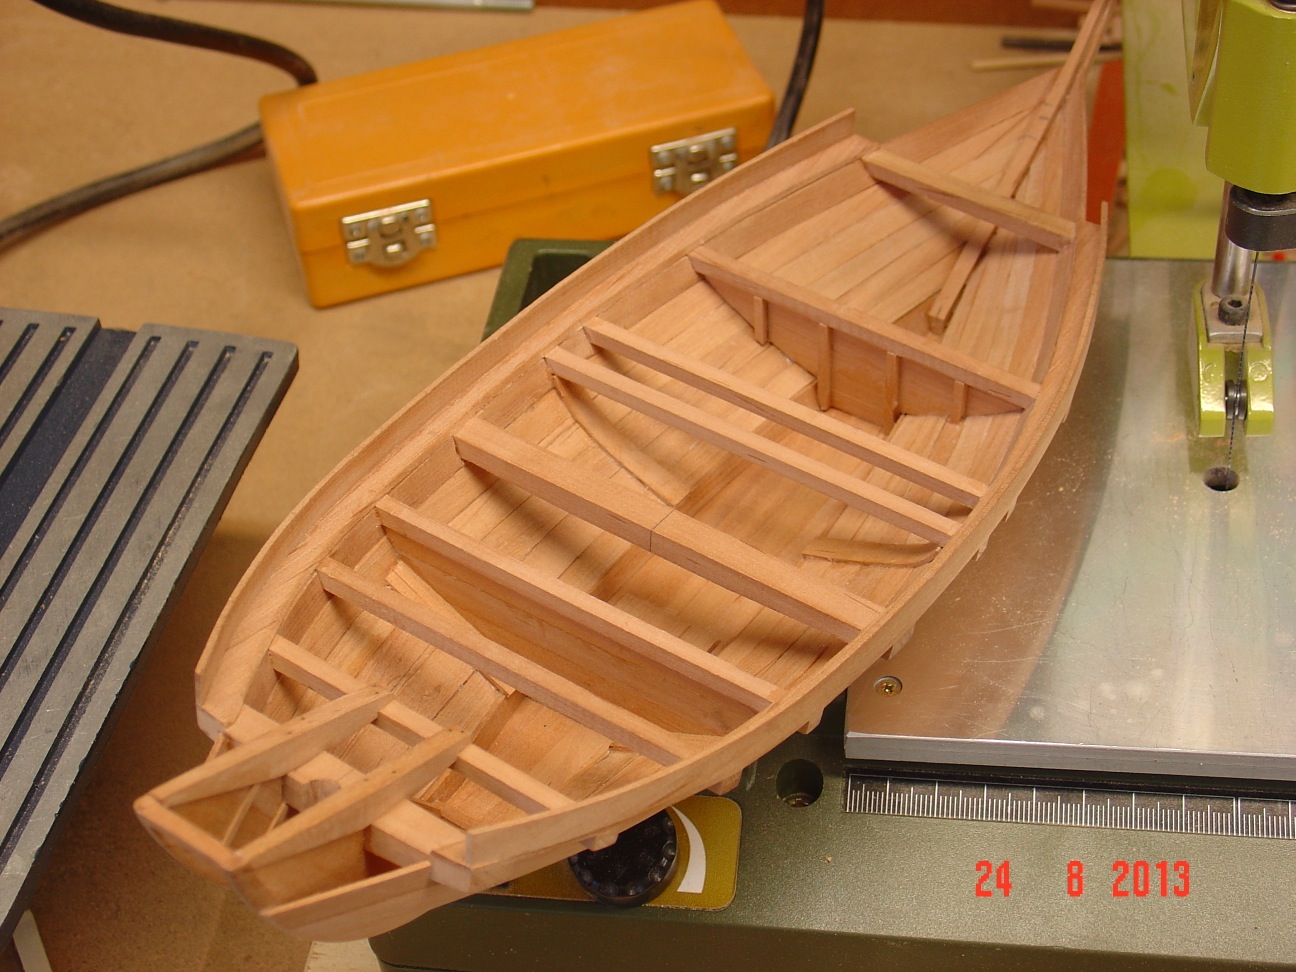
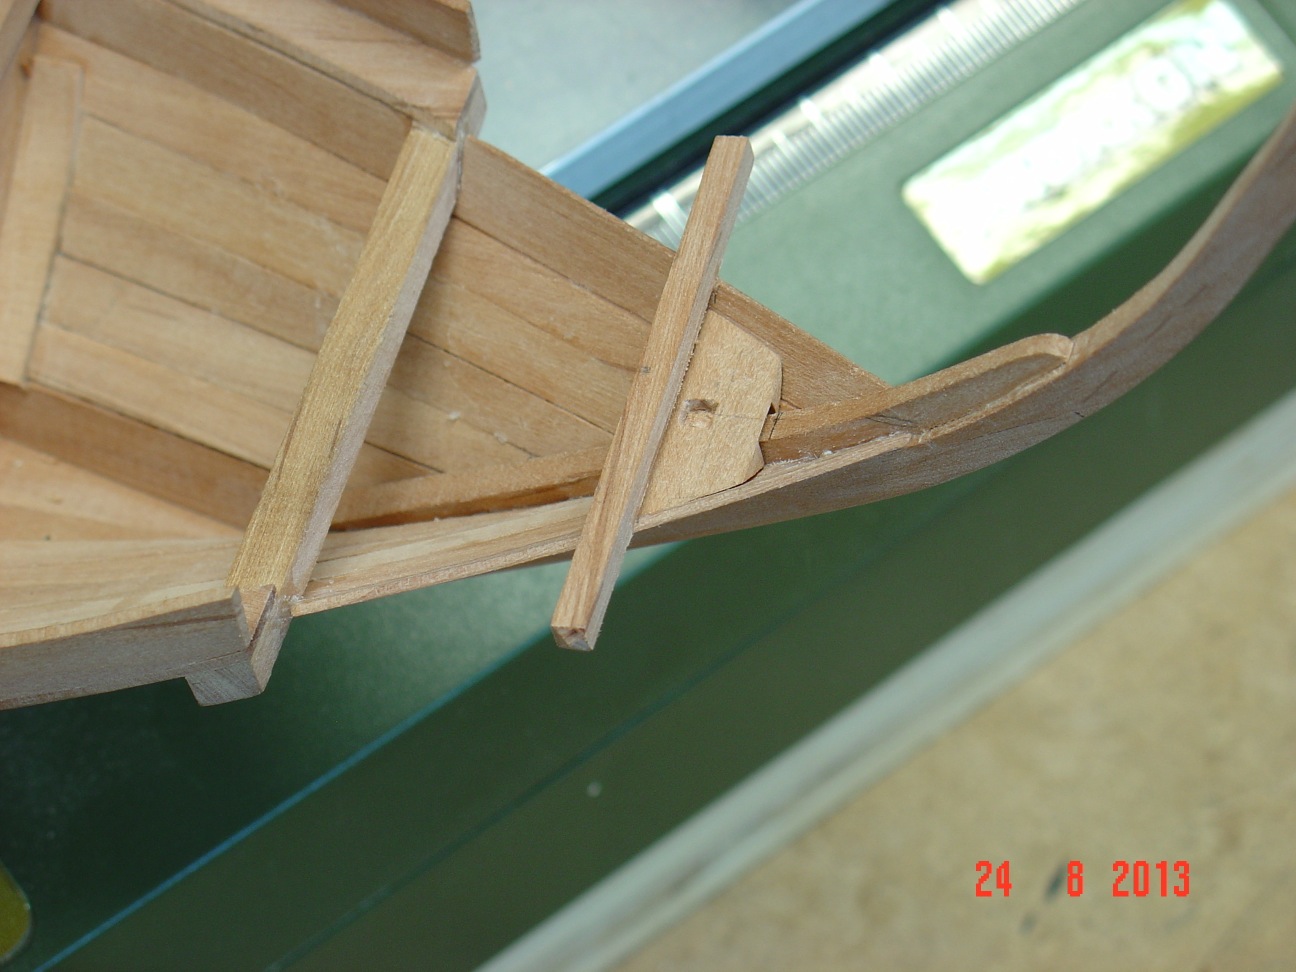
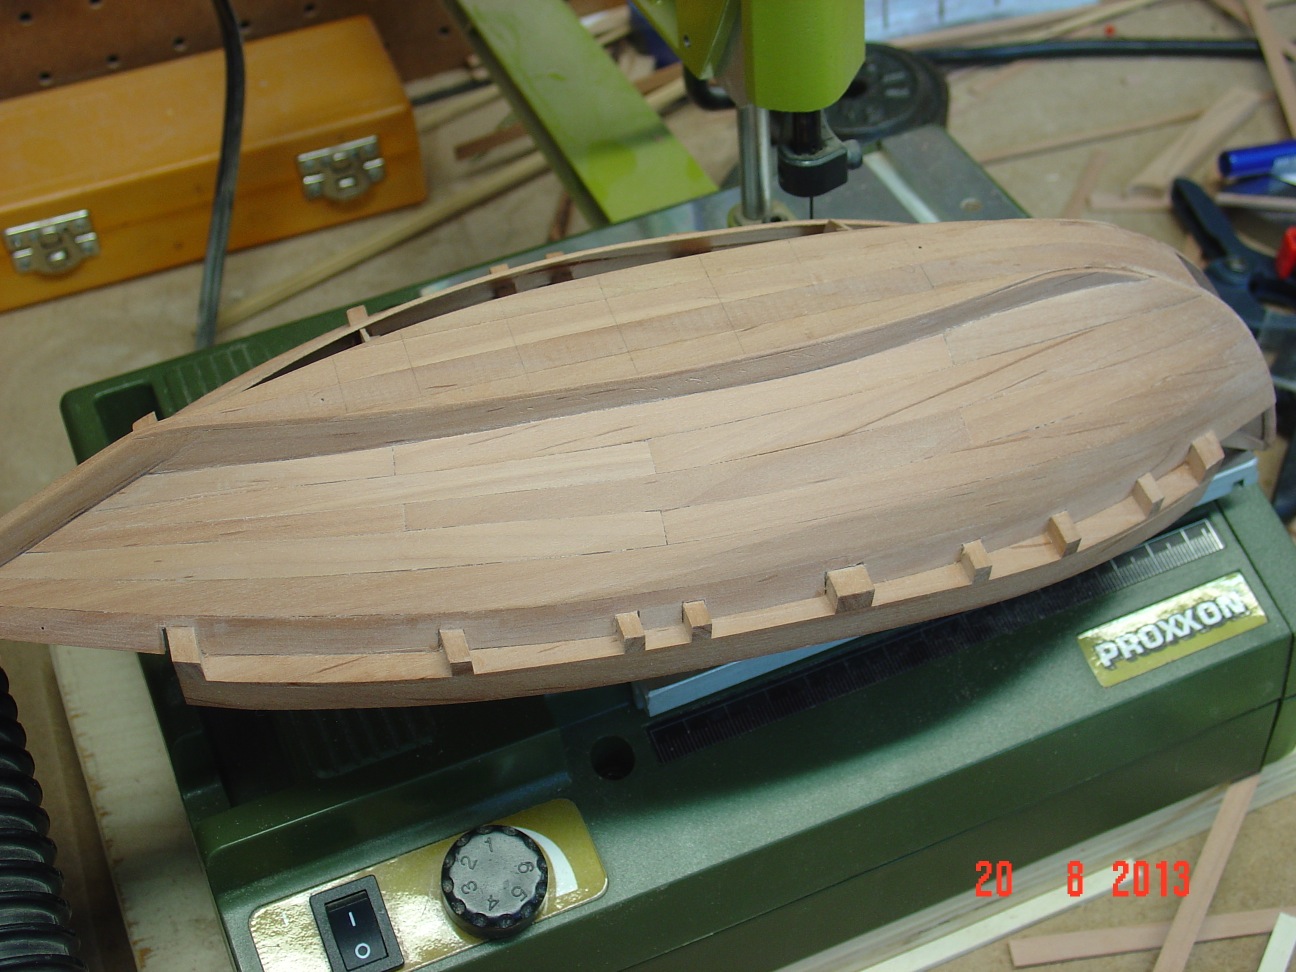
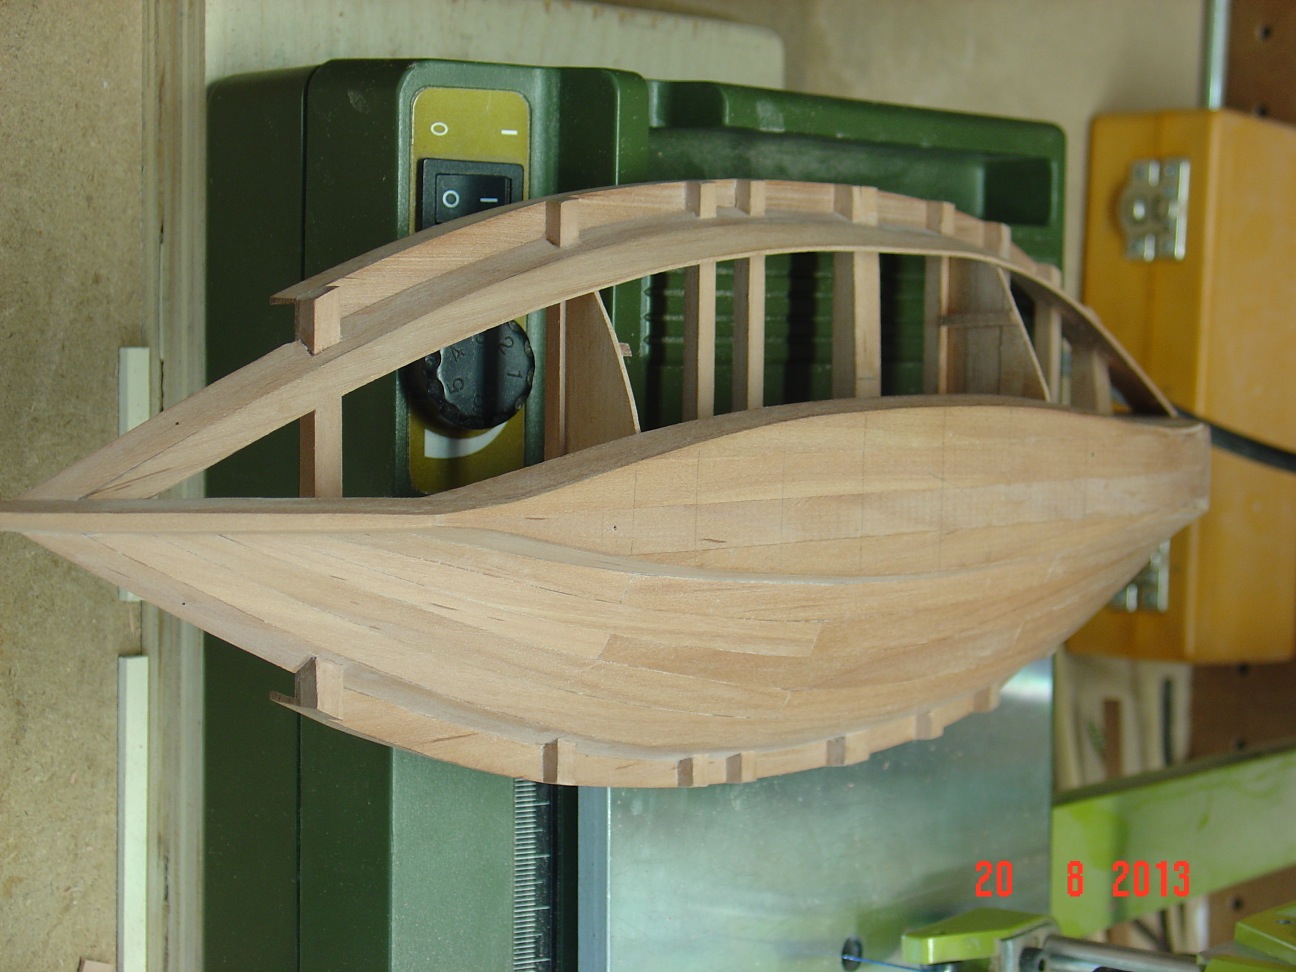
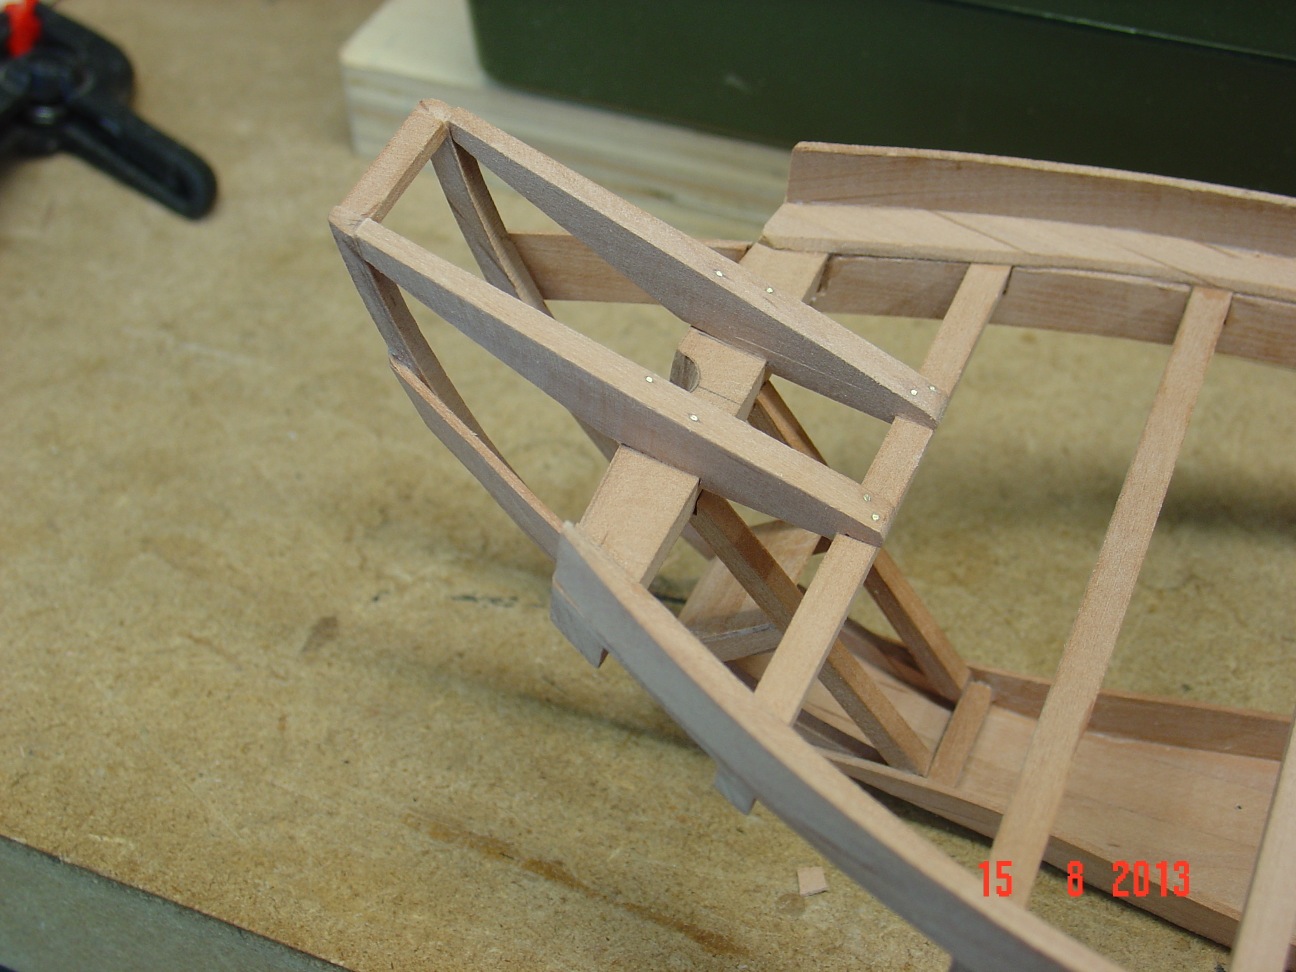
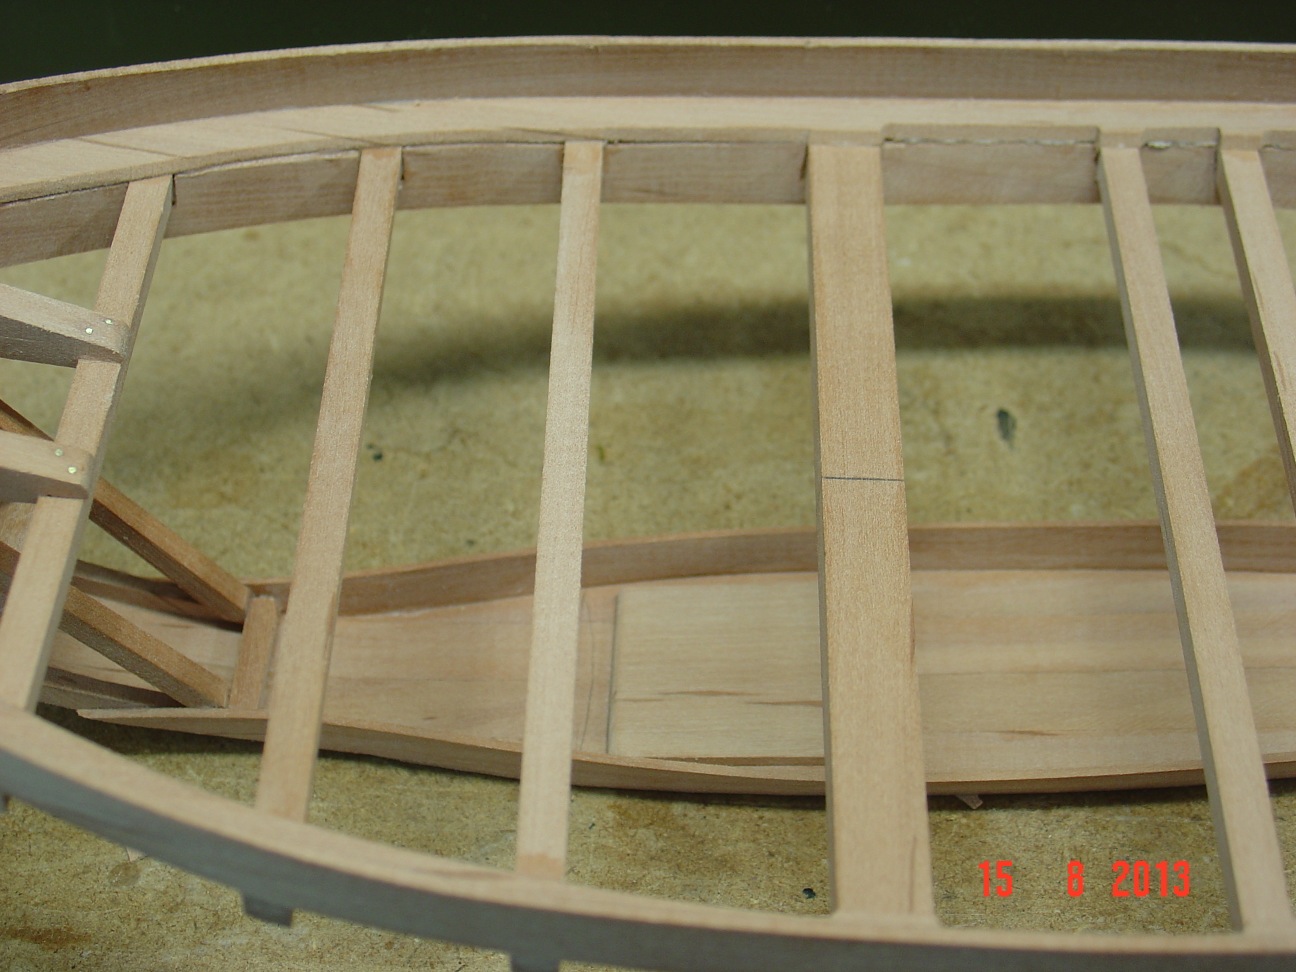
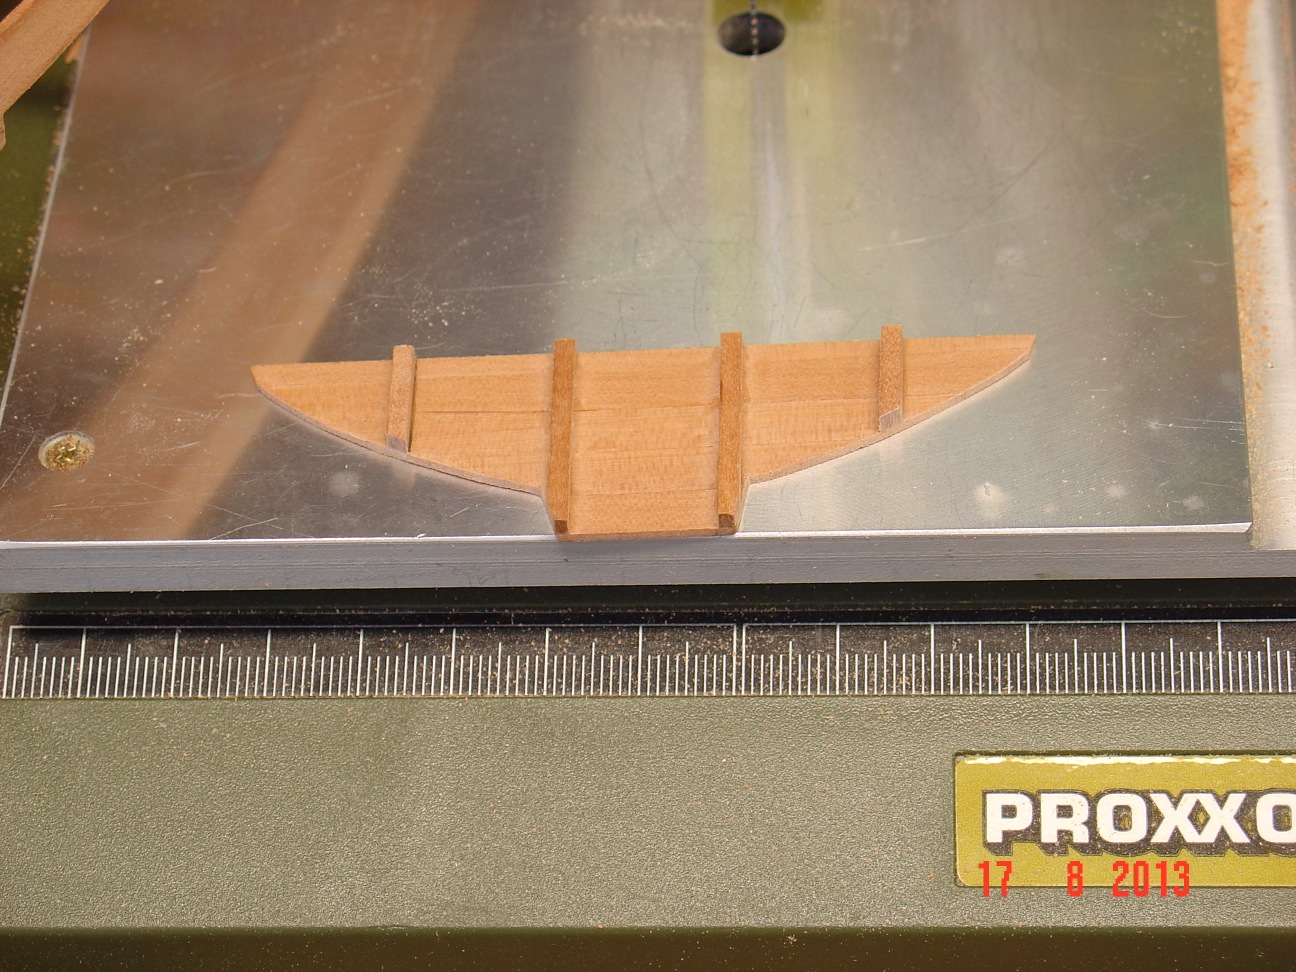
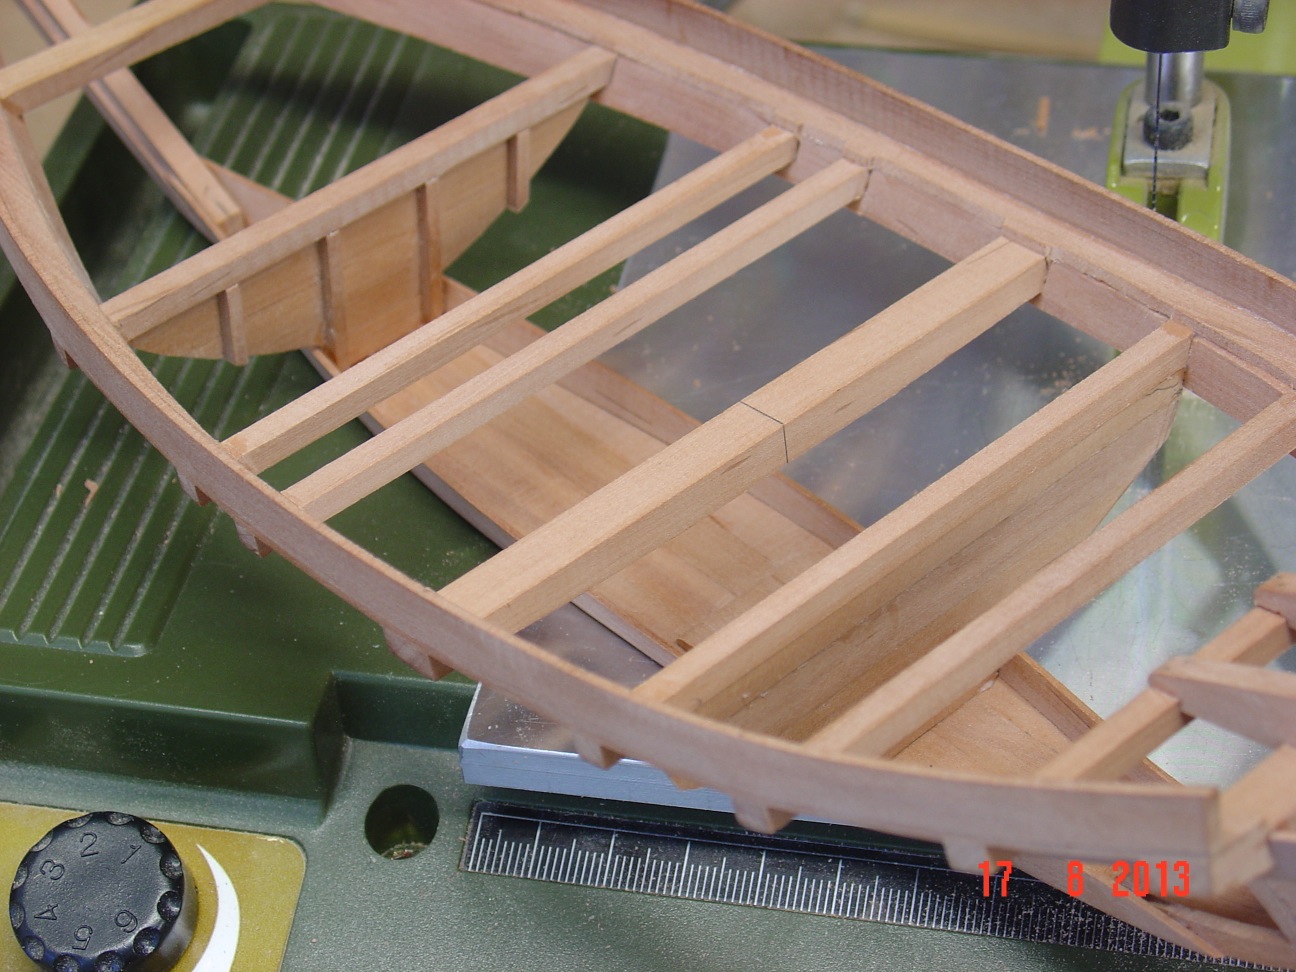
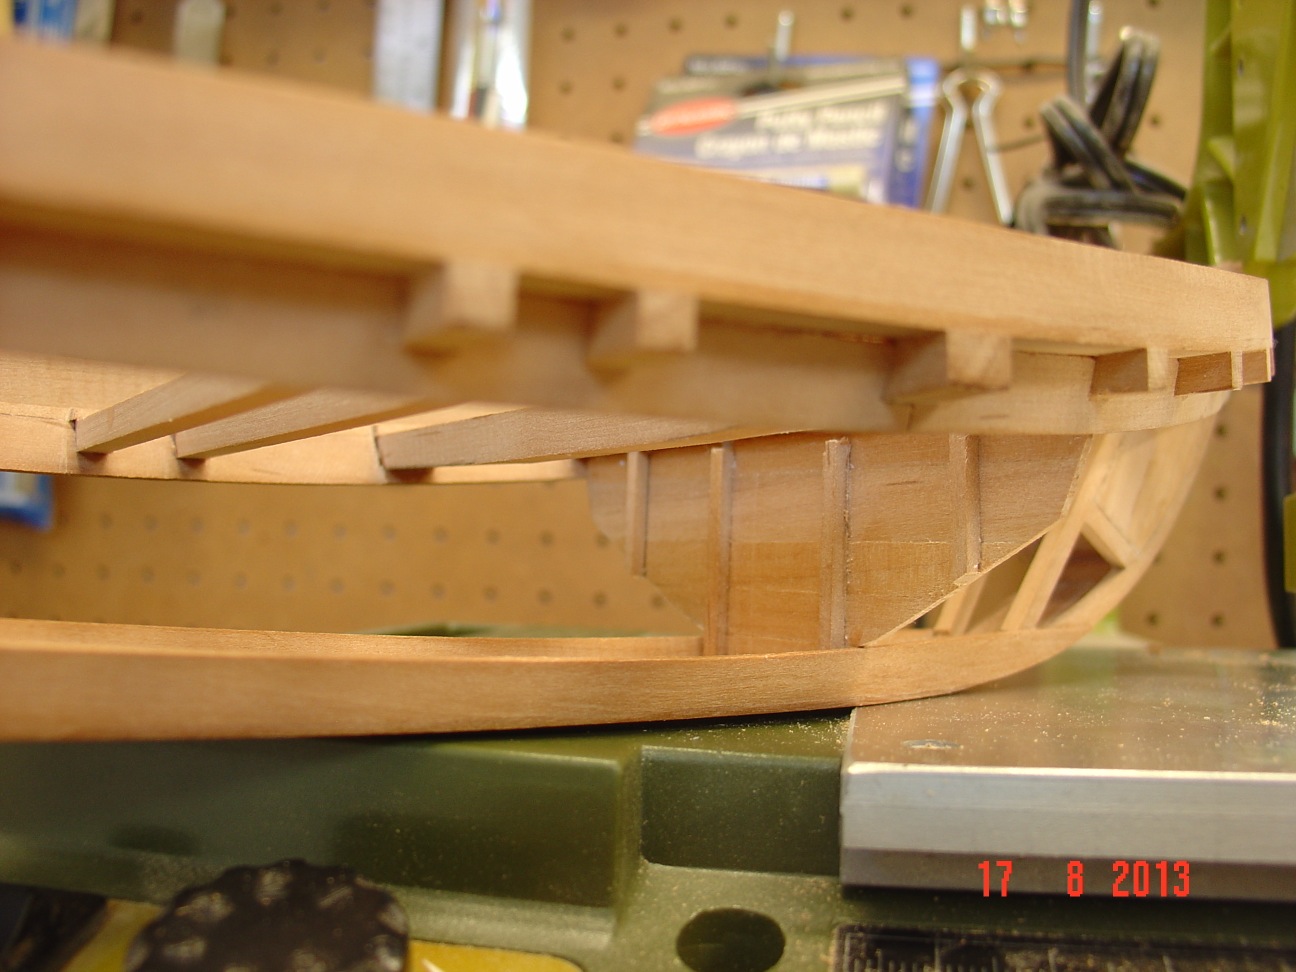
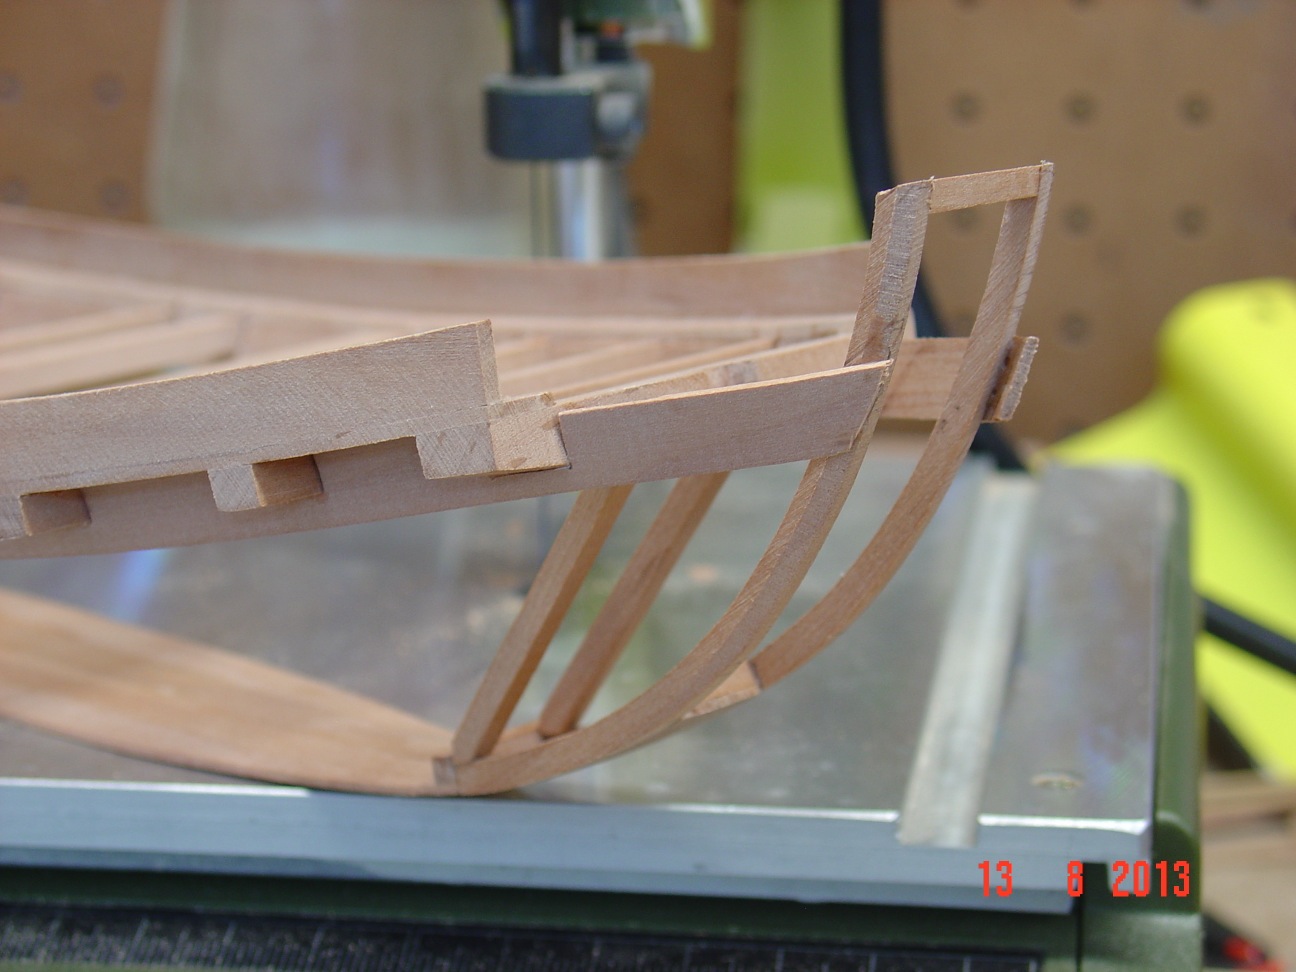
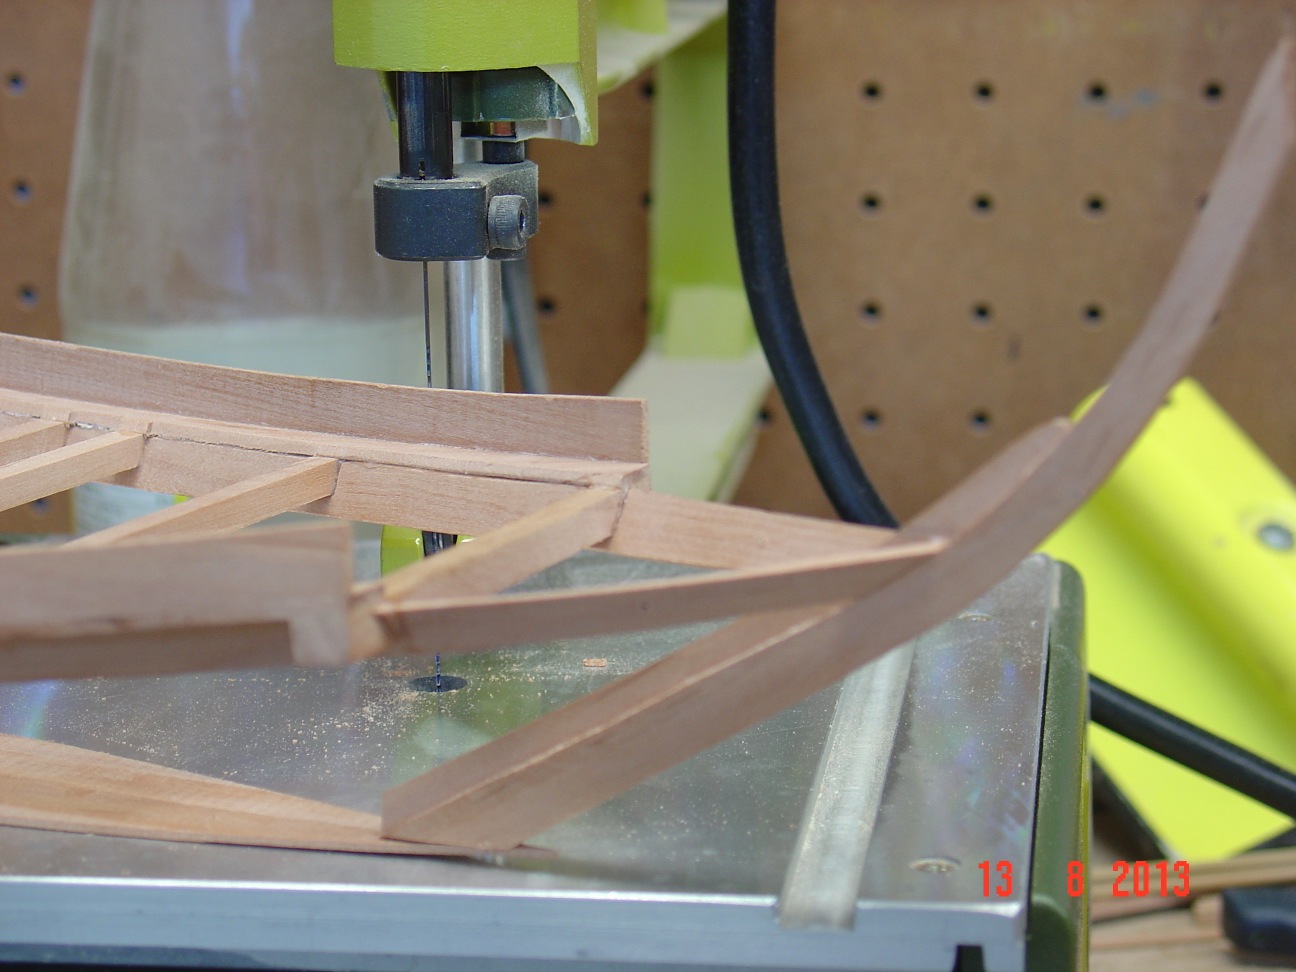
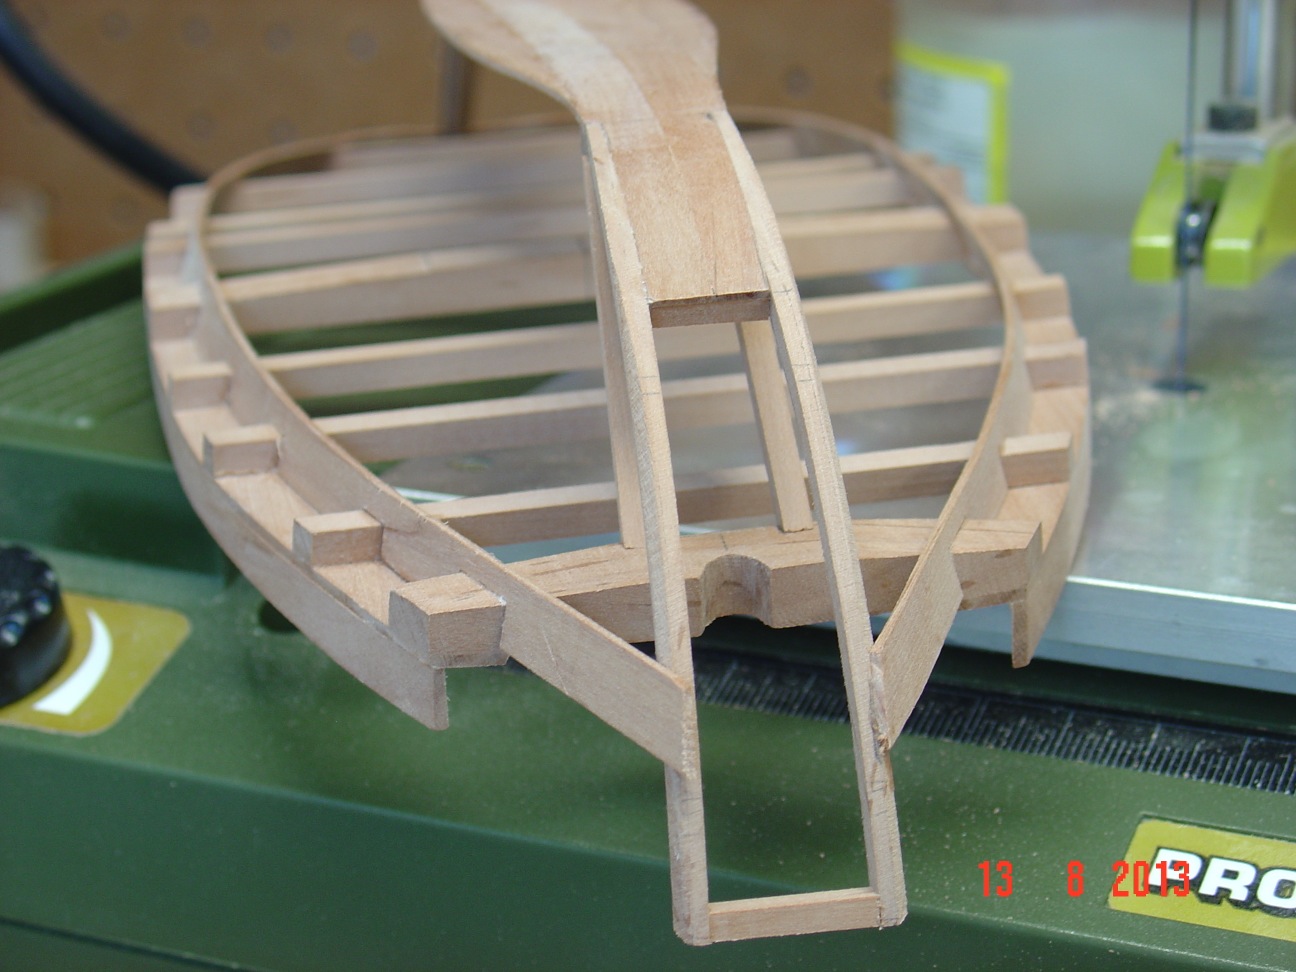
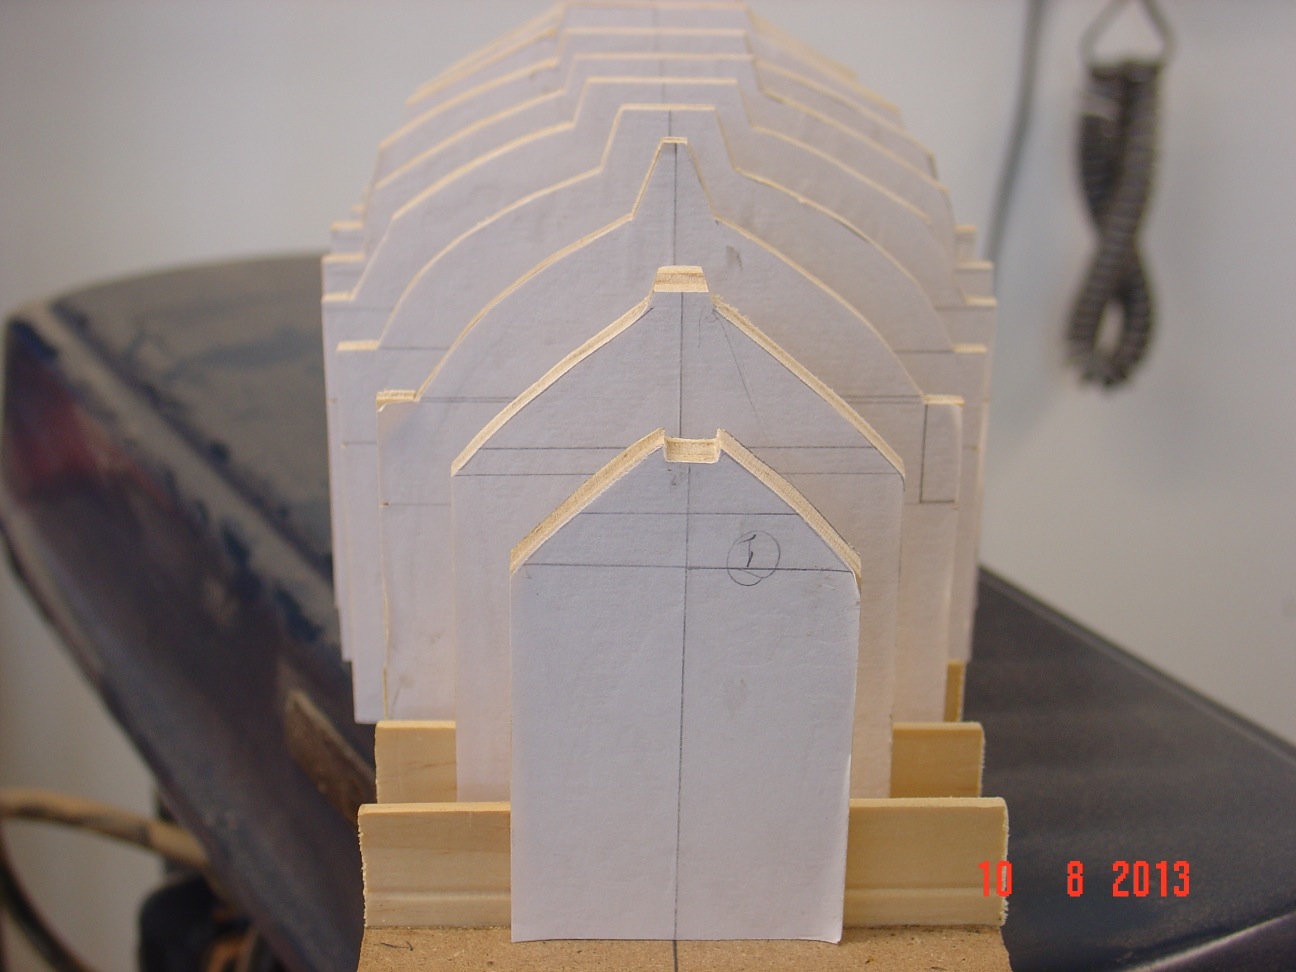
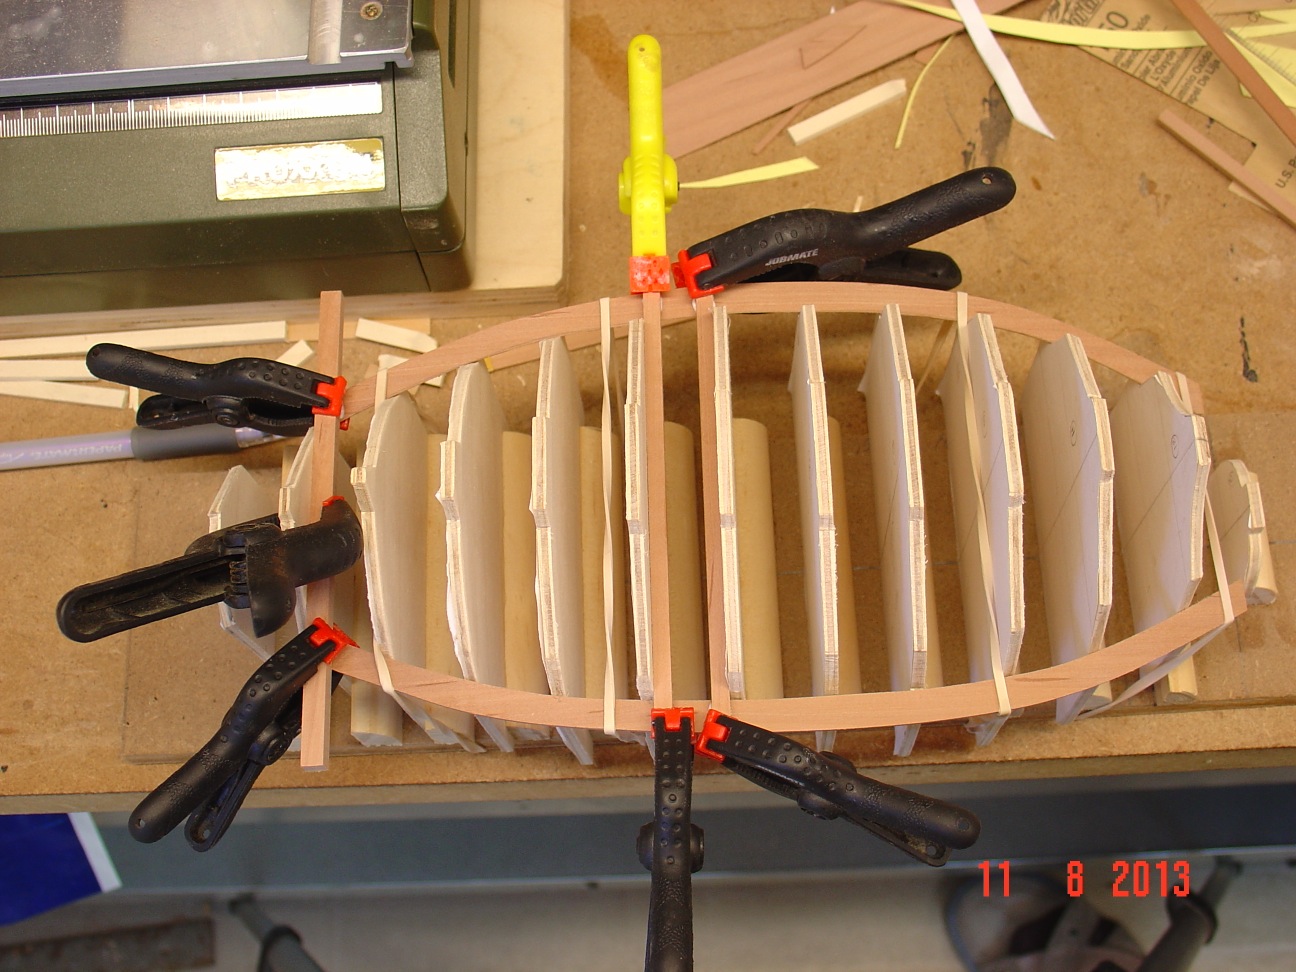
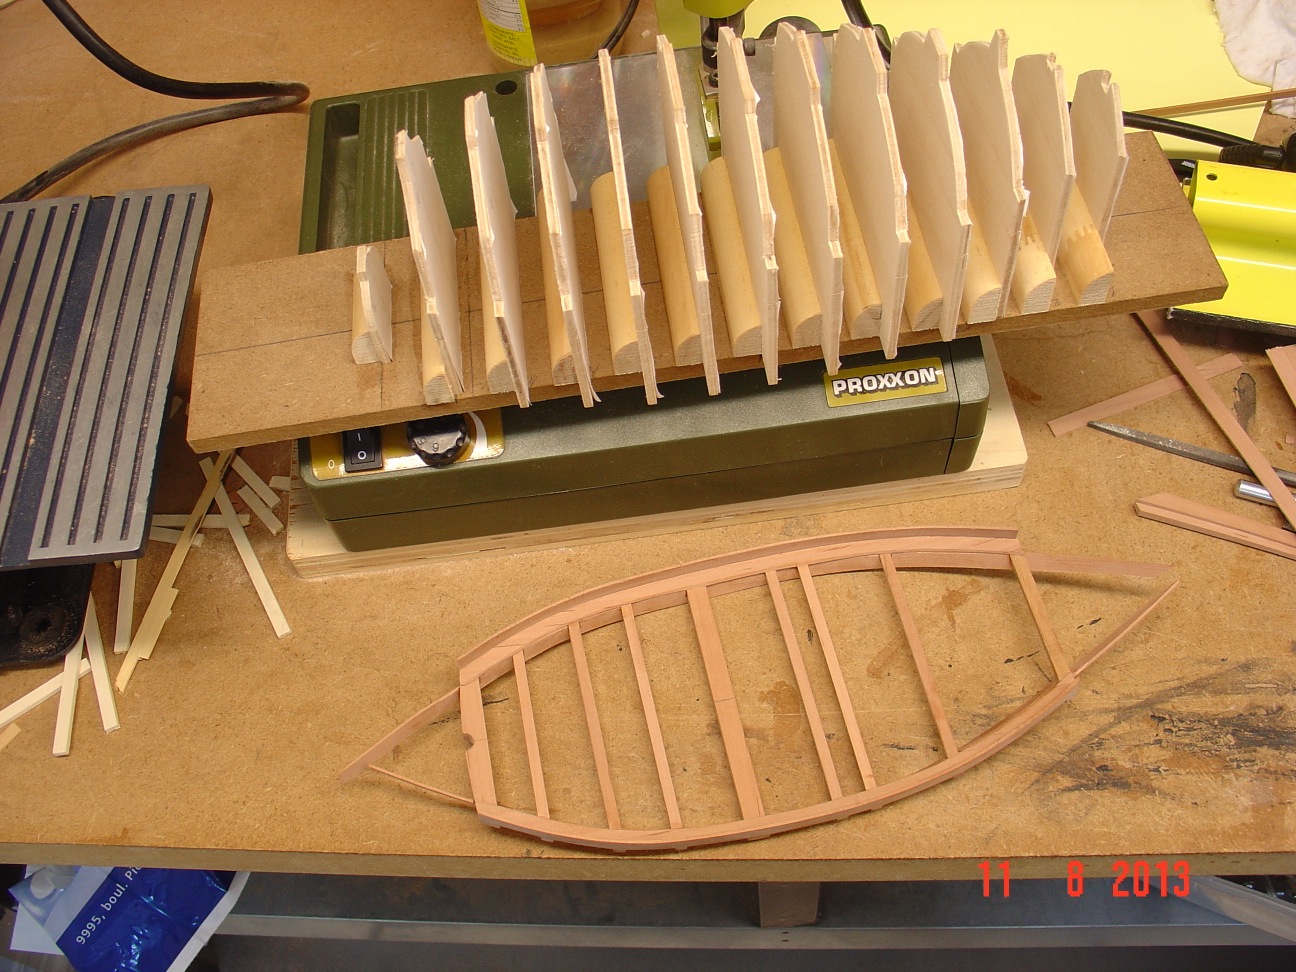
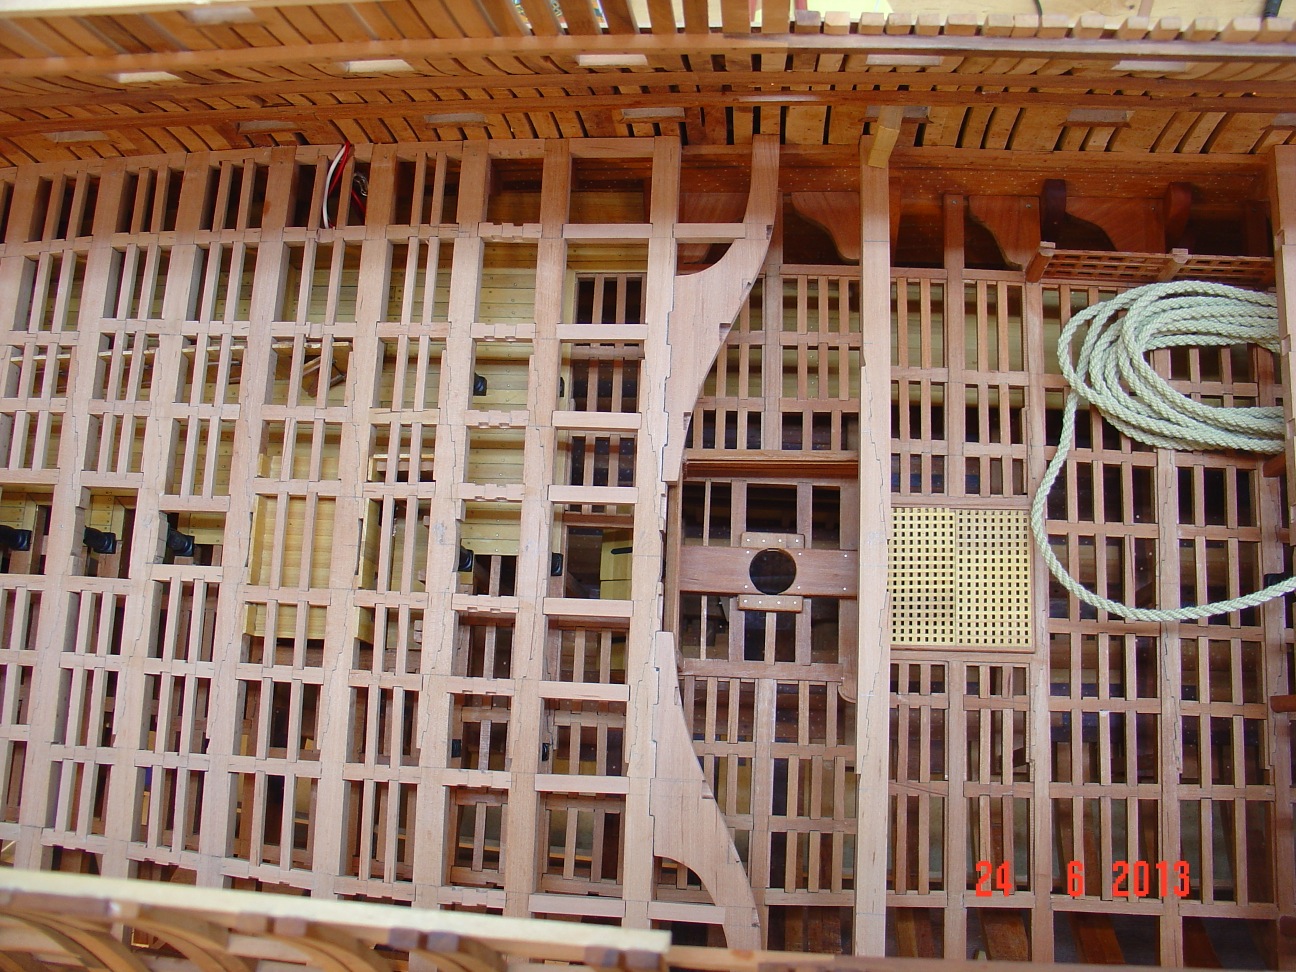
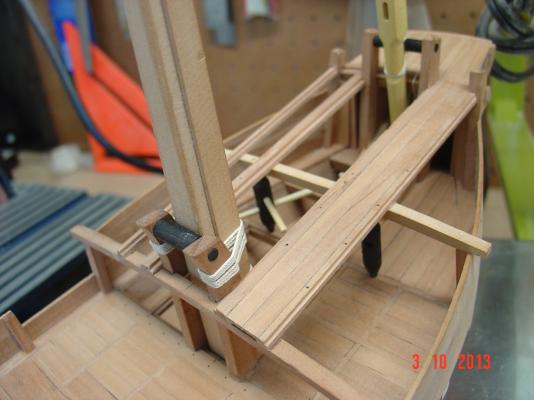
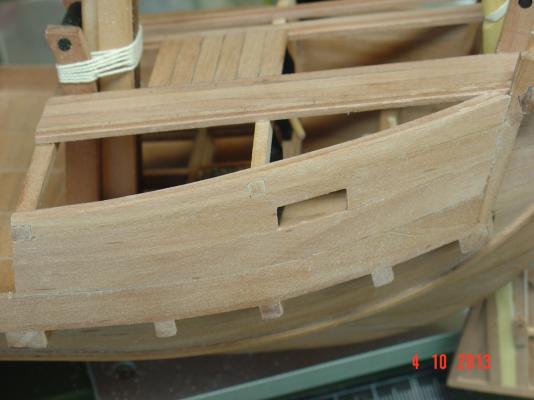
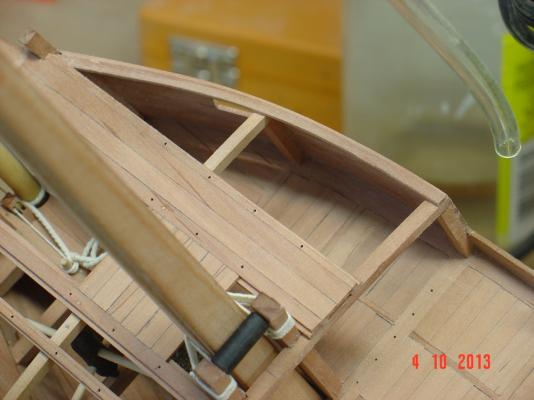
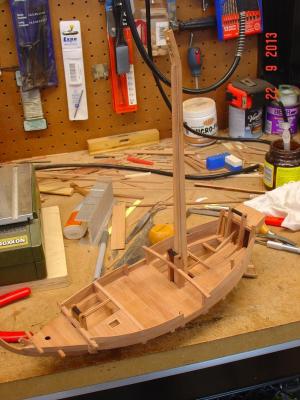
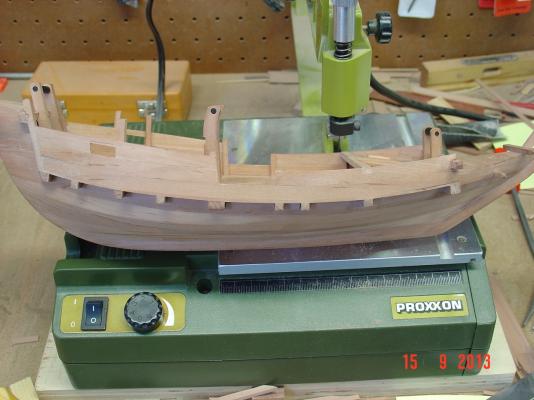
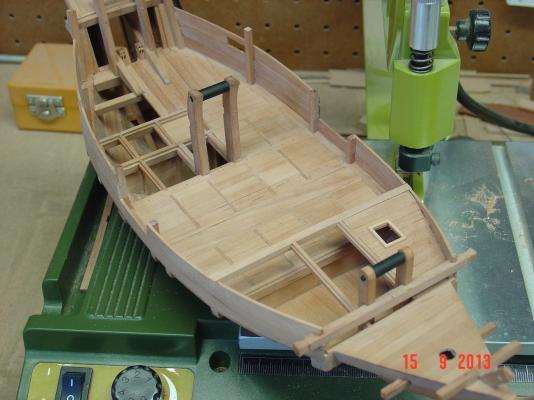
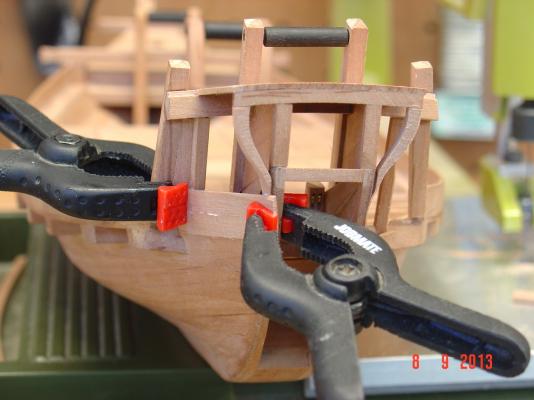
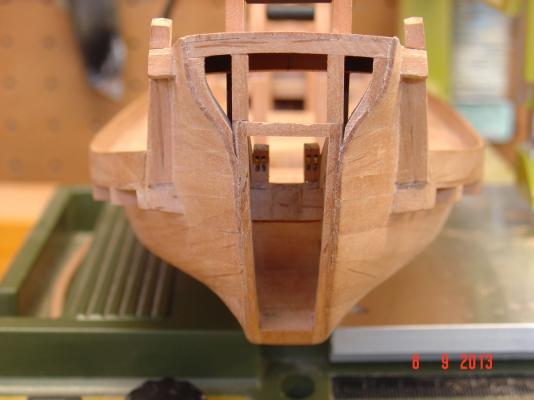
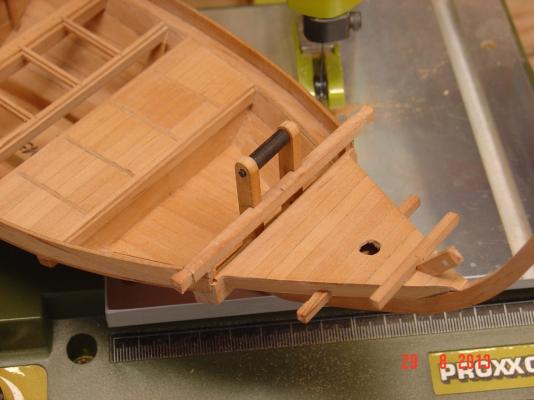
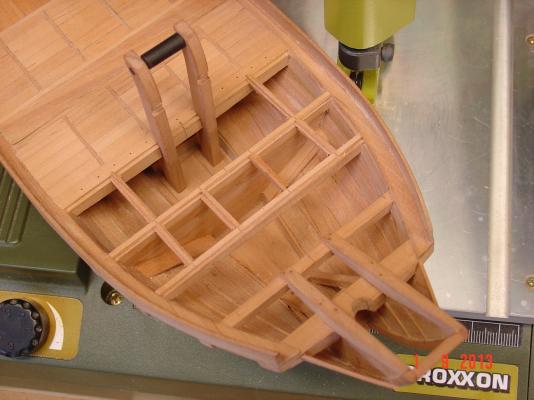
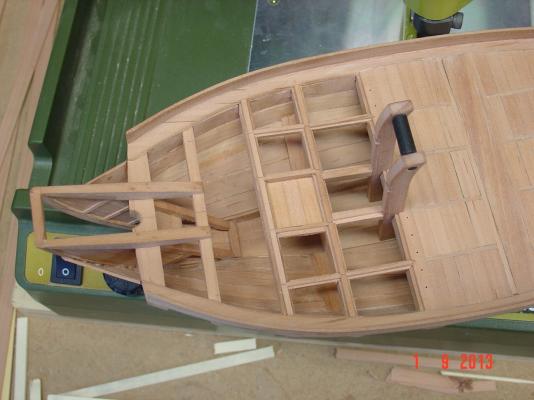
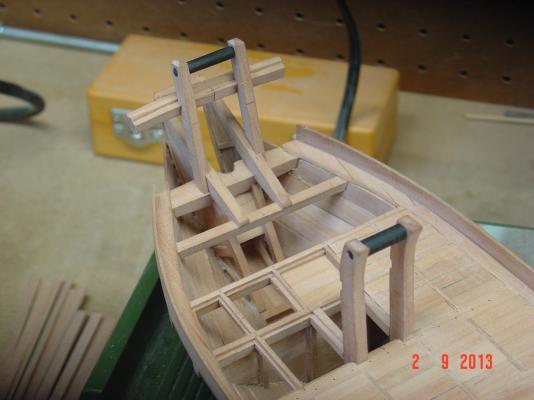
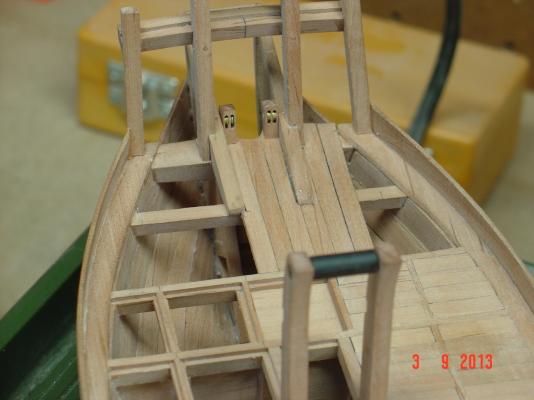
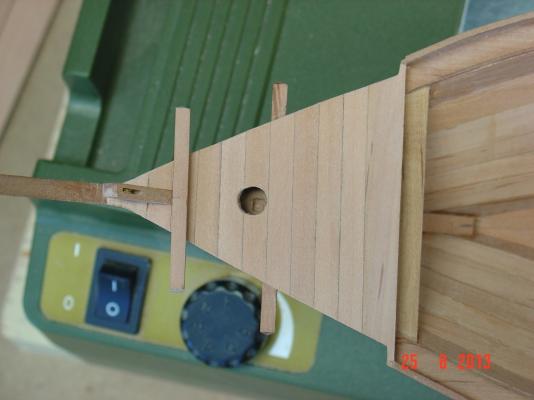
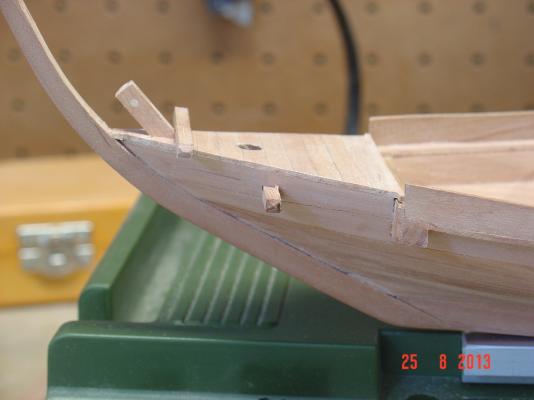
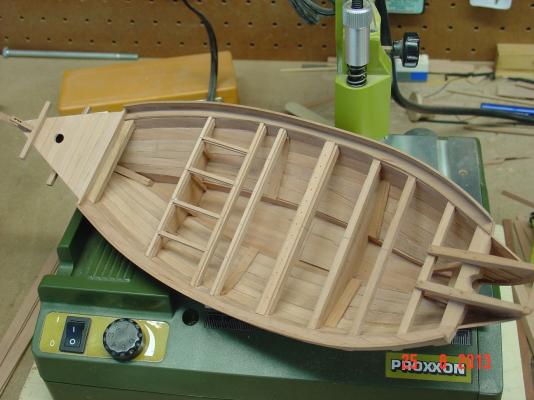
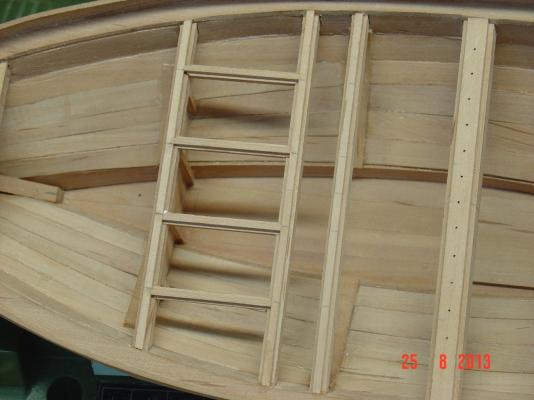
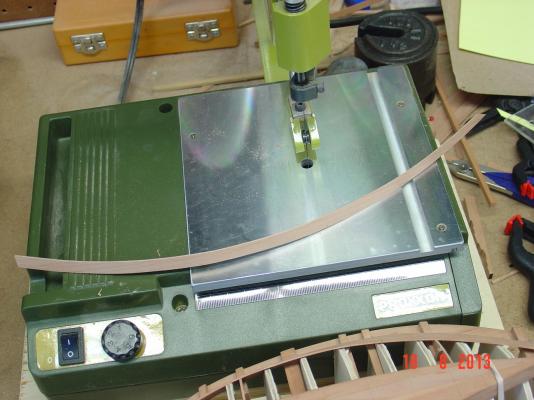
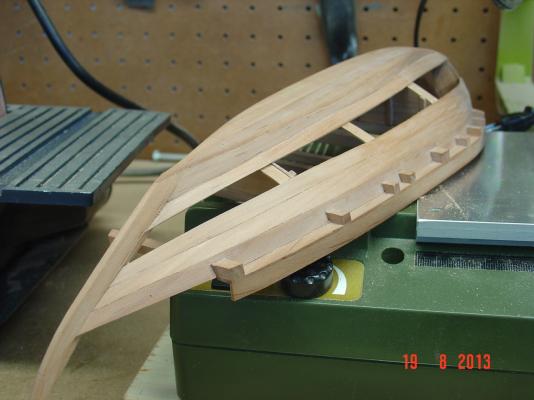
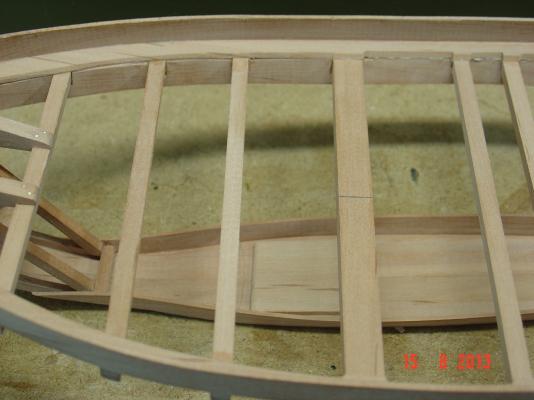
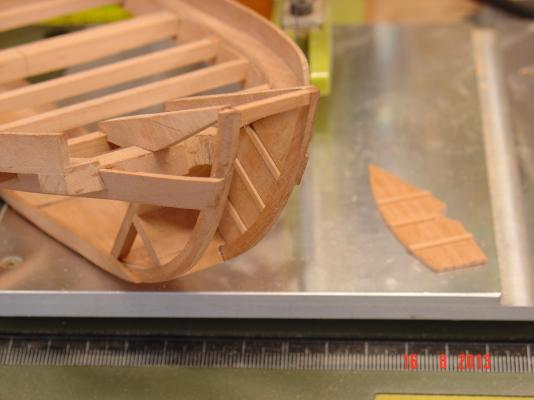
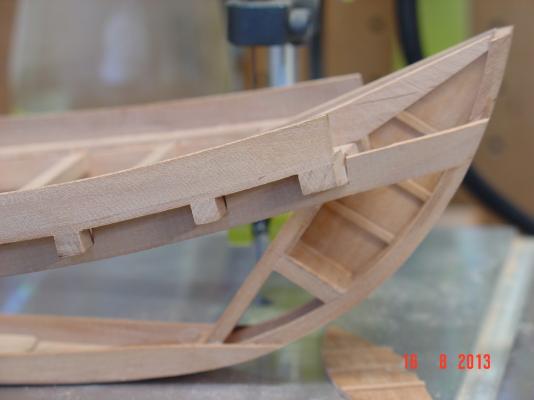
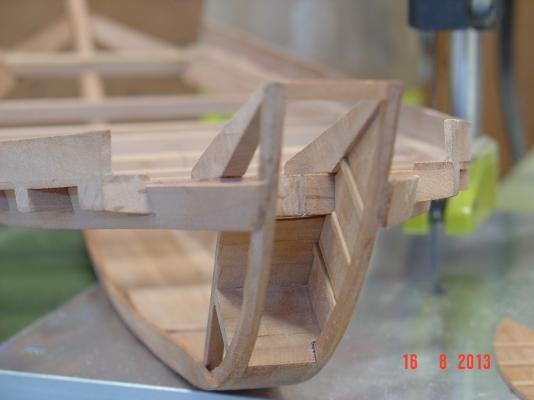
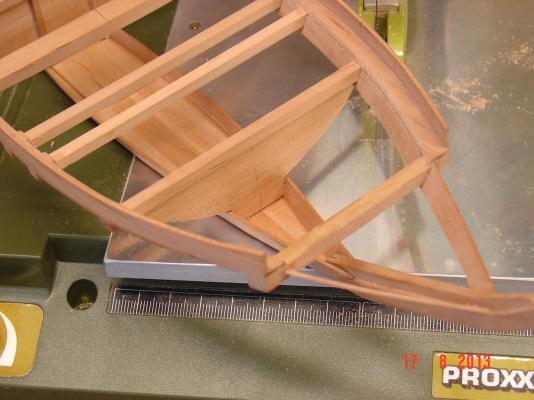
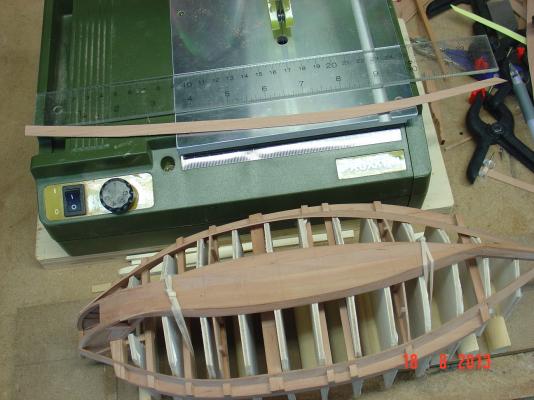
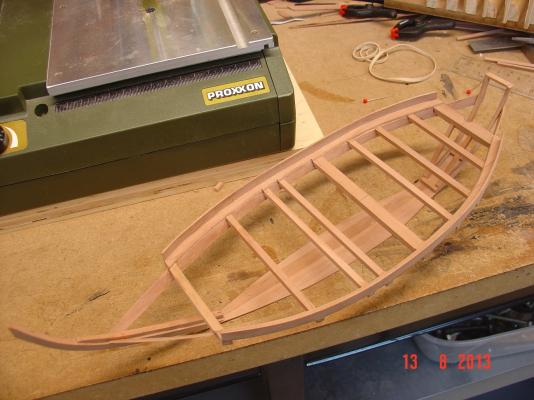
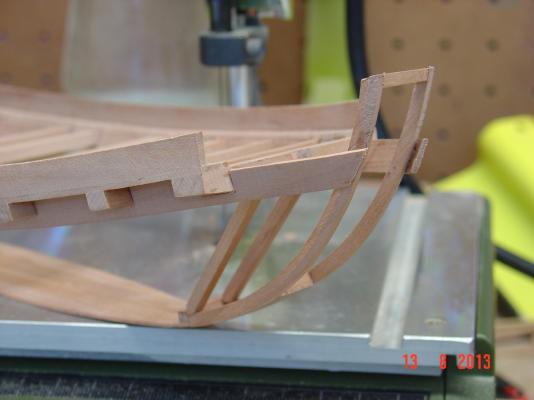
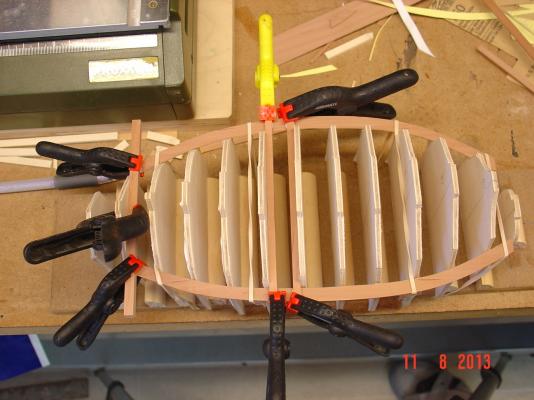
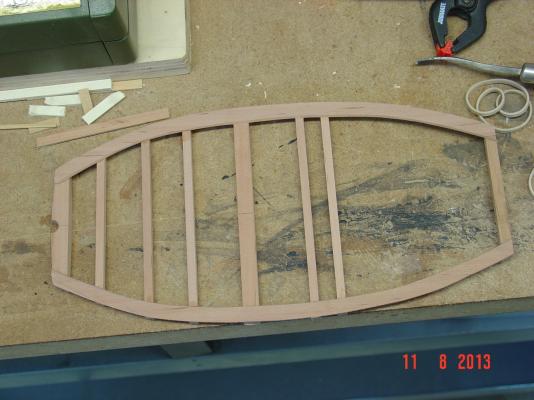
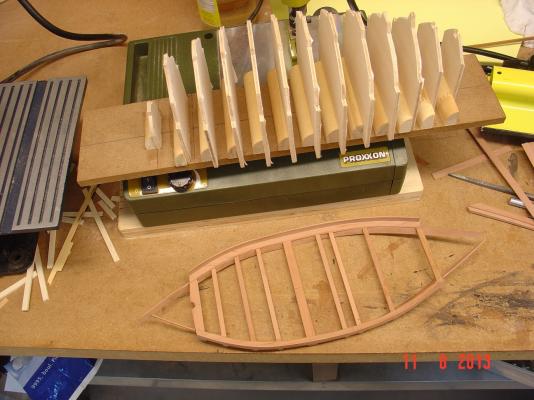
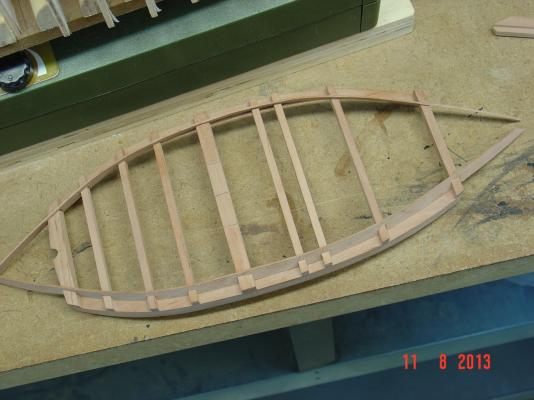
Hello, Here is another update on the Japanese Fune. The progress was slower than I initially imagined. The ship only looks simple but it has a particular shape that proved quit difficult to plank using wide planks. Additionally I had to do some small planking around the ruder as later will be even more difficult. Also added two bulkheads in the hold and the mast step even if I am not decided yet if the hold will be visible in any way or fully closed. There are other few details in the hold that I might not do if I decide to close it. Here are the pictures


-
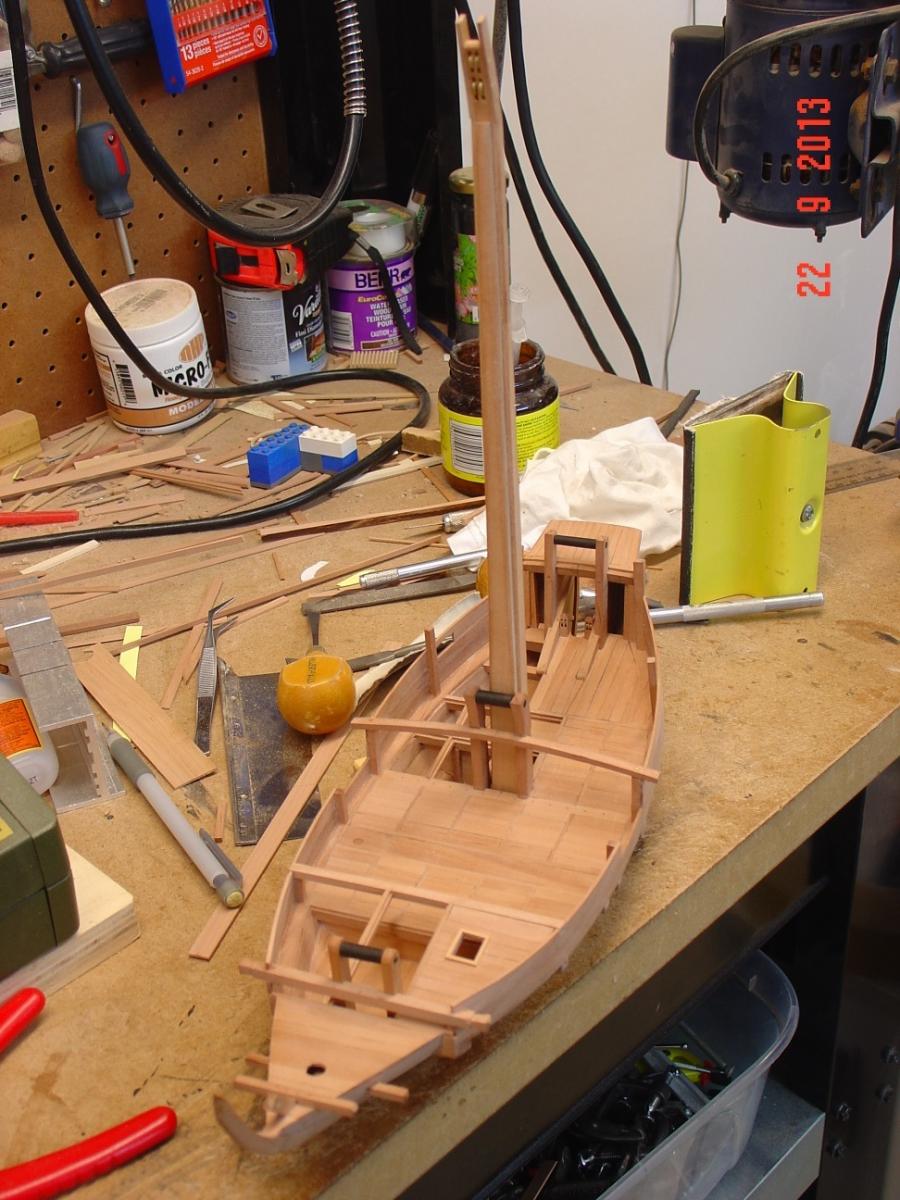
Thank you all for interest. Here is a small update.


-
Regards, Alexandru

-
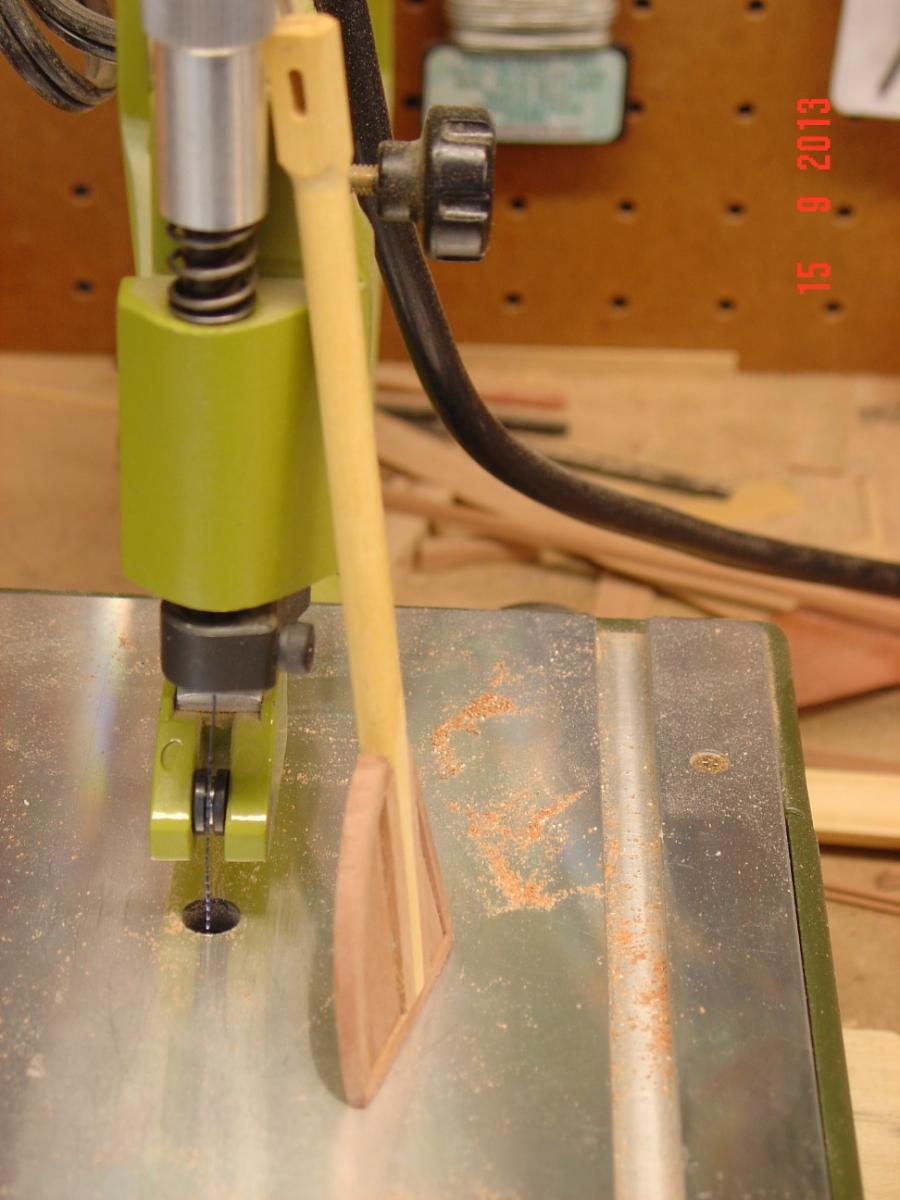
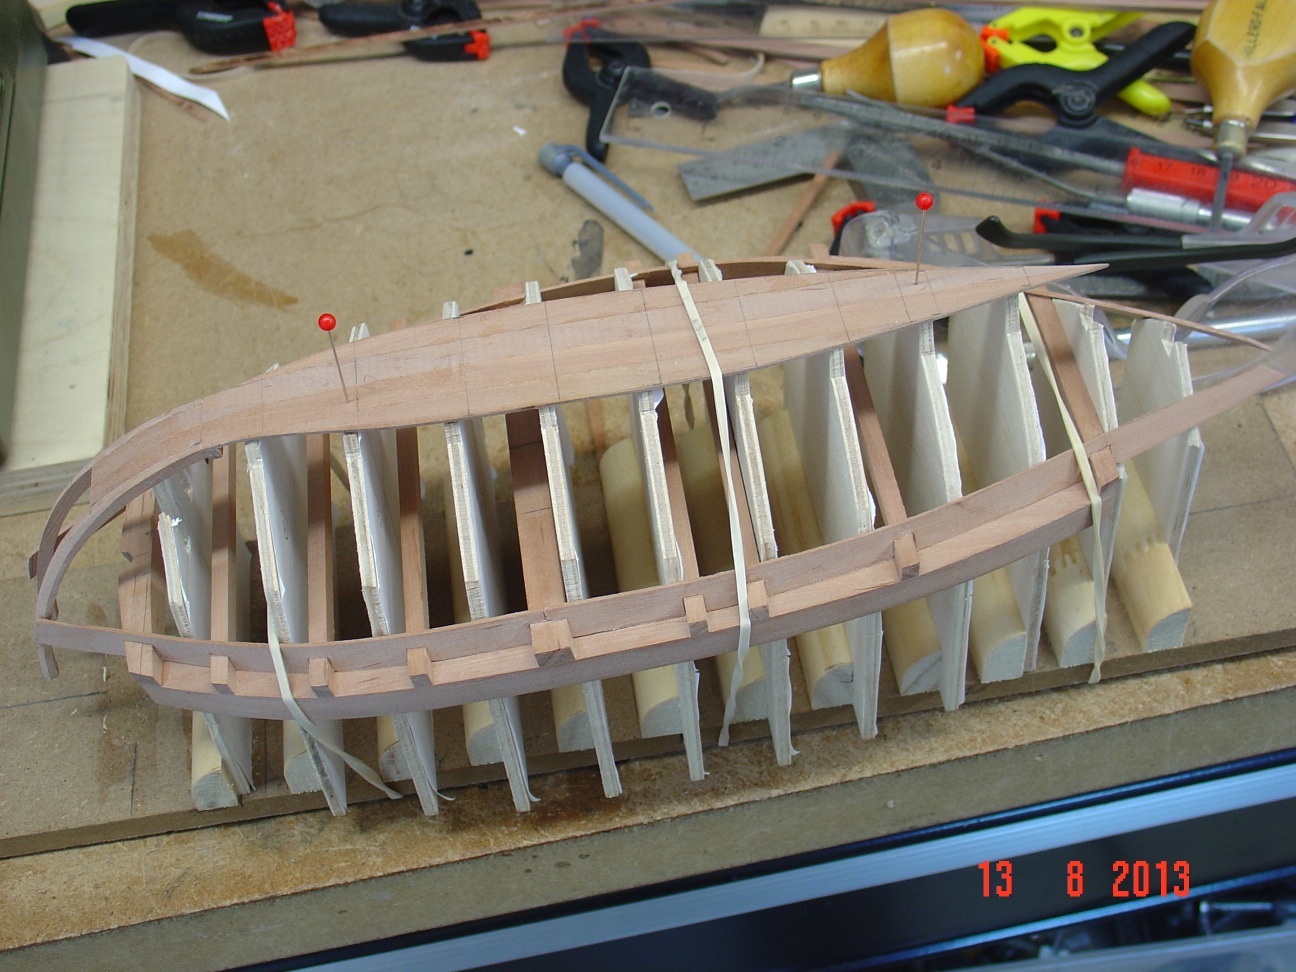
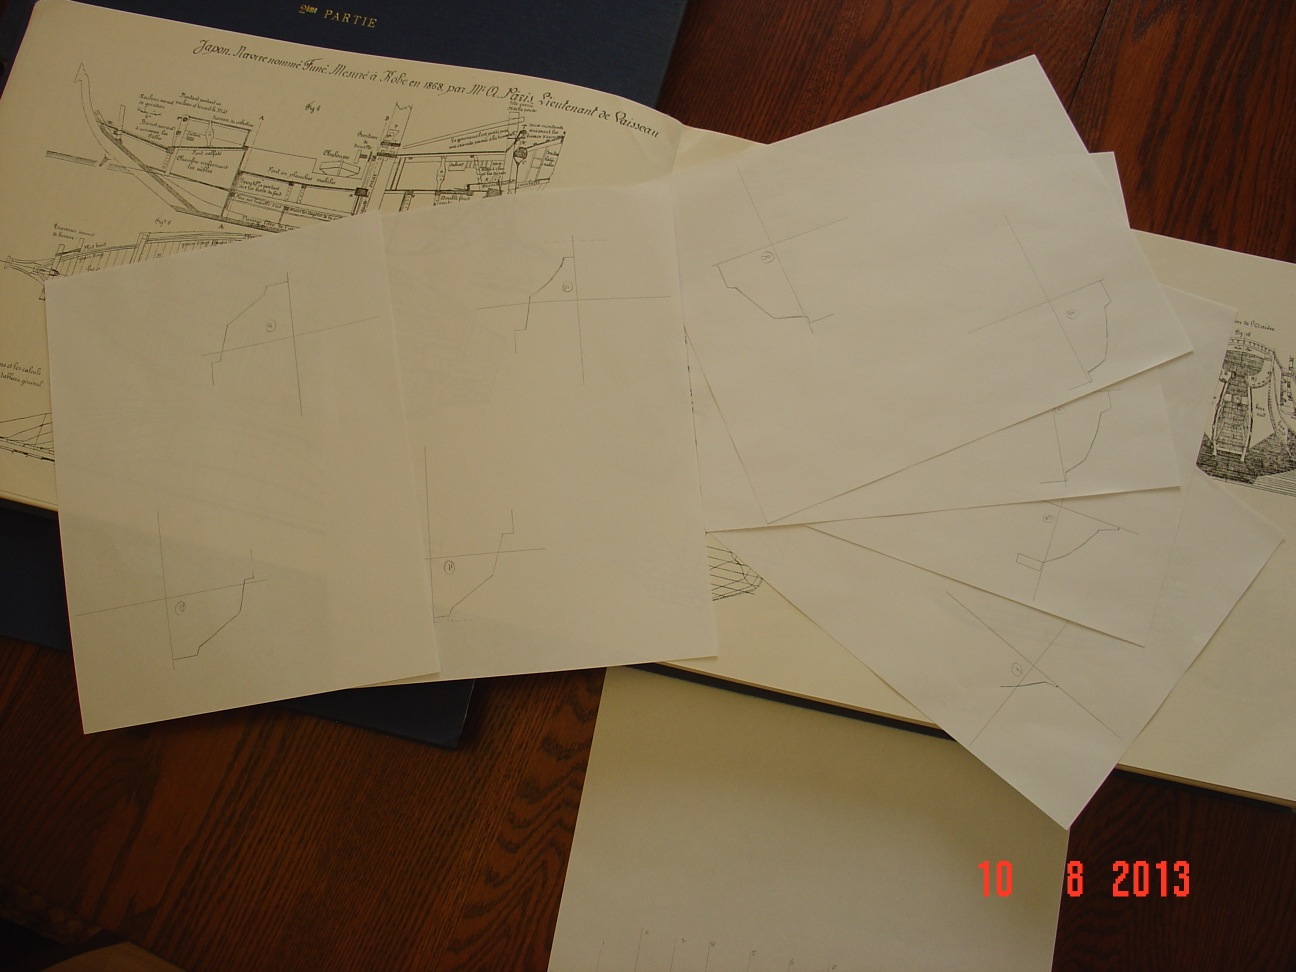
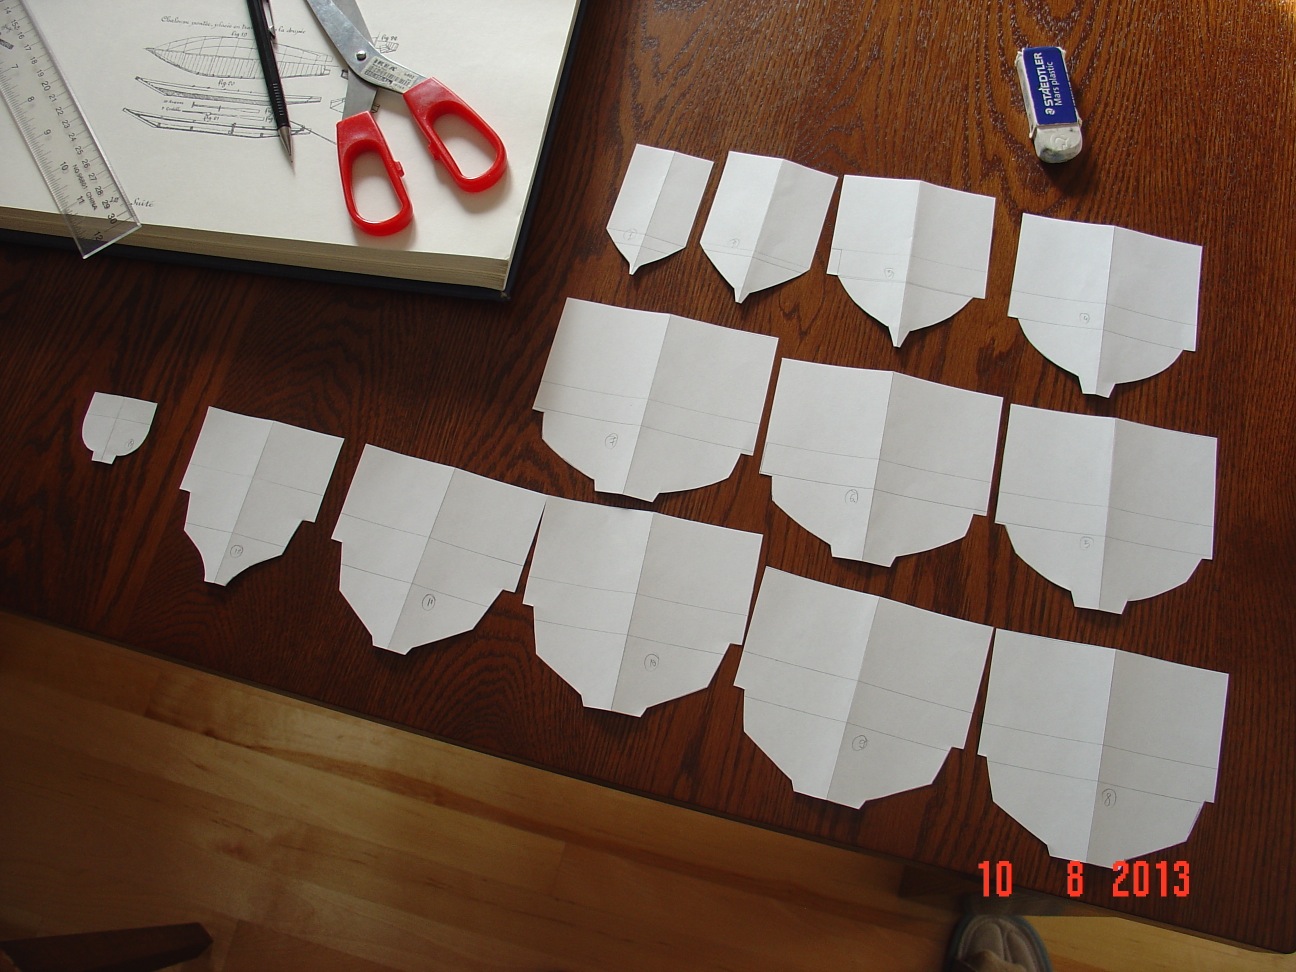
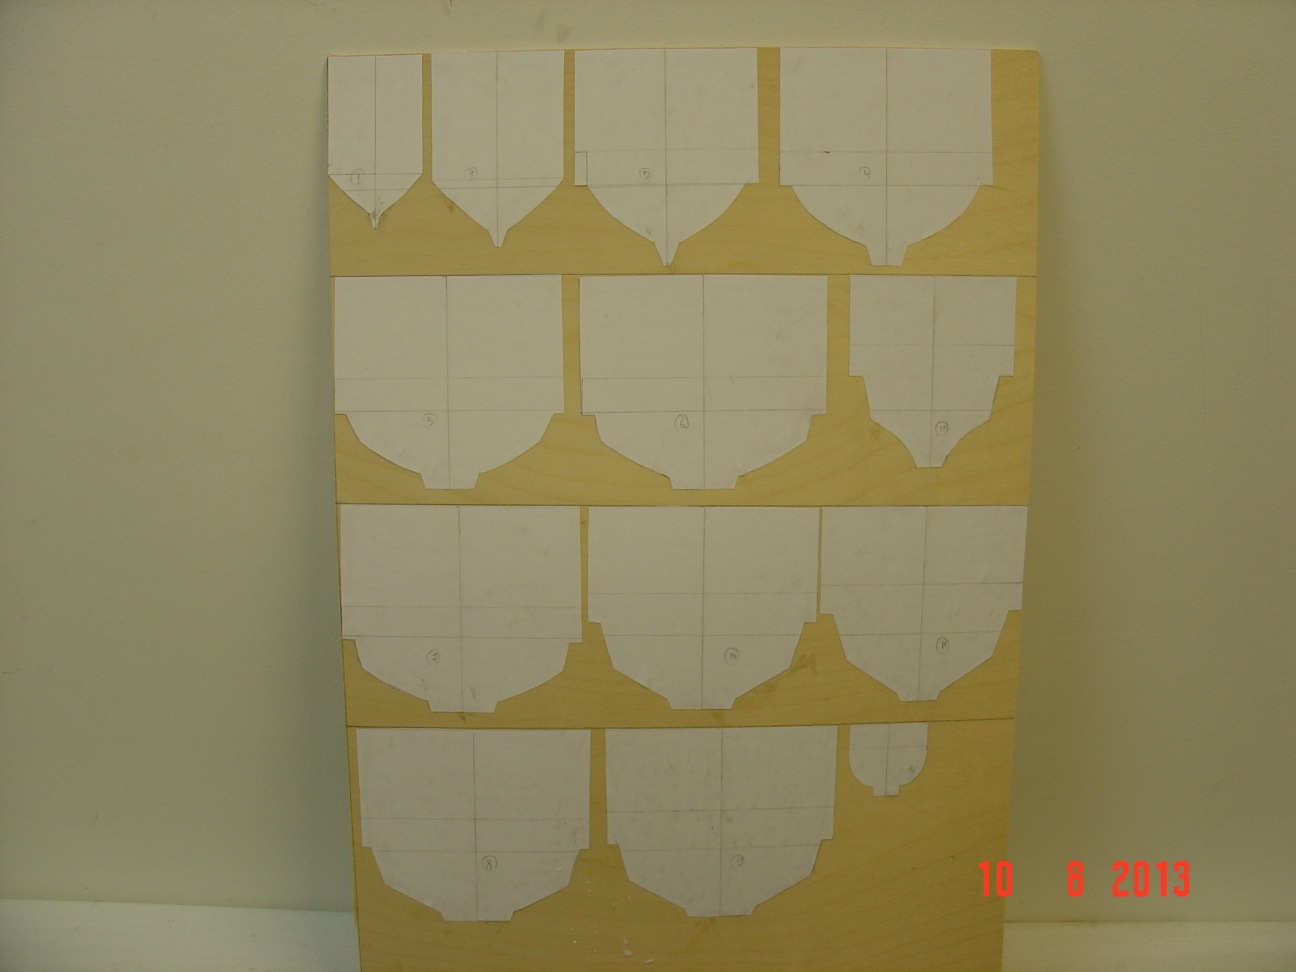
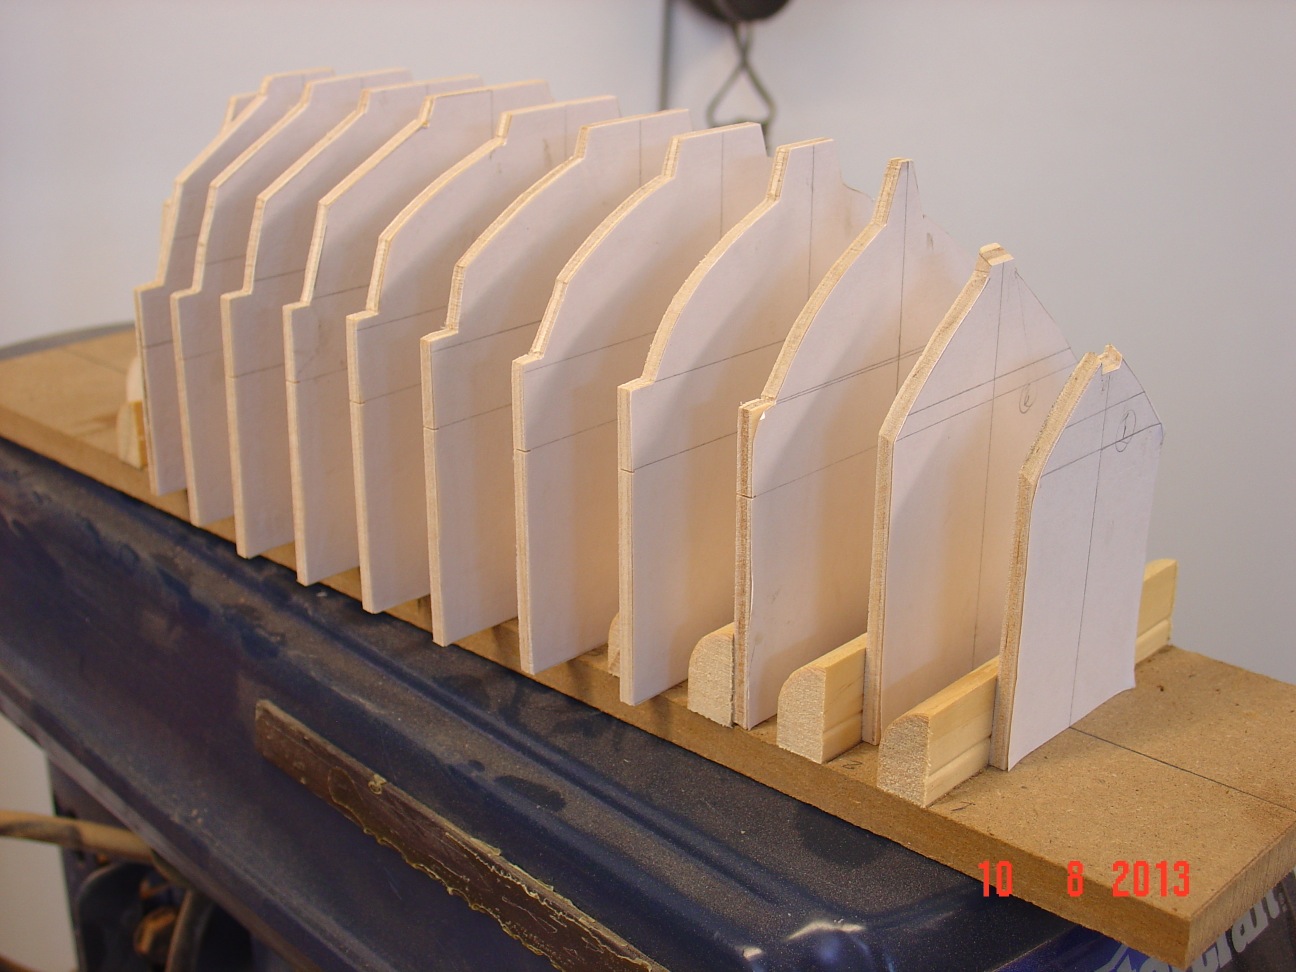
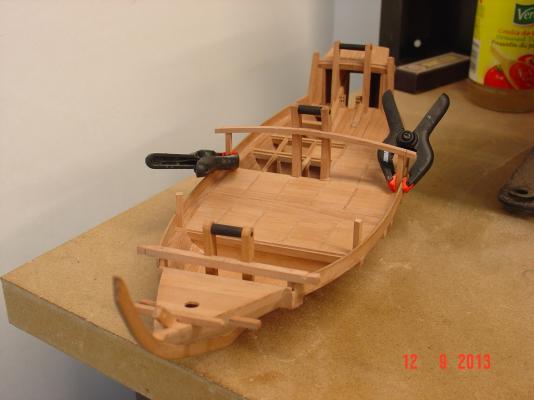
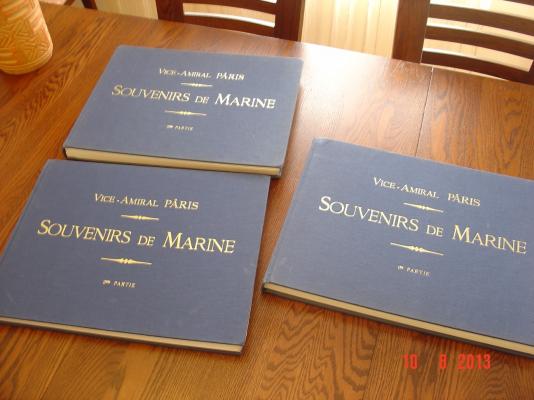
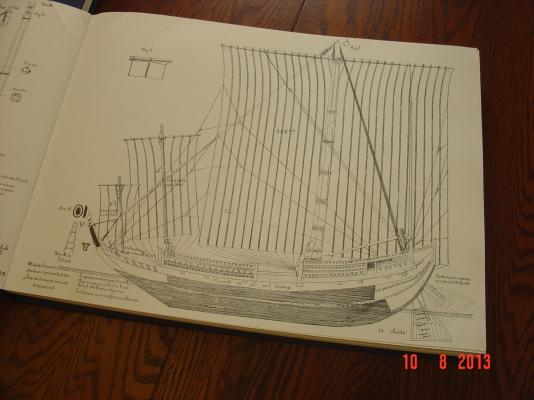
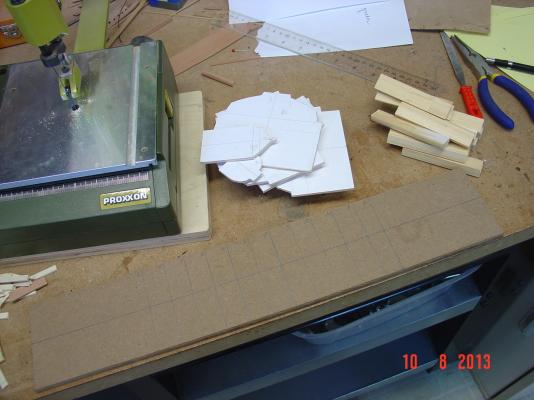
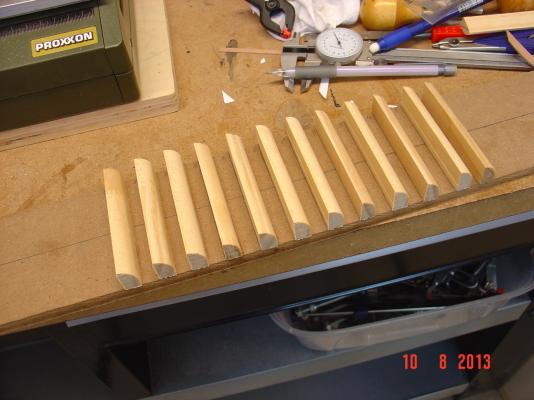
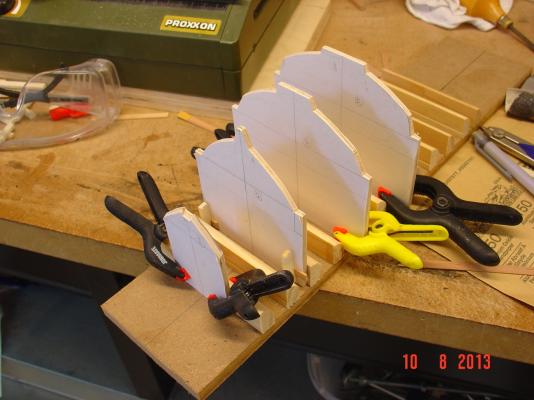
Hello, I decided to start another small project as a side summer project to my Victory to break a little bit the monotony of drilling holes and nailing the main deck. As I just returned from a very nice vacation in Paris, from where I bought the three volumes of the book "Souvenirs de marine" by Vice-Admiral A. Paris (reprinted in 1975 by "4 seigneurs") I decide to build one of the small curious ships that he (or his son) measured and made the draughts while voyaging around the world late 19 century. Some of the strange things about this ship I've noticed so far (which I discovered by reading the book, was common practice in Japanese shipbuilding at the time) are: no keel almost no use of nails or anything iron - only wood treenails square, hard wood masts in a single piece ruder that can be brought up on the ship use of very vide and long planks no cannons even if this is a warship different way of rowing - not even rowing in fact they were sculling Scale is 1:50 and the plans look quite detailed but there are not complete or very precise in al details - so I'll have to use my imagination sometimes. In fact I'm not even sure the ship is called Fune - might by Bune or Tune - a bit hard to decipher as this re-print is a identical reproduction of the hand written original book. I google it for images and found some with all names. Here is the progress I've done this weekend.


-
...
-
Hello, here is another progress update...


-
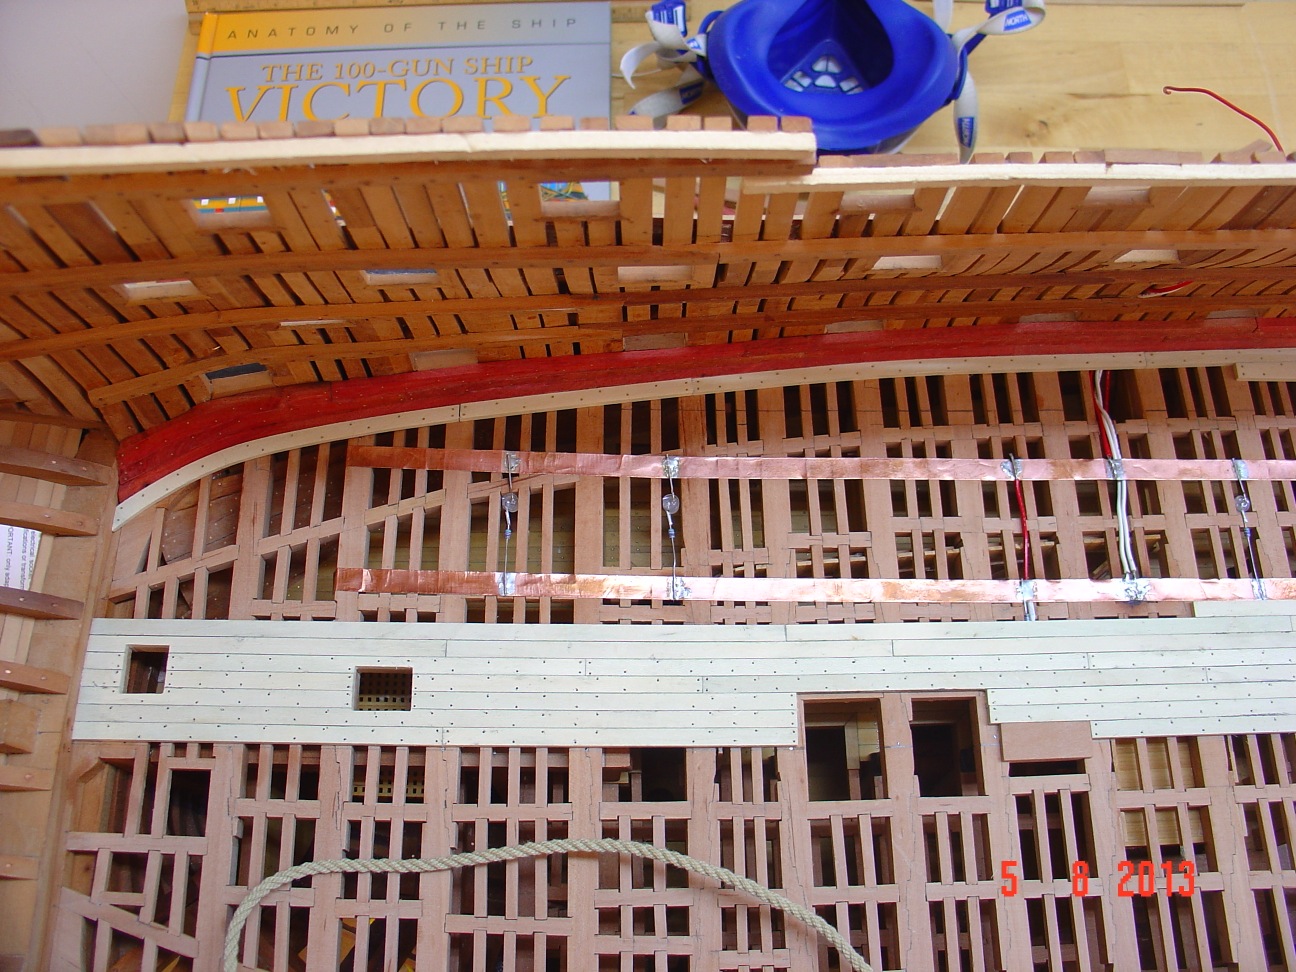
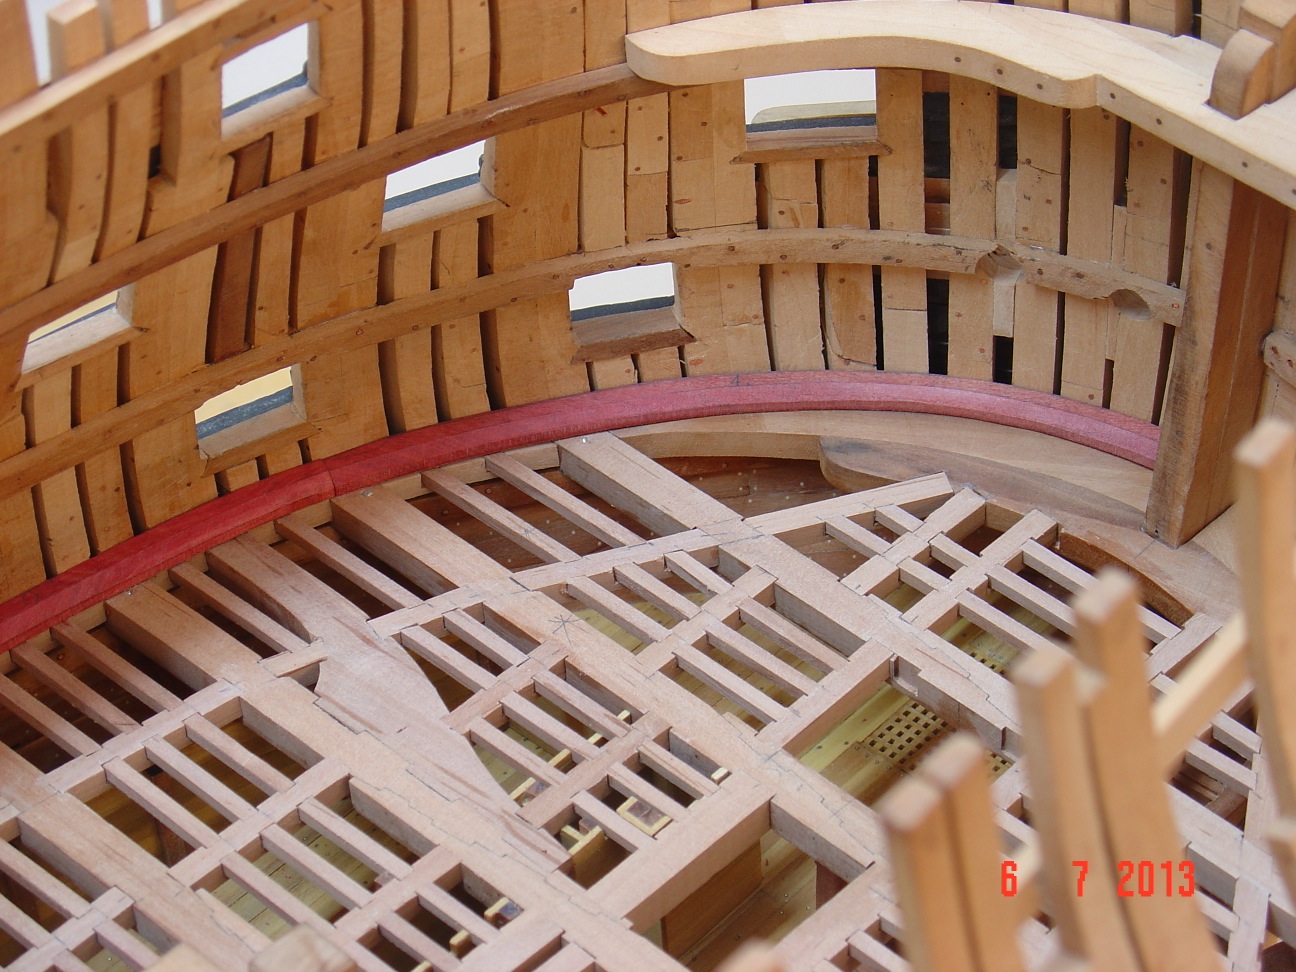
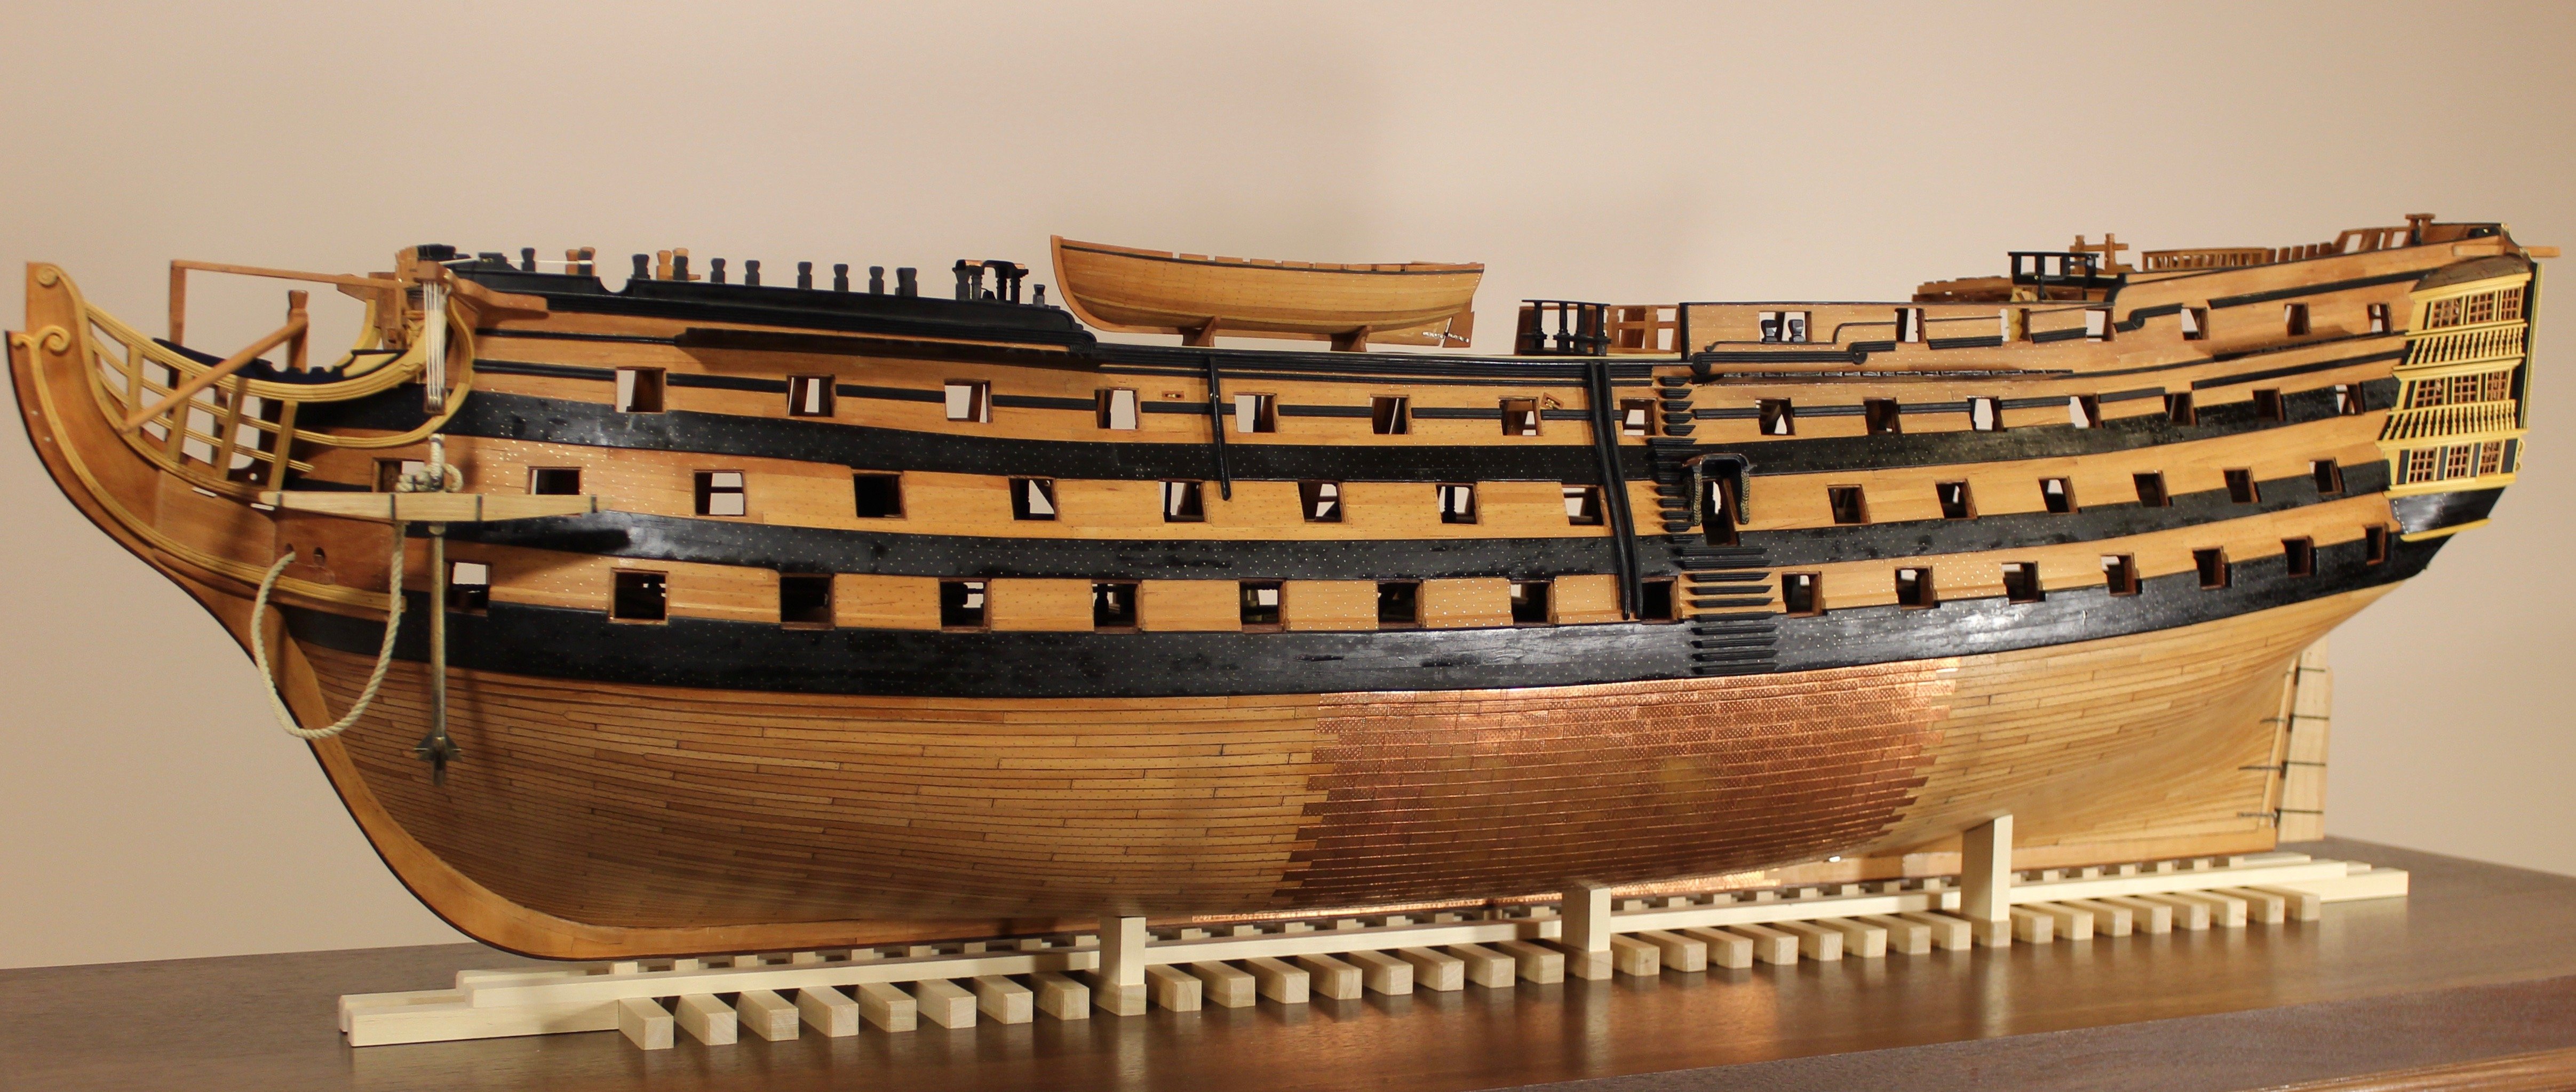
Hello all, Sorry for the late answers but I was in vacation far from home last couple of weeks, but now I am back and here they are: @YaRus: the plan I am using (McKay's AOS book) do show a slight height difference between main deck about 32in and middle deck 30in. These are measured from above the deck planking vertically. Similar difference is shown in Bugler's book. @Bluto: thank you. @Sergei Kutuzov: The white deck planking in the last pictures above - main deck - is holly. For the orlop deck I used a variety of boxwood from south america. Thank you, Alexandru
-
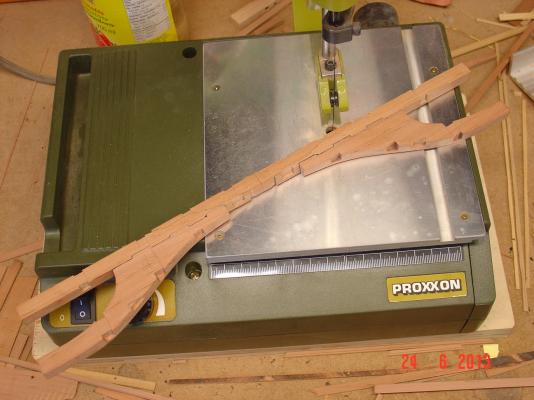
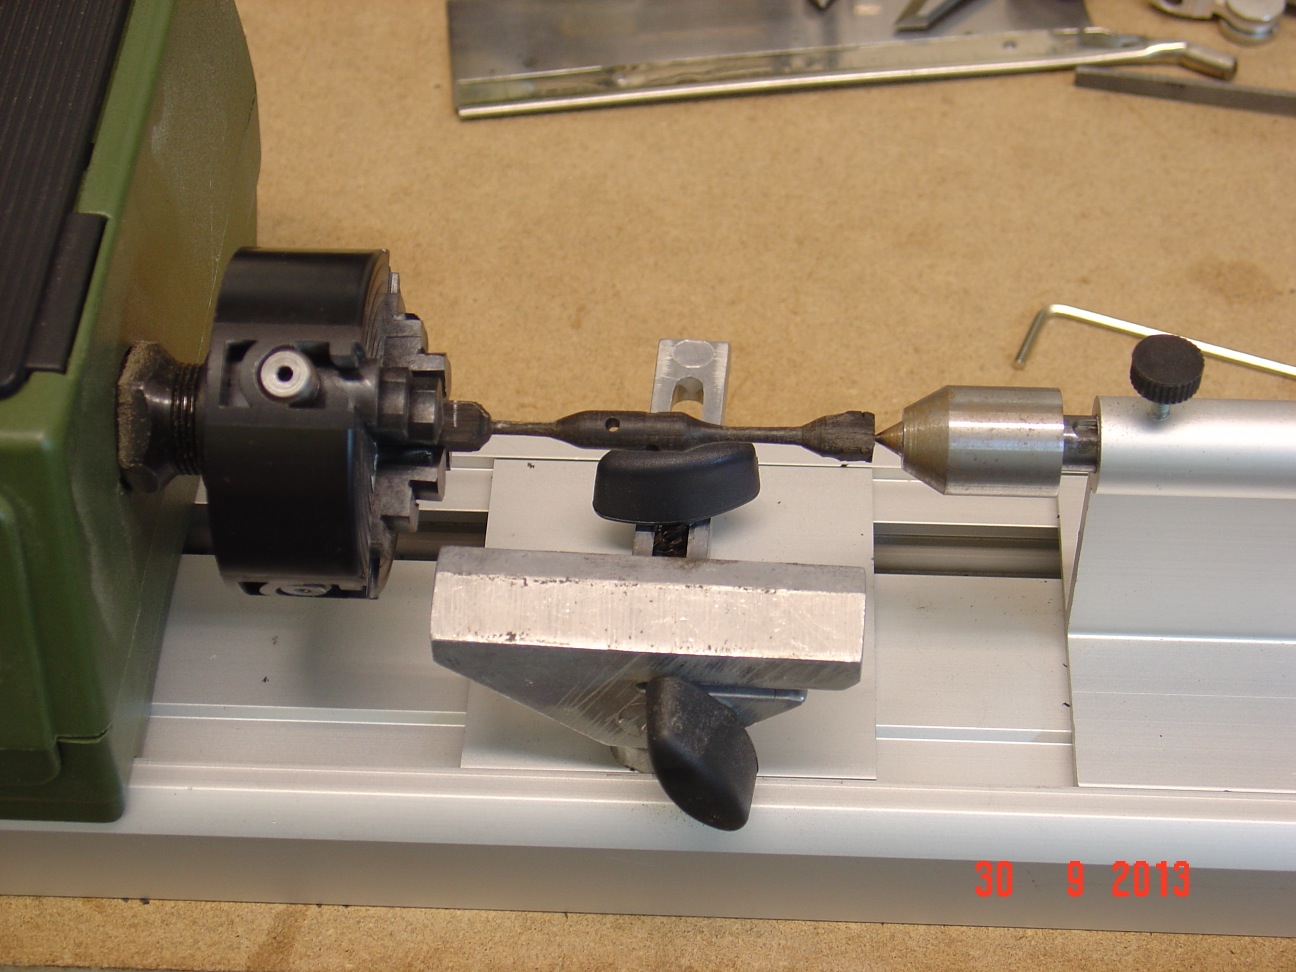
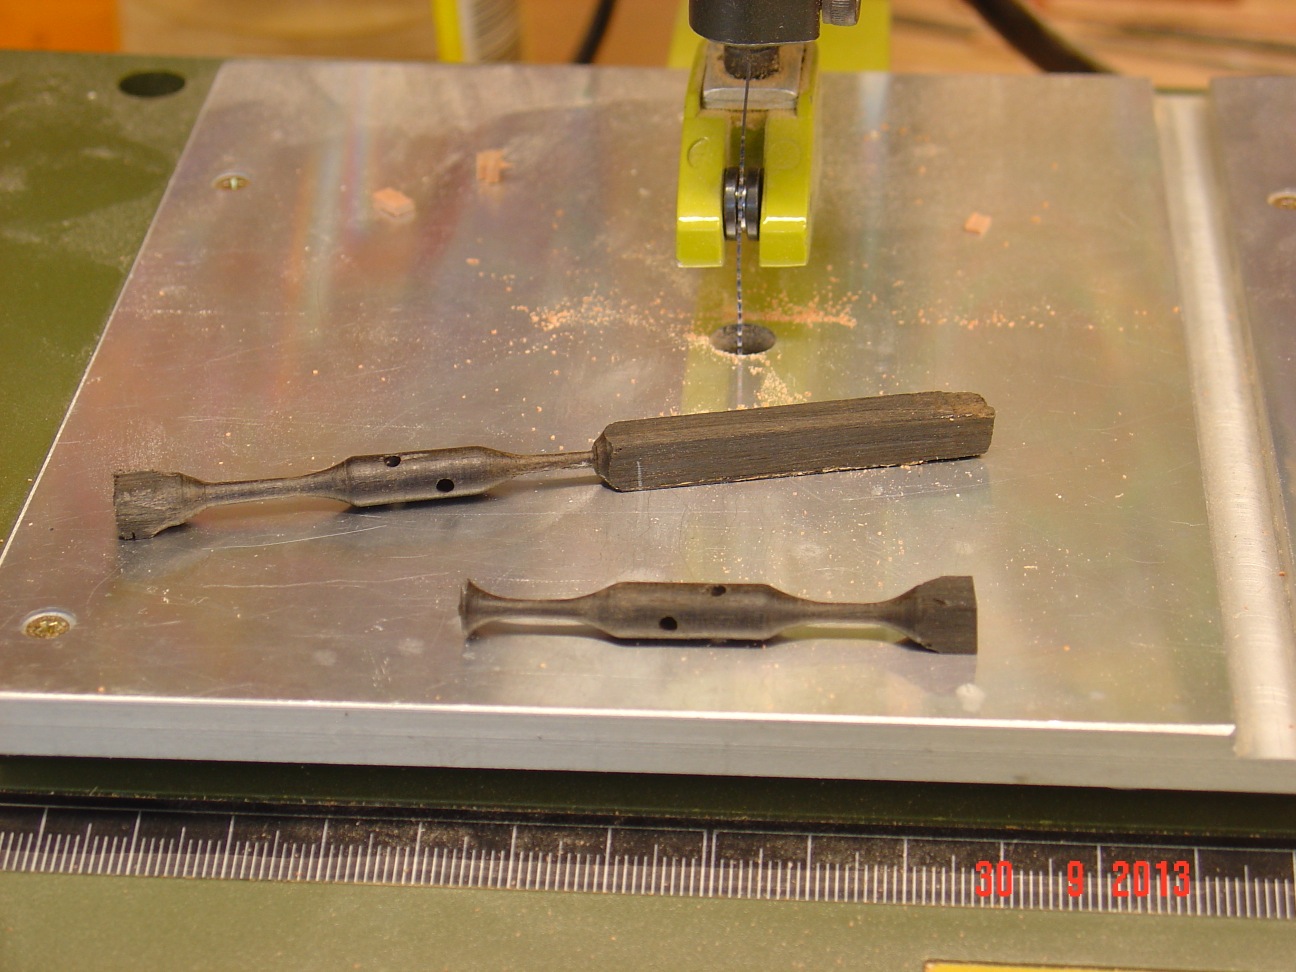
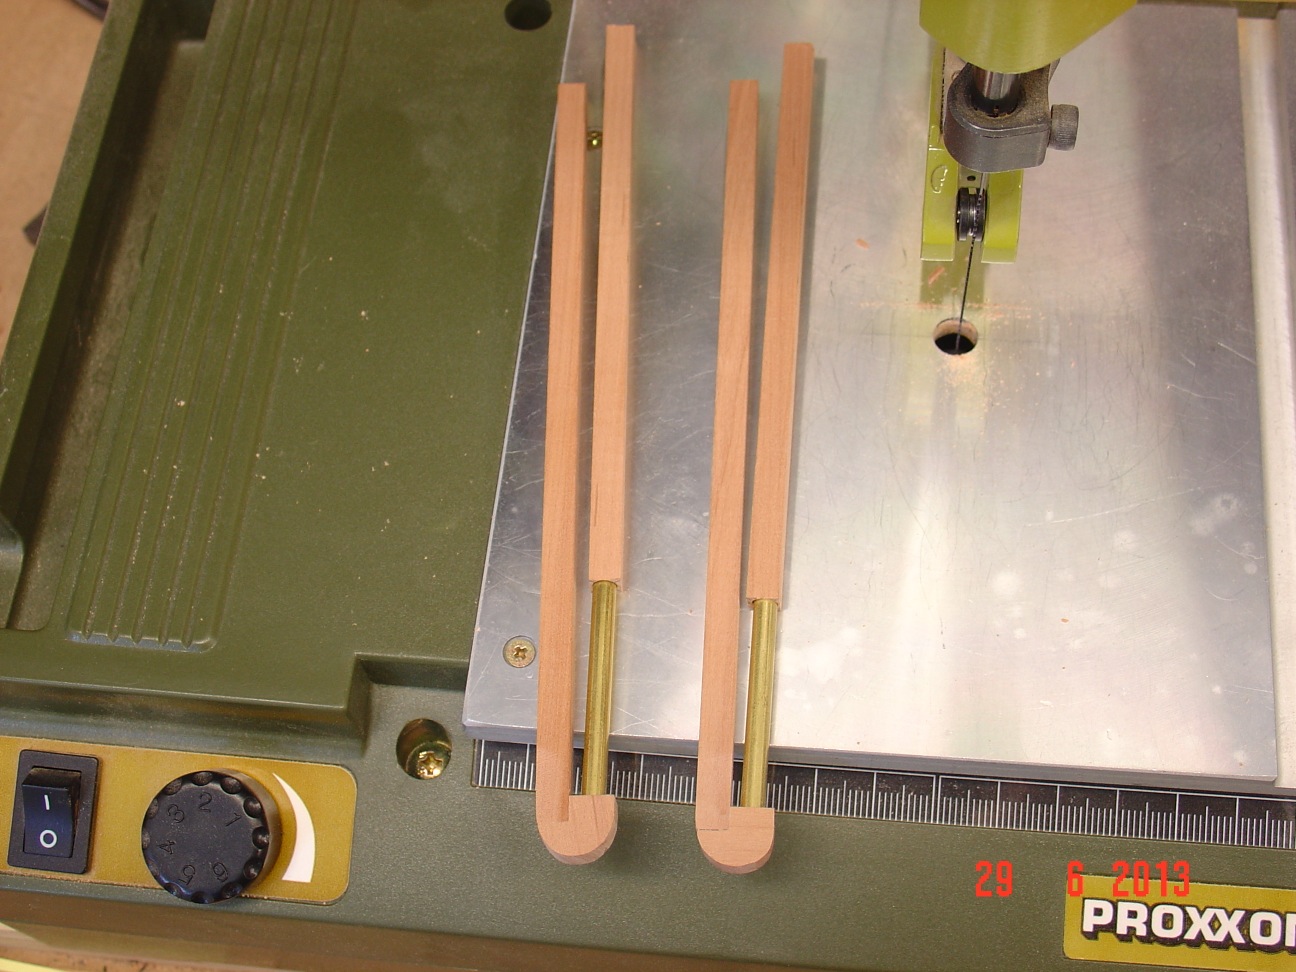
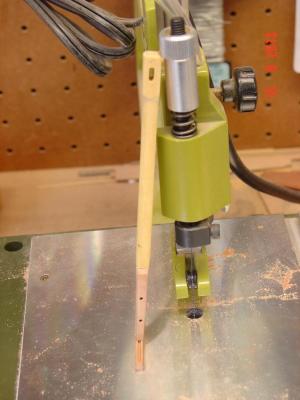
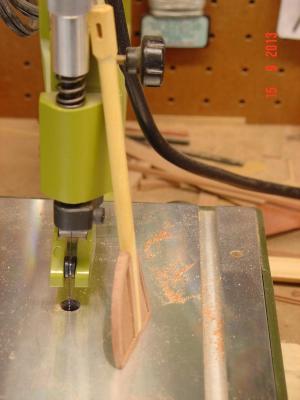
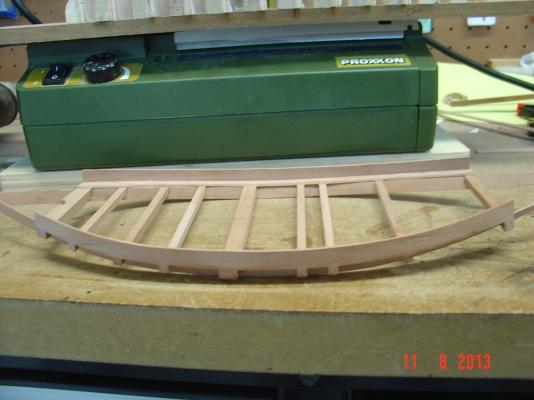
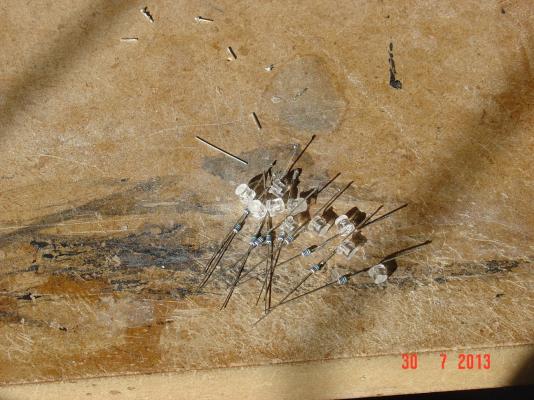
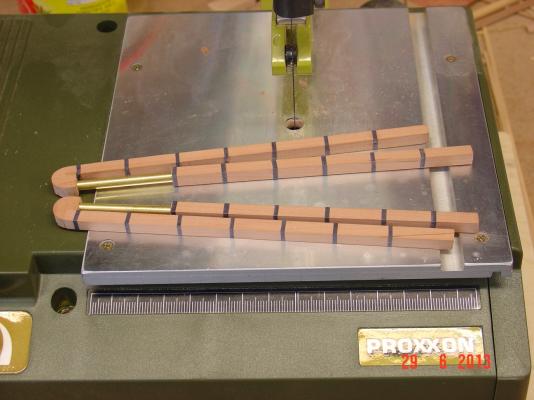
Hello all, I also own a Proxxon DB250 wood lathe with several optional attachments I bought a year or so ago. So far I am very happy with it but I can't compare it with anything else as is the only wood lathe I ever had. It proved to be very reliable and powerful for the small jobs I used it for - pictures 3 and 4. Variable speed I find it useful. The extra stuff I bought for it was a three jaws chuck, a four jaws one, a mandrel which can be installed to replace the live centre so holes can be drilled into the wood and a set of turning chisels - as you can see in the second picture. The lathe came with six collets of different sizes. Think someone already mentioned that it has a bore through the head so longer stock can be worked. The diameter of that hole is 10mm. That also I find very useful as allowed me to work closer to the chuck. The four jaws chuck is made of some kind of hard plastic. Seems pretty solid but if you clamp in it a piece of (square) wood for only a short distance (say 5mm) so only the tips of the jaws are holding the wood and screw the jaws hard they tend to get out of position. This does not happen if all the jaw surface is in contact with the wood. Other than that works fine. Another thing I found out is that the wood lathe is only as good as the chisels you have. Before buying the Proxxon set I used to use some regular chisels (shorter) and they didn't do a good job - for me a chisel was a chisel but turns out that not all are made equal... So consider in the price of the lathe at least a good set of chisels (if you don't have one) otherwise you will be disappointed. As in my build I didn't get to making masts yet - only small posts to support the decks I can't express any opinion about turning long masts. Hope this information helps and if you have any questions I can try to answer them. Thank you, Alexandru


-
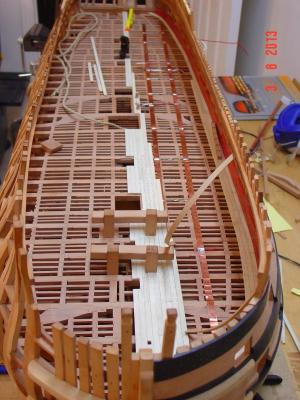
Started lower deck planking... . . . pictures order is a bit messed up again . . .


-
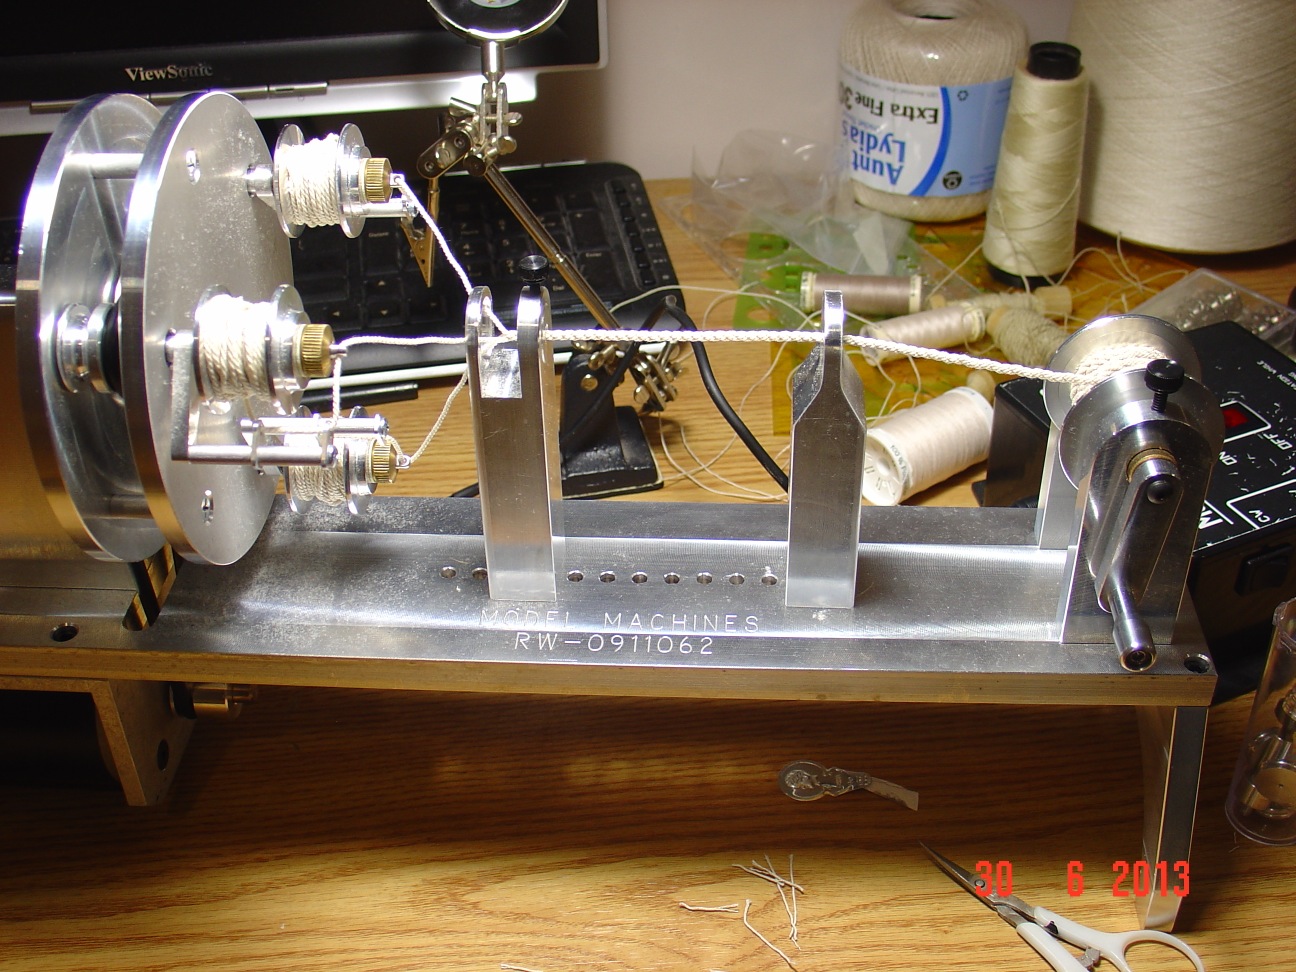
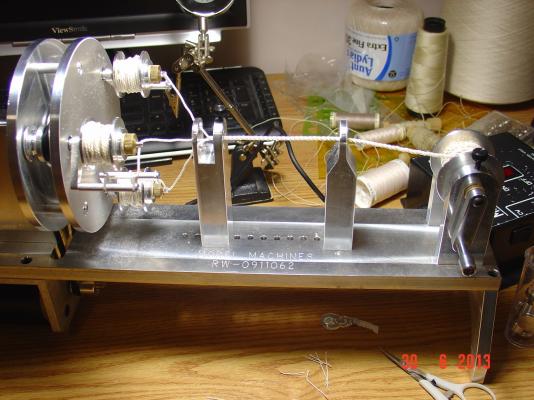
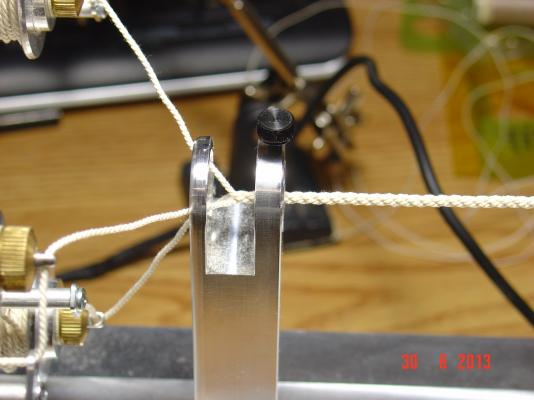
Michiel, Here are some pictures of my rope making machine I bought from Byrnes Model Machines http://www.byrnesmodelmachines.com You can find more details on it on their site. If you have other questions pleas ask I will gladly answer if I can. Alexandru


-
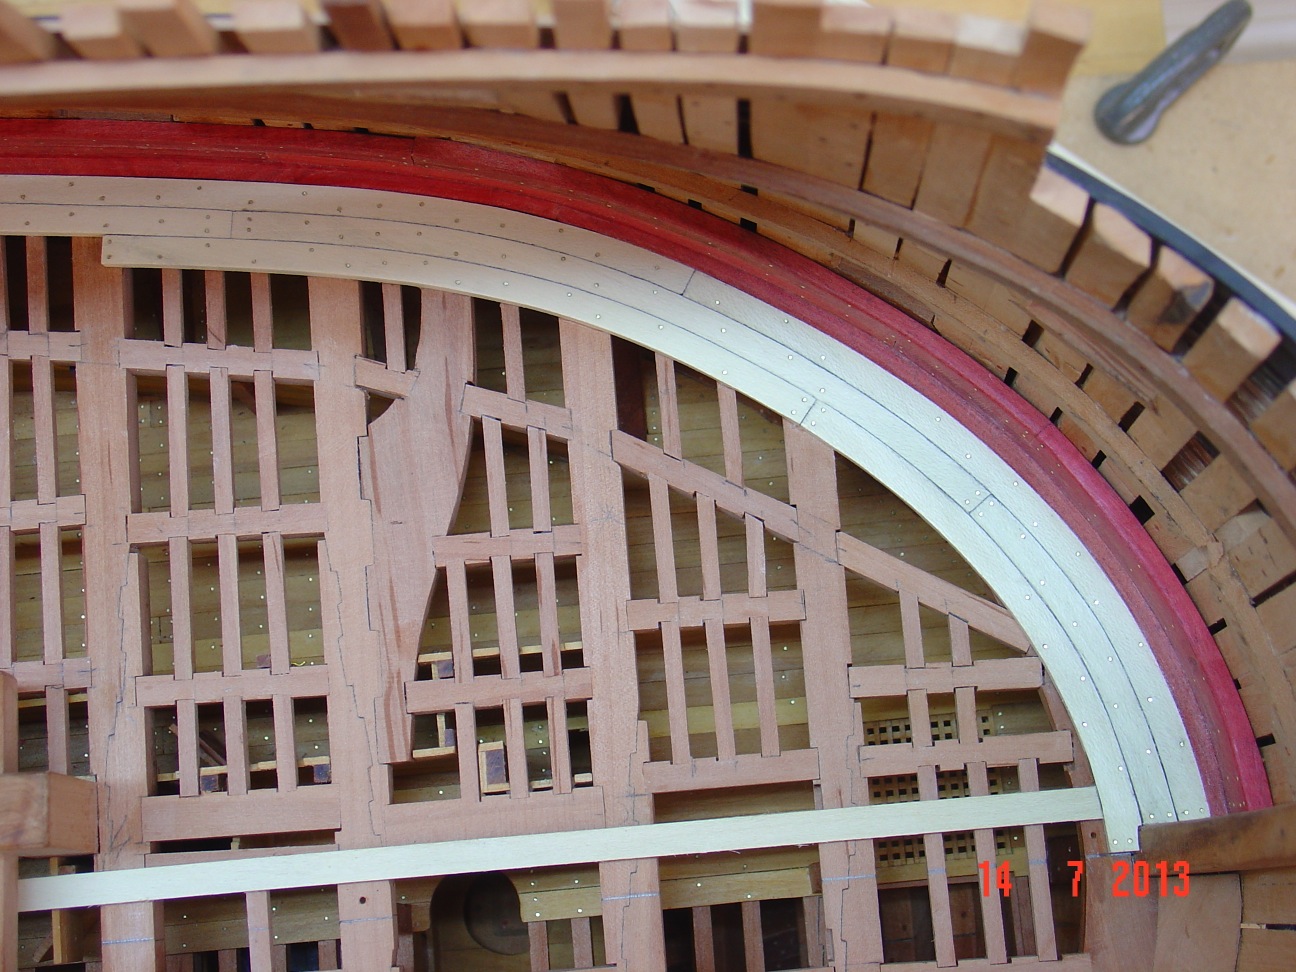
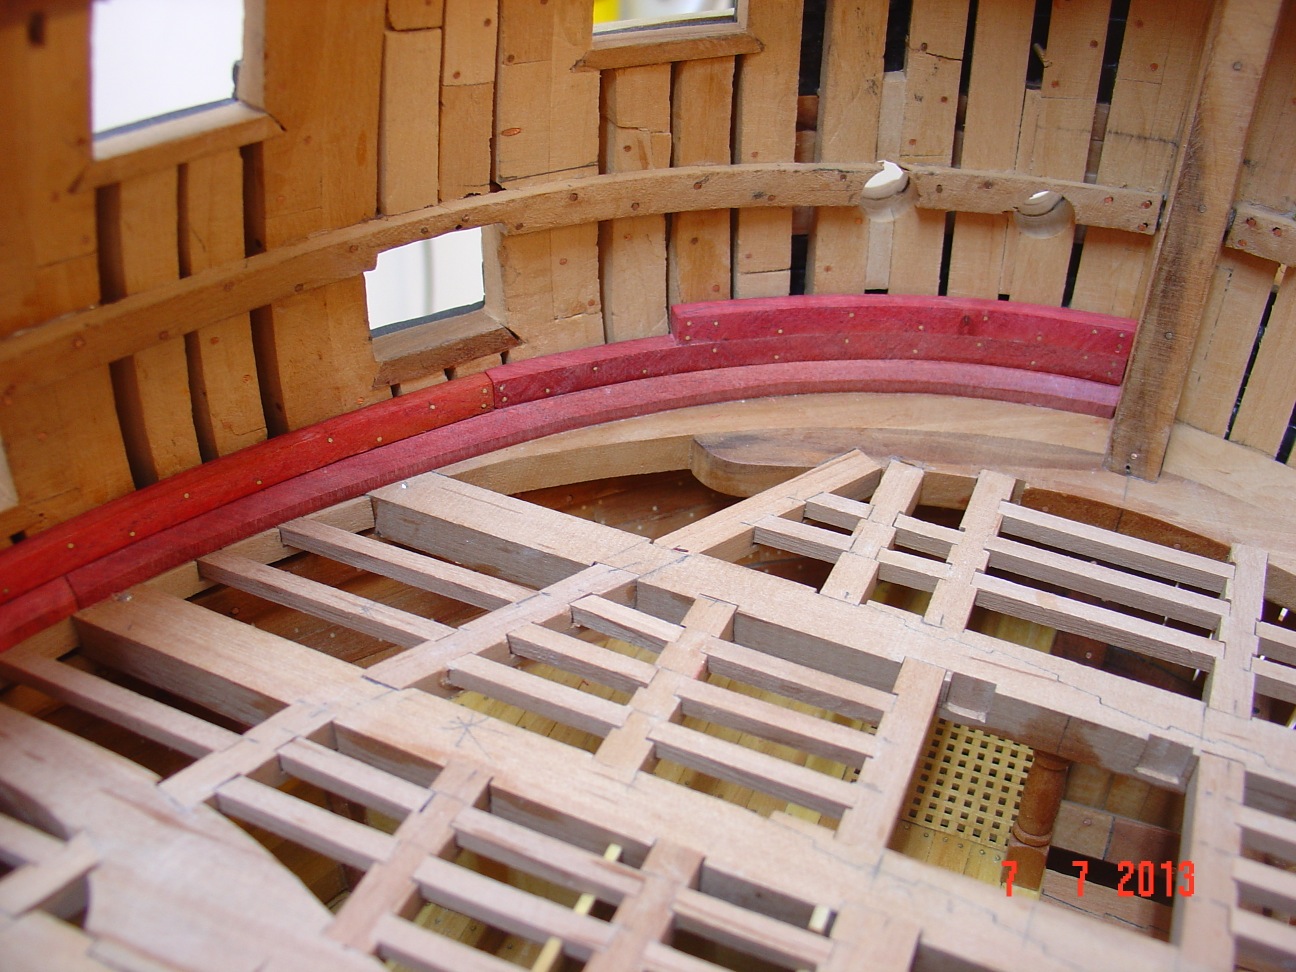
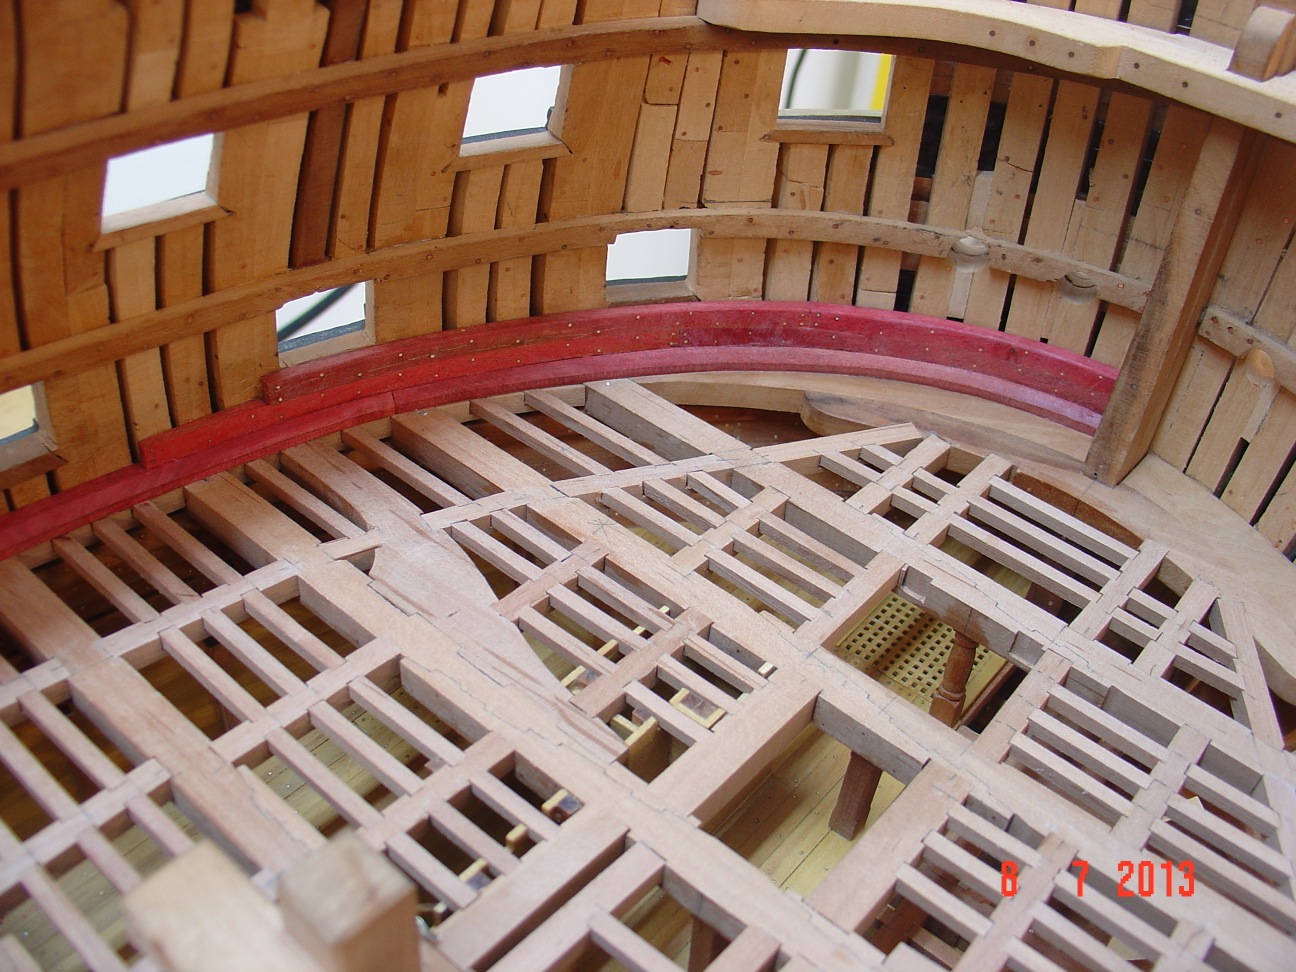
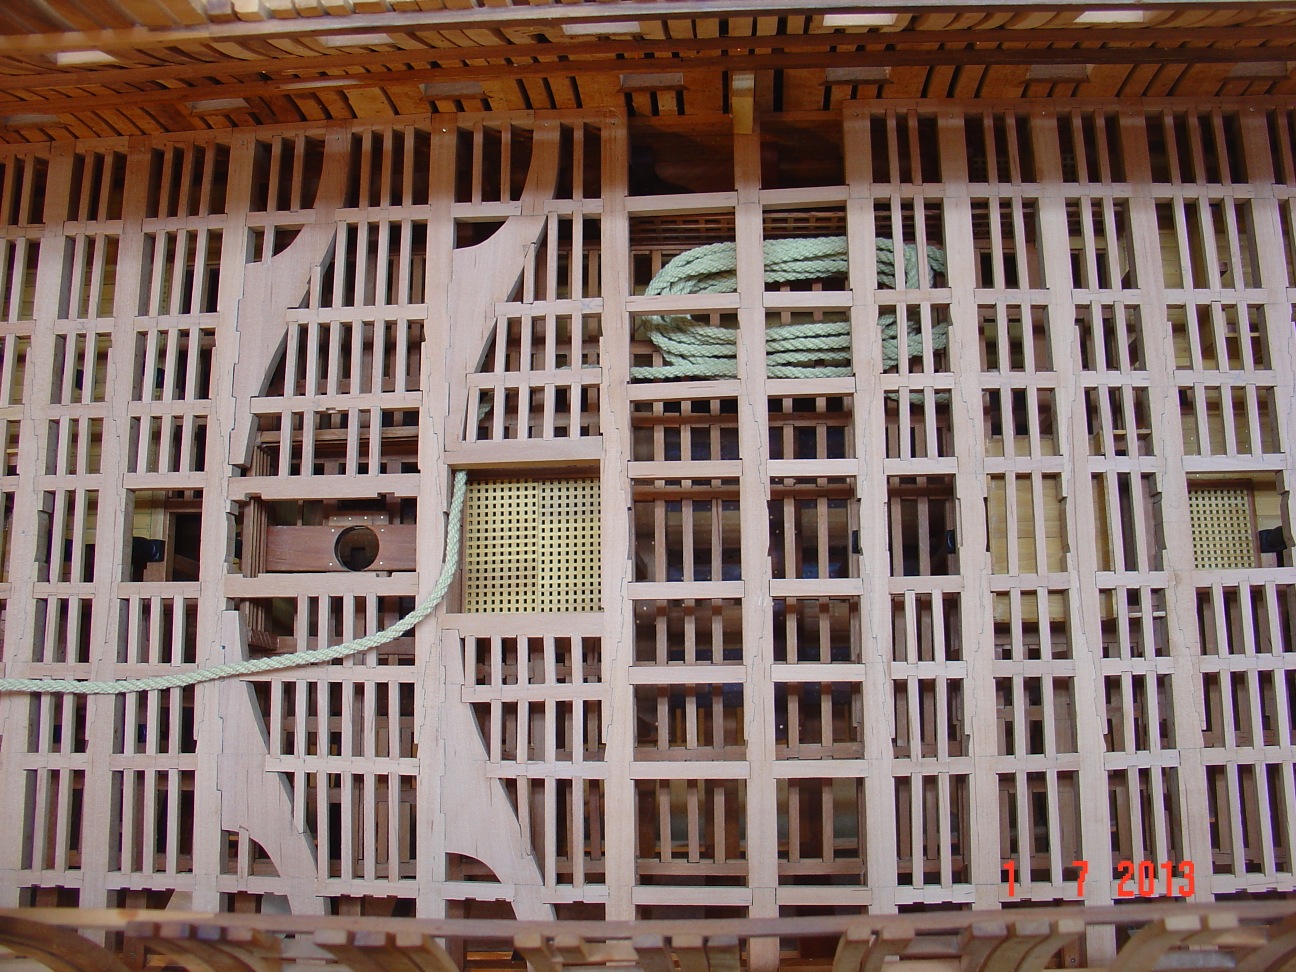
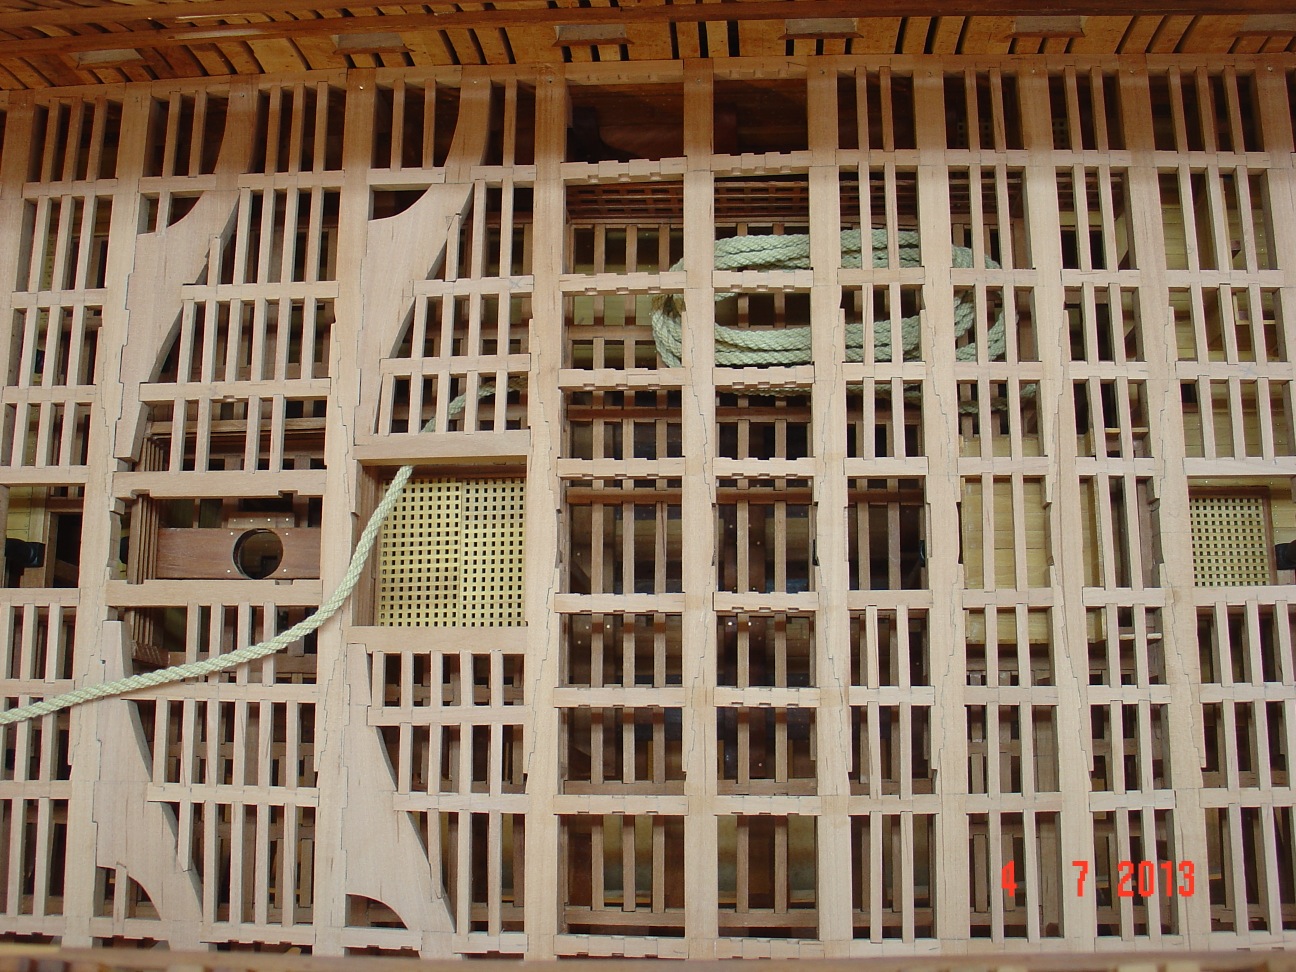
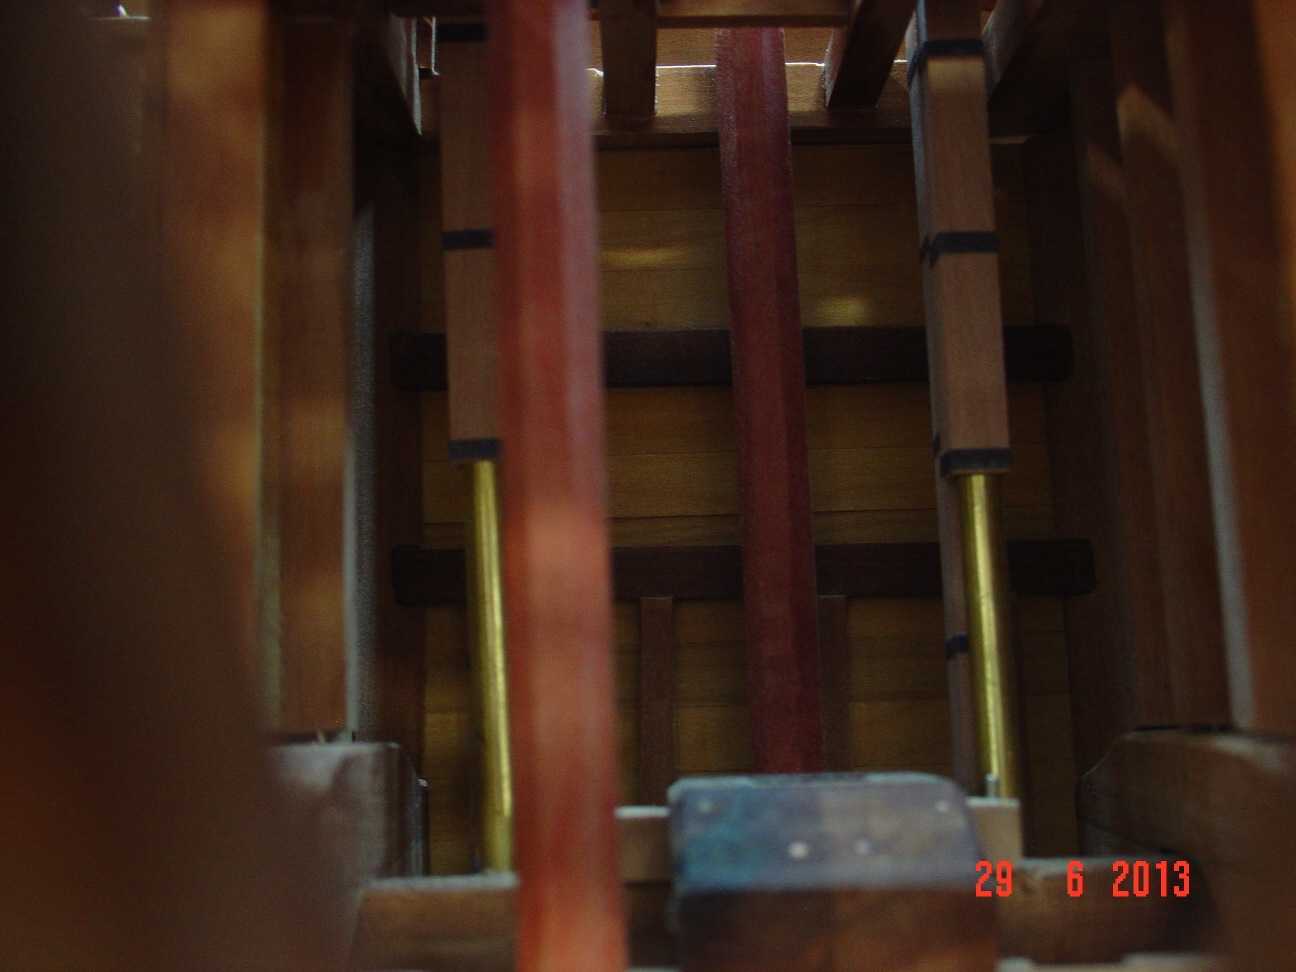
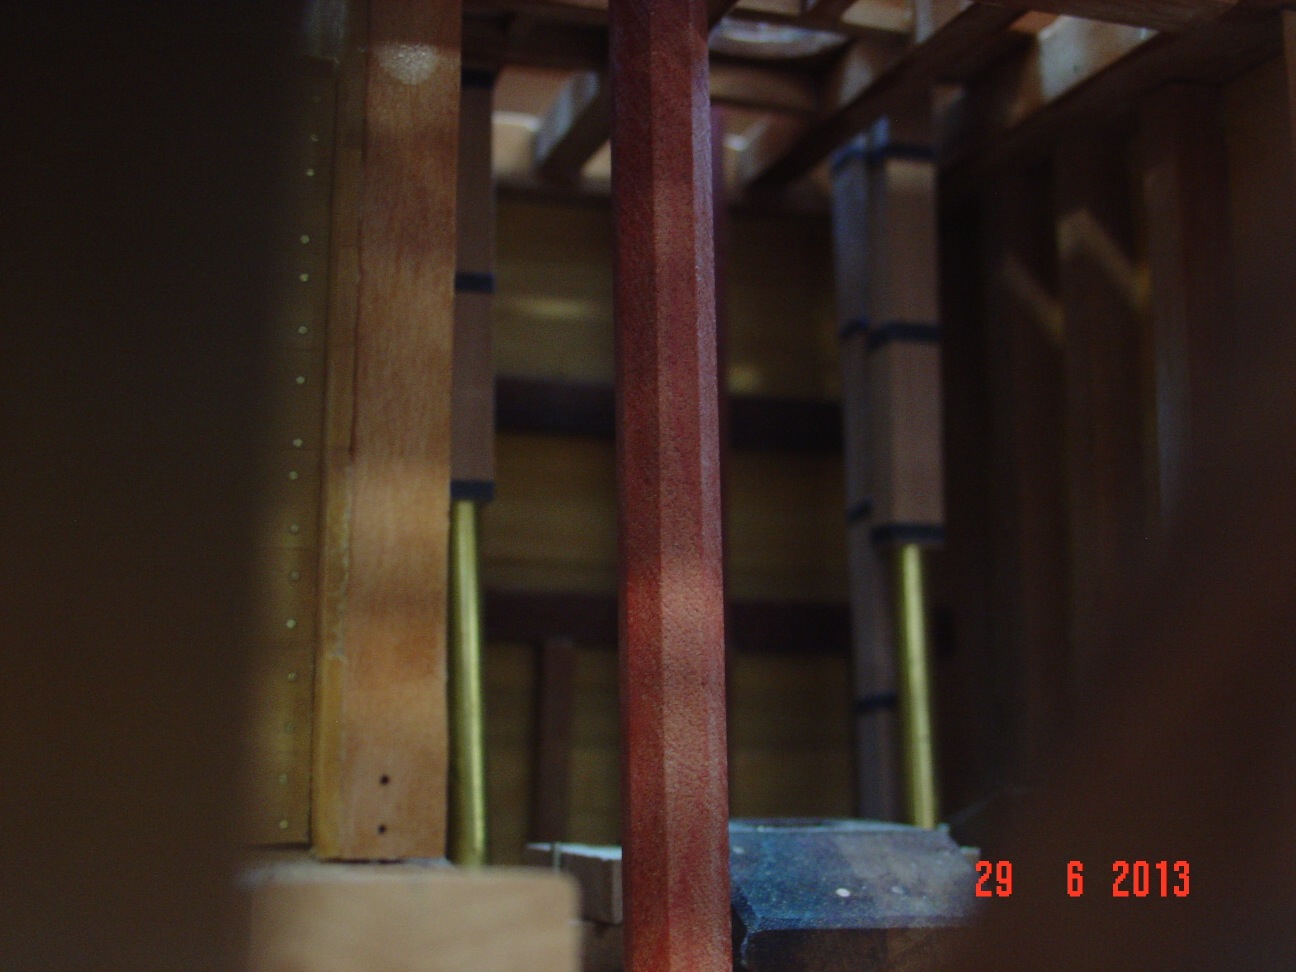
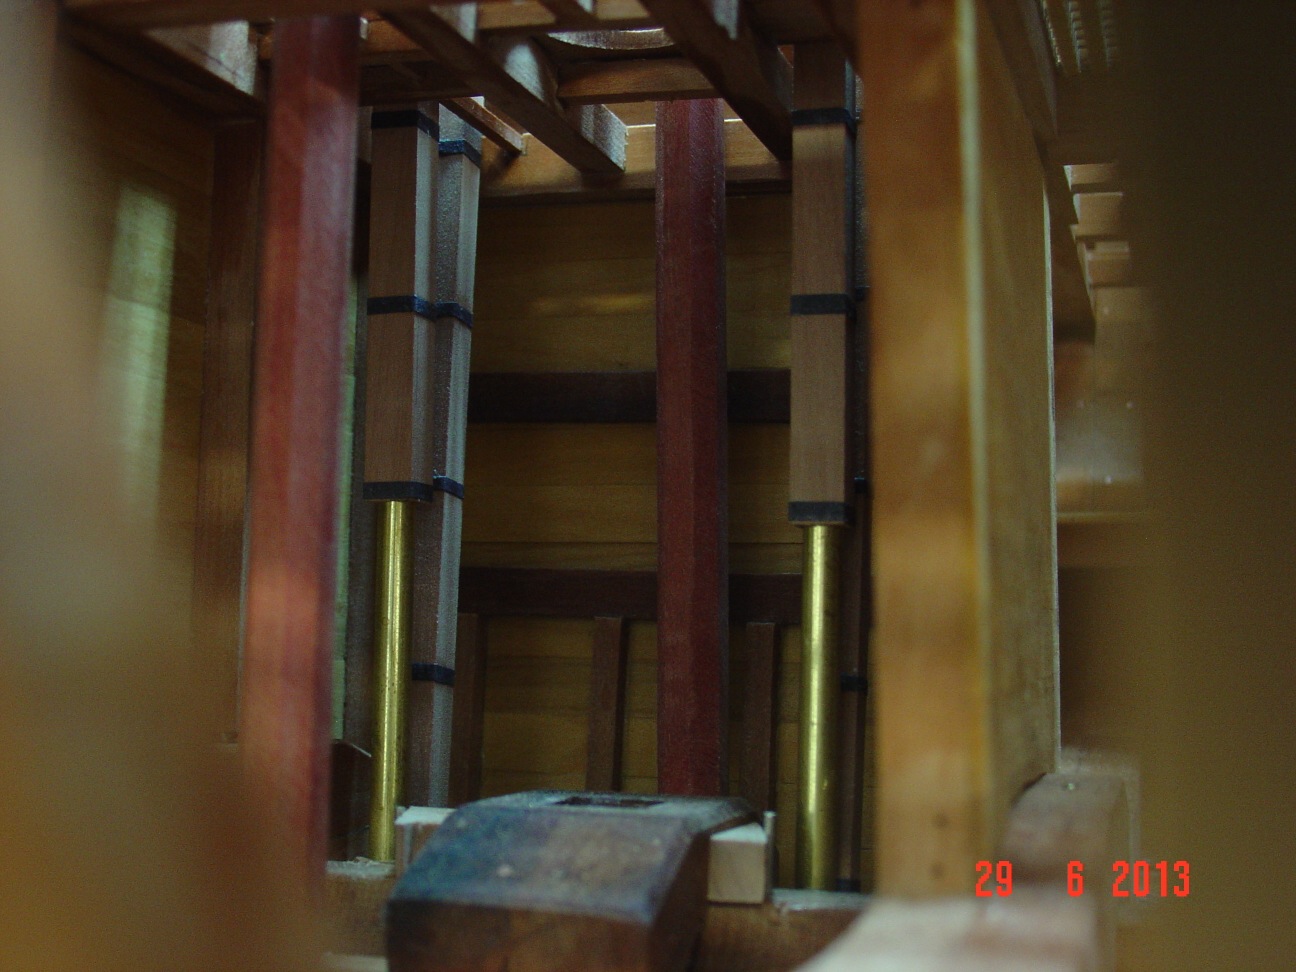
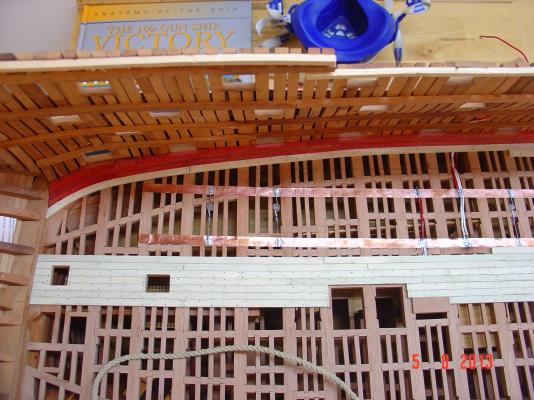
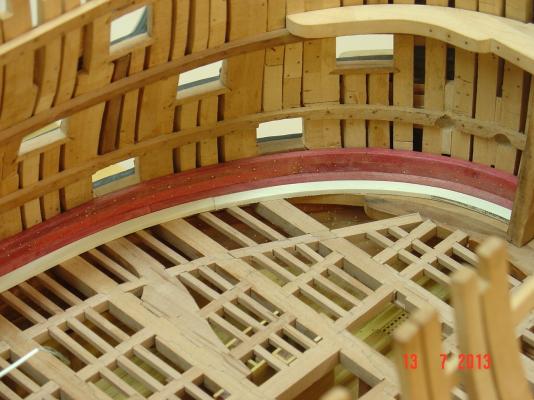
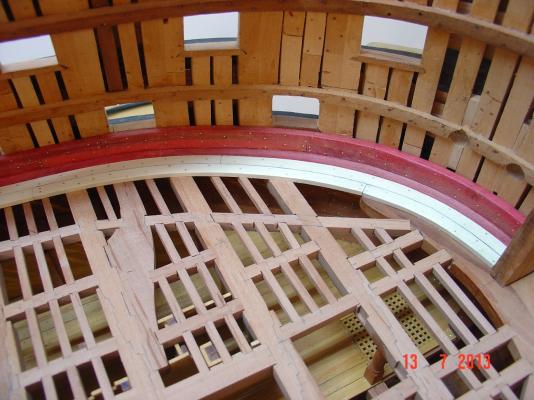
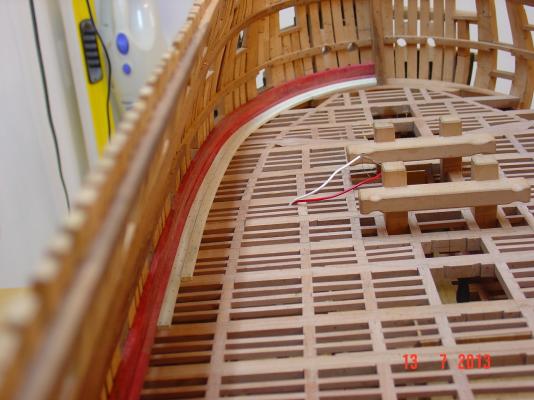
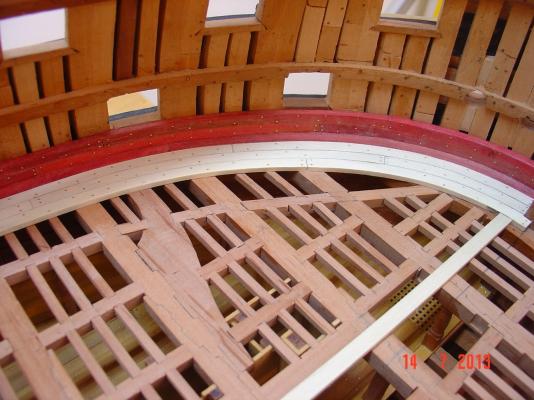
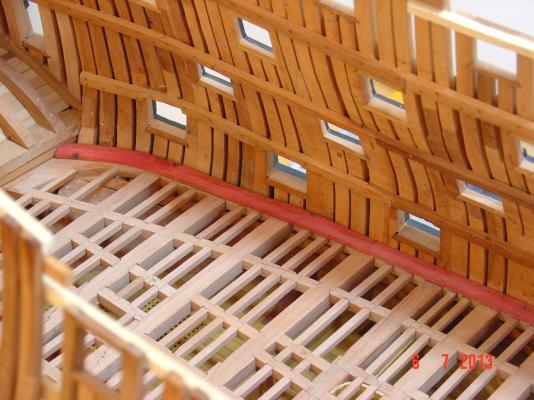
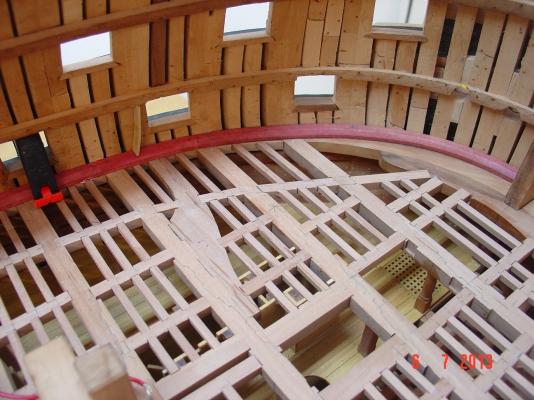
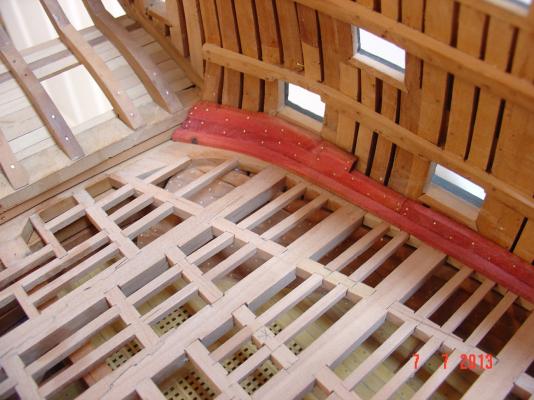
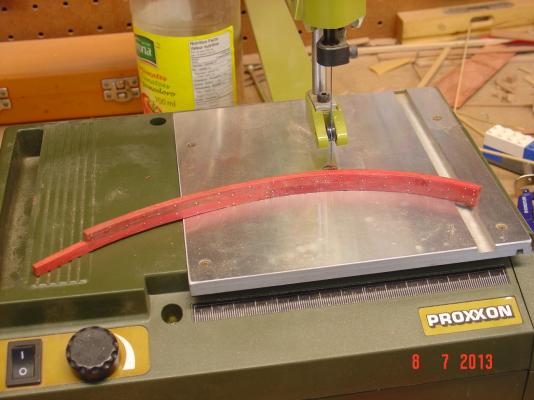
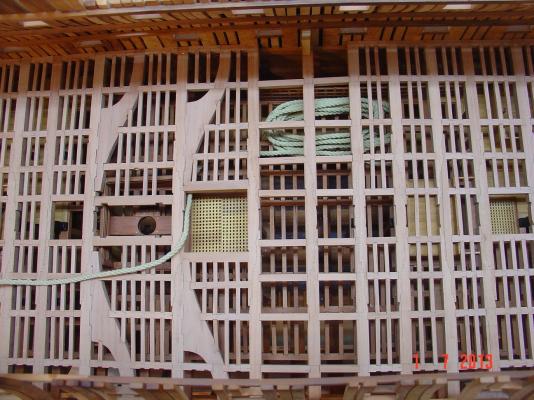
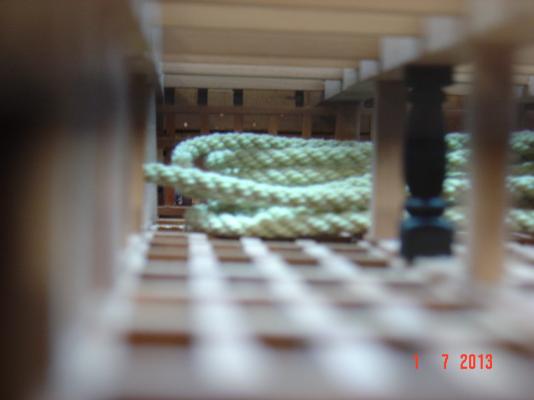
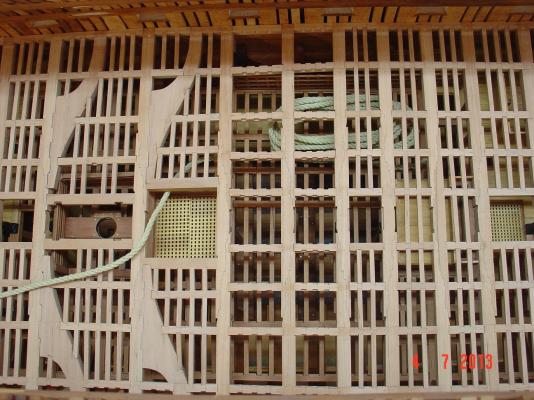
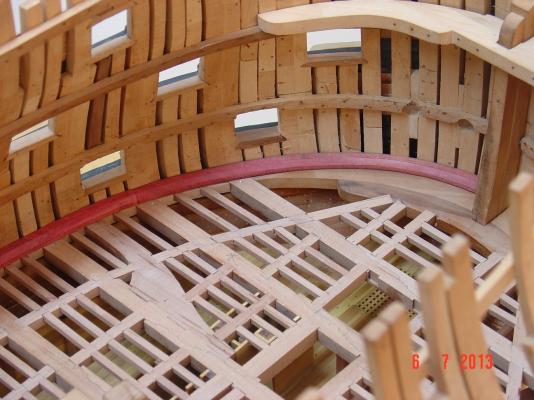
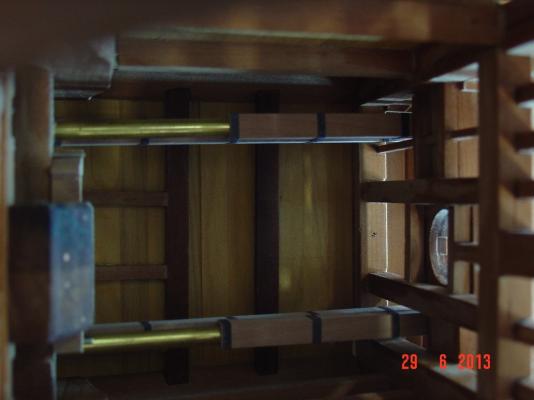
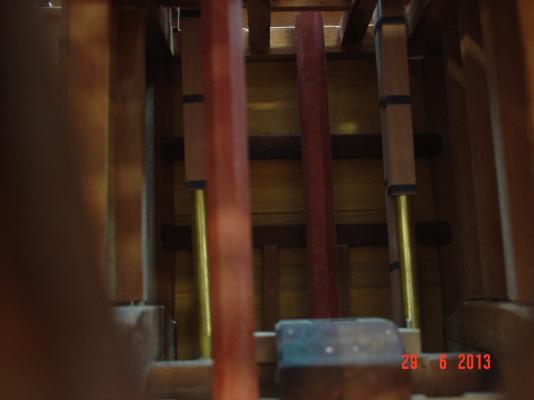
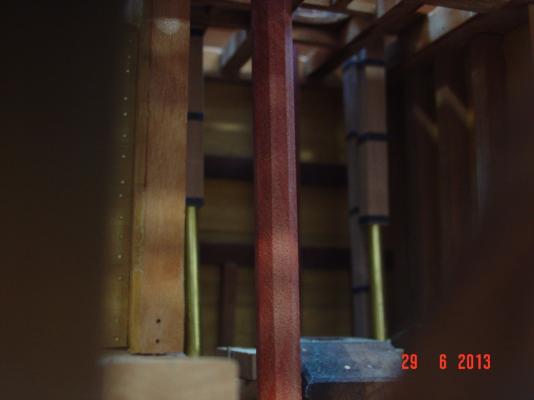
Kevin, the would be anchor cable on the orlop deck is not secured in any way other than the "cable tier" construction: rounded corner posts on three sides and a kind of grating toward the ship's sides. The cable can move around inside that perimeter and if I pull it out it will come out. Jan, The red wood is actually red colour wood - think is called bloodwood - is not stained. I decided to used it for all gun decks but I have to find some more as the stock I have won't cover more than lower deck. Alexandru
-
...


-
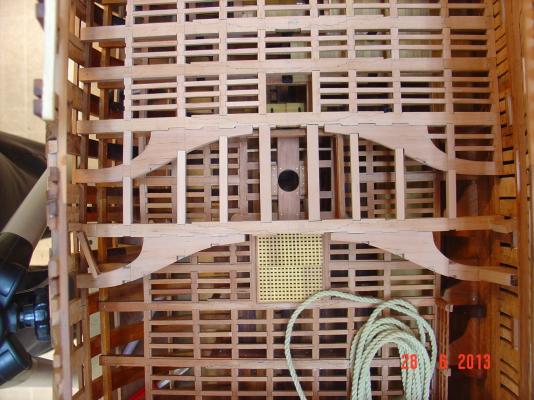
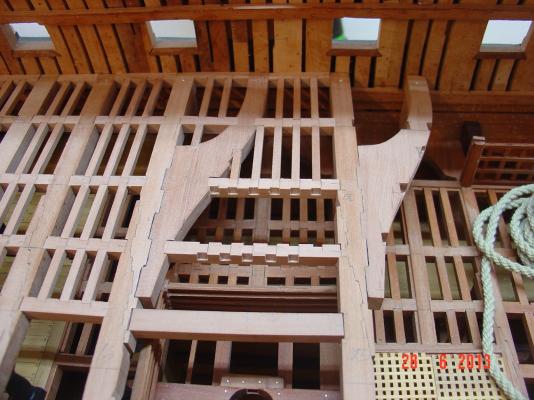
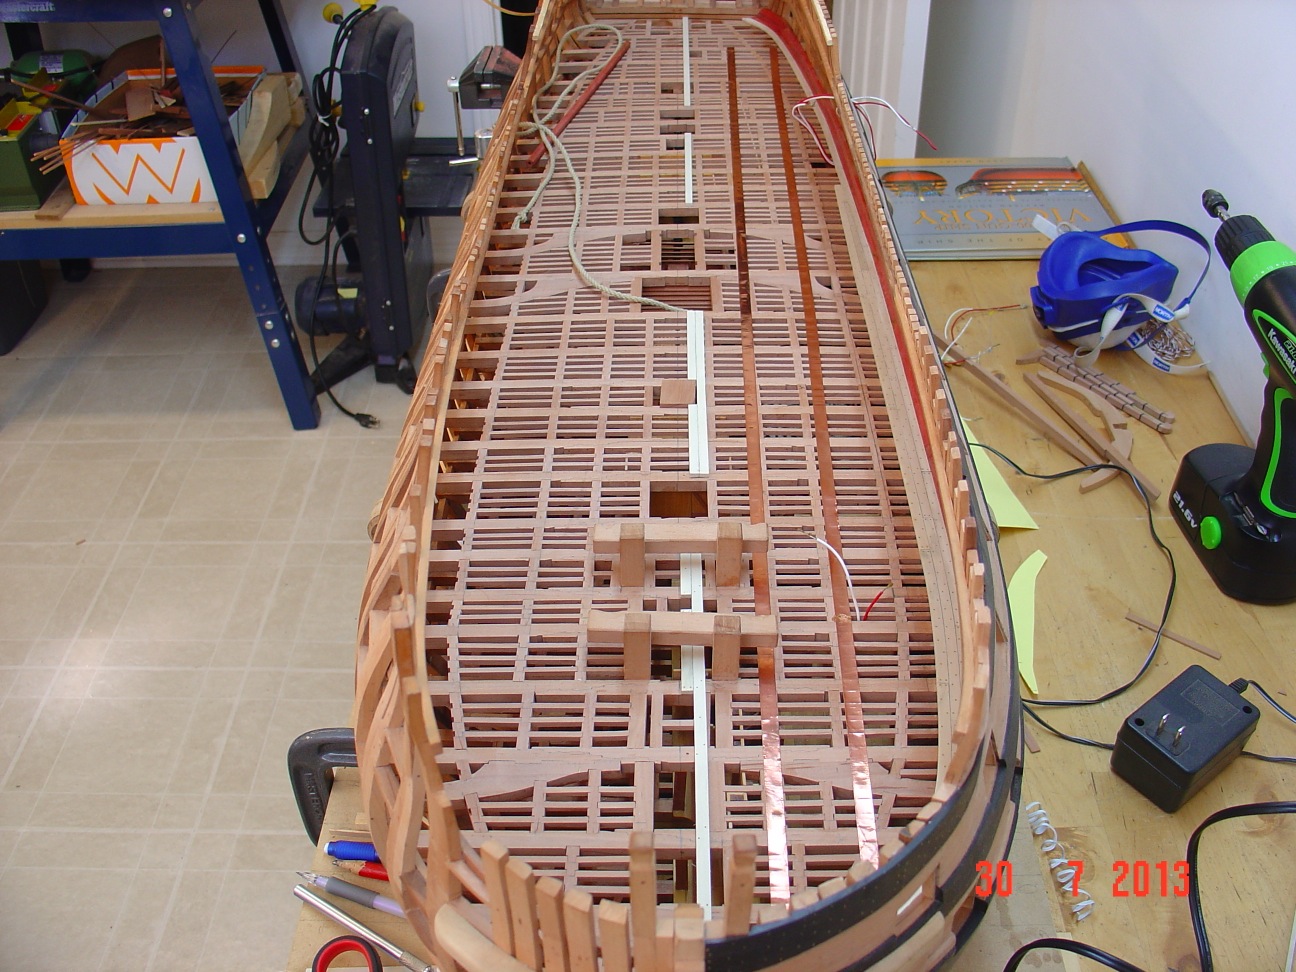
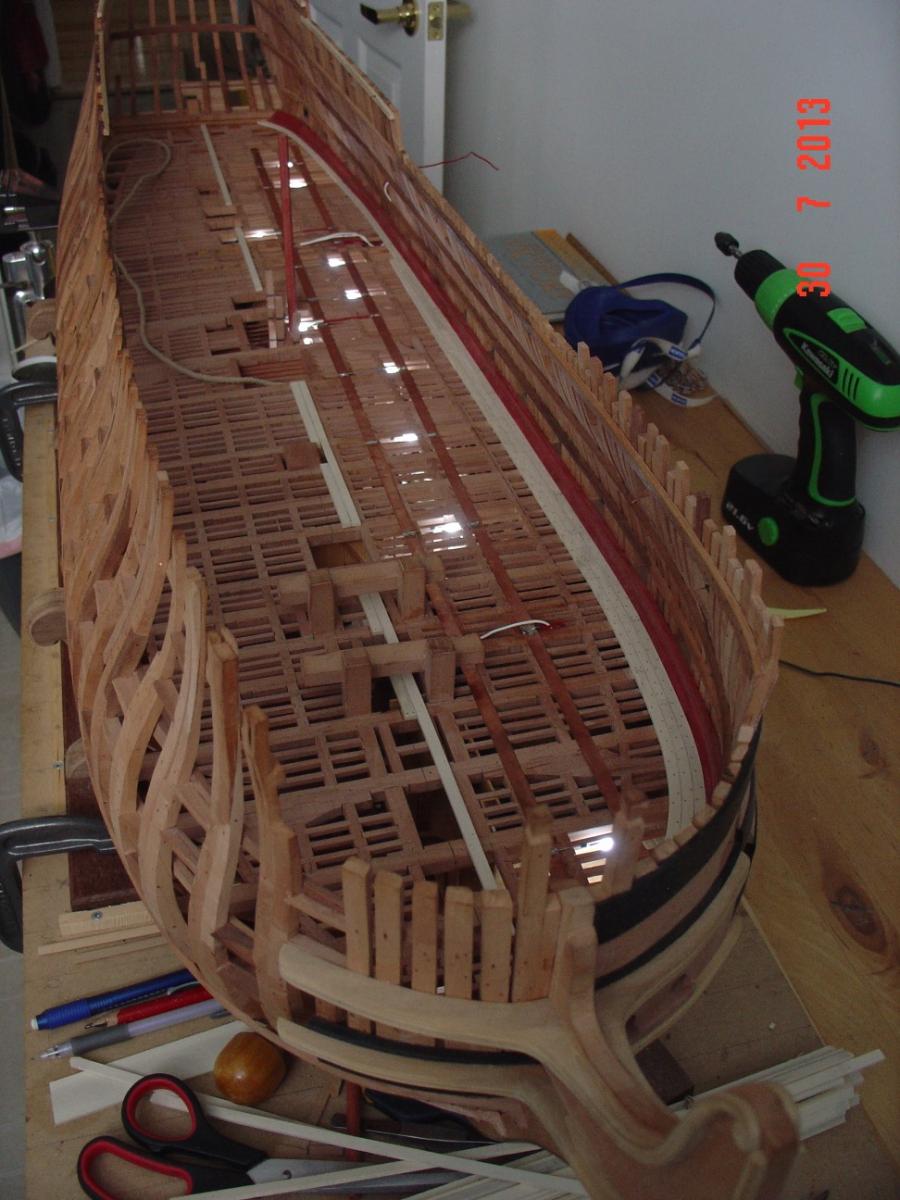
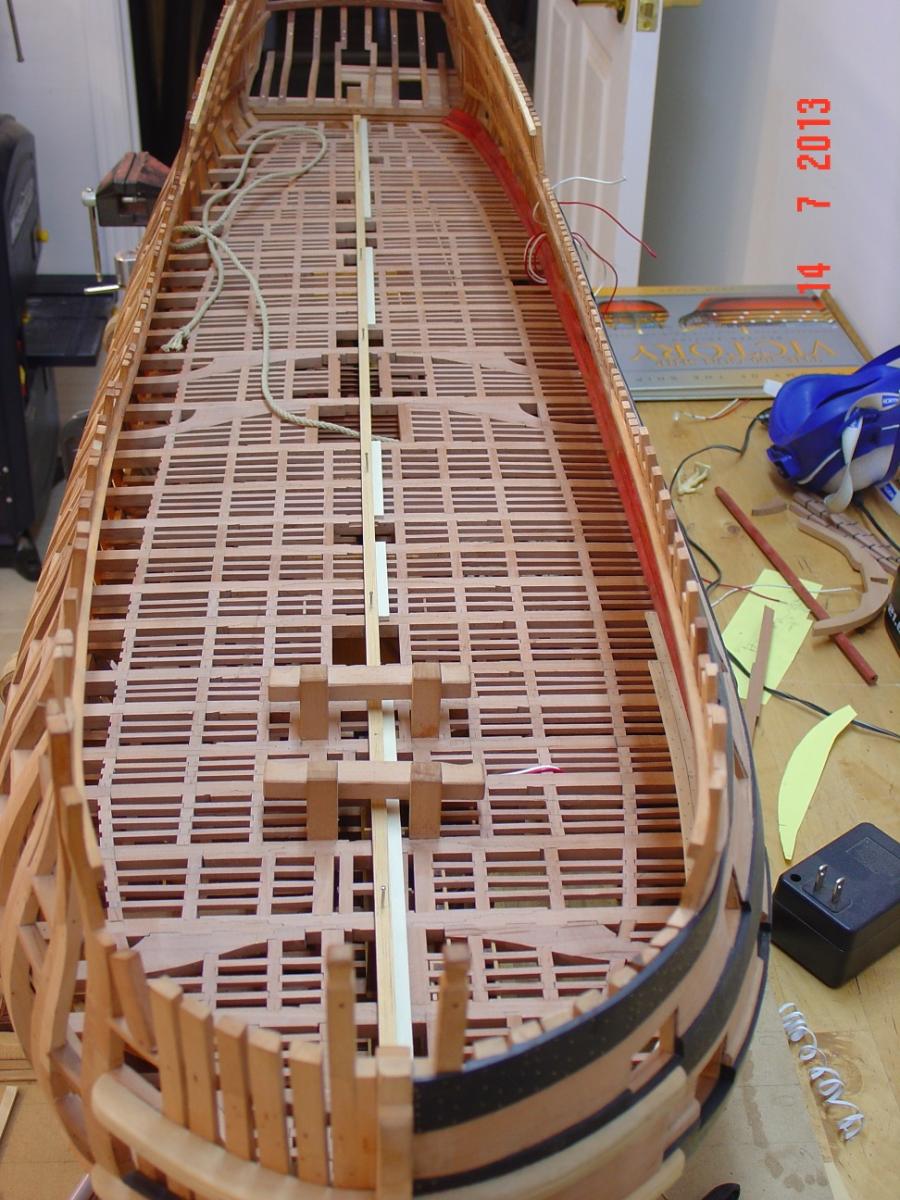
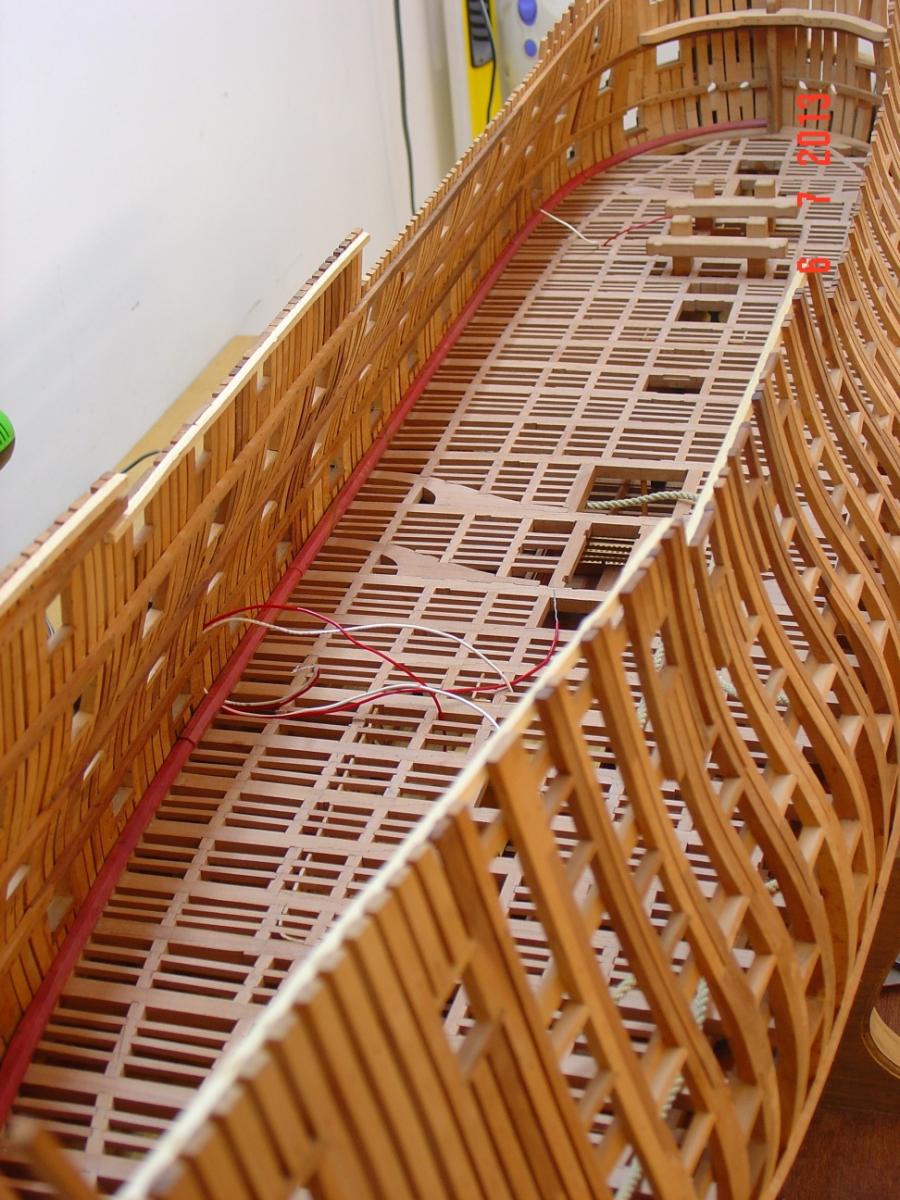
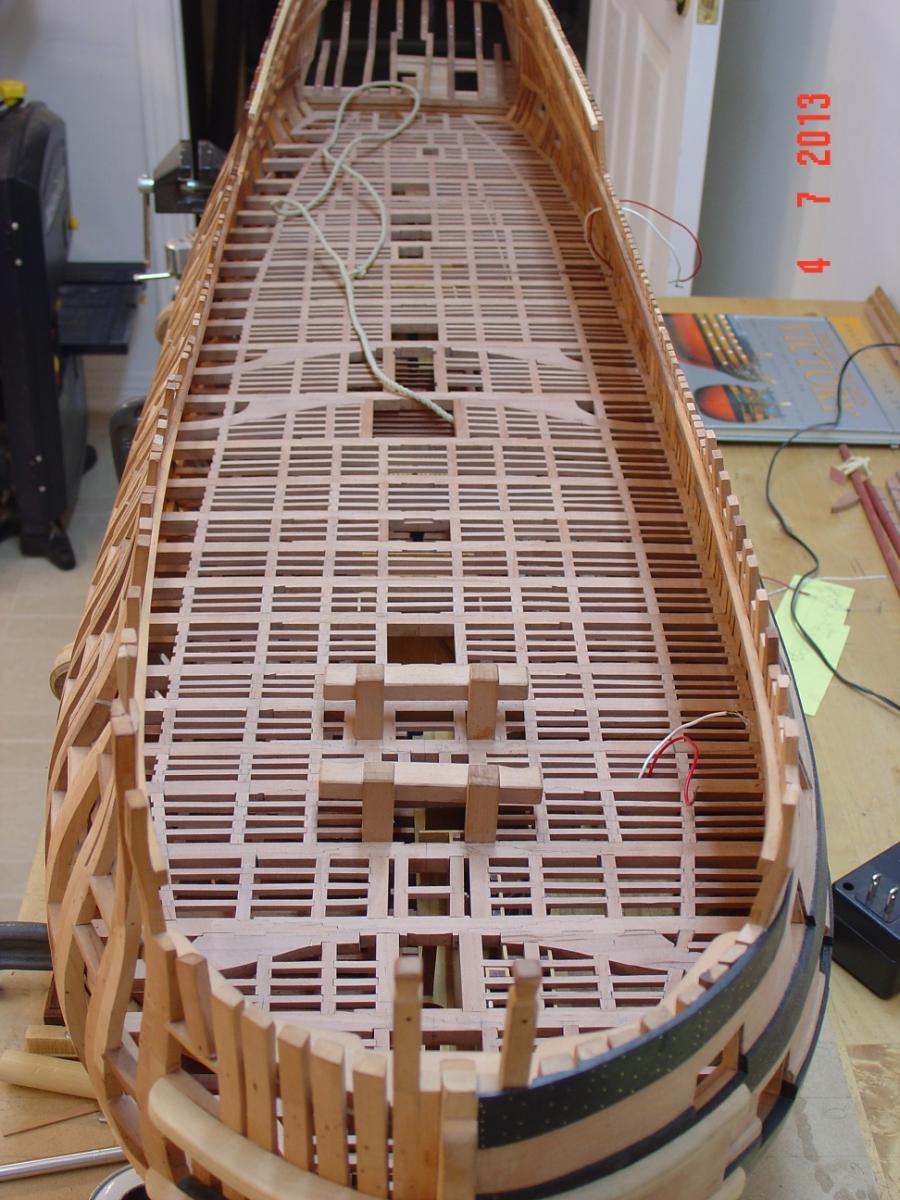
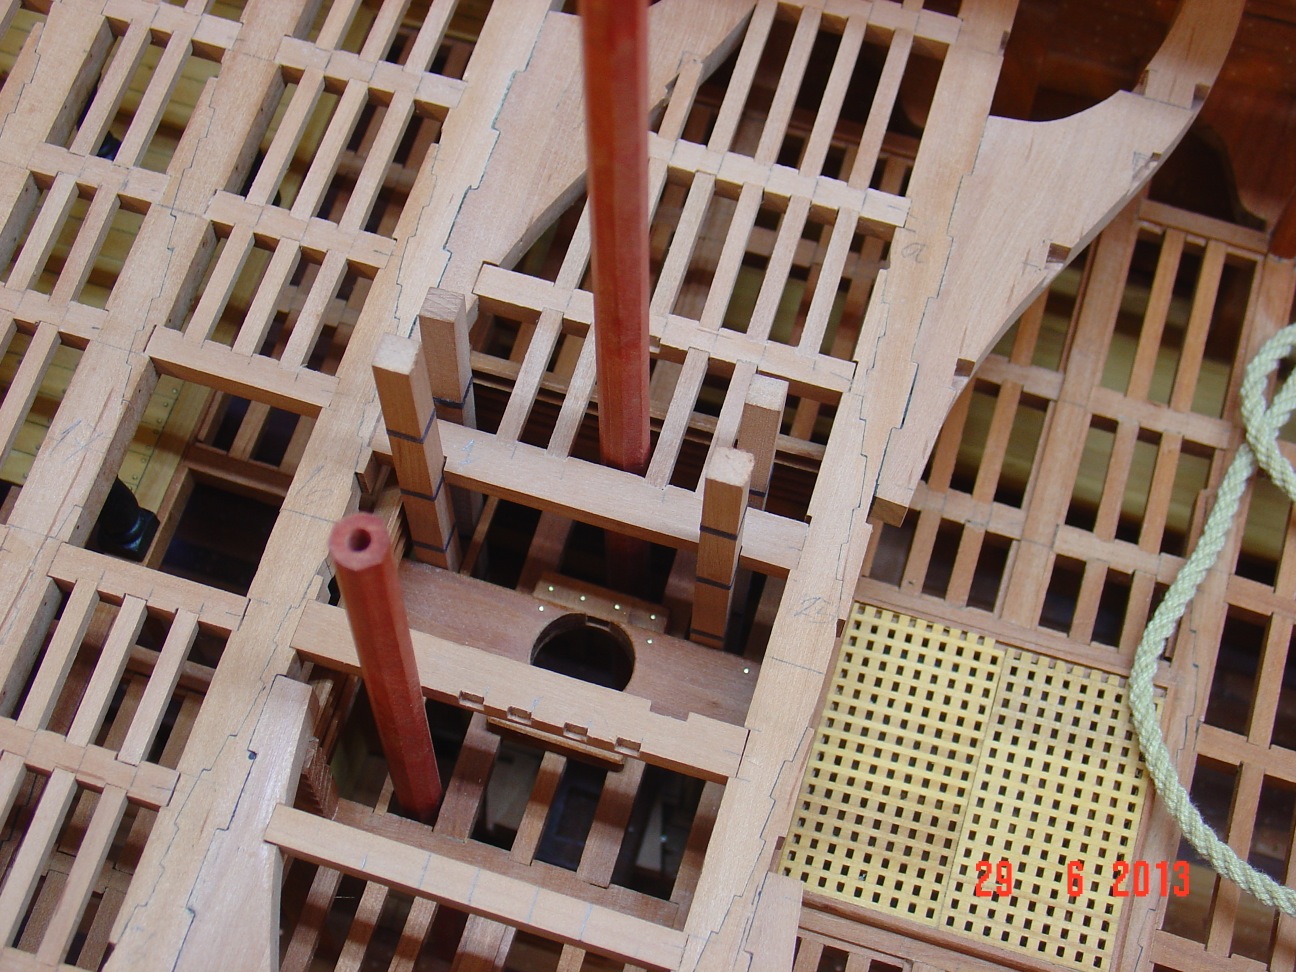
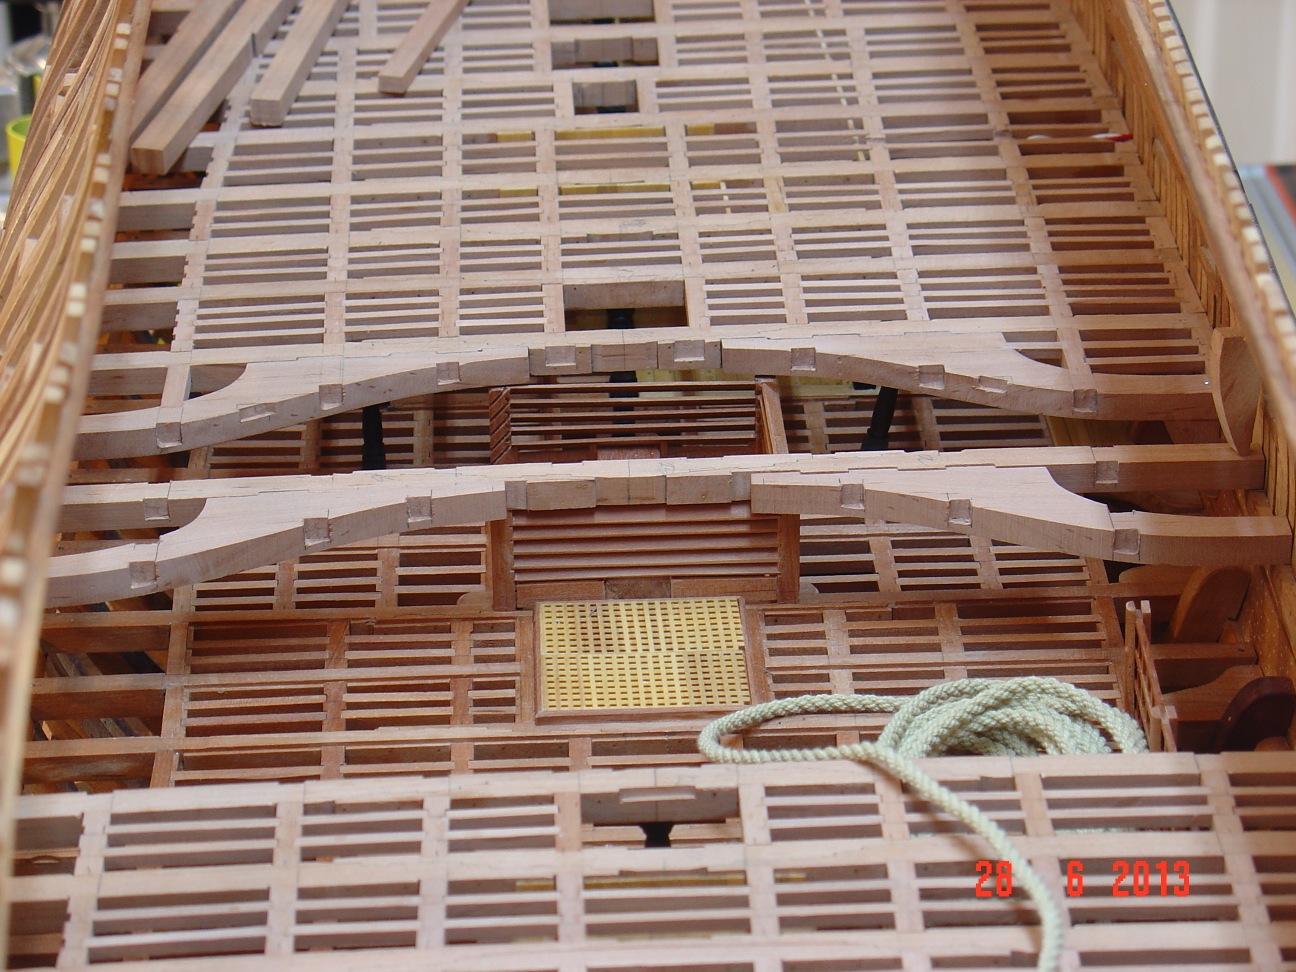
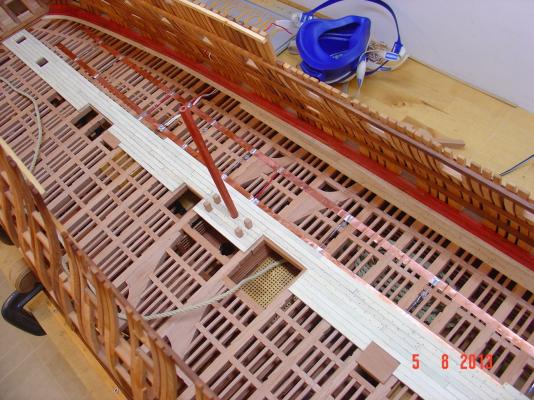
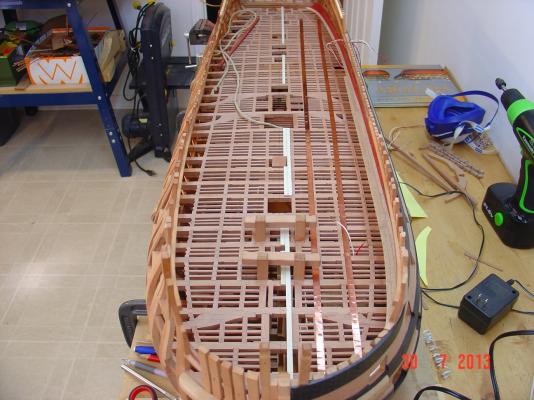
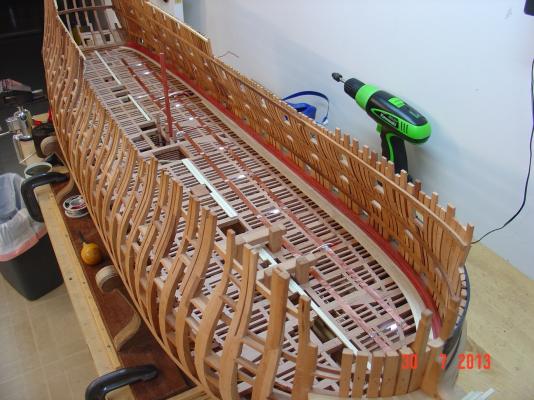
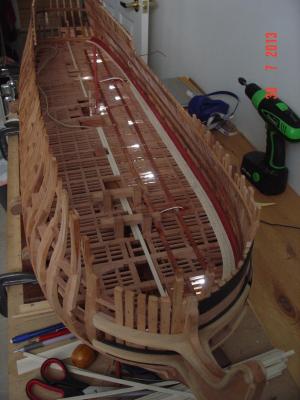
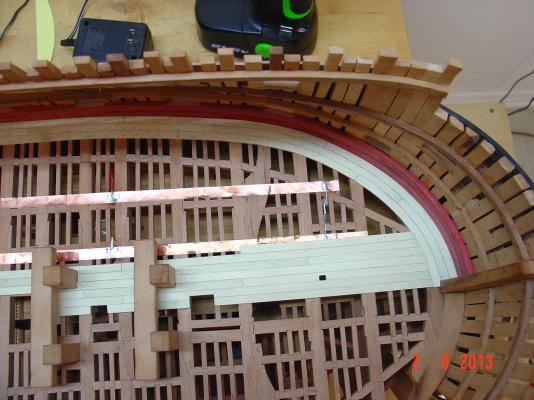
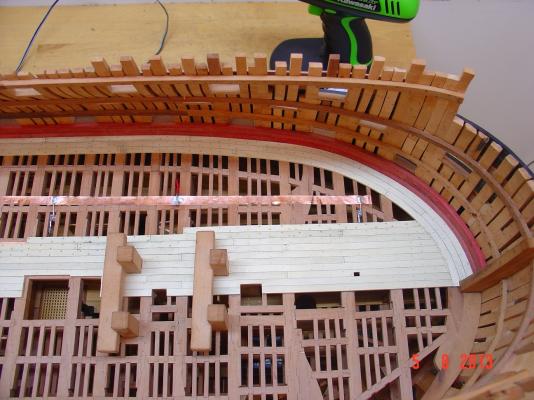
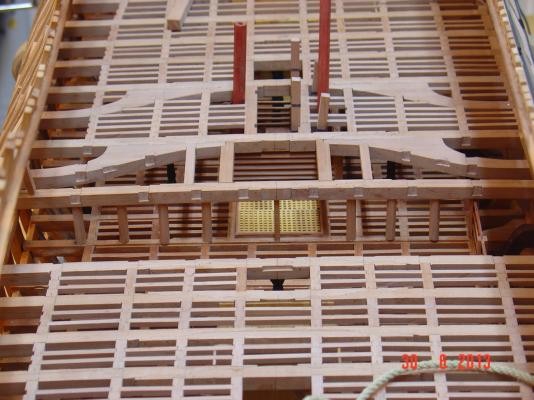
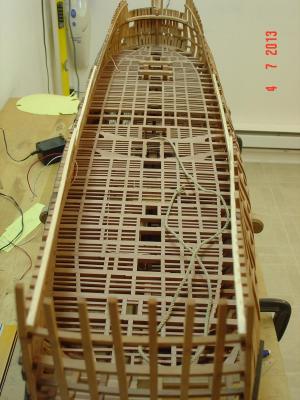
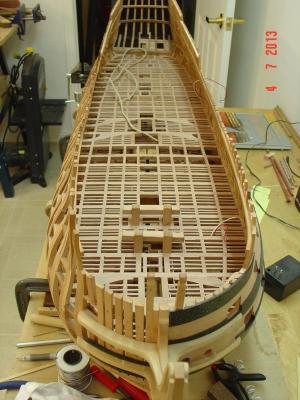
Thank you all, your comments are appreciated. Several more pictures on the last week progress. Lower deck is now fully framed and I started working on the waterway and the planking above it.

-
Thank you, Alexandru

-
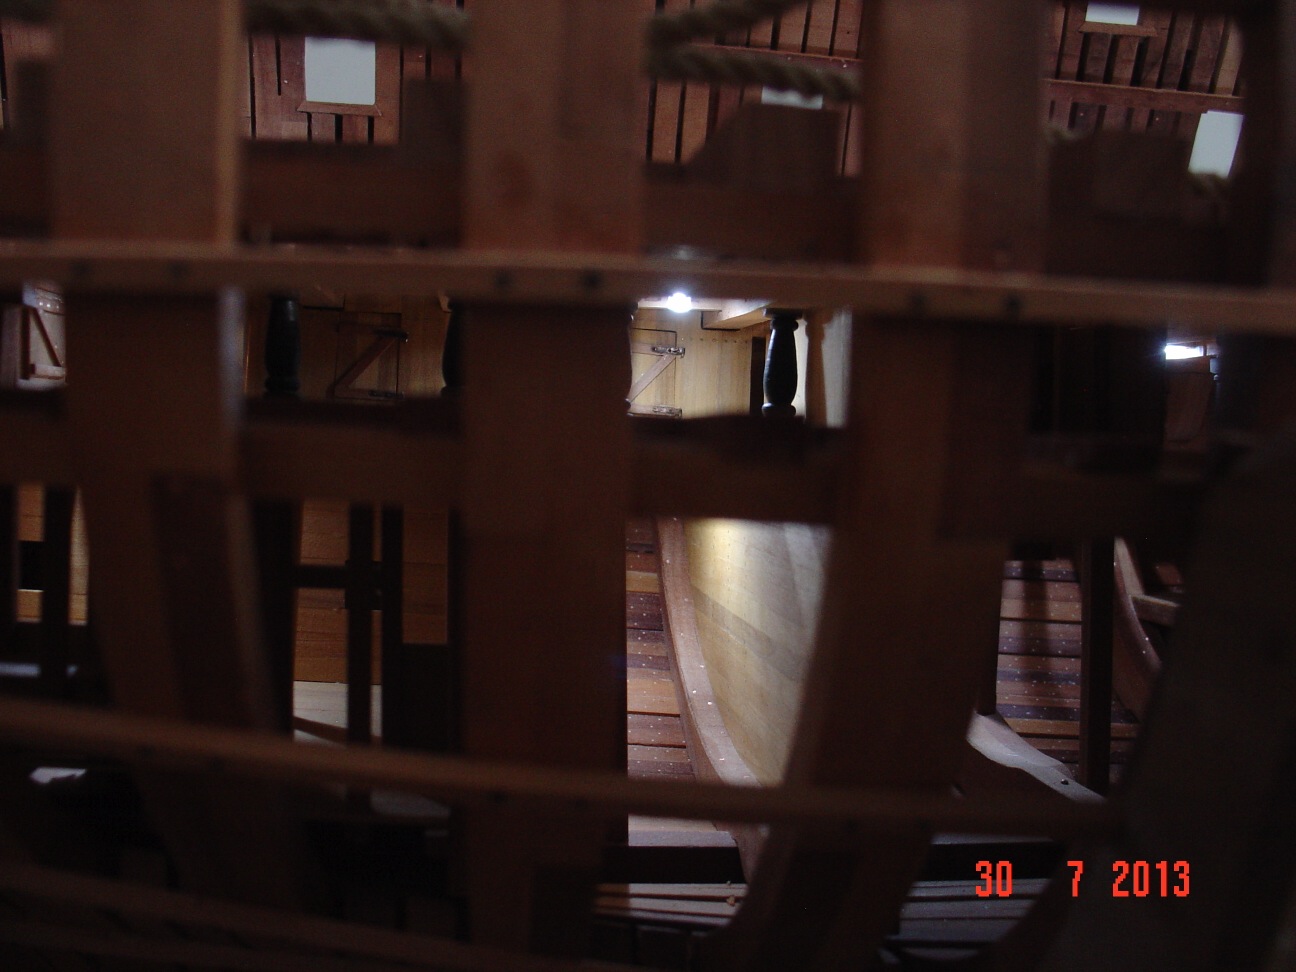
Hello all, Made some progress and here are the pictures.