HOLIDAY DONATION DRIVE - SUPPORT MSW - DO YOUR PART TO KEEP THIS GREAT FORUM GOING! (Only 20 donations so far - C'mon guys!)
×

guraus
-
Posts
361 -
Joined
-
Last visited
Content Type
Profiles
Forums
Gallery
Events
Everything posted by guraus
-
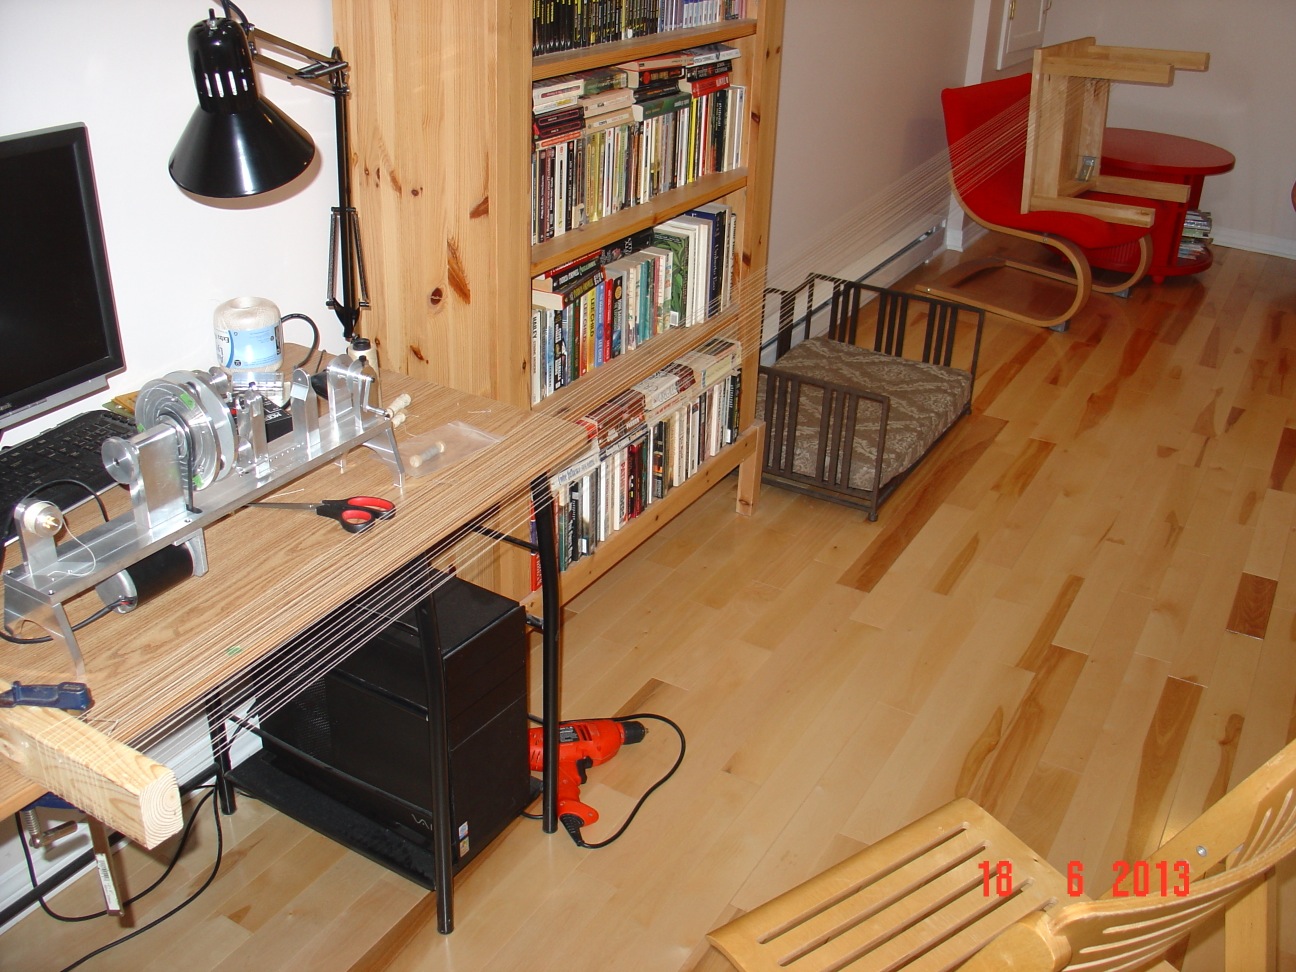
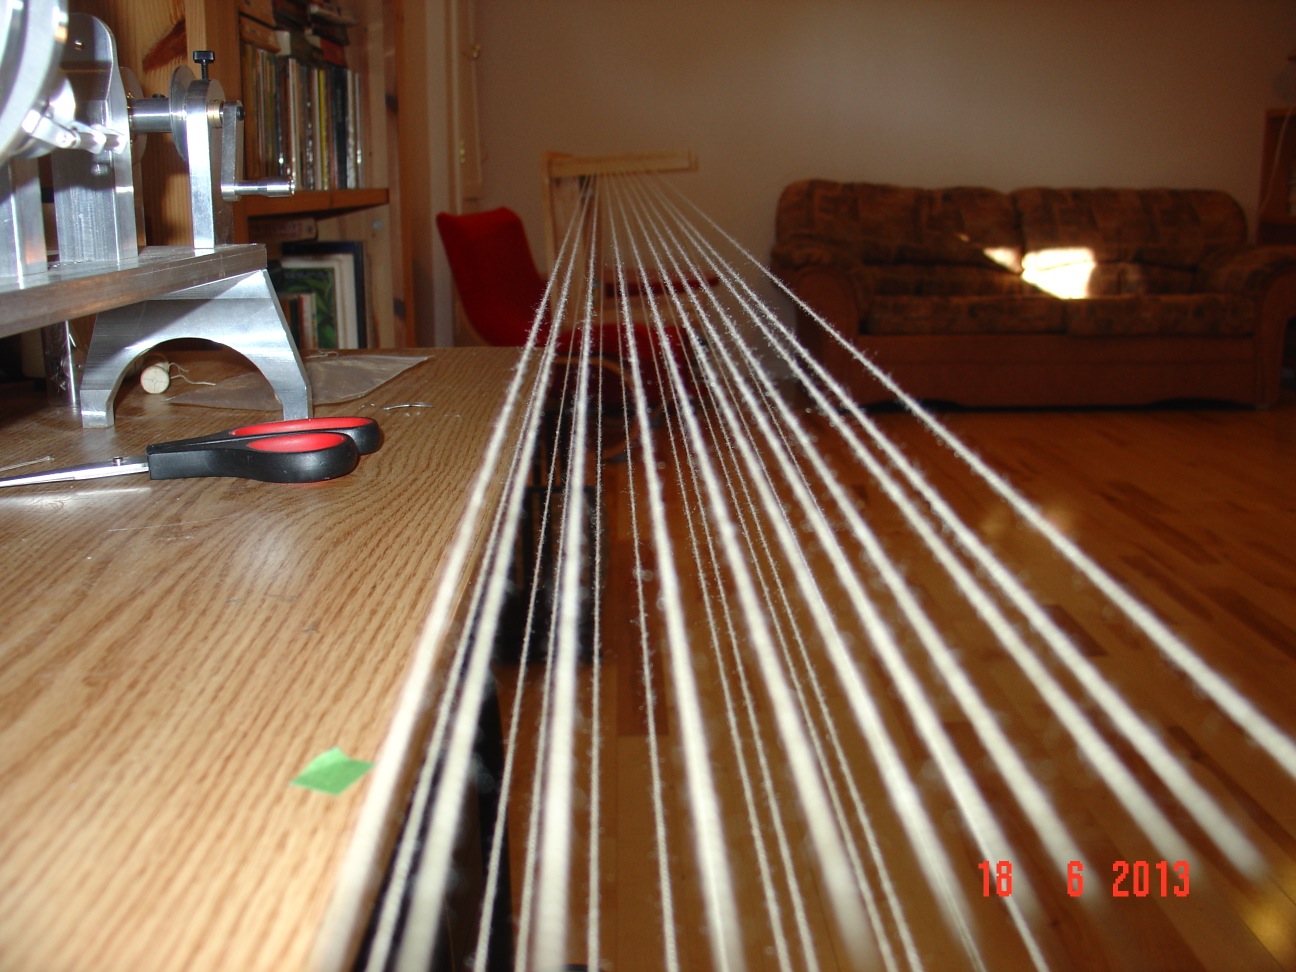
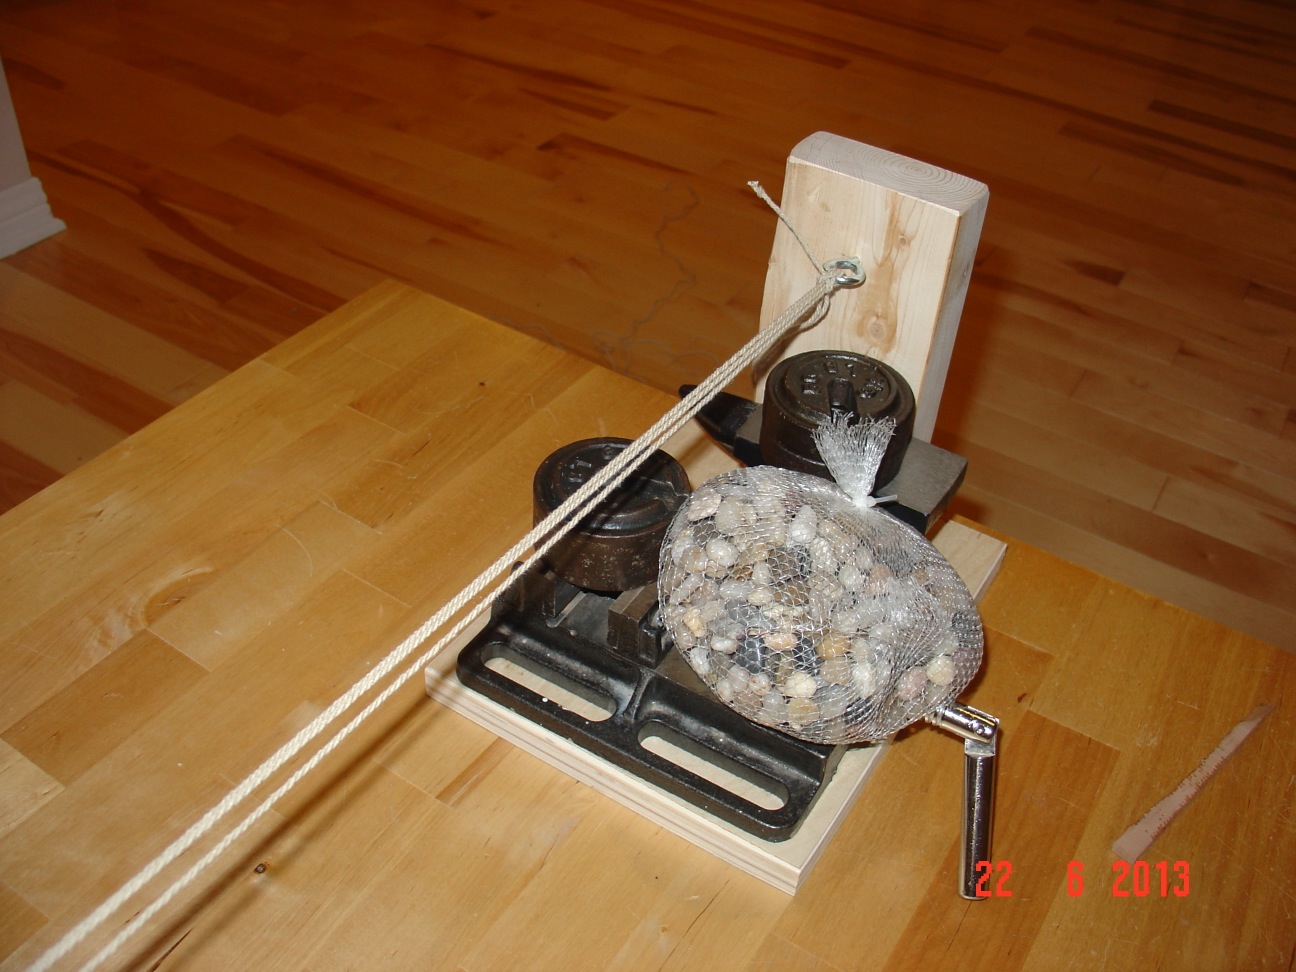
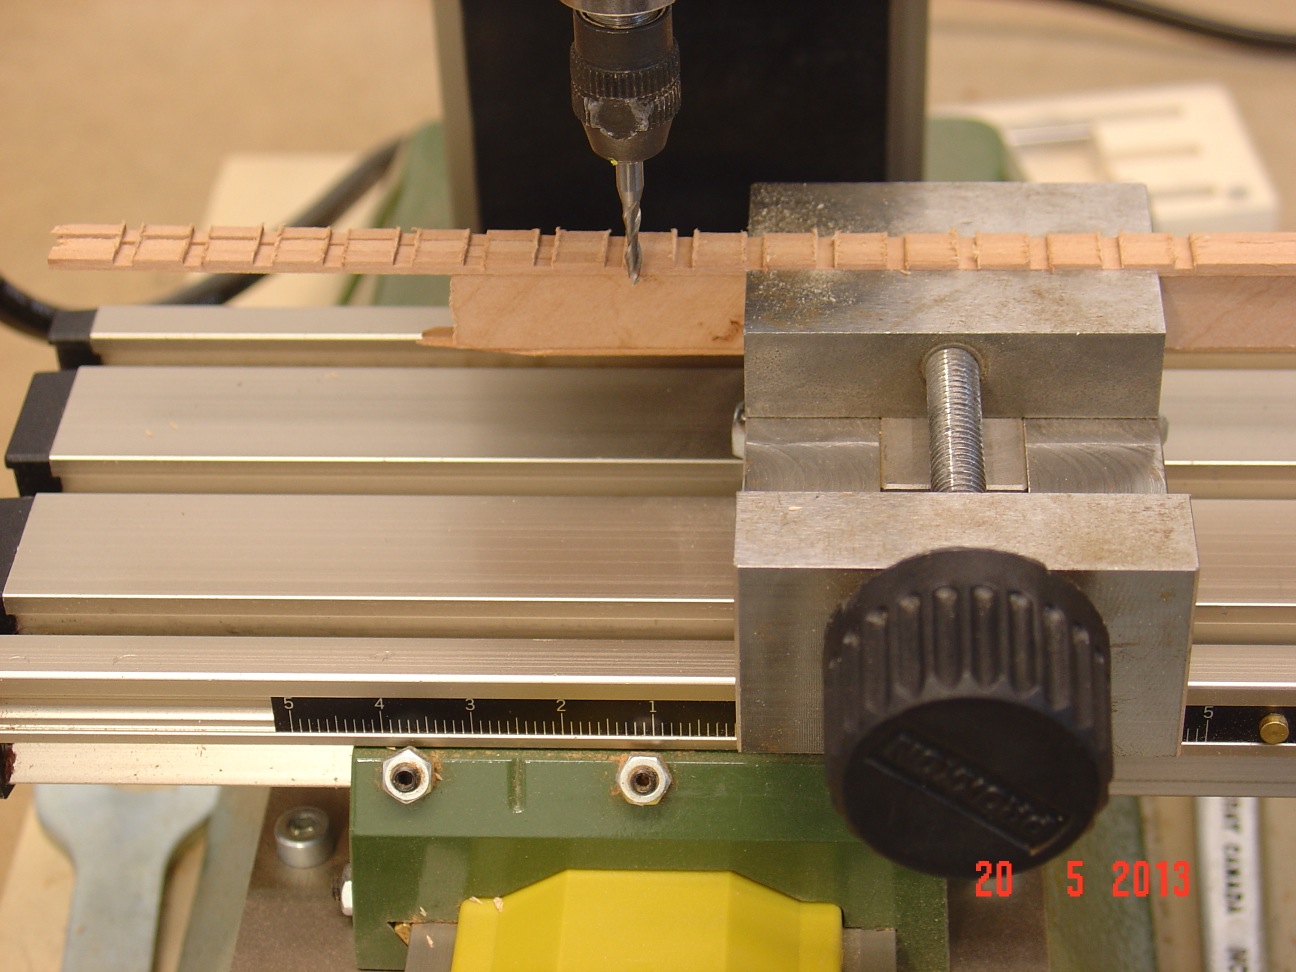
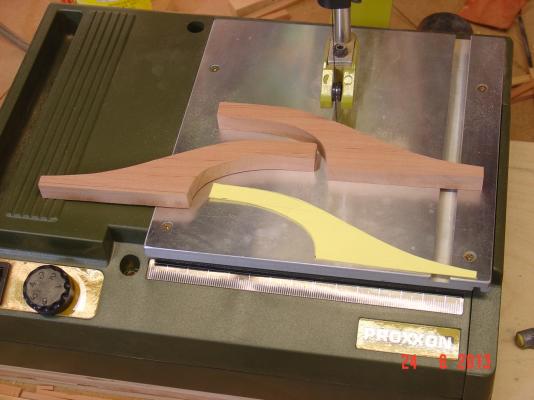
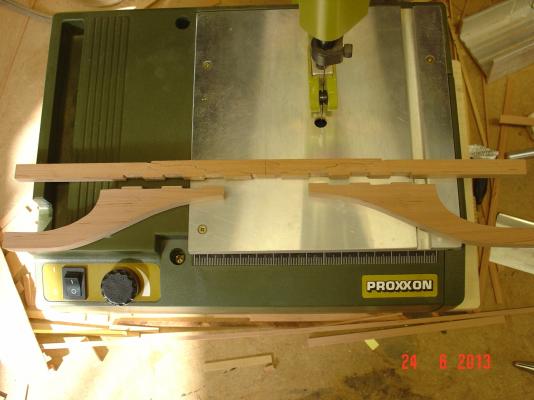
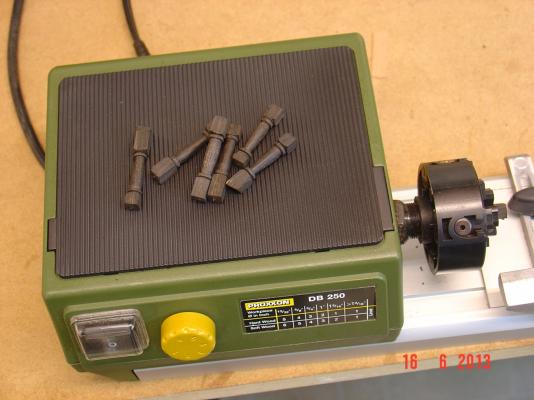
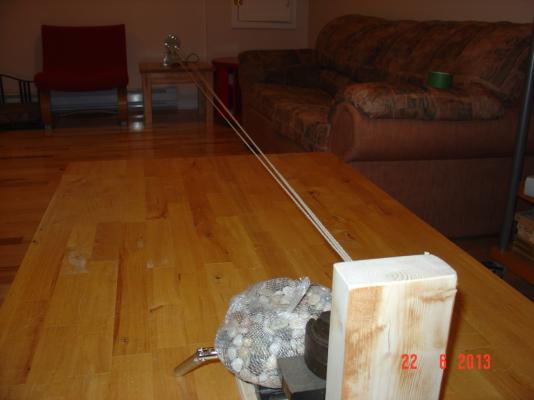
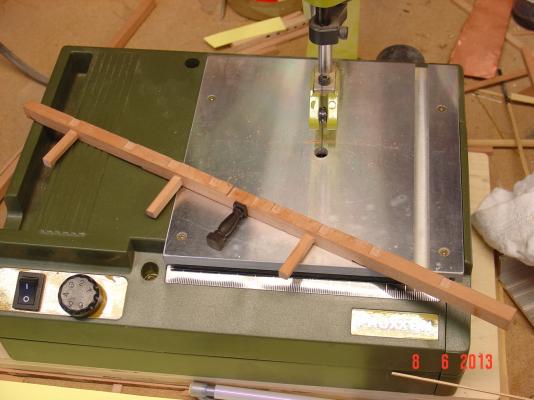
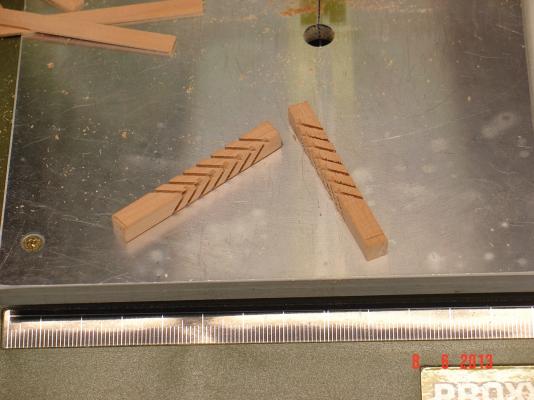
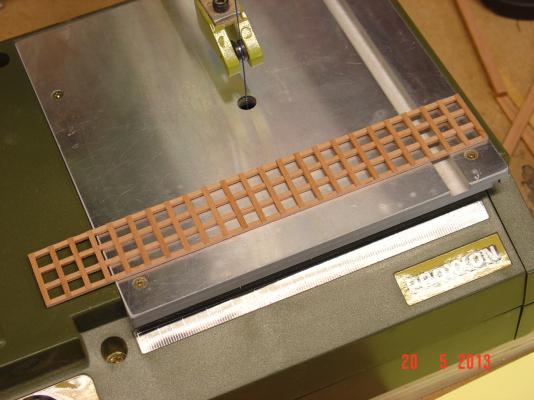
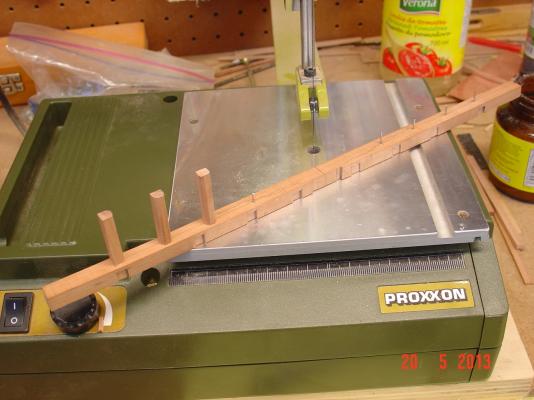
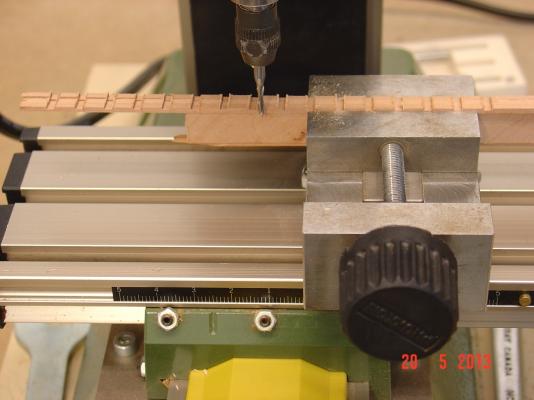
Thank you for appreciation. Andy, the rope machine is quite small. I used the entire room to spread the rope so I can cut it in three more or less equal pieces. Then only for the last pass I had to clamp the machine on one table and the other end of the cable being made on a weighted "slide" I build myself on another. Joe, I am quite happy with the machine right now but I had to figure out some issues as it did not twisted the rope uniformly. There was not enough tension on one of the threads - I had to add an additional washer on it. Now works ok, quite fast but even so, to make that one piece of cable it took me at least 5-6 hours. And doing it becomes quite fast boring.... But I am very happy with the result so it was worth it. Bob, glad you pointed that out, as I won't have access to one end - I should do it now before I forget again. The beams are made on the milling machine. I have a small Proxxon mill. Regards, Alexandru
-
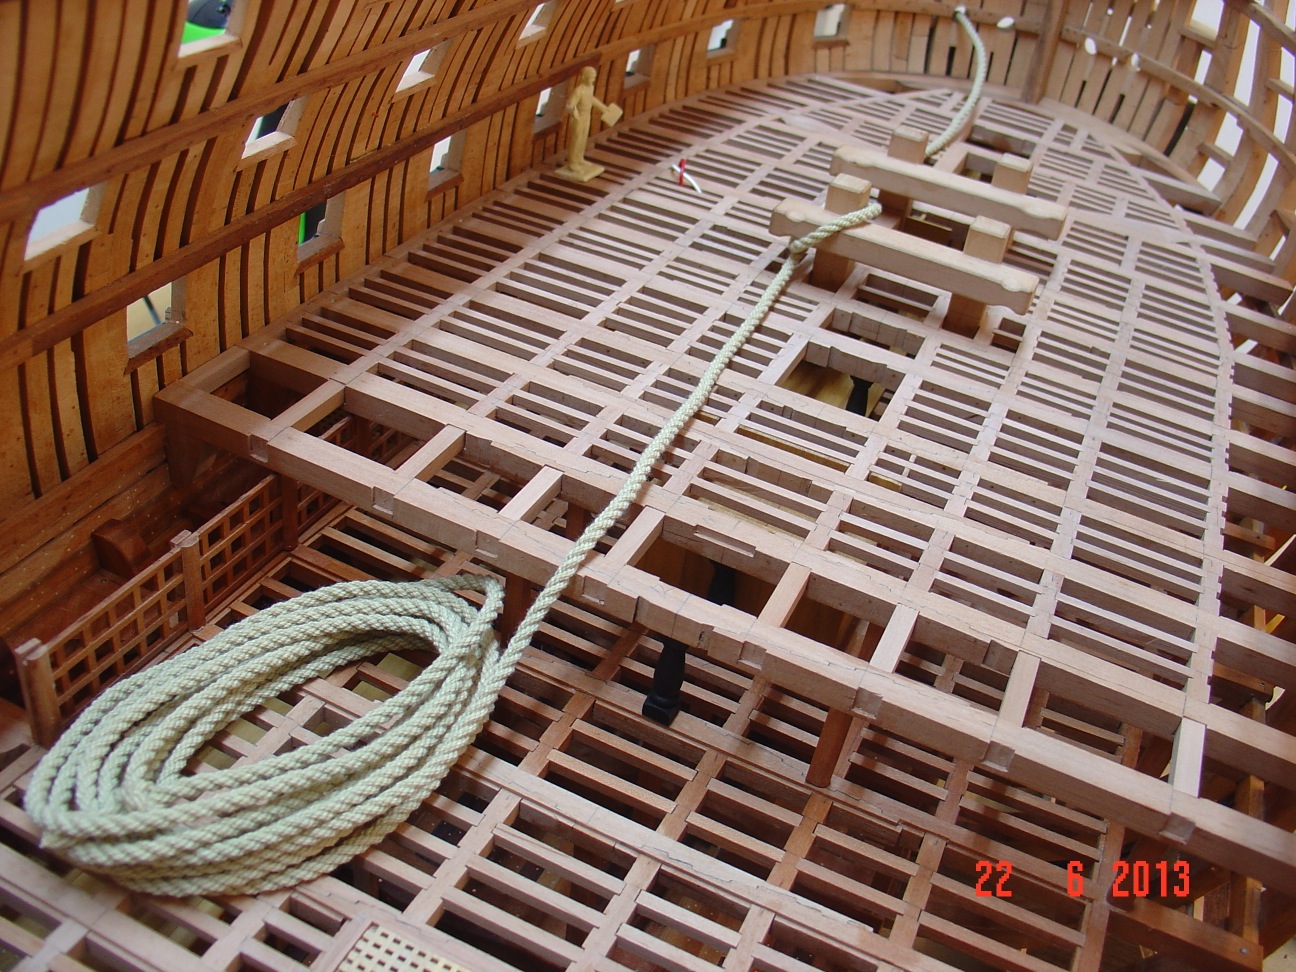
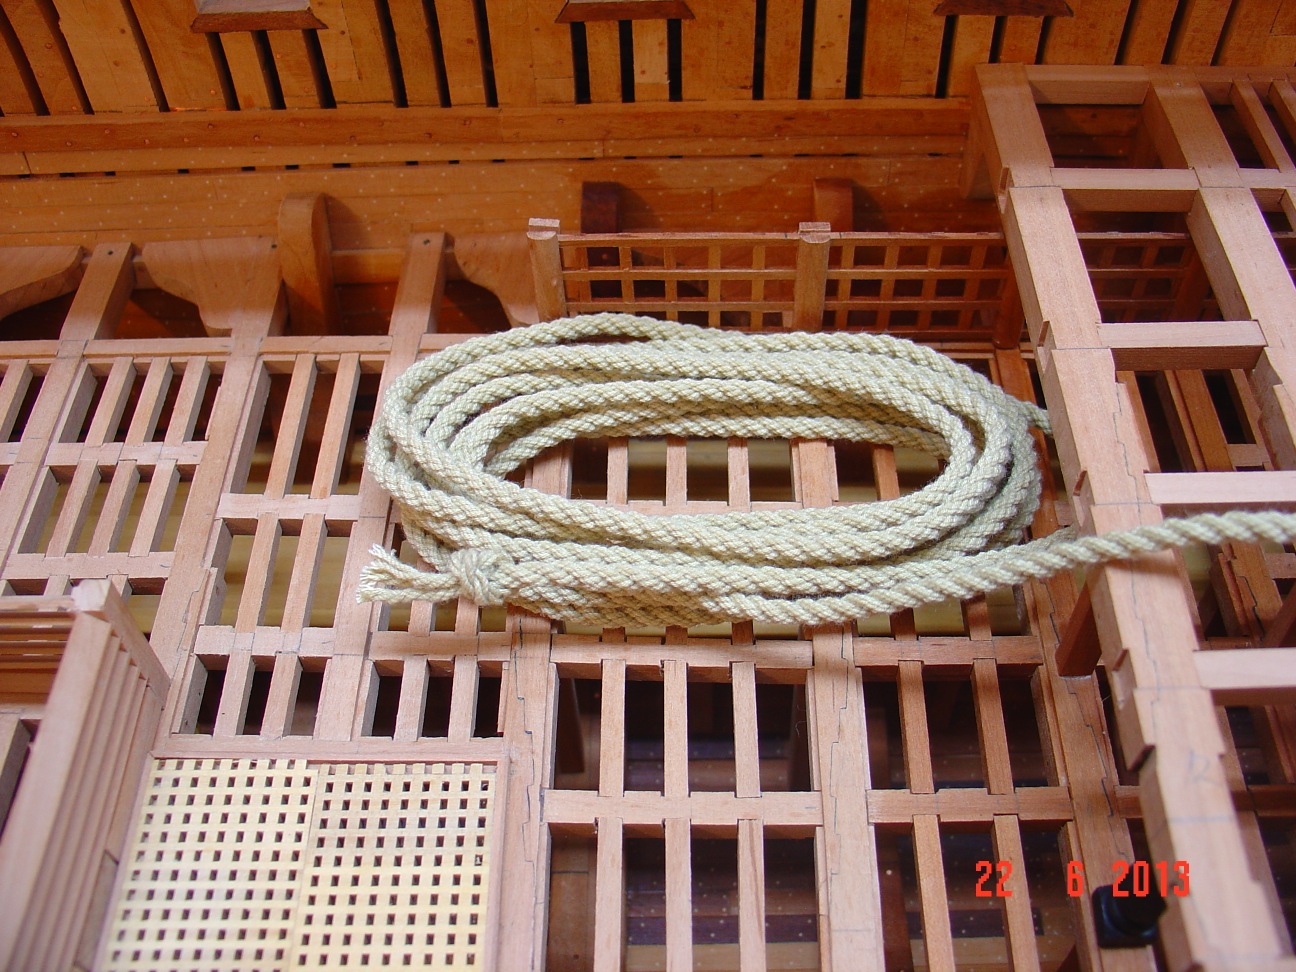
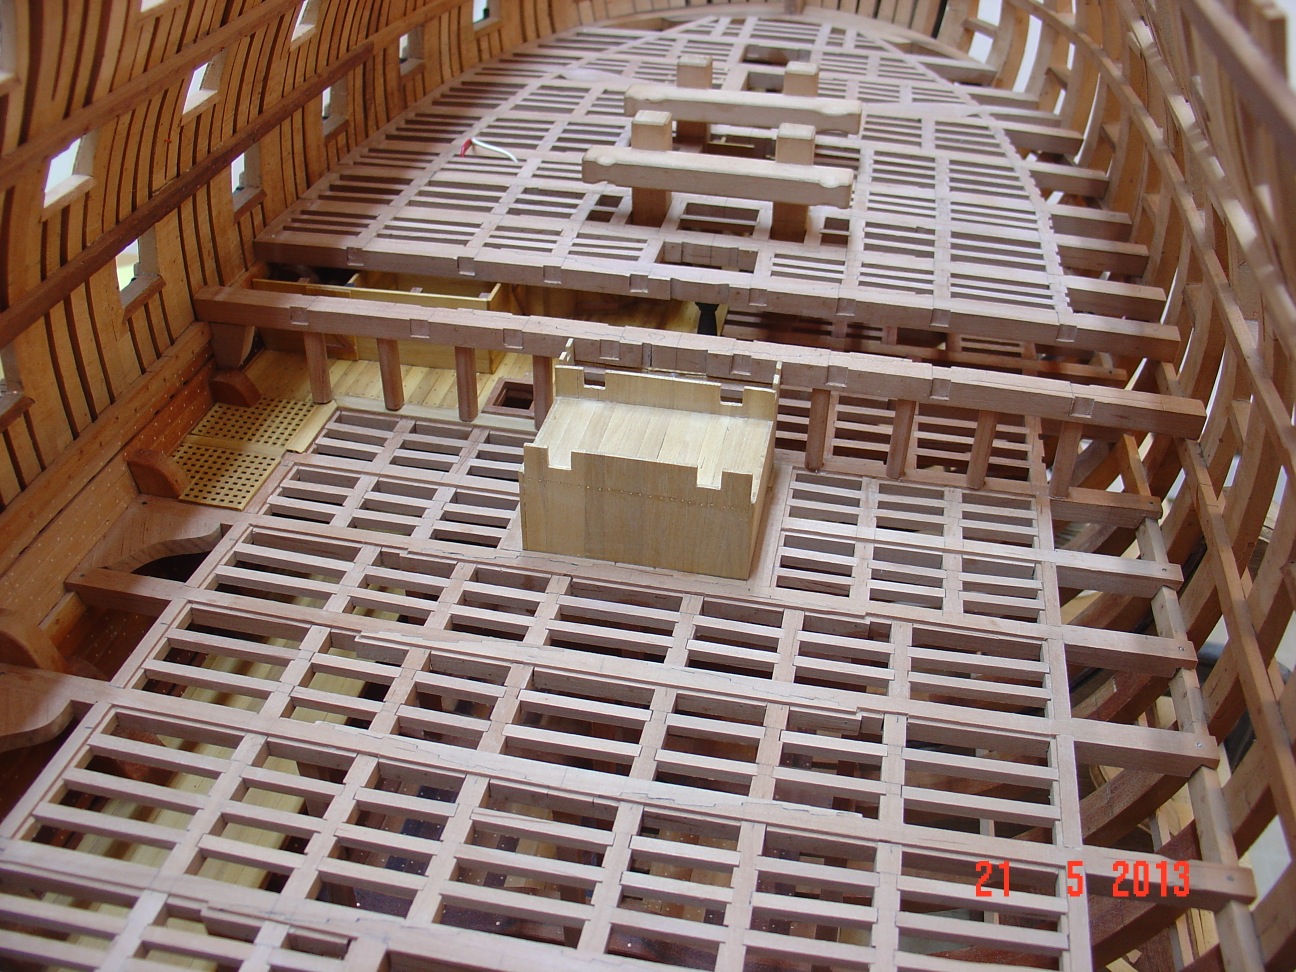
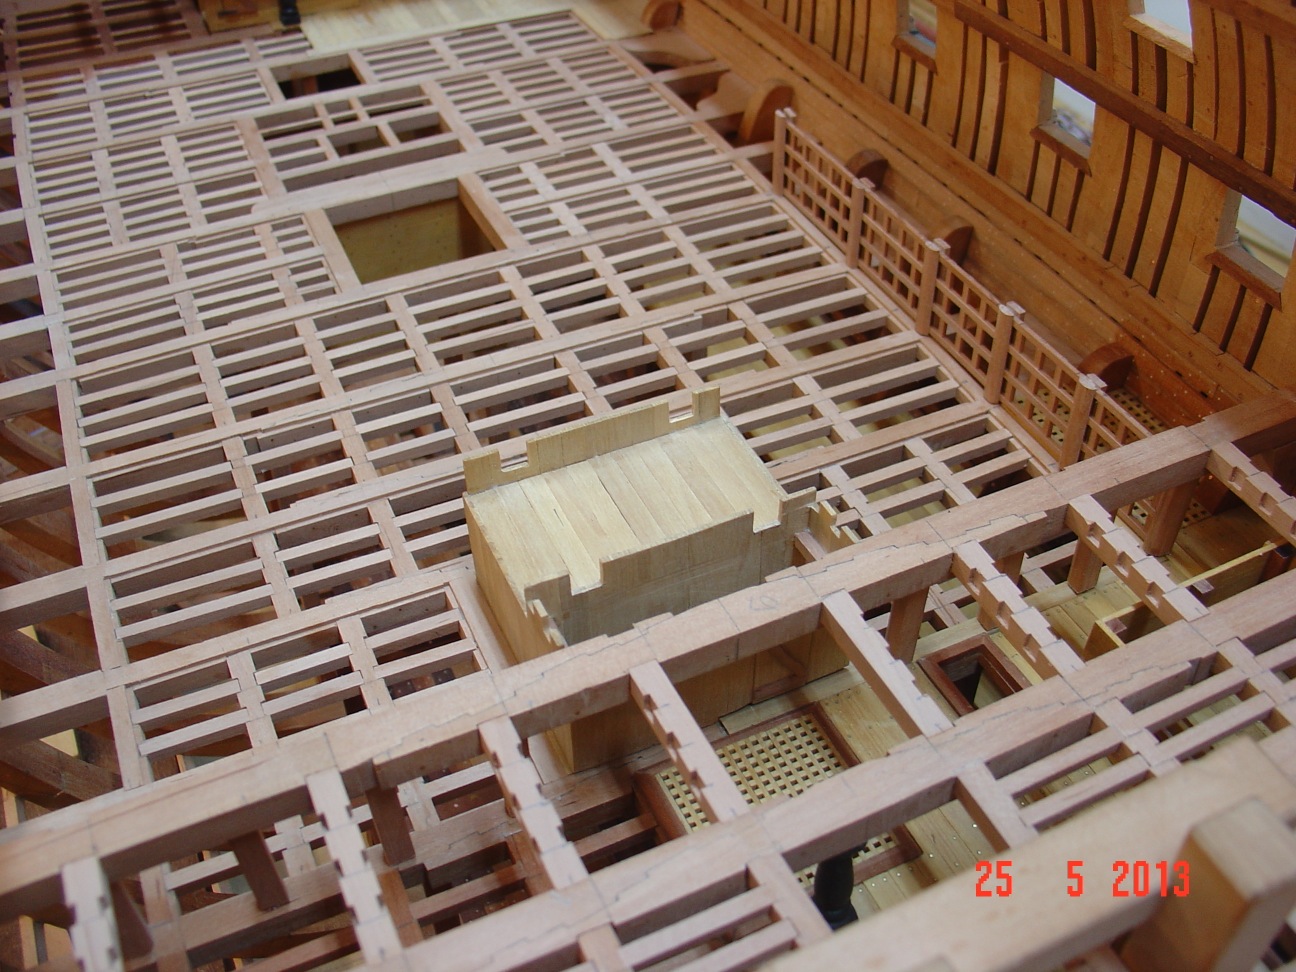
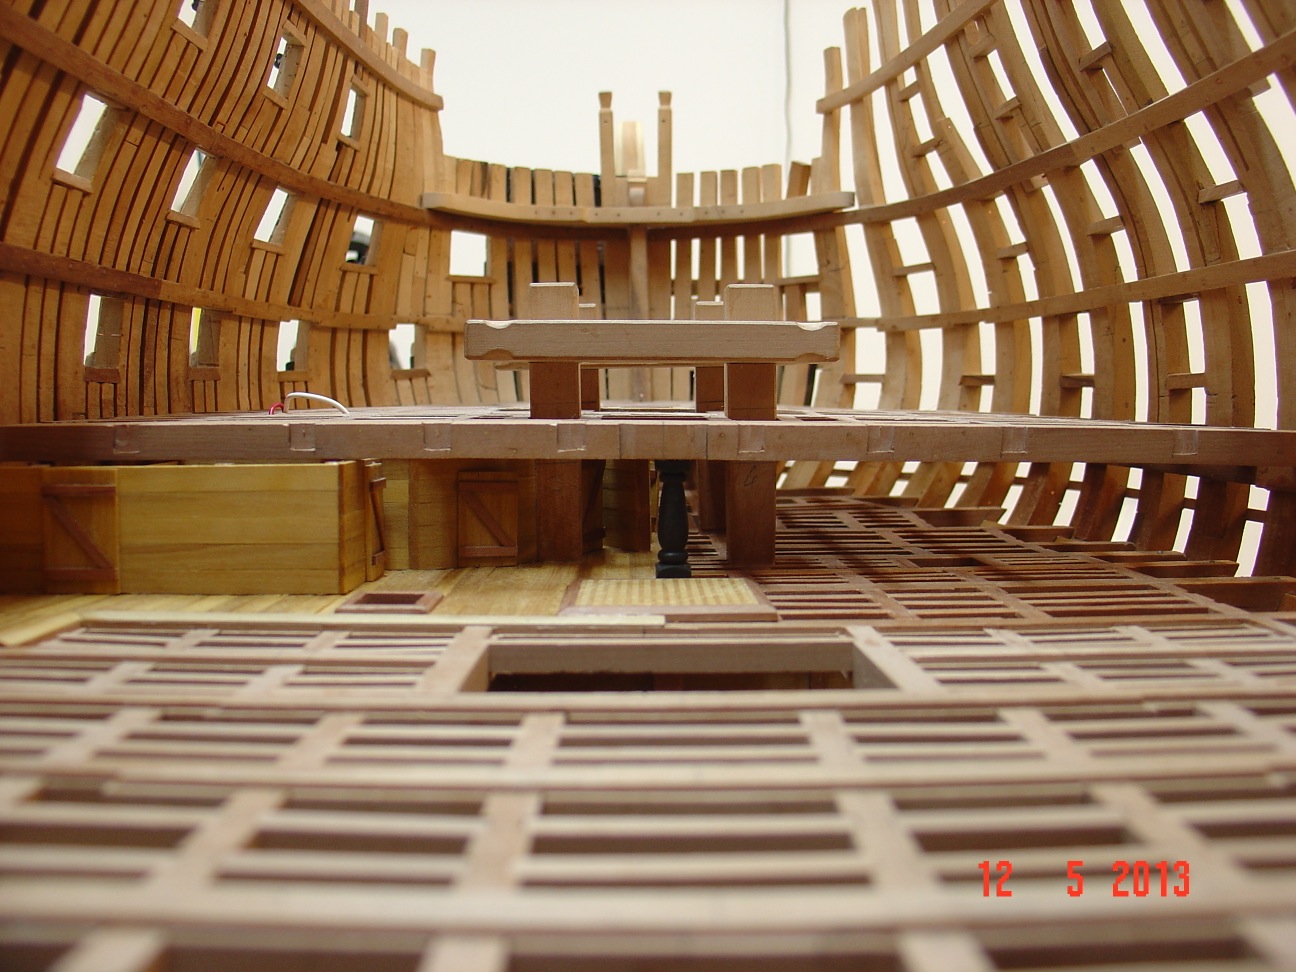
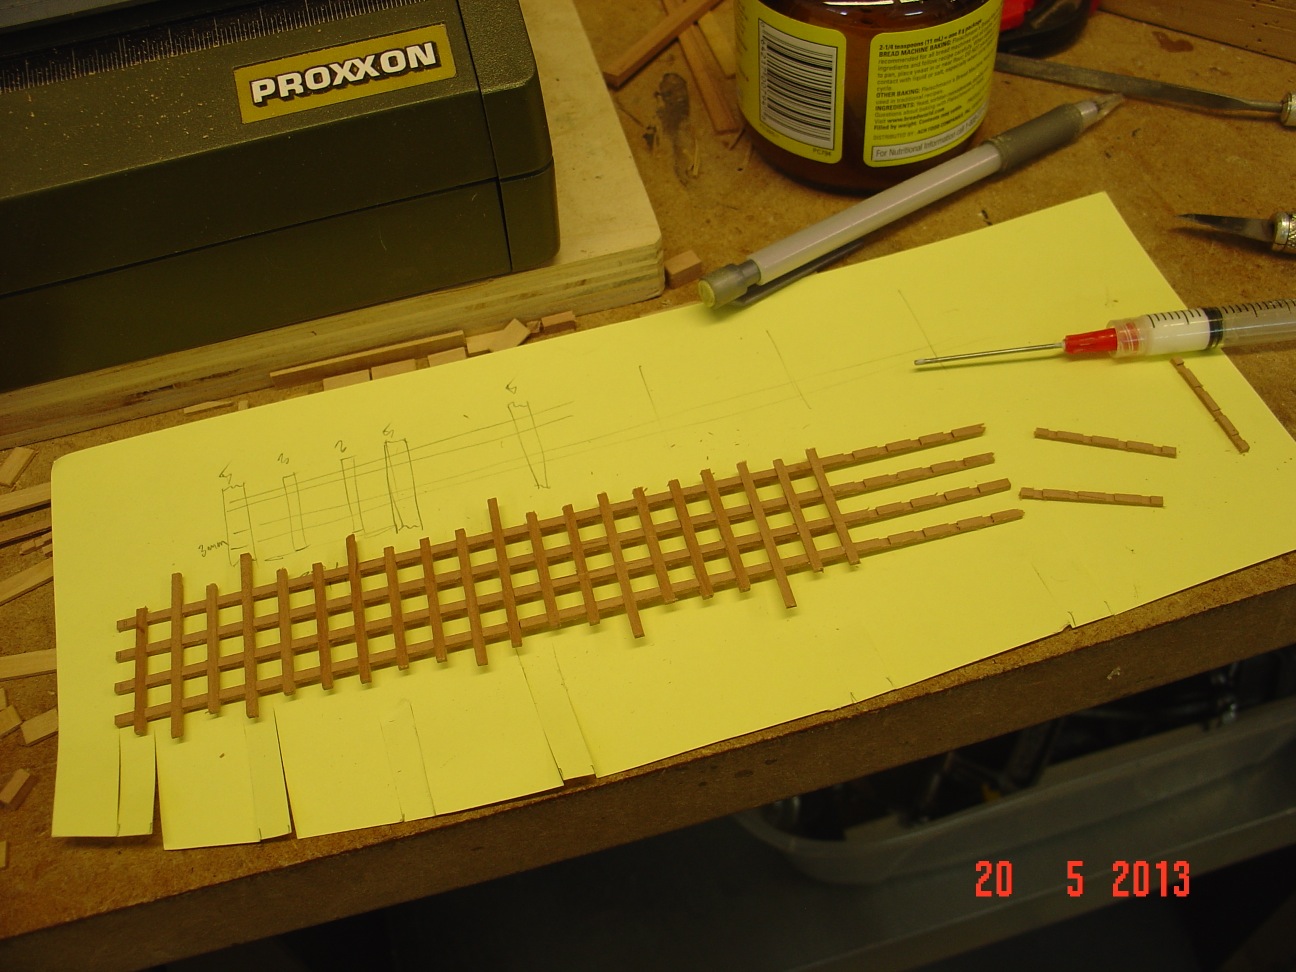
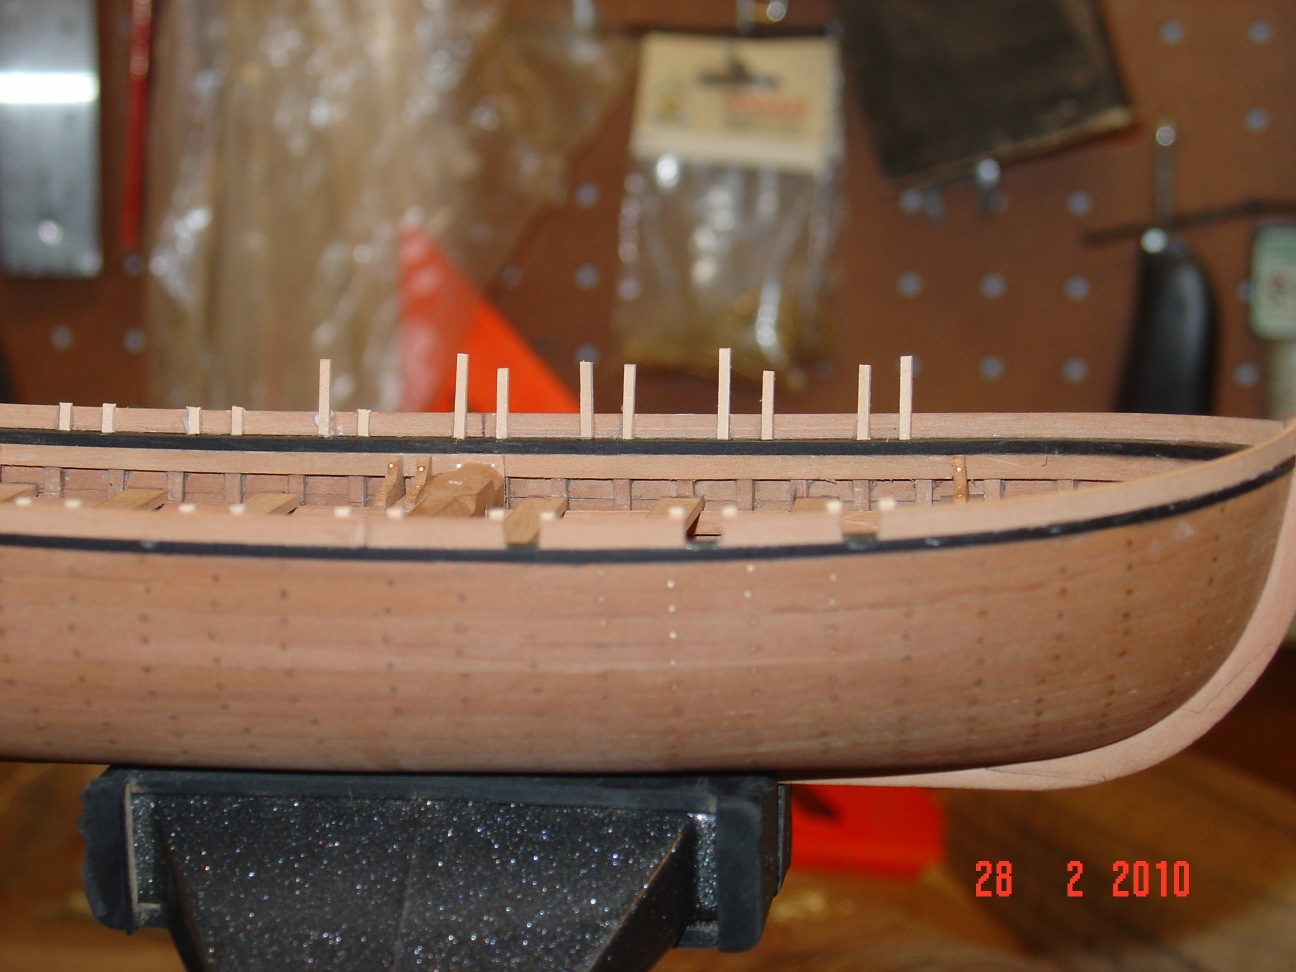
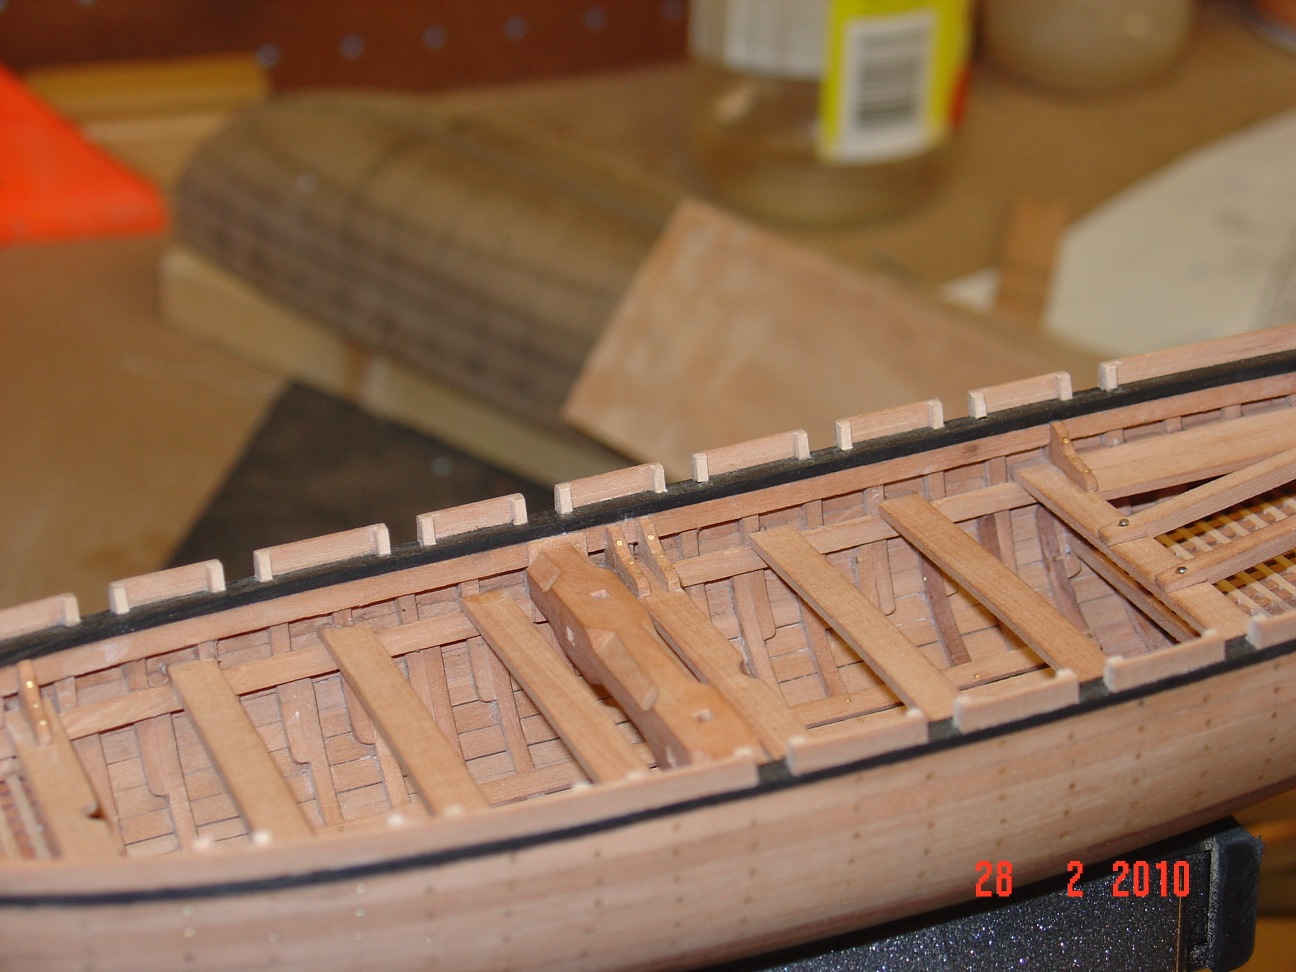
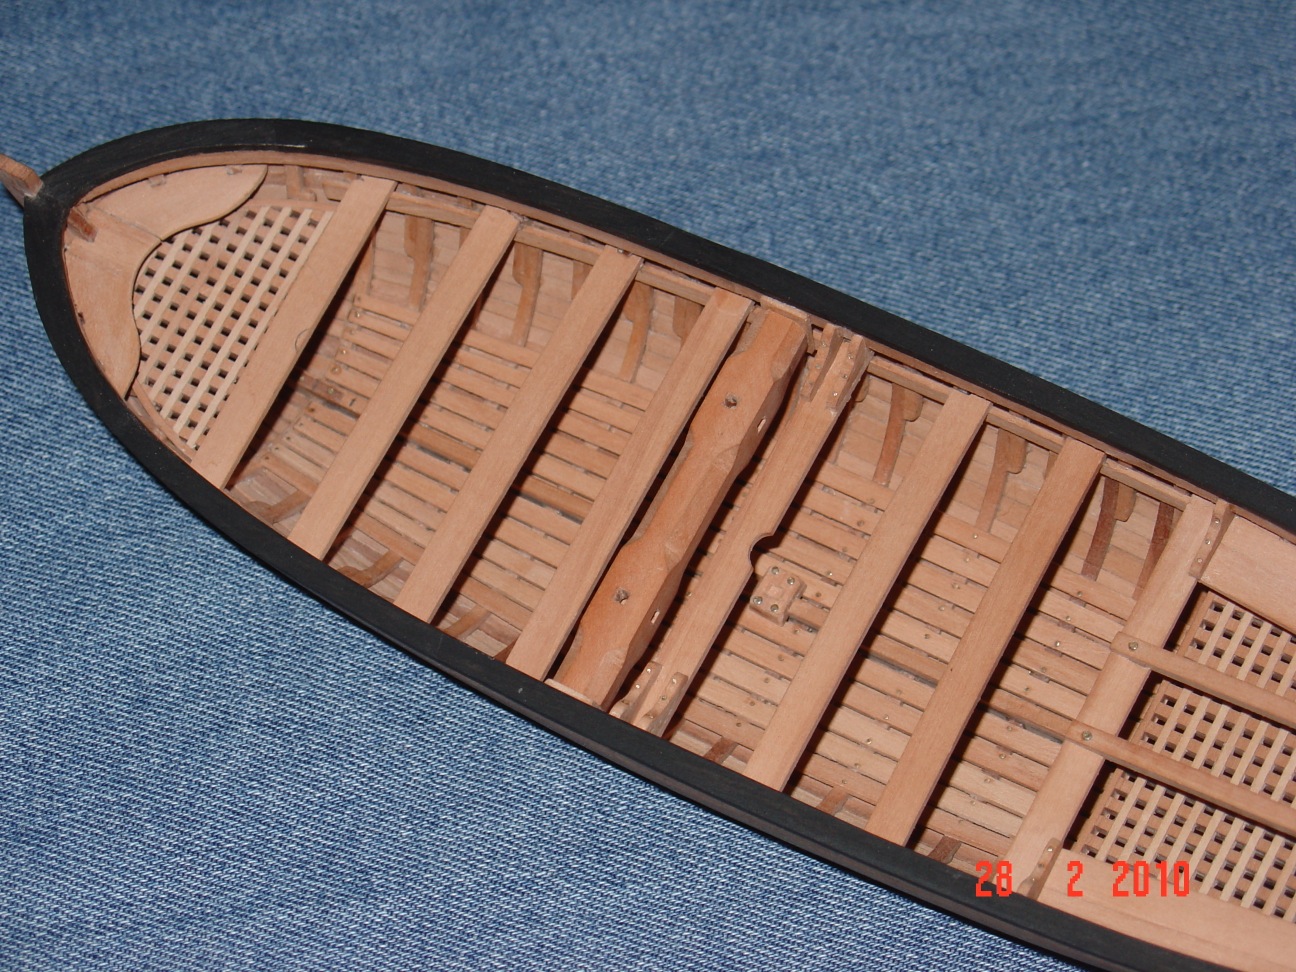
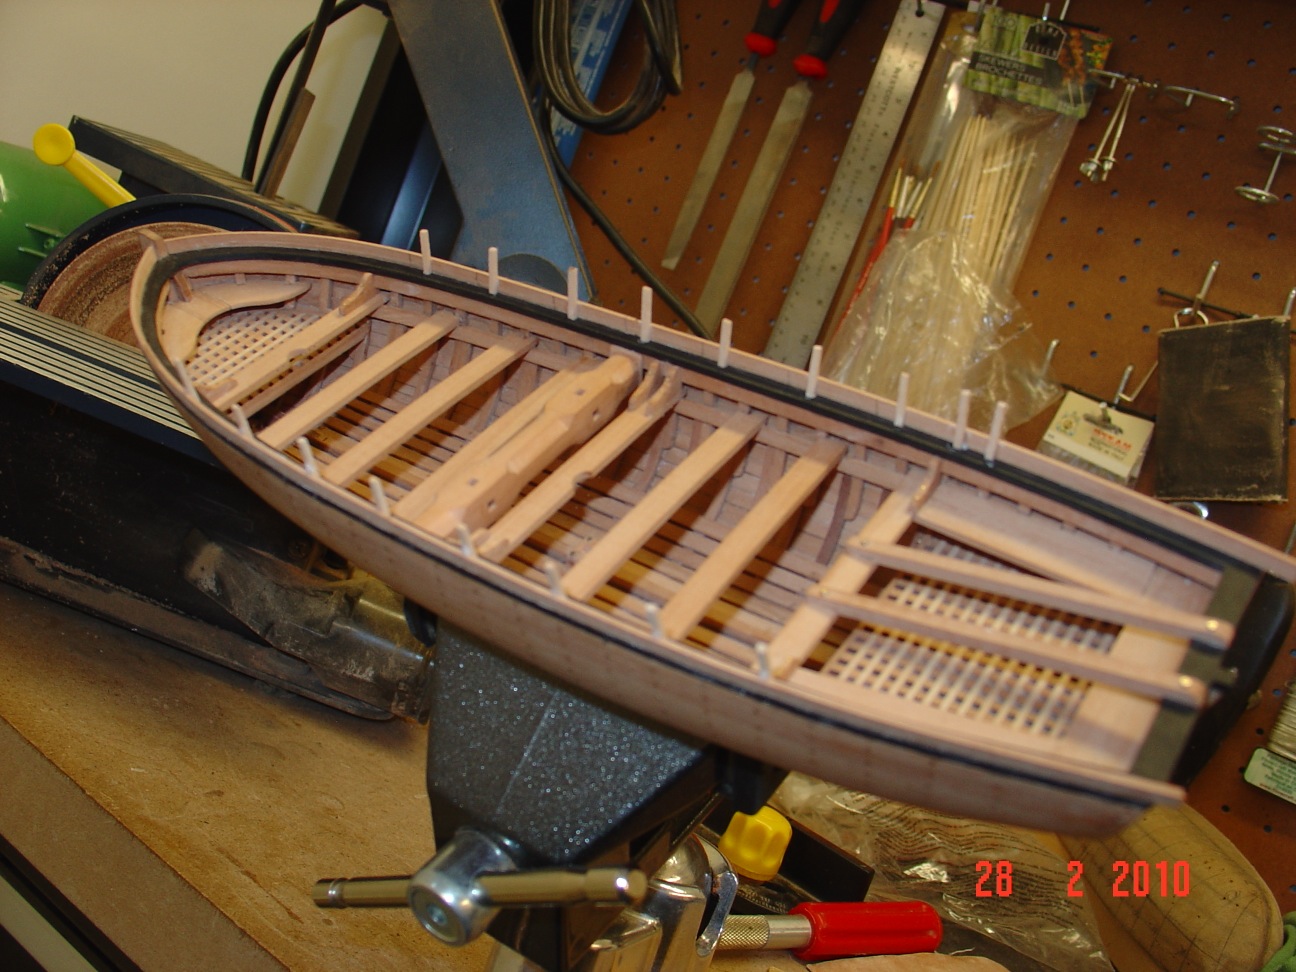
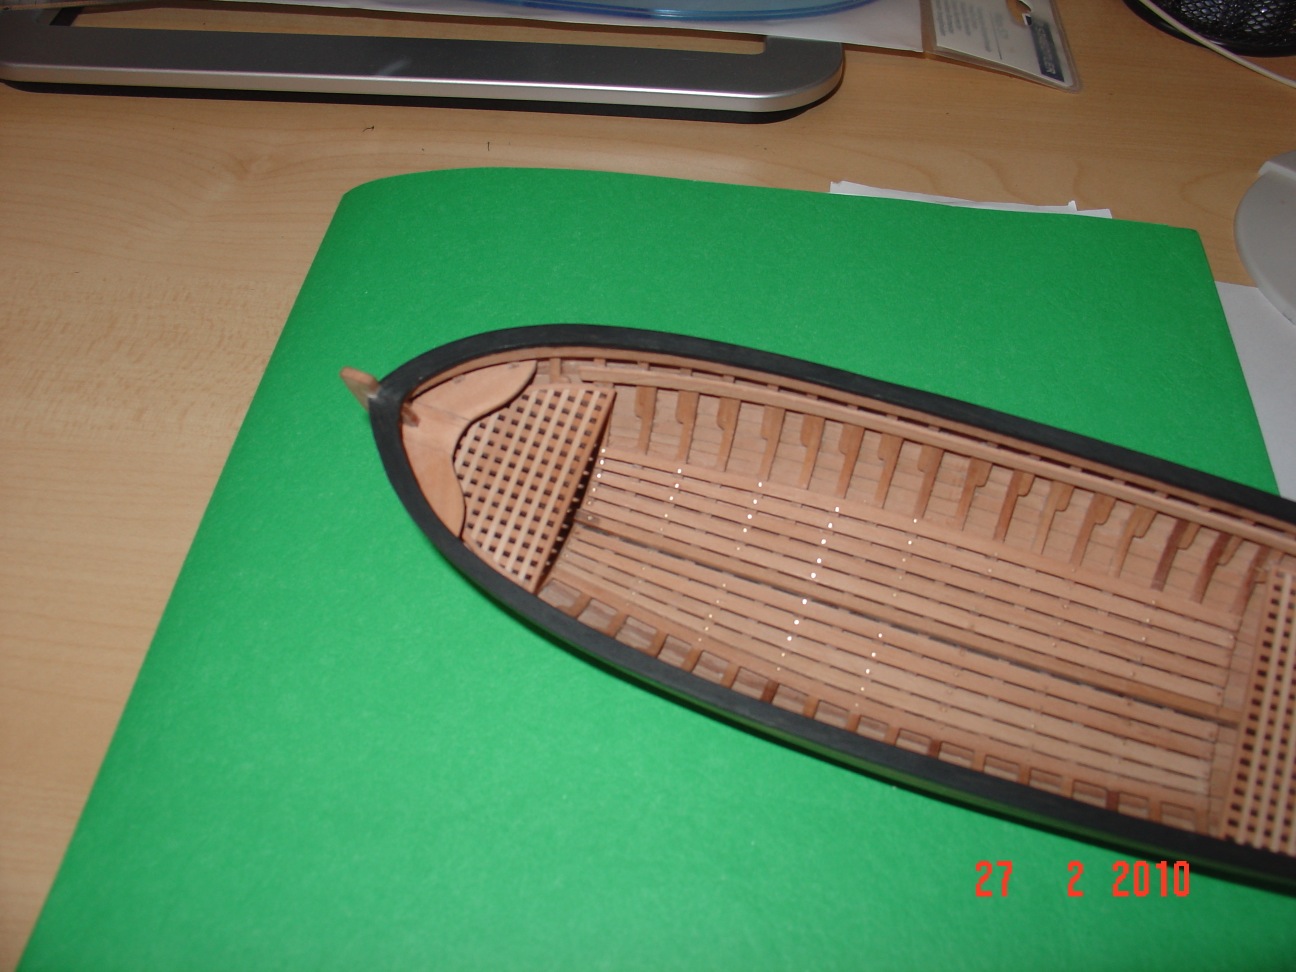
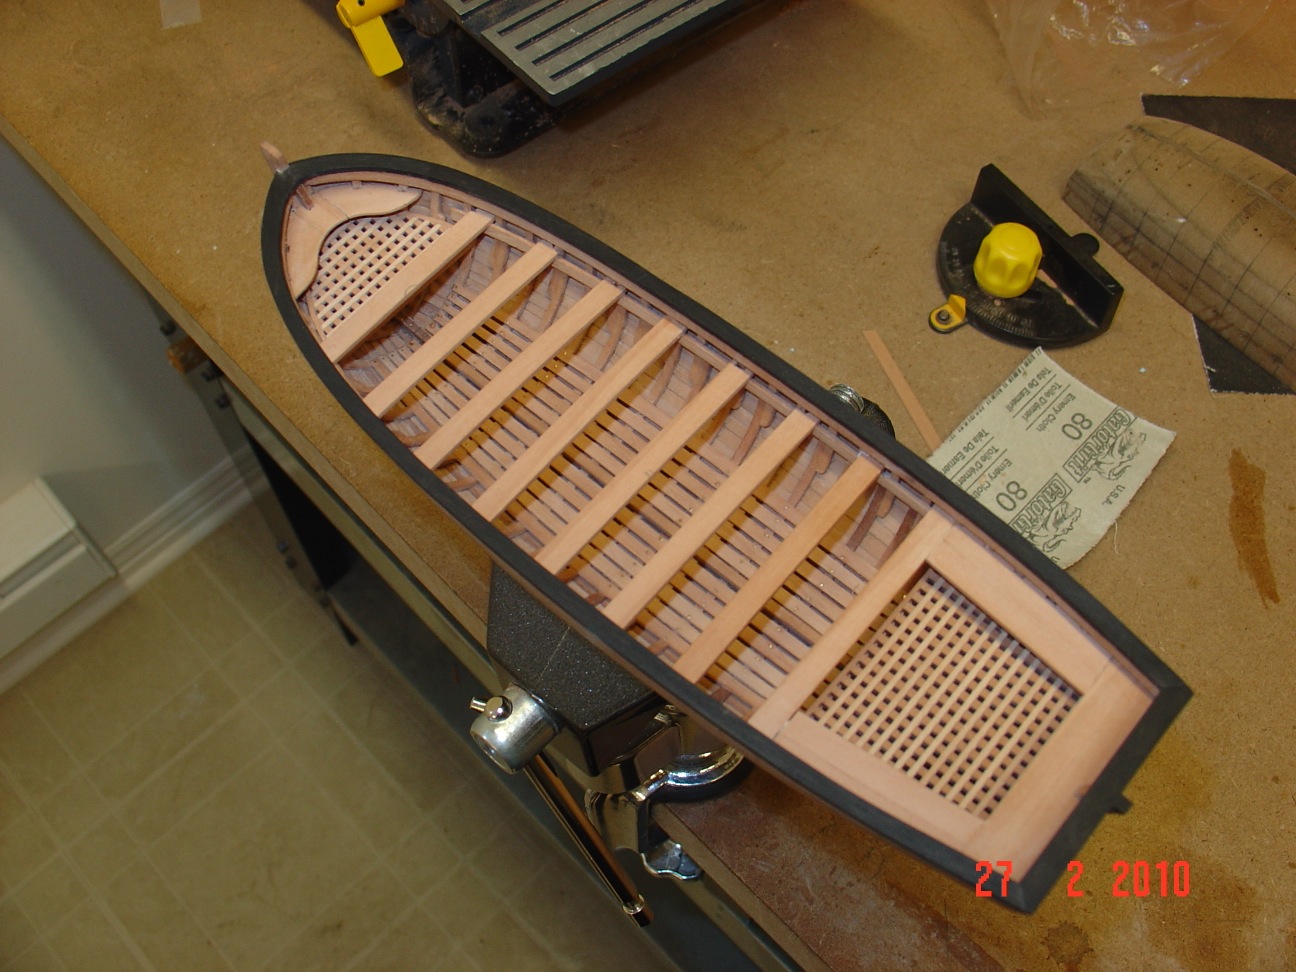
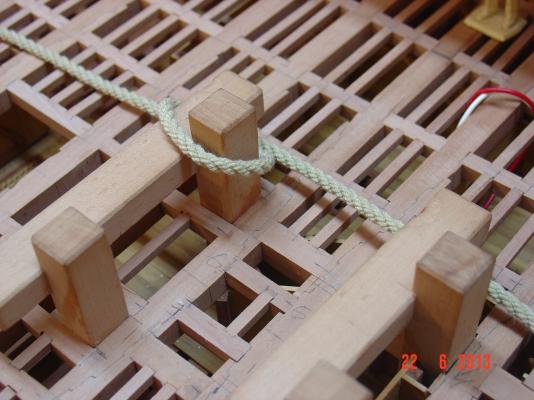
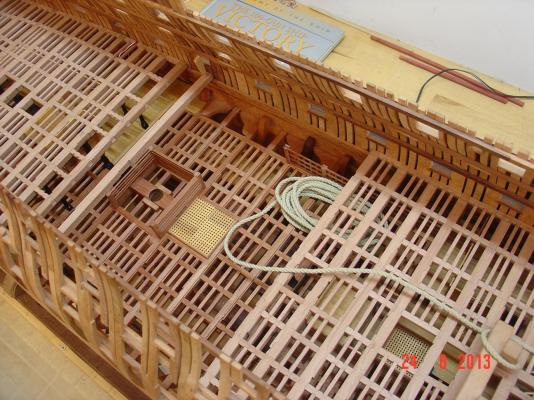
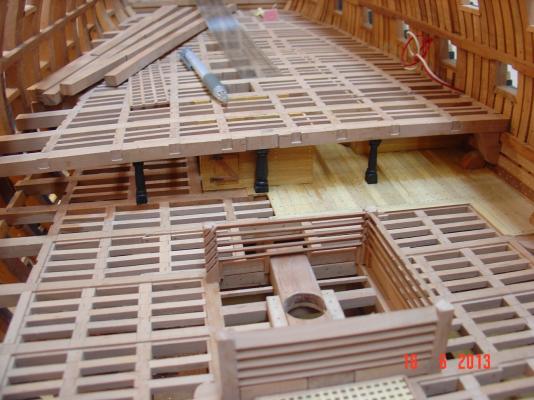
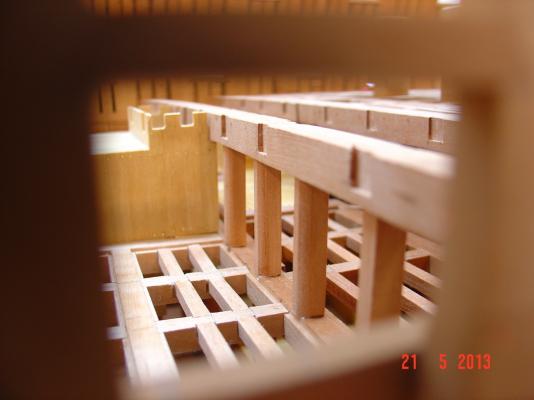
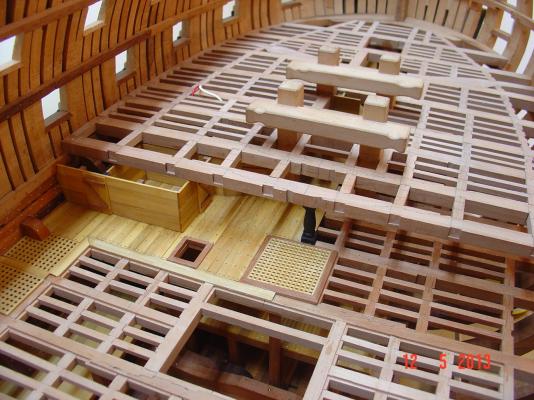
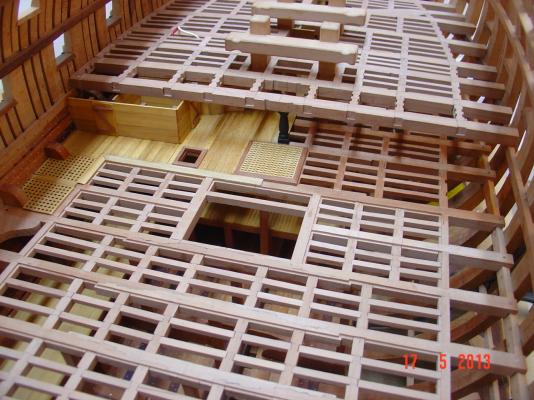
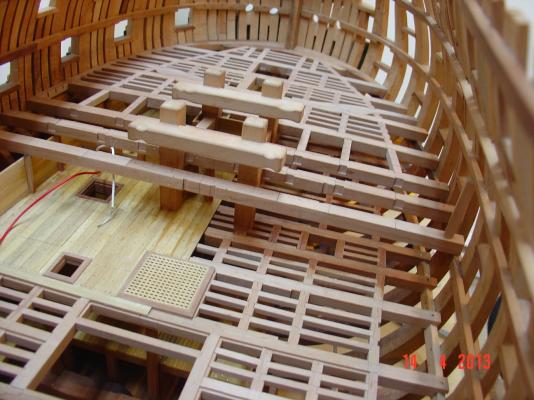
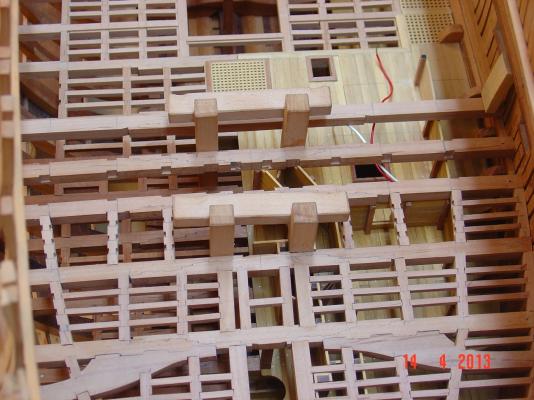
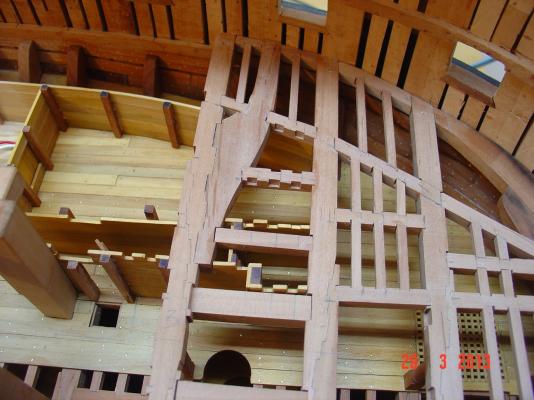
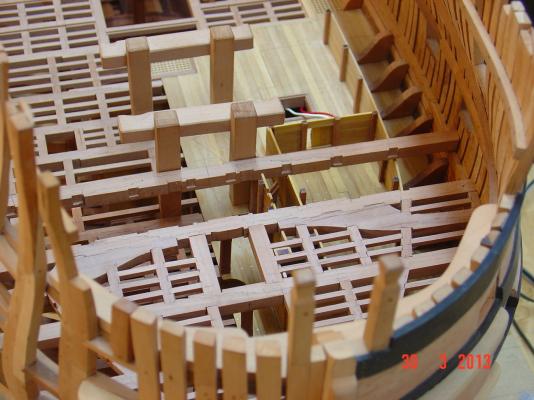
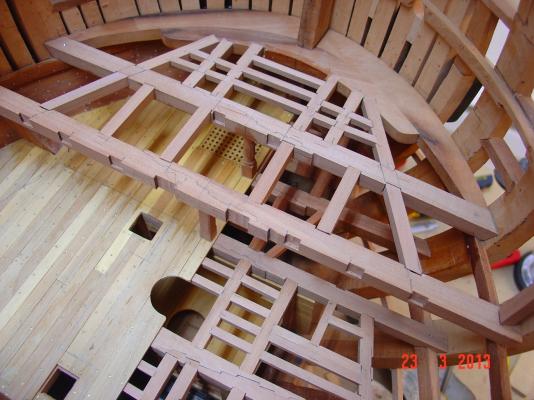
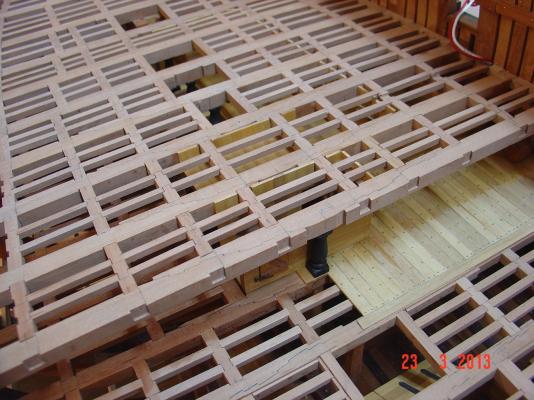
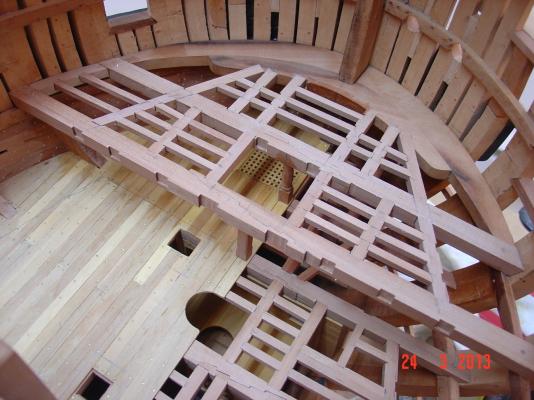
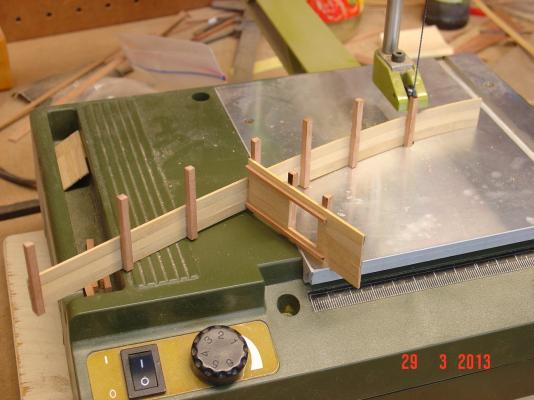
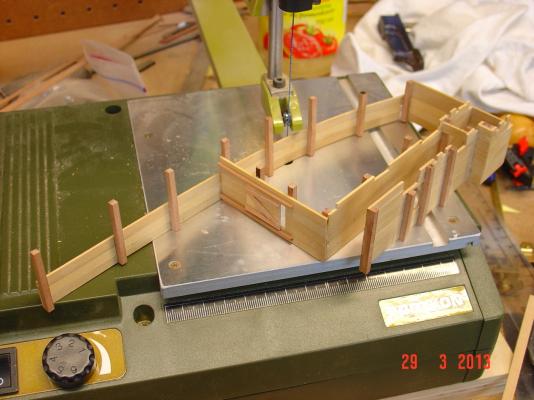
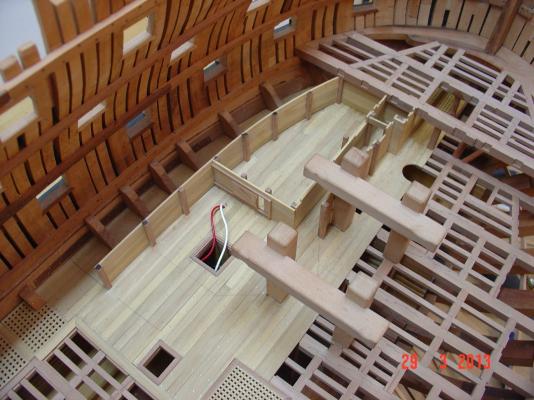
After the cable was done I continued working on the deck framing as you can see from the pictures. Thank you, Alexandru


-
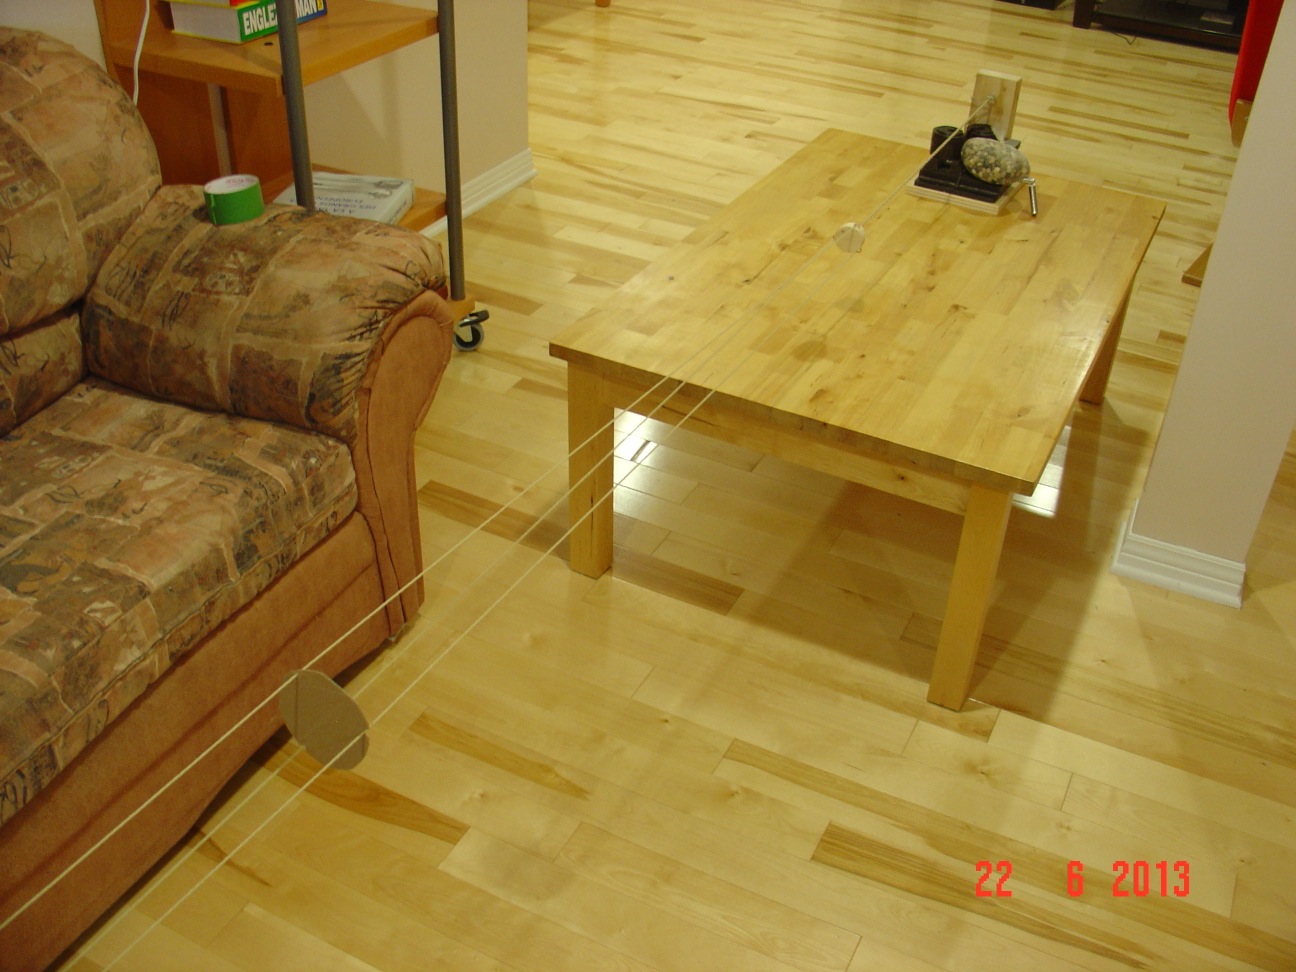
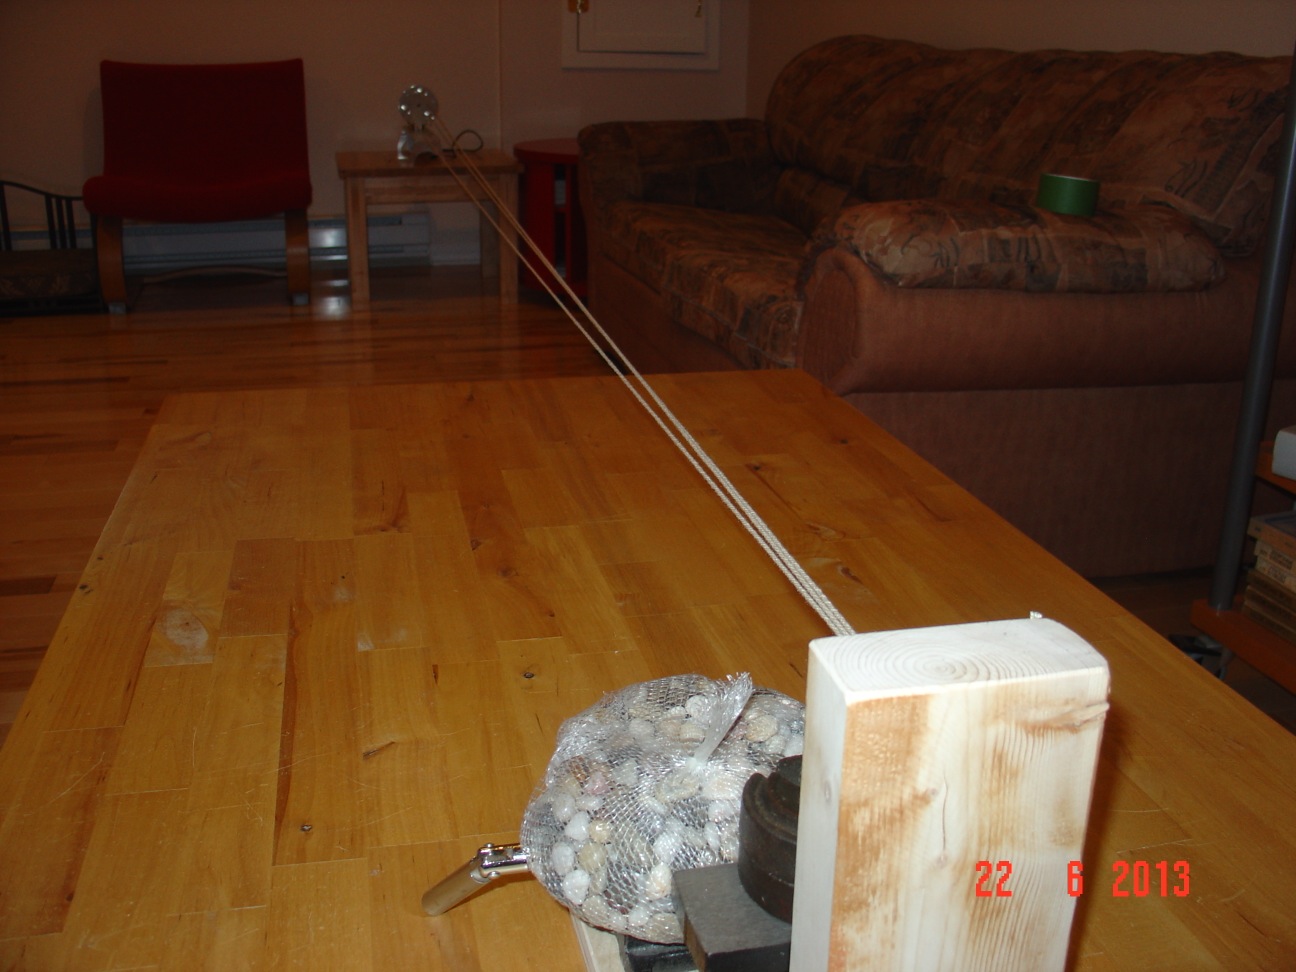
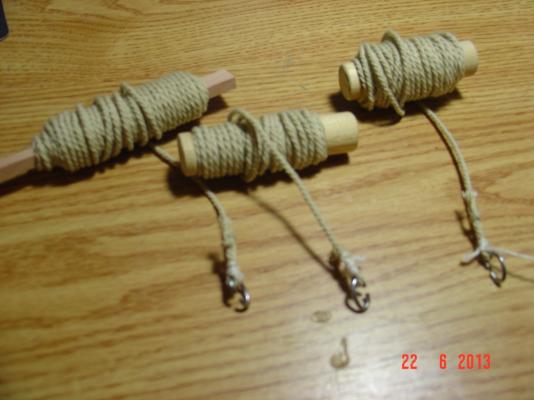
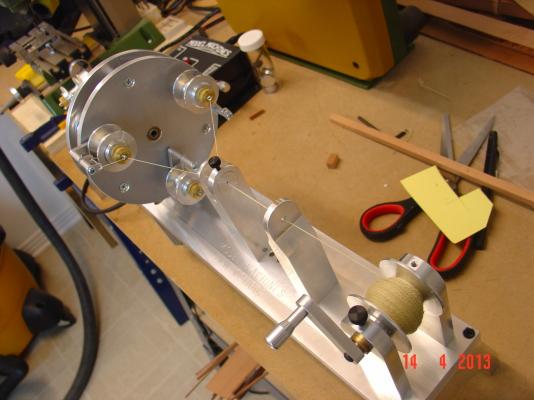
As I am closing in on completing the lower deck framing, I wanted to do one anchor cable to place on the orlop deck before the deck is done. Took me a while but I've done it using the rope walk I bought recently - only problem the diameter of the cable I needed won't go though the machine. I did passed it the first three times but had to find something else for the forth and last one - in total 81 strands of thread. First pass, three threads I done it three time up to the spool capacity which in the end turned out to be about 100m of rope. Each one of these was cut in three roughly equal pieces and the three passed again to form a 9 strands rope, which again was cut in three and passed again to get about 7-8 meters of 27 strands rope. For the last pass I disassembled the rope walk only used the turning part and fixed the cables to it at one end and to a fixed point on the other. After a bit of experimenting I managed to get about 5m of 81 strands cable.


-
Giovanni, Very good progress you have done on you Victory. I am impressed. Keep up the good work. Alexandru
-
Thank you guys for the time you took to do all this research and to post all this valuable information. Based on what I've seen it seems that both options (with or without the platform) were used in practice. It also seems that the fact that the upper wale went all the way through to the stem and it was above the level of the upper deck a platform was built and if the wale ended up before then the sides of the ship only went up to the level of the upper deck and no platform was required. The combination upper wale to the stem and above deck level plus no platform does not seems to be used and I think is logical. Now, concerning Victory - it seems that there is no consensus on how it was and when that platform was build. It is there now and the wale ends up at stem - which I did on my model too so I will probably build the platform too. Were the sides of the ship at beak head level rise when the round bow was added later on Victory? Probably. Later again when the restoration of her to 1805 shape was done these were cut off at about 2 ft above the upper deck level - and a platform was installed. All evidence seems to point to that. Was this how she looked in 1805? I don't know. The original plans do not show the platform but this does not necessarily means that it was not there. The shipwright of the time had a great liberty when building a ship - thus the necessity of "as built" plans. Once again thank you for the info and for your interest. Alexandru
-
...


-
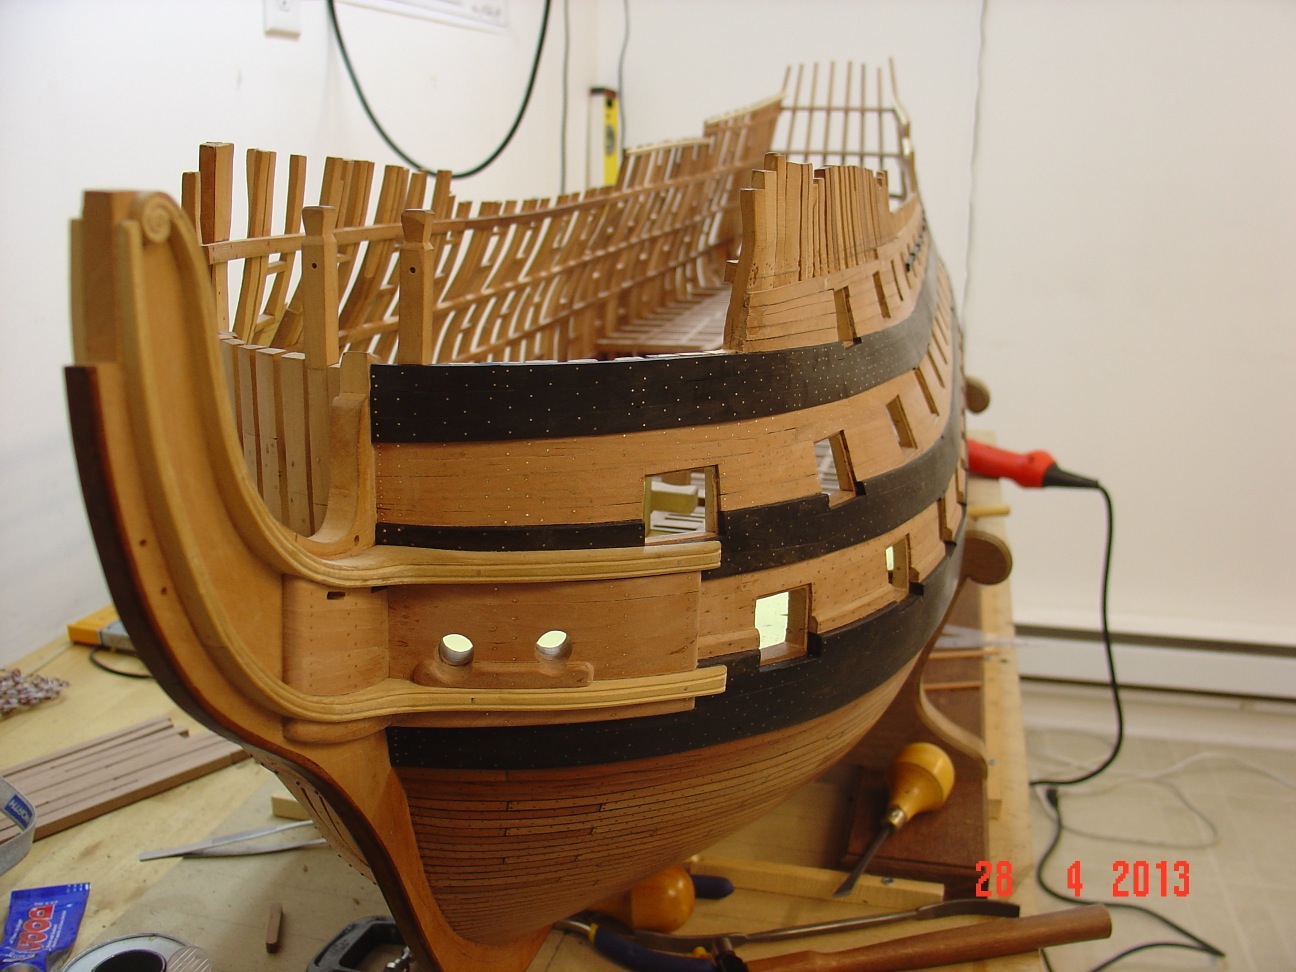
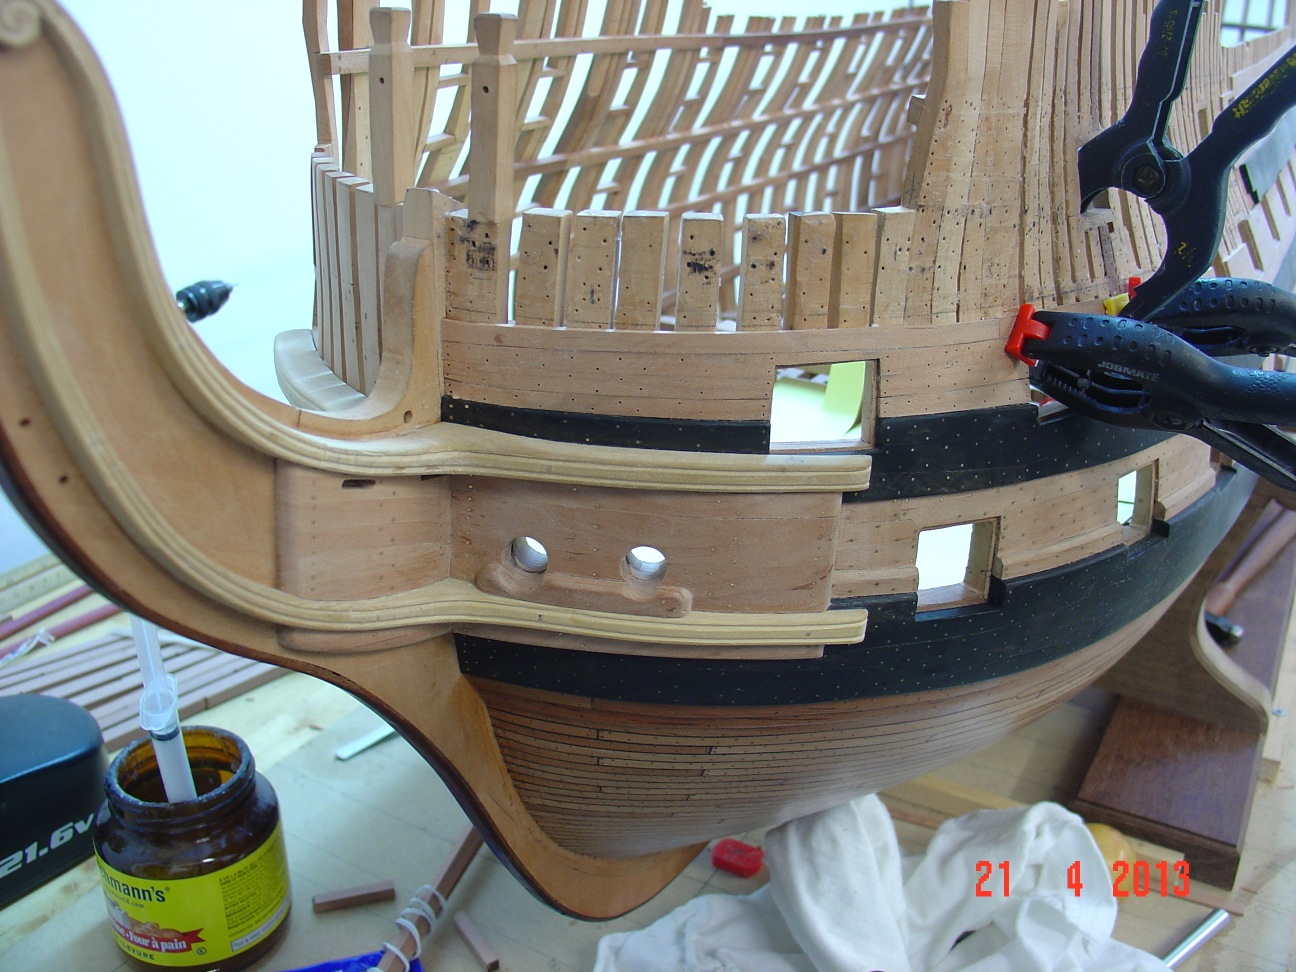
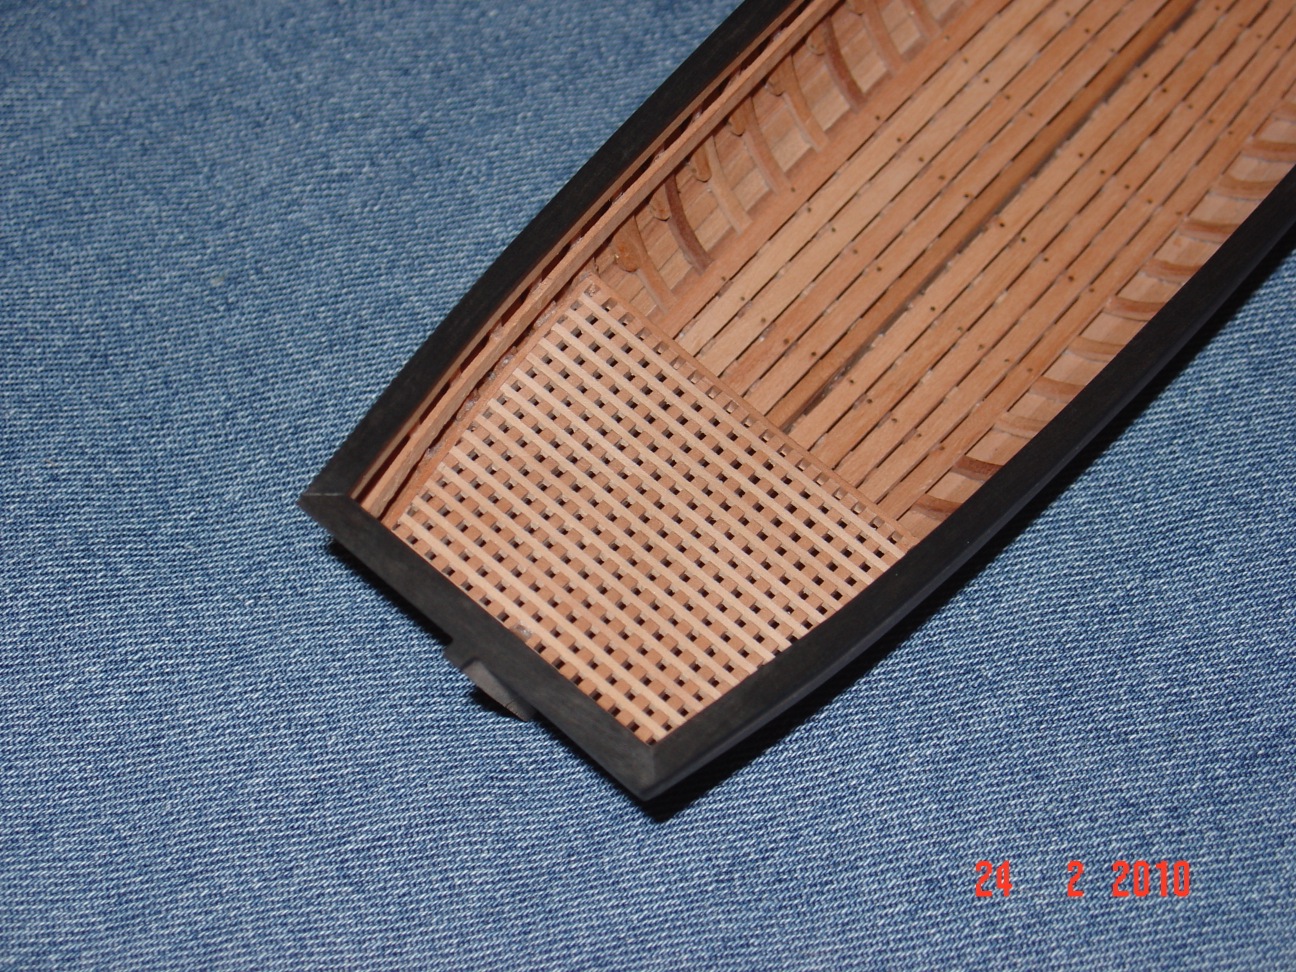
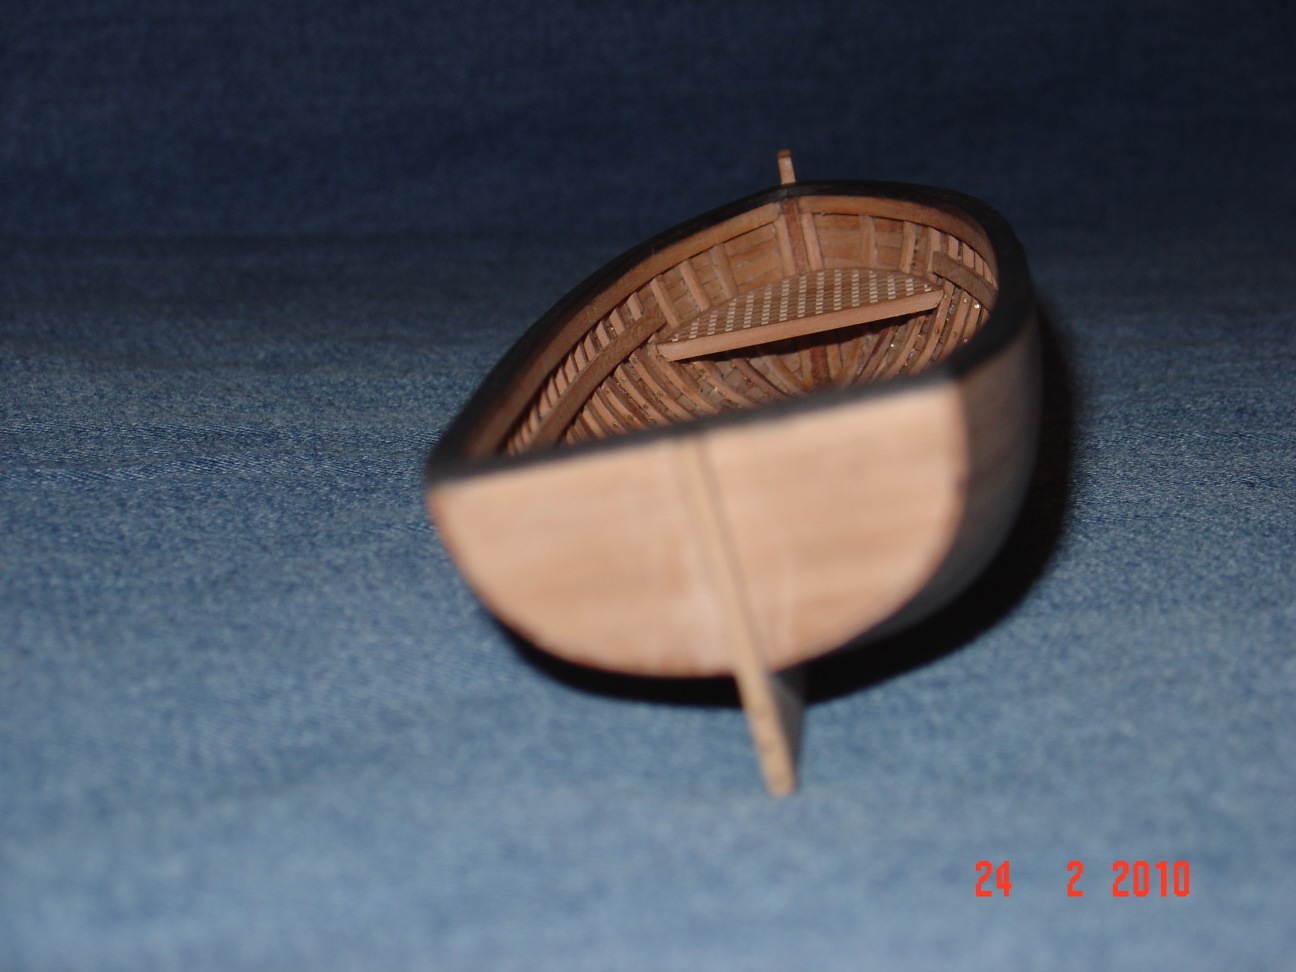
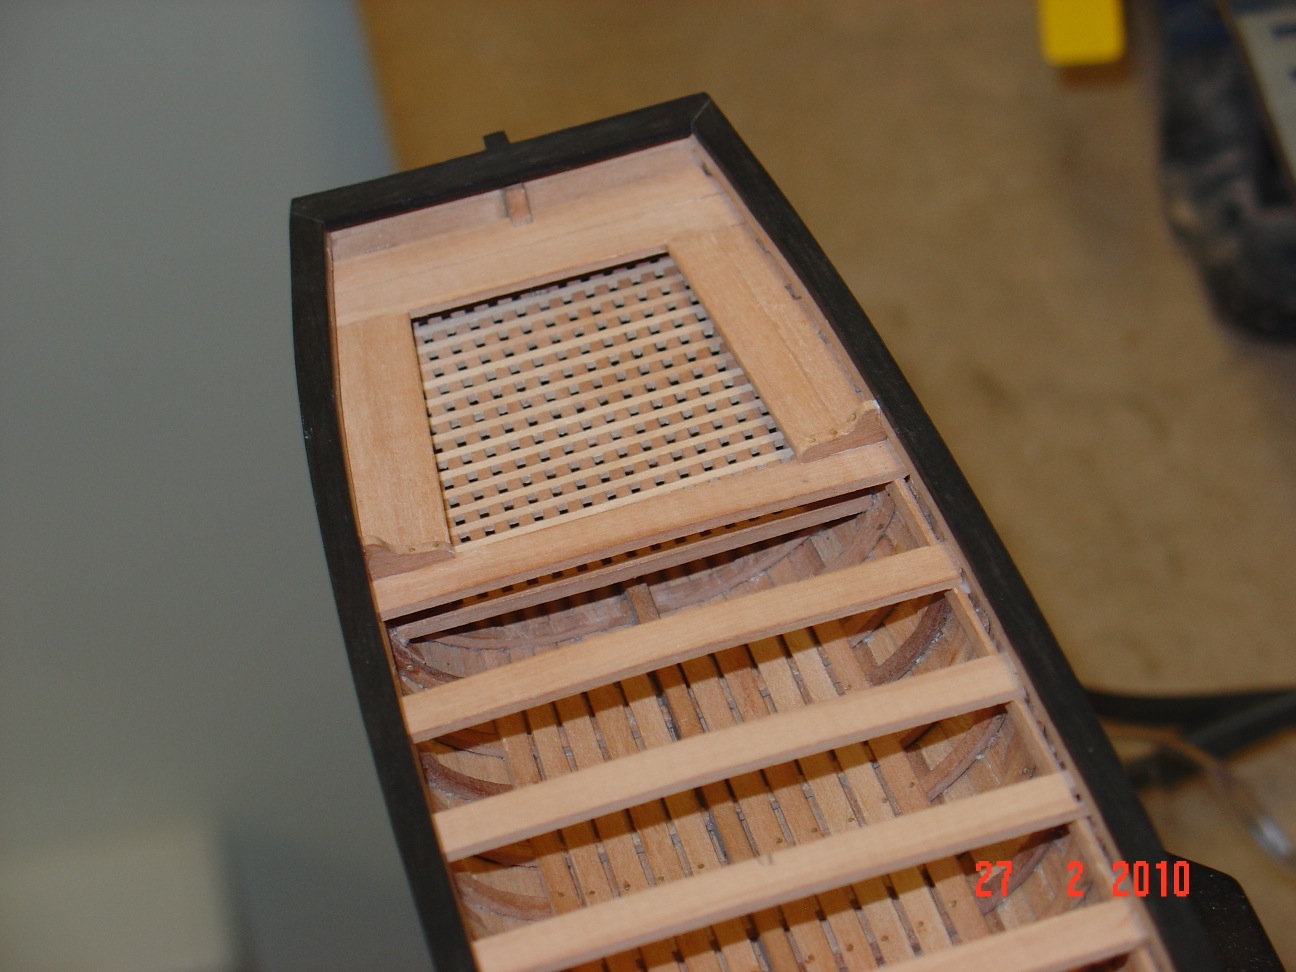
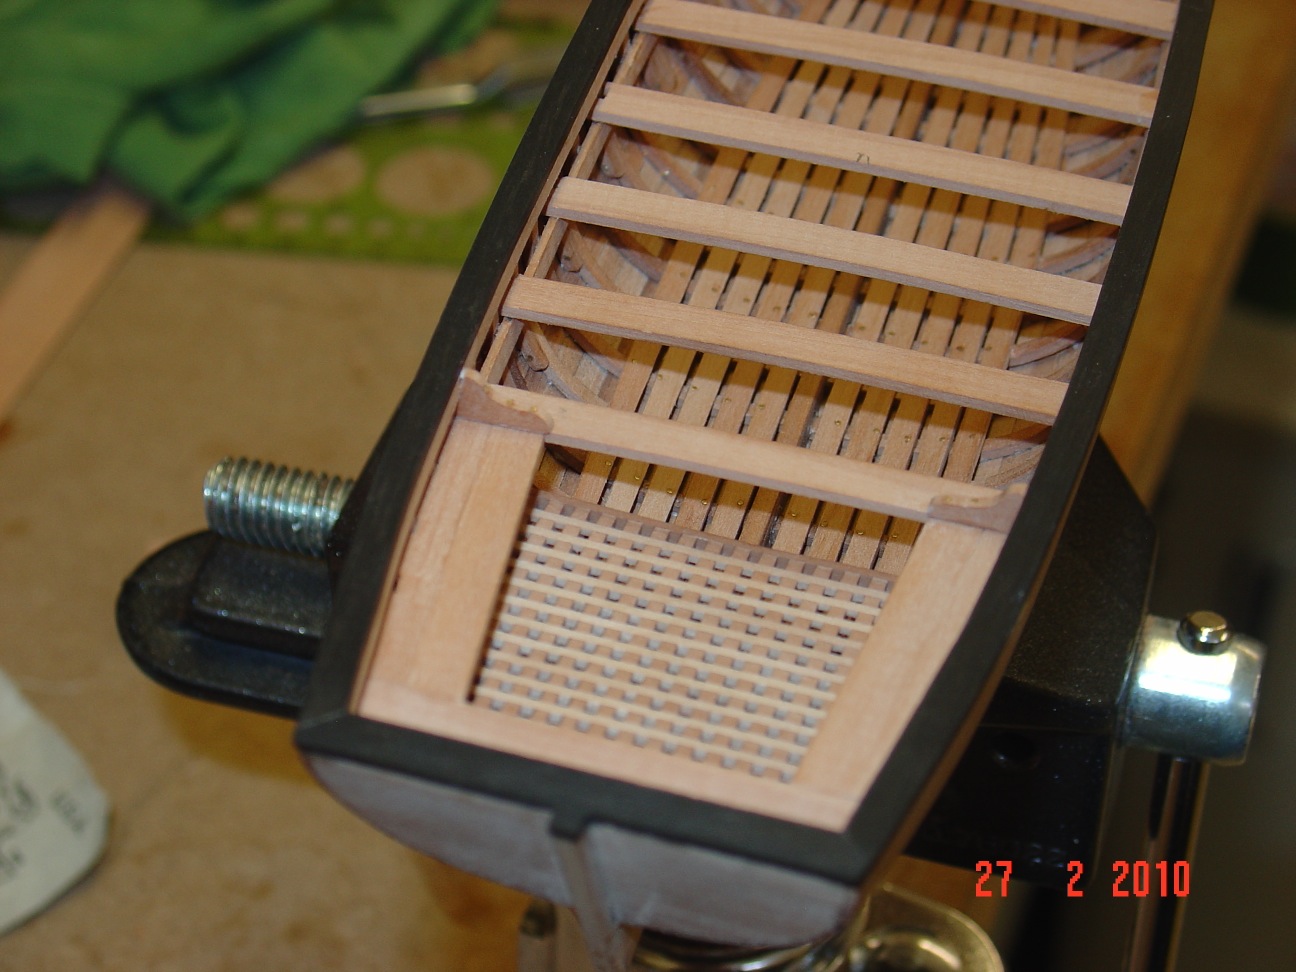
Thanks Bob, I totally agree with your opinion concerning the beak head deck. Here are some more progress photos. Alexandru

-
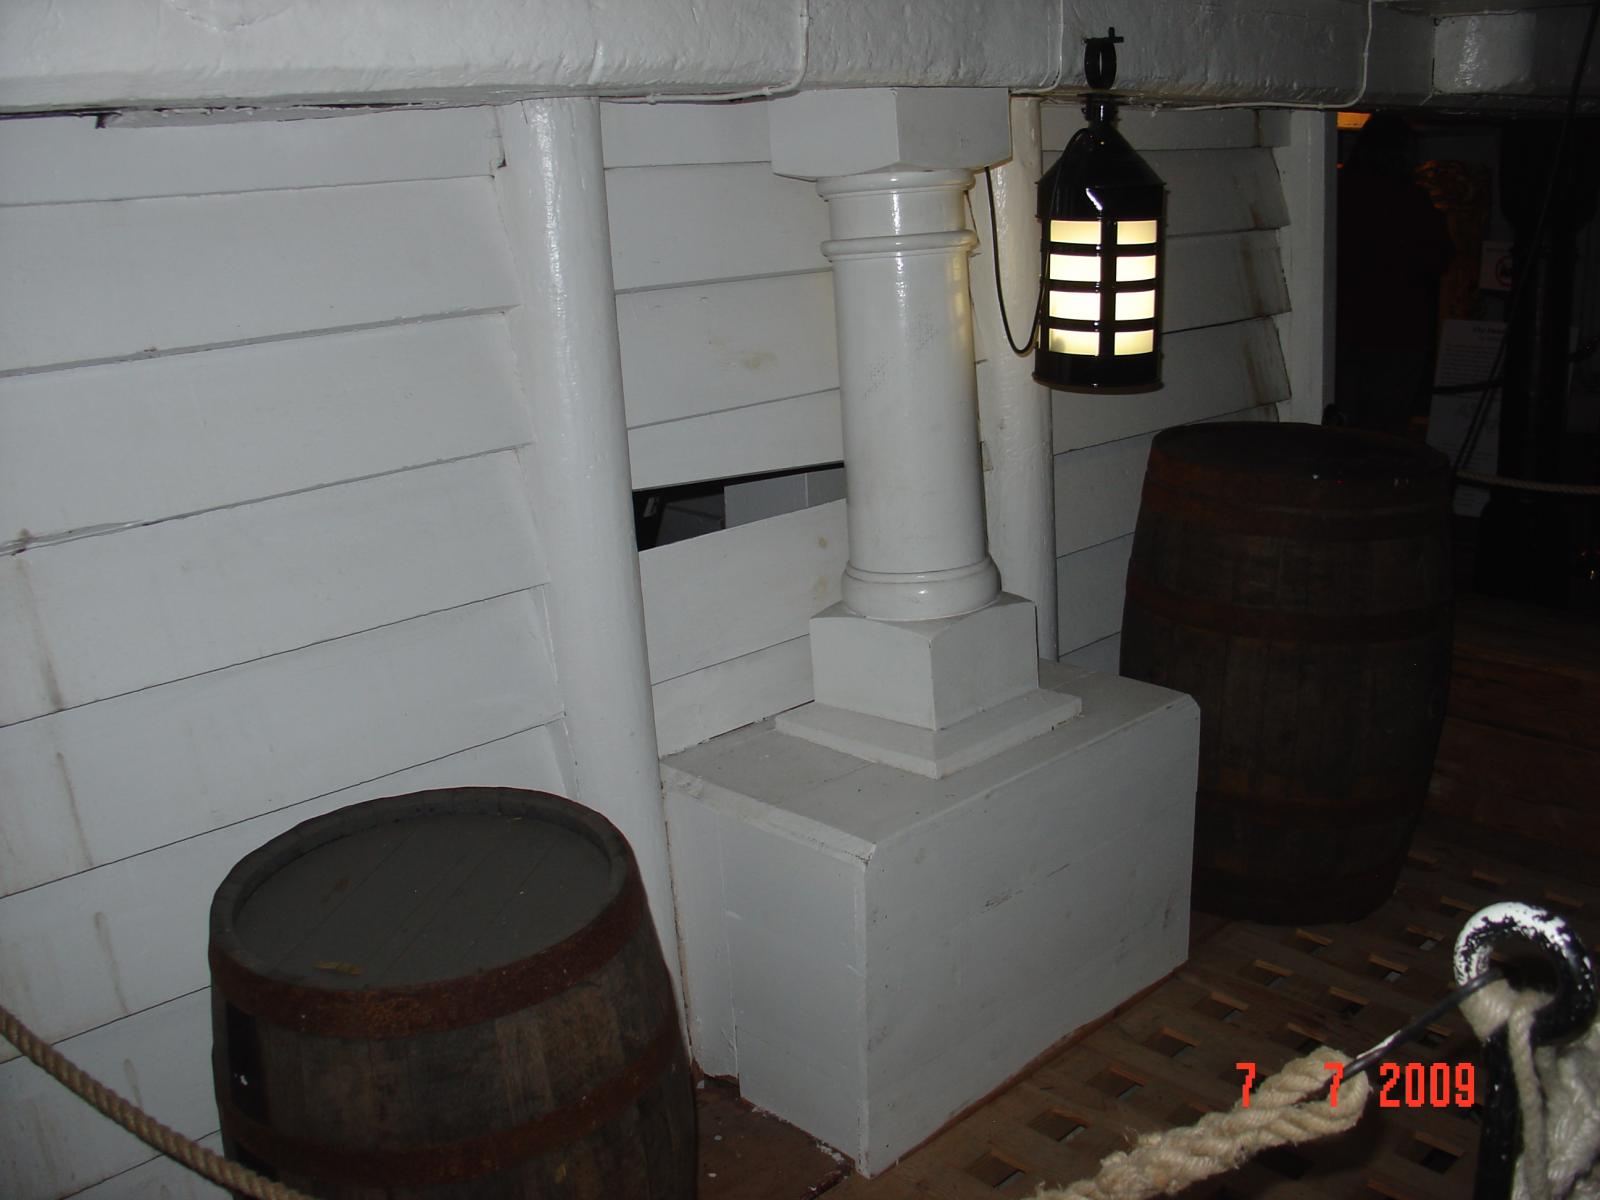
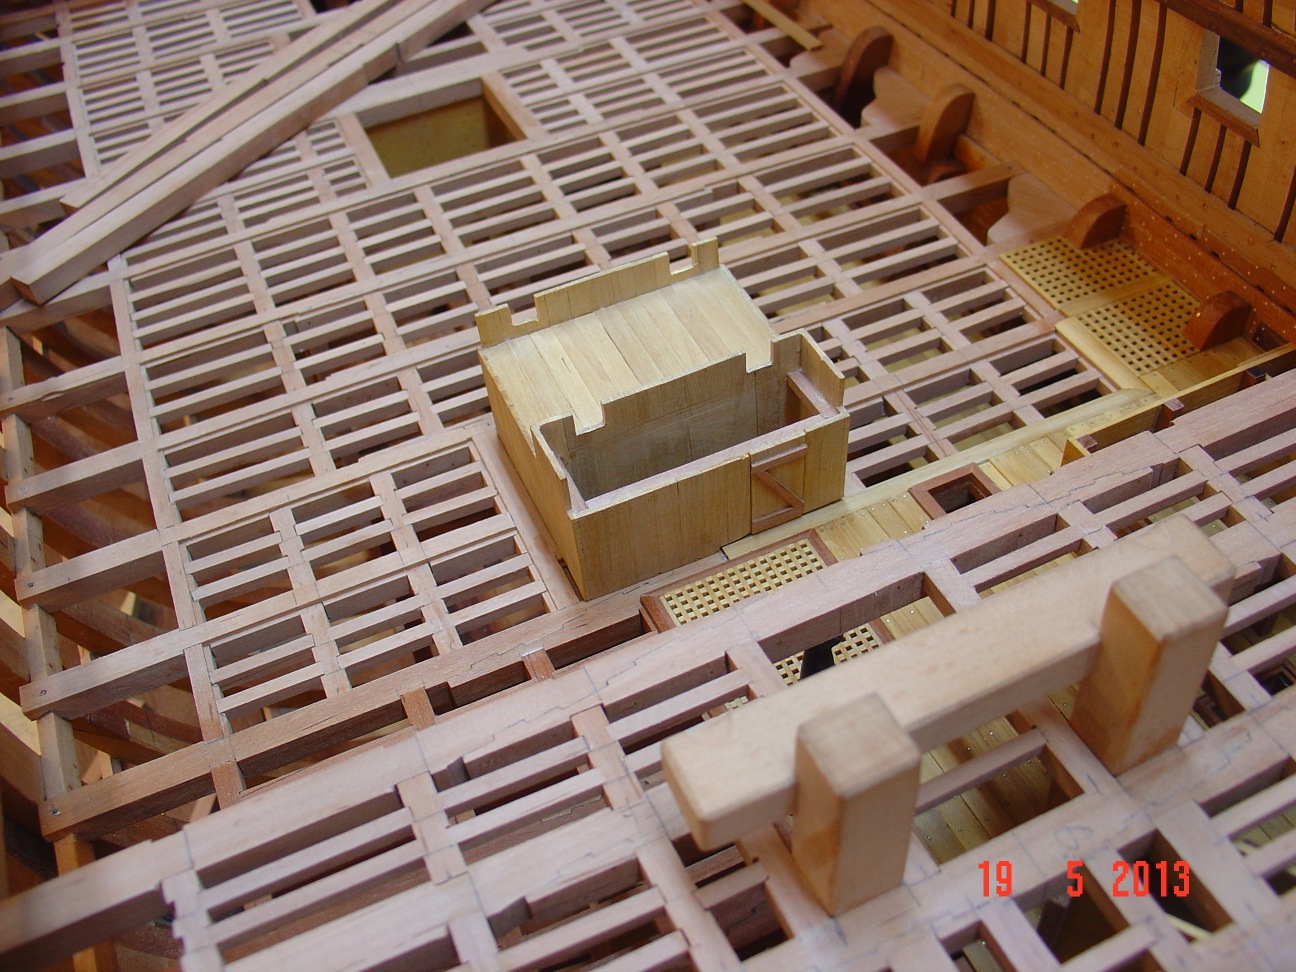
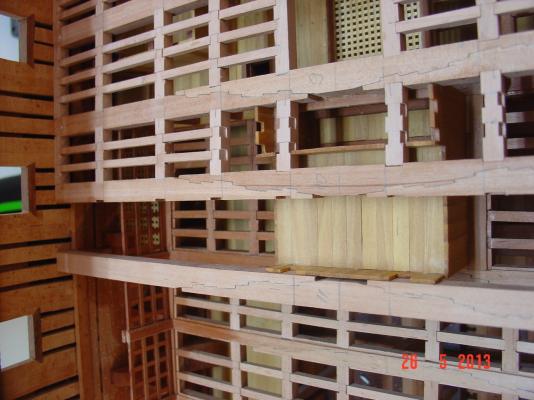
Thanks Bob, I've missed that picture - there are so many - I think you are referring to the one that I attached. I can see there the end of that big piece of wood (as you said this is probably just a box now) and the louvered planks. Looking at it I can't see the ventilation gap between the planks - maybe the angle is not good? Chris, thanks for the explanations. I am not there yet with my build and I am not sure what will I do when I get there. One step at a time for me. Thanks, Alexandru

-
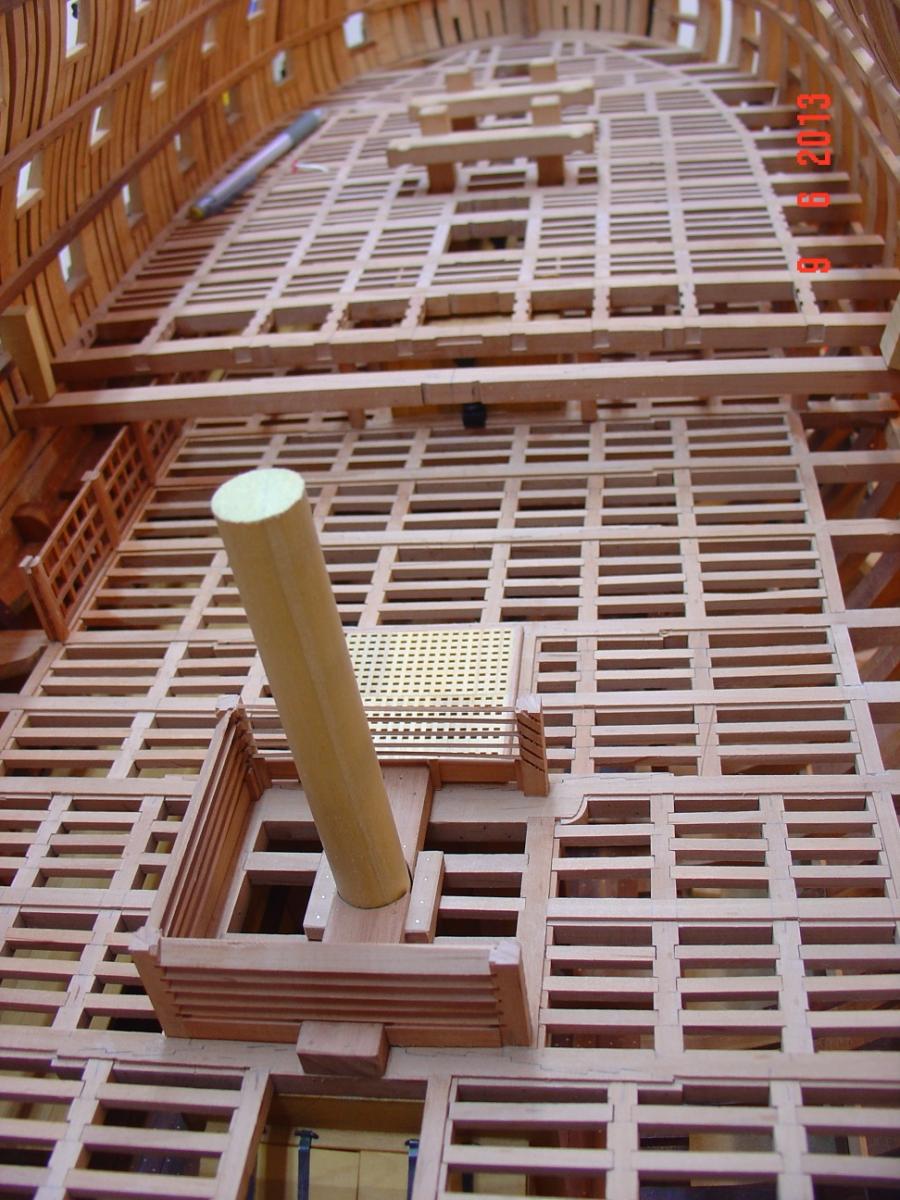
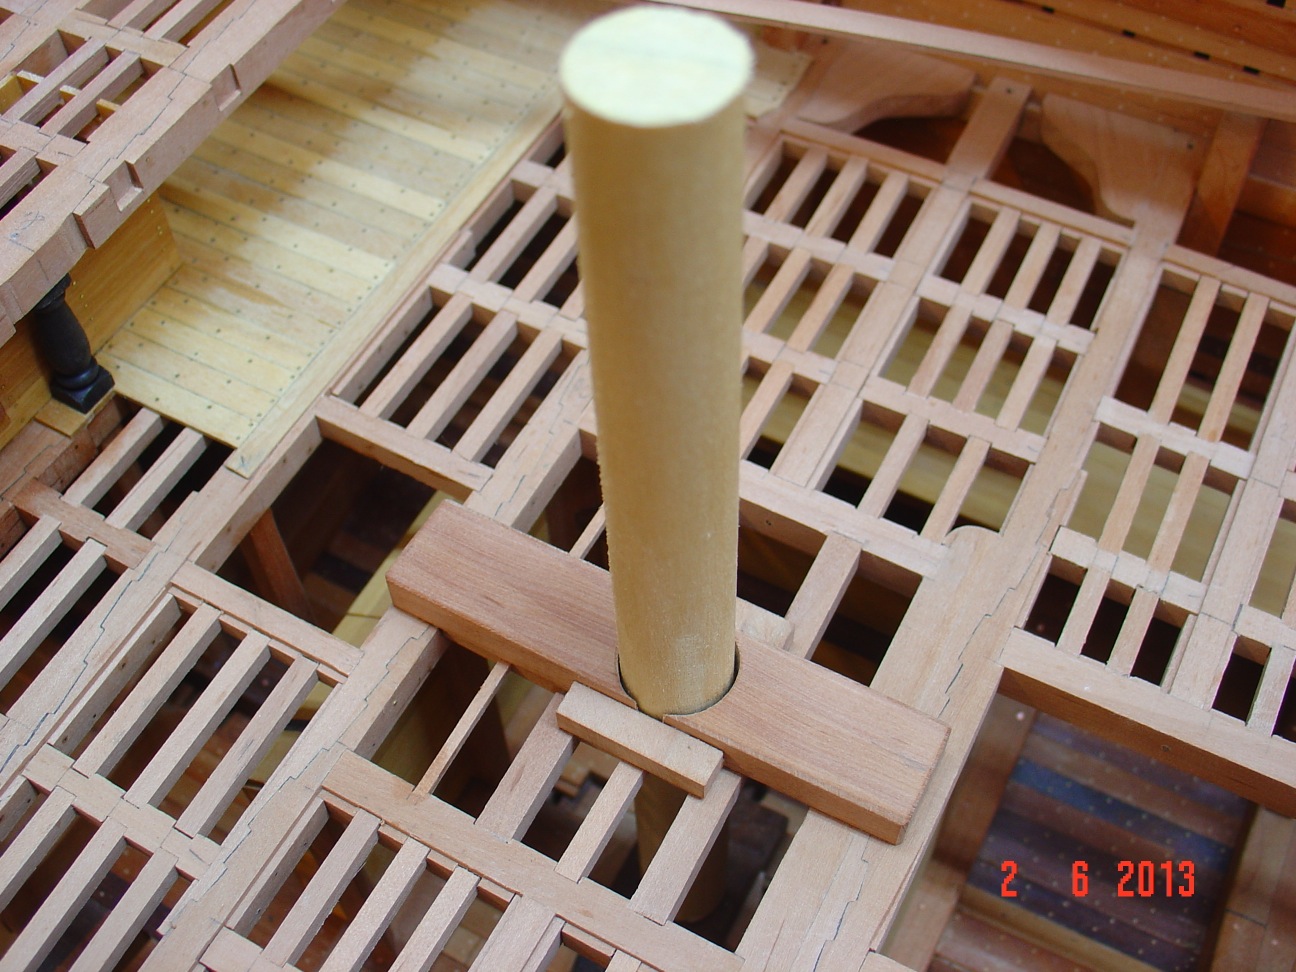
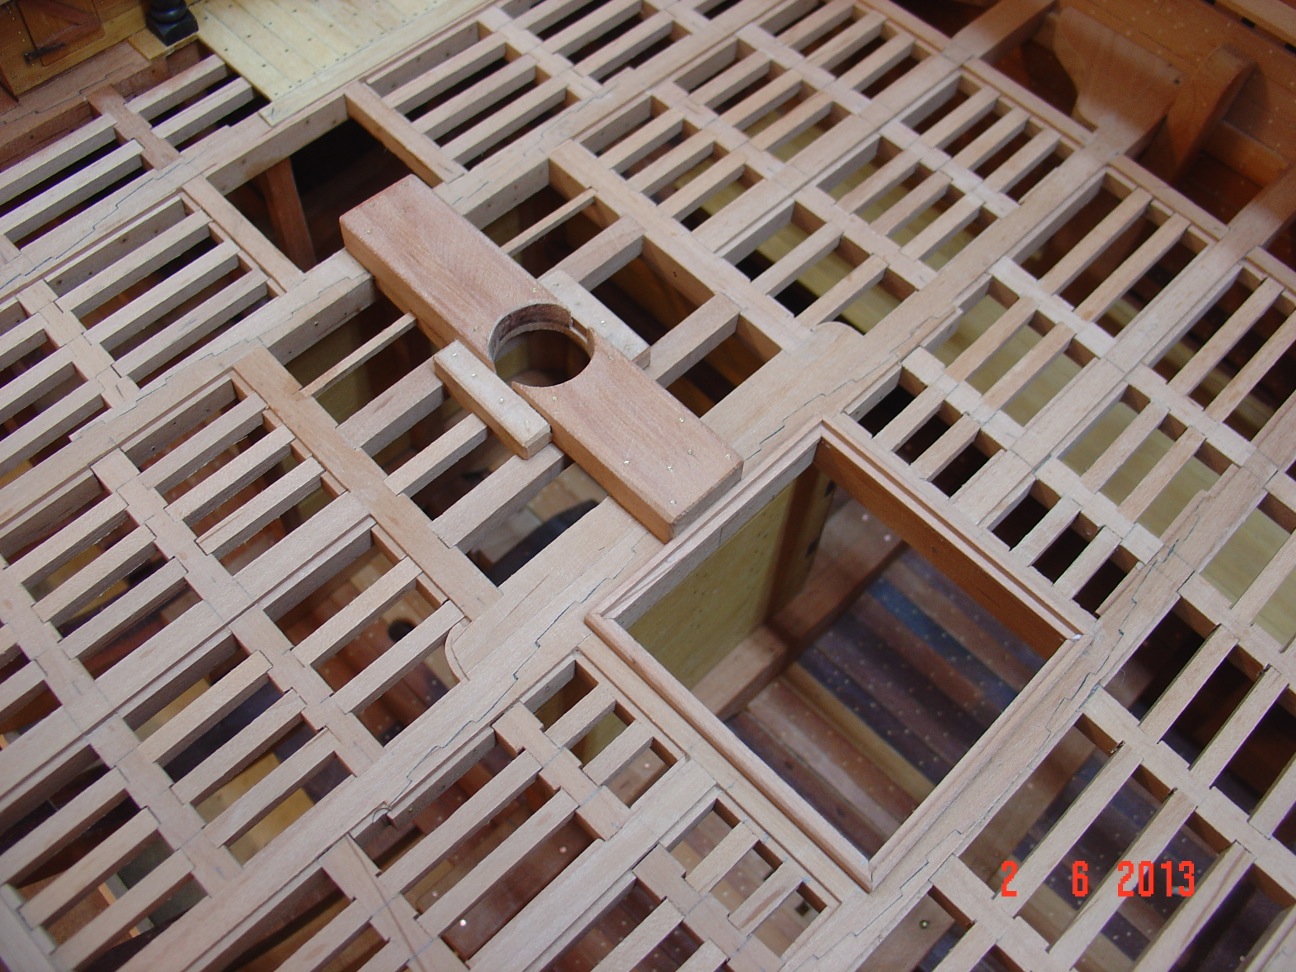
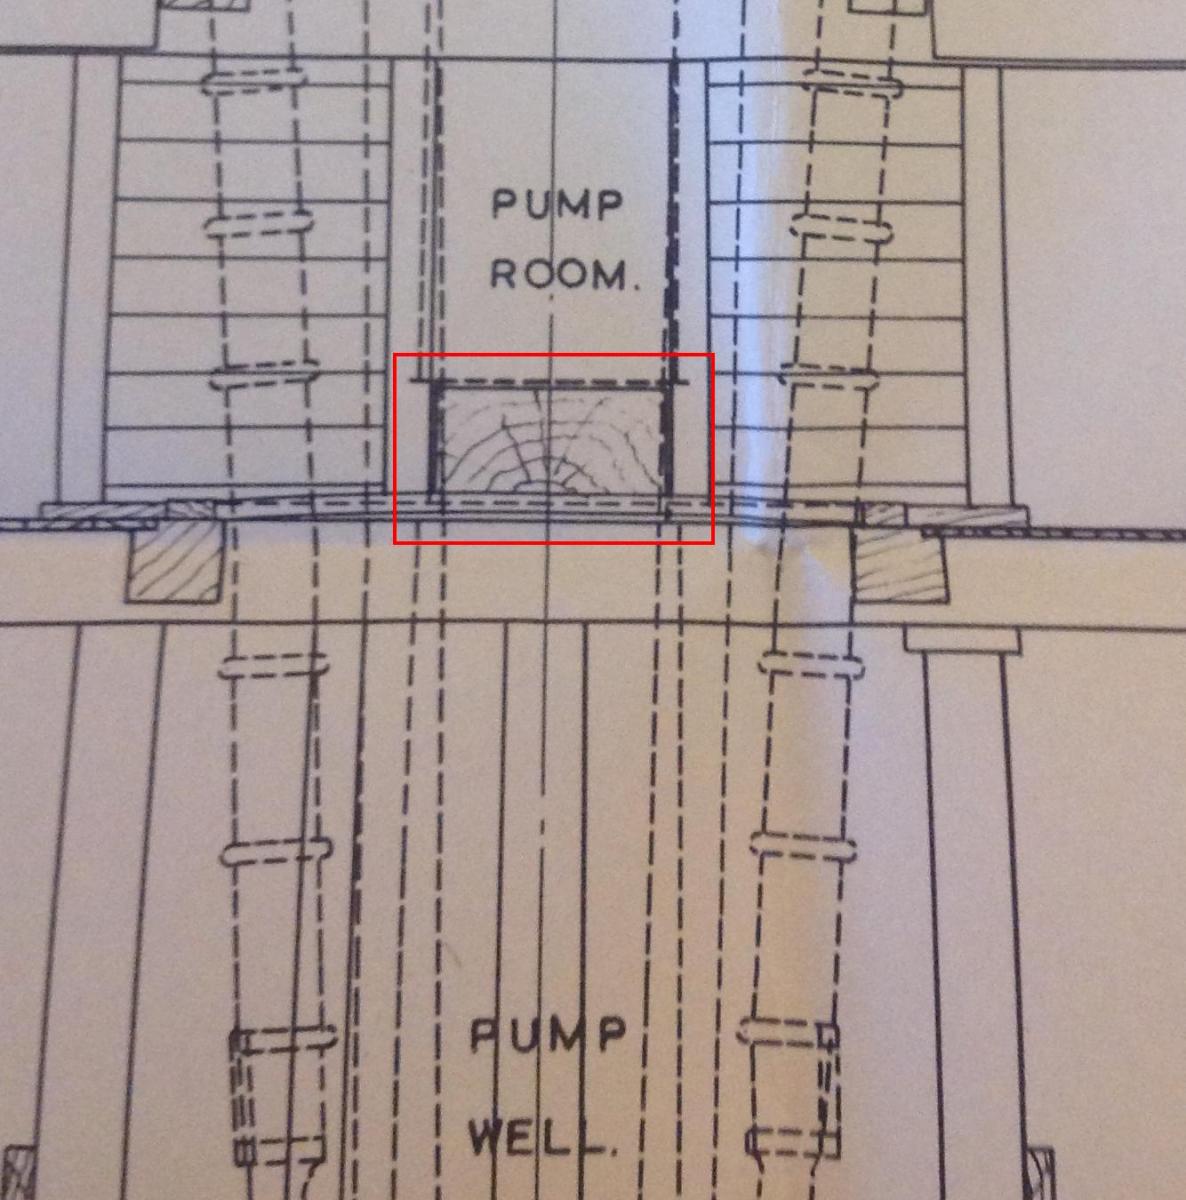
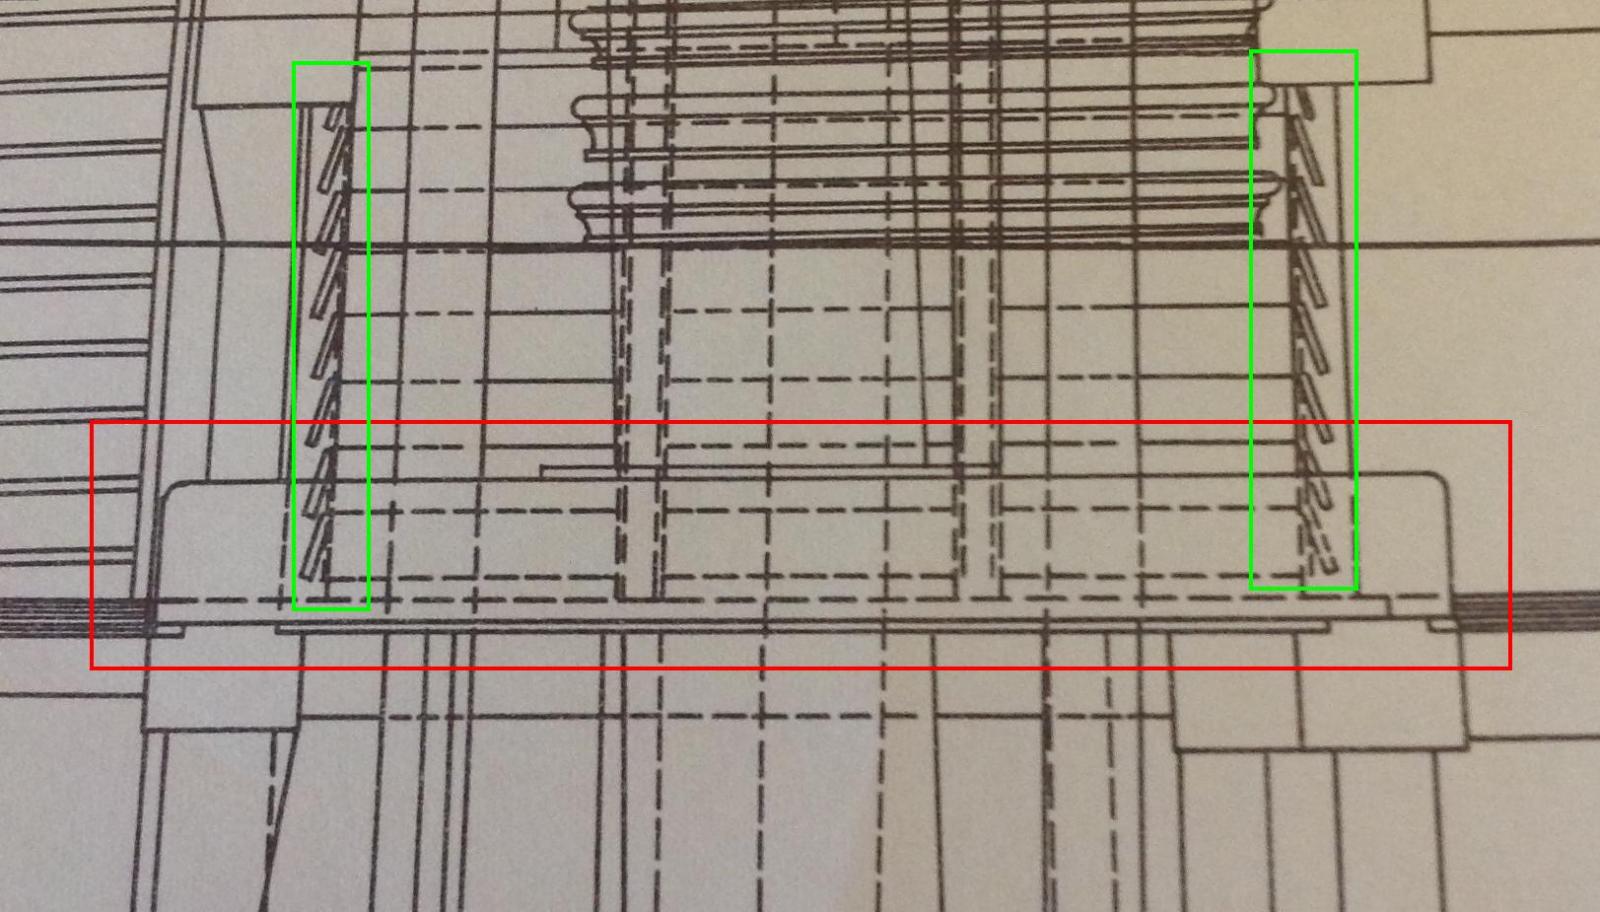
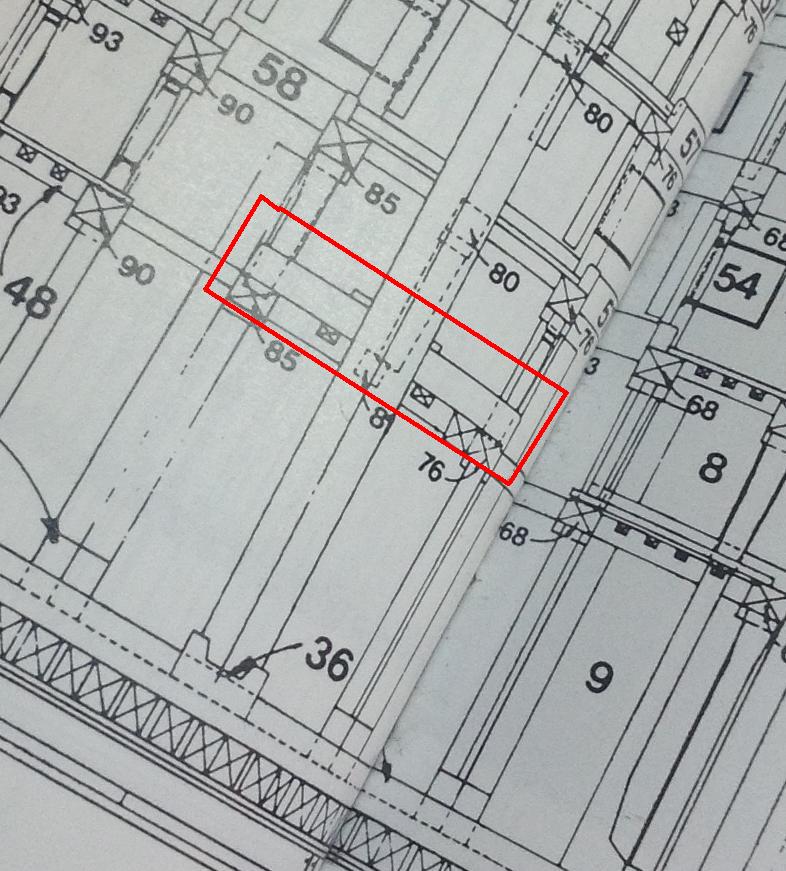
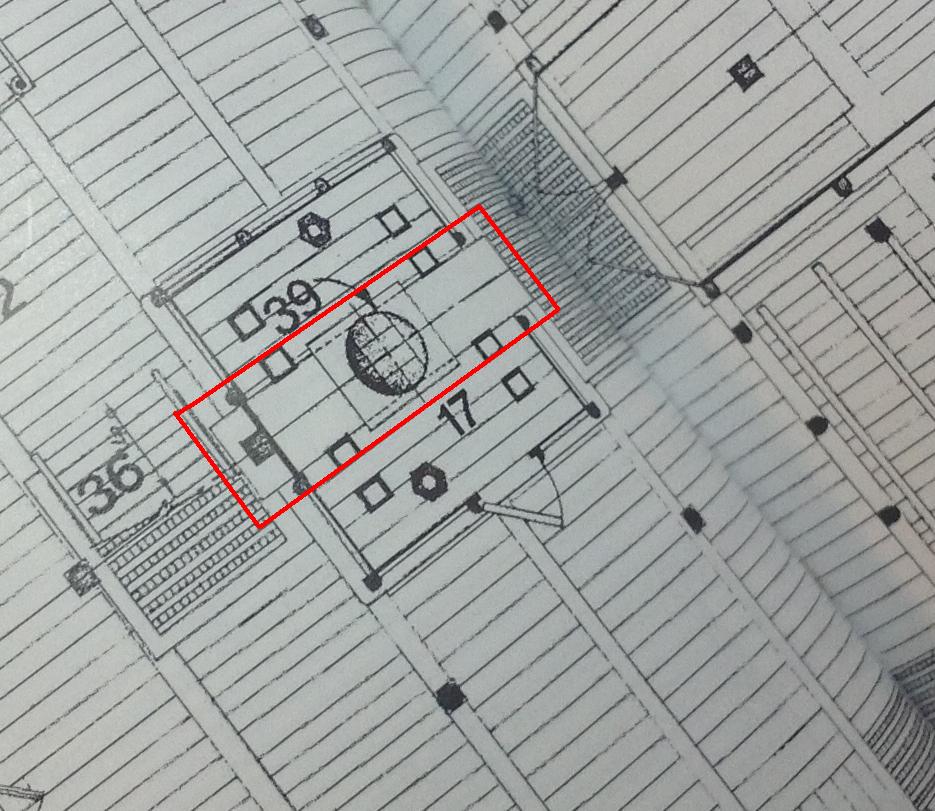
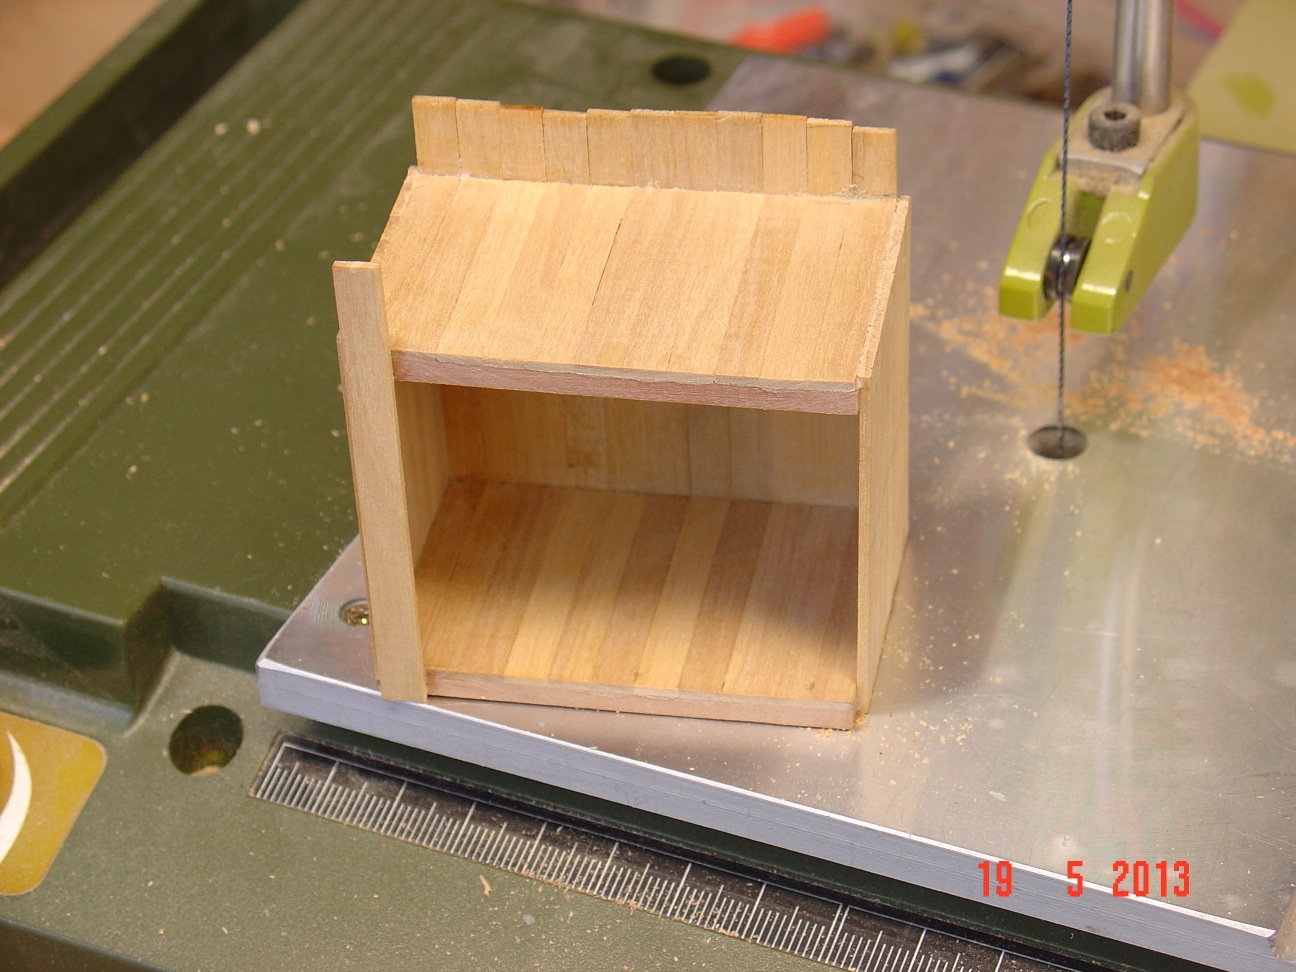
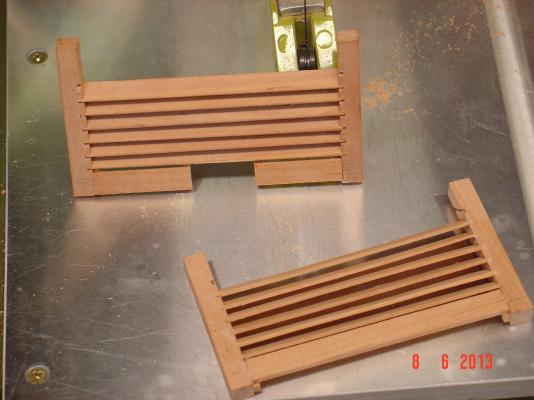
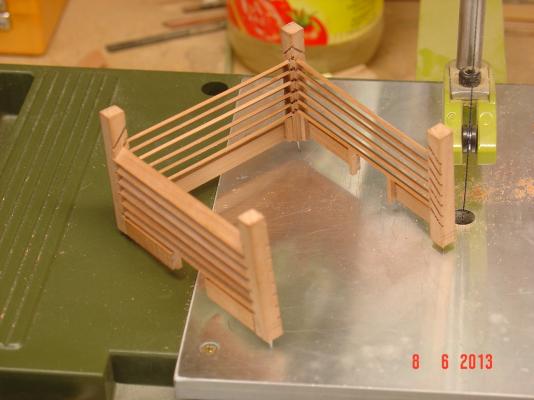
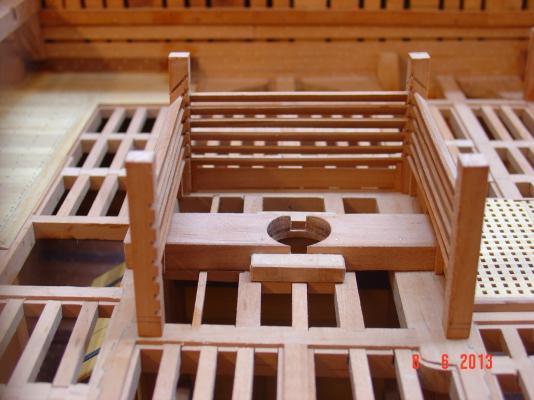
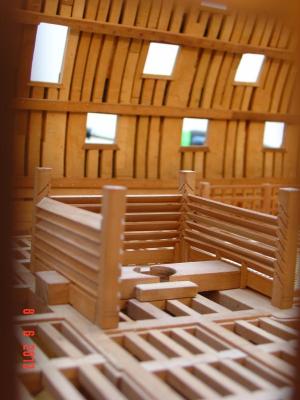
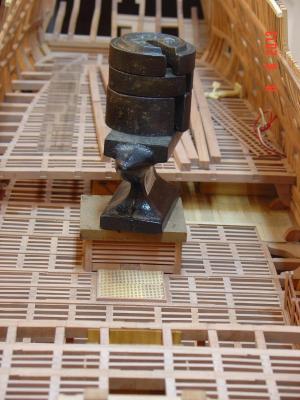
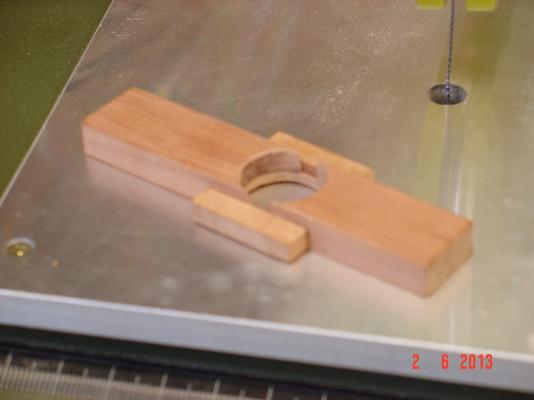
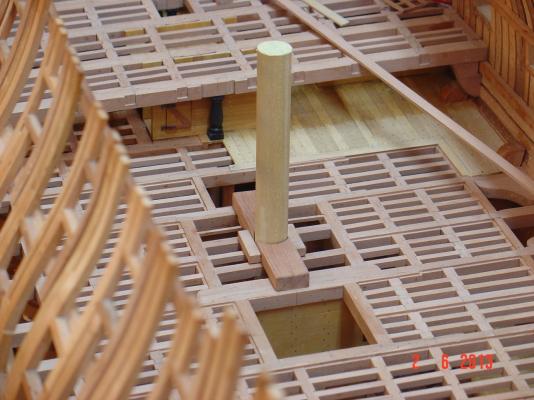
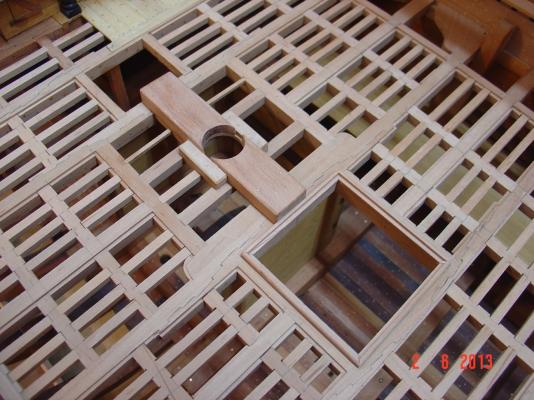
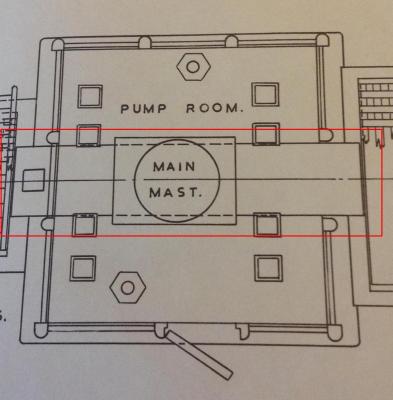
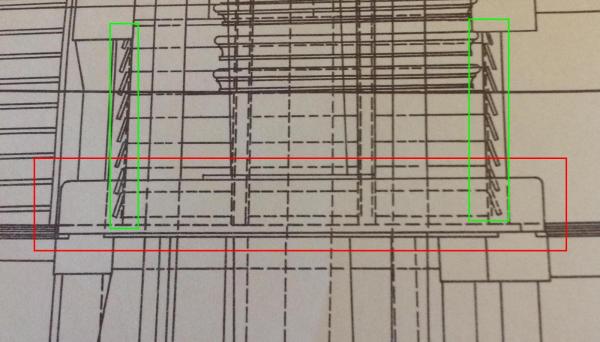
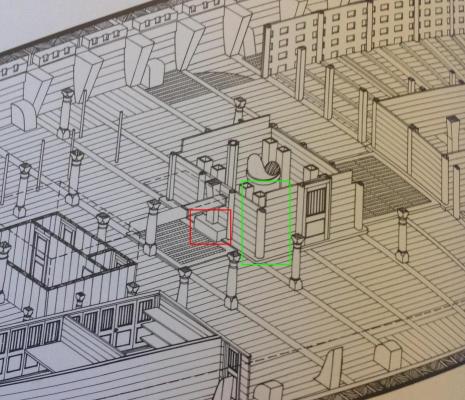
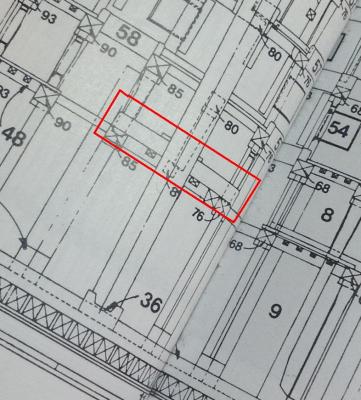
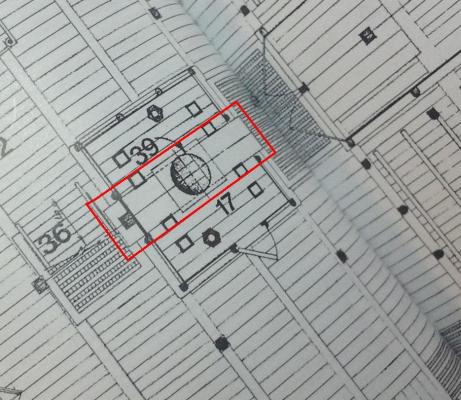
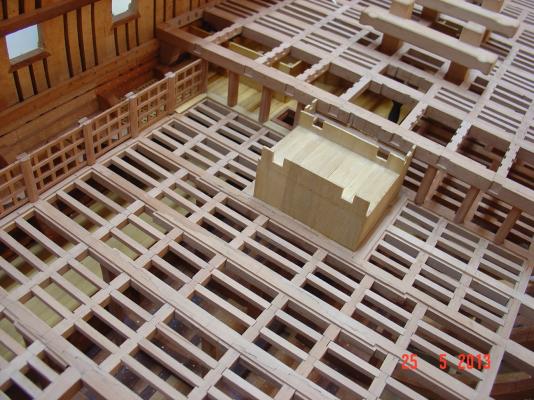
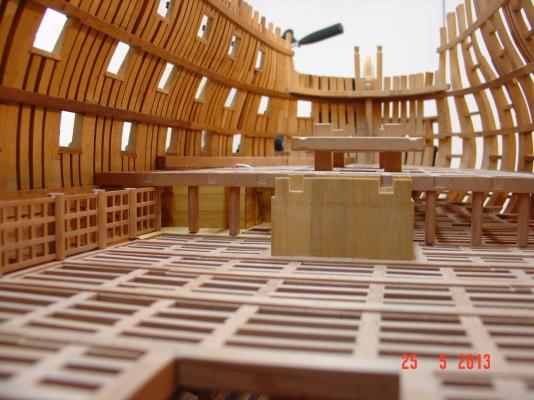
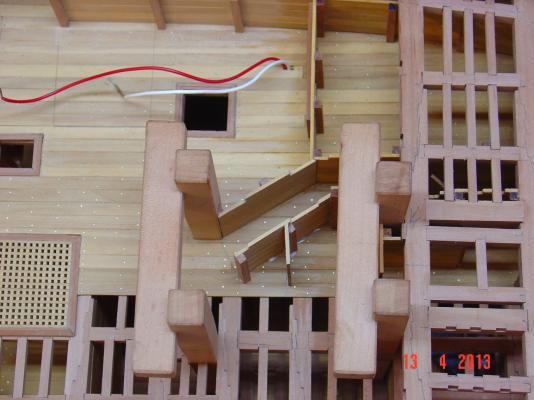
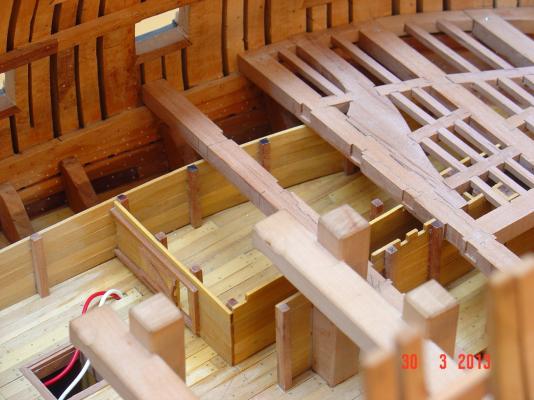
Thank you all for the kind words and for following my build. I am back so soon with a couple of questions related to the pump well at the level of orlop deck. To better understand the questions I've attached several photos from different sources I have: first three are from Bugler's plans forth one is from McGowan's book last two are from McKay's Anatomy of the ship - Victory As you can see I highlighted in red a big piece of wood placed longitudinally at the level of orlop deck in the pump room. My guess is that this should provide some support to the main mast. The problem with it is that its atwartship width is the same (or less) with the width of the main mast - this can be best seen in the first and second pictures. So if a round hole for the mast is made in this timber it will be cut in two basically as the mast diameter is the same as the timber width. Does this makes any sense? Why use such a thick piece of wood just to cut it in two? Shouldin't it be at least twice as wide? The second question is related to the bulkheads around the pump well at the orlop deck level or the pump room as Bugler calls it. I highlighted in green in the third picture (Bugler) the walls seem to have the planking placed at about 30 dgrees with the vertical so to provide gaps for aeration probably. I've seen this same setting in different other ships - including Swan class sloops. Problem is that in McKay's and McGowin's plans this feature is not shown (picture 4) - instead the walls are plain planked with regular planks butted against eacother - no ventilation gaps. So which one is true? Hope anyone can help me with these question. Thank you, Alexandru

-
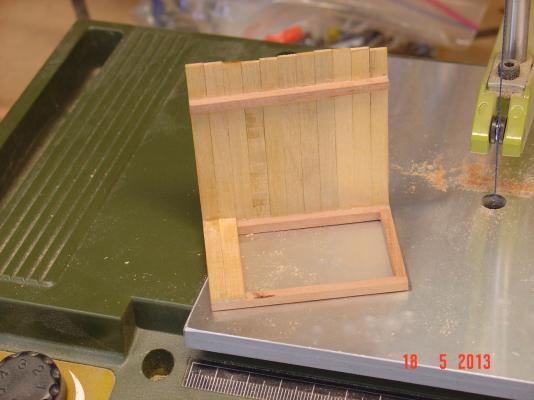
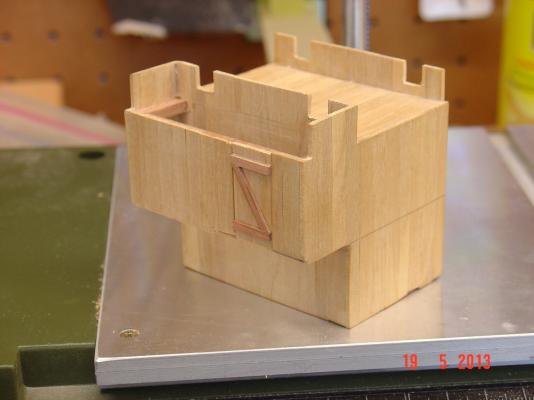
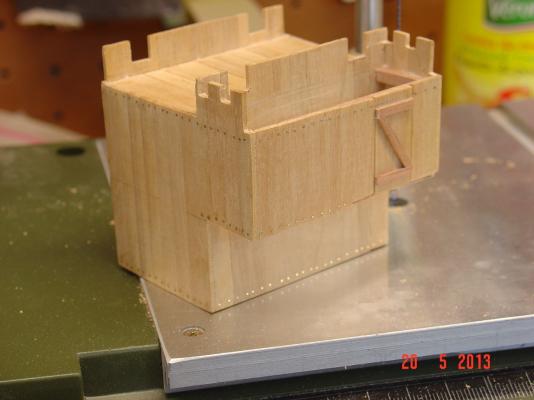
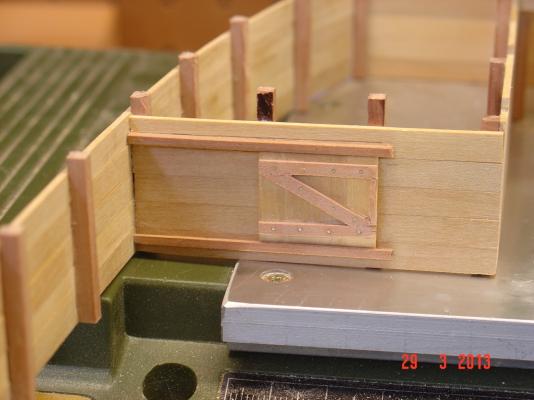
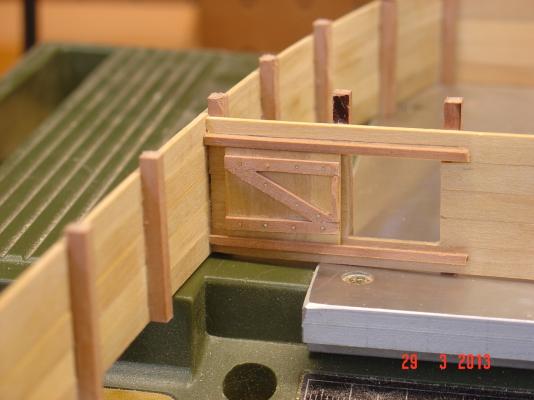
Mark, The cabin you are talking about is the fore hanging magazine which unlike the aft one I made fully closed as I left the other one open to see its interior arrangements. They were basically identical. Thank you, Alexandru
-
...


-
Here are some progress pictures for the last couple of weeks.


-
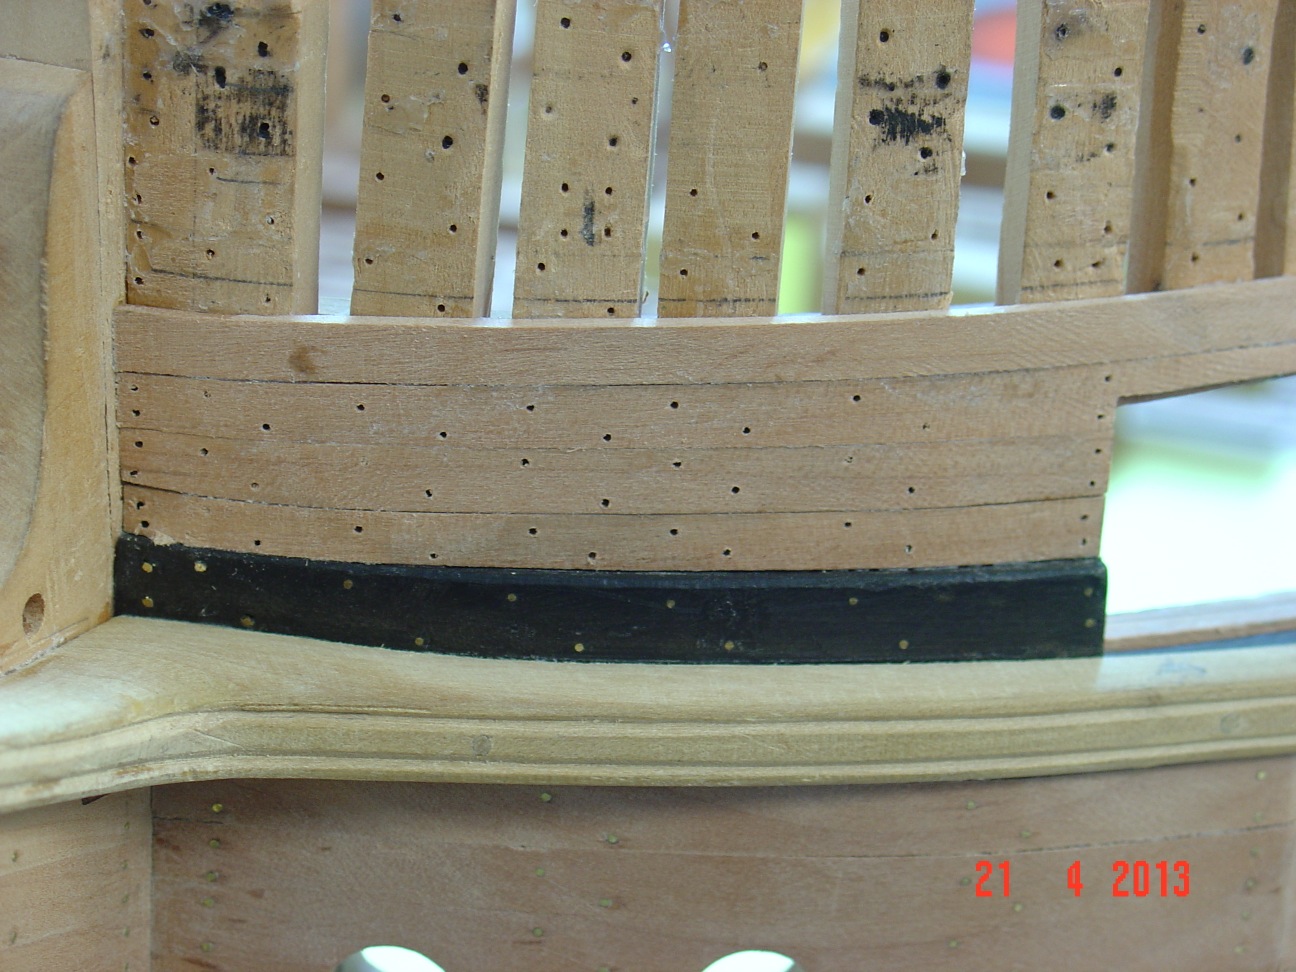
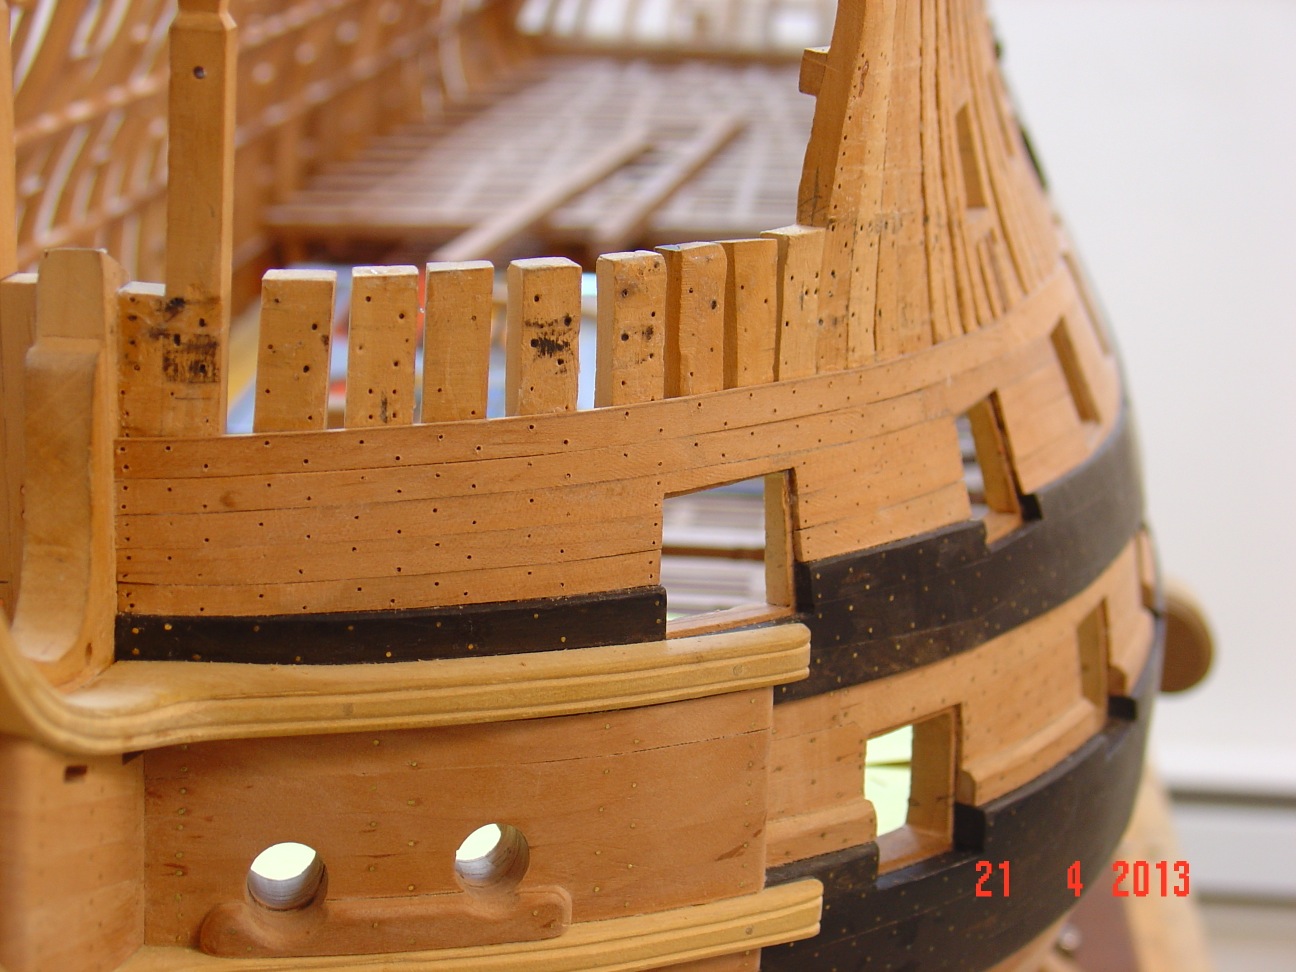
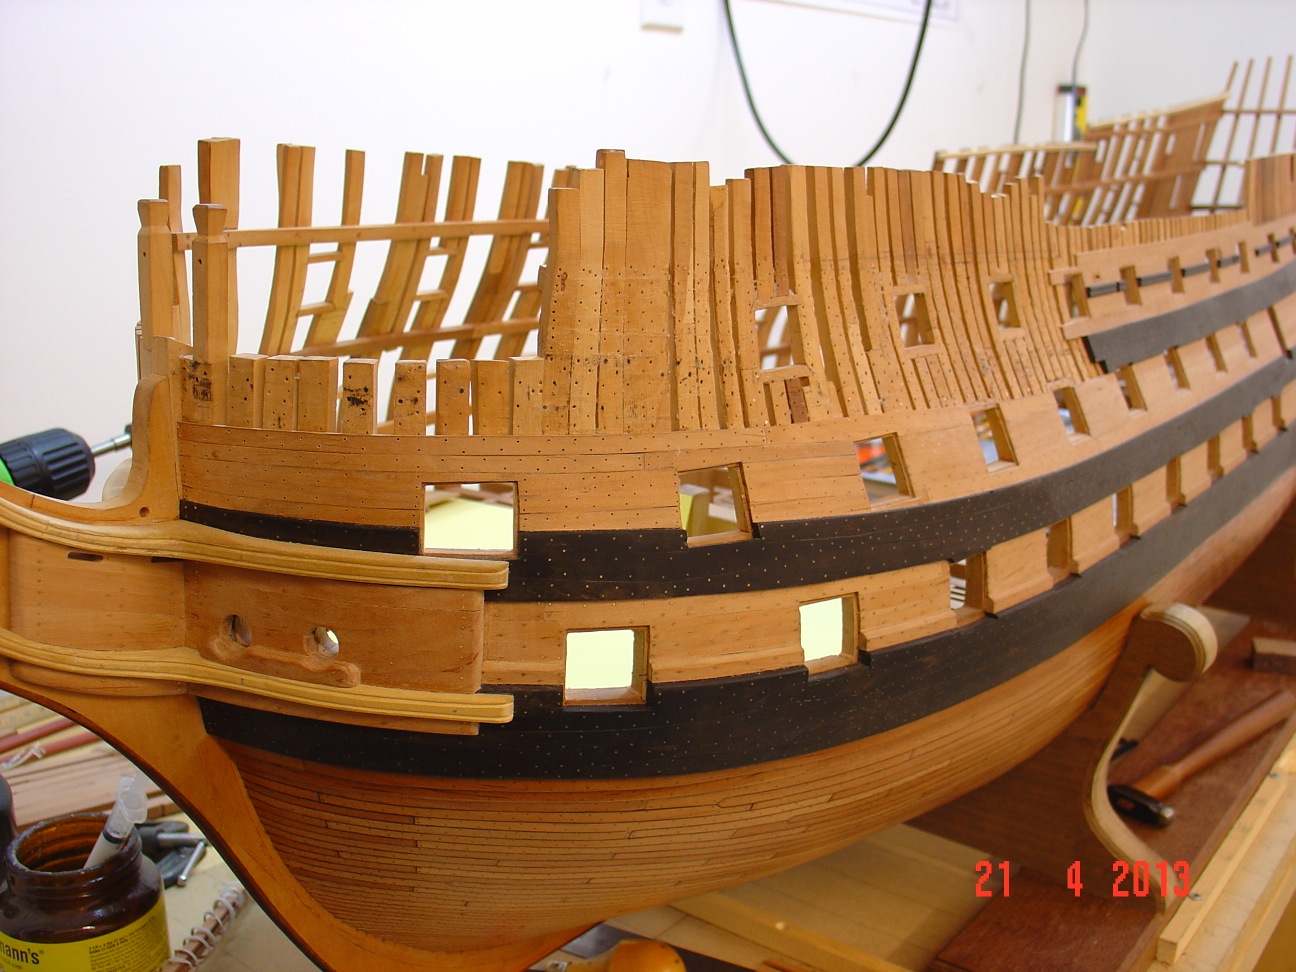
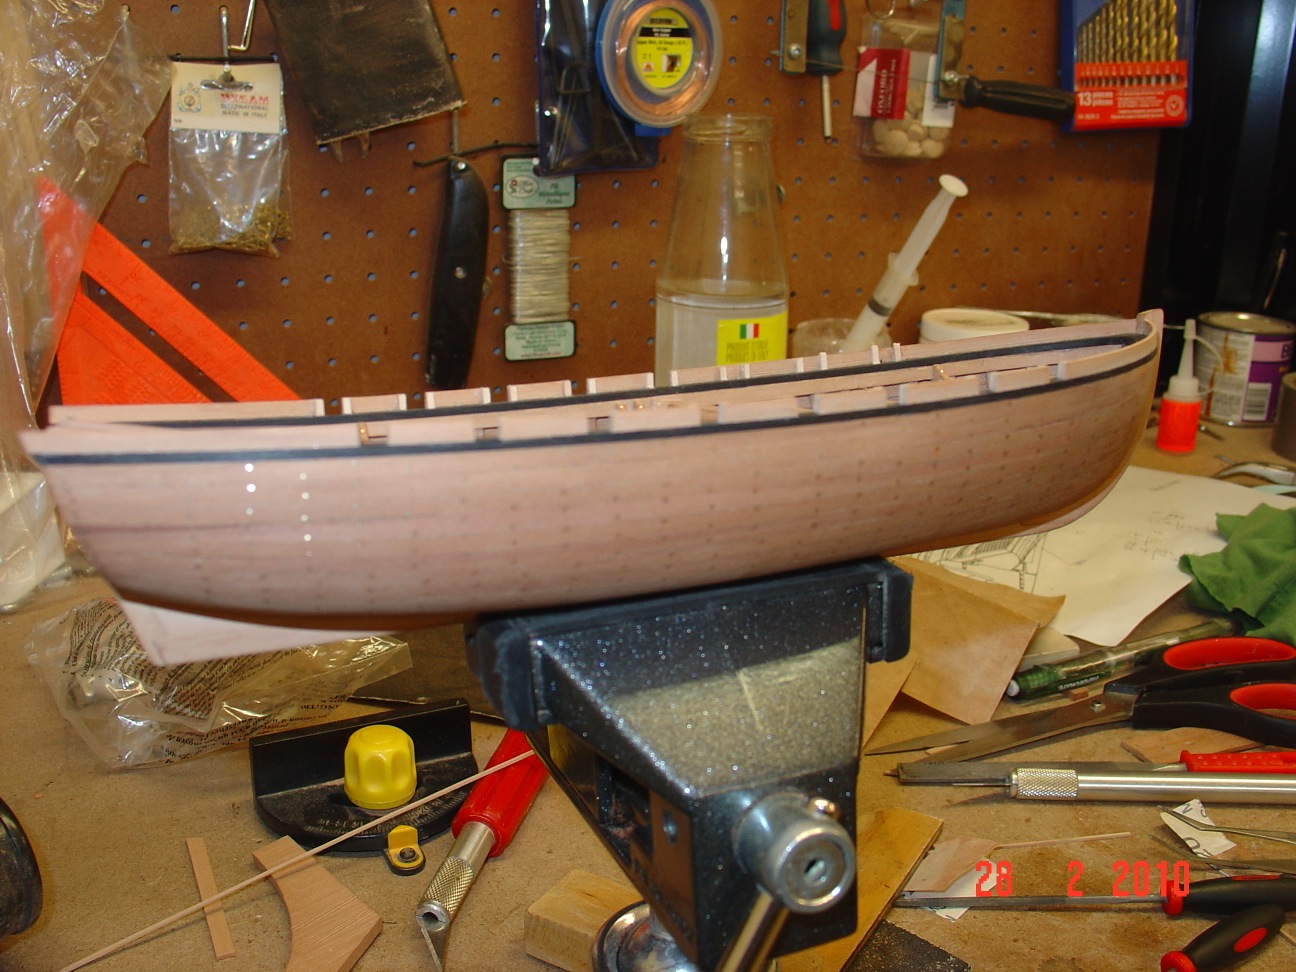
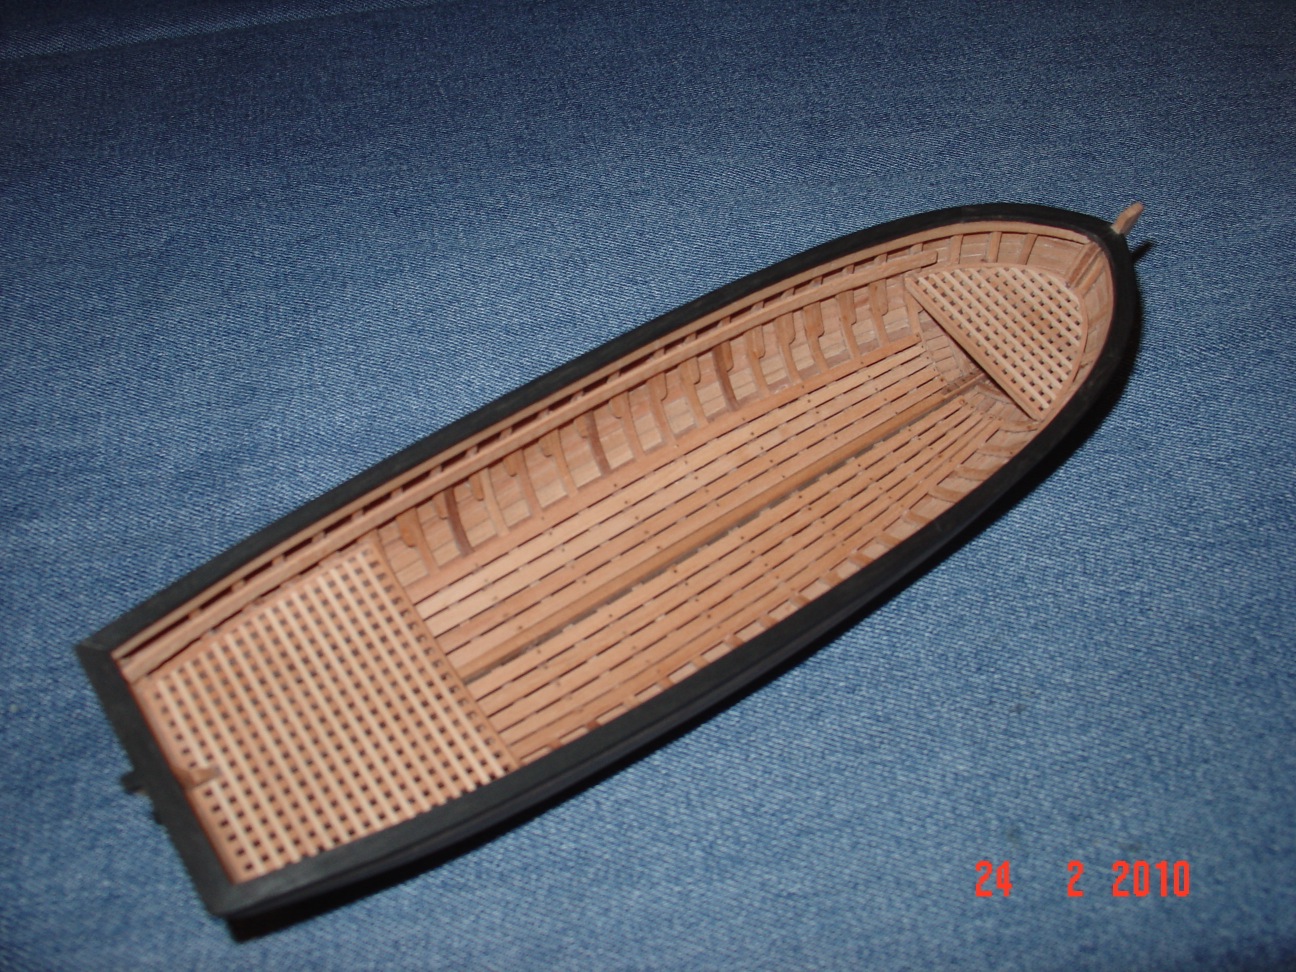
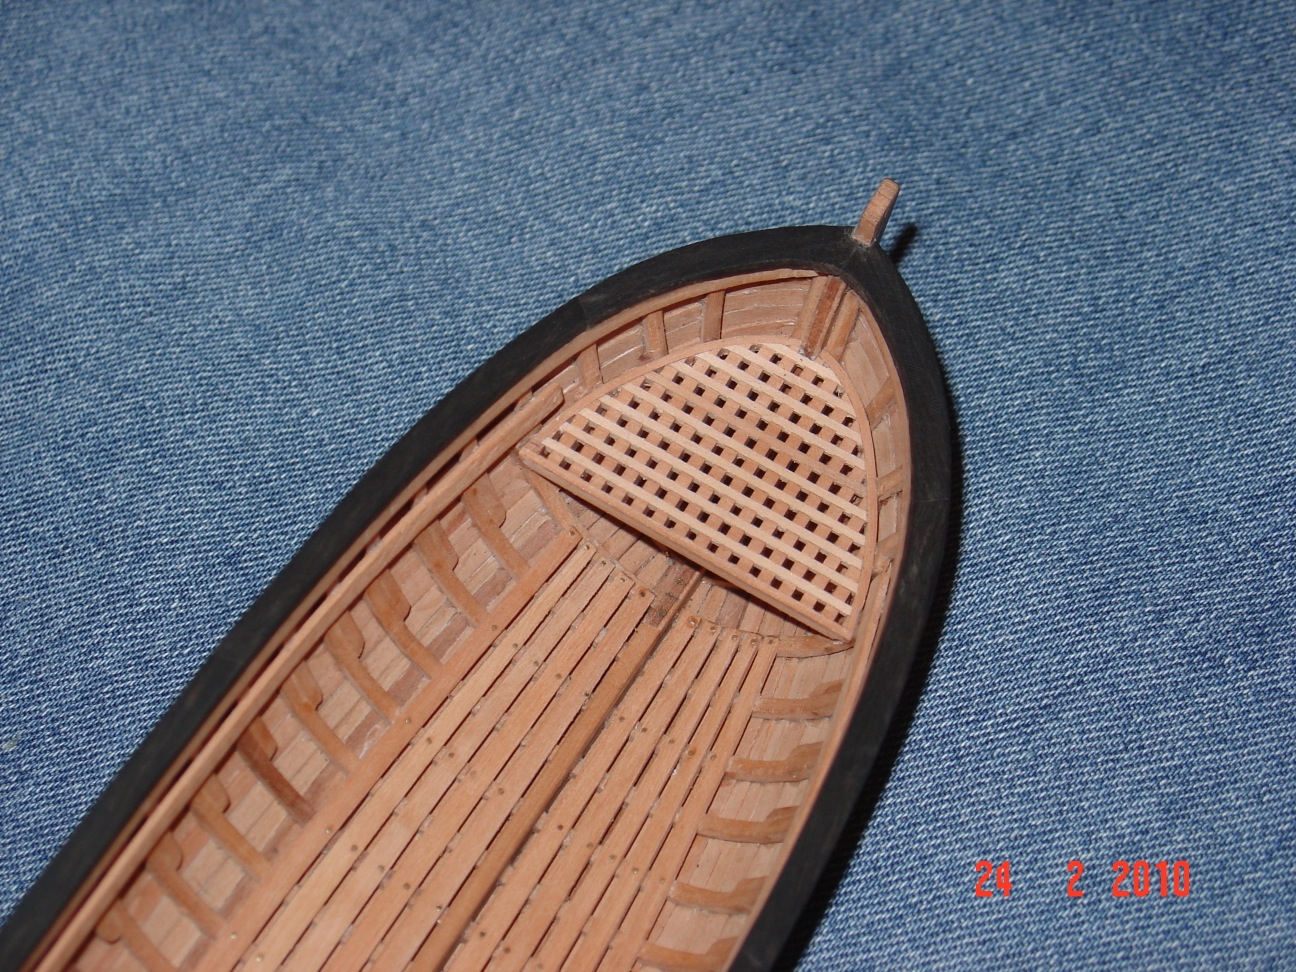
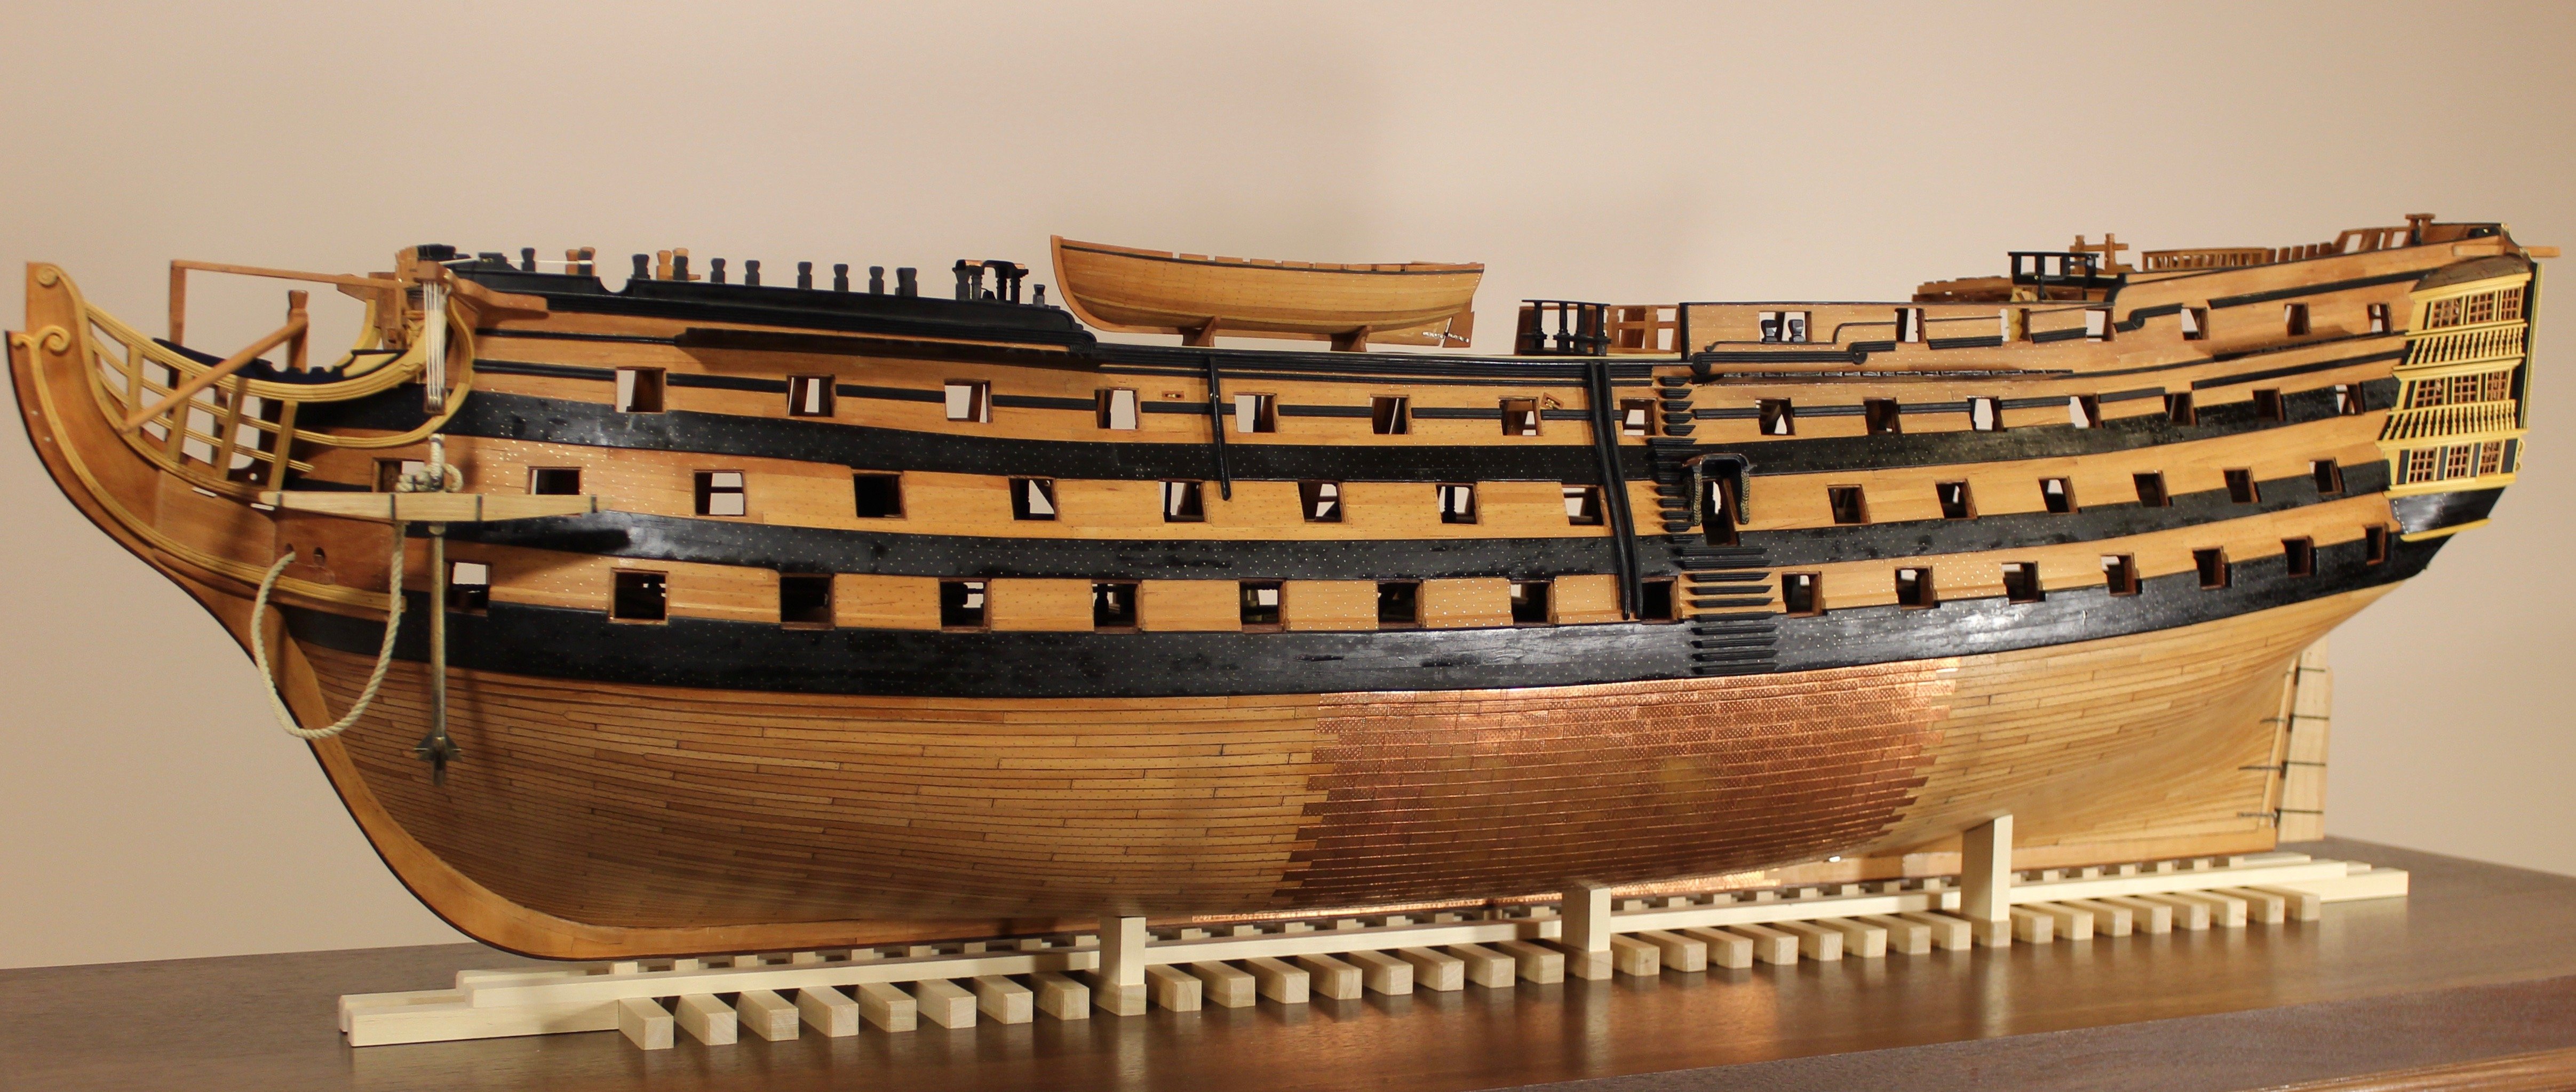
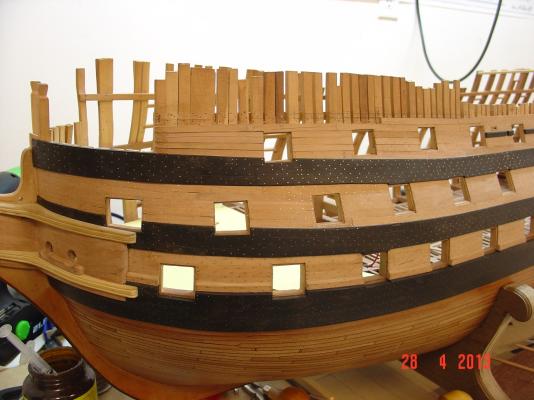
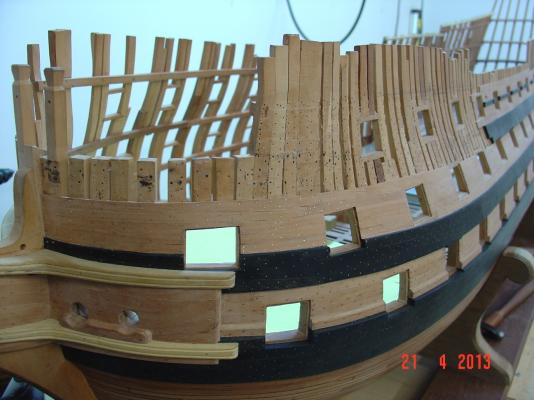
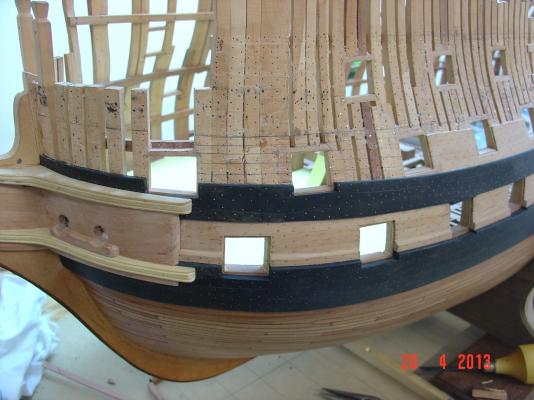
Almost completed the reparation of the planking. Only one plank is missing, some nailing and a thorough sanding. If you look at the last two pictures (after and before) taken from almost the same angle, I think it looks lot better now. I am happy with the result. And it was a couple of weeks small diversion from the deck framing. Alexandru


-
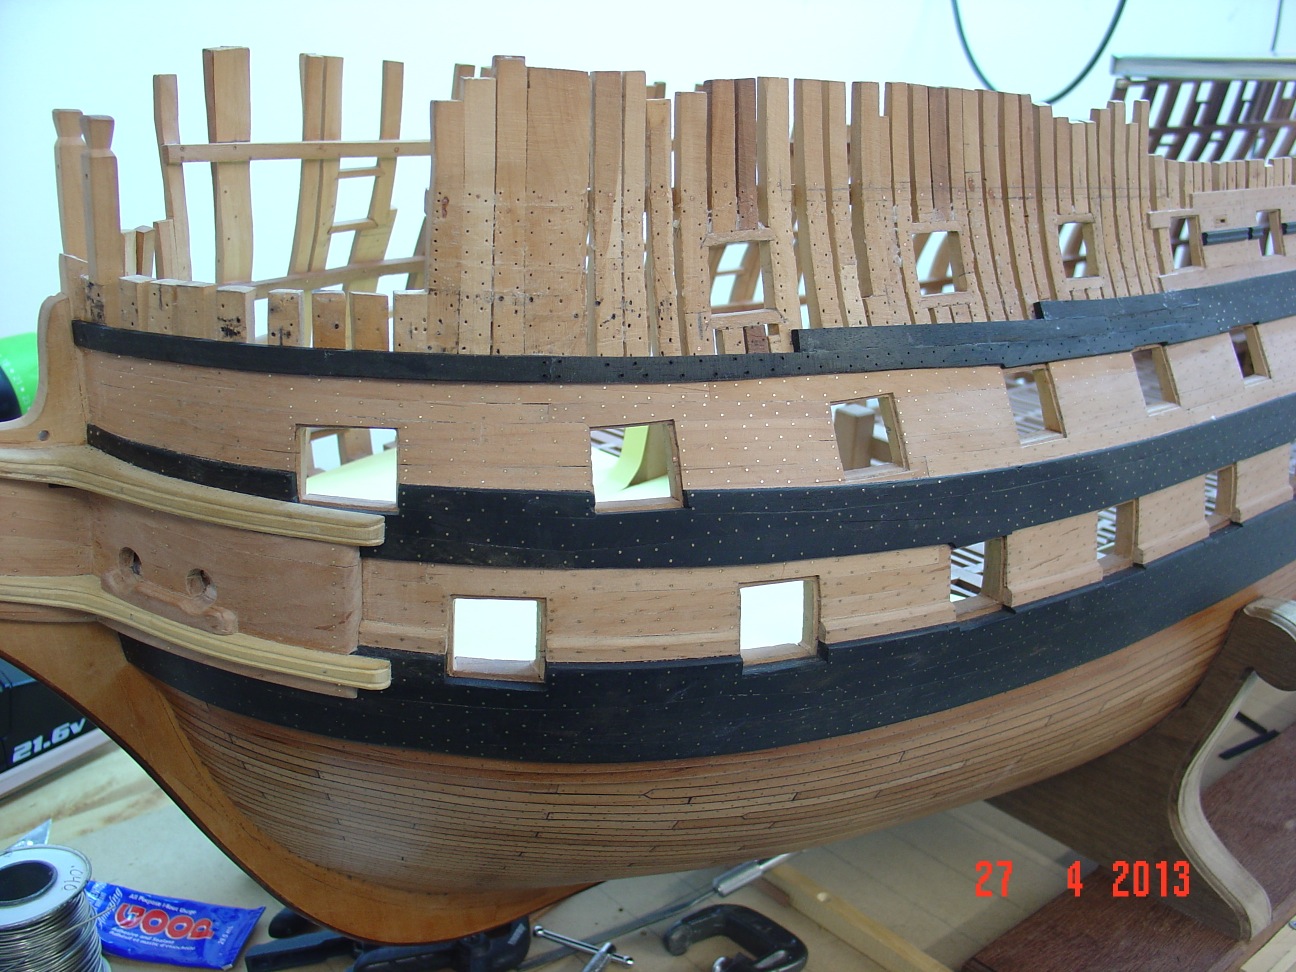
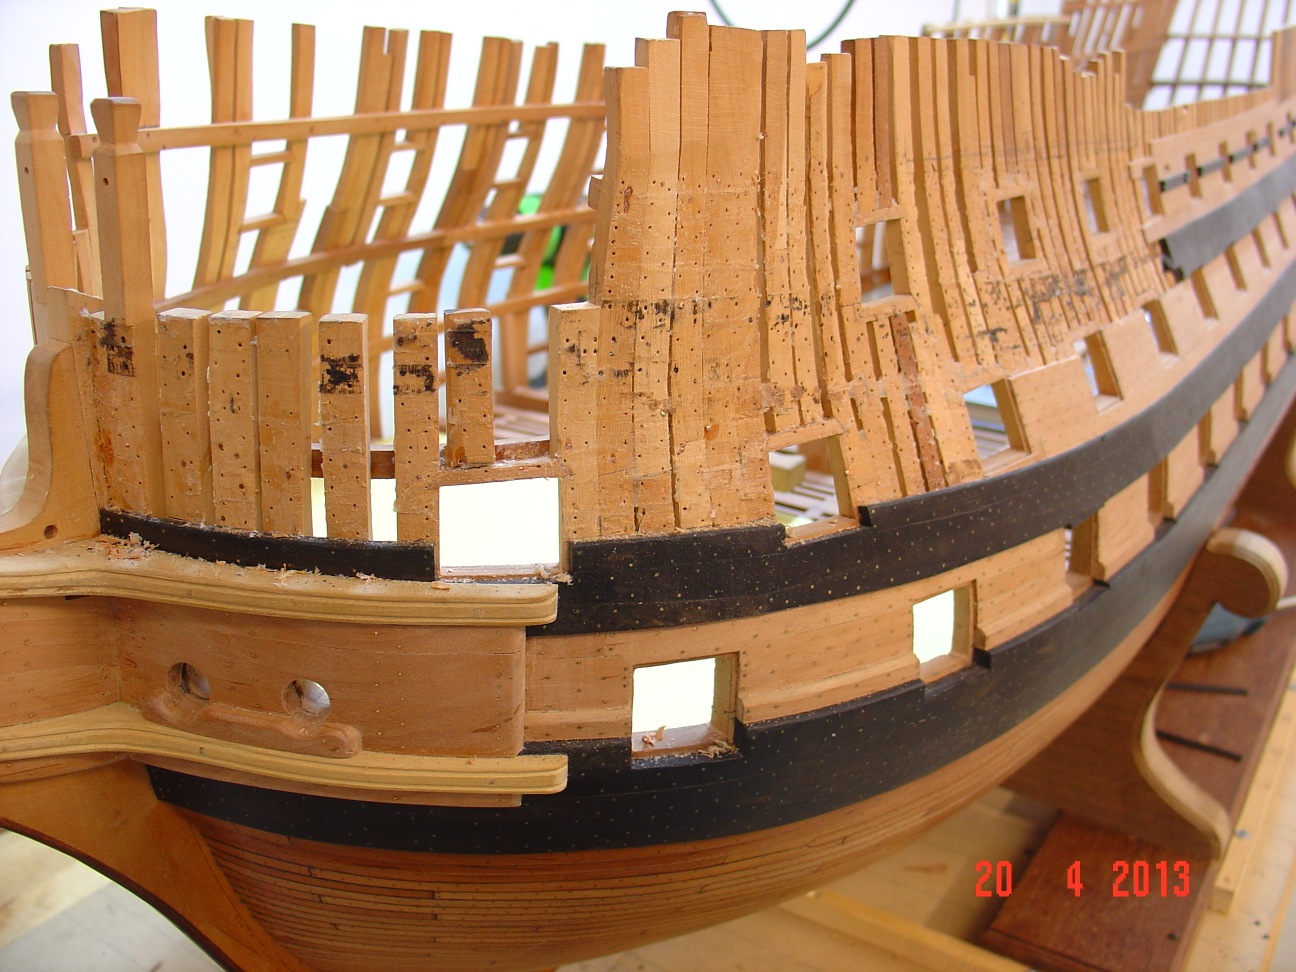
Hello, Thanks for the great feedback. Fortres, I looked again at my plans and pictures and I I think is a combinations of several cumulated errors of the wales, decks and gun ports. The main wale looks ok to me. The first gun ports probably should have a bit higher but not as much as you draw it on the picture. The middle wale is probably a bit to high in the front. The upper wale was a lot too high and now with the repair I am doing it will be just fine as its upper edge will end exactly at the level of the beakhead platform. I know is not perfect but in my opinion it will be a lot better than before. This build already spans over more than five years and mistakes I did several years ago when tracing the decks and cutting gunports come up to create other issues I have not foreseen. Conclusion is that each step has to be perfect but is hard to tell as I can't think of all the possible impacts later on. I will know for next time. As for the gunports to low - there are things I am willing to repair and things that I do not - this is one of the latter. I'll live with it. The fact that I corrected at least some of the problems makes me feel better about my build and this is something already. Thanks again to all.
-
I managed to put back the 5 rows (of tapered planks this time) as you can see in the pictures and I will continue with the wale and the rest next weekend.


-
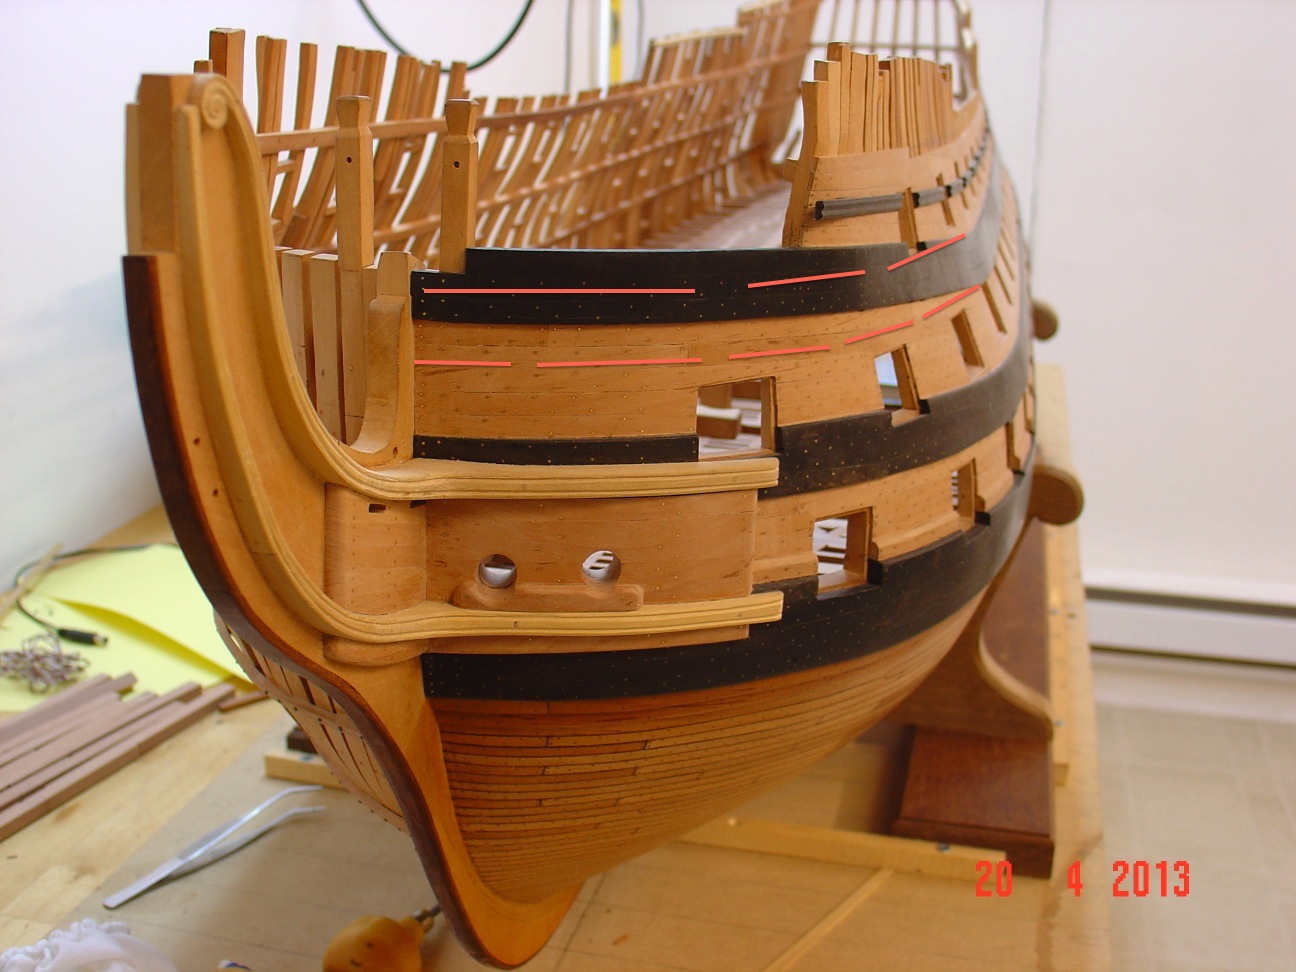
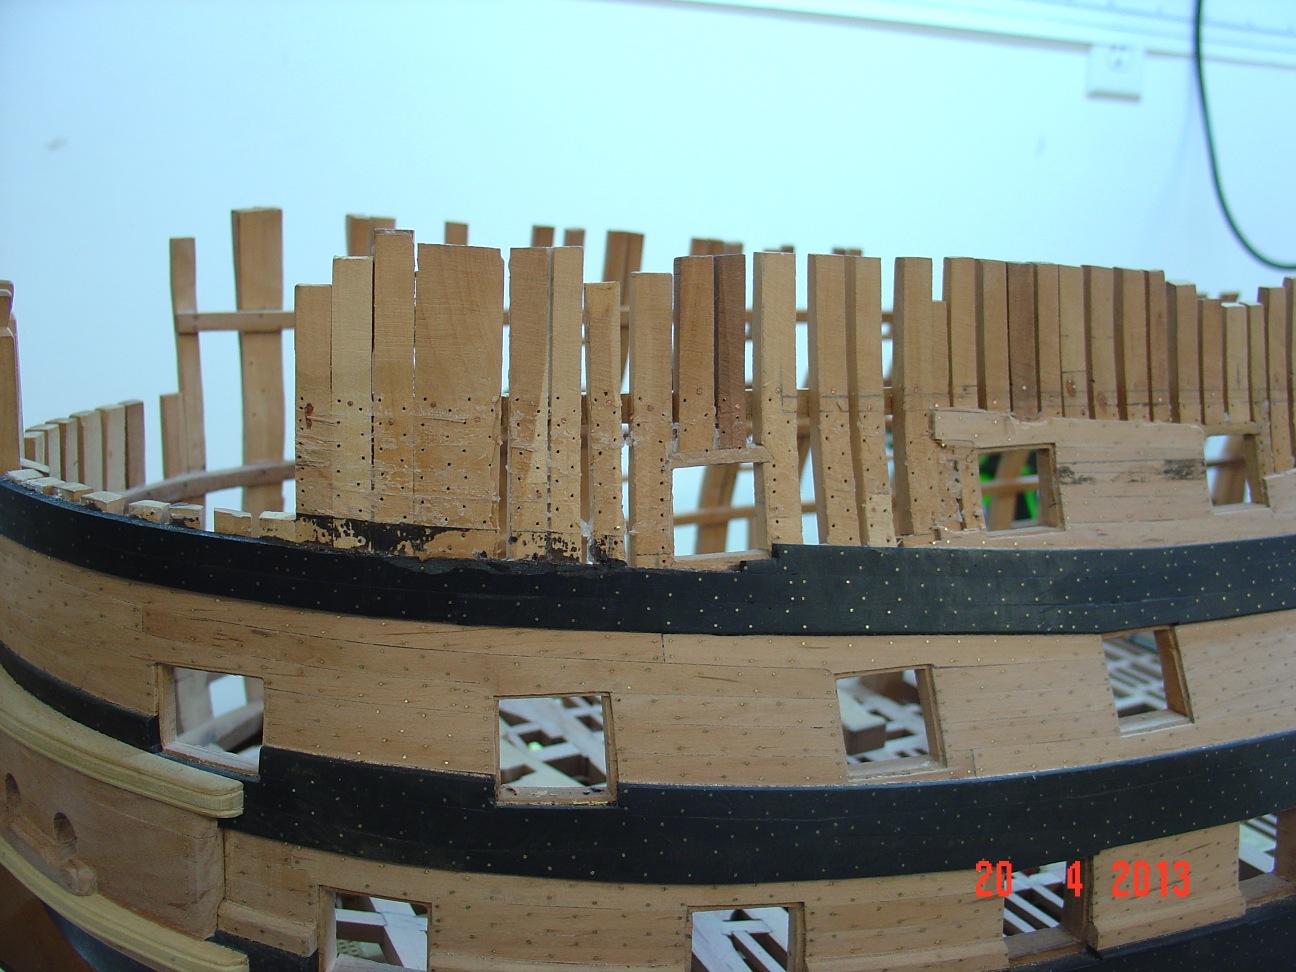
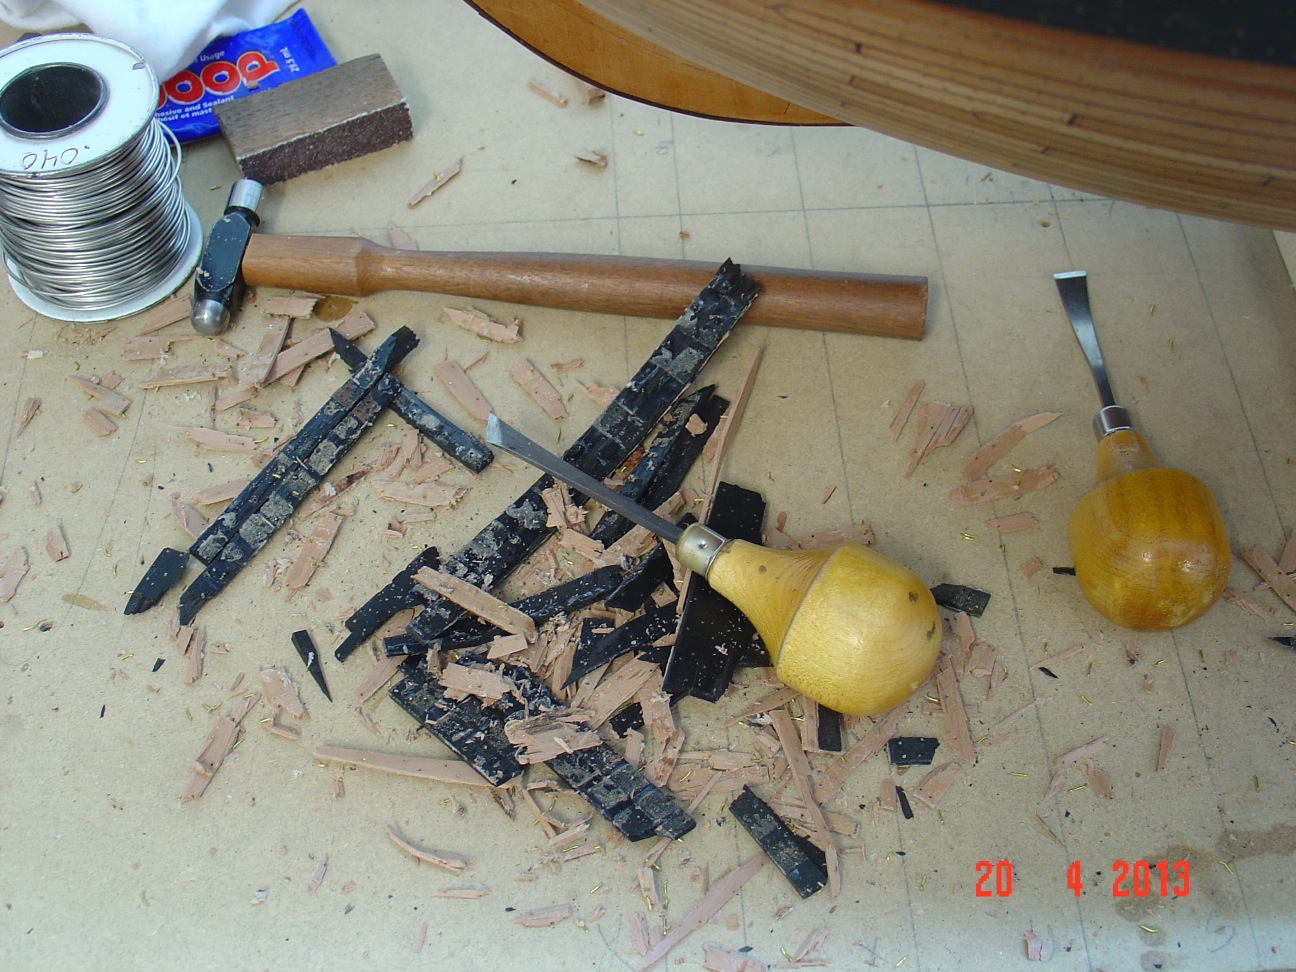
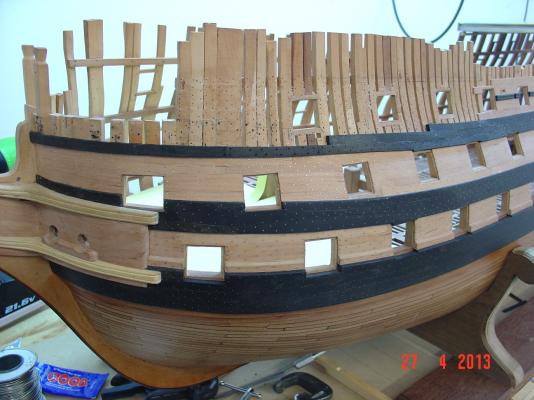
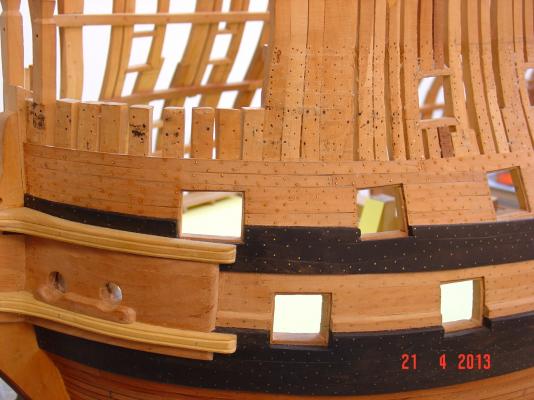
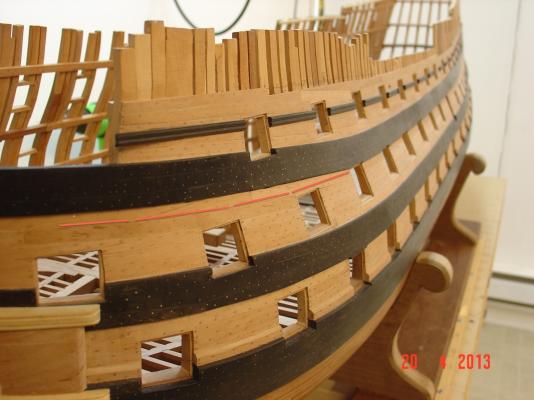
And the as I wanted to have more variation in my work I decided to fix an issue that keep bothering me for a while now. As you can see from the first two pictures the third or upper whale has a very "unnatural" curve in the fore side starting from the forth gun port, and should have been more like the red line I draw on the pictures. The problem was created by the fact that I went all the way up to the stem in the front with 5 rows of planking between the middle and upper wale but at the front the frames are smaller so I should have tapered the five rows - but I didn't and this forced the upper wale up. I was surprised how well the planking was glued in place - I had real difficulties to tear it apart and it went down only in very small pieces. Then I had to remove all the brass pins that were simulating the nails and remove the dry glue left behind.


-
Now on a different topic, I did a little bit of progress on my main deck framing - installed 3 more beams.
-
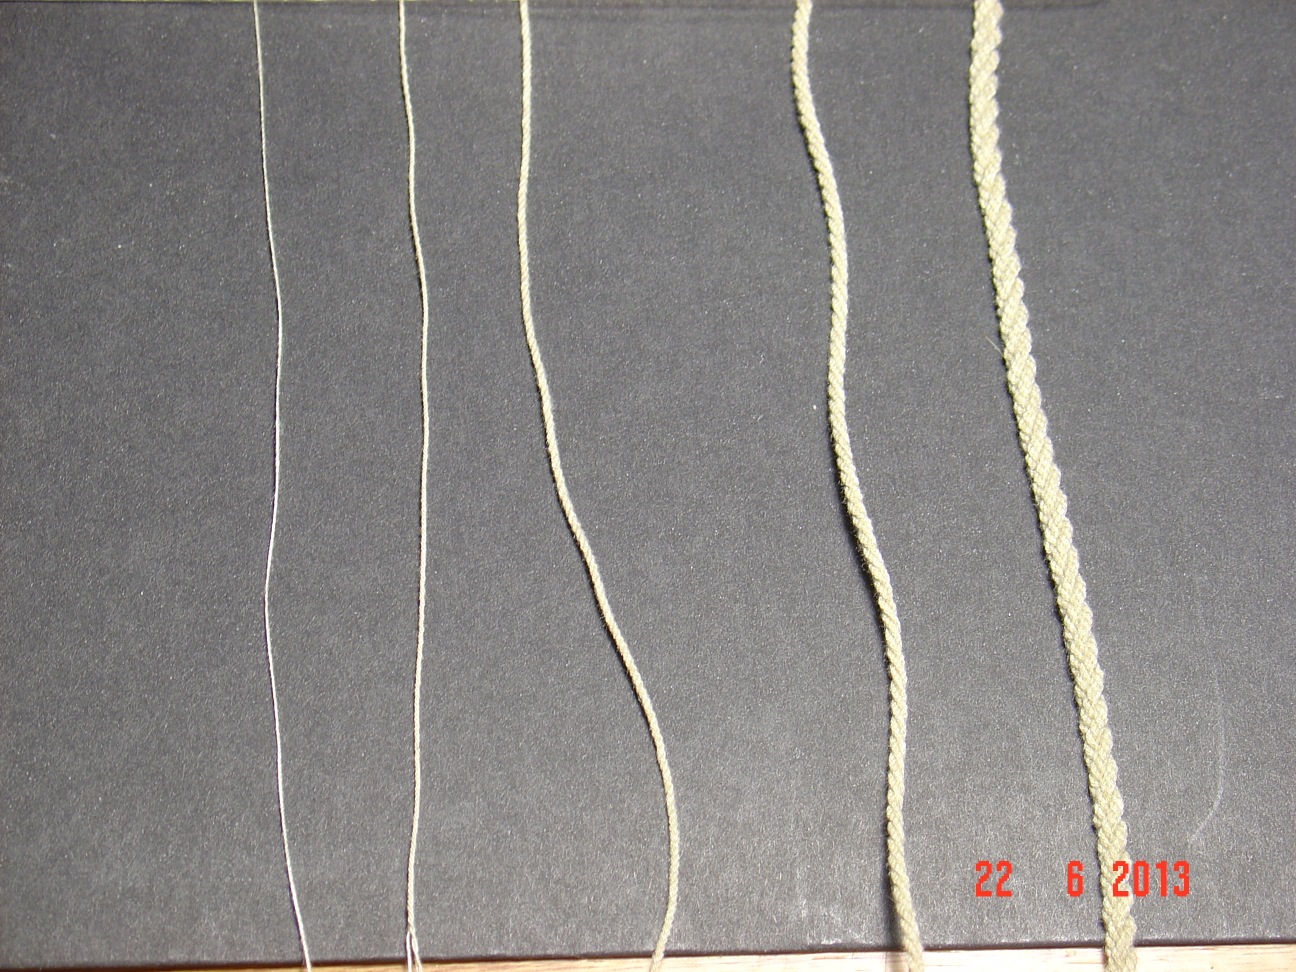
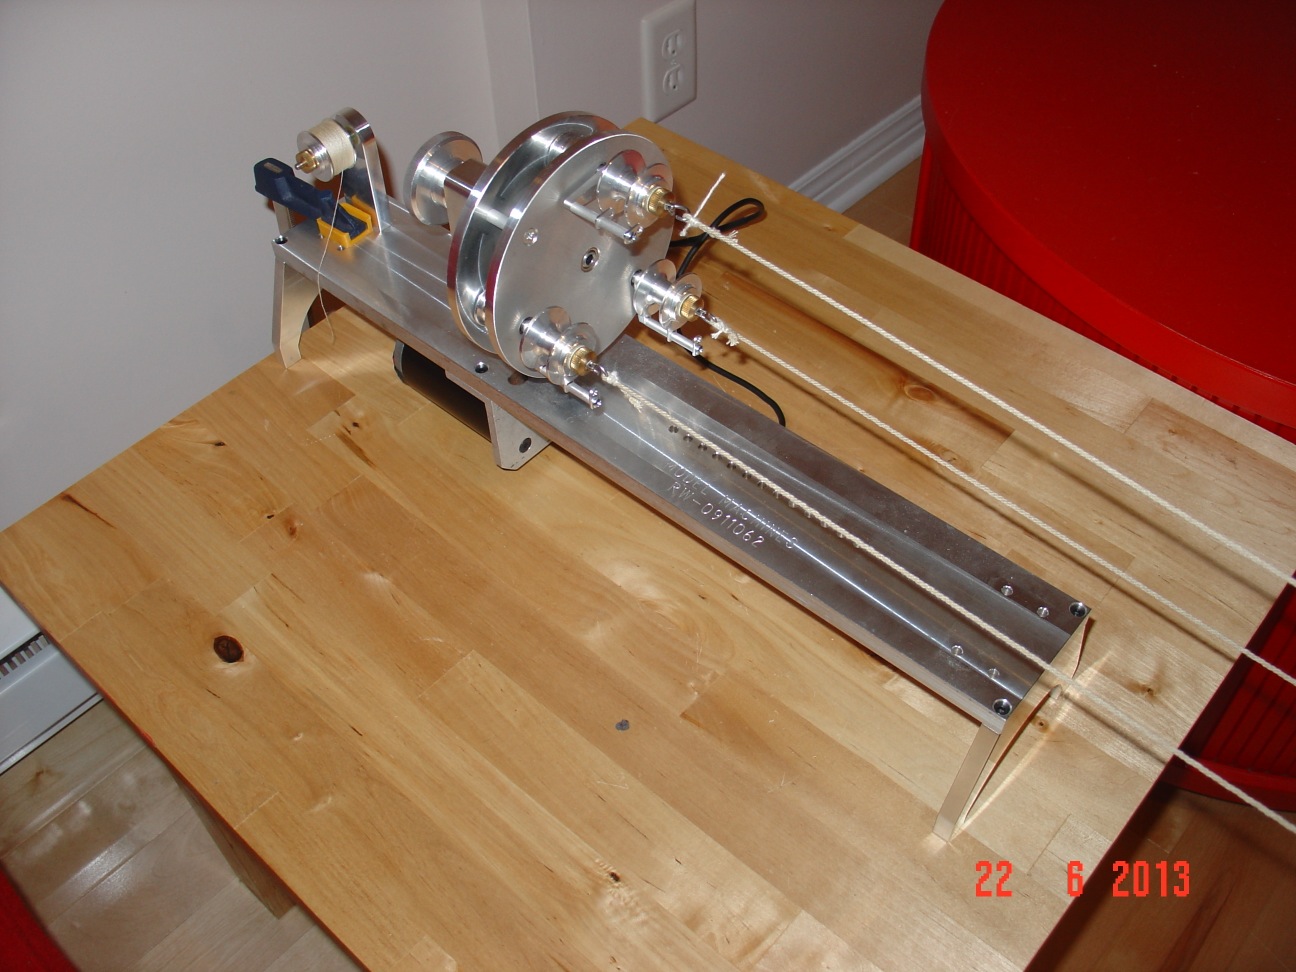
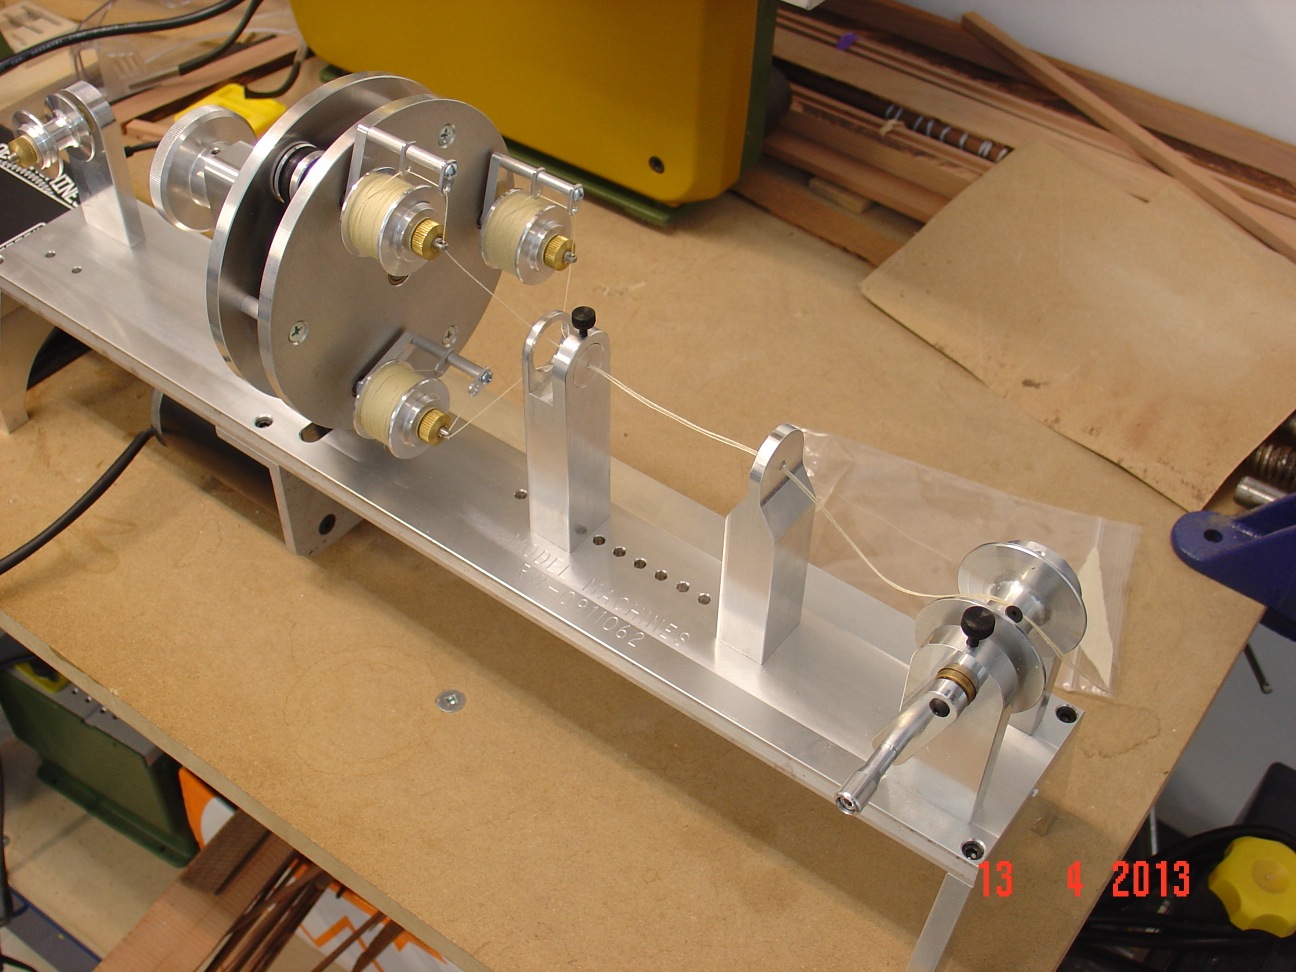
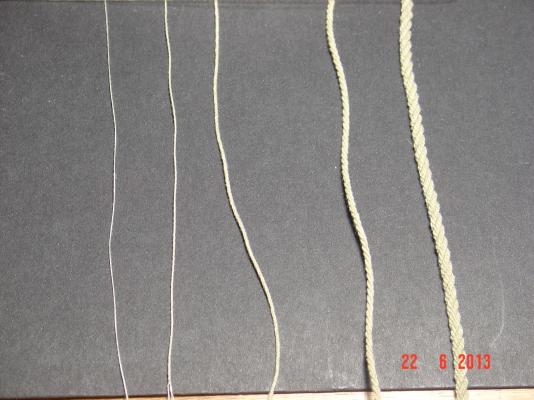
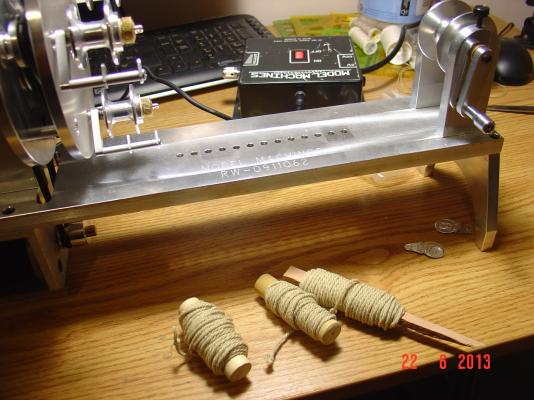
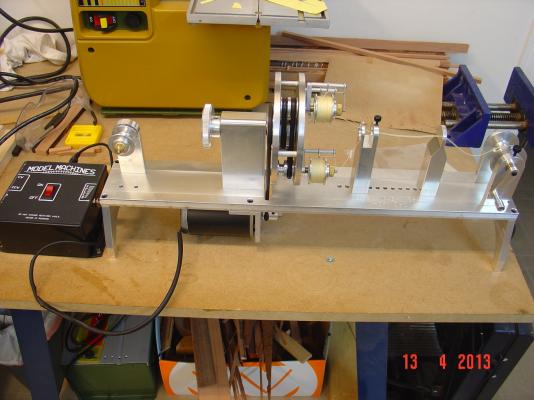
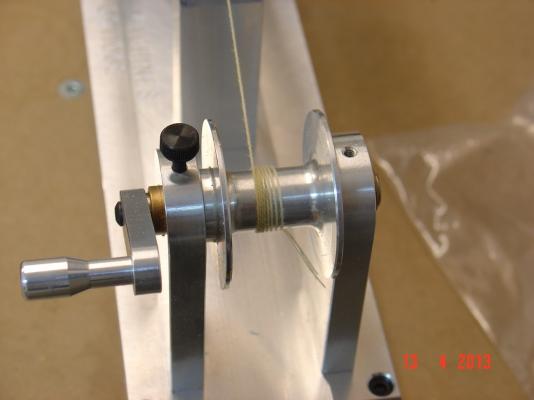
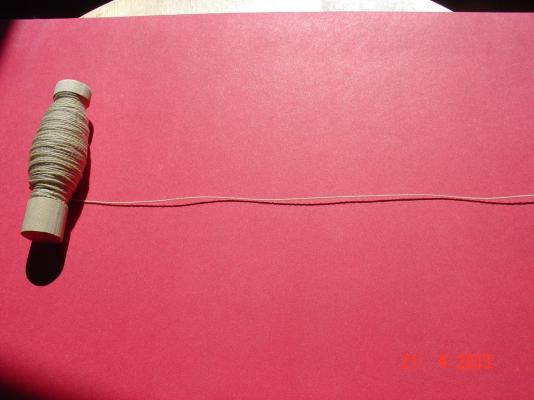
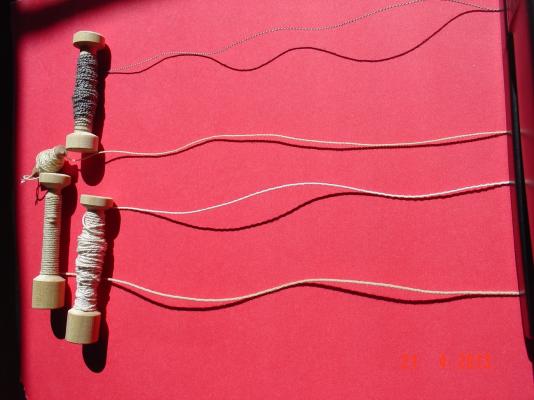
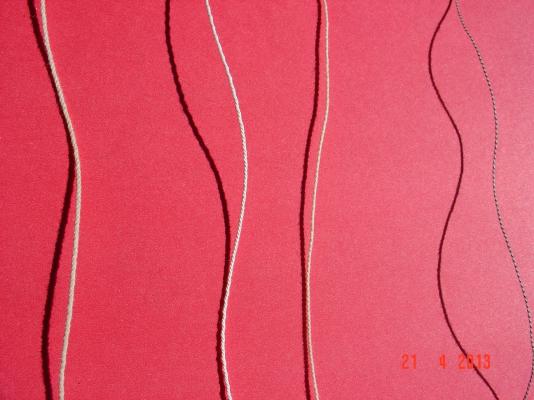
I didn't post for a while now but now I do have several things to show. First is my last acquisition: the Model Machines ropewalk. Go it last weekend and give it a try run. I like the workmanship put by Jim Byrnes into it and the ease of installation, use and maintenance (there is no maintenance required ) So far I managed do make some rope let's say of fair quality but I am not completely happy with it. The documentation that came with the machine specify that the quality of the rope is proportional with the skill of the user and that this skill is acquired by repetition - I am not there yet - as the user has to wind the rope "takeout" spool which applies the tension on the rope and this impacts the quality. What I like is that you can do any length of rope without needing lots of space the limit being hon how much thread you can wind on the three supply spools than the length of your room. What I only discovered after I received the machine is that the diameter of the rope you can make is limited by the holes in the supply spools unwinding mechanism which is about 2-3mm so no chance doing the anchor cables for my Victory on this machine. I made 3 strands rope and then use it to make even thicker rope - this one looks better than the initial one. did a couple of more try with 4 strands, thicker strands, different colour etc. You can see the results in the last 3 pictures. In the last one from right to left there are: 3 strands with different colour - wanted to see if there is more tension on one of them - not conclusive. 4 strands - 3 turned around a forth one of same type 3 strands but from thicker yarn 3 strands of the first produced rope (picture 5) - I think this will pass again through the machine to produce a cable of 27 strands but that's it as afterward it will be to thick. I will have to play with it a bit more with different kind of yarn - I just tried with what I had and I don't even know if is cotton or synthetic or a mix. The problem I have can best be seen in the last picture second rope from the left. If one closely look at it and at its shadow on the red paper you will notice that in the middle is nice and uniform but above and bellow looks like one of the strands is turned around the other two differently - and this repeats at regular intervals like the machine (or me?) is not turning round.

-
...

-
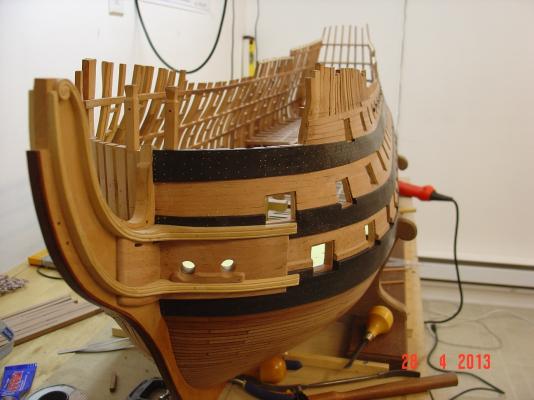
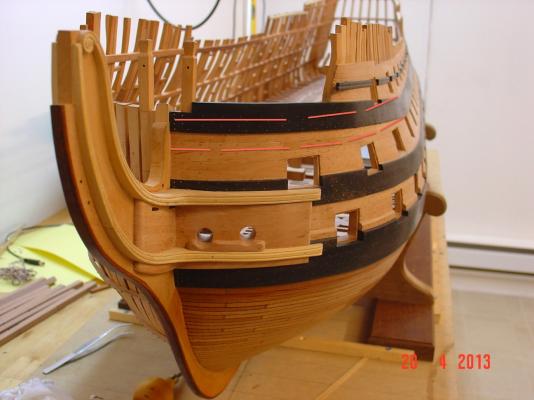
Did a bit of work on my Victory these last two weeks and here are the progress pictures.


-
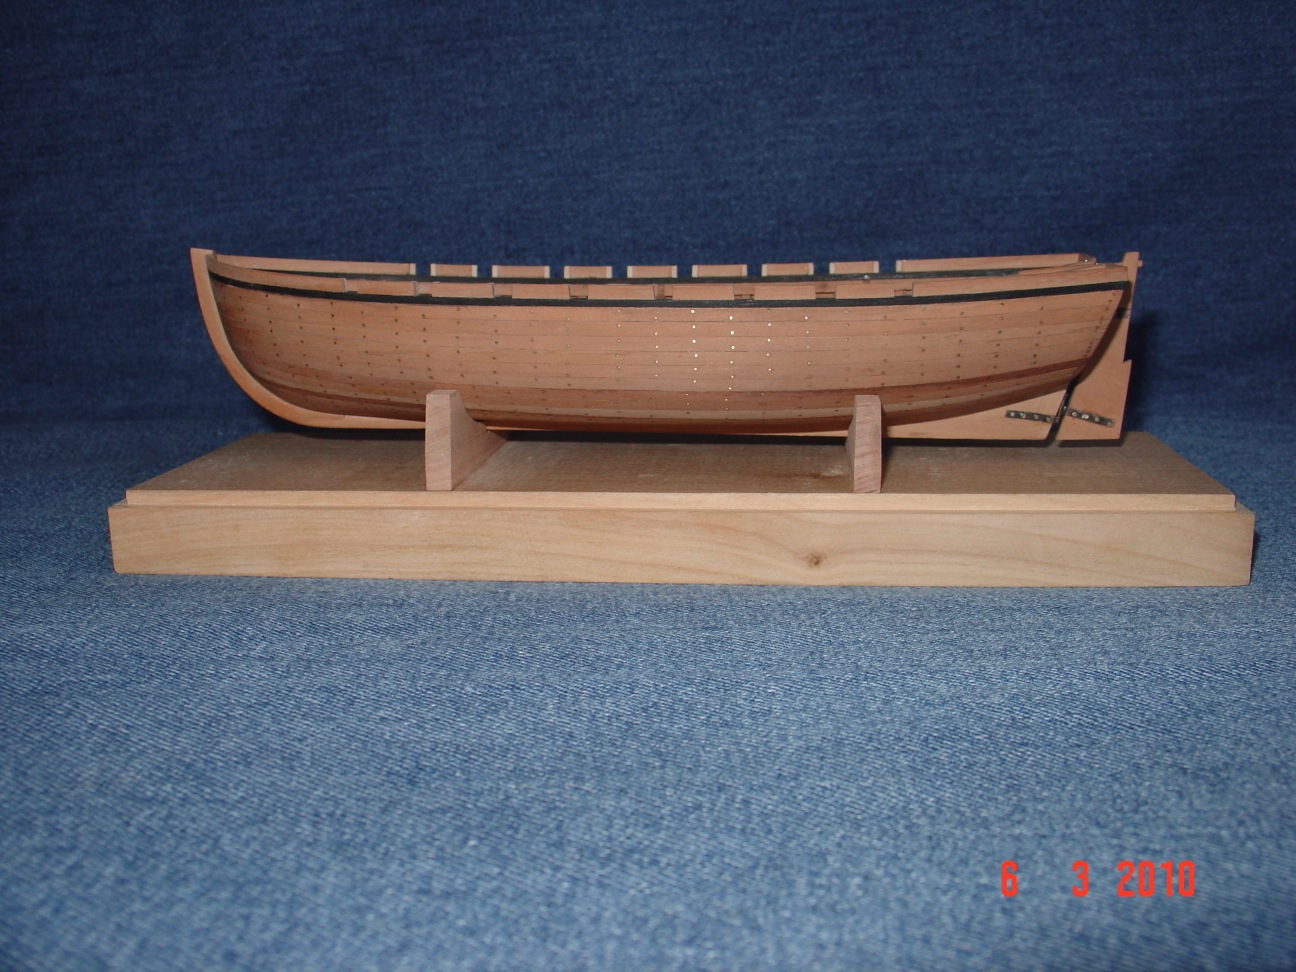
Tony, here it is: http://modelshipworld.com/index.php?/topic/1474-34-ft-hms-victory-launch-by-alexandru-scale-148-completed/ Alexandru