HOLIDAY DONATION DRIVE - SUPPORT MSW - DO YOUR PART TO KEEP THIS GREAT FORUM GOING! (Only 20 donations so far - C'mon guys!)
×

guraus
-
Posts
361 -
Joined
-
Last visited
Content Type
Profiles
Forums
Gallery
Events
Everything posted by guraus
-
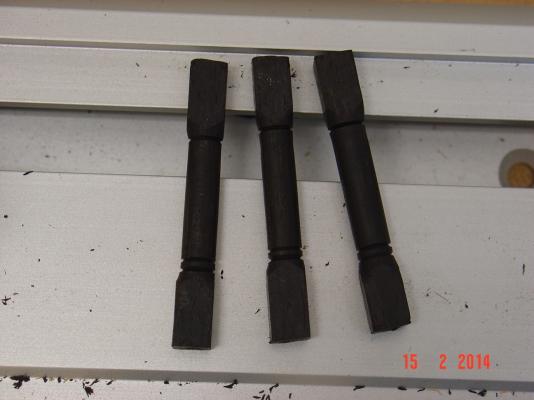
Hello Bob, Thanks for watching. I do plan to get the ropes to the wheel and make it work if I can - have to finish a couple more decks until then though... As for the level of detail I will add on the lower deck, what you see is pretty much what it will be. For sure there will be no guns. Gun ports maybe but the ropes and tackles to rise them probably not. No racks and no tools for the guns. No tables, benches and any other stuff for sailor accommodation either. One thing that I am working on and I want to add are the stanchions with the rope handrail around the ladders. The stanchions will be turned out of brass - I've already done a couple of tries and not very happy with the results. I'll post some pictures as soon as I get some I like. Alexandru
-
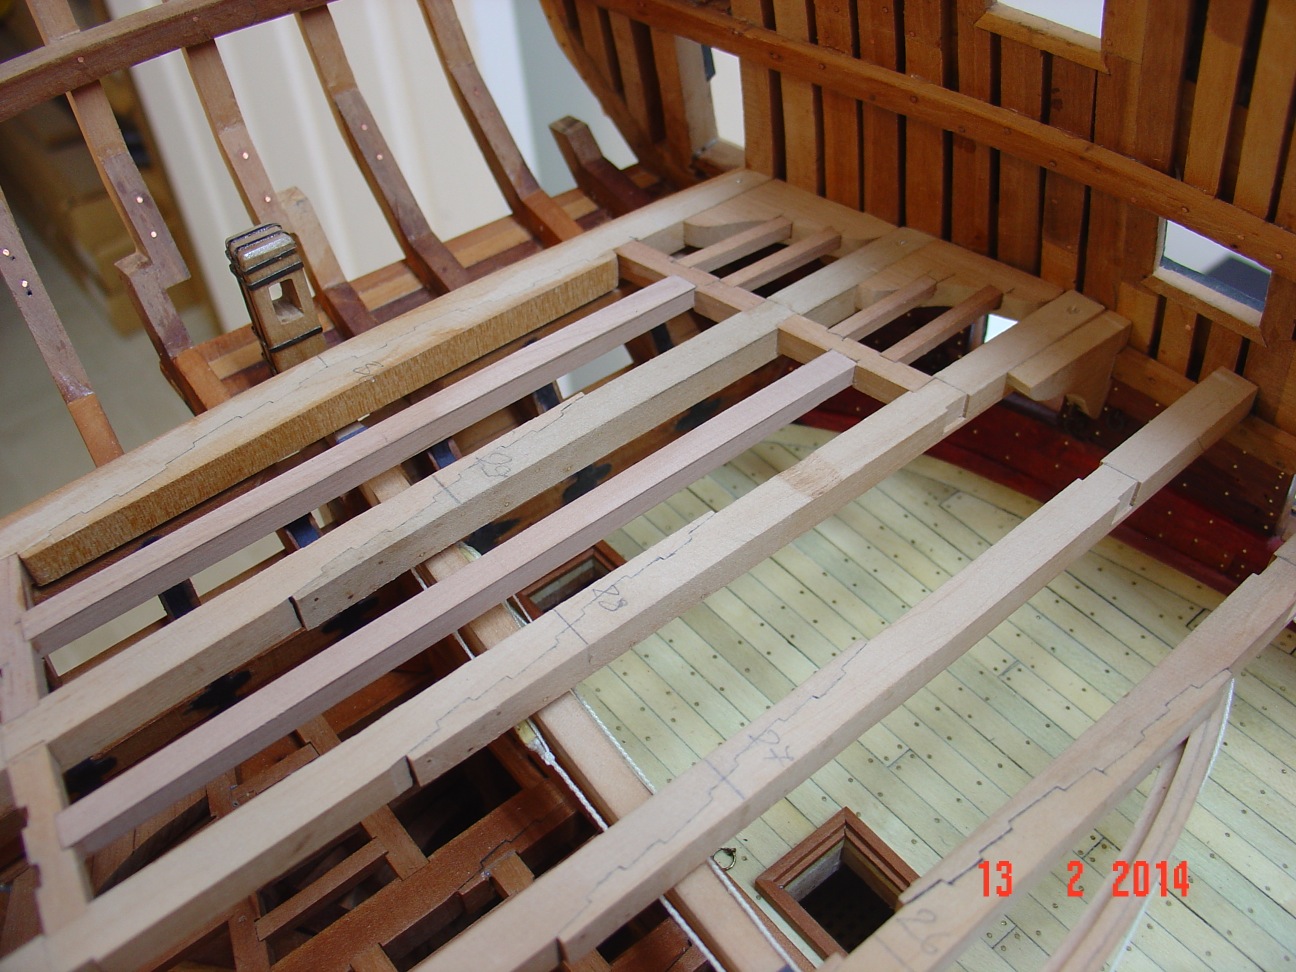
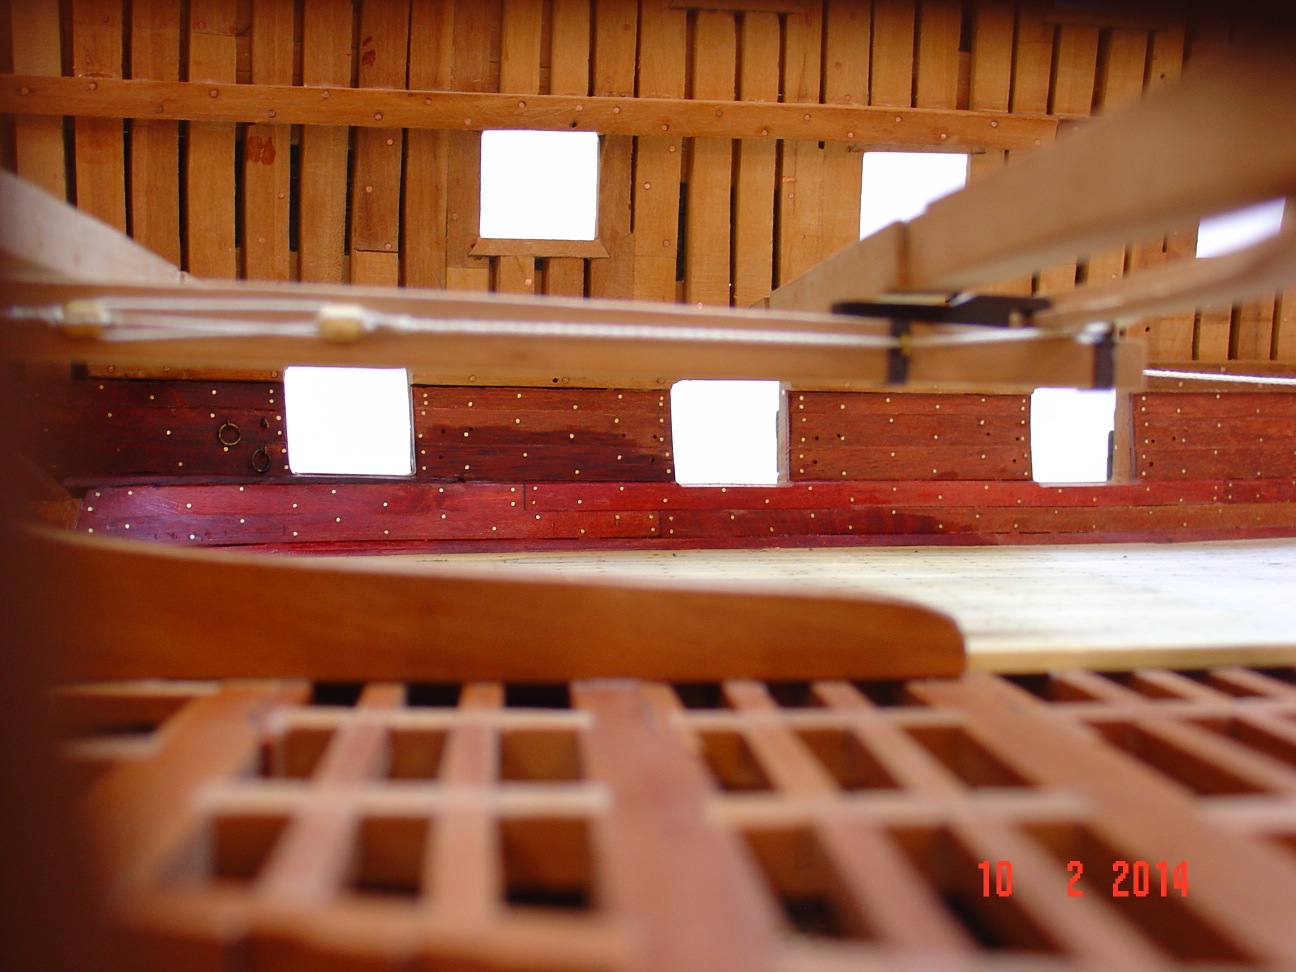
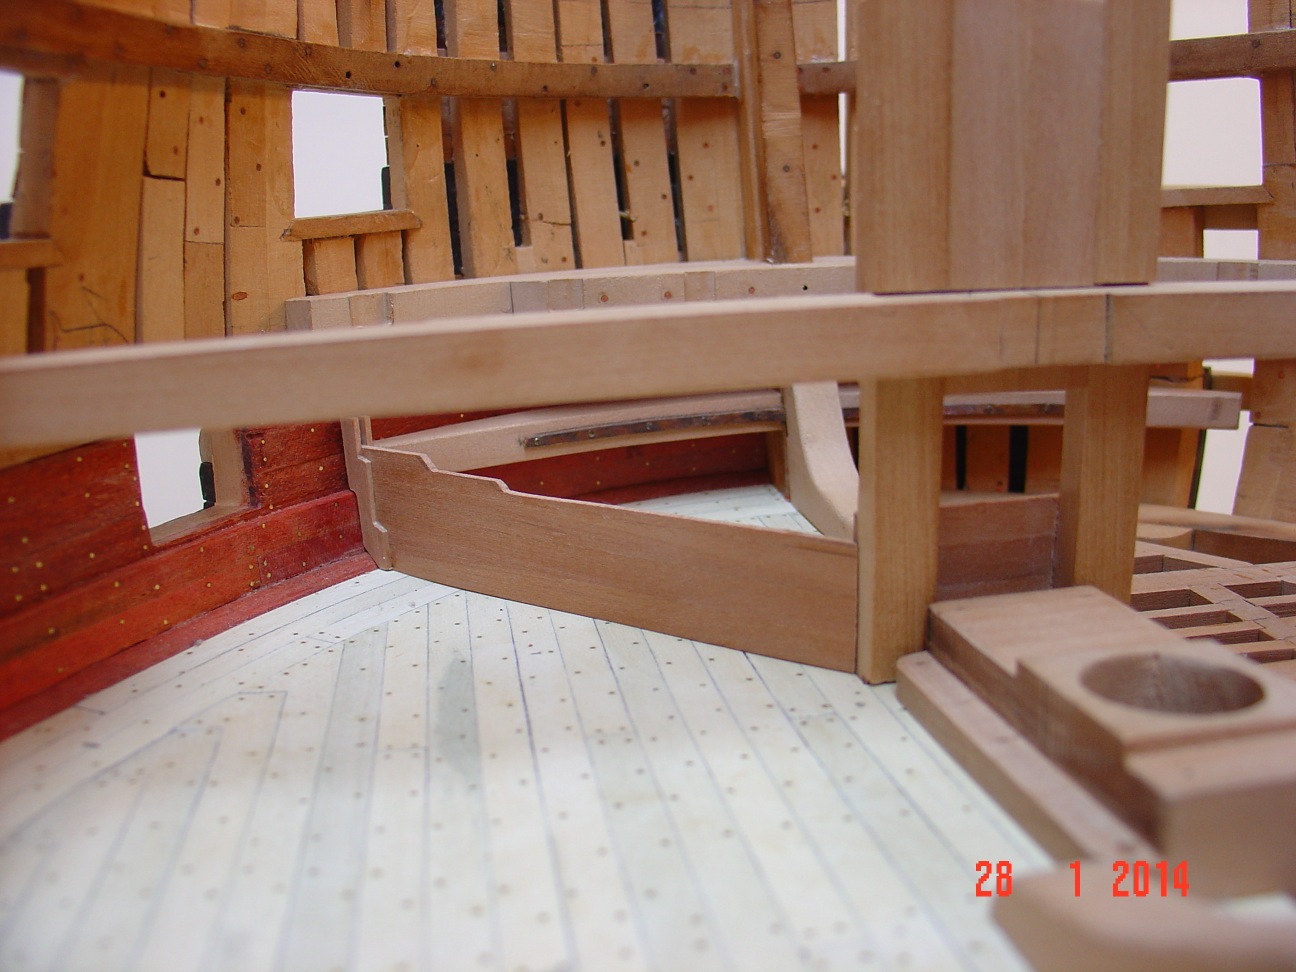
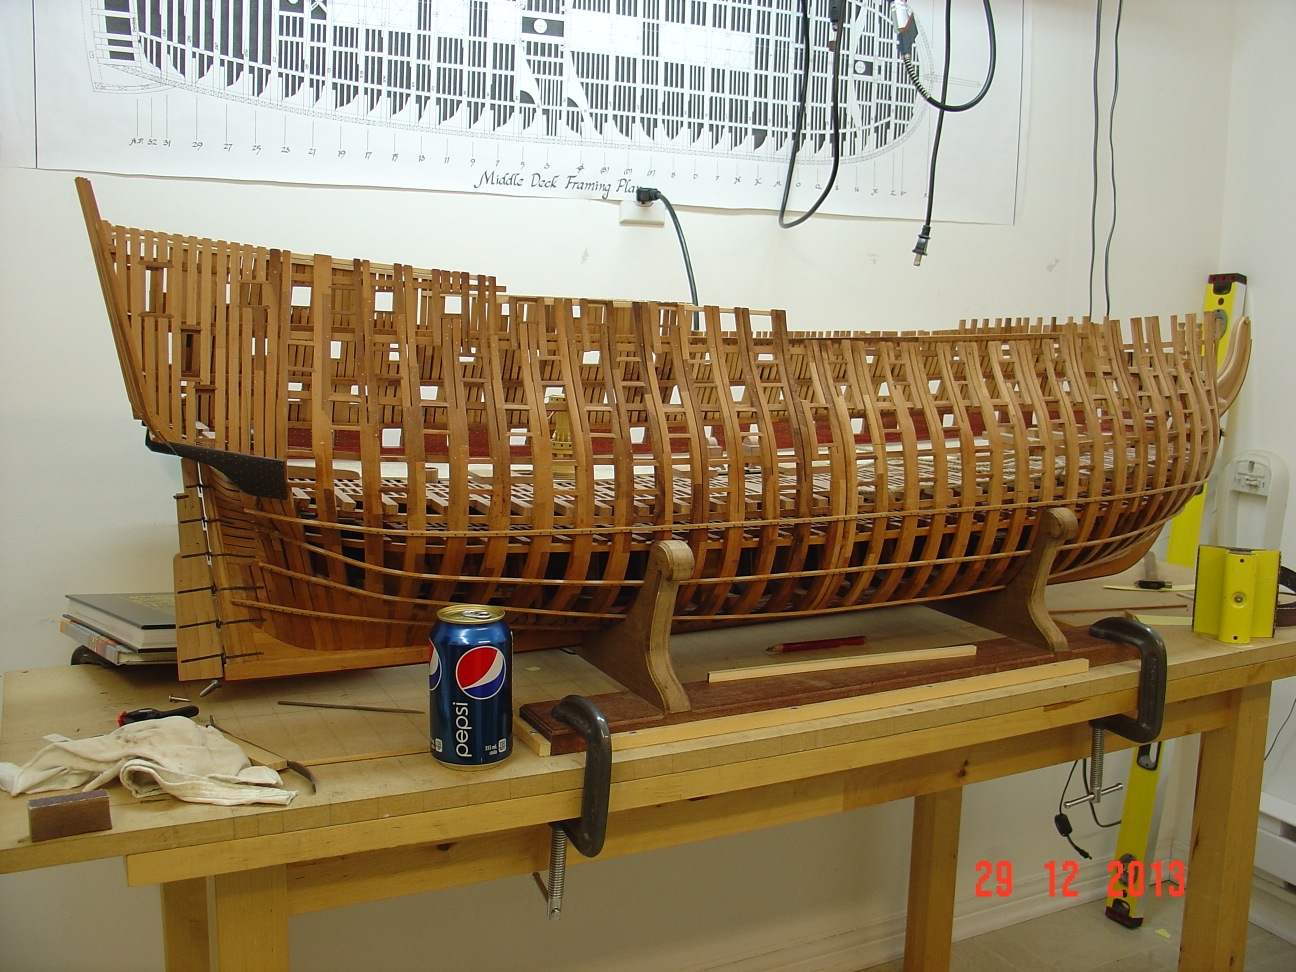
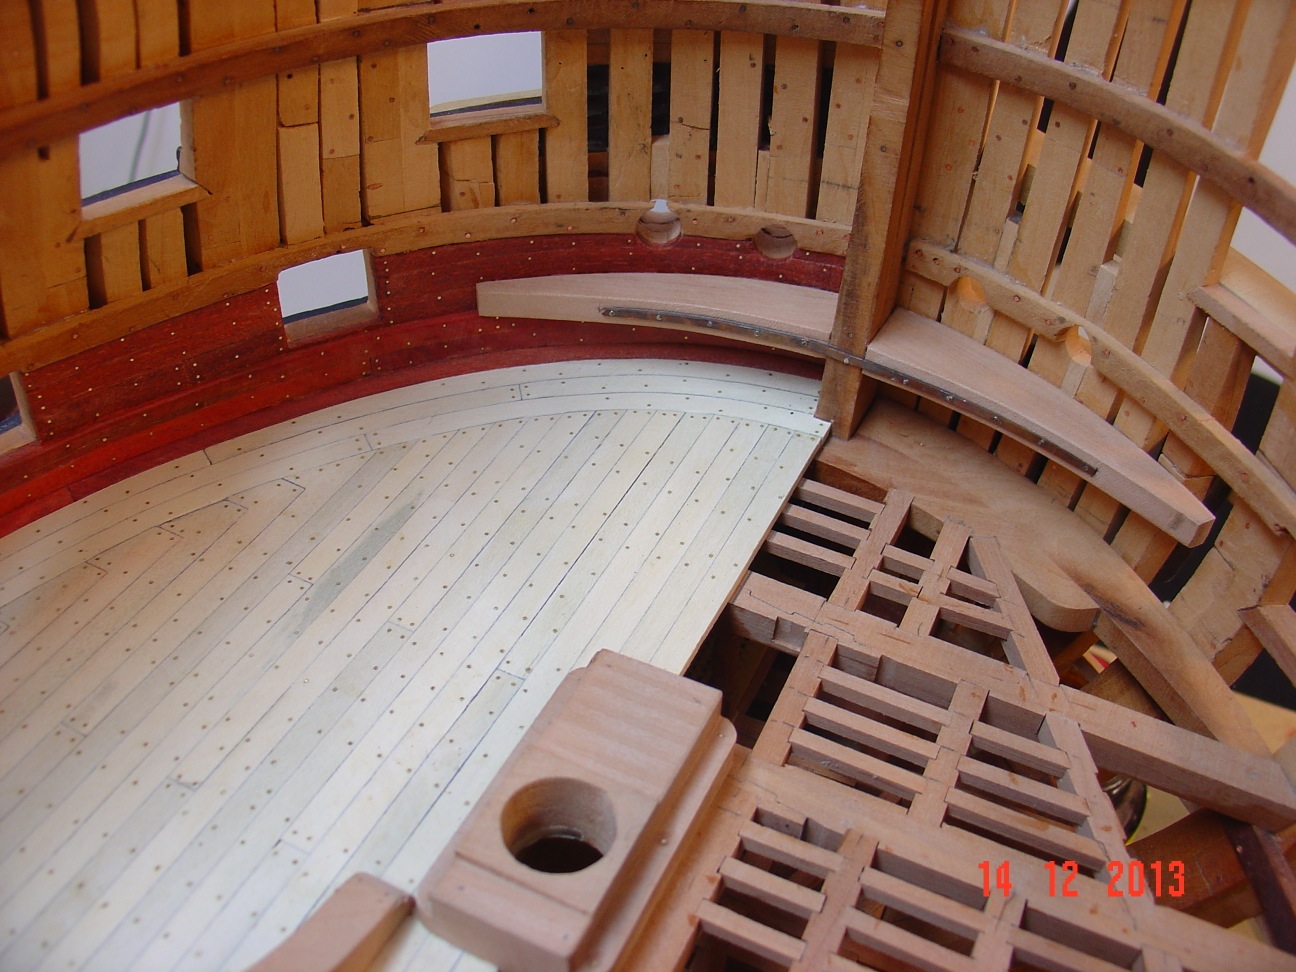
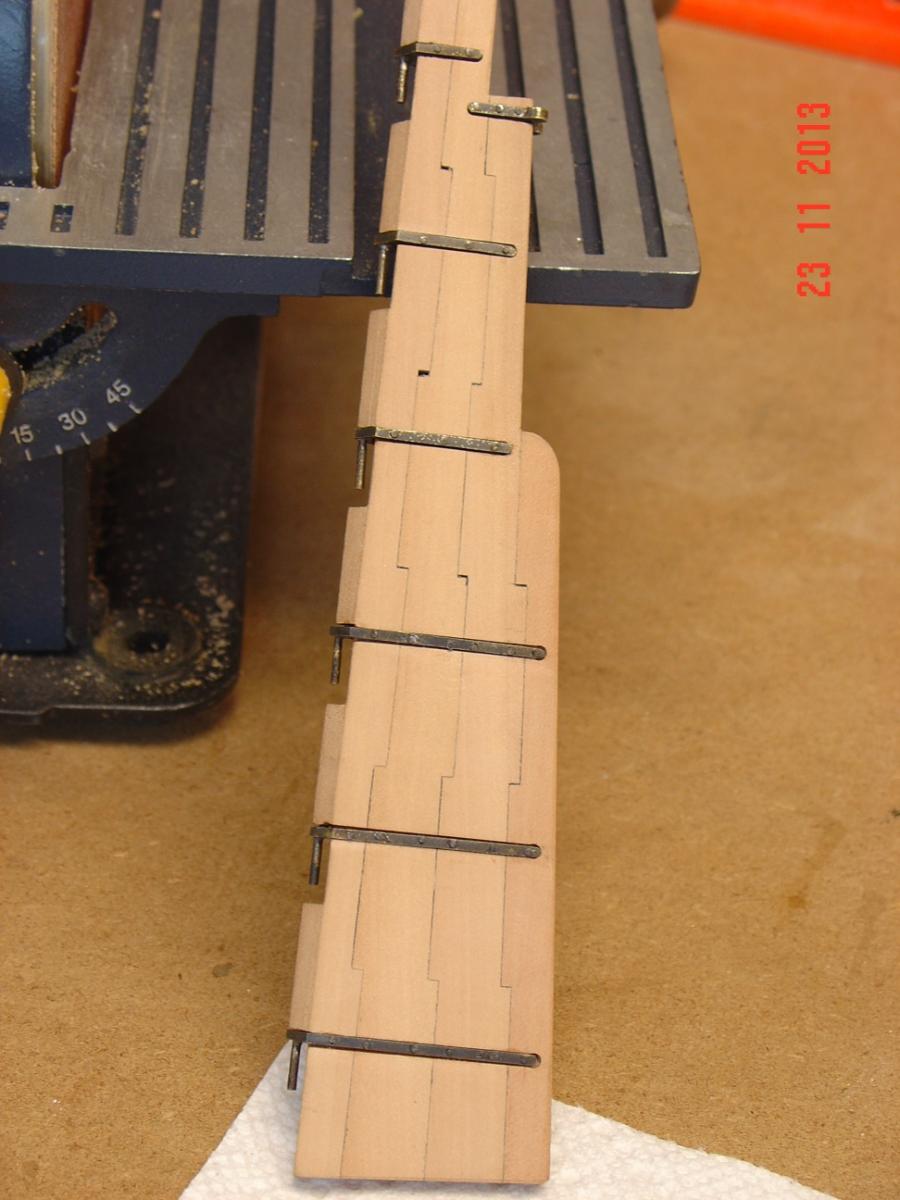
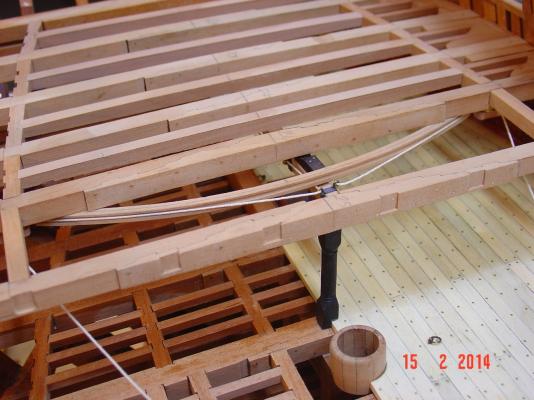
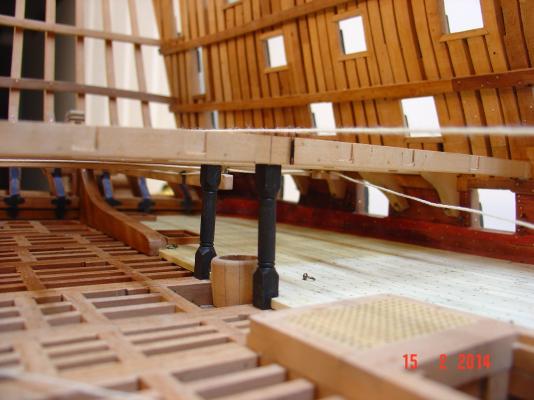
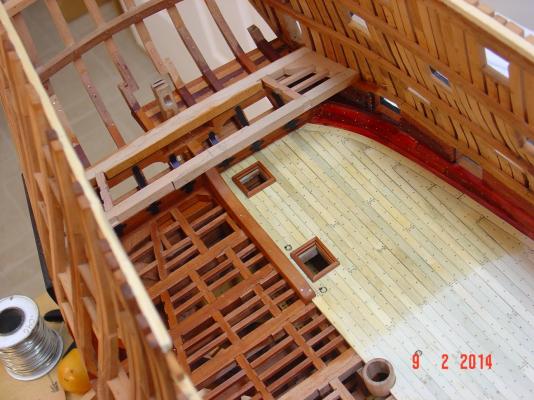
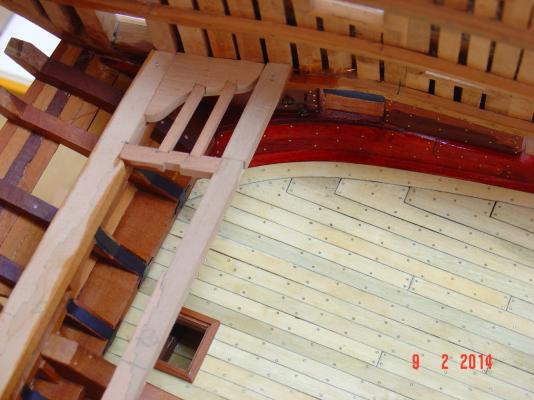
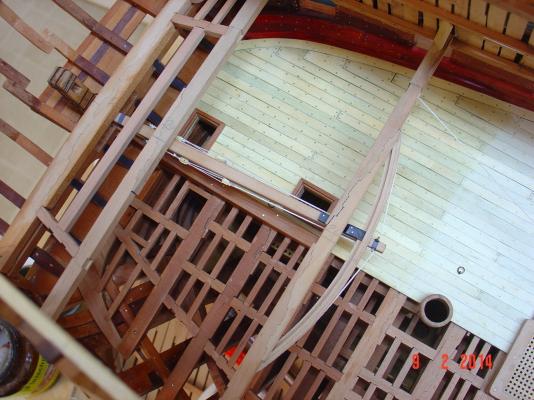
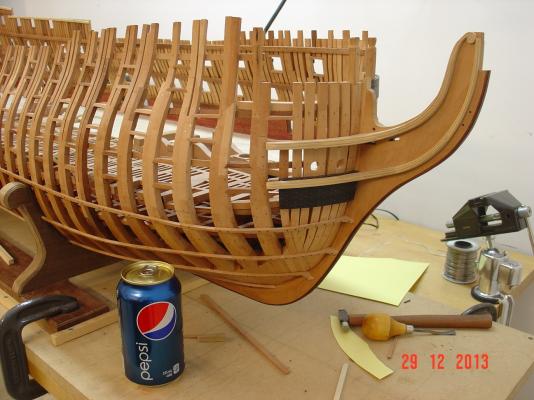
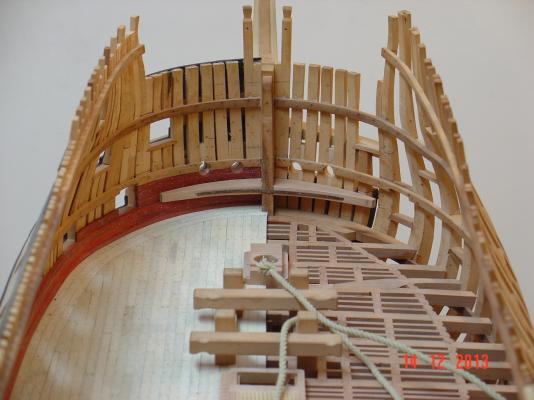
Thank you all for your kind words. They are really appreciated! Here are some more progress pictures with the framing of the middle deck aft part. Regards, Alexandru


-
...

-
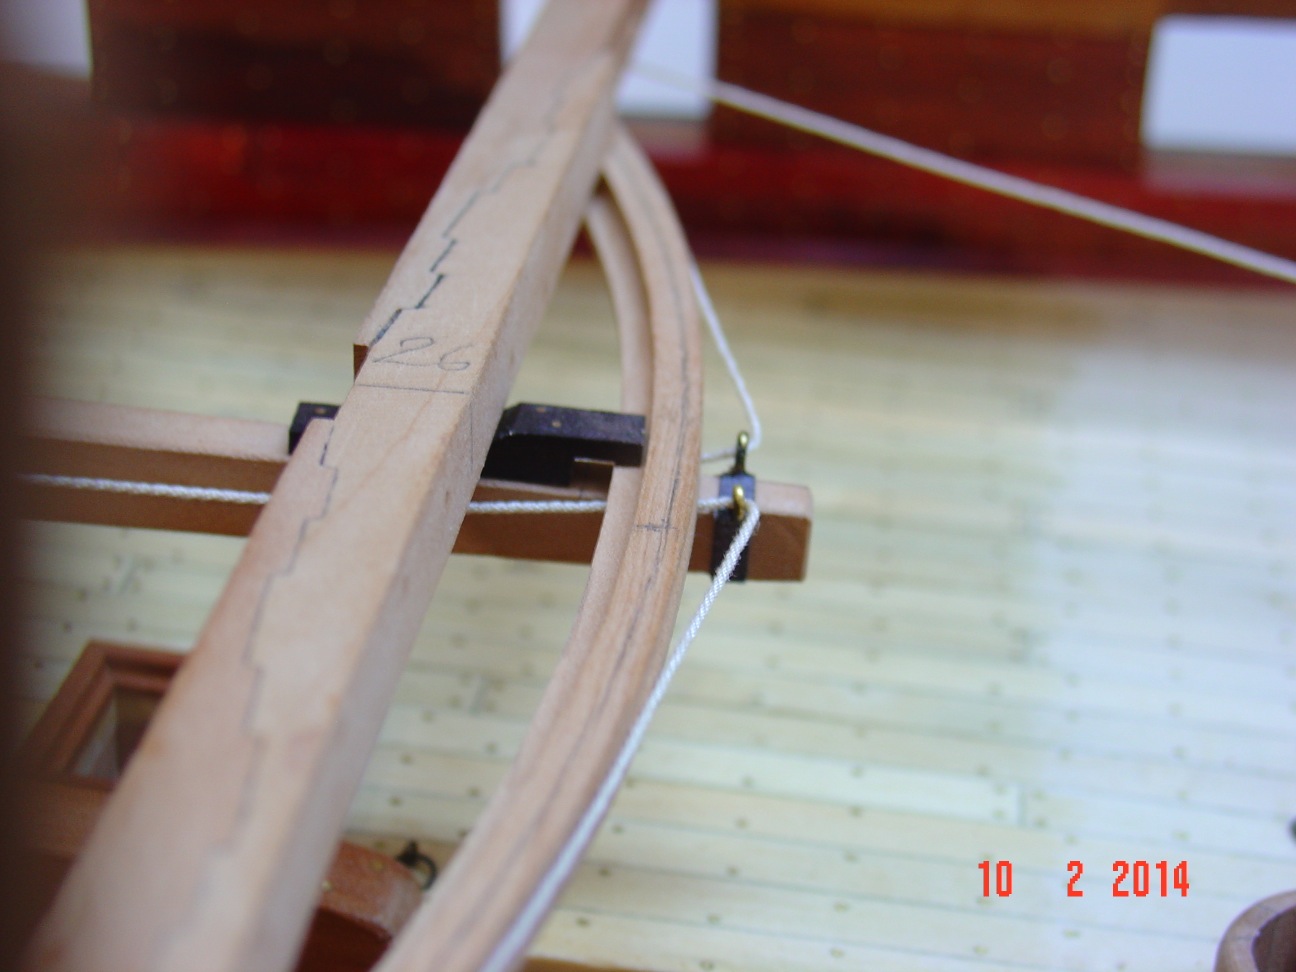
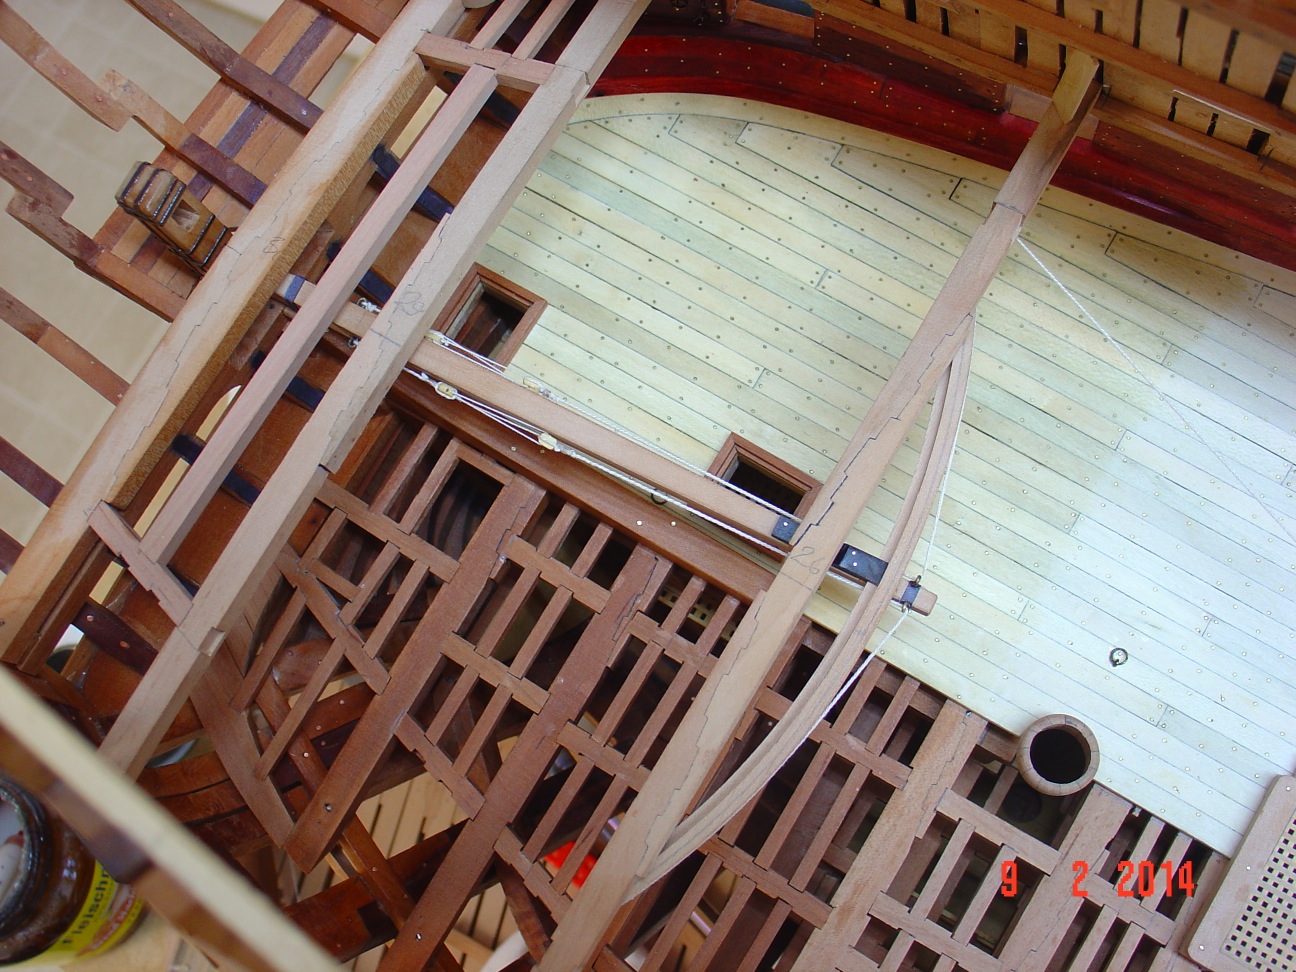
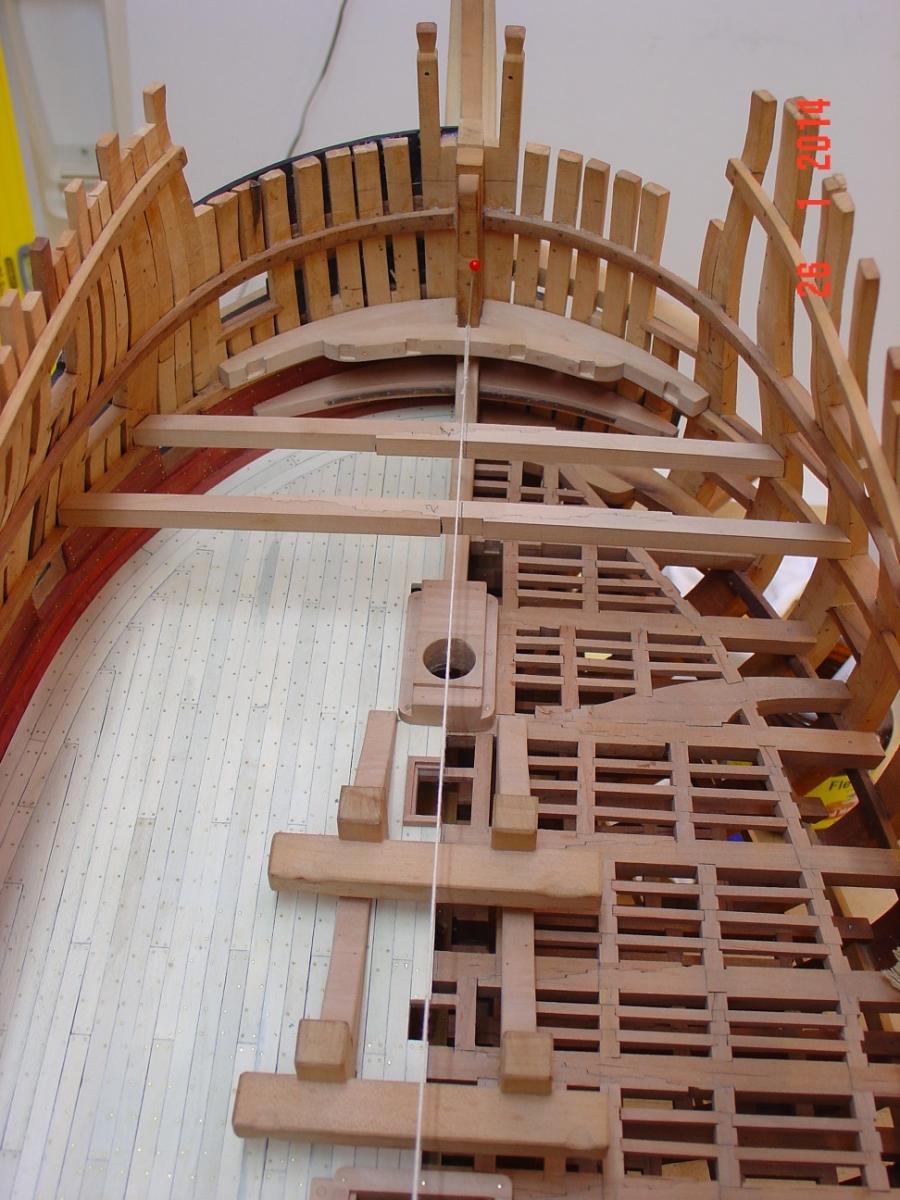
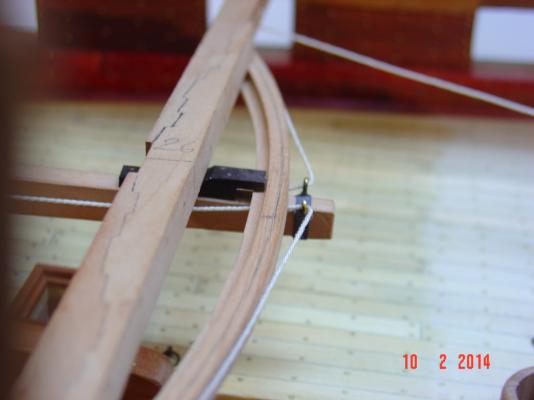
Hello all again, Here is another update mainly on the tiler installation. I was quite surprised how well it actually works! Pulling the two strings will actually make the rudder turn and wit only minimal resistance. Alexandru


-
...


-
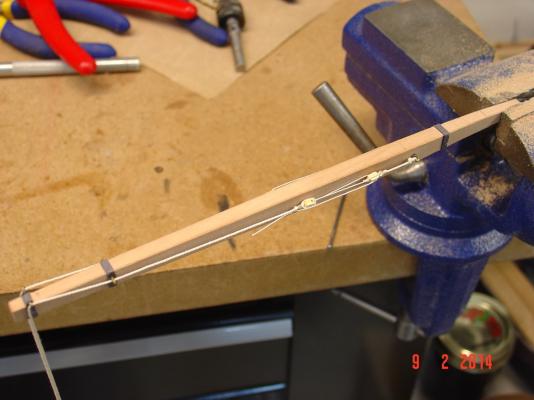
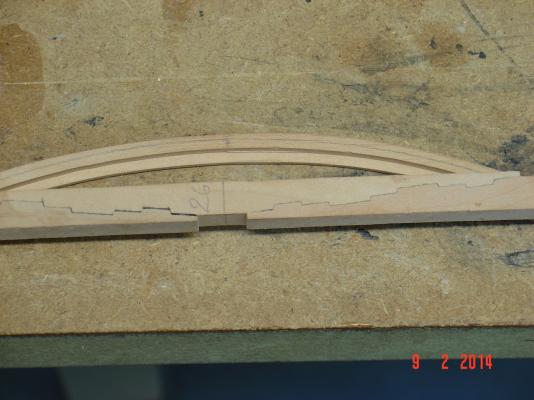
Hello all, Here are some progress pictures. Thank you.


-
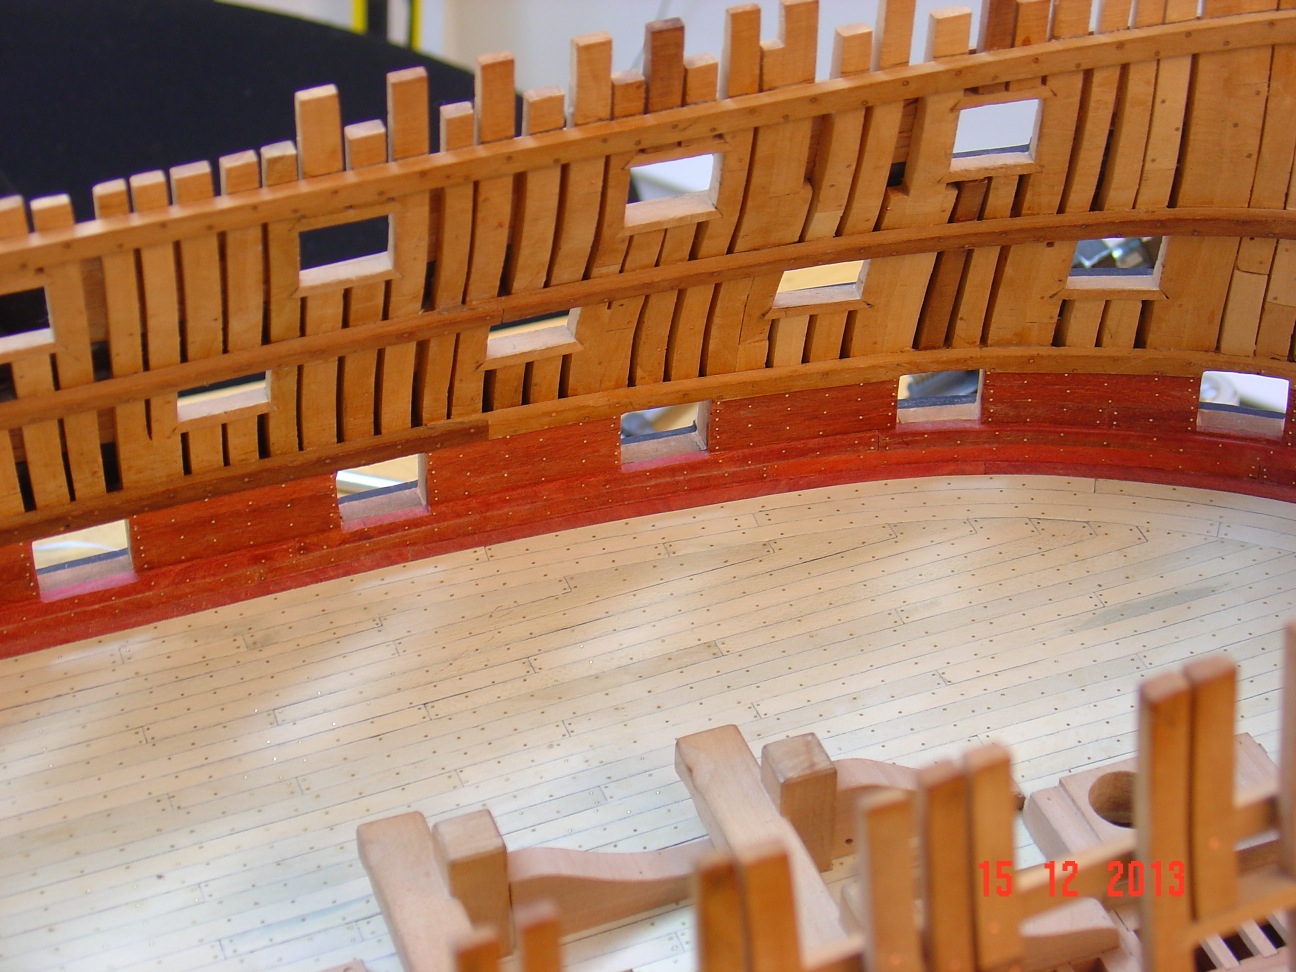
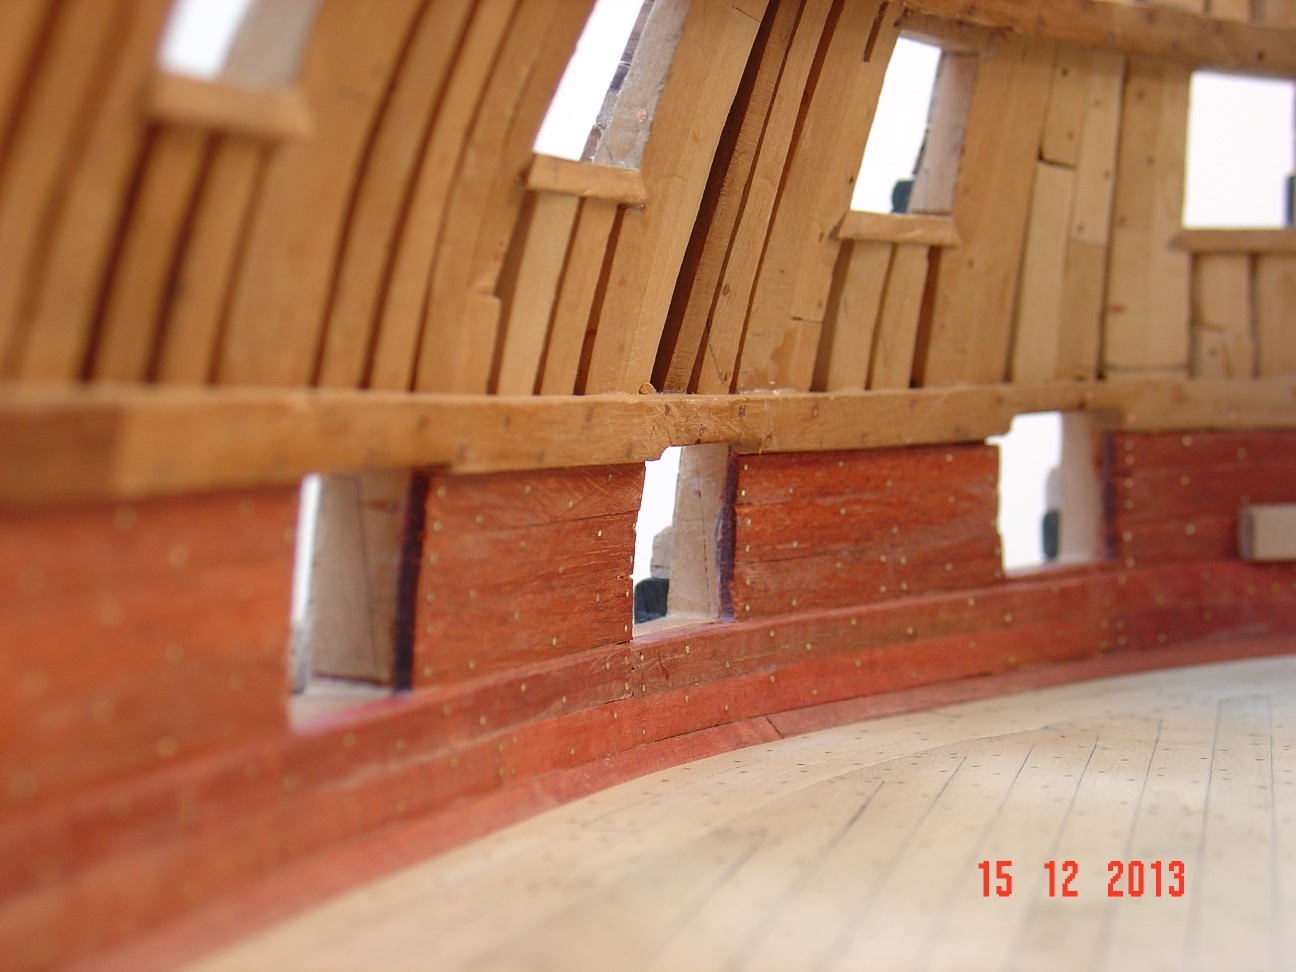
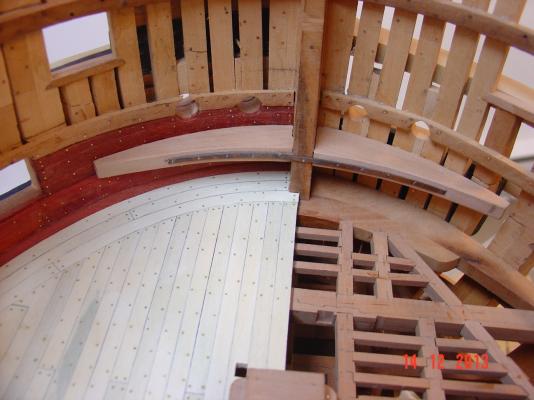
Thank you Mark. The red planking is actualy red wood called bloodwood. I didn't have to paint it at all. In fact nothing is painted on my model, just different colors of wood. Alexandru
-
...


-
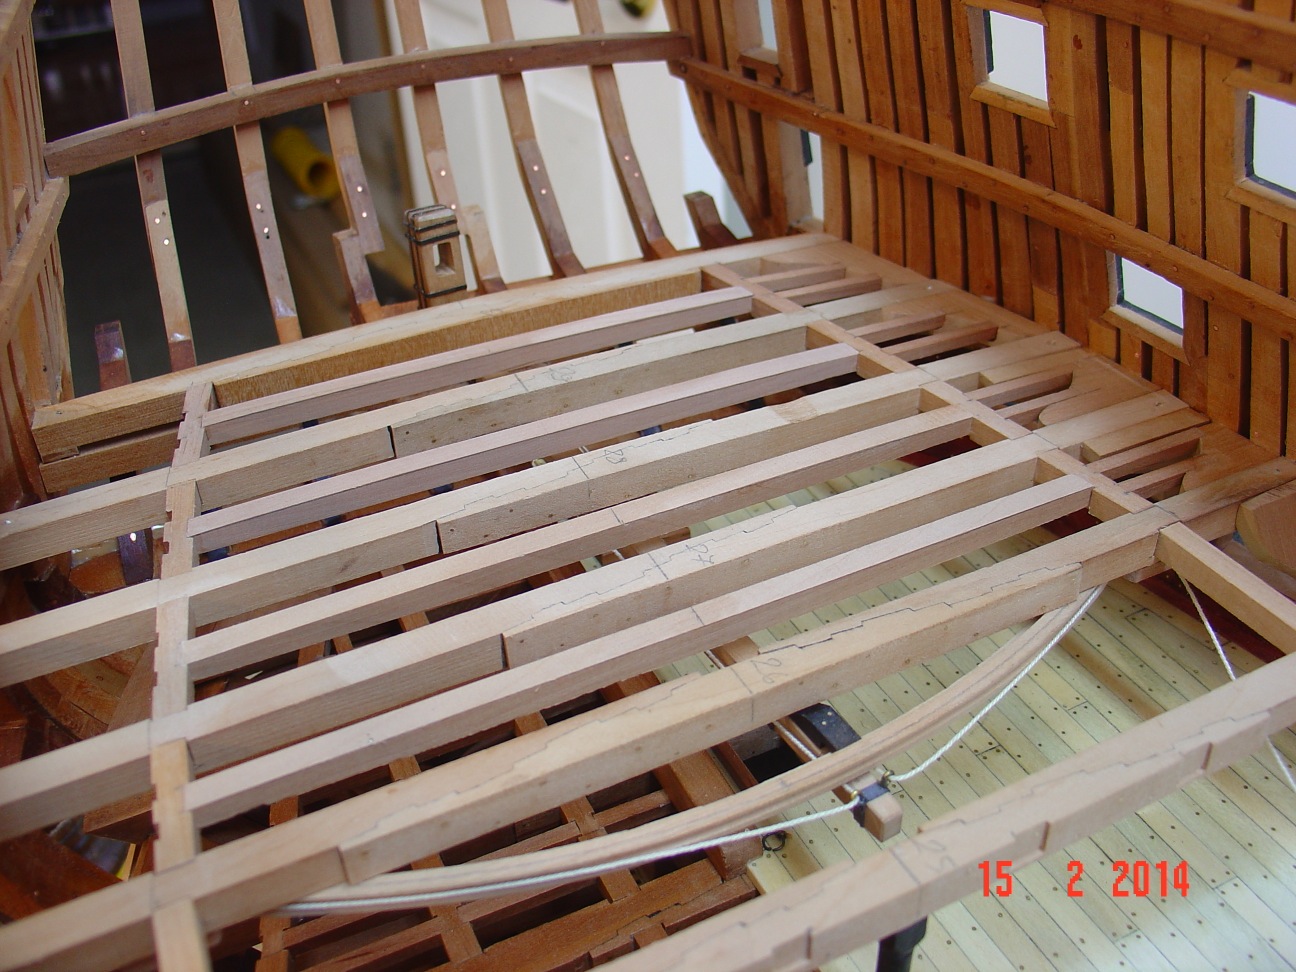
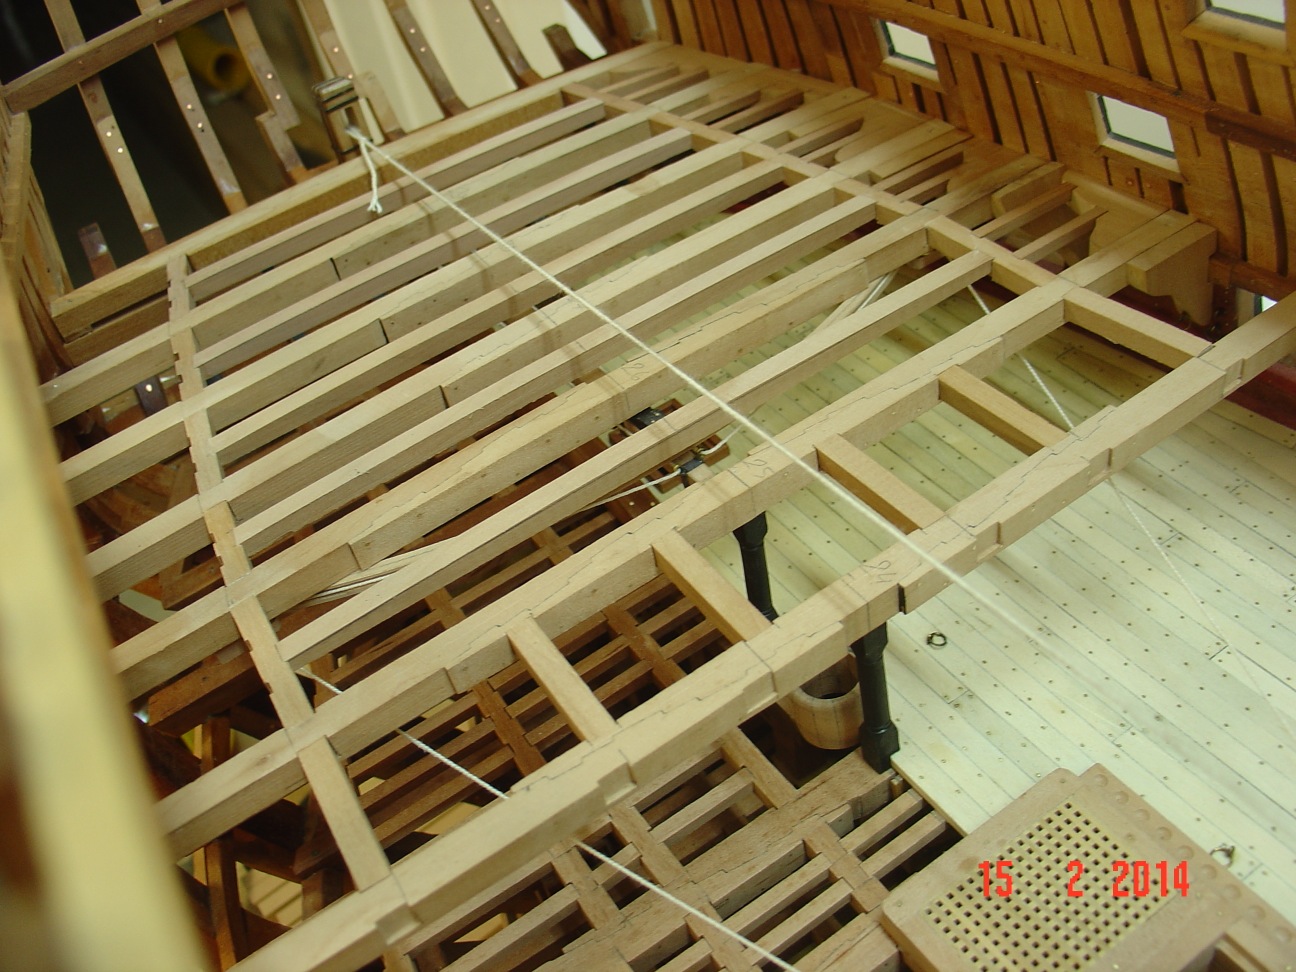
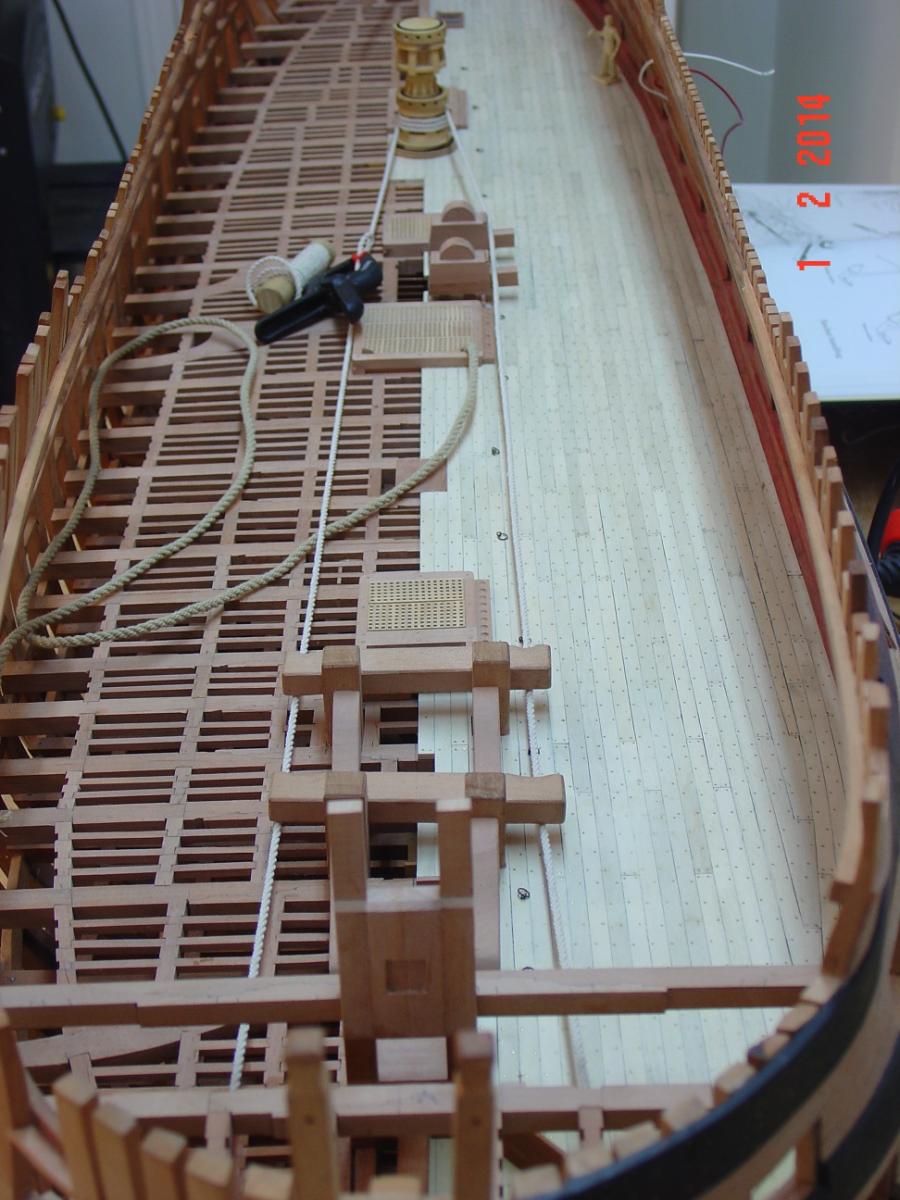
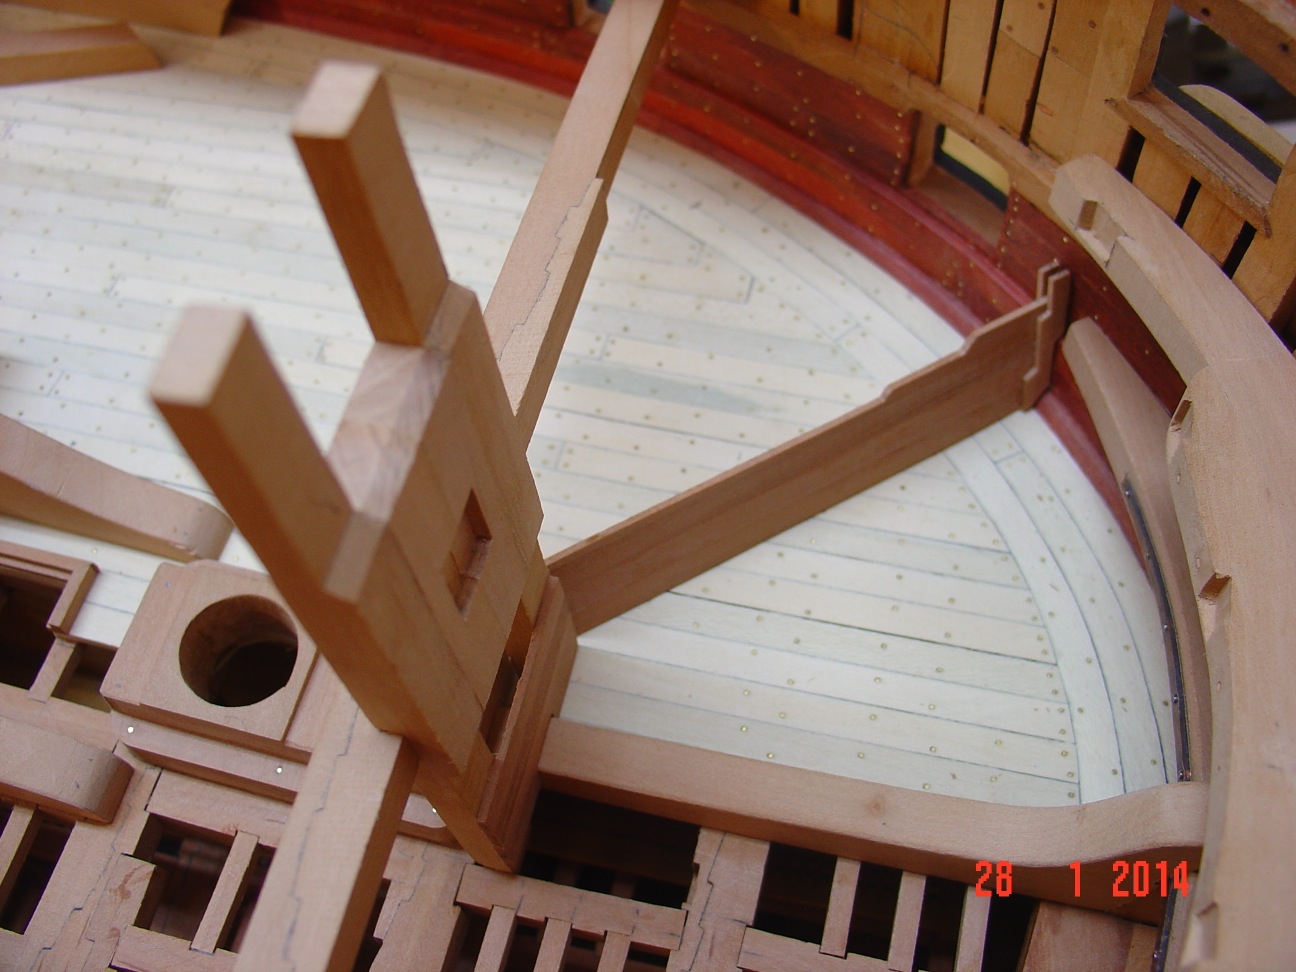
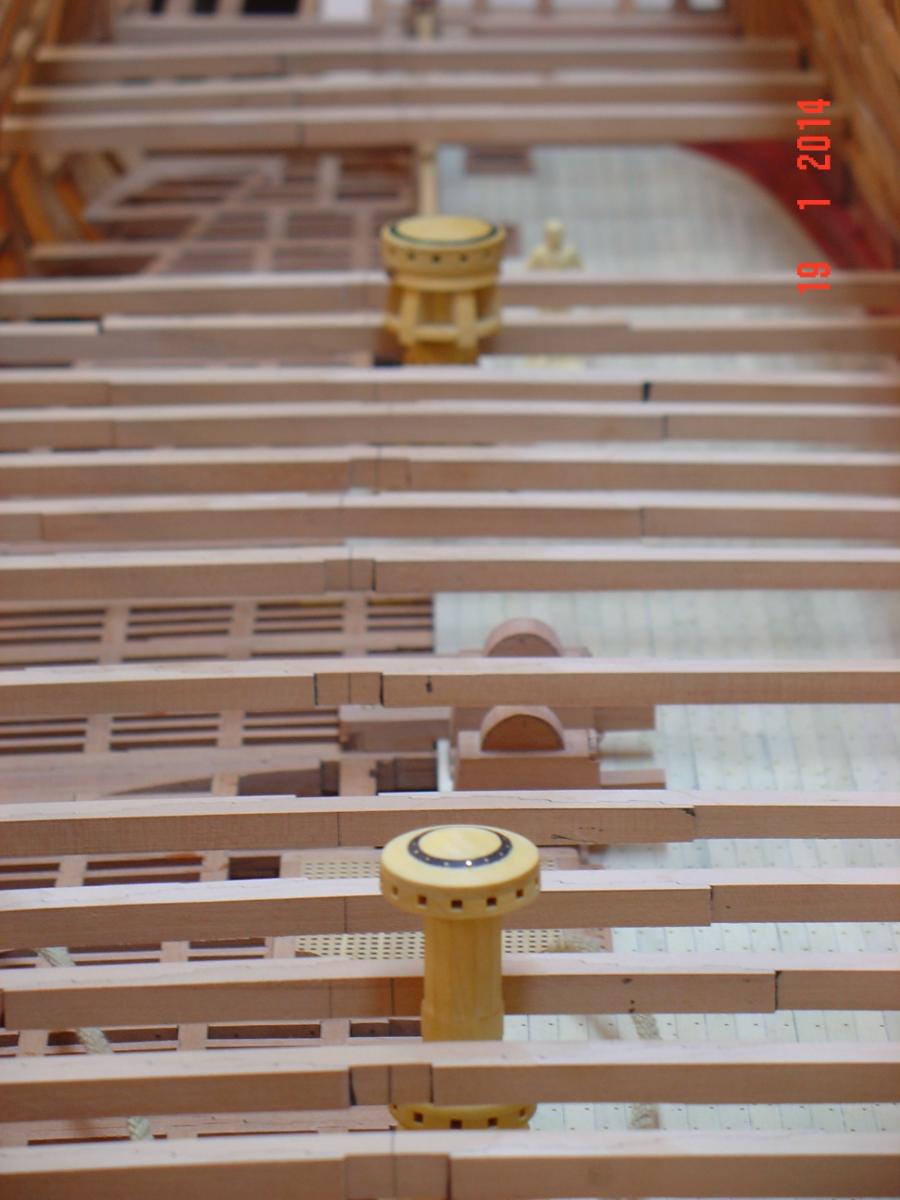
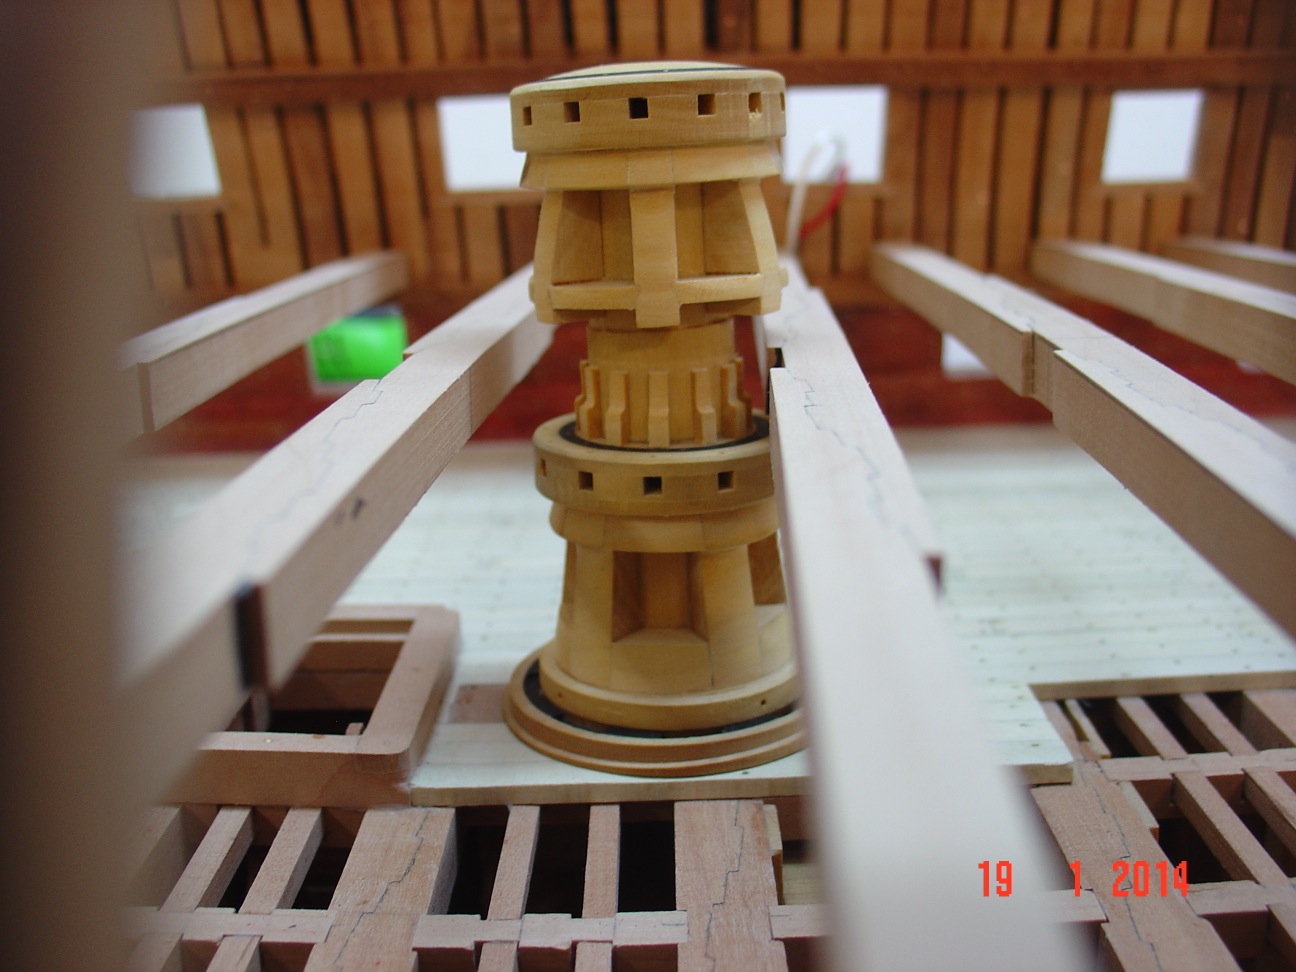
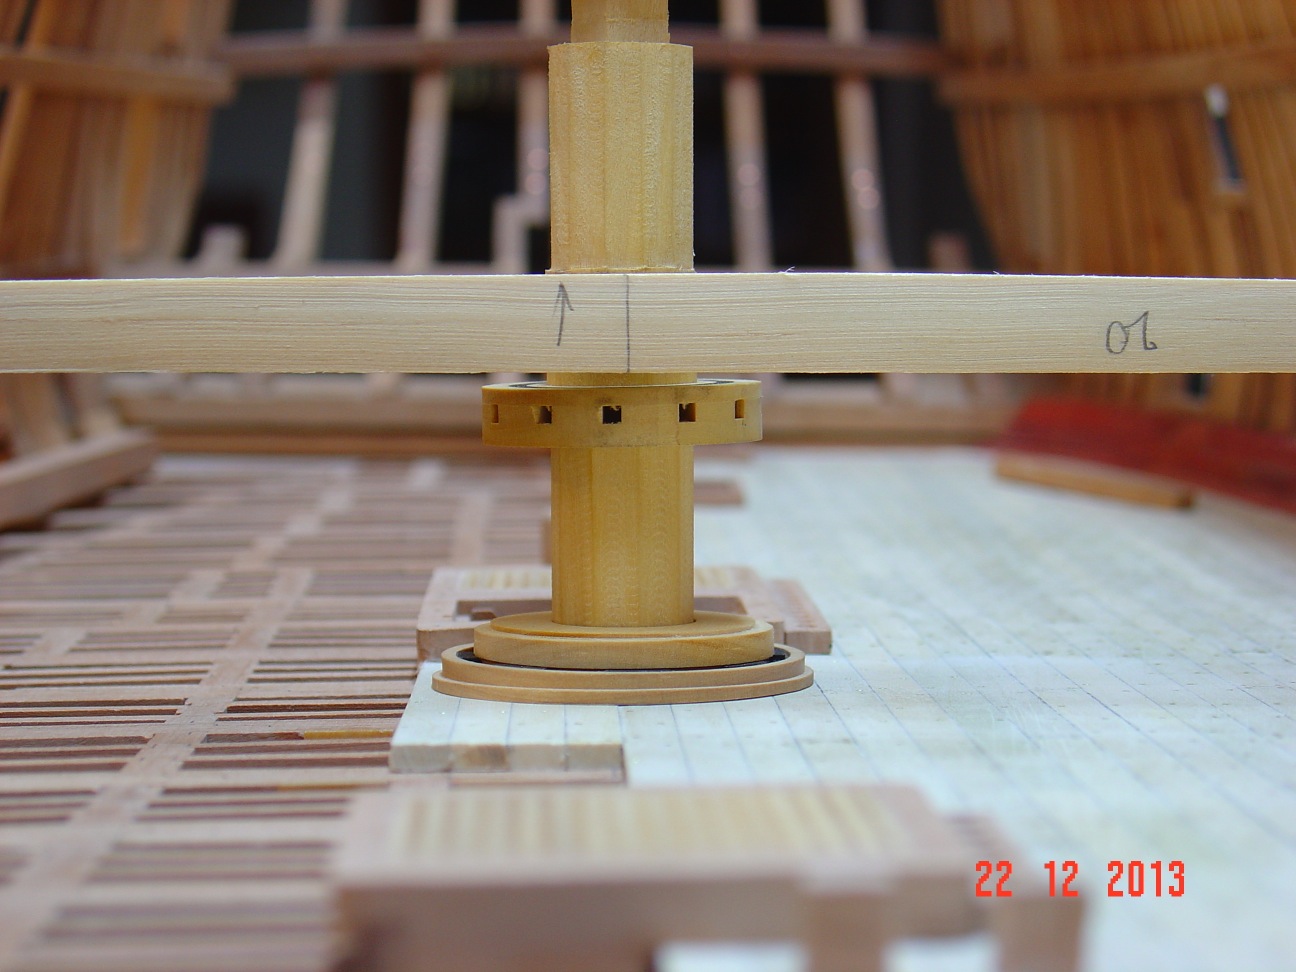
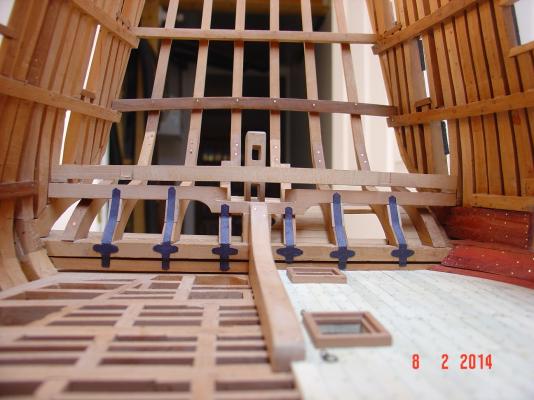
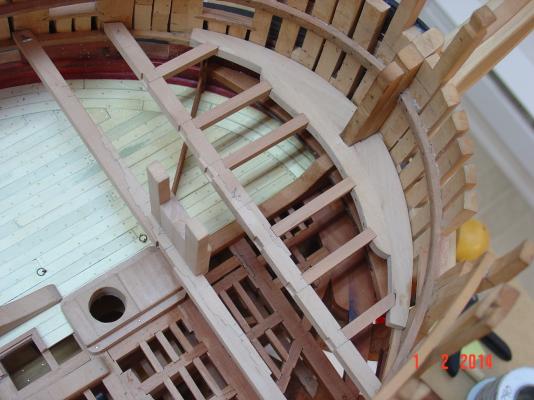
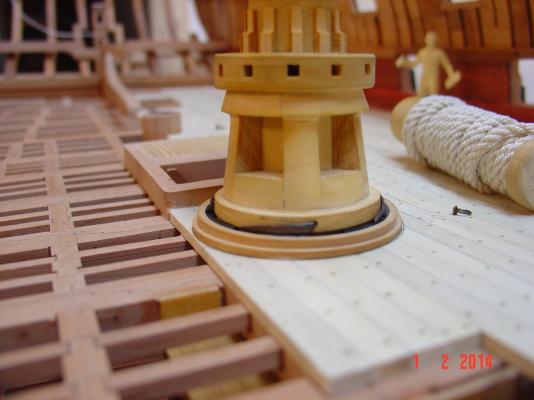
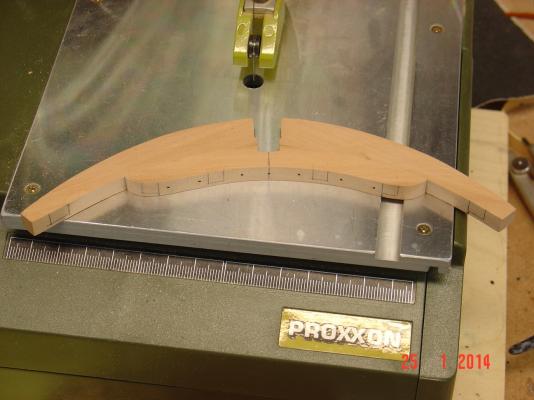
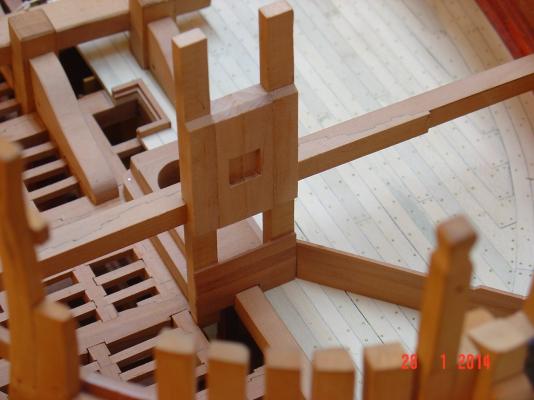
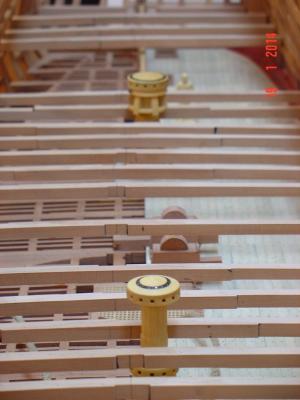
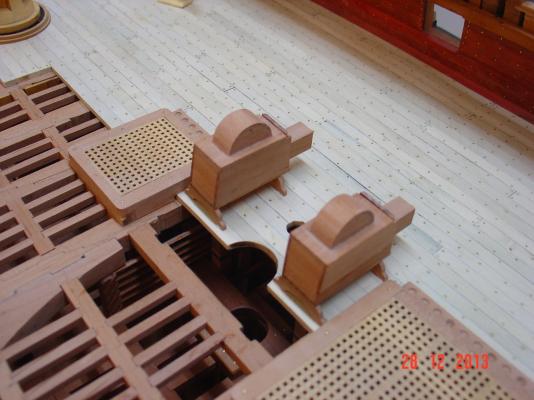
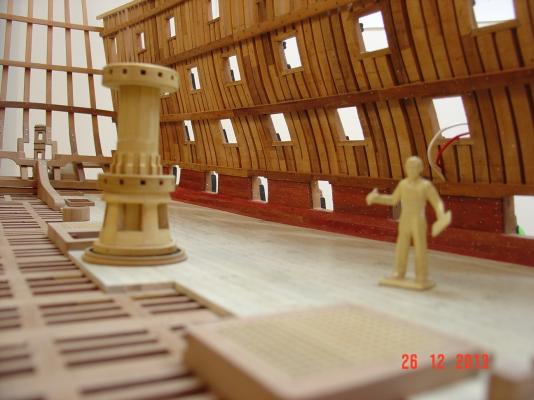
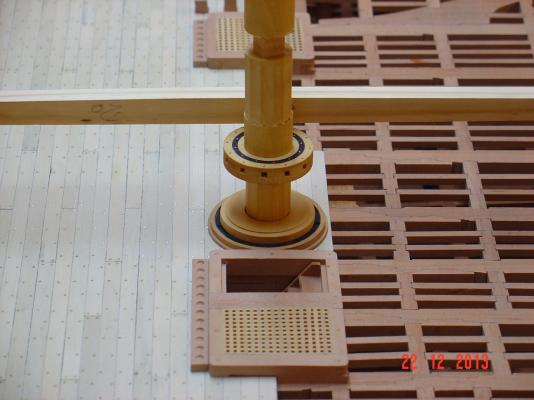
Hello all I've done some progress on the middle deck beams - 20 out of 29. But I have enough to get the height of the deck so I could continue working on the main capstan. Here are some progress pictures:

-
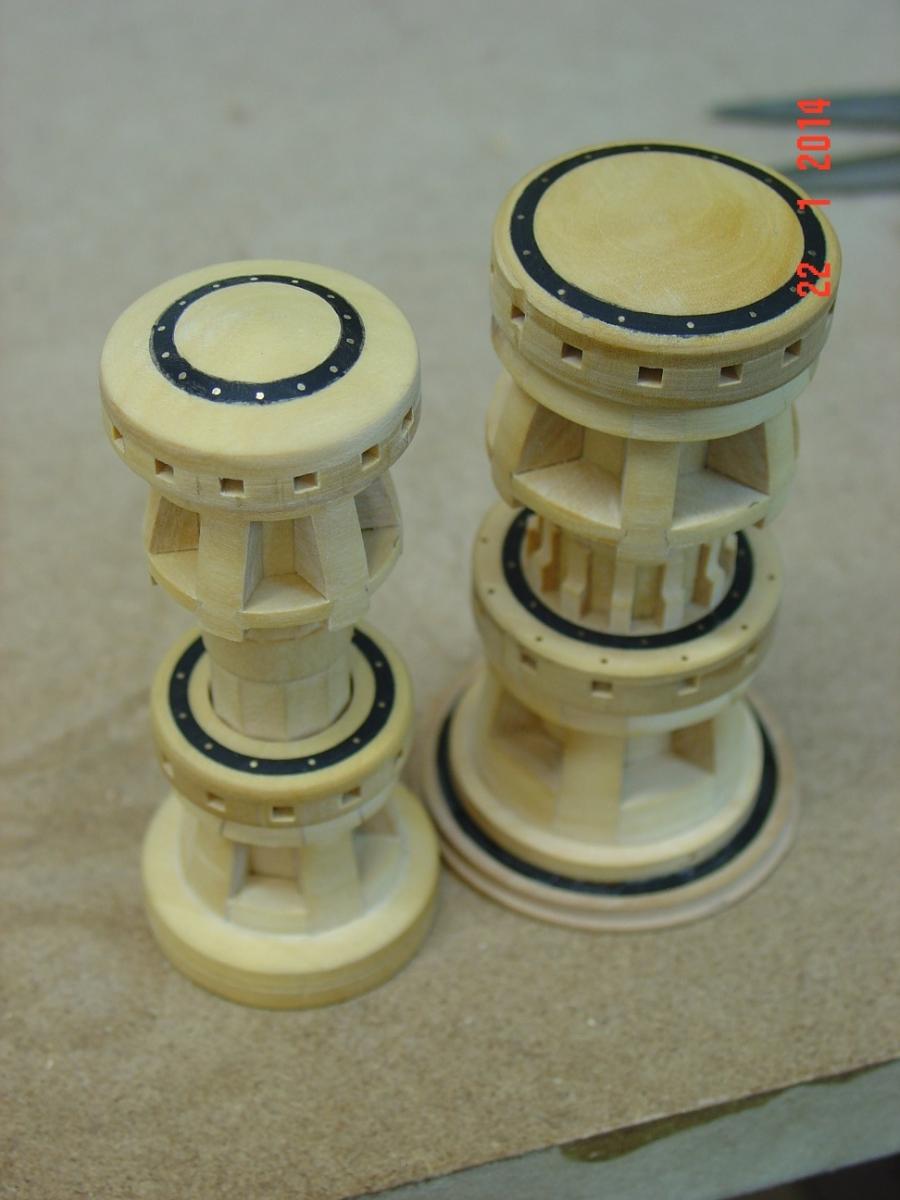
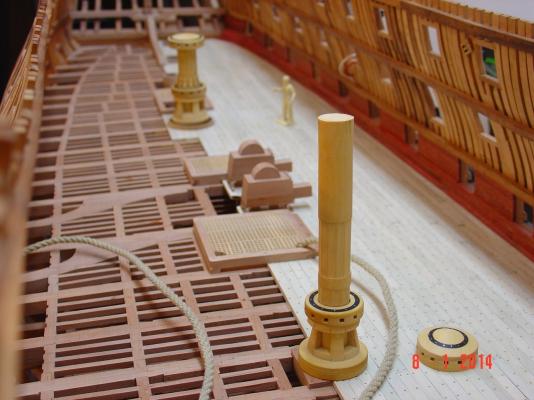
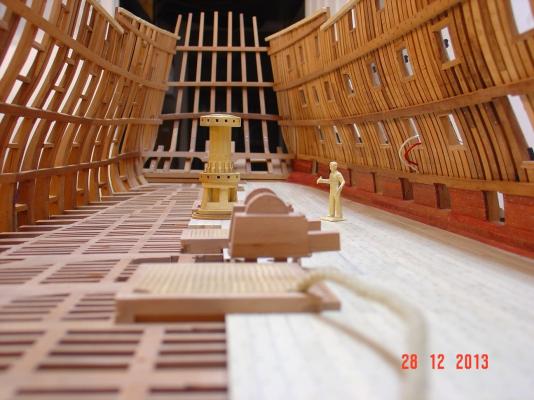
Hello all and thank you for the comments and compliments. Here is a very small update on the fore capstan. As the main one, the upper part is not completed yet as I will wait for the actual beams of the middle deck to be done for a more accurate setting. Thank you, Alexandru
-
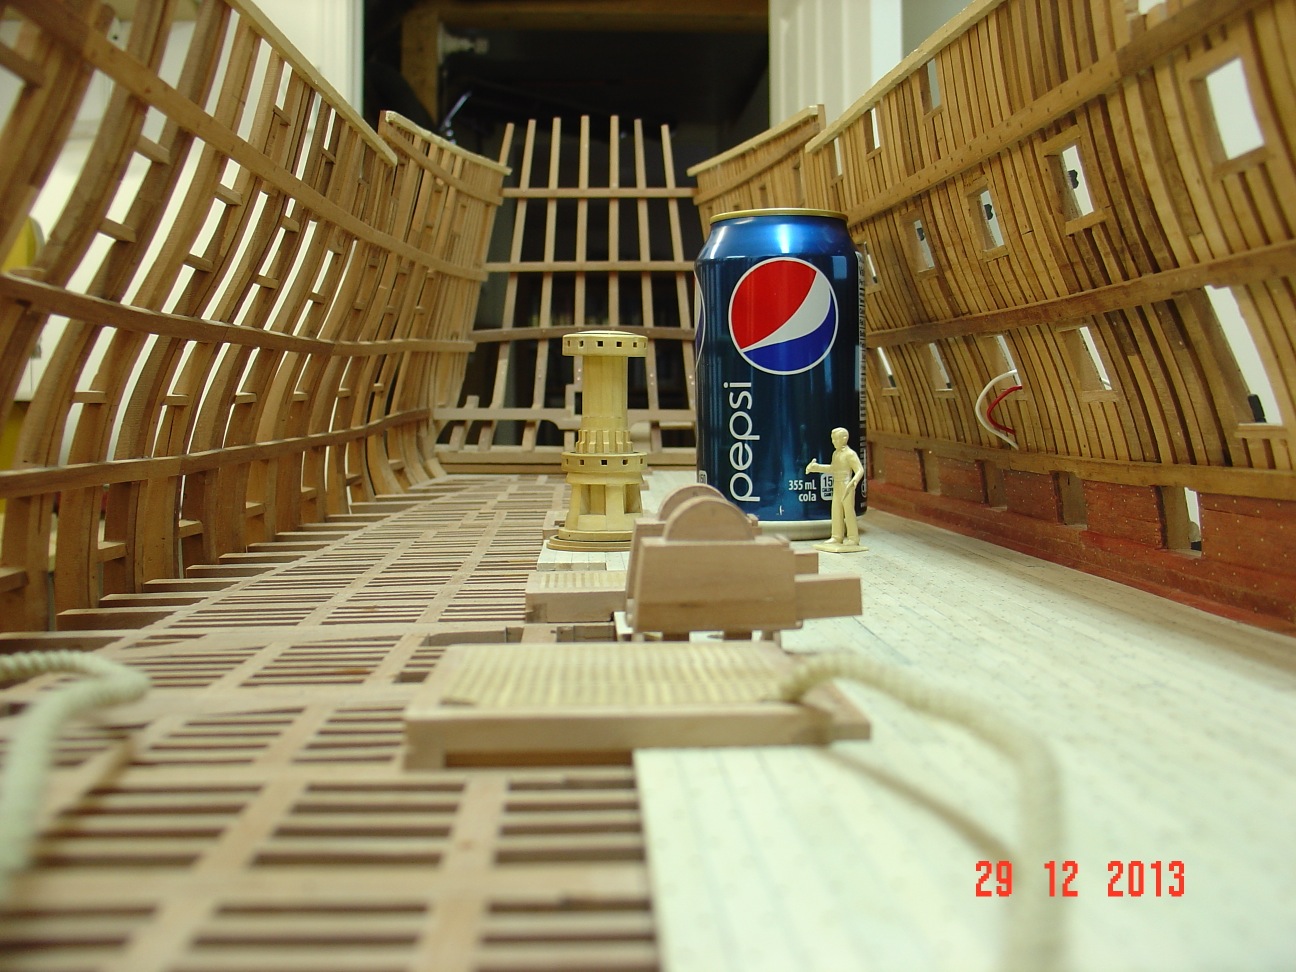
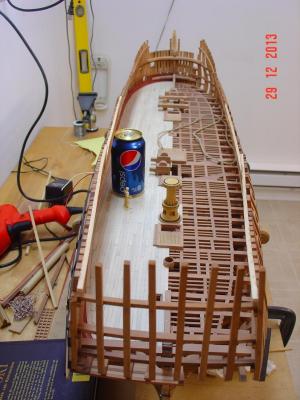
I've done a bit of progress on the lower deck: the "head" of the two chain pumps. Sailor1234567890 - as for the "beer bottle" scale I used a Pepsi can as you can see in the last five pictures. Hope this helps. Alexandru


-
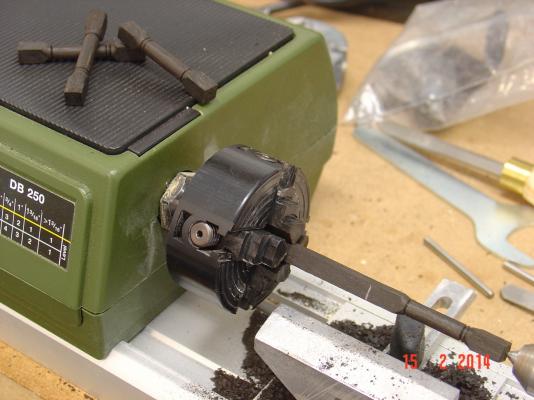
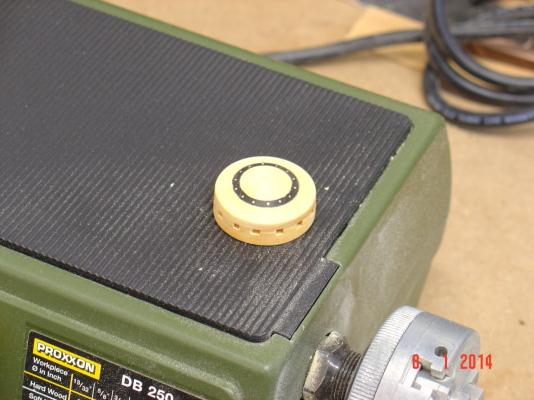
Hi Karl, Yes, that is from Proxxon, called dividing attachment and you can find it here: http://www.proxxontools.com/store/pc/viewPrd.asp?idproduct=66&idcategory=31 Alexandru
-
Thank you all. Here is another update... Regards Alexandru


-
Another small update...


-
just a dry fit...

-
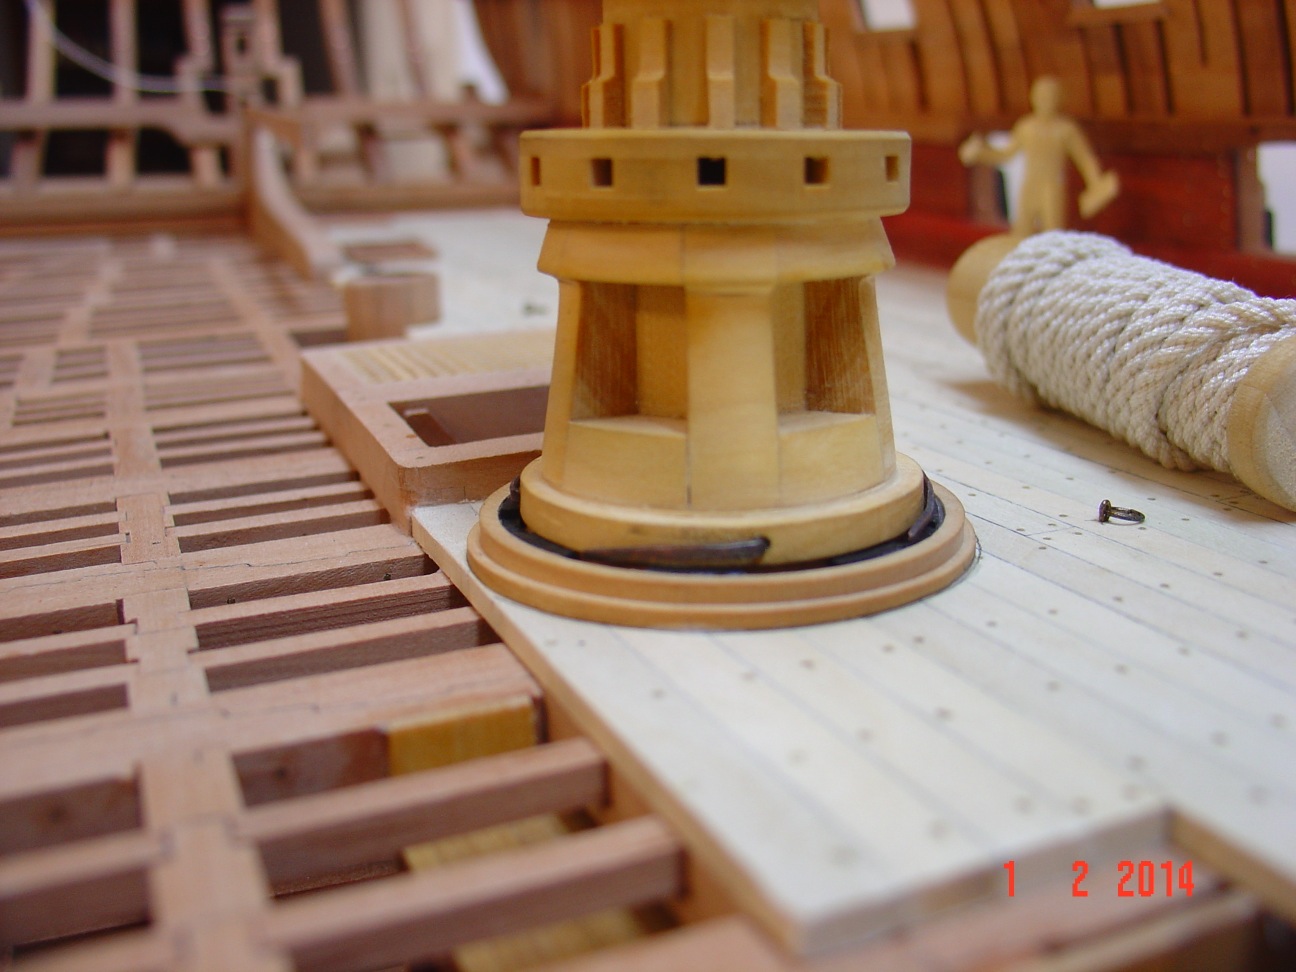
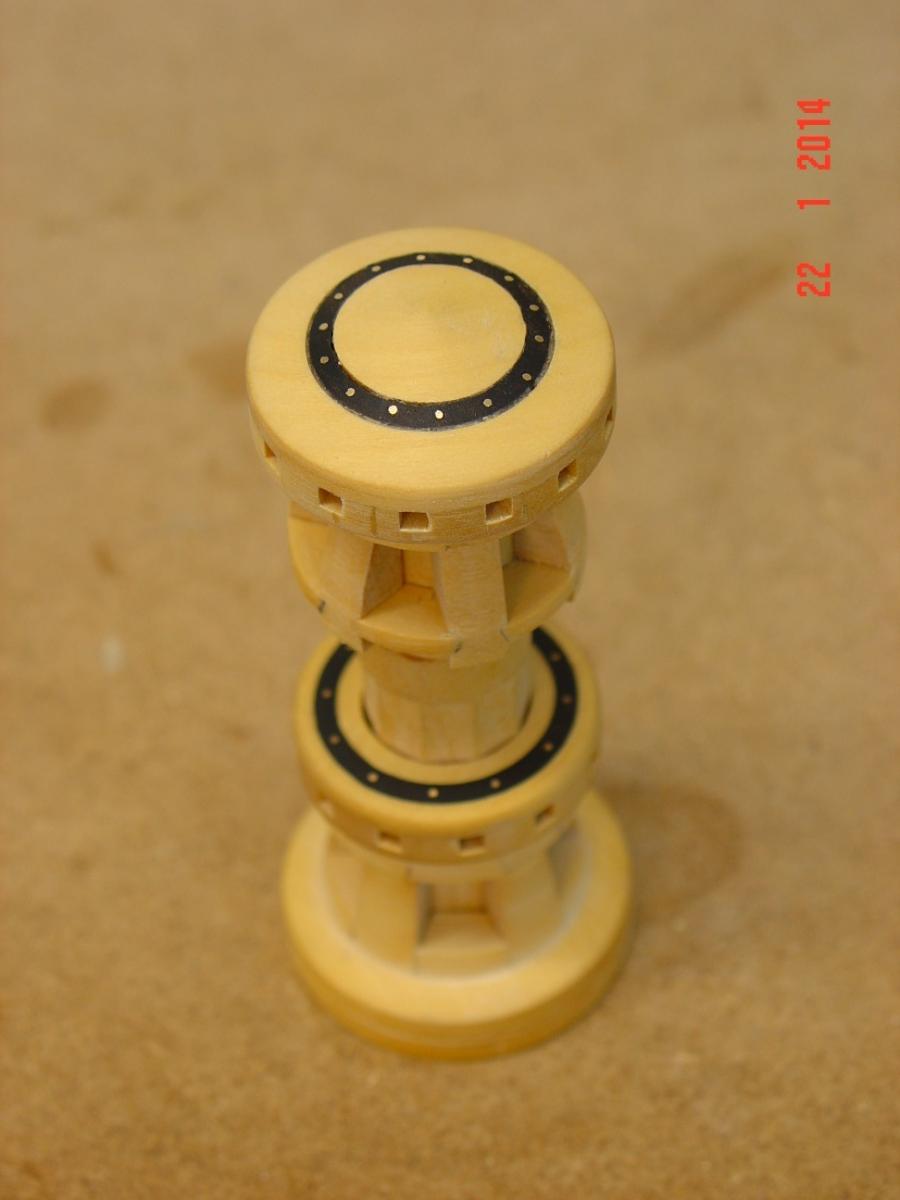
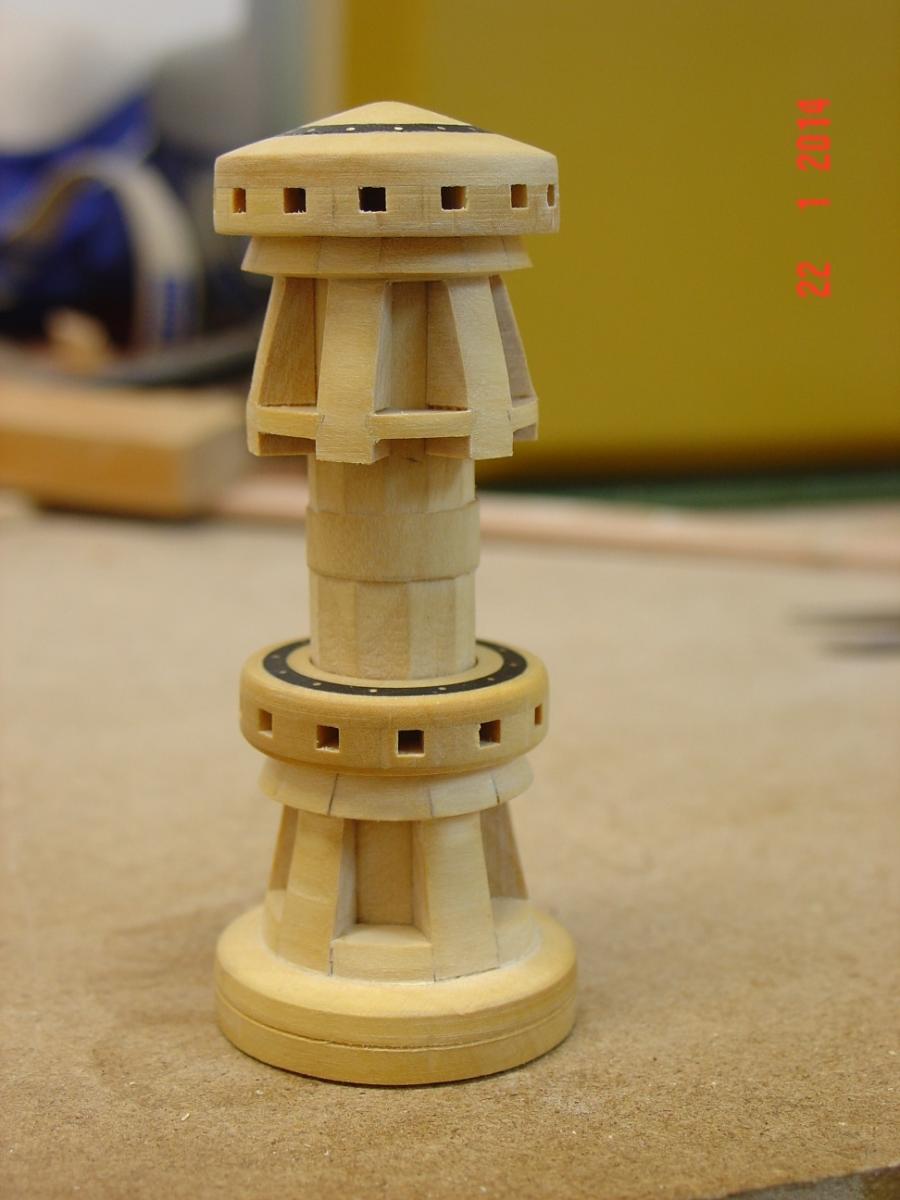
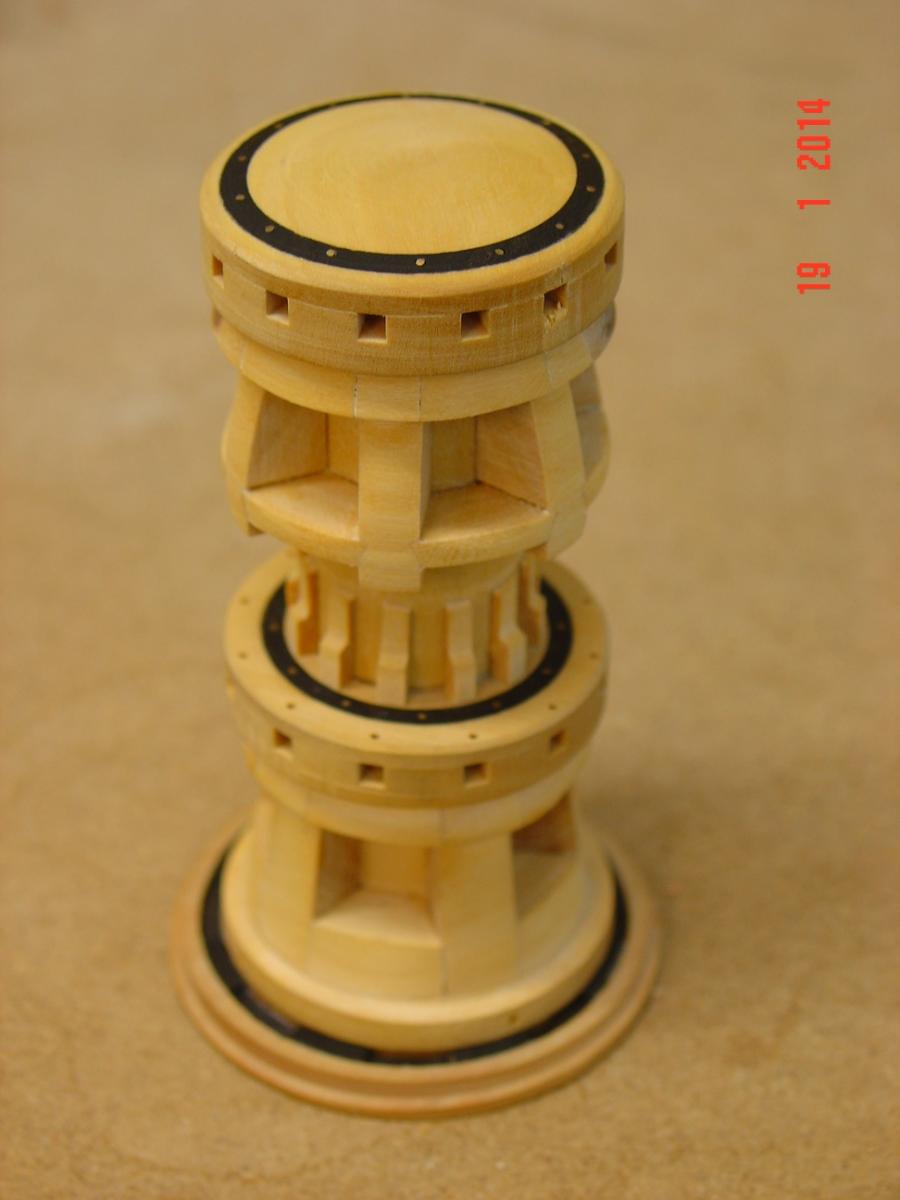
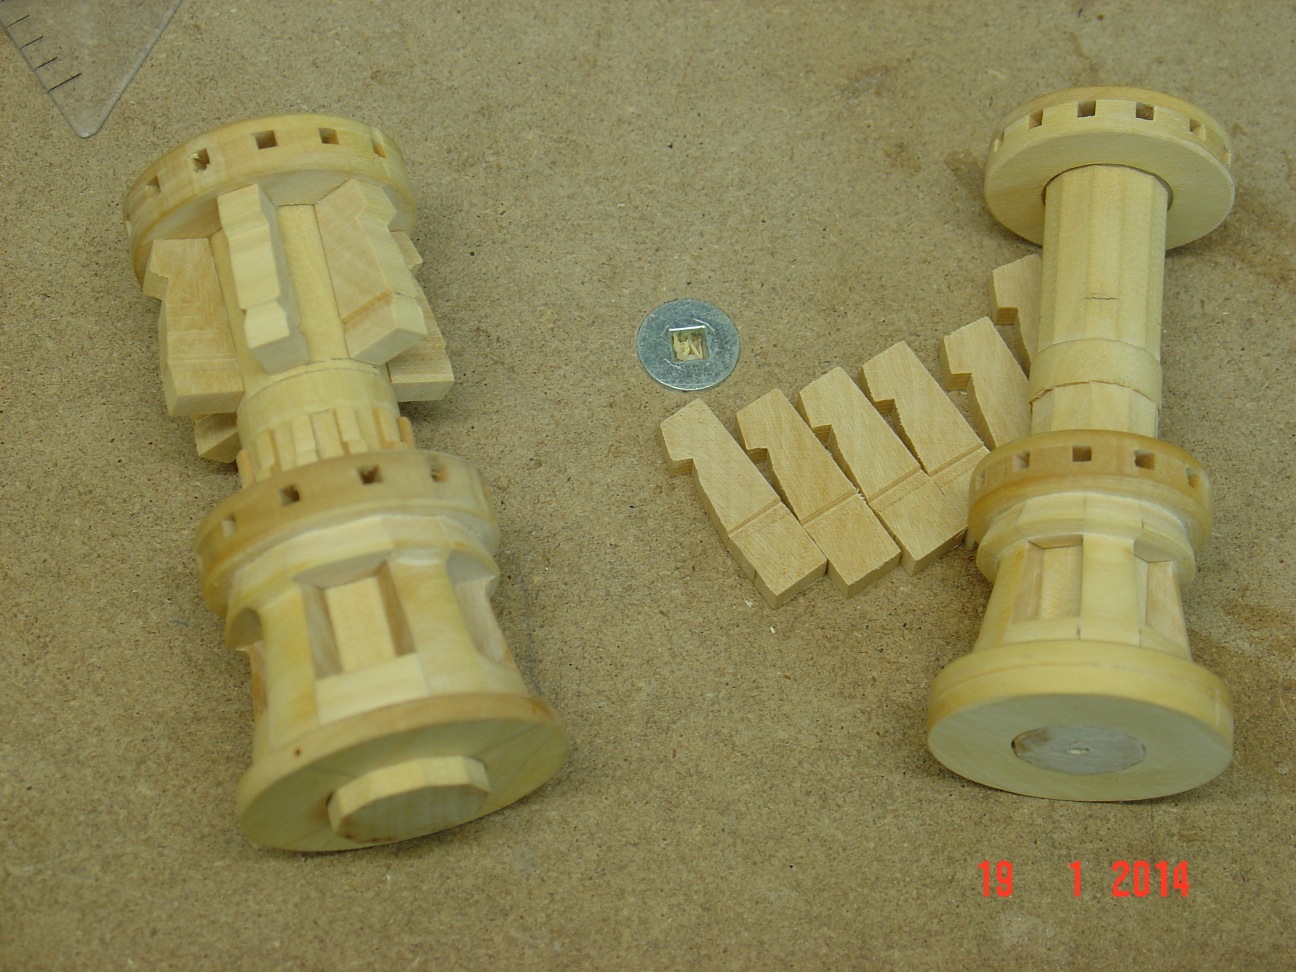
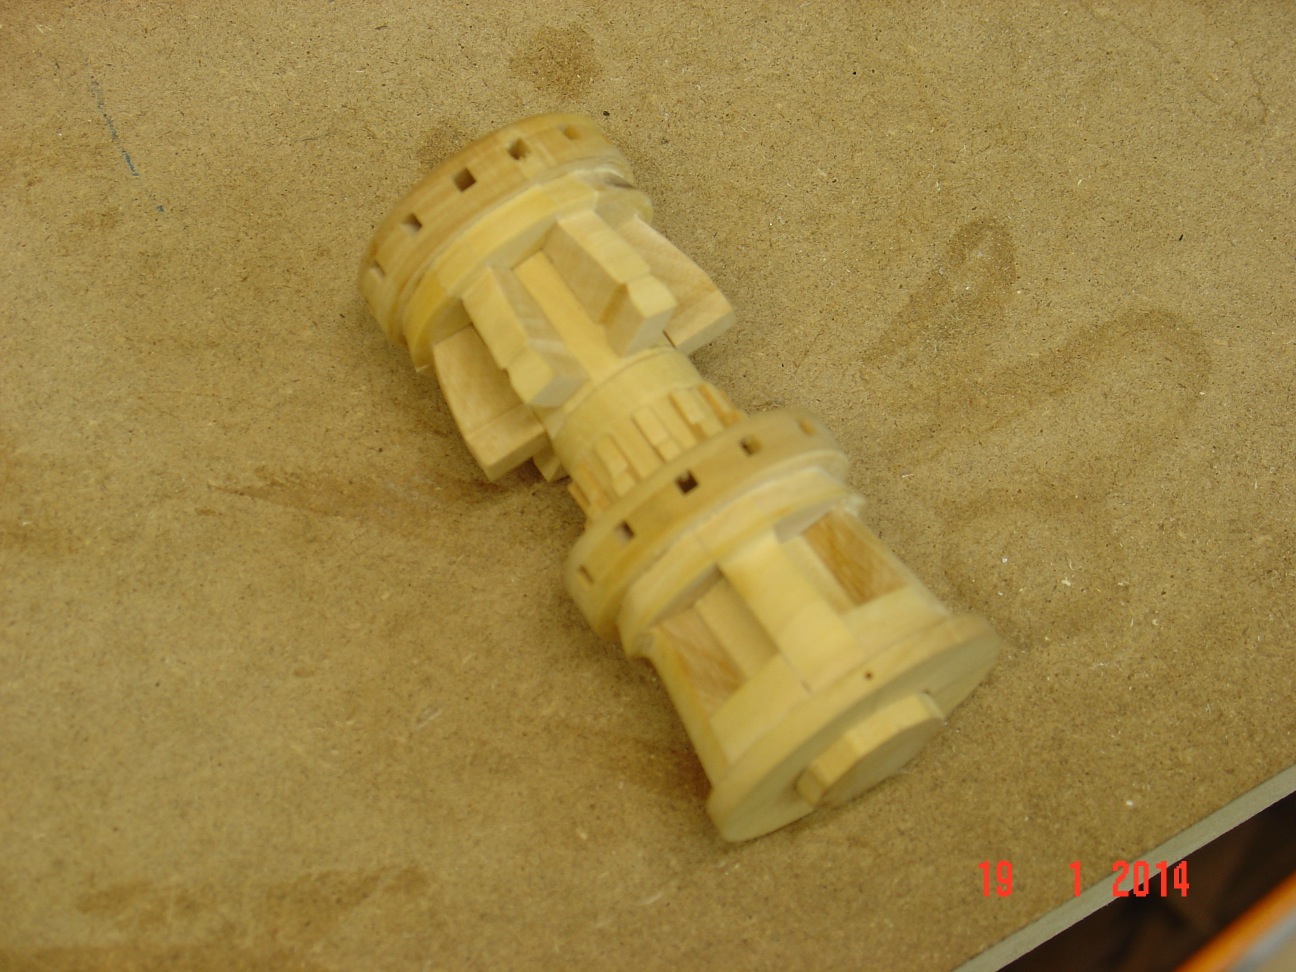
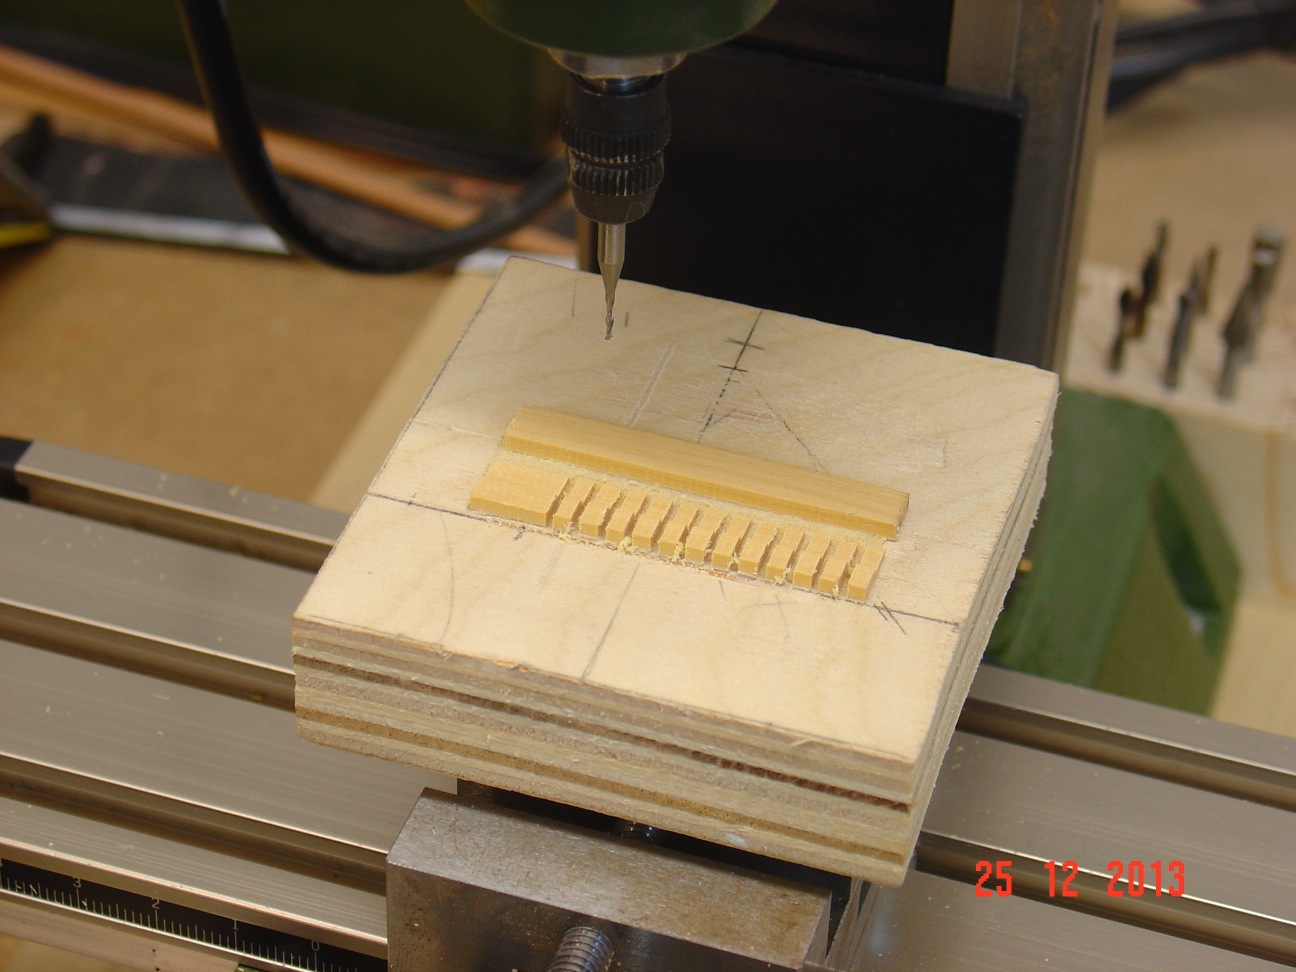
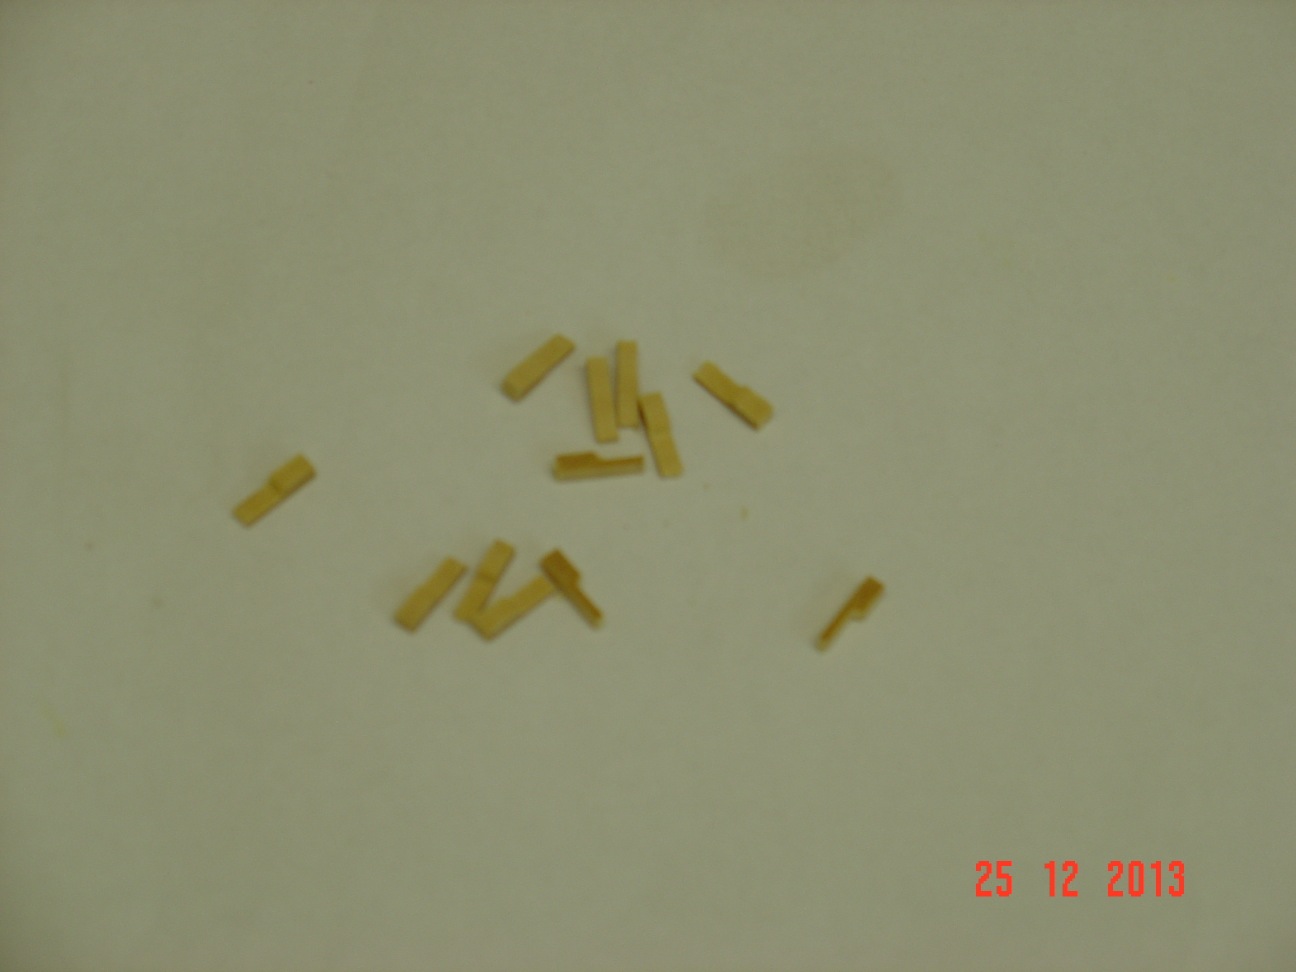
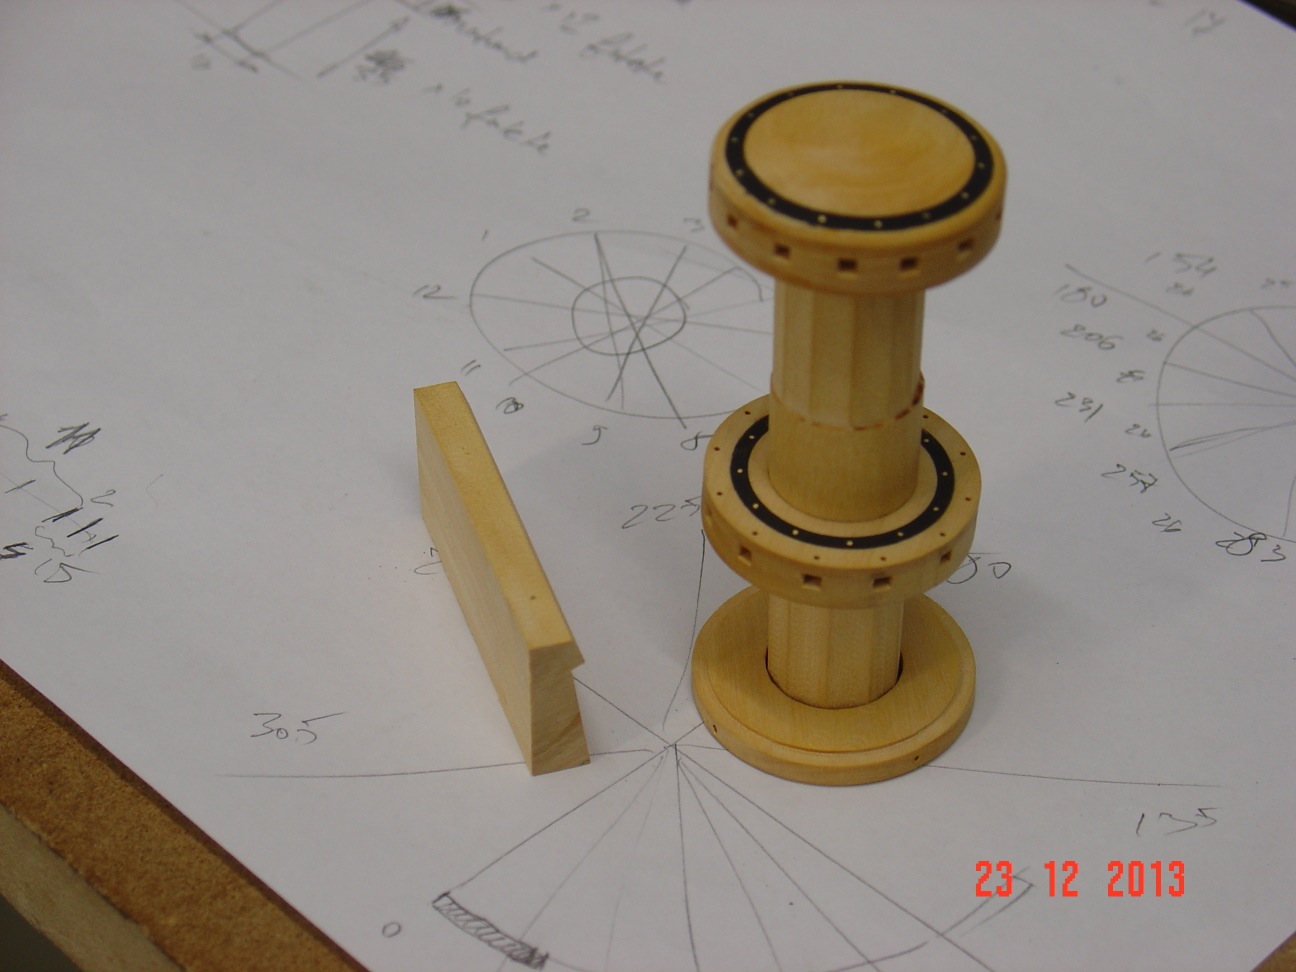
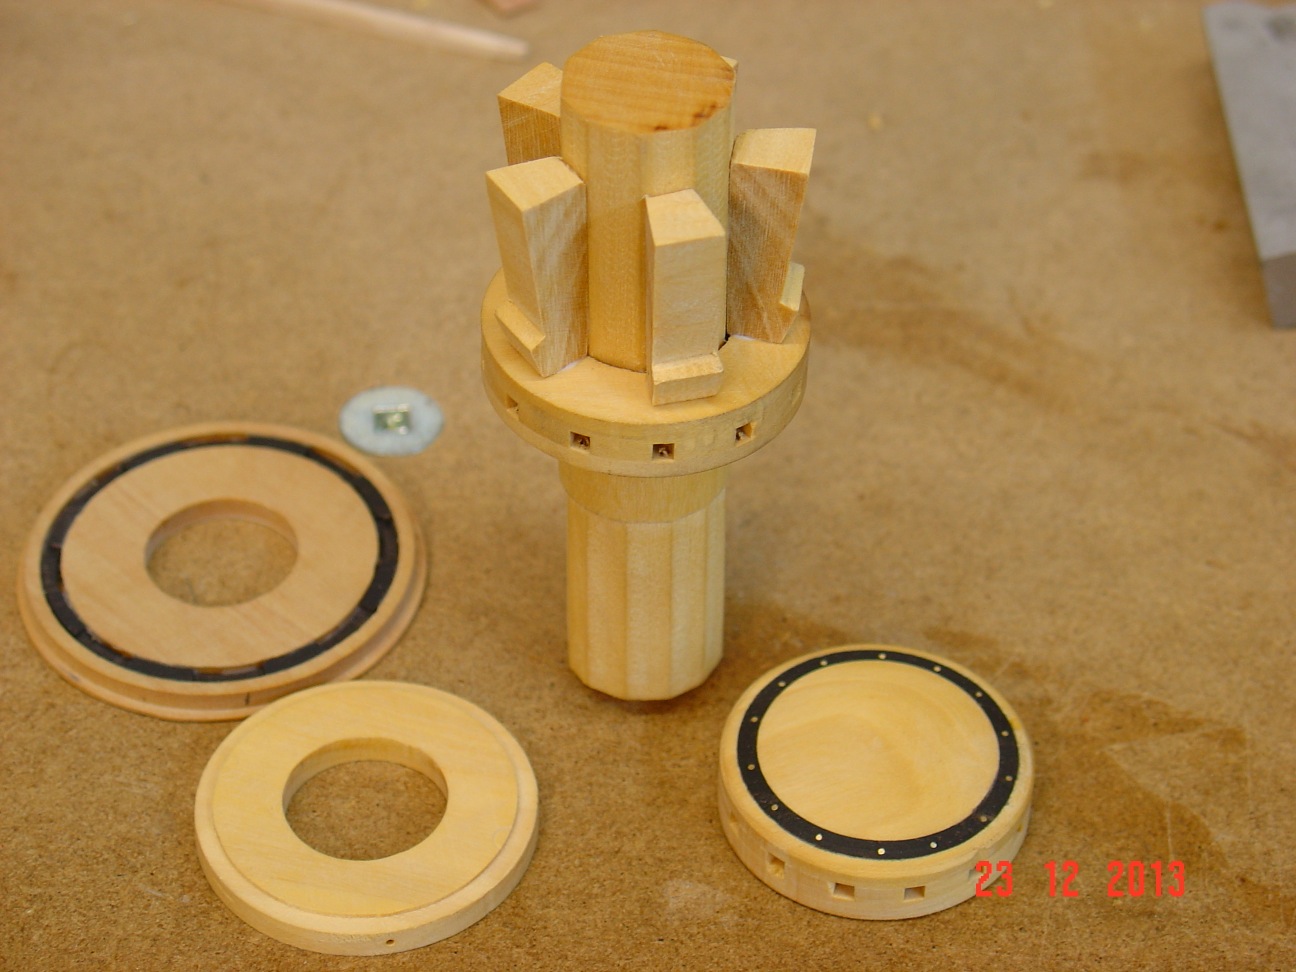
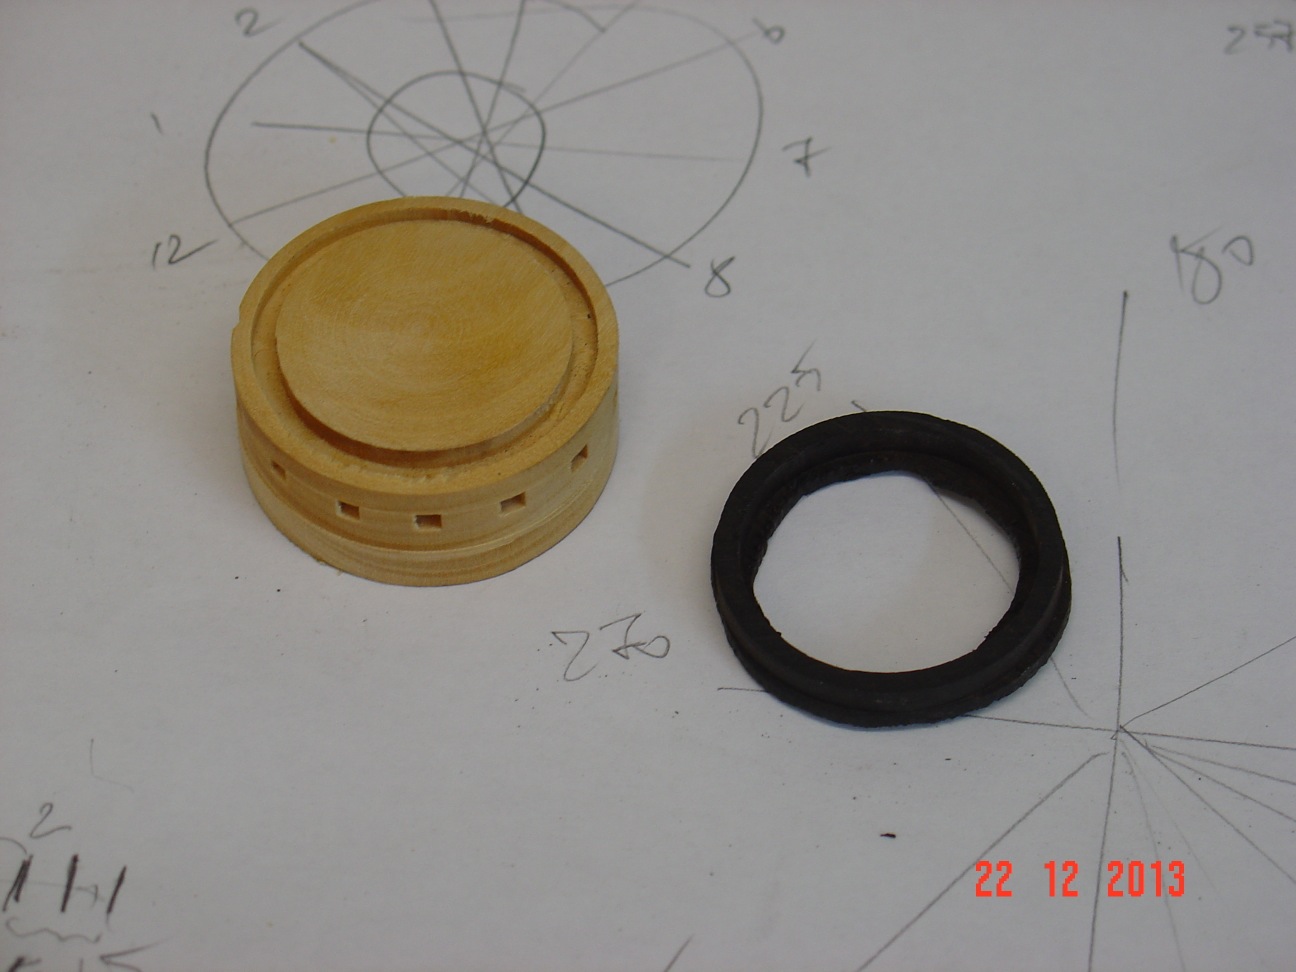
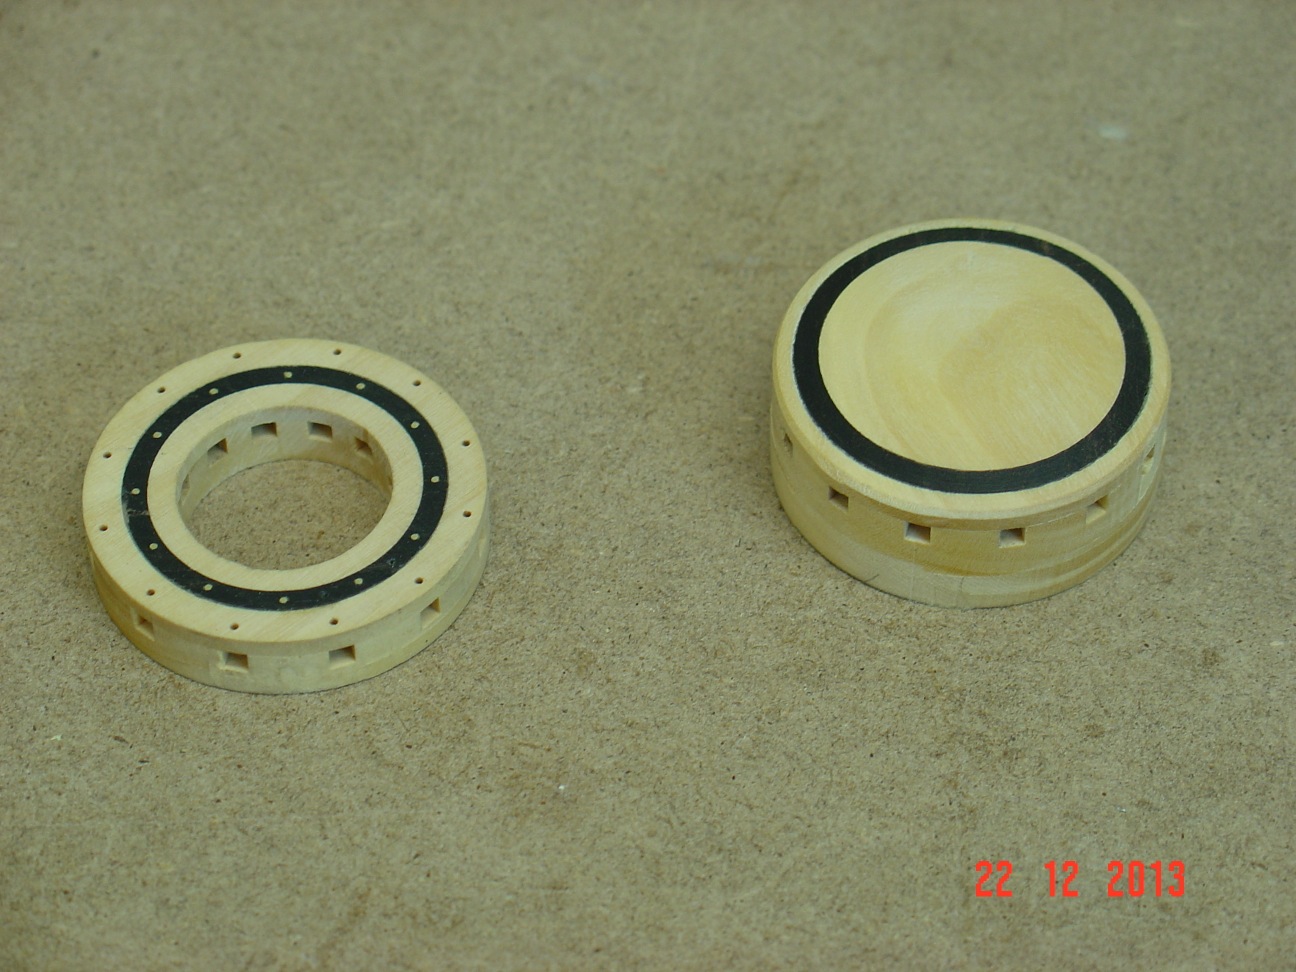
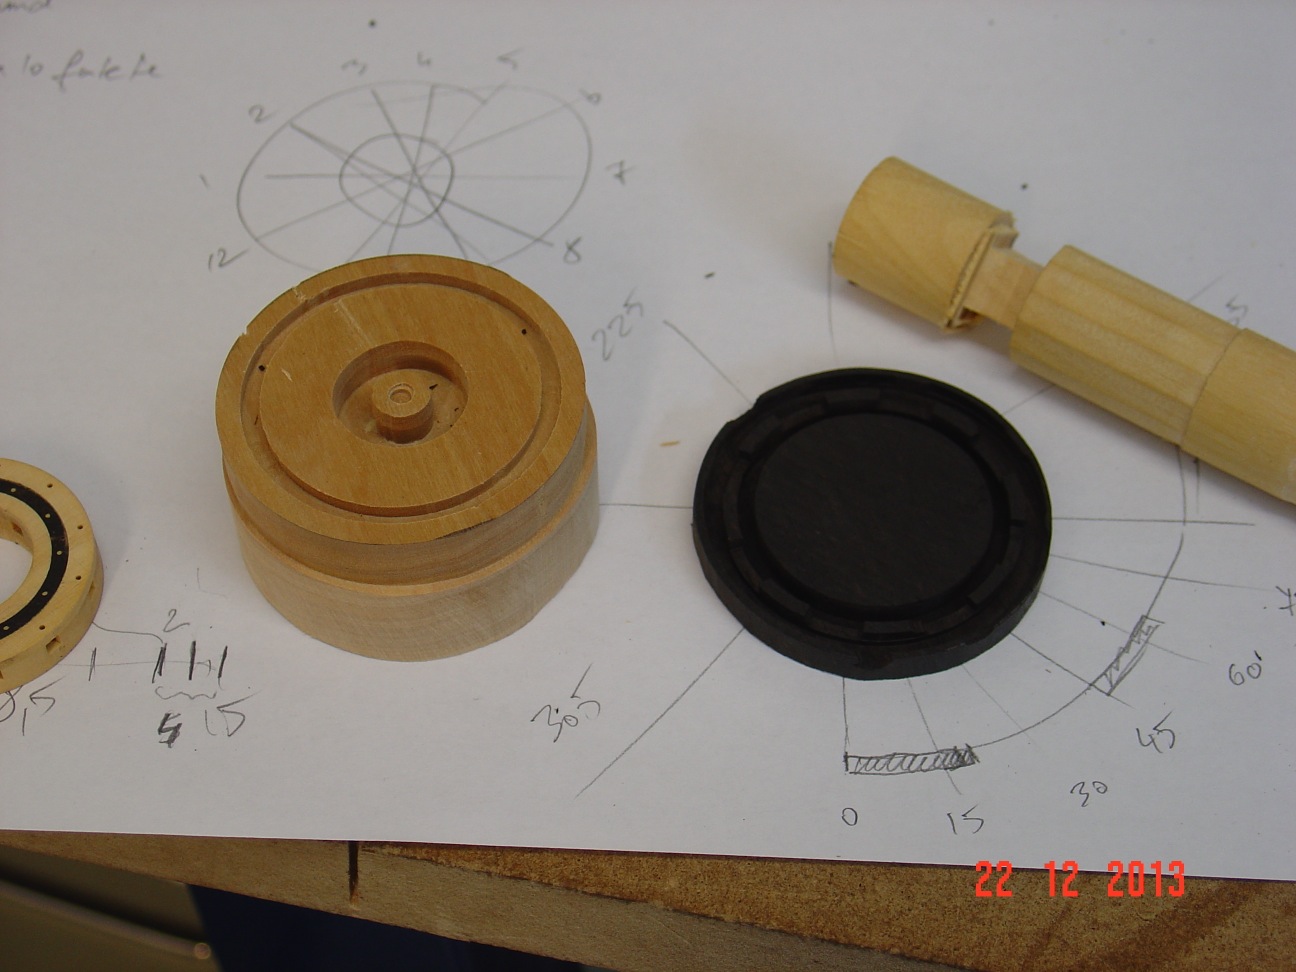
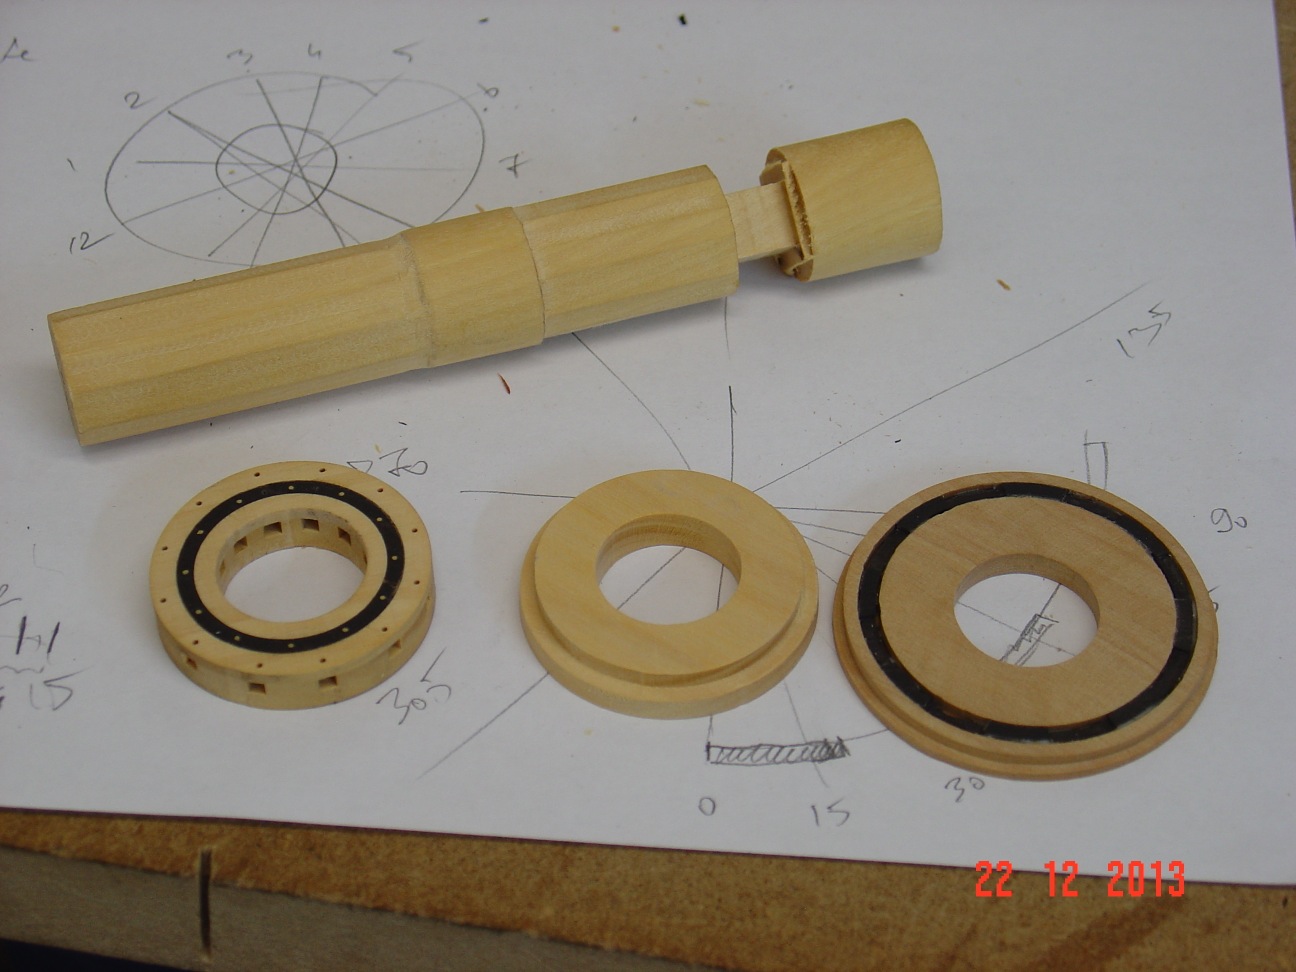
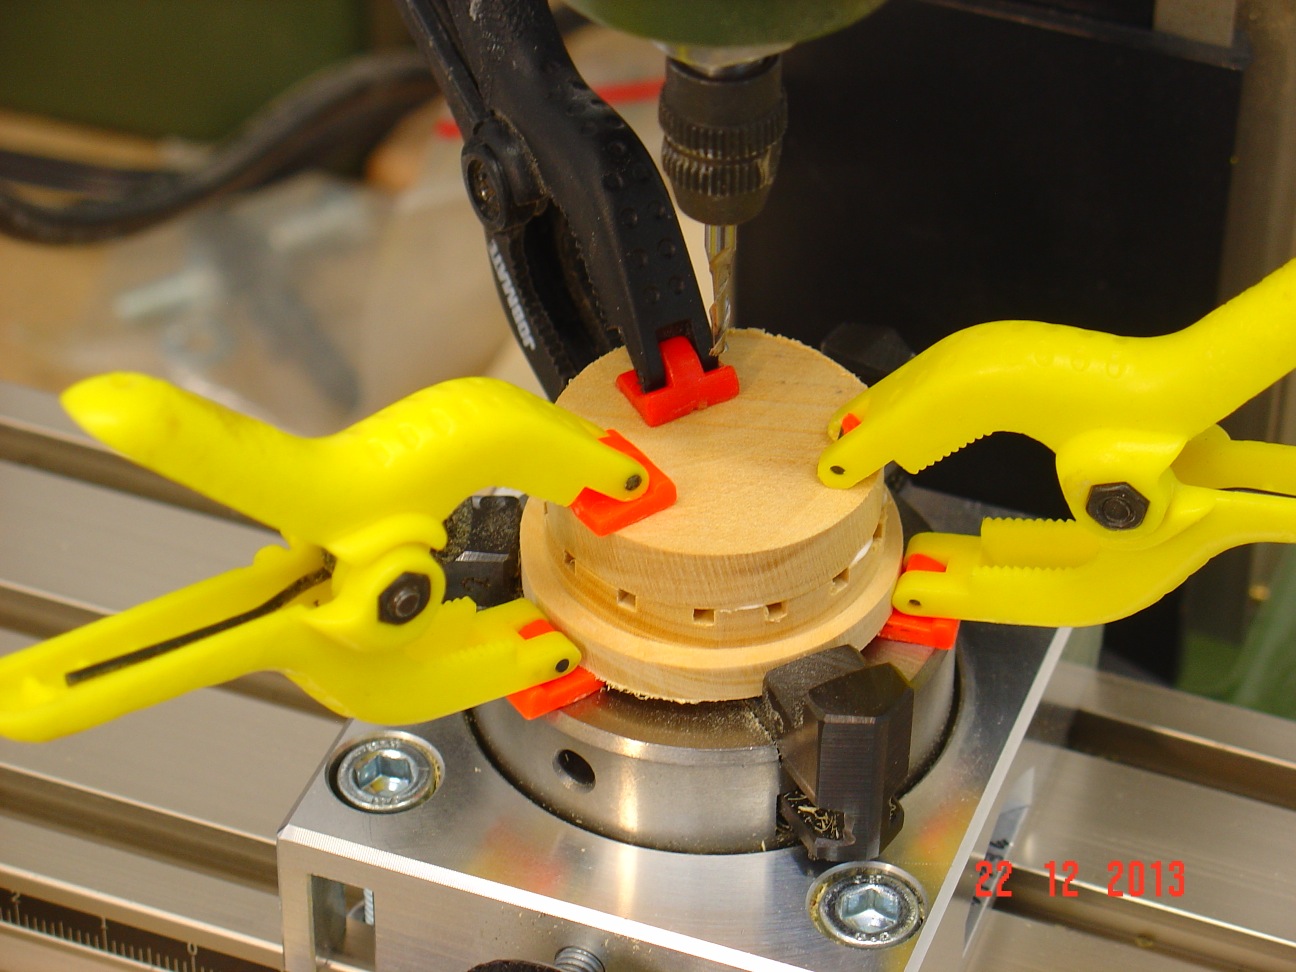
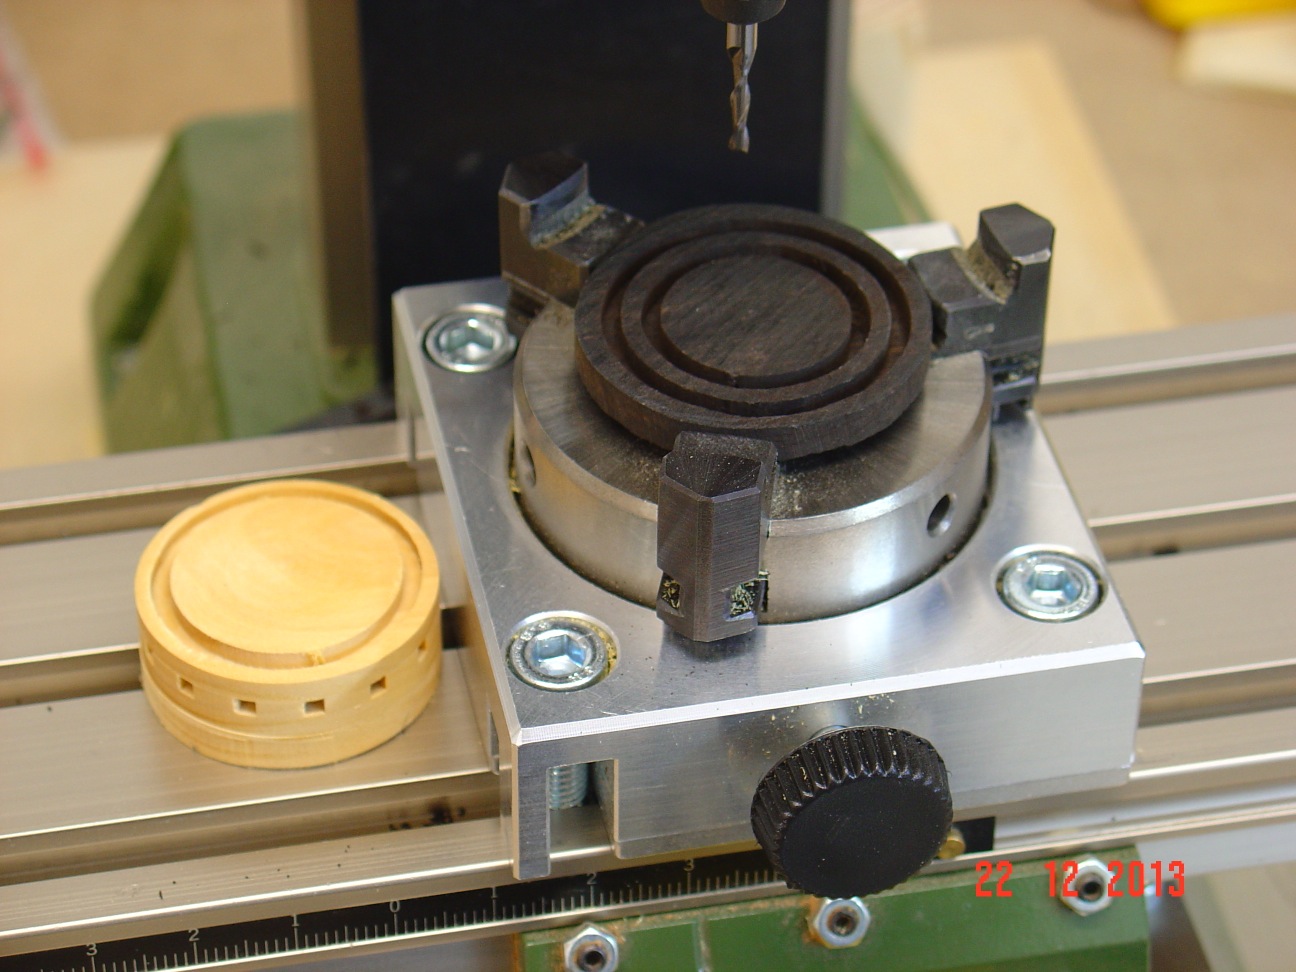
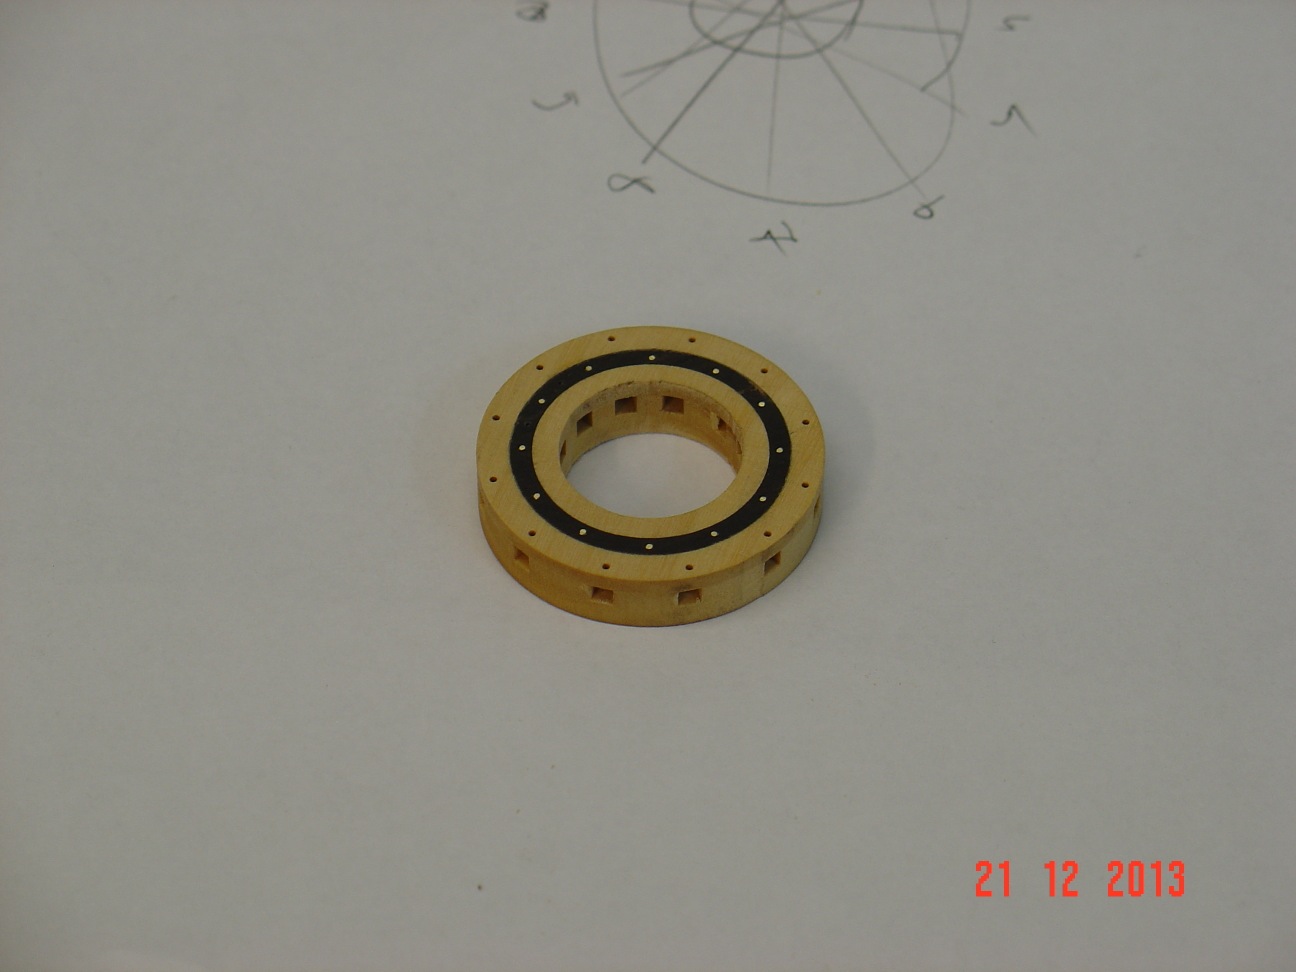
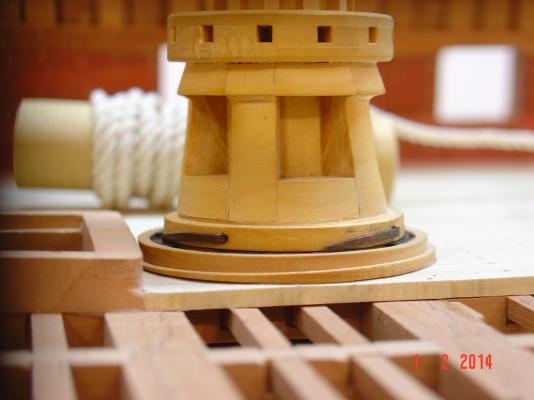
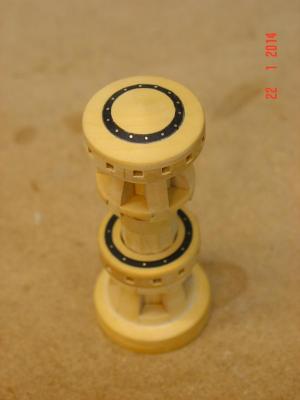
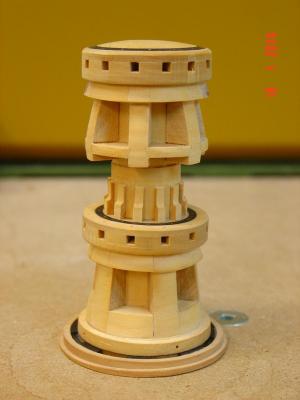
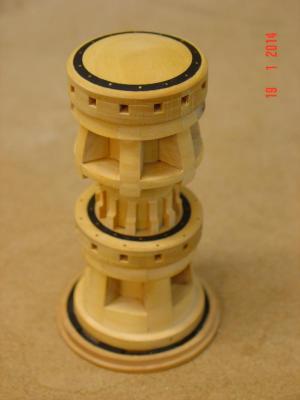
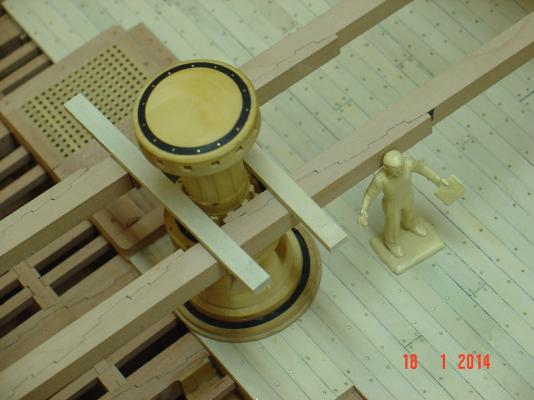
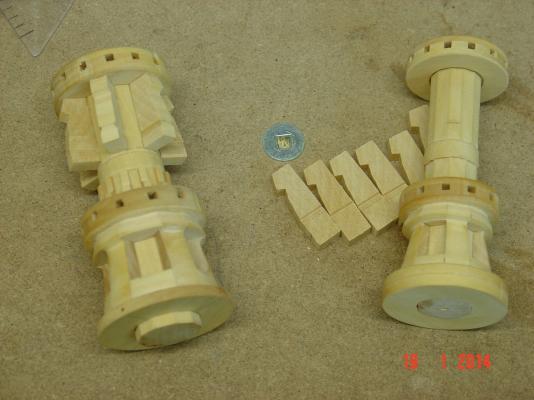
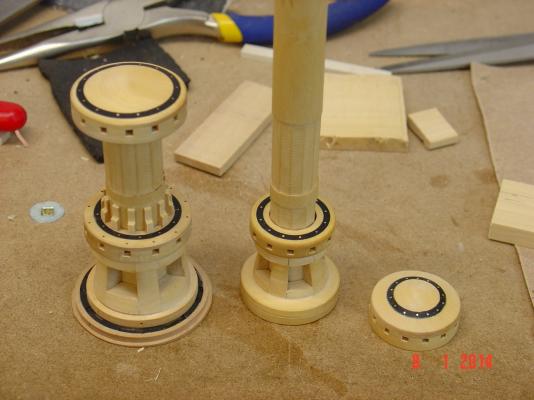
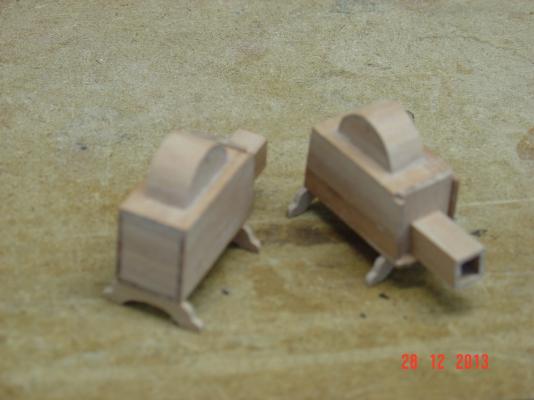
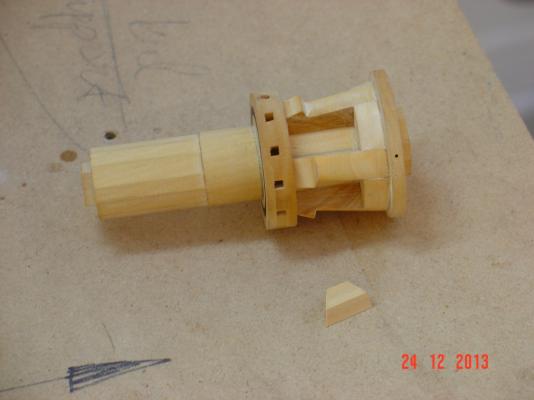
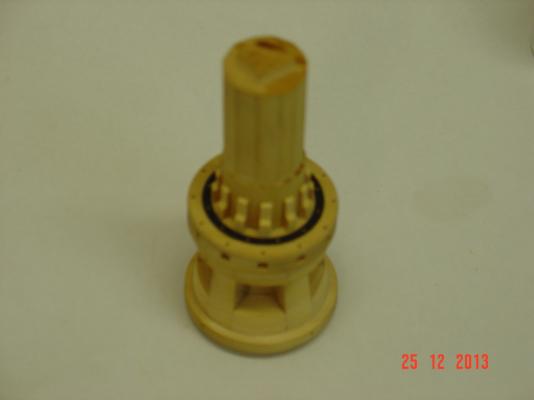
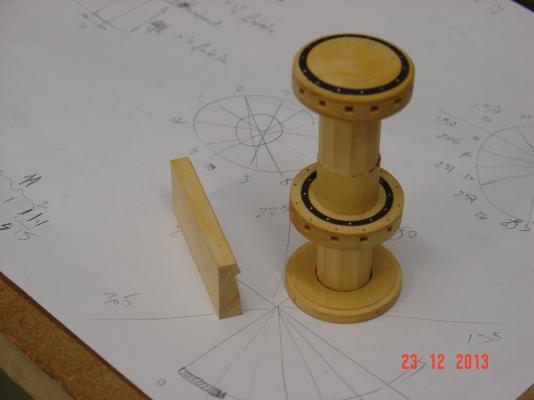
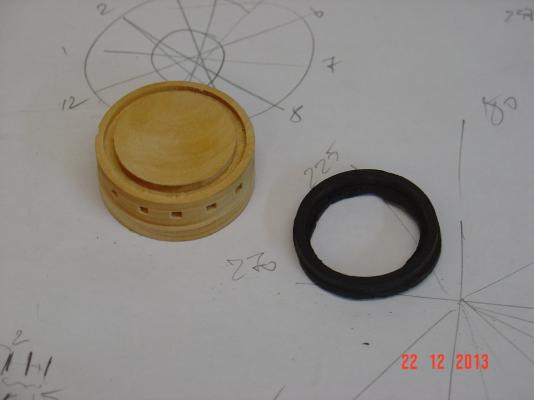
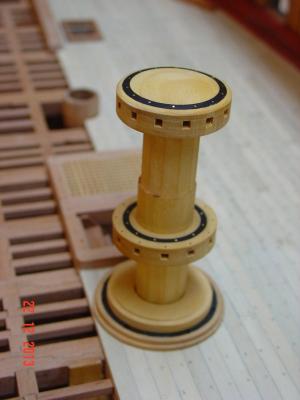
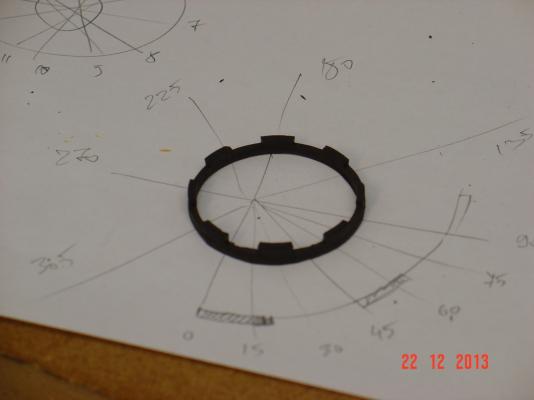
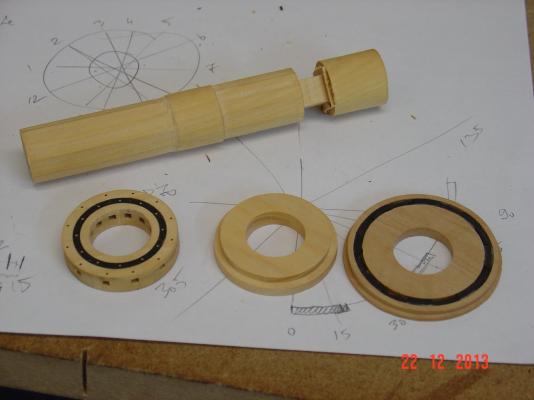
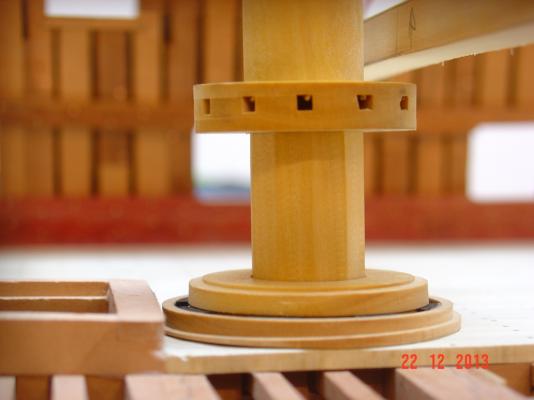
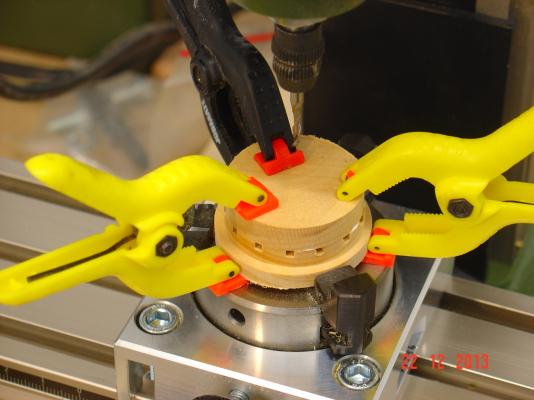
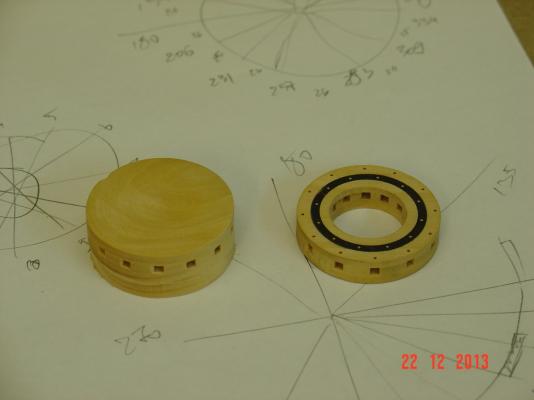
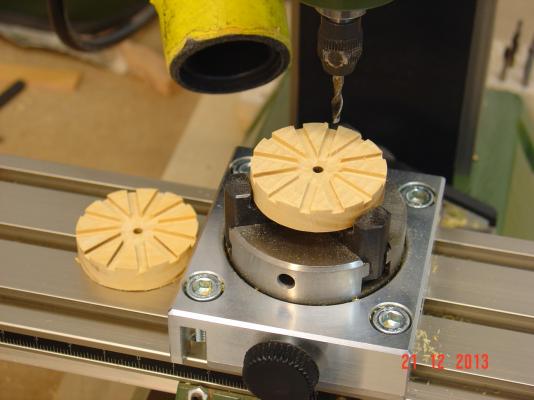
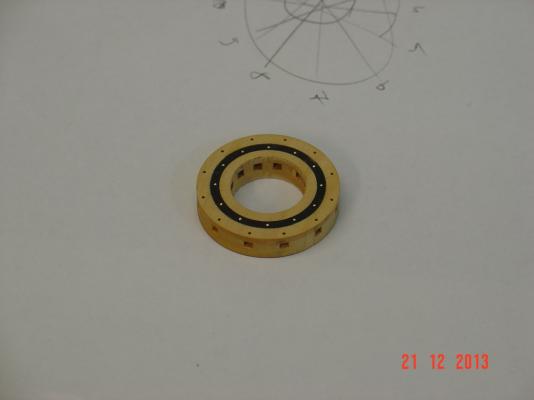
Hello all, Thank you for the great comments. Here are some more progress pictures. Still not done yet but closer now. I am glad now that my indexing attachment can be set to any of the 360 degrees of a circle as the upper drumhead has 14 holes for bars. Which means almost 26 degrees but not exactly, so 10 angles were 26 and 4 - 25 degrees. I can't find the closer ones anymore. Un the second picture the black ebony ring with identations is a replacement of the metallic piece used to block the pawls. It was inserted in the fixed part of the capstan - biggest disk in the right of the third picture. Then I have to make the fore capstan... Alexandru


-
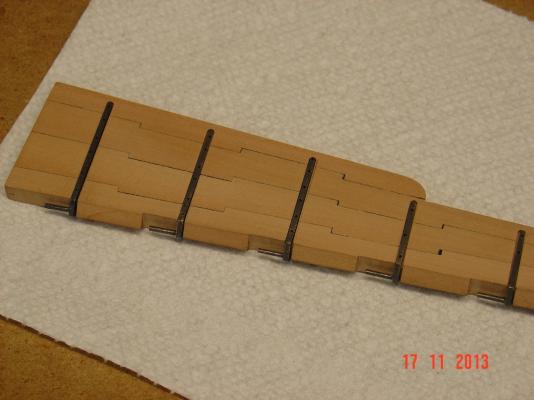
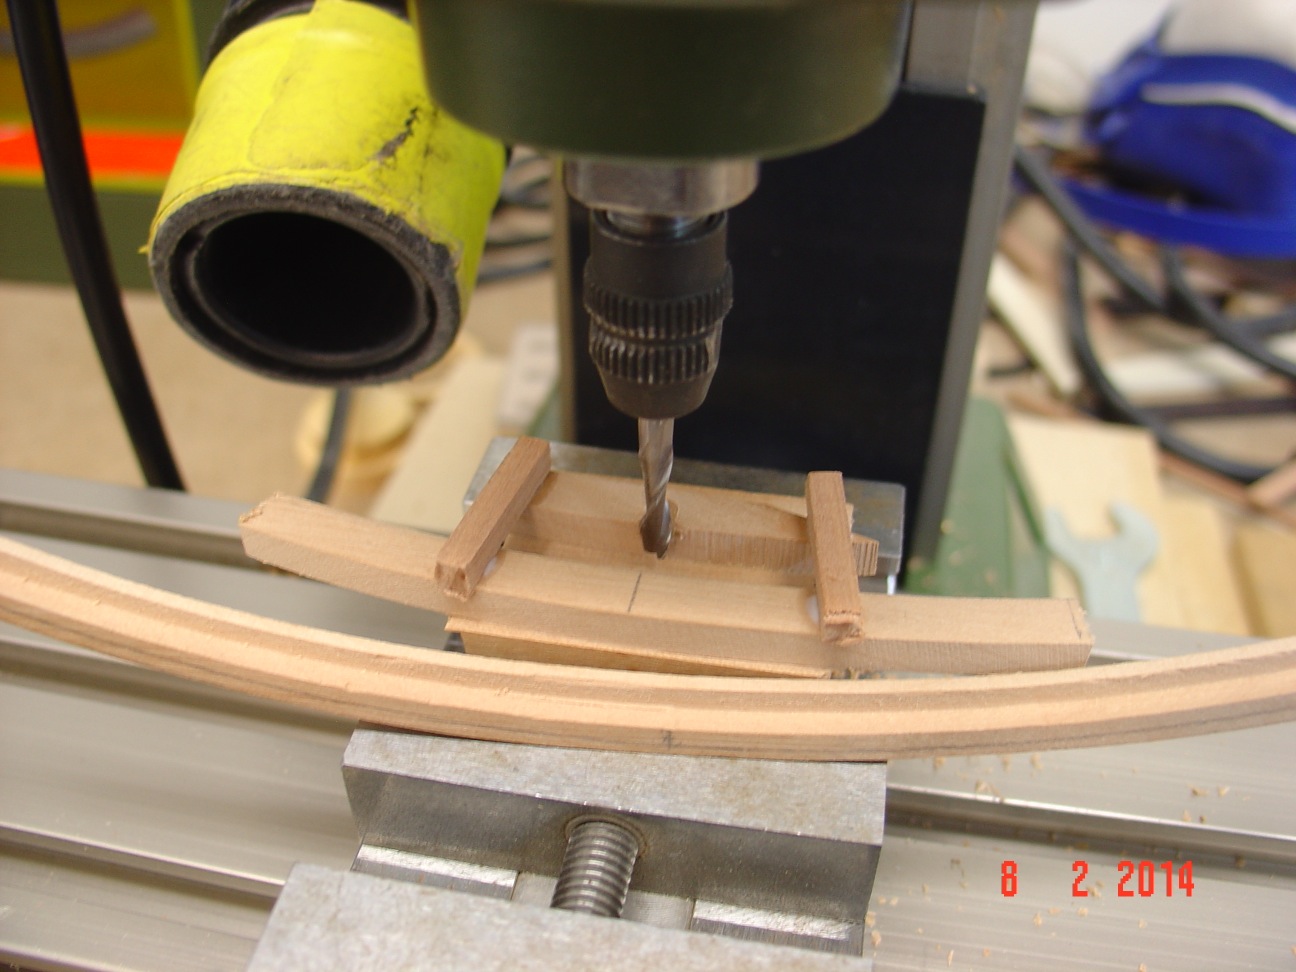
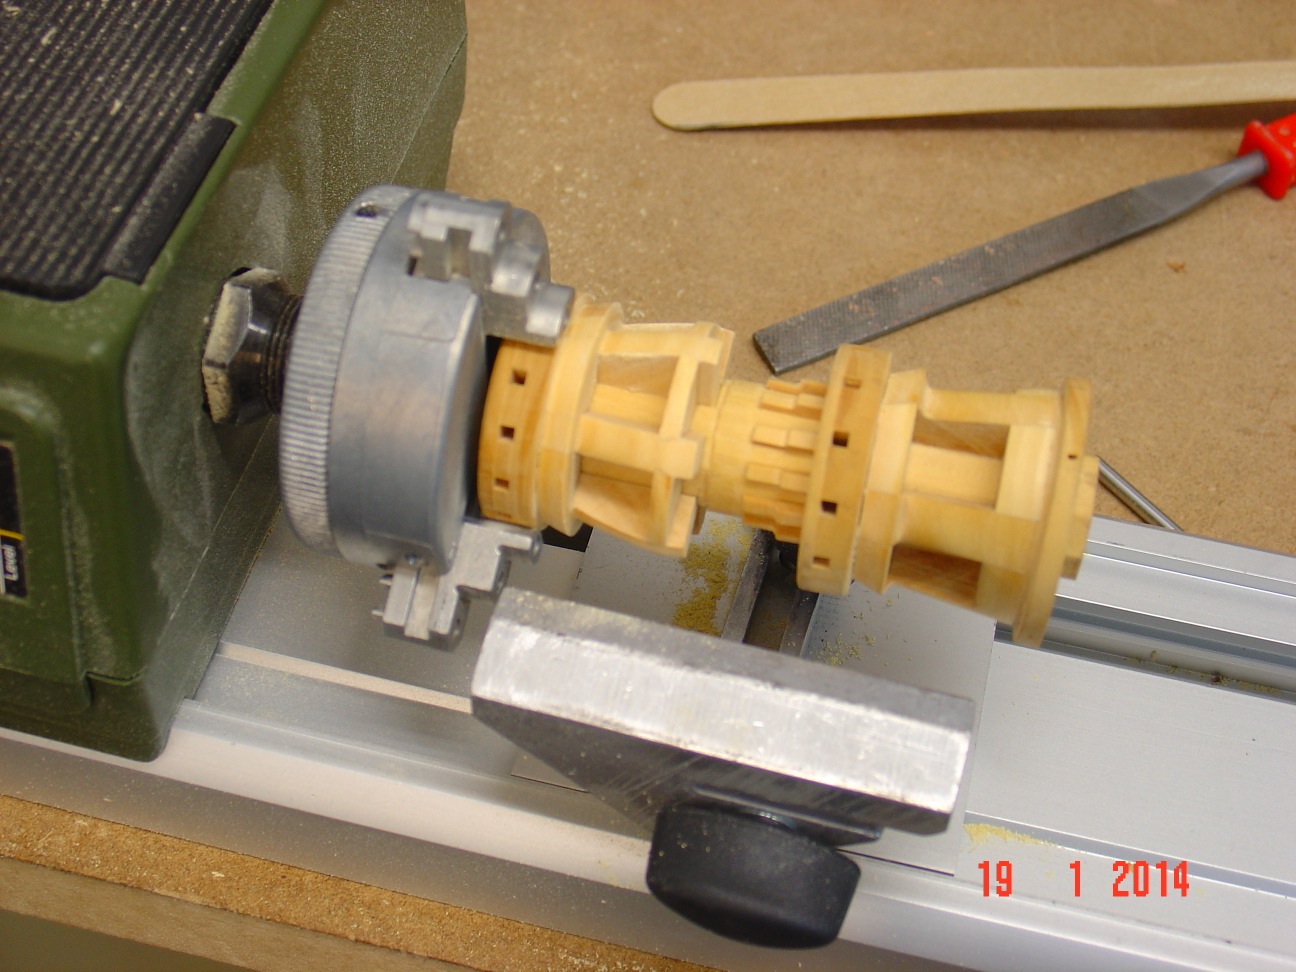
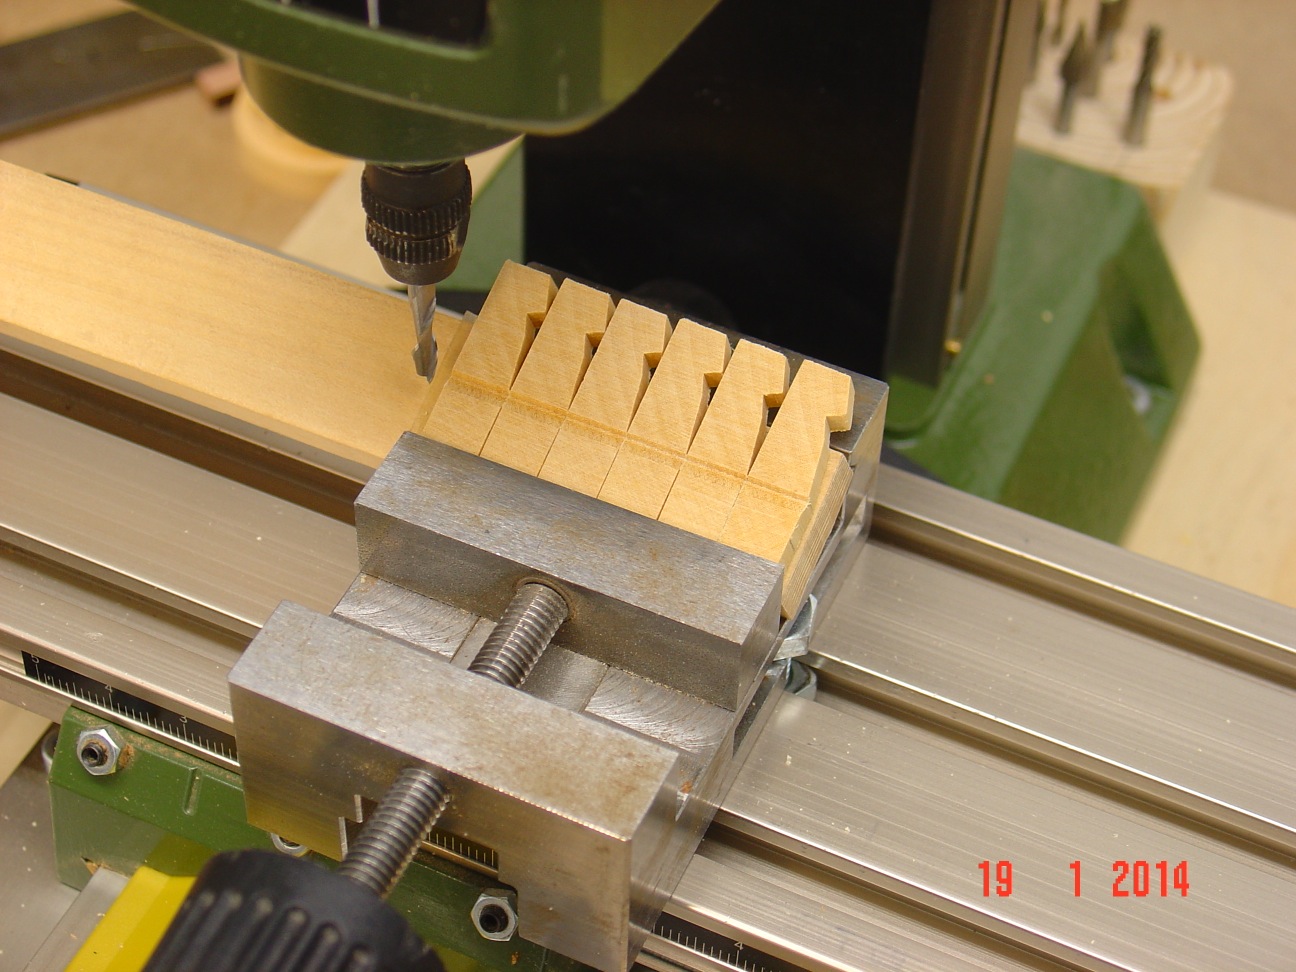
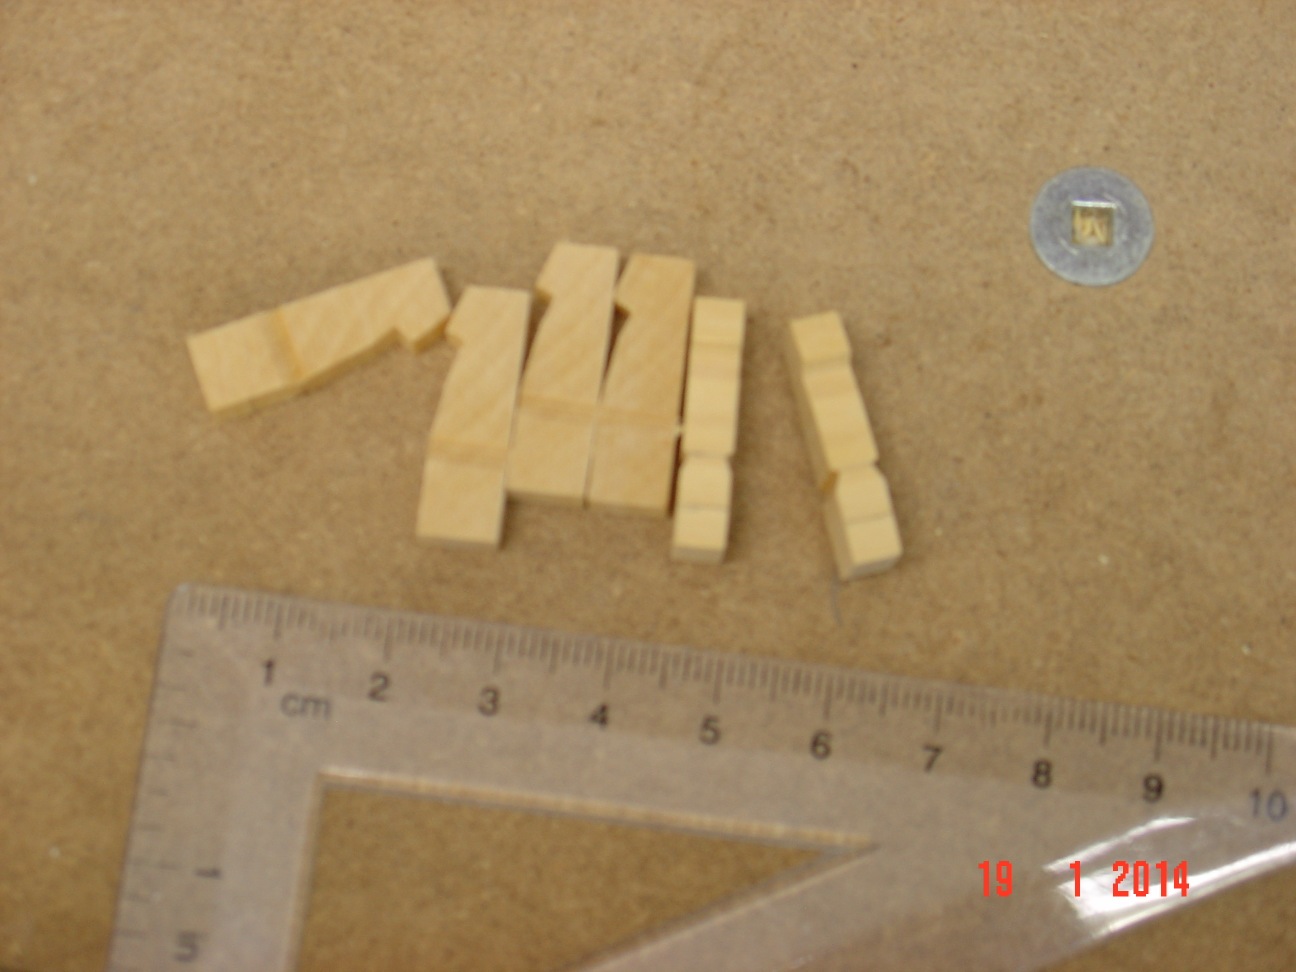
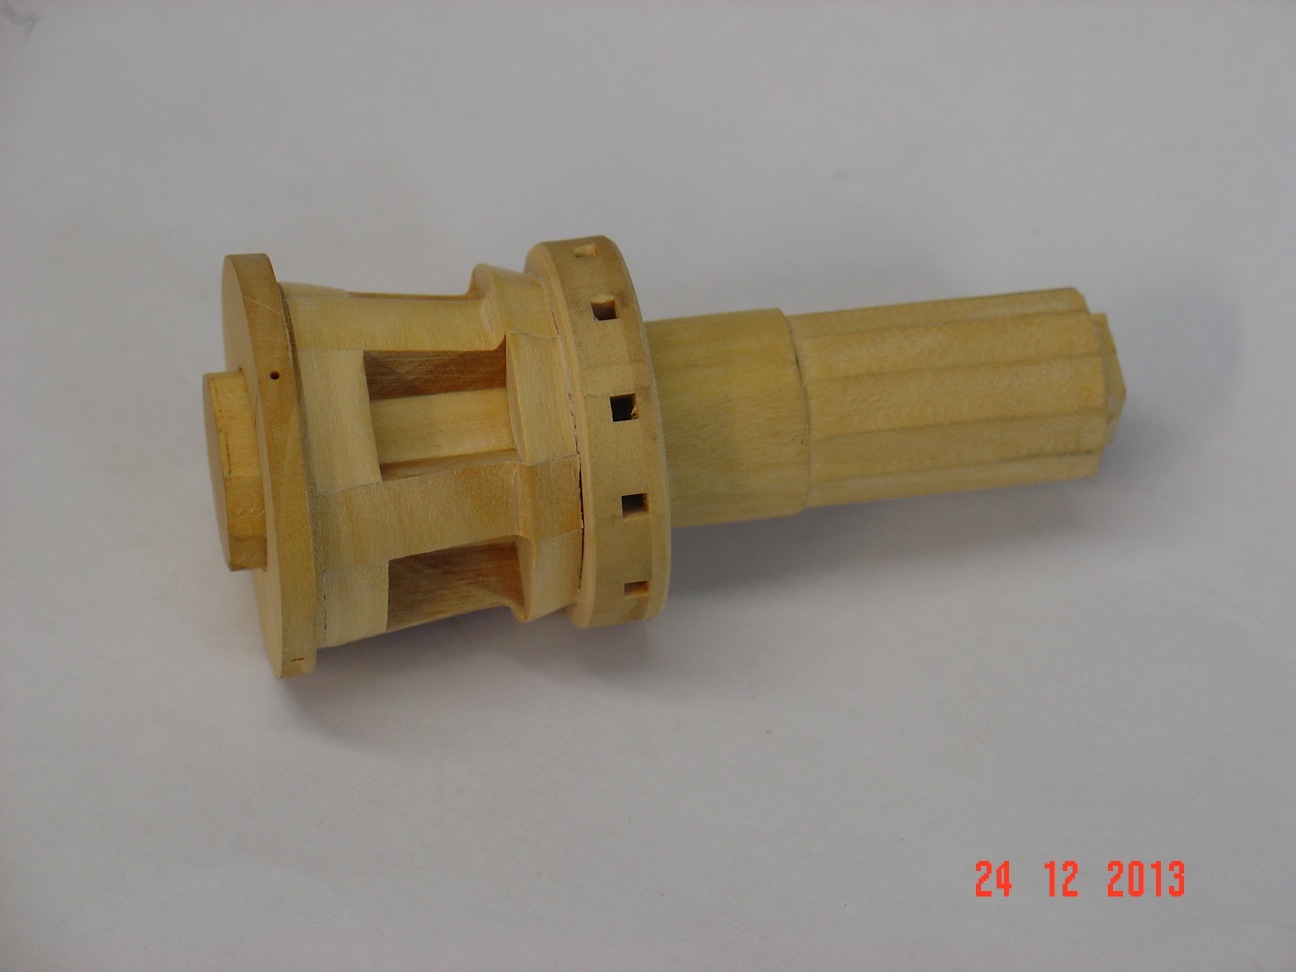
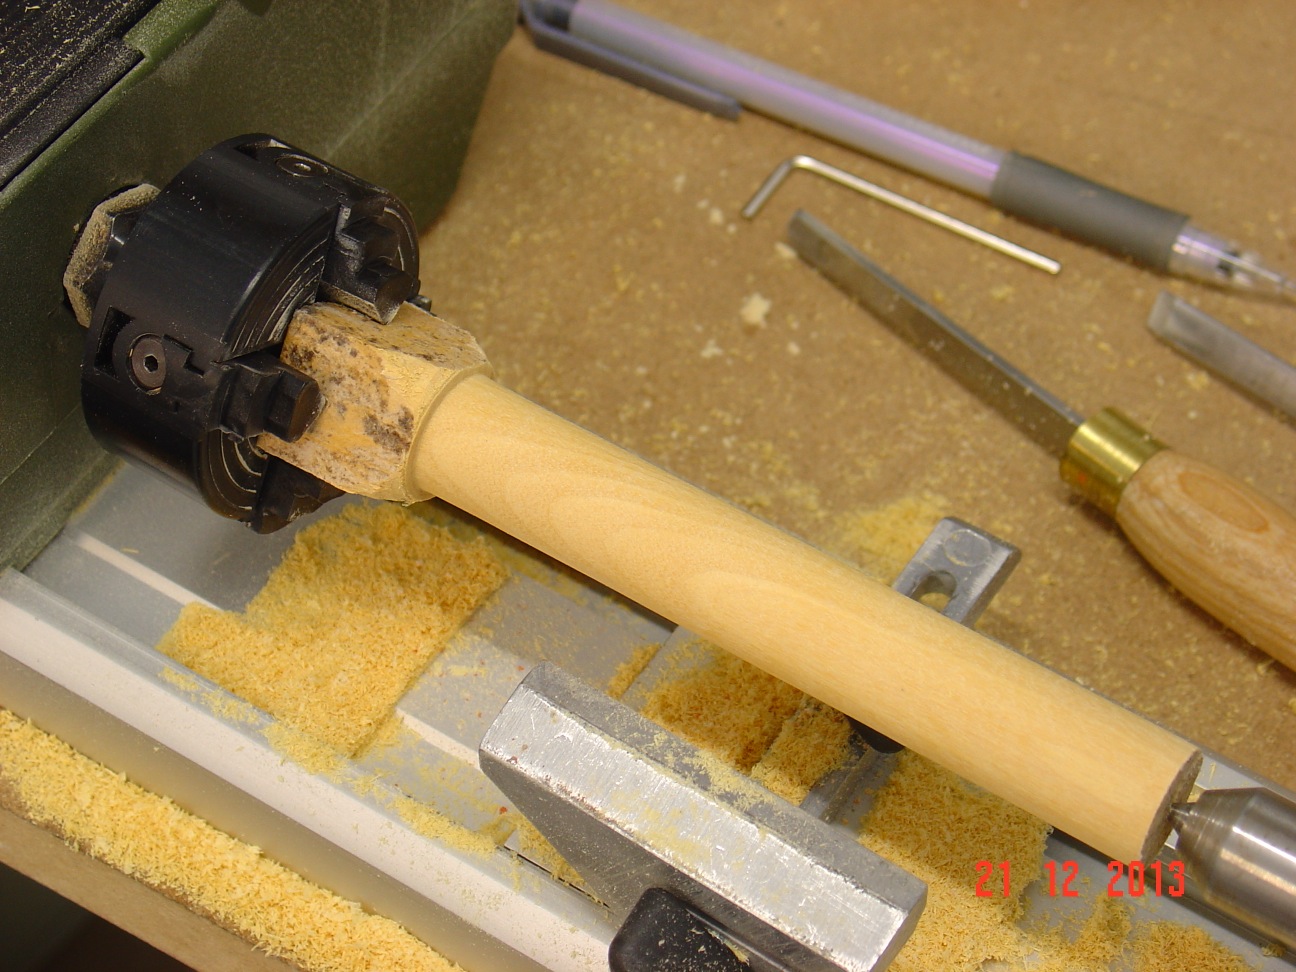
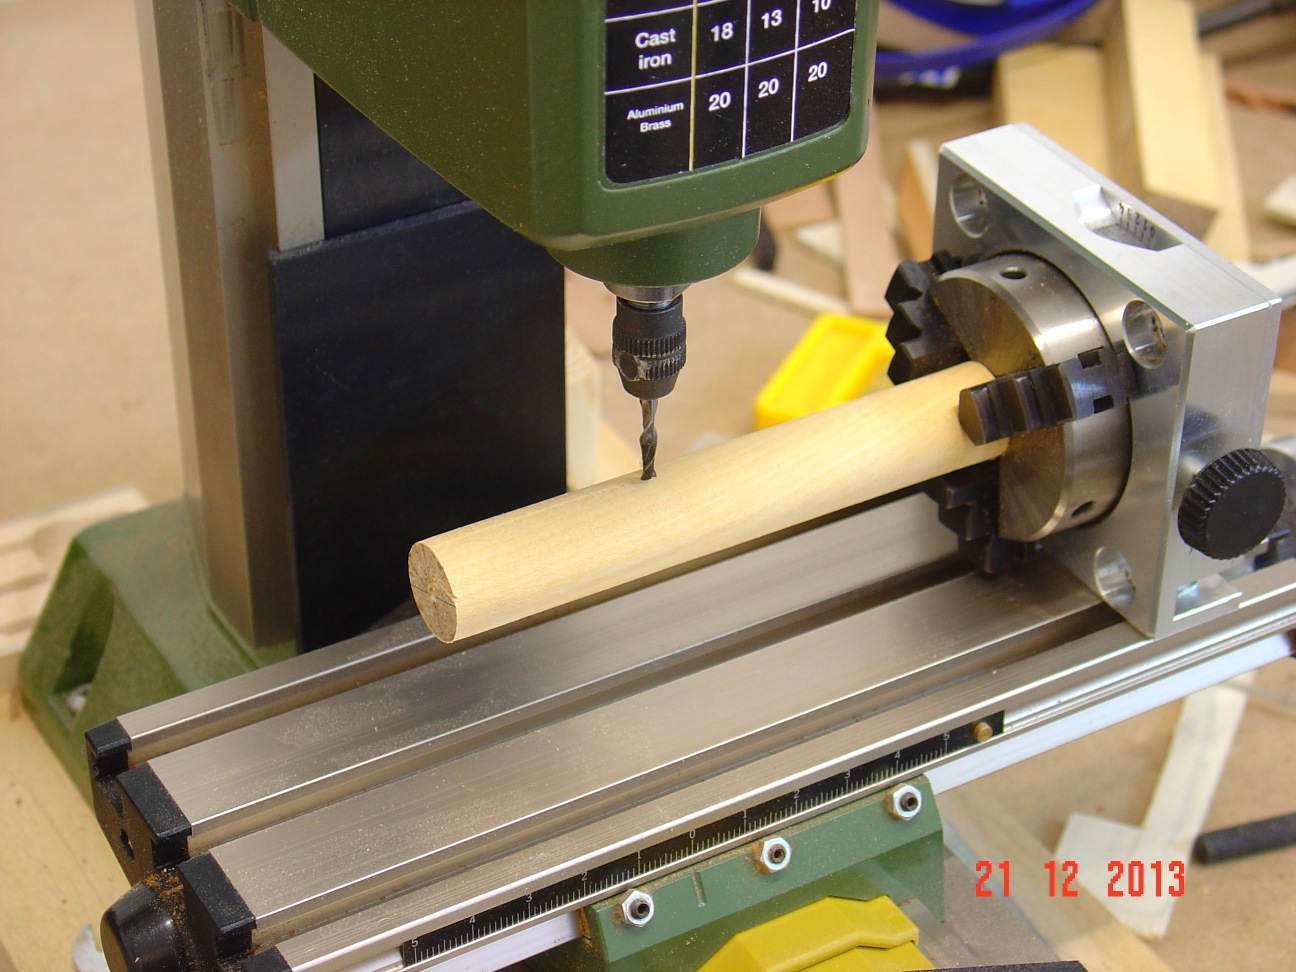
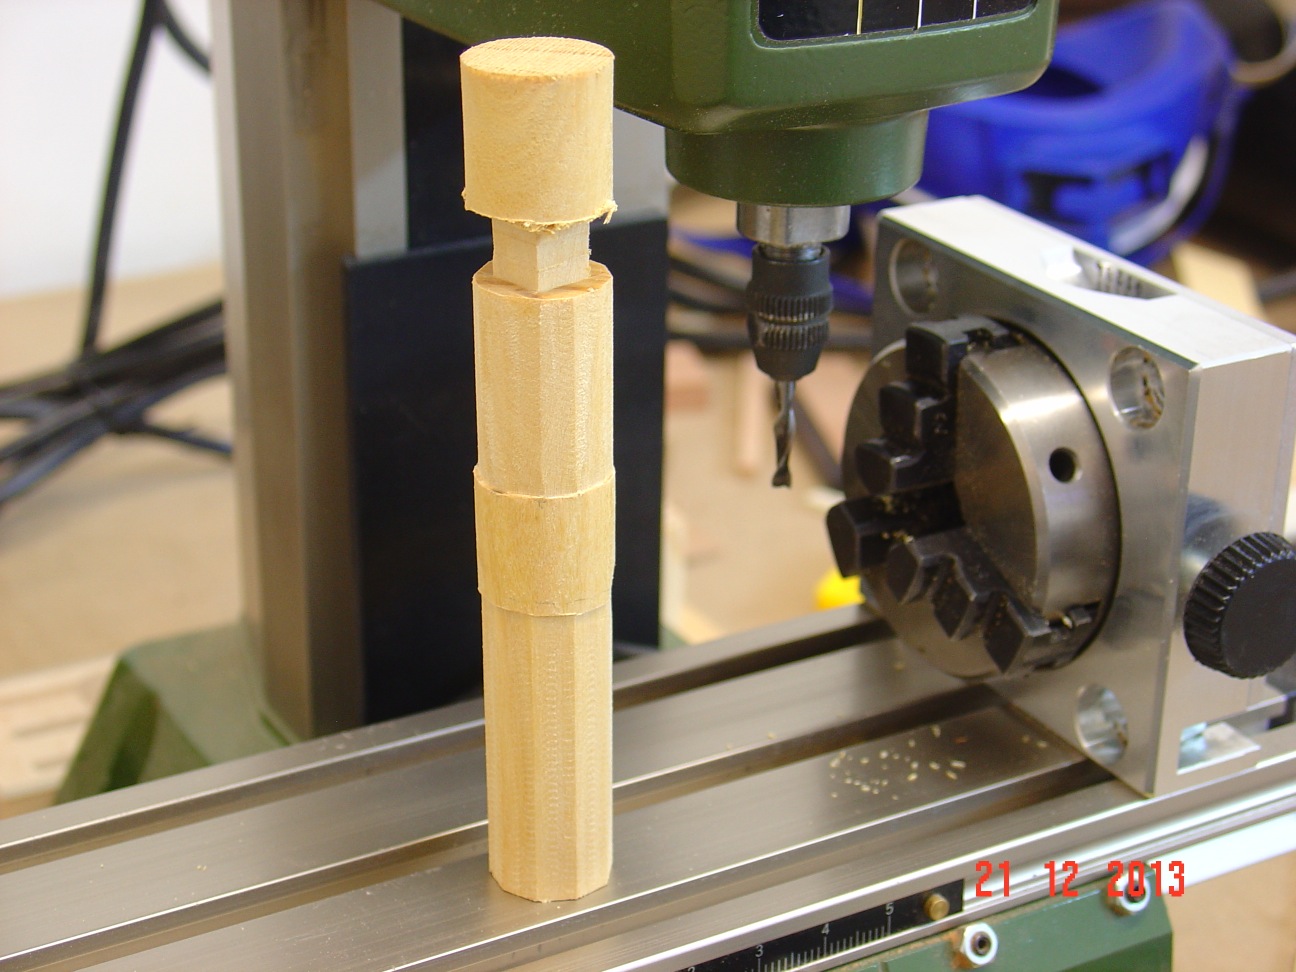
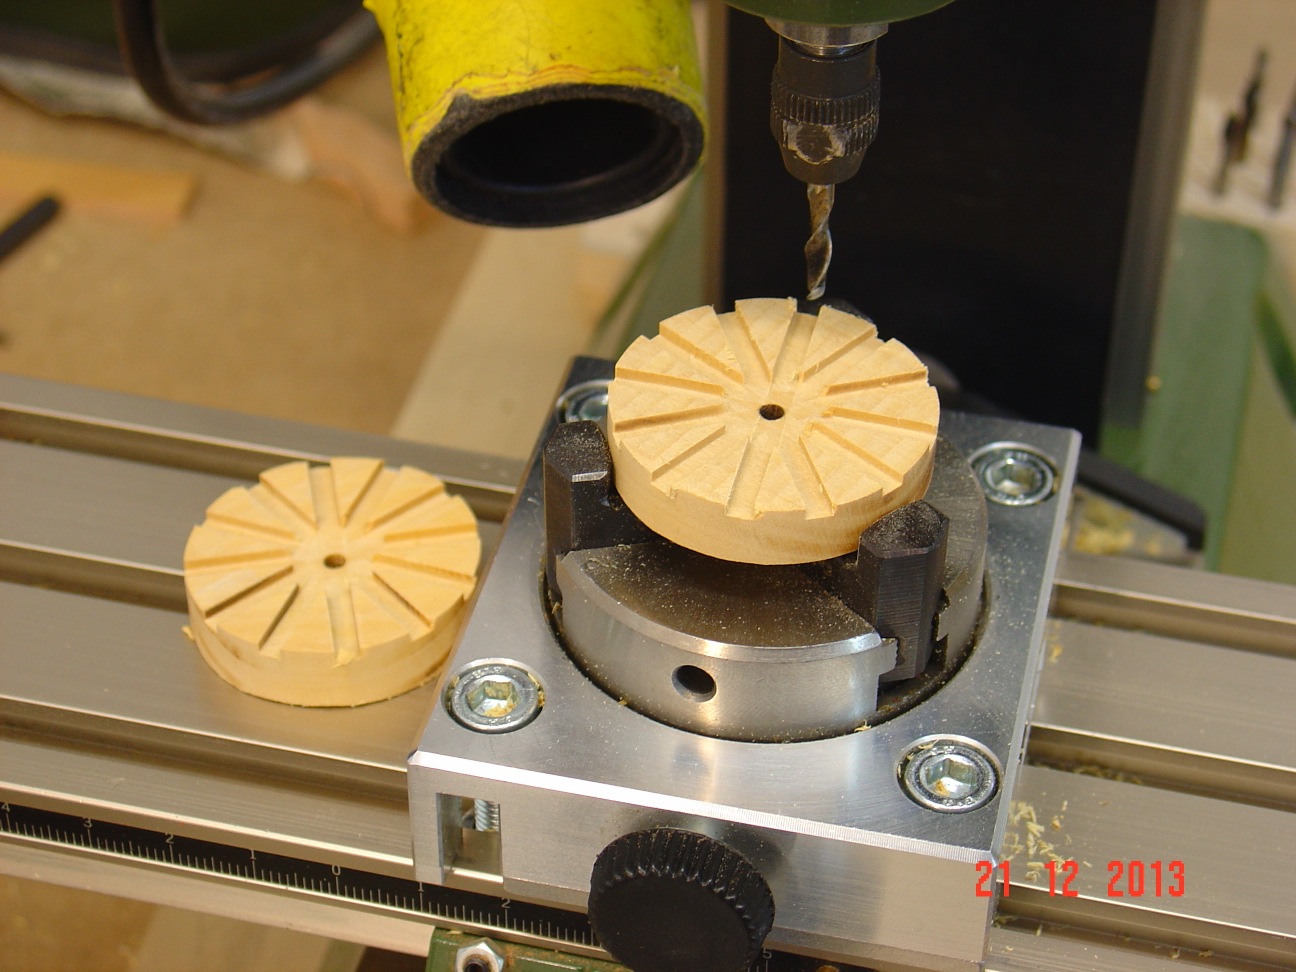
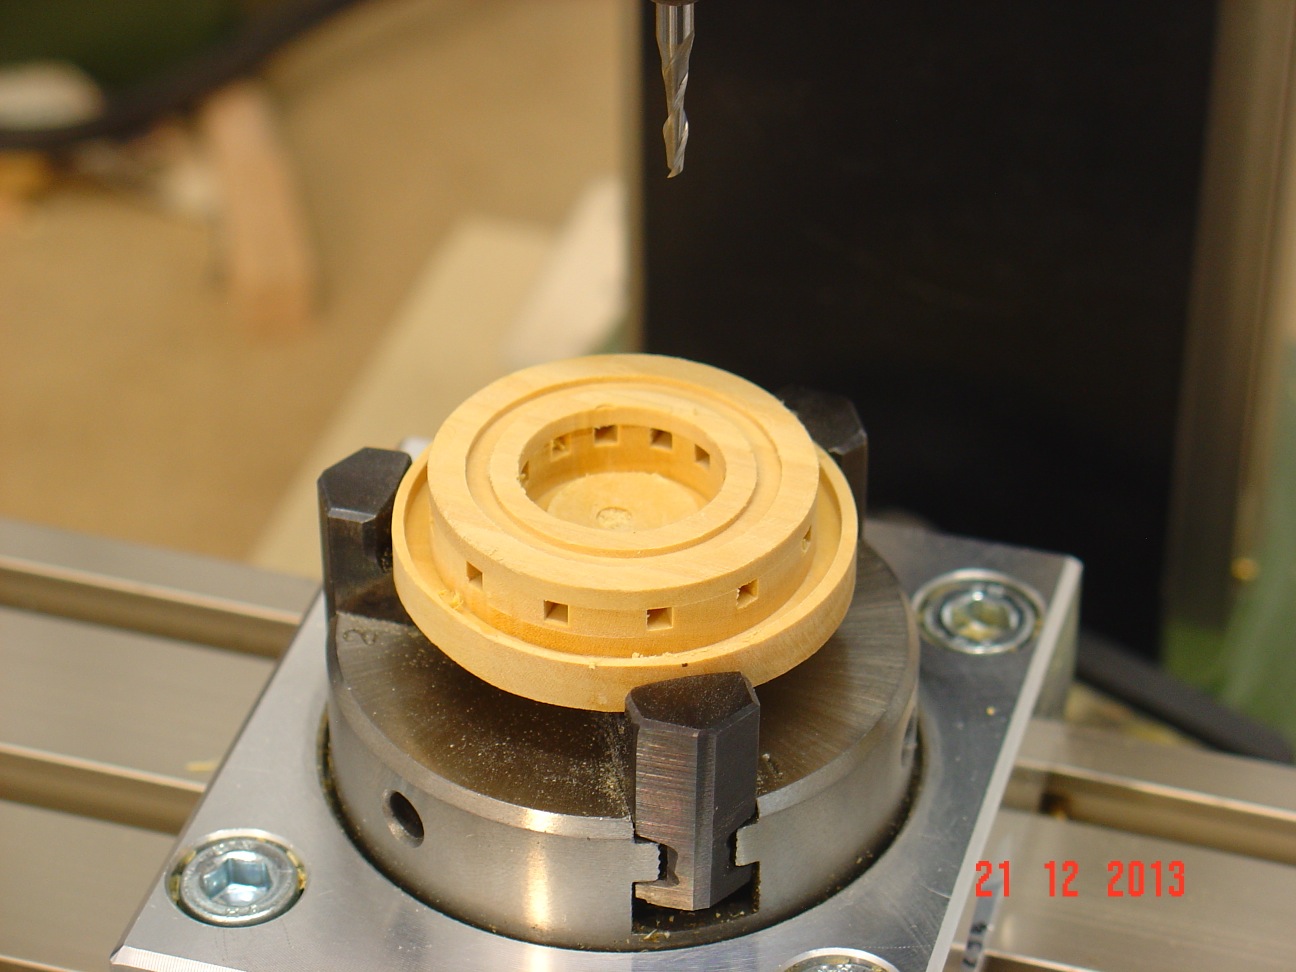
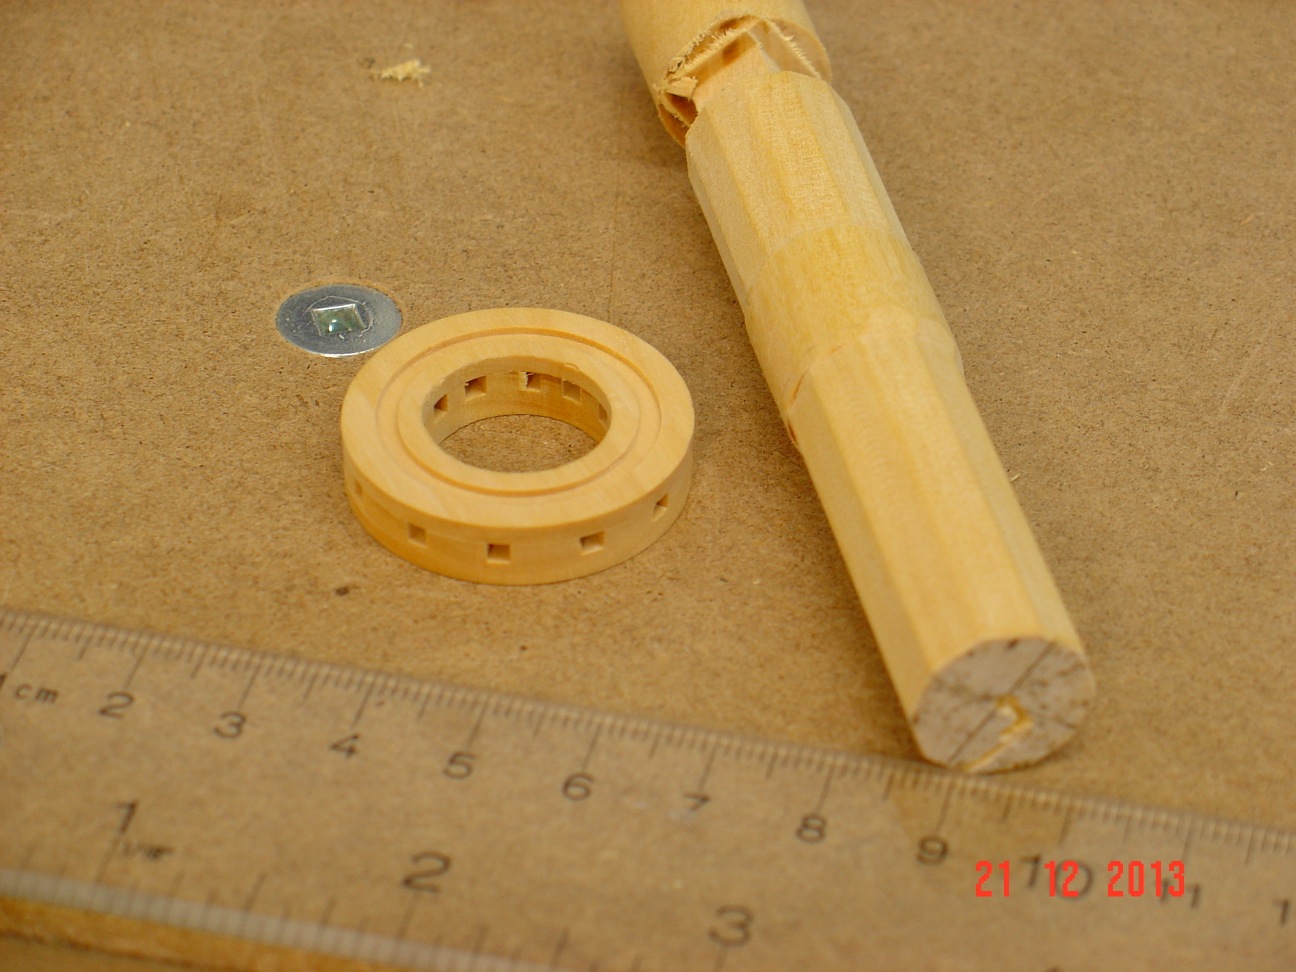
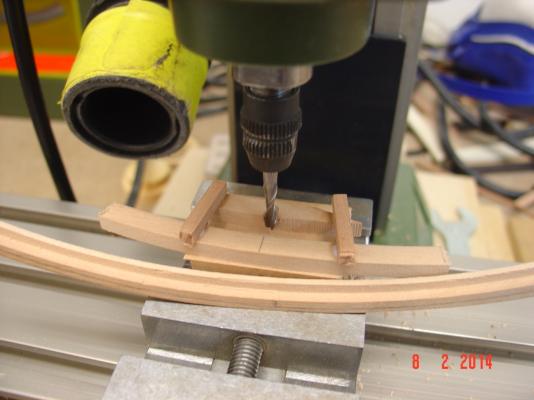
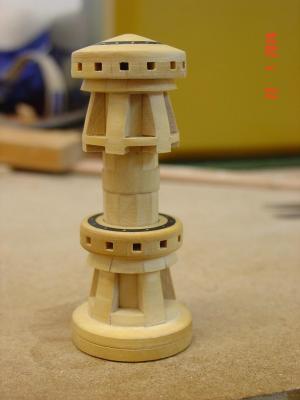
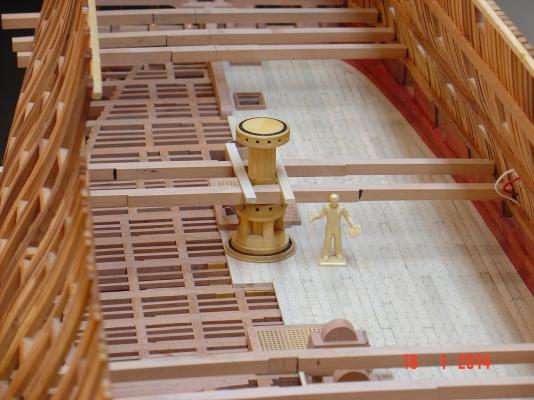
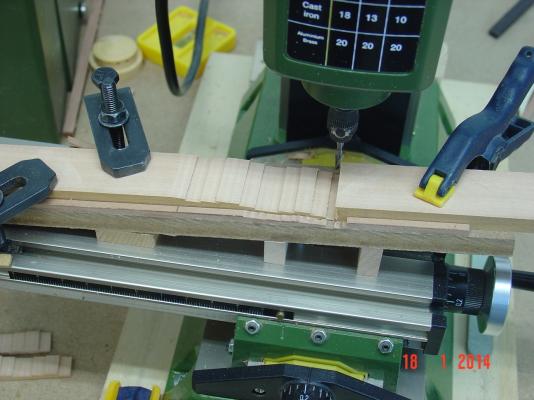
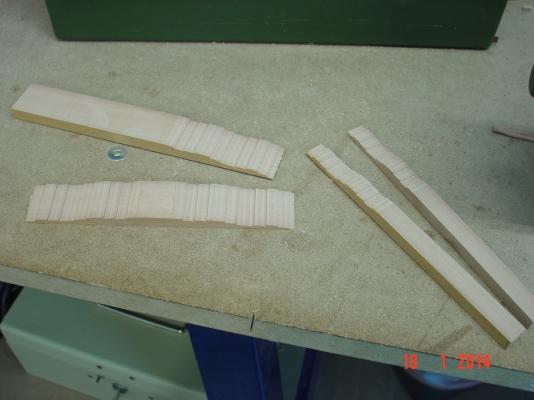
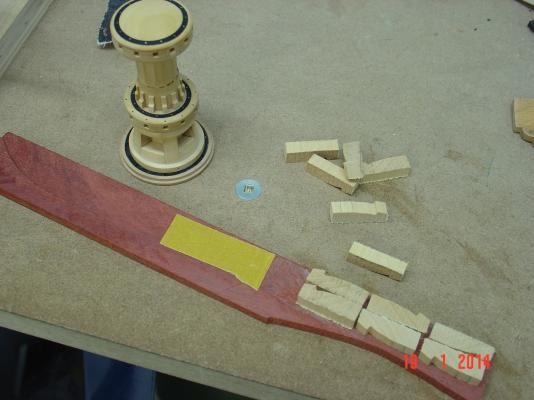
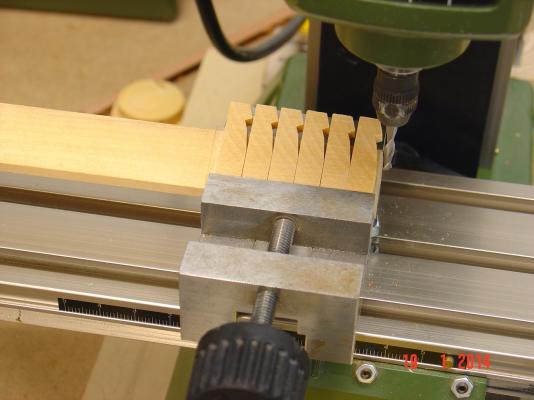
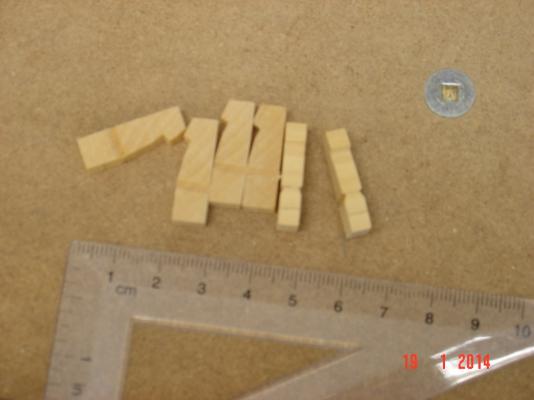
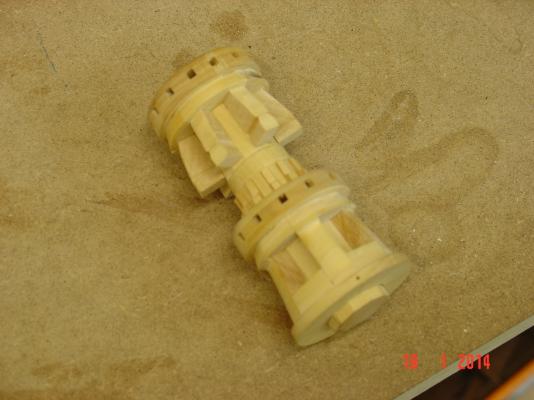
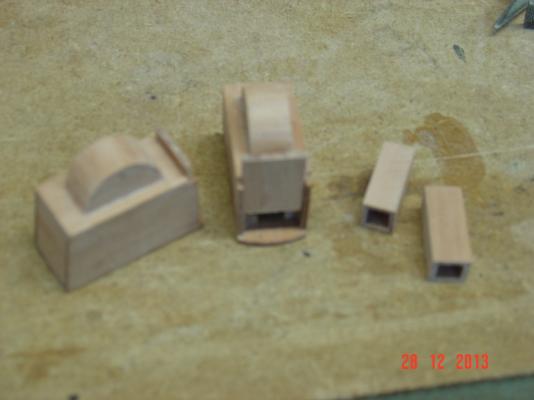
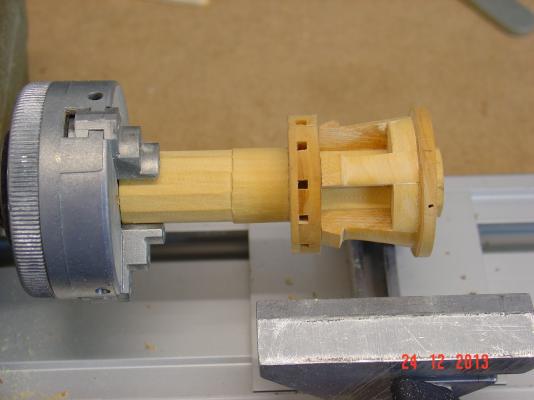
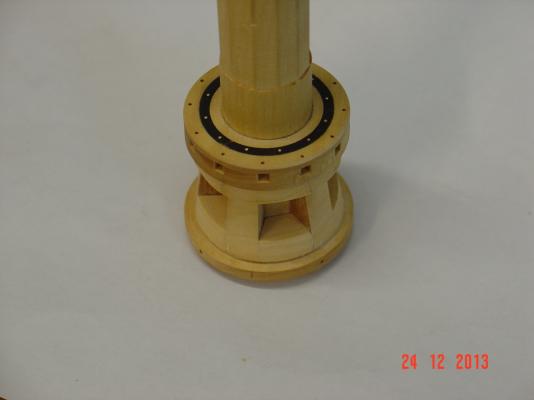
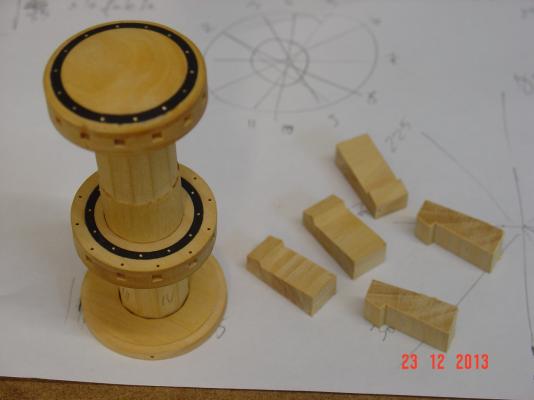
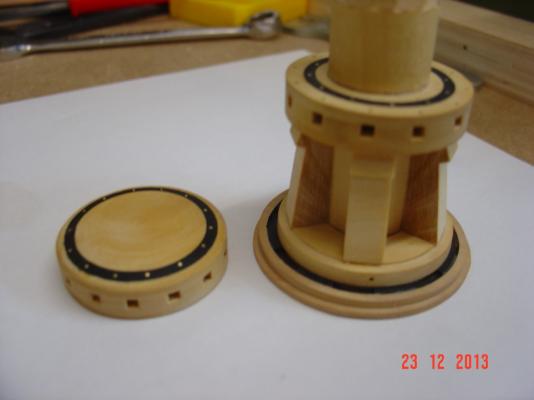
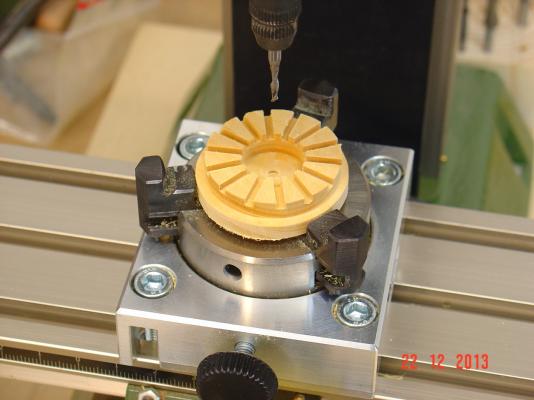
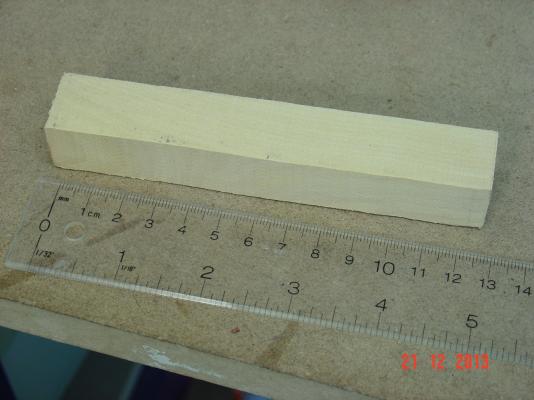
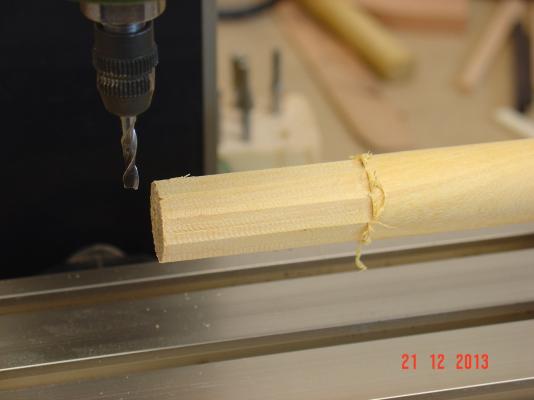
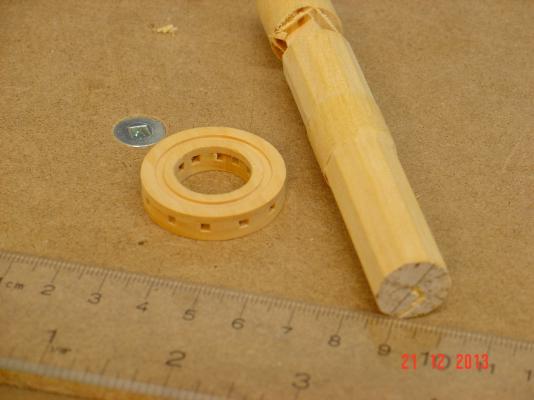
Hello all, Thanks for the comments and the interest in my build. Here is a small update with the progress on the main capstan. Not completed yet but so far I've done the spindle from a square piece of boxwood on the lathe. Next I milled it for 10 whelps on lower deck and on the middle deck 12. The lower deck drum has 12 square holes for the bars. Initially I wanted to do it from two pieces each milled half of the bar thickness as you can see in figure 7. The problem was that the two halves didn't mach so I was unable to align the square holes. So I did the next best thing - cut the notches deeper only on the lower half then glued the upper part which was a simple disk. The groove on the top of the drum was fitted with an ebony ring milled to fit and glued in place. This is all I've managed to do so far but I'll continue tomorrow. Thank you Alexandru


-
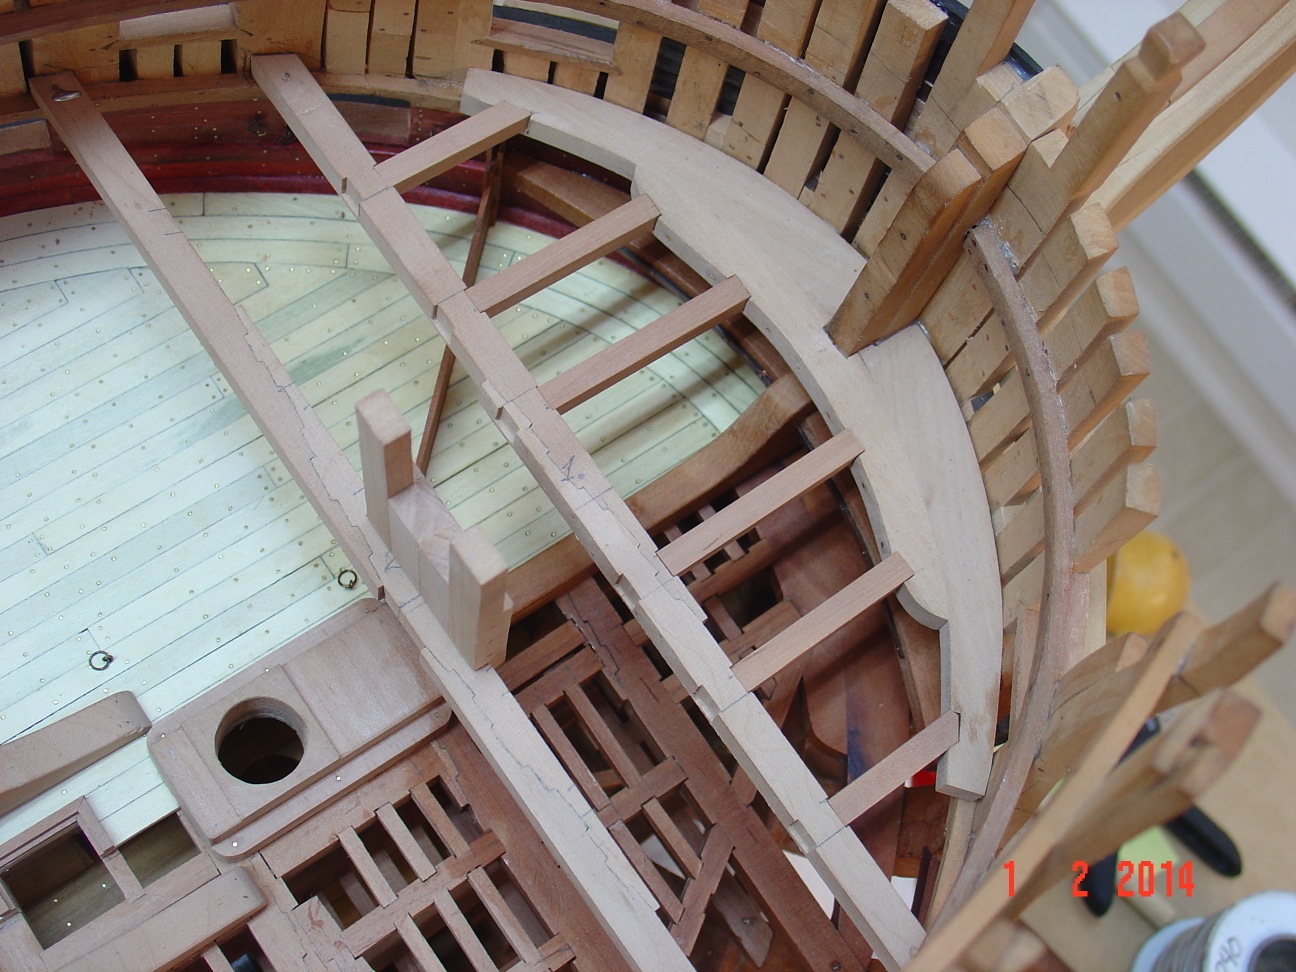
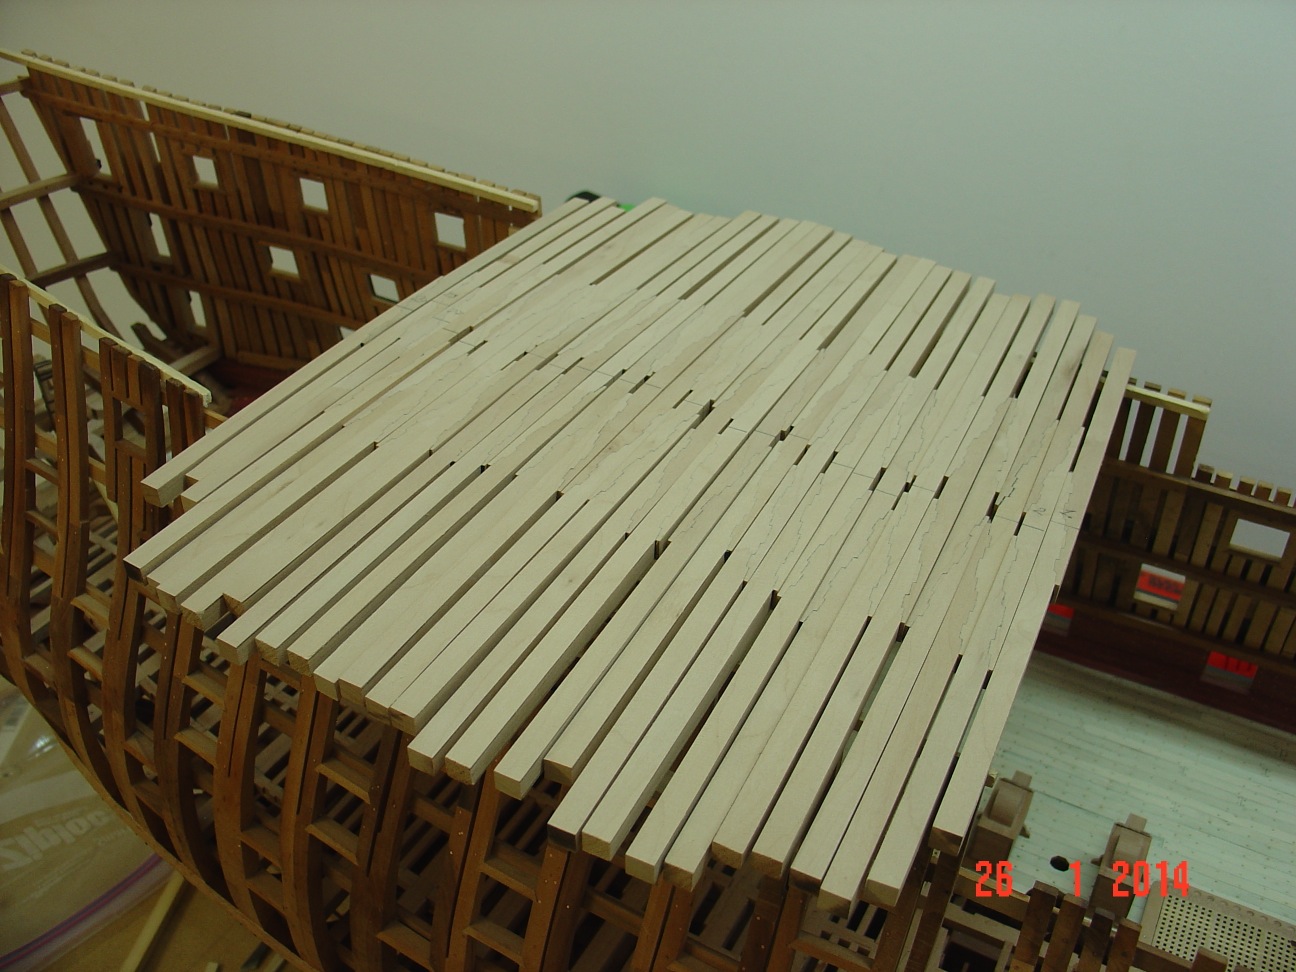
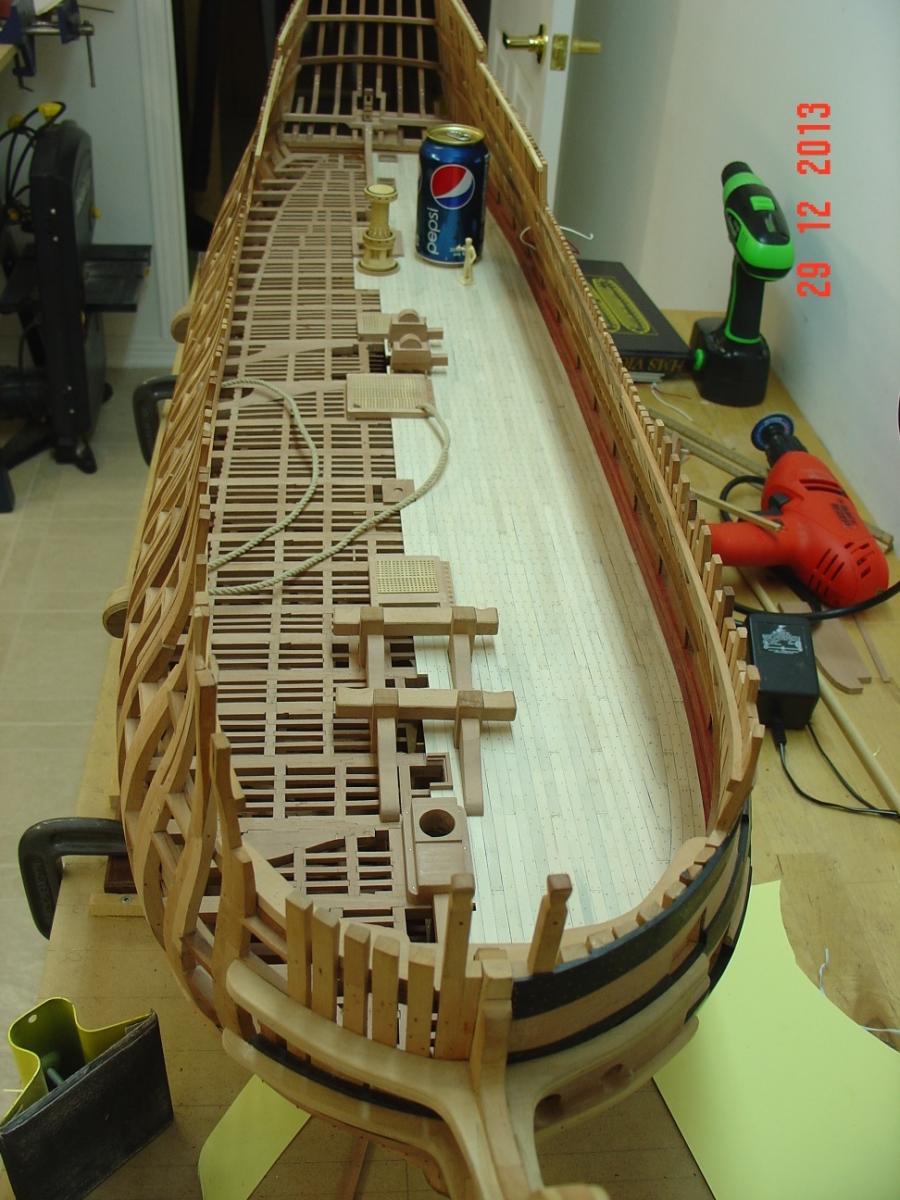
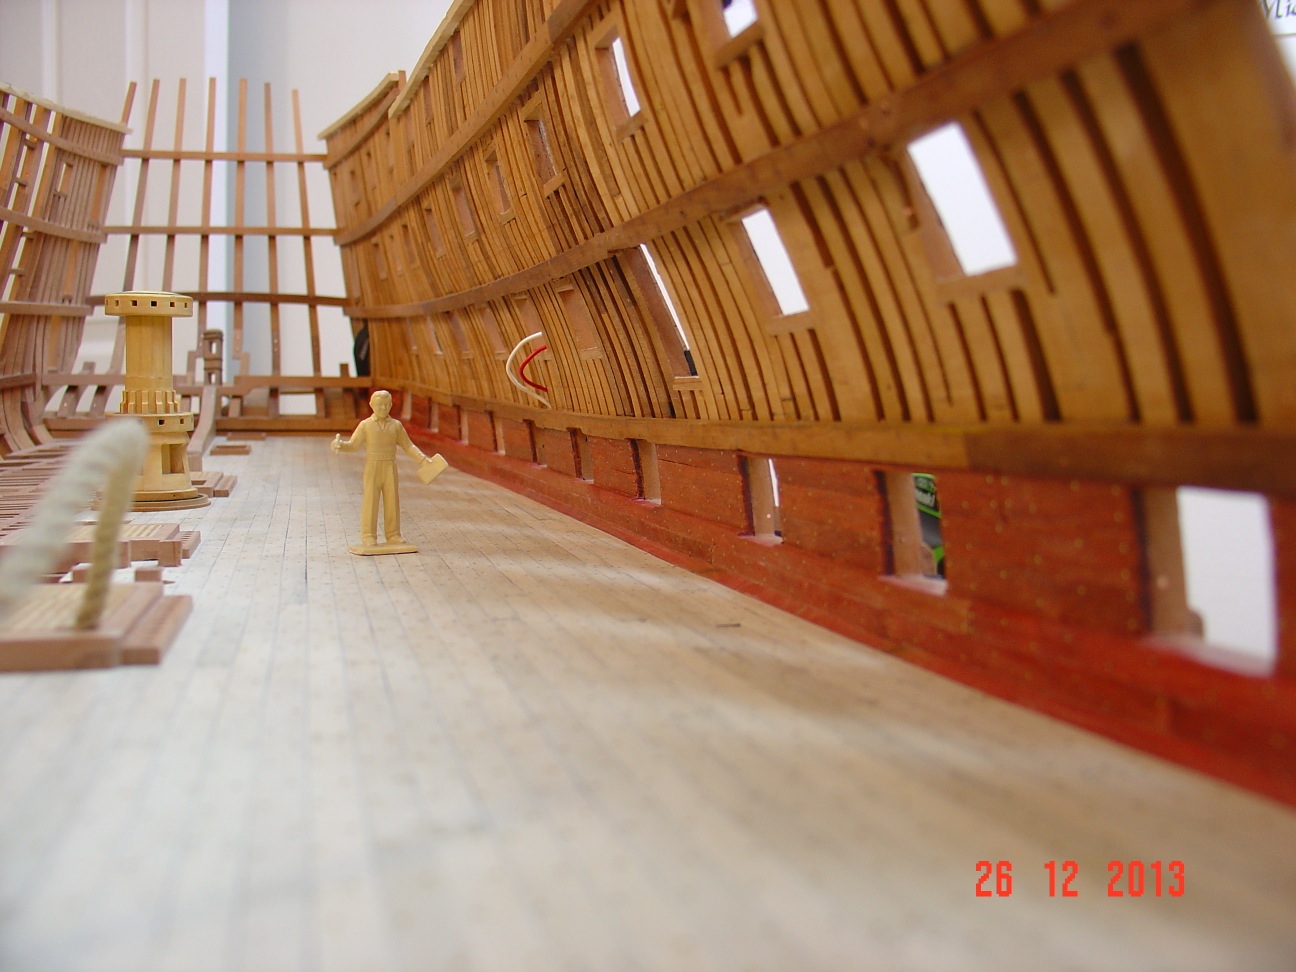
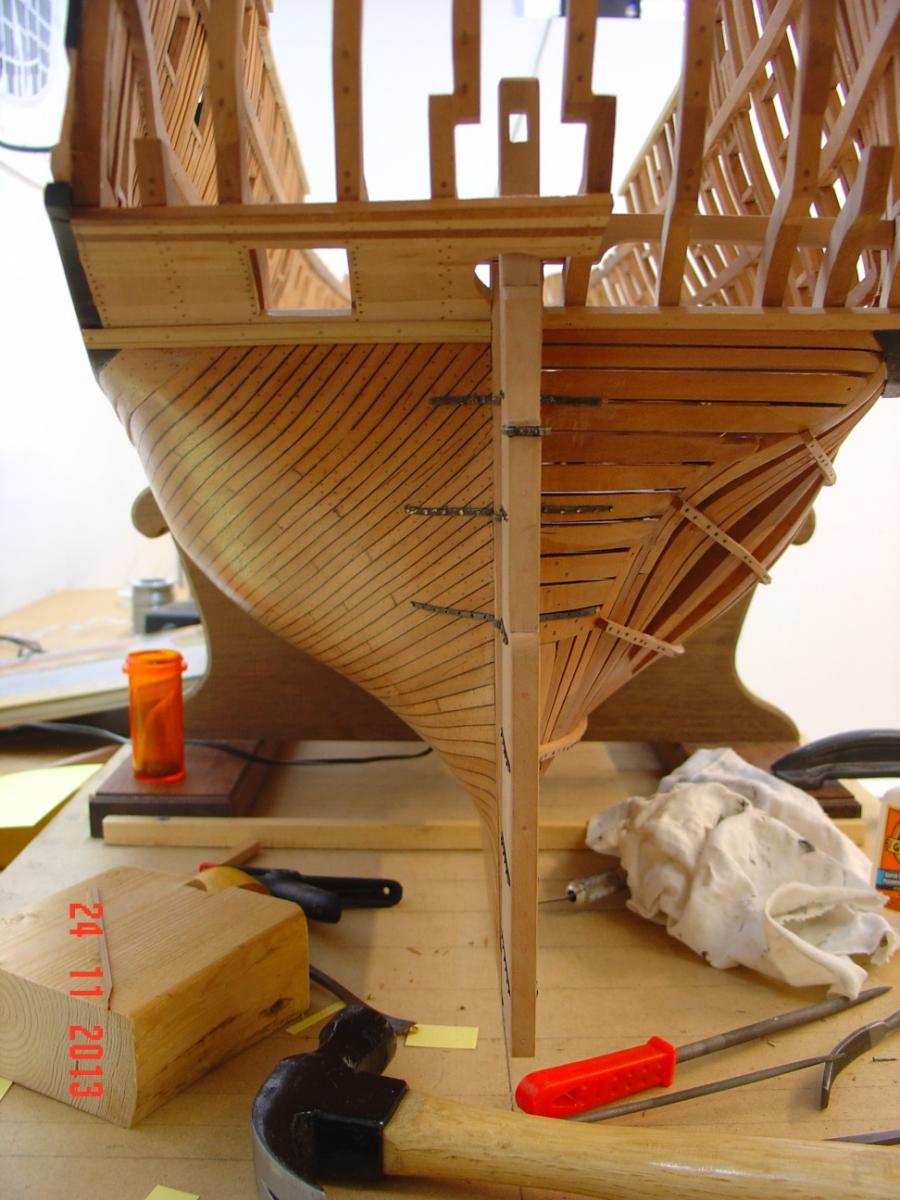
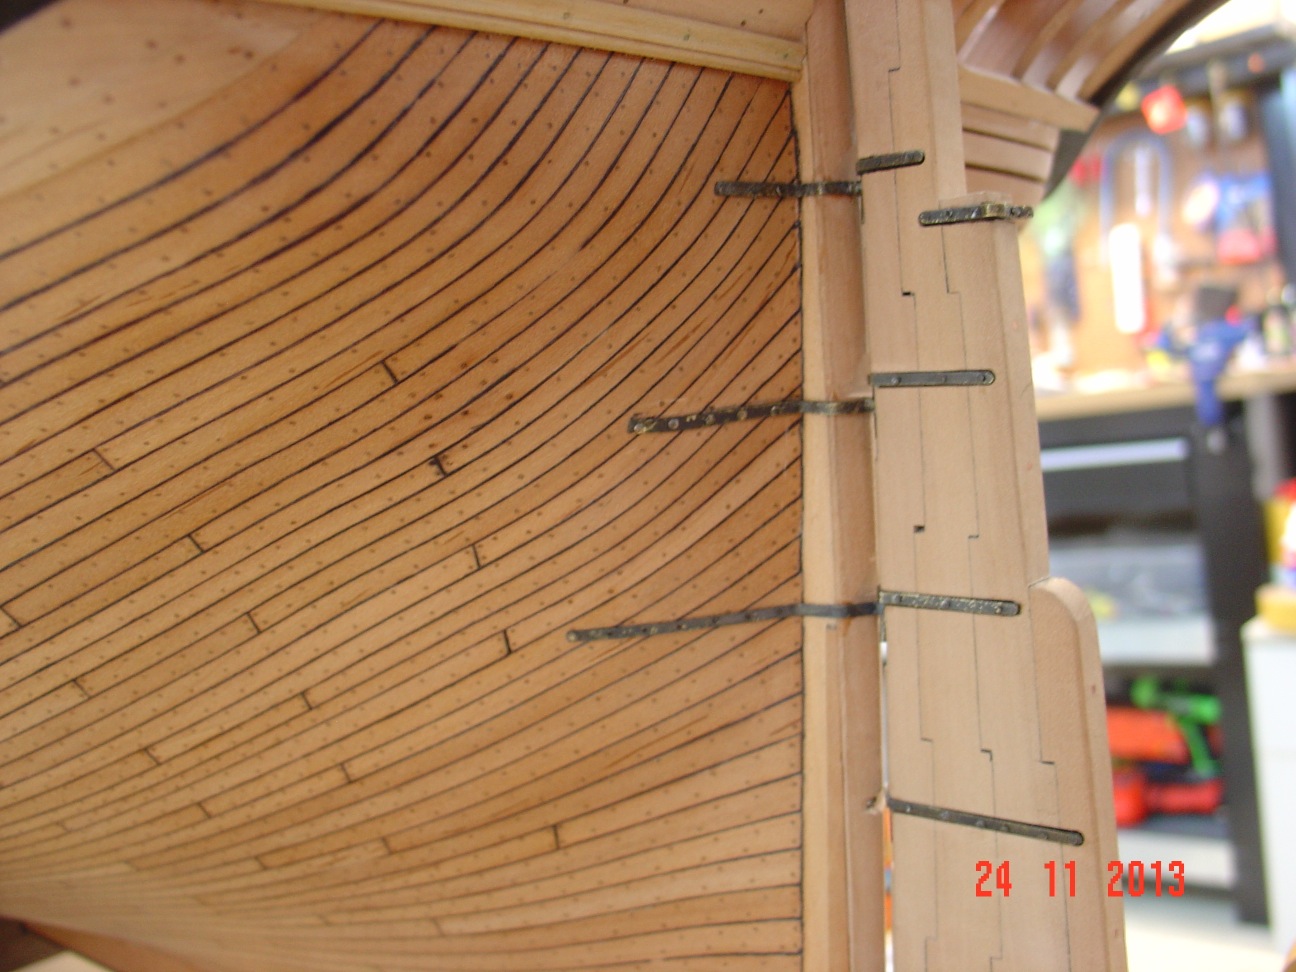
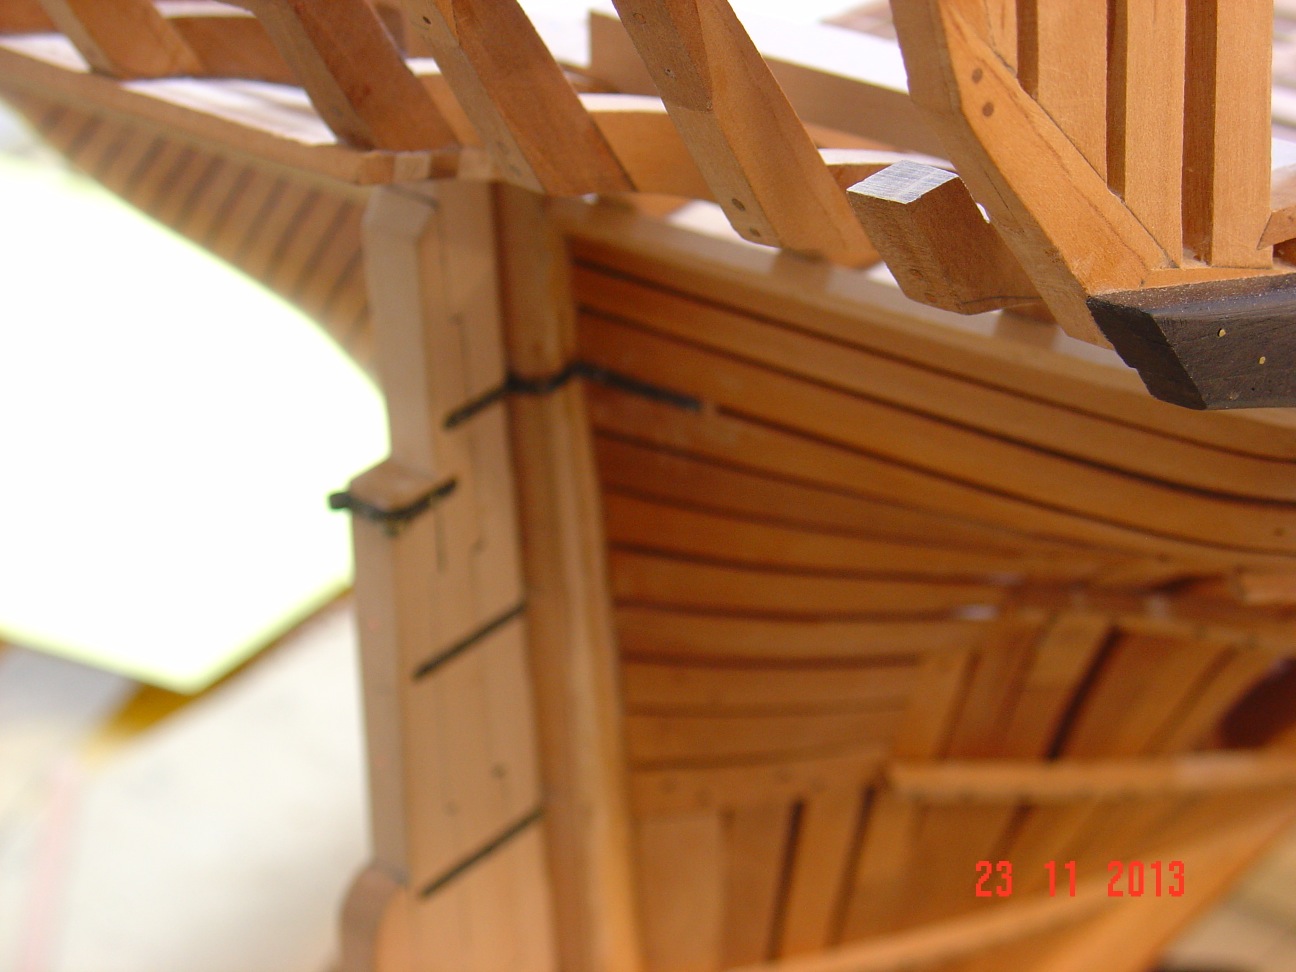
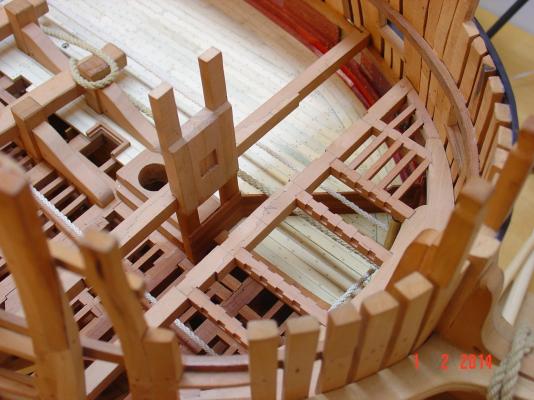
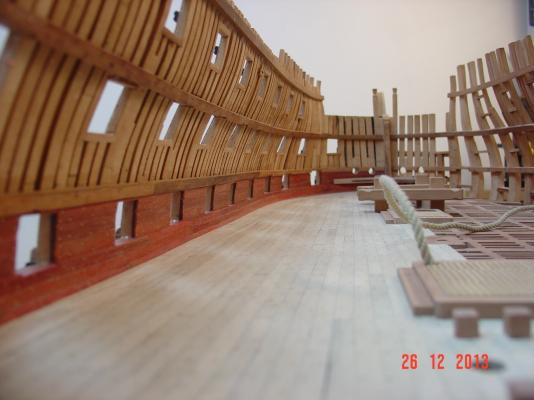
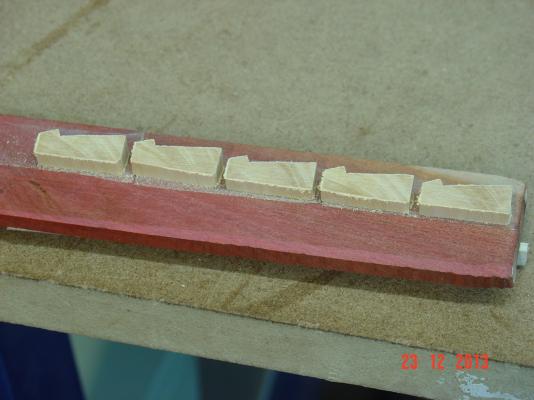
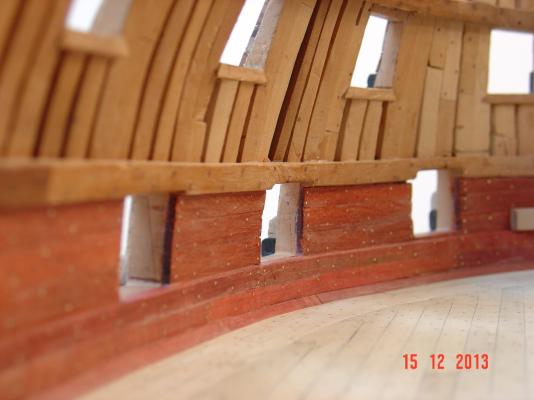
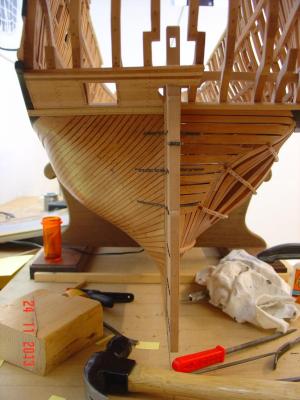
Next I've done the breast hook and continued the planking in blood wood.


-
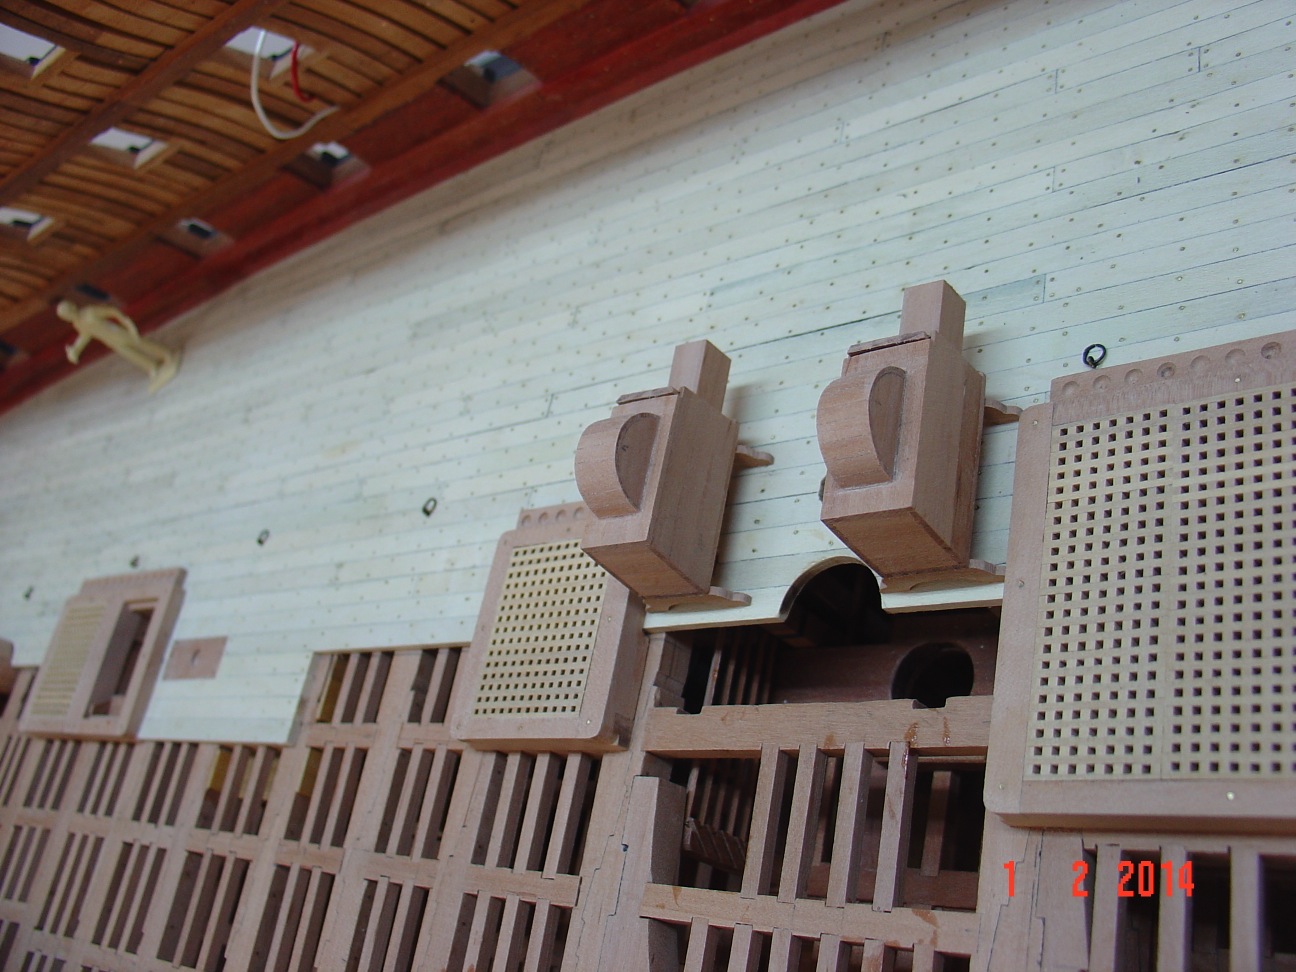
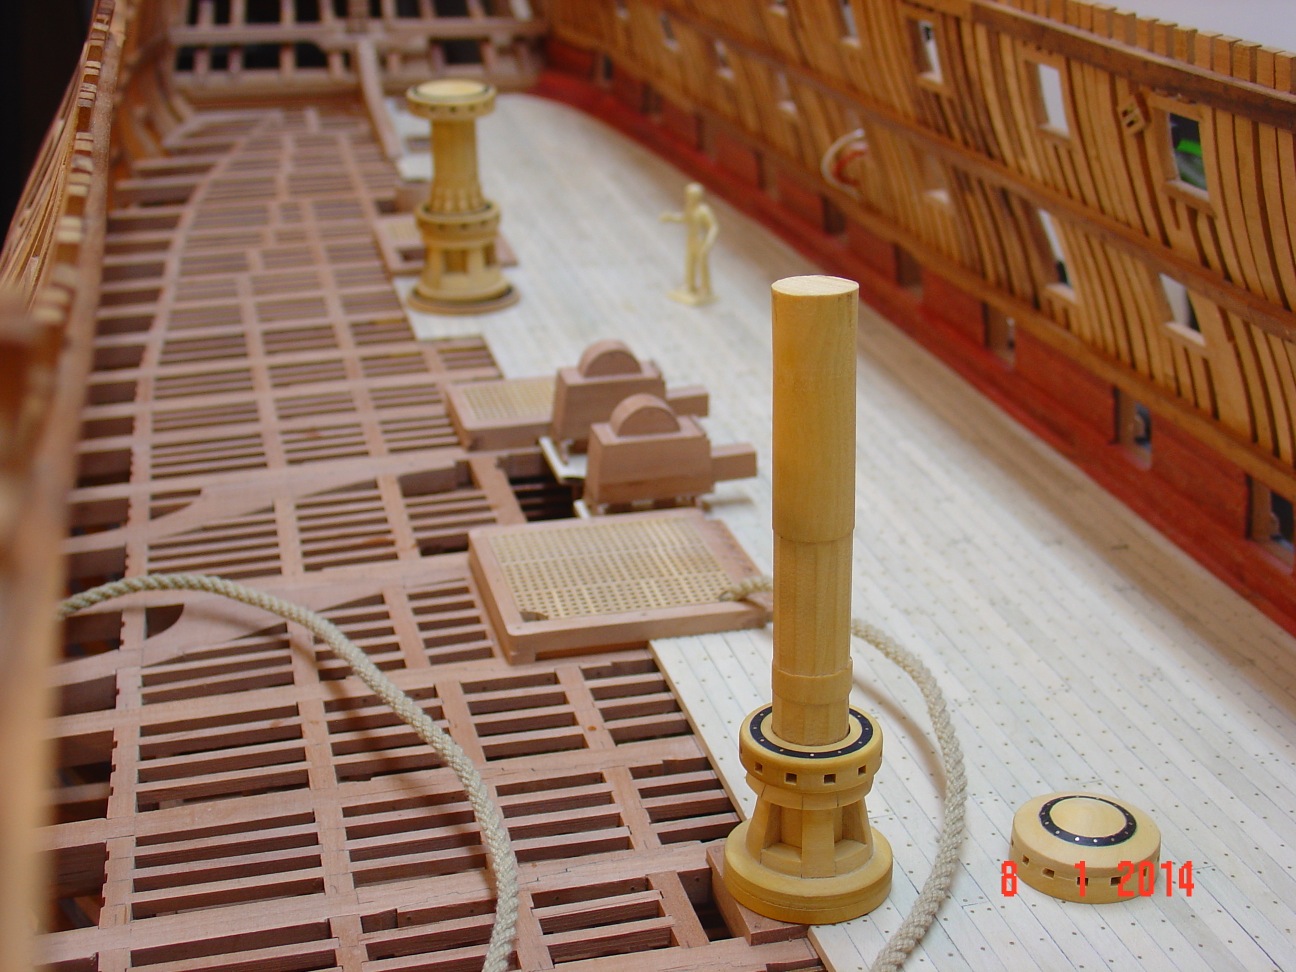
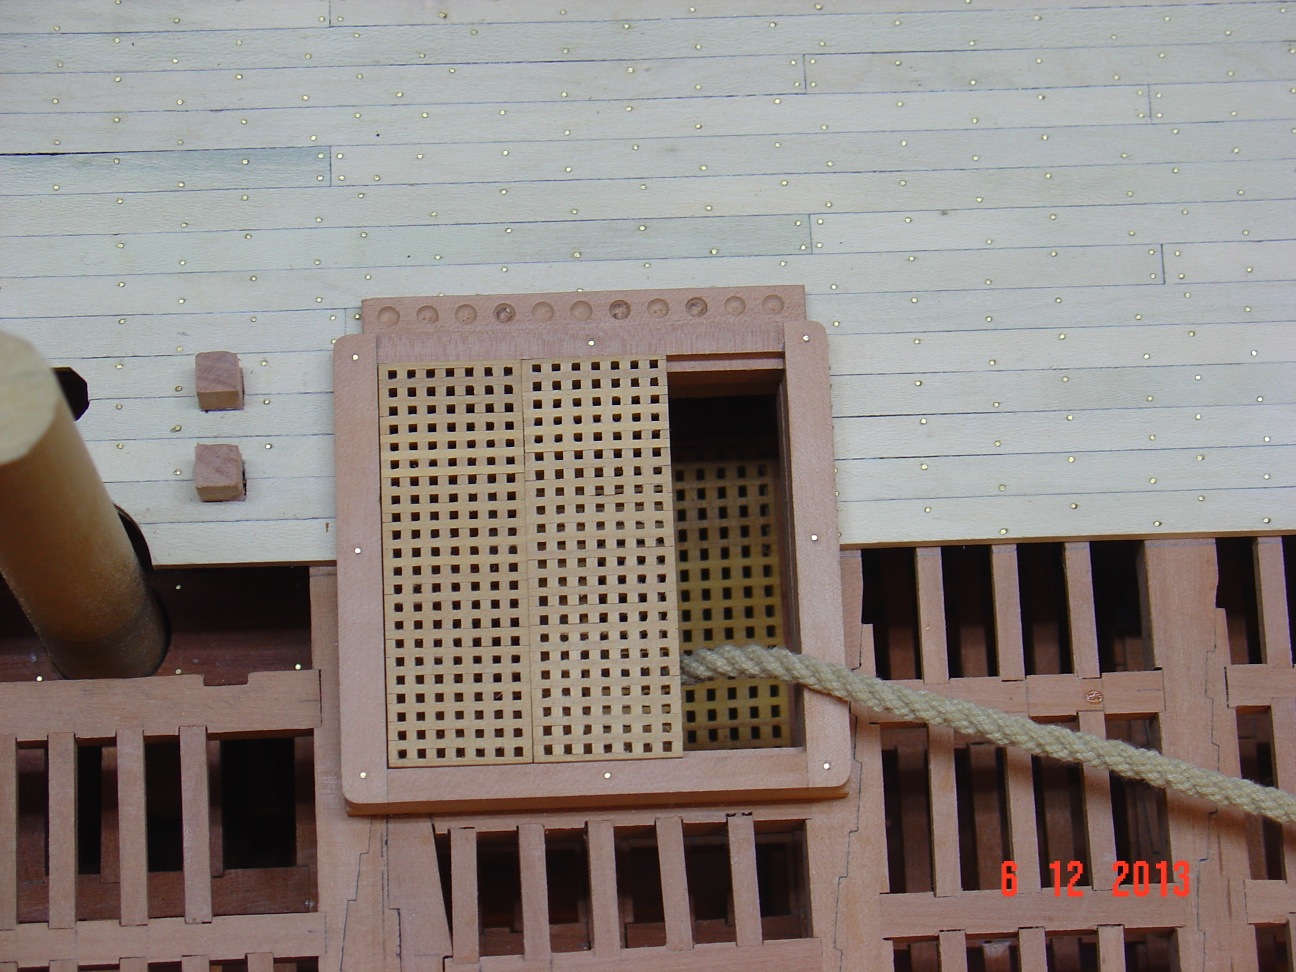
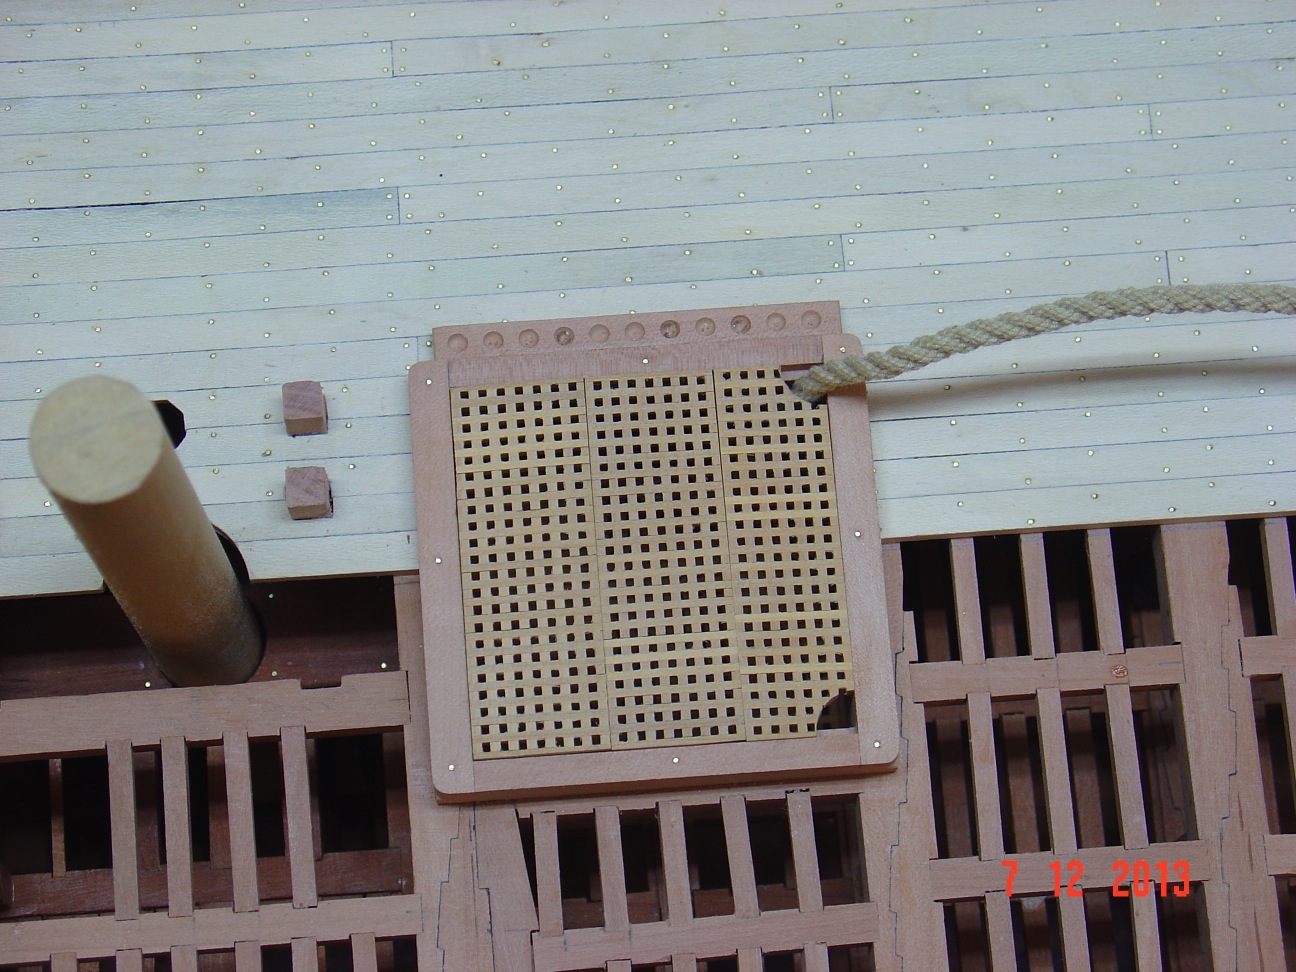
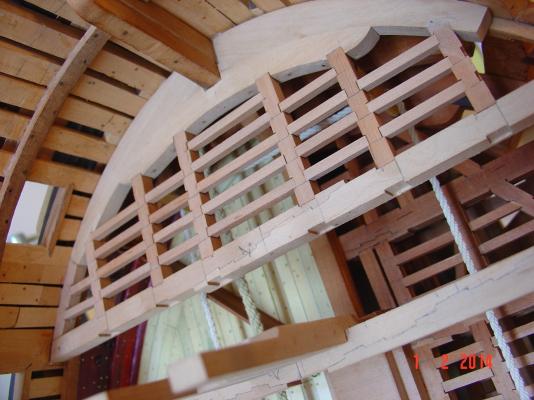
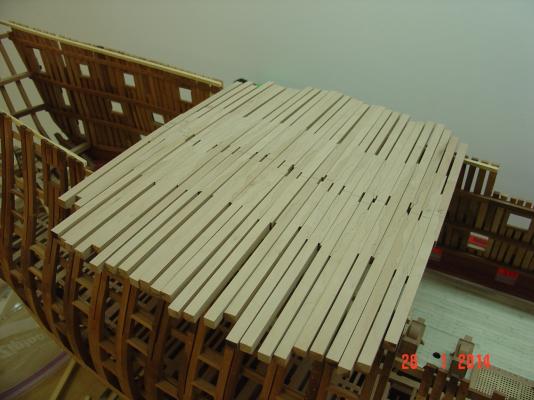
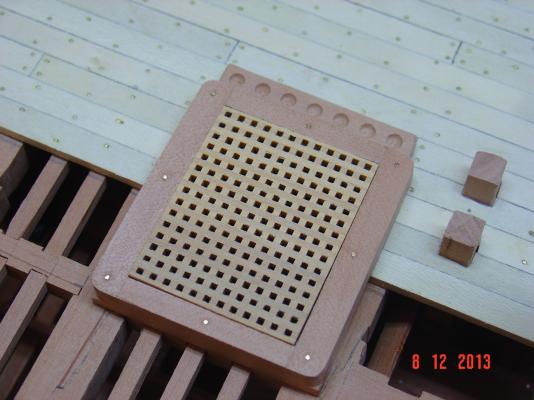
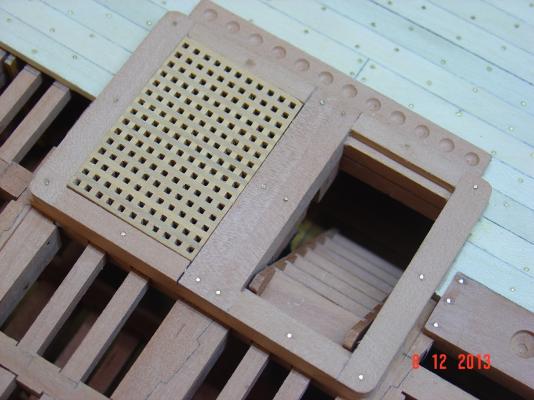
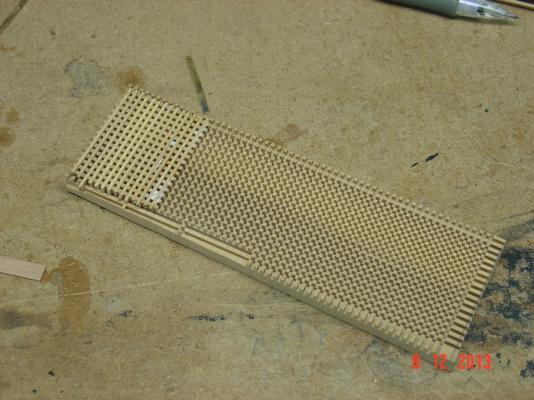
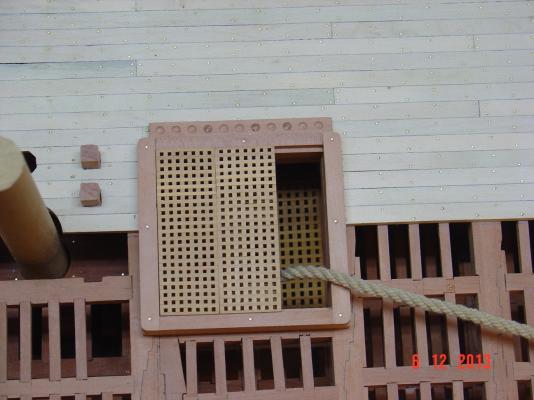
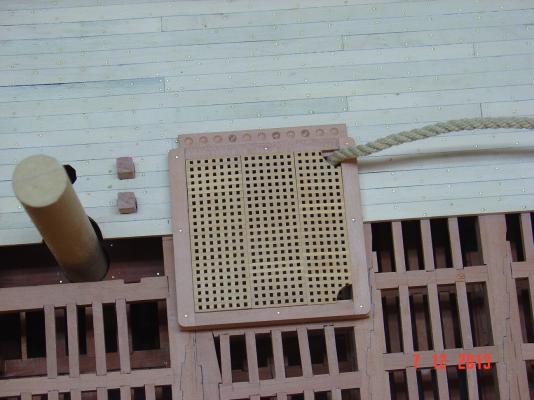
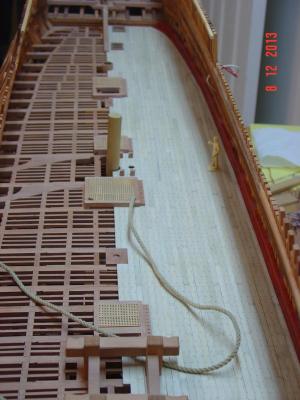
Then I started with the main deck gratings.


-
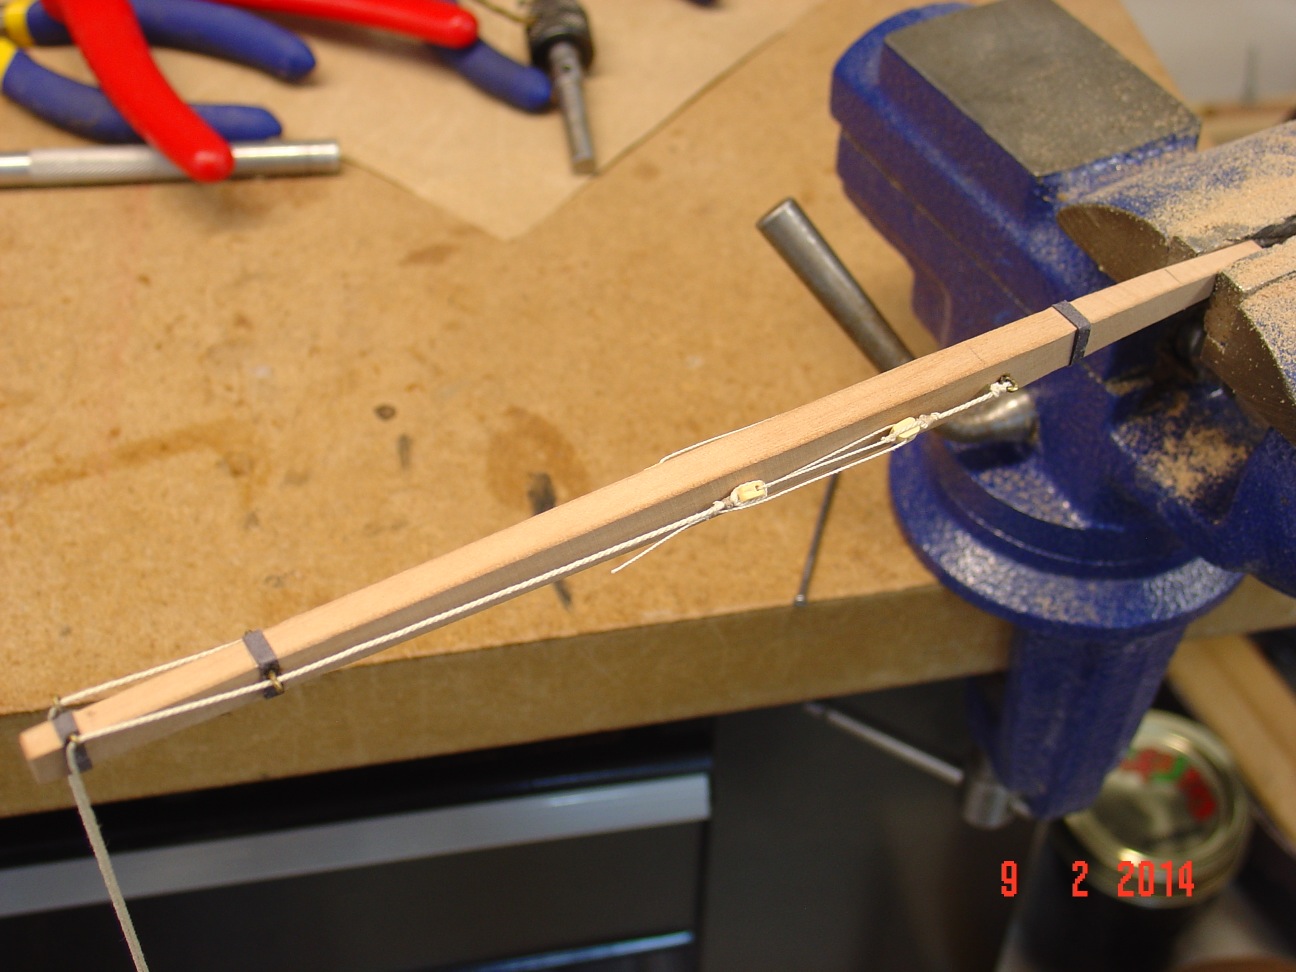
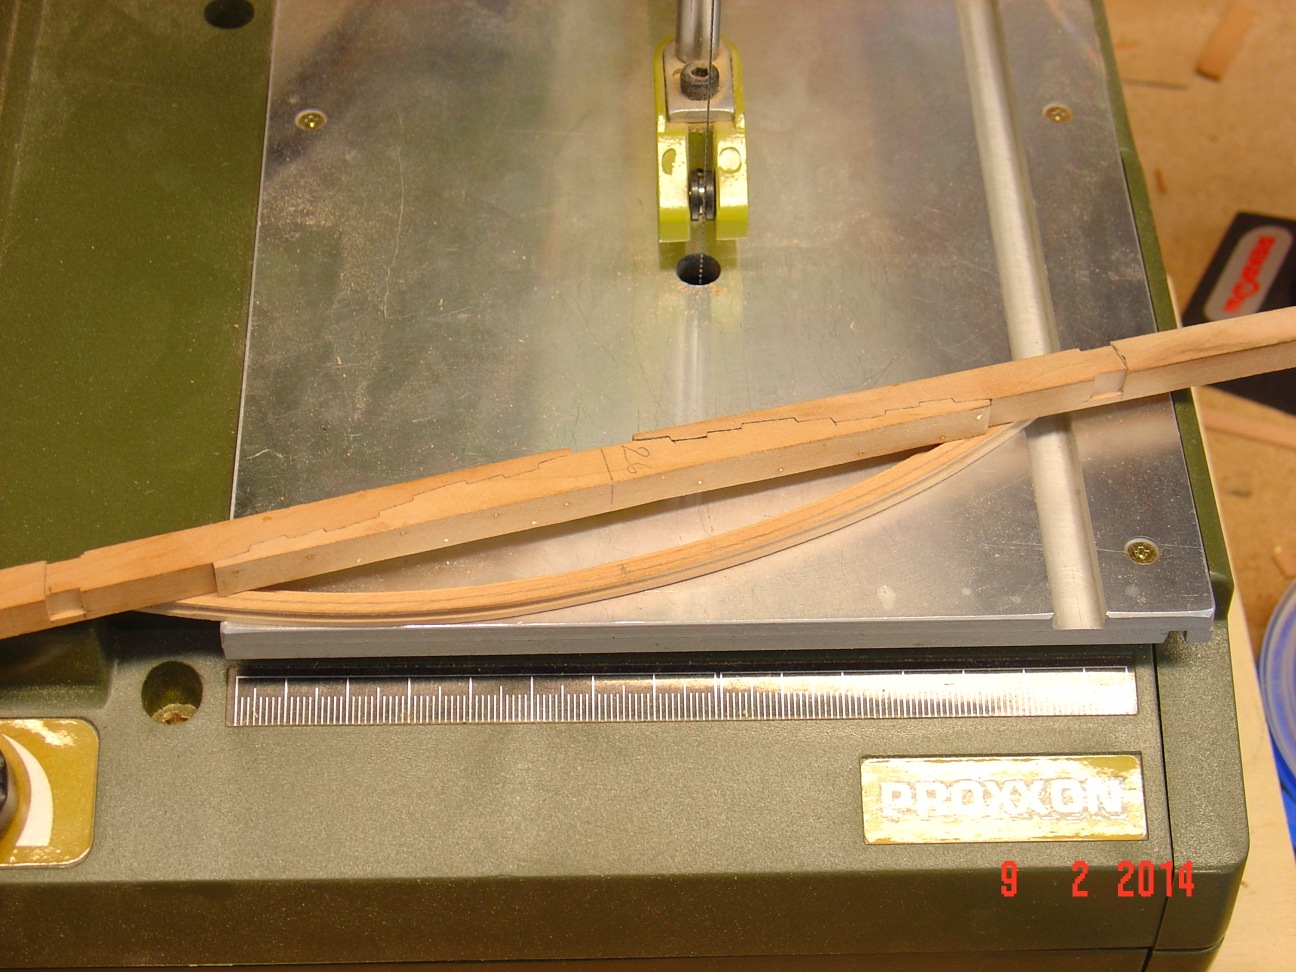
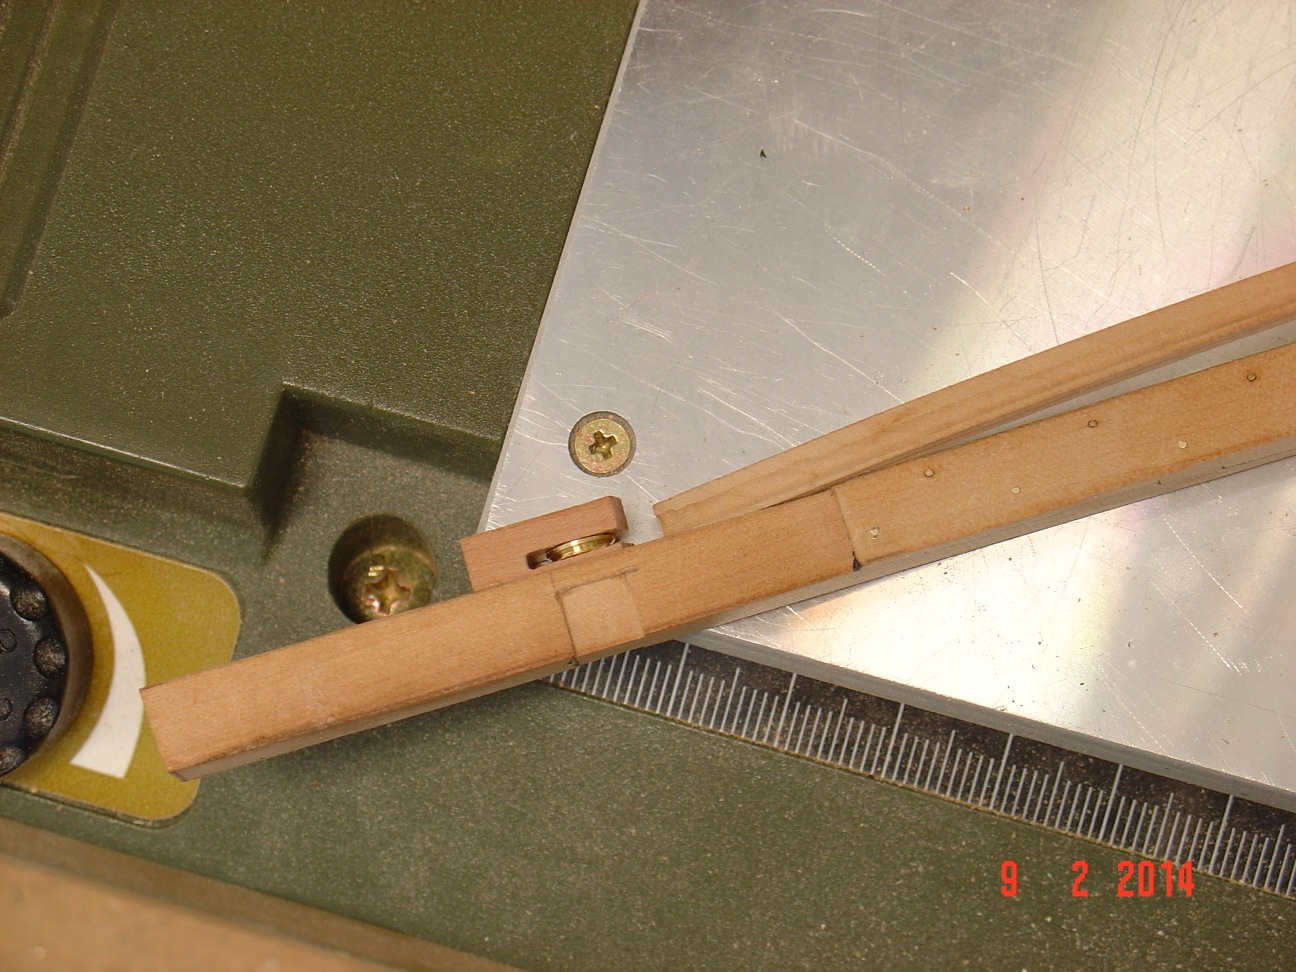
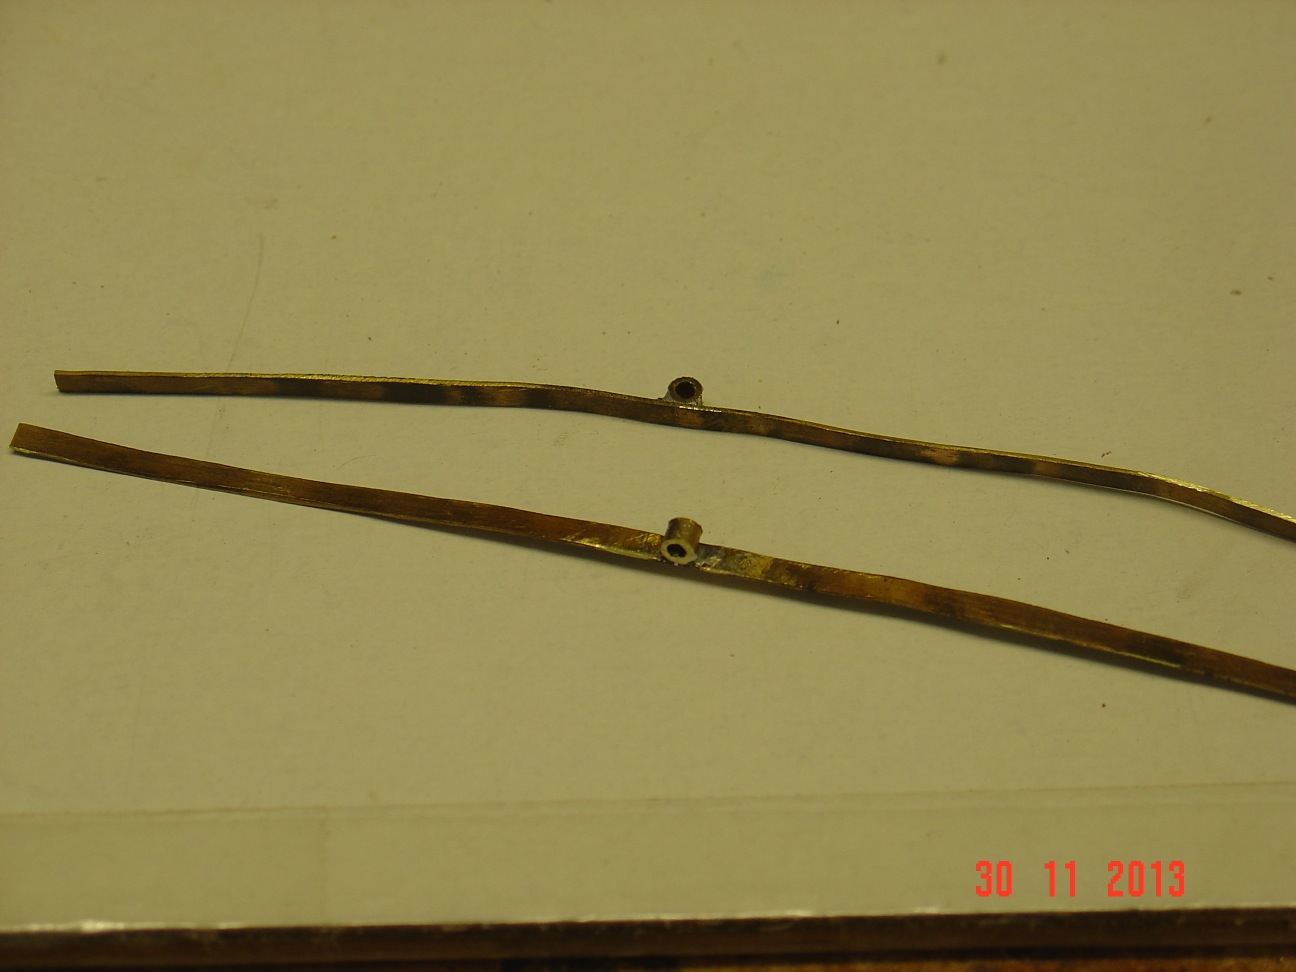
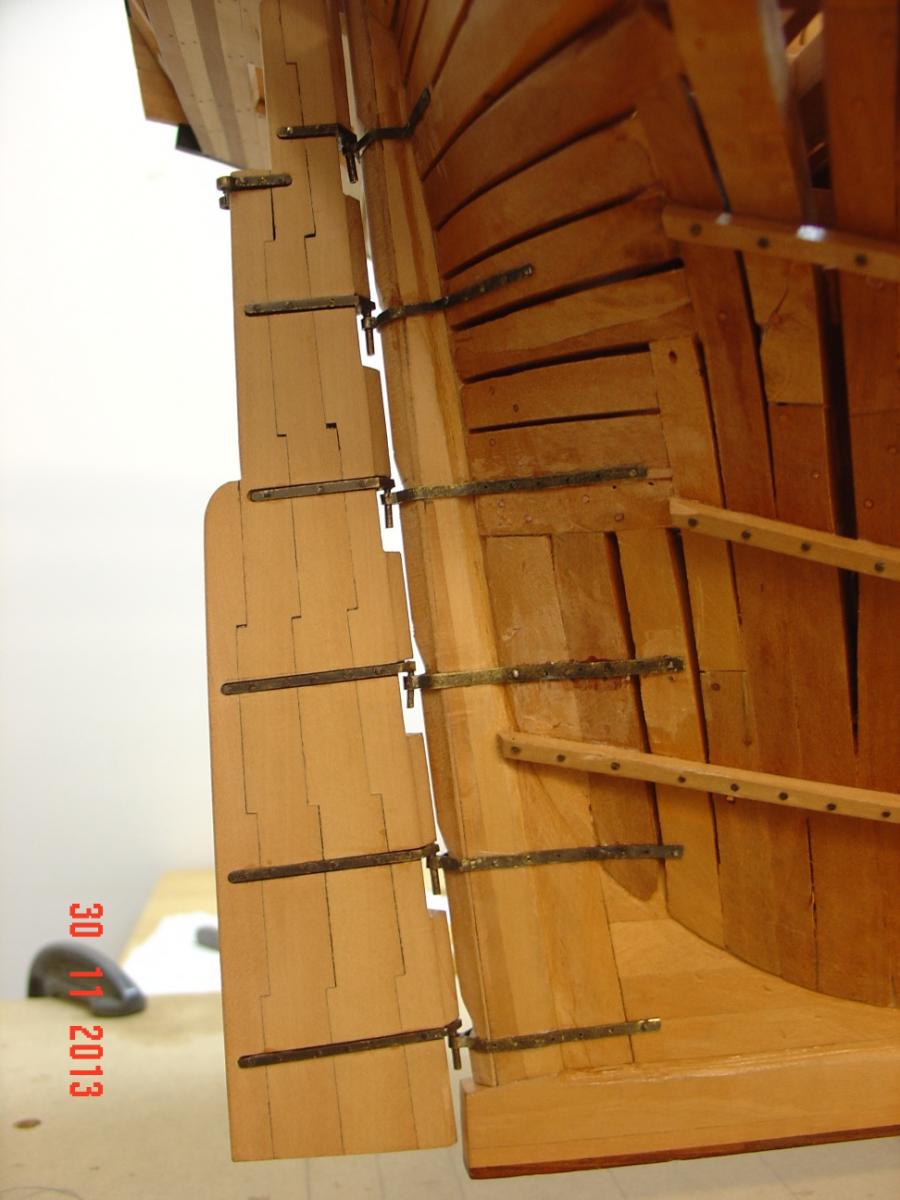
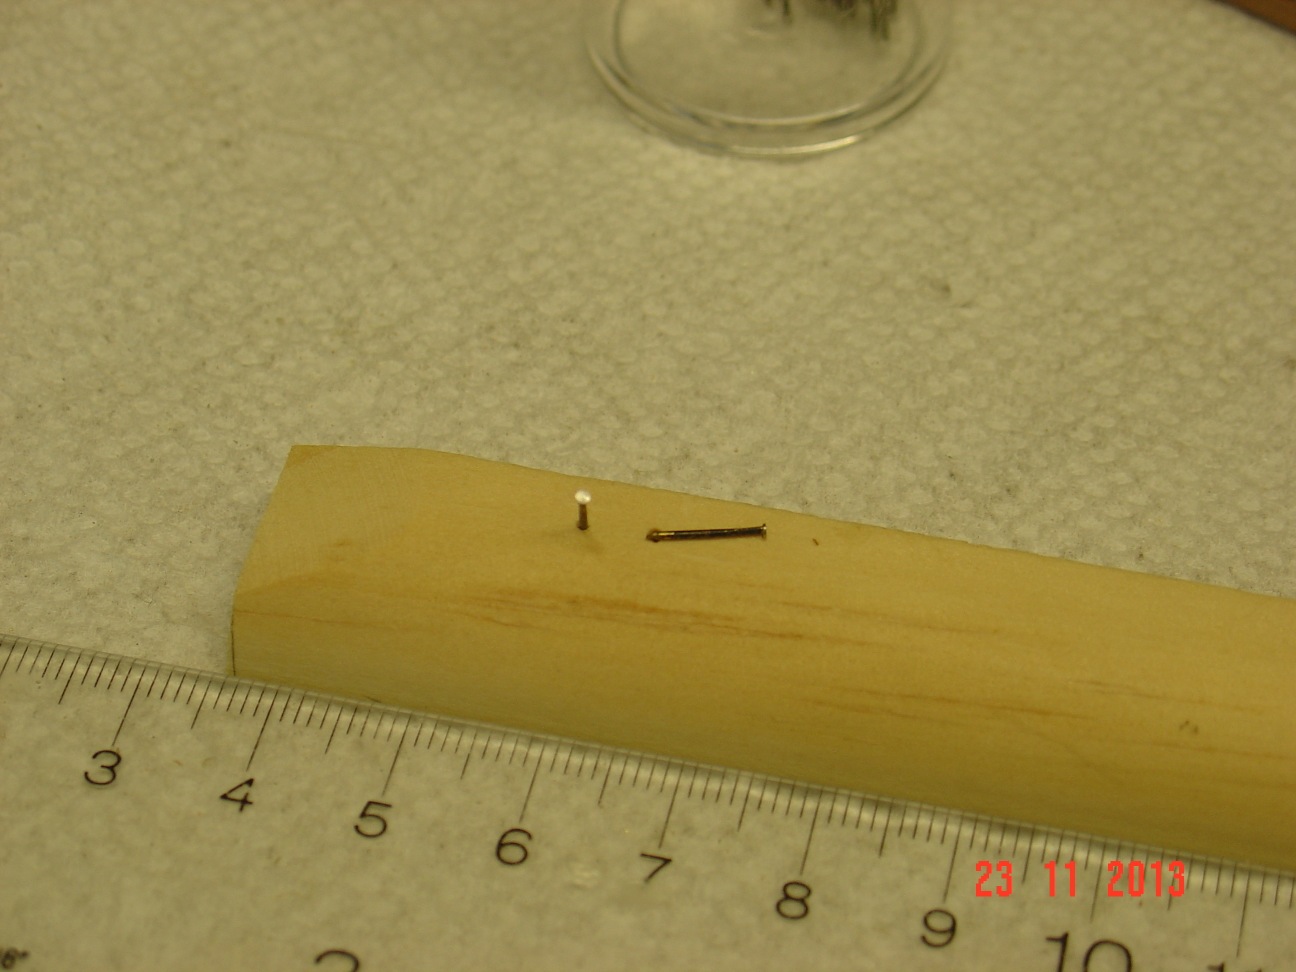
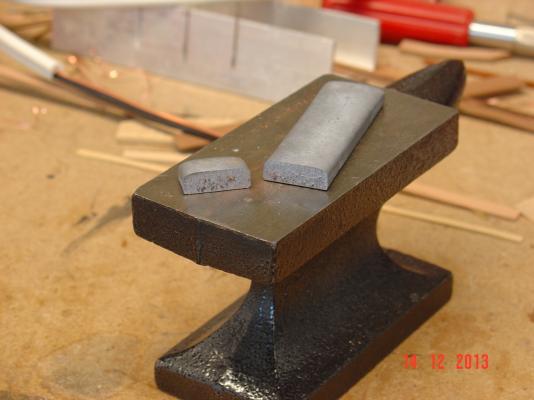
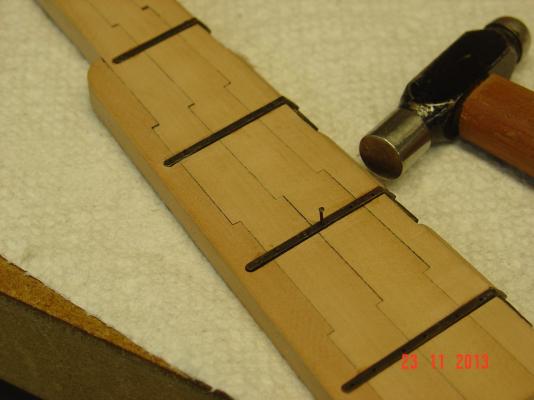
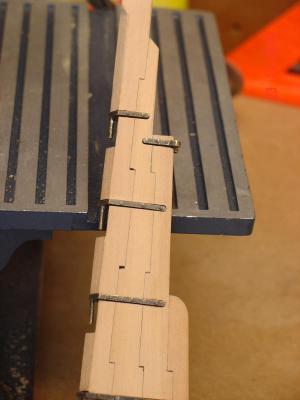
Thanks again. Here is an update for the last couple of weeks. The ruder is done and in place now. I am quite happy with it even if I am sure the next one I'll do will be even better. As my first metal-working task I put together a small step by step of how I made my gudgeons maybe will help somebody else too. There are 6 "straps" for Victory rudder but I think I made at least twice that many till I get the ruder in place. Biggest problem was the soldering - not strong enough - and the holes - broke a lot of 0.5mm drills.

-
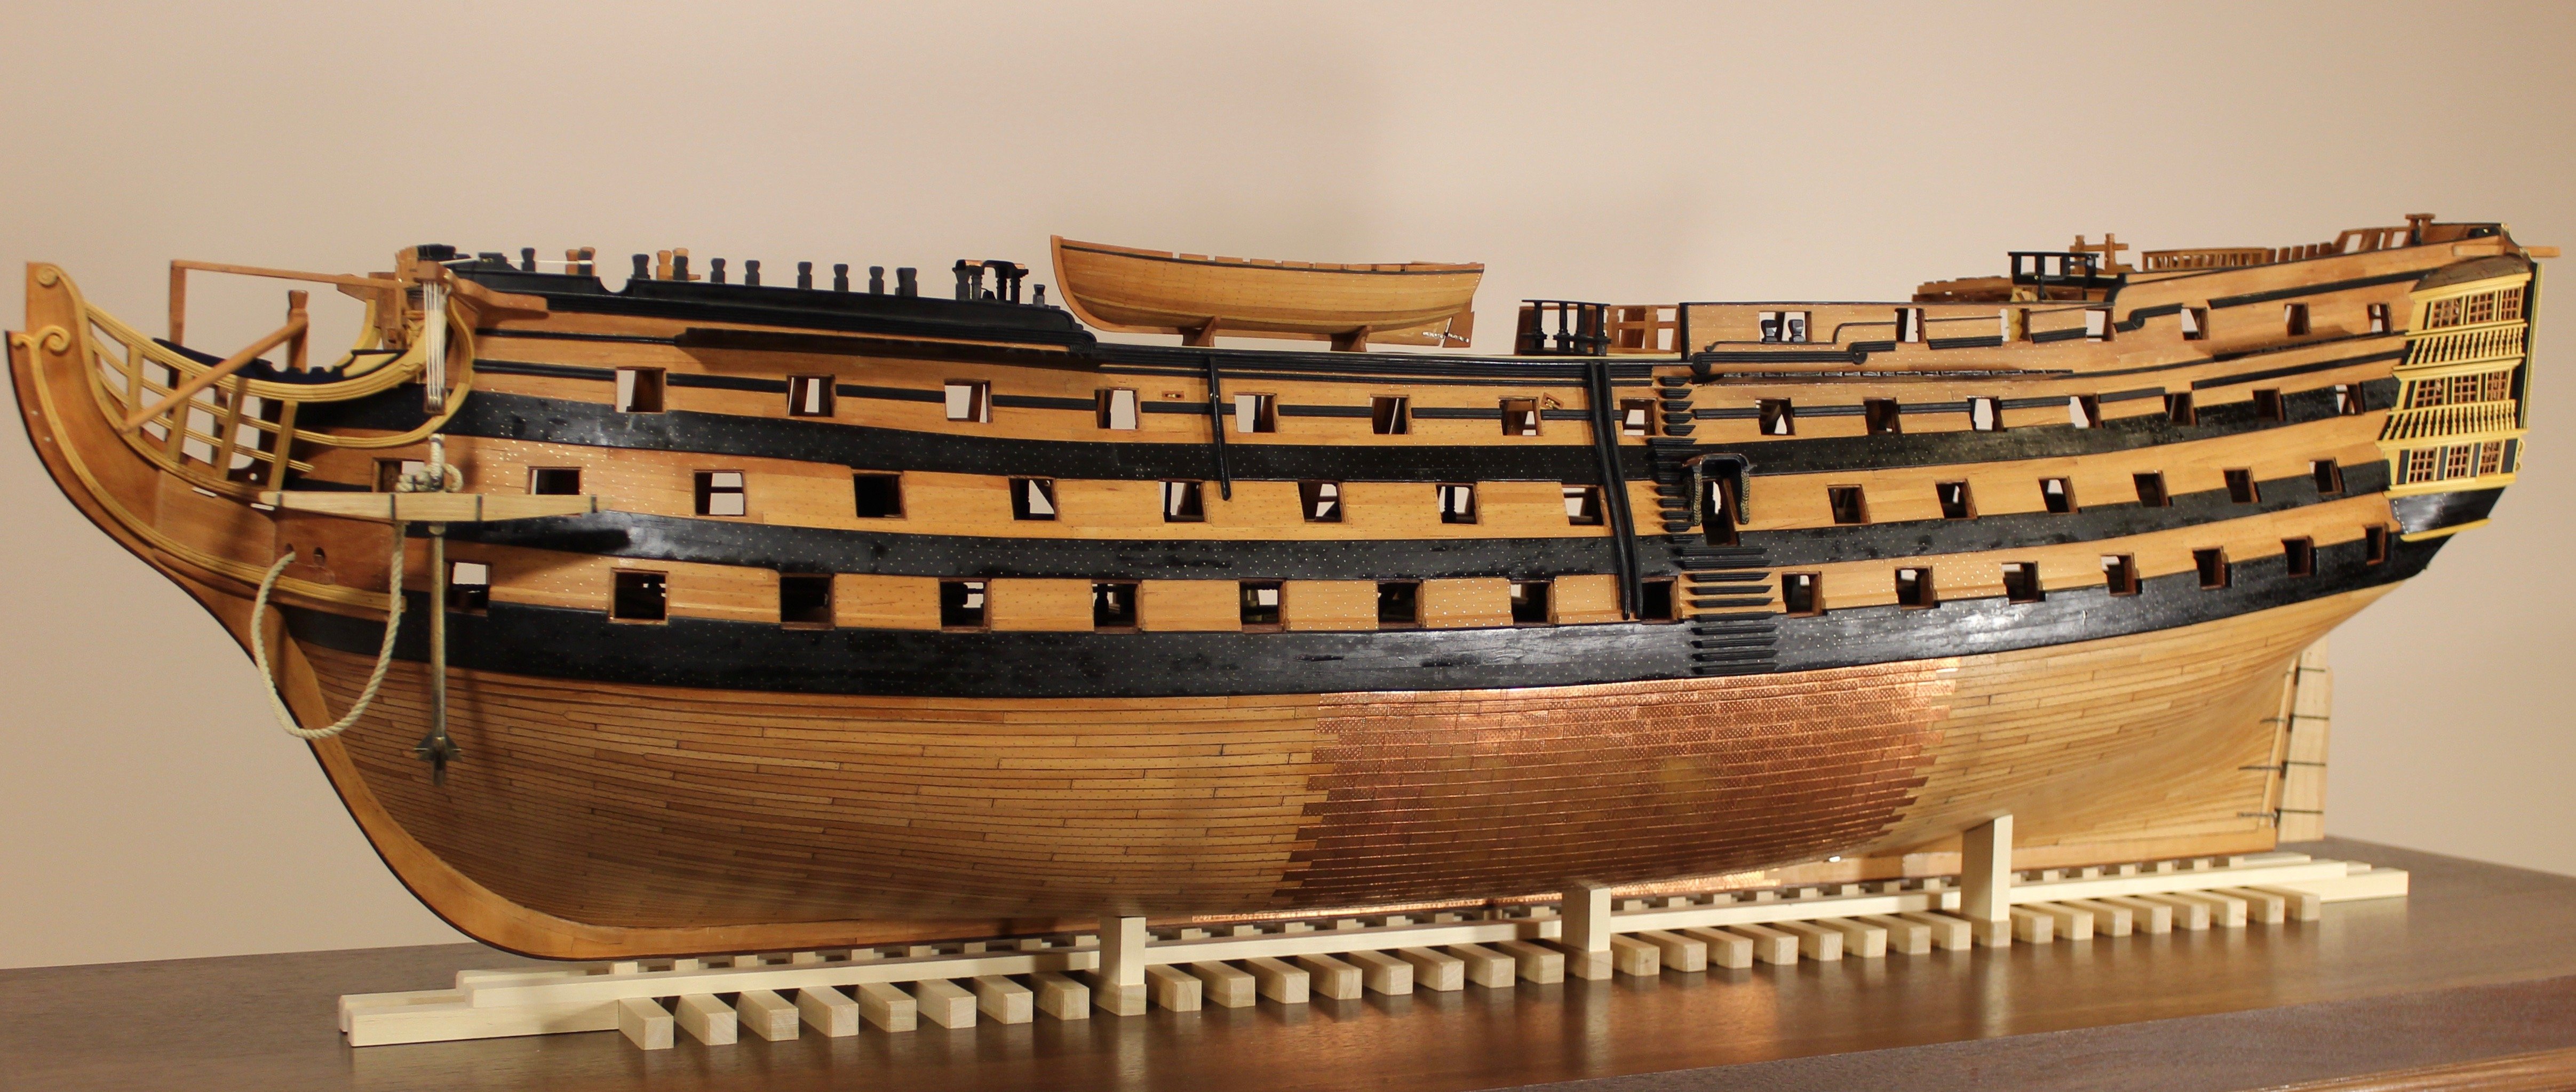
Thank you Chris and lambsbk for appreciation. Chris, I started working on Victory in the fall of 2007. As for the completion date, your guess is as good as mine. Probably another 5 years or even more. I do not have a schedule to meet so when is going to be done its fine. What is decided already is that I won't do a complete rigging for sure otherwise the finished model won't get out of my basement anymore. What is not decided yet is: will I do any rigging at all or not. And if I'll do something will probably be only the lower masts and standing rigging for them. Regards Alexandru
-
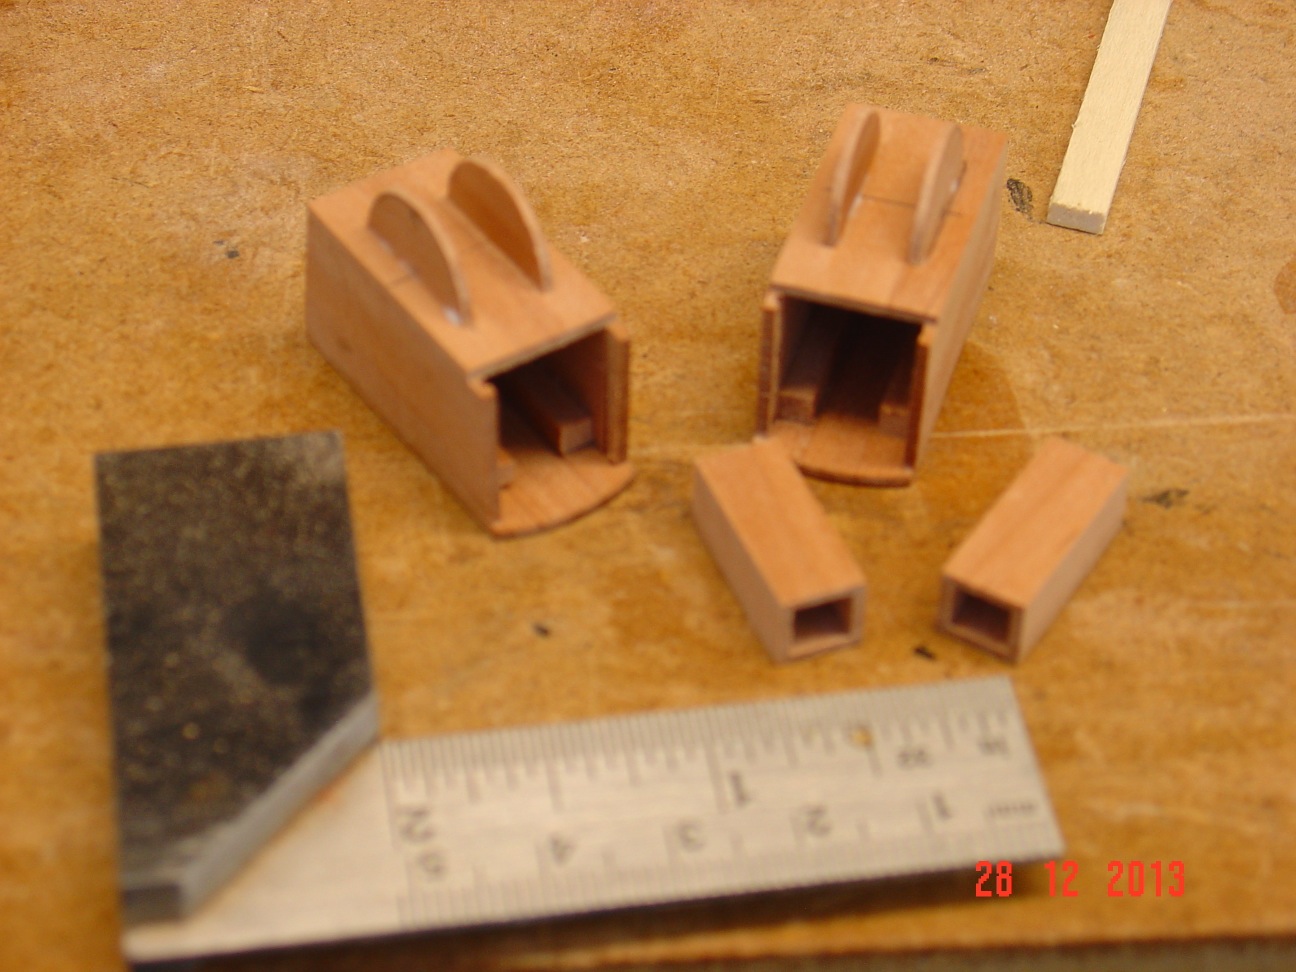
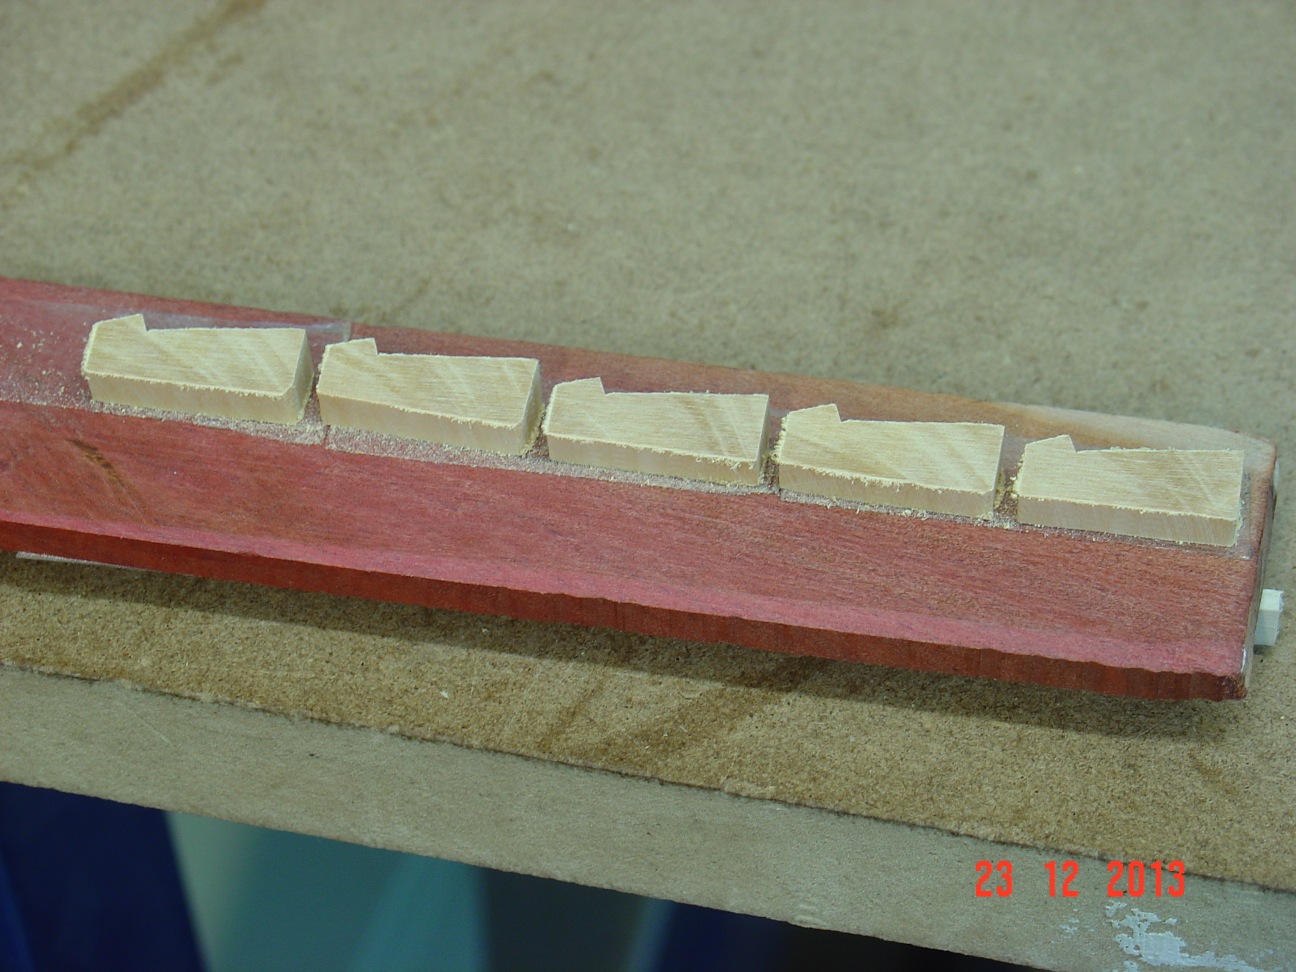
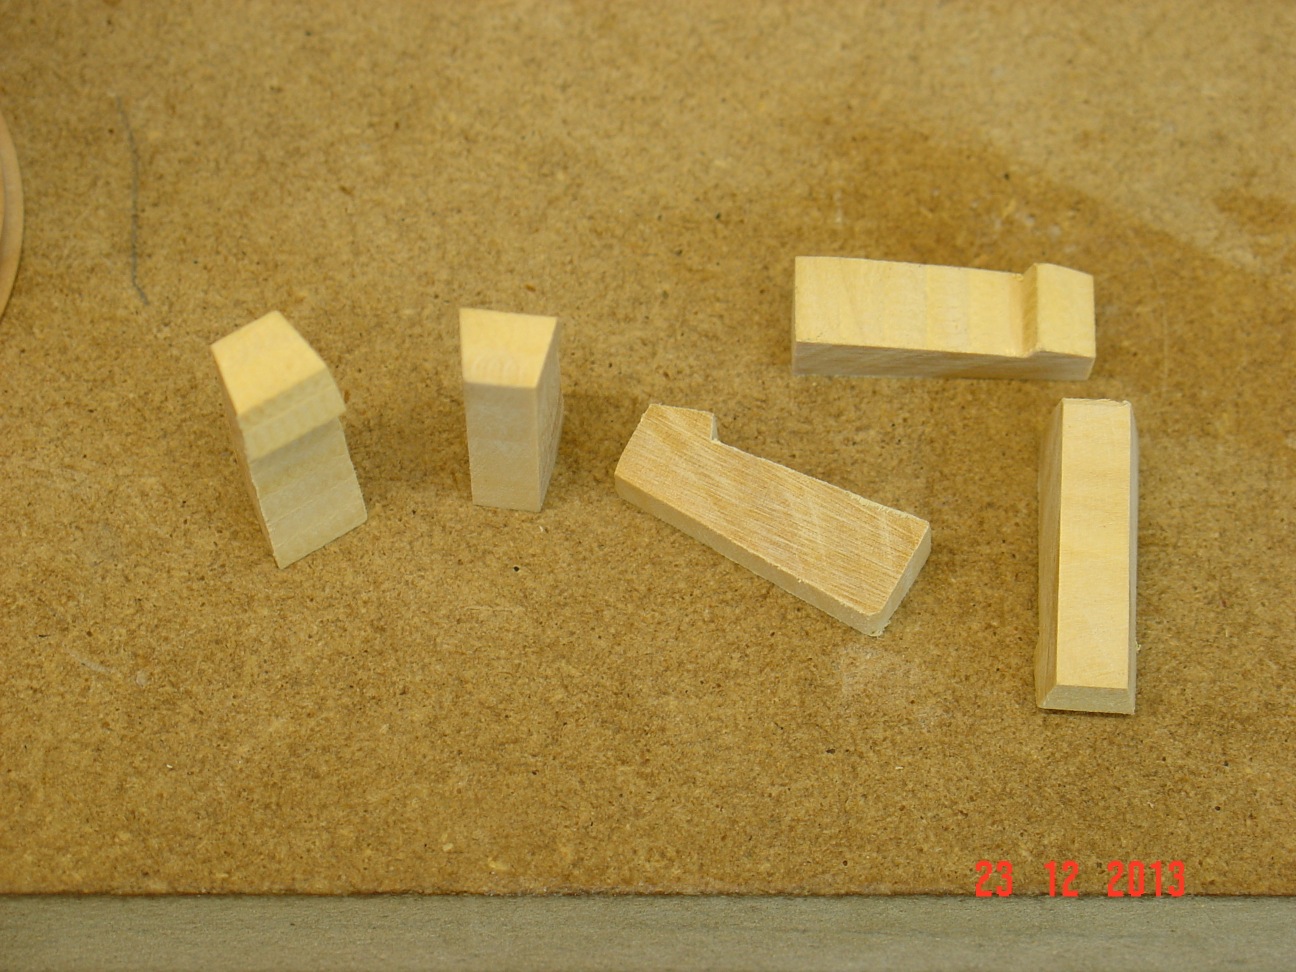
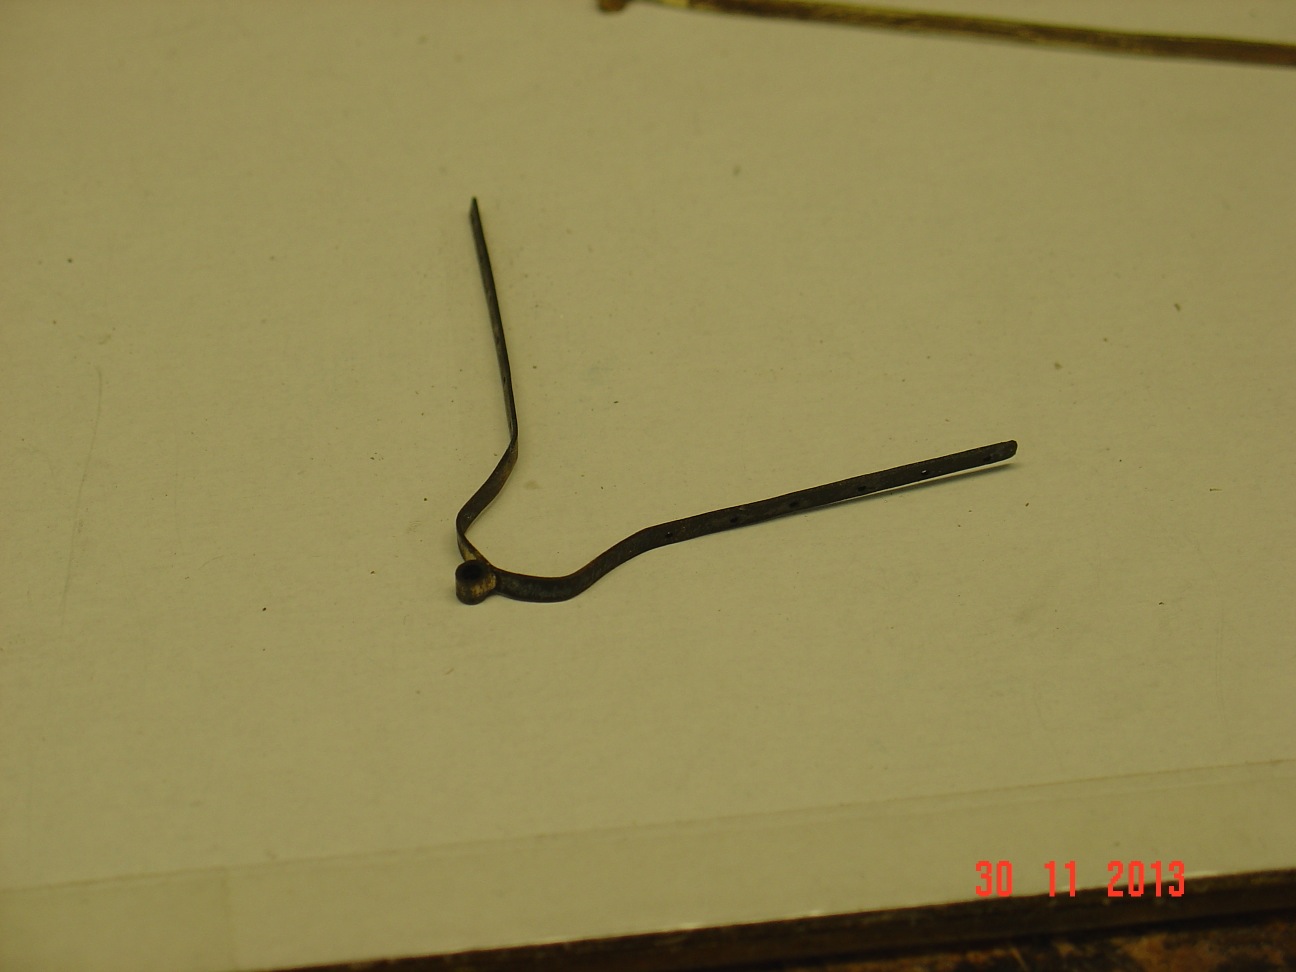
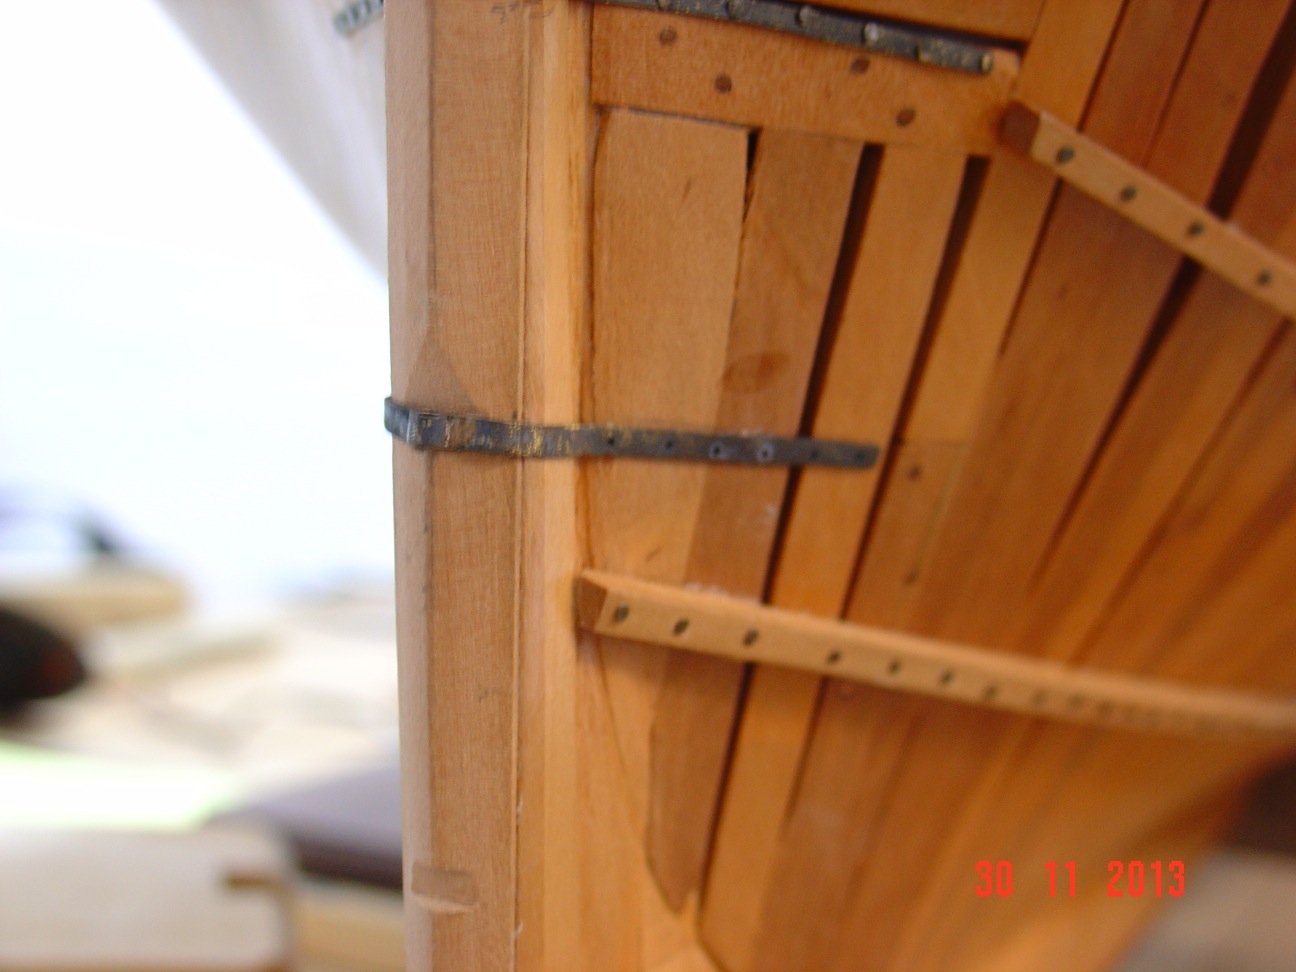
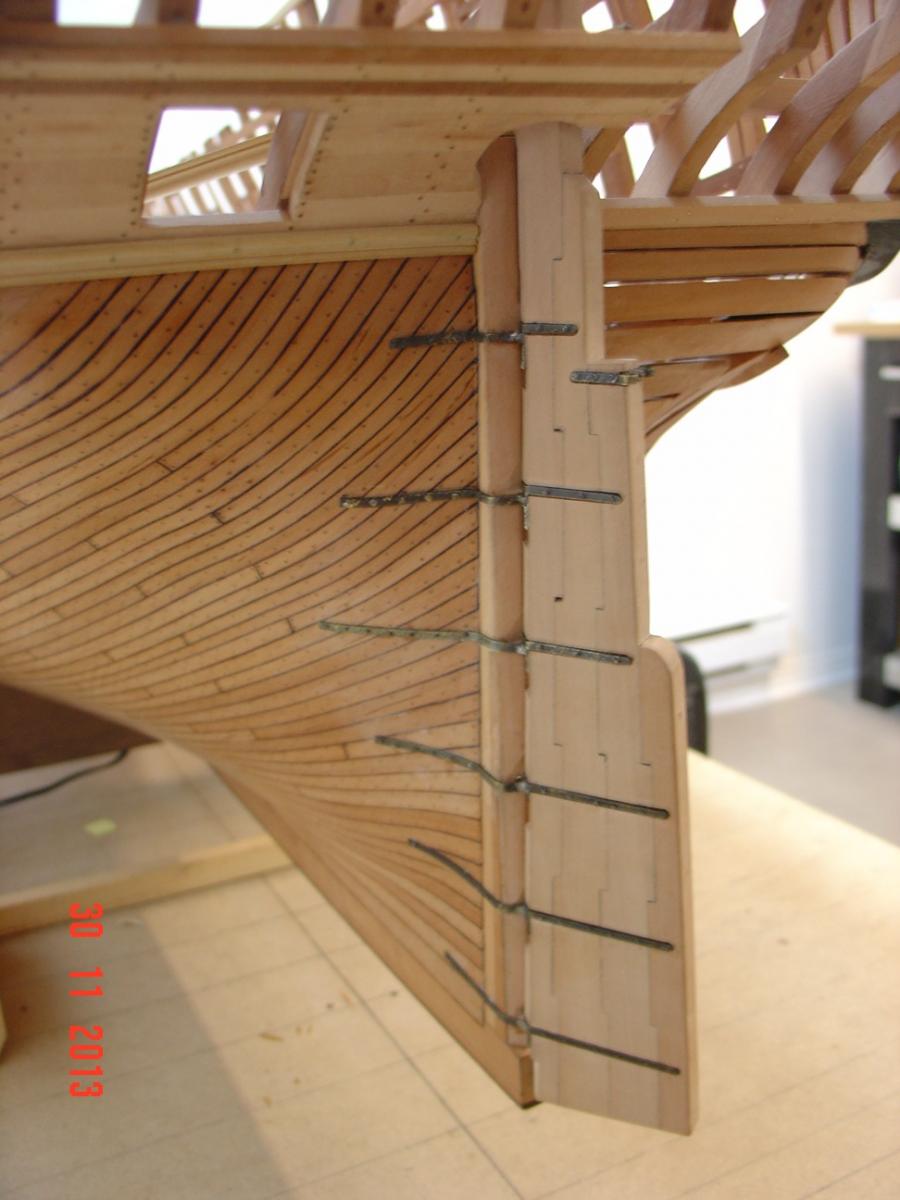
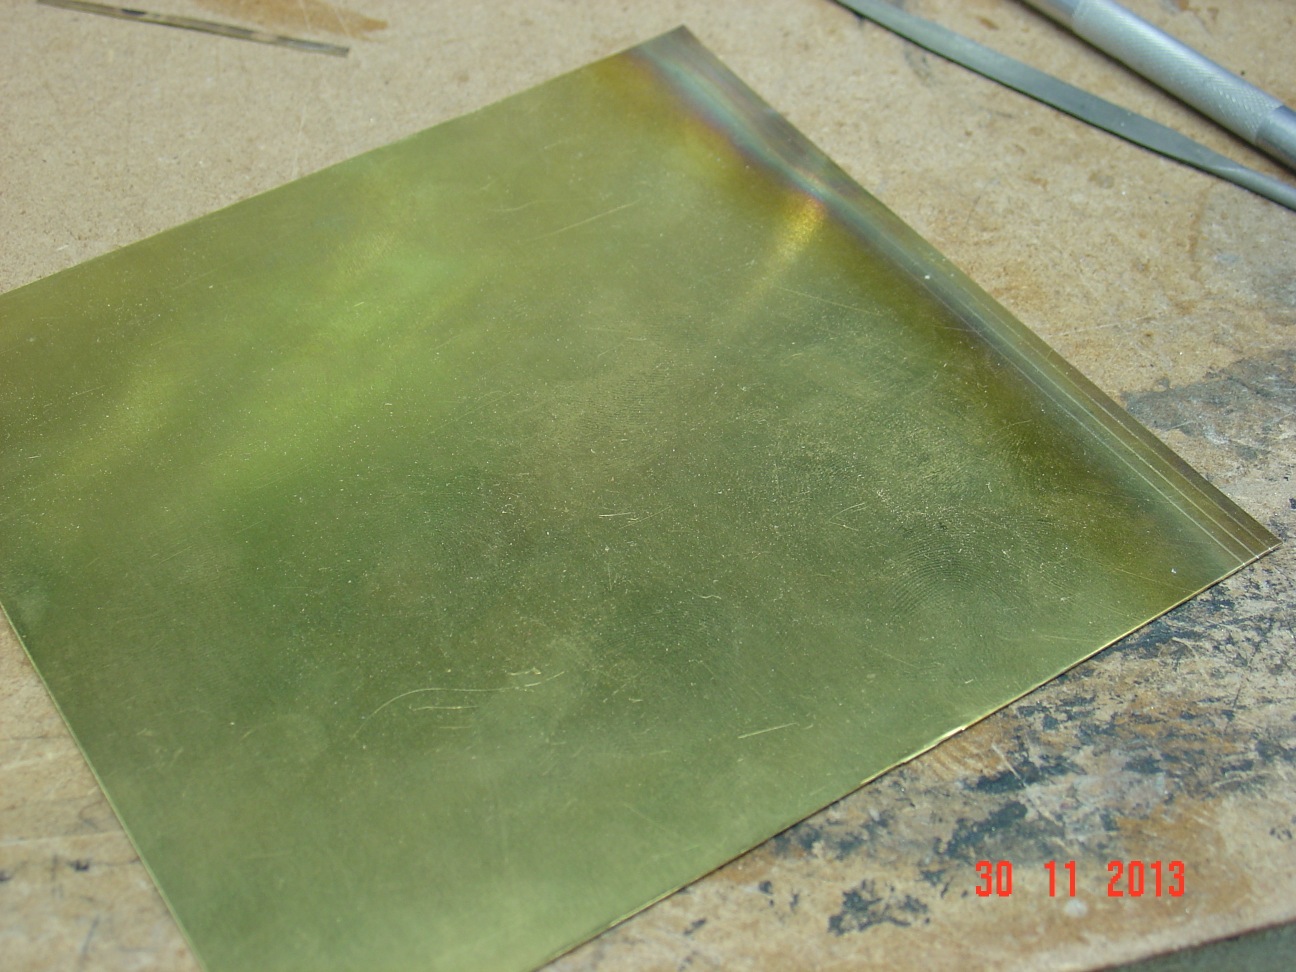
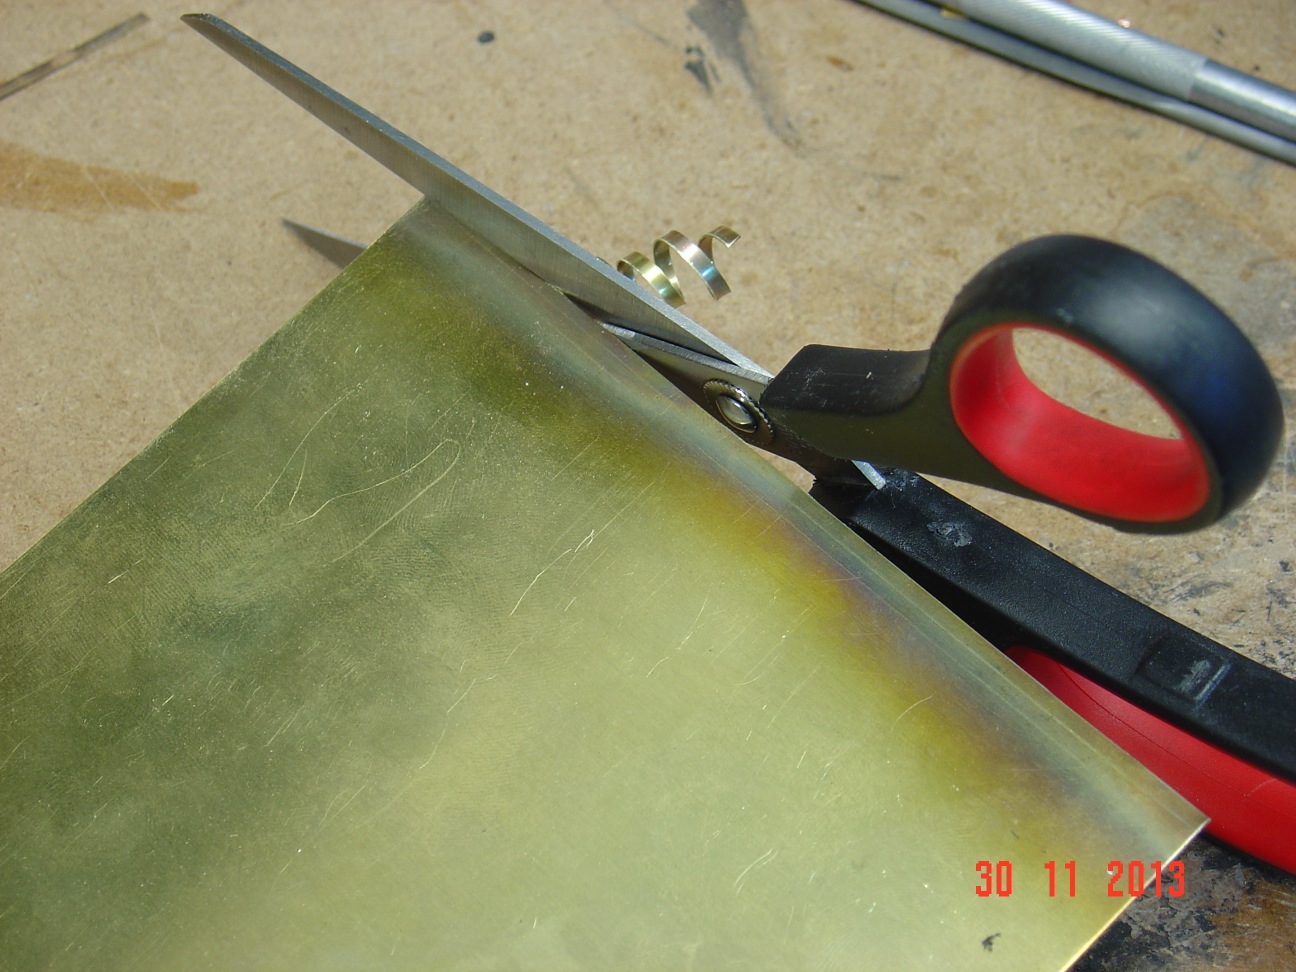
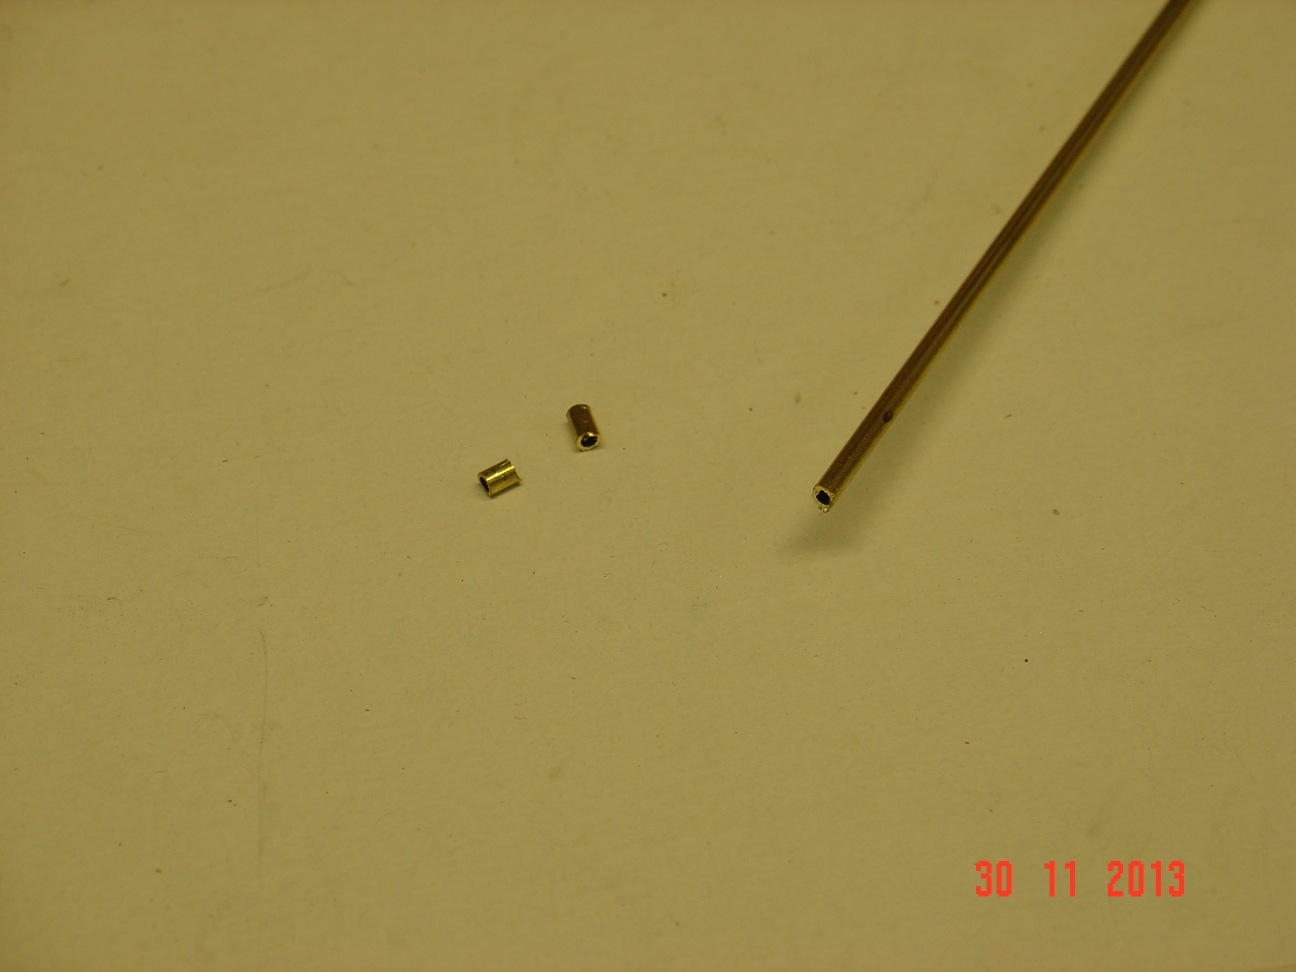
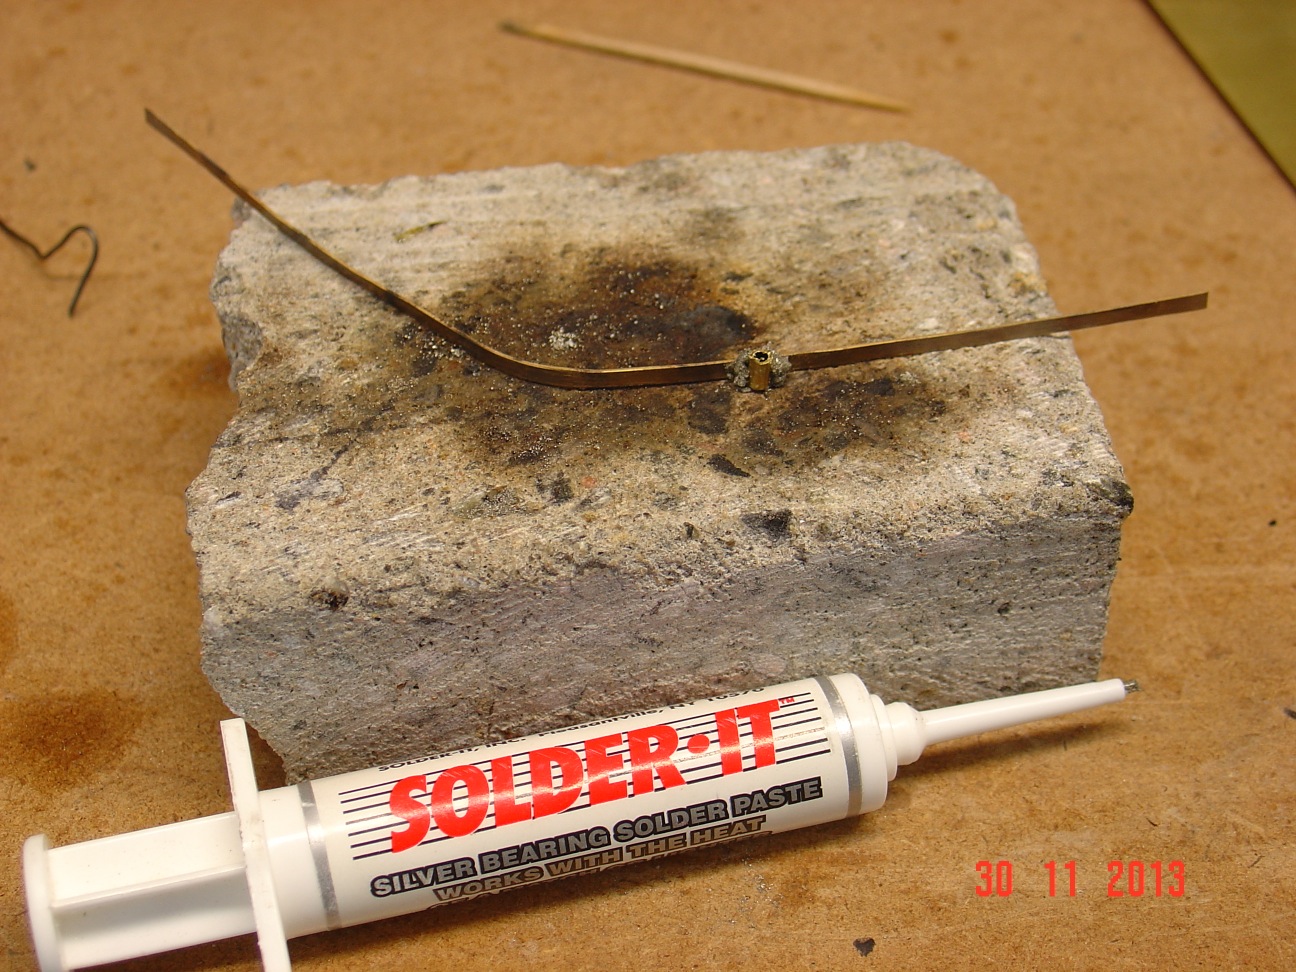
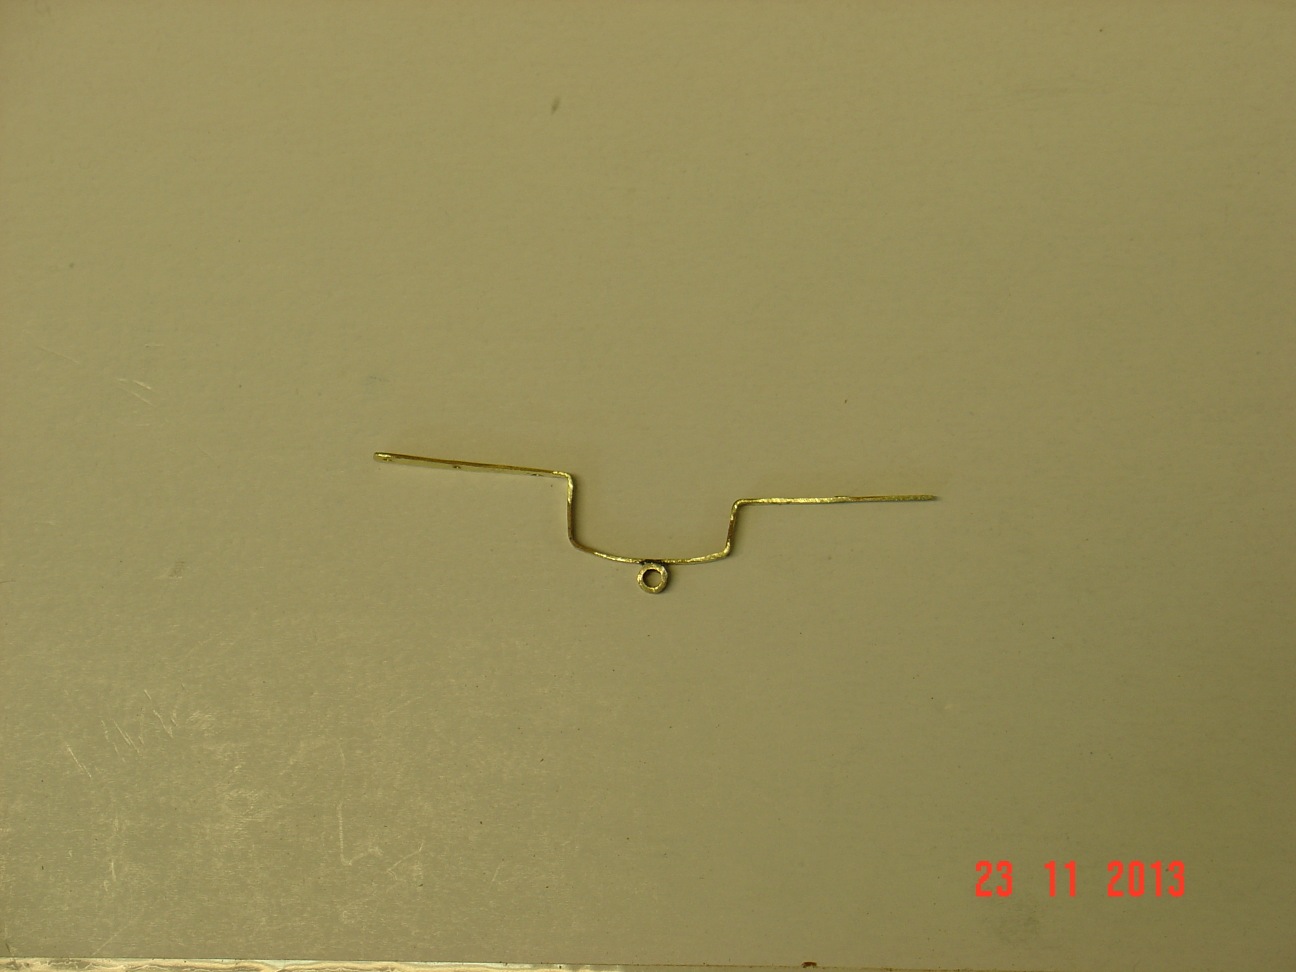
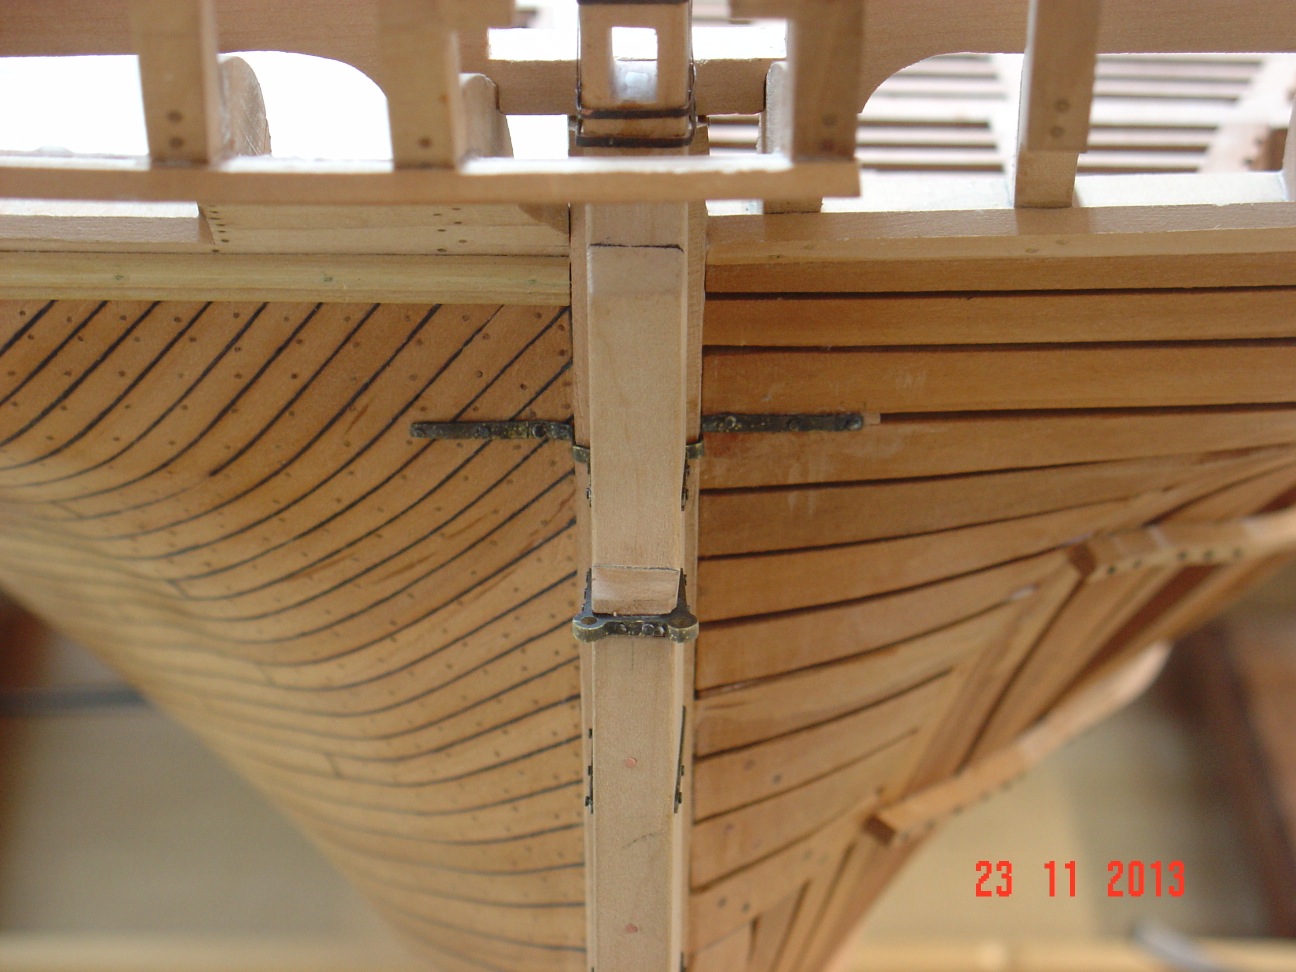
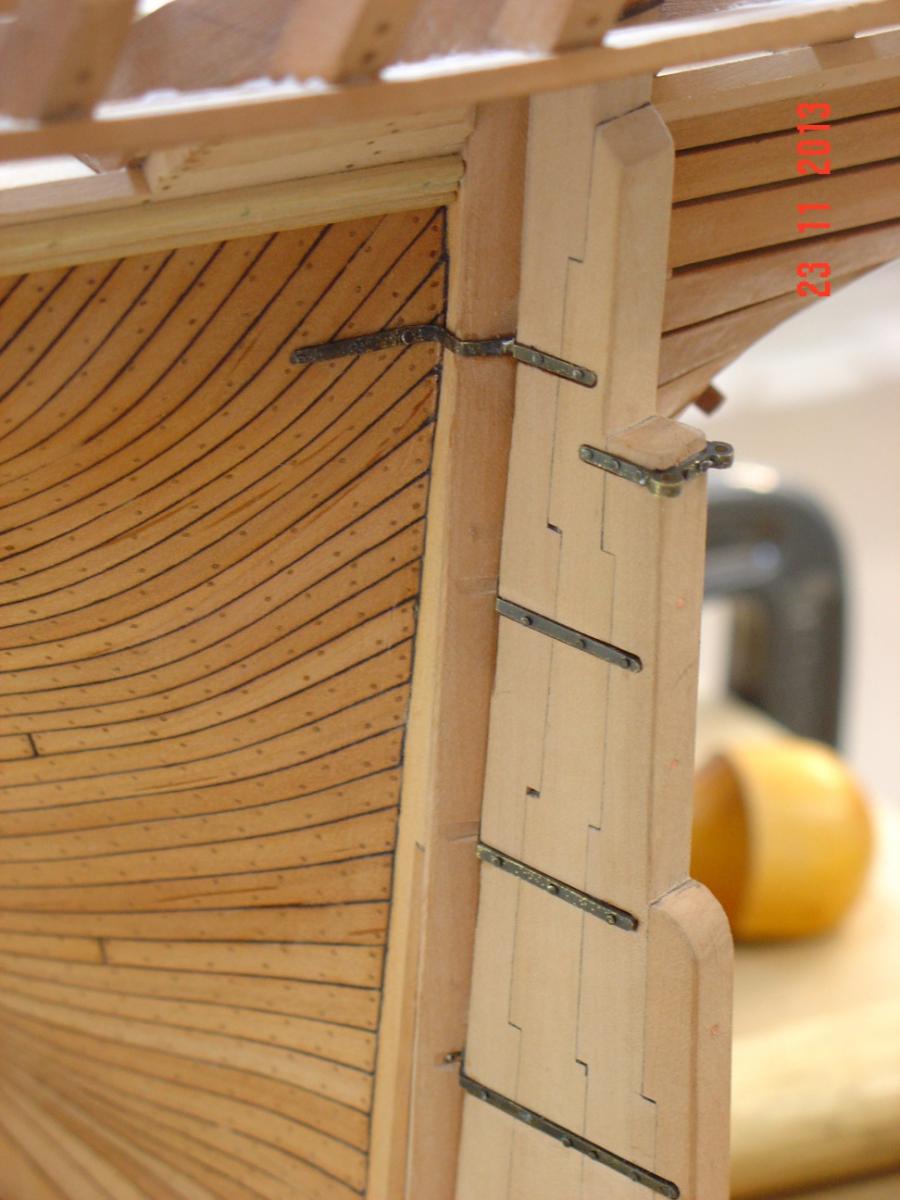
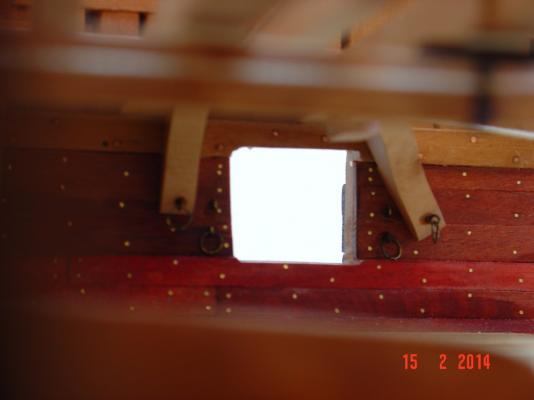
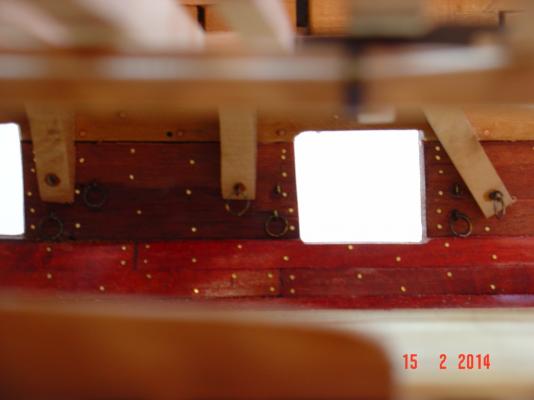
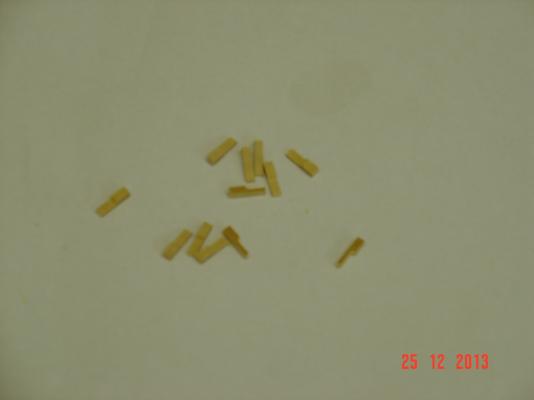
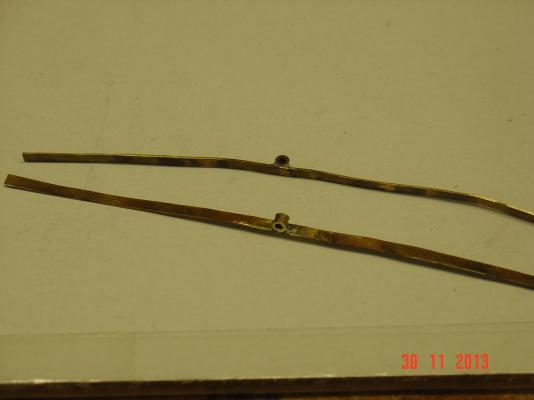
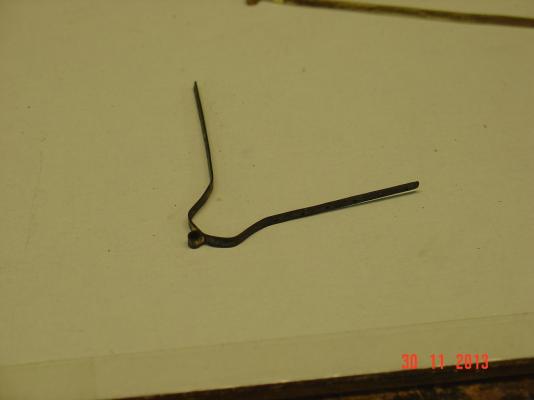
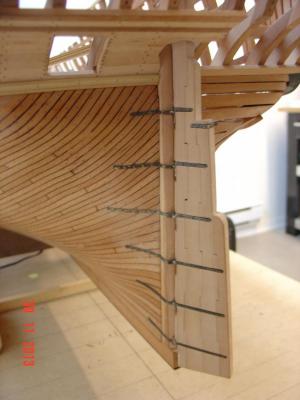
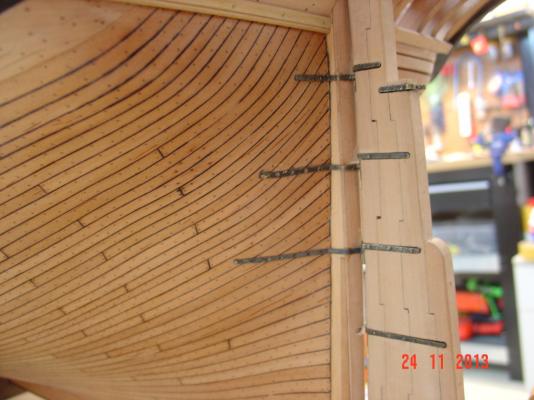
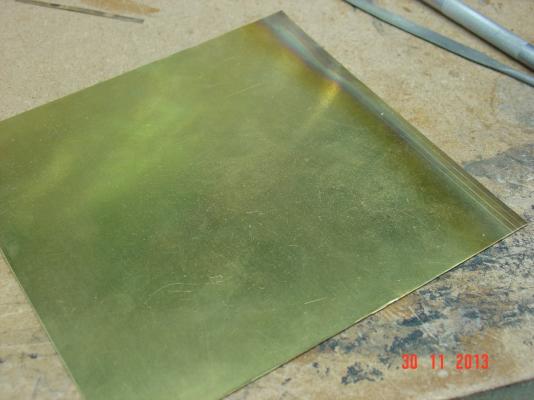
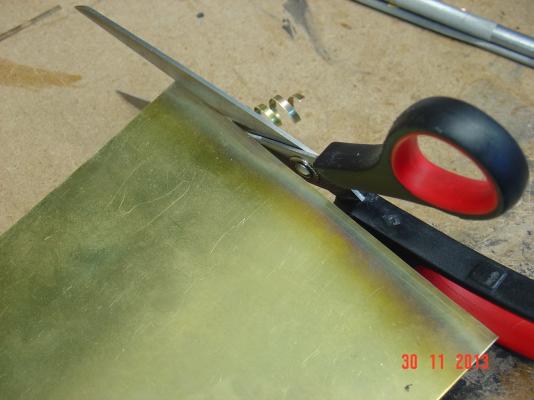
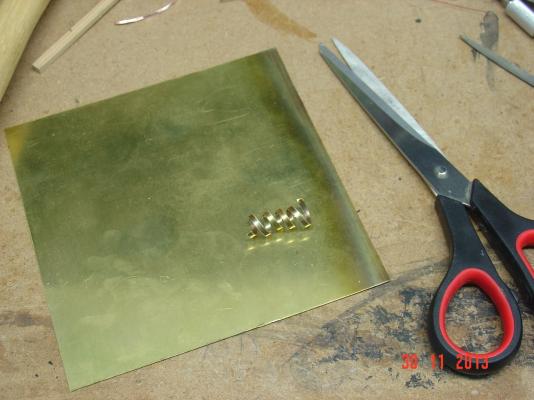
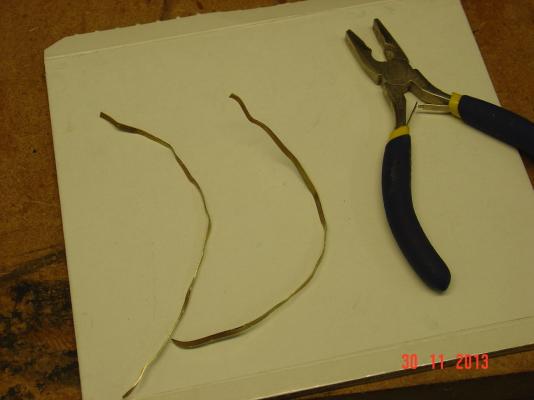
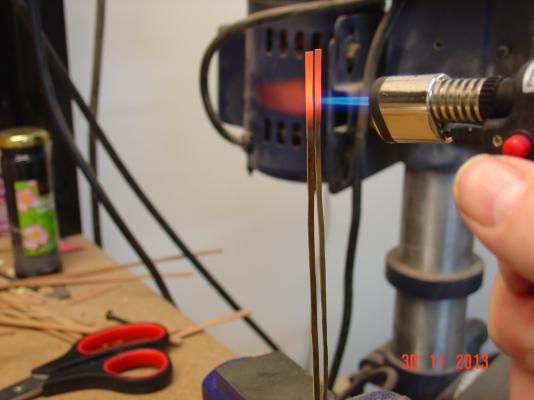
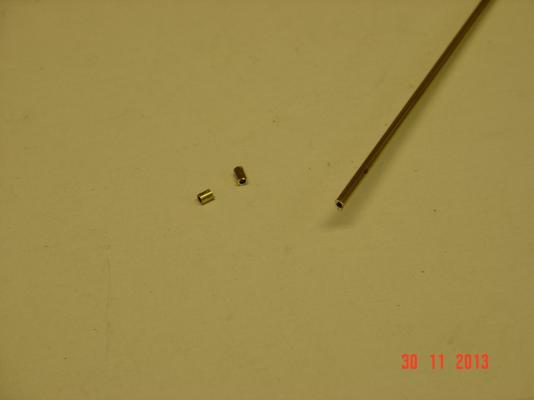
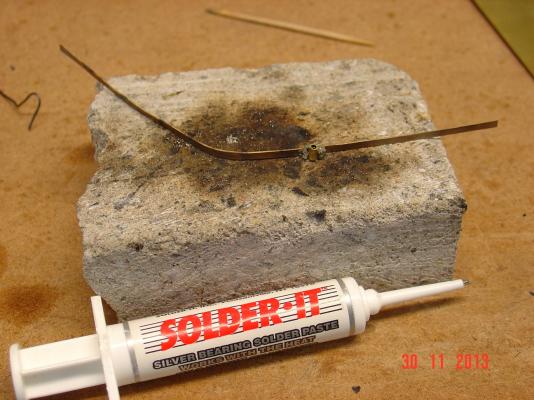
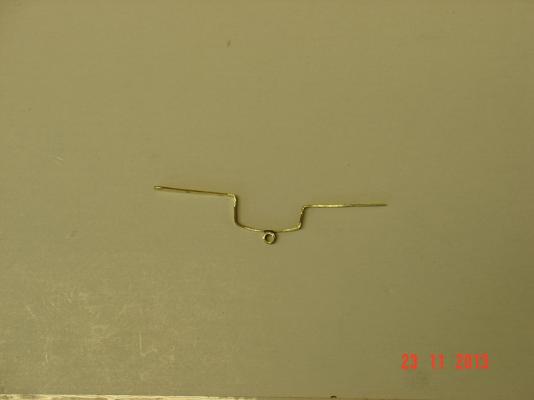
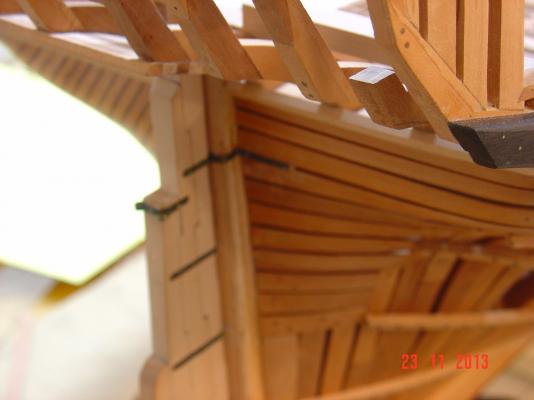
Hello all, The pintles are now finished, blackened and glued in place on the rudder. I've decided to use small nails to attach them instead of brass wire with a rounded or flattened end. The head of the smallest nails I had, were too big and didn't had uniform size so I had to put them in the lathe to try to make them nicer. In the end I just used a small file to get the size while spinning in the lathe chuck because when I tried to machine them they broke. After that I blackened them and cut a bit from the length and drive them through the pintle straps holes with a small hammer and a small drop of CA glue. Think this way they will hold strong enough. Next I moved to the gudgeons. These I make from thin strips of brass bended to shape (not cut to shape from thicker brass like the pintles). A small piece of brass tubing is silver soldered on the middle of the strap then the strap is bended to follow the shape of the hull at the corresponding place. Next, holes are drilled and the piece is cleaned and blackened with JAX. I've already done the first from the top as you can see in the pictures. There is a bit of scratching of the hull but I will retouch it with a bit of varnish when I am done with it. Here too I am using the same nails but without cutting them as the hull is thick enough. On the unplanned side I decided not to put a piece of plank under the strap but to make the straps asymmetrical a bit to fit in place. Regards, Alexandru


-
Hello Antony, As far as I know they were removable in the part of the ship you are building. The planks were short and let down in the beams except on the sides where the carpenter walk is. Alexandru
-
Thank you all for the kind words. All I do is try to do my best and use the most of the knowledge I gathered from other posts - like yours - on this site. Regards, Alexandru
-
I am quite happy with the results. Now I have to find a way to make the head of the boost used to attach the pintles.... Alexandru