
guraus
-
Posts
361 -
Joined
-
Last visited
Content Type
Profiles
Forums
Gallery
Events
Everything posted by guraus
-
ancre La Jacinthe 1823 by guraus - Scale 1:48
guraus replied to guraus's topic in - Build logs for subjects built 1801 - 1850
...


-
ancre La Jacinthe 1823 by guraus - Scale 1:48
guraus replied to guraus's topic in - Build logs for subjects built 1801 - 1850
...


-
ancre La Jacinthe 1823 by guraus - Scale 1:48
guraus replied to guraus's topic in - Build logs for subjects built 1801 - 1850
Thank you. Yes, I did the full rigging, I'll post some more pictures soon. Alexandru -
ancre La Jacinthe 1823 by guraus - Scale 1:48
guraus replied to guraus's topic in - Build logs for subjects built 1801 - 1850
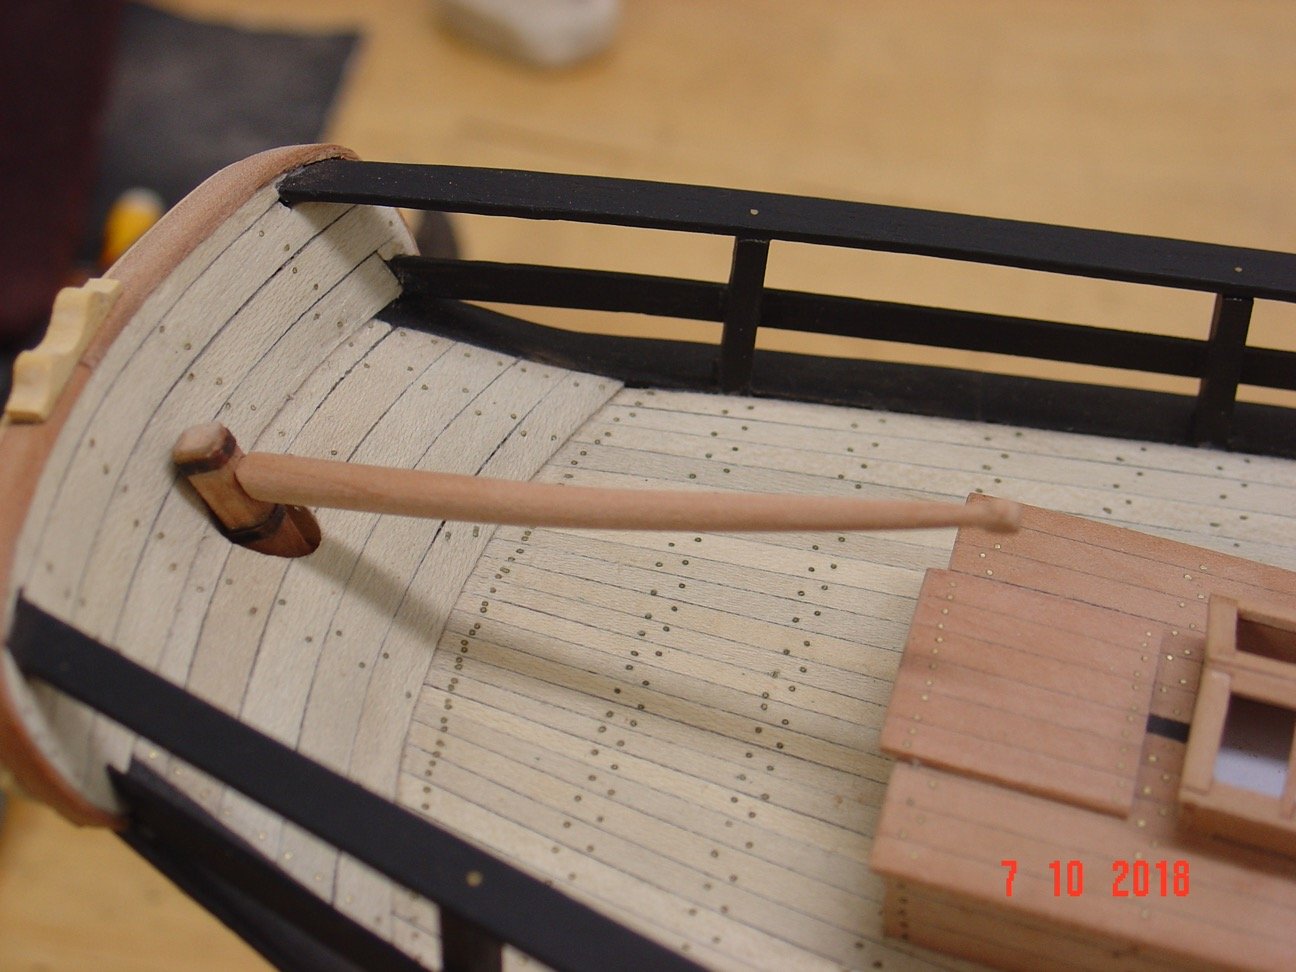
Here are some more progress pictures.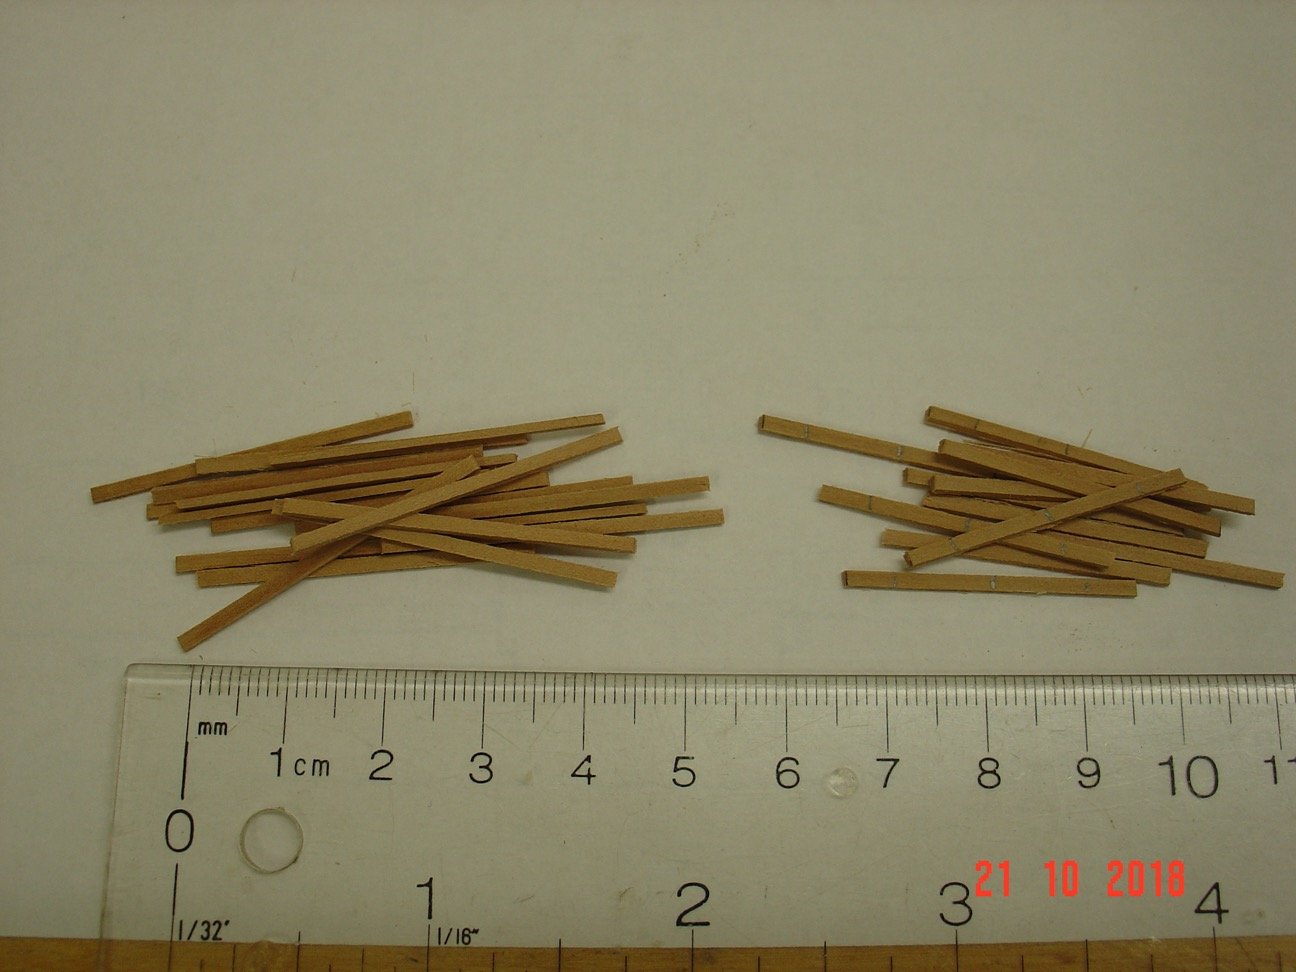


-
ancre La Jacinthe 1823 by guraus - Scale 1:48
guraus replied to guraus's topic in - Build logs for subjects built 1801 - 1850
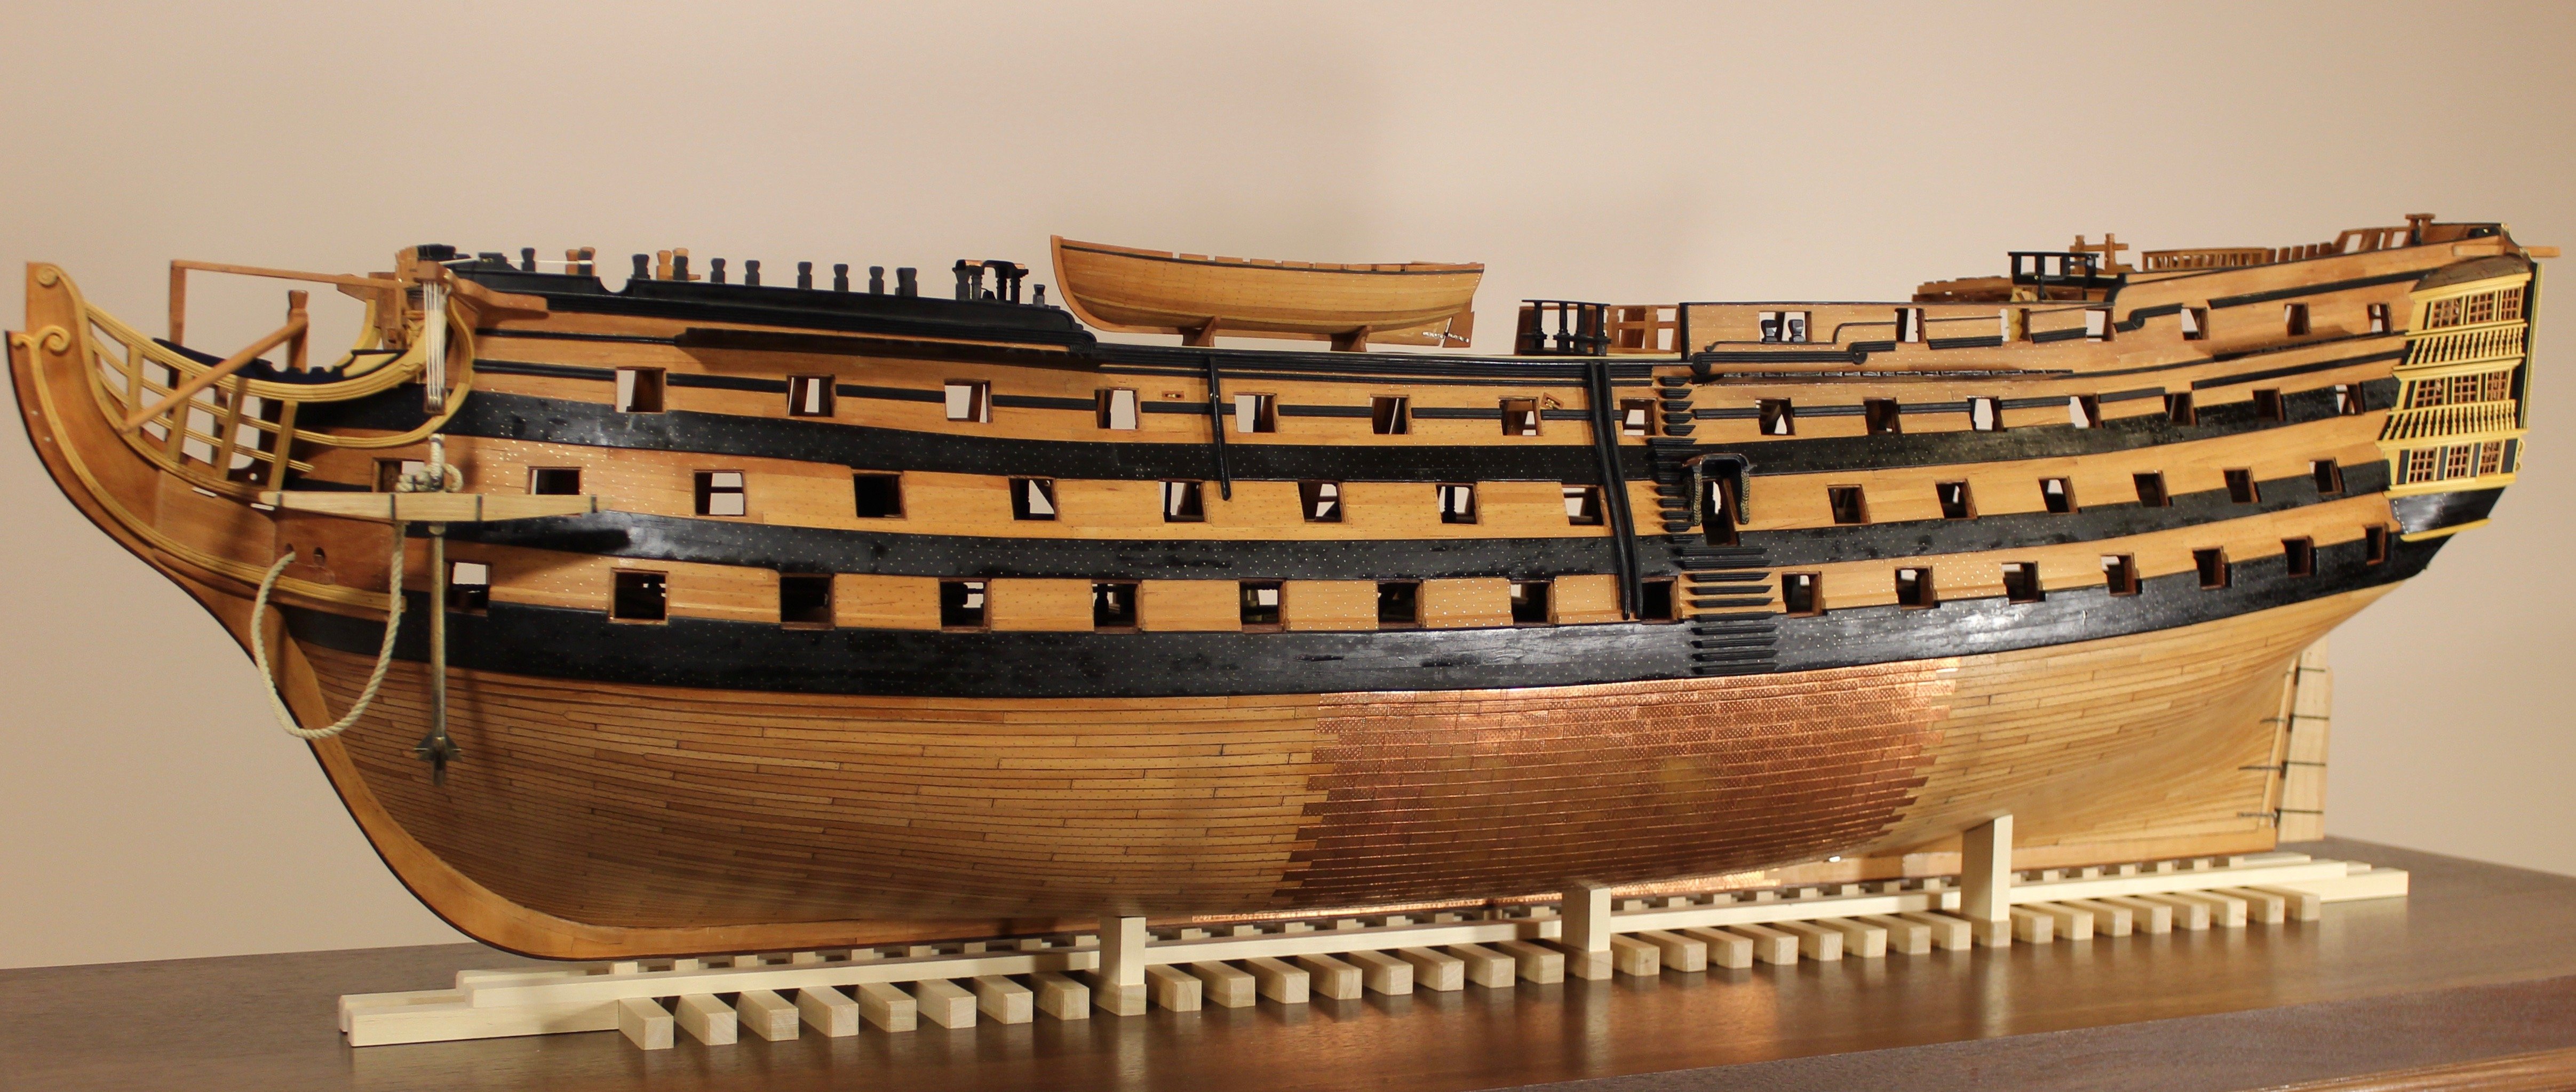
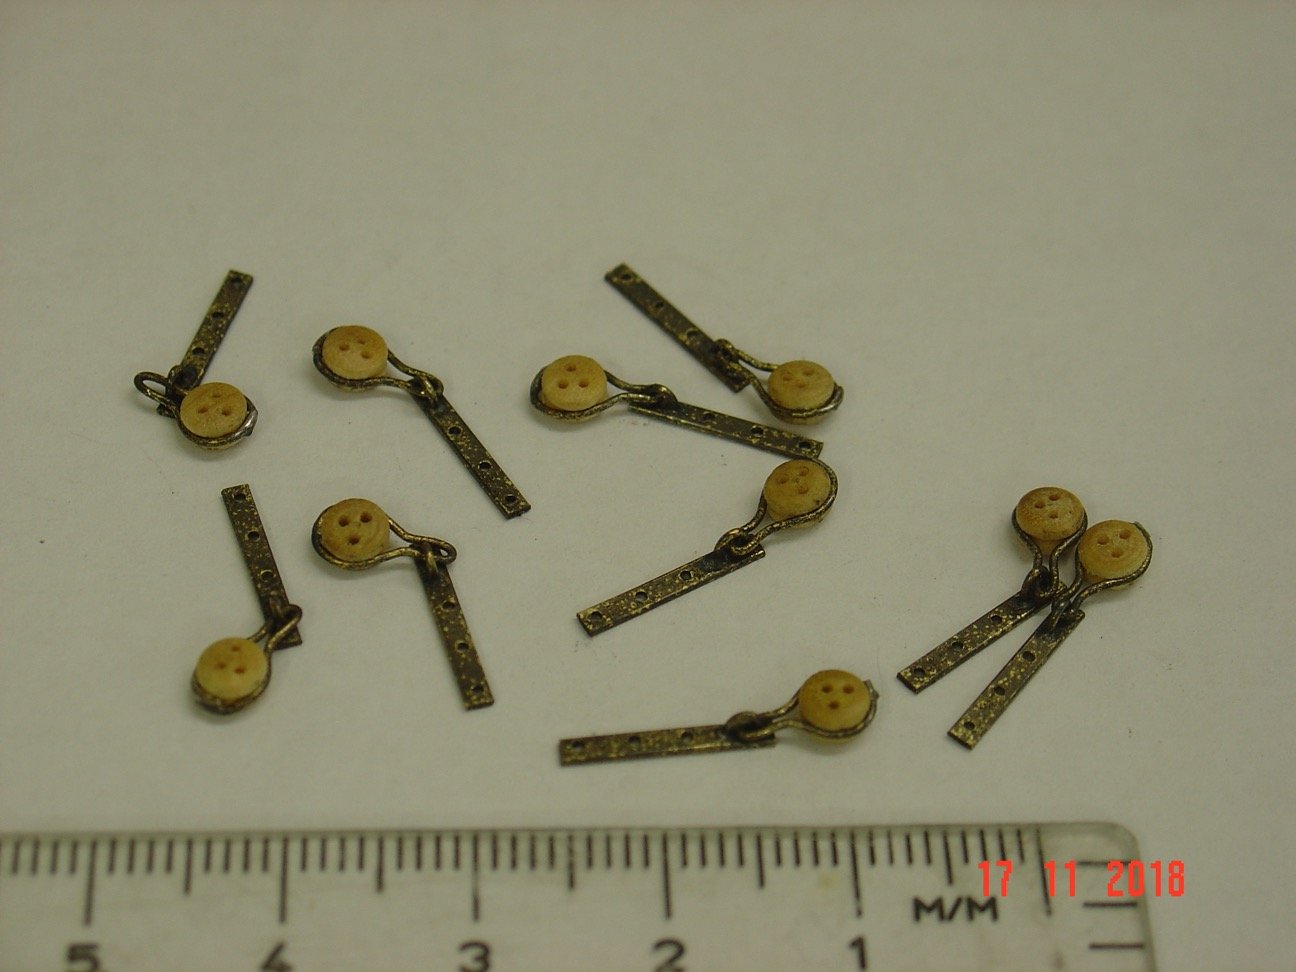
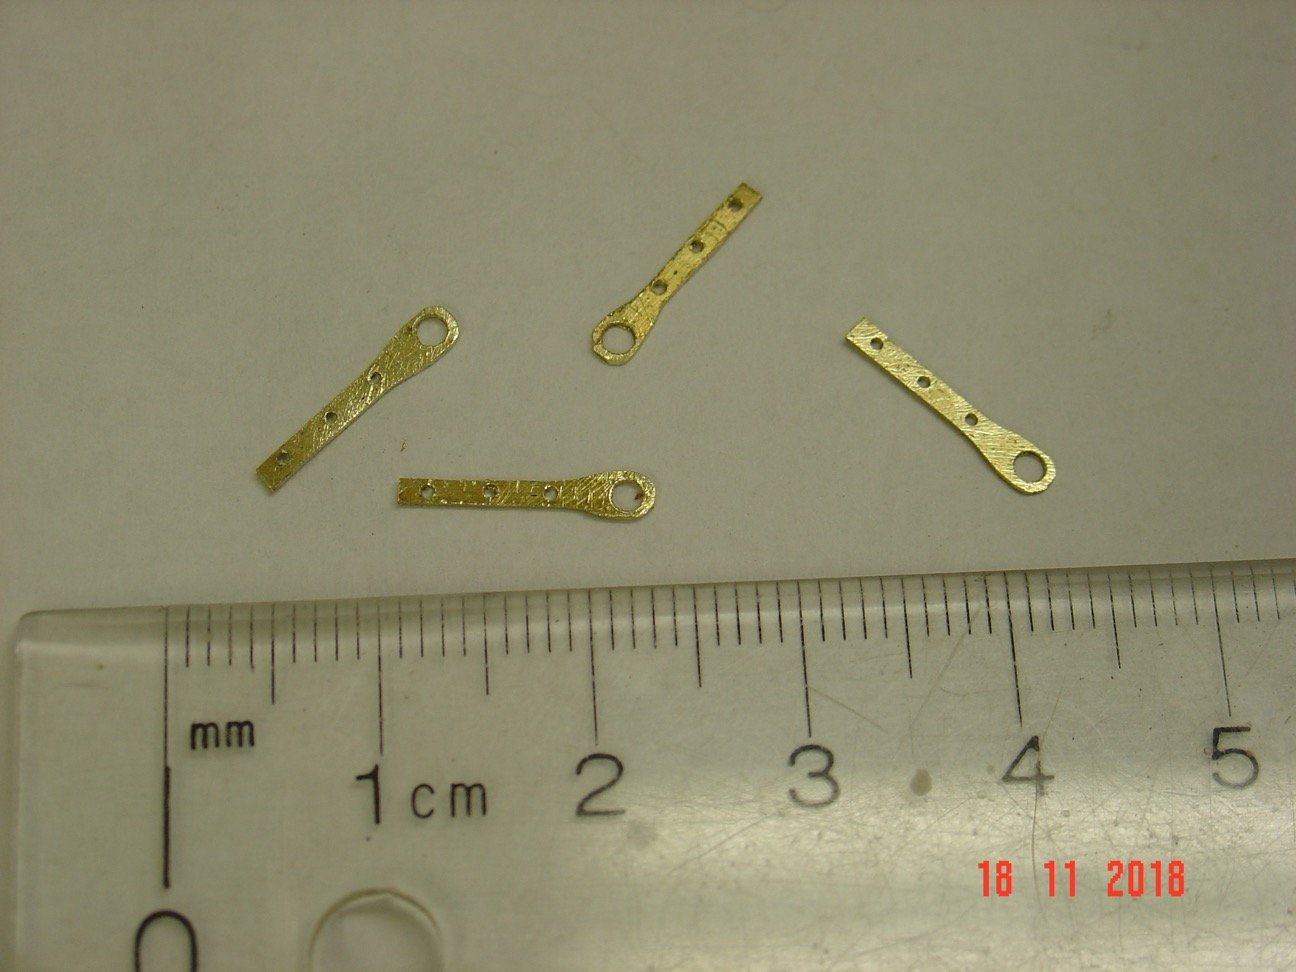
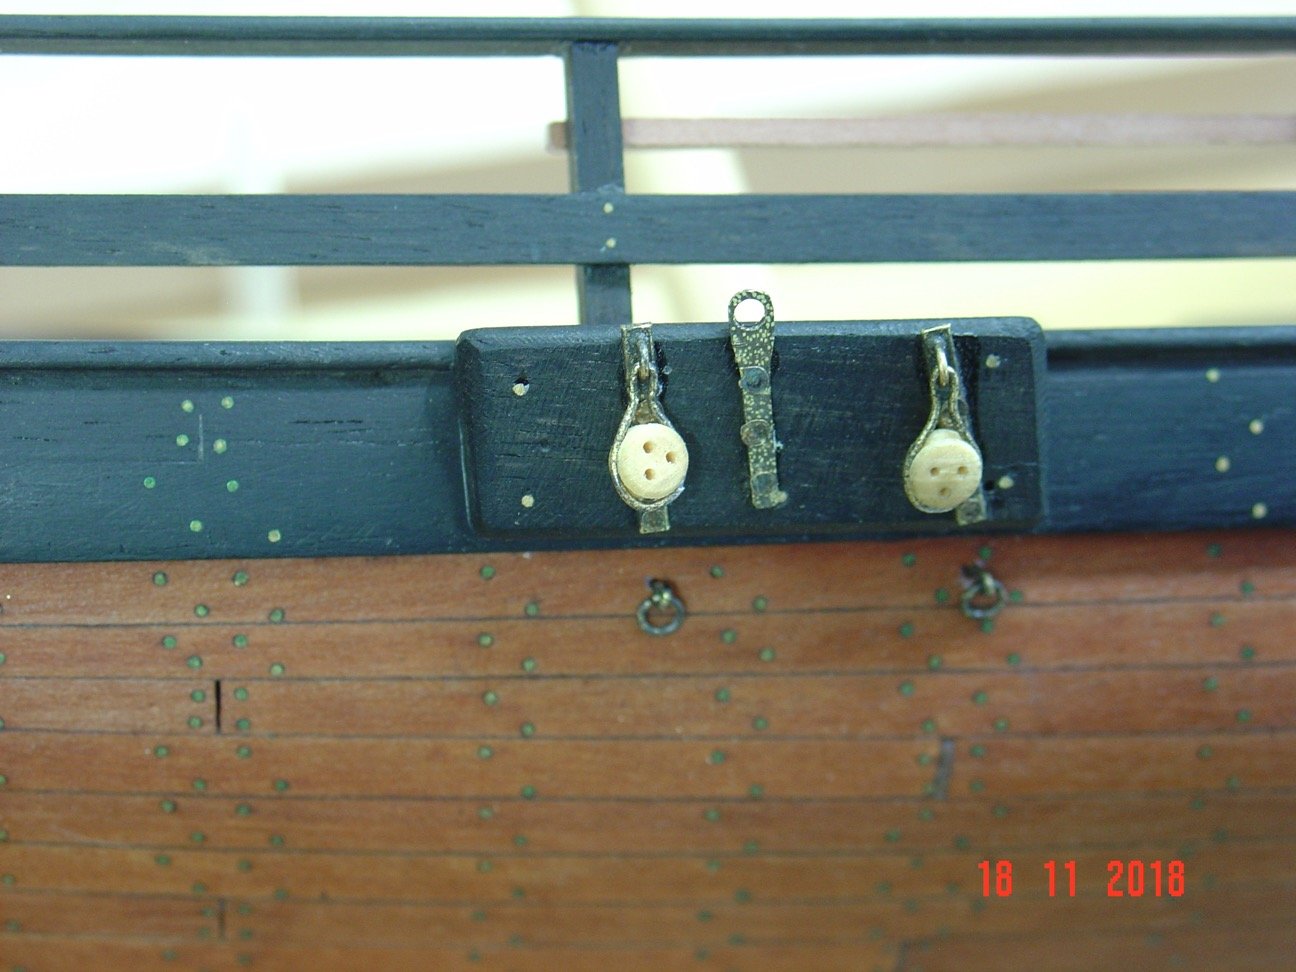
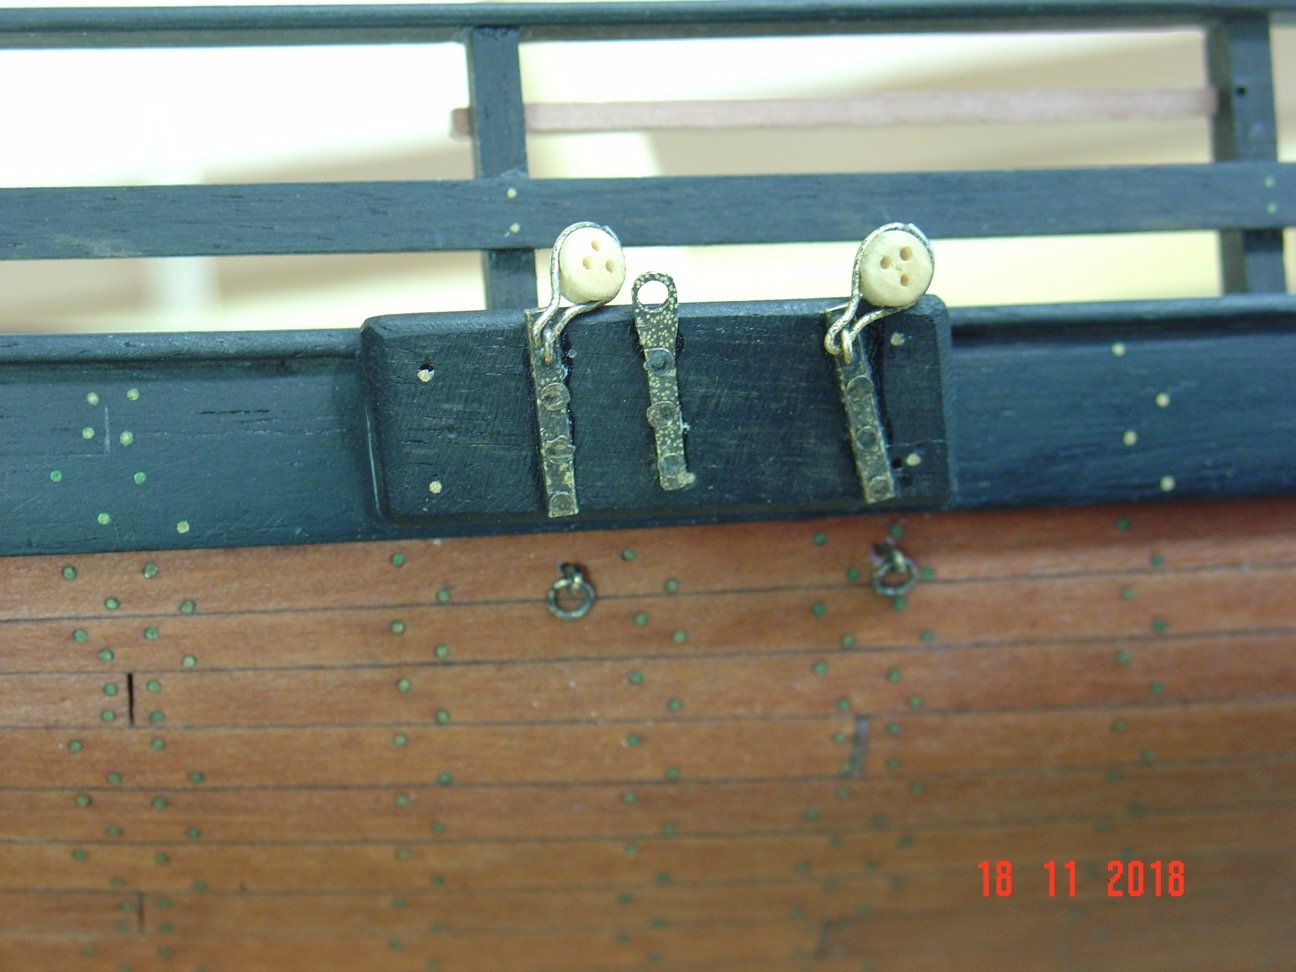
My Victory sits nicely in her display case - I didn't touch it in the last couple of years. Now and then I look at her and I say to me I will take it out and add some small details like pins in the pintails, lids on gunports, deadeyes and chainplates etc.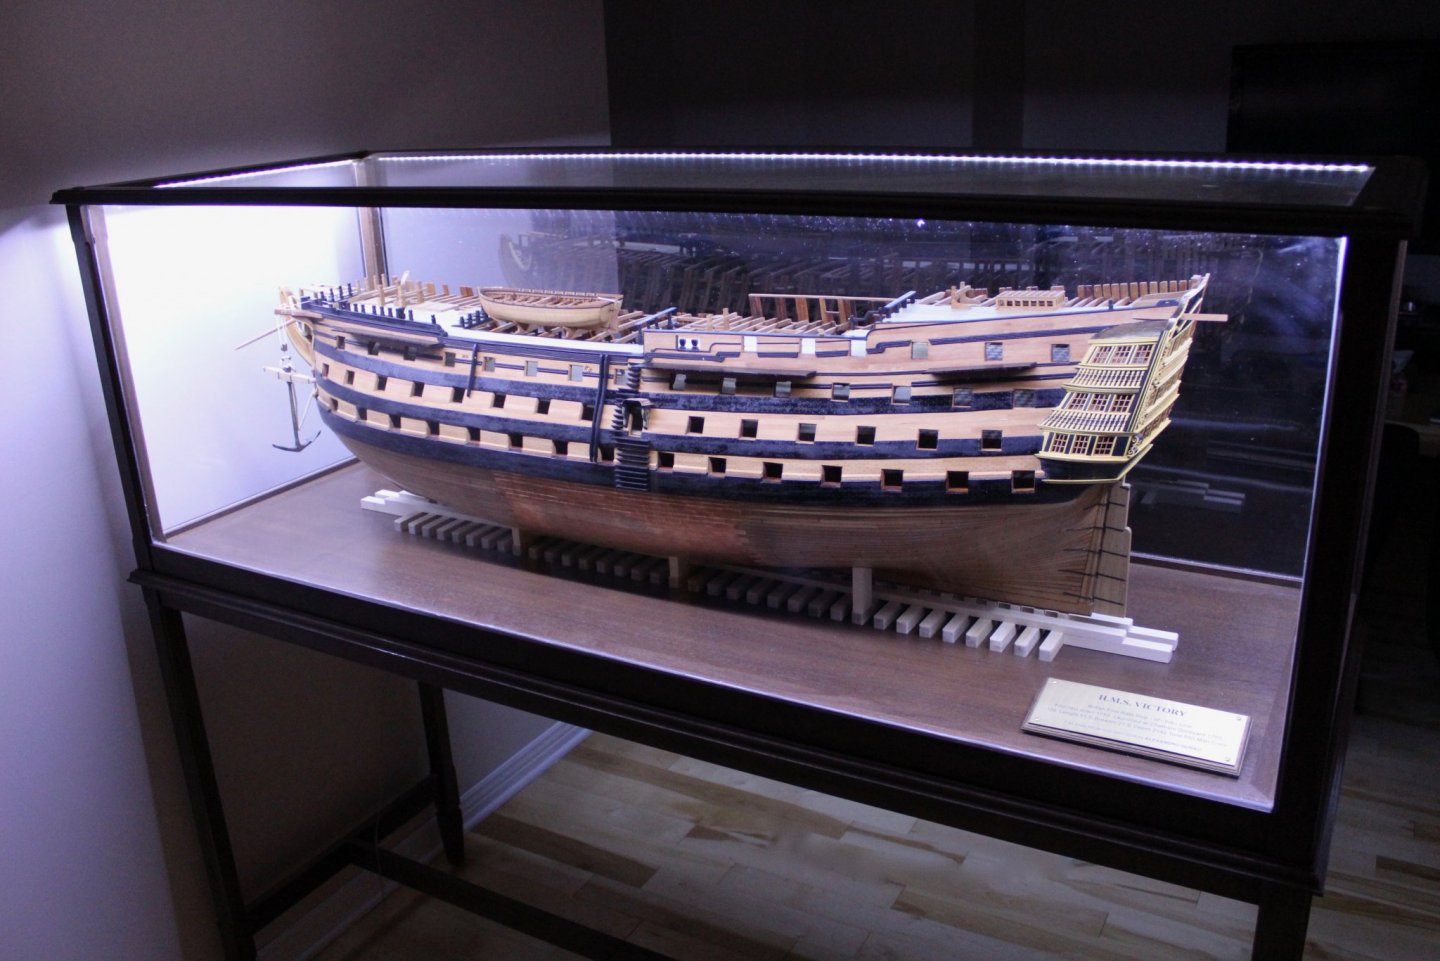
-
ancre La Jacinthe 1823 by guraus - Scale 1:48
guraus replied to guraus's topic in - Build logs for subjects built 1801 - 1850
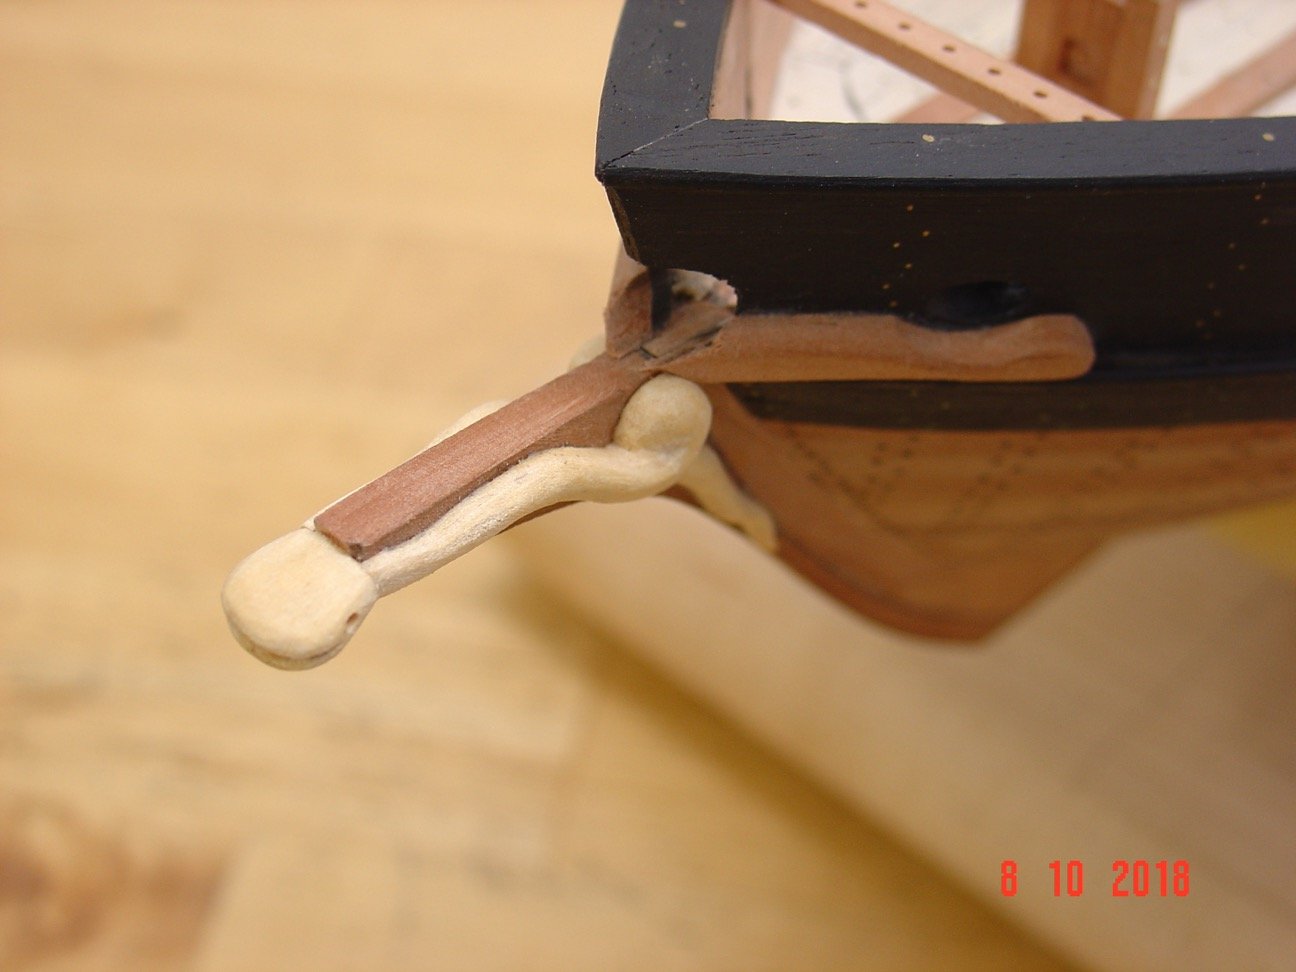
... and some more...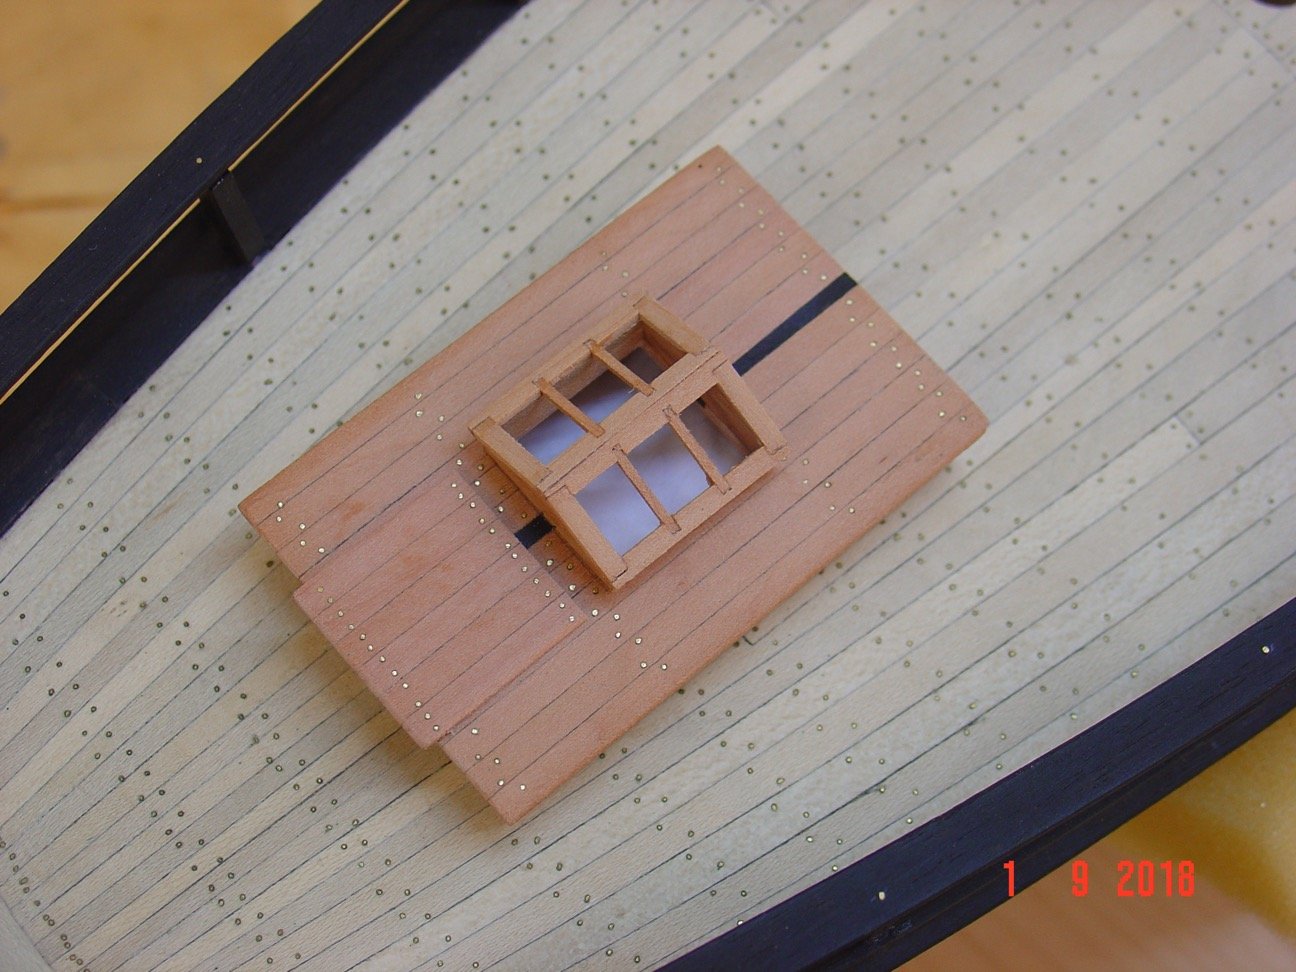


-
ancre La Jacinthe 1823 by guraus - Scale 1:48
guraus replied to guraus's topic in - Build logs for subjects built 1801 - 1850
... and some more ...


-
ancre La Jacinthe 1823 by guraus - Scale 1:48
guraus replied to guraus's topic in - Build logs for subjects built 1801 - 1850
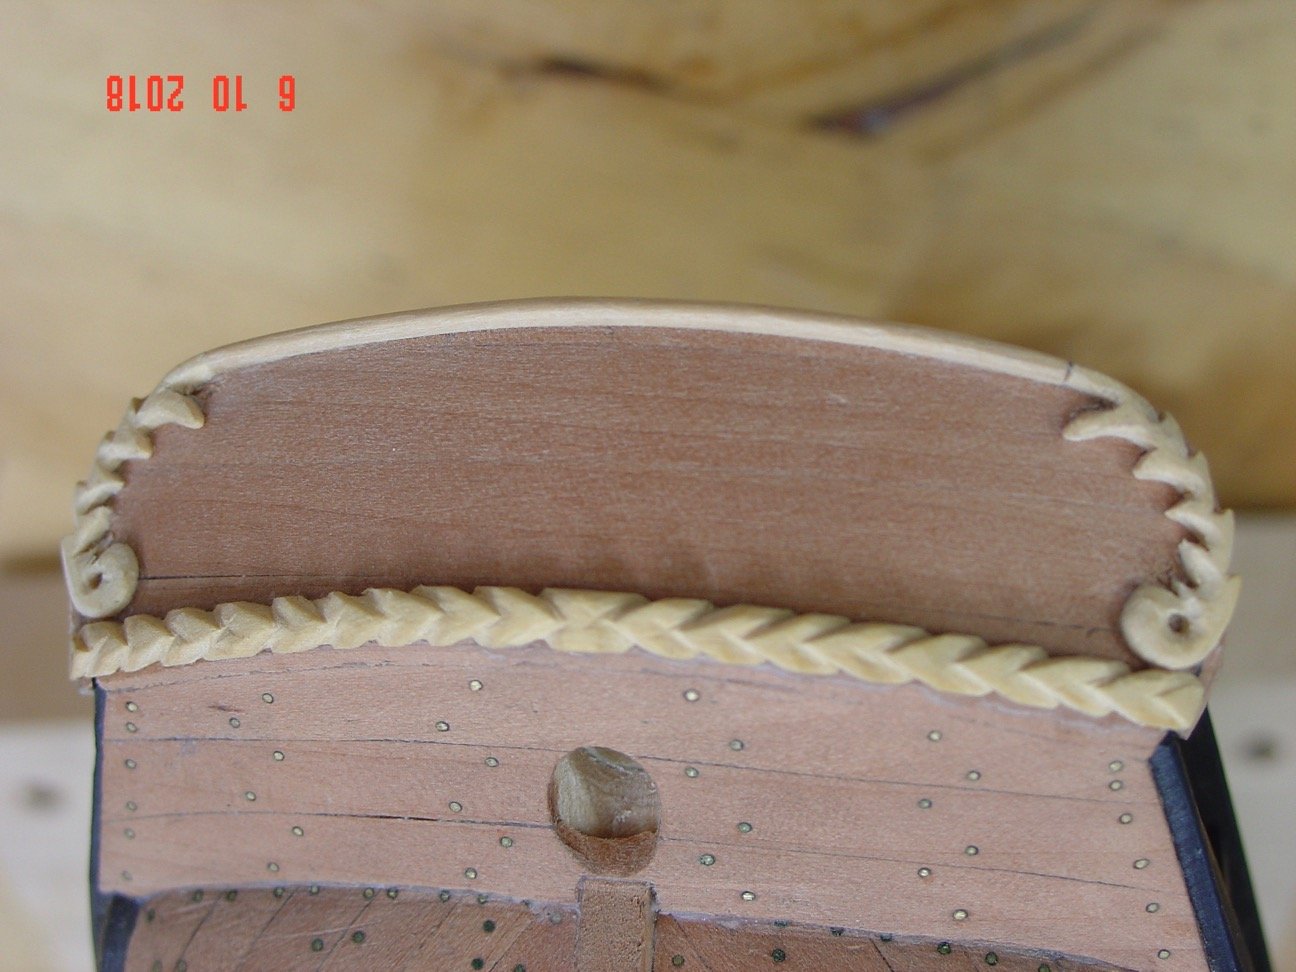
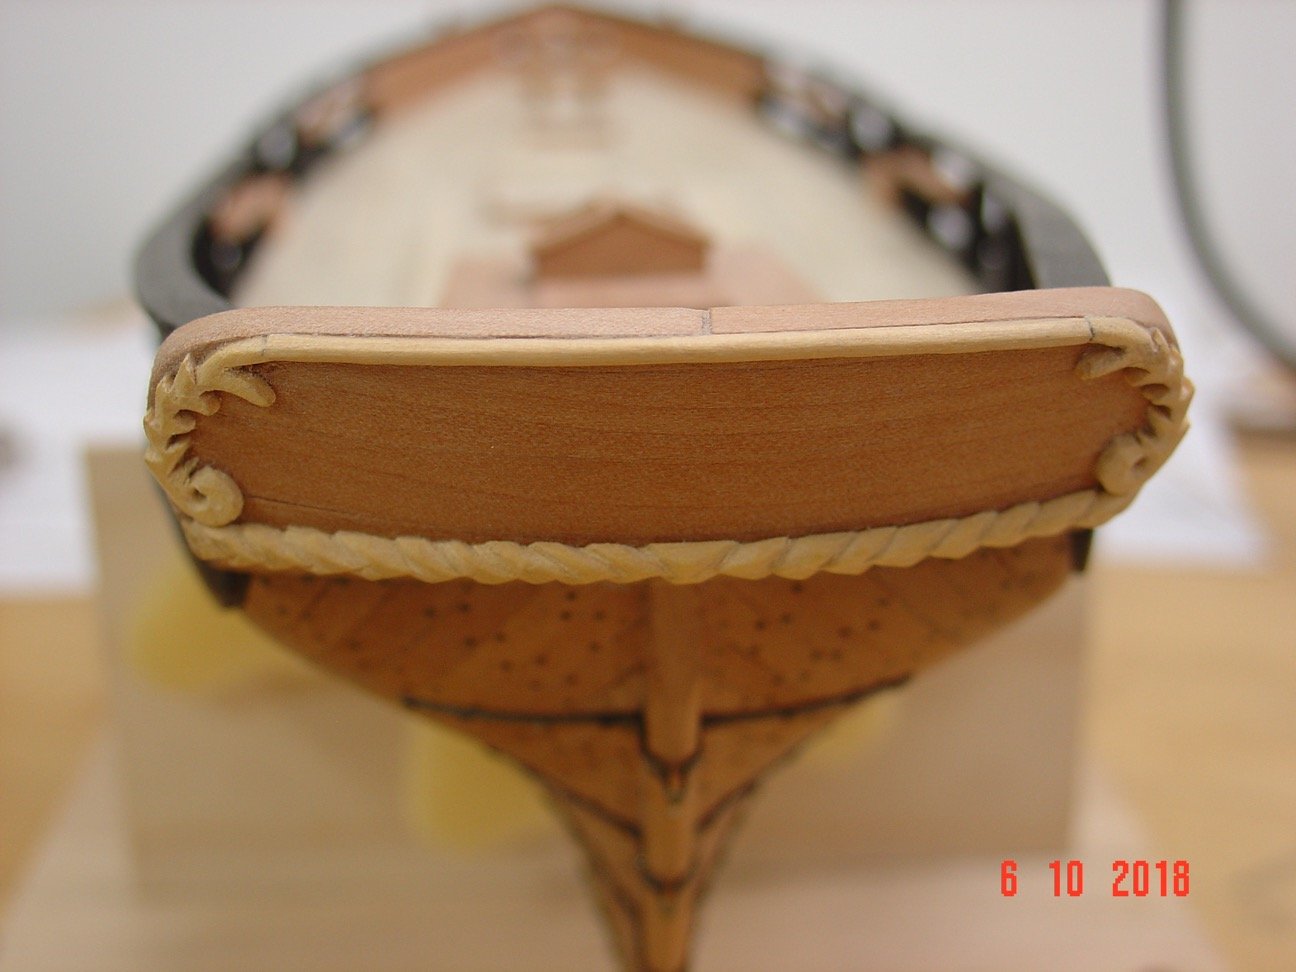
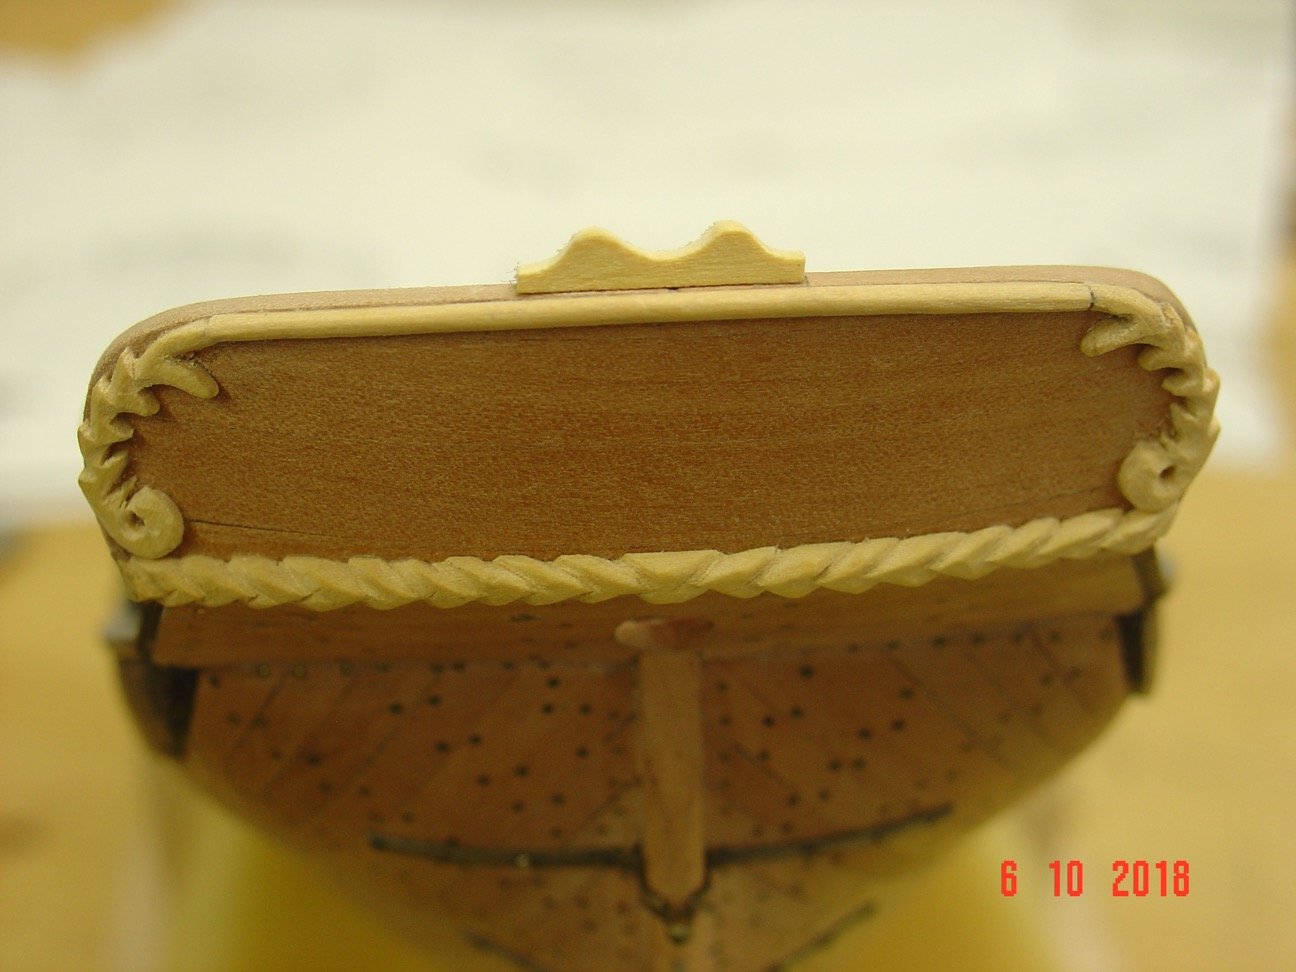
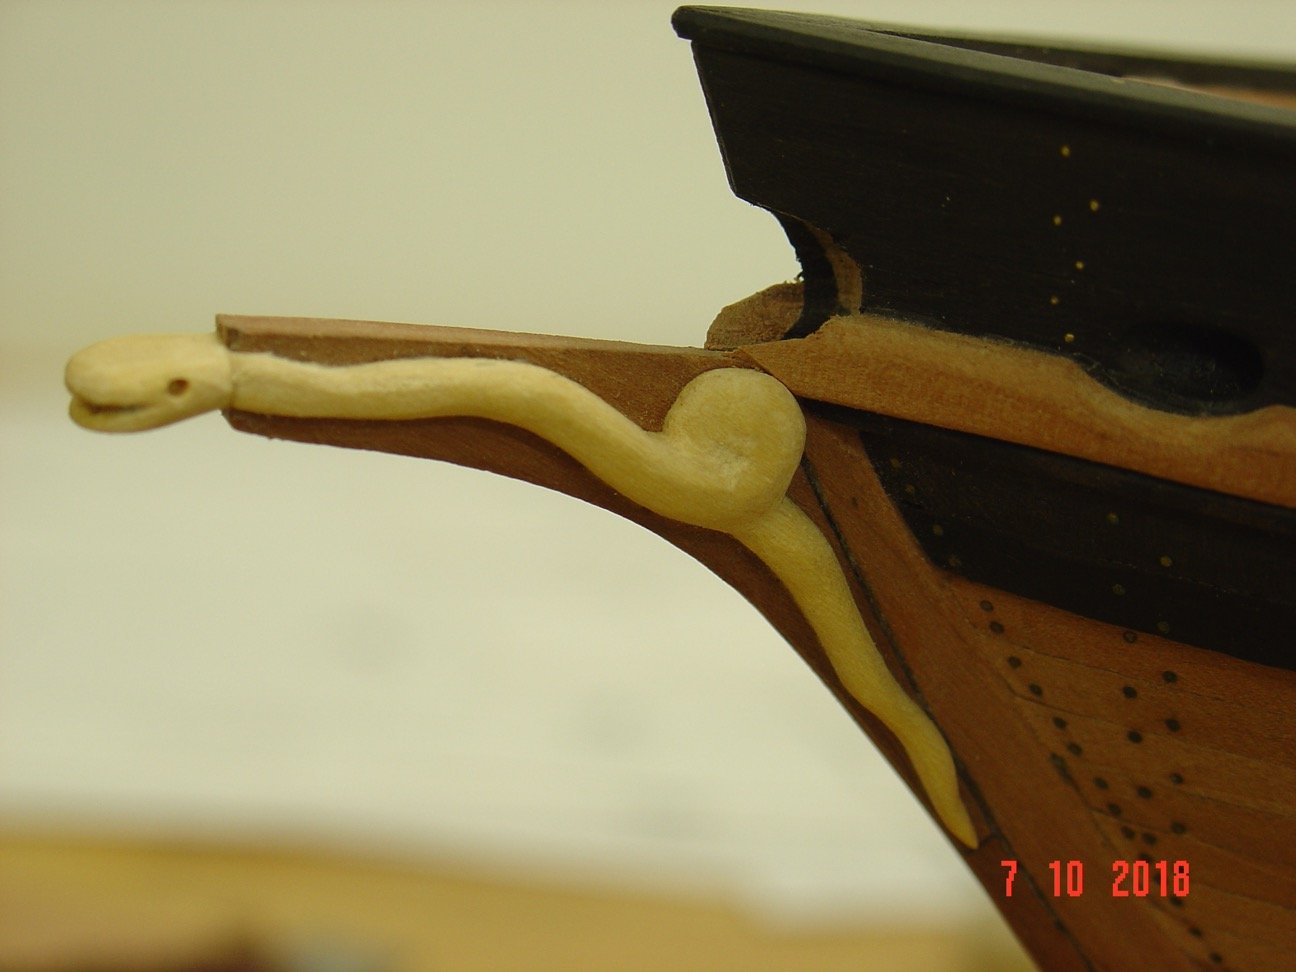
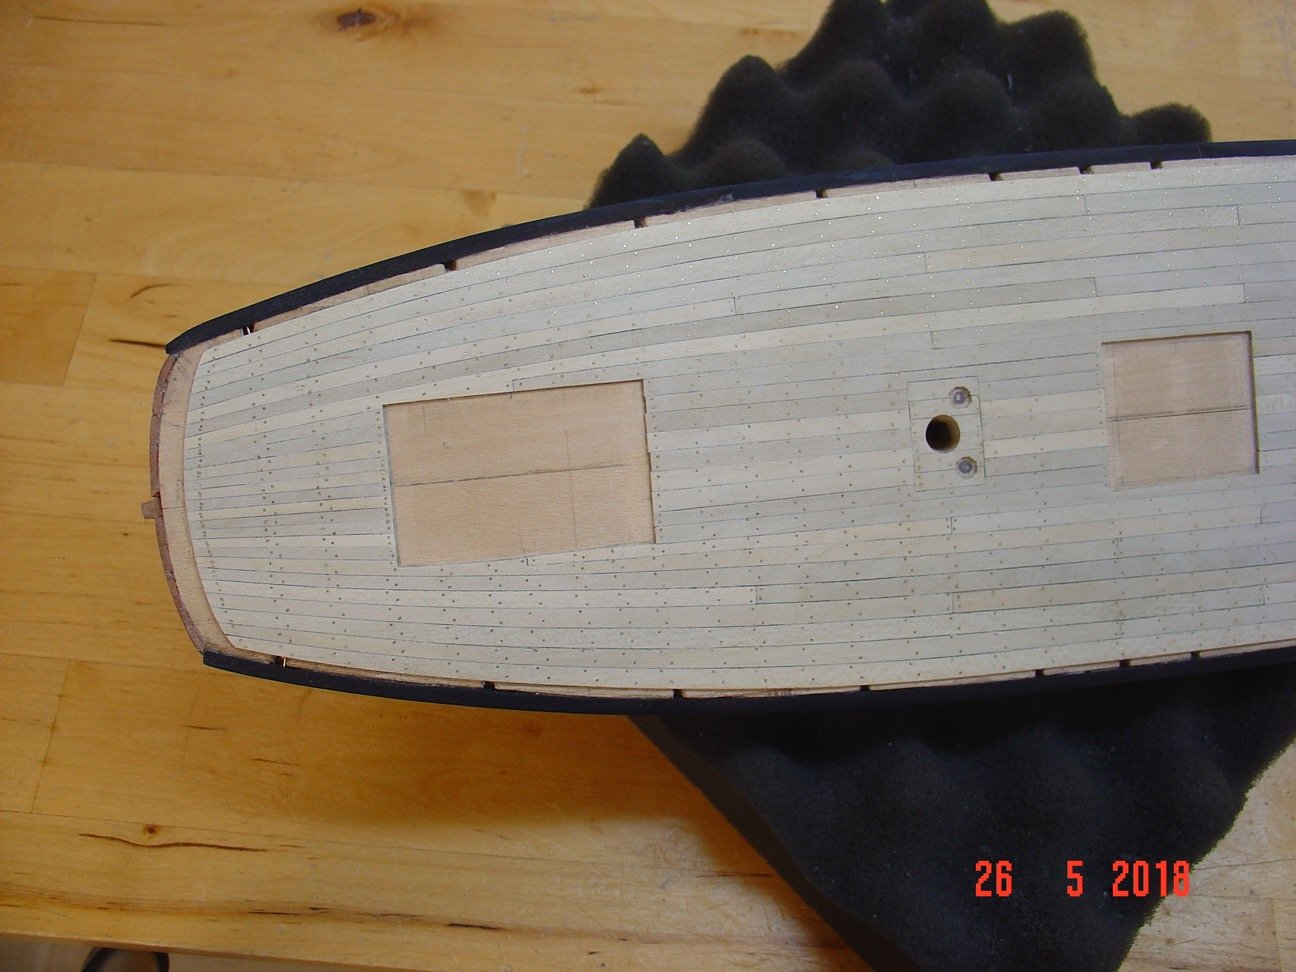
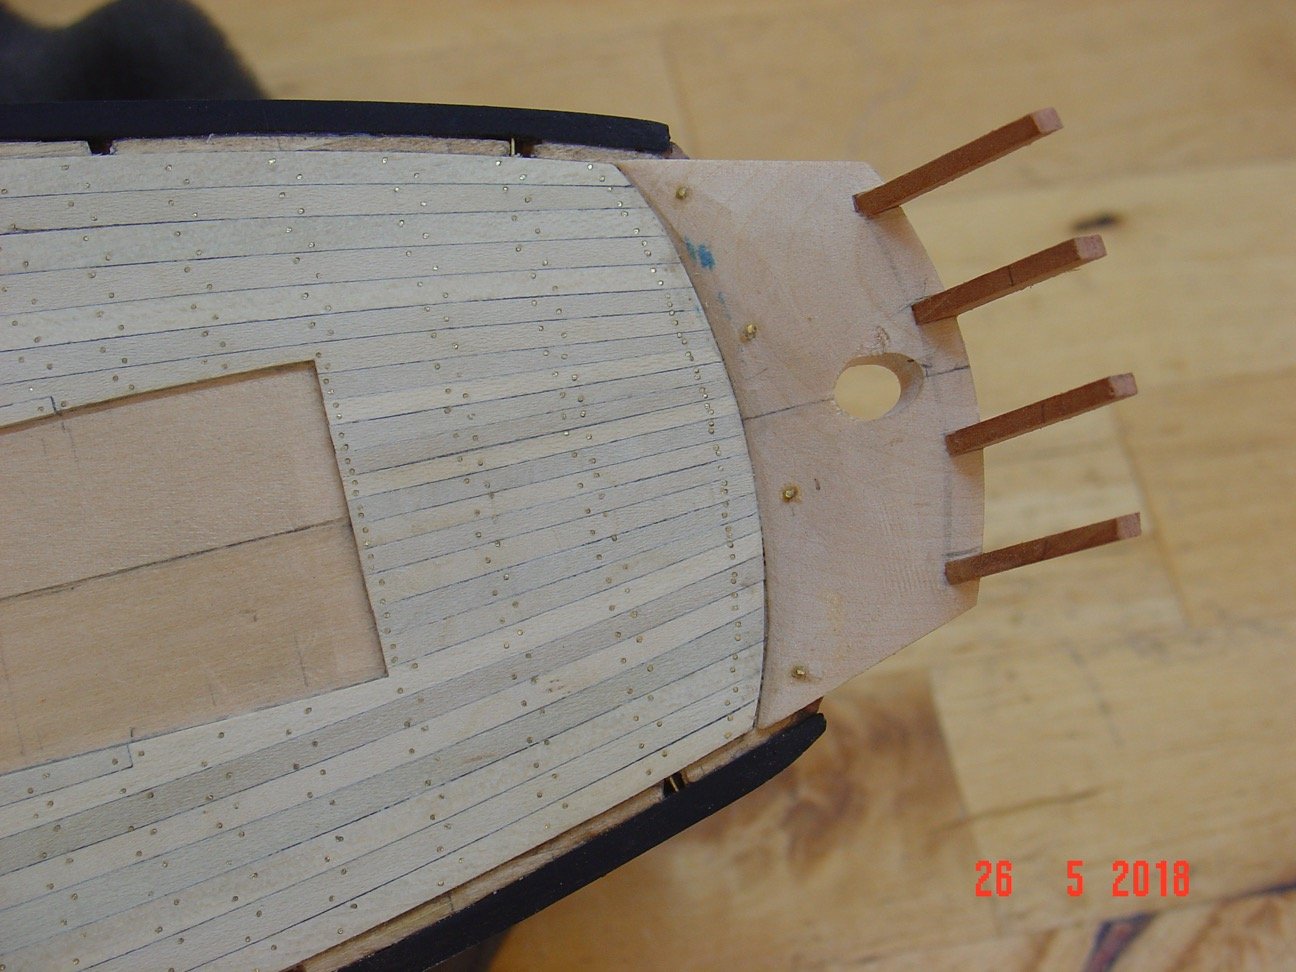
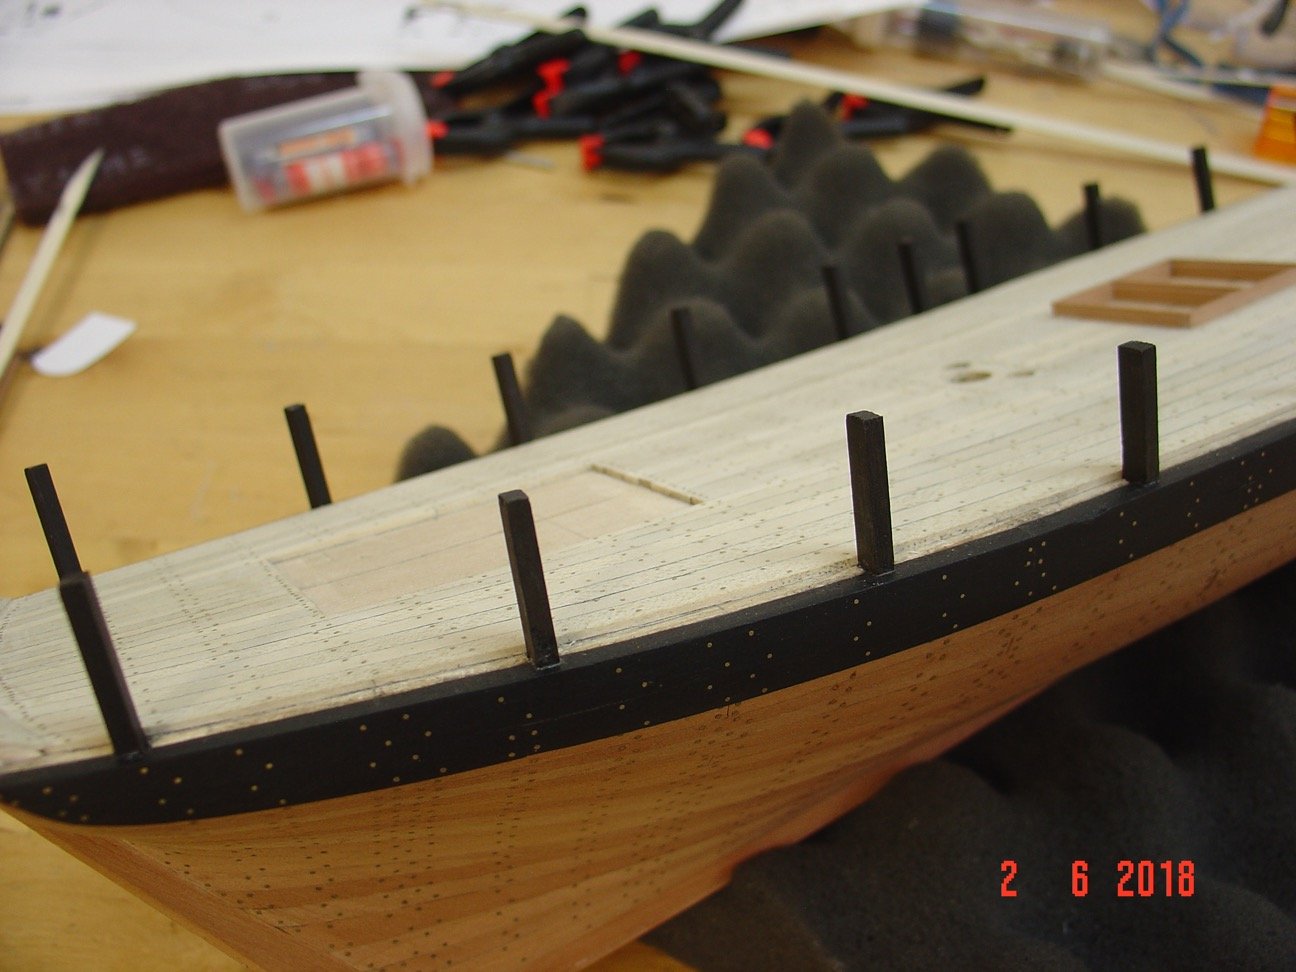
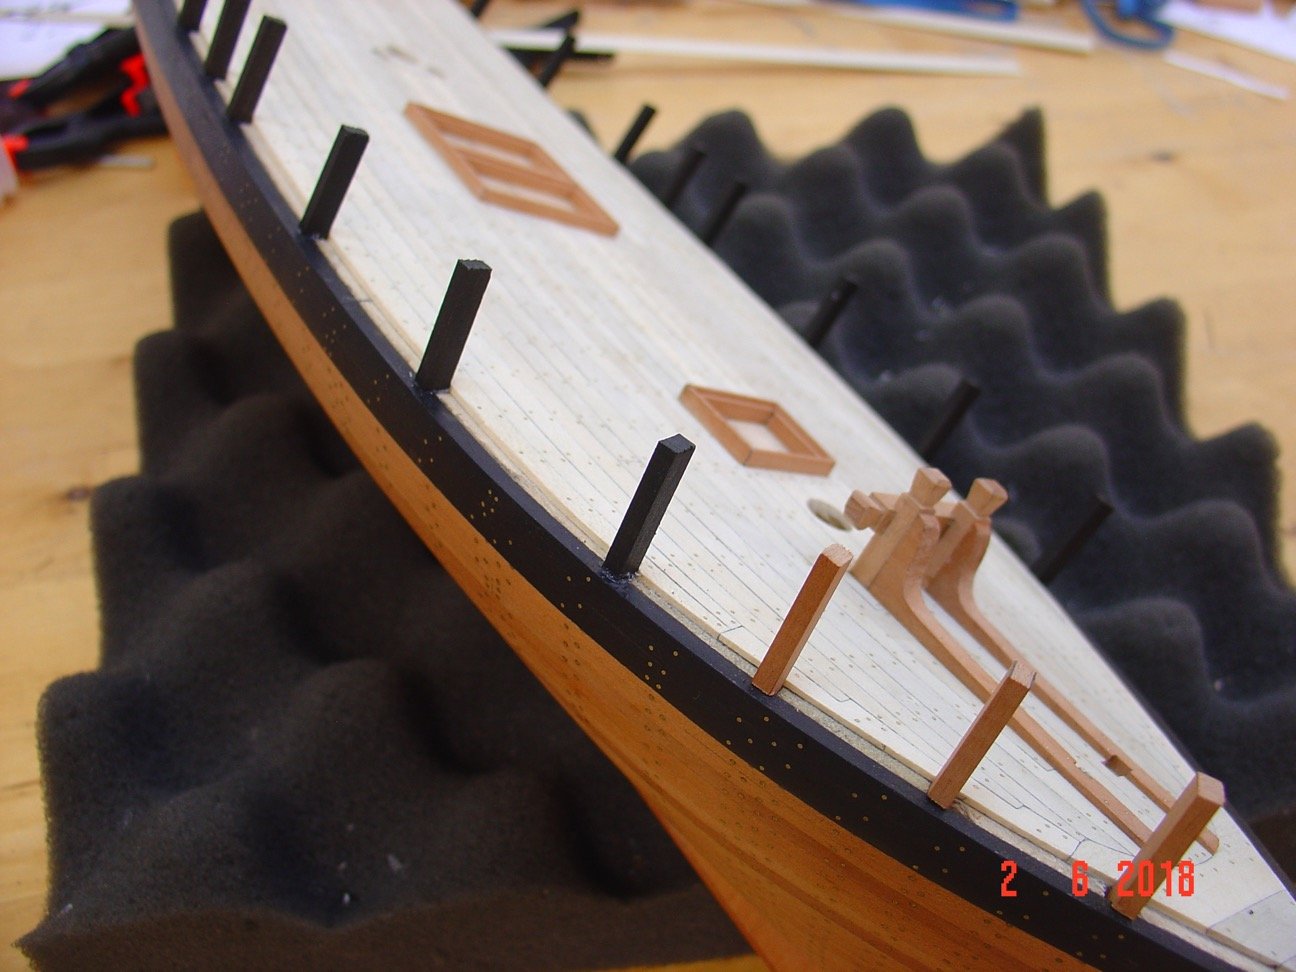
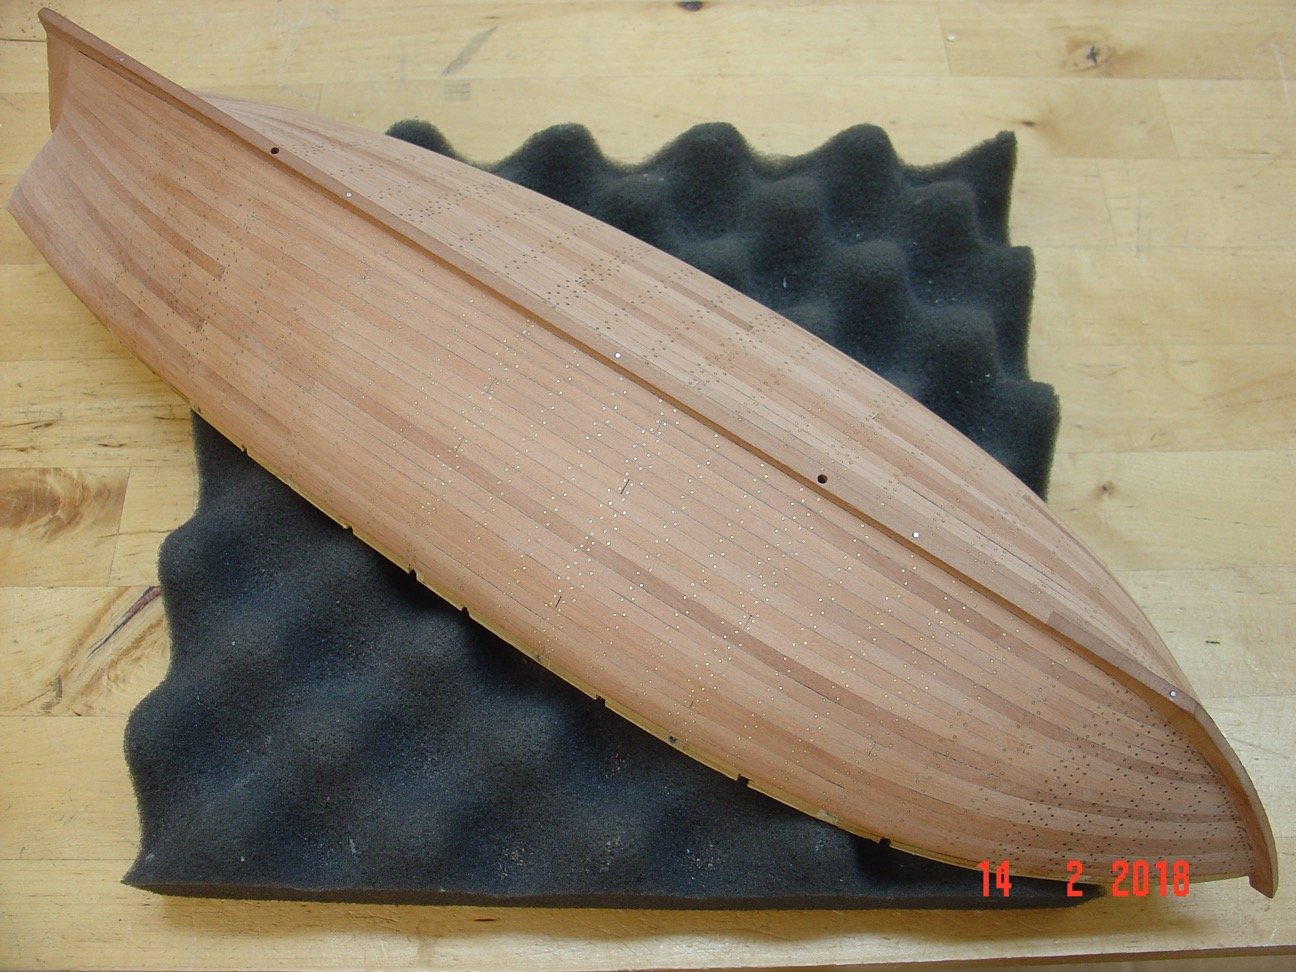
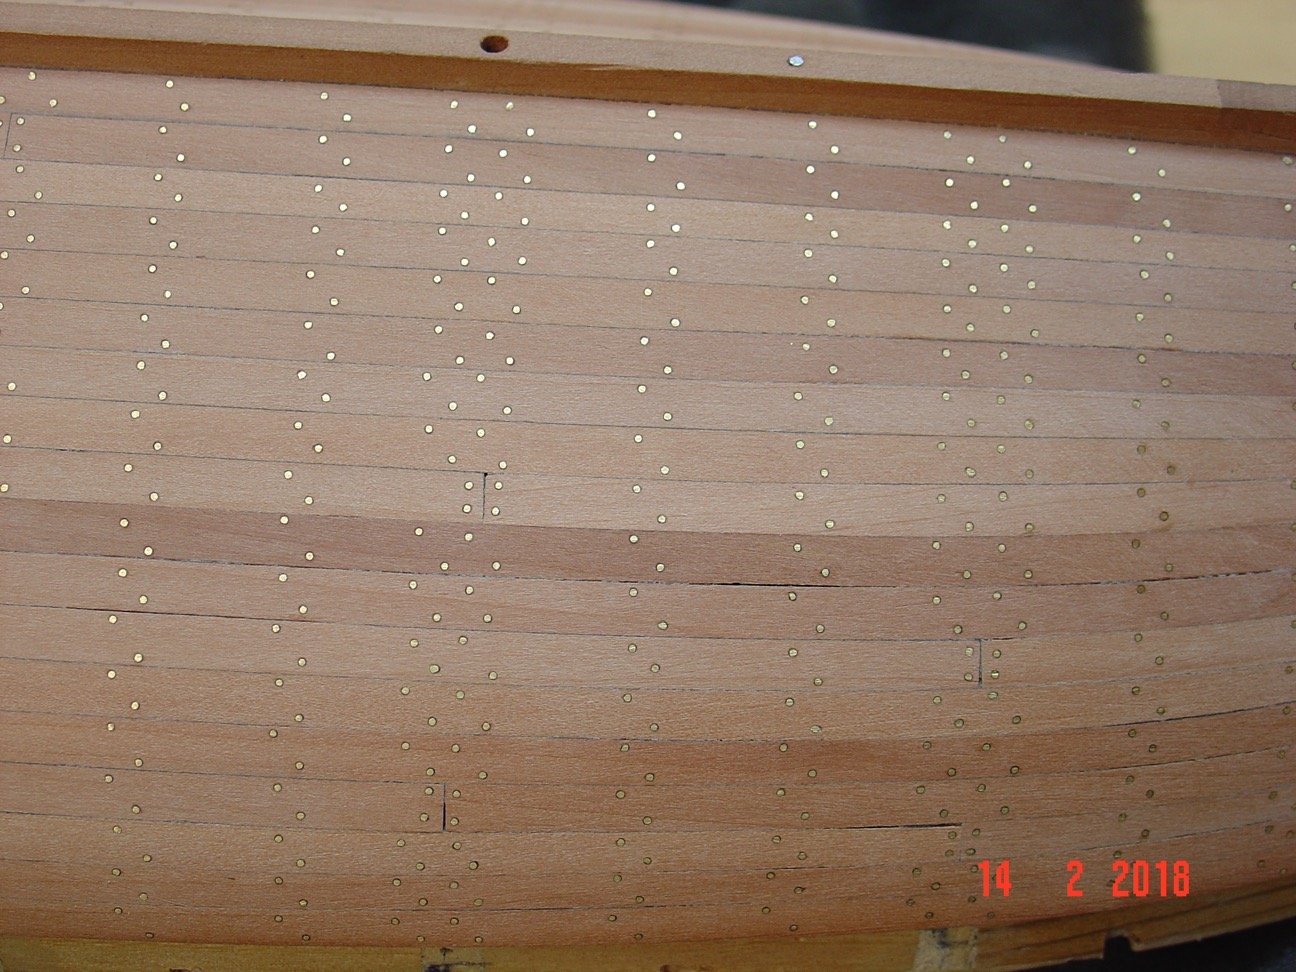
For some reason I stopped posting on MSW. Now, a bit over 2 years later I decided to finish this build log as I finished the model a while ago. I even started a new one. So here are the pictures, maybe someone will find them interesting. Regards Alexandru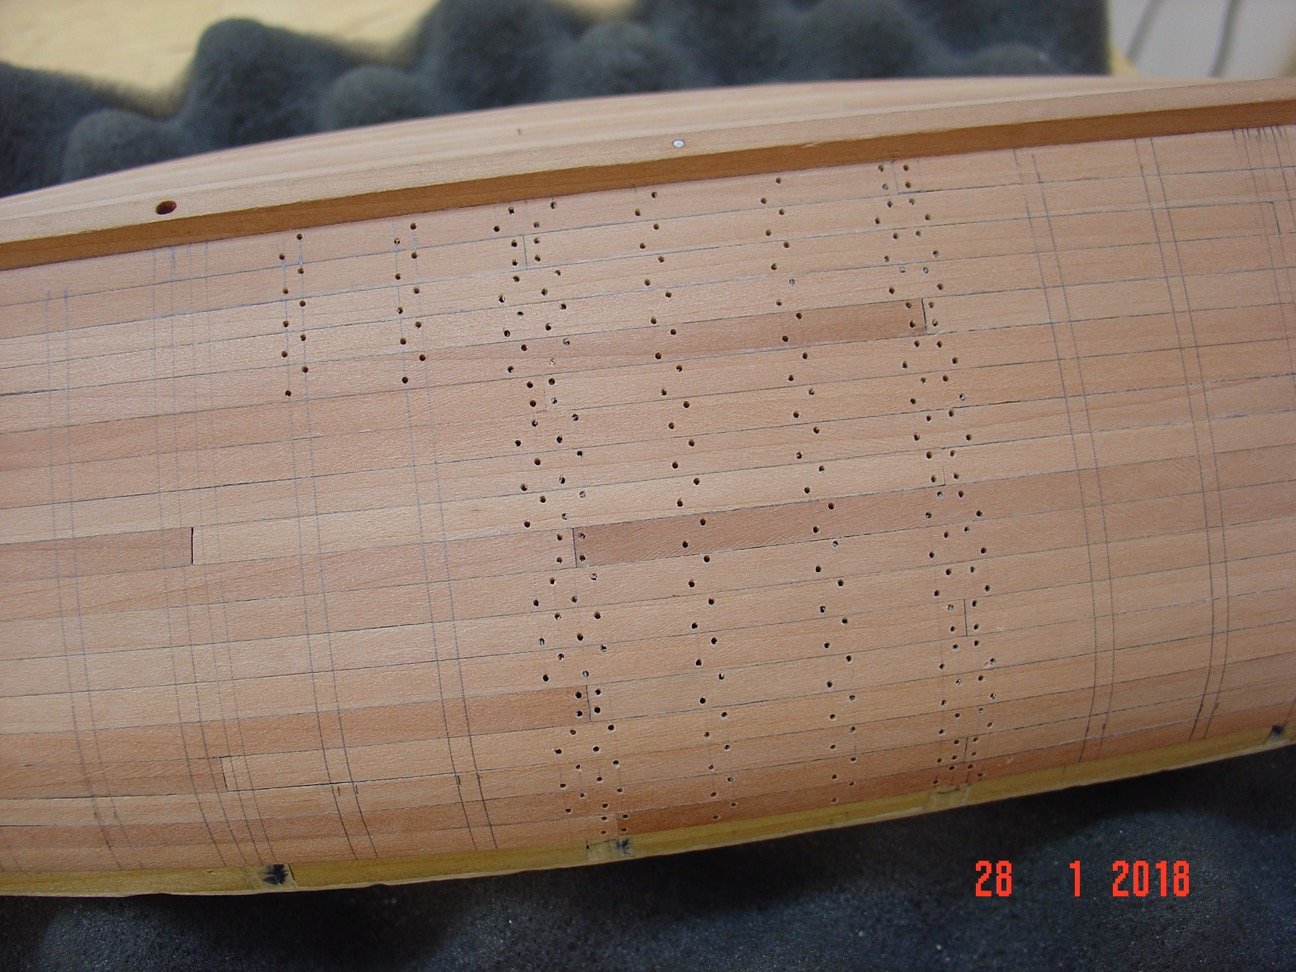

-
ancre La Jacinthe 1823 by guraus - Scale 1:48
guraus replied to guraus's topic in - Build logs for subjects built 1801 - 1850
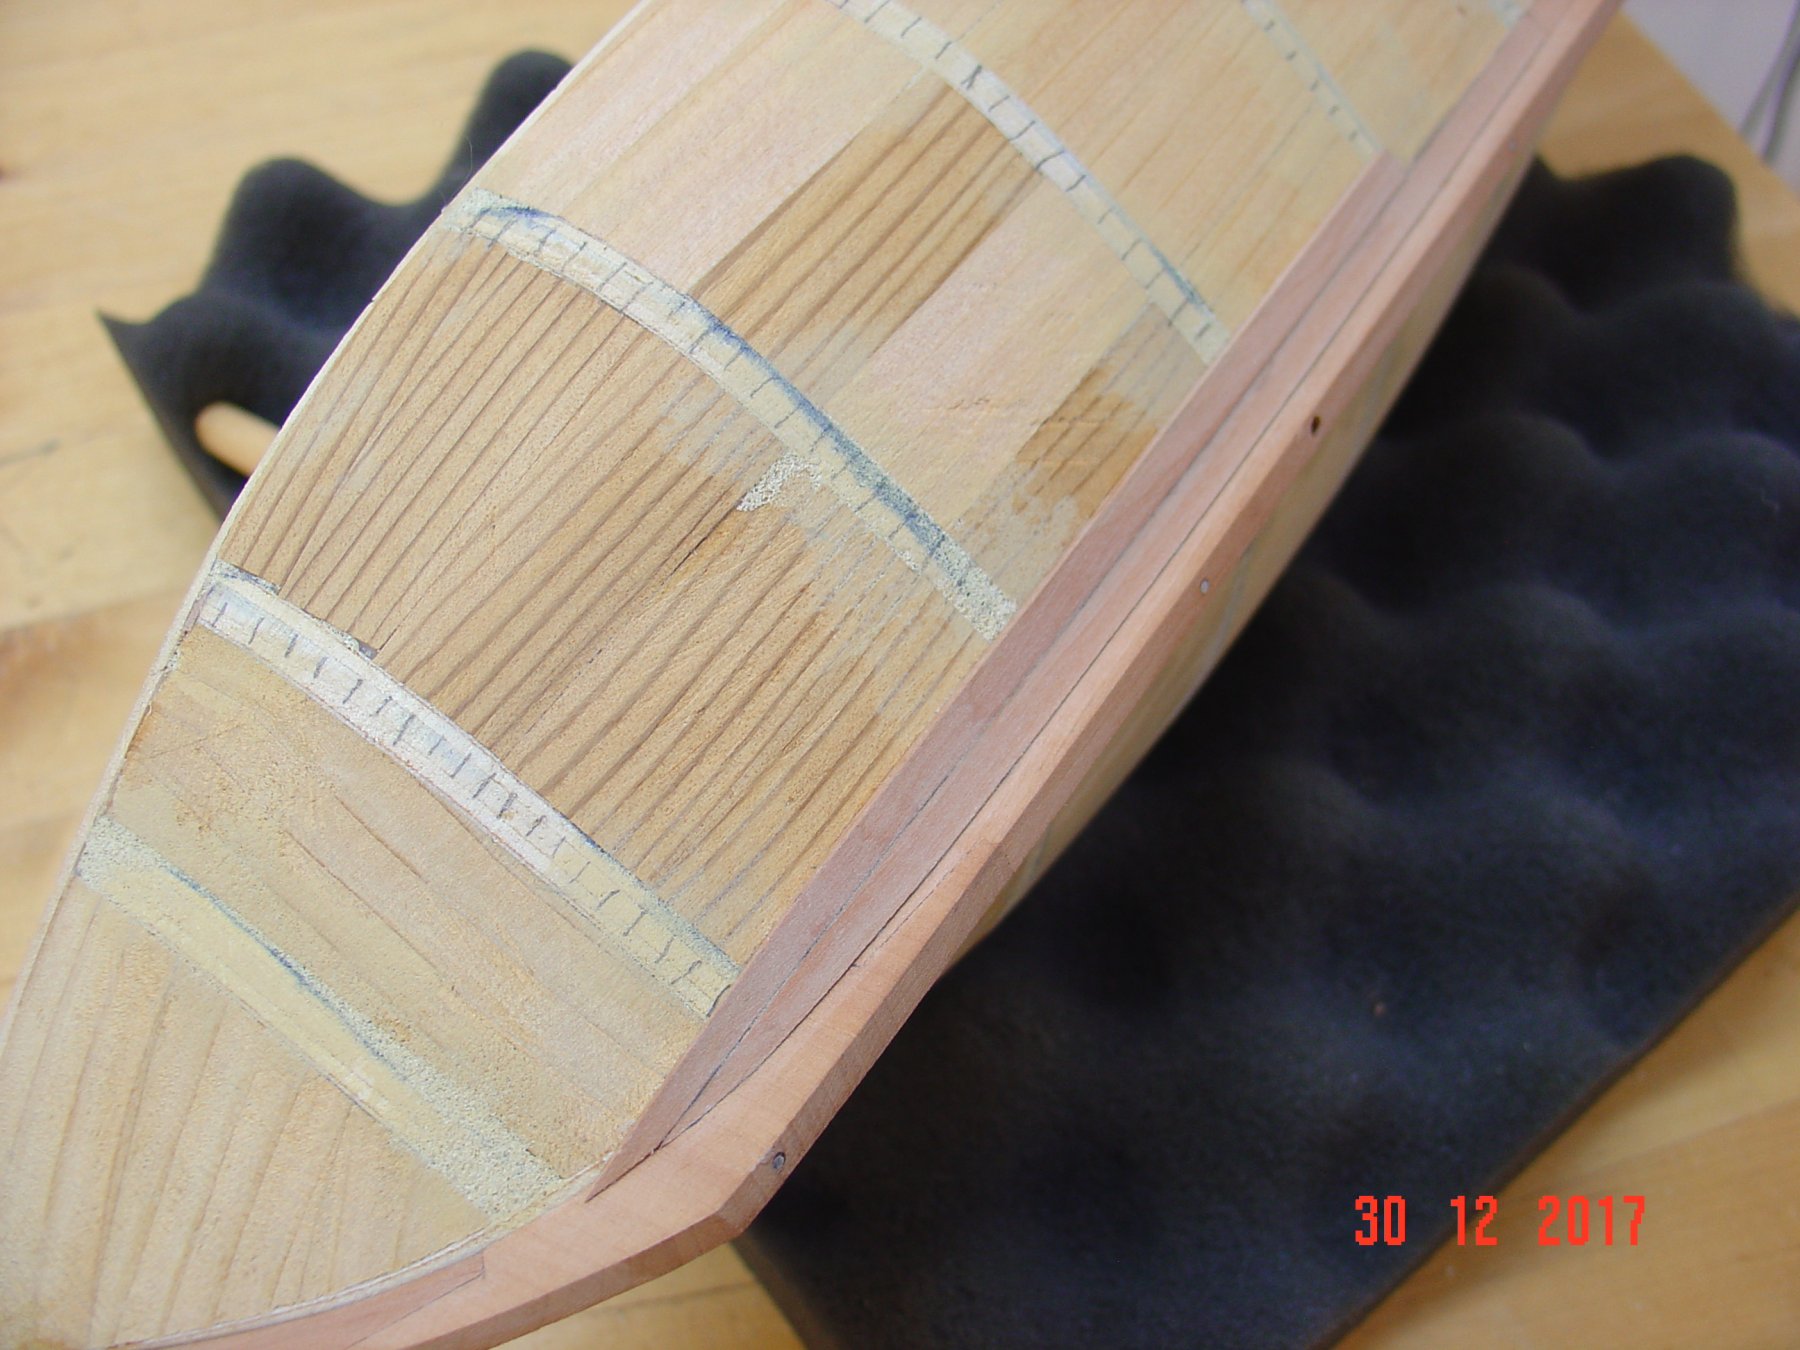
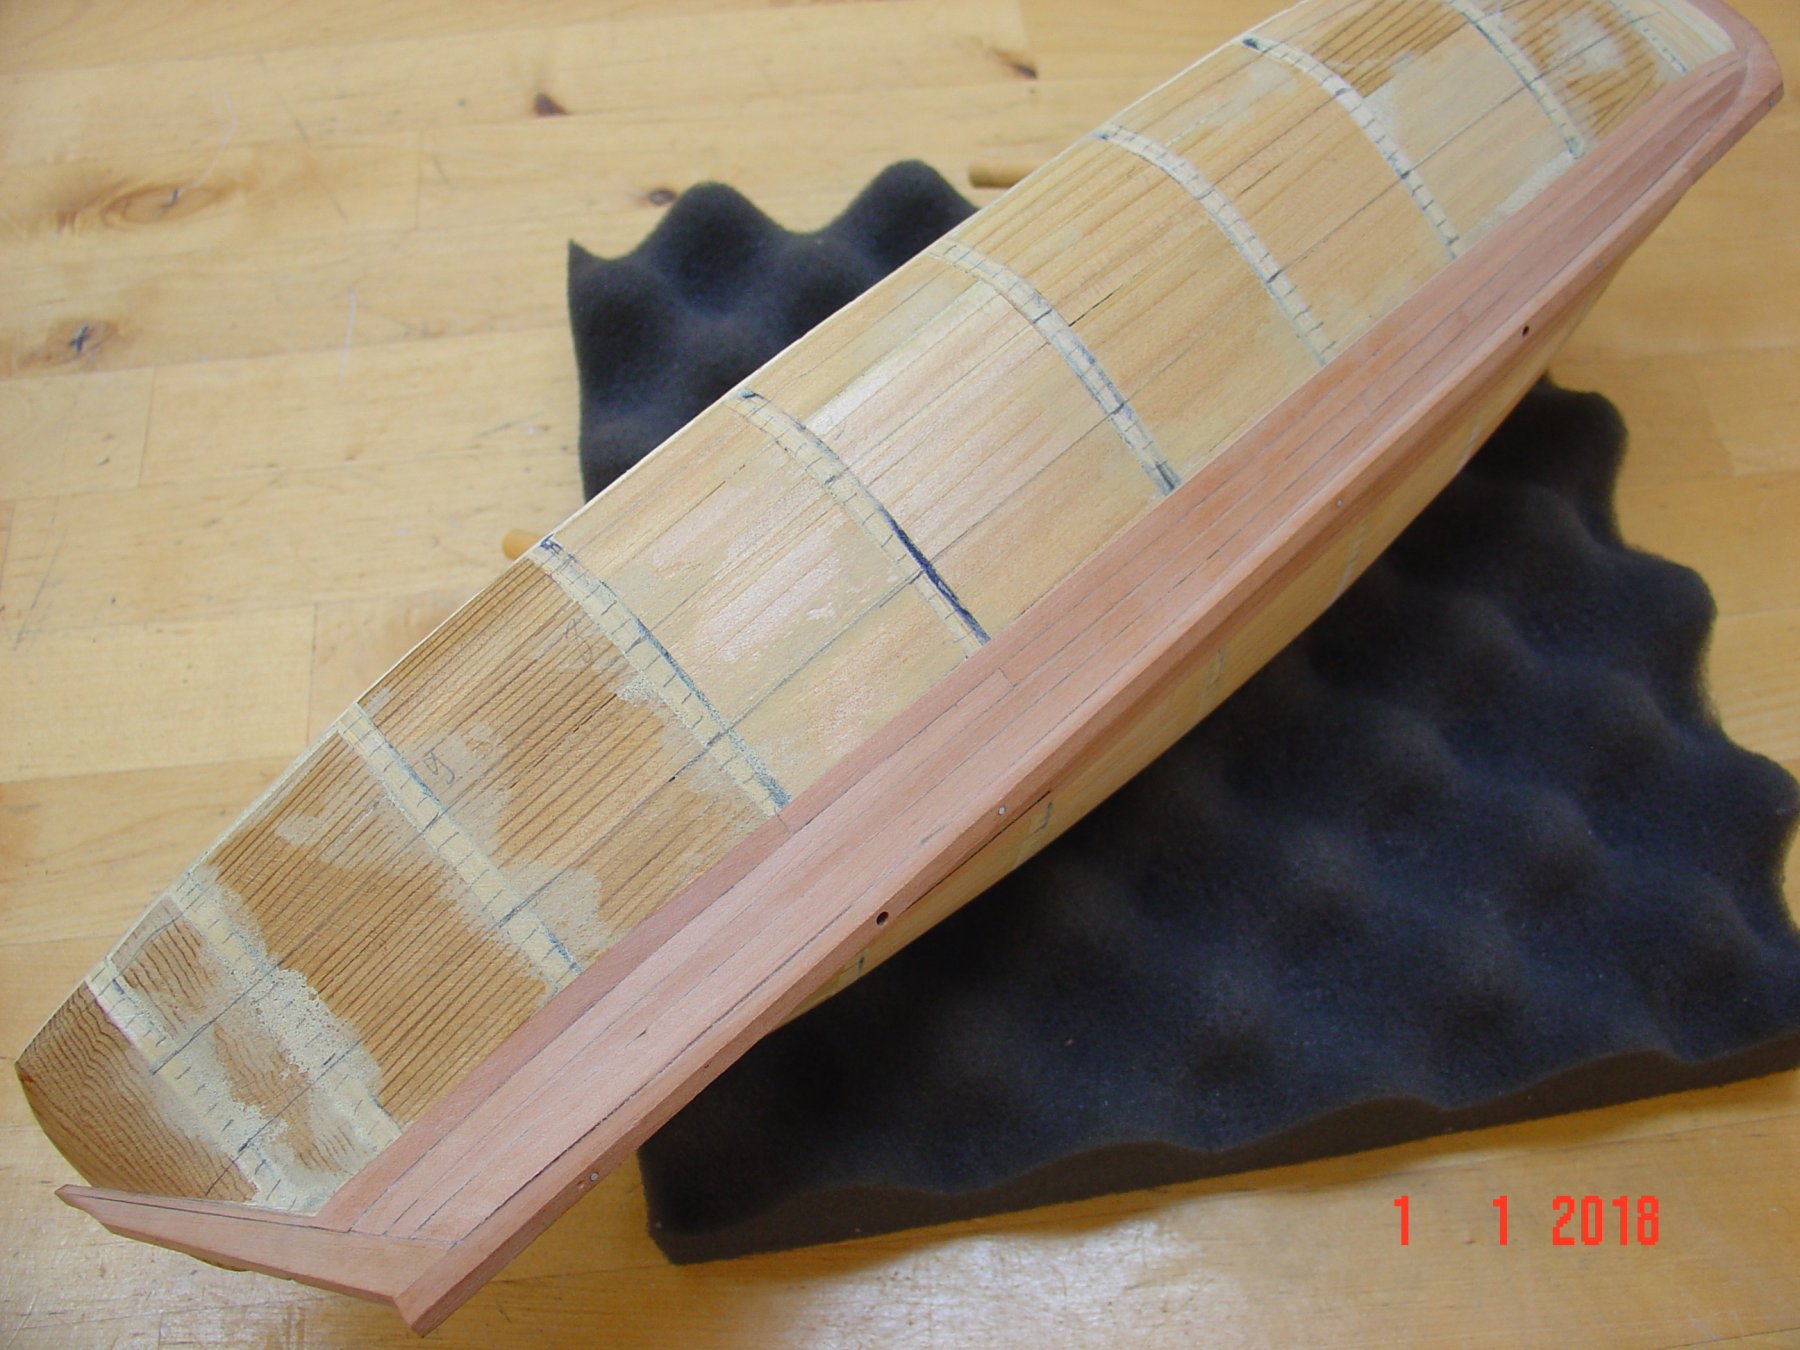
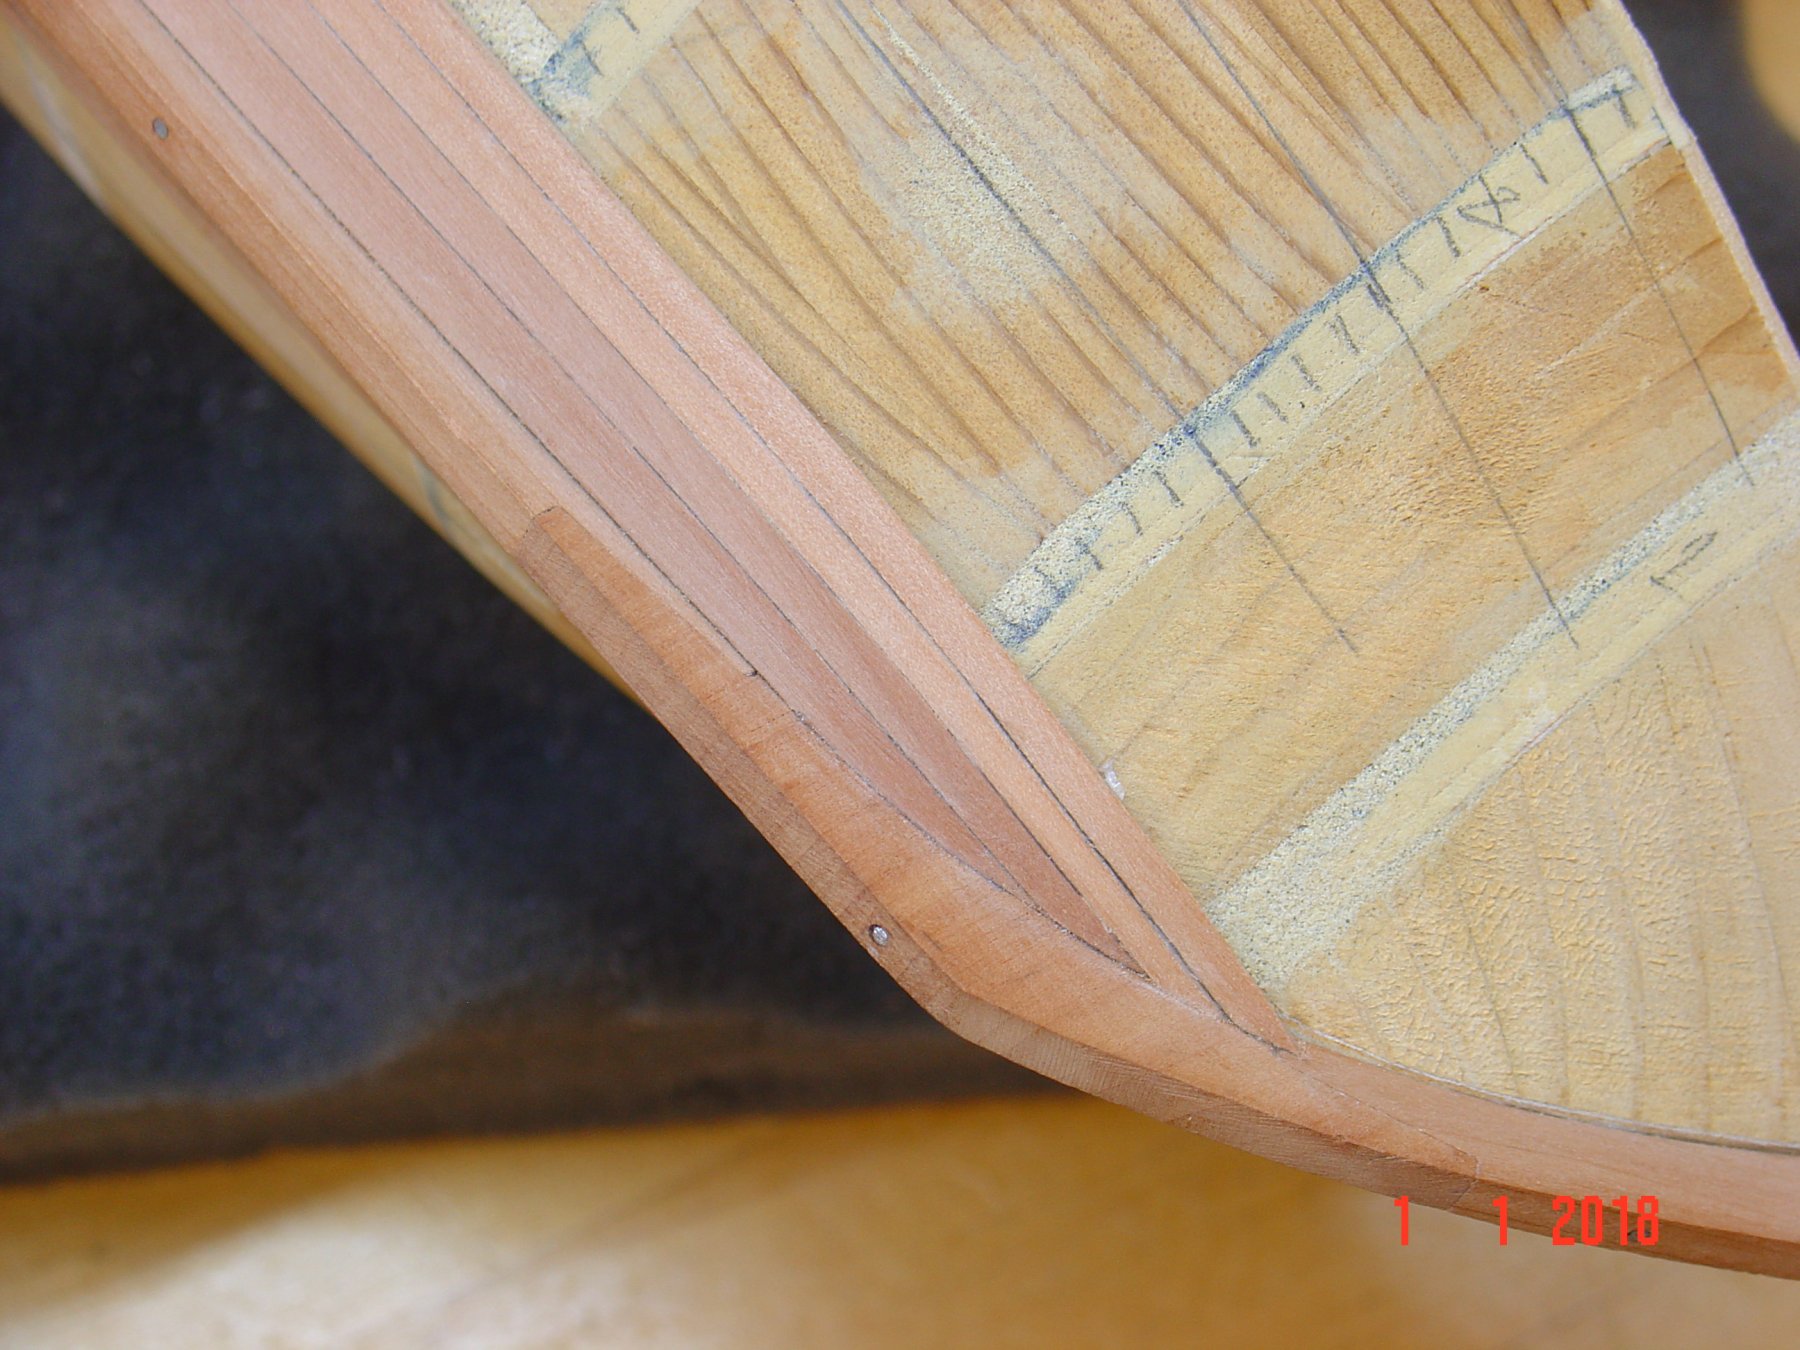
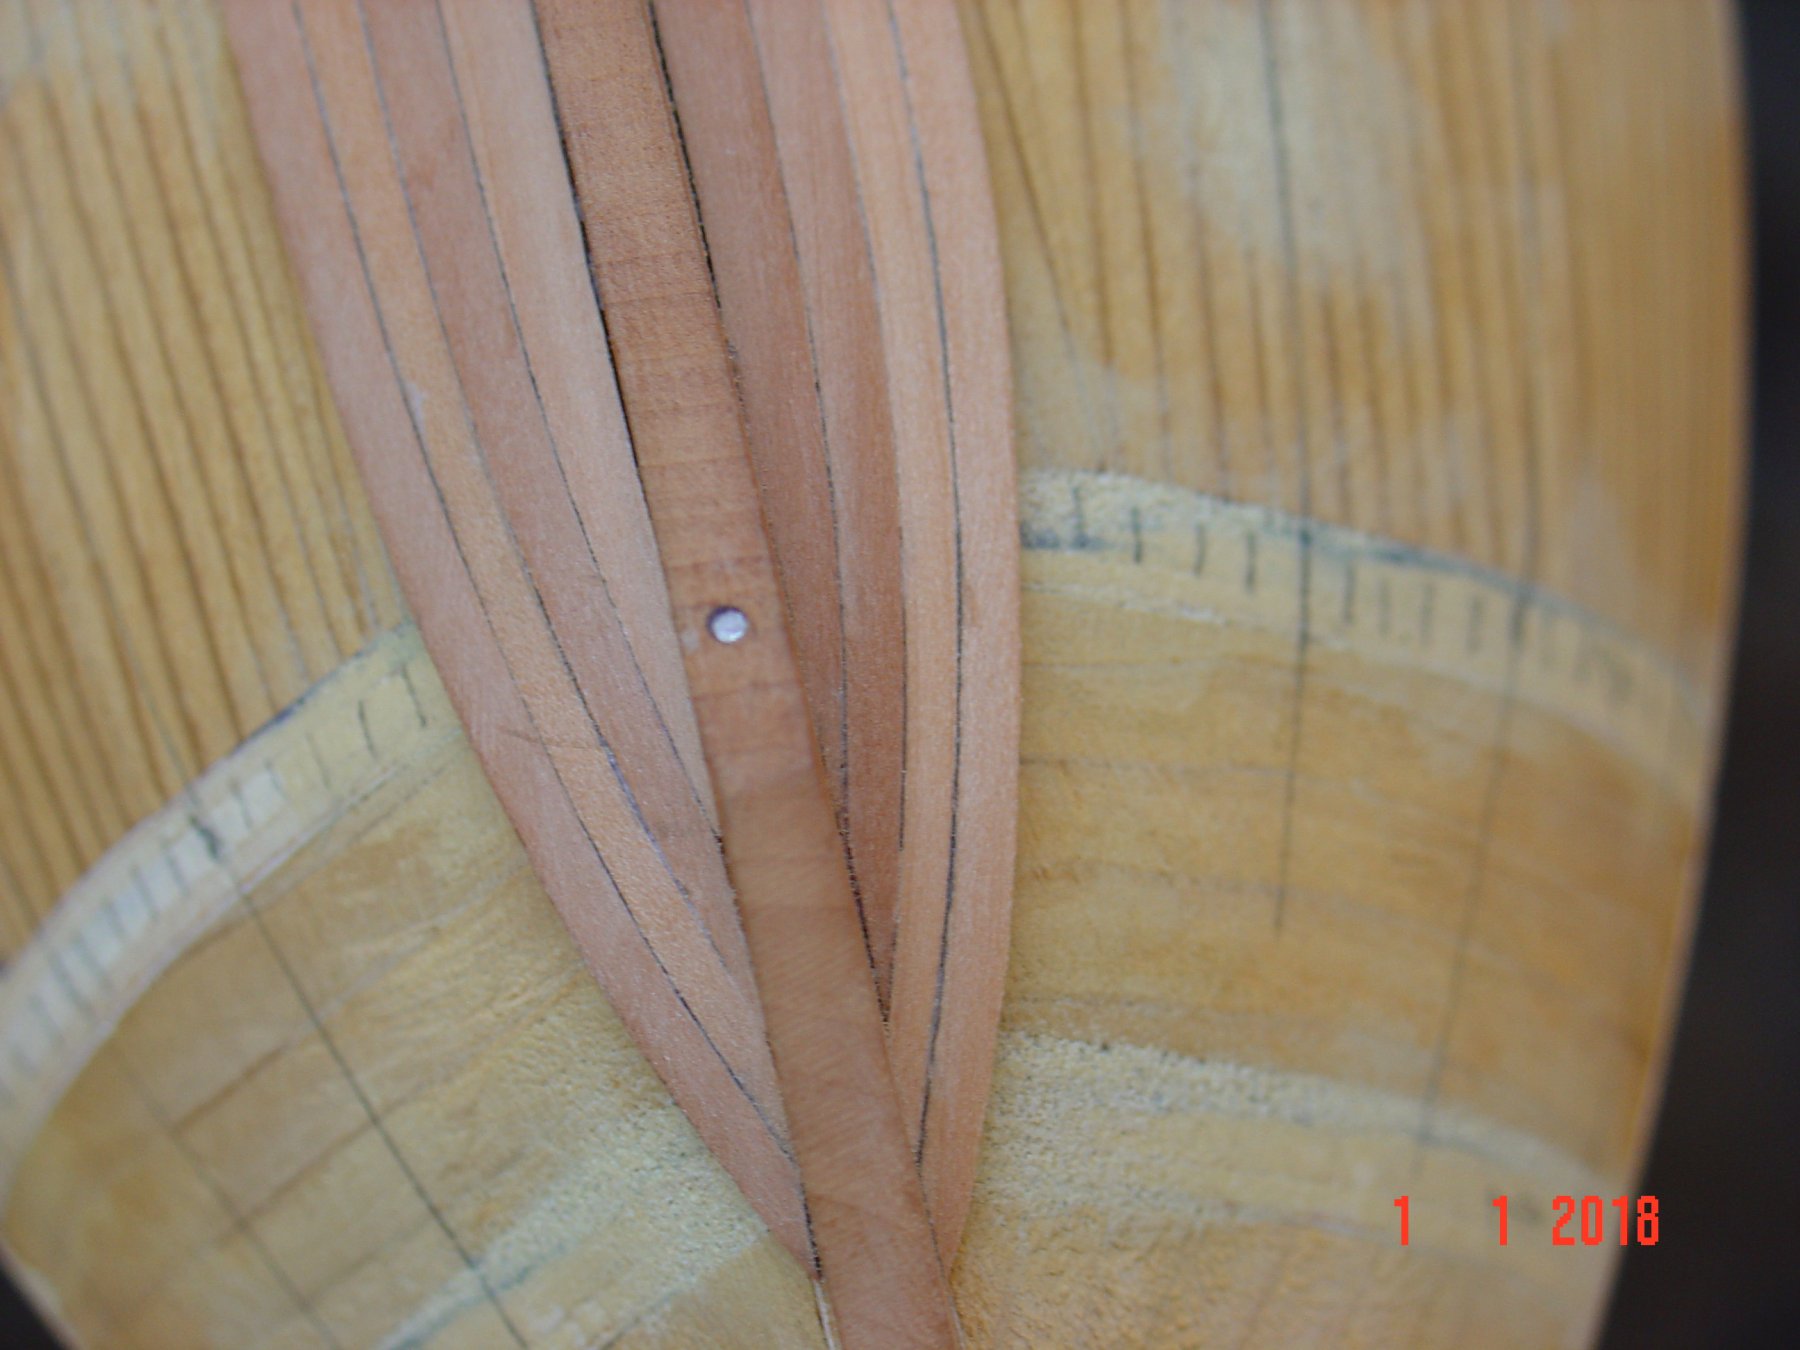
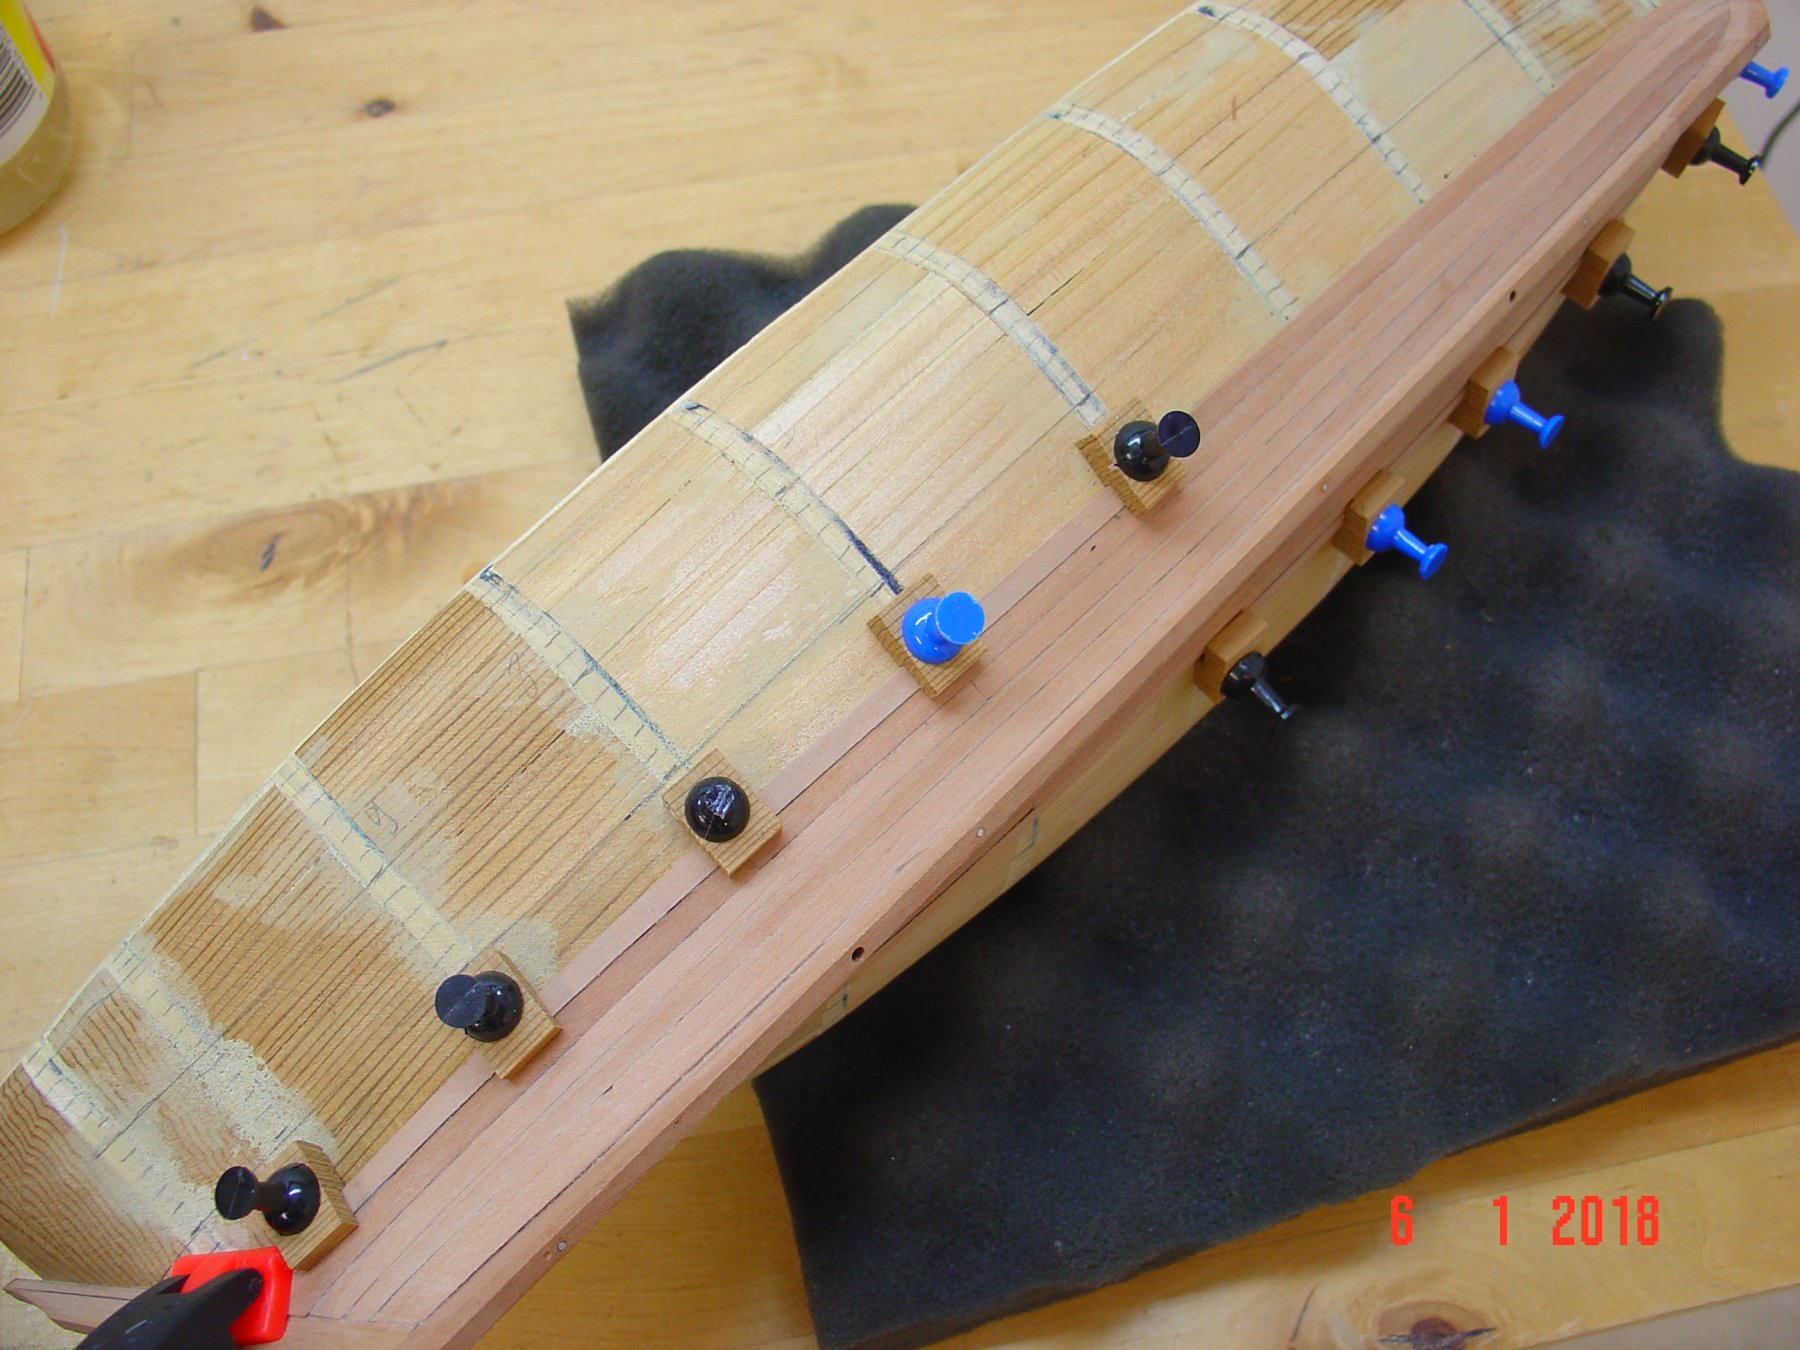
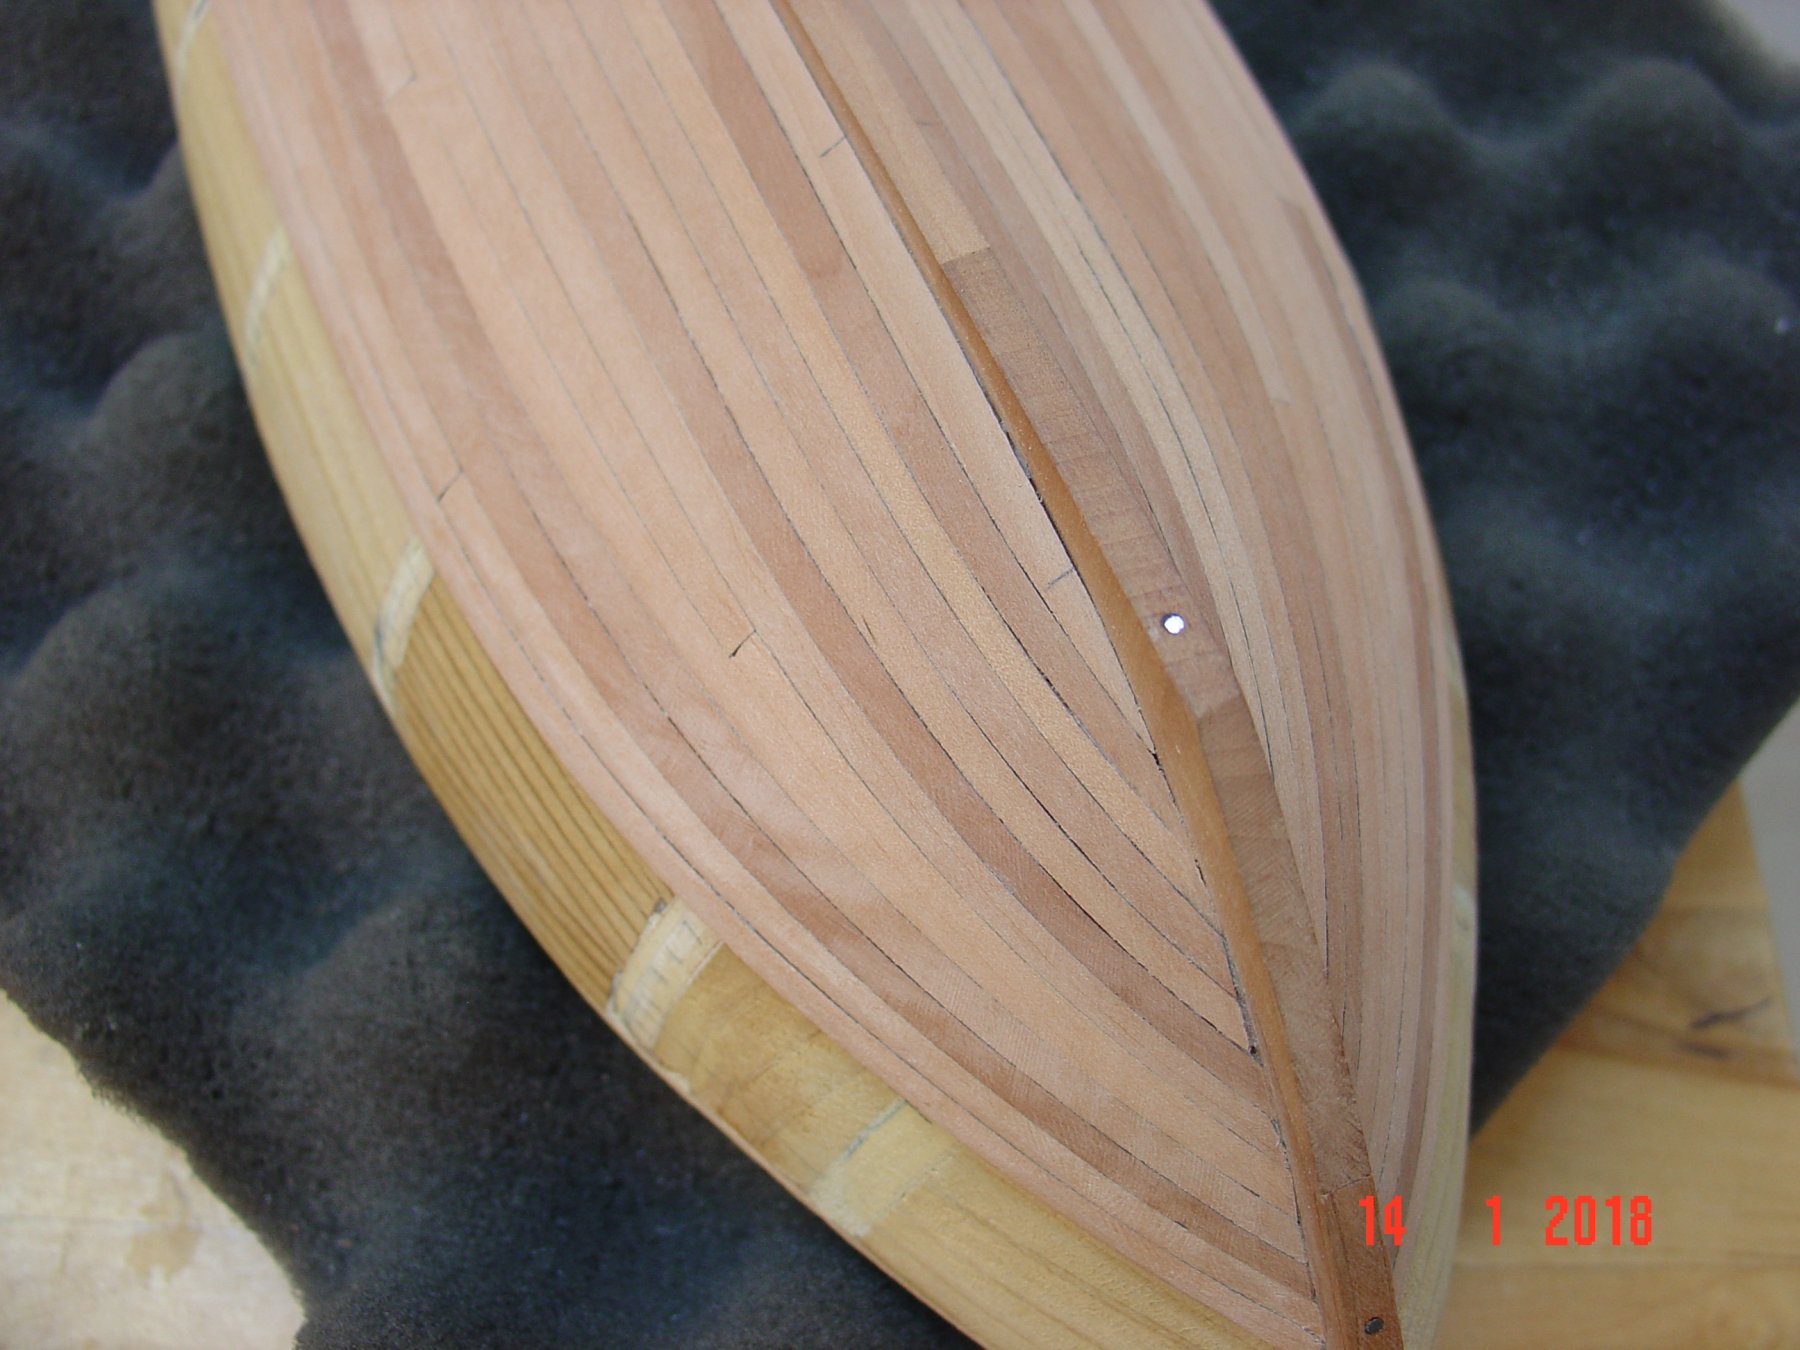
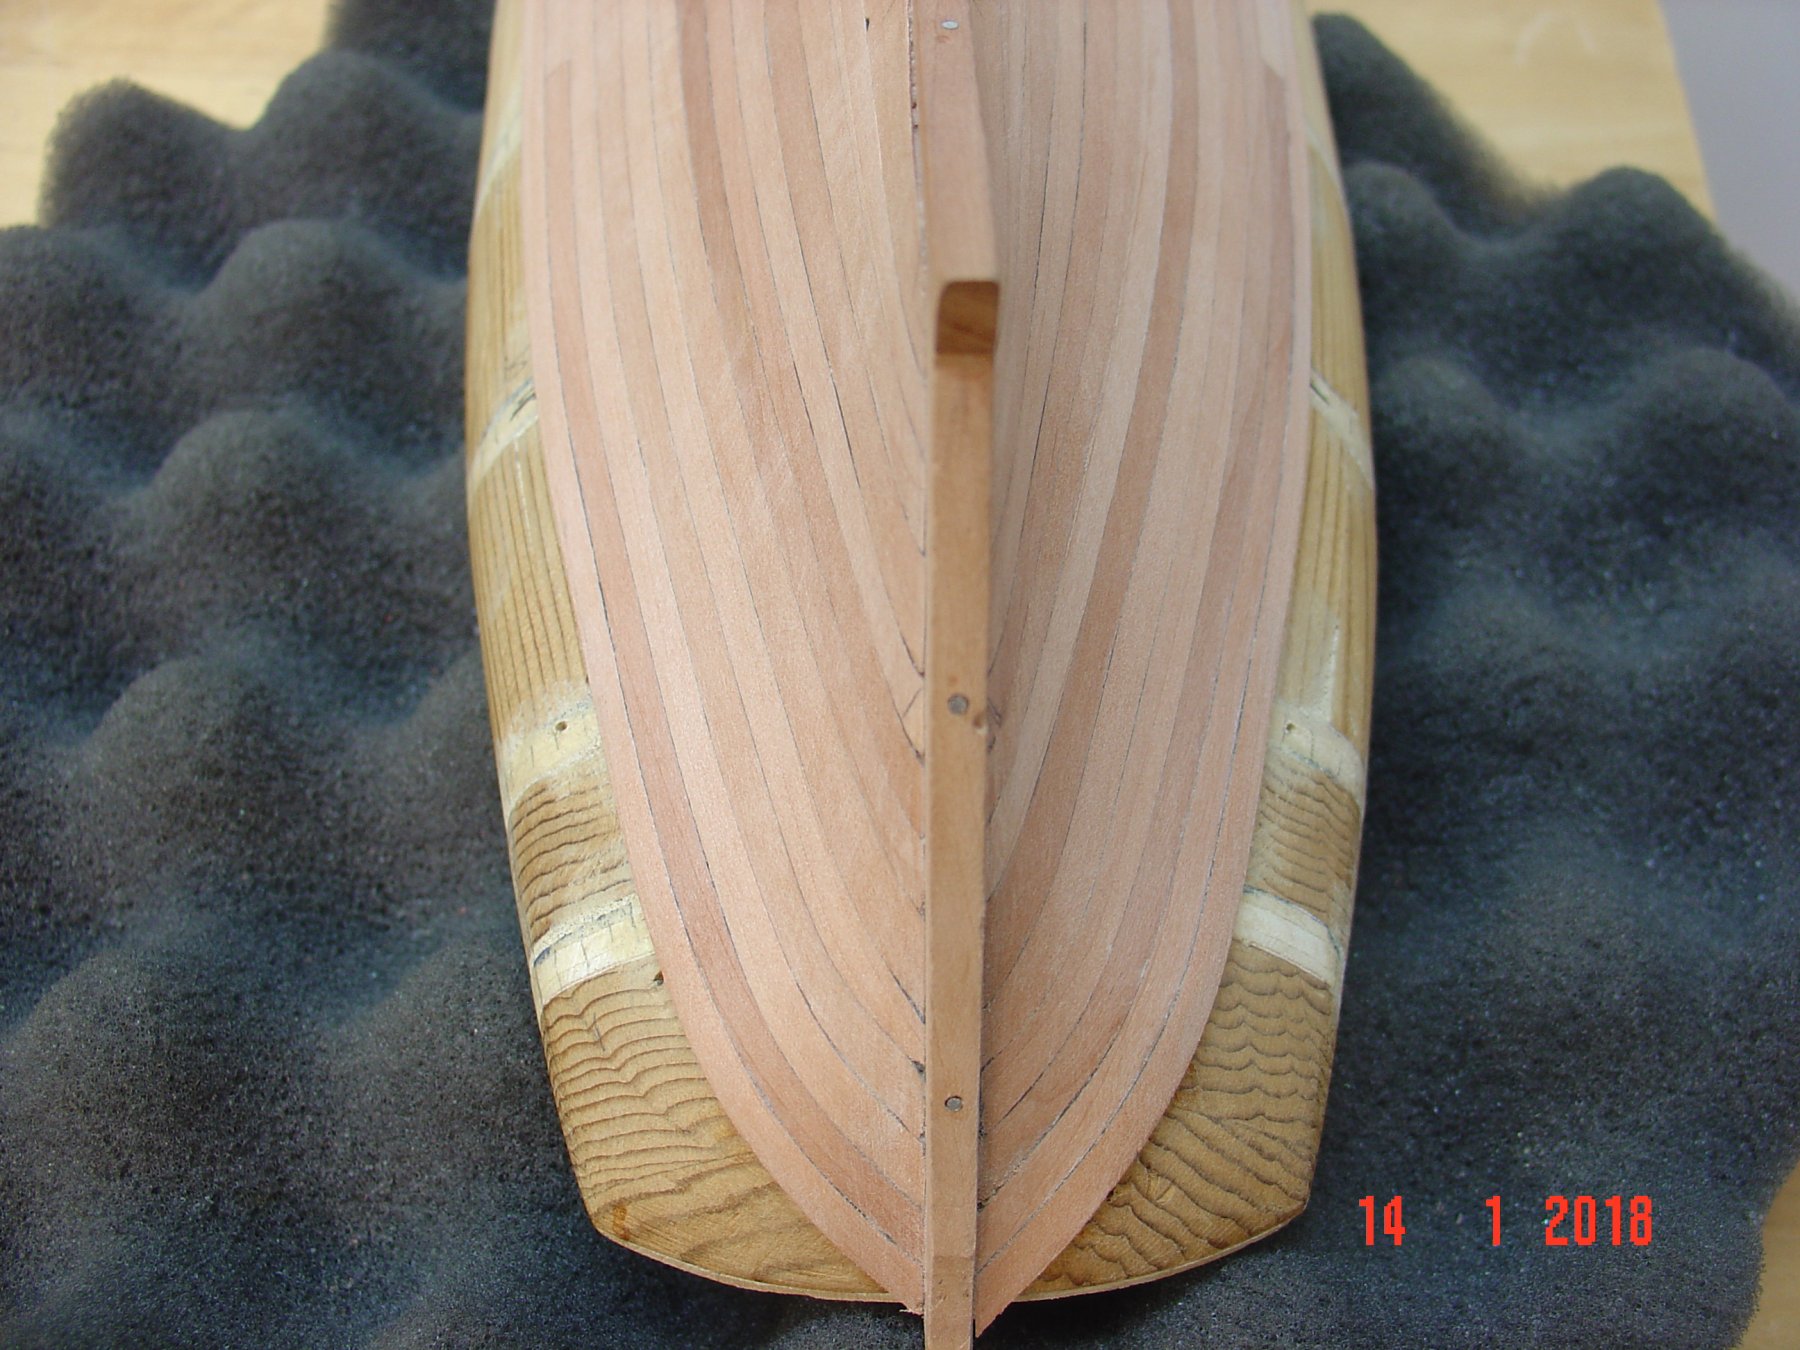
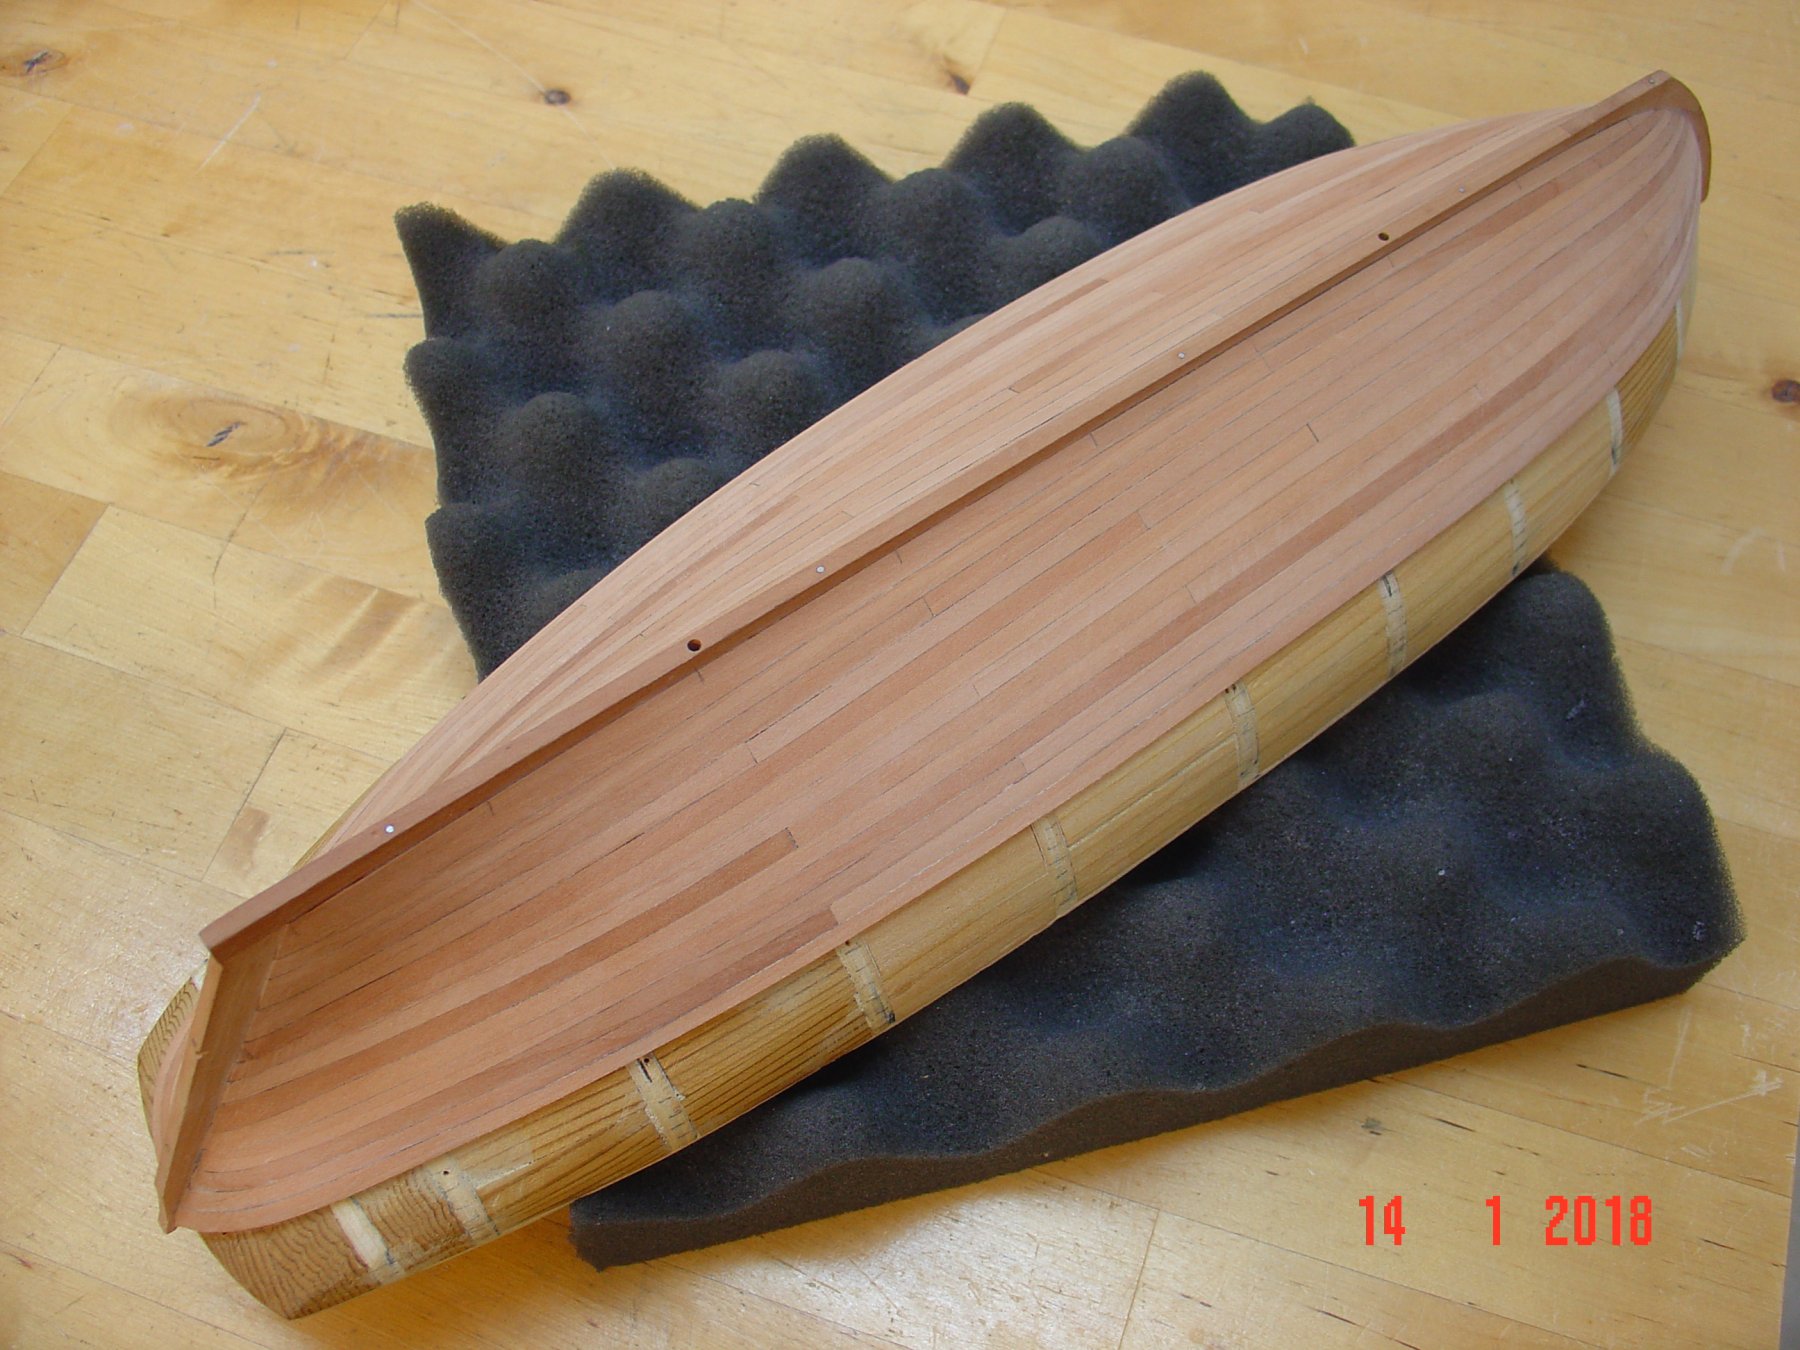
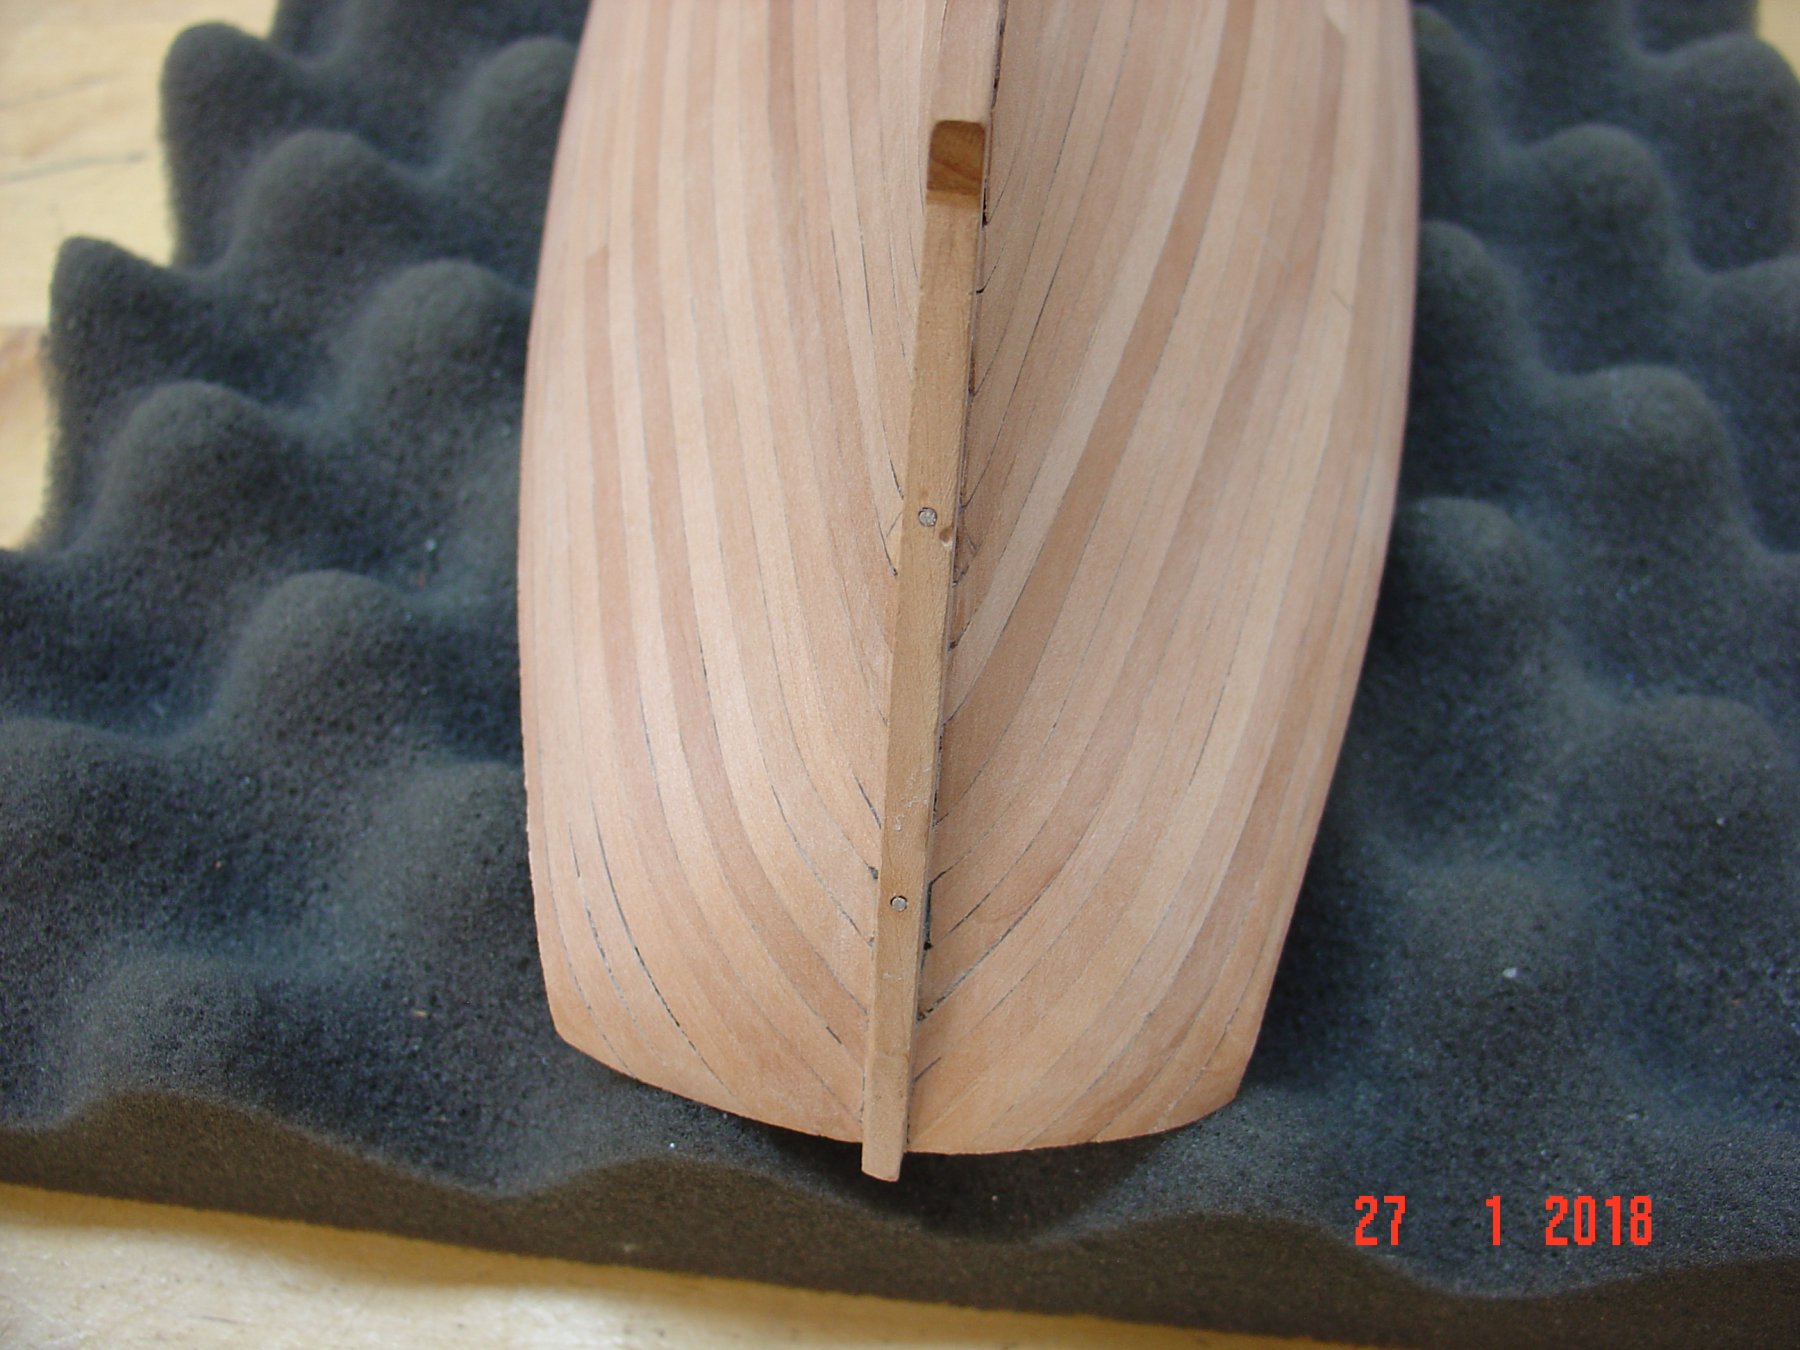
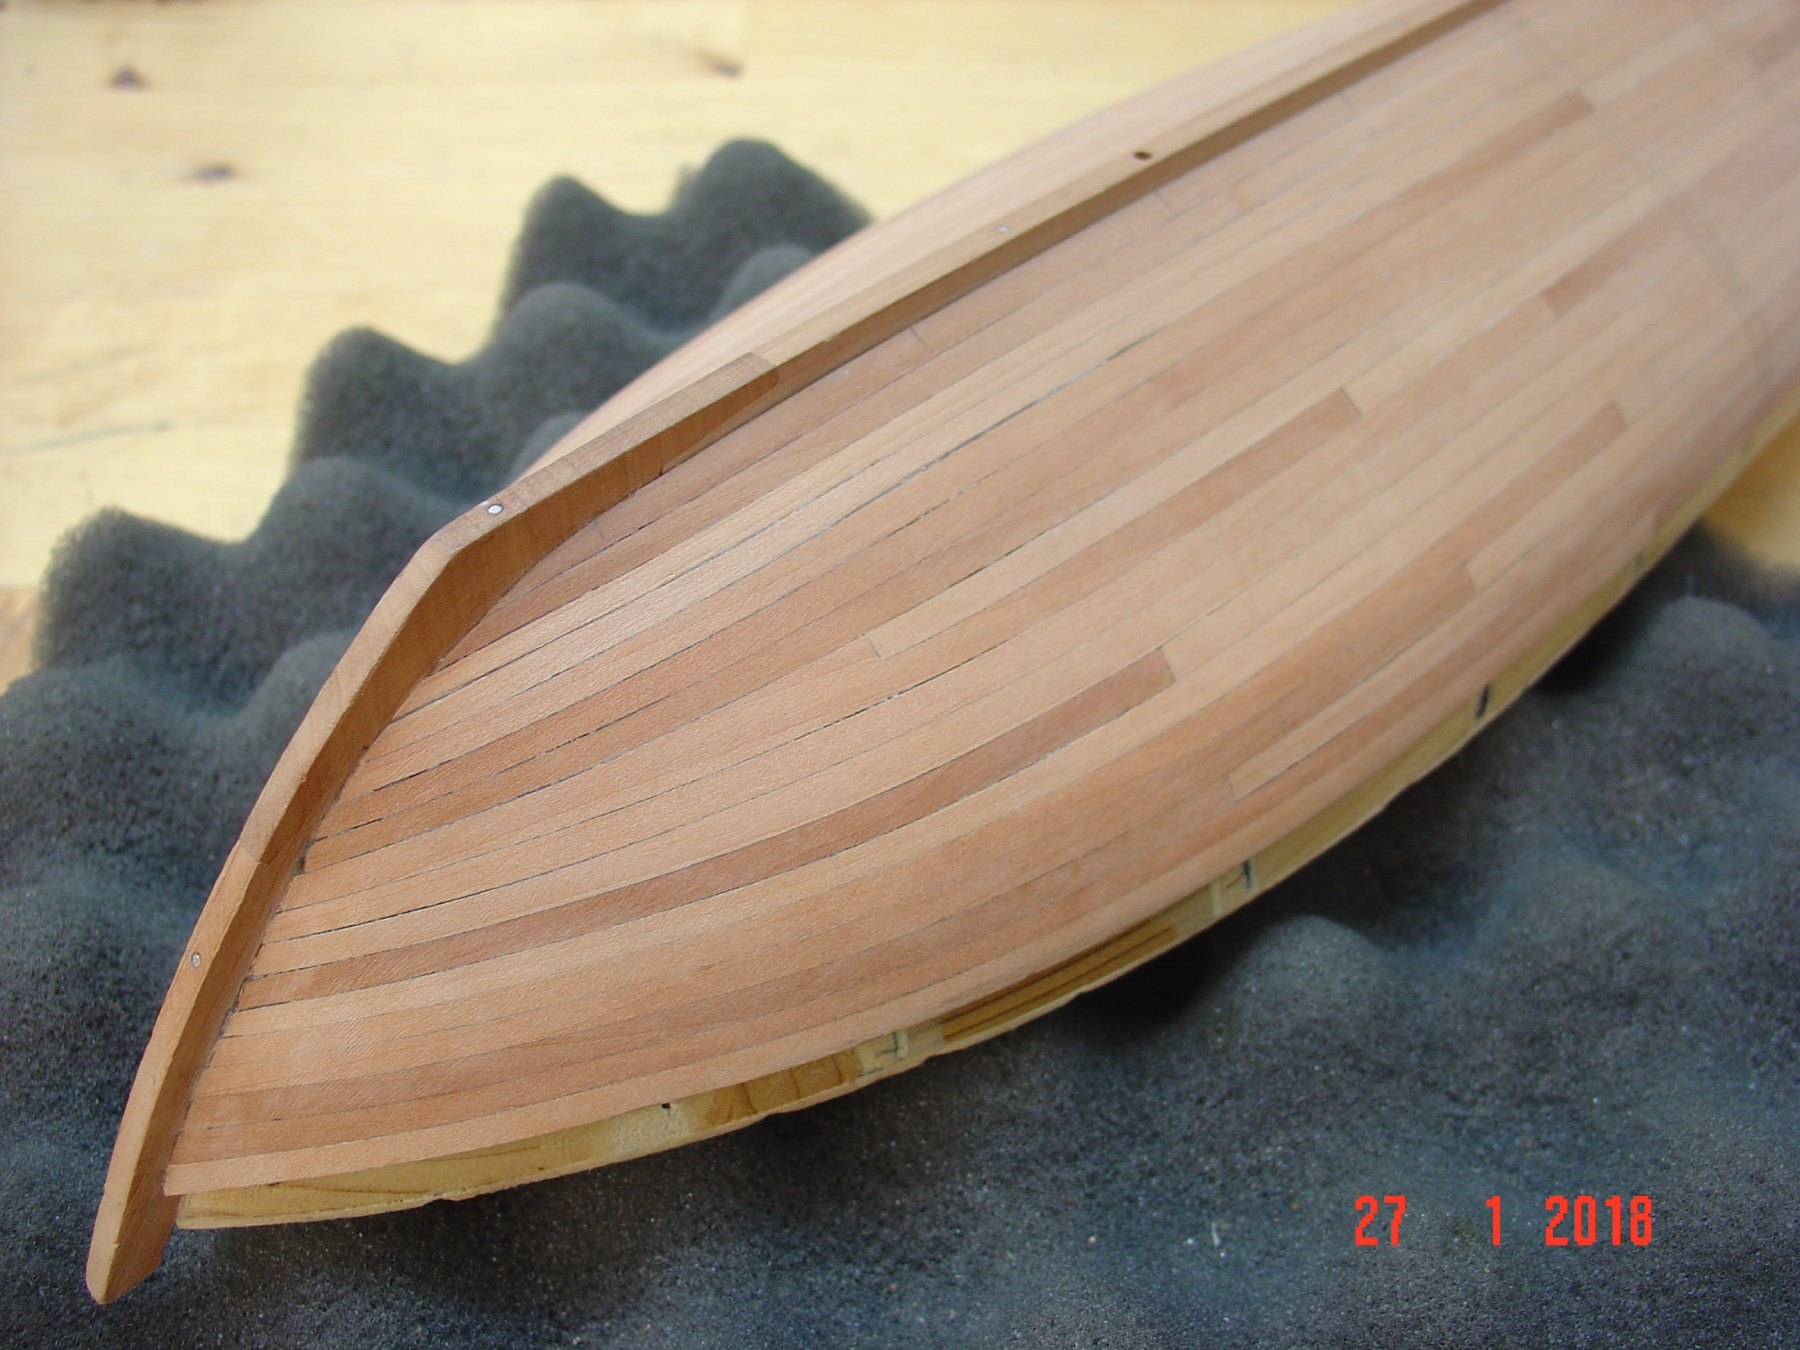
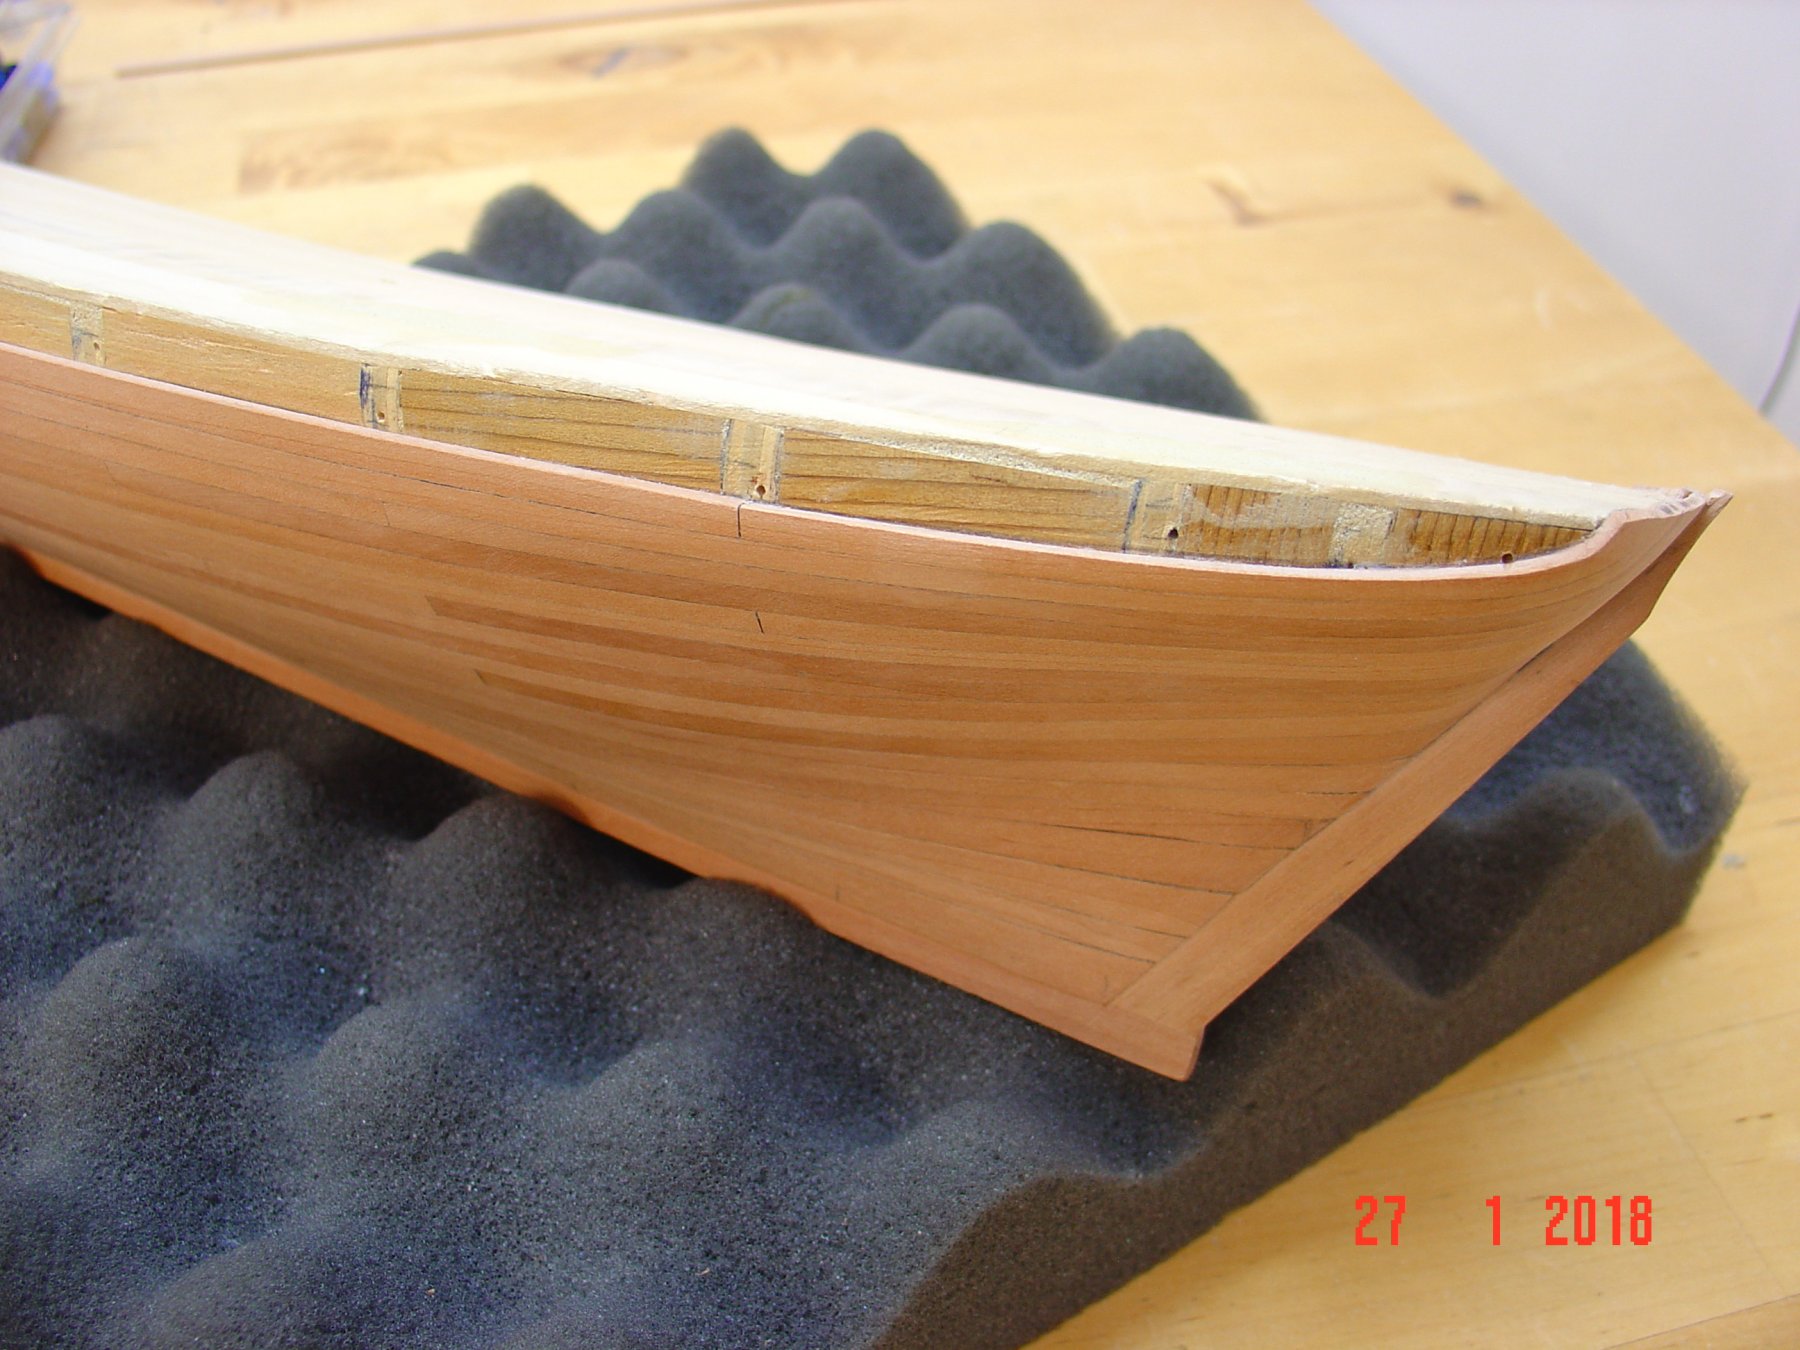
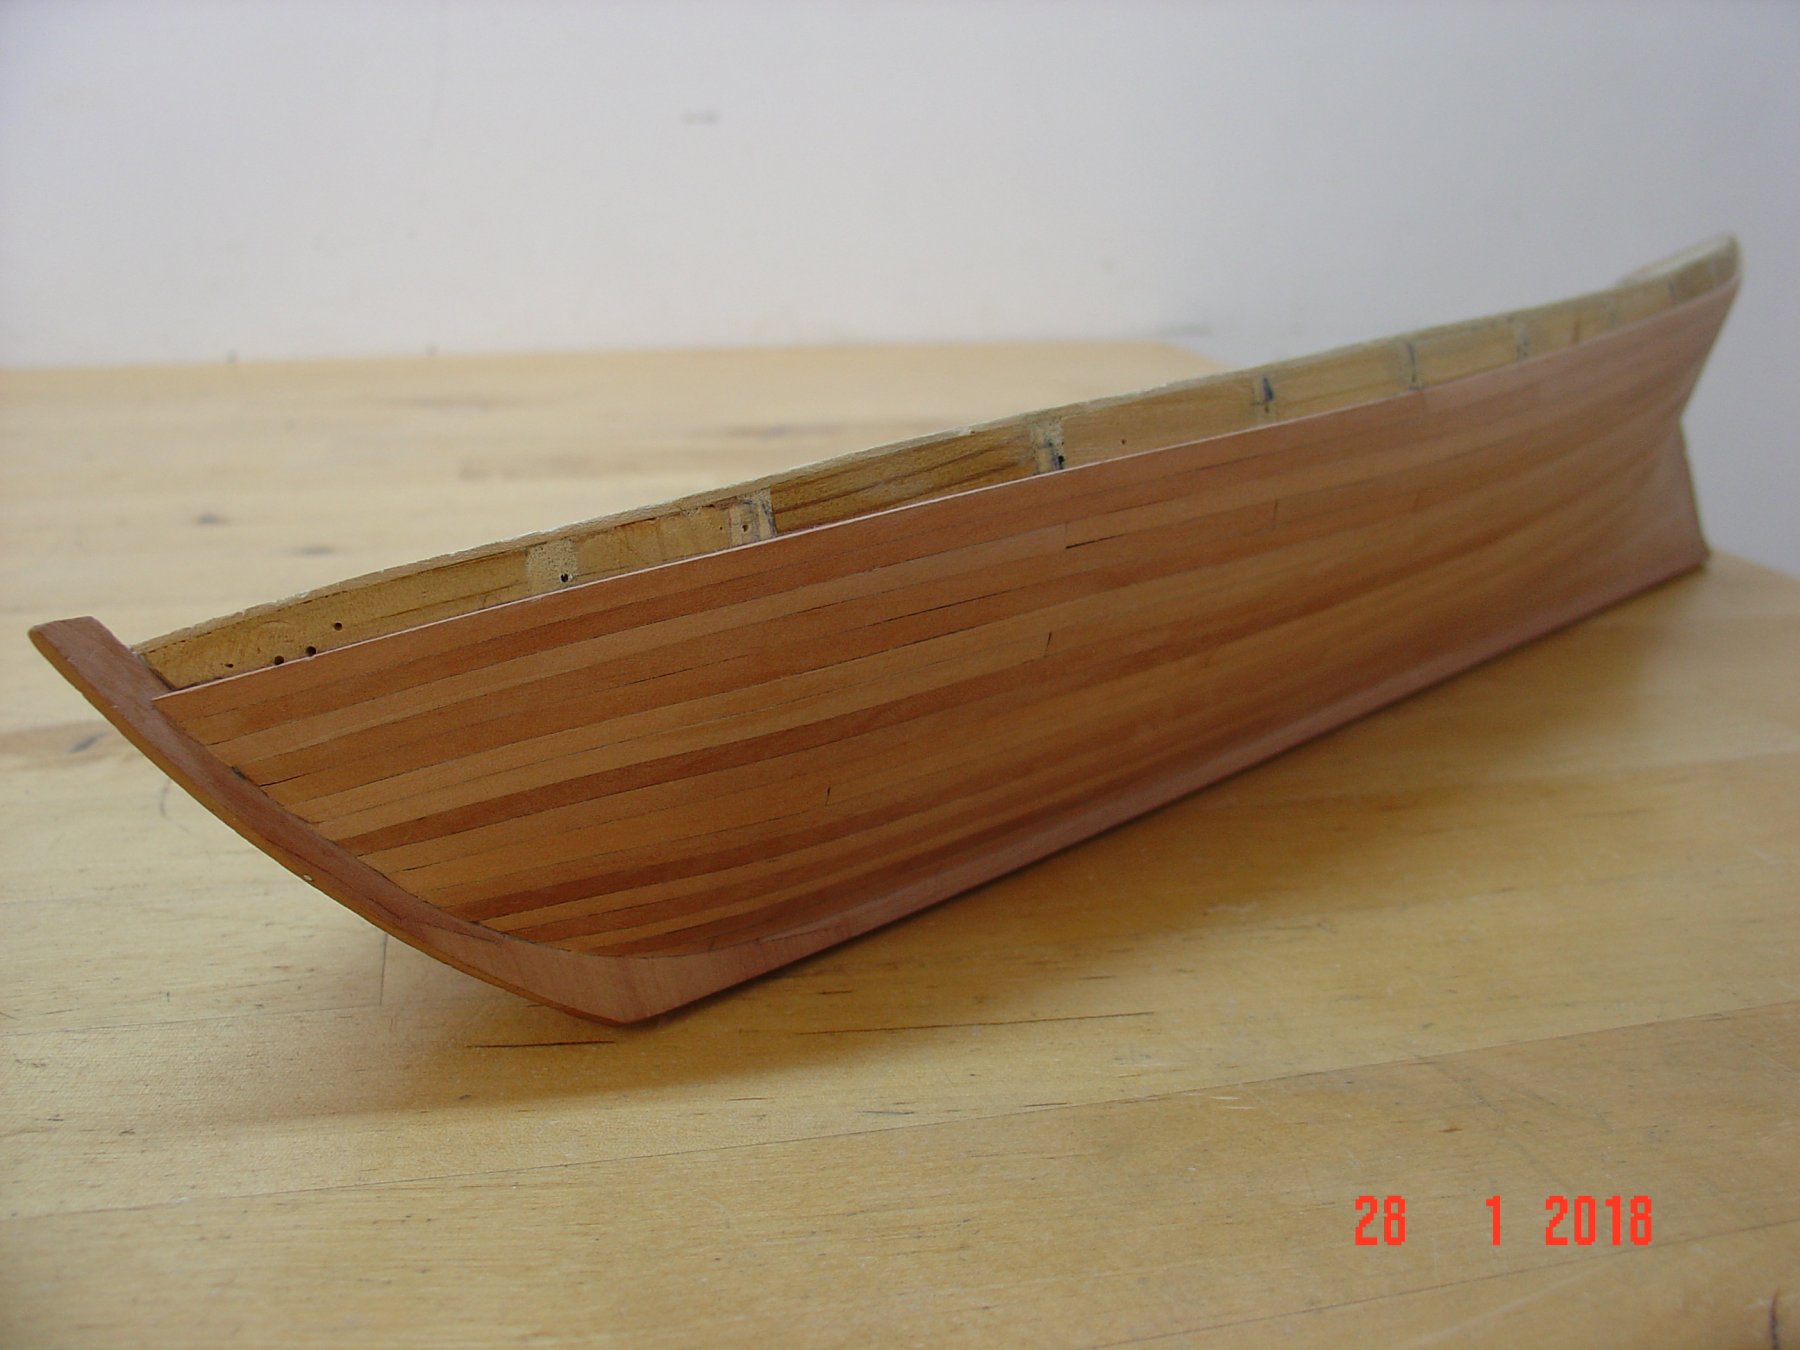
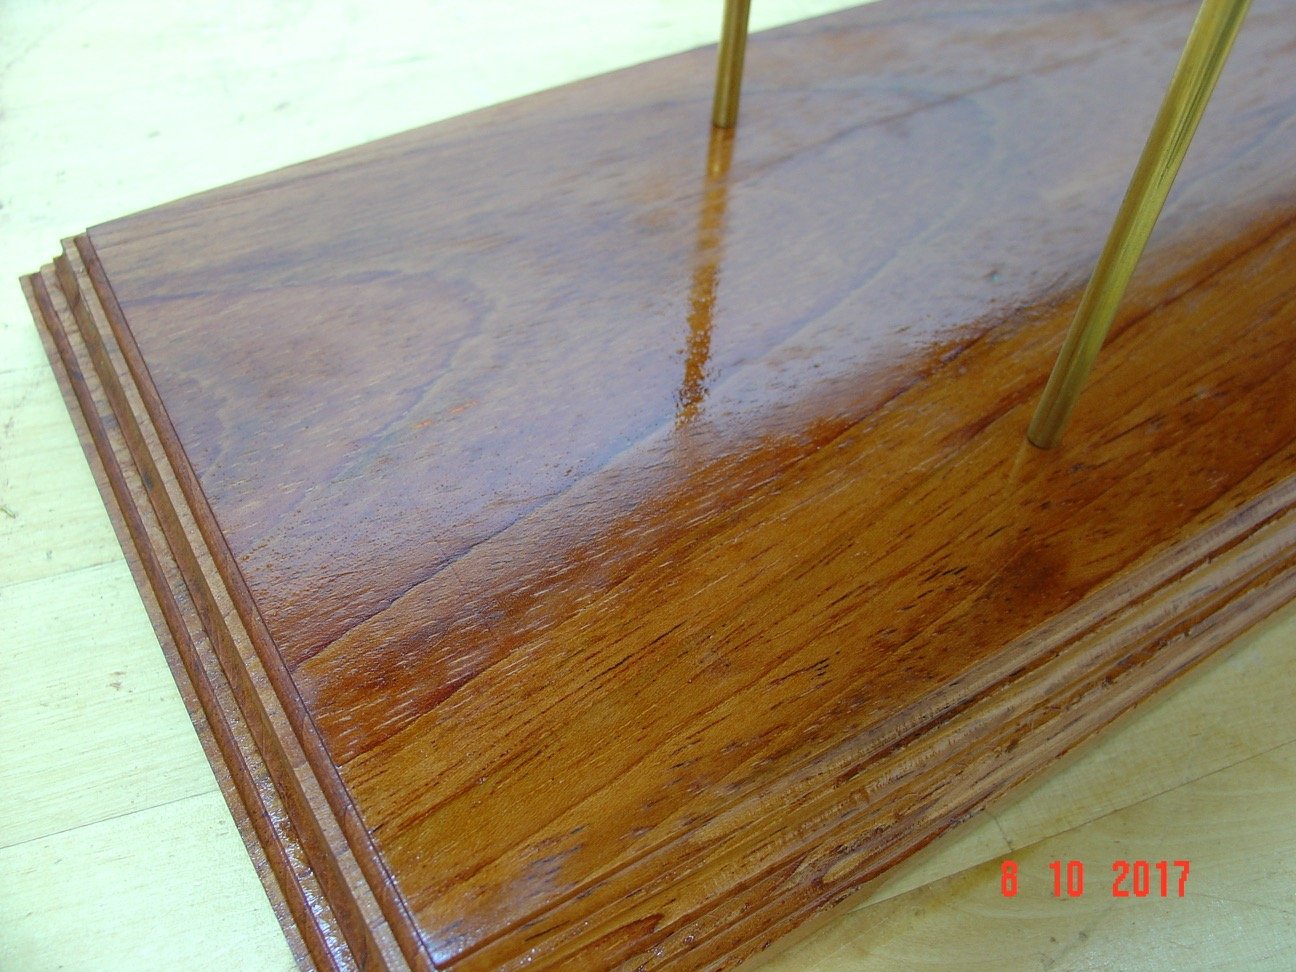
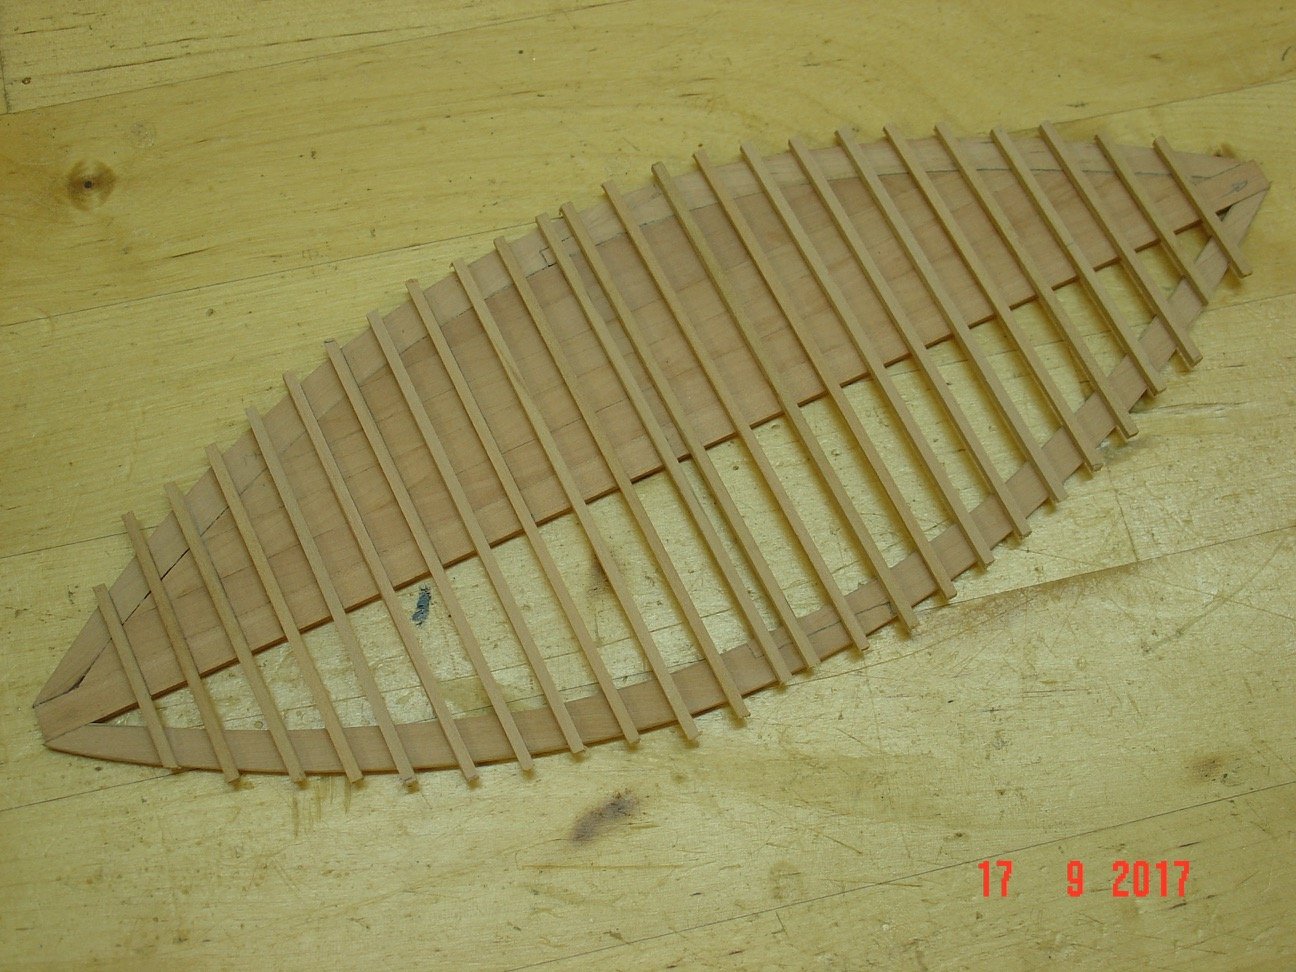
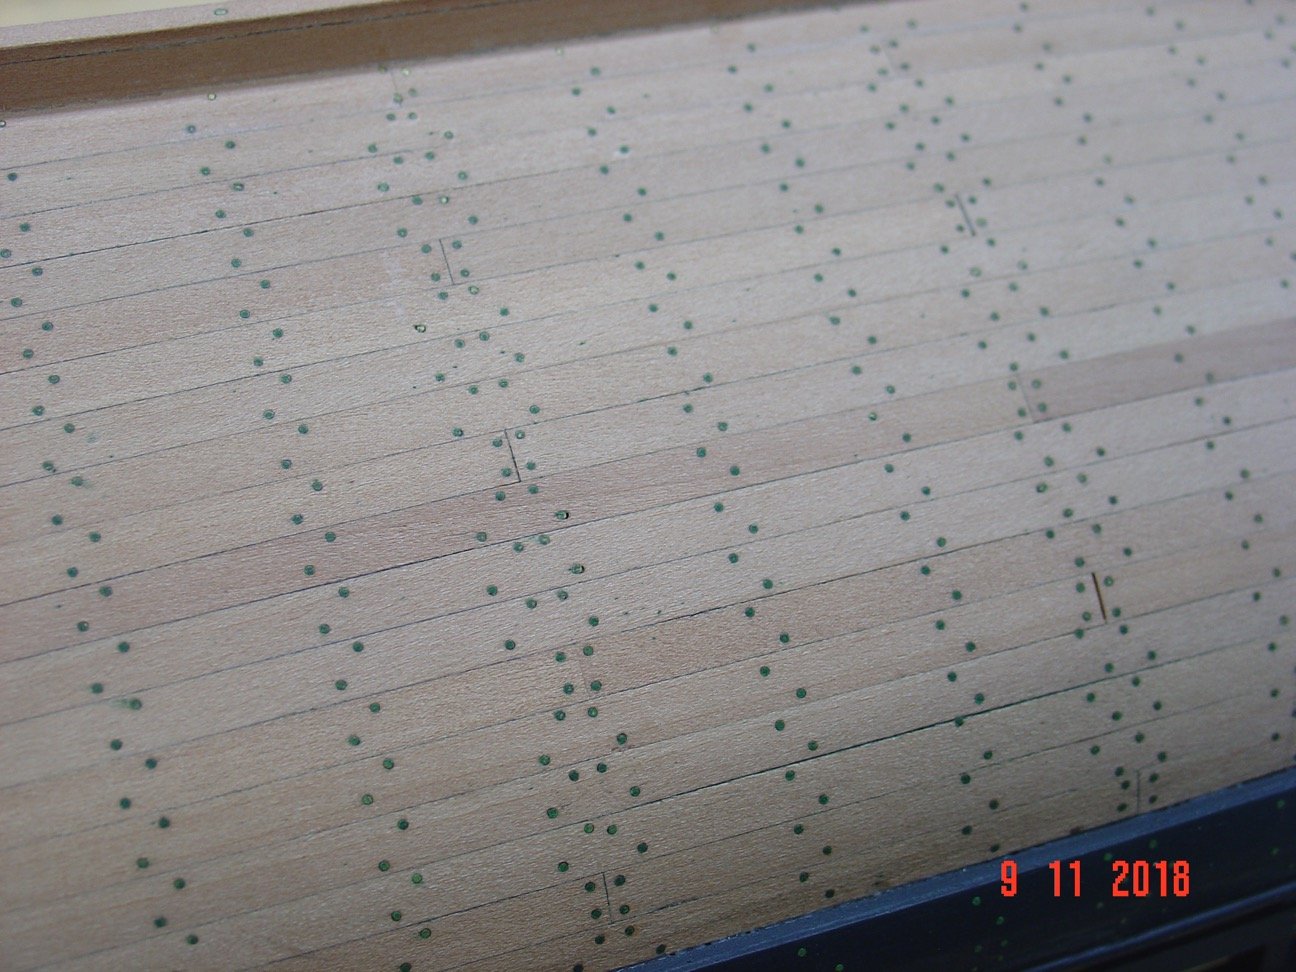
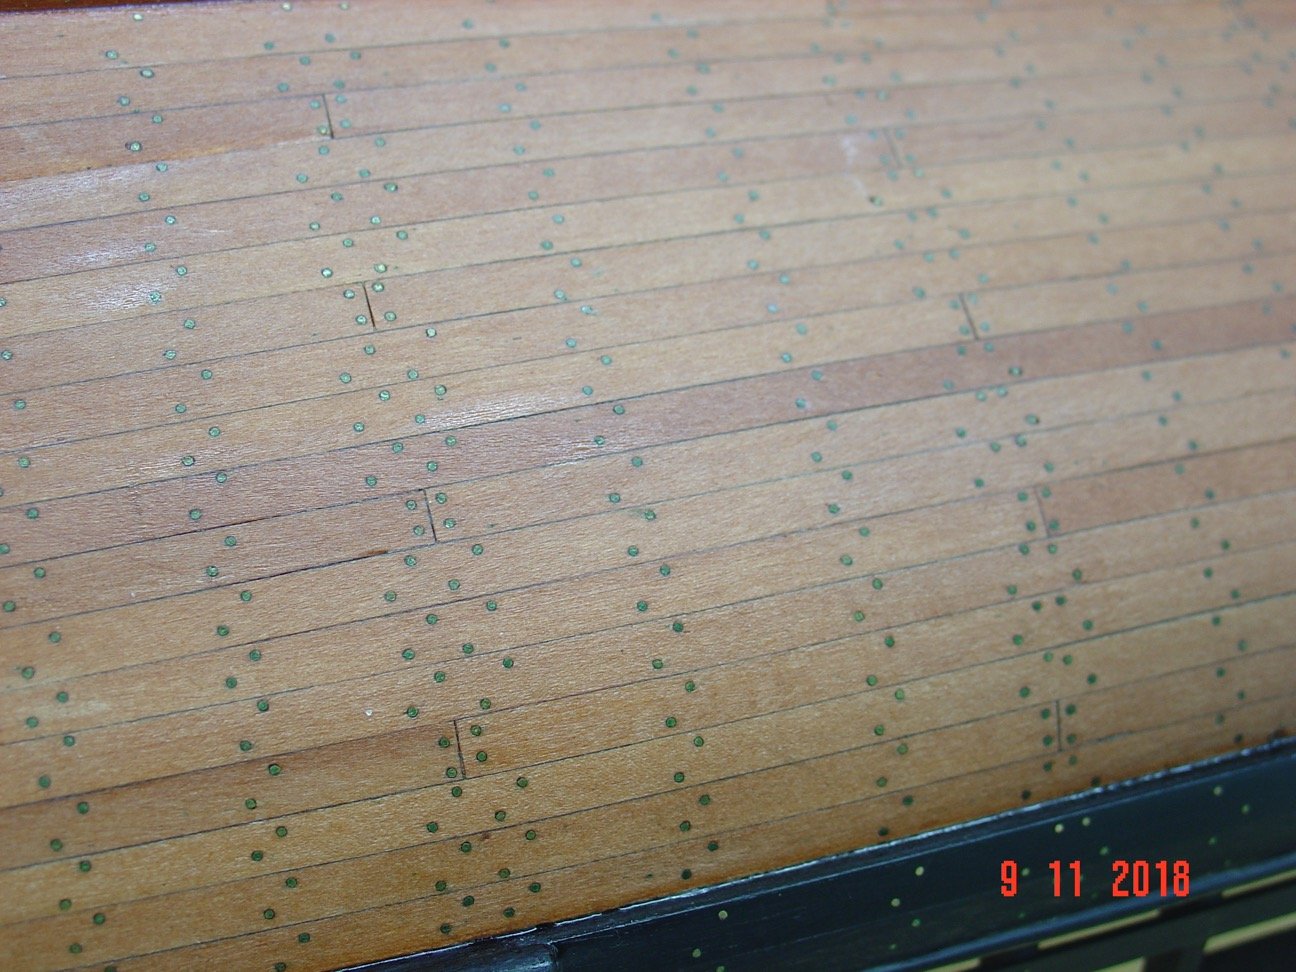
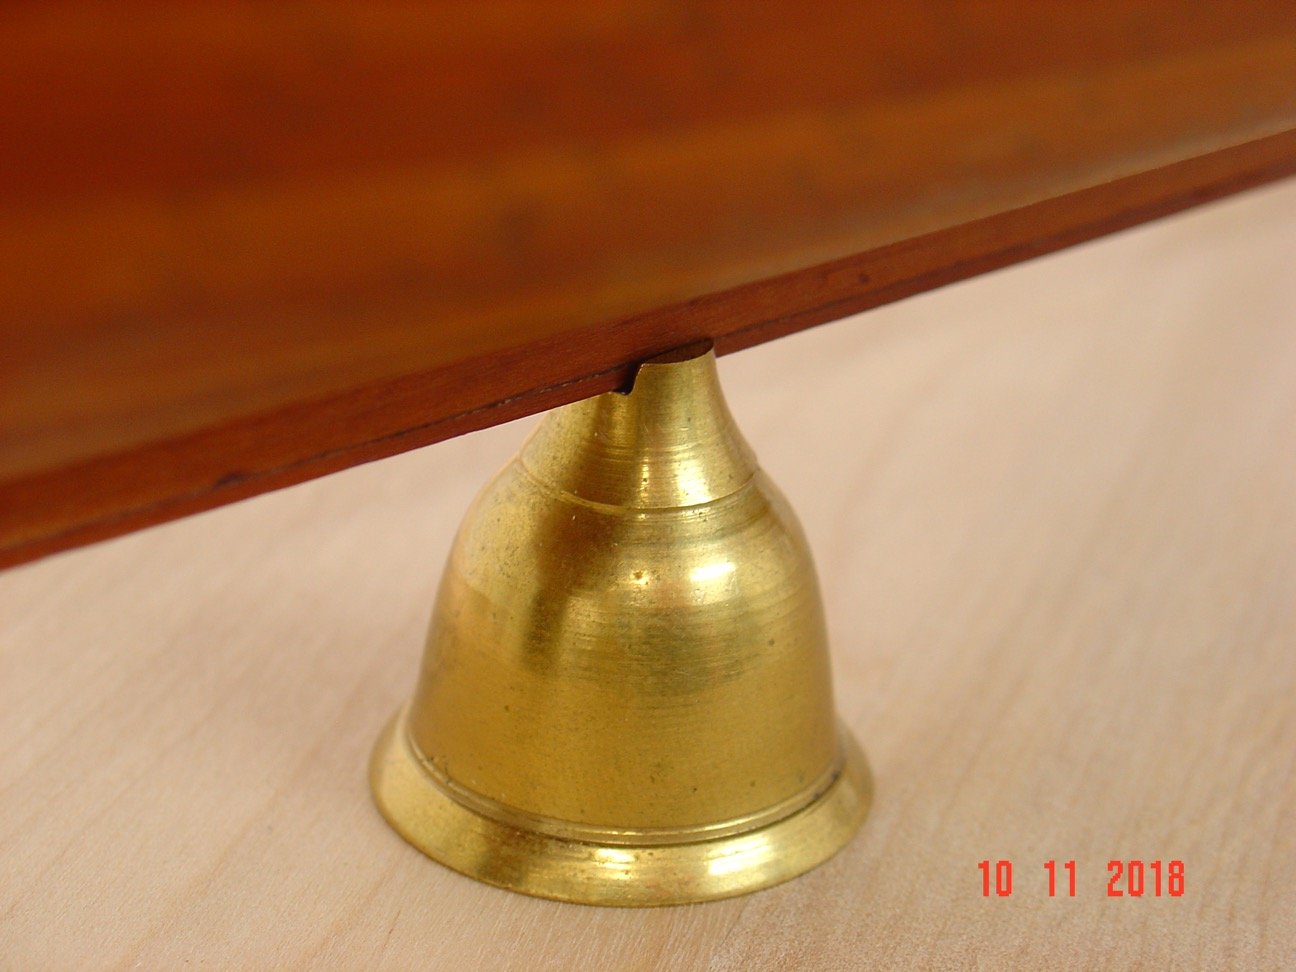
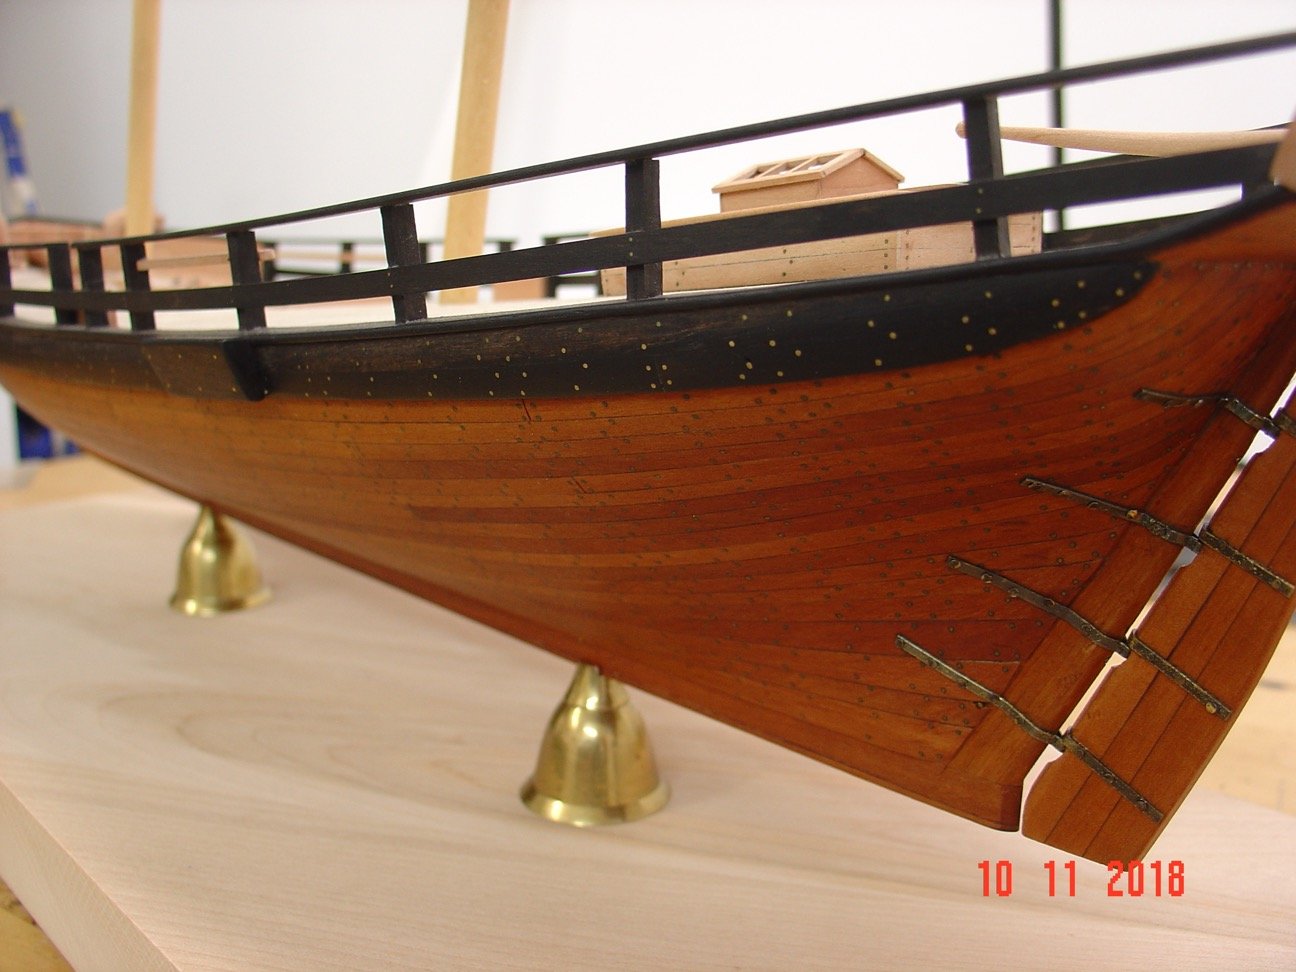
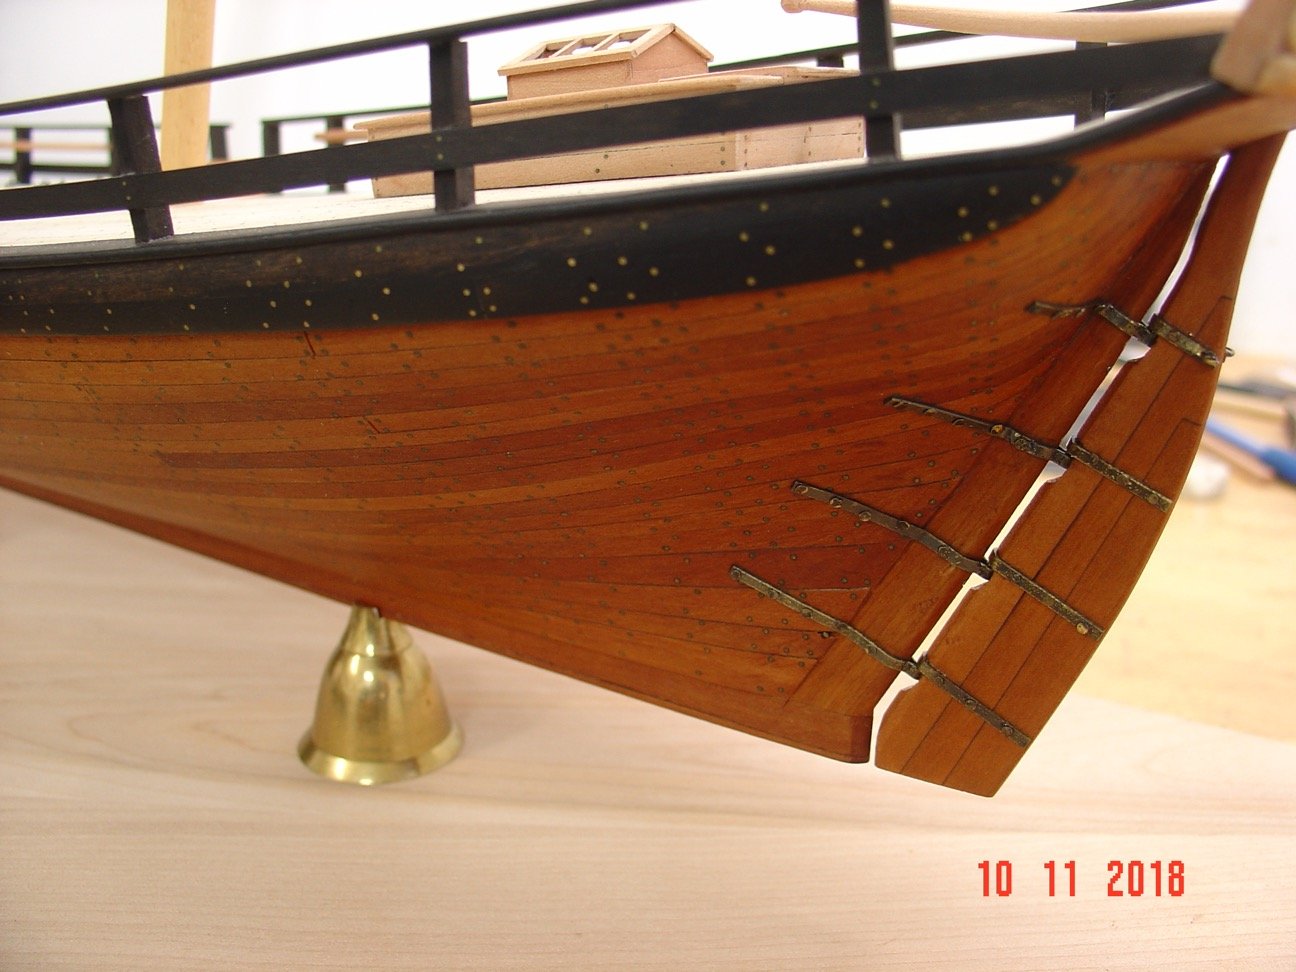
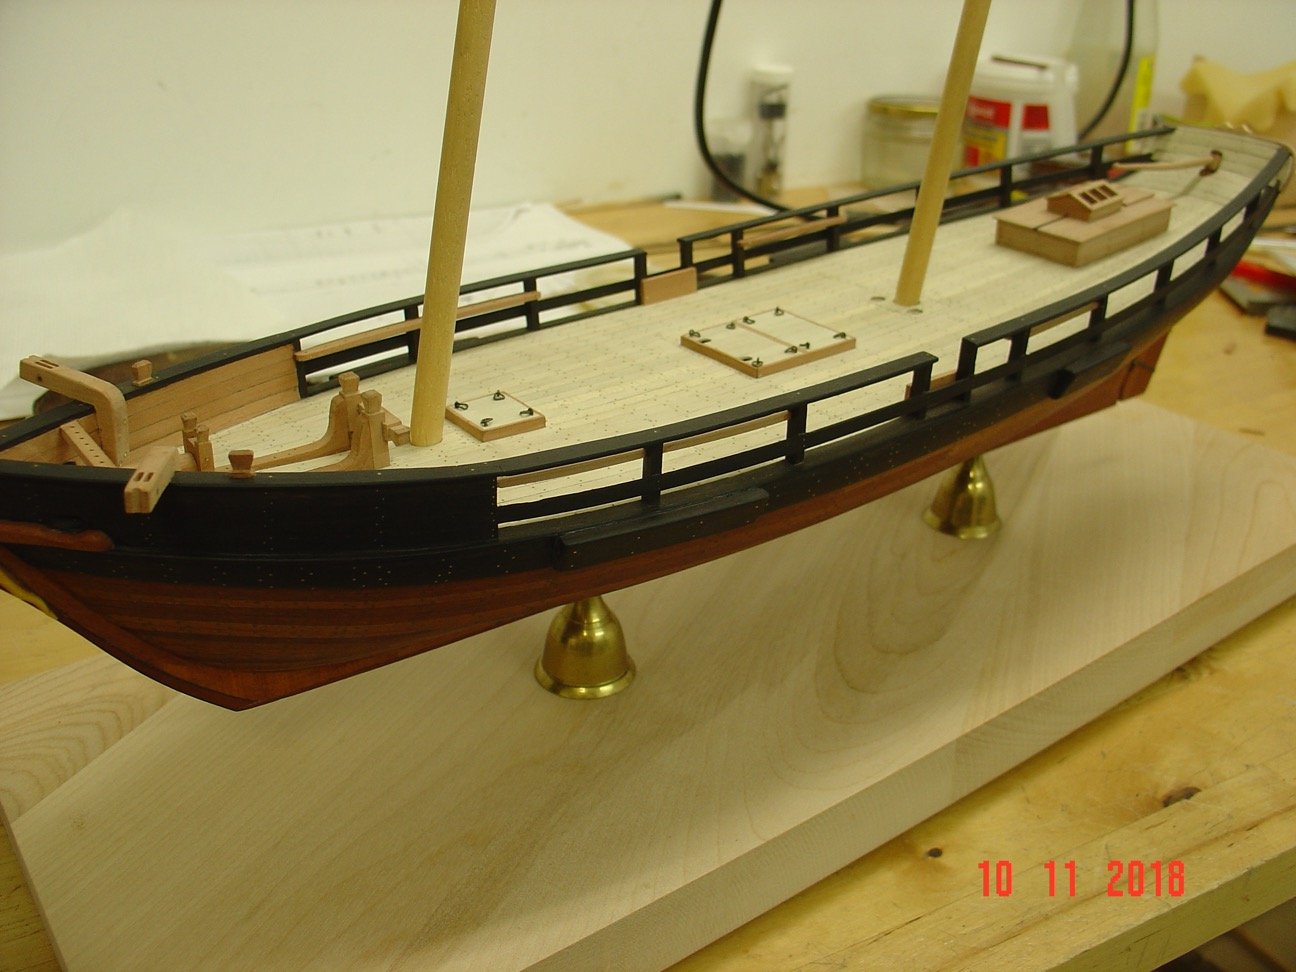
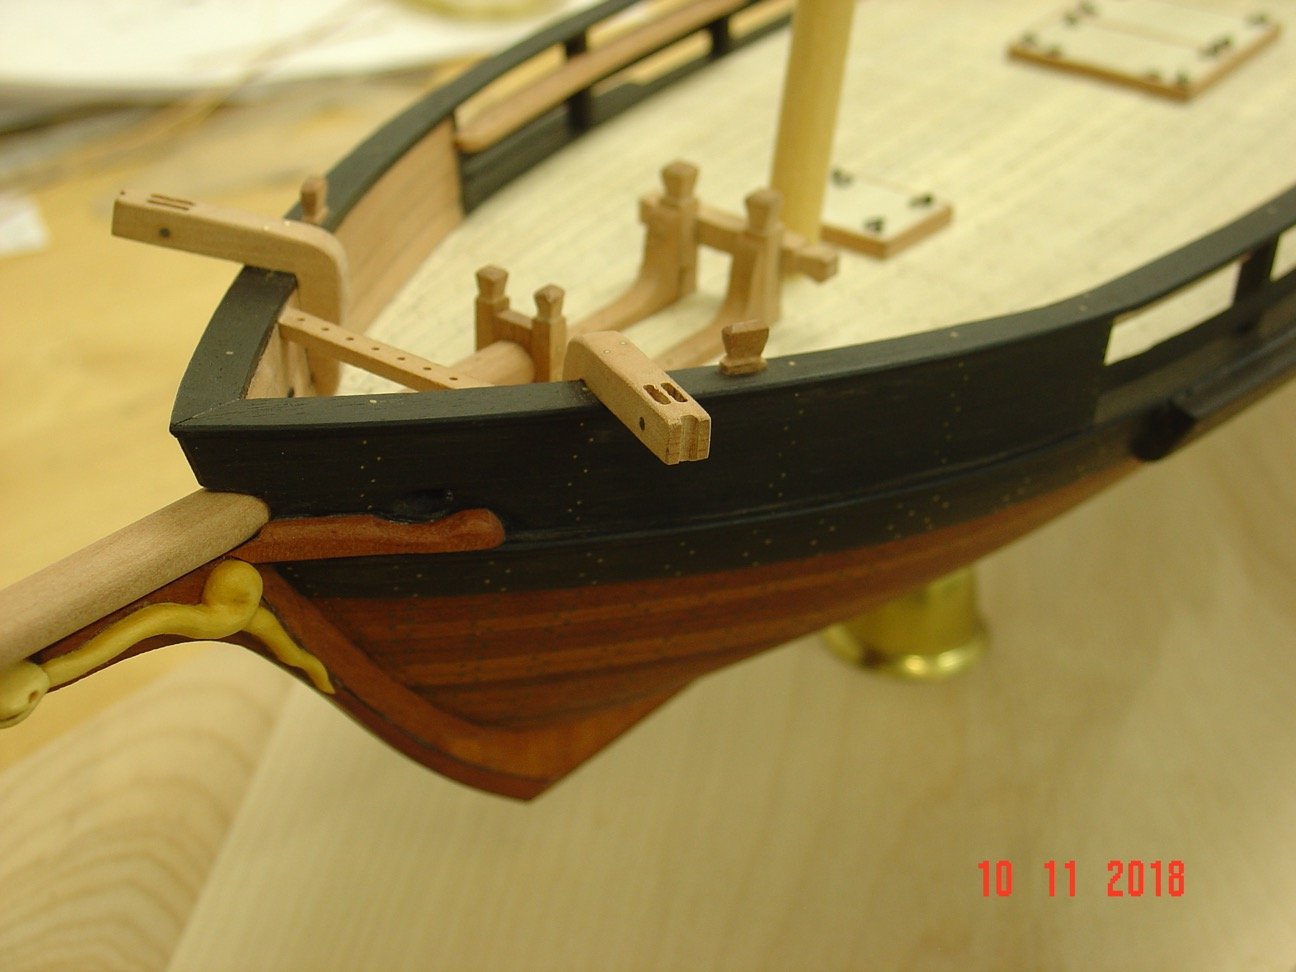
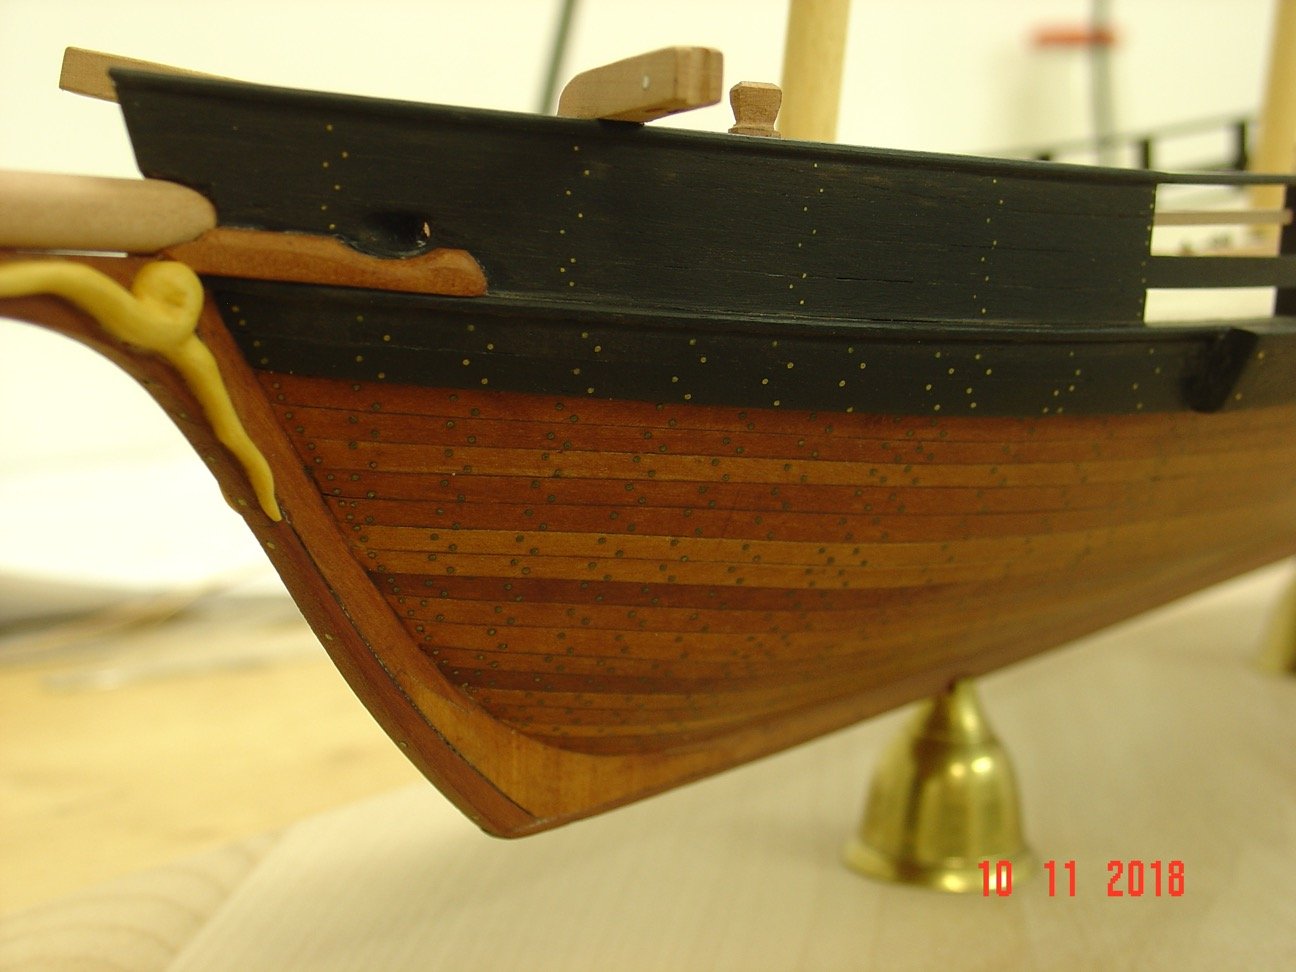
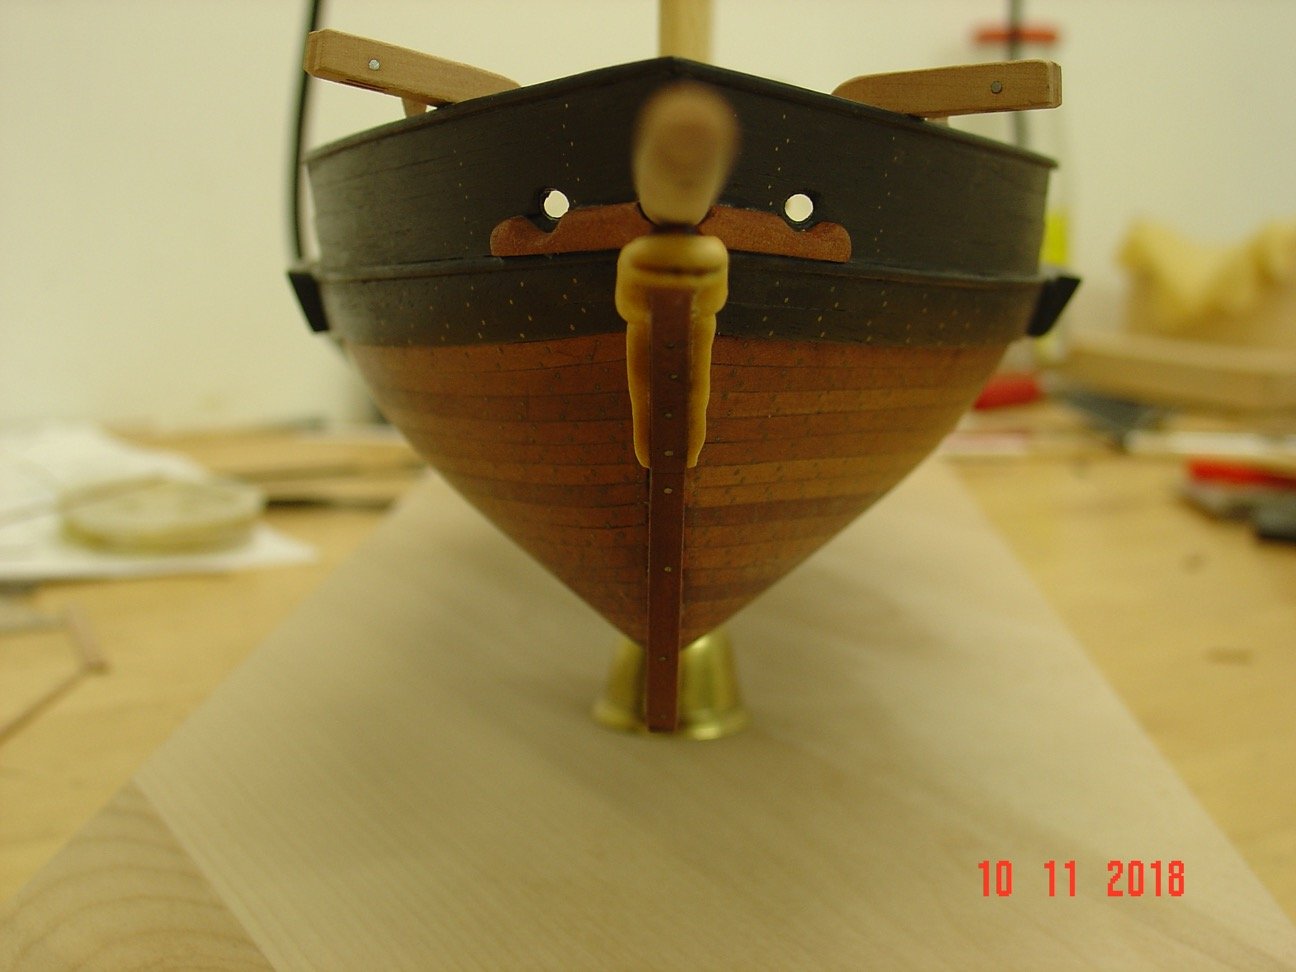
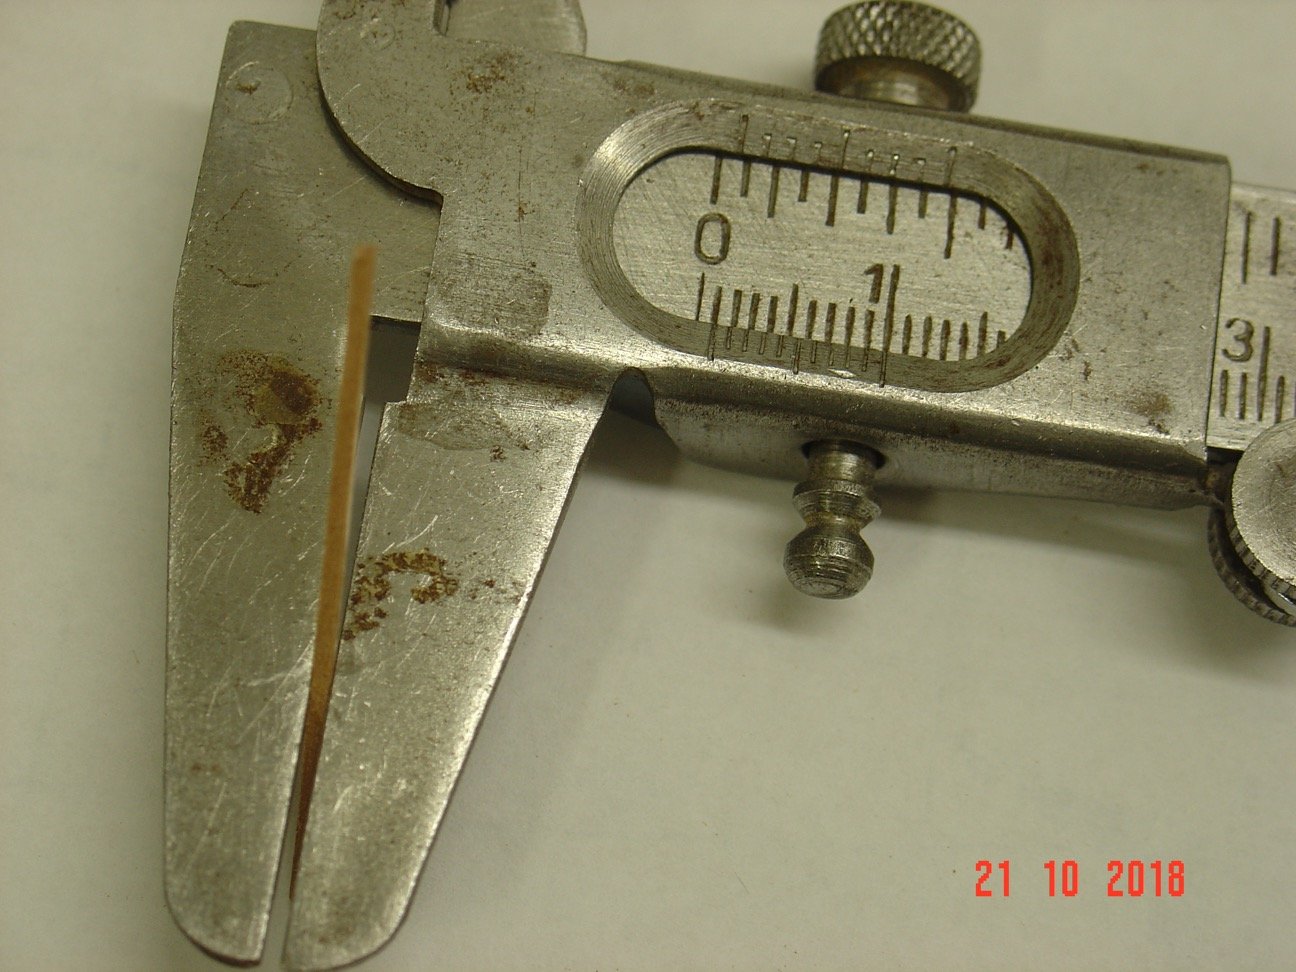
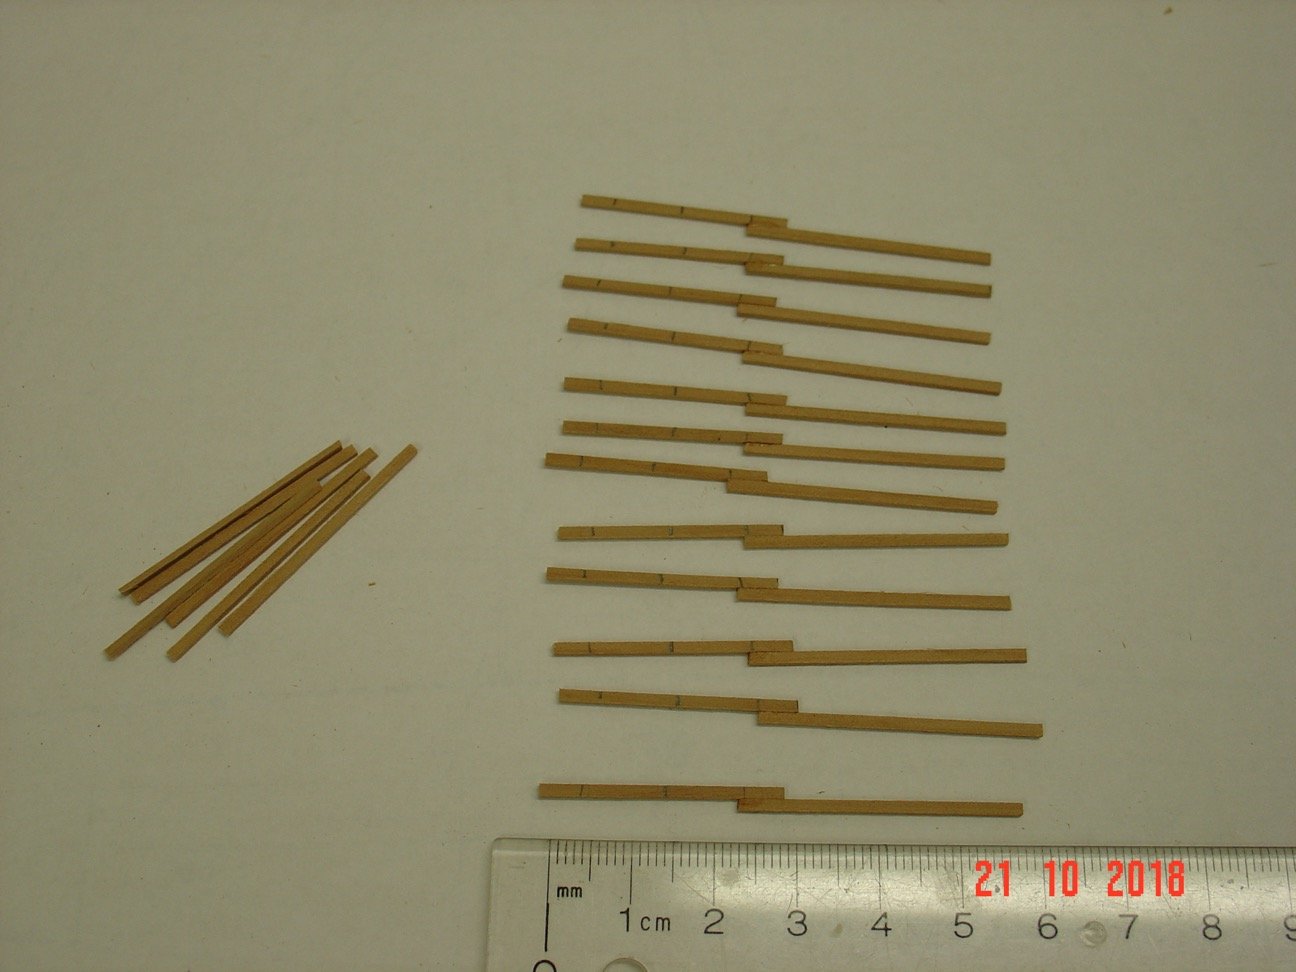
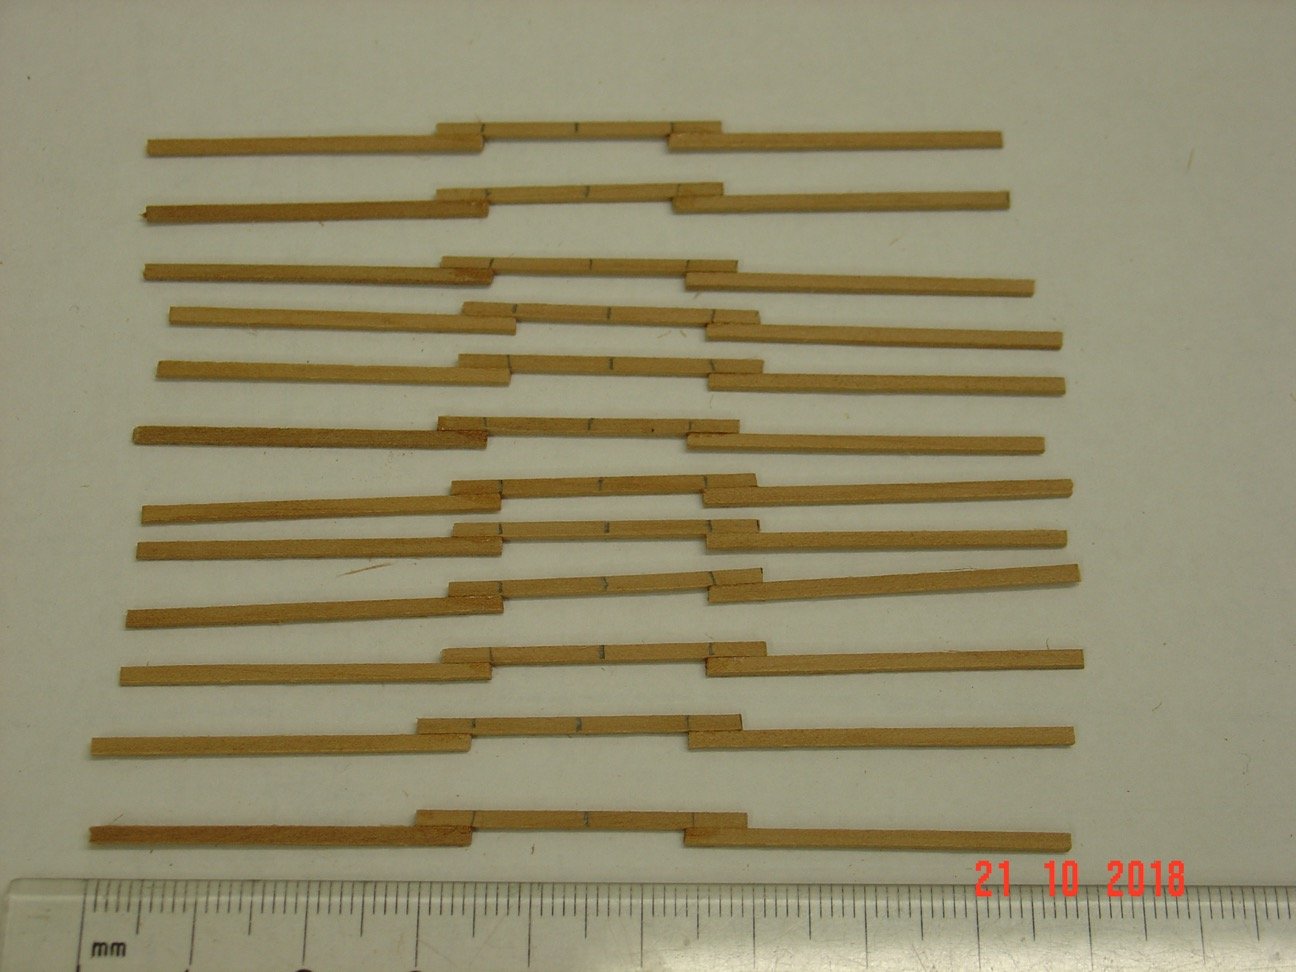
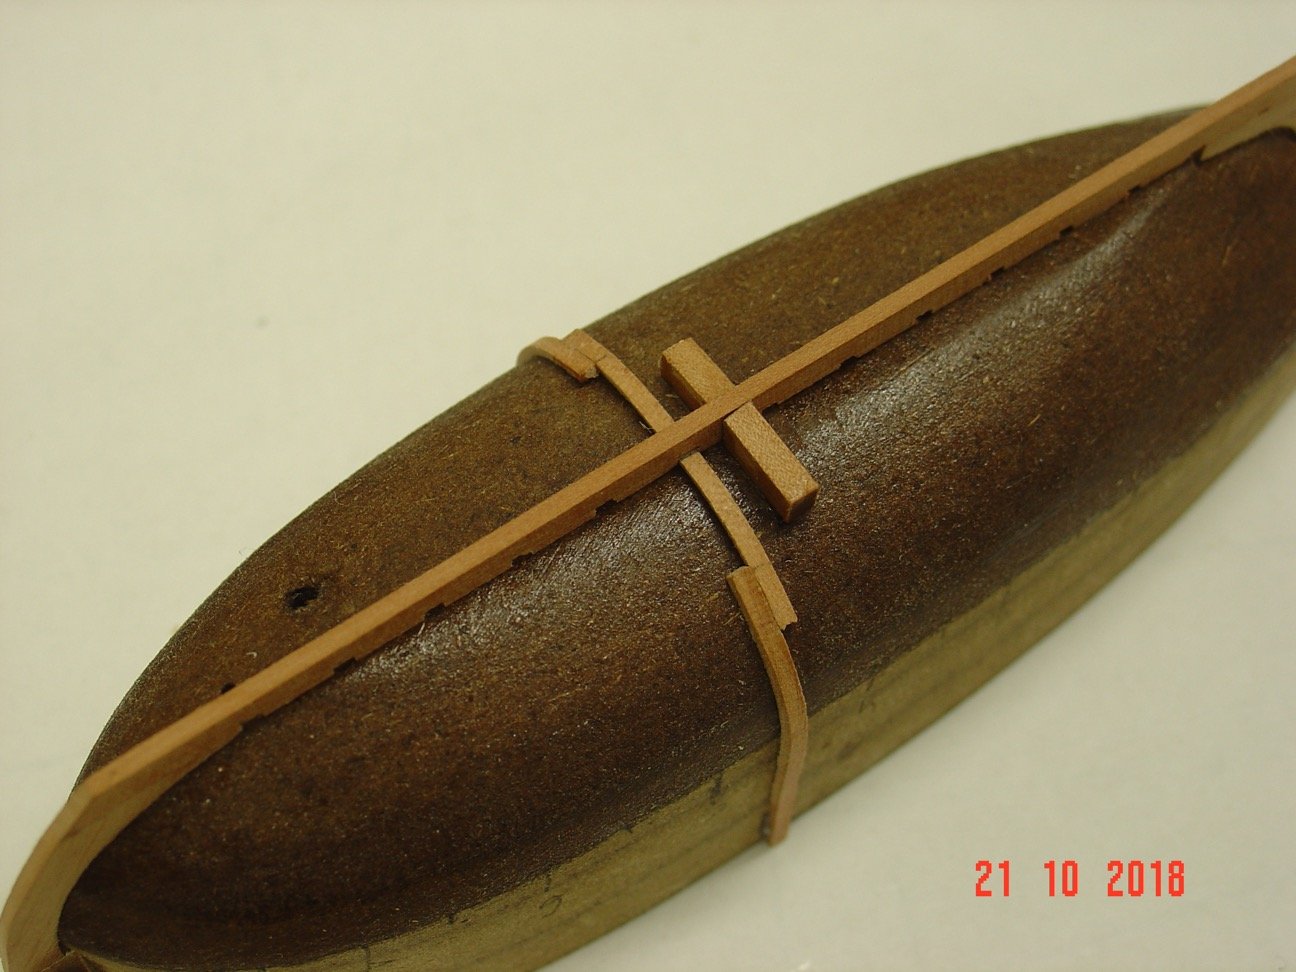
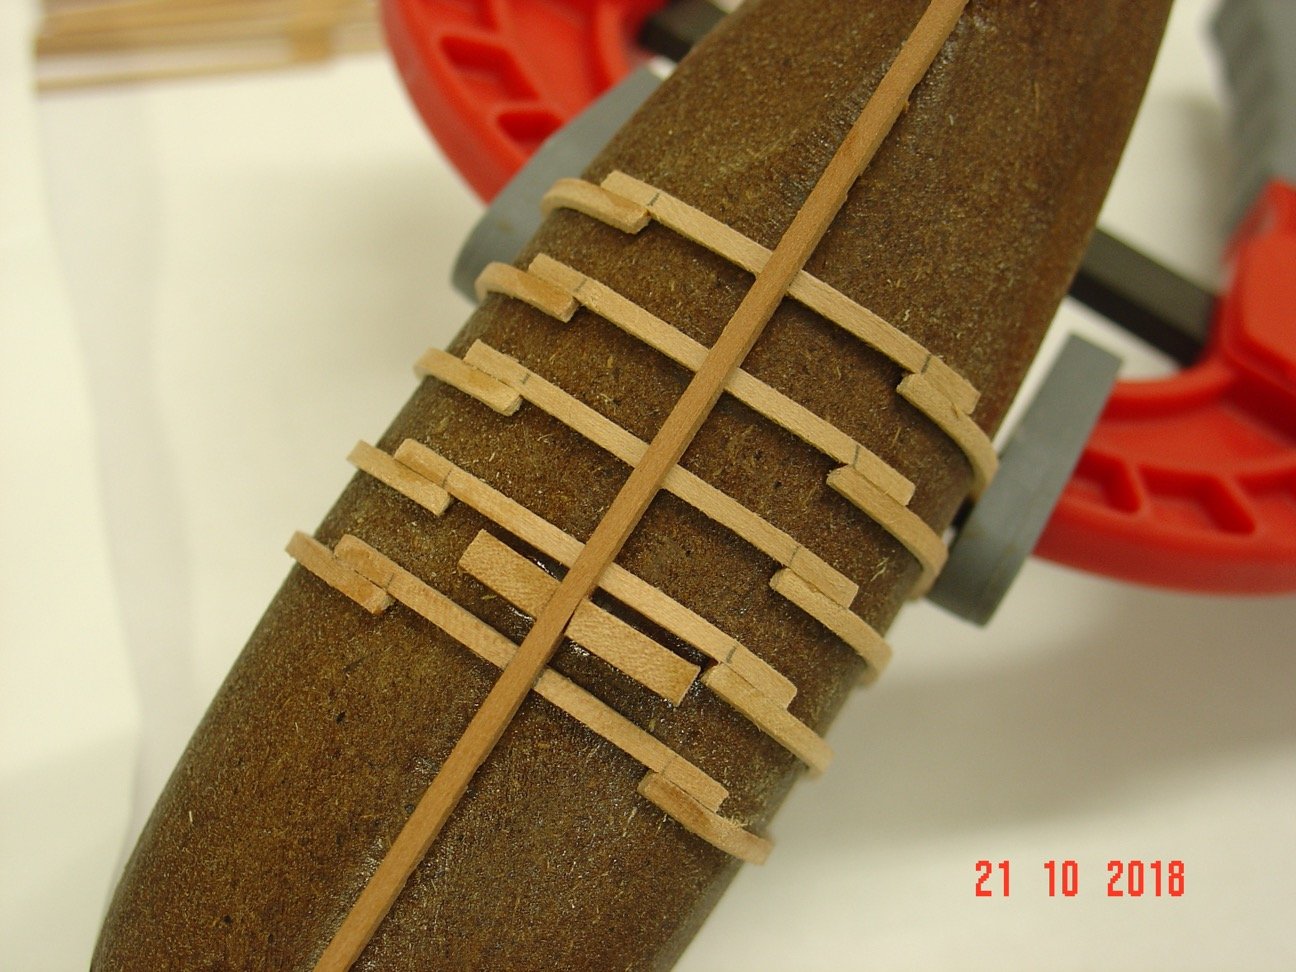
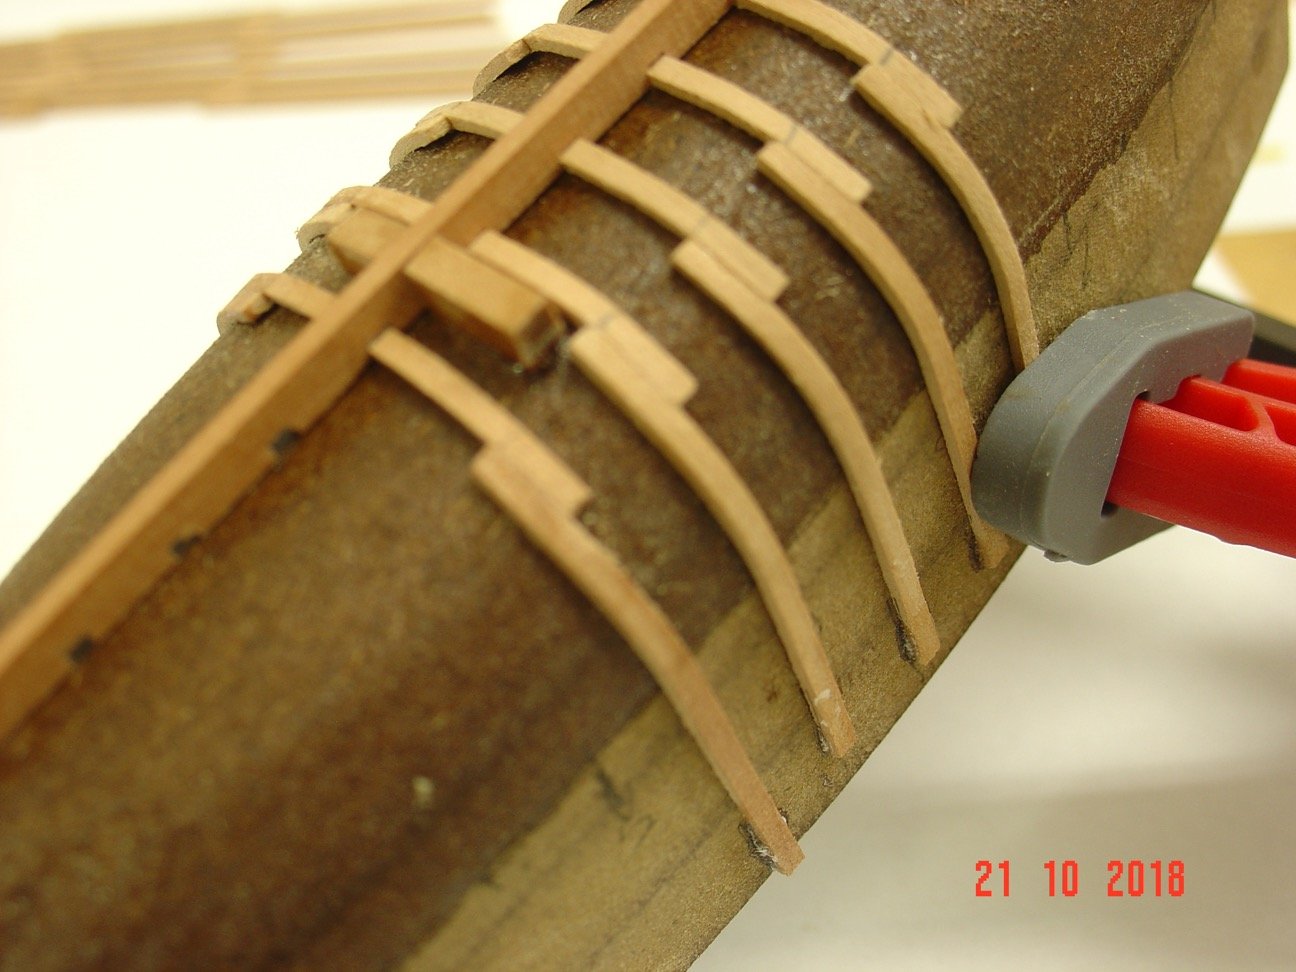
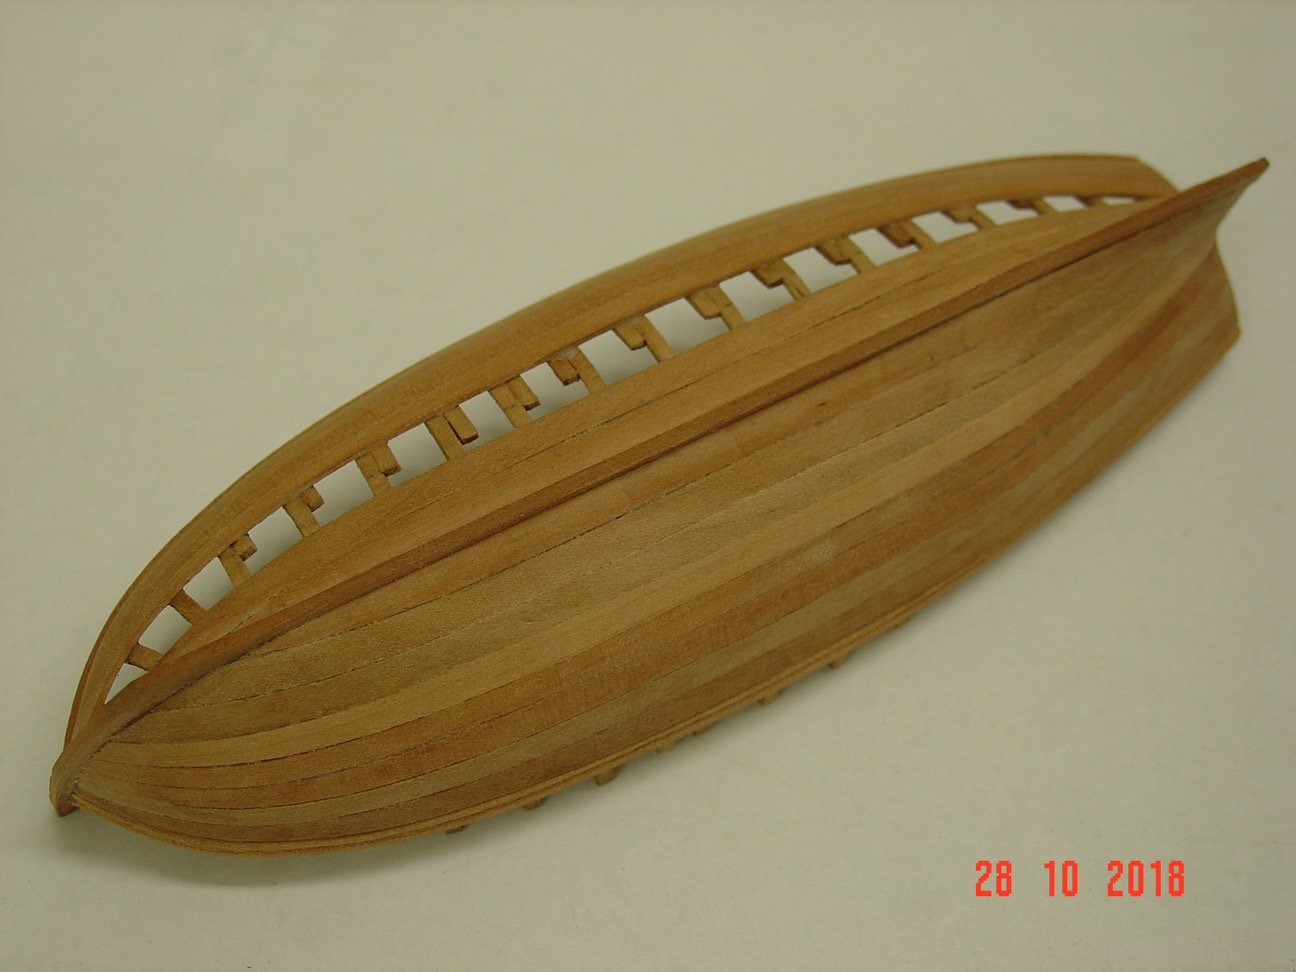
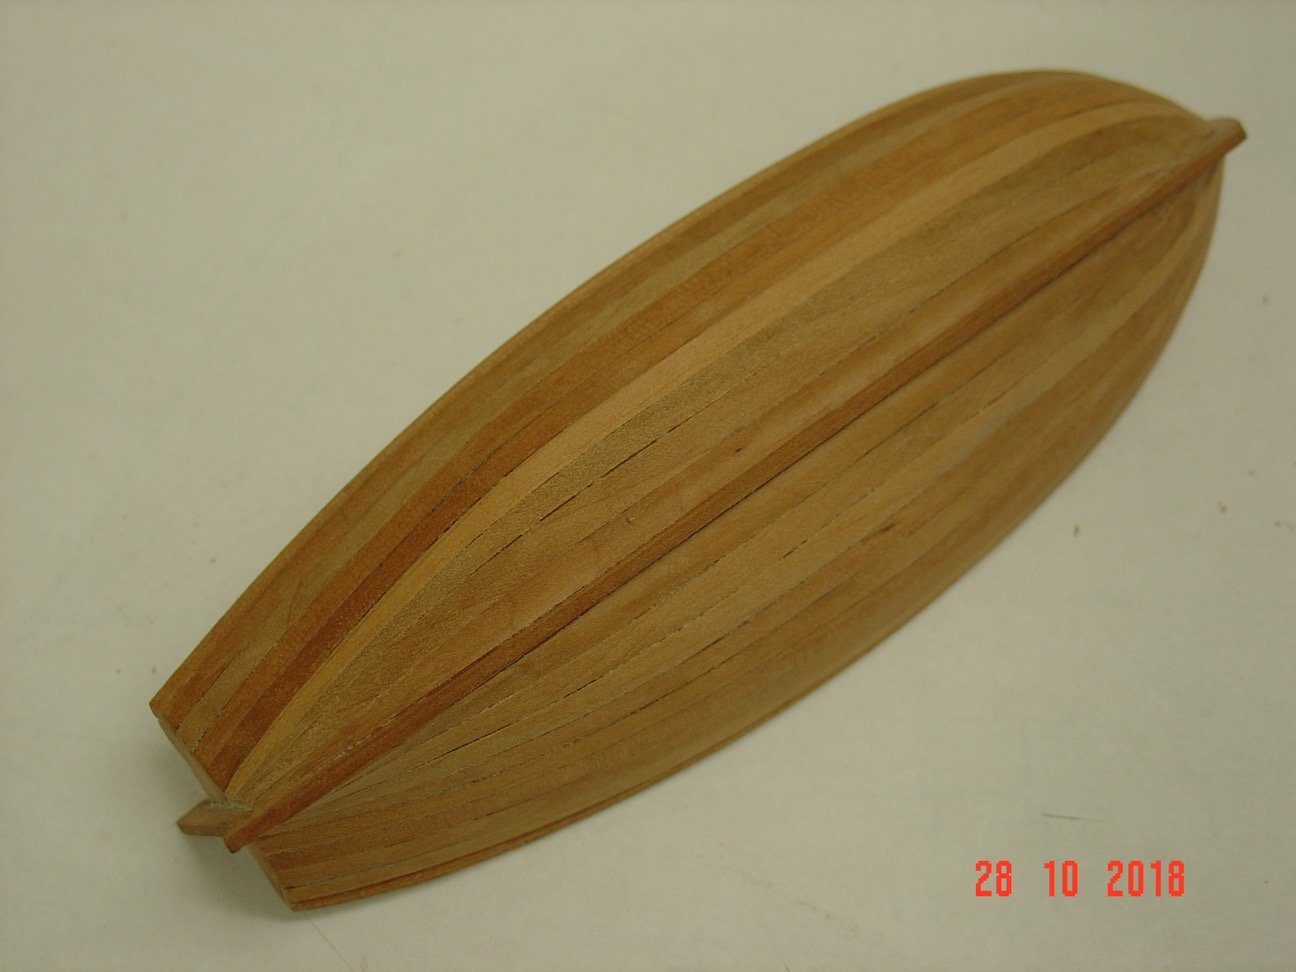
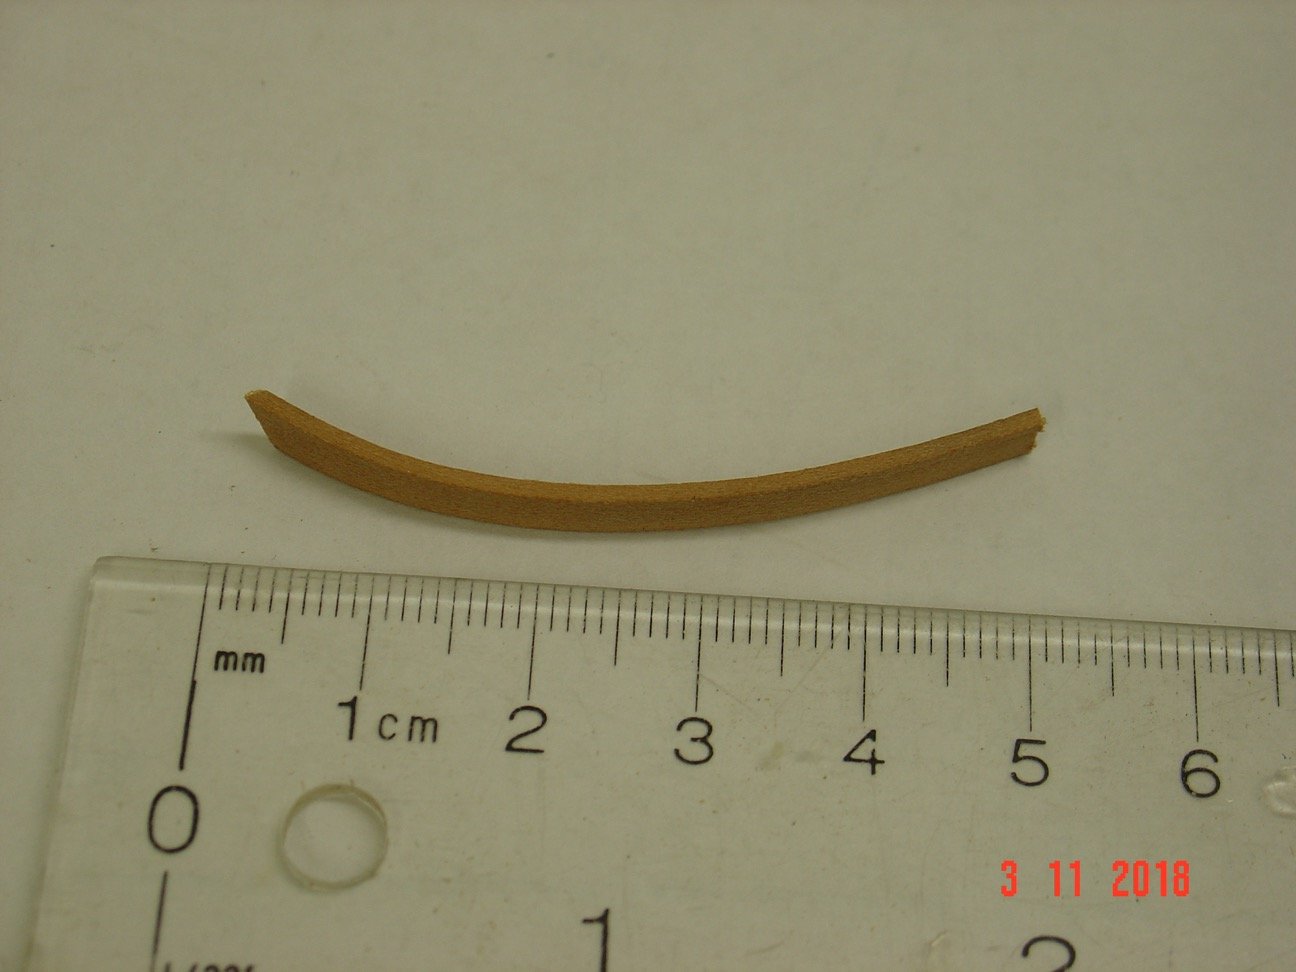
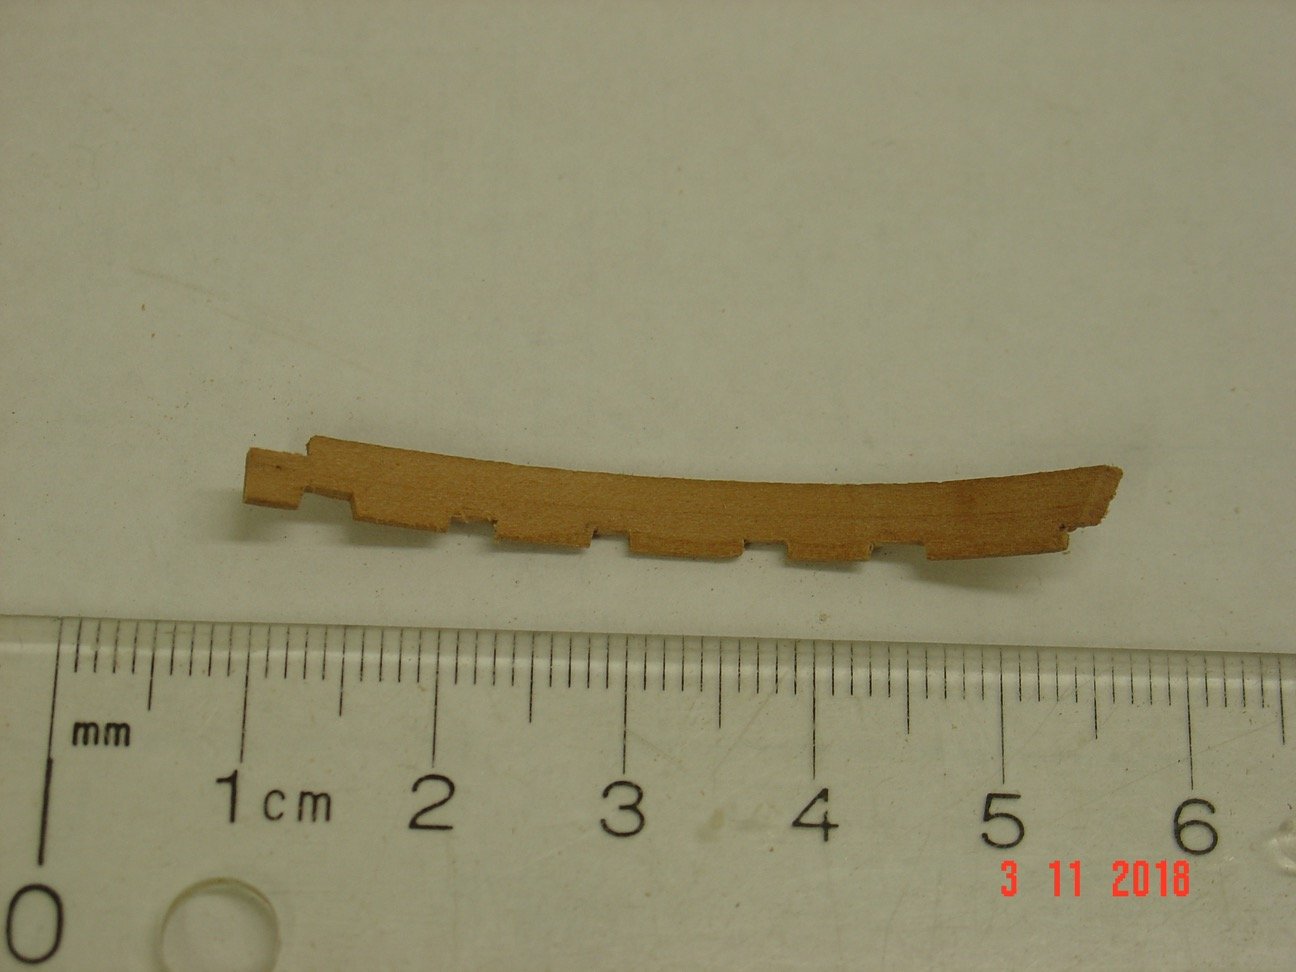
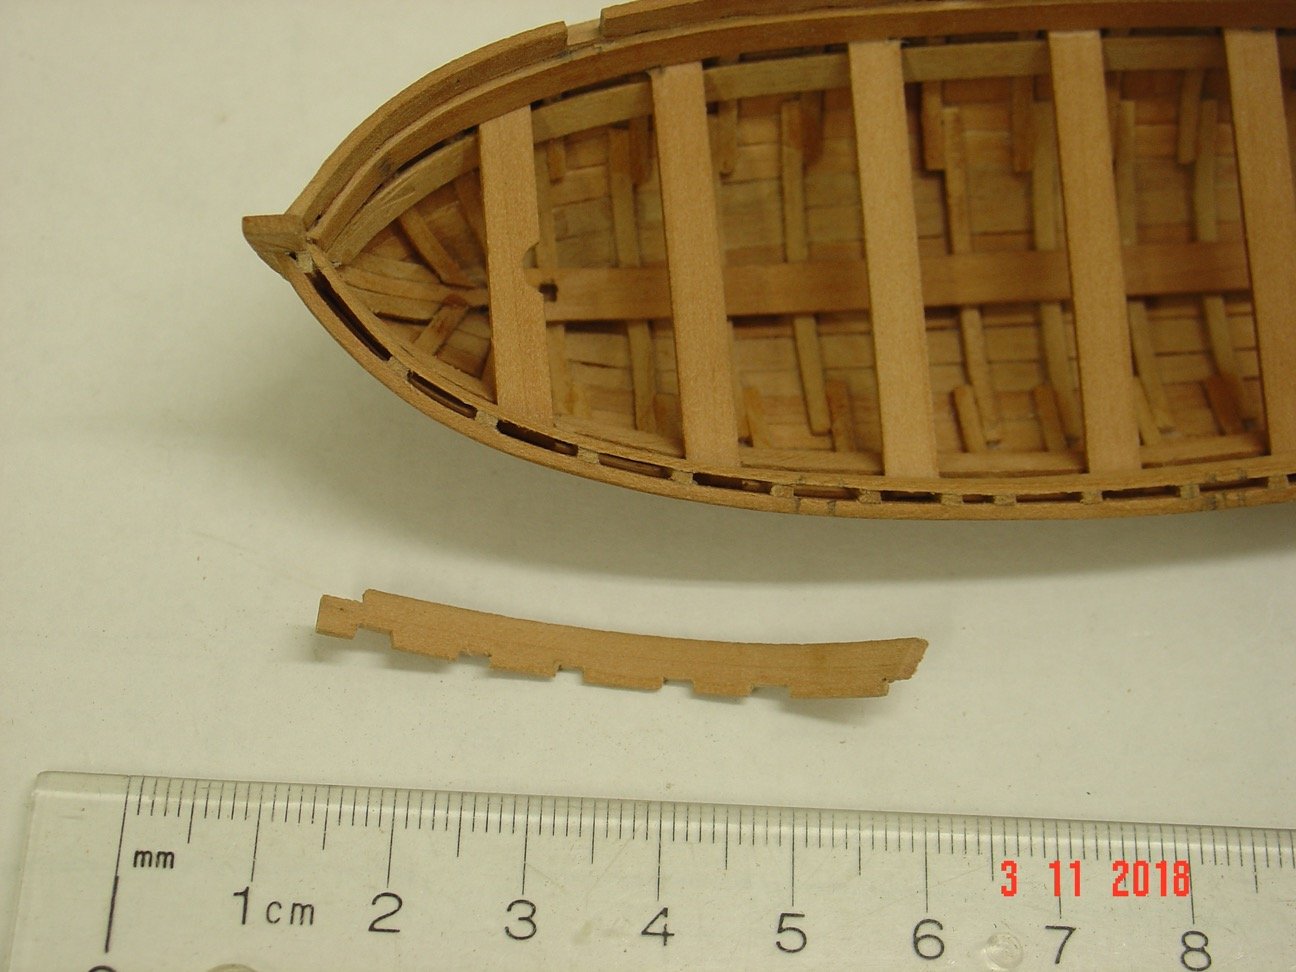
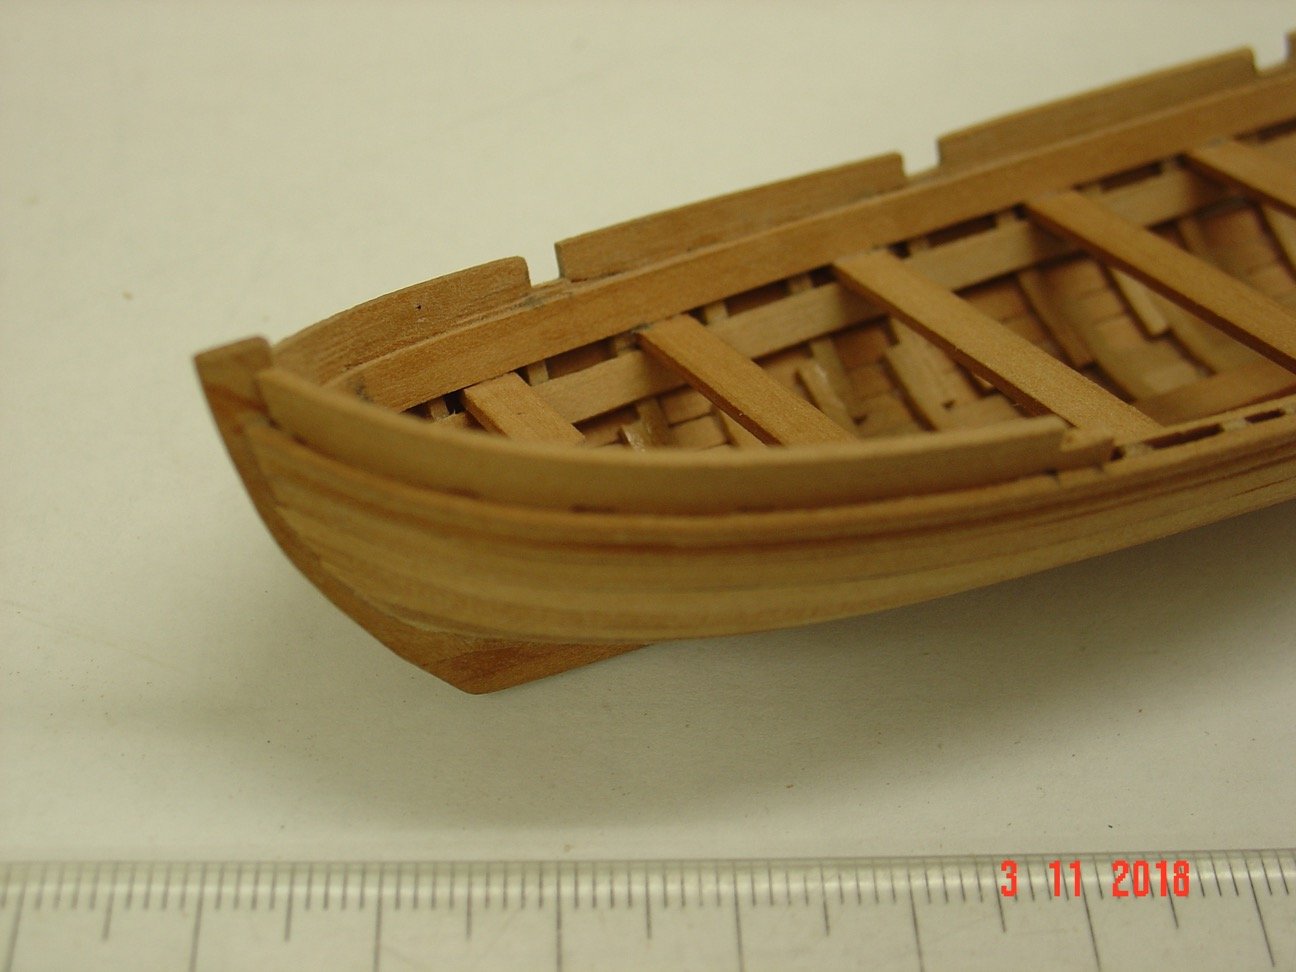
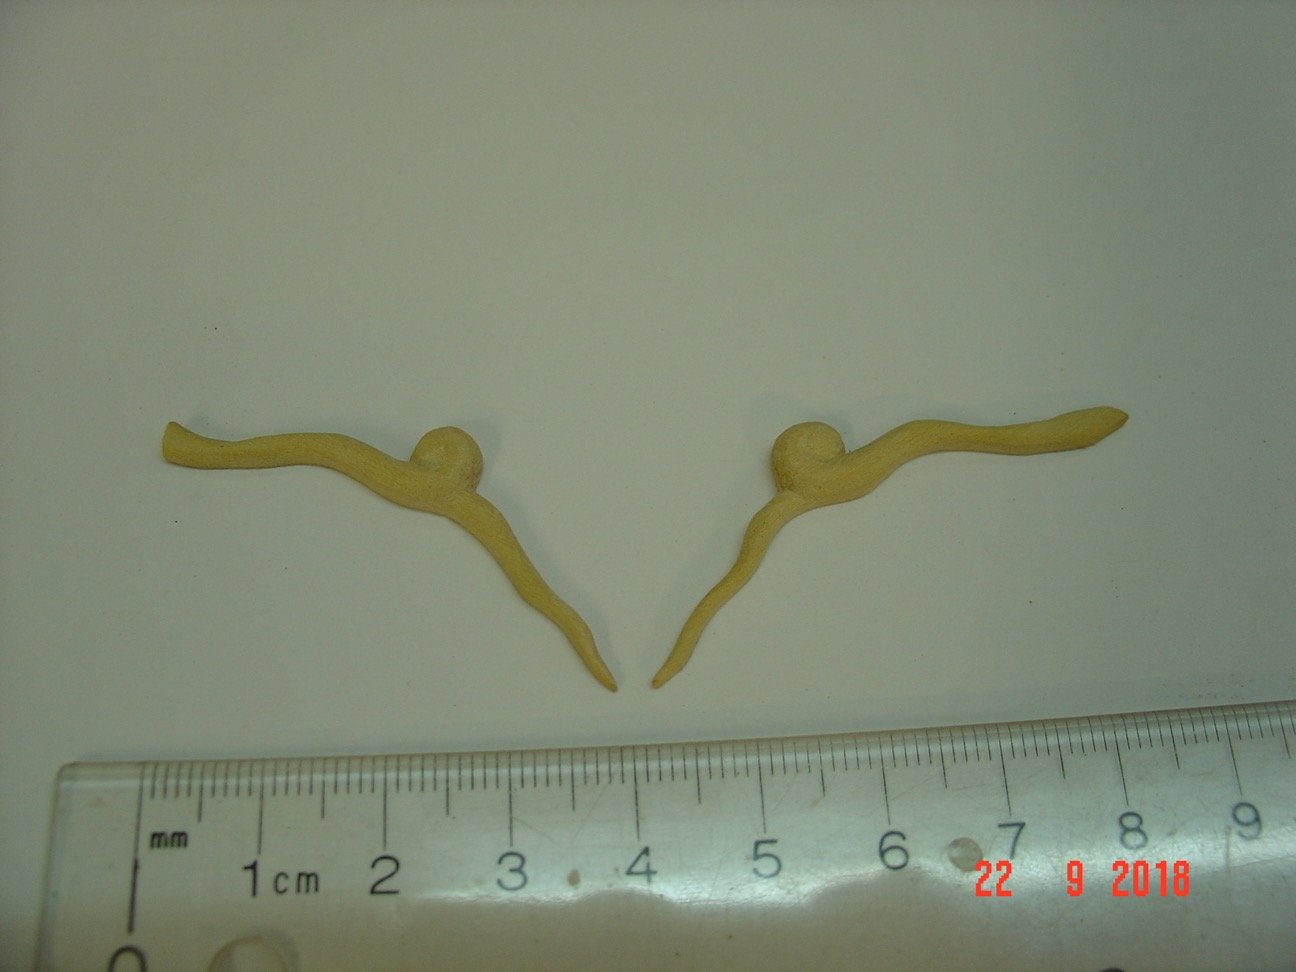
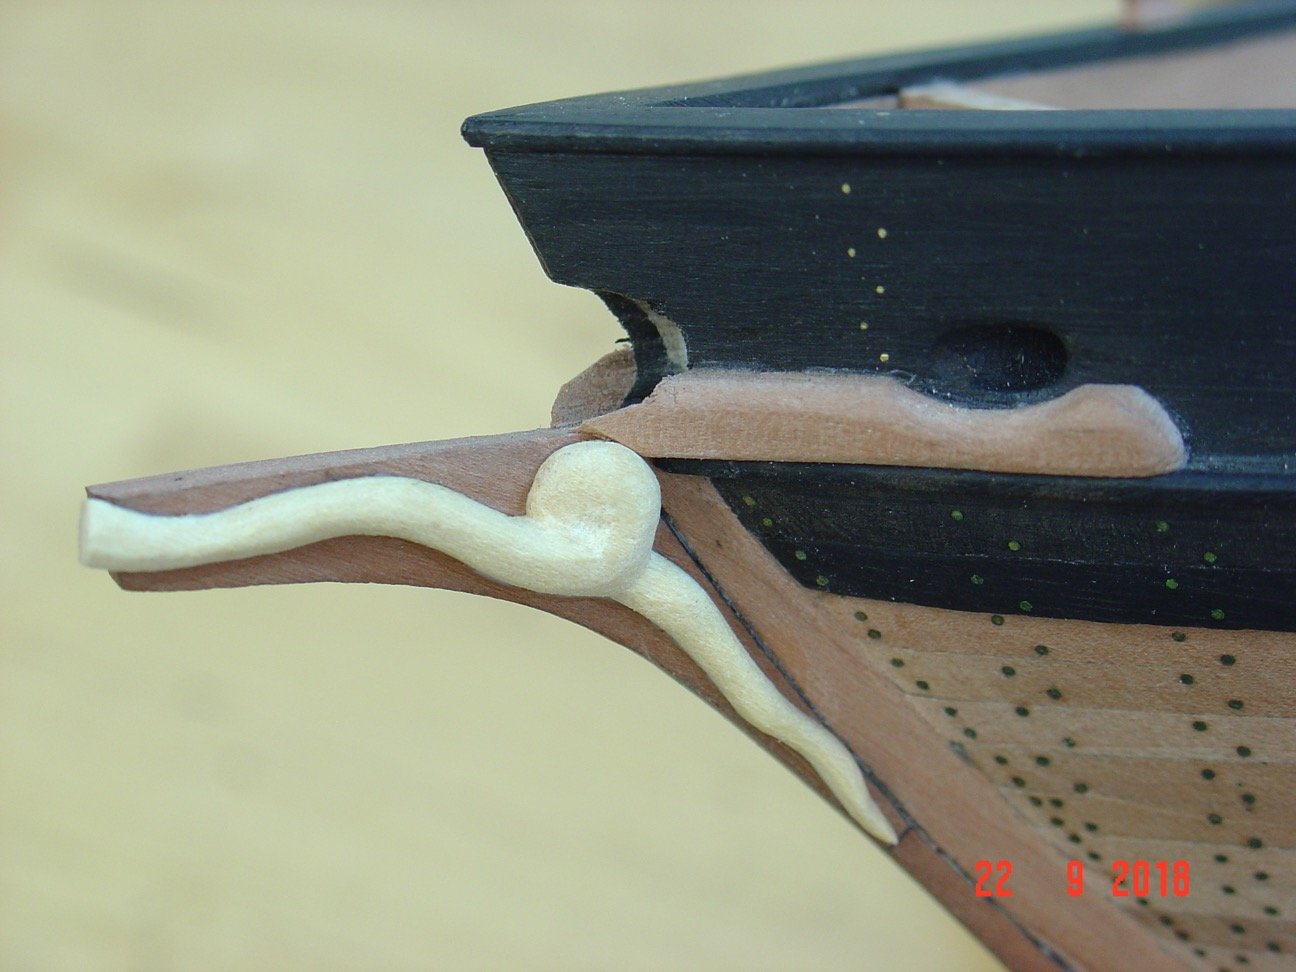
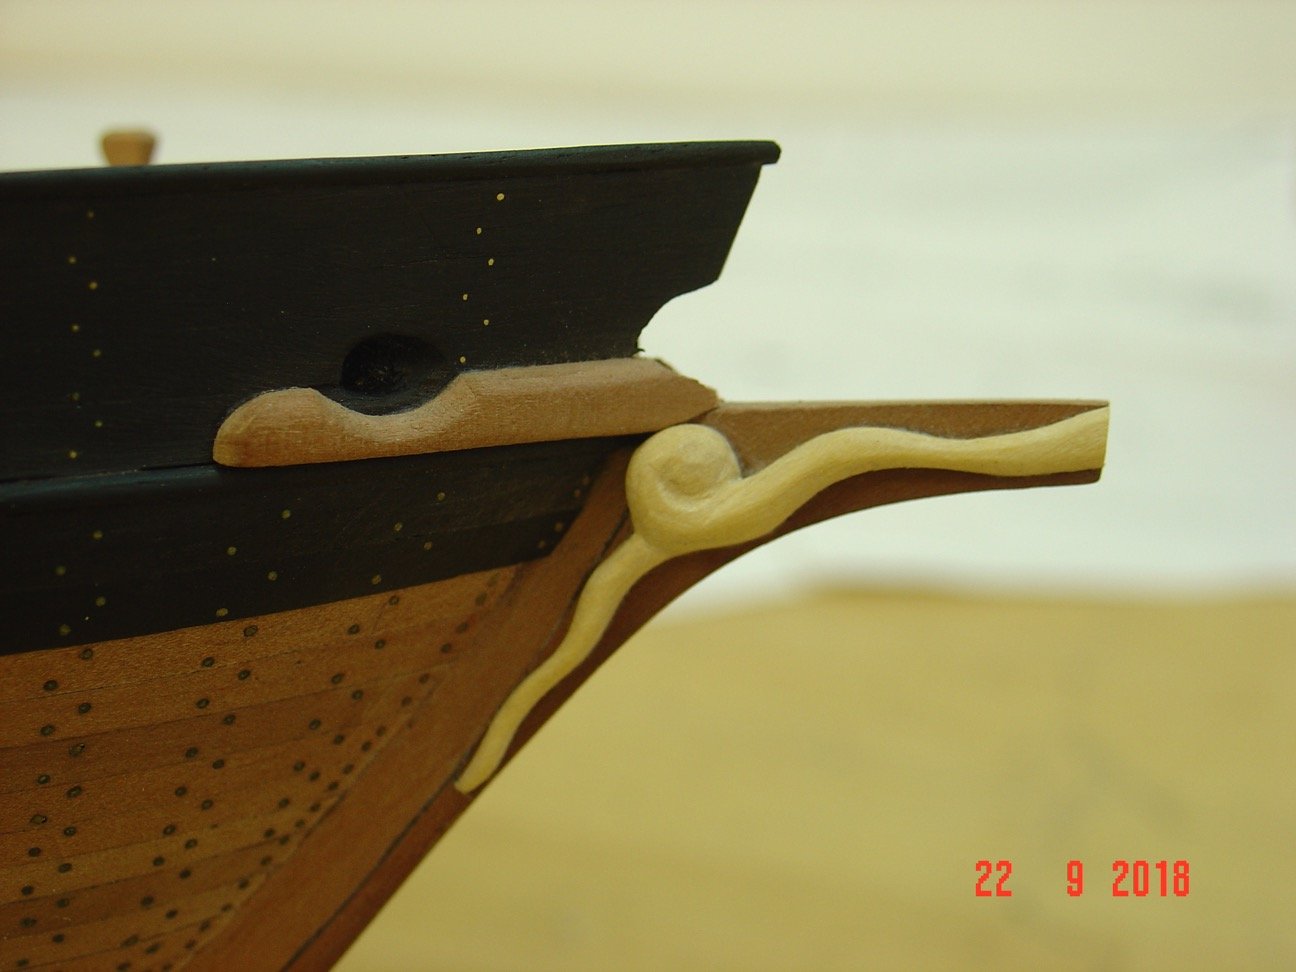
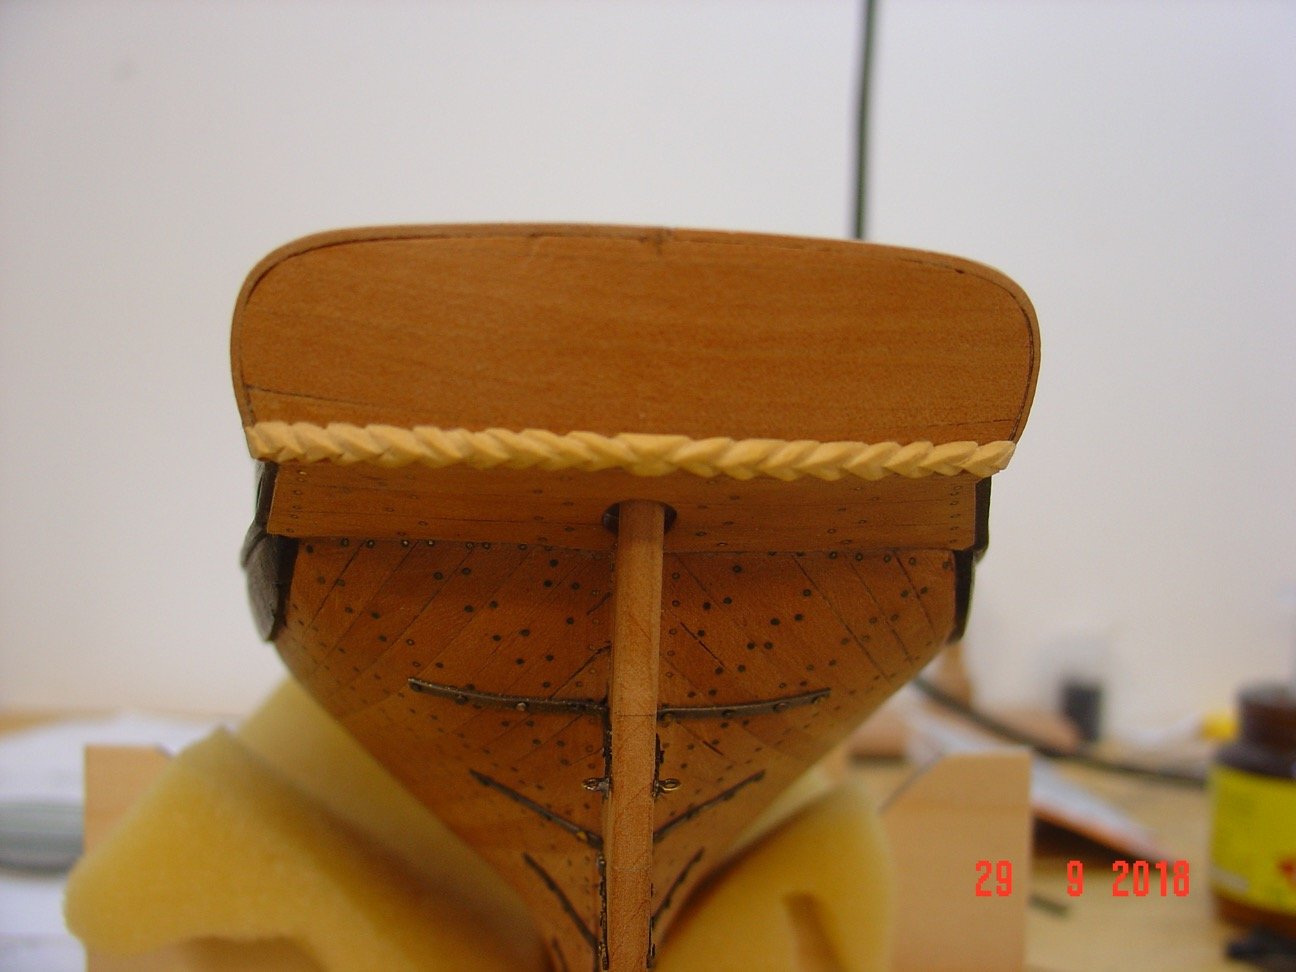
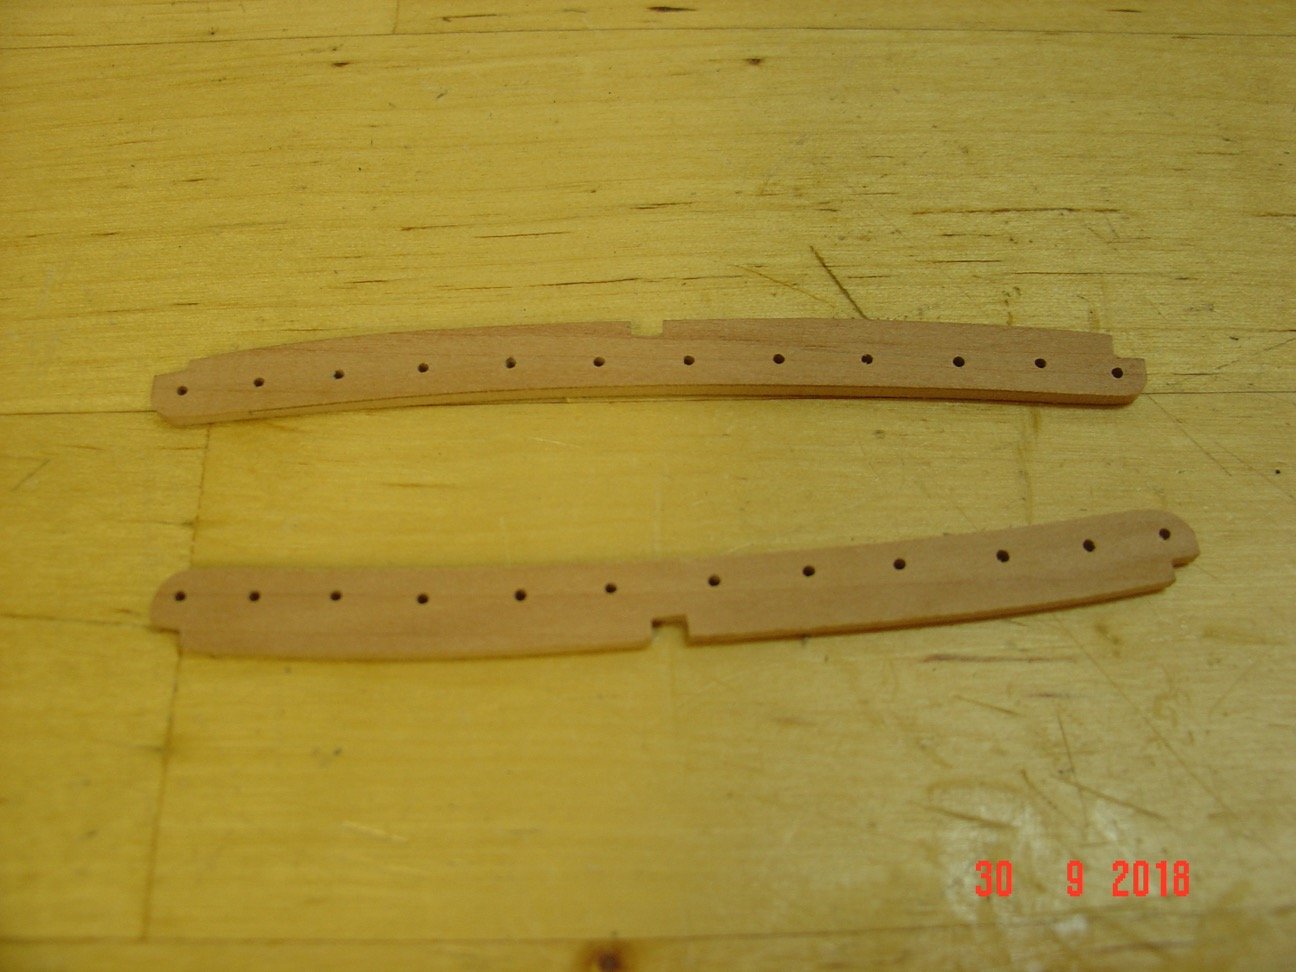
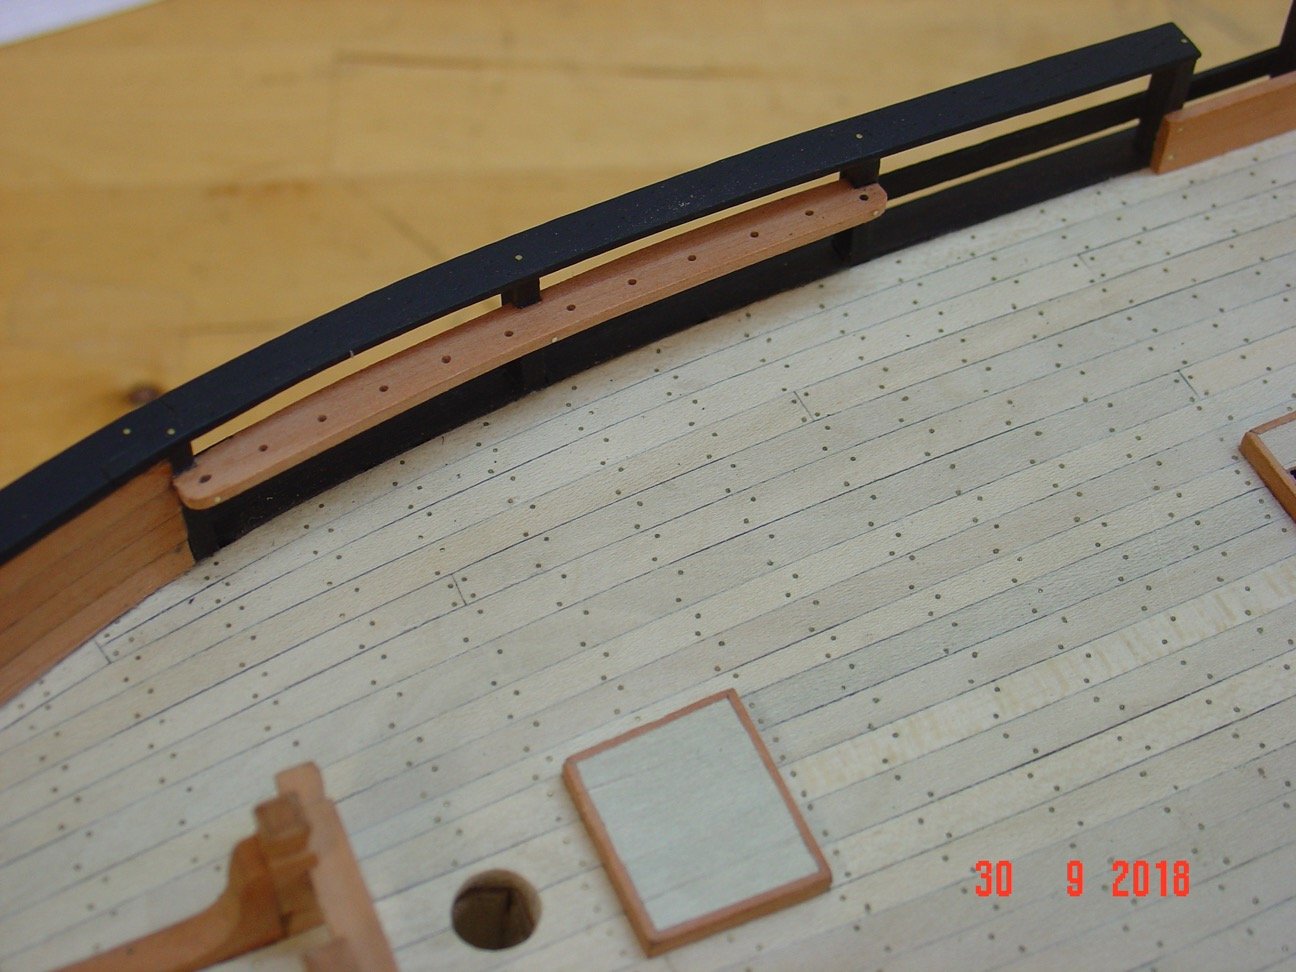
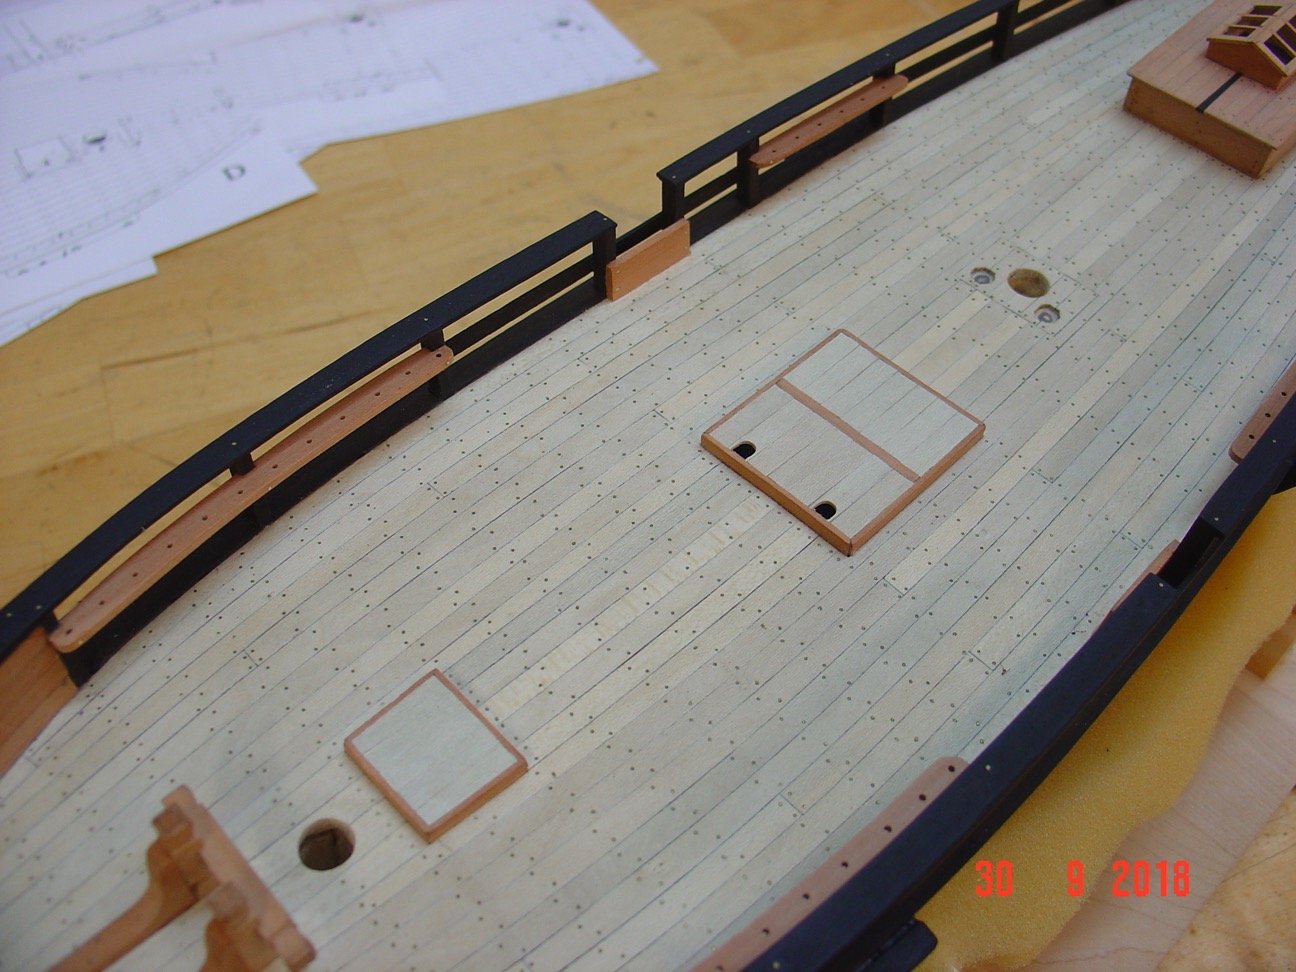
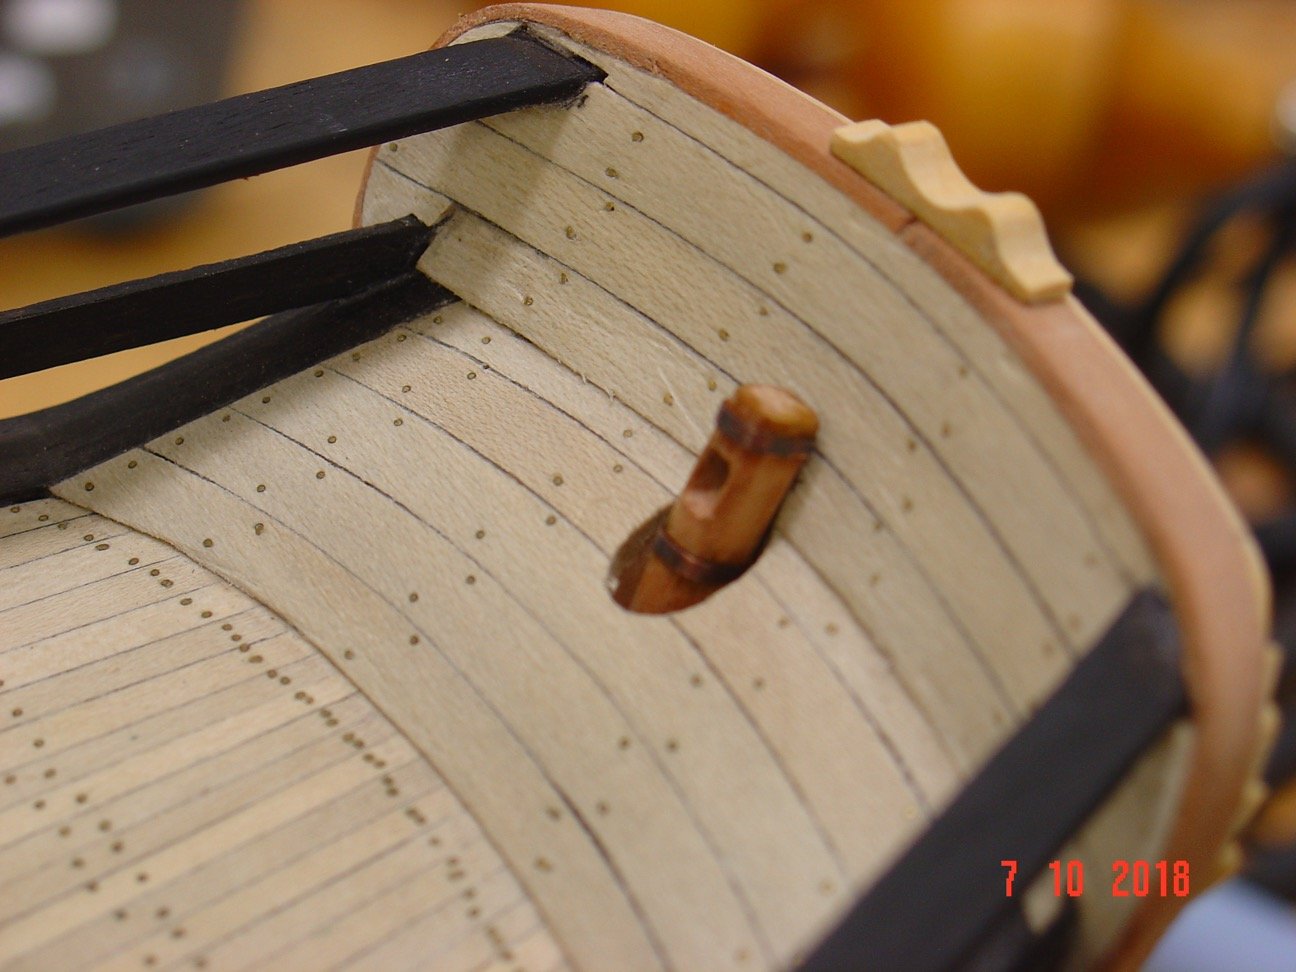
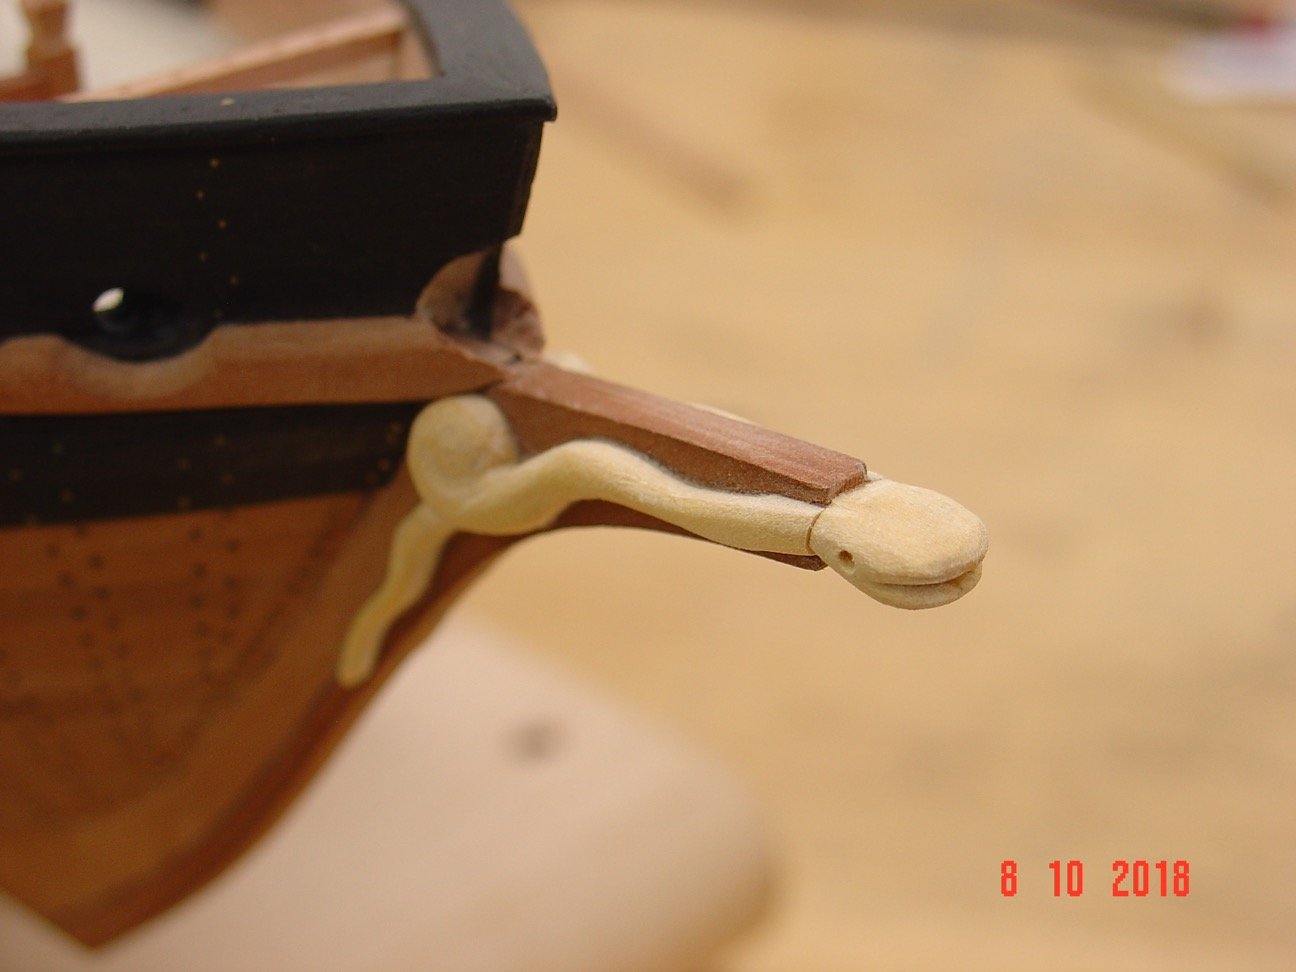
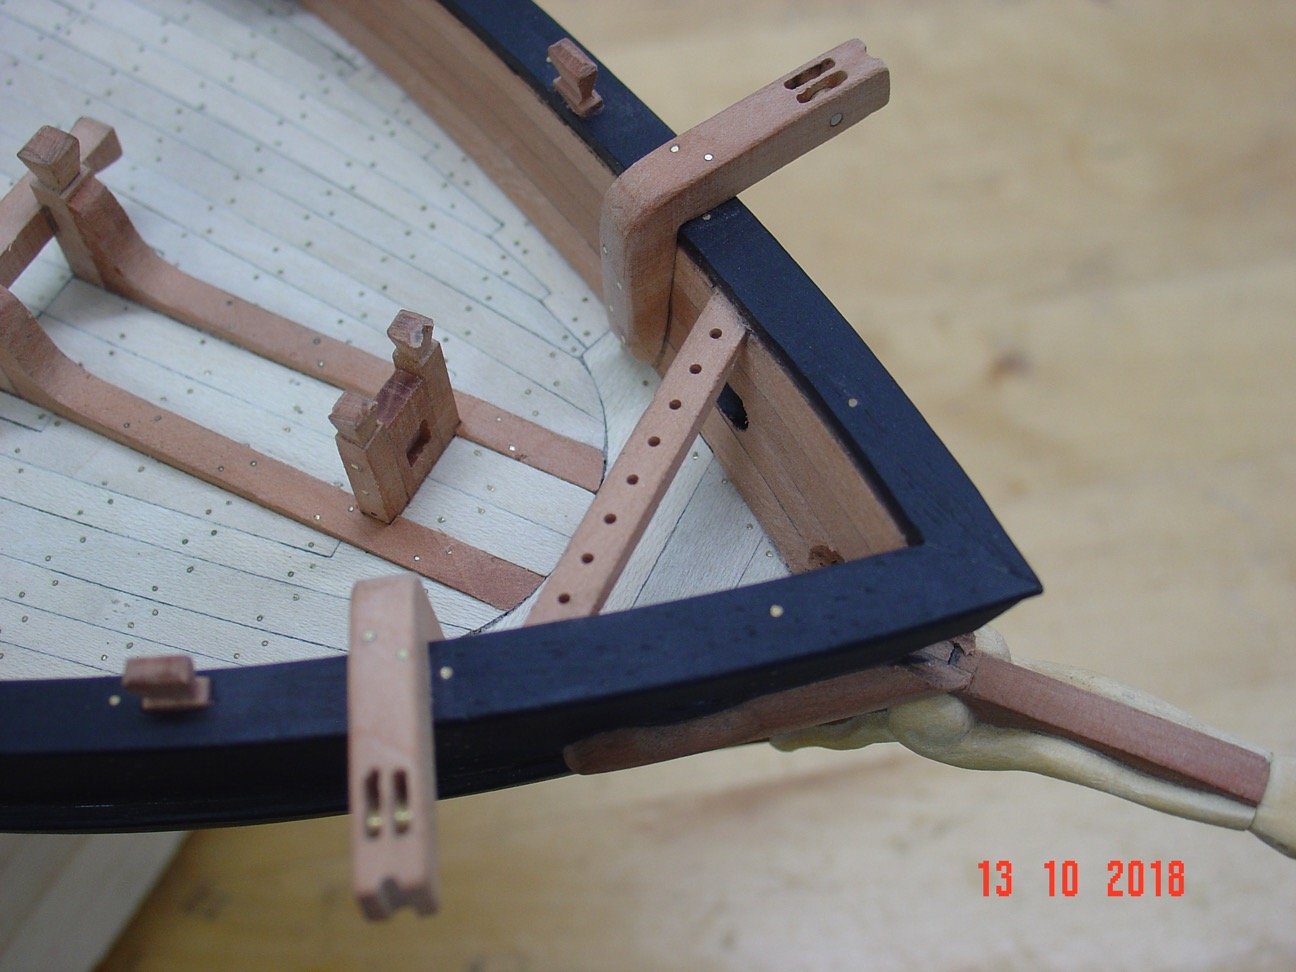
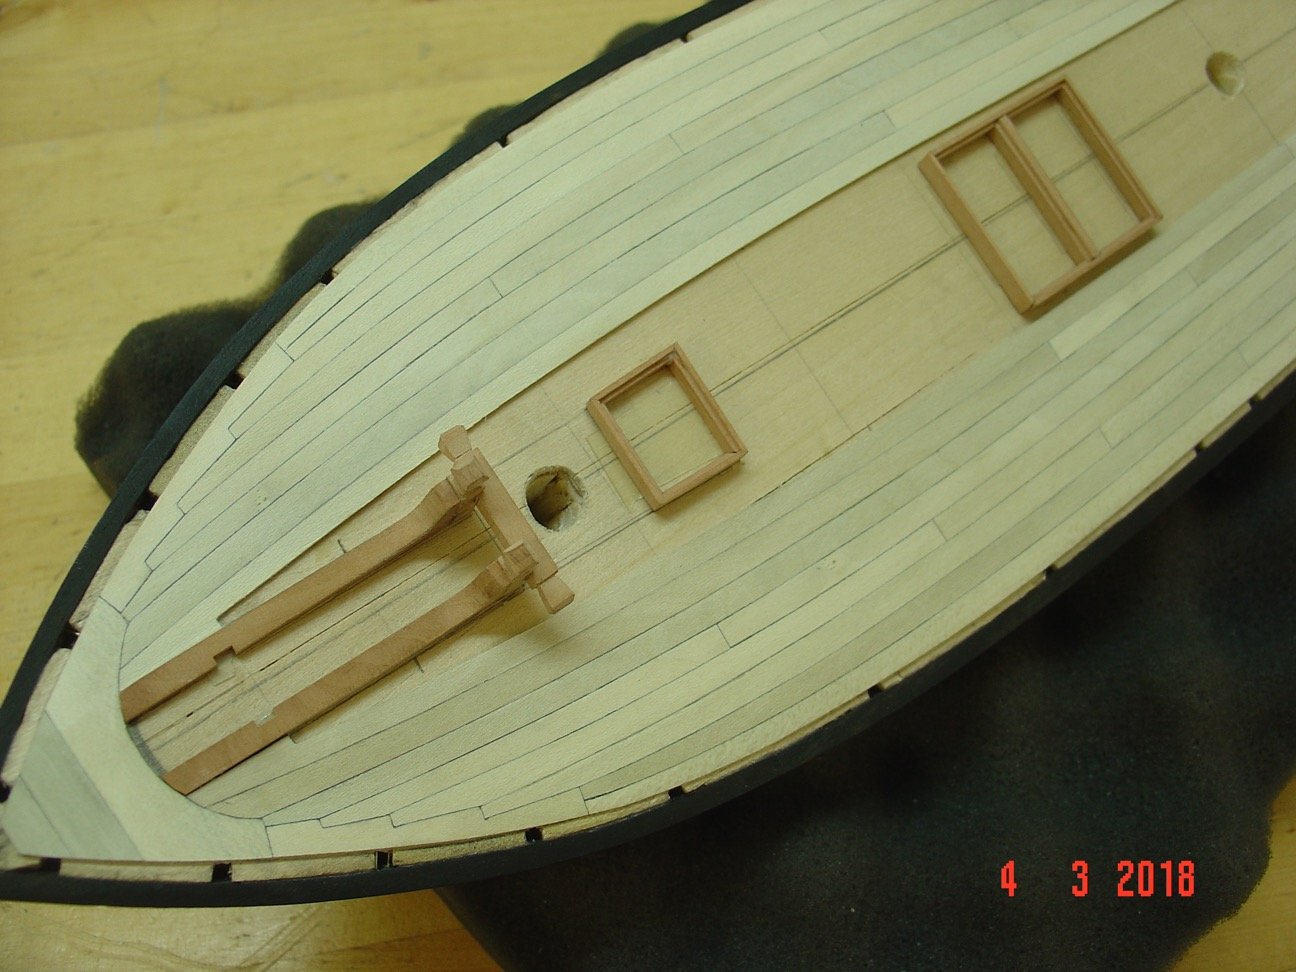
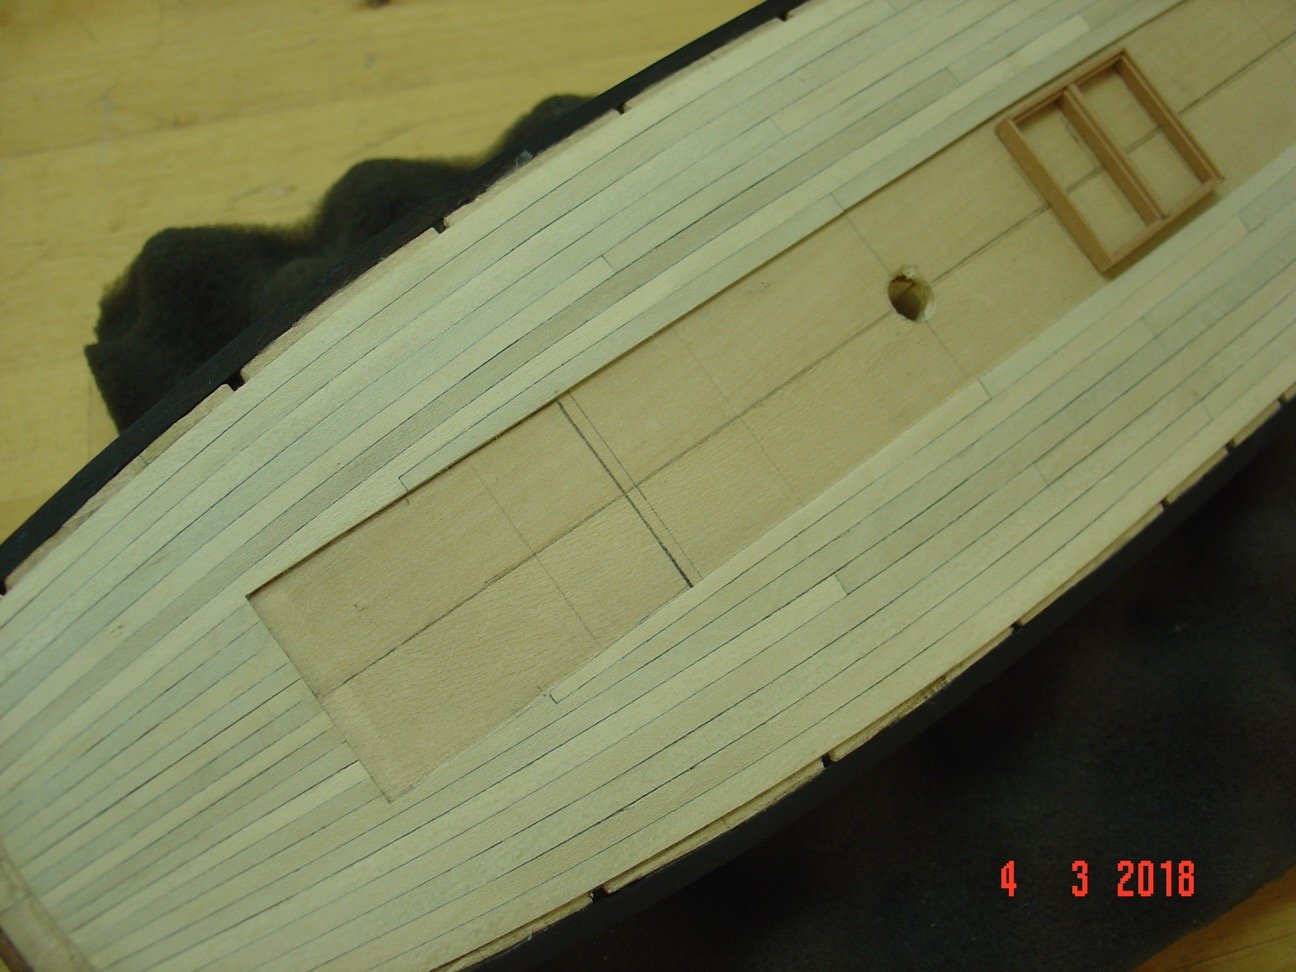
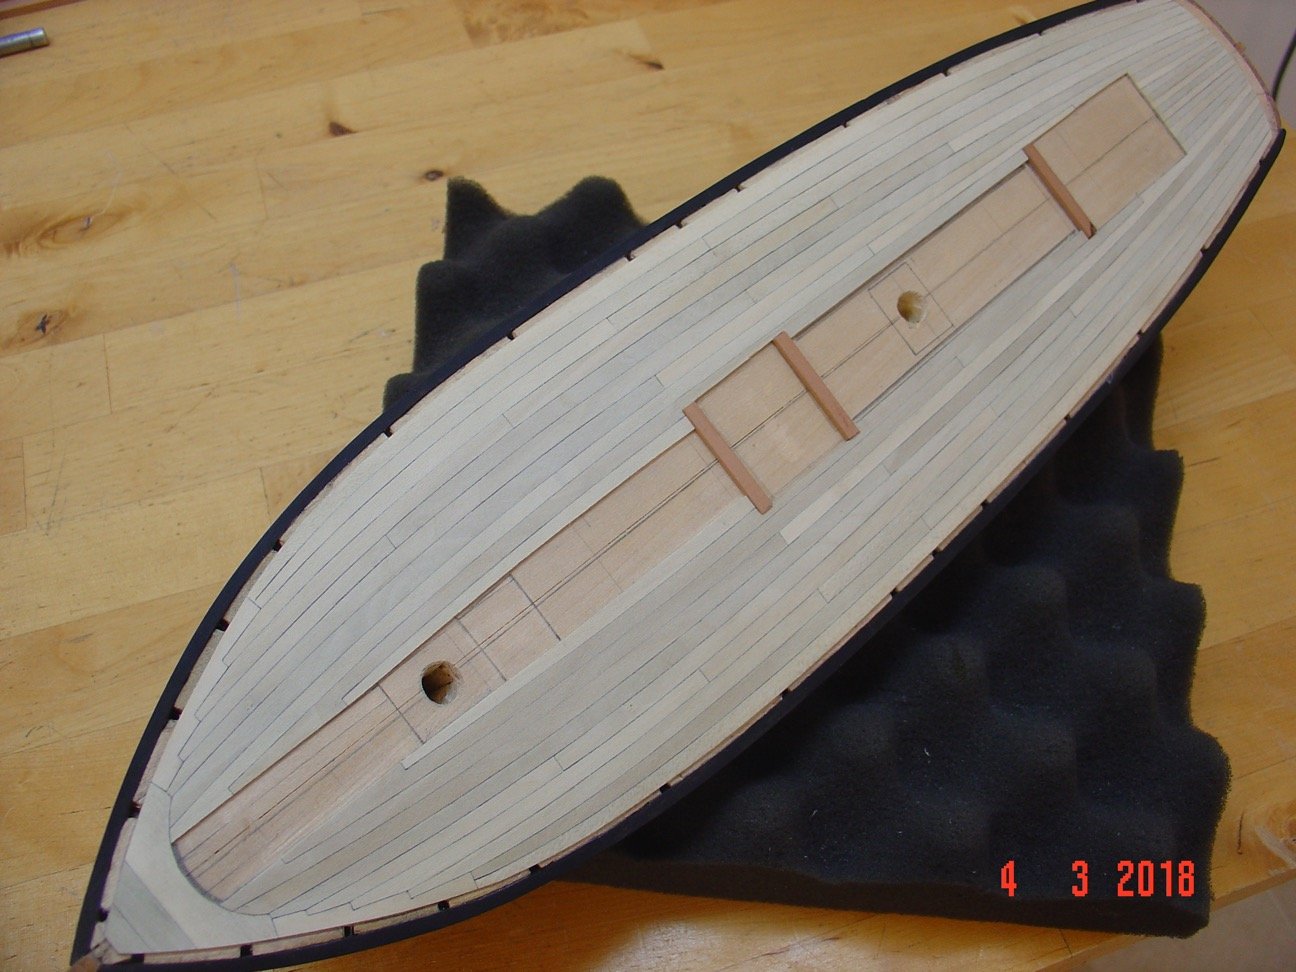
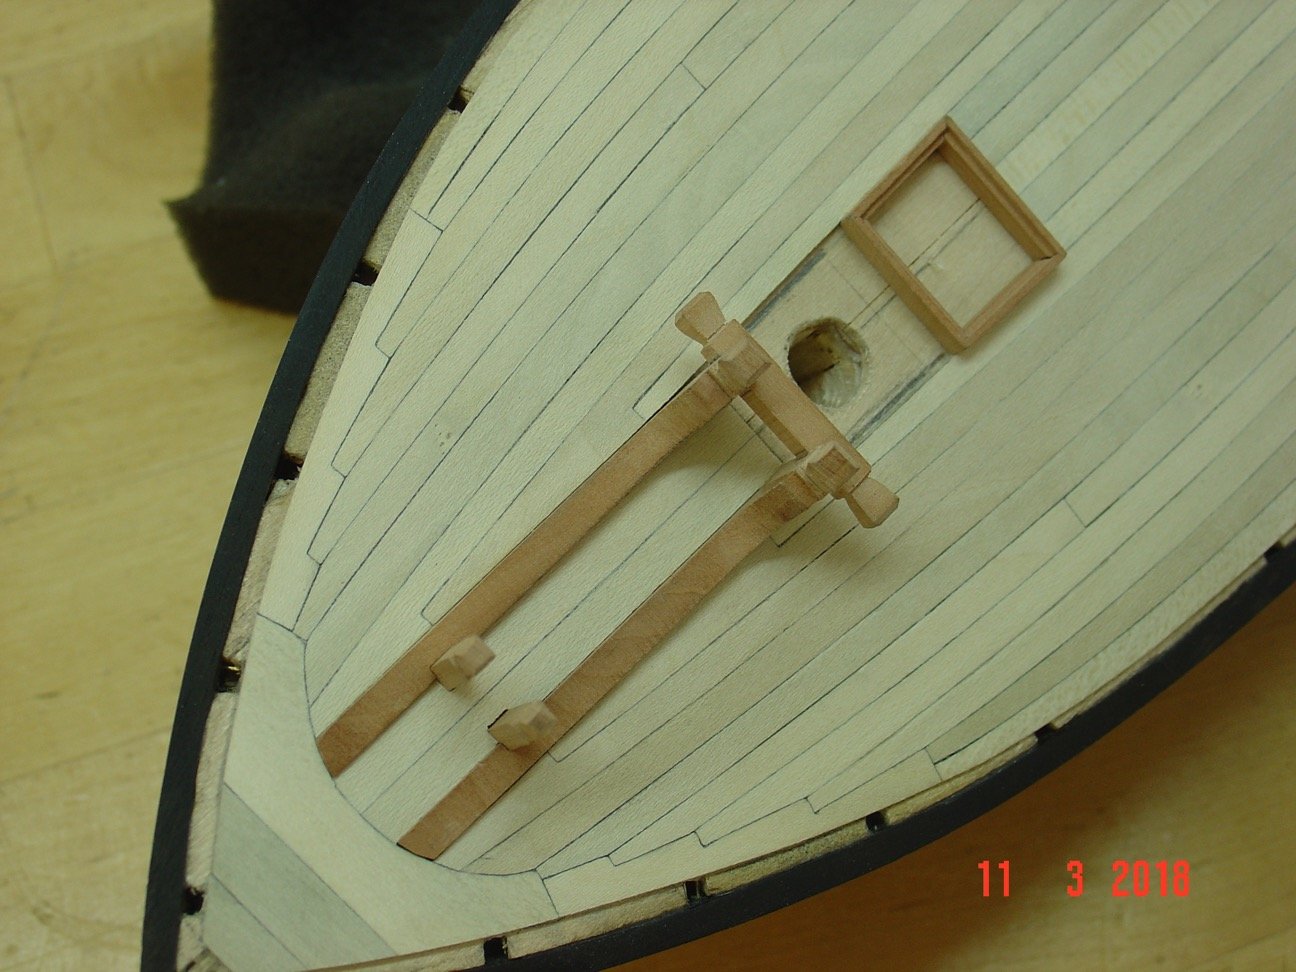
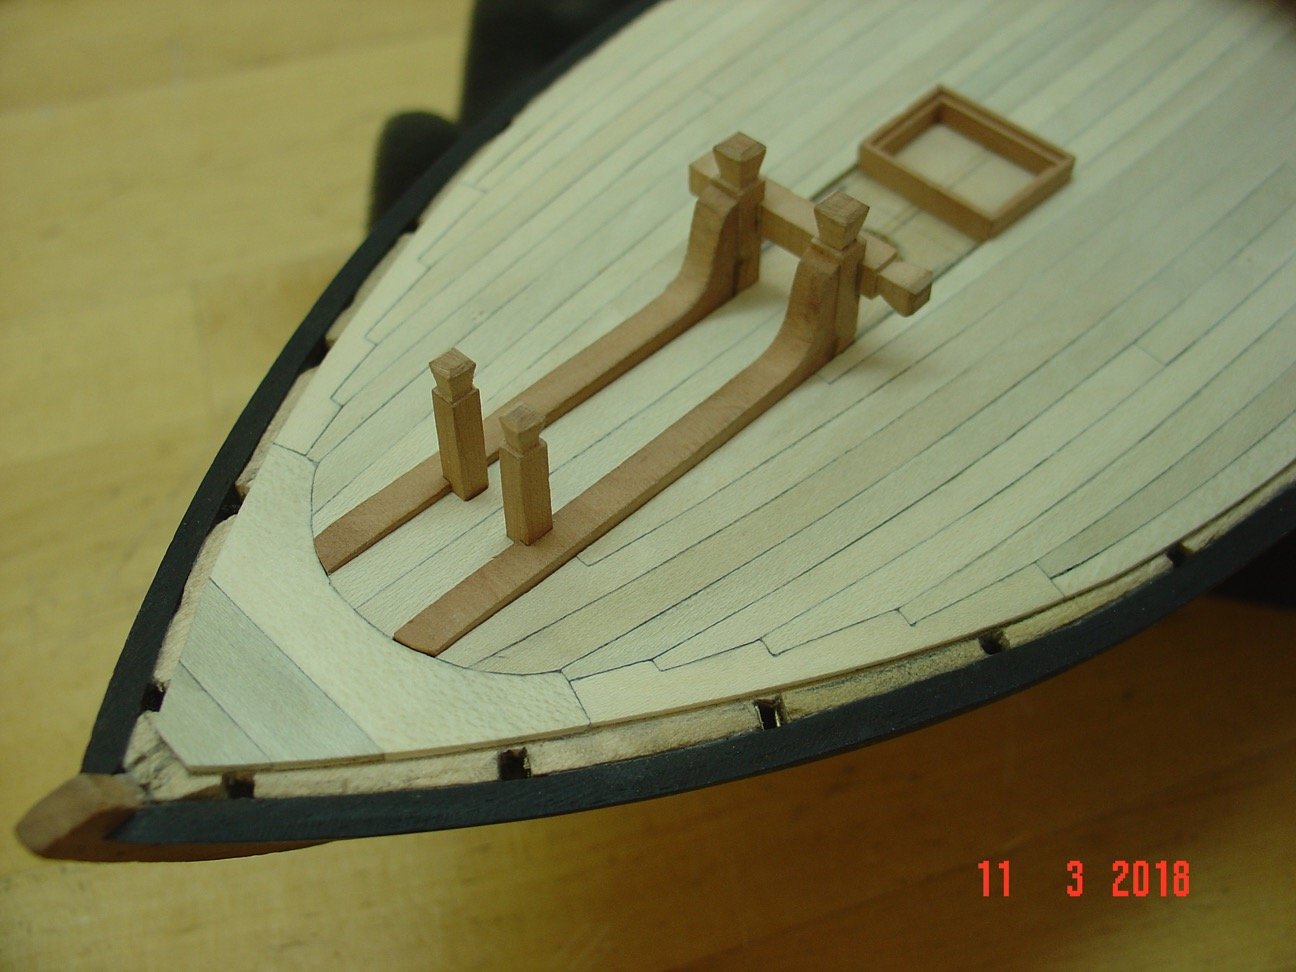
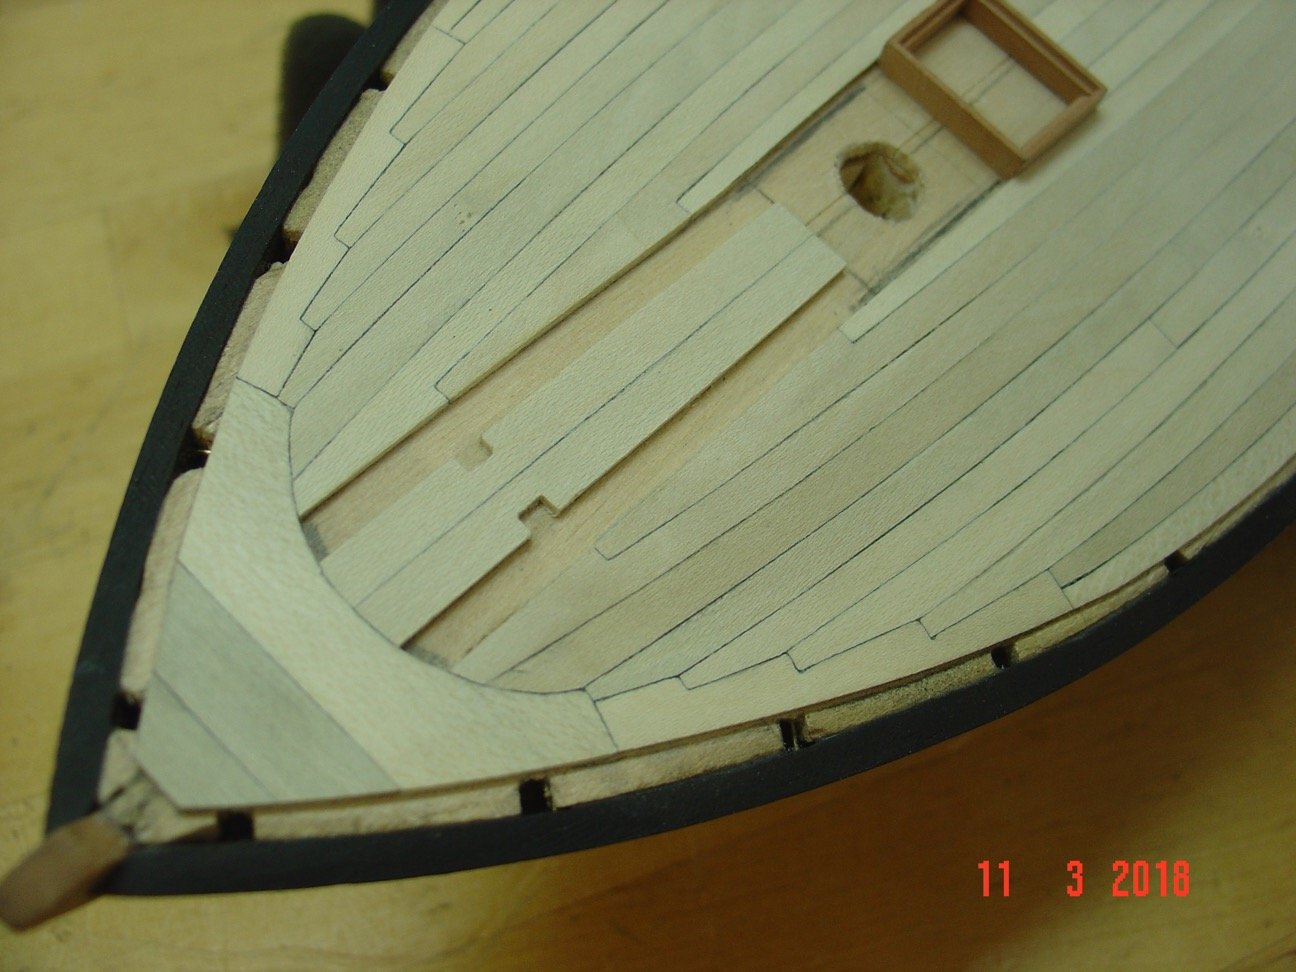
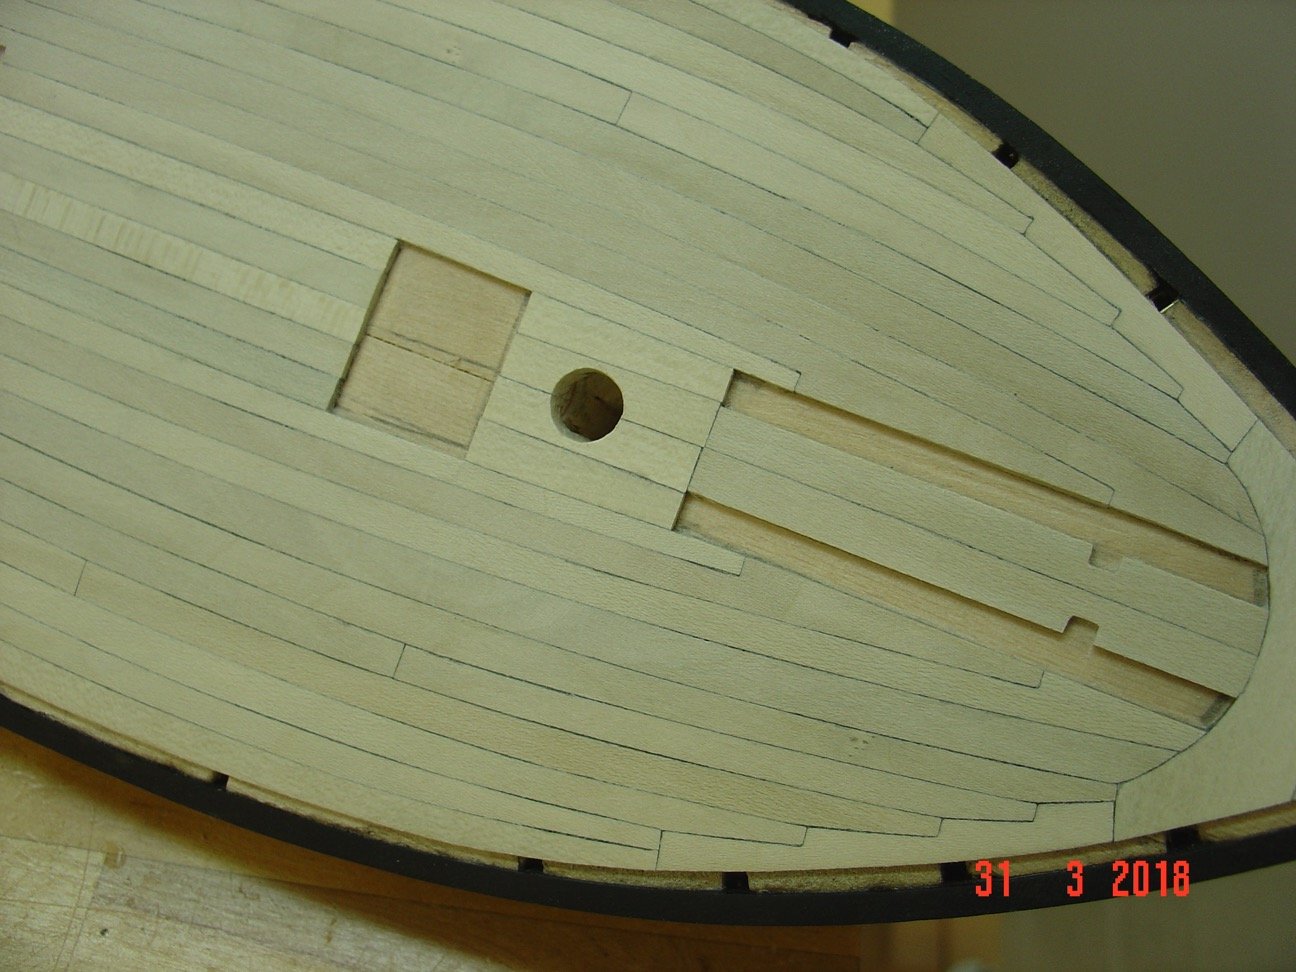
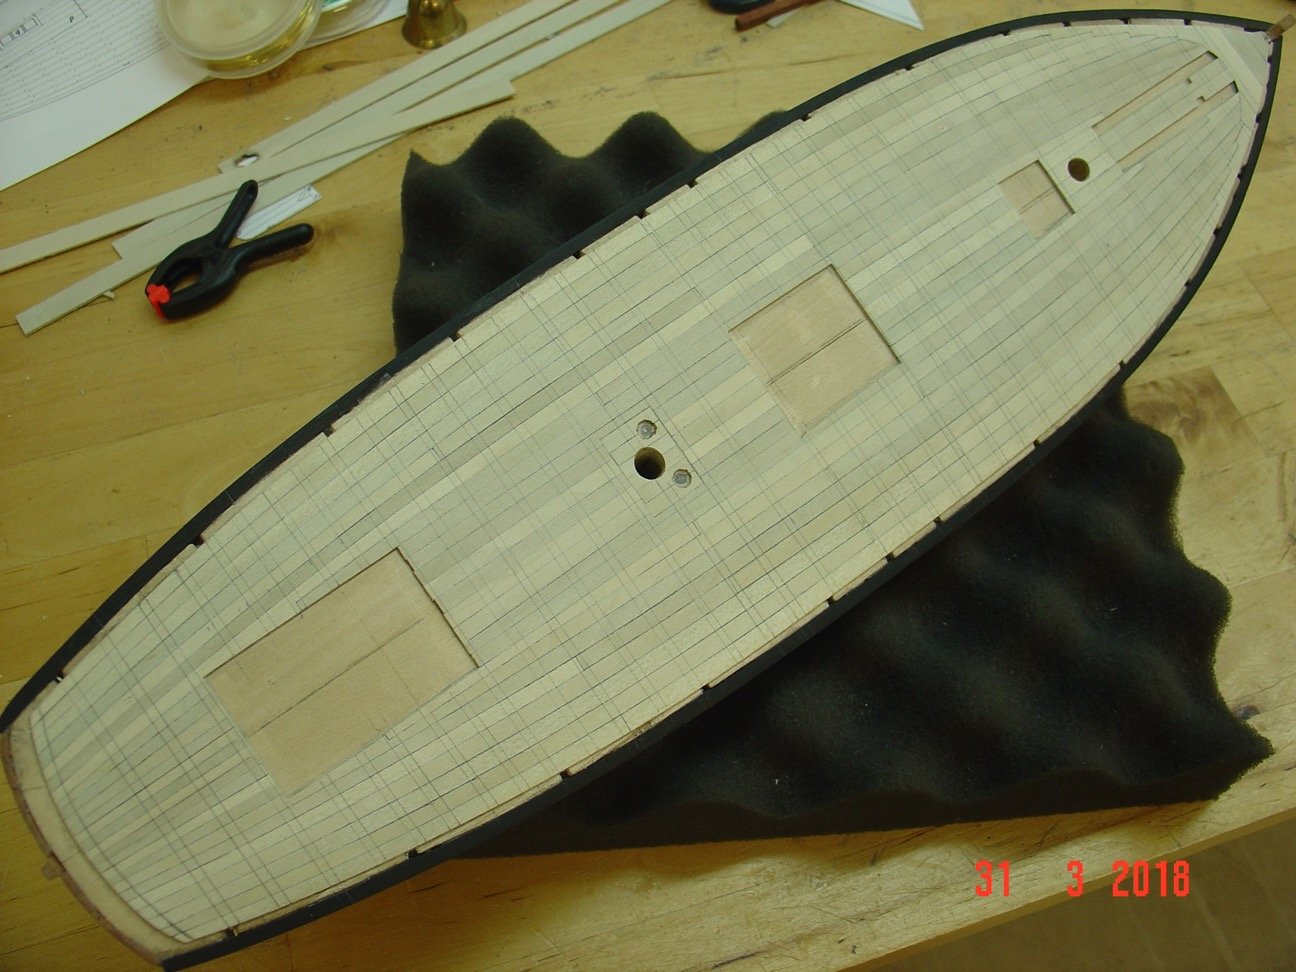
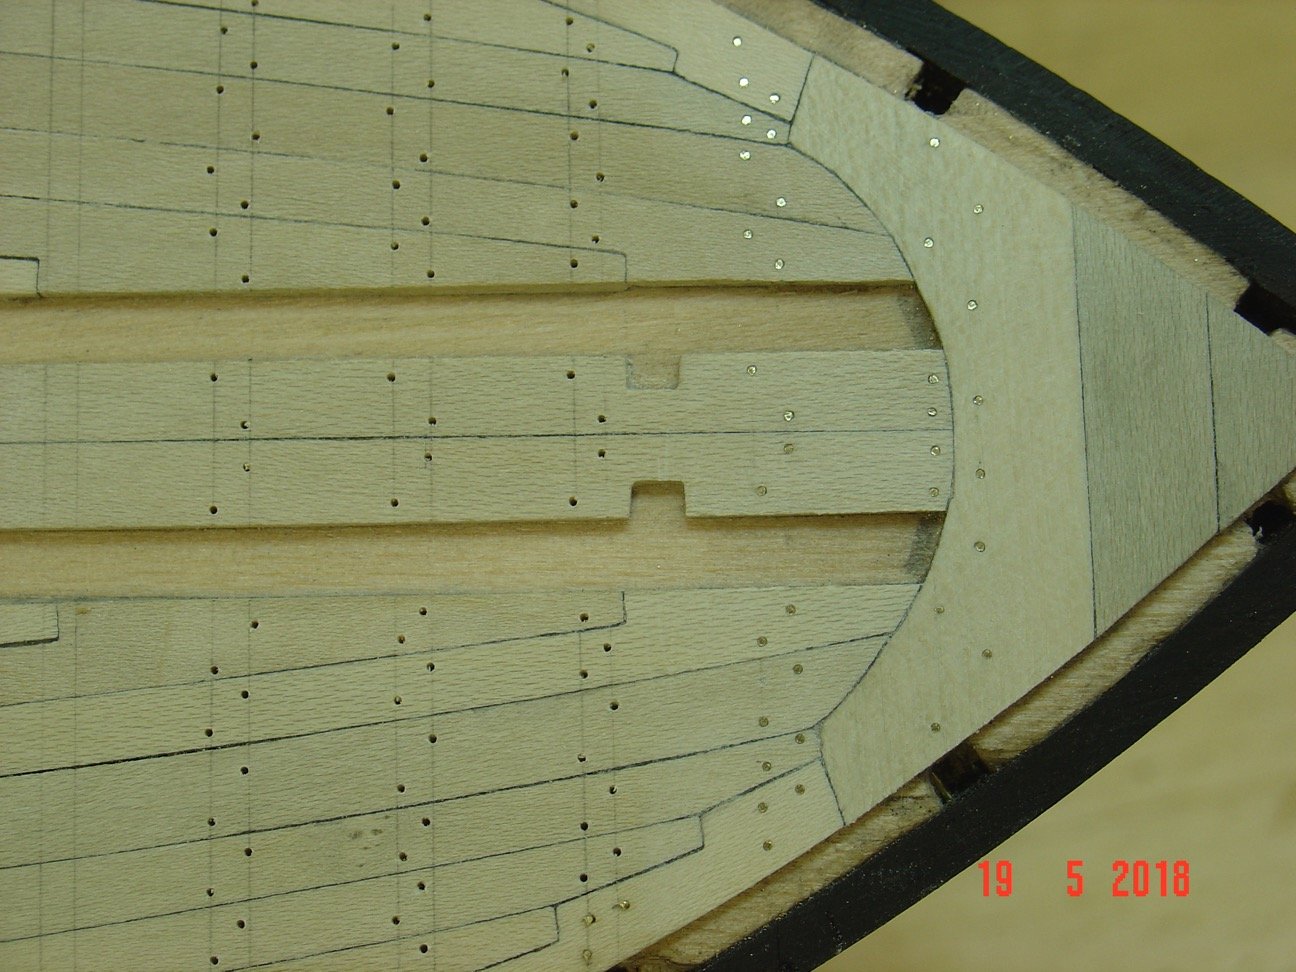
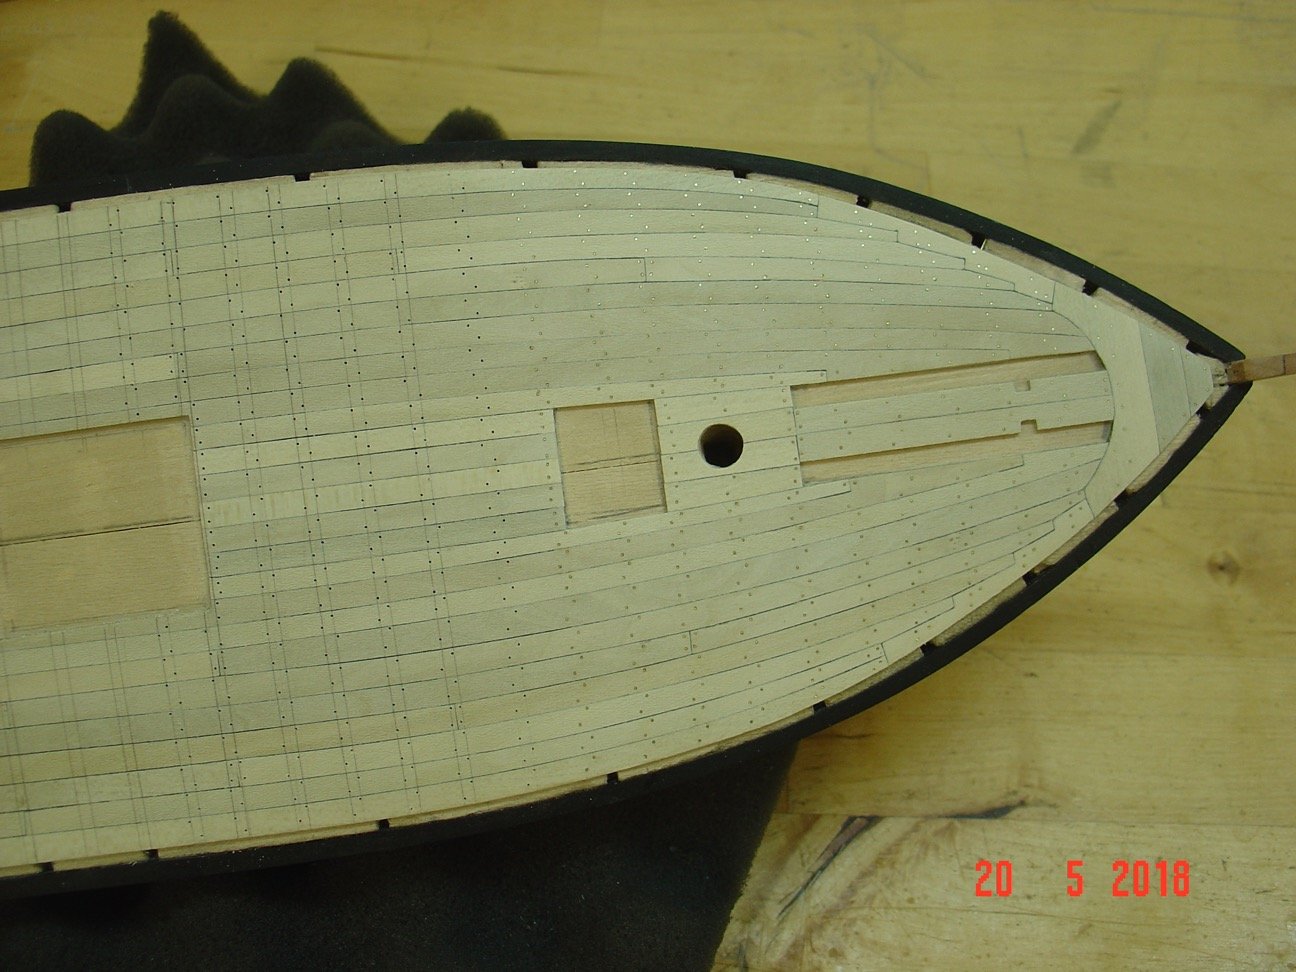
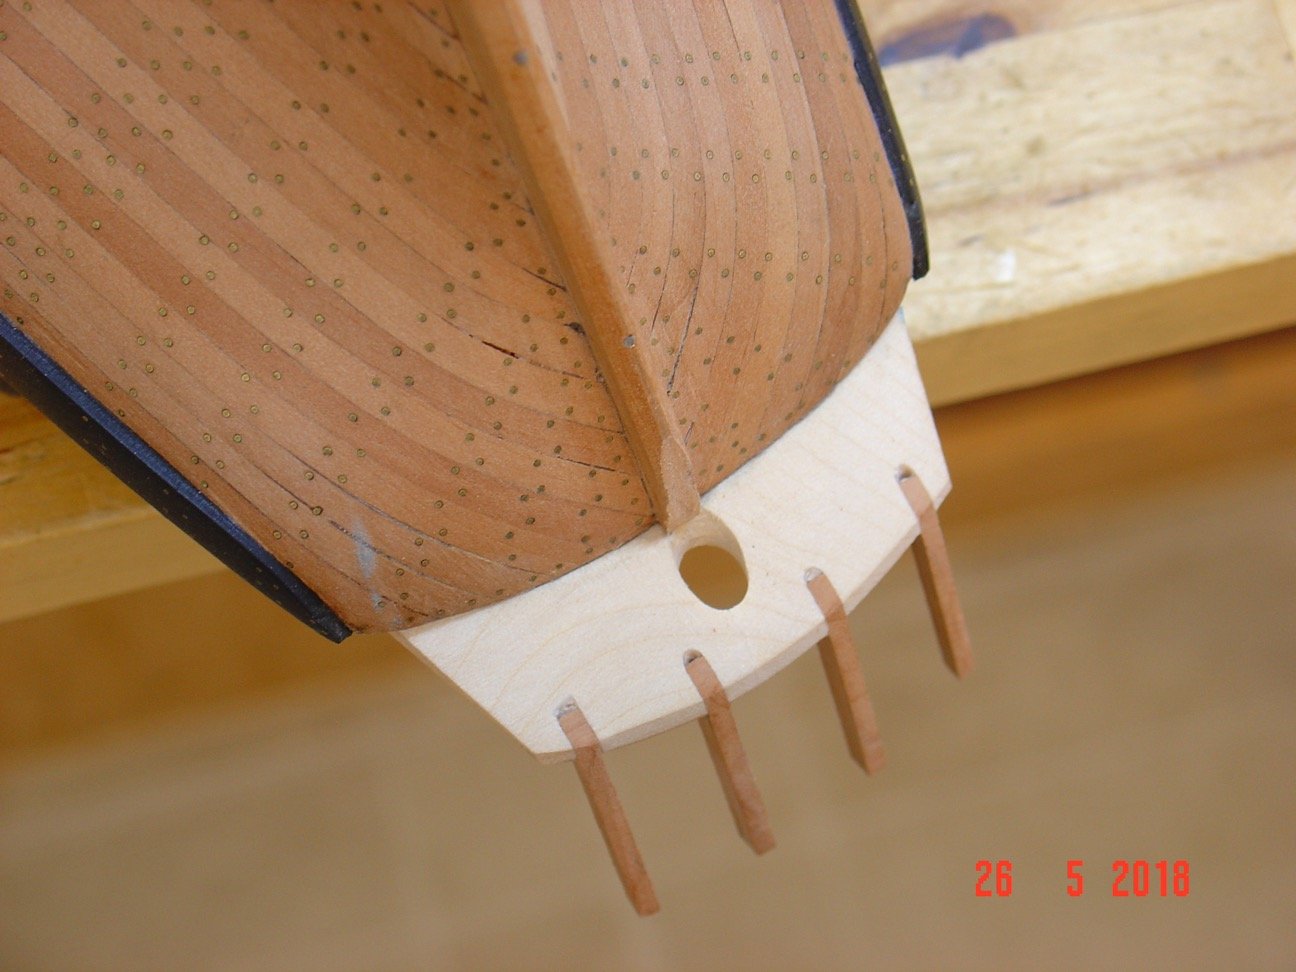
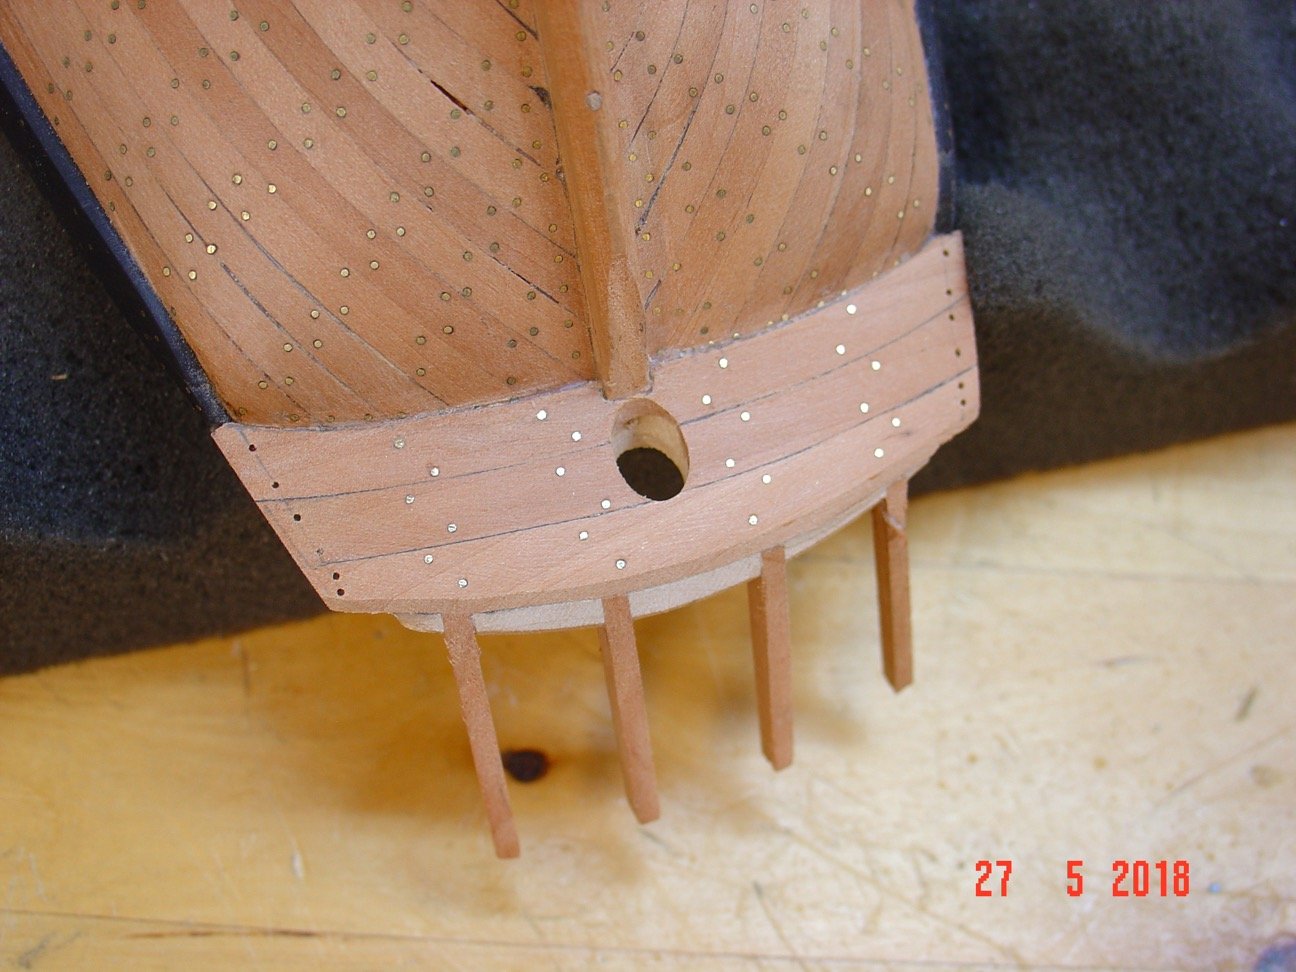
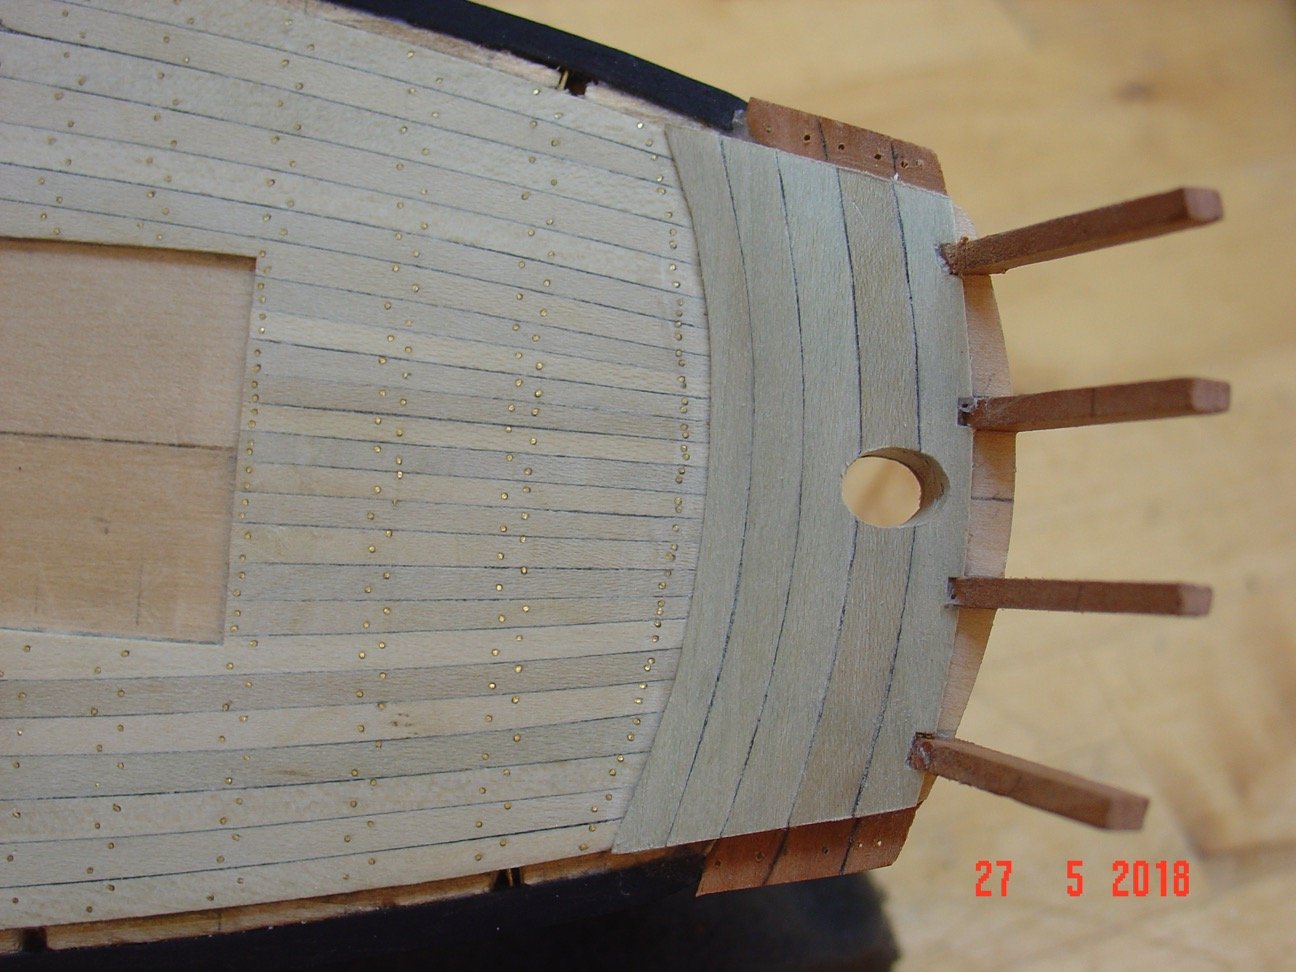
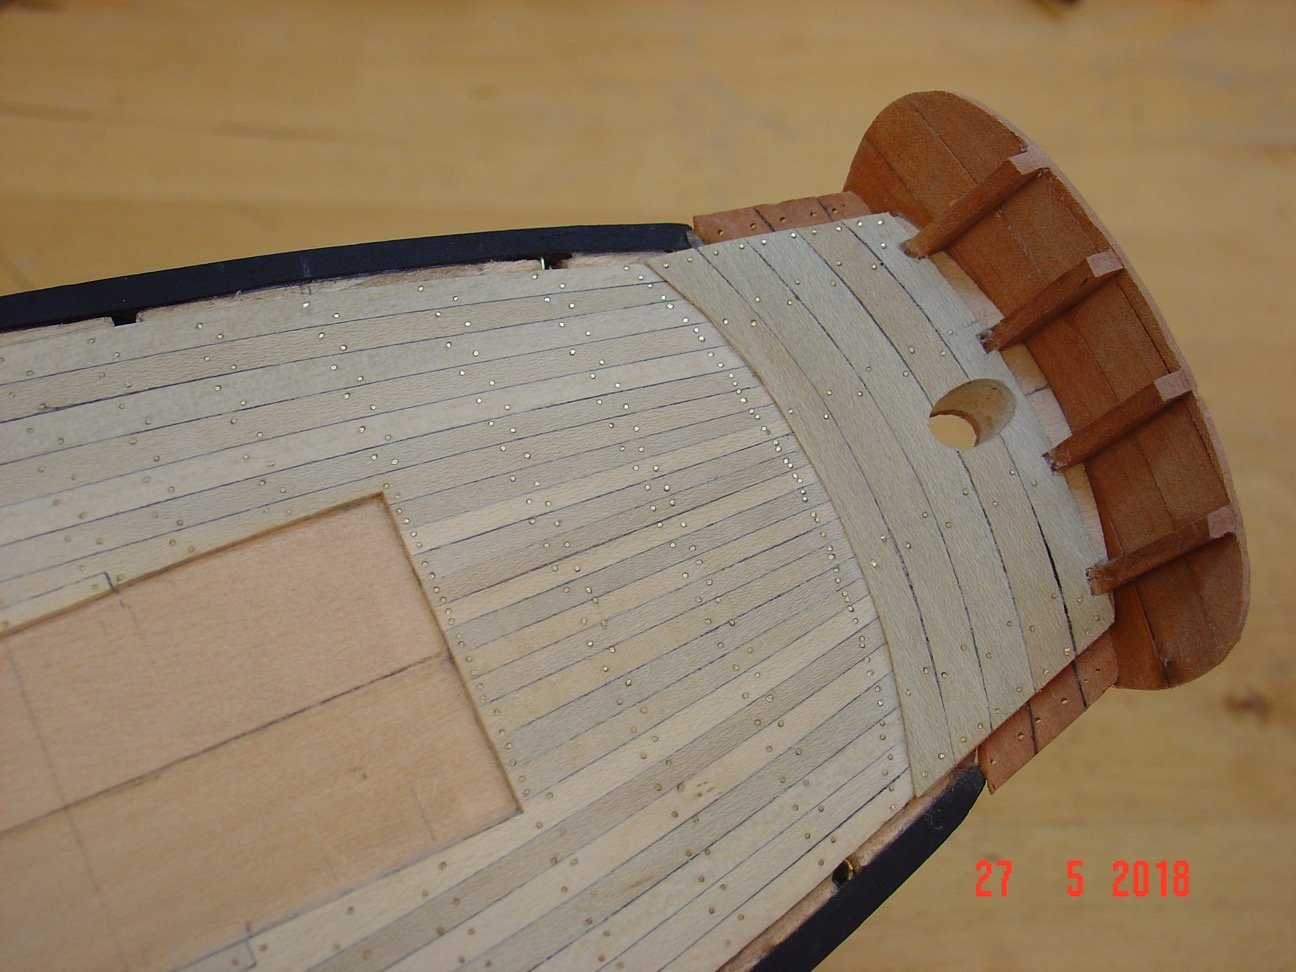
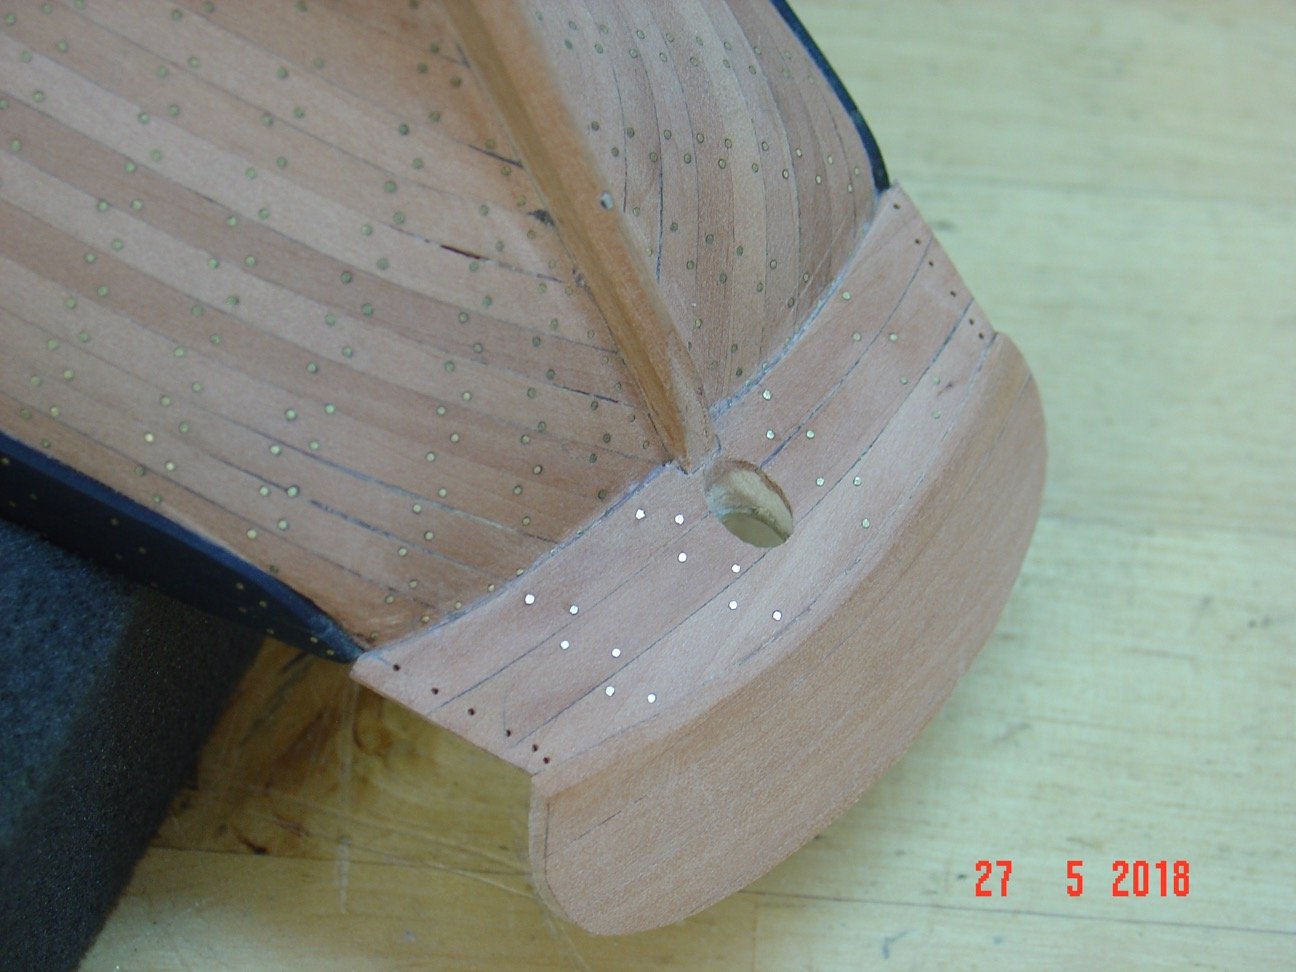
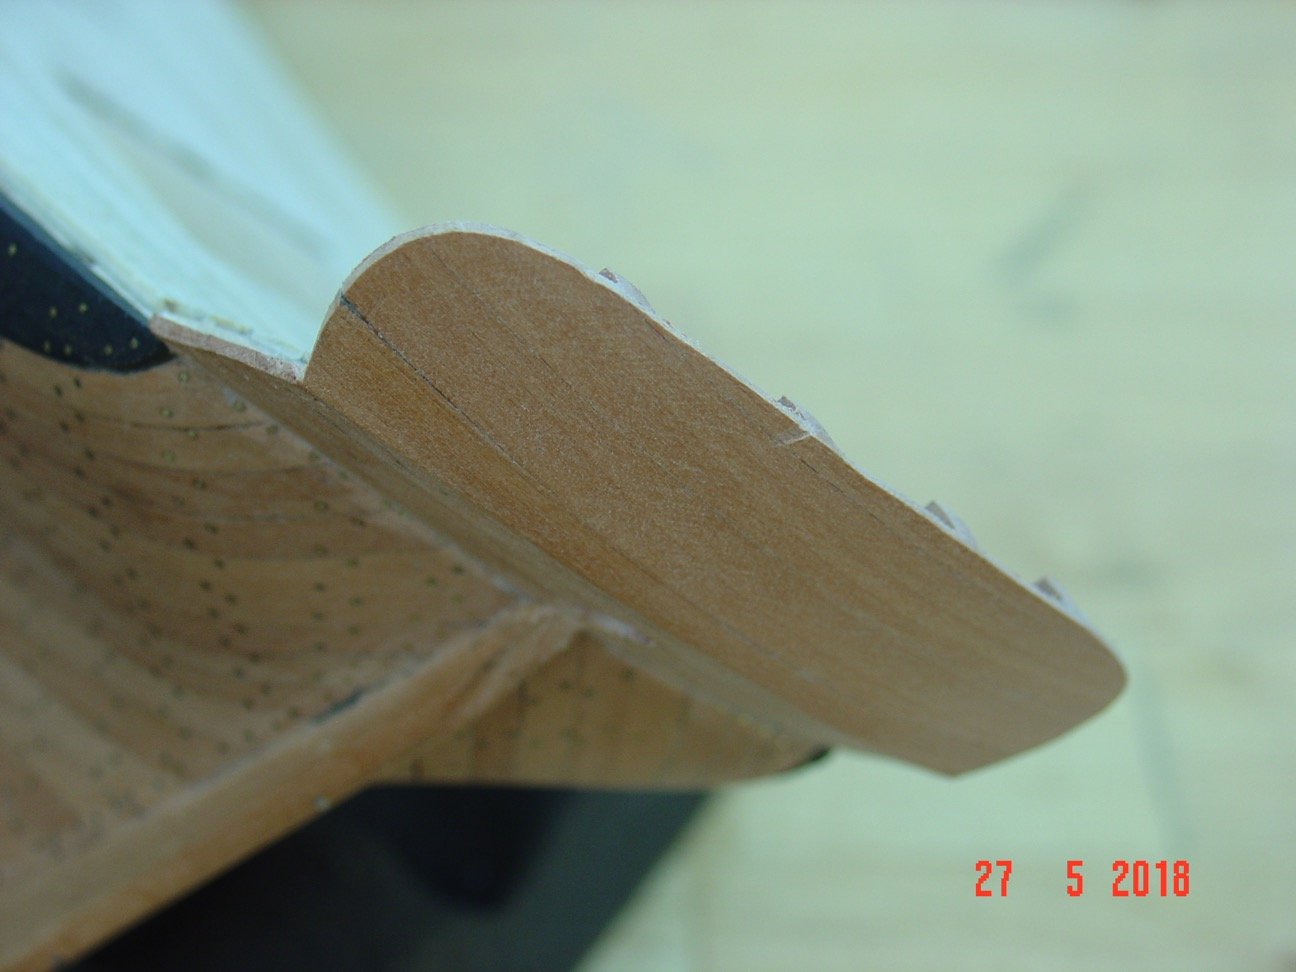
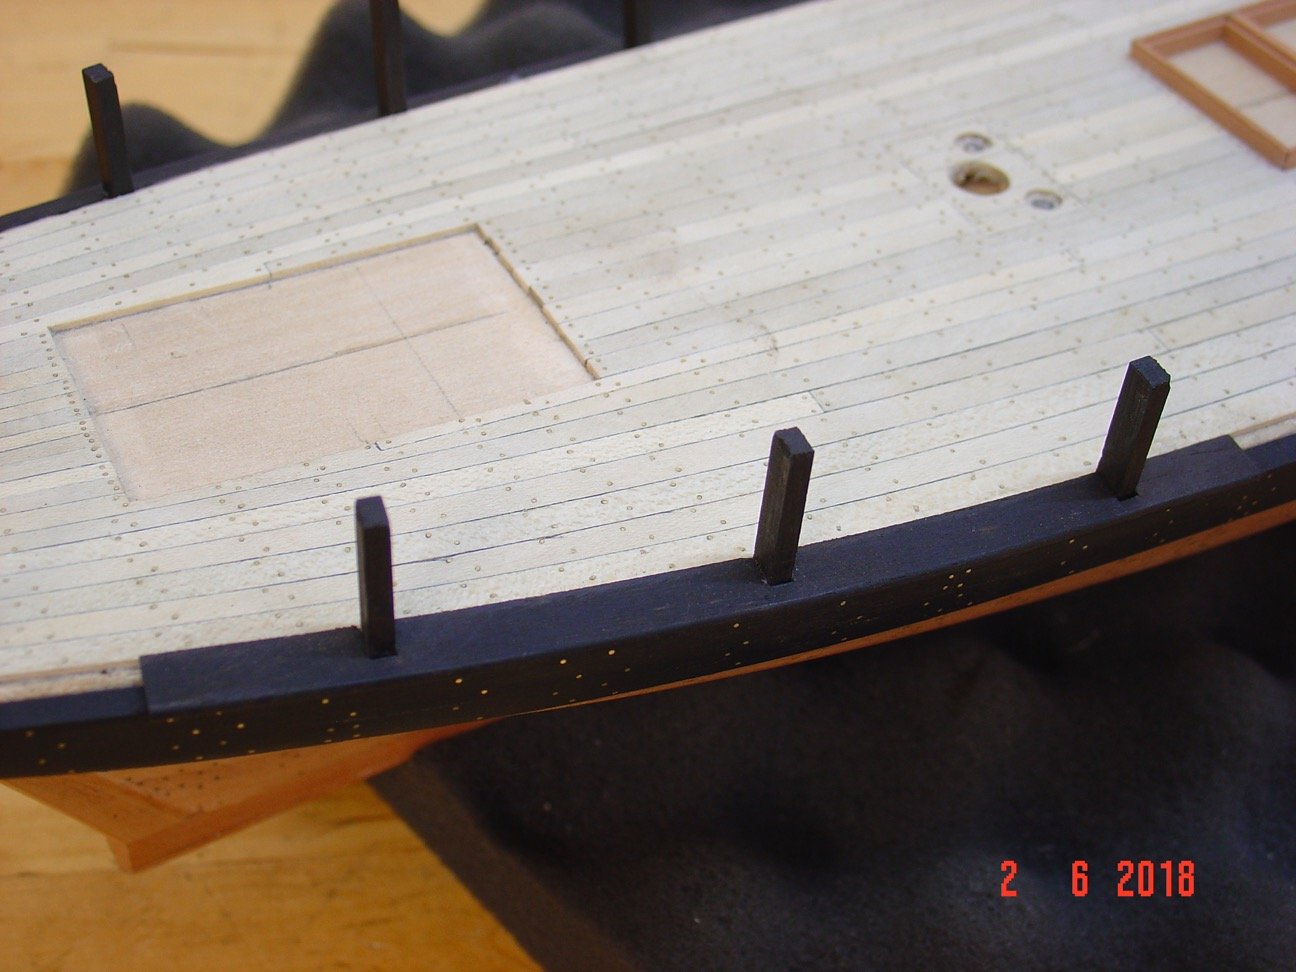
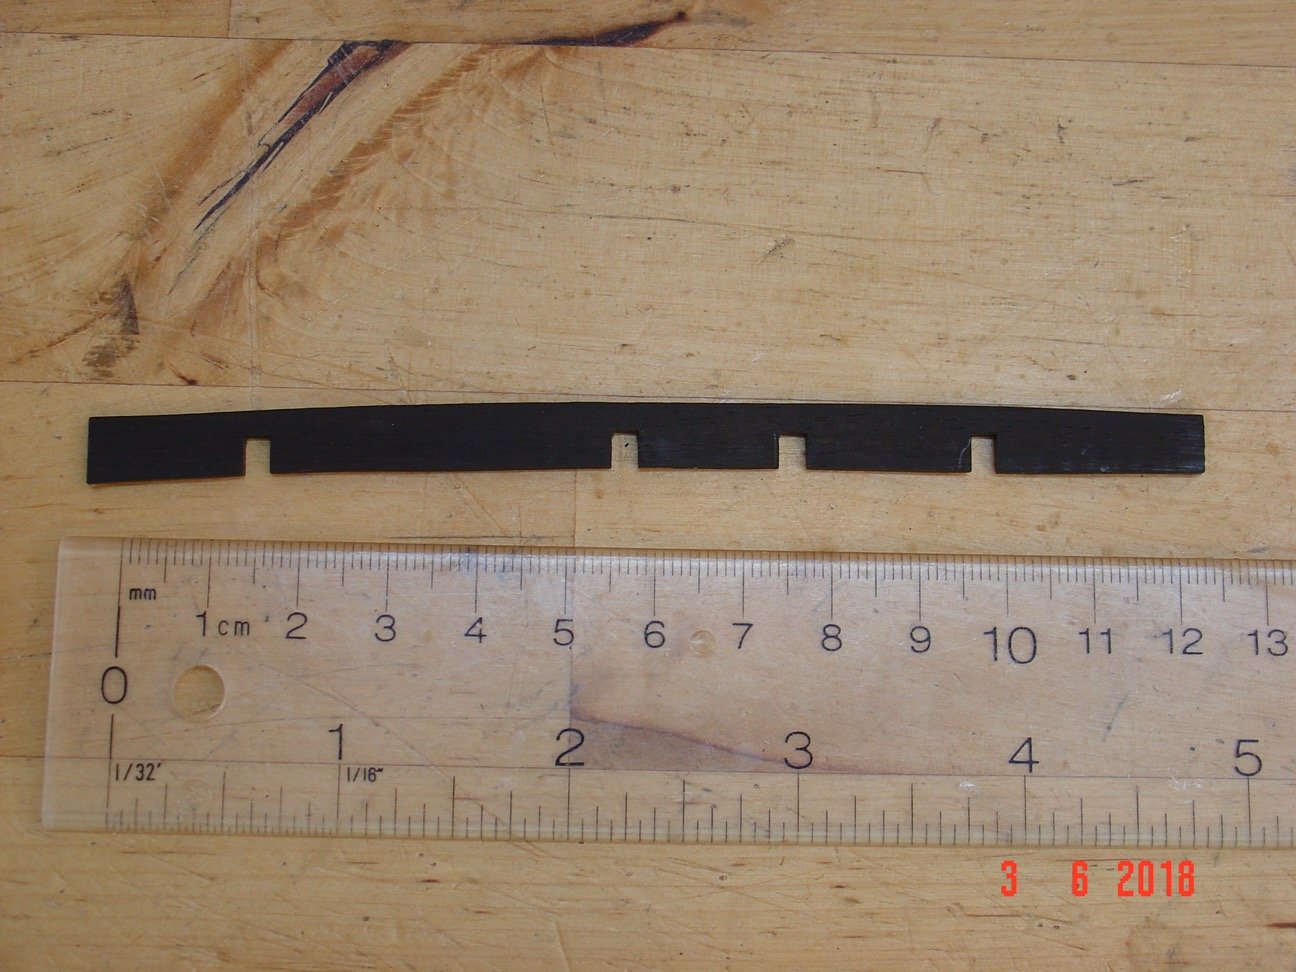
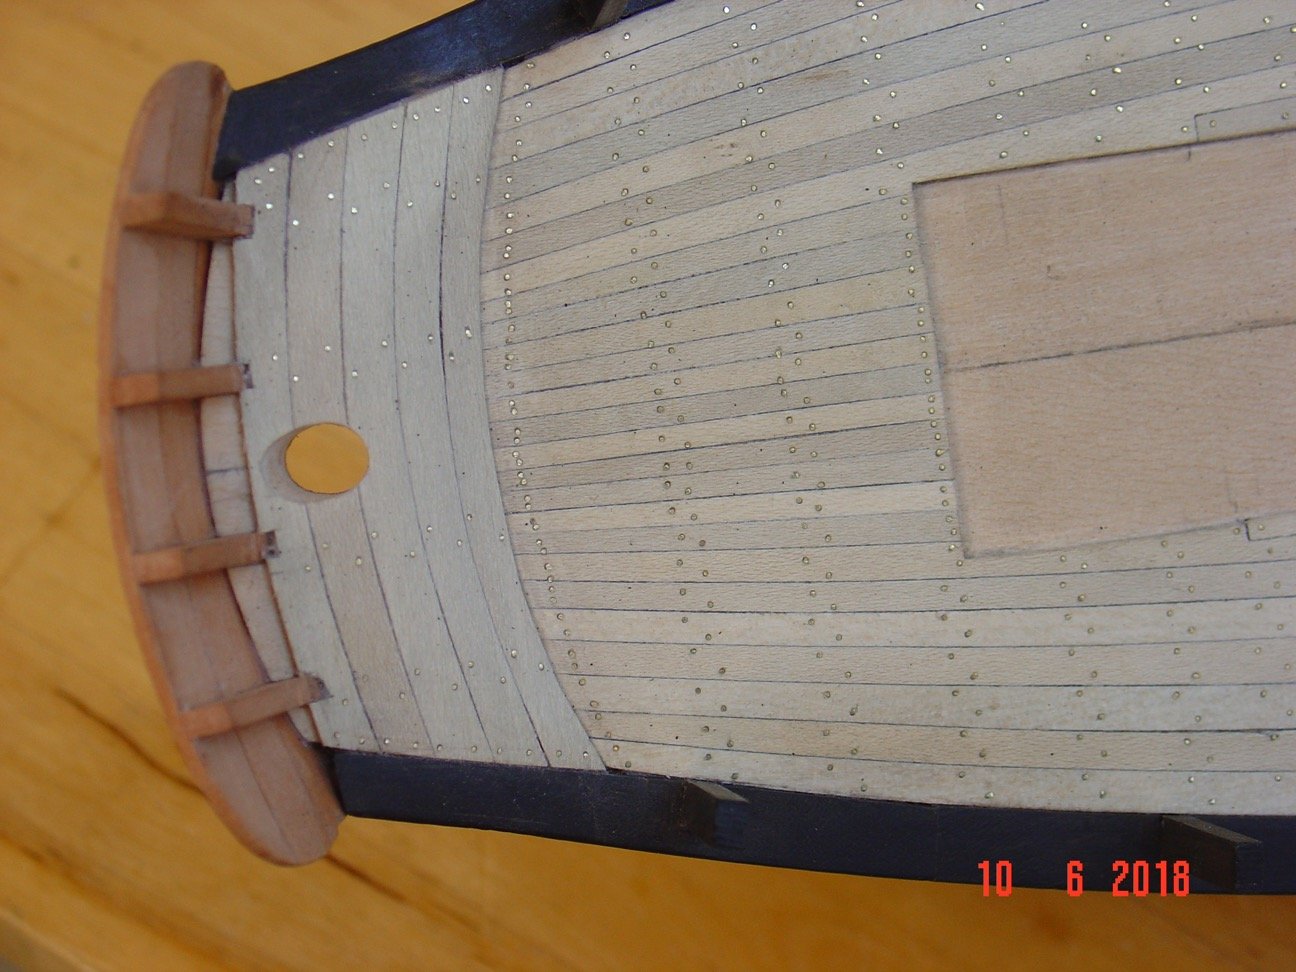
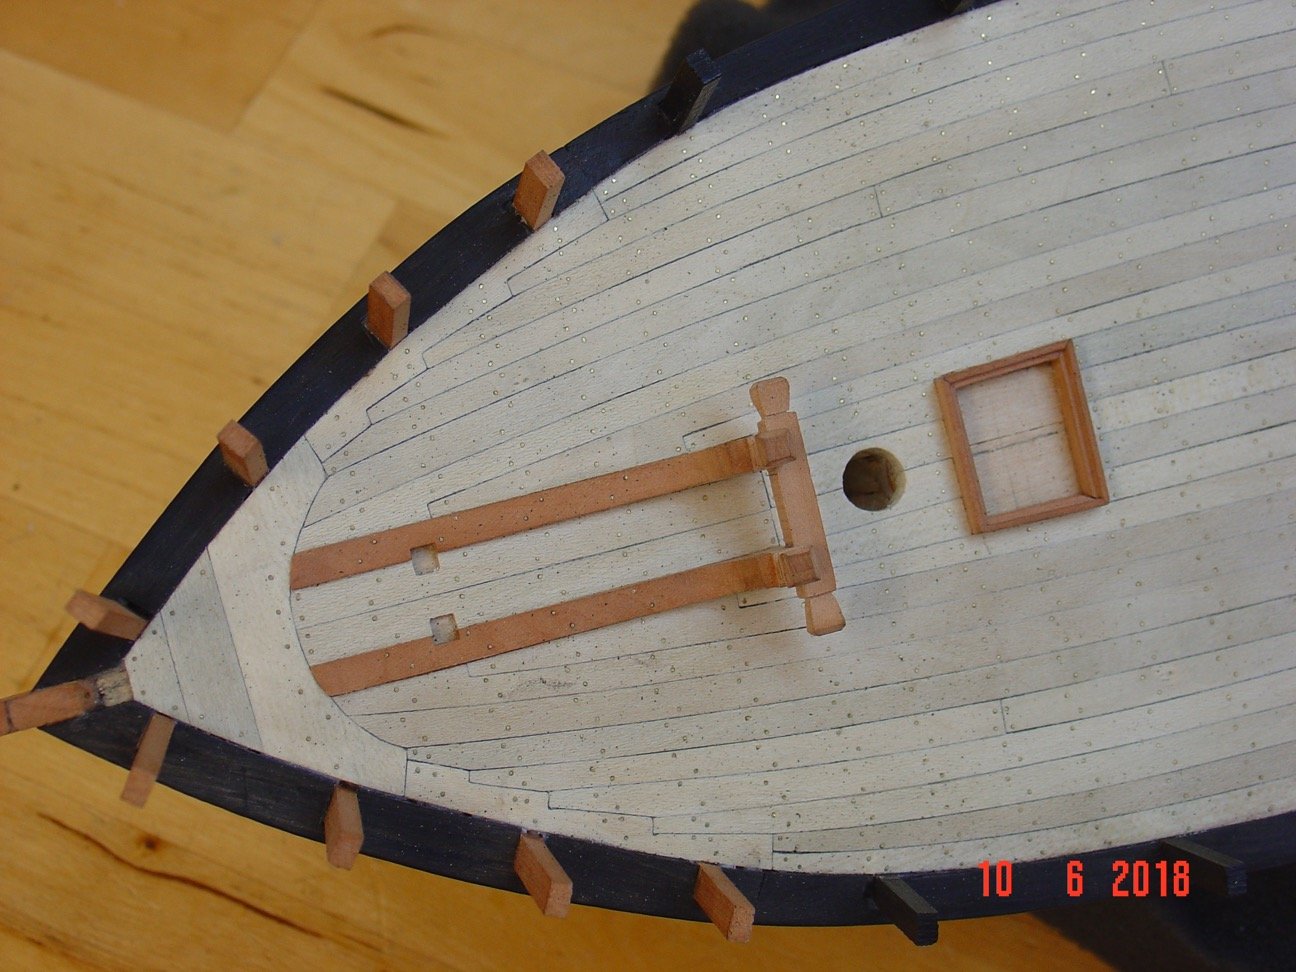
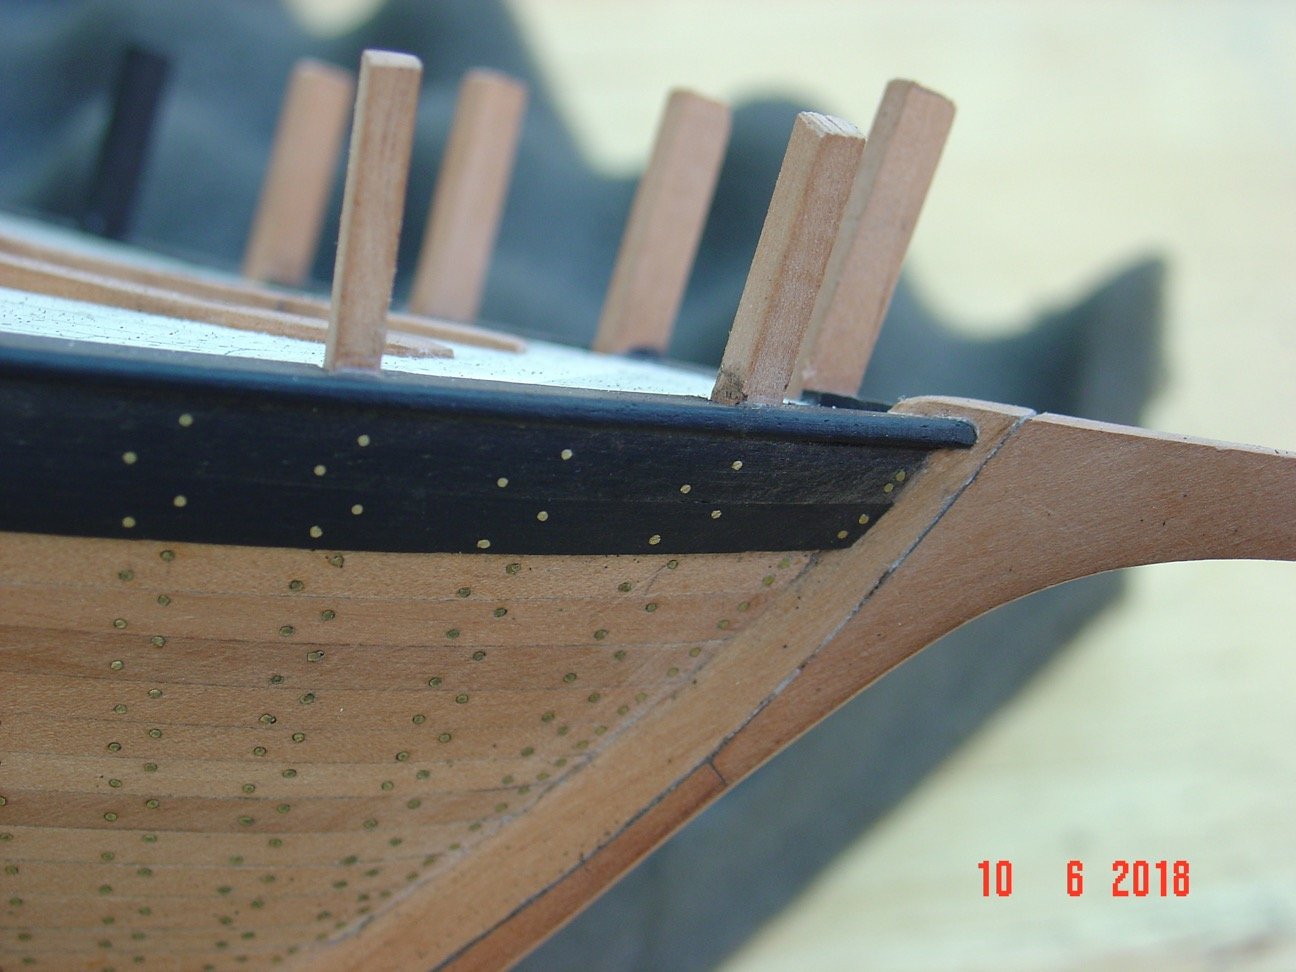
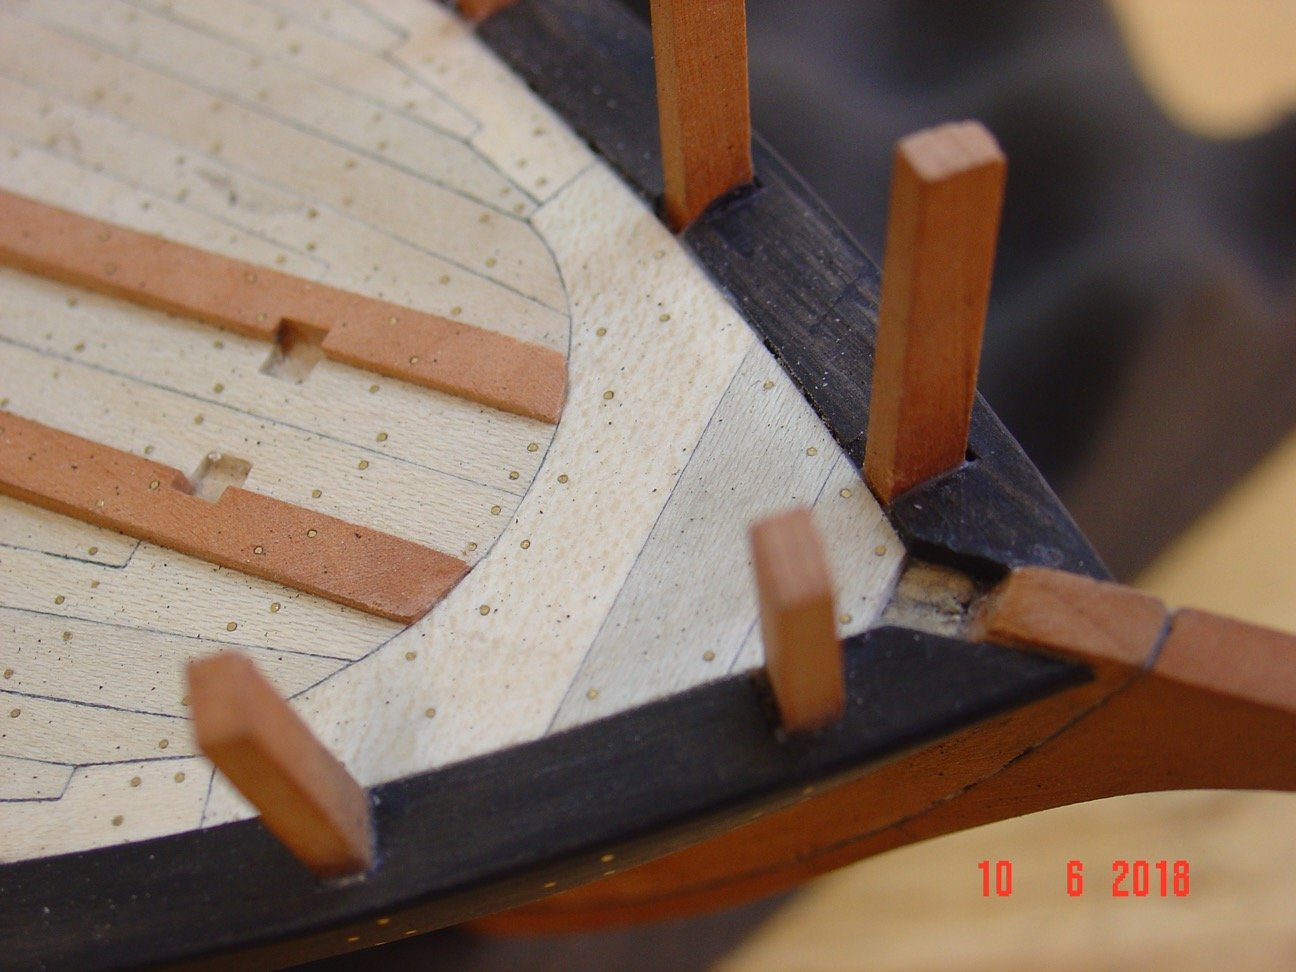
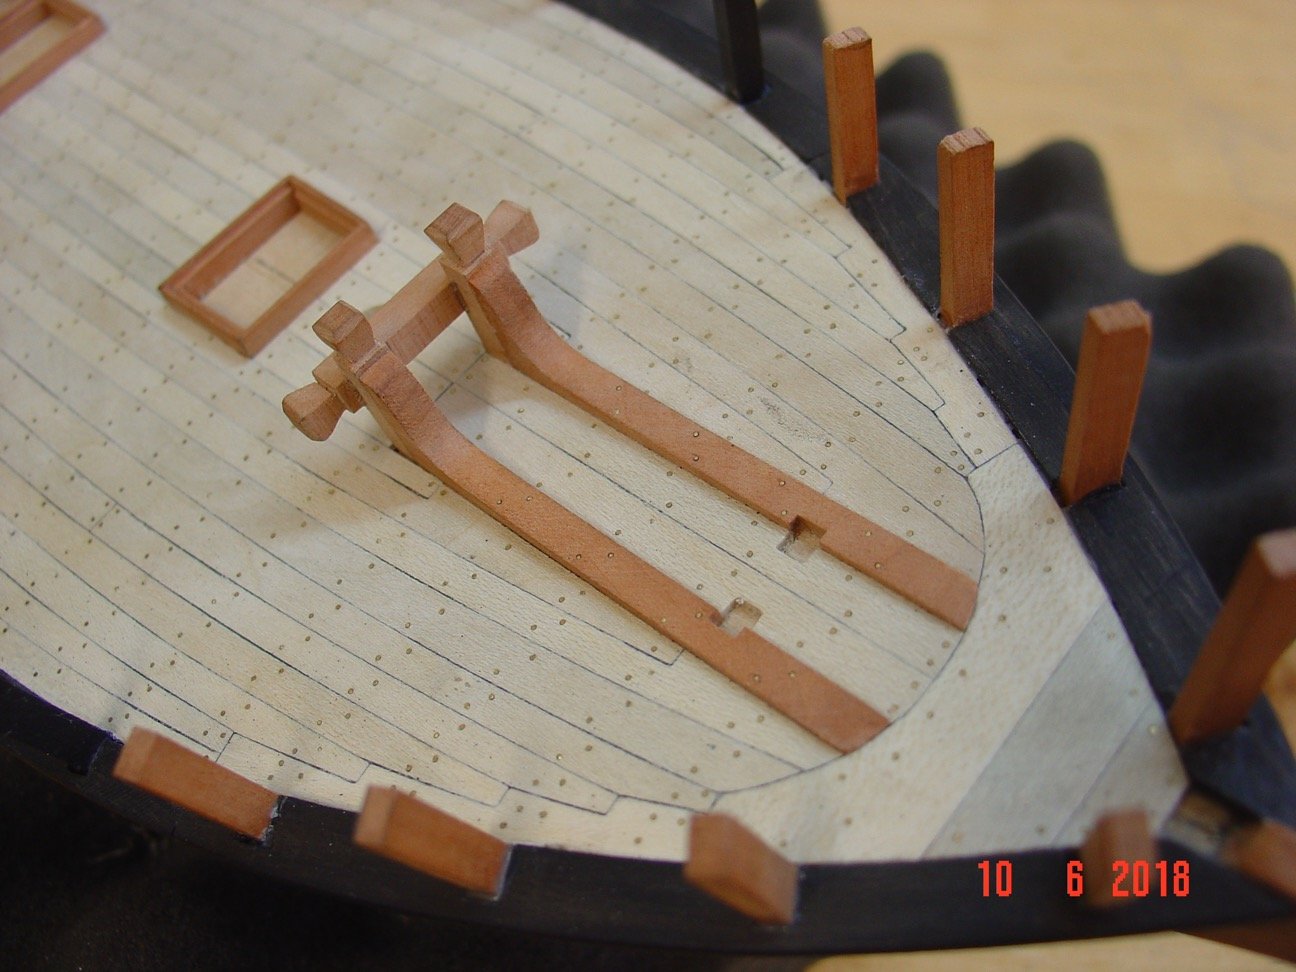
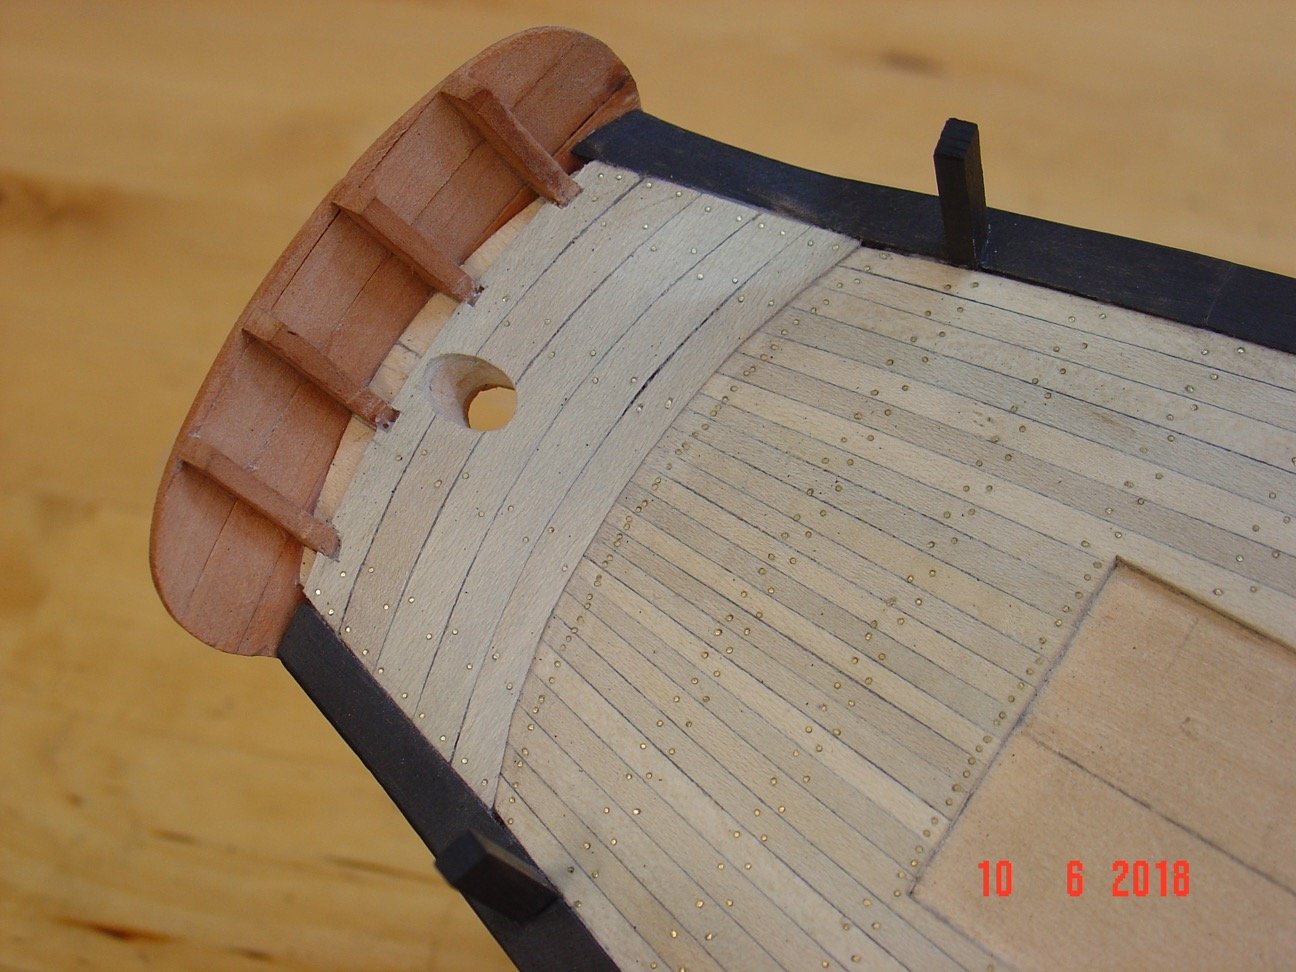
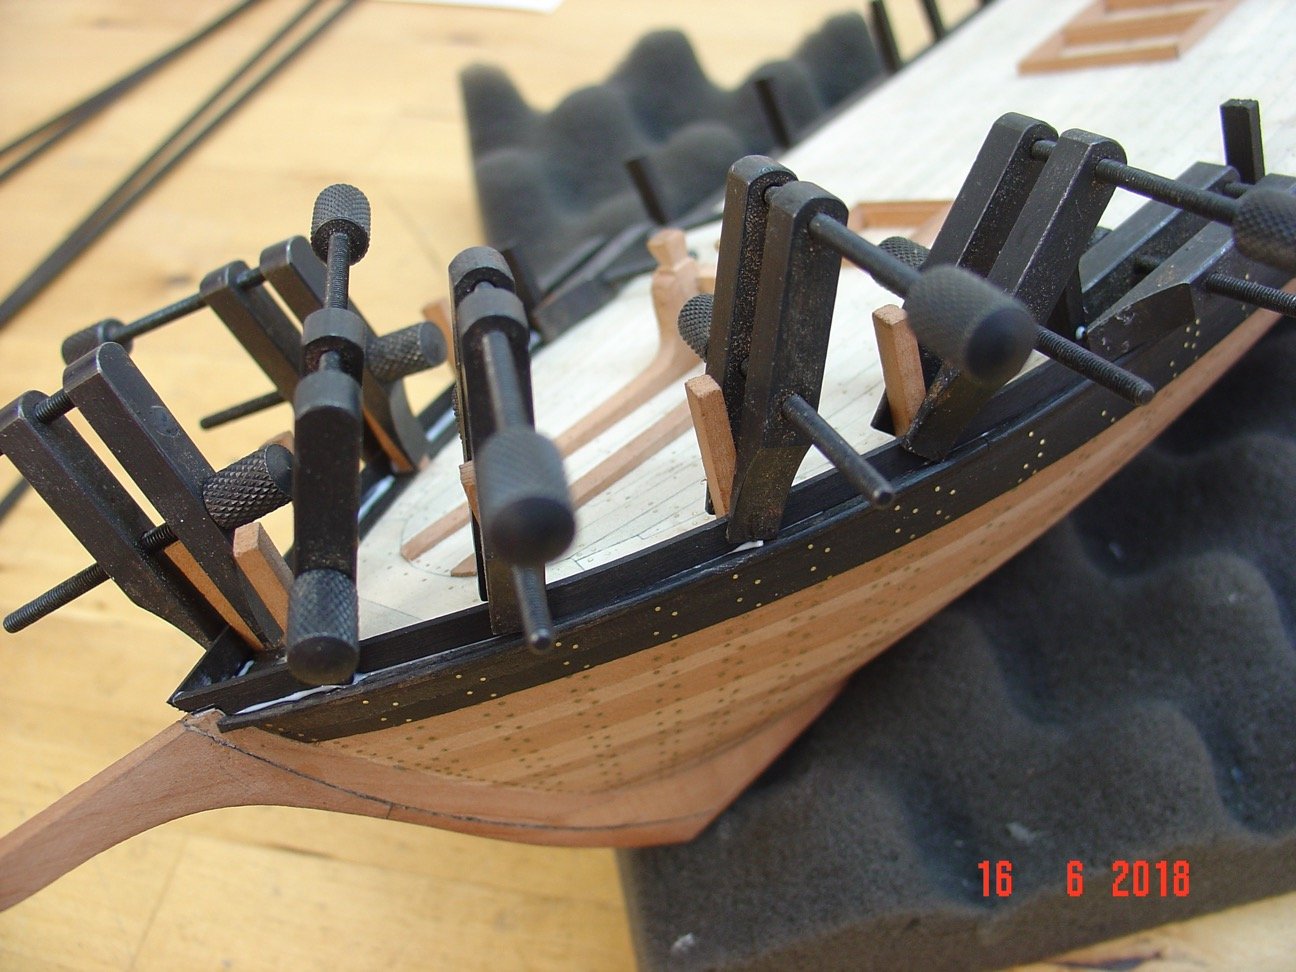
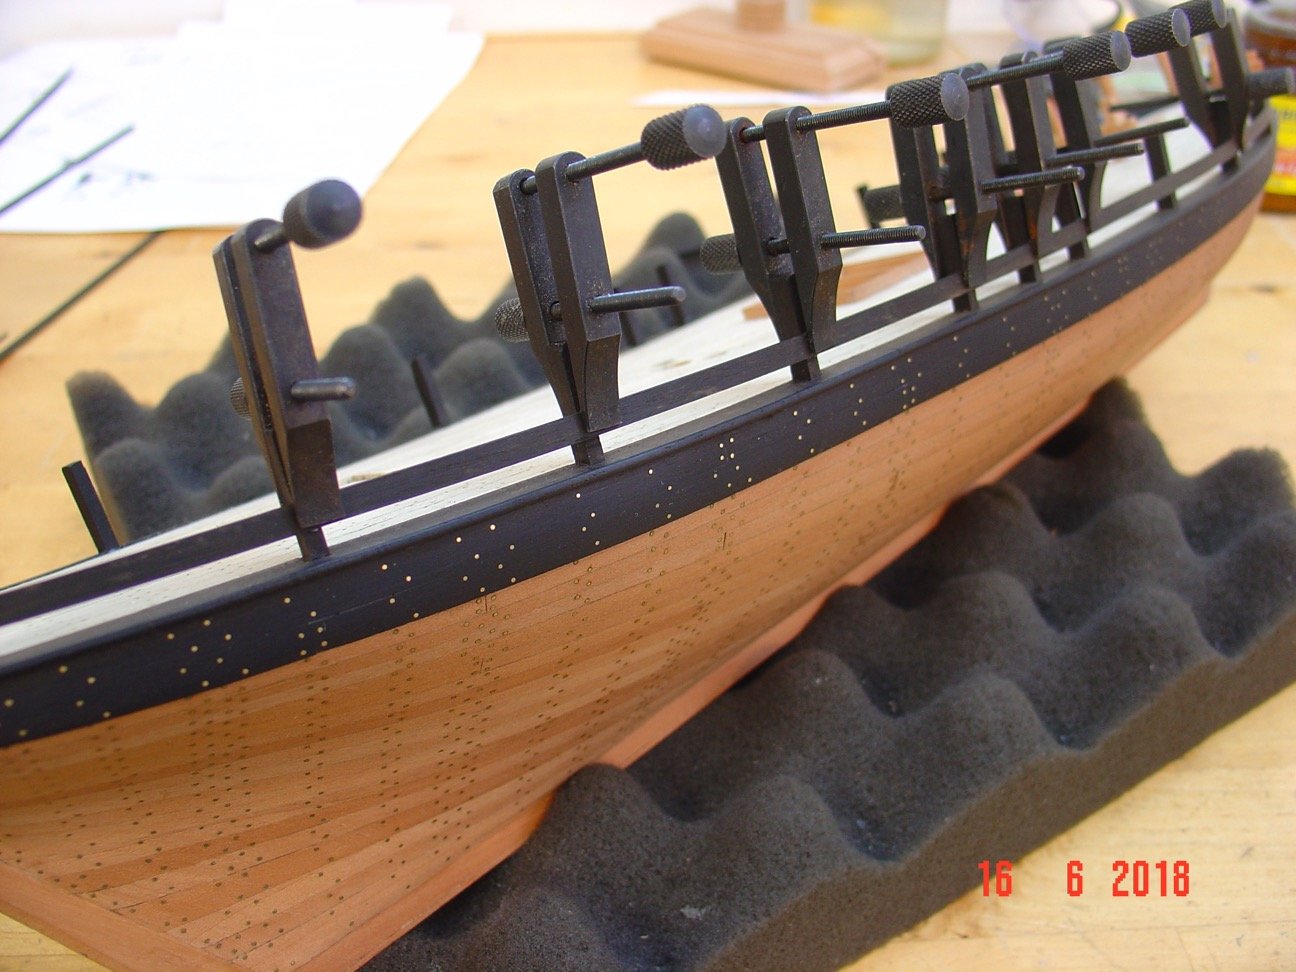
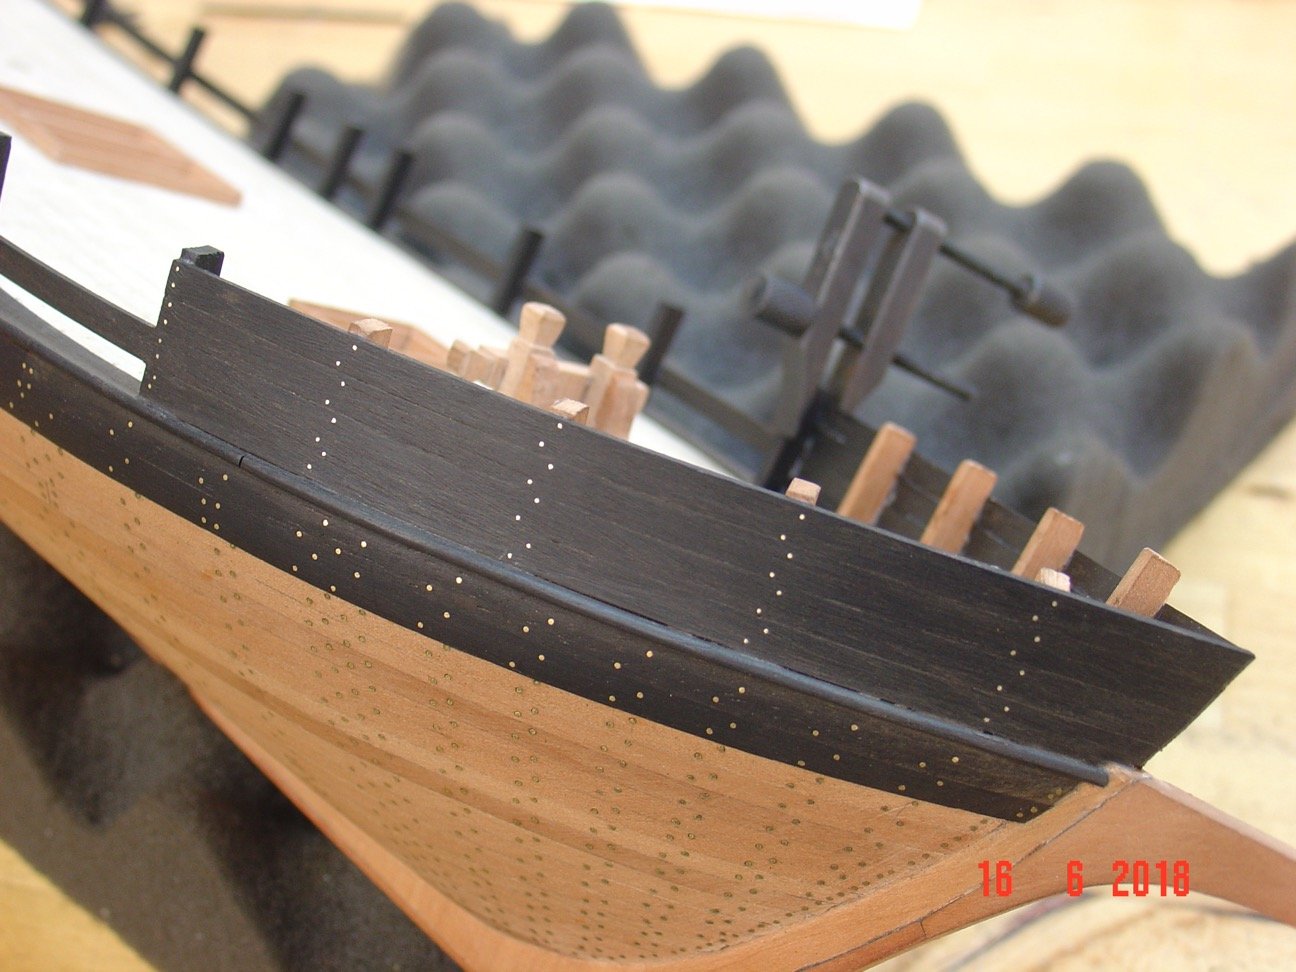
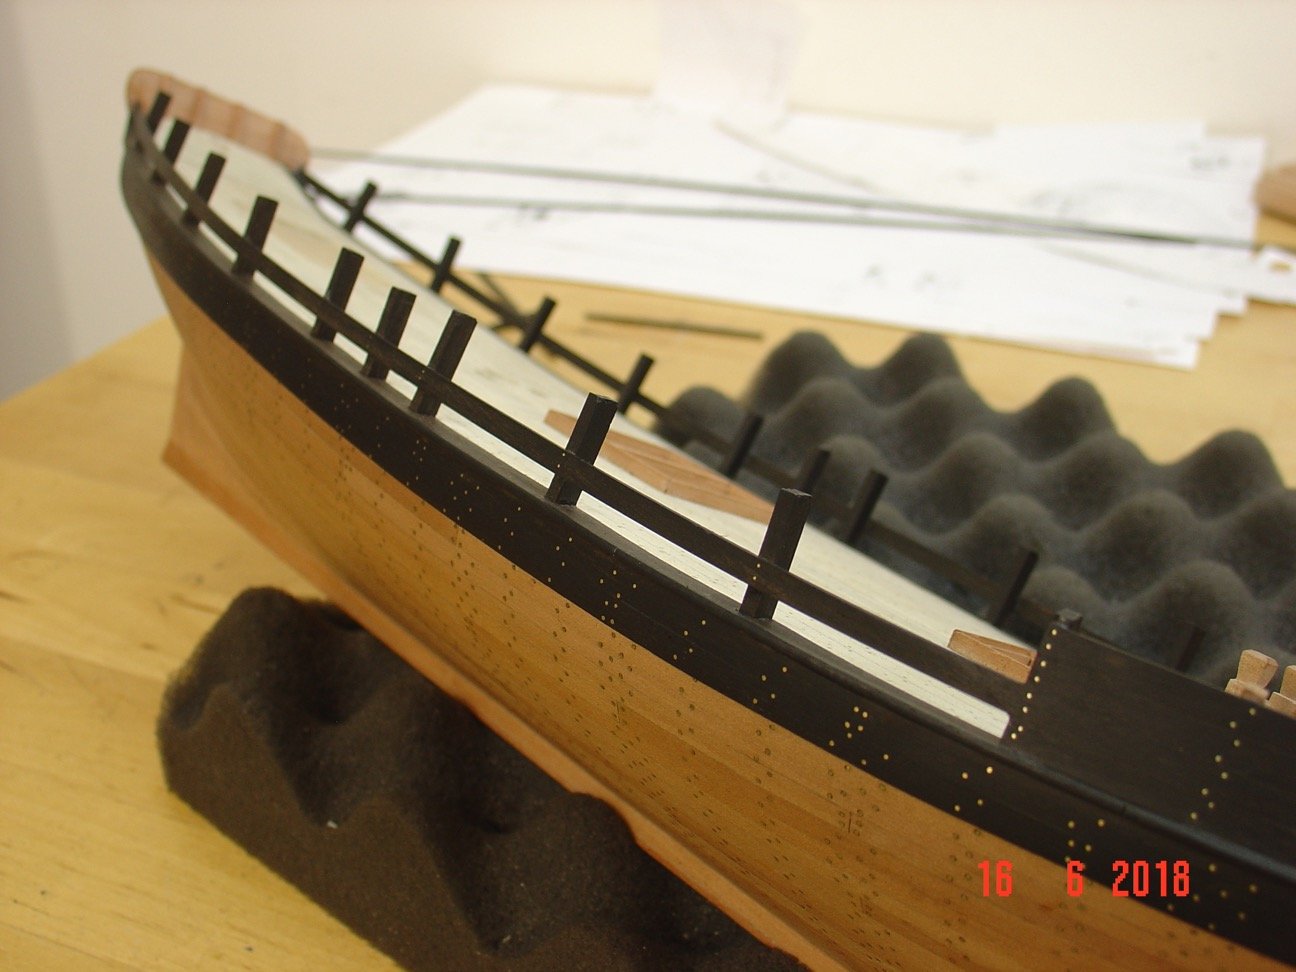
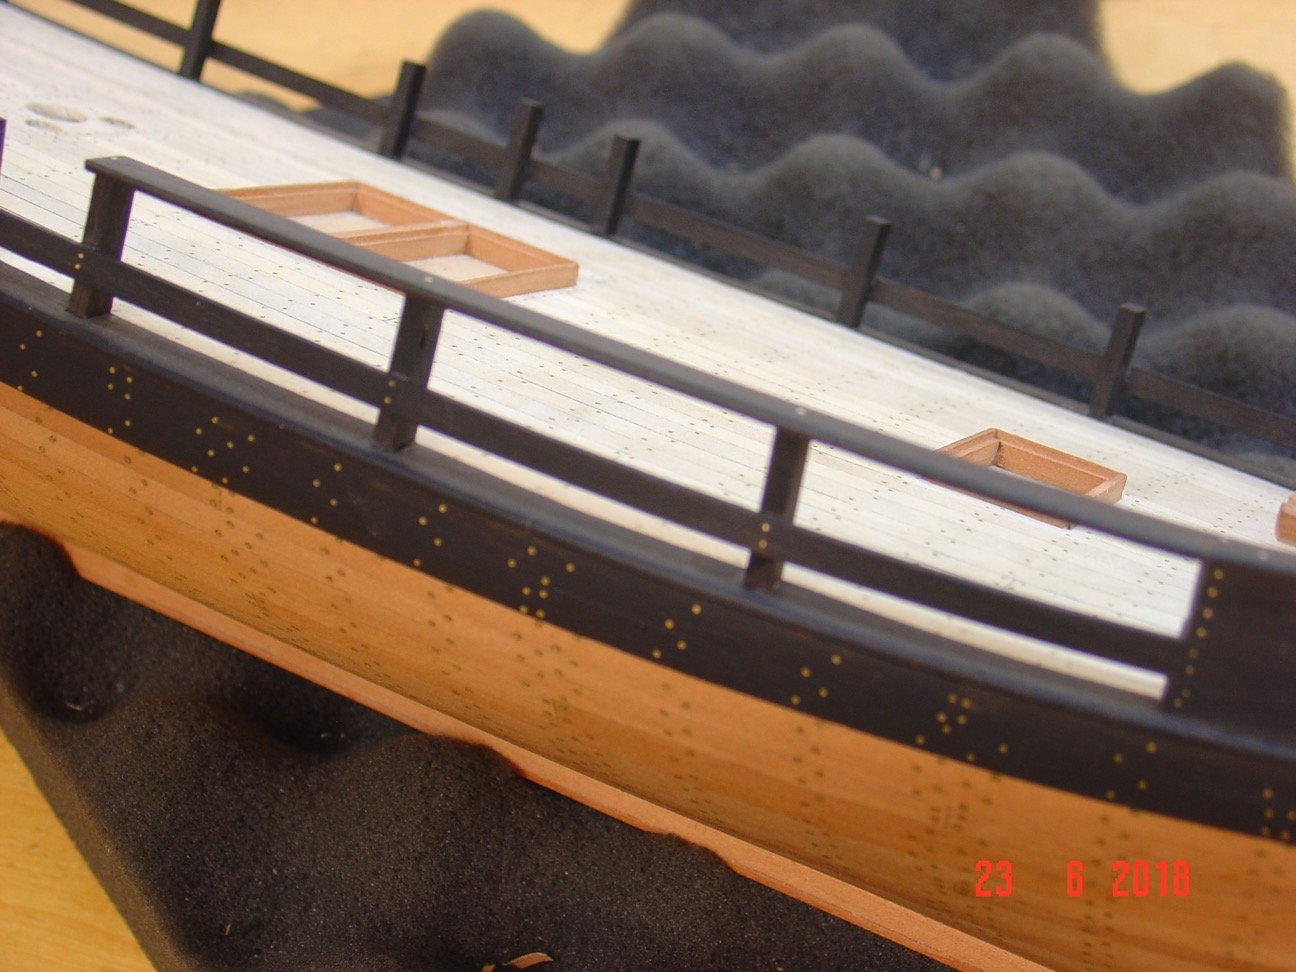
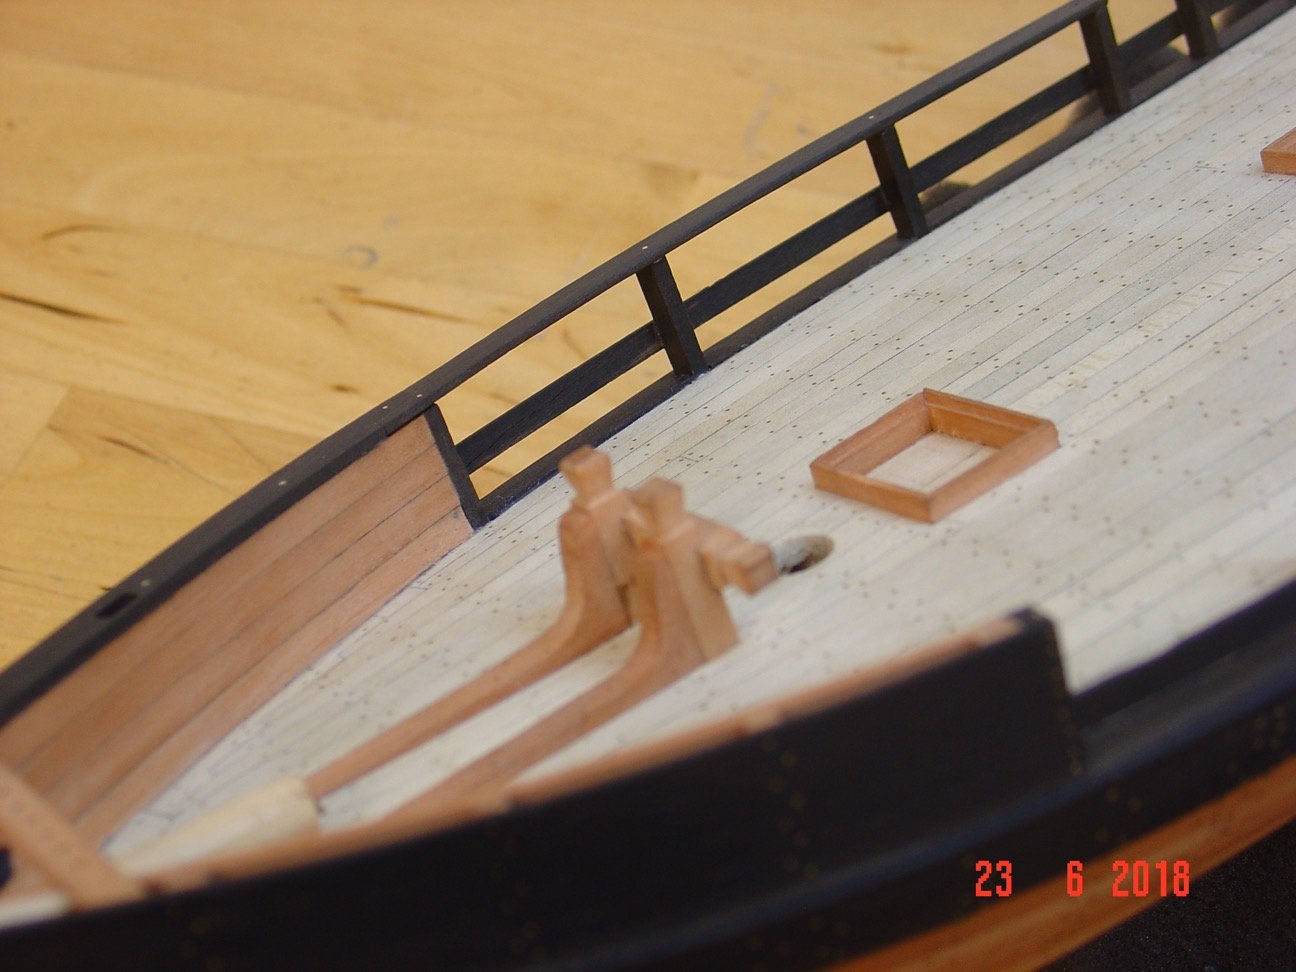
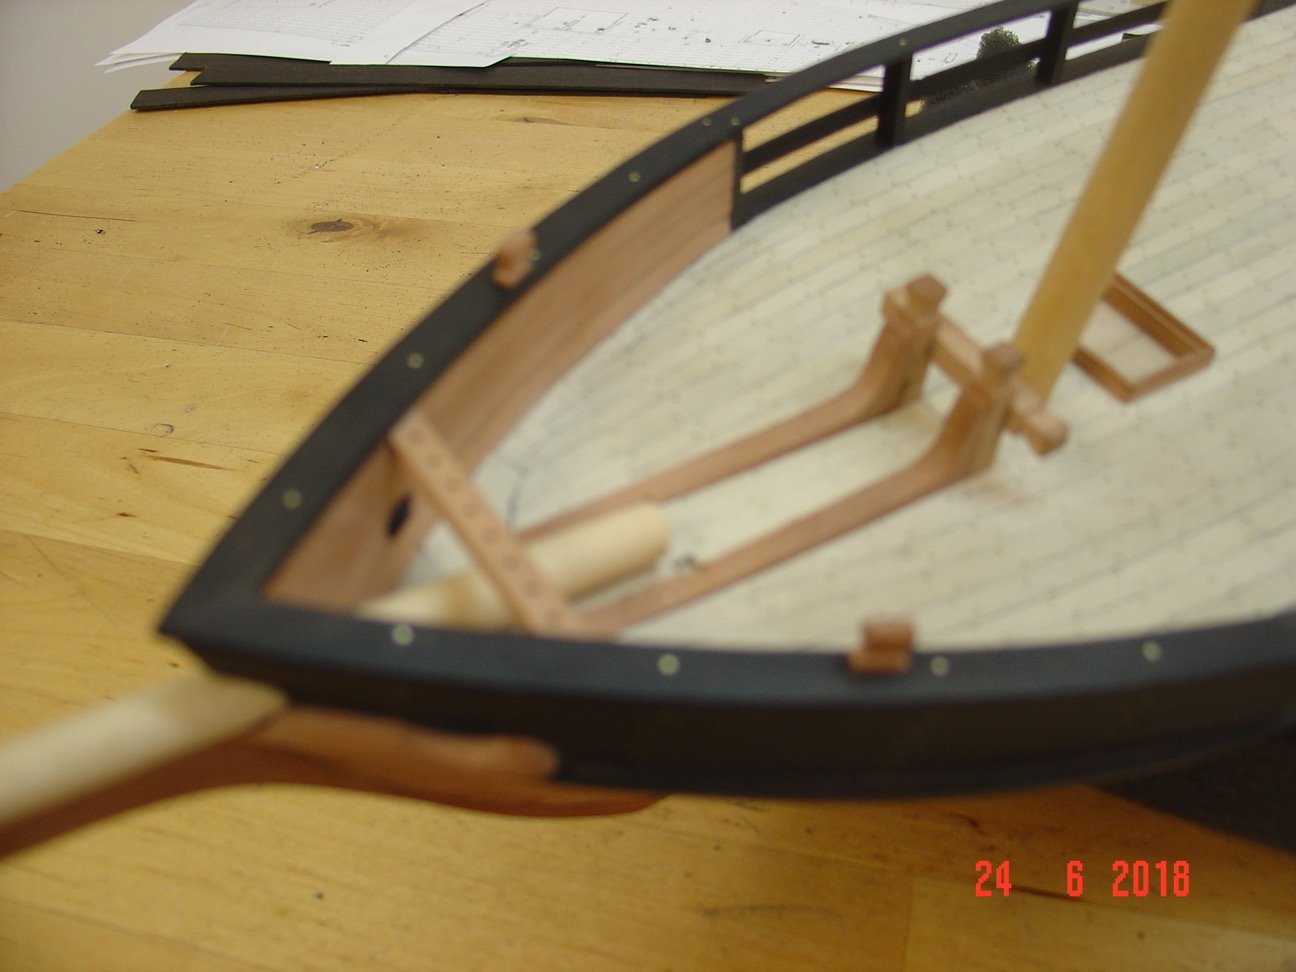
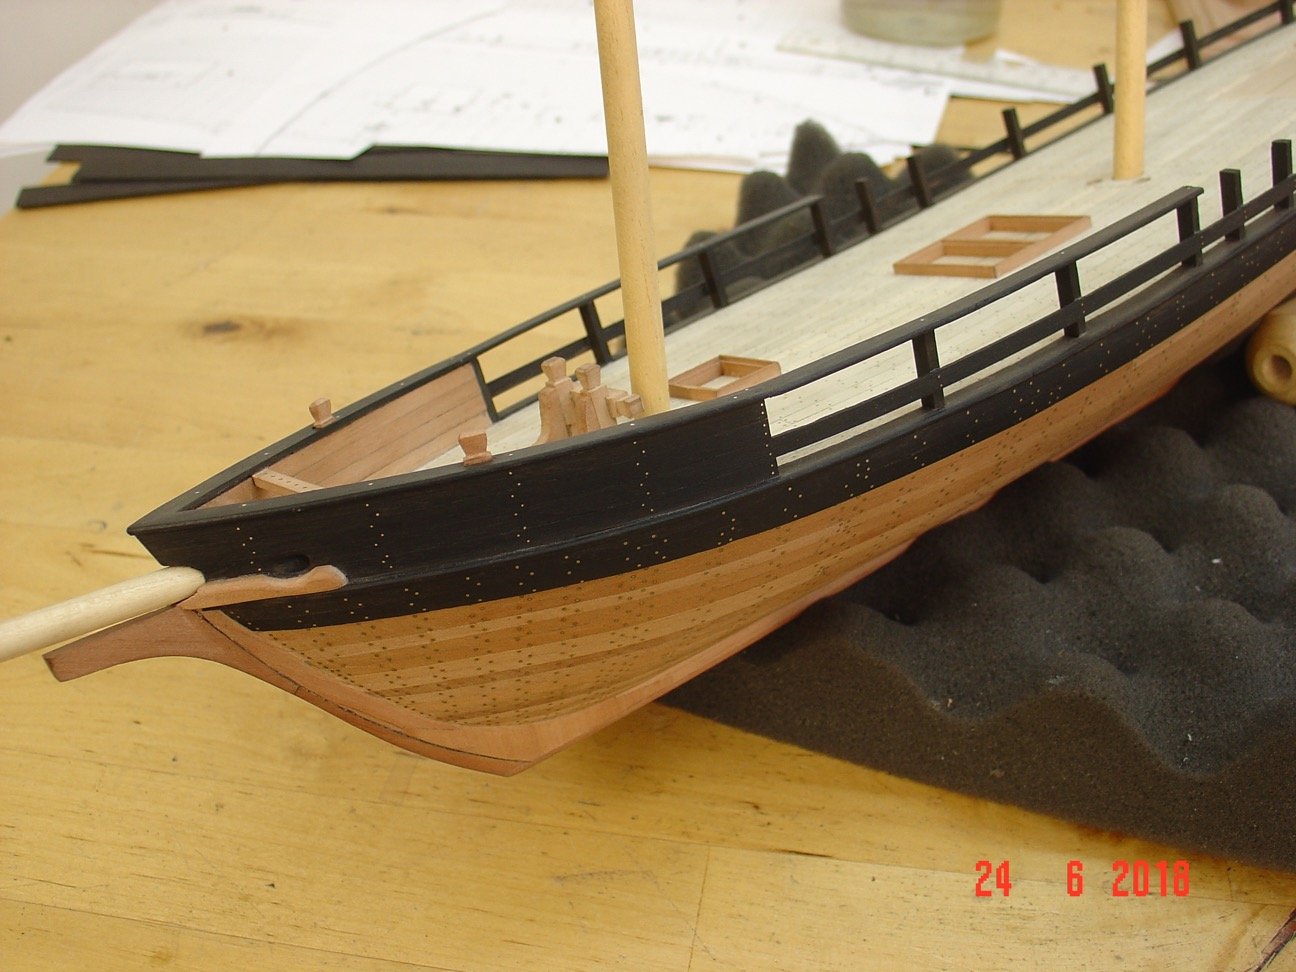
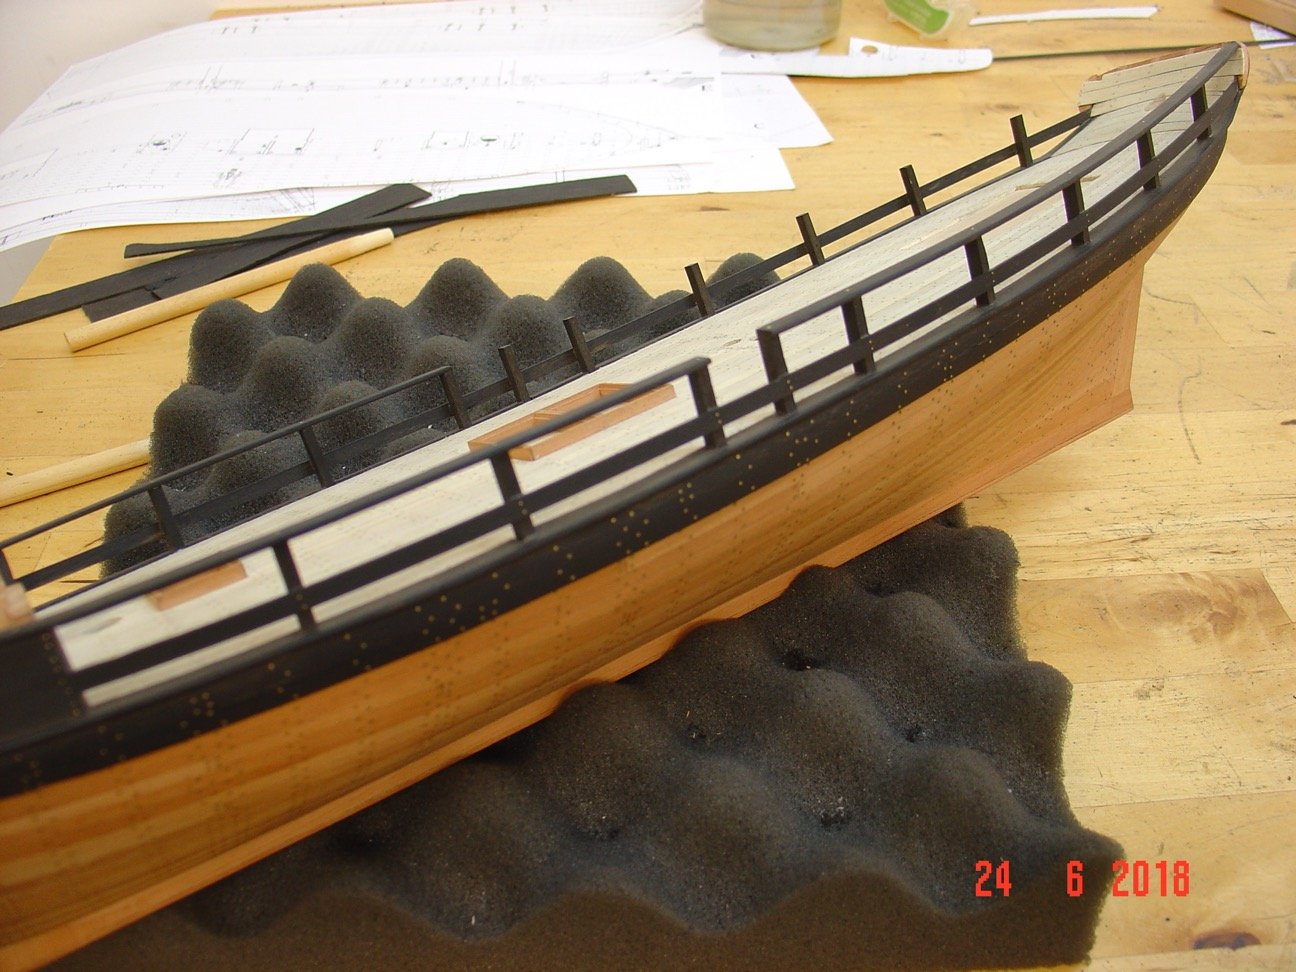
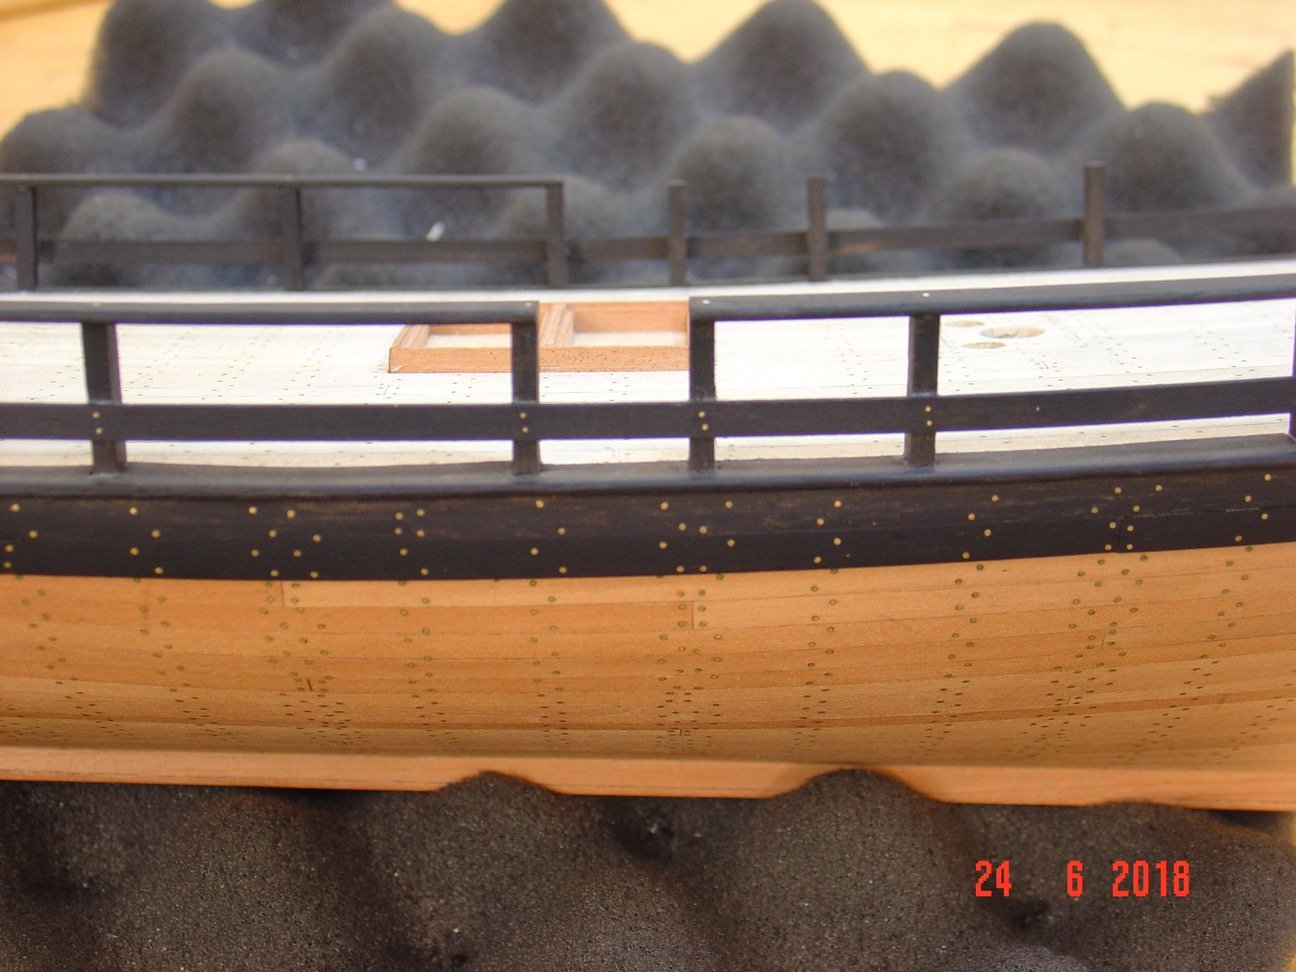
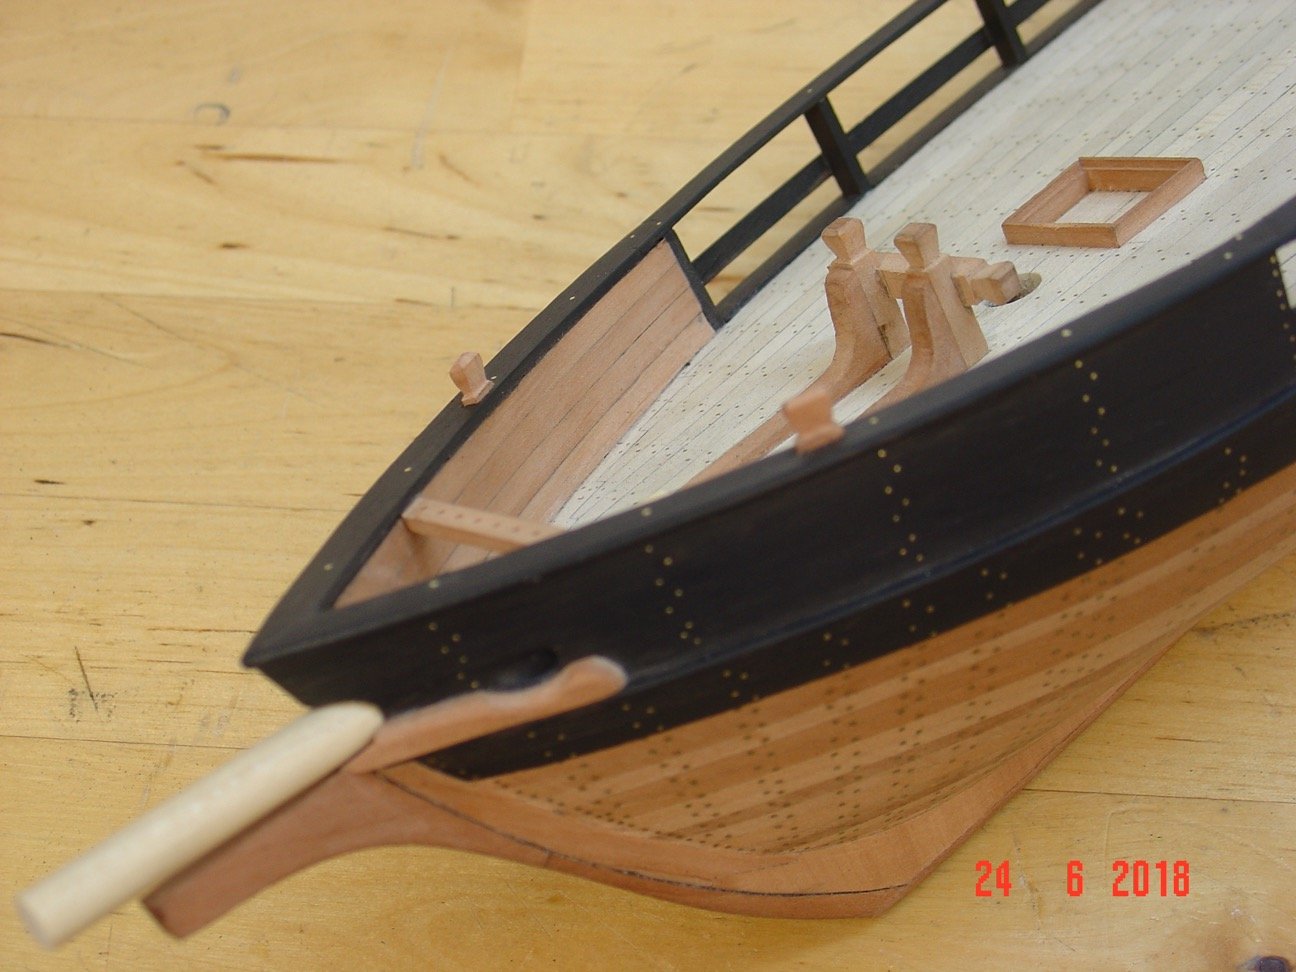
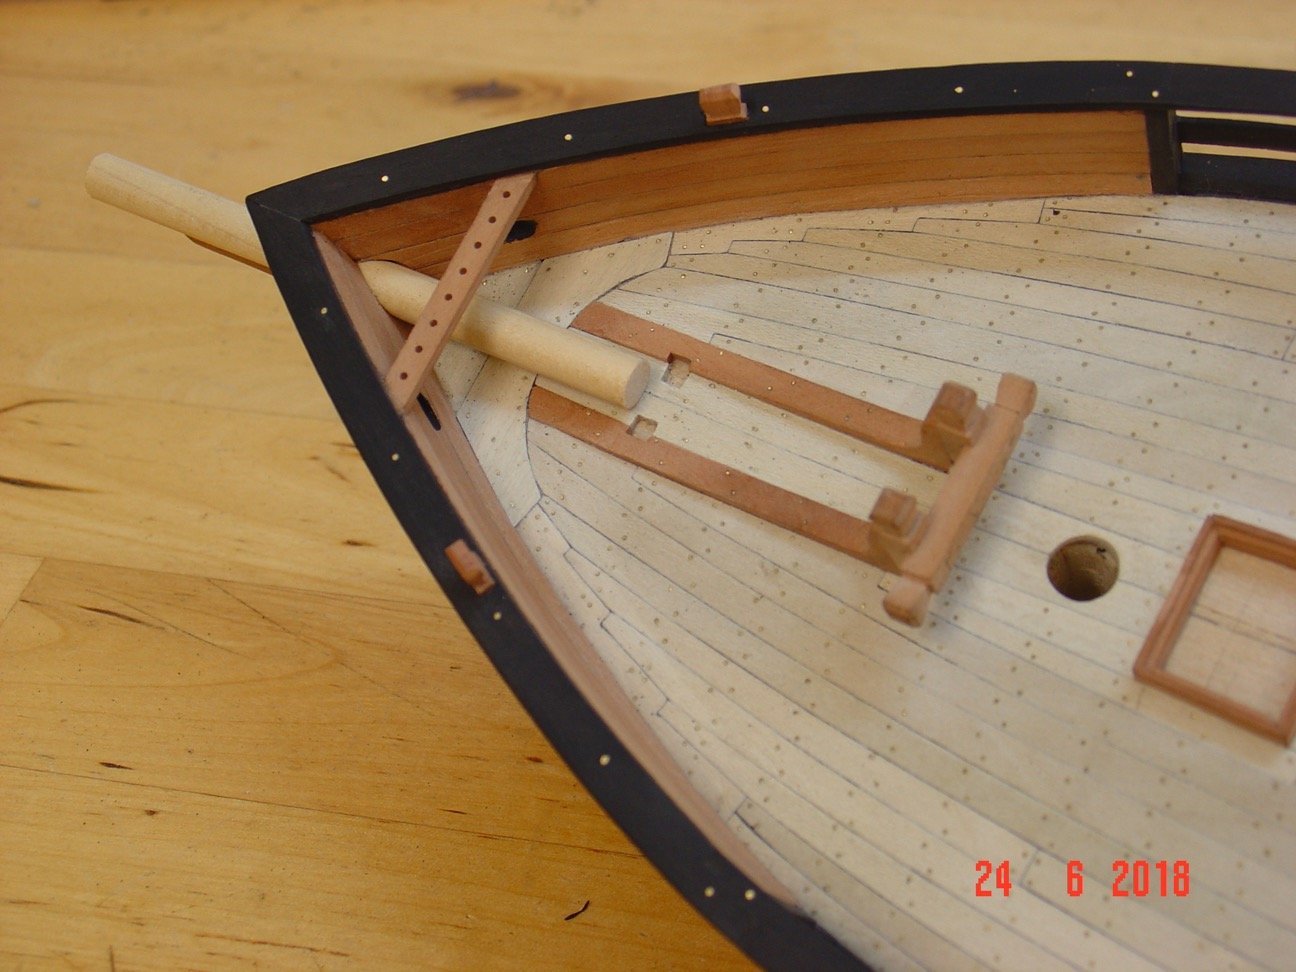
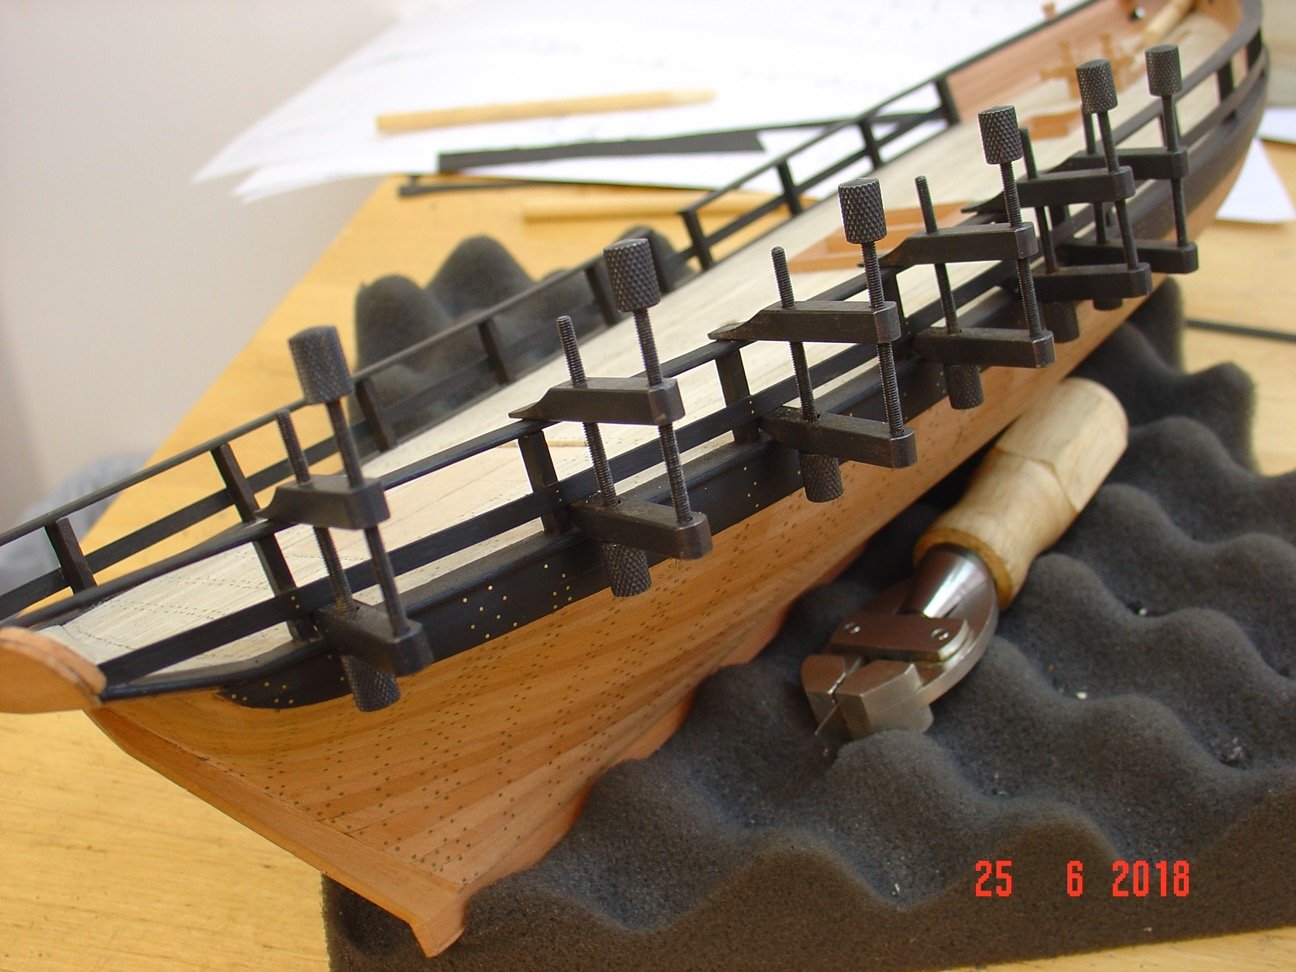
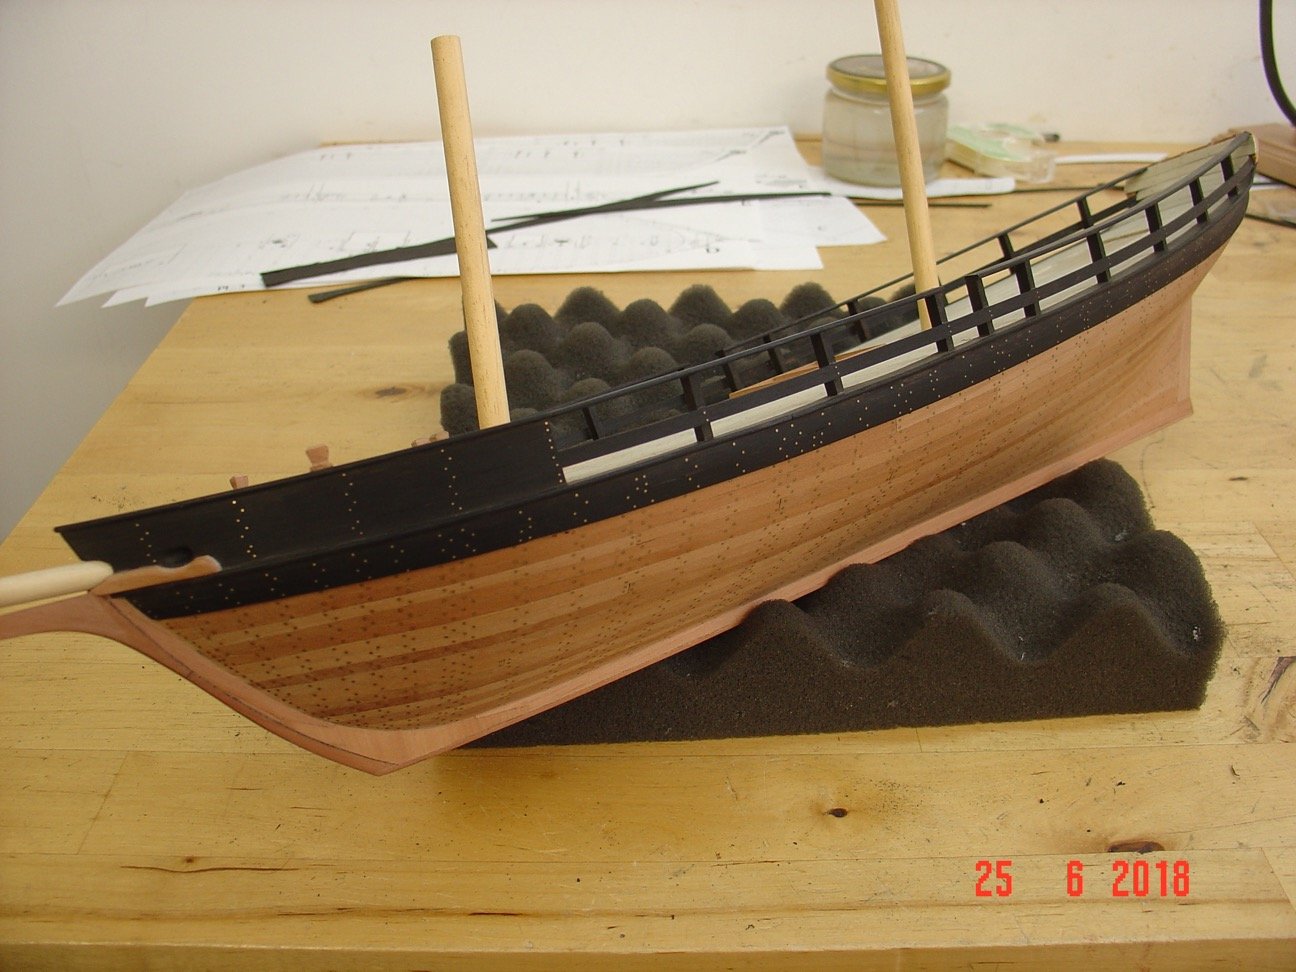
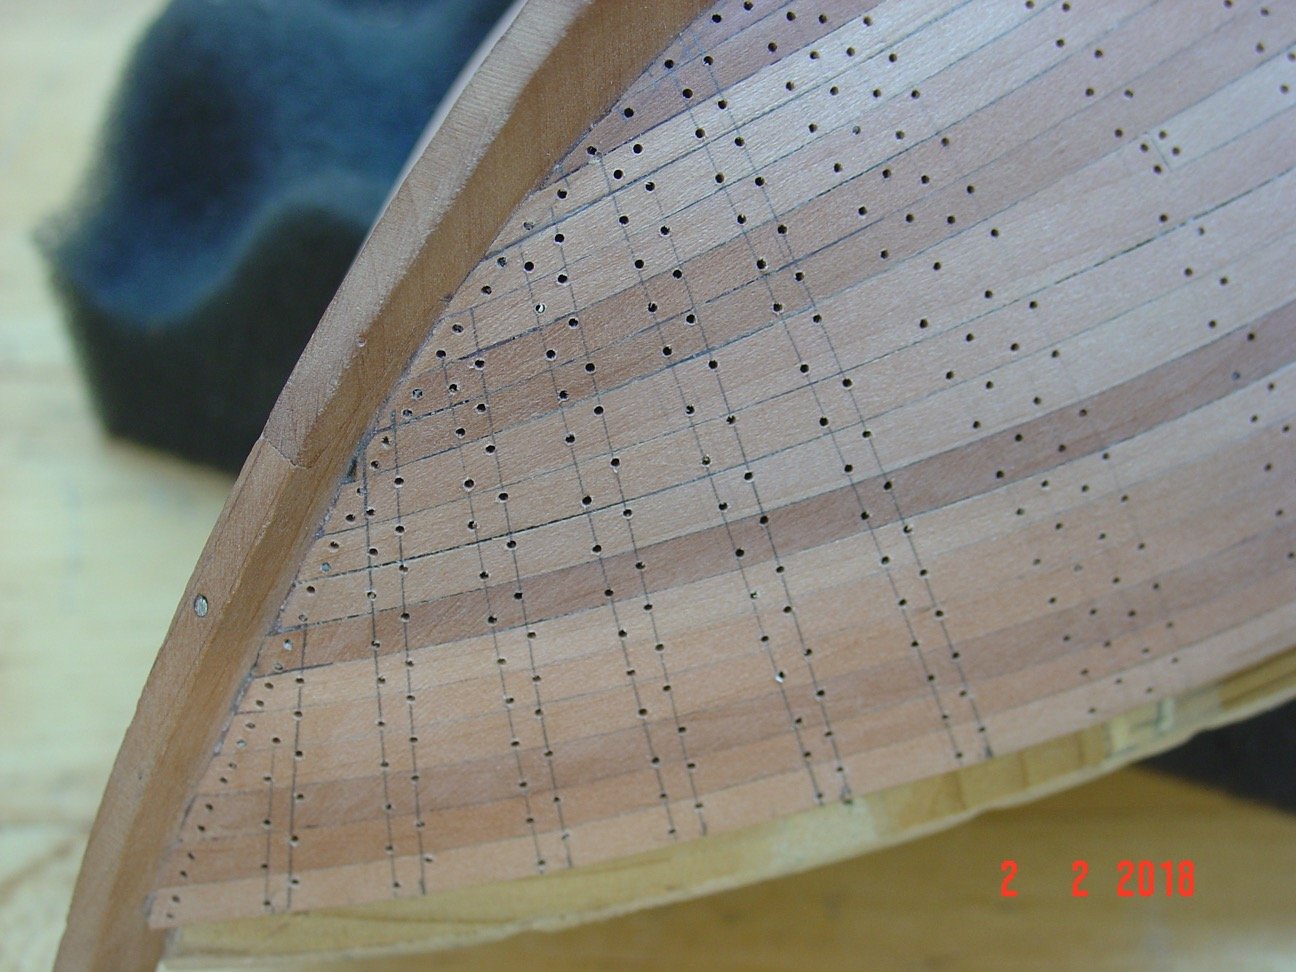
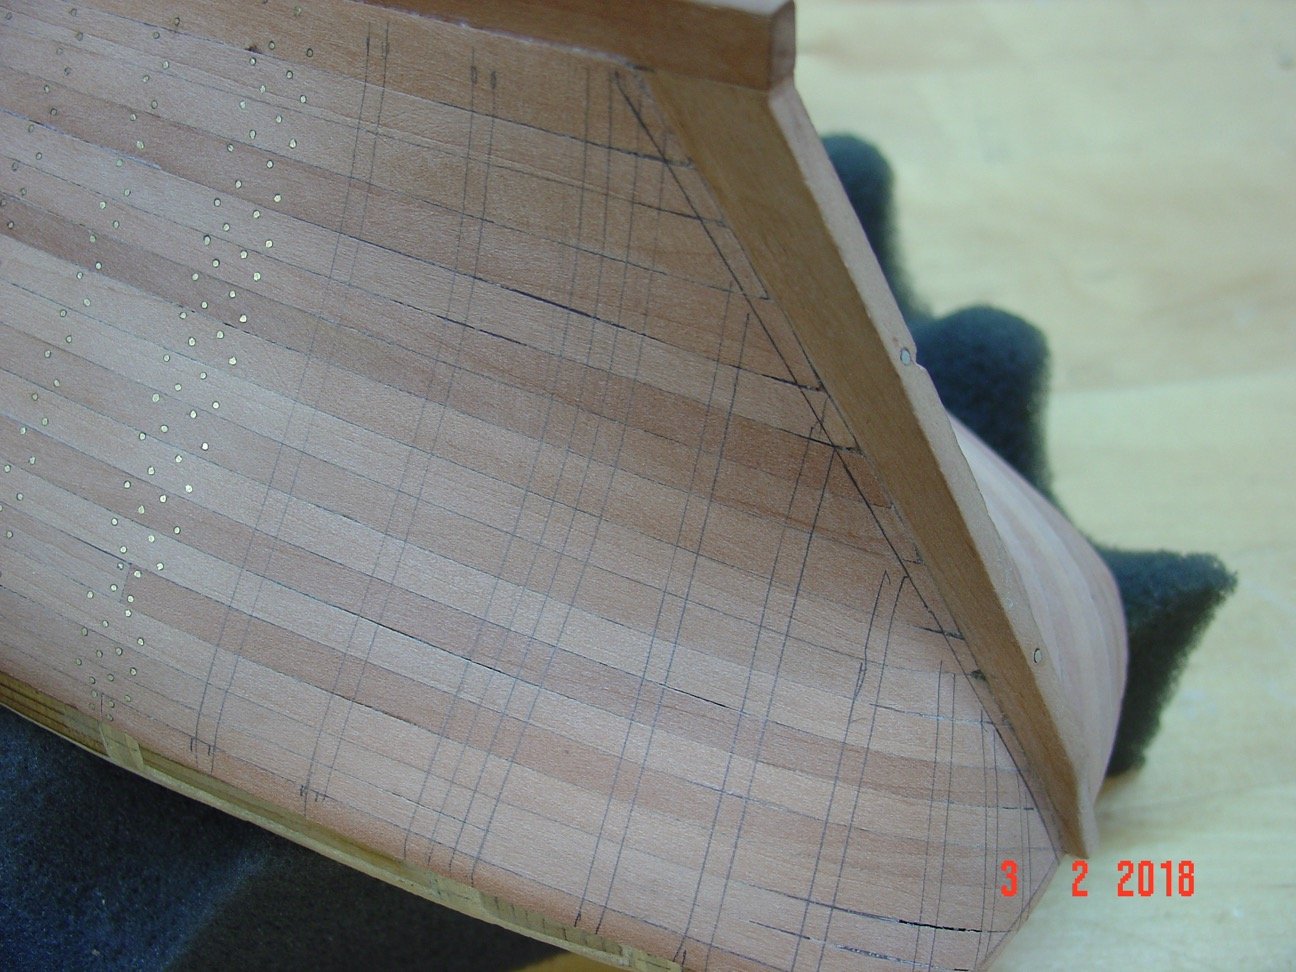
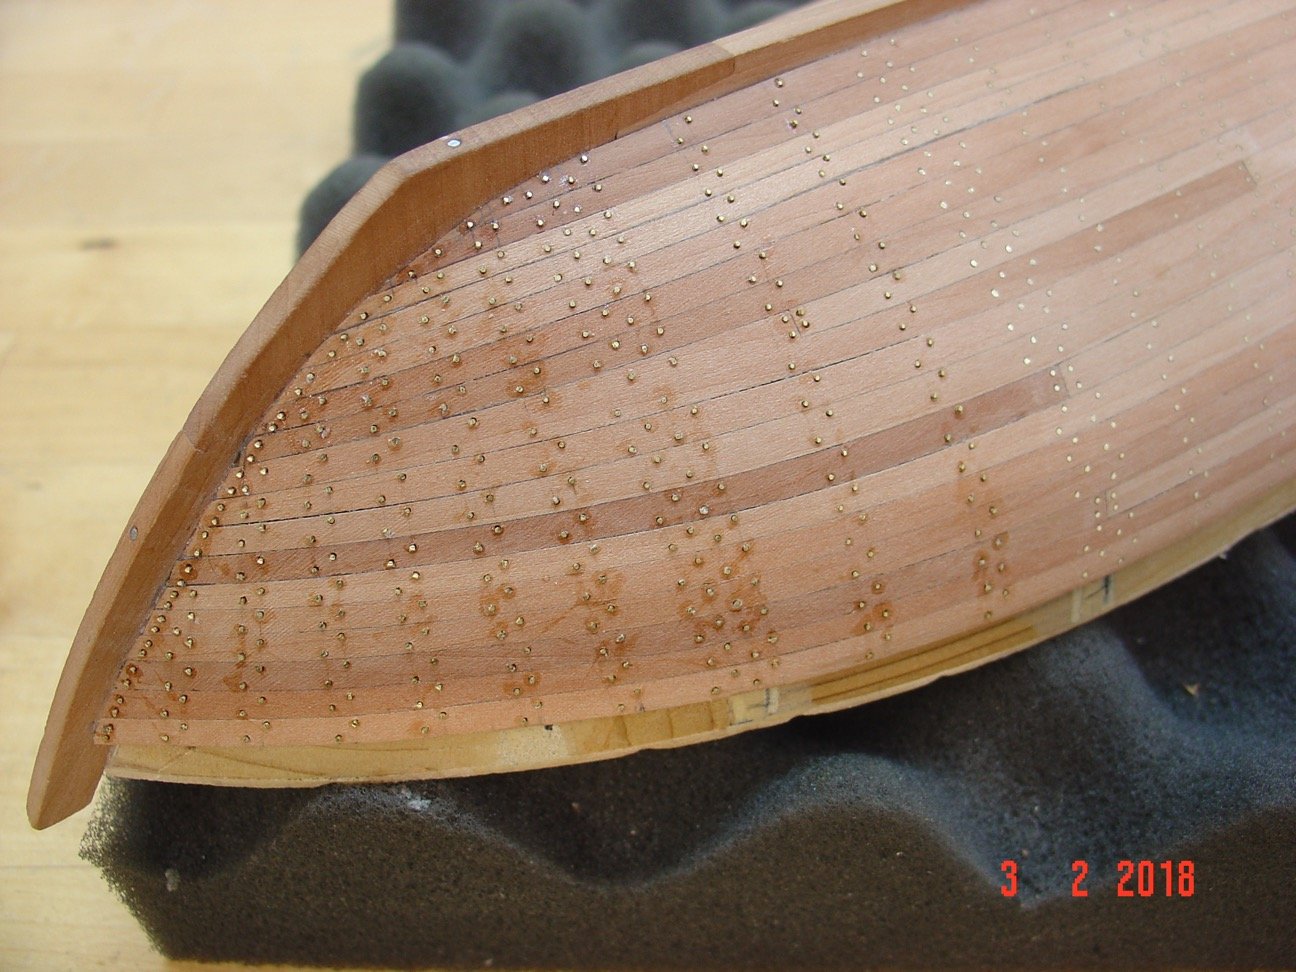
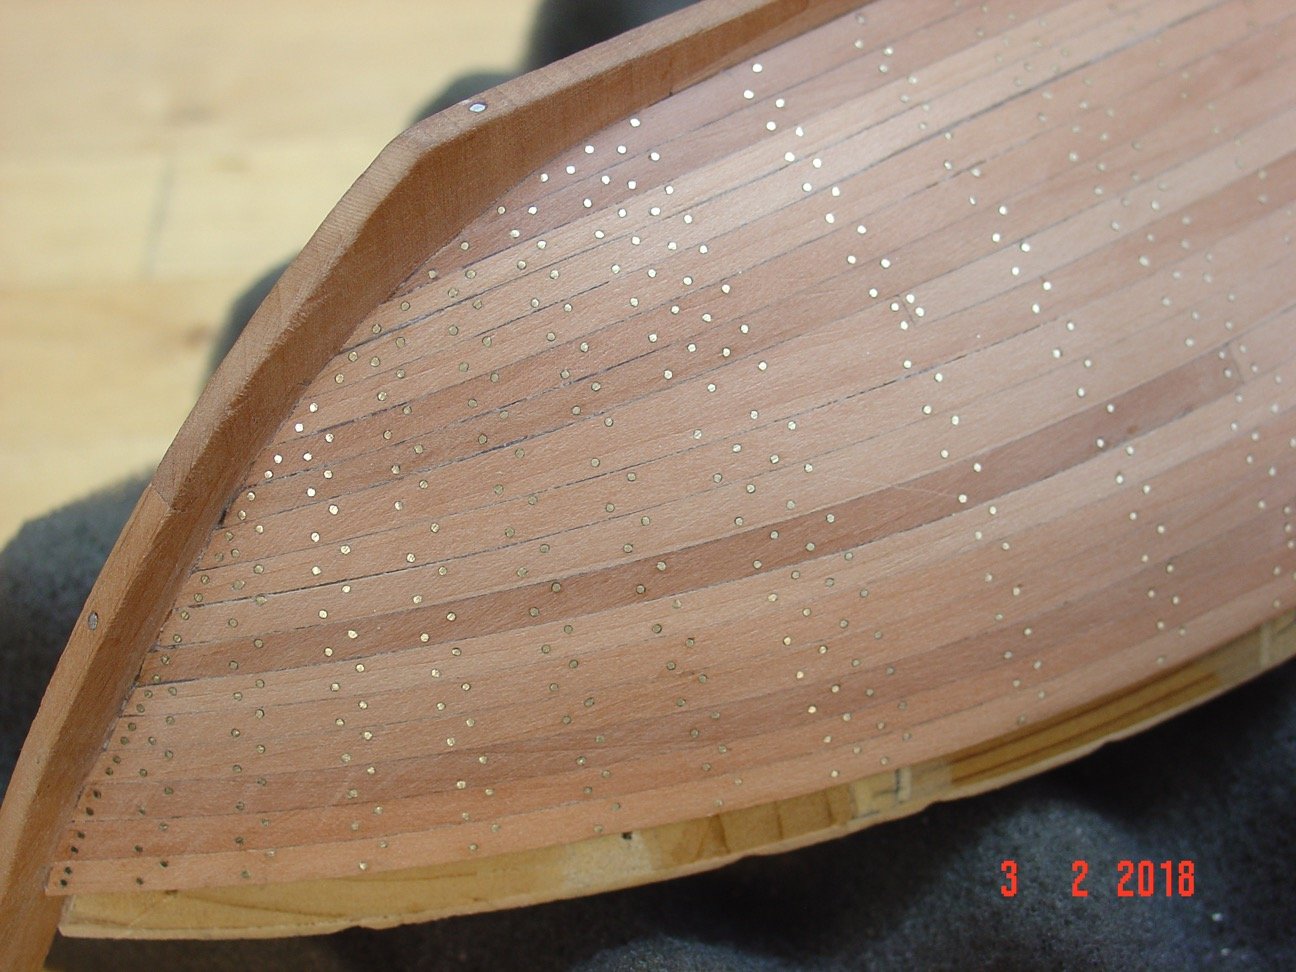
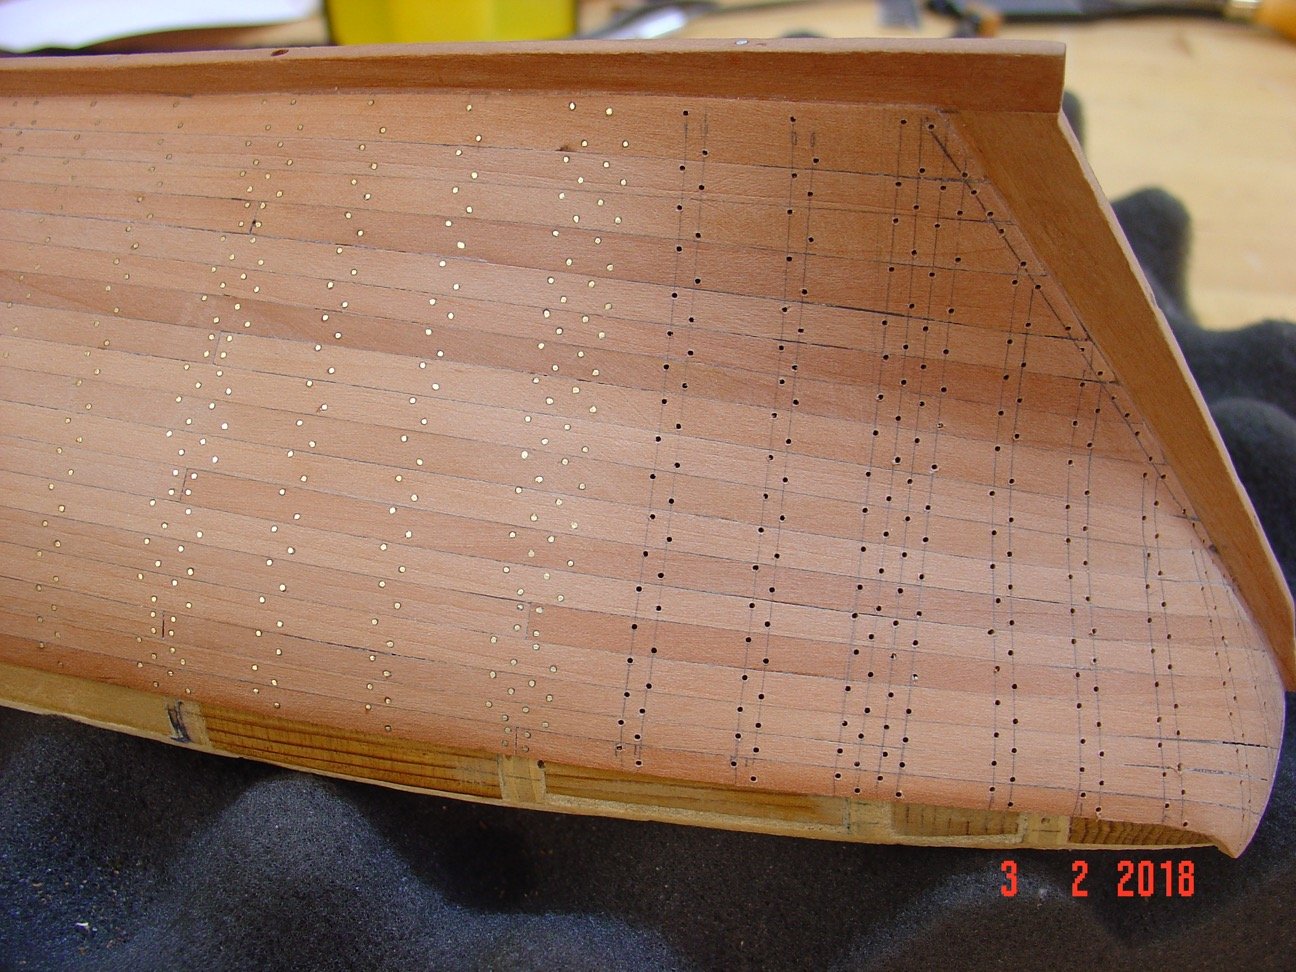
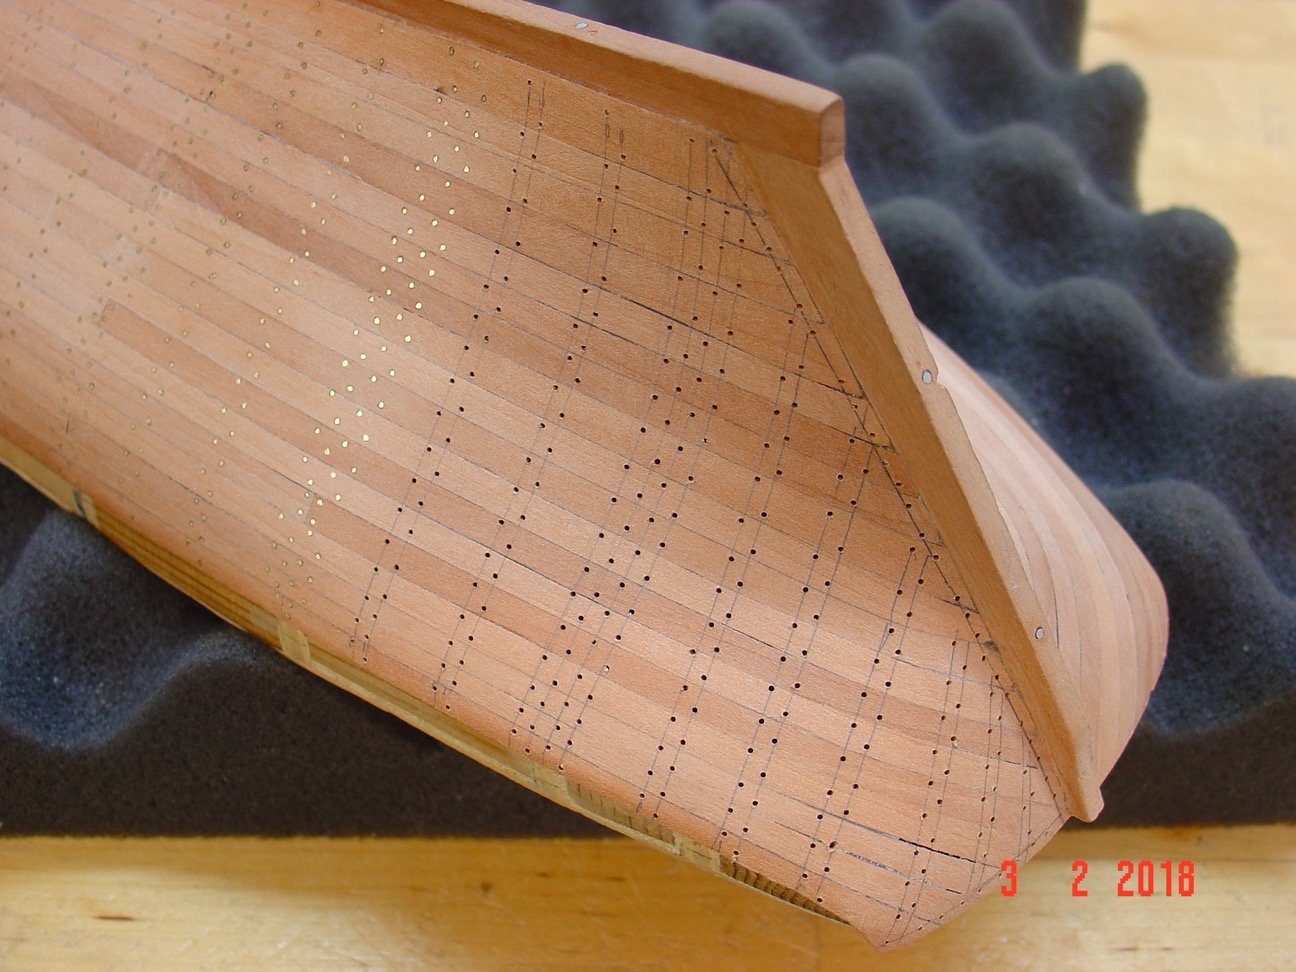
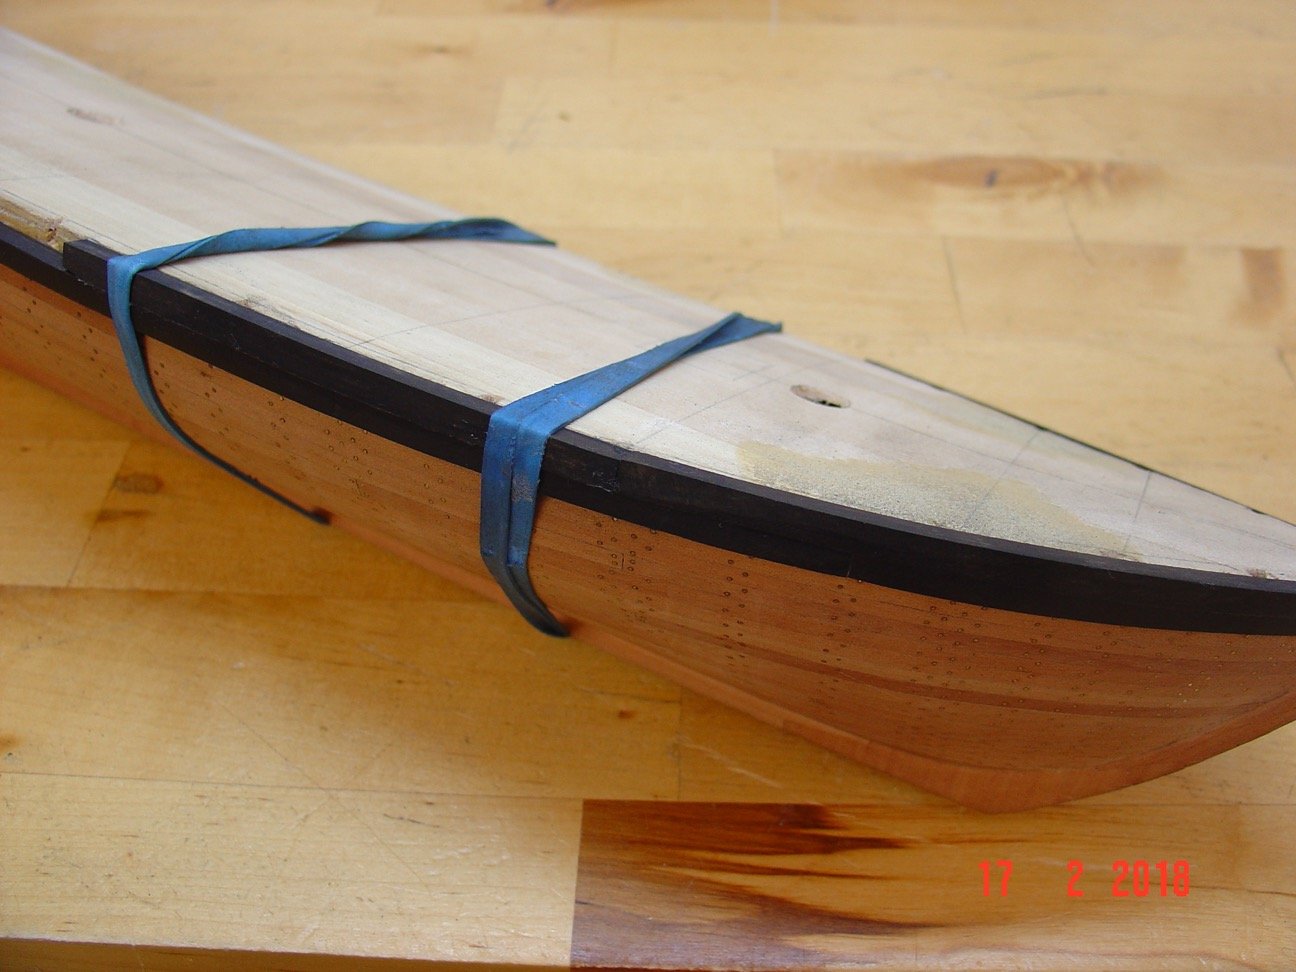
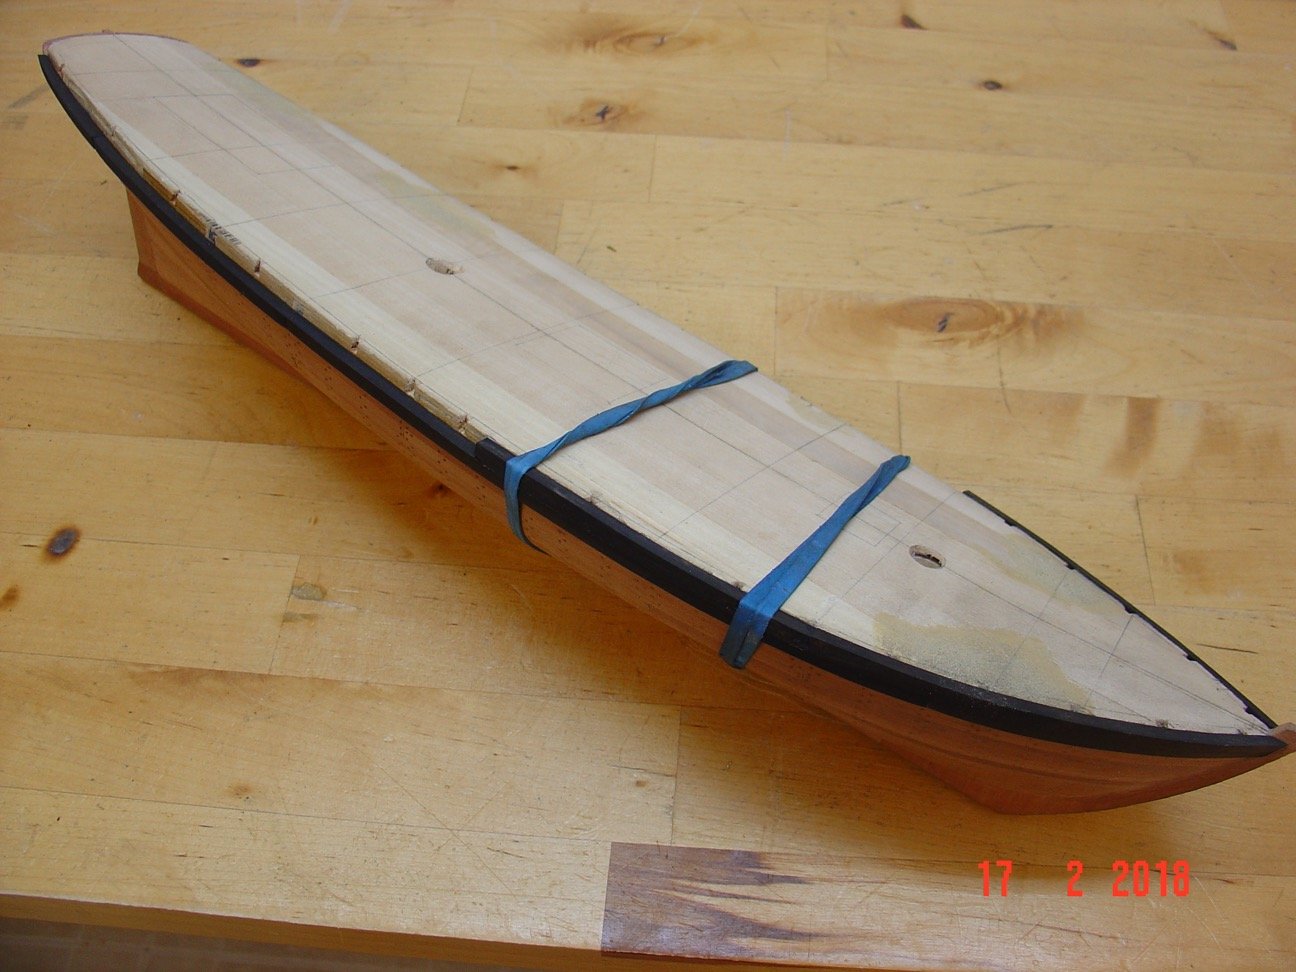
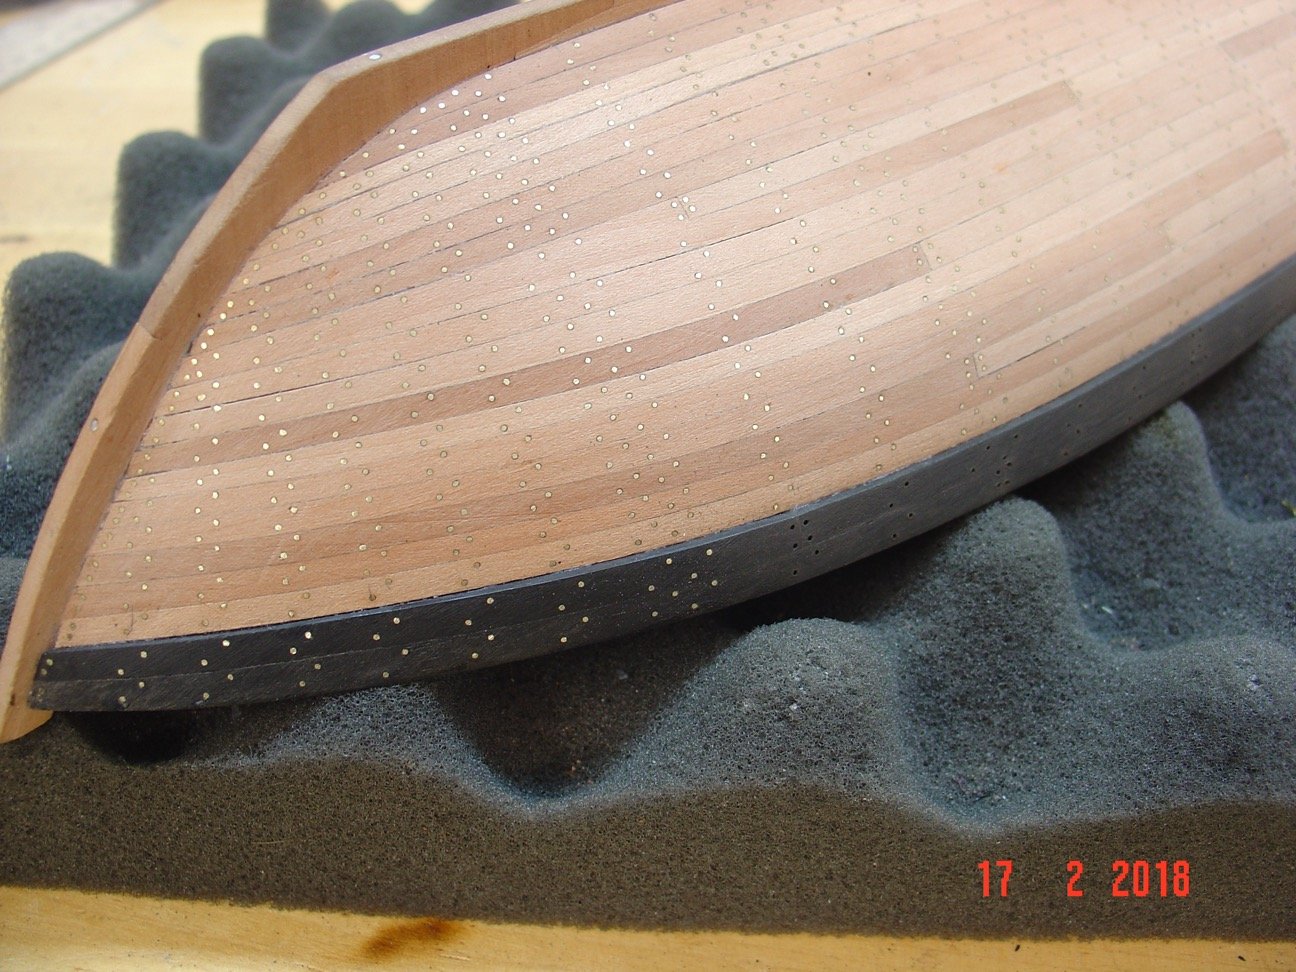
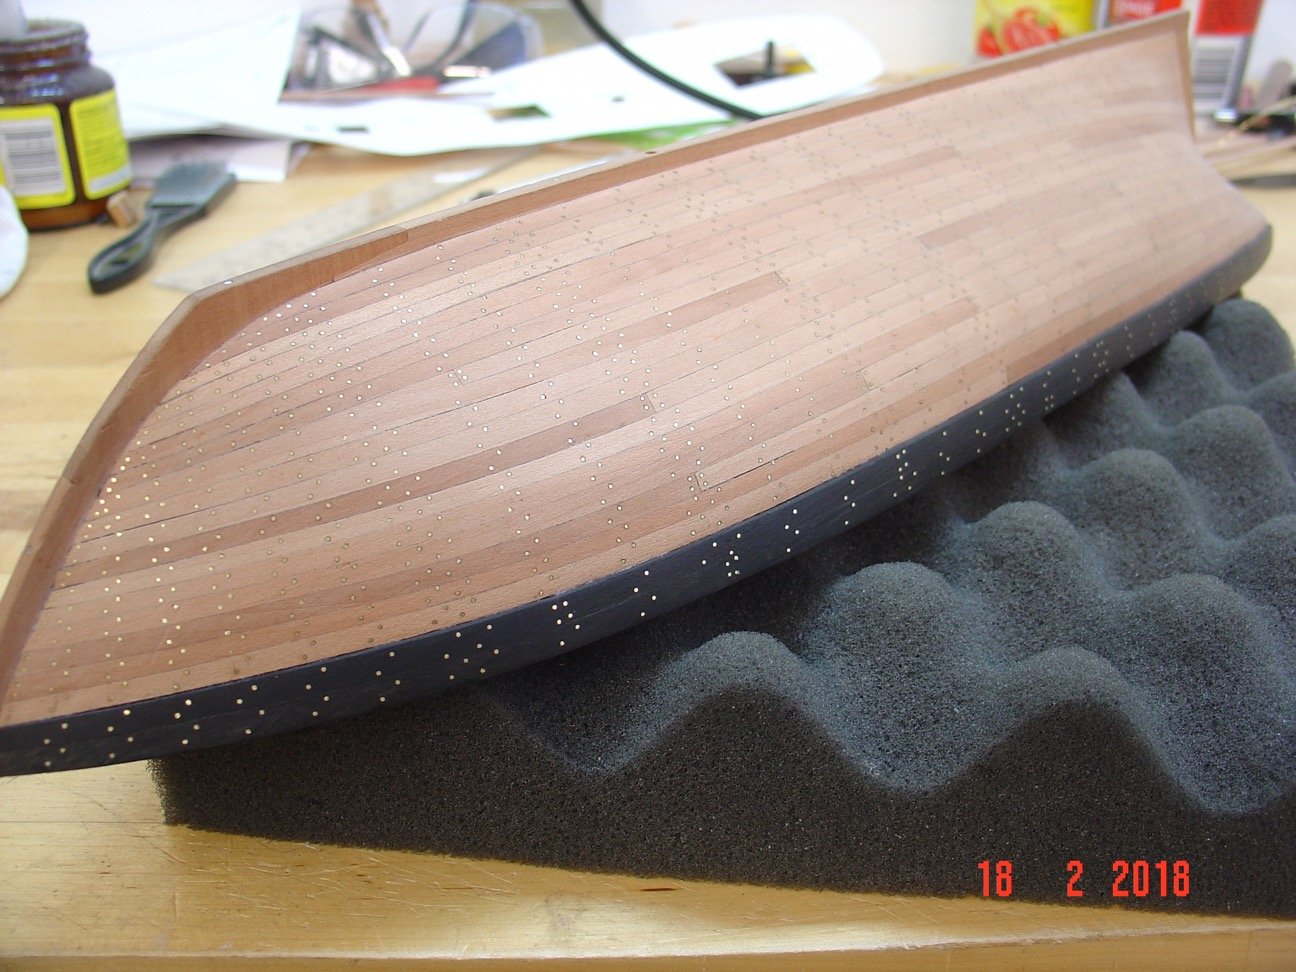
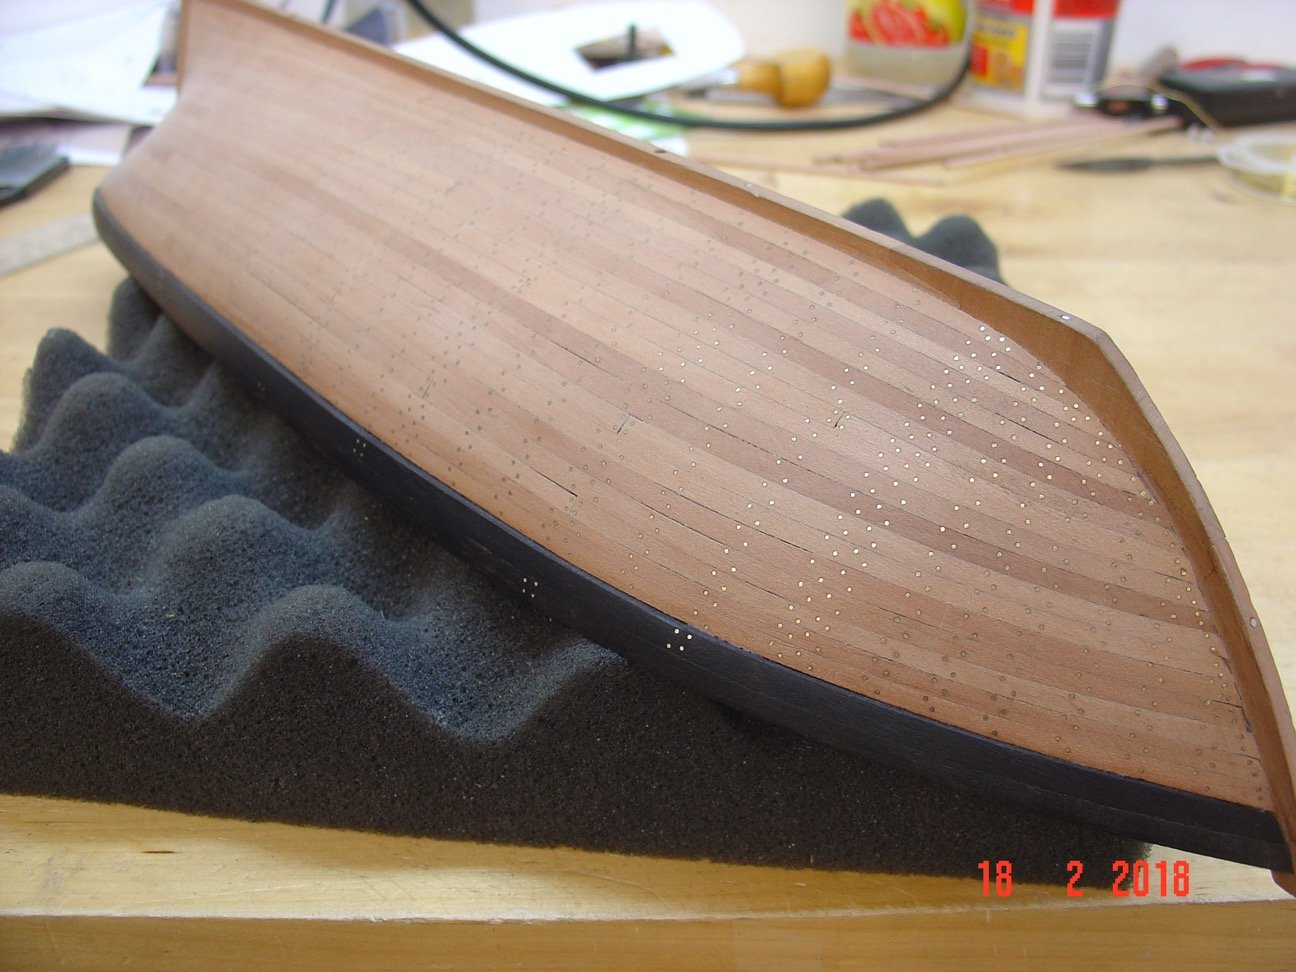
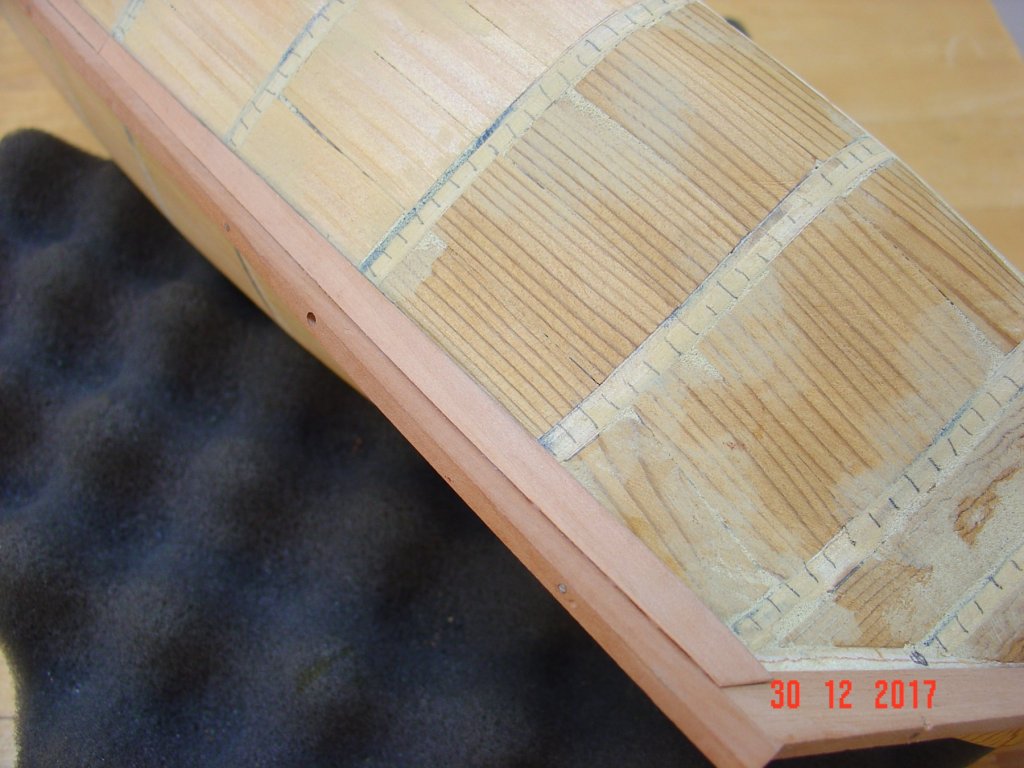
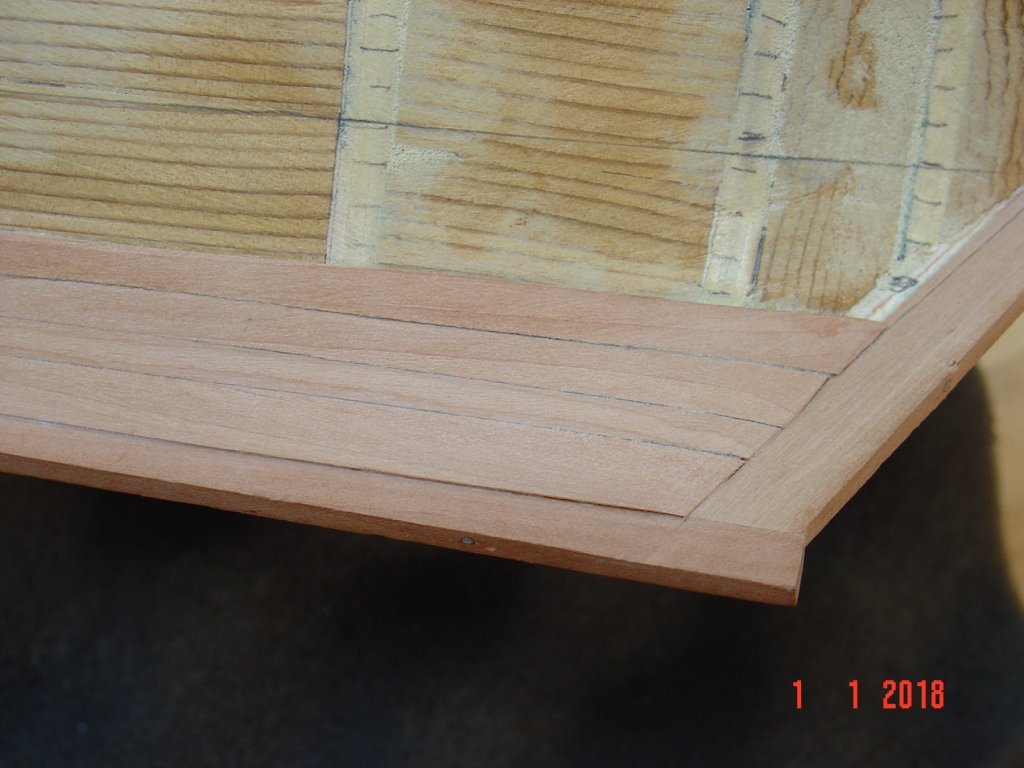
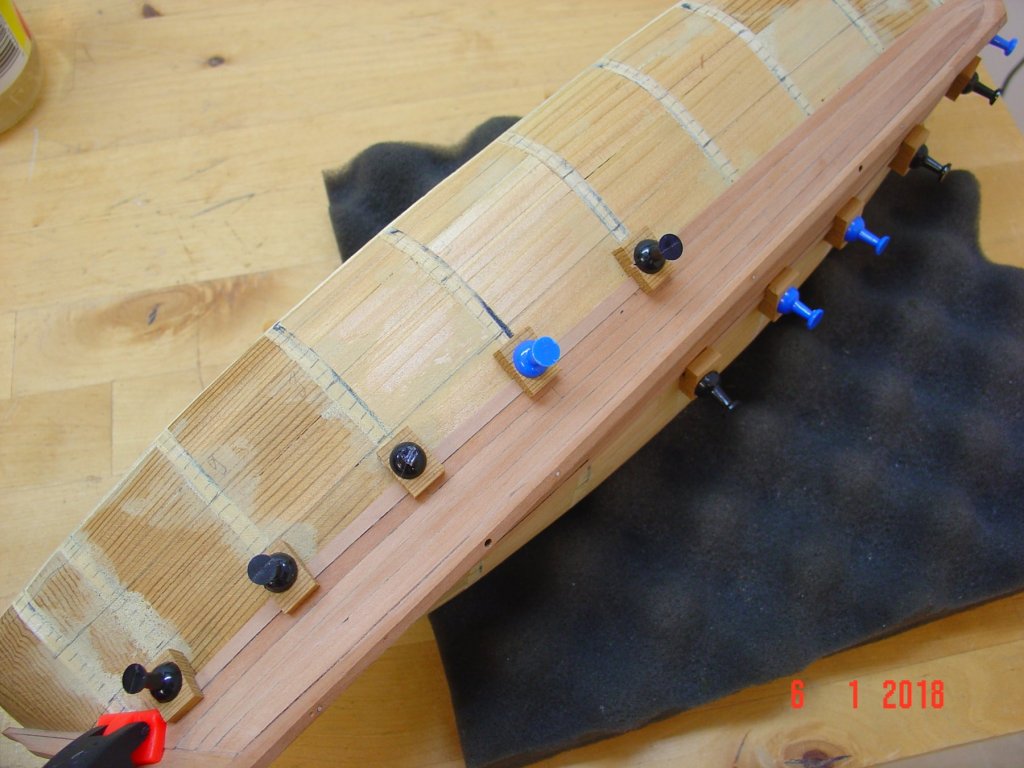
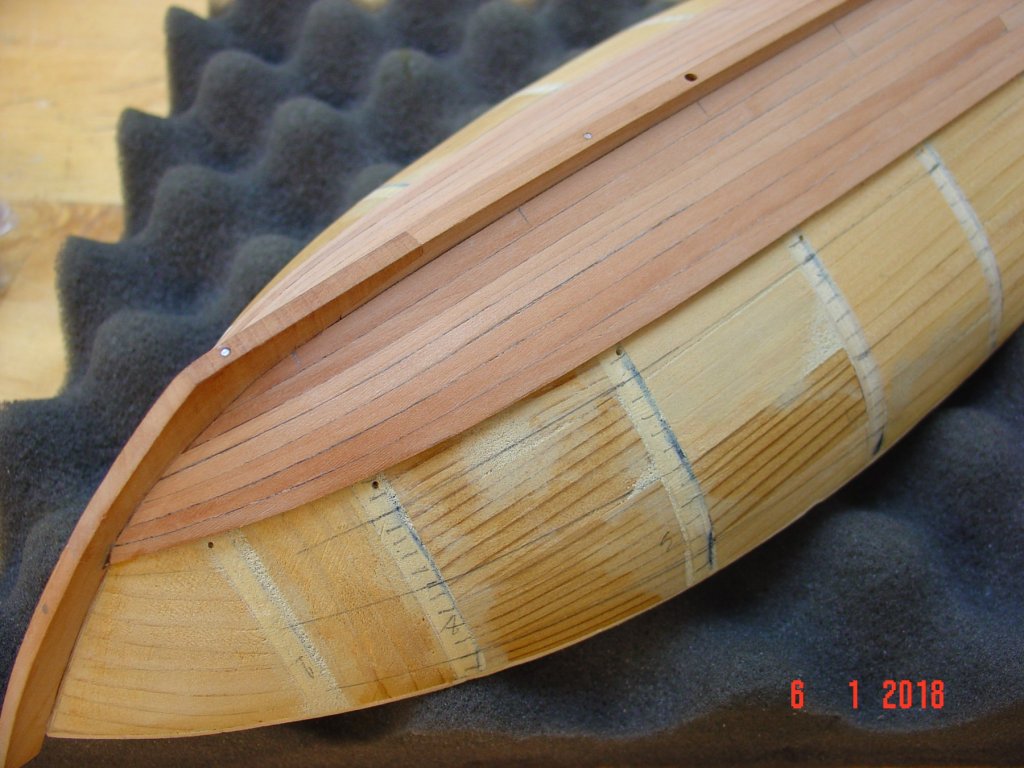
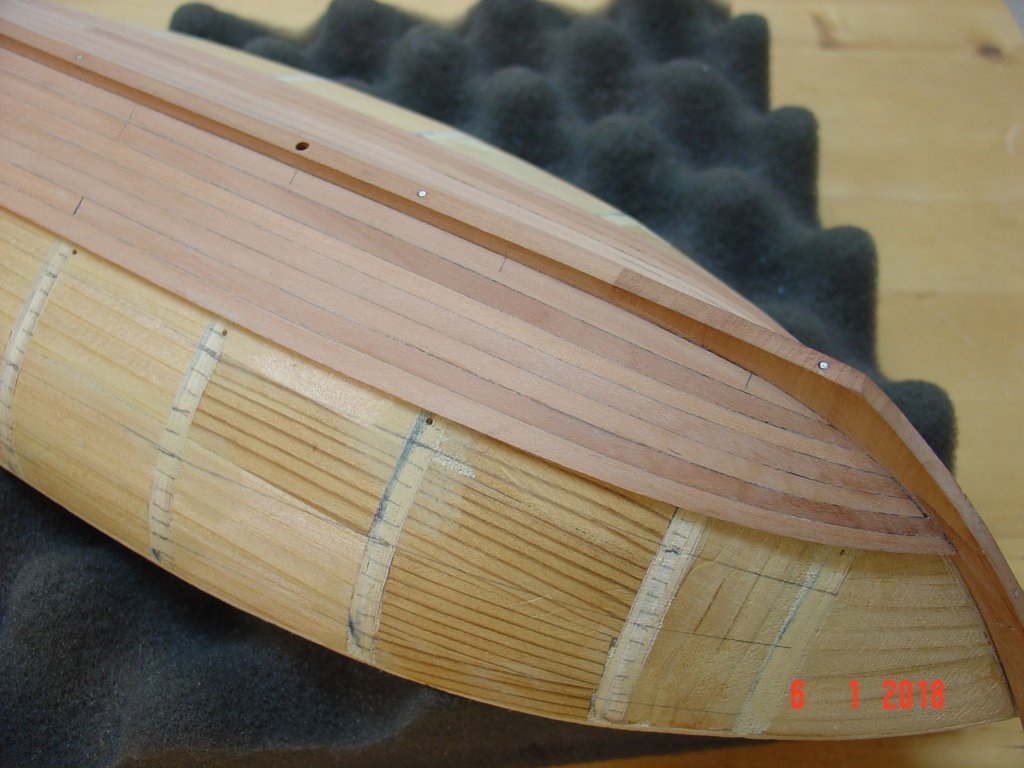
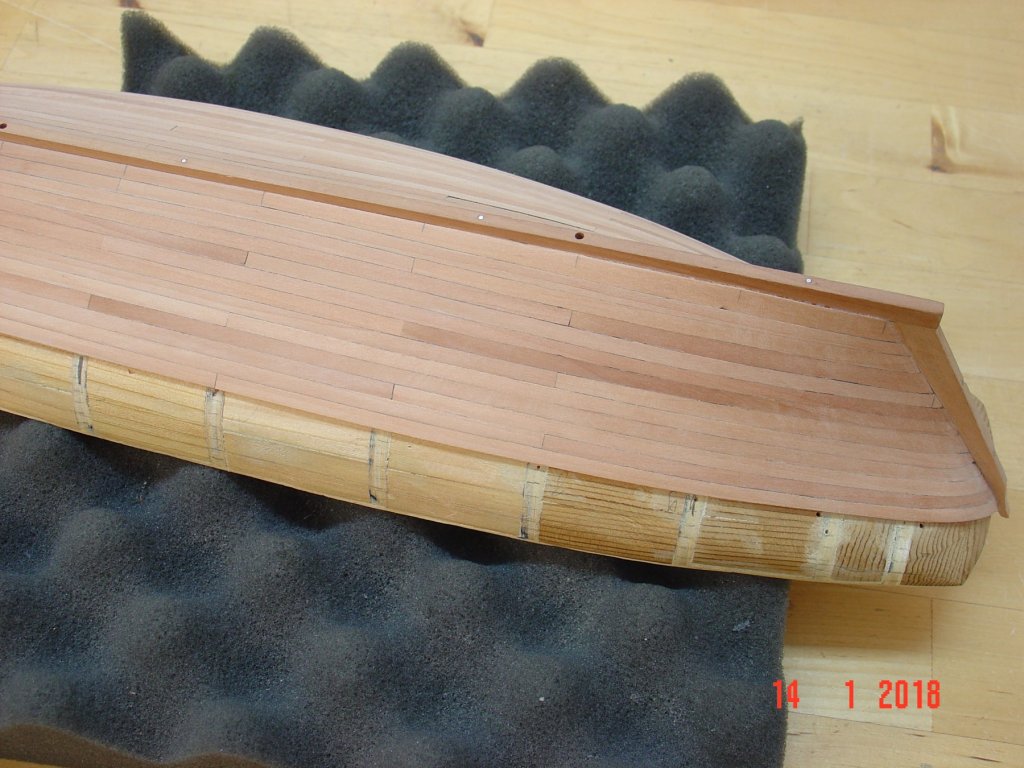
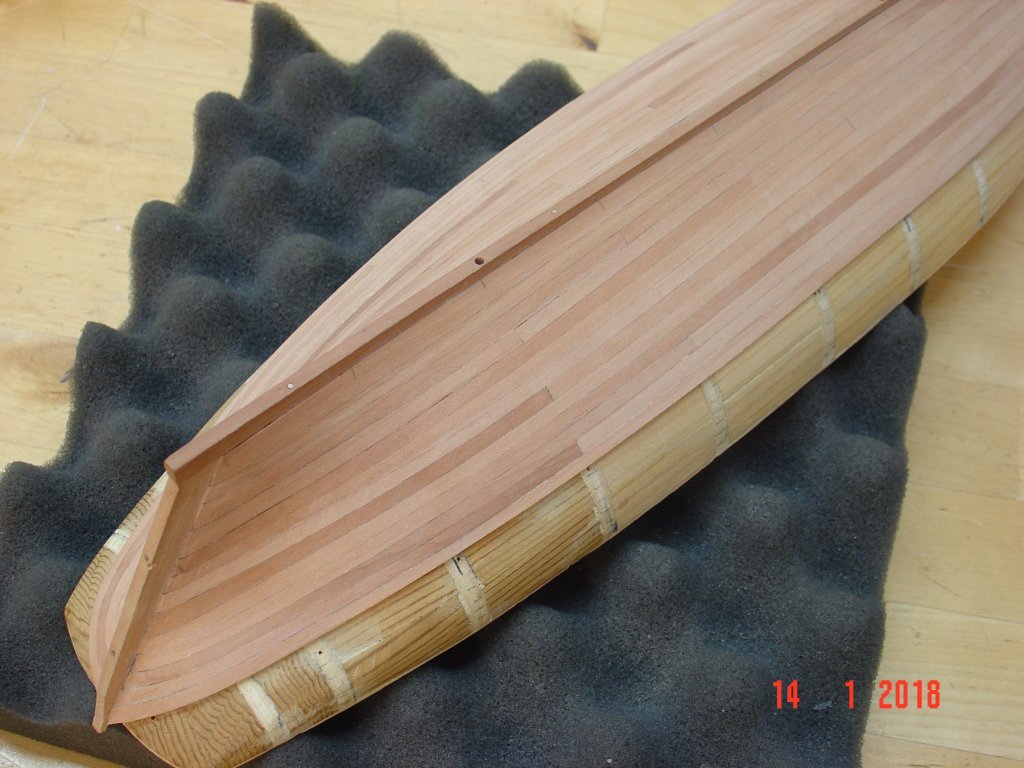
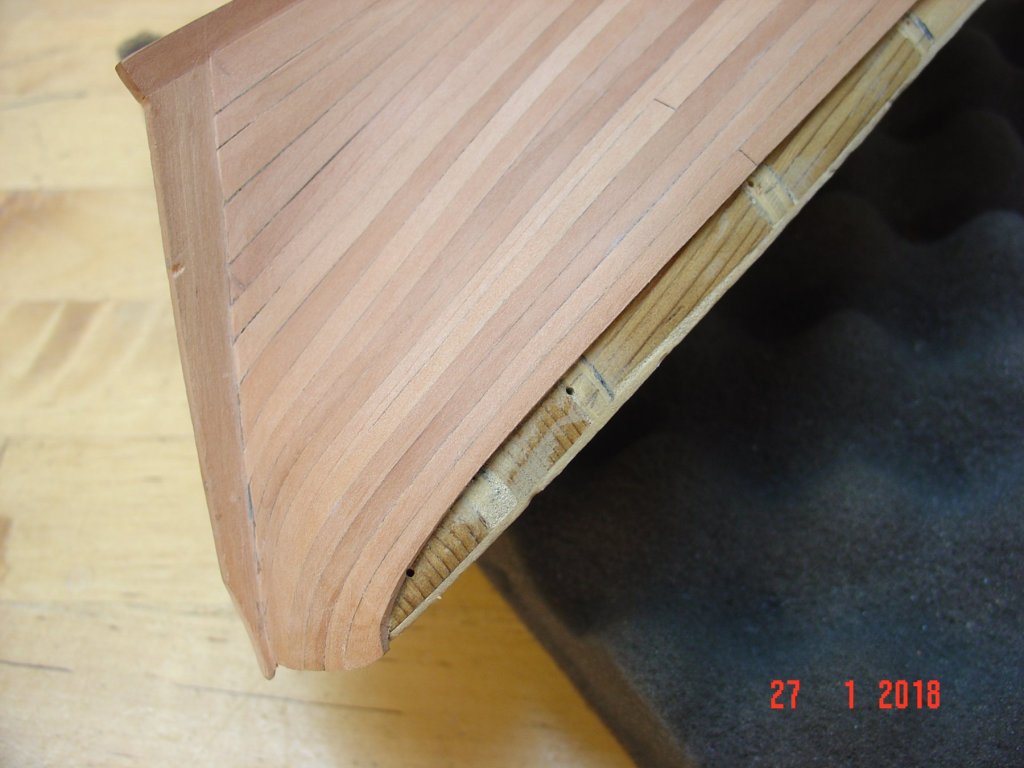
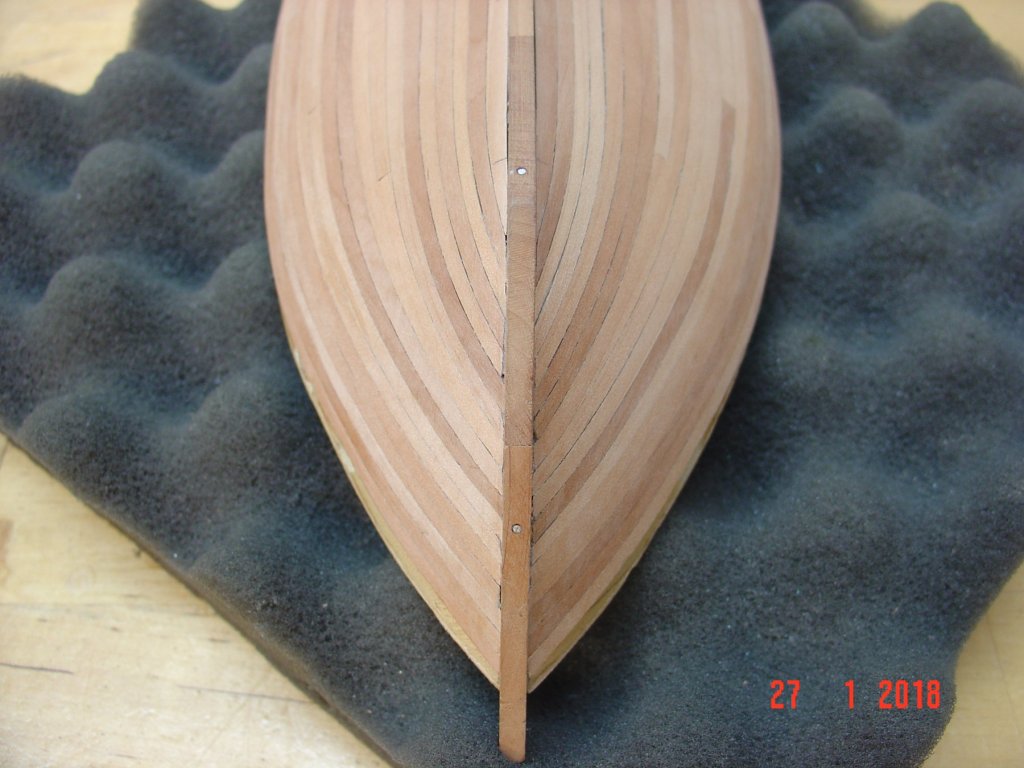
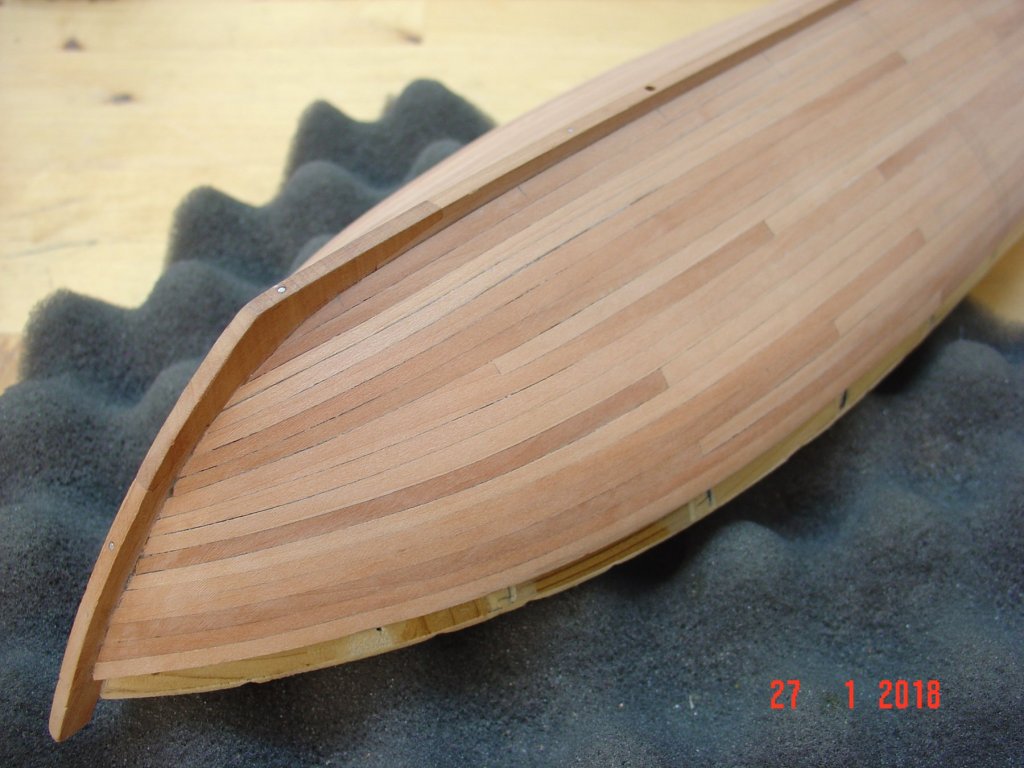
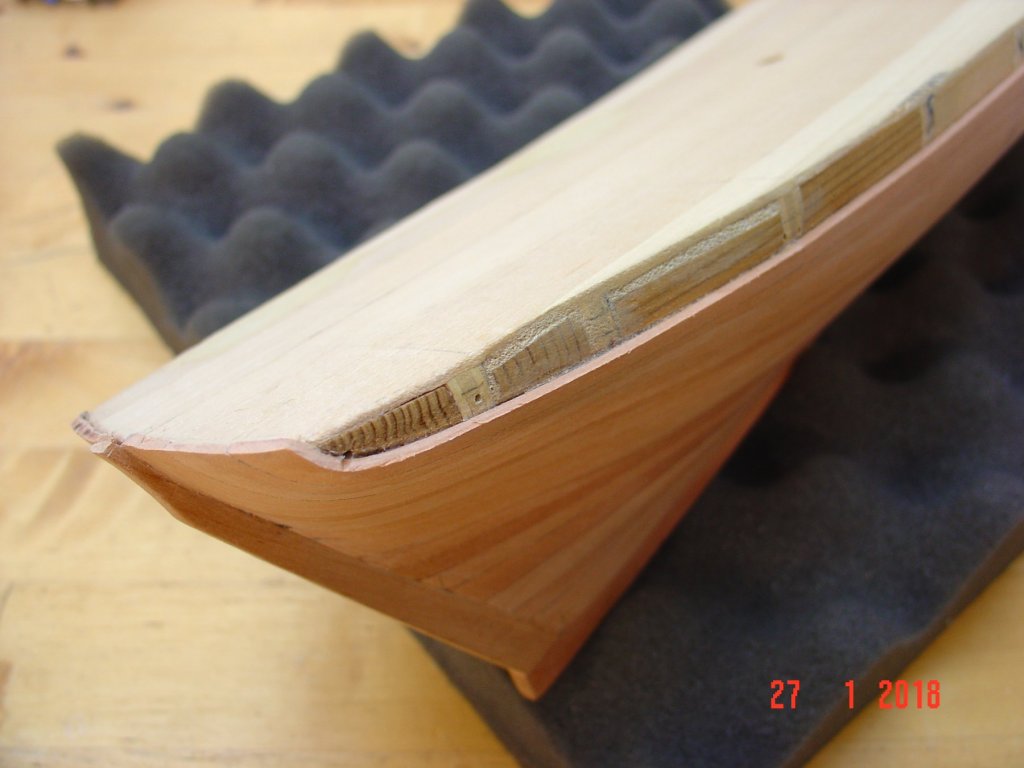
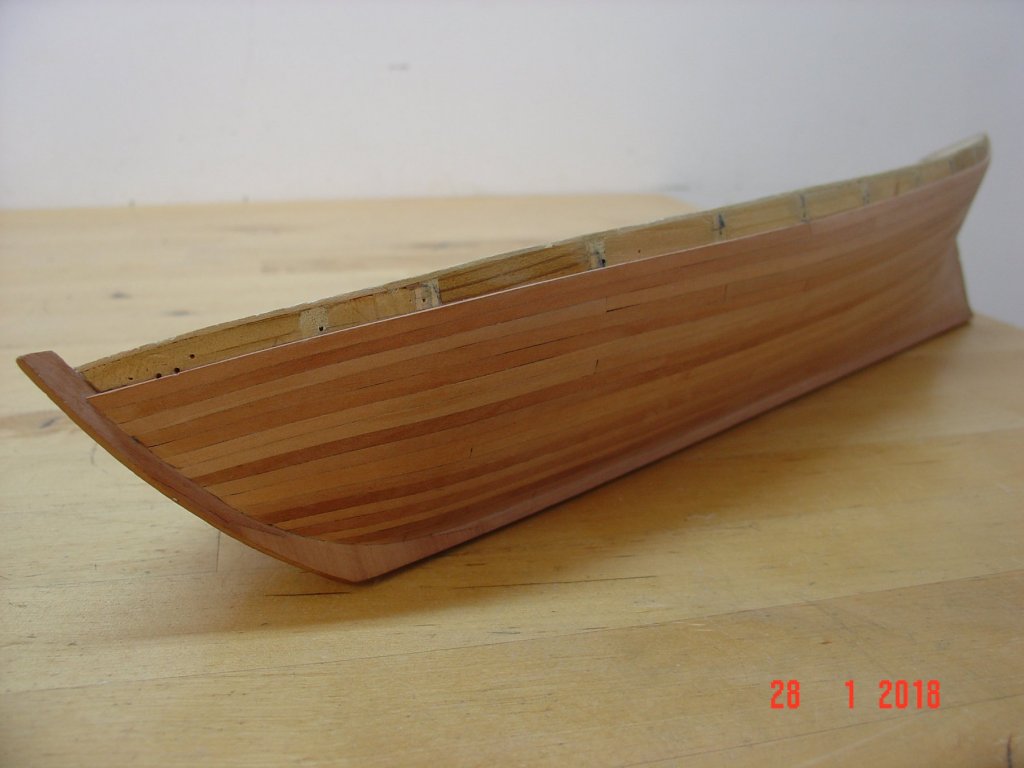
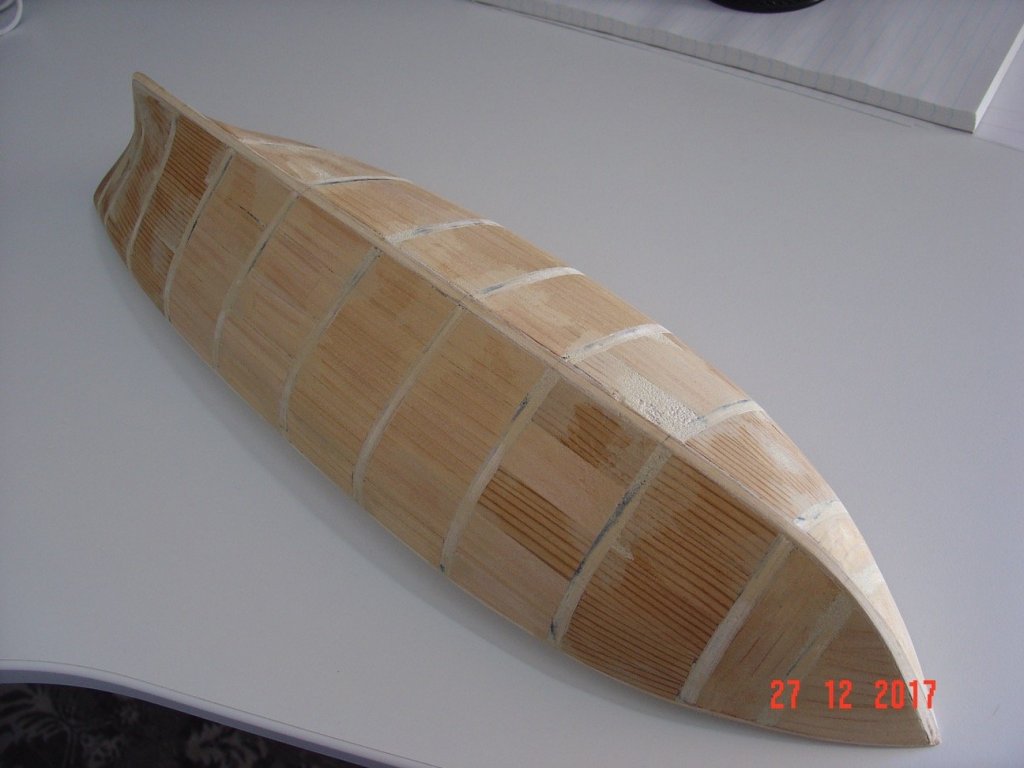
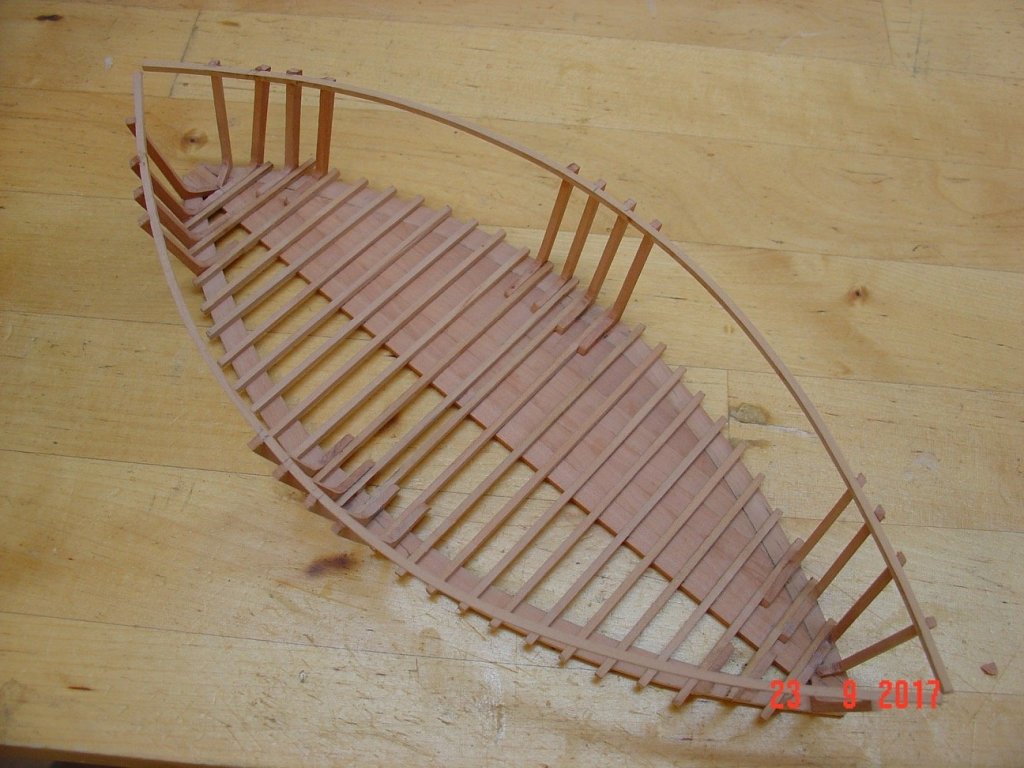
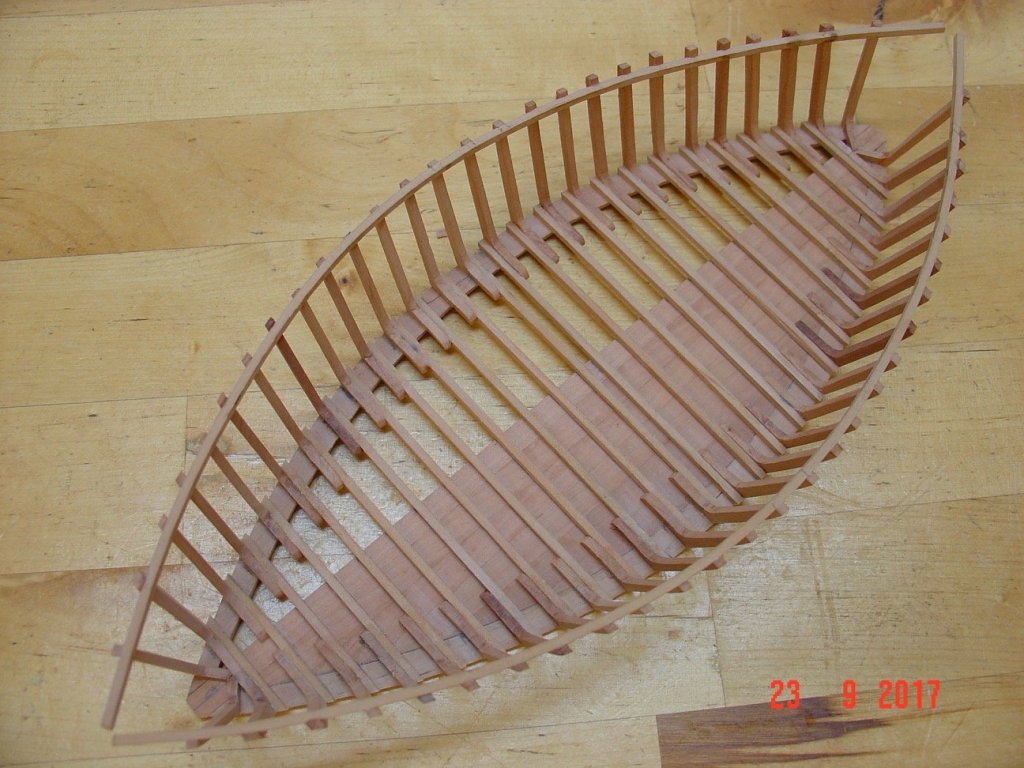
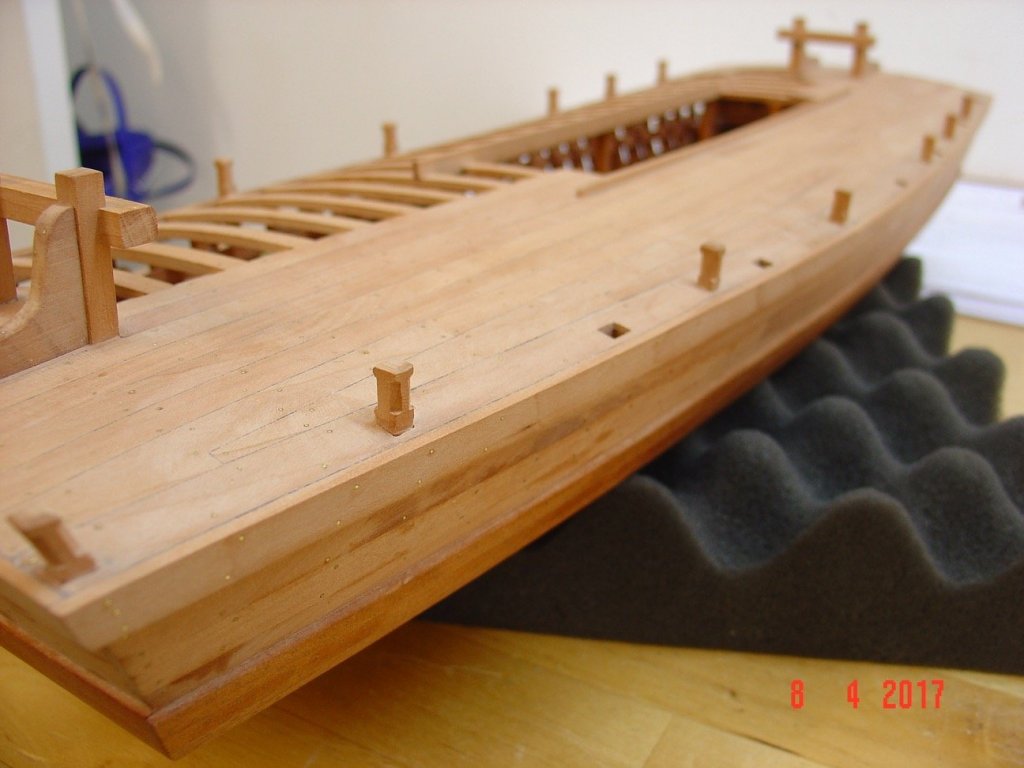
Hello, The hull, up to the whales is now planked. Here are some pictures. Alexandru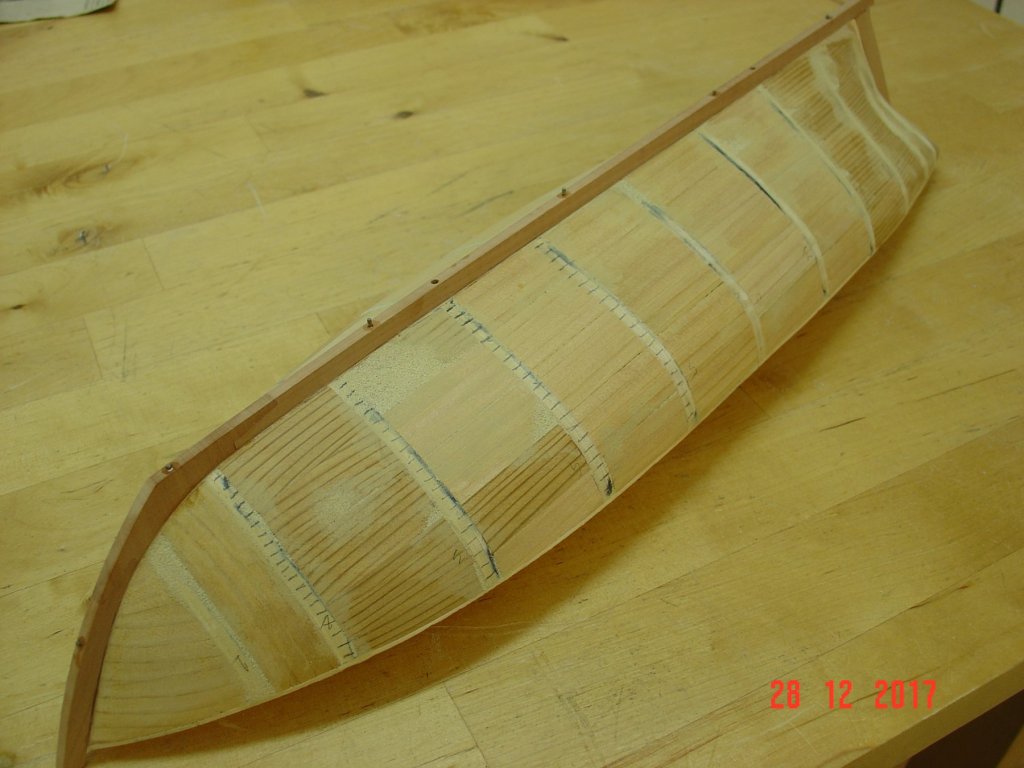


-
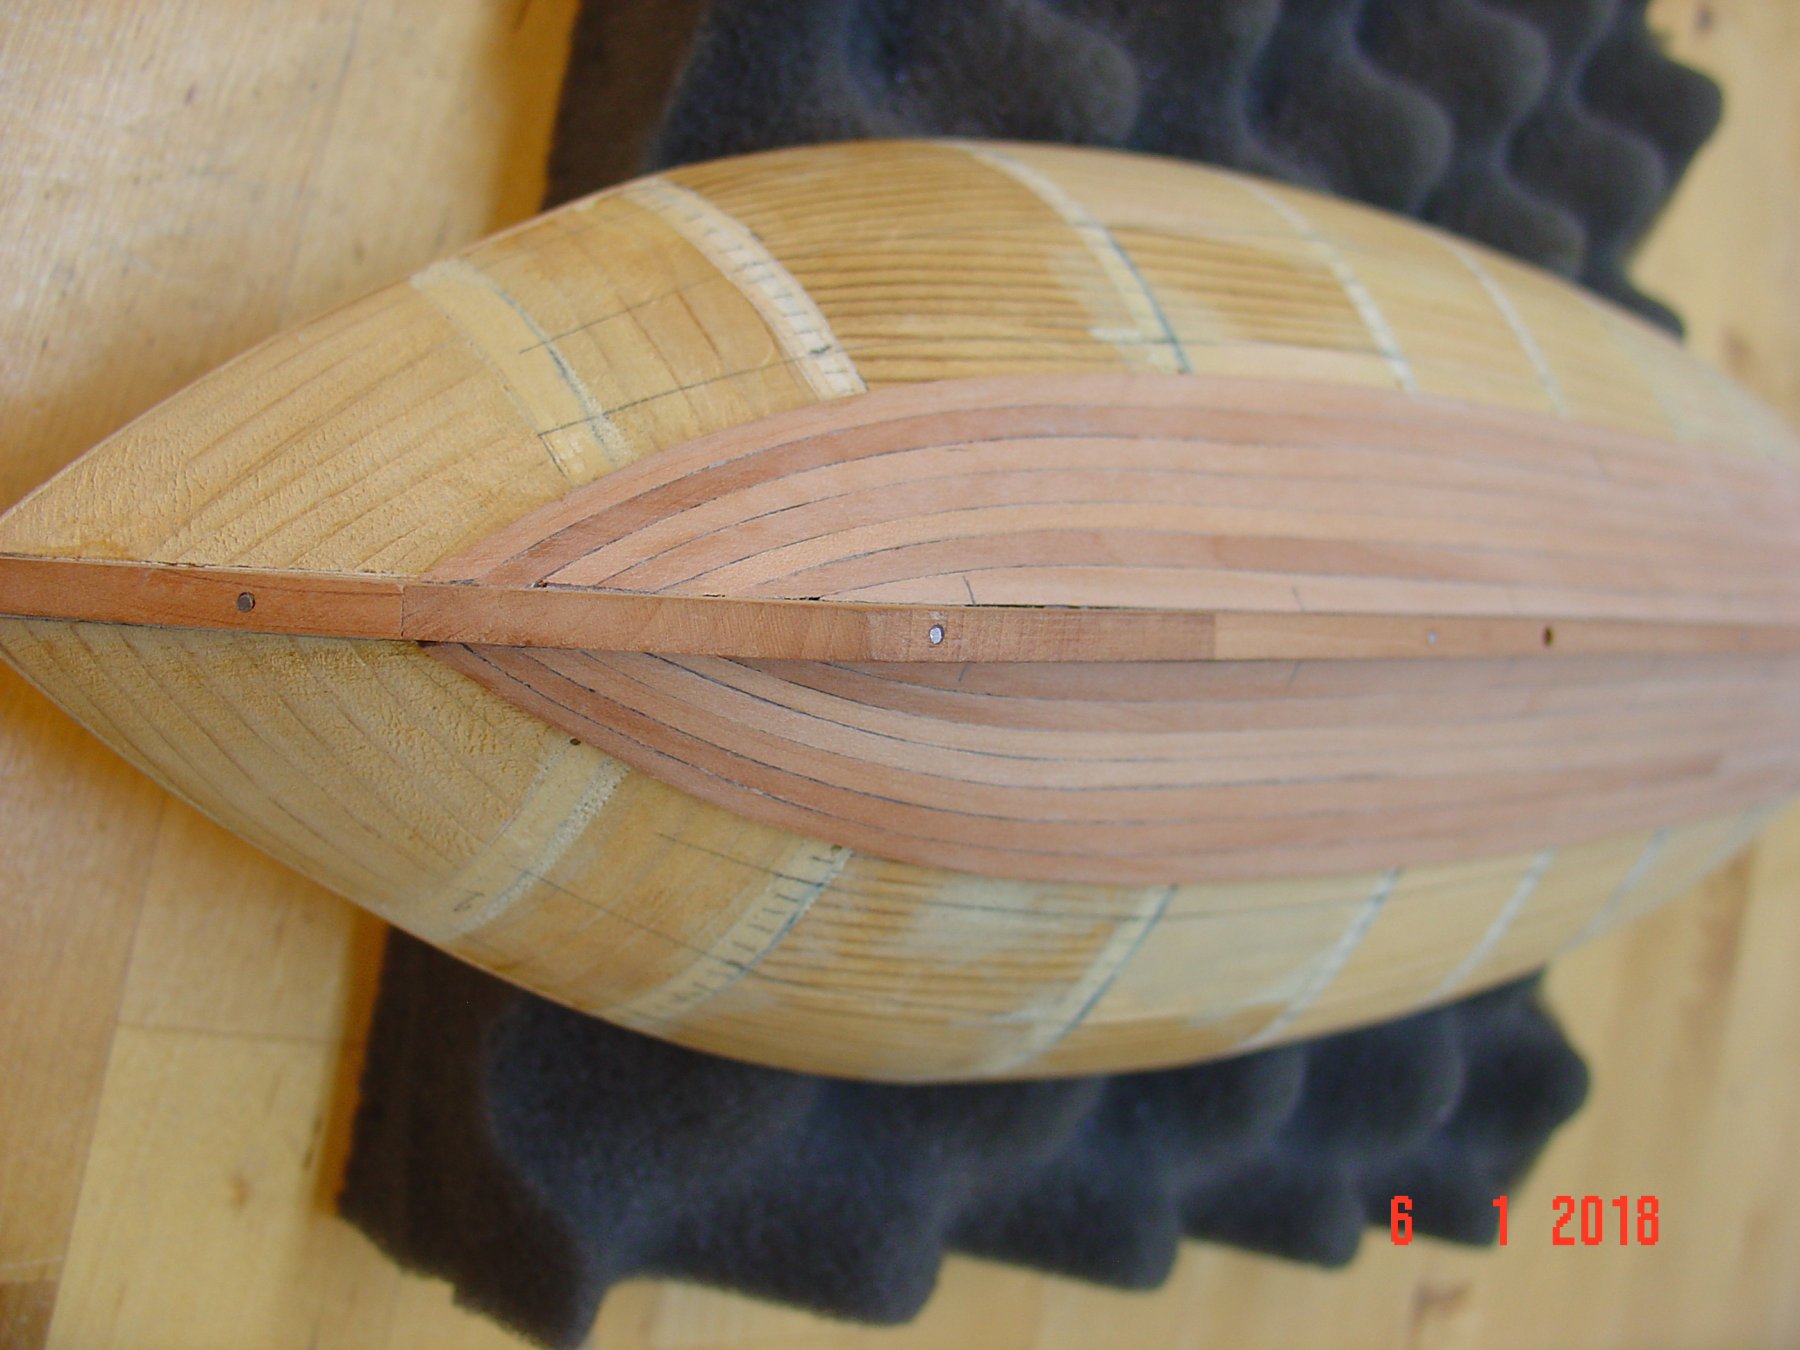
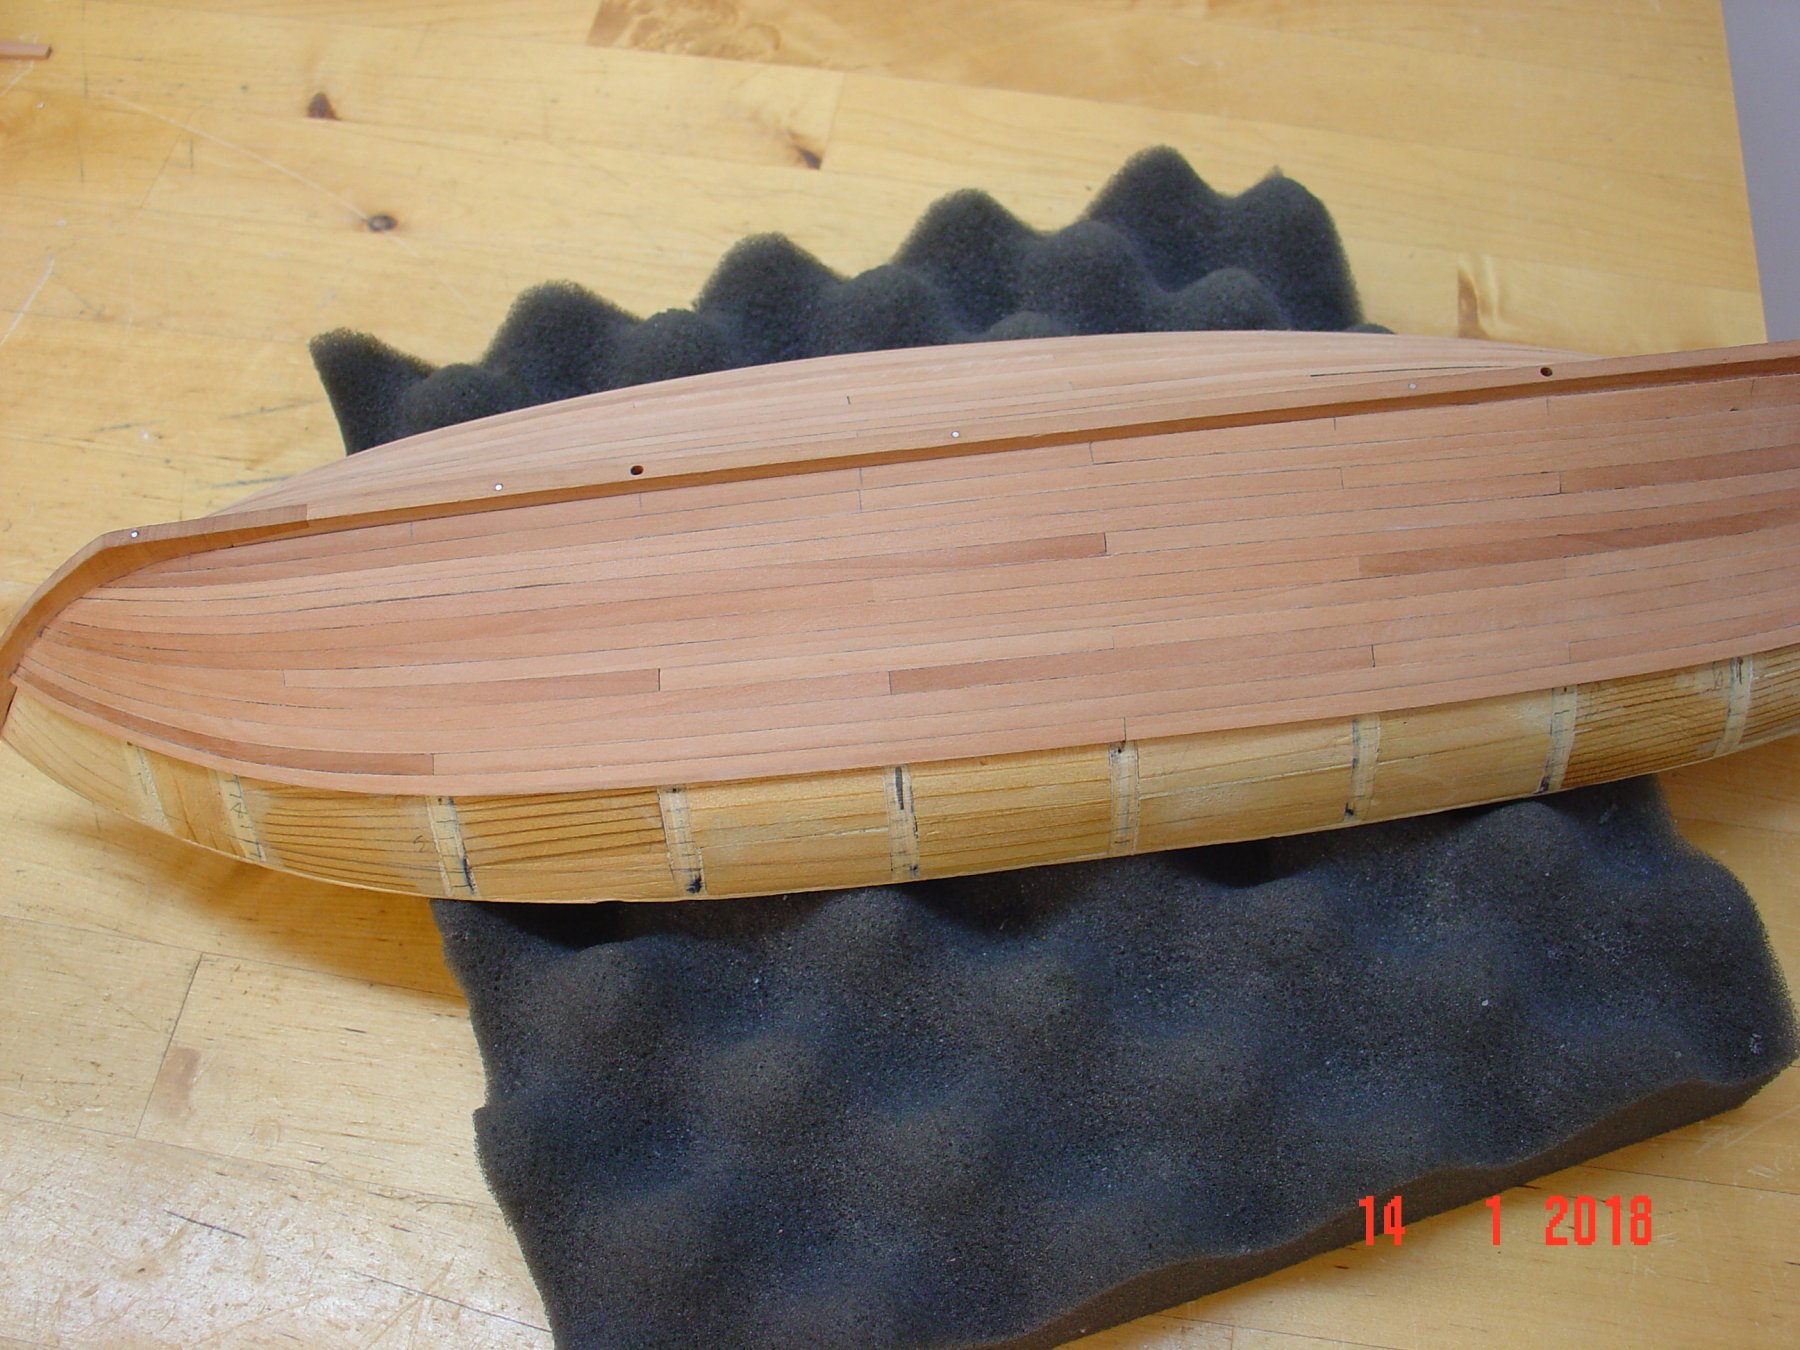
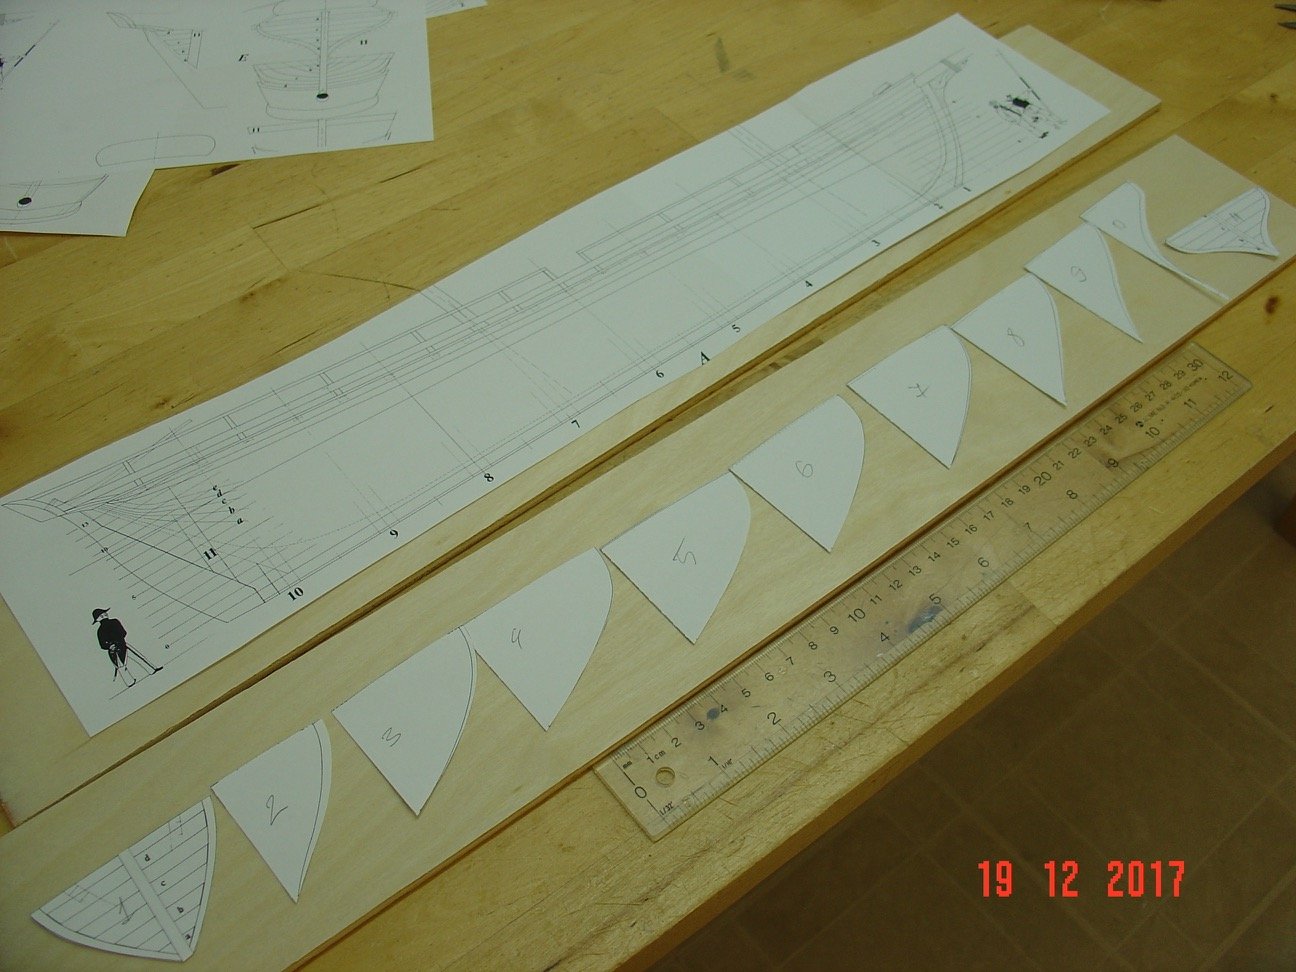
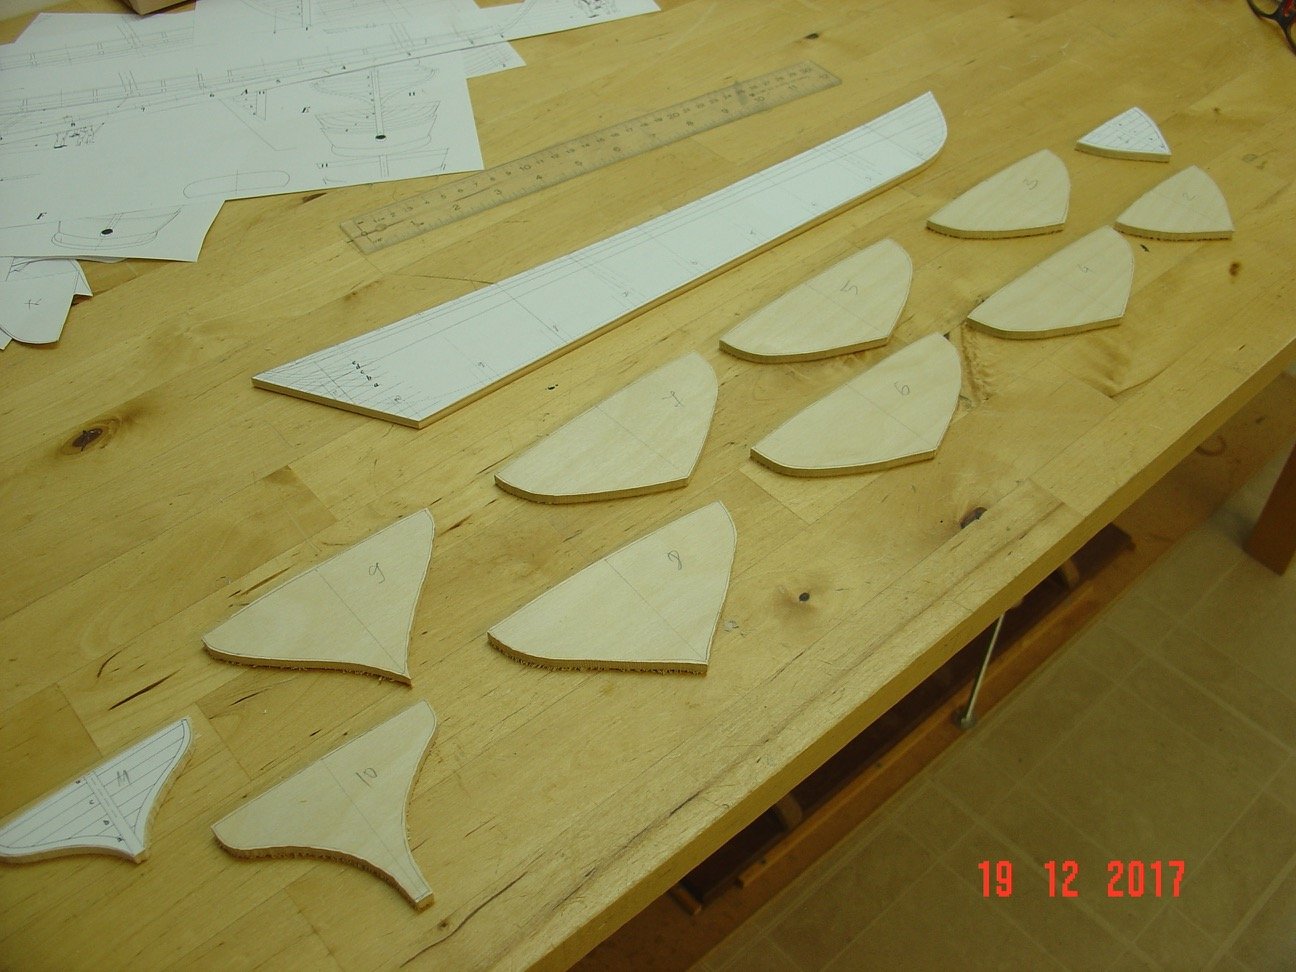
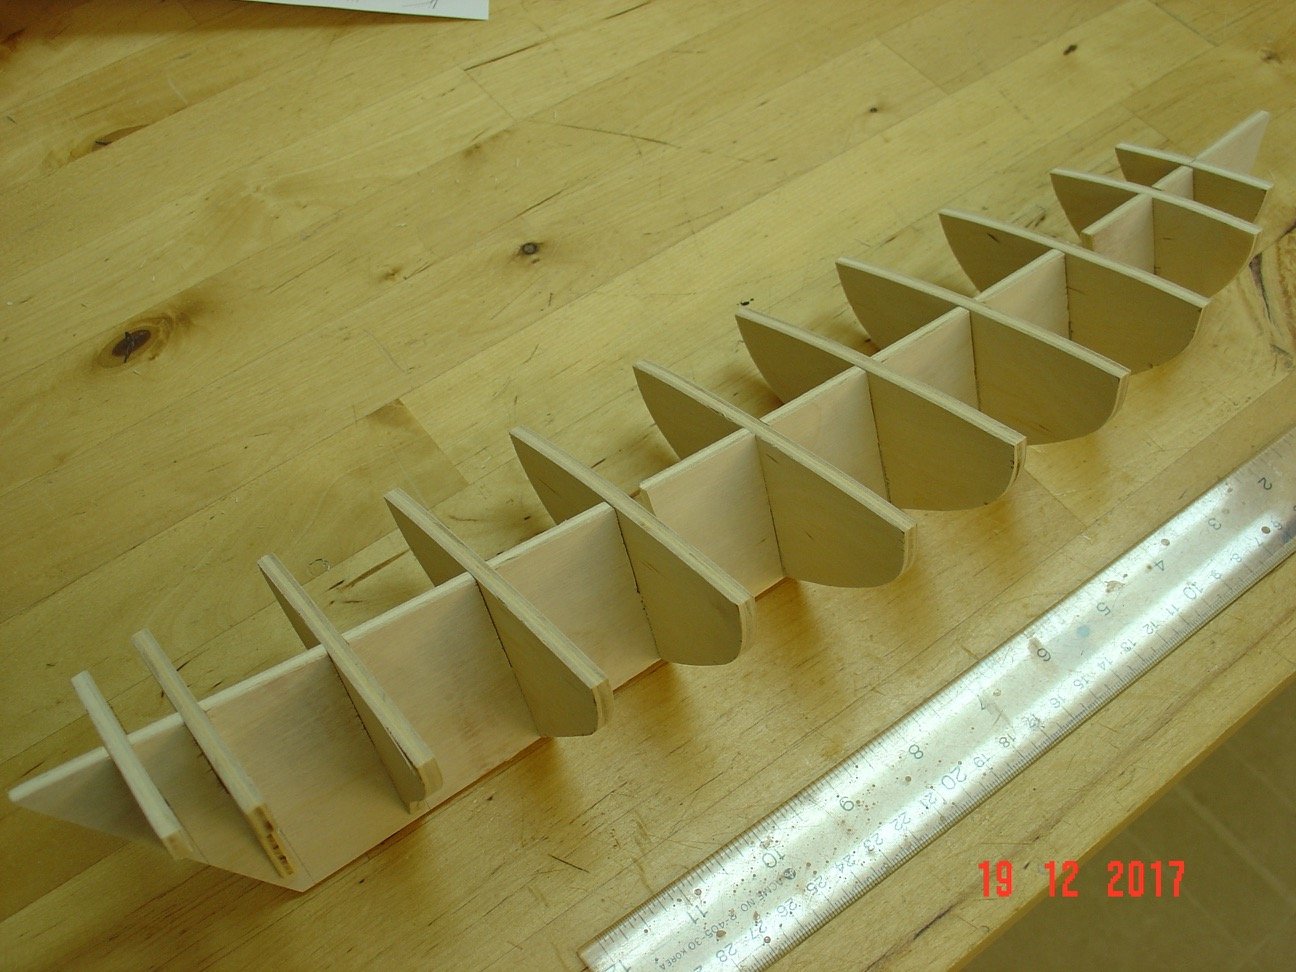
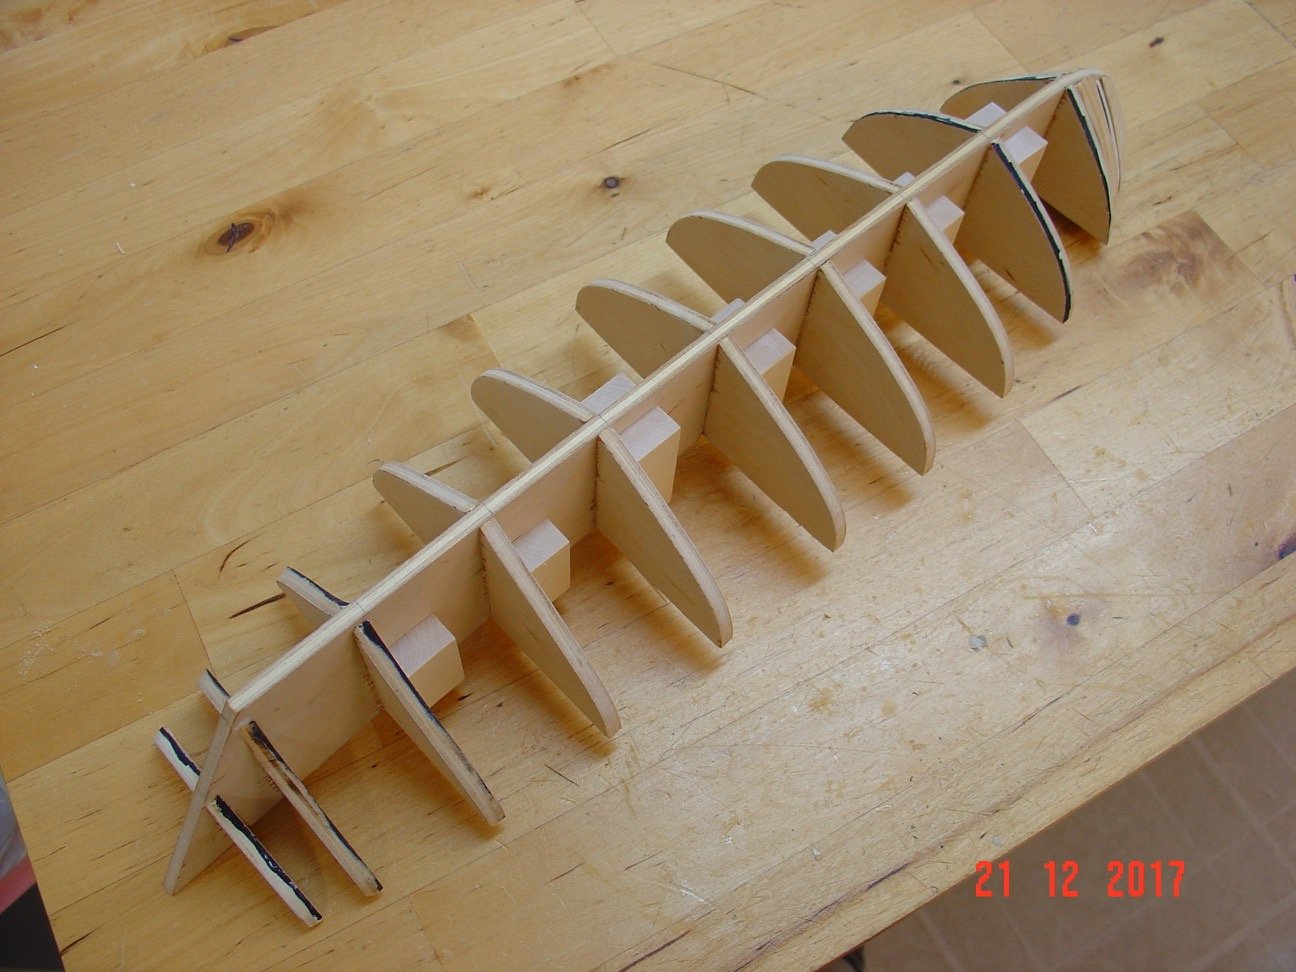
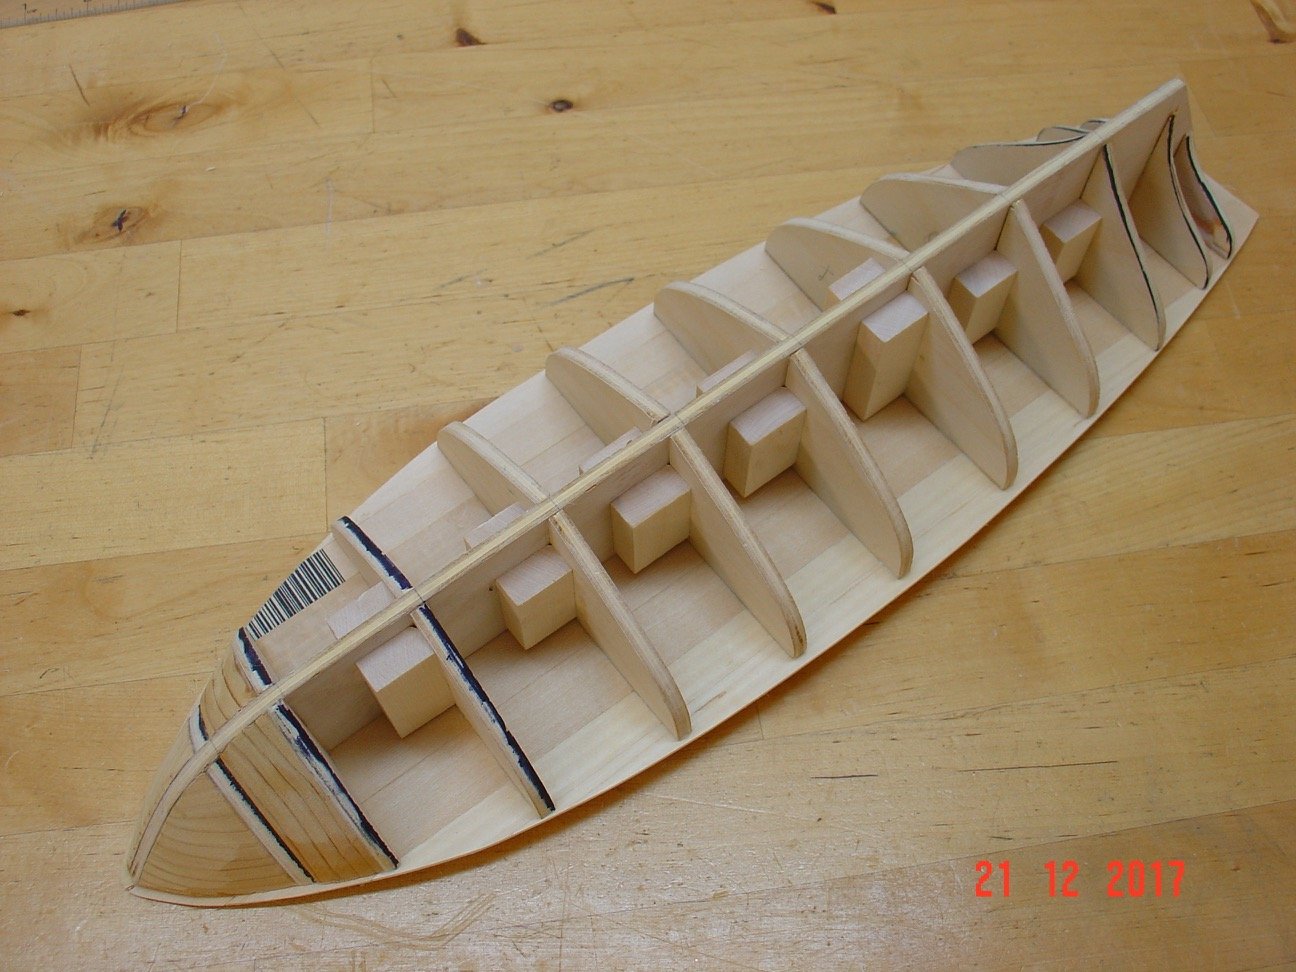
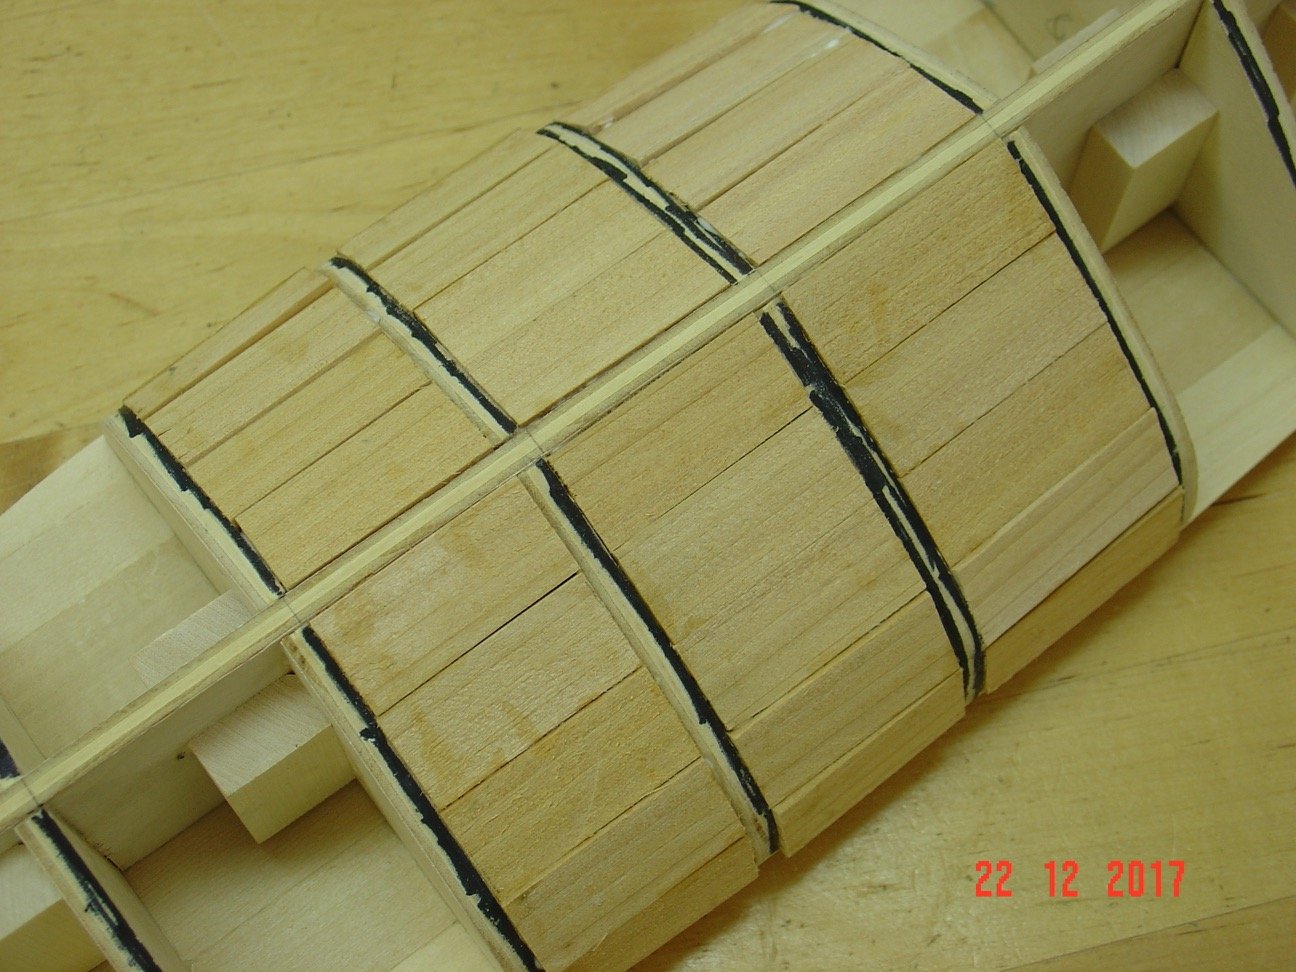
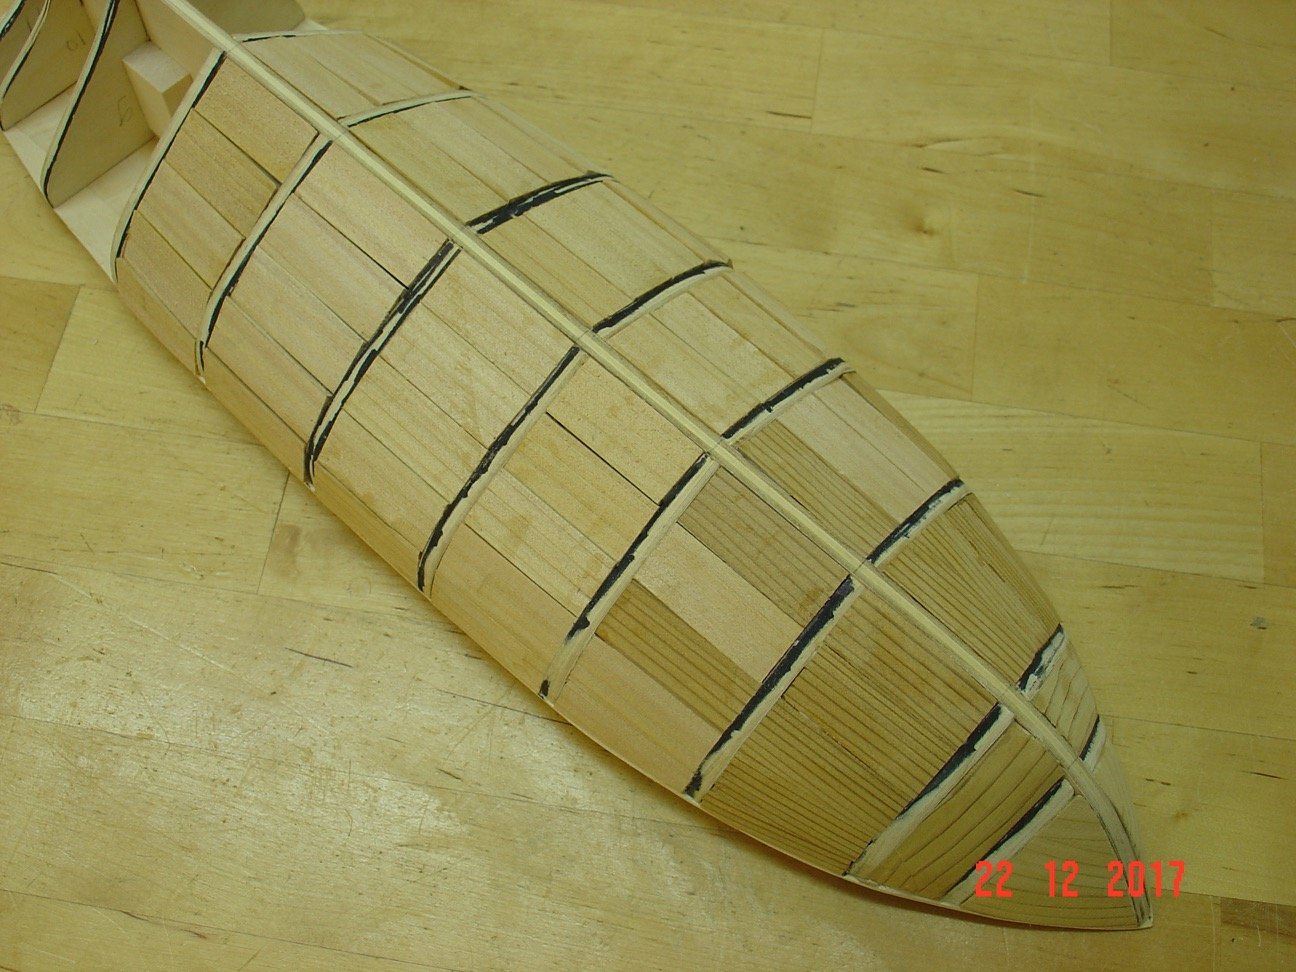
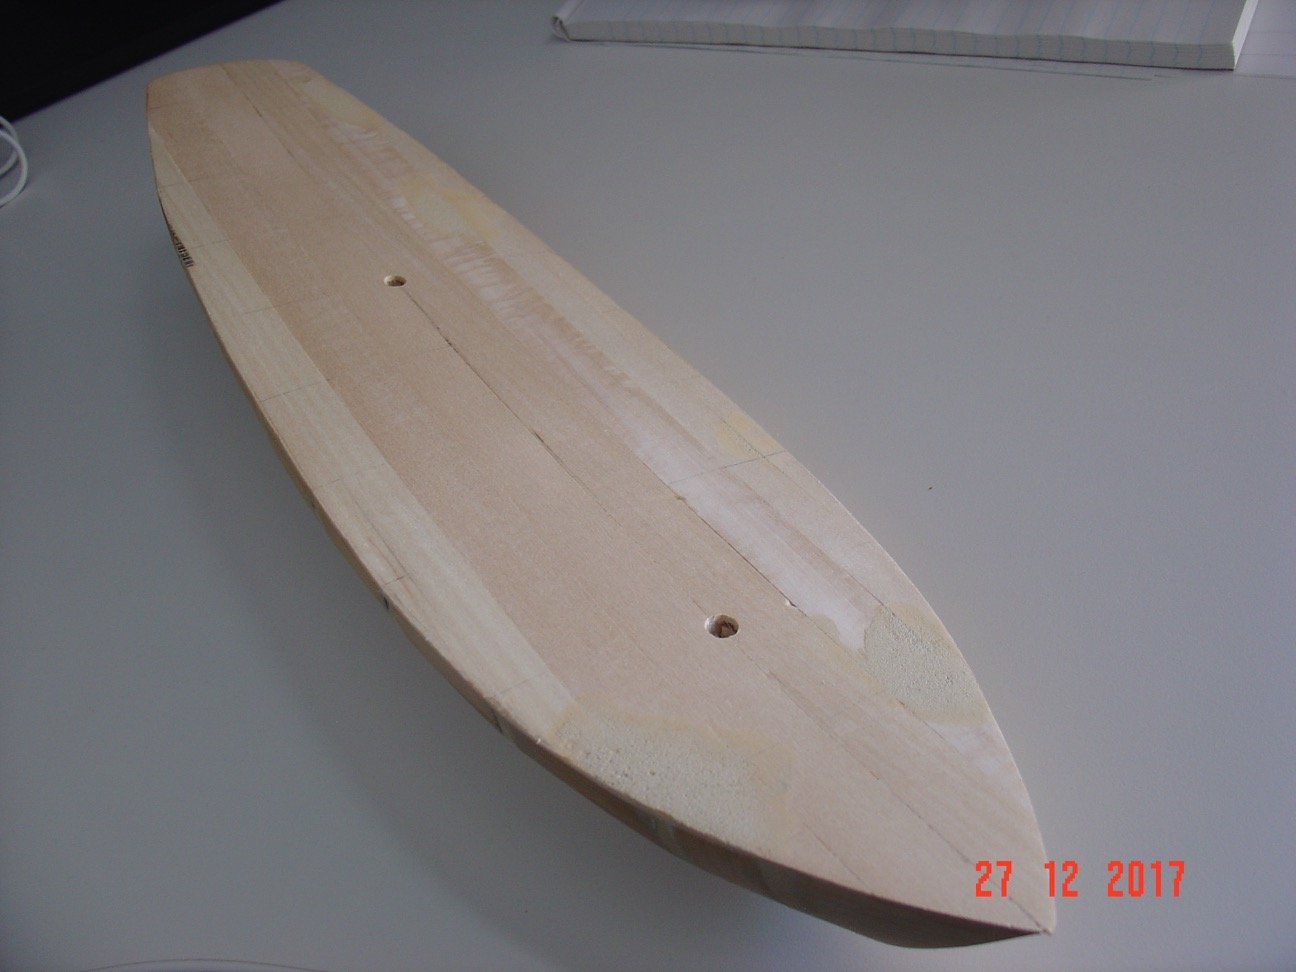
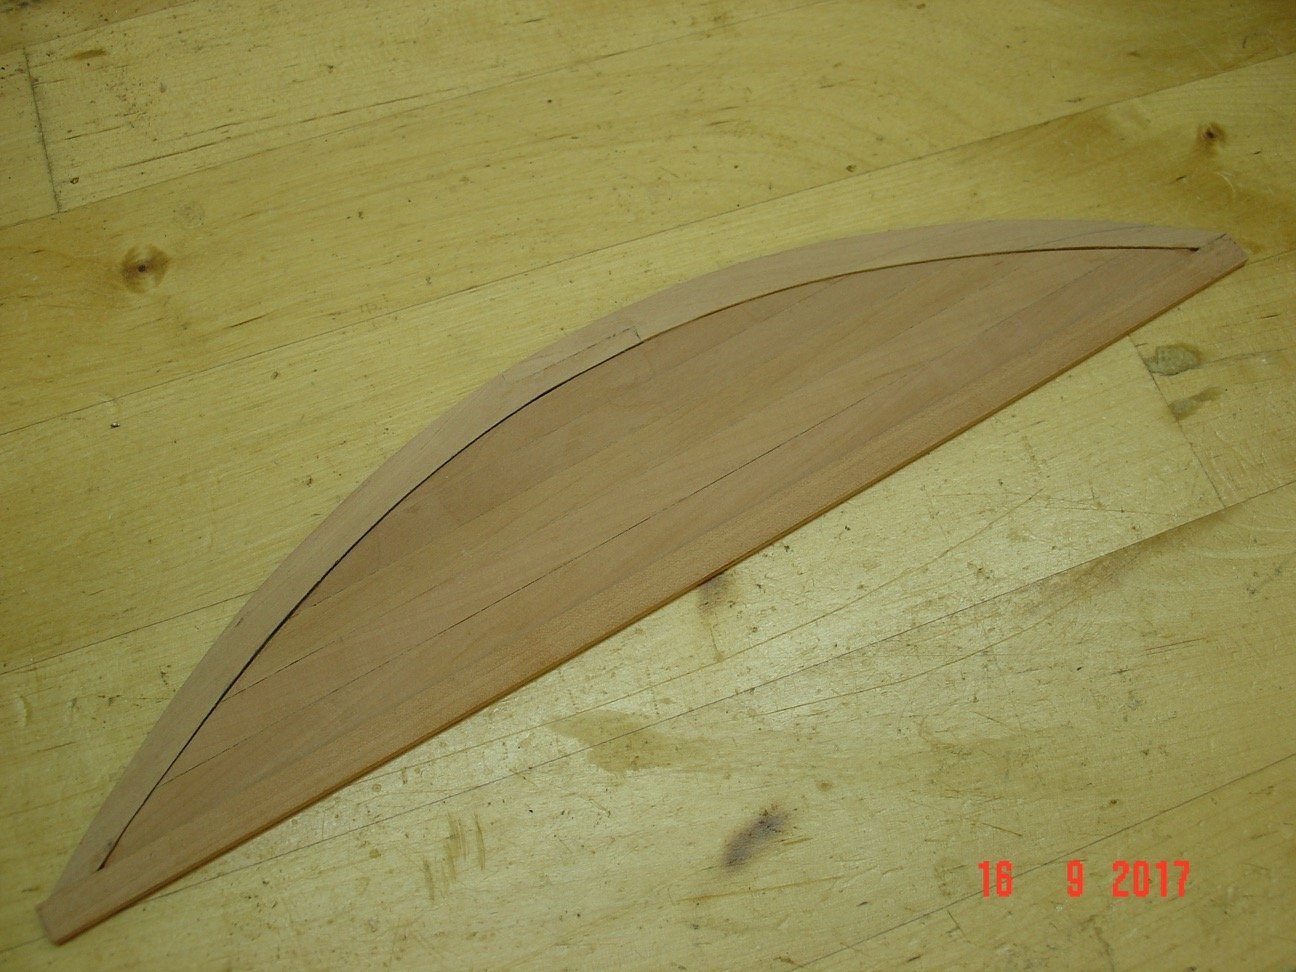
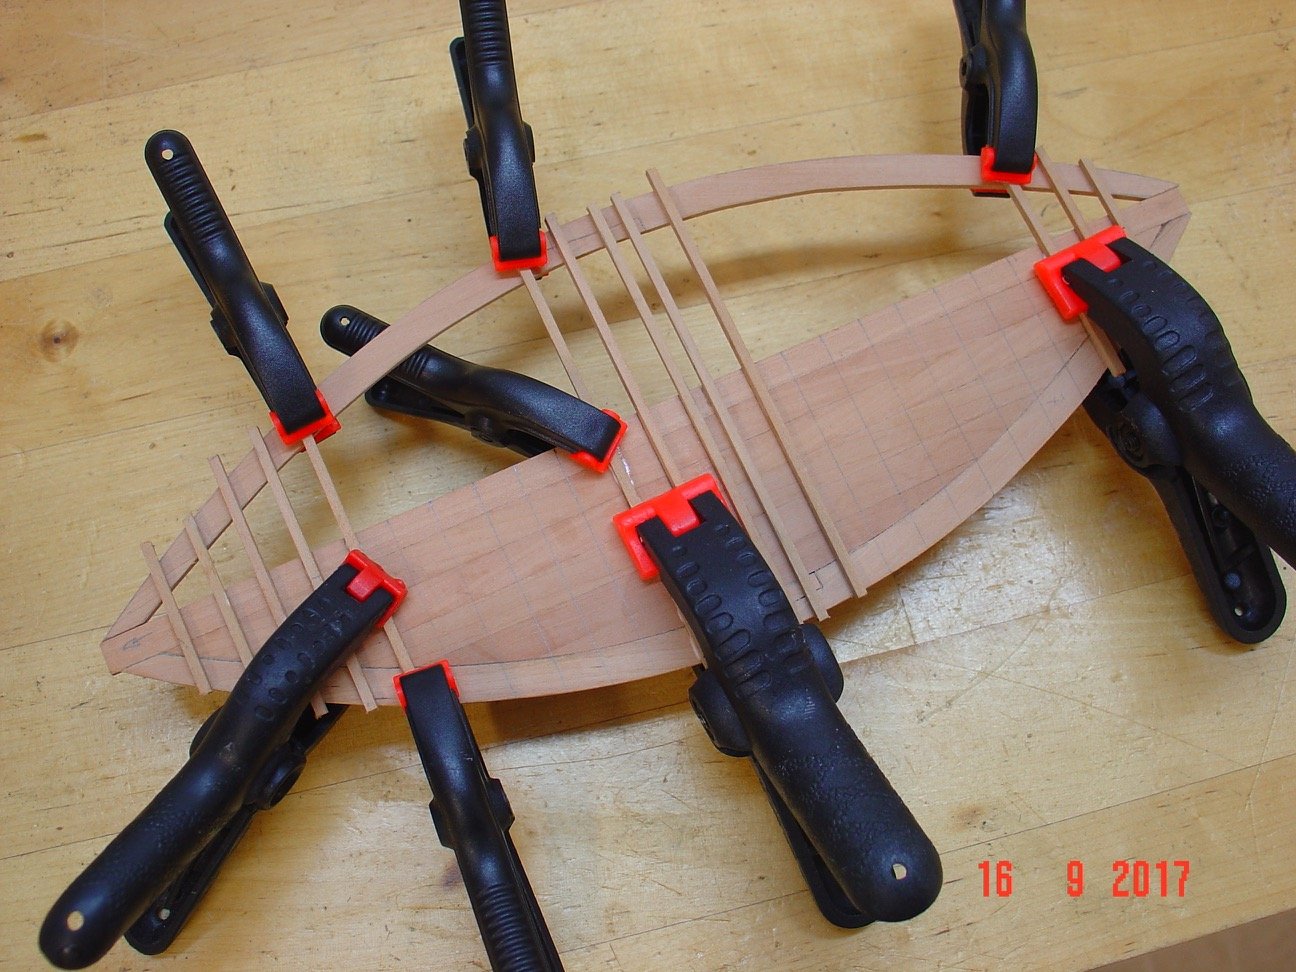
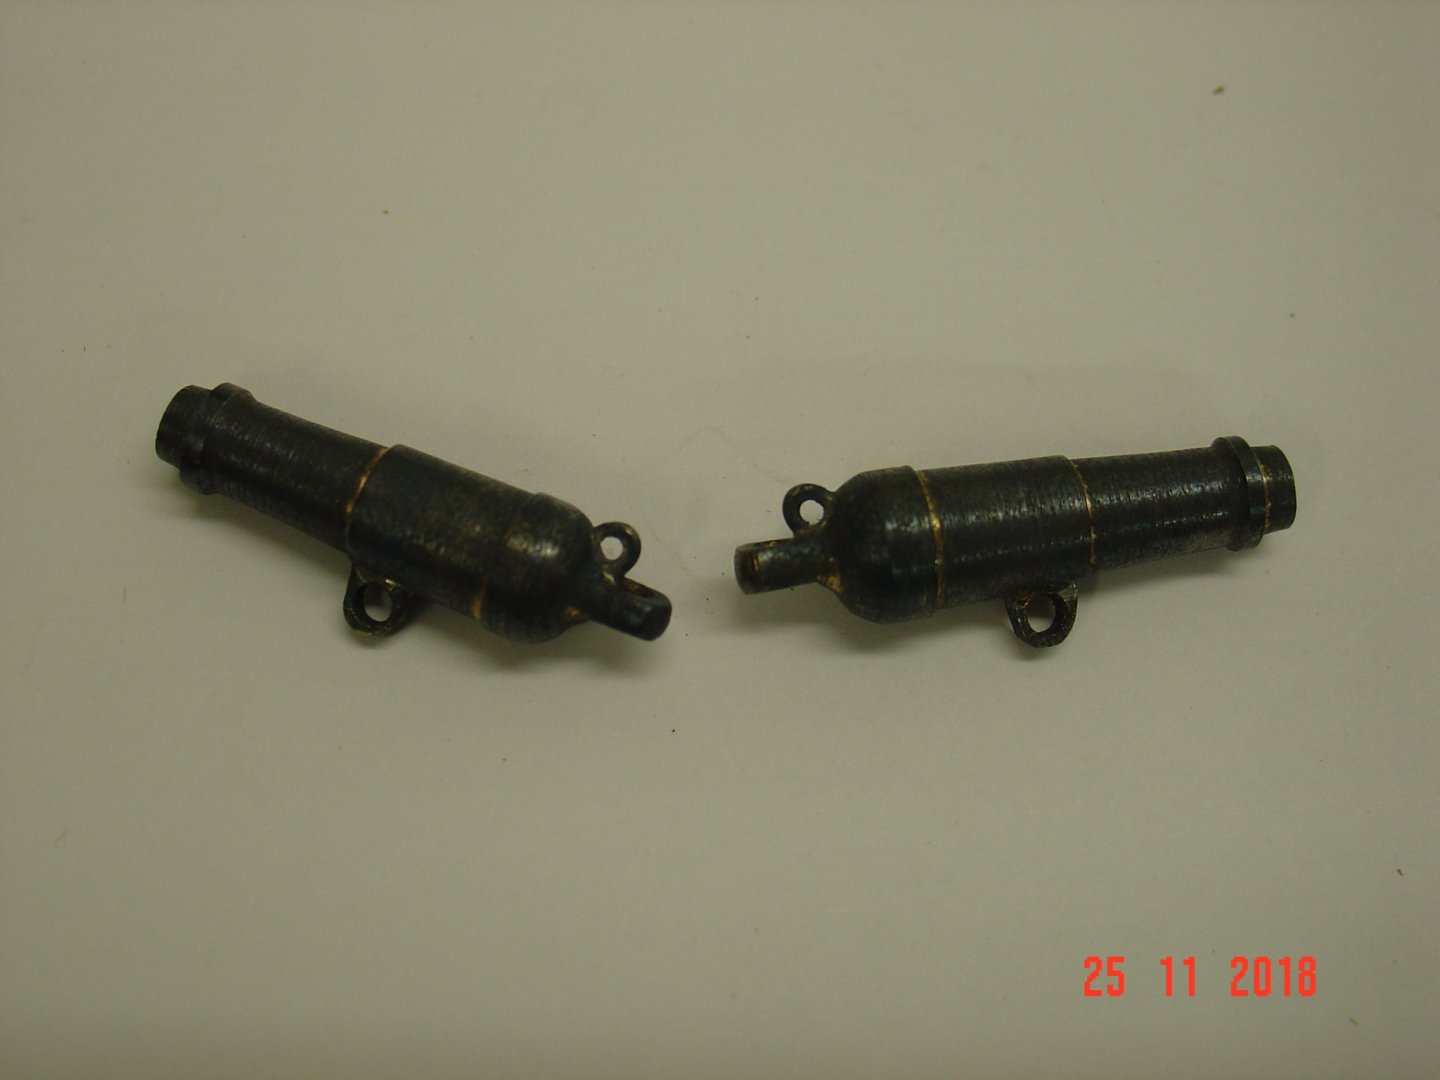
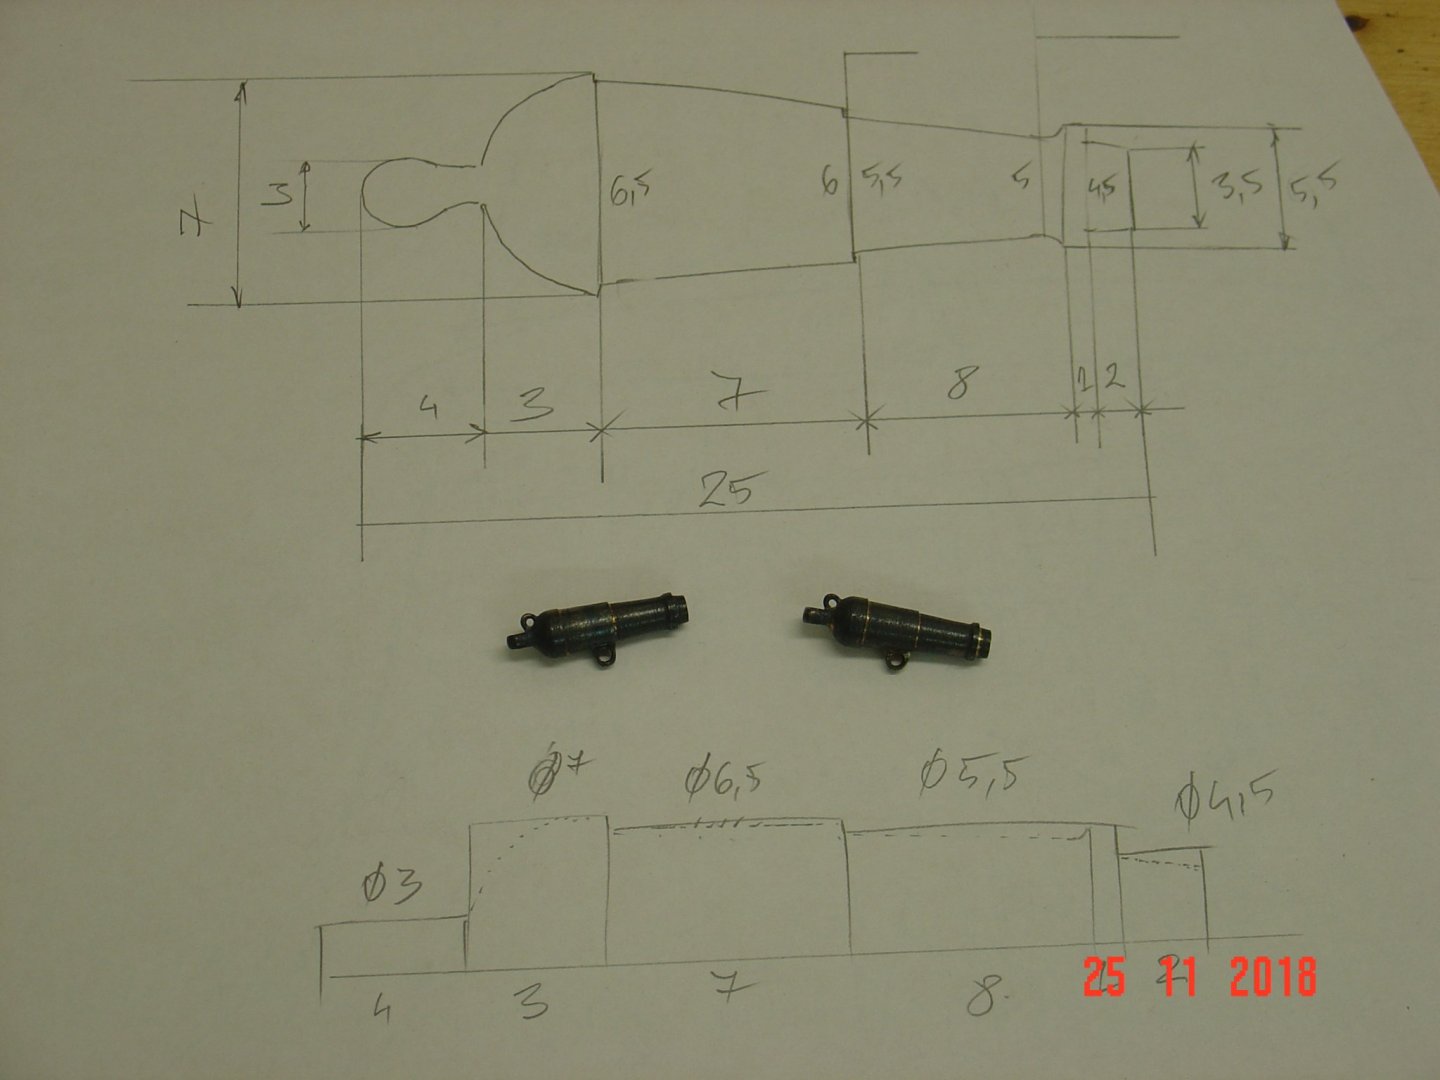
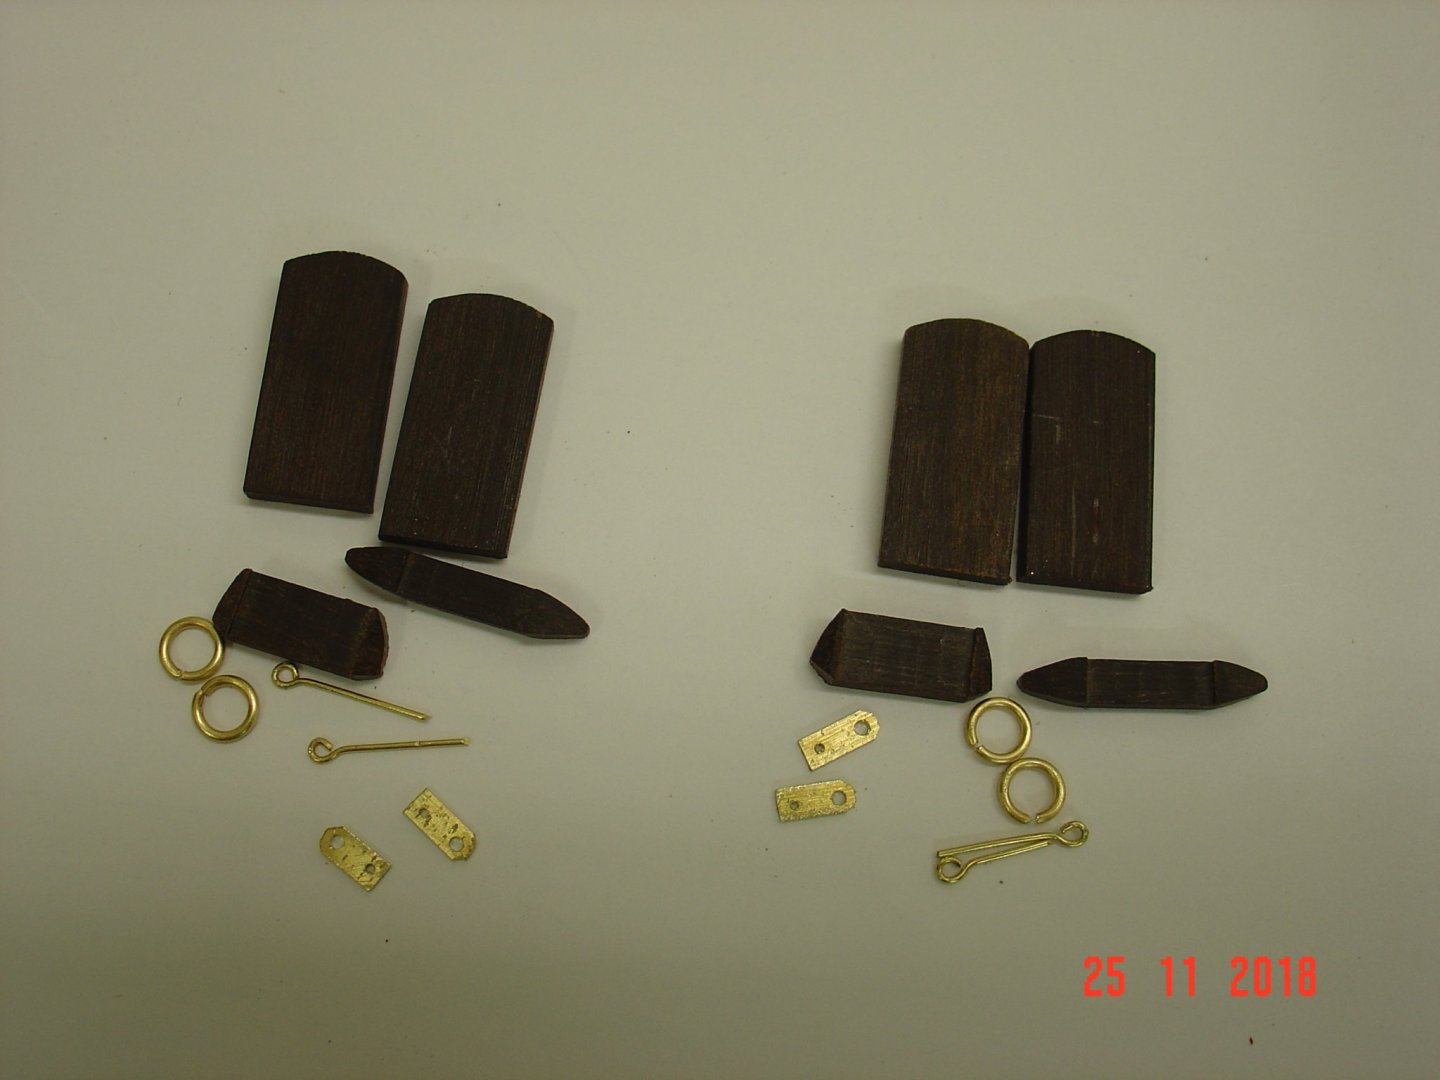
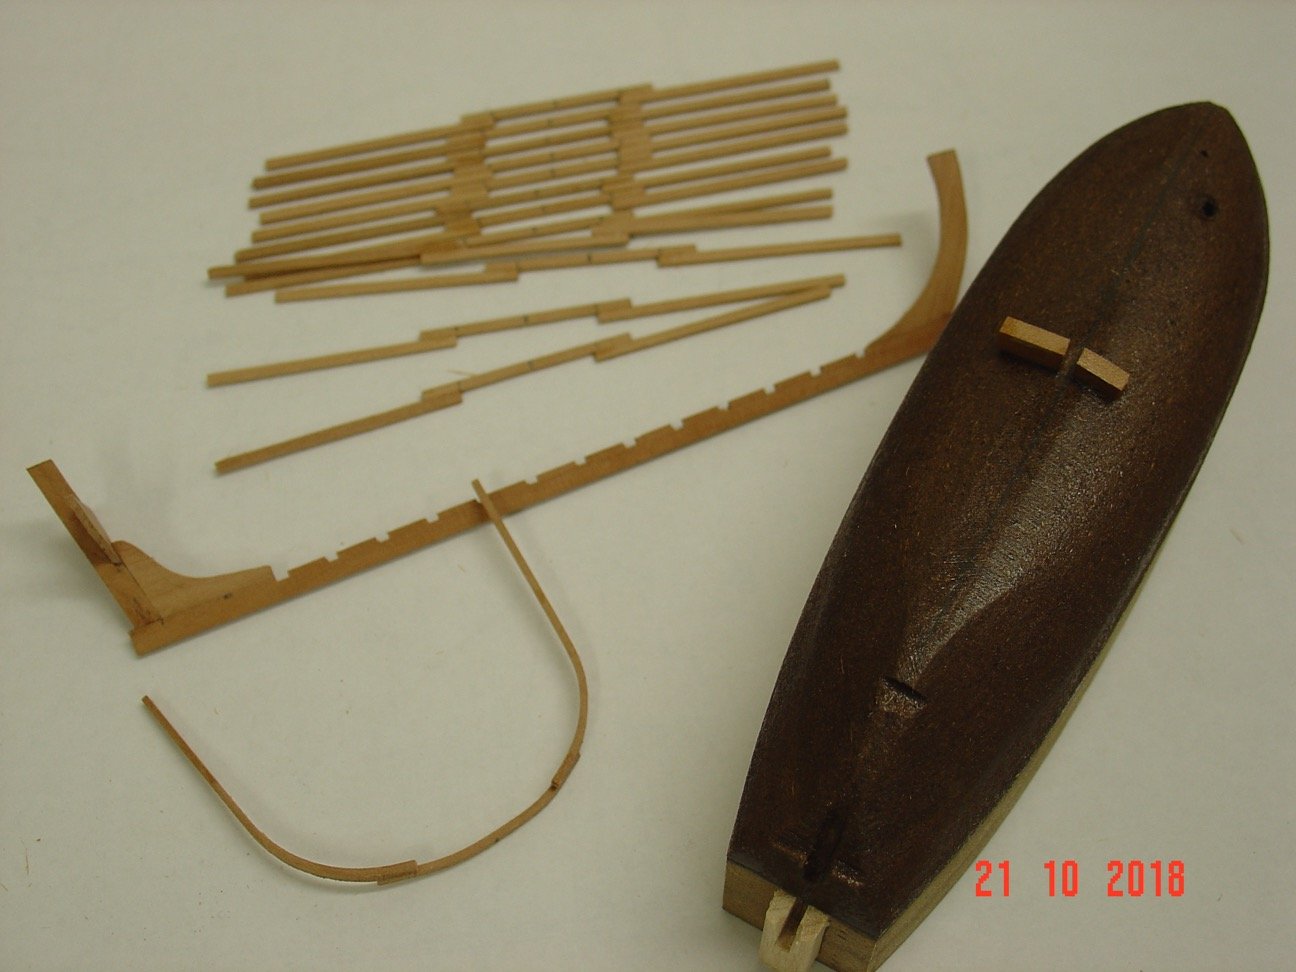
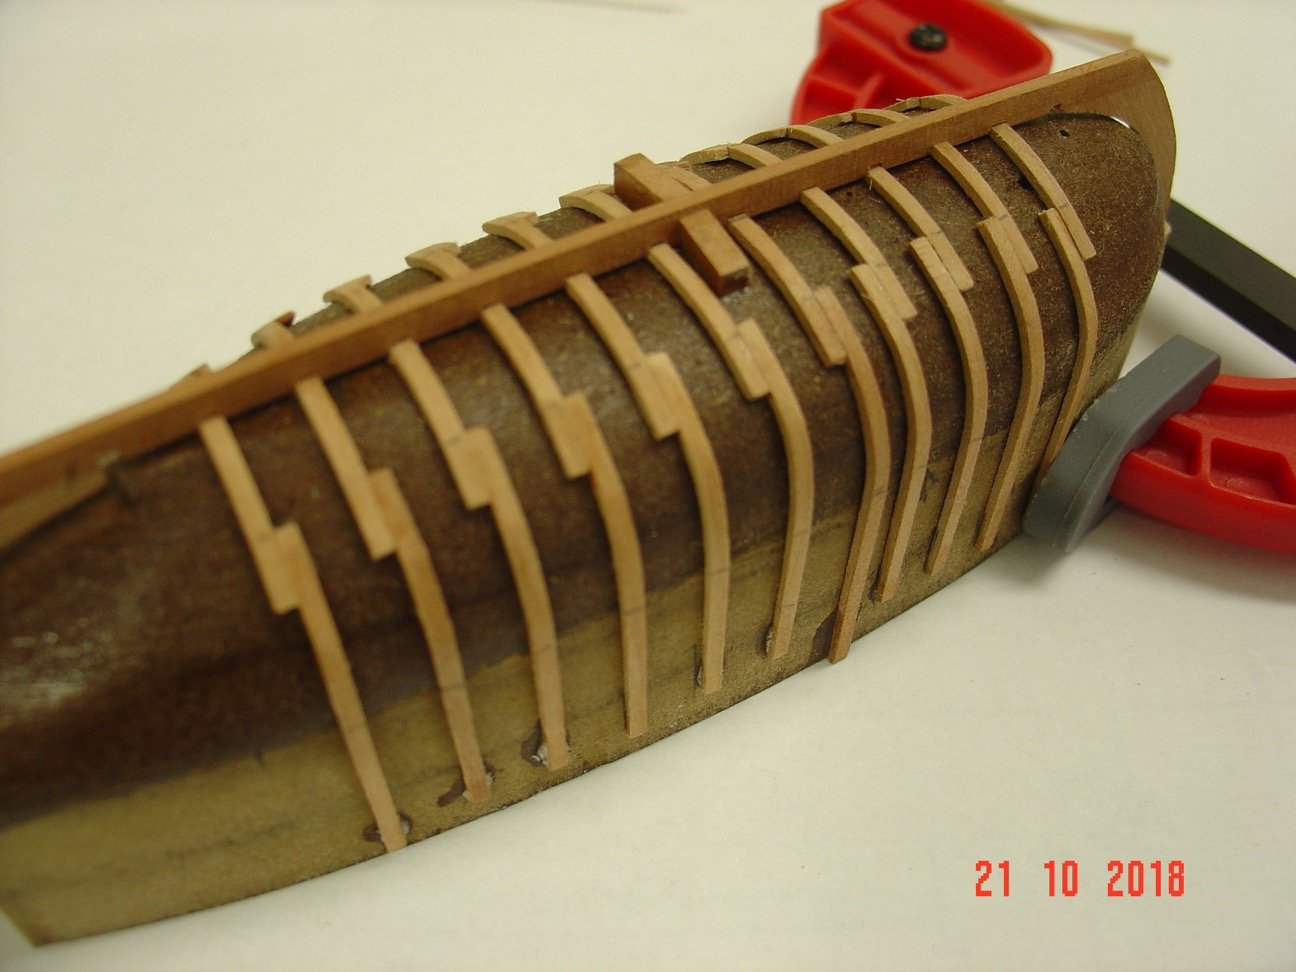
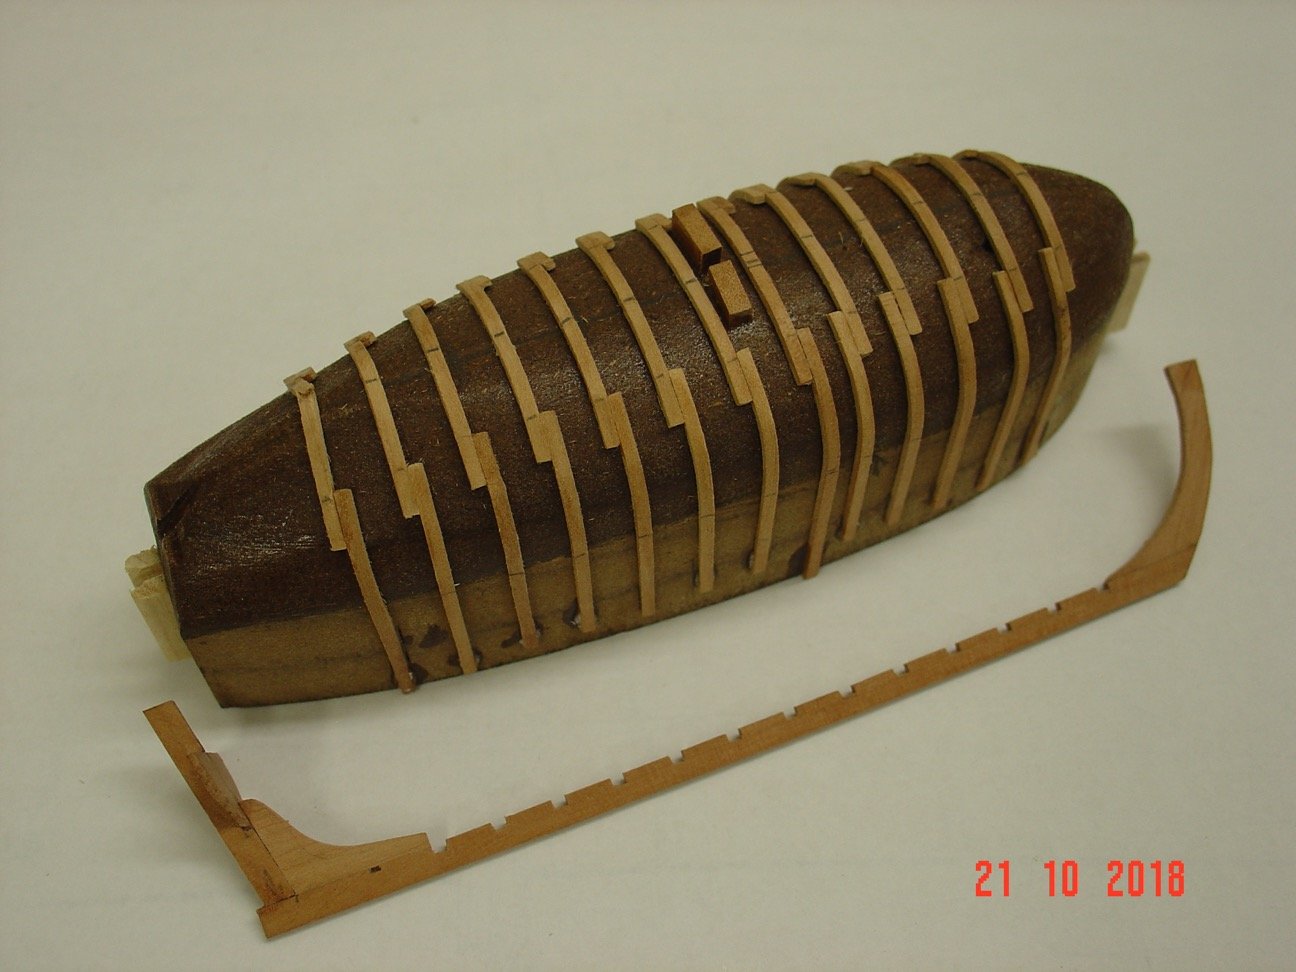
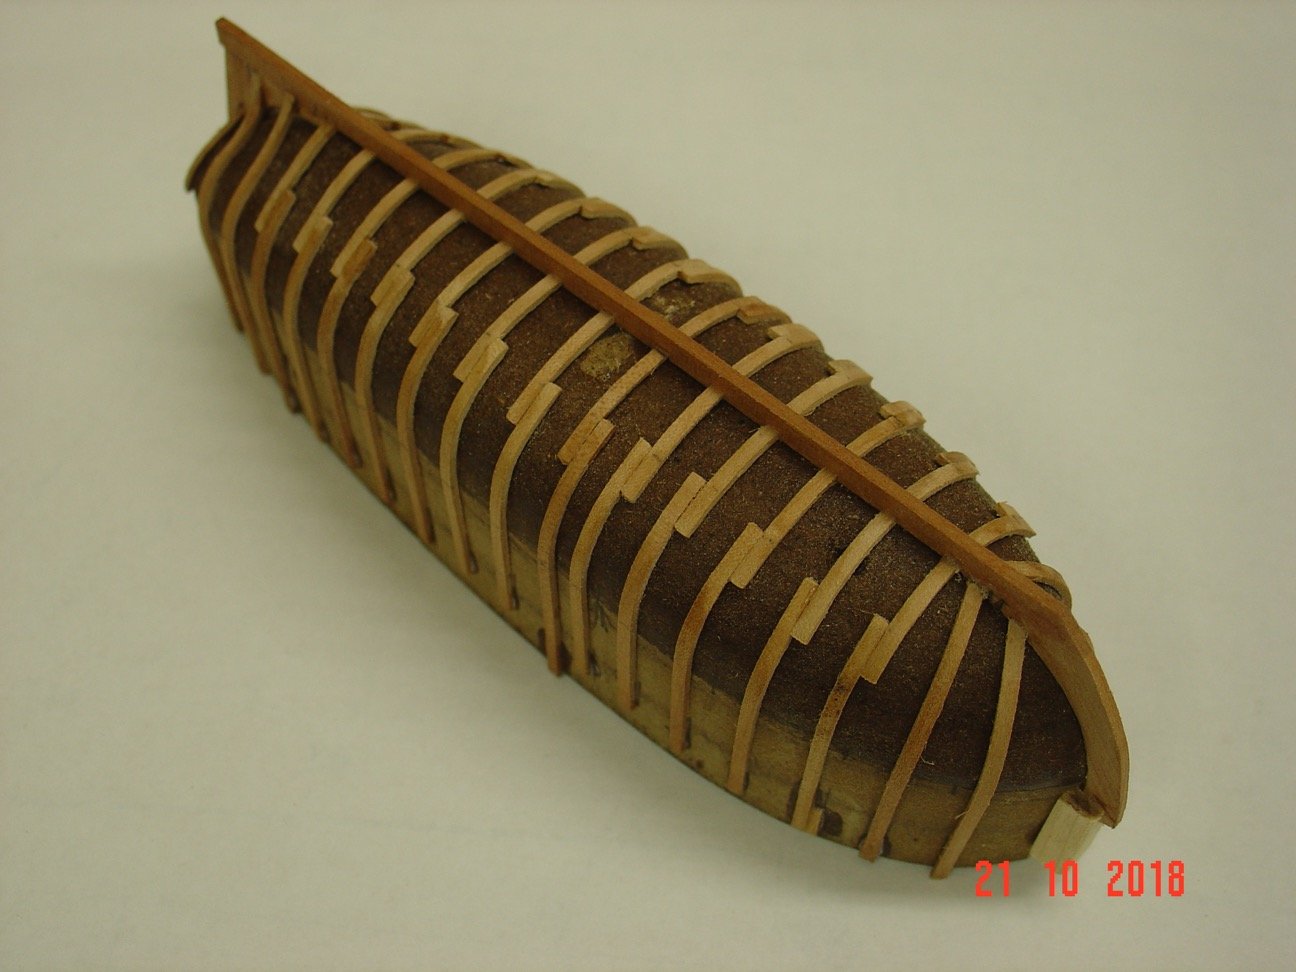
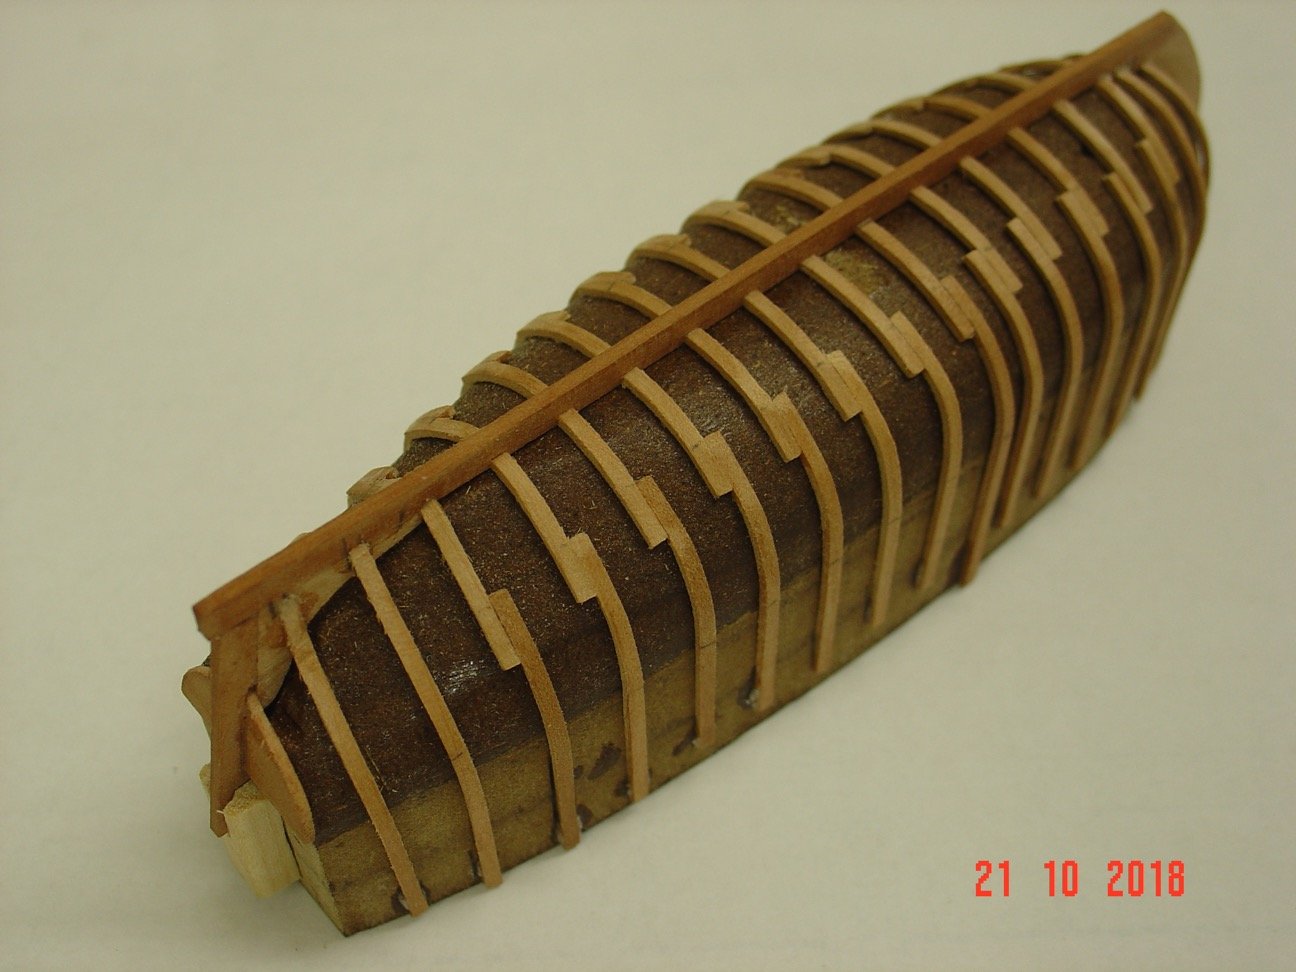
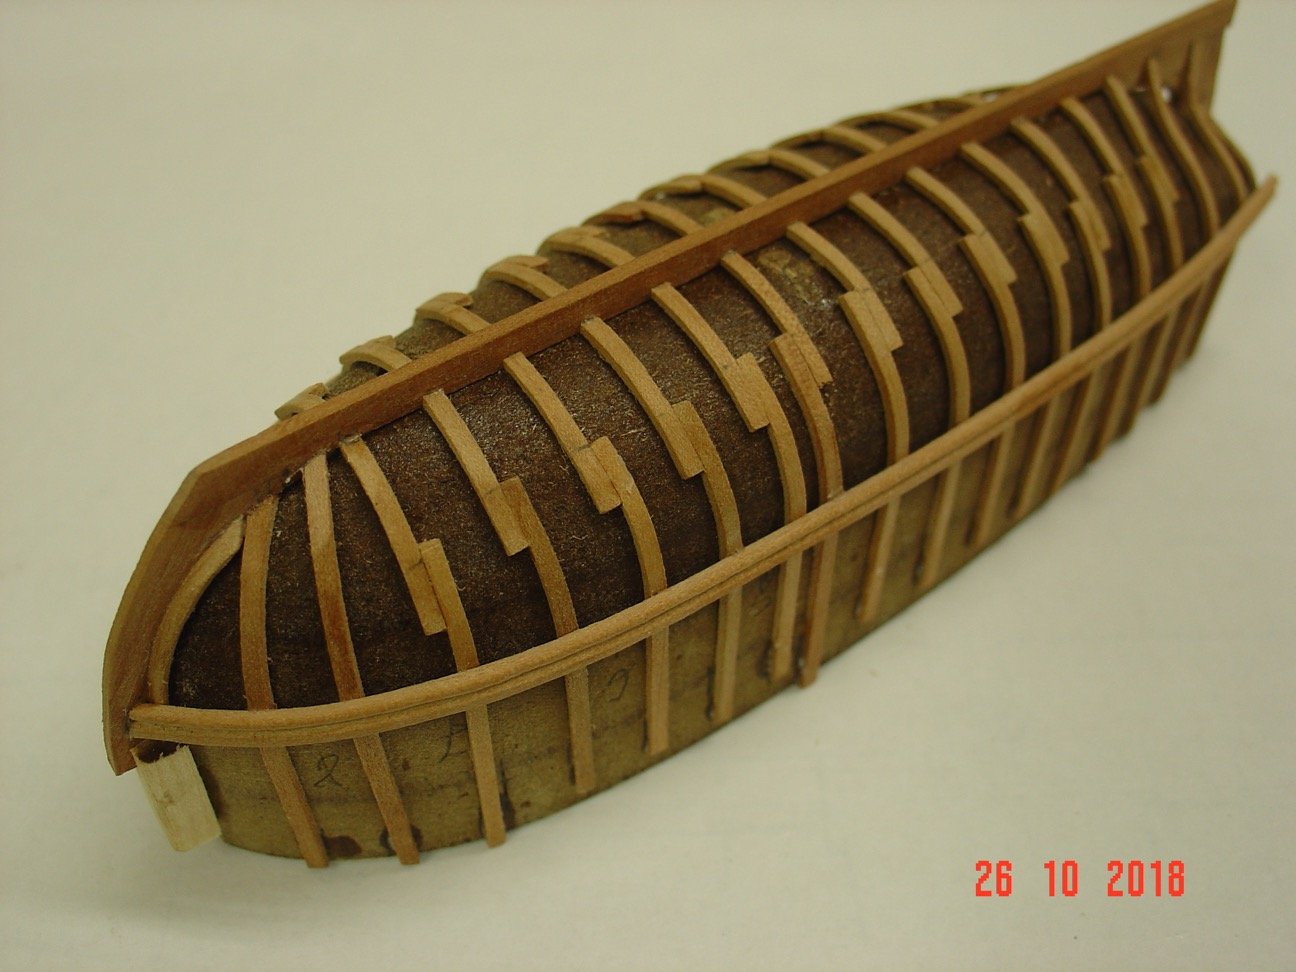
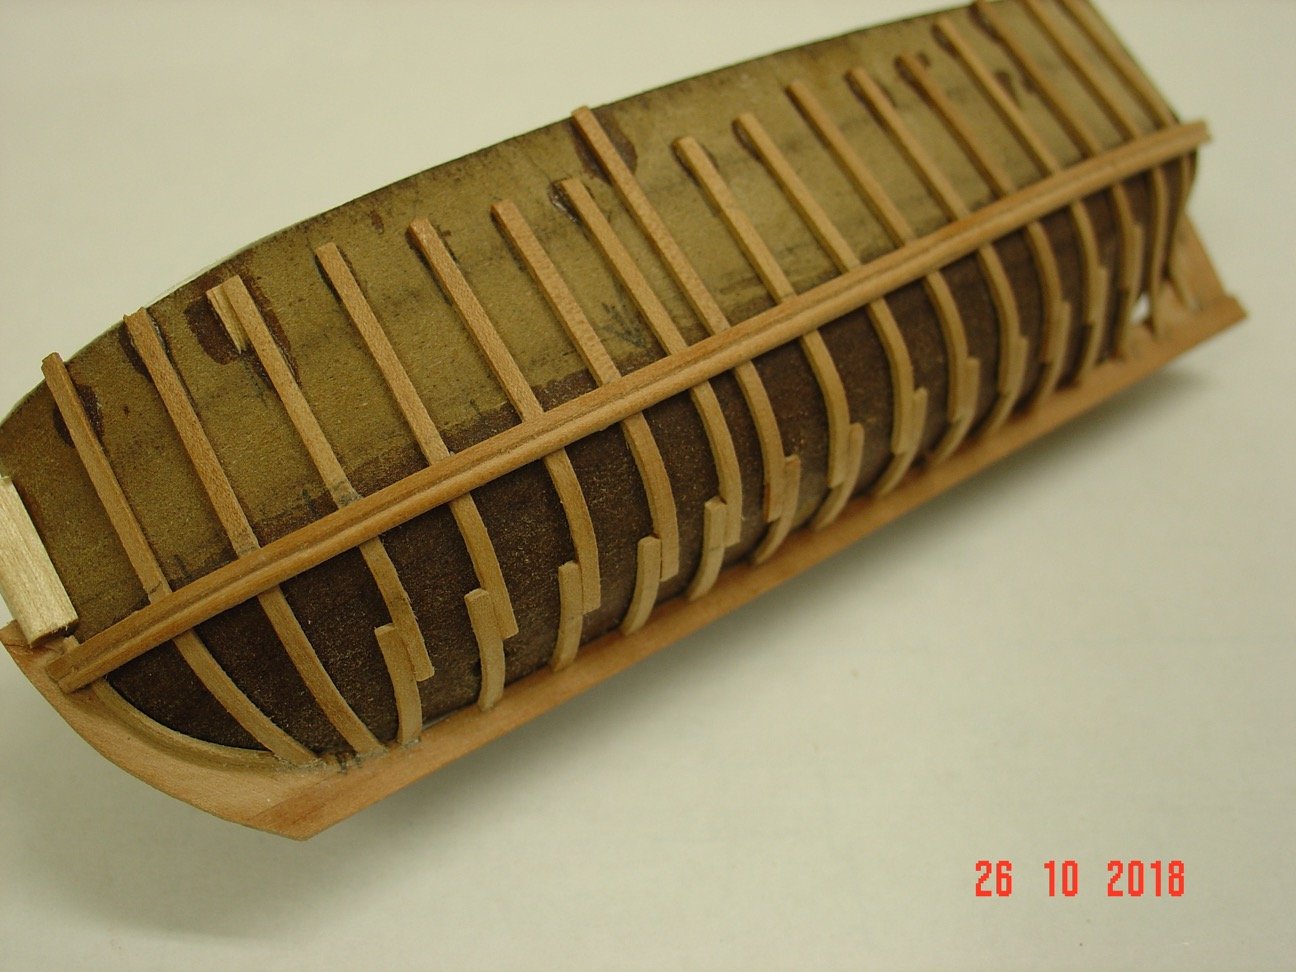
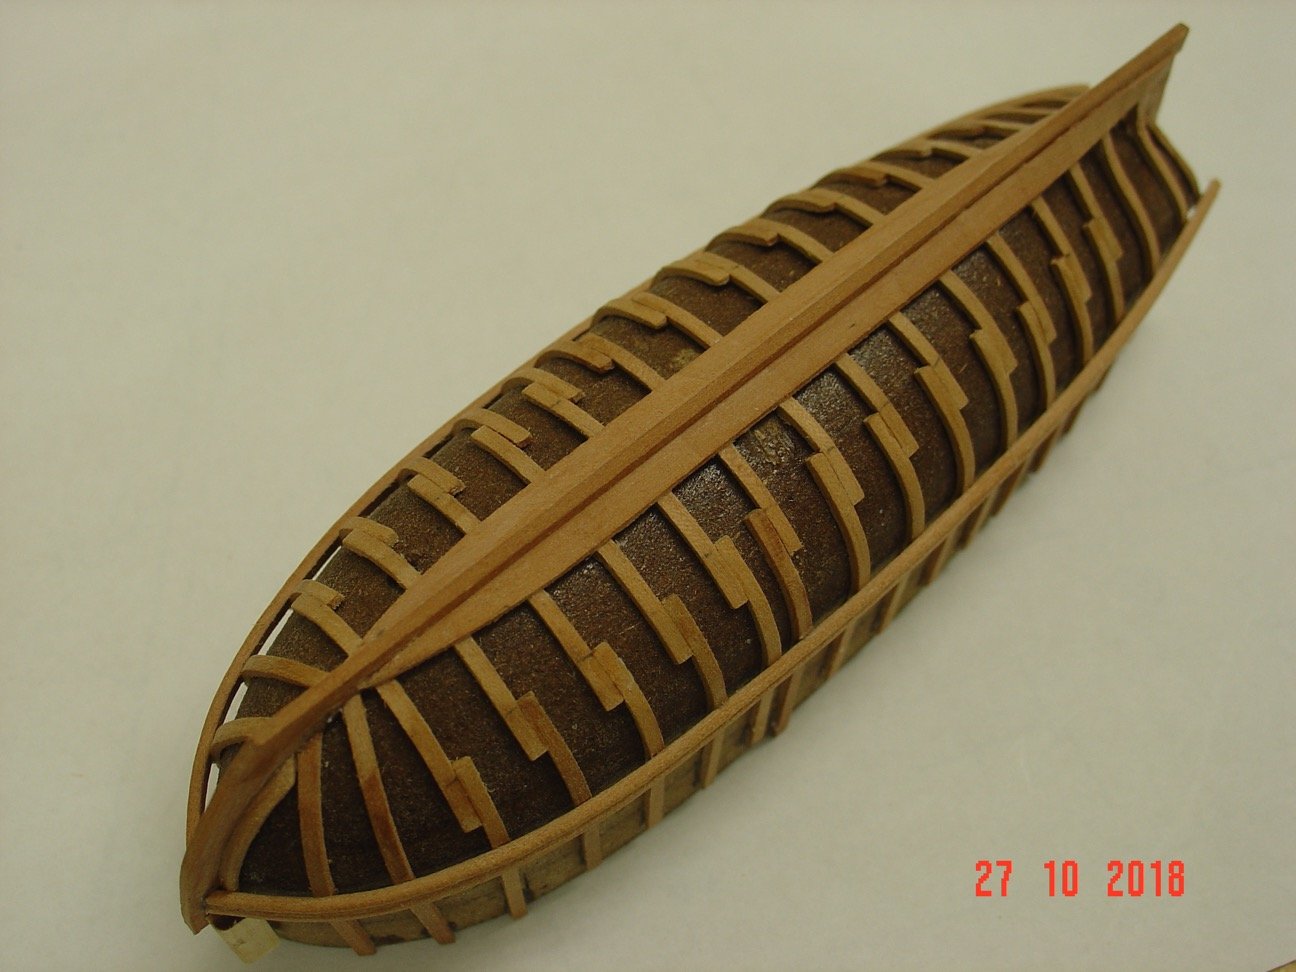
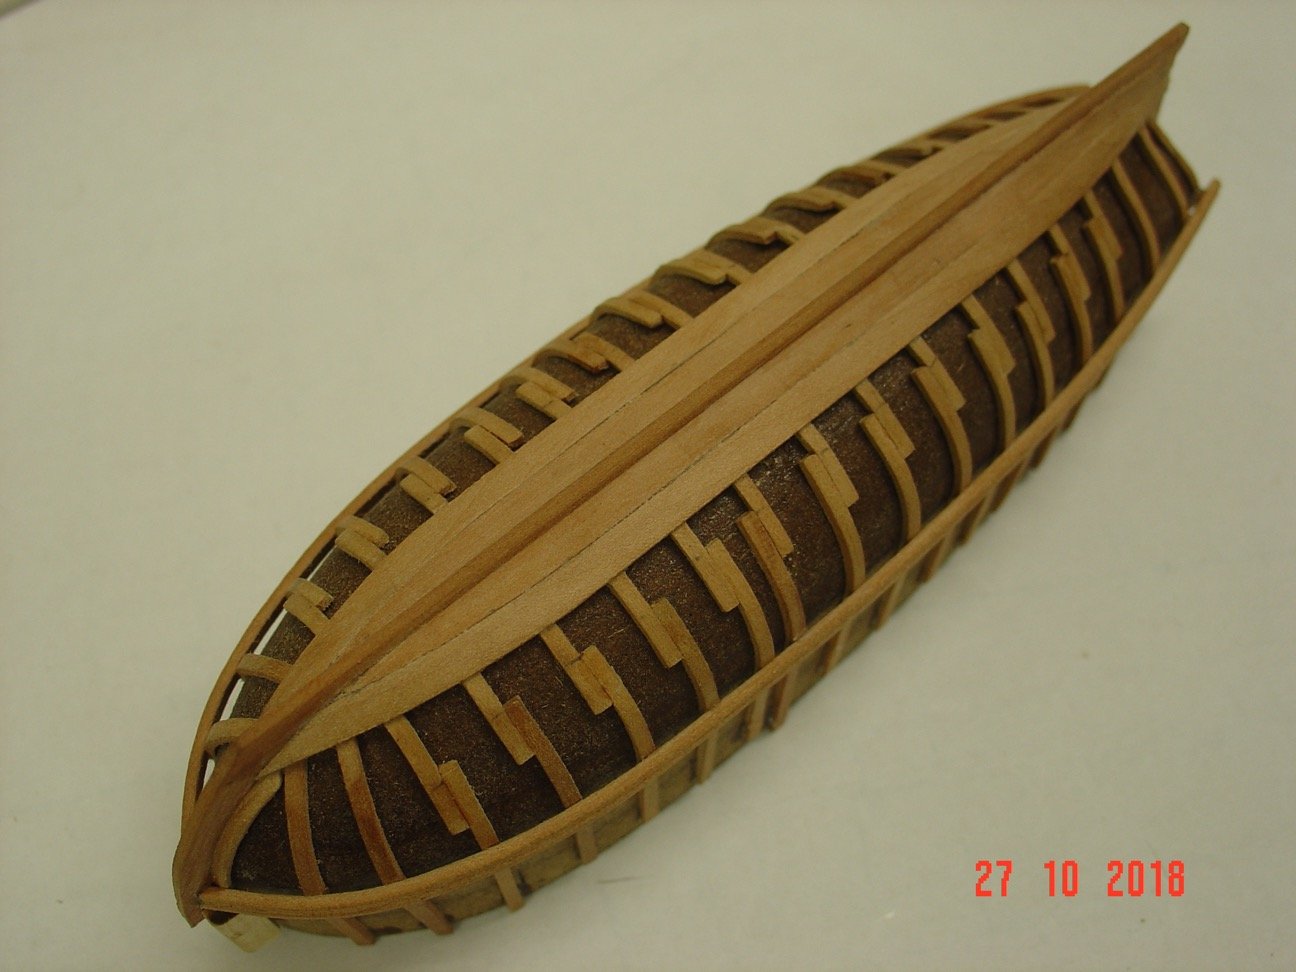
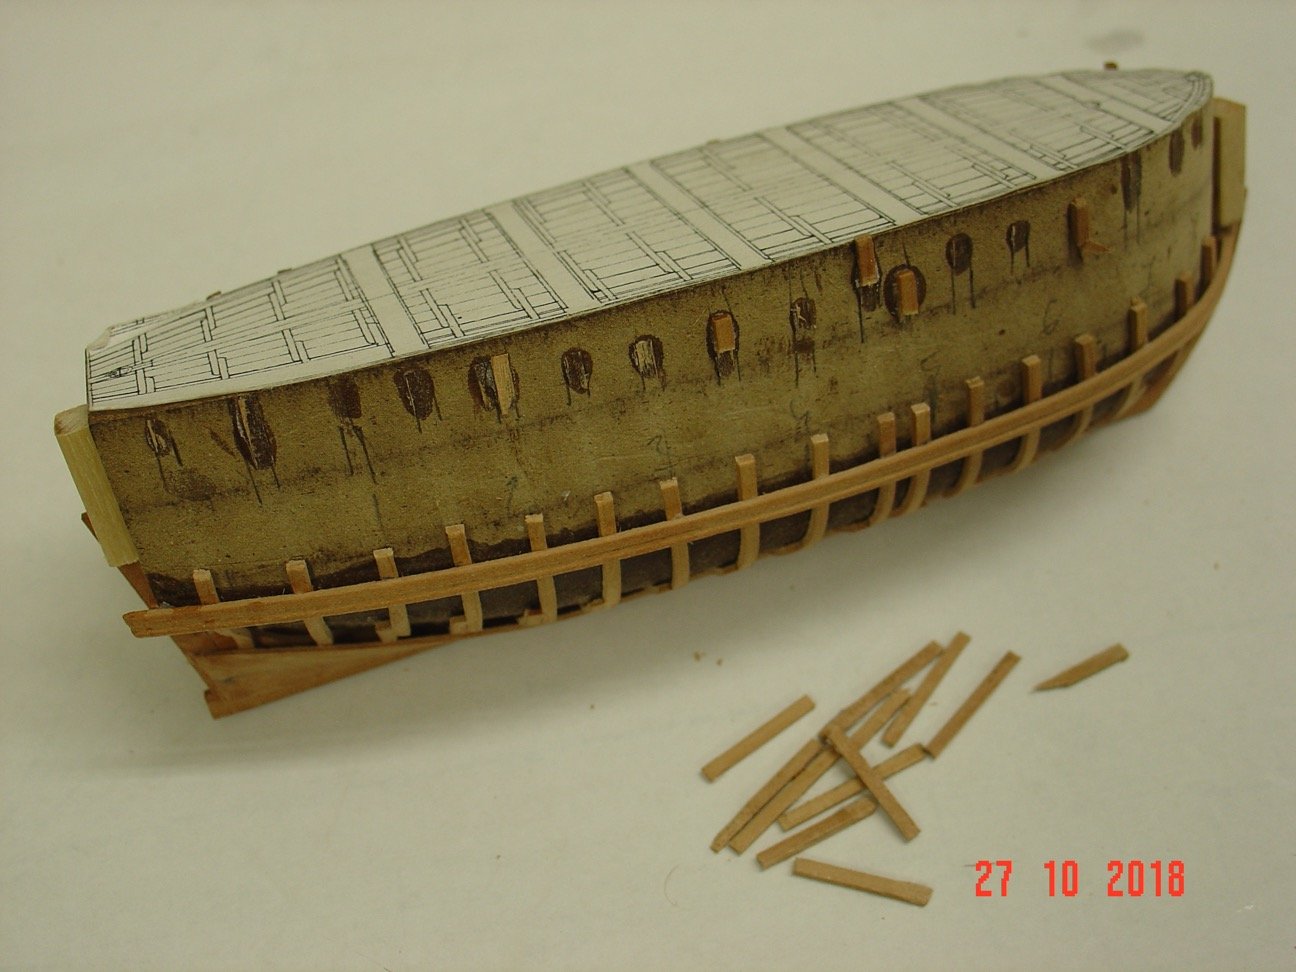
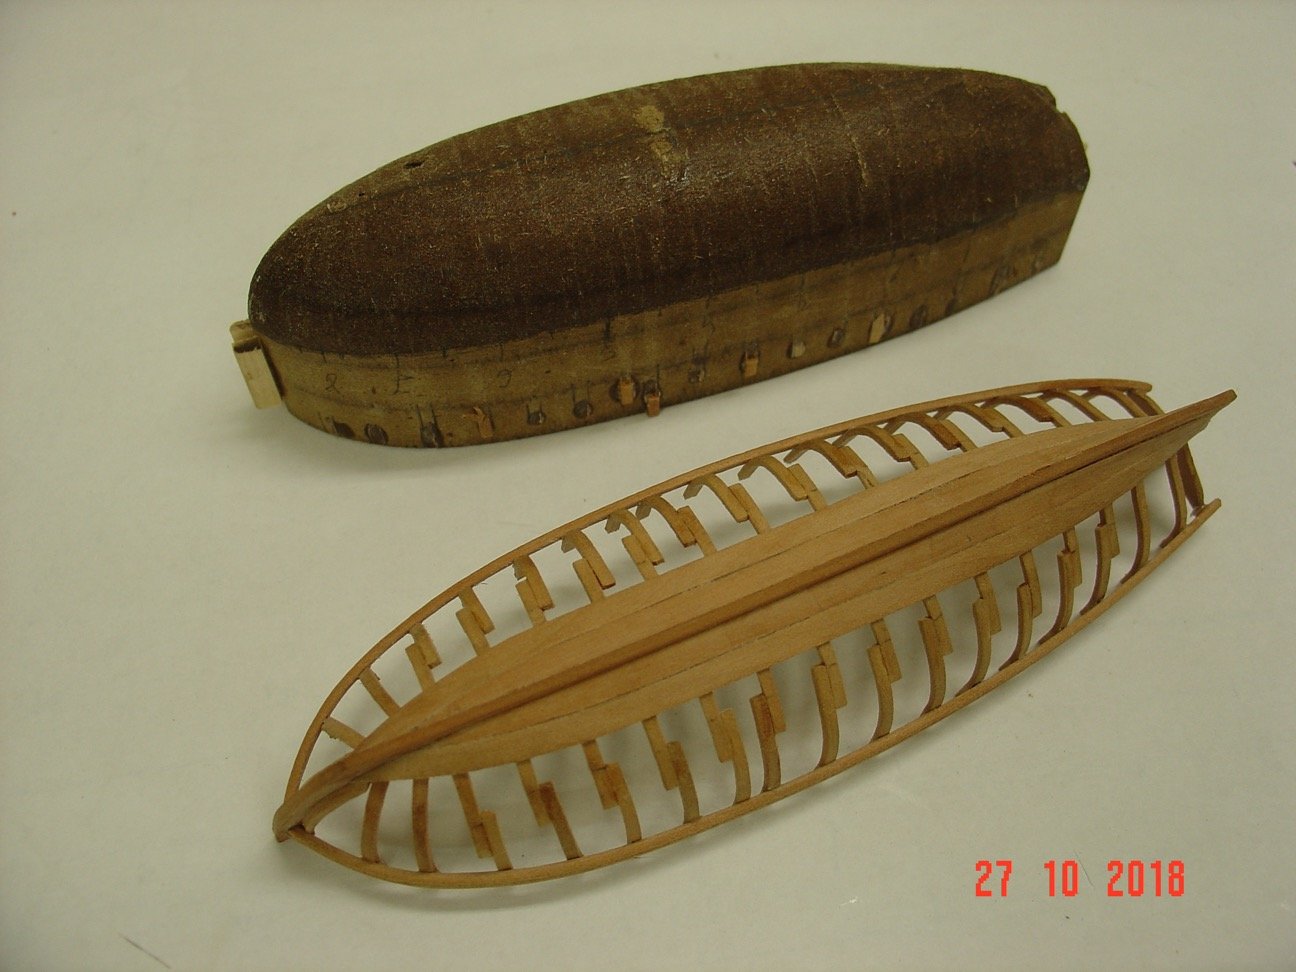
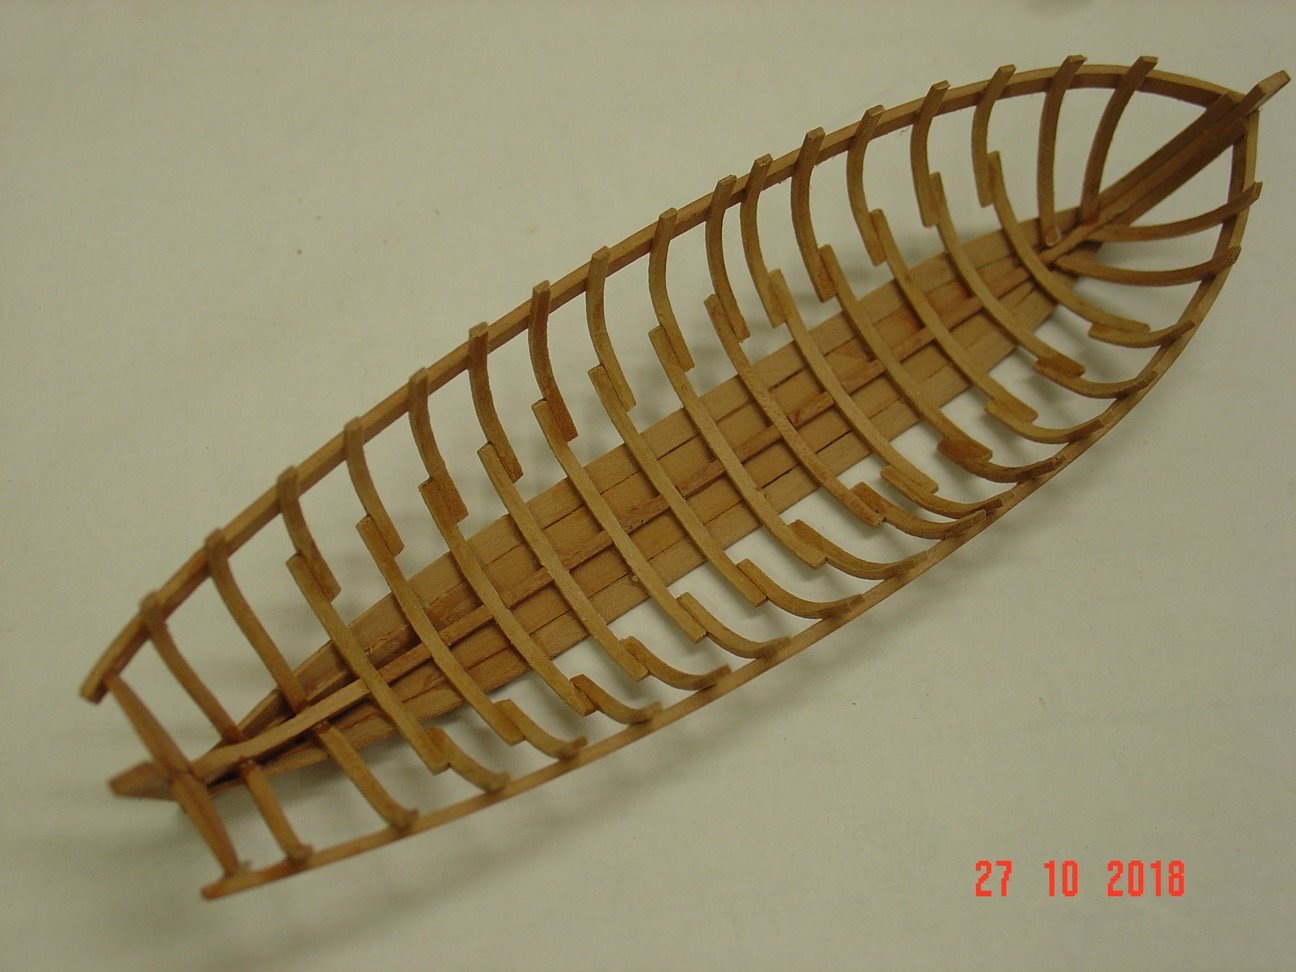
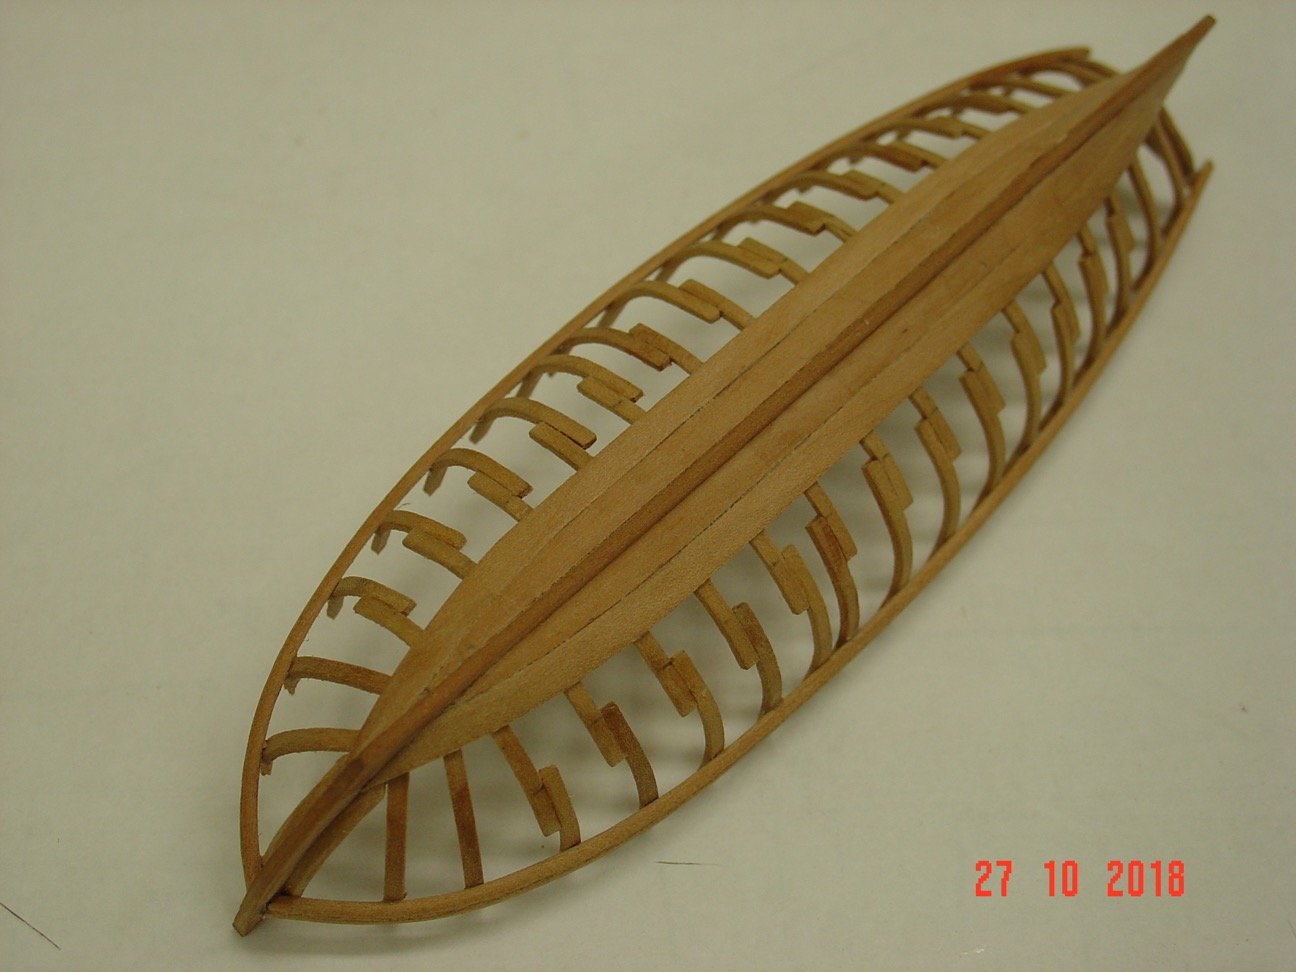
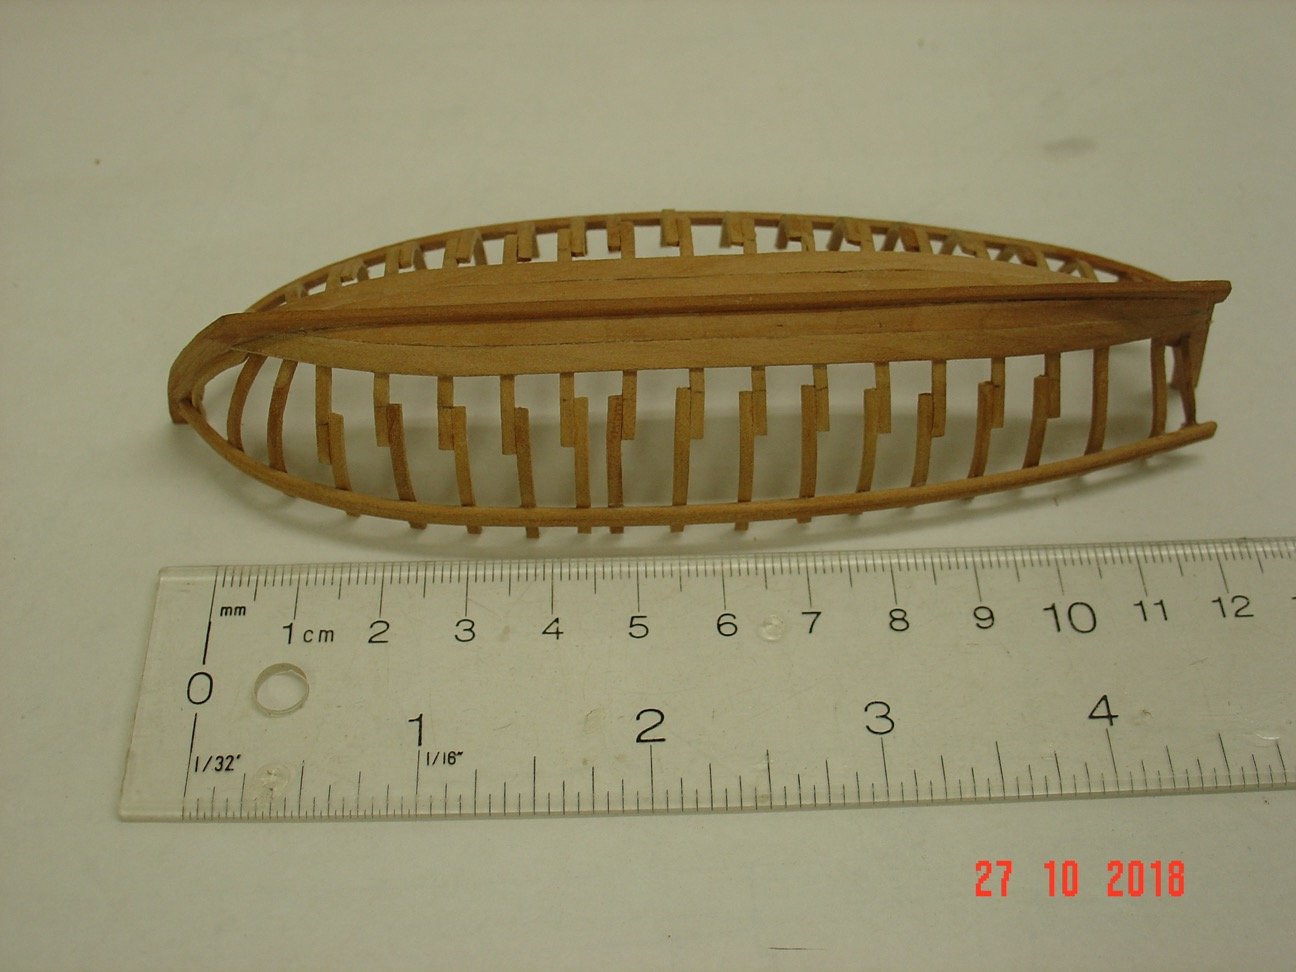
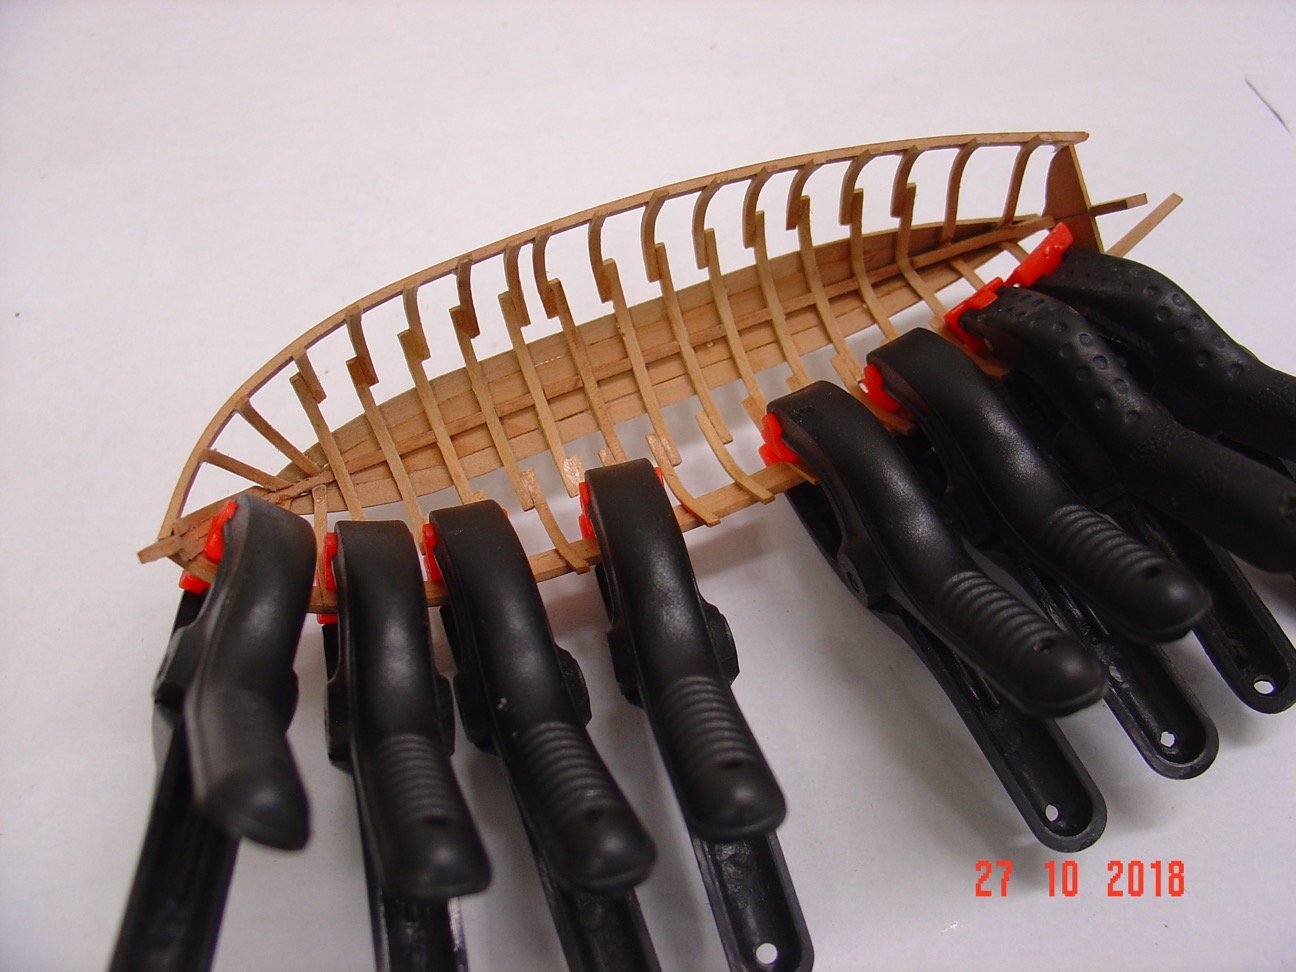
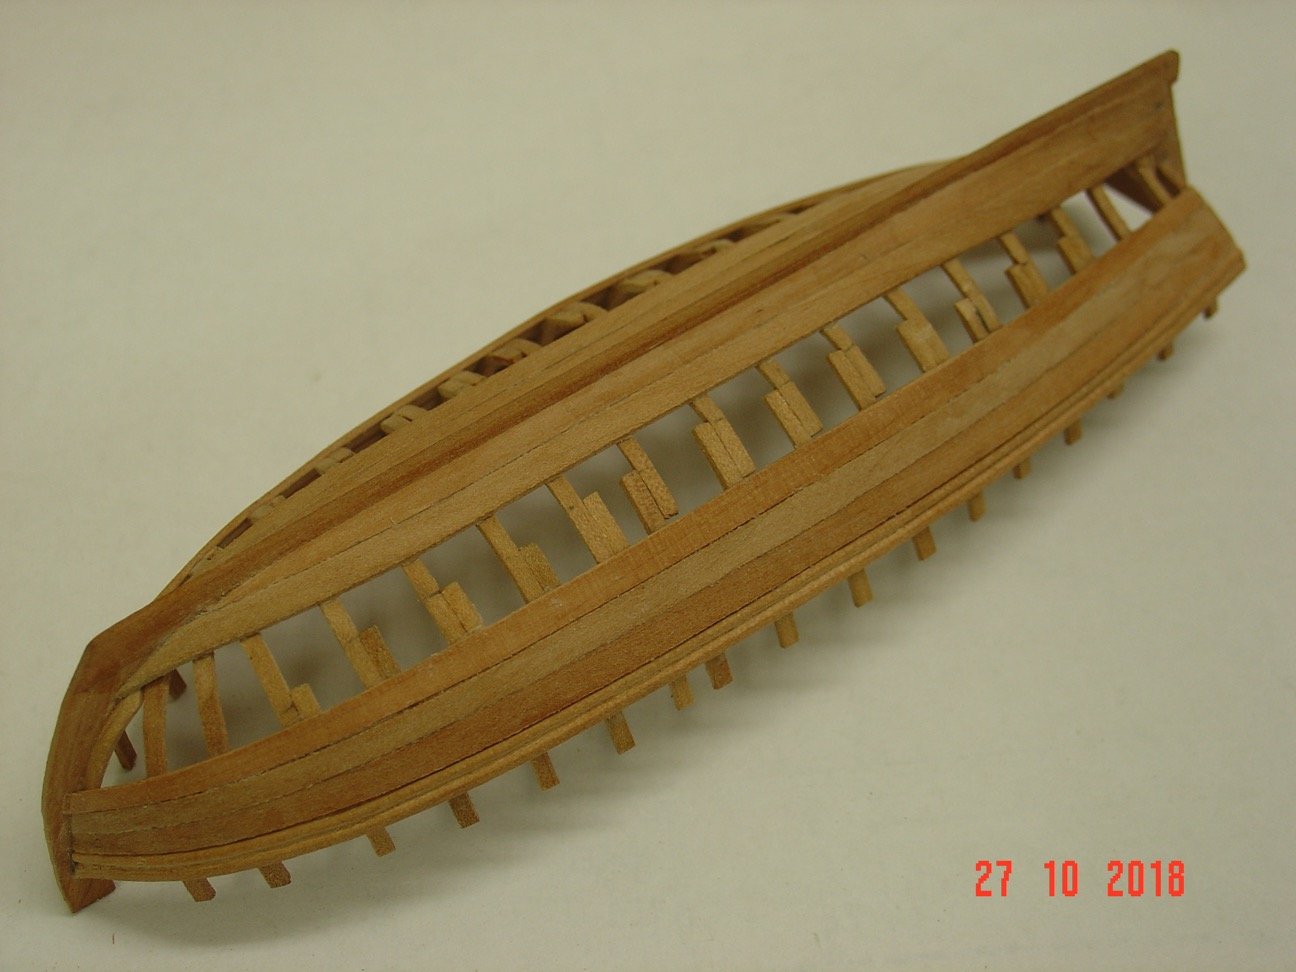
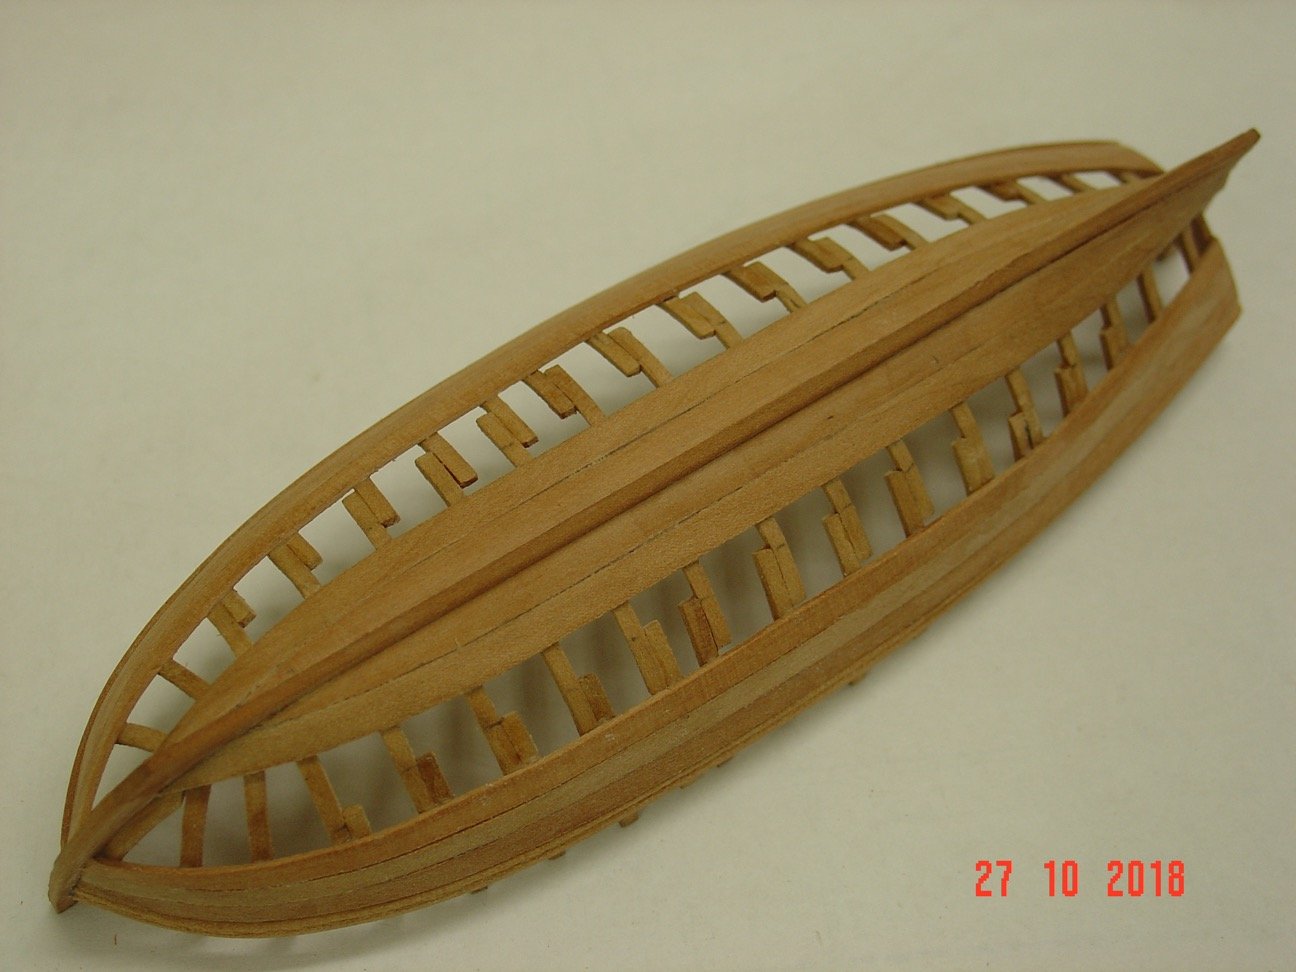
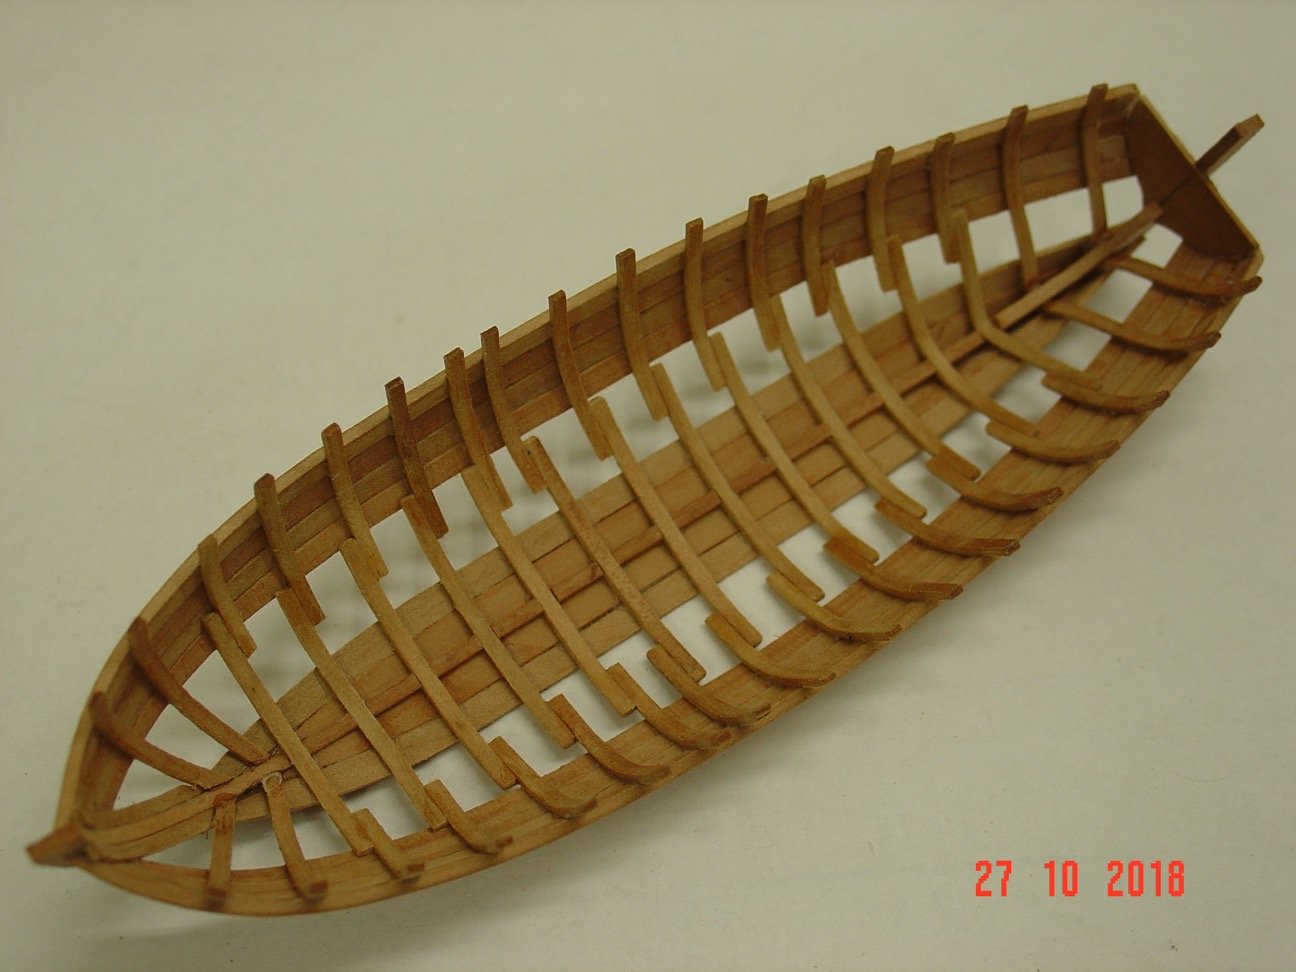
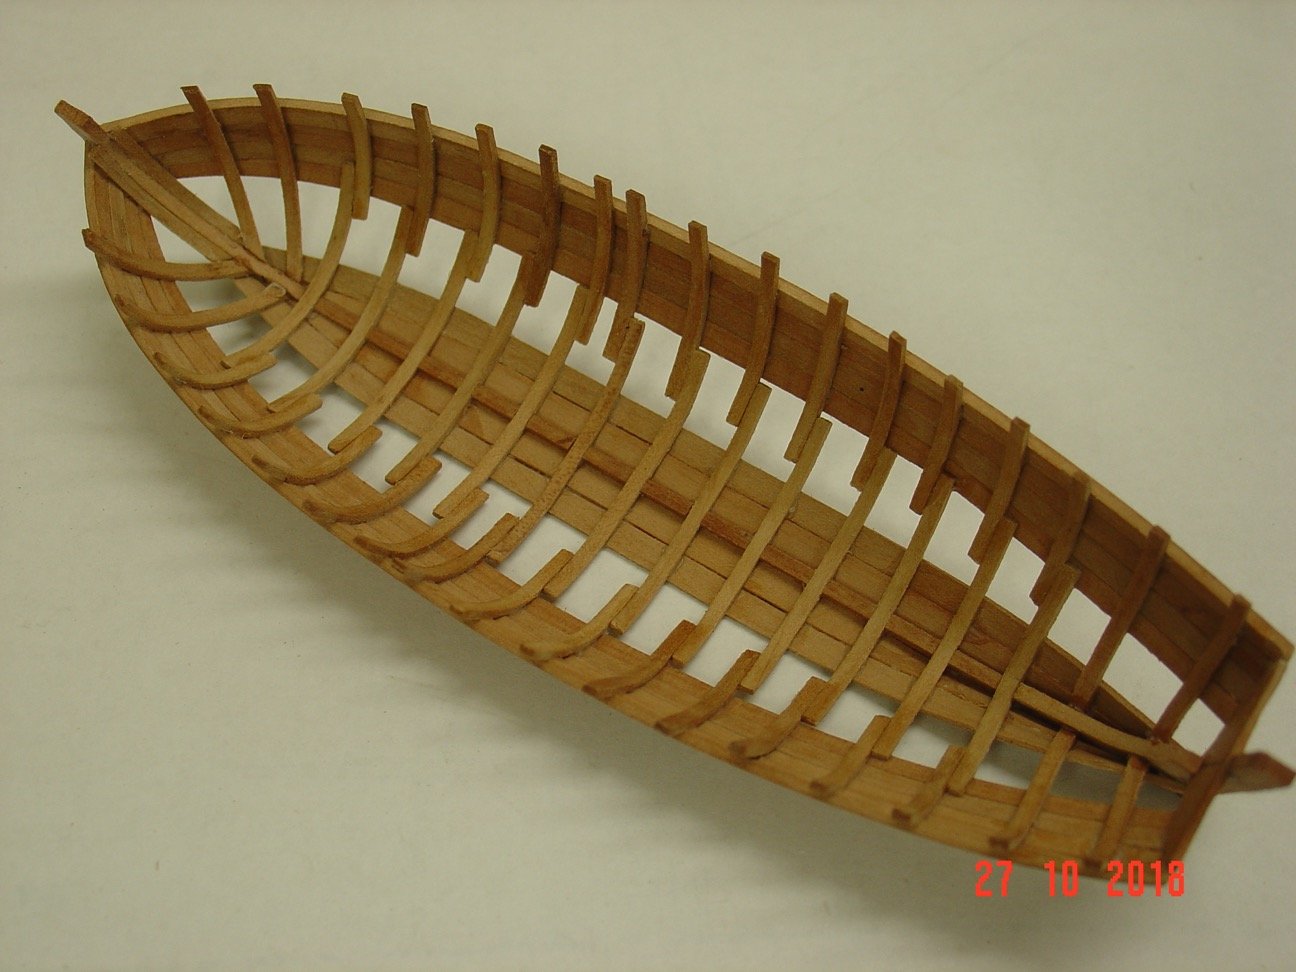
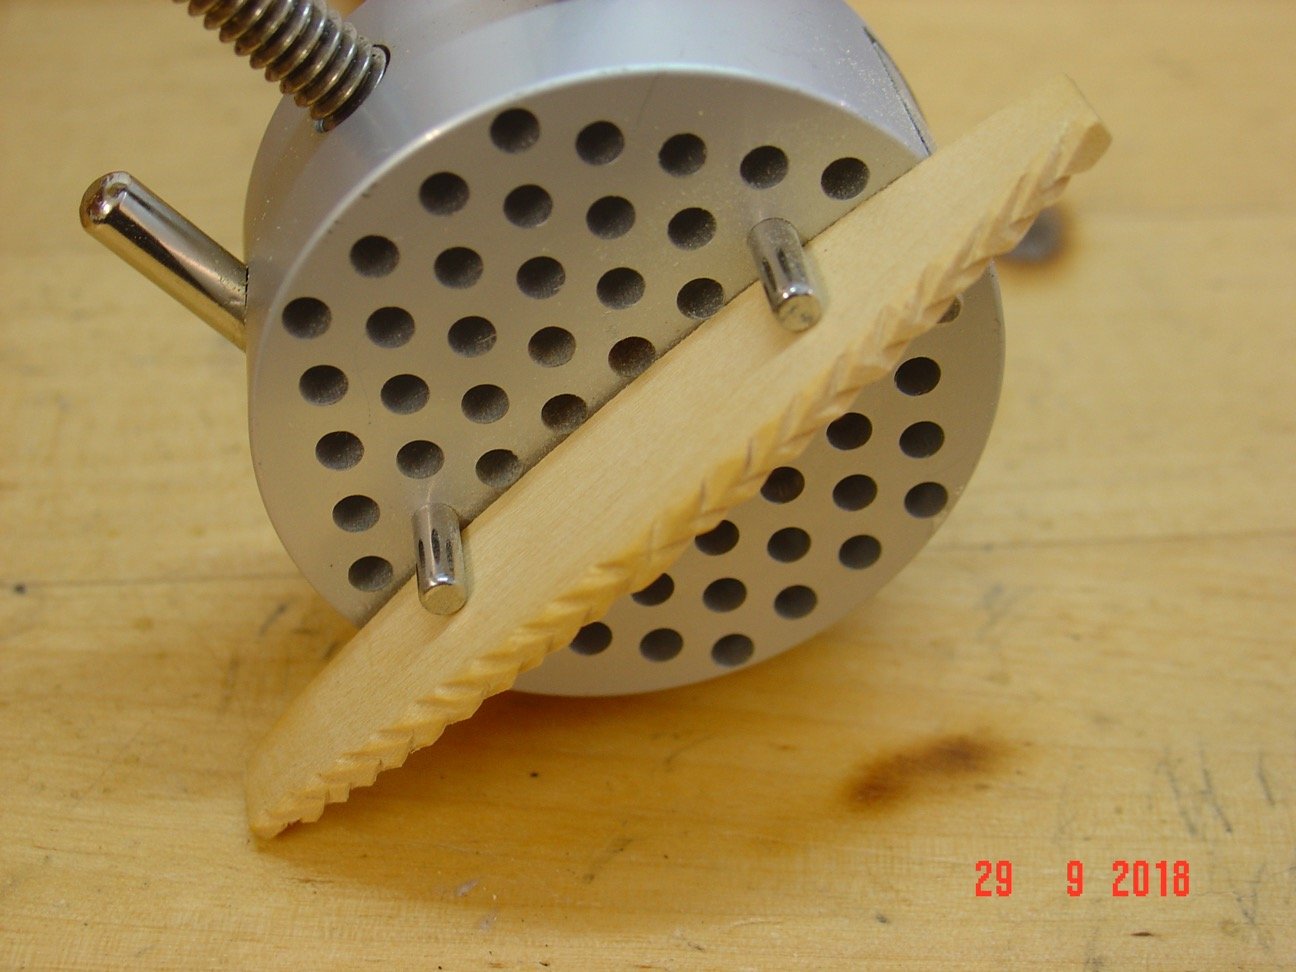
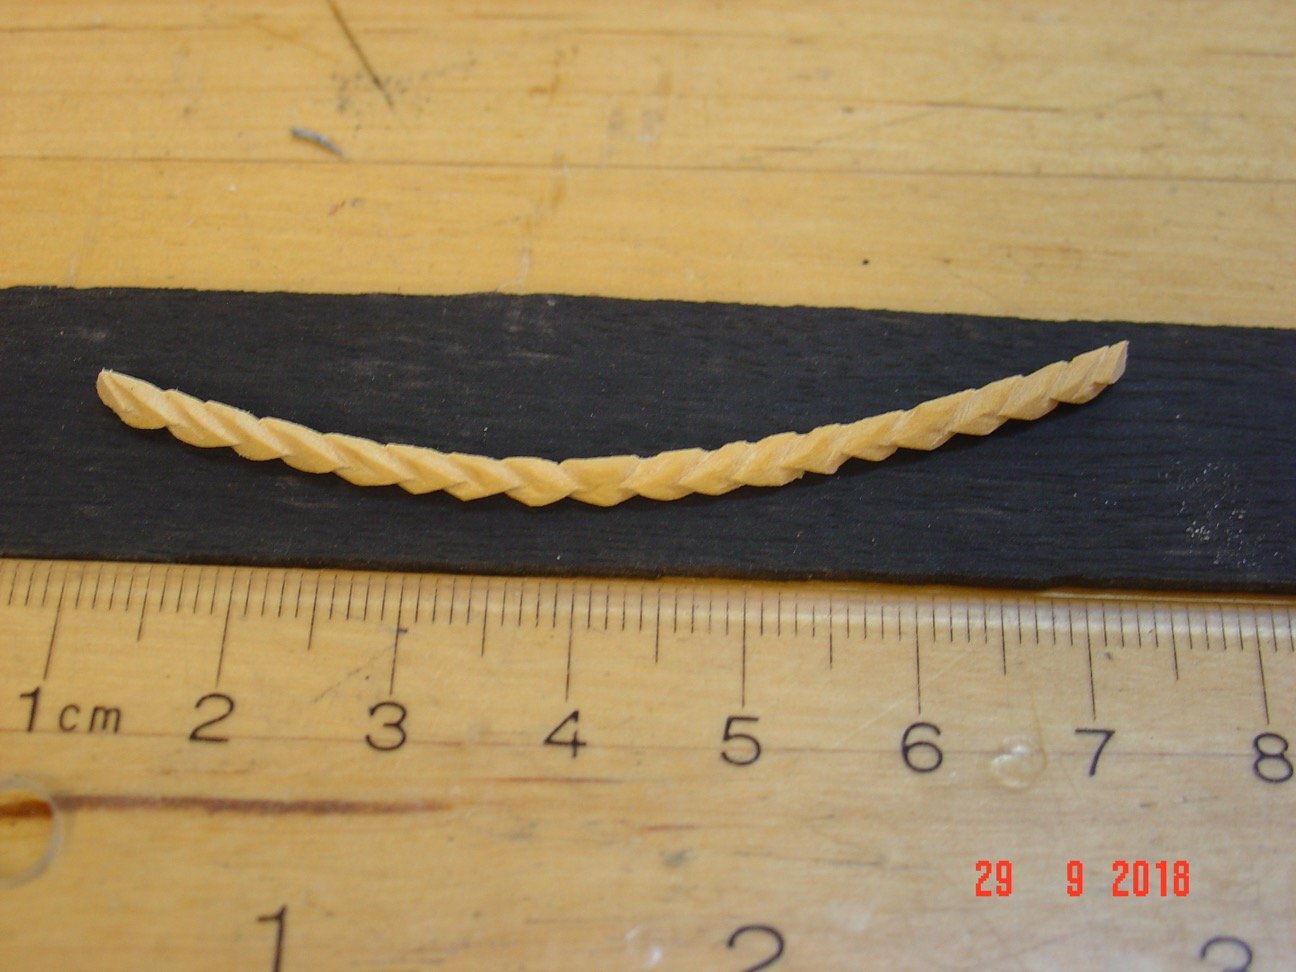
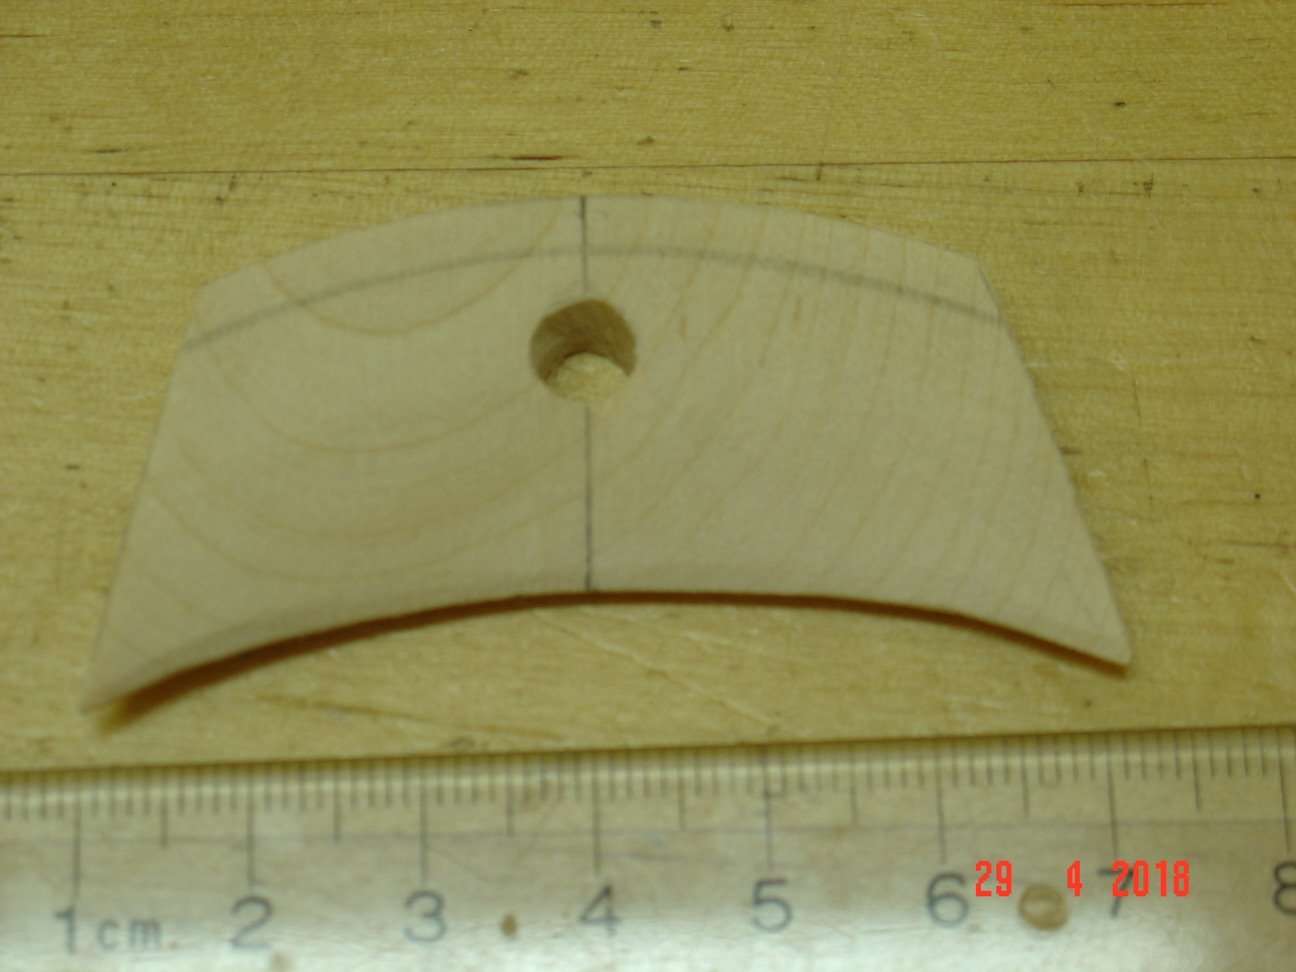
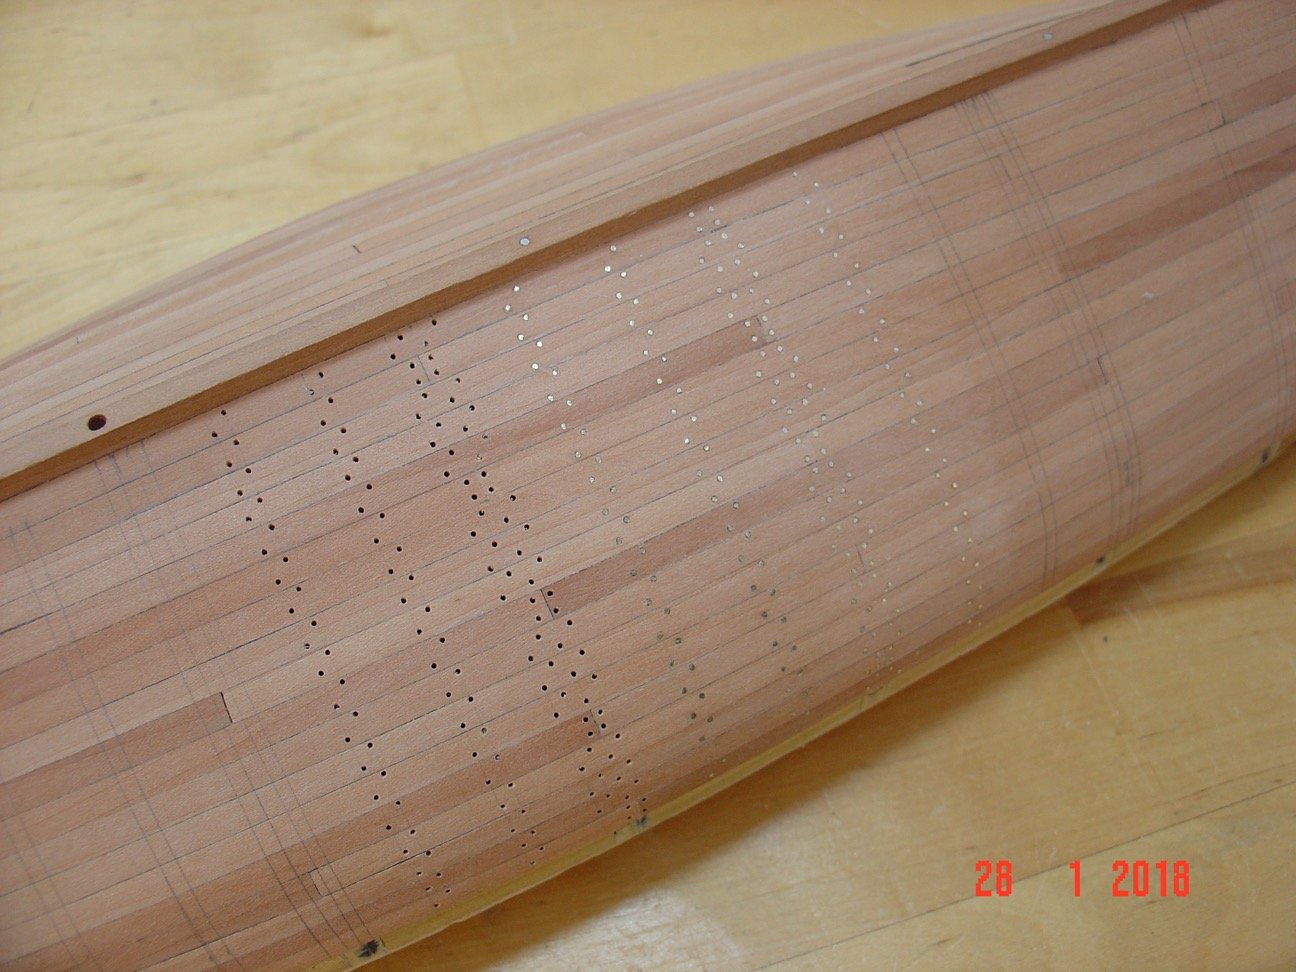
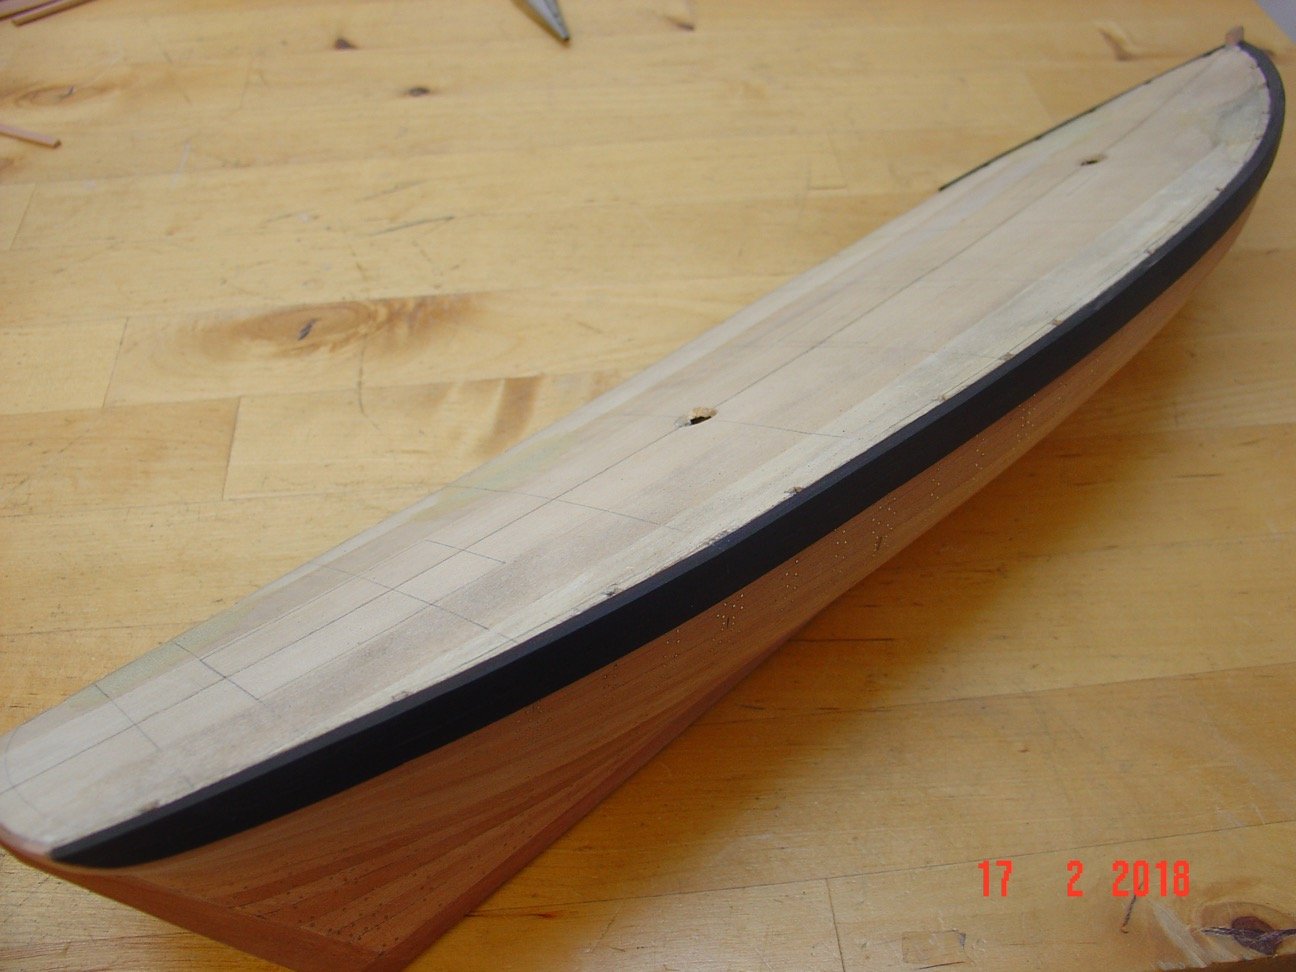
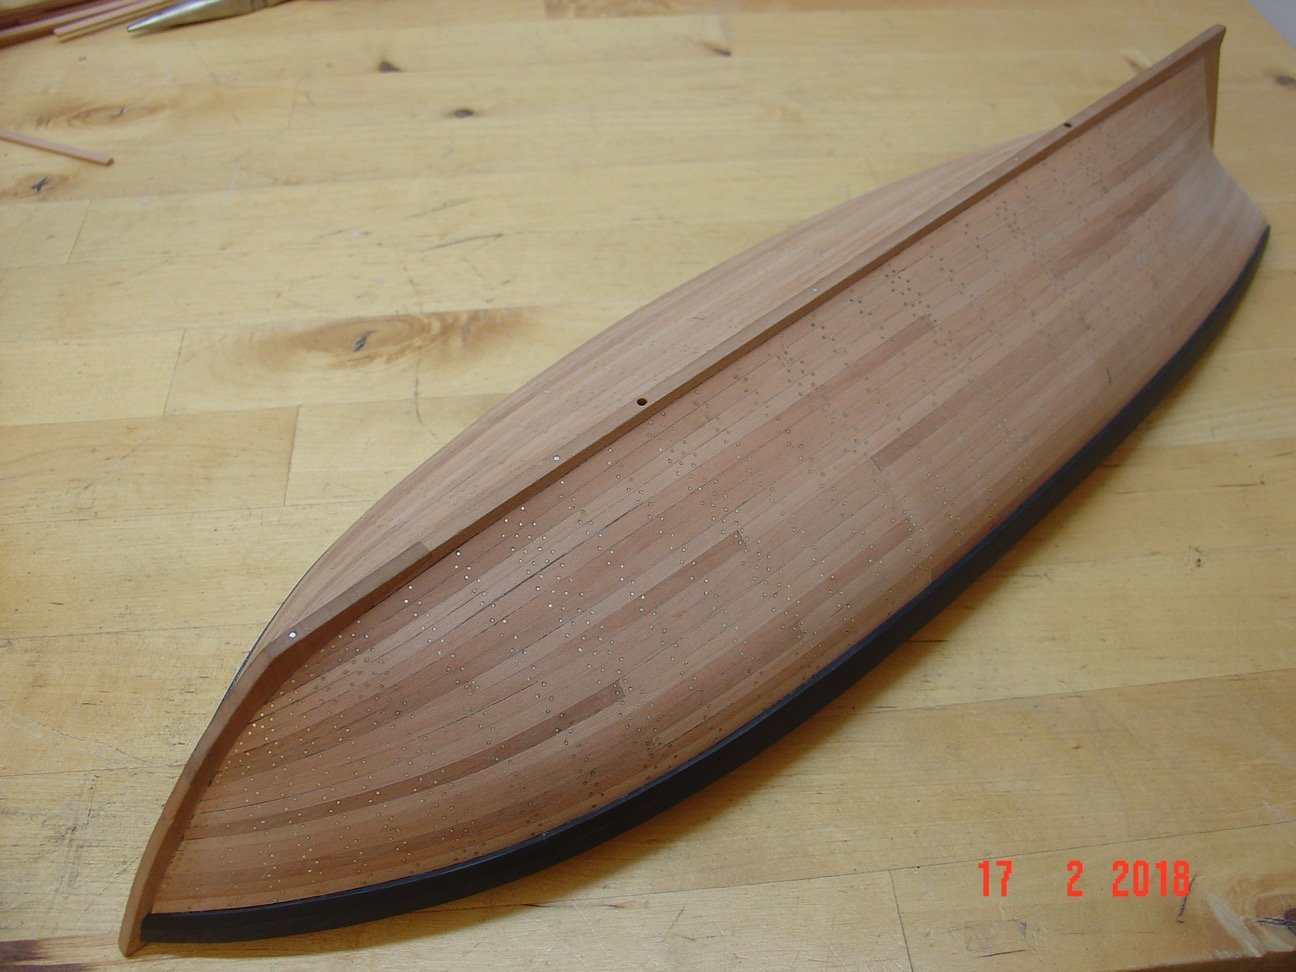
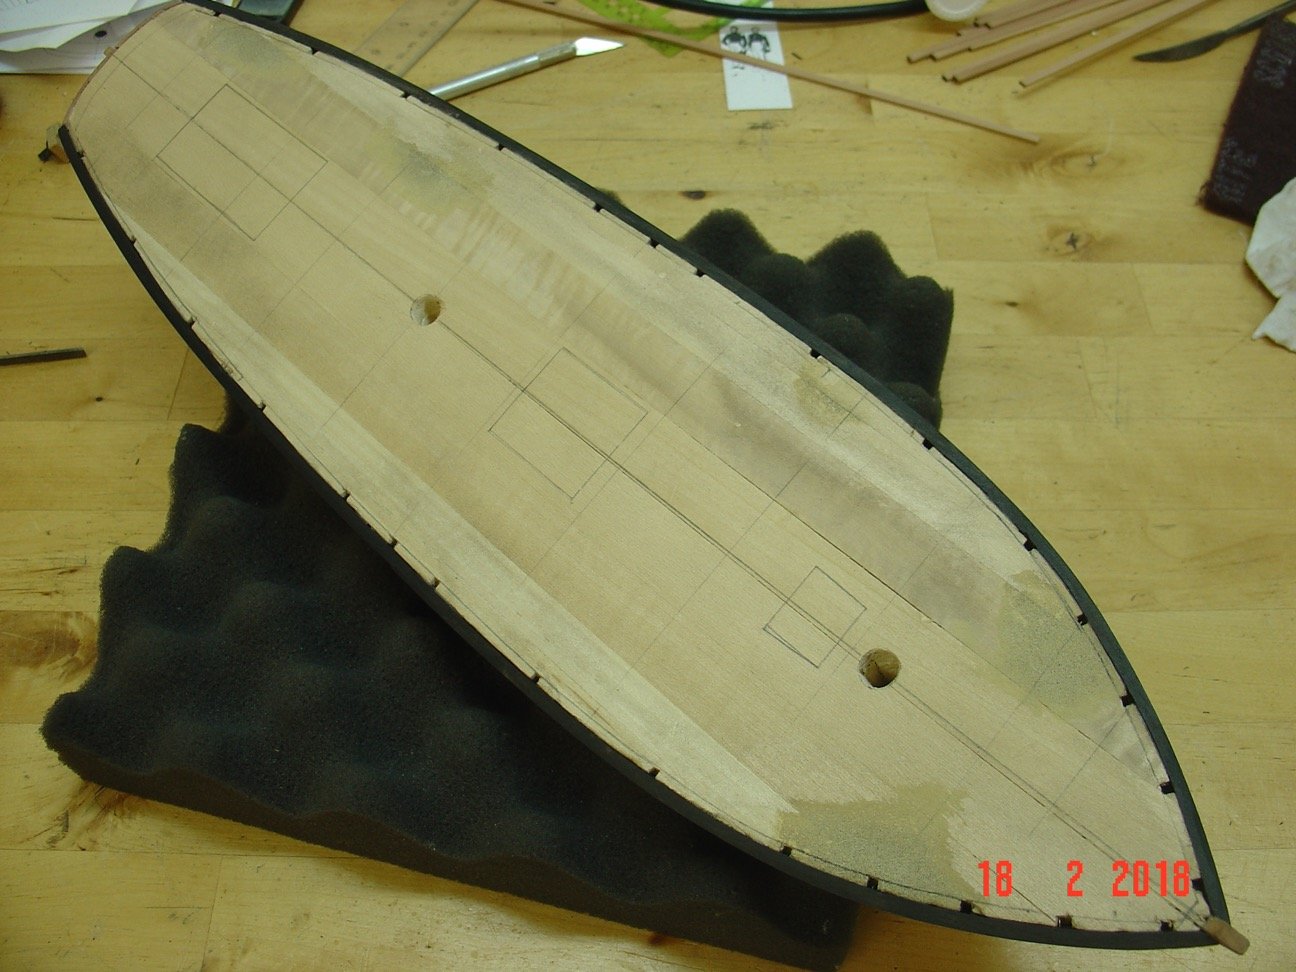
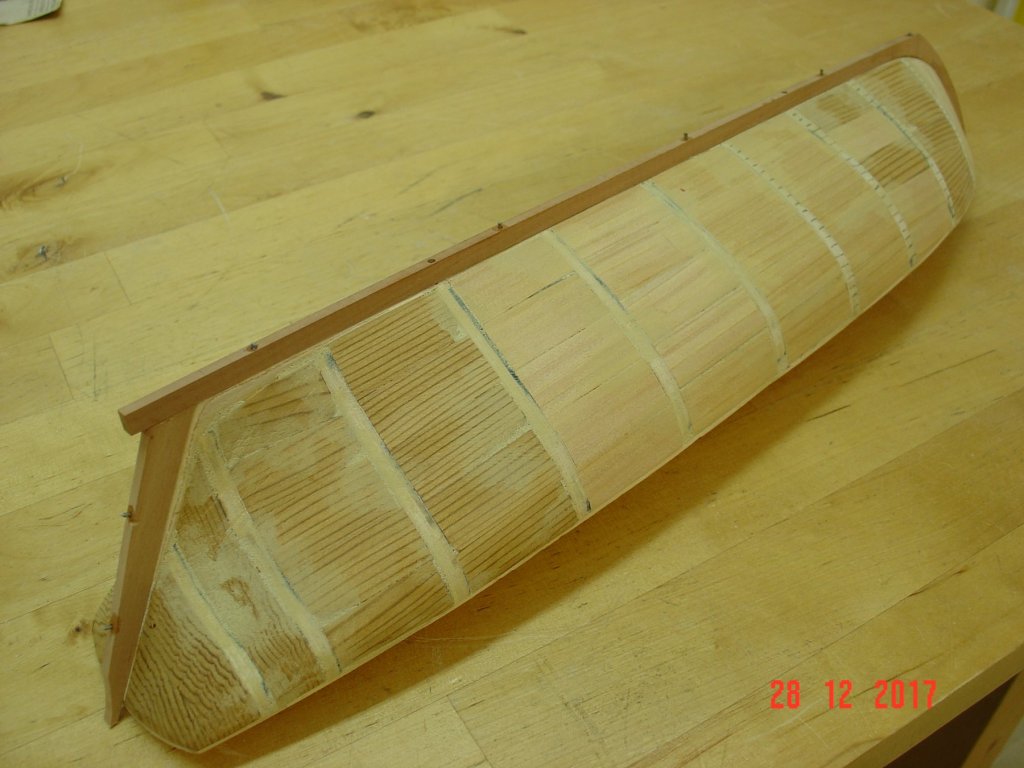
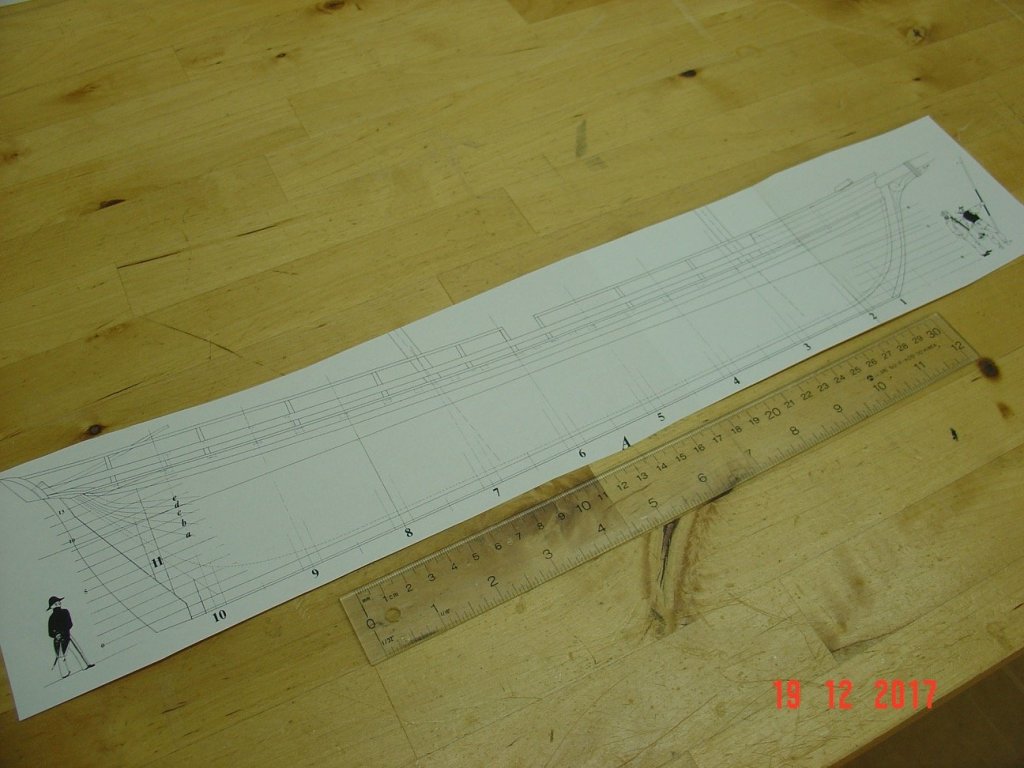
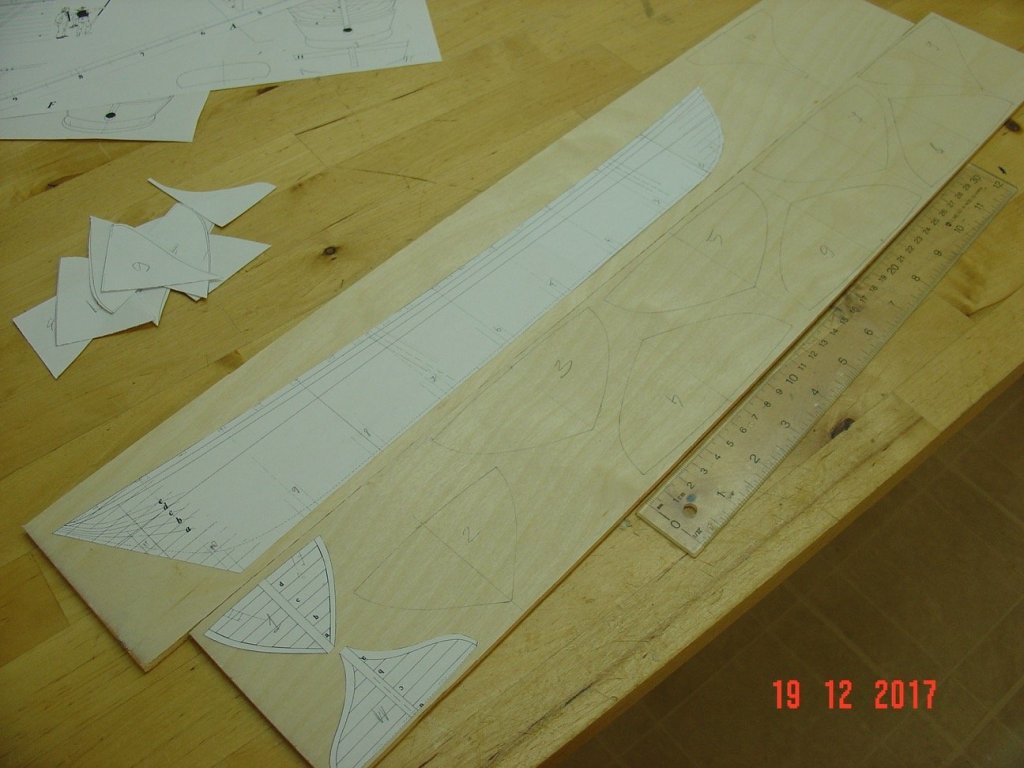
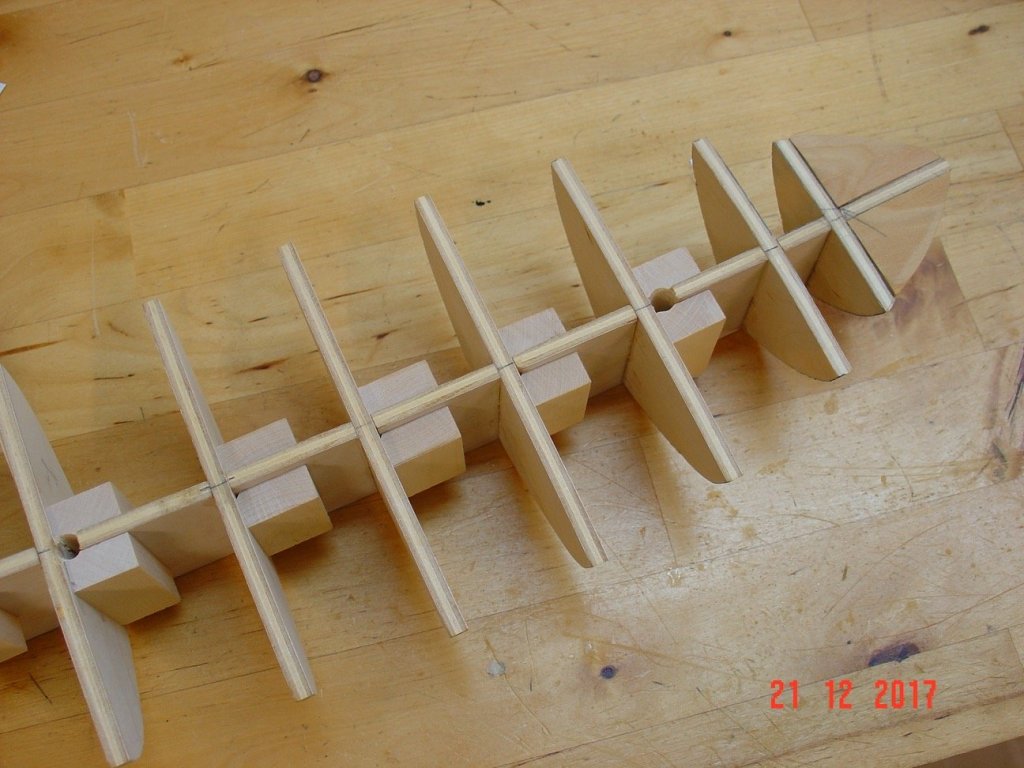
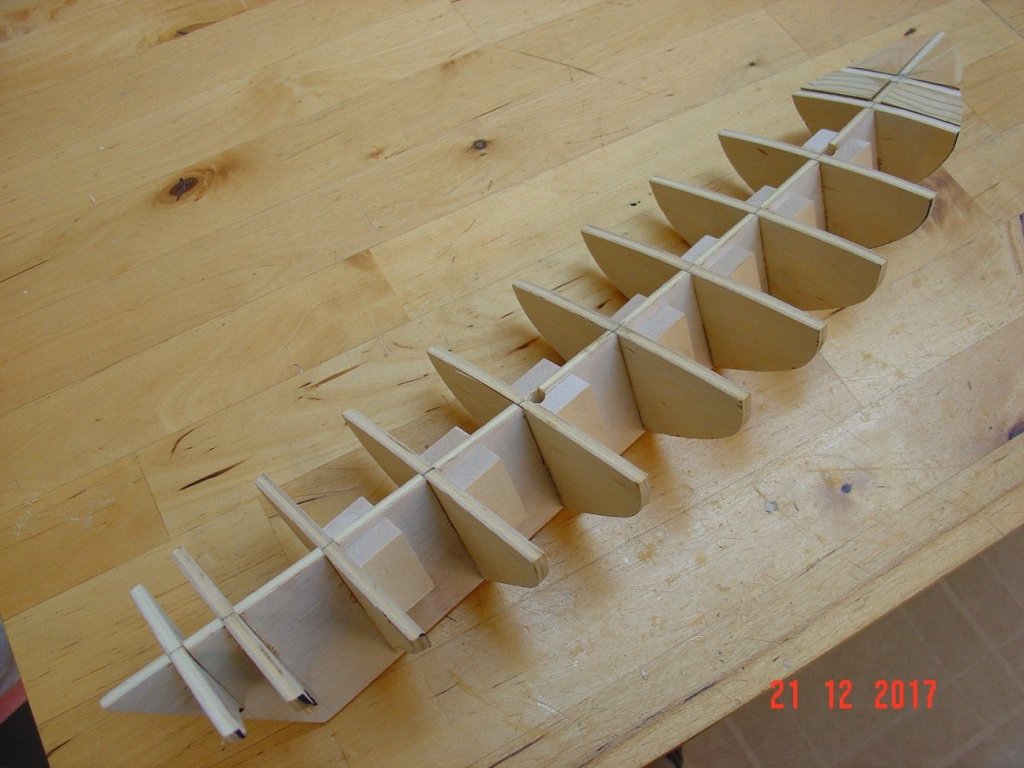
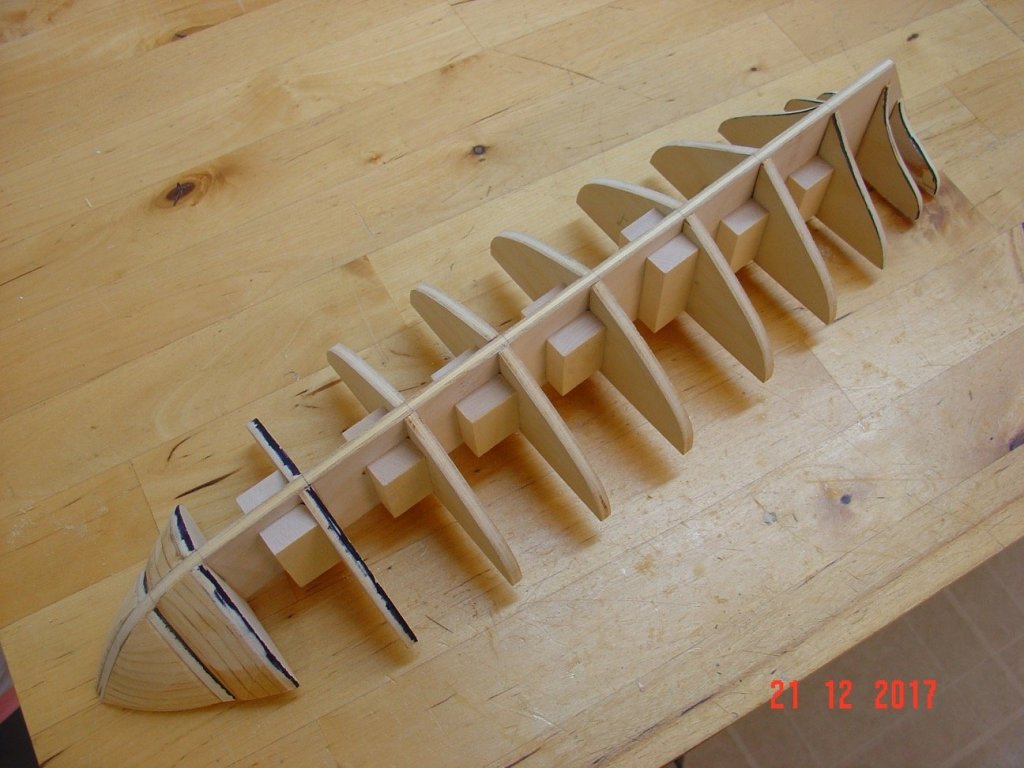
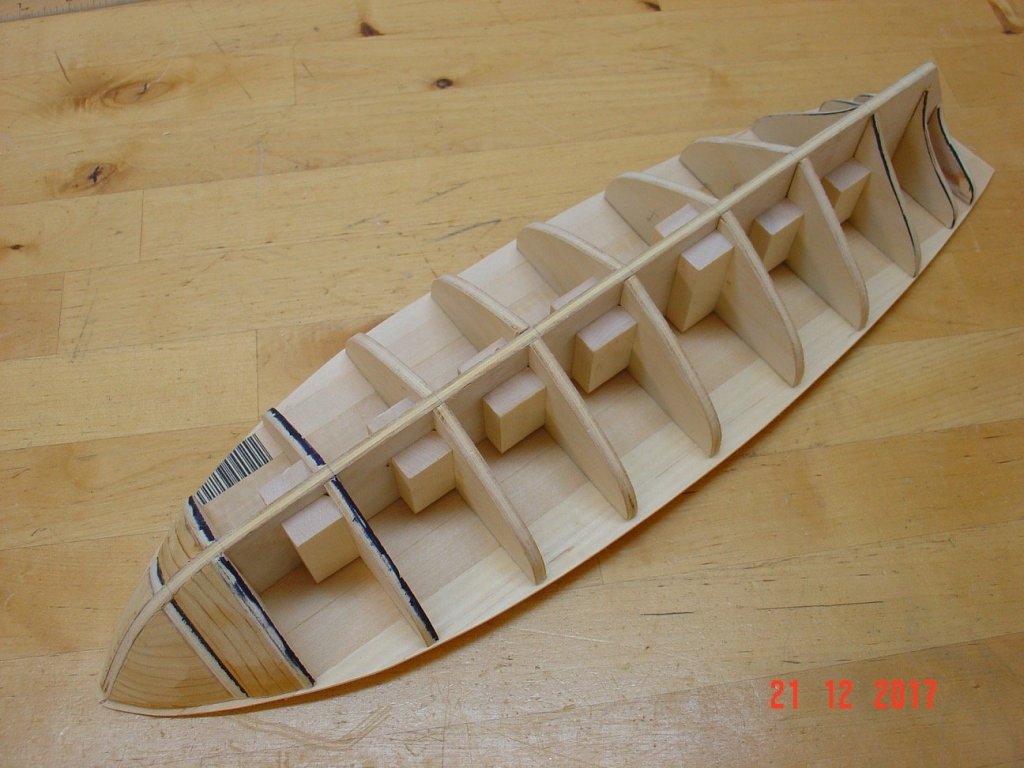
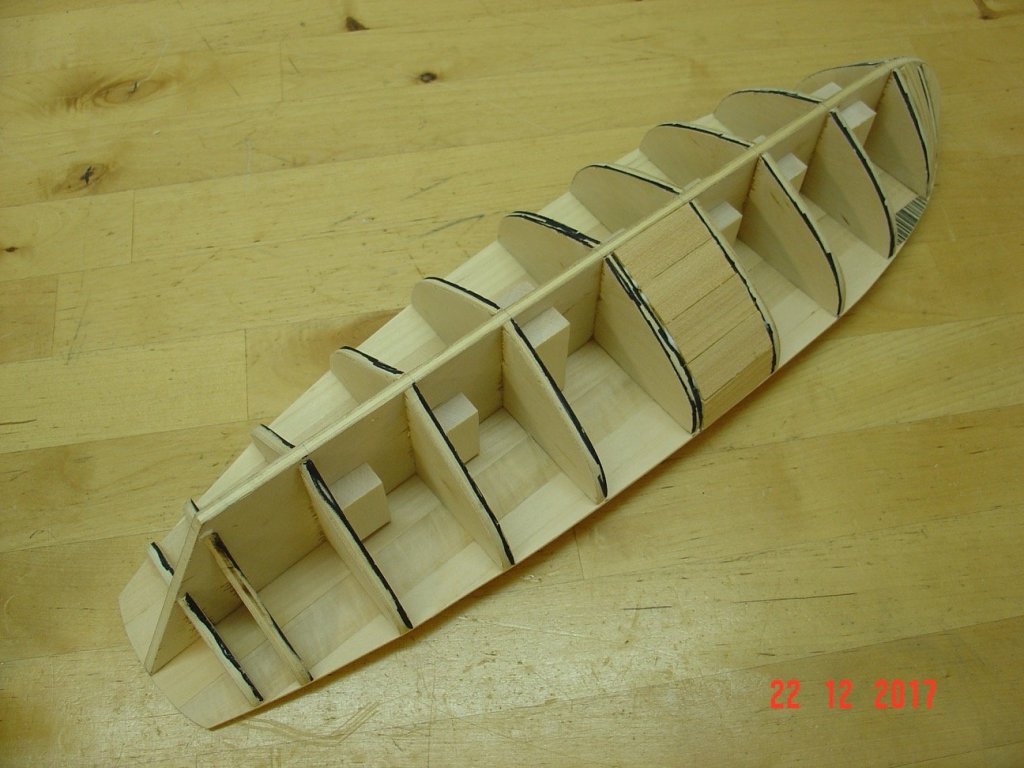
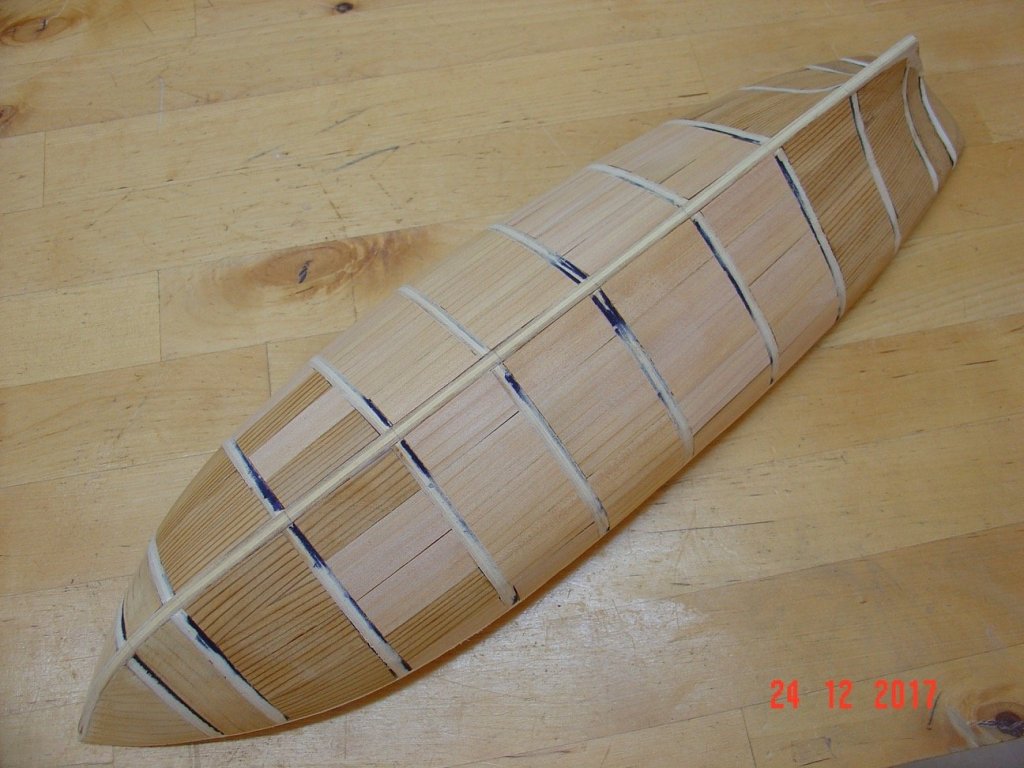
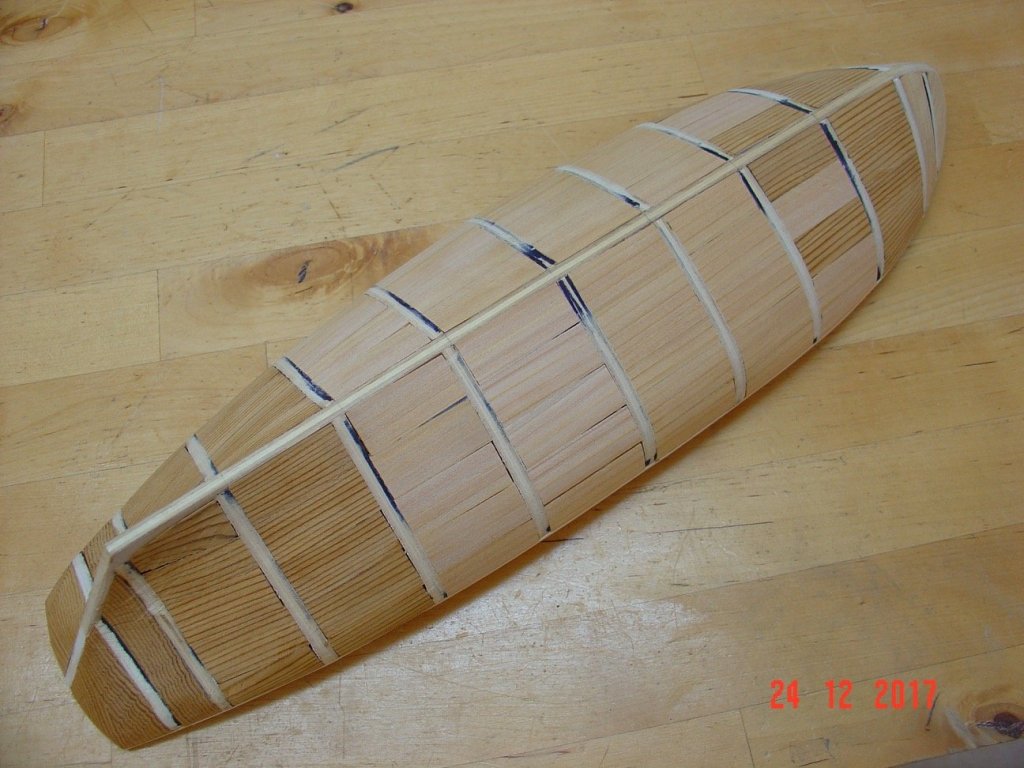
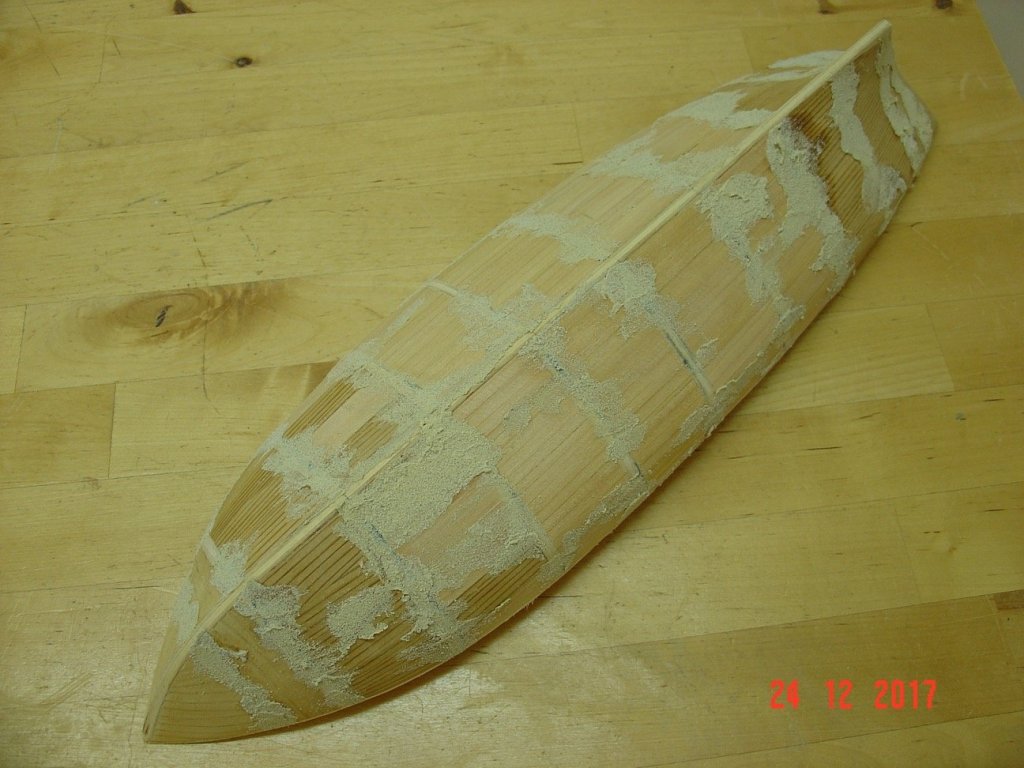
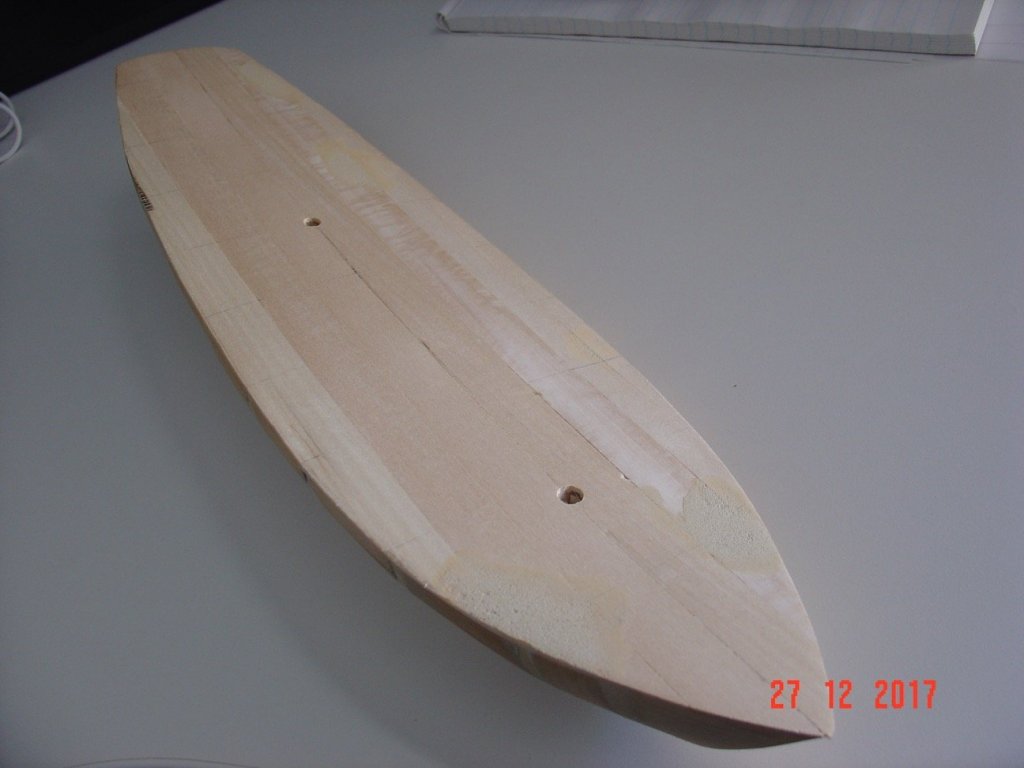
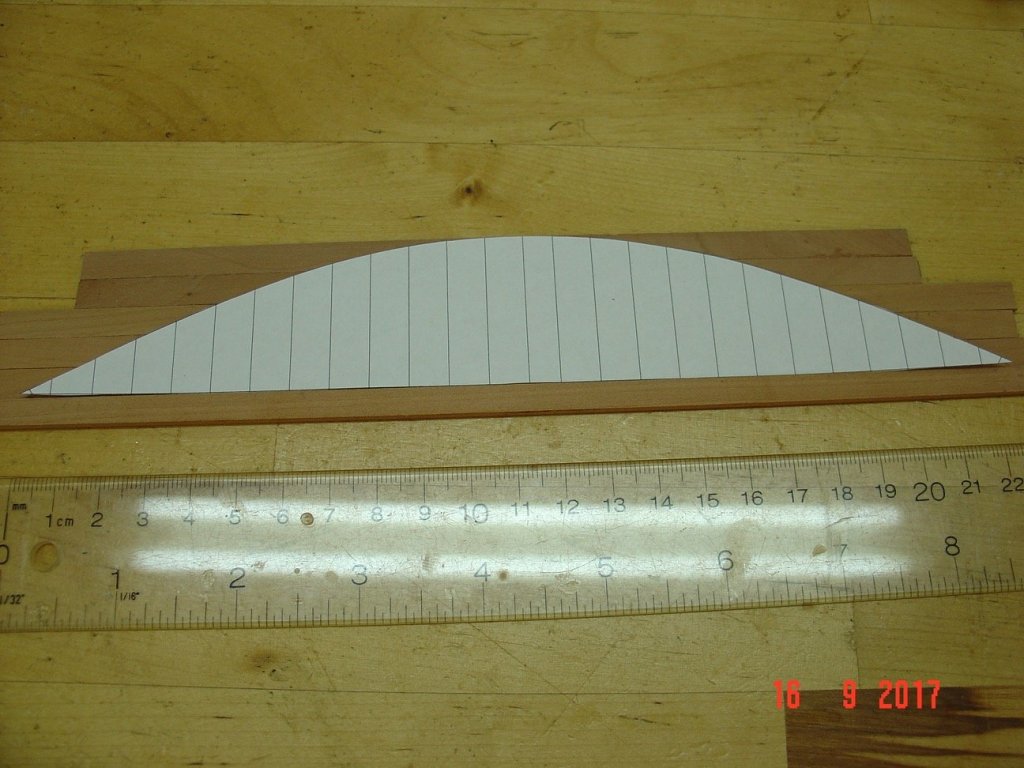
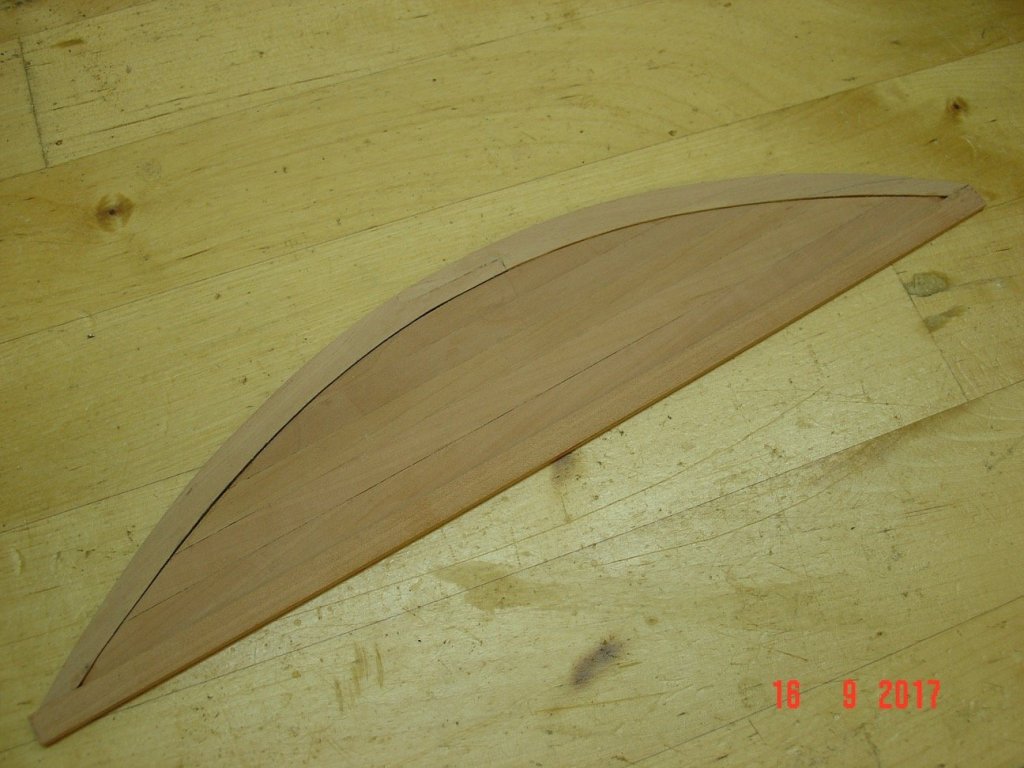
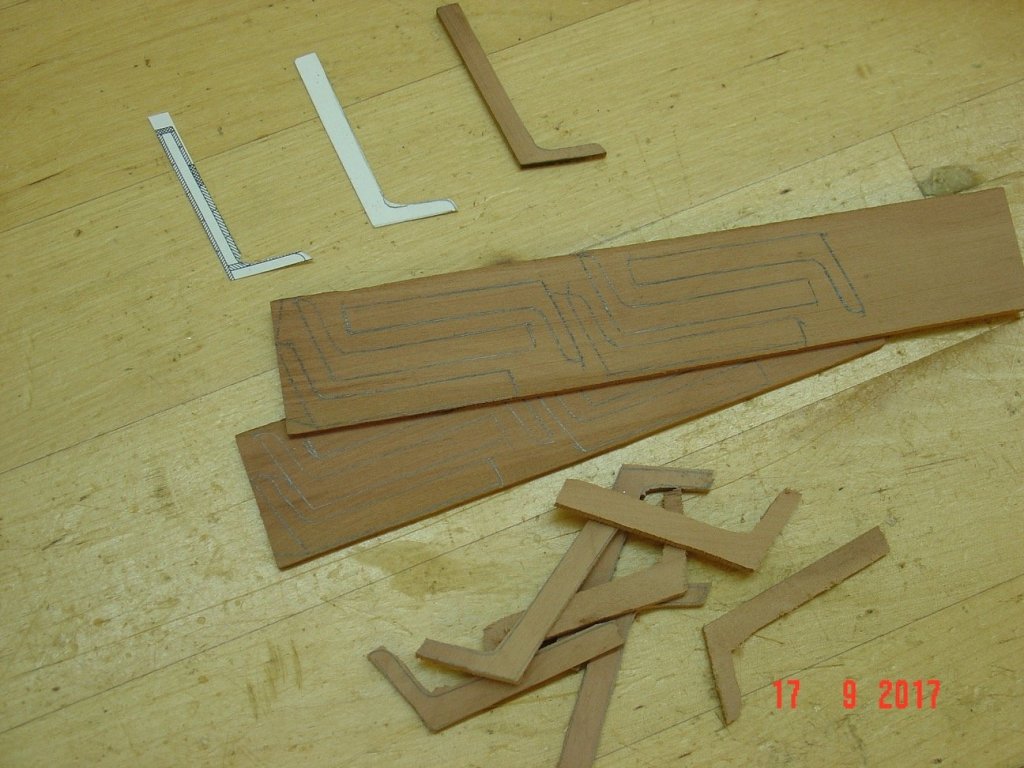
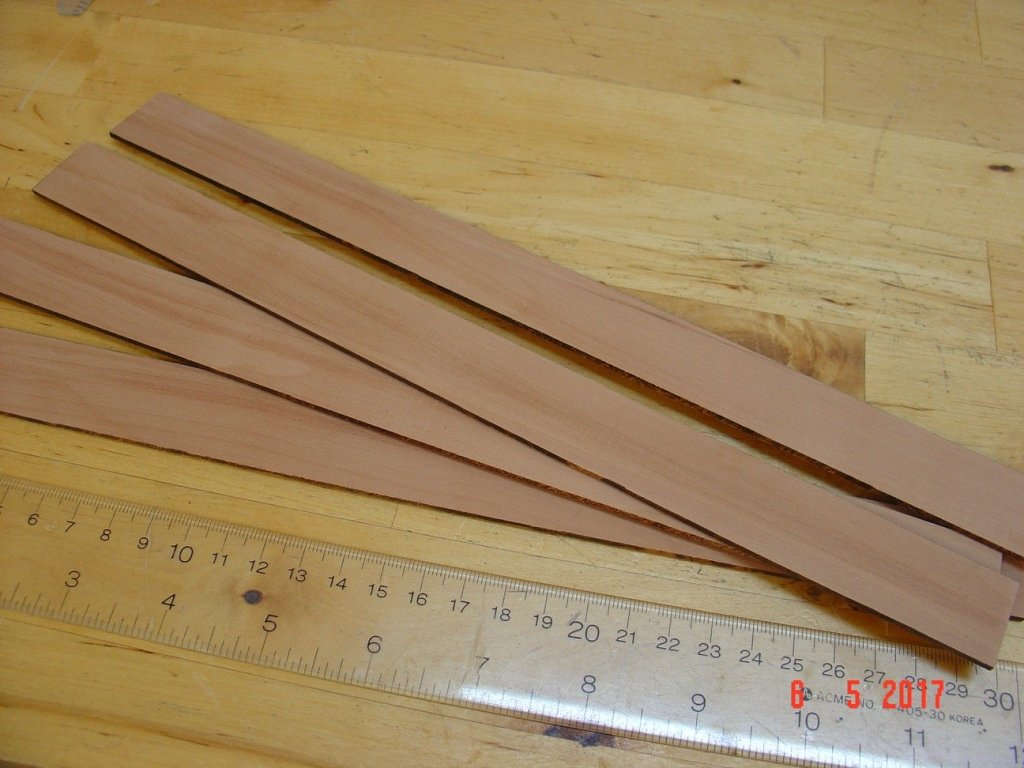
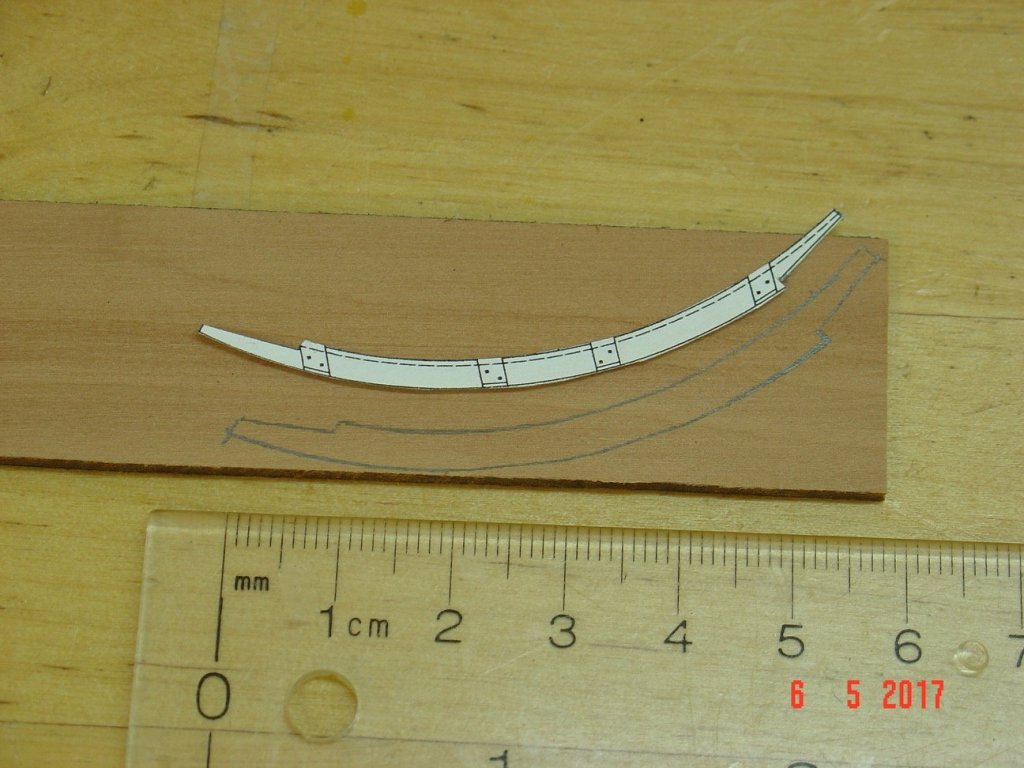
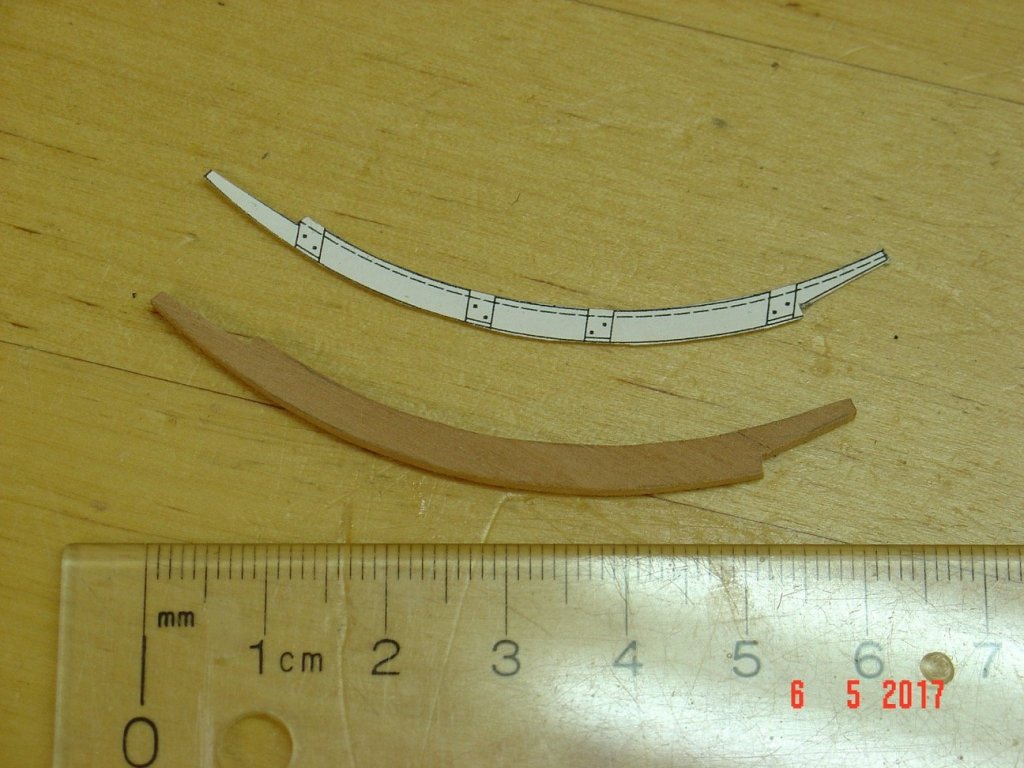
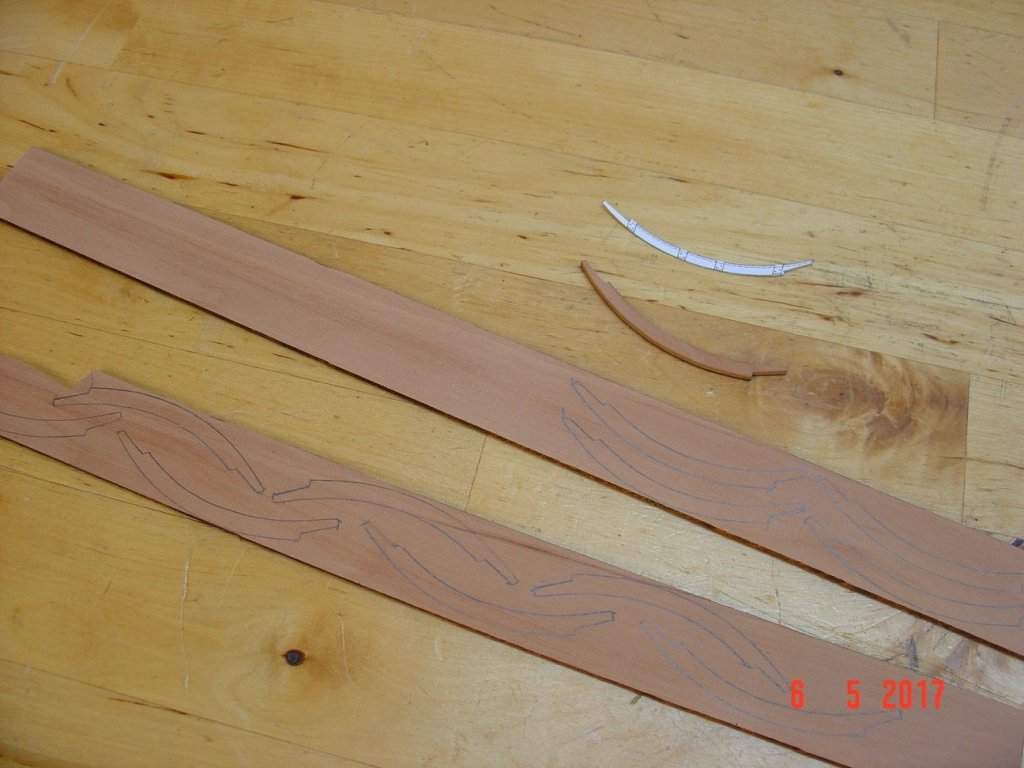
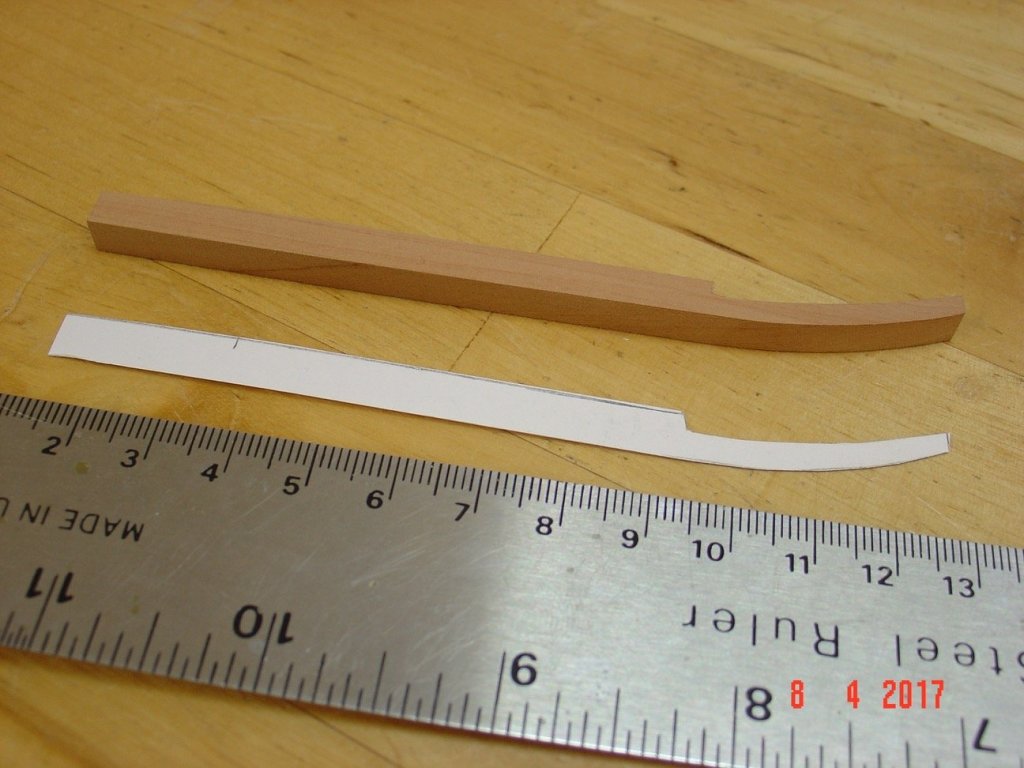
Hello, Here is my new project: the schooner "La Jacinthe" at 1/48 based on Jean Boudriot's monograph from Ancre. As there are no frames plans in the monograph I will do a solid hull model as suggested by the author. The keel and frames I made out of 6mm plywood, the deck was covered with 1.5mm thick bass strips and the spaces in-between the frames was filled with 10mm x 20mm strips of cedar wood. The hull was sanded then the imperfections were filled with wood filler and sanded again. It is now ready to be planked - I will use pear wood for external haul planking and holly for the deck. At this moment I plan to do a full rigged model and with the rigging the model will be 80/25/60cm (L/W/H). Hull only is 48/13/10cm Here are the pictures with the progress so far. Regards, Alexandru


-
Druxey, I would definitely consider that - I think it's a great idea in fact! I will look to see what can I find. Thank you, Alexandru
-
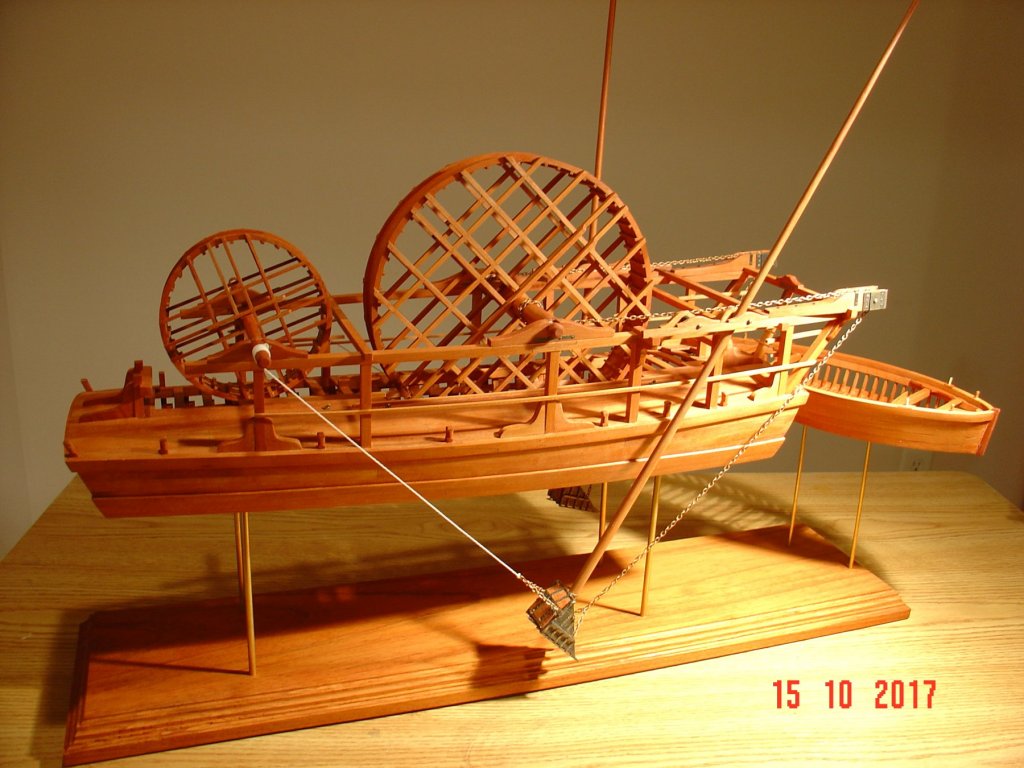
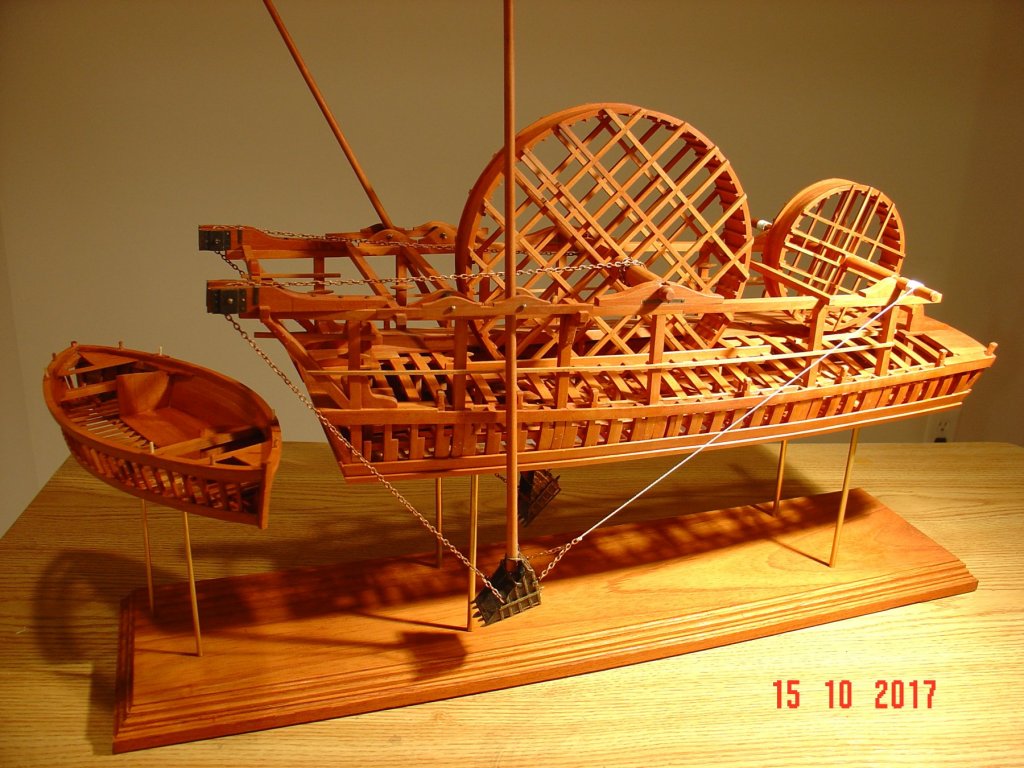
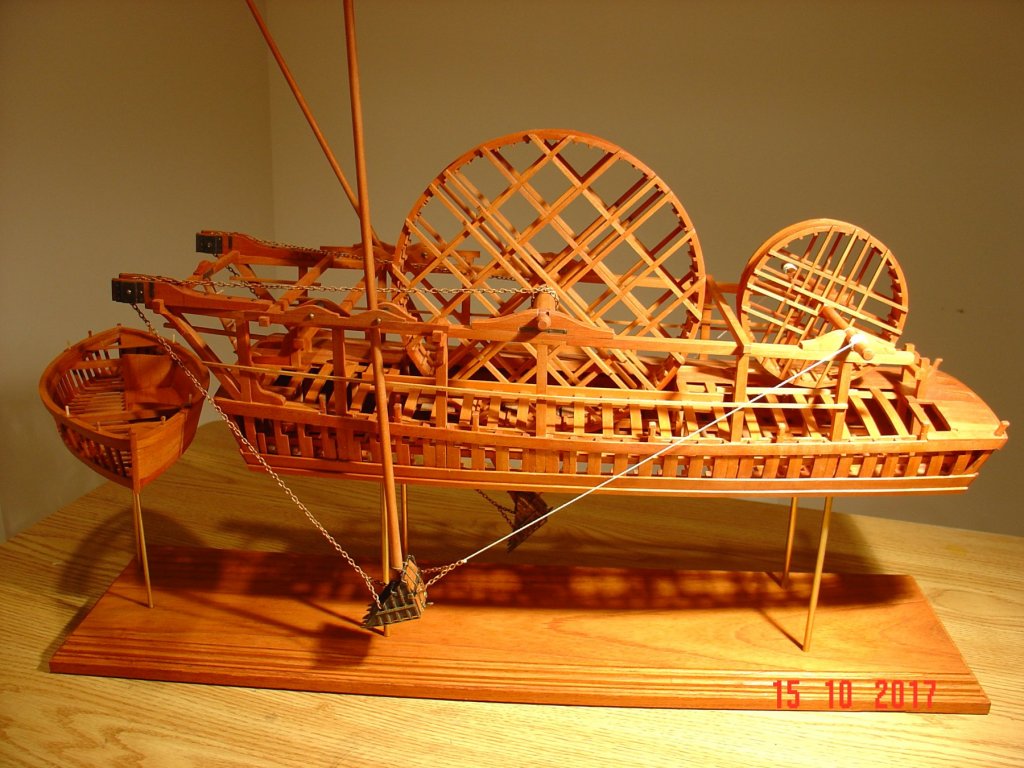
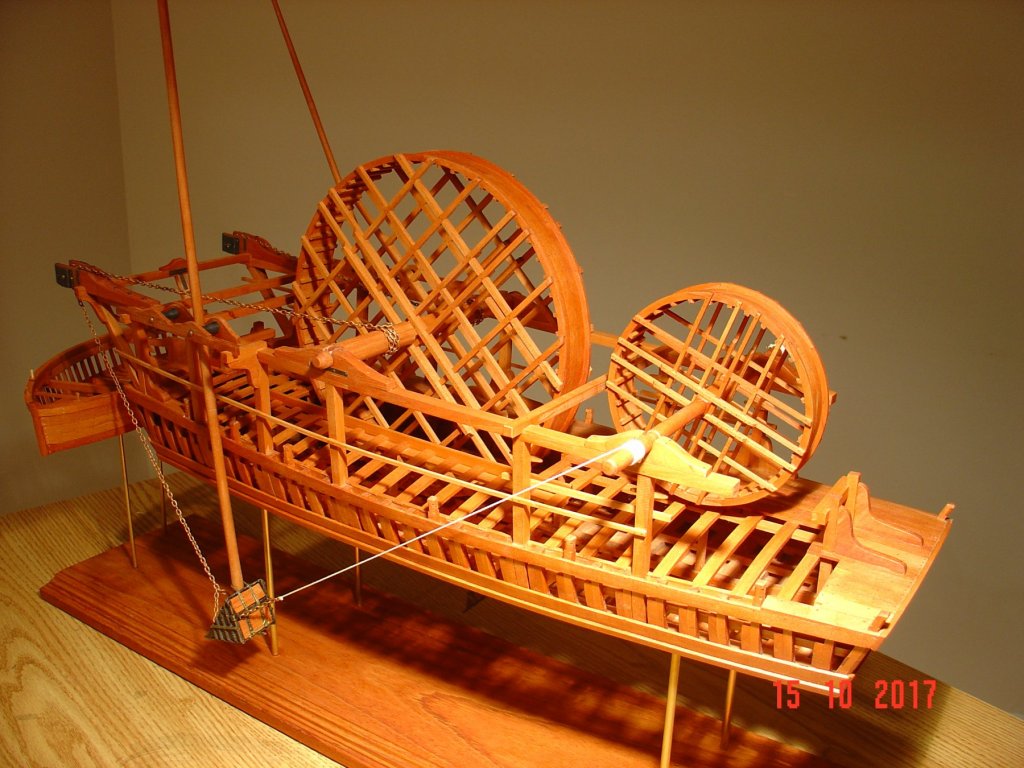
Thank you all for your interest! If you want to see more pictures on the finished model I have them on my personal web site here: http://www.alexshipmodels.com/2017/10/15/machine-a-curer-les-ports-gallery/ For now I haven't decided on the next project but I am thinking about the schooner "La Jacinthe" based on Ancre monography. But before starting that one I will probably make some small changes/additions to the models I already built - I usually do that in between big projects. Like adding the pins on my Victory pinrails or finishing the base for a case I have for my Japanese Fune model. But if I start something new I will definitely post the build on this site. Regards, Alexandru
-
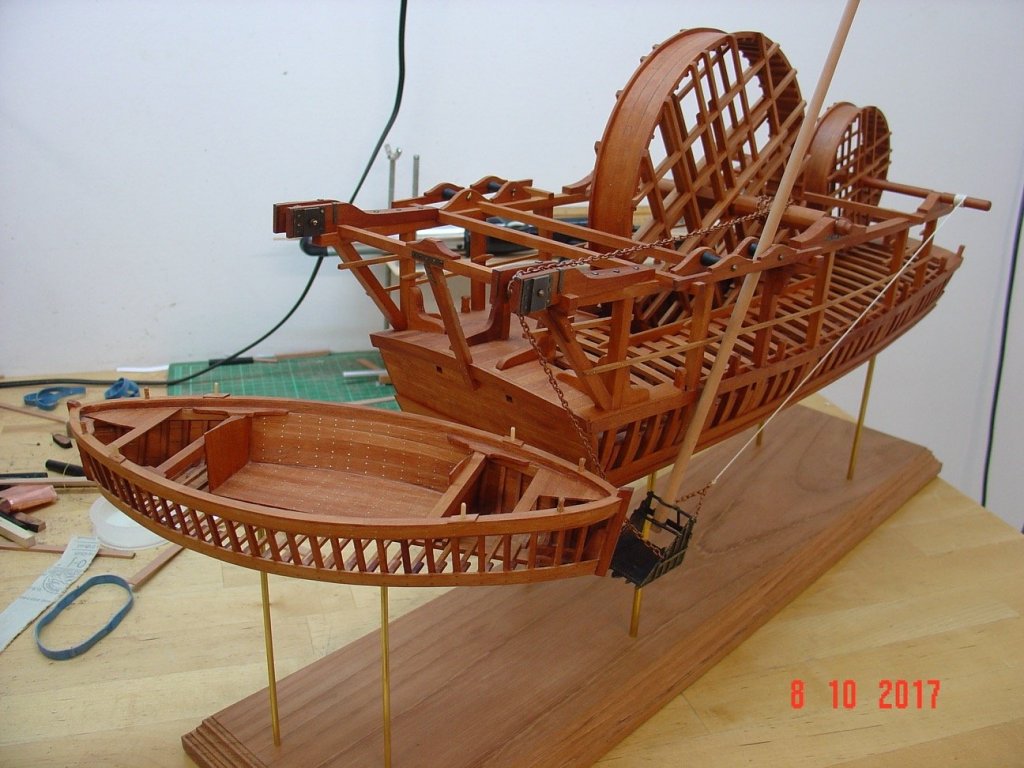
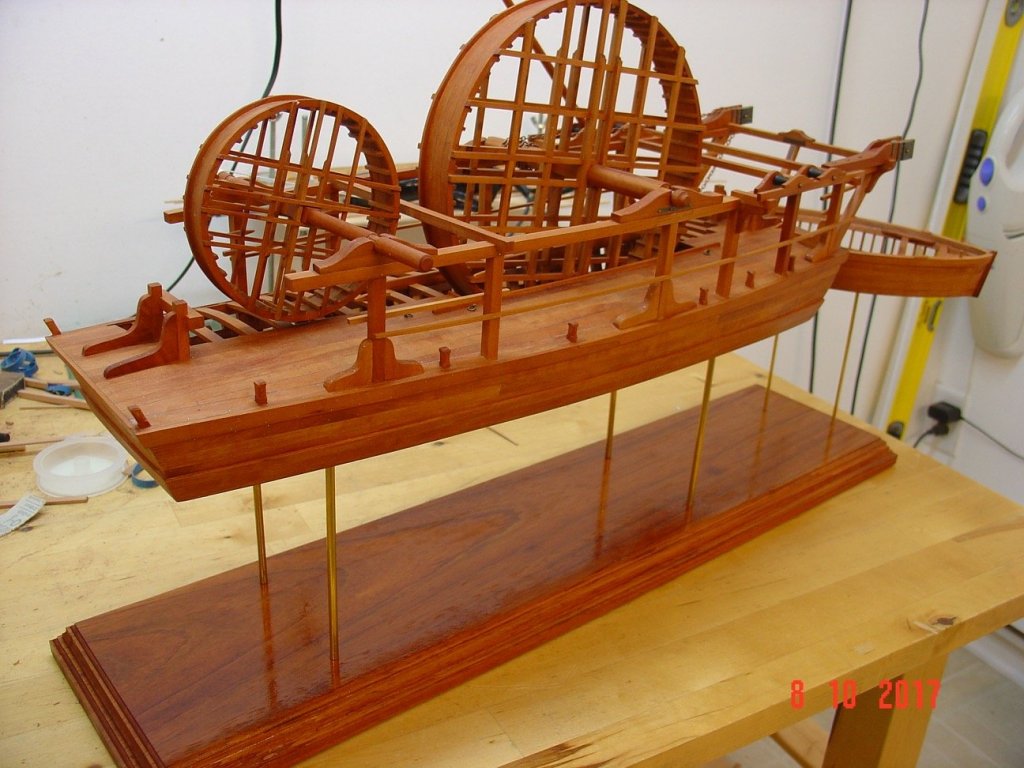
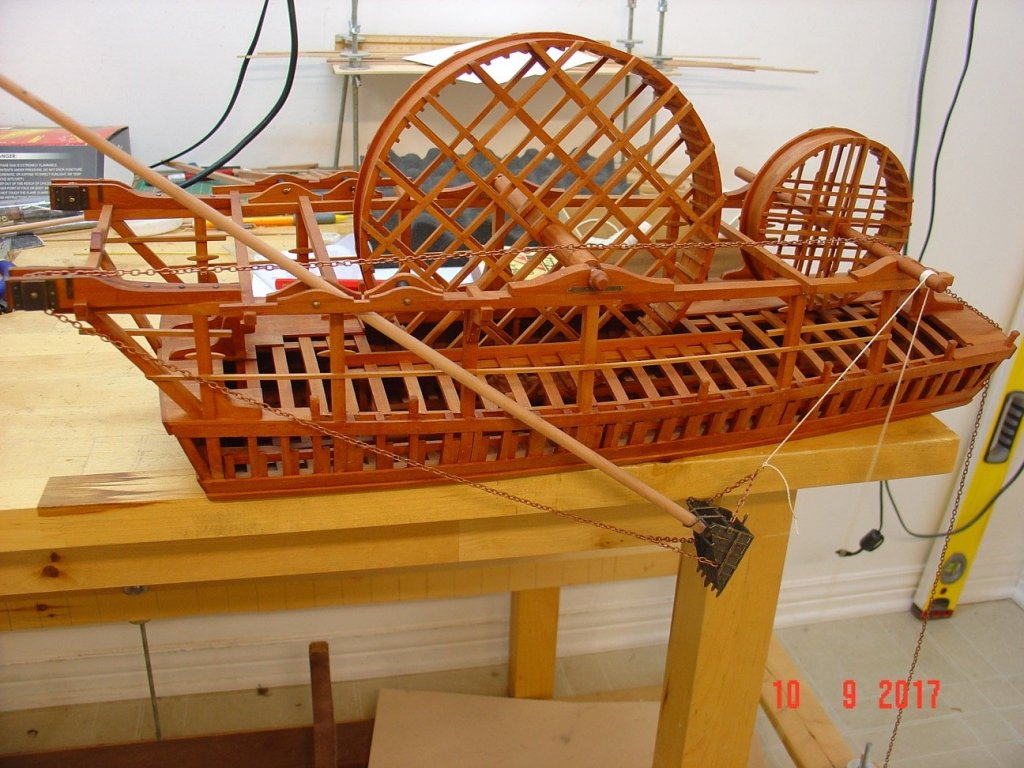
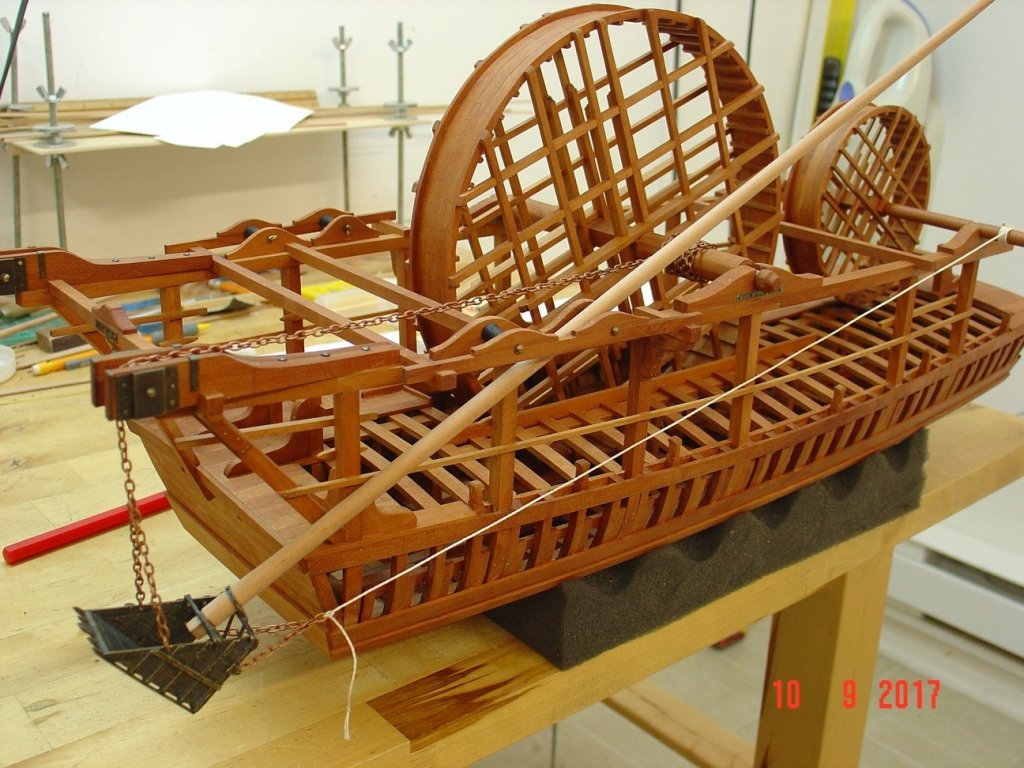
And here is the finished model. Alexandru


-
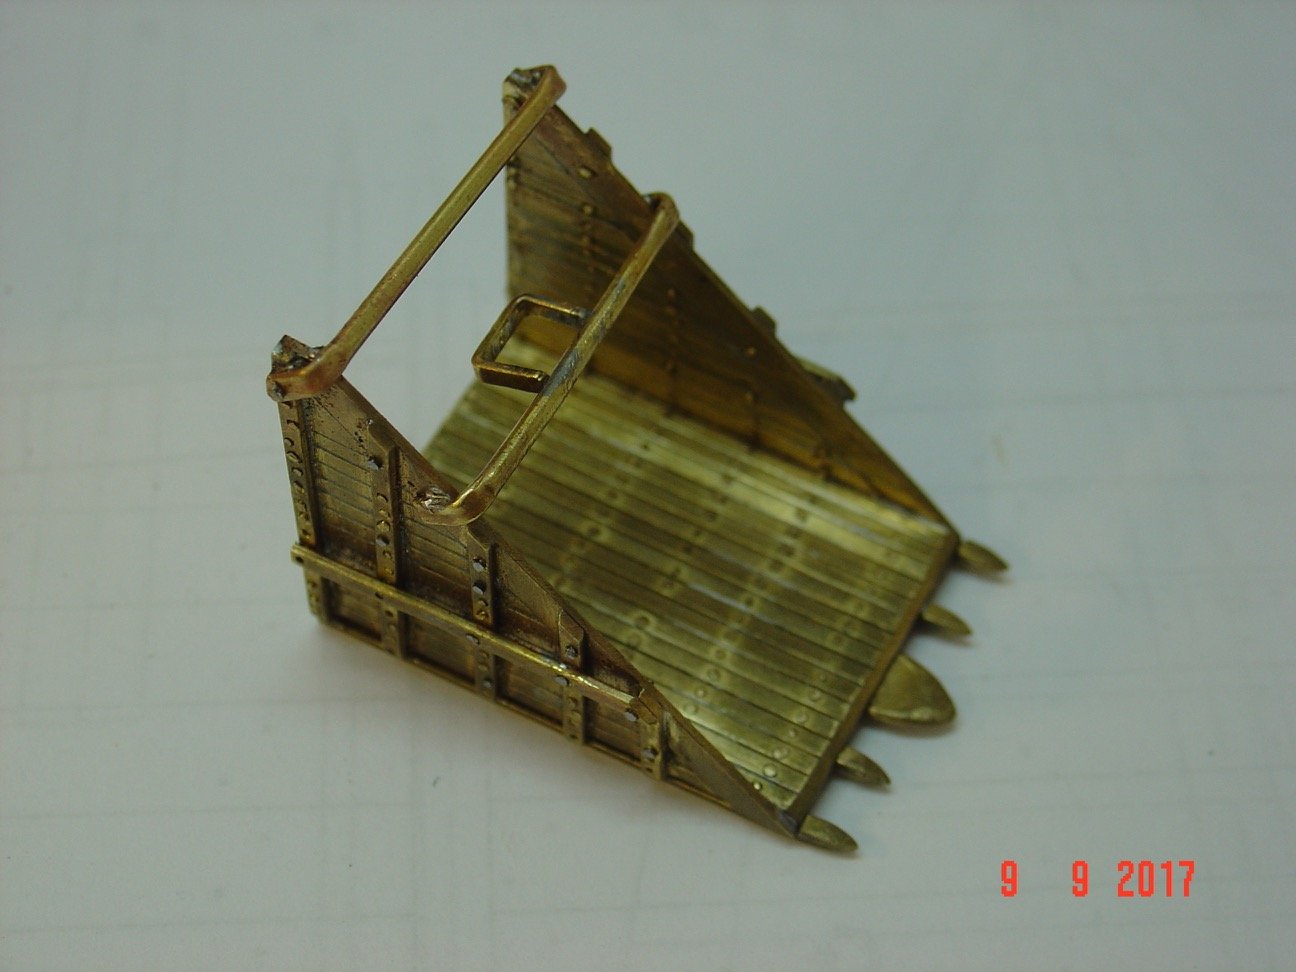
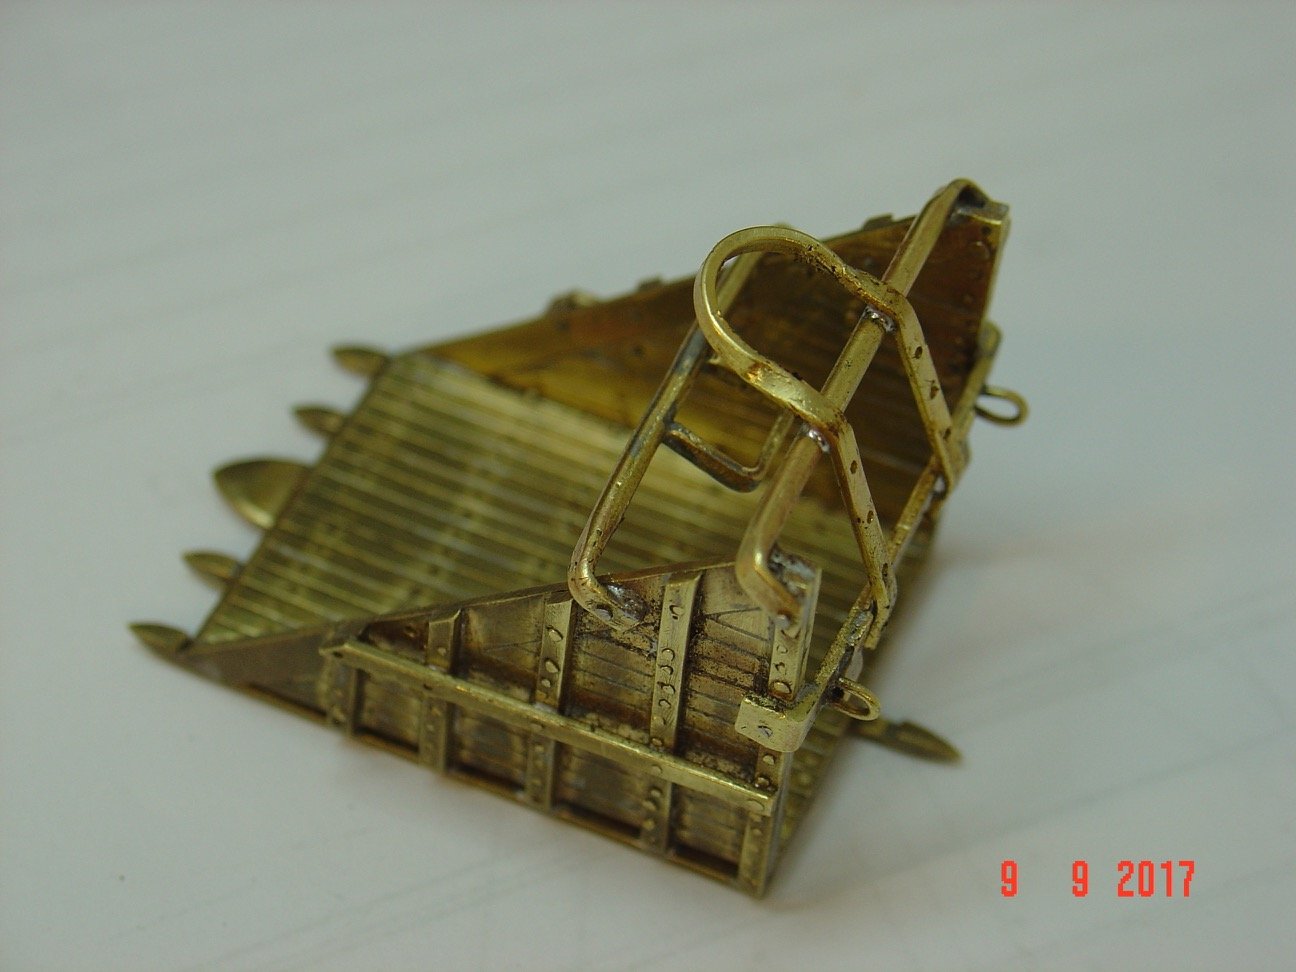
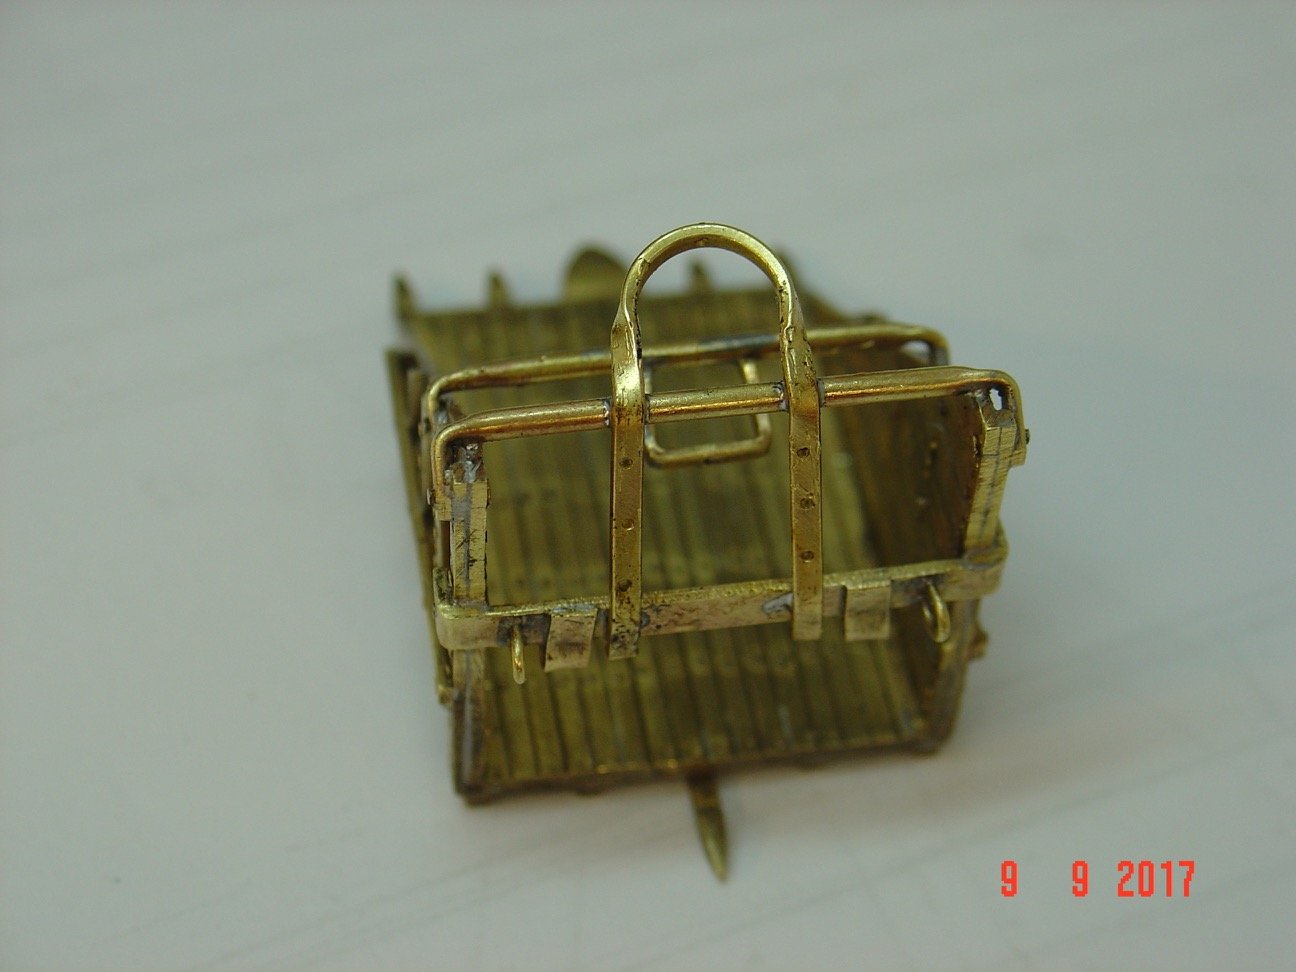
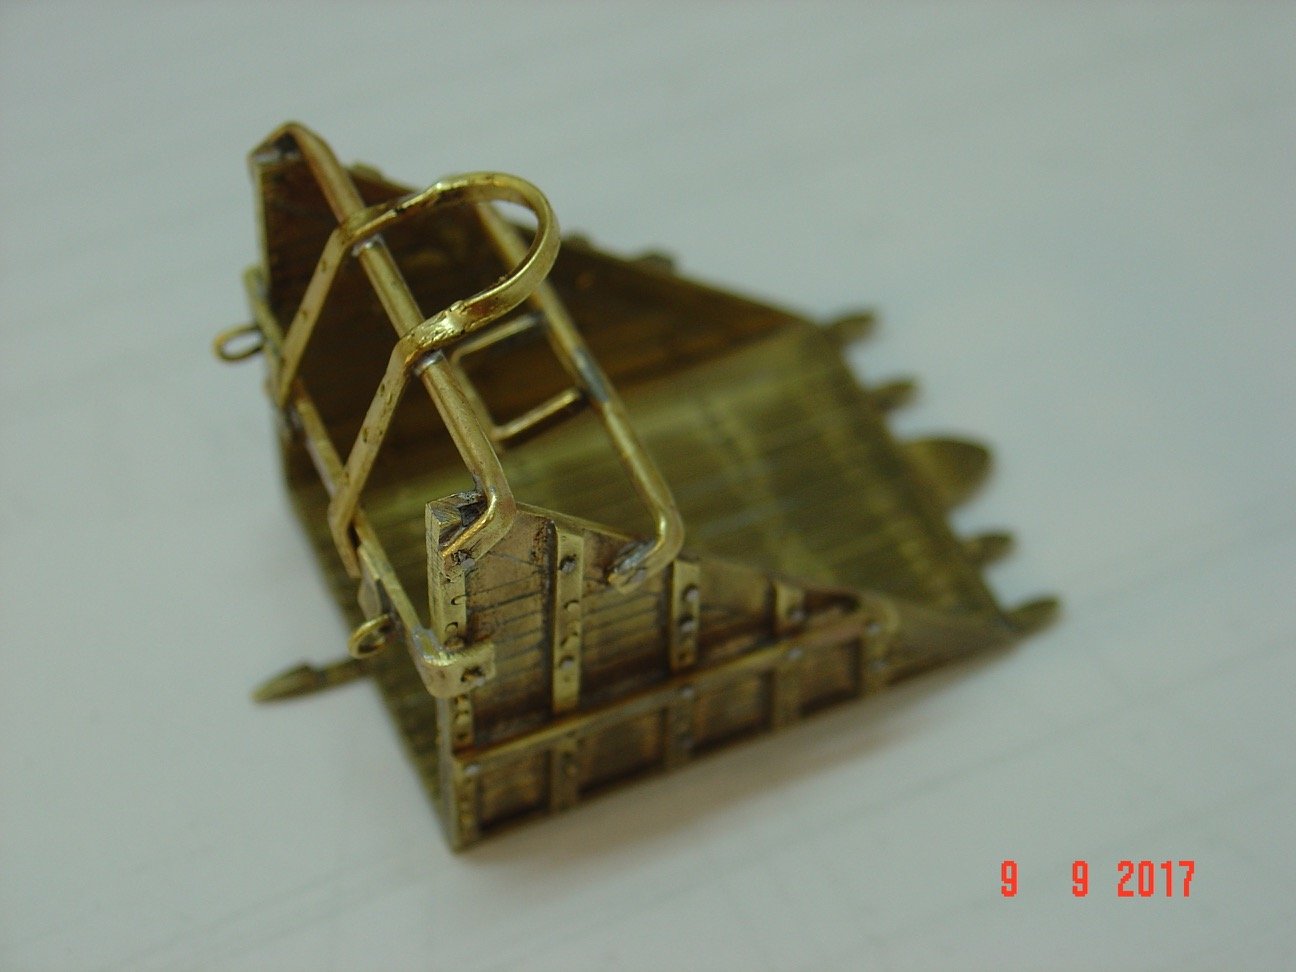
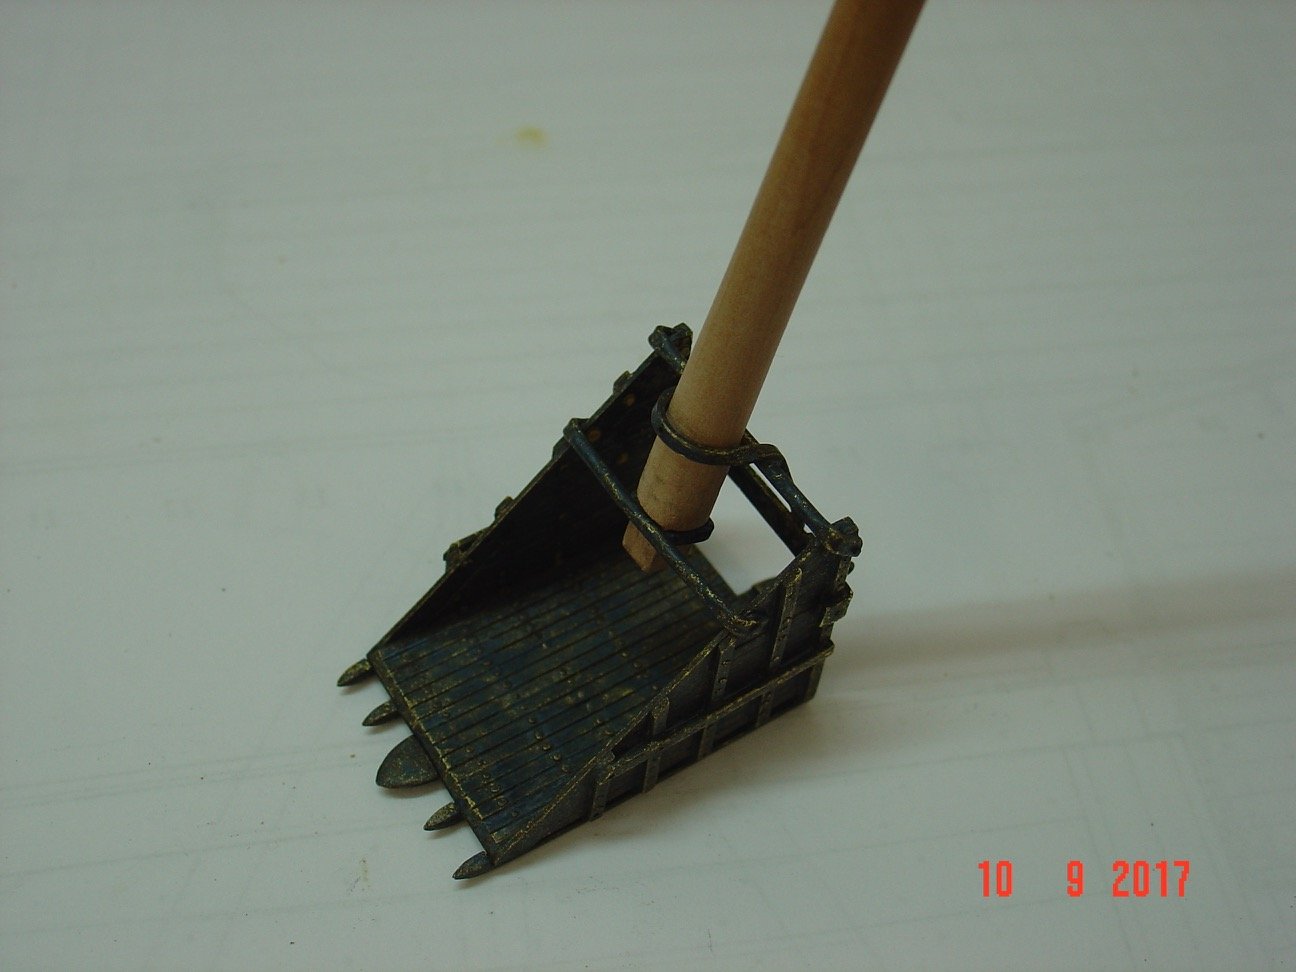
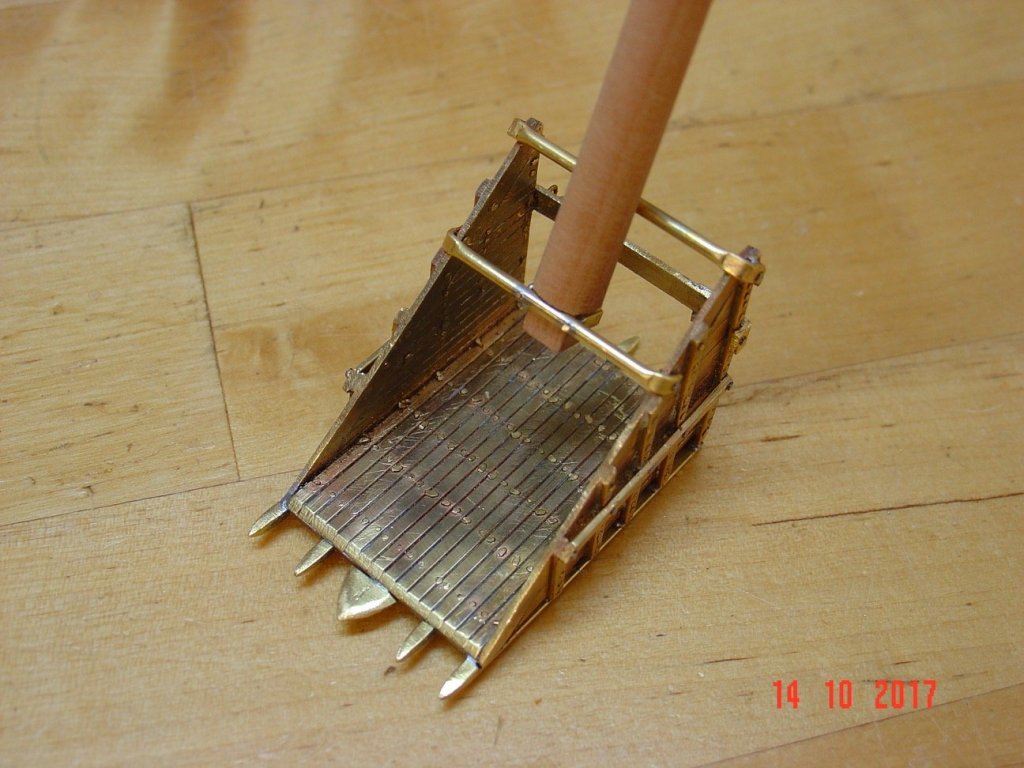
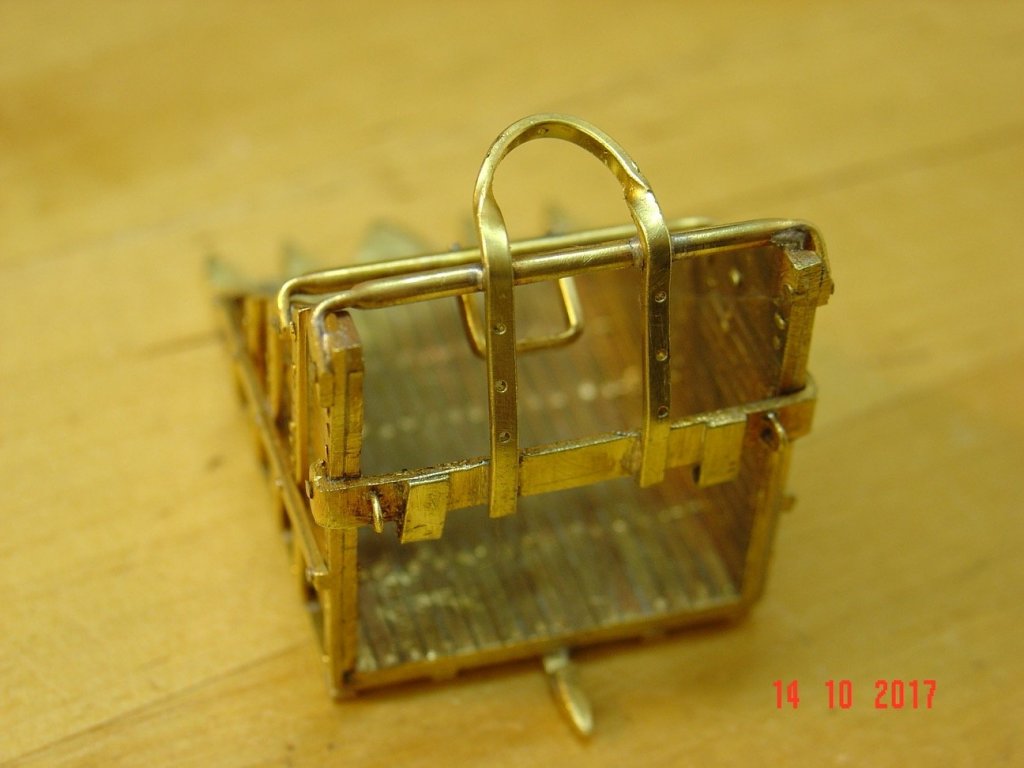
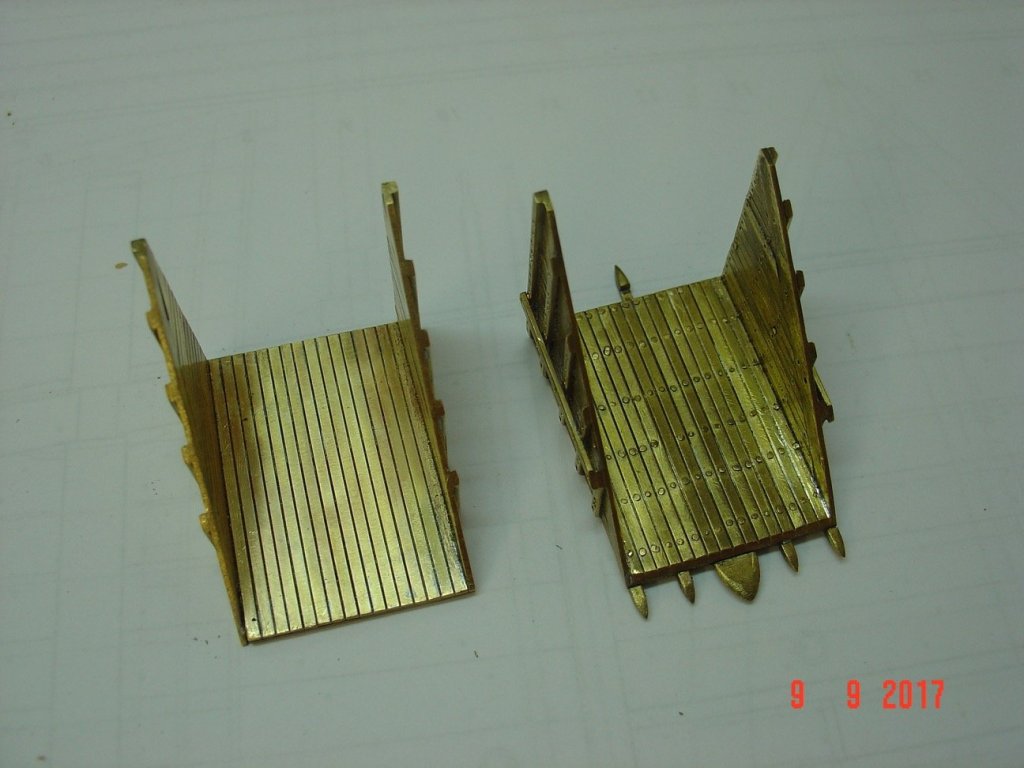
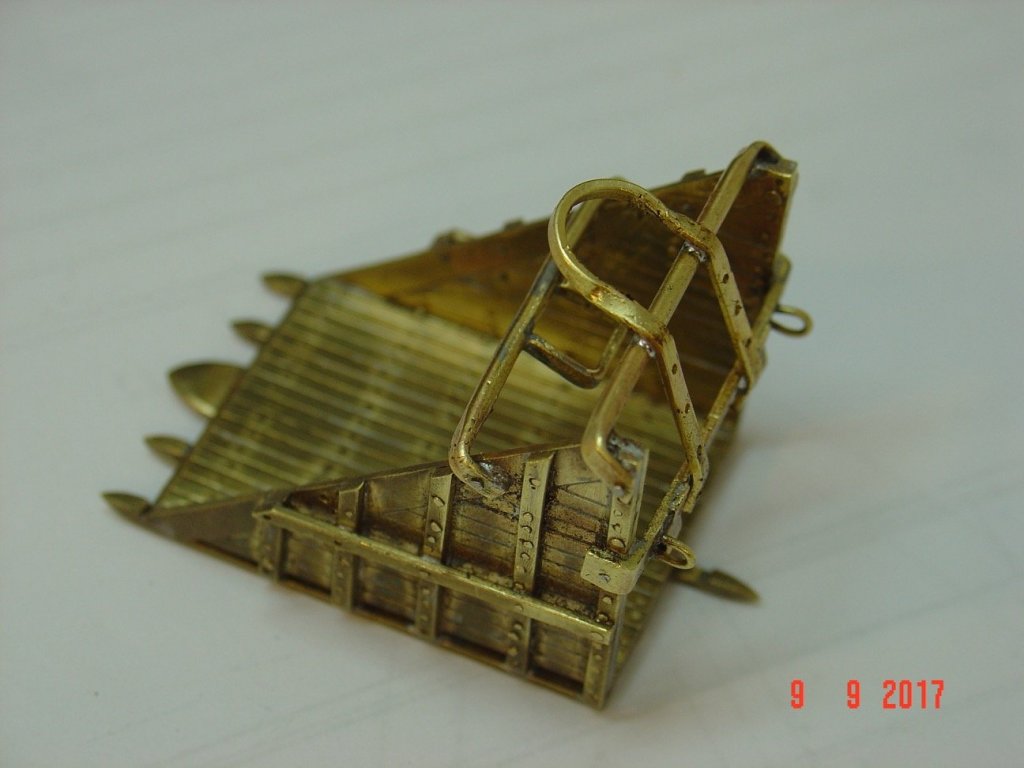
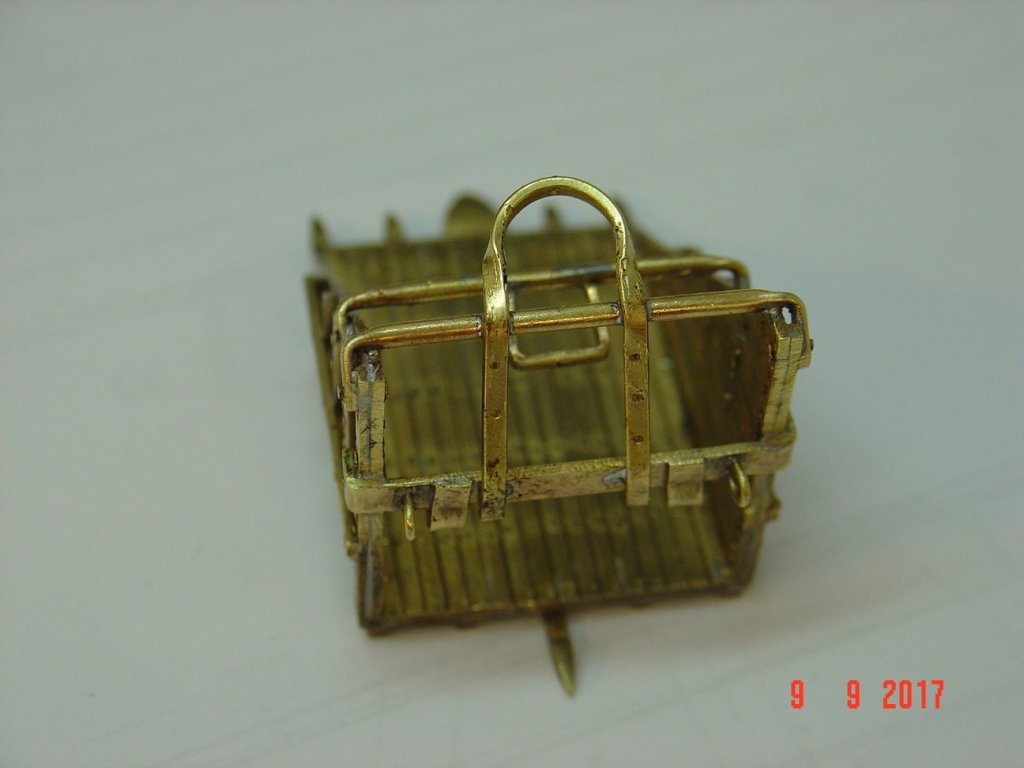
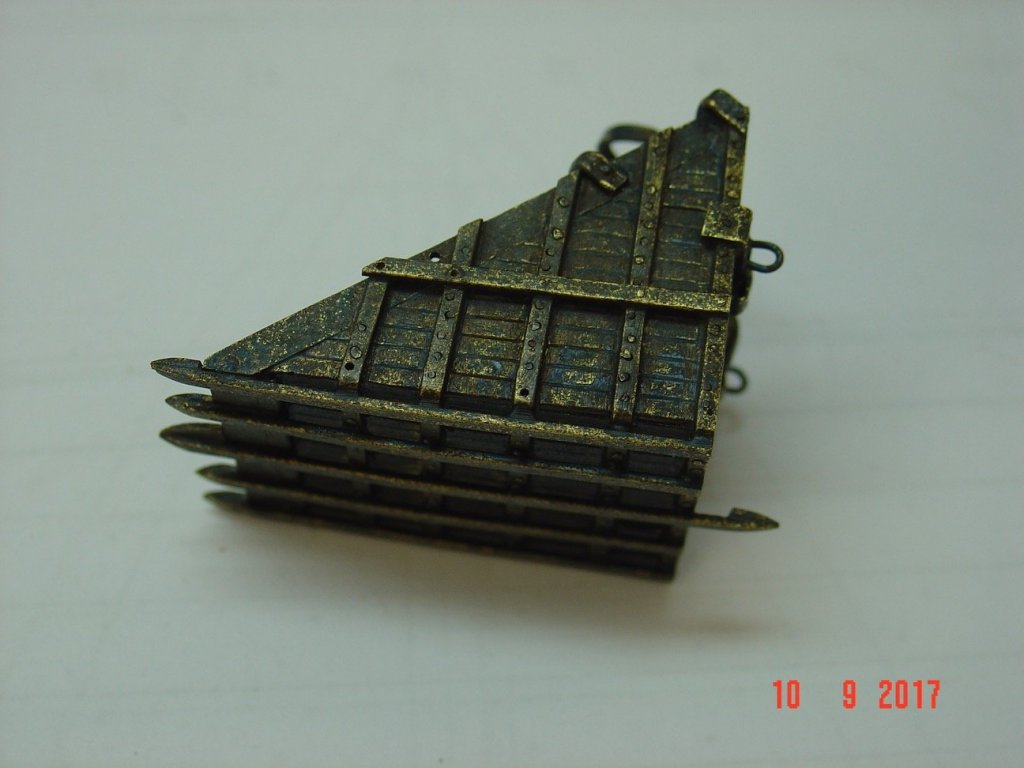
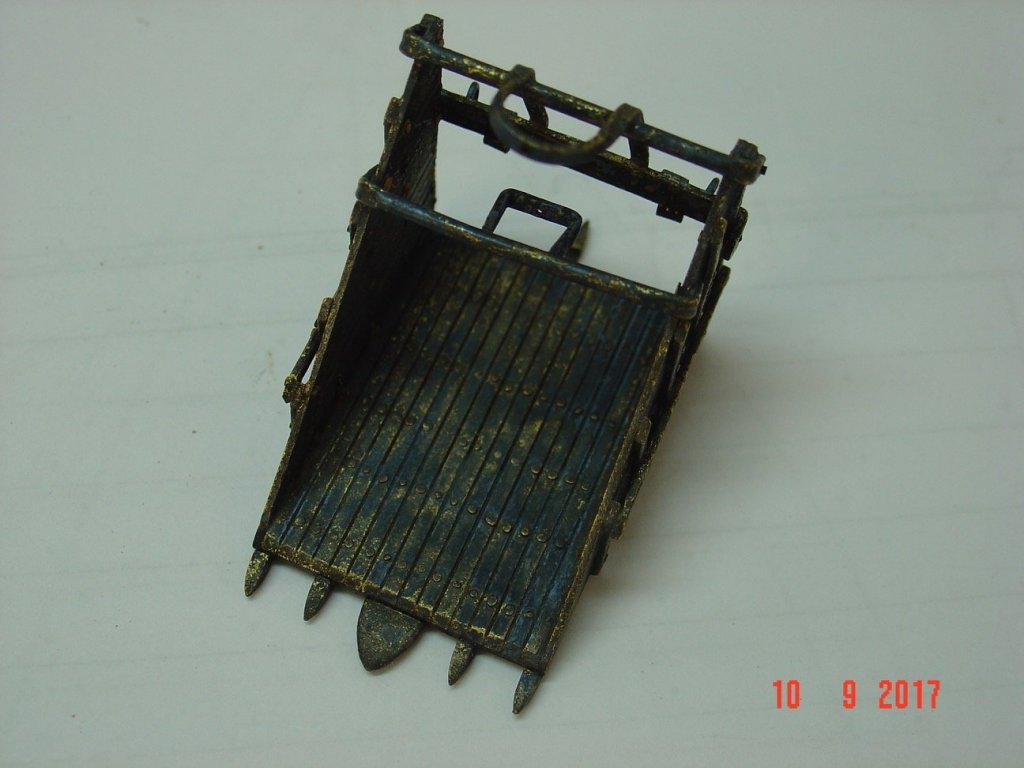
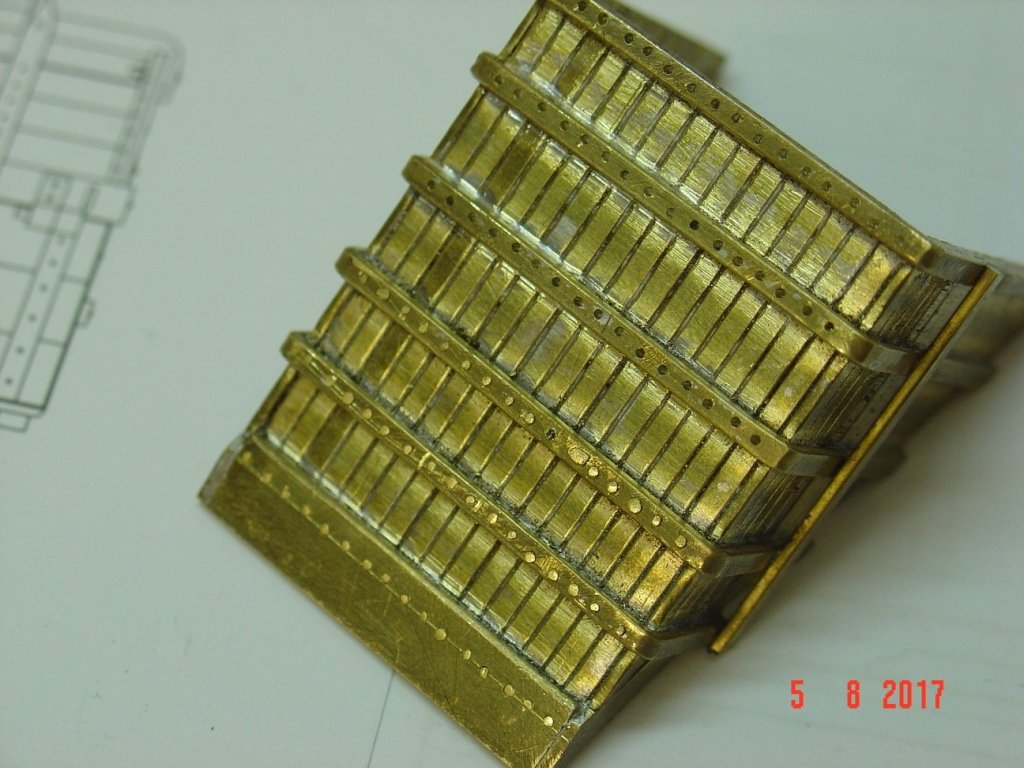
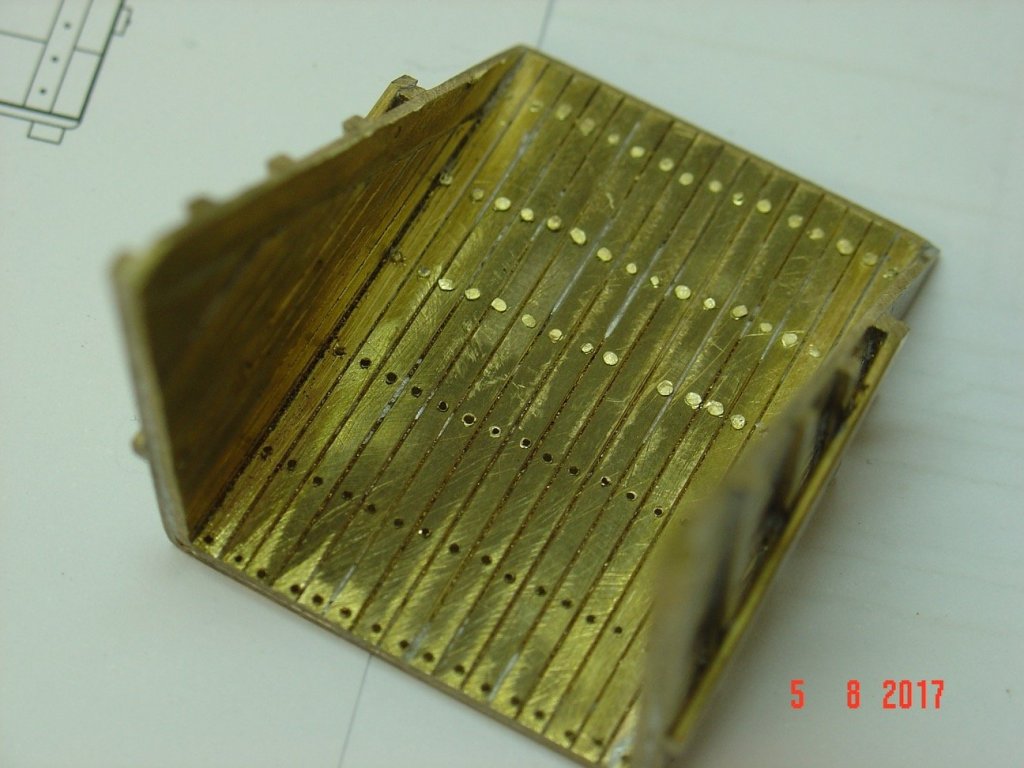
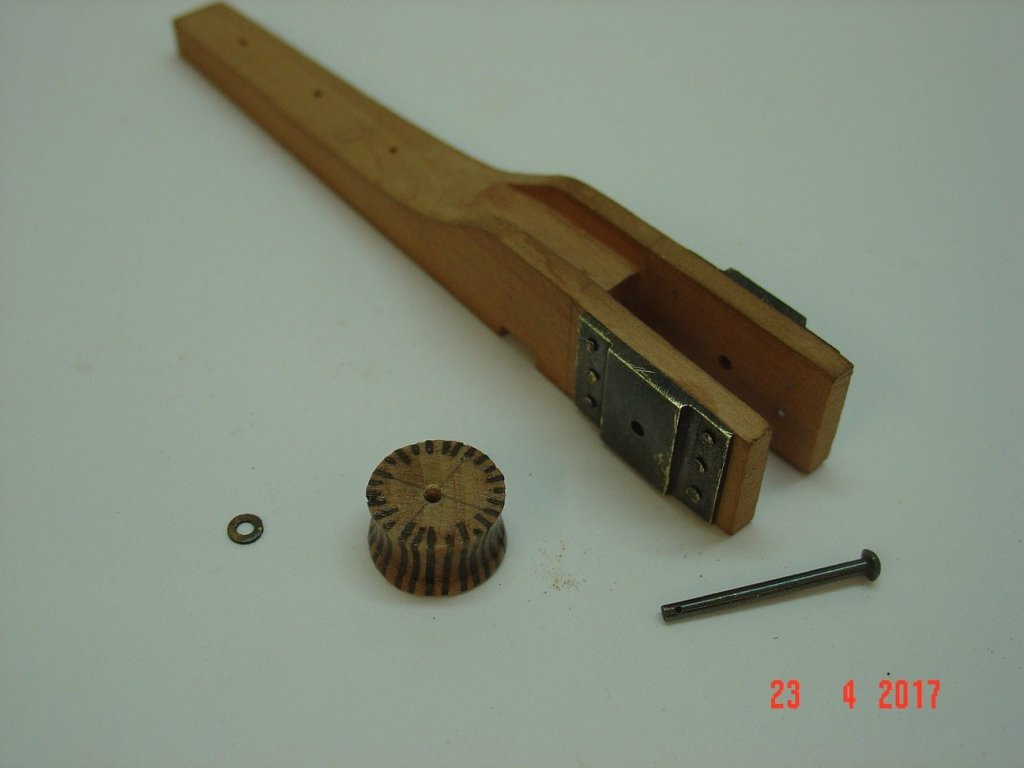
Hello, Here are the last pictures on this build - the second scoop.


-
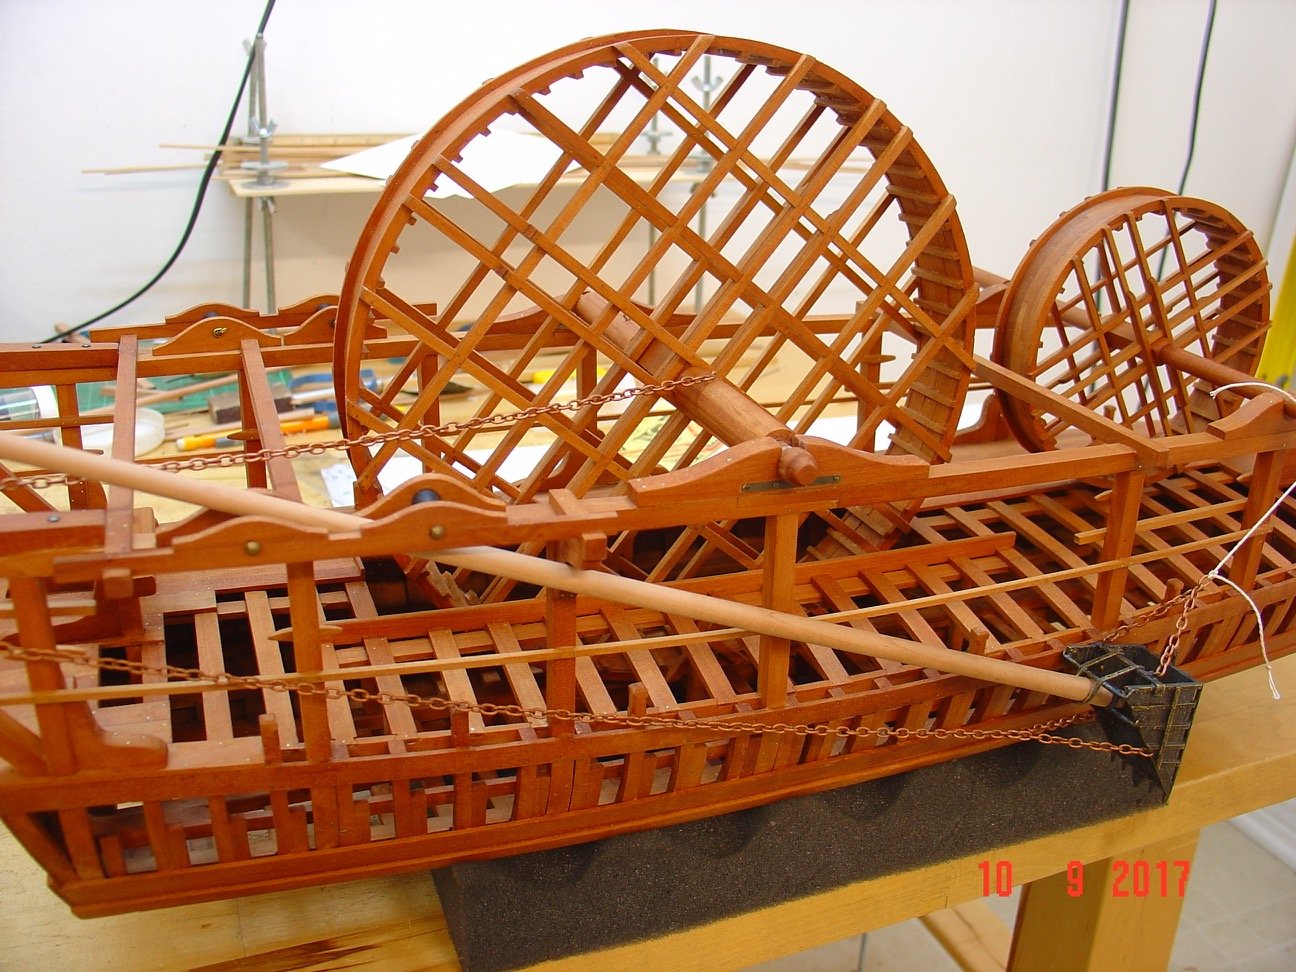
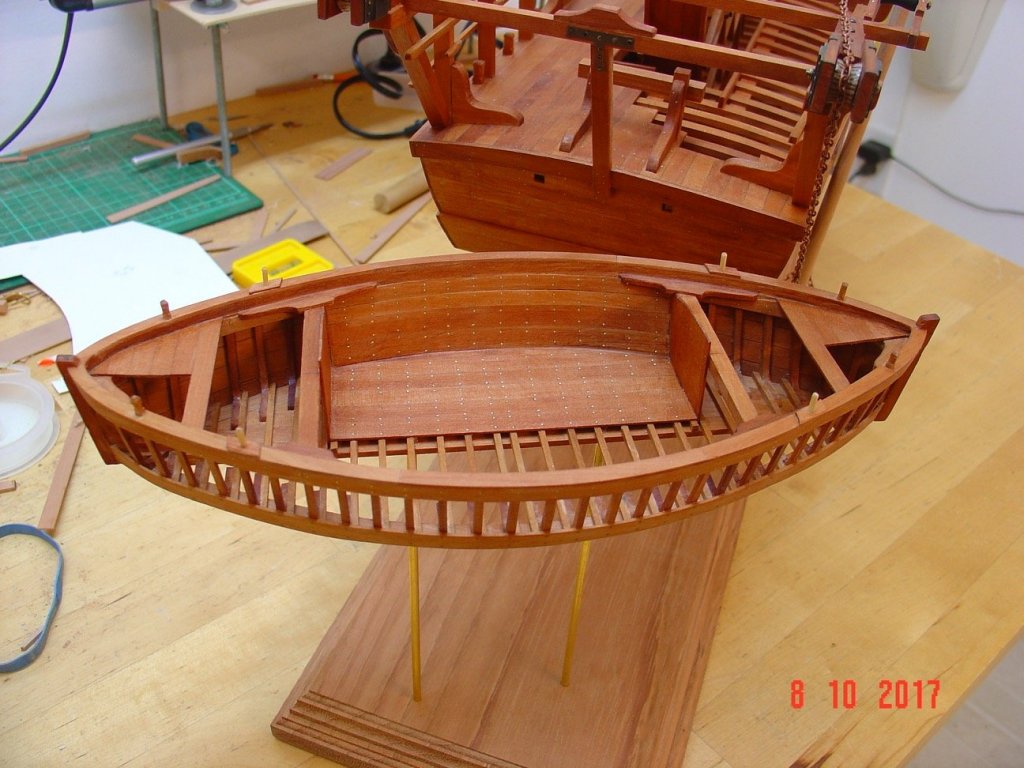
Thank you all for your kind words. Here is another progress report - I've made the small boat used to transport the dirt scooped from the bottom of the port. Alexandru


-
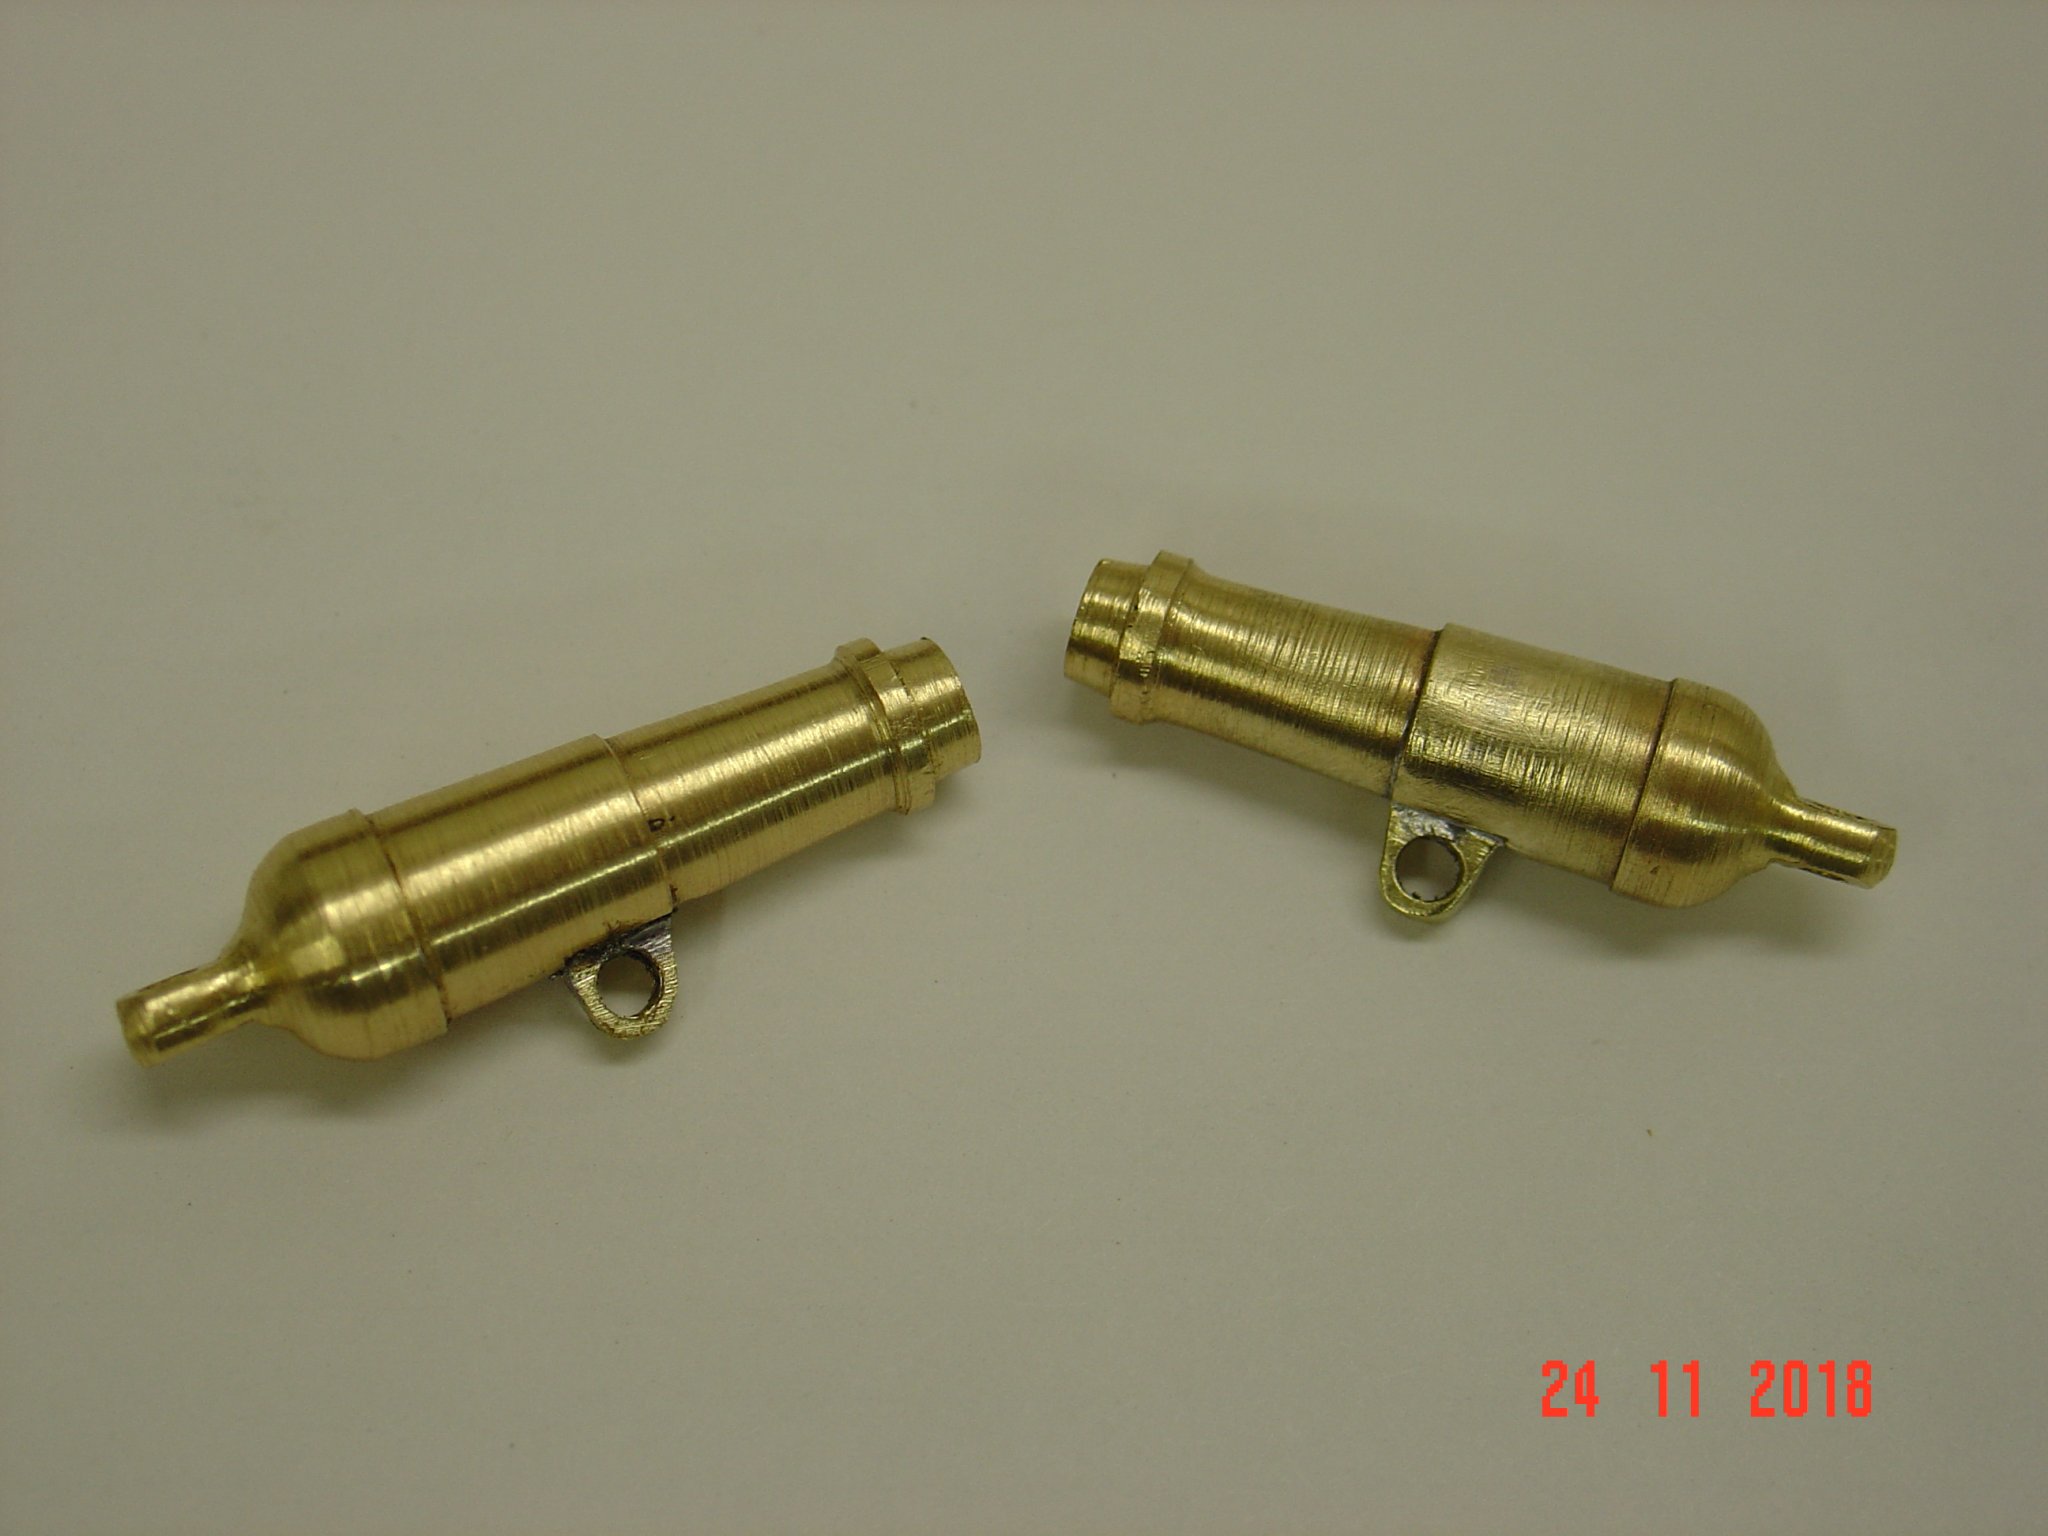
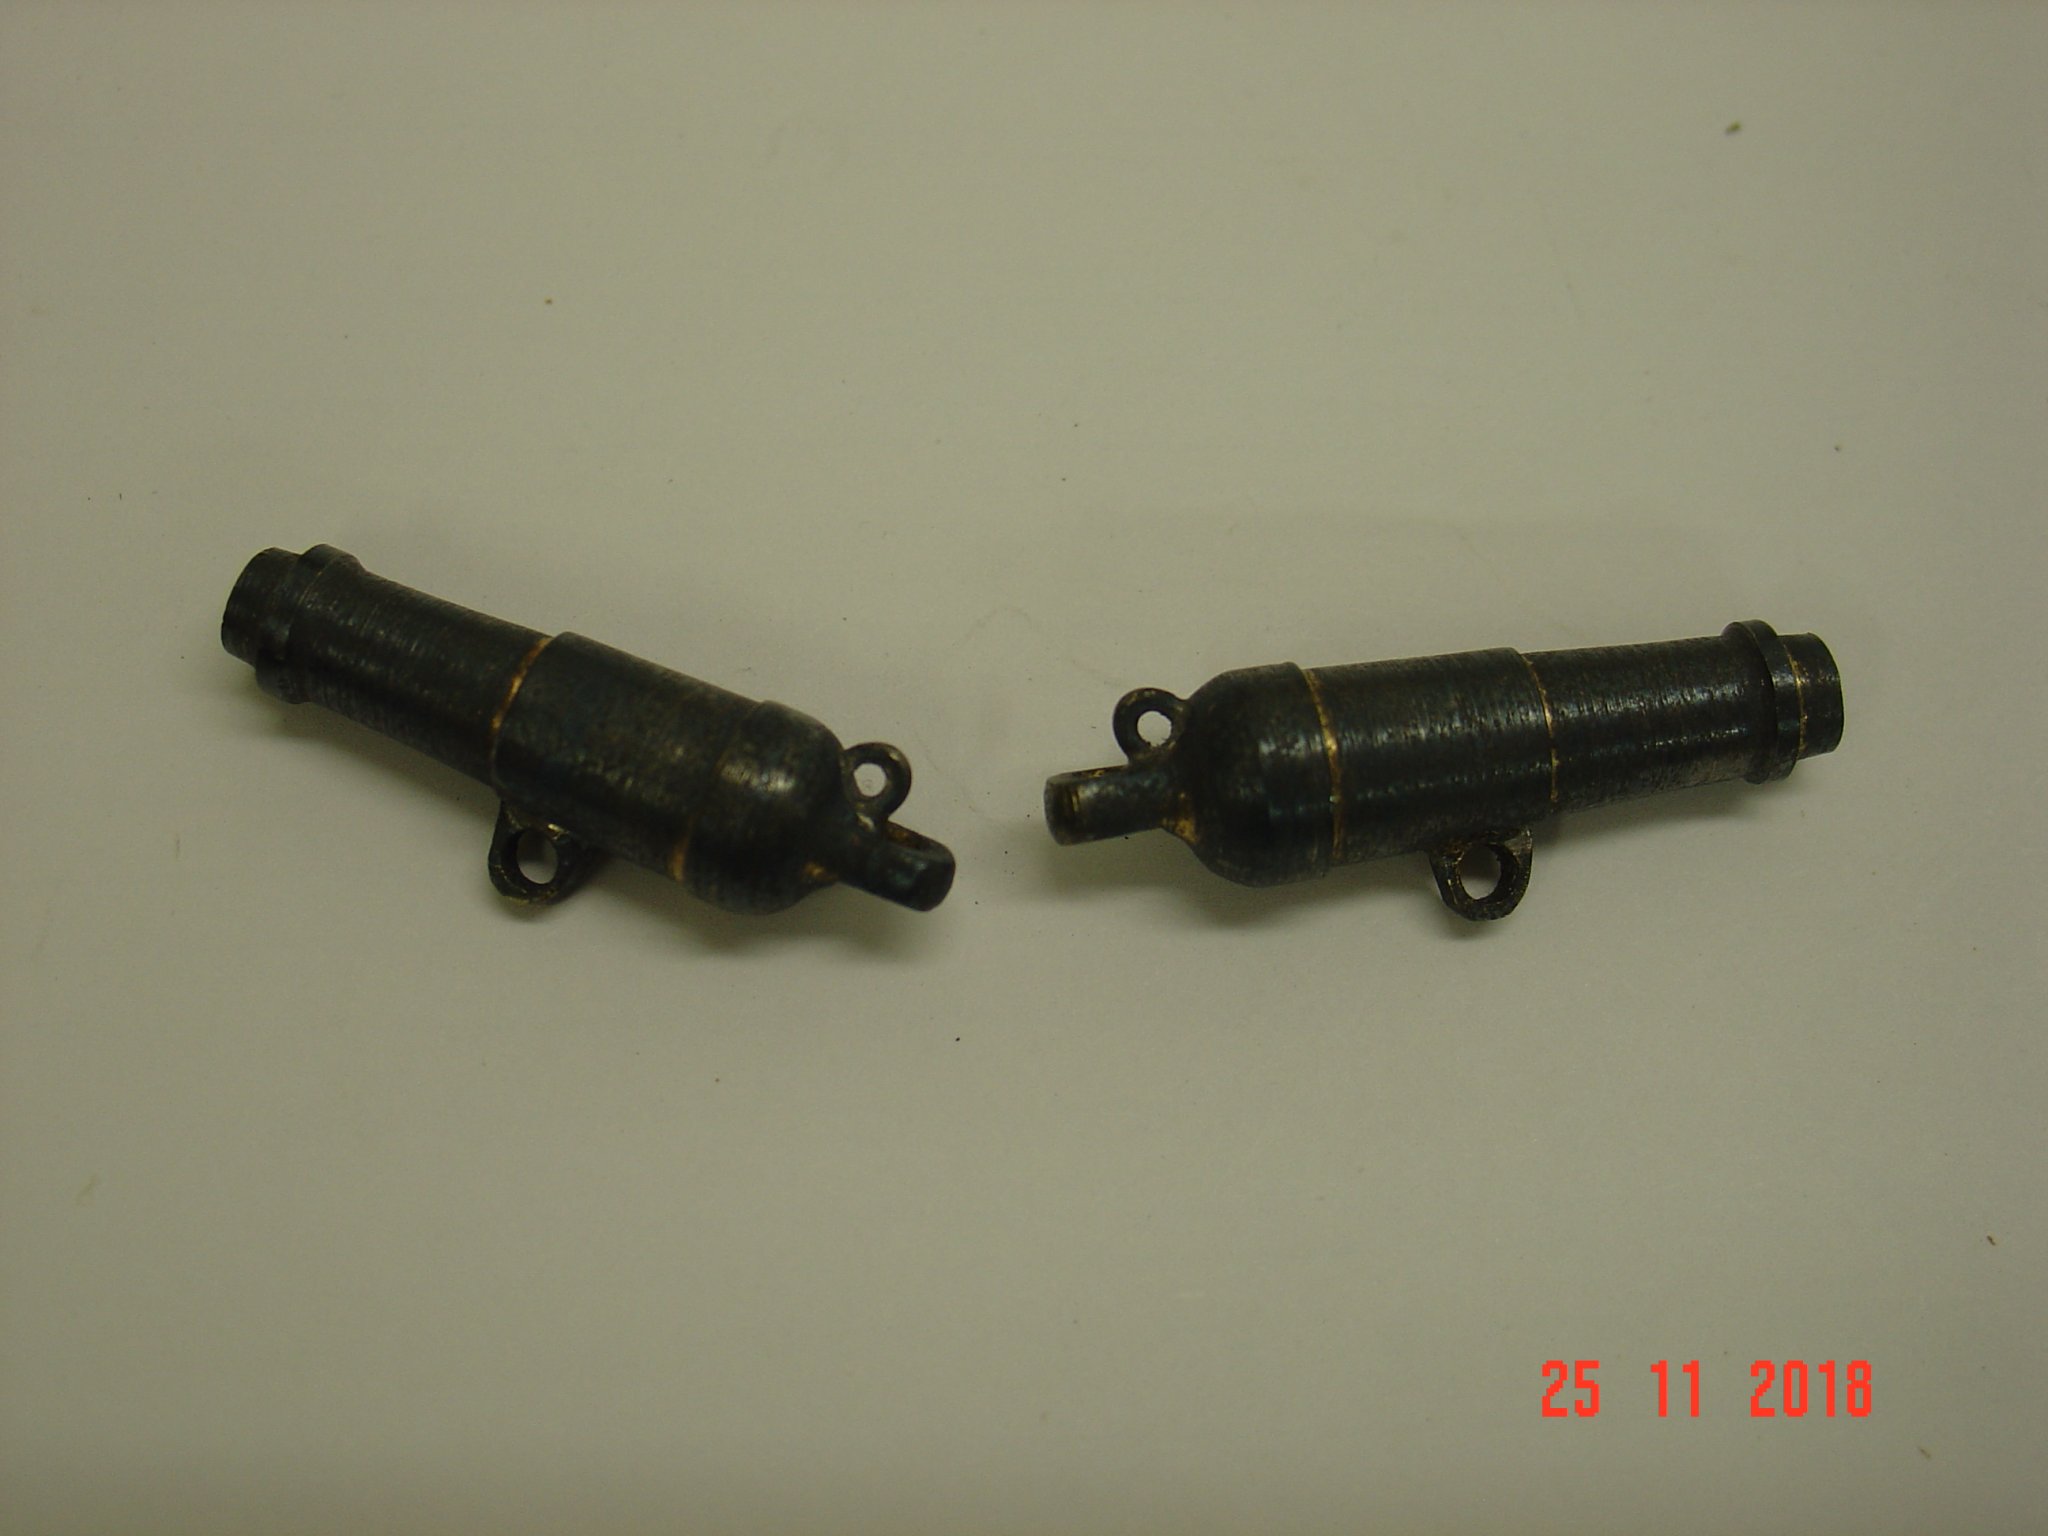
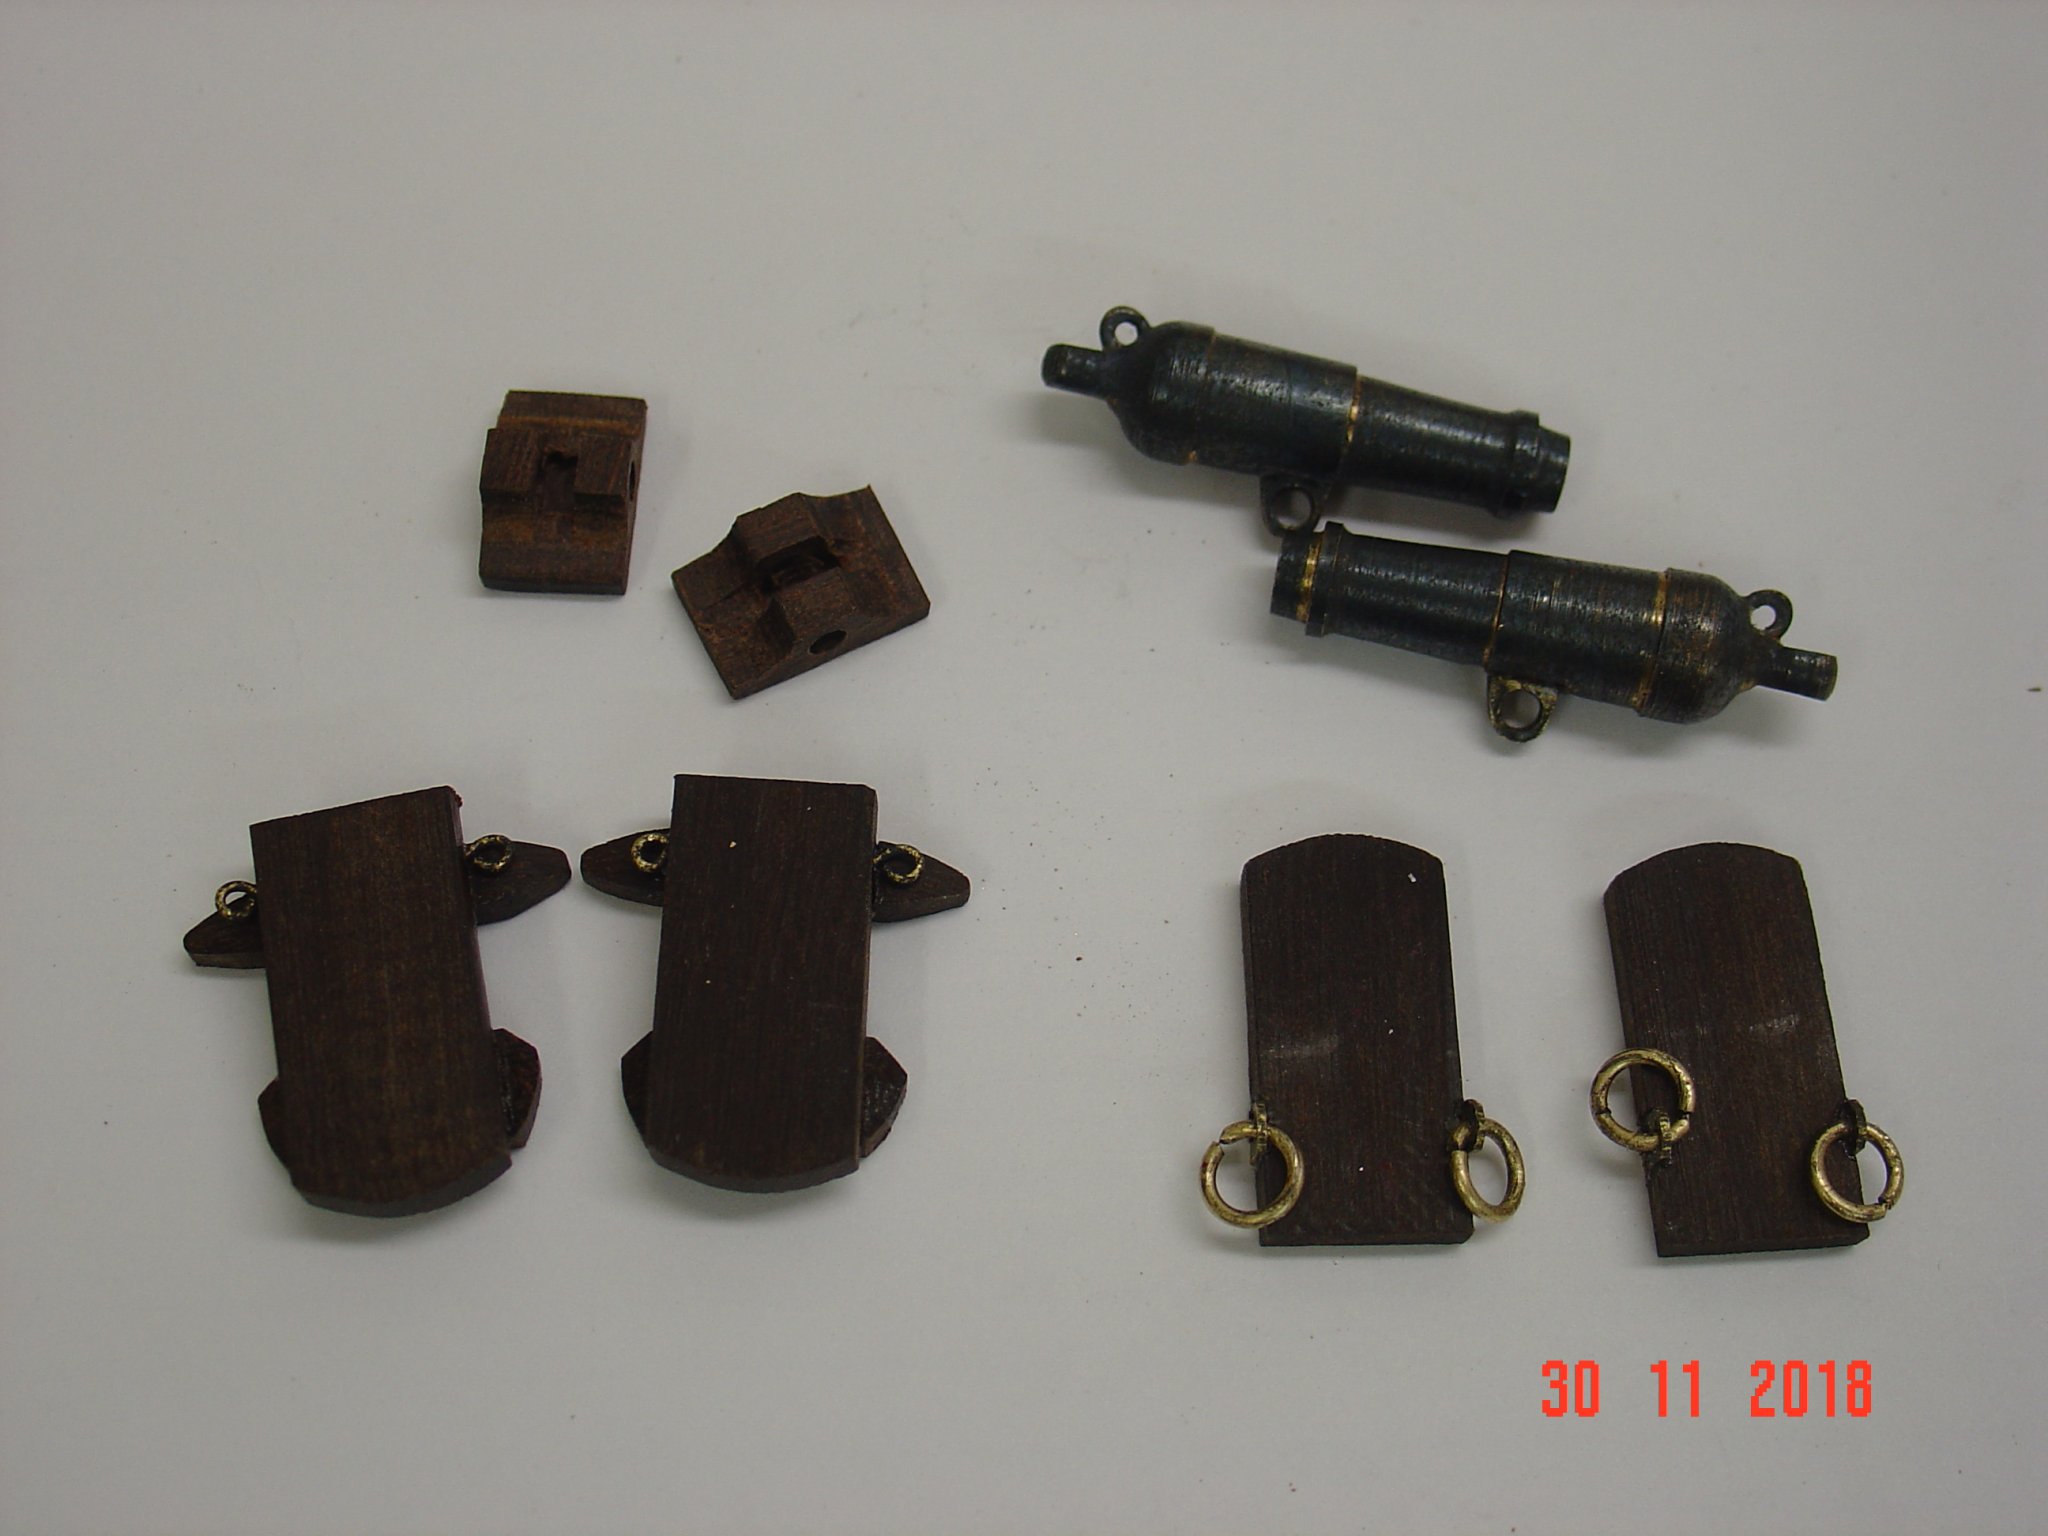
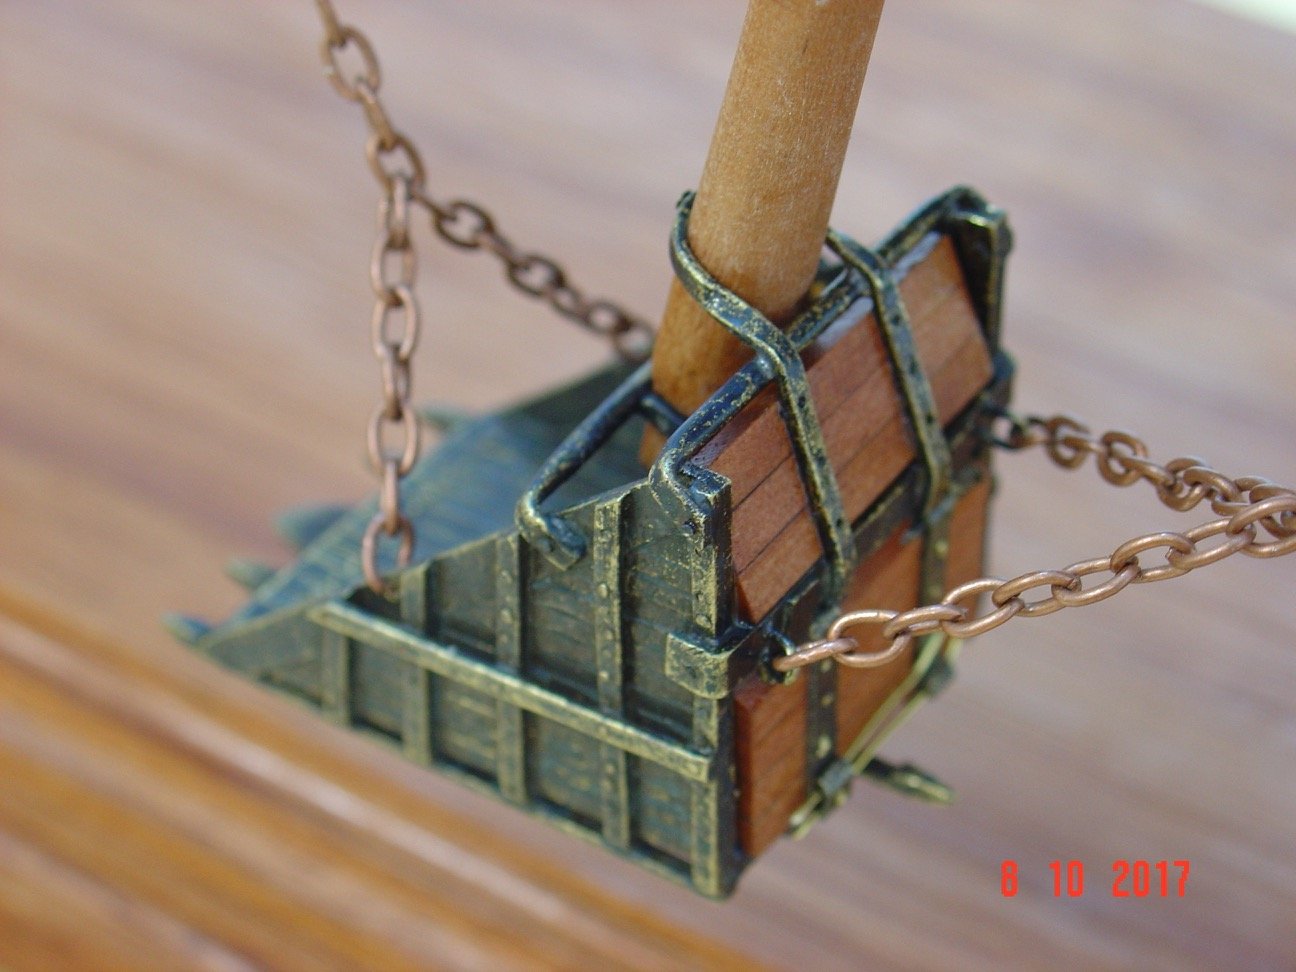
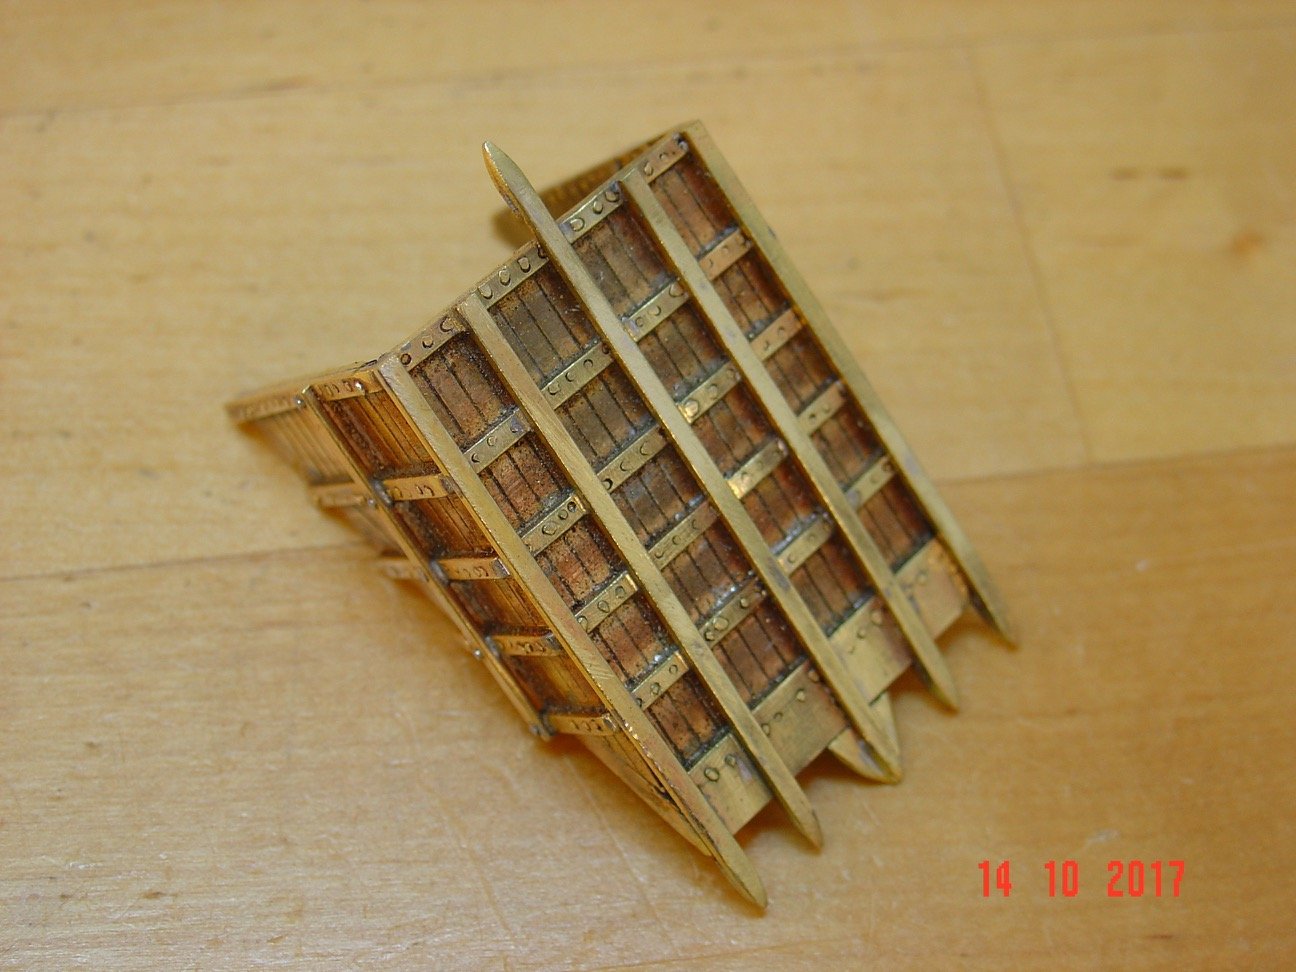
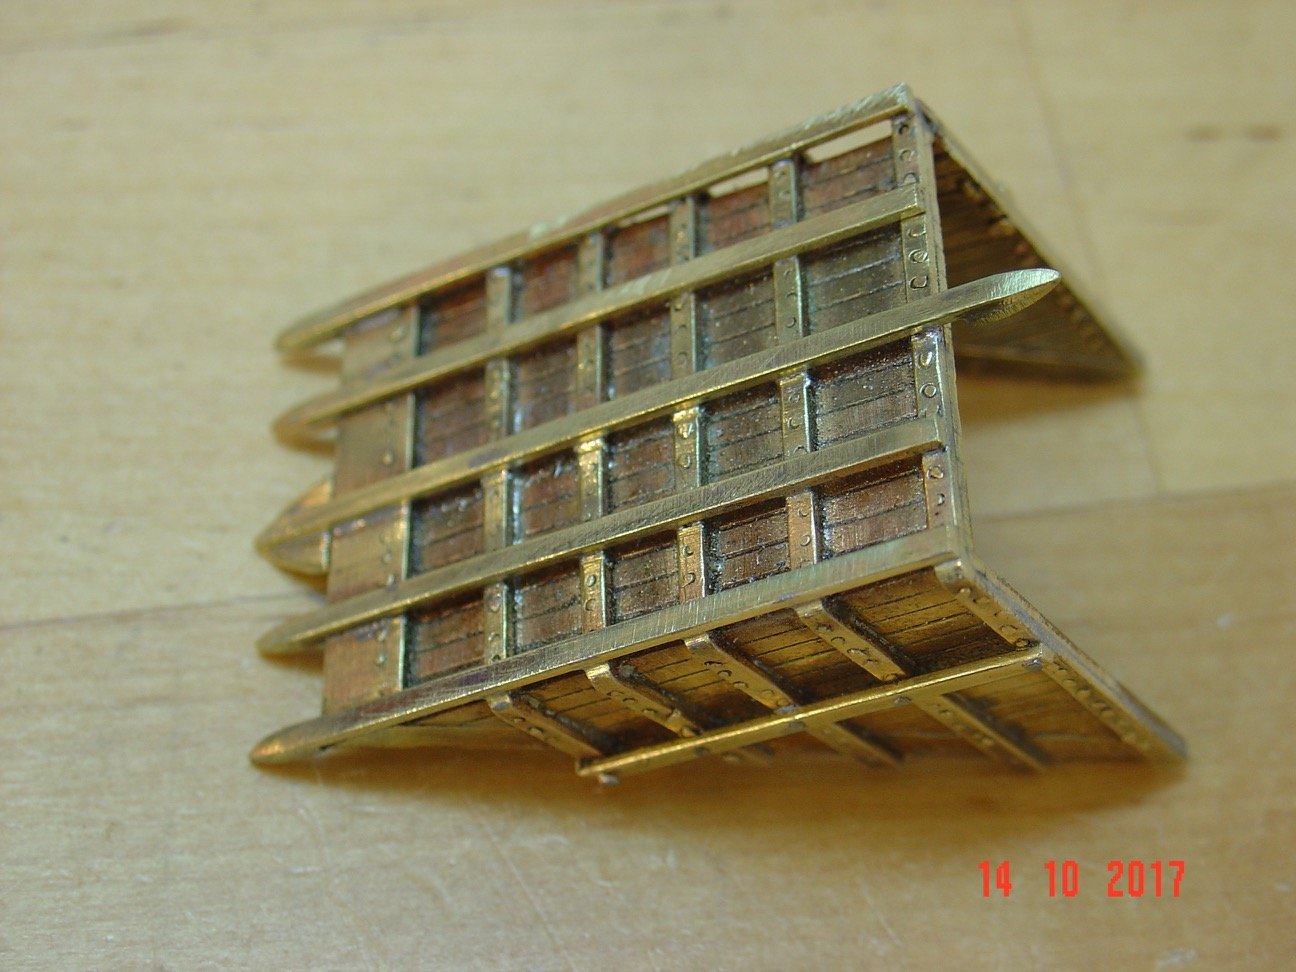
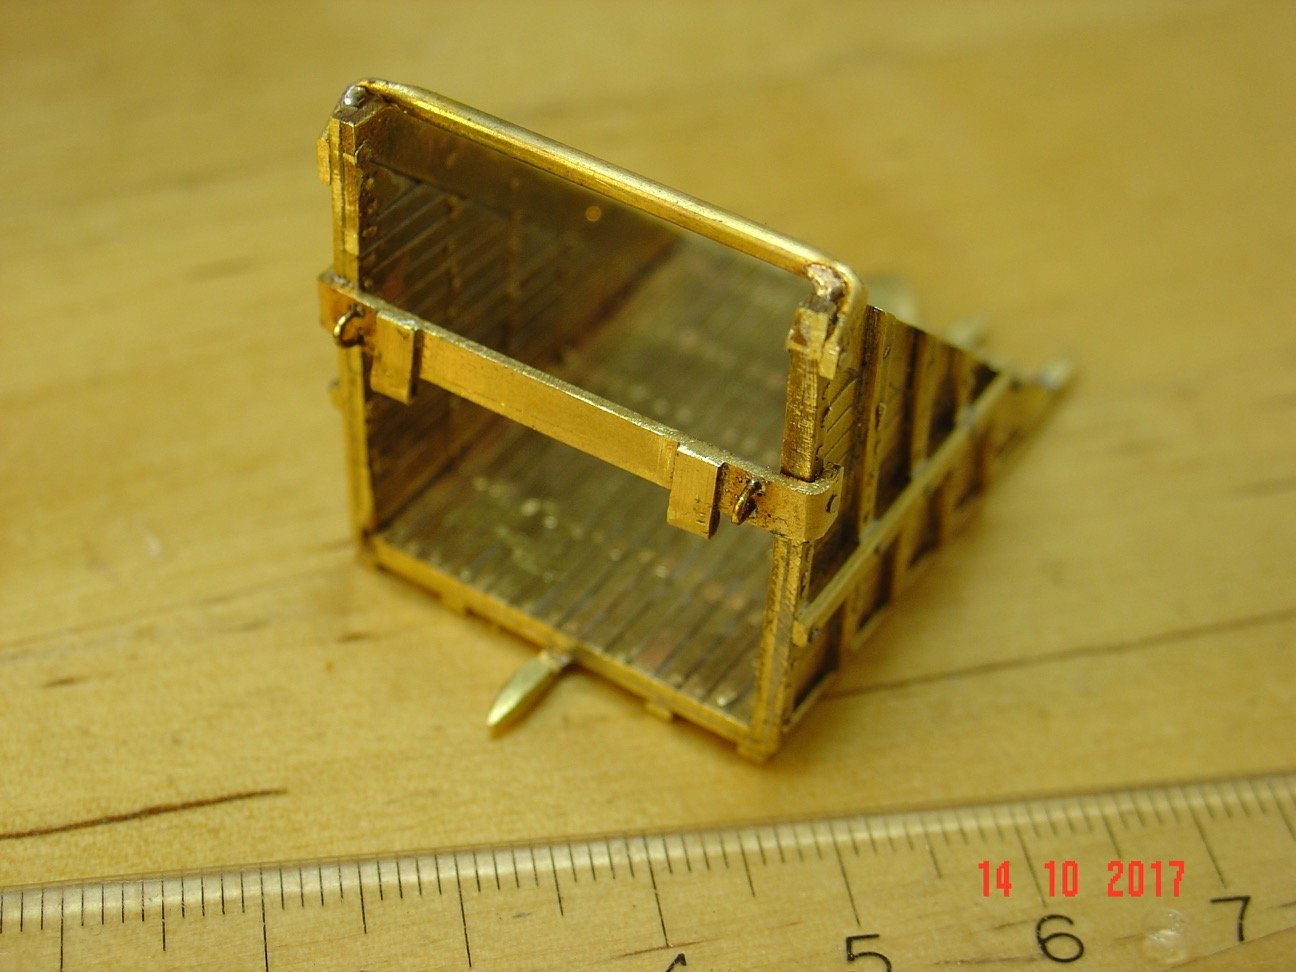
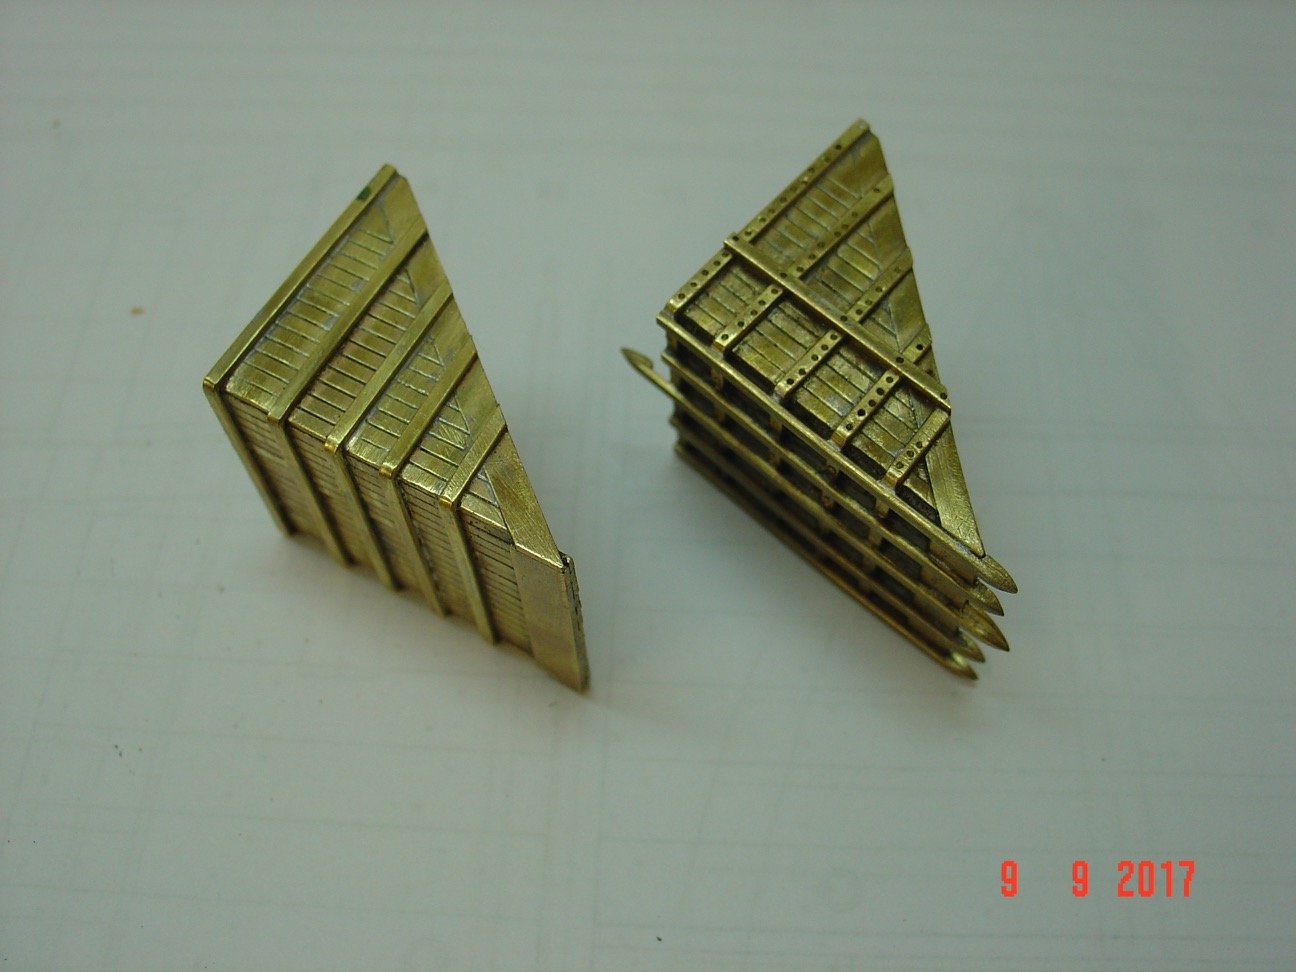
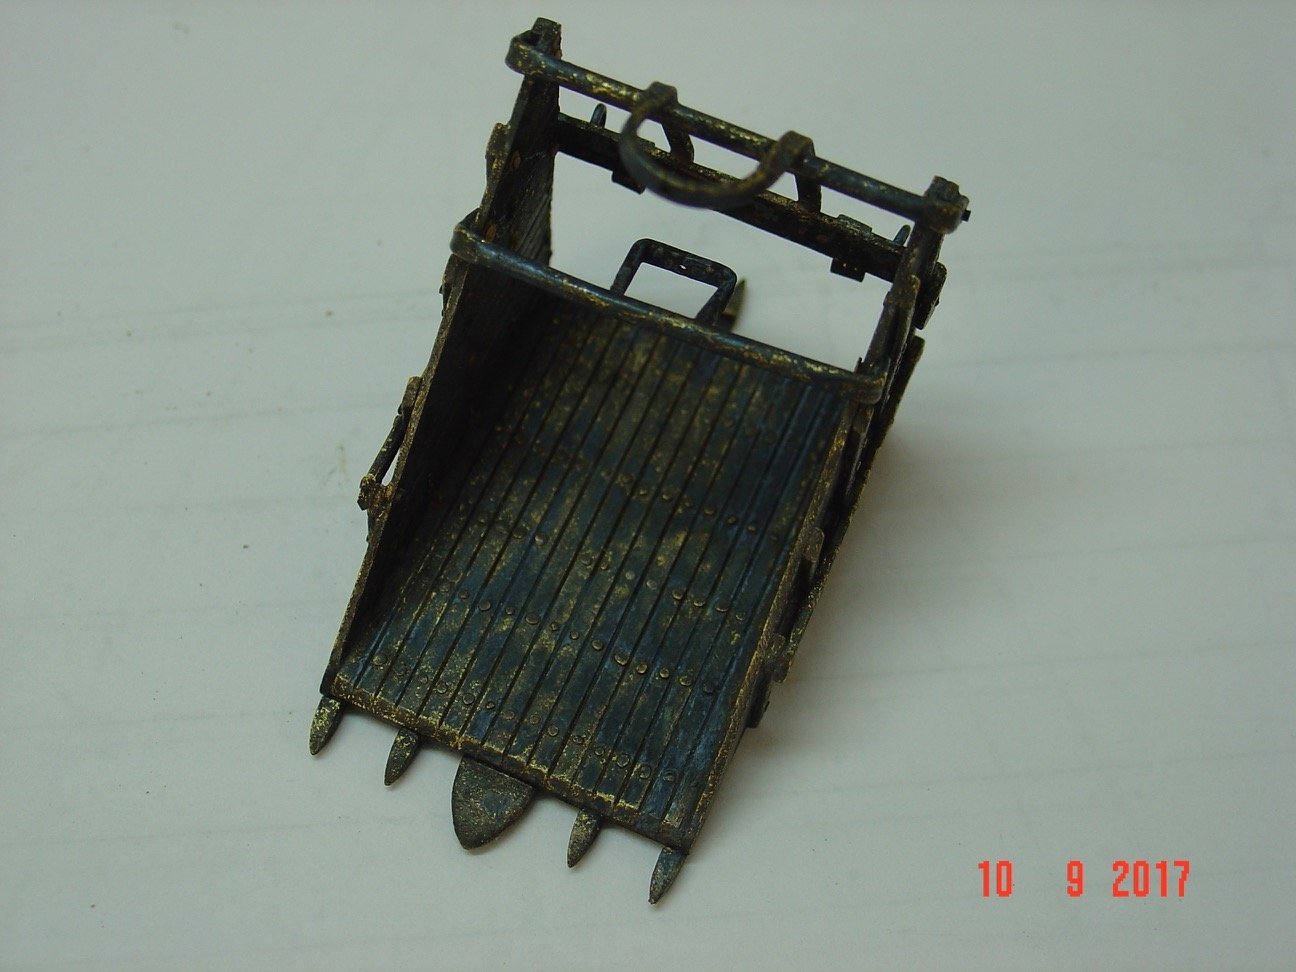
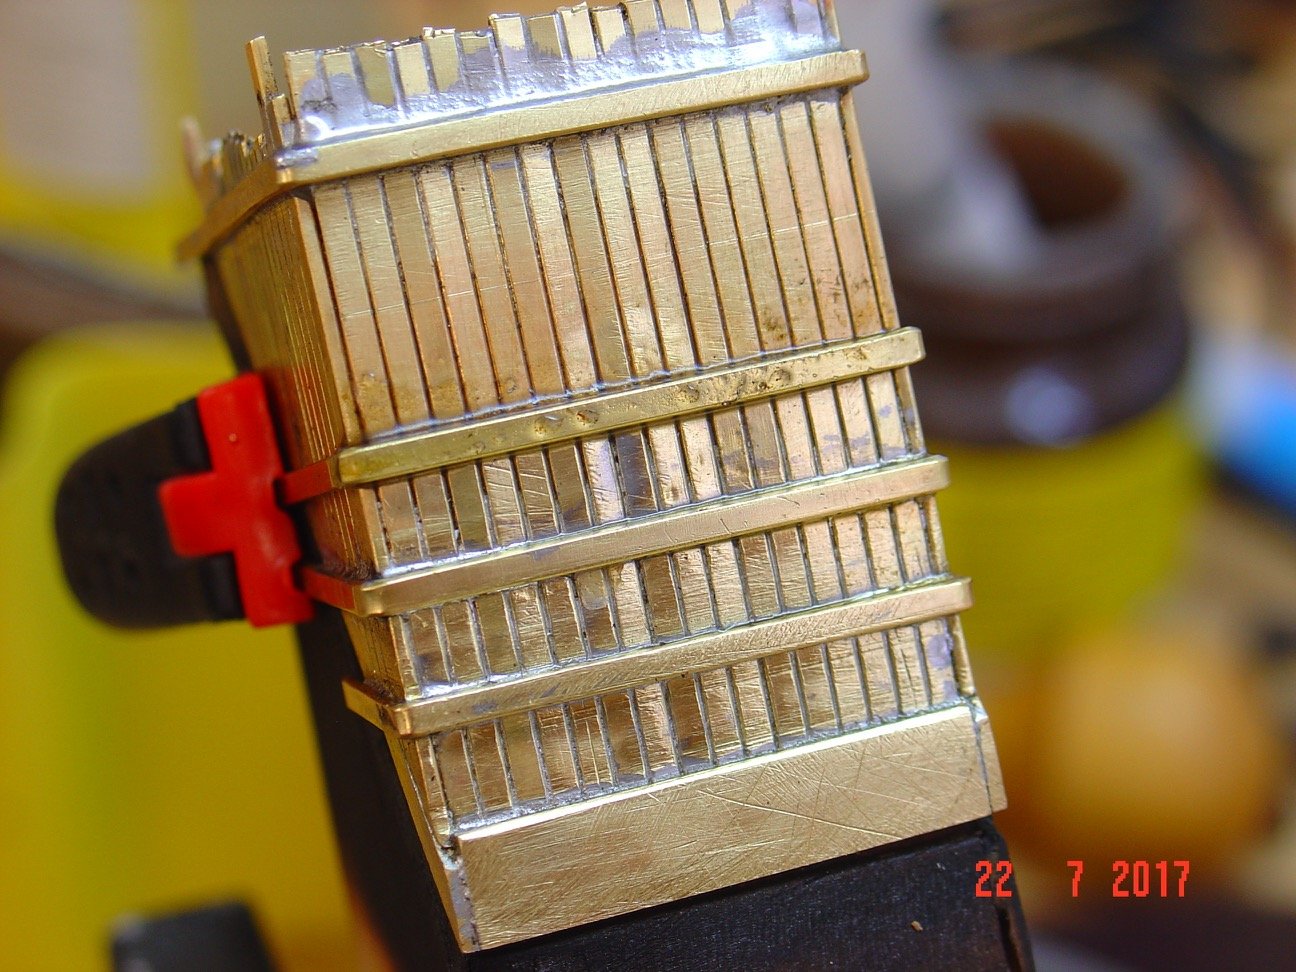
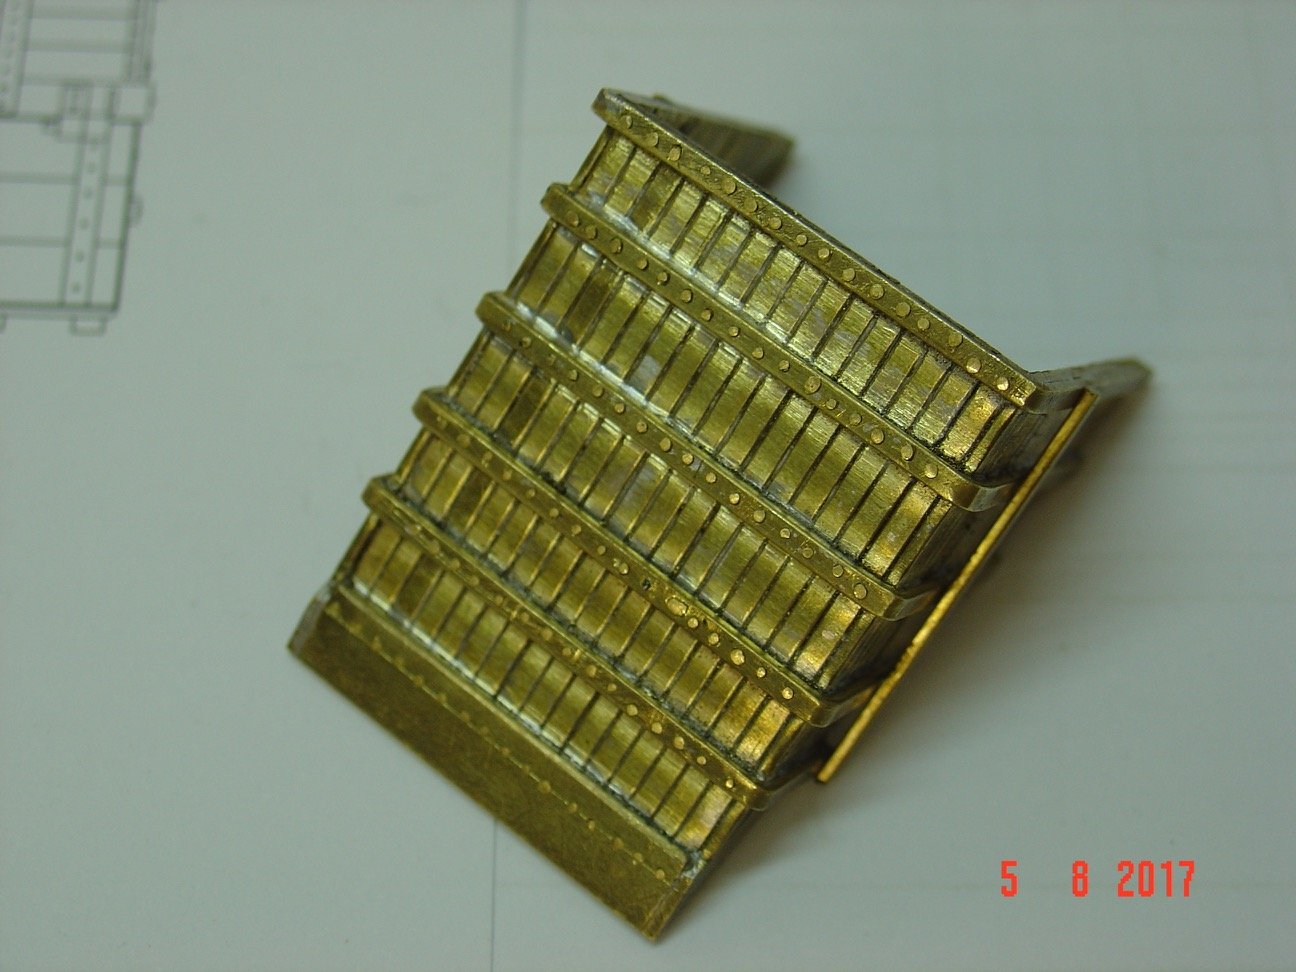
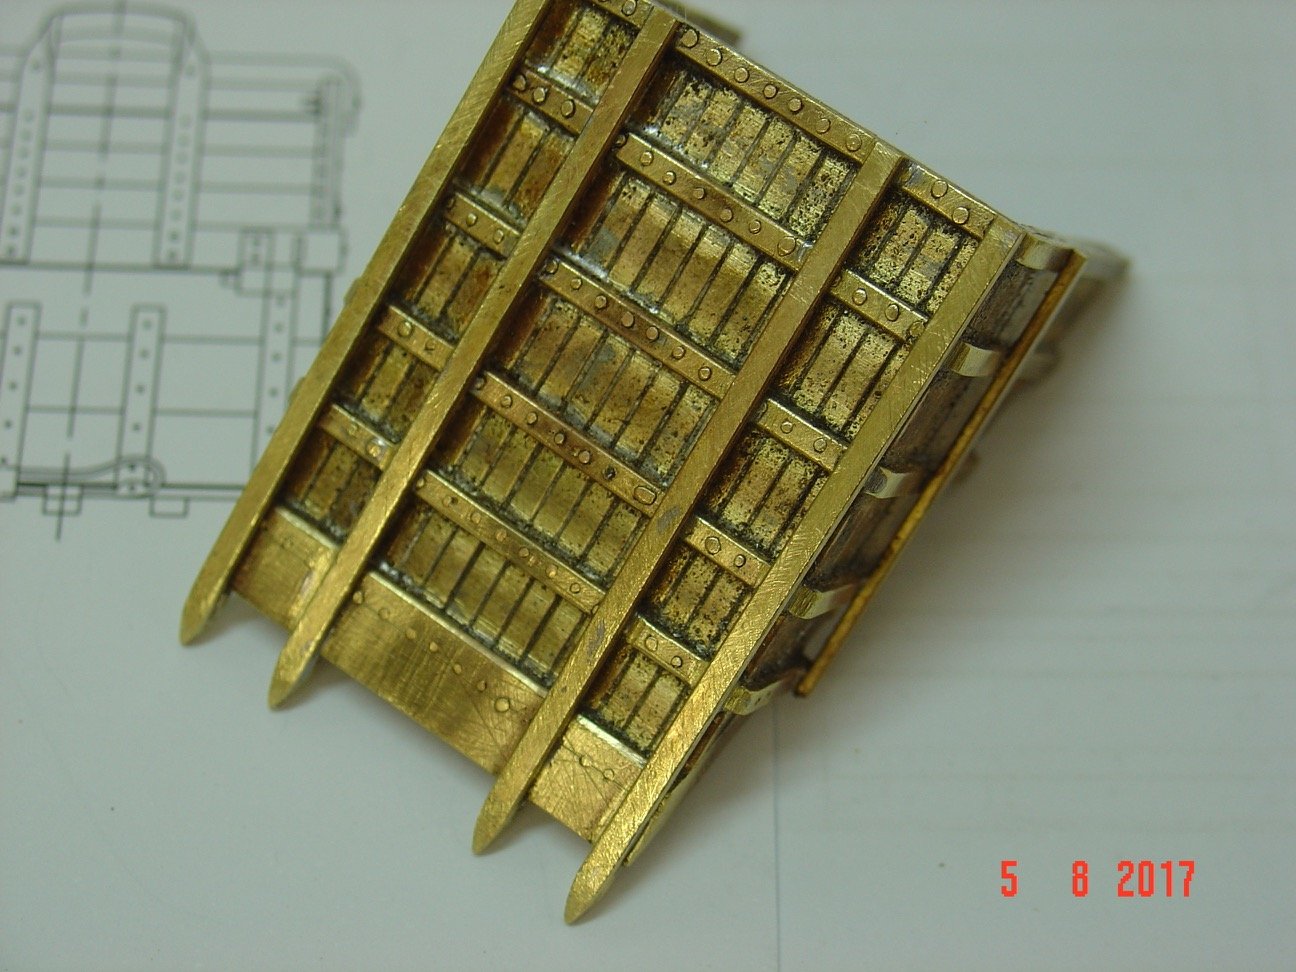
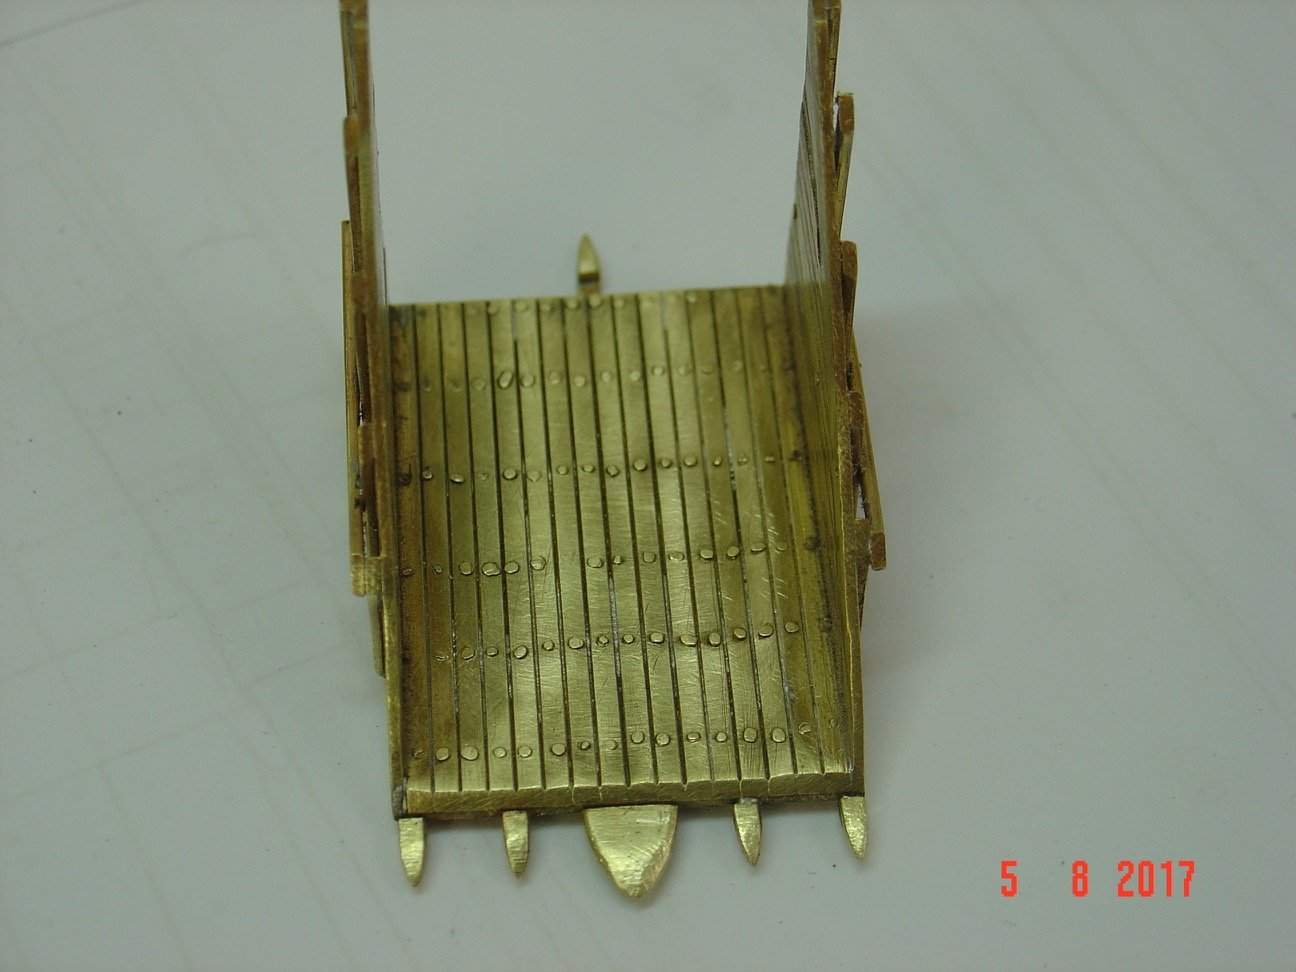
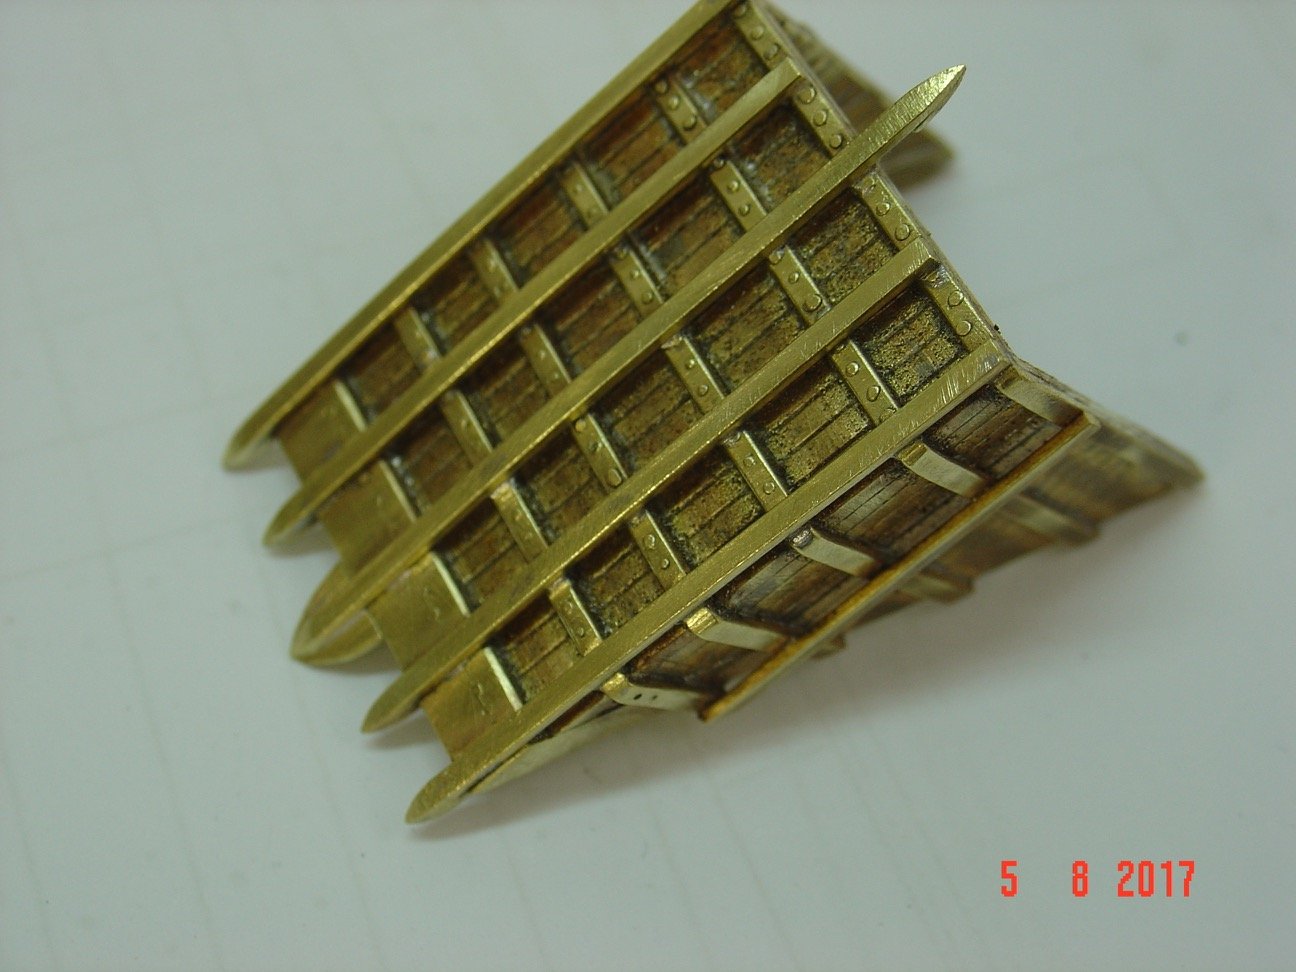
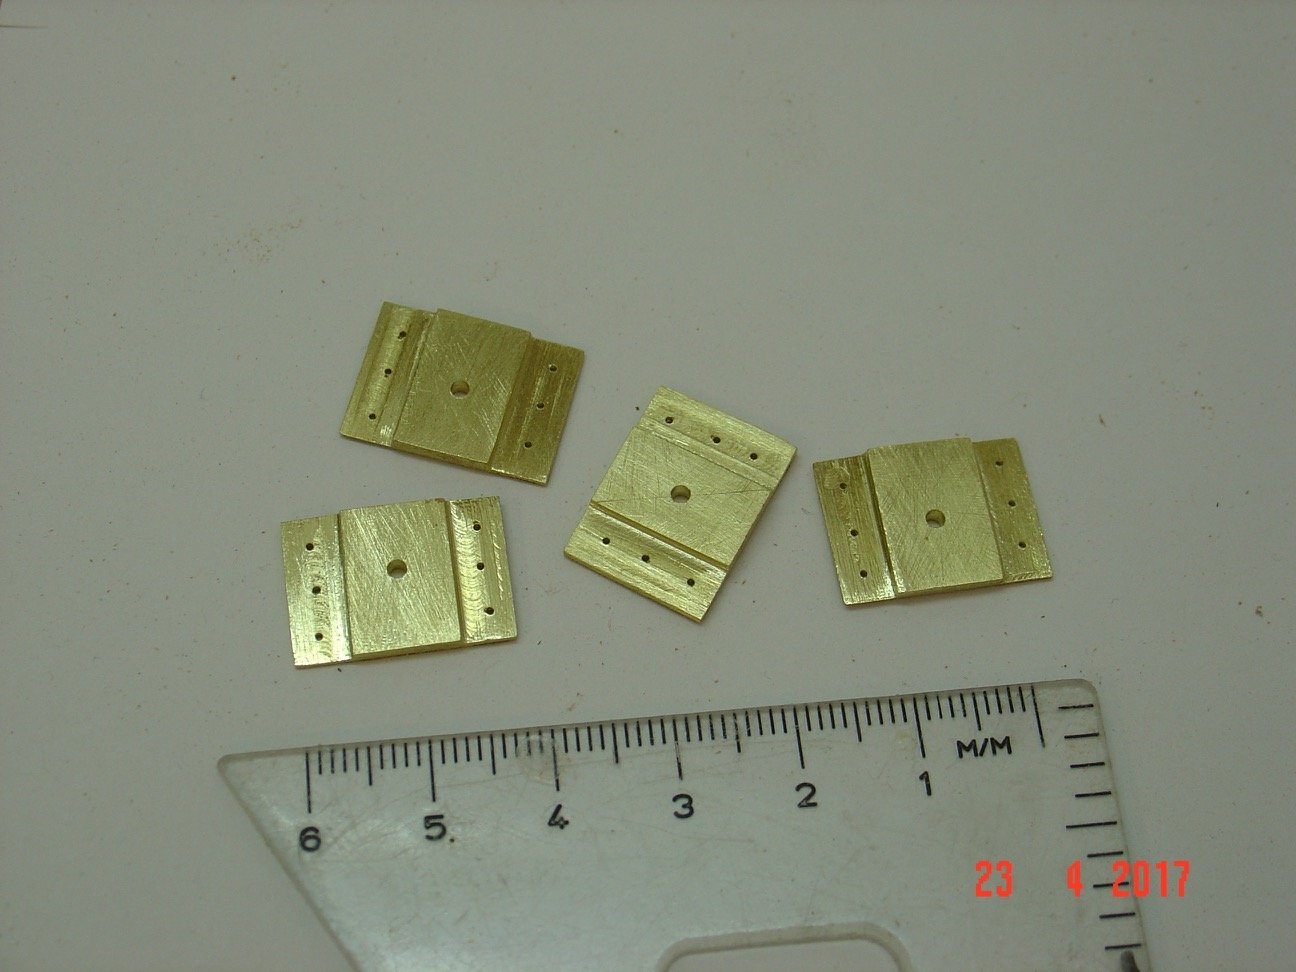
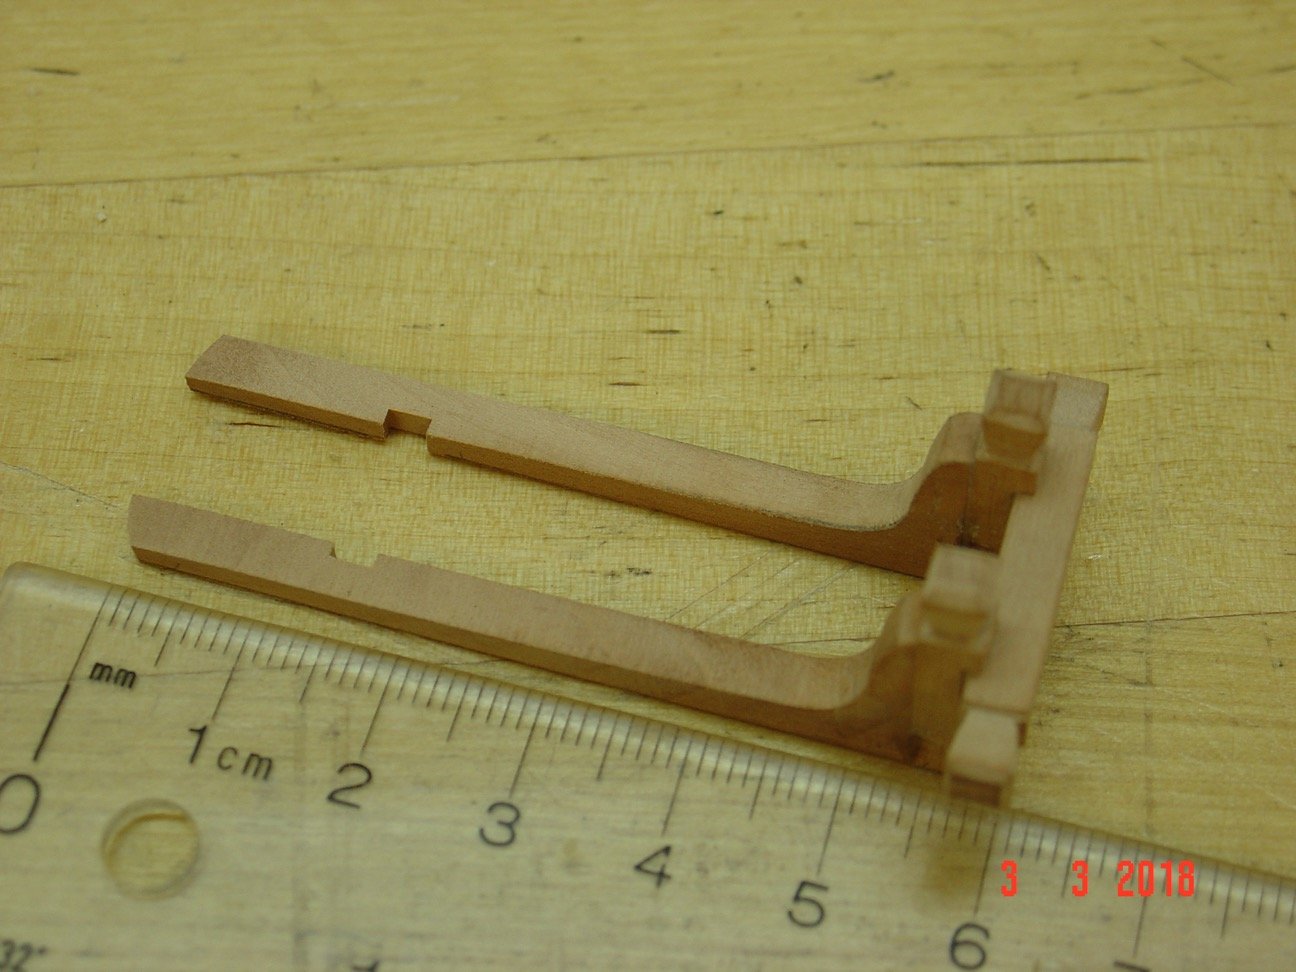
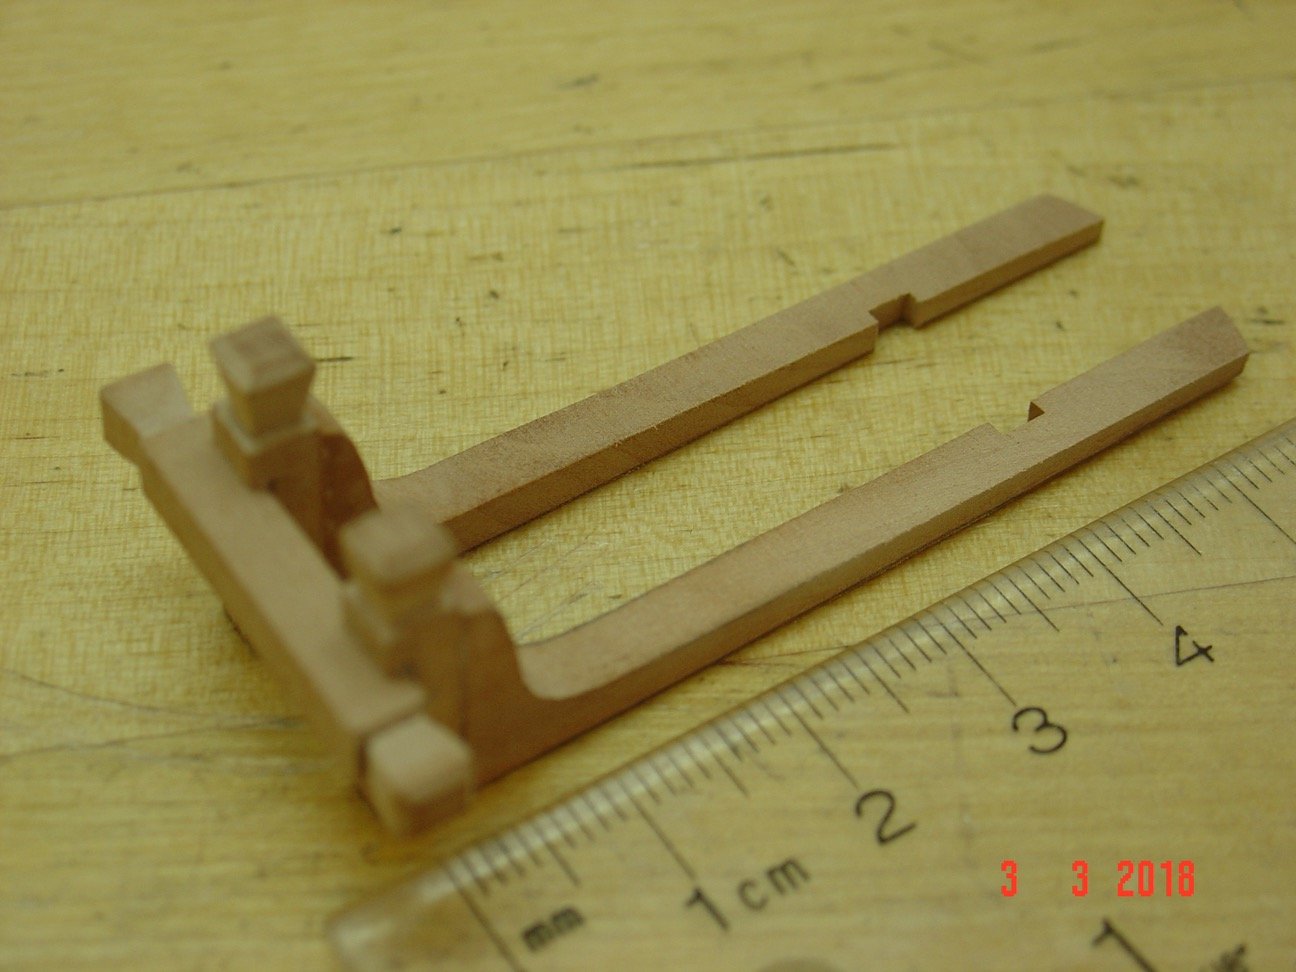
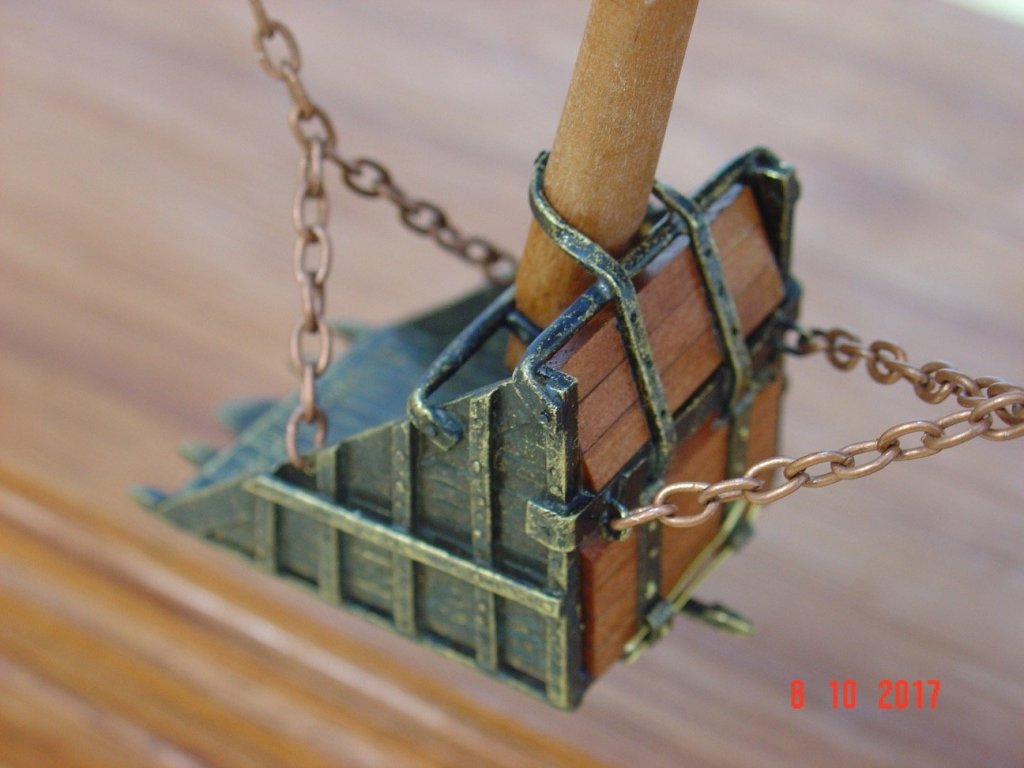
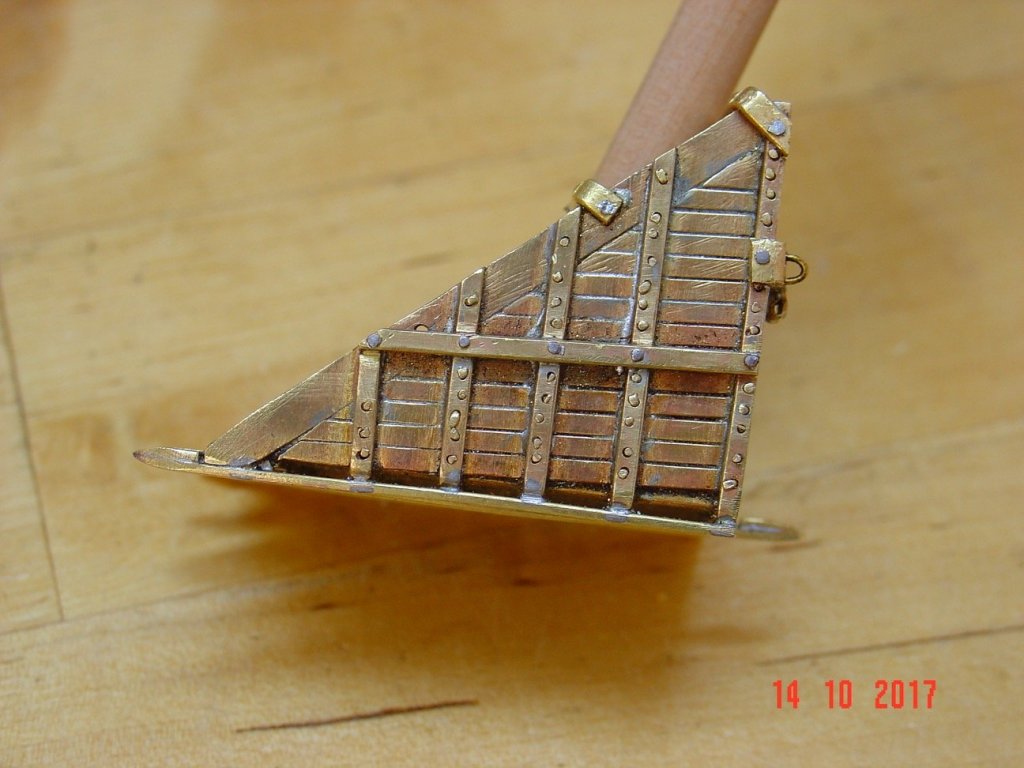
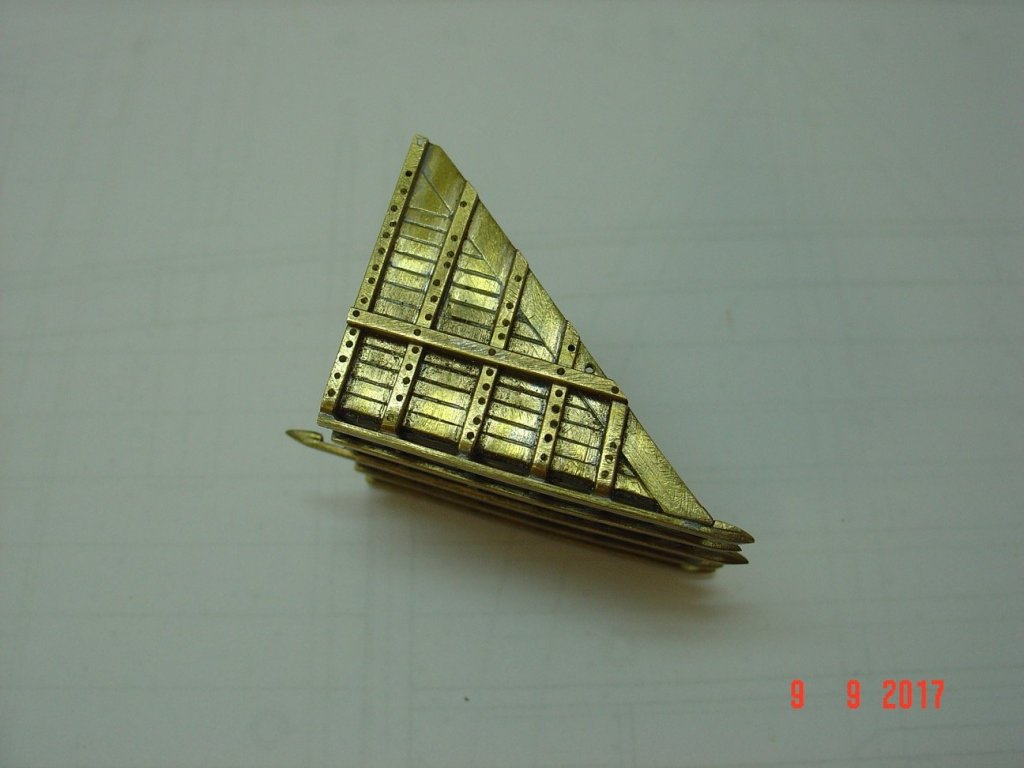
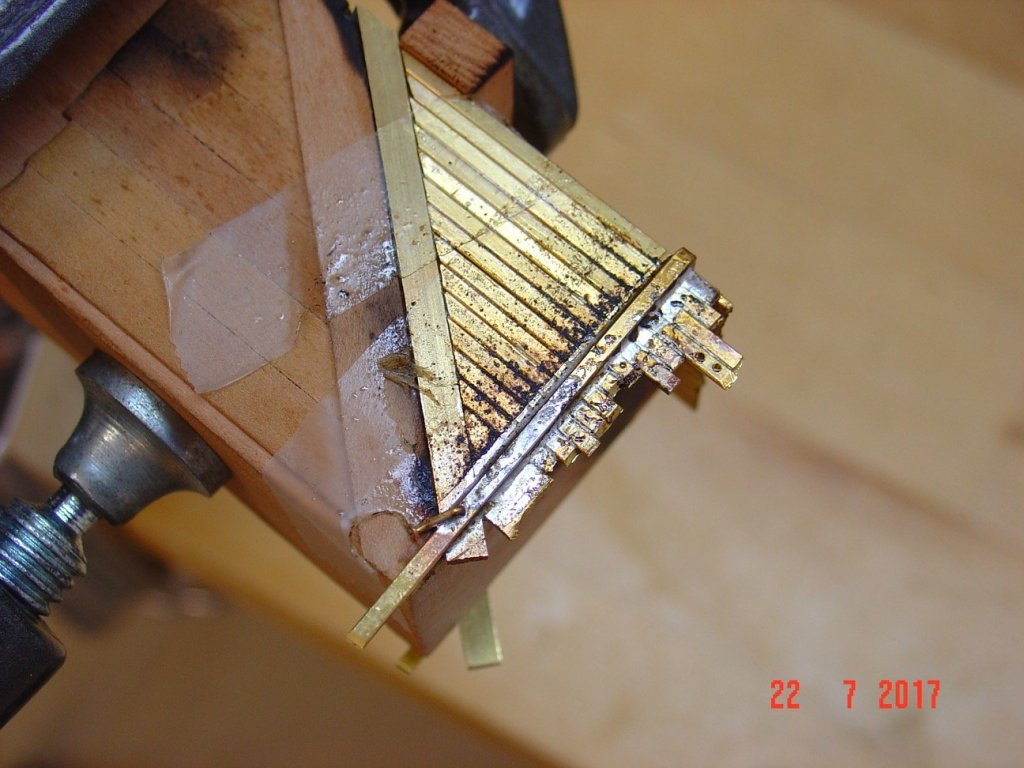
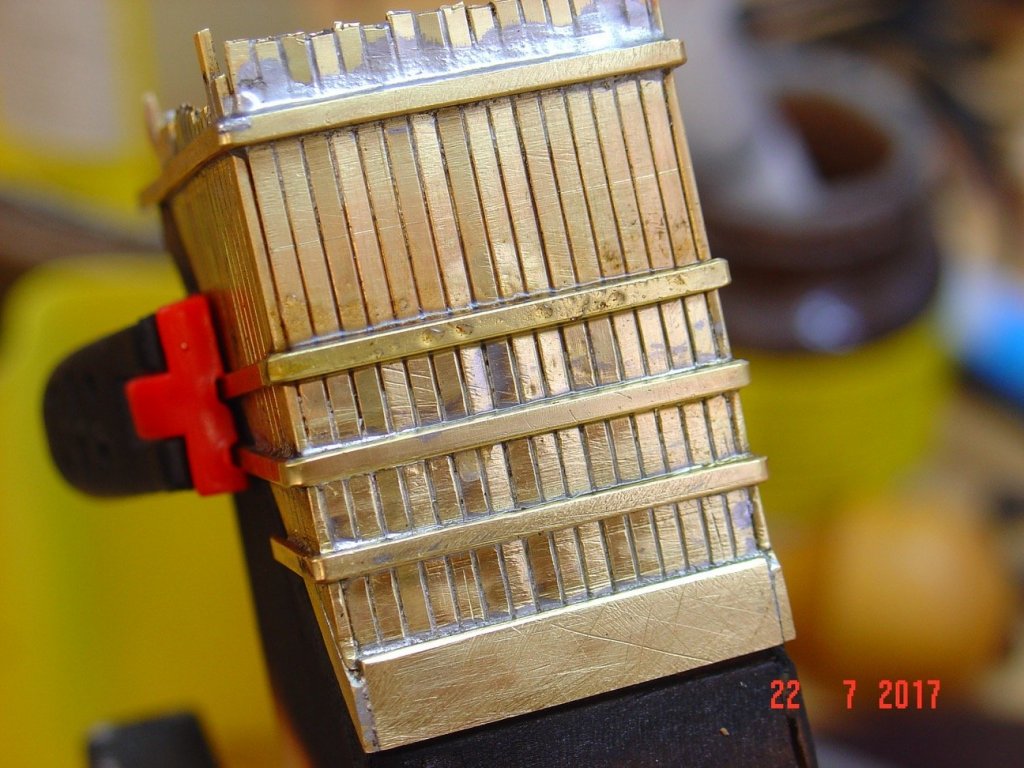
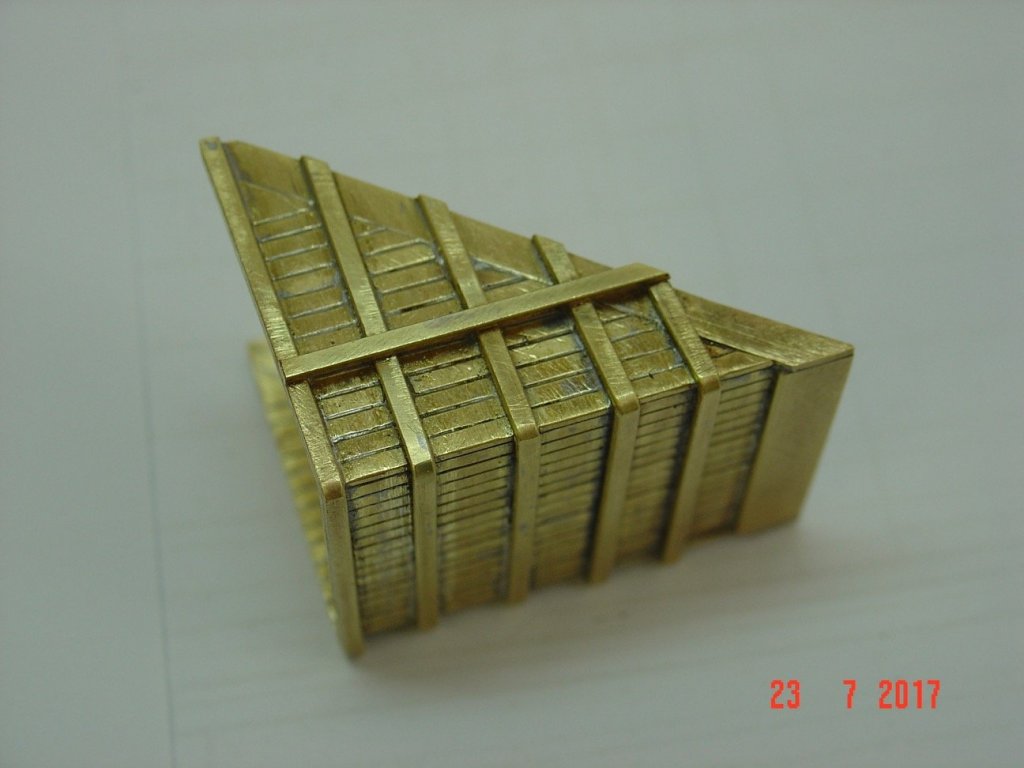
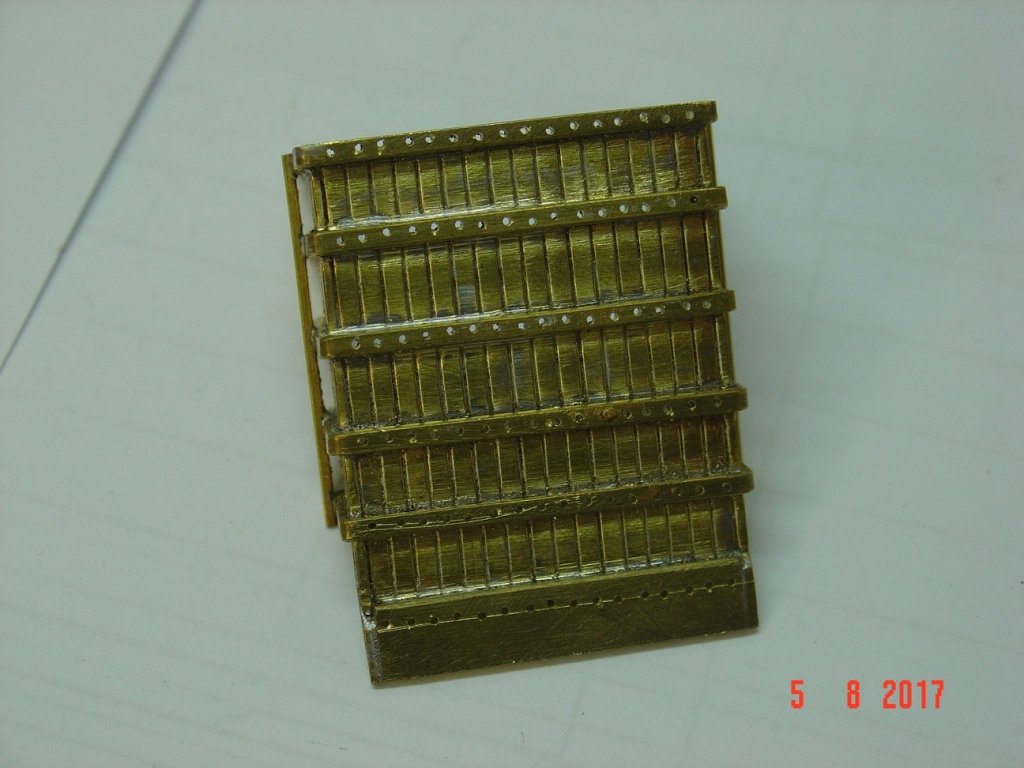
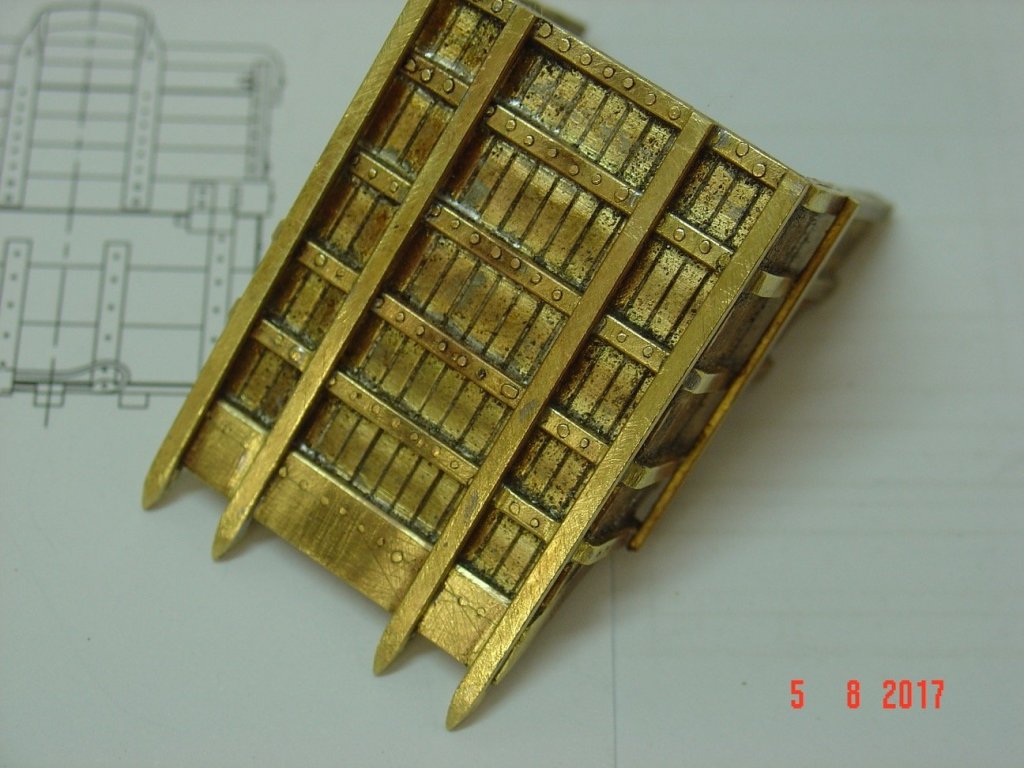
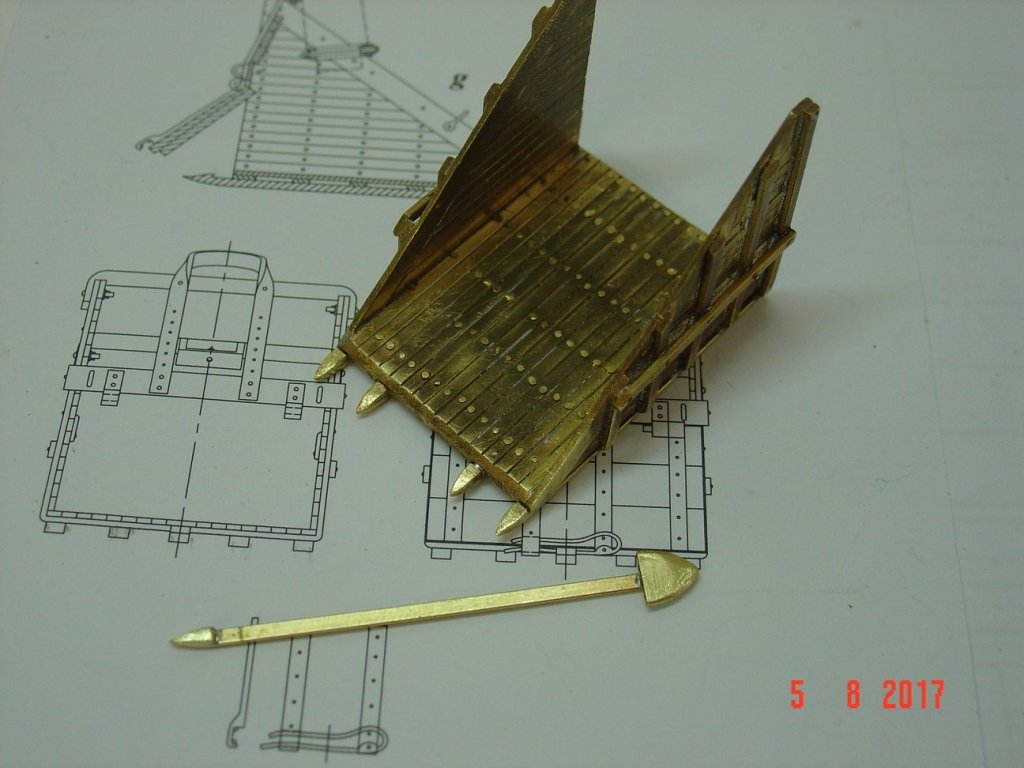
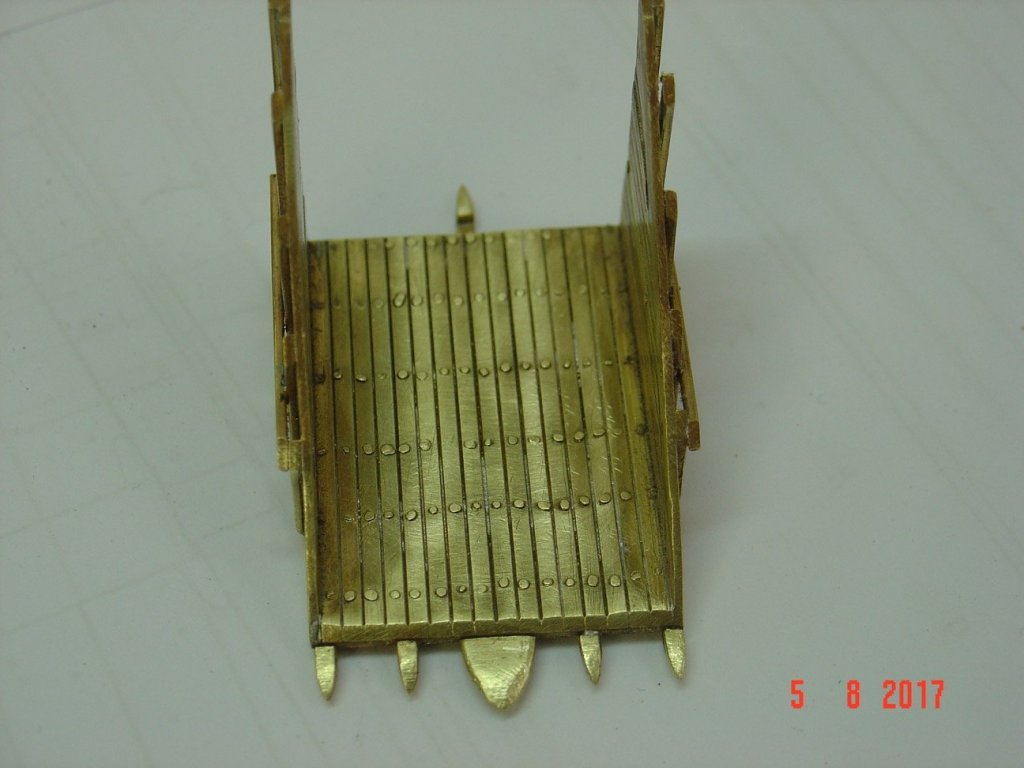
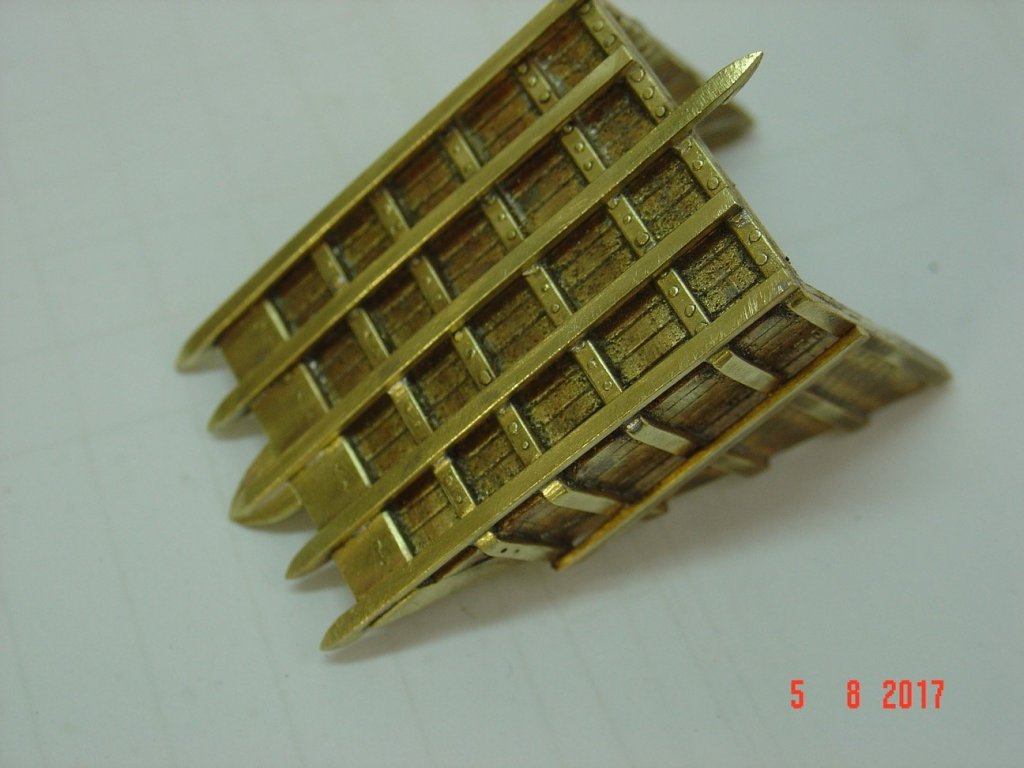
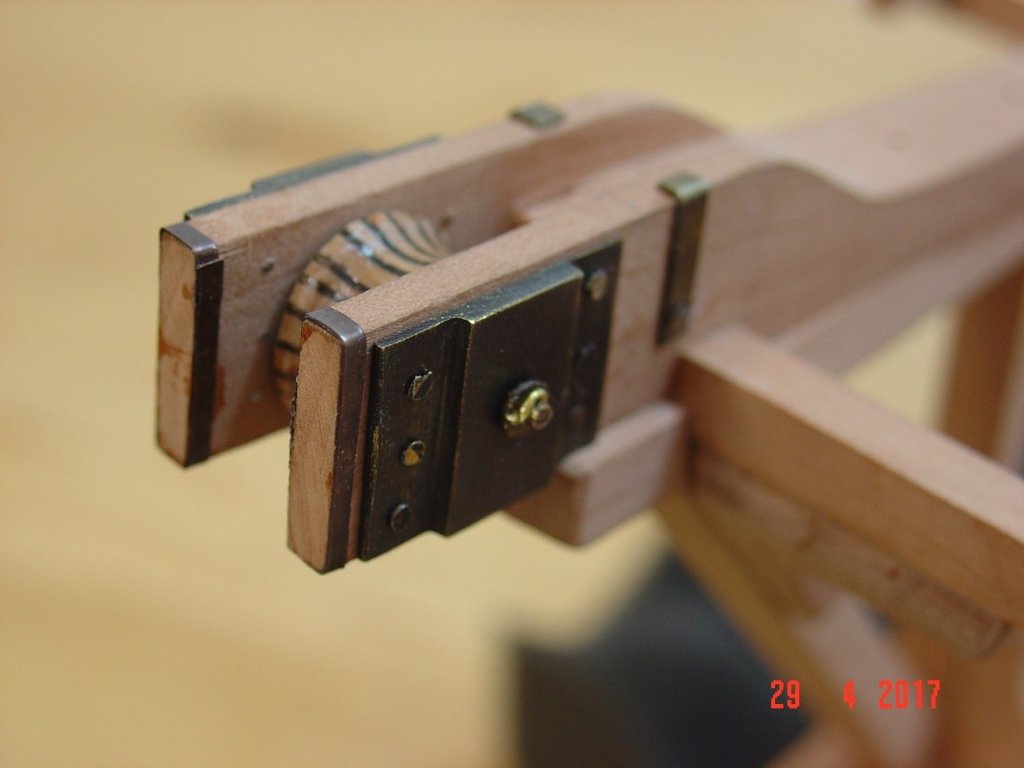
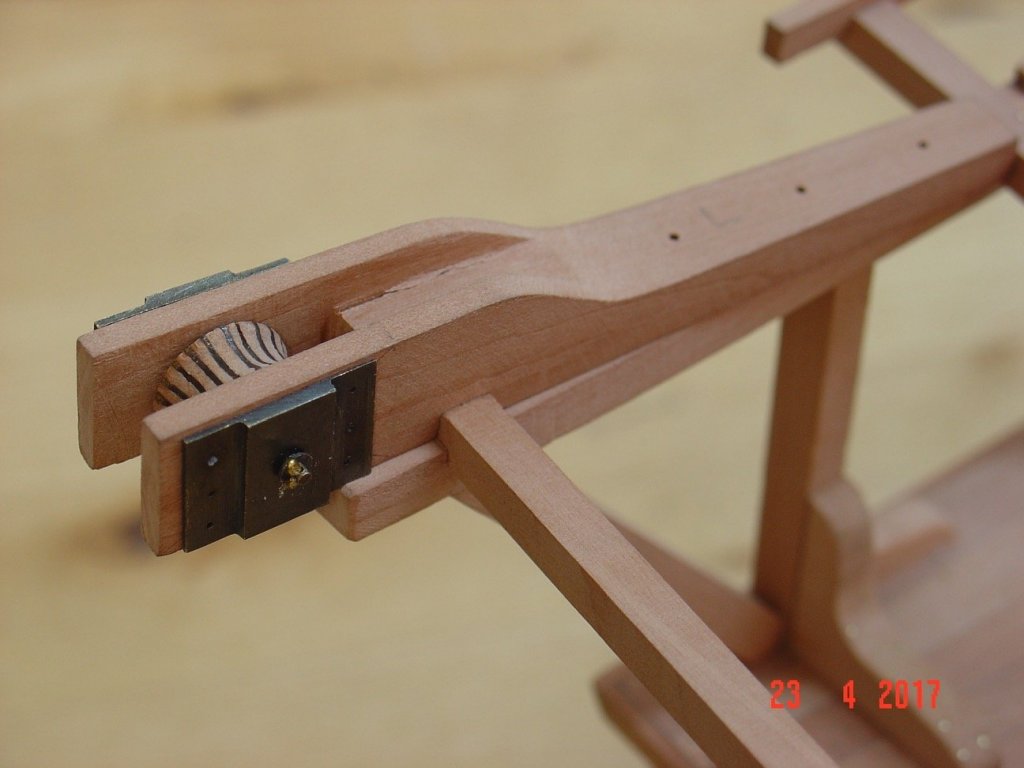
Hello all, Had to wait quite a while for 0.6mm drill bits from China as I broke all I had. Got them last week and one of the "scoops" is now ready and installed on the model. Second one is also at drilling stage. Alexandru


-
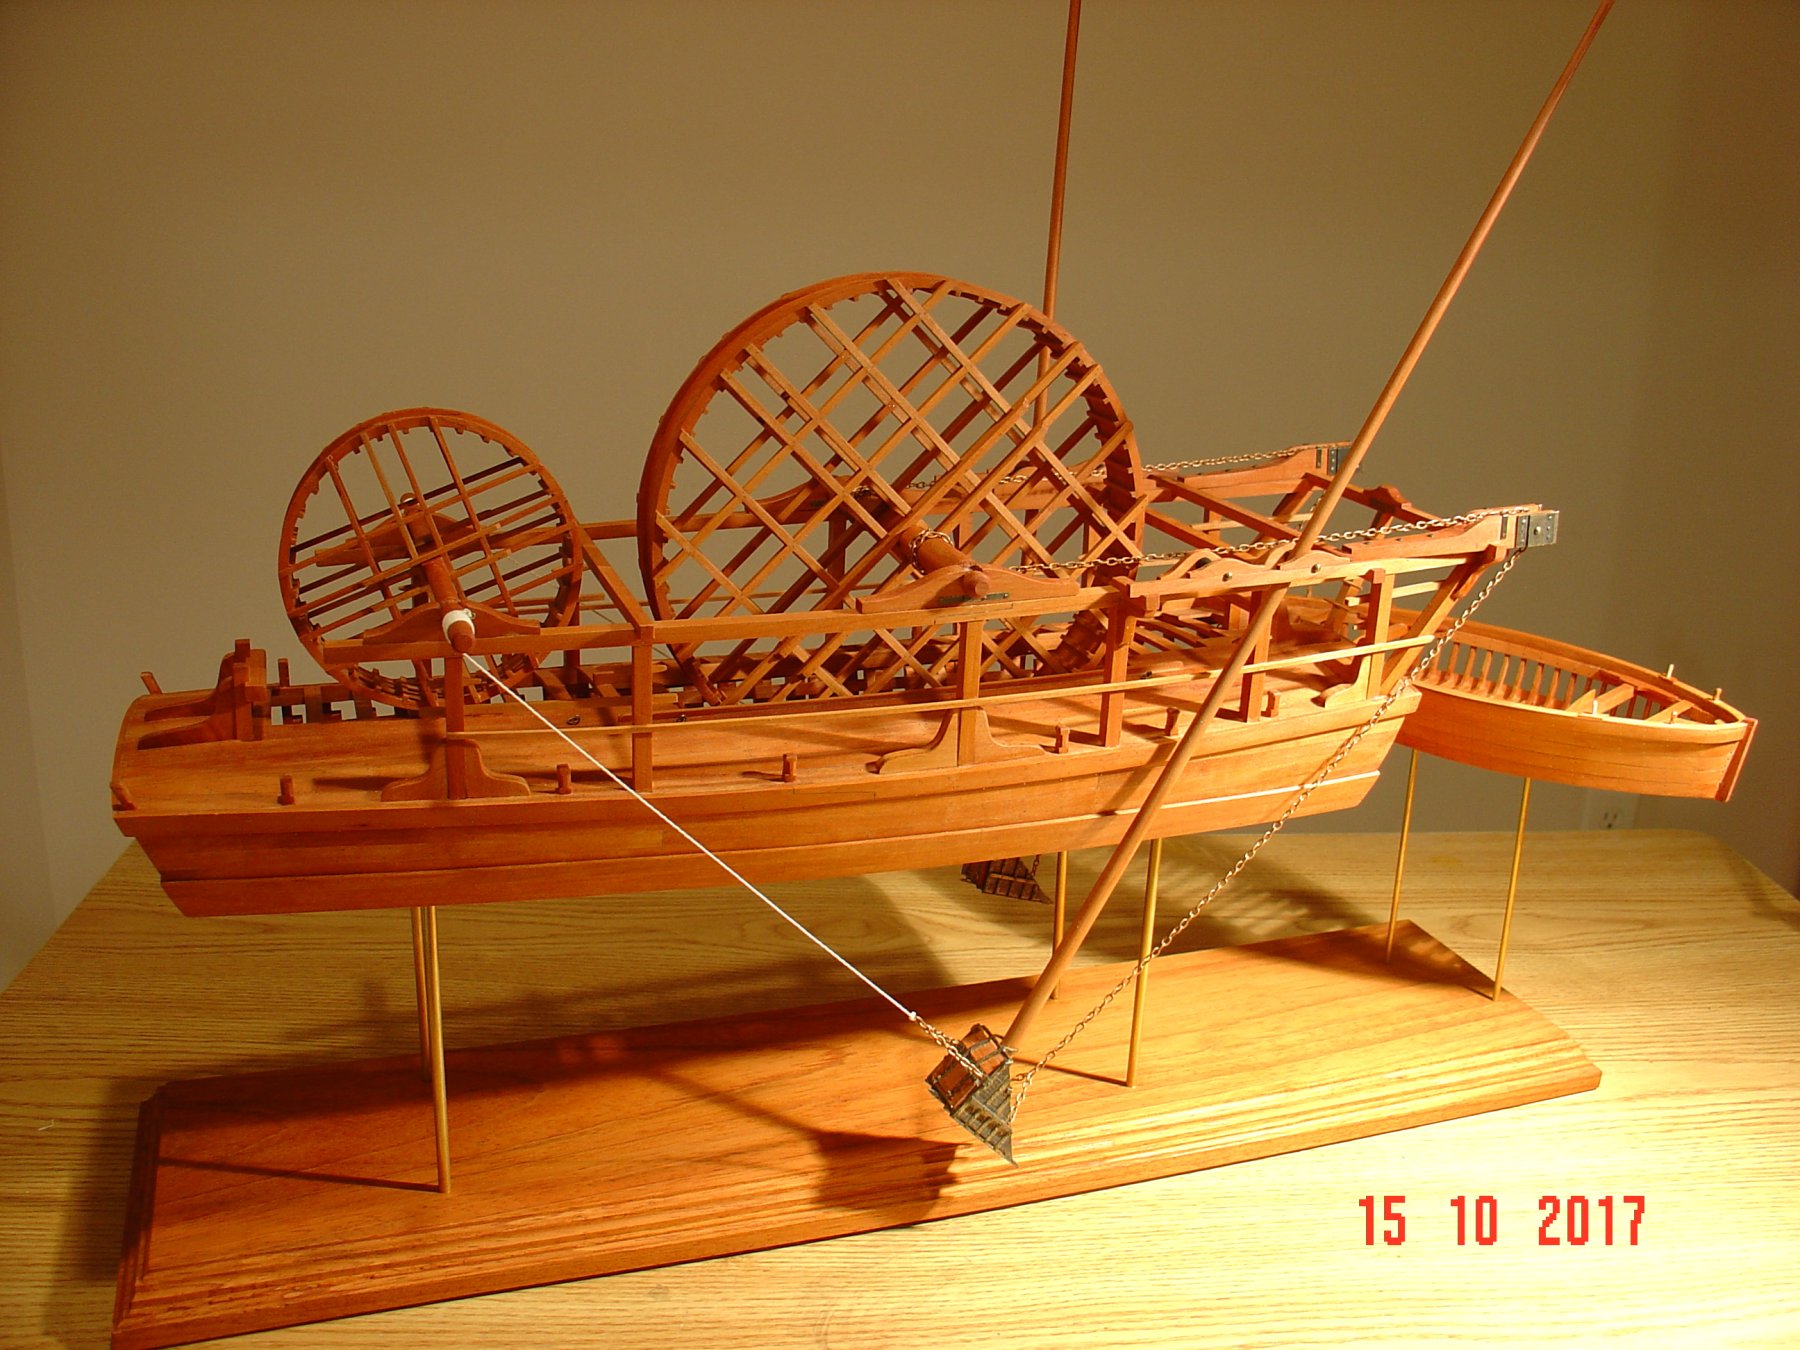
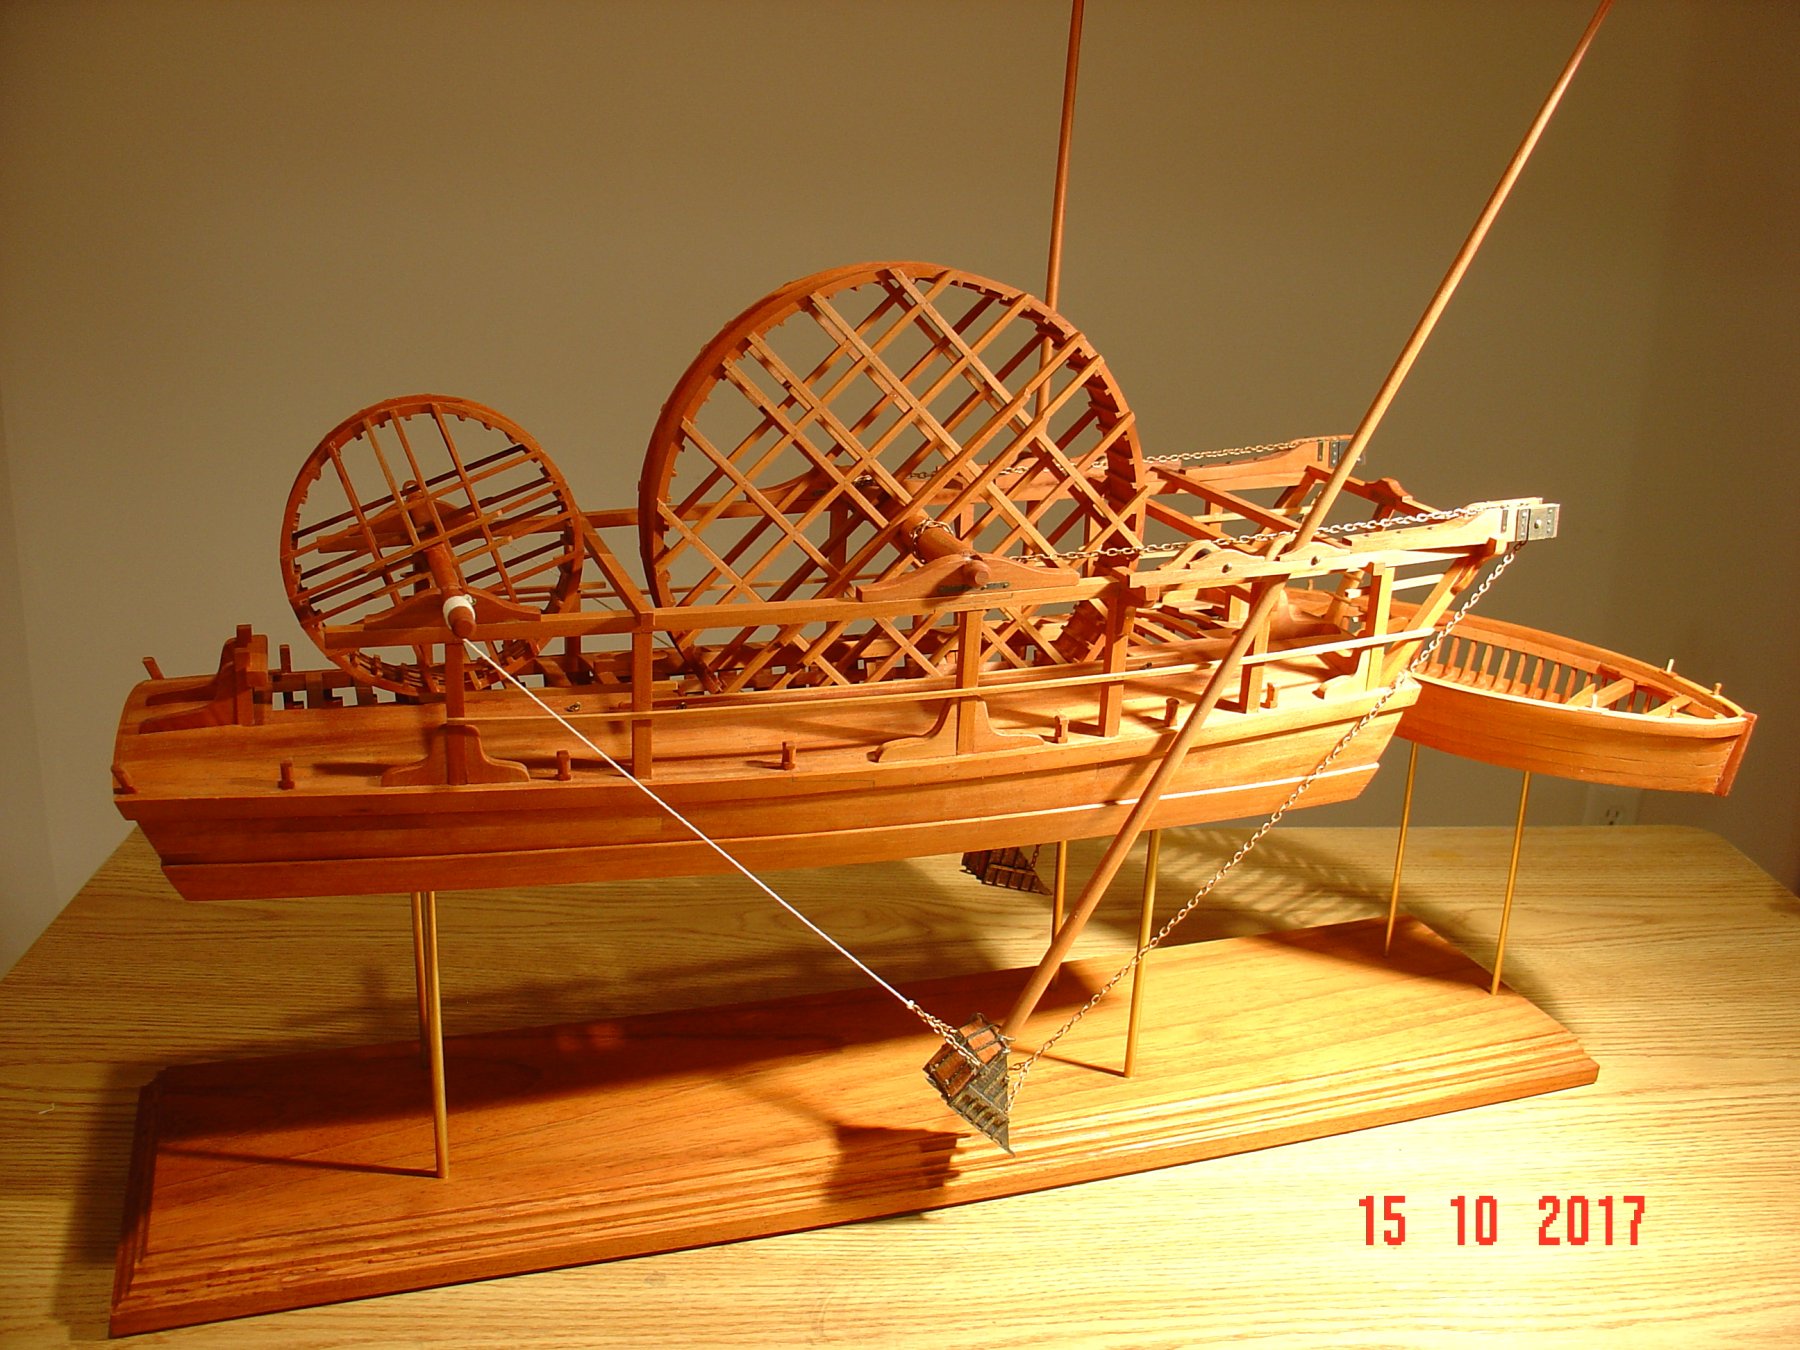
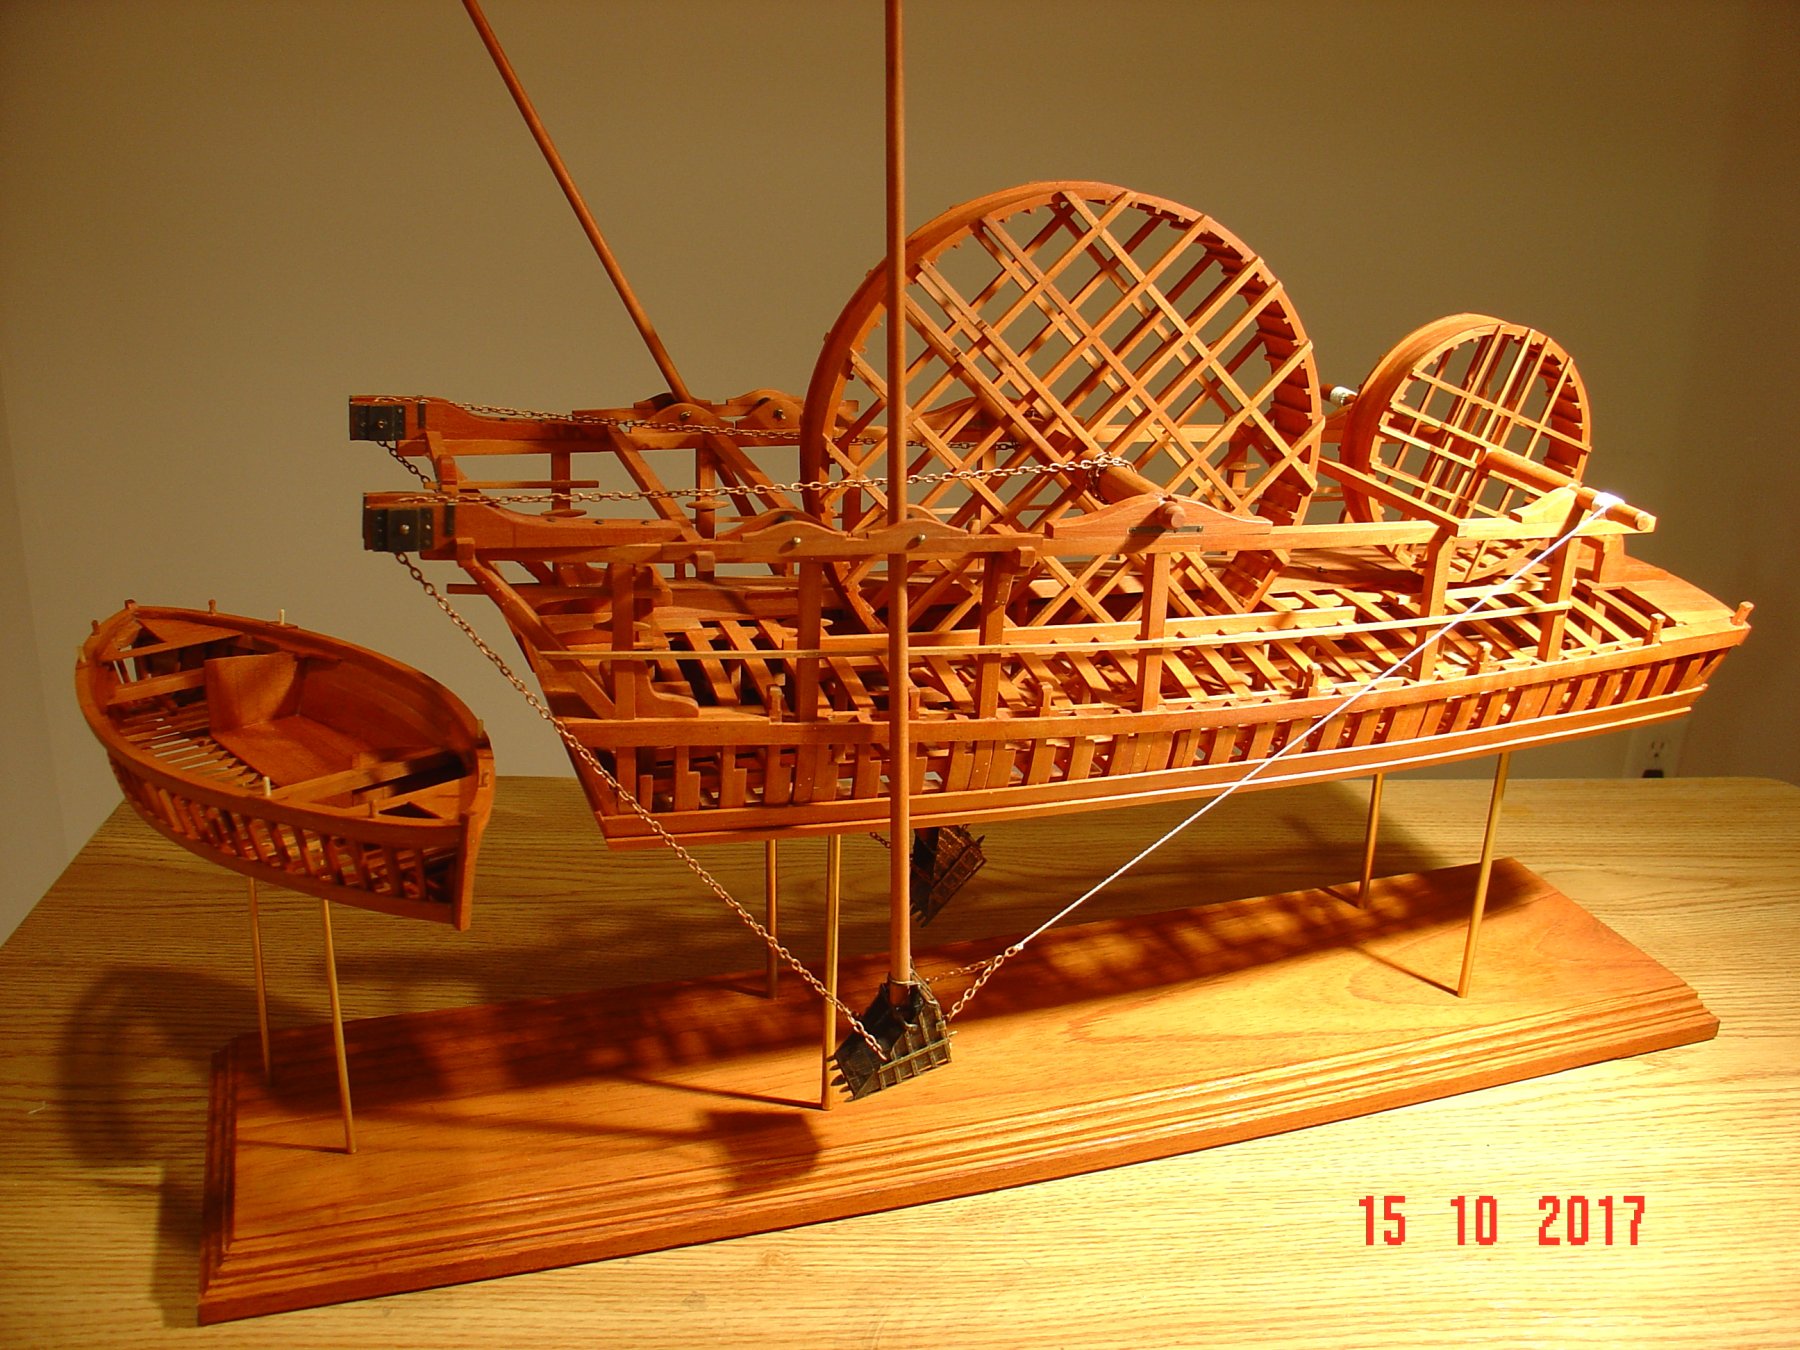
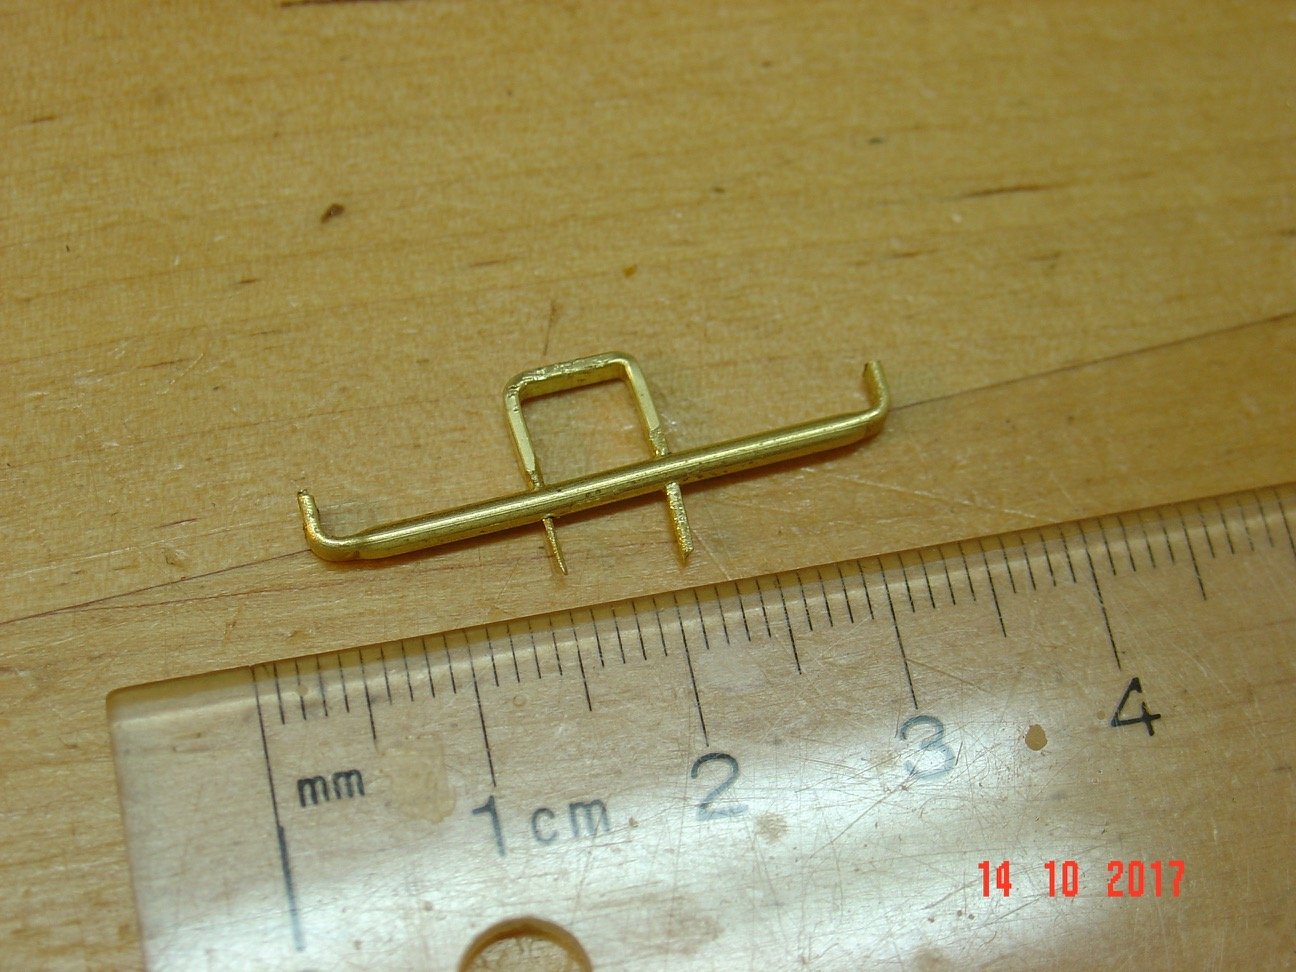
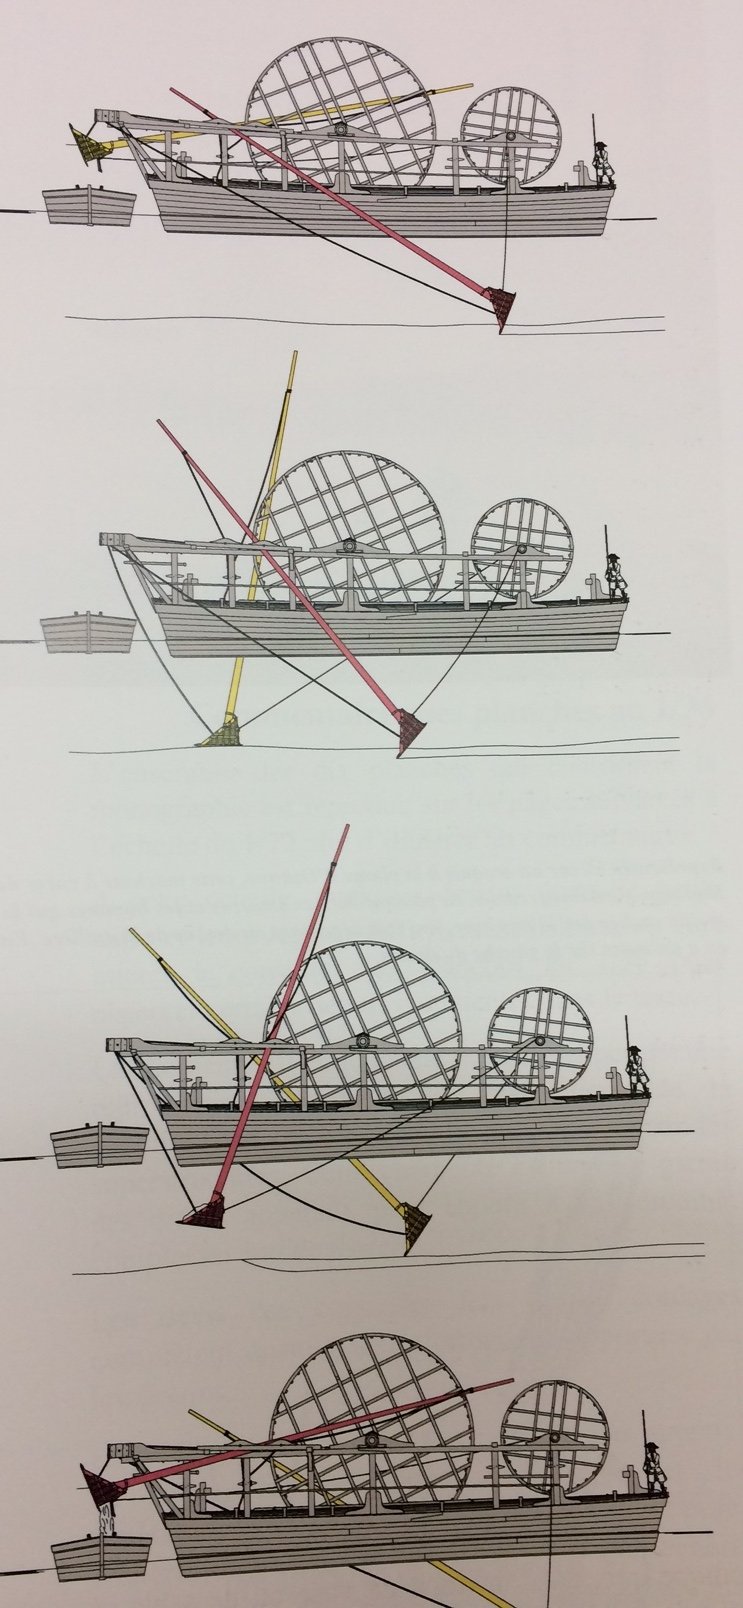
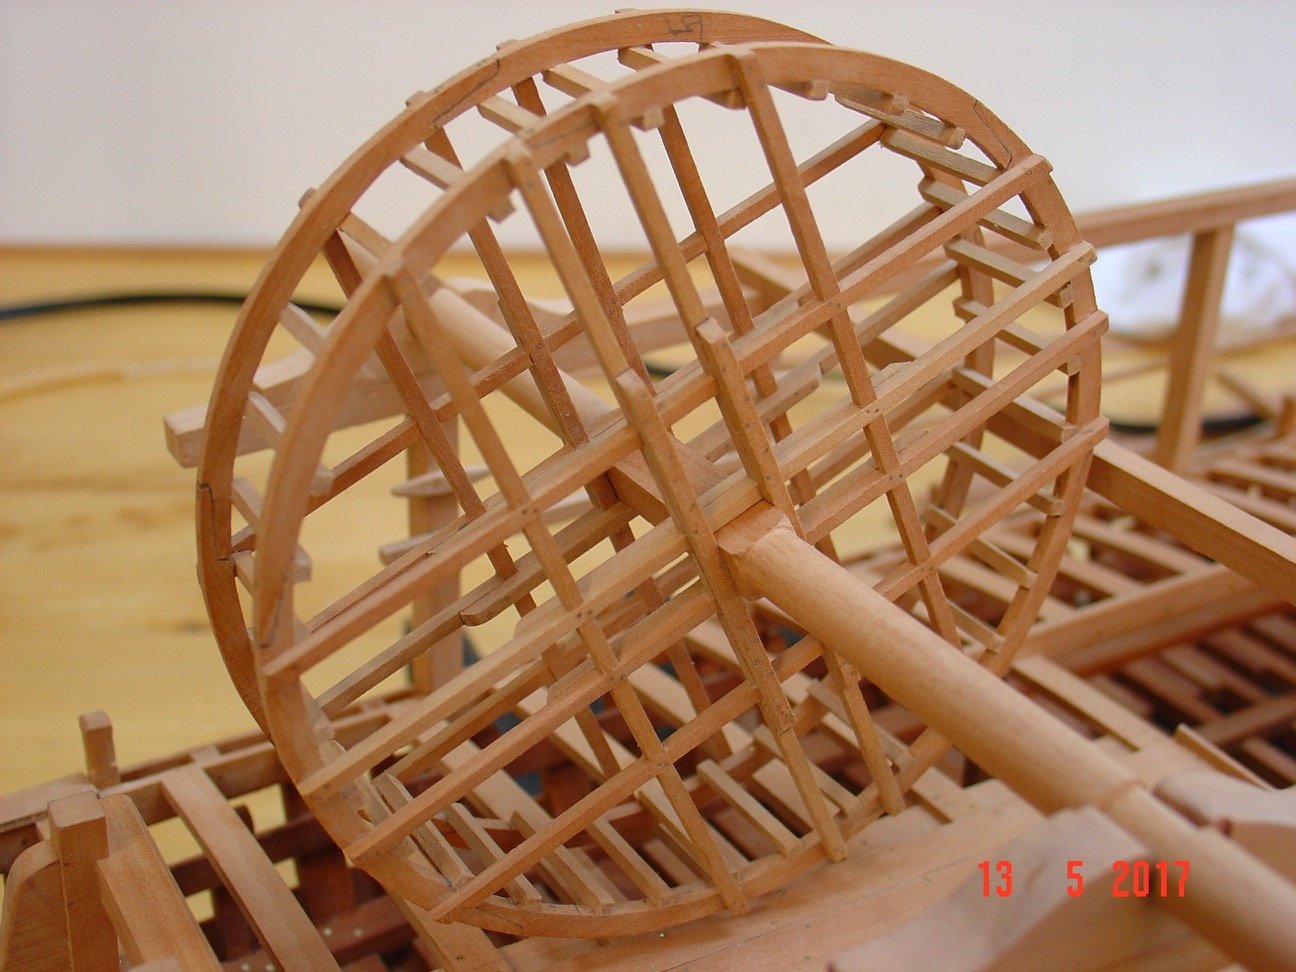
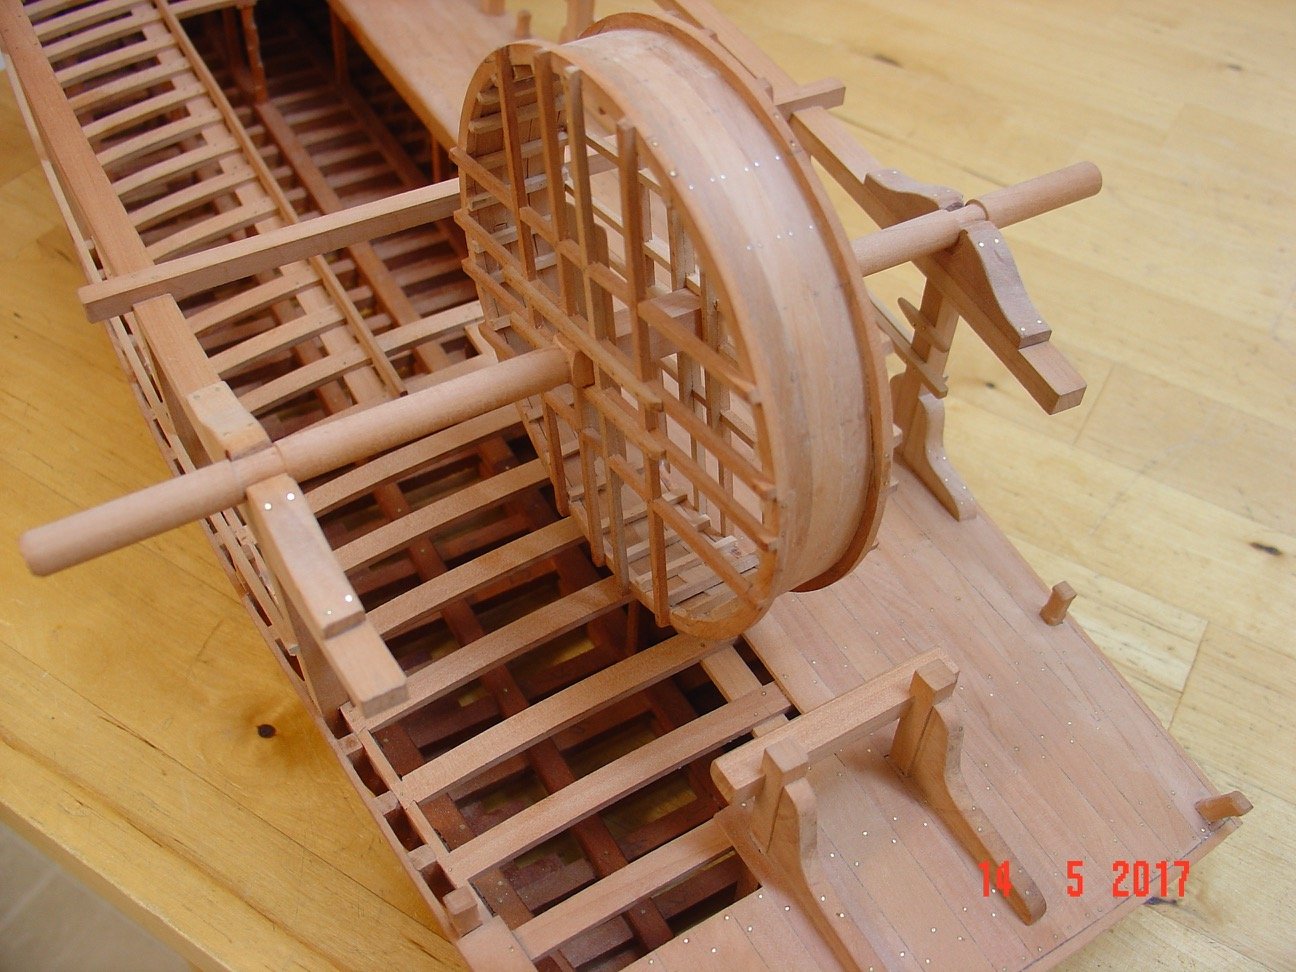
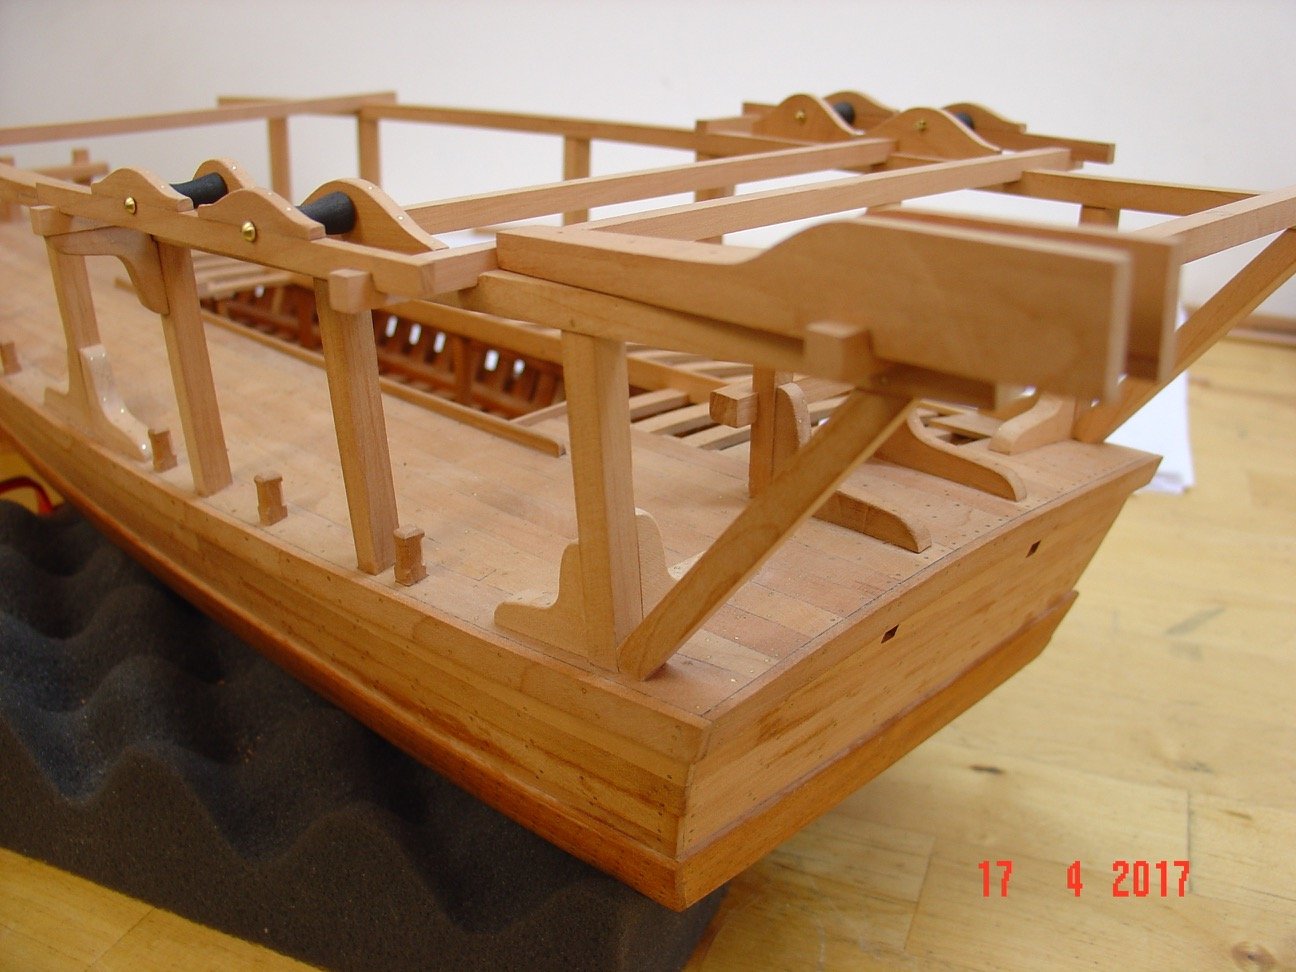
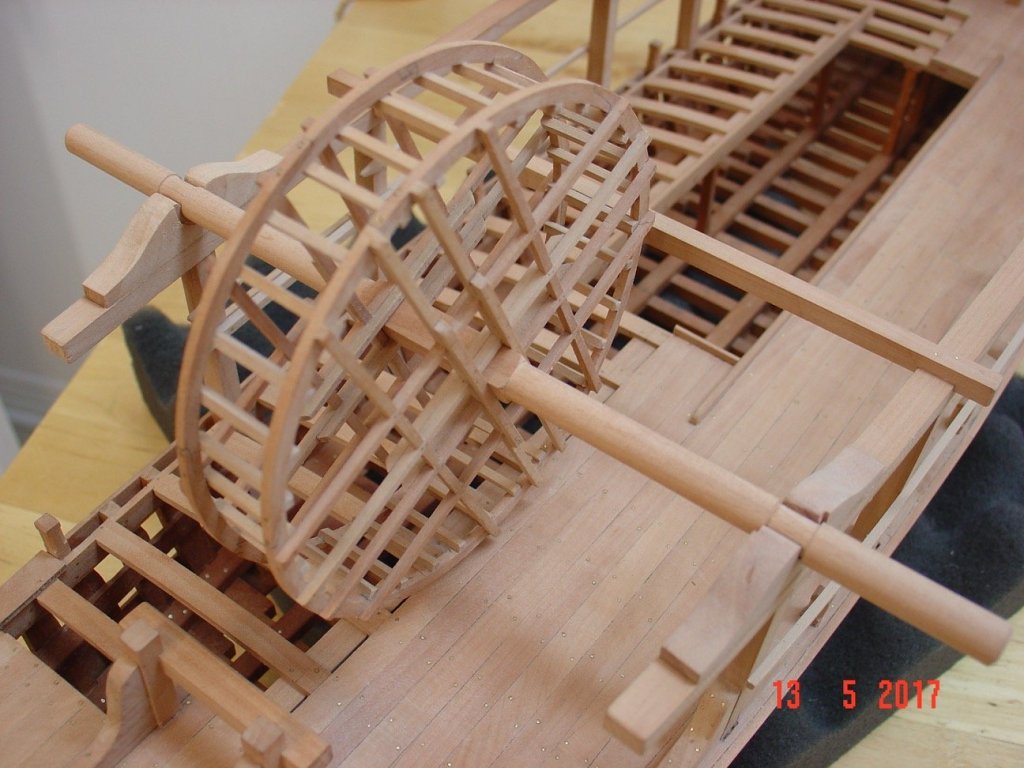
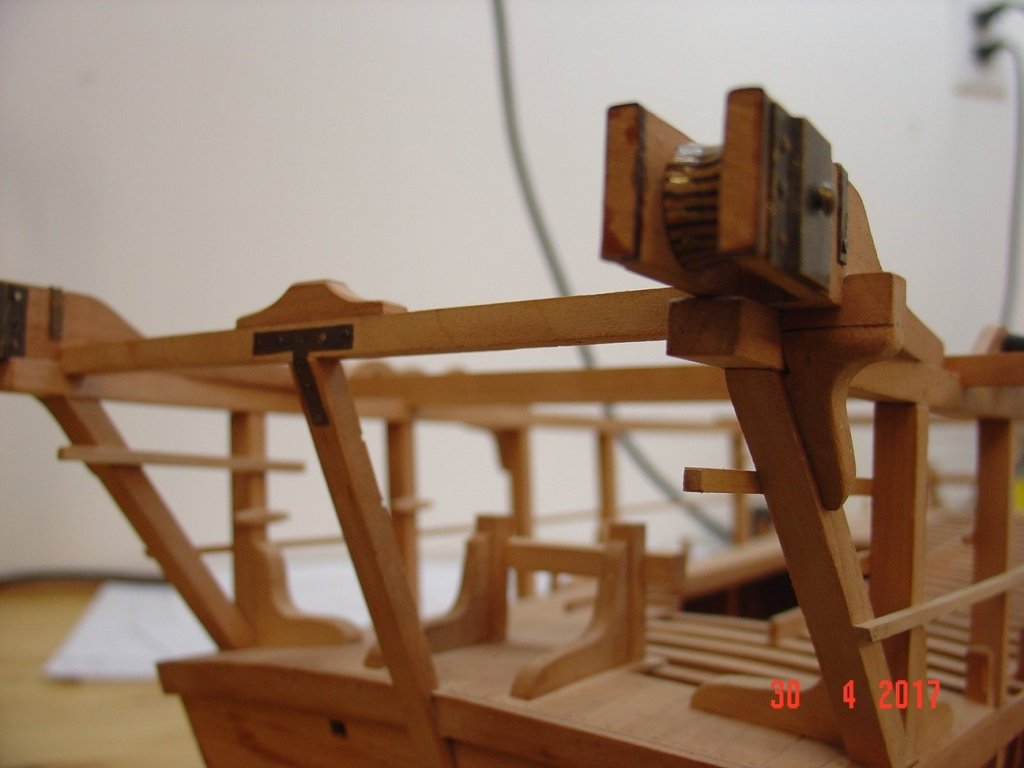
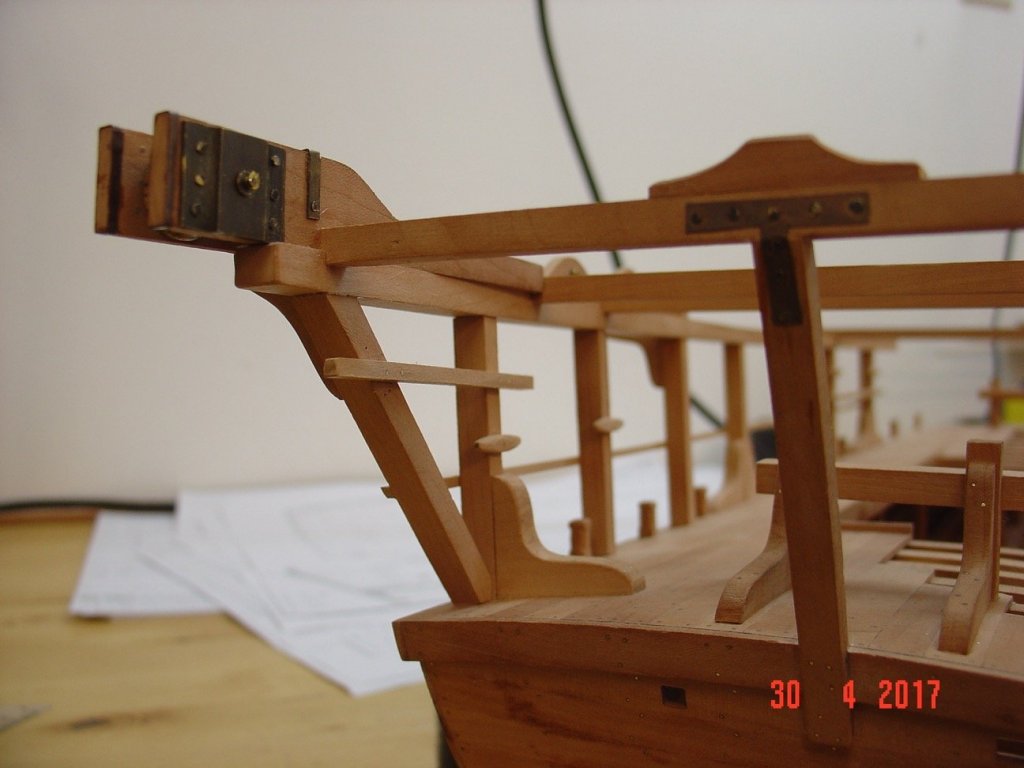
Jan, There will be two scoops - one on each side and they work alternatively: one scoops the bottom of the sea while the other is pulled back in the start position. The big wheel is used to pull the scoops towards the back of the ship via a chain and this is the move that actually does the work - thus the need for more power produced by the bigger wheel with a bigger diameter. The small wheel is used to pull the scoops back in initial position via a rope (less strain on it). The wheels are turned by man power in one direction then in opposite direction. The full scoop is raised above the water and a small boat goes under it and its content is discharged through a lid on the back side of the scoop which is released by a piece of rope acting on a lock mechanism. Once empty the lid is closed and locked in position and the boat moves so the now empty scoop can start its reverse move by turning both wheels in reverse direction. It probably was a time consuming process but it also was the most efficient way to keep the ports clean for more than 250 years. There were 4 anchors dropped from each corner at some distance and these allowed to boat to advance after each pair of scoops - this produced two long cleaned trenches on the bottom. Then the boat was moved sideways by a couple of feeds (the width of the scoop) and to the process started again to do another pair of trenches next to the previous ones. Probably the best way to understand the process is the picture from G. Delacroix's monographs below (hope he won't mind). Alexandru

-
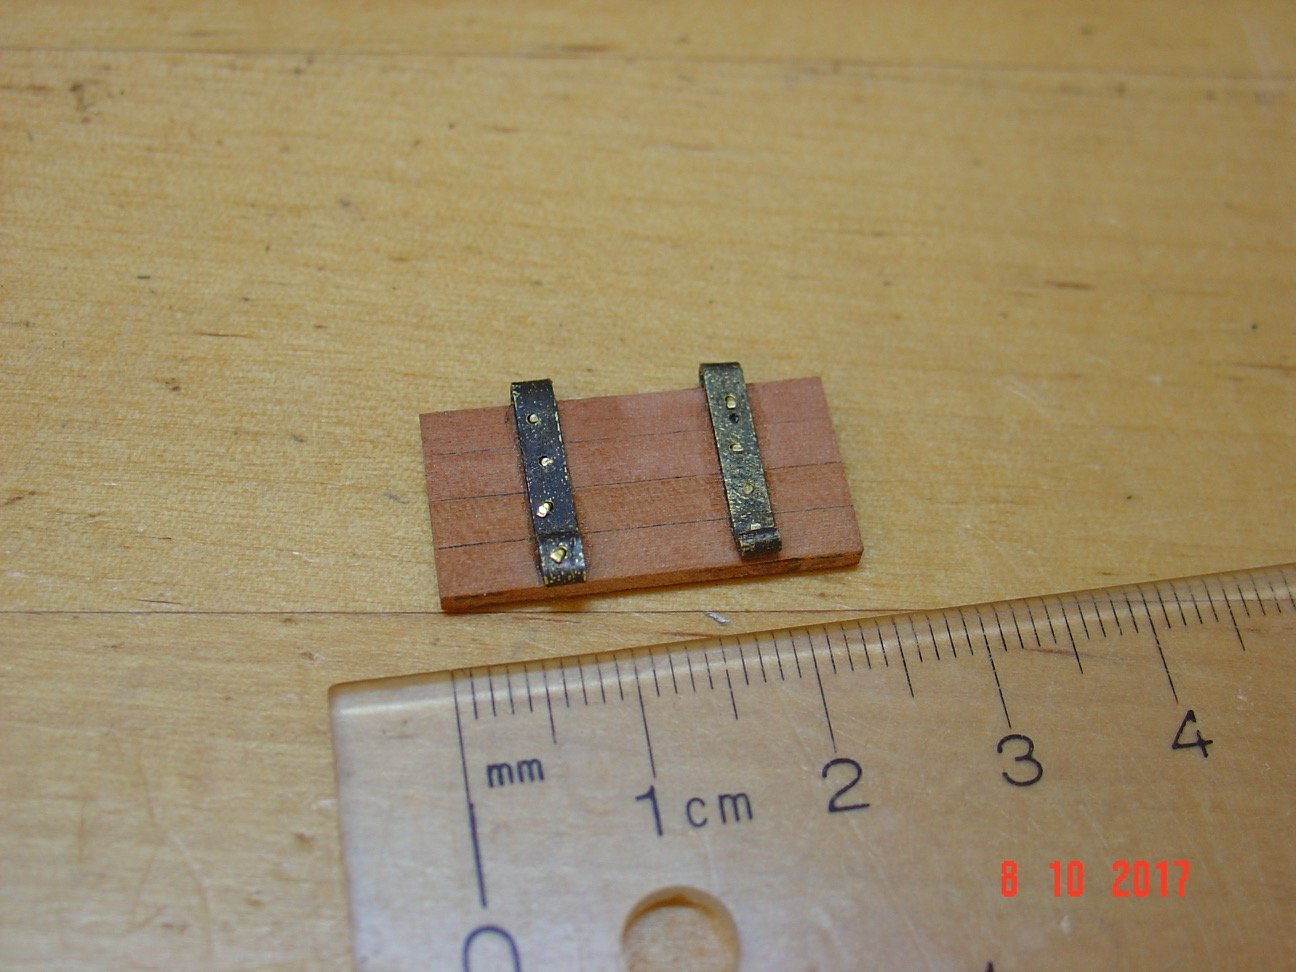
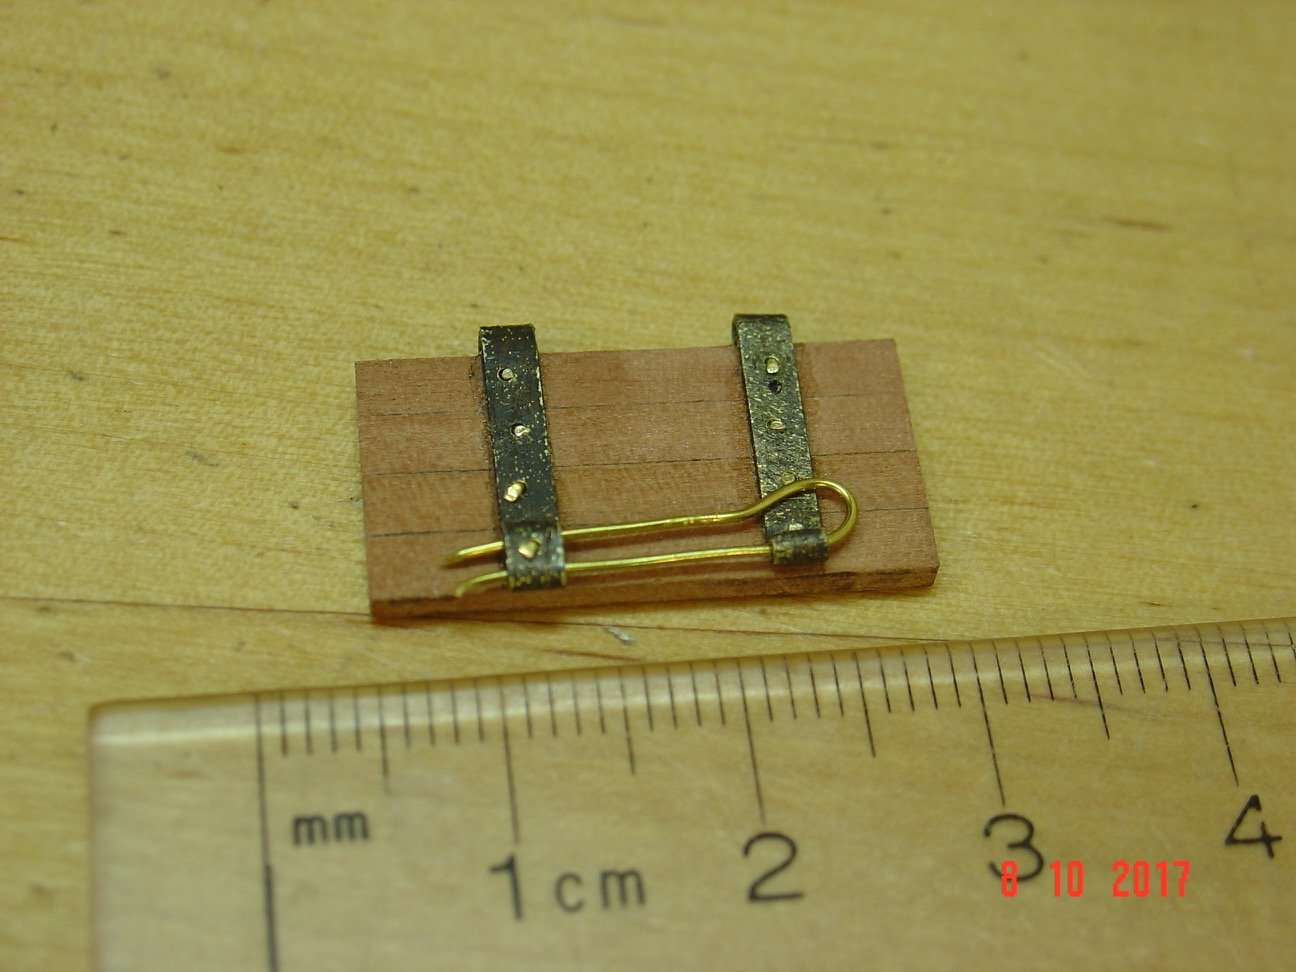
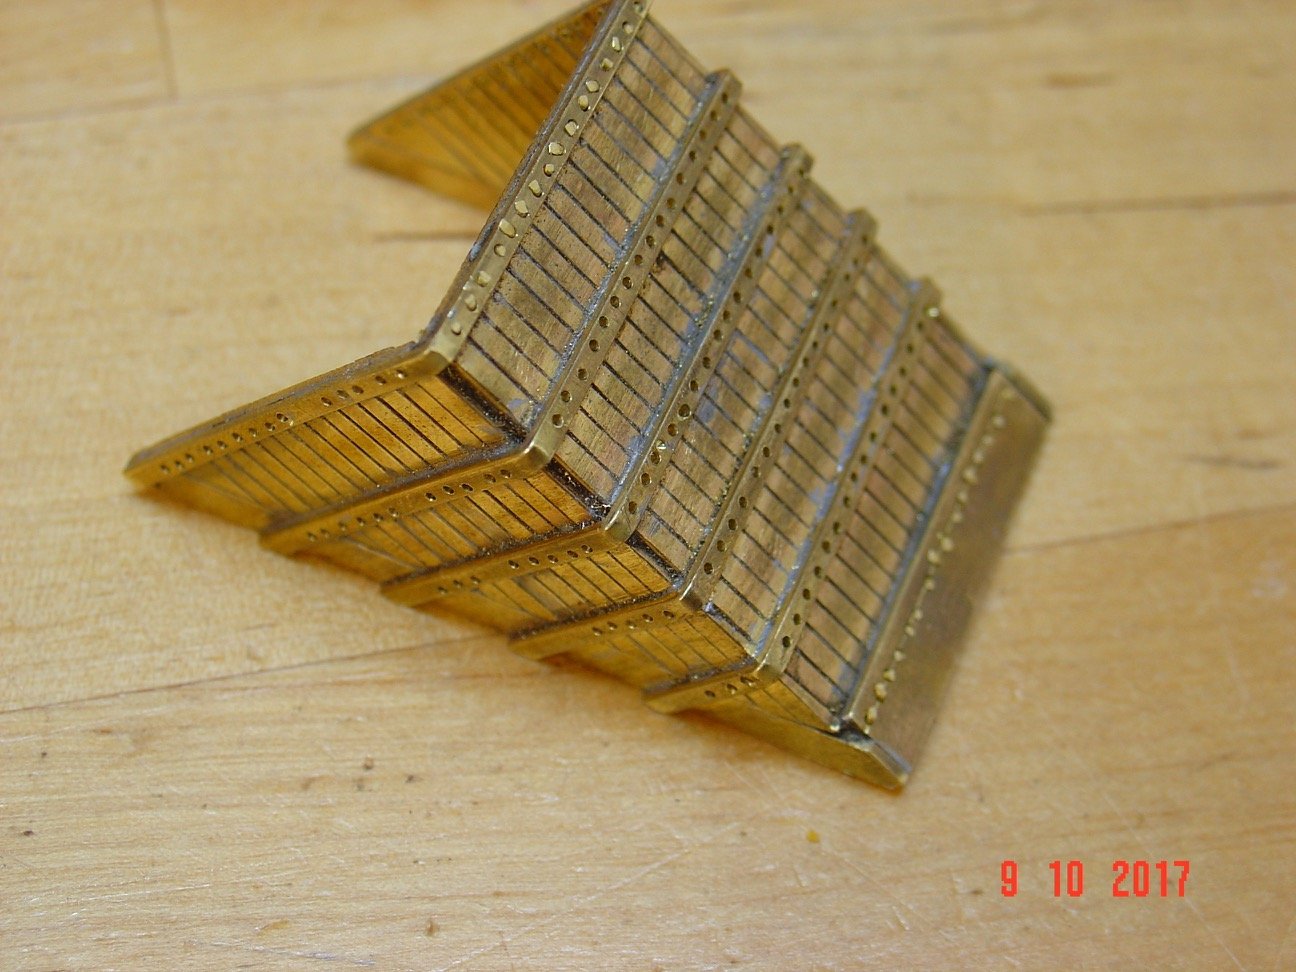
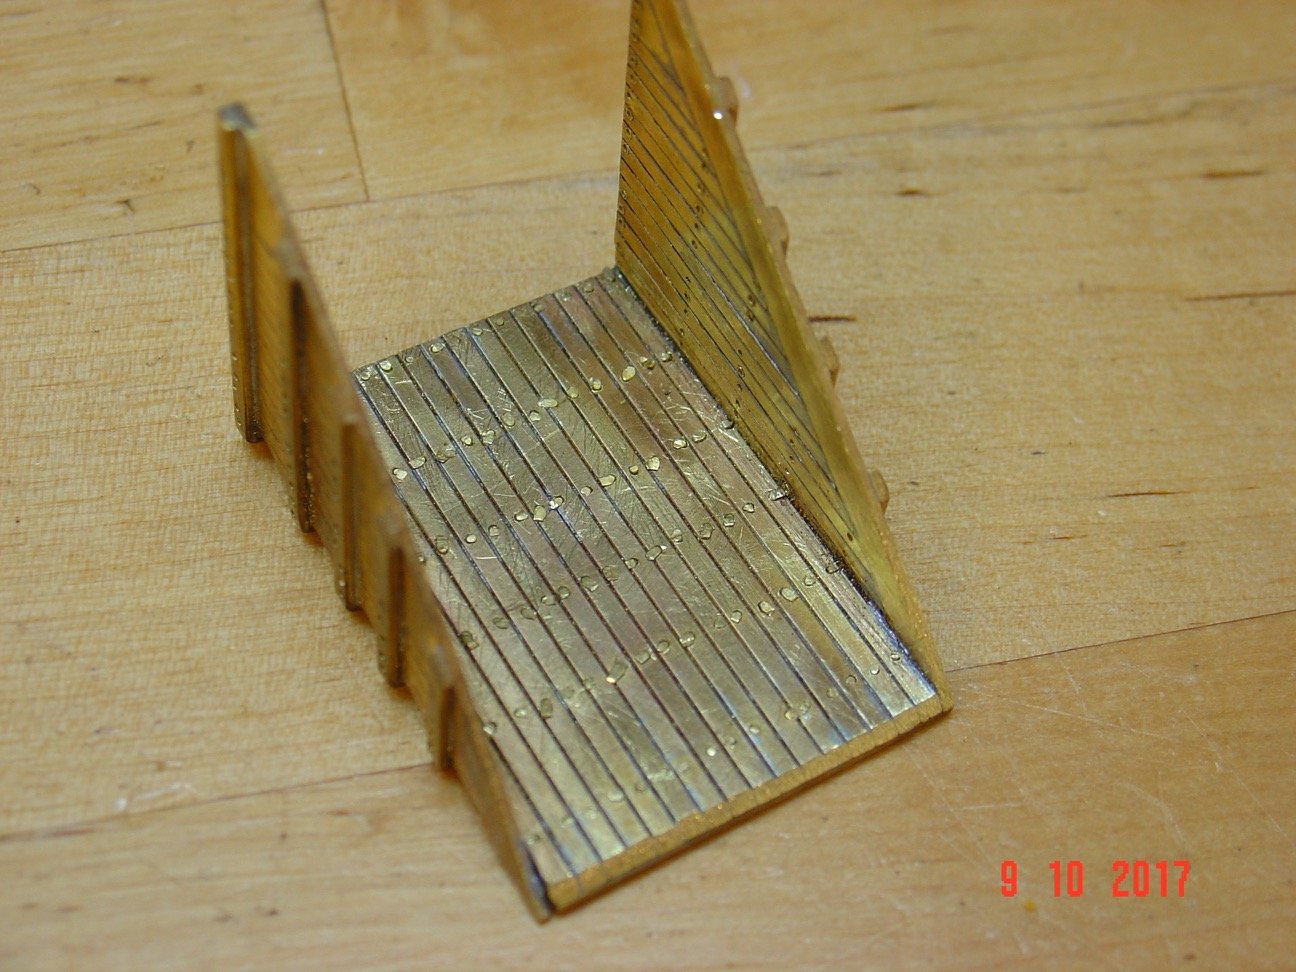
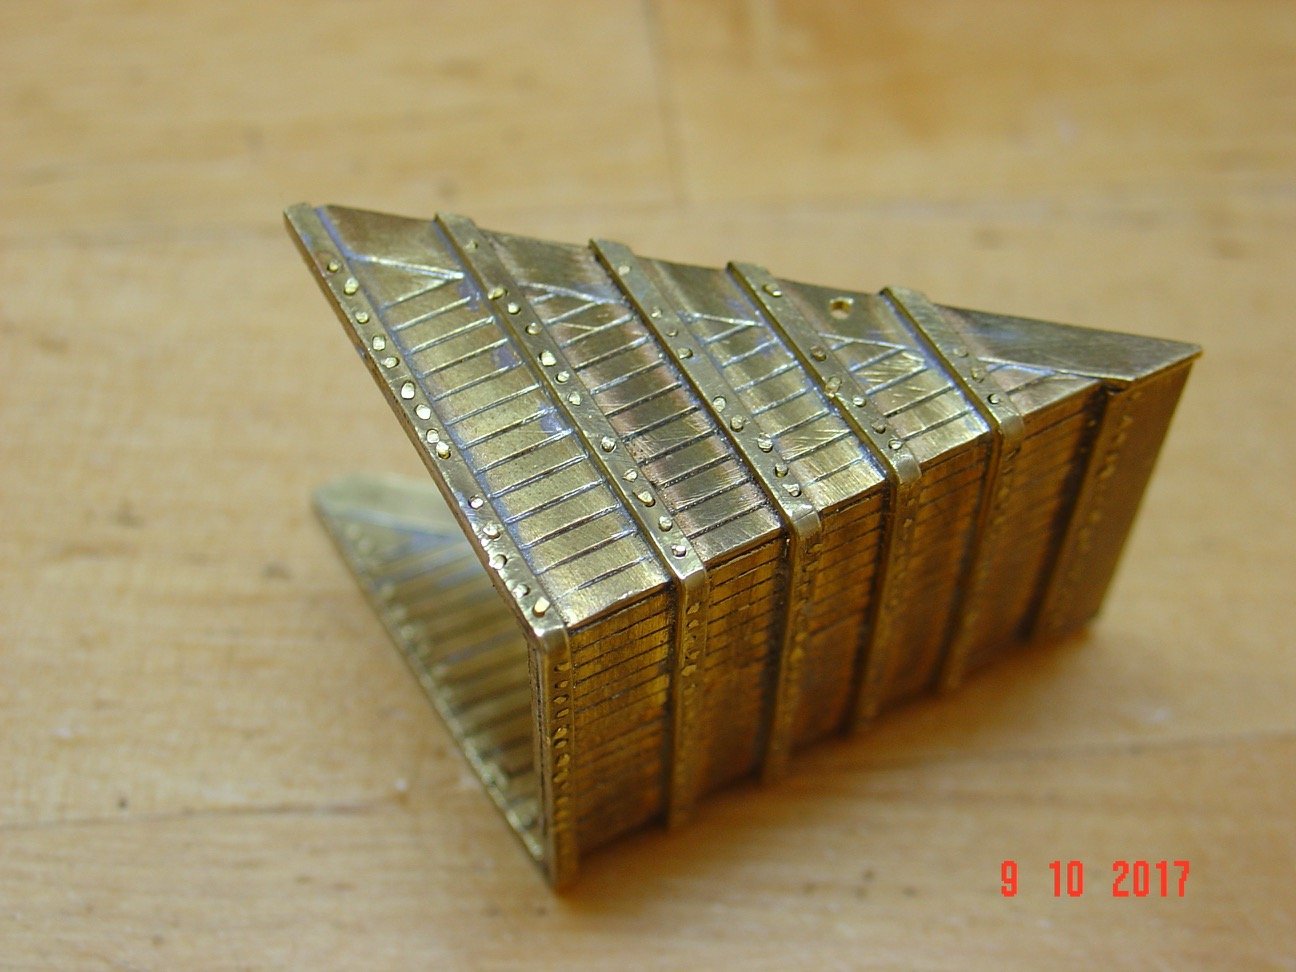
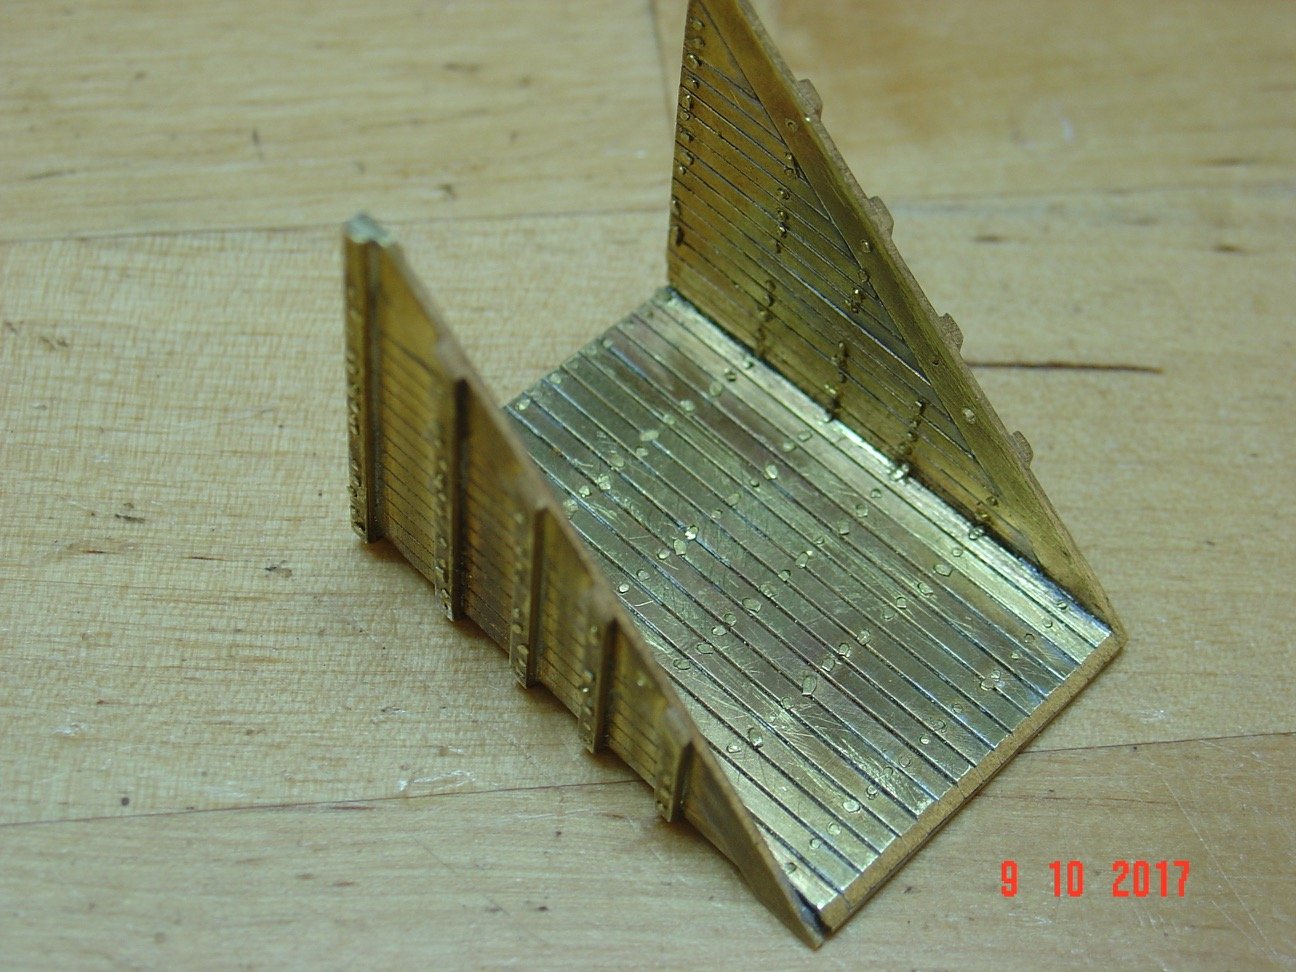
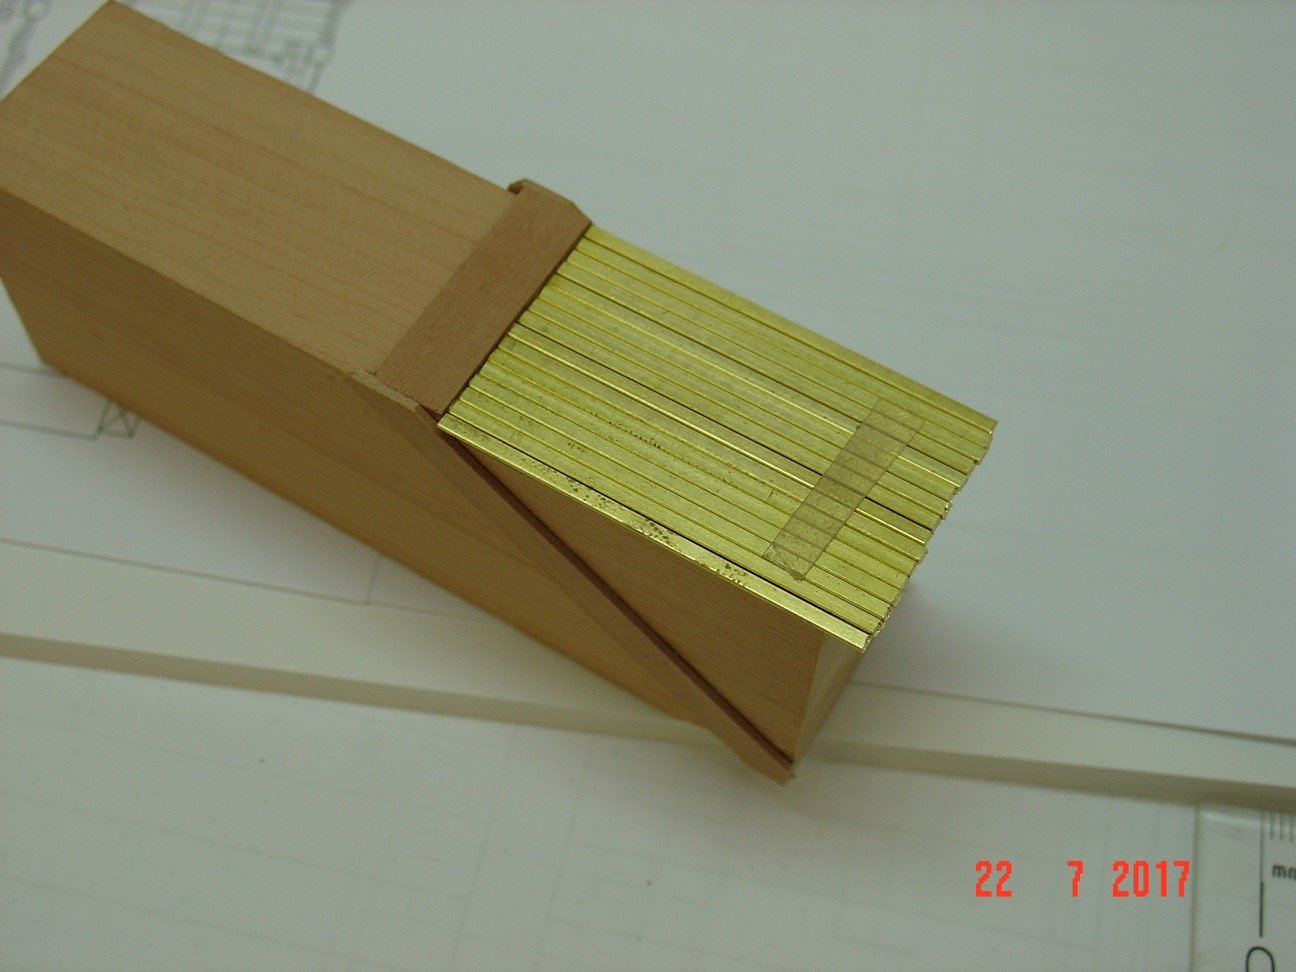
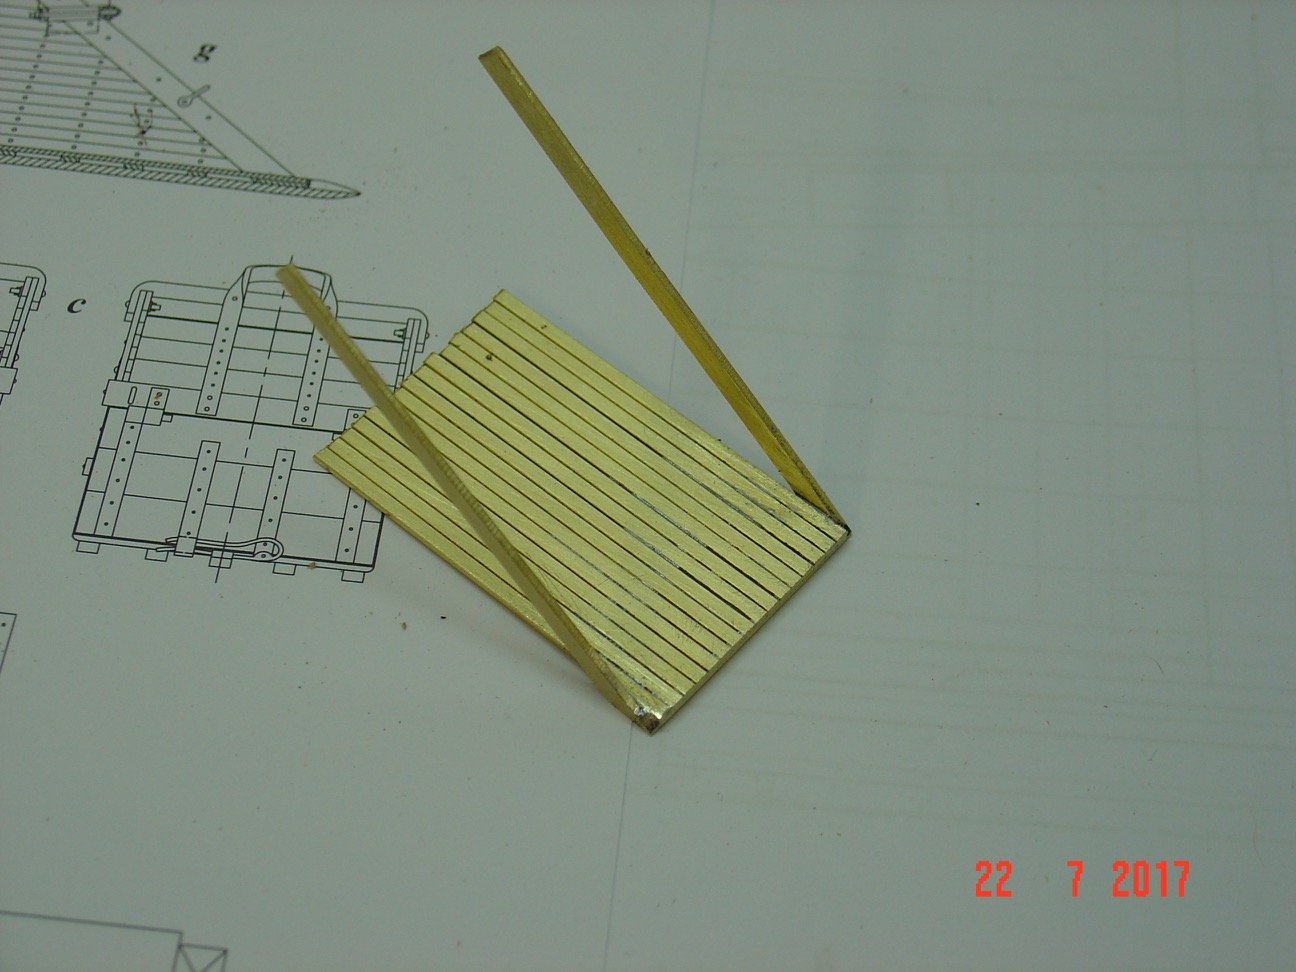
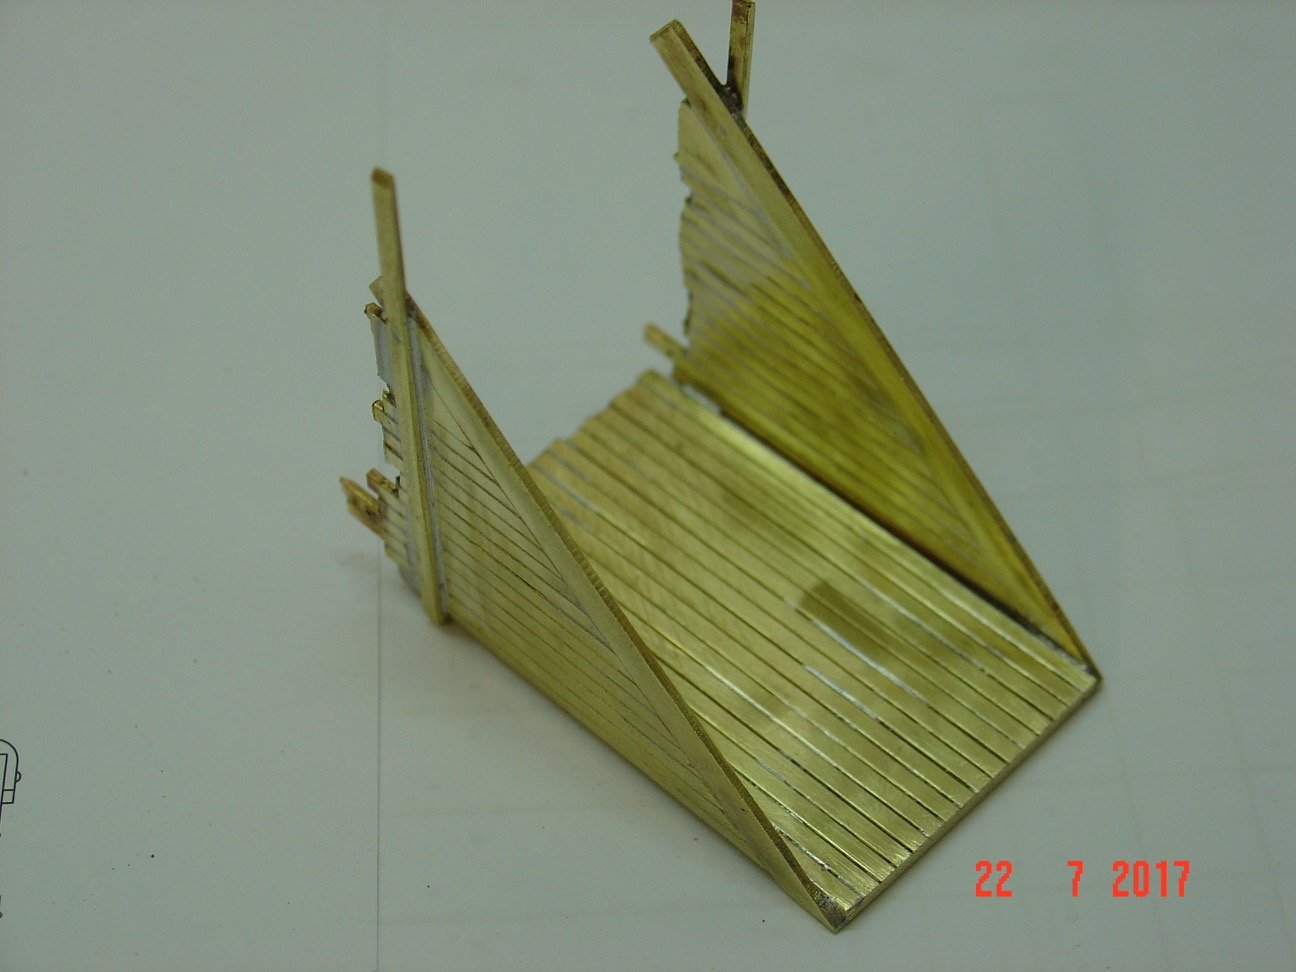
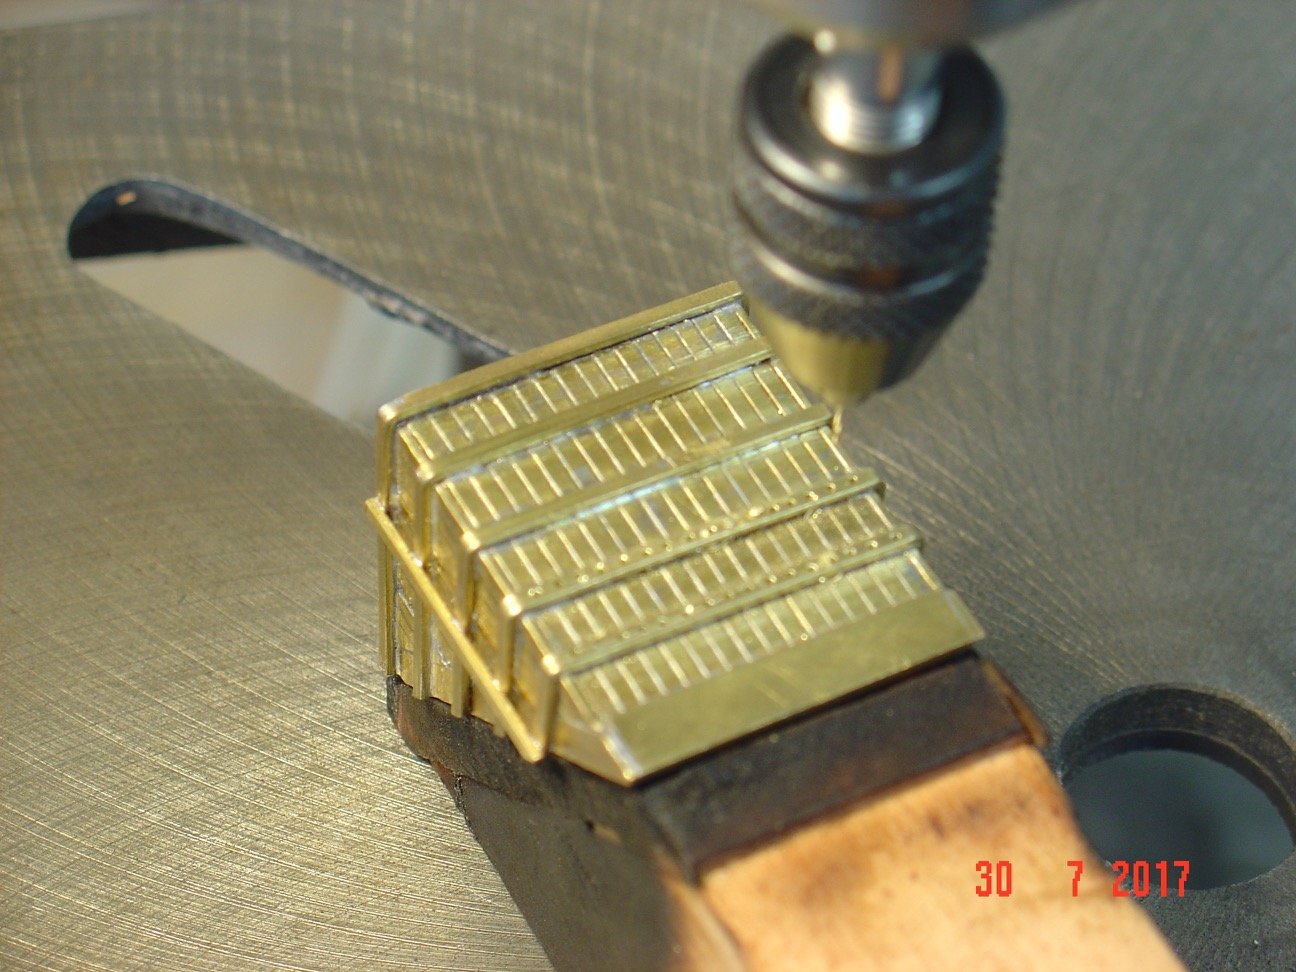
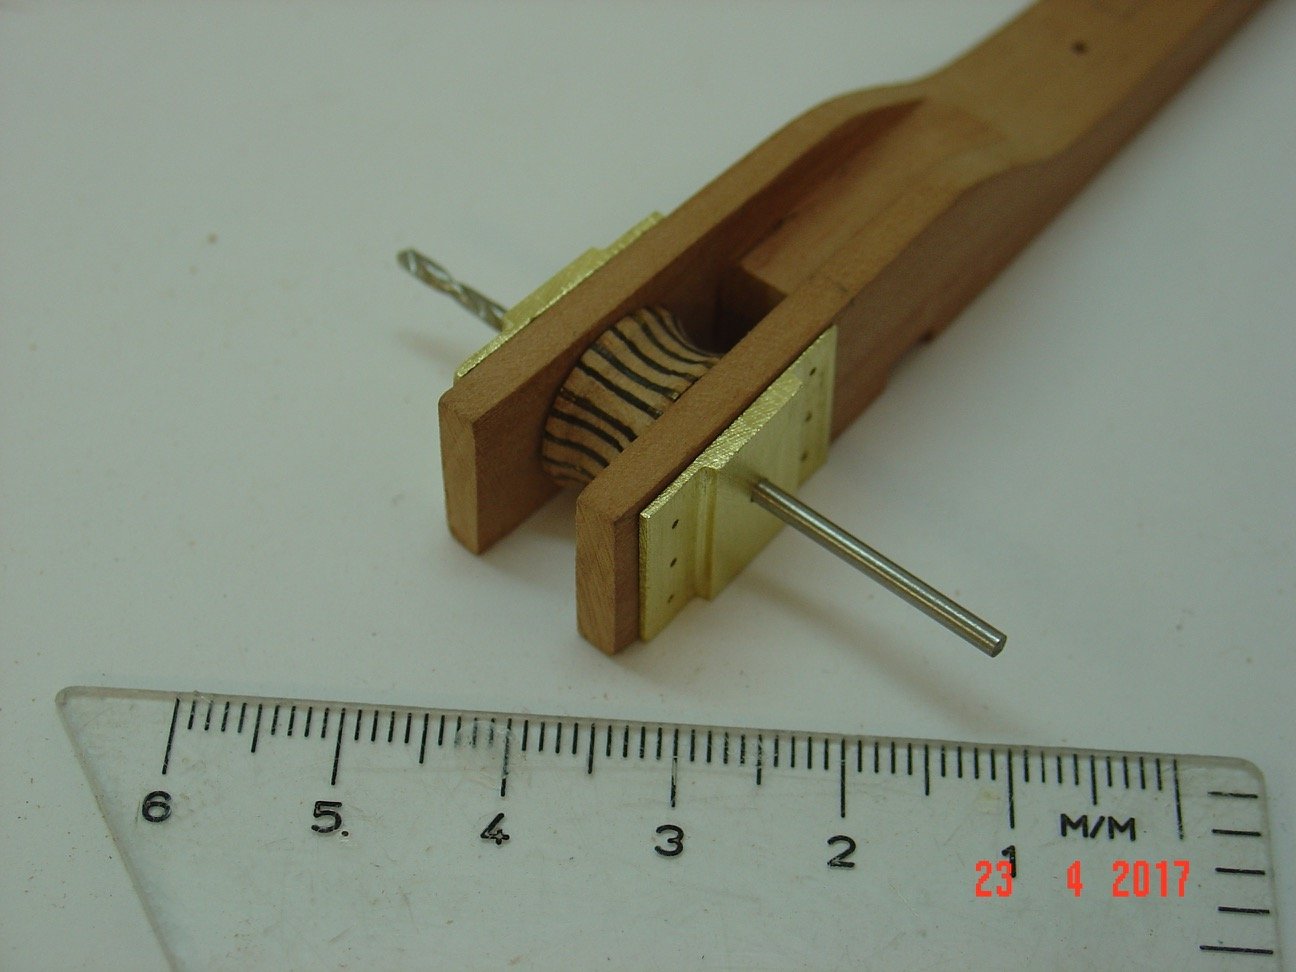
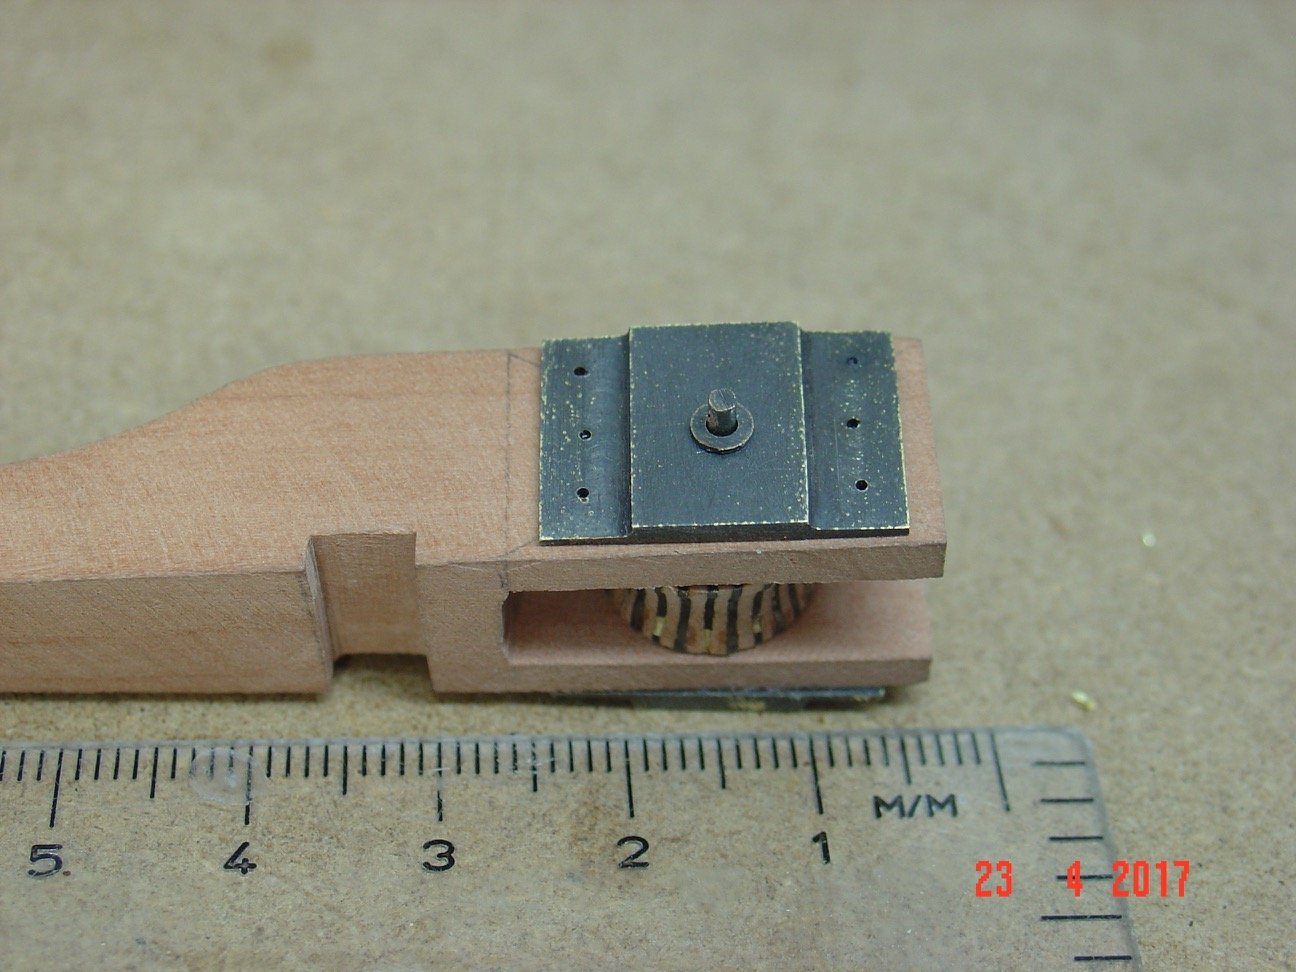
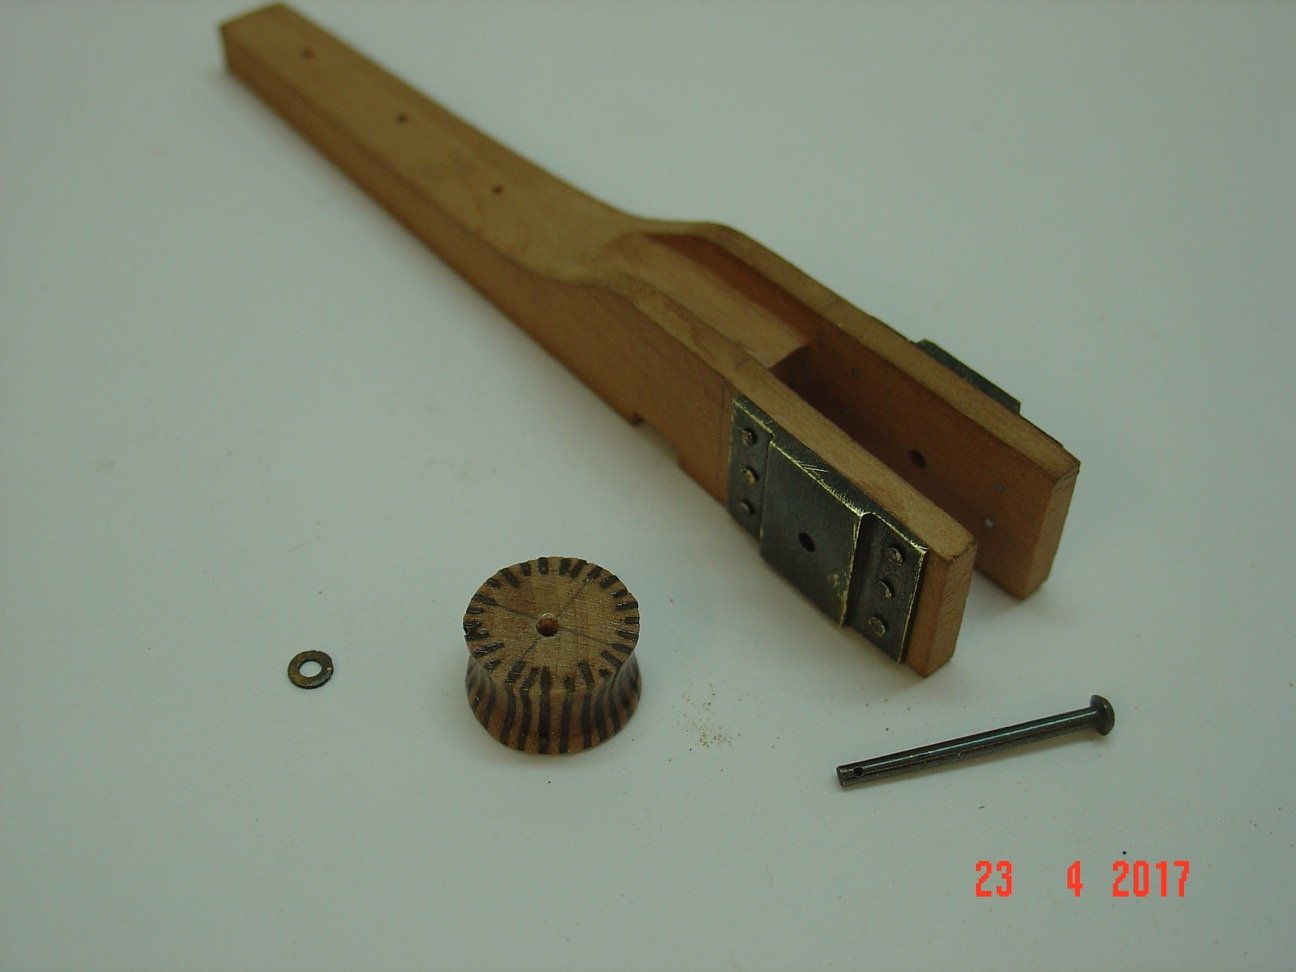
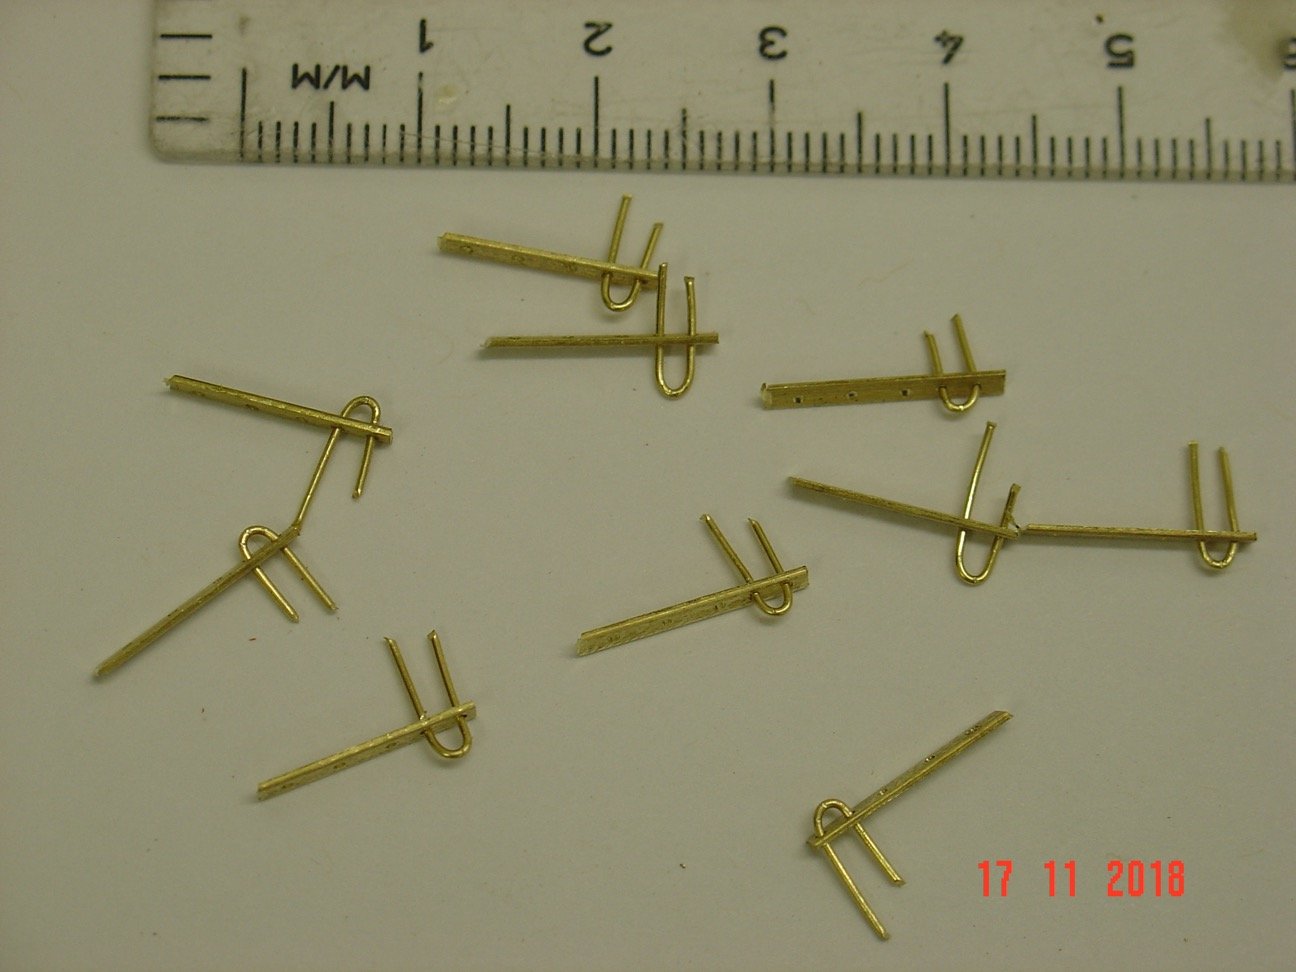
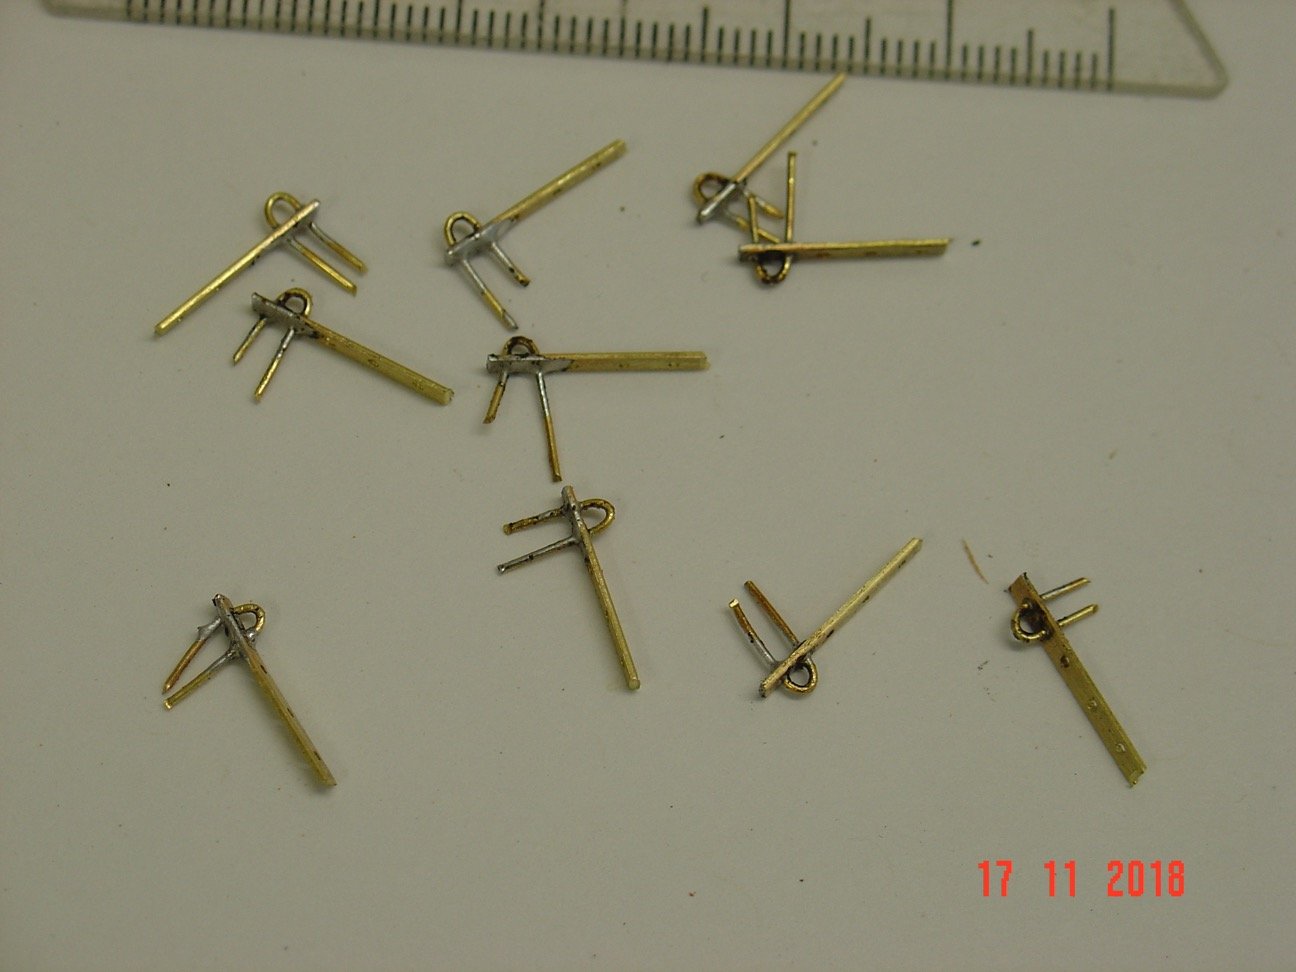
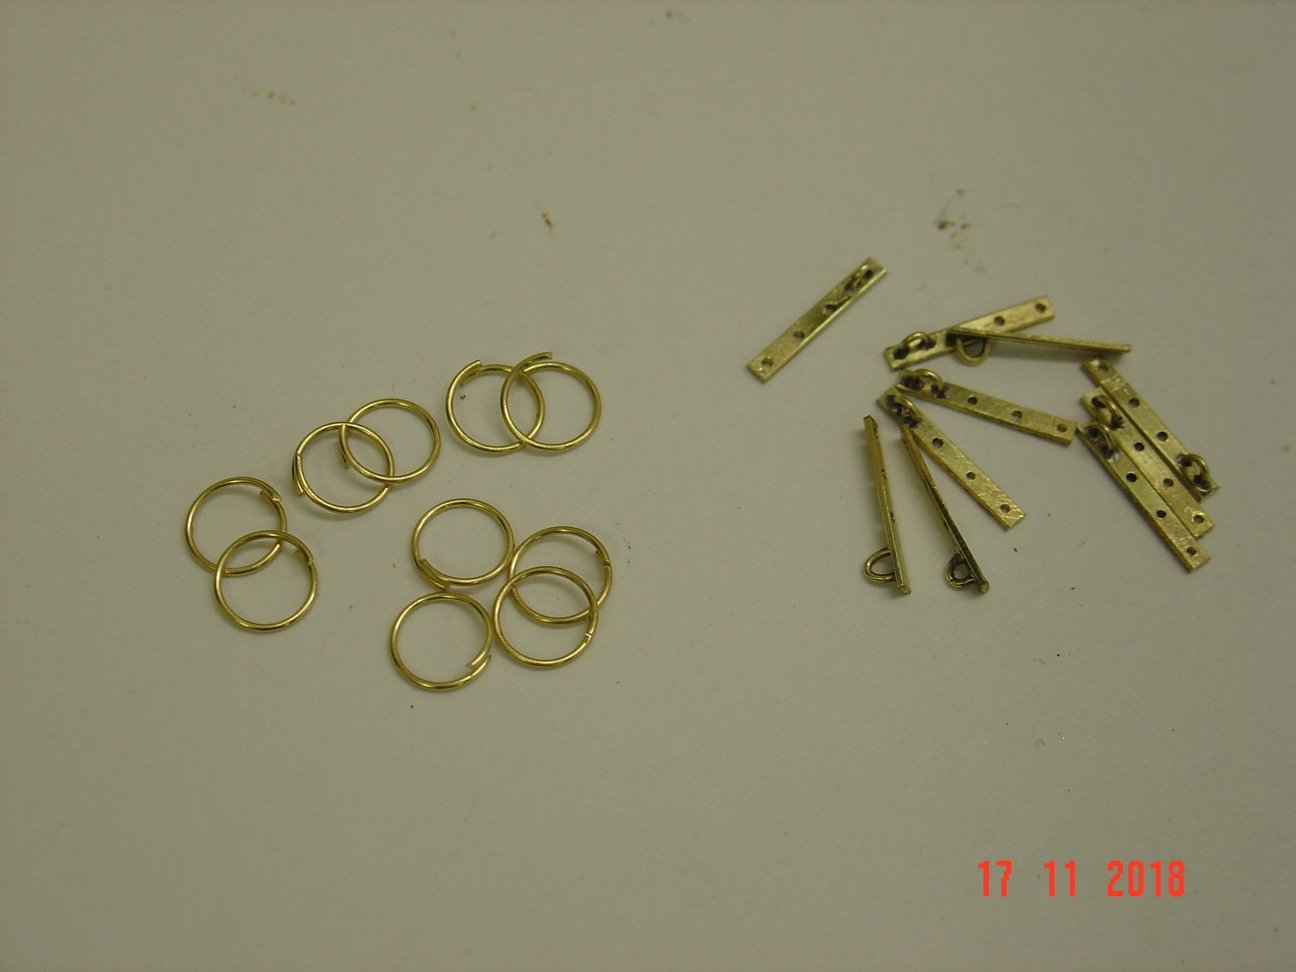
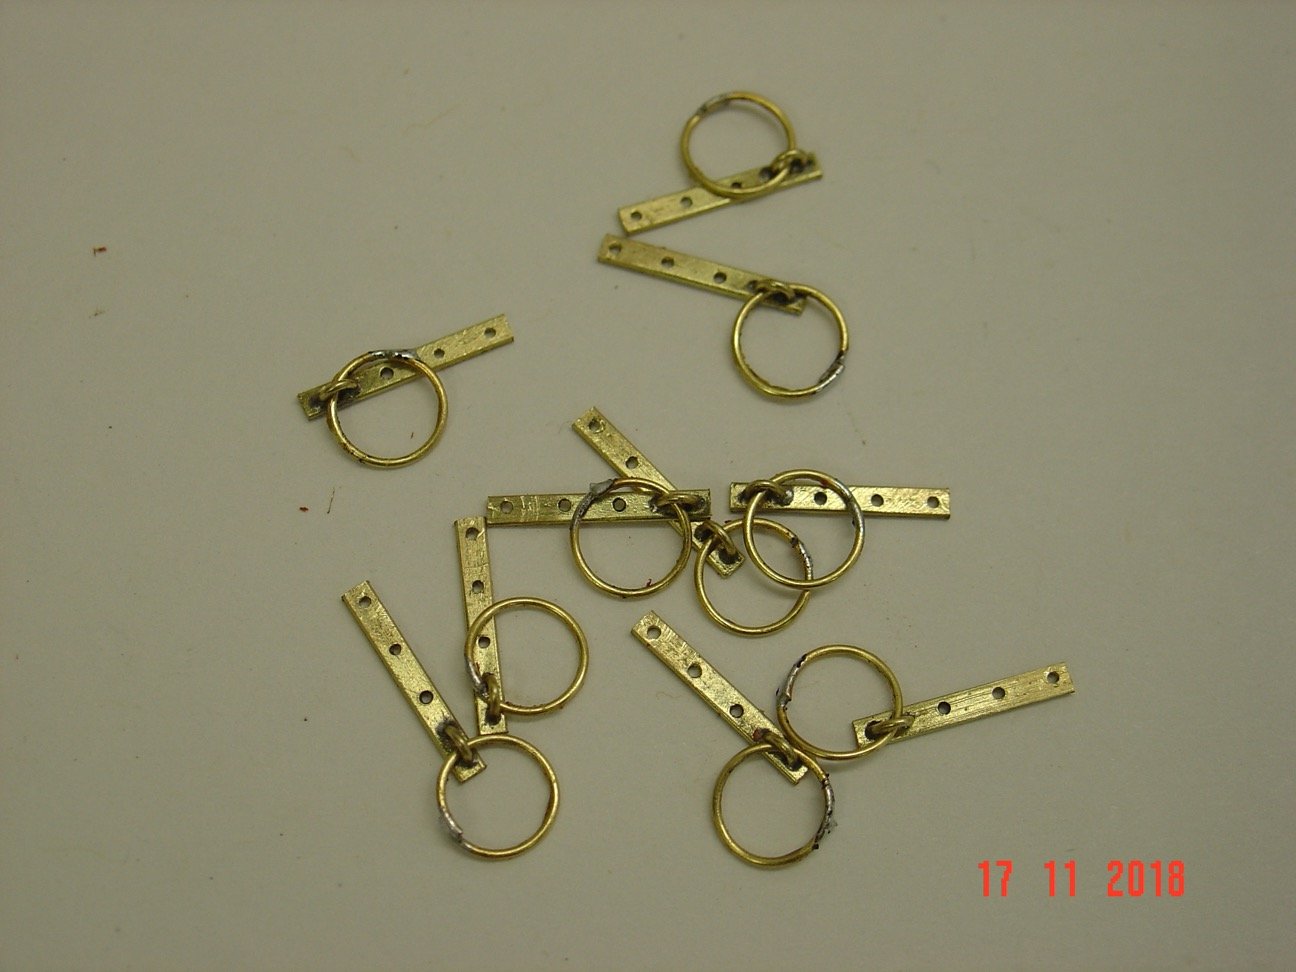
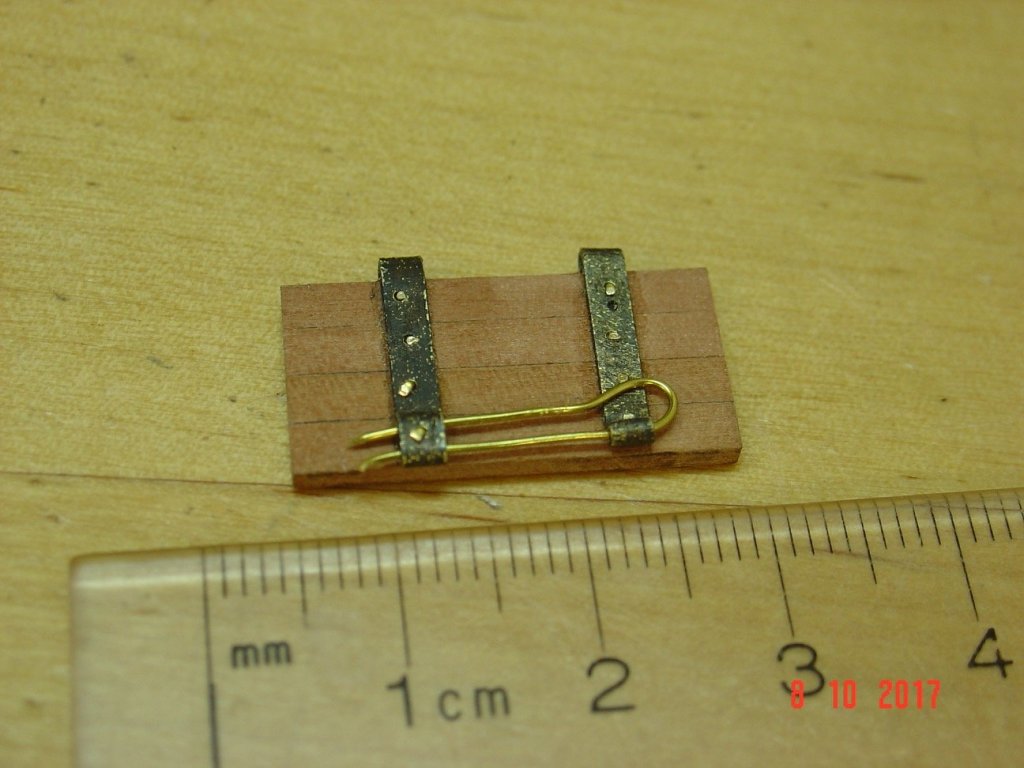
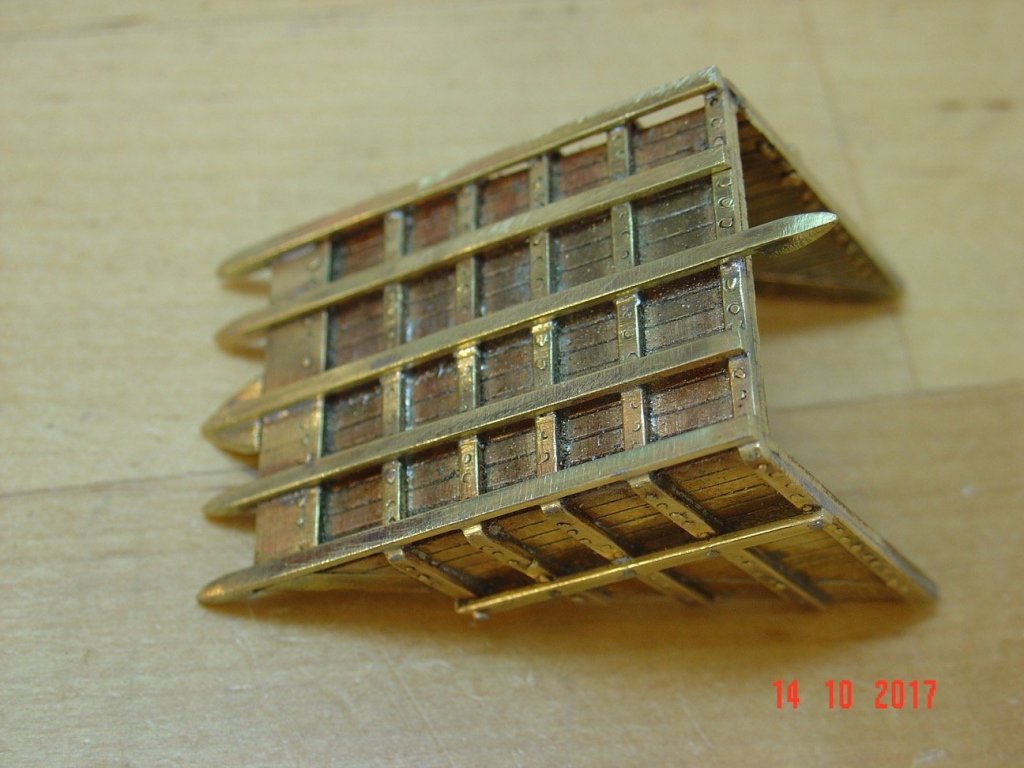
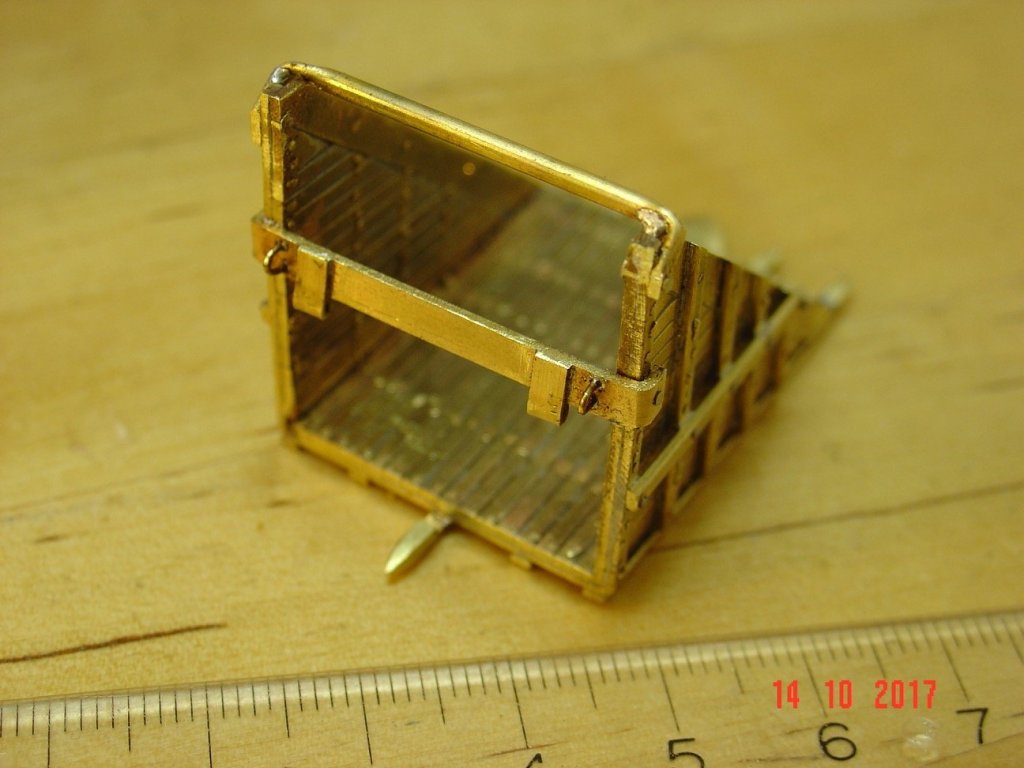
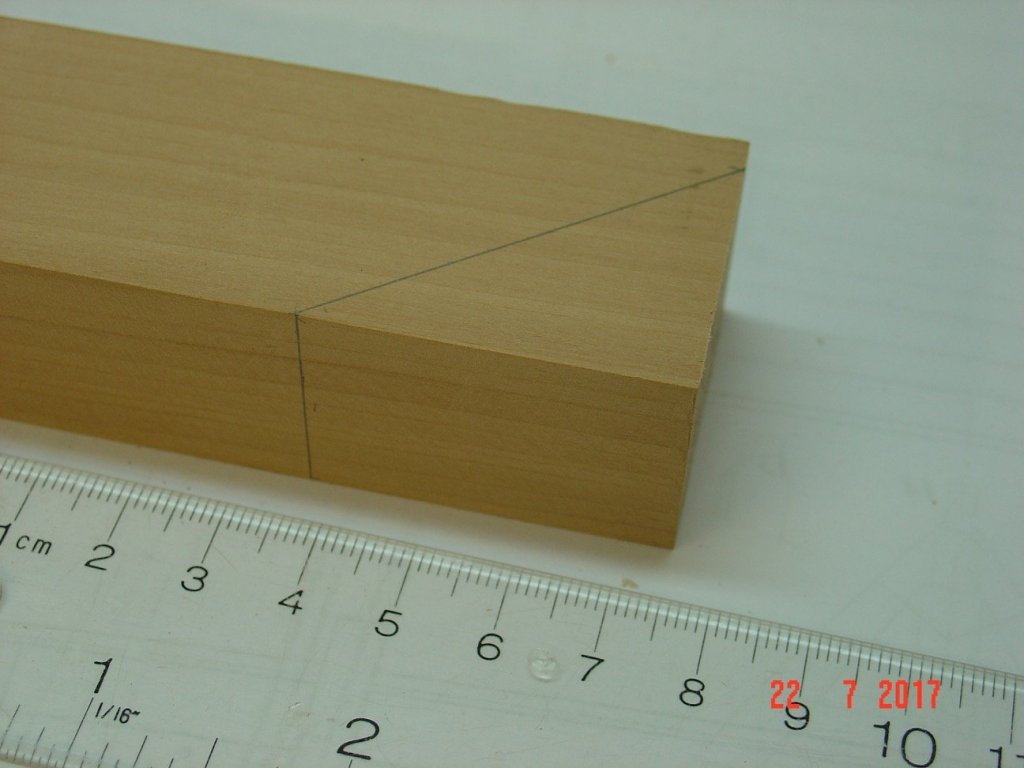
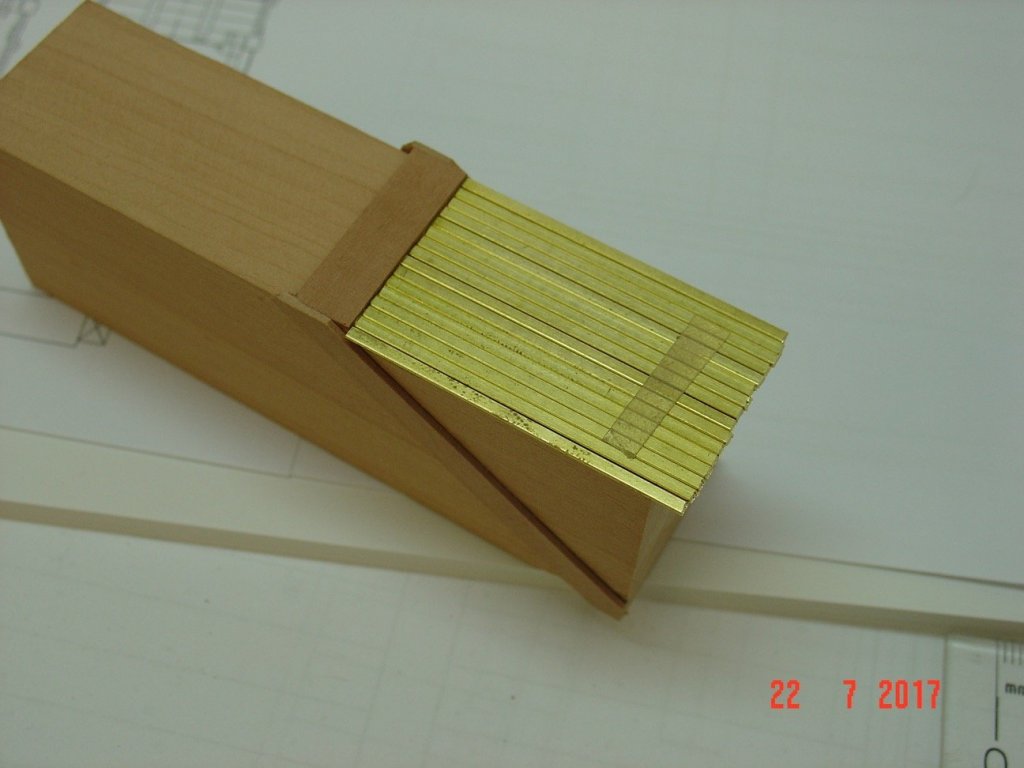
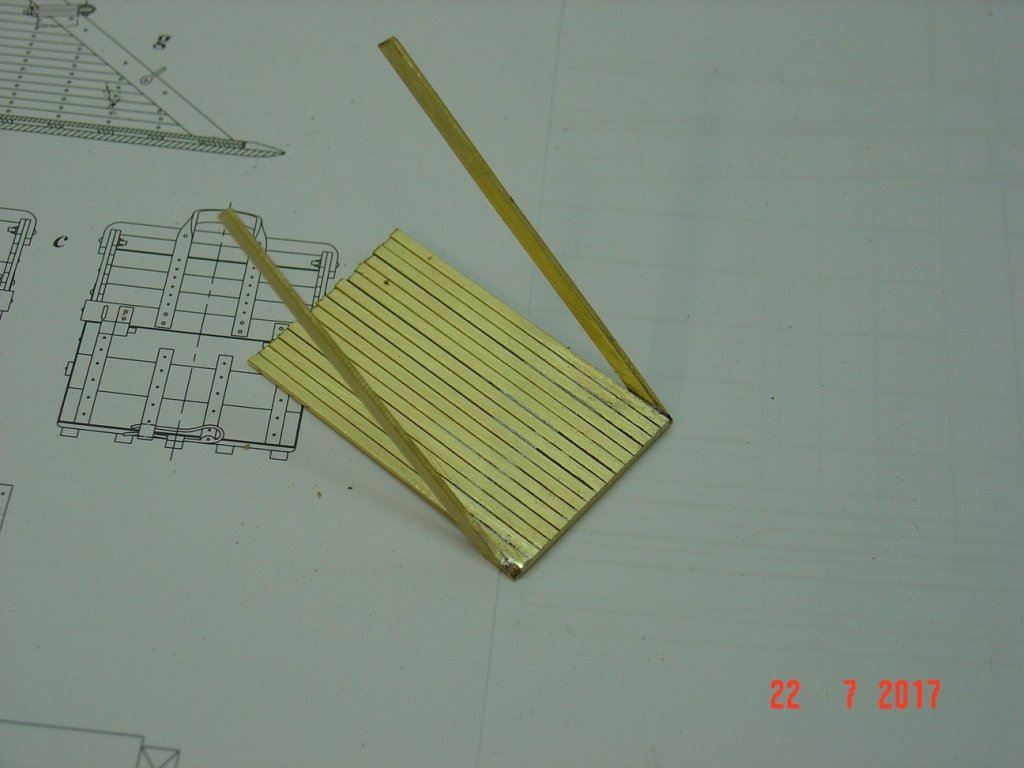
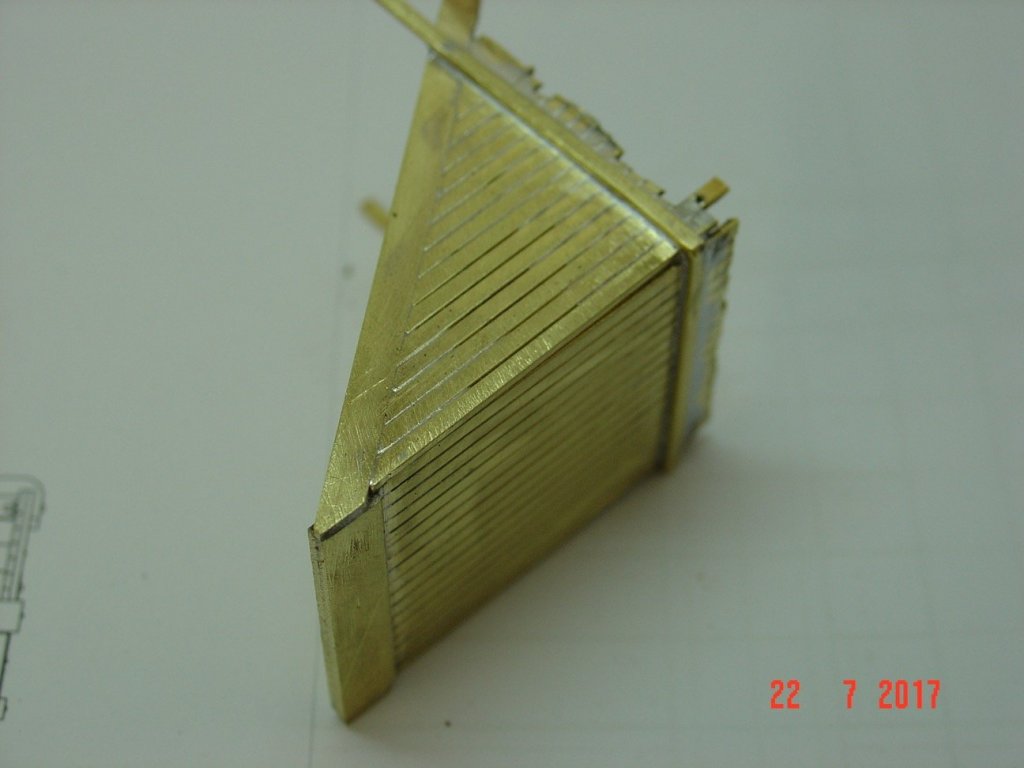
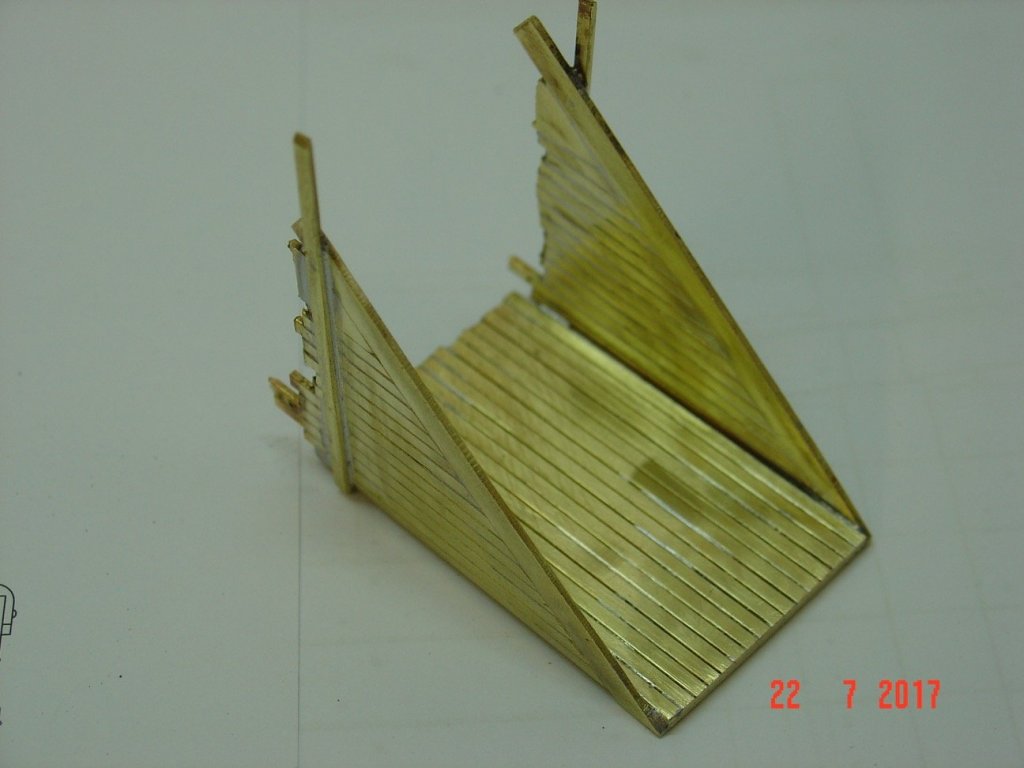
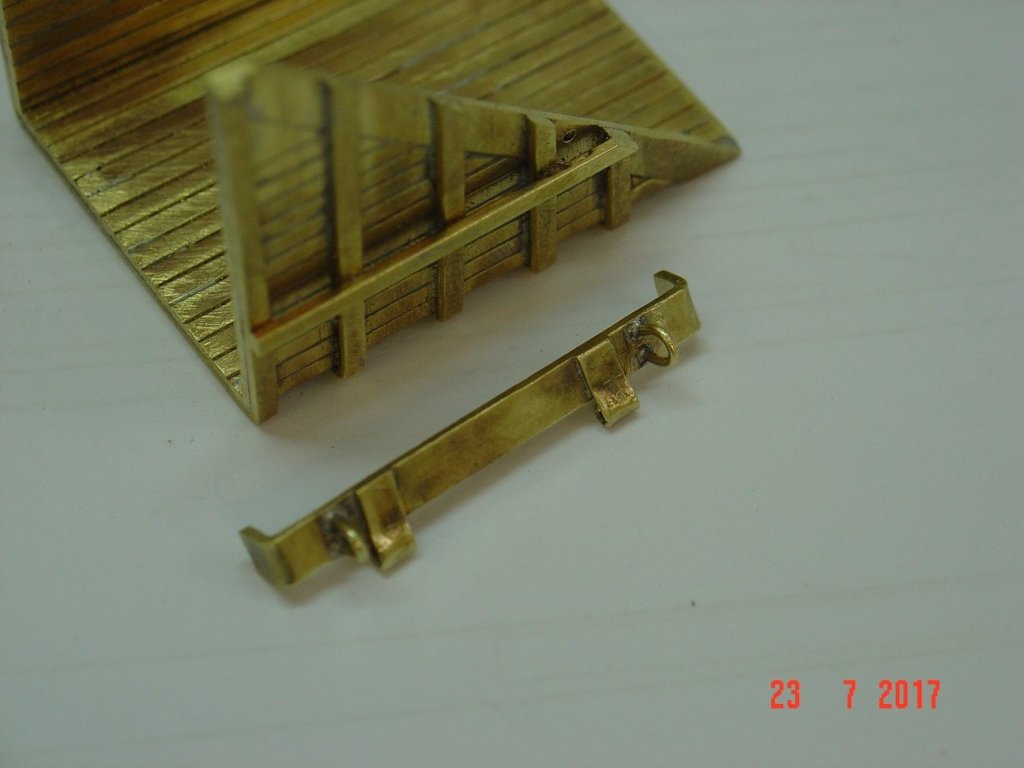
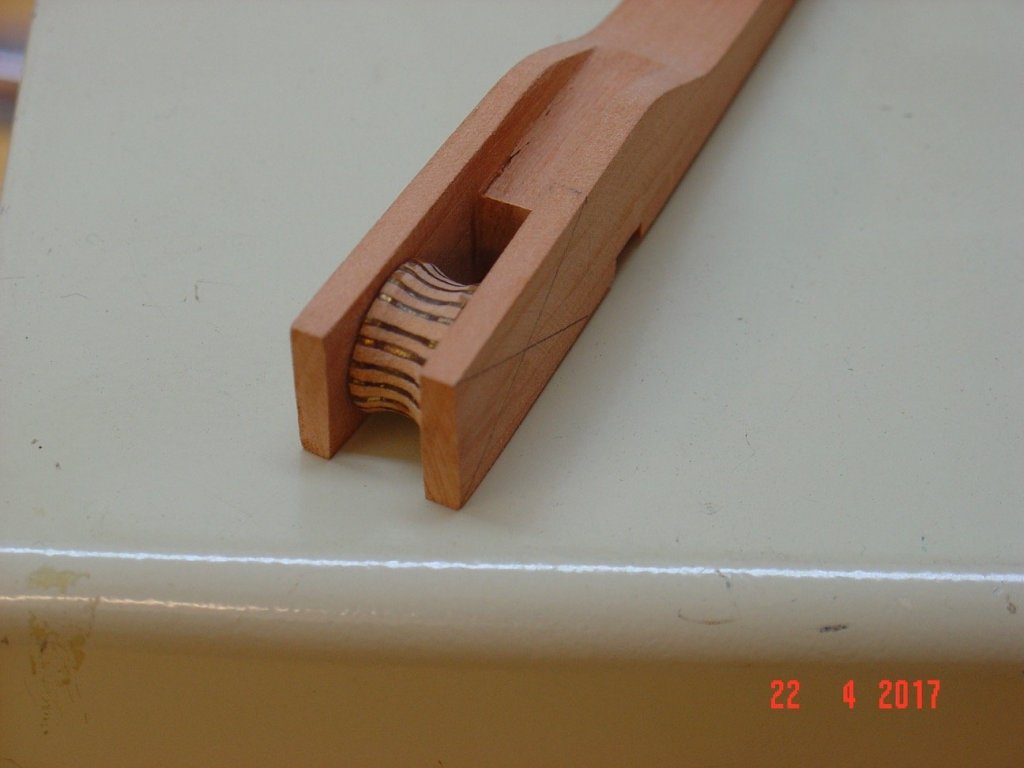
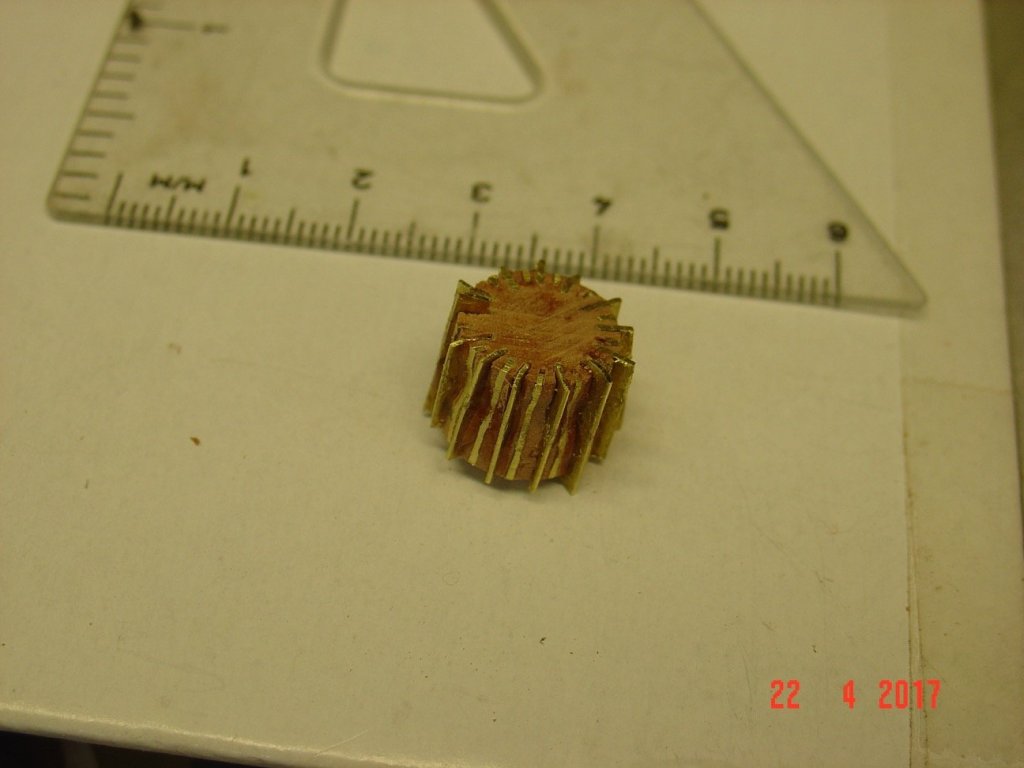
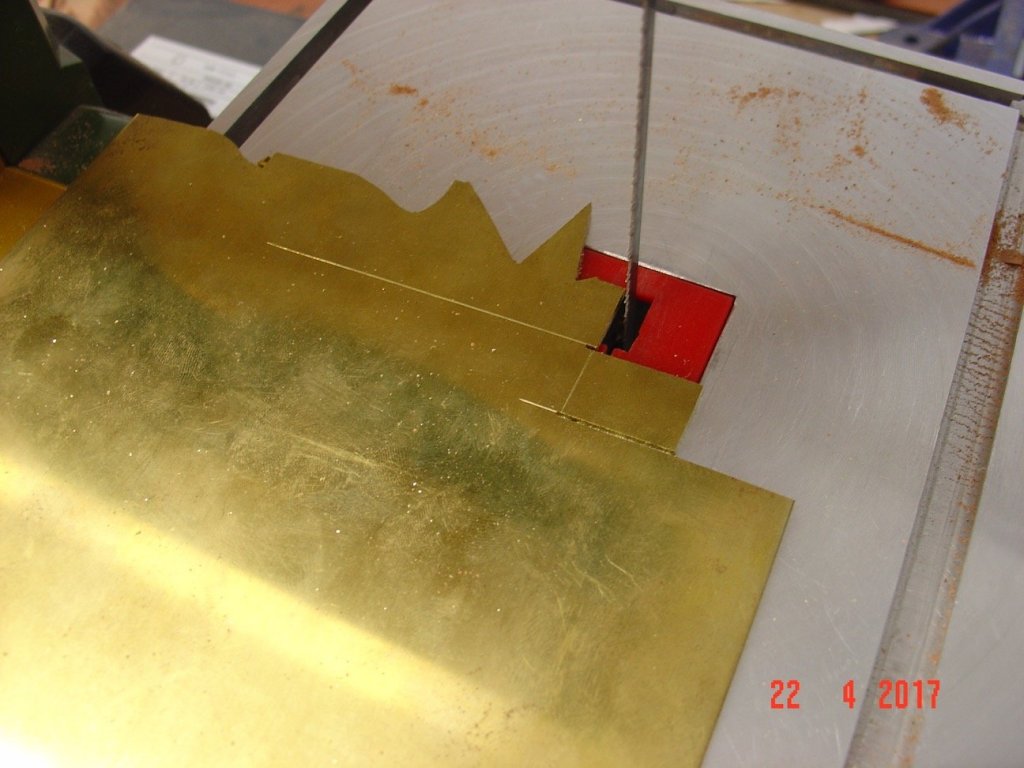
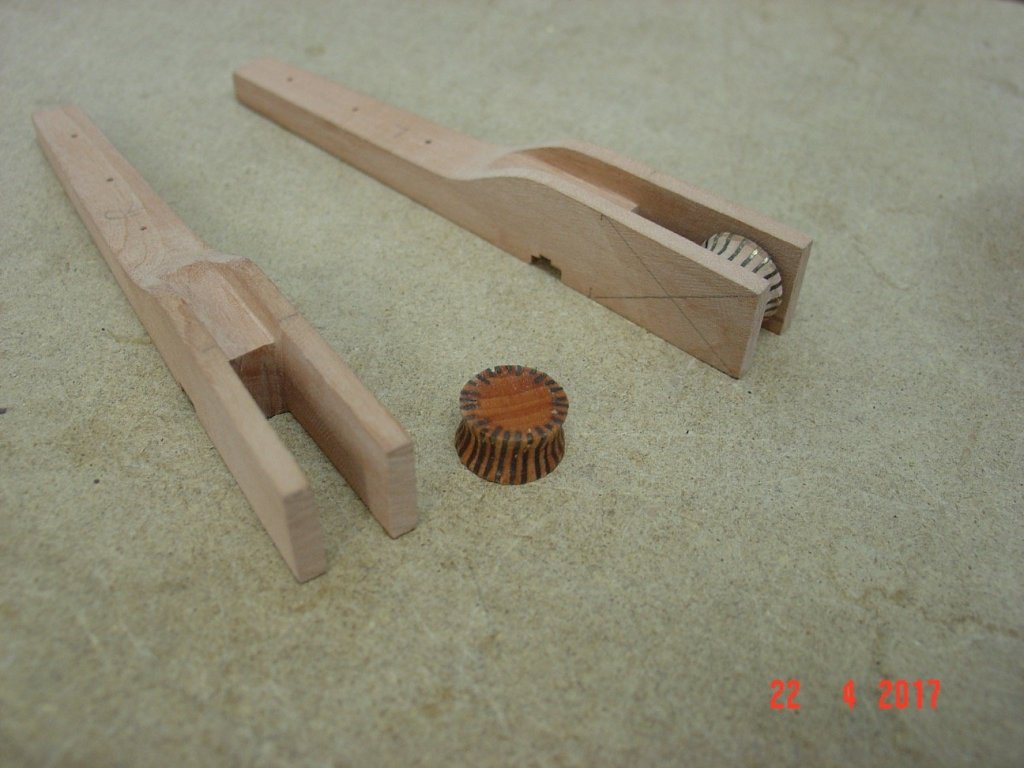
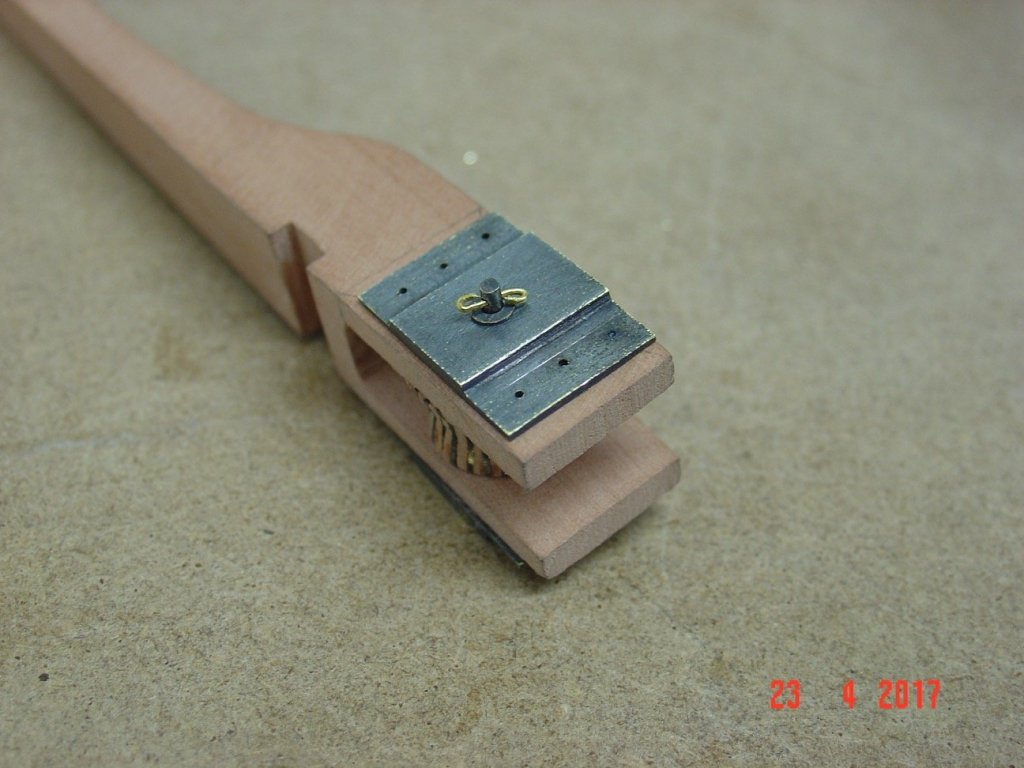
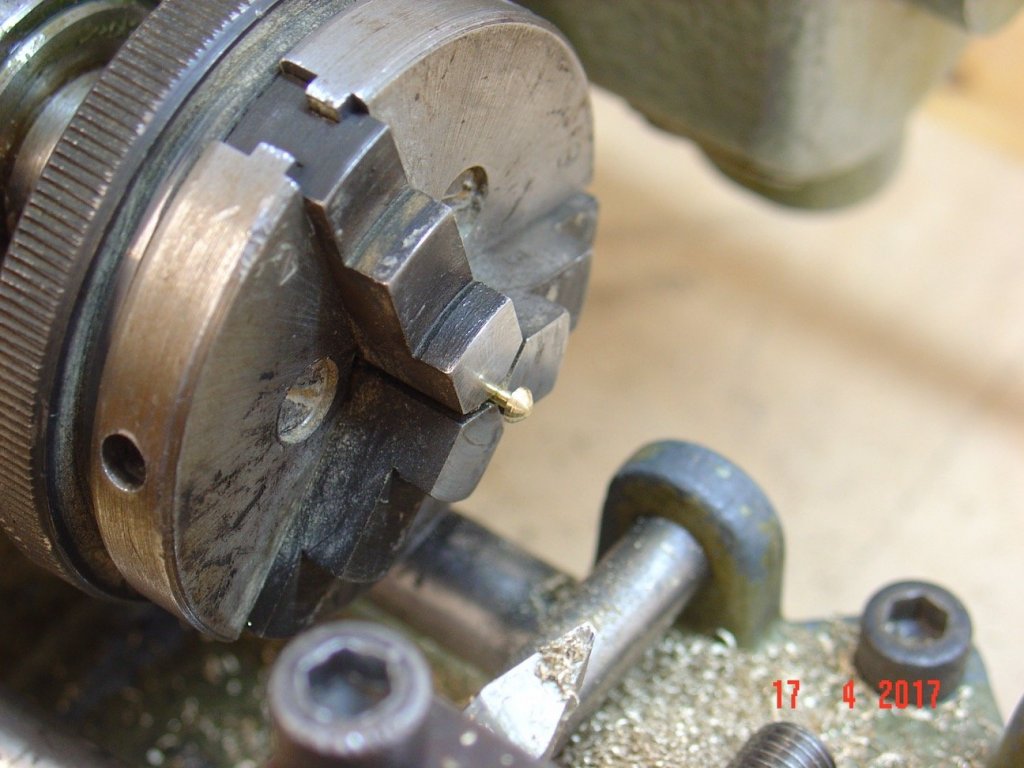
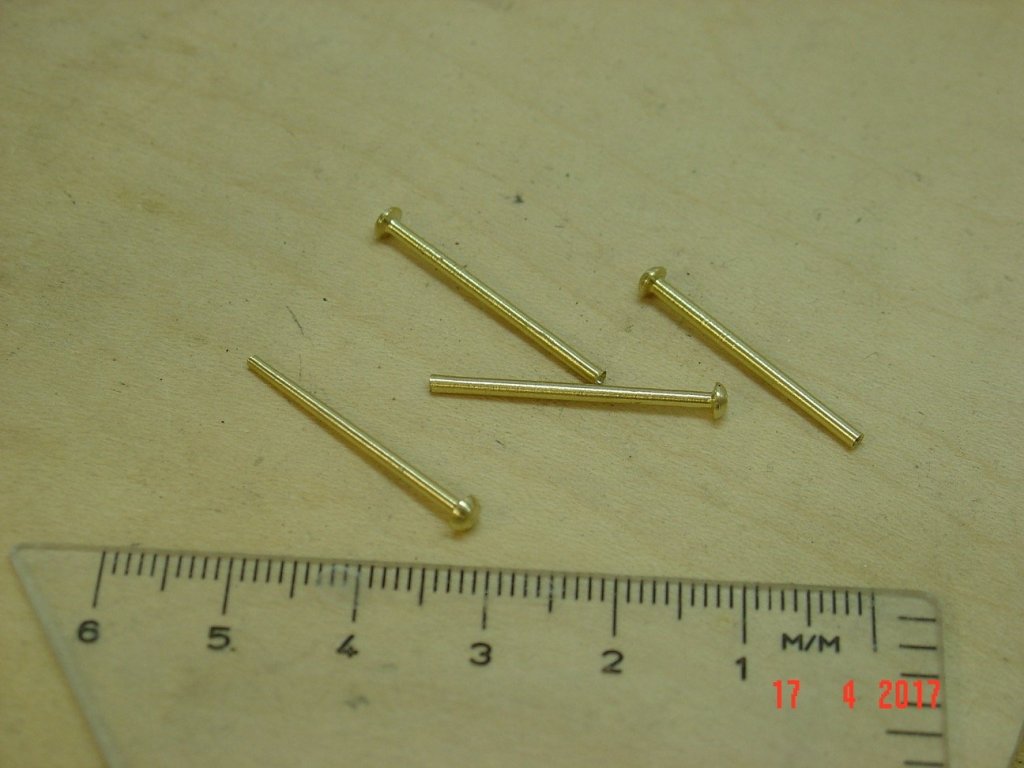
Hello, Here are some more progress pictures. Slower progress over the summer with vacations and nice weather to stay in the basement workshop. The small wheel was completed beginning of May. The big one mid June. Then a long break and after that started working on the "scoop" - metalworking is not my forte so is taking a lot of time. Plus I break a lot of 0.6mm drill bits. Worst part is that when they break they rest into the piece and there is no way to take the small bit out. Now I am blocked again as I break the last bit this morning and I still have to drill both sides. I ordered 100 more bits on eBay but it will take a while till I get them. They are very cheap (0.99CAD for 10, free shipping from China) but the quality is proportional with the price - I would say one in three actually cuts into the brass, the others I will end up using them in wood. Another first today - riveting - went better then I expected once I got the feel for it and learned how long the piece of wire to make a nice rivet. Alexandru Oh darn, the pictures ended up in reverse order.


-
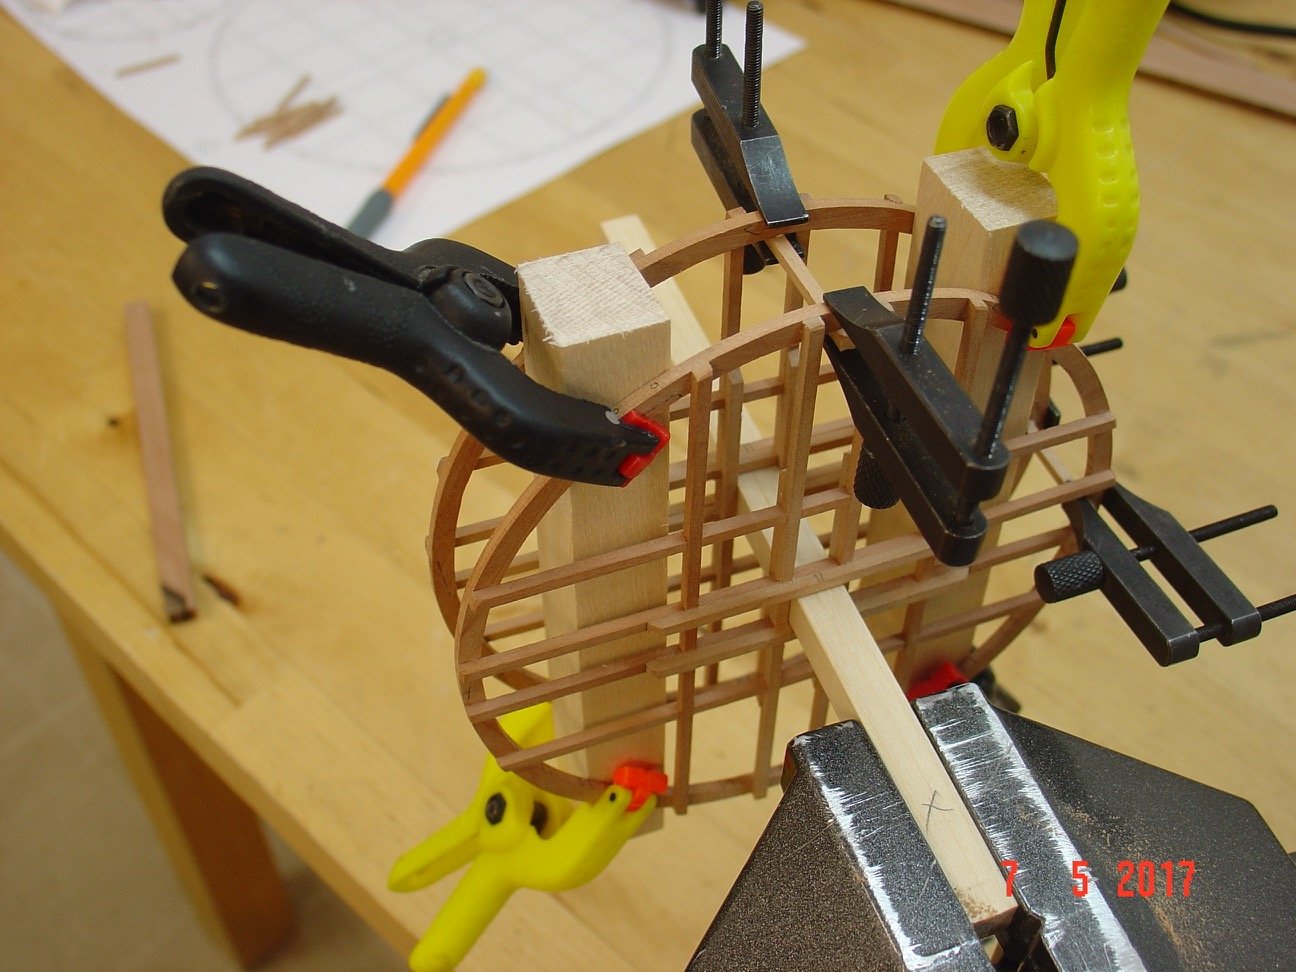
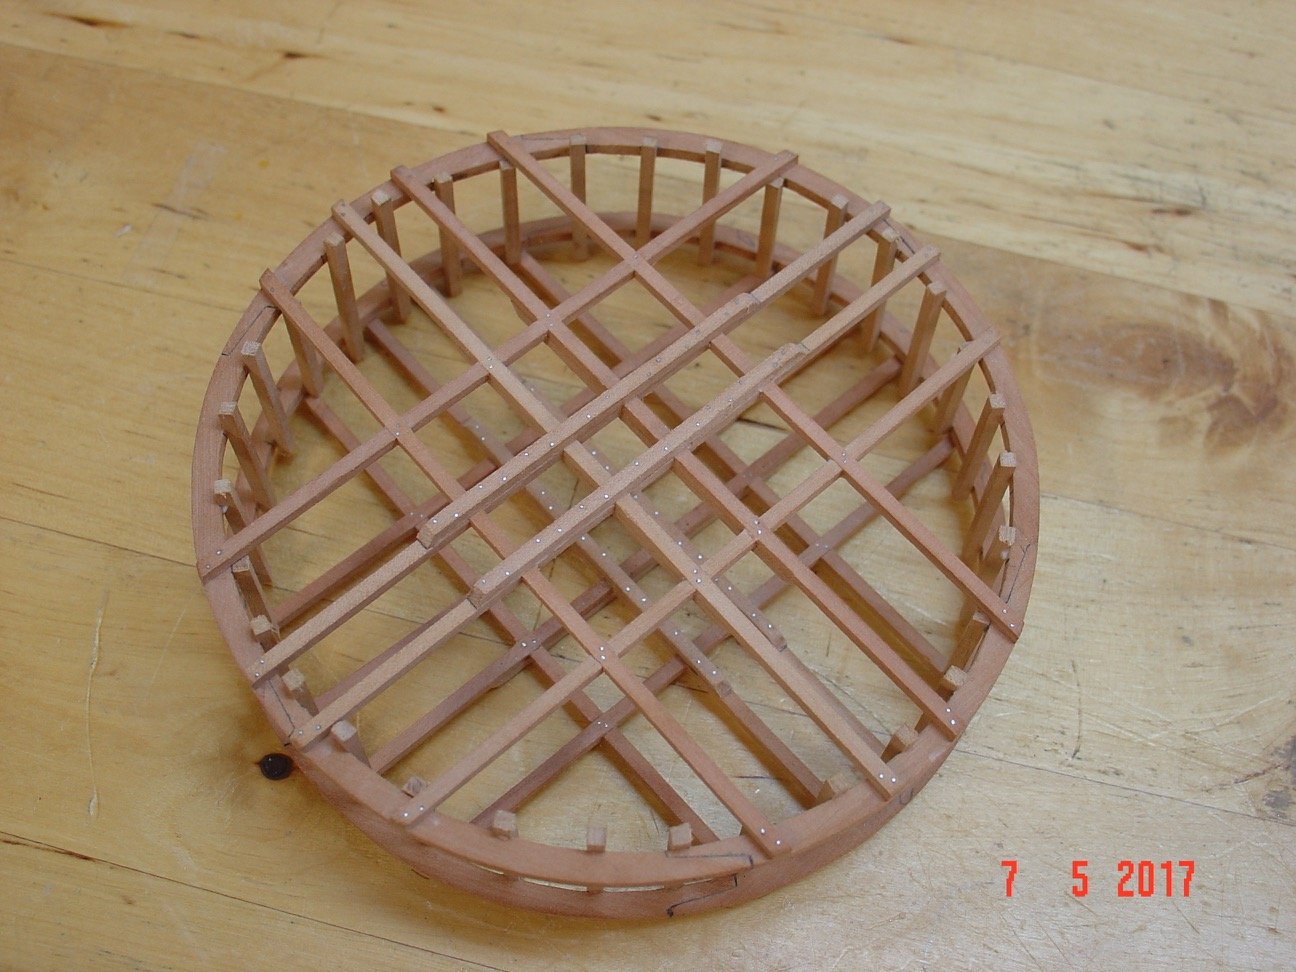
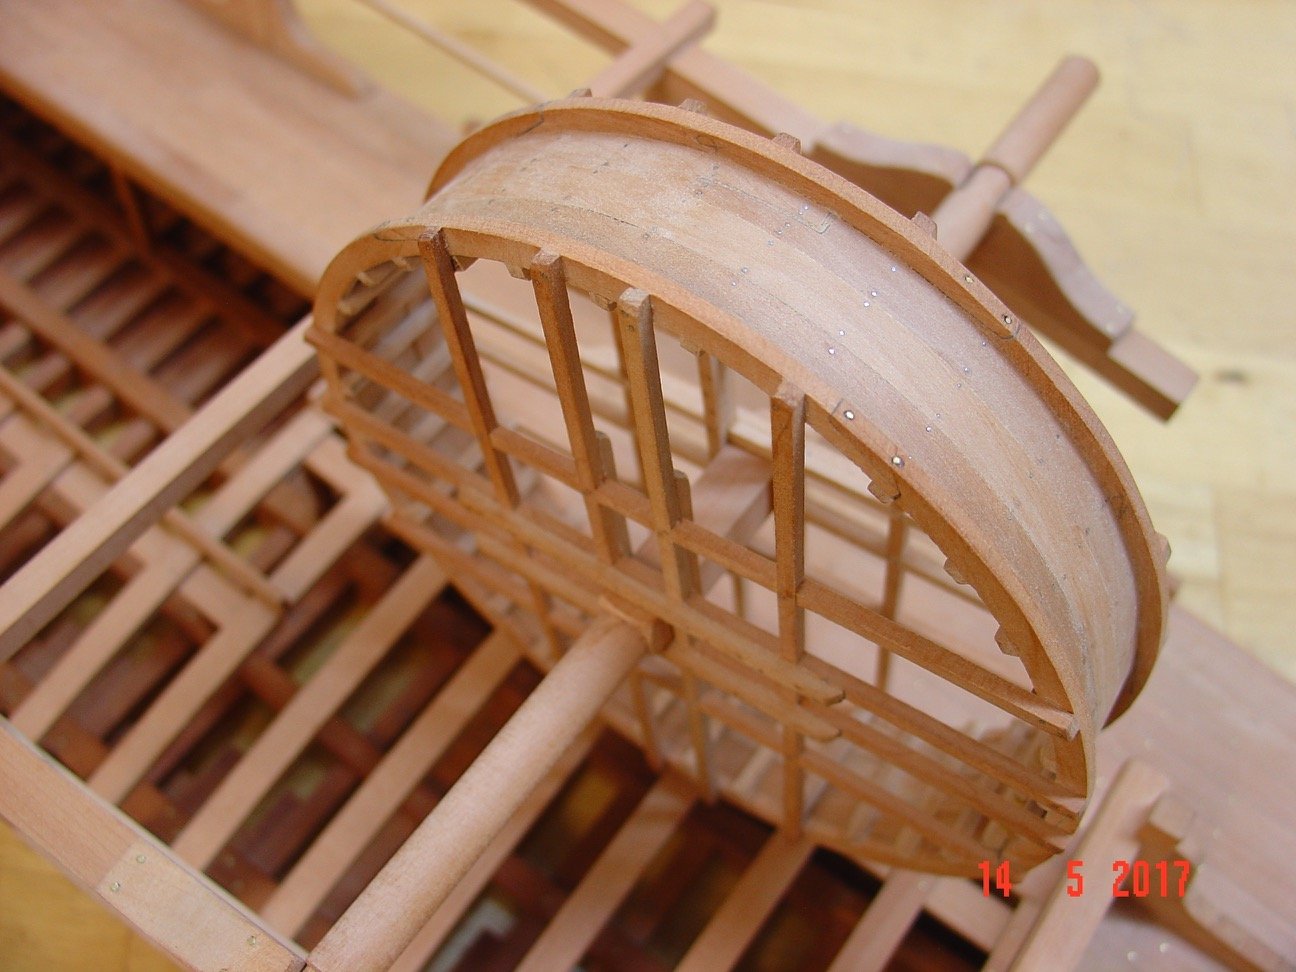
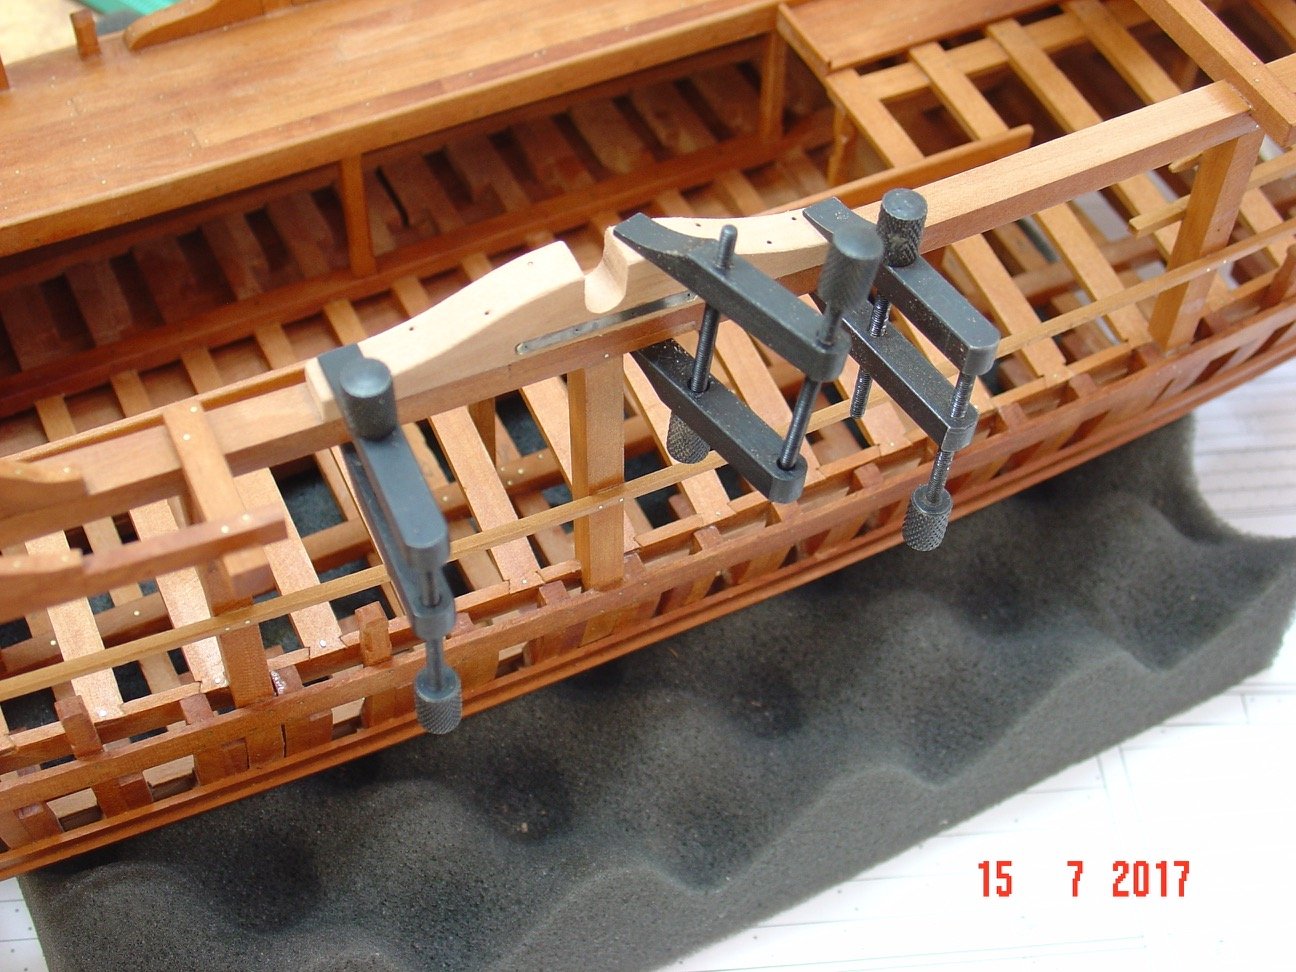
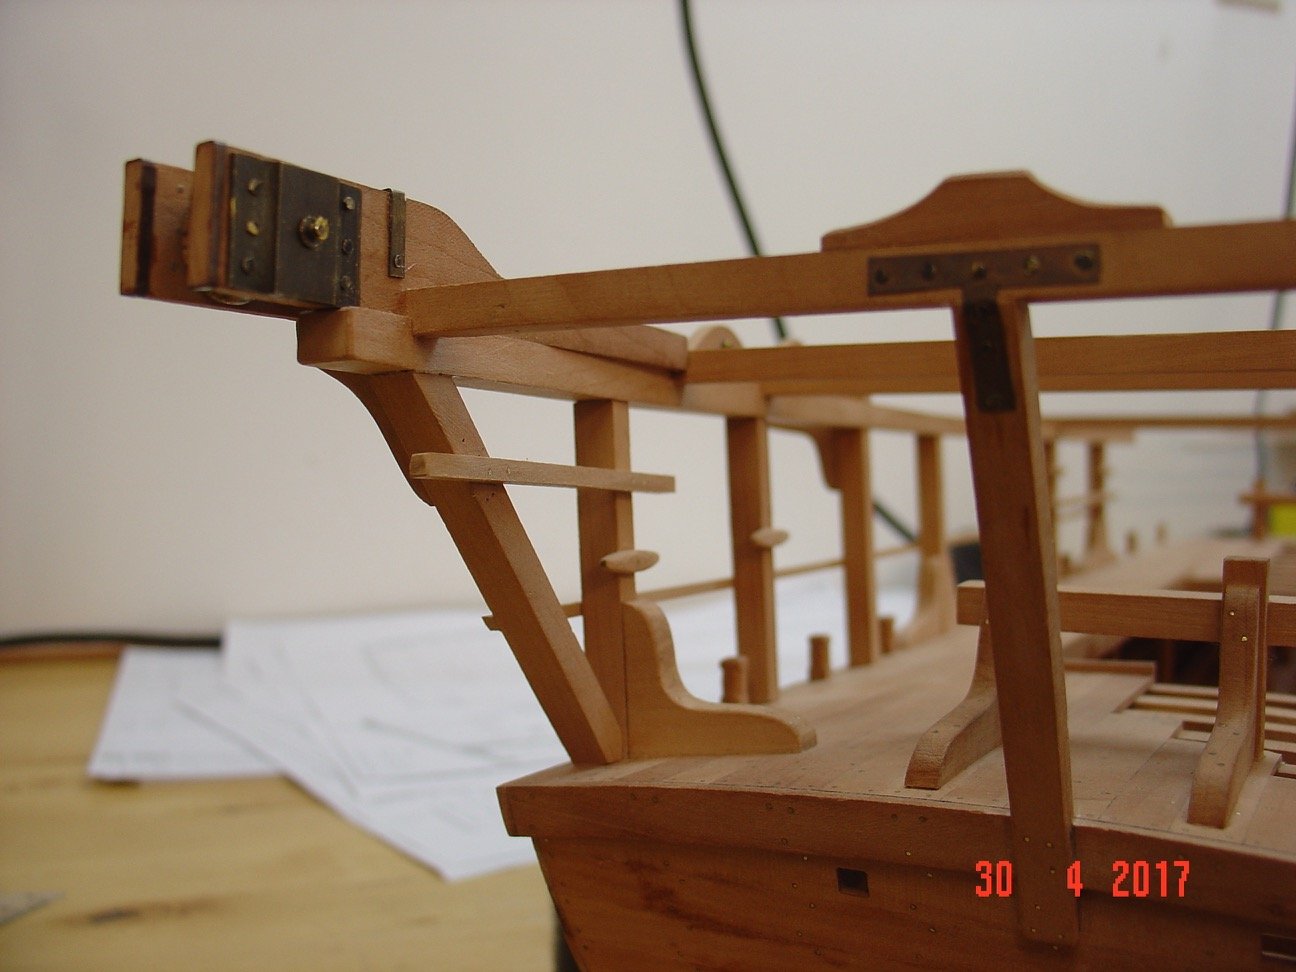
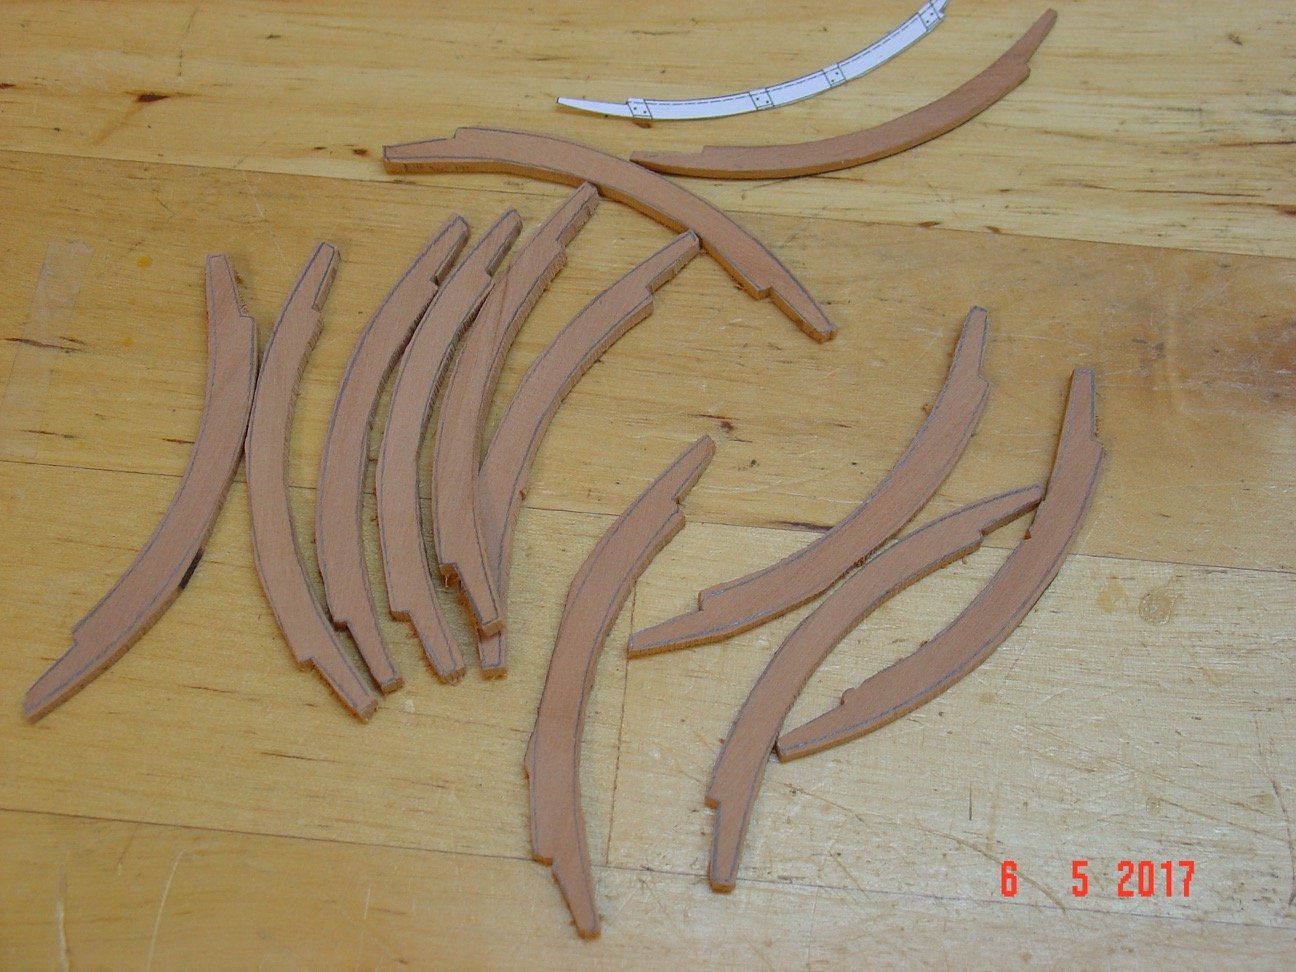
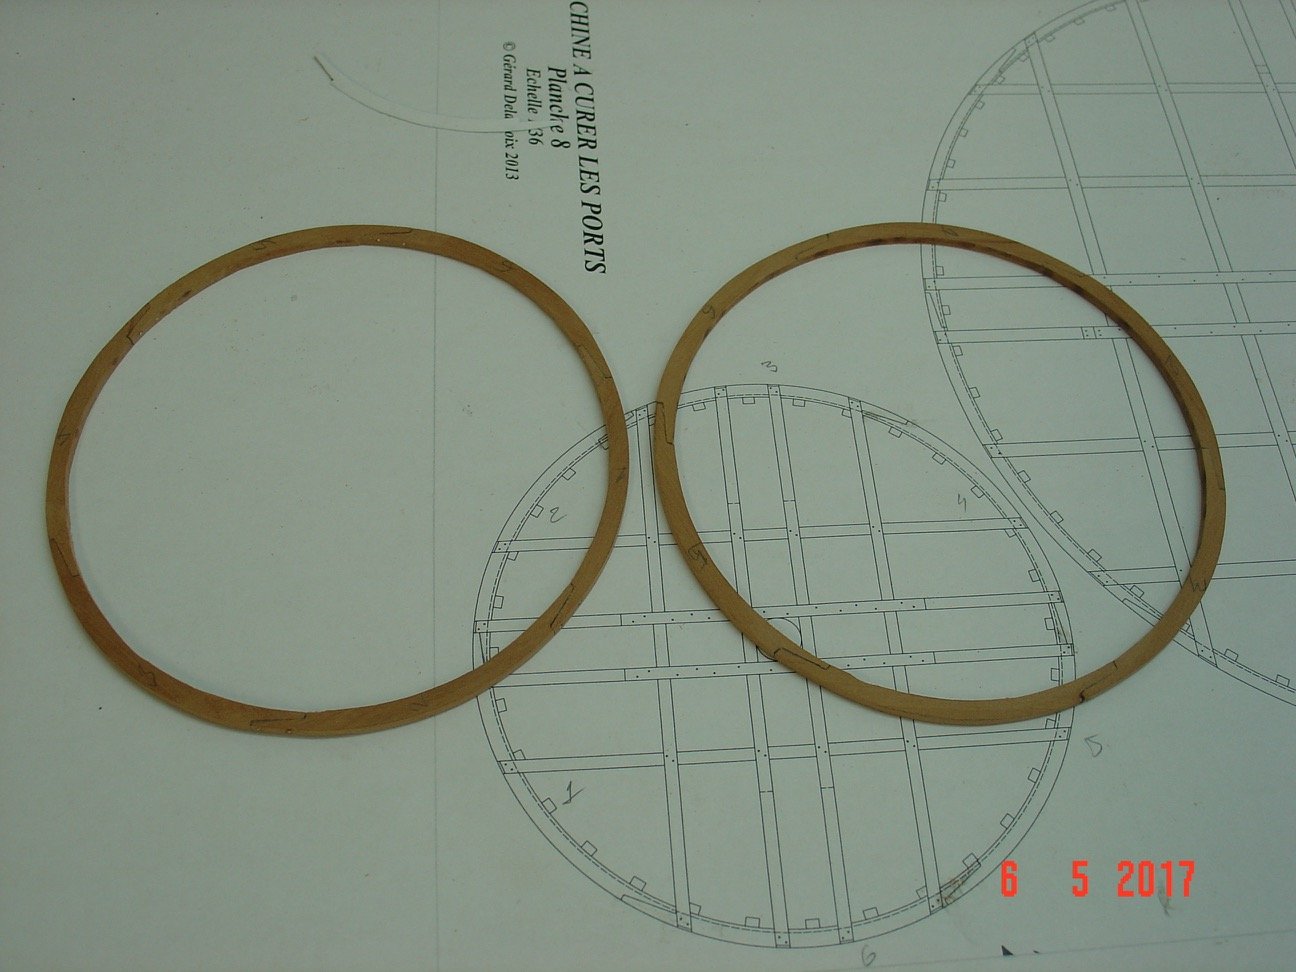
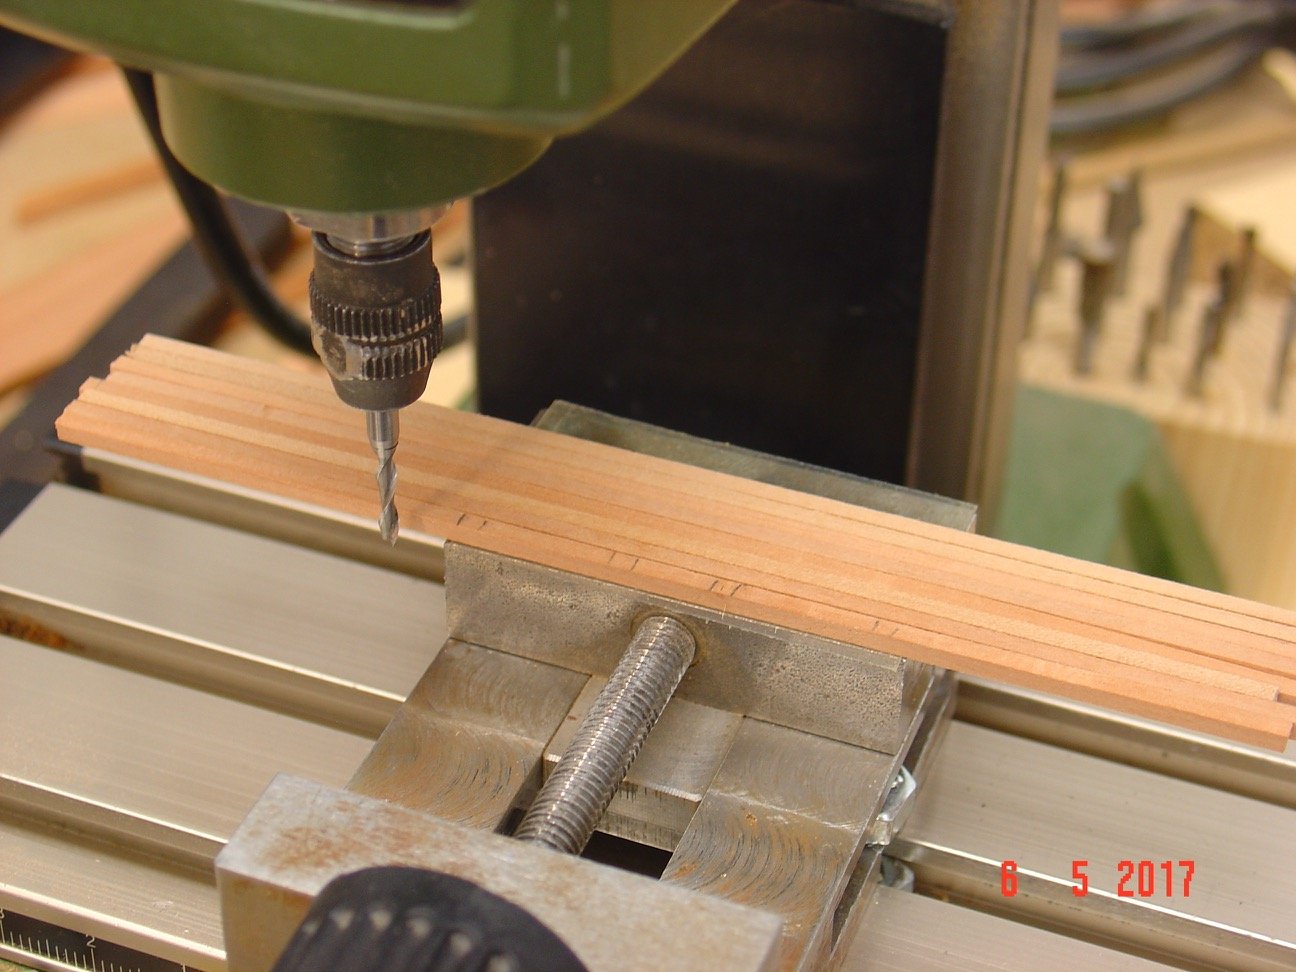
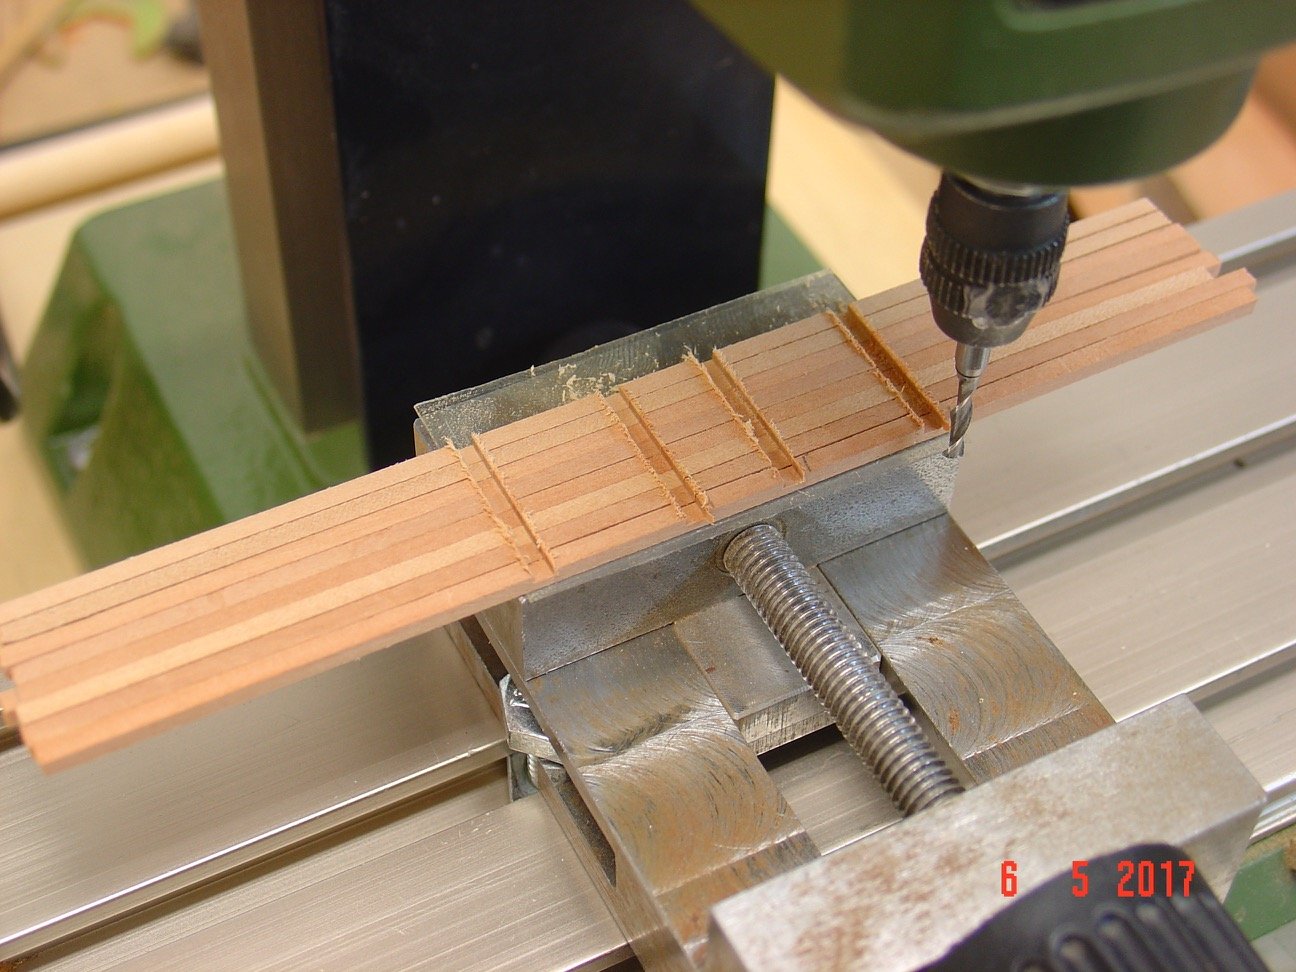
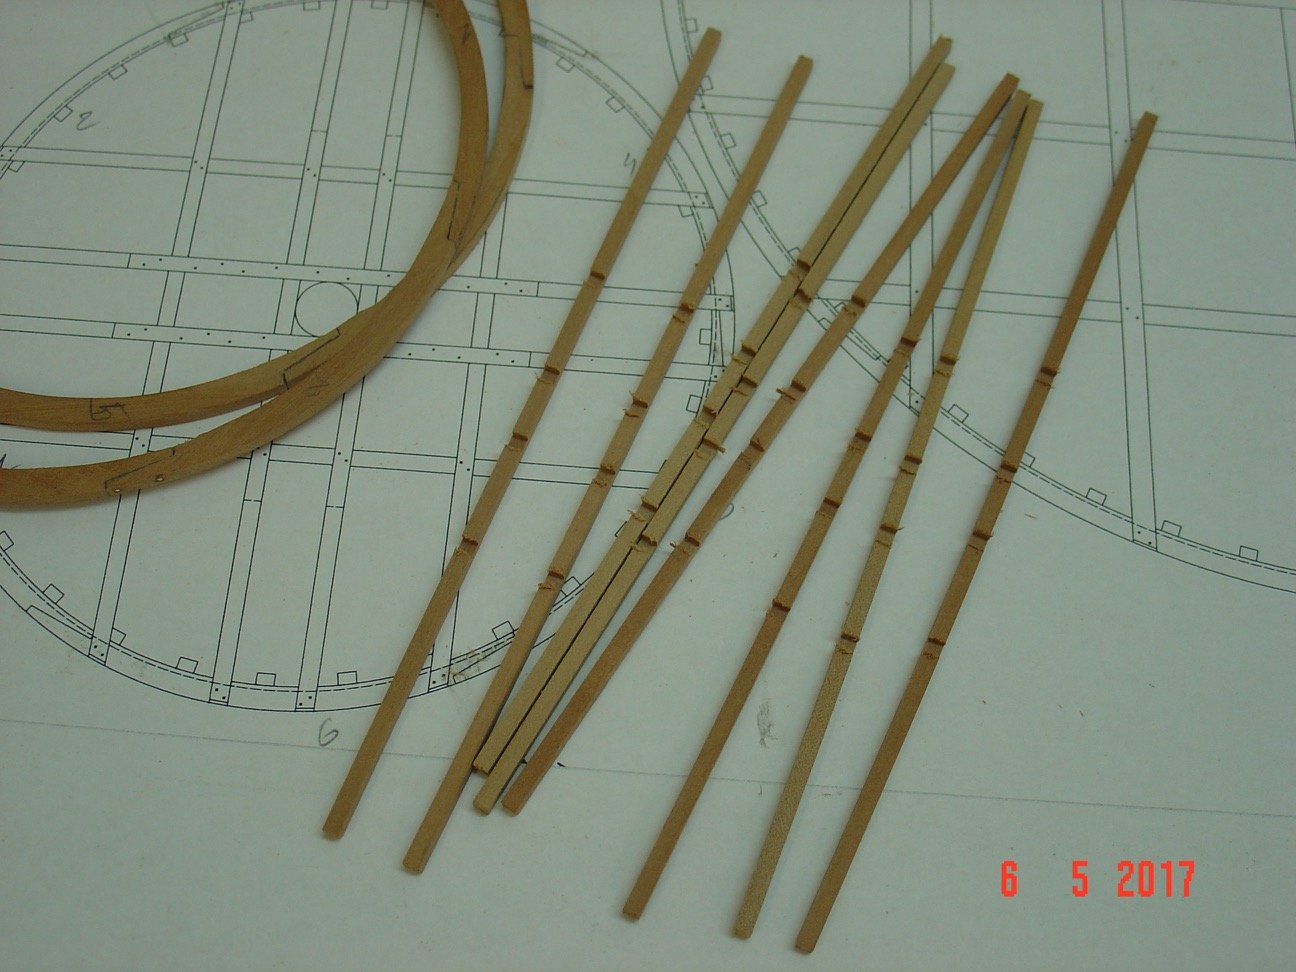
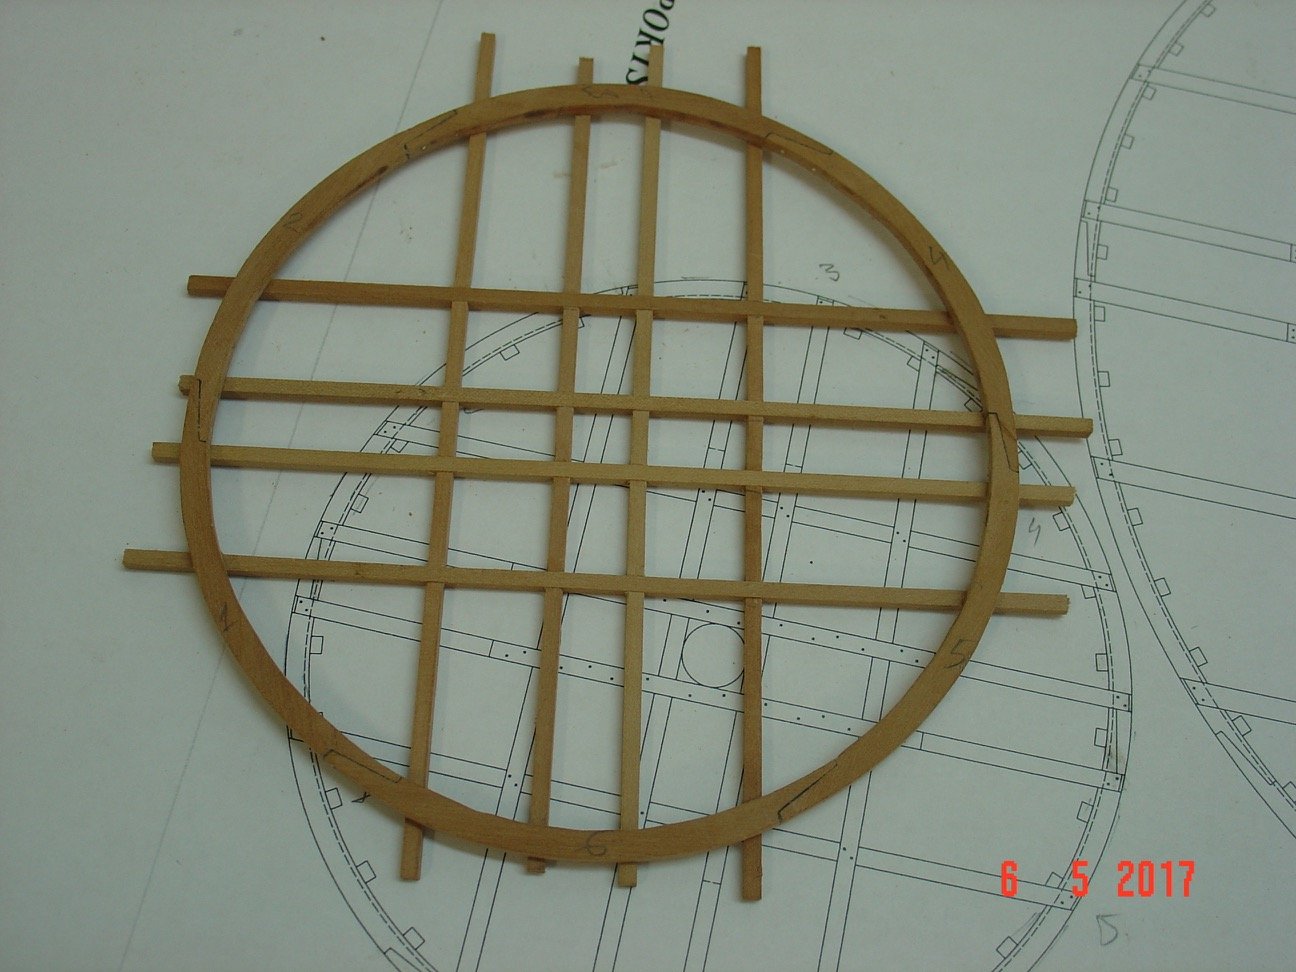
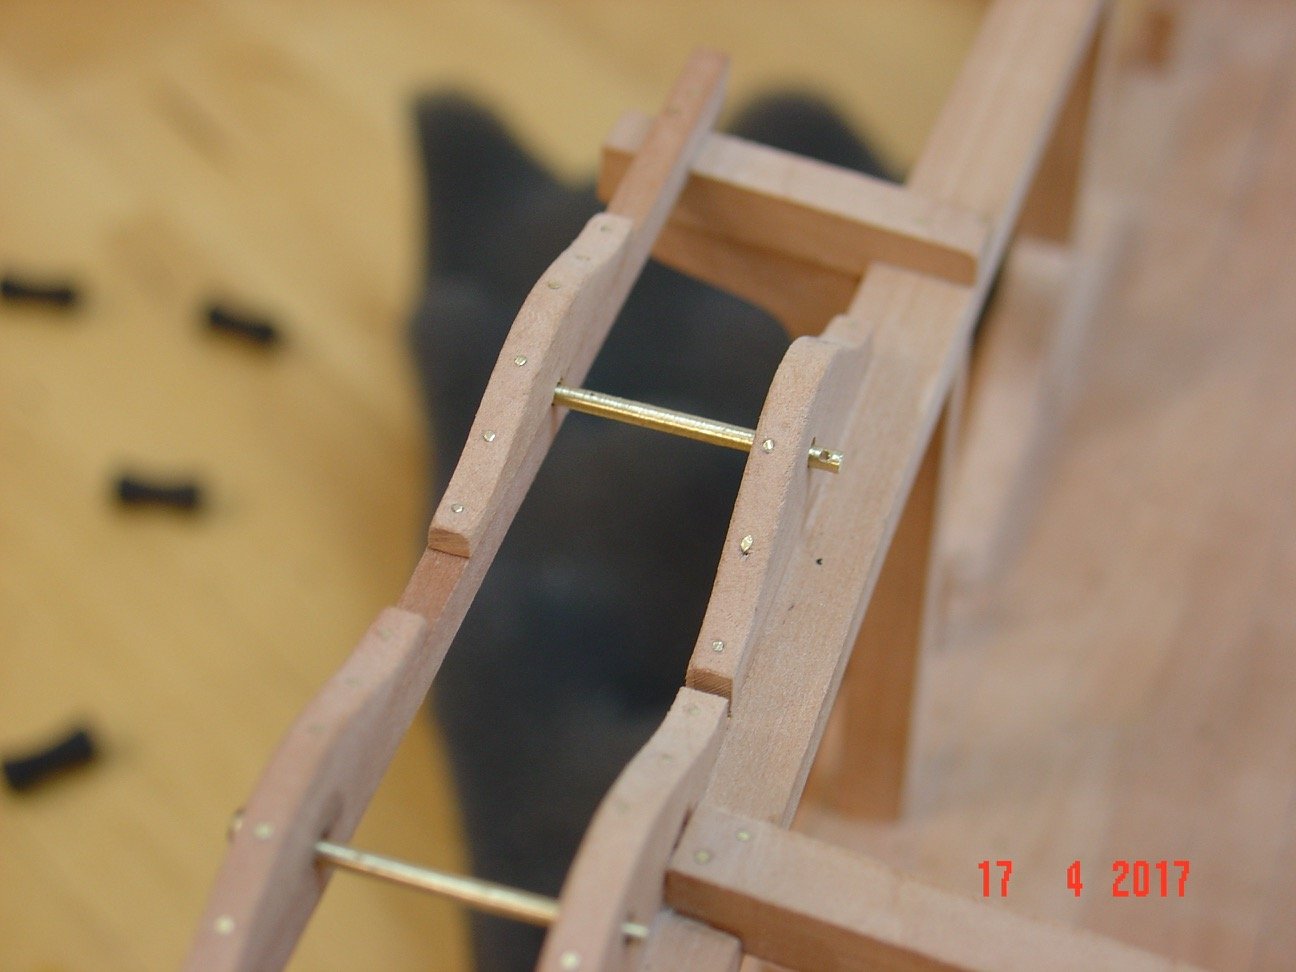
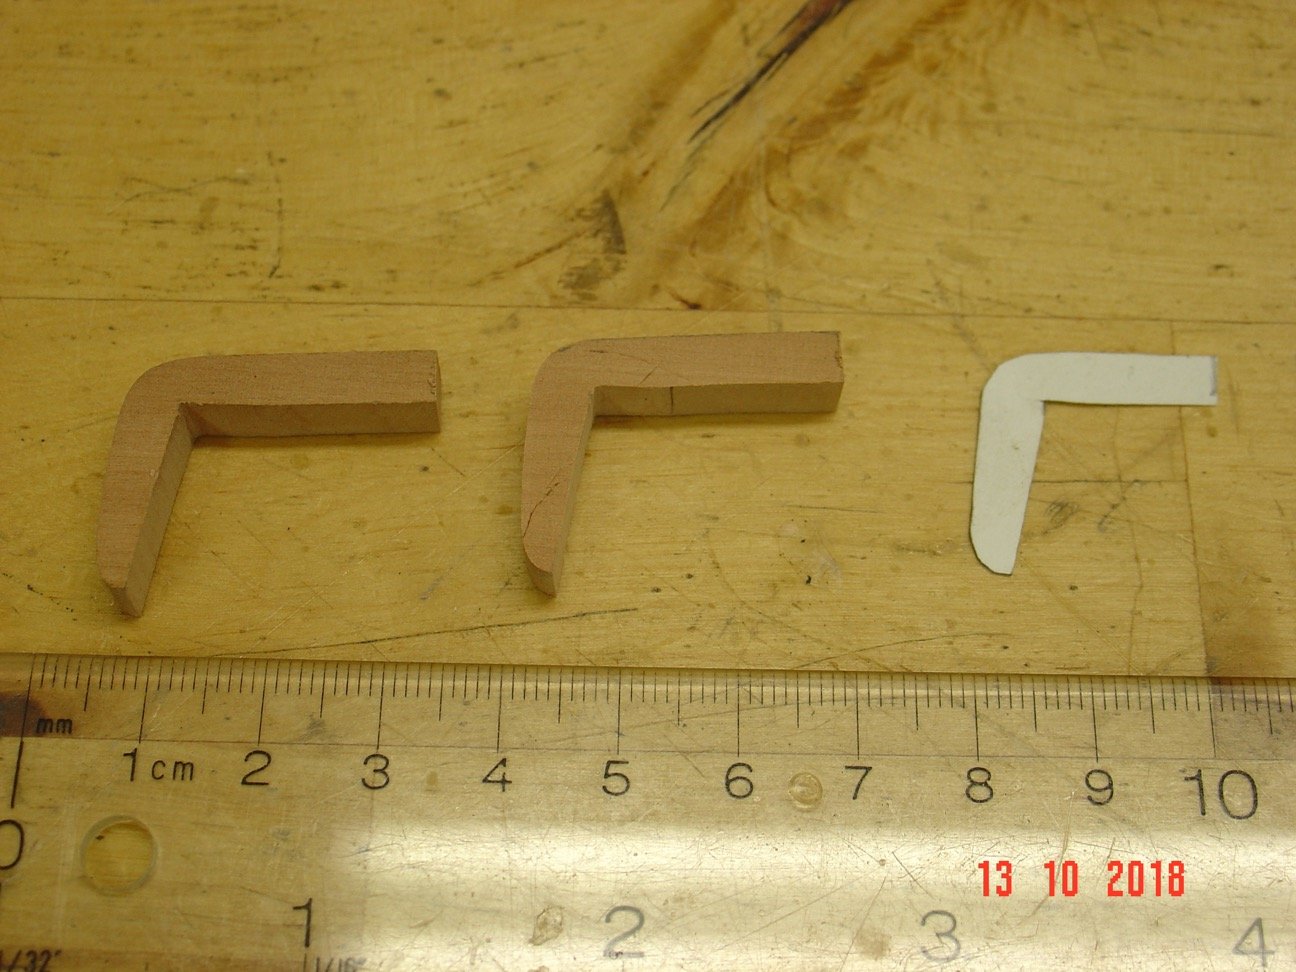
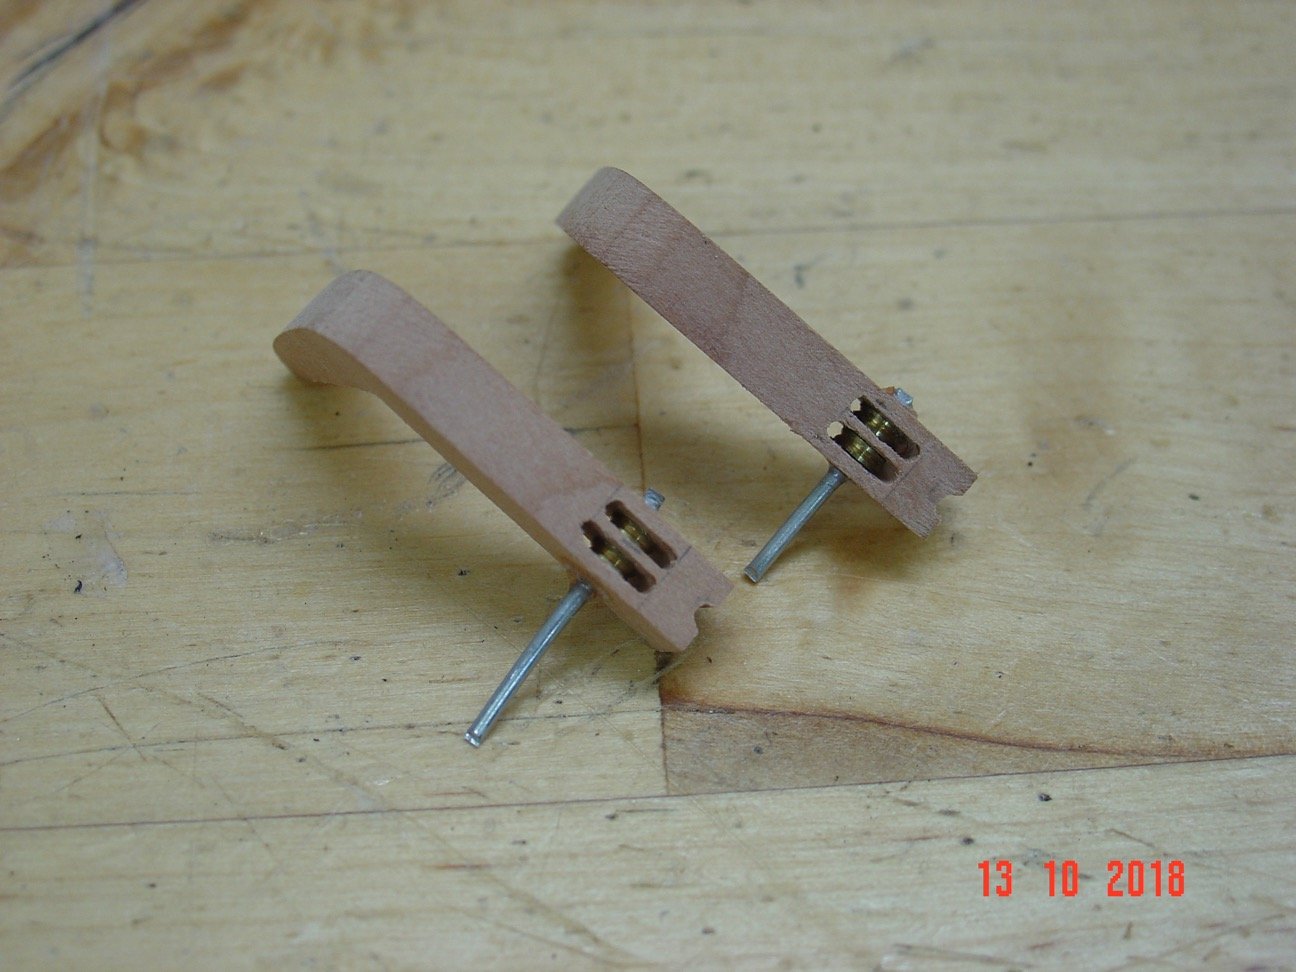
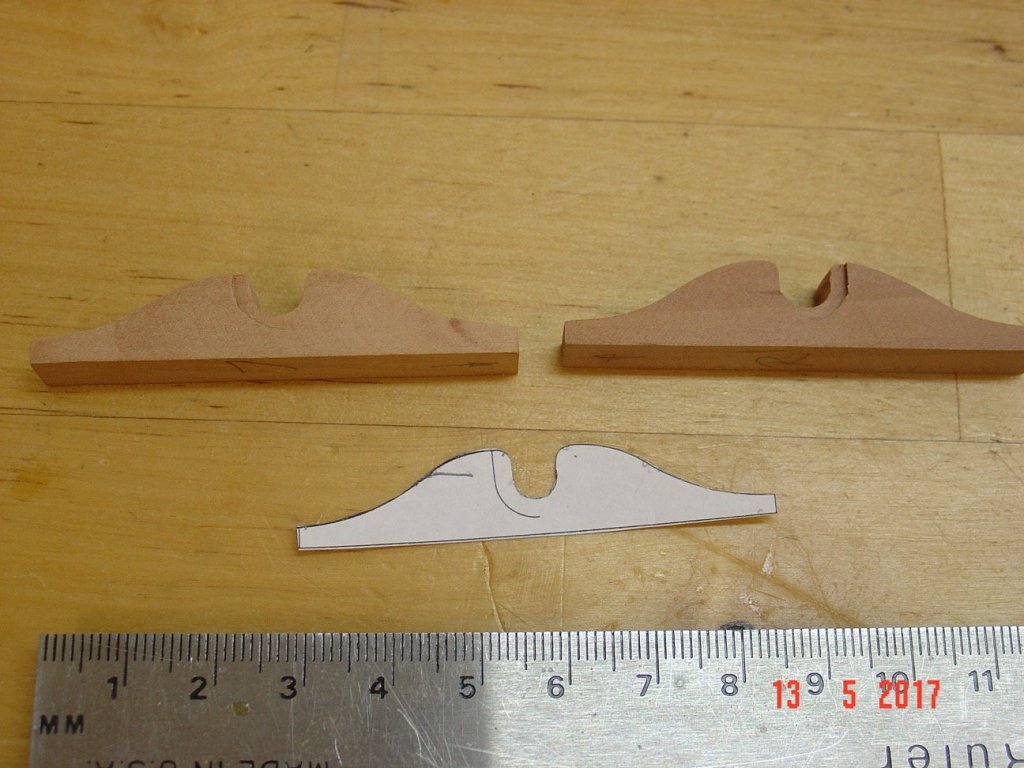
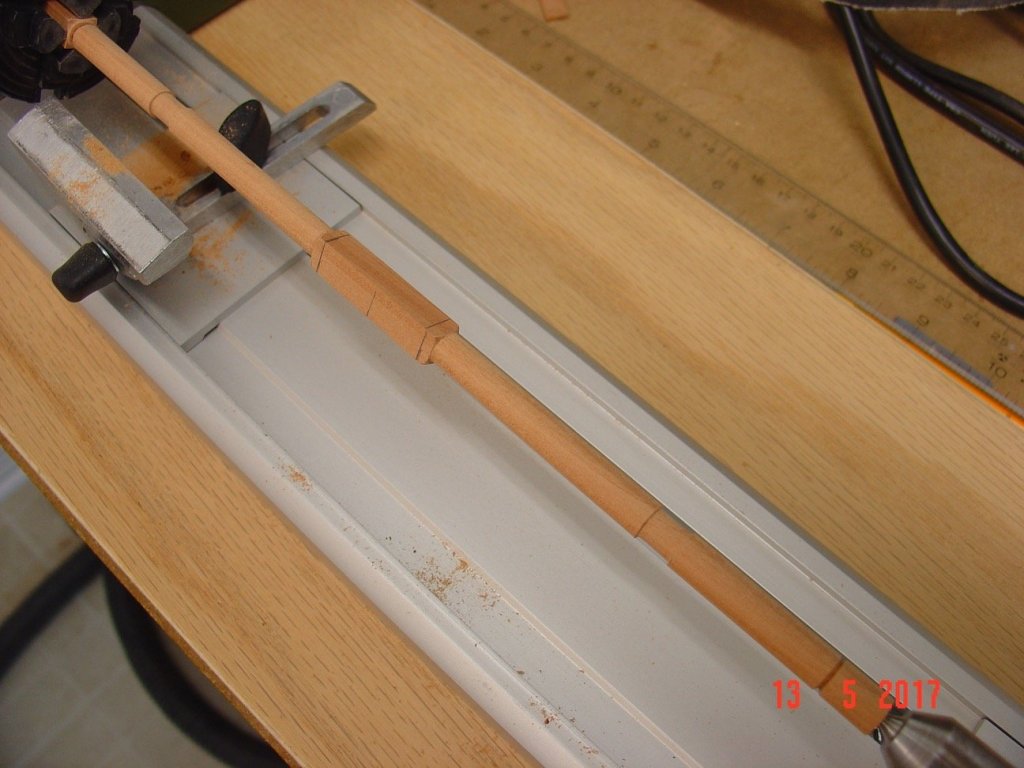
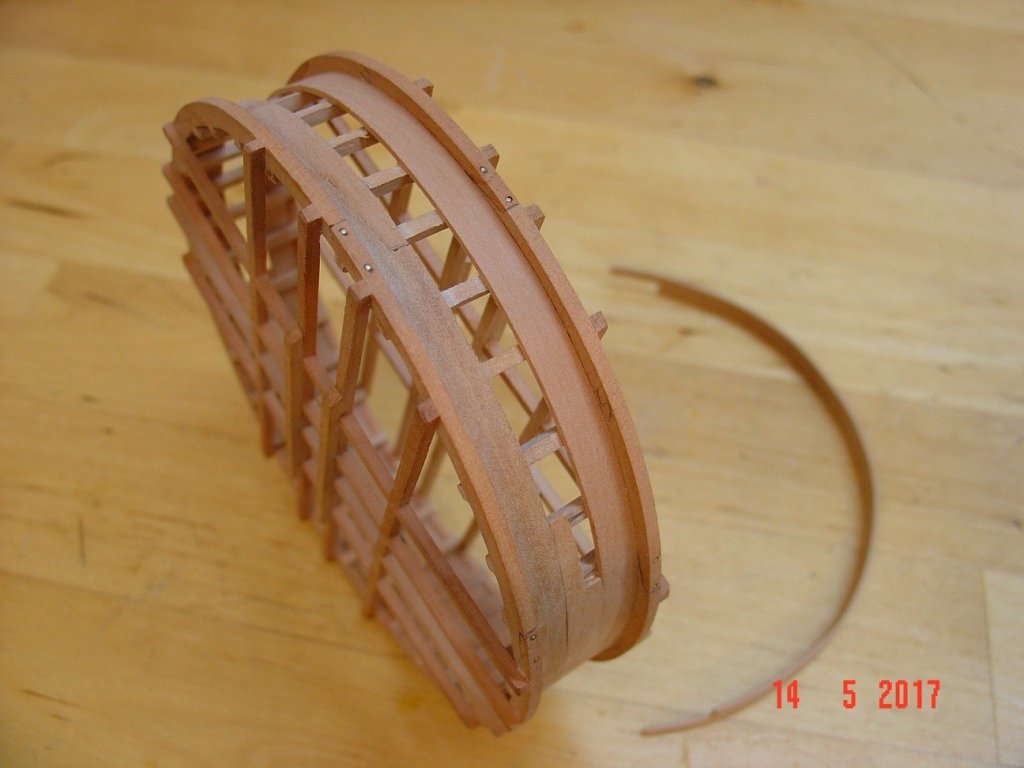
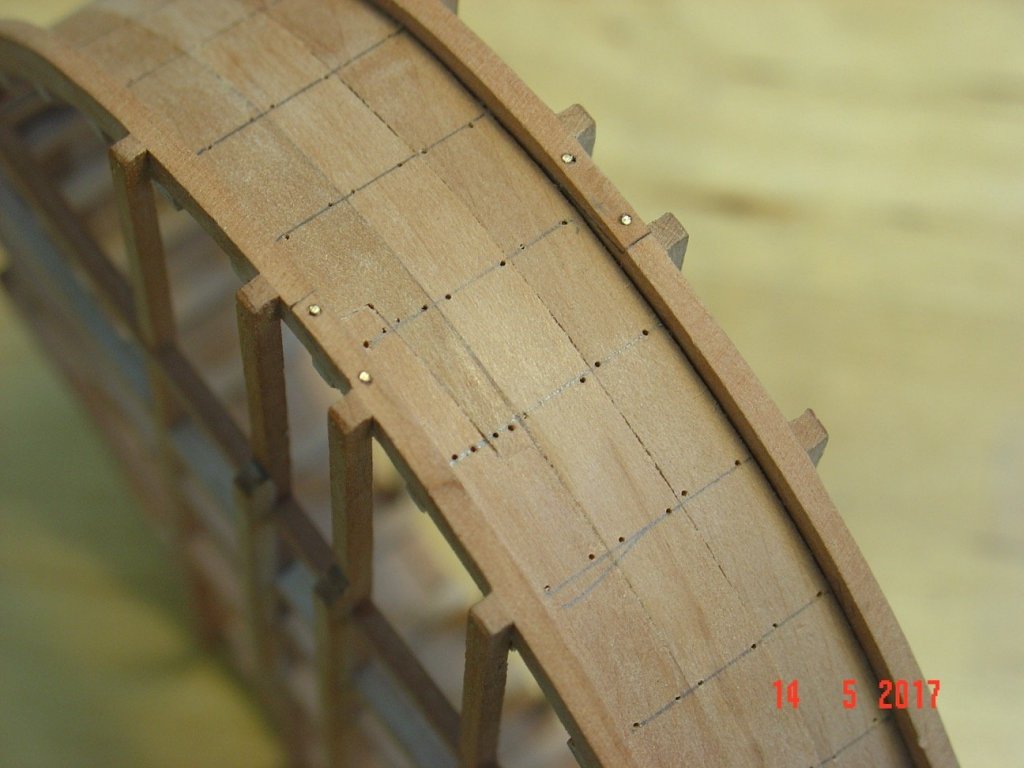
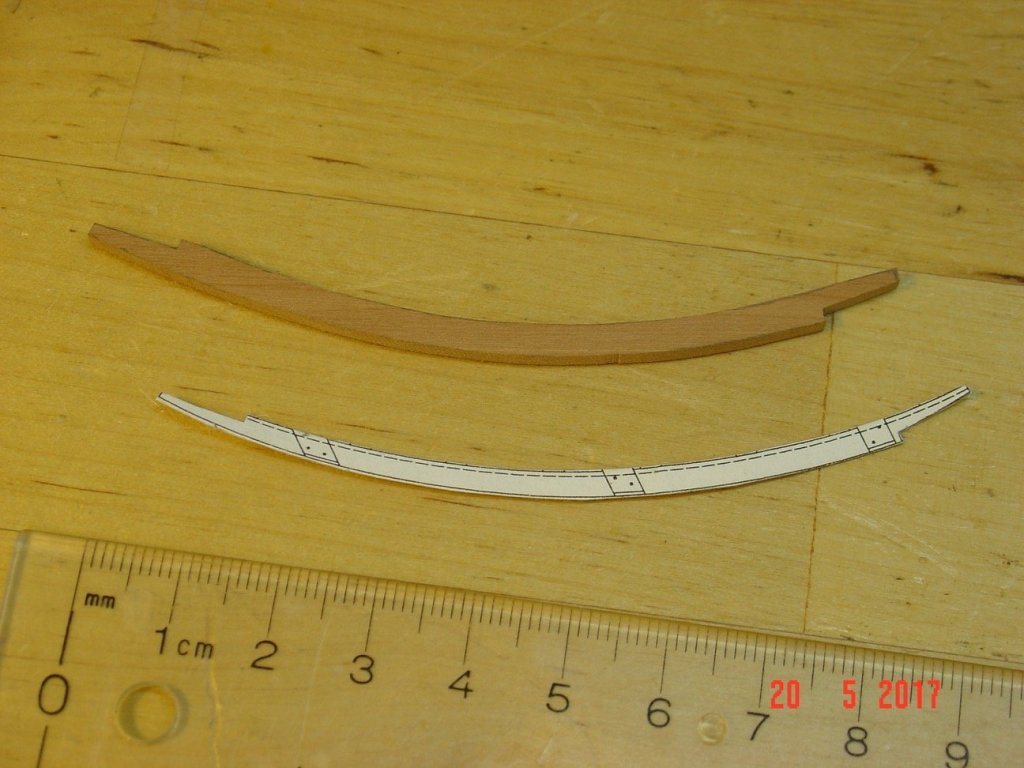
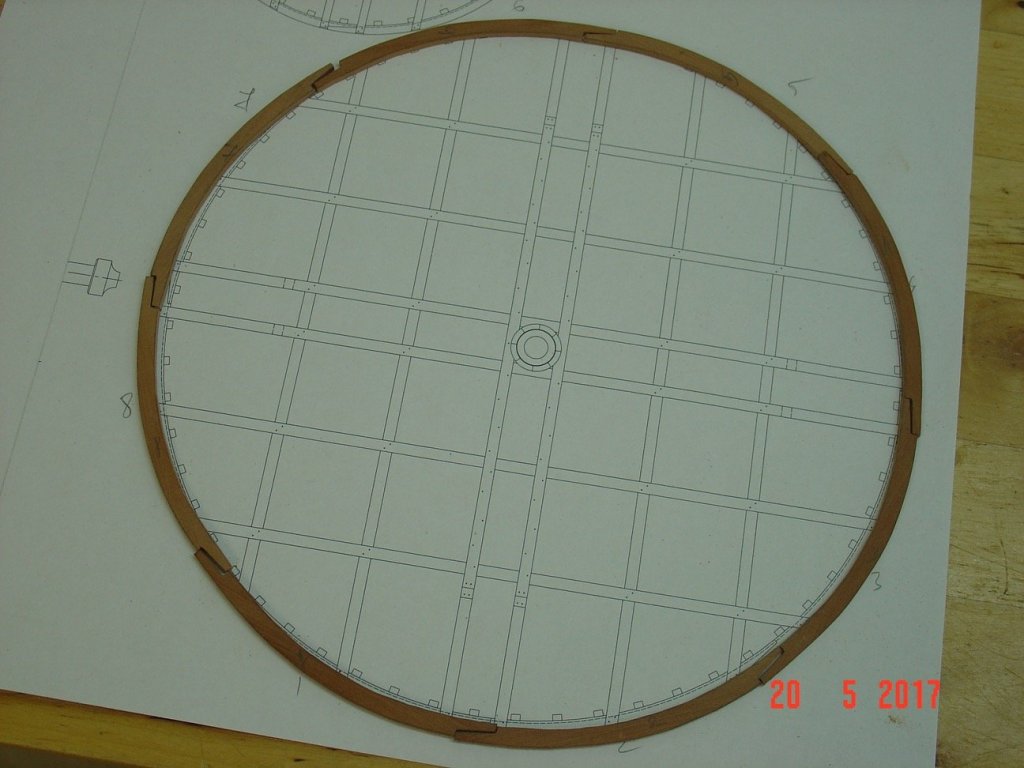
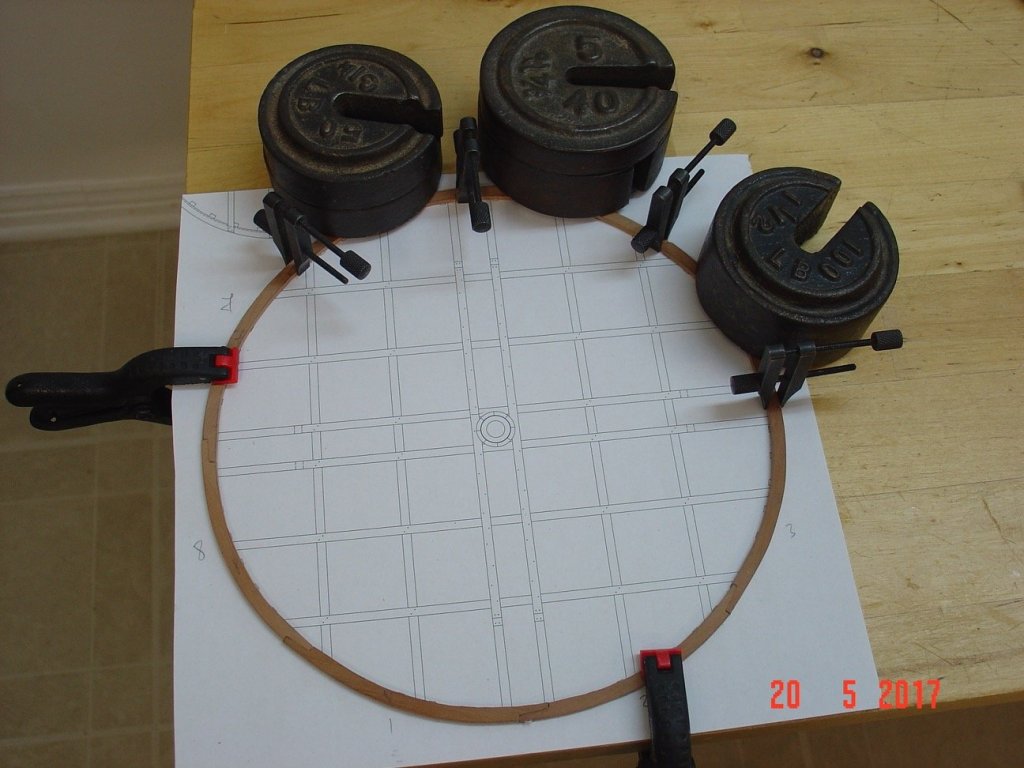
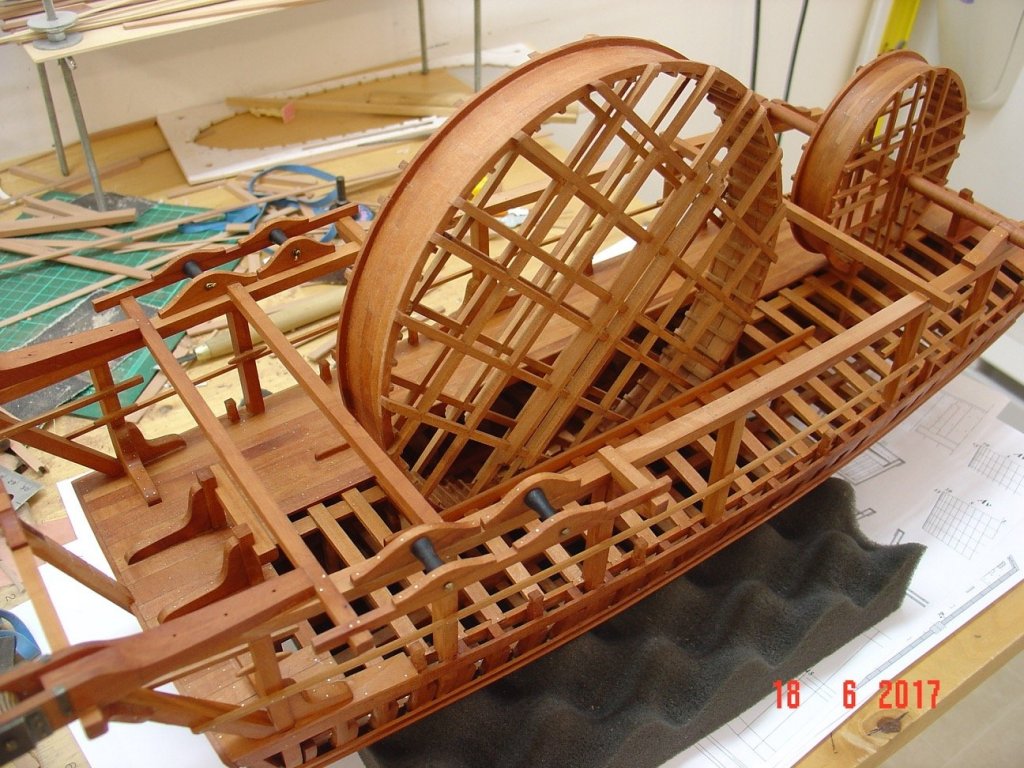
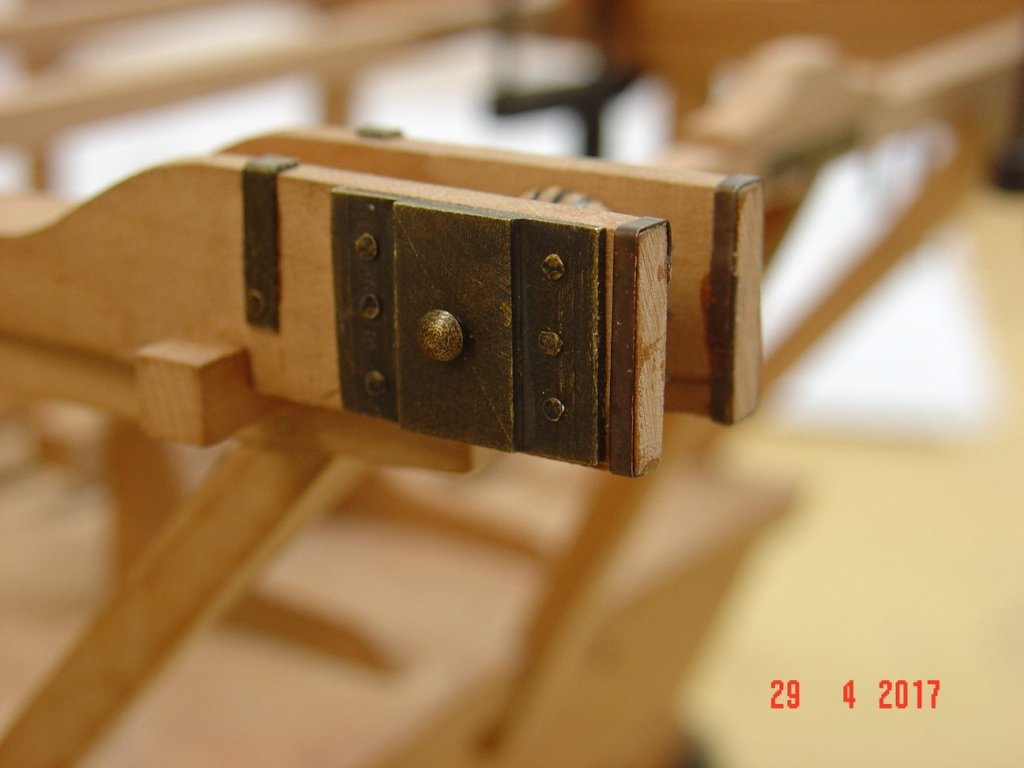
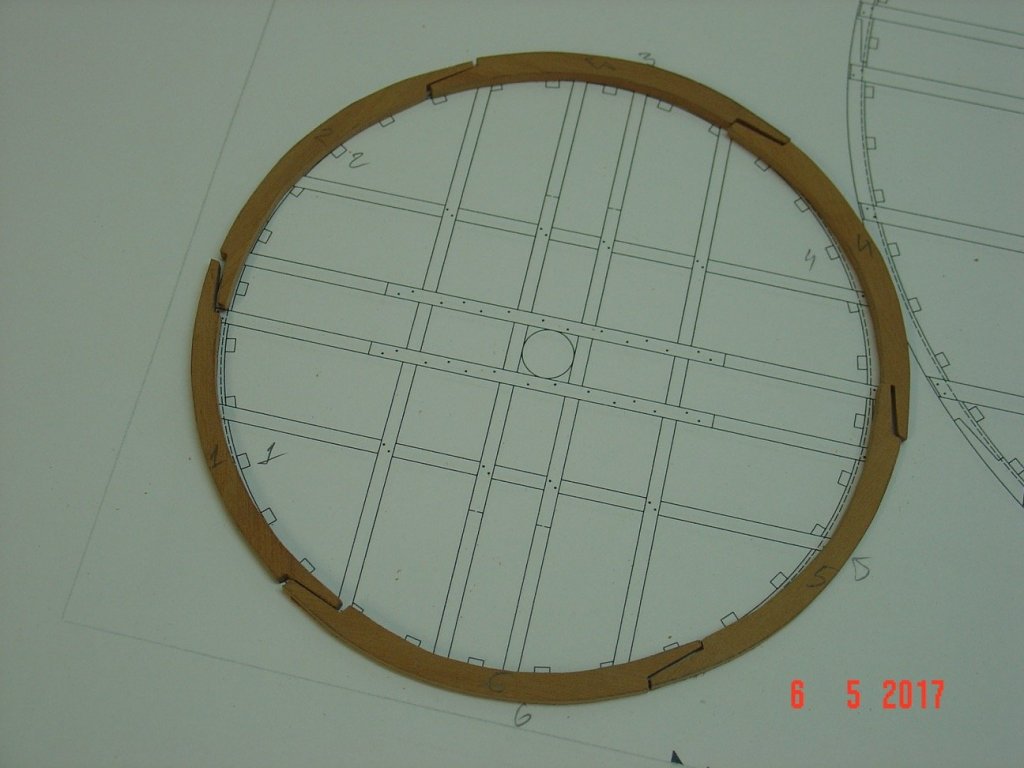
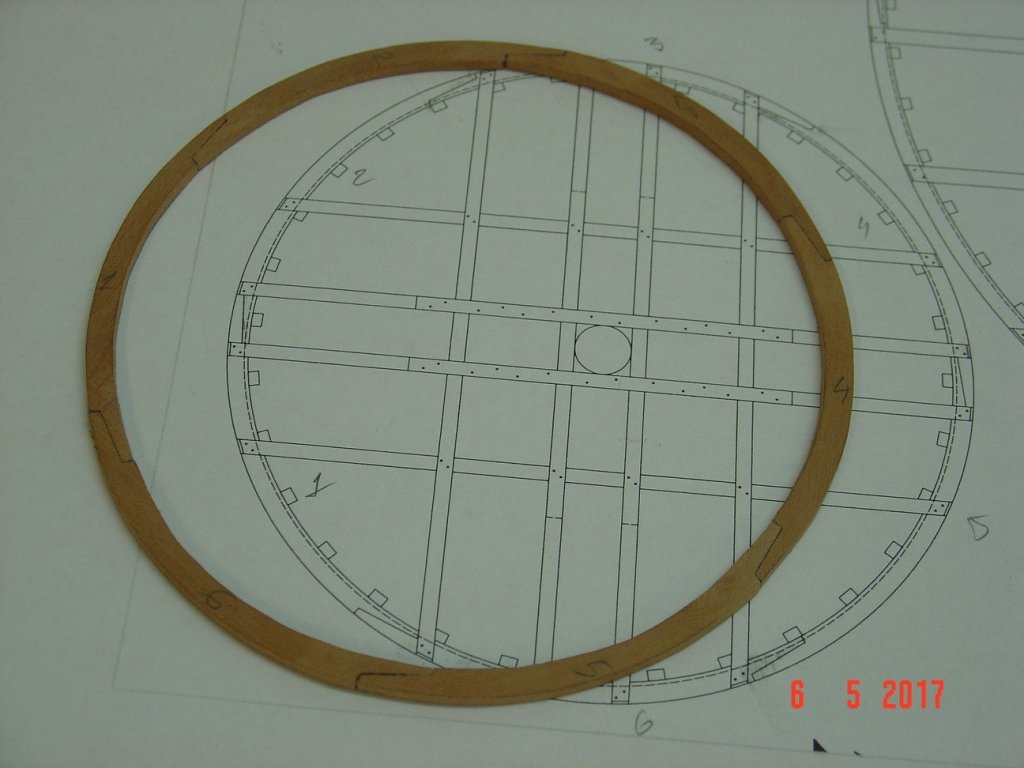
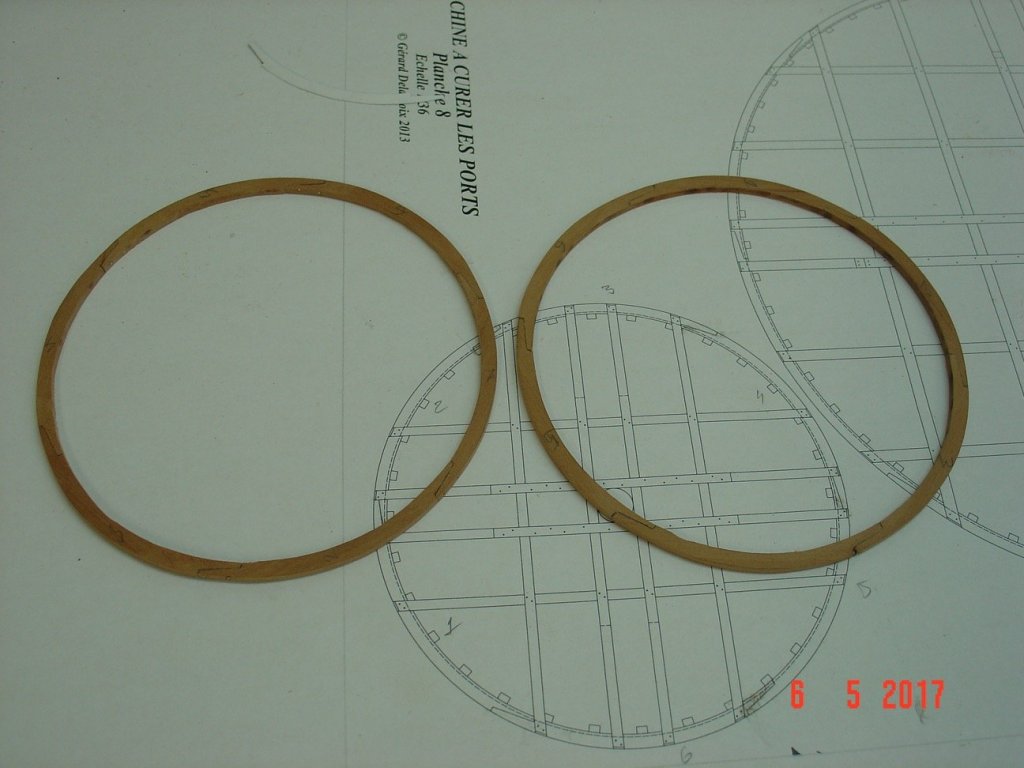
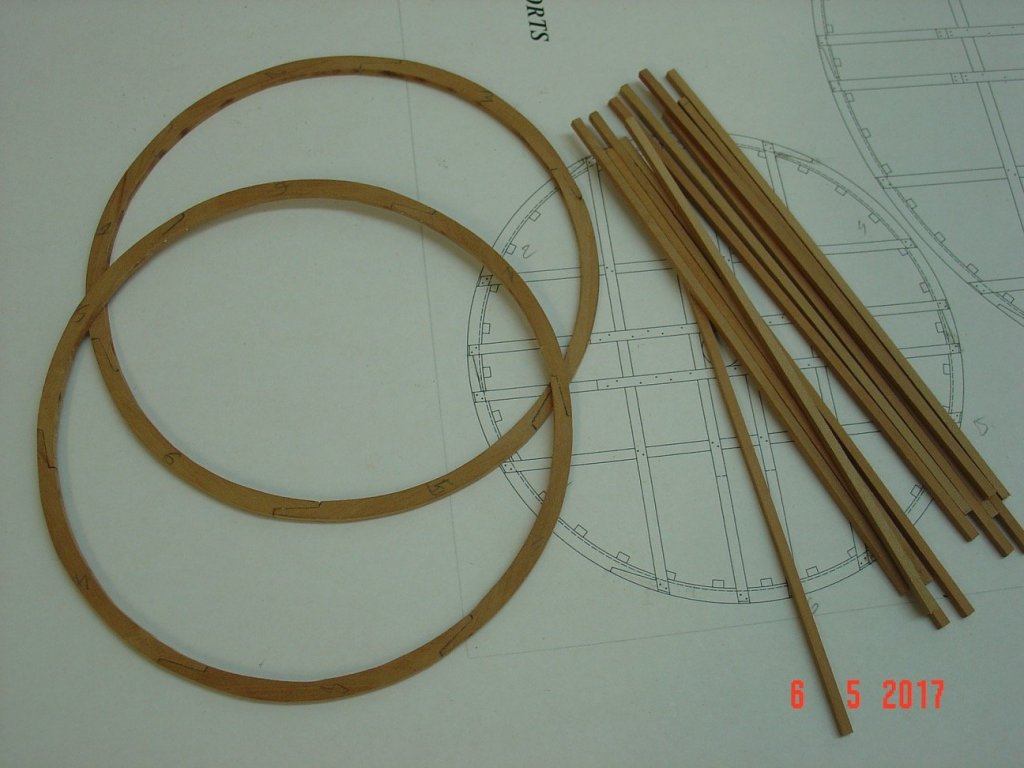
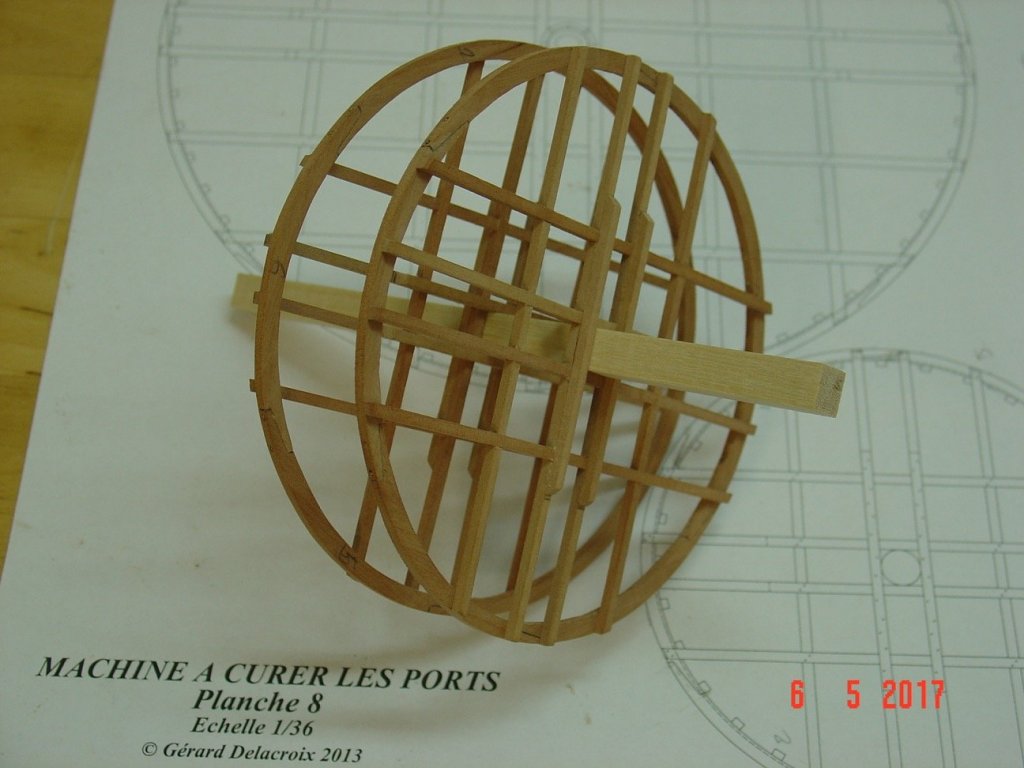
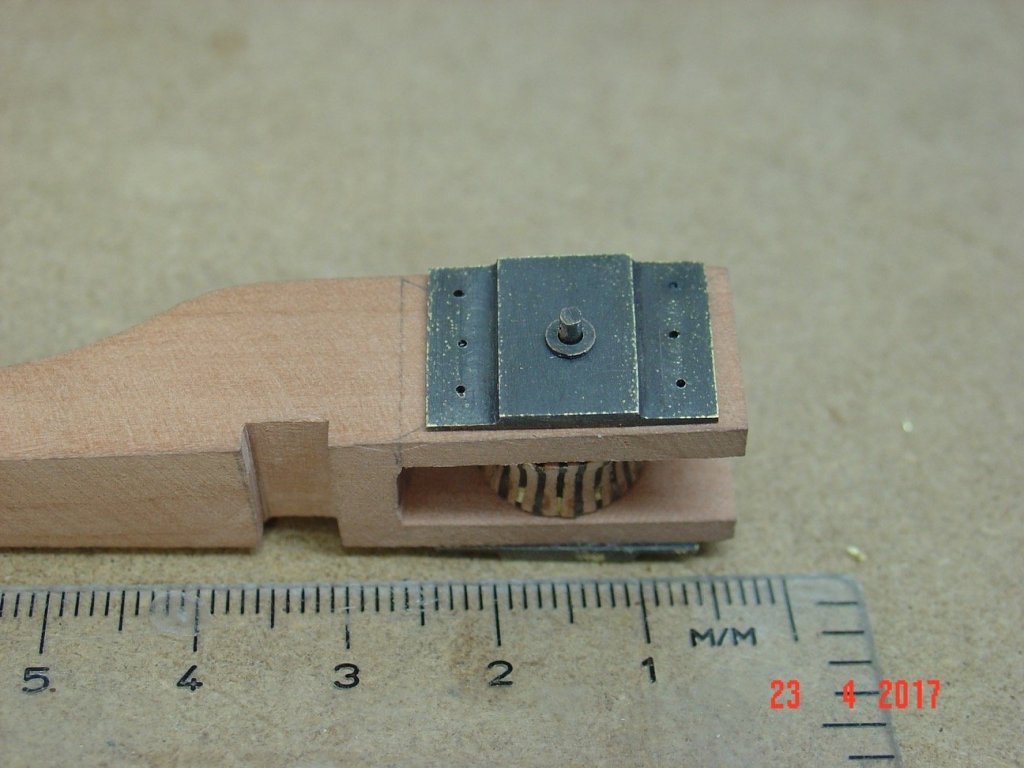
Hello, More progress pictures. You will probably notice the knee under the last beam placed on the inside in first 2 pictures - that was a mistake and I took them out since then. In picture number 8 they are on the outside as they should have been in the first place. I started the small wheel this morning and it is more complicated to build than I expected. I thought that the small one will be easier to do than the big one first but because is small all pieces are thin and break very easily. The two wheels are made from 6 arched pieces each - think I had to cut at least 4 more to replace the broken ones. Plus the horizontal/vertical spokes are square 2mm thick in section and they join at half wood. Those broke a lot too. But in the end I managed to do them and they look quite sturdy now after the full assembly. Quite happy with them. Alexandru


-
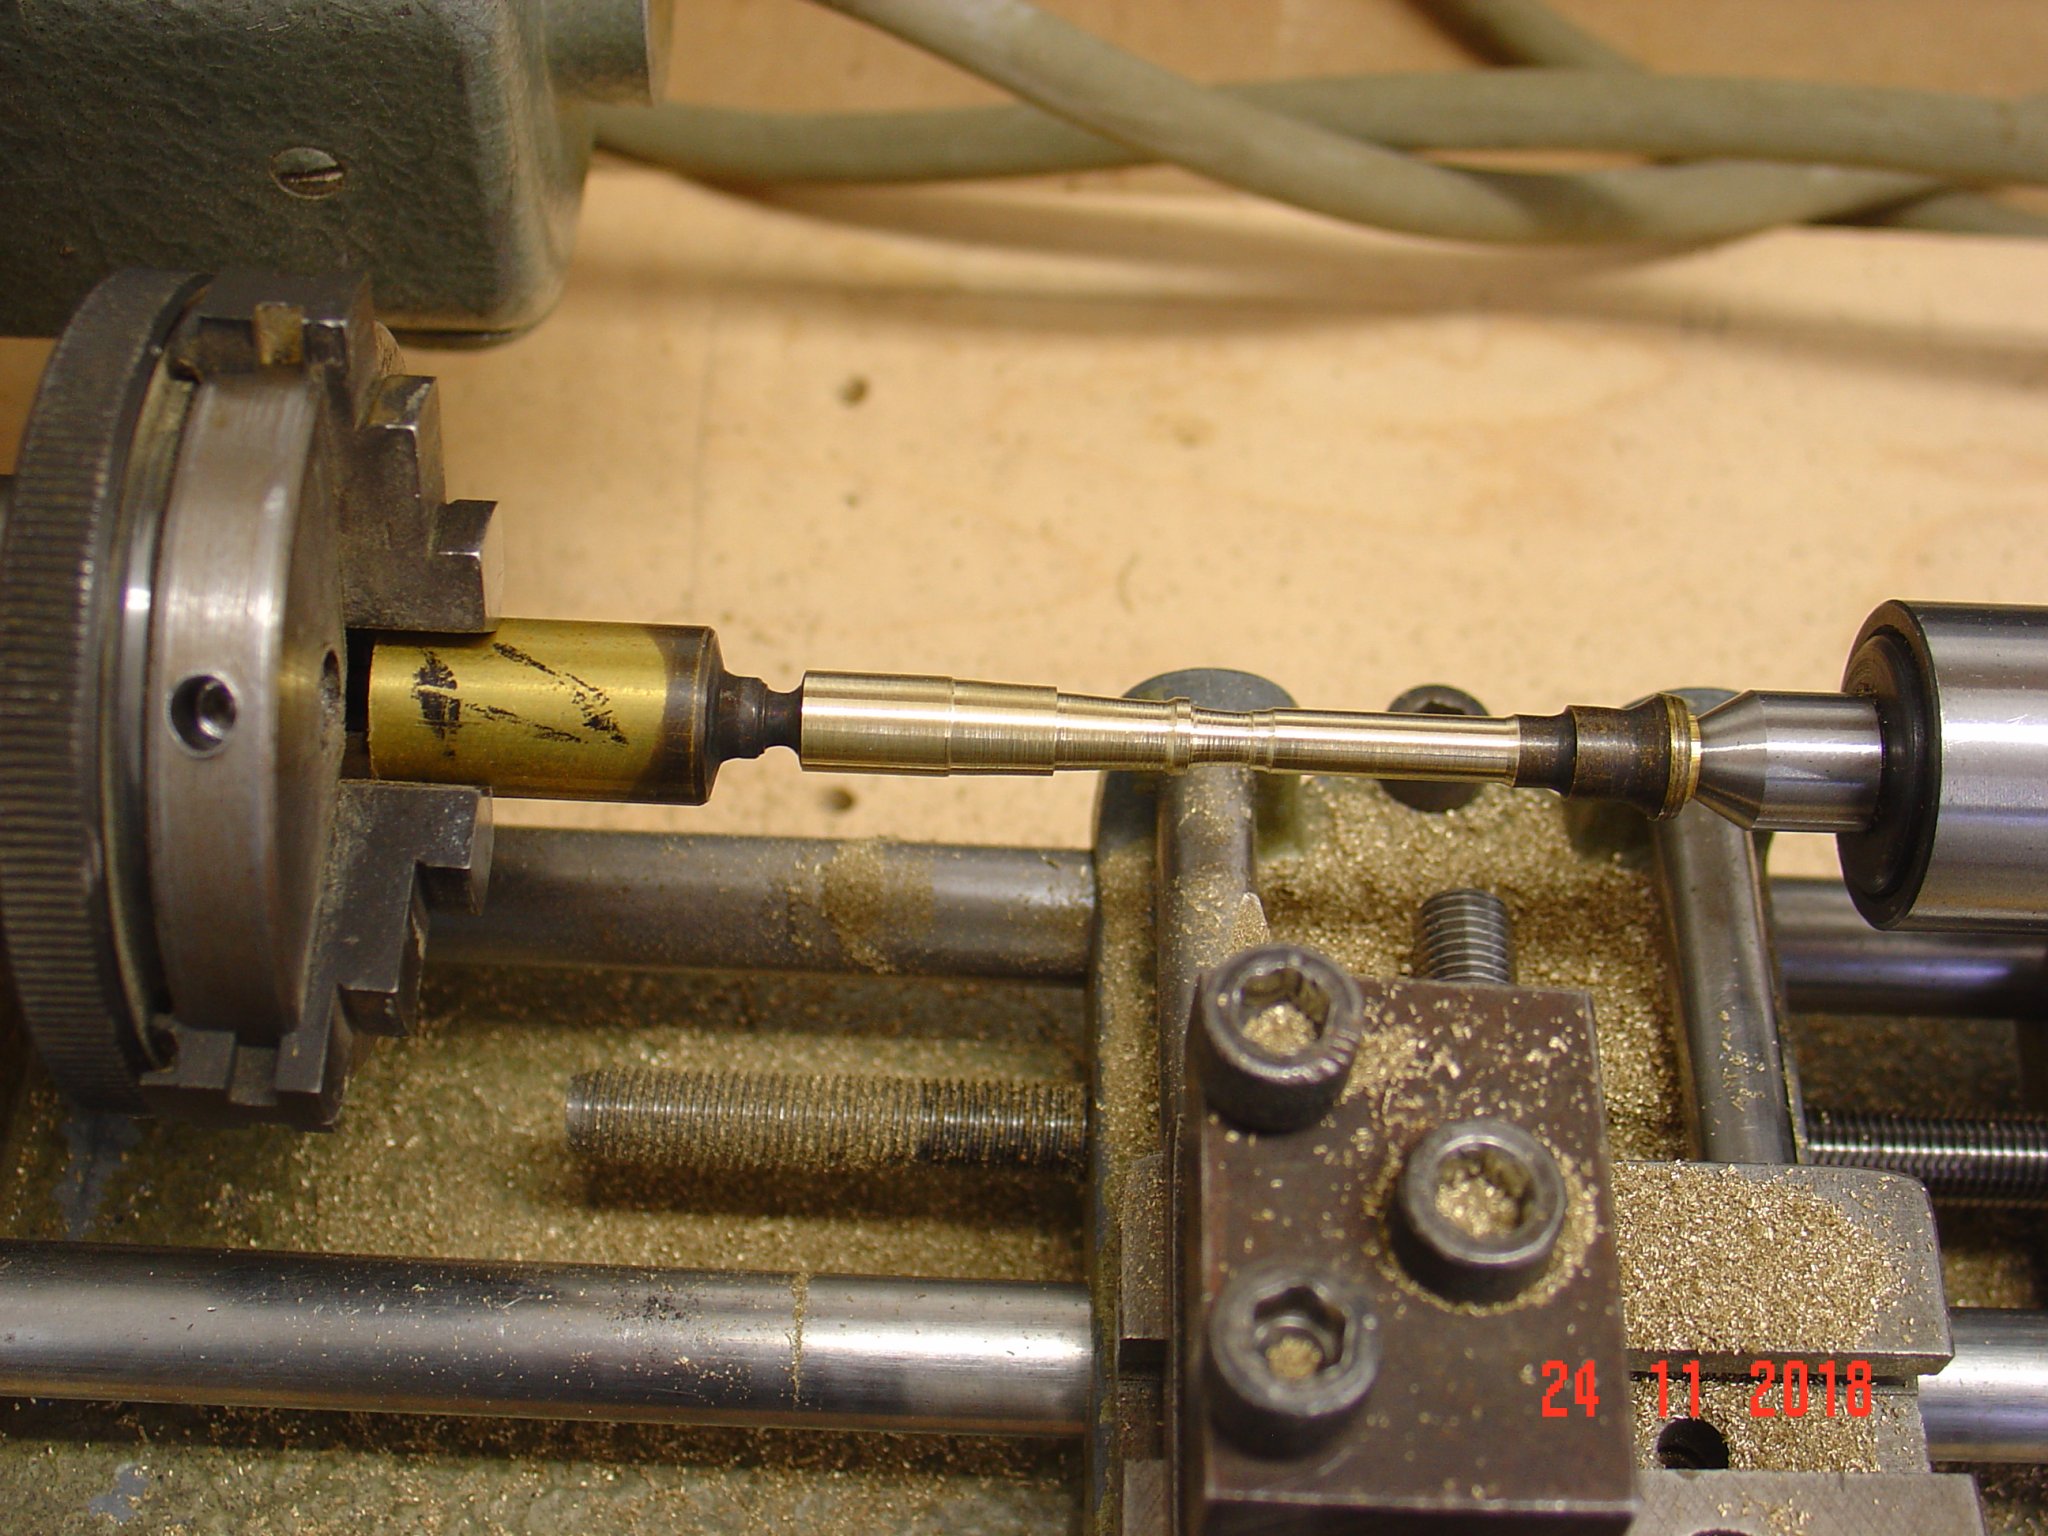
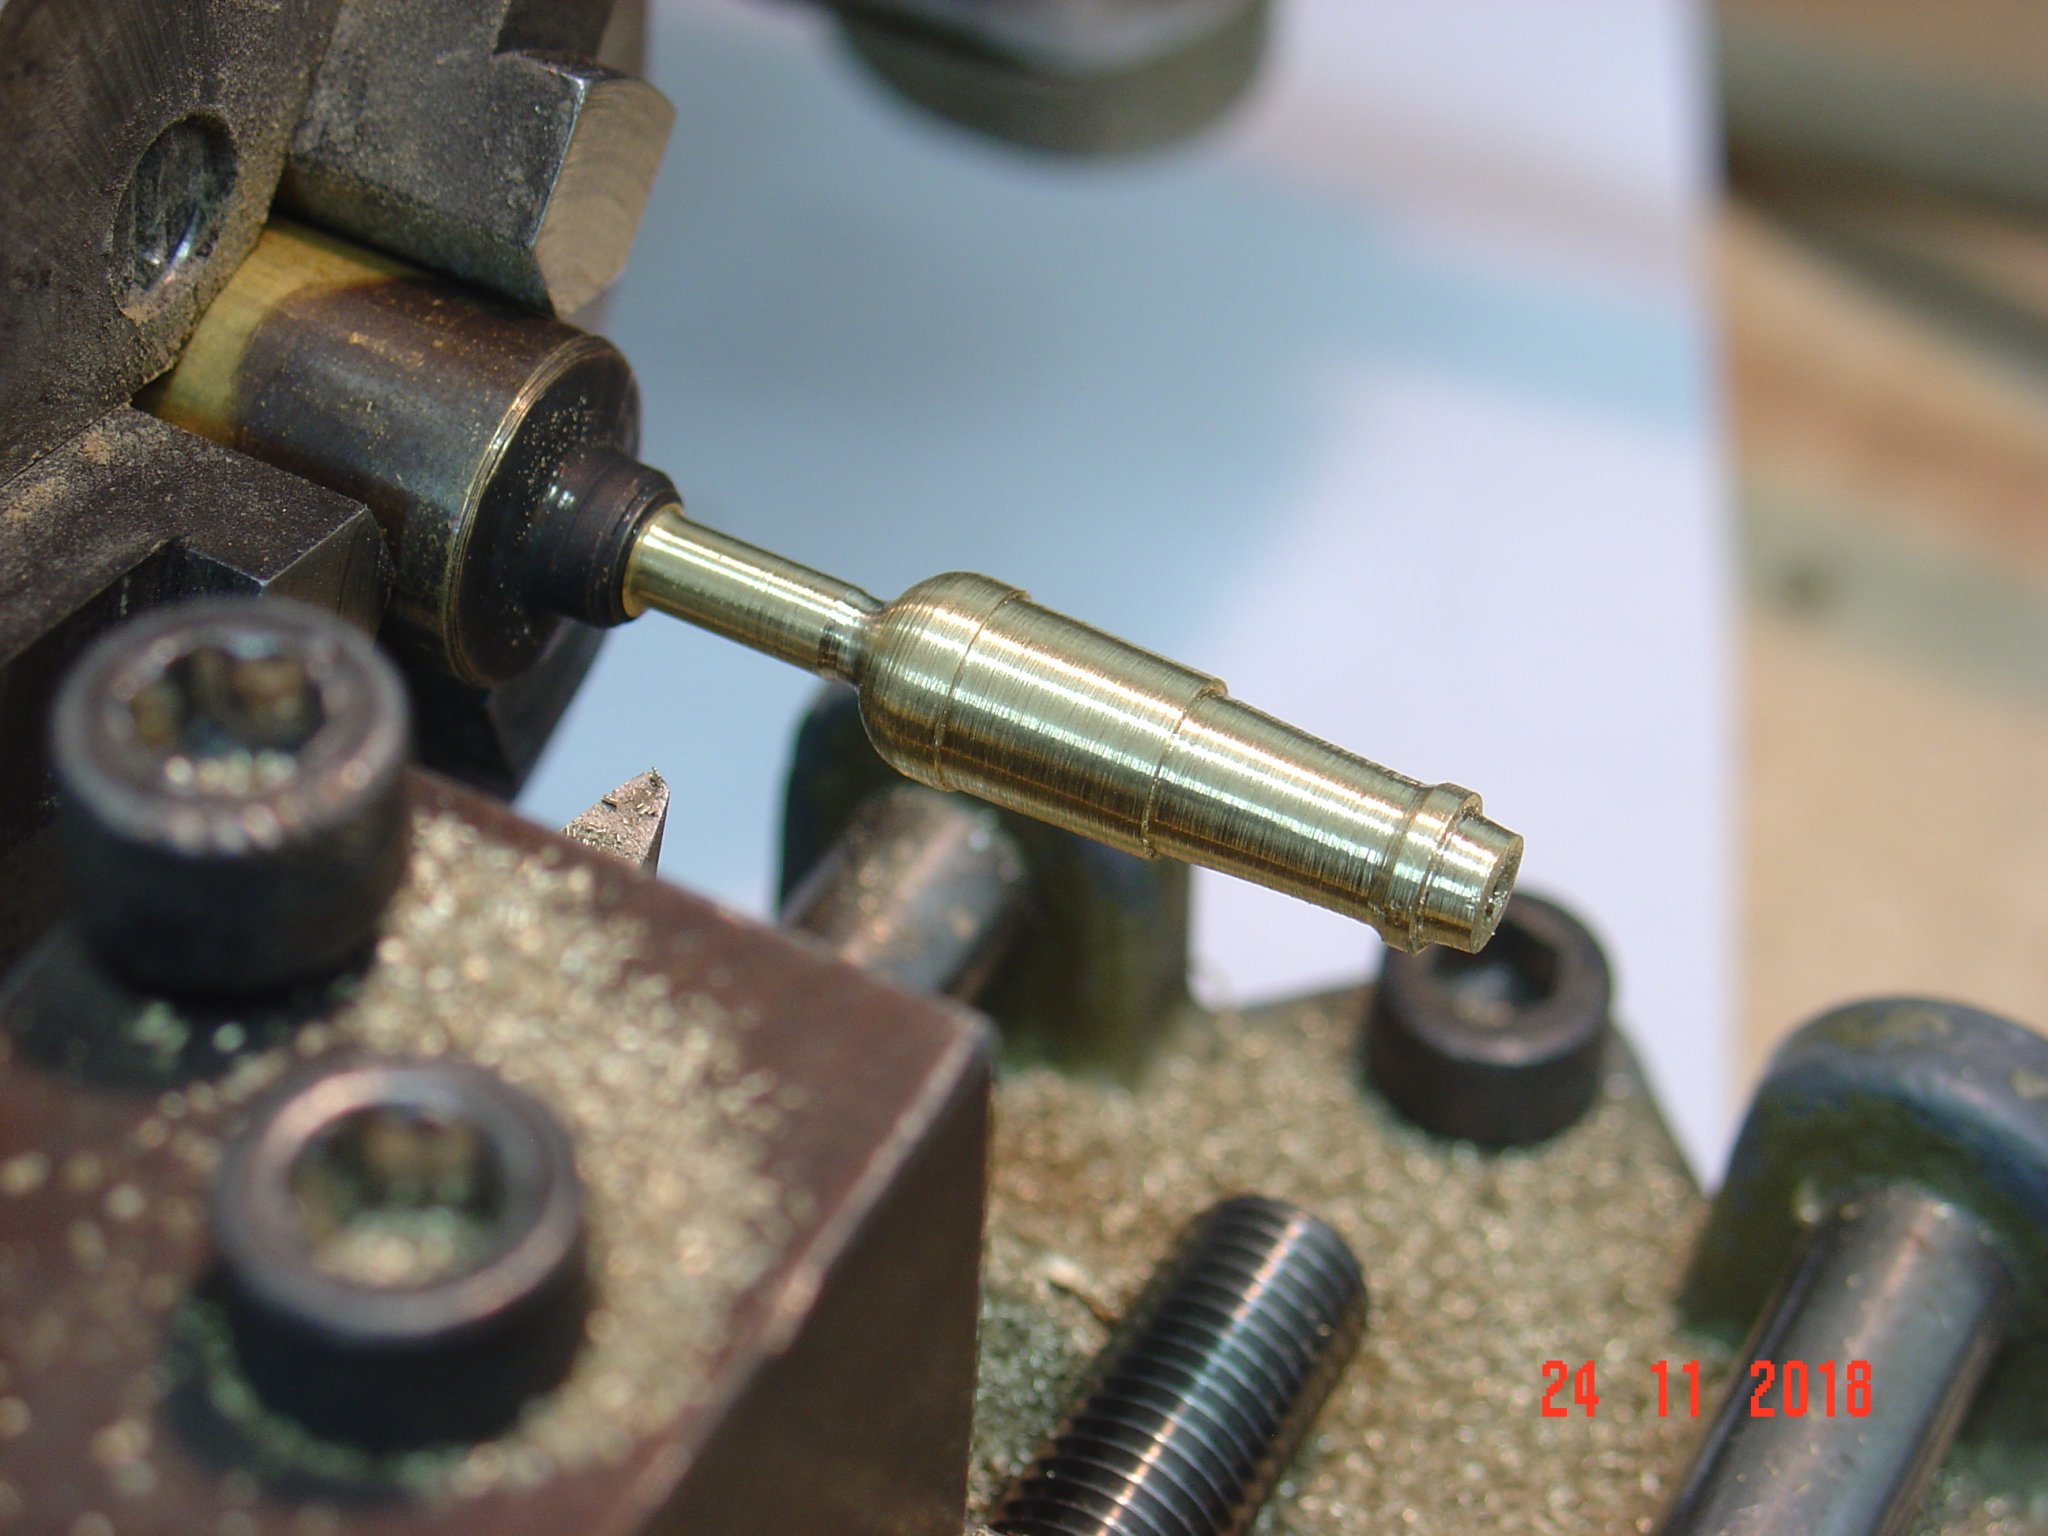
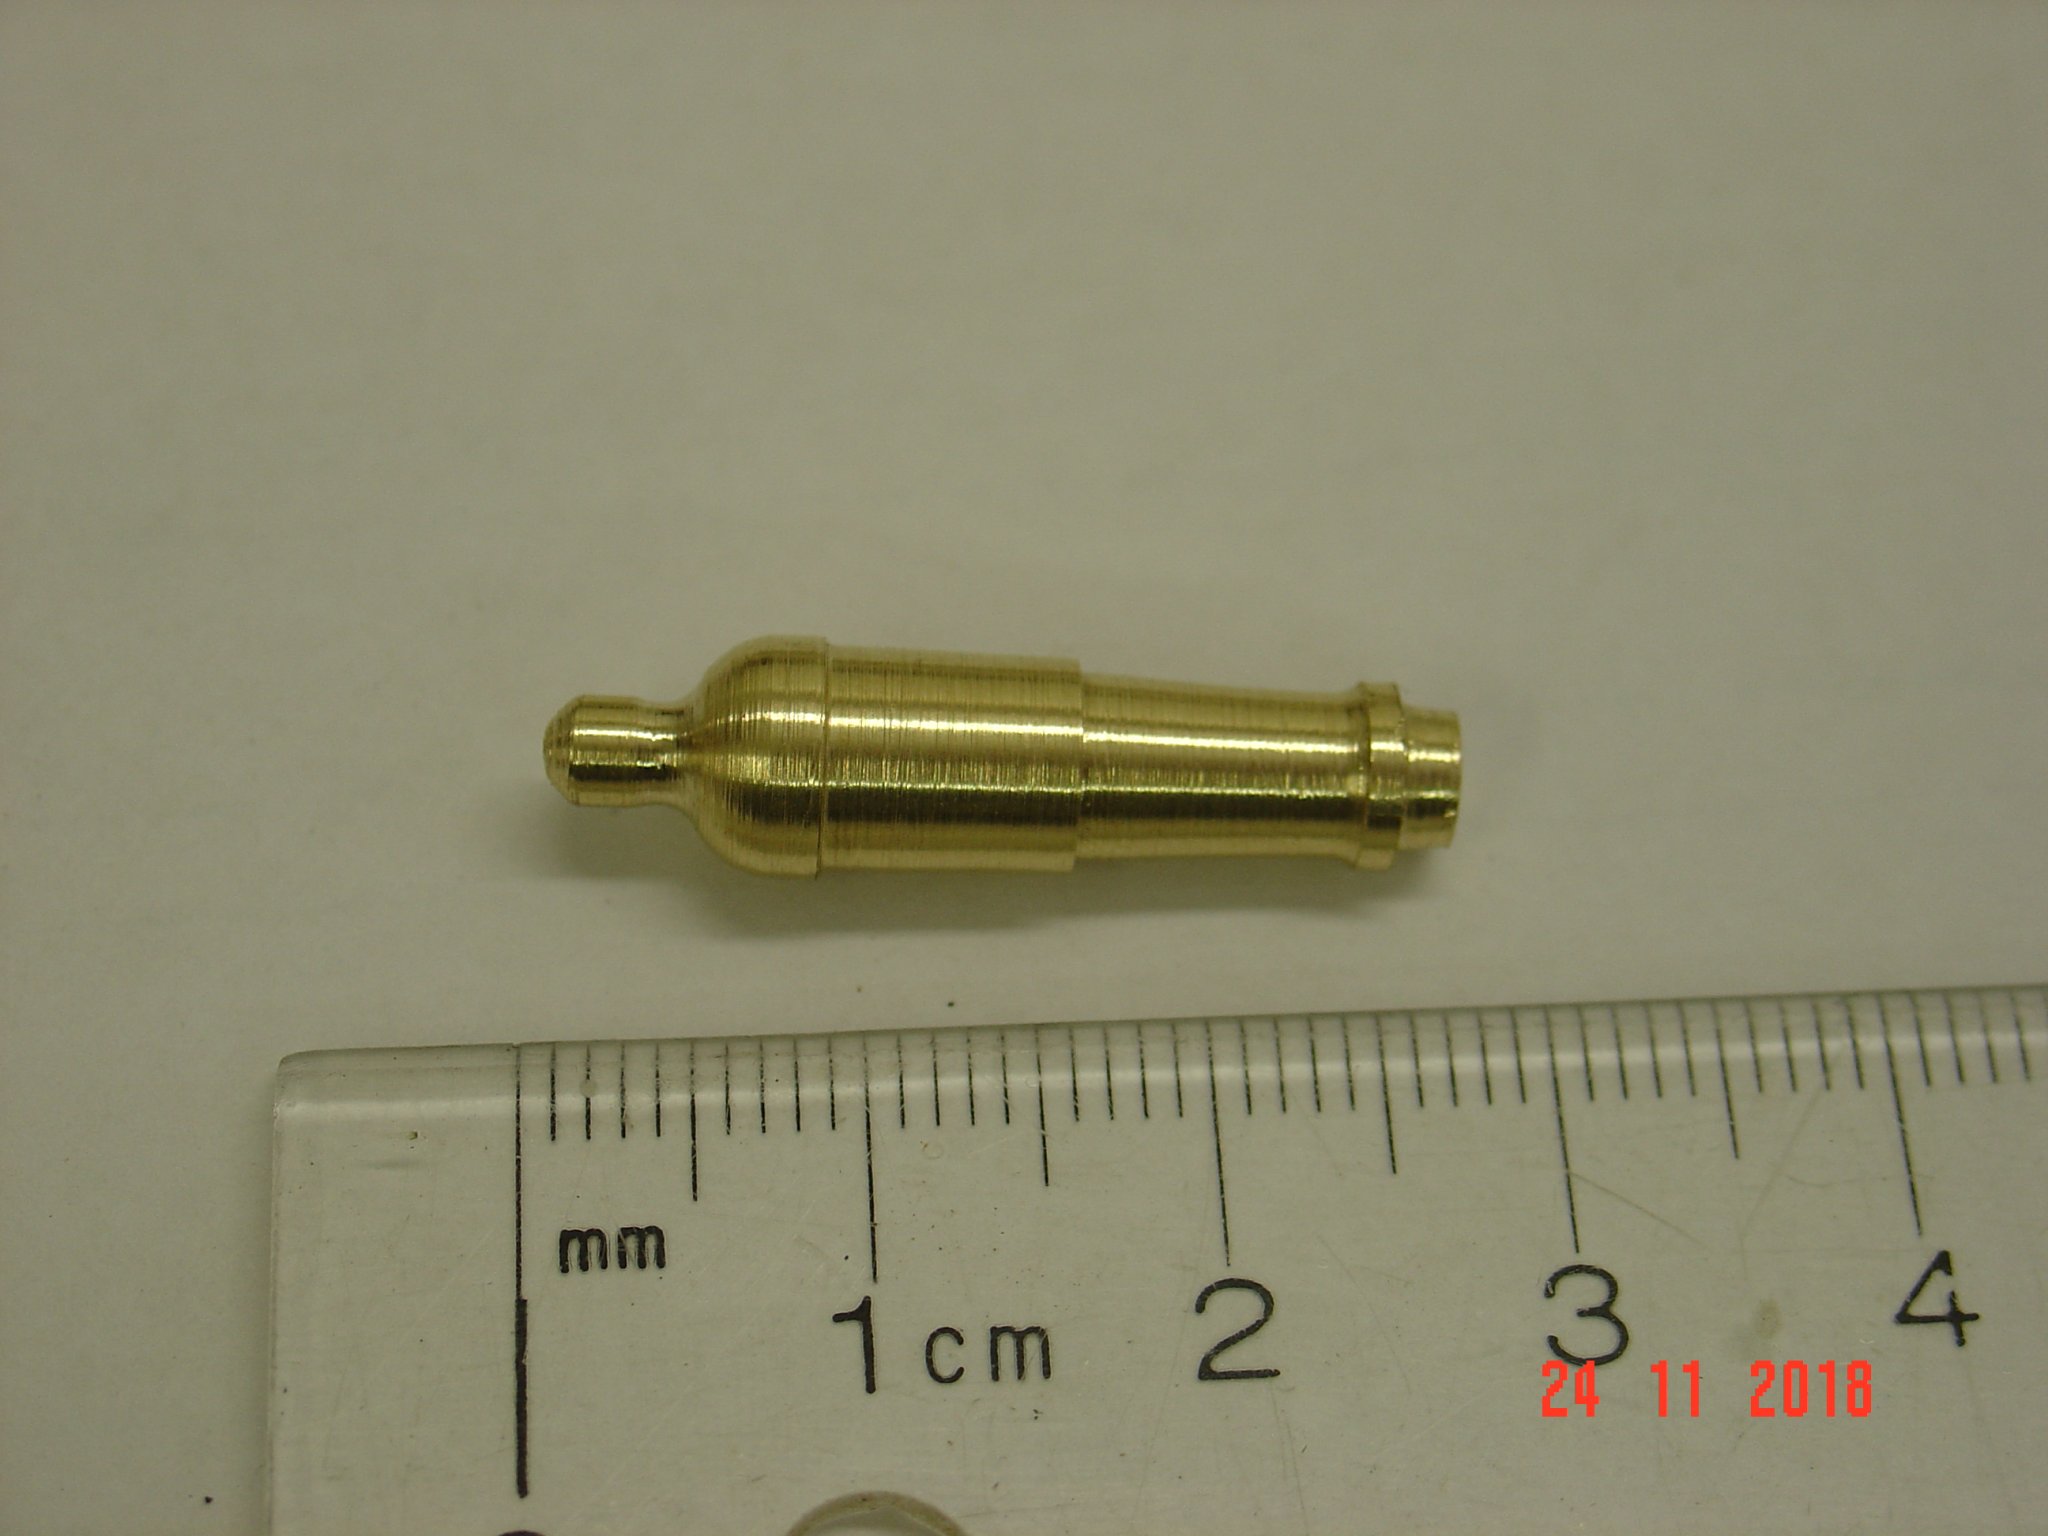
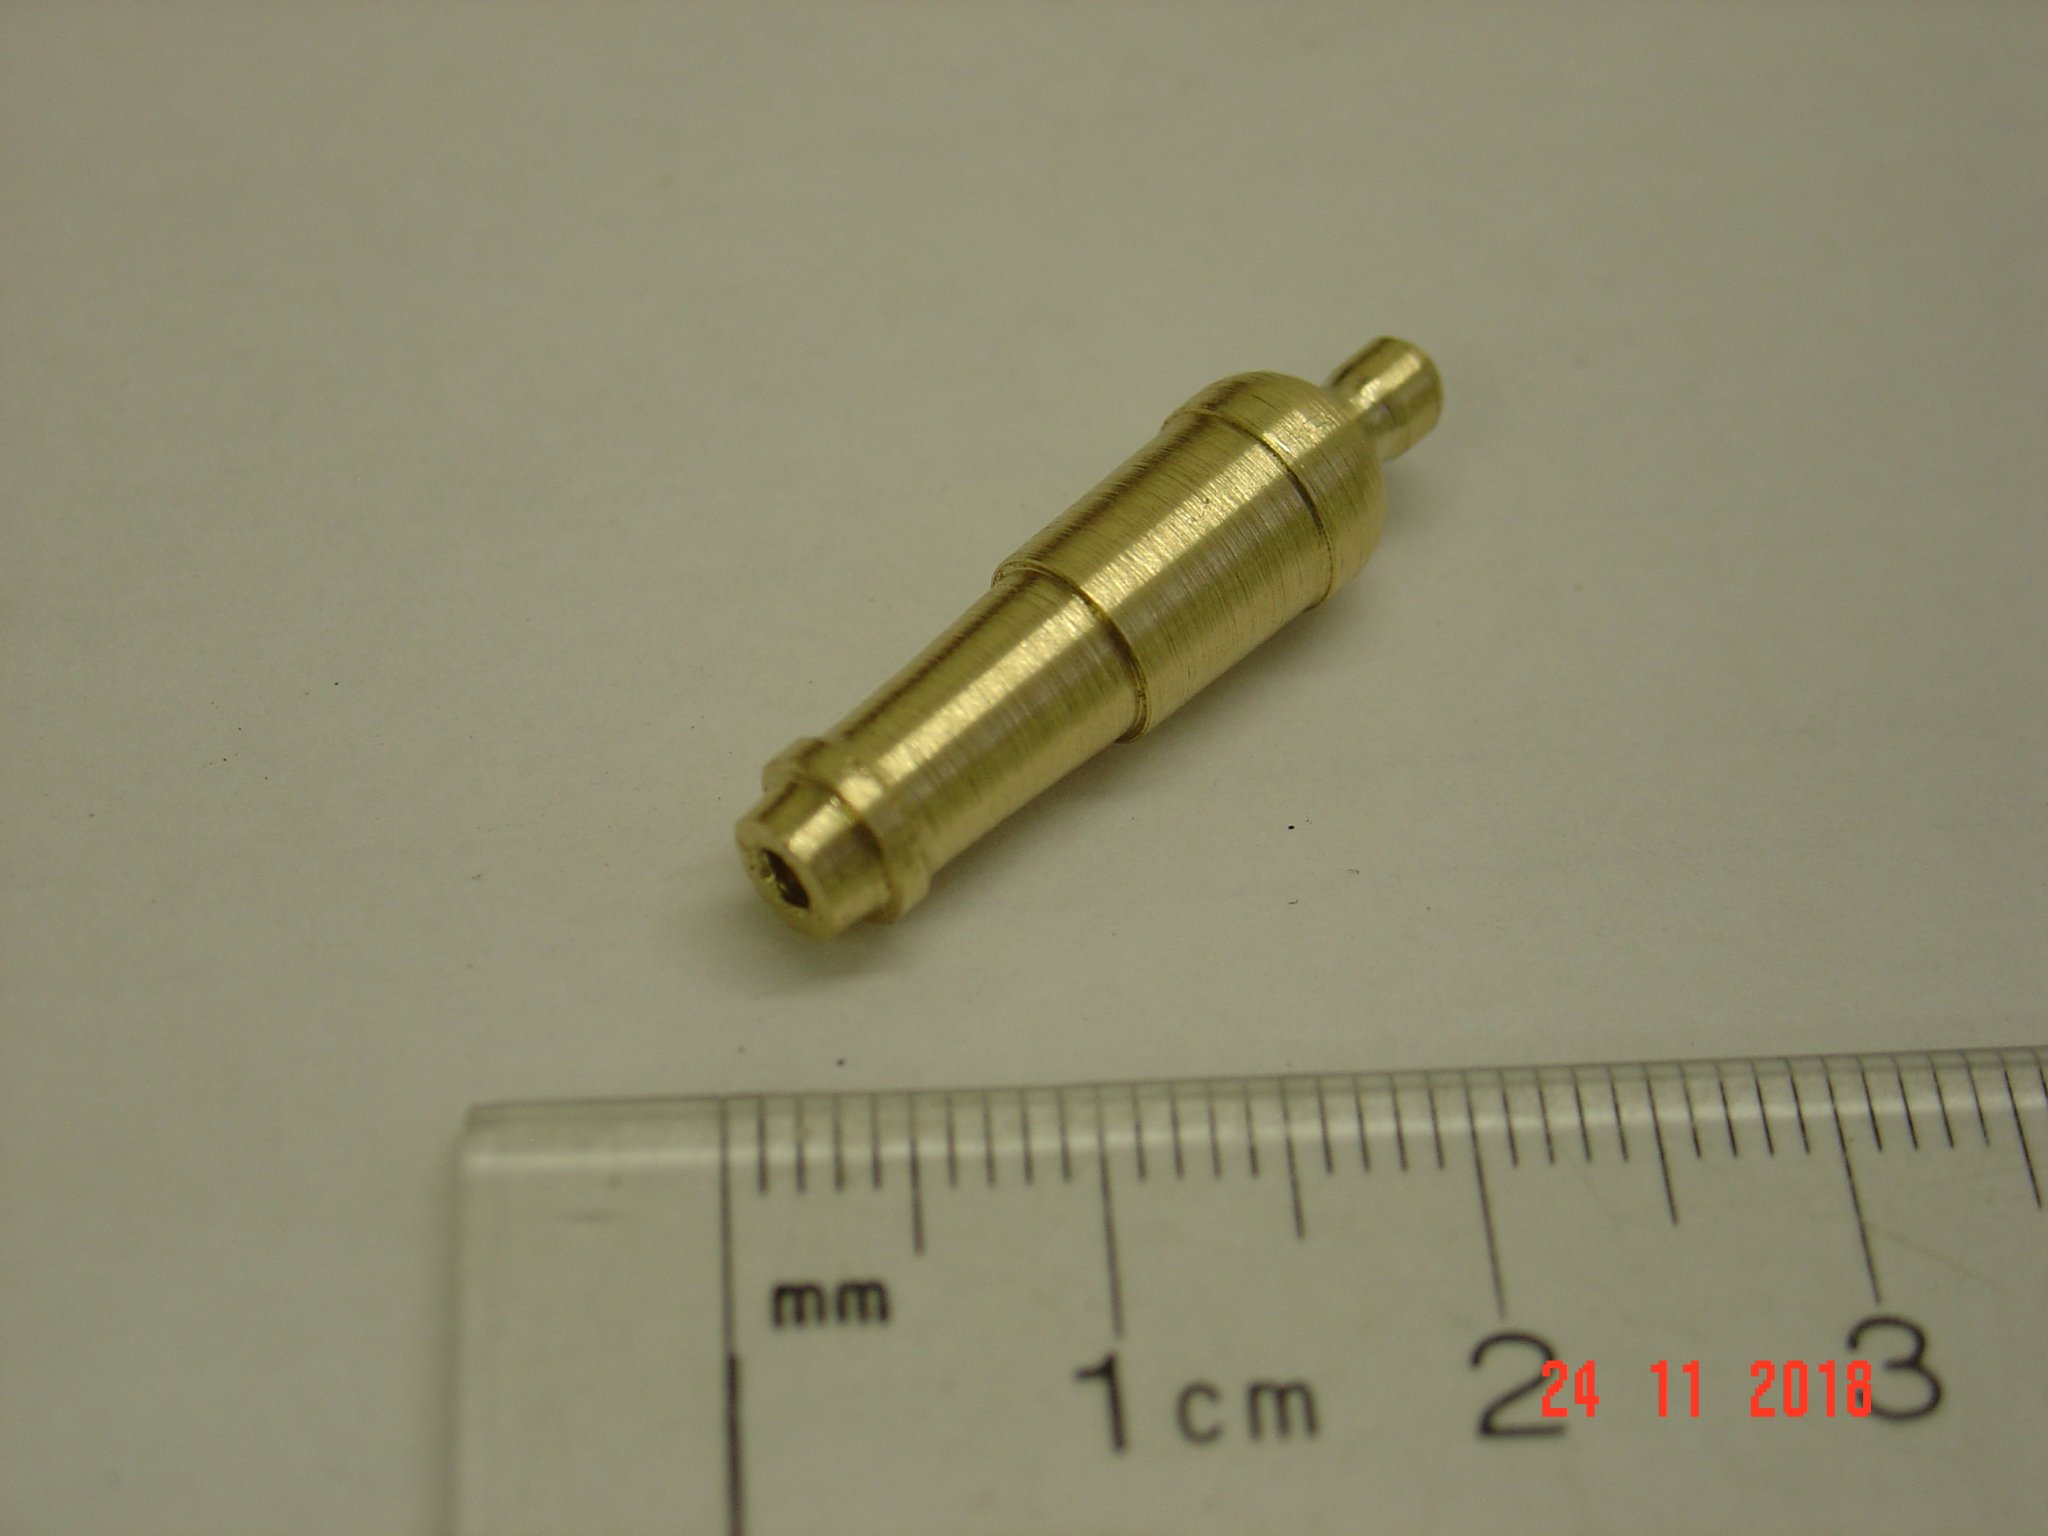
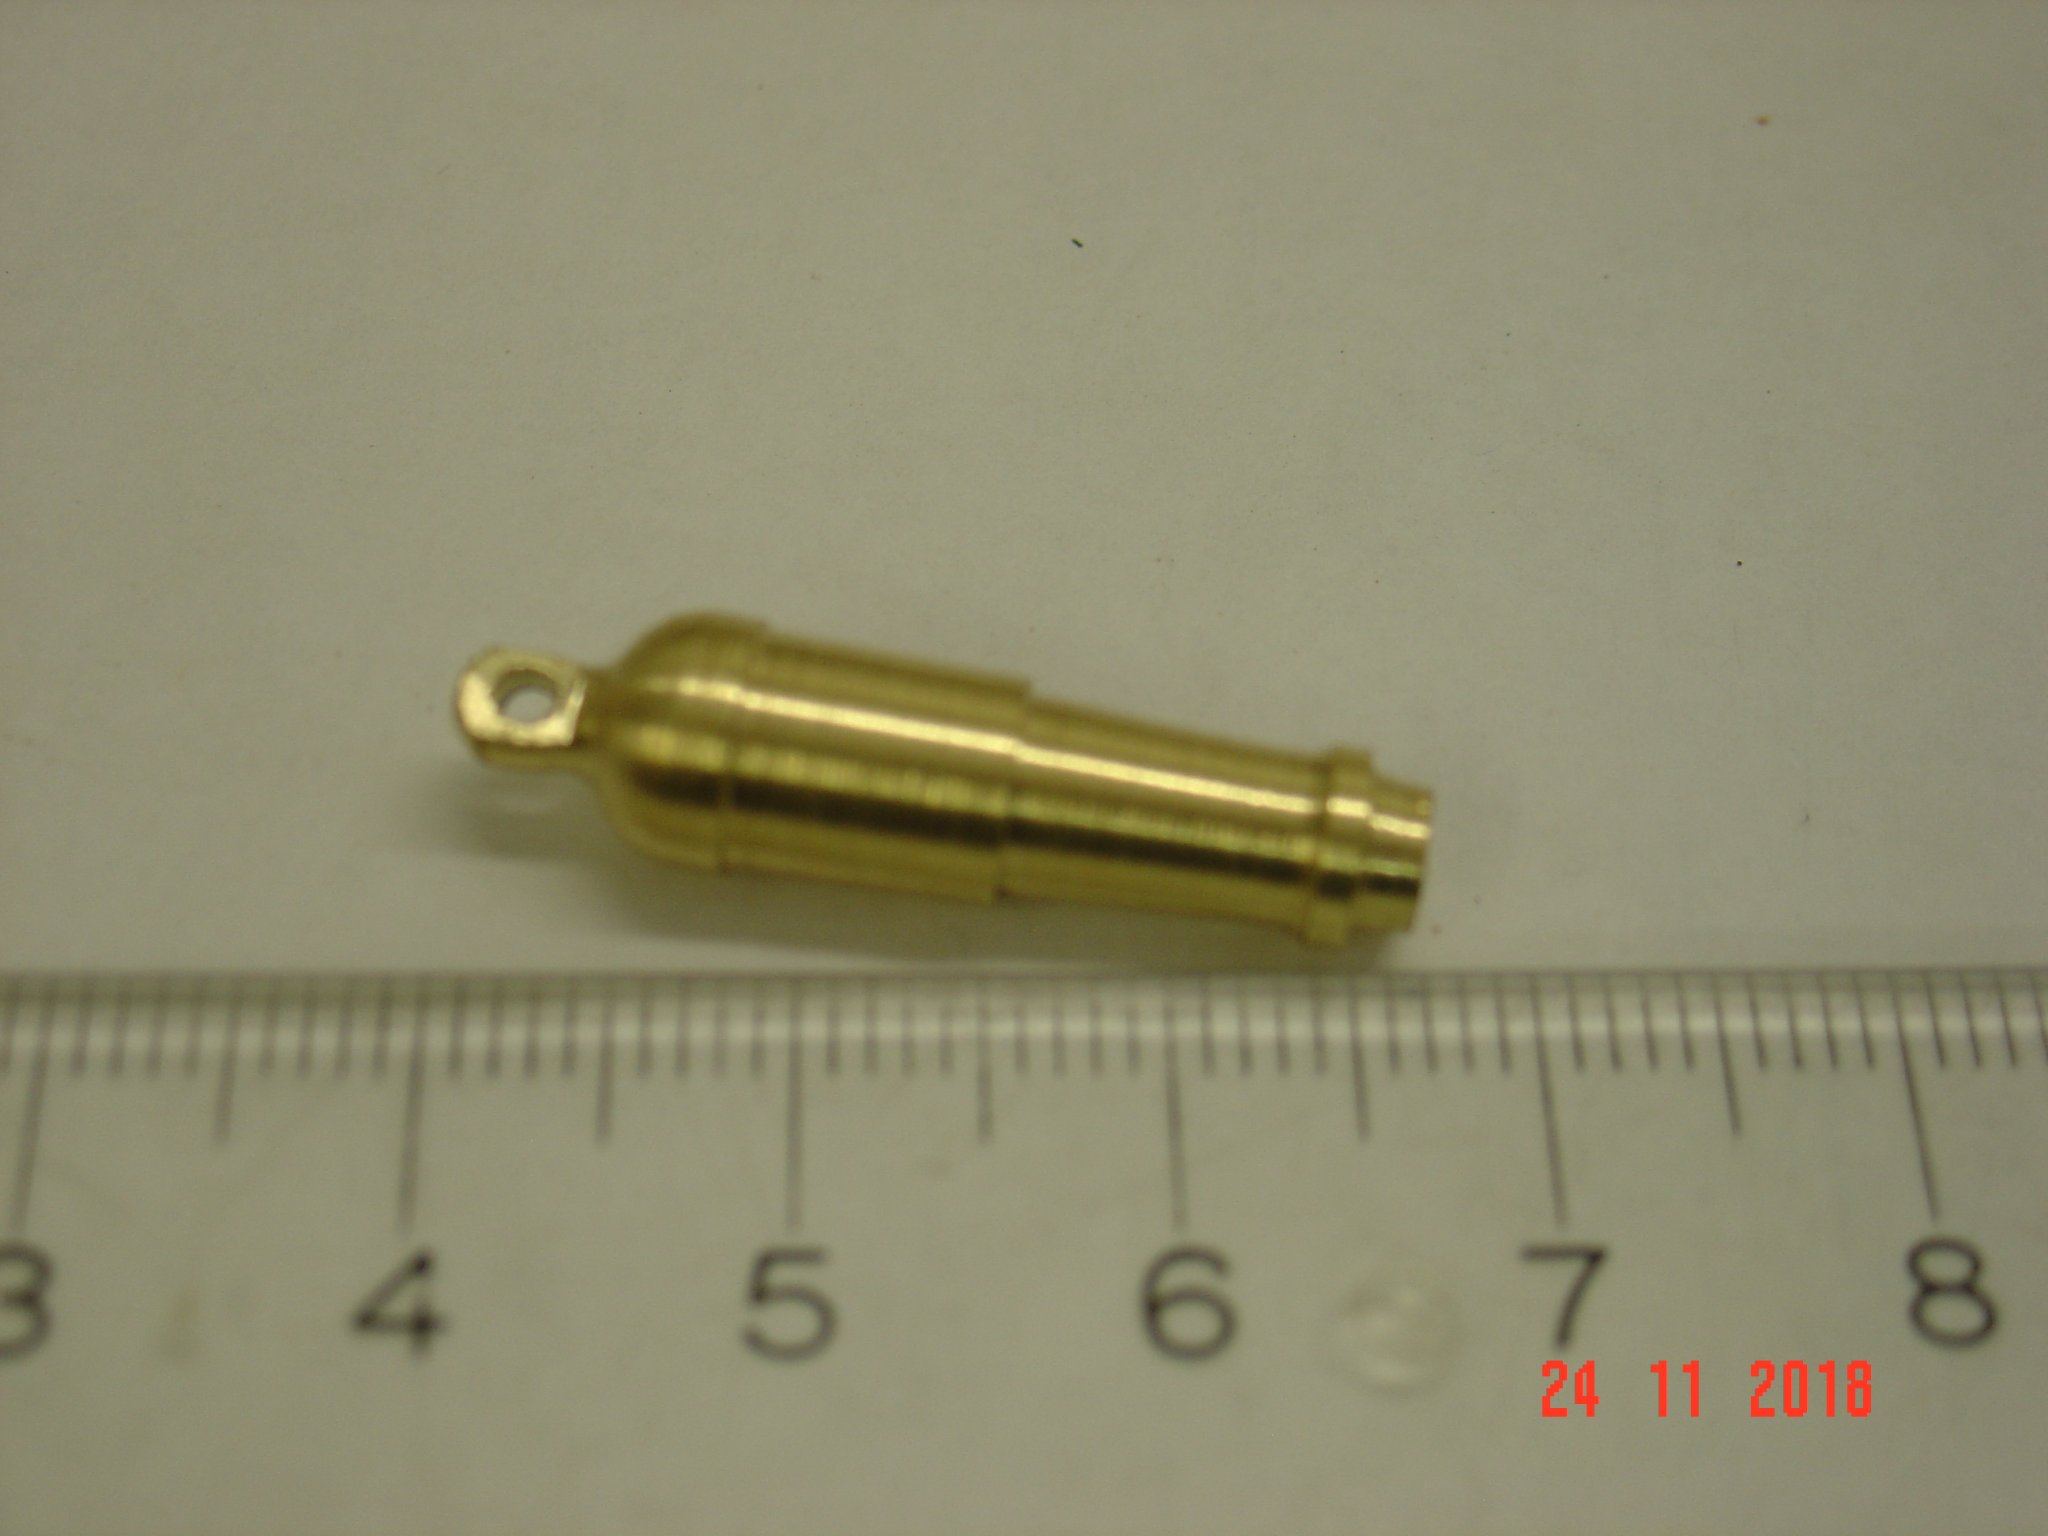
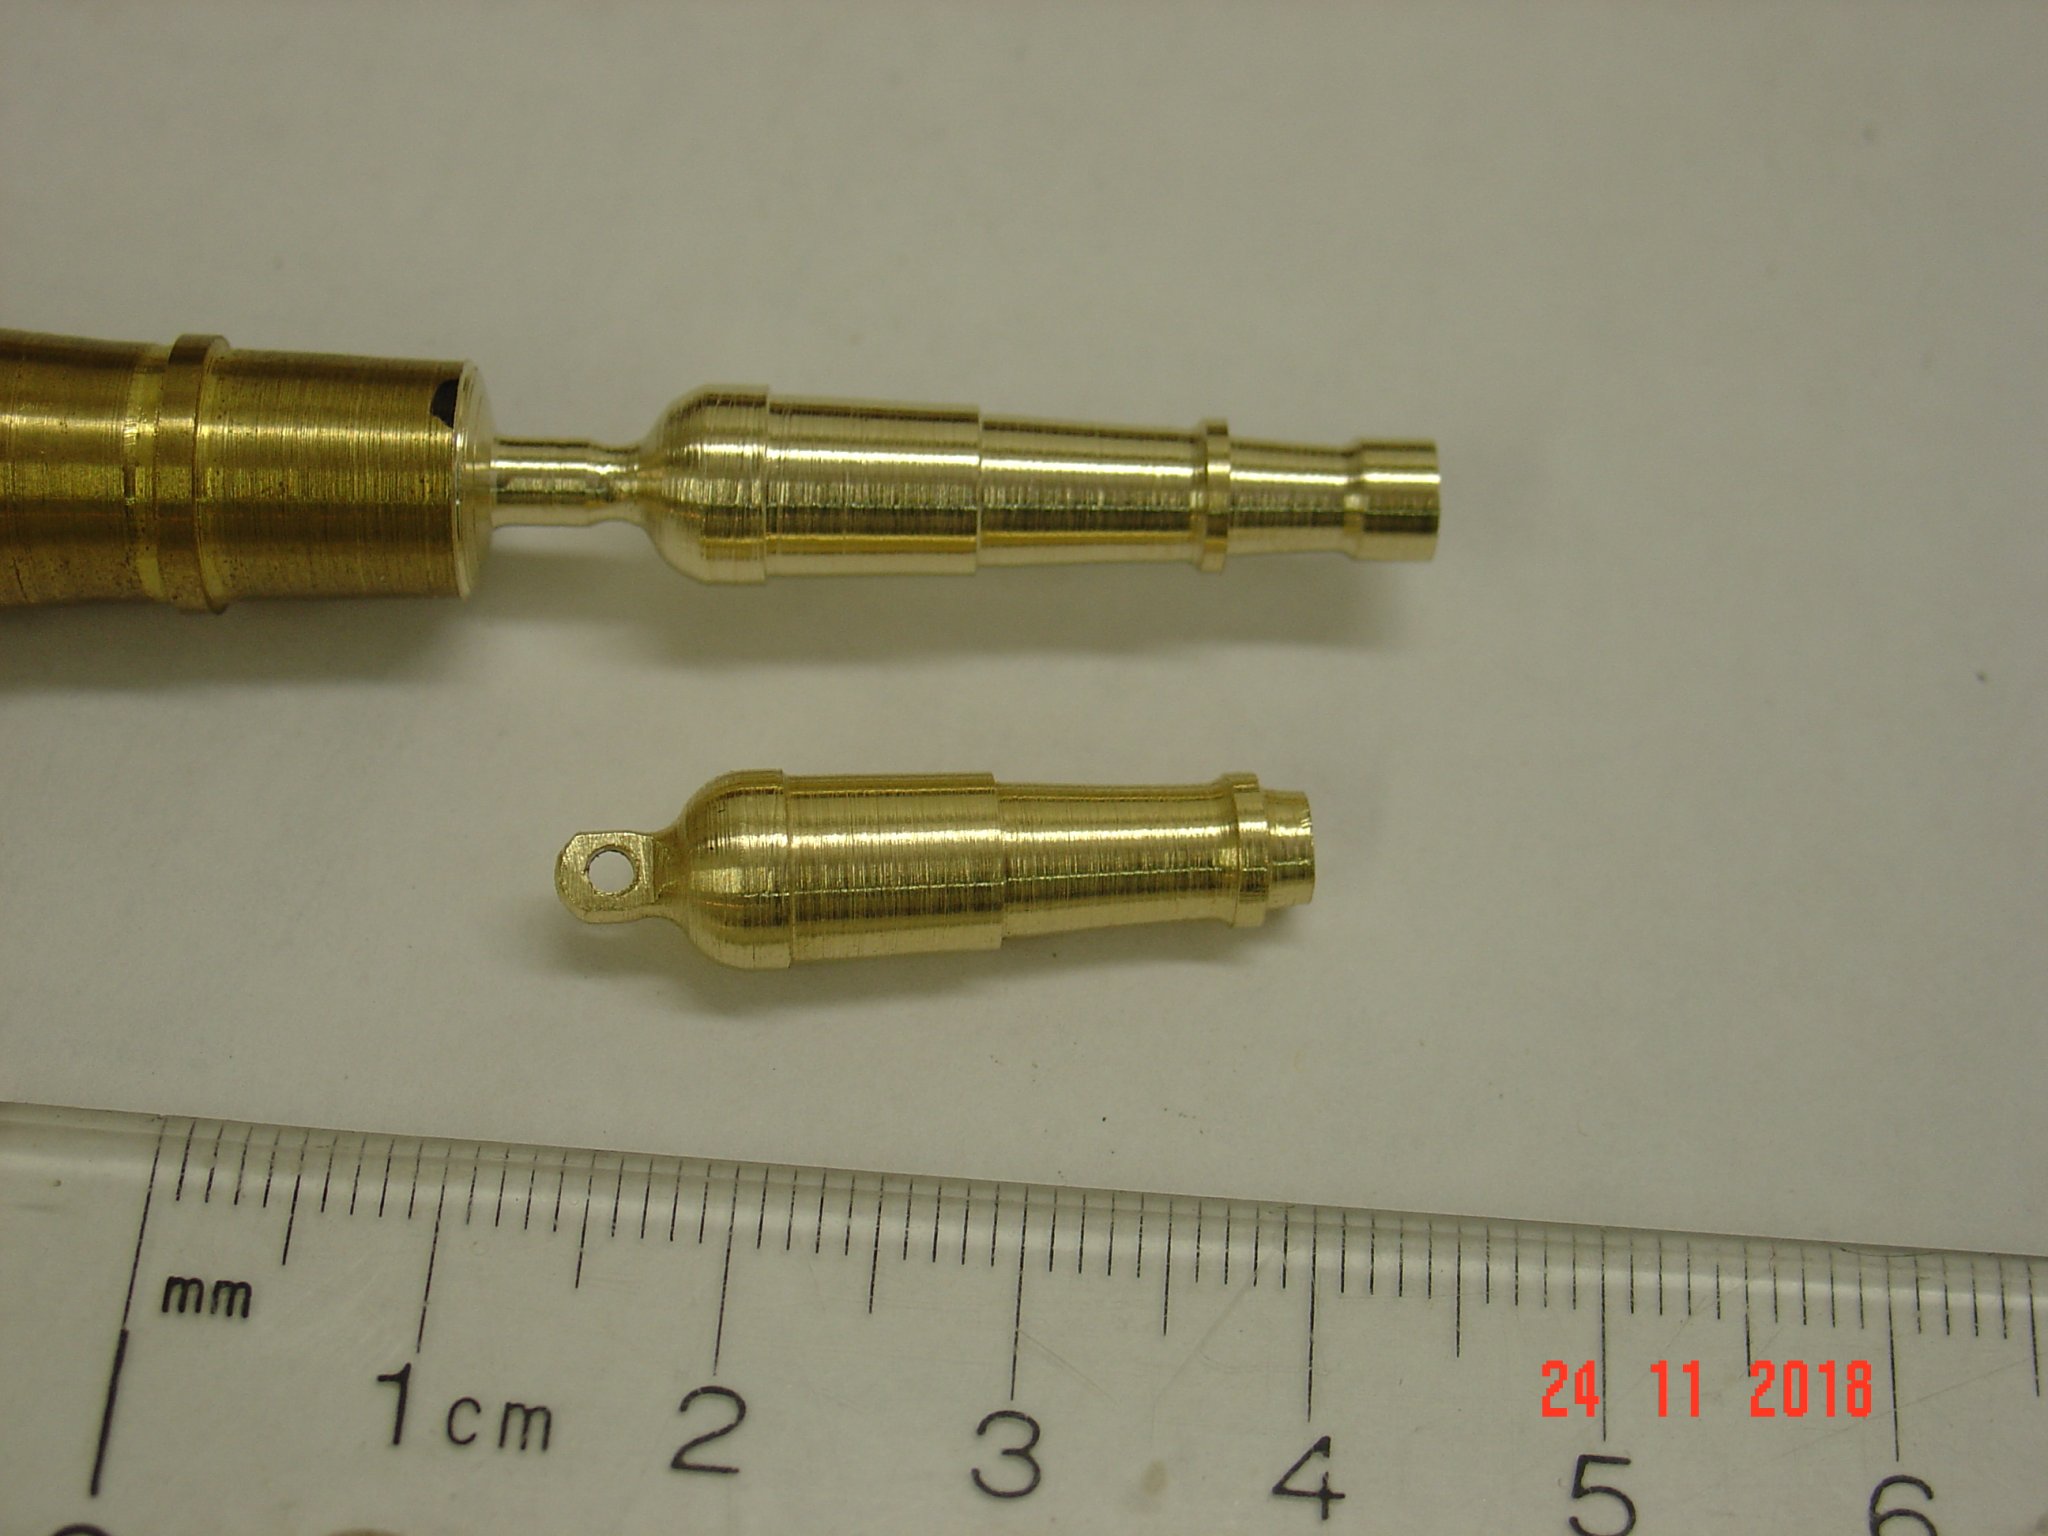
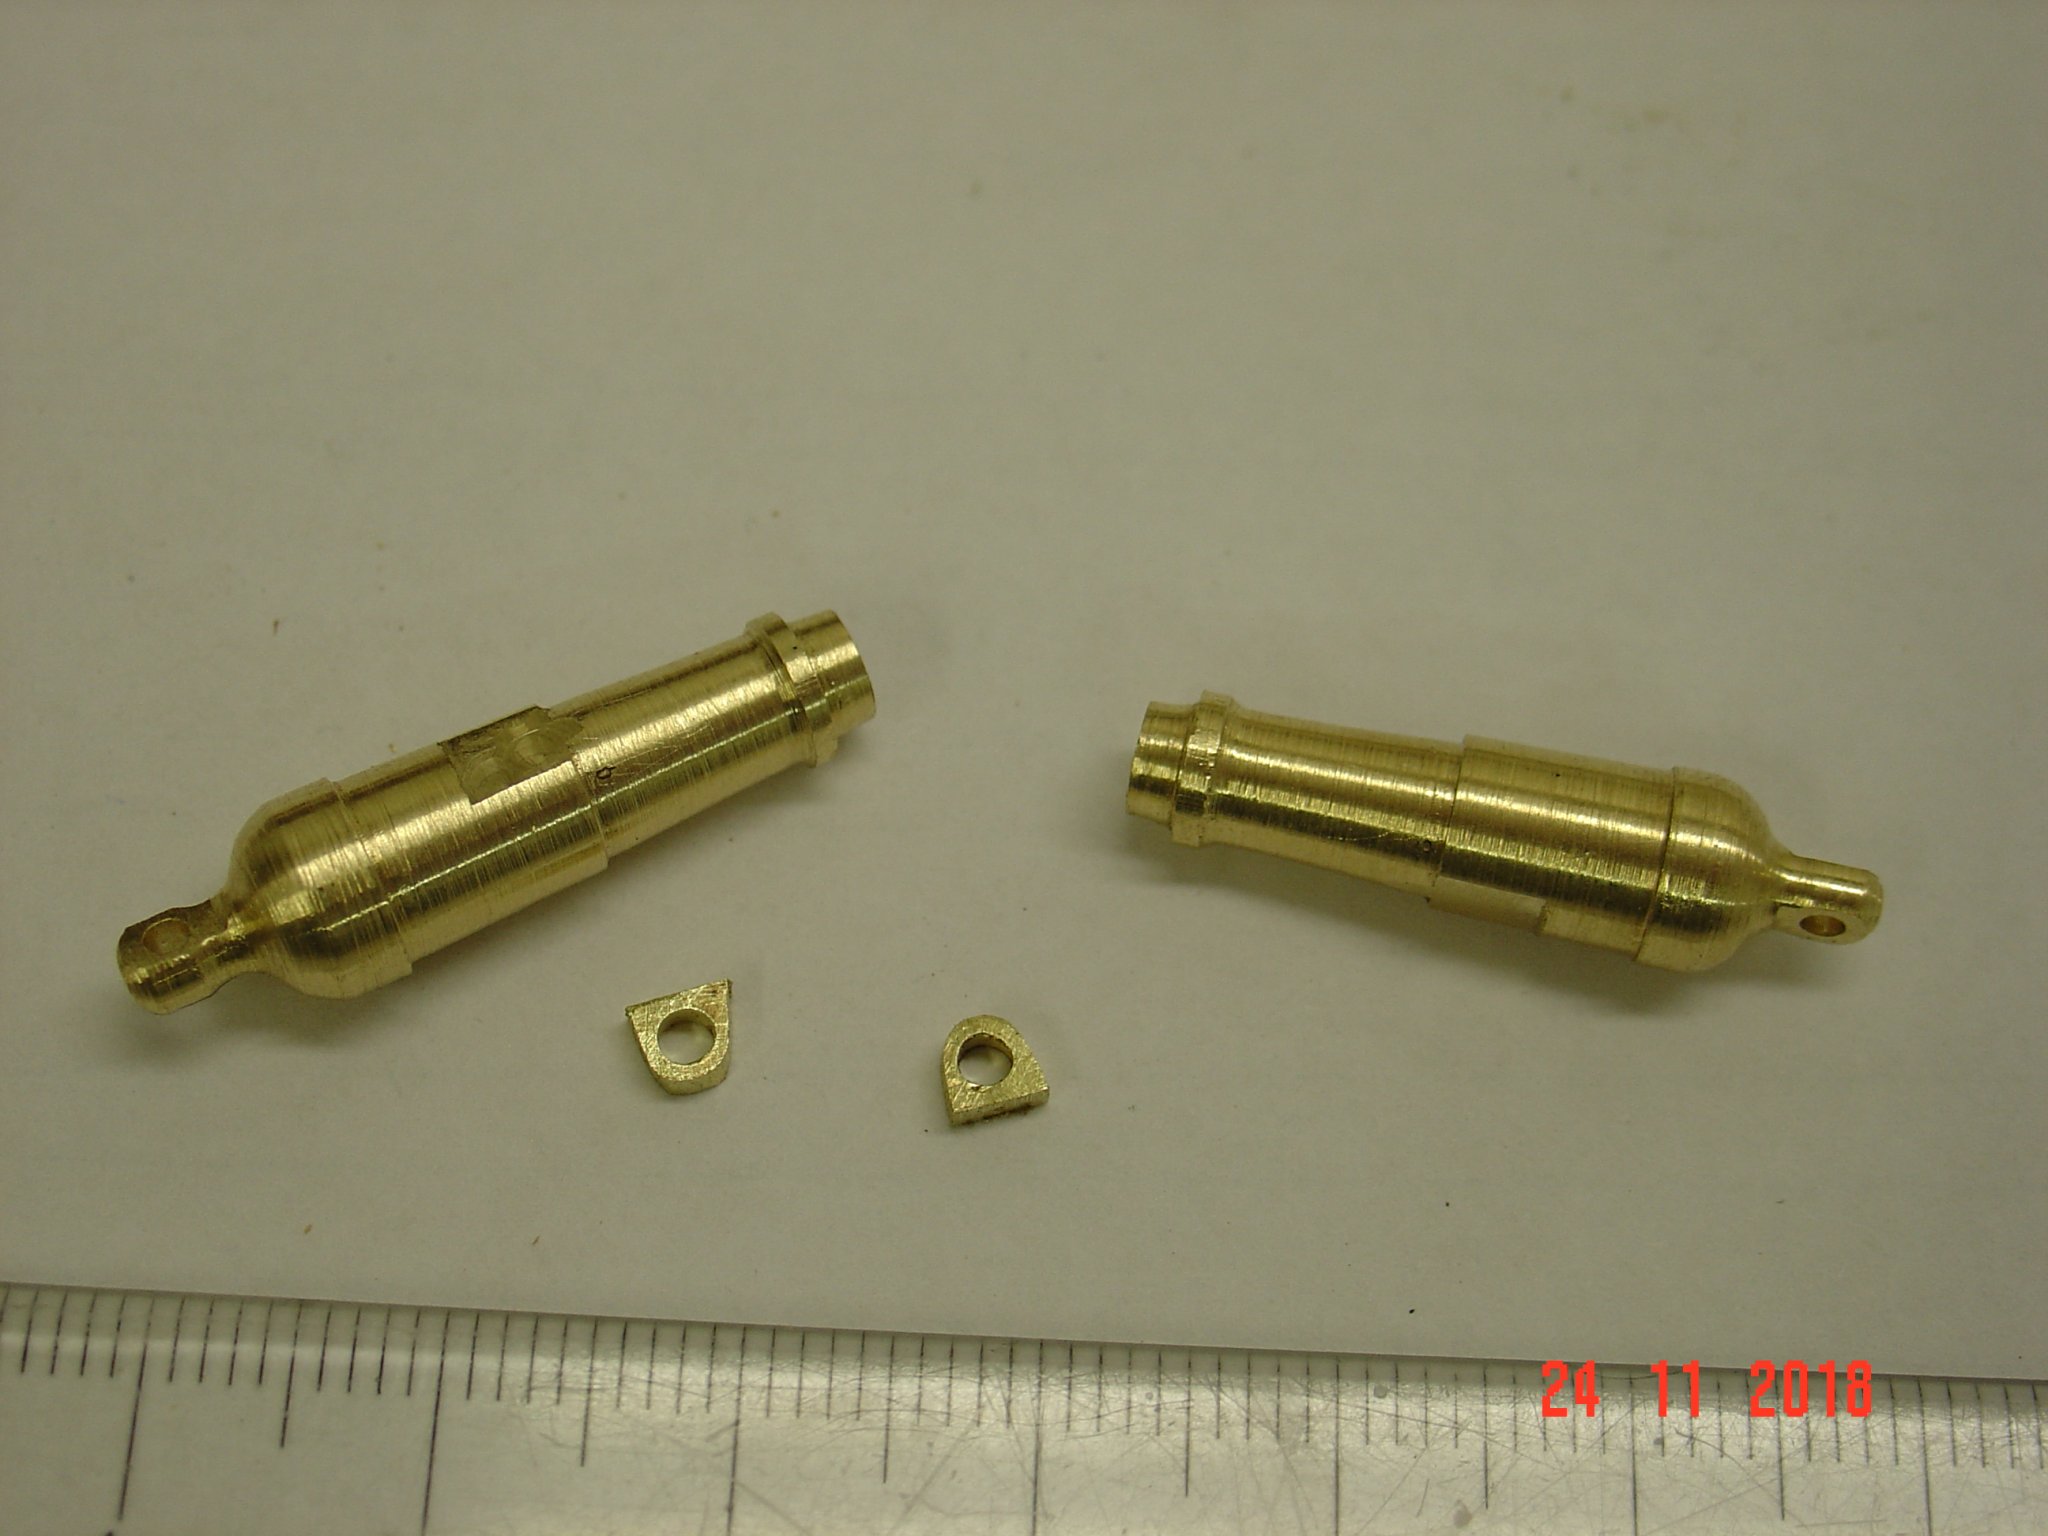
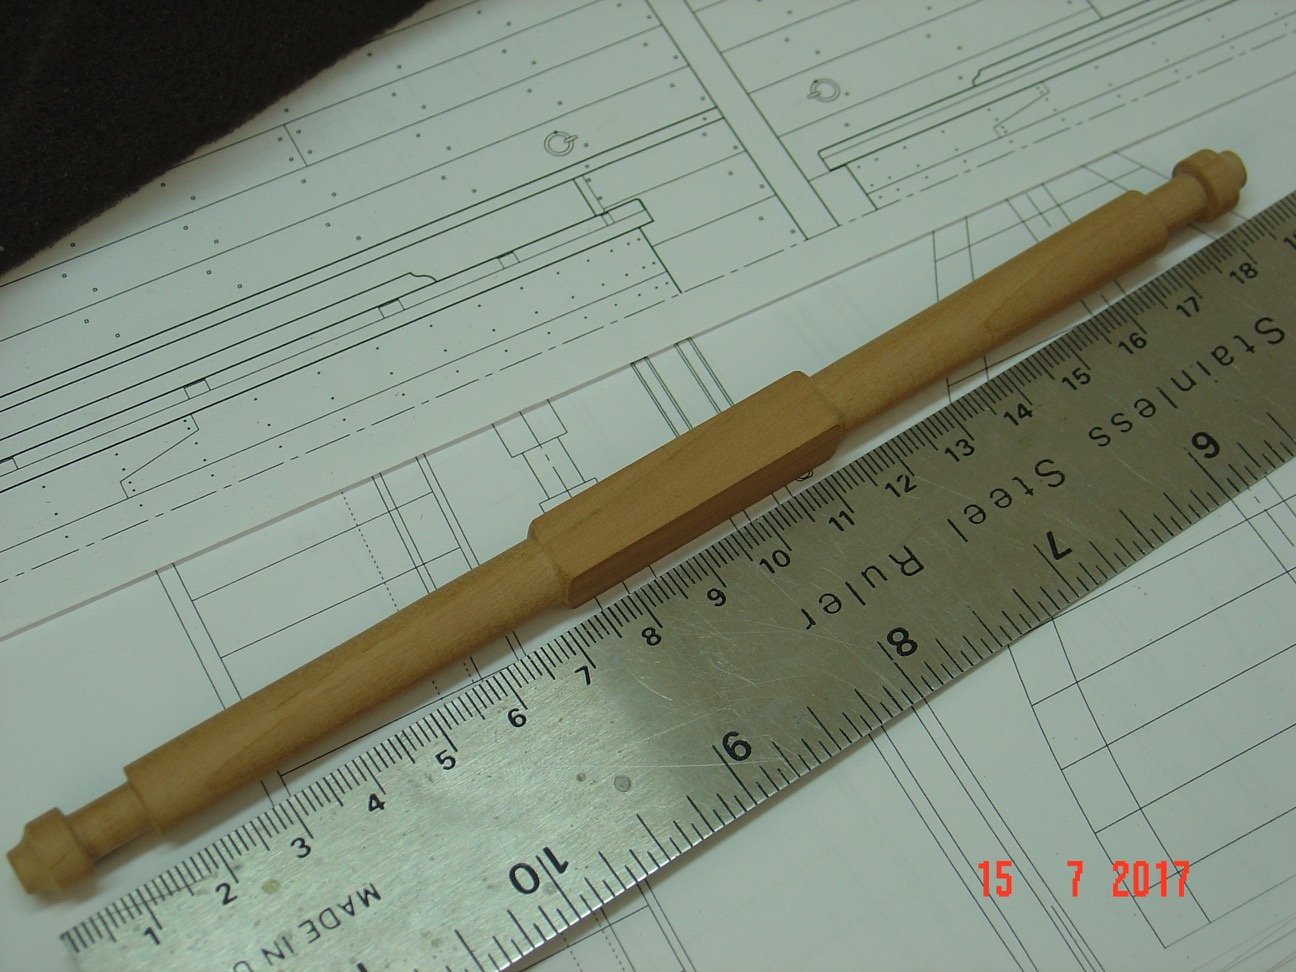
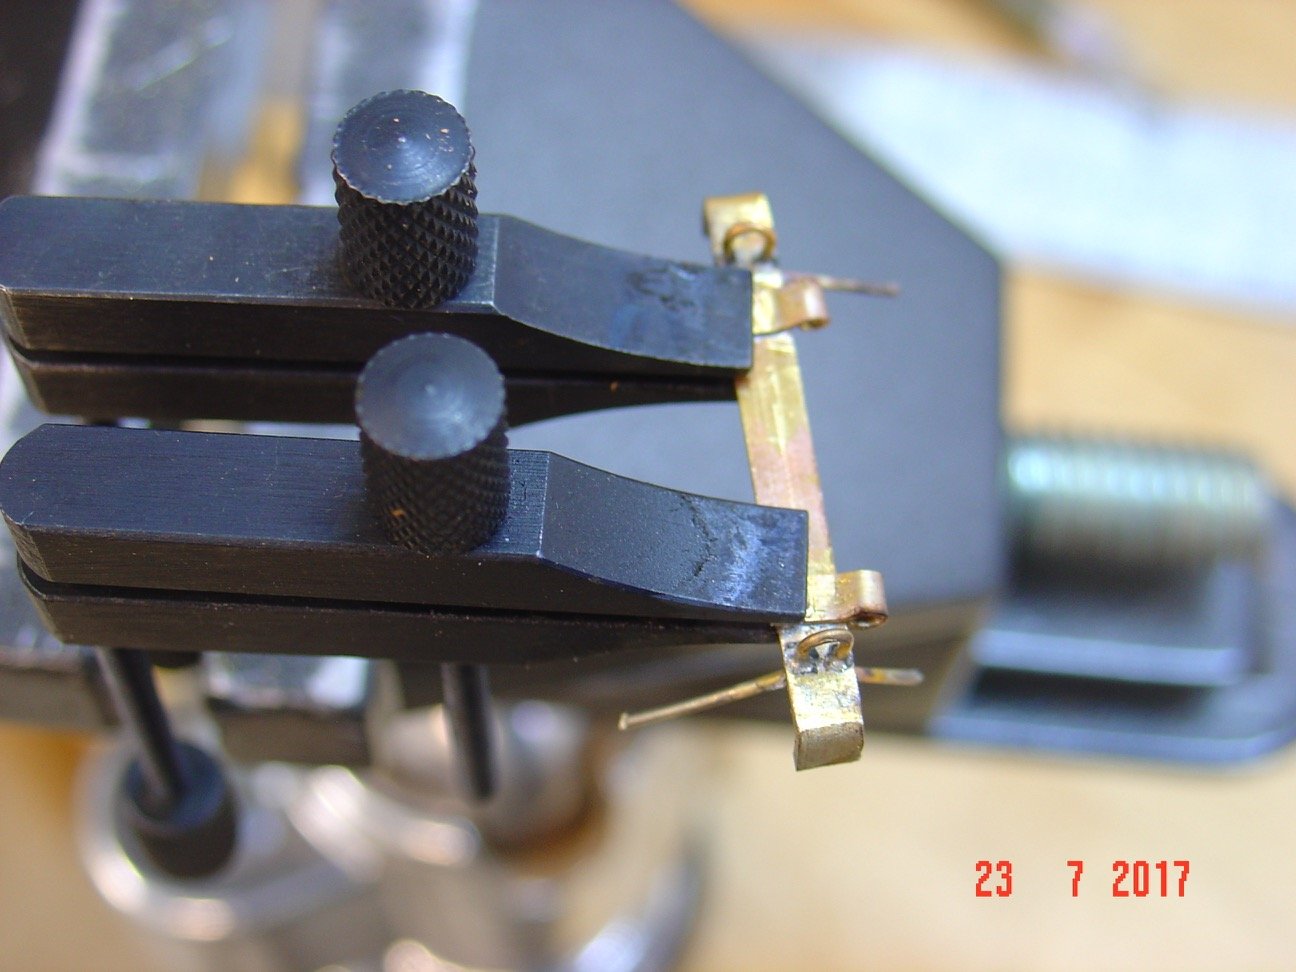
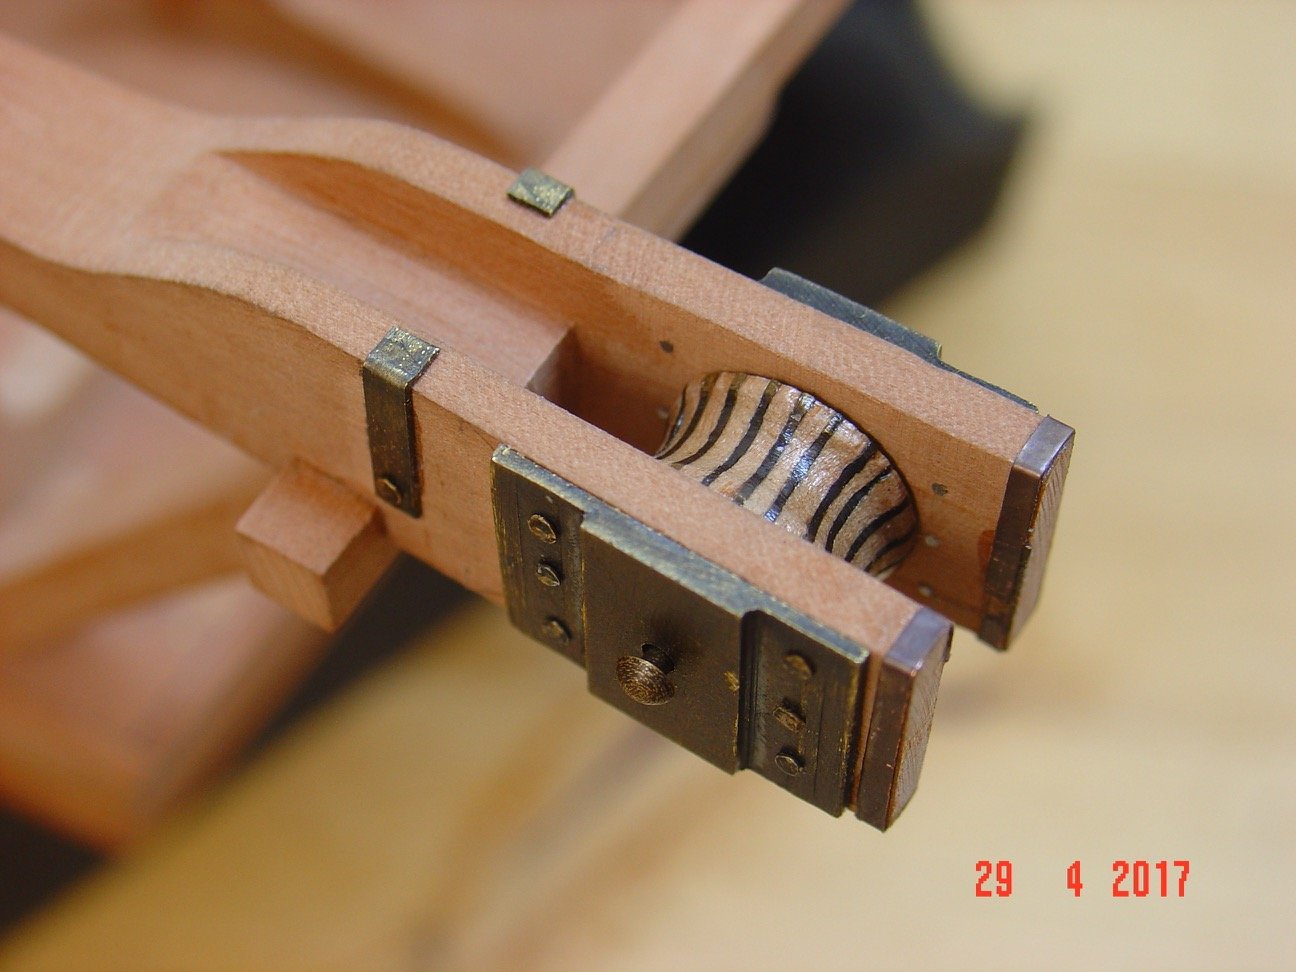
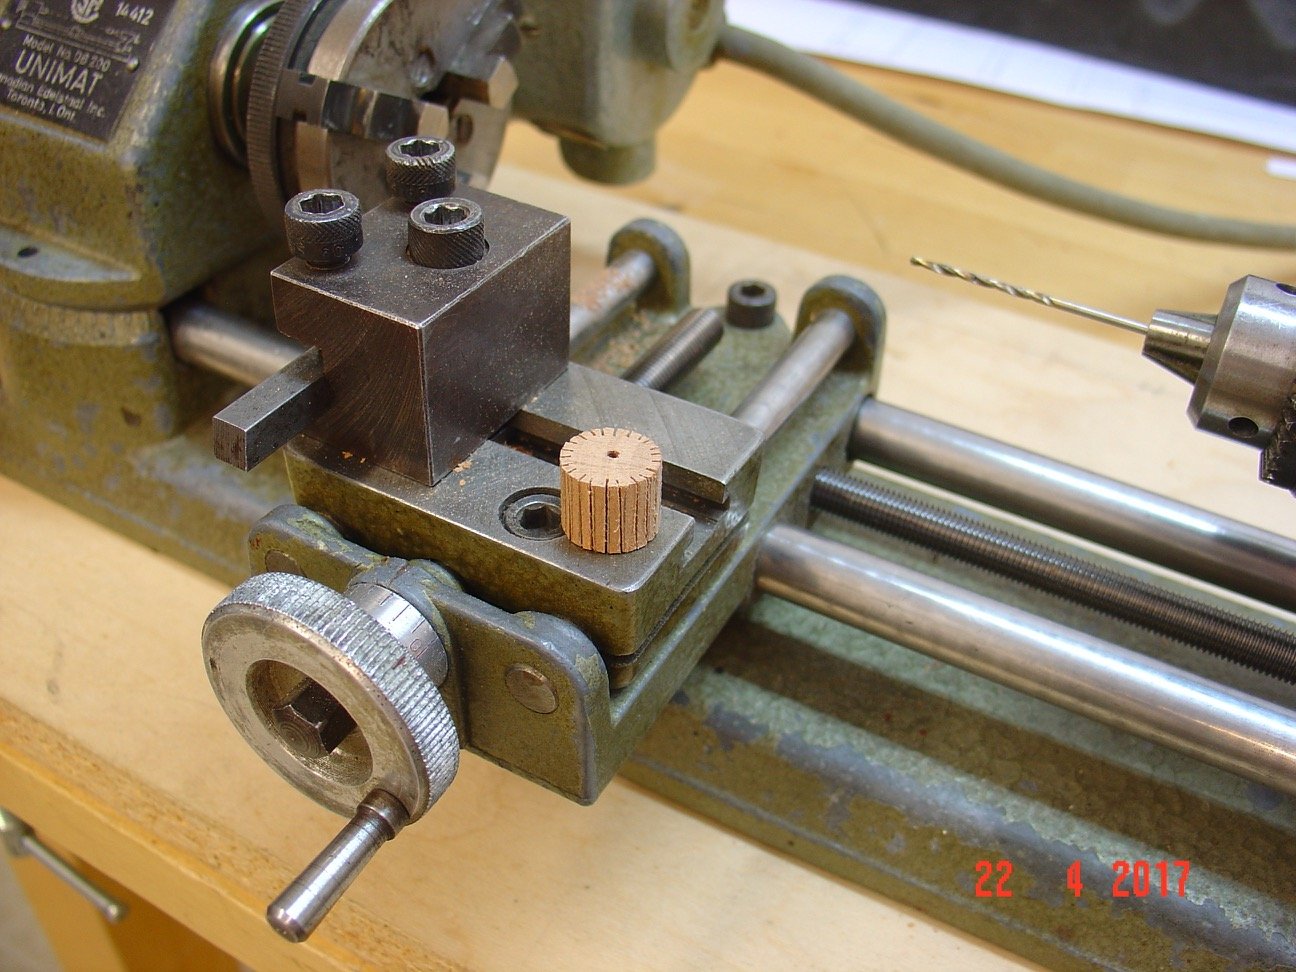
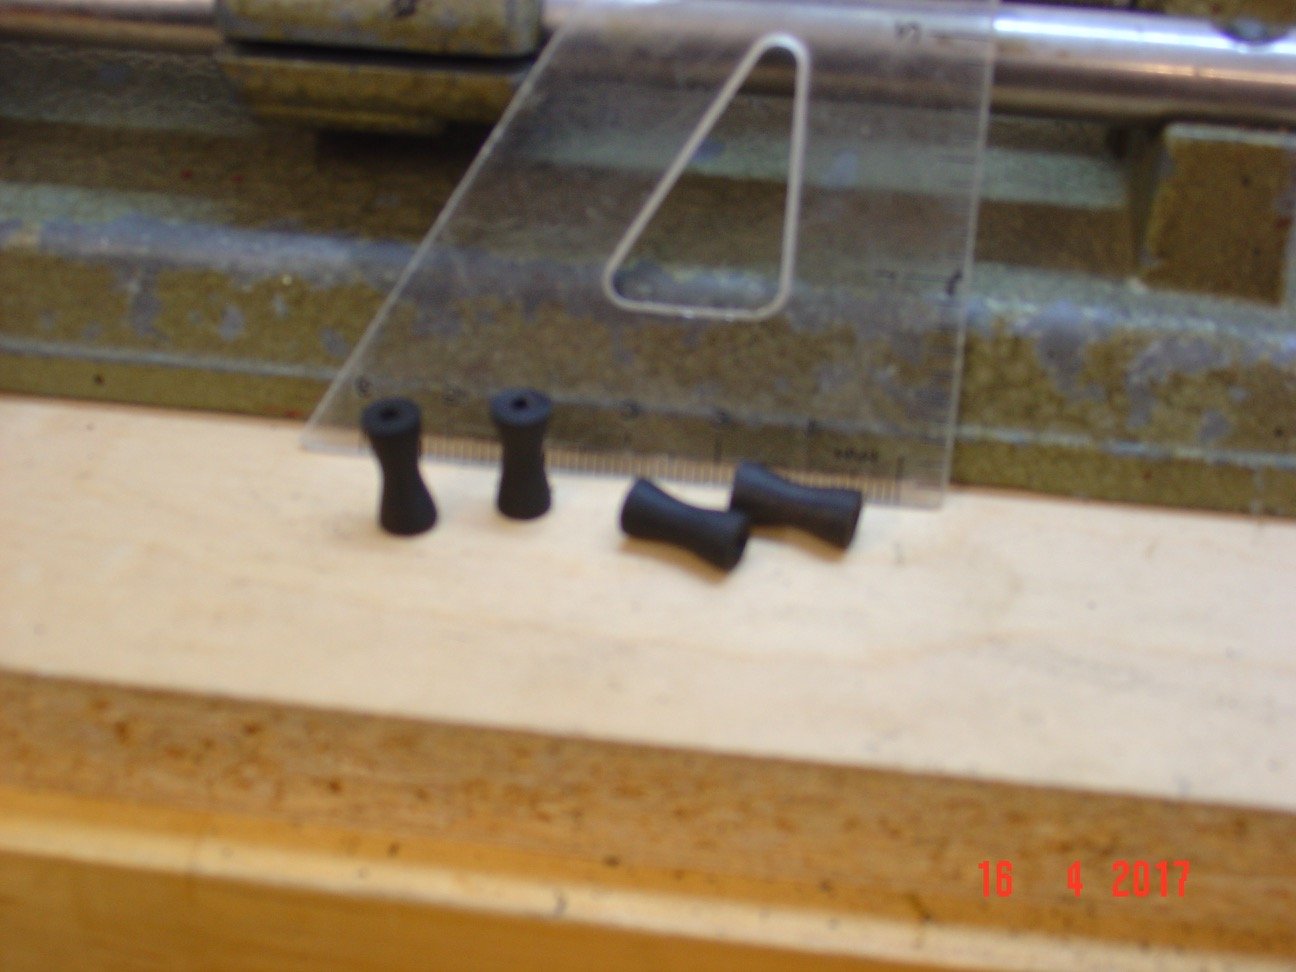
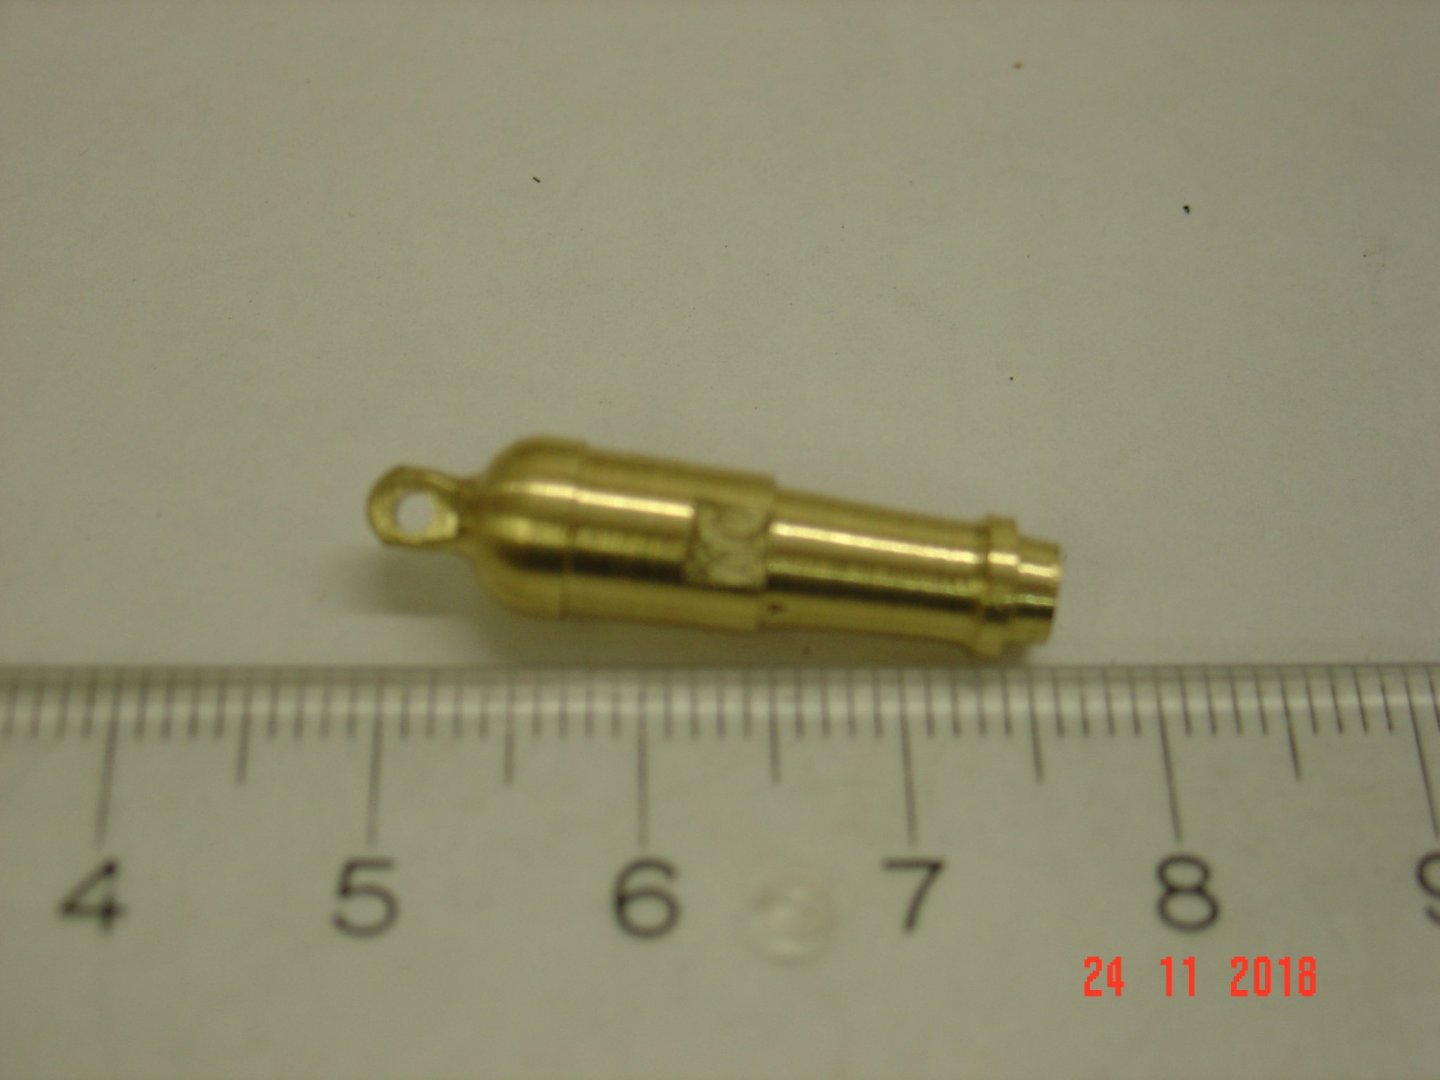
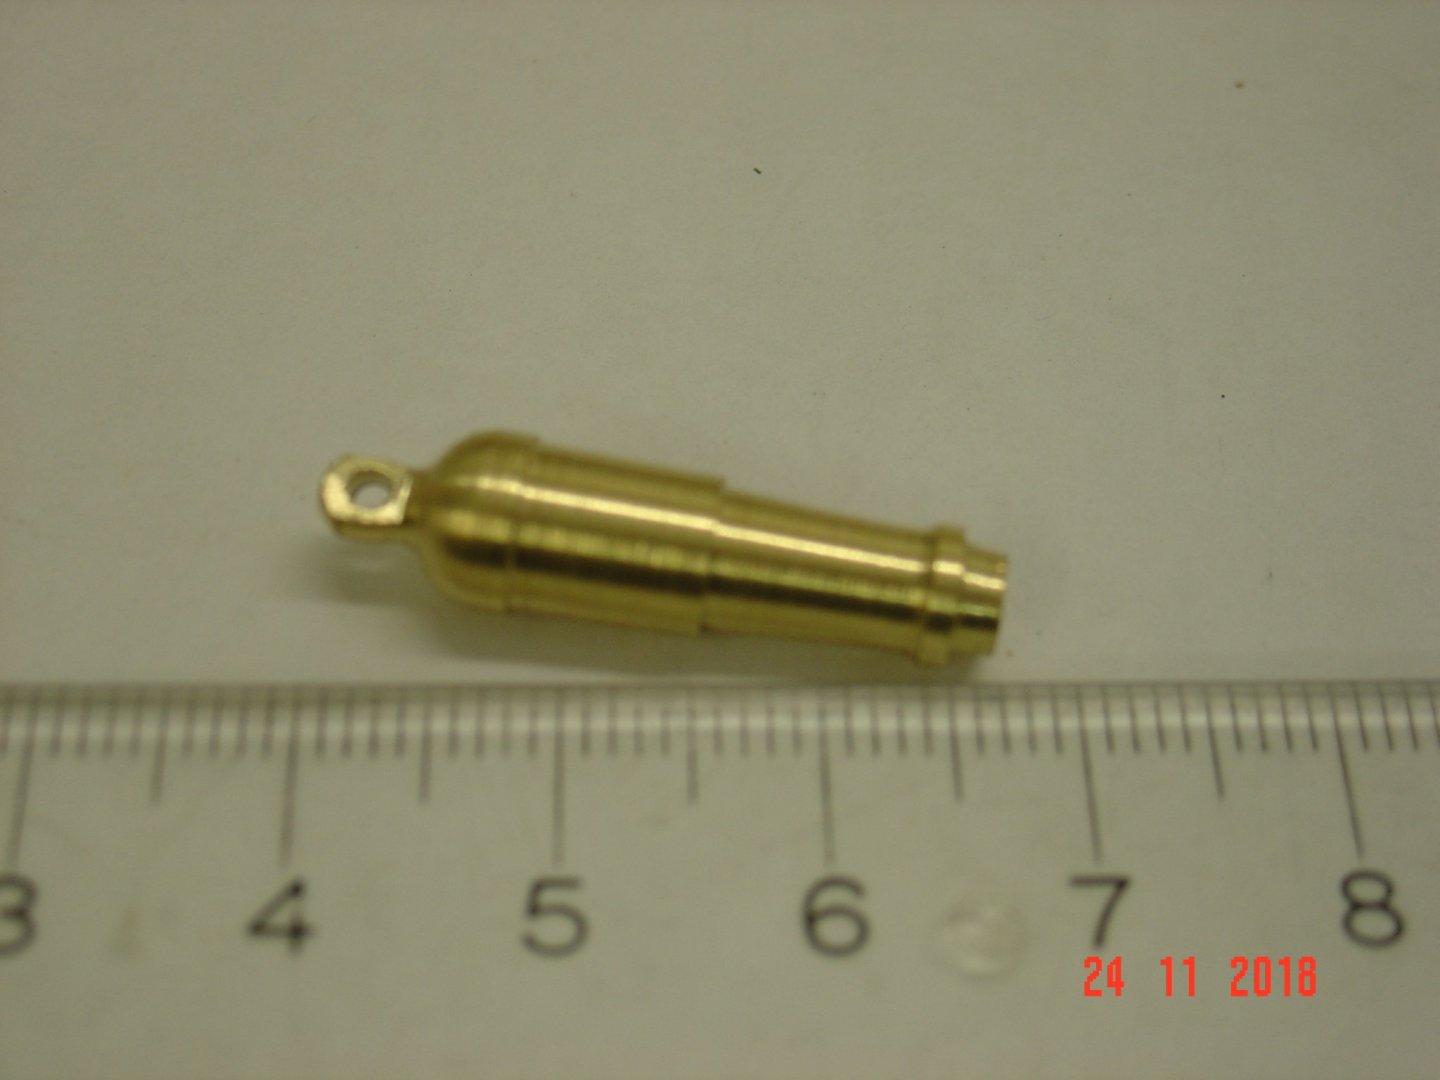
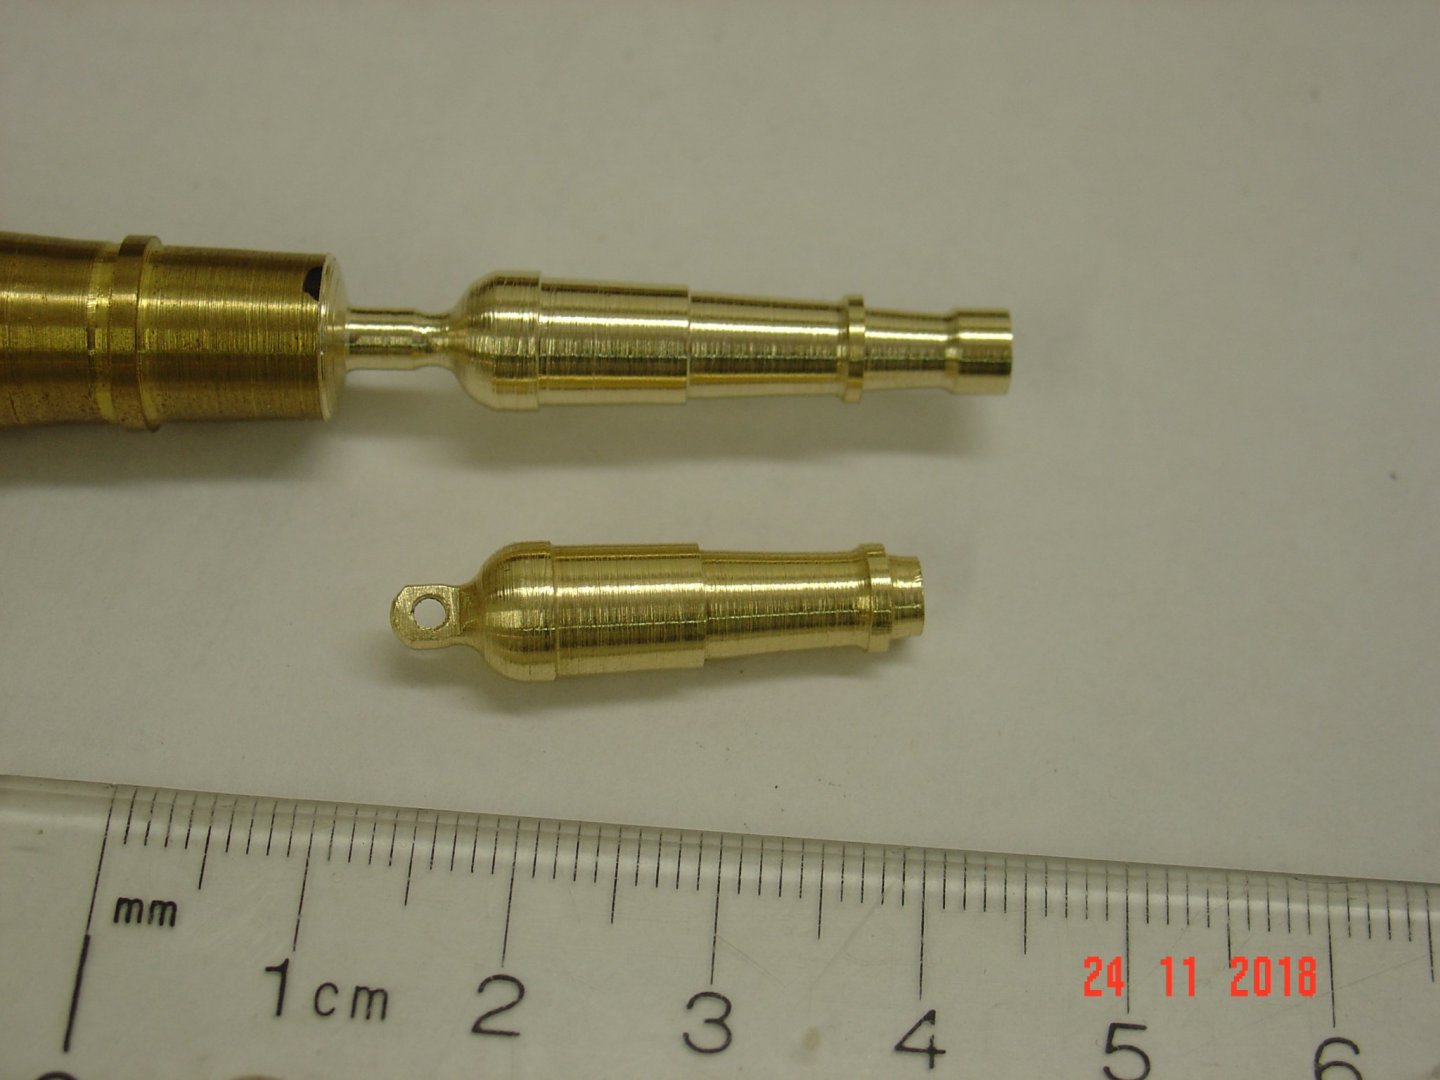
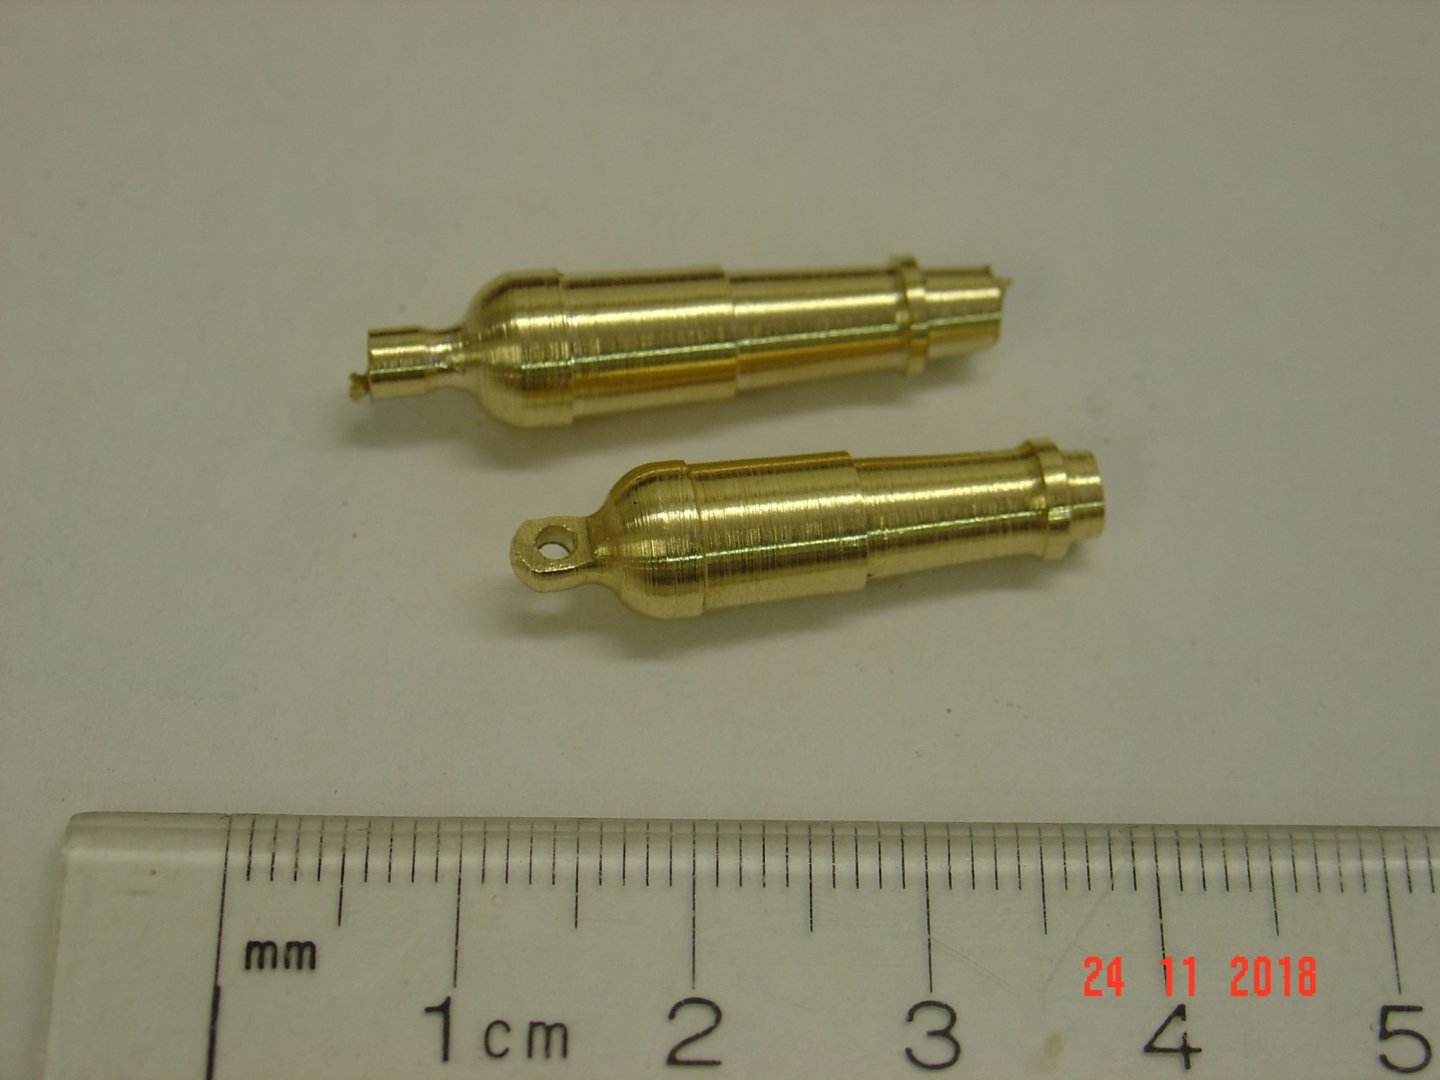
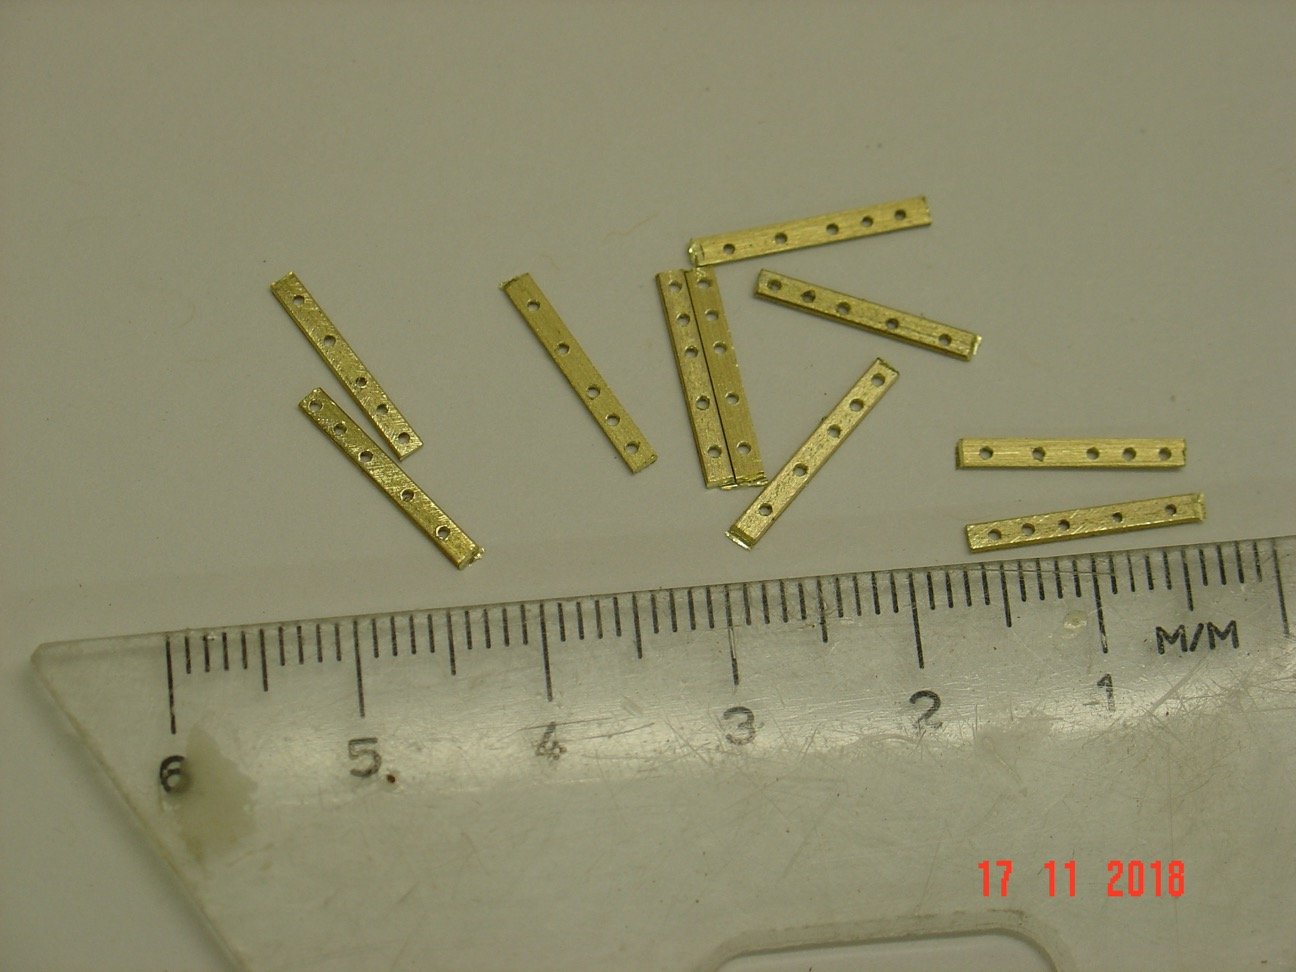
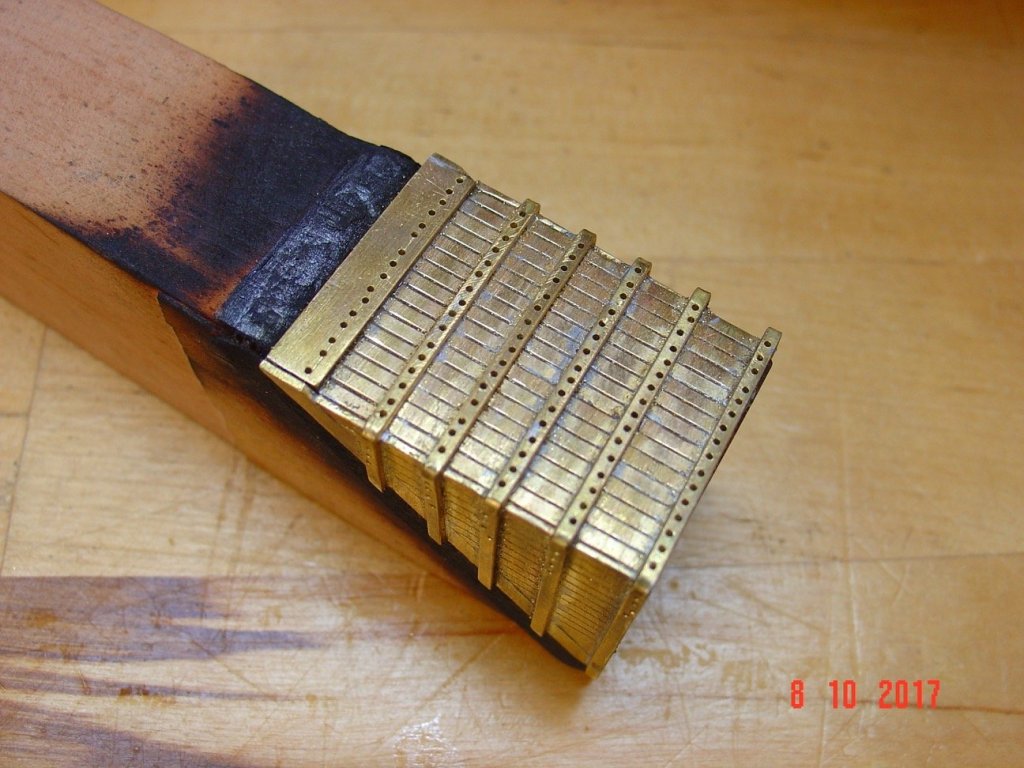
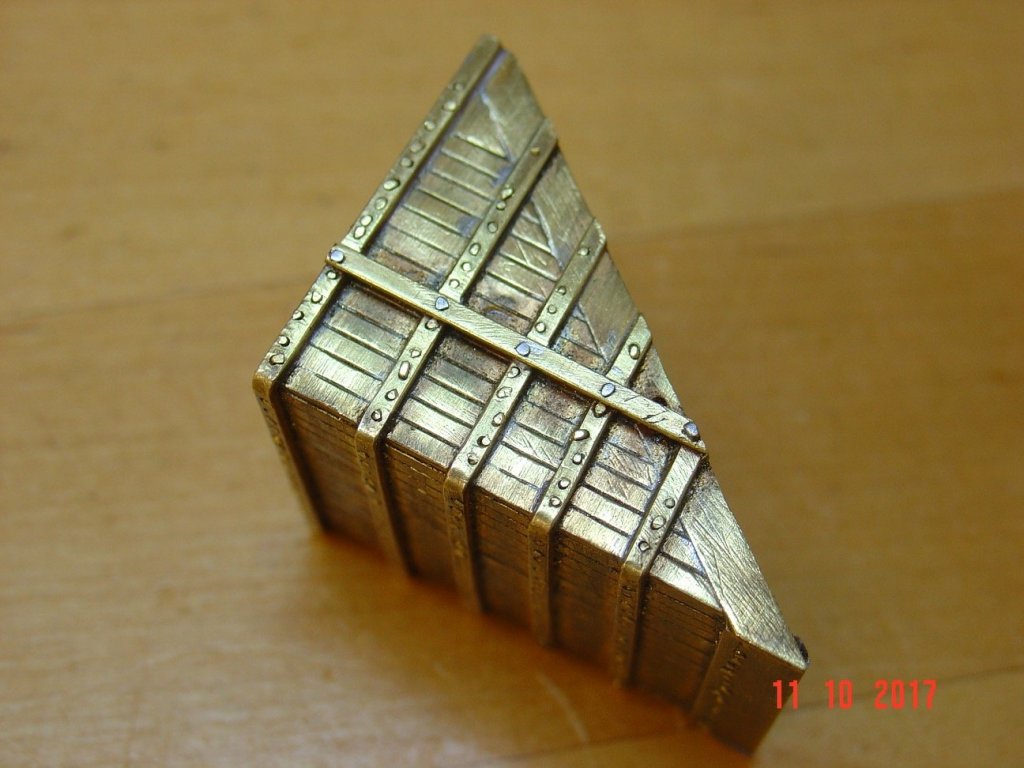
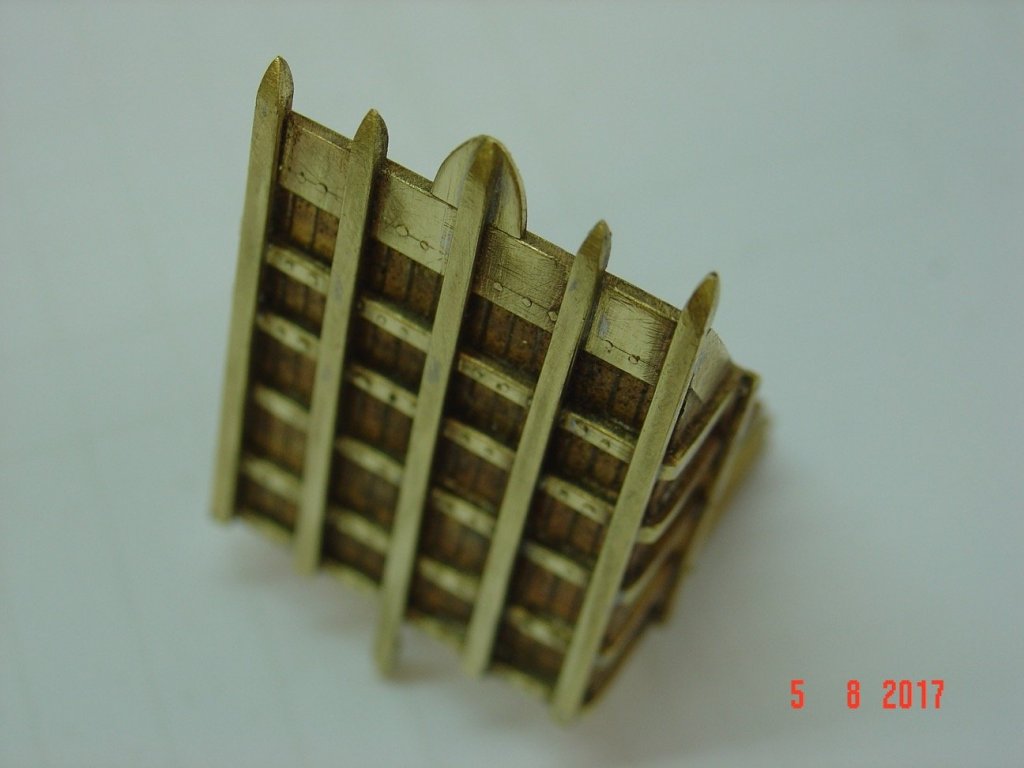
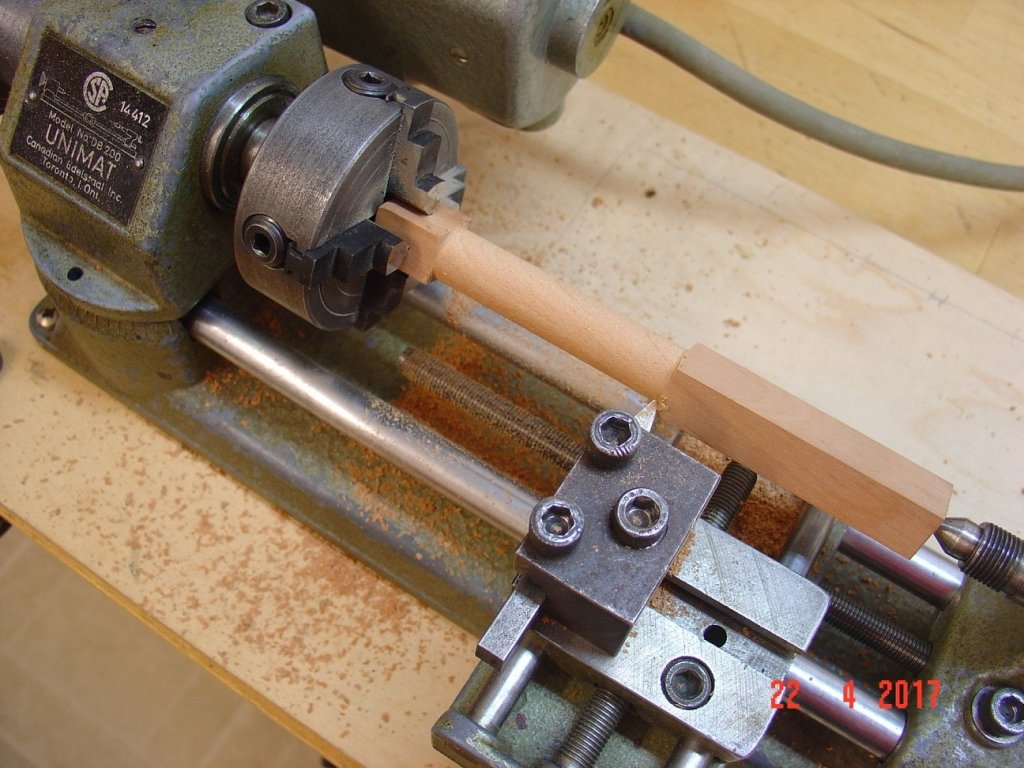
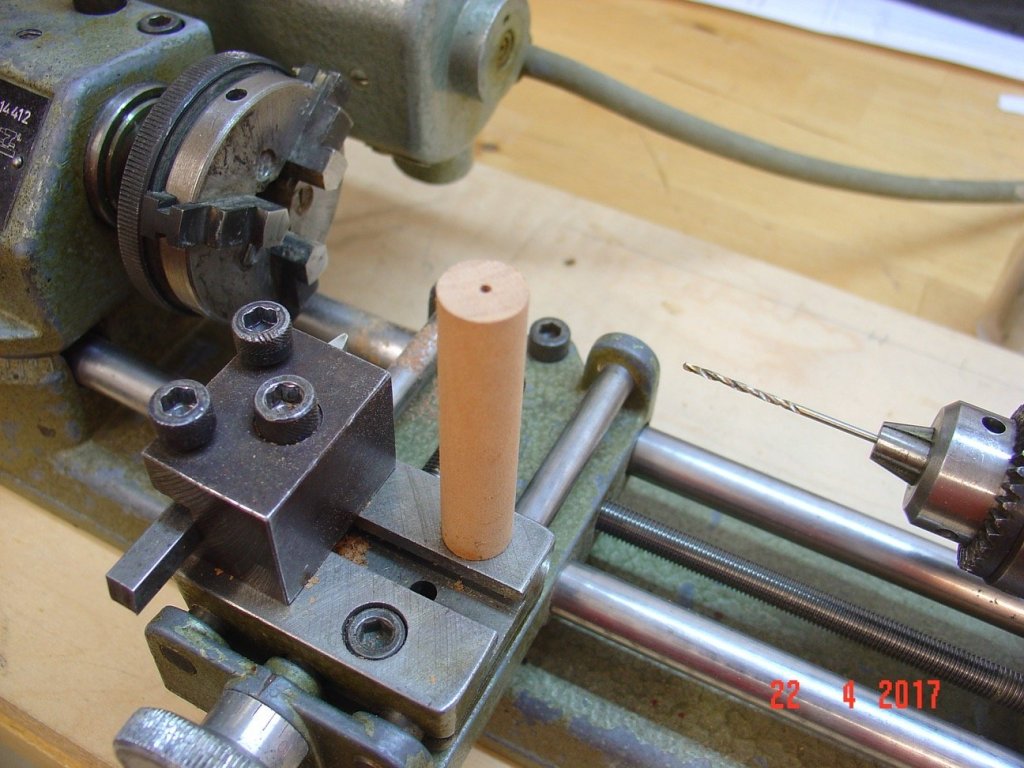
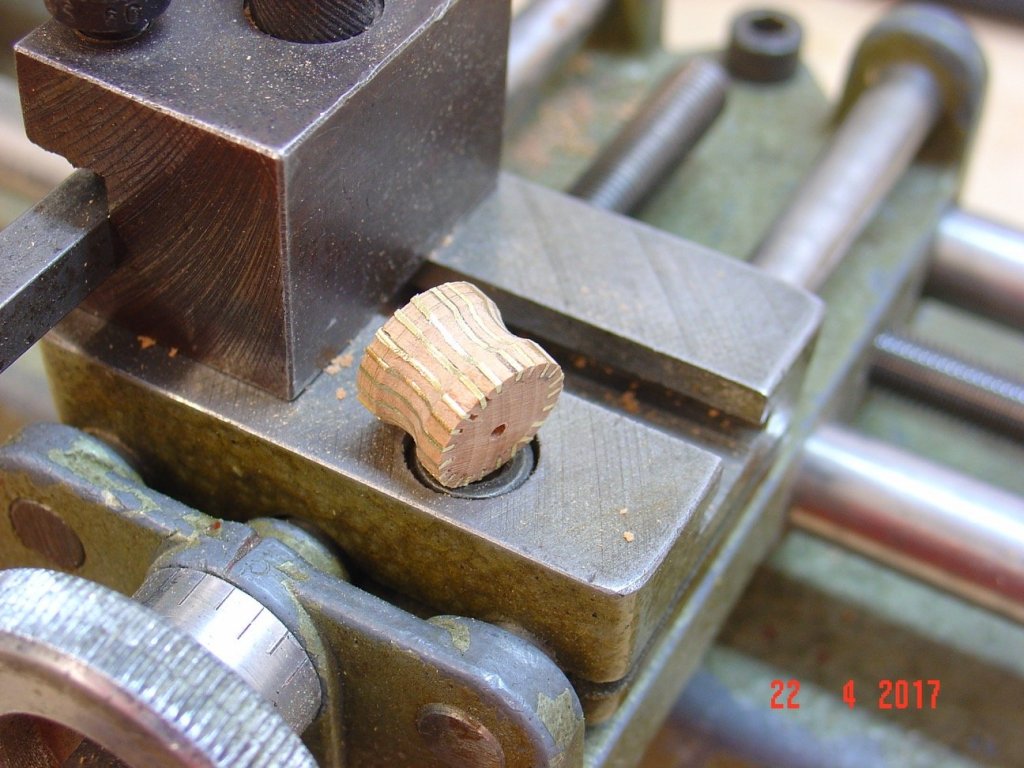
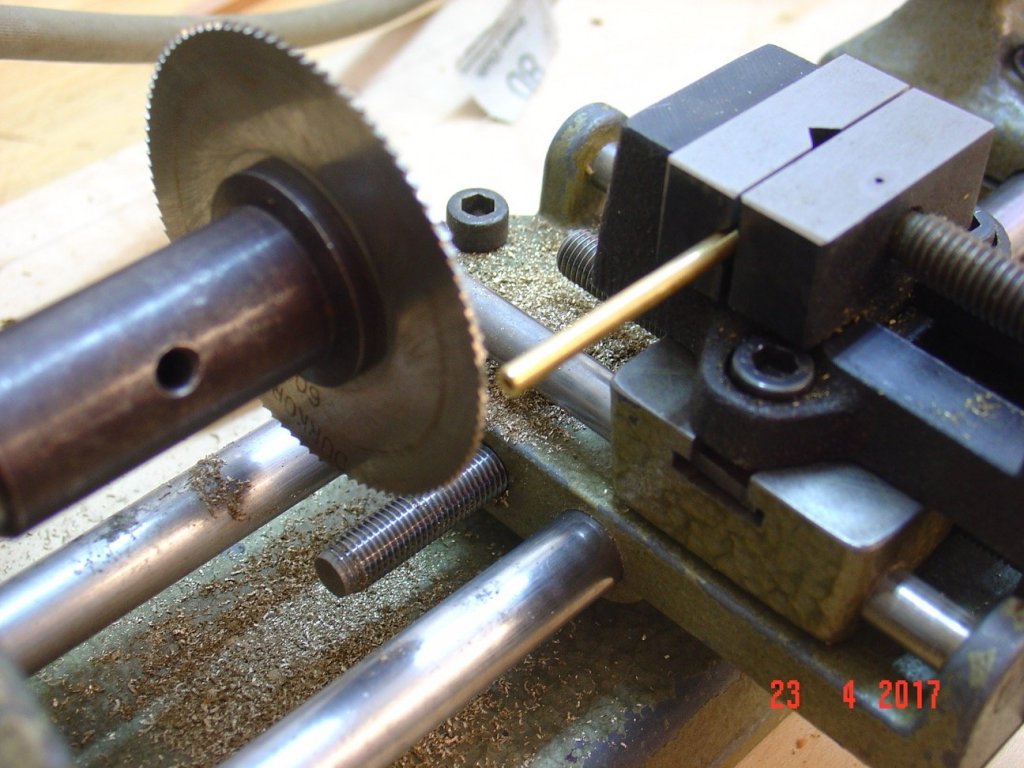
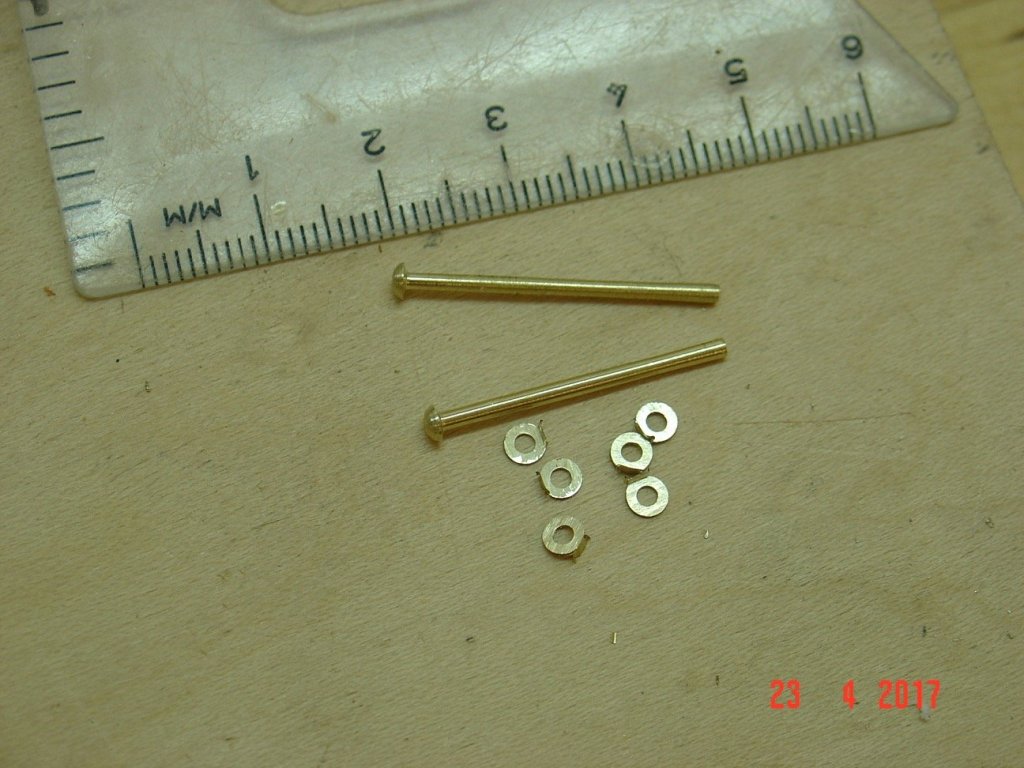
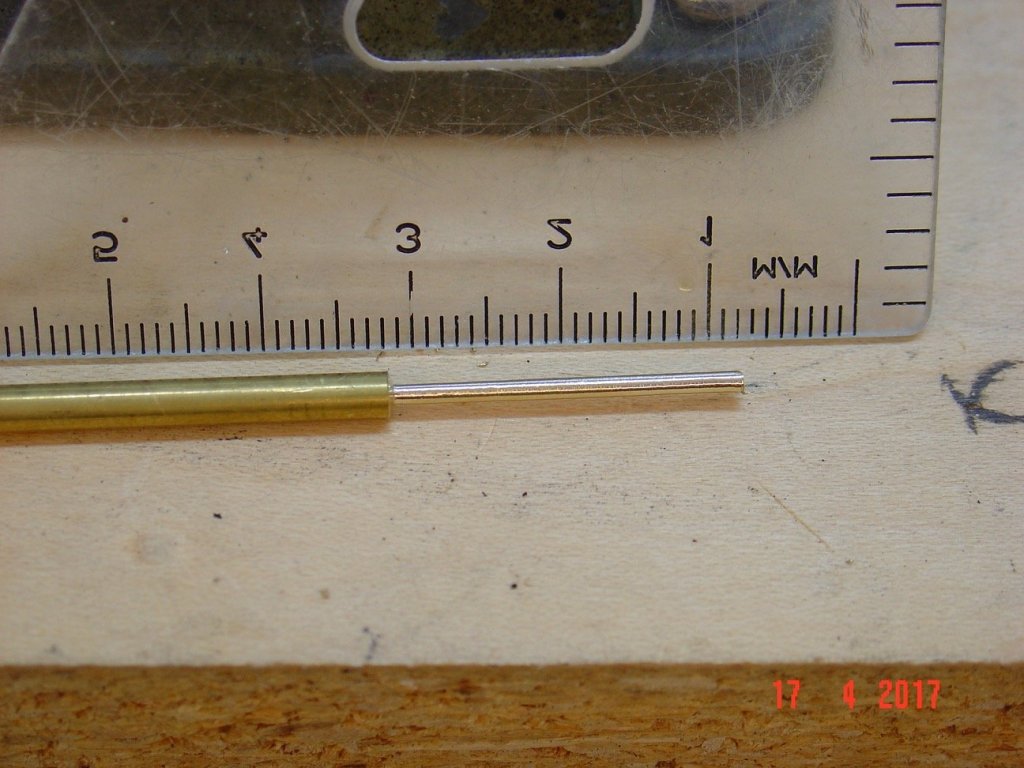
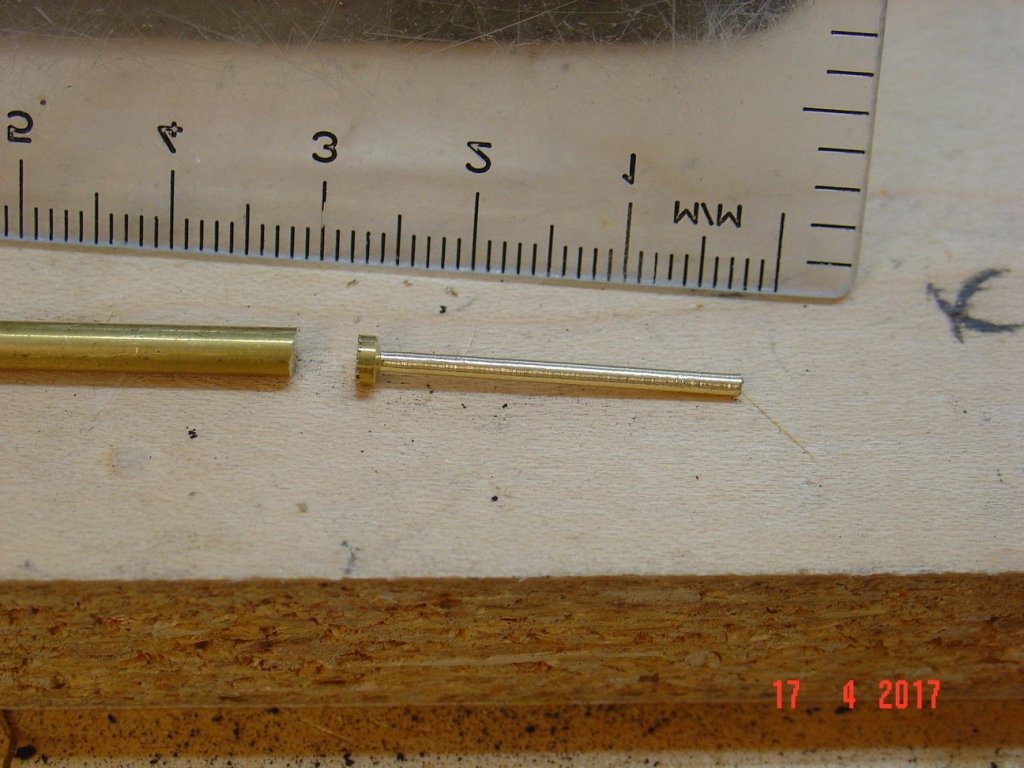
Hello, Some more progress pictures - quite a bit of metalwork which I like less but I am quite happy with the results. I managed to only break a single 0.5mm drill bit of while drilling holes in the end of those turned brass axels. Alexandru


-
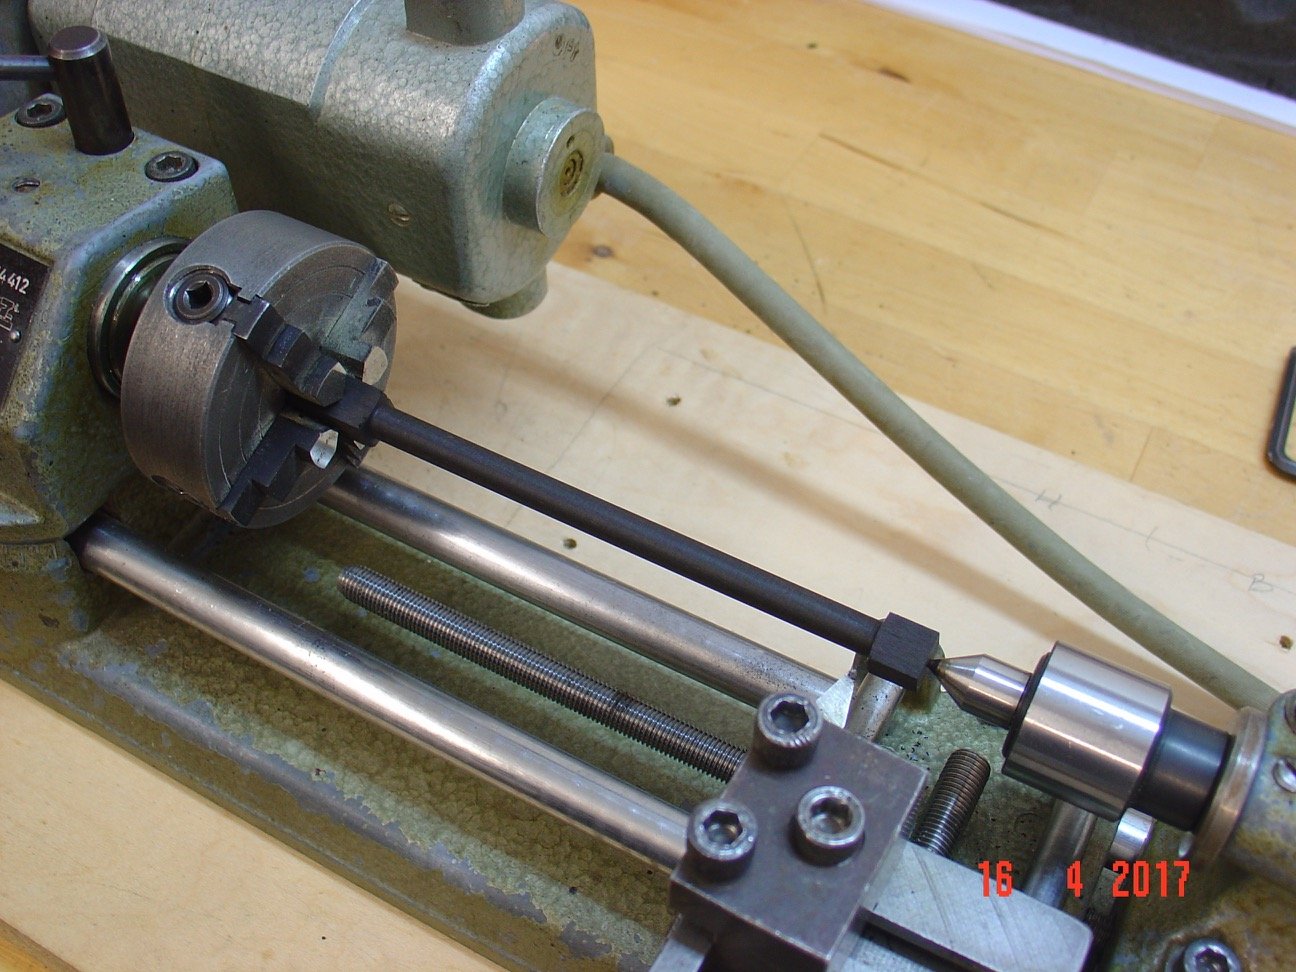
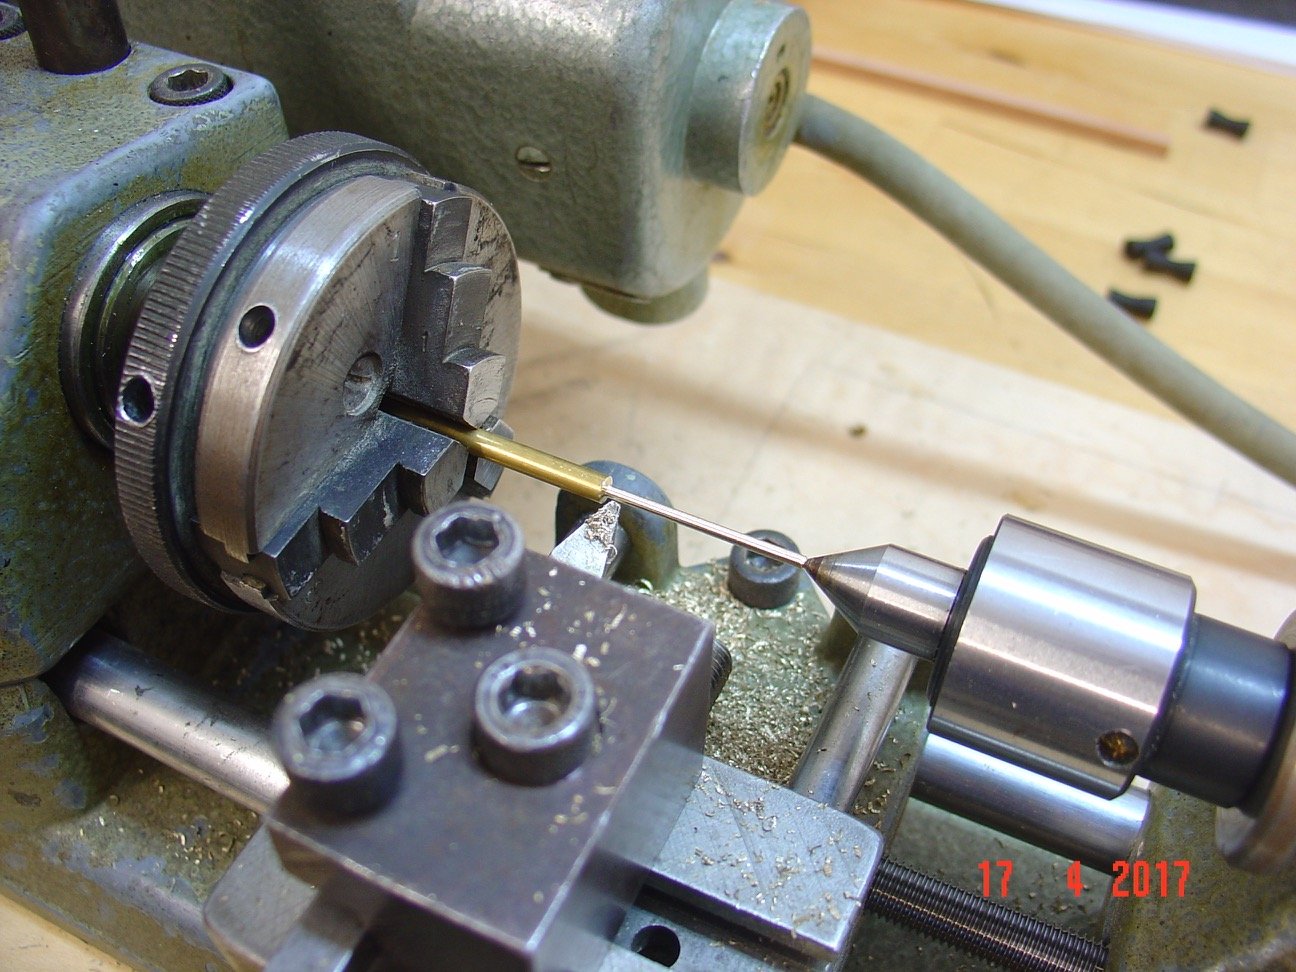
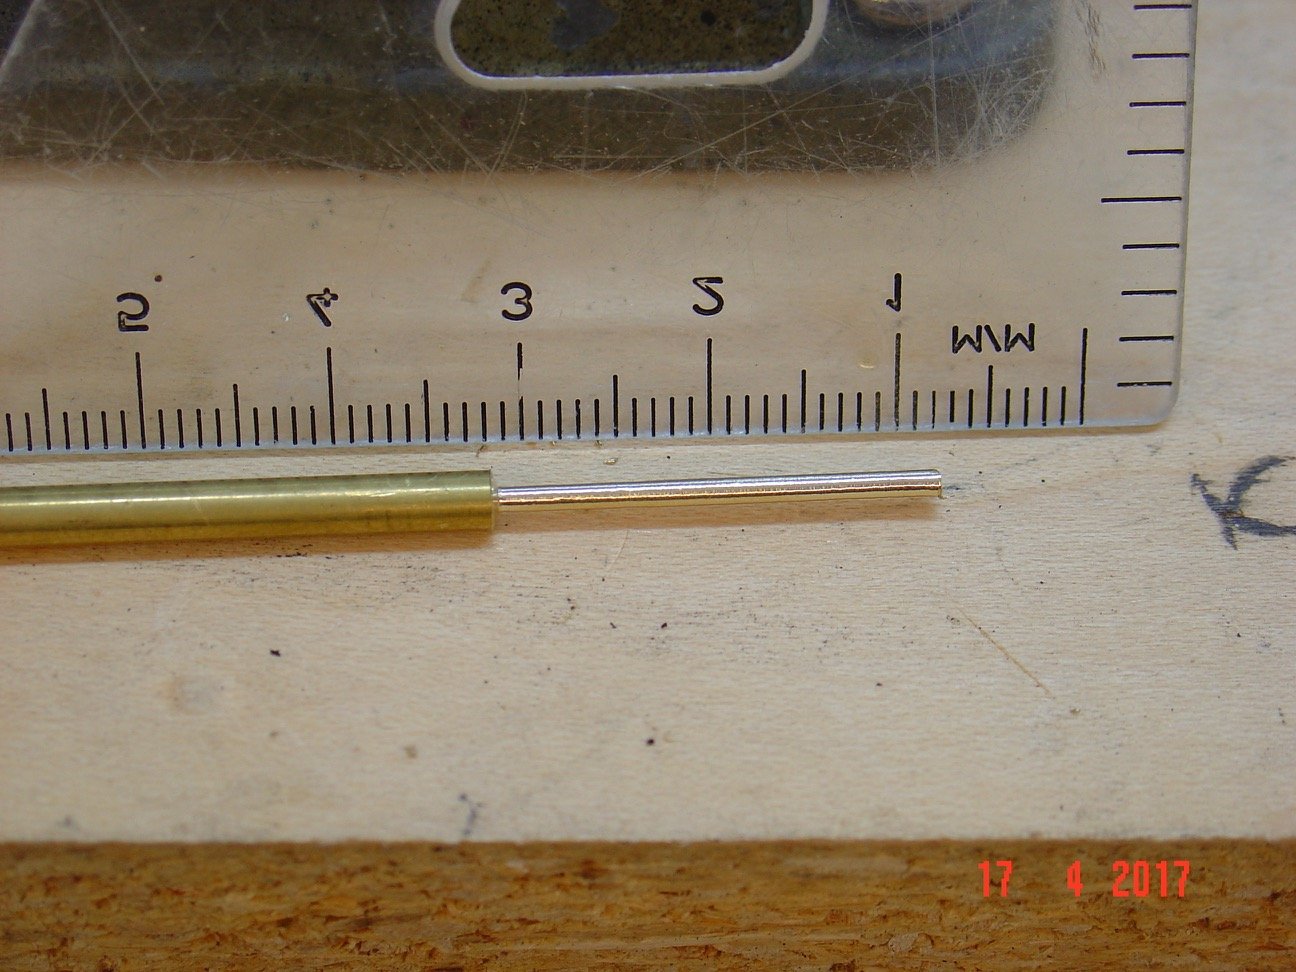
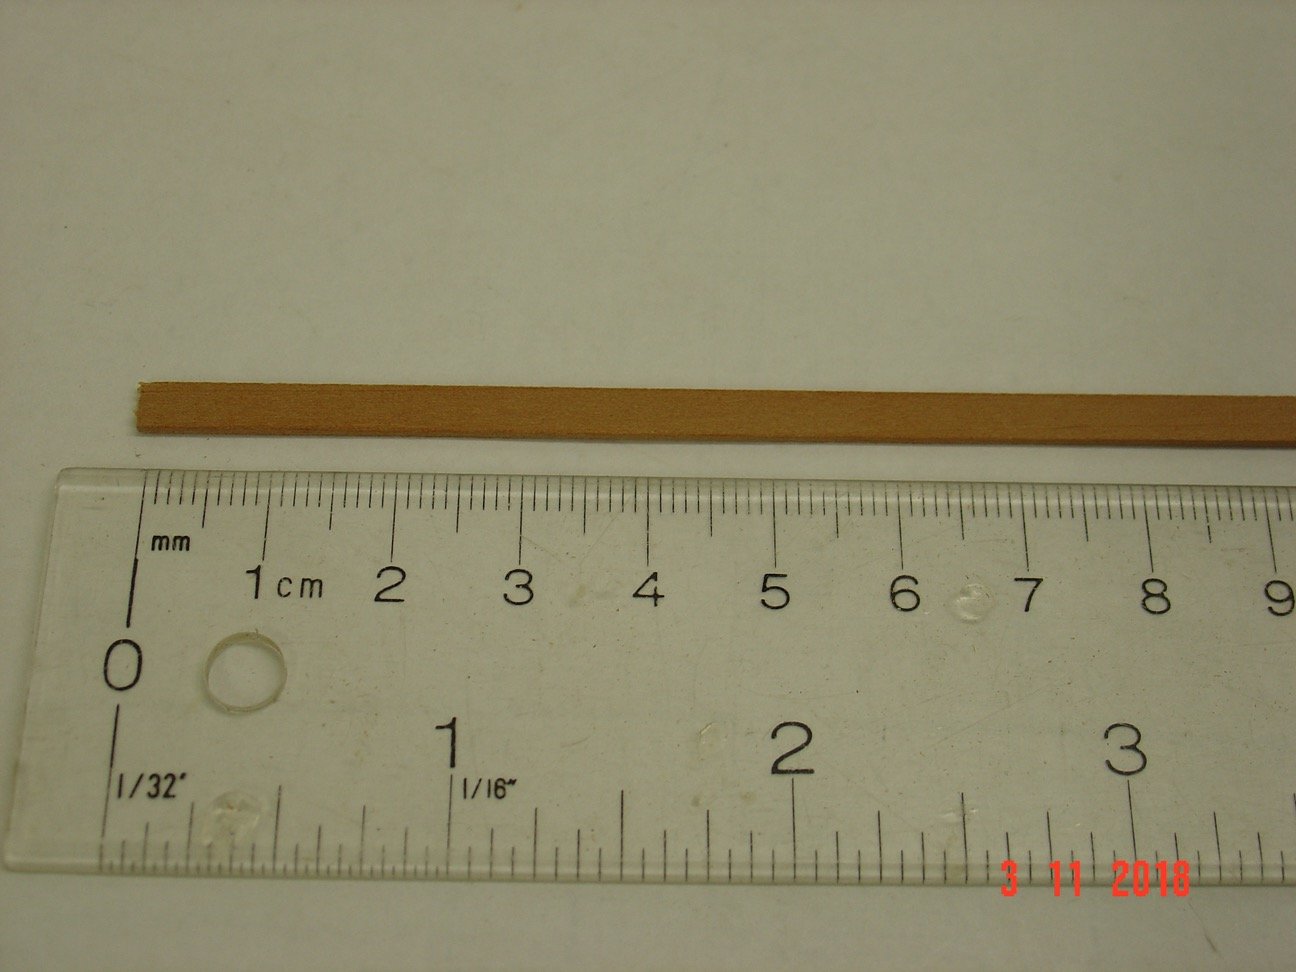
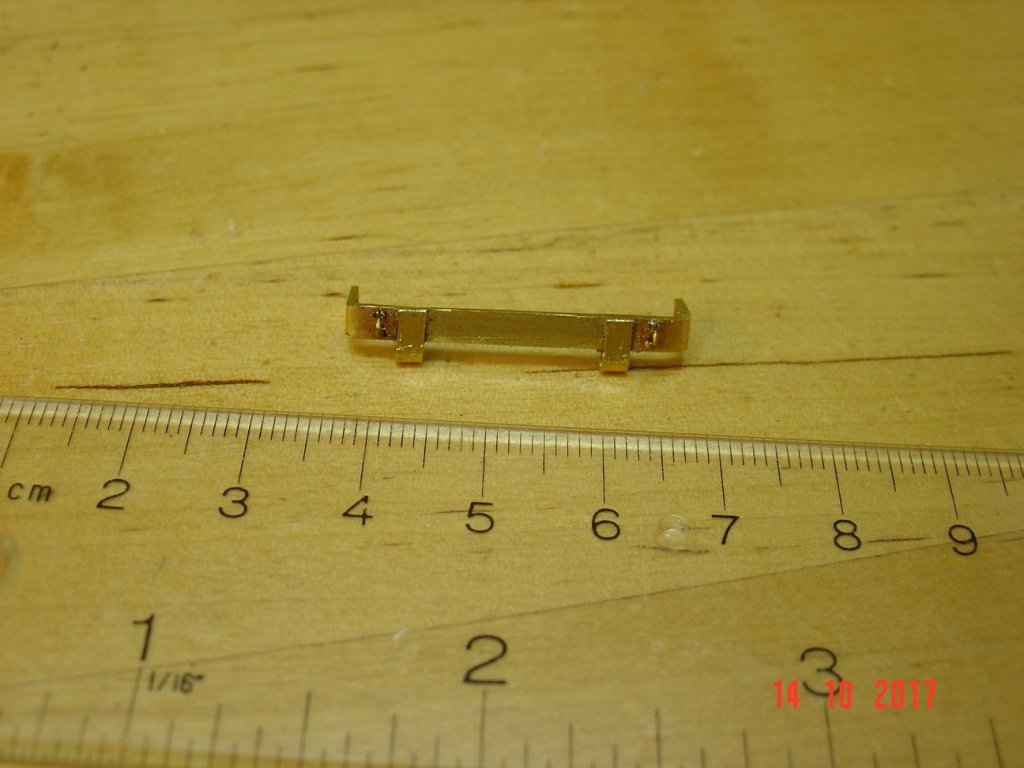
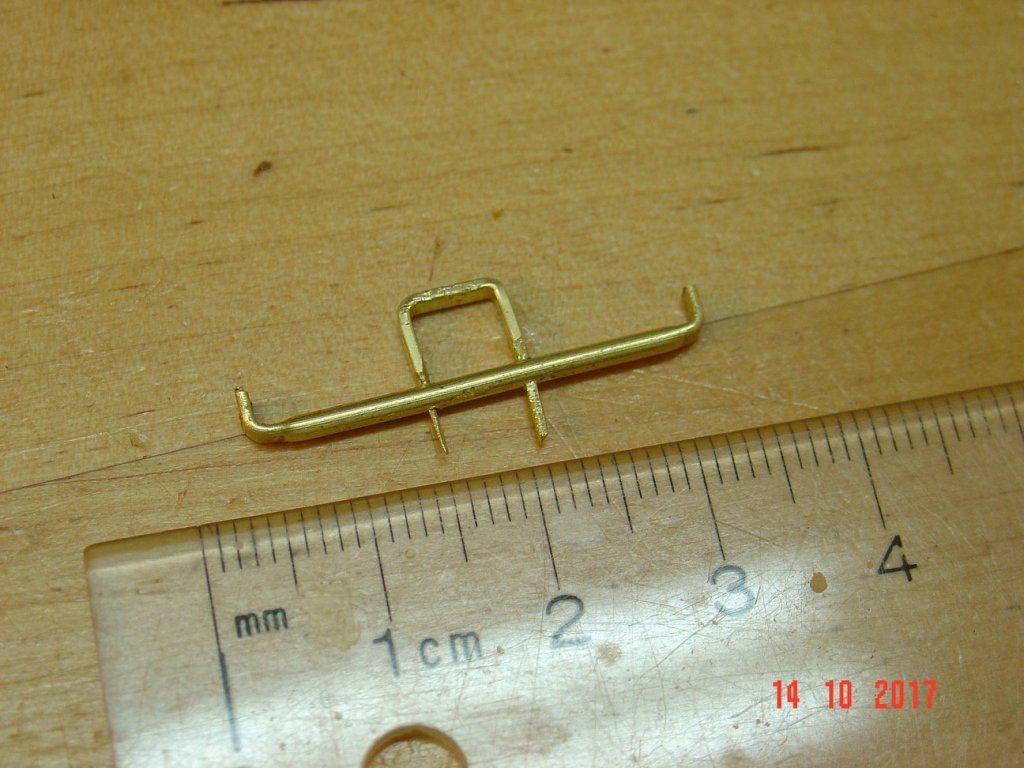
Michael, The brass wire is 0.5mm in diameter. Alexandru
-
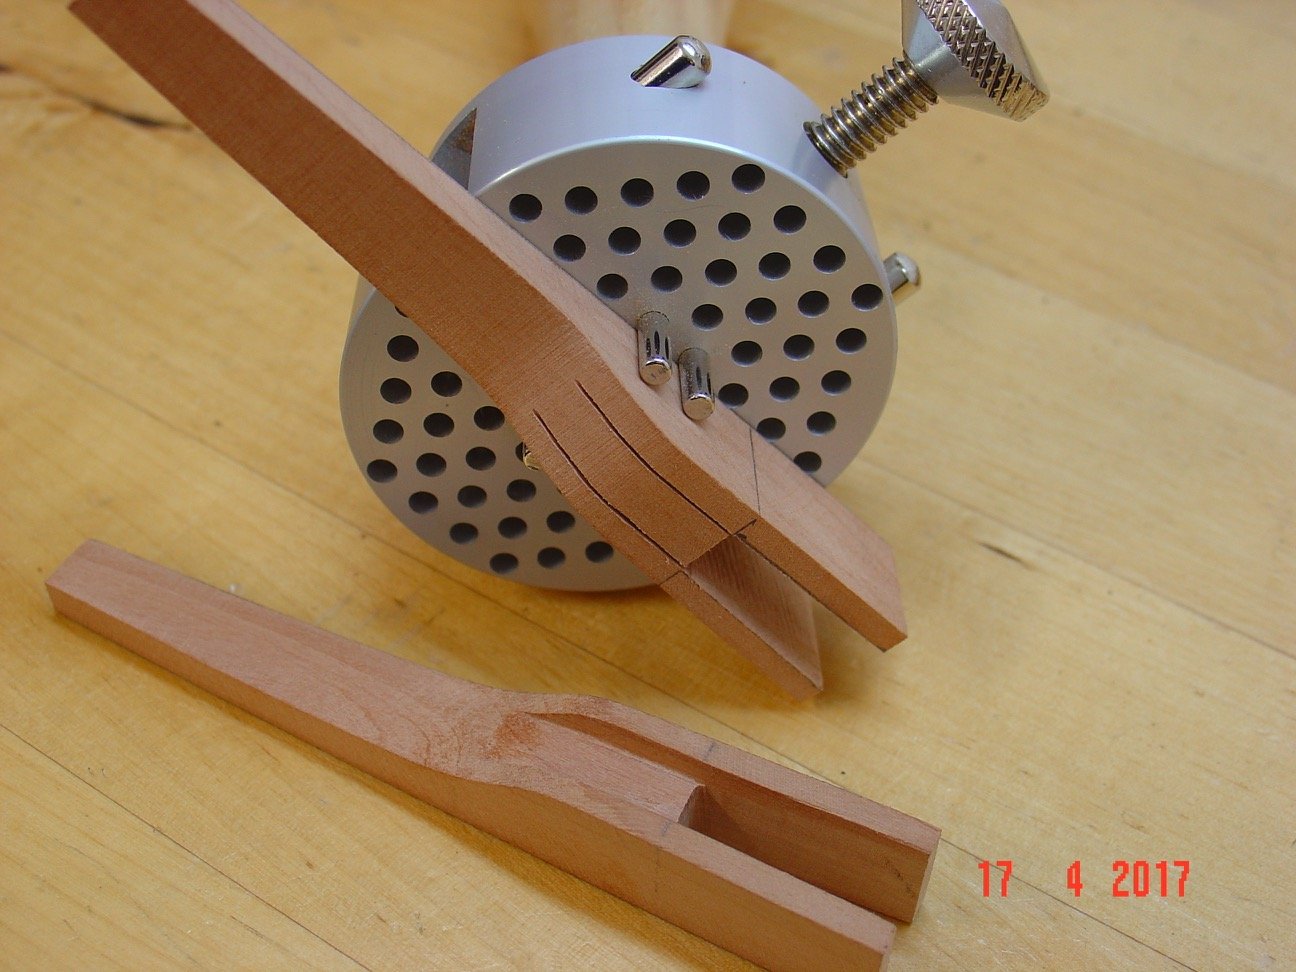
Thank you all for appreciation. Mark, this is a hand held vise/clamp you can find on Amazon: https://www.amazon.ca/Universal-Holder-Jewelers-Jewelry-Engraving/dp/B00NA7SG9C/ref=sr_1_12?ie=UTF8&qid=1492517975&sr=8-12&keywords=jewelry+clamp Alexandru
-
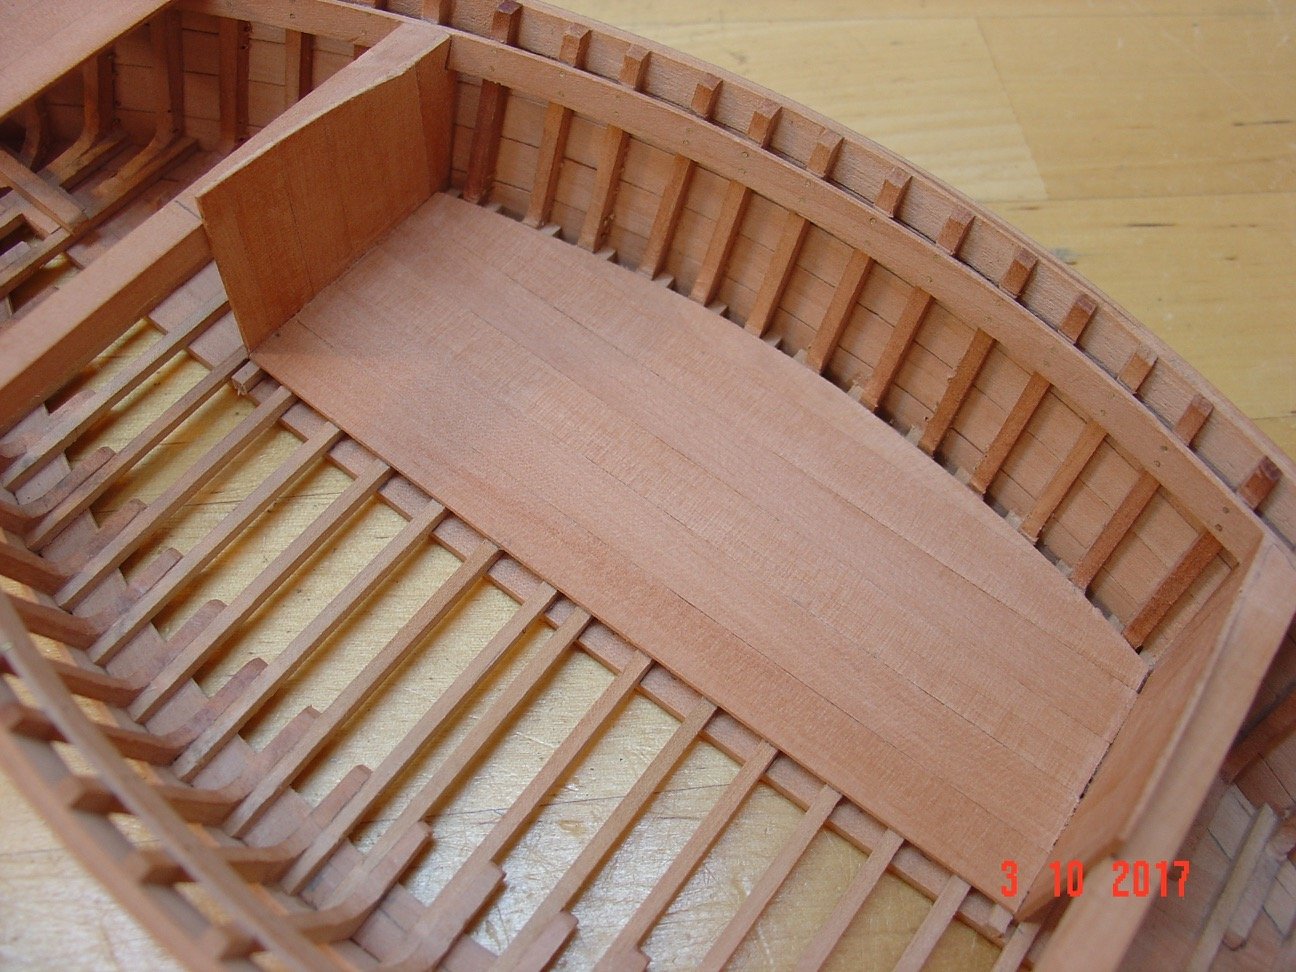
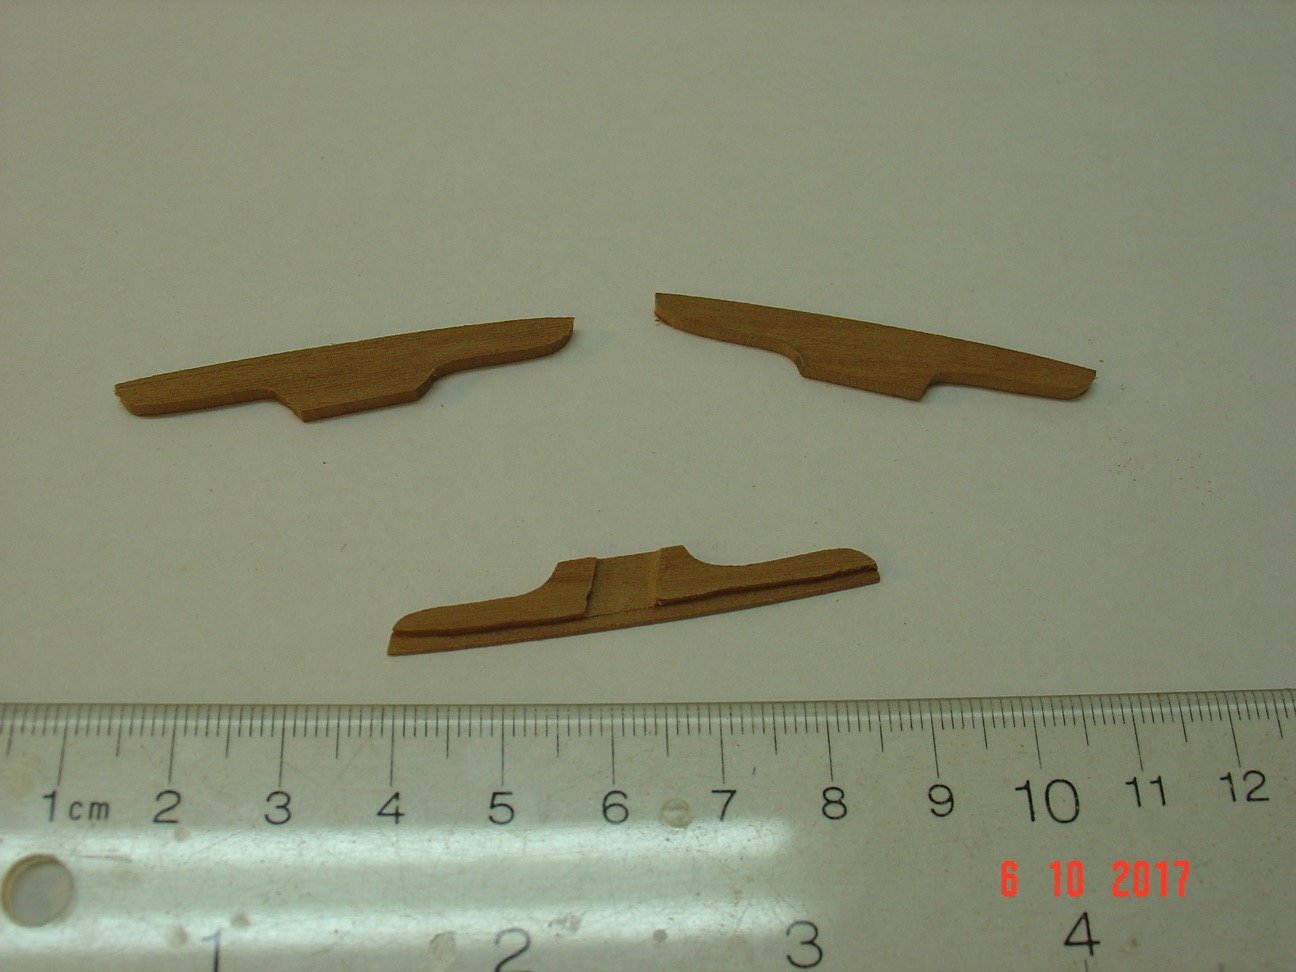
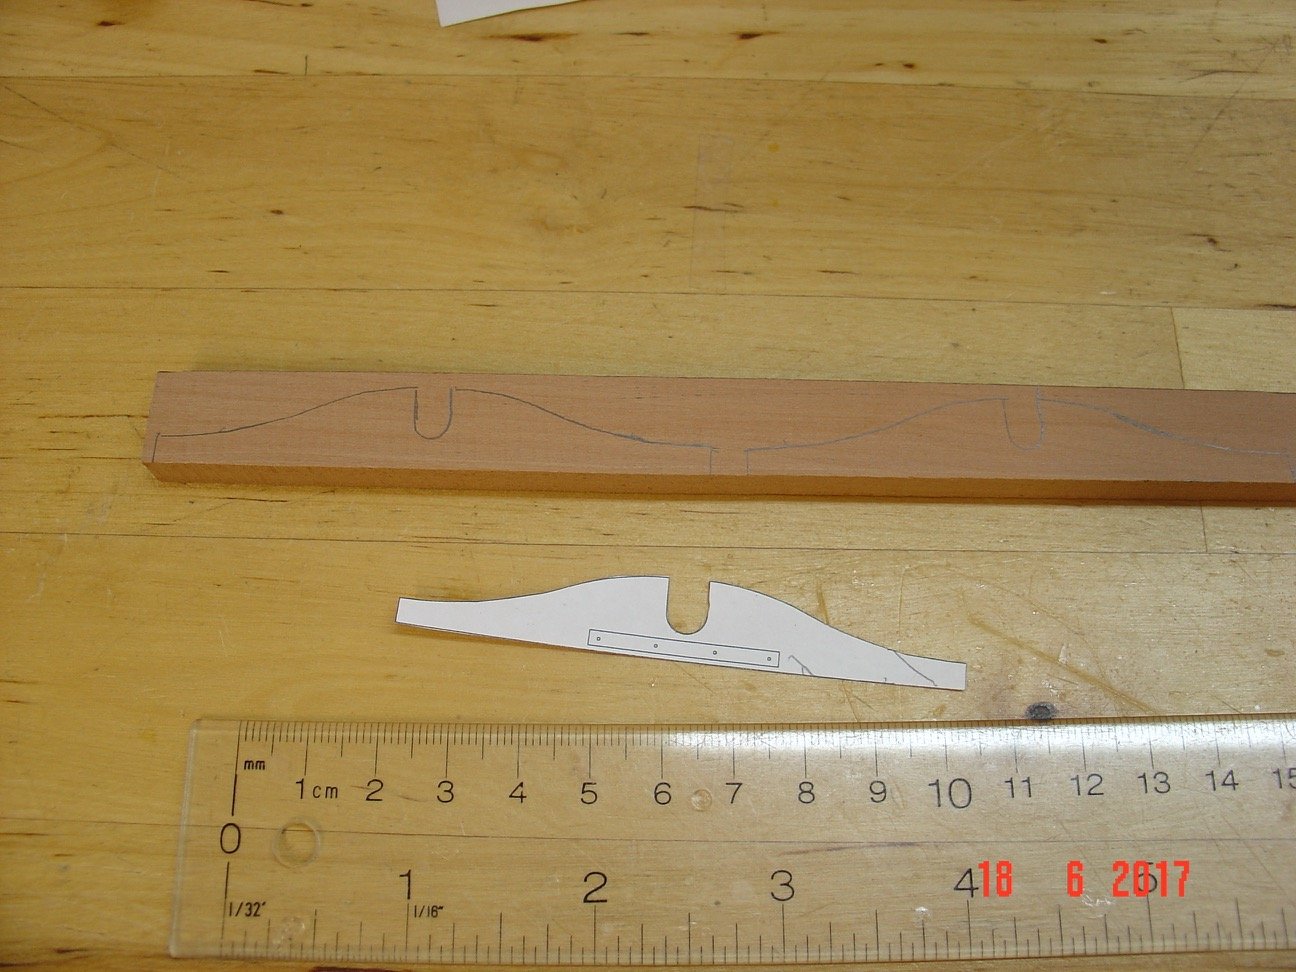
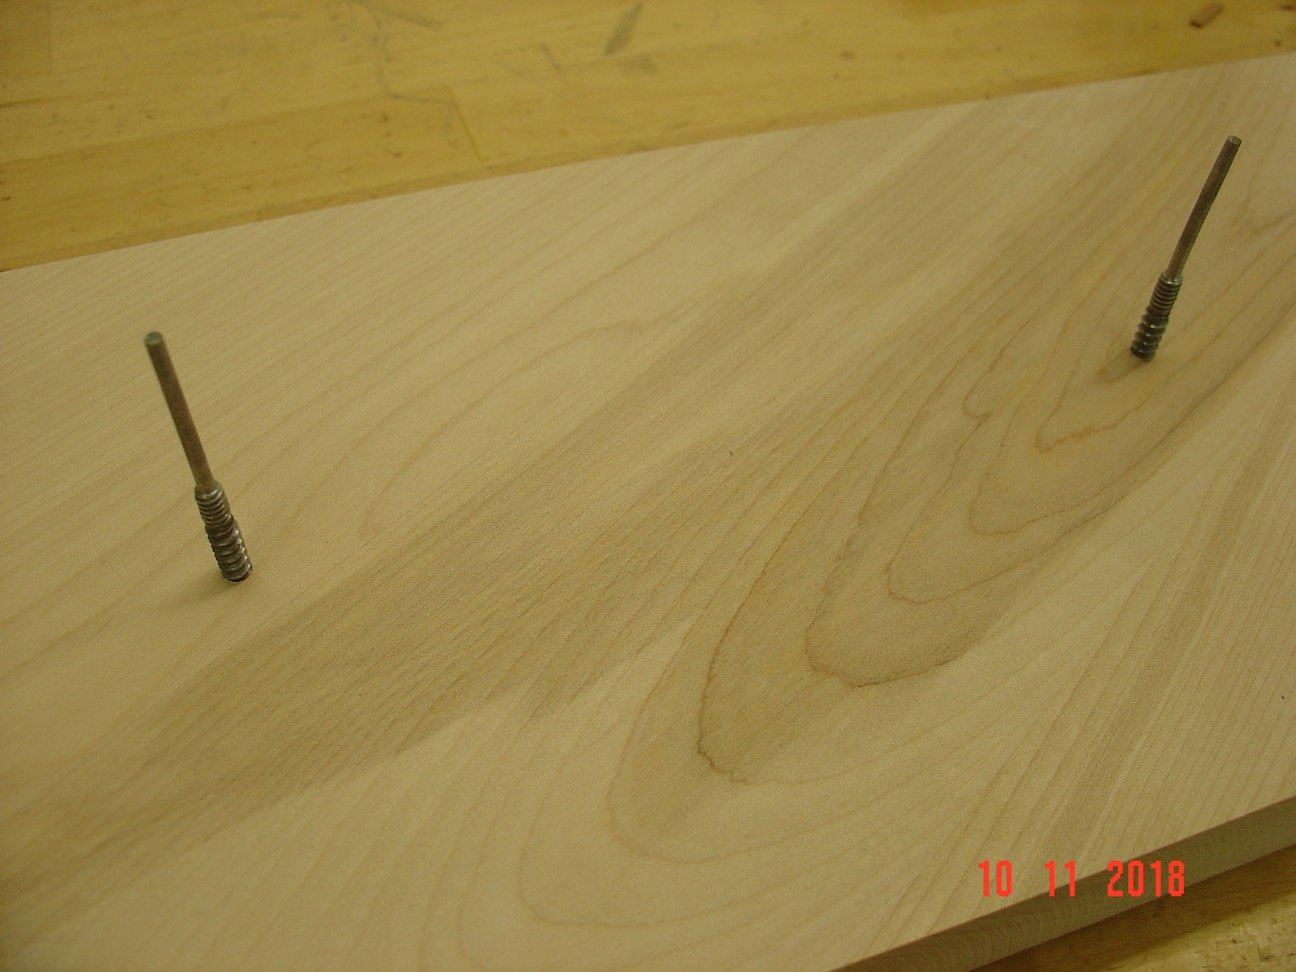
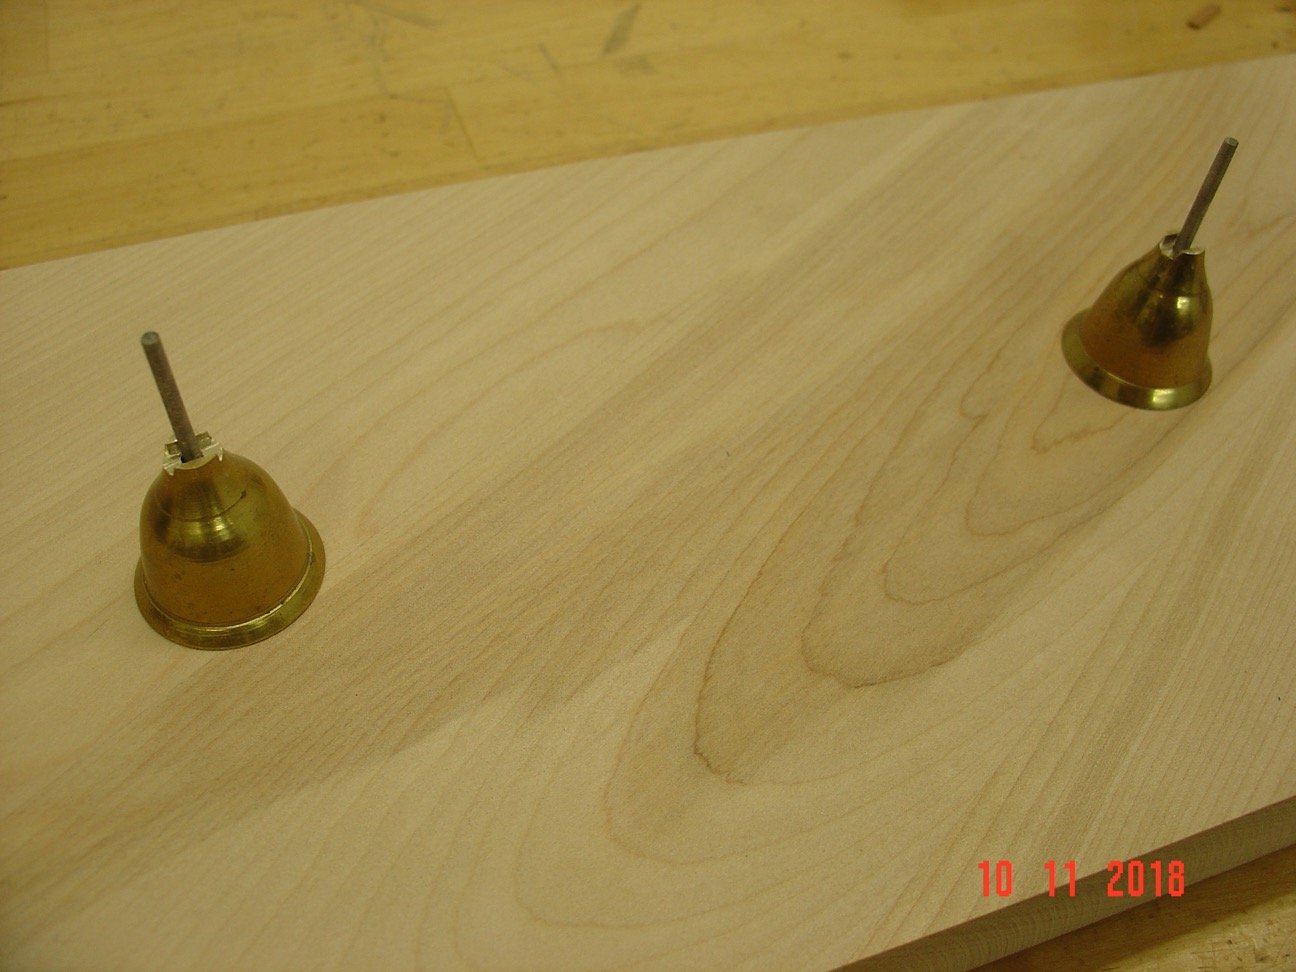
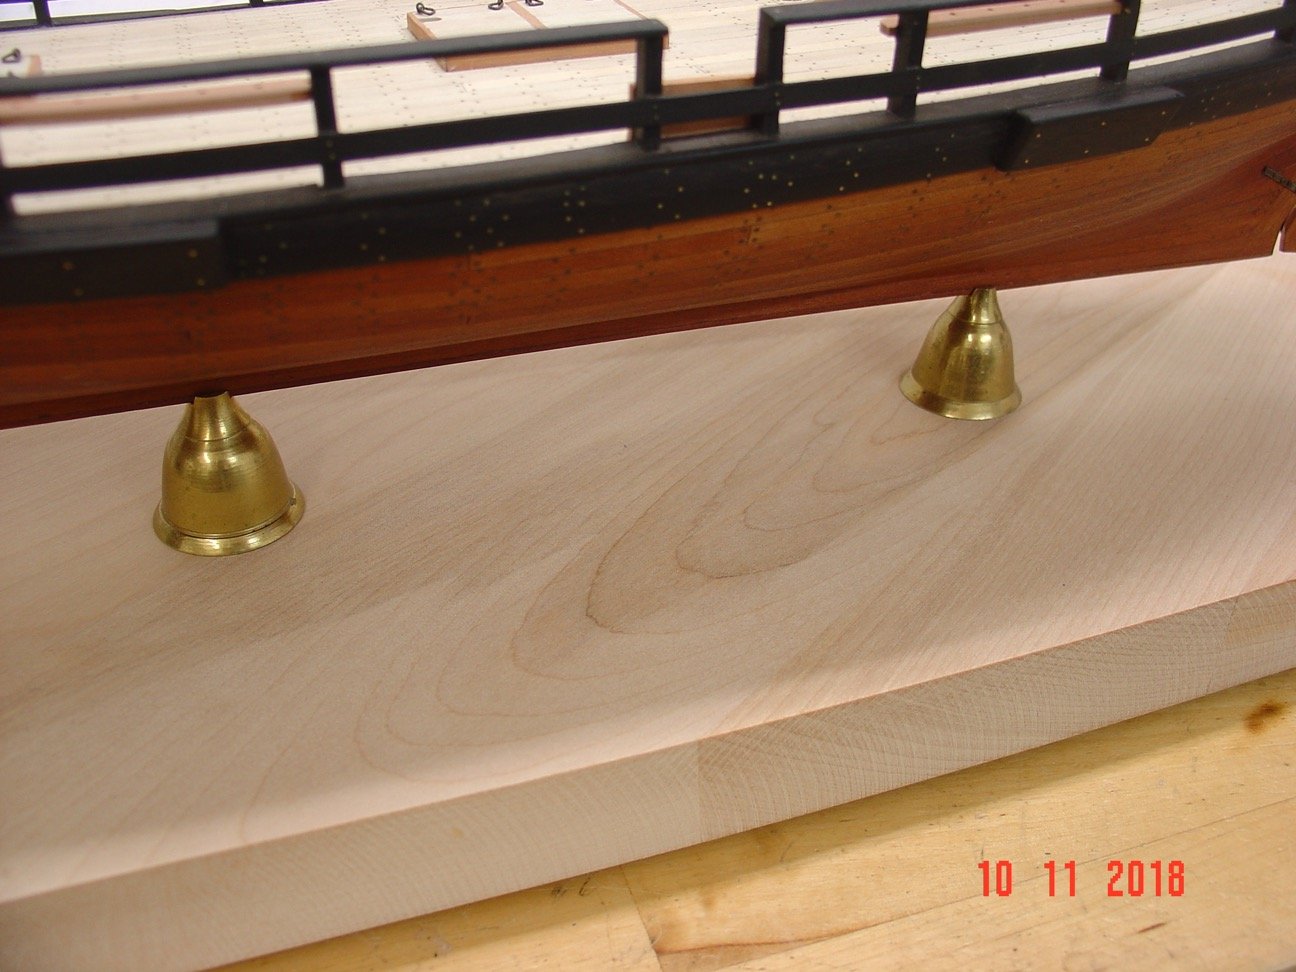
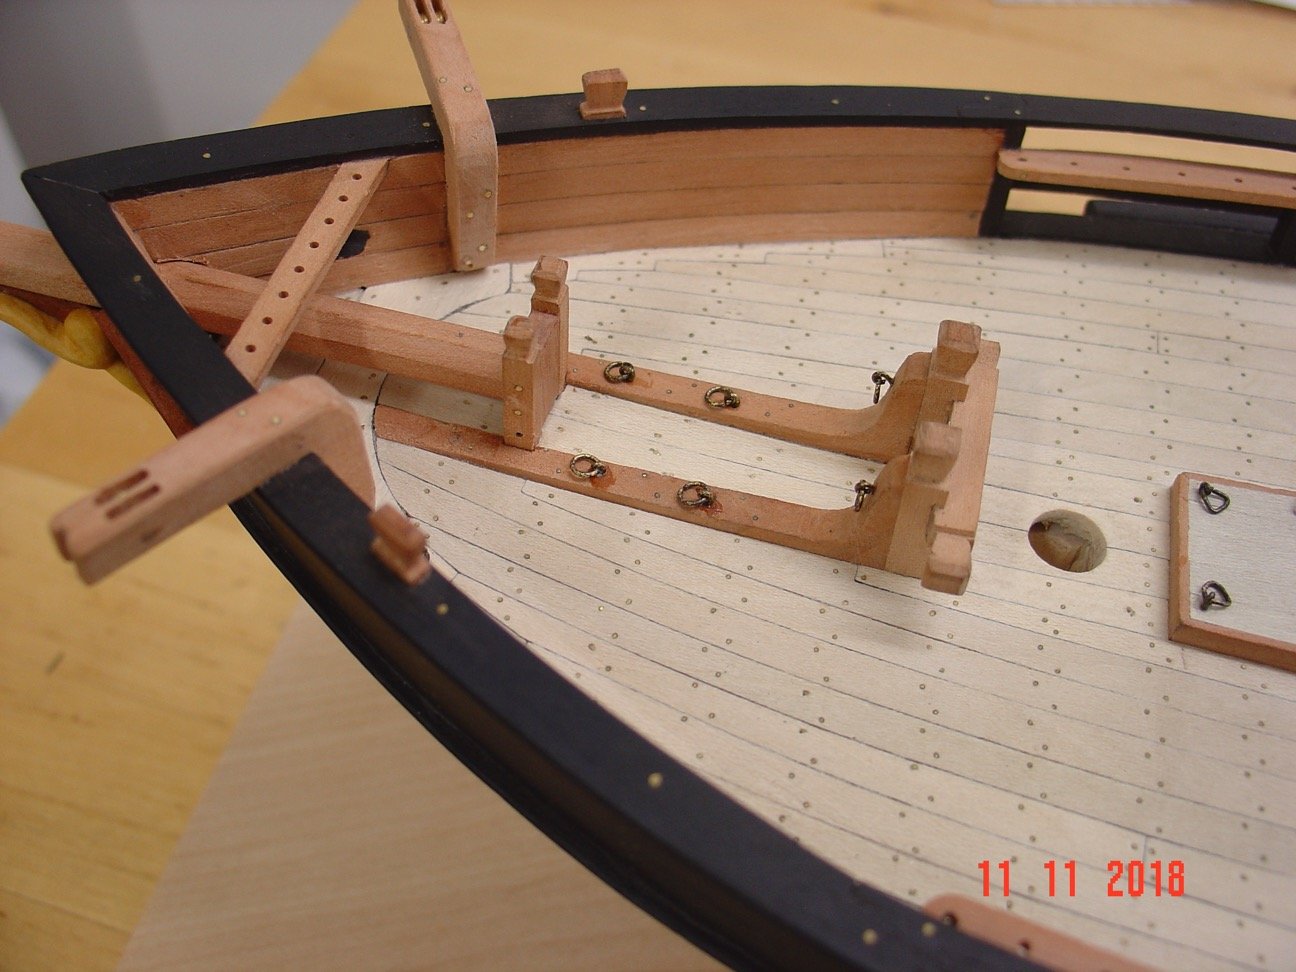
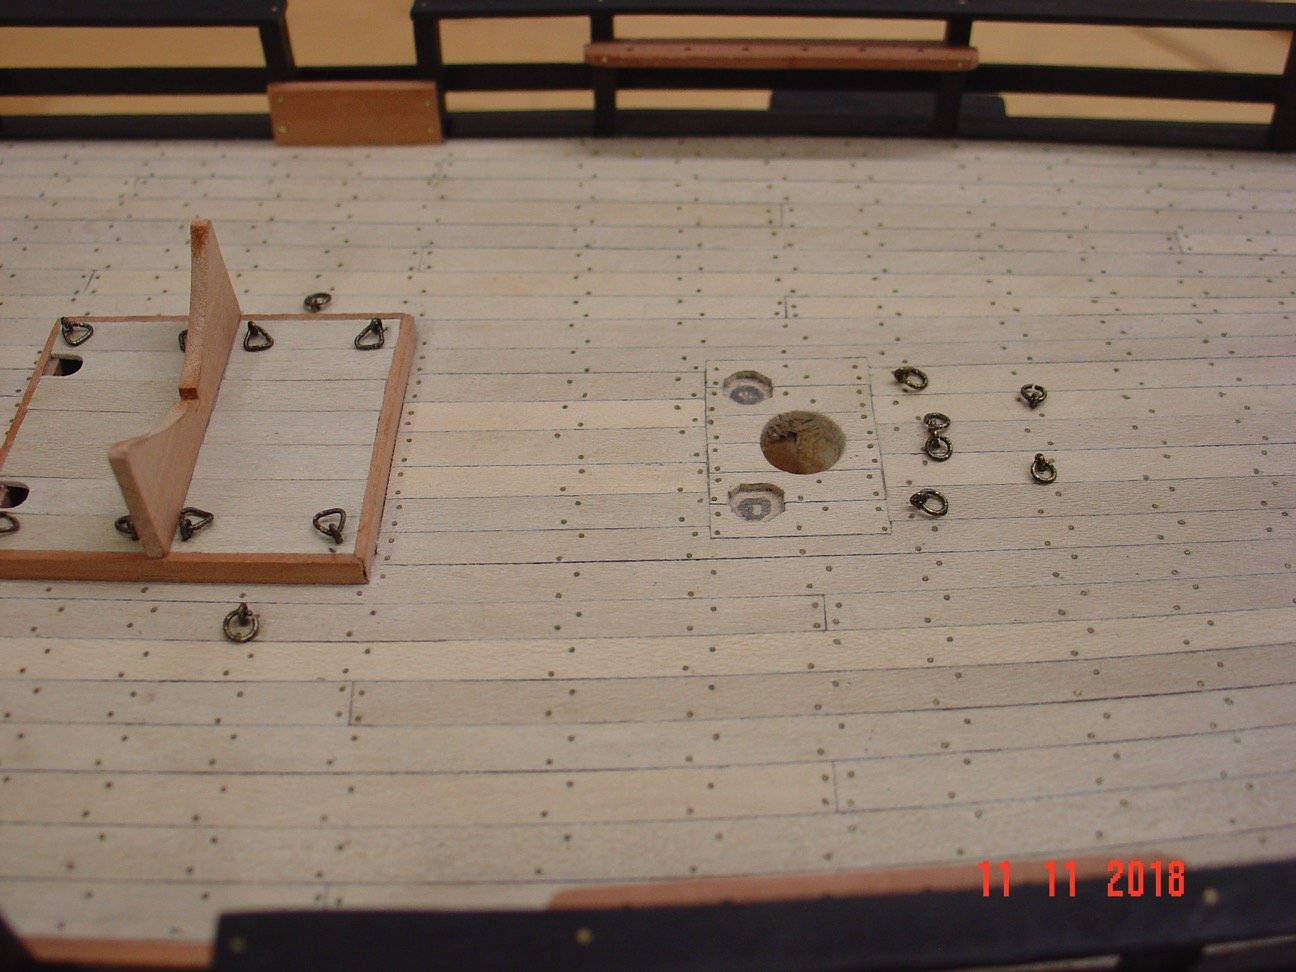
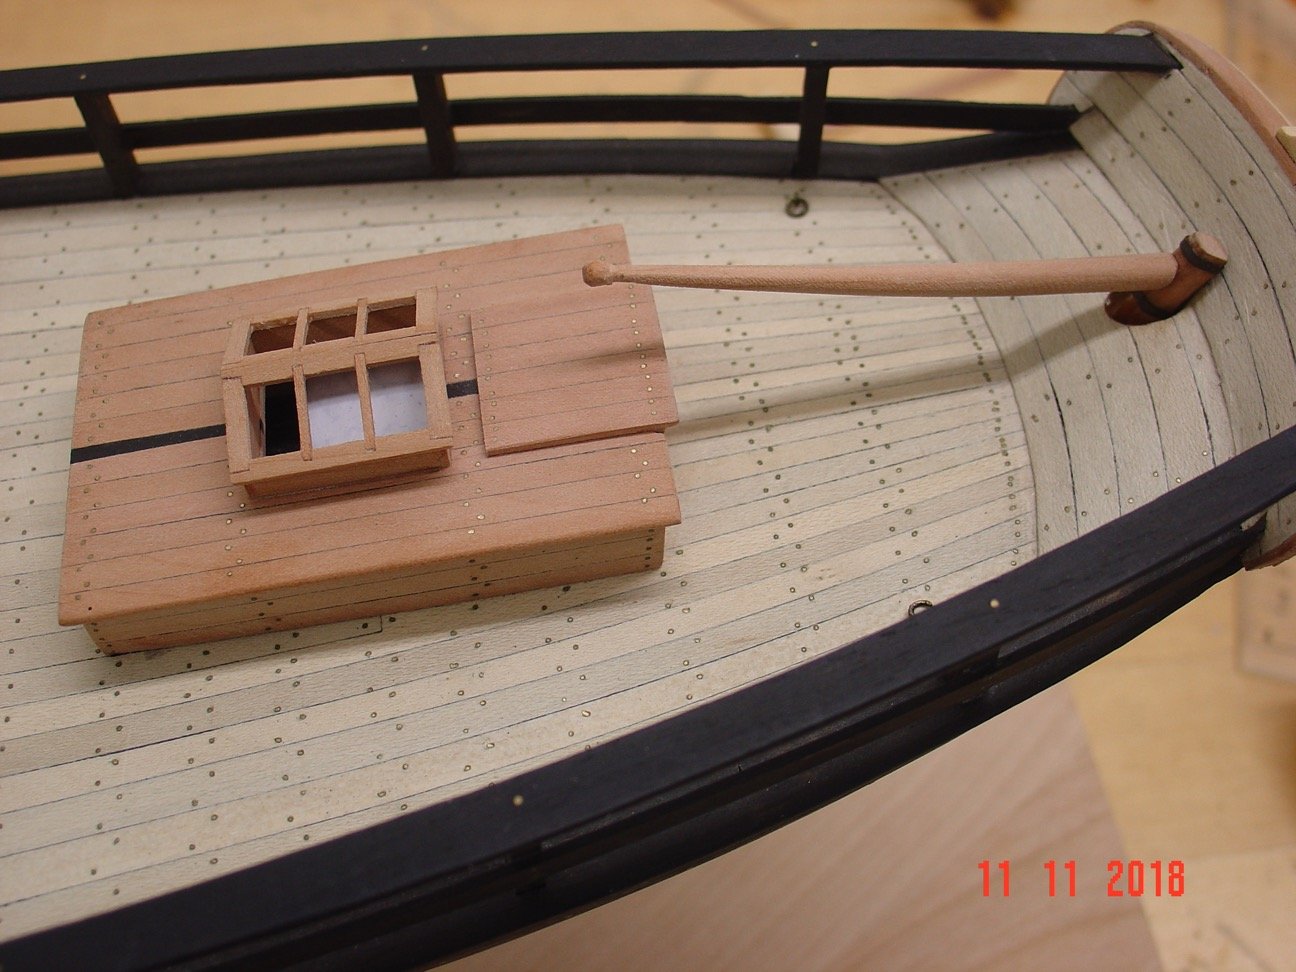
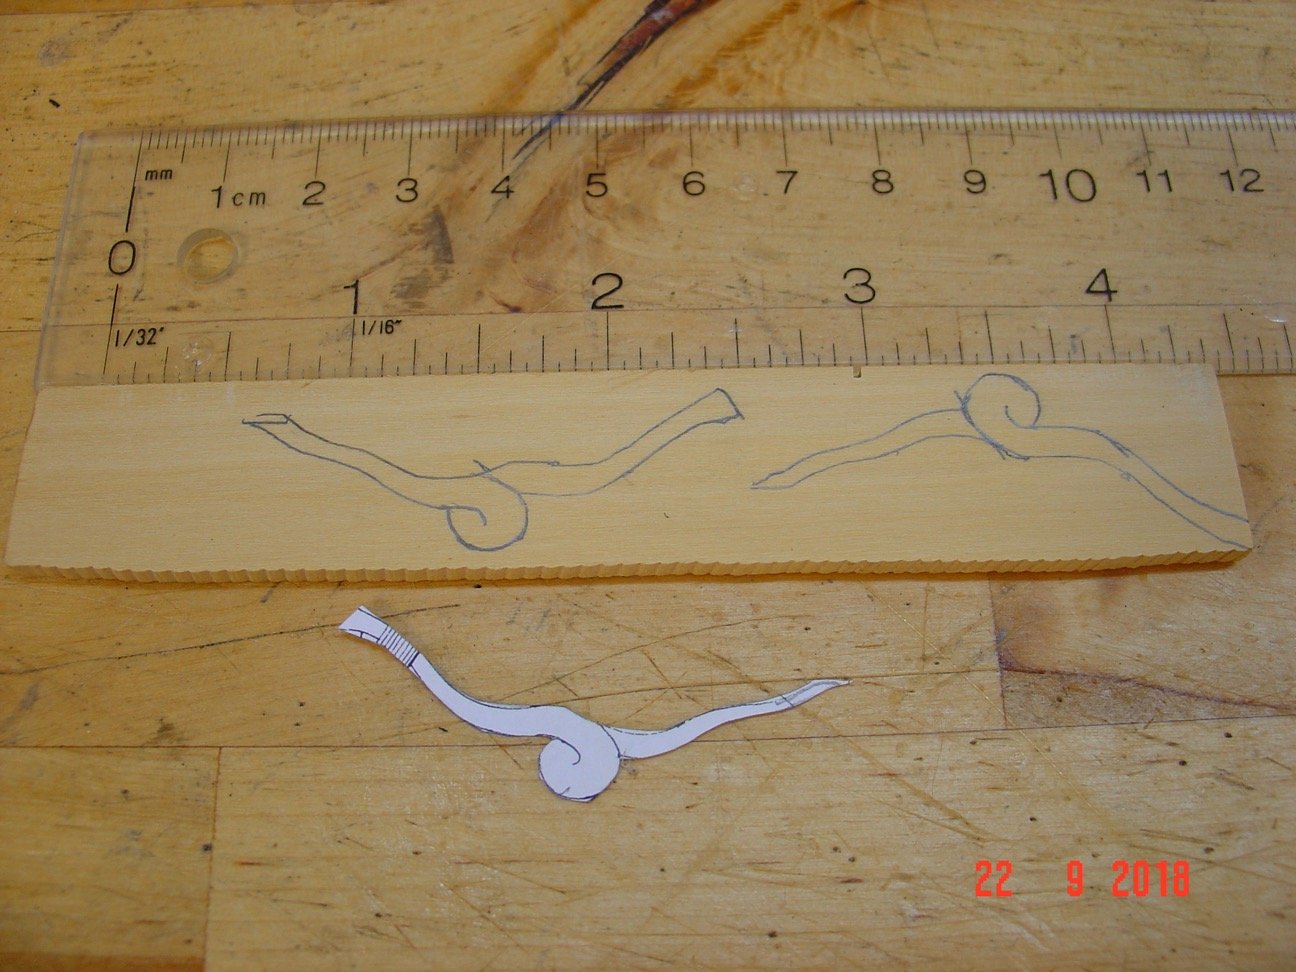
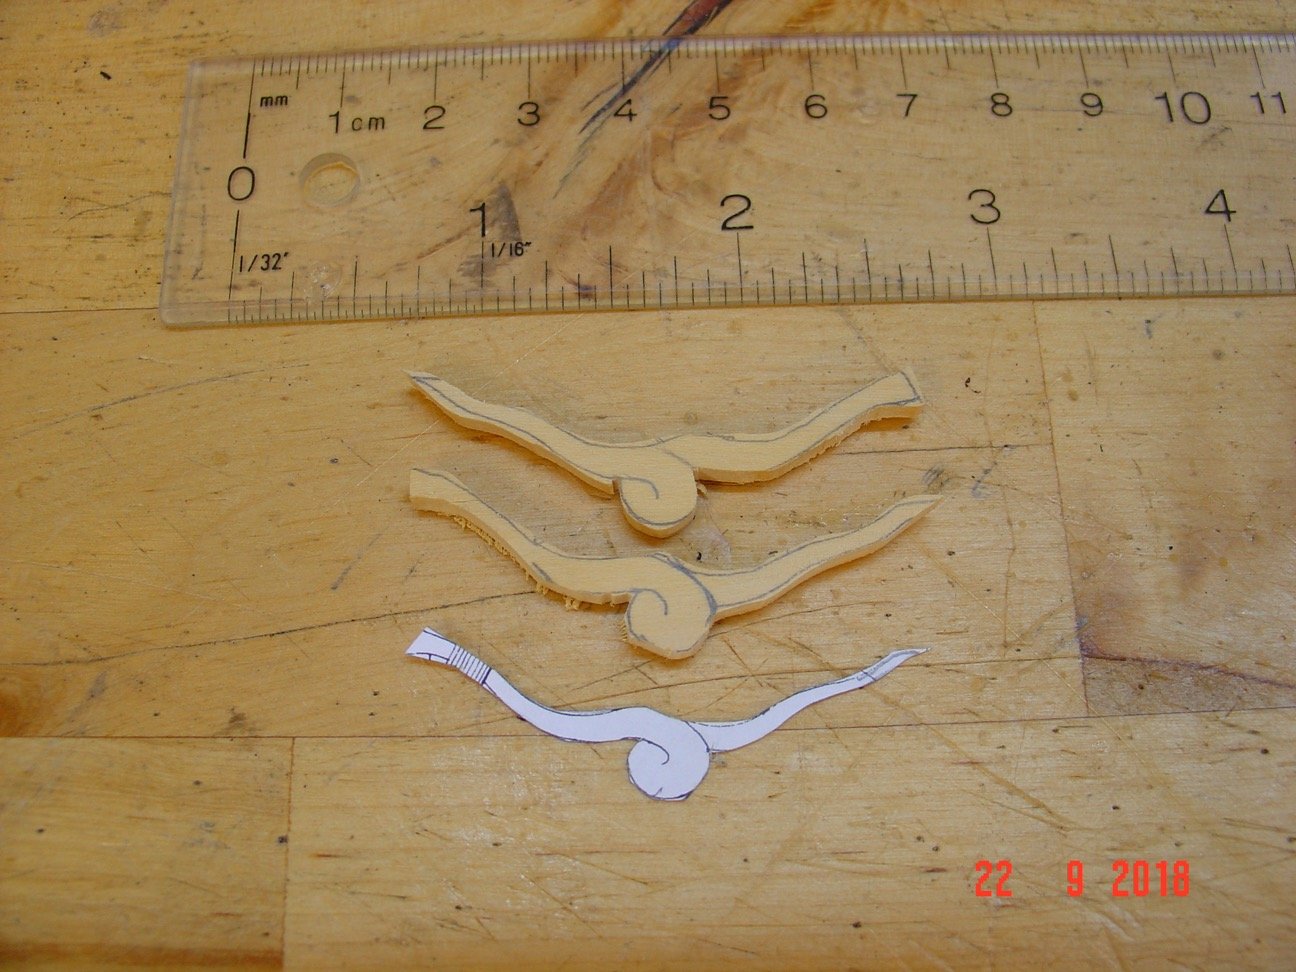
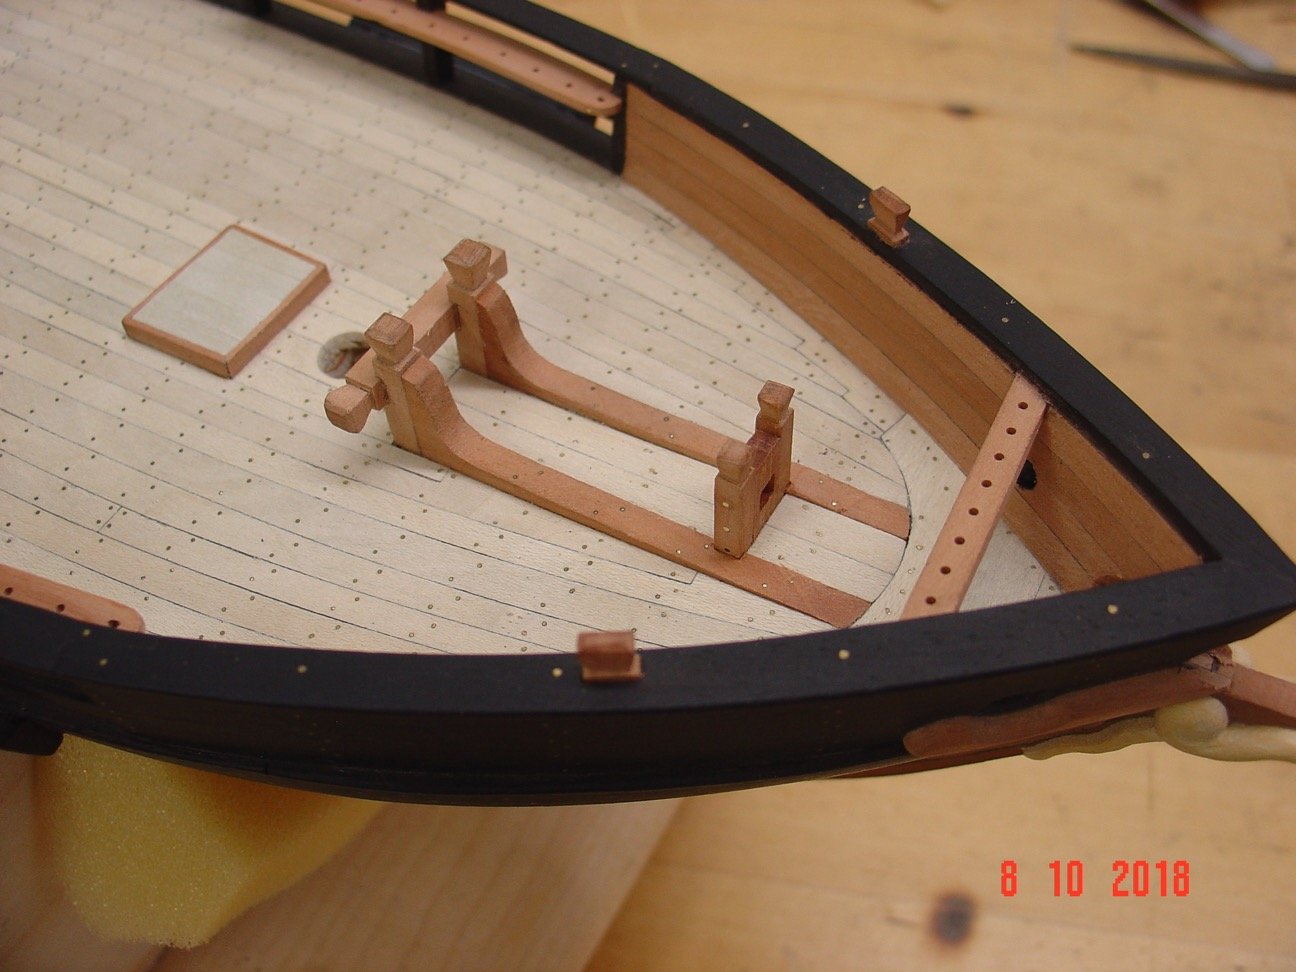
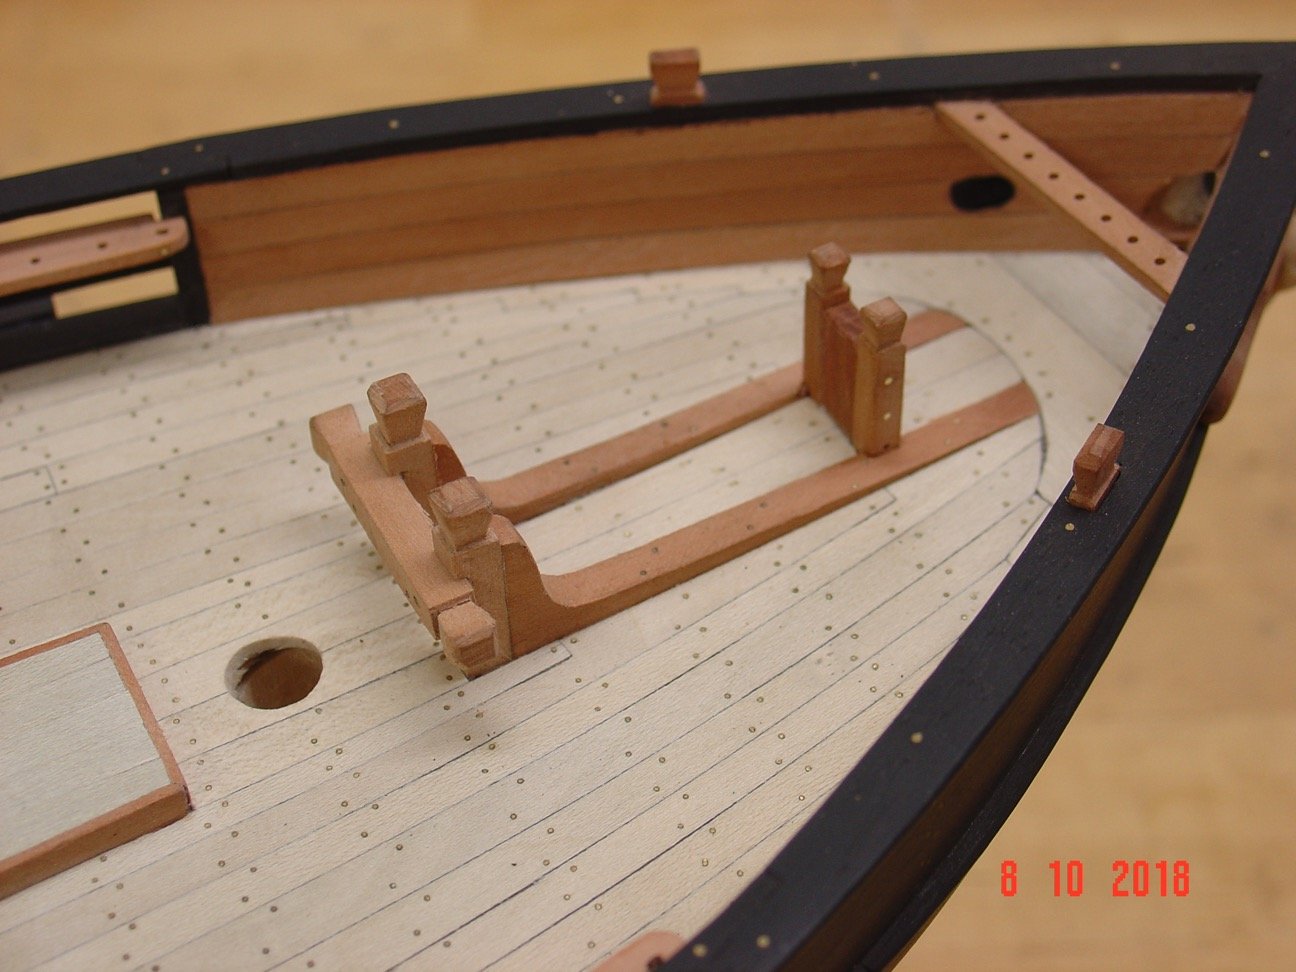
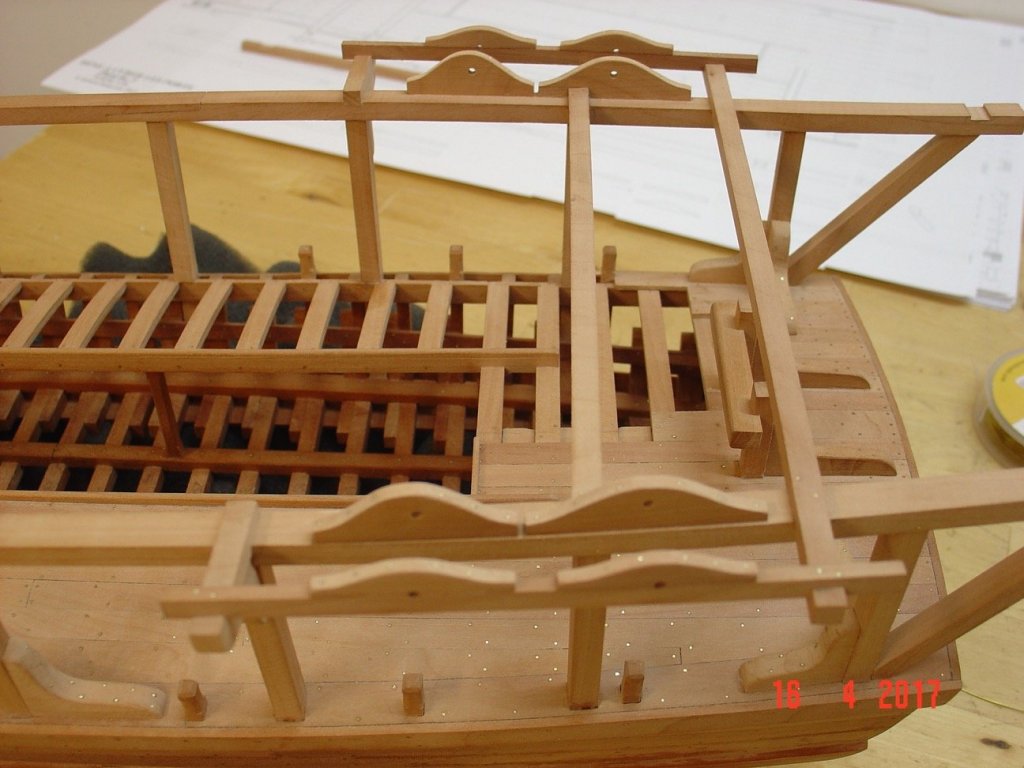
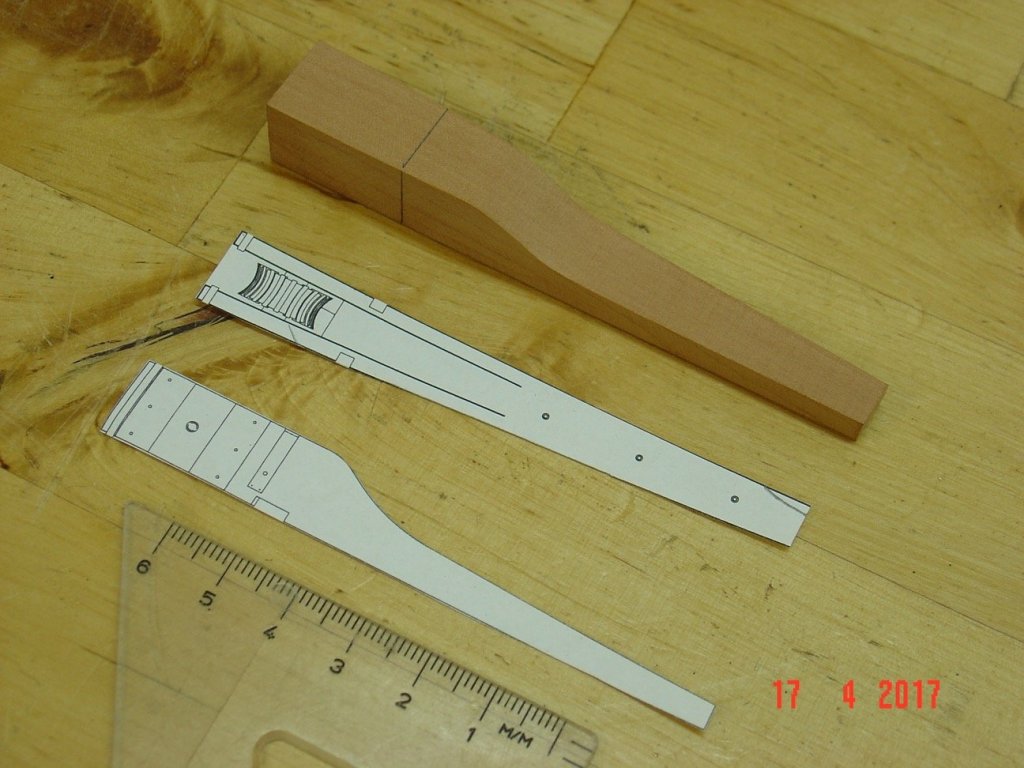
Hello, Here is another update. Alexandru


-
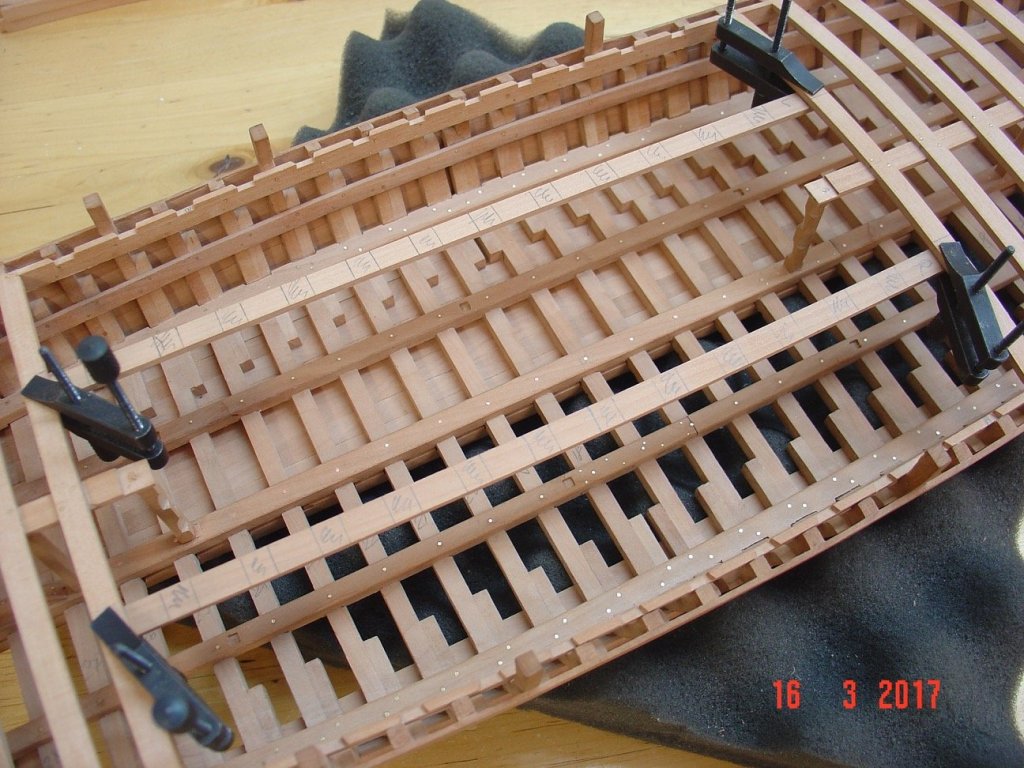
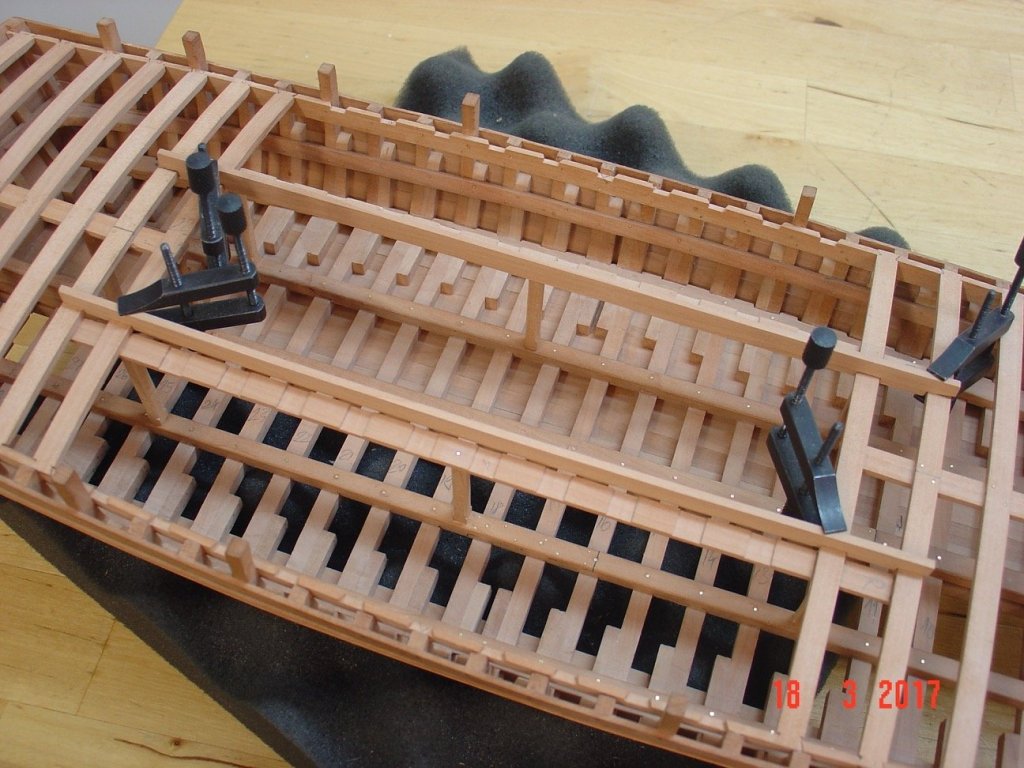
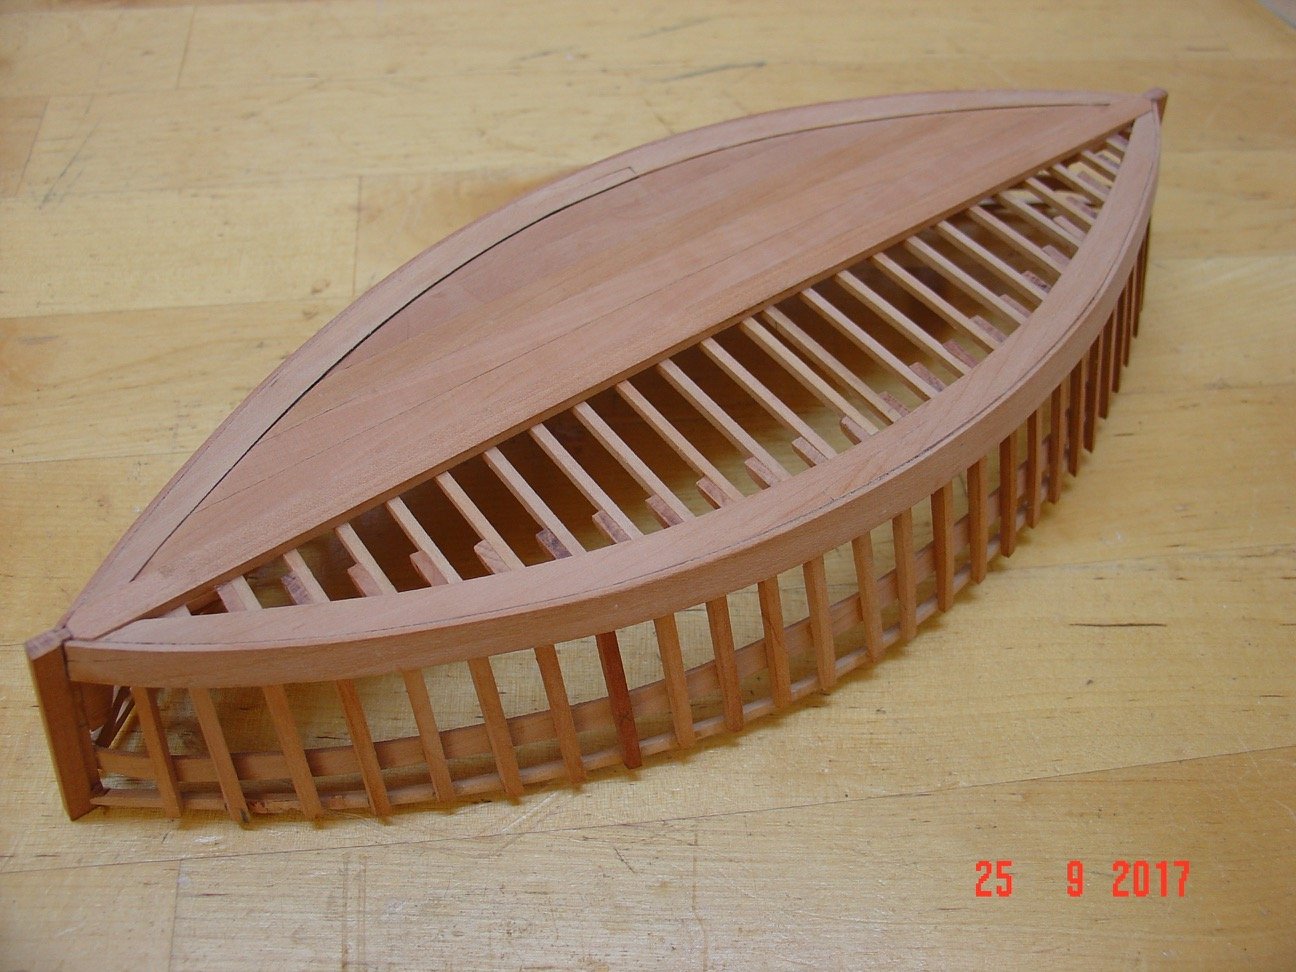
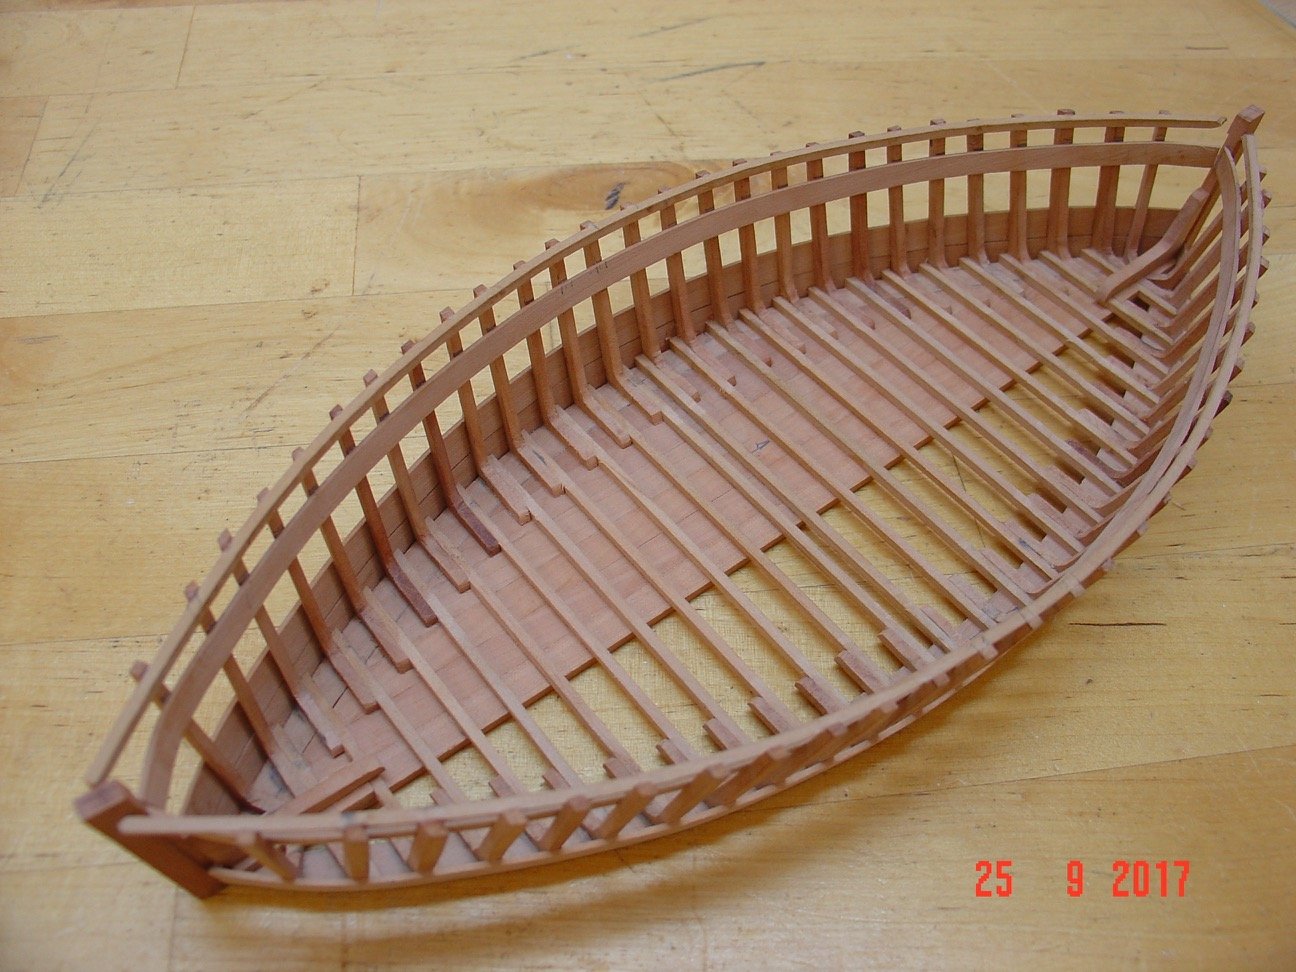
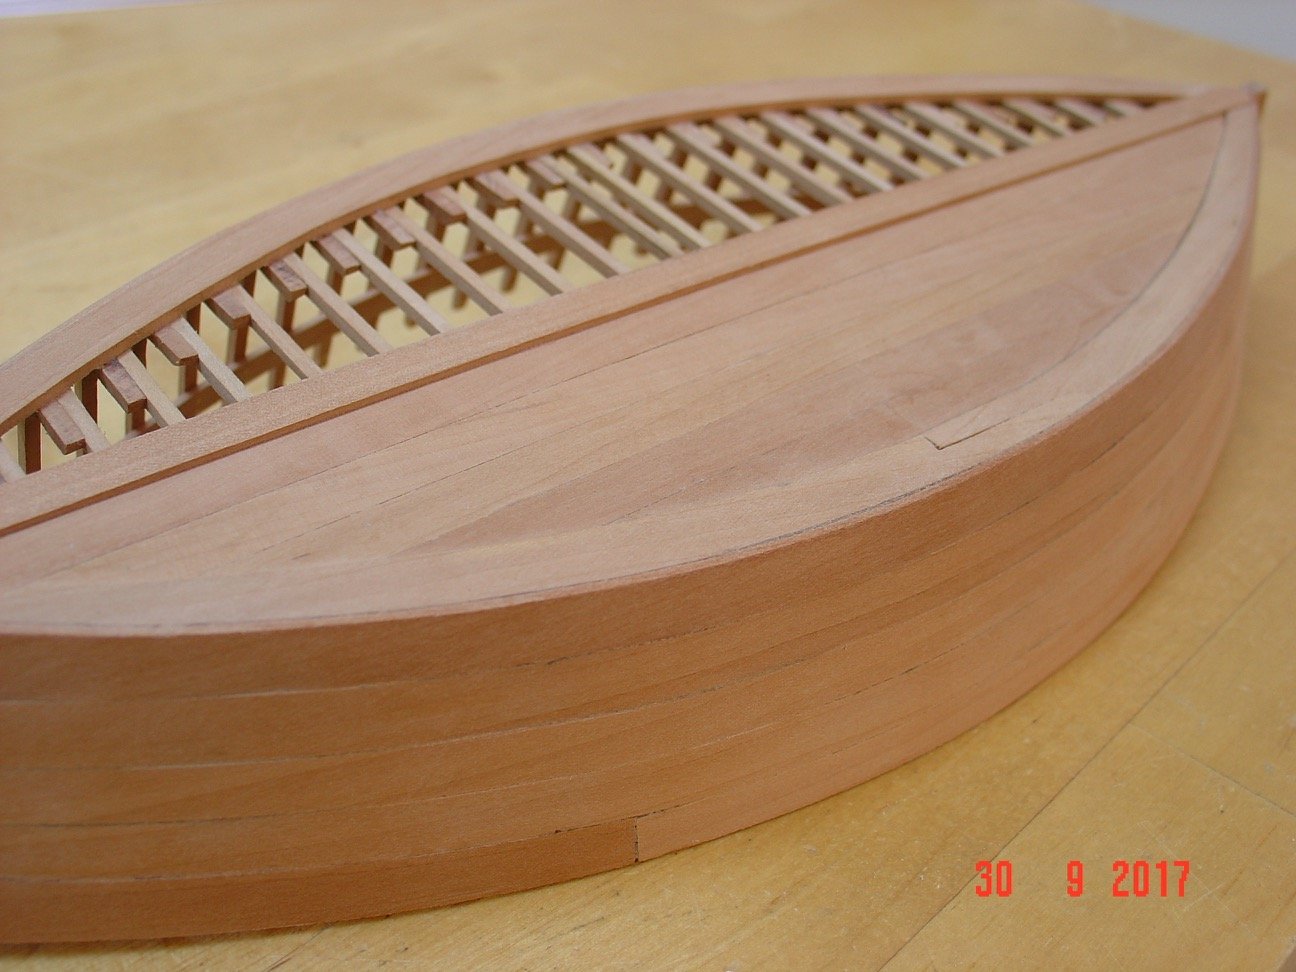
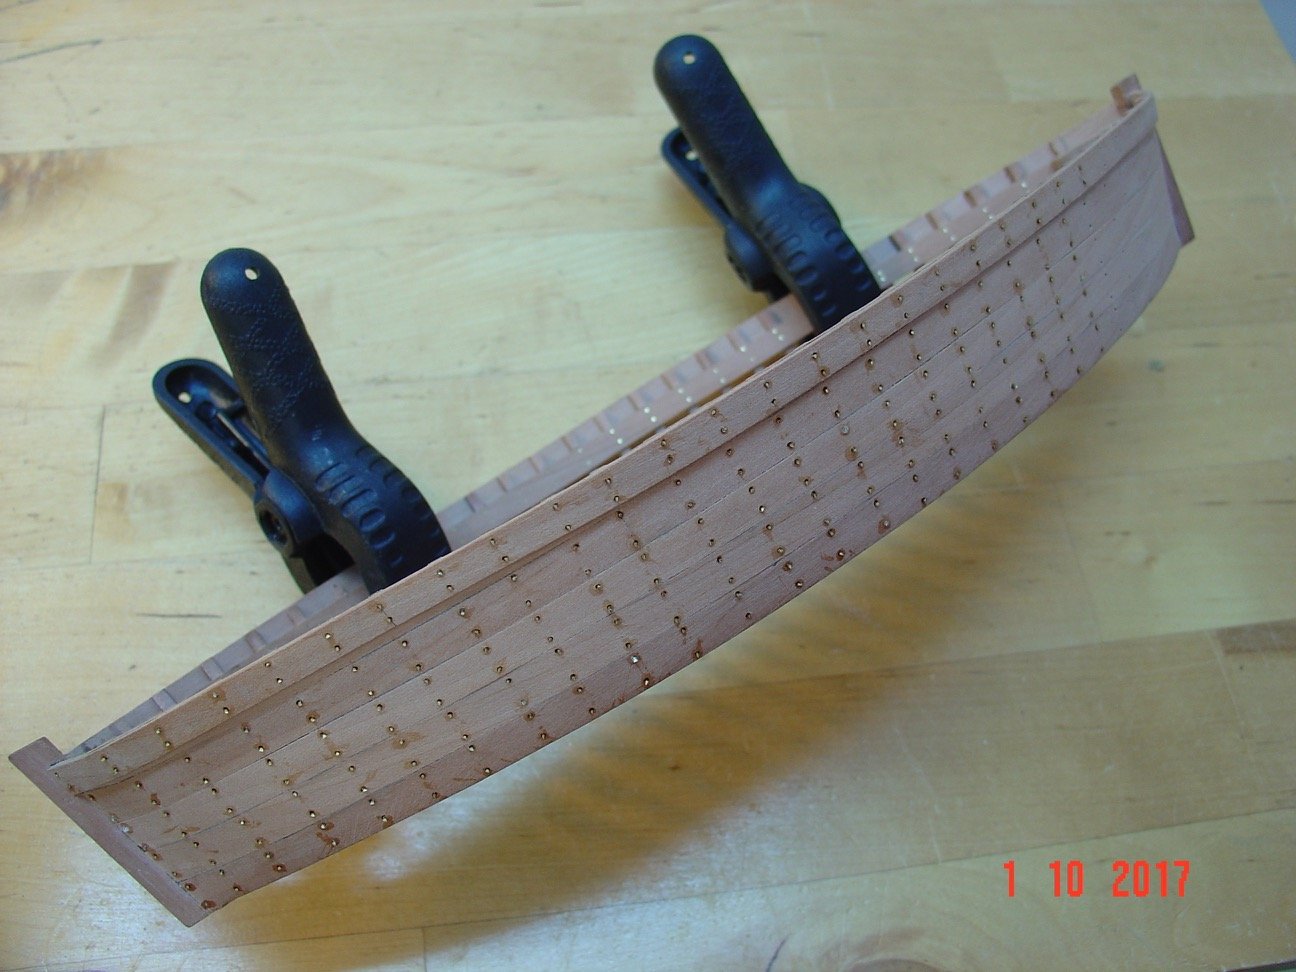
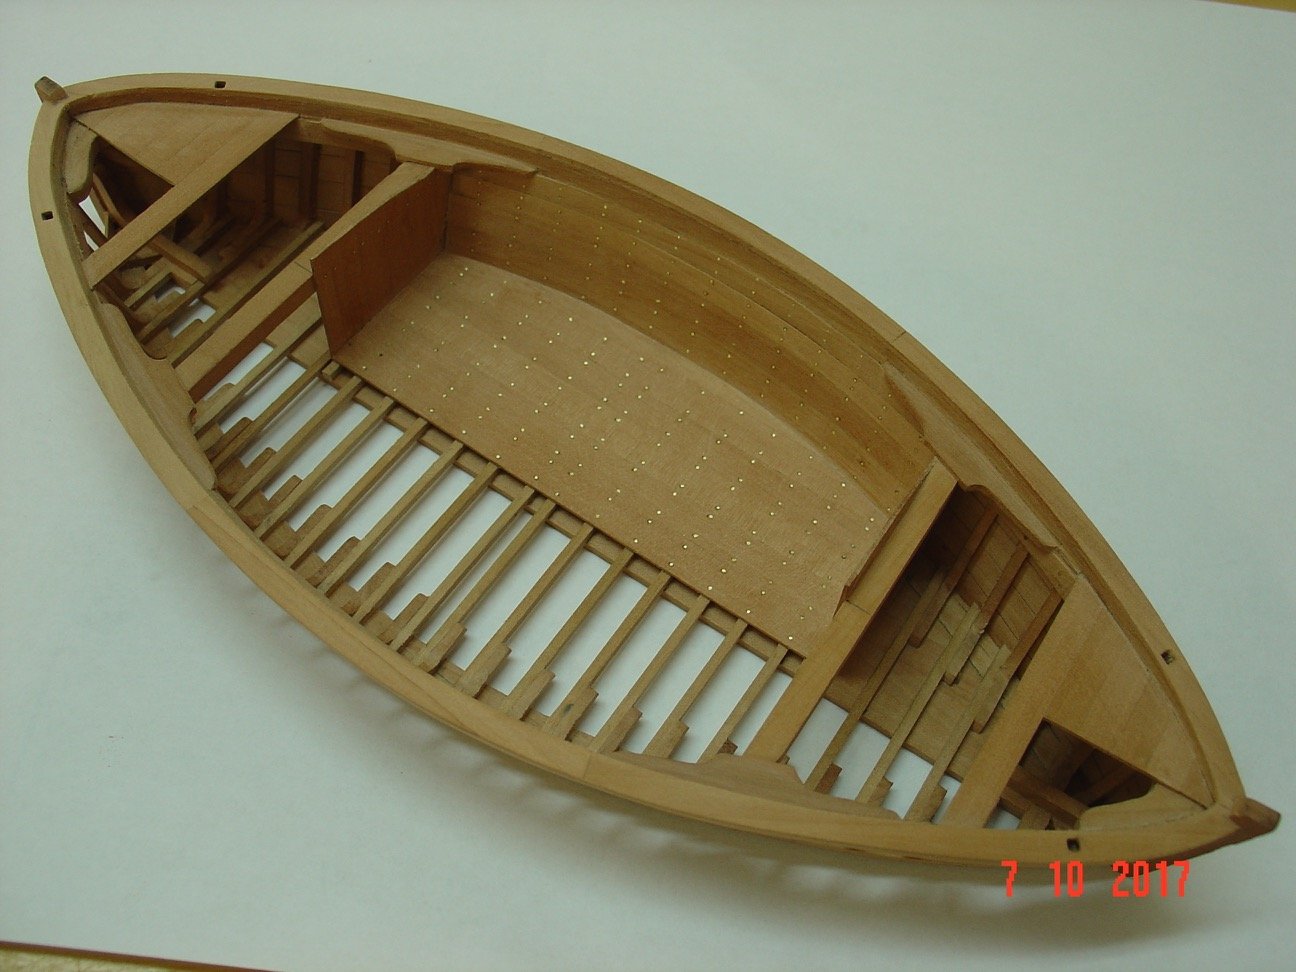
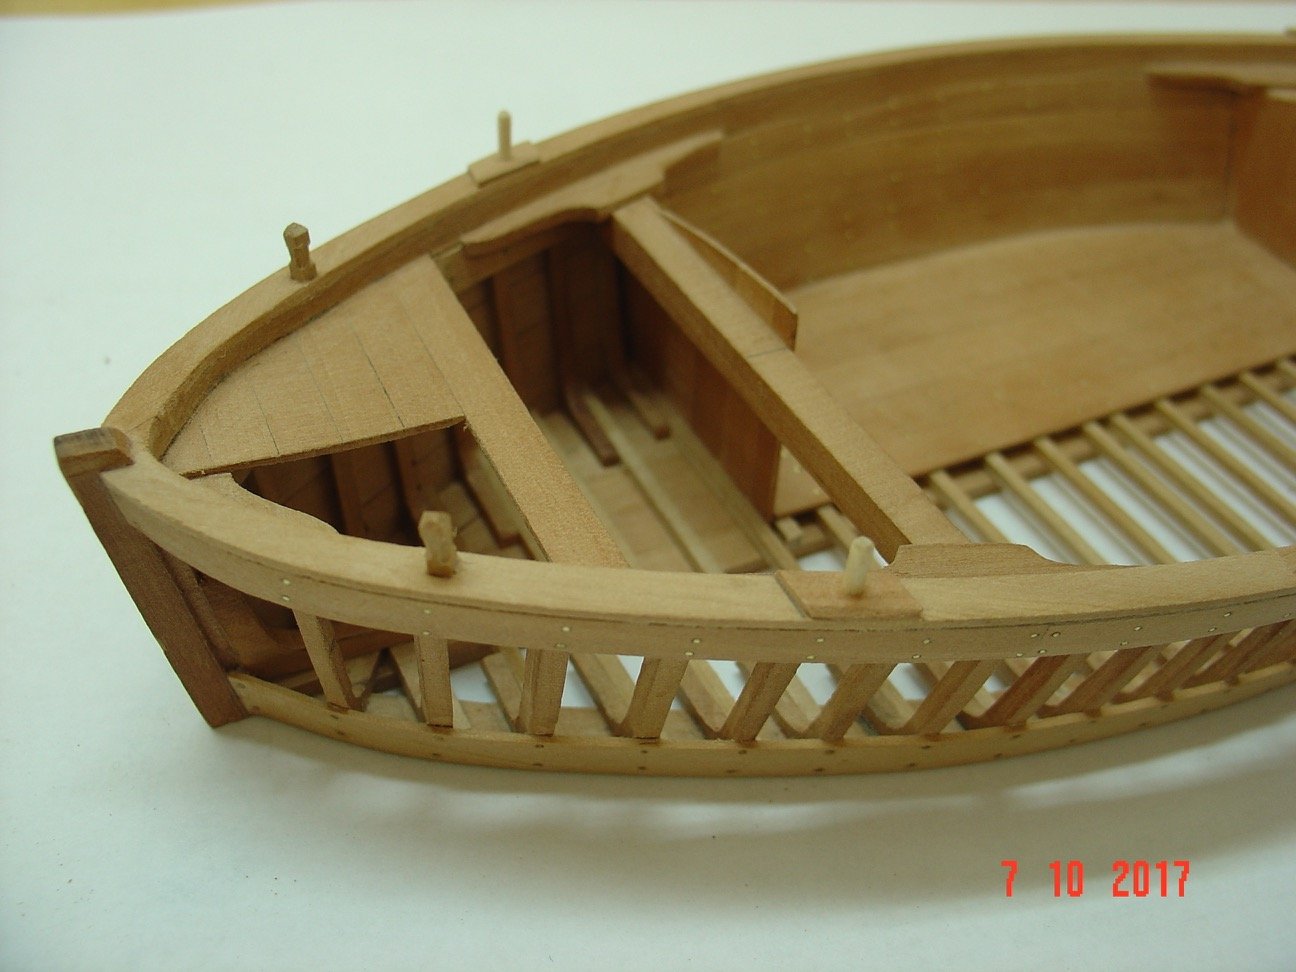
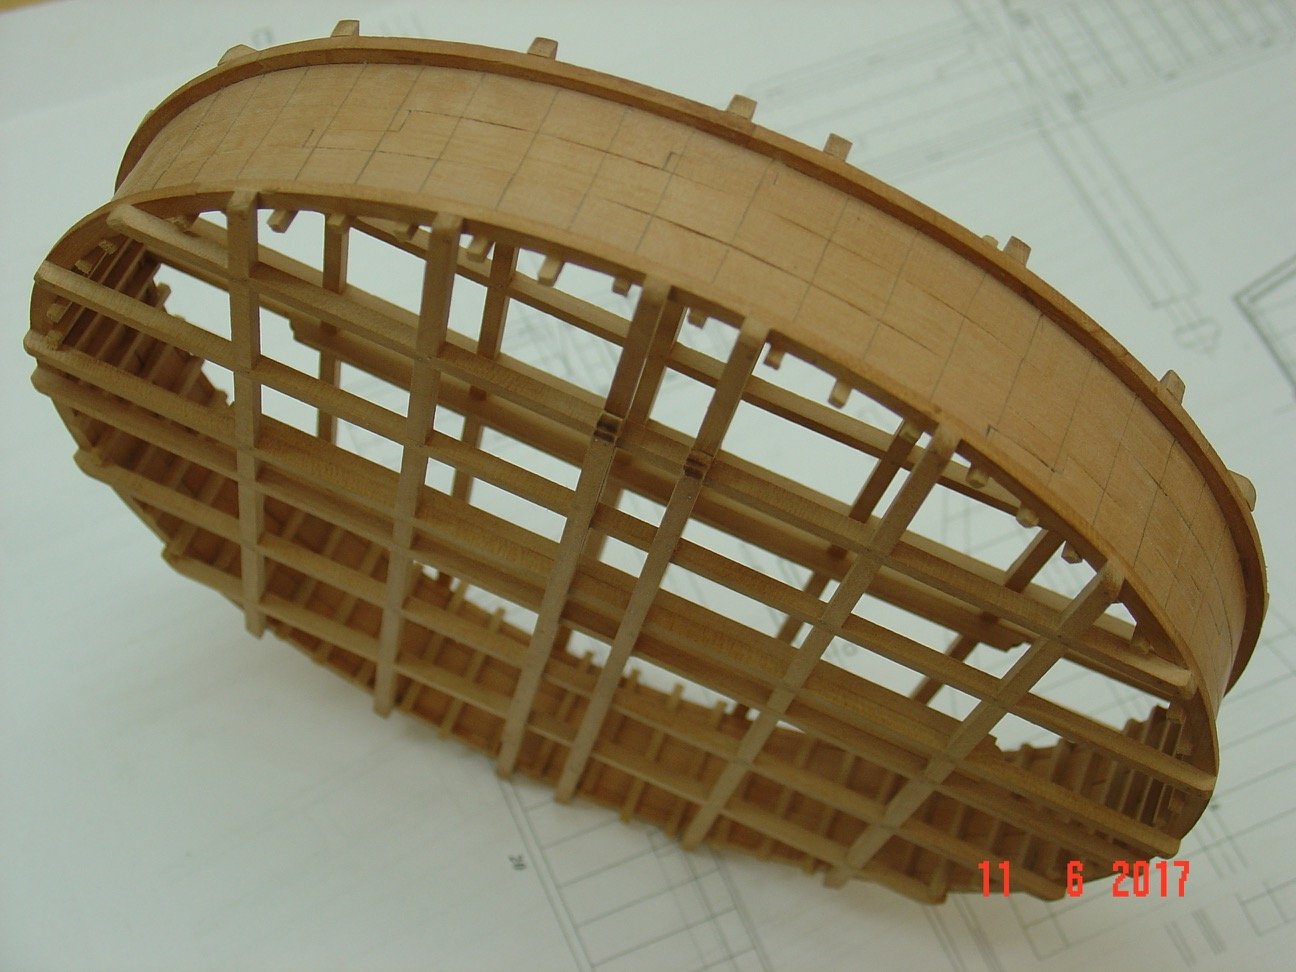
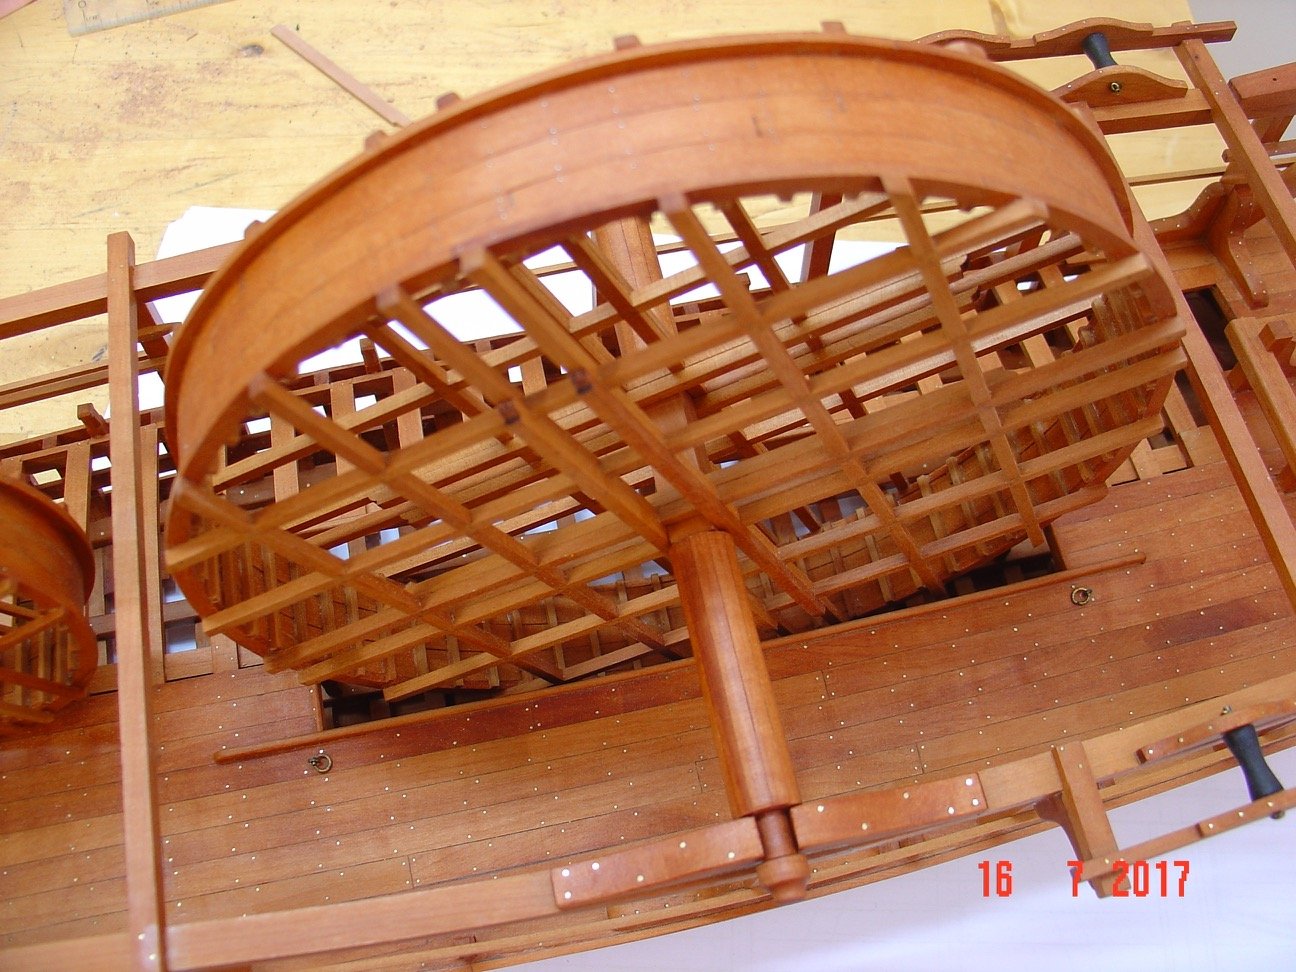
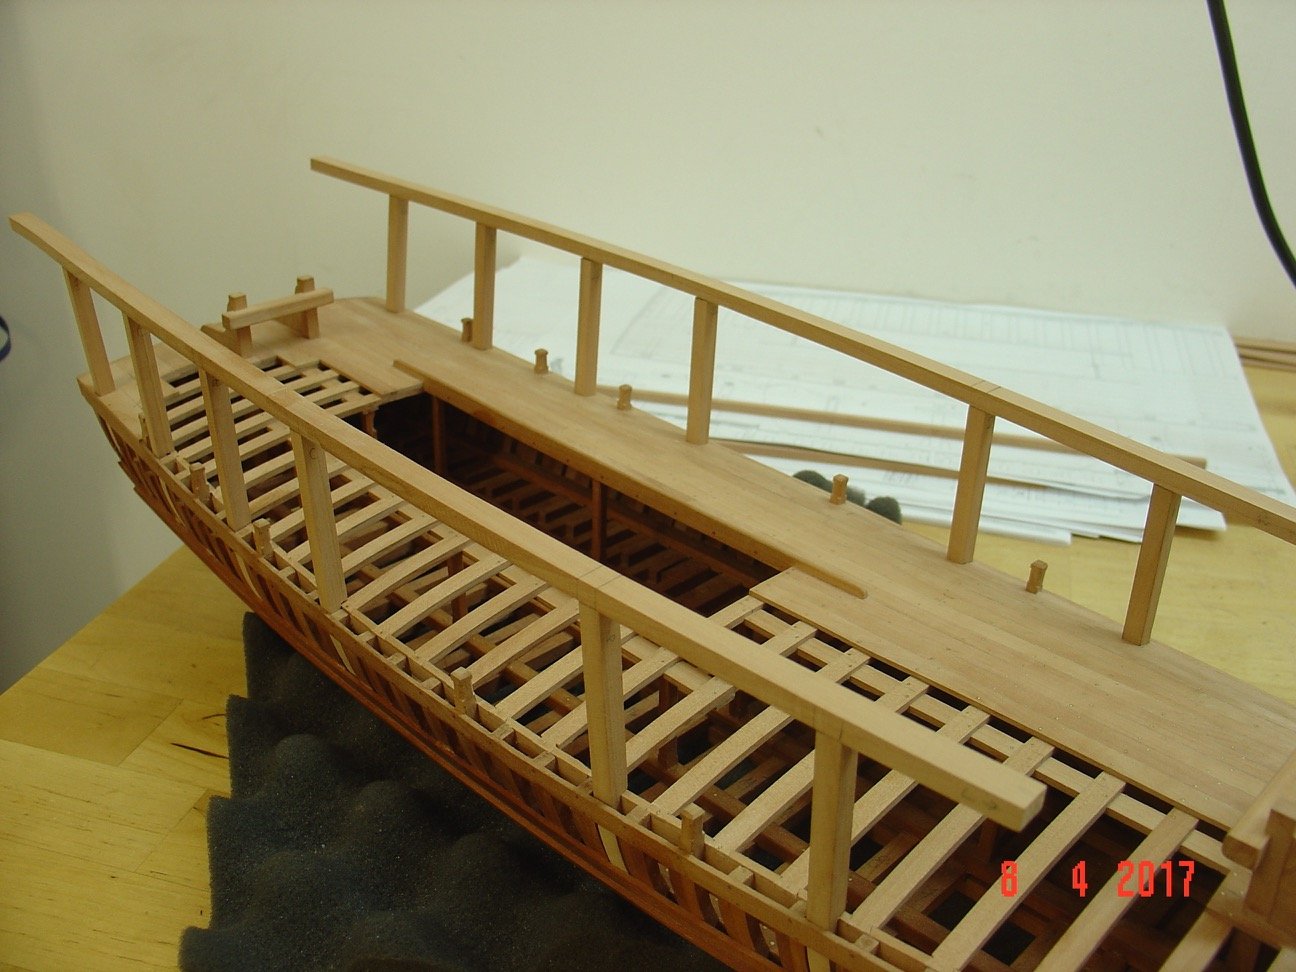
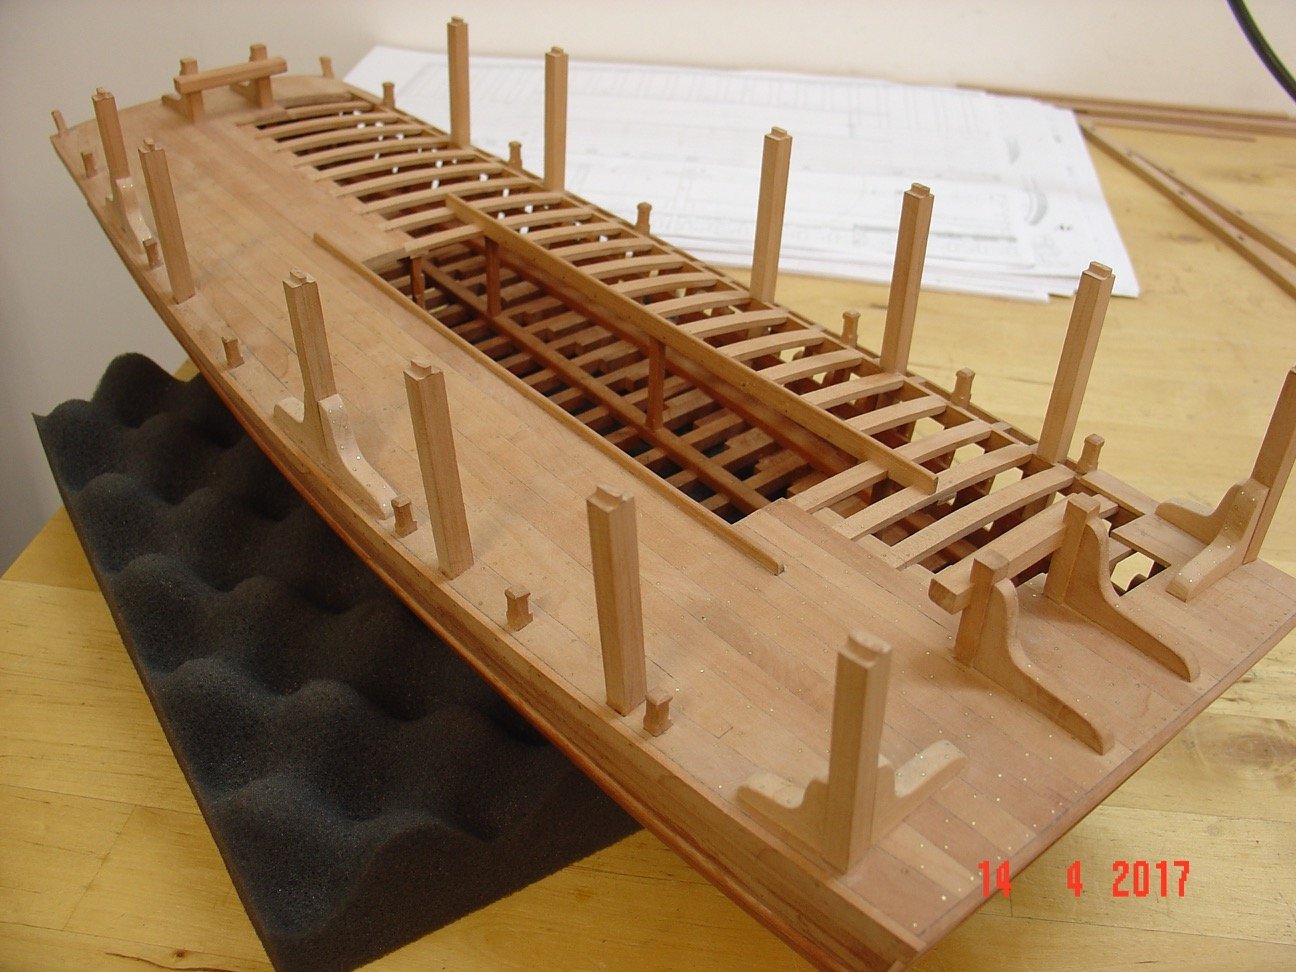
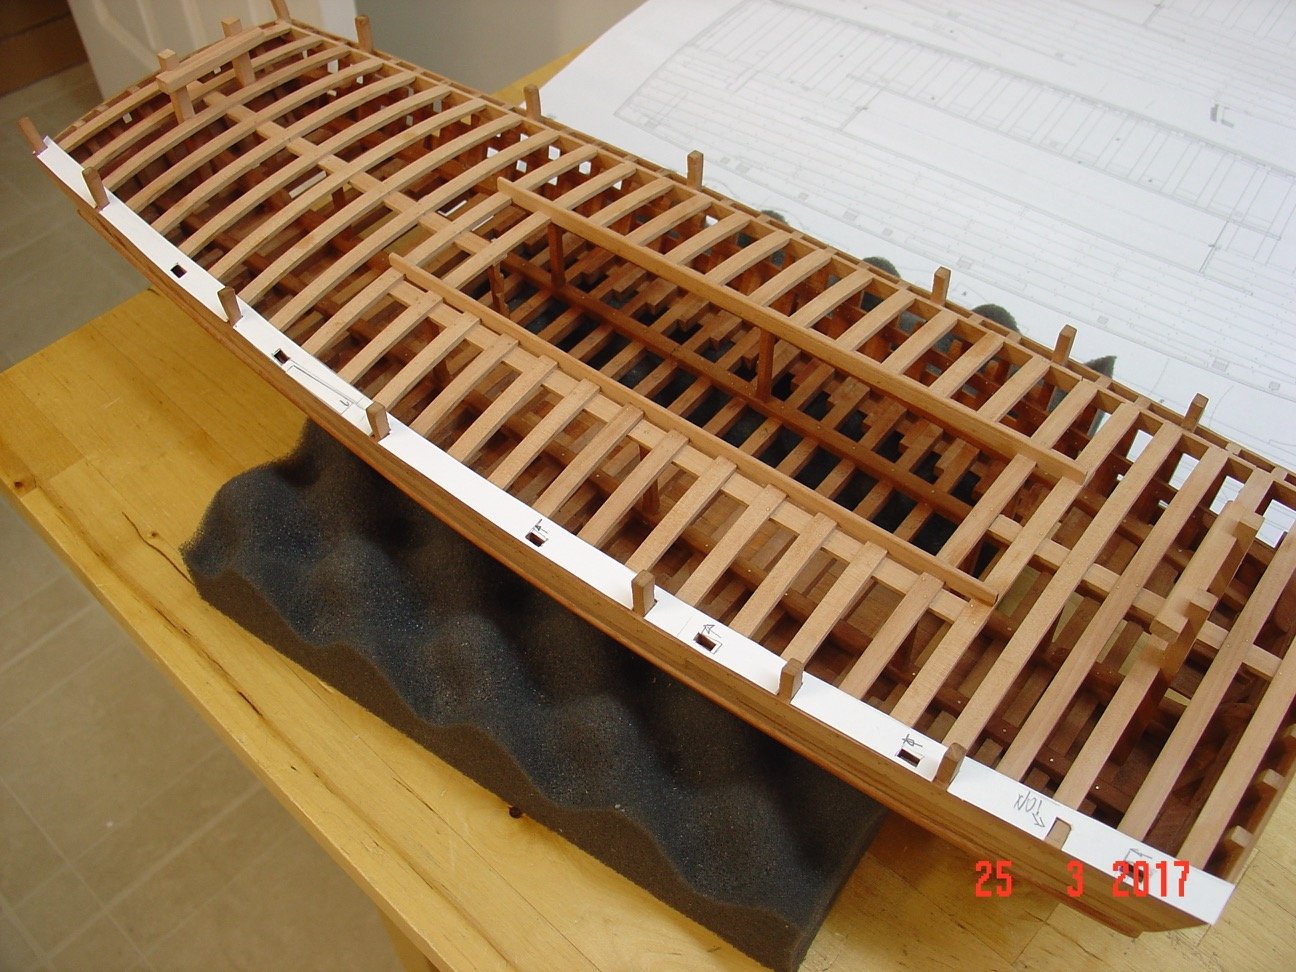
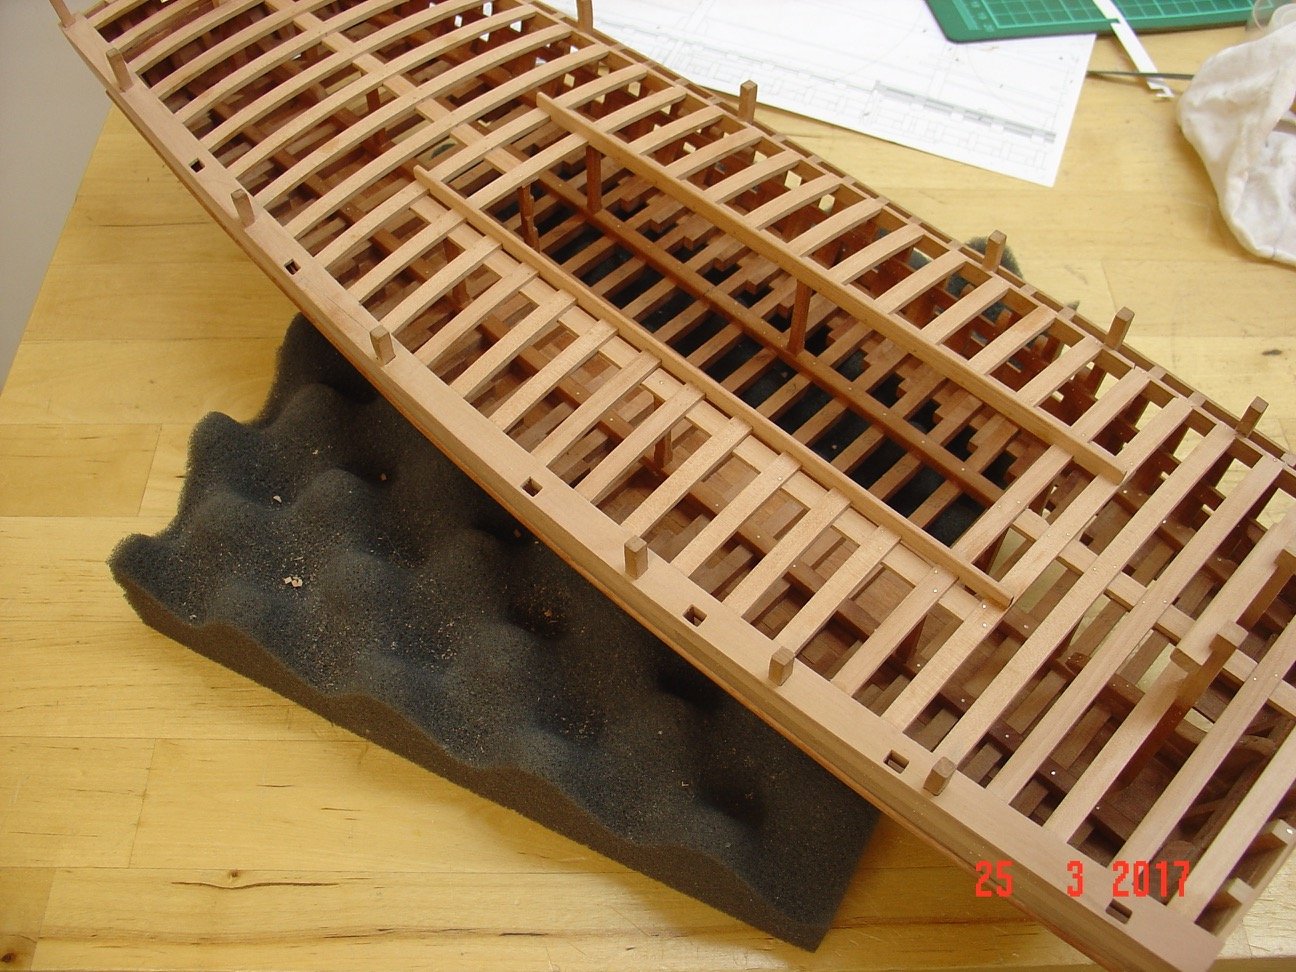
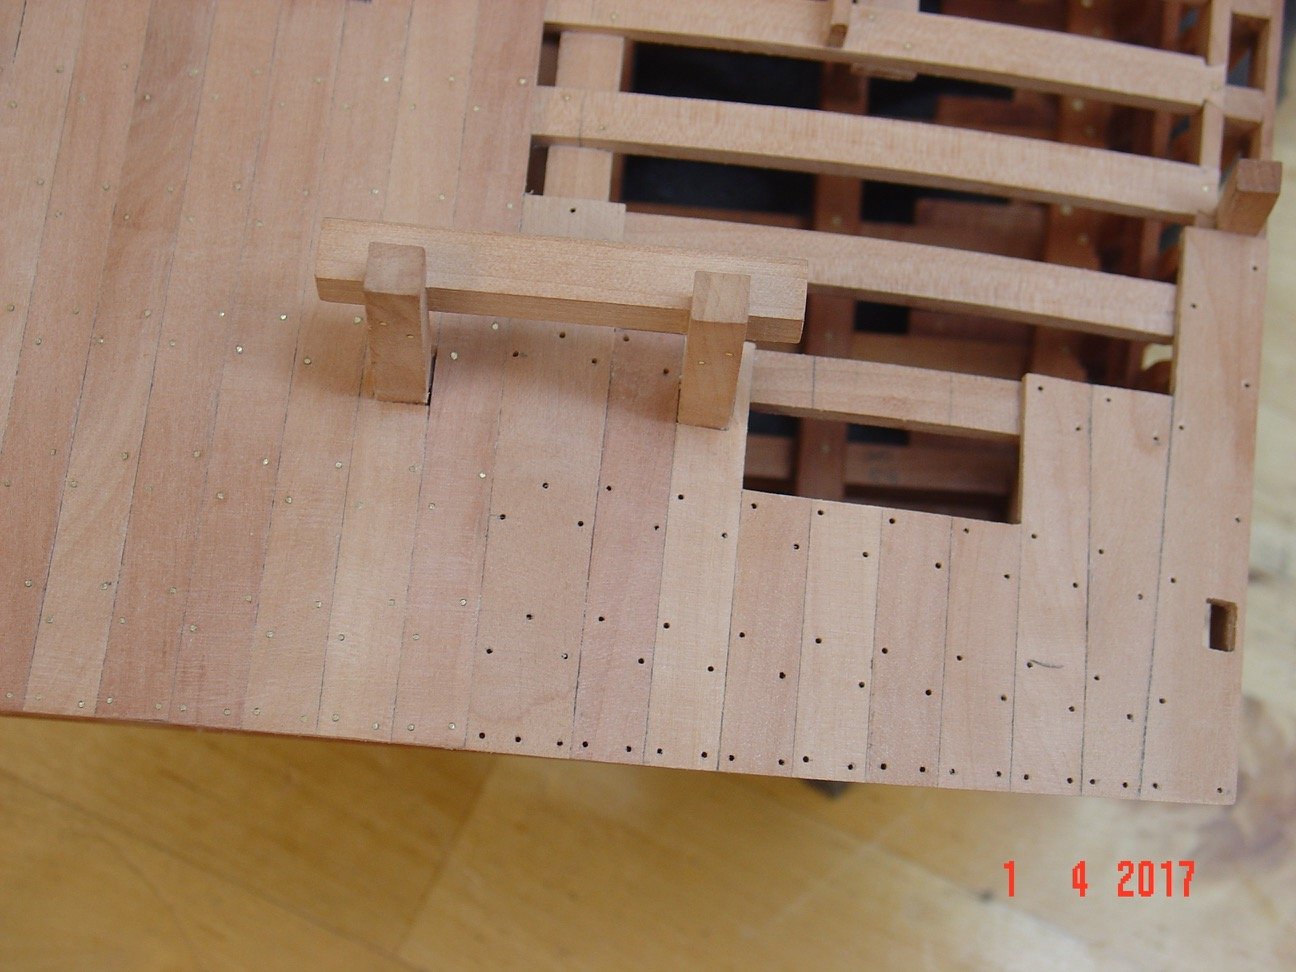
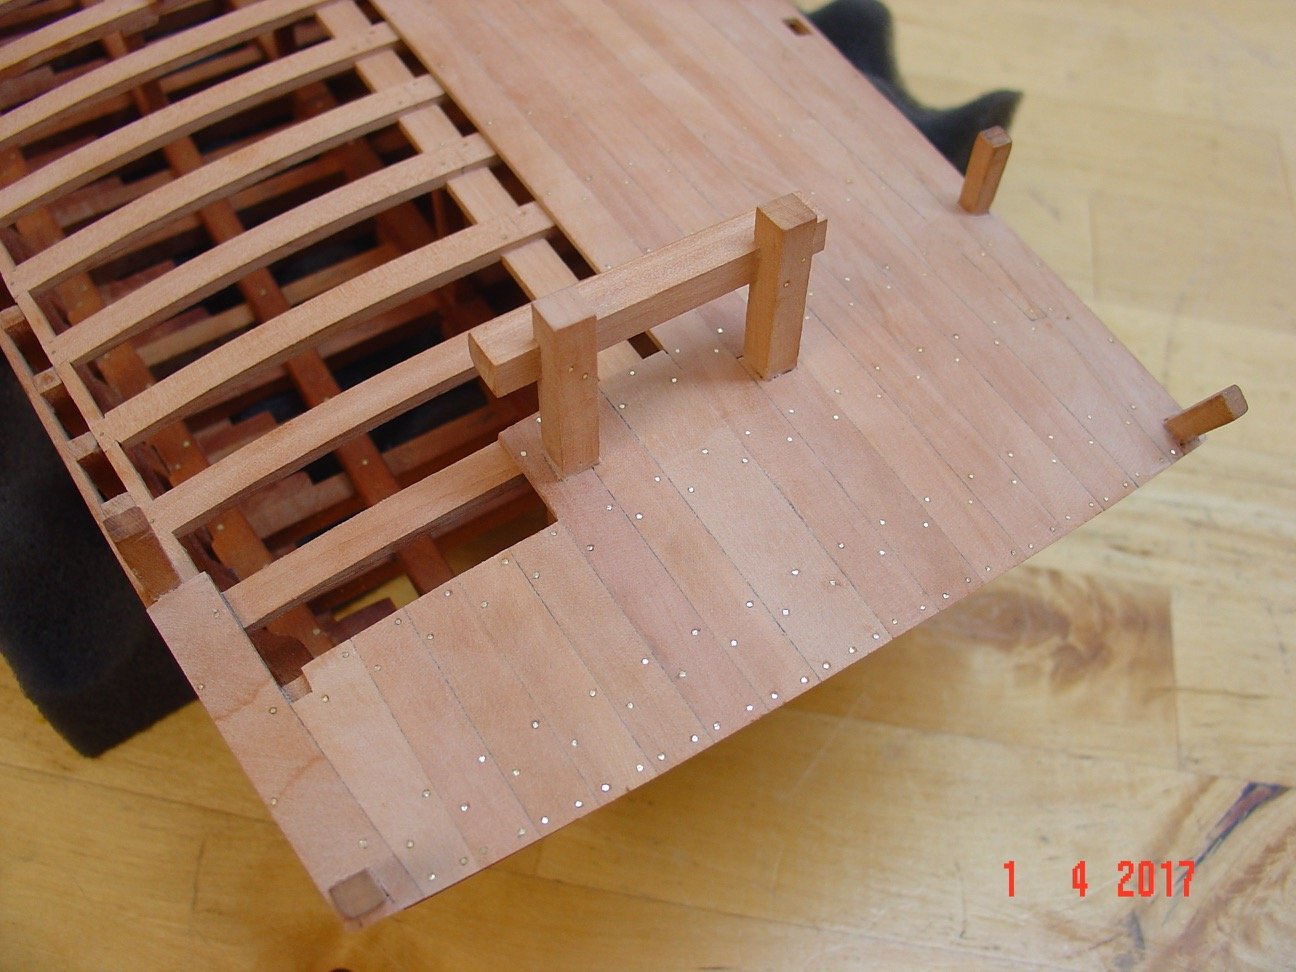
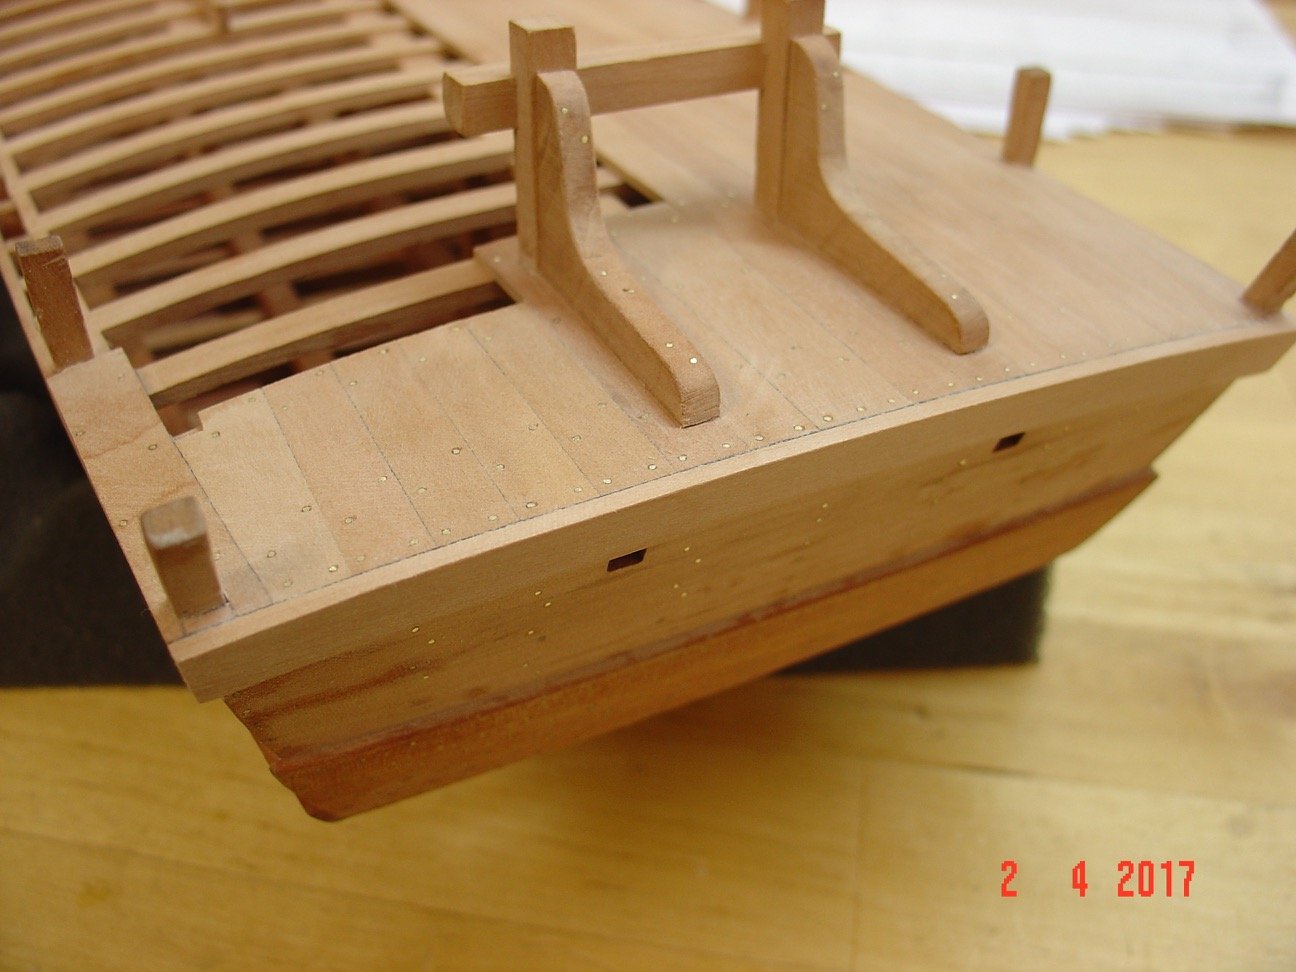
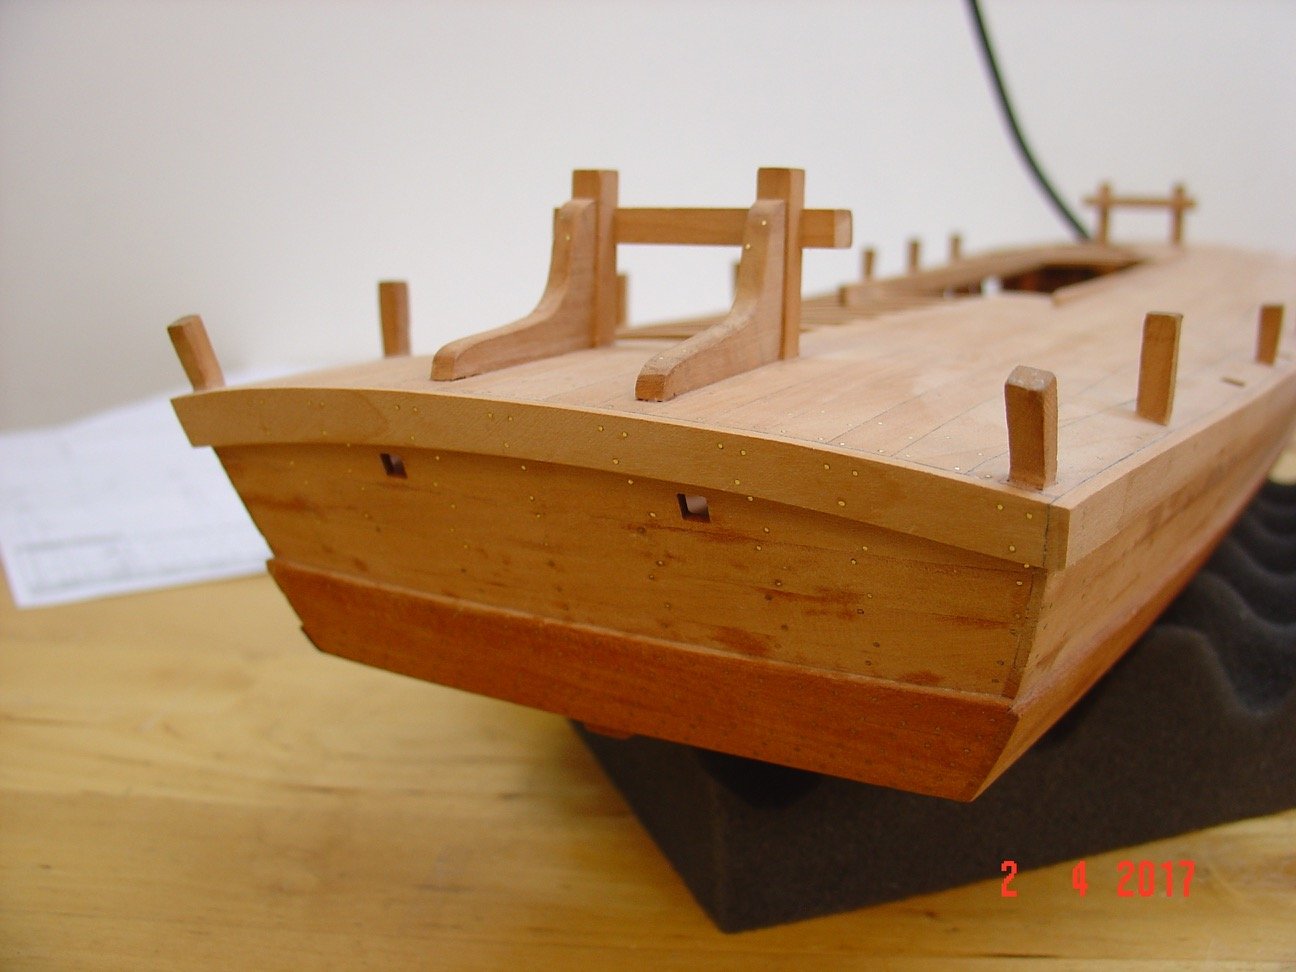
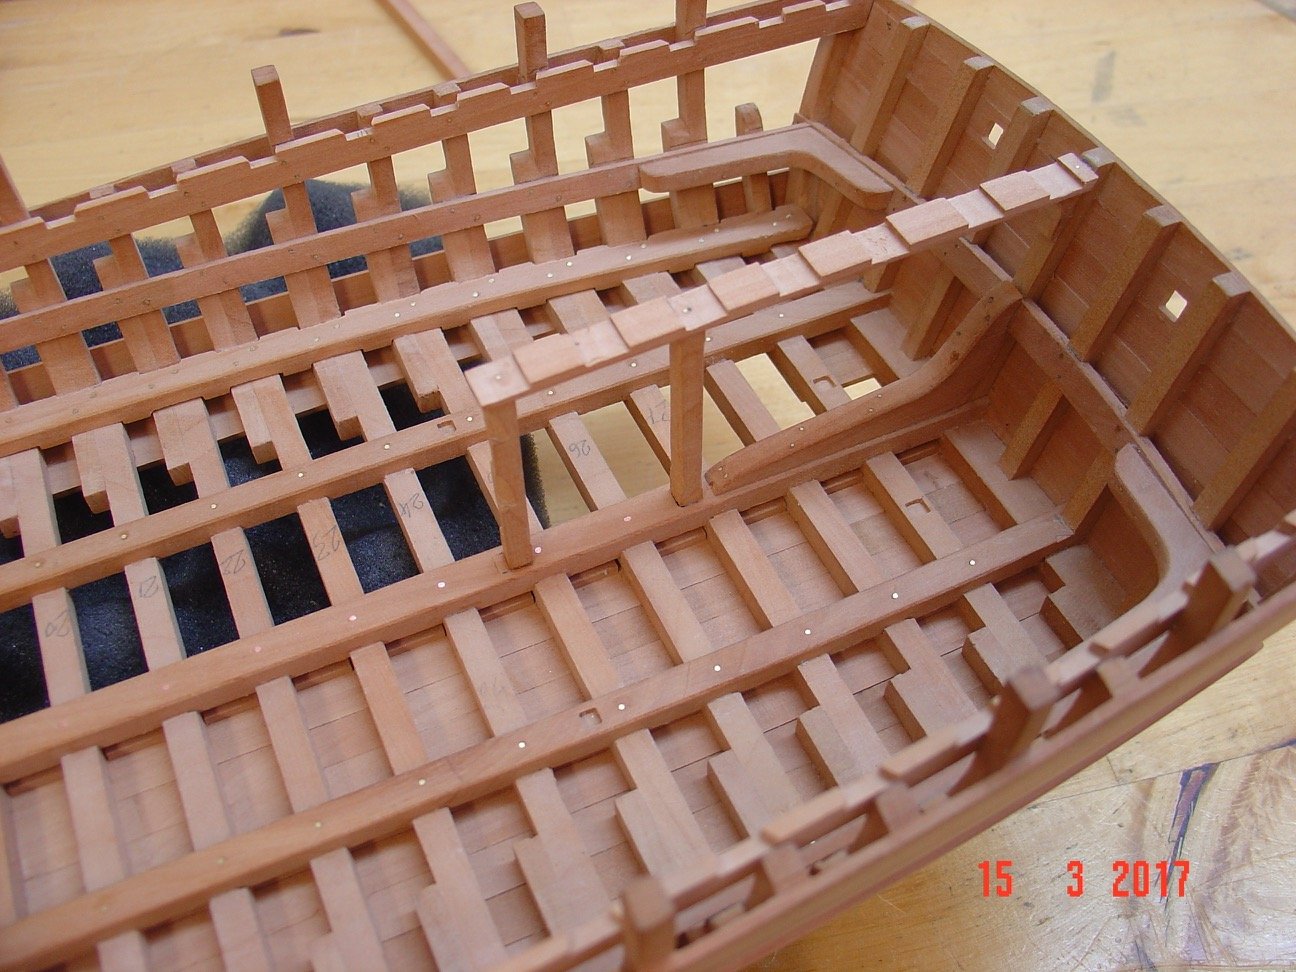
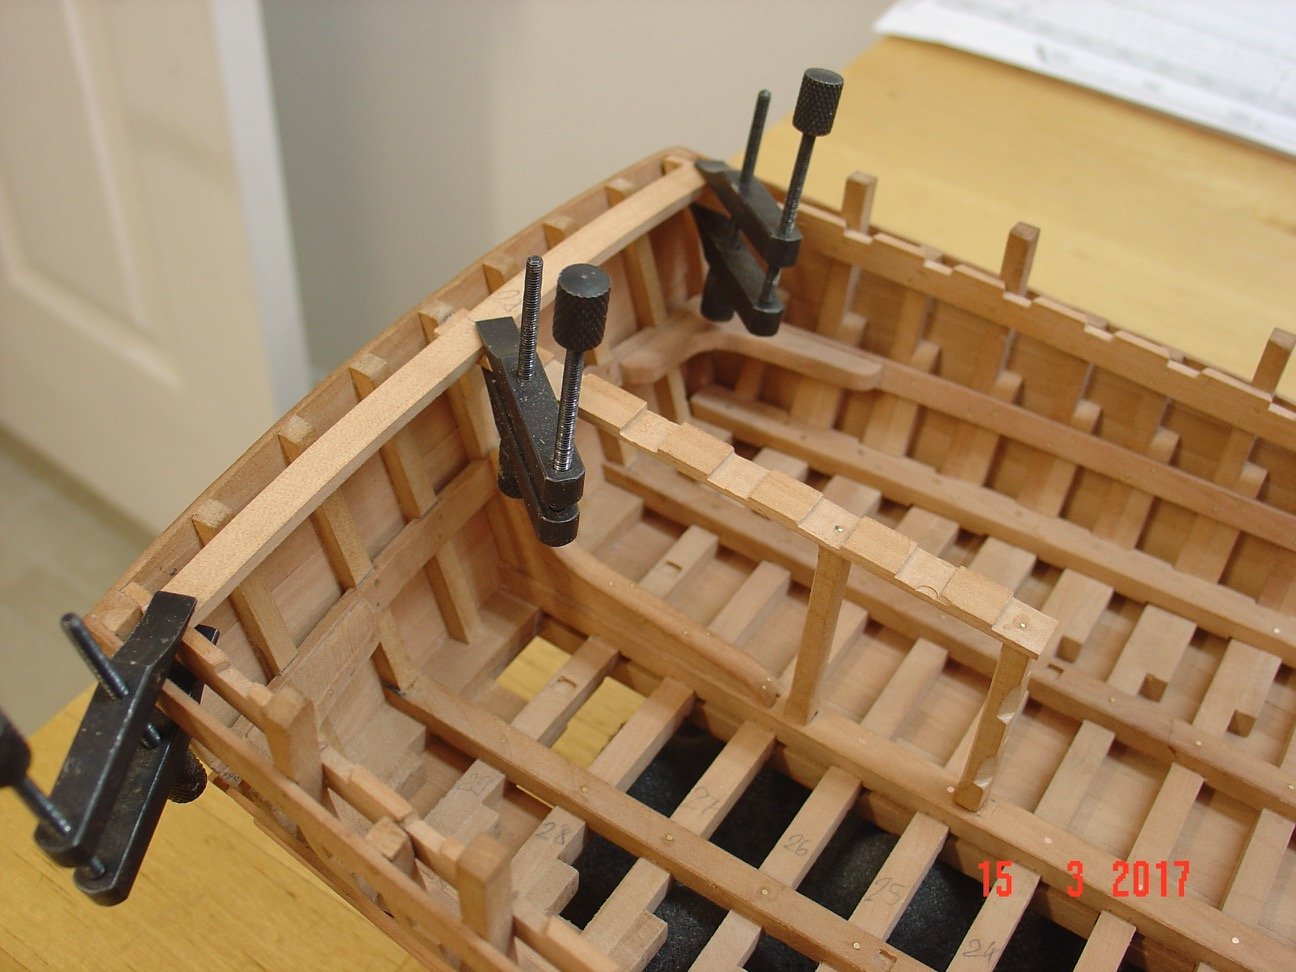
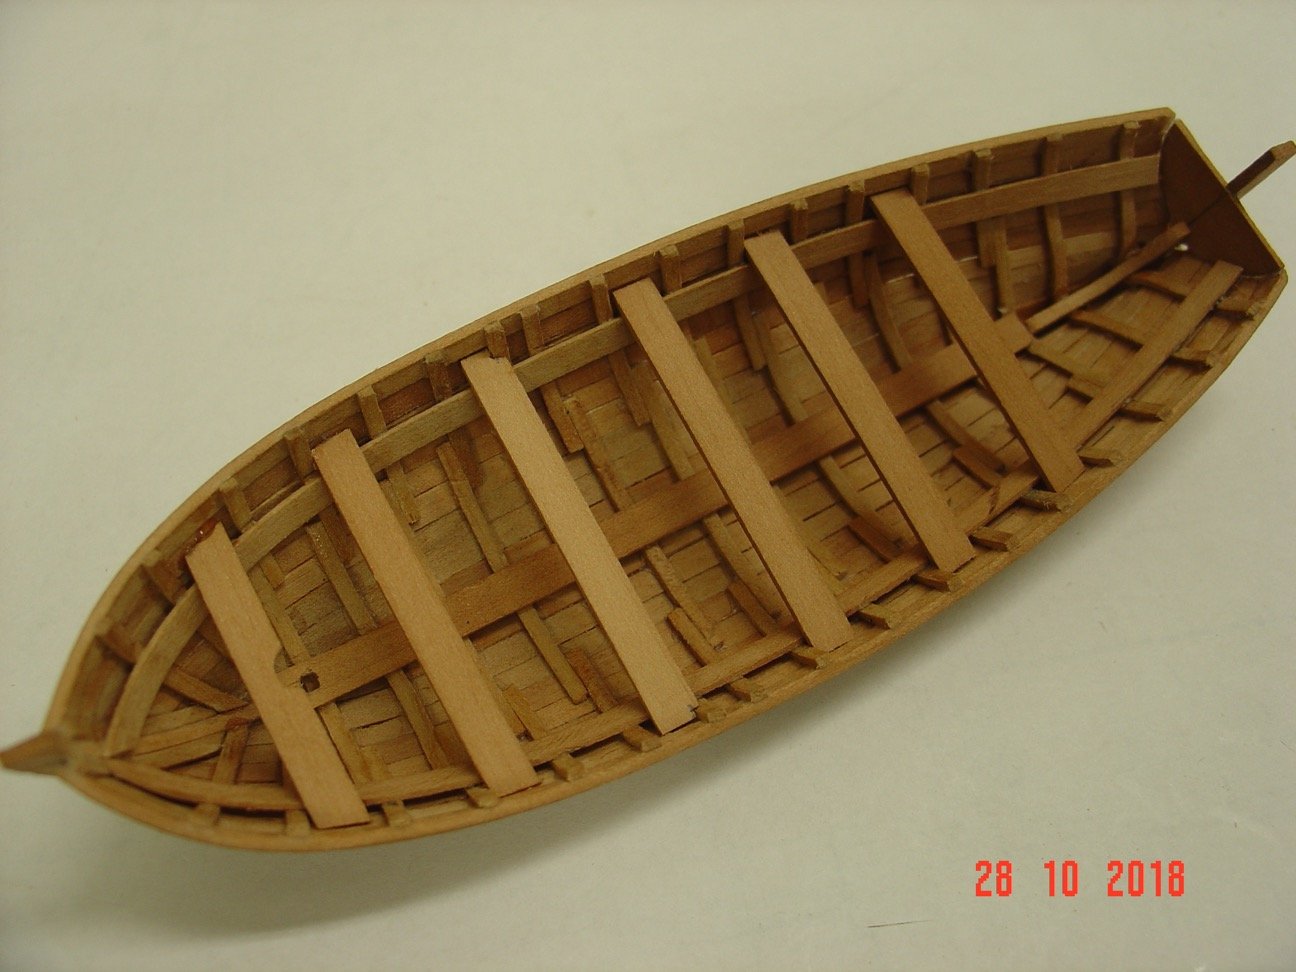
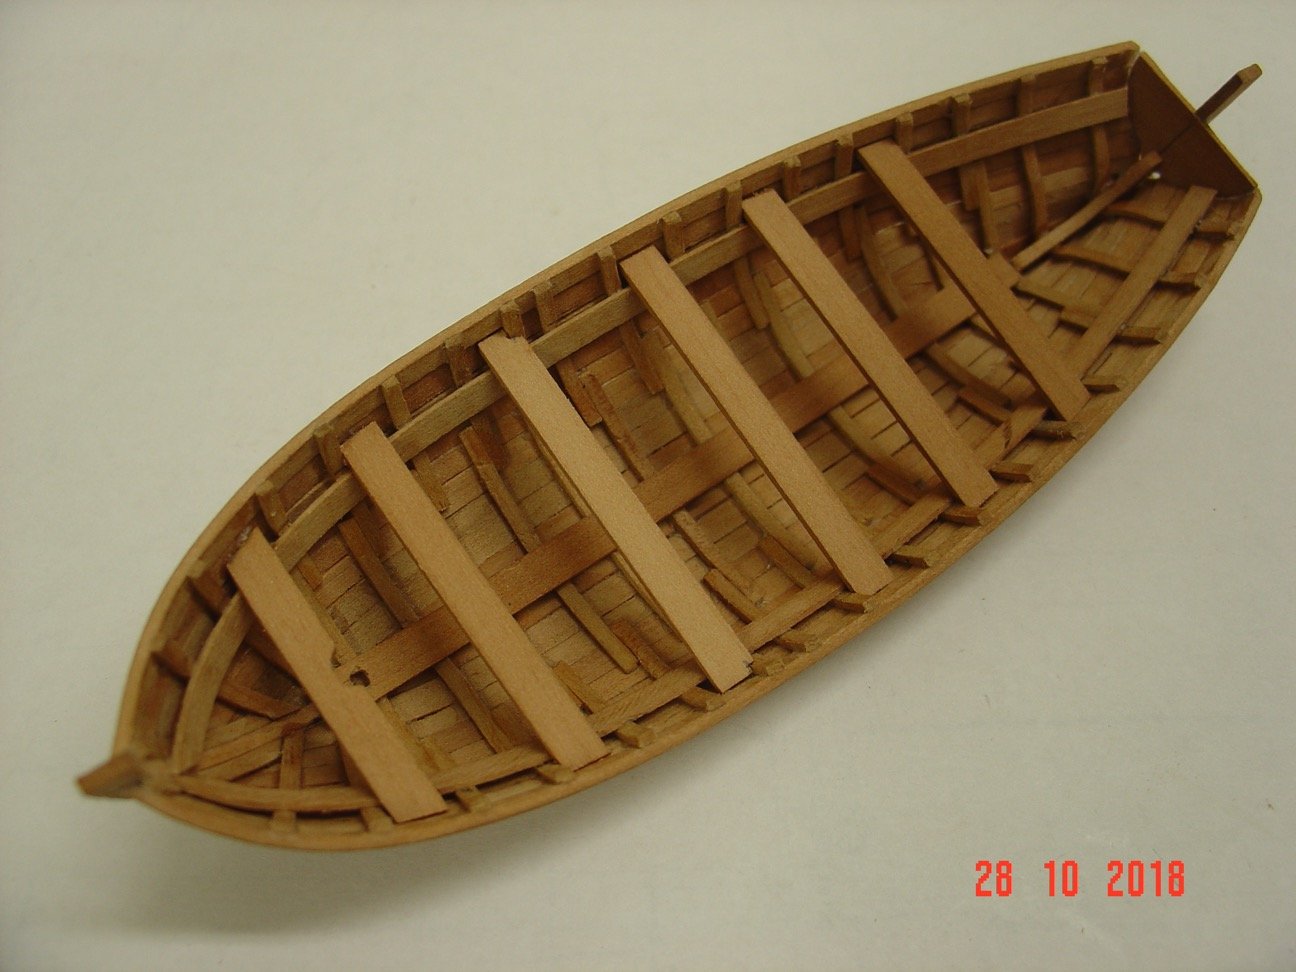
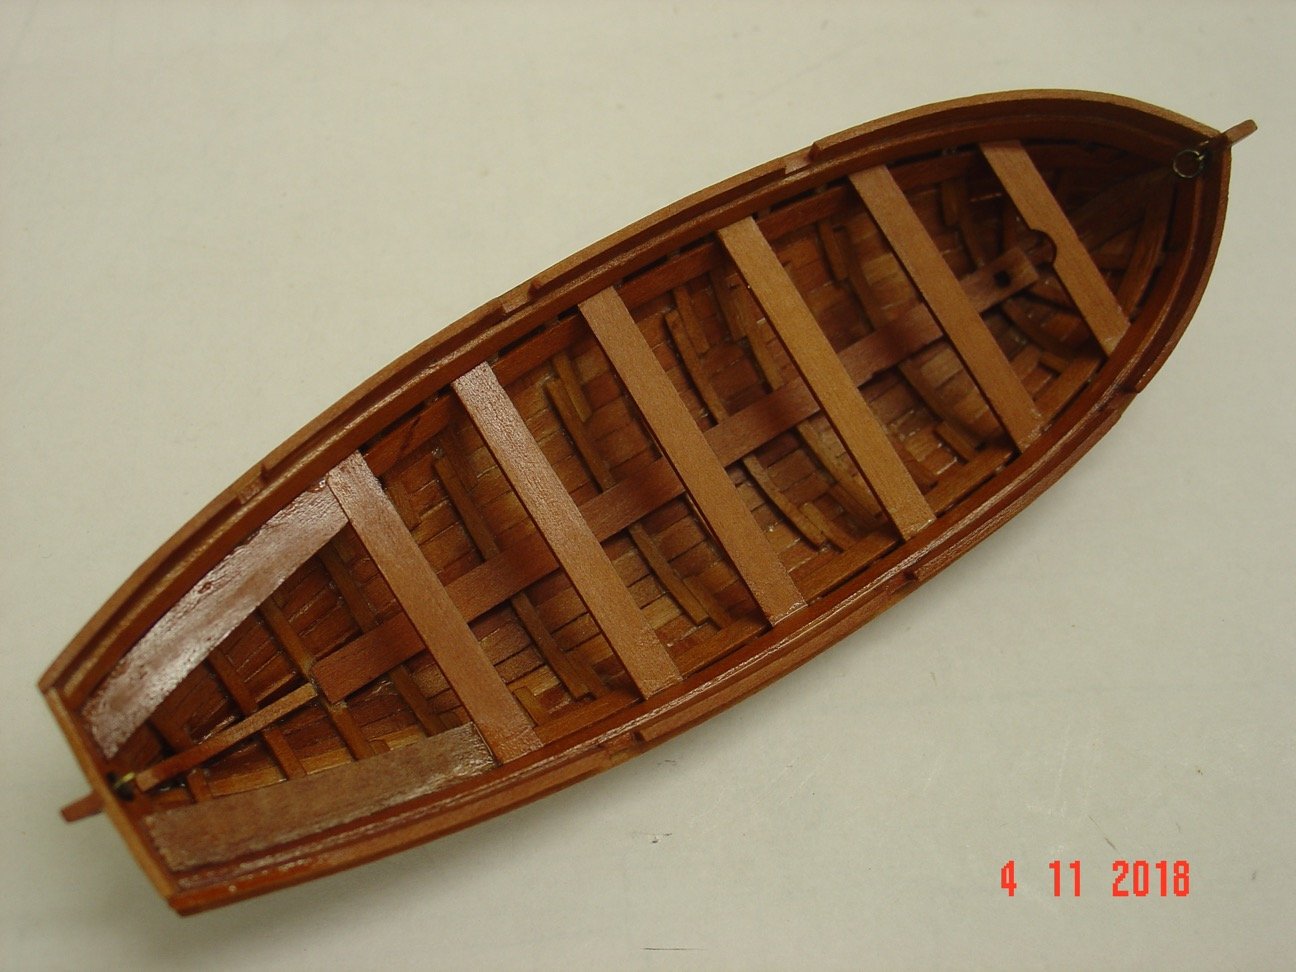
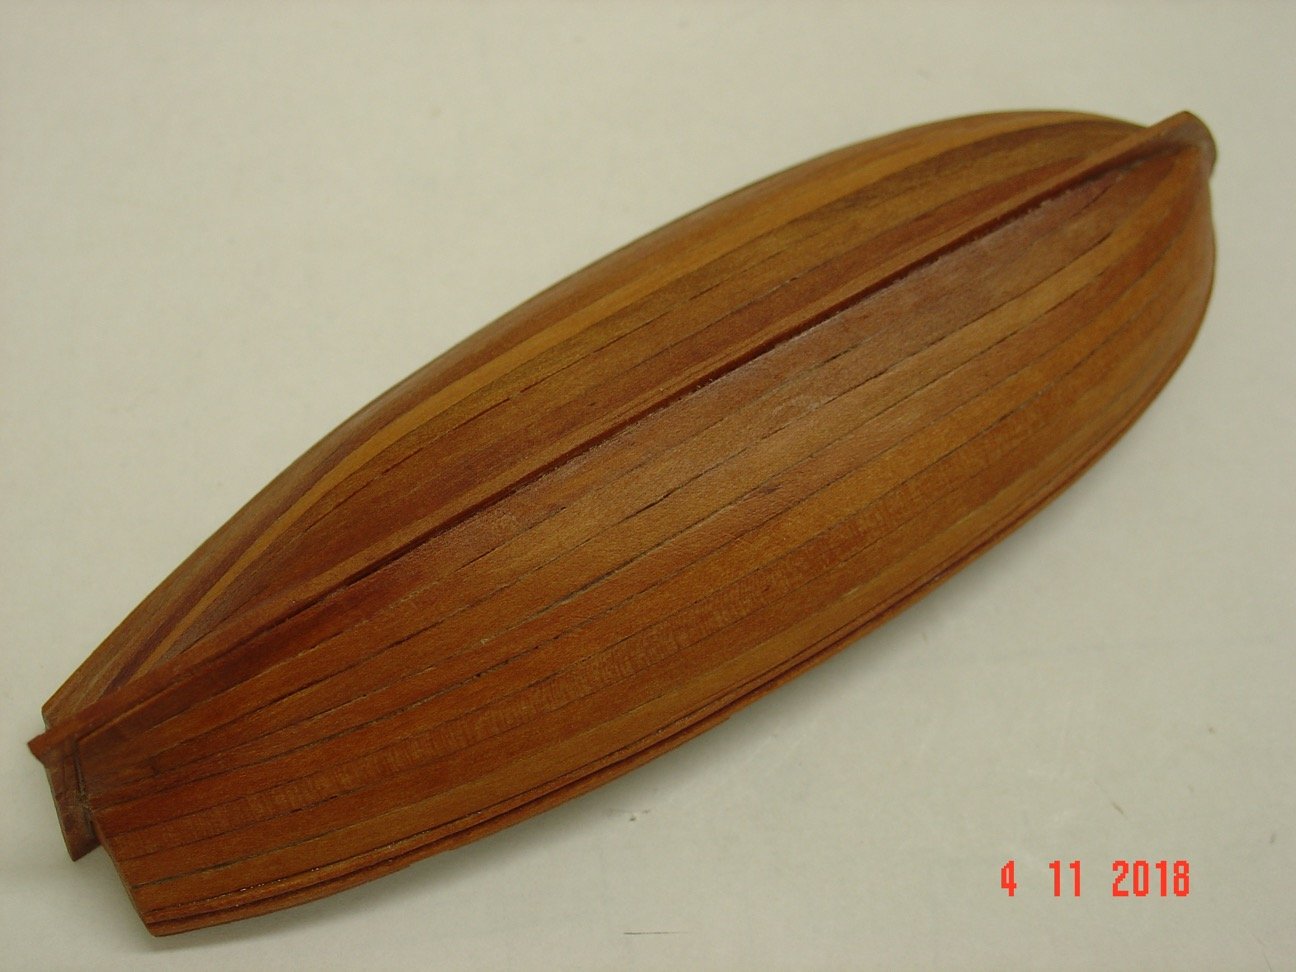
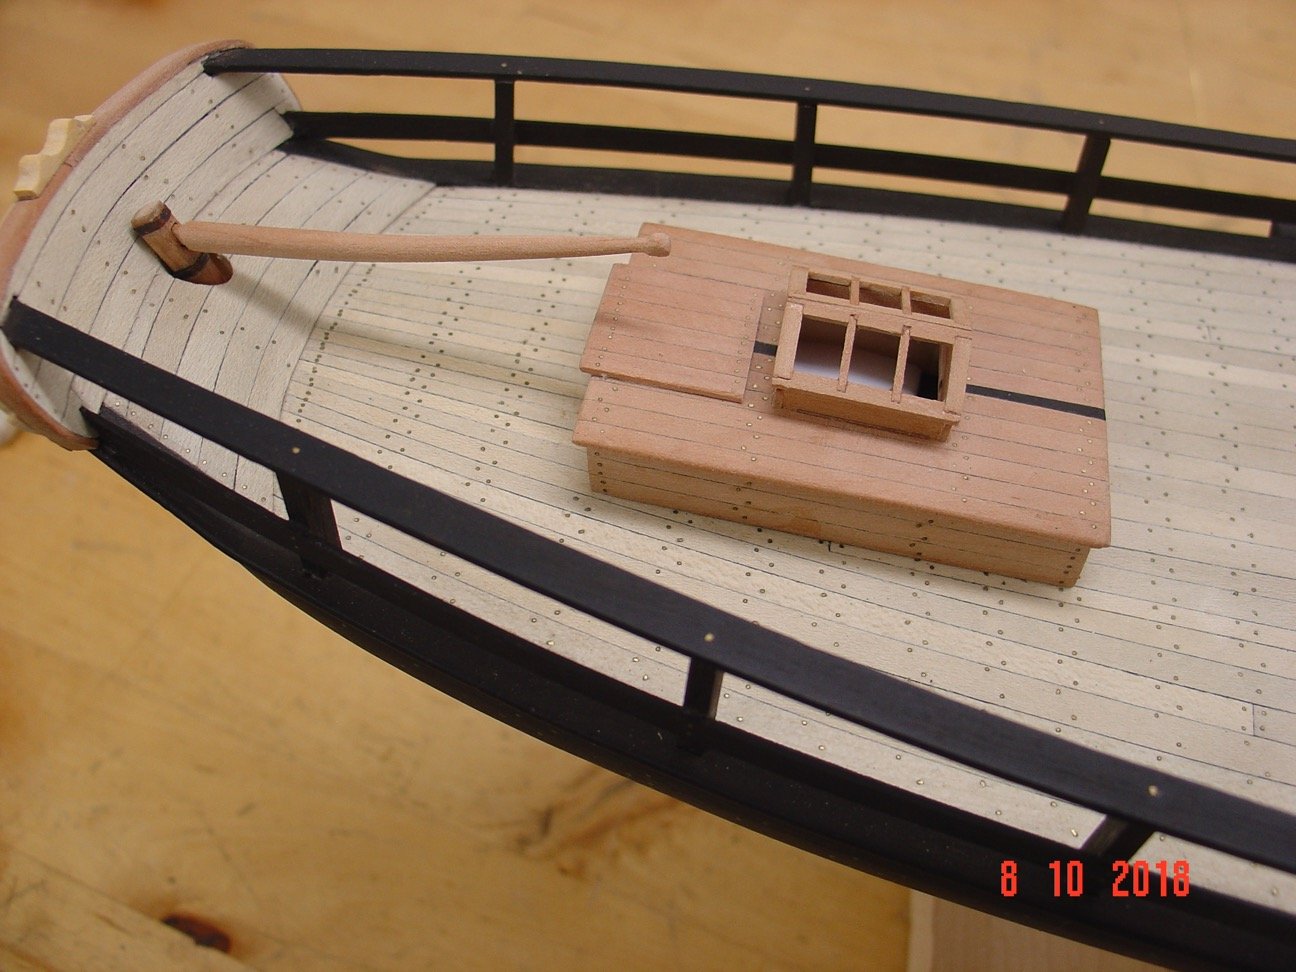
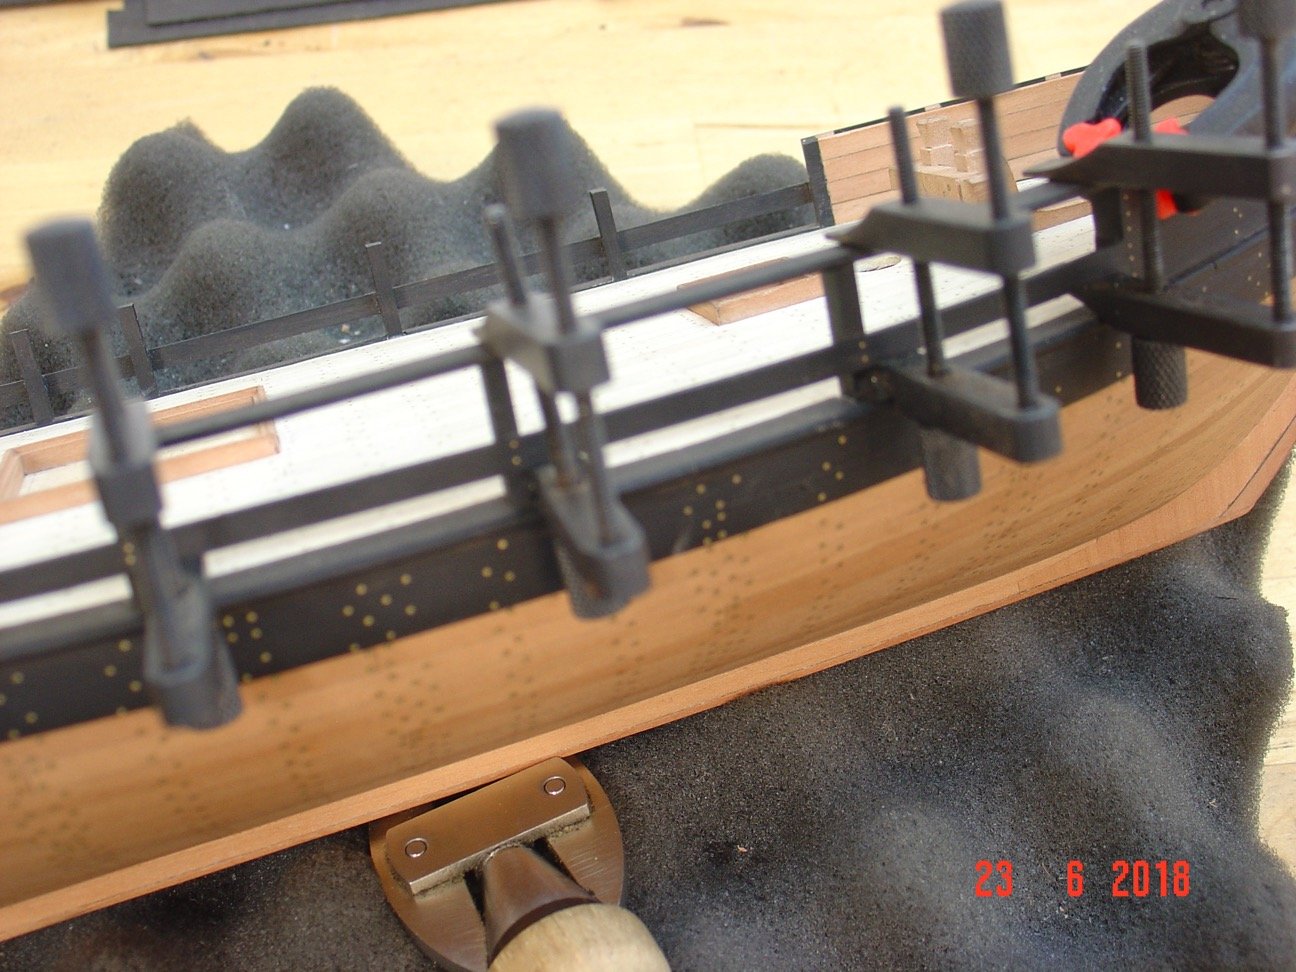
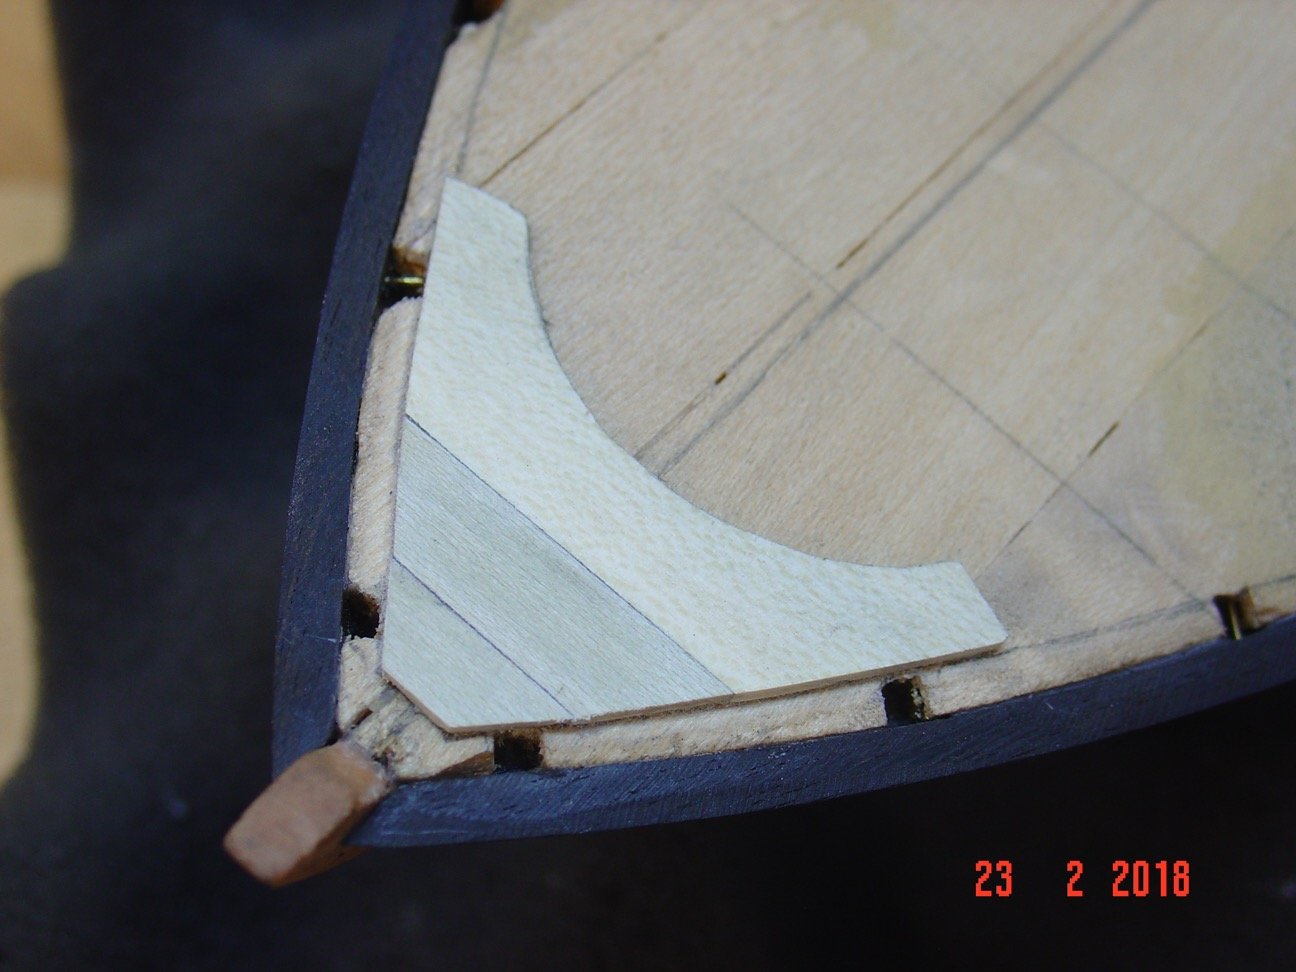
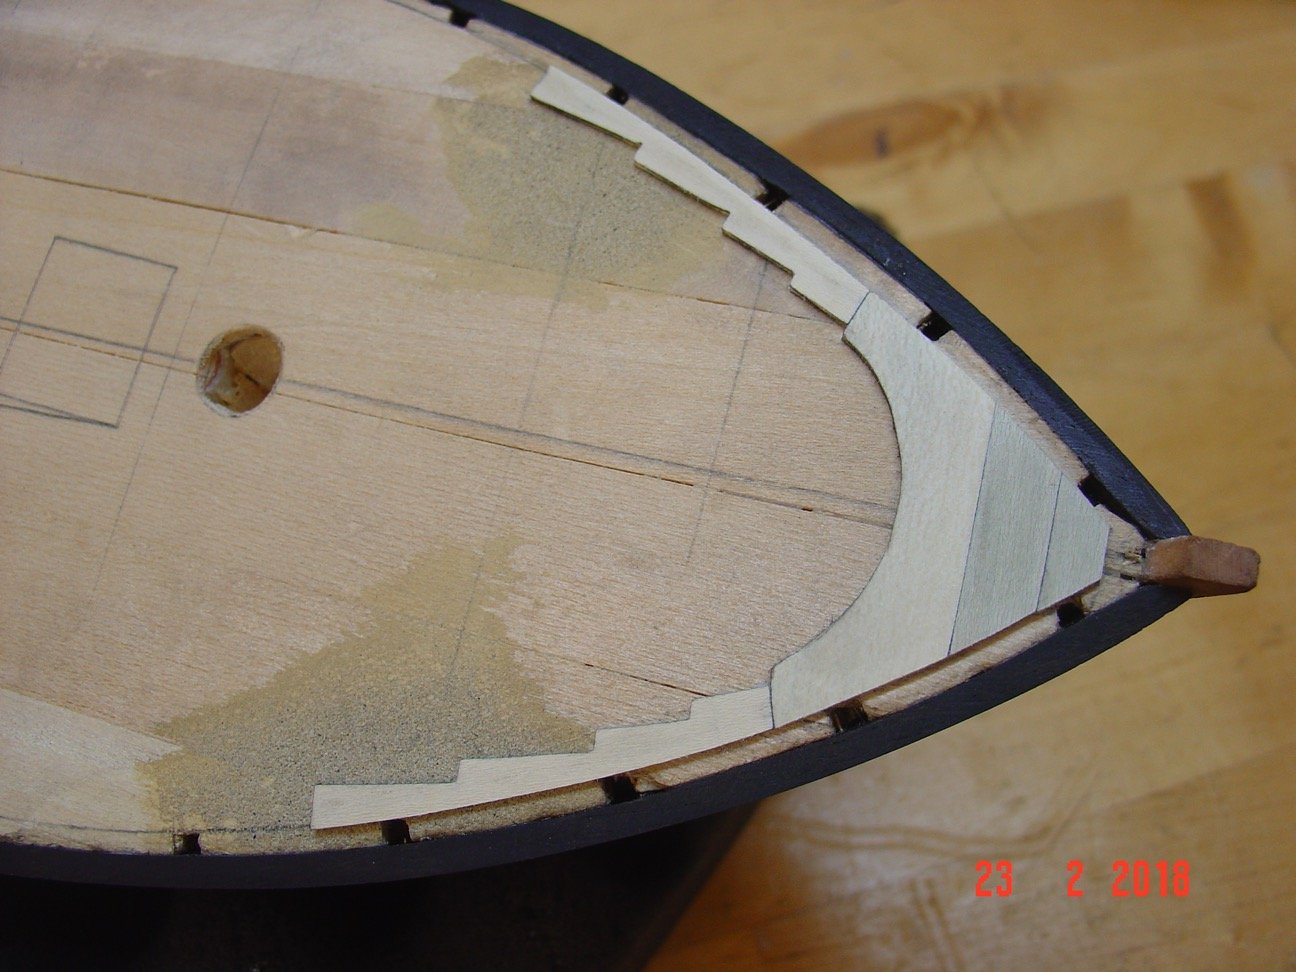
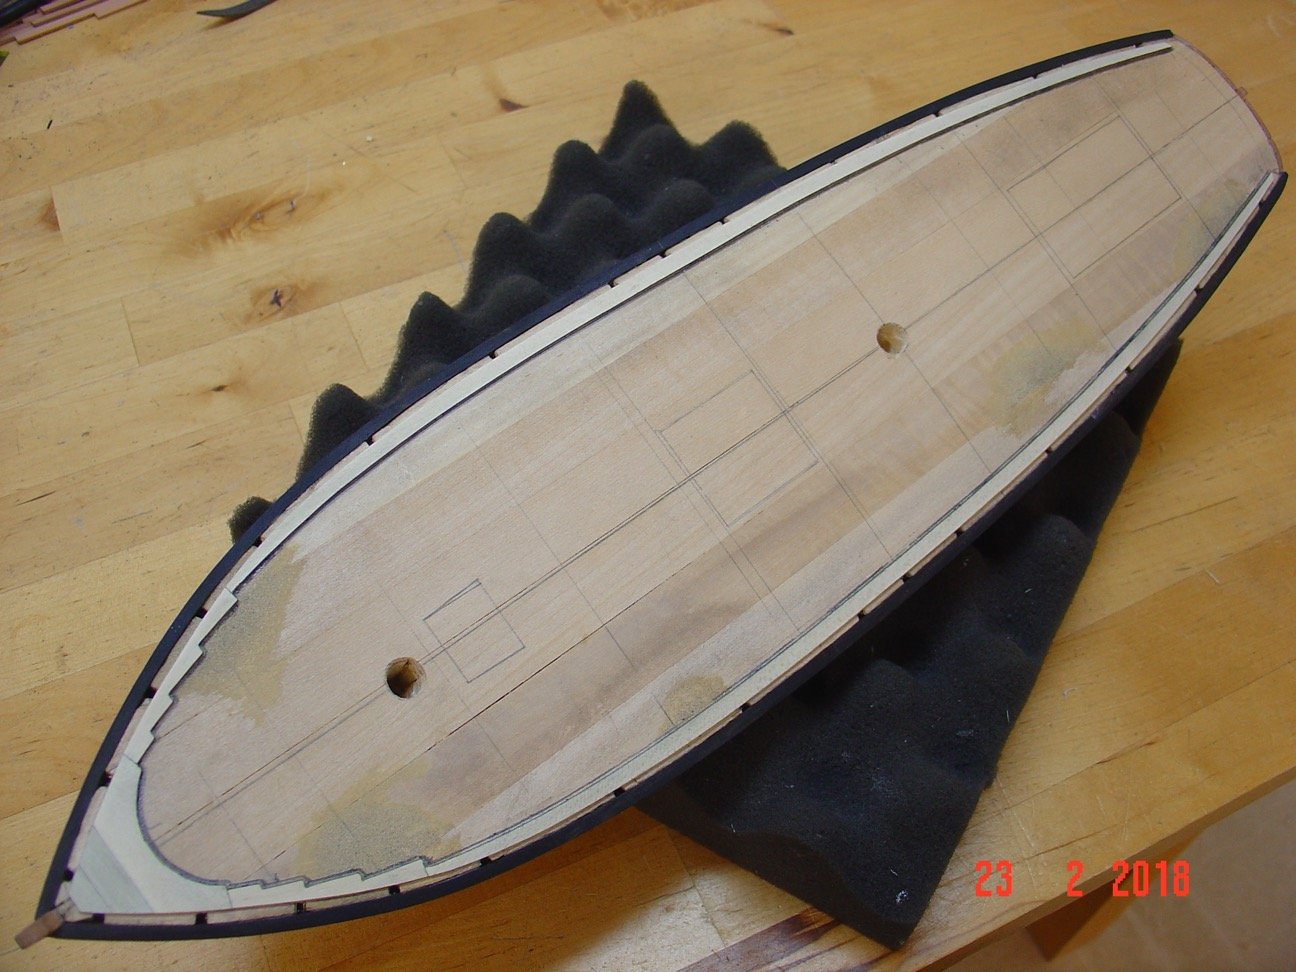
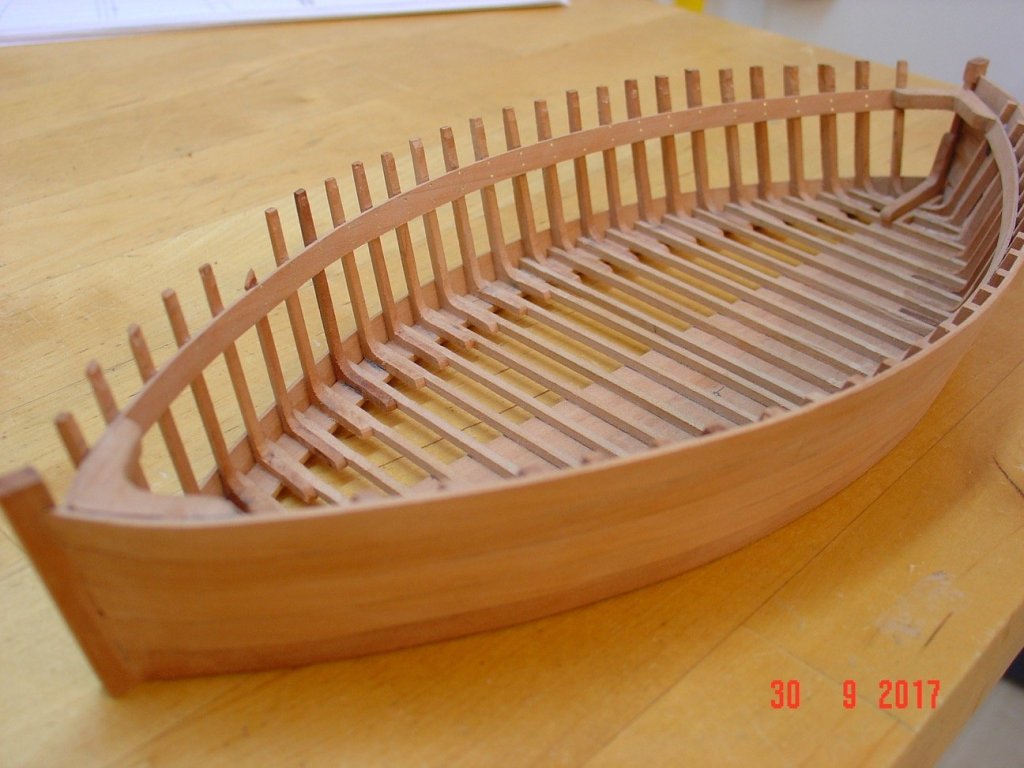
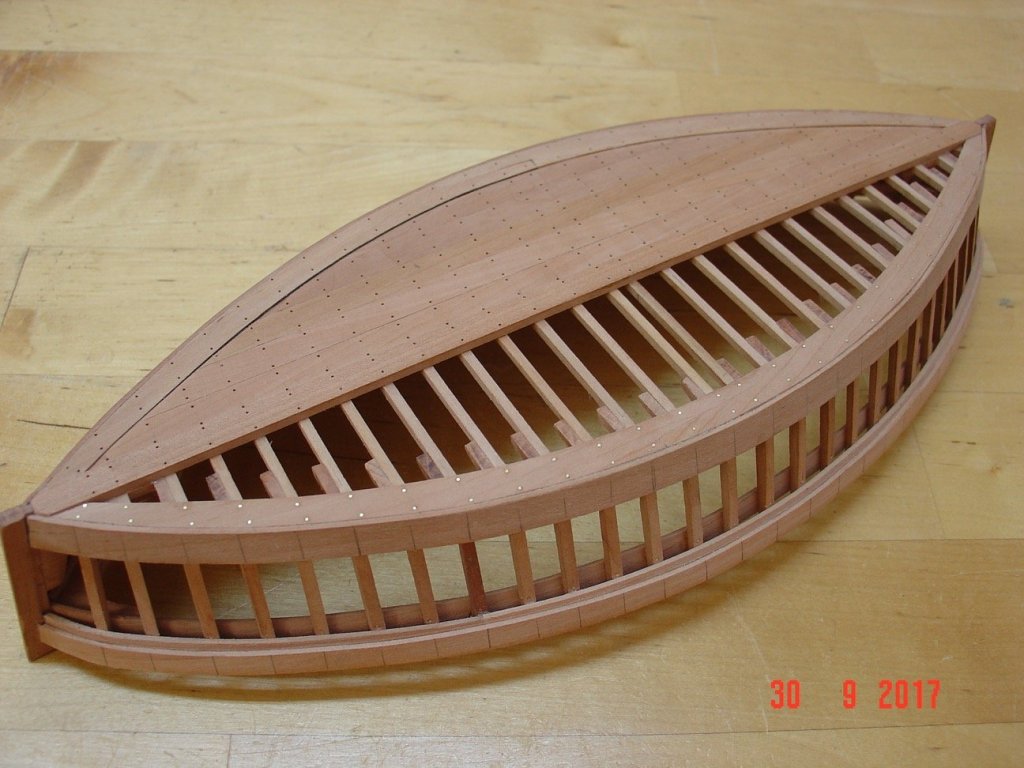
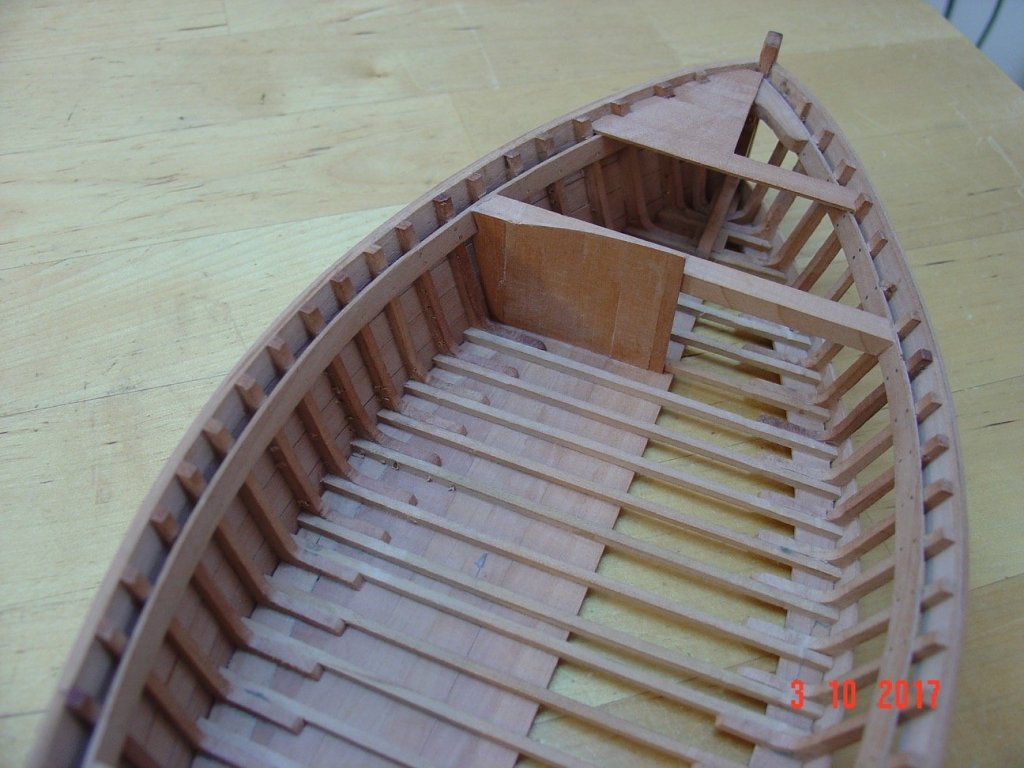
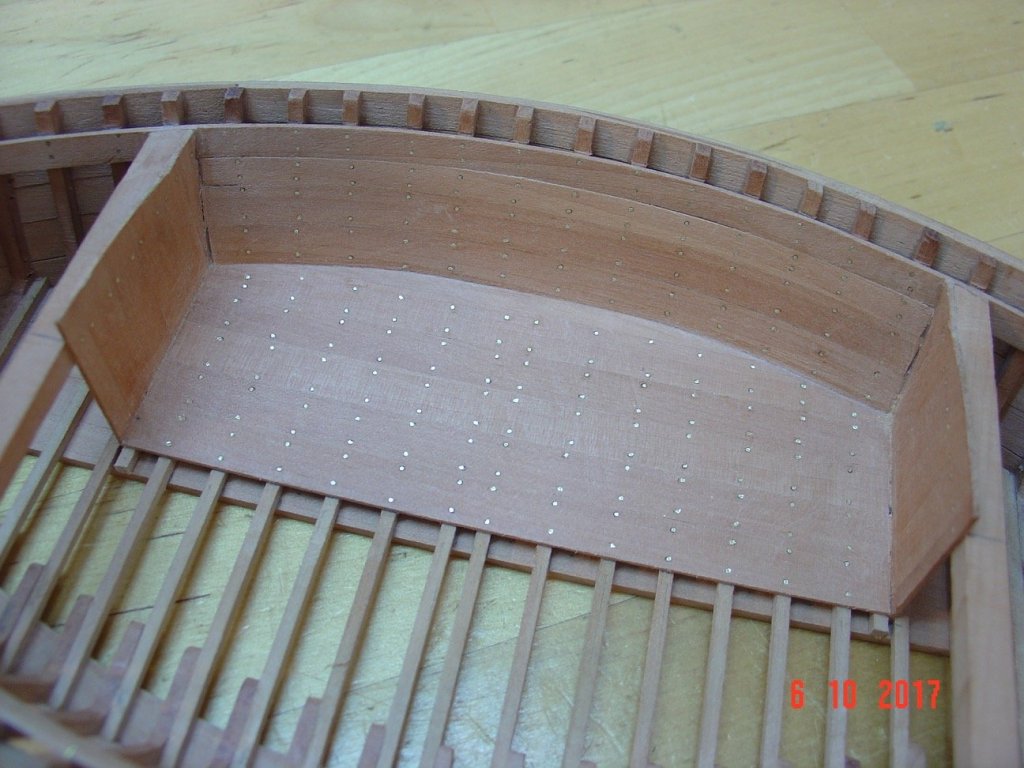
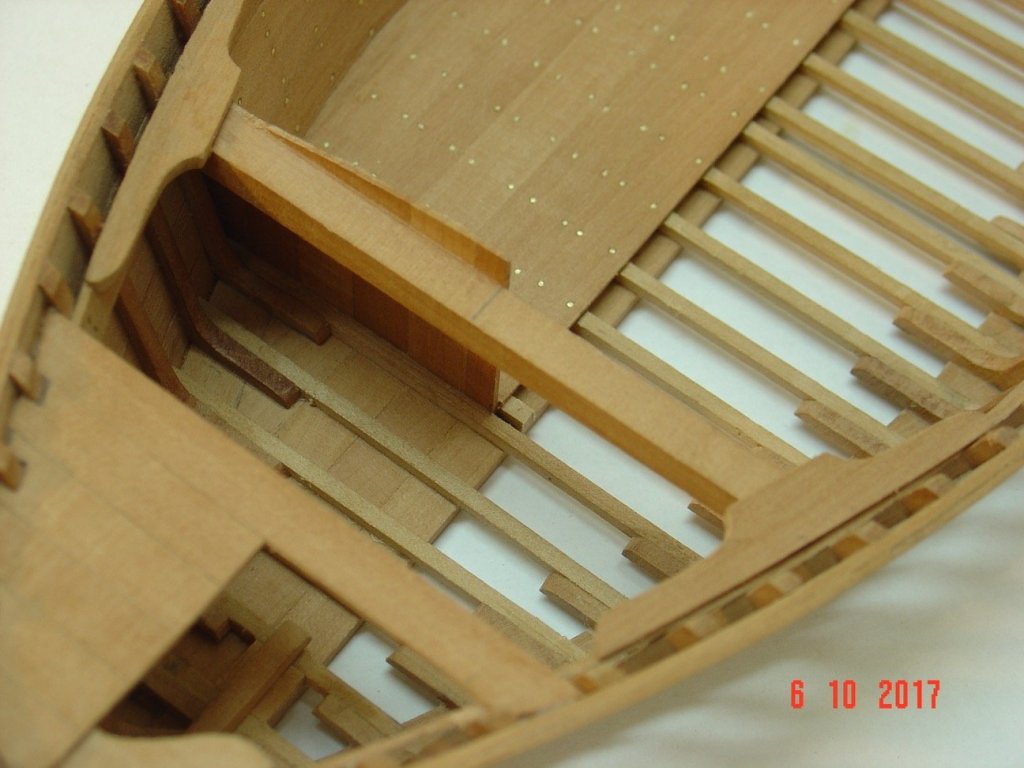
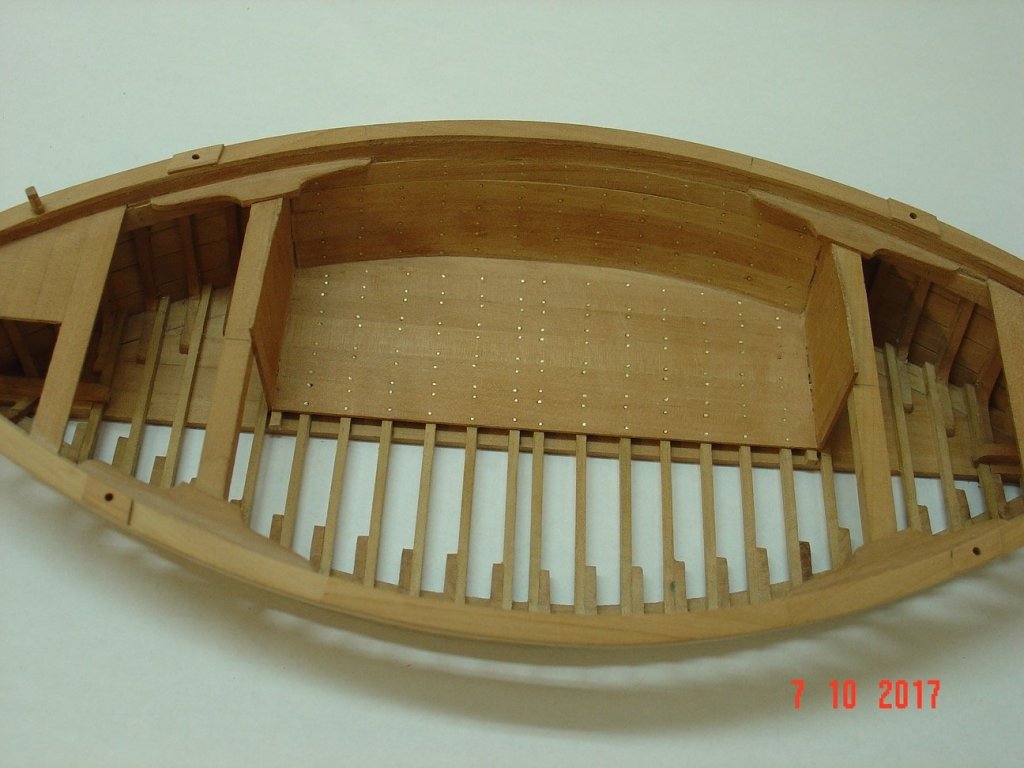
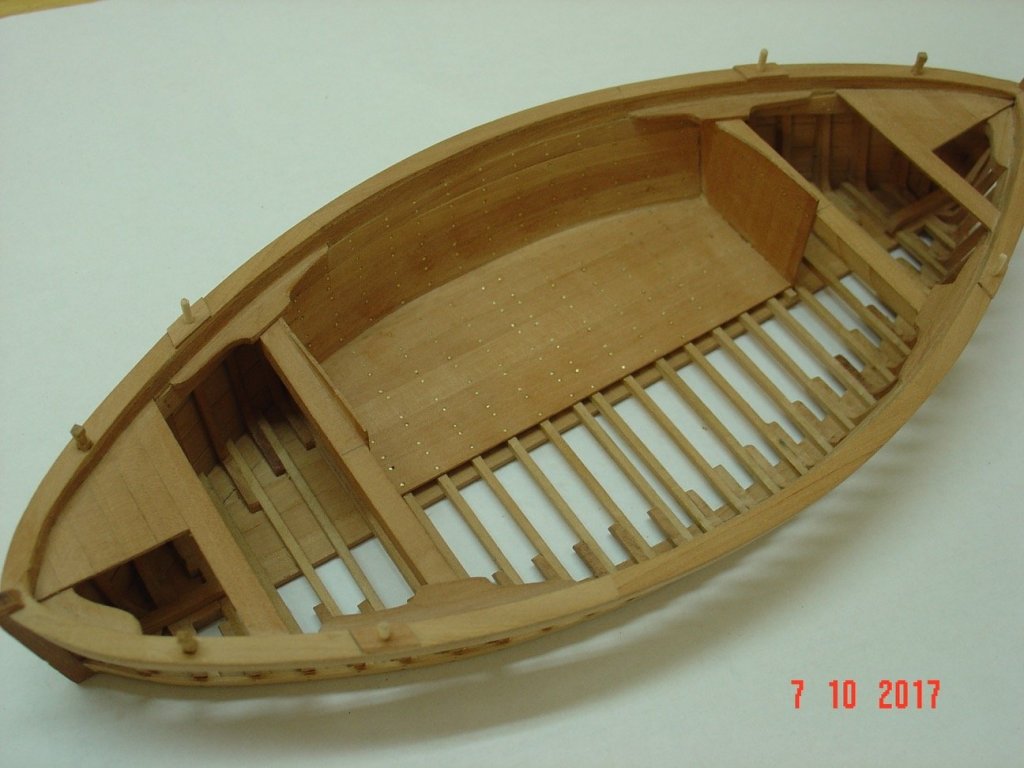
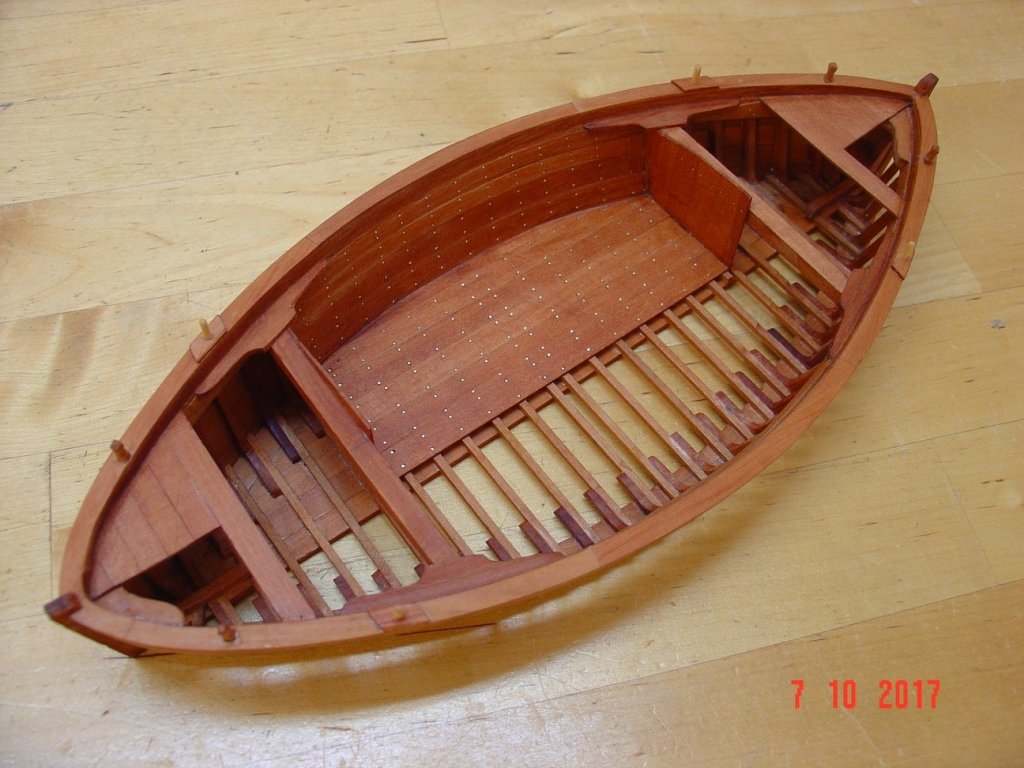
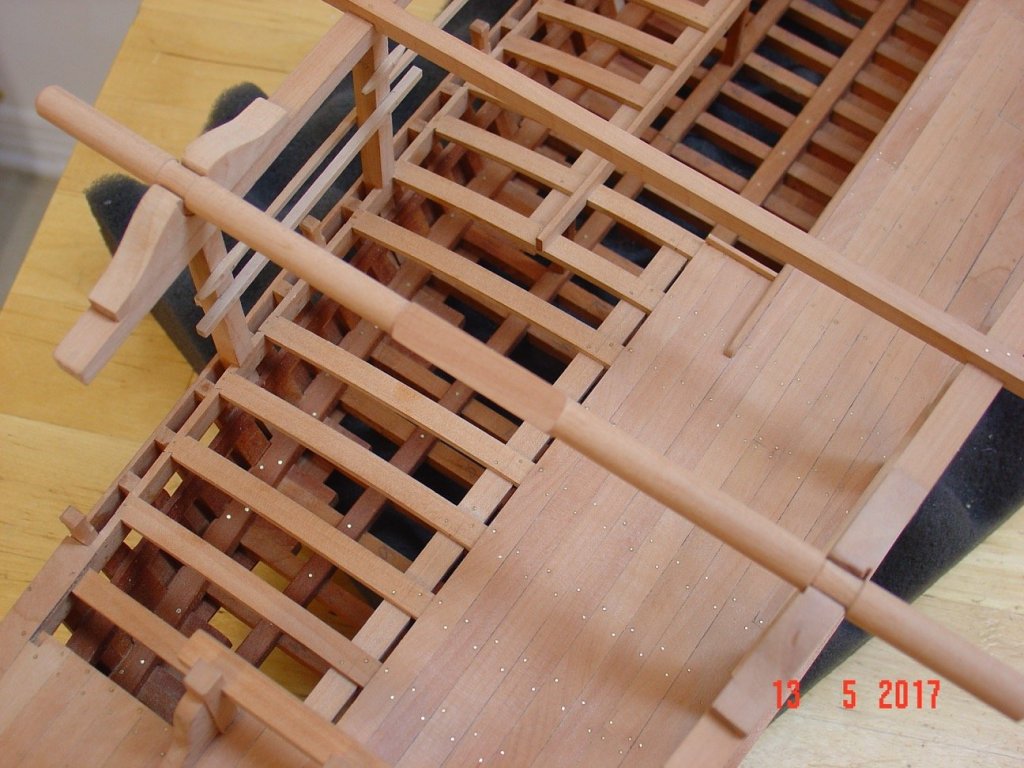
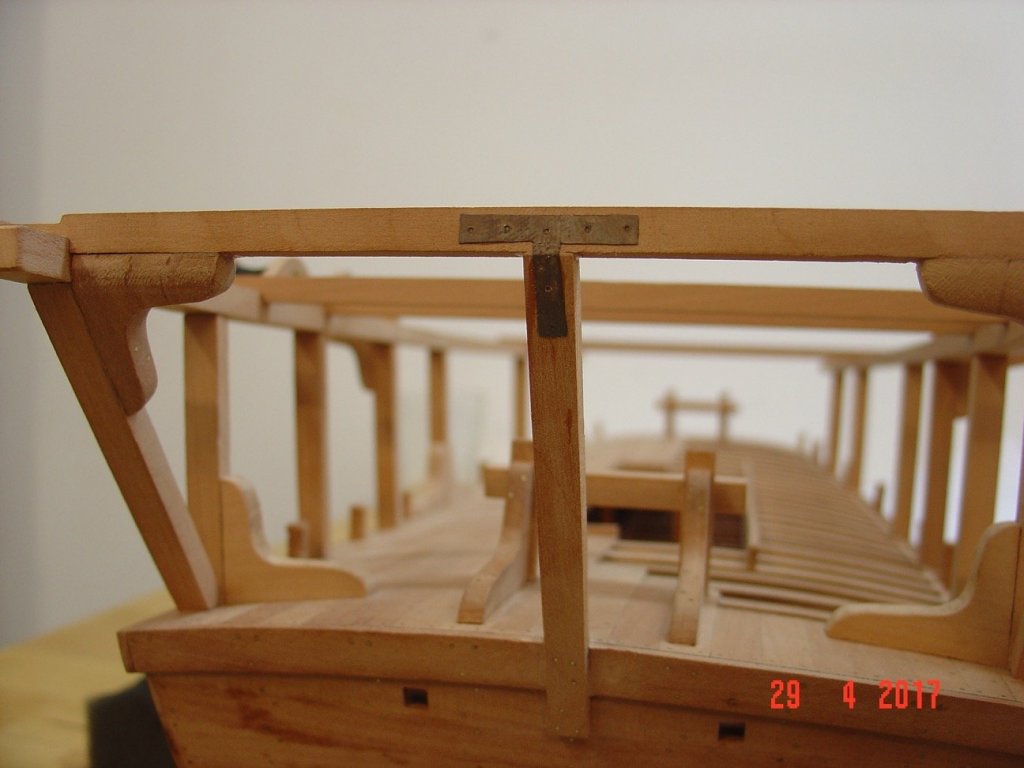
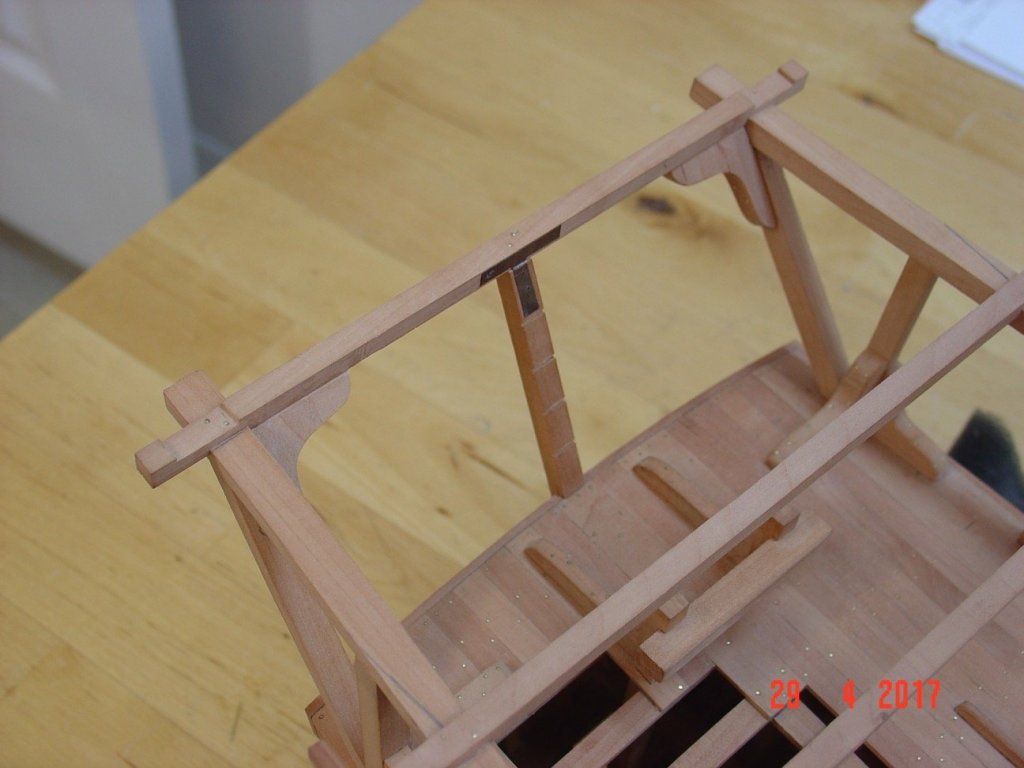
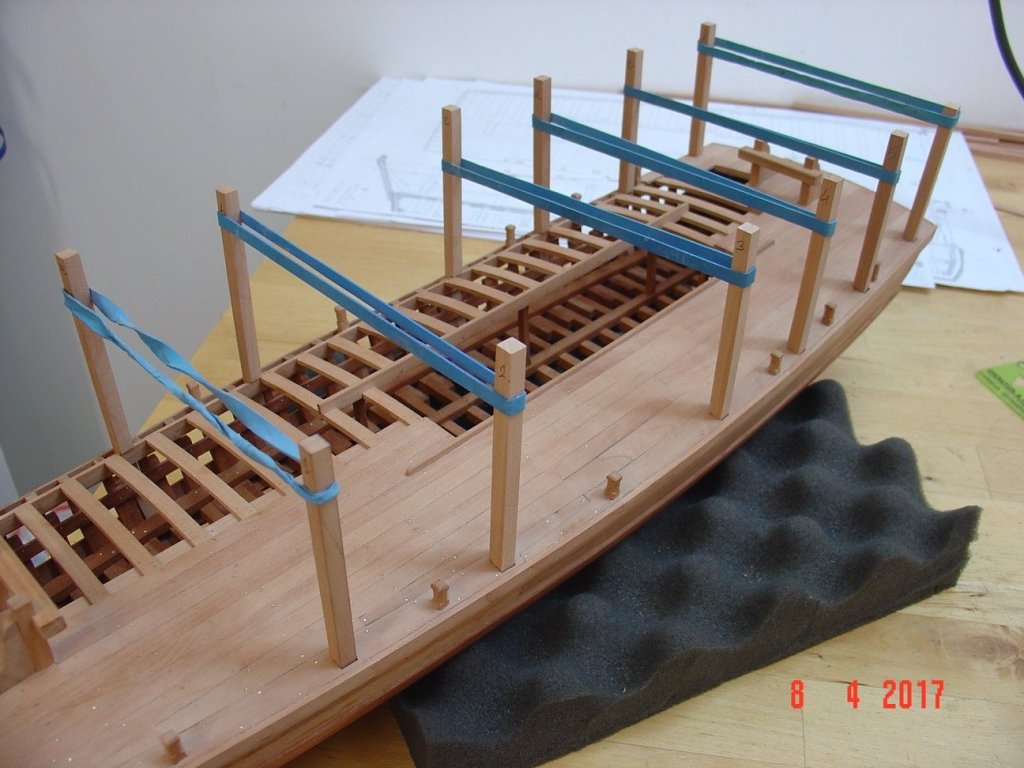
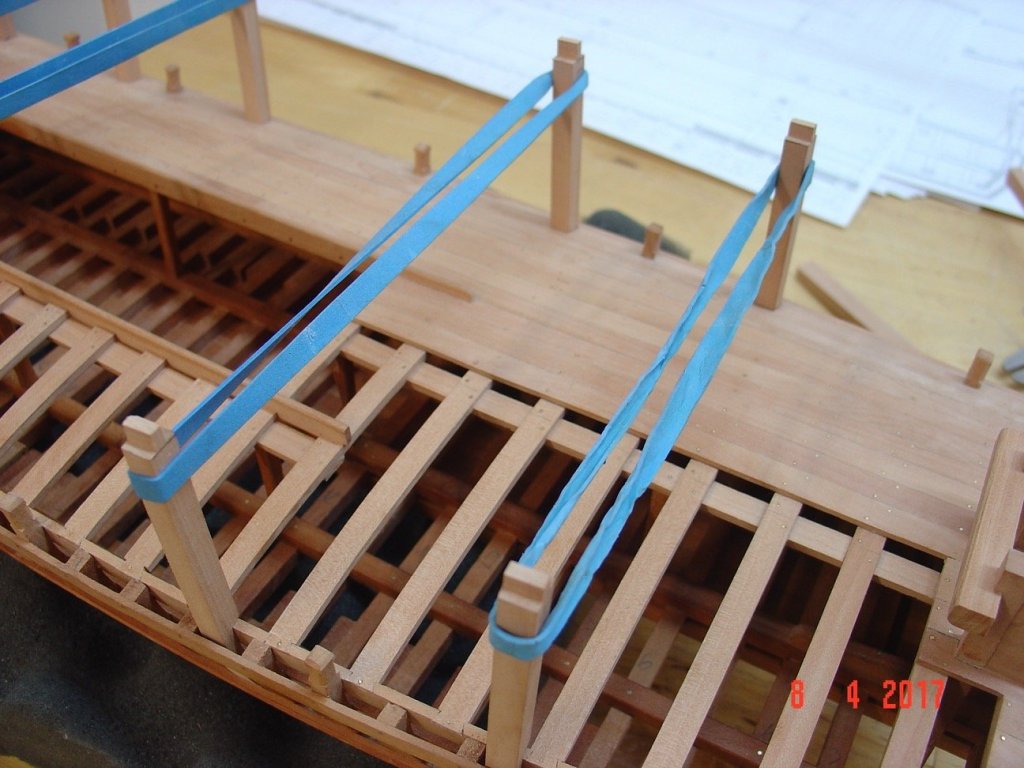
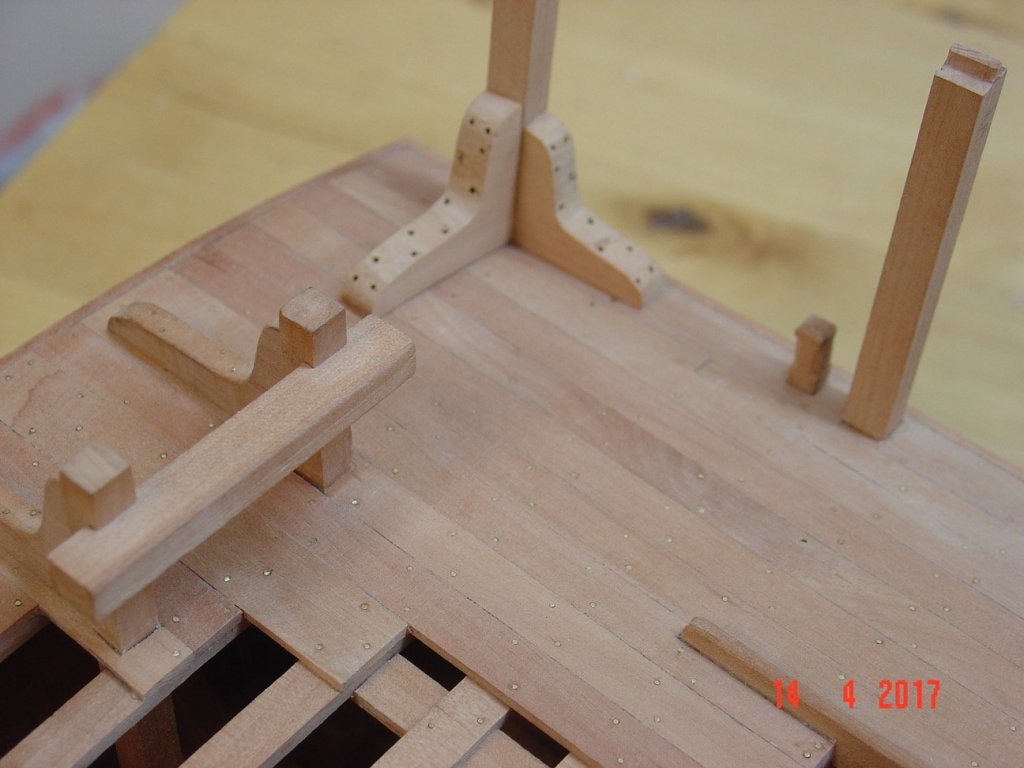
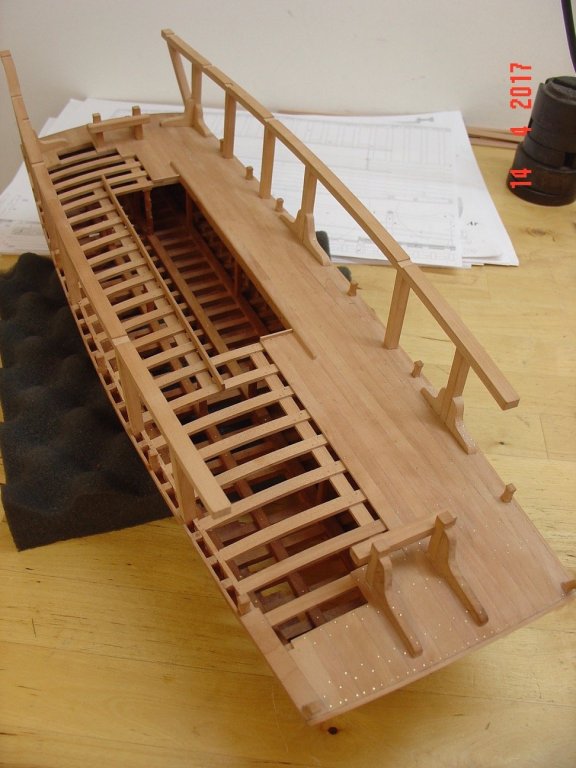
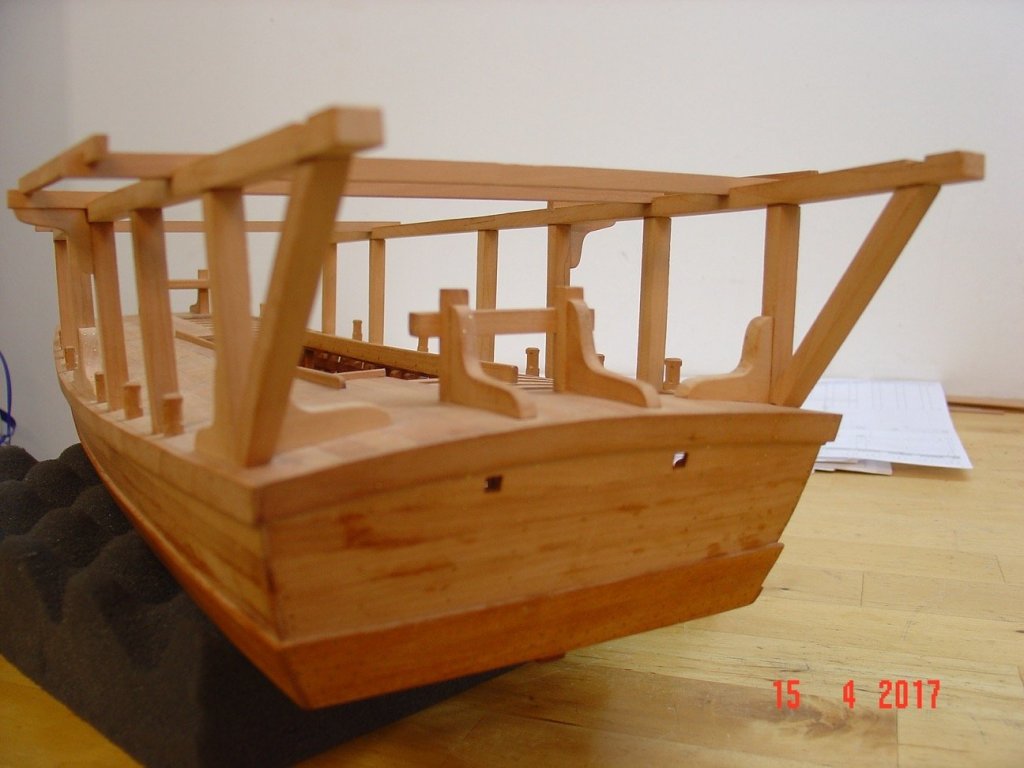
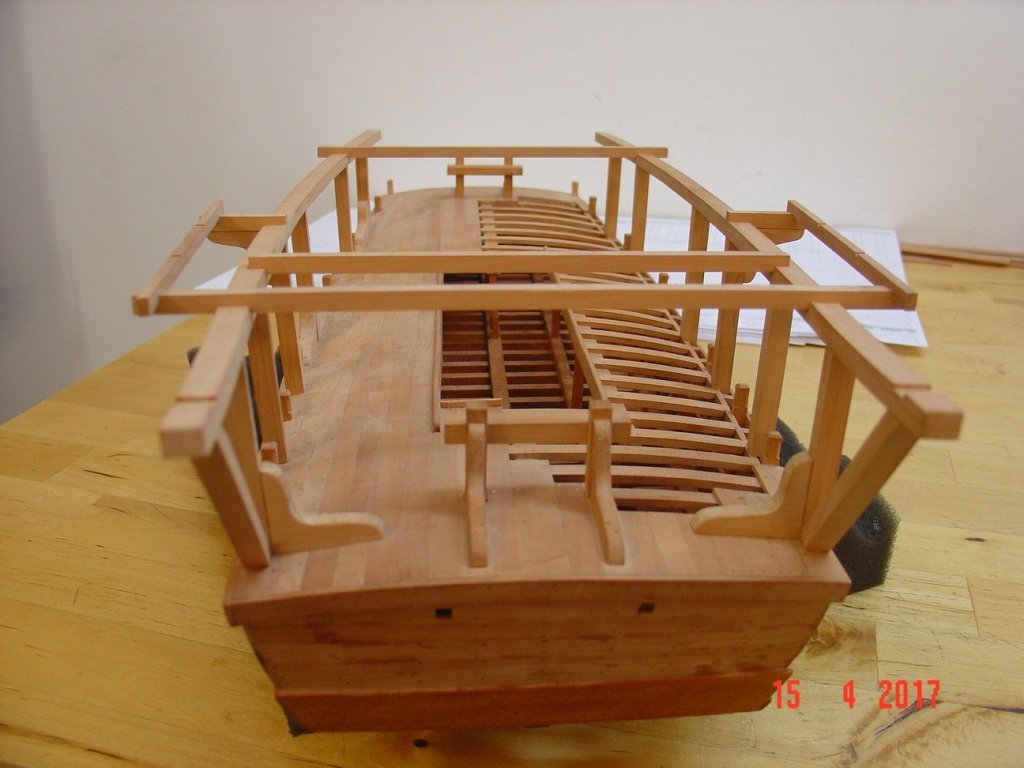
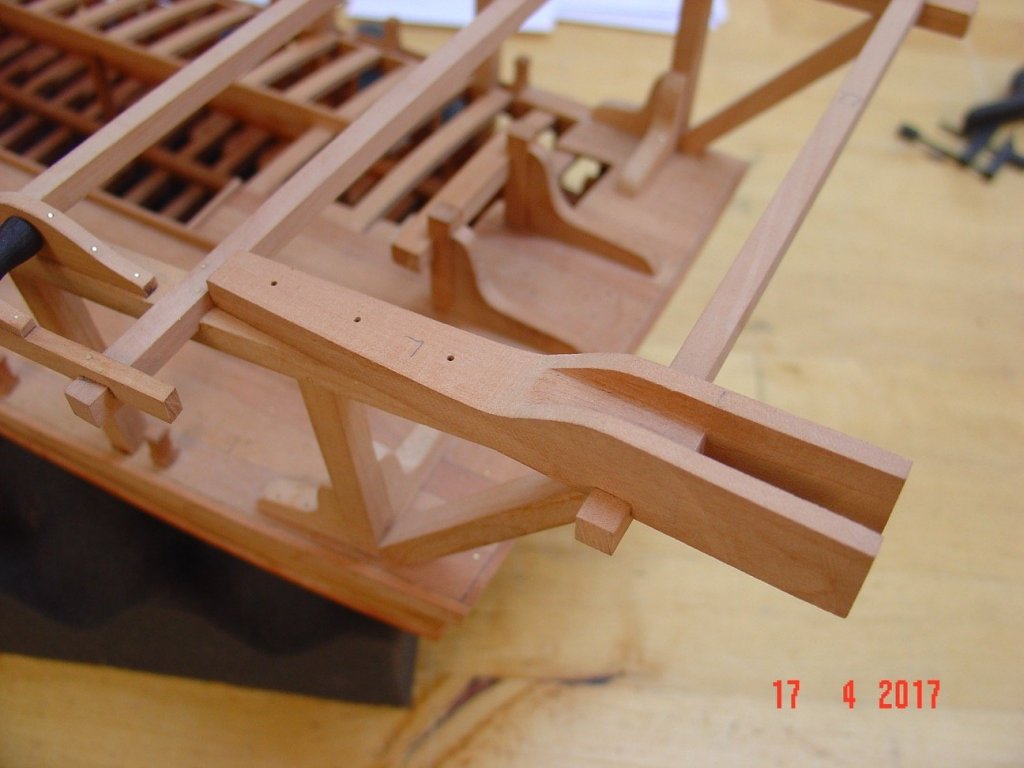
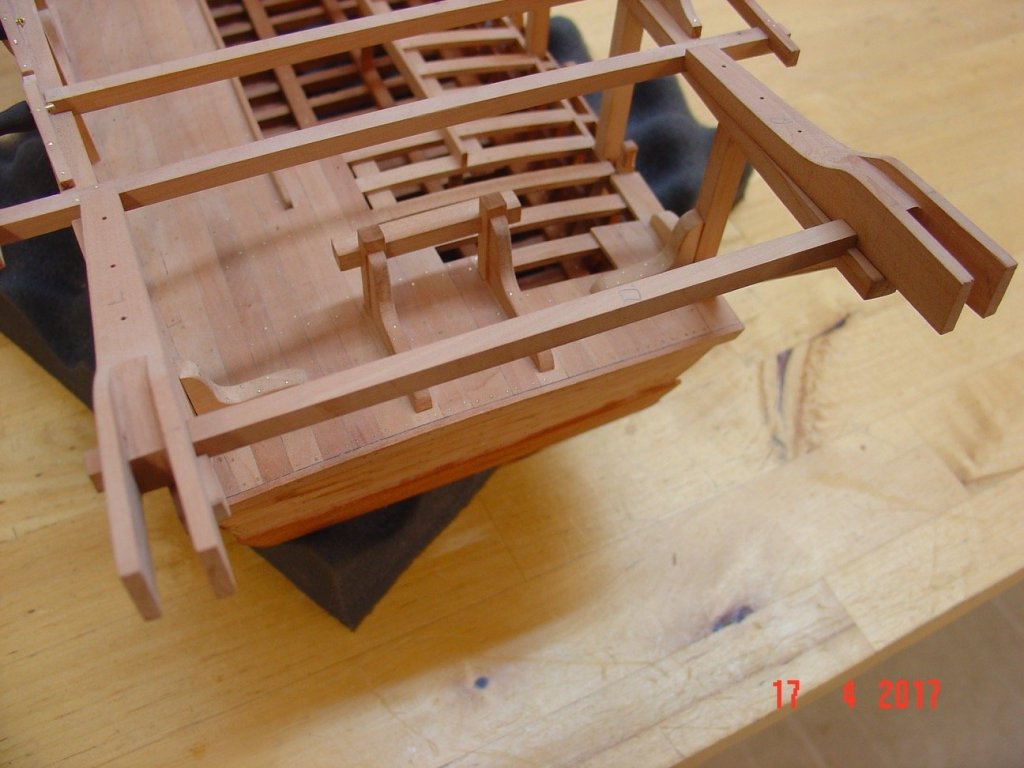
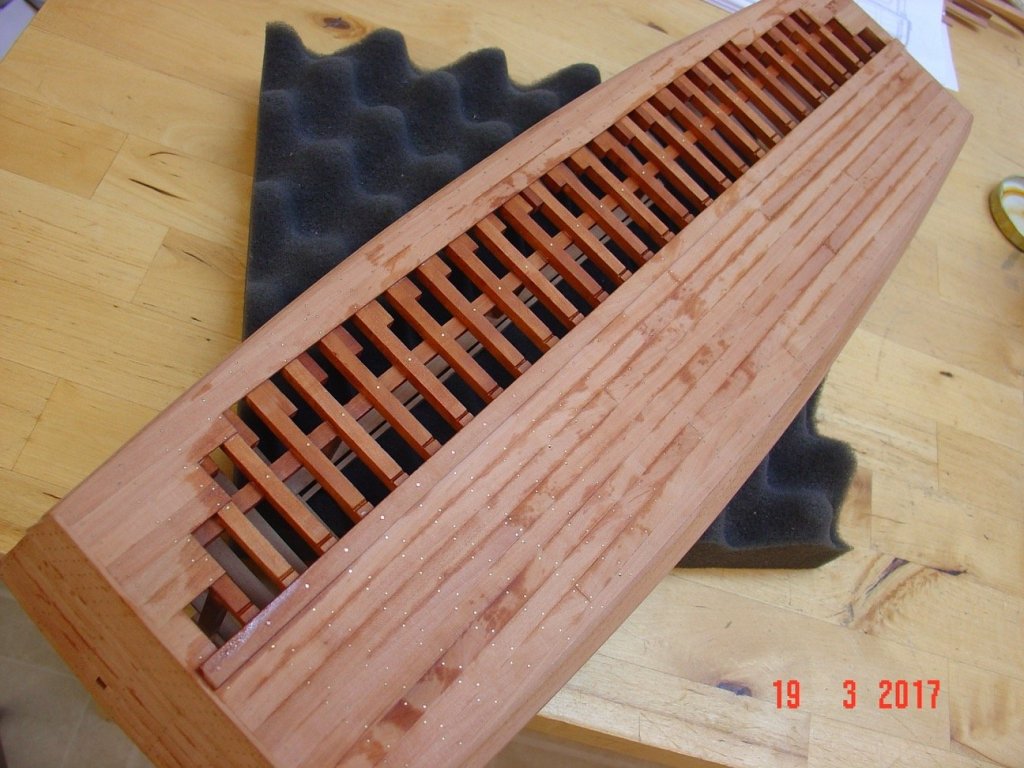
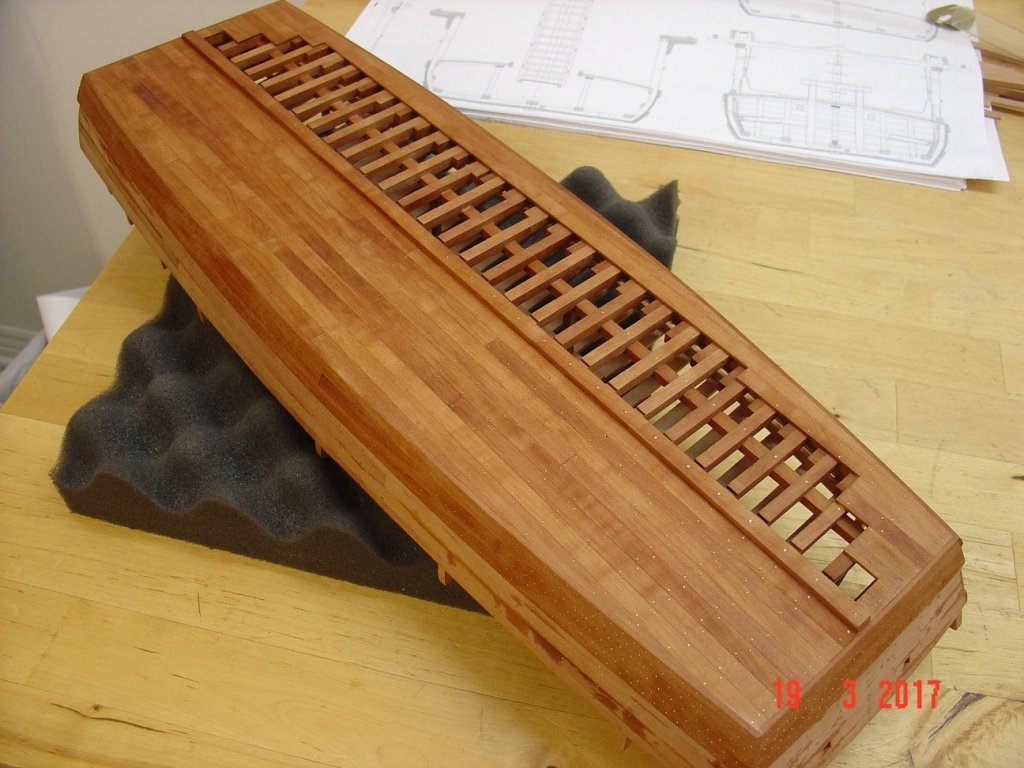
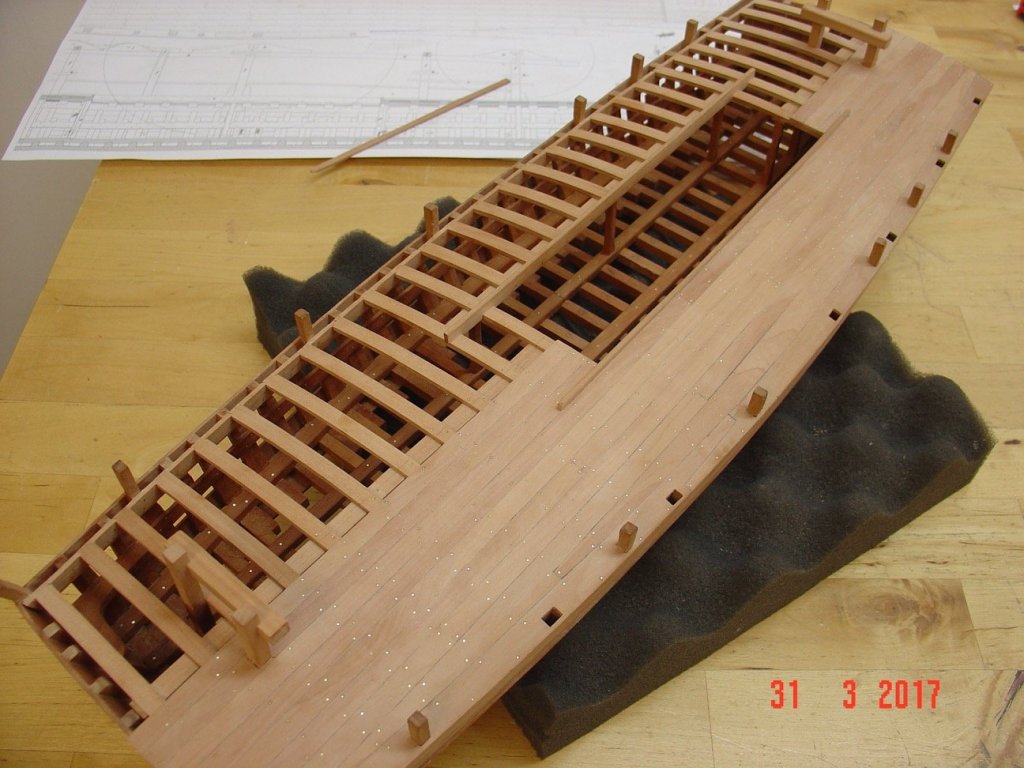
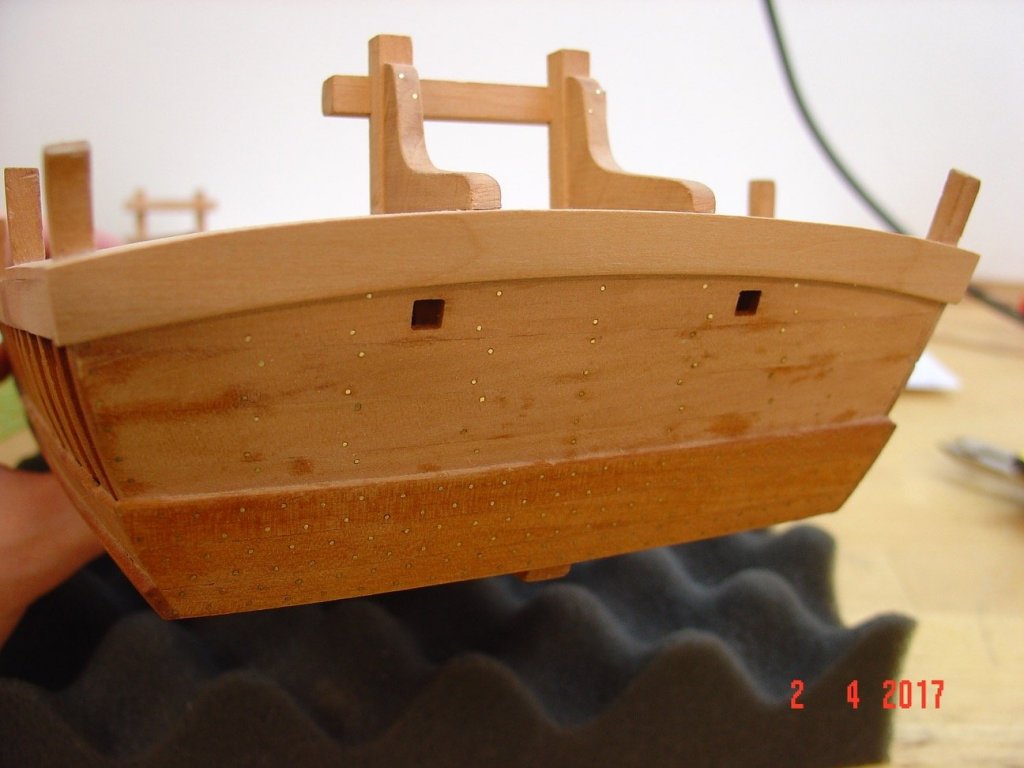
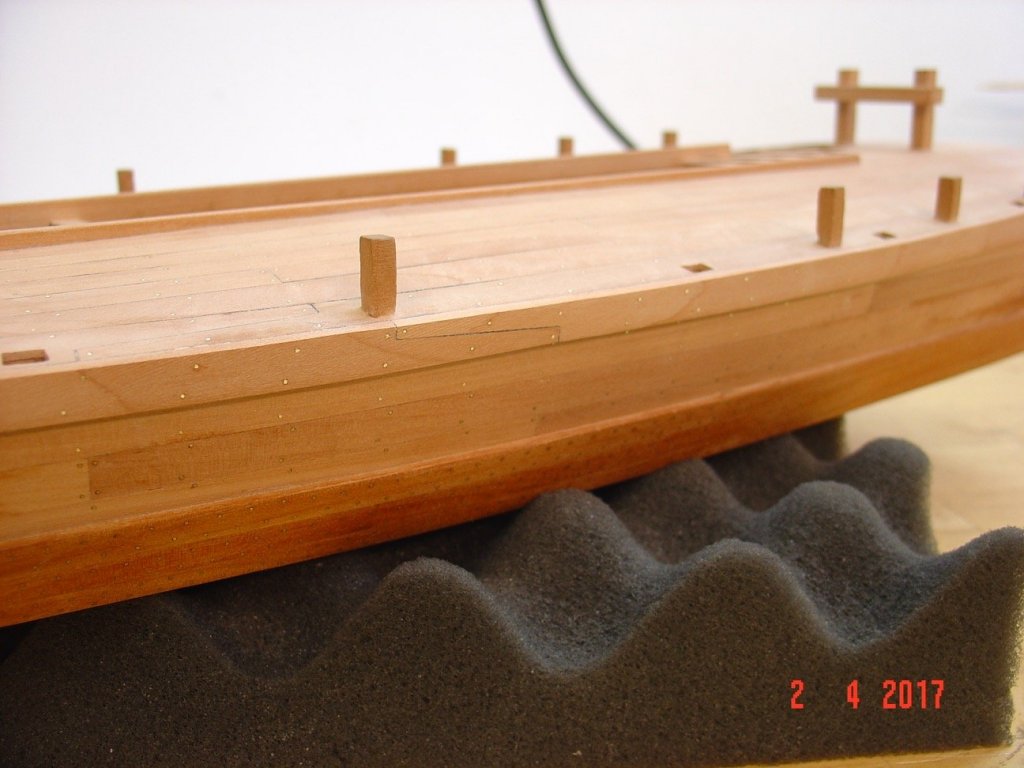
Thank you Greg, Druxey, Christian and Albert. I made some progress in the couple last weeks and now the barge is completed. The inside was already oiled as once the deck is in place I will have limited access to do it later - even if the deck planking is only partial. Here are the pictures. Alexandru


-
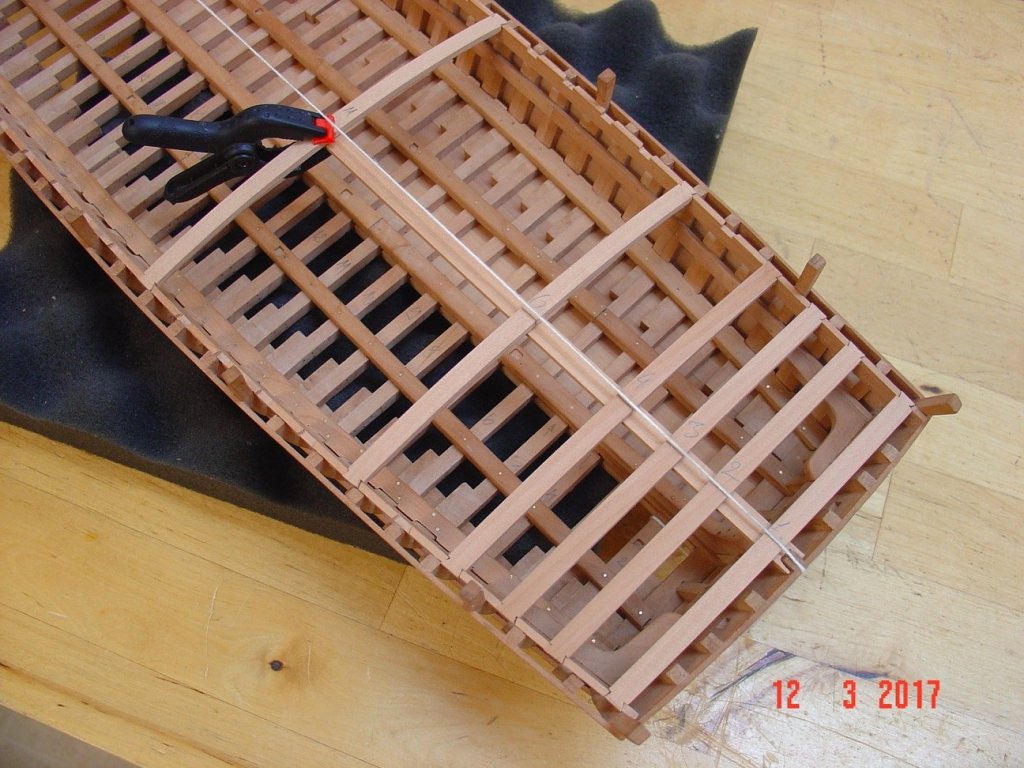
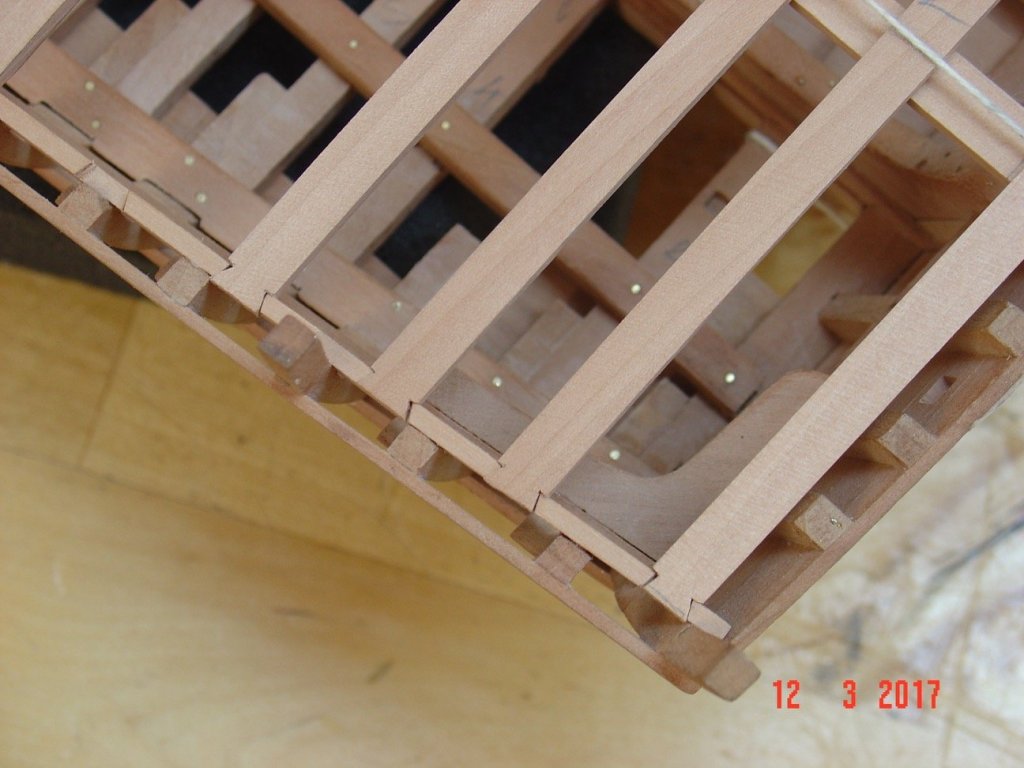
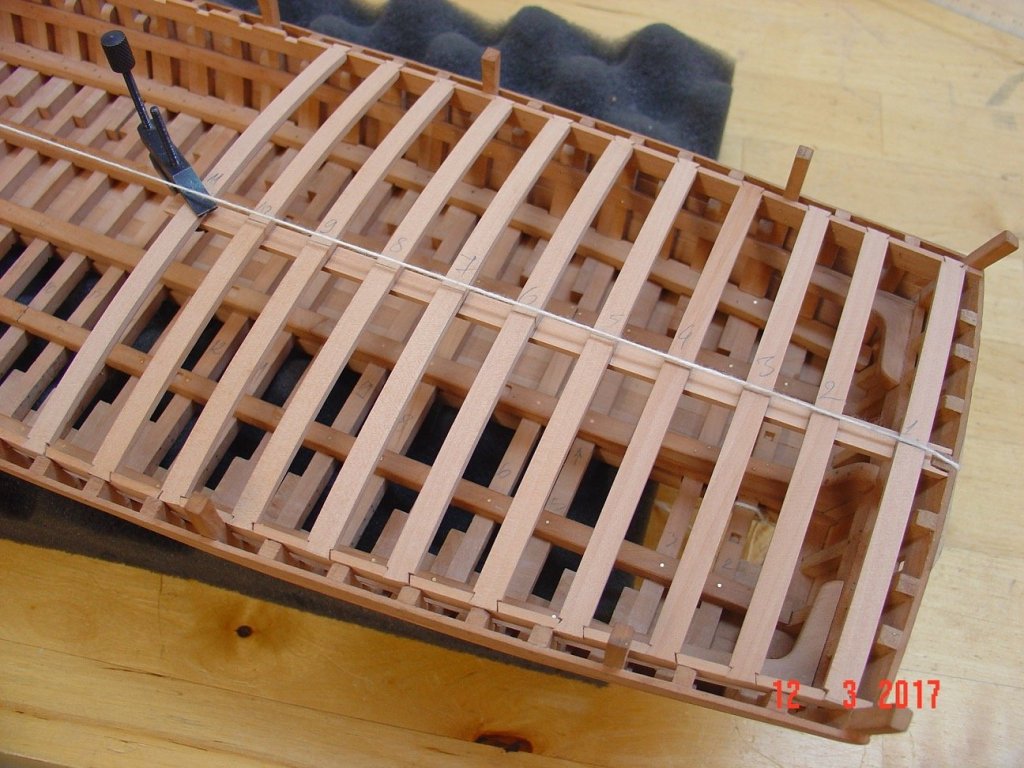
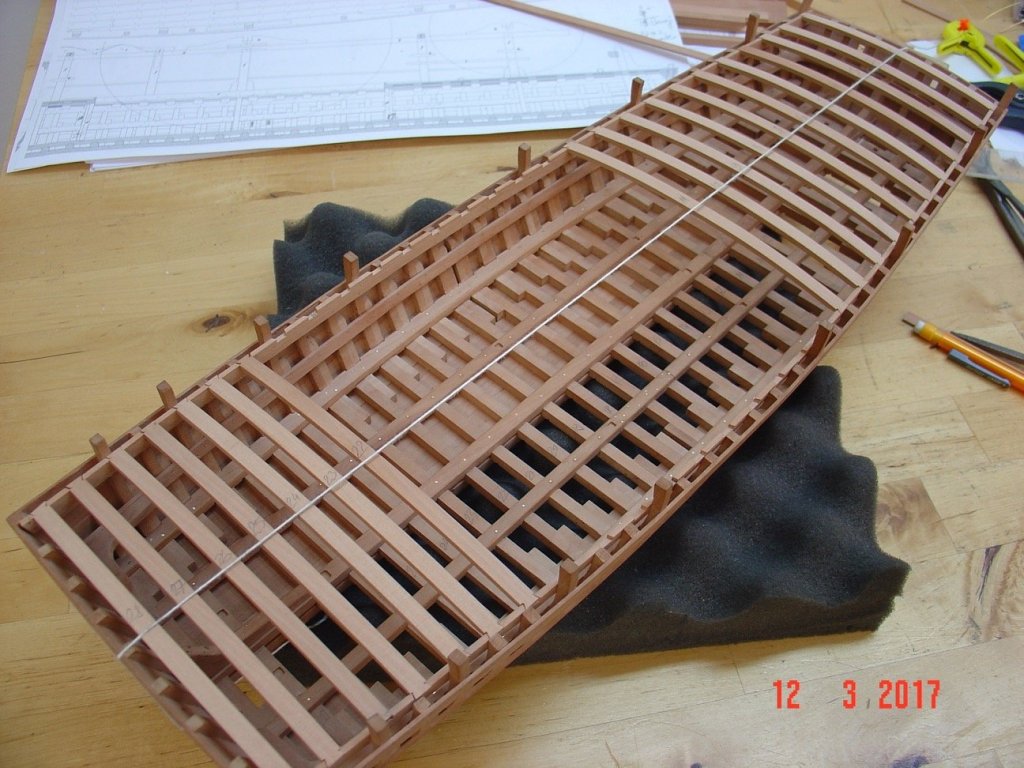
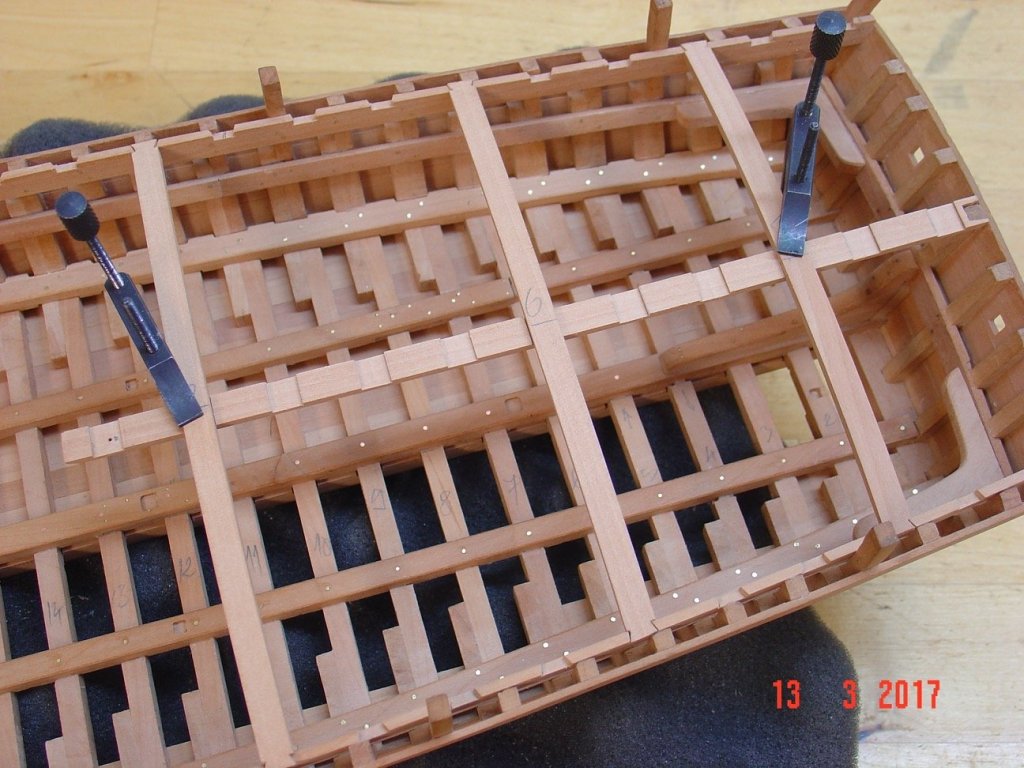
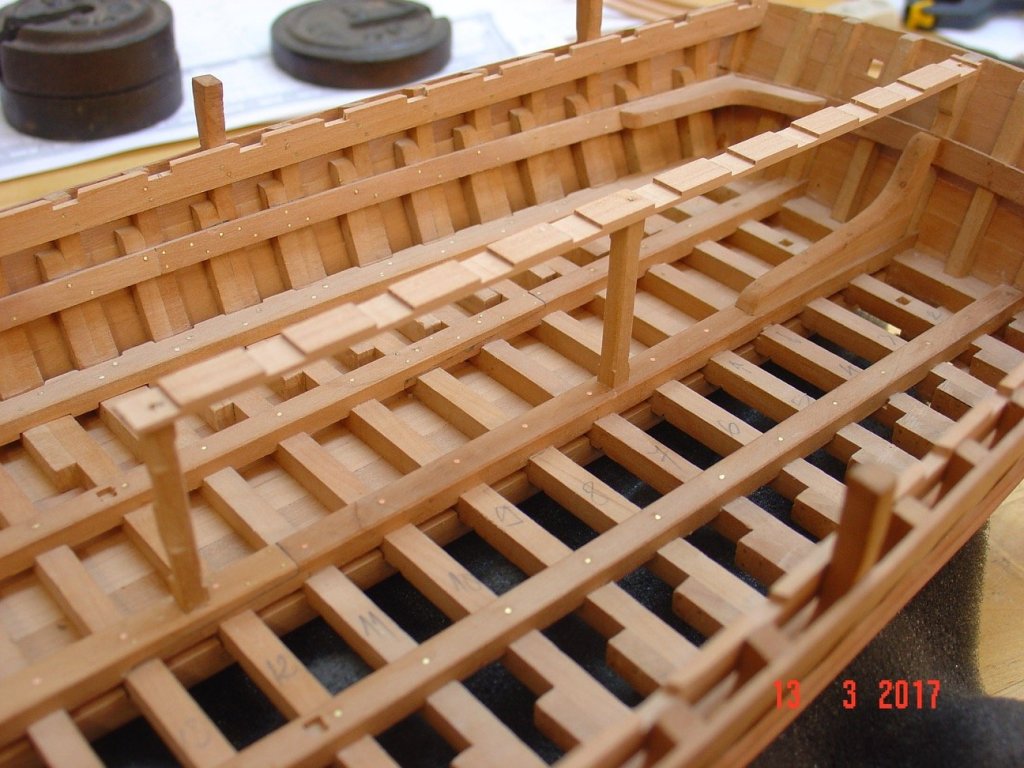
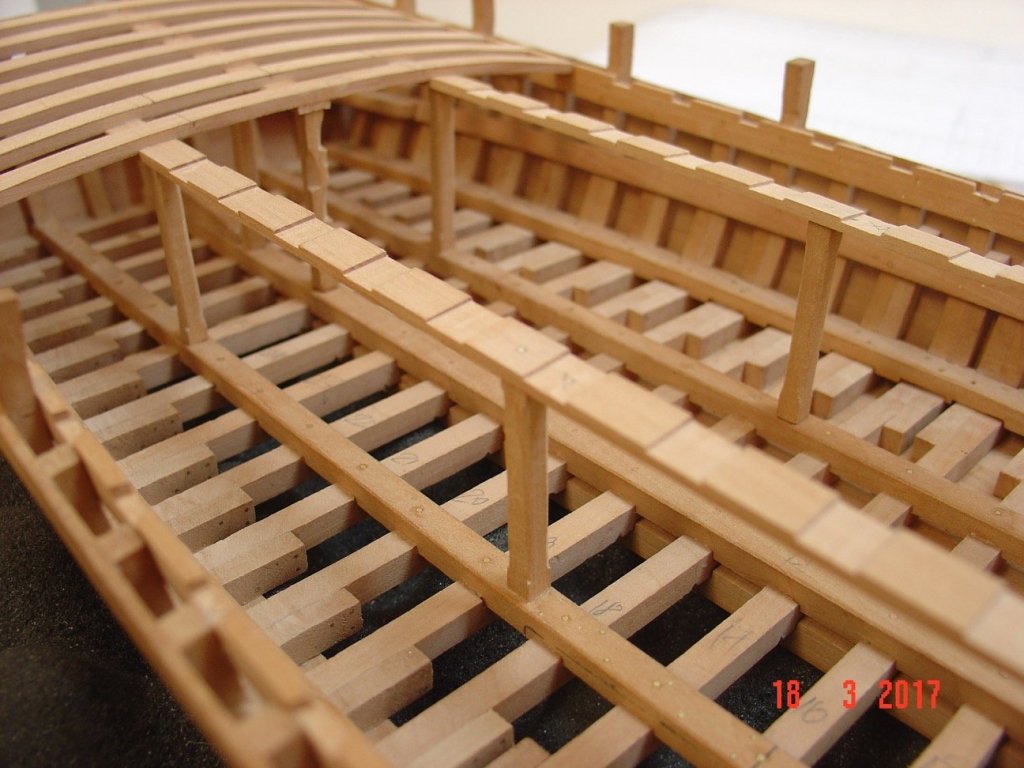
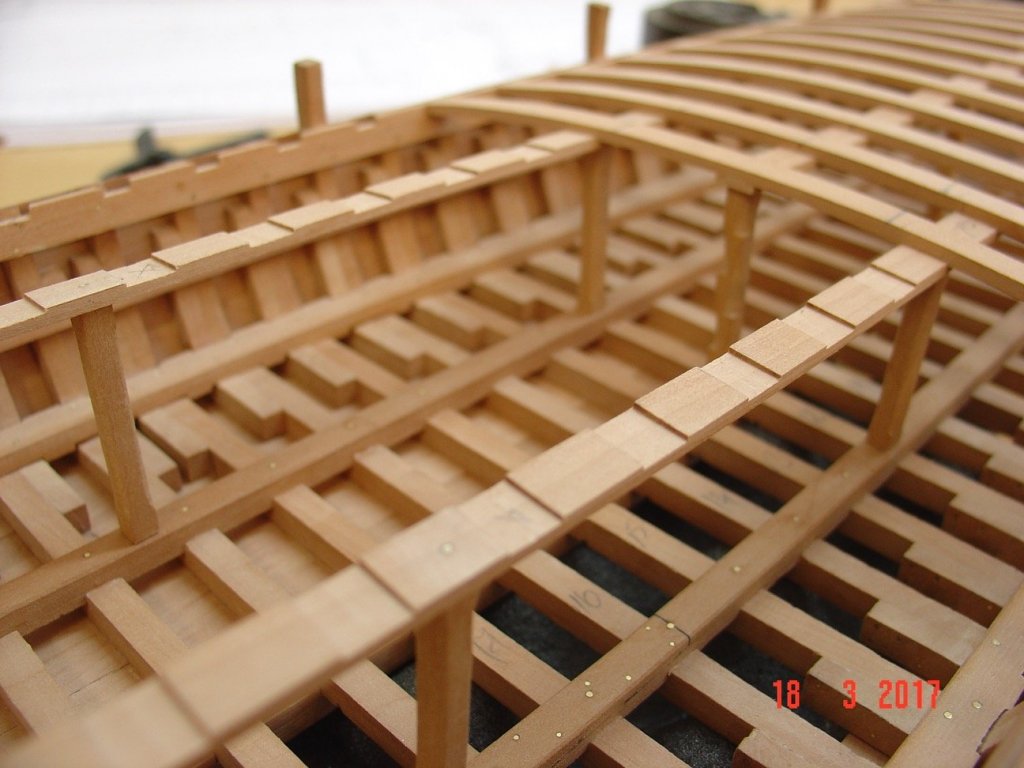
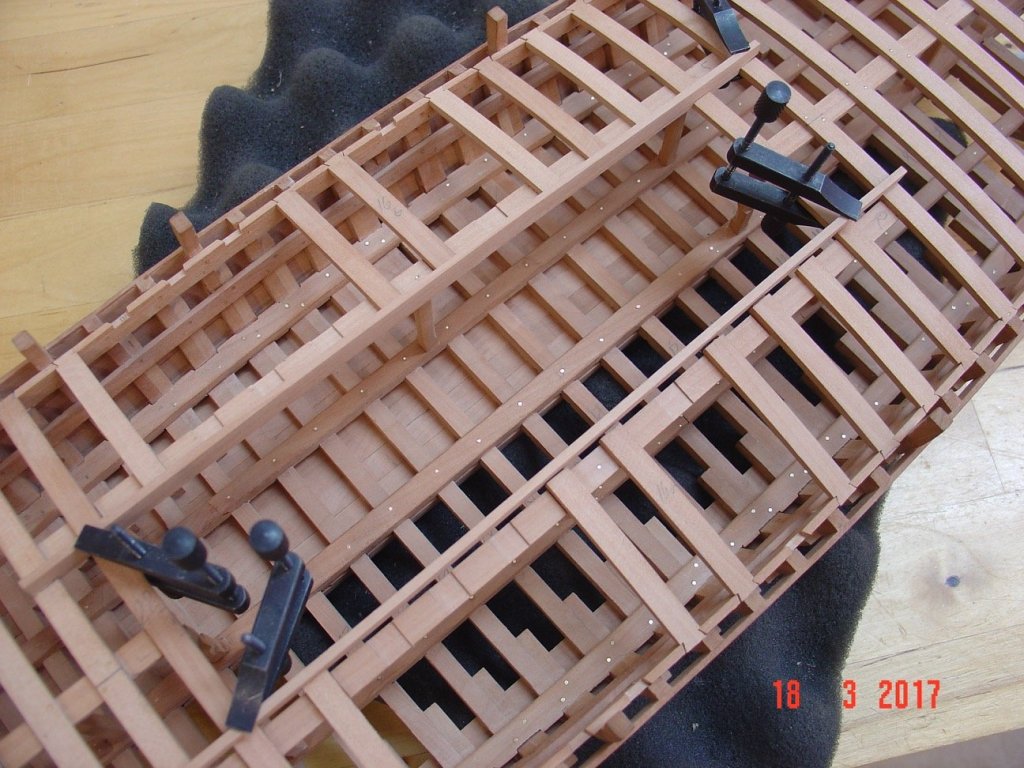
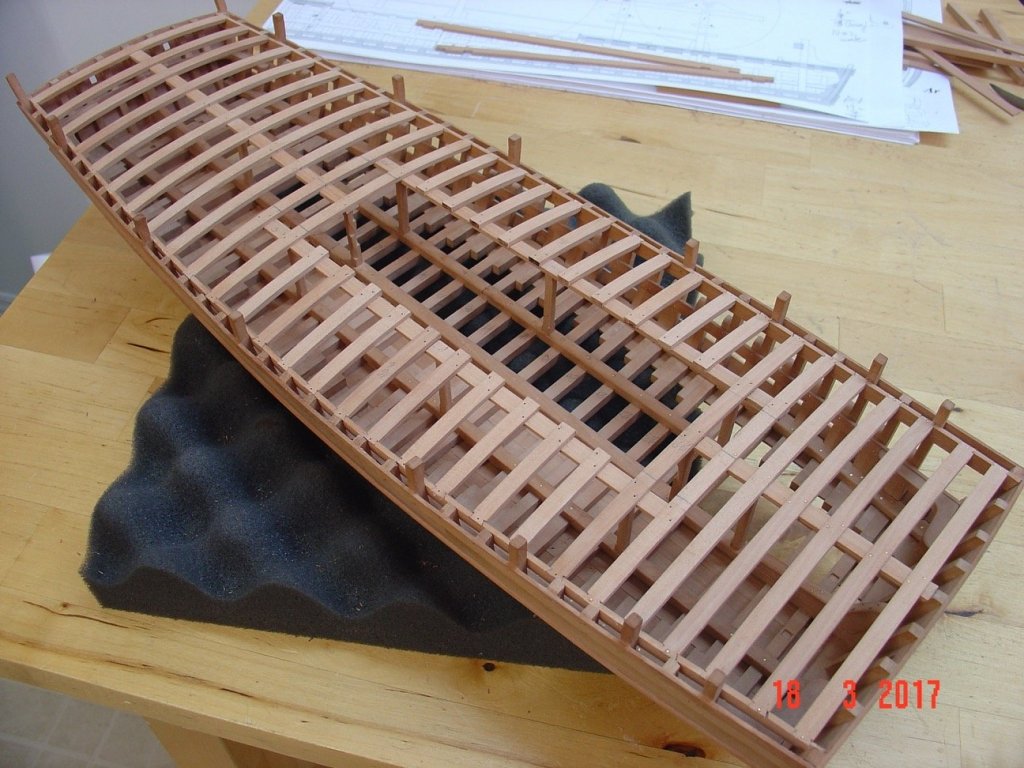
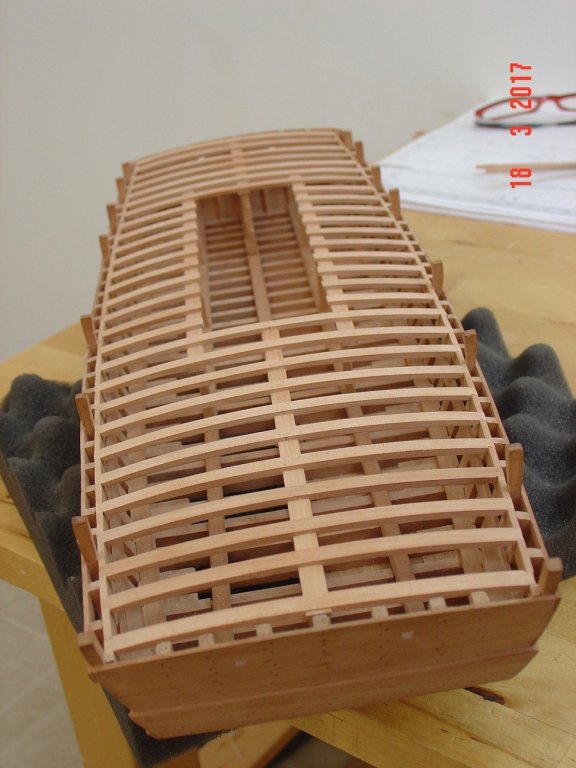
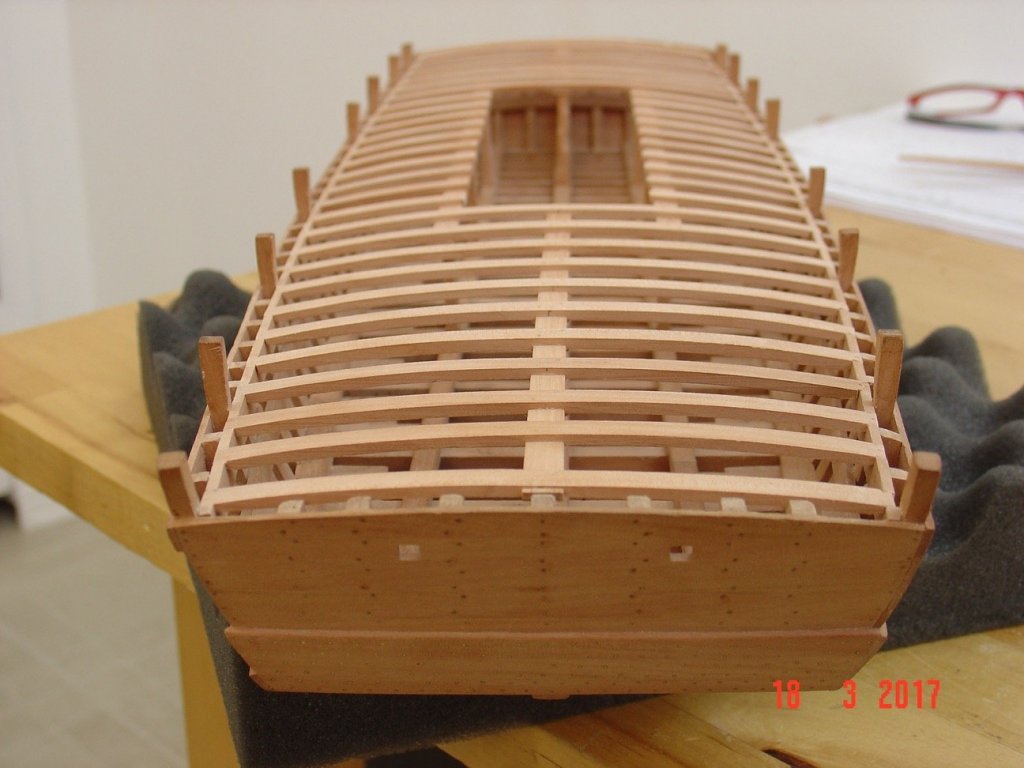
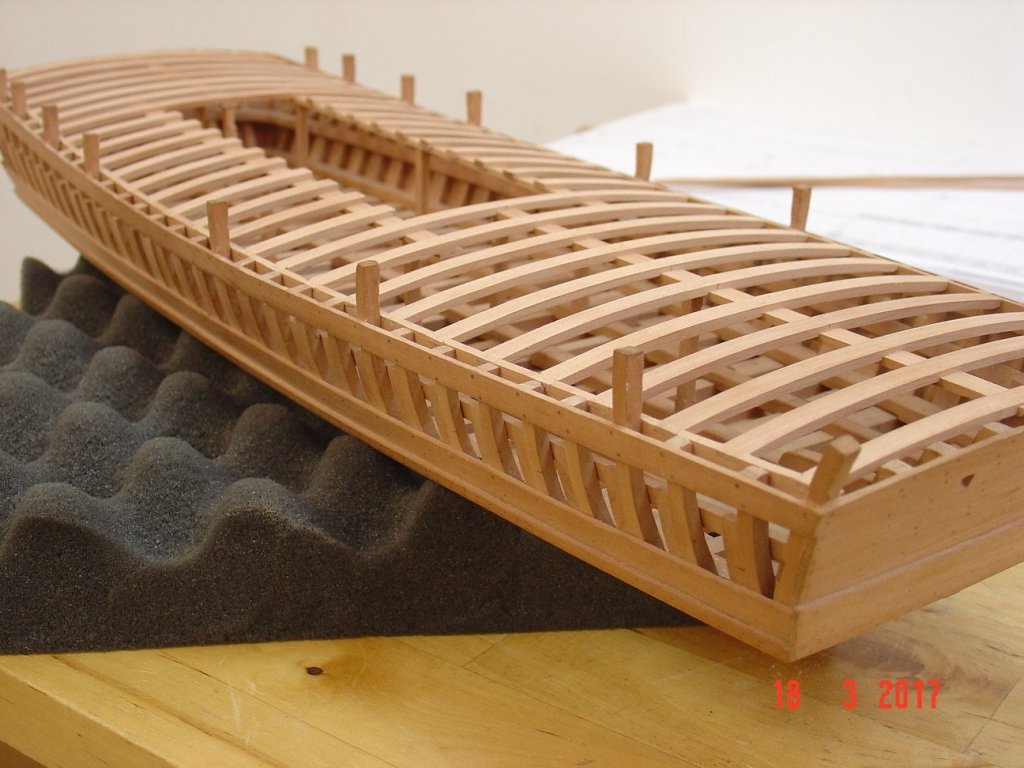
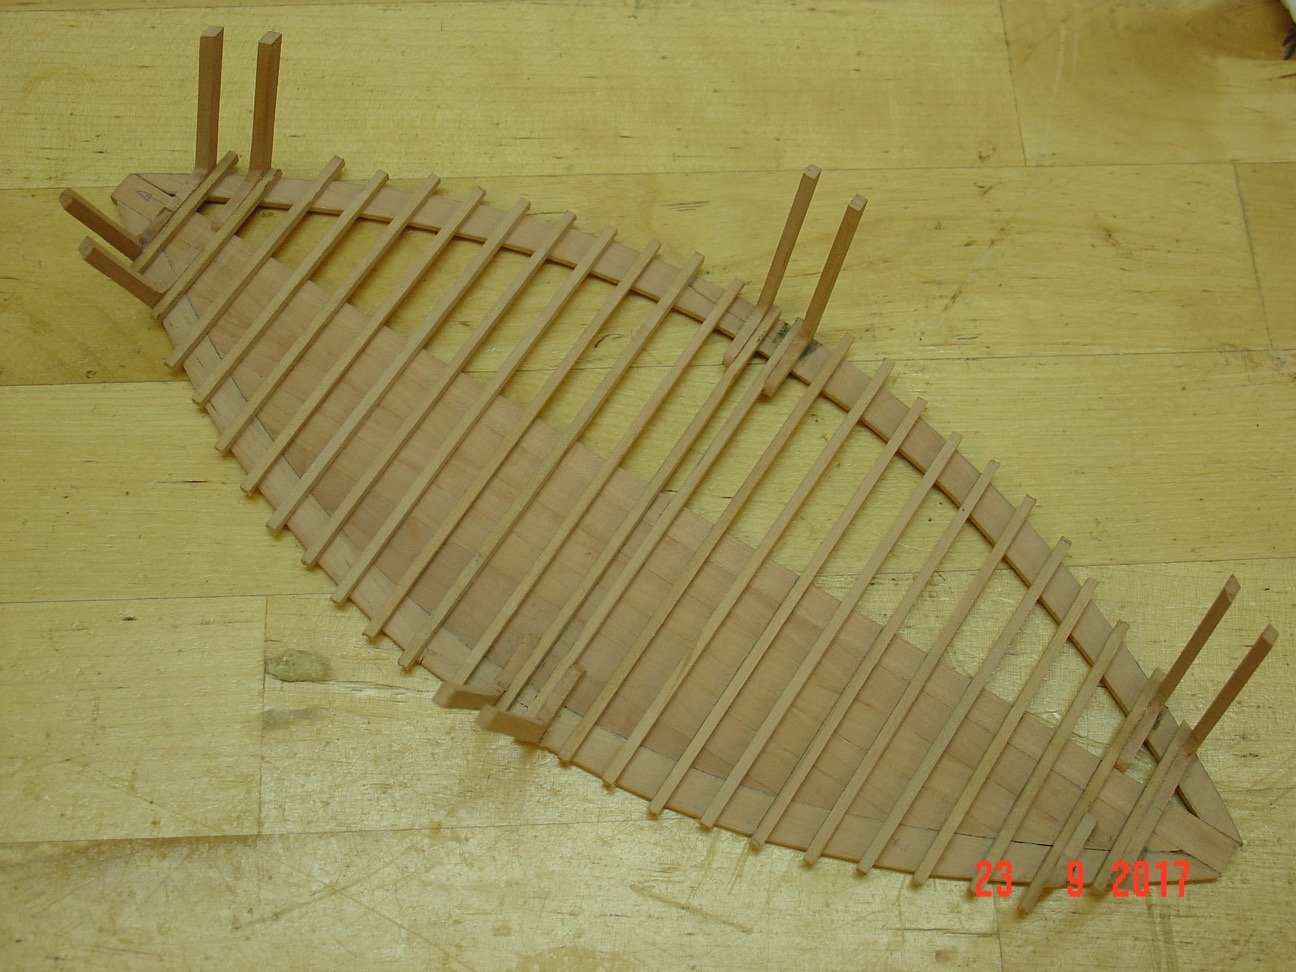
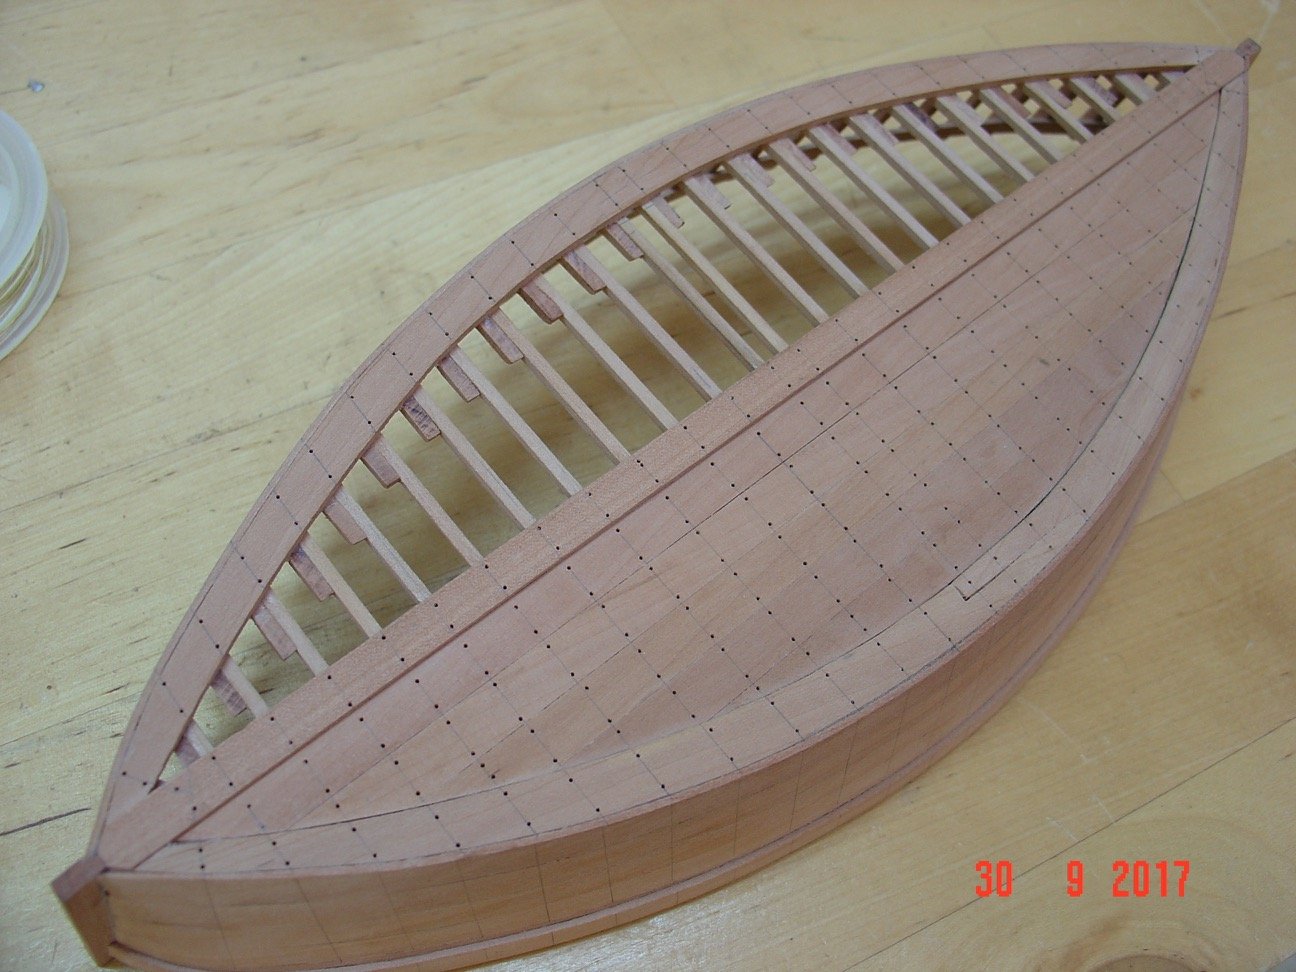
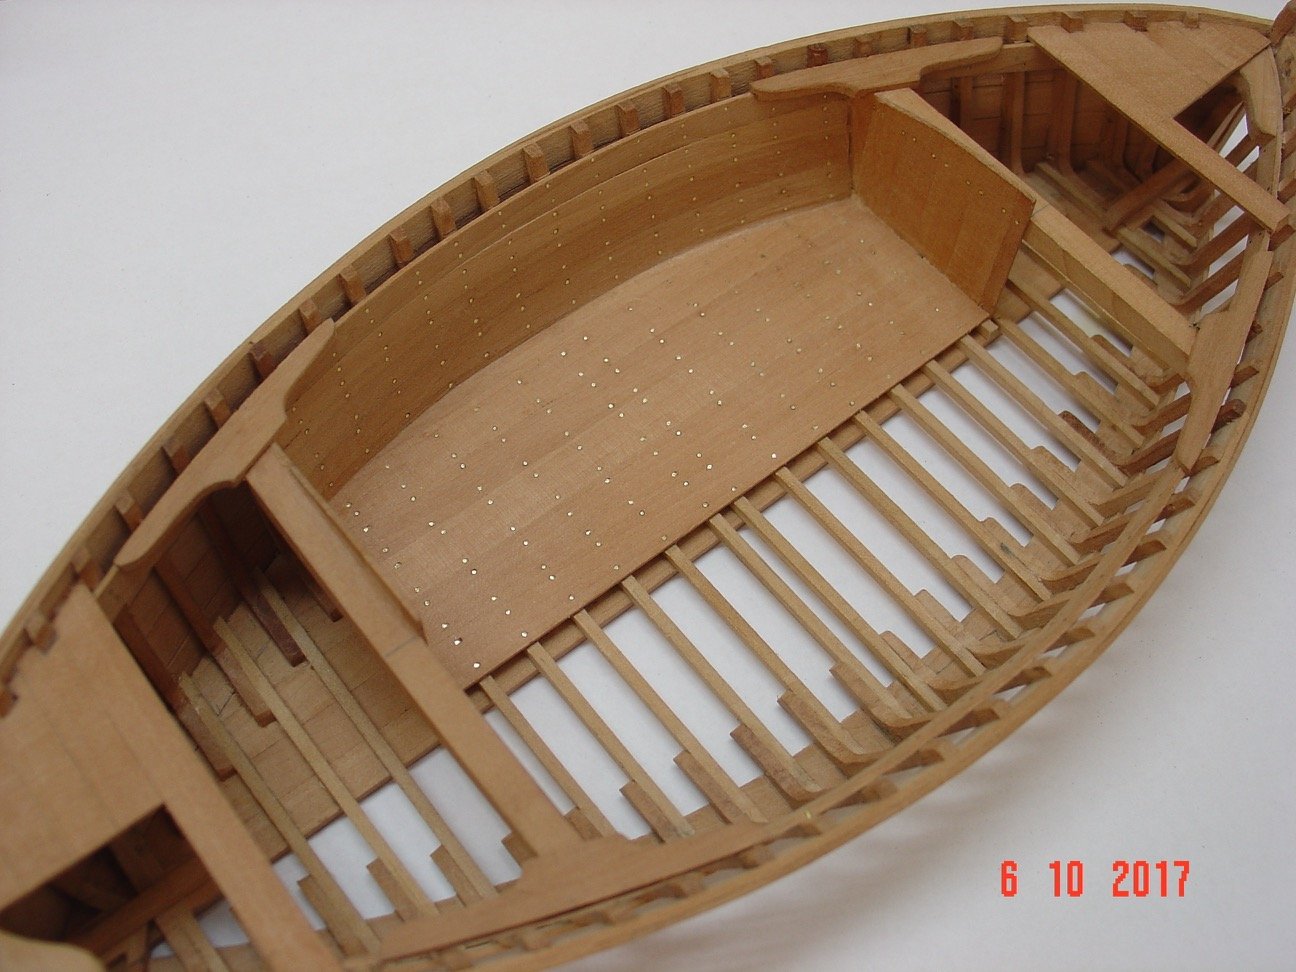
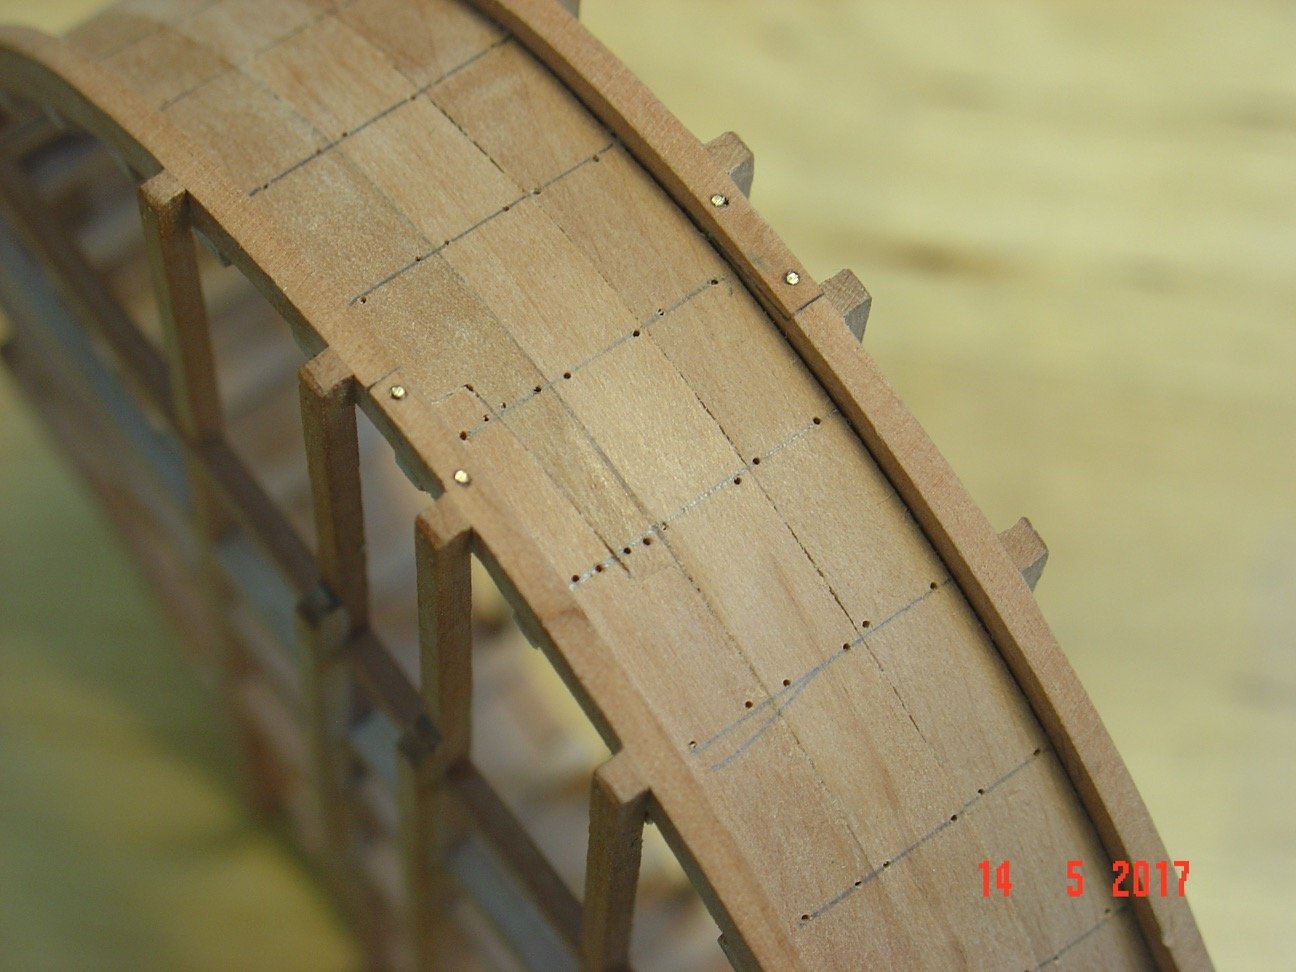
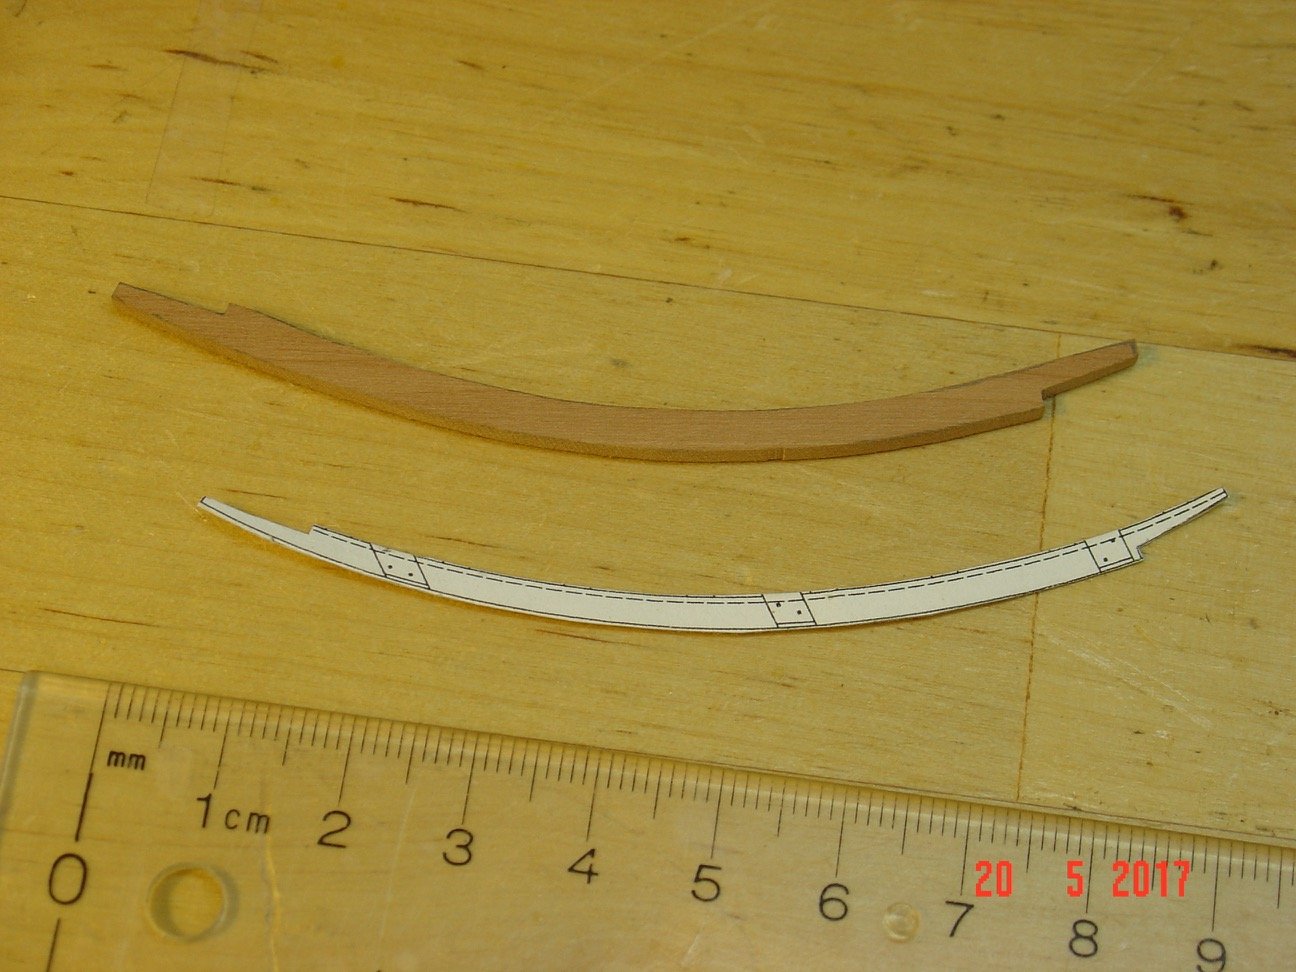
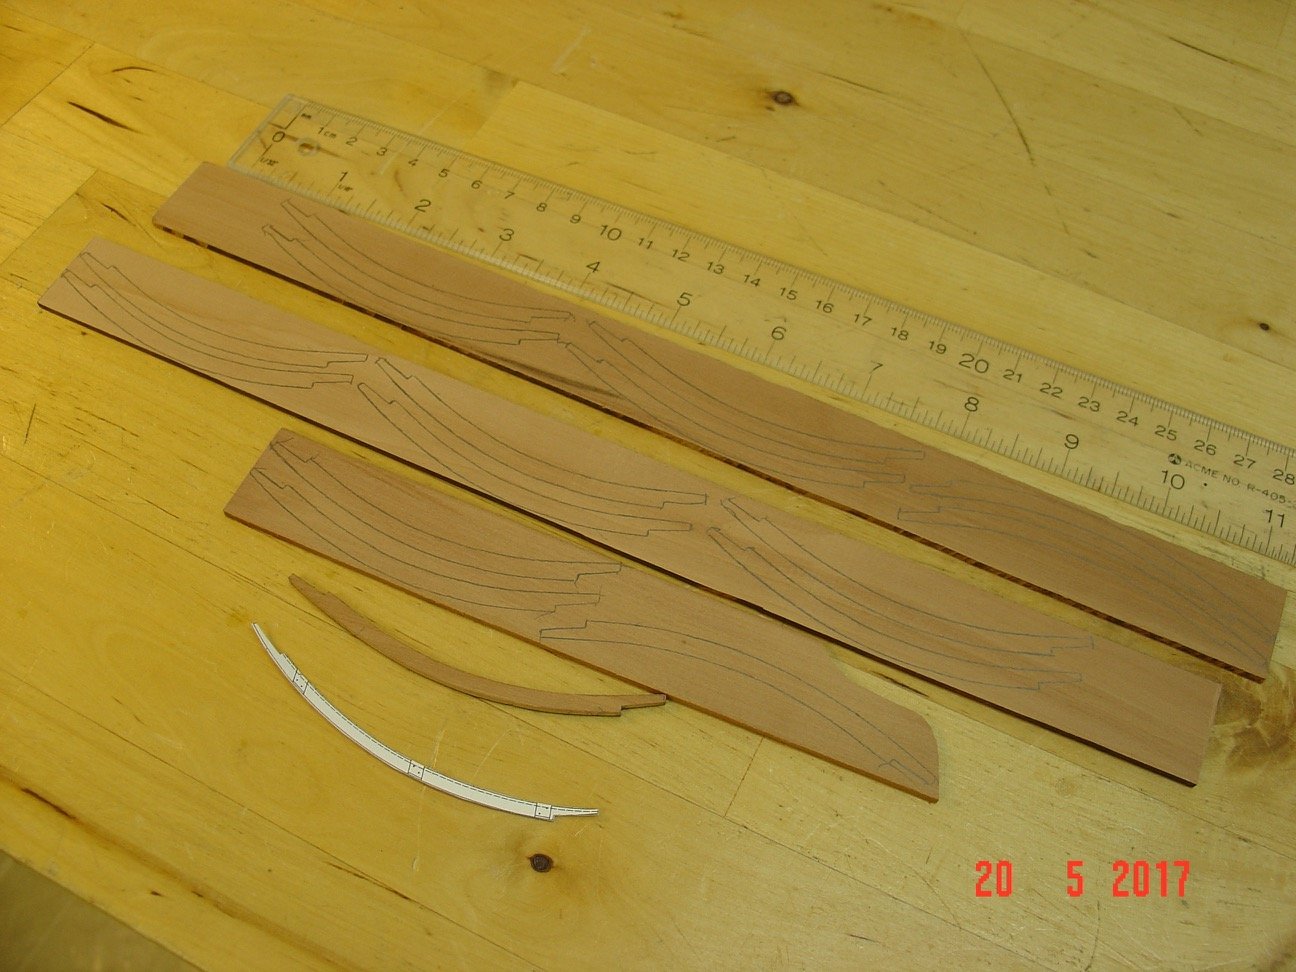
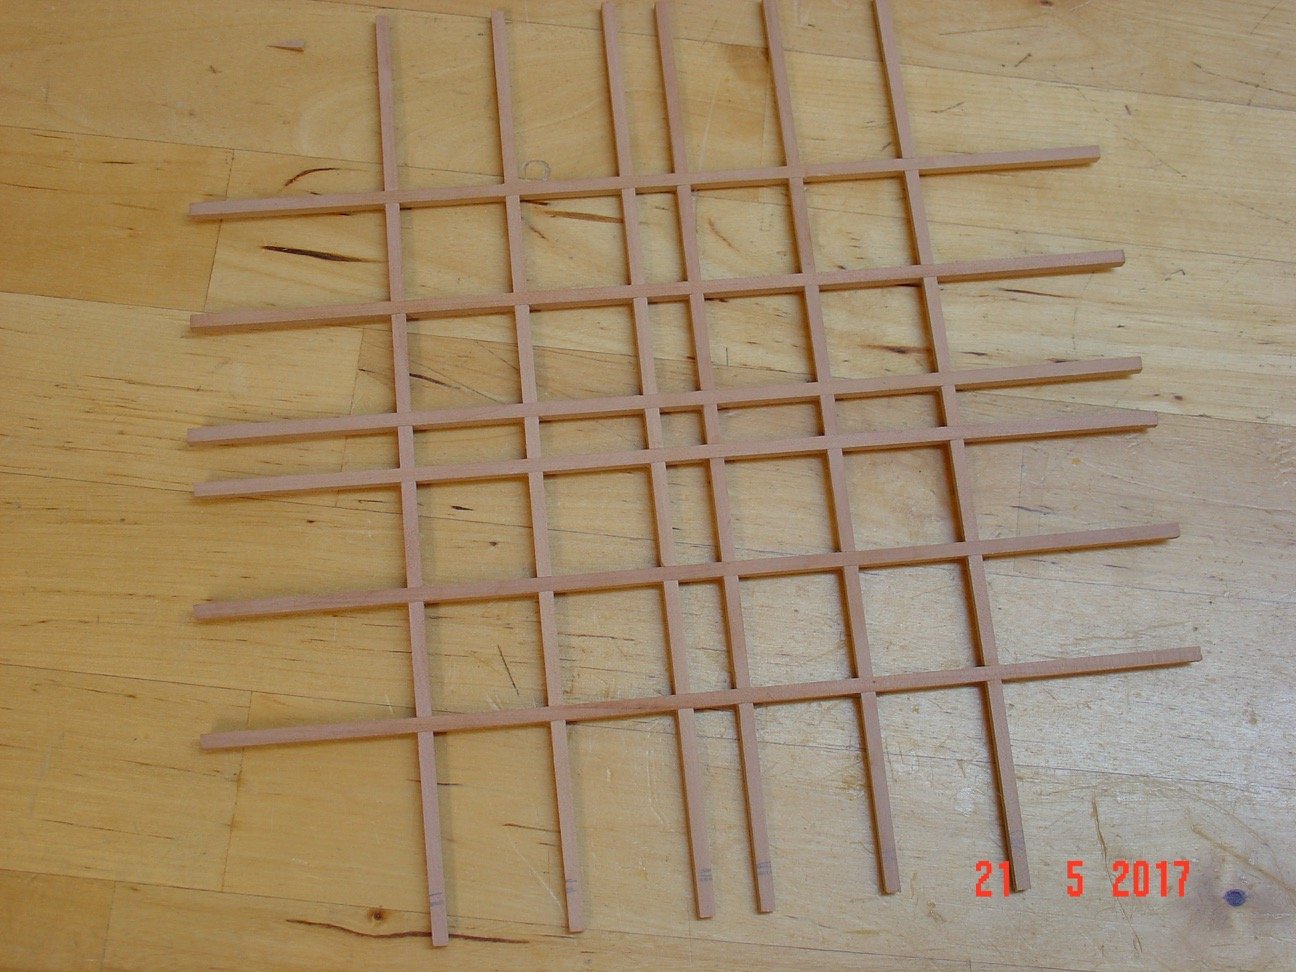
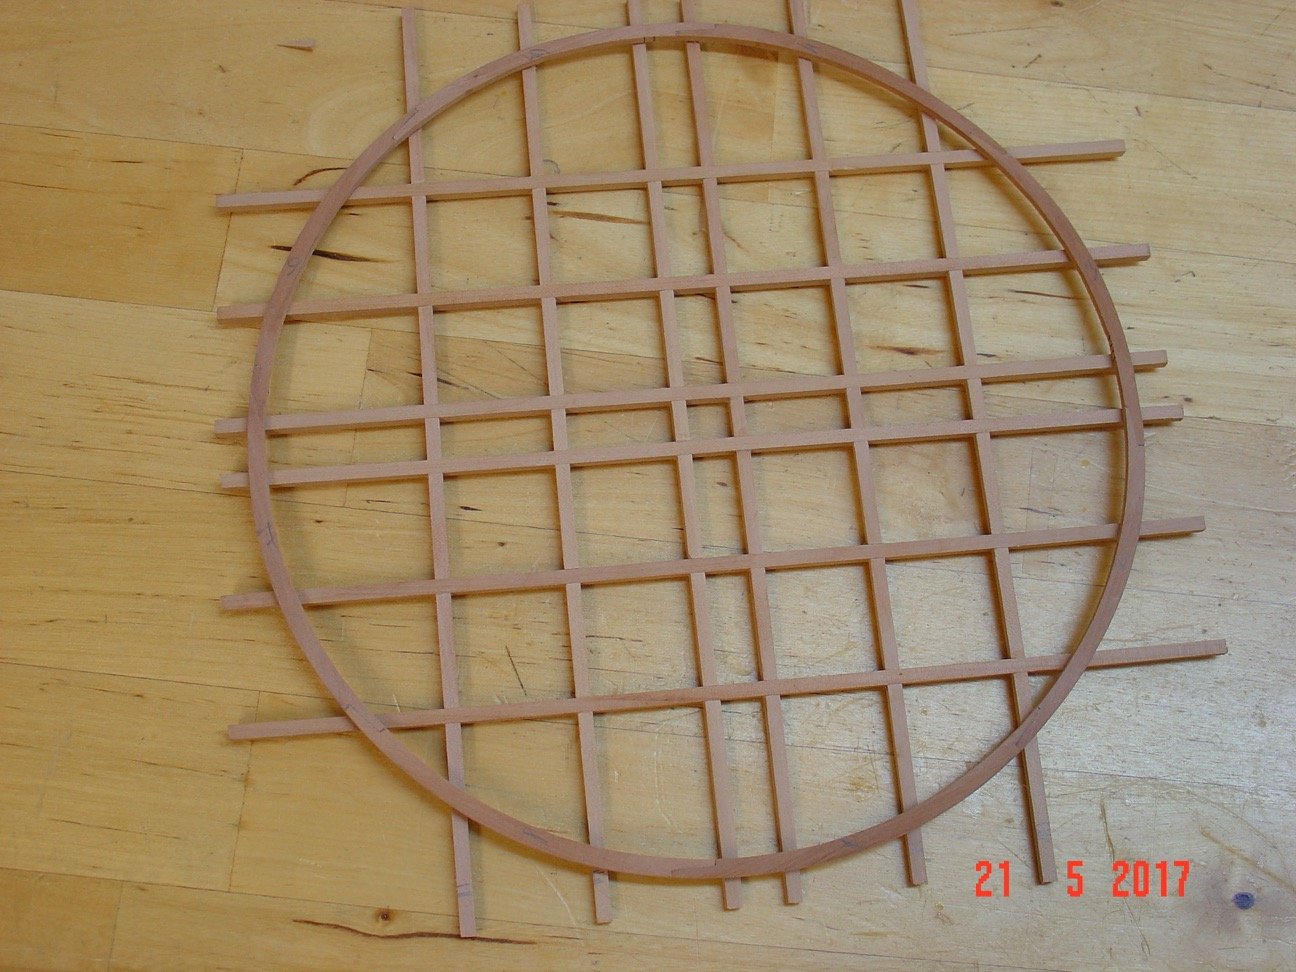
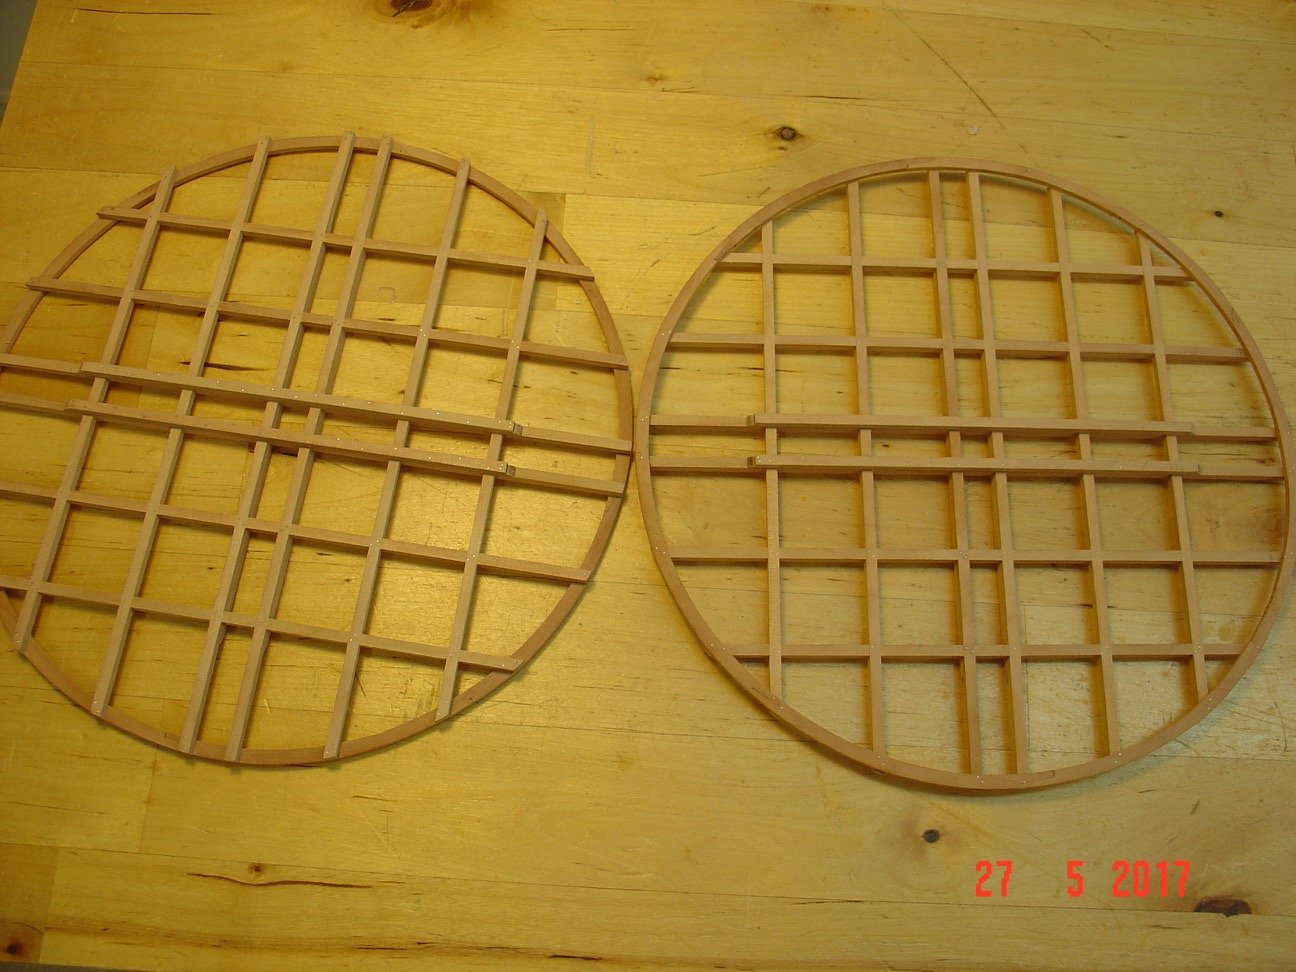
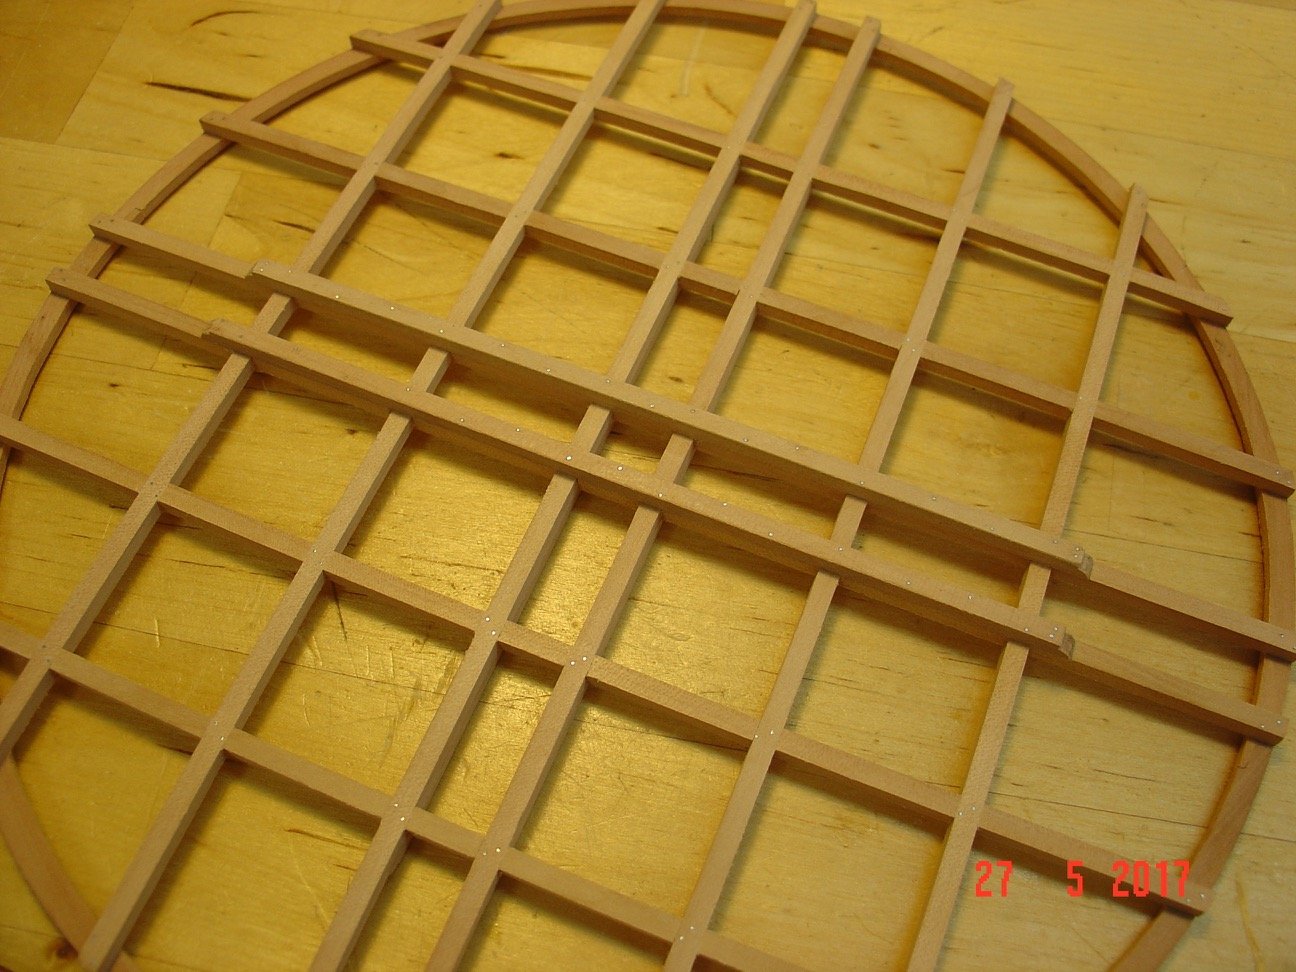
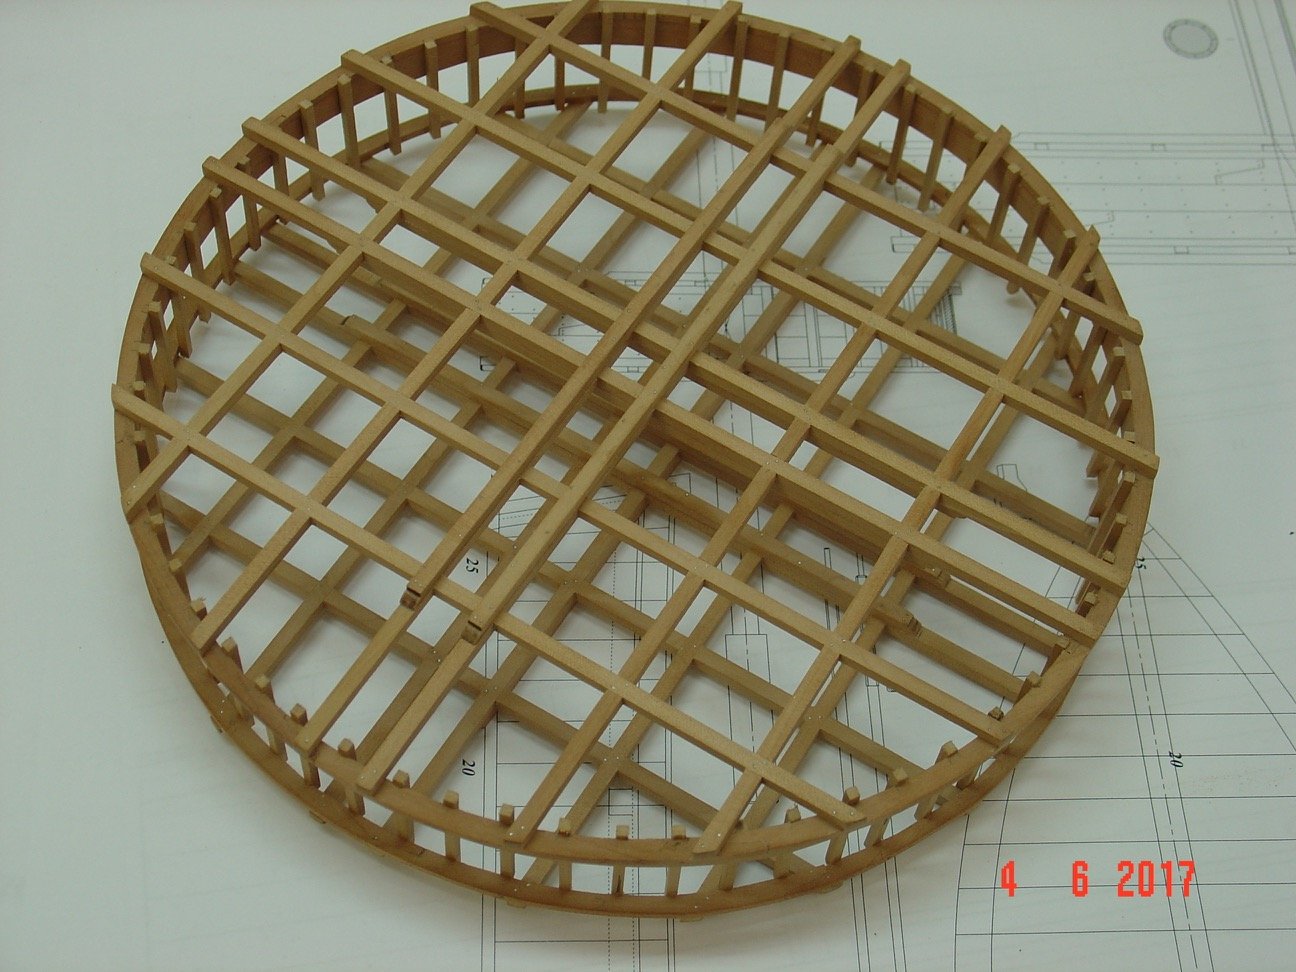
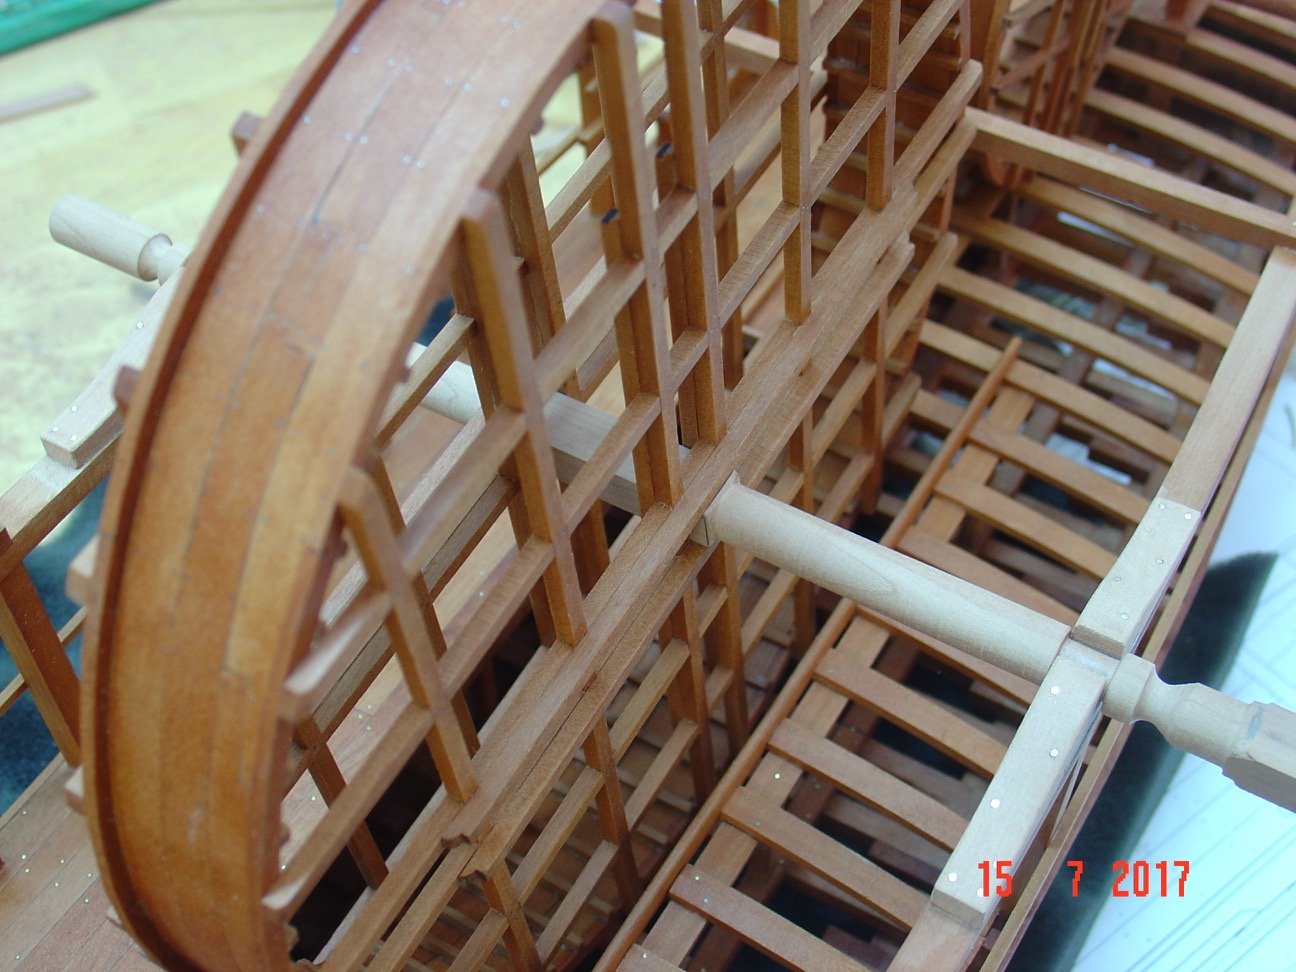
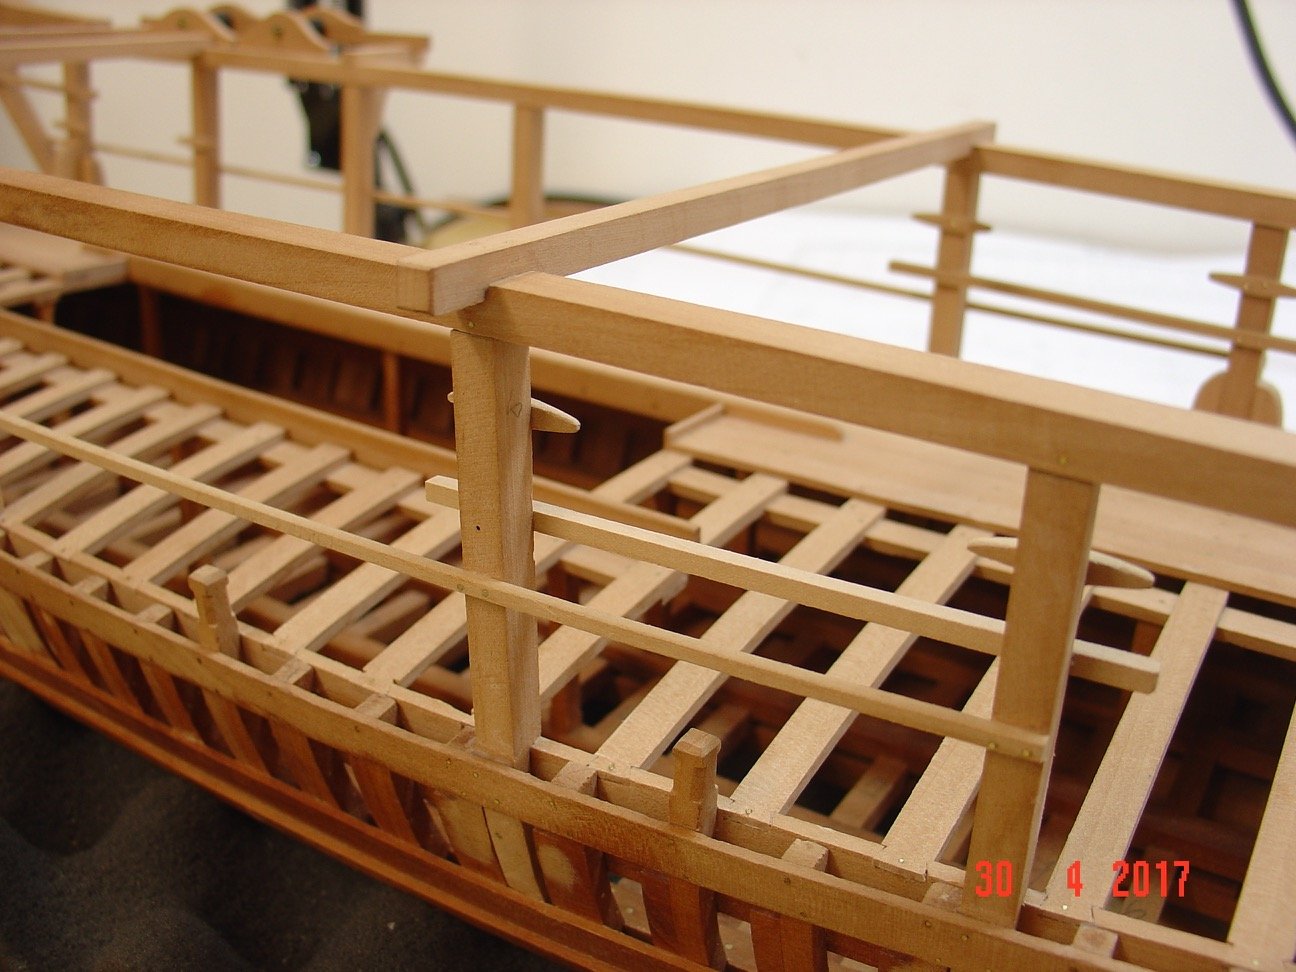
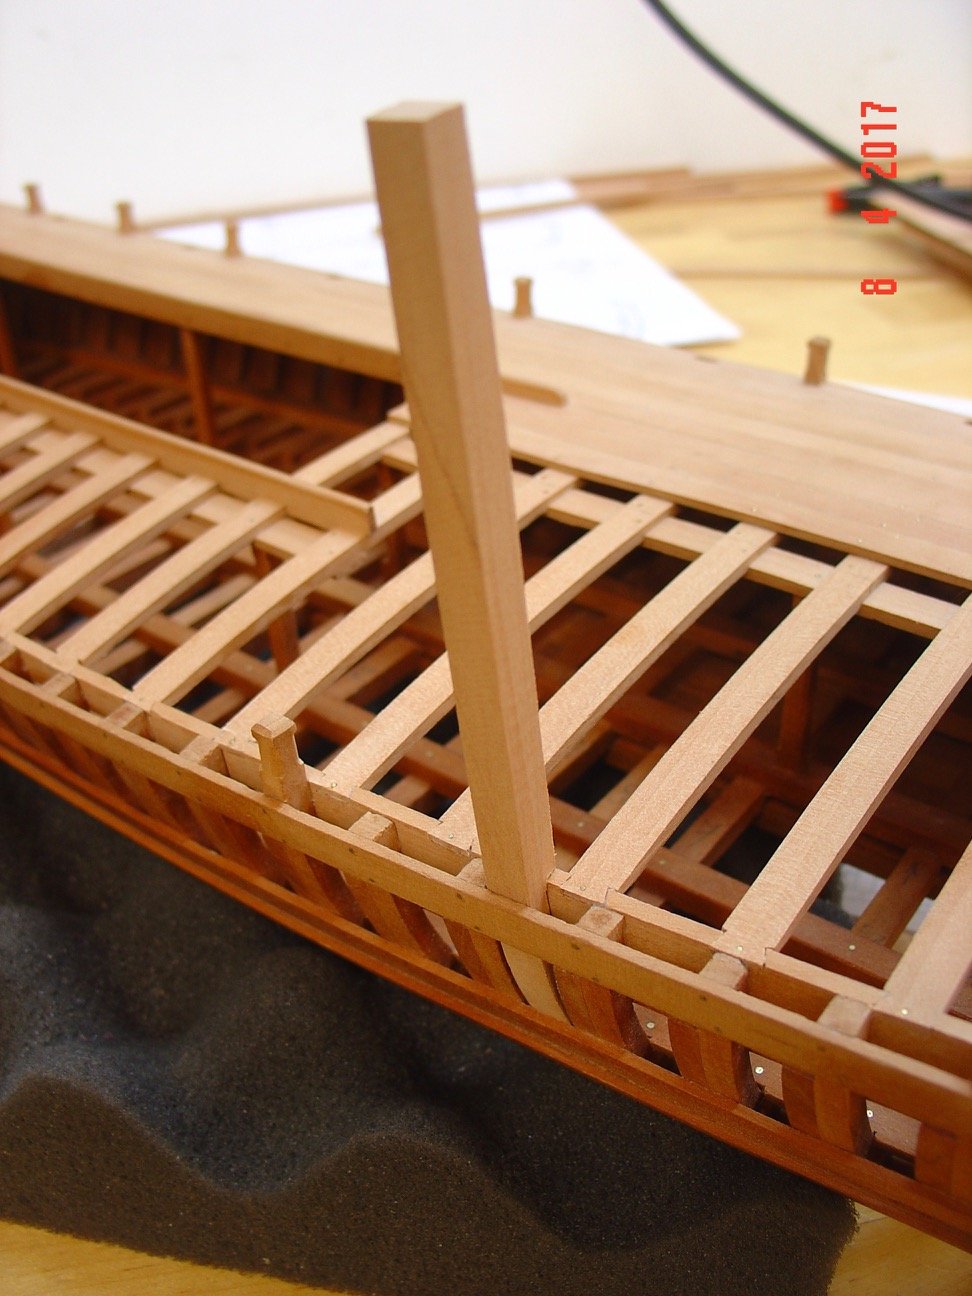
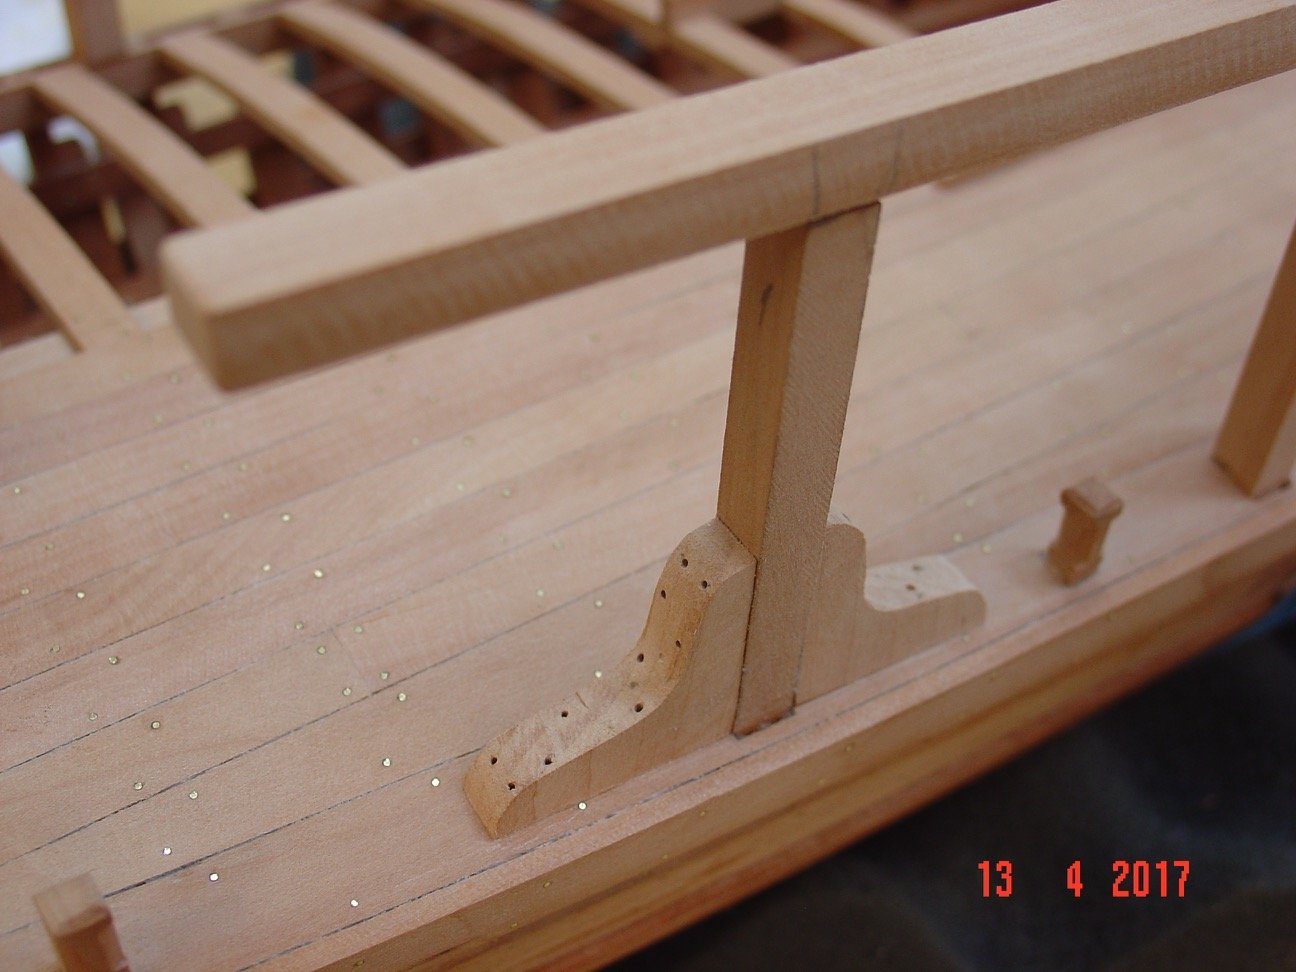
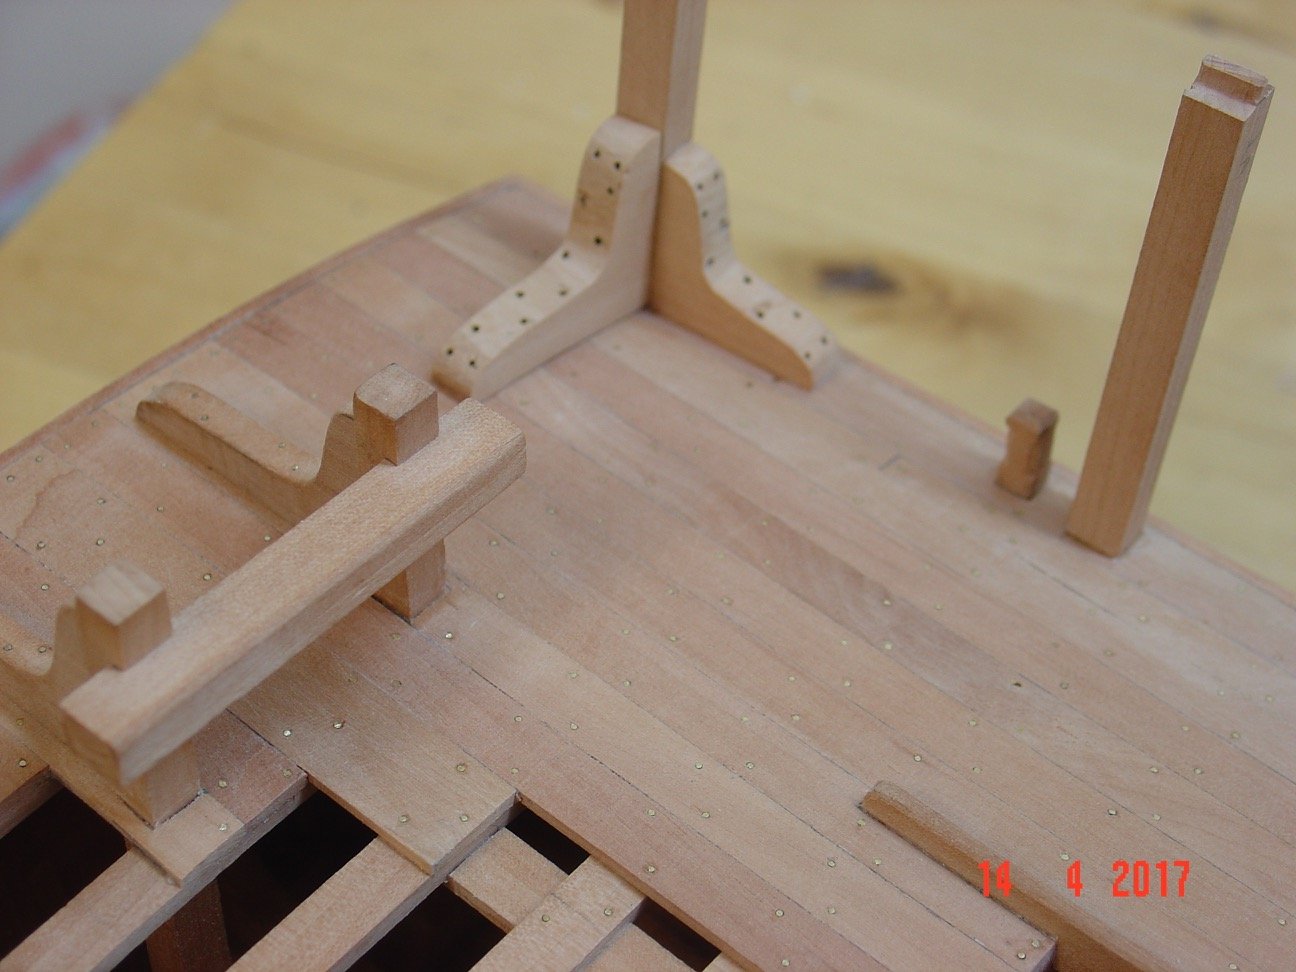
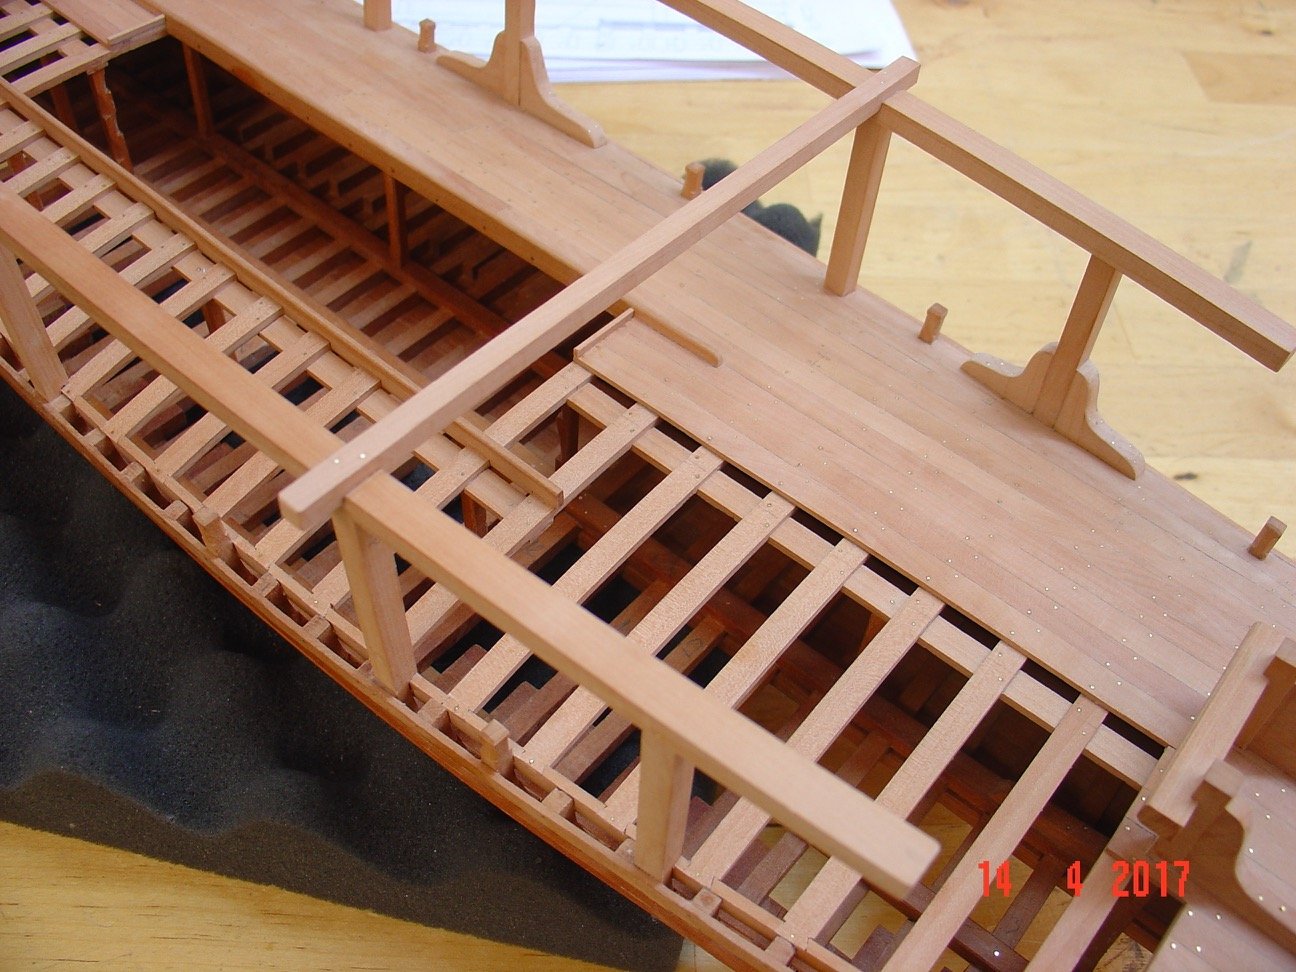
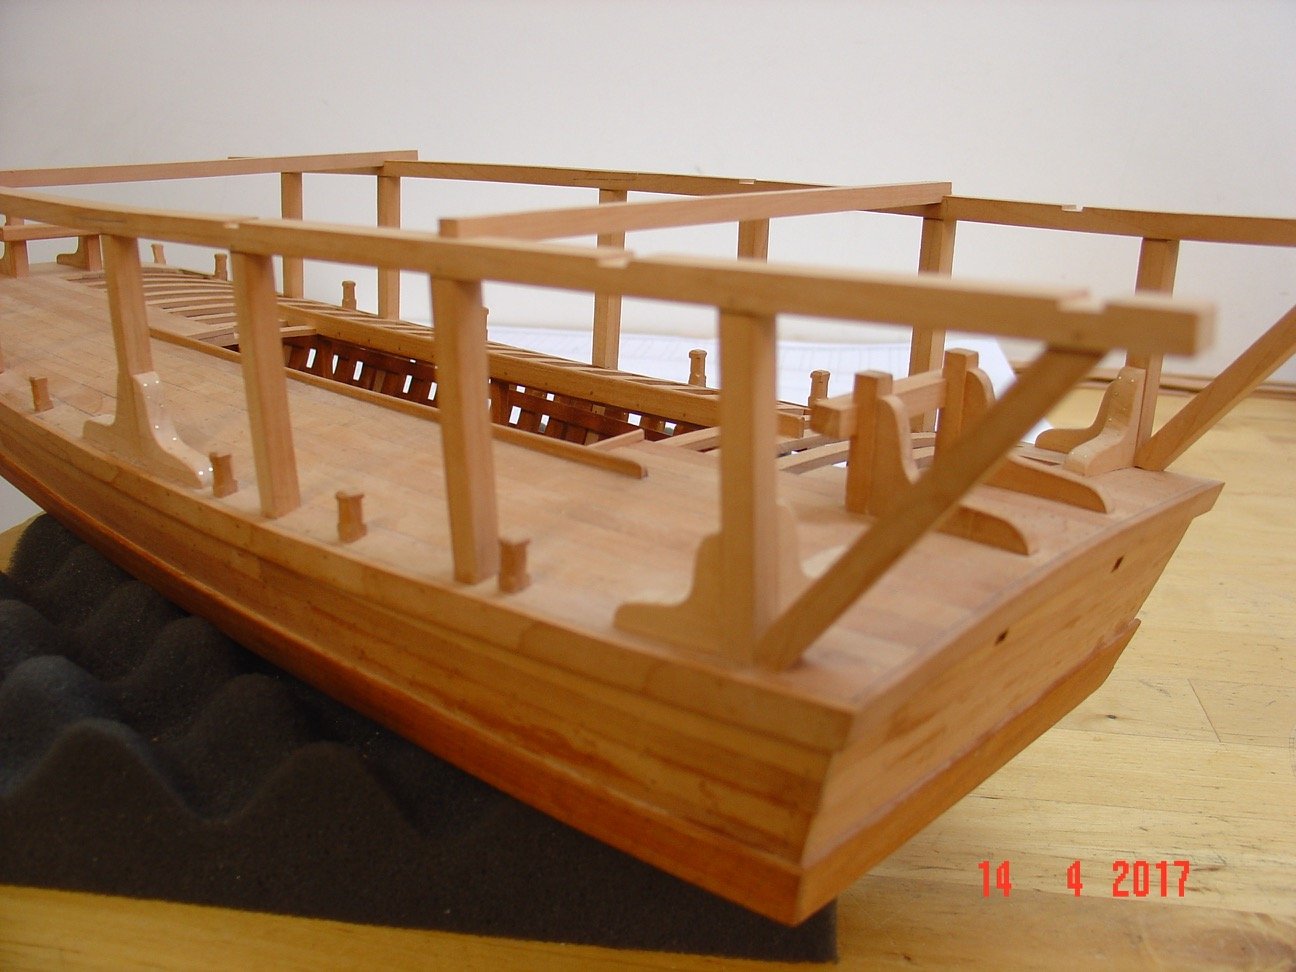
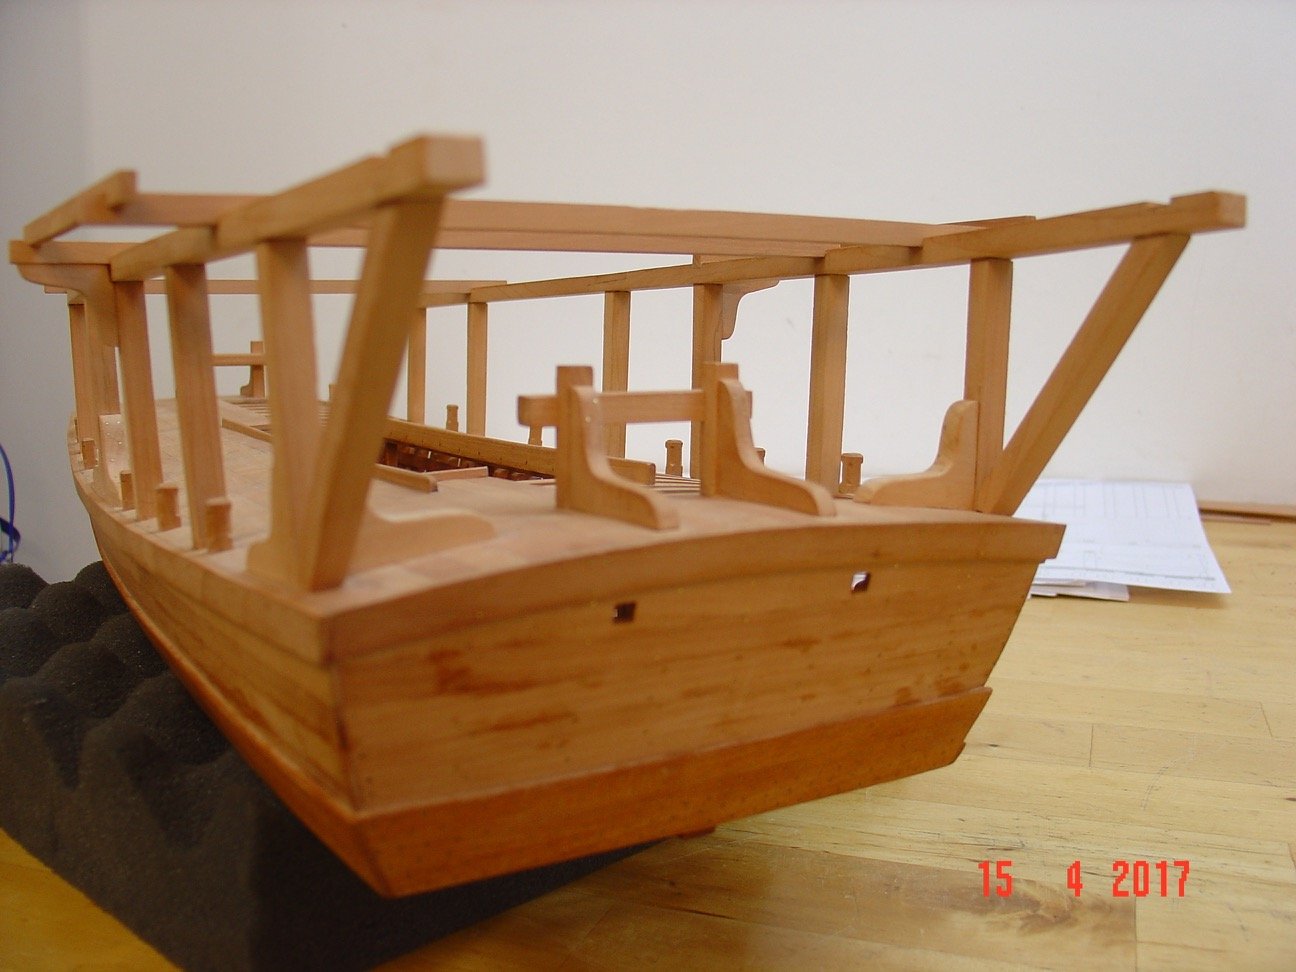
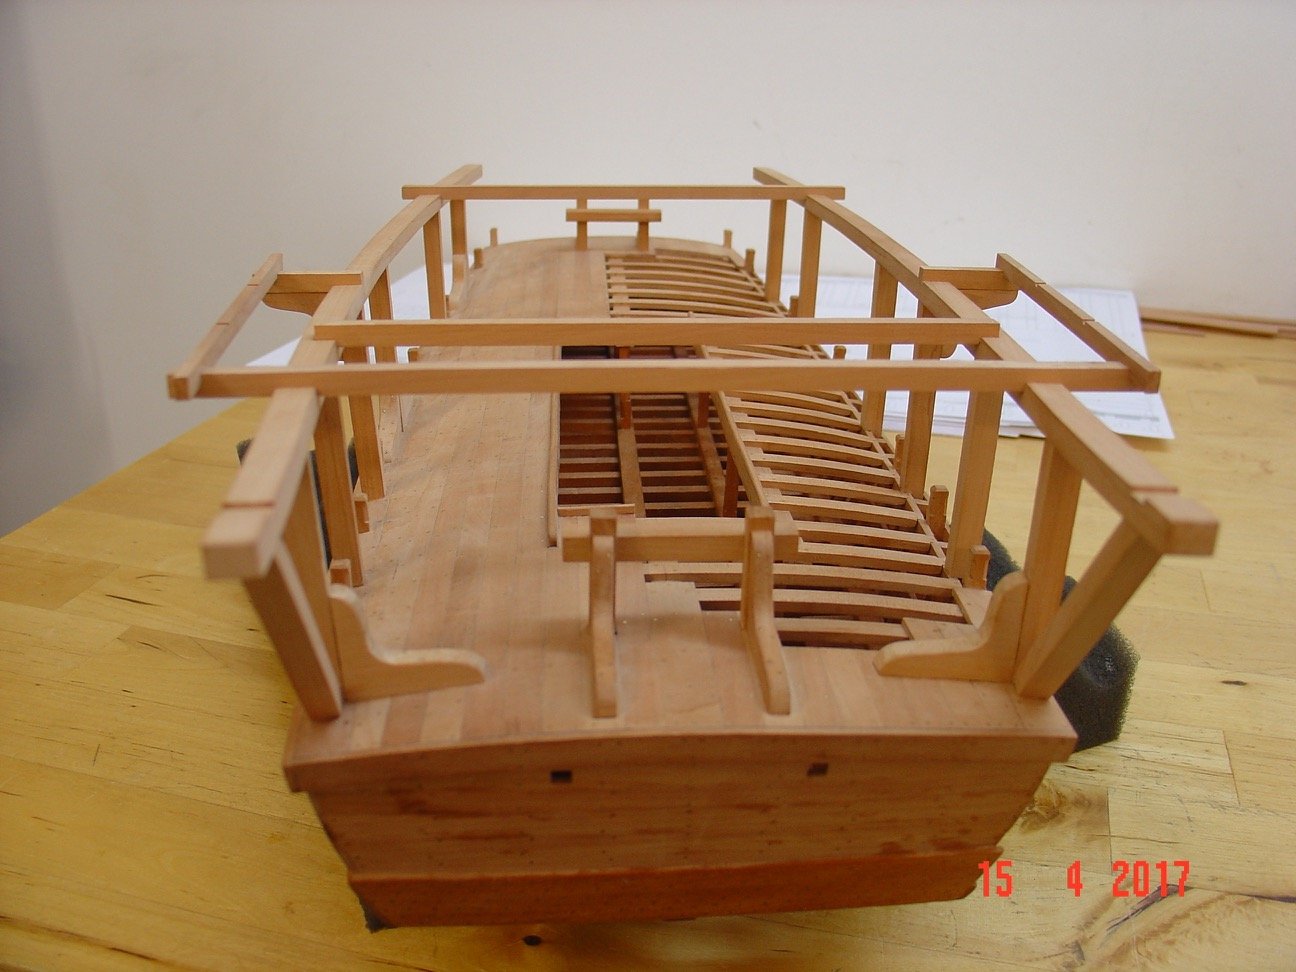
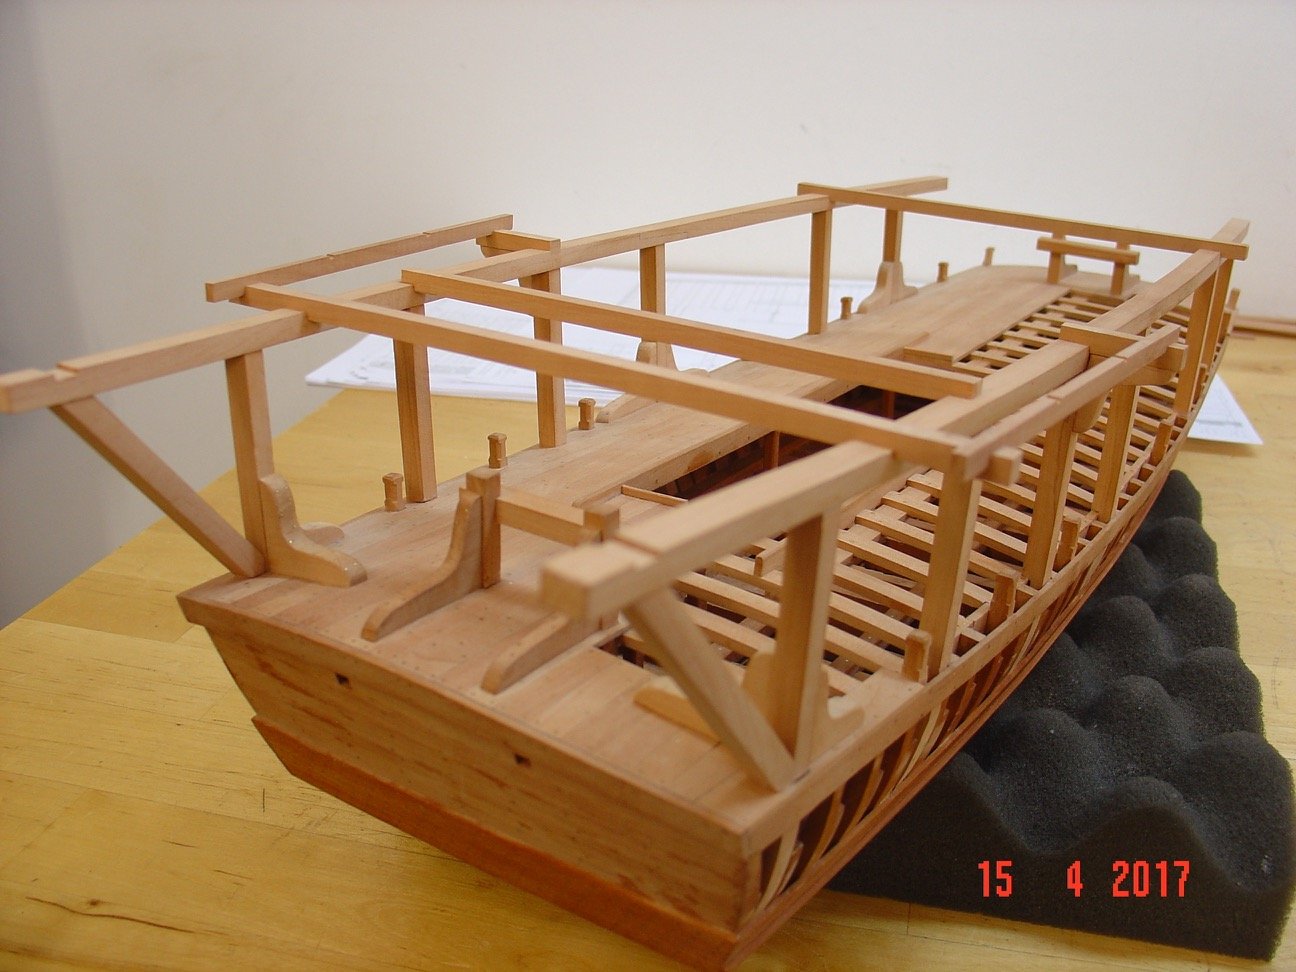
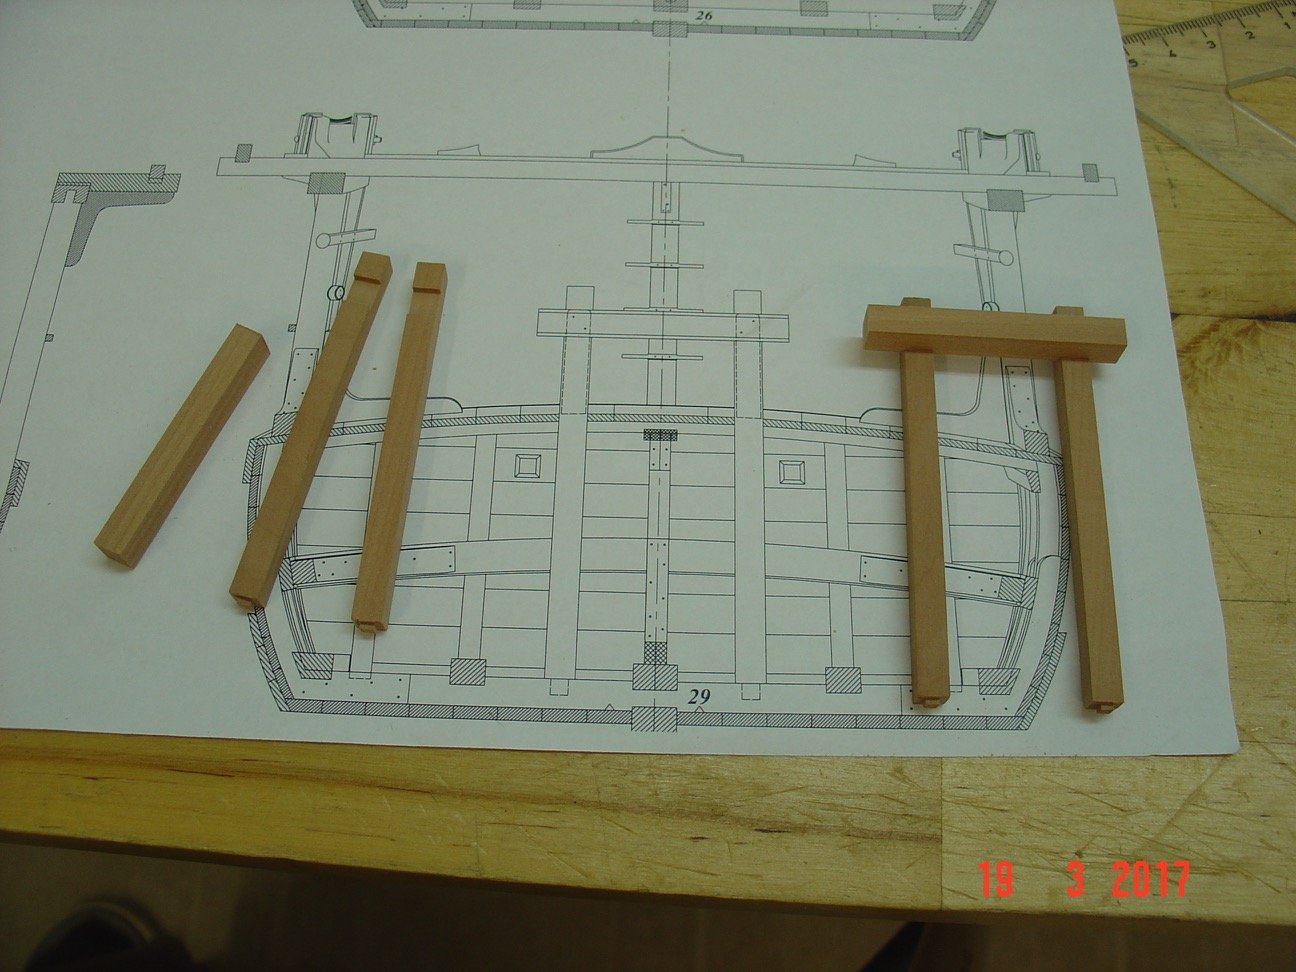
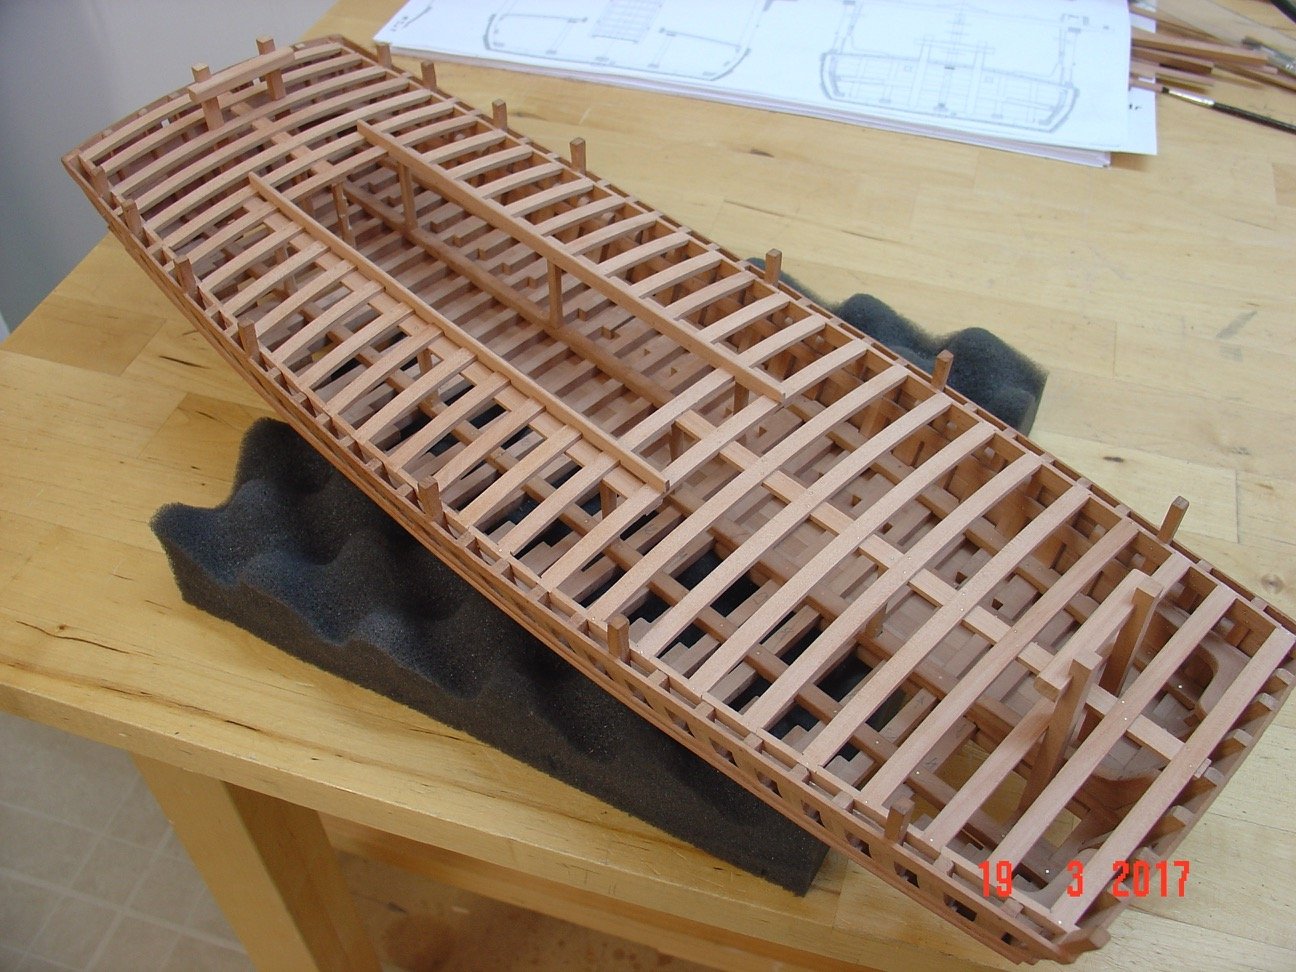
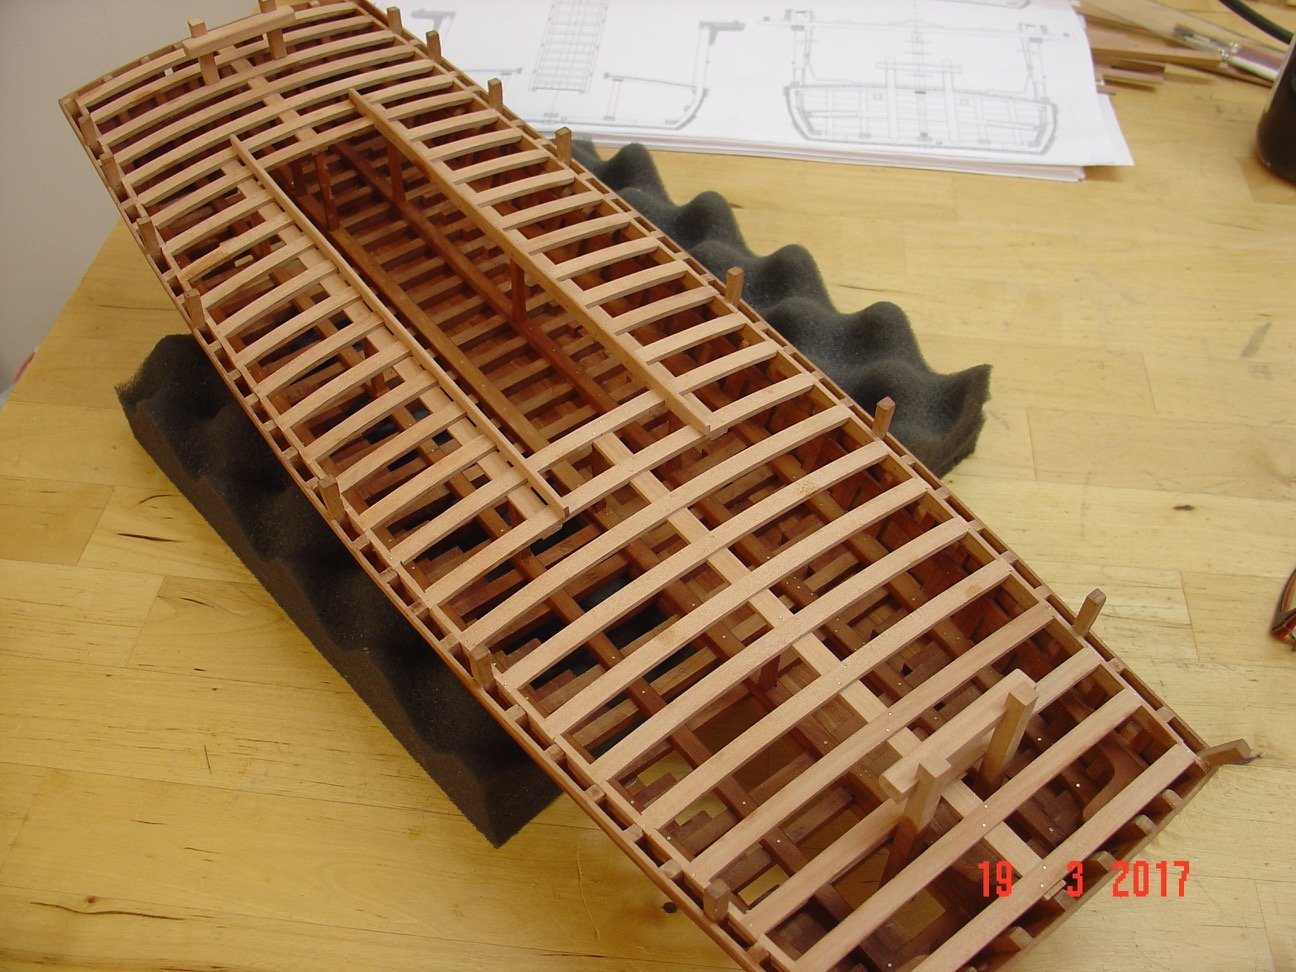
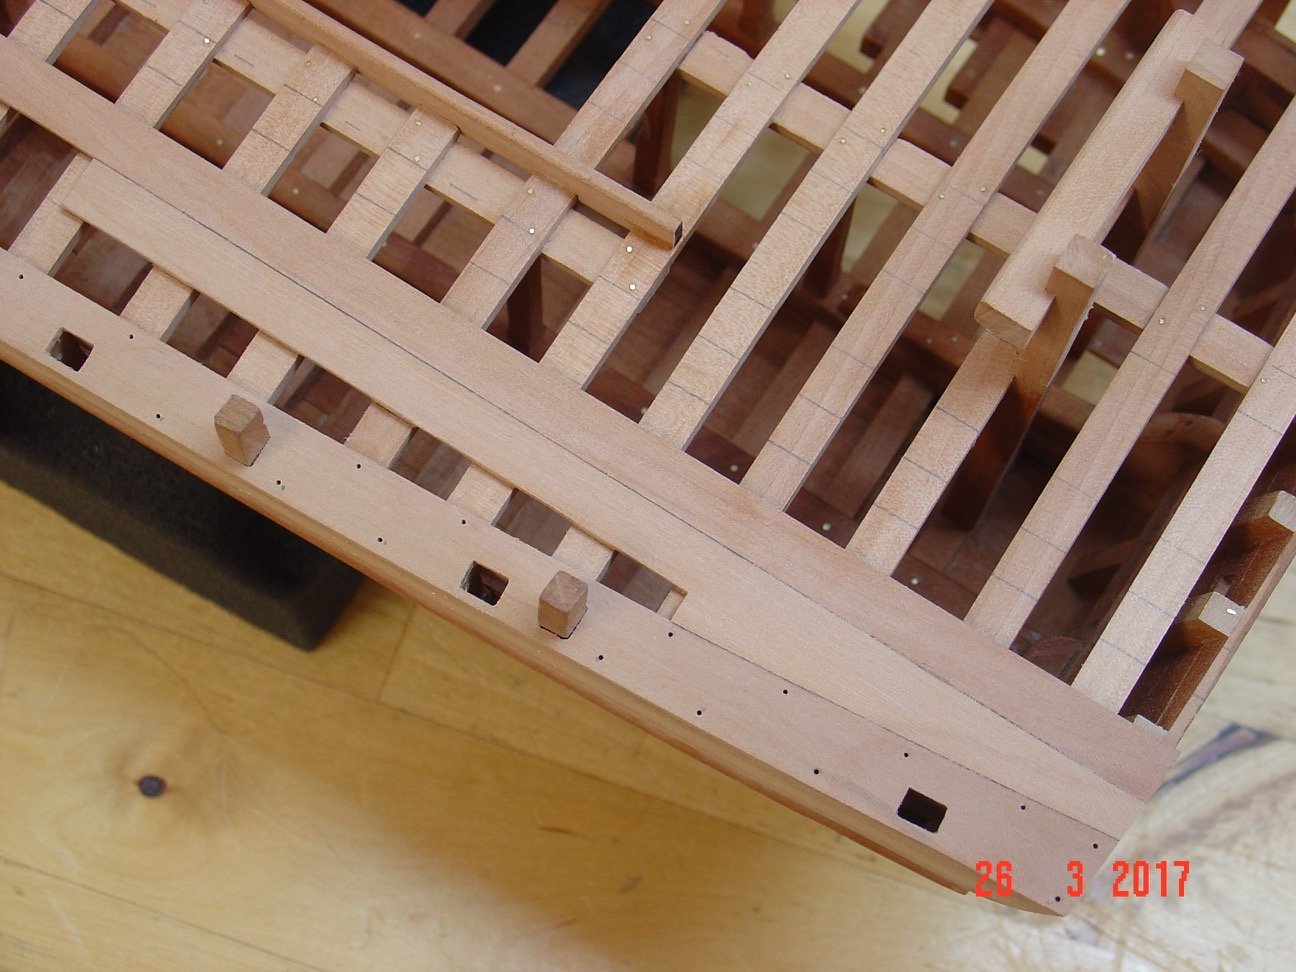
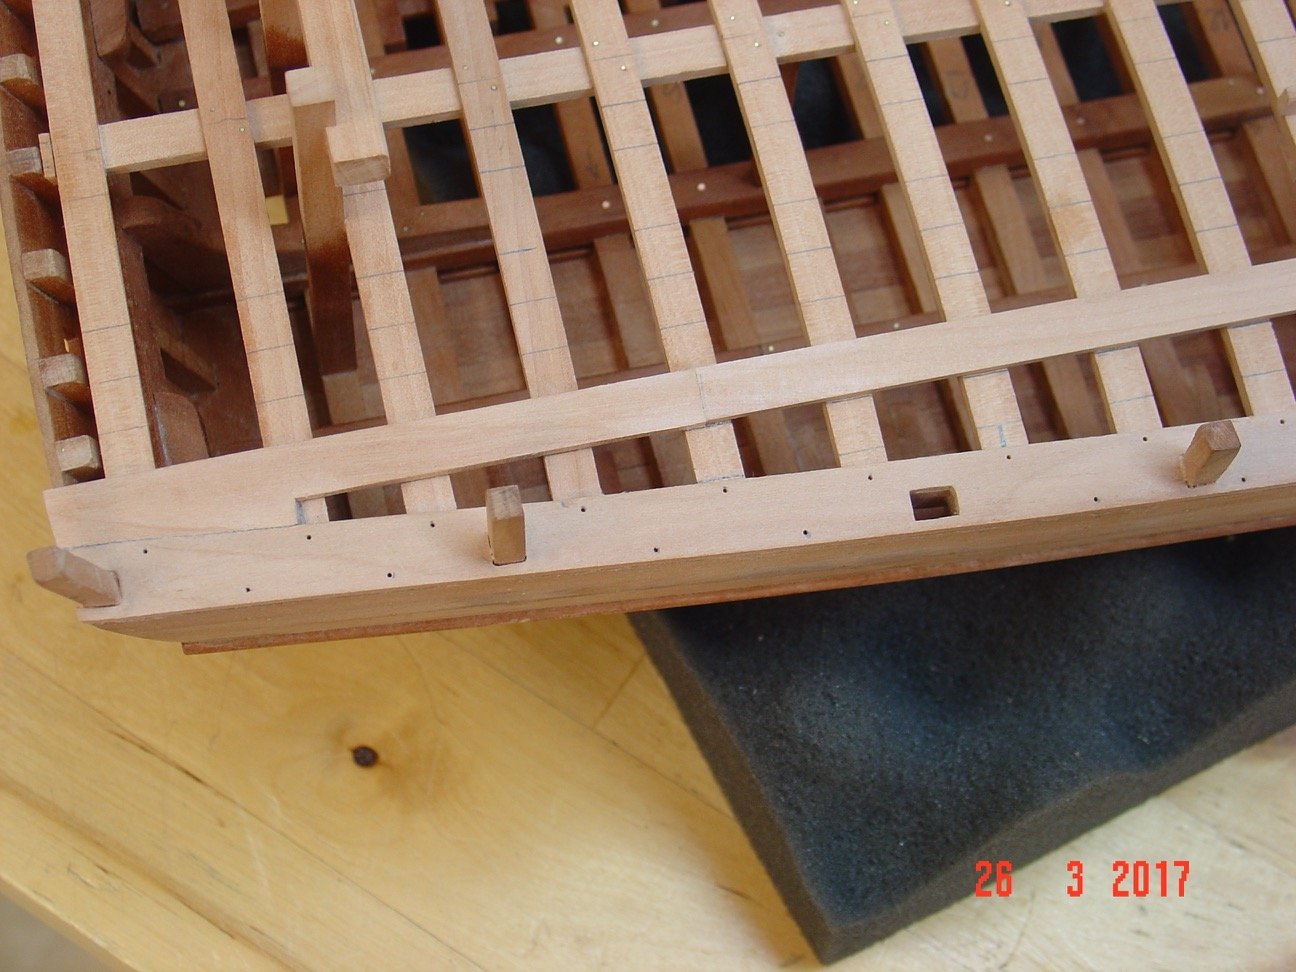
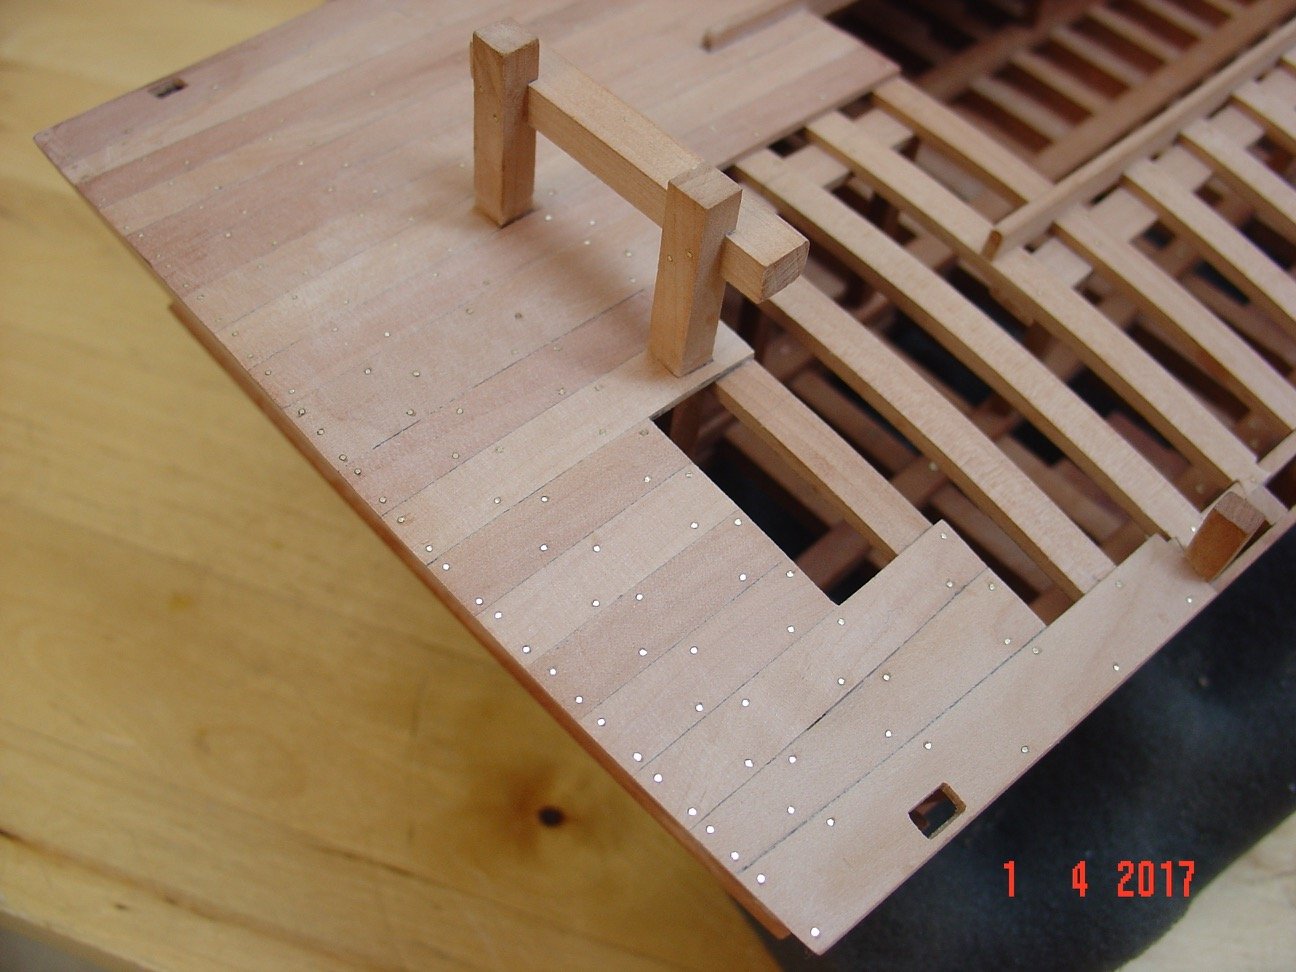
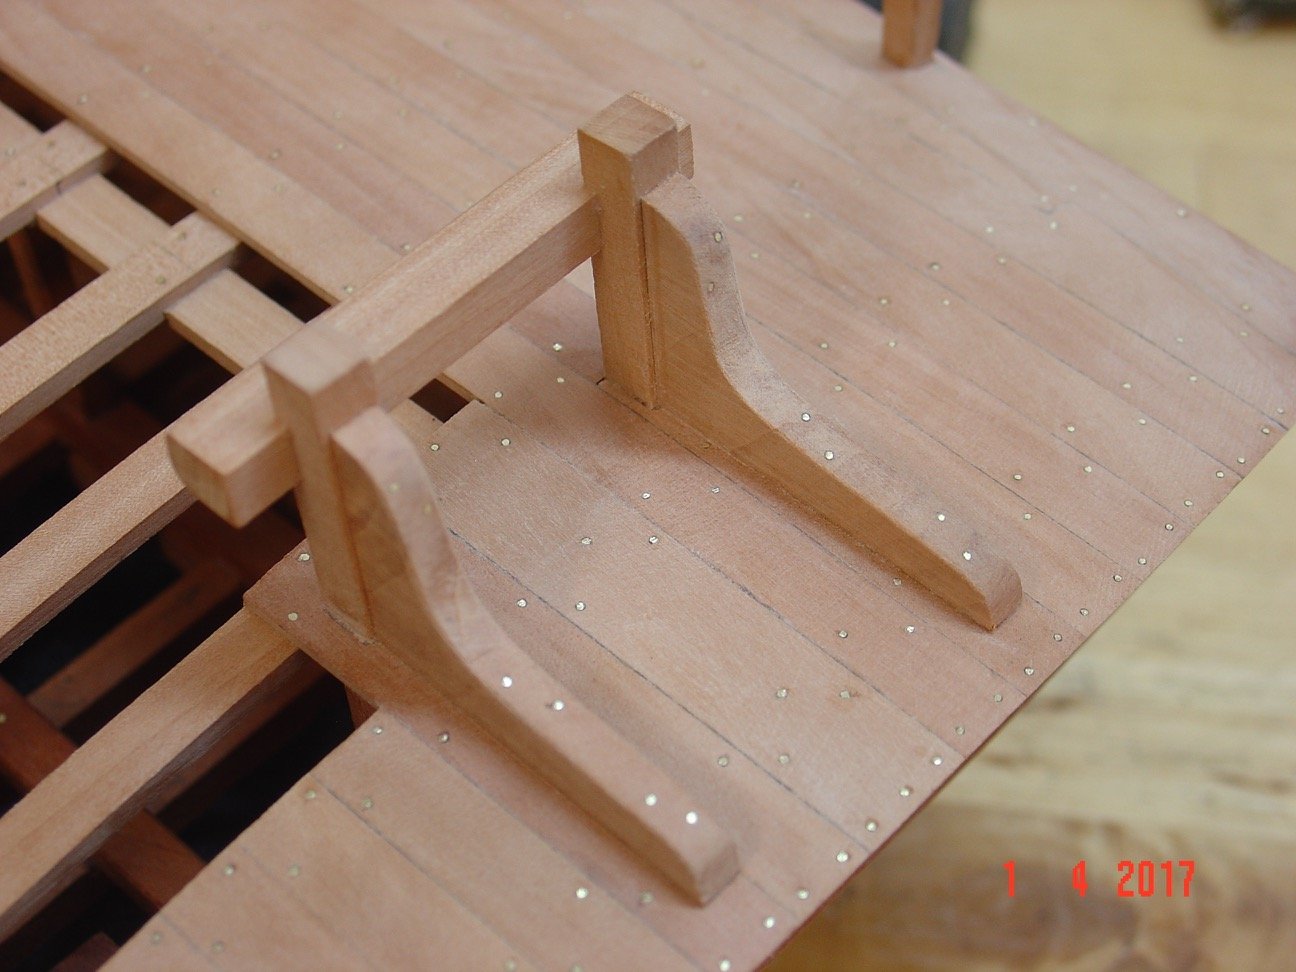
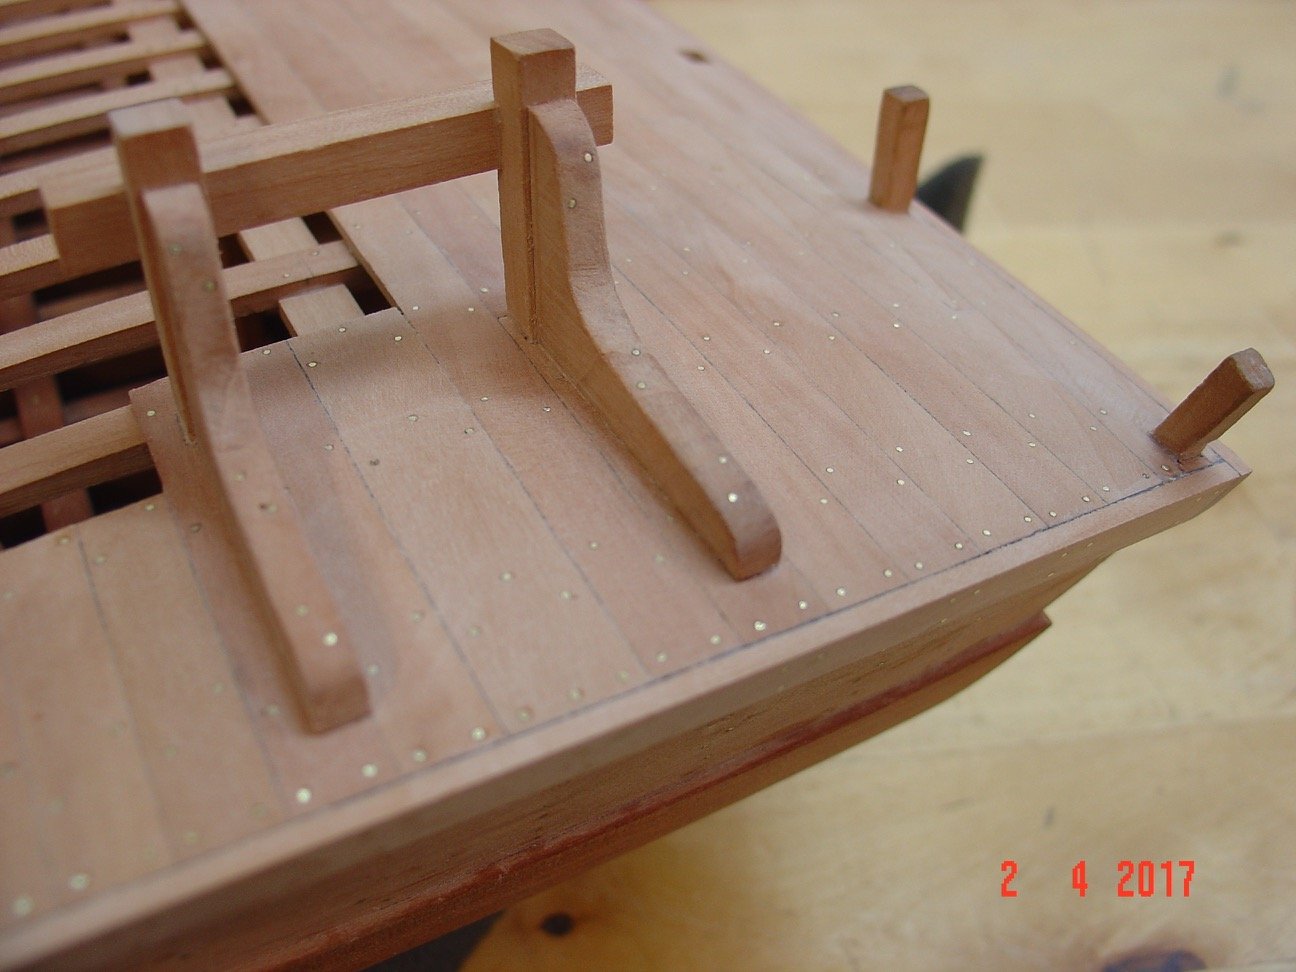
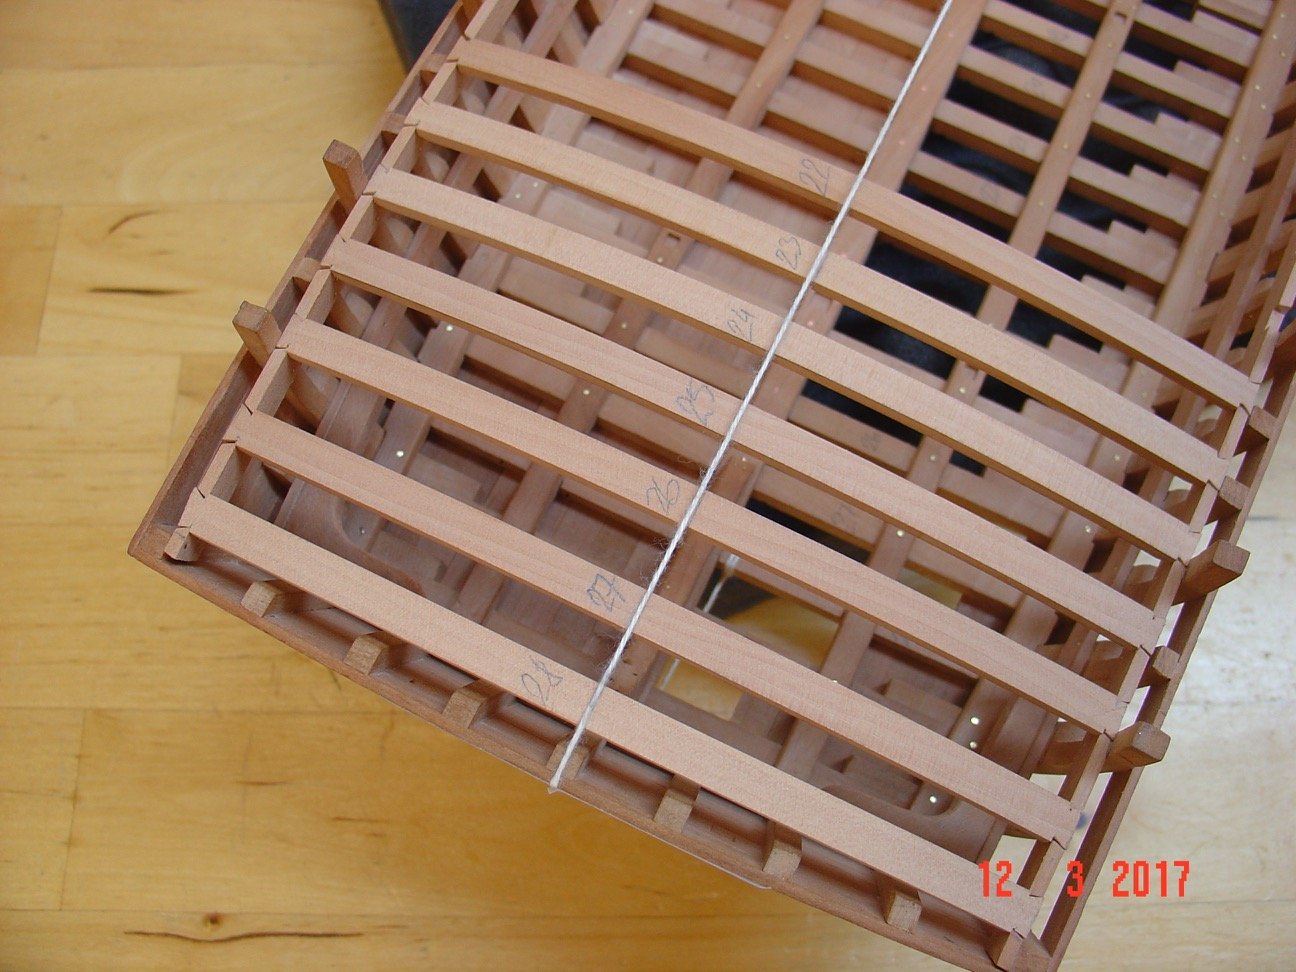
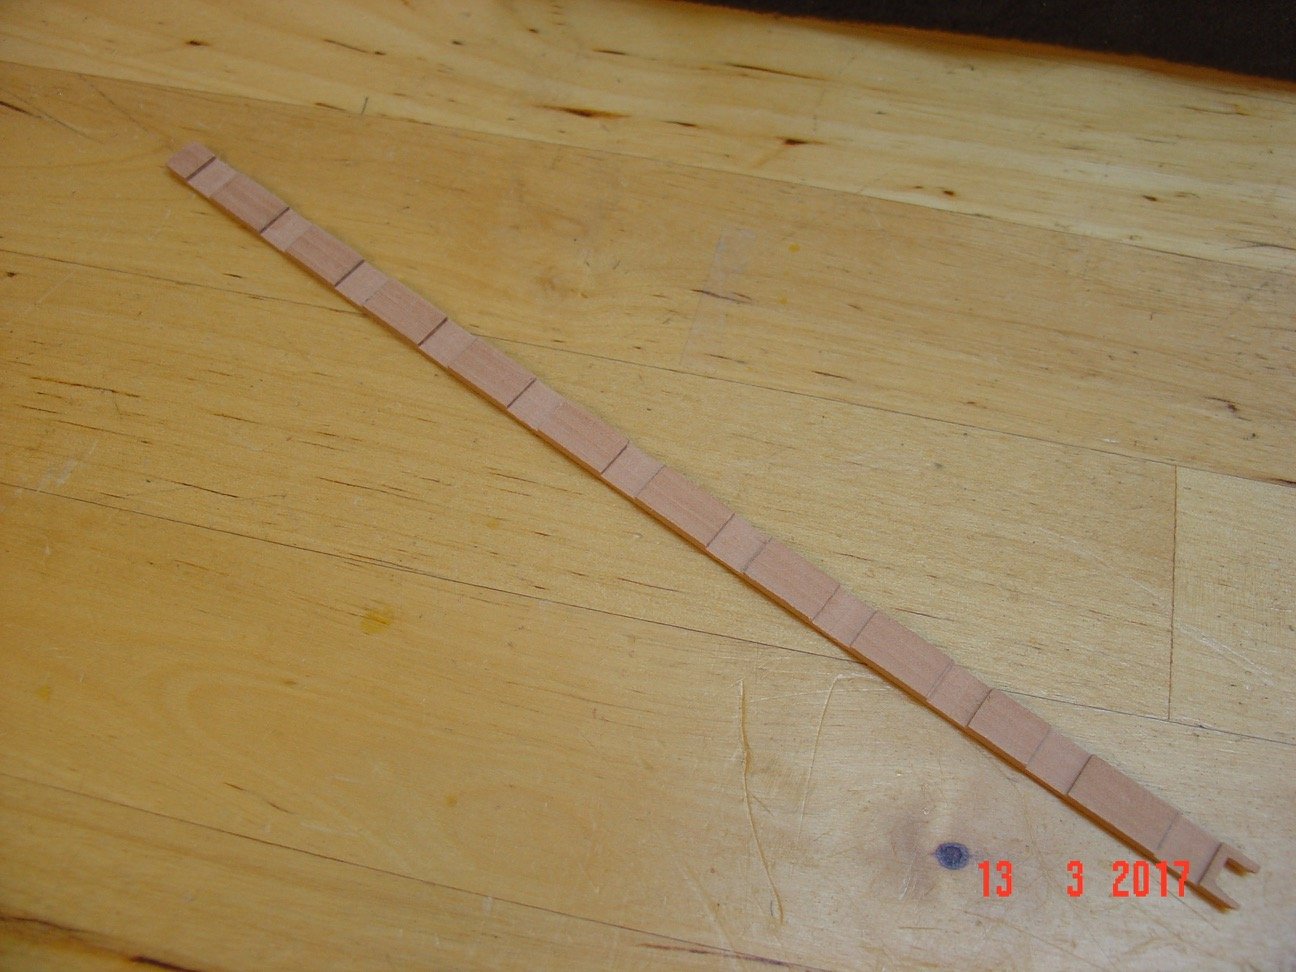
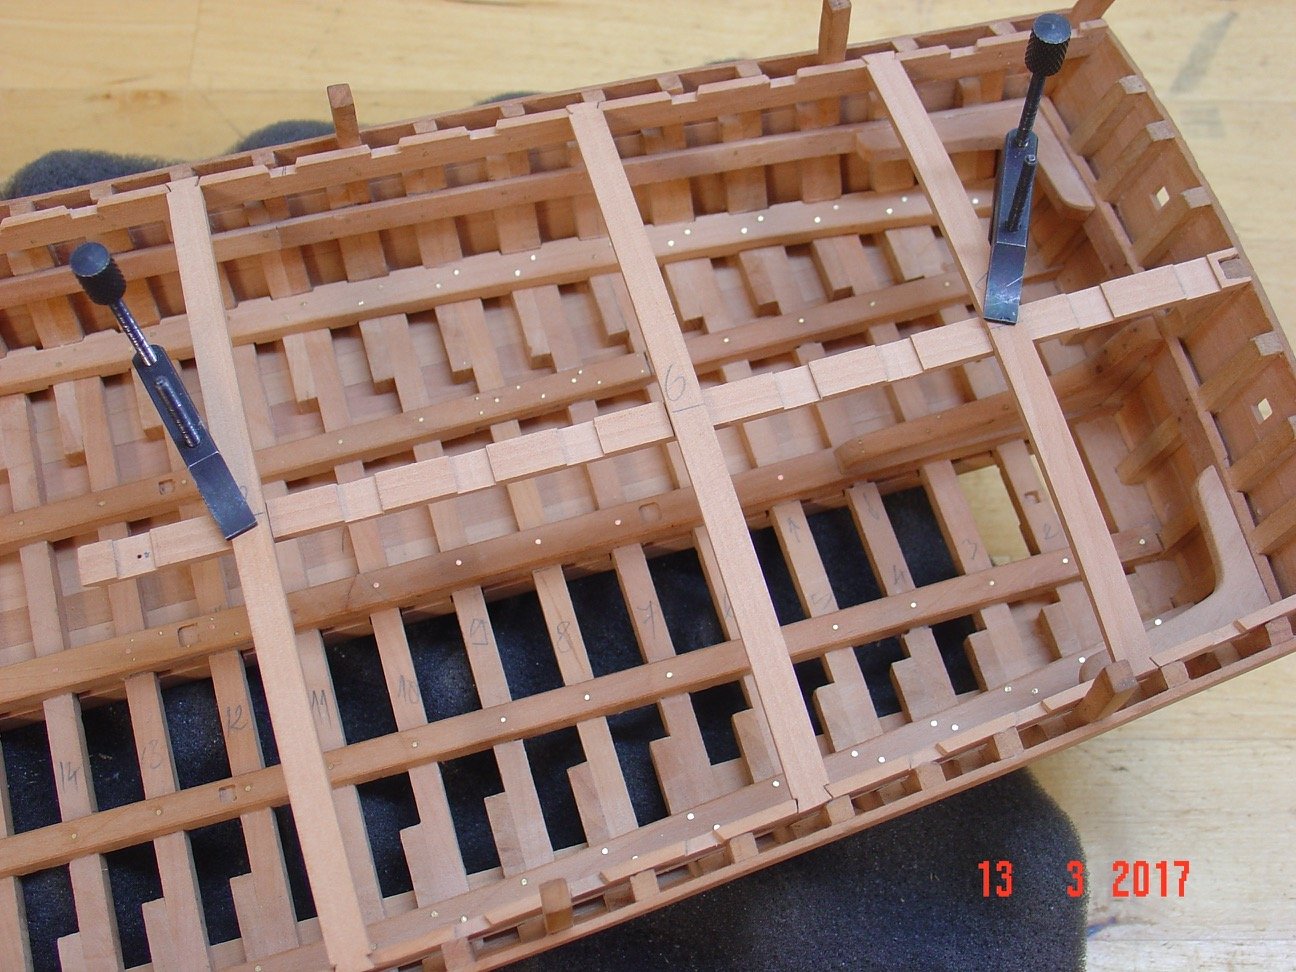
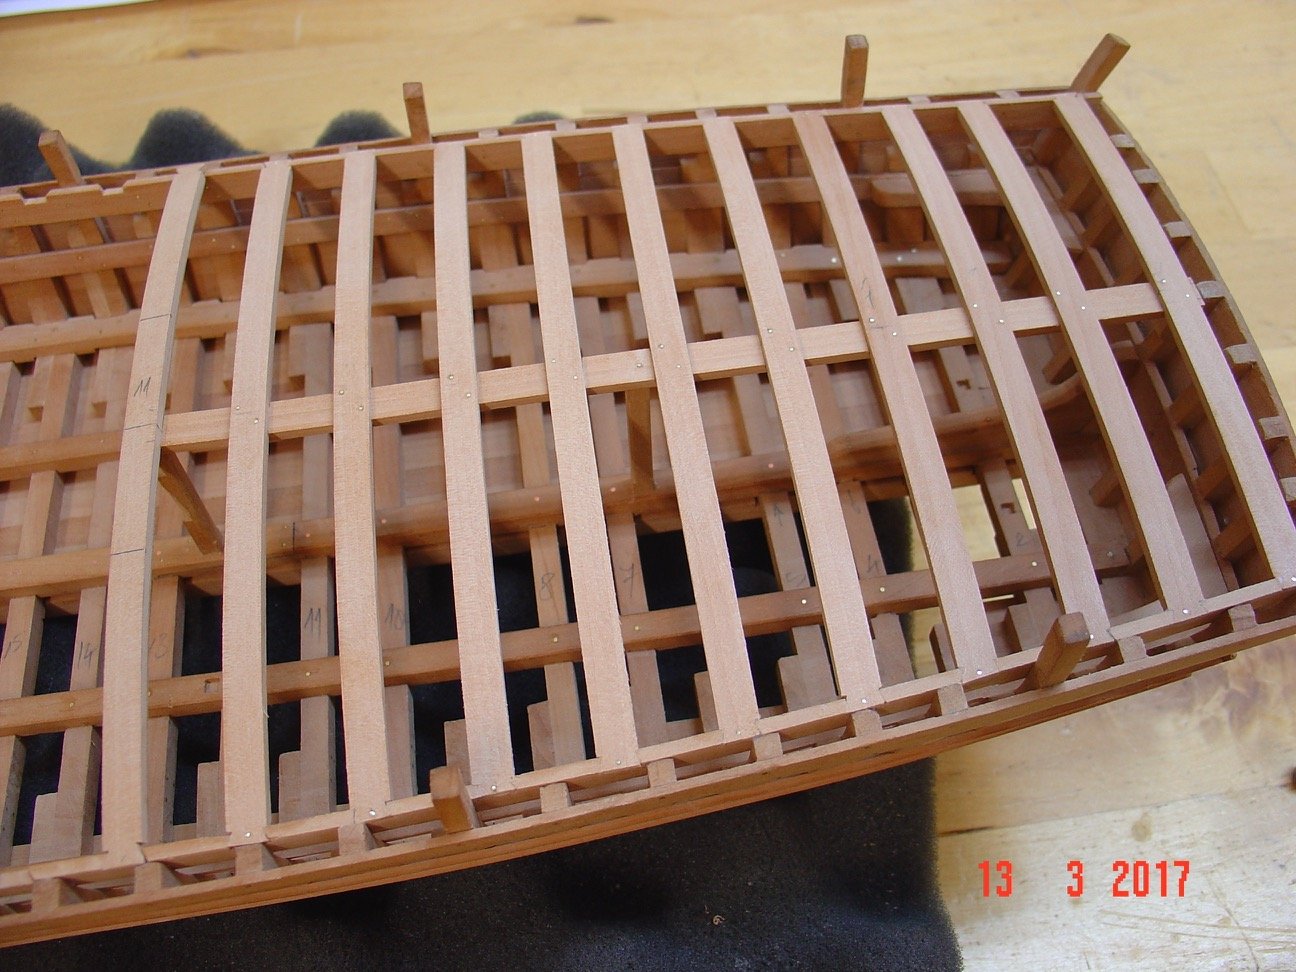
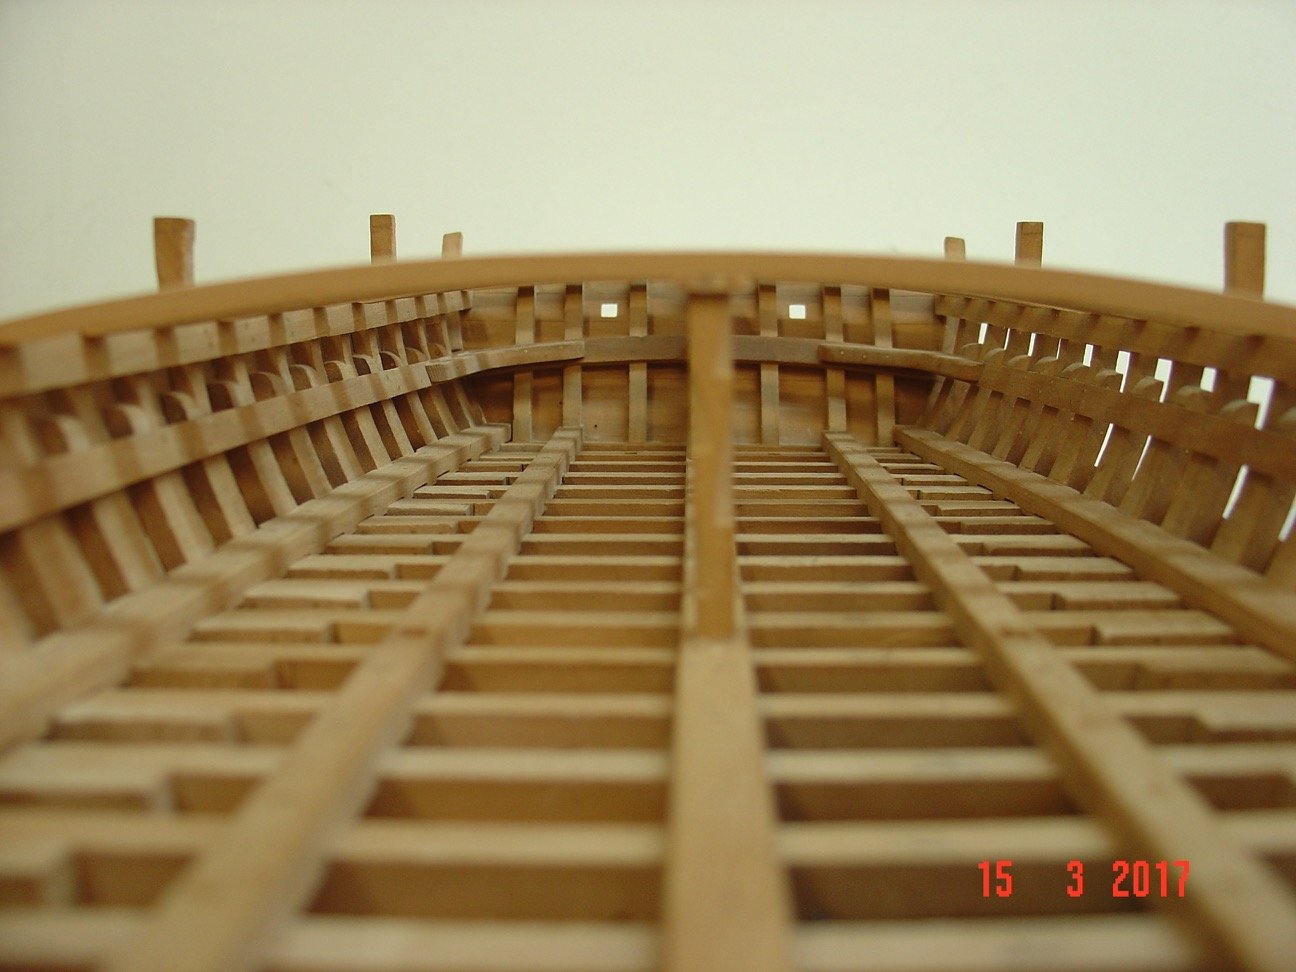
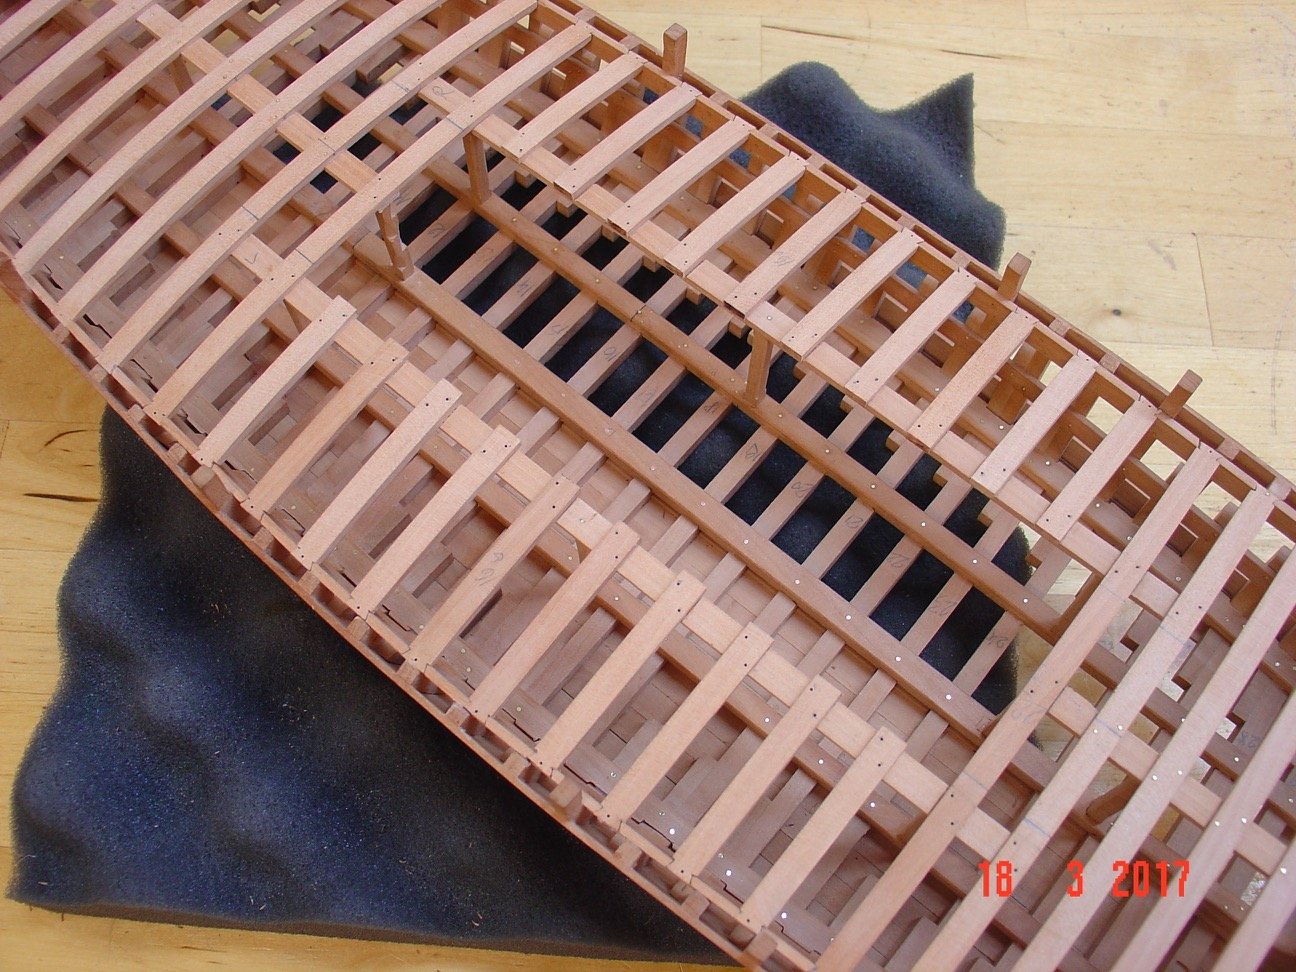
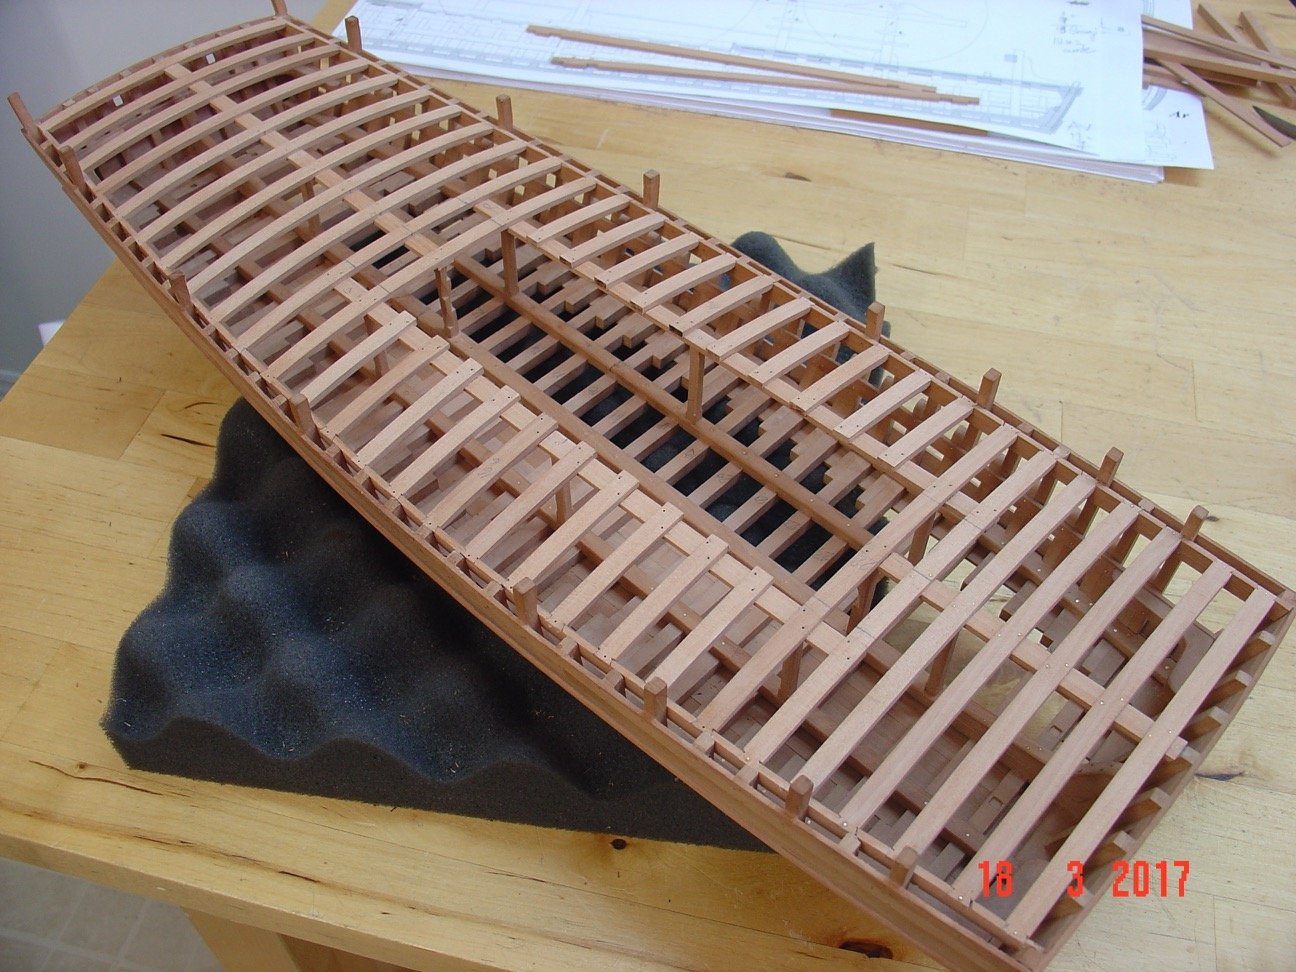
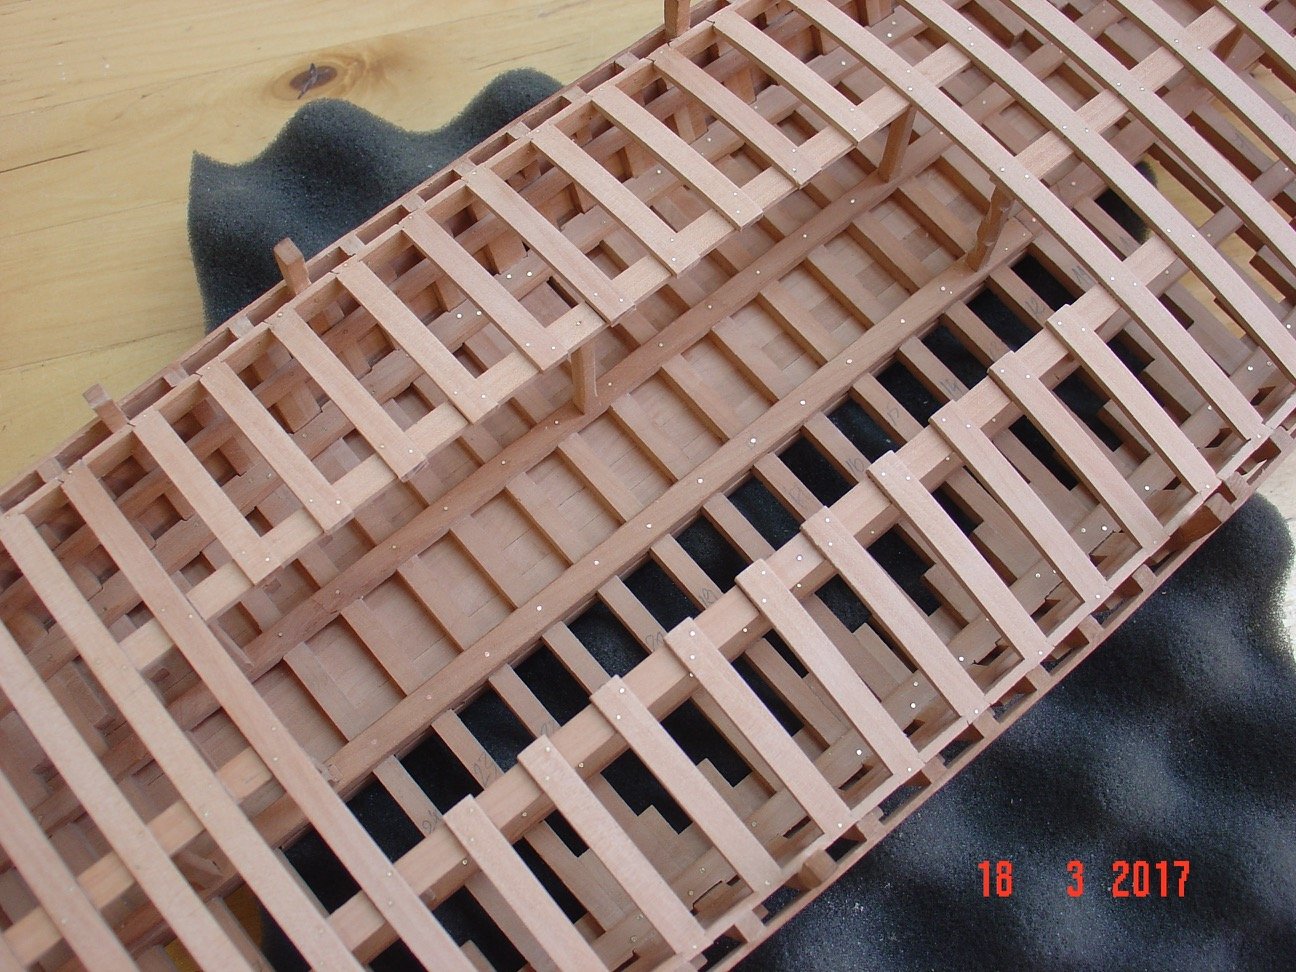
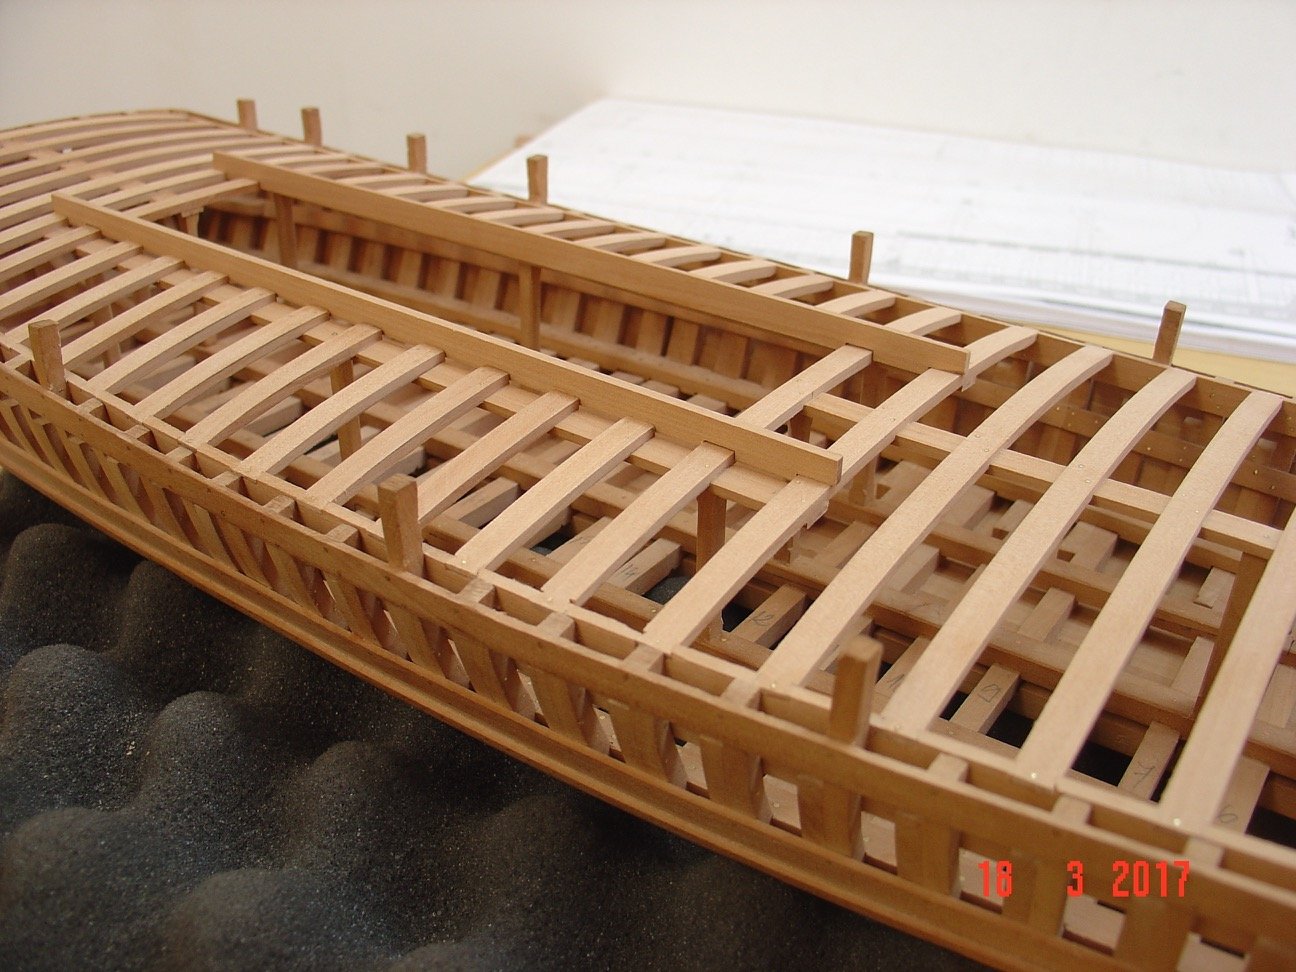
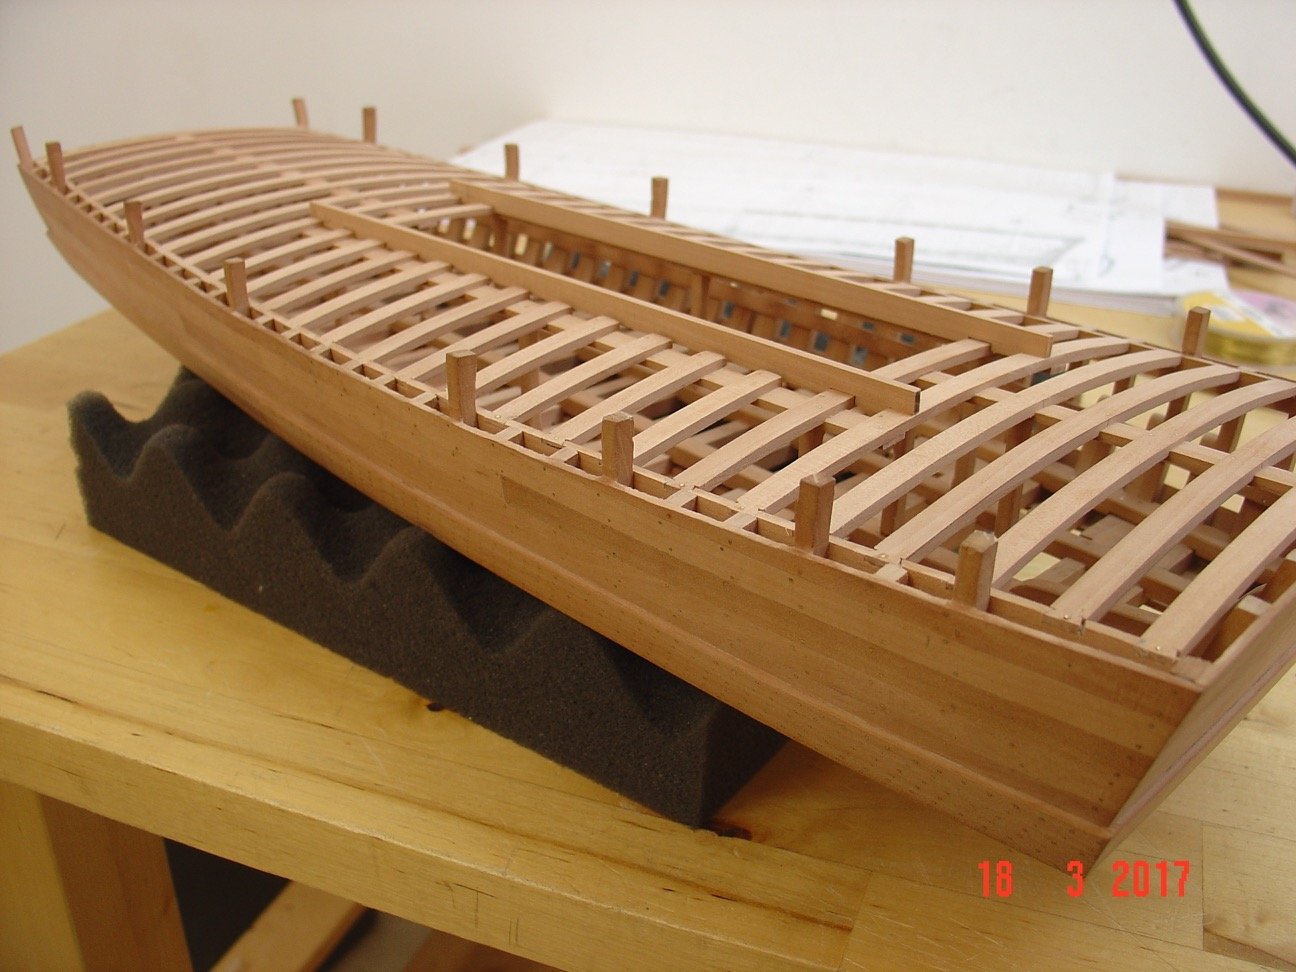
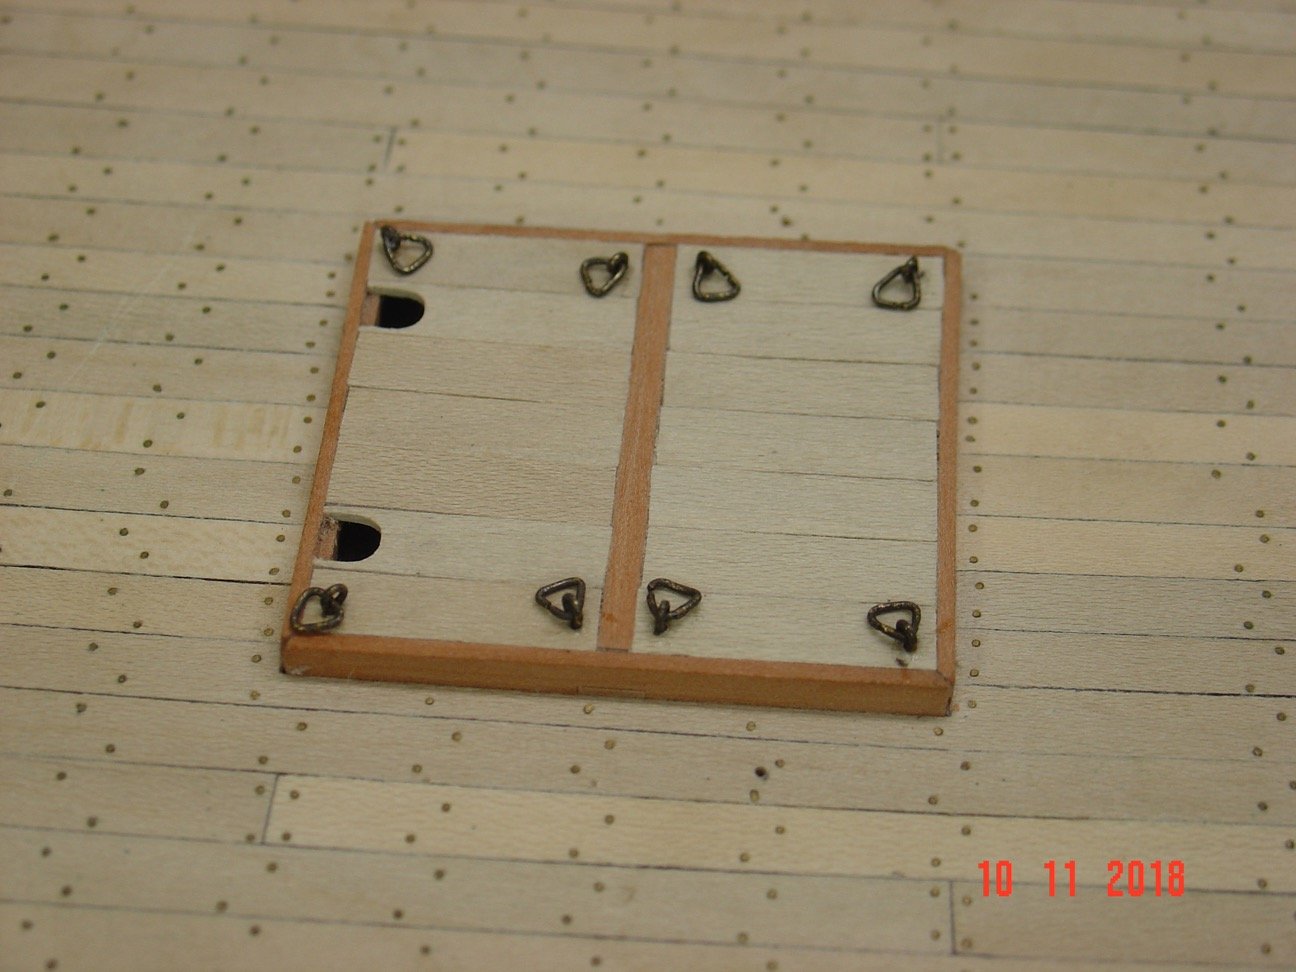
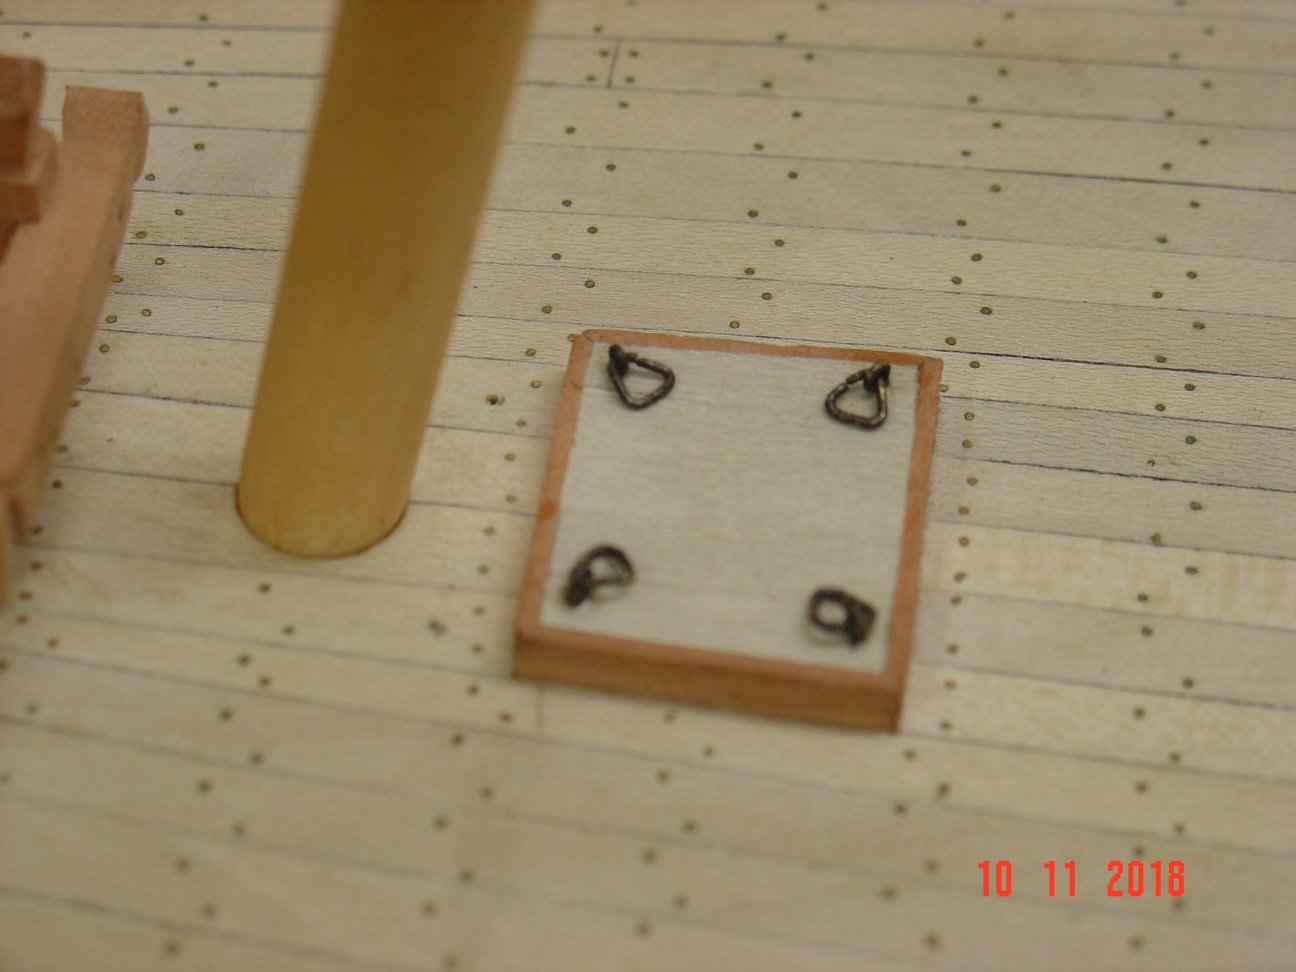
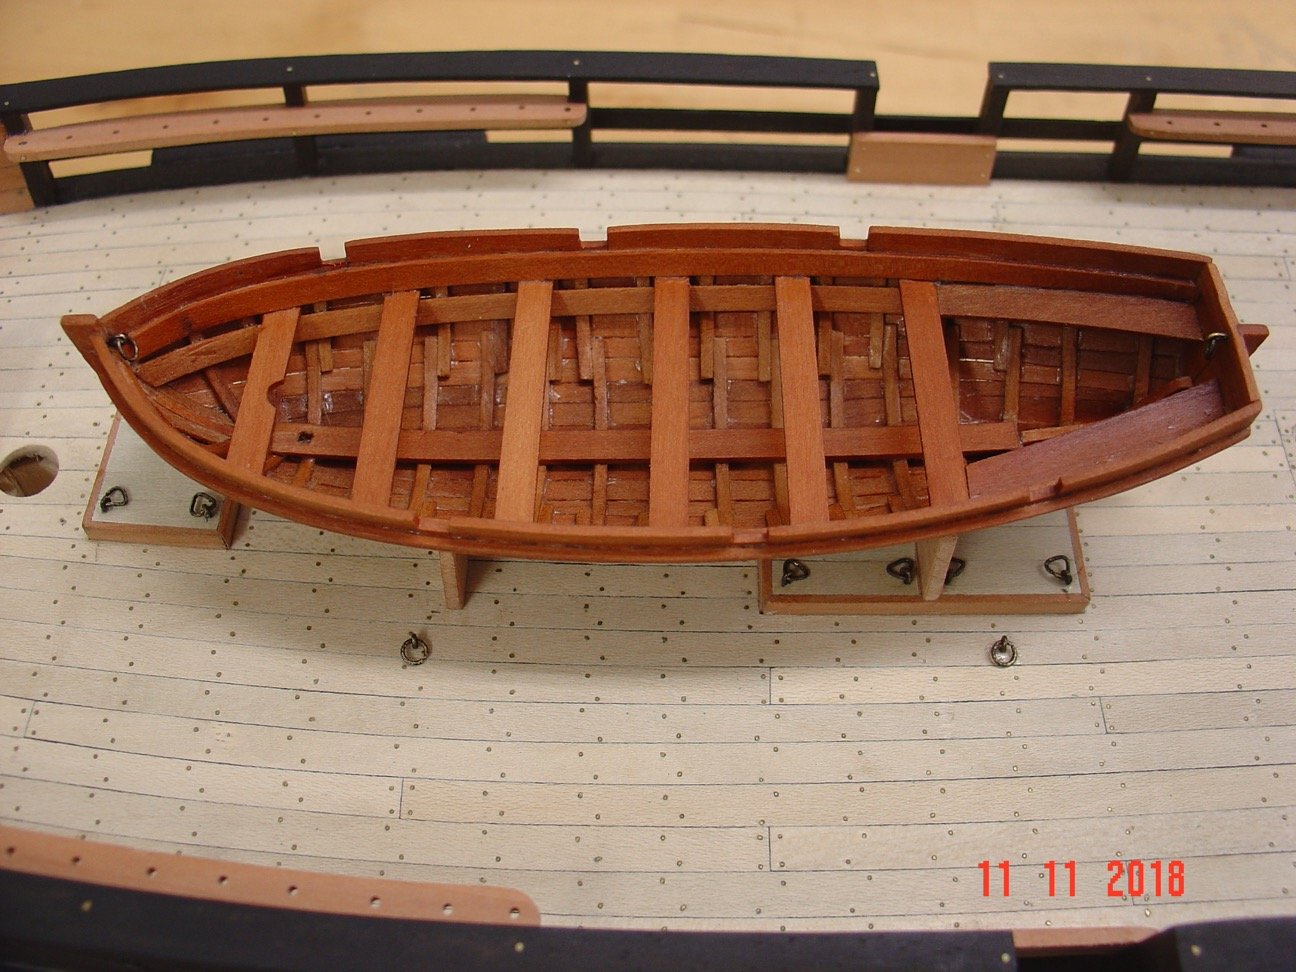
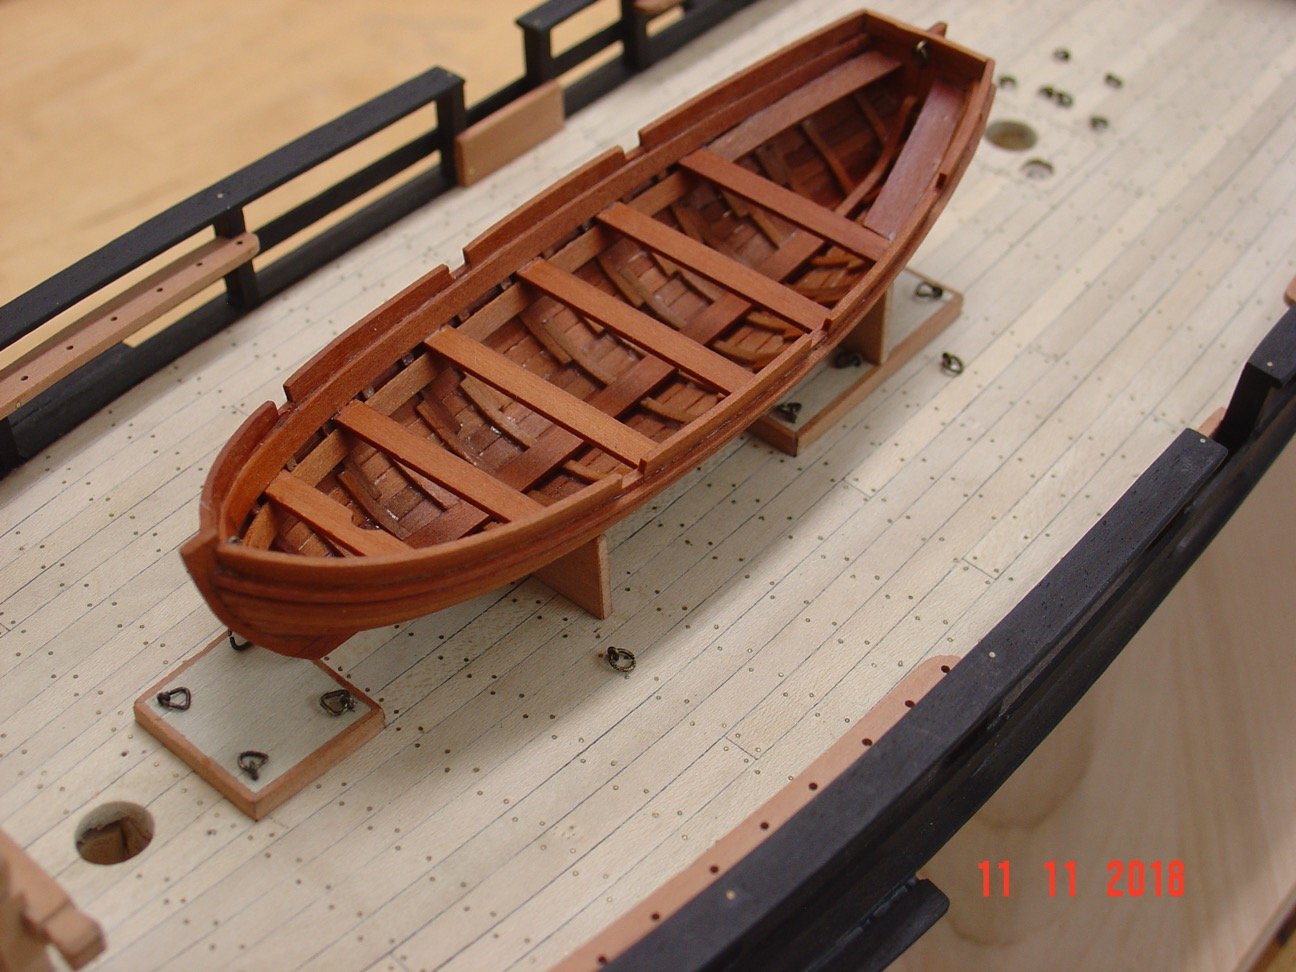
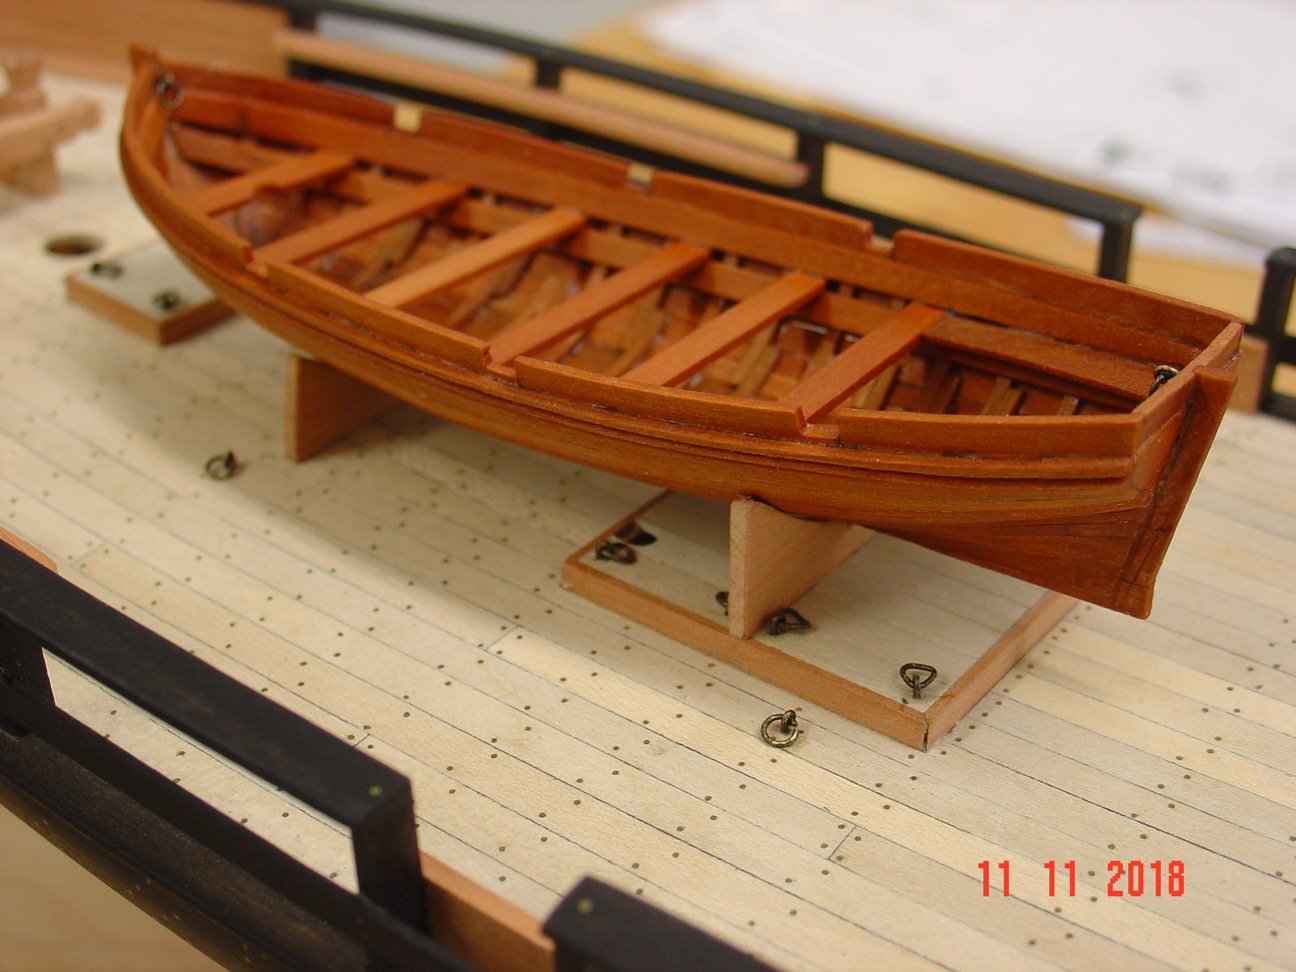
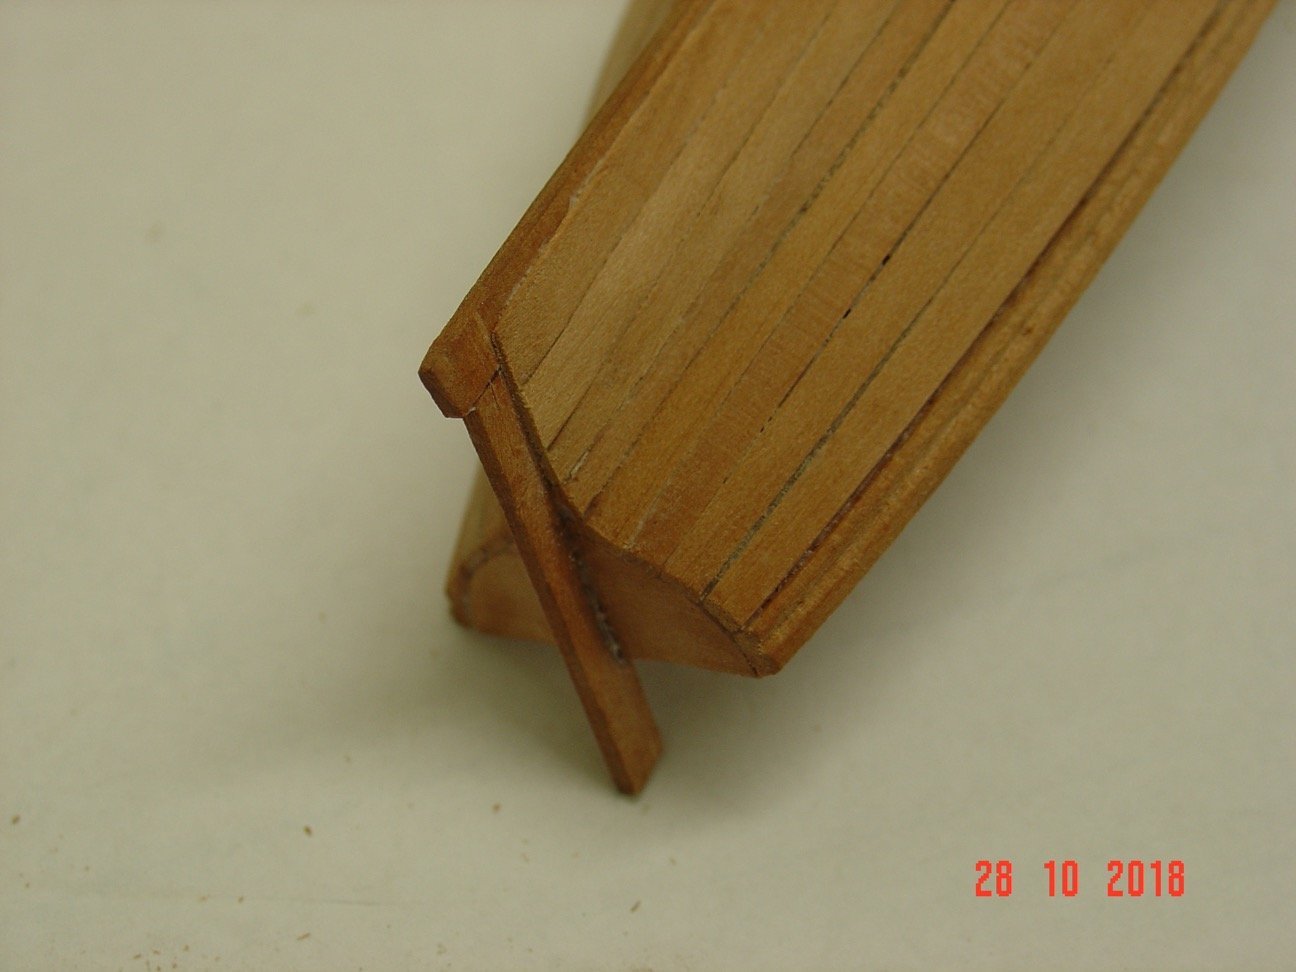
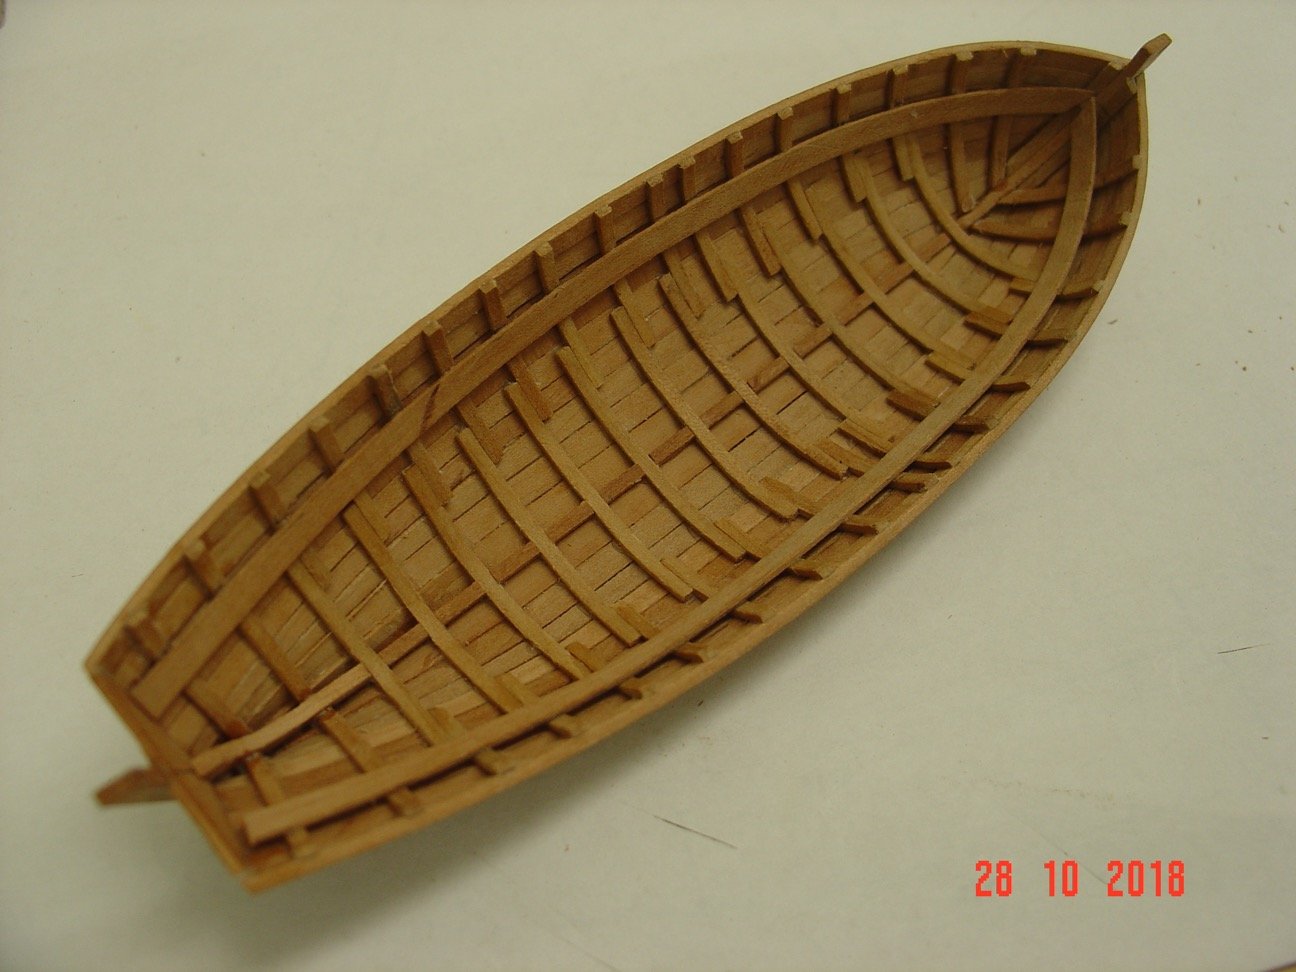
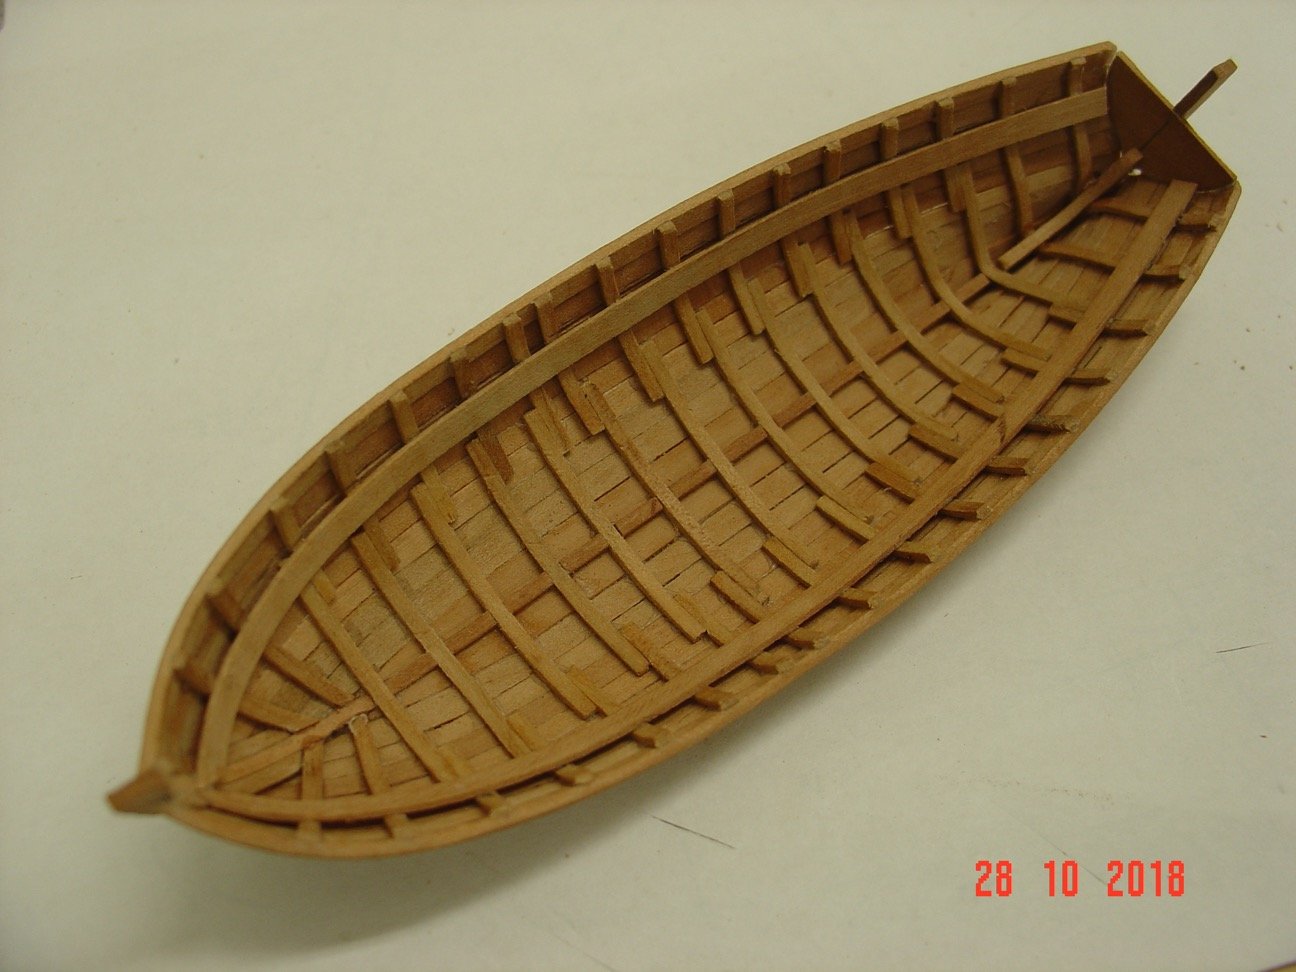
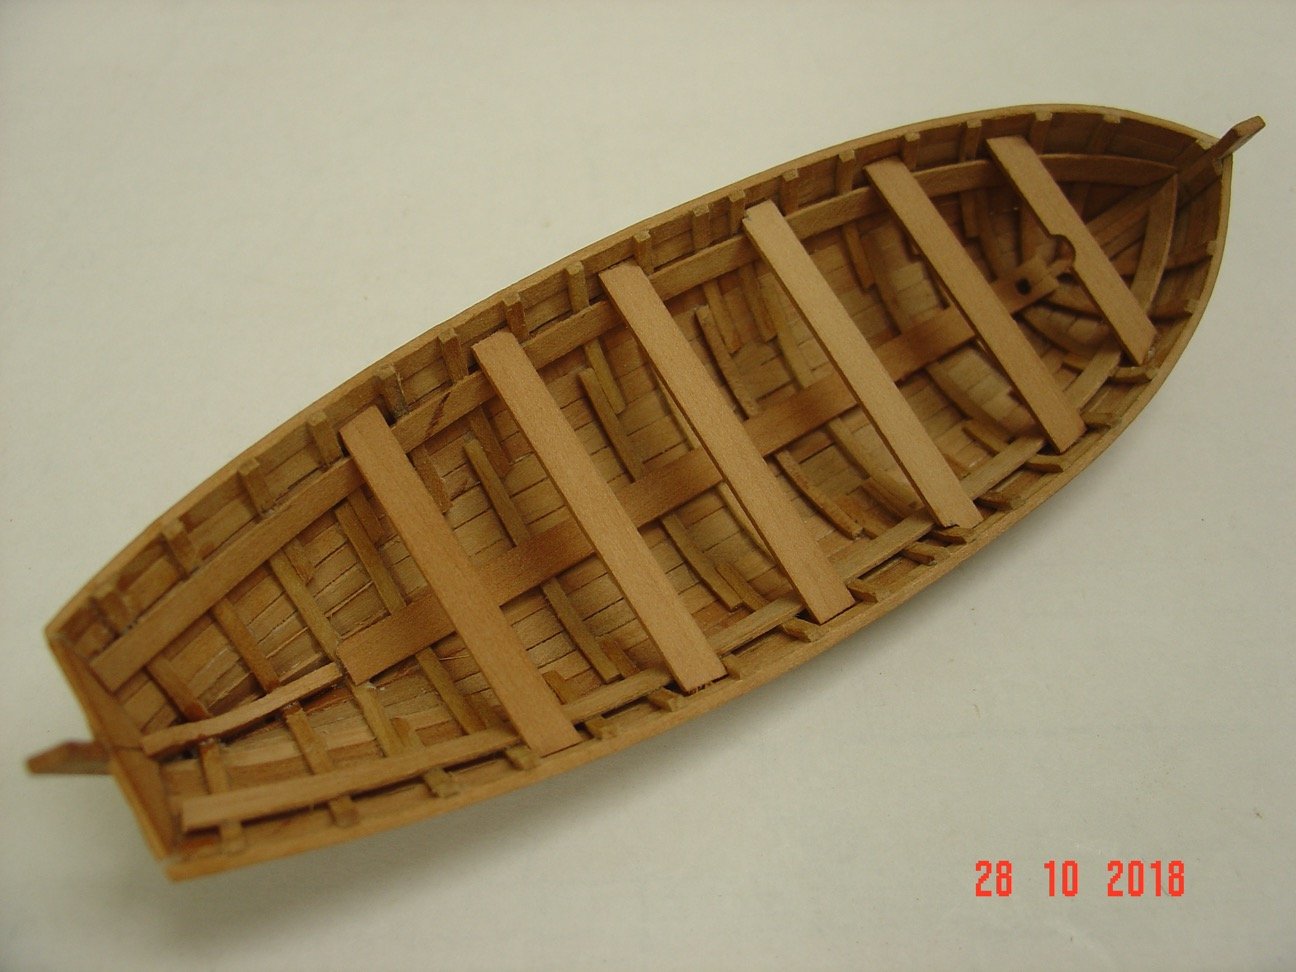
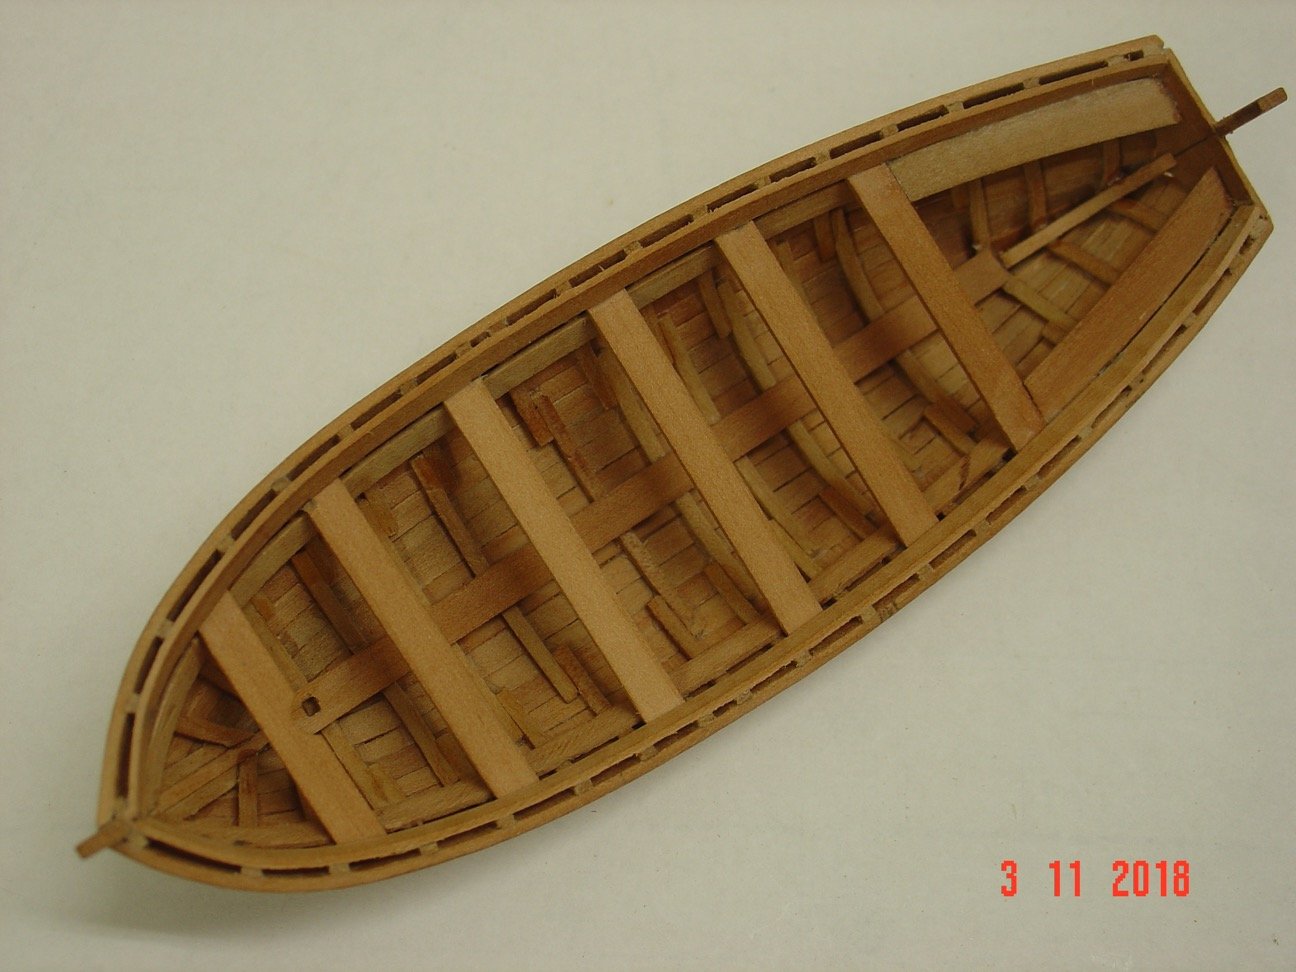
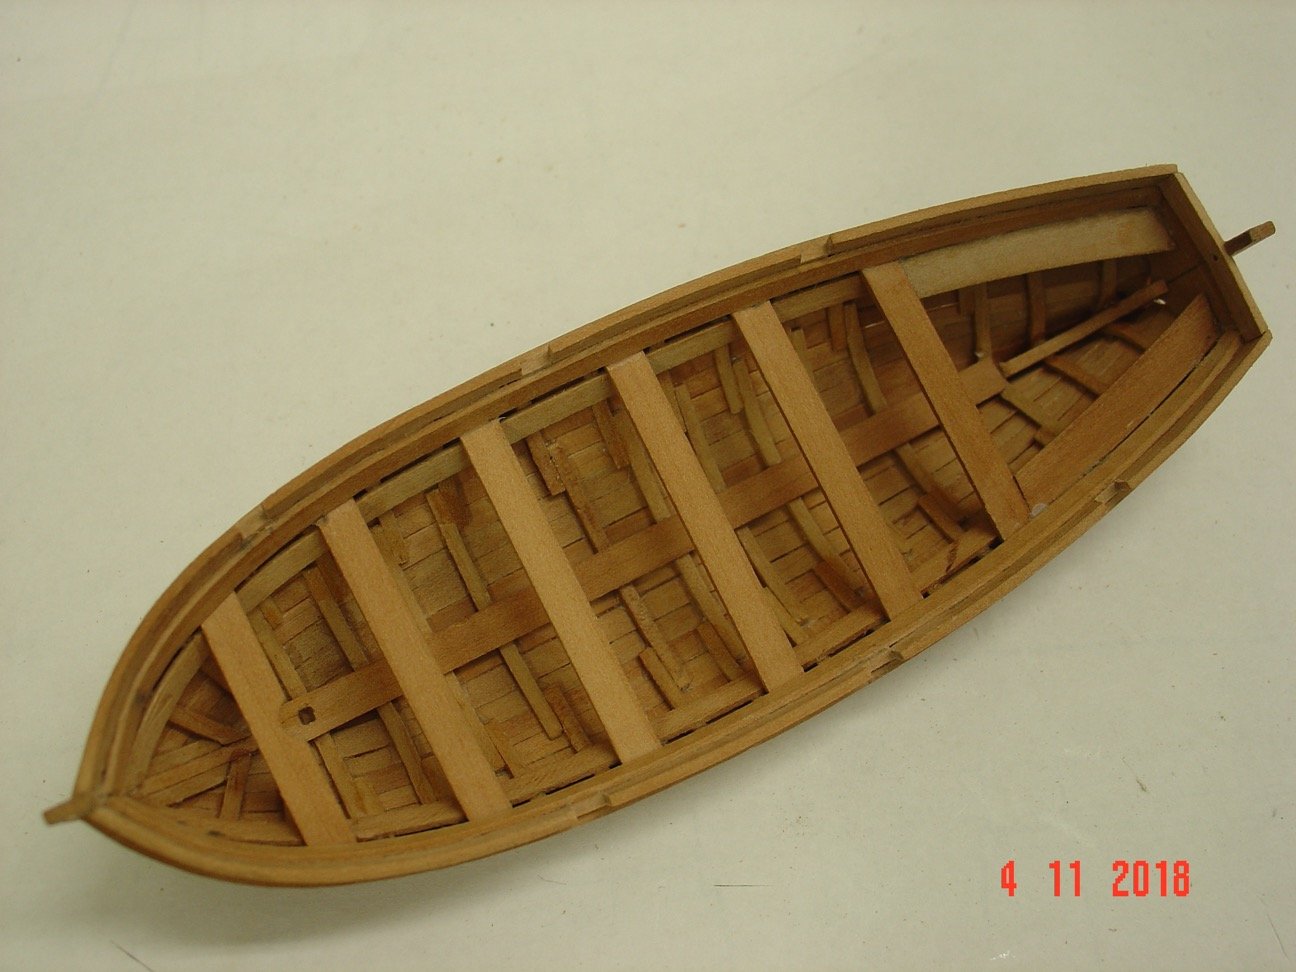
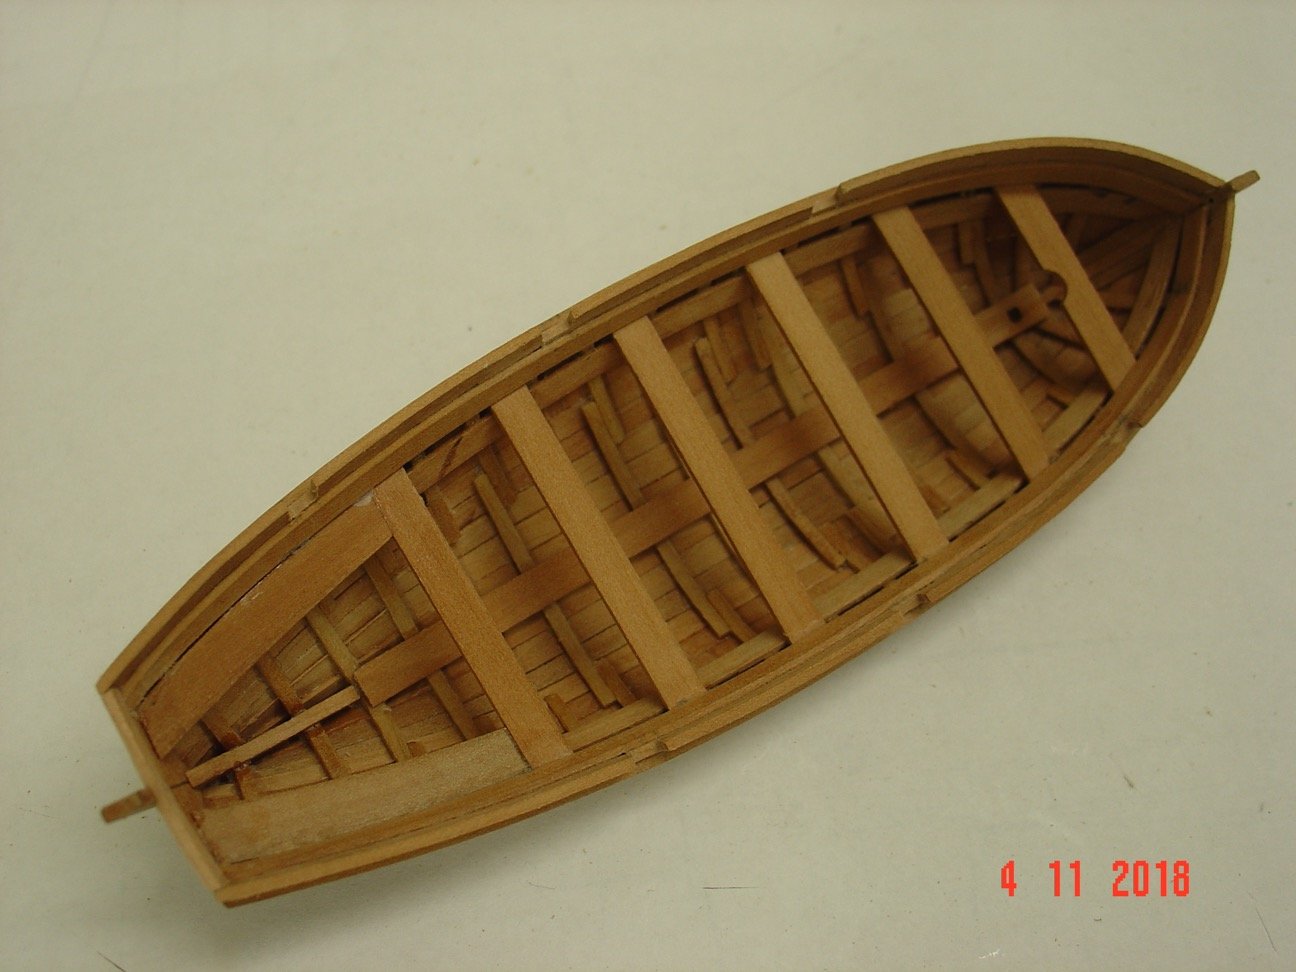
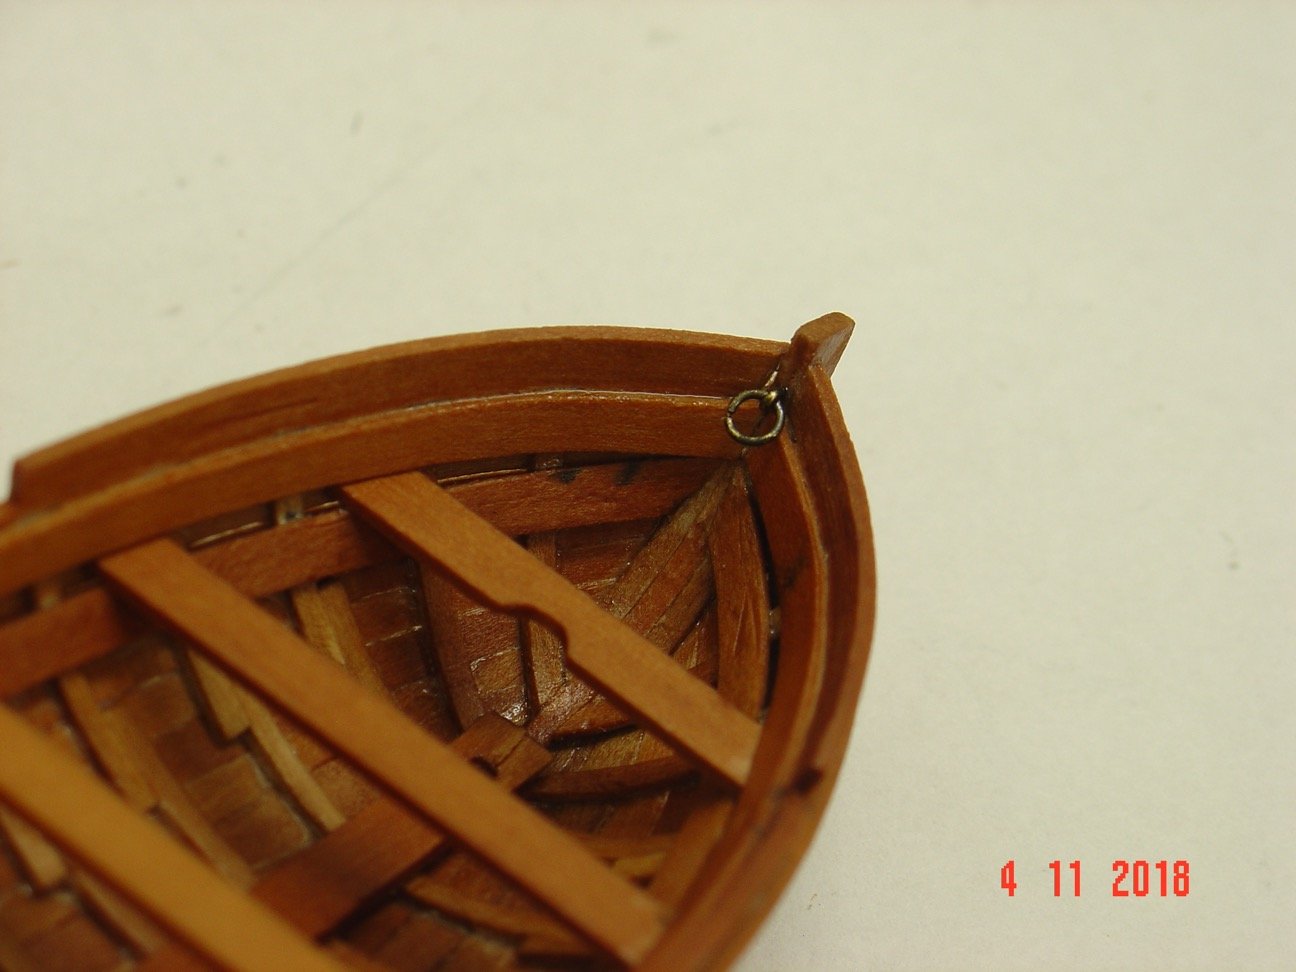
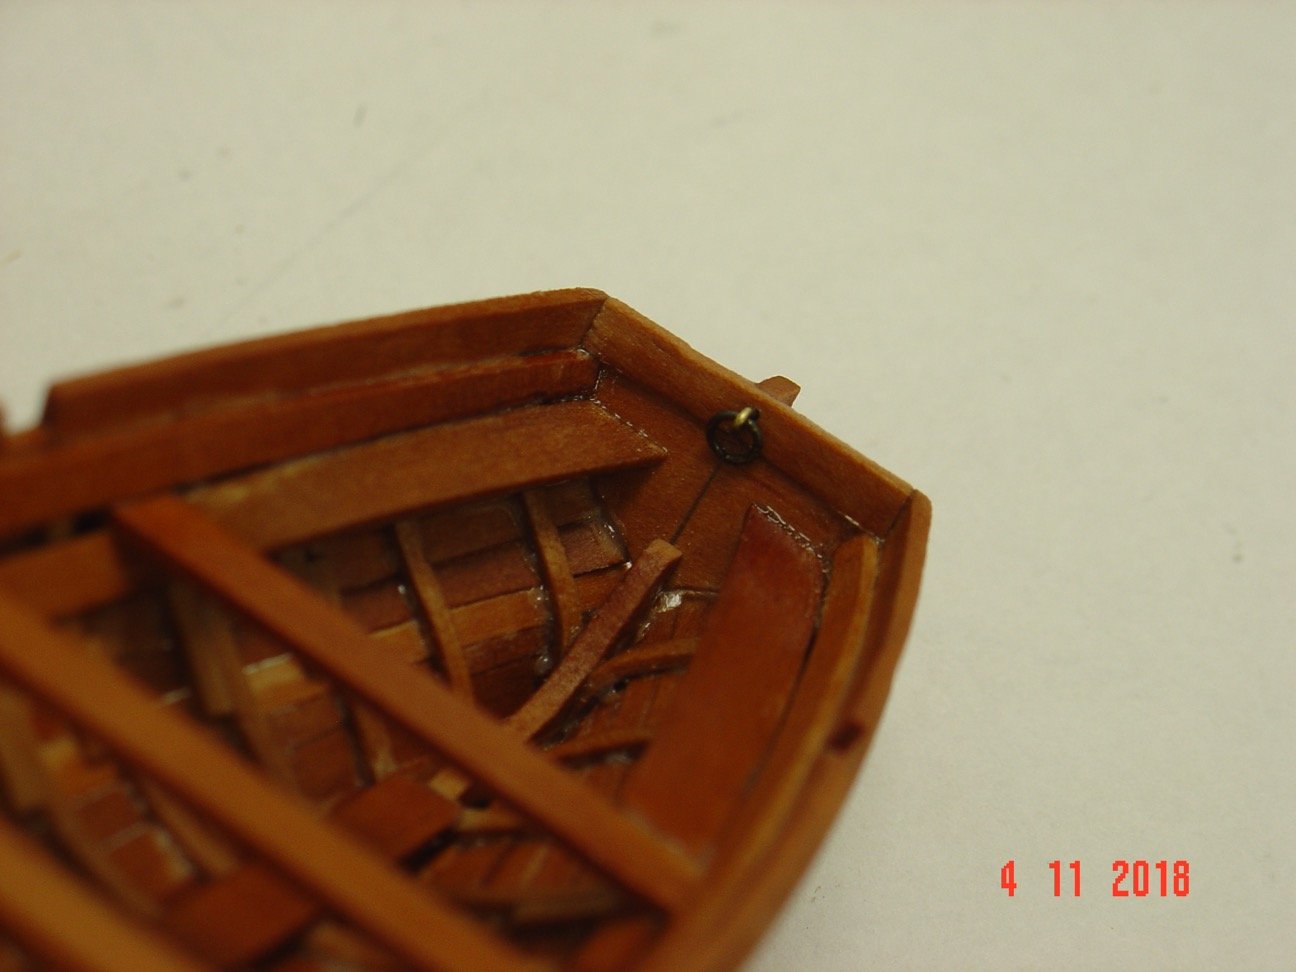
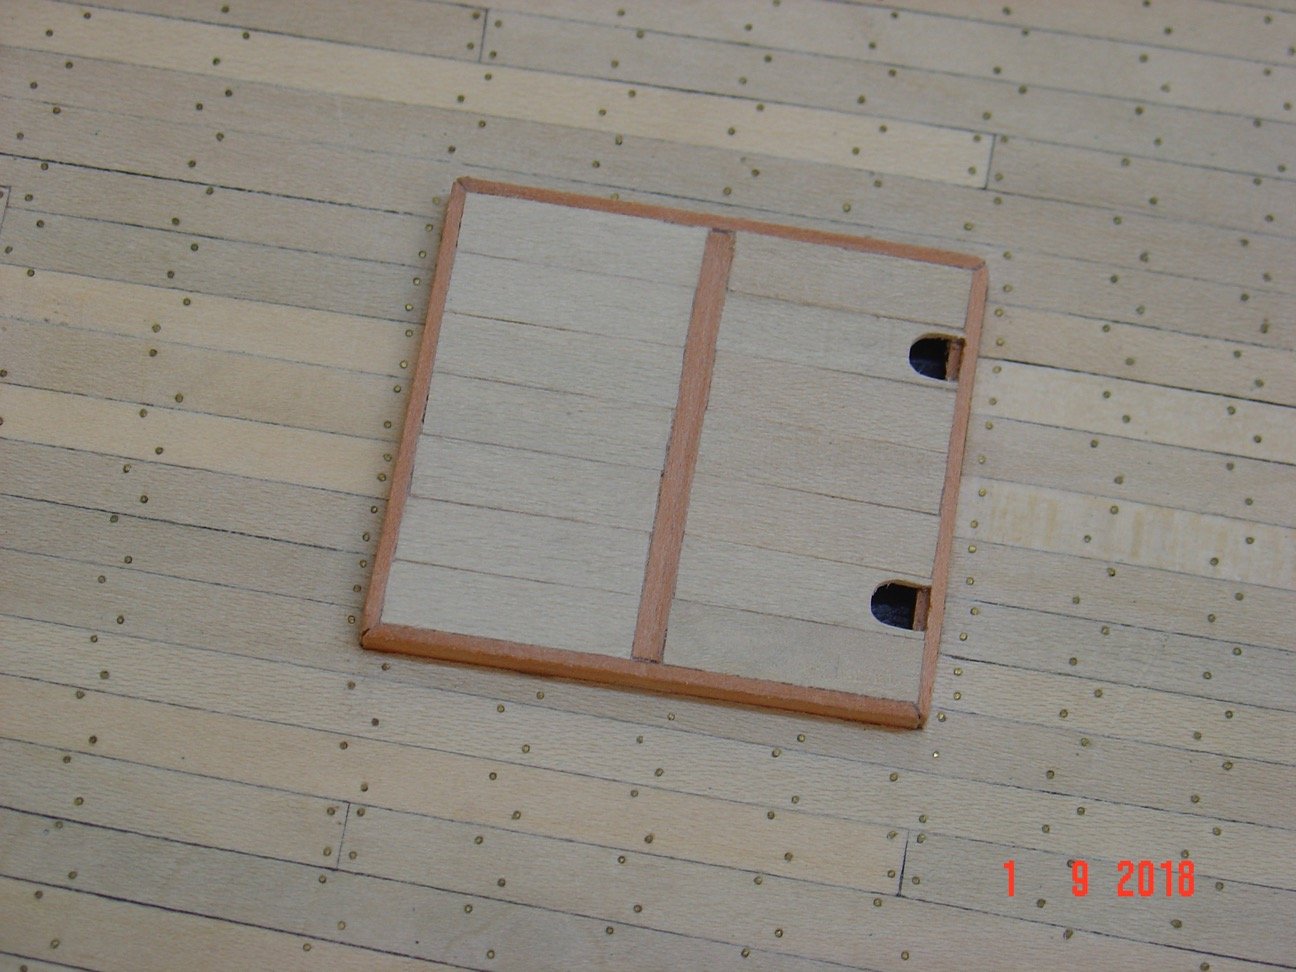
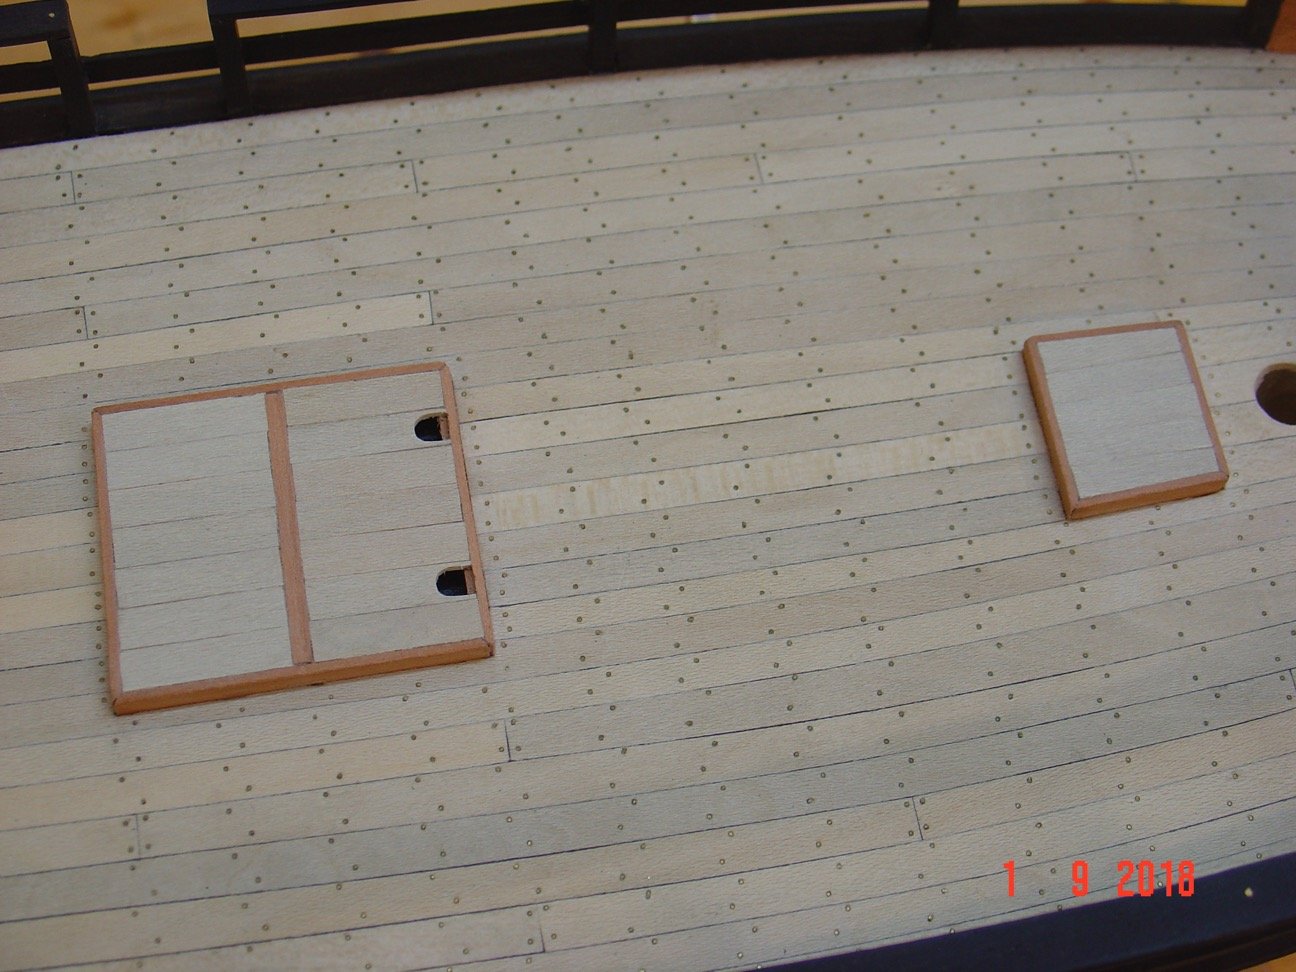
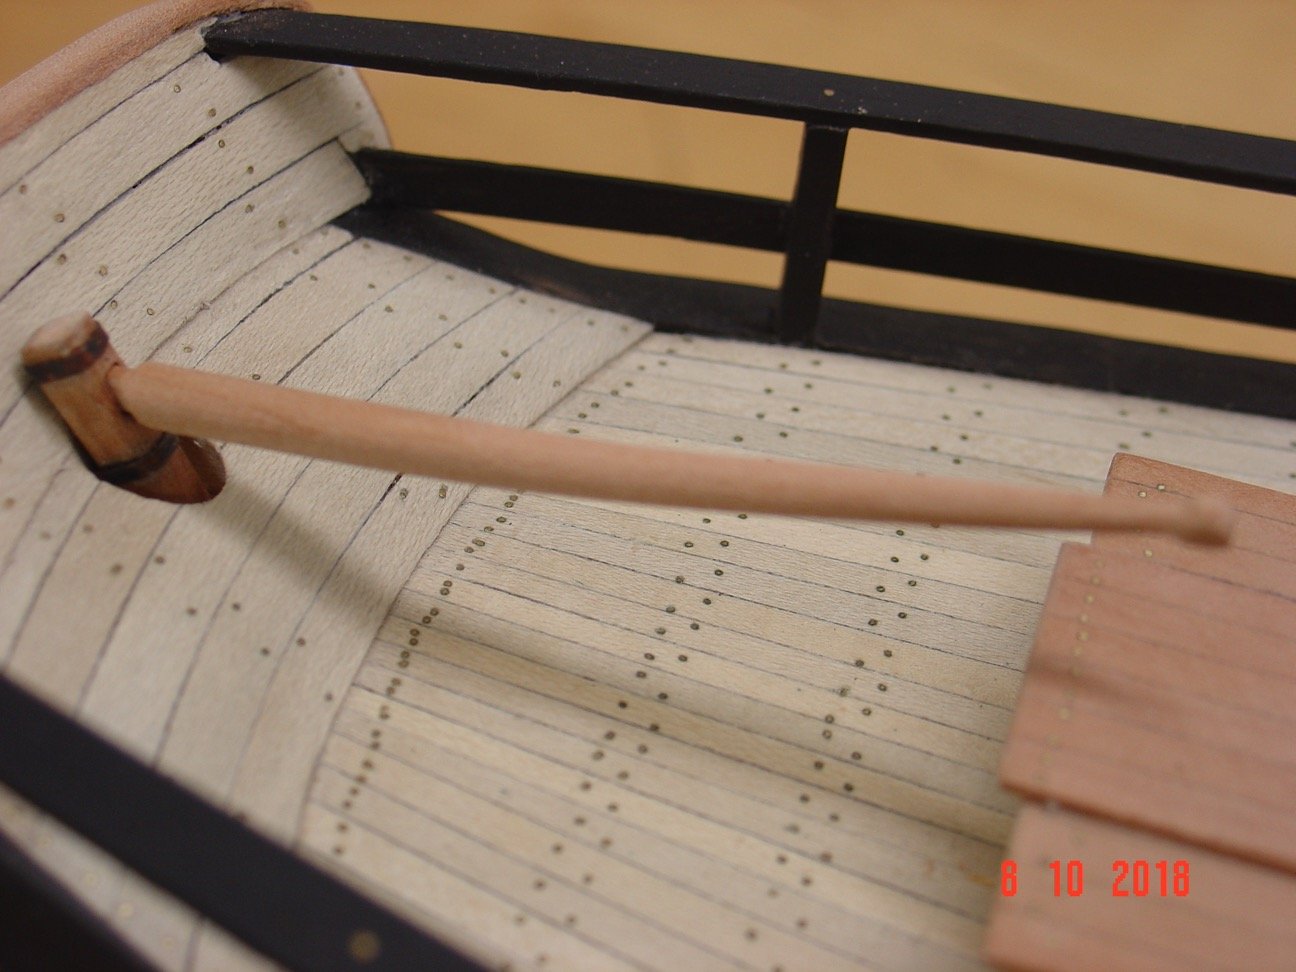
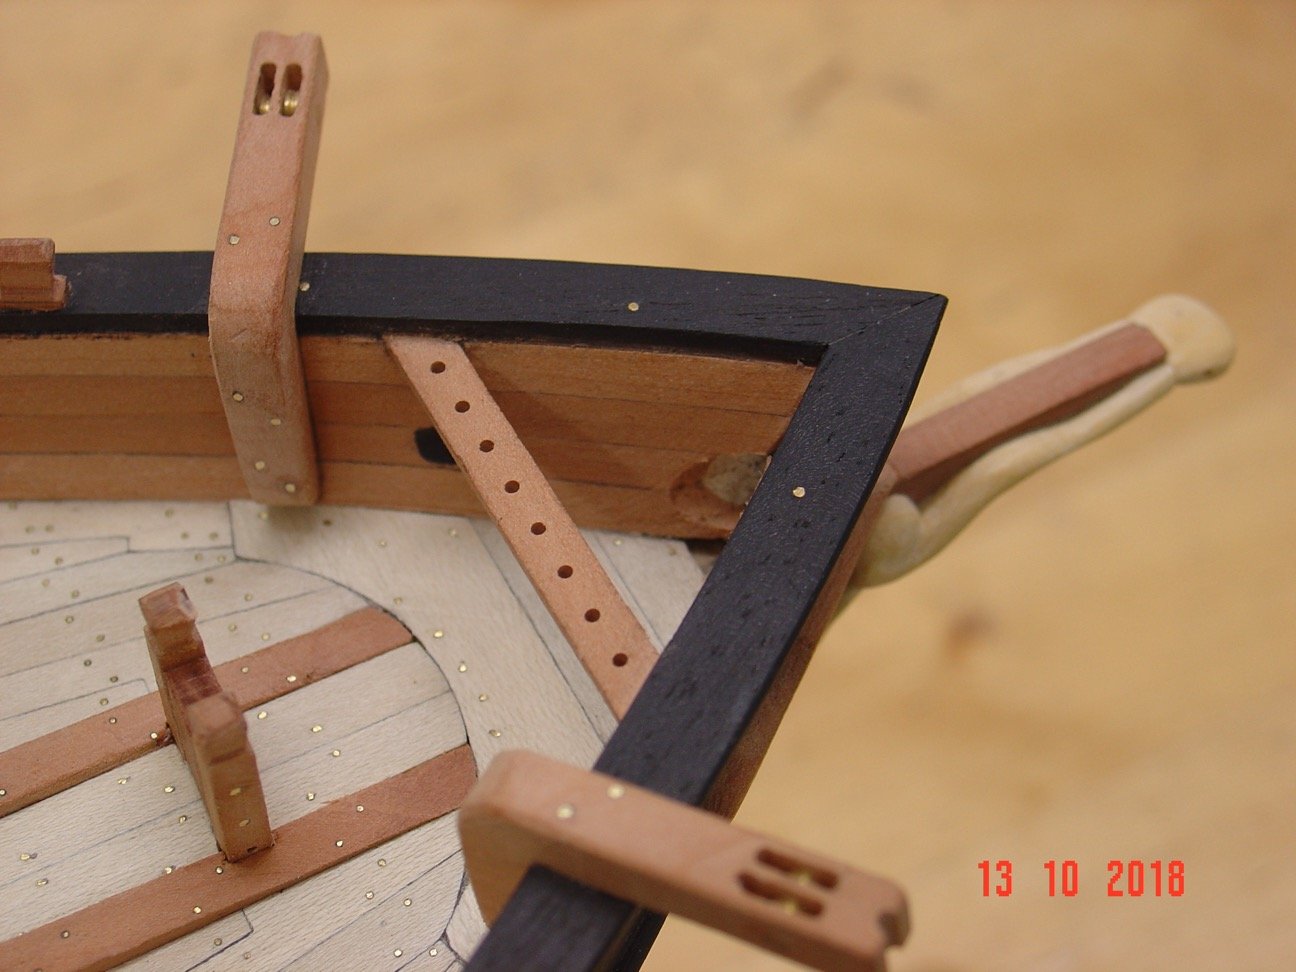
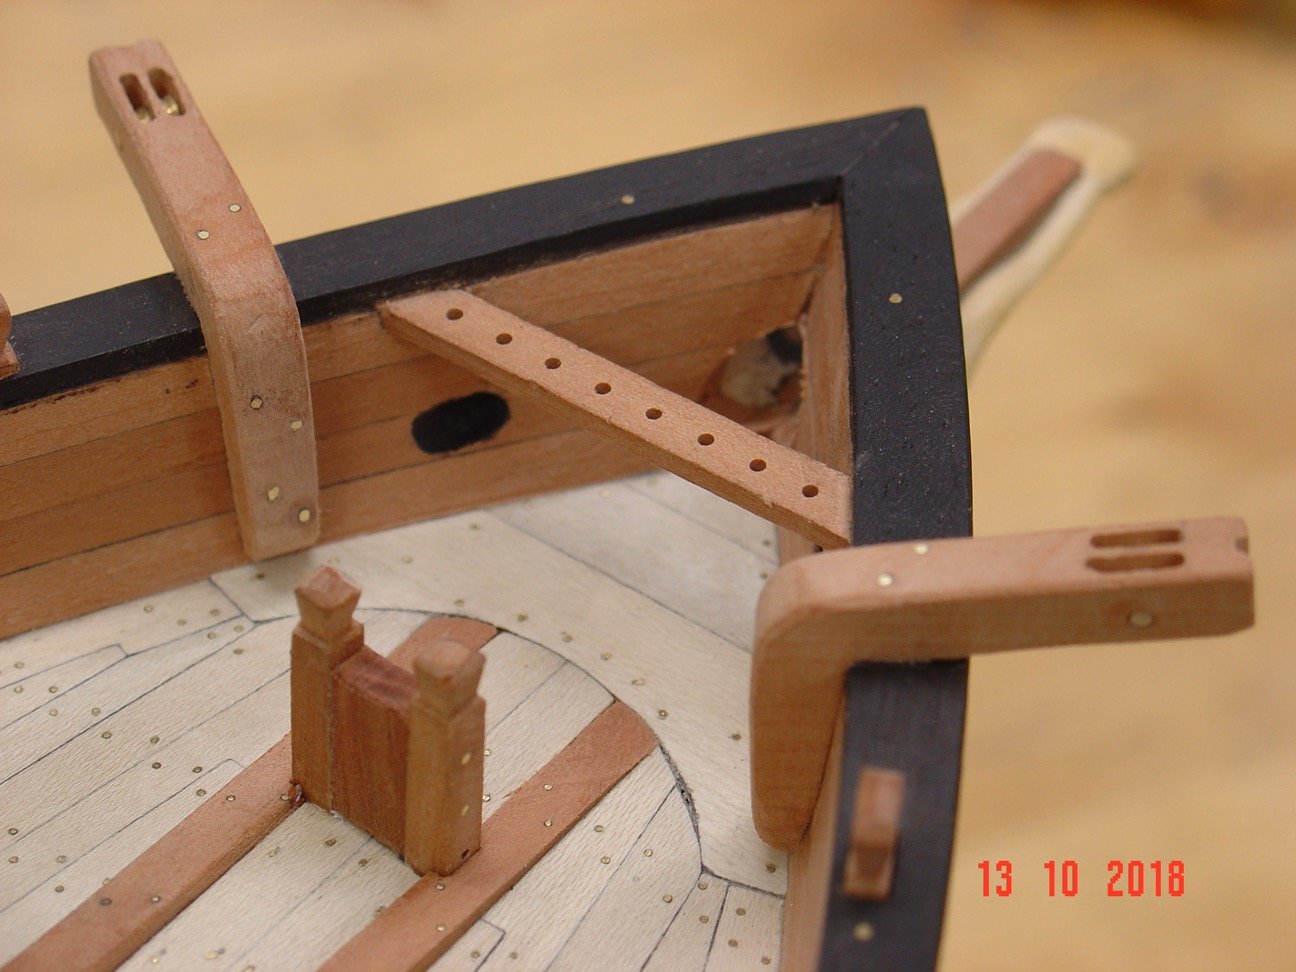
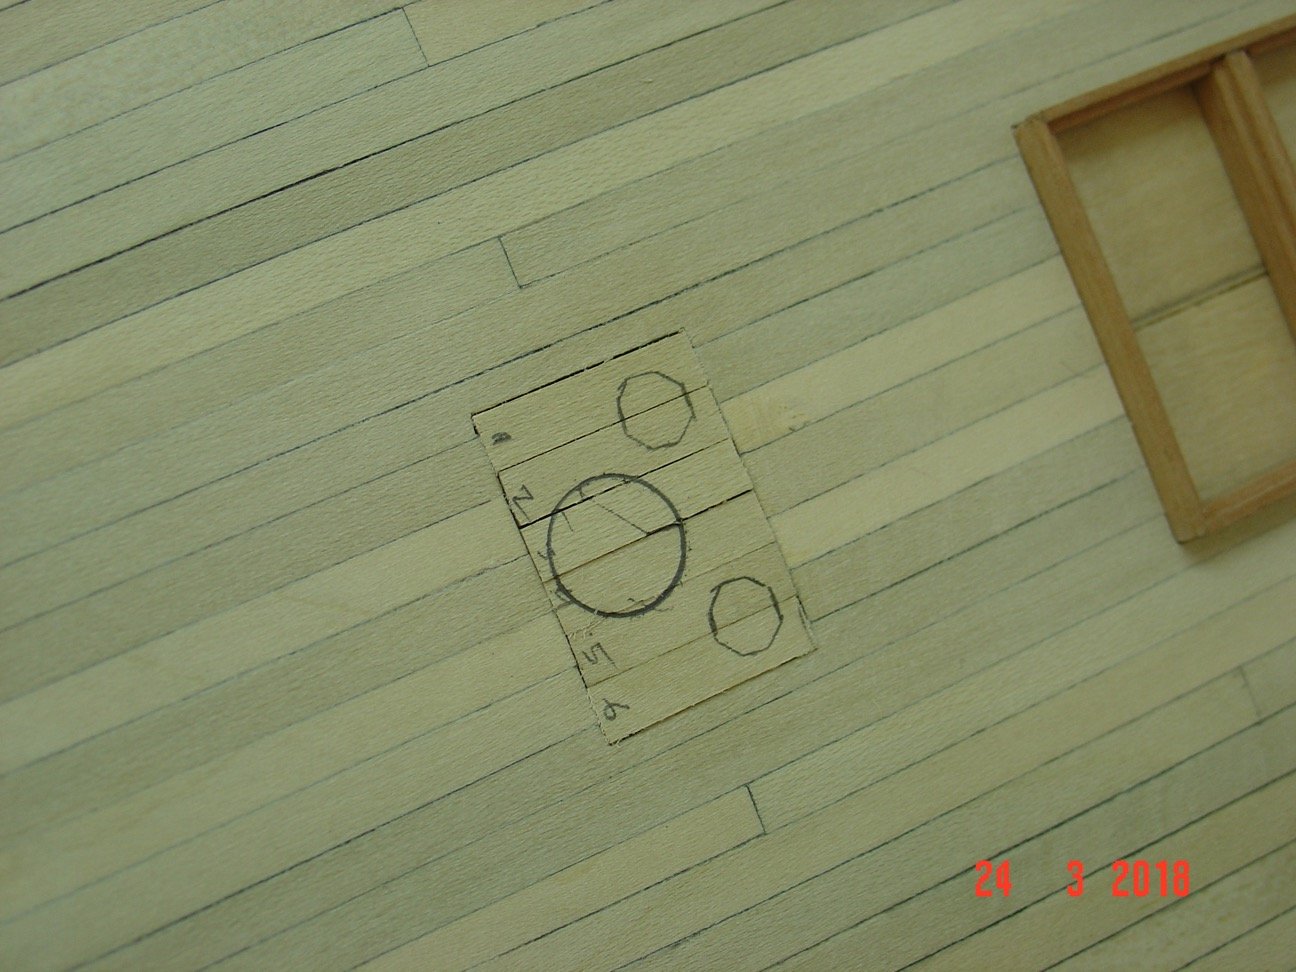
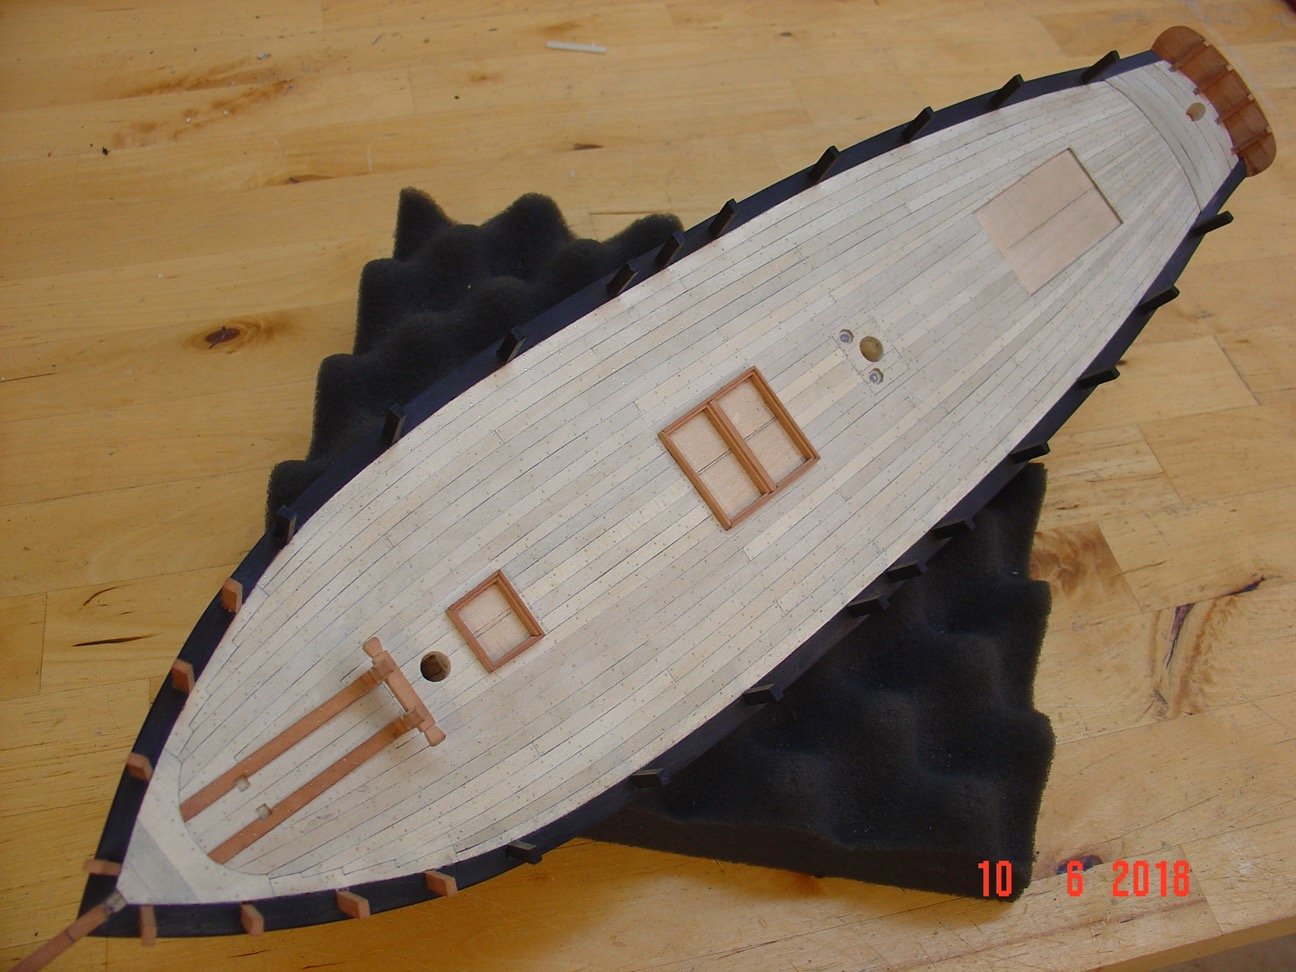
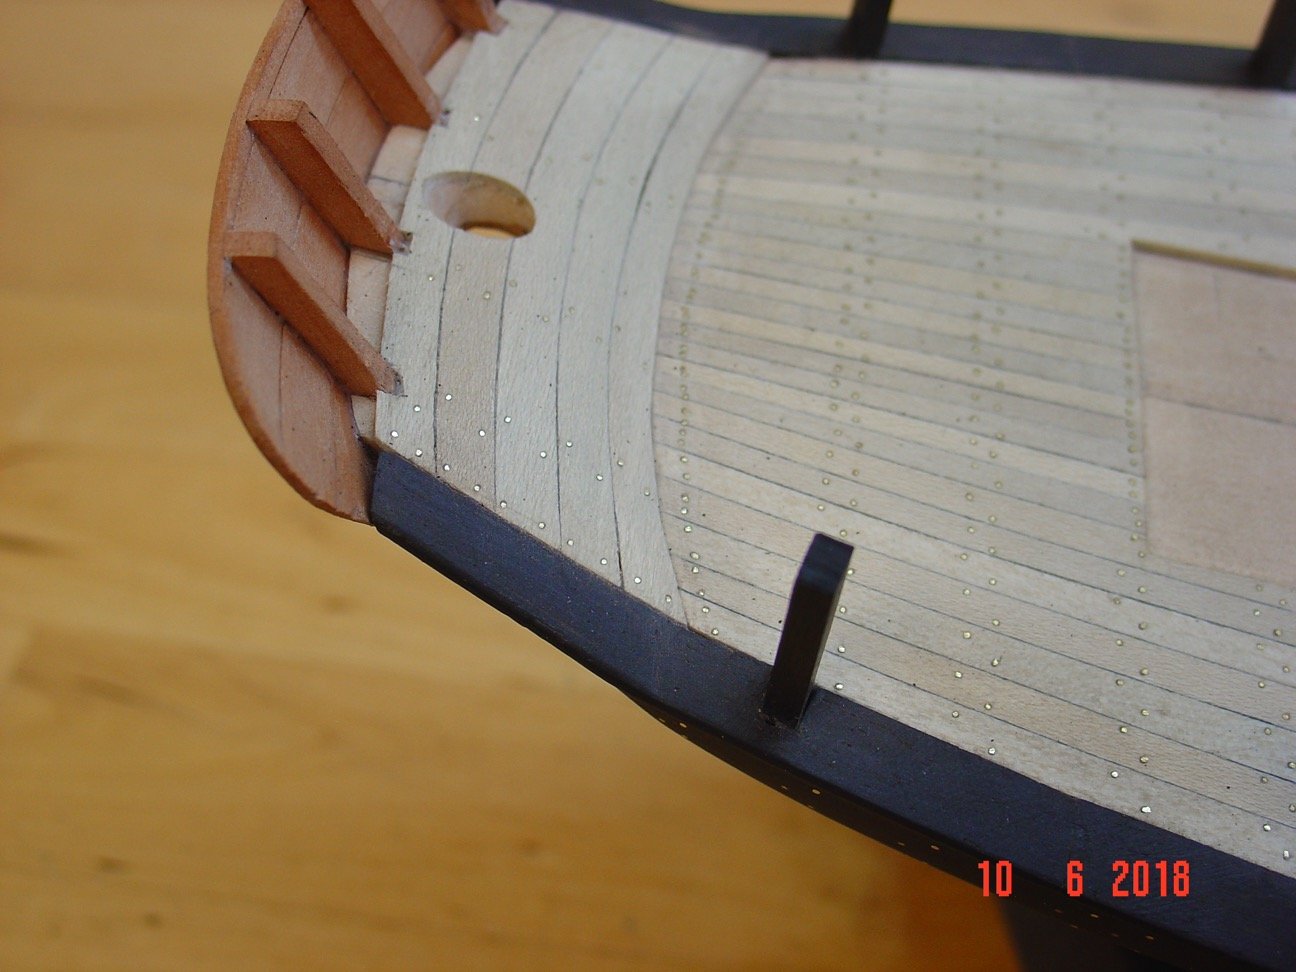
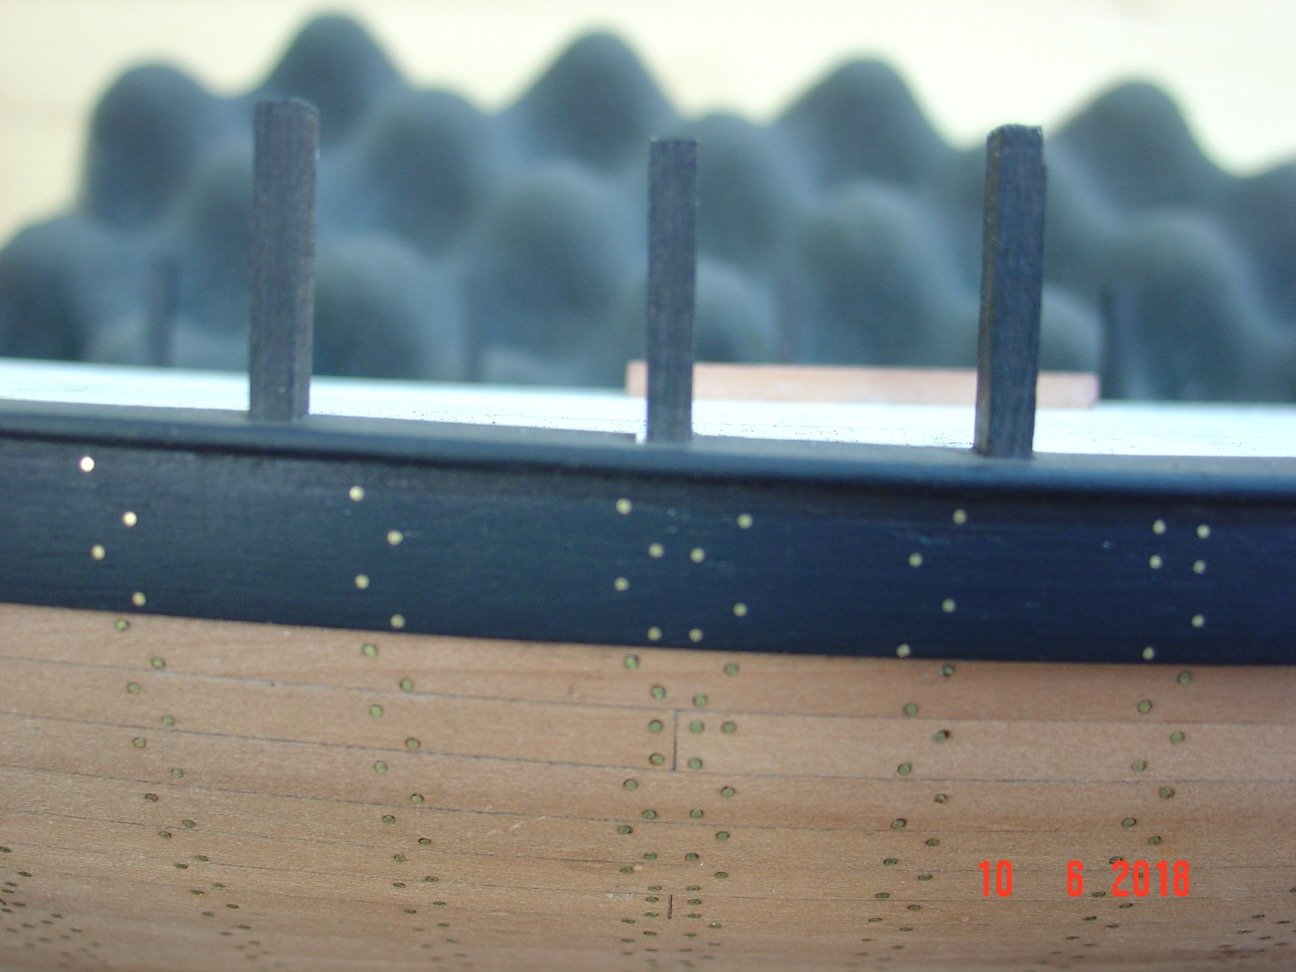
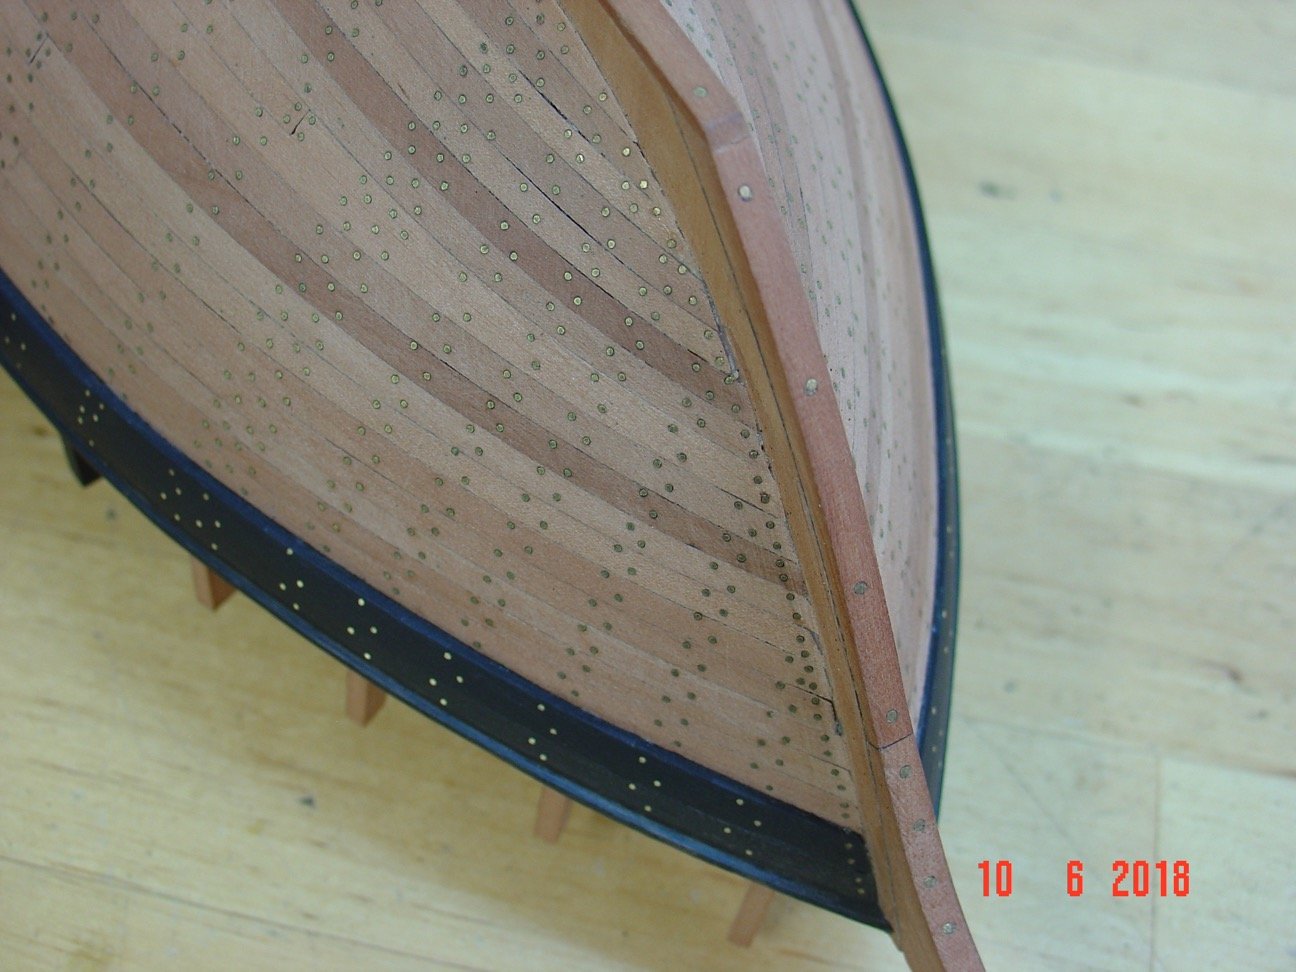
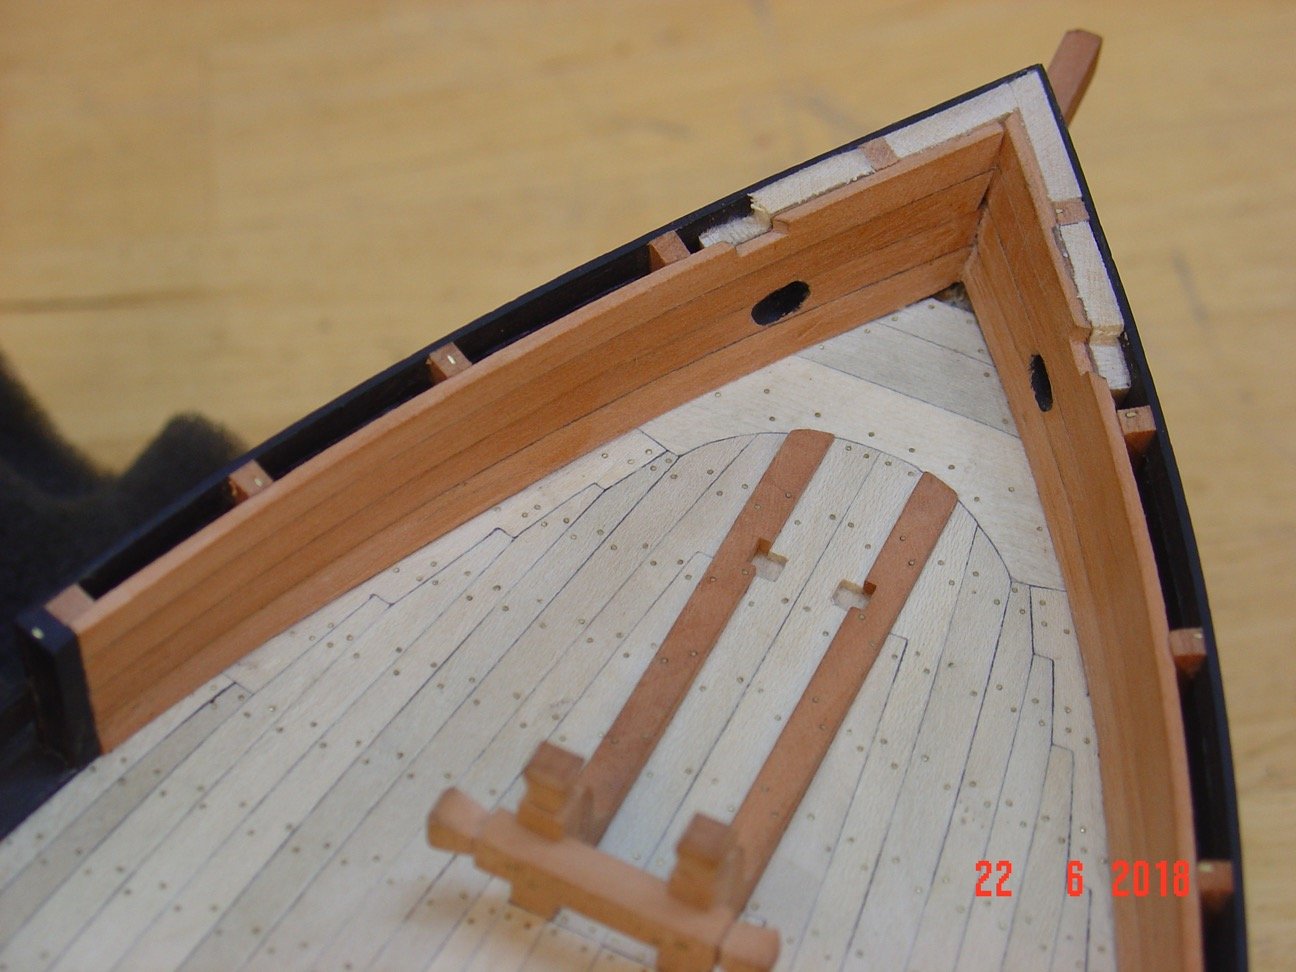
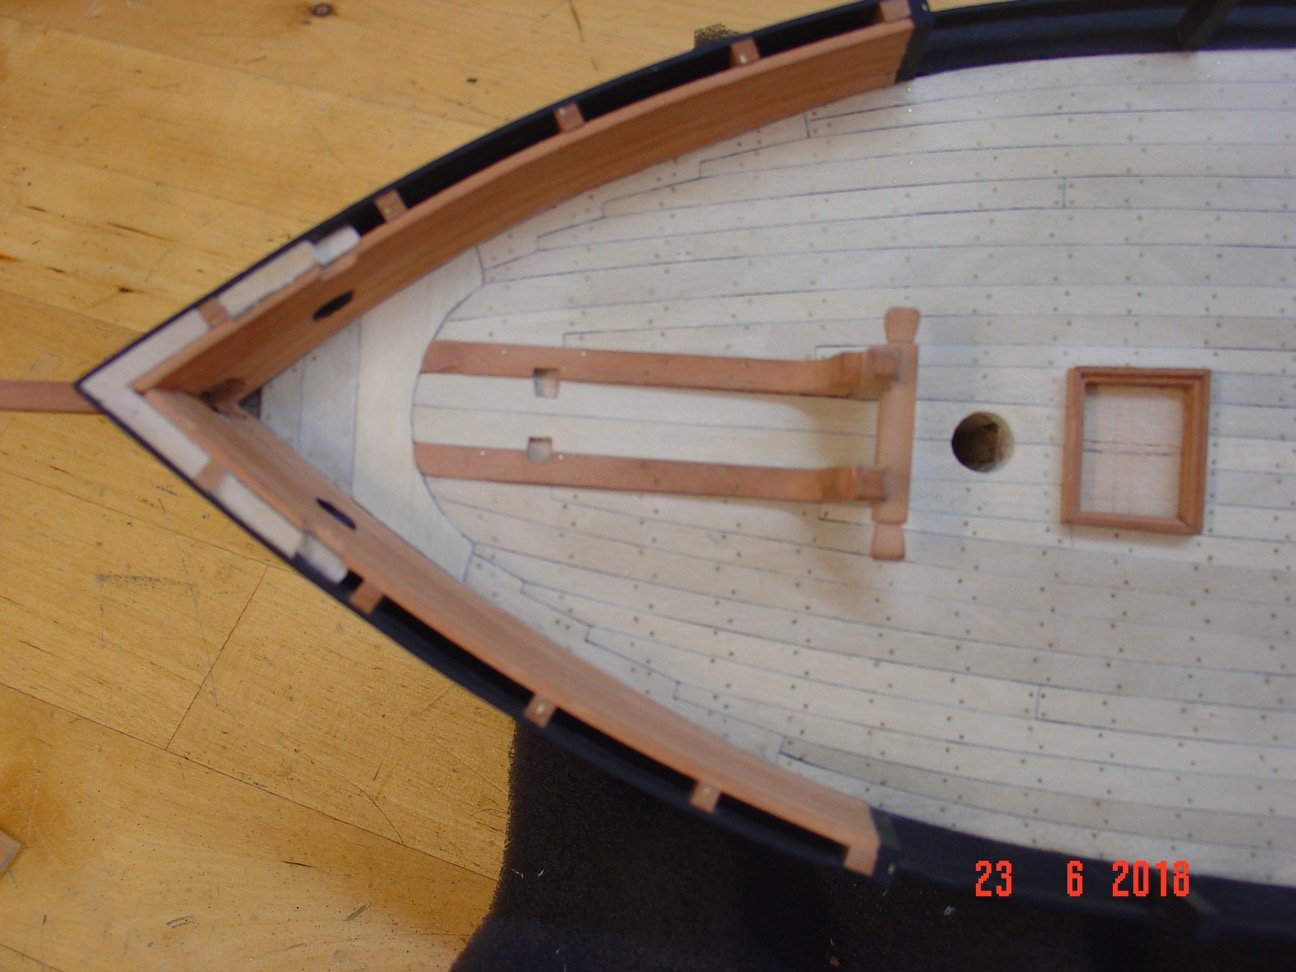
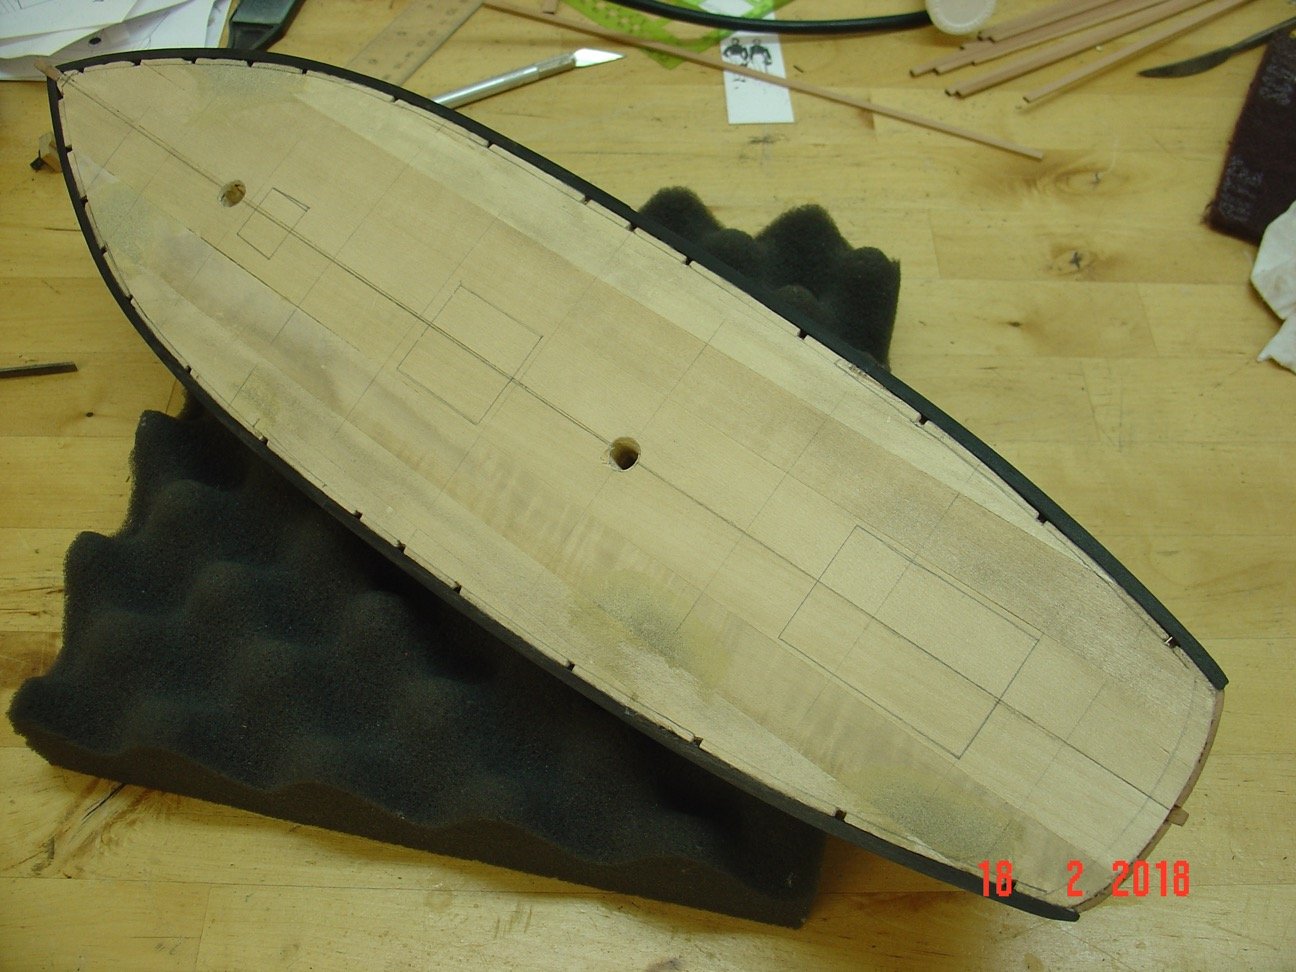
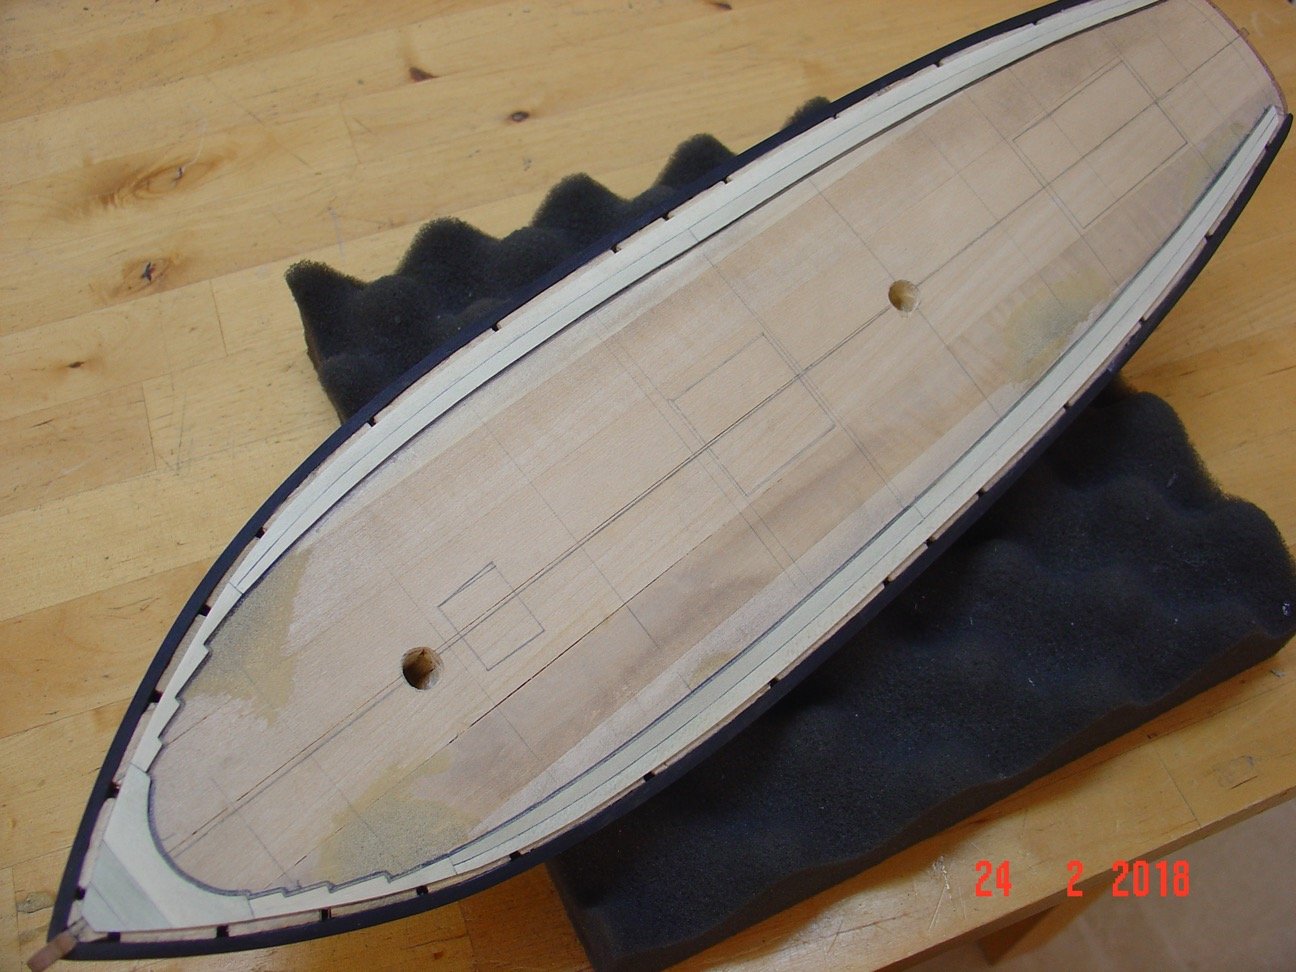
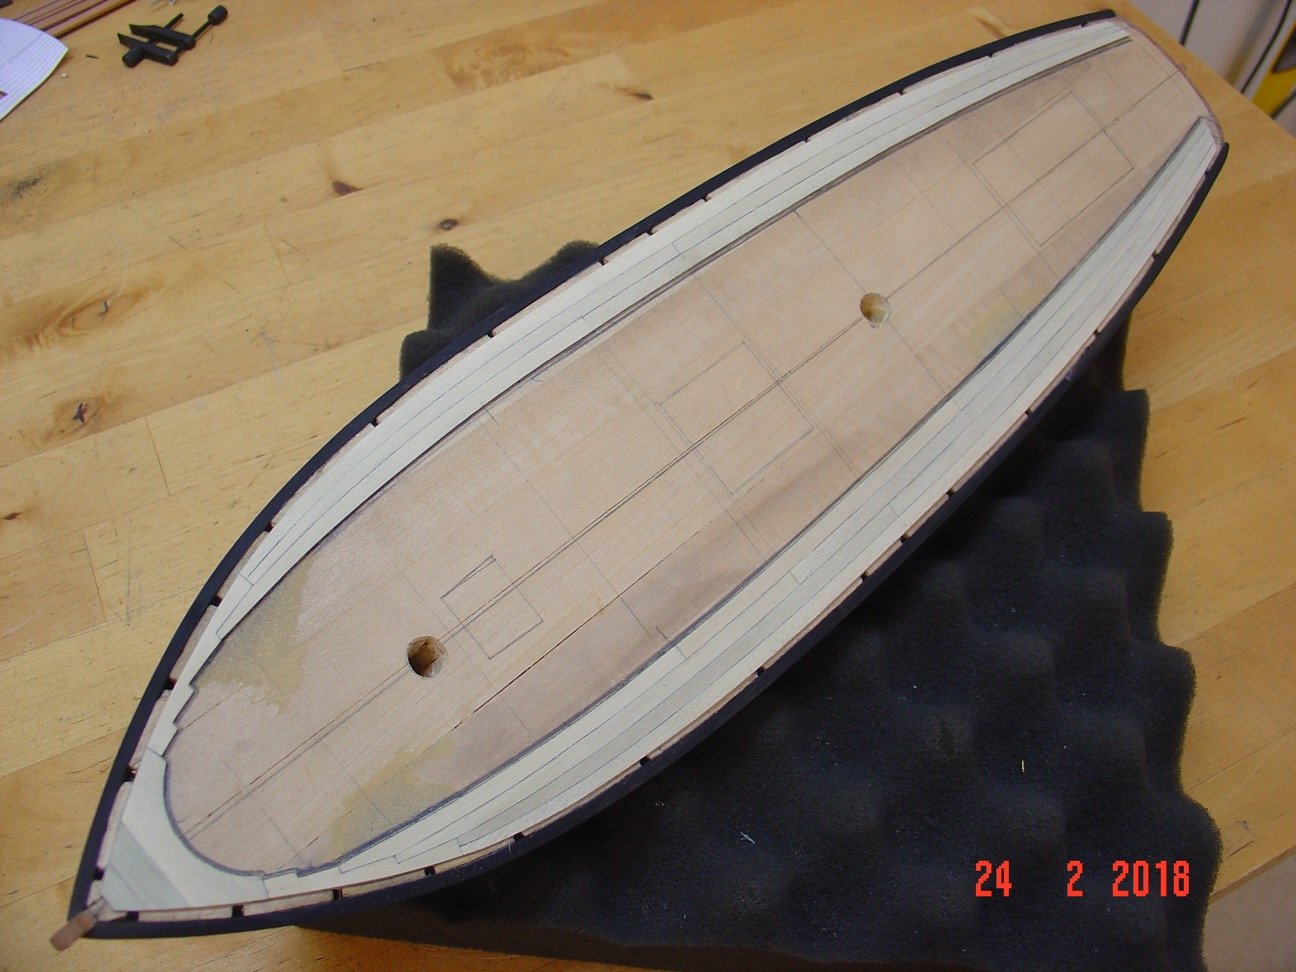
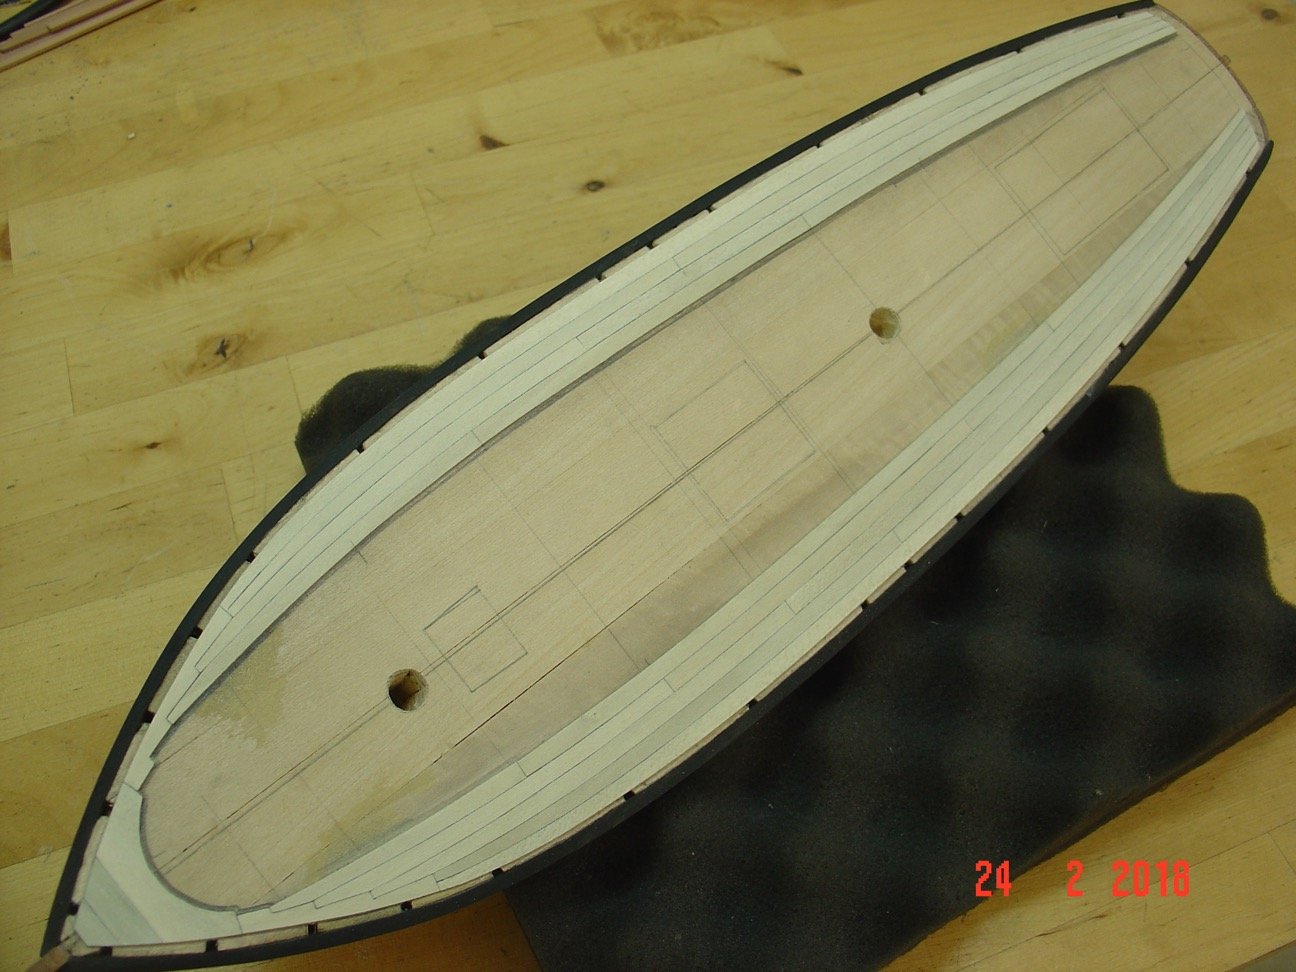
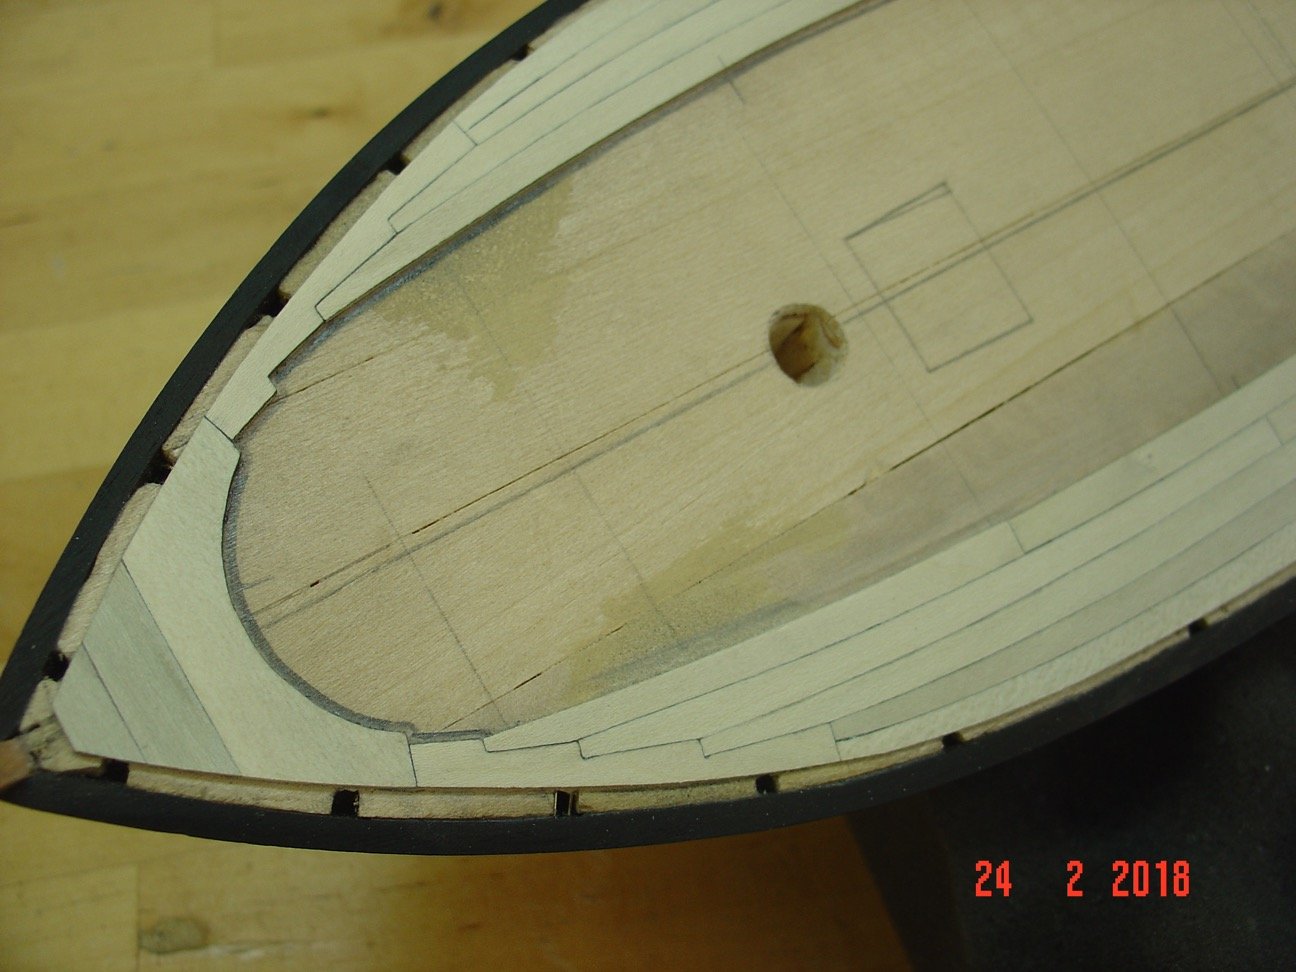
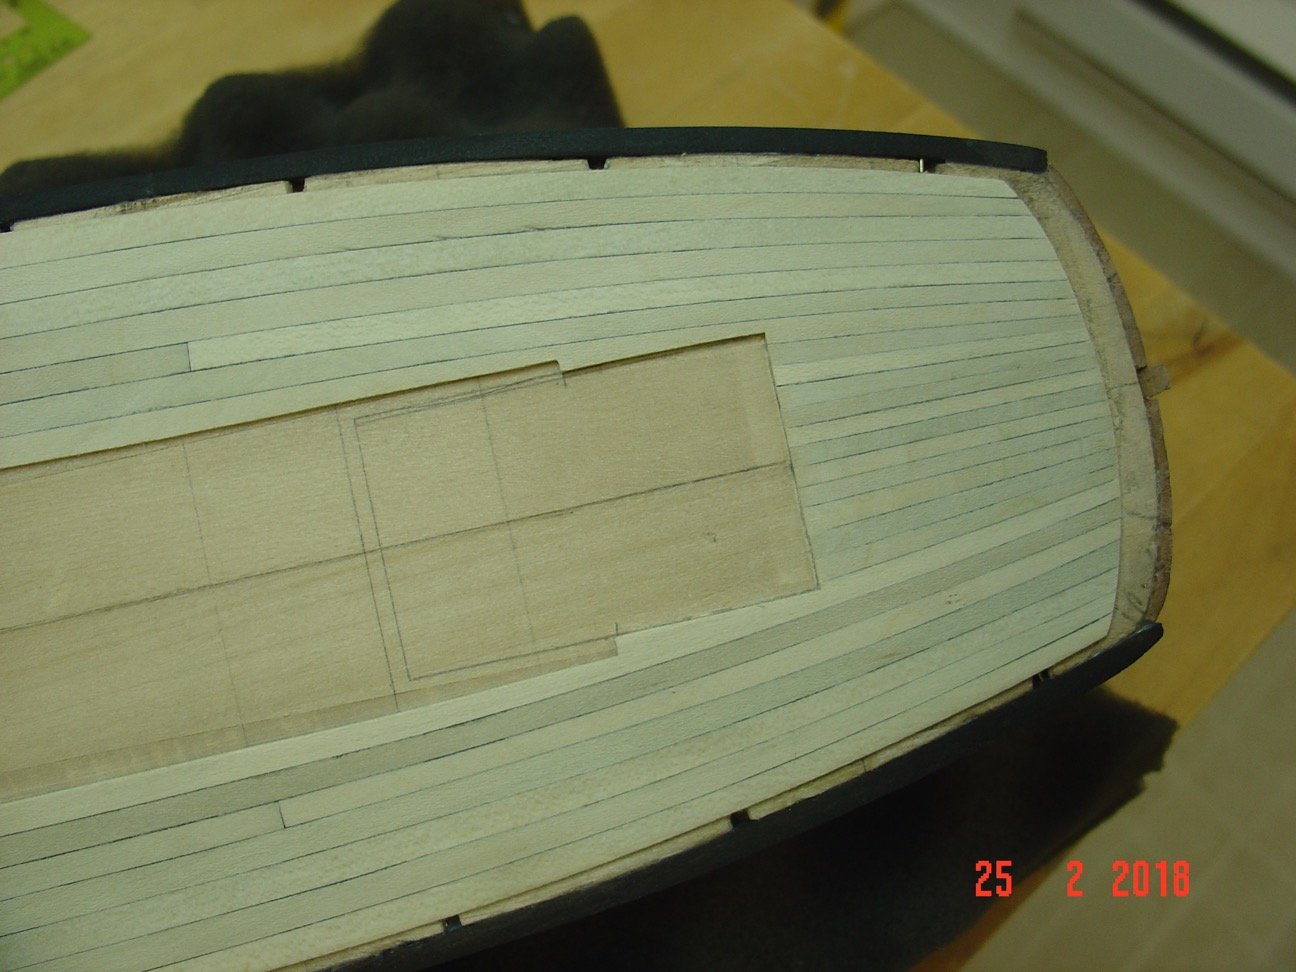
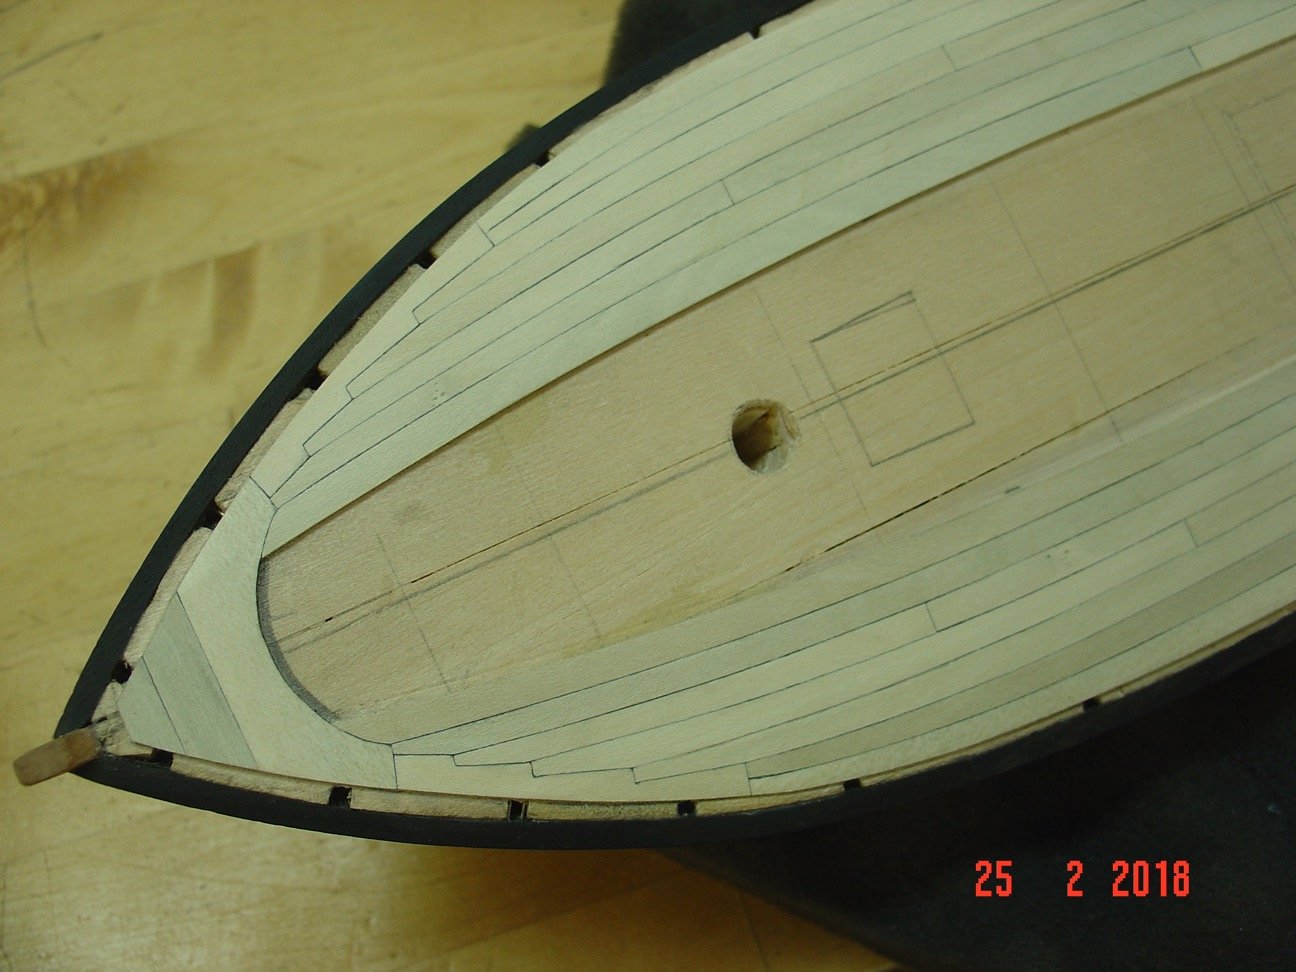
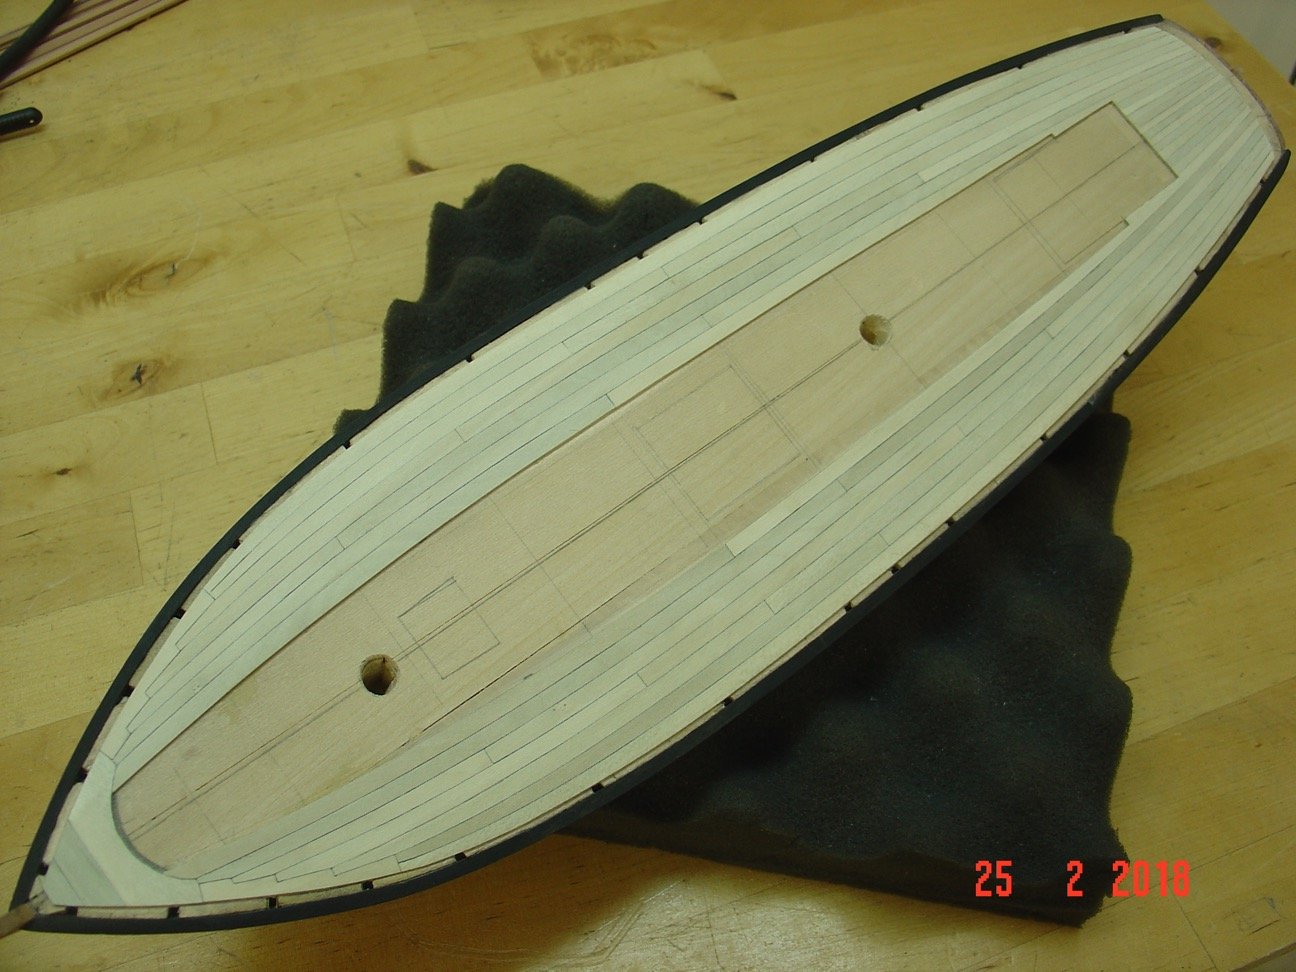
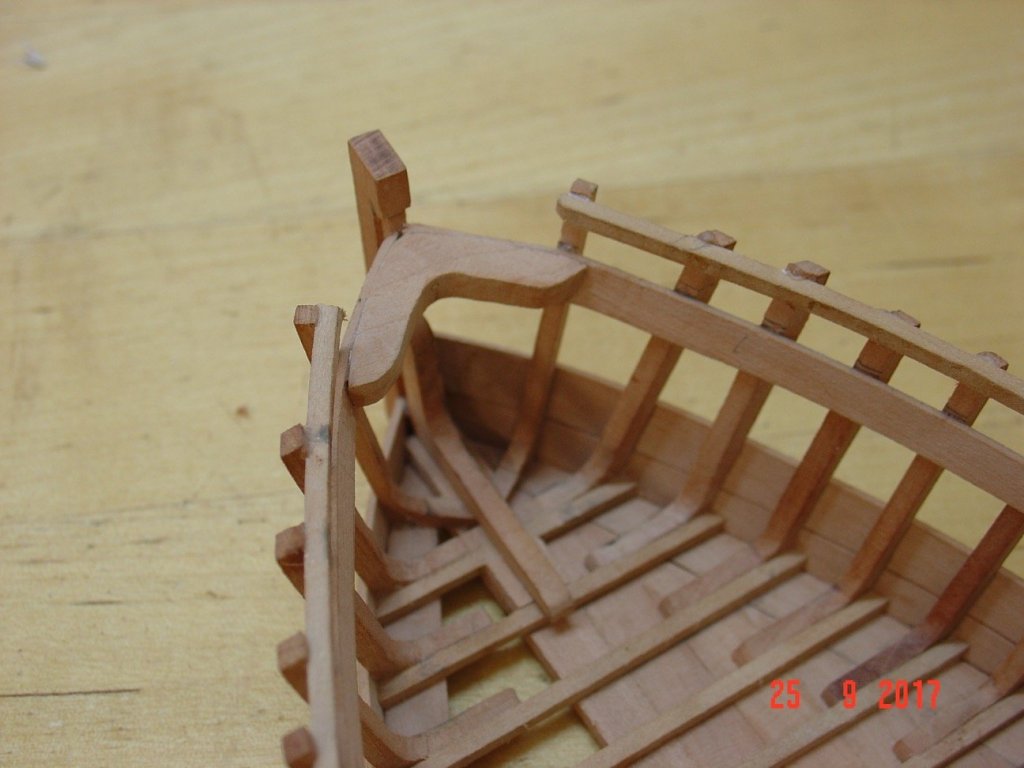
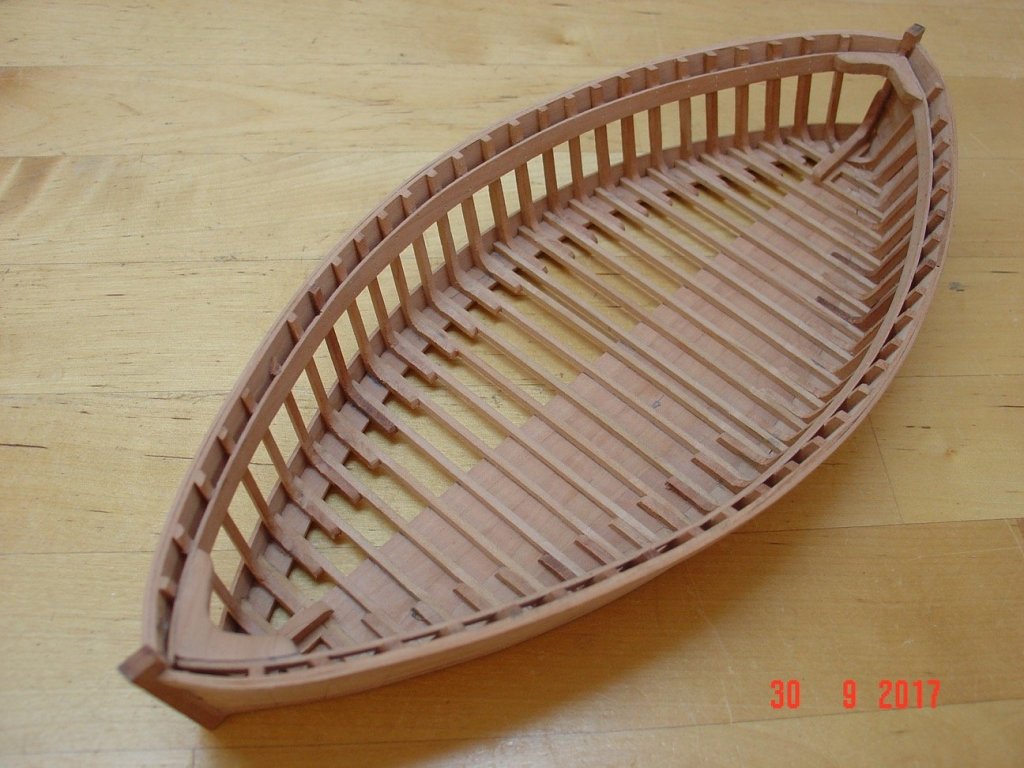
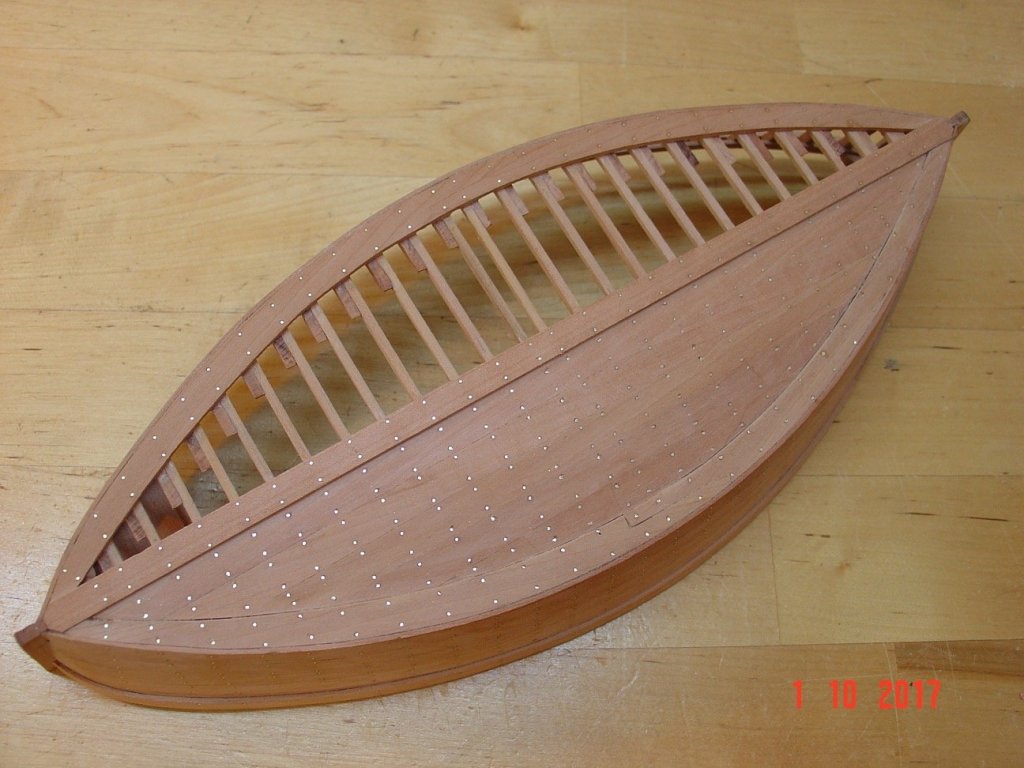
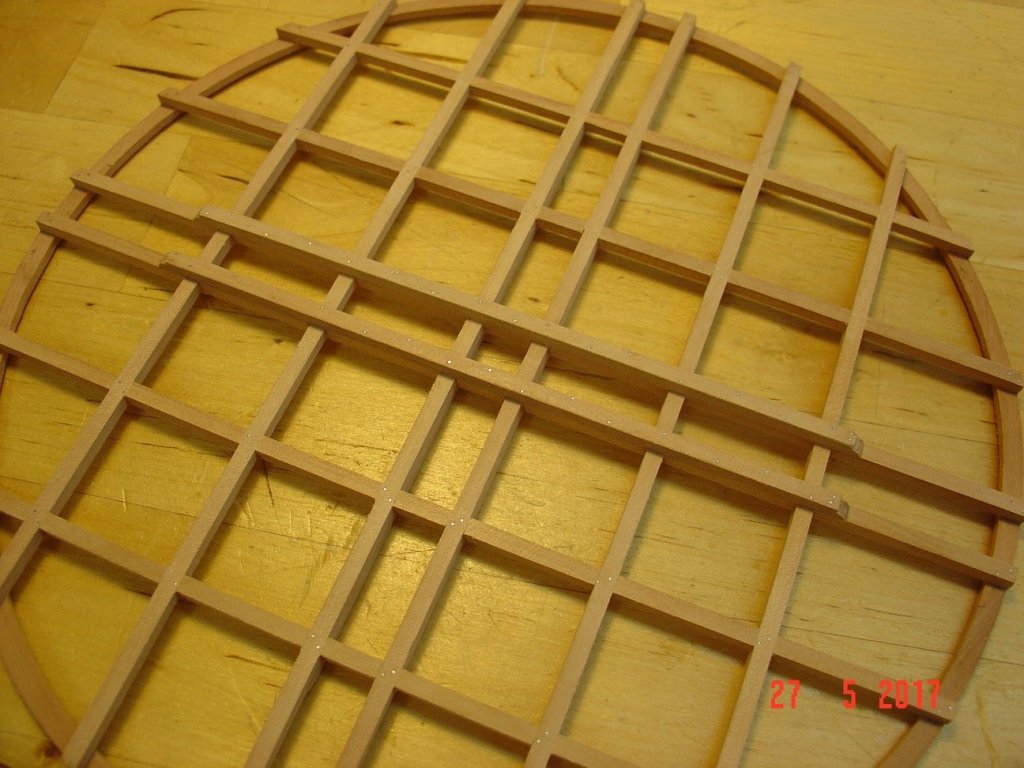
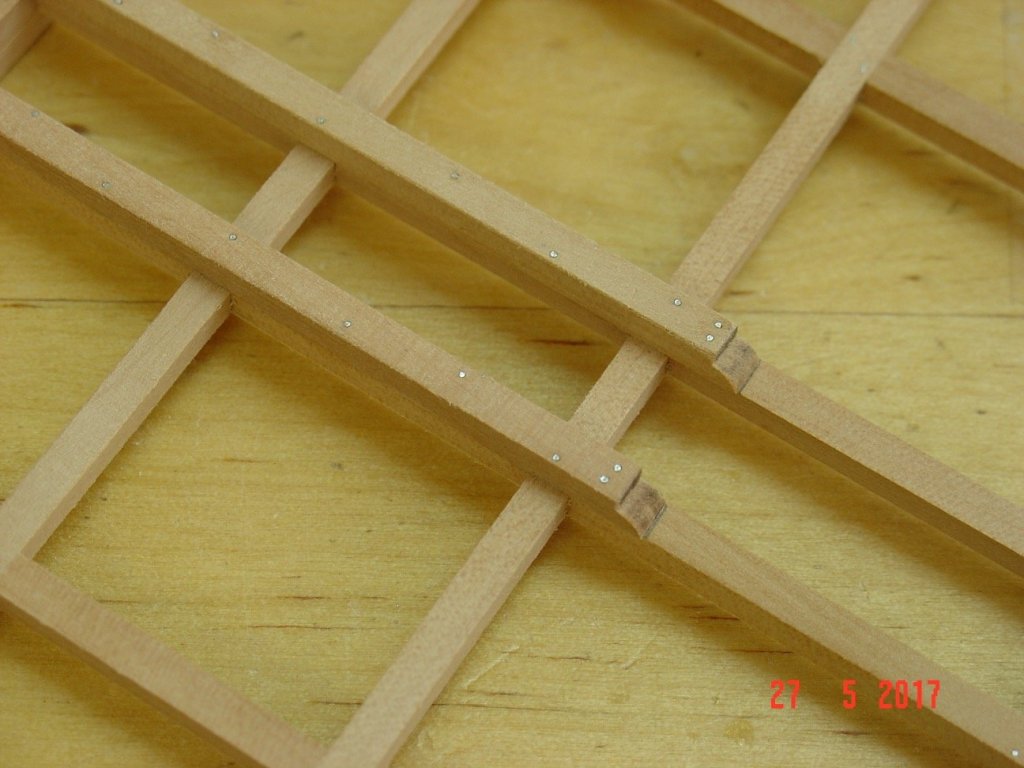
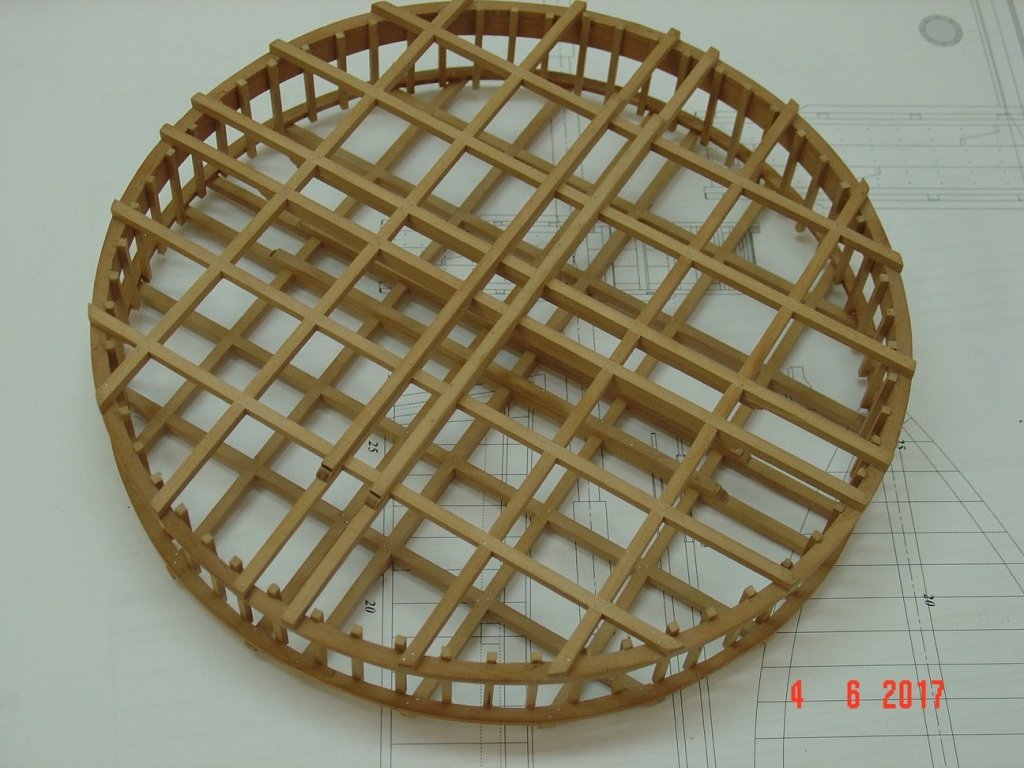
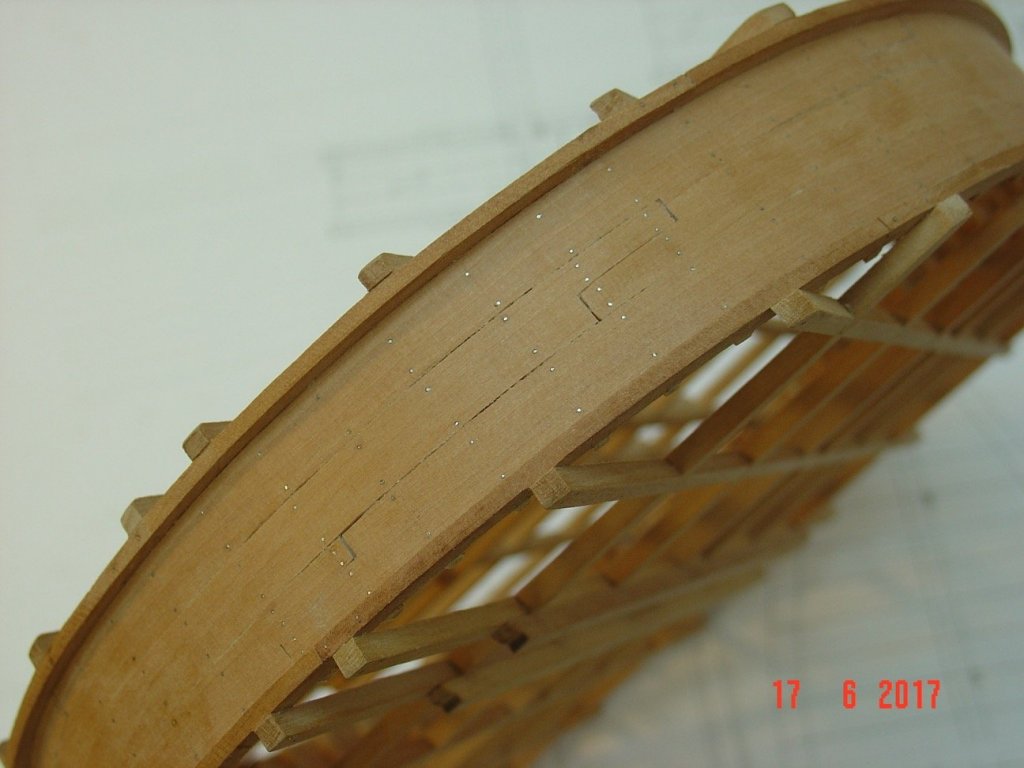
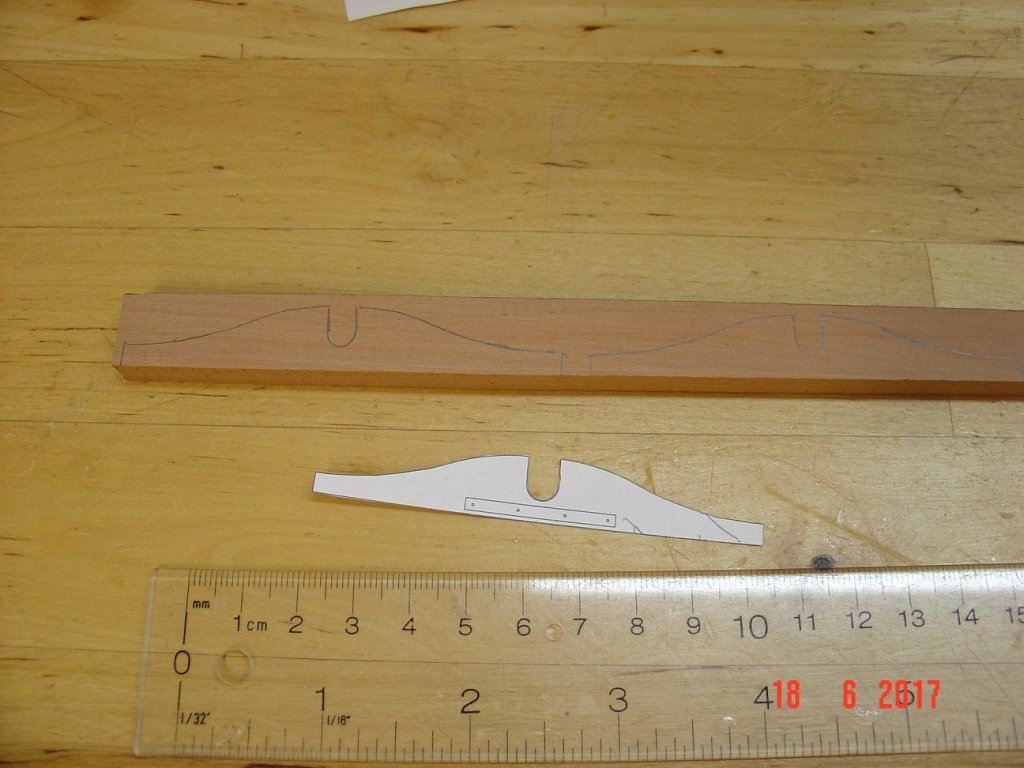
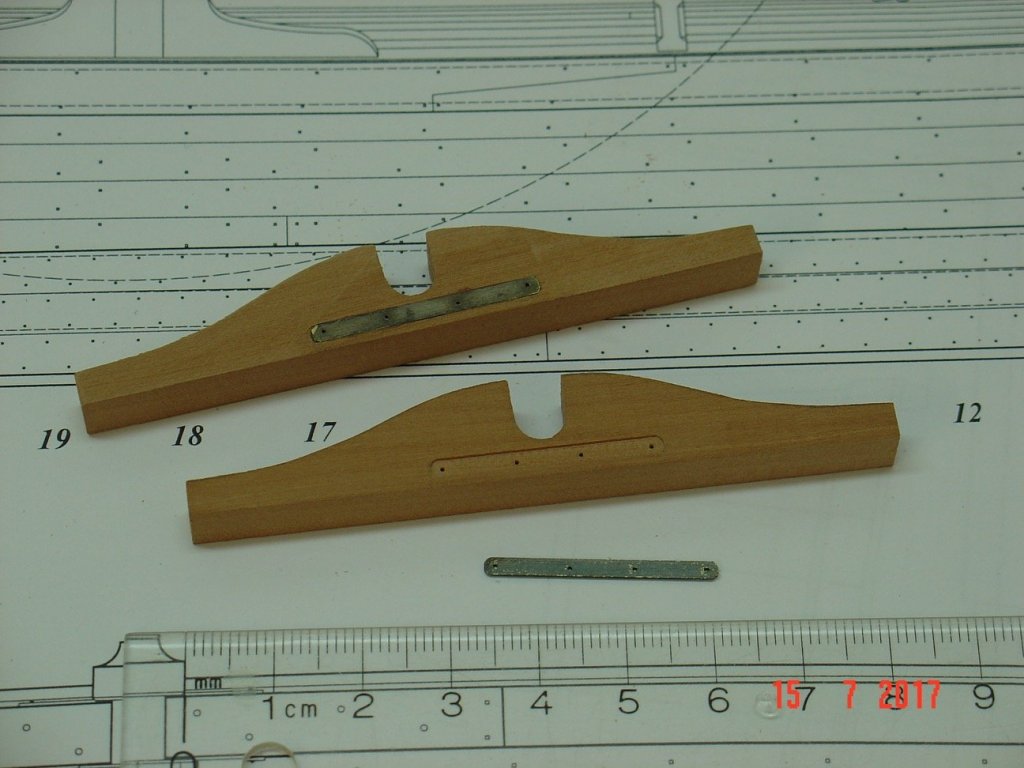
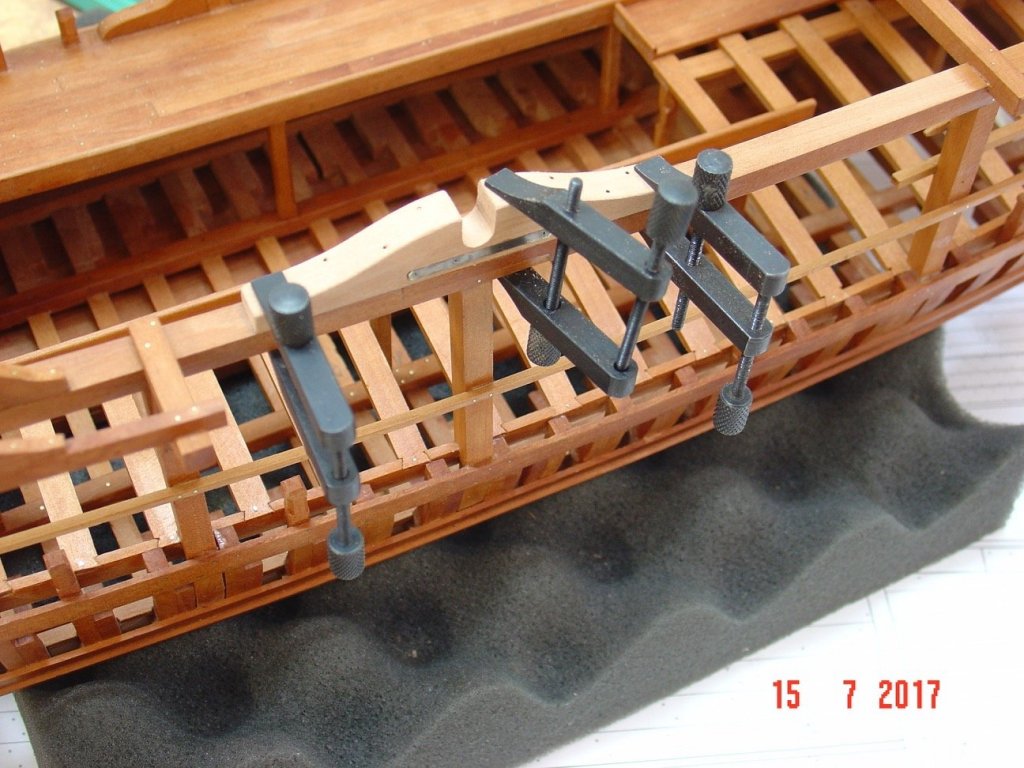
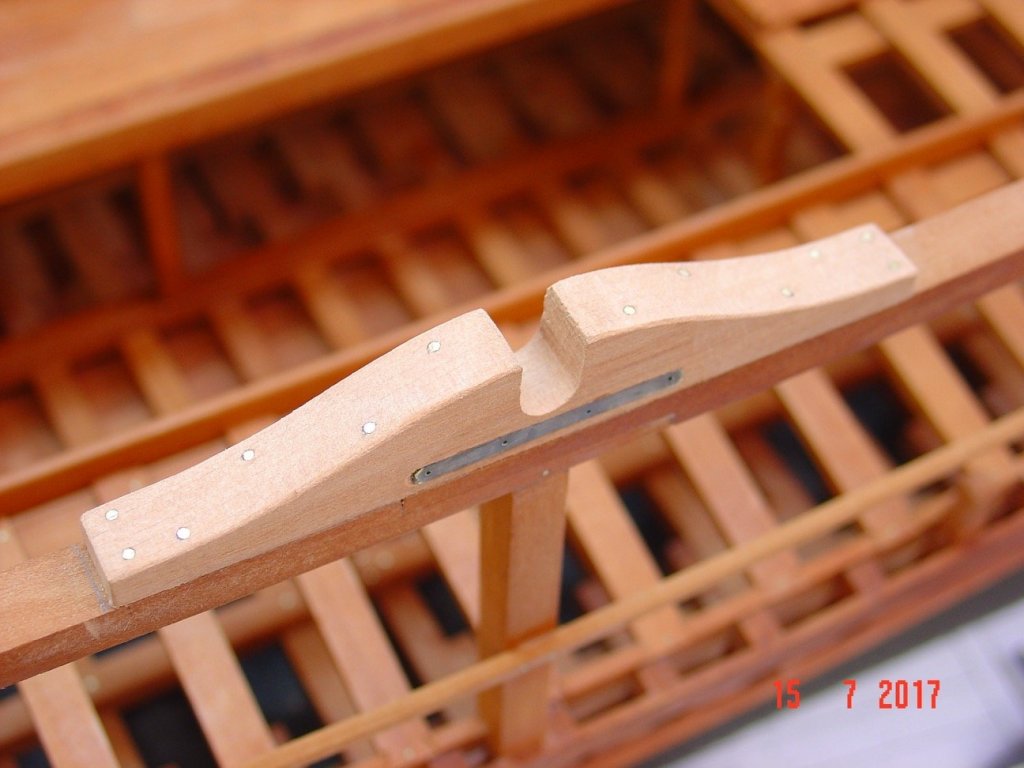
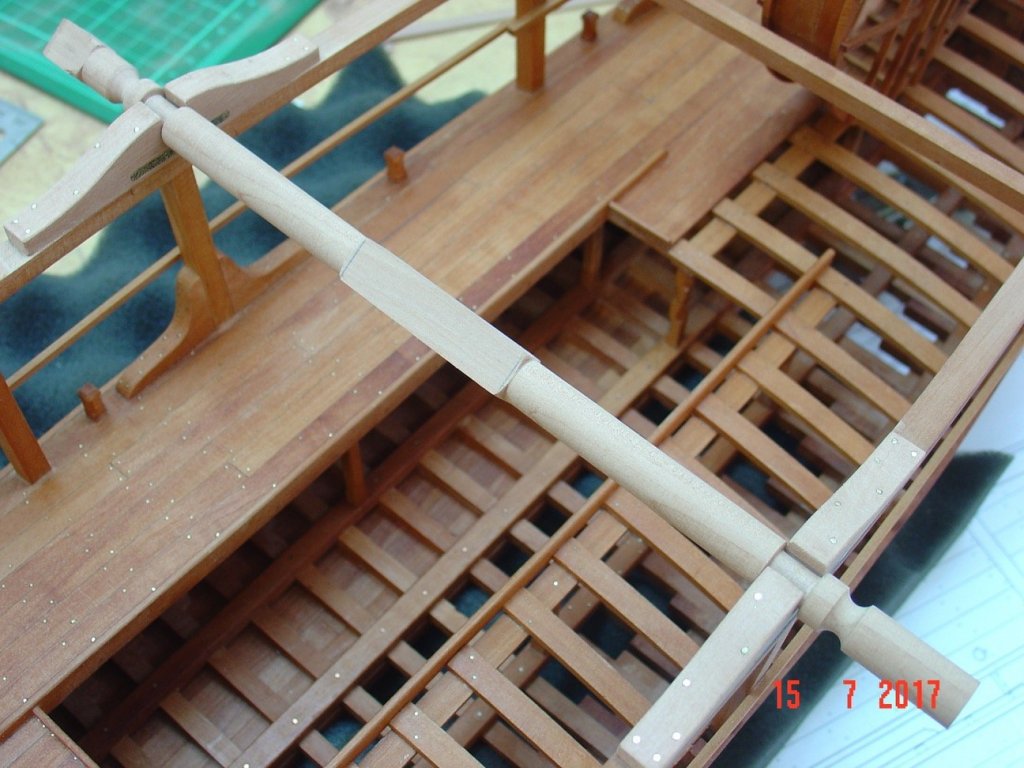
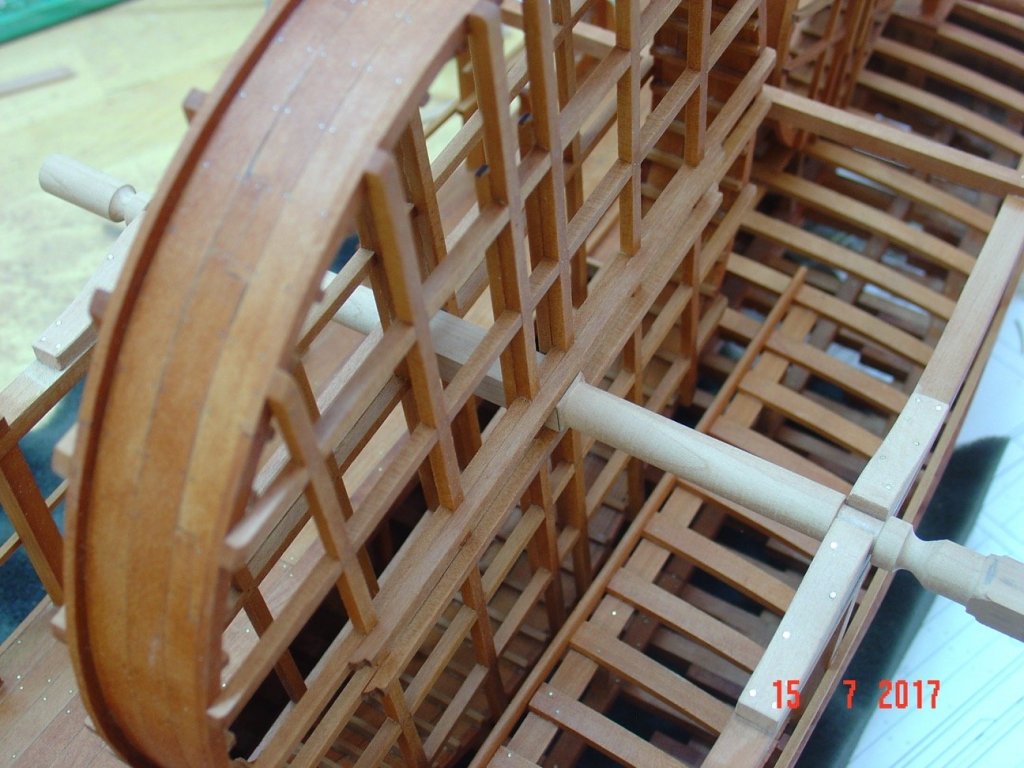
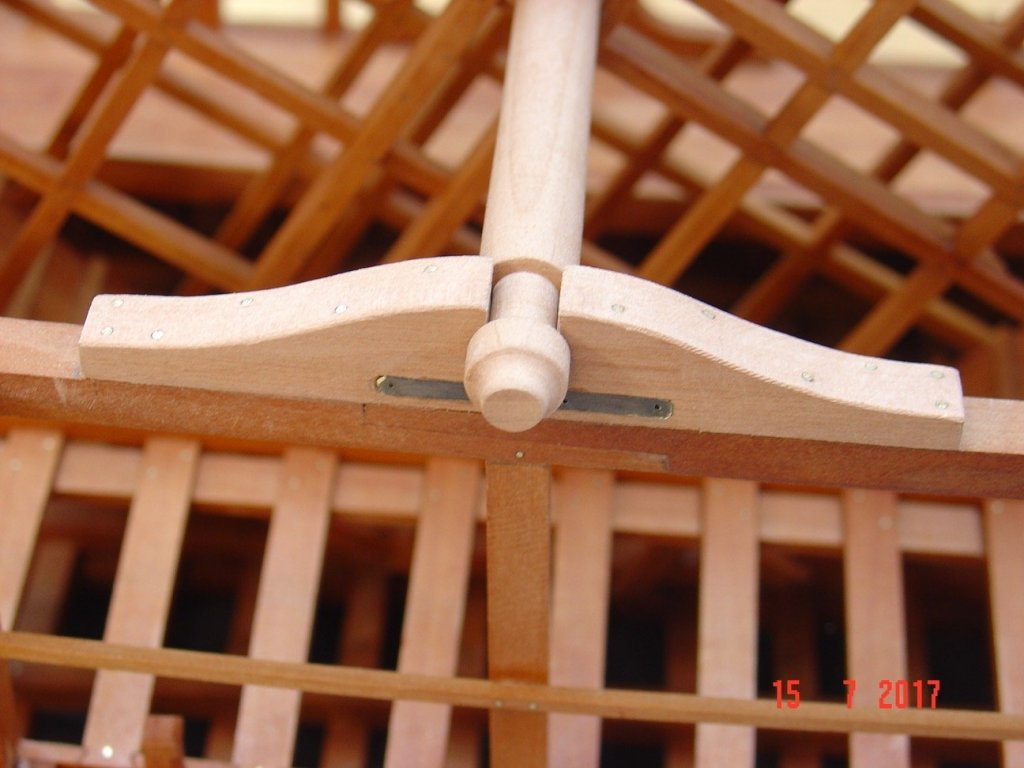
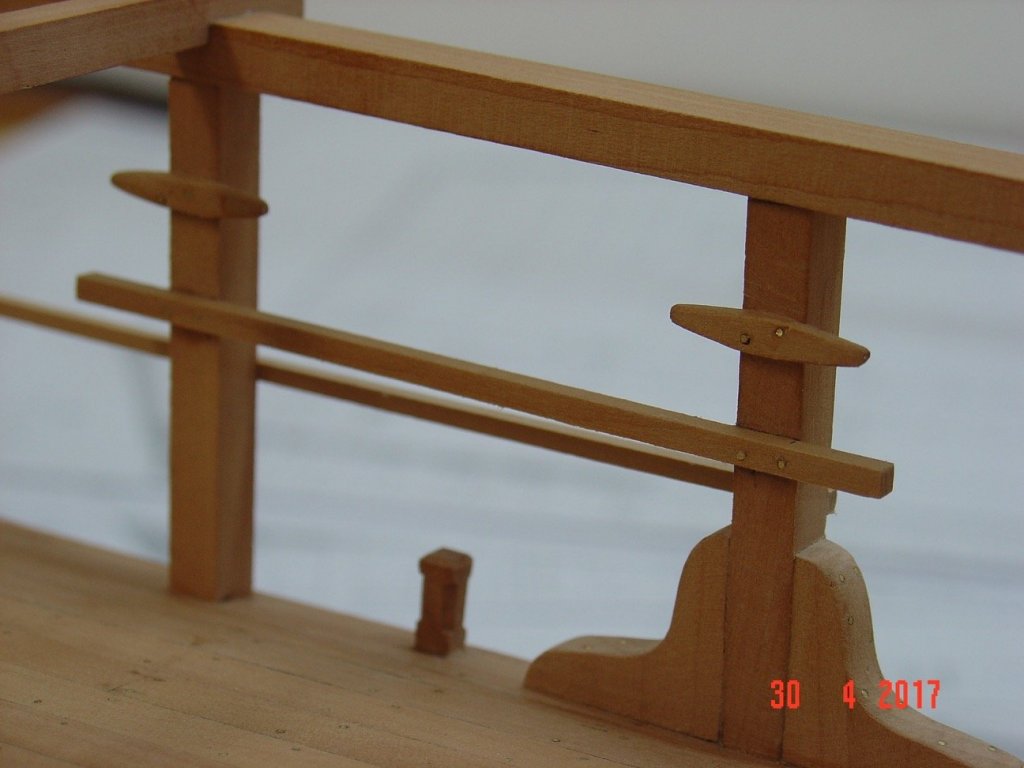
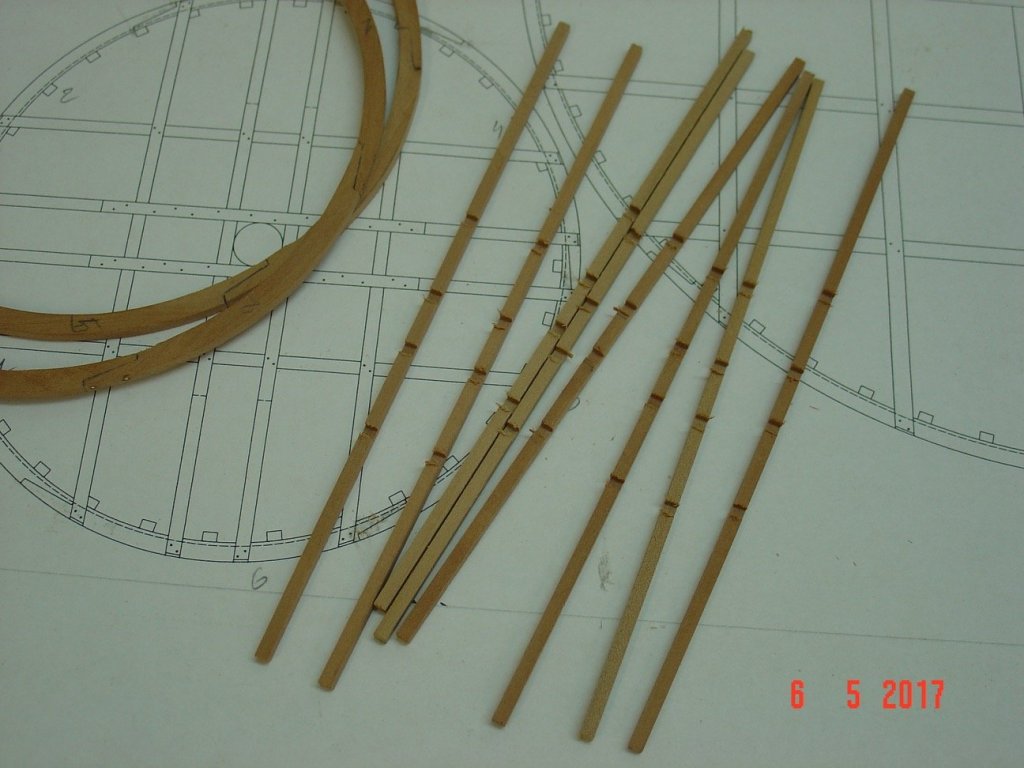
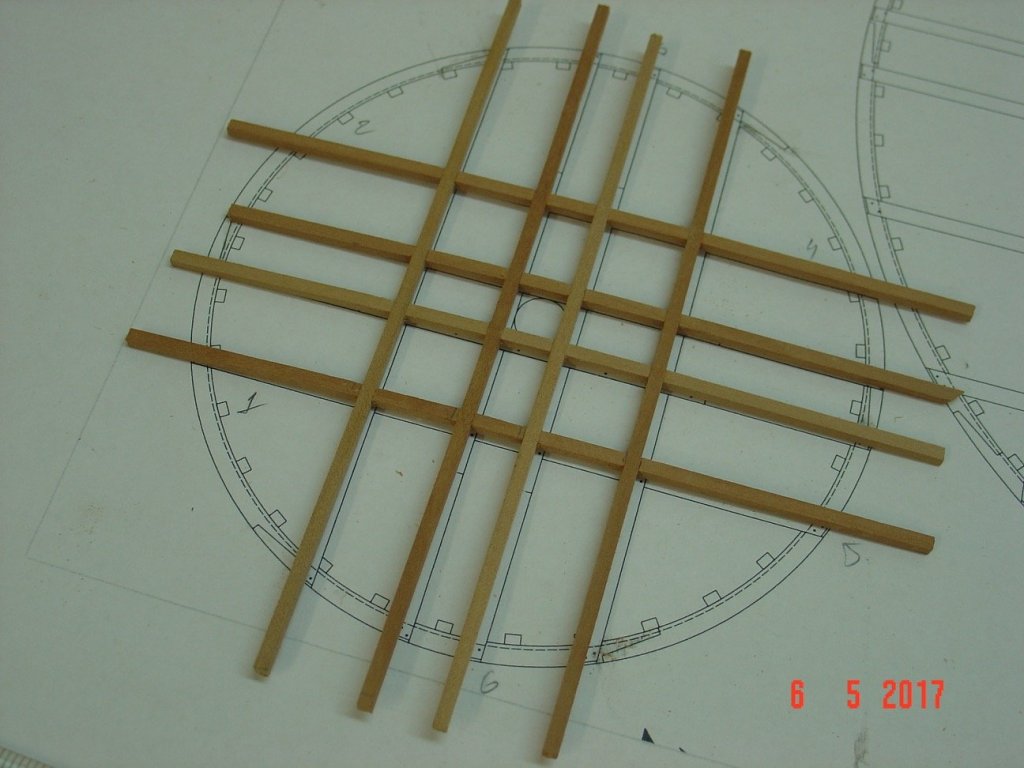
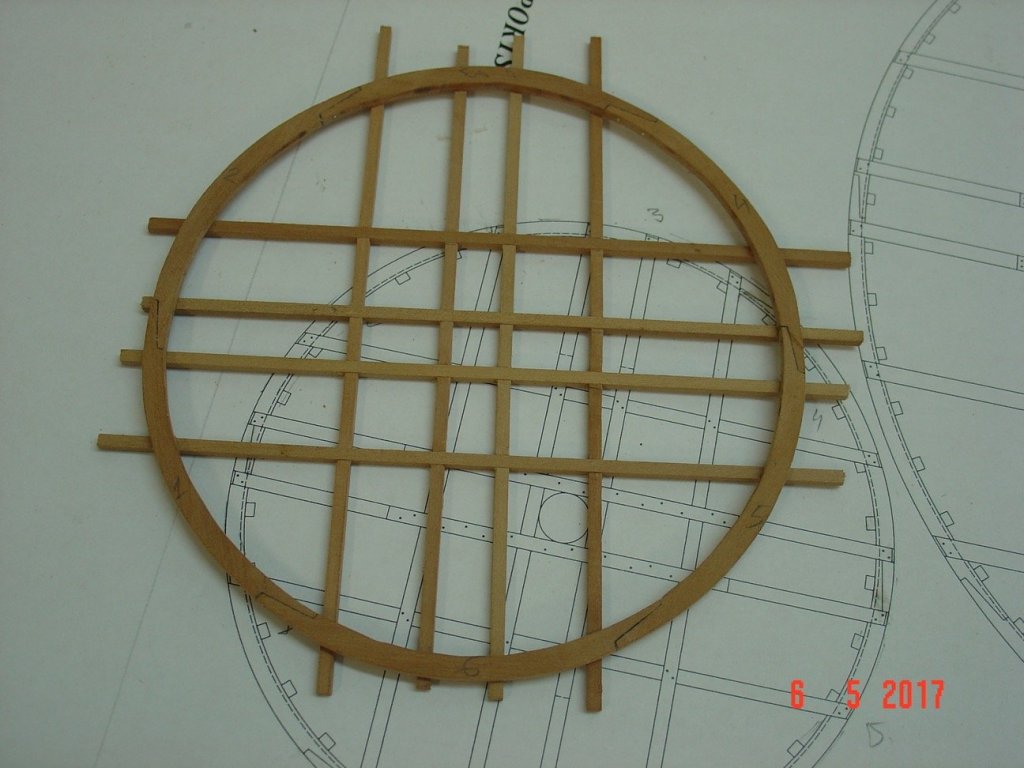
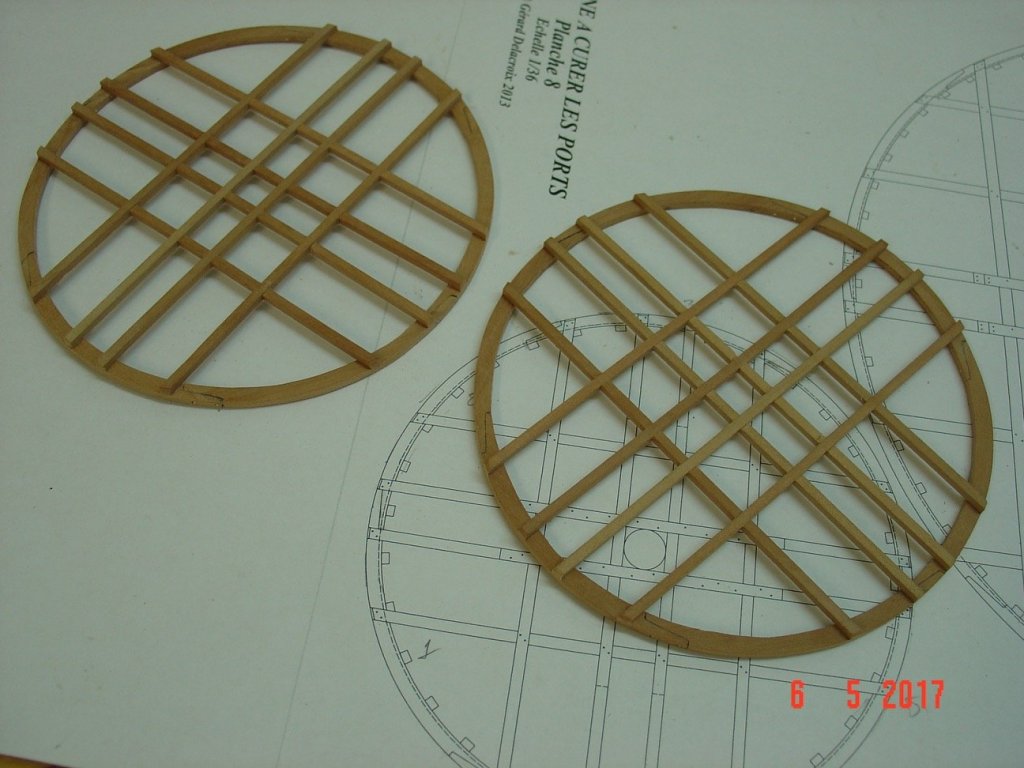
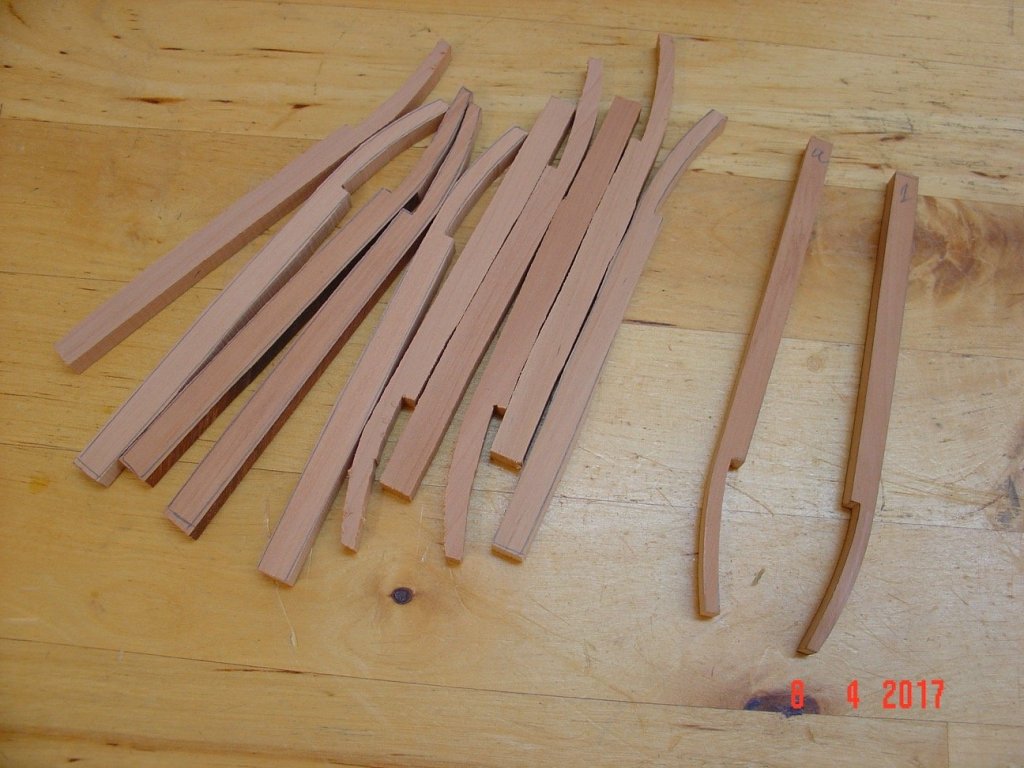
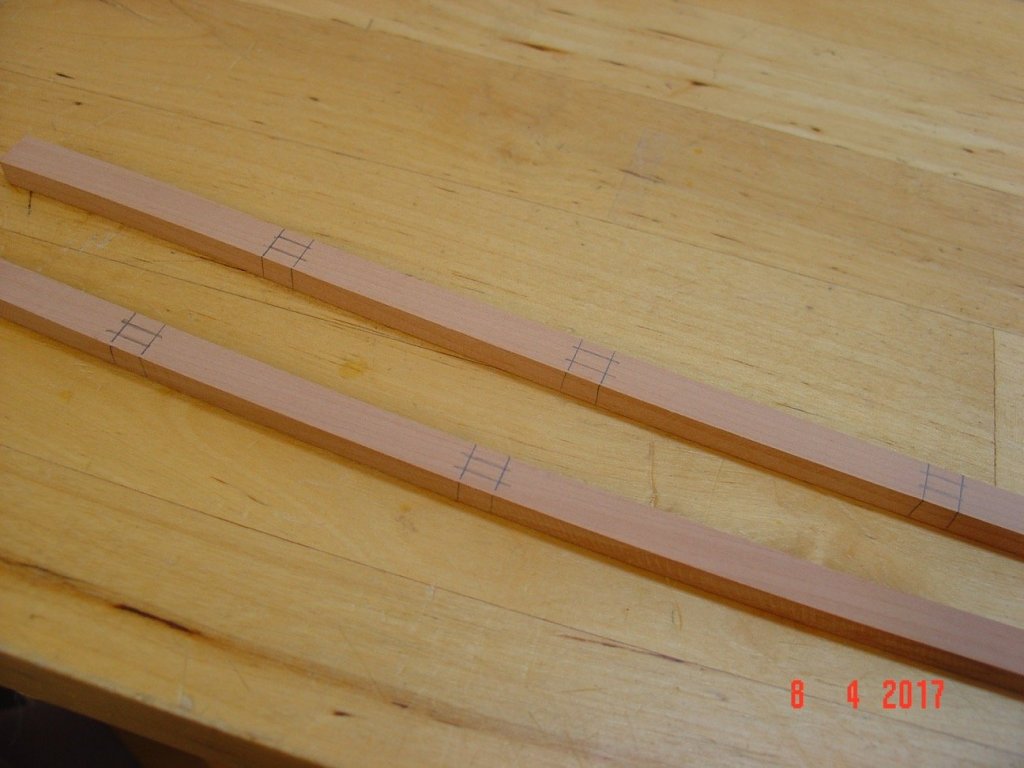
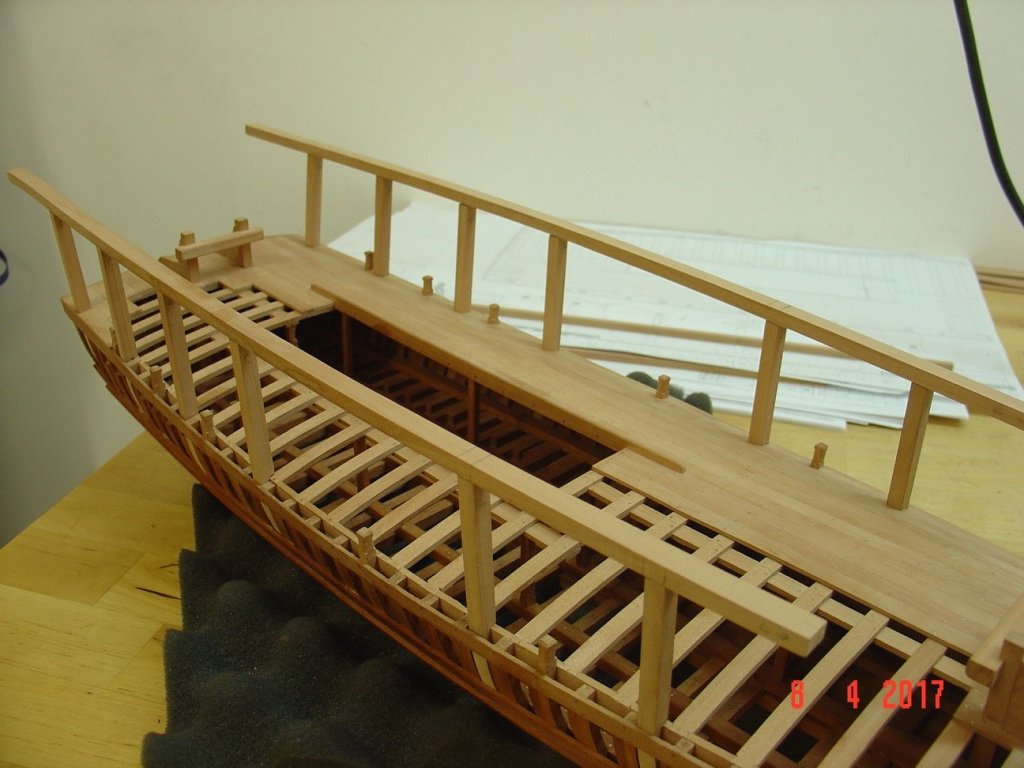
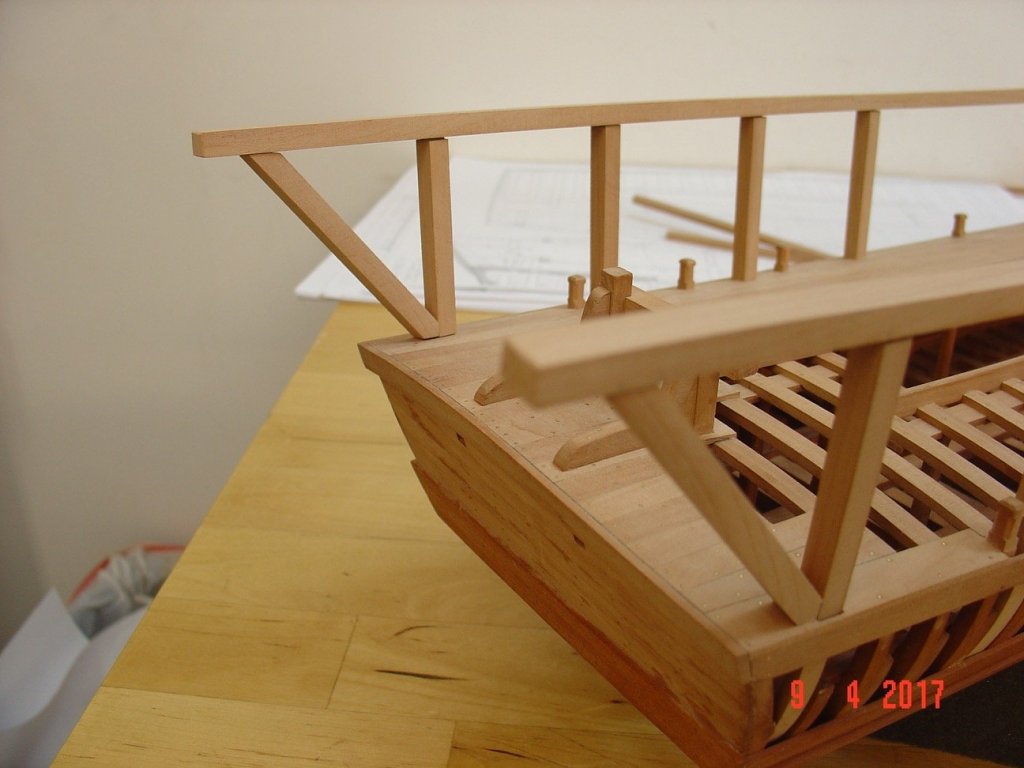
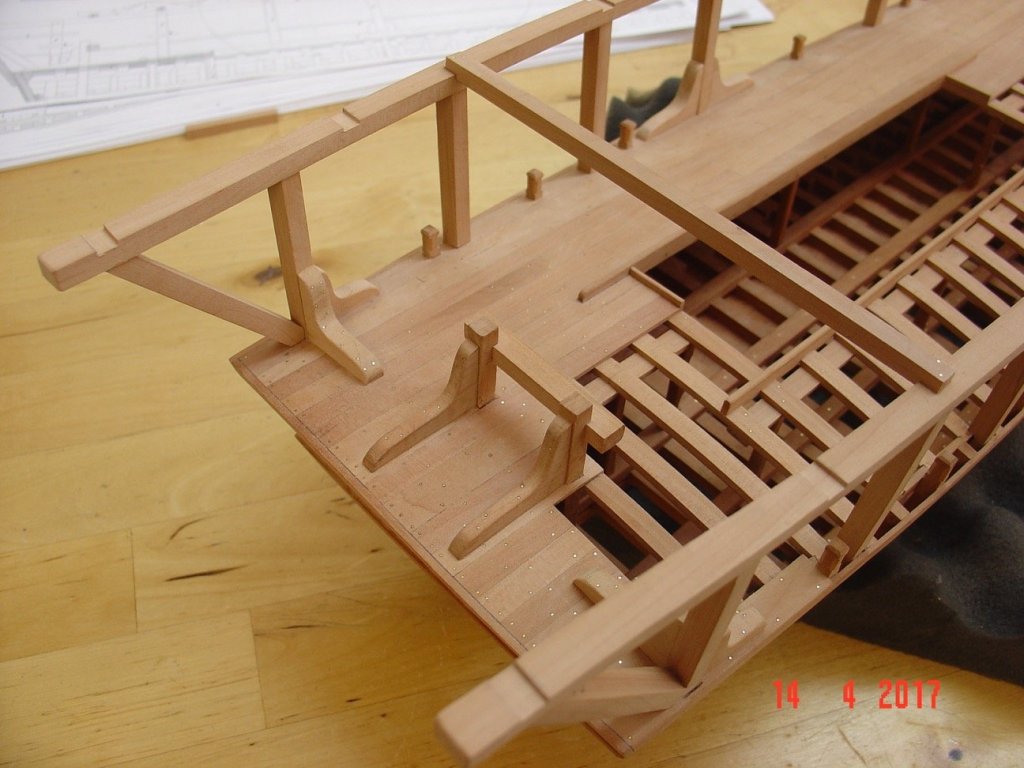
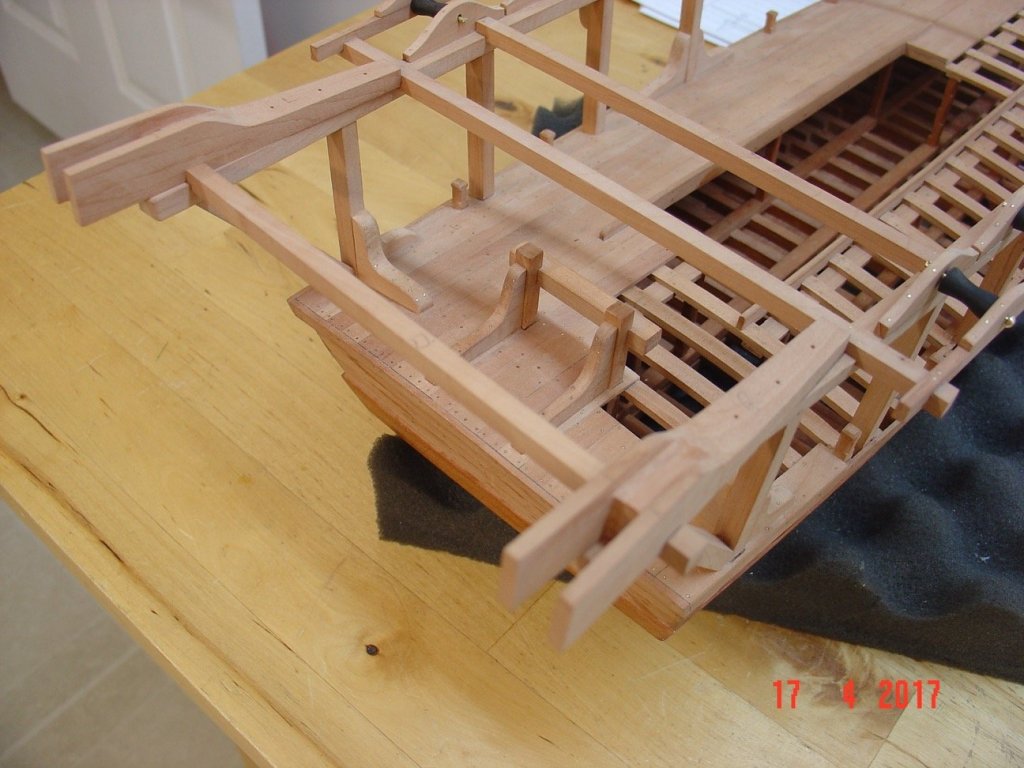
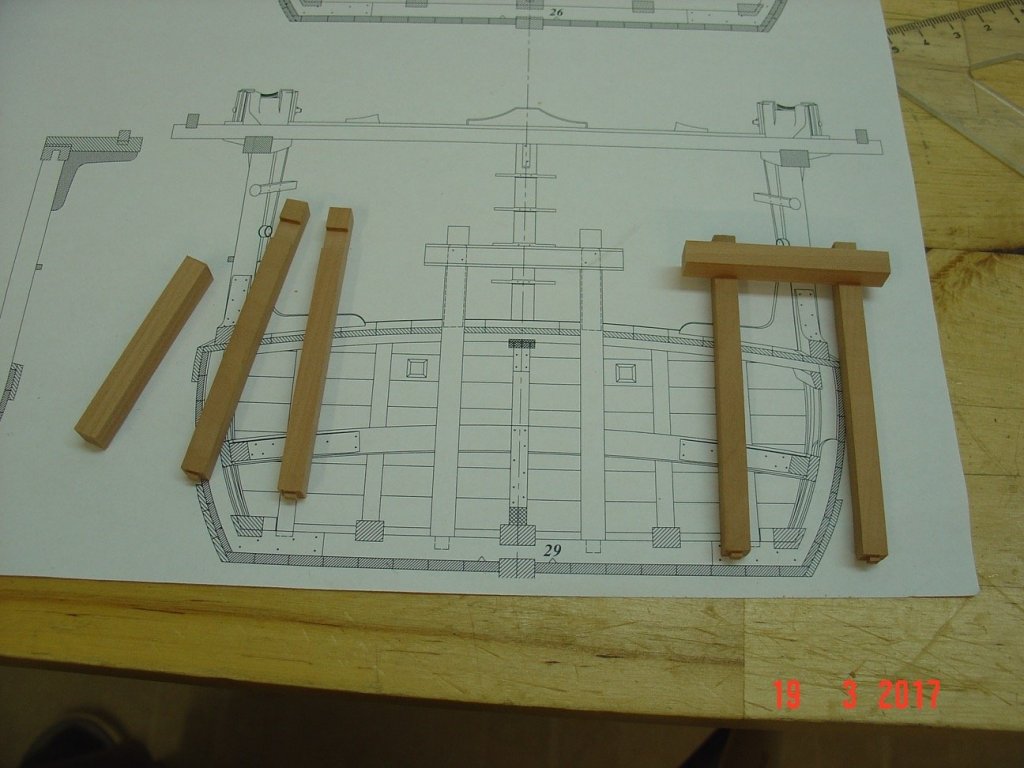
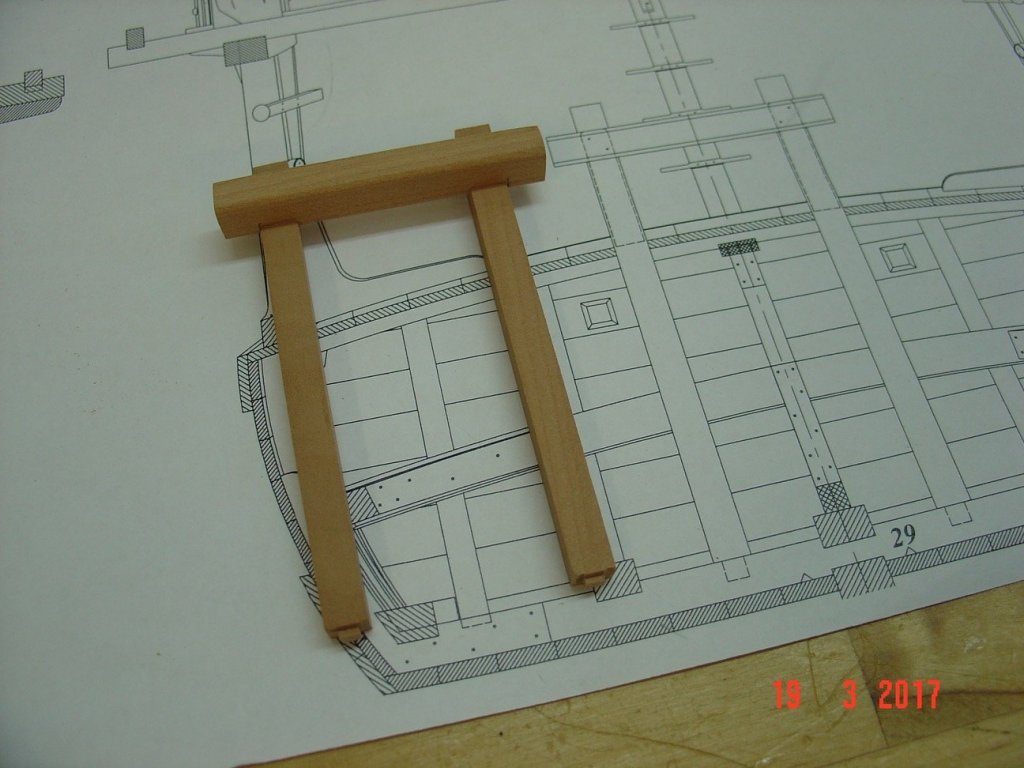
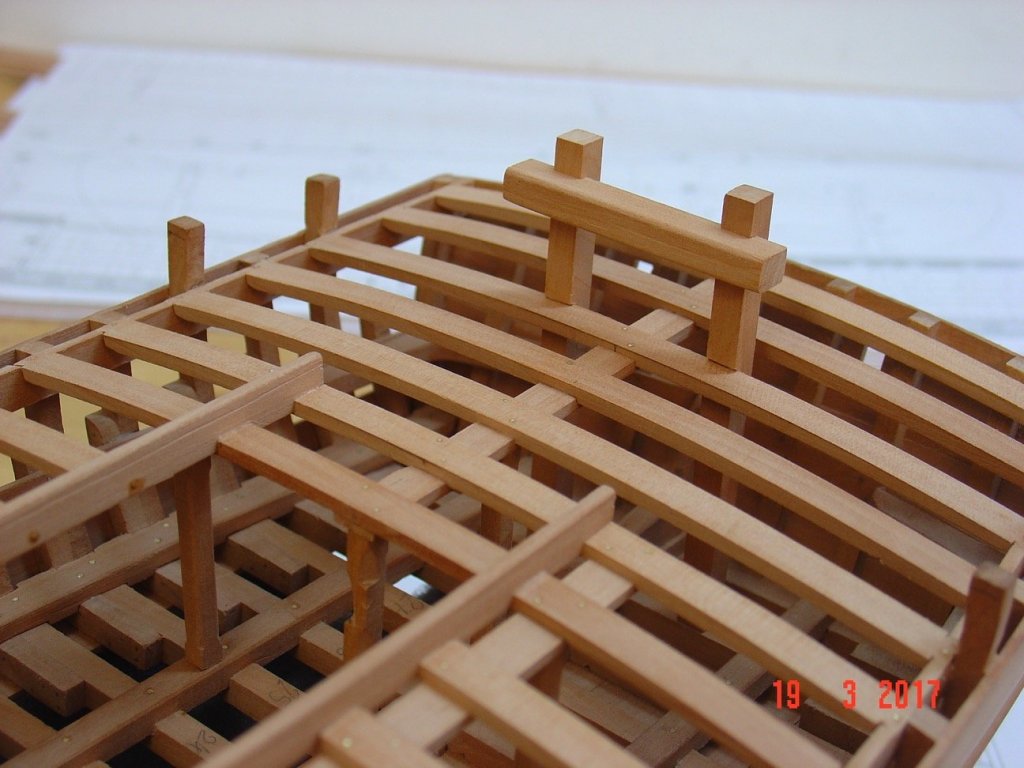
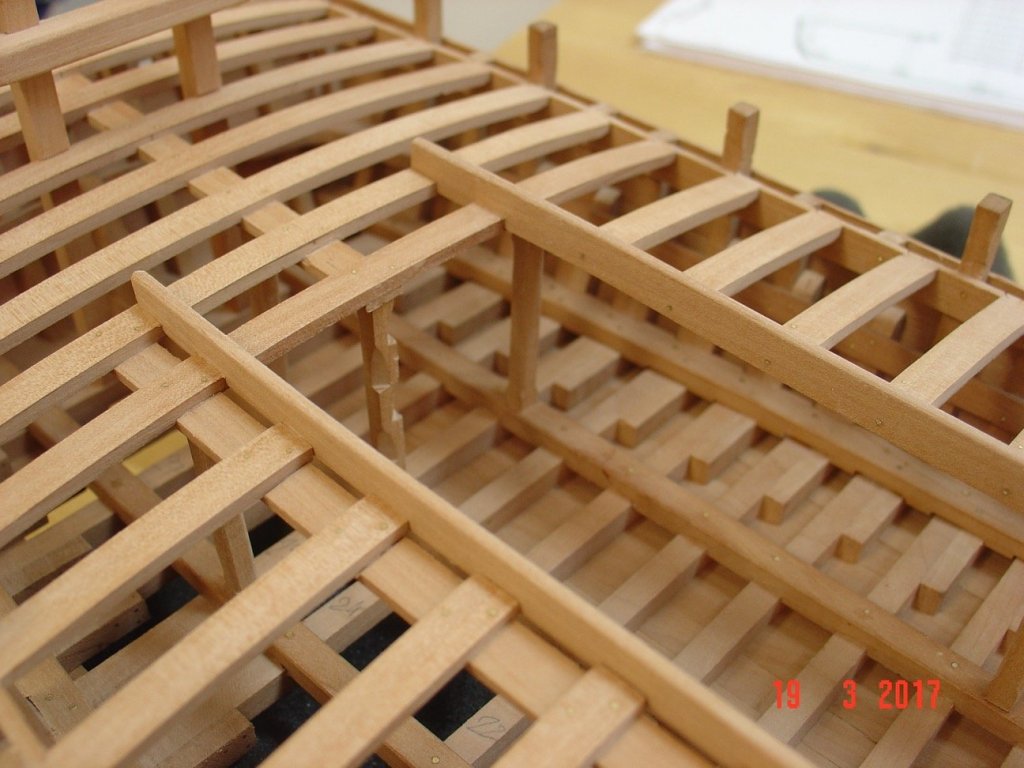
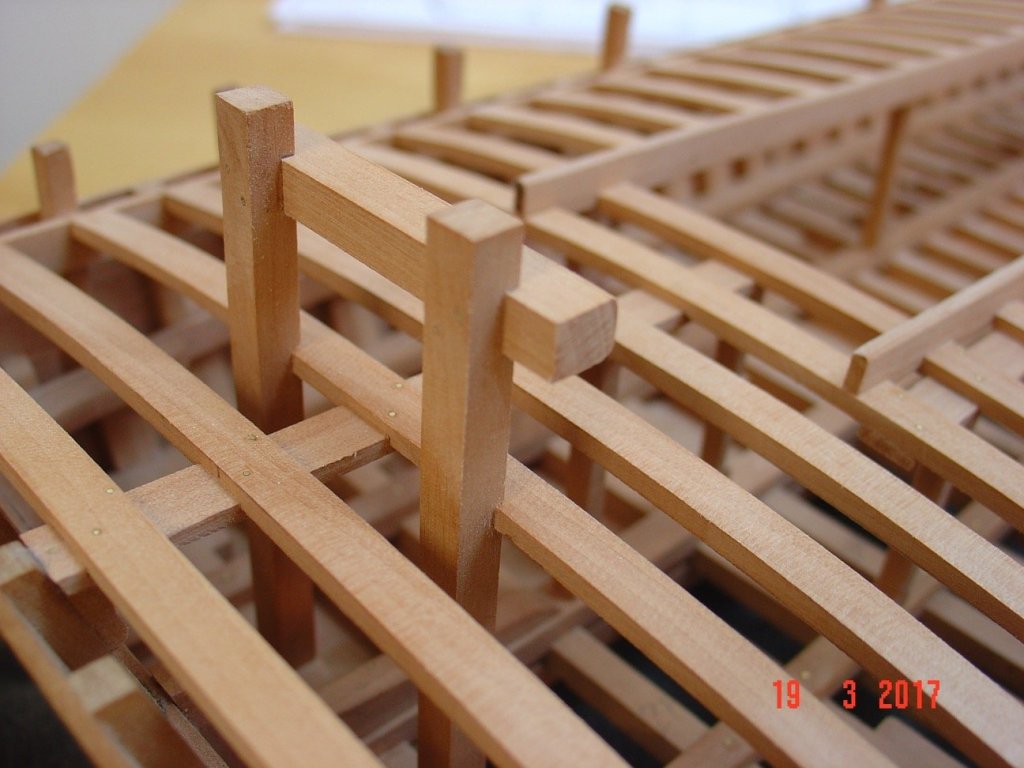
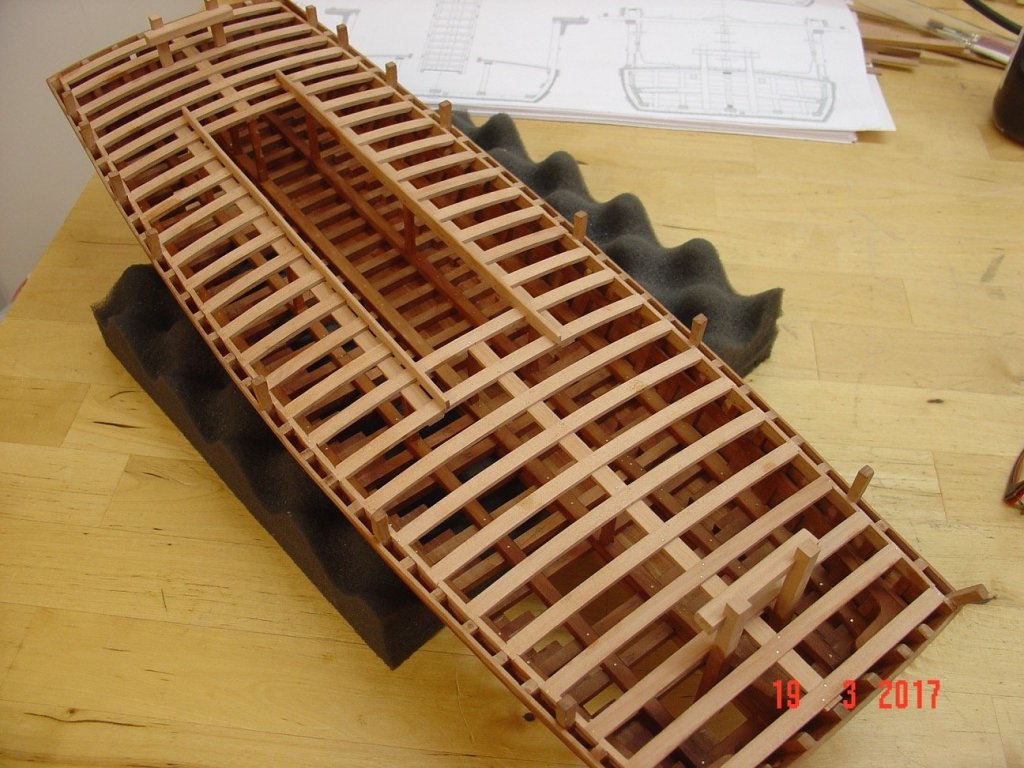
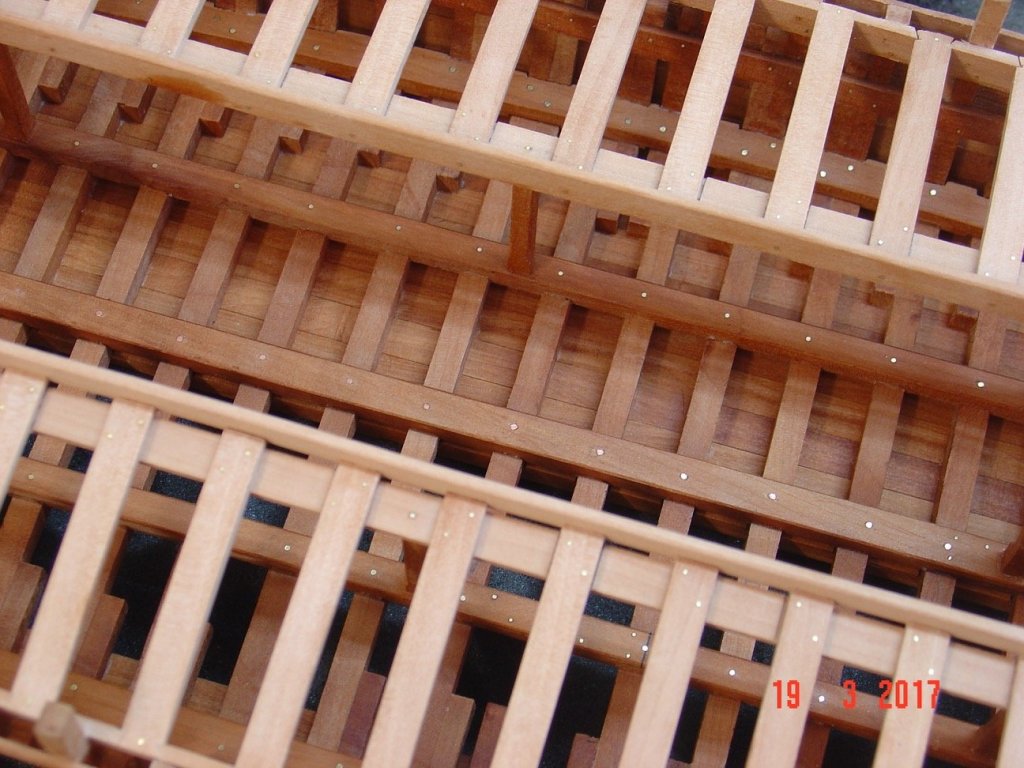
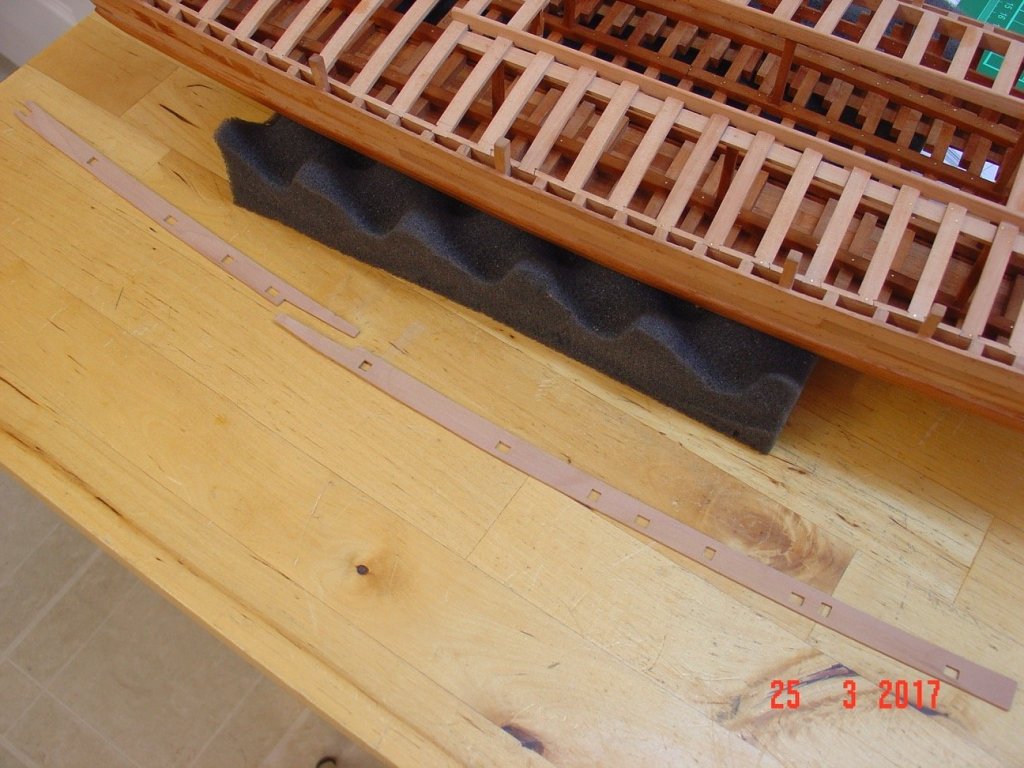
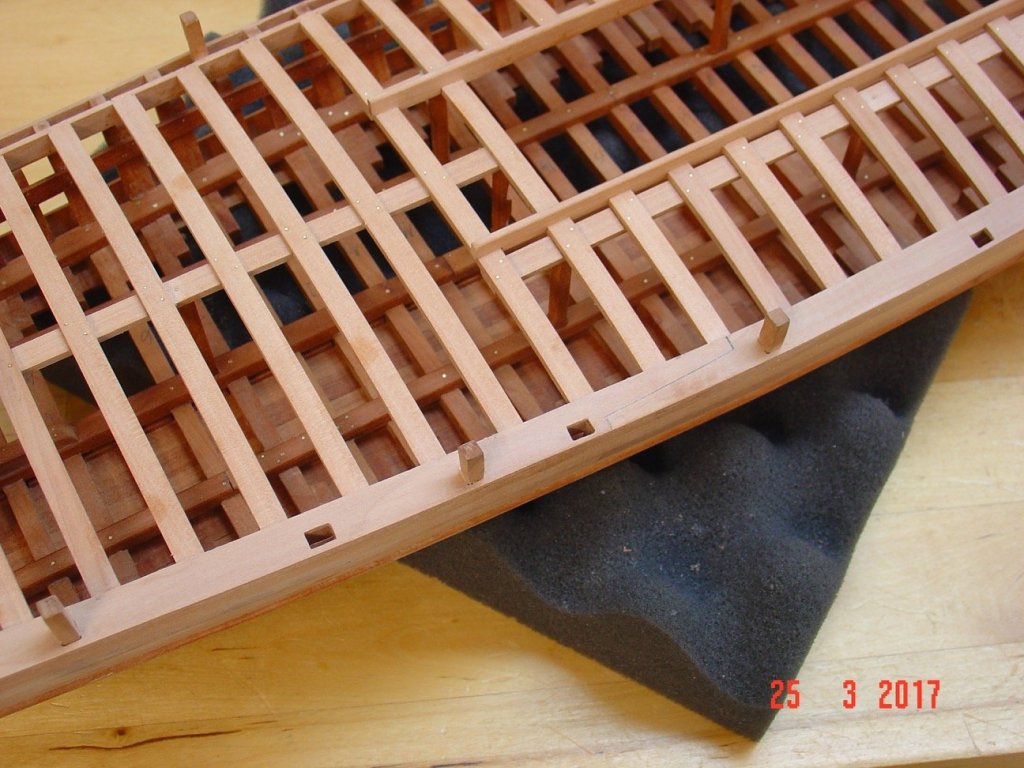
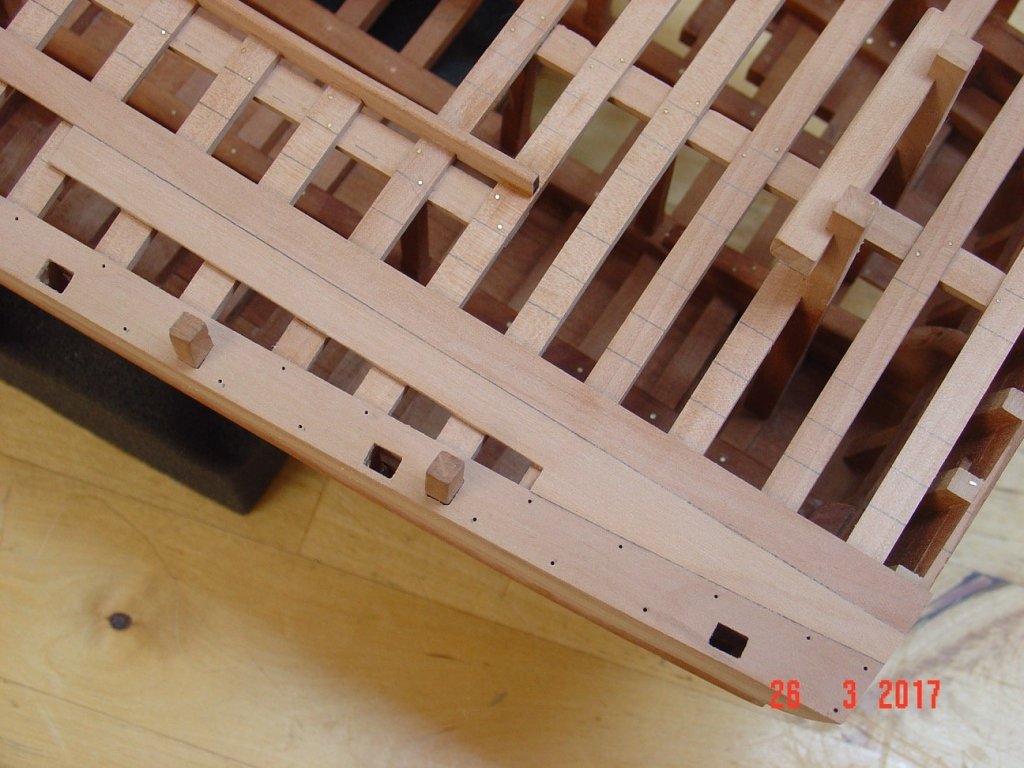
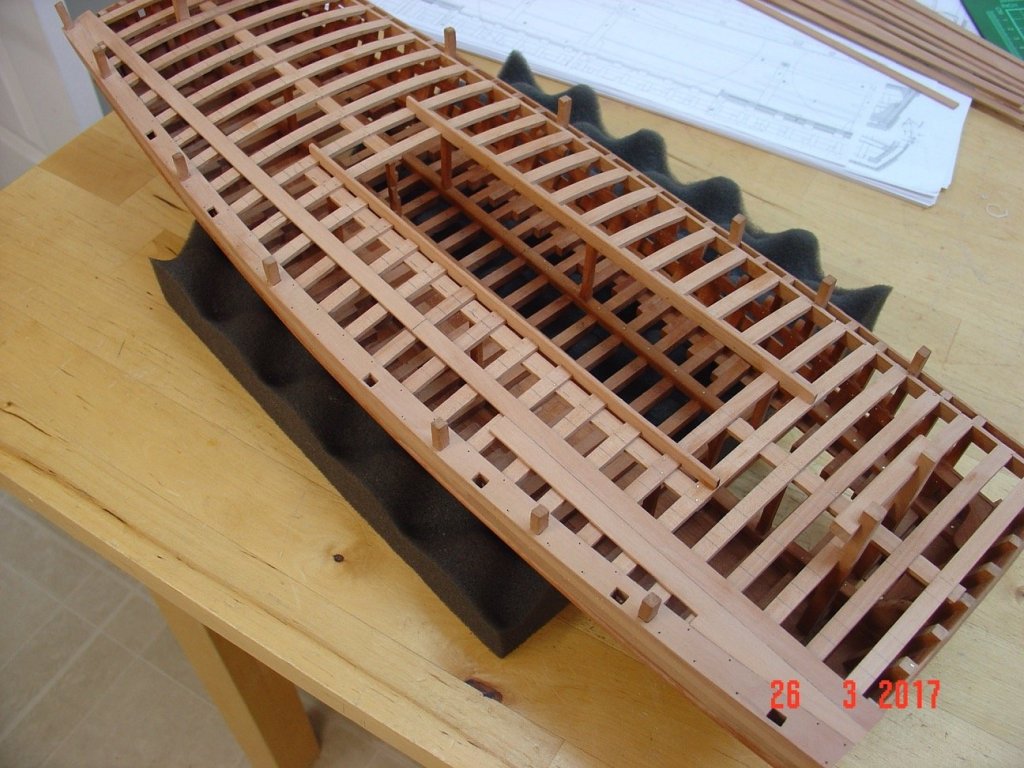
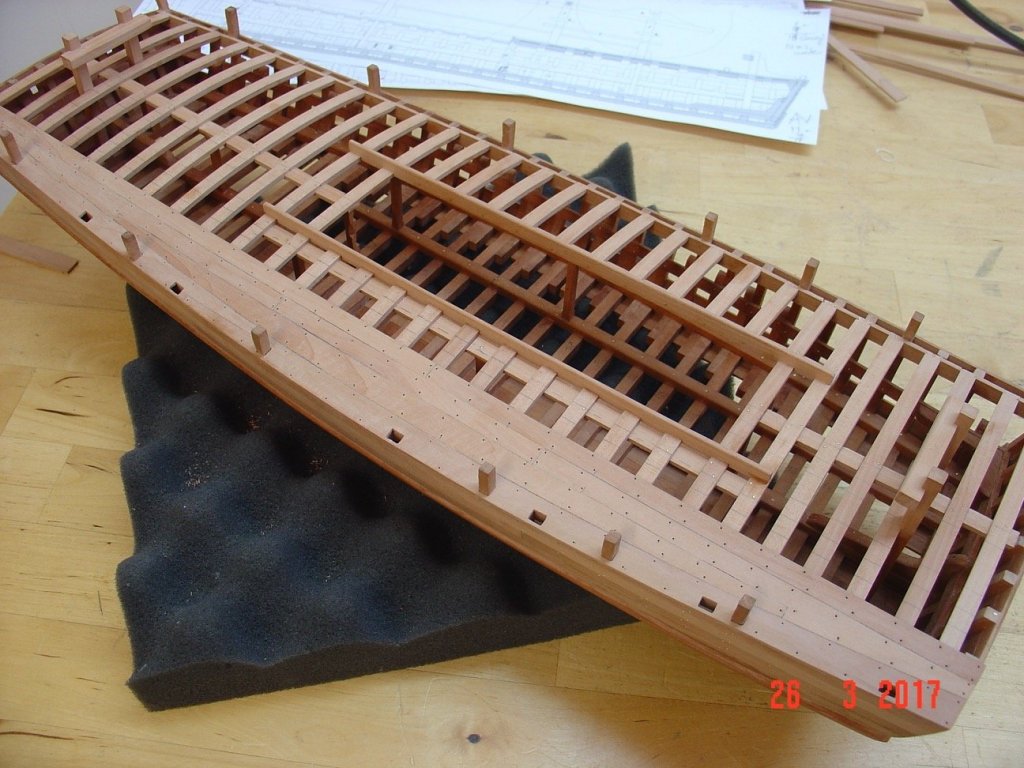
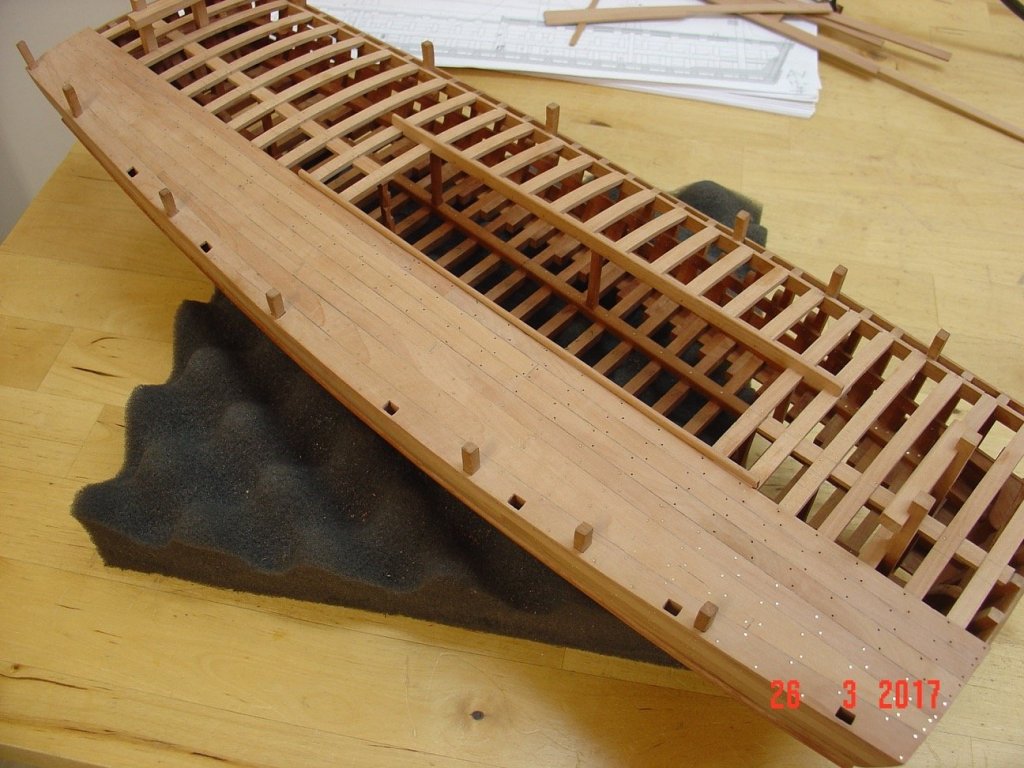
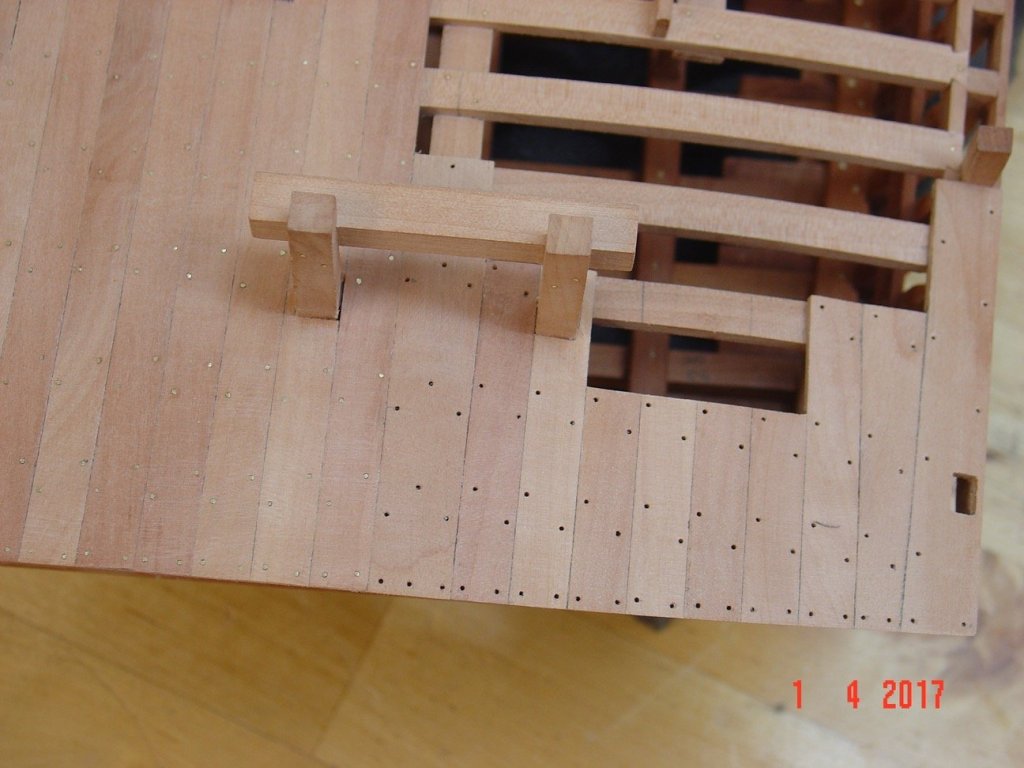
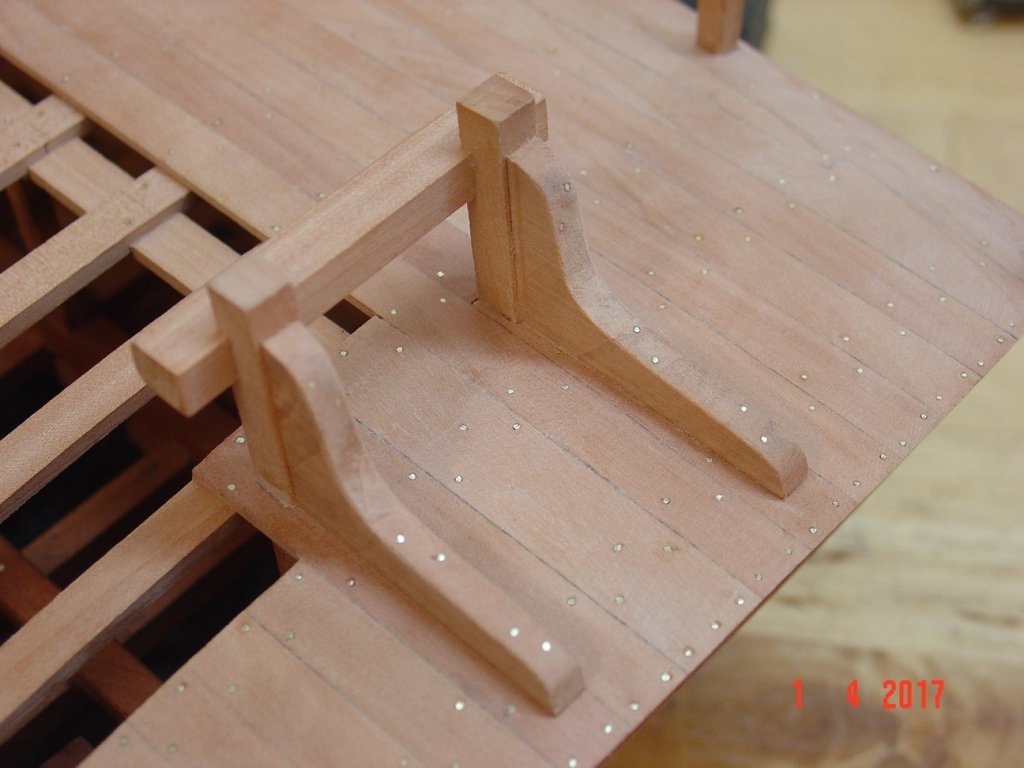
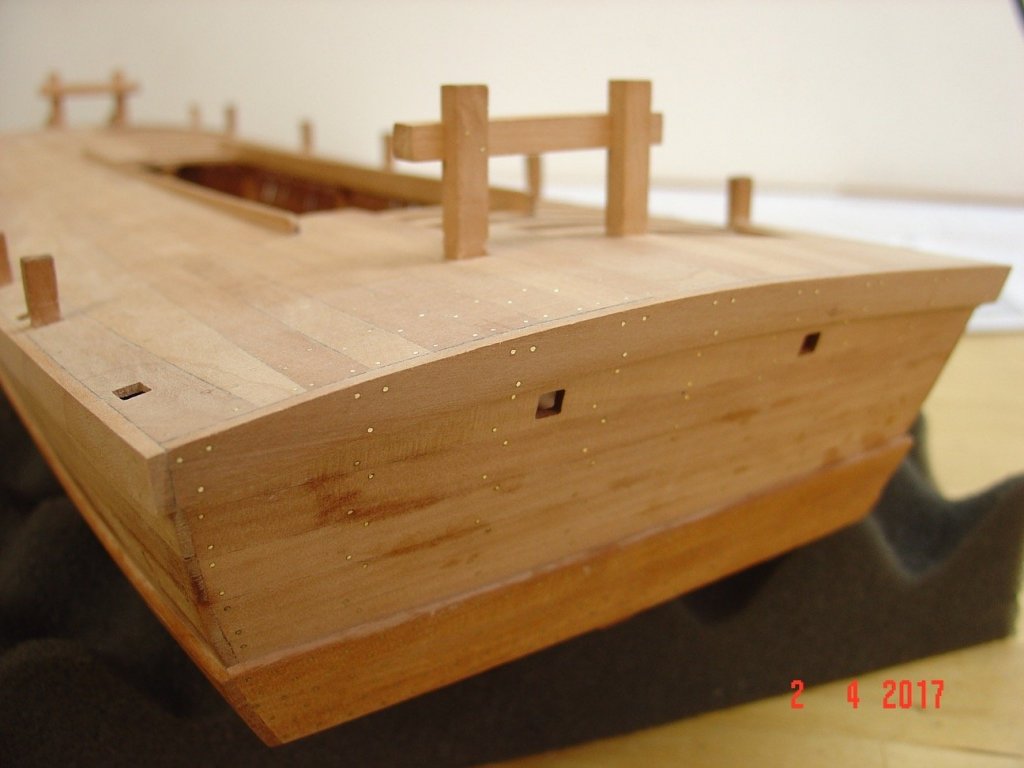
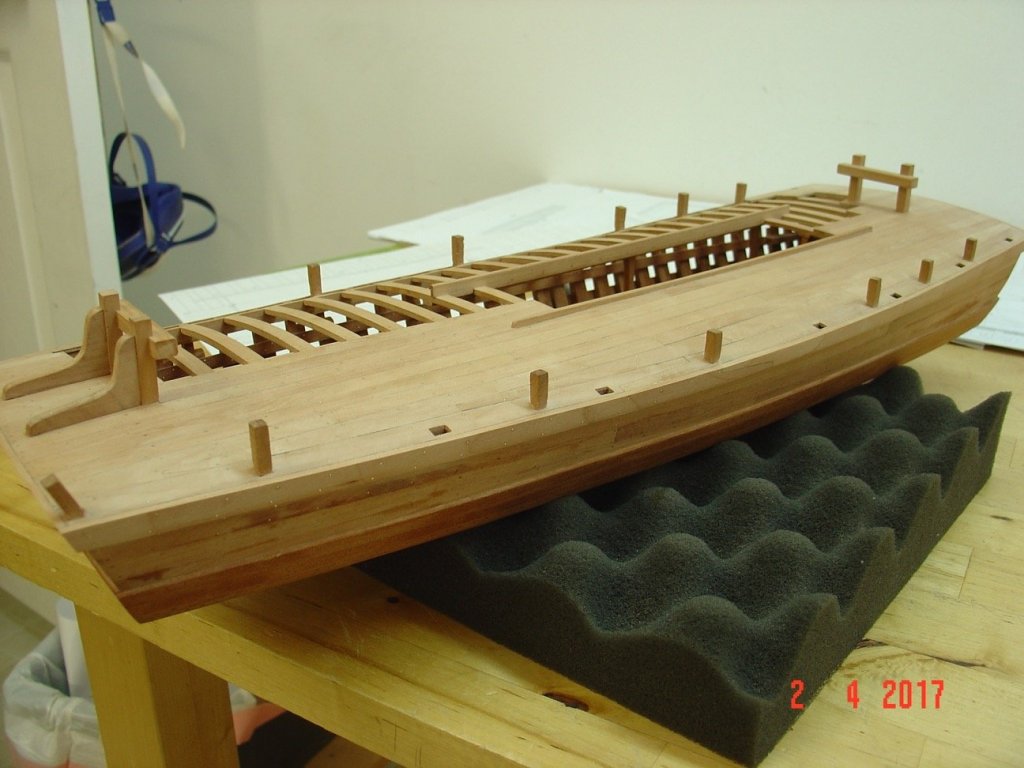
Hello, The deck framing is now complete. Here are some pictures. Alexandru