Pete Jaquith
-
Posts
343 -
Joined
-
Last visited
Content Type
Profiles
Forums
Gallery
Events
Everything posted by Pete Jaquith
-
 Captain Hook, Thank you for the likes. I typically break the edges on hull planking and try to minimize sanding in order to retain plank runs. Regards from the shipyard, Pete
 -
Bob, Thank you for your interest. I find the work rewarding and she is a fine looking ship. More to follow in the coming days. Regards from the shipyard, Pete
-
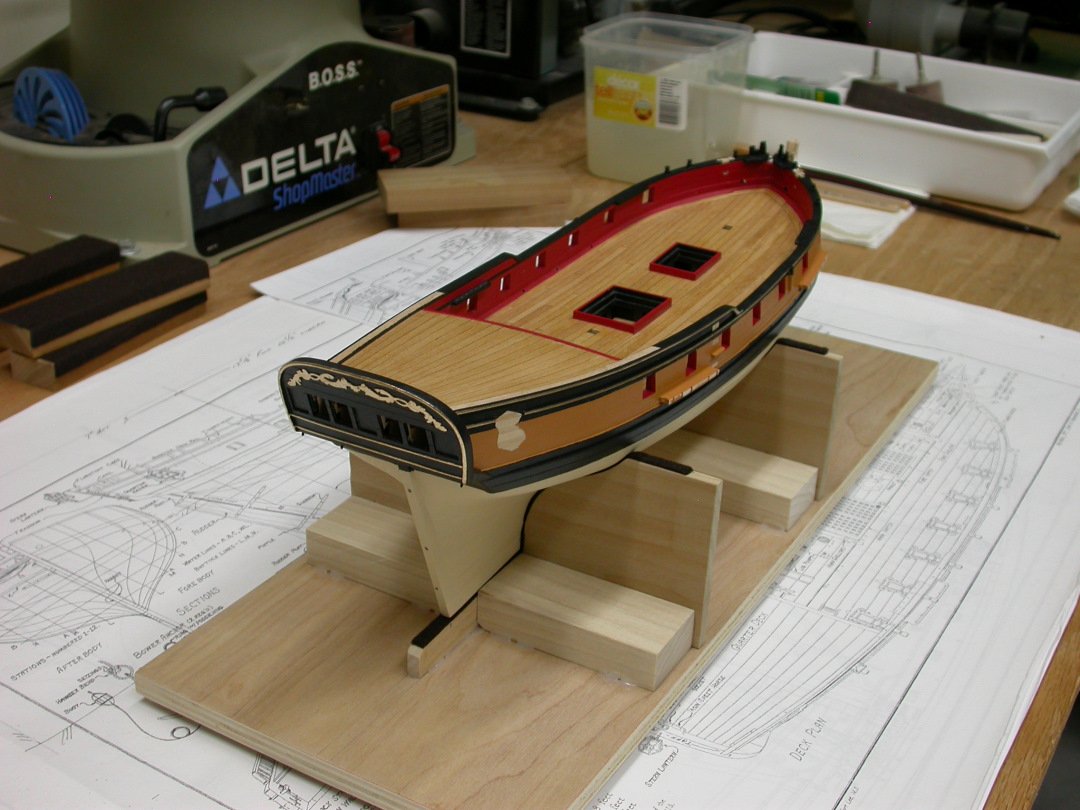
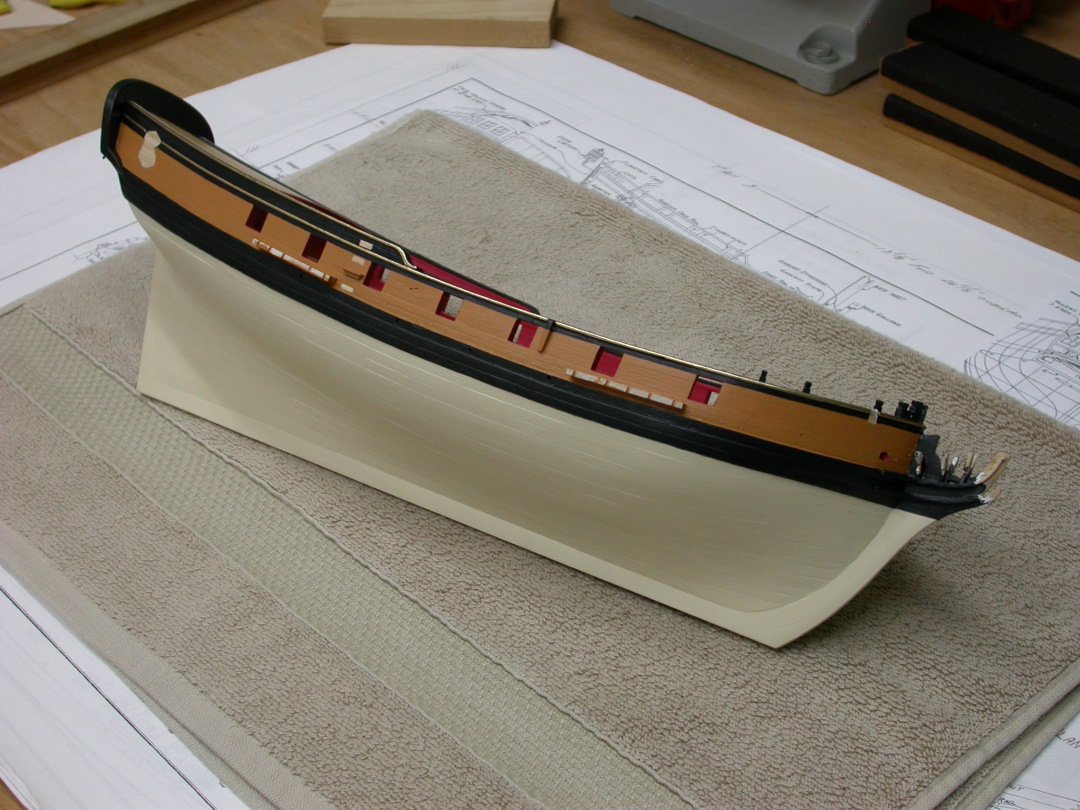
Progress continues on the head structure. More pictures to follow when this work area is completed. Regards from the shipyard, Pete
-
Mugje, Thanks for your interest. Its been a long project as construction on this build started in October 2011. "Fair American" construction was delayed from 2012 to 2019 due to competing full scale shipbuilding assignments and moves from Hancock NH to San Diego and Indio CA. With painting in hand, progress should move along a little faster, Regards from the shipyard, Pete
-
Chris, Thanks for your interest. She is starting to come together now. Many more bitts and pieces to be added to complete the exterior. Regards from the shipyard, Pete
-
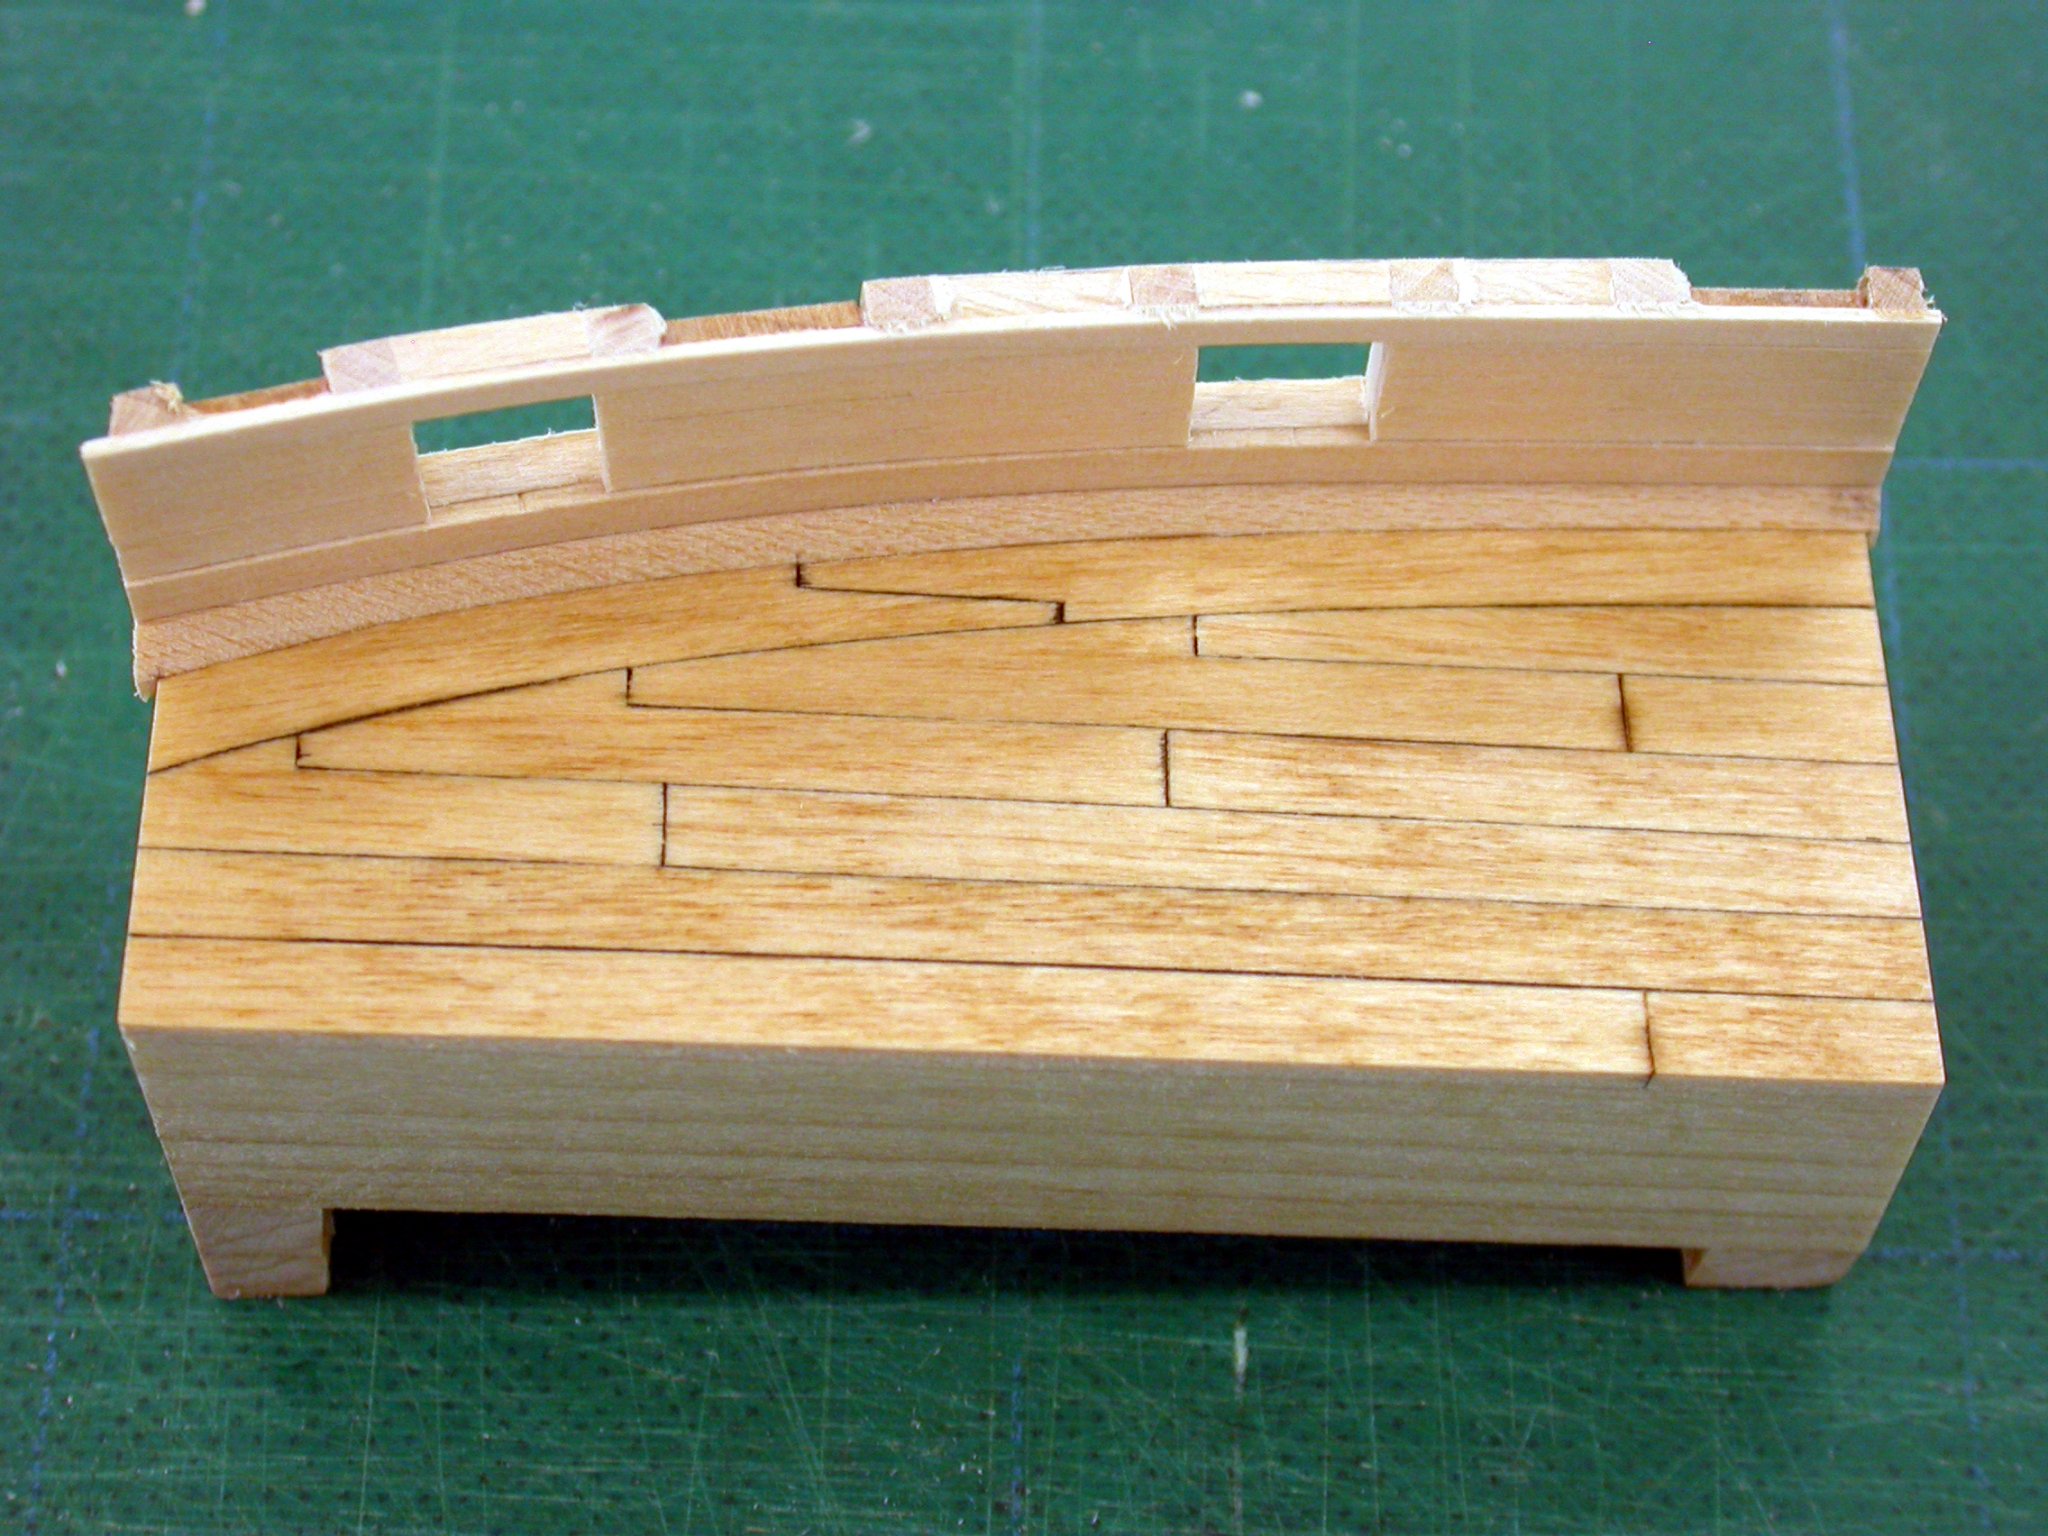
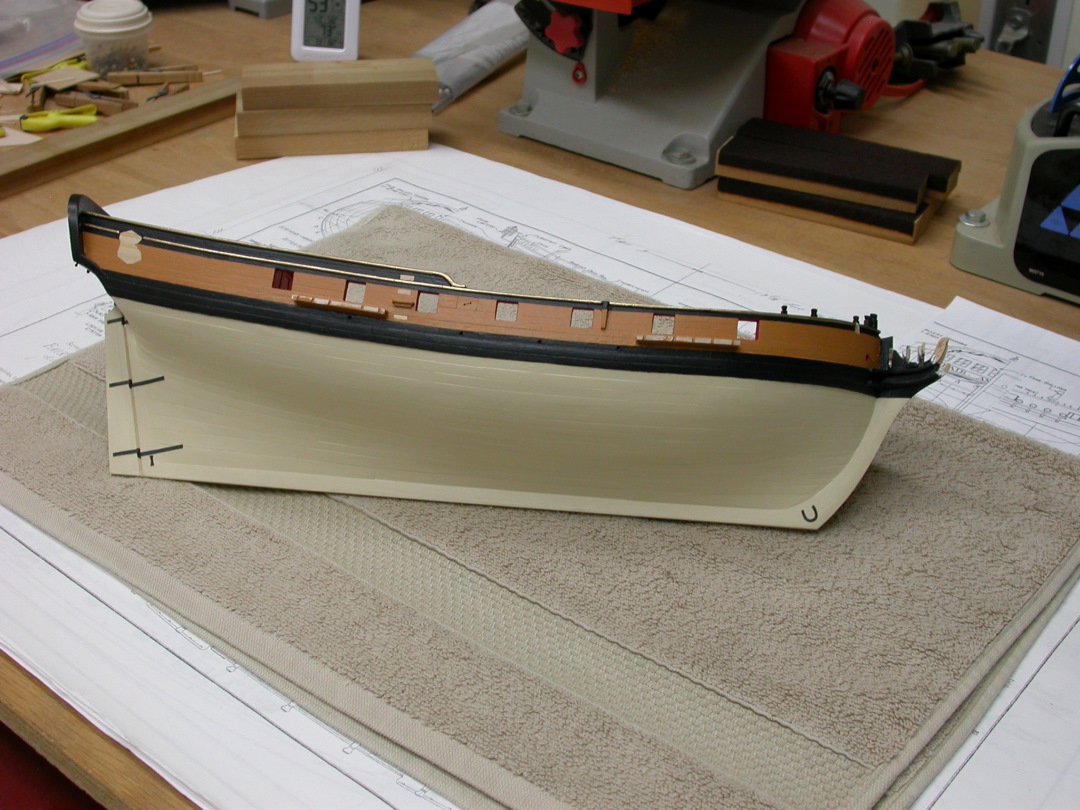
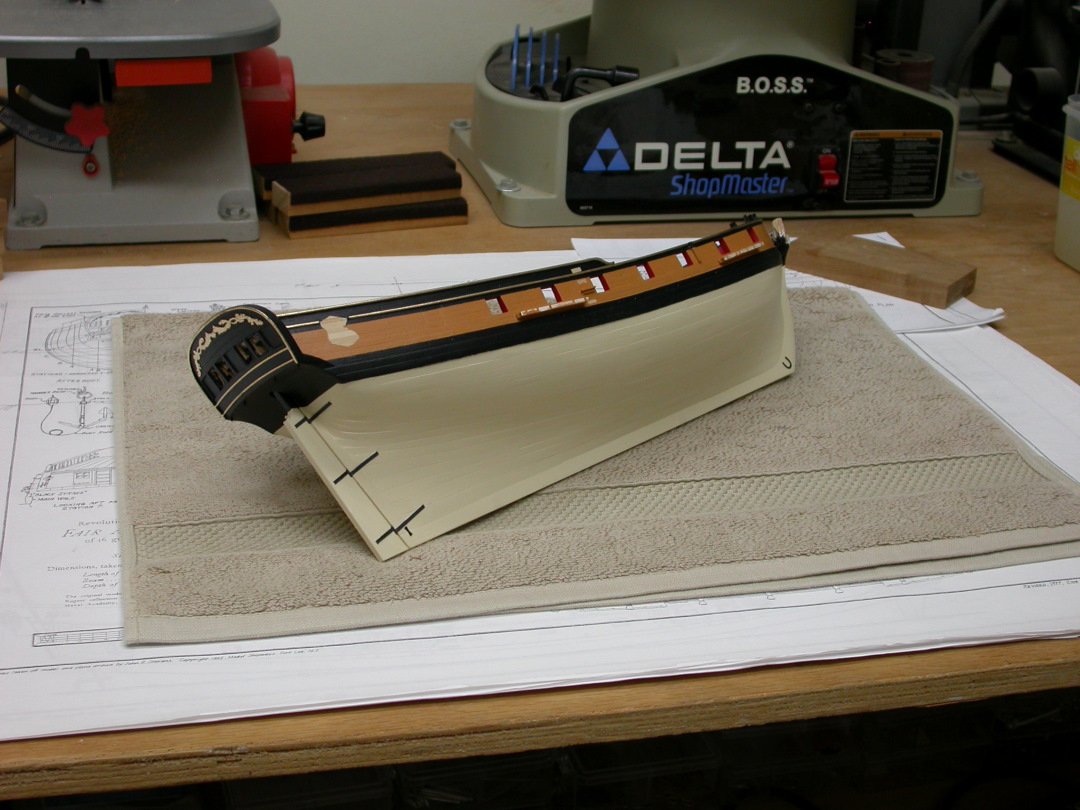
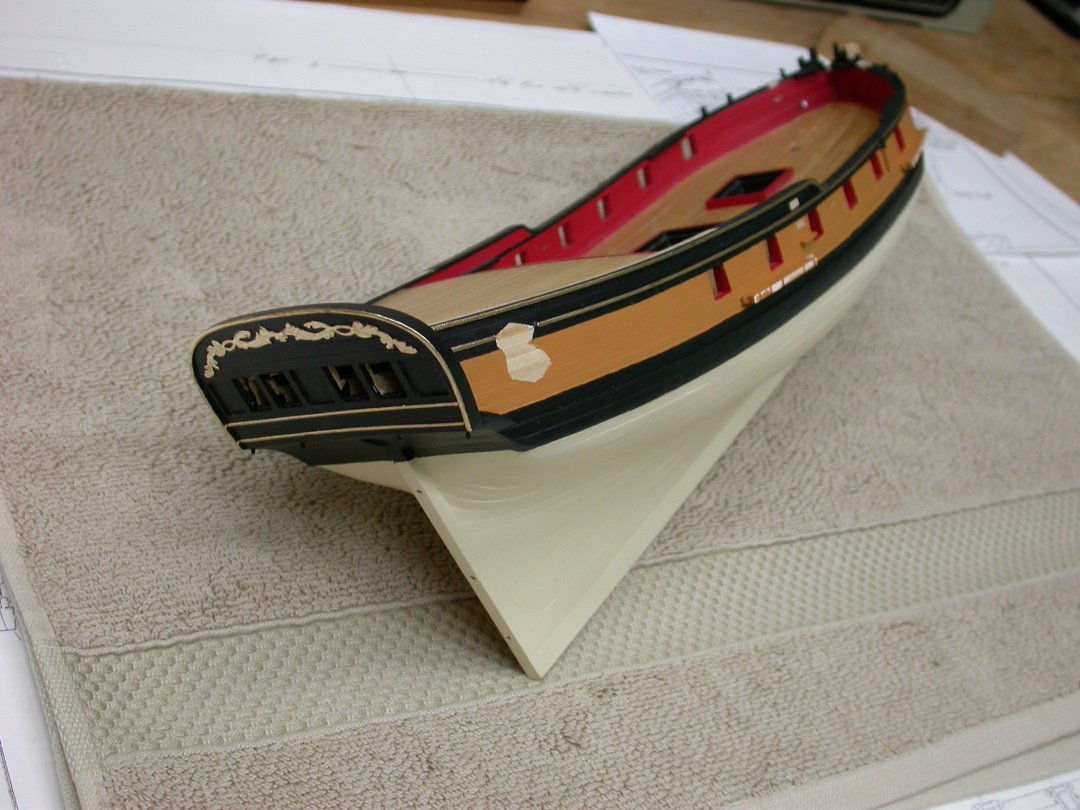
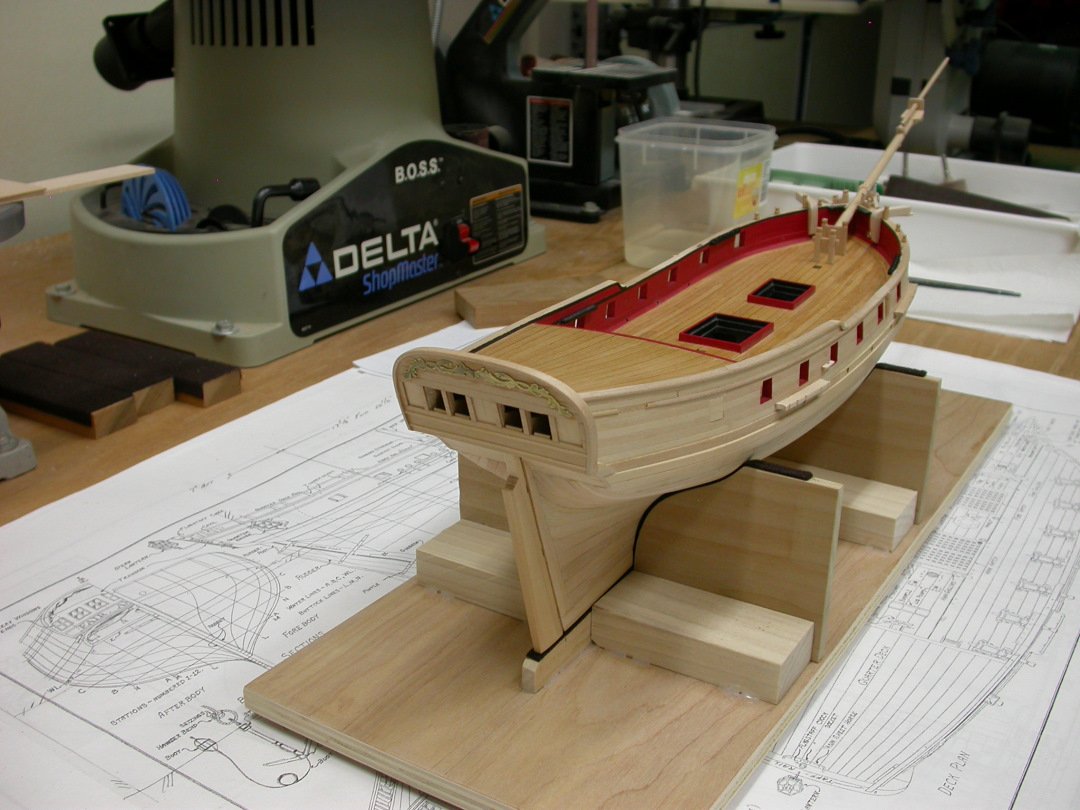
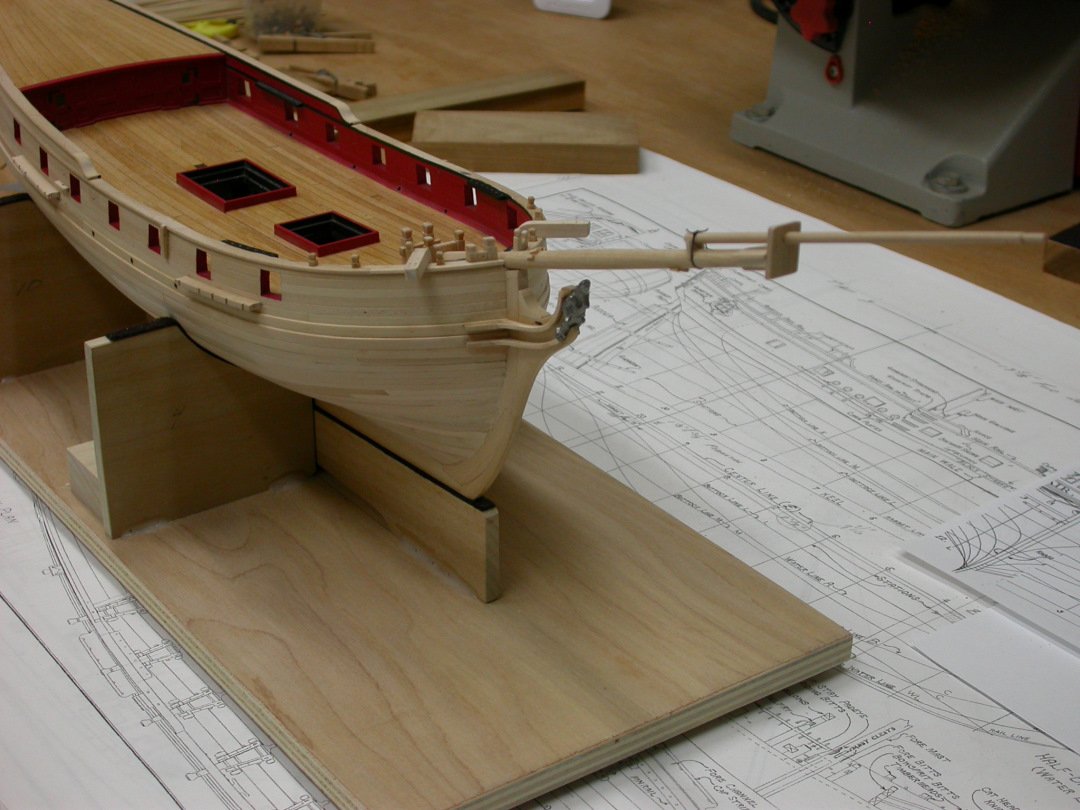
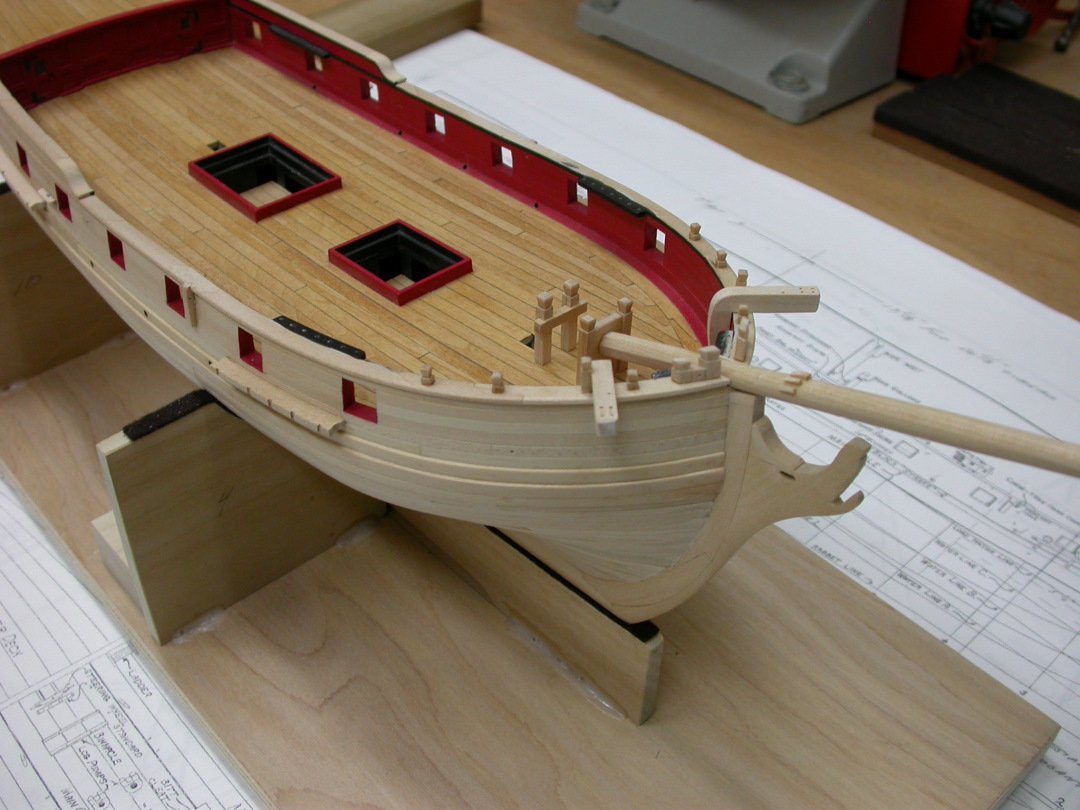
With the Brig Fair American hull painting complete, construction continued with installation of lower hull outfit: Rudder was painted and installed Rudder gudgeons were fabricated and installed (strips of painted Bristol board) Keel and horseshoe plates were installed (from Syren Ship Model Company) Next steps will continue installation of exterior hull outfit with completion of the head structure. Regards from the shipyard, Pete Jaquith
-
Ryland, Thanks for the likes. Construction is moving along slowly but my eyes limit the detail. Regards from the shipyard, Pete
-
Milestone Achieved. With the Brig Fair American hull outfit well along, a major milestone was reached with completion of exterior hull painting. The following notes apply: Head rails, figurehead, catheads, gangway steps, chain plates & channel caps, gunport hinges, quarter badges, and rudder were left loose to facilitate masking and painting Paint was Model Expo Marine Acrylics (Hull Tallow, Hull Yellow Occre & Hull Spar Black) and Floquil Polly Scale (AT&SF Red) Masking was done with Tamiya masking tape Gold trim was done with Deco Color Prime-Premio gold metallic paint pens With a search on eBay I was able to purchase some Floquil Polly Scale AT&SF Red to match the previously painted inner bulwarks. While some paint touchup was required, I am pleased with the end result. Next steps will continue installation of exterior hull outfit starting with the rudder, rudder gudgeons, keel trim, and completion of the head structure. Regards from the shipyard, Pete Jaquith

-
Tim, its good to hear from you. I hope things are going well. Regards from the shipyard, Pete
-
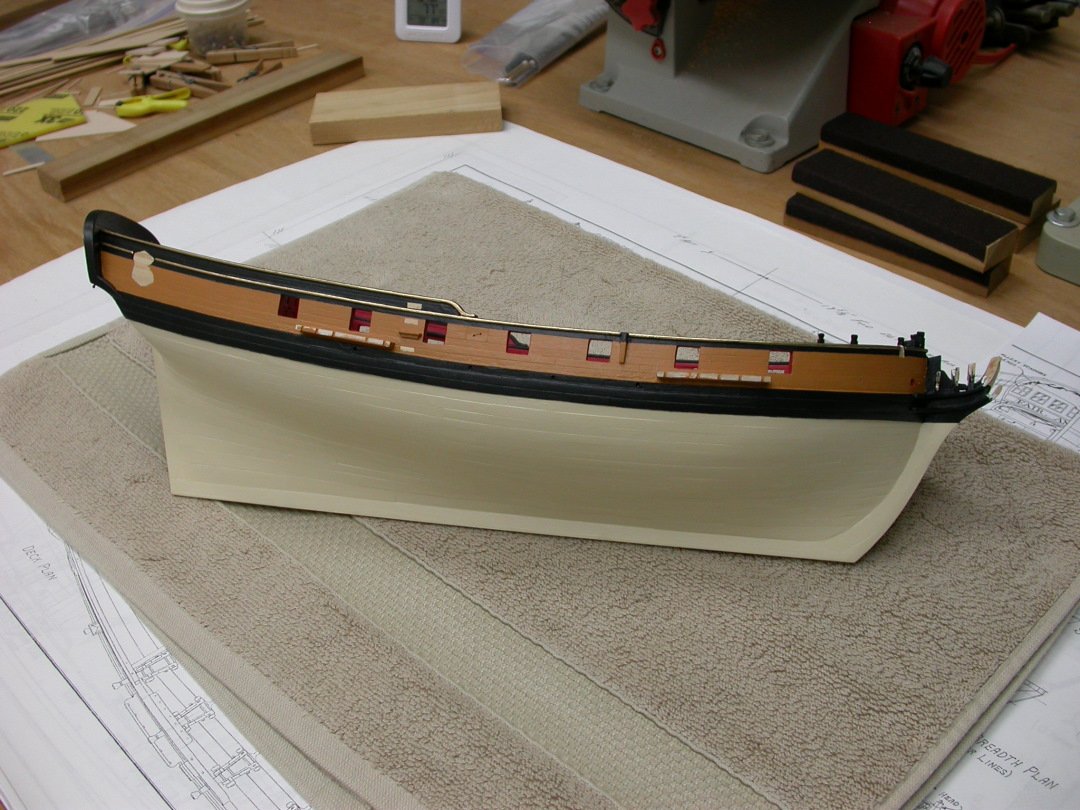
Status update: Painting nearing completion but I still have to add gold trim to transom moldings / carvings. Many pre-fabricated bitts and pieces to be added to complete exterior hull outfit. Regards from the shipyard, Pete
-
Stephen, I have had good success with a non-bleed fabric marker "FabricMate" from Jo Ann Fabrics. Regards from the shipyard, Pete

-
"Fair American" is in the paint shed. Many coats/colors so it will be a few more days. Then many bits and pieces to be added. Pictures to follow. Regards from the shipyard, Pete
-
John, Thank you for your likes. Thinks are starting slowly as its been over 7 years since I put aside "Fair American" and "Newsboy" to support a series of full scale shipbuilding projects. Regards from the shipyard, Pete
-
Will see how it goes. It is several years since I painted a model and this will require a lot of masking. Regards from the shipyard, Pete Jaquith
-
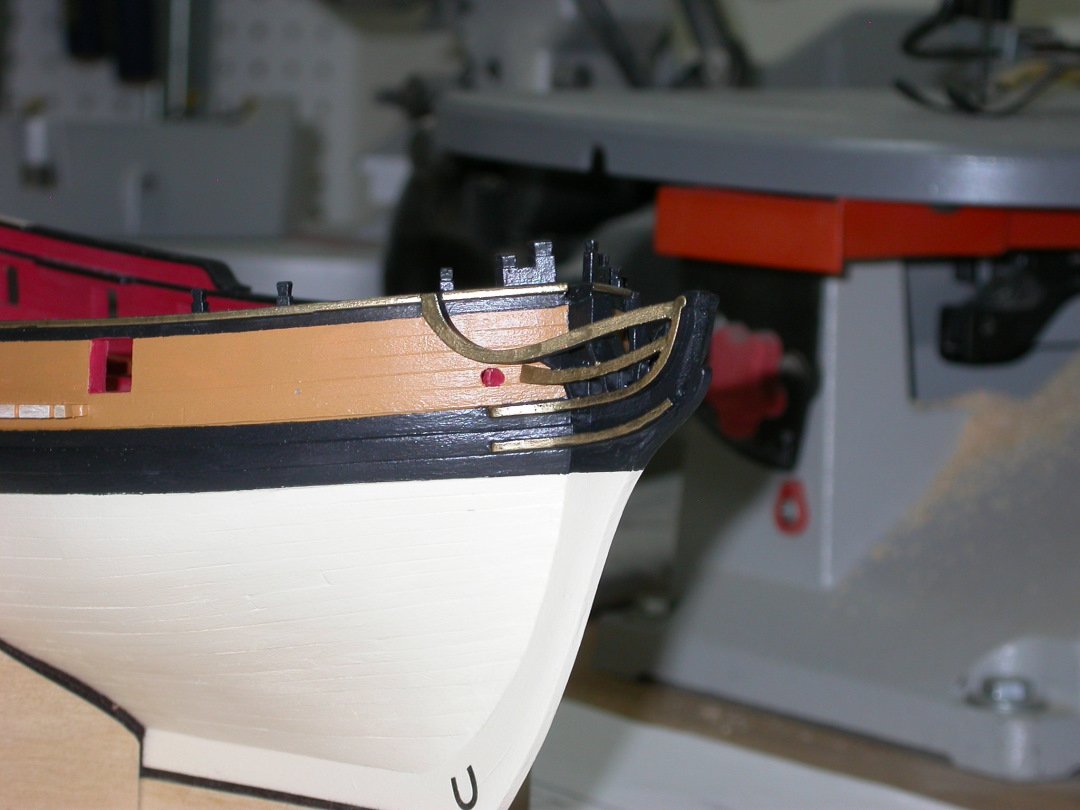
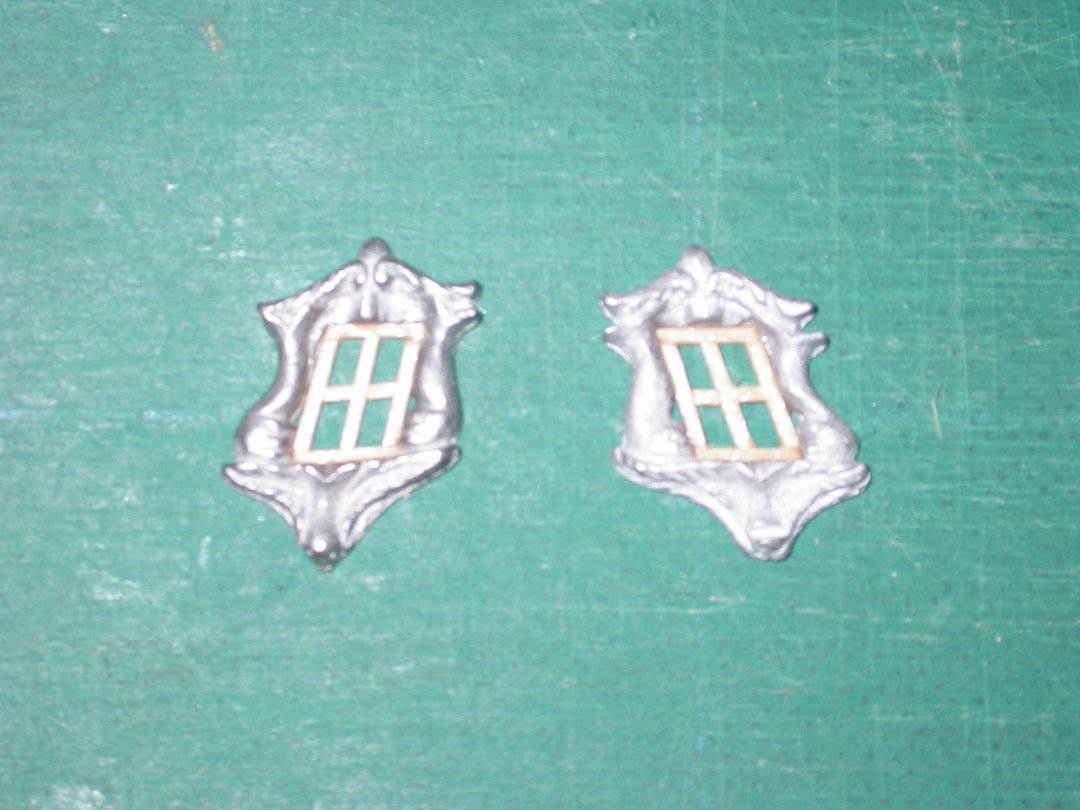
A few more details added before we head to the paint shed: Rudder chain pad eyes were added to the counter and rudder post. Rudder chain final installation will follow completion of exterior hull outfit when the model can remain securely in its construction cradle (note that I may use larger chain next time). Quarter badge windows were framed with .03 sq. stock. The window frames were assembled on double sided tape and secured in place with CA glue. If you are familiar with the “Fair American” design, you may have noticed that I have taken certain liberties with the design and that I am free to add new details based on period practice. In other words, I look at ship modeling as an art and an opportunity for the builder to express his/her interpretation of how these historic period ships looked in their prime. I hope that you enjoy watching my 14 Gun Brig “Fair American” as it develops. Sorry for the picture quality. Next step, move to the paint shed for exterior hull painting. Regards from the shipyard, Pete Jaquith
-
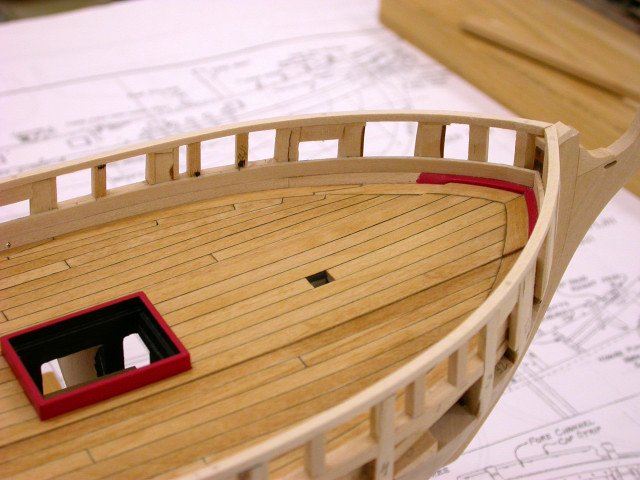
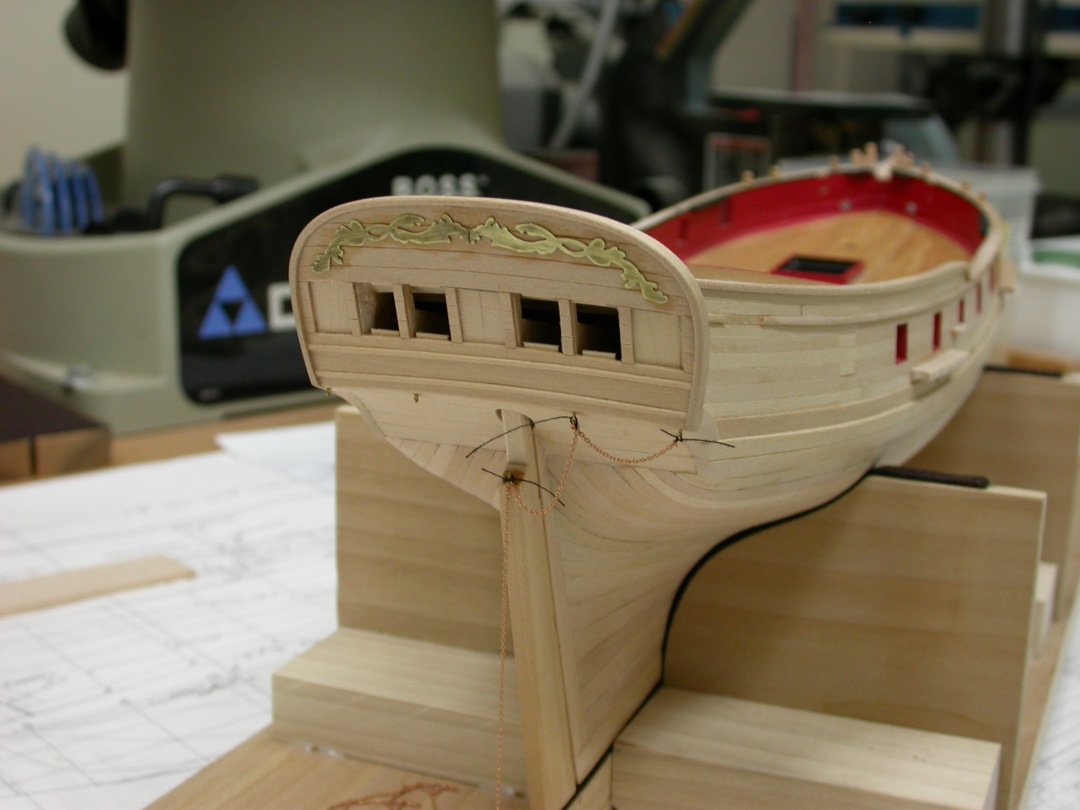
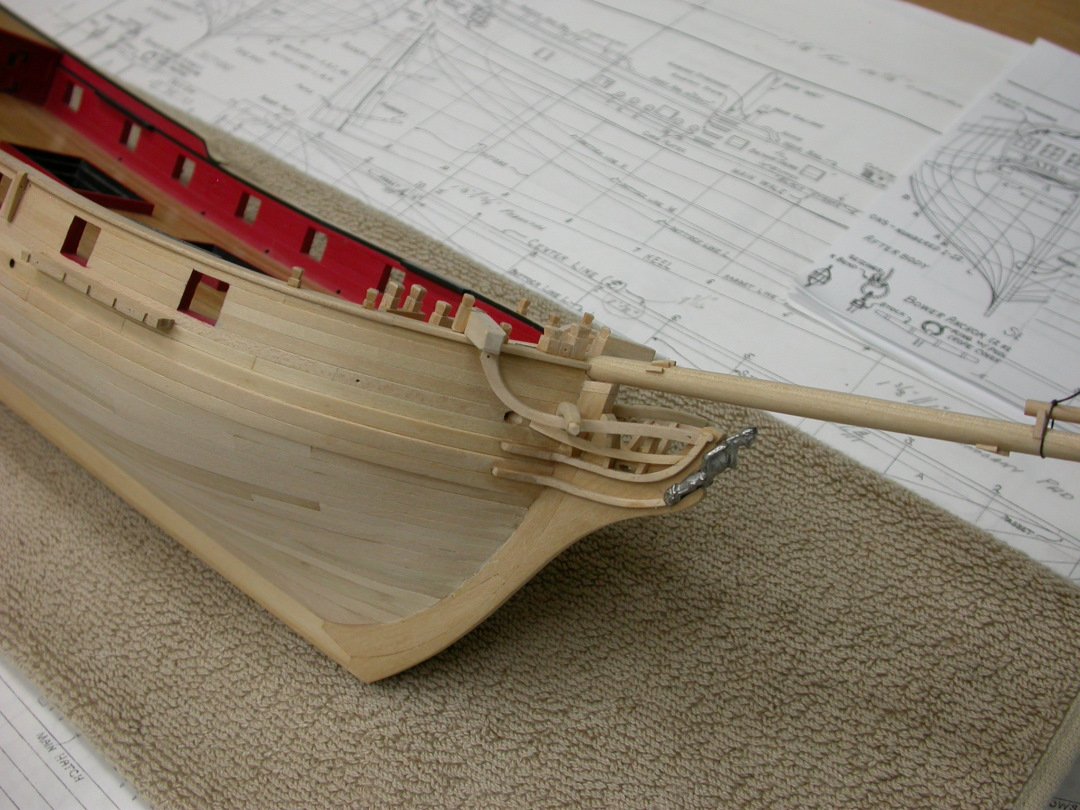
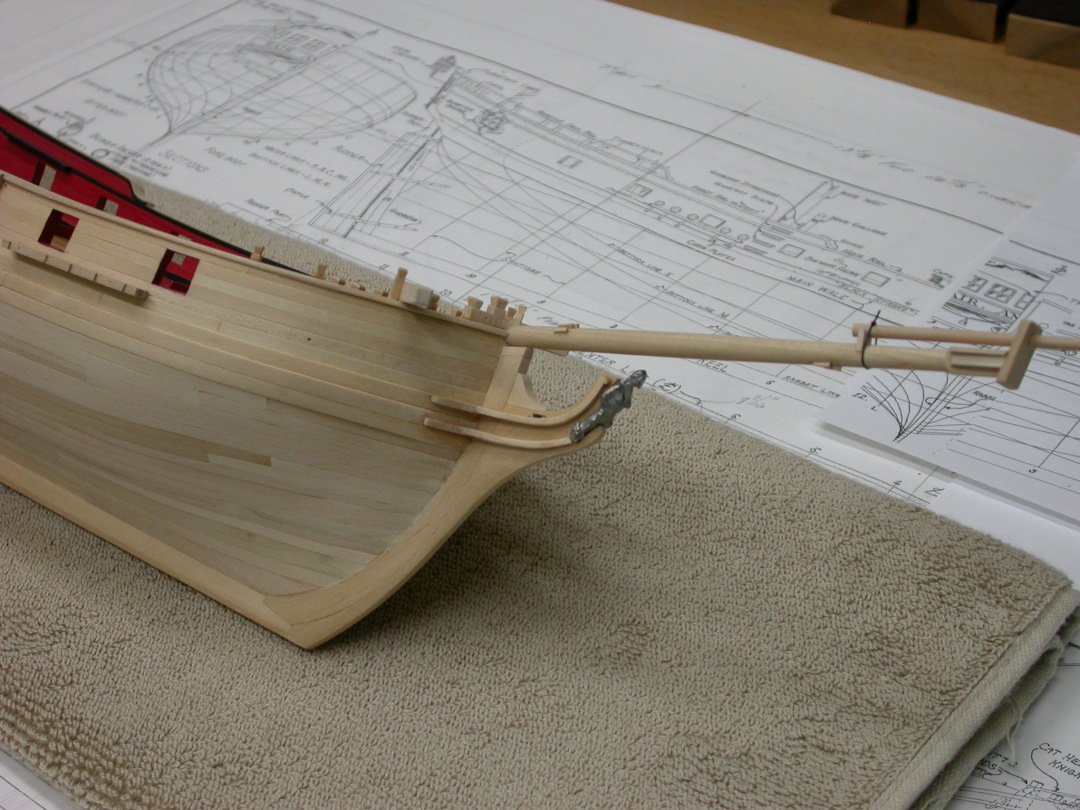
With the cheek knees complete; attention turned to fabrication and installation of head framing and the remaining exterior outfit planned for installation prior paint: Head rails were fabricated/dry fitted. Head rails were fabricated from 3/32” laminated stock (3 layers of 1/32” sheet stock). Middle rails were fabricated/dry fitted from 1/16” sheet stock. Wire pins were used to reinforce the middle rail hull attachment. With the head and middle rails temporally pinned in place, the head rail knees were fabricated/installed in two pieces (to simplify fitting) from 1/16” sheet stock. Fore tack boomkins were fabricated/dry fitted from 1/8” sheet stock. Wire pins were used to reinforce the boomkin hull and head rail attachments. With the head framing defined, the hawse holes were located and drilled out. At his point, the transom trim was installed (photo etch from Lauck Street Shipyard). The head framing is one of the more complex portions of the build. Artistic license and patience were required for its construction. After hull paint, gold paint pens will be used to highlight its many intricate features. Final installation of the head rails, middle rails, and figurehead will follow hull painting. Final installation of the fore tack boomkins will await the rigging phase. Next step, exterior hull painting. Regards from the shipyard, Pete Jaquith


-
I am working my way through lofting the head framing. This is a complex area with many curved pieces and dimensions that requires real study and evaluation. I have completed fabrication of the major pieces but installation and fine tuning still awaits. I will post a description and pictures at successful completion. Regards from the shipyard, Pete
-
With bowsprit fabrication complete; attention turned to the cheek knees and head framing. As this is a complex area, additional care was placed on its fabrication: Templates for the stem, head rails, and middle rails were prepared to assist in visualizing the arrangement. Figurehead was dry fitted to the stem (casting from the kit). Cheek knees were fabricated/installed from 1/16” and 1/8” sheet stock. Cheek knees were fabricated in 3 pieces with final shaping done in position. Next step, fabrication and initial installation of head framing and the remaining exterior outfit planned prior paint. Regards from the shipyard, Pete Jaquith
-
Tim, Its very good to hear from you. I miss all my good friends in the Newburyport and the Constitution Ship Model Guilds. Since I am working back into ship modeling I will try to keep up through MSW. I hope to finish "Fair American" 1st and then check out the status of "Newsboy" (crated since my move in 2013); we will see where is goes after these two builds. Please say hello to my many friends in Newburyport and Boston. Regards, Pete
-
Thank you for your interest and support. Working through my Brig "Fair American" head framing. I think I have an approach worked out. More to follow when I complete this portion of the build.
-
Its good to be back in the shop and among friends hear at MSW. Progress is slow but the work is rewarding. Regards from the shipyard, Pete
-
Period head framing - an interesting and challenging portion of this build. More to follow as I work through this portion of the build.
-
Thank you for your interest. This model was started in 2010 and was put in layup from 2012 thru 2018 while I pursued a series of full scale shipbuilding projects in the US and overseas. "Fair American" makes a beautiful model, and with time being available I opened it up and despite two moves (Hancock NH to San Diego CA to Indio CA) I found it in good shape. While working along, progress is limited by the following: My eyes are not what they used to be, now awaiting new glasses My shop temperature is good in the early morning (72-75 degrees F), but it raises to mid-80's in the afternoon (outside summer temperature 102 - 118 F). My attention span wain is limited after 3-4 hours work That said, I plan to keep working and I should be into hull paint and final exterior details in the coming weeks.
-
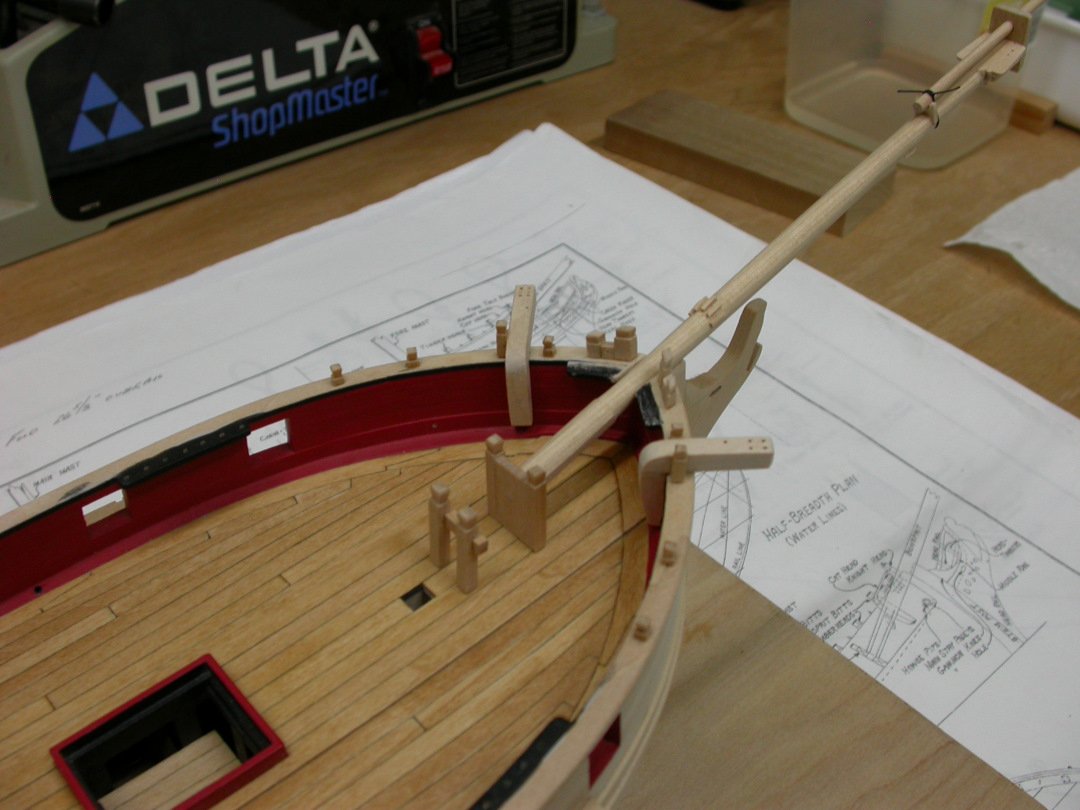
Continuing the upper hull outfit, attention turned to fabrication and dry fitting of the bowsprit, bowsprit bitts, fore bitts, and the jibboom: Bowsprit assembly was completed. This is an interesting assembly with lots of fine period details. Jibboom fabrication was completed. Bowsprit bitts were fabricated from 3/32” sheet stock and 1/8” sq. stock. Bowsprit bitts were doweled to the inboard end of the bowsprit. Fore bitts were fabricated from 1/16” x 1/8” and 3/32” x 1/8” strip wood. Bowsprit and fore bitt deck attachments were reinforced with 3/64” dowel pins. The bowsprit notch was cut in the forward bulwark and the bowsprit, bowsprit bitts, and fore bitts were dry fitted to the hull. This step included a 3/32” extension to the stem to conform with the 3/32” added to the bulwark height to suit the cannon ports. After completing the above tasks, the knightheads and timberheads were installed on the forward bulwarks. To facilitate hull painting and inner bulwark attachments the catheads will be installed after hull painting; and, the bowsprit, bowsprit bitts, and fore bitts will be installed after fitting inner bulwark attachments and the cannons. The jibboom will be installed later during the rigging phase. Next steps will continue with construction of the cheek knees and head framing.

-
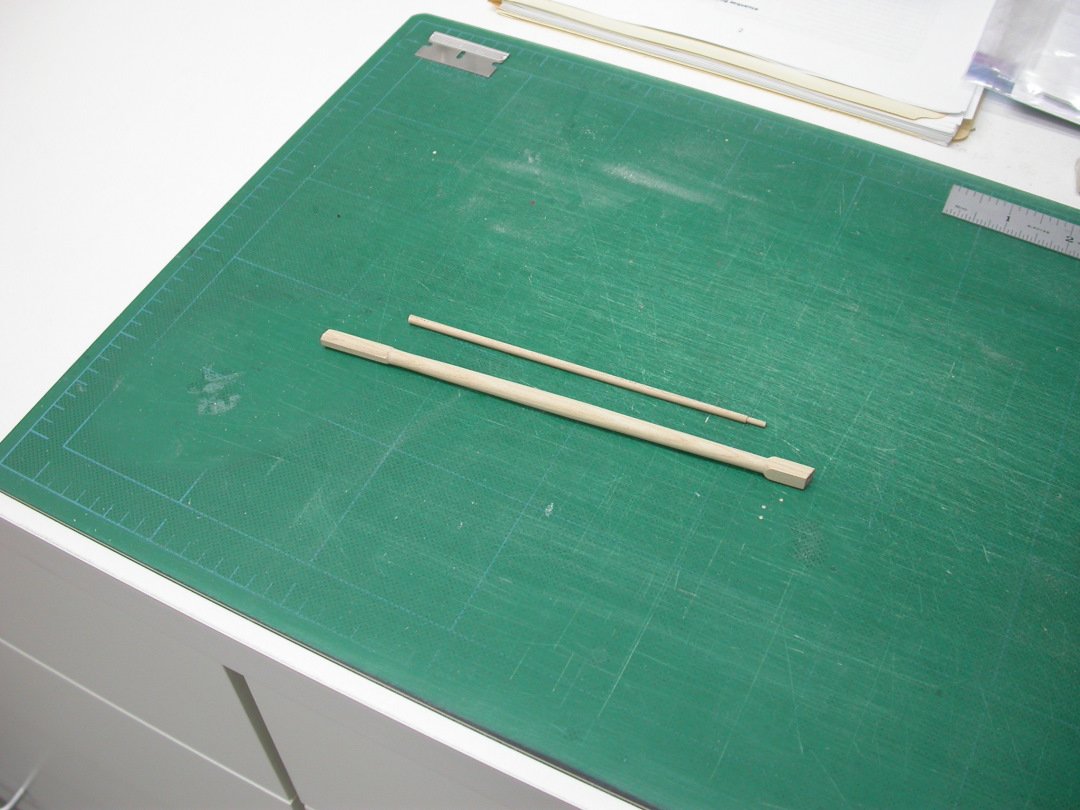
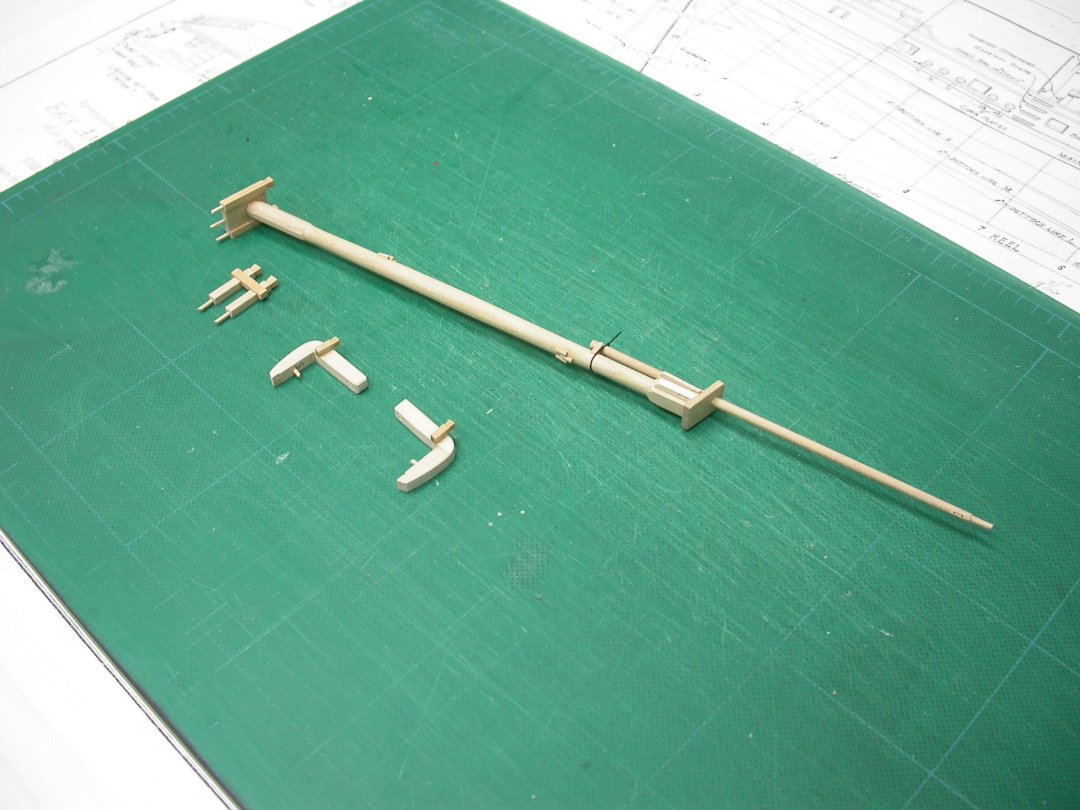
With the Brig Fair American hull planking complete, construction continued with fabrication and dry fitting of the bowsprit and jibboom: Bowsprit was fabricated from 5/16” dowel stock. The bowsprit was turned on my mini-lathe using fine standing sticks. The eight sided square inner foot and the square outer end were shaped with a disk sander. Jibboom was fabricated from 1/8” dowel stock. The jibboom was turned on my mini-lathe using fine standing sticks. The outer tip was shaped with a sharp razor blade and fine sanding sticks. Next steps will continue with detailing the bowsprit and jibboom, fabricating the bowsprit bitts, and dry fitting the completed assemblies to the hull.