Pete Jaquith
-
Posts
343 -
Joined
-
Last visited
Content Type
Profiles
Forums
Gallery
Events
Everything posted by Pete Jaquith
-
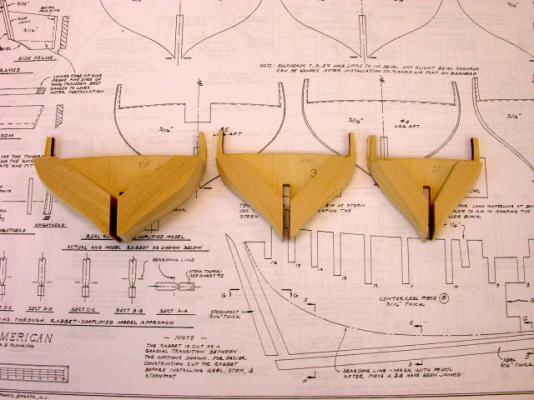
 Ronjja76, On my "Fair American, circa 1780" build, I glued filler blocks to the bulkheads before hull assembly. Rough shaping was done with disk and spindle sanders. Final fairing was done with #60 grit sandpaper wrapped around an 1 1/2" dia hard wood dowel. Regards, Pete
-
Ed, This looks like a very effective framing/hull construction technique. Thank you for sharing this with the NRG Model Ship World membership. Regards, Pete
- 191 replies
-
- 2
-

-
- young america
- clipper
- (and 1 more)
-
For those modelers and marine historians interested in American Merchant Sail of the mid 1800’s, the following are three fine reference books by William L. Crothers: The American-Built Clipper Ship 1850-1856 This well researched book describes the characteristics, design, construction, and details of American built clipper ships from the mid 1800’s. The book is well illustrated and gives a unique insight into the design and construction of these beautiful ships. The book describes in detail the design, arrangements, hull framing and fastening, and outfitting of these great American ships. Tables summarize the arrangements and details of most American clipper ships of the subject period. Masting and rigging are not covered in detail but they are addressed in The Masting of American Merchant Sail in the 1850’s by William L. Crothers. American-Built Packets and Freighters of the 1850’s This well researched book describes the characteristics, design, construction, and details of American built packet and freight ships from the mid 1800’s. The book is well illustrated and gives a unique insight into the design and construction of these important ships. The book describes in detail the design, arrangements, hull framing and fastening, and outfitting of these fine American ships. Tables summarize the arrangements and details of many American merchant sail from the subject period. Masting and rigging are not covered in detail but they are addressed in The Masting of American Merchant Sail in the 1850’s by William L. Crothers. The Masting of American Merchant Sail in the 1850’s This well researched book describes the masting, yards, and rigging of American built clipper, packet, and freight ships from the mid 1800’s. The book is well illustrated and gives a unique insight into the design and construction of these beautiful ships. The book describes in detail the masting and rigging design, arrangements, and fabrication of these beautiful ships. Tables summarize the arrangements and details of many American merchant sail from the subject period. Hull construction and hull outfitting of these ships are addressed in The American-Built Clipper Ships 1850-1856 and American-Built Packets and Freighters of the 1850’s by William L. Crothers. Regards, Pete
-
Fiebing's Leather Dye
Pete Jaquith replied to JohnB40's topic in Painting, finishing and weathering products and techniques
I have used aniline dye in furniture building. In building Windsor chairs with different wood species (pine, maple, and ash) I used different dye concentrations to match the color. Chair assembly was done after dyeing with no dificulties using Tilebond wood glue. Based on my experience, I recommend you dye your material off the model. Regards, Pete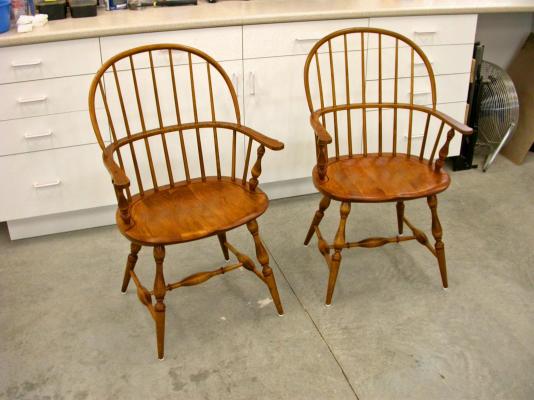
-
wq3296, The doors on my model are ~4' 6" high as I have modified the bulwark and quarter deck heights. Tight, but with a step down under the quarter deck it would be consistant with period practice. Regards, Pete
-
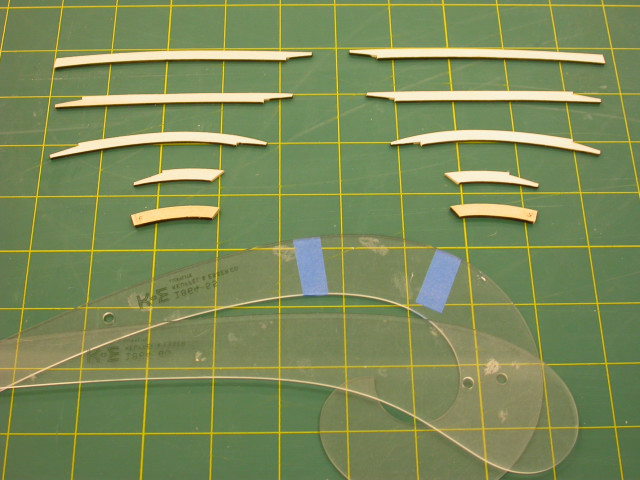
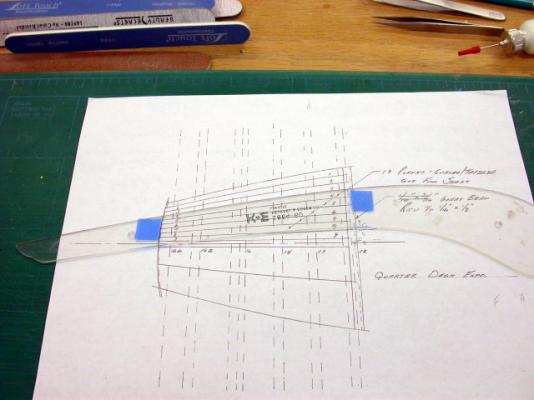
Floyd, Jeff, Ships curves were developed for drafting/fairing ships lines plans. Their formilation gives a better fit with the shape we run into as ship model builders. A full set of 156 curves is hard to find and expensive, but you can find a selected set of 6-8 curves for a reasonable cost on the internet. For cutting pieces to shape, I use a few ships curves almost as much as a steel straight edge. Regards, Pete
-
Why no jibboom guys on Fair American?
Pete Jaquith replied to GaryKap's topic in Masting, rigging and sails
Gary, I have found many examples of missing rigging on MS plans (e.g. my Topsail "Eagle" 1847 plans showed no bowsprit or jib boom guys). I just add what I believe would have been used based on period practice. Regards, Pete -
Kirby, Your pictures of the "Morning Star" look very similar to "Newsboy", two beautiful ships. I am sure you will do a fine job with her. Regards, Pete
-
Filler Blocks
Pete Jaquith replied to Jimz66's topic in Building, Framing, Planking and plating a ships hull and deck
Jim, Basswood will give you a firmer base for planking. It can be faired easly with #60 grit sandpaper and large hardwood dowels (1" & 1.5" dia.). Regards, Pete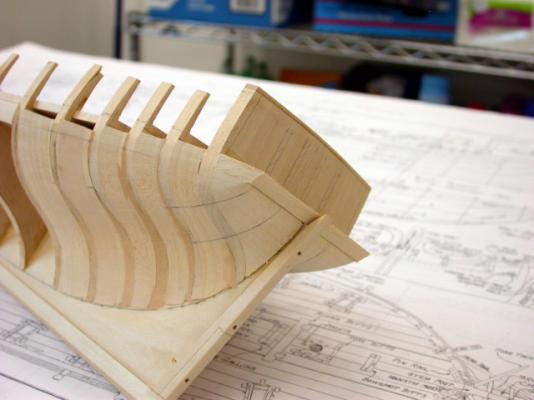

-
Kirby, It is good to hear from you. I have just completed three years working 1st at Irving Shibuilding in Halifax NS; and, then at Vancouver Shipbuilding in North Vancouver, BC. Linda and I have relocated to San Diego, CA and I am currently reestablishing my work shop in the garage. I will then go back to work on my Newsboy and Fair American builds. Please give my best to the North Shore Club members. Regards, Pete
-
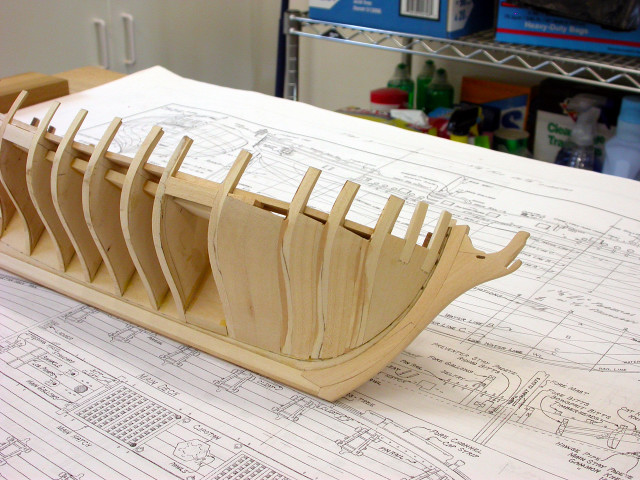
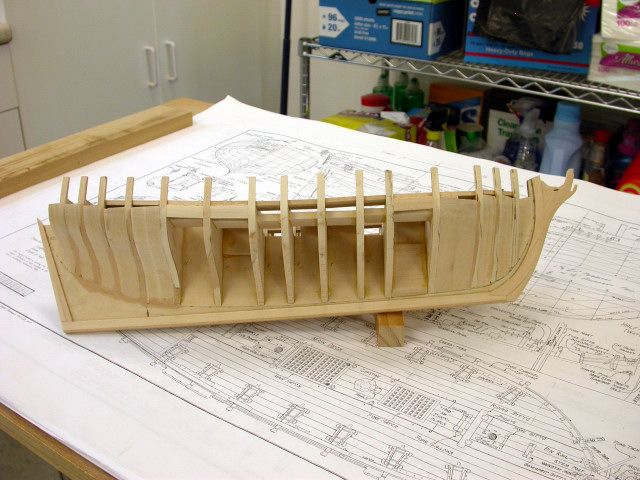
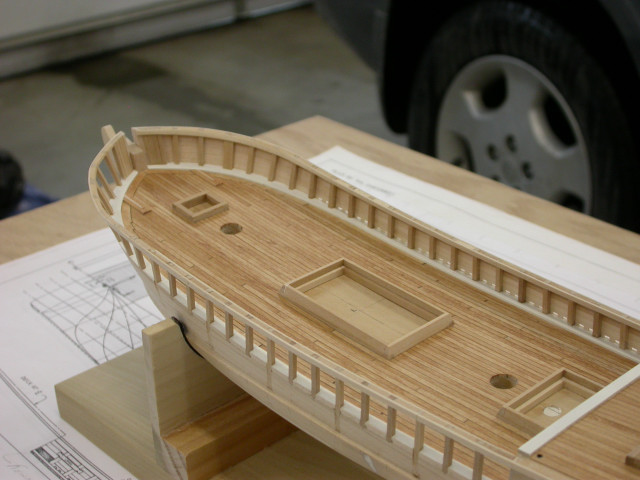
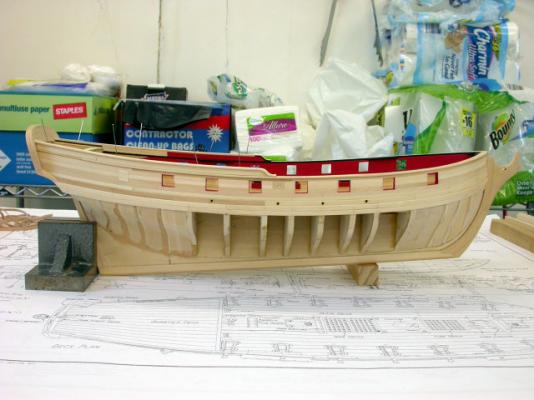
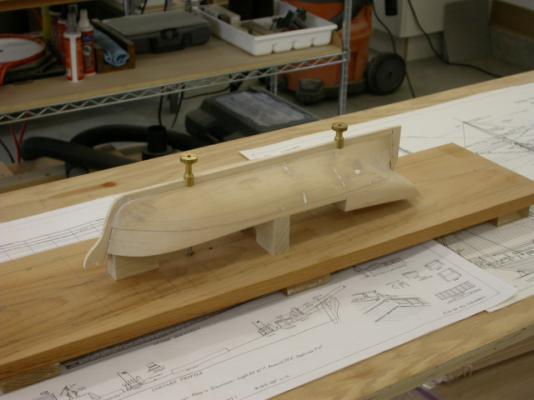
Figuerres, Having built several Plank on Bulkhead (POB) kits, some thoughts on the use of filler blocks: For POB hulls with widely spaced bulkheads filler blocks provide a more secure surface for planking For POB hulls with inaccurate bulkheads filler blocks provide a basis for fairing the hull I find fairing the hull with filler blocks to be faster than fitting/fairing shims I prefer to single plank the hull following period practice I have used bass wood for filler blocks I also add deck filler blocks to reinforce plank endings and rigging points On my current build of MS's Fair American, circa 1780 I chose to use filler blocks between the fwd/after bulkheads. I was pleased with this approach which is illustrated below and described in the attached link: http://modelshipworld.com/index.php/topic/7158-brig-fair-american-circa-1780-by-pete-jaquith-model-shipways-148-scale/page-1 Regards, Pete

-
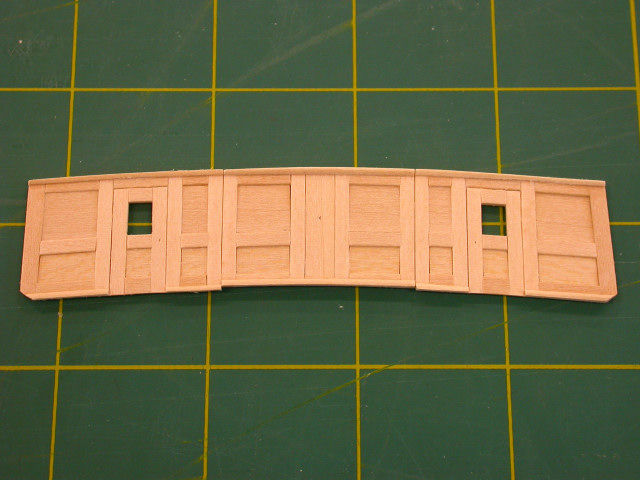
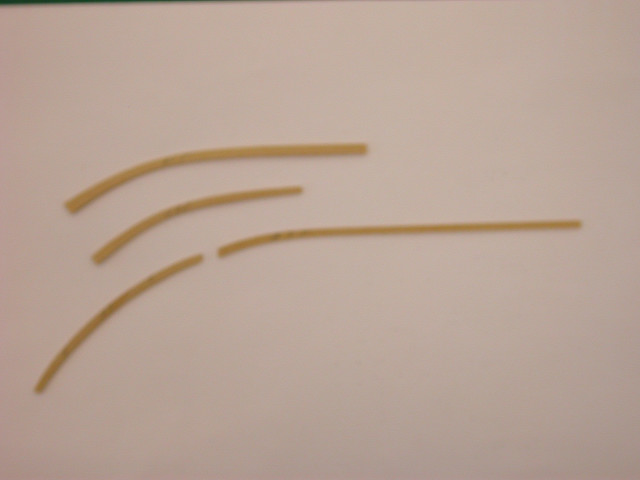
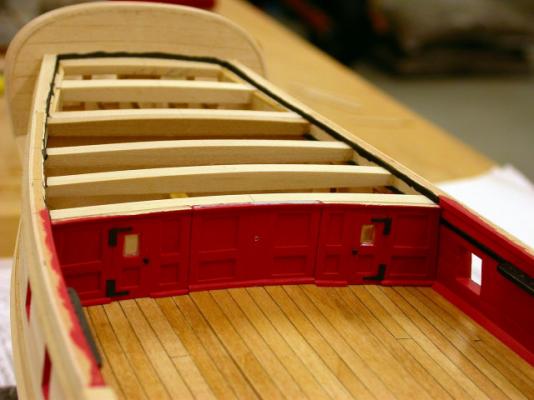
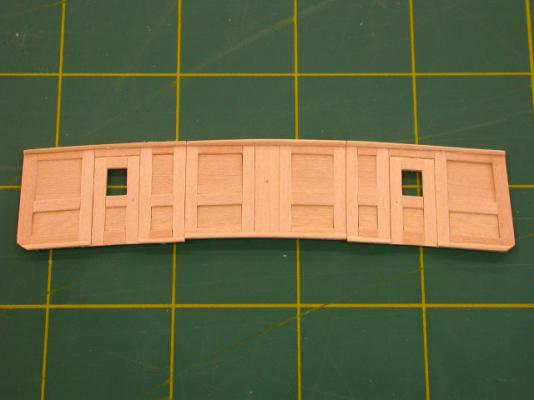
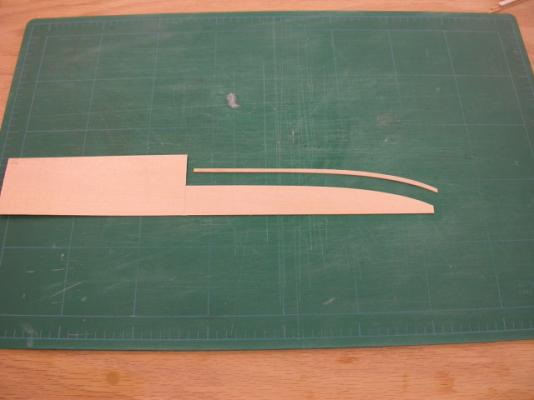
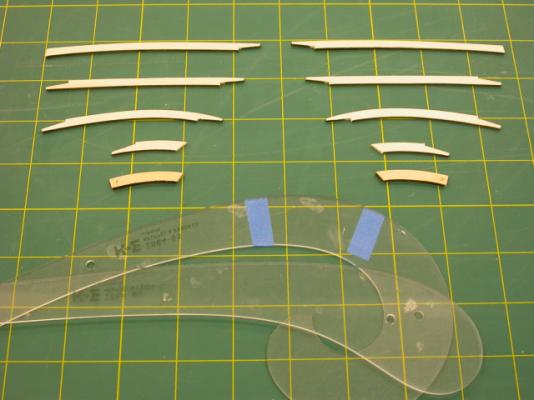
I have found it easier to use individual planks as I have found that bow and stern planks often require cutting from sheet stock due to their shape. An example from the bulwark of my Topsail Schooner Eagle 1847 build is illustrated below. Regards, Pete

-
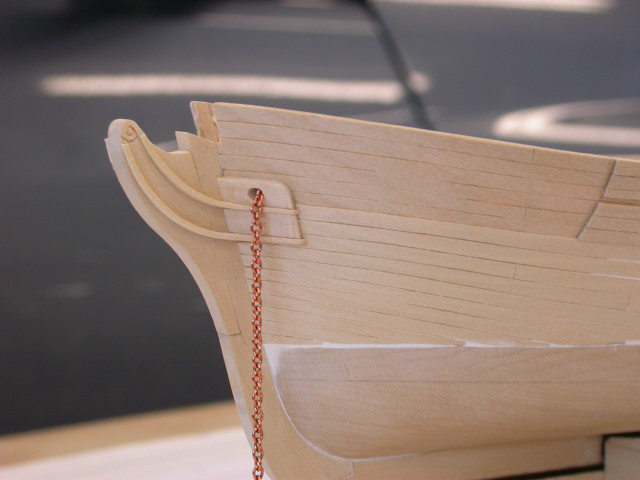
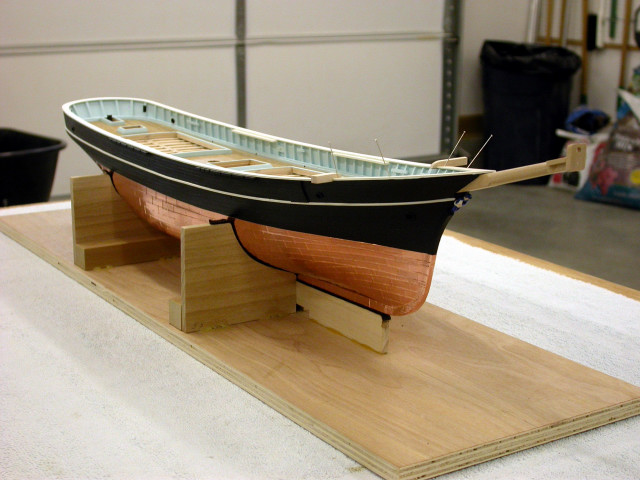
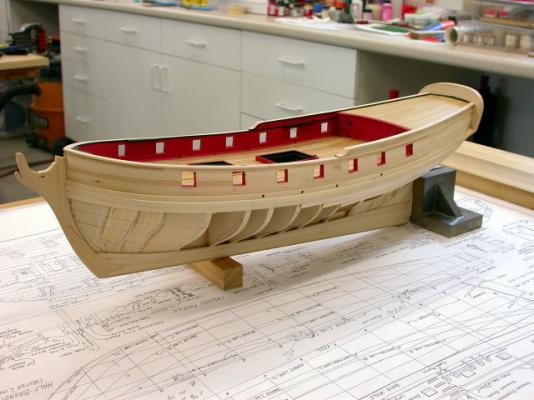
Richard, My Brigantine "Newsboy" 1854 was coppered with self adhesive copper tape from Bluejacket Ship Crafters. It was protected with three coats of Minwax Wiping Varnish. The planning and installation process is outlined at the following link: http://modelshipworld.com/index.php/topic/6783-coppering-the-ship-model-hull/page-1 Regards Pete Jaquith Shipbuilder
-
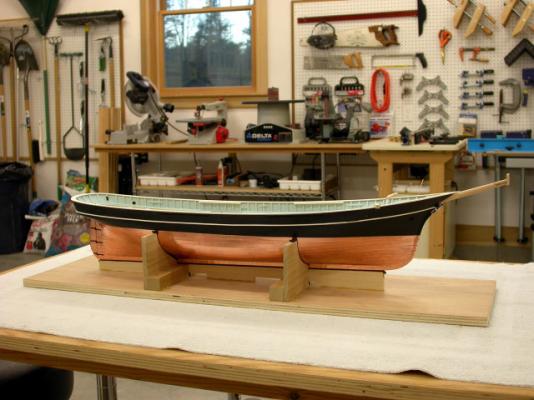
Richard, Prior to coppering, I typically complete the decks, bulwarks, cap rails, exterior hull paint, as well as dry fitting the bowsprit. After coppering I support the hull in a building cradle lined with felt tape. Pictures of my Brigantine "Newsboy" 1854 shortly after coppering are attached. Pete Shipbuilder

-
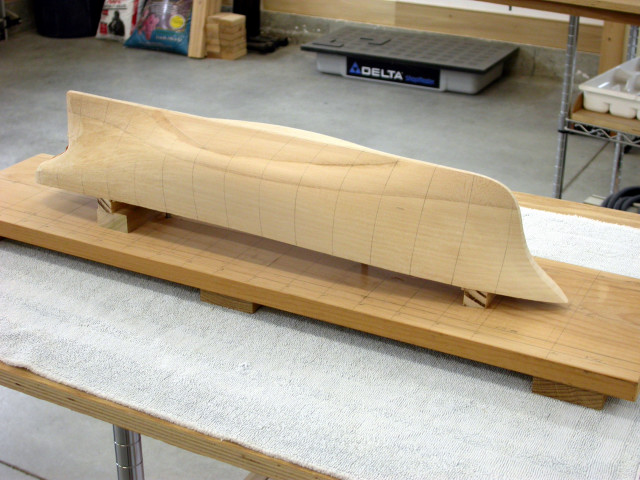
Interesting topic. Several additional thoughts re my earlier post: Each builder should select the medium they enjoy, they are all OK As I overplank the solid hull it is the base for hull planking similar to POB construction I have found I can carve a solid hull, either scratch or kit supplied, faster than dealing with a typical kit POB hull I find that I can carve a solid hull more accurately than a typicall POB hull As a result of these factors I chose to fill the bow and stern areas on my current "Fair American" build, this has worked out well and planking will be easer as a result (picture attached) It should be noted that most professional/museum class models are solid hull or plank on frame In summary, I believe that every model builder should feel free to experiment and employ those techniques that fit their experience, access to tools and supplies, etc. Regards, Pete Shipbuilder
-
I have worked in both mediums: MS Pilot Schooner "Katy" (solid hull over planked) MS Armed Virginia Sloop (POB) Topsail Schooner "Eagle" (scratch solid hull over planked) Brigantine "Newsboy" (MS solid hull over planked) Armed Brig "Fair American" (MS POB) I find solid hull construction to be more accurate that many POB kits. Additionally, I find I can complete a solid hull ready in ~ one half the time on building a POB kit. I should be noted that most of the time in wooden sailing ship modeling is spent on deck furnature, outfit fittings, masts, and rigging. Regards, Pete

- 31 replies
-
- 11
-
-
I cut bow, counter, and curved deck margin planks from sheet stock using a single edged razor blate and ships curves. Regards, Pete


-
Thank you all for your responses and suggestions, My current thinking would be to assume flush rivets on hull plating, raised button head rivets on bulwark and house plating. Regards, Pete
-
Hi Steve, Thank You for your interest in "Eagle" 1847. With respect to research for my Topsail Schooner "Eagle" 1847 scratch build I used the following sources: >>> Model Shipways 3/16" scale plans by William Zakambell >>> Over 36 shipmodel plans of mid 1800's merchant sail collected from Model Shipways, A.J. Fisher, Bluejacket, Harrold Underhill, and various maritime museums >>> A number of reference books including Crother's, Steel's, Underhill, and many books on rigging >>> A large scale model of the sister ship "Arrowsic" at the Maine Maritime Museum in Bath, Maine The rest is sort of common sense. I try to consider how I would build the vessel full scale as well as a sense of proportation. When you get ready to start, I would be glad to forward my files and sketches. Regards, Pete
-
Thank you for your interest in "Newsboy" 1854. In reducing the topsides by 3/64" to accomodate hull planking the following process was followed: >>> The 3/64" offset was laid out on the top of the bulwarks >>> A waterline 1/8" below the copper line was laid out >>> The subject waterline was groved using a 1/16" W x 3/64" D gouge >>> The upper hull surface was shaved down by 3/64" using sharp gouges and flat chisels >>> The upper hull surface was faired using emery boards (from beauty supply store) >>> Throughout this process, the hull surface was checked using the original station templates When you are ready to start "Newsboy" 1854 I would be glad to forward copies of my files and sketches (drawings and sketches are currently in storage). Regards, Pete
-
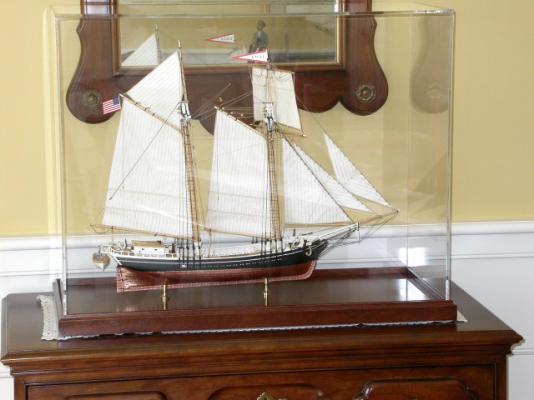
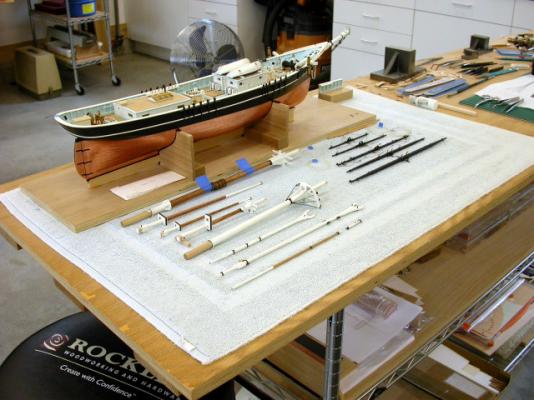
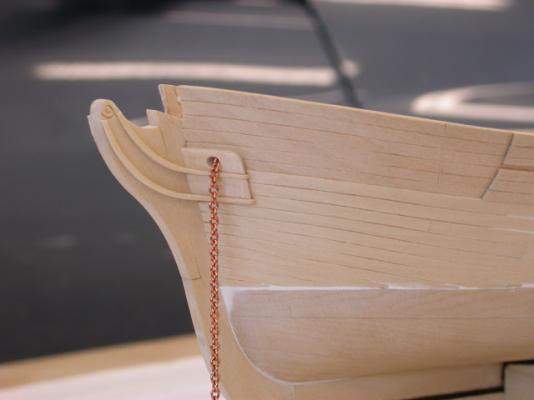
Brigantine "Newsboy" 1854 pictures:


-
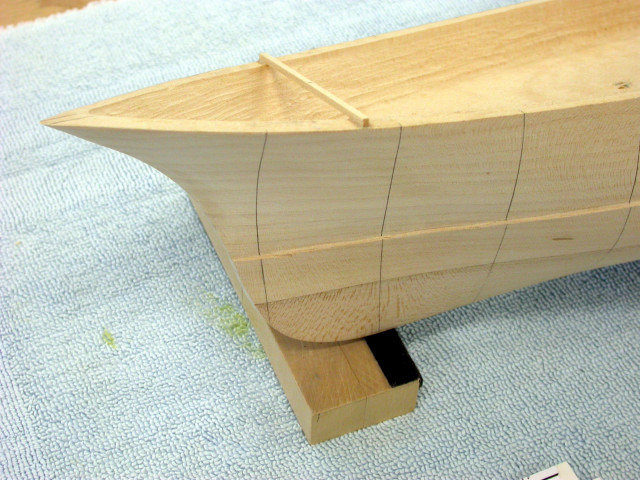
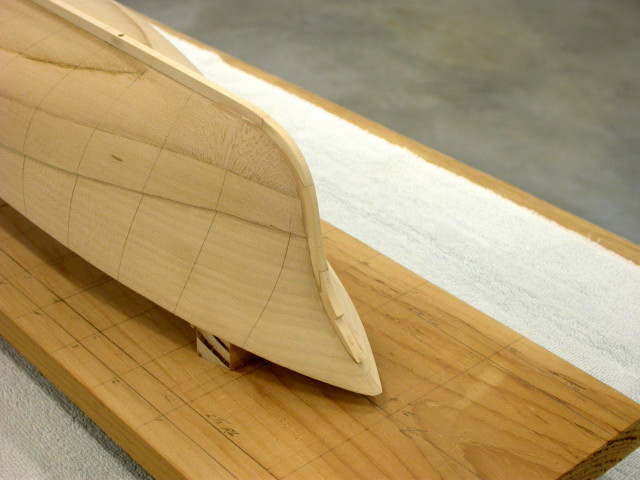
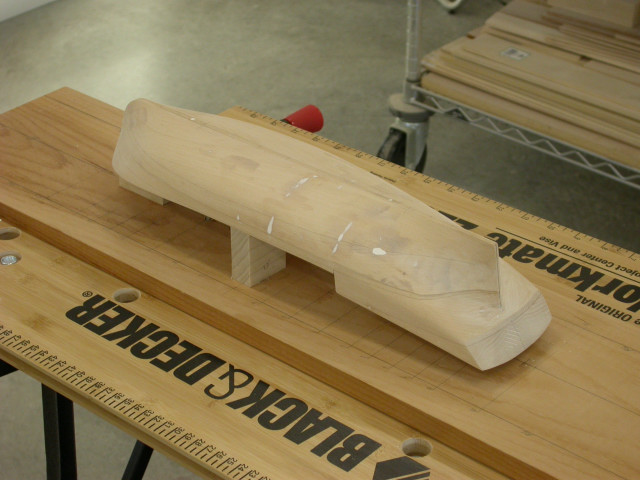
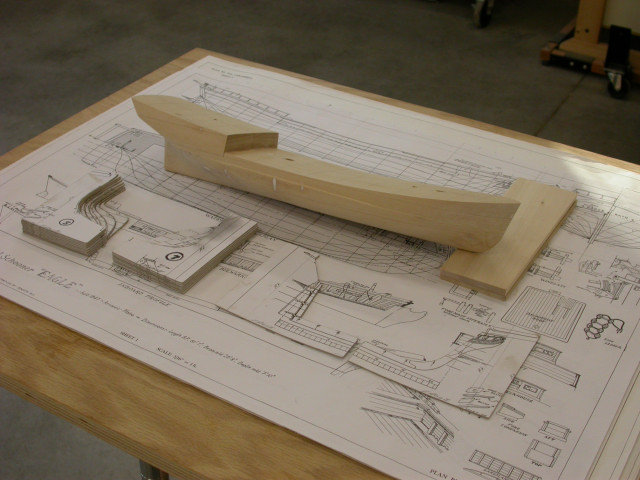
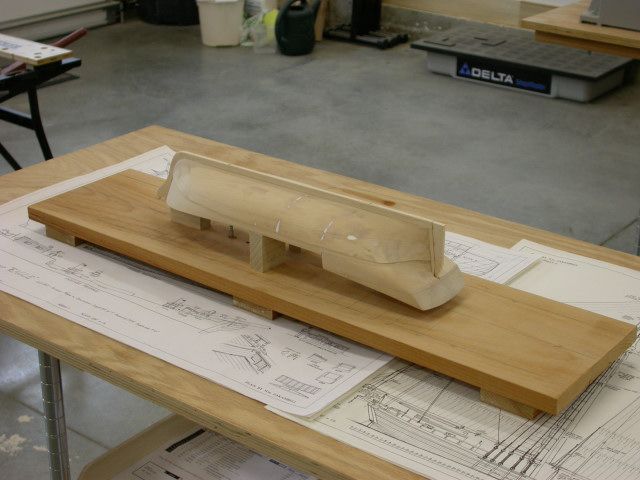
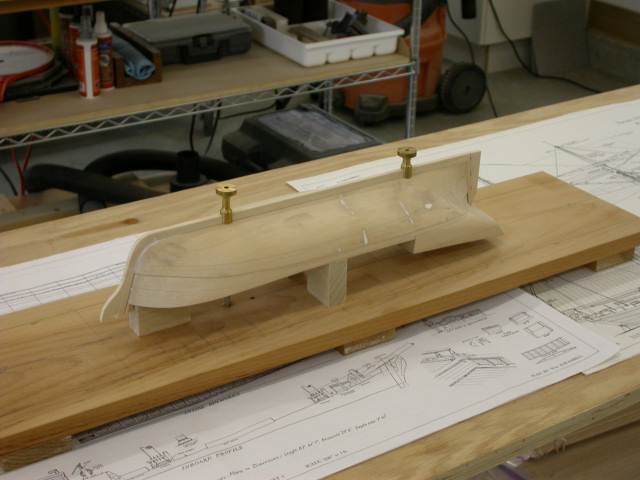
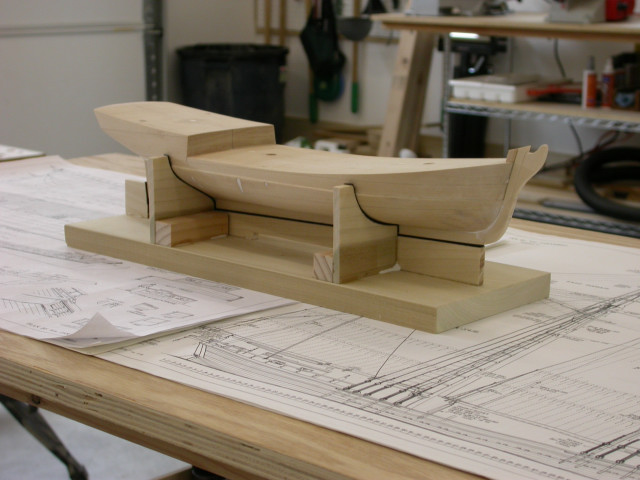
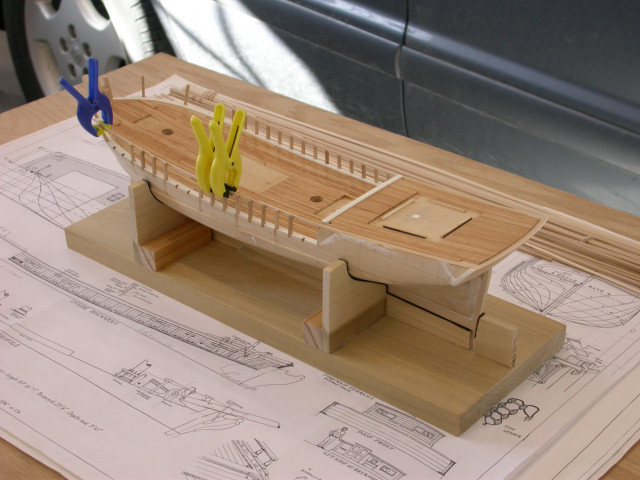
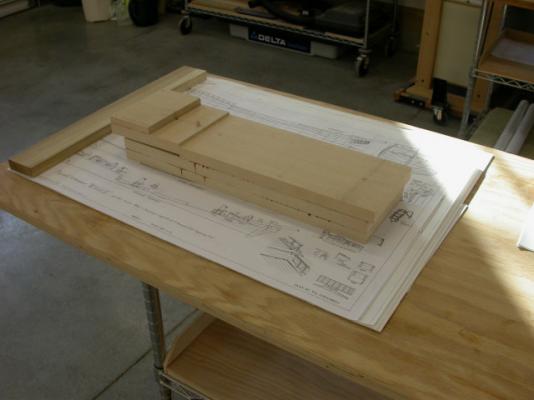
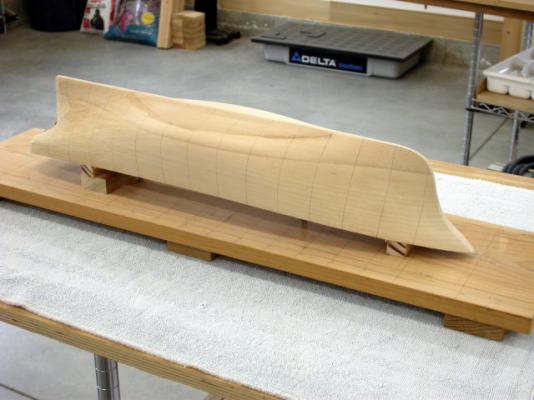
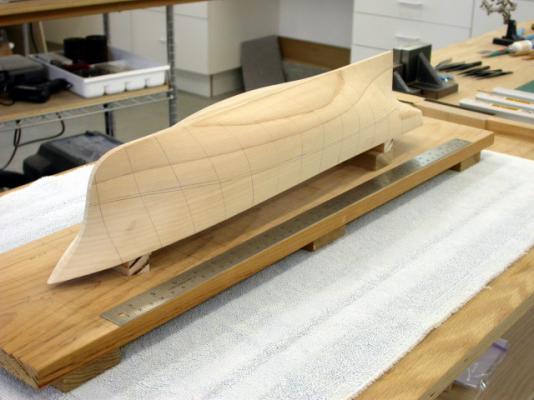
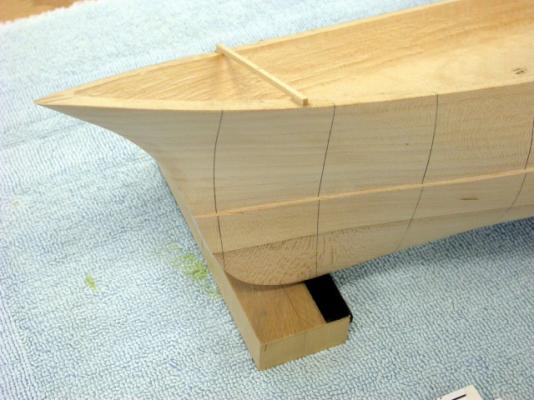
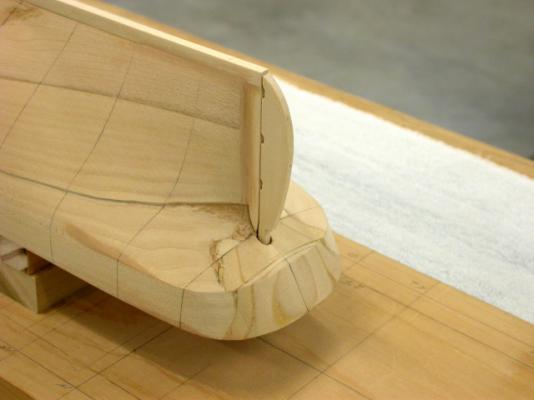
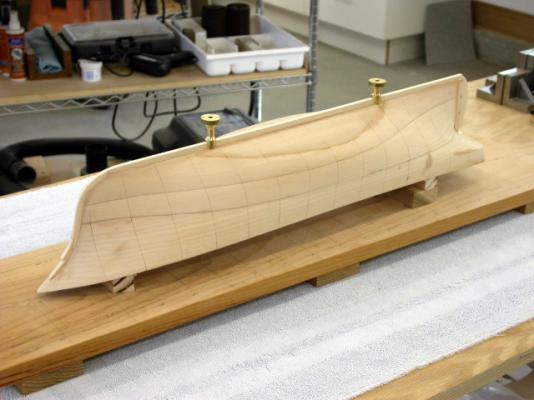
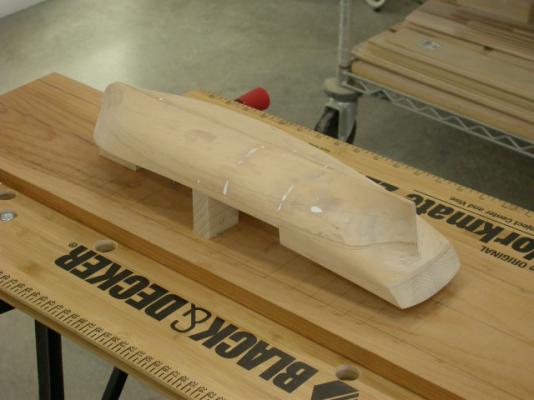
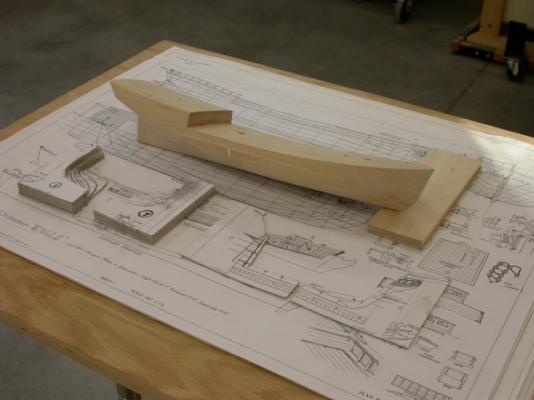
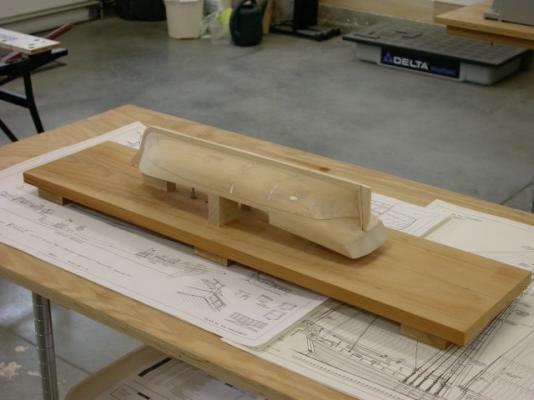
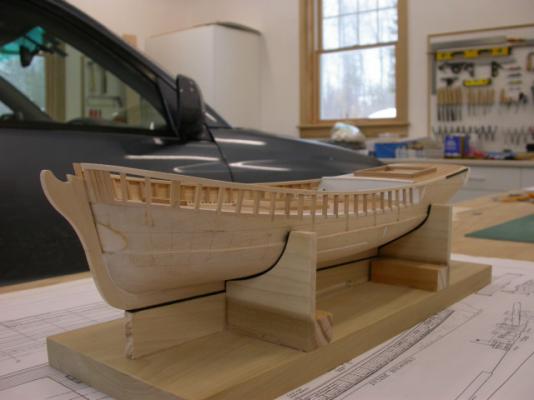
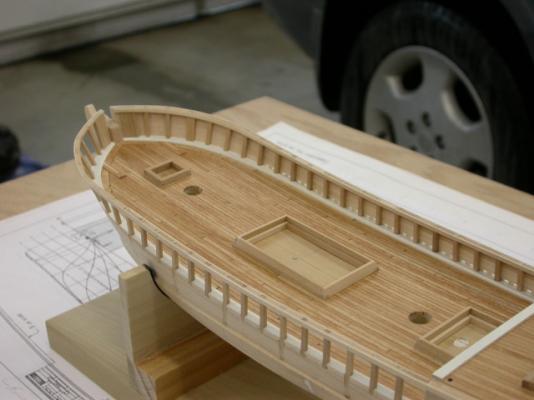
Plank on Solid Ship Model Hulls By Pete Jaquith Recent private messages have raised questions relative to the process for constructing solid ship model hulls. The following notes outline the process I used for plank on solid construction with built up bulwarks in scratch building the Maine Topsail Schooner Eagle 1847 illustrated in a build log here at MSW: Shaping the Solid Hull: 1.0 Material – For scratch built solid hulls I prefer to work with basswood or sugar pine. 2.0 Templates – Station, deck camber, deadrise (if applicable), fore/aft deck endings, fore/aft cap rail endings, and stem & stern frame profile templates were prepared by pasting copies of the body plan and forward/aft hull lines on firm card stock or matt board. 3.0 Hull Block Fabrication – Hull laminations were fabricated using a table saw. The hull block was laminated in rectangular form in order to allow accurate layout and shaping. I glued up the laminations using brown carpenters glue as the glue lines provide useful reference lines. Where appropriate, I laminate the poop deck as a separate assembly. 4.0 Reference Lines – Hull and deck reference lines were laid out with the hull block in rectangular form as it fascinates accurate layout the centerline, station, deck shear and deck at side lines. 5.0 Transom Assembly – The transom assembly was shaped using a disk sander to shape the transom or counter. 6.0 Deck Shear and Camber – A draw knife was used to shape the deck shear and camber. As a poop deck was involved, I shaped the main deck prior to installing the poop deck assembly. 7.0 Deck at Side – After layout of the deck at side molded breadth, a band saw was used to rough out the deck at side (leaving adequate material for tumblehome). A flat chisel was then used to carve the deck edge to the molded breadth using a downward sloping cut to allow for tumblehome. 8.0 Keel, Stem, and Stern Profile – The next step was shaping the keel, stem, & stern profile. Where material needs to come off the keel line, I use a draw knife or block plane. For shaping the stem and stern profile a flat chisel, mill file, and round sanding drums were used. 9.0 Carving the Hull Surface – The hull was carved to the exterior hull lines while secured in the inverted position on a building/reference board. The deadrise was carved using a draw knife. The stations were then roughed out the stations using a sharp gouge. Fairing between stations was performed using sharp gouges to remove the majority of material followed by a #49 Pattern Making file. An alternative to the pattern making file is #80 open grit sand paper wrapped around a 1 ¼” and 1 ½” dia. hard wood dowels. 10.0 Upper Hull Recess – For vessels such as Eagle and Newsboy with copper sheathing, I recess the upper hull and plank only the upper hull above the copper line. Constructing Built up Bulwarks: 1.0 Bulwark Timberheads – Bulwark timberheads were slotted into the solid hull. I fabricated the waterway 1st and used it as a template to cut the slots. I recommend slotting every 2nd timberhead in flat areas and every timberhead in curved areas. After installation the timberheads were faired on both the interior and exterior surfaces using sanding sticks. 2.0 Bulwark Planking – Bulwark planking was installed in the normal manor working down from the upper strake or up the plankshear. I dry fitted the plank shear and cap rails for installation after paint in order to achieve a sharp paint line. On my Topsail Schooner Eagle 1847 build, I cut the bulwarks scuppers in the lower bulwark strake prior to installation. 3.0 Cap Rails – Cap rails were built up with scarf joints and edged with double bead stock. The cap rails were dry fit for installation after paint in order to achieve a sharp paint line. Planking and Finishing the Hull: 1.0 Hull Planking – Hull planking was installed in the normal manor working down from the plankshear. I dry fitted the plank shear for installation after paint in order to achieve a sharp paint line. For full lined vessels with flair forward such as the Topsail Schooner Eagle 1847, the expanded planks curve down at the bow and should be cut from sheet stock. The transition between the planked topside and solid lower hull was faired with wood filler. 2.0 Coppering the Hull – Copper sheathing was installed after completion of hull planking and hull painting. My notes on coppering the ship model hull are posted elsewhere at MSW. Using the above techniques, I was able to accurately fabricate and carve the ship model hull for my Topsail Schooner Eagle 1847 build. While my Brigantine Newsboy 1854 build started as a machine carved hull, similar techniques were used. I should note that the above approach generates a limited amount of sanding dust but a lot of wood chips (most of the material is removed by draw knife, gouges, and chisels). A good shop vacuum is a critical tool here. I have attached pictures of the Topsail Schooner Eagle 1847 (laminated solid hull, scratch) and Brigantine Newsboy 1854 (machine carved hull, kit) illustrating the process. Pete Jaquith Shipbuilder Topsail Schooner "Eagle" 1847 pictures:


-
Johann, Thanks for your interest. The Topsail Schooner "Eagle" 1847 was a joy to build. Regards, Pete
-
Chuck, I will be watching from my post in North Vancouver, BC Canada. Good luck! Regards, Pete
-
Ken, Very good progress on your Brig "Fair American" build. Its interesting to study the vaious FA builds here at MSW. Regards, Pete