Pete Jaquith
-
Posts
343 -
Joined
-
Last visited
Content Type
Profiles
Forums
Gallery
Events
Everything posted by Pete Jaquith
-
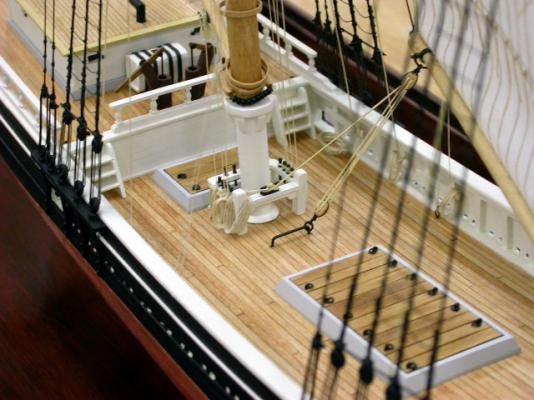
 Ken, Michael, Rusty, Thank you for your interest and all the "likes" Ken - the panel arrangement of the flying jibs is typical of what I have found on drawings of mid 1800's merchant sail. Regards, Pete
 -
Steve, Jim, Thank you for your interest. The Maine Topsail Schooner "Eagle" 1847 was my 1st scratch build and also a very enjoyable build. I think that future models of my "American Merchant Sail from the Mid-1800's Series" will be scratch or near scratch build as I have developed a standard build sequence and list of preferred fitting suppliers. Planning for the Topsail "Eagle" build was ~40-60 hours while I built furniture for our New Hampshire house. Actual construction was ~800 hours spread over roughly one year. As I was retired at the time, time was reletively free. Now that I am working again, time is more limited. Regards, Pete
-
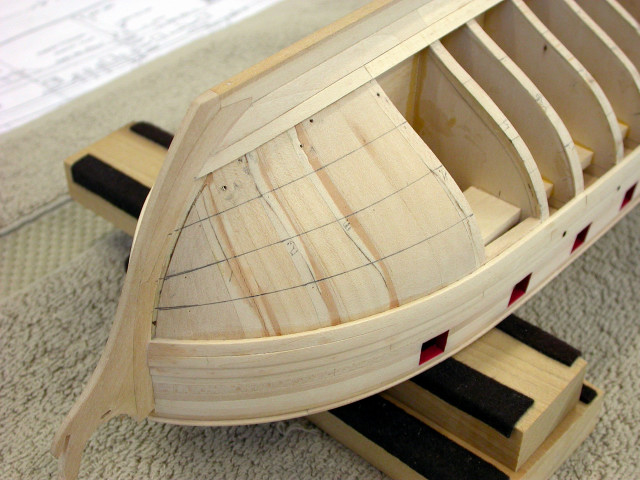
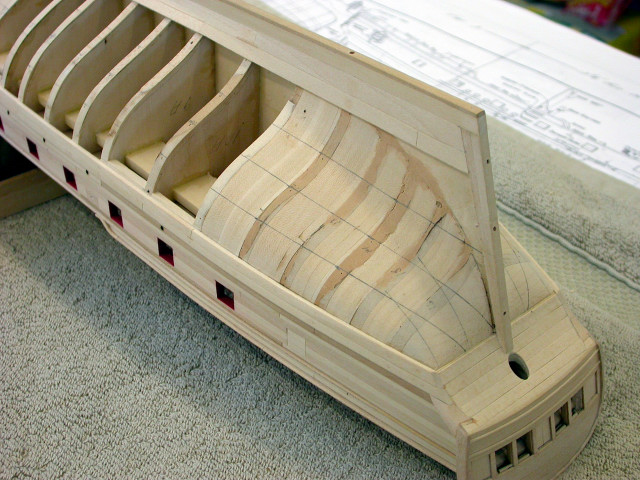
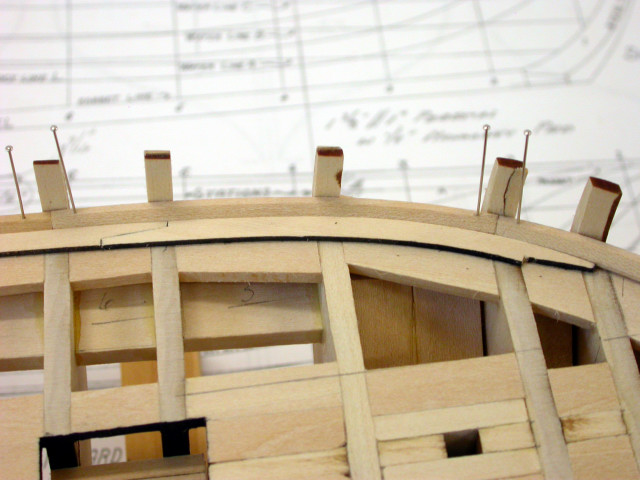
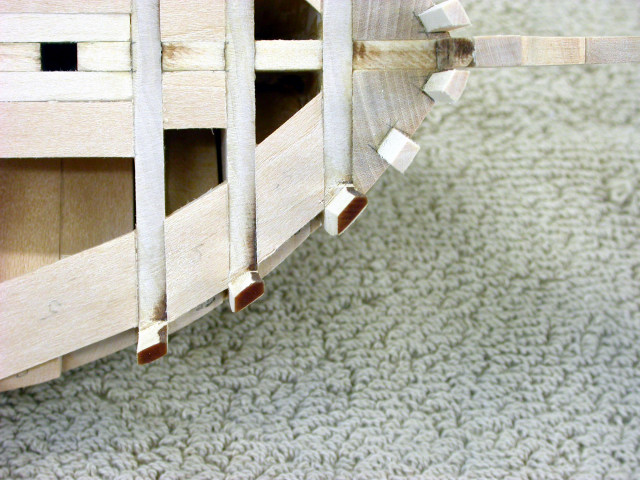
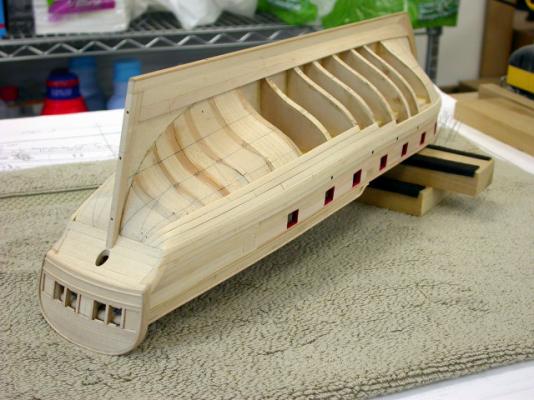
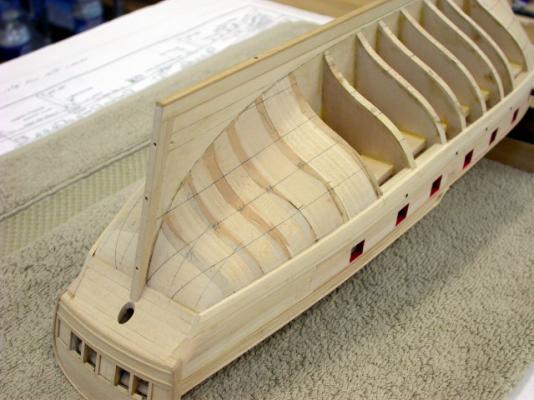
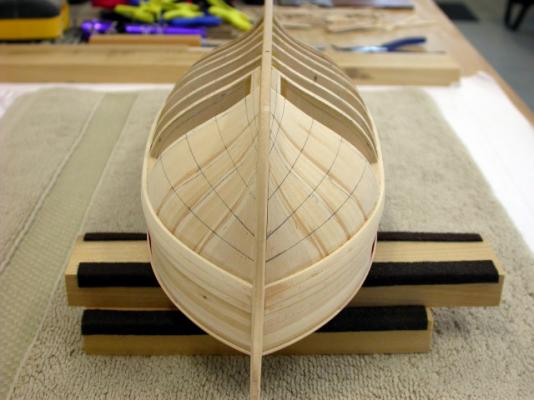
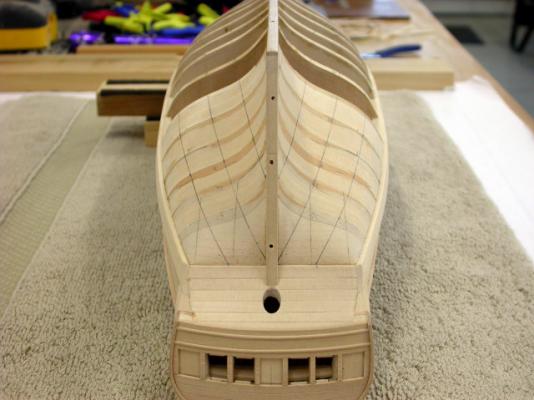
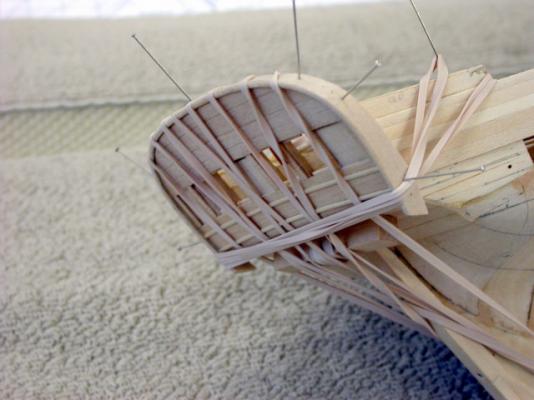
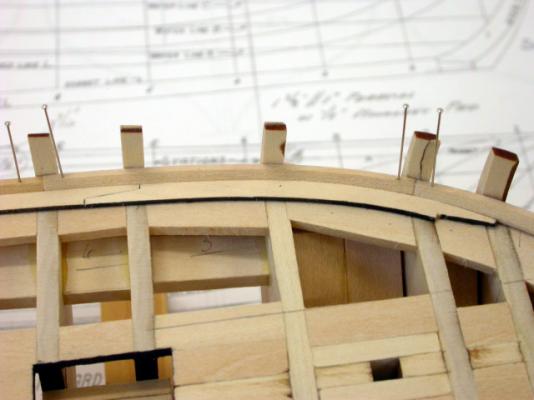
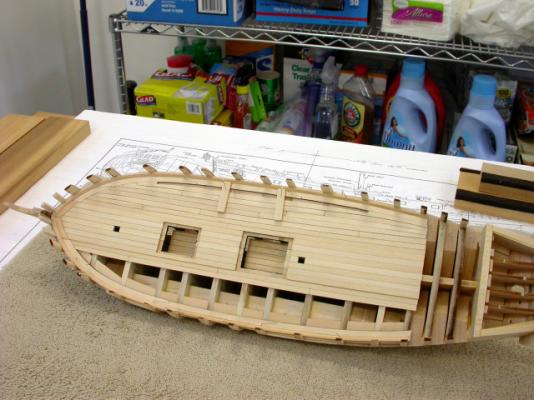
Welcome to the Brig "Fair American" circa 1780 build log, Continuing with the lower hull planking, key points include: >>> 1st broad and garboard strakes fitted (see previous pictures) >>> 3 strakes fitted below wales aft port >>> Aft curved planks were cut from sheet stock >>> Aft planks required heavy soaking where bending up to counter Since completing the above construction, I have been engaged in Vancouver Shipbuilding's start up of their newly updated shipyard in North Vancouver, BC Canada. I am working as the Mgr. Production Engineering with responsibility for shipbuilding plans, hull block and outfit module arrangements, design for production guidance, and assembly planning for 17 ships (6 different designs) under Canada's Non-Combat Federal Fleet Renewal Program. My "Fair American" circa 1780 model is currently in storage awaiting my return to the model shipyard. Pete Jaquith Shipbuilder

-
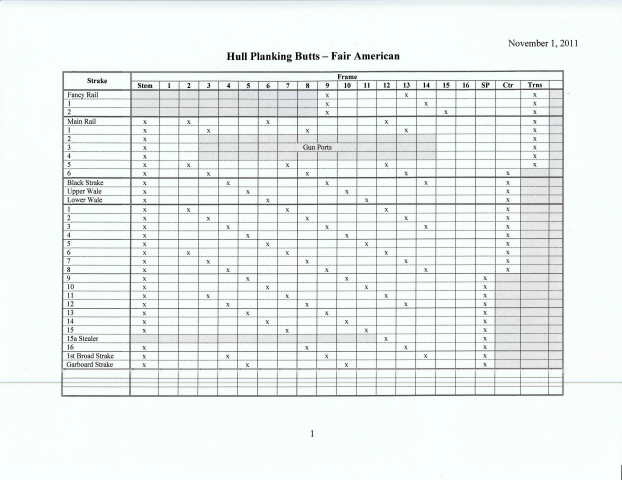
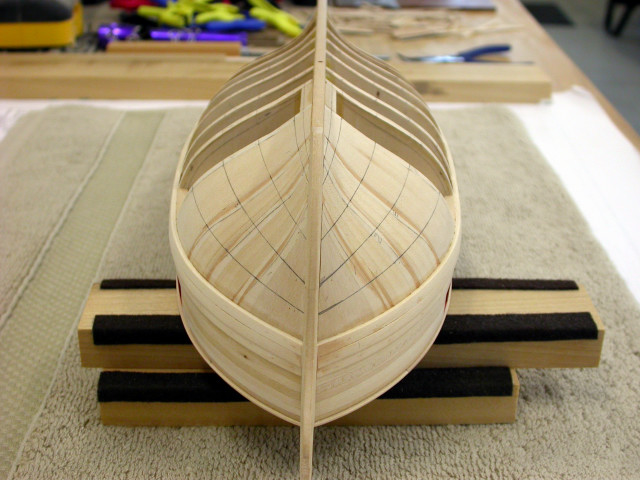
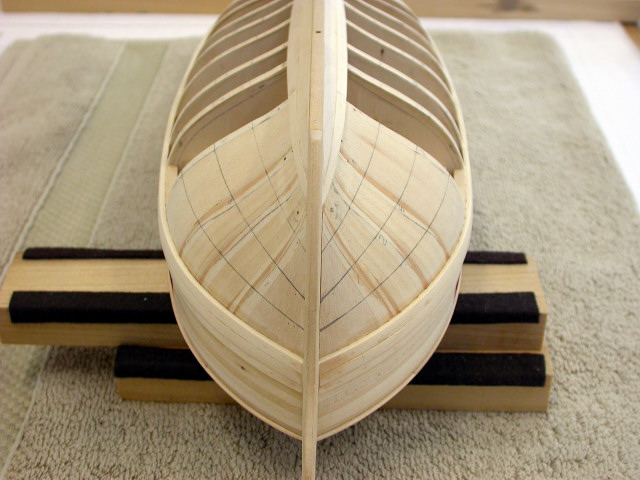
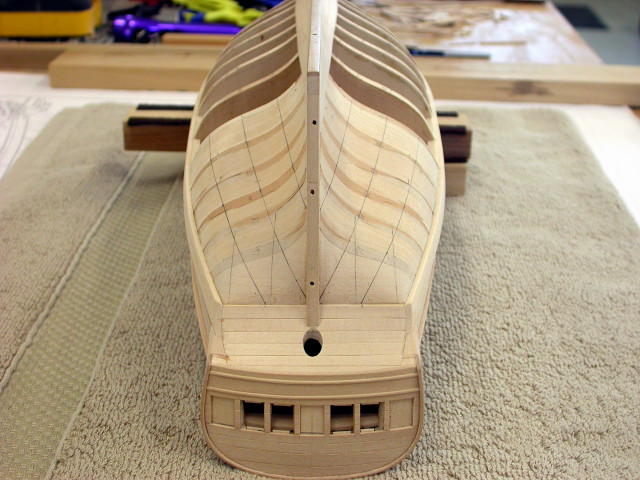
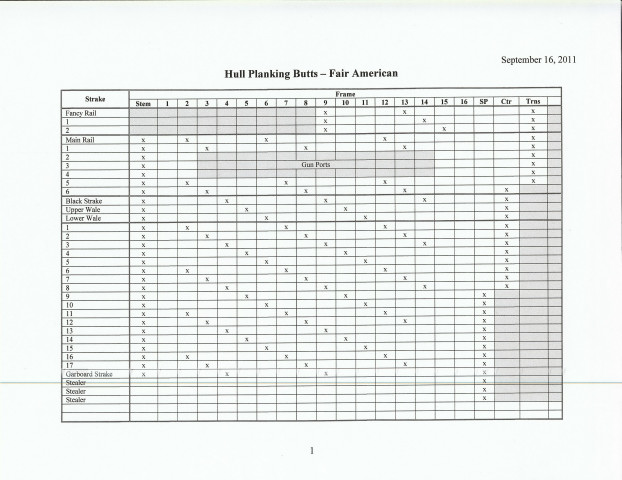
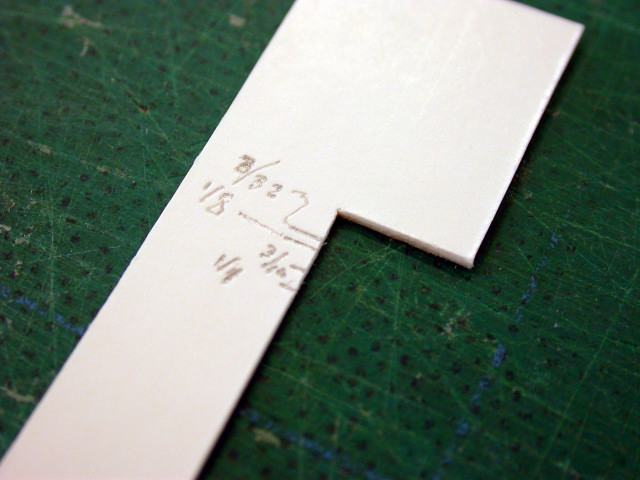
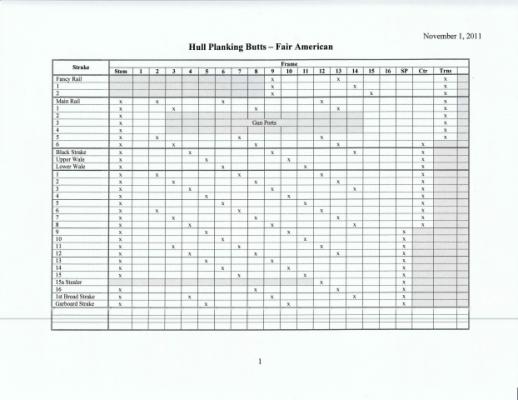
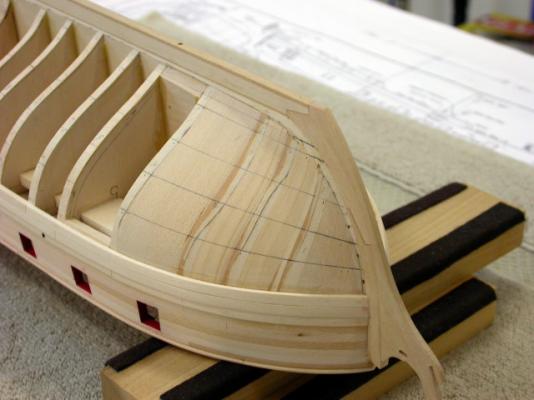
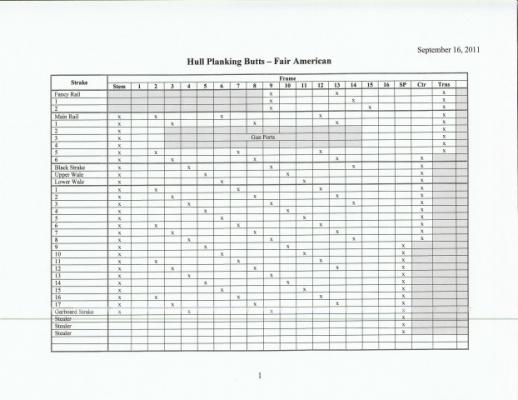
Welcome to the Brig "Fair American" circa 1780 Build Log, With the deck, bulwarks, and transom complete, work shifted to the lower hull planking. Key Points include: >>> Table of planking butts updated (see pictures) >>> Planking layout includes 4 planking belts, 1st broard and garboard strakes (18 plank strakes) >>> One stealer added to lower planking belt >>> Planking belts laid and faired using 3/32" sq. batterns >>> Planking 1/16" basswood >>> Midship plank width ~7/32" (10" full size) >>> Maximum plank width at stern post ~5/16" (15" full size) >>> Curved planks cut from sheet stock using ships curves Pete Jaquith Shipbuilder


-
Mike, Tony, Thank you for your interest. The Topsail Schooner "Eagle" 1847 was an enjoyable build and a great learning experience. Many of these techniques and the basic construction sequence were applied on my current Brigantine "Newsboy" 1854 build. Regards, Pete Jaquith Shipbuilder
-
Mike, I try to complete maximum rigging setup, including sails on the masts and spars before installation on the model. My approach and pictures are included in the Topsail Schooner "Eagle" 1847 build log. See the links below: http://modelshipworld.com/index.php?/topic/6774-topsail-schooner-eagle-1847-pete-jaquith-scratch/page-3 http://modelshipworld.com/index.php?/topic/6774-topsail-schooner-eagle-1847-pete-jaquith-scratch/page-4 Regards, Pete Jaquith Shipbuilder
-
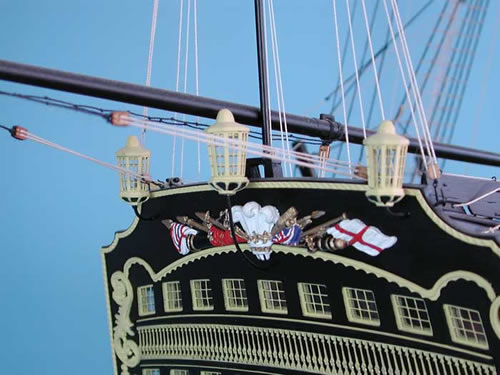
Floyd, Excellent point, when I return to the Brig "Fair American" circa 1780 build I will take a look at the stern lanterns by Chuck's Syren Ship Model Company. Regards, Pete
-
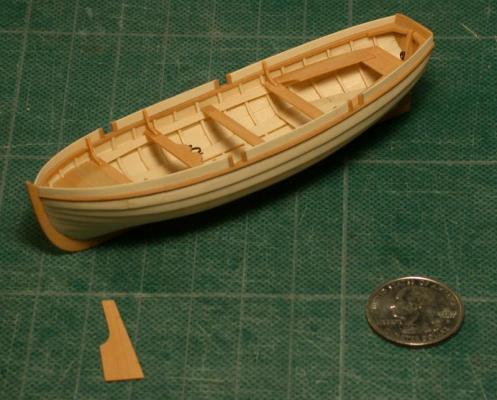
Gary, Thank you for your interest in the Brig "Fair American" circa 1780 build log. Is noted earlier, I try to model my ships as they might have looked. In doing so, I feel free to modify details and resize components as my research dictates. My Brig "Fair American" circa 1780 is currently in storage while I persue my latest 1:1 scale shipbuilding project at Vancouver Shipyards in North Vancouver, BC Canada (17 ships to 6 different designs). I have a few "Fair American" pictures left addressing planning of hull planking, lining off, and installation of the 1st few strakes of hull planking. A few of the changes under consideration include: Single hull planking following period practice Replacement cannons/gun charriages (per mock up) Resize deck furniture (as required) Possible addition of ships cutter (from Admirality Models) Stern lantern kit (from Caldercraft Models) Pete Jaquith Shipbuilder
-
Robert, Thank you four interest in "Fair American" circa 1780. The curved planks were realy not difficult, just developing a sketch based on ship conditions. I used proportional dividers and ships curves to layout the planking. Regards, Pete
-
Divarty, I belay the line to the pin with several figure 8 loops and the last loop passing under the crossing line. With all lines properly tensioned, I secure the belayed line with dilute white glue. I recommend against CA glue as it can cause premature brittle failure of your rigging. After rigging completion, I add seperate rigging coils fabricated from the appropriate rigging line using a jig. As noted, some lines will be paired up on a single belaying pin. Regards, Pete
-
Floyd, Ships curves are different curves more suitable for ships lines. A full set of 156 curves would be hard to find, but a selection of 6-8 common curves should be available on the internet. I have been using the same set of 8 curves for >50 years but I don't have the numbers with me. Good luck, Pete
-
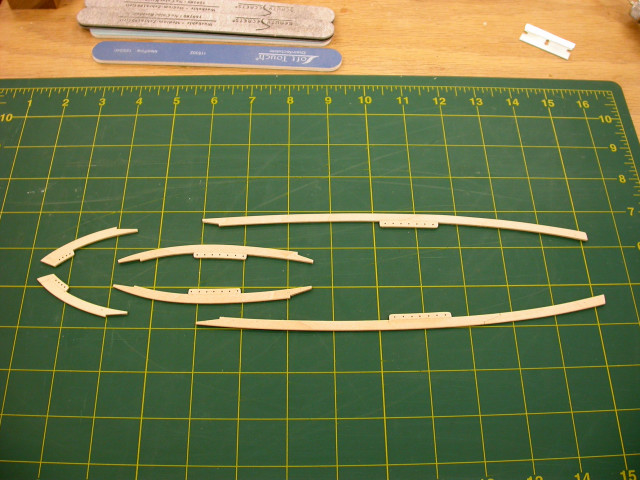
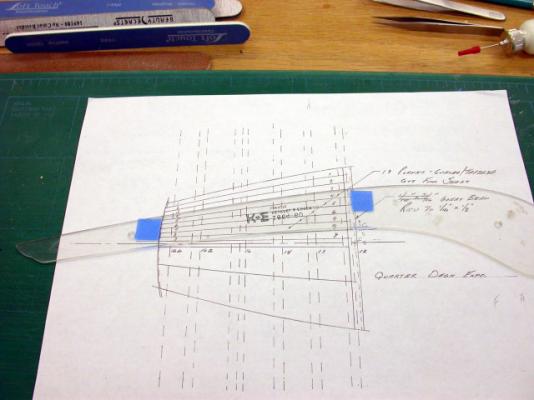
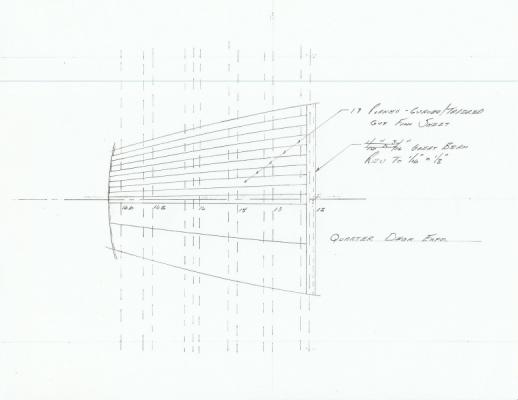
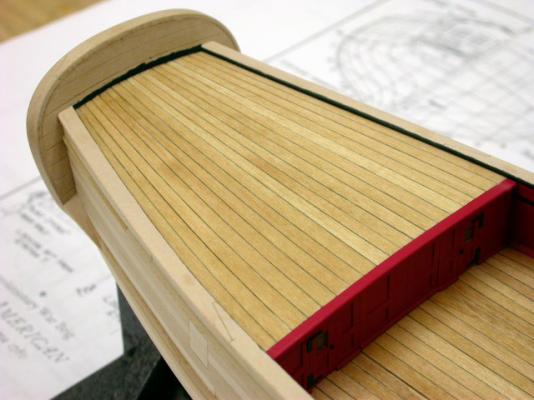
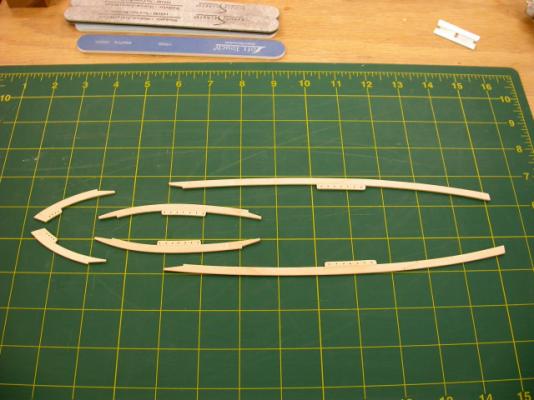
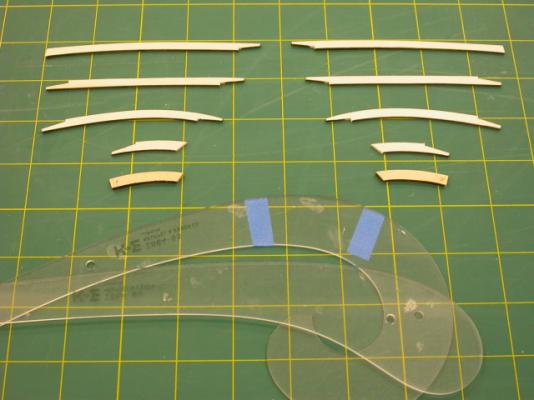
Floyd, That's right, the poop deck planks were cut from sheet stock. The planks were cut using ships curves (pictured) as a guide. Regards, Pete
-
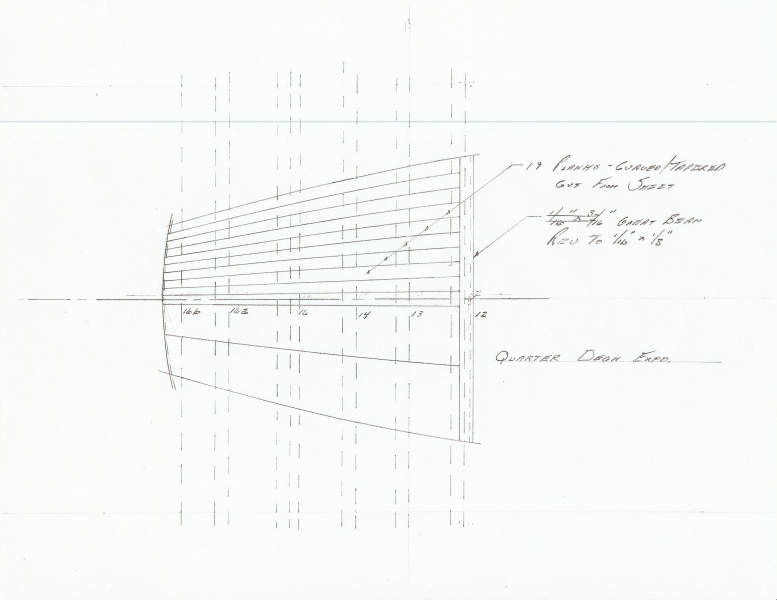
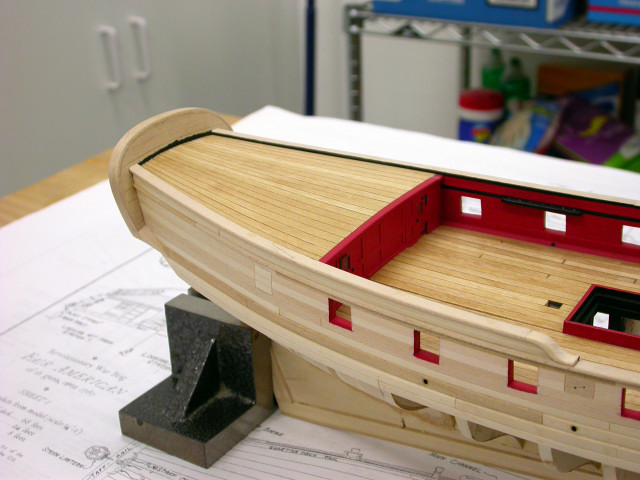
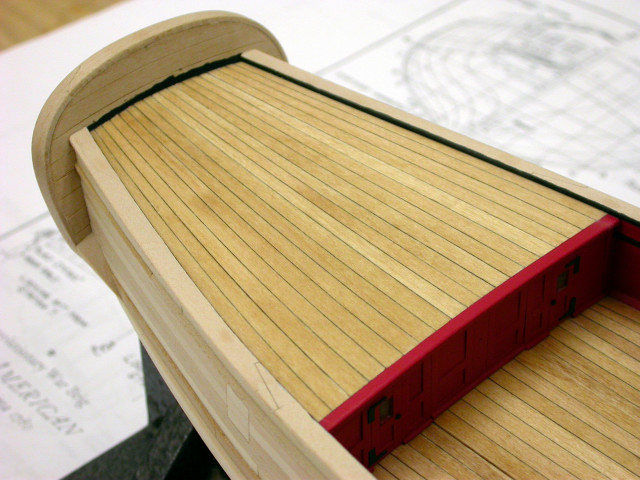
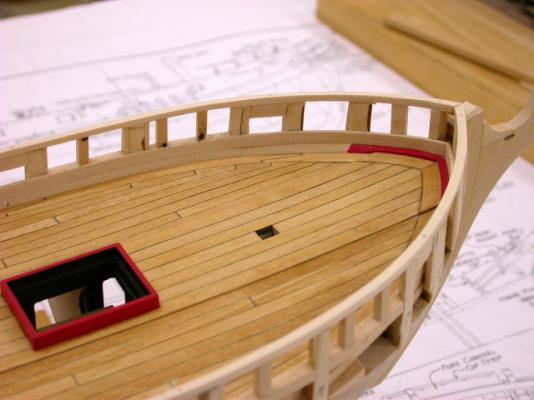
Welcome to the Brig "Fair American" circa 1780 build log, Next step was poop deck planking. Key points include: >>> Poop deck planked using curved/tapered planks >>> Deck planking laid out using design sketch >>> Deck planking cut from sheet stock using ships curves >>> Deck planking finished as per main deck planking (Ipswich Pine oil stain and oil based gell wiping varnish) >>> Fancy rail cap installed after completion of poop deck planking This completes deck, bulwark, hull, and transom construction above the main wales. The transom and upper hull framing on these vessels is rather complex but makes an interesting model when complete. My choice of curved planking on both the main and poop decks added a little challenge but I feel it was worth while. This model is but a small tribute to the craftsmen who built these vessels in the late 1700's. Pete Jaquith Shipbuilder

-
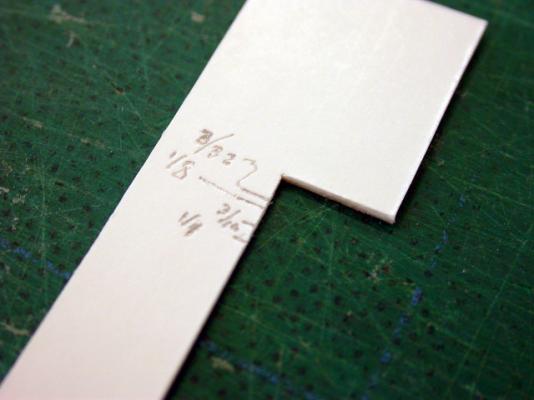
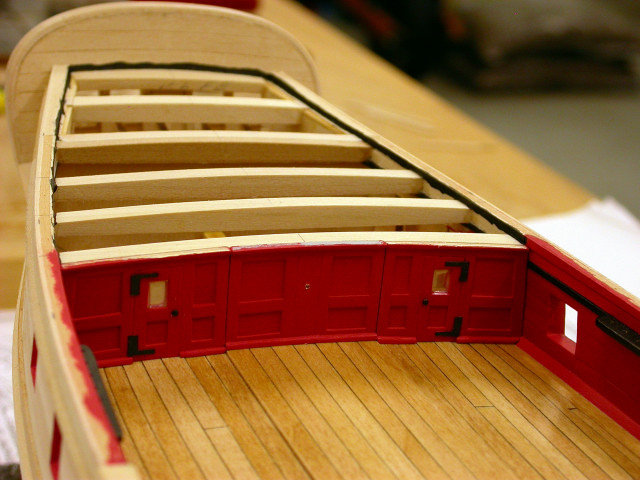
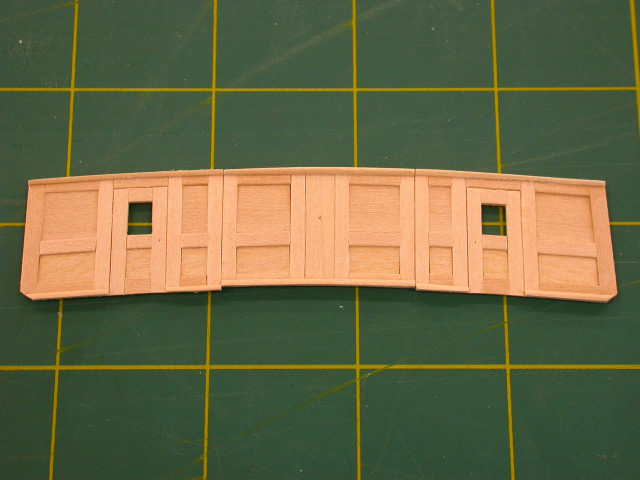
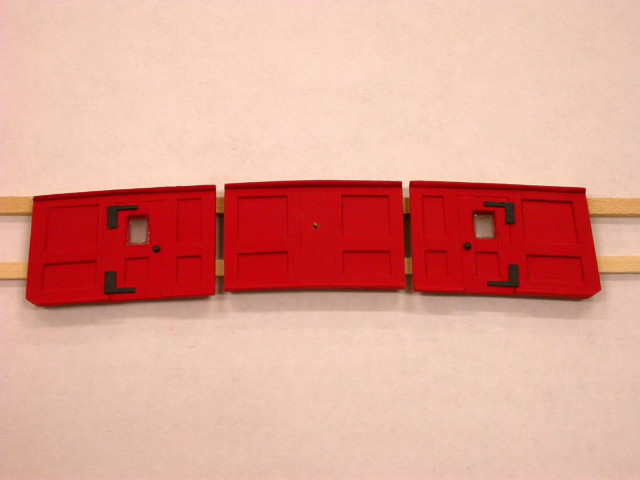
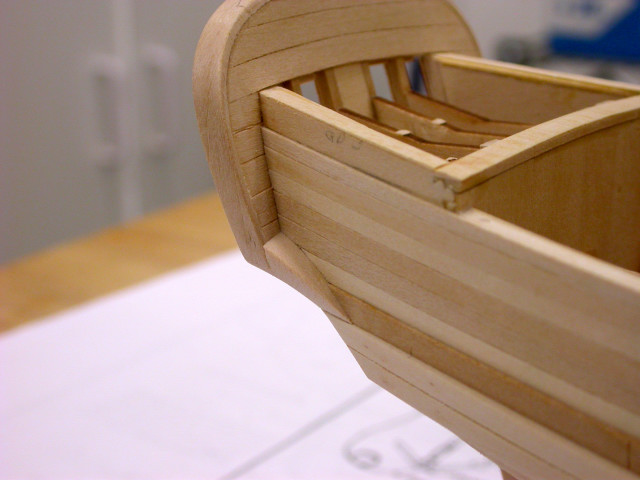
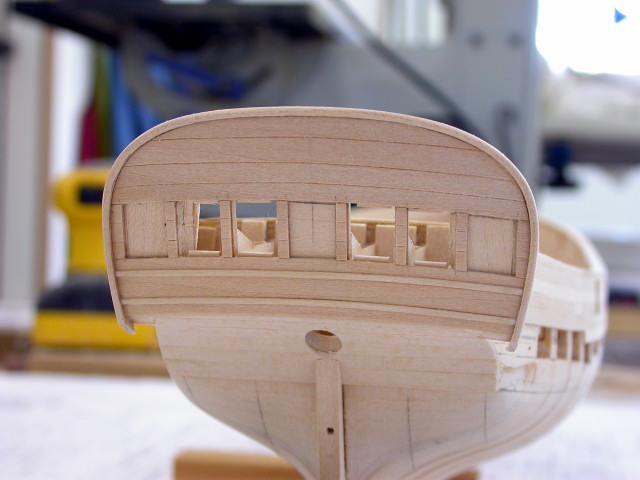
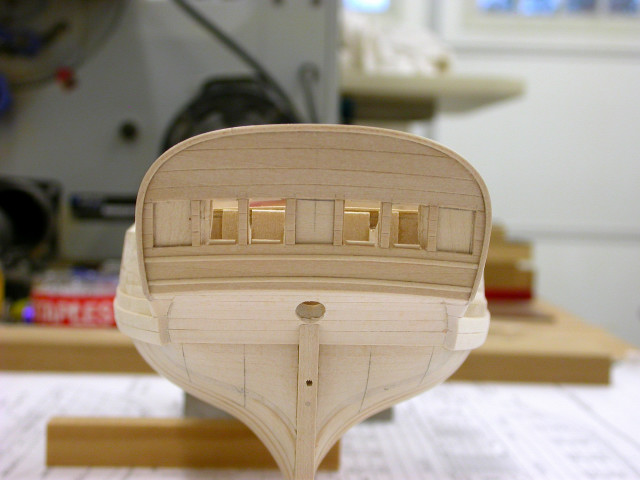
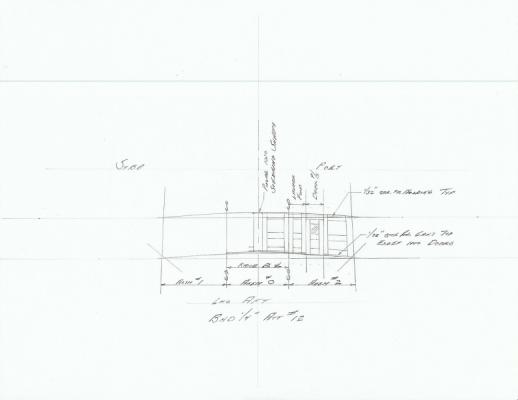
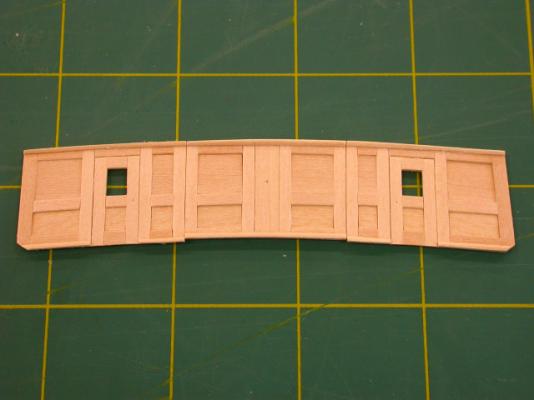
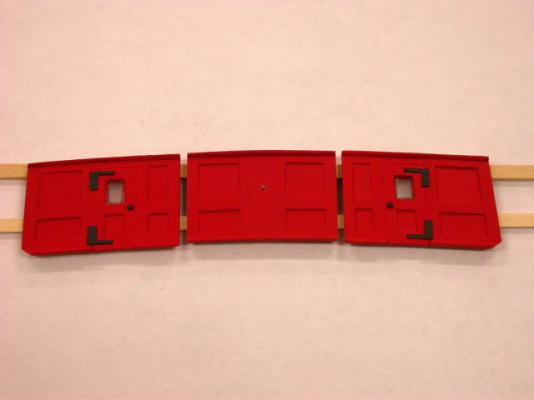
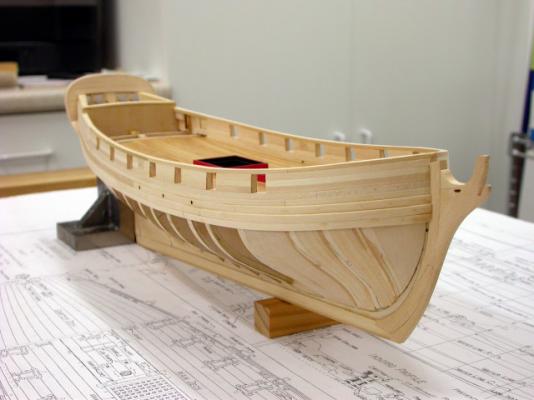
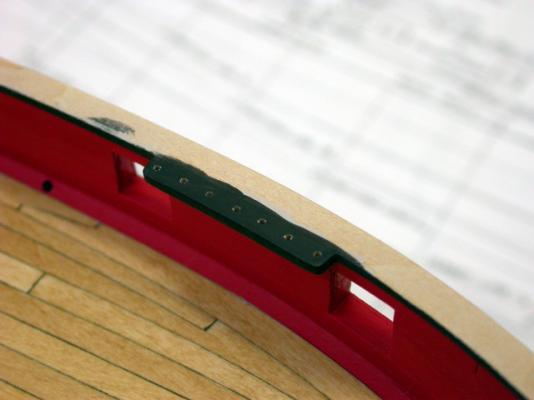
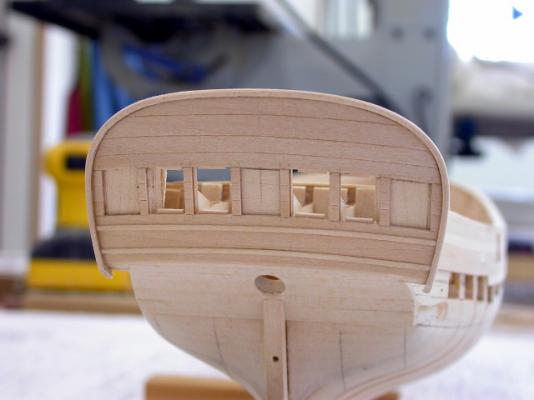
Welcome to the Brig "Fair American" circa 1780 build log, Continuing with the poop bulkhead, key points include: >>> Poop bulkhead moved aft to clear cannon rigging >>> Poop bulkhead redesigned based on contemporary practice >>> Poop bulkhead designed as P/S removable panels with fixed CL panel (e.g. P/S panels removed when at battle station); see design sketch >>> CL bulkhead panel includes support for steering shaft >>> Poop bulkhead painted prior to installation Pete Jaquith Shipbuilder

-
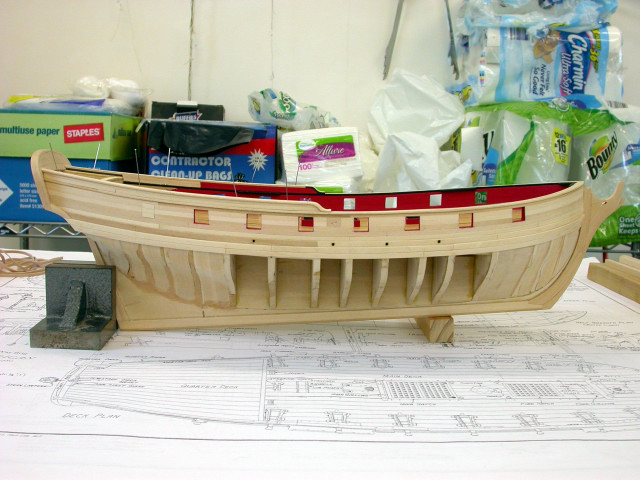
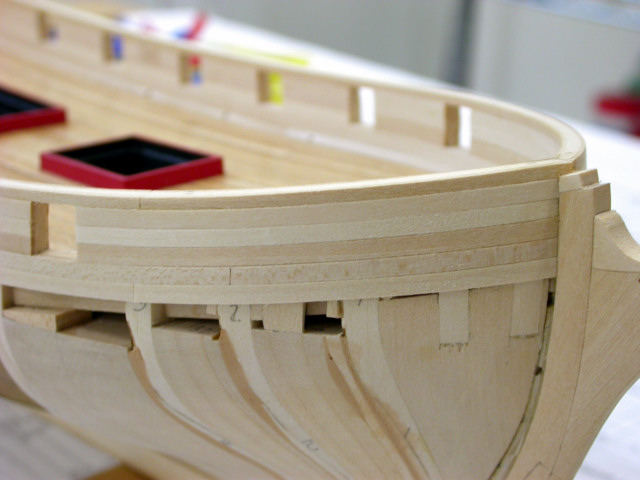
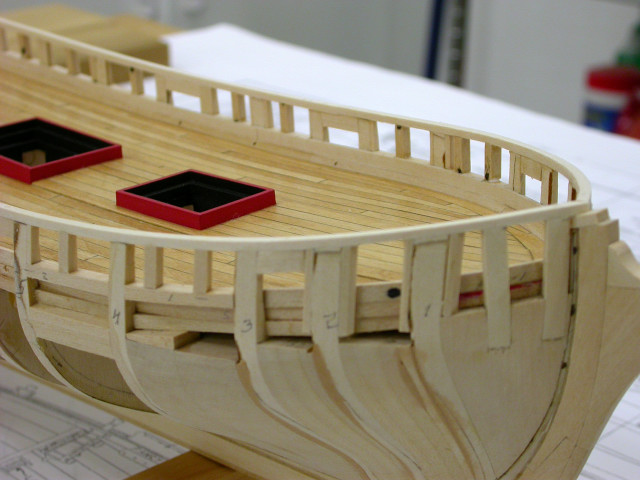
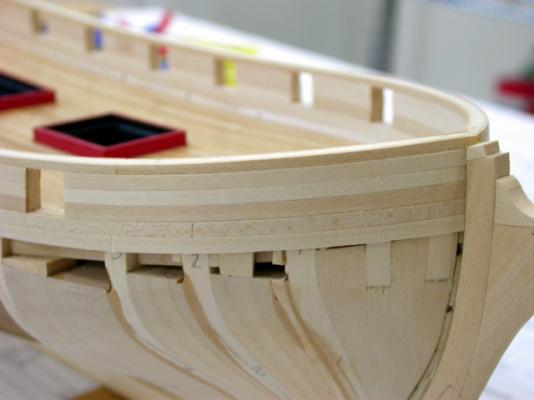
Welcome to the Brig "Fair American" circa 1780 build log, Continuing with the fancy rails and poop deck framing, key points include: >>> Heights of wales, black strake, bulwark planking, main rail, fancy rail, and poop deck planking are all related >>> Fancy rails pre painted to minimize masking >>> Fairing of poop deck framing required >>> Fancy rail caps left loose (install after poop deck planking) With the fancy rails complete, the stern is starting to take shape. Next steps will include the poop bulkhead and poop deck planking. Pete Jaquith Shipbuilder


-
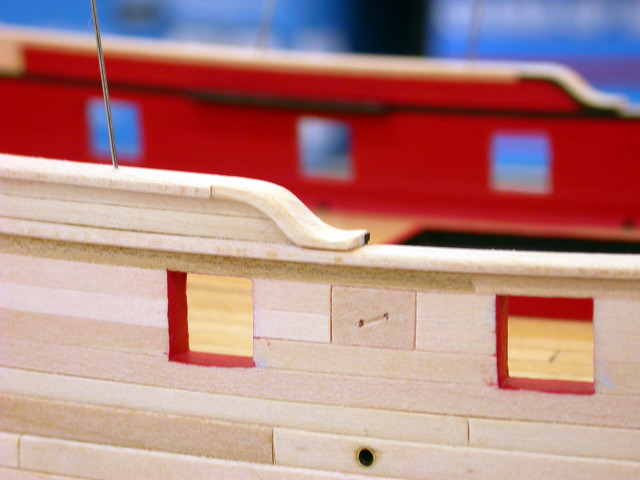
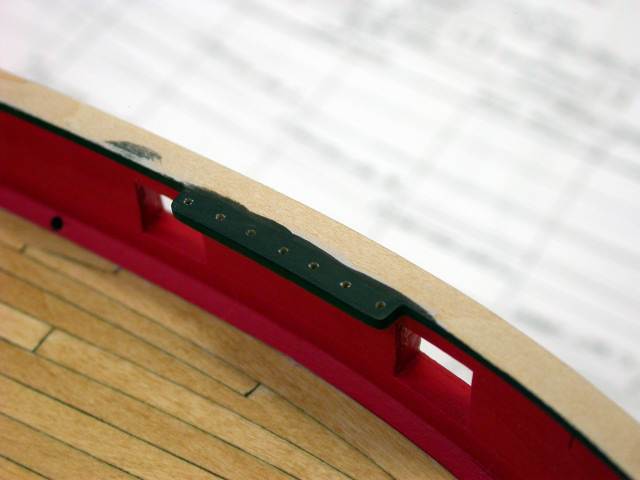
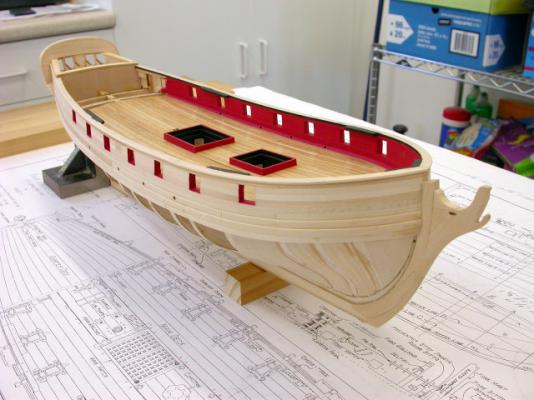
Floyd, Robert, Thank you for your interest and a very good question re waterways. The following points apply: Period Wooden Shipbuilding Practice >>> The outer deck edge or waterway was a logical place to add strength members; i.e. the larger the vessel the more and larger strength members >>> The current Clipper Ship "Young America" build log shows this even on the lower decks >>> While some of the added thickness would be let into the frames, shipbuilders tend to add most thickness changes away from the molded line (top of deck frames and outside of shell frames) >>> As a result, most deck scuppers were located in the waterway planking or in the deck planking IB with a bend just below the deck framing (see "Newsboy" picture attached) >>> Some coastal schooners left out the lower bulwark plank or part there of (see "Eagle" picture attached) Modern Steel Shipbuilding Practice >>> The outer deck plate (deck stringer) and upper shell plate (shear strake) are often thicker high strength notch tough steel (up to 2/1/2" on modern container ships) >>> As an exception to the general rule, this is sometimes let into the internal framing (i.e. flush on top) >>> Deck scuppers are pipe with a 120 degree bend below the deck framing passing out through the shell plating >>> Modern ships typically have no camber, and if used camber is straight line >>> Modern ships typically have no shear, and if used shear is straight line >>> These changes are a result of mechanized flat panel line construction >>> Deck drainage is considered early in the design, but remember ships are constantly in motion at sea and therefore through off most deck water when at sea, in port they are moored with a slight list to keep the decks clear Pete Jaquith Shipbuilder

-
Welcome to the Brig "Fair American" circa 1780 build log, With the bulwarks, transom, and black strake complete, next steps included: >>> Deck scuppers fabricated from 5/64" thin wall brass tube >>> Deck scuppers drilled from both ends >>> Wales fitted after completion of deck scuppers >>> Bulwark cap rail fabricated from sheet stock >>> Bulwark interiors painted prior to cap rail installation Pete Jaquith Shipbuilder

-
Robert, Thank you for your interest. I would recommend 8-9" deck planks so 5mm would work just fine. Regards, Pete
-
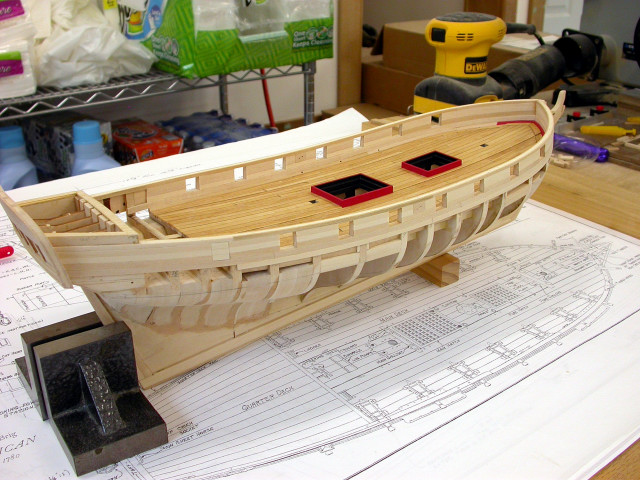
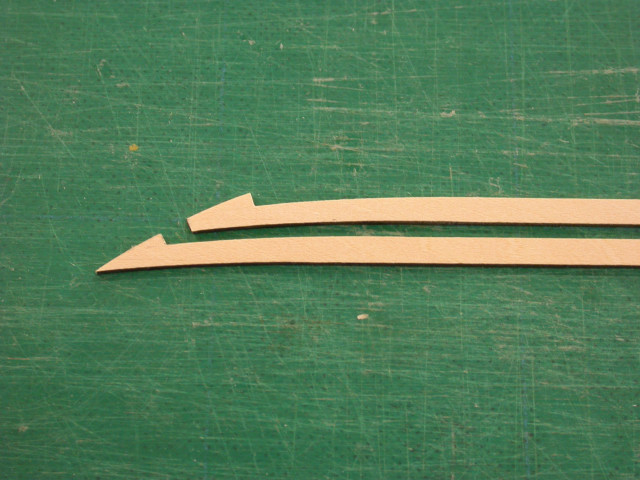
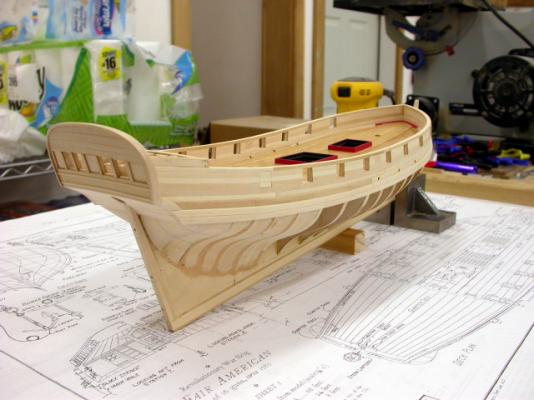
wq3296, With respect to building the "Fair American" mockup, I had several objectives in mind: >>> Bulwark Height - this problem was previously identified in Bob Hunt's practicum on building the MS Armed Virginia Sloop circa 1768; FA drawings and bulkheads were inconsistent; and as I was using replacement cannons the bulwark had to be increased in height >>> Bulwark and Upper Hull Planking Widths - plank widths were established to suit gun port height >>> Waterway Construction Details - evaluate construction sequence >>> Deck Planking Construction Details - evaluate planned design/construction details >>> Deck Scupper Construction Details - evaluate construction sequence >>> Silver Soldered Chain Plate Construction - evaluate new construction techniques and silver soldered ring diameters >>> Cannon Tackle Arrangements - evaluate ring bolt locations, tackle lengths, and installation sequence >>> Paint Colors - evaluate use of Floquil model railroad acrylic colors >>> Go Ahead Decision on Modeling "Fair American" - mockup was constructed as I was building "Newsboy" and I was still evaluating a FA build With respect to deck planking design: >>> As I recall, the latest FA kit provides 1/8" or 6" wide deck planks; 3/16" or 8-9" wide deck planks would be more typical of the period >>> Allowing deck planks to end in long tapers was considered poor practice as effective caulking of these joints was not possible >>> I agree that OB nibbing of deck planks would not be appropriate as this construction detail was typical of the 1800's after machine cut planks came into general use >>> I therefore chose to use curved planks with hooked scarfs more typical of hand cut planks of the 1700's >>> Note that curved planks were also used on the poop deck With respect to my modeling practice: I strive to model ships as they might well have appeared based on period construction practice. Therefore, I will deviate from model kit plans and instructions where experience suggests alternate details and arrangements apply. Pete Jaquith Shipbuilder
-
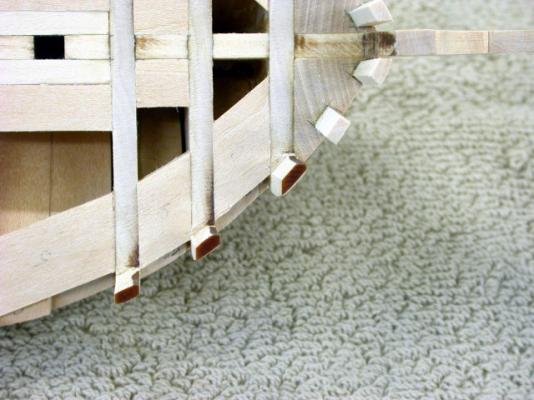
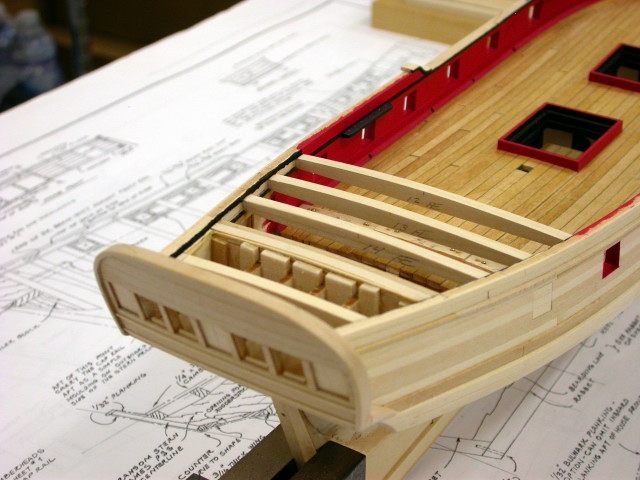
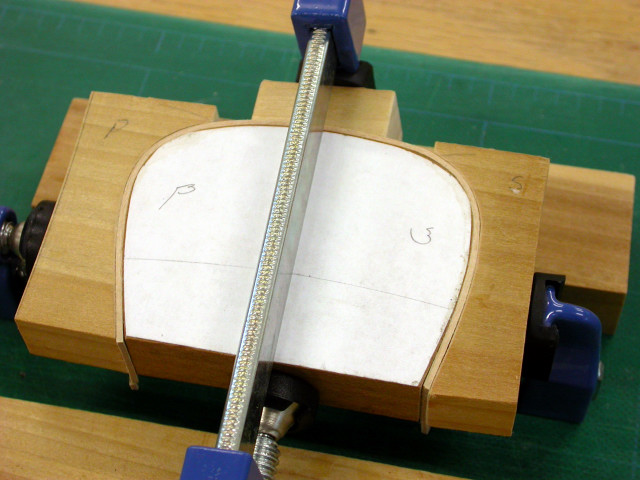
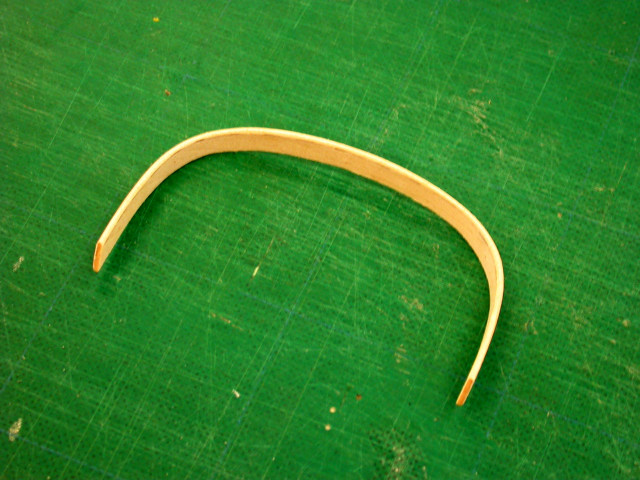
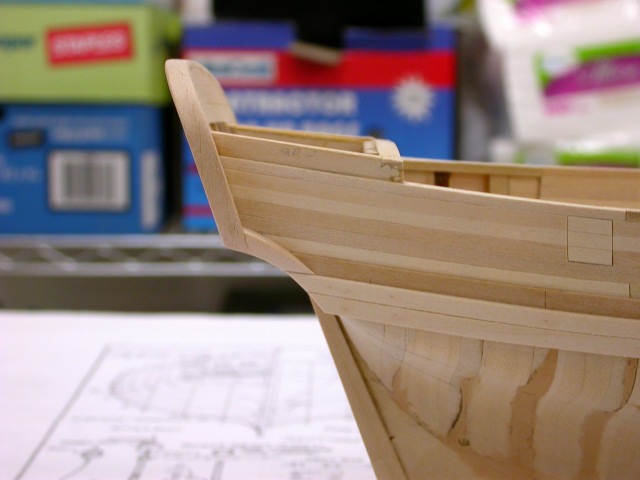
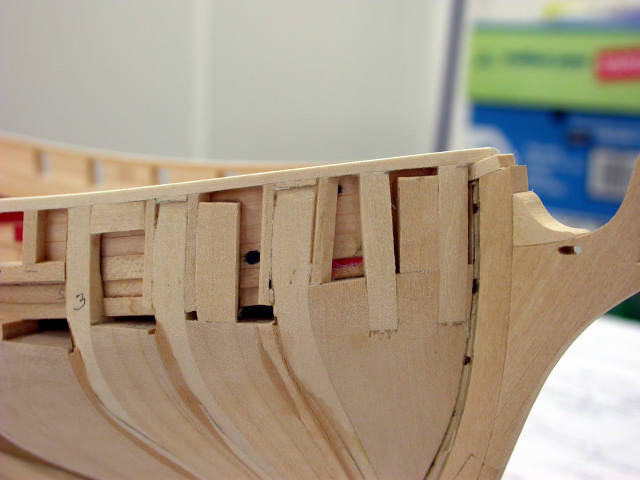
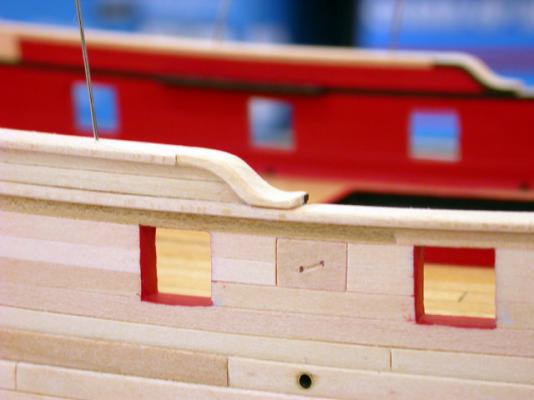
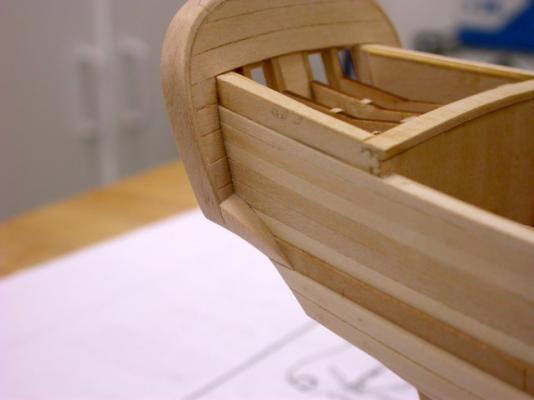
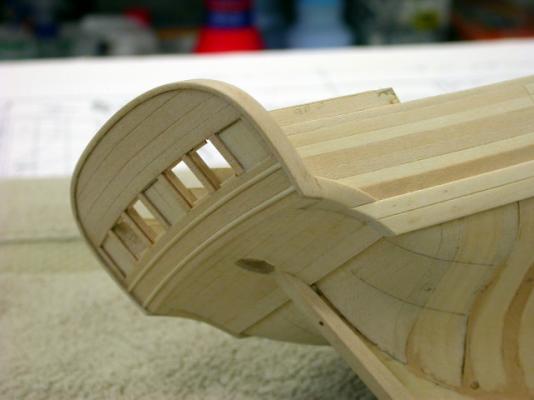
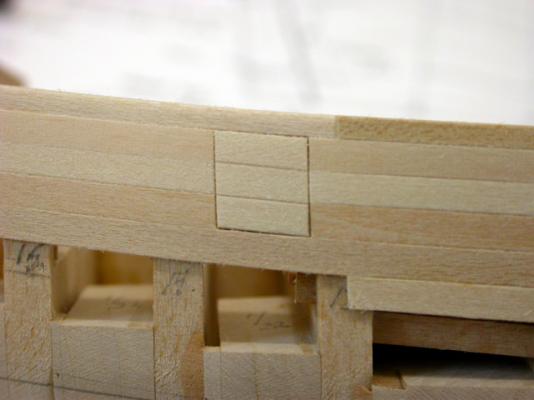
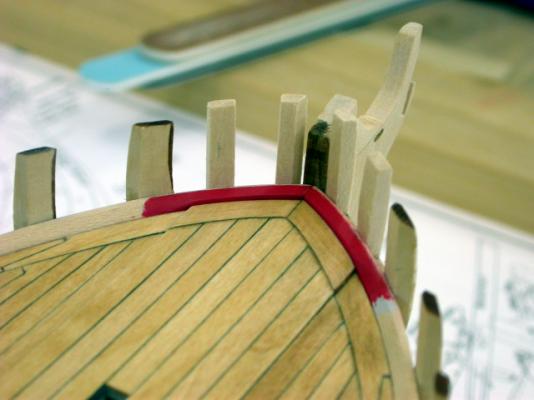
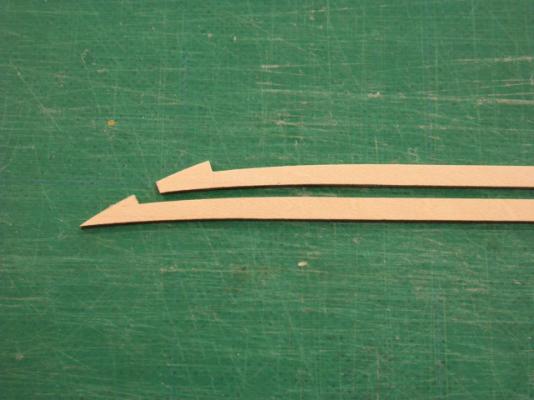
Welcome to the Brig "Fair American" circa 1780 build log, Nils: Thank you for your interest Moving on to the transom rail and fashion pieces, key points include: >>> Transom cap rail is curved in both section and elevation >>> Transom cap rail might well have been fabricated in several pieces >>> Transom cap rail was formed in one piece of sufficient width to accomodate the forward sweep required to follow the line of the transom >>> Forming jig used to form the cap rail (see picture) >>> Transom cap rail was shaped to fit the transom prior to installation >>> Transom cap rail was installed with extra length and faired in place >>> False scarfs were cut into the transom cap rail after installation >>> Fashion pieces were partially formed prior to installation >>> Fashion piece final forming was performed in place >>> Bulwark planking, black strake, and whales were fitted and faired into counter planking Note: This area has a complex and distinctive geometry typical of many ships of the period. It is critical that design and construction of the transom, transom cap rail, fashion pieces, bulwark planking, black strake, and whales all fit together. Pete Jaquith Shipbuilder


-
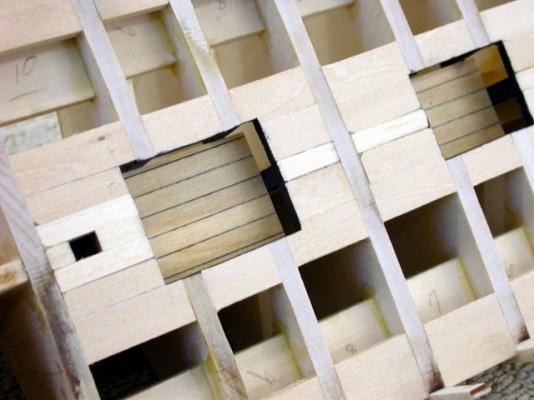
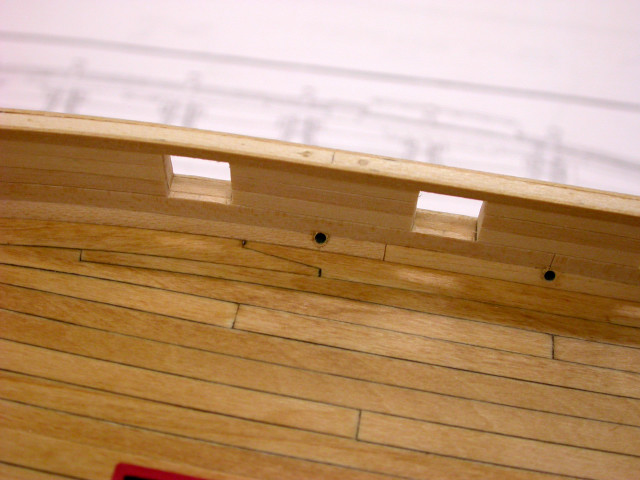
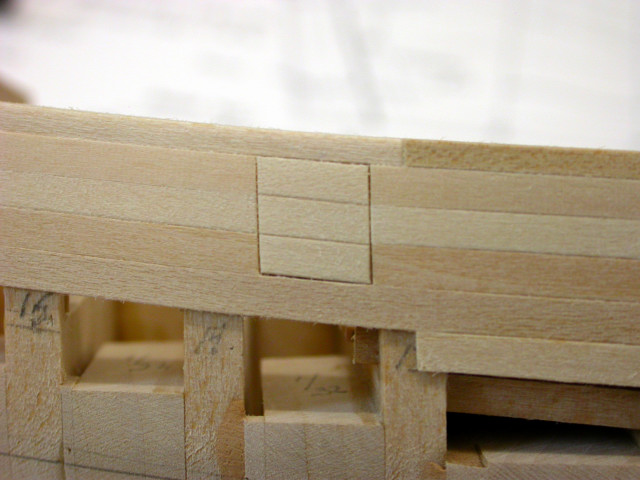
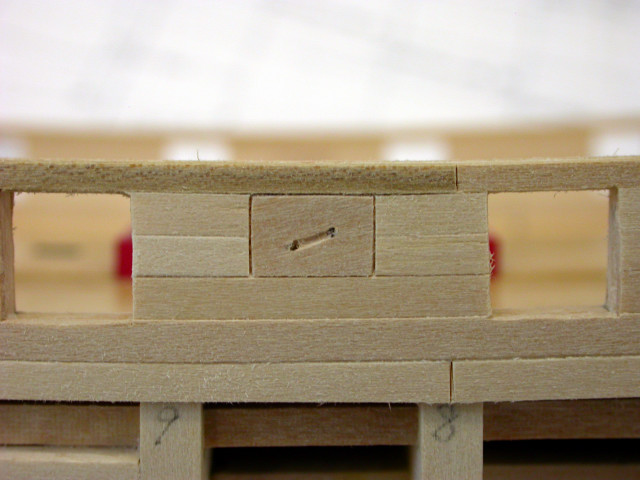
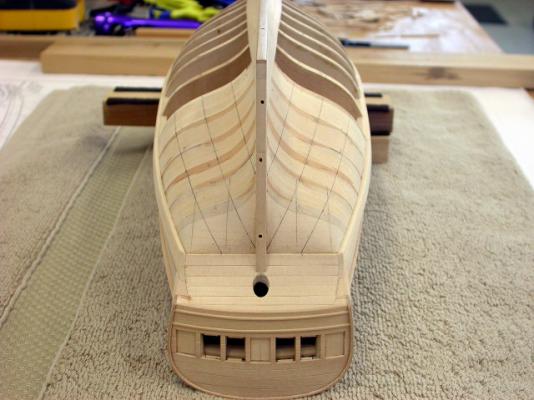
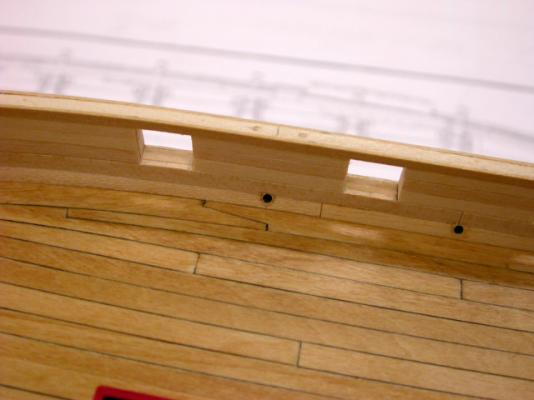
Welcome to the Brig "Fair American" circa 1780 build log, Continuing with bulwark construction, key points include: >>> Bulwark and gun port framing fitted >>> Bulwark ceiling (interior planking) fitted >>> Bulwark sheeves fitted with ceiling planking >>> Waterway drilled for deck scuppers (will be fitted later) >>> Bulwark filler pieces added in way of hause holes, bulwark sheeves, rigging attachments >>> Outer bulwark planking fitted >>> Bulwark sheeves fitted with outer bulwark planking >>> Aft gun port cover fitted (modeled in closed position) Pete Jaquith Shipbuilder


-
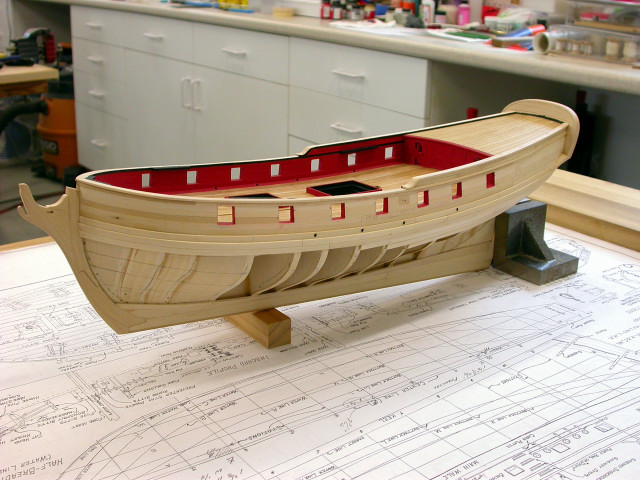
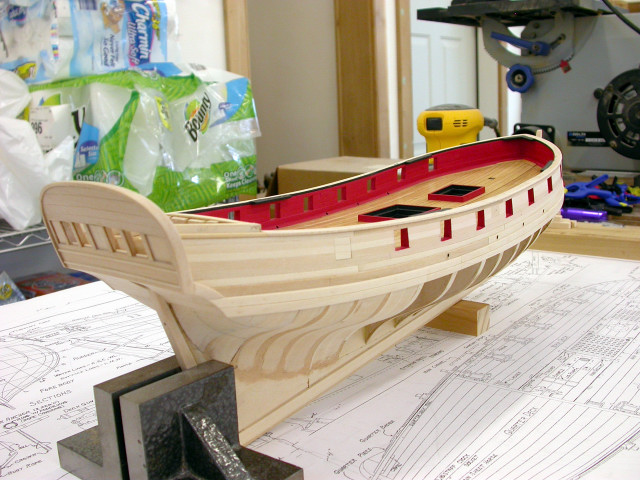
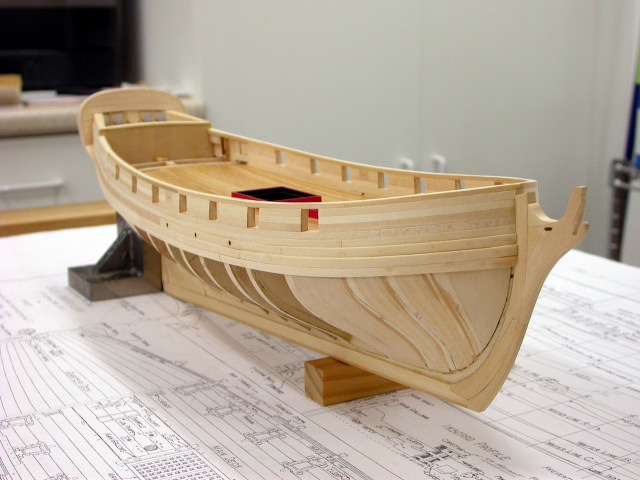
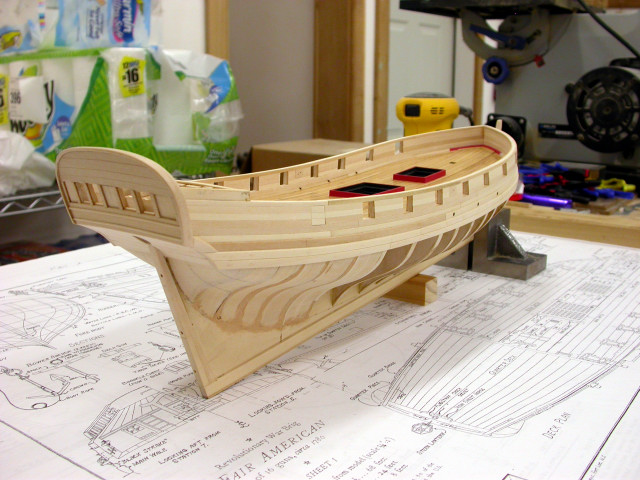
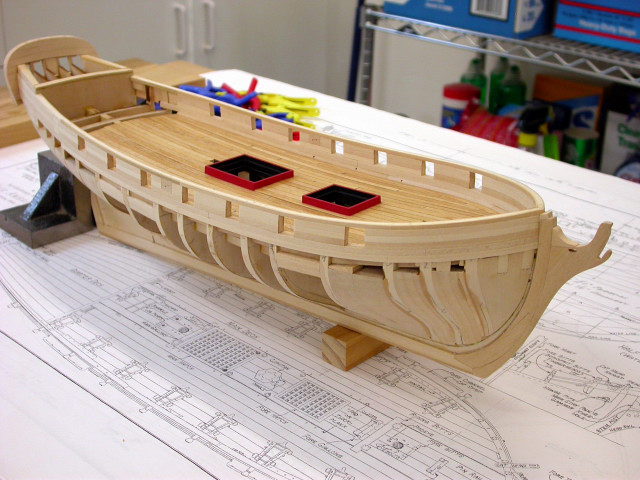
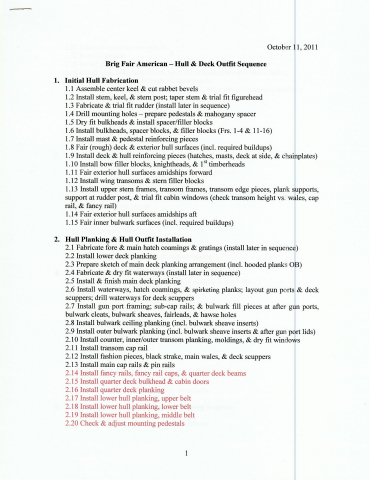
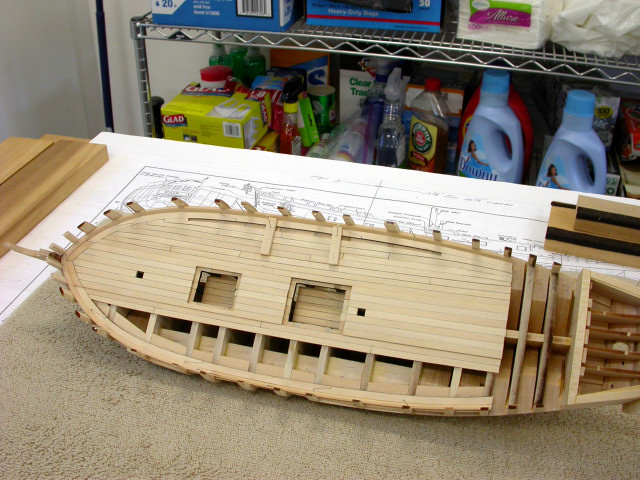
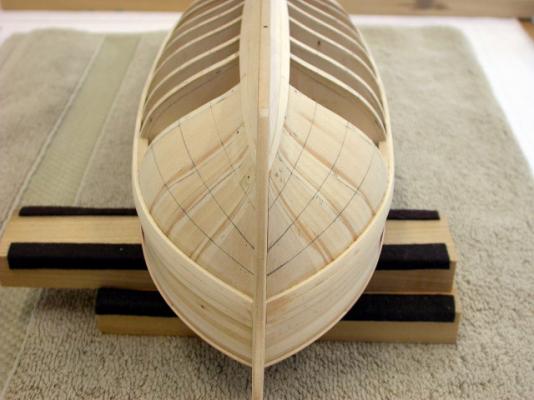
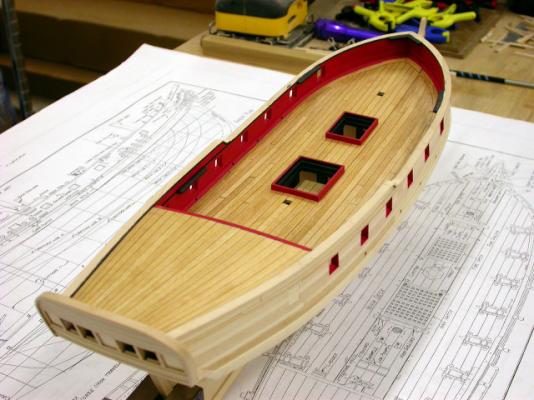
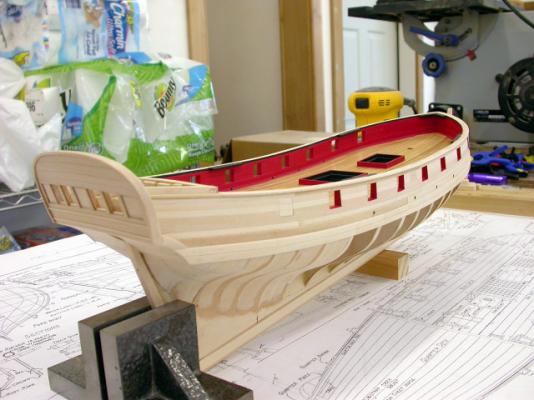
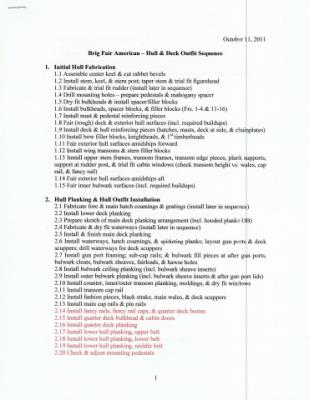
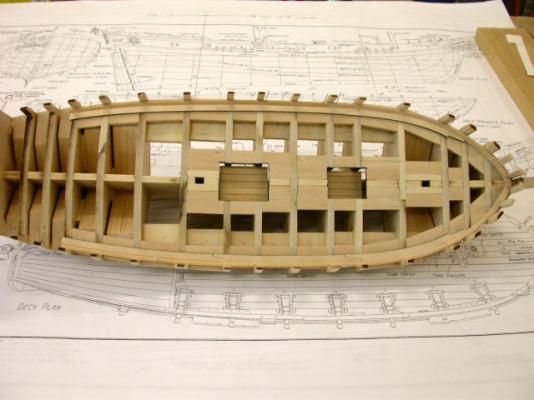
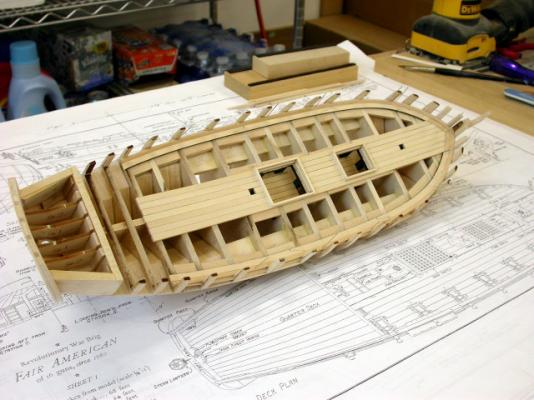
Welcome to the Brig "Fair American" circa 1780 build log, With the main deck complete, I have attached pictures of some of the planning and design tools used in my "Fair American" circa 1780 build: >>> Construction work sequenced based on initial plan review (allows a look ahead re next steps) >>> Some construction resequencing takes place based on conditions >>> Hull planking butts laid out per period practice Pete Jaquith Shipbuilder
-
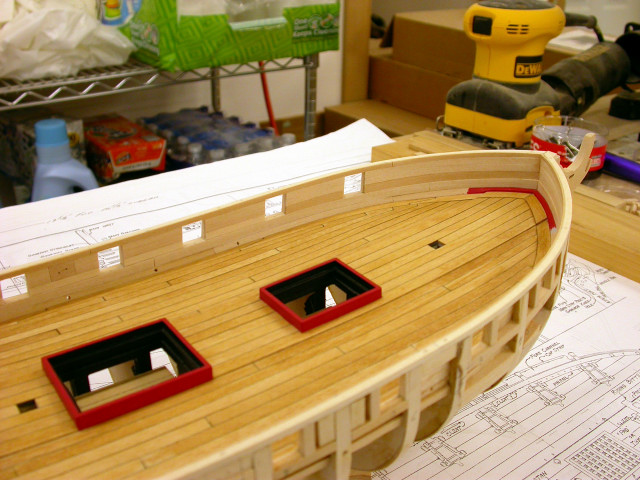
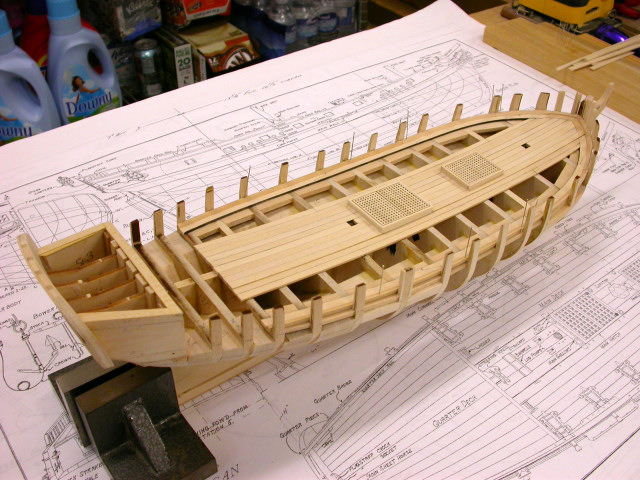
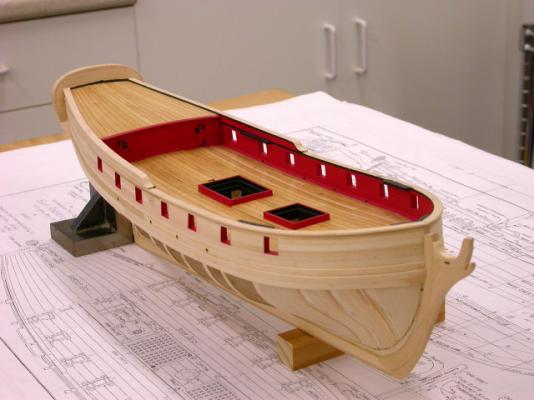
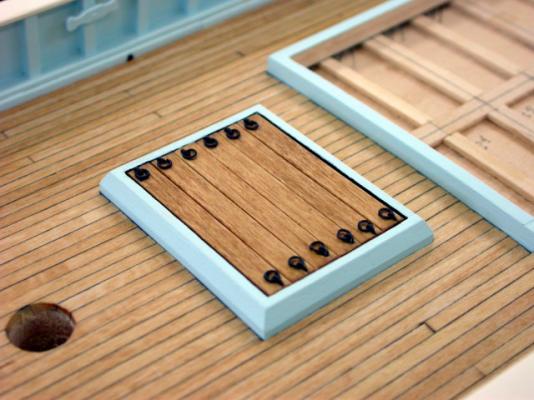
Welcome to the Brig "Fair American" circa 1780 build log, Rich - thank you for your comments Continuing with deck planking, the following notes apply: >>> Deck planking stained with Minwax Ipswich Pine (oil stain) >>> Deck planking finished with Bartley's Gel Wiping Varnish (oil based satin finish) >>> Deck rubbed down with 0000XF steel wool >>> Waterways installed after deck finishing Pete Jaquith Shipbuilder
-
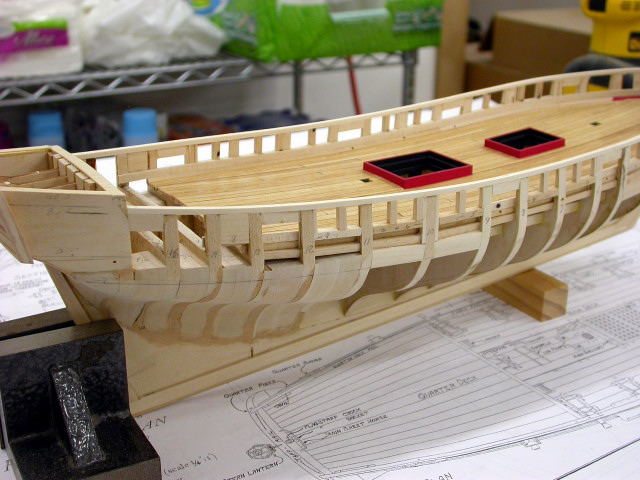
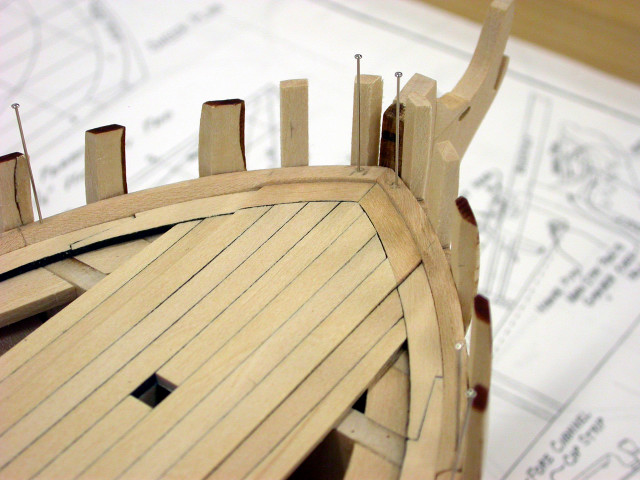
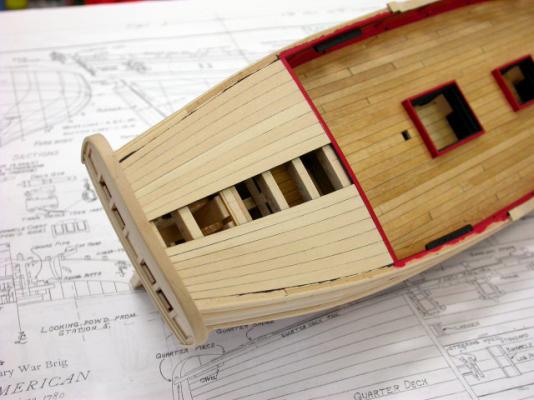
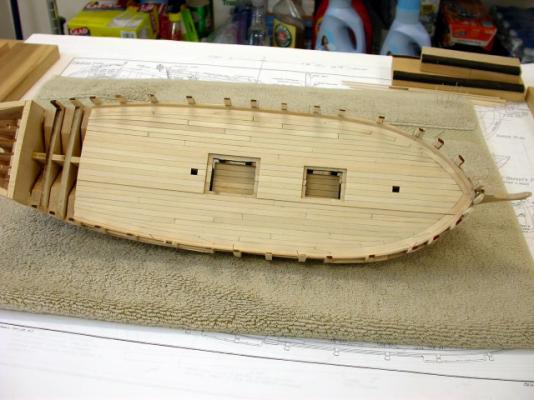
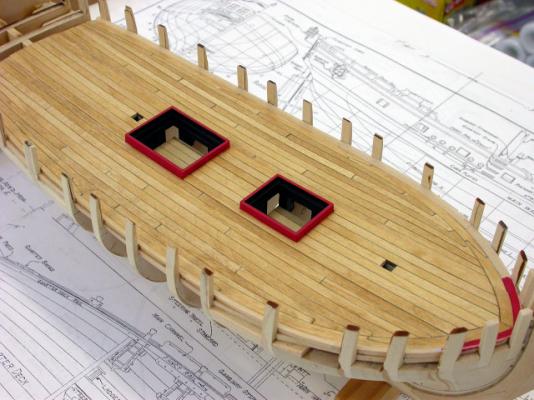
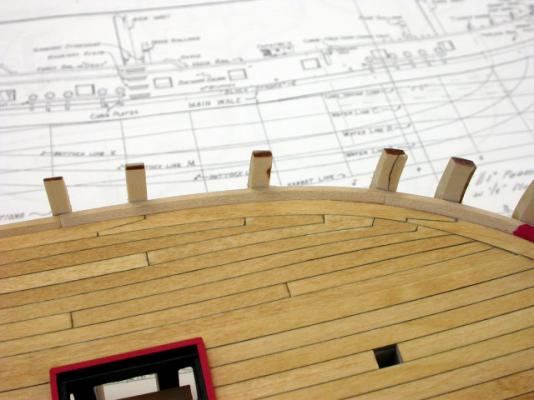
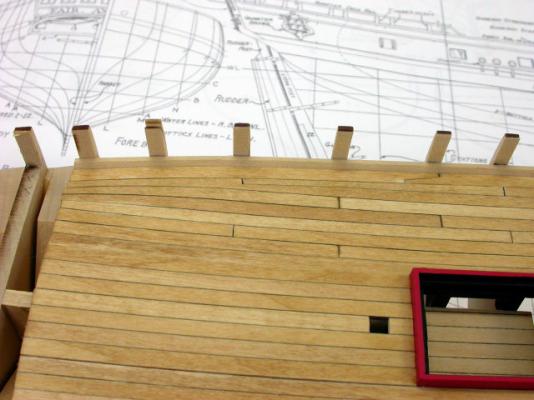
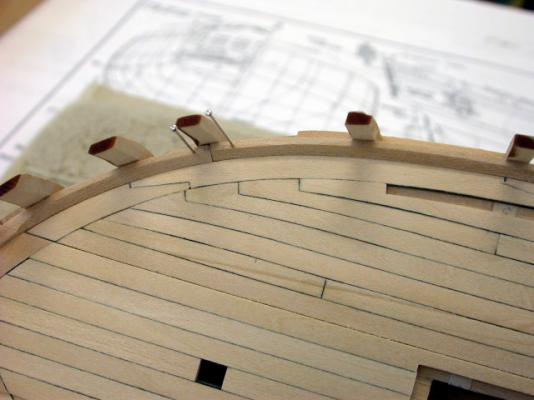
Welcome to the Brig "Fair American" circa 1780 build log, Starting with deck planking, the following key points apply: >>> Waterway fitted and left loose for deck staining/finishing >>> Margin planks fitted with scarf joints >>> Thick planking fitted around coamings from CL outboard >>> Outer planking fitted from CL outboard >>> Tapered/curved planks w hooked scarfs used outboard >>> Planking layout follows design sketch >>> Planking cut with use of ship's curves Pete Jaquith Shipbuilder

-
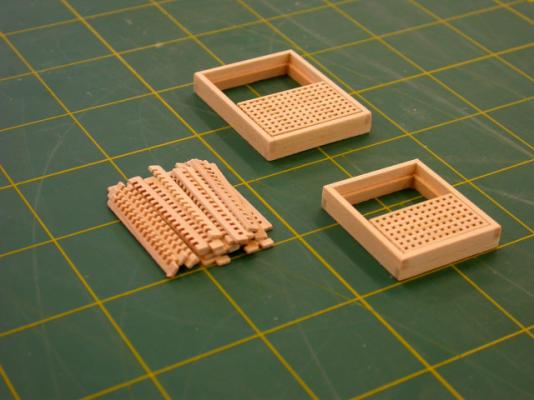
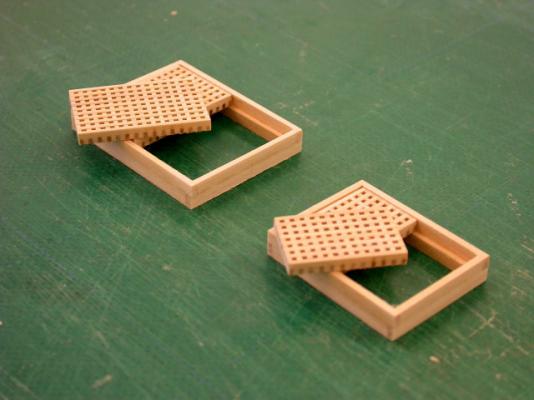
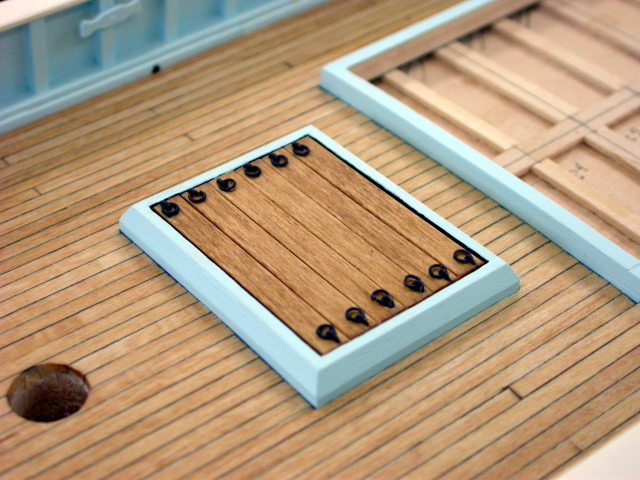
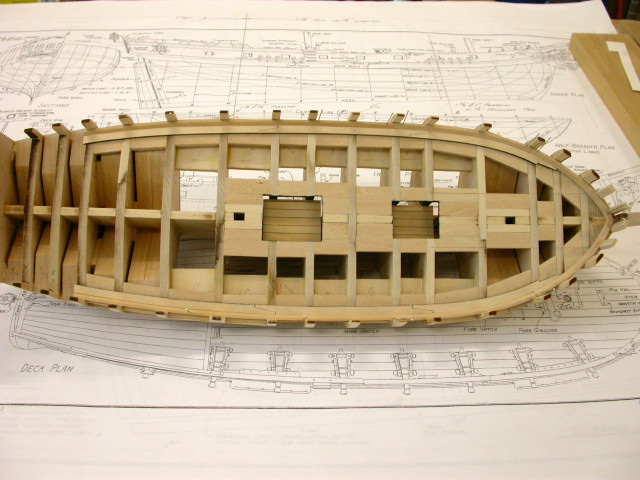
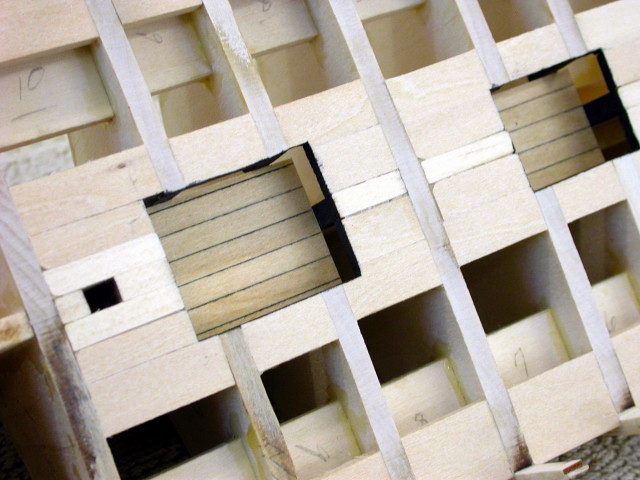
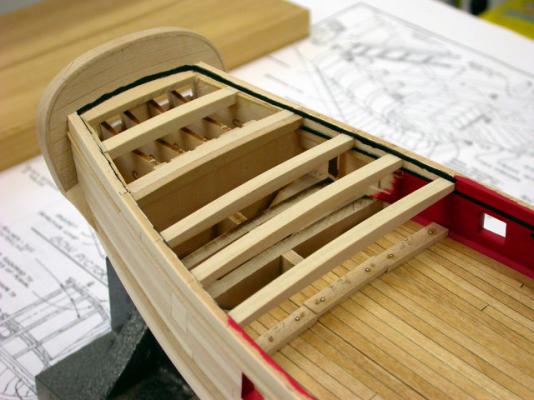
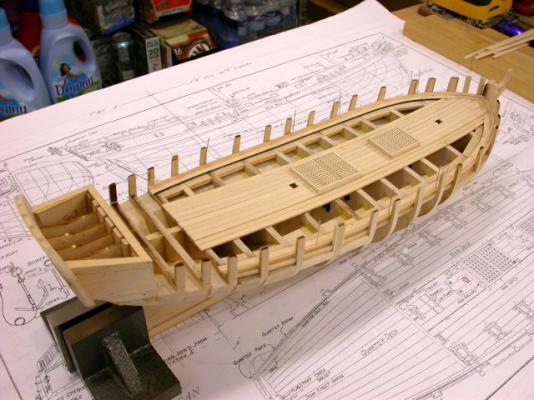
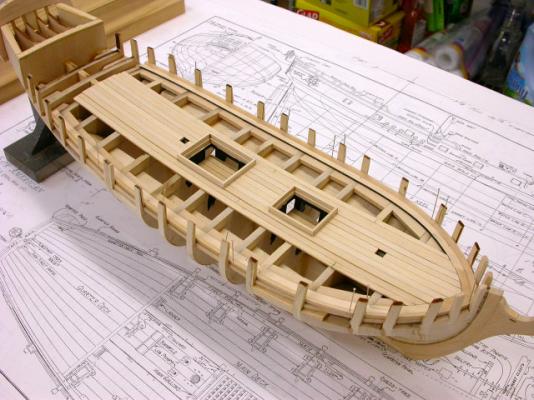
Welcome to the Brig "Fair American" circa 1780 build log, In preparation for deck planking, the following was accomplished: >>> Inner timberheads faired (some buildup required) >>> Lower deck fitted >>> Hatch gratings fabricated >>> Hatch coamings fabricated >>> Deck planking will be fitted around coamings >>> Coamings fabricated with lapped corner joints Pete Jaquith Shipbuilder