-
Posts
153 -
Joined
-
Last visited
-
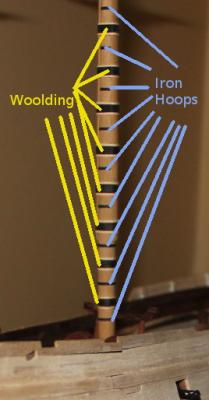
Arthur - now I realise the source of the confusion.... These..... are the cheeks on my mast. As you can see they go all the way down the side of the mast and the hoops do go under them , and the wooldings over. The wooden bands above and below the woolding are (and I've just looked up TFFM IV because I couldn't think of their name) aparently called woolding hoops (logically enough). Problem sorted. Brain no longer confused. And thanks for the compliment.... I'm enjoying doing the masts more than the hull at the moment. C
-
Jason, My favourite alternative material - paper. That's a 250g tan coloured cardstock. Getting wood to be that thin and bent is a huge effort, and some people do that, but I'm not interested in that level of frustration. Similarly the hoops are black cardstock. At viewing distance you can't tell the difference. C
-
Thanks guys Arthur - the bands going under the cheeks aren't woodlings - they are the iron hoops that would have been put on a "made" mast to hold it together. These were put on before the the cheeks.... Then follows about 4 paragraphs describing how to make the cheeks, including hollows for the hoops. I have course have cheated and made something that looks right but is manufactured for ease of construction. Colin
-
That's pretty much what Lees illustrates. Good job. Colin
- 800 replies
-
- snake
- caldercraft
-
(and 1 more)
Tagged with:
-
Wefalck - thanks - acetone is not commonly in the house so that one hadn't even entered my thinking. Vossy - I'm aware of those products, but I'd much rather keep the natural brown patina it's developed by itself over the past couple of years, so I'm going to try and not have to go down the artificial road. Thanks Guys Colin
-
 clloyd reacted to a post in a topic:
Cleaning copper without removing patina?
-
The topic title pretty much states the question I just want to check with the people who have the experience or mettalurgy to guide me. I have left my copper plates to age with air exposure, with no particular concern about handling. Now I'm at the point that I'd like to seal the copper away and get it under a hard protective layer, but want to make sure there are no organic oils on it, but obviously I want to leave the patina intact. What could I use to take off any oils. I'm leaning towards isopropynol - a lightly damp cloth rubbed over copper. Any other options? Colin
-

dry brushing
clloyd replied to stevetuck56's topic in Painting, finishing and weathering products and techniques
To further what David said - basically when you have only a tiny amount of paint on the brush and lightly brush it across a surface - the paint goes onto areas that are higher and stays out of recesses. This is a technique to highlight areas that may normally reflect more light. Colin -
Yes - the size of the block was proportional to the line going through it. Larger lines took more stress, so the strop holding the blocks needed to be as strong. You had me confused there too - you do mean eyebolt not deadeye? On the cap? Turning - who needs turning?! Sharp pencil, sharp chisel, some maths and sandpaper is all you need. The taper on the lower yard was to 3/7 it's width (before battens). per Lees: prior to 1773 deadeyes were used for the mizzen topmast stay. "About 1773 the deadeyes were replaced by thimbles...." so the CC diagrams would seem to be correct. The line is probably small enough that a fall lashed between two thimbles would be sufficient for tensioning. Colin
- 800 replies
-
- snake
- caldercraft
-
(and 1 more)
Tagged with:
-
Hi Jason, looking good. in response to your questions: 1: if a knot is out of the question then seizing is the way to go. If you are unsure about the strength, then two tricks I use are to pass the seizing through the line with a needle first - essentially sewing the line together before wrapping it tight, then flood the sieze with diluted white glue. Just out of interest which block to which deadeye? 2: though shalt not use dowels for masting This will also go to something I wanted to say about your yard. My experience is that CC tends to over dimension their masts and yards - probably to protect against people breaking things too much. When I look at the yard my eye screams that it needs more taper. You've done so much in the rest of the build that I wanted to encourage you to look at the dimensions in steel and compare. (my mainyard starts at 6.5mm and tapers to about 2.4mm) 3: if you want to specify which stays I can double check in Lees. Peterson doesn't neccessarily cover all ship types. Colin
- 800 replies
-
- snake
- caldercraft
-
(and 1 more)
Tagged with:
-
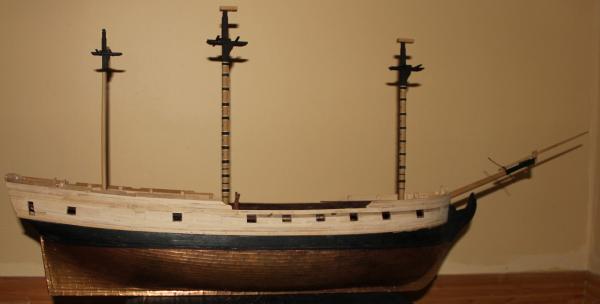
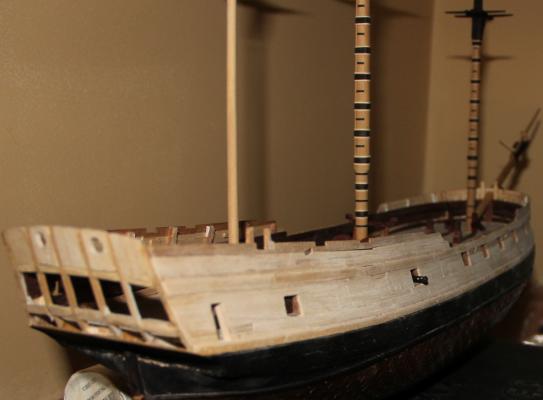
Further work! I got a calm sunny day - so got the chance to take her out and sand the upper hull - that job is 90% complete. I can still see a couple of places that need smoothing down a little more. I've been working on the interior (most of this is not glued or varnished - just placed for assessment). Shot racks mostly done. I ran out of 6lb shot, so need to get some more Jeer bits are well under way - the decorative bar at the top cost blood to make. after redoing the gunport height it's nice to see the trial gun sitting nicely in the port. Which gives us my latest full hull picture! Colin
-
Jason, It's a bit of working from first principles. We know from numerous sources that straight planking didn't start until well after this time so curved planking is the order of the day. Equally then we know that hooked plank ends rather than nibbling was the order of the day. The swan ships (built about the same time as Pandora) had top and butt planking under the guns for strength. There are rules for how the butts in the margin plank relate to the butts in the side planking (this is where my head began to hurt) We know well where the beams were. McKay uses a 5 butt shift, but that gives a really long plank as it crosses across the midships area, so I chose a 4 butt shift. Then I took my scans into gimp (free photoshop alternative), scrubbed out the illustrated planking and started dividing up the width of the deck into bands much like you would for side planking, using the Swan deck plans as a rough guide (and any errors there are entirely mine not as a result of copying anything David Antscherl did ). I printed out the result at full scale and away I went to try and replicate that, keeping in mind that when the other decks go on, most of it is going to be lost to sight. Colin
-
It continues to shape into a lovely build Jason. I'm with you on the ratlines. There is so much detail in one of these ships that things like that just don't stand out. Colin
- 800 replies
-
- snake
- caldercraft
-
(and 1 more)
Tagged with:
-
 clloyd reacted to a post in a topic:
HMS Snake by Beef Wellington - FINISHED - Caldercraft - Scale 1: 64 - First wooden ship build
-
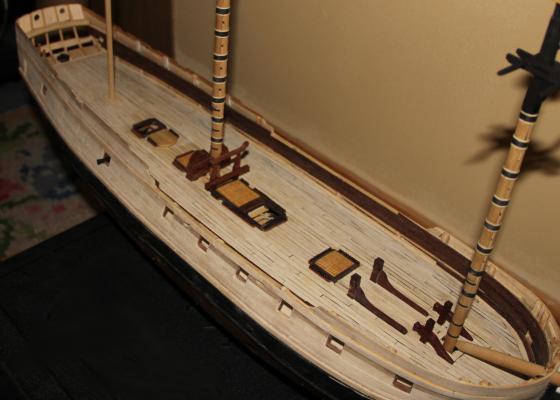
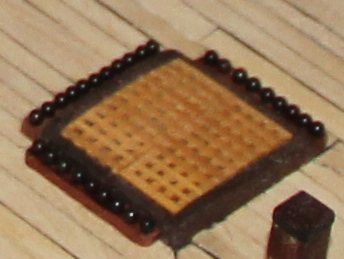
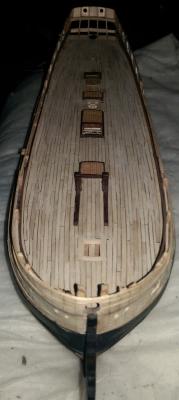
Finally got the main deck planking finished. Crappy mobile camera shots - sorry. Sanding is about half way through - it's mostly smooth, but I can still see and feel a few irregularities in the deck. Not being able to see into the guts of the ship also gives it a much more finished feel straight away. Short term to do list: Finish sanding exterior hull. finish interior planking. install main deck fittings. I have a few things built, but just need to get down now and install ringbolts and cleats and work my way down the deck. I'll probably leave guns until the very last minute before installing upper deck beams. Colin
About us
Modelshipworld - Advancing Ship Modeling through Research
SSL Secured
Your security is important for us so this Website is SSL-Secured
NRG Mailing Address
Nautical Research Guild
237 South Lincoln Street
Westmont IL, 60559-1917
Model Ship World ® and the MSW logo are Registered Trademarks, and belong to the Nautical Research Guild (United States Patent and Trademark Office: No. 6,929,264 & No. 6,929,274, registered Dec. 20, 2022)
Helpful Links
About the NRG
If you enjoy building ship models that are historically accurate as well as beautiful, then The Nautical Research Guild (NRG) is just right for you.
The Guild is a non-profit educational organization whose mission is to “Advance Ship Modeling Through Research”. We provide support to our members in their efforts to raise the quality of their model ships.
The Nautical Research Guild has published our world-renowned quarterly magazine, The Nautical Research Journal, since 1955. The pages of the Journal are full of articles by accomplished ship modelers who show you how they create those exquisite details on their models, and by maritime historians who show you the correct details to build. The Journal is available in both print and digital editions. Go to the NRG web site (www.thenrg.org) to download a complimentary digital copy of the Journal. The NRG also publishes plan sets, books and compilations of back issues of the Journal and the former Ships in Scale and Model Ship Builder magazines.


