MORE HANDBOOKS ARE ON THEIR WAY! We will let you know when they get here.
×


SpencerC
-
Posts
211 -
Joined
-
Last visited
Content Type
Profiles
Forums
Gallery
Events
Everything posted by SpencerC
-
 Would it be possible that her layout changed over time?
 -
simple enough dilemma hoping for a simple answer! how do i get these little tiny nails into the planks? they obviously dont really hold anything together trhey are just for show, but i still want them installed. do i need a tiny hammer? lol
-
so can anyone say why the guy who made th model in the link i posted did the layout of the deck differently?
-
theres no rabbet and the plans dont show the bearding line. theres no sheer plan
-
Yeah I noticed that the really thin timbers were for the deck which does not make sense to me. But whatever. So I guess I'm using these fatty timbers?
-
Well unfortunately this kit doesn't come with the damn sheer plan! I couldn't believe it. I was like OMG this is why I scratch build... >.> .. Not only that but it doesn't have a body plan nor a half breadth. Ugh.
-
Oh and thank you jpett that's is great advice.
-
Well no one else has a build log up of this exact ship. It's a Latina cutty sark 1/84
-
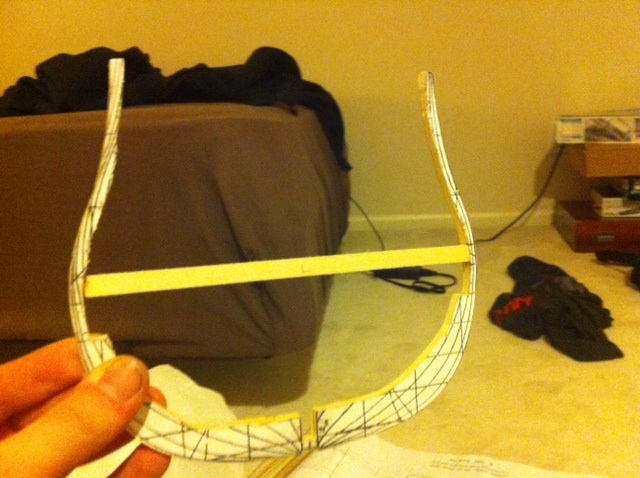
Oh and also the slots in the keel that are for the masts were slanted for some reason so i sanded them until they were aligned at a 90 degree angle.
-
Before i start i wanted to let you know my "e" key sticks so im sorry if my spelling is a bit off. So, i told myself i would never do a kit build, i dont consider them to be true ship modeling. Scratch all the way. HOWVER, i could not pass up a $50 BRAND NEW 40 inch long latina cutty sark POB model!! This was probably the best craigslist deal i have ever found. I looked it up and these are 450~ new. It is ten years old (not the 40 yar old model i thought it was) but in great condition for the price. The awkward thing is, I am also doing a scratch built clipper ship from the same era, the Ariel tea clipper. And that project is my baby so i cannot turn my back on that now that i have a kit of almost the same model... There was, however, a warped/bent bulkhead and the false keel was slightly bent as well. verything else was fine. So i clamp down the bulkhead and douse it in CA, and put the keel in my home made keel straightener/holder which works EXTREMELY well for just being two perfectly straight pieces of wood glued parellel to each other on a plywood board. Let them sit over night. The next day (today) after work I check them and the keel is completely straight and the bulkhead is about 85% straight, much btter than what it was. After perusing through the box i notice a few things missing. The gold scroll work and the gold lettering for the bow and the stern are gone, as well as the plastic "glass" for th skylights. If anyon knows where i could purchase this in 1/84th scale pleas let me know. everything else seems to be in order. I then proceed to dry fit everything and after a few adjustments find that everything is good to go. i glue the blkheads in with elmers wood glue, and while waiting for that to dry i paint the sides of each bulkhead so i can make sure each is symmtrical while fairing the hull. i then dry fitted the false deck and that is where i am at now besides a tiny bit of fairing of the stern. Any advice or help is greatly appreciated. anything in general i should know about kits. Also is the rigging on this bad boy as complex as it looks? It frightens me.


-
artsania latina cutty sark 1/84, I dont see a model numbr but theres something that says ref 20800
-
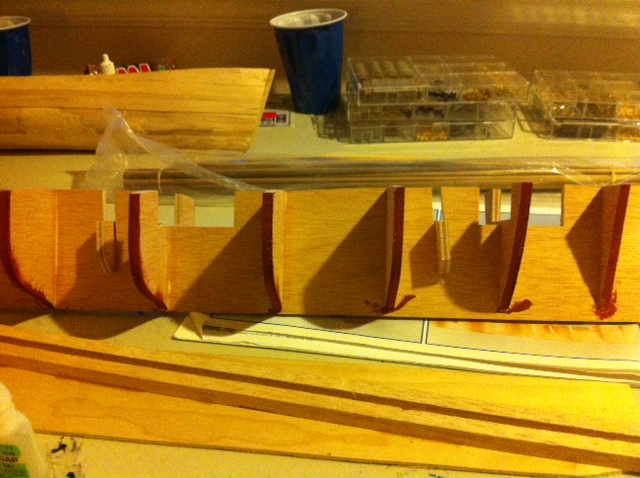
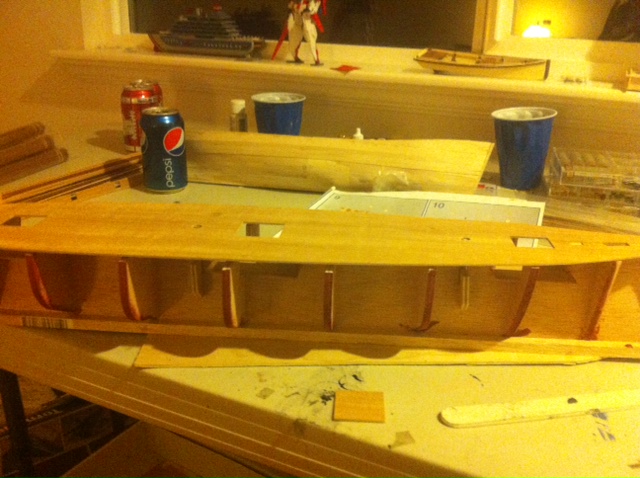
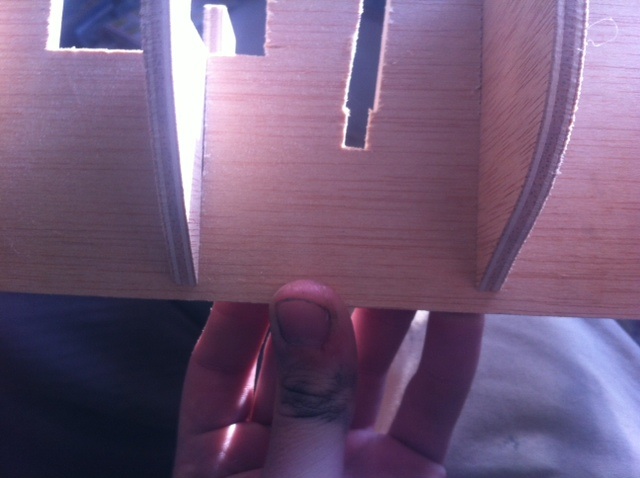
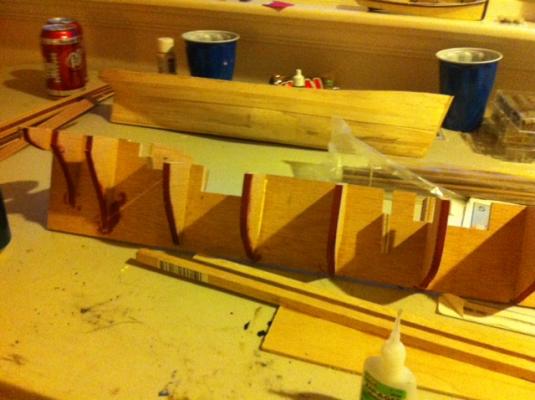
I have tapped everything down everything is completely flush. I pushed bulkhead 3 up a little cause I noticed when I put the deck on that it was a little low not touching the bottom of the deck board. So I brought it up a little and it looks like it is now higher than bulkhead 4 but I am worried that now it is not in the right position for planking. I glued every bulkhead except 3 and four just incase anyone here had a better idea.
-
Oh and everything is sitting flush. I can not push either down any more.
-
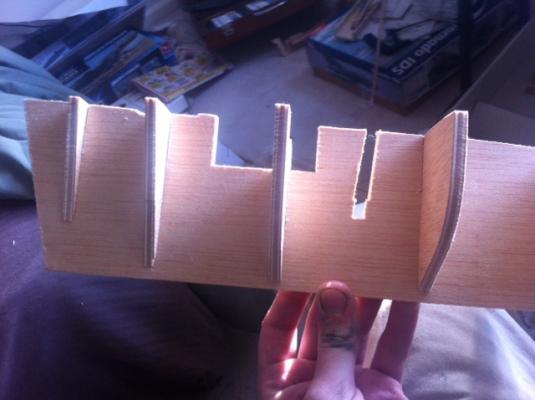
As you can see from te pictures bulkhead 4 is higher up than bulkhead 3. As they run 1-13 from front to back shouldn't number 3 be higher than number 4? It's a kit so I know I didn't cut it wrong. Brand new out of the laser cut wood, nothing has been chipped and both sides look the same. Please any help would be great. The one on the right is bulkhead four.

-
It seems like the thinner timbers would be my ideal choice but there's nowhere near enough of them.
-
So my cutty sark model kit came with a lot of wood. There's the deck planking, and then there's some really thin walnut but not enough of it to plank the whole hull. However, there are four HUGE bundles of really thick walnut strips like 1/4 by 1/8. Am I supposed to plank with ONE EIGHTH thick timbers?? I don't understand. I usually use 1/32!! Maybe it's not one eight, its whatever the very next size is right after 1/16
-
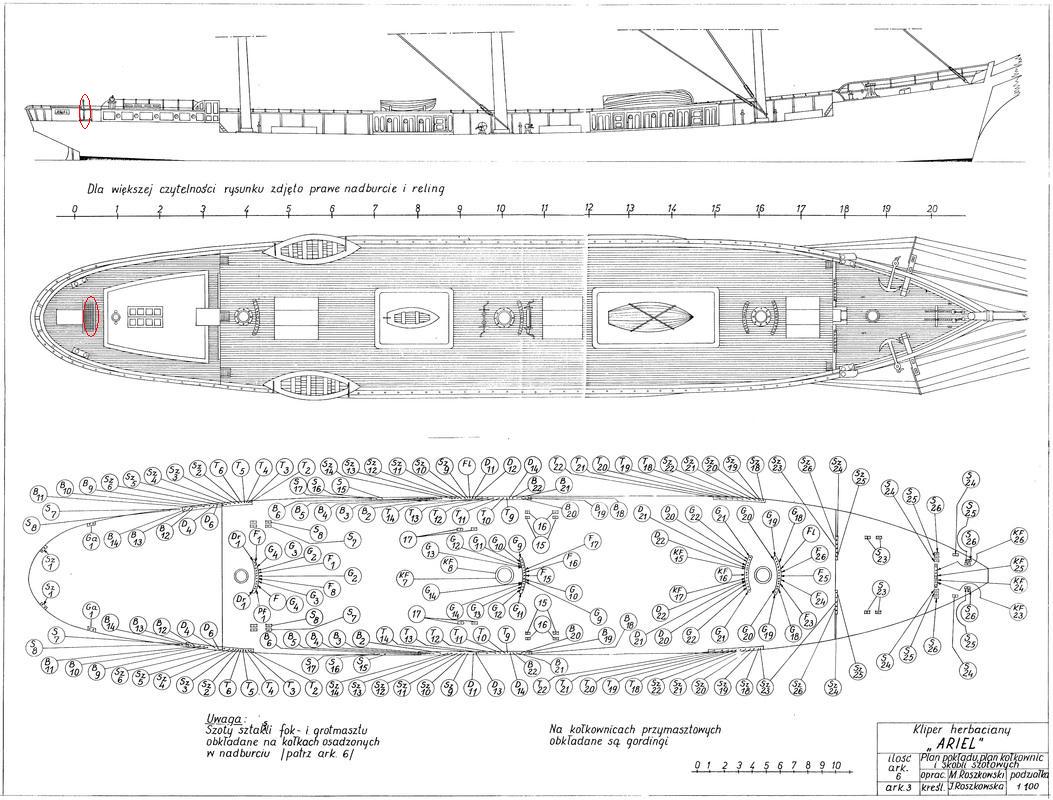
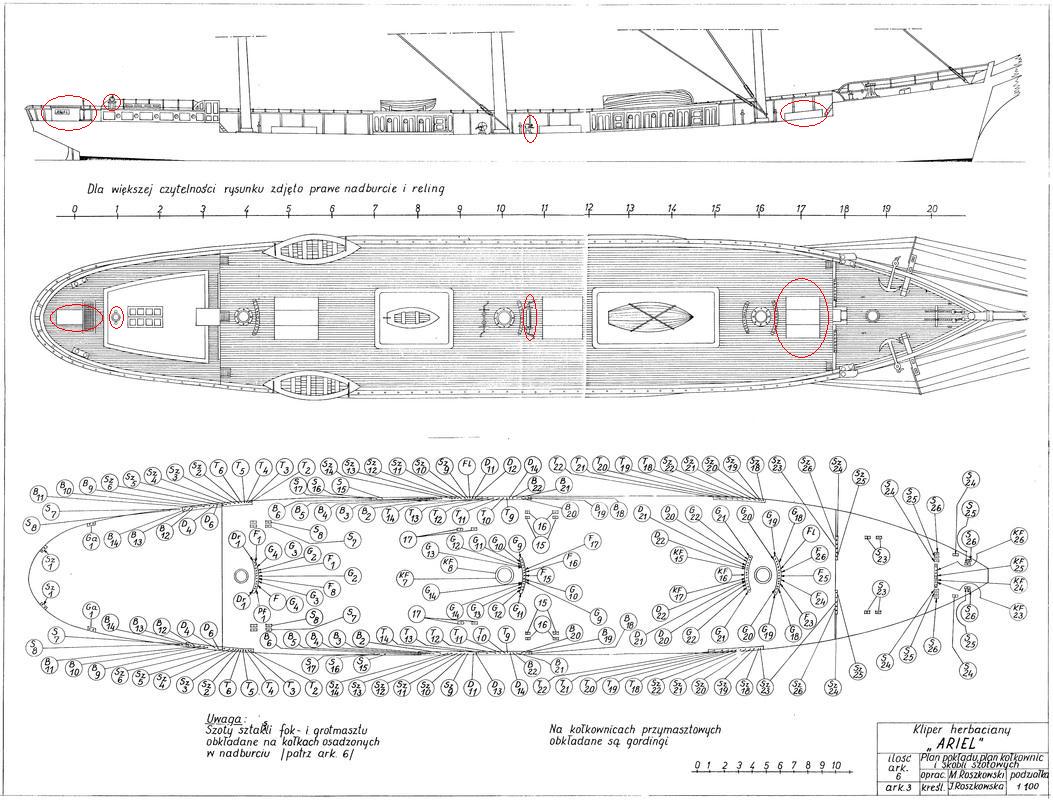
I thought the dolly winch is that thing on the other side of the mast? and also if that is the wheelbox then what is this grated looking thing in front of it on the overhead deck view, and on the side view what is the thing sticking up in front of it?

-
forgot to attach the pic lol

-
A few things on the plans of my clipper model i was curious as to what they were. If you could also provide maybe a picture of each item too? the plans are such bad resolution i cant get a good look at them. the one model thats been made of this ship has a completely different layout than what is shown in my set of plans. Any help is greatly appreciated. While we're at it could someone maybe explain why this person did the layout differently? heres the link to the model pictures: http://www.vallejogallery.com/item.php?id=1934
-
Well I trust your guys' opinions. Looks like this is one of my worser ideas
-
Any new updates for us, Richard?
-
Hmm. Interesting. Well mostly what I'm worried about is having little gaps in between the plates so does anyone know if this would even work?
-
So I'm thinking about diluting some copper paint in cyanoacrylate the water thin kind, so that when I glue the copper plates down it will seep out the sides making it look welded/soldered. How should I do this? Should I use enamel? Acrylic? How much do I put in? Do I dilute it in water first or just dilute it in the glue? Any advice would help on what the best way to do this would be
-
Thanks cap'n bob that's probably the most informative answer yet. Ill post pics of what I've done so far and you guys can let me know if I'm on the right track. Thanks all
-
Woops didn't attatch picture