Trafalgarhero
-
Posts
67 -
Joined
-
Last visited
Content Type
Profiles
Forums
Gallery
Events
Everything posted by Trafalgarhero
-
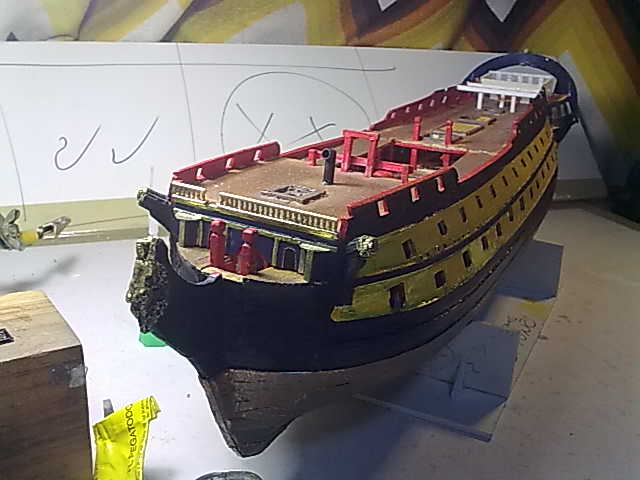
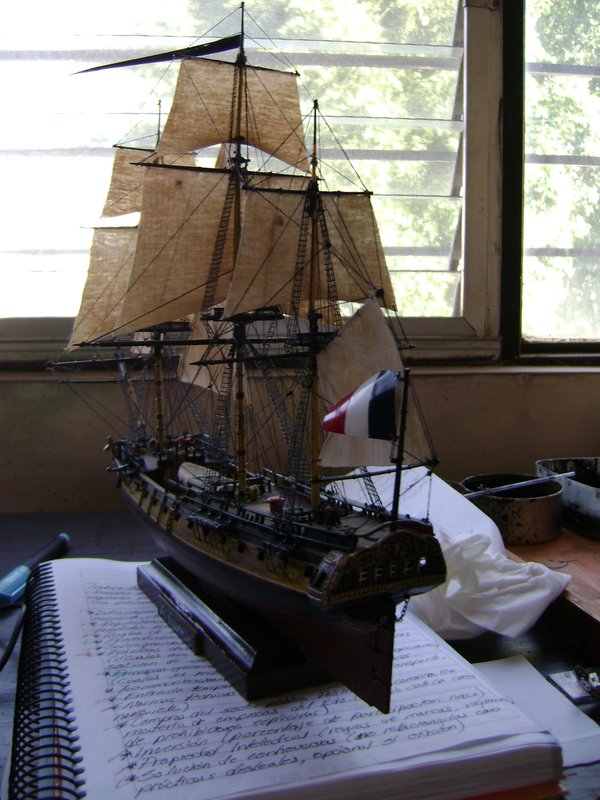
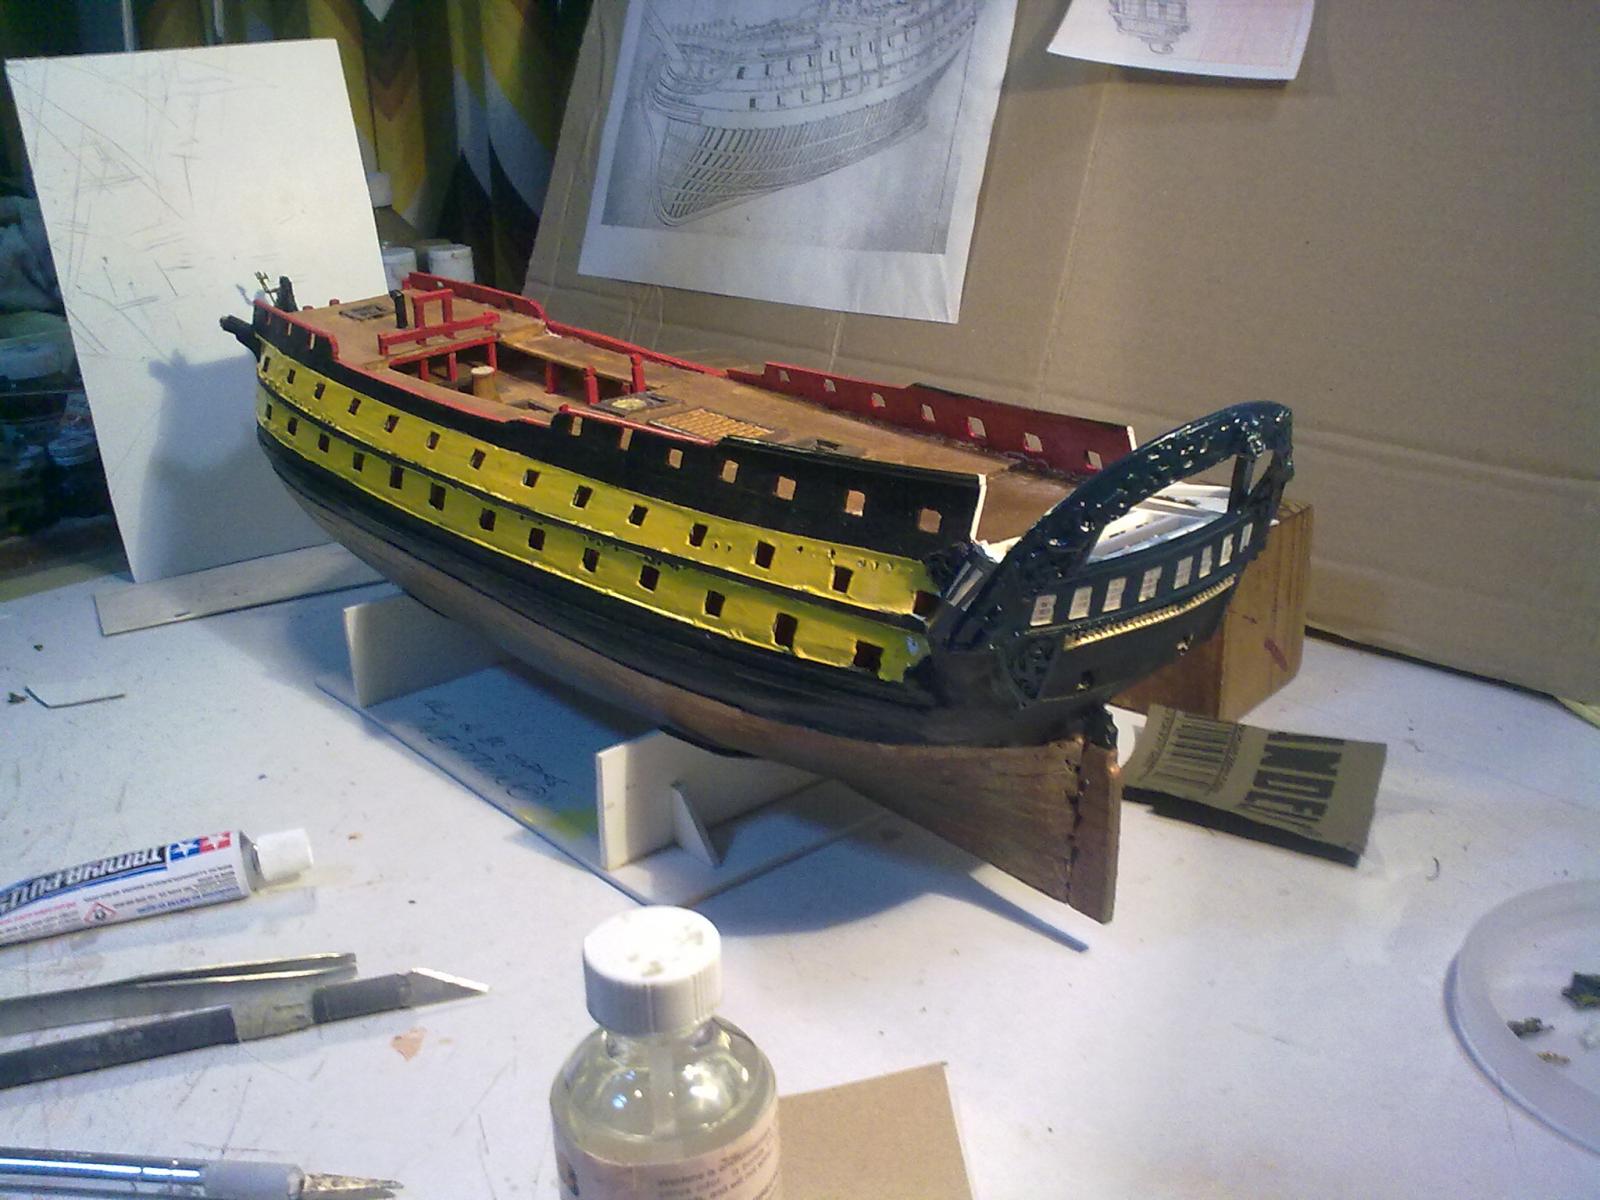
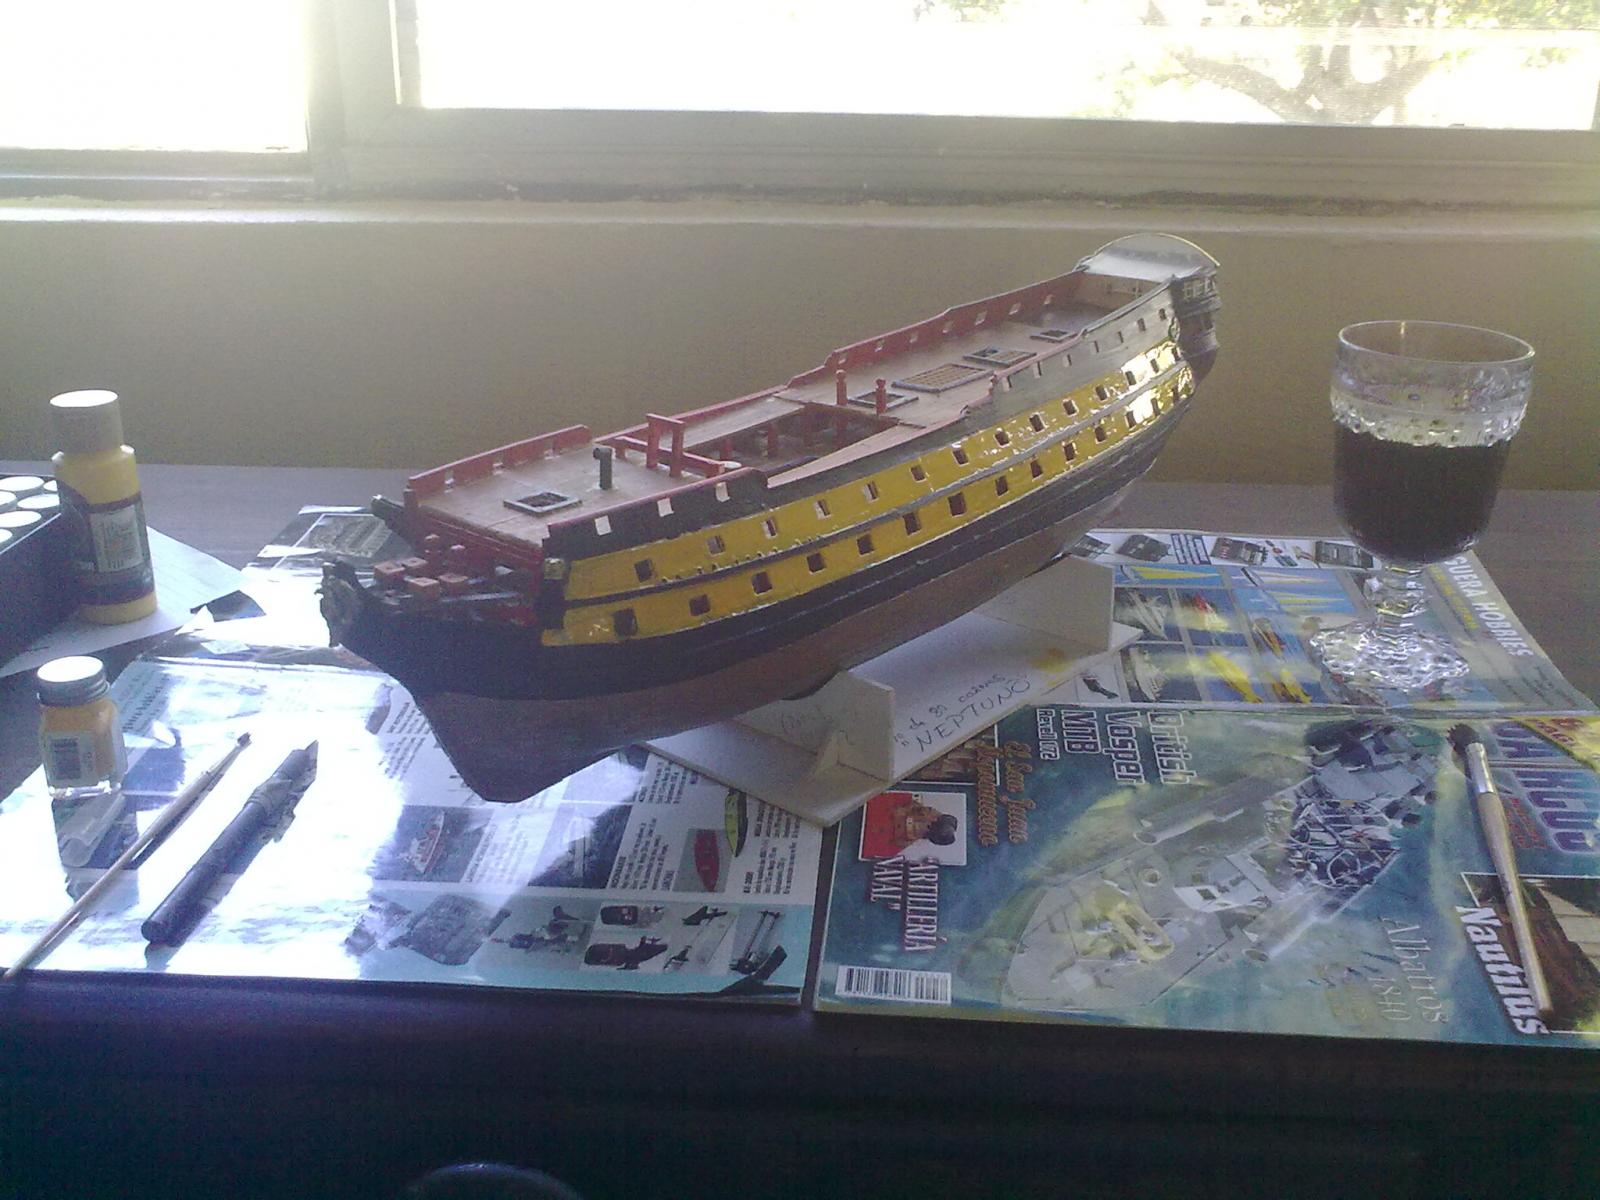
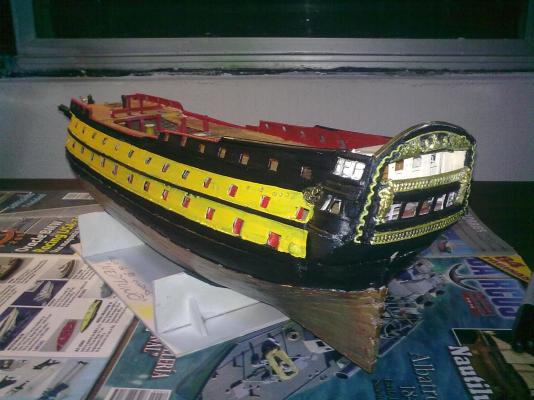
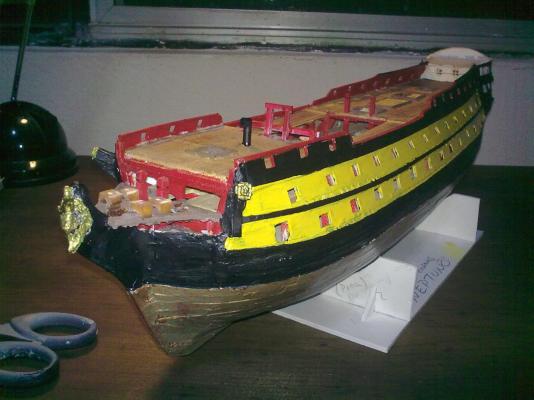
 General view of the project, January 5th, 2014 11:03 pm.
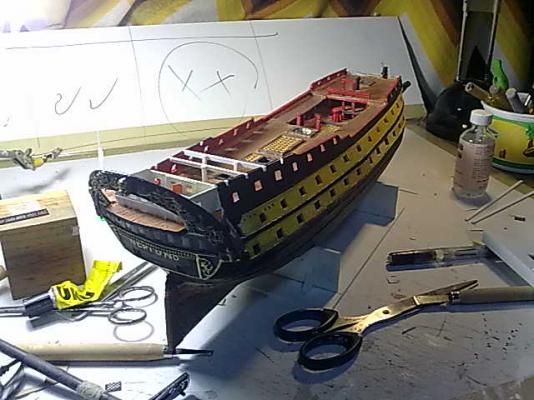

- 43 replies
-
- 3
-

-
- neptuno
- ship of the line
- (and 1 more)
-
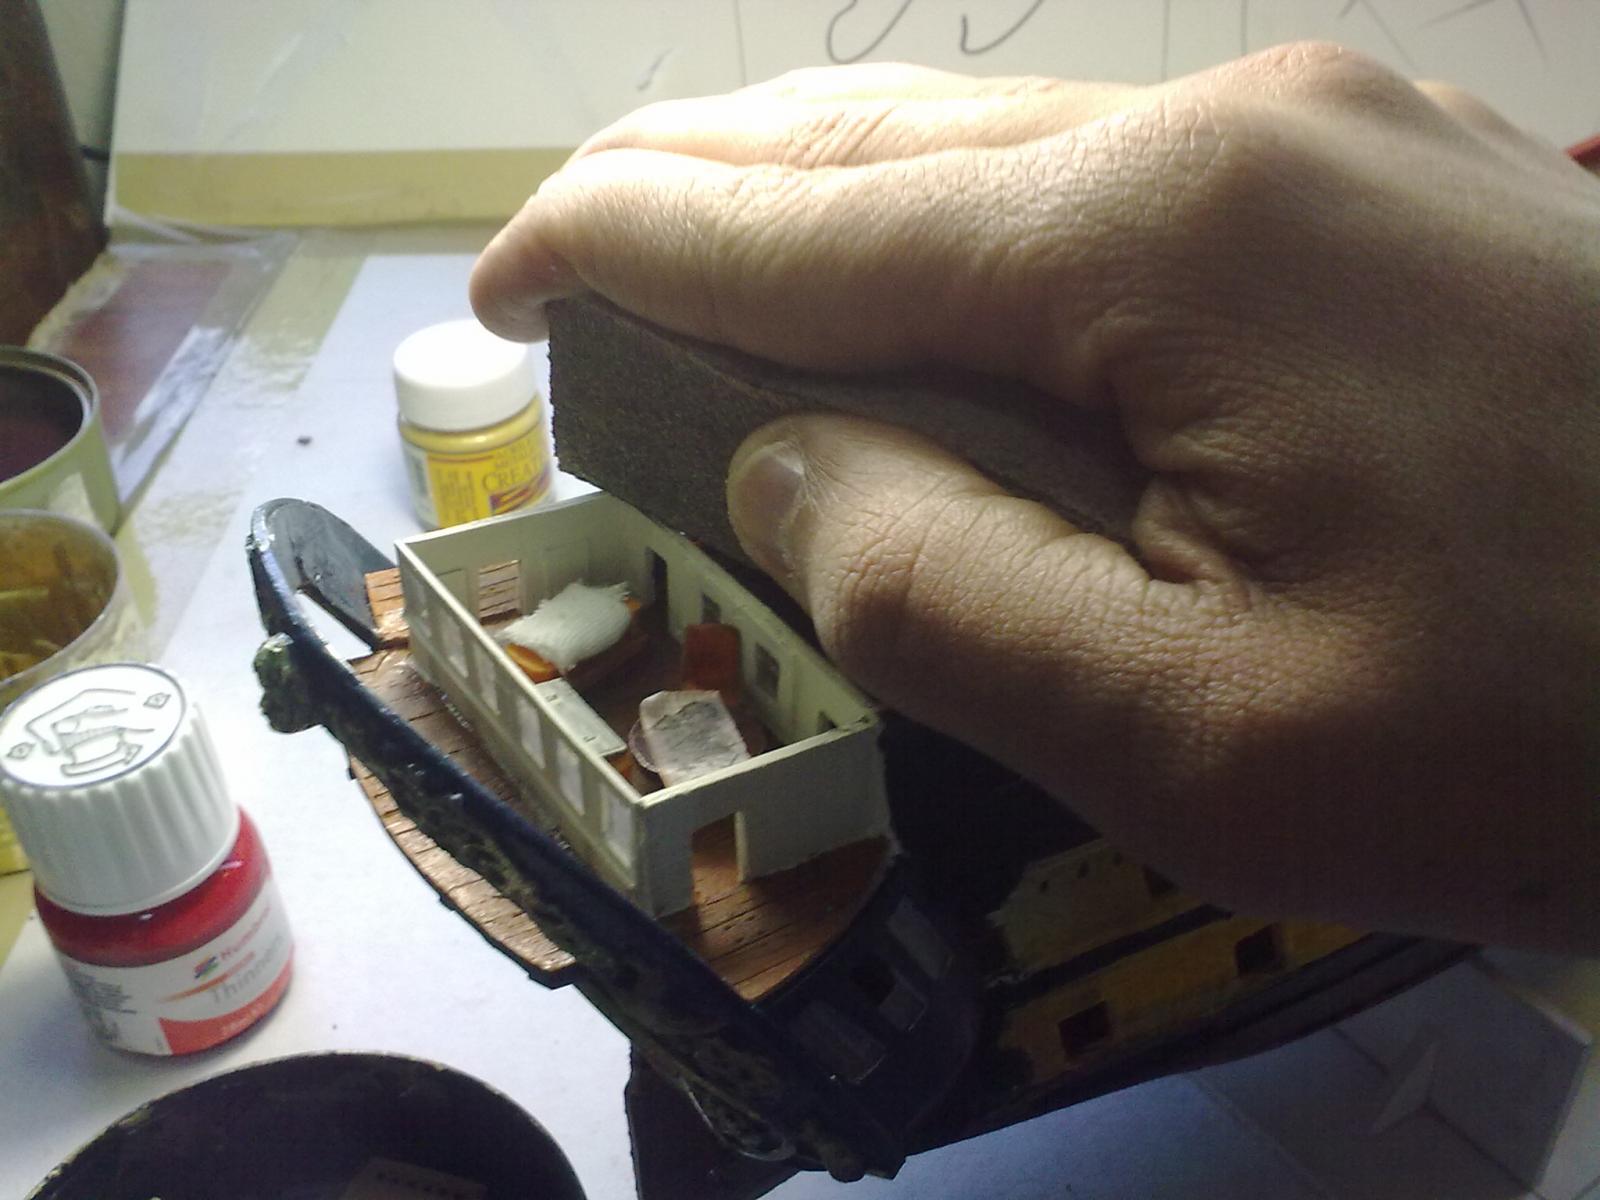
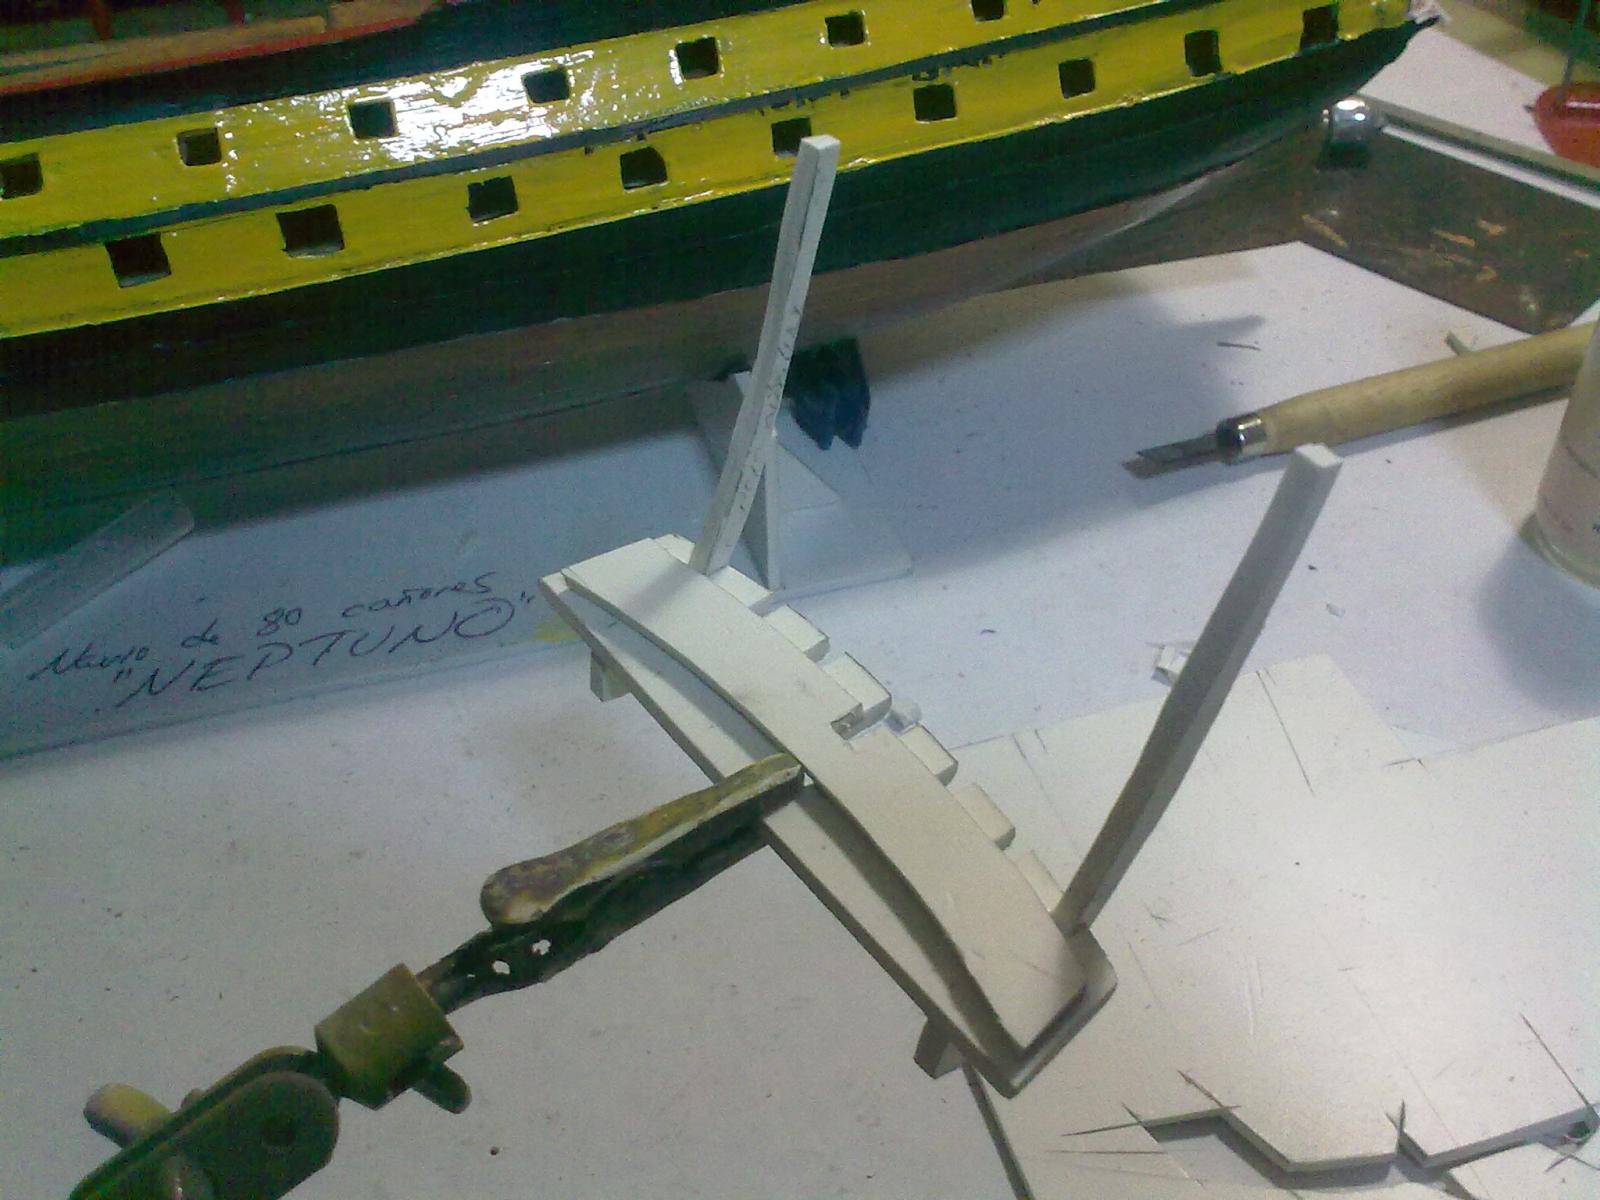
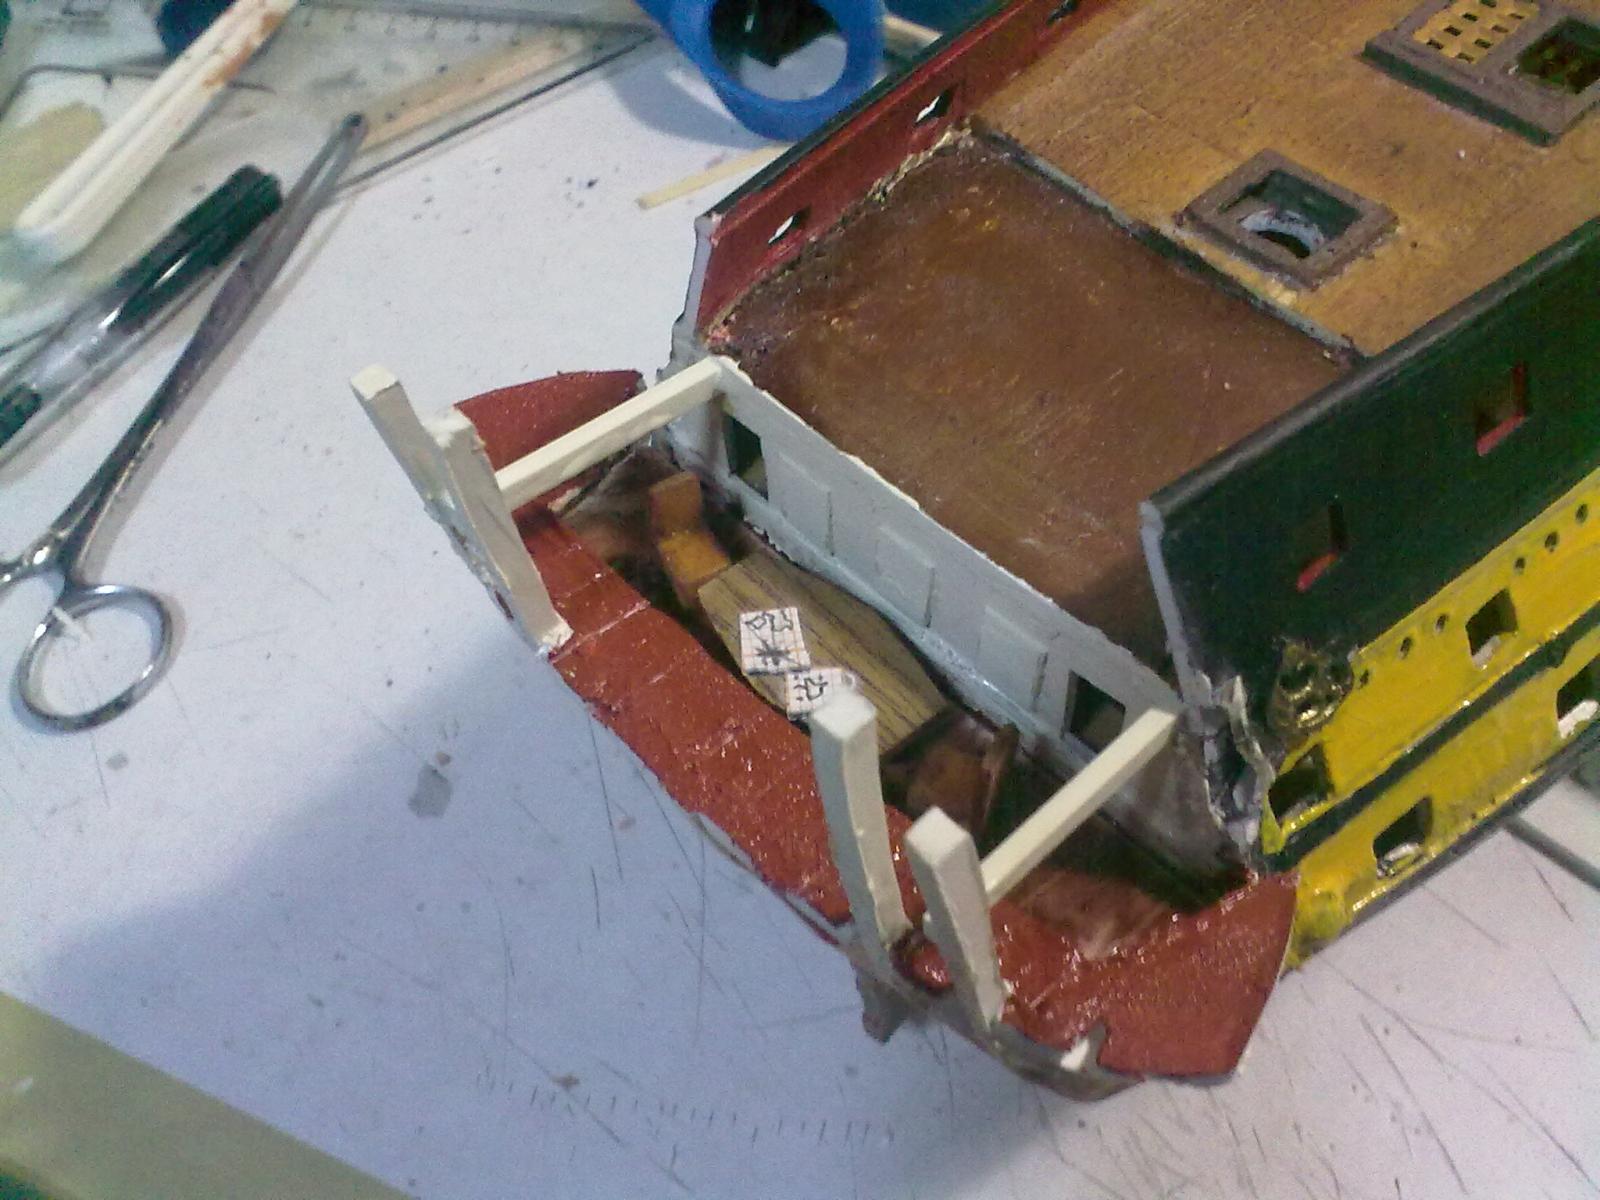
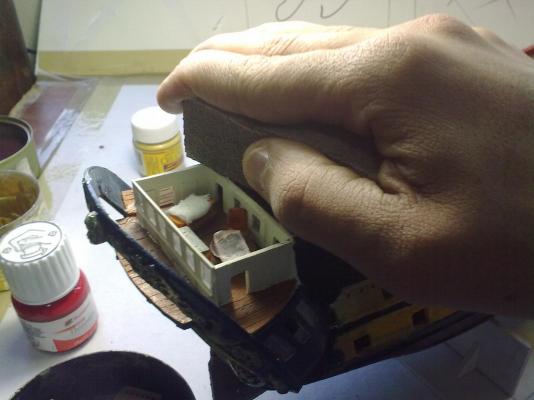
Sanding into shape the beams that will support the poop deck/ quarterdeck (help! I don't know which term is correct!) The last detail: the captain's cot. Originally, in these ships the cot was a wooden box with a mattress suspended from the ceiling (I omitted this because the detail won't be visible). On a curious note, the shape and size was not coincidence: it has custom built for each captain, and given the case -which it was for Cayetano Valdez, who died on board the Neptuno during Trafalgar- a lid was nailed into place and the cot would serve as a coffin for the dead commander.

- 43 replies
-
- 2
-
-
- neptuno
- ship of the line
- (and 1 more)
-
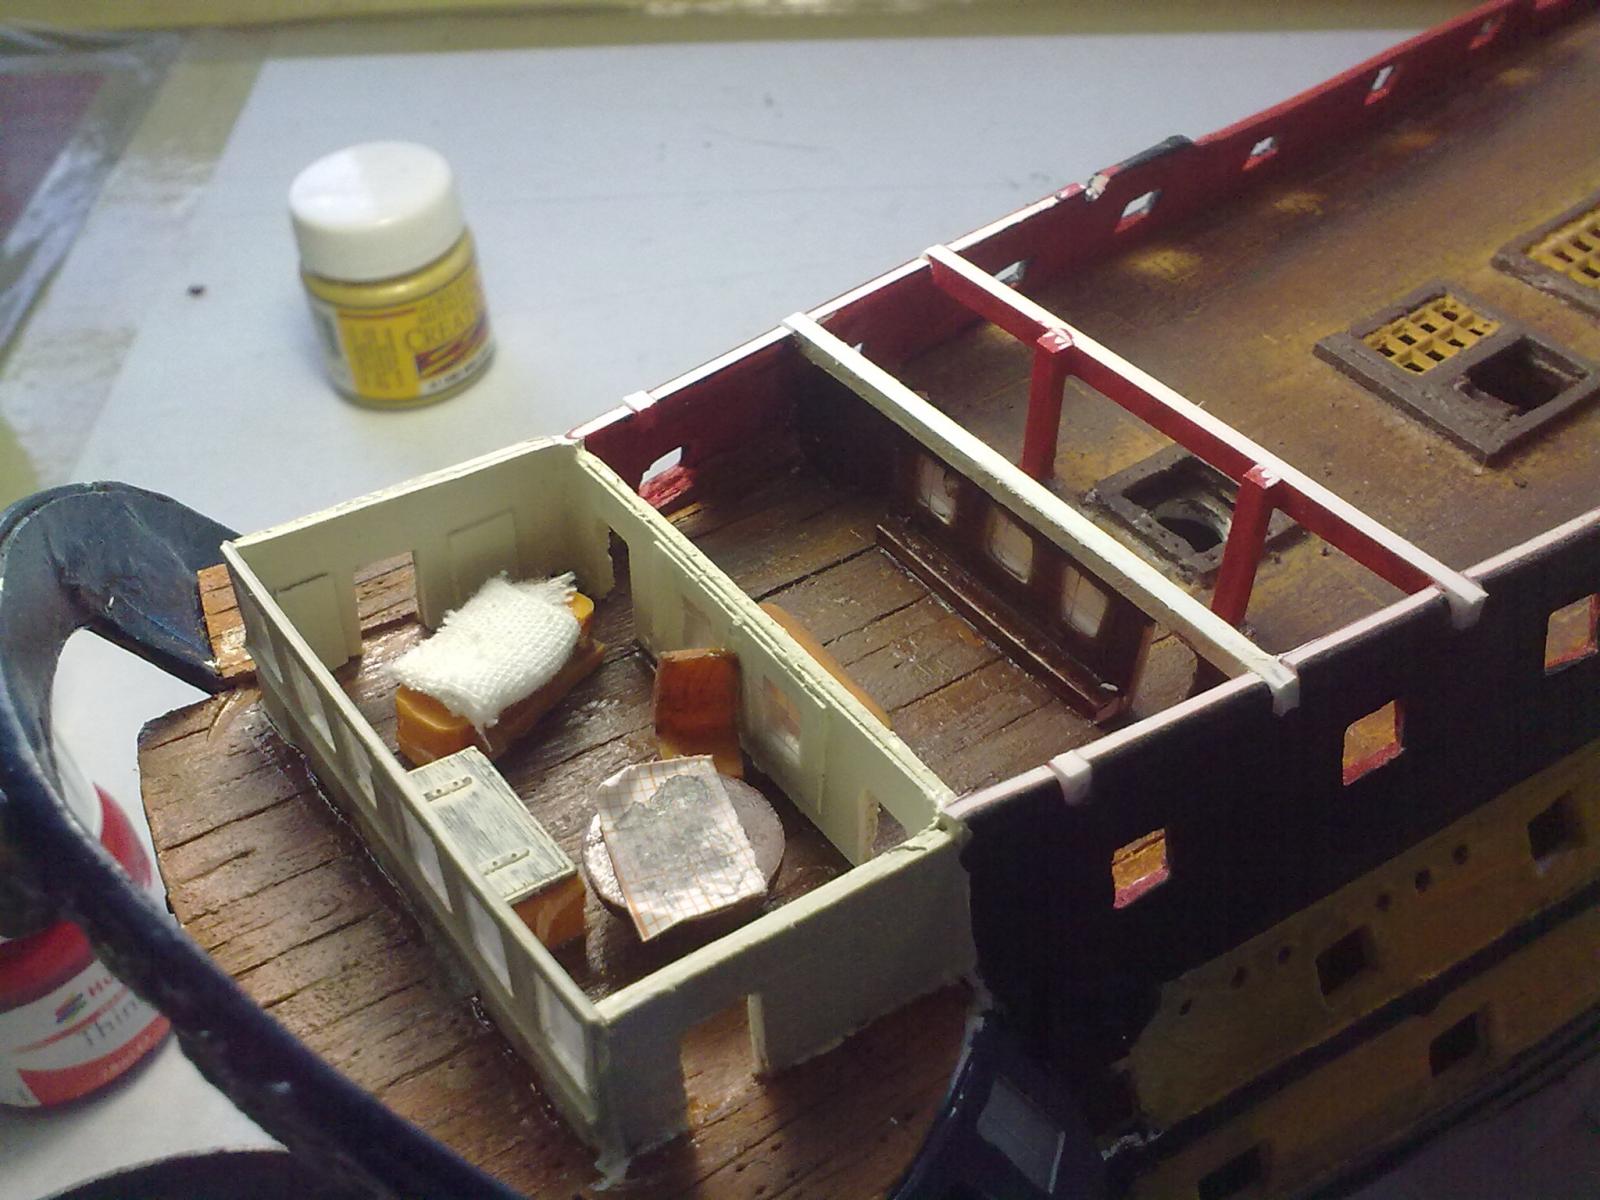
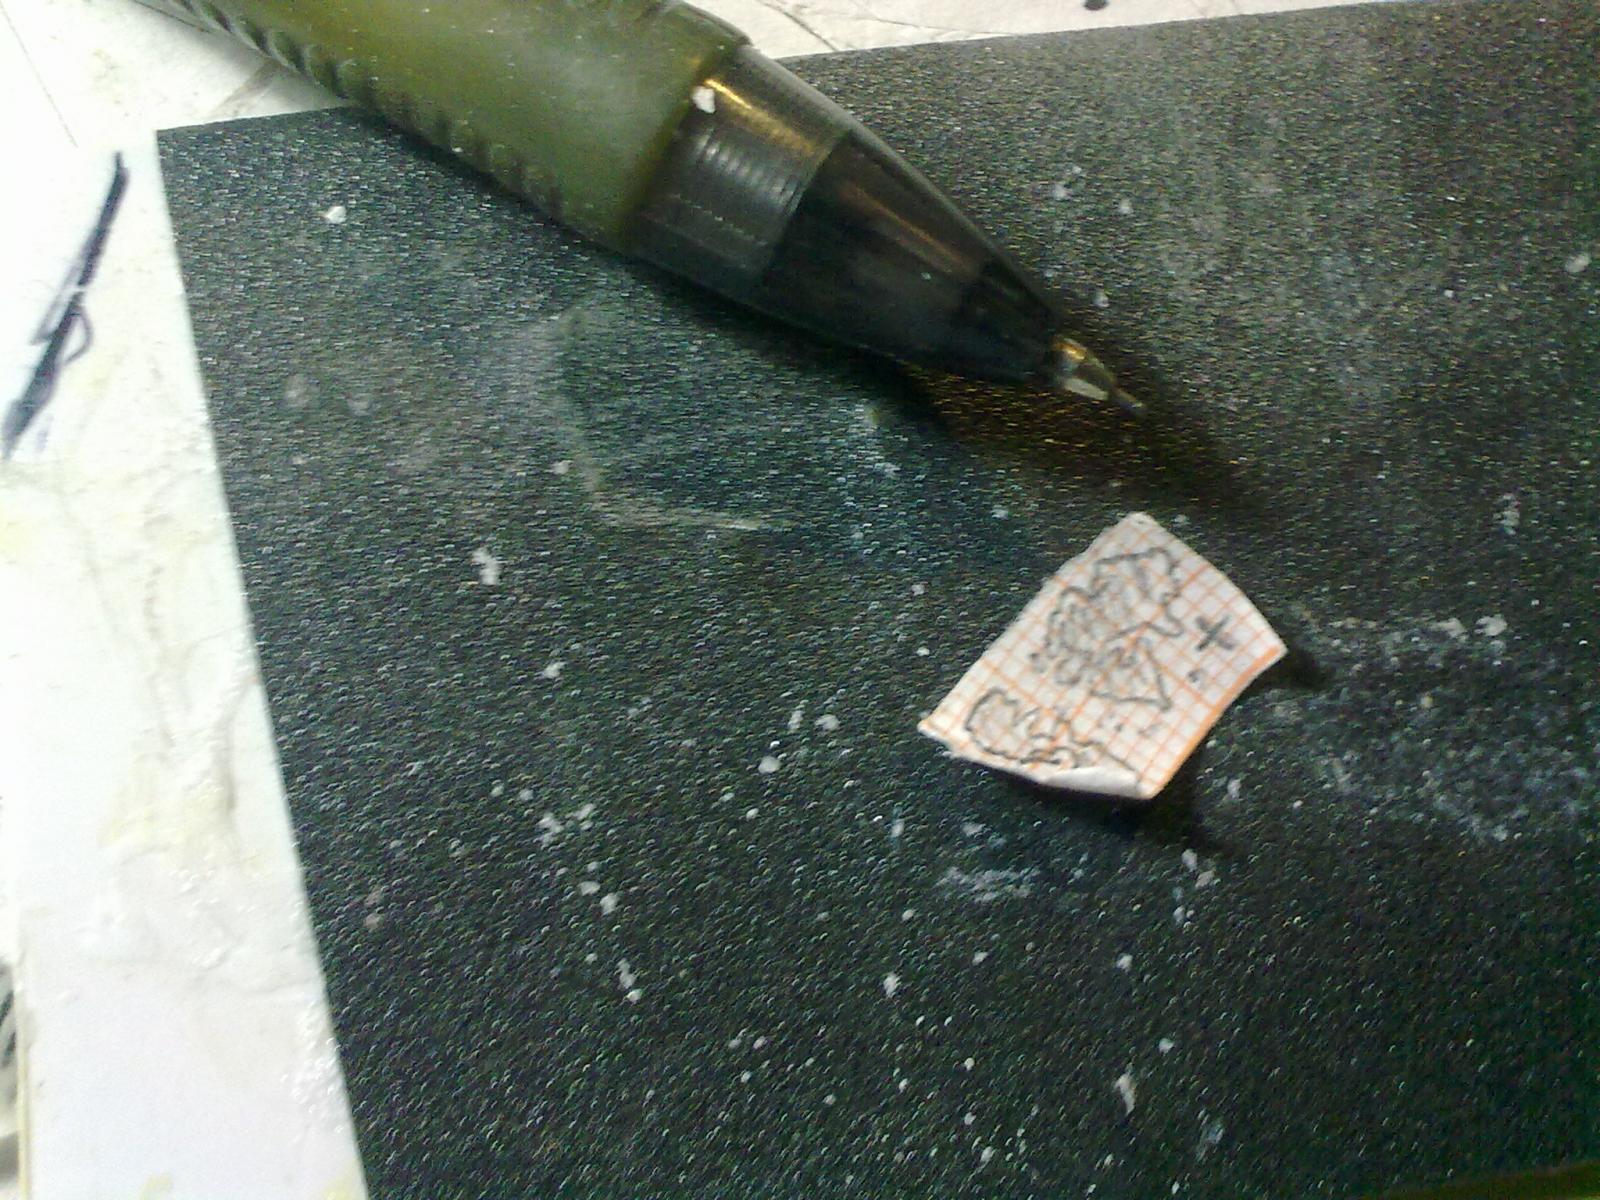
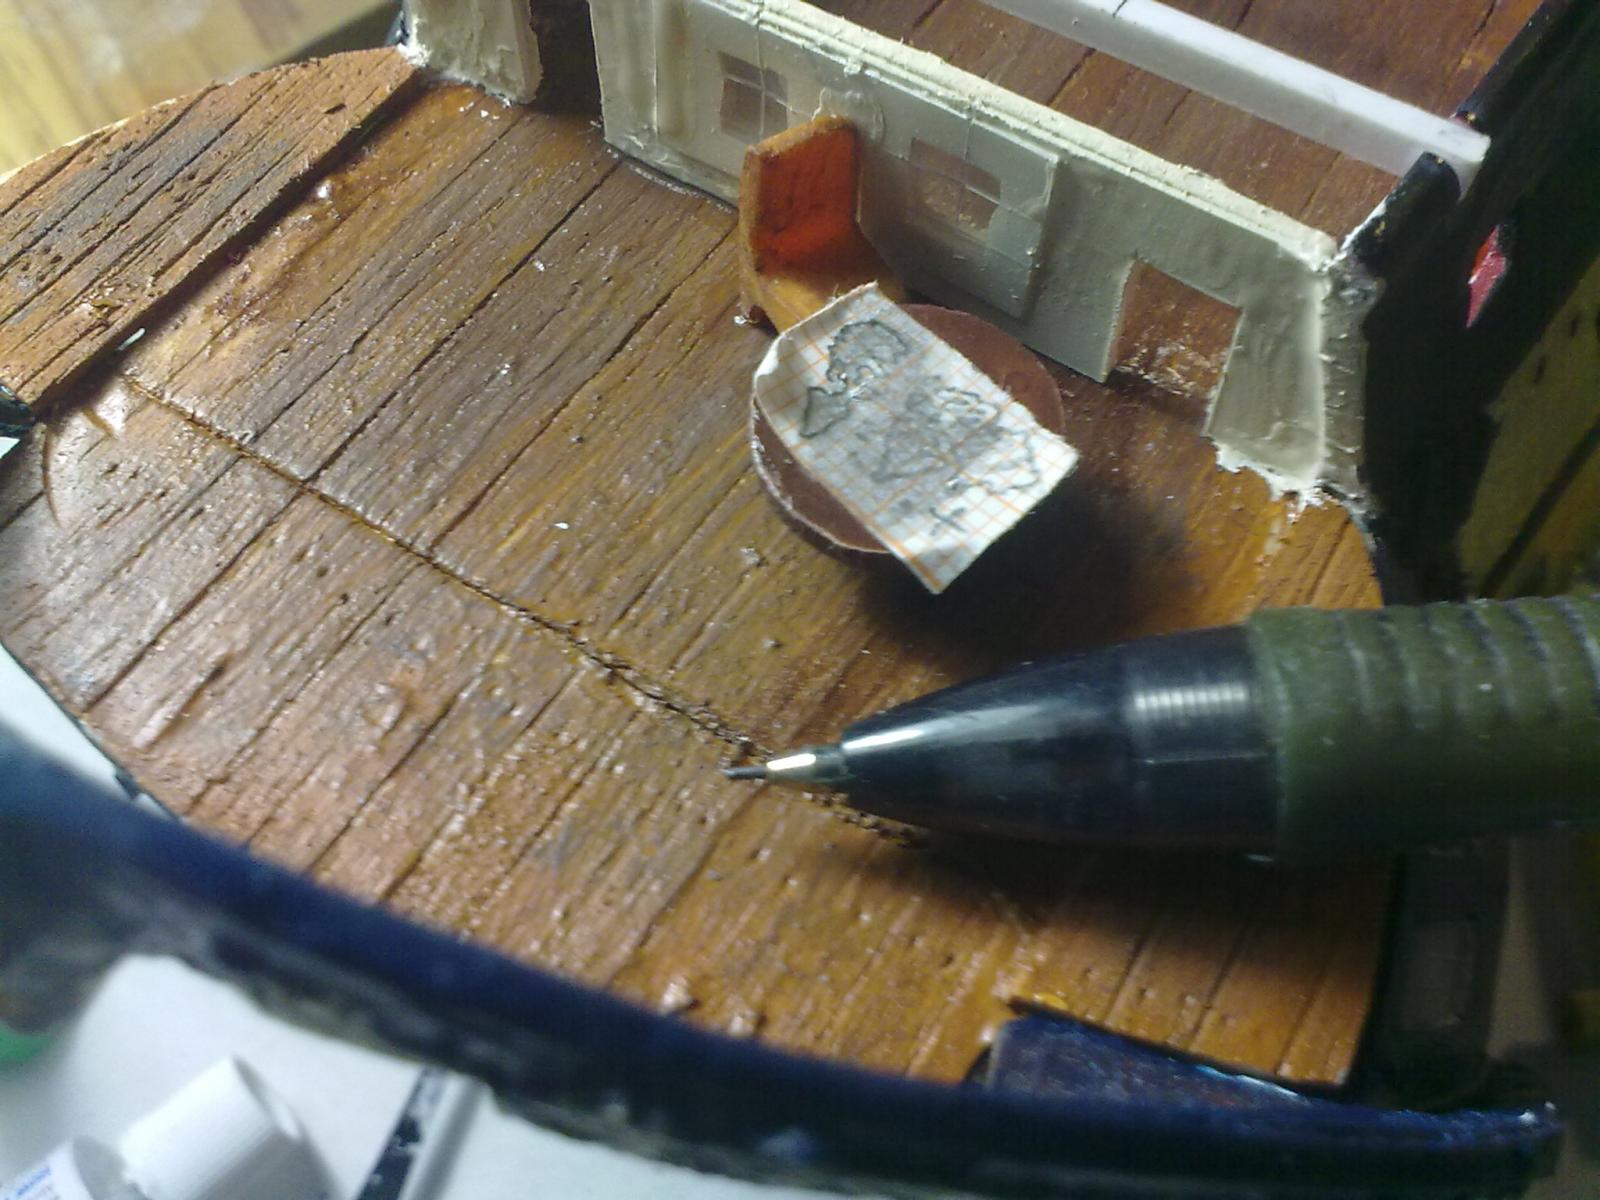
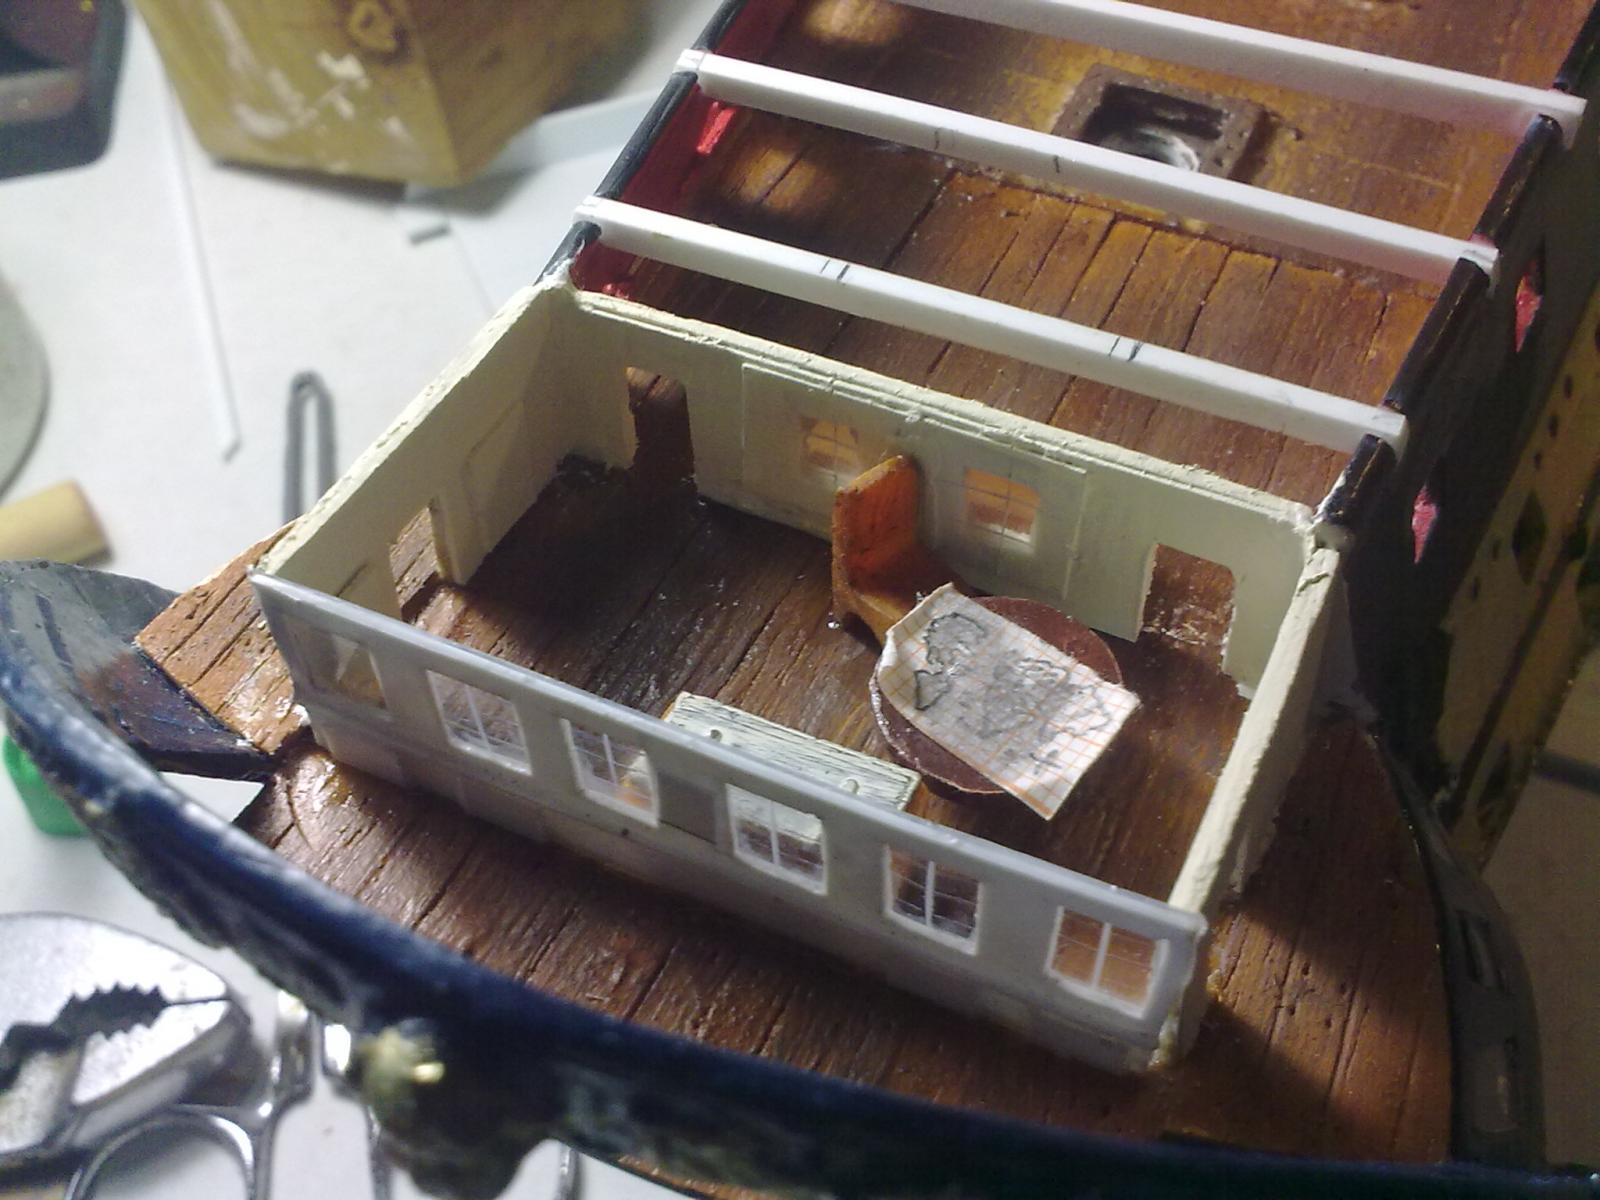
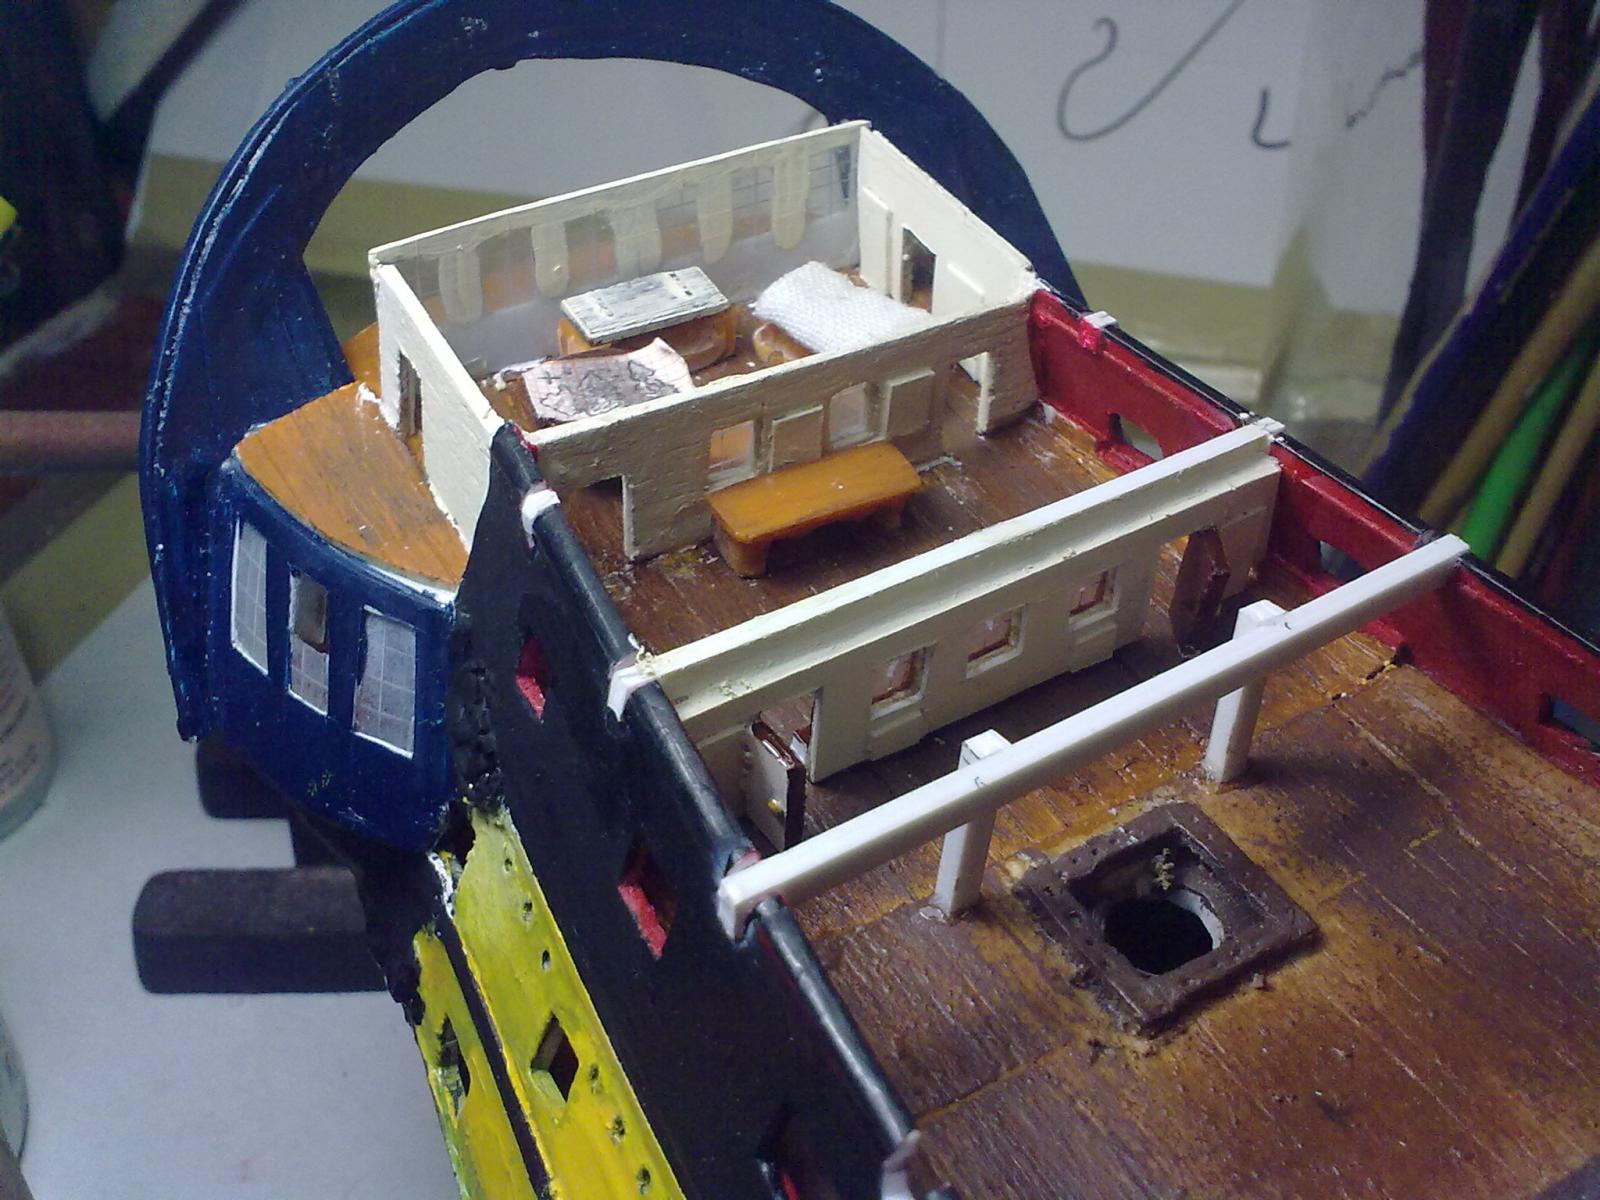
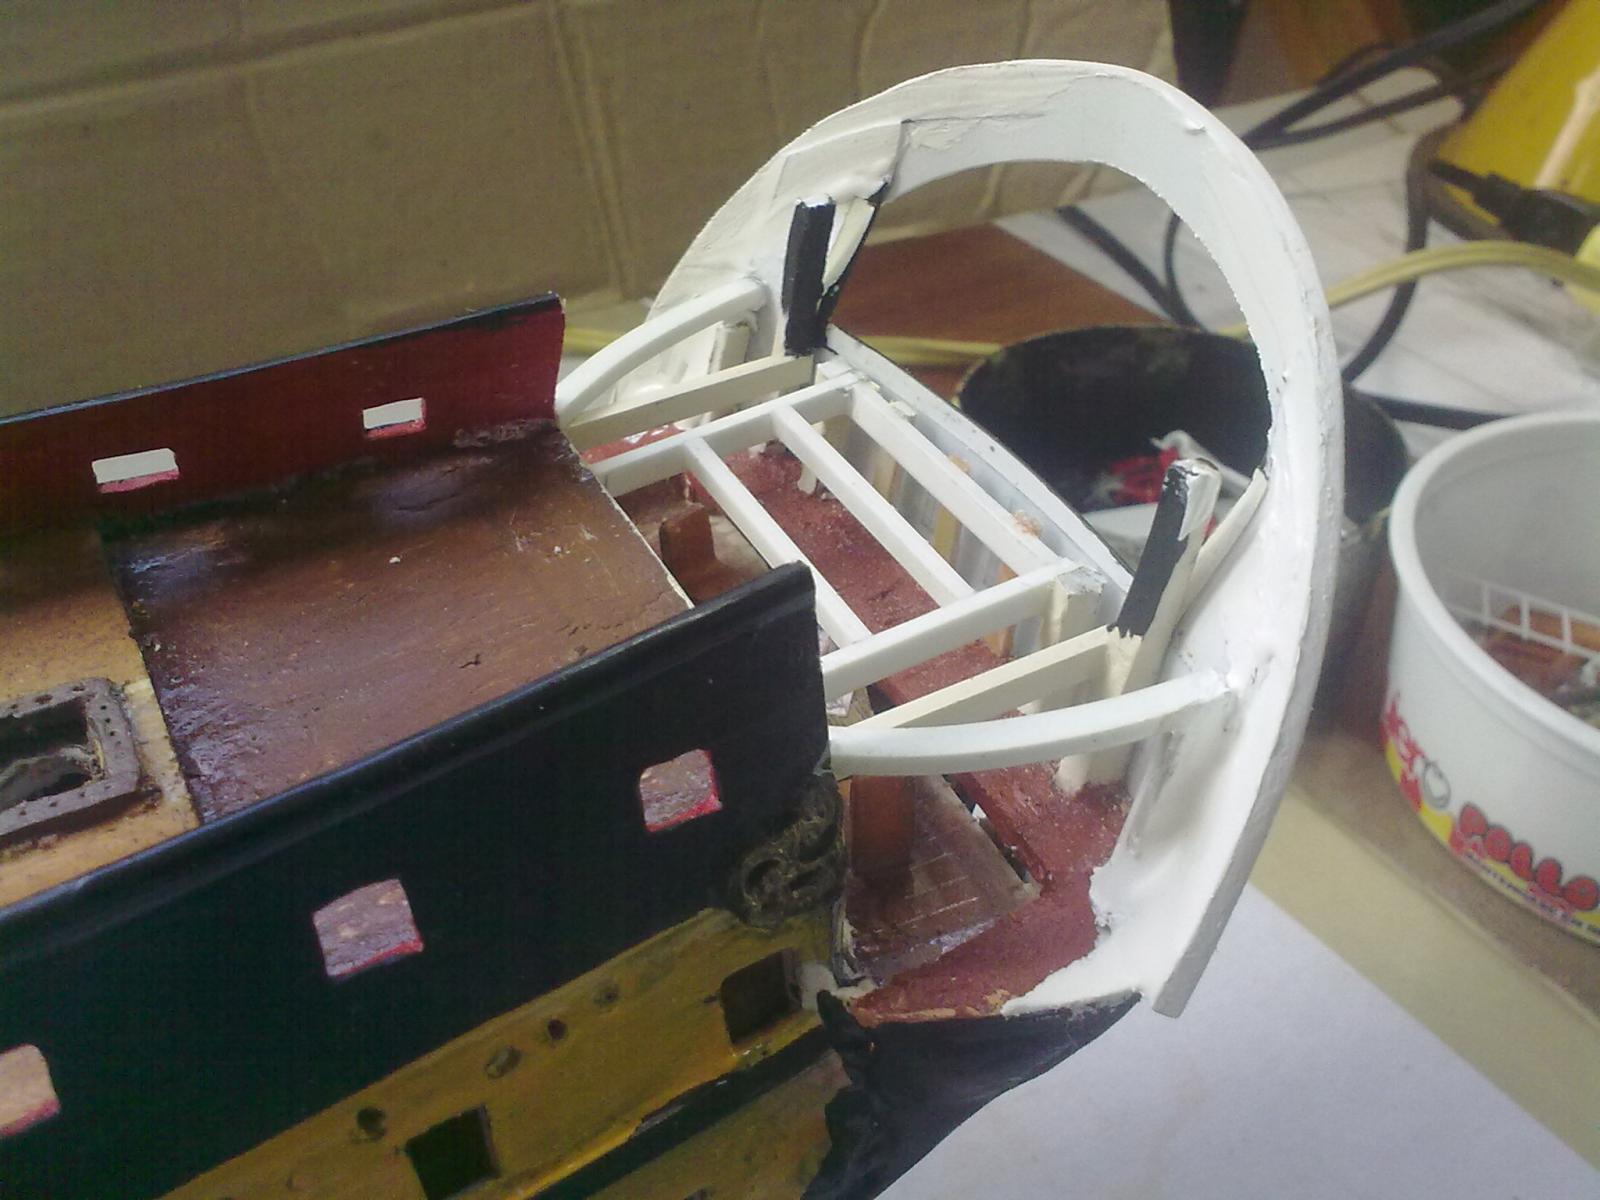
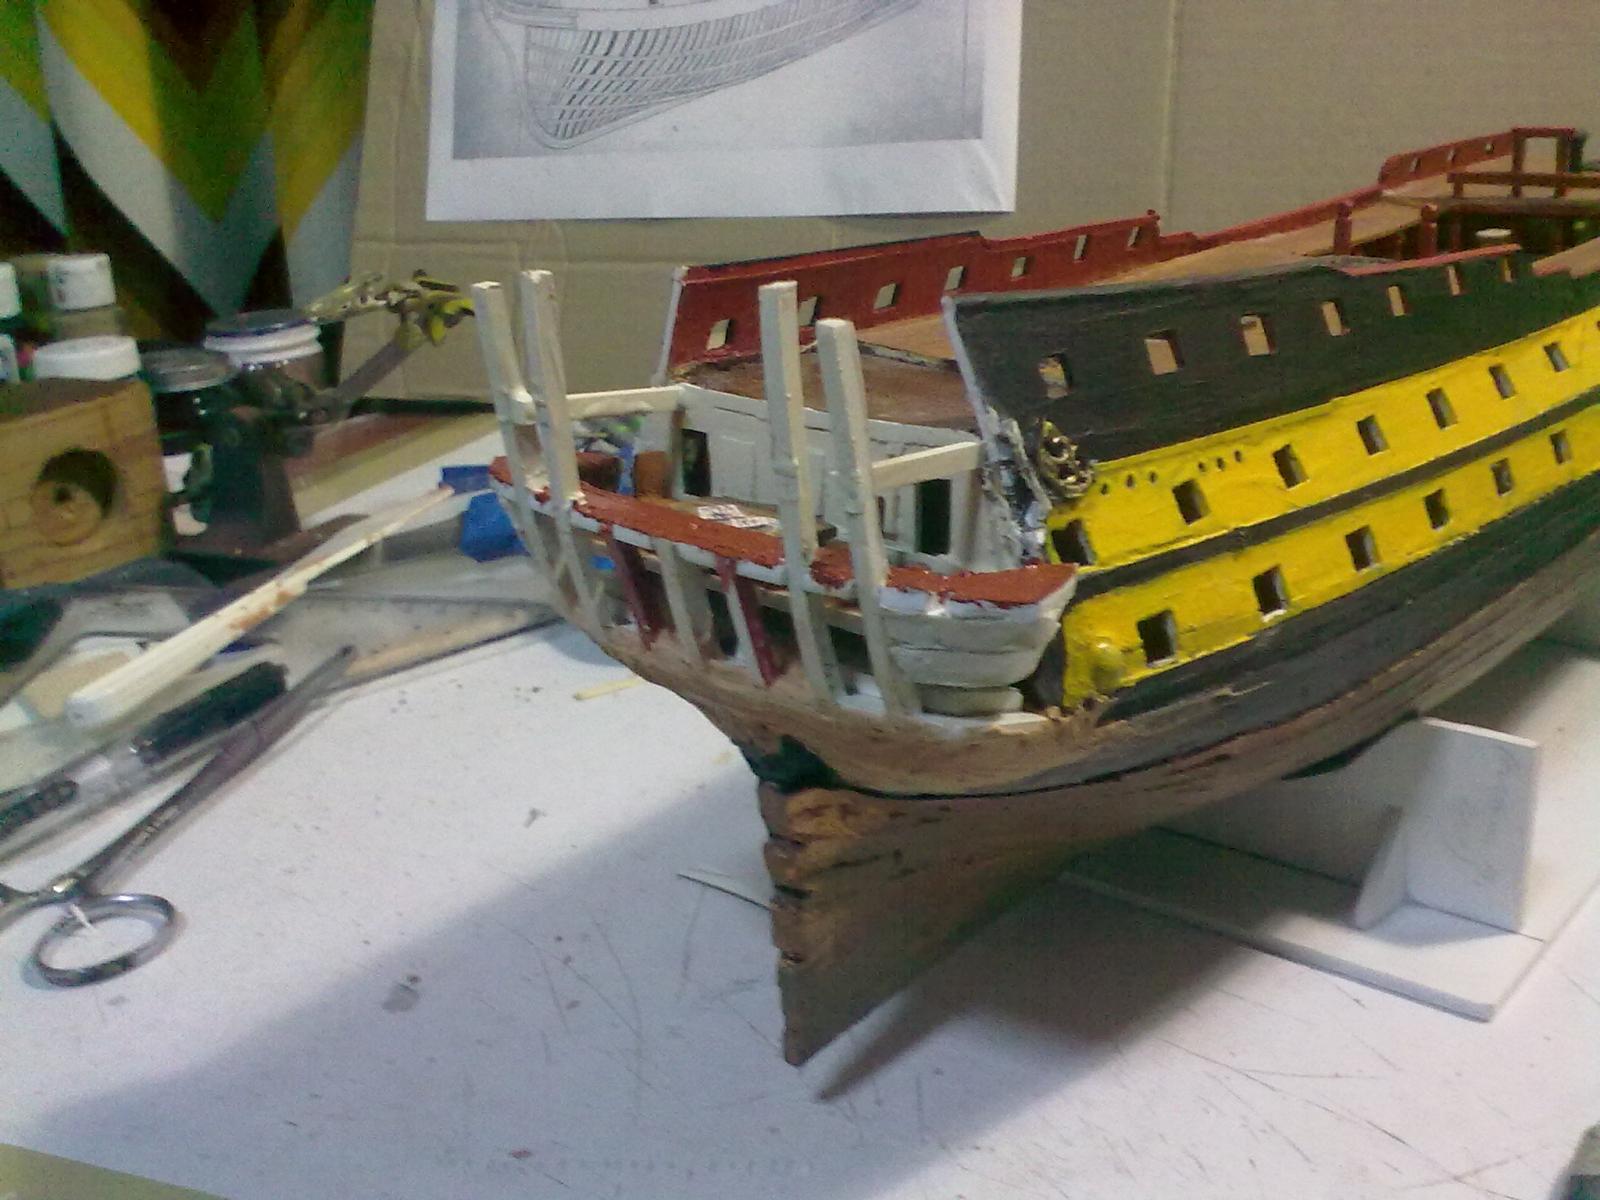
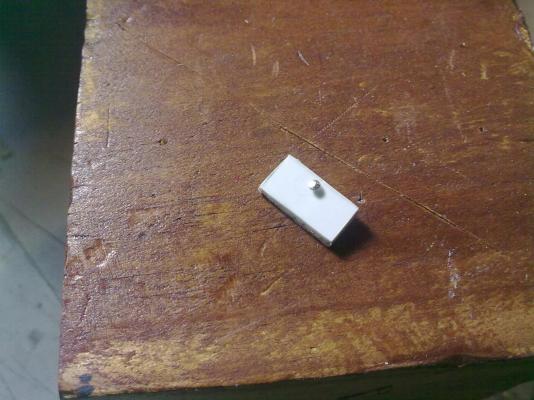
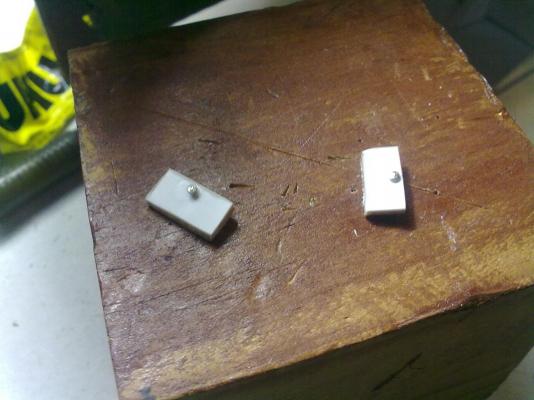
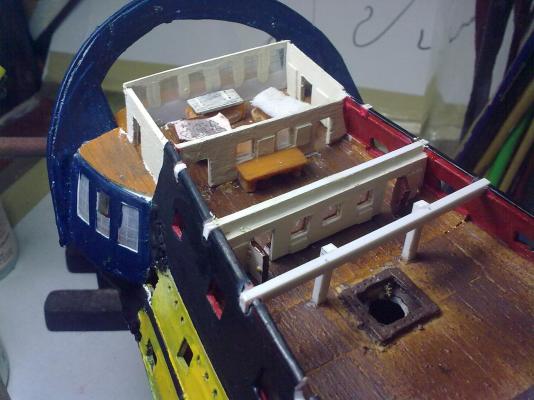
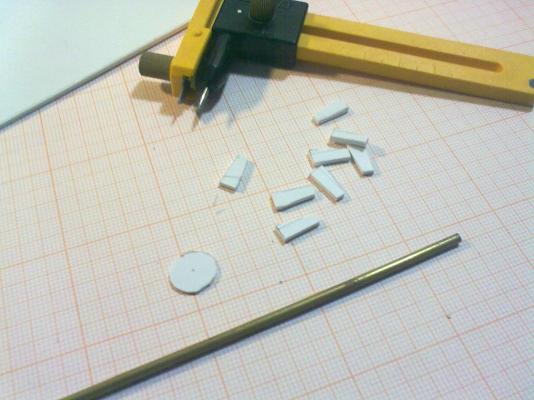
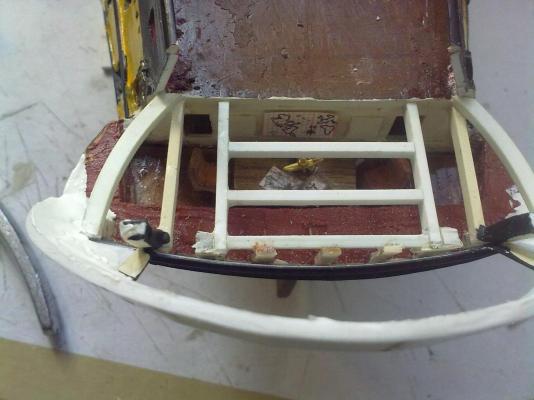
Beams for the quarterdeck One of the part of the project I enjoy more: furnishing and detailing the captain's quarters. Unlike the officers' quarters, these are going to be more visible through the transom windows, stern balcony and the aft hatch, so I care for the detail deeply.I got the furniture from a store that sells architectural models, painted and detailed it. For the maps, milimetric paper was used (a mechanical pencil tip for scale). Clear styrene was used for windows. Cabin done. Door knobs are pin heads glued into place with cyanoacrilate. Aft quarters done


- 43 replies
-
- 2
-
-
- neptuno
- ship of the line
- (and 1 more)
-
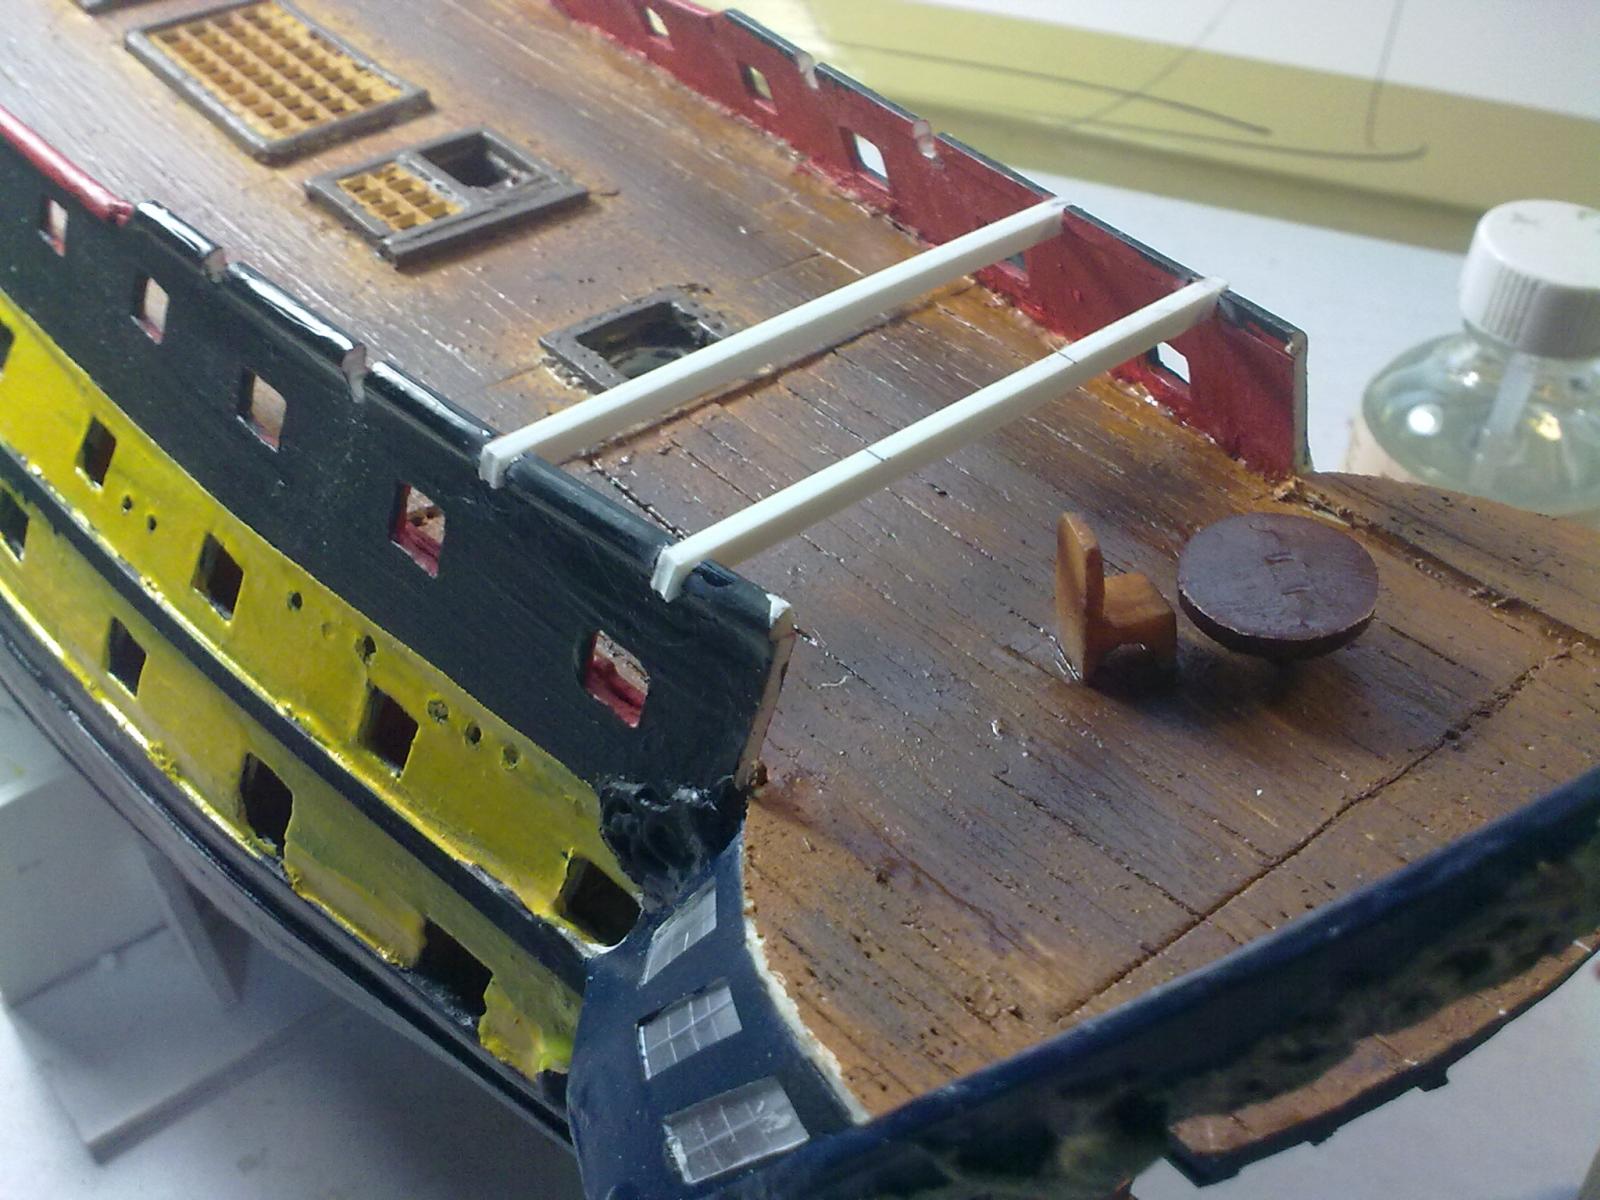
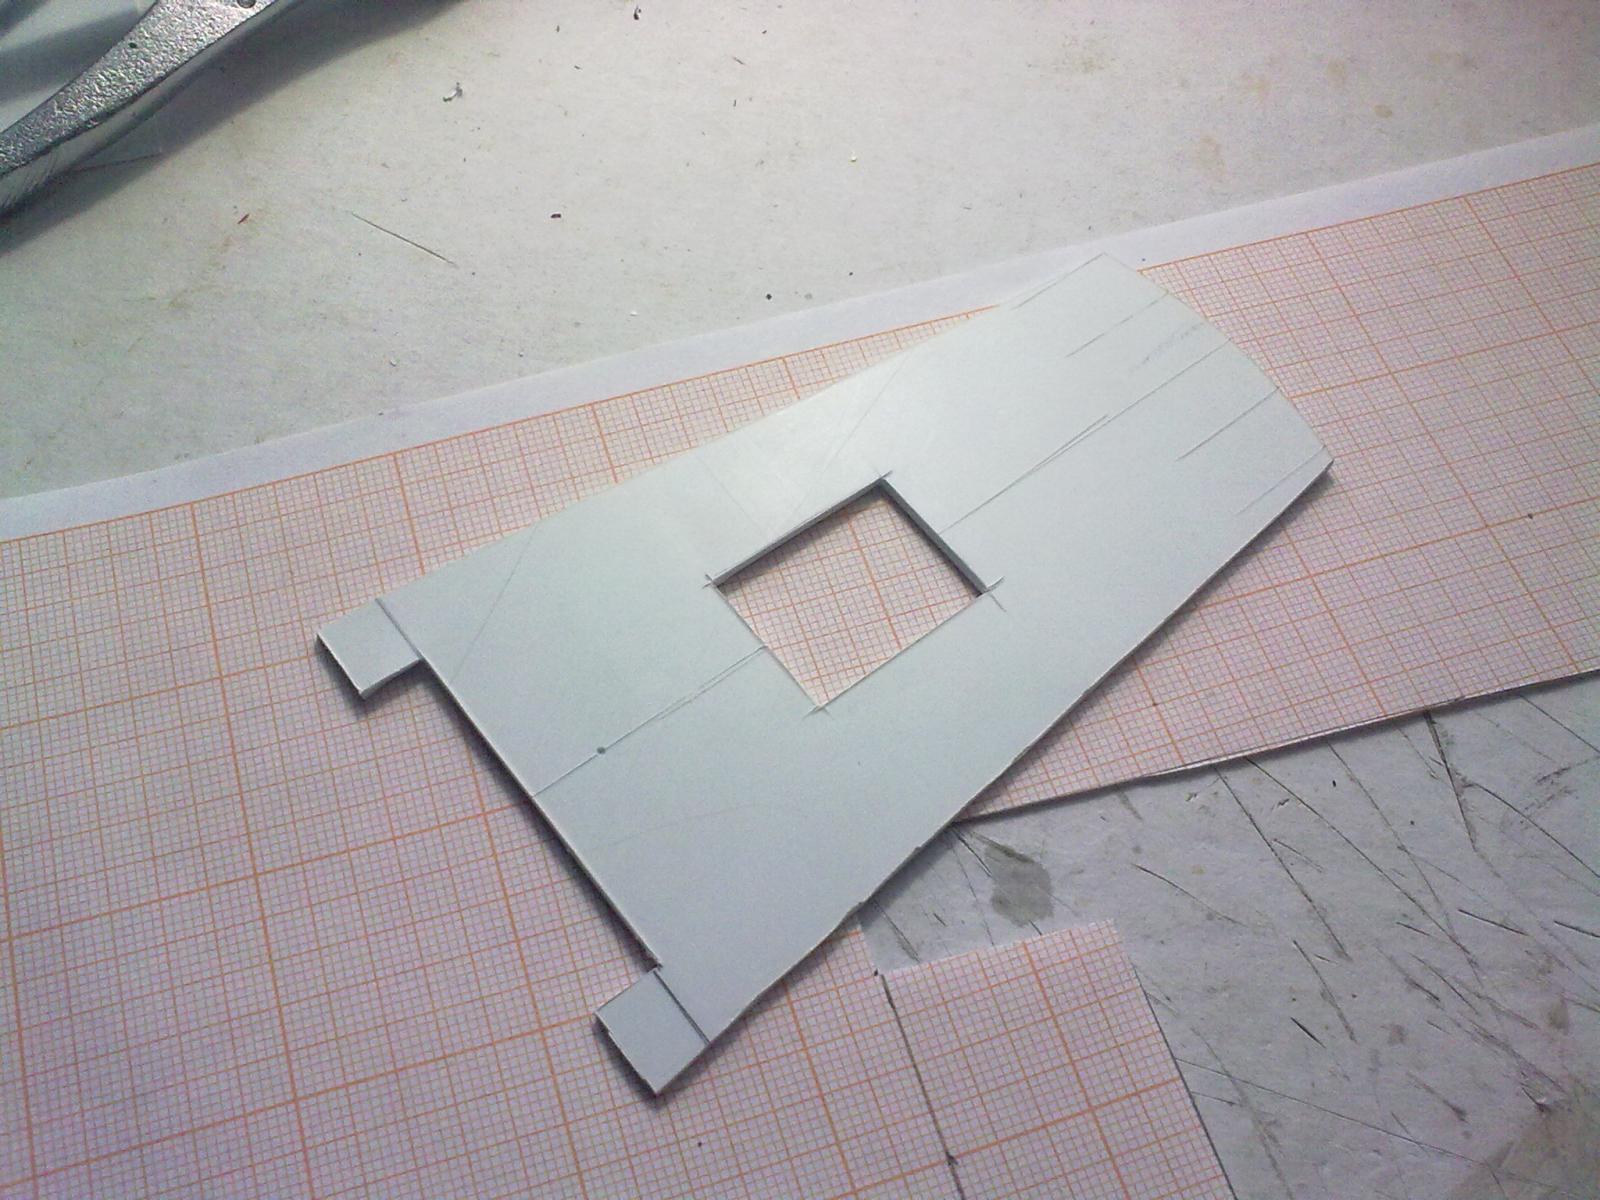
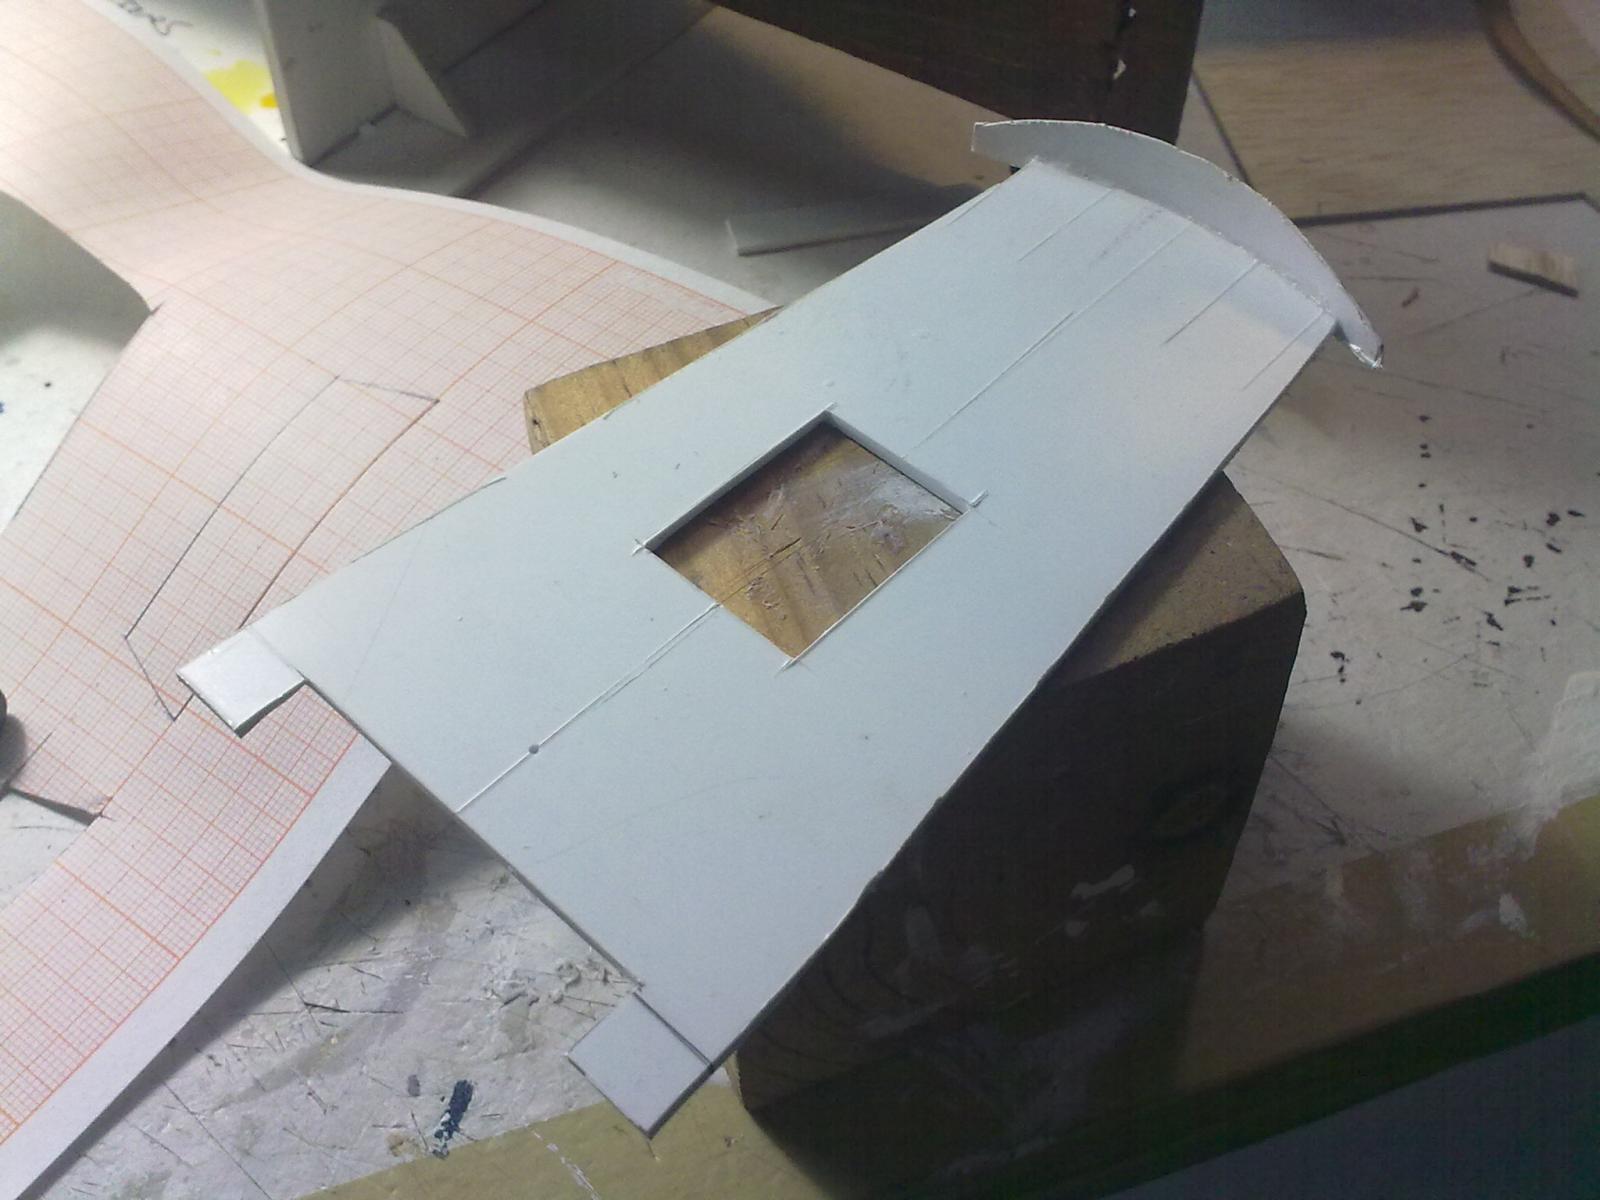
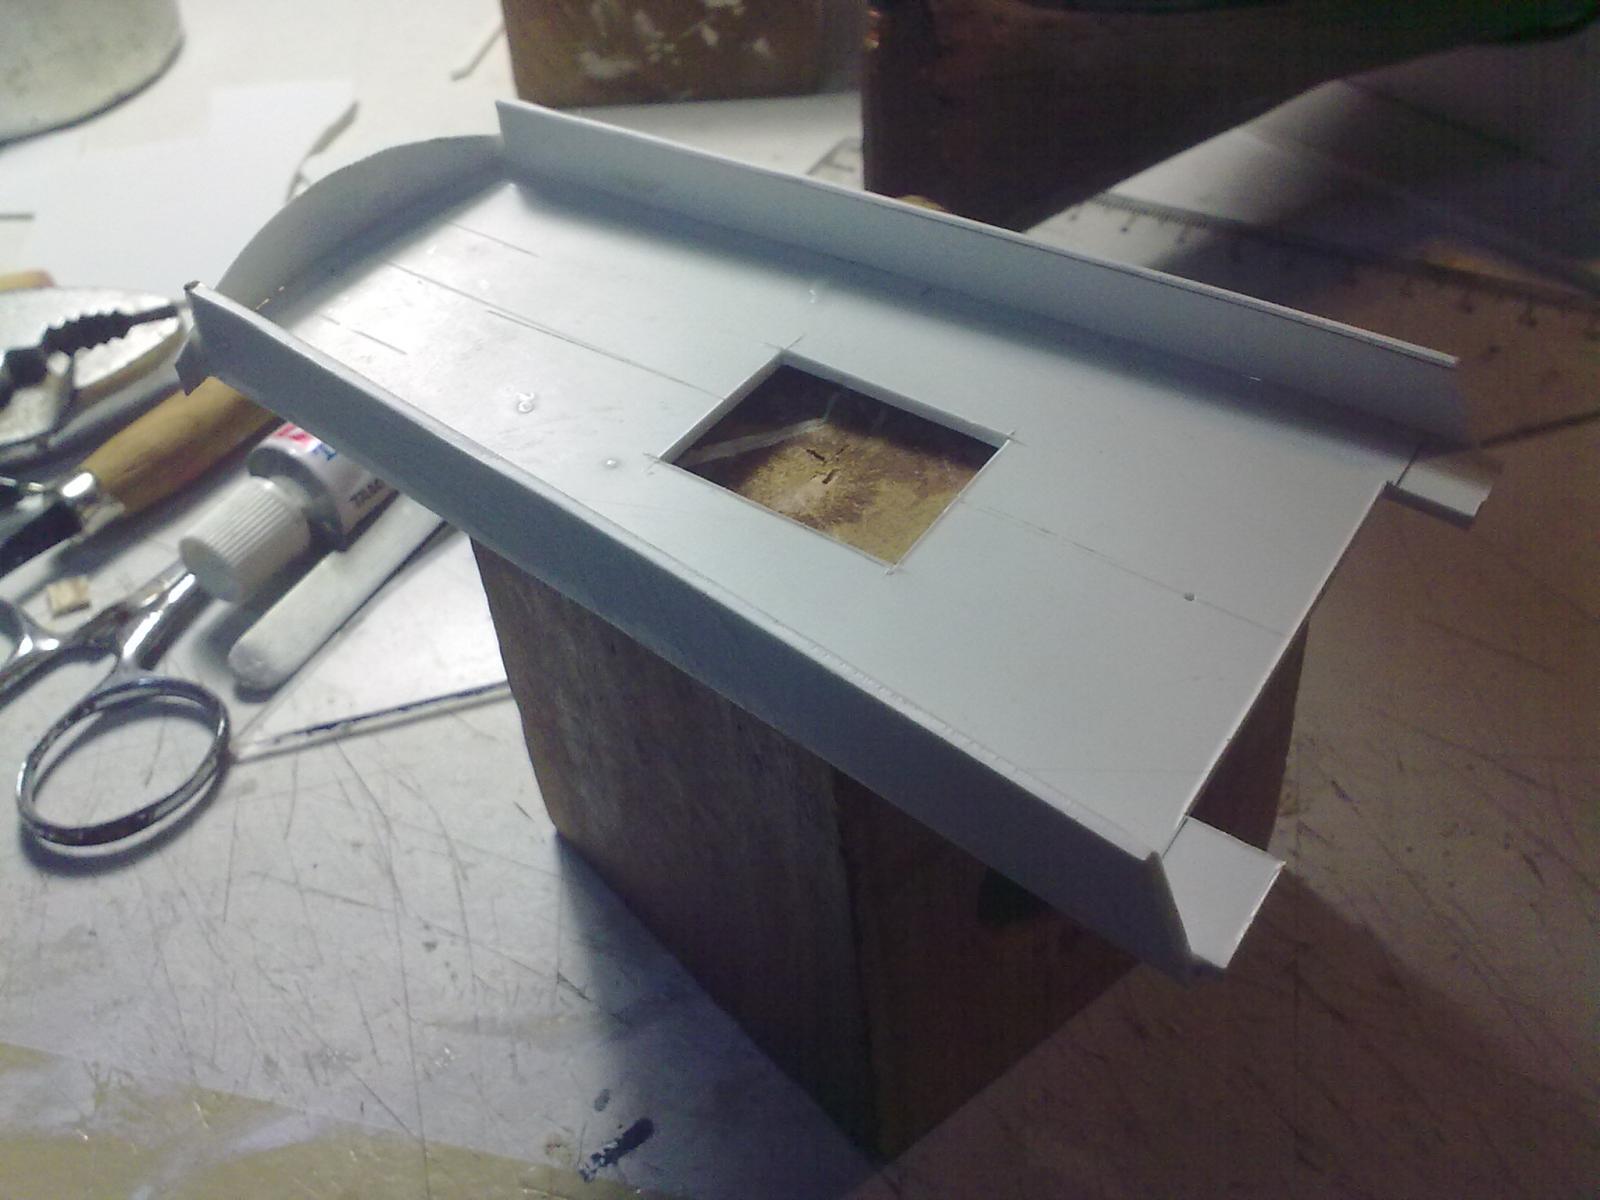
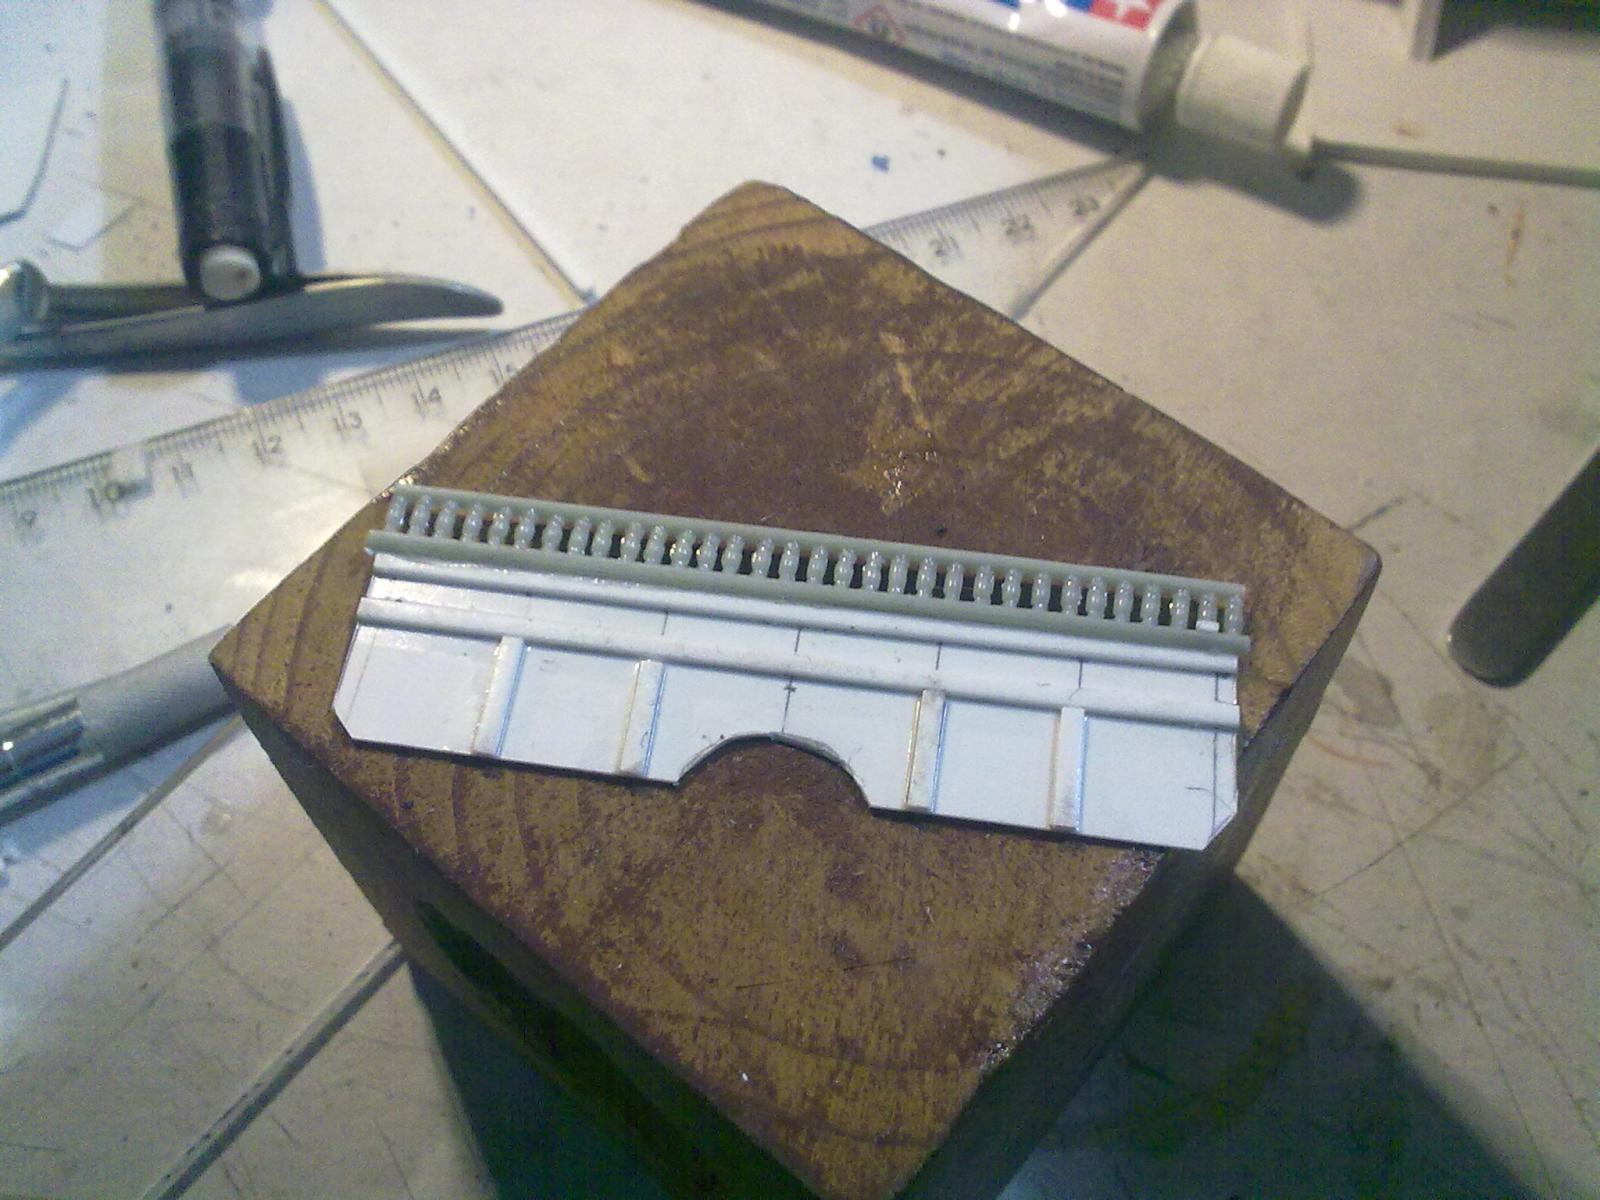
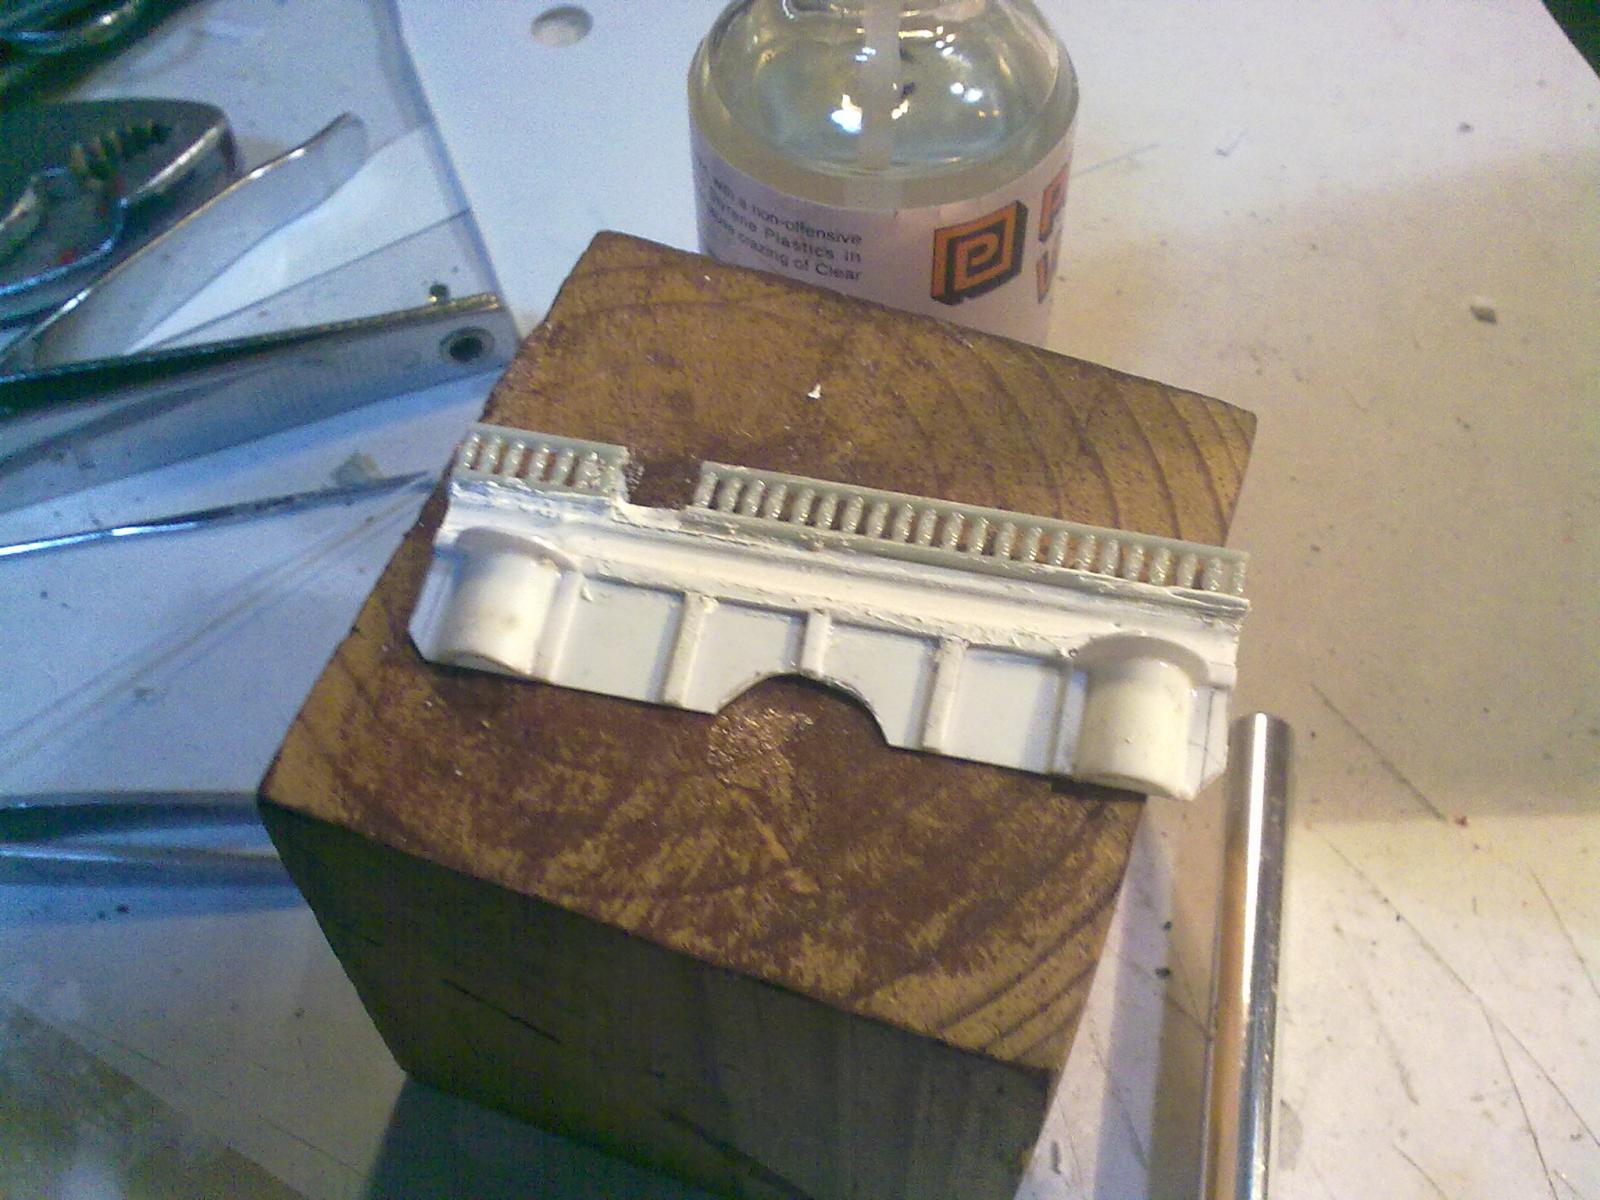
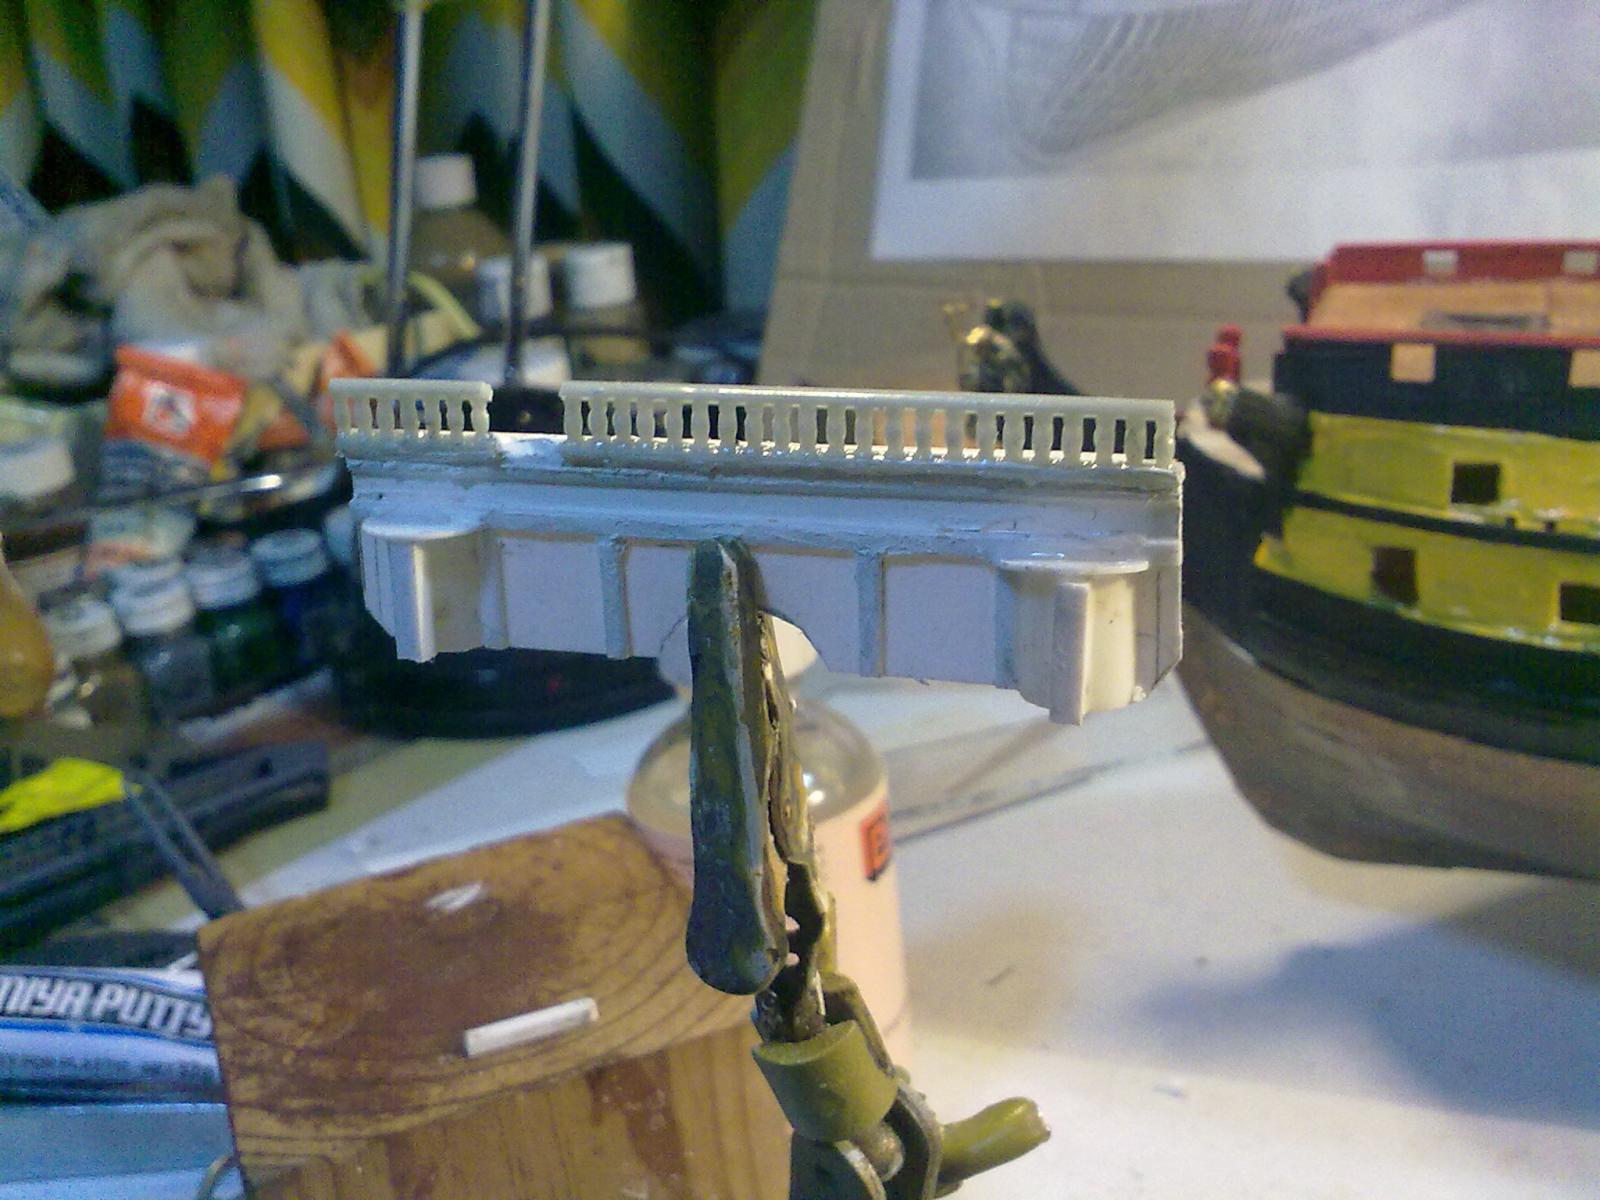
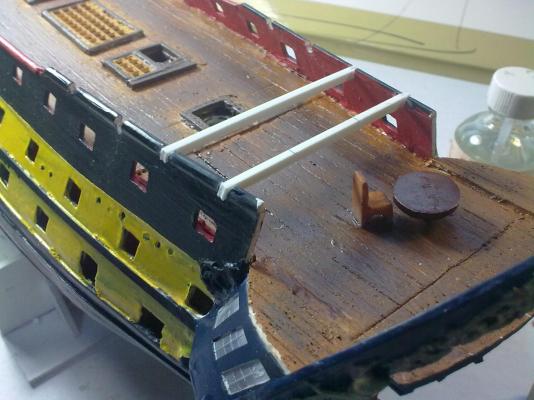
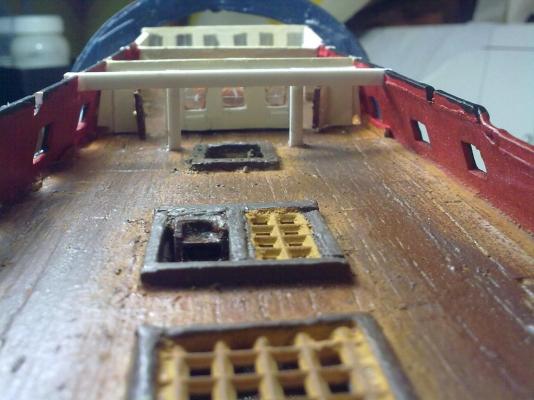
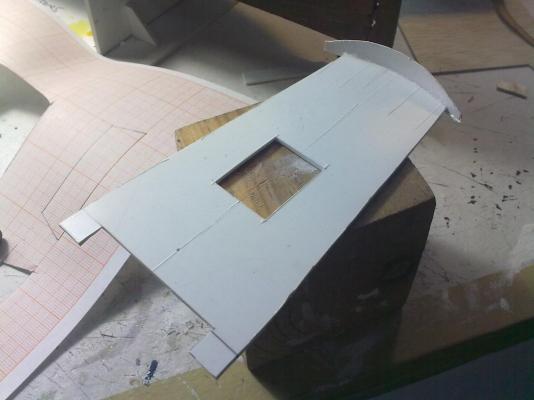
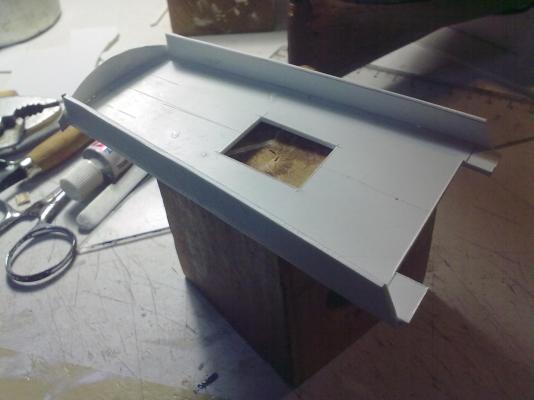
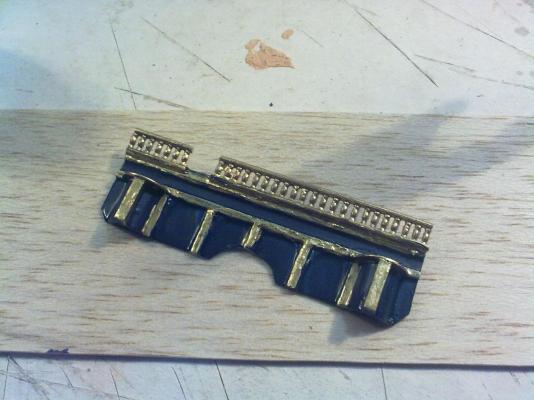
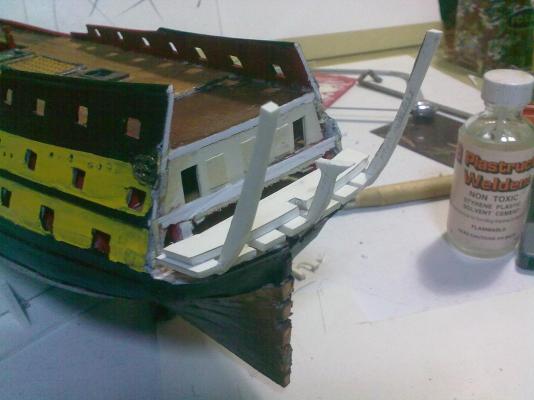
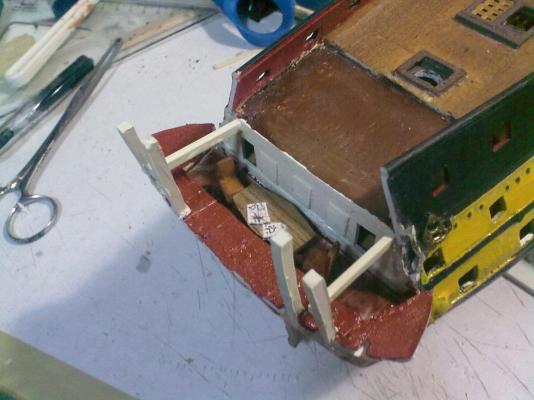
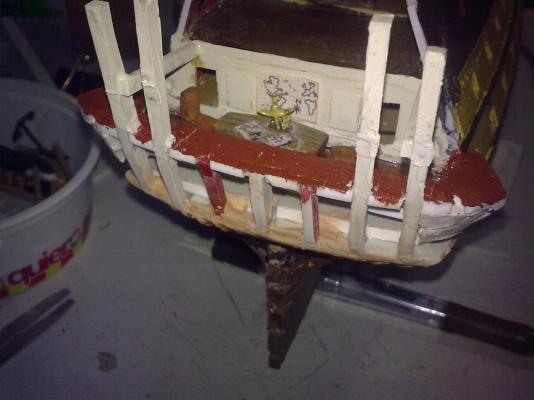
Styrene base for the poop deck. The opening is for the skylight/portlight. Railings fitted. The styrene was sanded -the trick is to do it in long, one-direction, swift movements- in order to simulate wood grain when painted.

- 43 replies
-
- 2
-
-
- neptuno
- ship of the line
- (and 1 more)
-
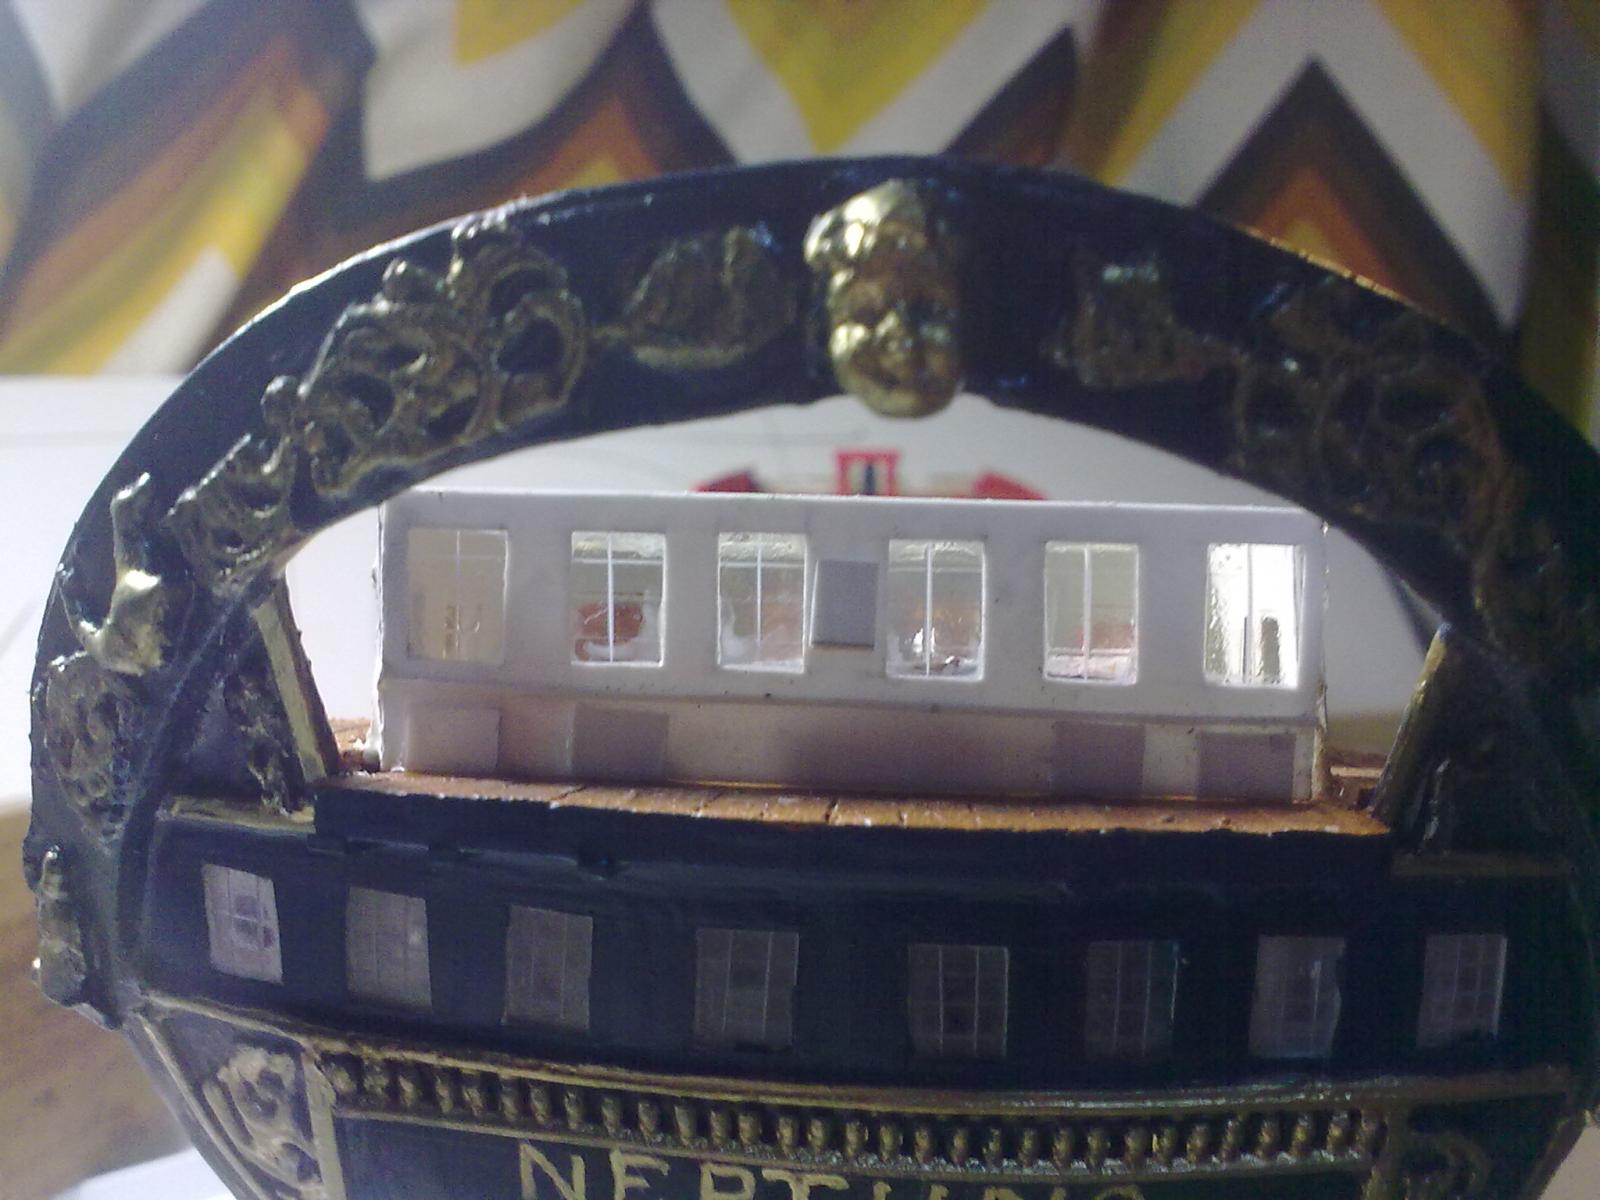
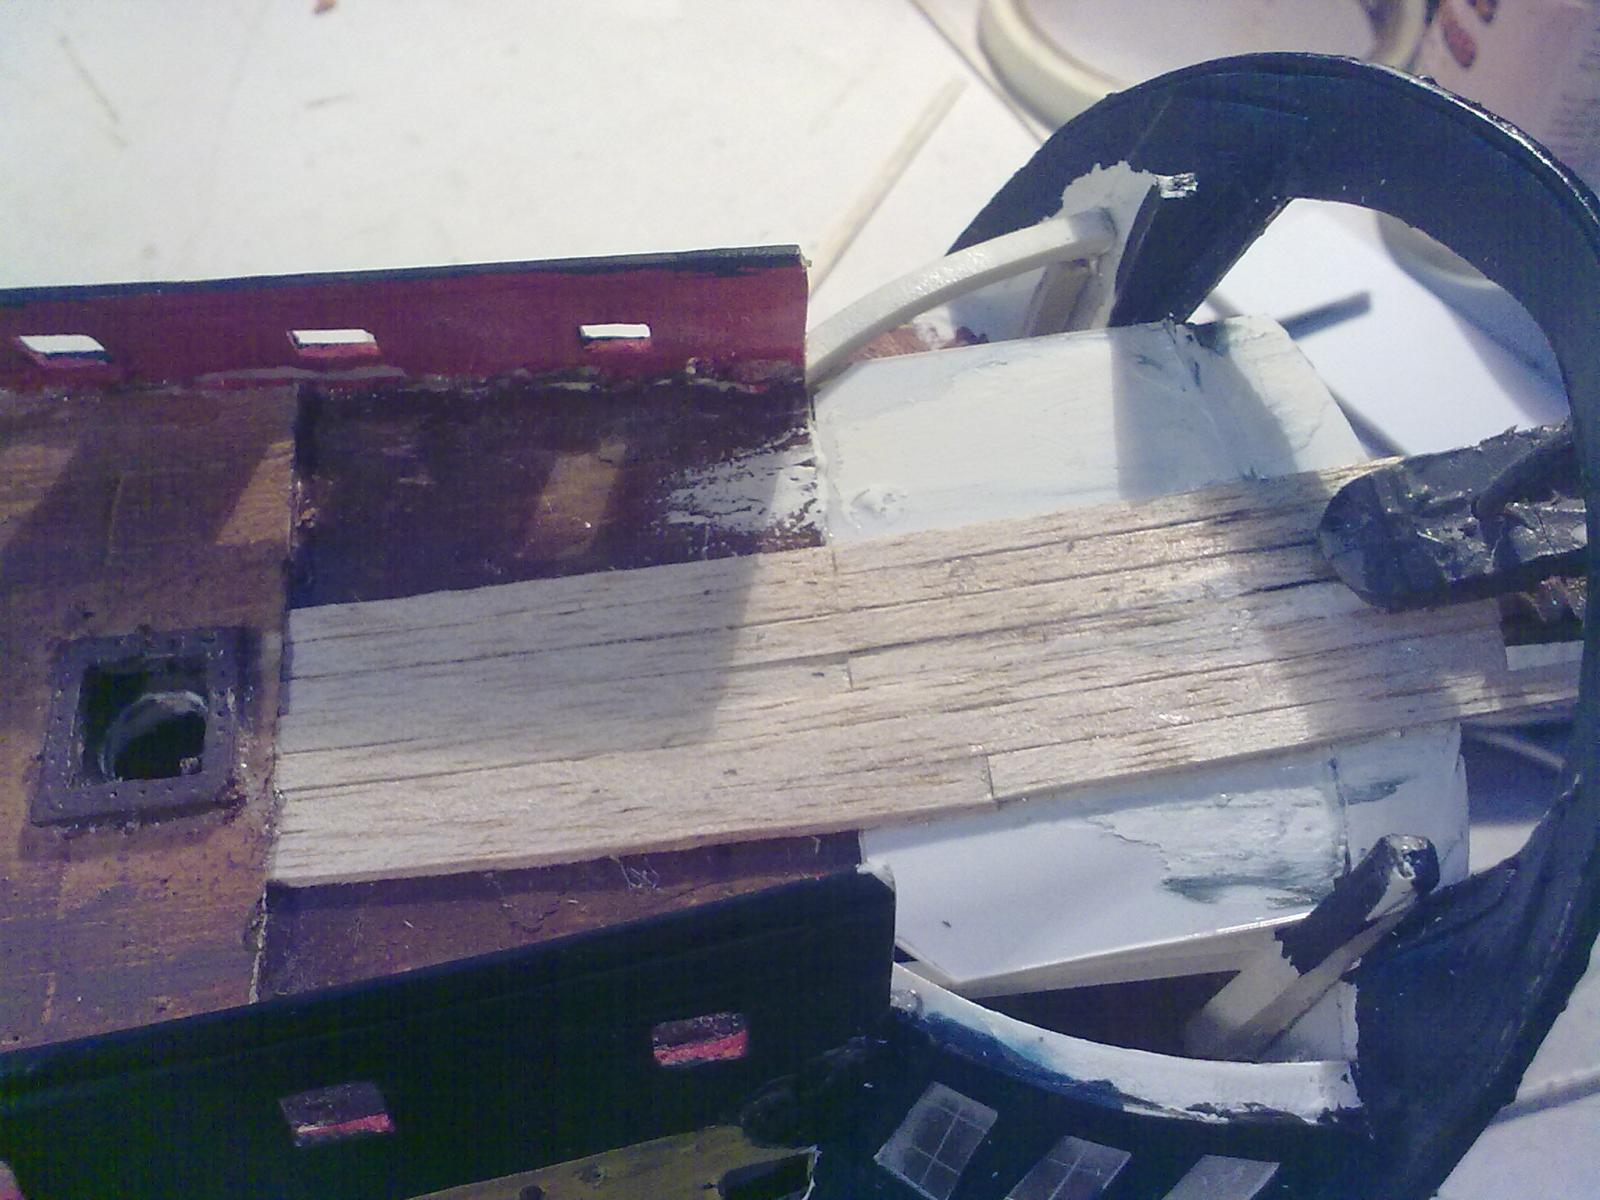
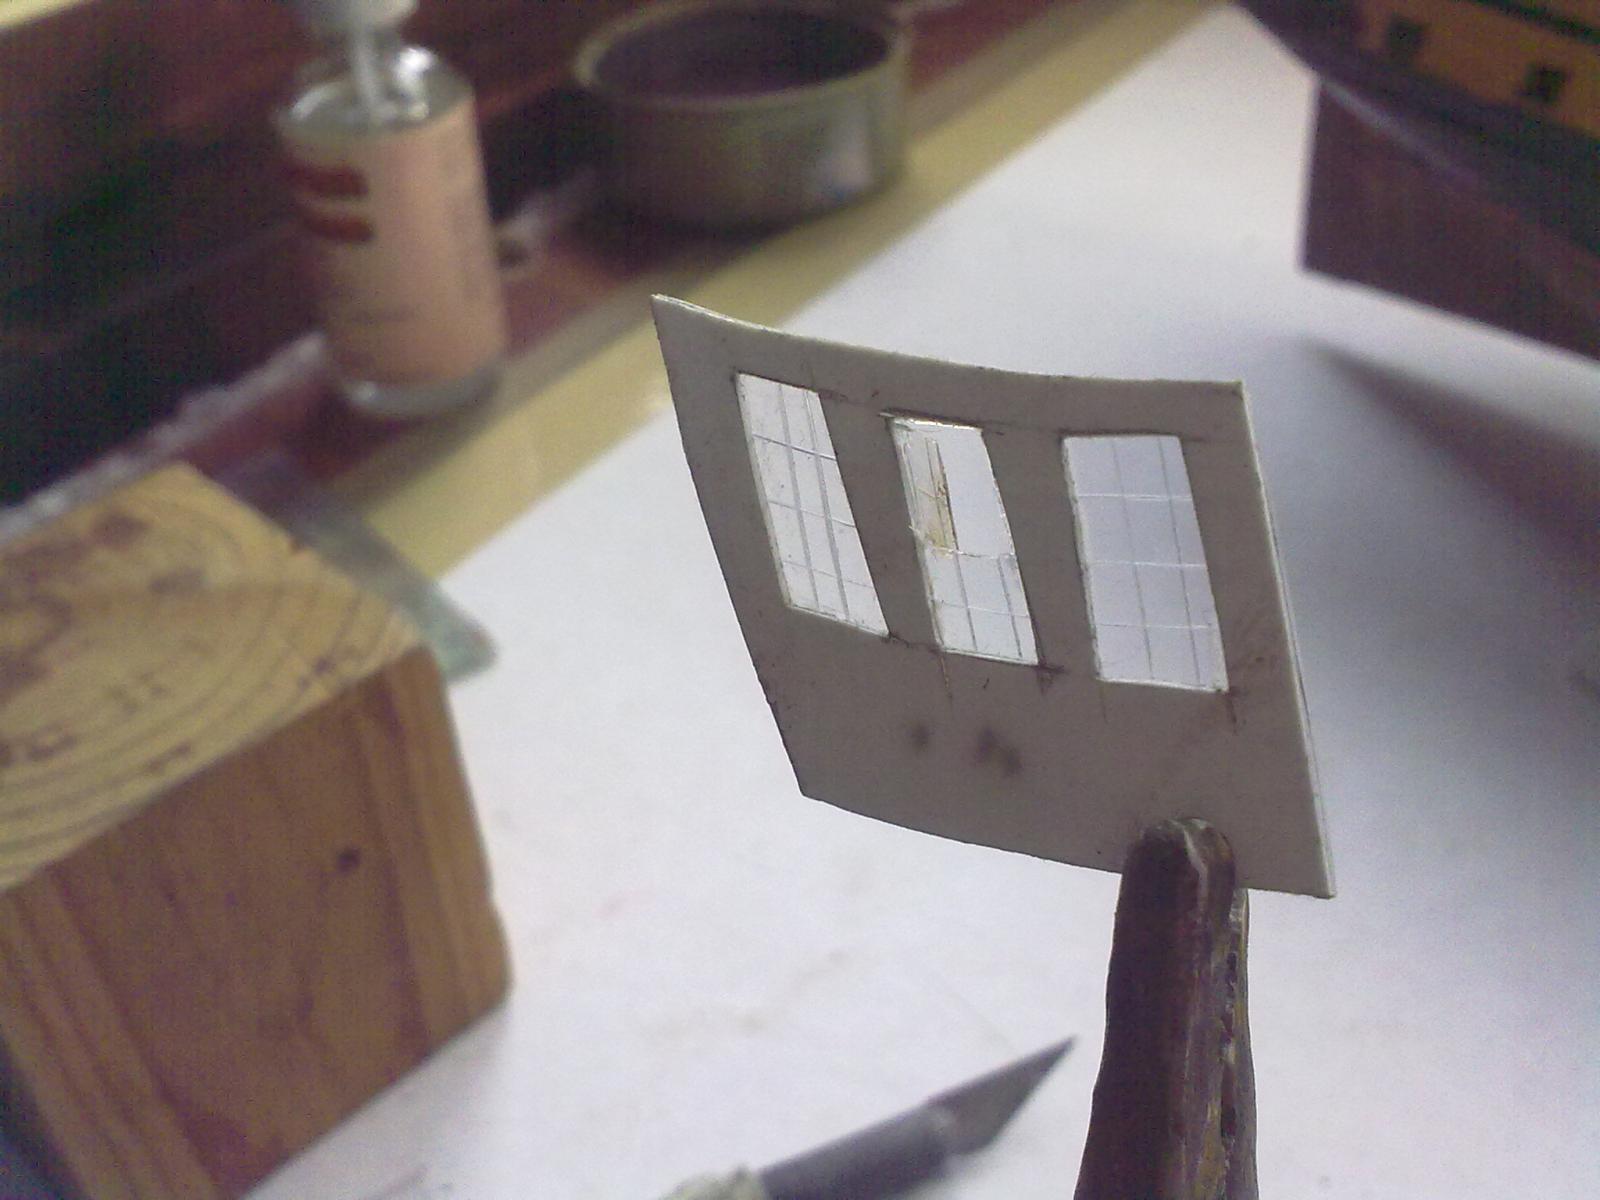
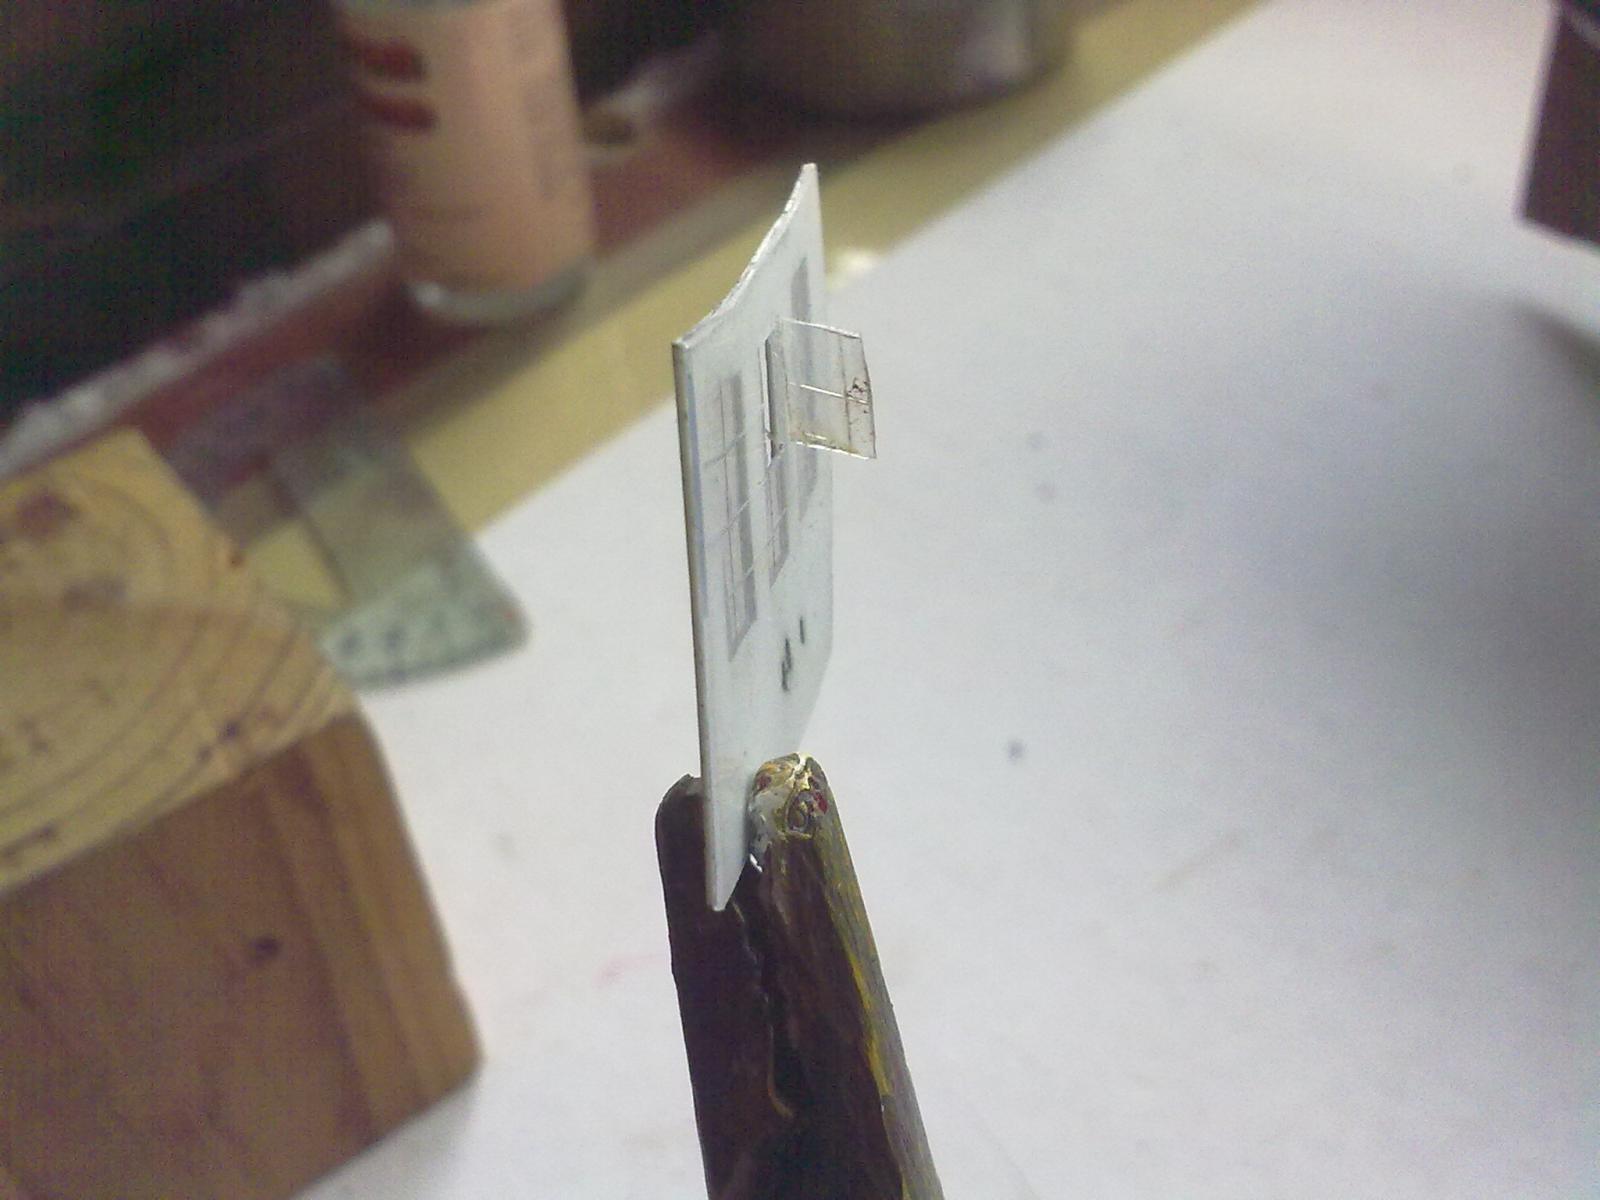
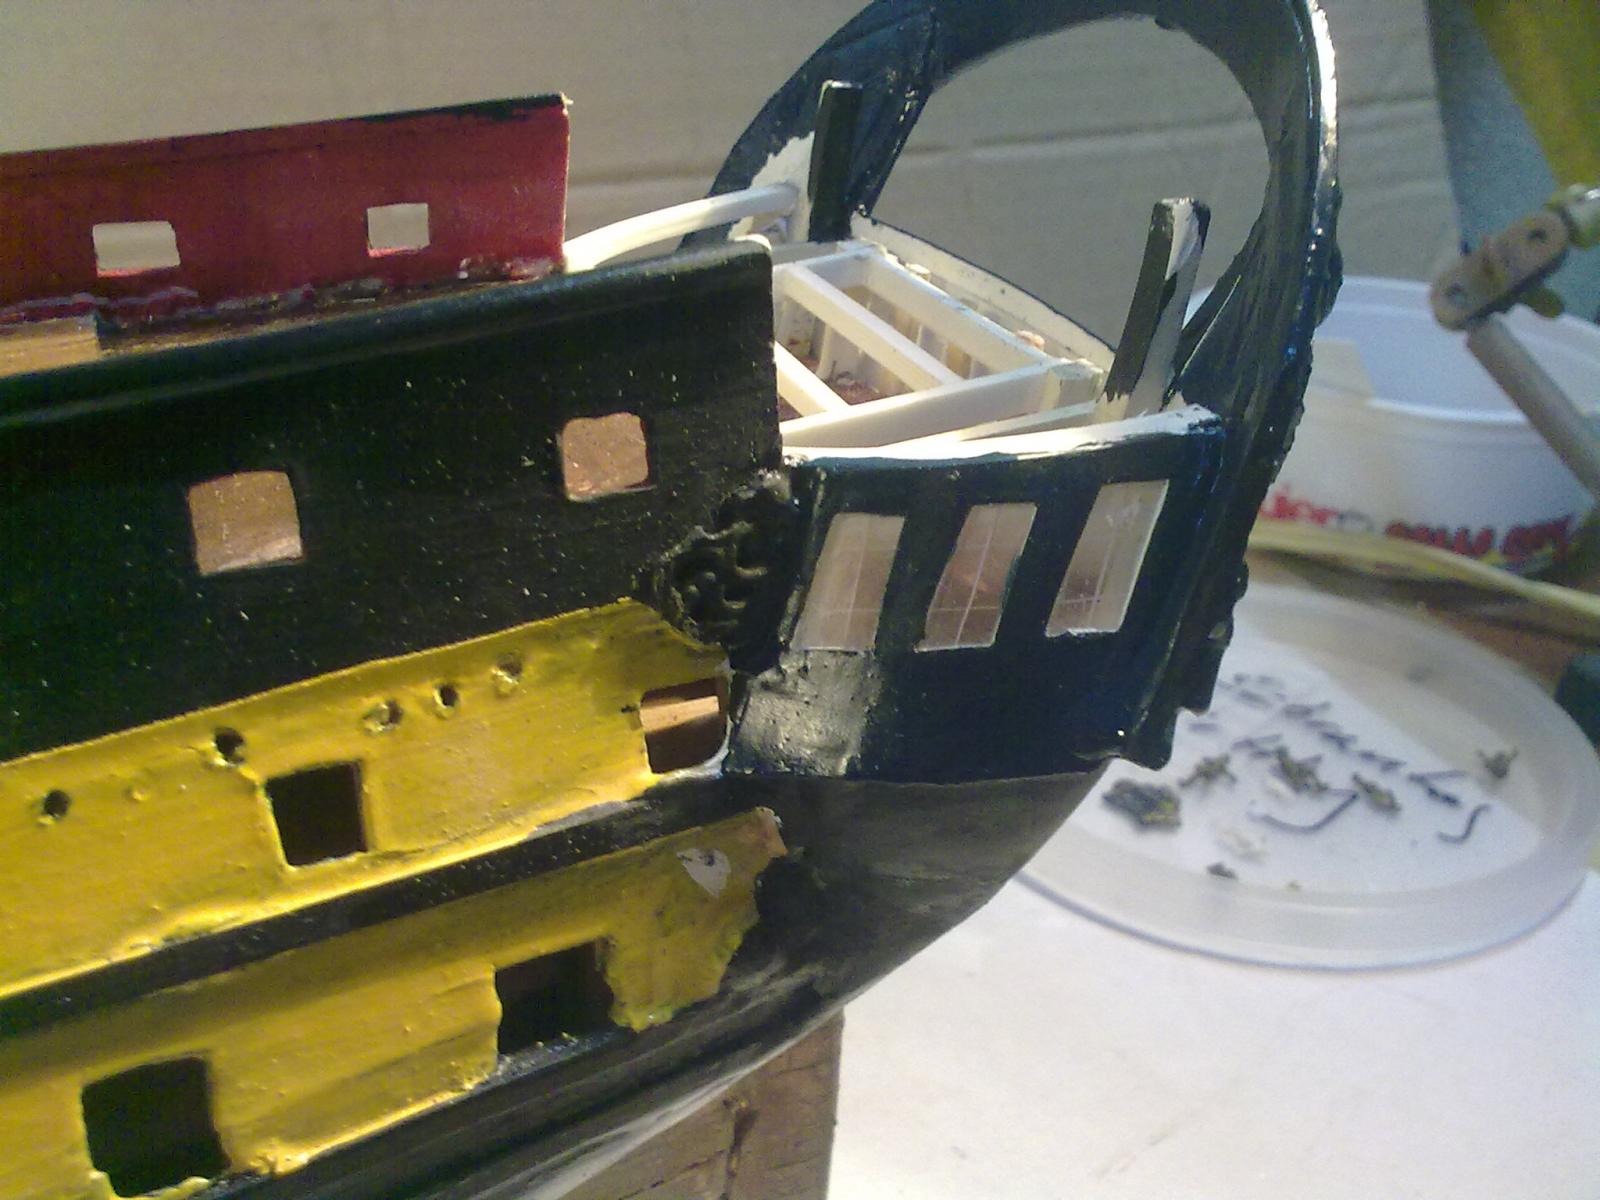
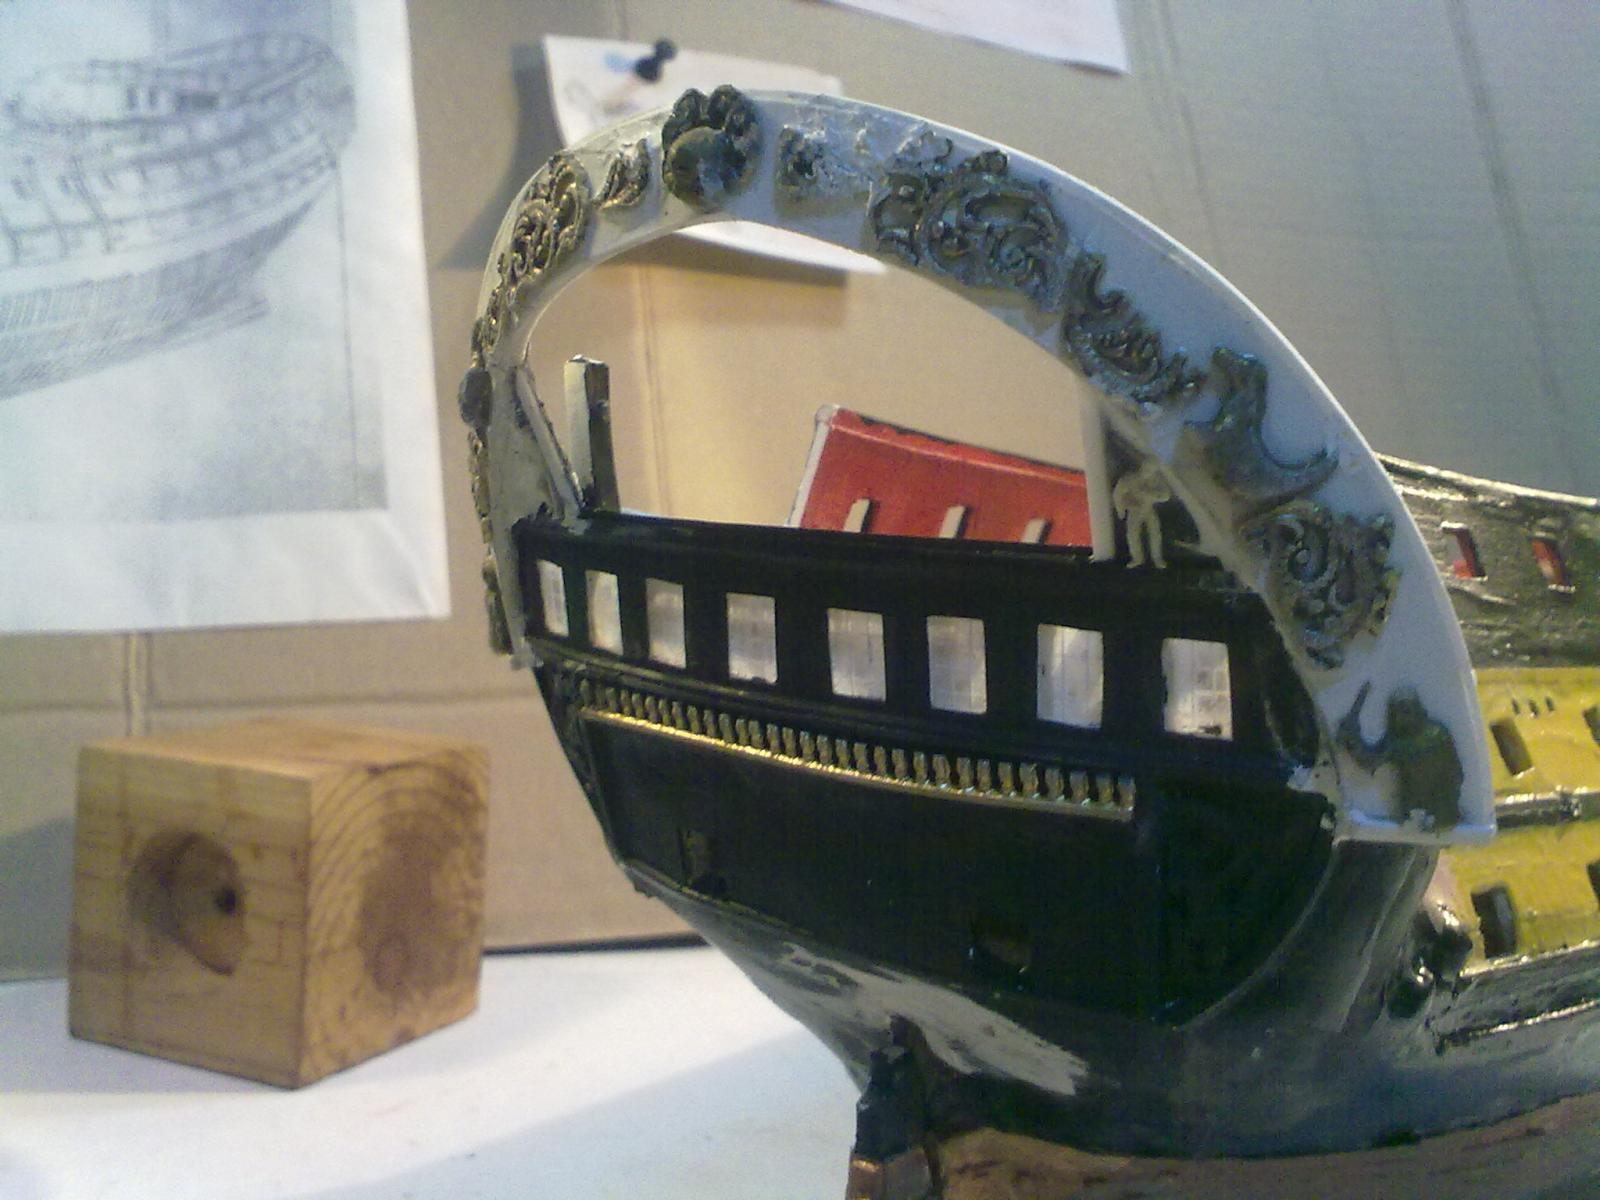
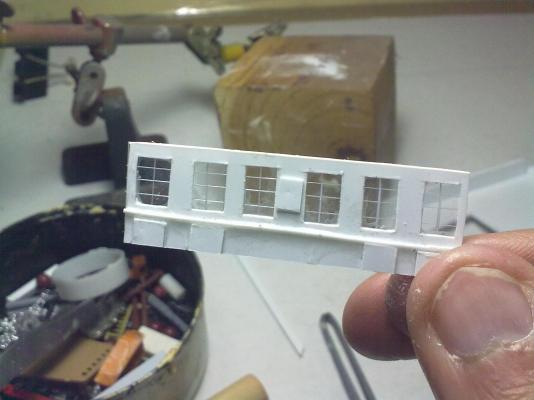
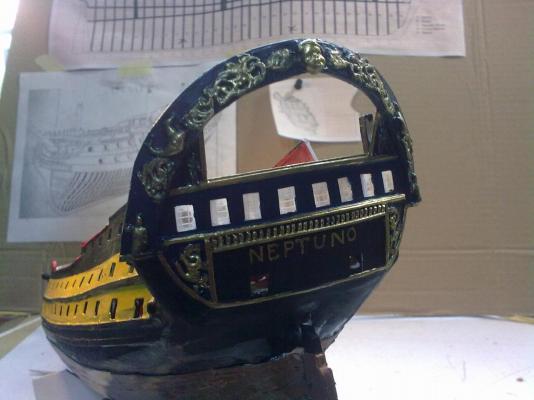
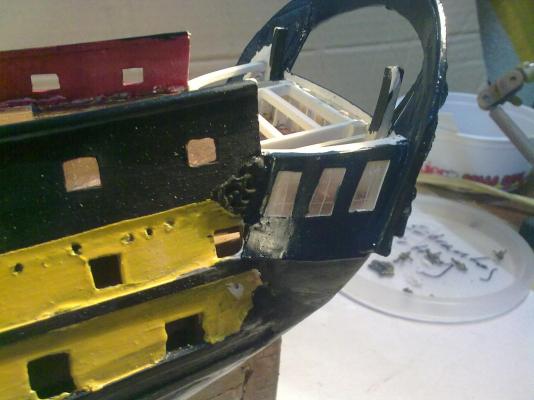
Aft quarterdeck, stern galleries and stern balcony. I decided to make one of the window to stay open, in order to appreciate the furnished cabin. Windows were made of clear styrene. I marked the frames and lines of the windows with an exact-o-knife, which is much better than making them our of styrene strips, according to the scale. Planking of aft quarterdeck, sealed, varnished and painted. Nameplate done


- 43 replies
-
- 2
-
-
- neptuno
- ship of the line
- (and 1 more)
-
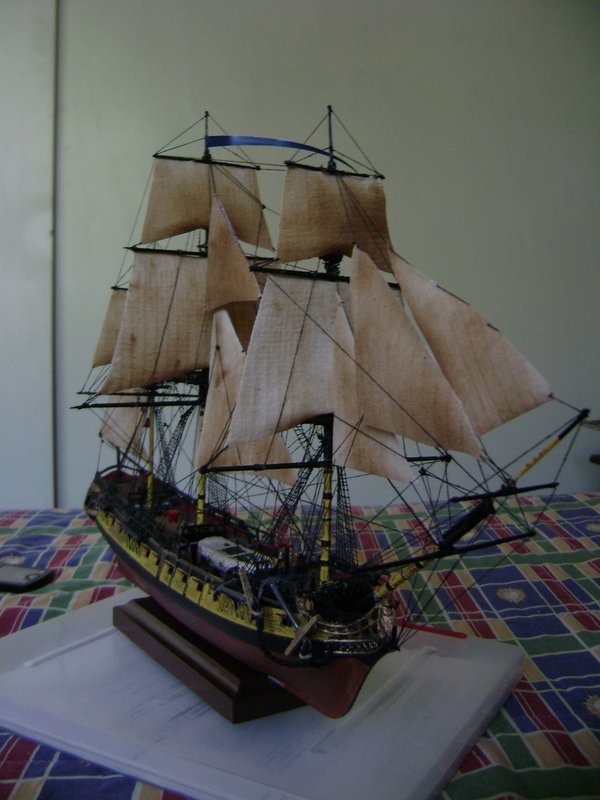
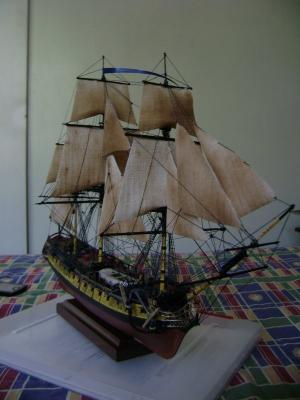
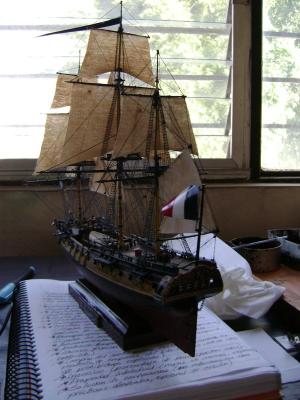
Very nicely done! I recommend you to make your own ratlines and sails (they are much more realistic than the plastic ones in the kit) and to improve the windows in the transom with styrene wire. You can weather the hull using pastel paints or by using the dry brush technique -apply some occre, rust, black, brown and green- to simulate old wood or copper, and the same effect can be achieved by soaking the sails (fabric ones, cut from an old t-shirt) in watercolors and then rubbing them with ground coffee. Here is my own version of the same model, which I modified to be the French frigate Guerriere:
- 118 replies
-
- 4
-
-
- jolly roger
- lindberg
- (and 2 more)
-
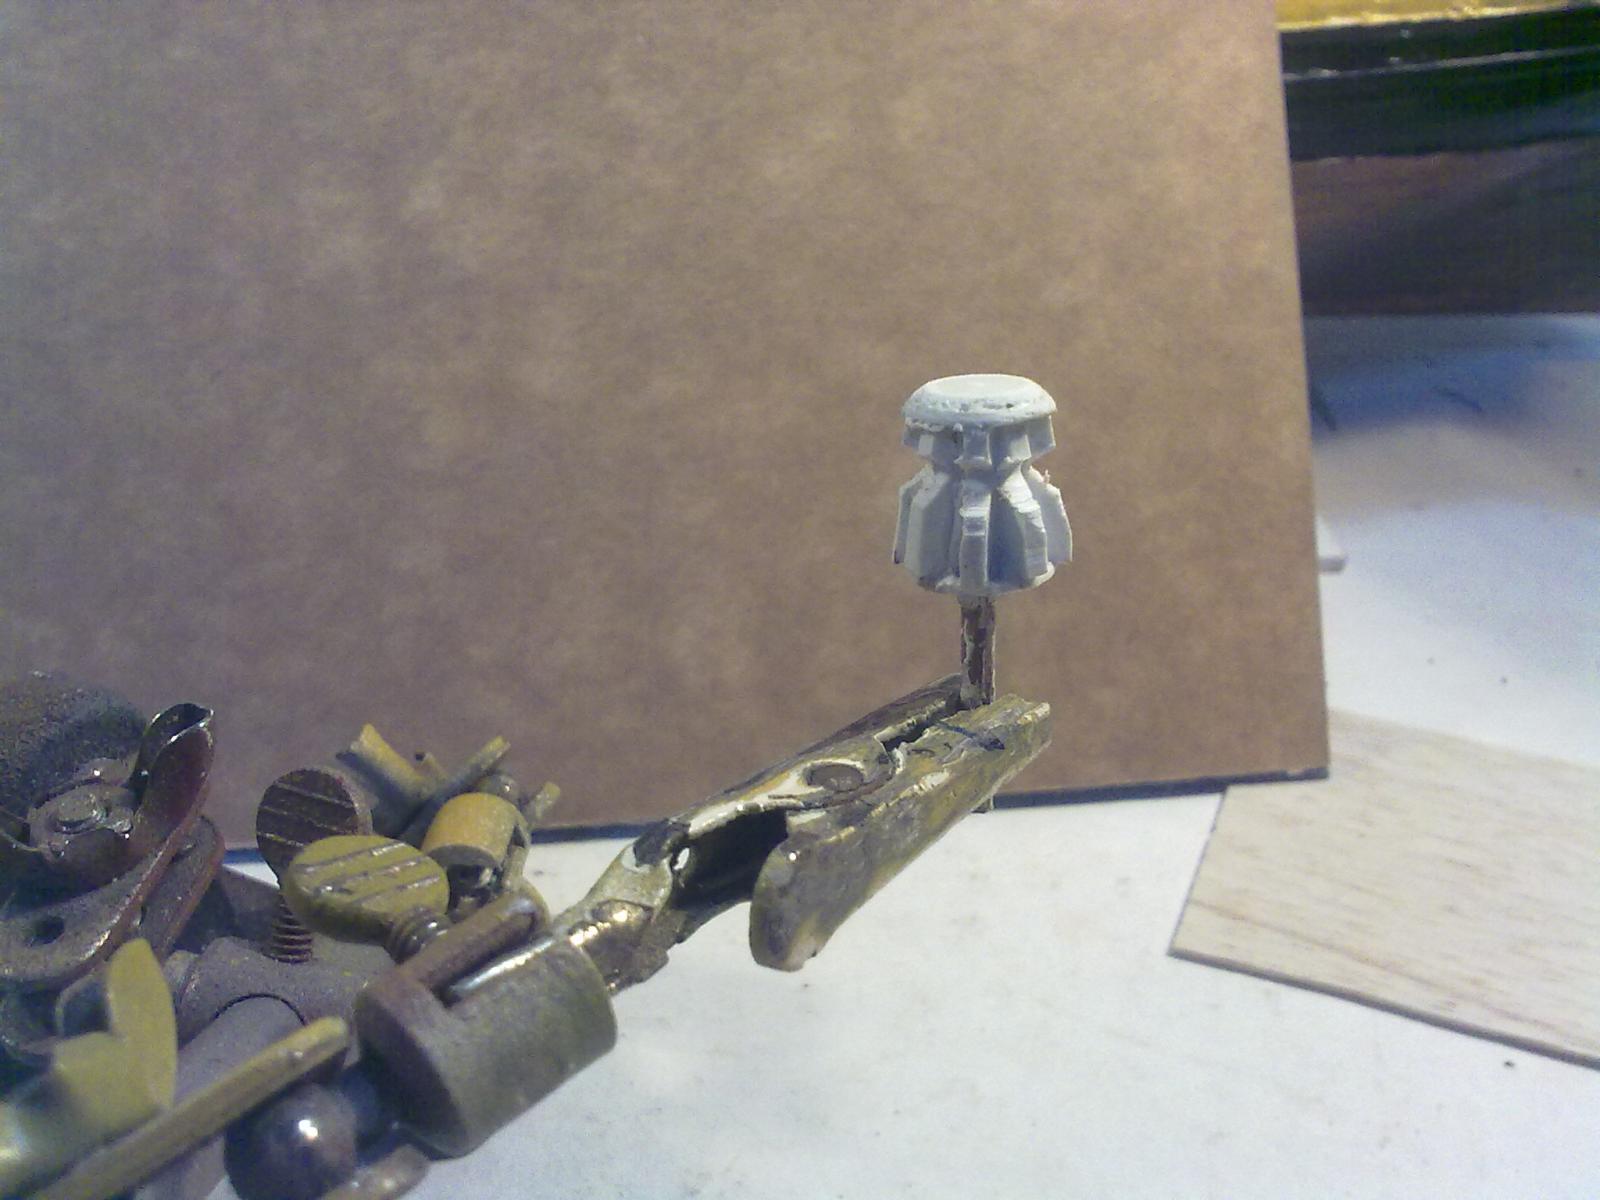
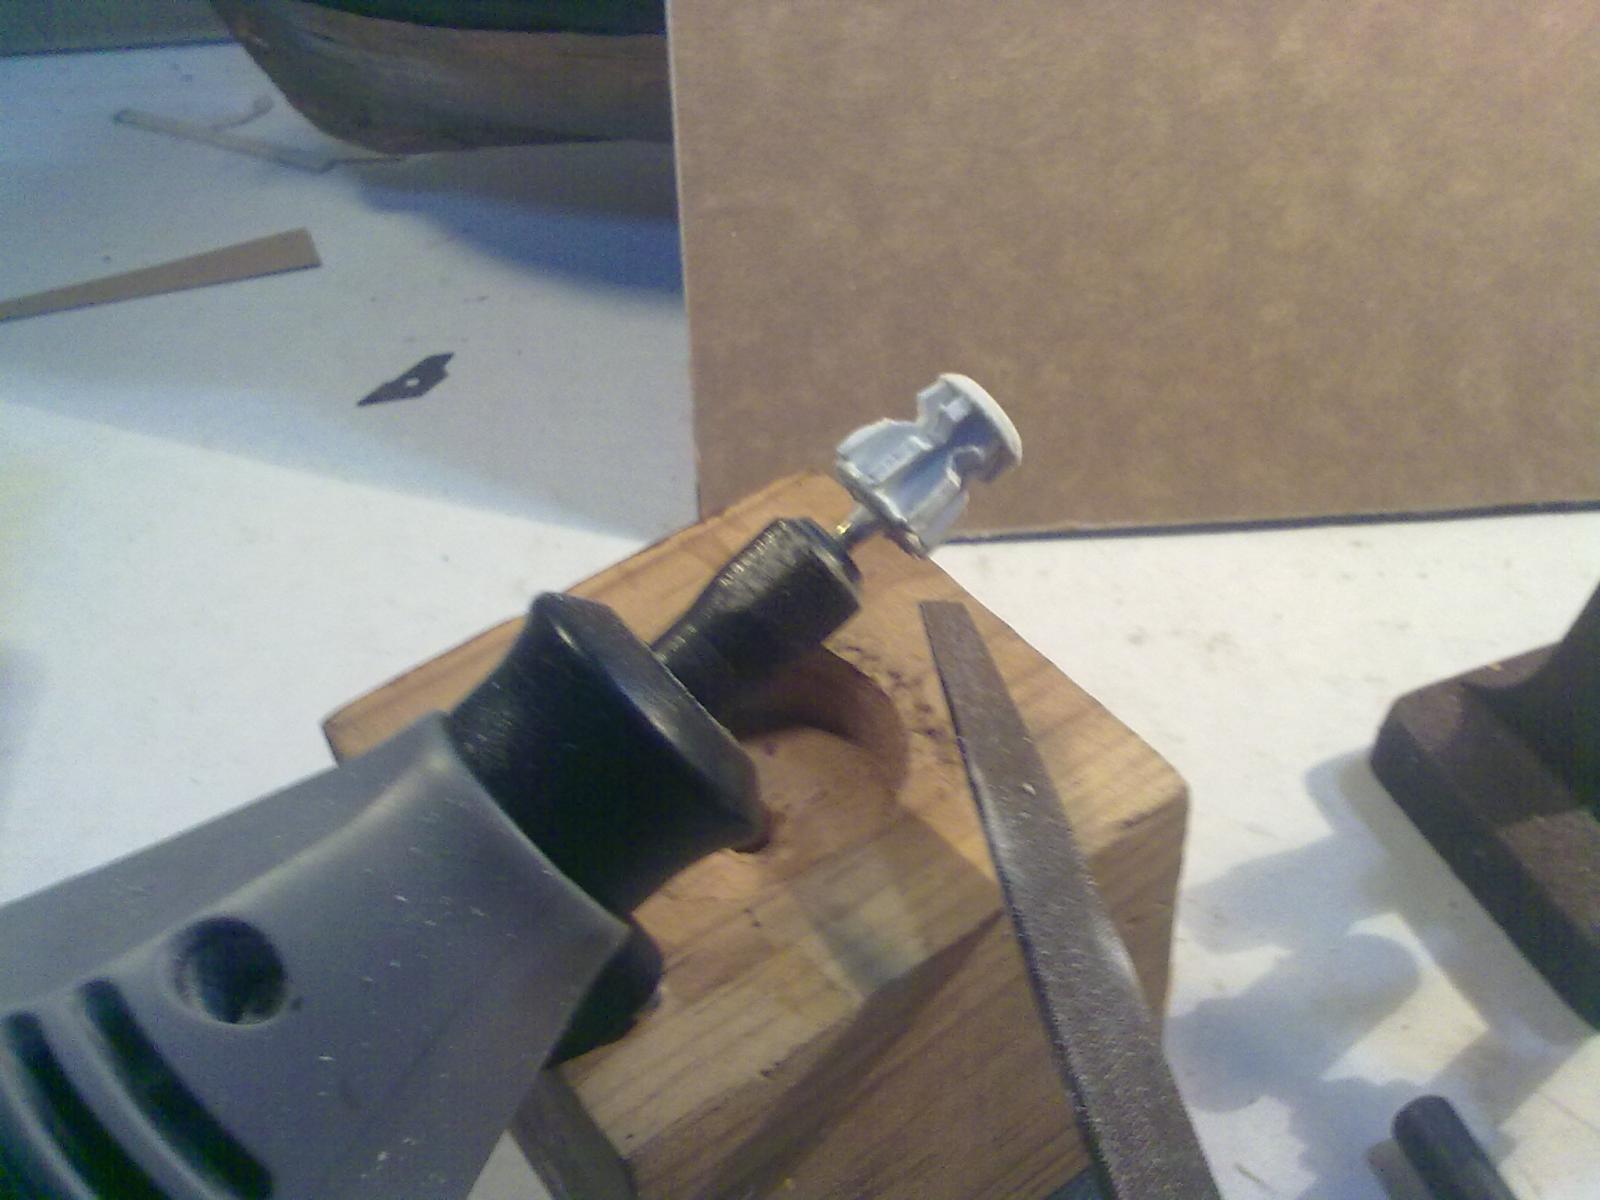
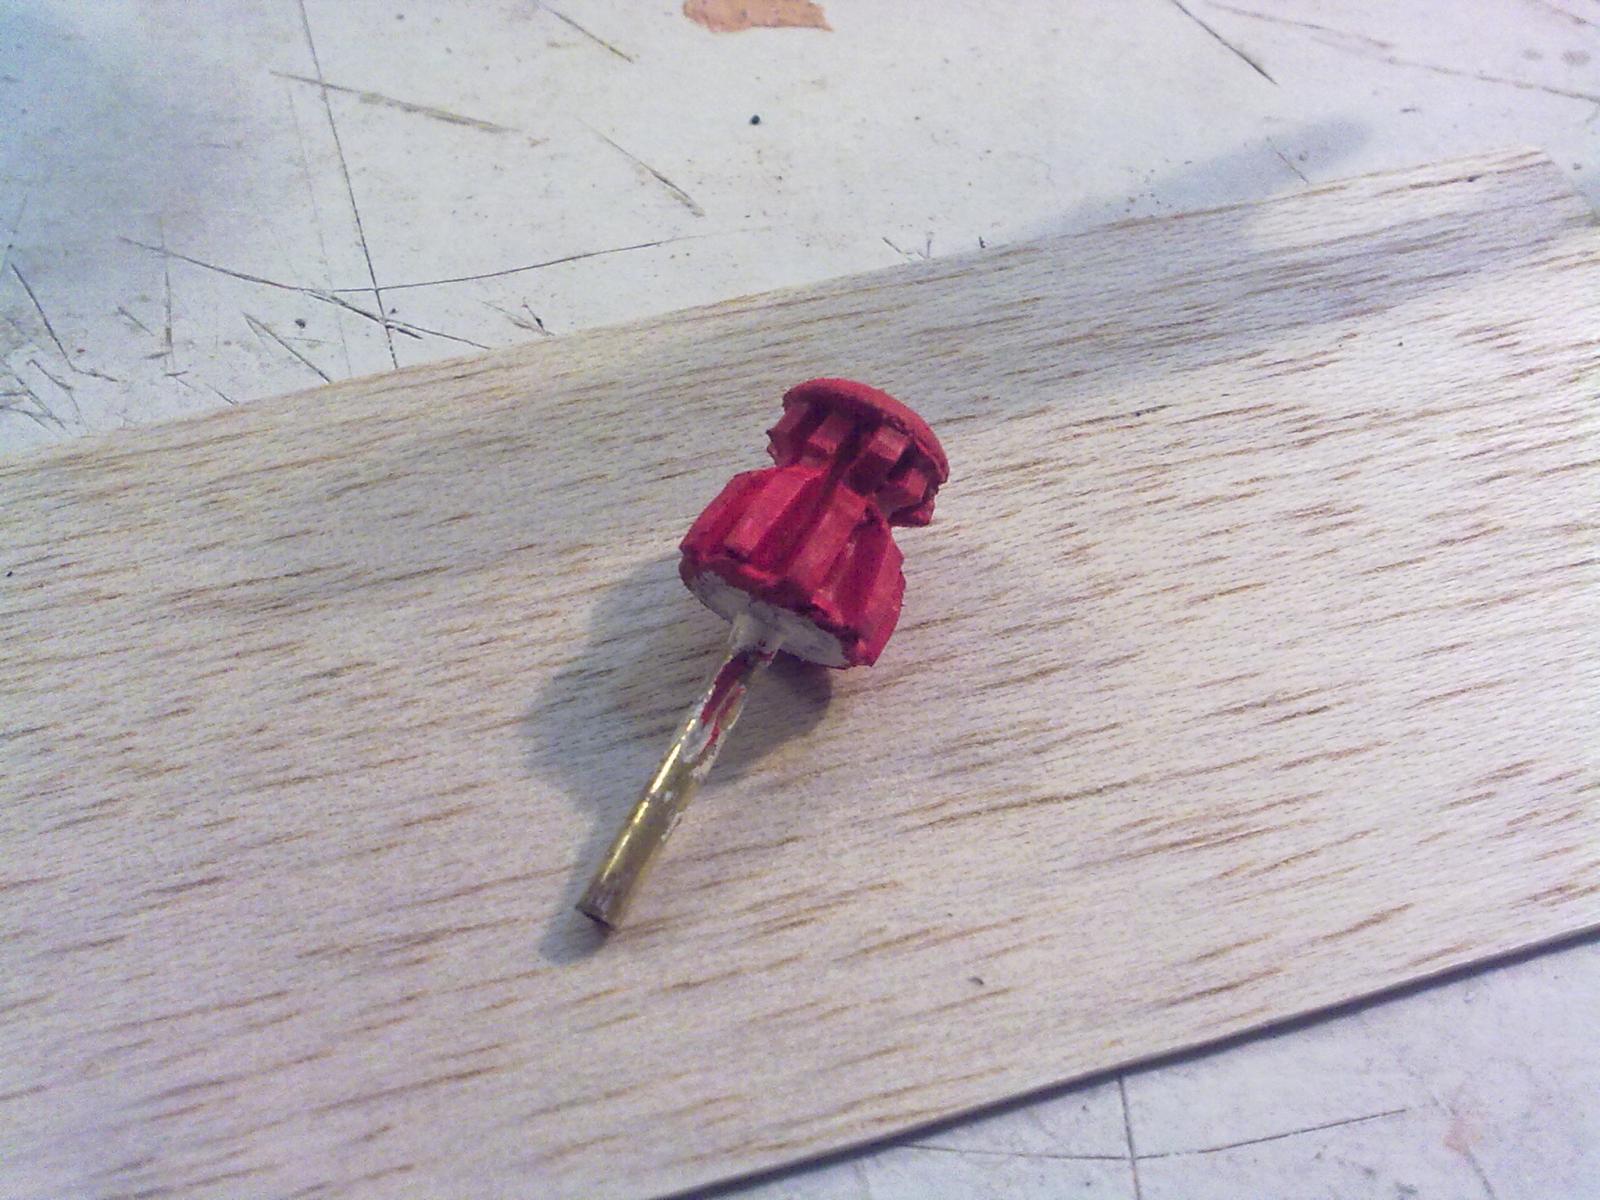
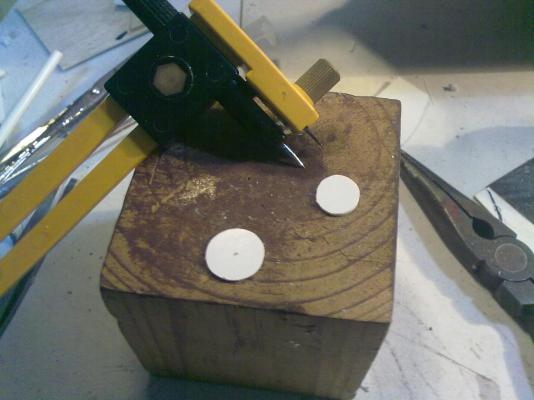
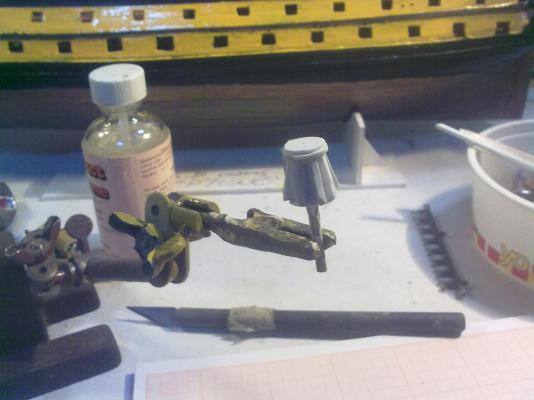
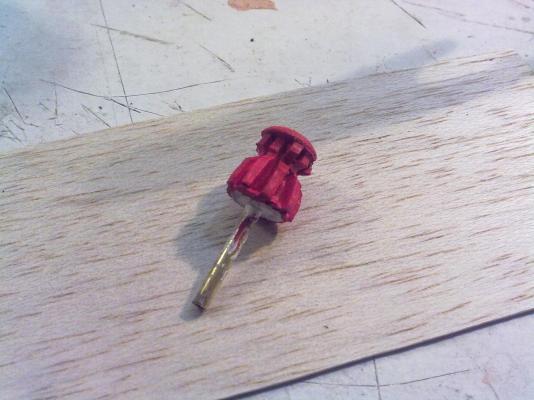
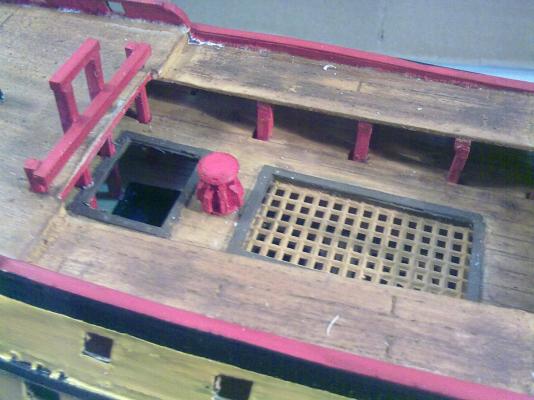
Improved capstan. Following some advice from Force9, the capstan is made if individual pieces of thick plasticard. Cutting the top of the capstan with a circular exact-o-knife All pieces, ready for assembly Assembly ready After drying, I mounted it on a dremel tool at spun it at the lowest speed. A triangular file did the rest. Painted capstan All in place.


- 43 replies
-
- 2
-
-
- neptuno
- ship of the line
- (and 1 more)
-
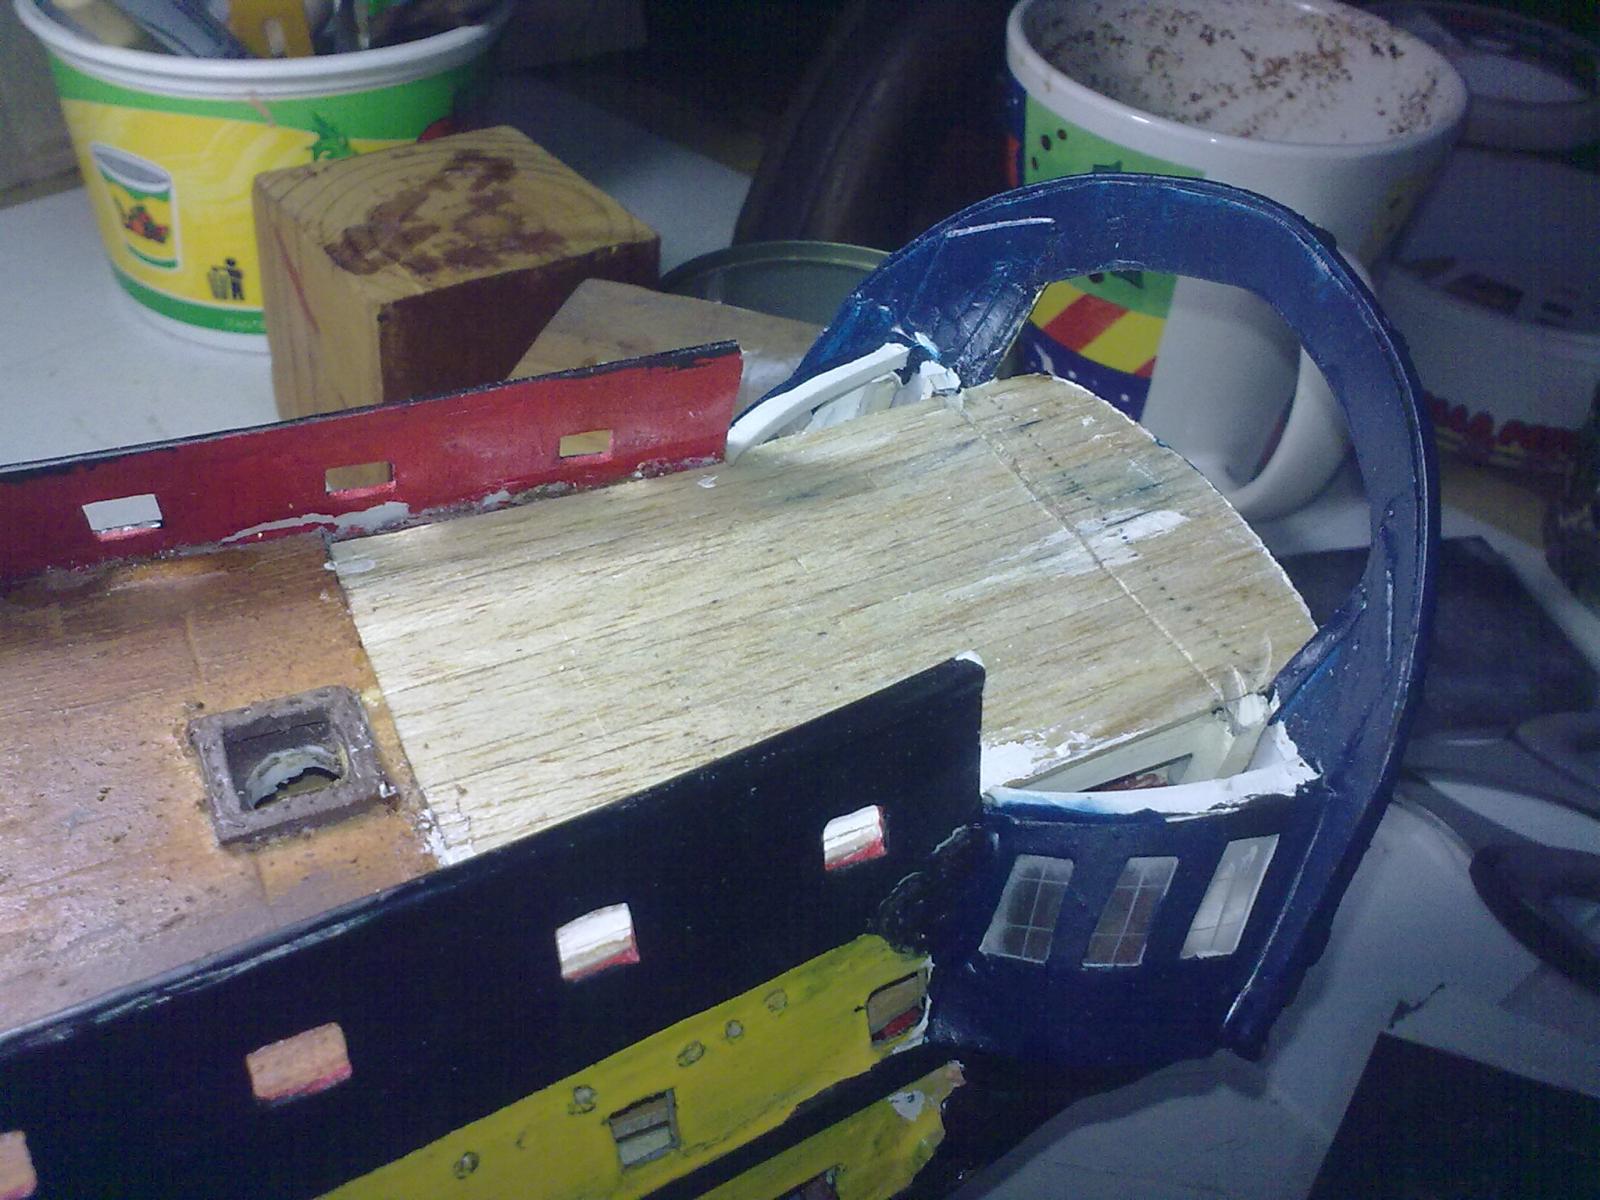
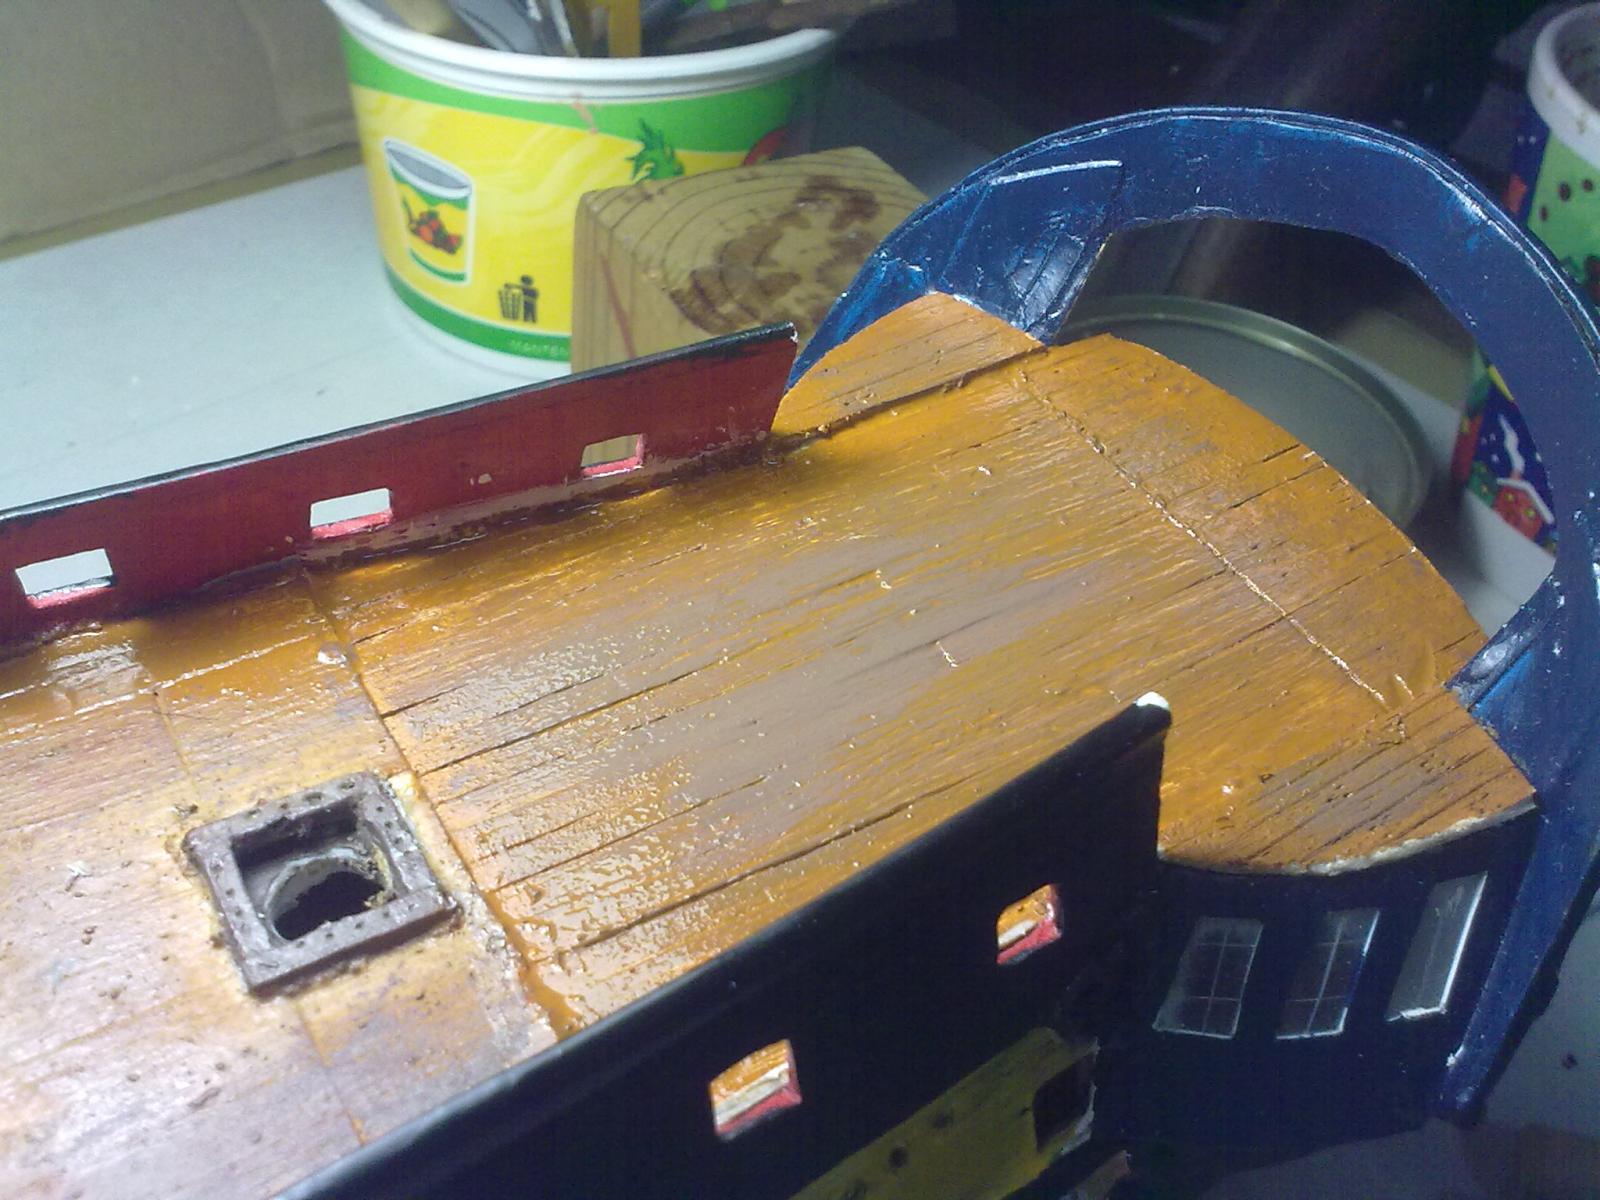
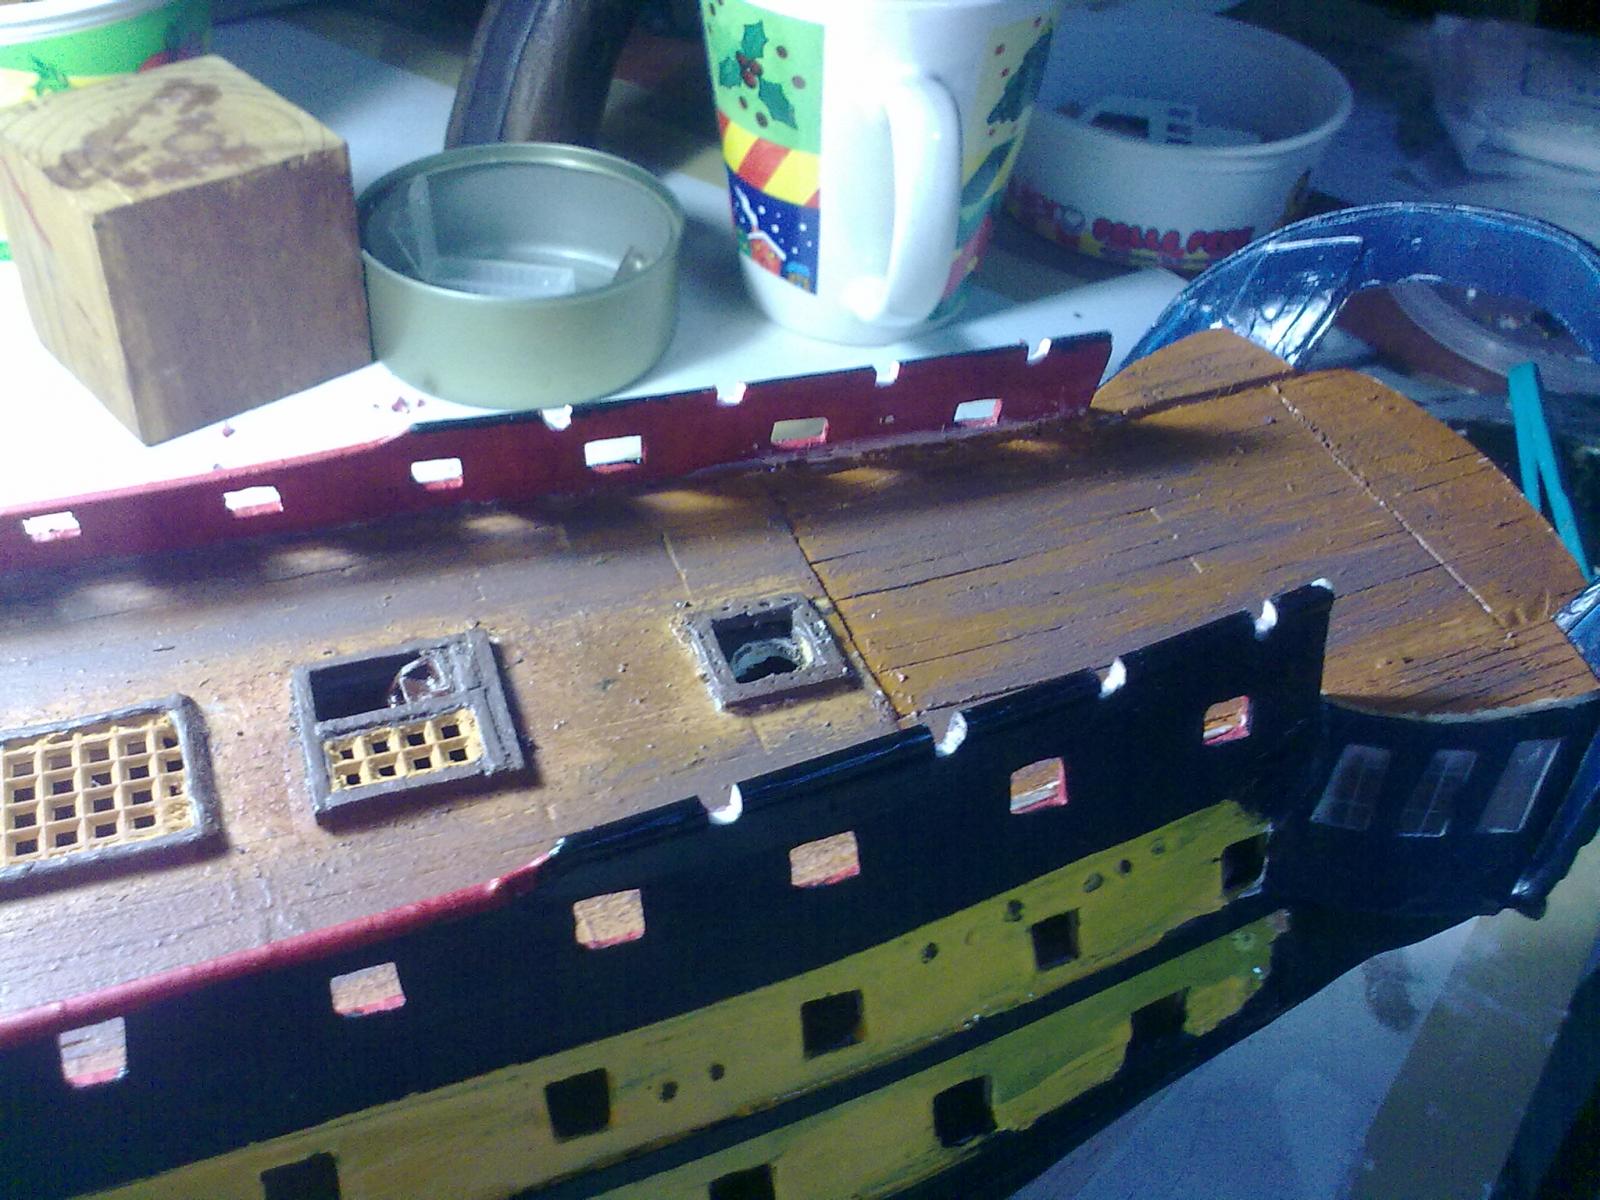
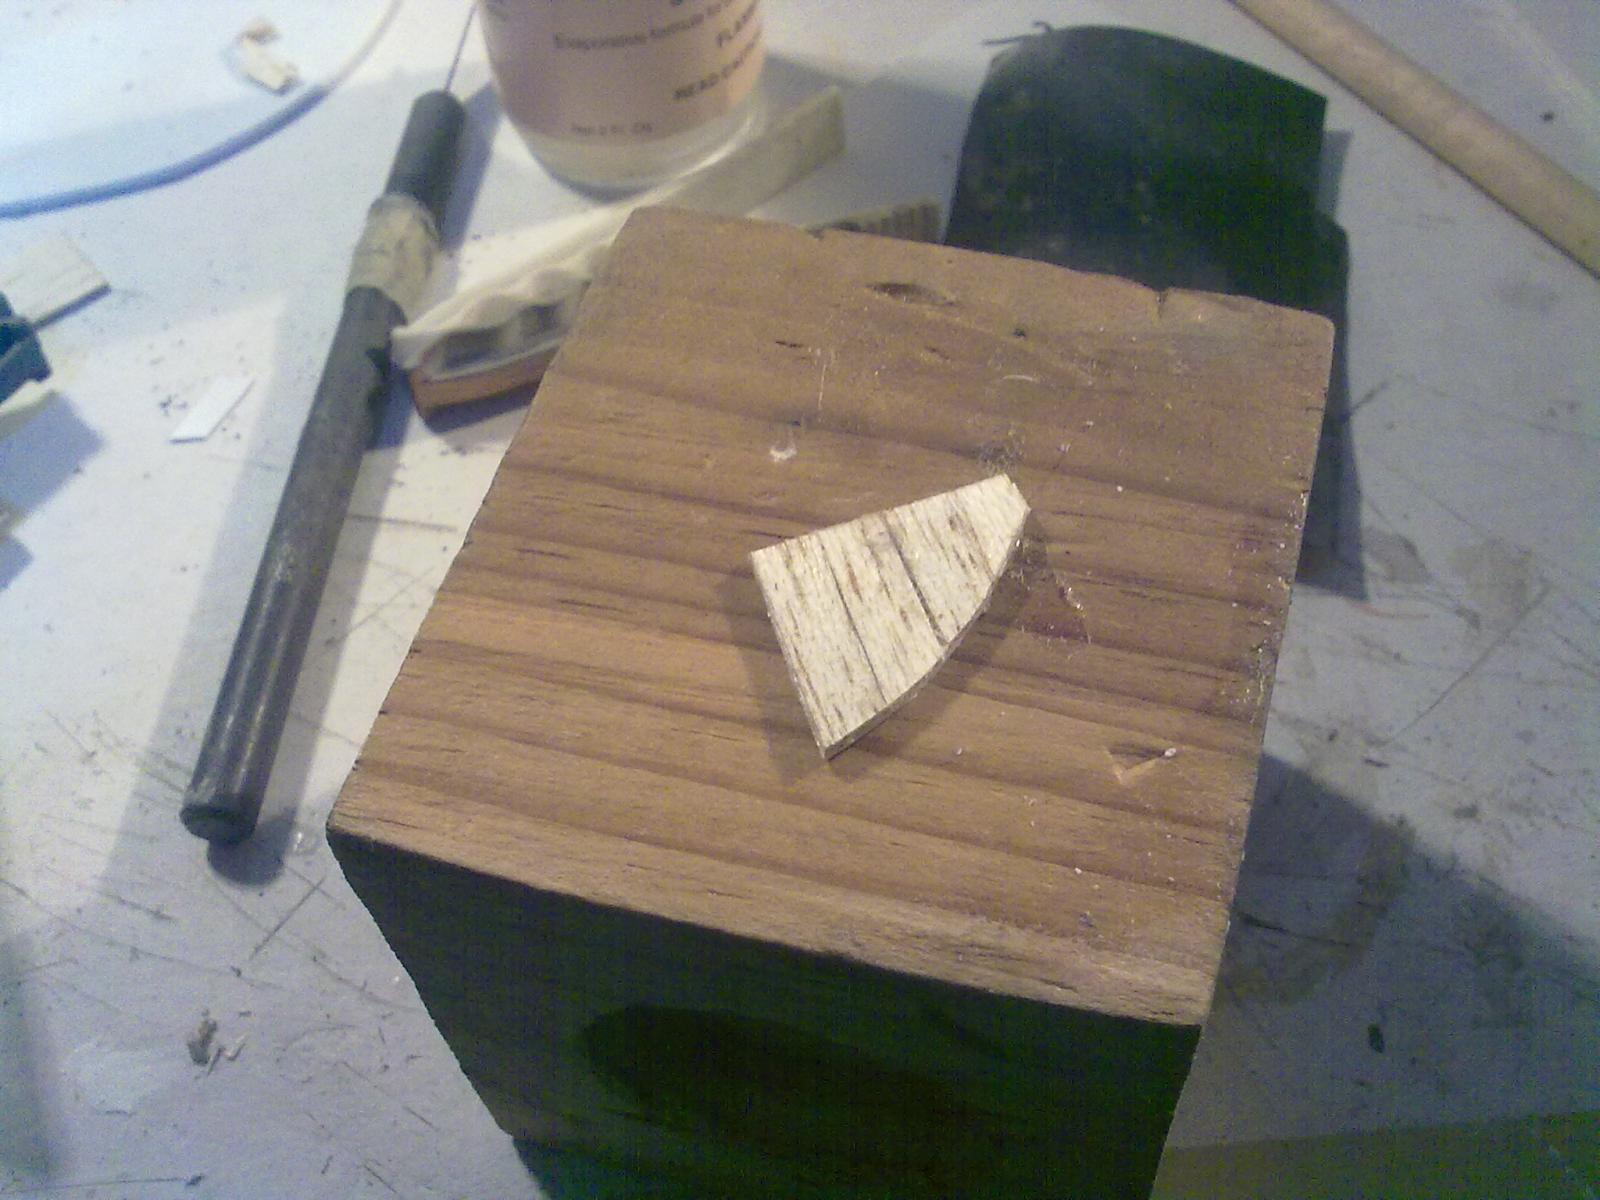
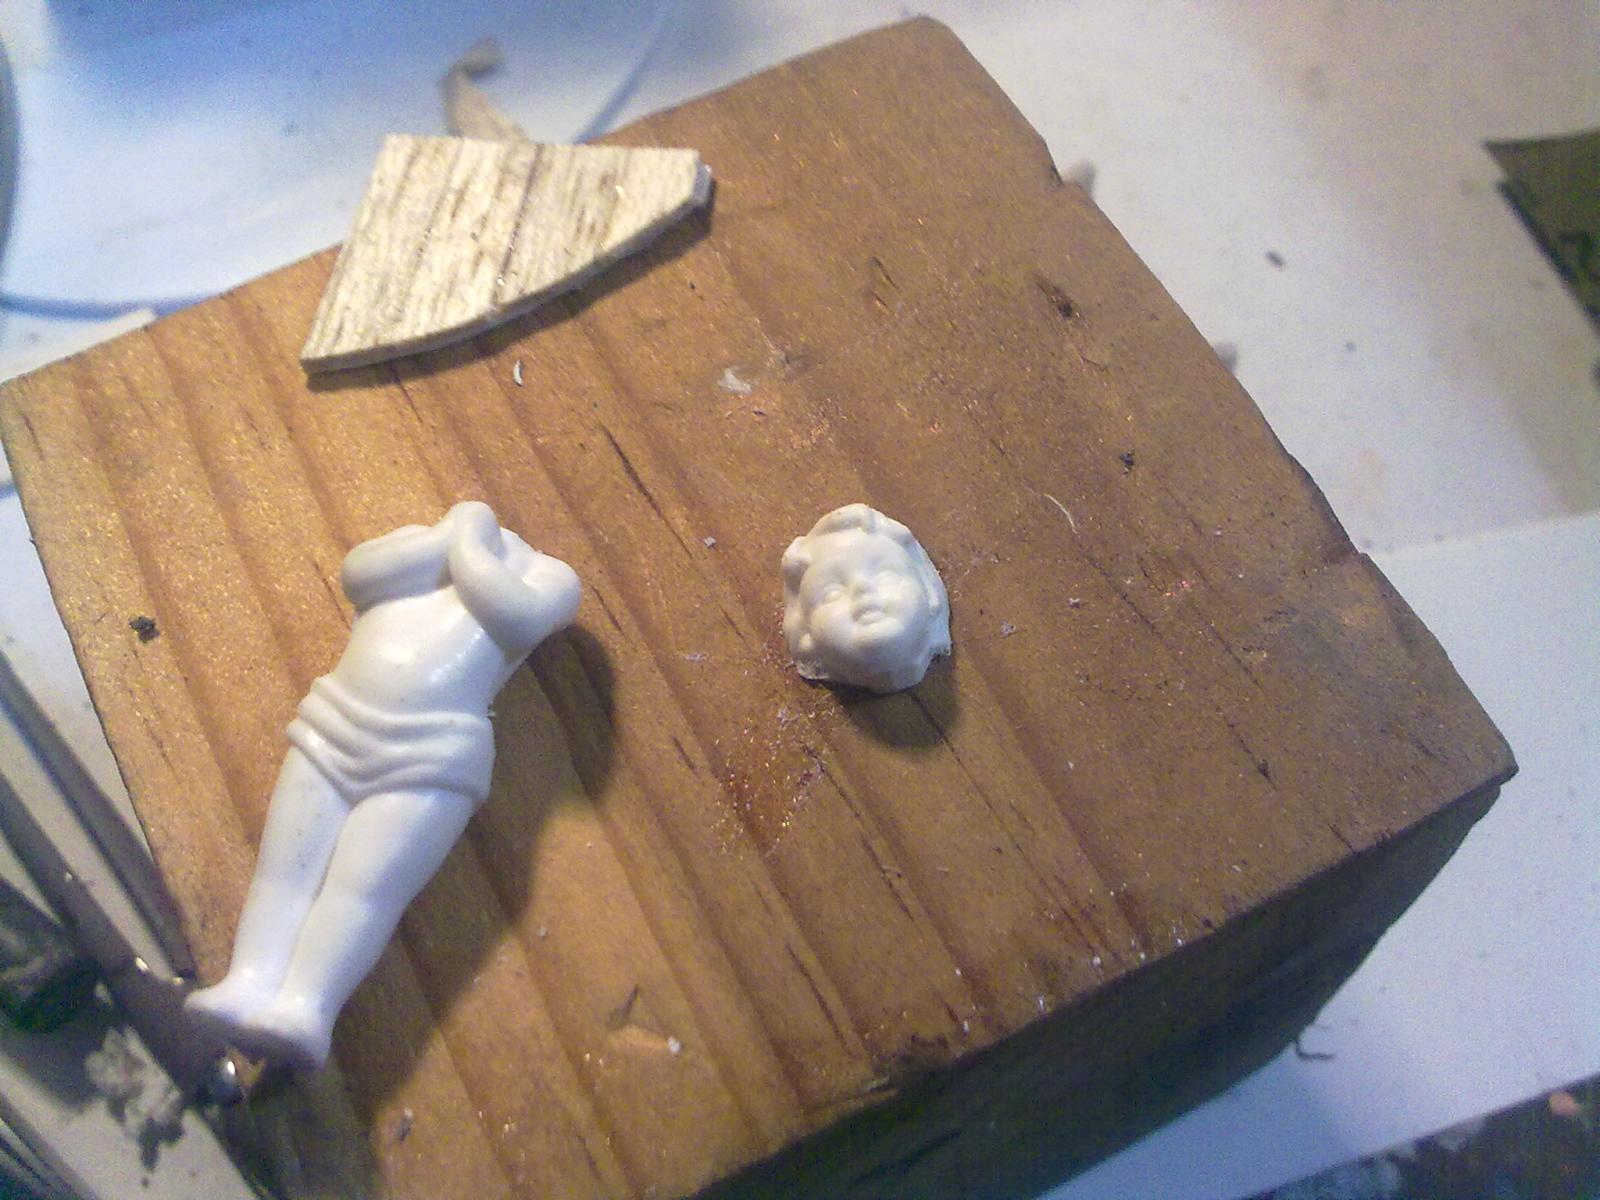
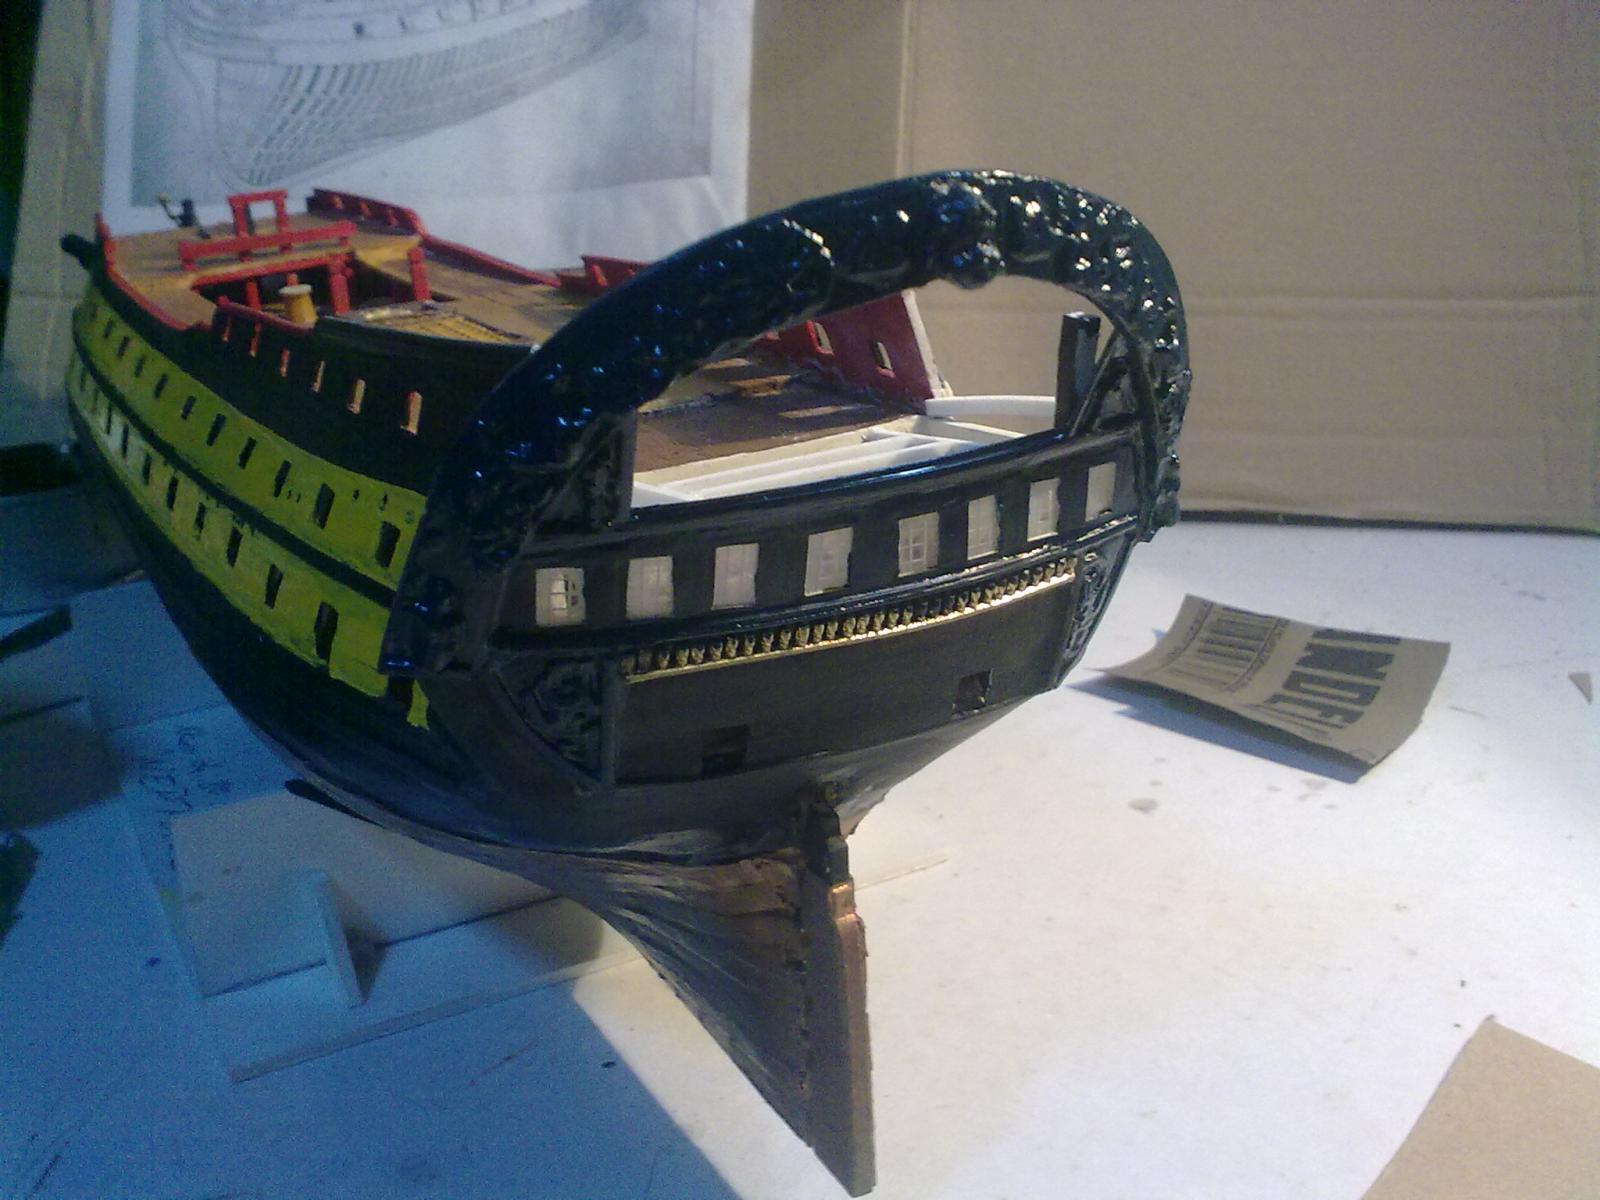
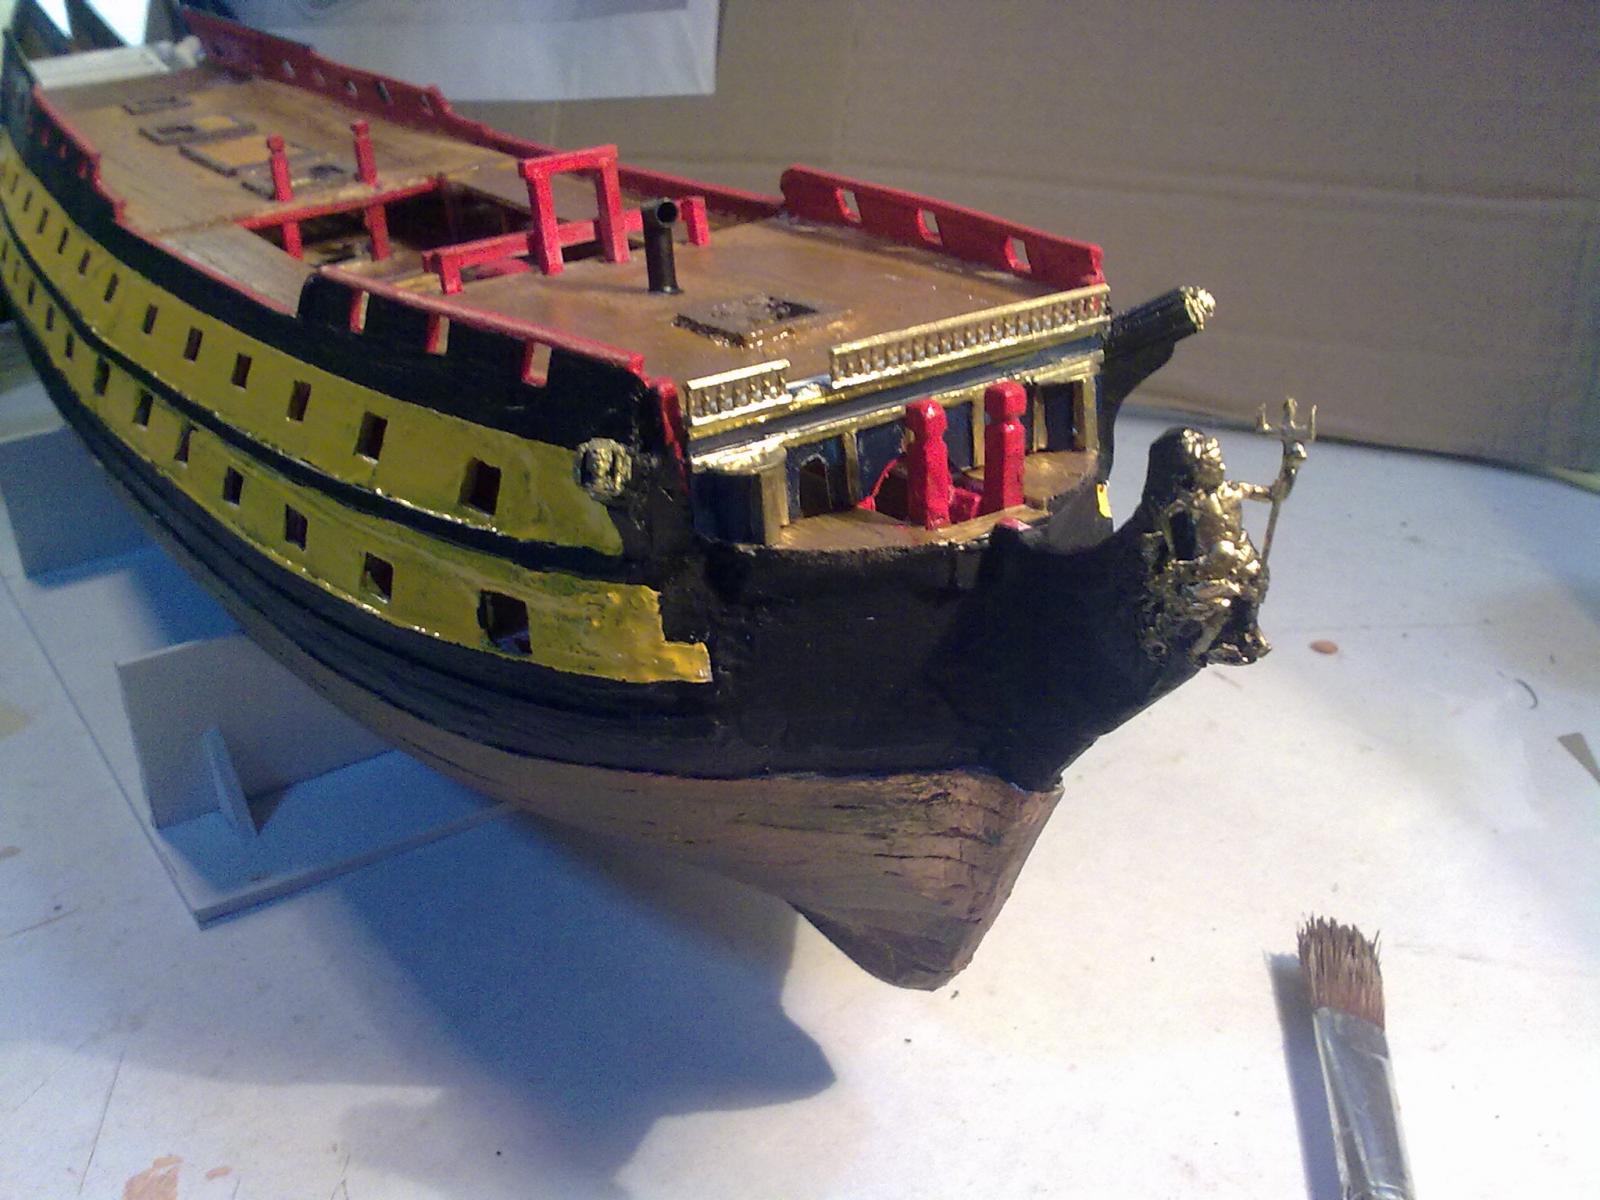
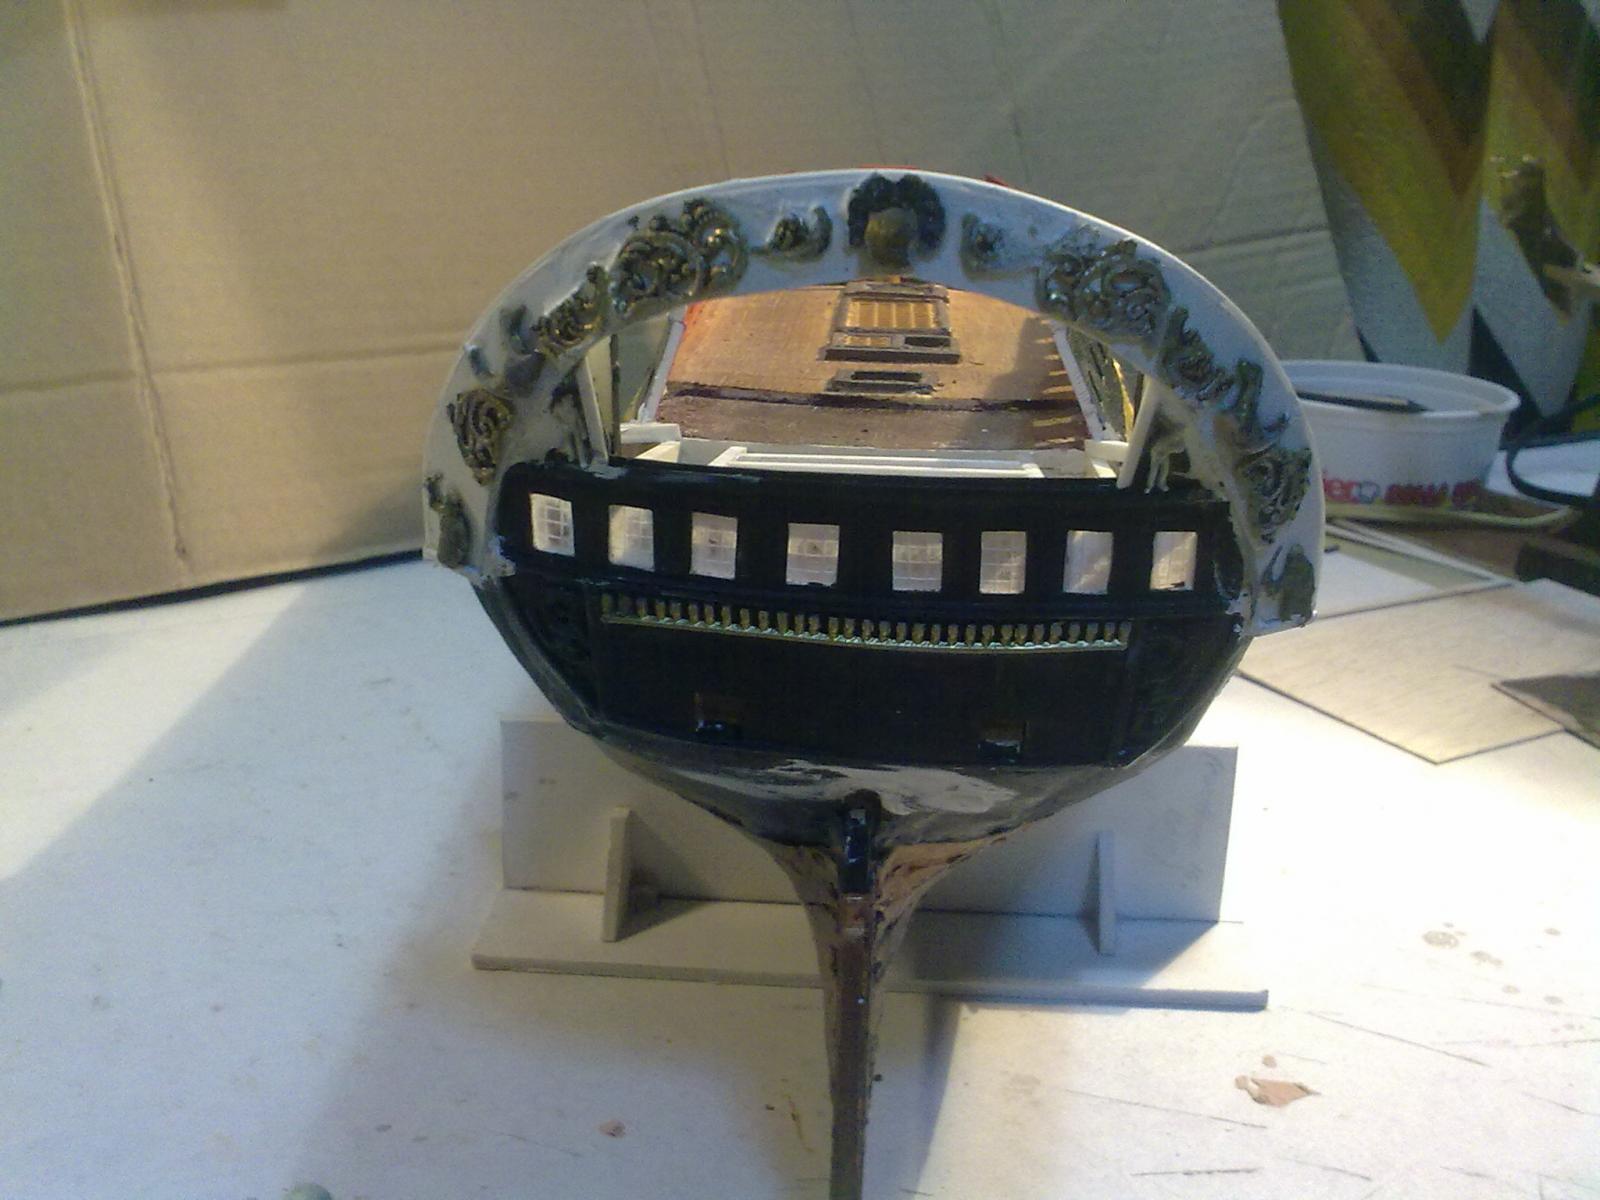
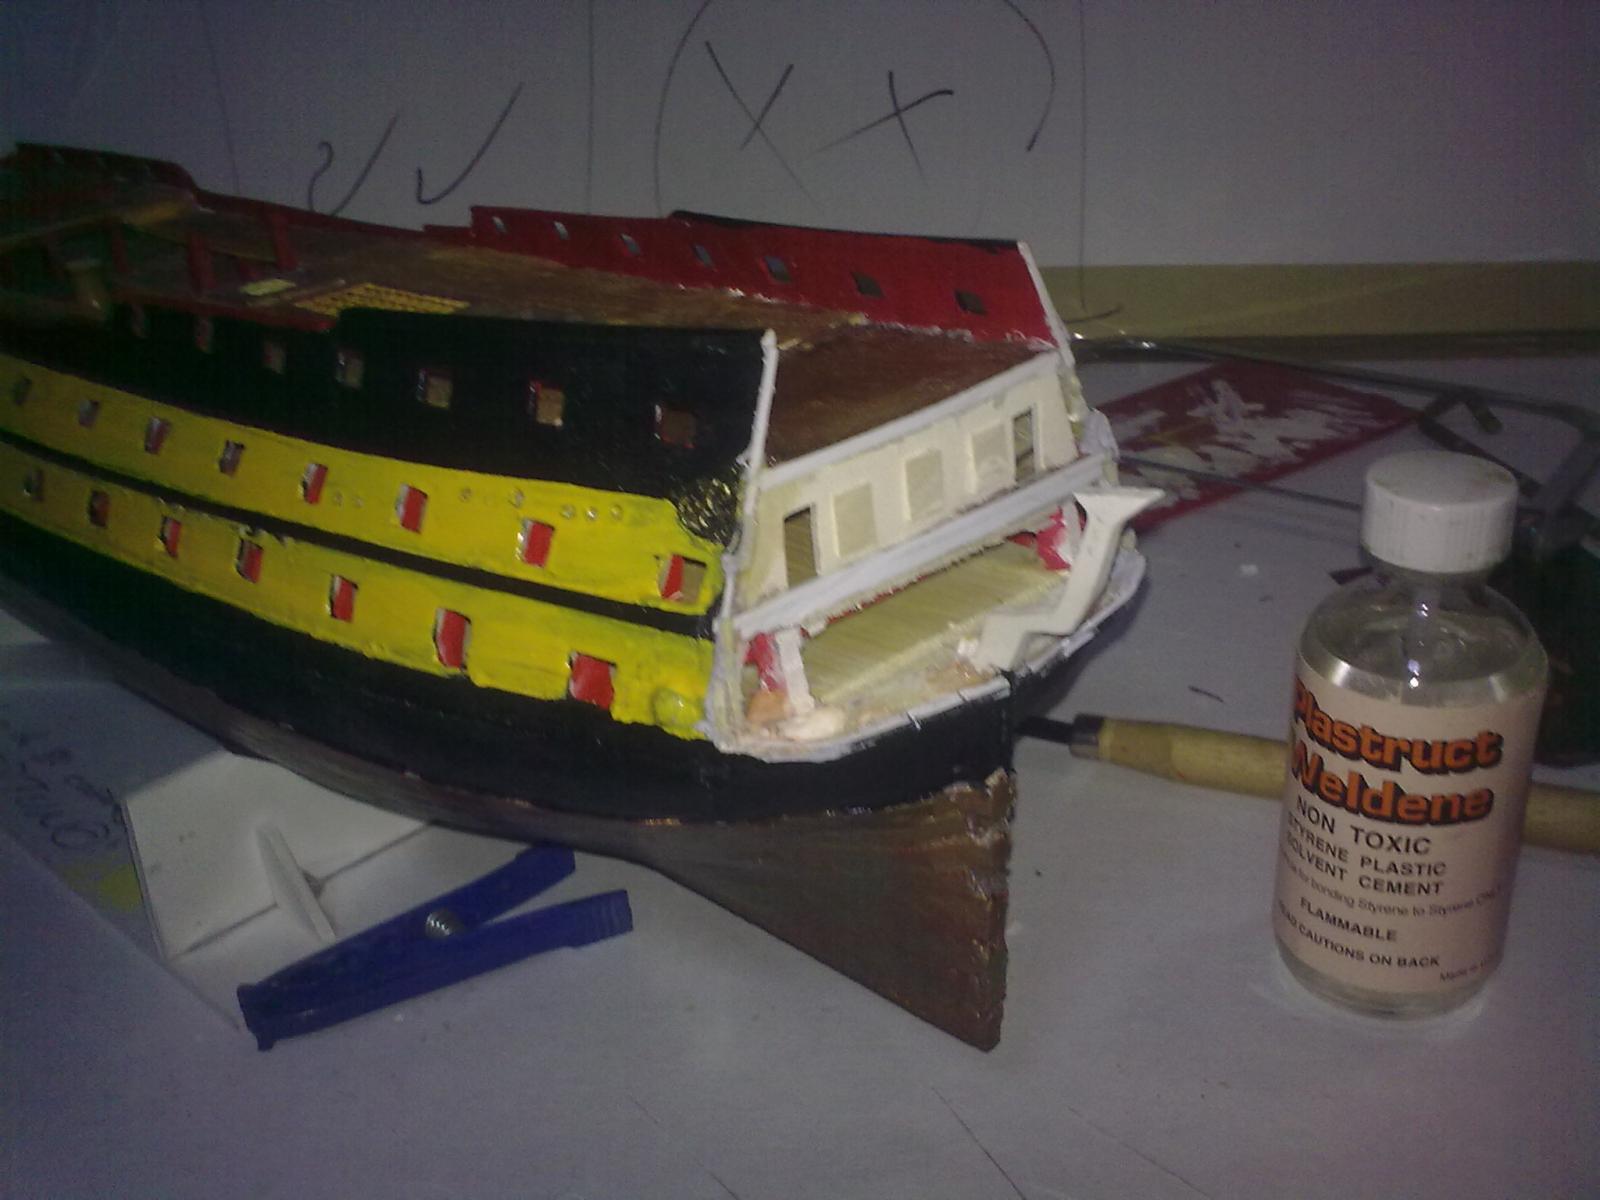
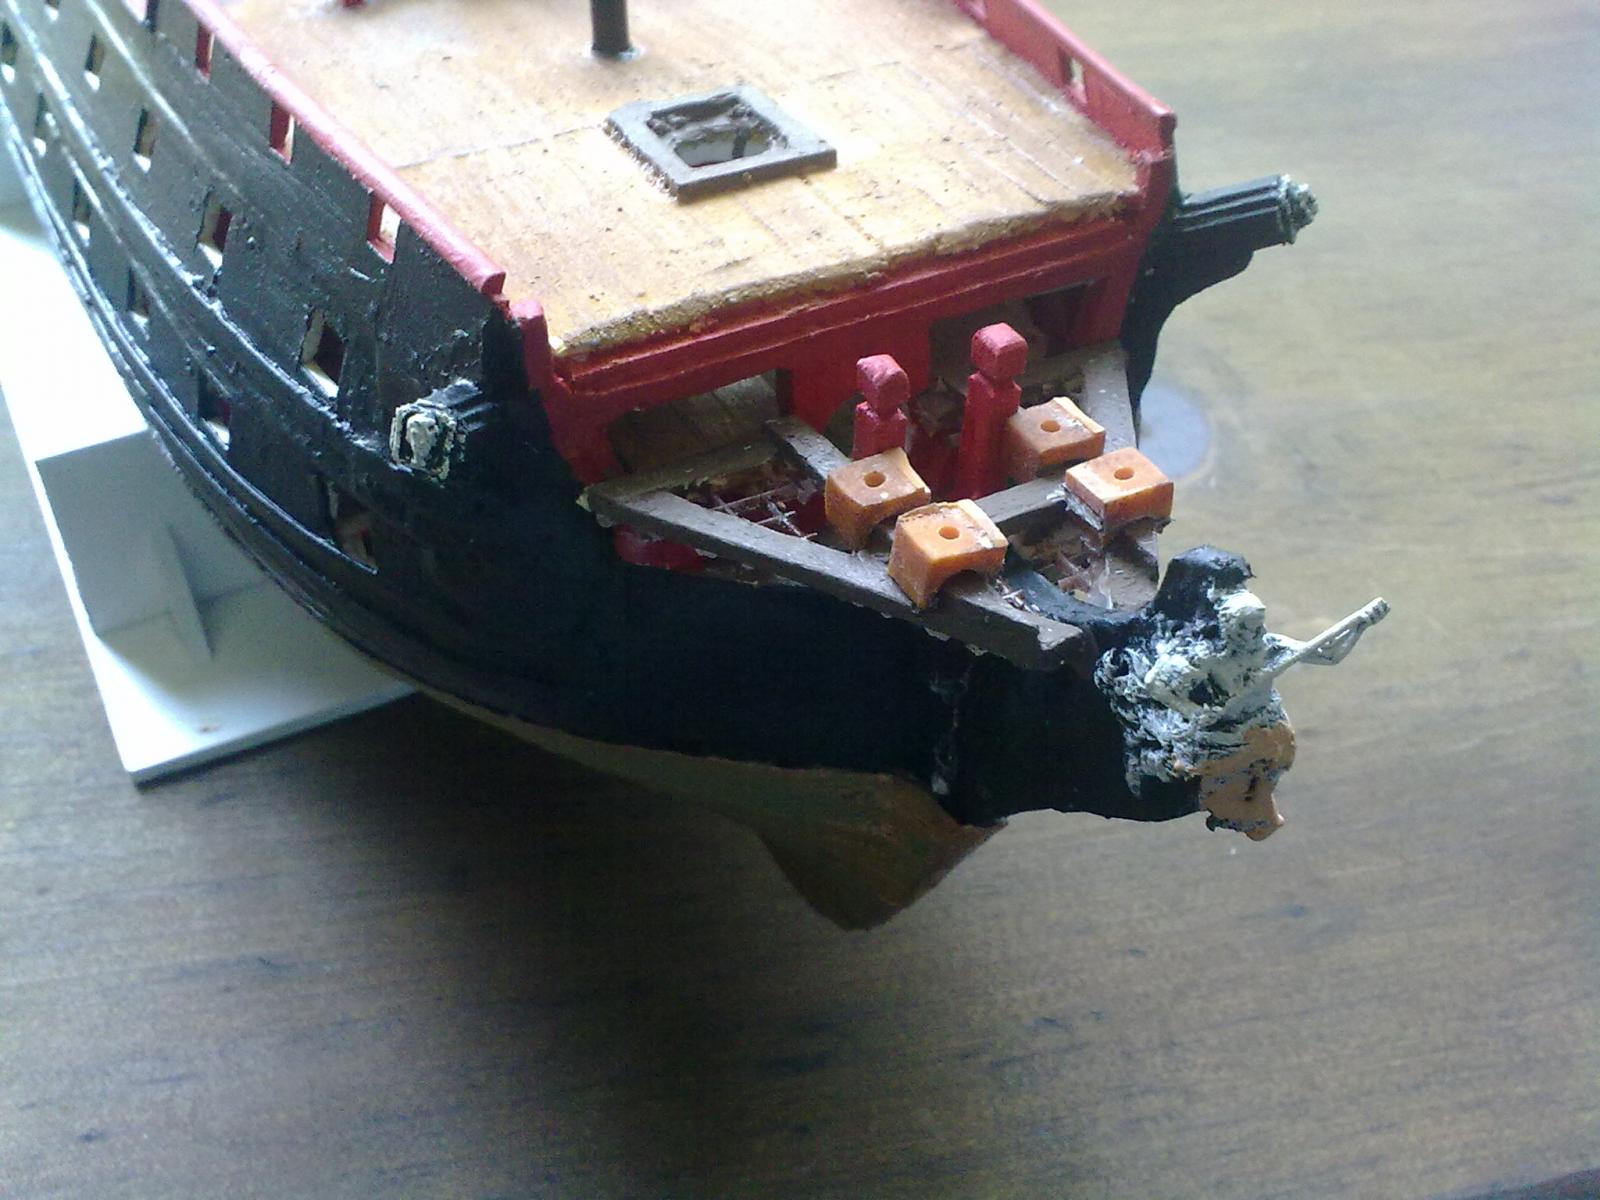
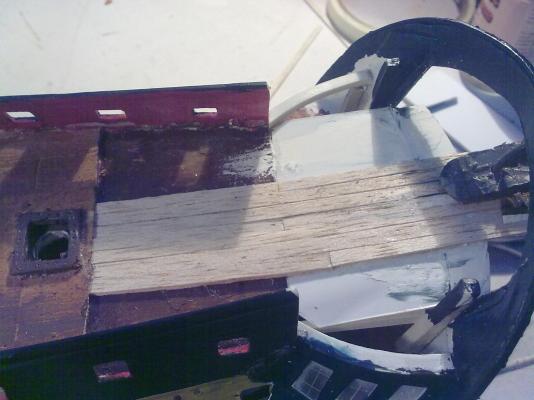
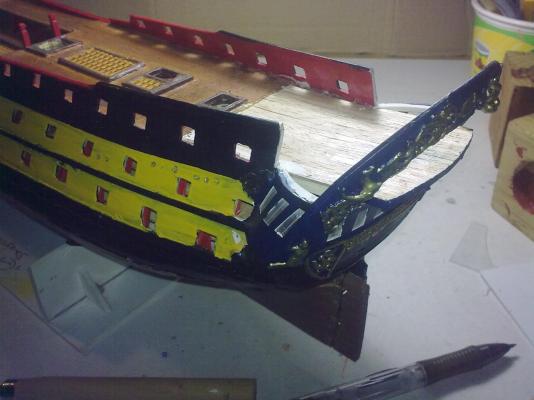
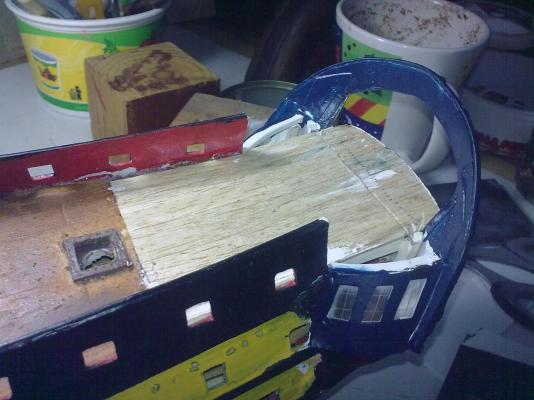
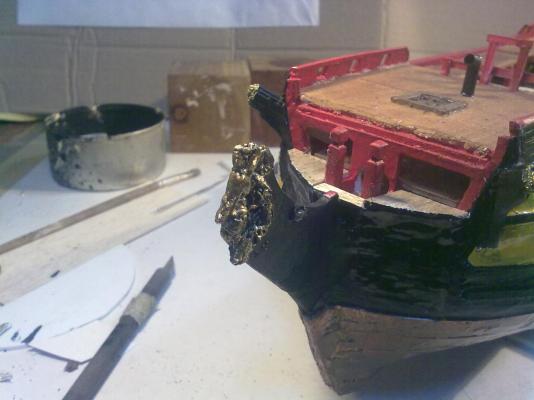
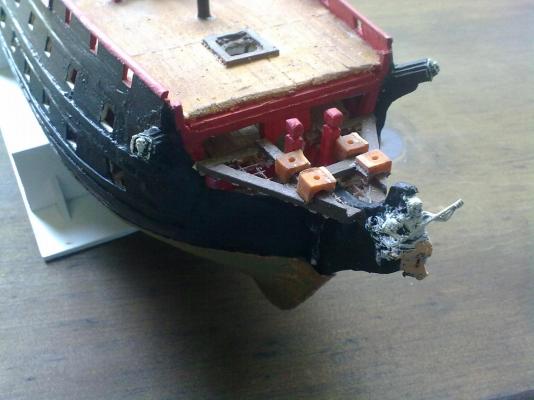
Transom and figurehead, painted and fitted into place. Forecastle and fore end of the quarterdeck. These are made of plasticard, covered with individual balsa wood planks. Here I eliminated the necessary seats* and the gratings, since they were inaccurate. *English is not my mother tongue, and although I speak and write it quite fluently my nautical terms are not so great. I found these terms in an old nautical dictionary, which I believe is out of date -please, if someone would recommend me a good Spanish-English nautical dictionary, it would be much appreciated!- Cherub face for the transom's carvings (it's a doll from a King's Ring Cake, a traditional Latin American pastry eaten on Epiphany Day) Finished transom with carvings, painted in its traditional blue. I followed the color scheme described in the magnificent historical novel "Cabo Trafalgar" (Cape Trafalgar) by Arturo Perez-Reverte. Here is the fragment I used "'Una cosa sufrida, fashion' había sugerido el ministro en turno. 'Cascos negros a bandas amarillas, cámaras en porcelana y azul y entrepuentes en ocre y tierra roja para disimular las manchas de sangre en combate, para que nuestros muchachos no se desmoralicen cuando se los escabechen y sigan gritando '¡Viva España¡' y todo eso..." Arturo Perez-Reverte, Cabo Trafalgar, 2005 "'A fashionable, simple thing', suggested the minister in office at the time. 'Black hulls, yellow stripes, galleries in porcelain and blue and tweendecks in occre and red to hide bloodstains in combat, so the moral of our boy won't shake when the enemy cuts them to ribbons and continue yelling 'Long live Spain!' and all that..." Arturo Perez-Reverte, Cabo Trafalgar, 2005 Forecastle and forecastle deck, with fitted figurehead.


- 43 replies
-
- 2
-
-
- neptuno
- ship of the line
- (and 1 more)
-
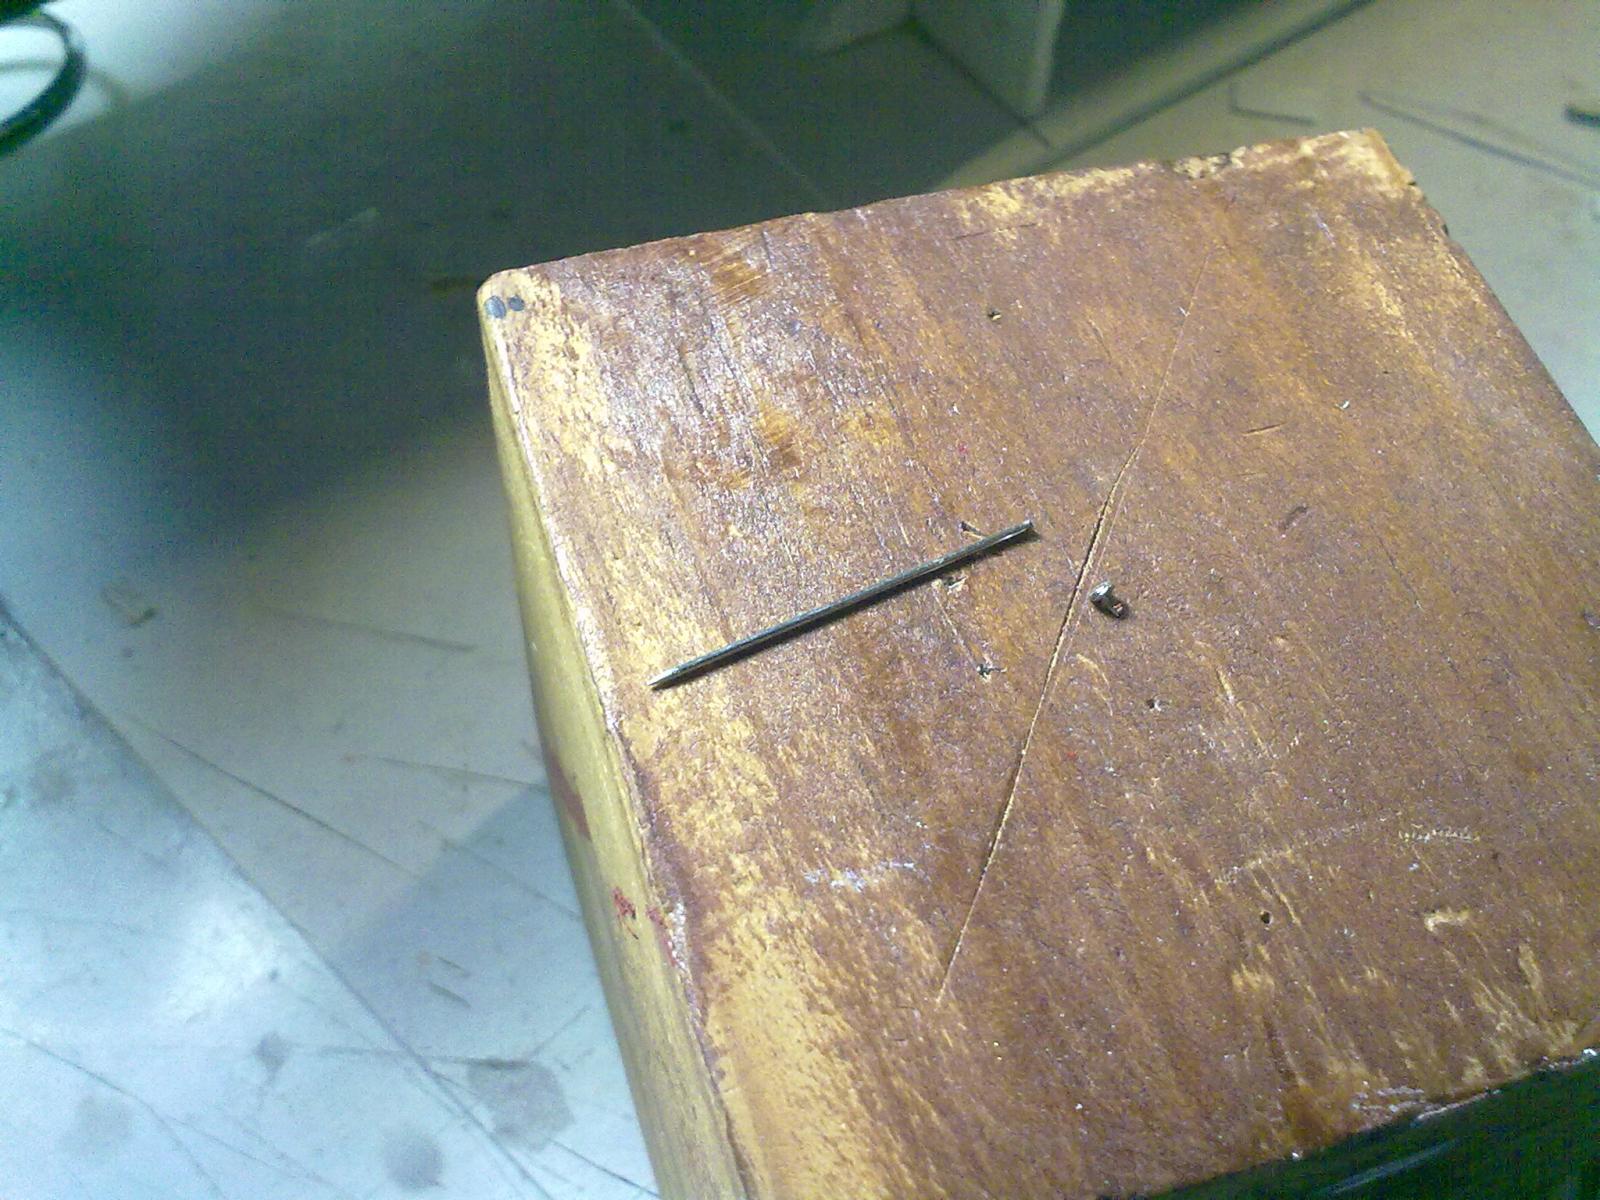
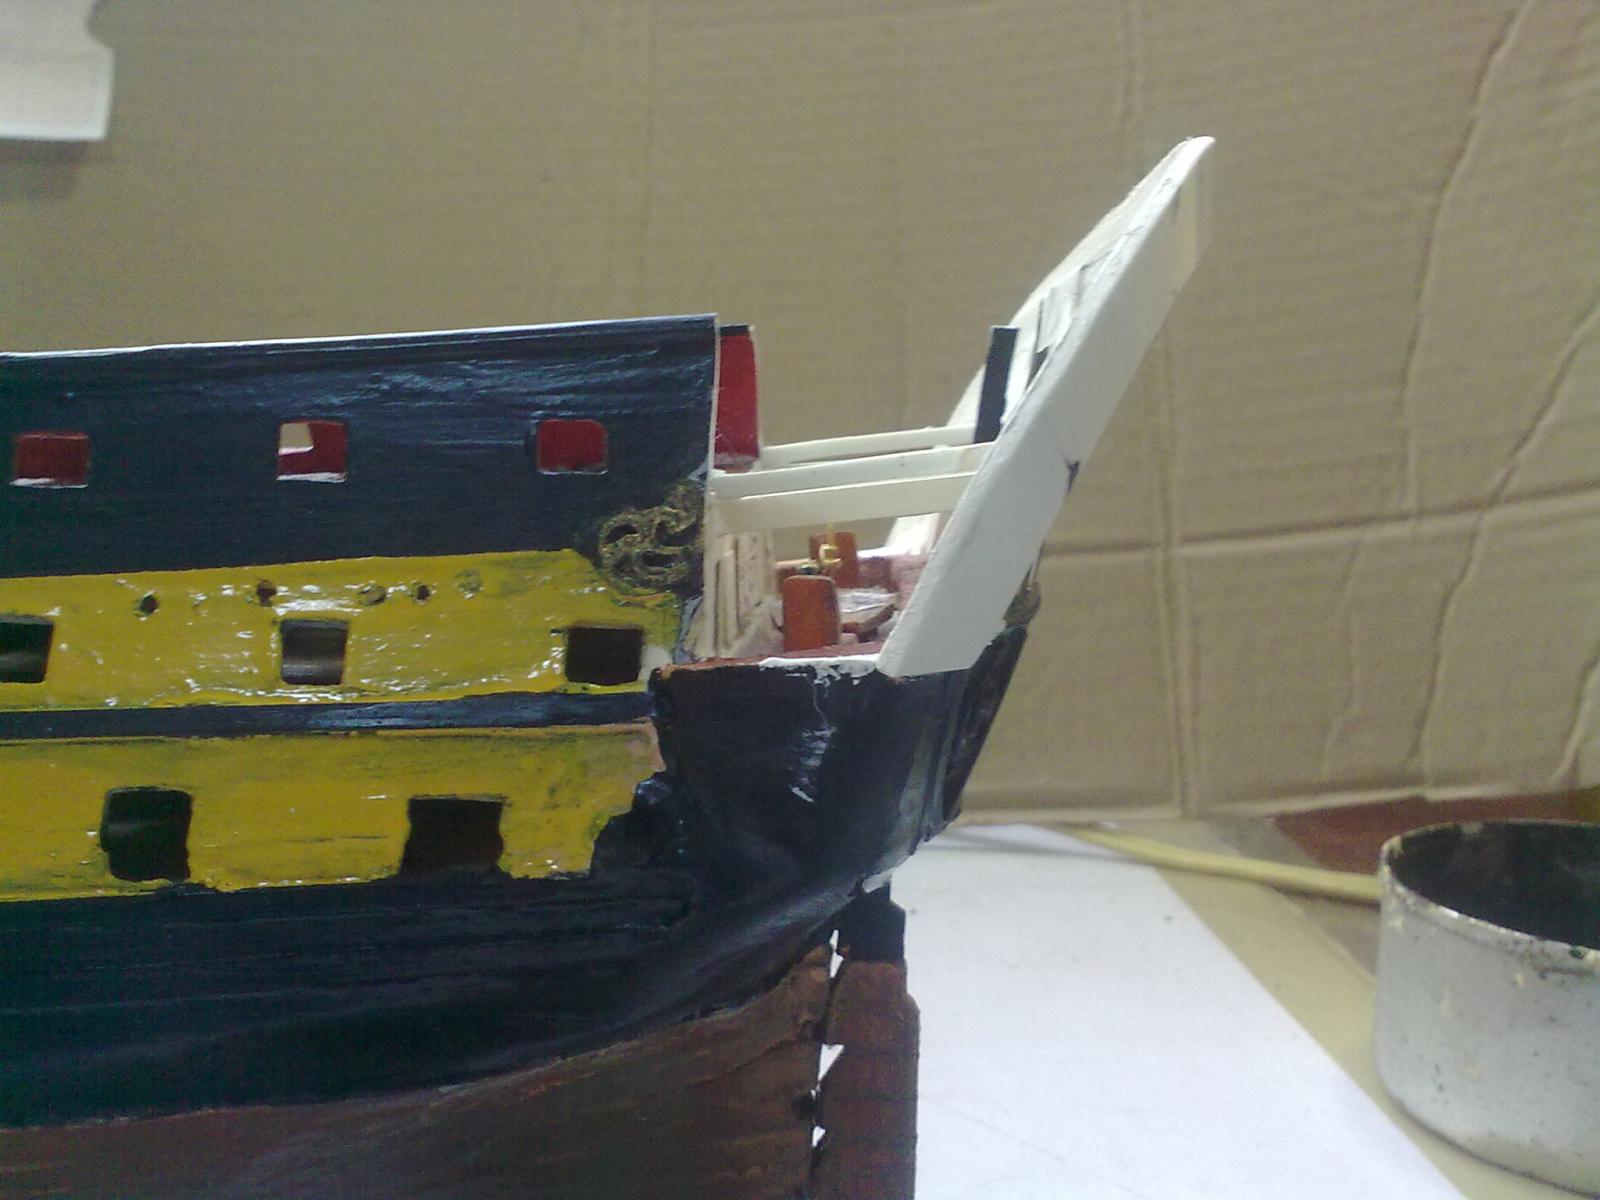
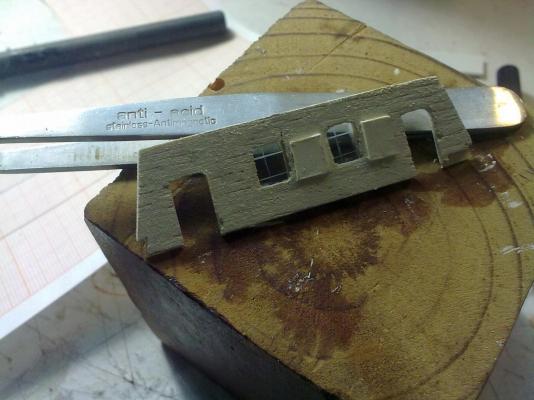
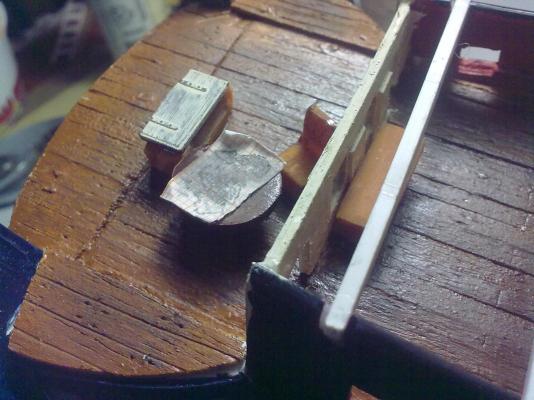
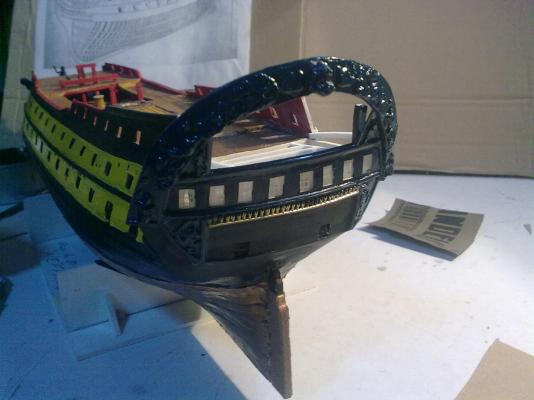
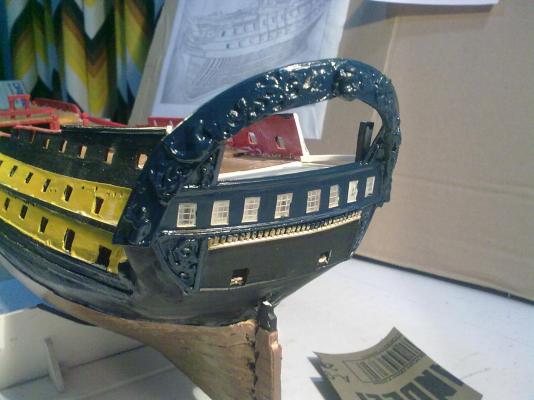
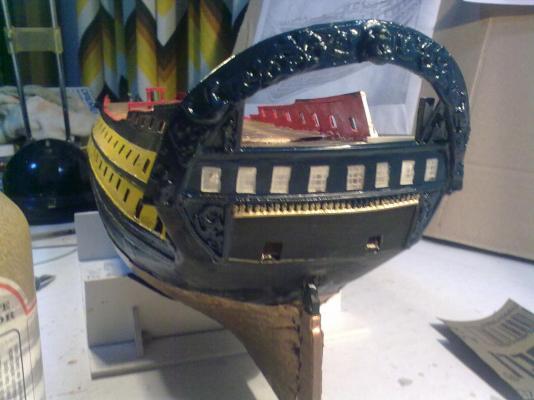
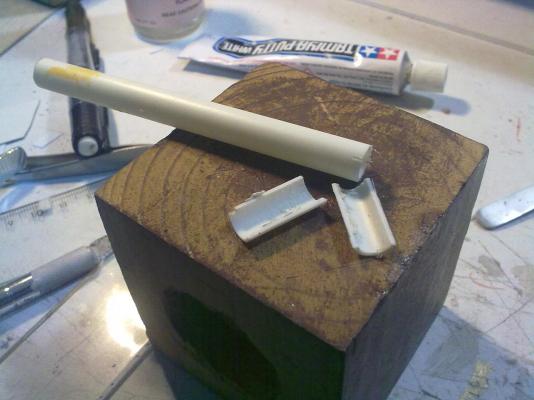
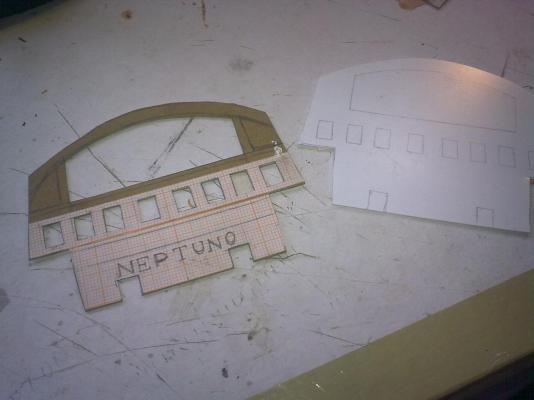
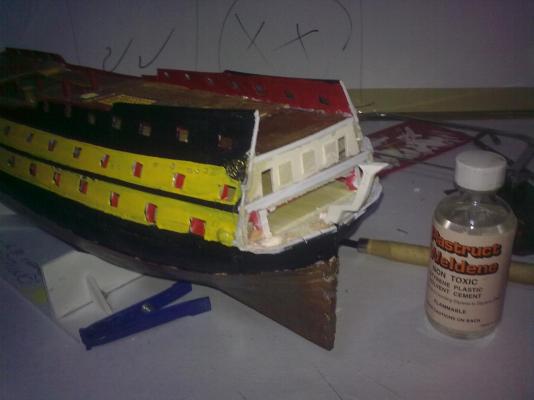
The windows of the officers' quarters were cut out of styrene, which first I shaped using a cardboard template. Once the quarters were fully furnished (table, maps, chairs and candelabra included) I made the beams out of styrene. The carvings over the transom were tricky, in the end, I got an old brass knob from a drawer, flattened it and carved it using a dremel tool. Here is the result.


- 43 replies
-
- 2
-
-
- neptuno
- ship of the line
- (and 1 more)
-
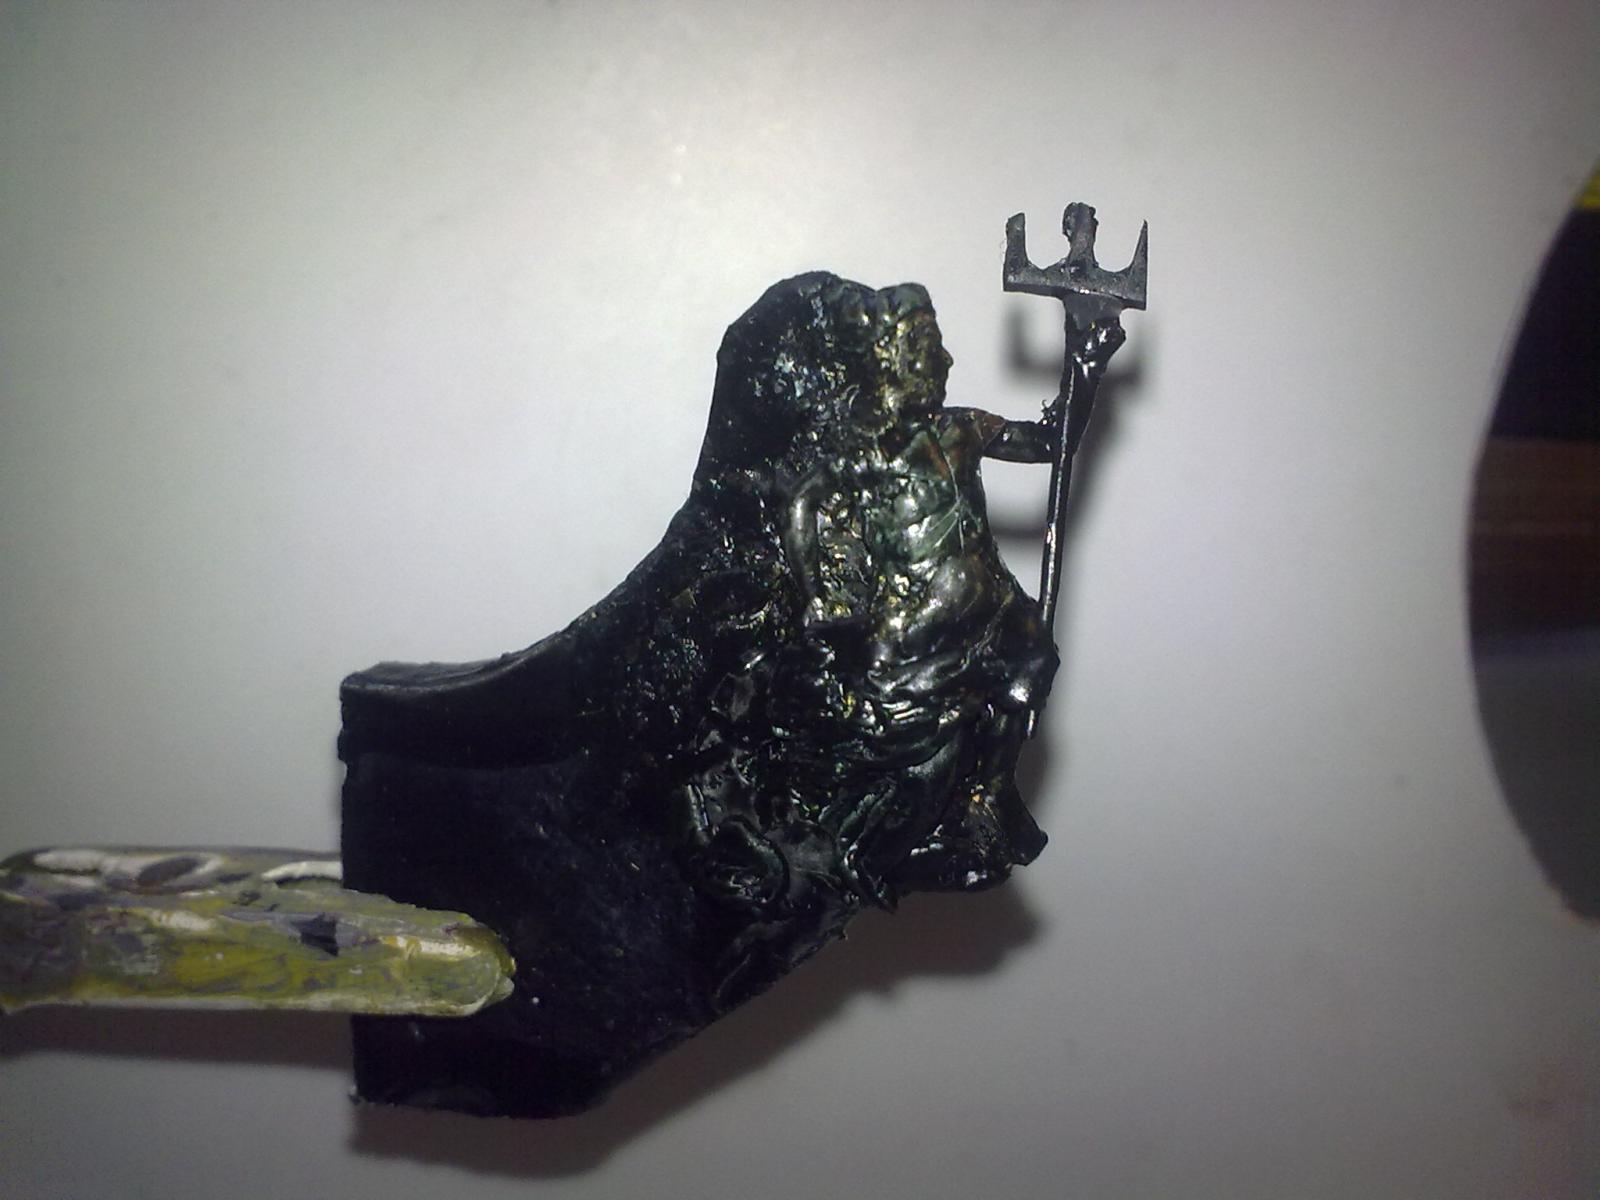
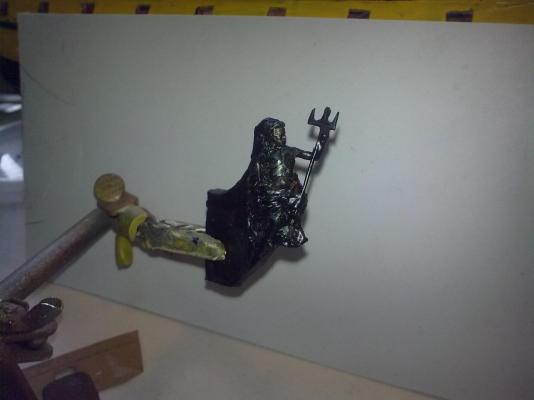
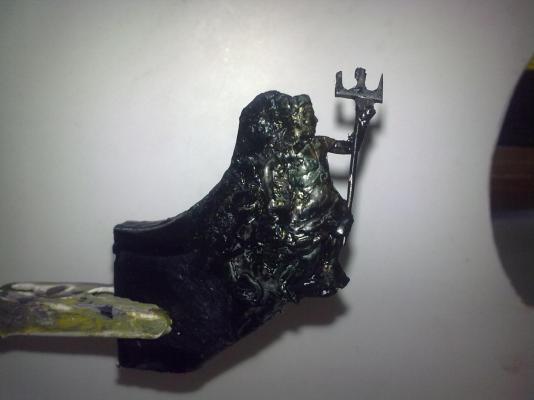
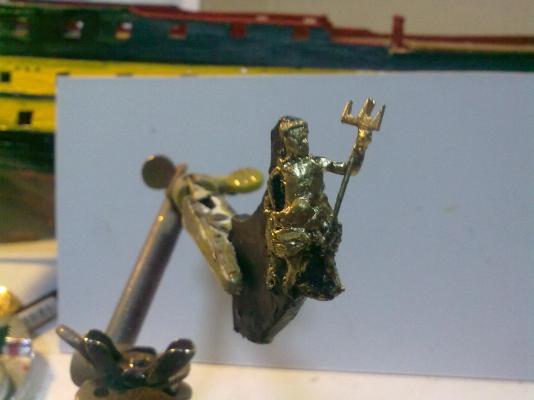
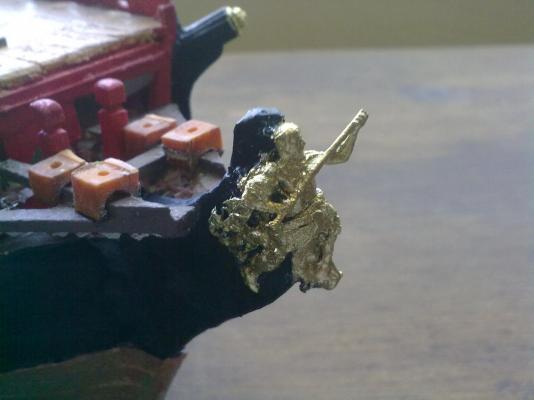
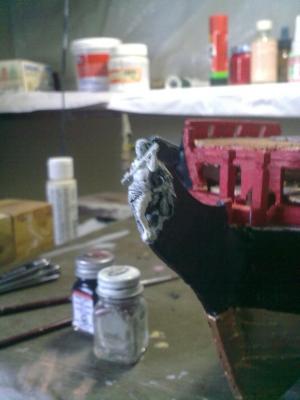
The figurehead had to be corrected as well. A bit of epoxy was used for the crown, the beard and the tunic. The trident is made from steel wire and styrene.
- 43 replies
-
- 2
-
-
- neptuno
- ship of the line
- (and 1 more)
-
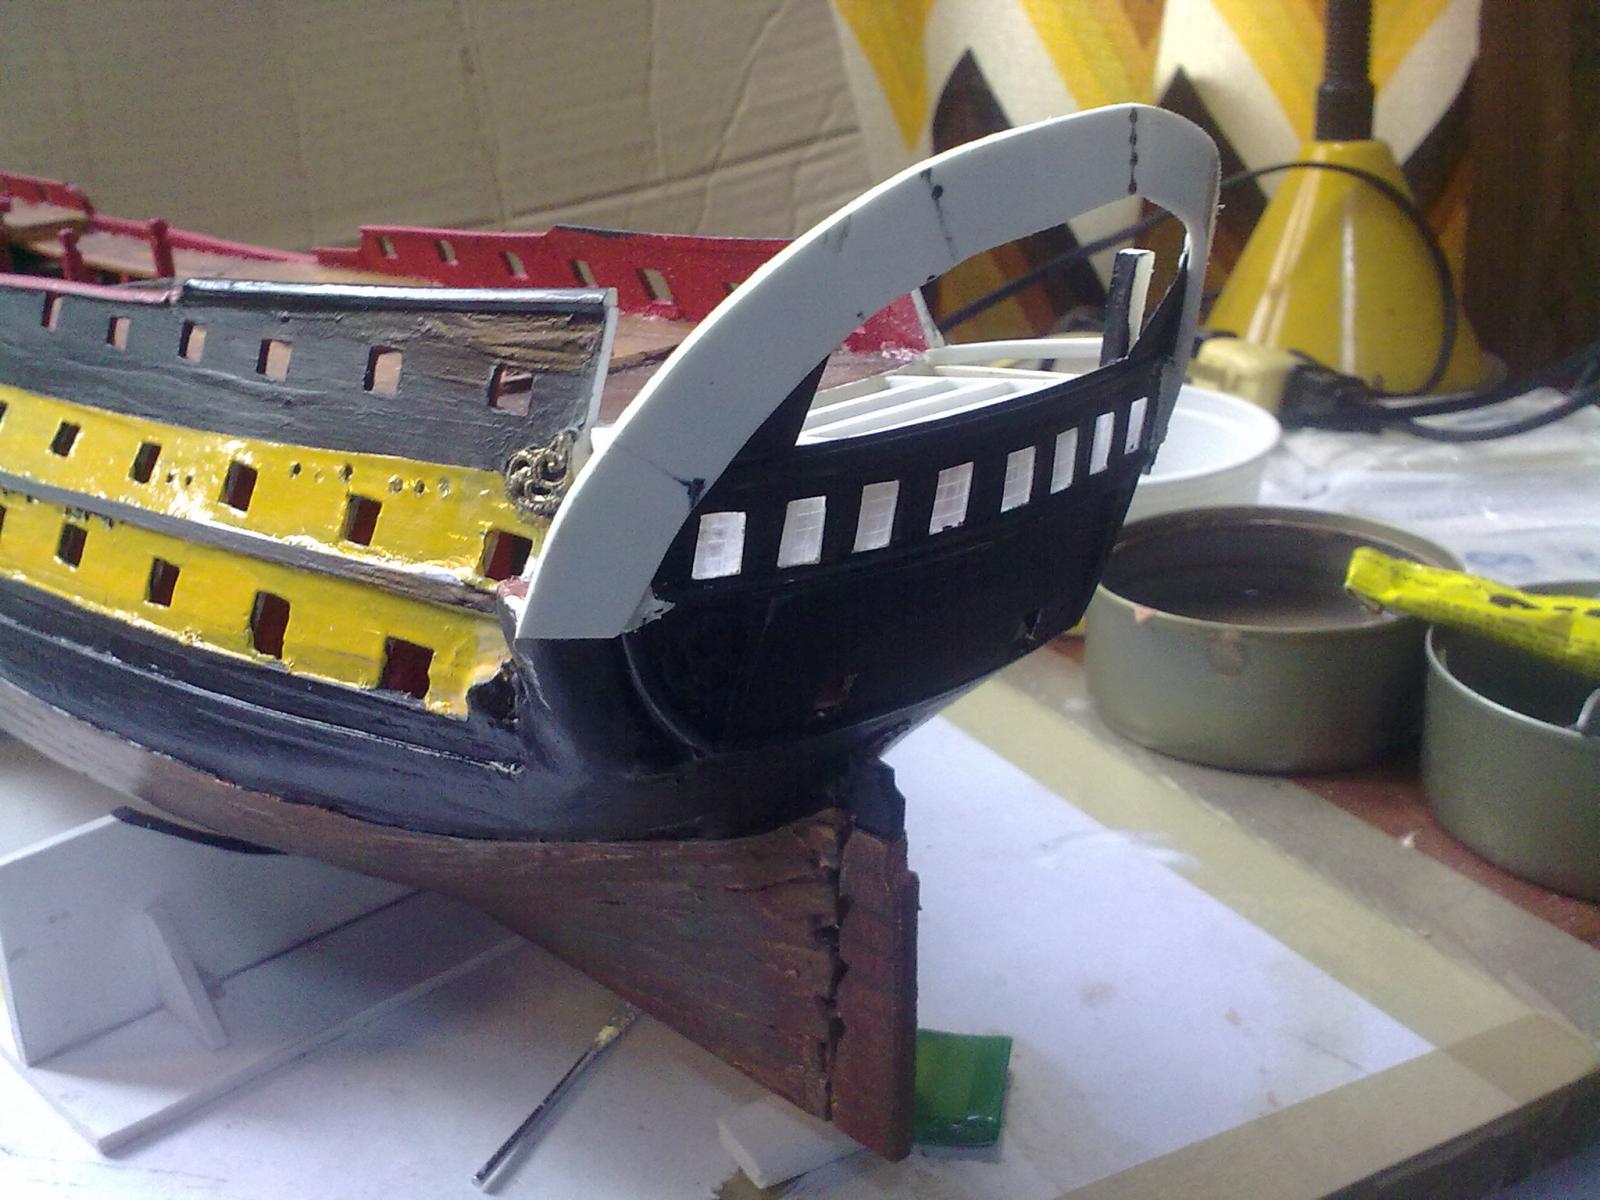
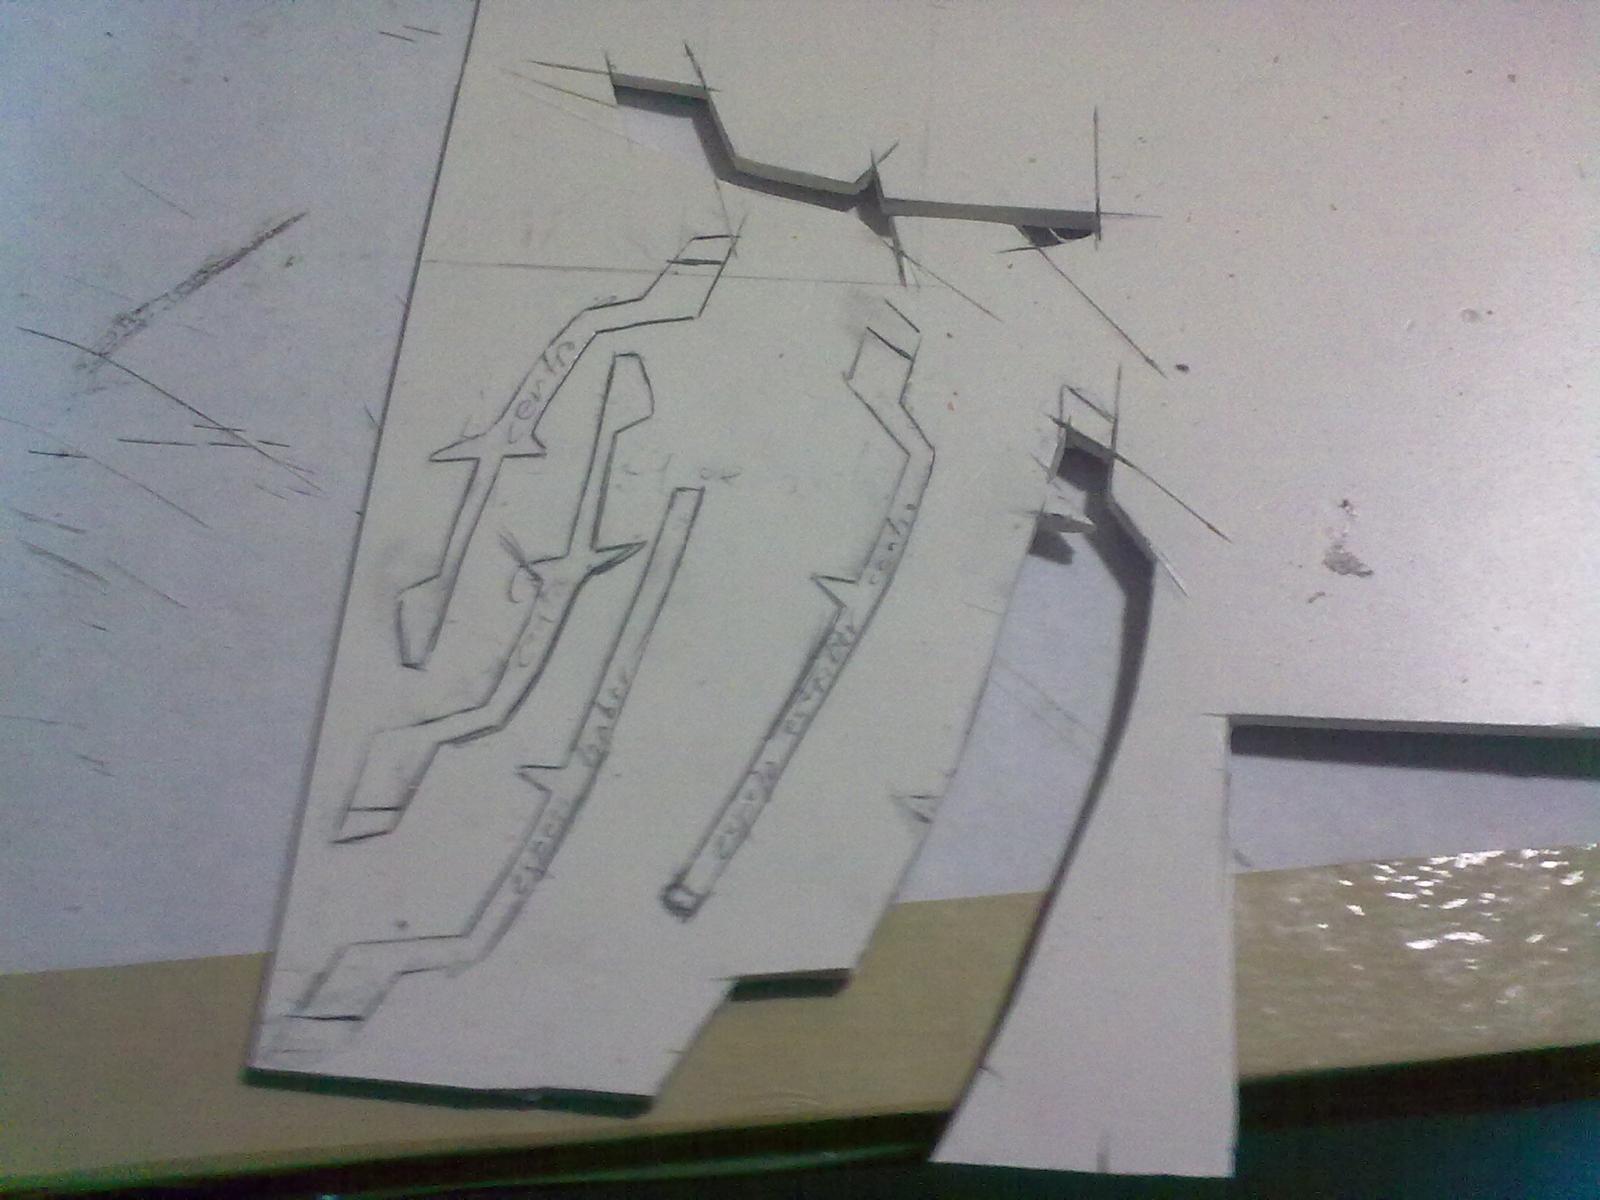
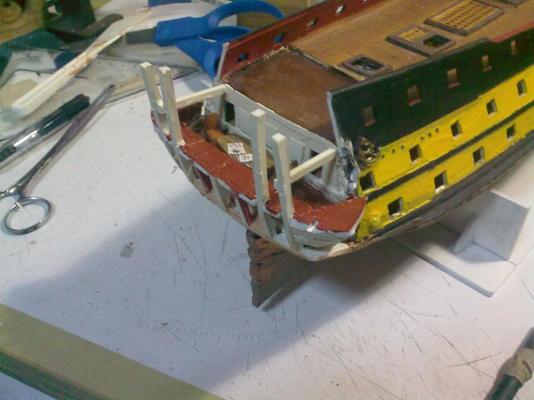
At last! Holidays are here (At least for me) and I can continue. Here is my progress so far. So, blueprints were wrong, so I entered http://www.todoababor.es/ (web page is in Spanish) and I corrected my model. First, the transom and figurehead were wrong, so I rebuilt them: Cutting away! Templates for new frame: Transom and officers' quarters Furnishing the quarters.


- 43 replies
-
- 1
-
-
- neptuno
- ship of the line
- (and 1 more)
-
Dear Sjors: Just a clarification: the San Ildefonso's twin sister was not the Montañés, another 74' gunner of a different class. The famous Ildefonsinos were the San Telmo, San Francisco de Paula, Europa, Intrépido, Pelayo and Monarca. Incidentally, she kept her name after being captured in Trafalgar by the British (HMS San Ildefonso). Her Spanish colours are currently on display at the National Maritime Museum, in London, England. Cheers!
- 1,873 replies
-
- 1
-
-
- occre
- san ildefonso
- (and 1 more)
-
Naval History On This Day, Any Nation
Trafalgarhero replied to Kevin's topic in Nautical/Naval History
1861: Great Britain, France and Spain send their fleets to start a blockade of the Mexican harbours of Veracruz and Tampico, after president Benito Juarez decreed a suspension on the payments of foreign debt, due to bankruptcy after the Mexican Reform War. -
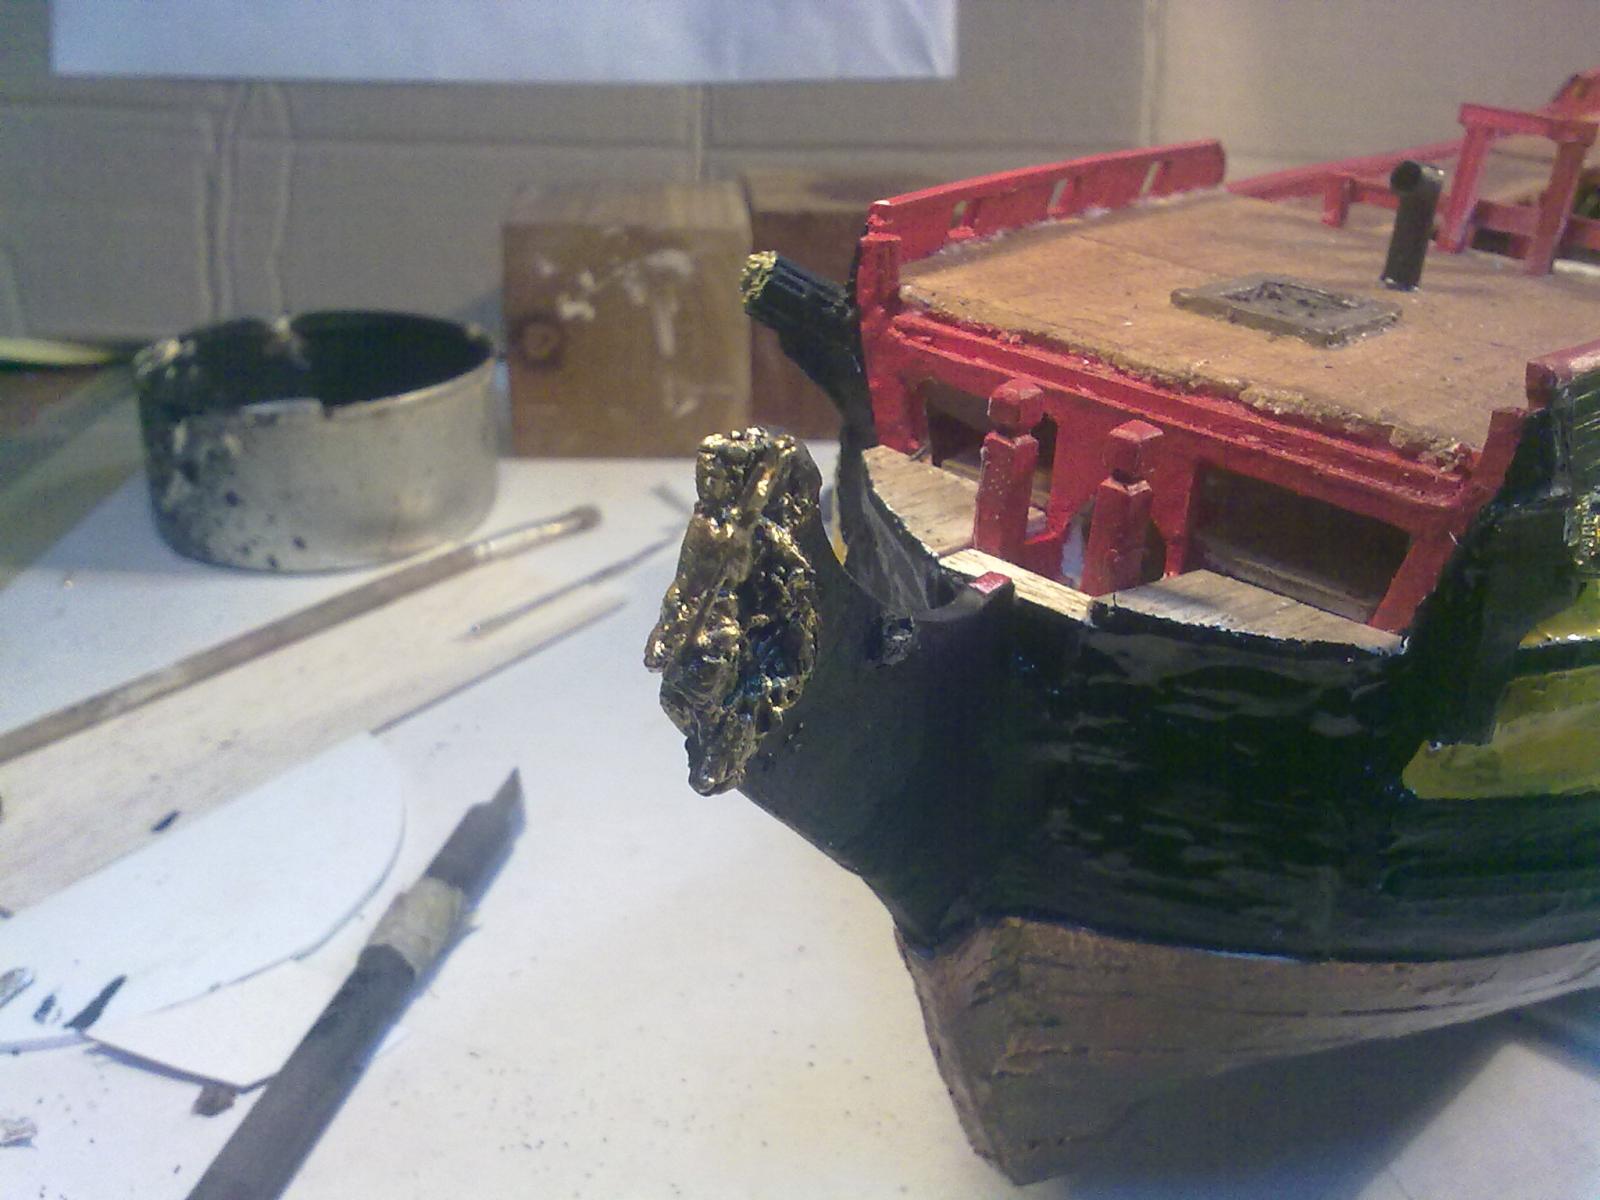
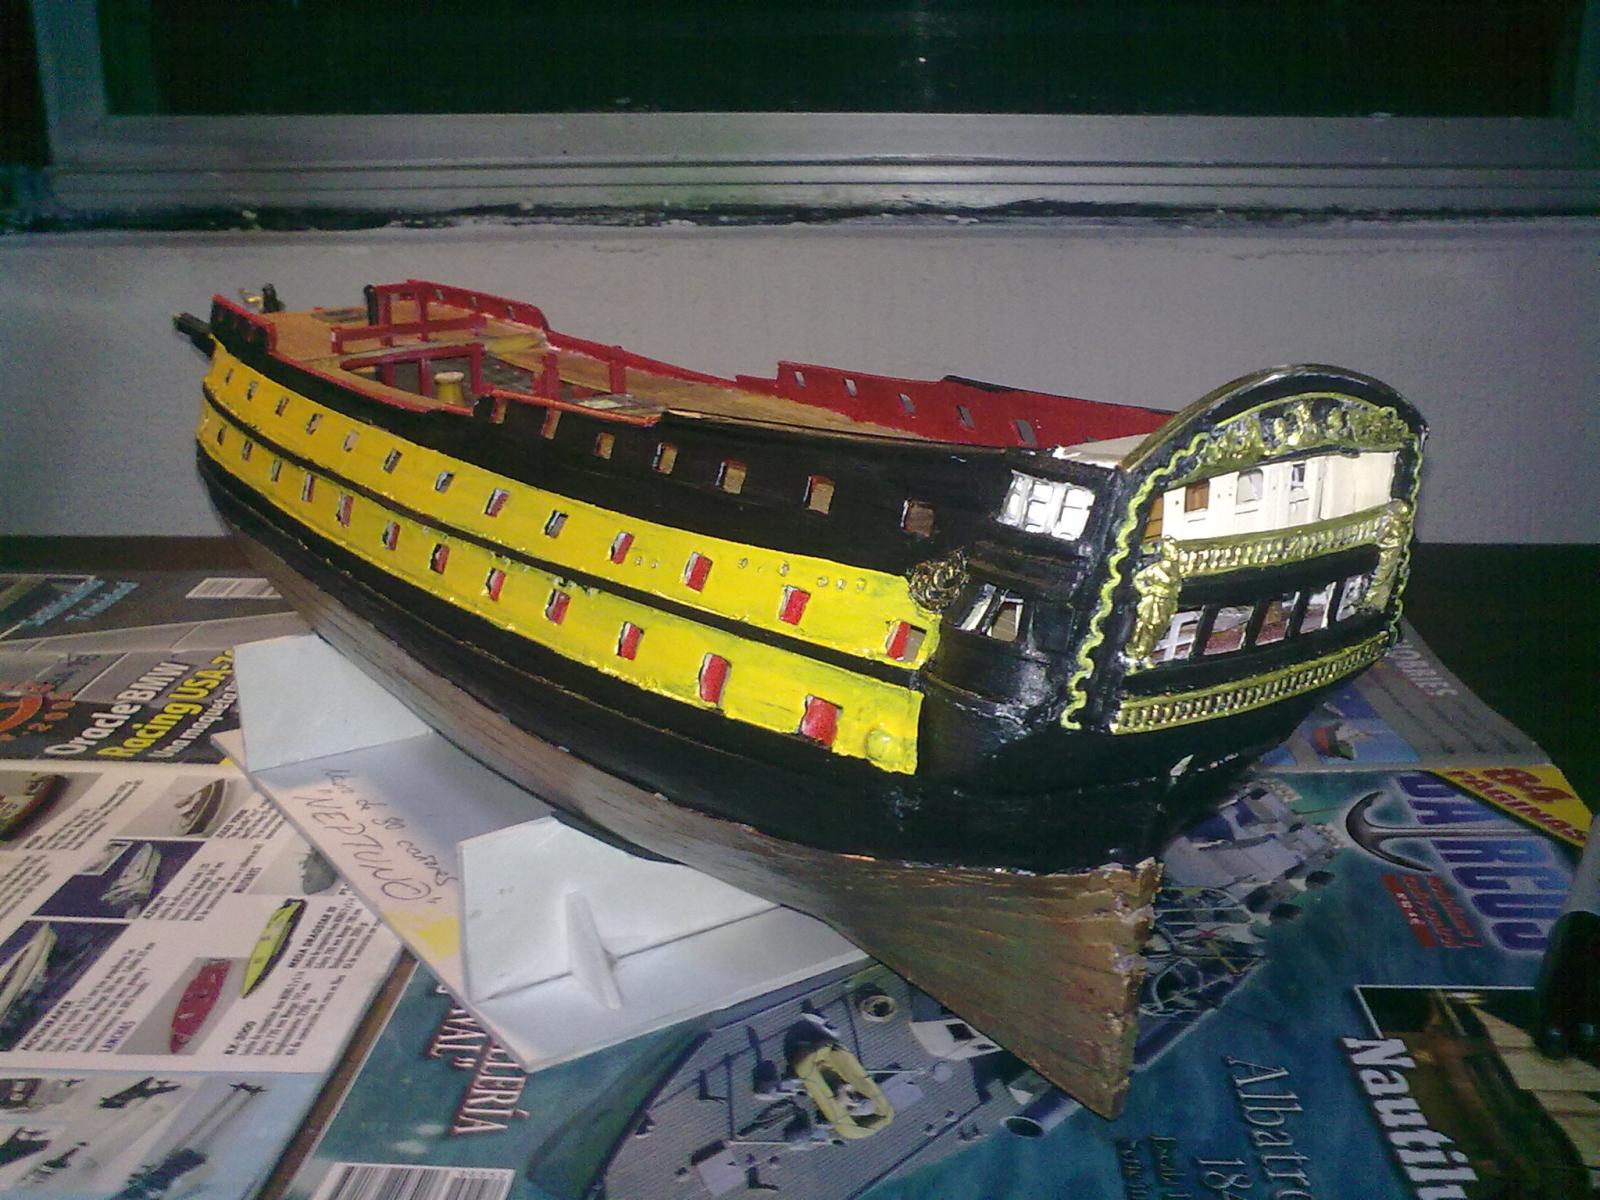
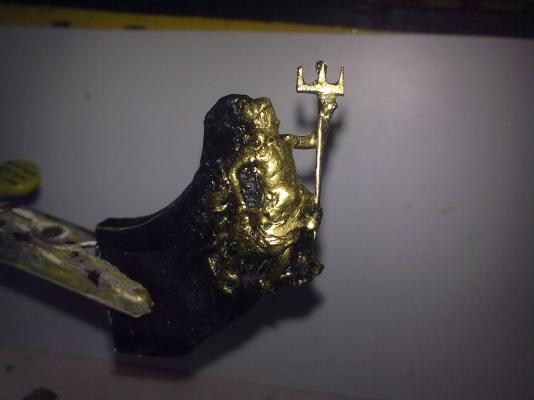
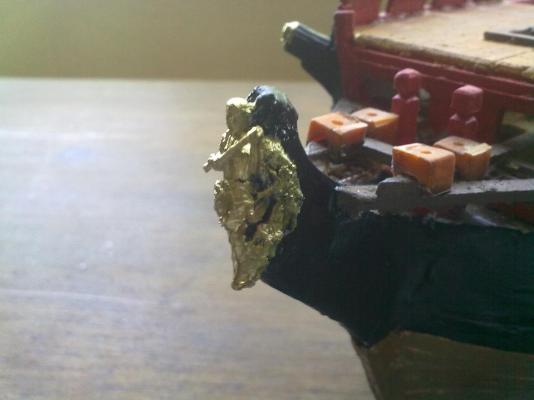
Finally! I was able to take a two day break from grad school -master's degree in history, no less. My dissertation paper is on Napoleonic naval warfare,so you could say I got to live from my passion- to dive into my other passion...so, here it comes: The ship's latrines (sorry for my nautical terms in English!) The improved figurehead, painted gold. Regulatory yellow stripes painted along the gunports. Transom and stern galleries. Still, the transom needs improvement. General view of the project, as to September 1st, 2013


- 43 replies
-
- 3
-
-
- neptuno
- ship of the line
- (and 1 more)
-
A bitt, for the bowsprit section. Both bow bitts, in their place. The catheads, made out of styrene strips of different width. The chimney for the ship's galley... And the galley itself. It will be almost invisible being in the first gundeck and all, but noticeable through the gunports and hatches. The hull's tapes, to go along the gunports The decking for the transom's balcony Finally, one of the things I was looking forward to: the ship's figurehead. Depicting the image of King Neptune, the figure was made out of several scale figures from train maquettes. The toga is a piece of tissue paper, soaked in CA glue, and the crown and other features were made from plastic filling putty. The whole figure is about 12 mm. tall and consumed nearly four hours of work. Here are some views of the figurehead, mounted and ready on the hull. Still, I am unhappy with the color and, although not historically accurate, I will change it from white to gold. Transom, ready and fitted. Statues, the same as the figurehead, were taken and modified from figures for train maquettes, sanded in the back to make them appear as carvings. Windows were left open, so the details of the captain's cabin and officers' quarters -which are fully furnished- will be appreciated. Still, not happy with the result so...modifications ahead! Copperplating of the hull's bottom. Each plate is made from paper-thick styrene, measuring only 10.0 x 0.5 mm. each Copperplating ready. It has been spray-painted with four layers of automotive lacquer Upper hull paint ready. I used testors' flat black enamel. The details of the figurehead can be appreciated. As I intend the Neptuno to appear just as she looked in Trafalgar, a freshly painted, brand new look just won't do: it lacks realism. Admiralty models, spectacular as they are, do not have that battle-worn look I believe warships ought to have. So, I weathered the copperplating a bit using flat green, olive and rust watercolors.


- 43 replies
-
- 1
-
-
- neptuno
- ship of the line
- (and 1 more)
-
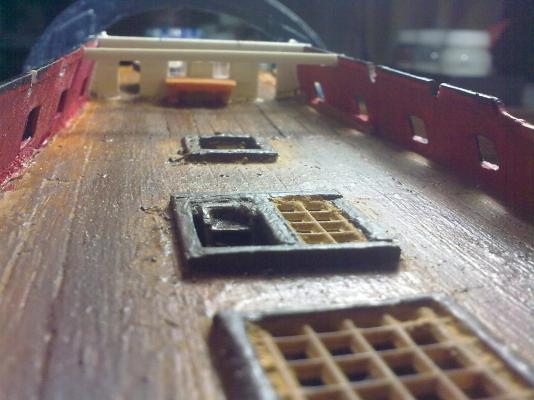
Yeah, the keel, frames, sides and deck are made out styrene (plasticard), and then planked with basswood stripes. The deck gratings are also plastic, made out from accesories for architecture models. The trick is to sand the styrene, before painting, with a rough sandpaper (# 7) and then with a very fine one, always in the same direction. Knots and fibers of the wood, as well as the planks themselves, can be scribbled with a very sharp exact-o knife, too.
-
Frames fitted to false keel, orlop deck and quarterdeck fitted into place Planking of quarterdeck, using stripes of balsa wood Quarterdeck painted and ready. I used Testors' tan color for the base, with some layers of brown oil paint for weathering The aft hatch, before varnish and paint Upper gun deck, before being fitted into the hull Bow fittings. The lower part of the hull will be filled with polyurethane foam, sanded into shape and then sealed with wood filler Filling the gaps between the bulkheads with polyurethane foam Sealing the foam with waterproof varnish Applying wood filler to the hull Preparing and cutting the gunports, starboard side. Fitting of the upper side of the hull, starboard side, and marking of the waterline. That's always handy for correcting the shape... Aft quarterdeck's gunports and rail


- 43 replies
-
- 1
-
-
- neptuno
- ship of the line
- (and 1 more)
-
Hello: My name is Luis and I live in Mexico City. I have always admired the ships from the napoleonic era. I have built scale models for quite a few years now, both scratch and from kits, but this is the first time I post a building log. This ship is the spaniard 80 gunner "Neptuno". Built in 1795 in El Ferrol shipyards, in Spain, she fought at Trafalgar under Captain Cayetano Valdez's command. Taken by the British after a four hour combat, she was recaptured by the Spanish crew but was beached and lost during the storm that followed the battle. The model will be completely stratch-built, out of styrene, cardboard, basswood and balsa wood. Cutting out the paper templates for the frames. Designs for transom and stern gallery False keel. The material is styrene False keel, keel and rudder Stem Frames, starting from stern Quarterdeck


- 43 replies
-
- 1
-
-
- neptuno
- ship of the line
- (and 1 more)