Trafalgarhero
-
Posts
67 -
Joined
-
Last visited
Recent Profile Visitors
1,180 profile views


-
 FrankWouts reacted to a post in a topic:
HMS Vanguard by RMC - FINISHED - Amati/Victory Models - scale 1:72
FrankWouts reacted to a post in a topic:
HMS Vanguard by RMC - FINISHED - Amati/Victory Models - scale 1:72
-
popeye the sailor reacted to a post in a topic:
Jolly Roger Pirate Ship by Kimberley - FINISHED - Lindberg - PLASTIC - 1:130
-
popeye the sailor reacted to a post in a topic:
Jolly Roger Pirate Ship by Kimberley - FINISHED - Lindberg - PLASTIC - 1:130
-
GrandpaPhil reacted to a post in a topic:
Jolly Roger Pirate Ship by Kimberley - FINISHED - Lindberg - PLASTIC - 1:130
-
GrandpaPhil reacted to a post in a topic:
HMS Vanguard by RMC - FINISHED - Amati/Victory Models - scale 1:72
-
GrandpaPhil reacted to a post in a topic:
Neptuno by Trafalgarhero - 1/120 scale - PLASTIC - Ship-of-the-Line
-
GrandpaPhil reacted to a post in a topic:
Neptuno by Trafalgarhero - 1/120 scale - PLASTIC - Ship-of-the-Line
-
GrandpaPhil reacted to a post in a topic:
Neptuno by Trafalgarhero - 1/120 scale - PLASTIC - Ship-of-the-Line
-
GrandpaPhil reacted to a post in a topic:
Neptuno by Trafalgarhero - 1/120 scale - PLASTIC - Ship-of-the-Line
-
GrandpaPhil reacted to a post in a topic:
Neptuno by Trafalgarhero - 1/120 scale - PLASTIC - Ship-of-the-Line
-
 Try using tin foil. Just print the ensign on a decal and place it on or -if you feel adventurous- paint it directly on the tin foil. Let it dry and then use tweezers to imitate waving. https://www.youtube.com/watch?v=NjFmukVDwBs&t=164s(go to minute 16:55)
 -
Trafalgarhero reacted to a post in a topic:
San Felipe by newbuilder101 (Sherry) – Scale 1:96
-
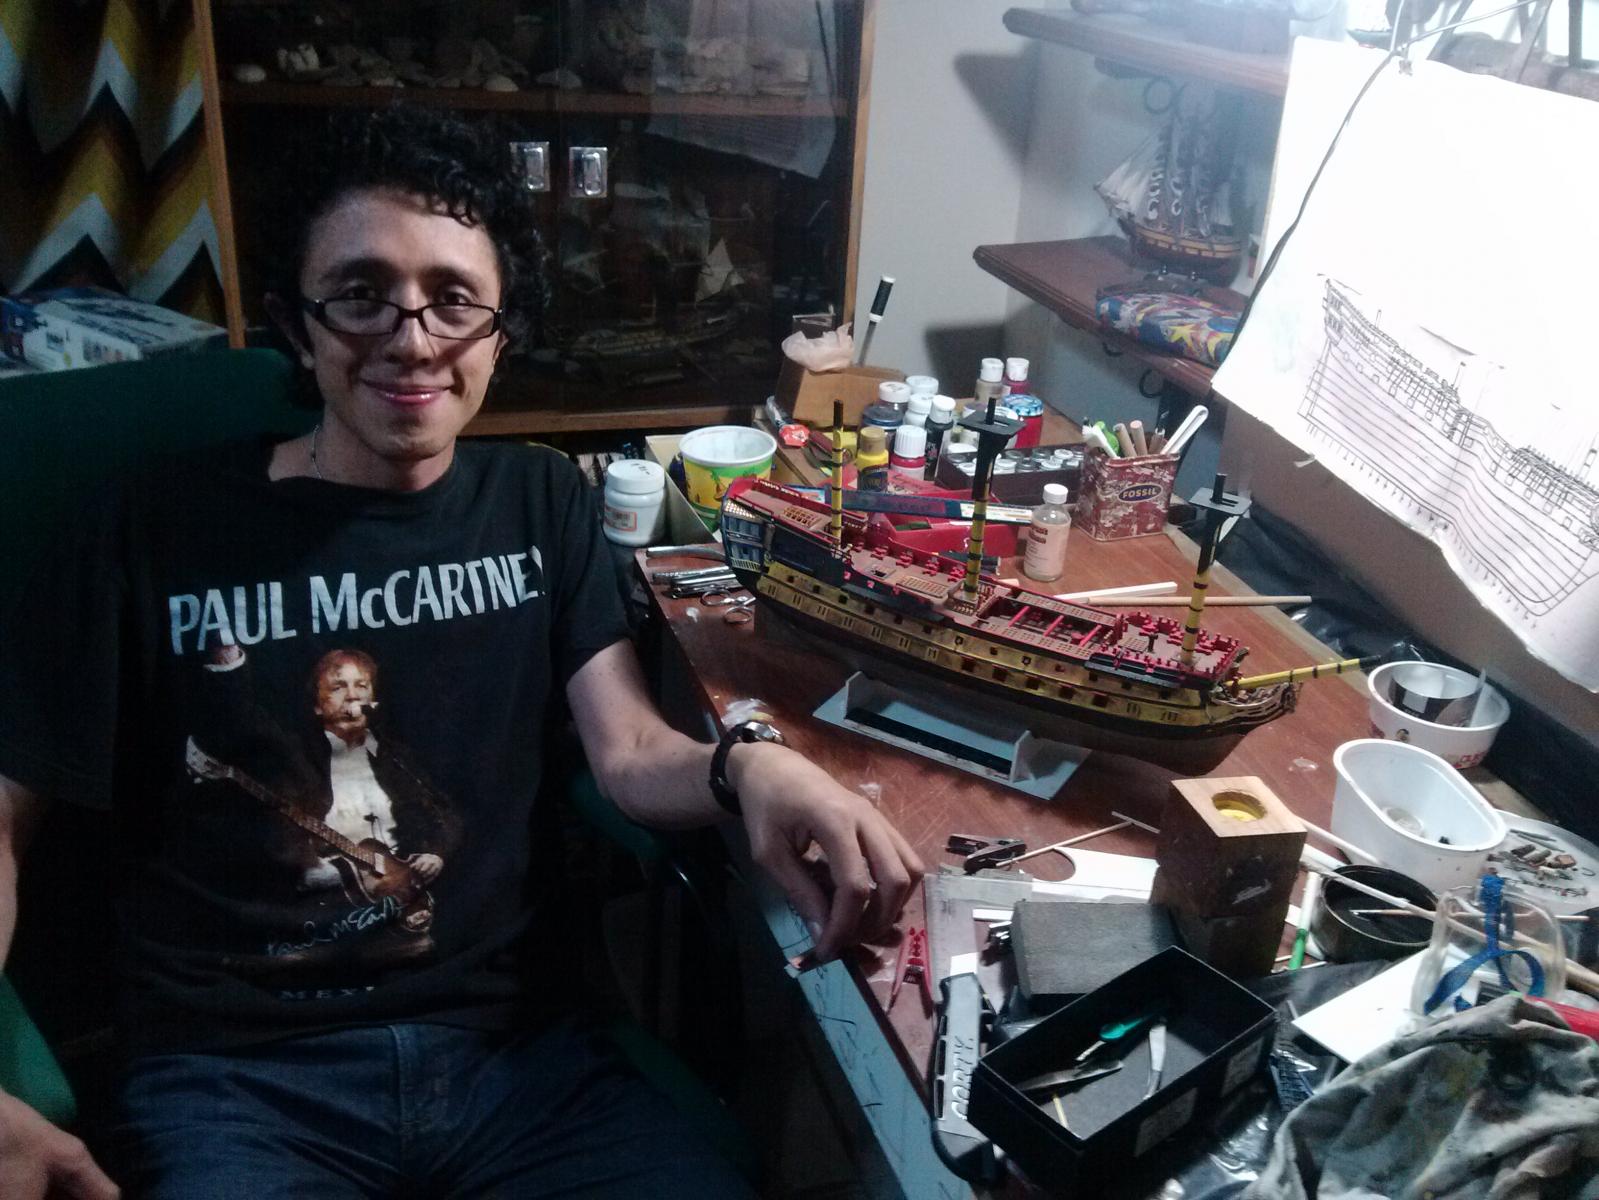
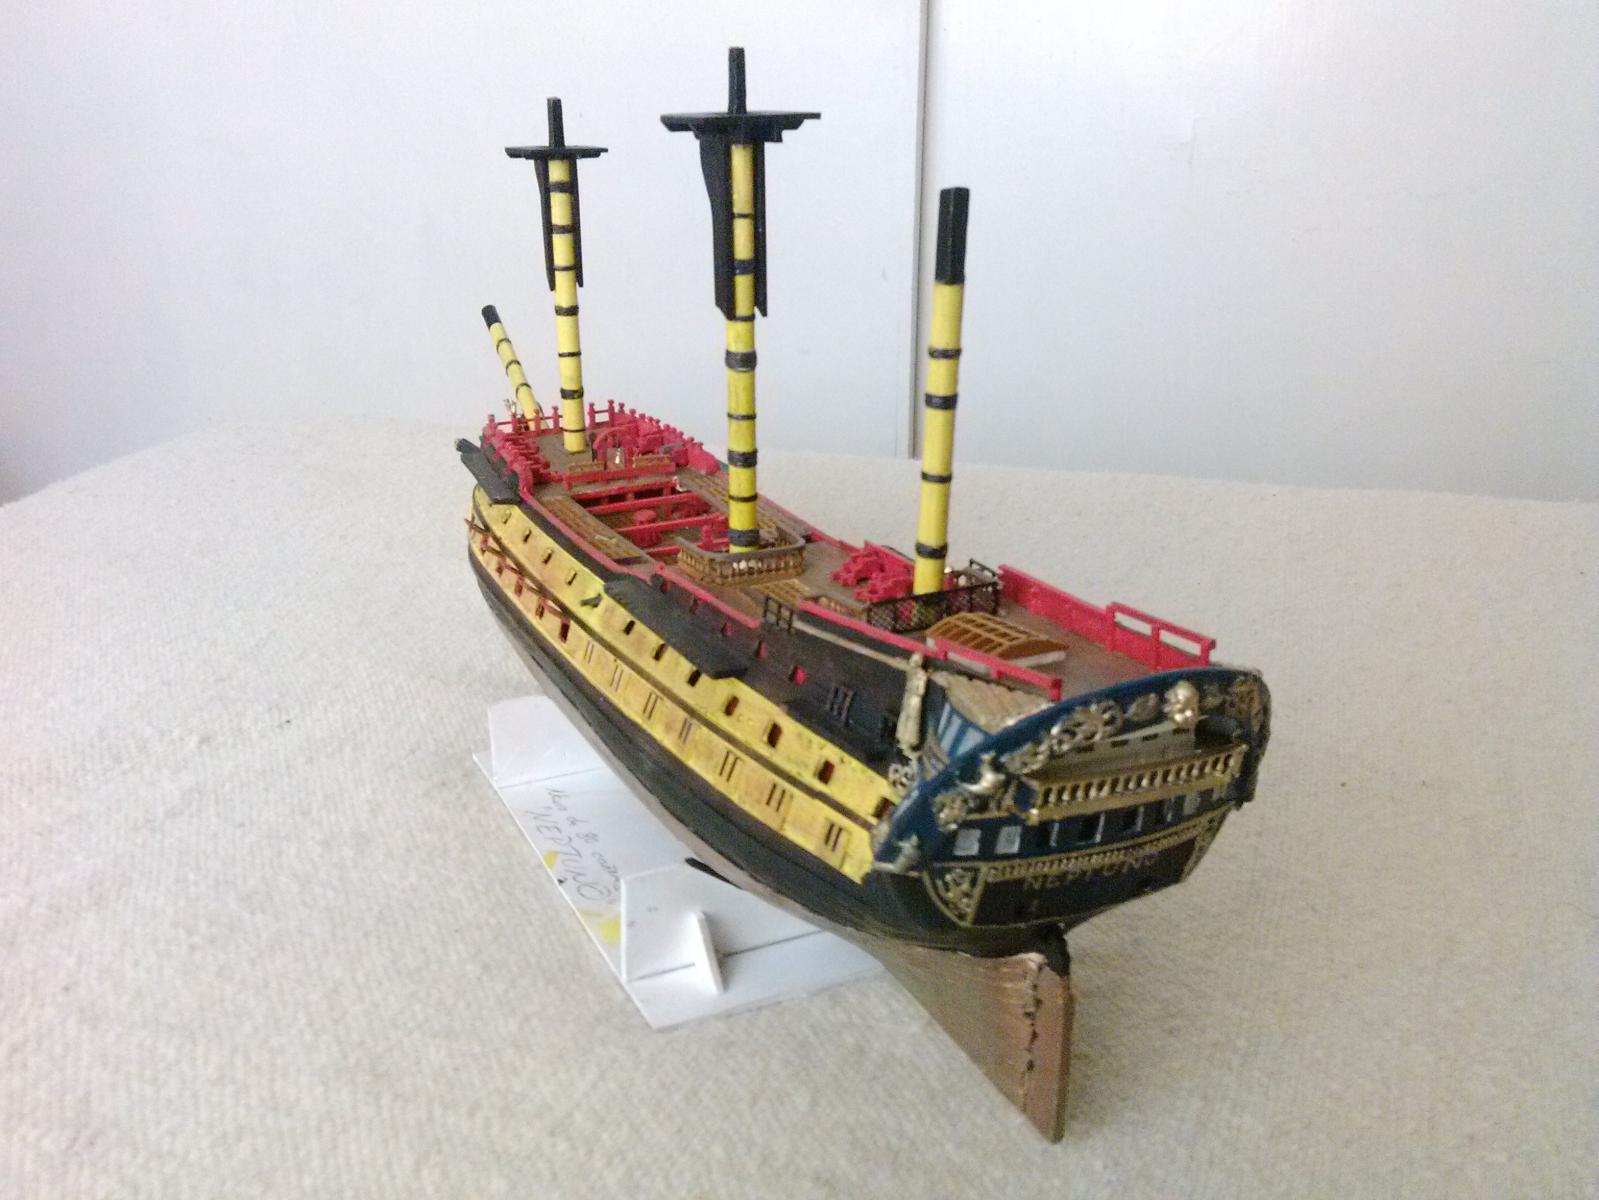
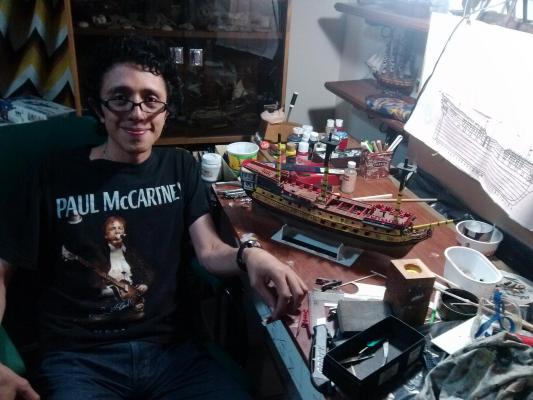
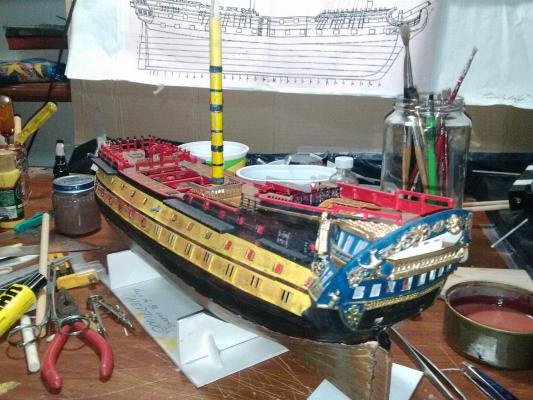
Some general views of the project: The proud builder (that's me)


- 43 replies
-
- 2
-
-
- neptuno
- ship of the line
- (and 1 more)
-
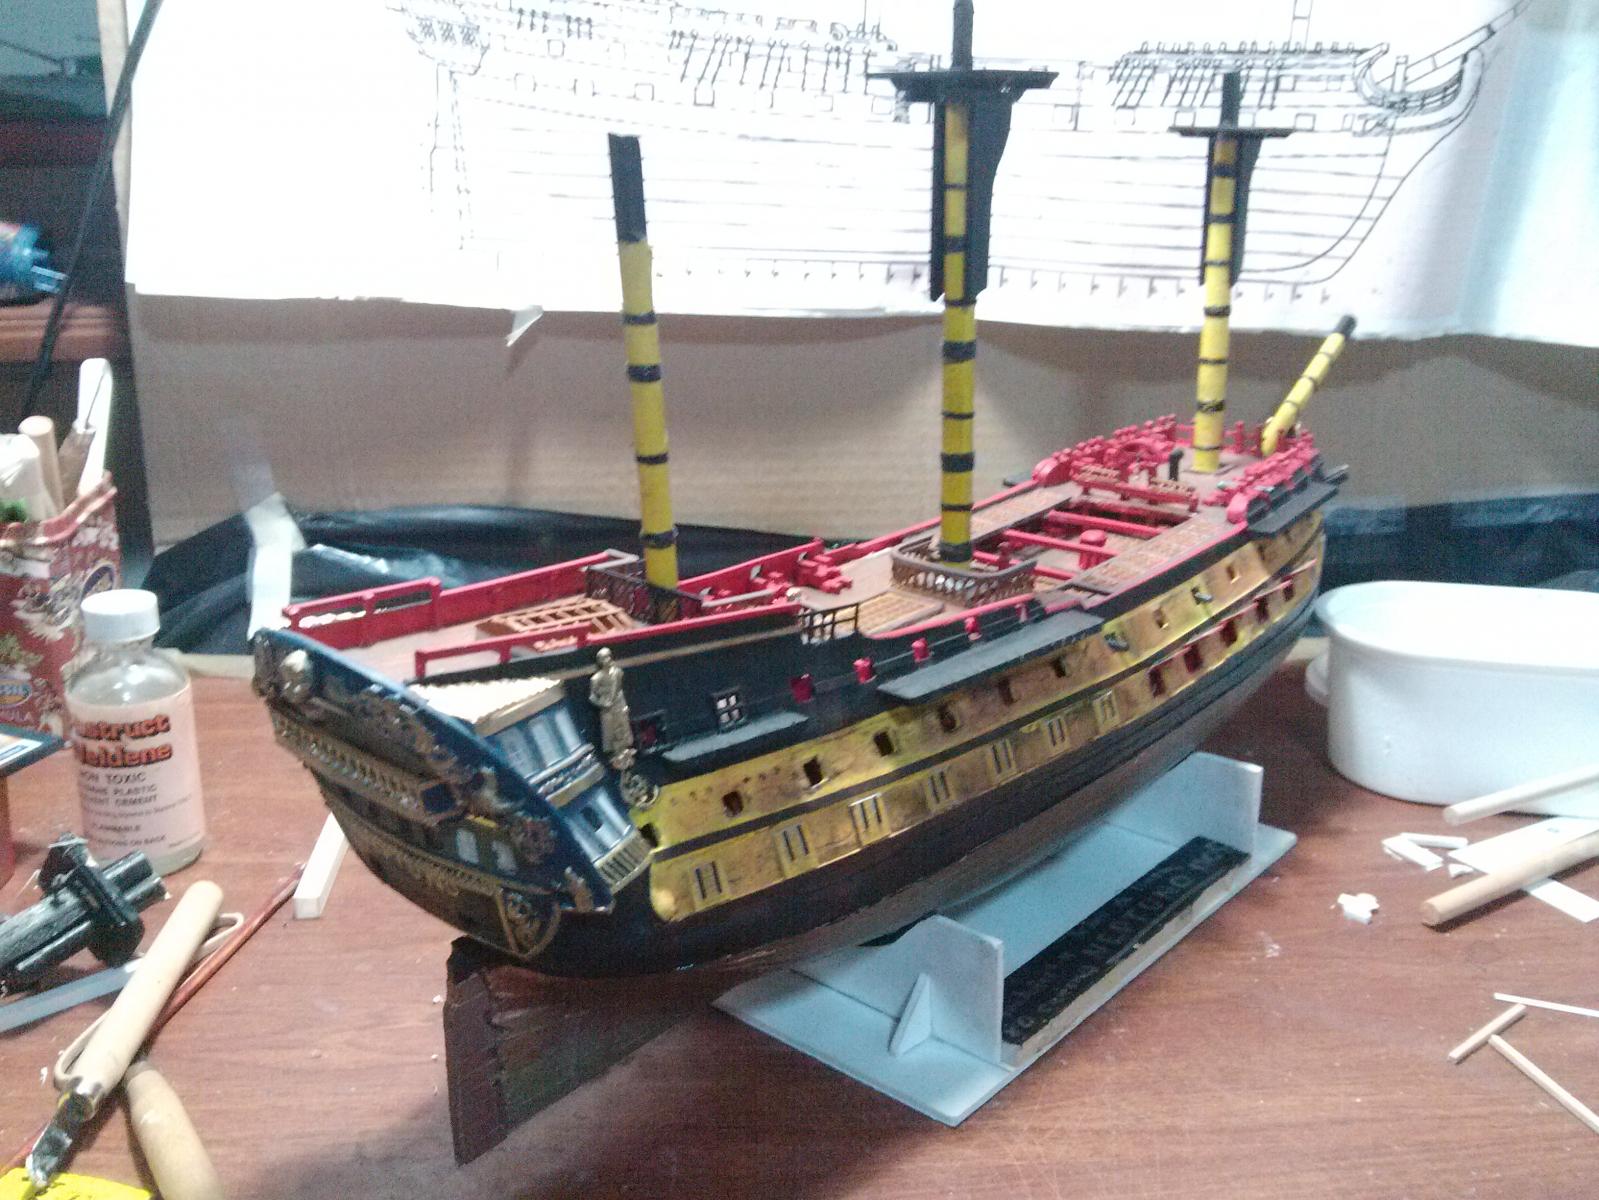
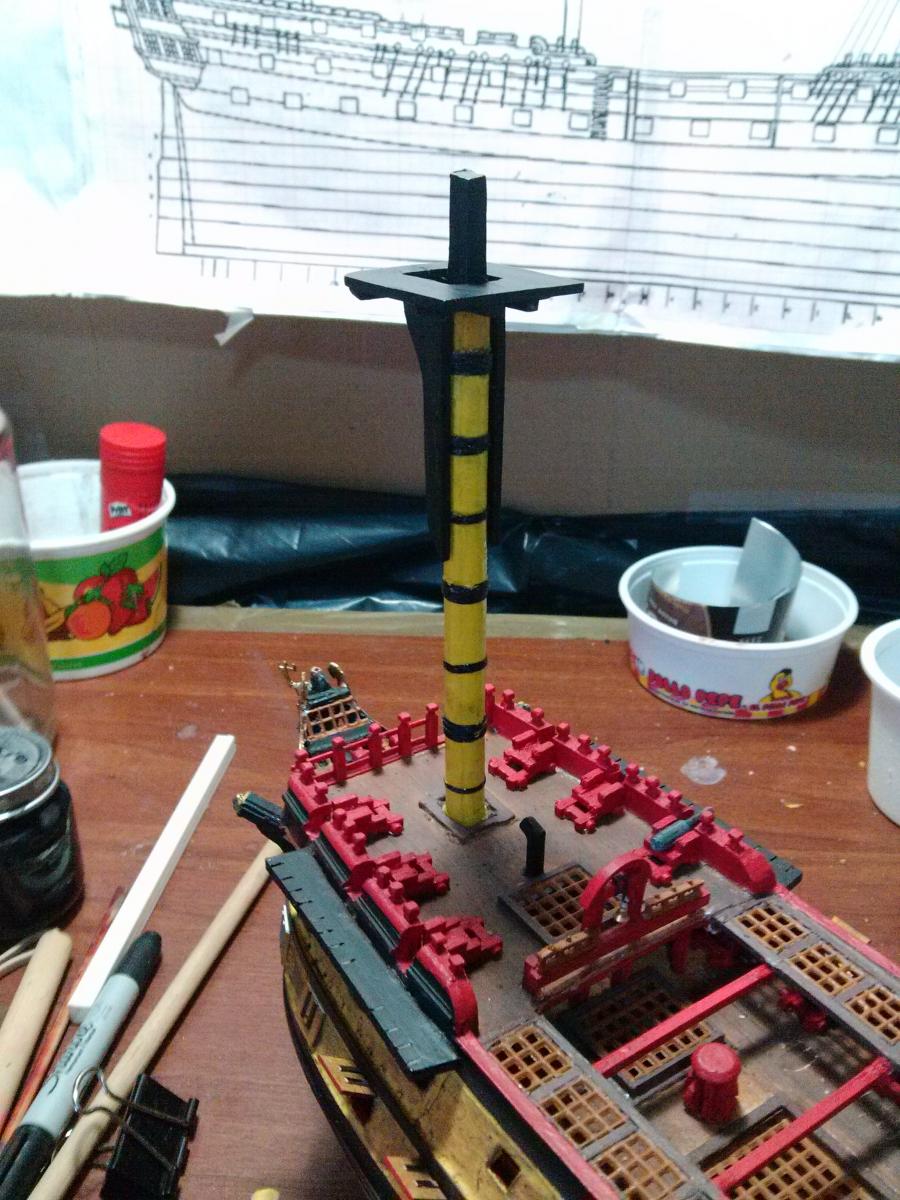
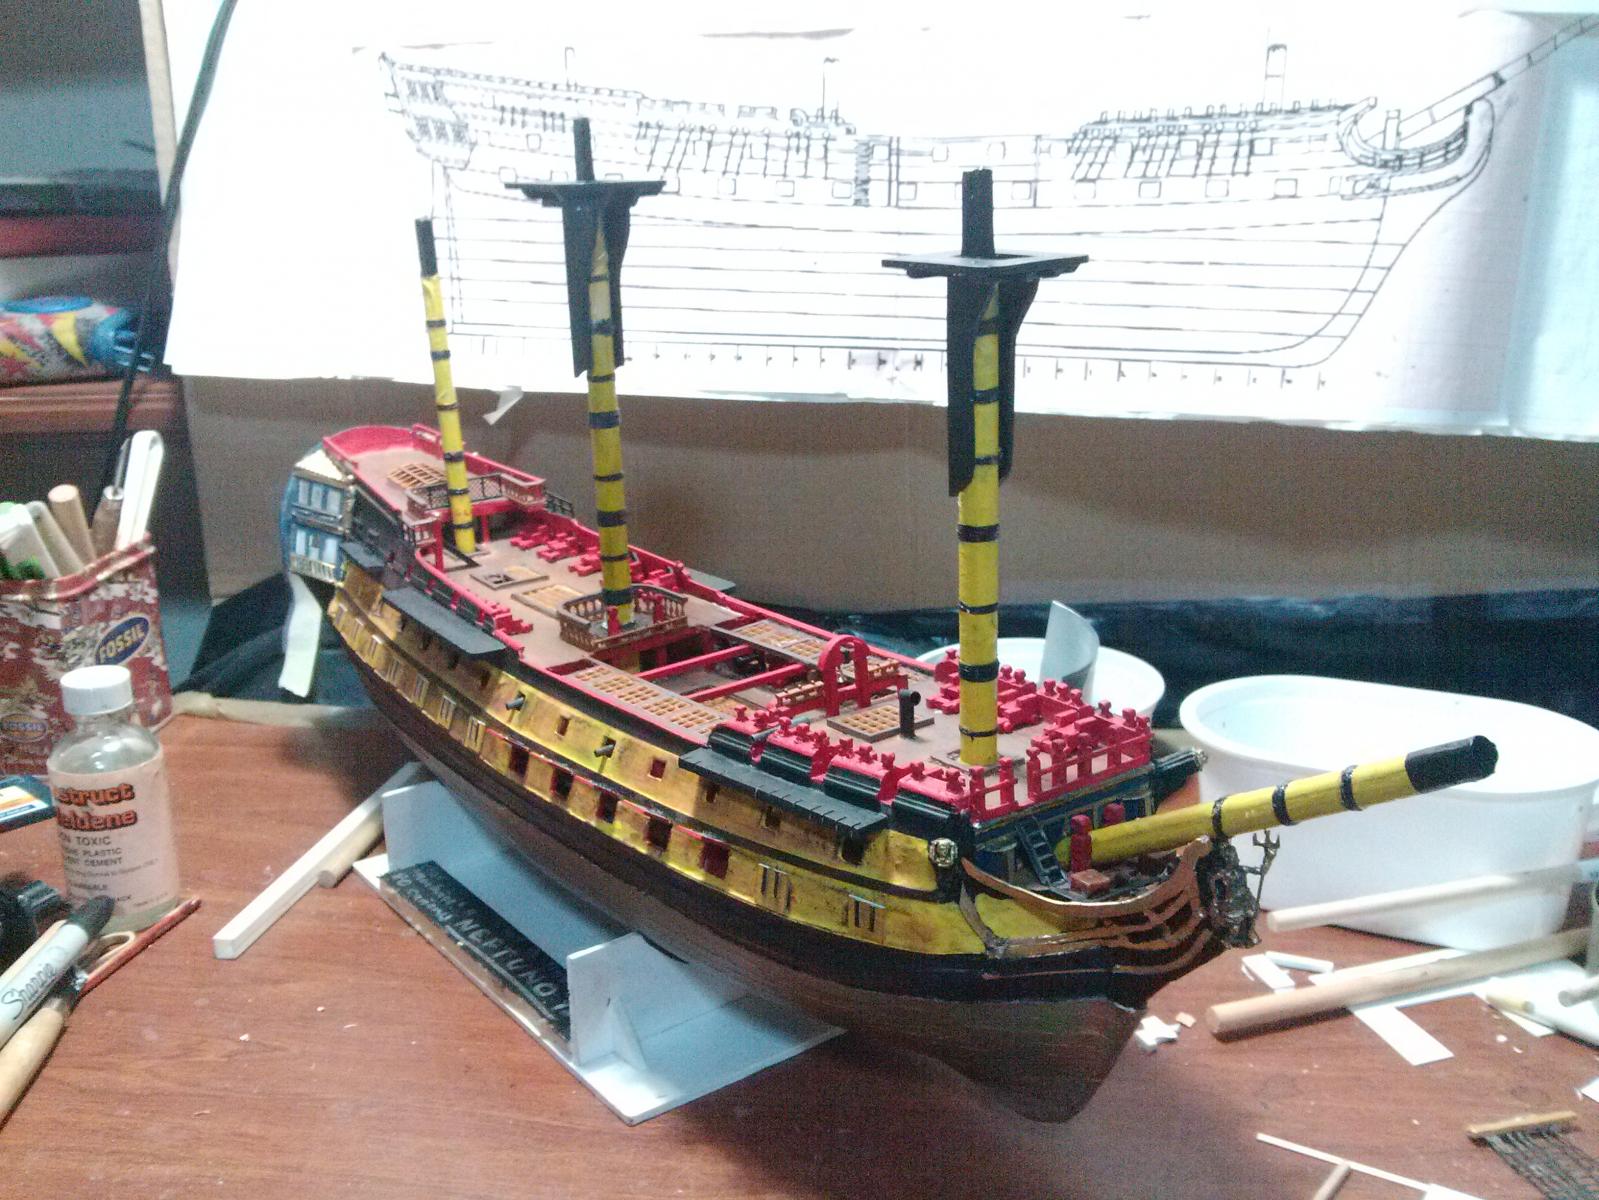
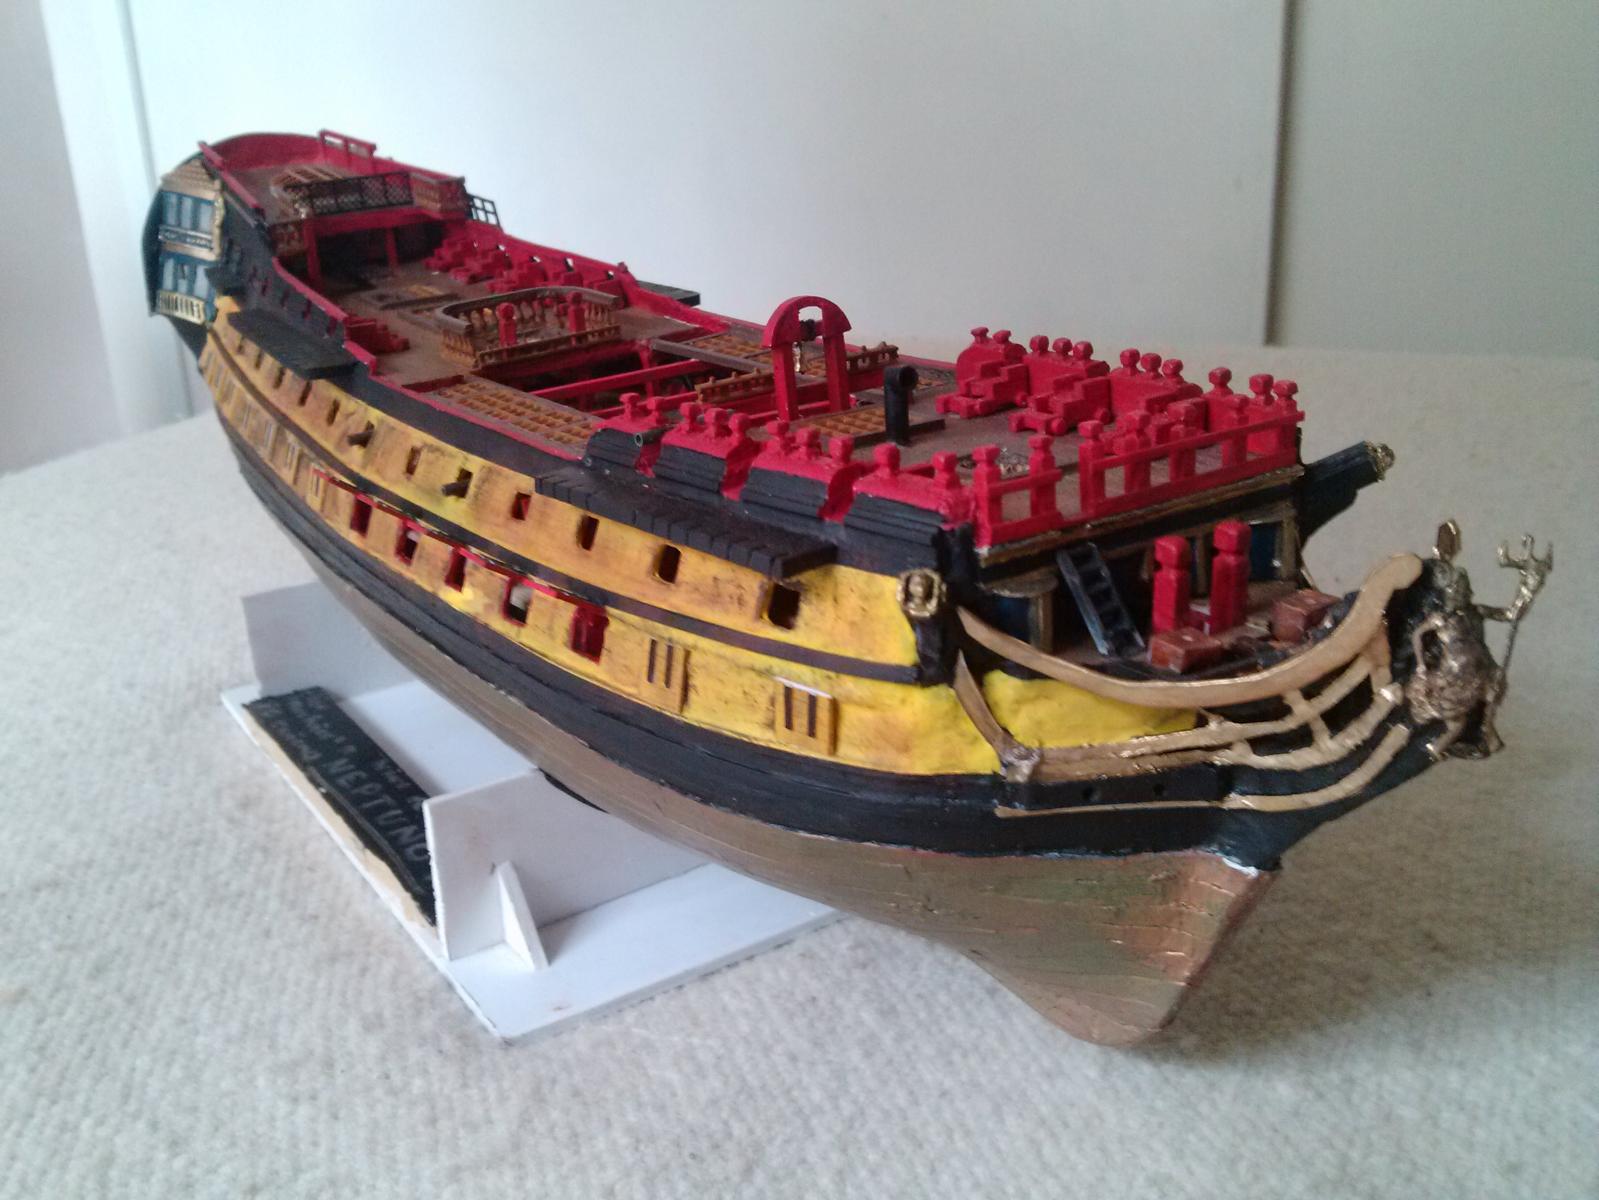
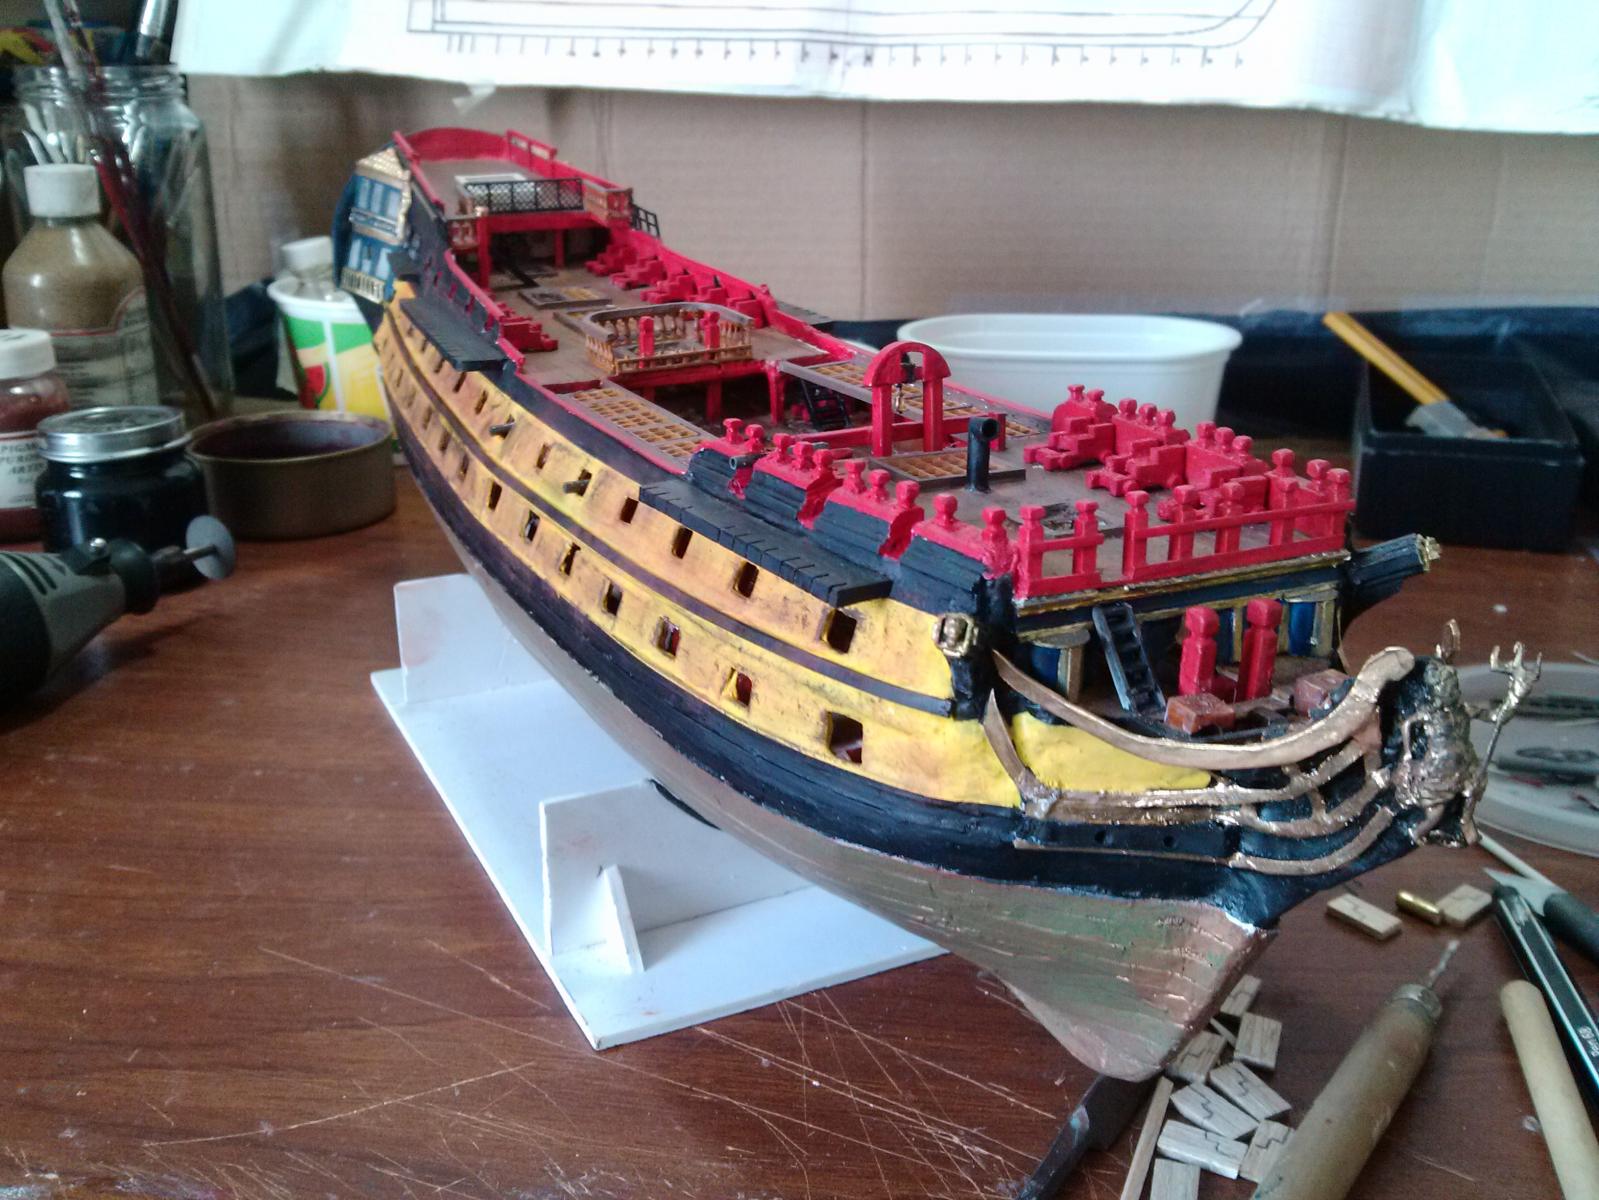
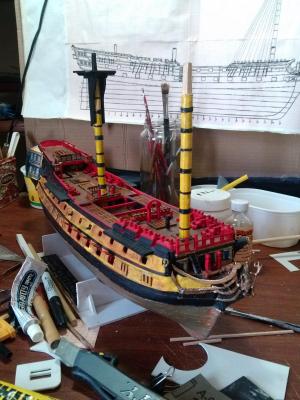
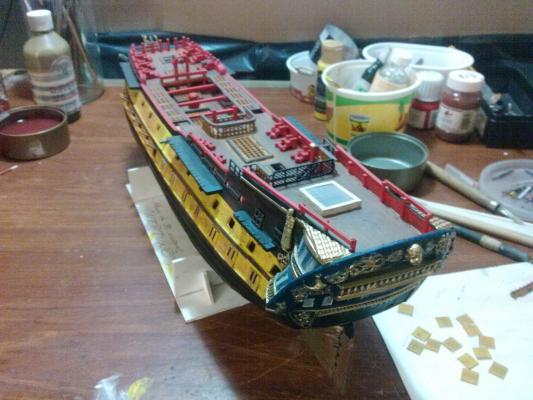
Fore fighting top. Foremast with its top. Attaching the mizzen mast Bowsprit fitting General stern view

- 43 replies
-
- 1
-
-
- neptuno
- ship of the line
- (and 1 more)
-
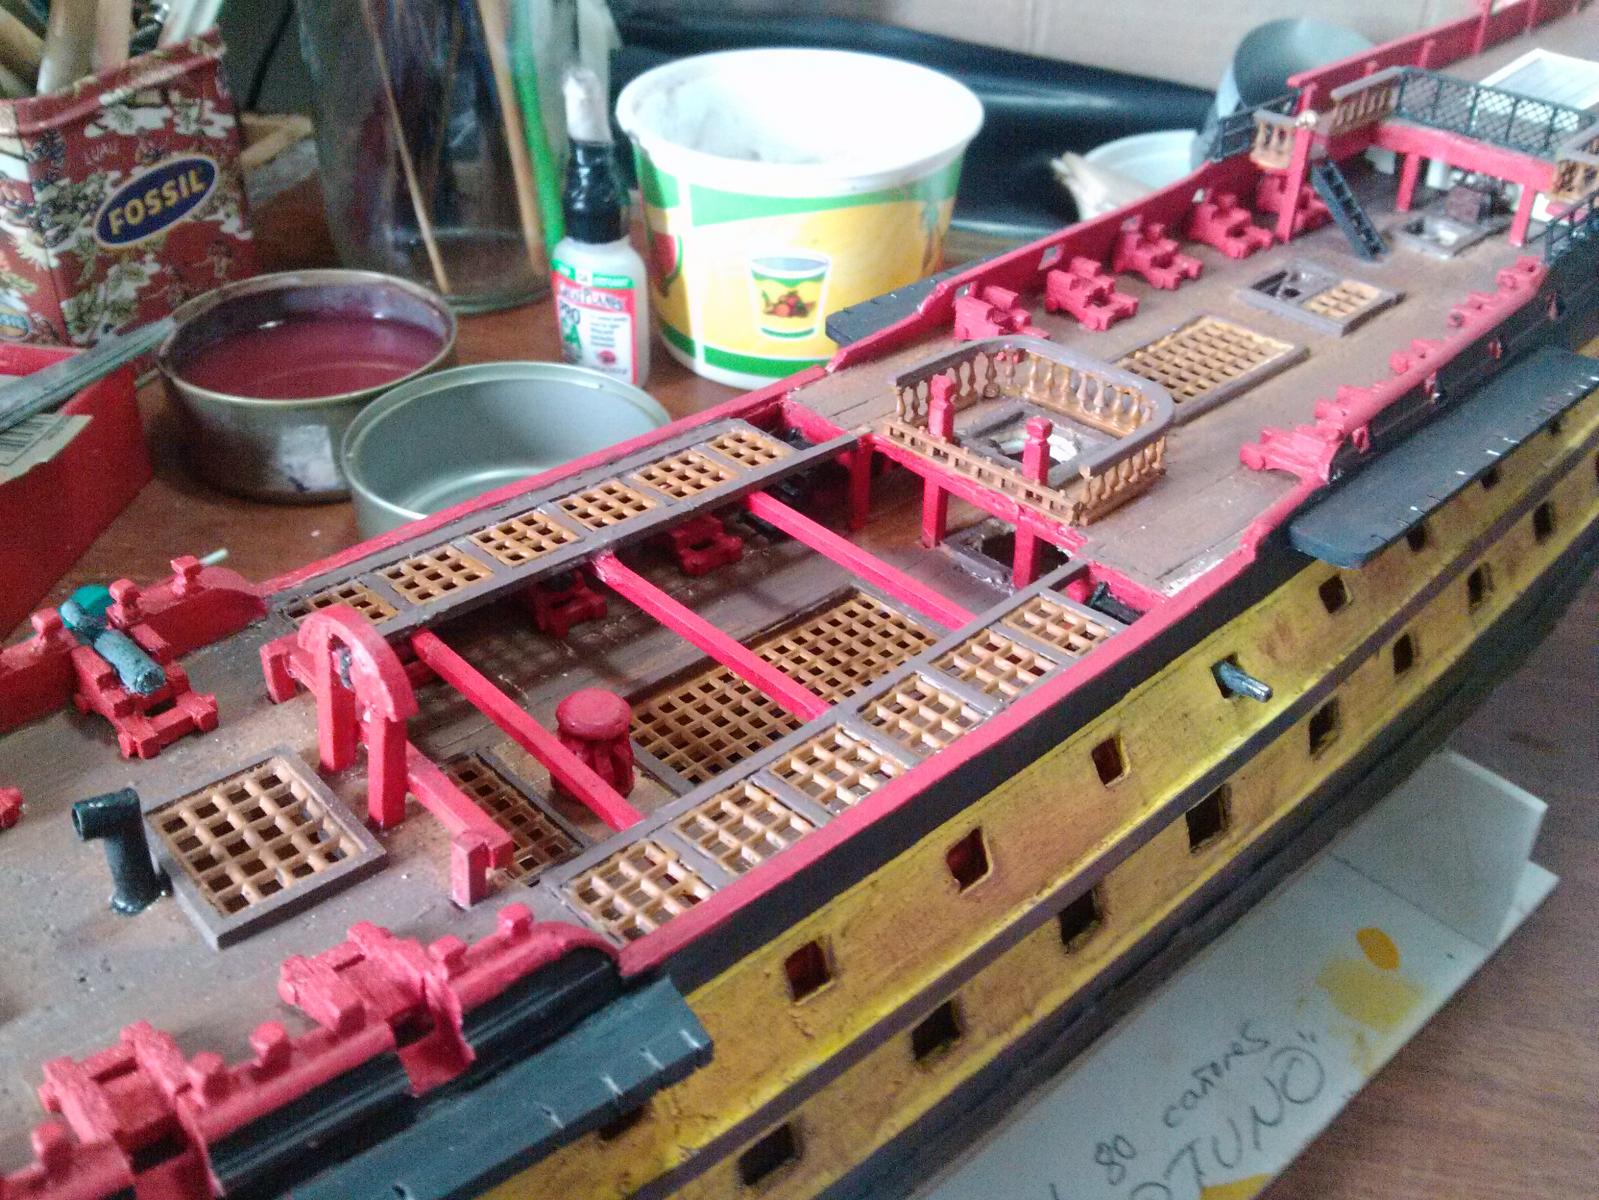
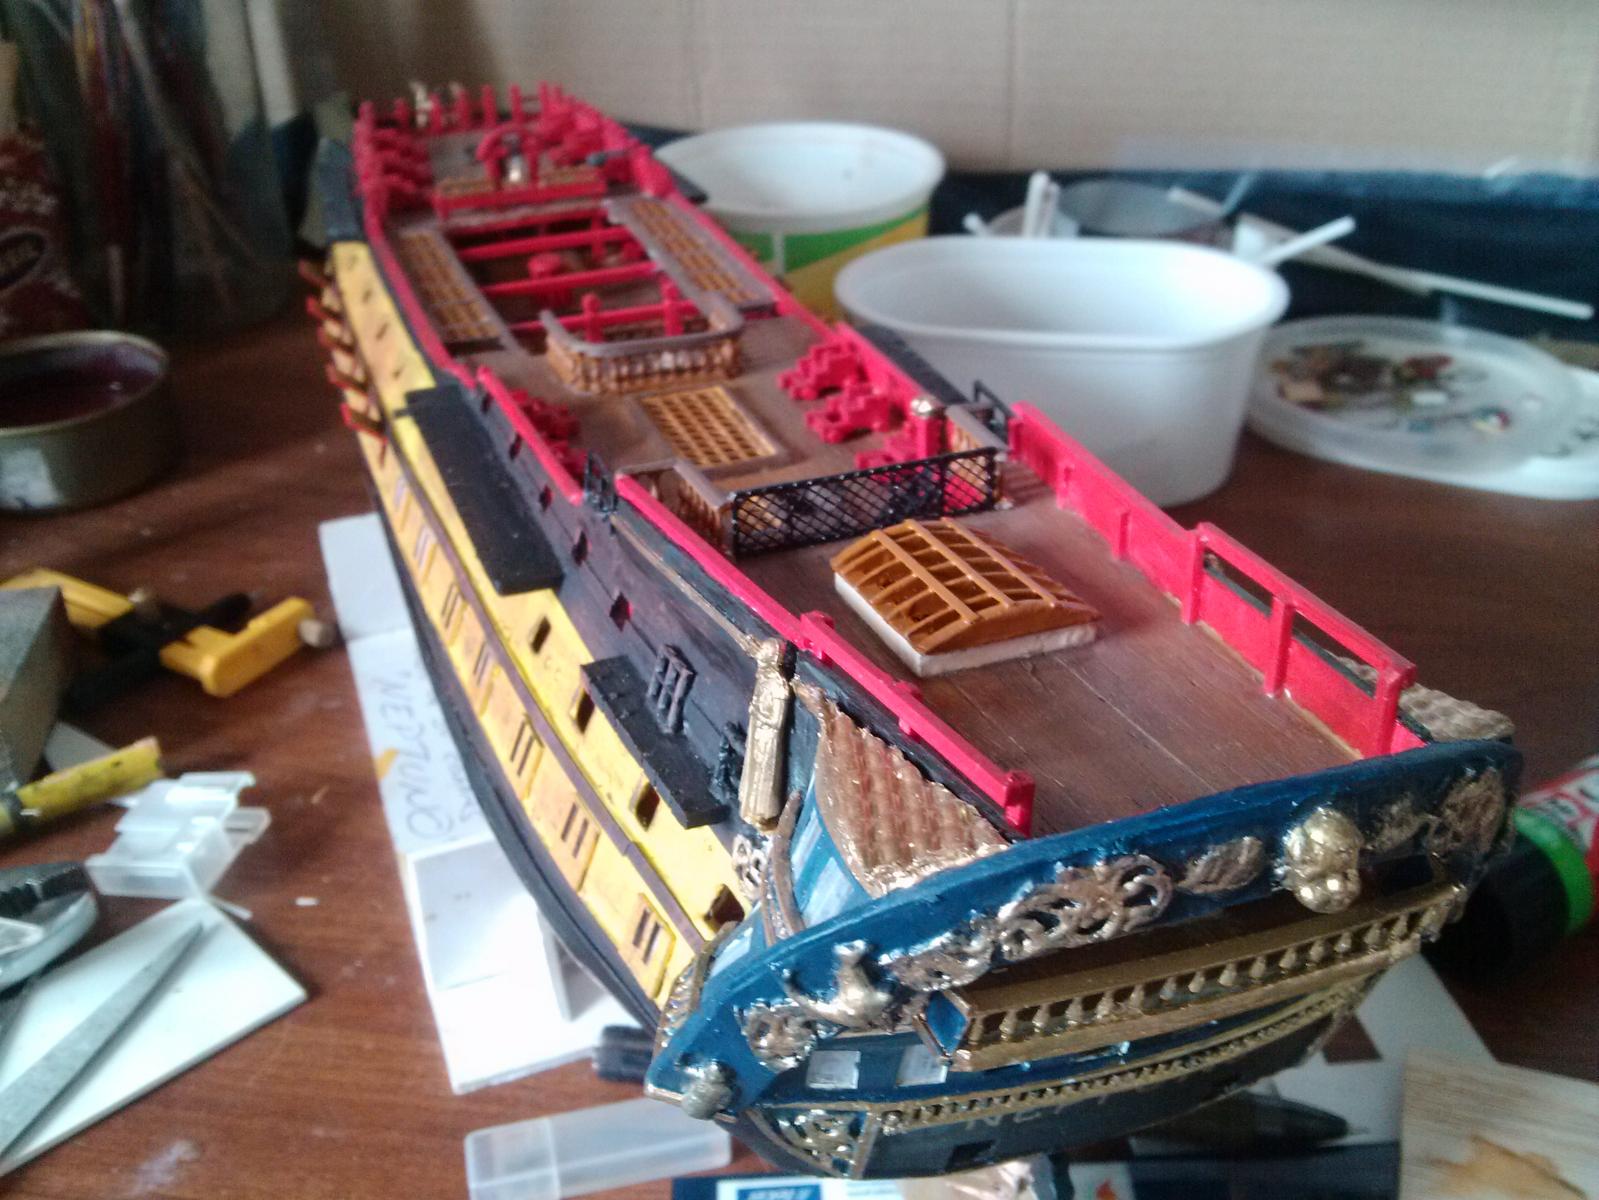
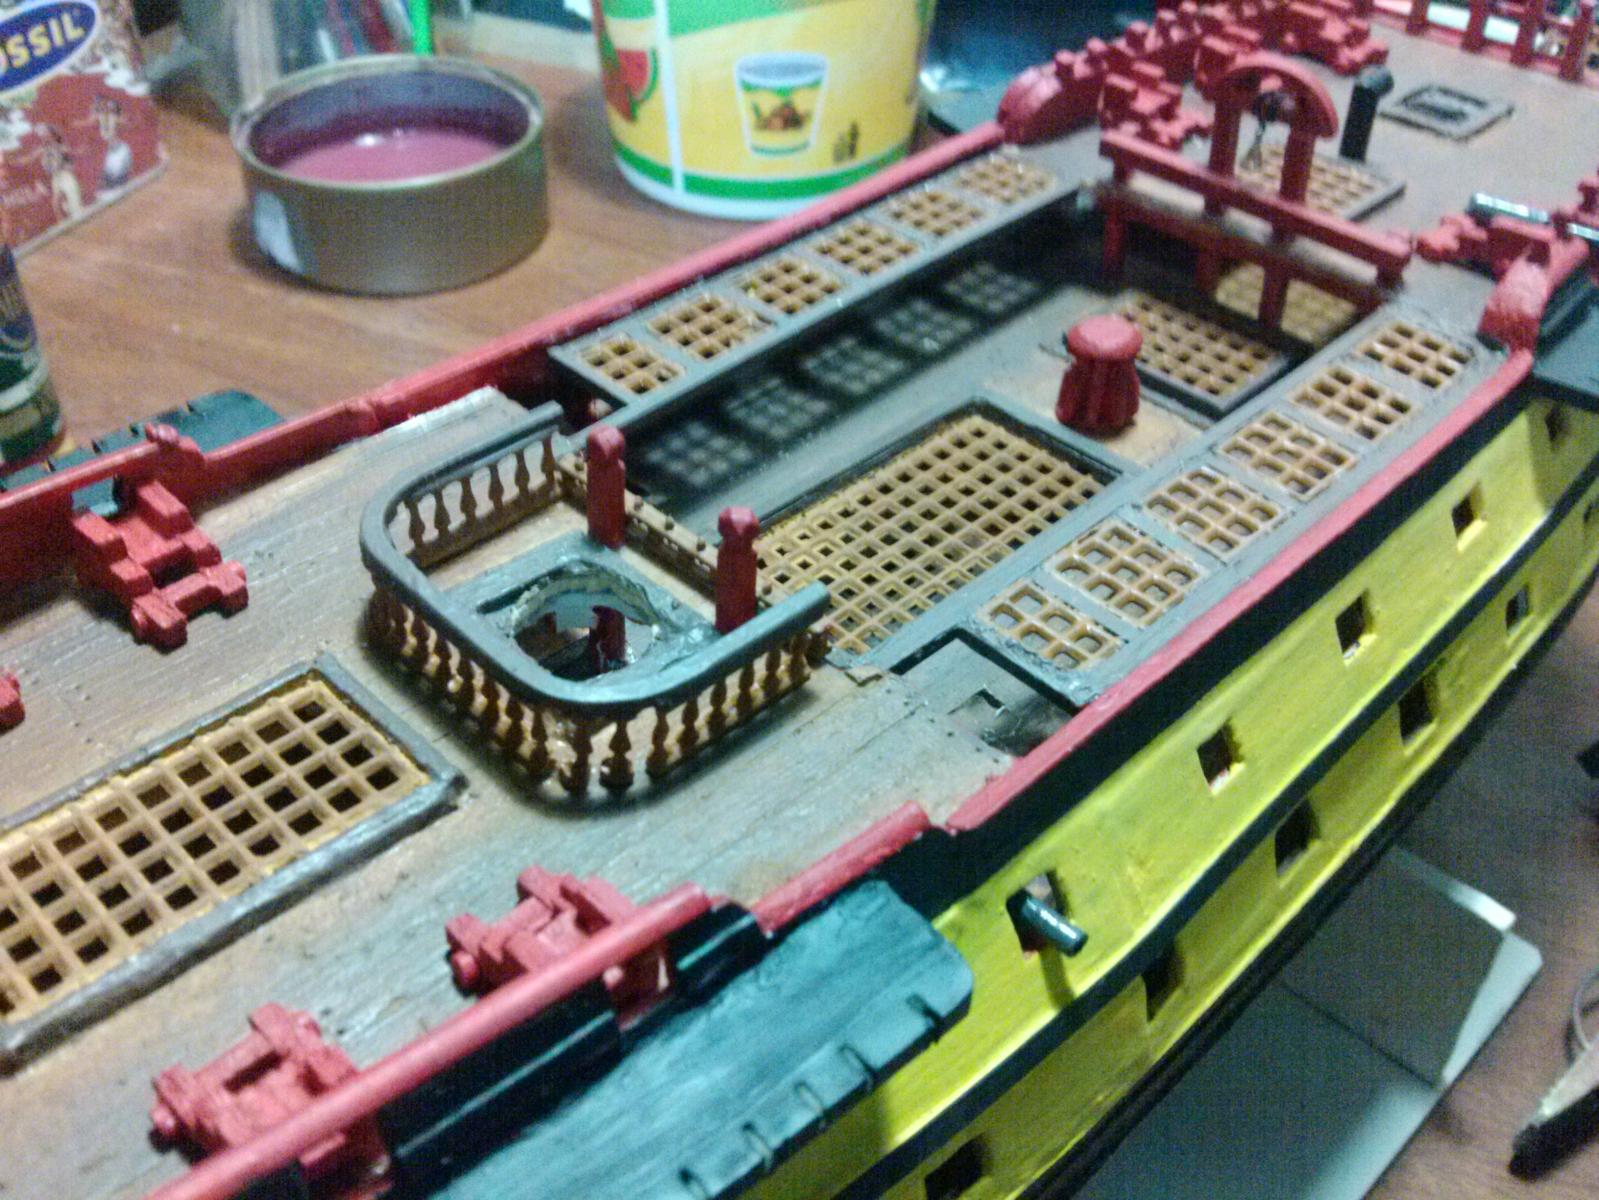
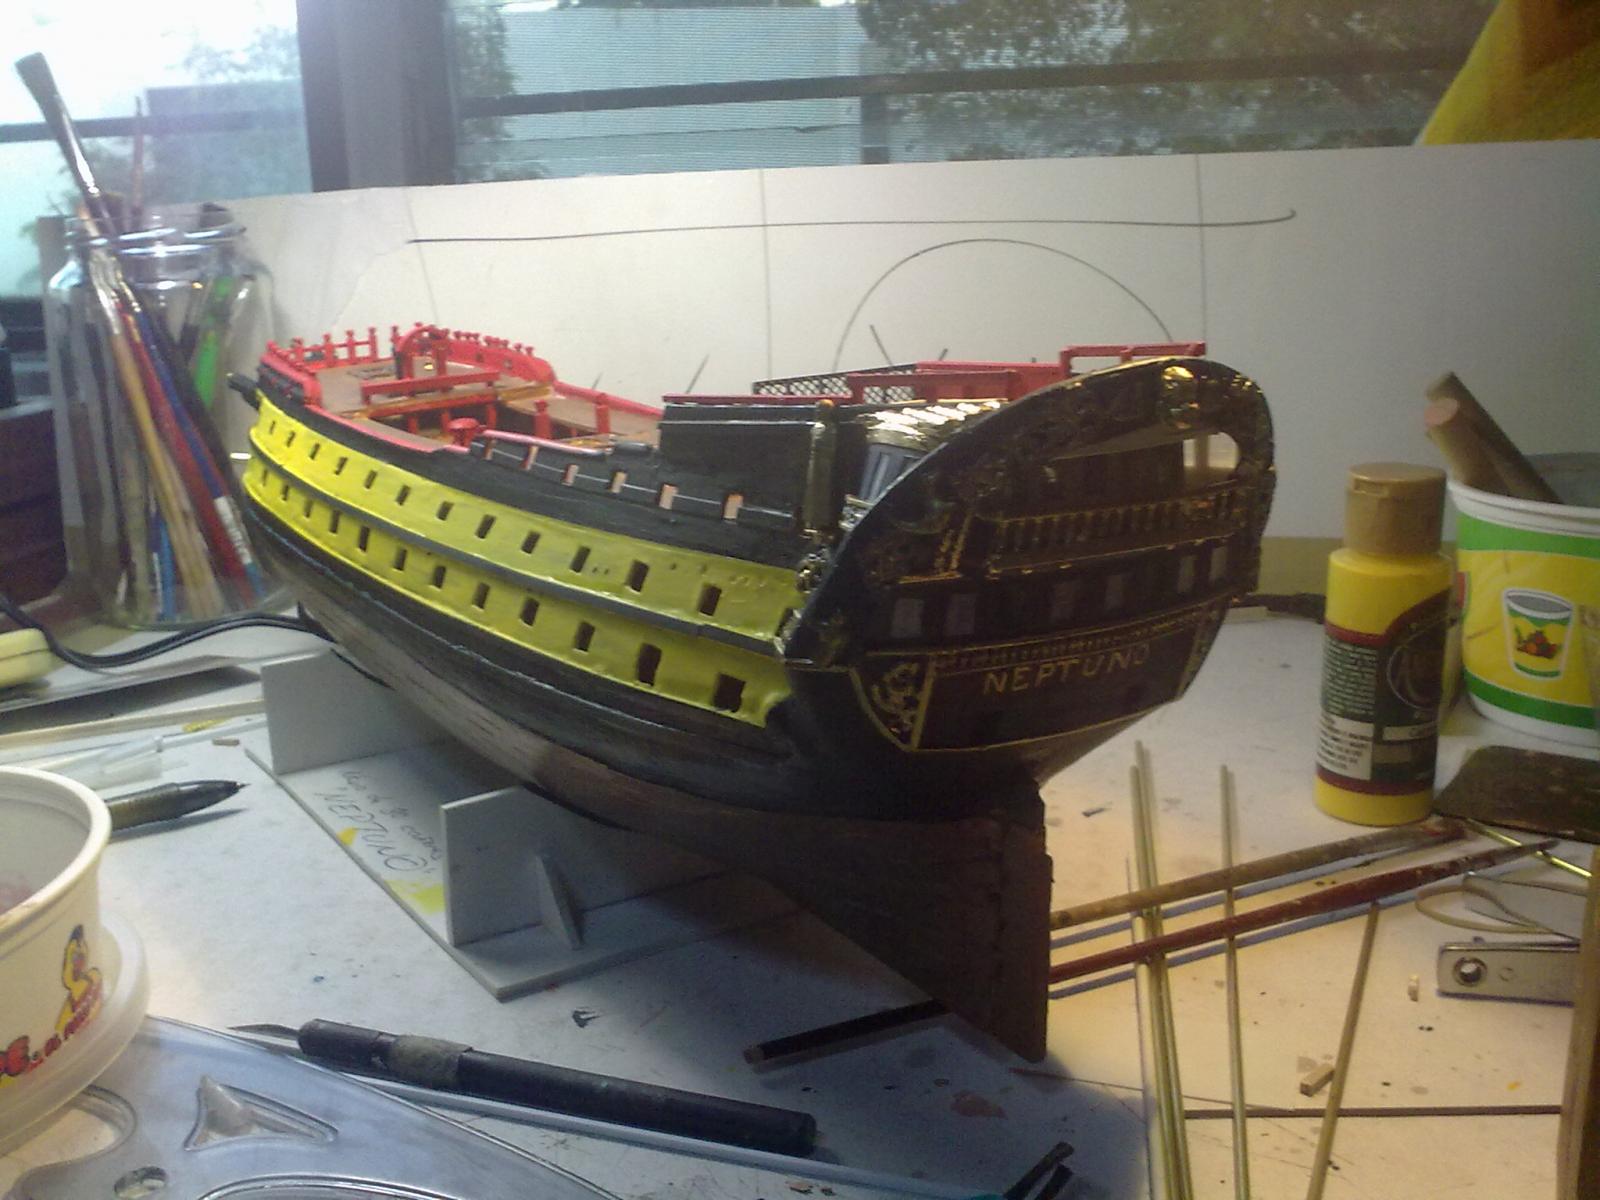
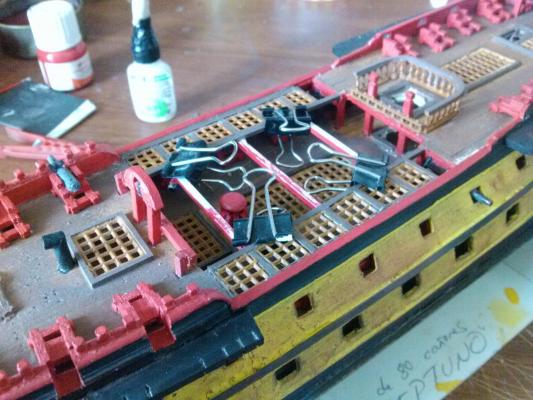
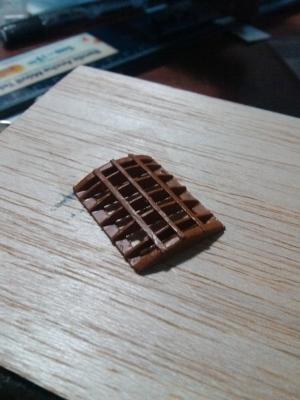
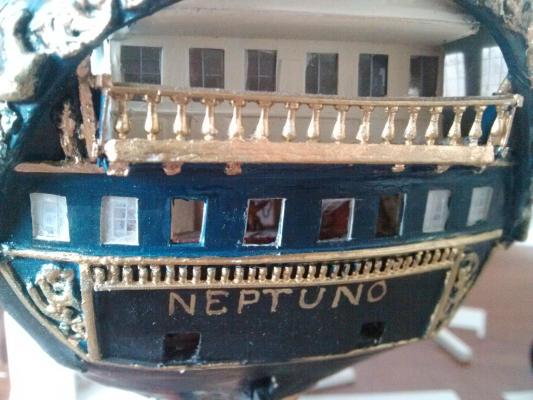
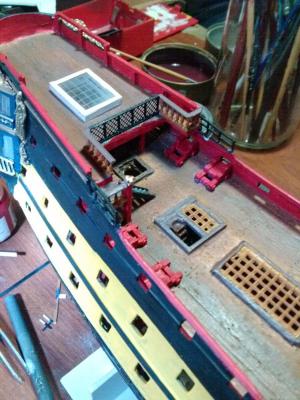
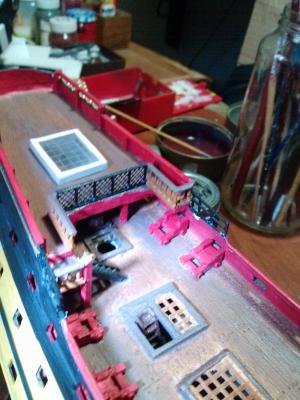
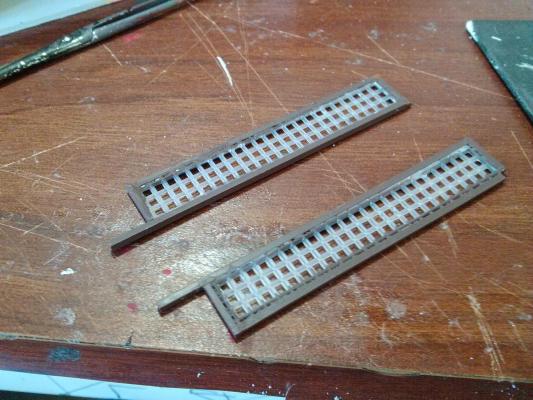
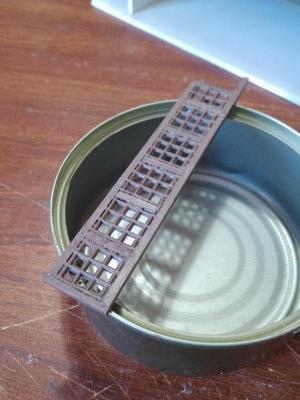
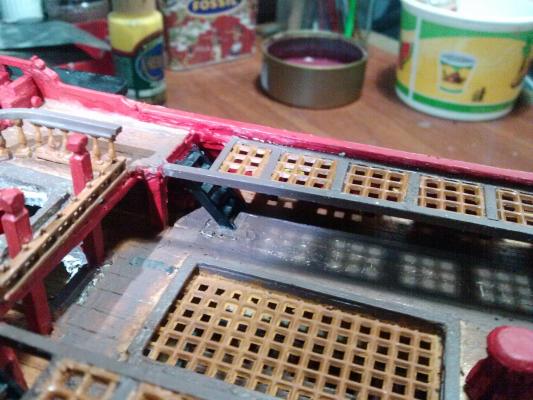
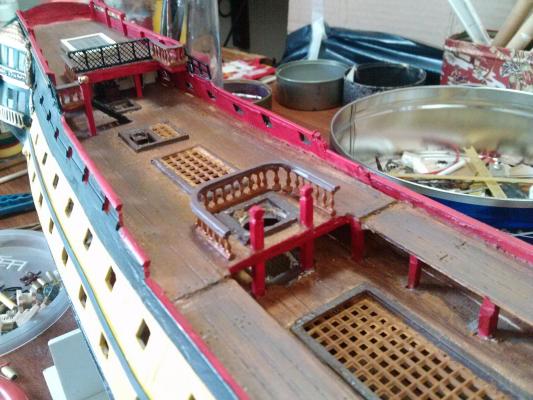
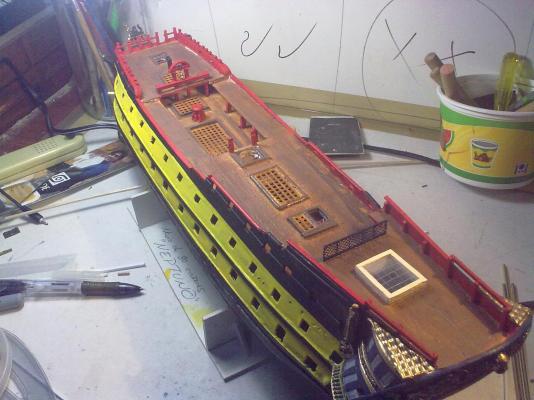
Lids of the gunports. Beams of the waist deck. New skylight New openings on the window of the transom, in order to better appreciate the furnished interior General view of the project Main mast and fighting top. Details of the crosstrees, openings for Jacob's ladder and supports for the mast,


- 43 replies
-
- 2
-
-
- neptuno
- ship of the line
- (and 1 more)
-
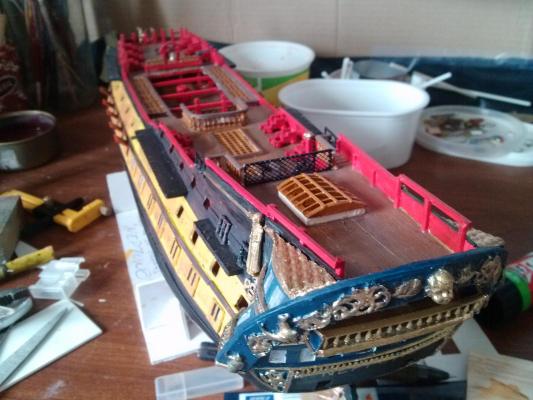
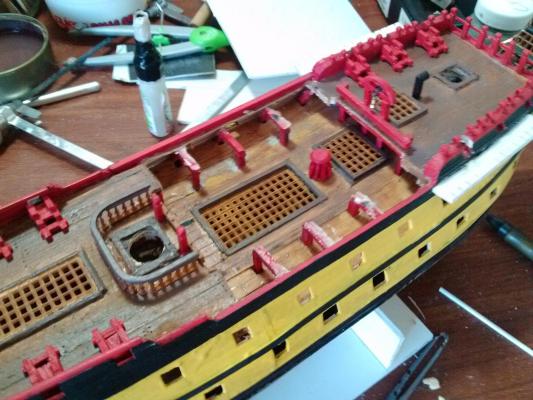
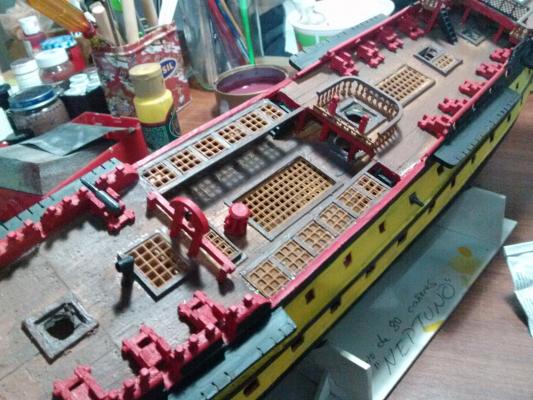
Mounting the gun carriages of the quarterdeck. Window frames of the officers' cabins. Seat of the ratlines and gun carriages of the forecastle New decks in the waist deck Details of the waist deck. Weathering of the hull


- 43 replies
-
- 2
-
-
- neptuno
- ship of the line
- (and 1 more)
-
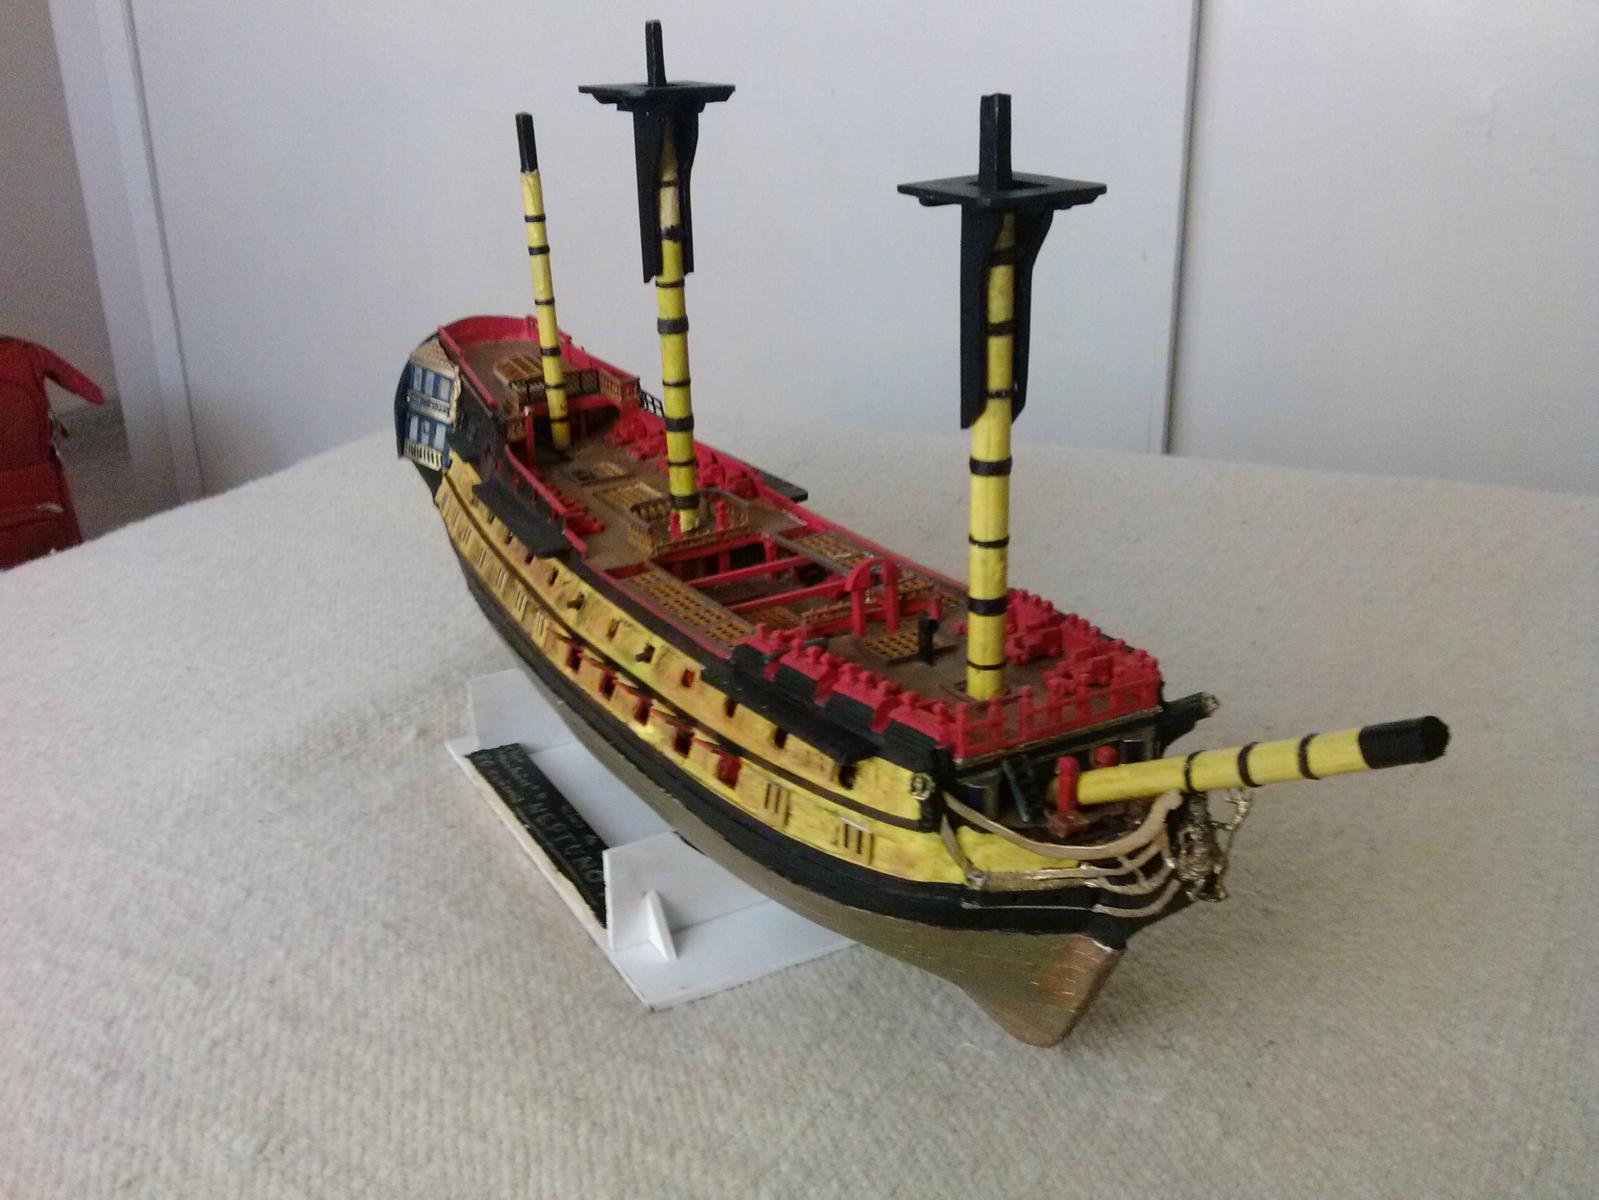
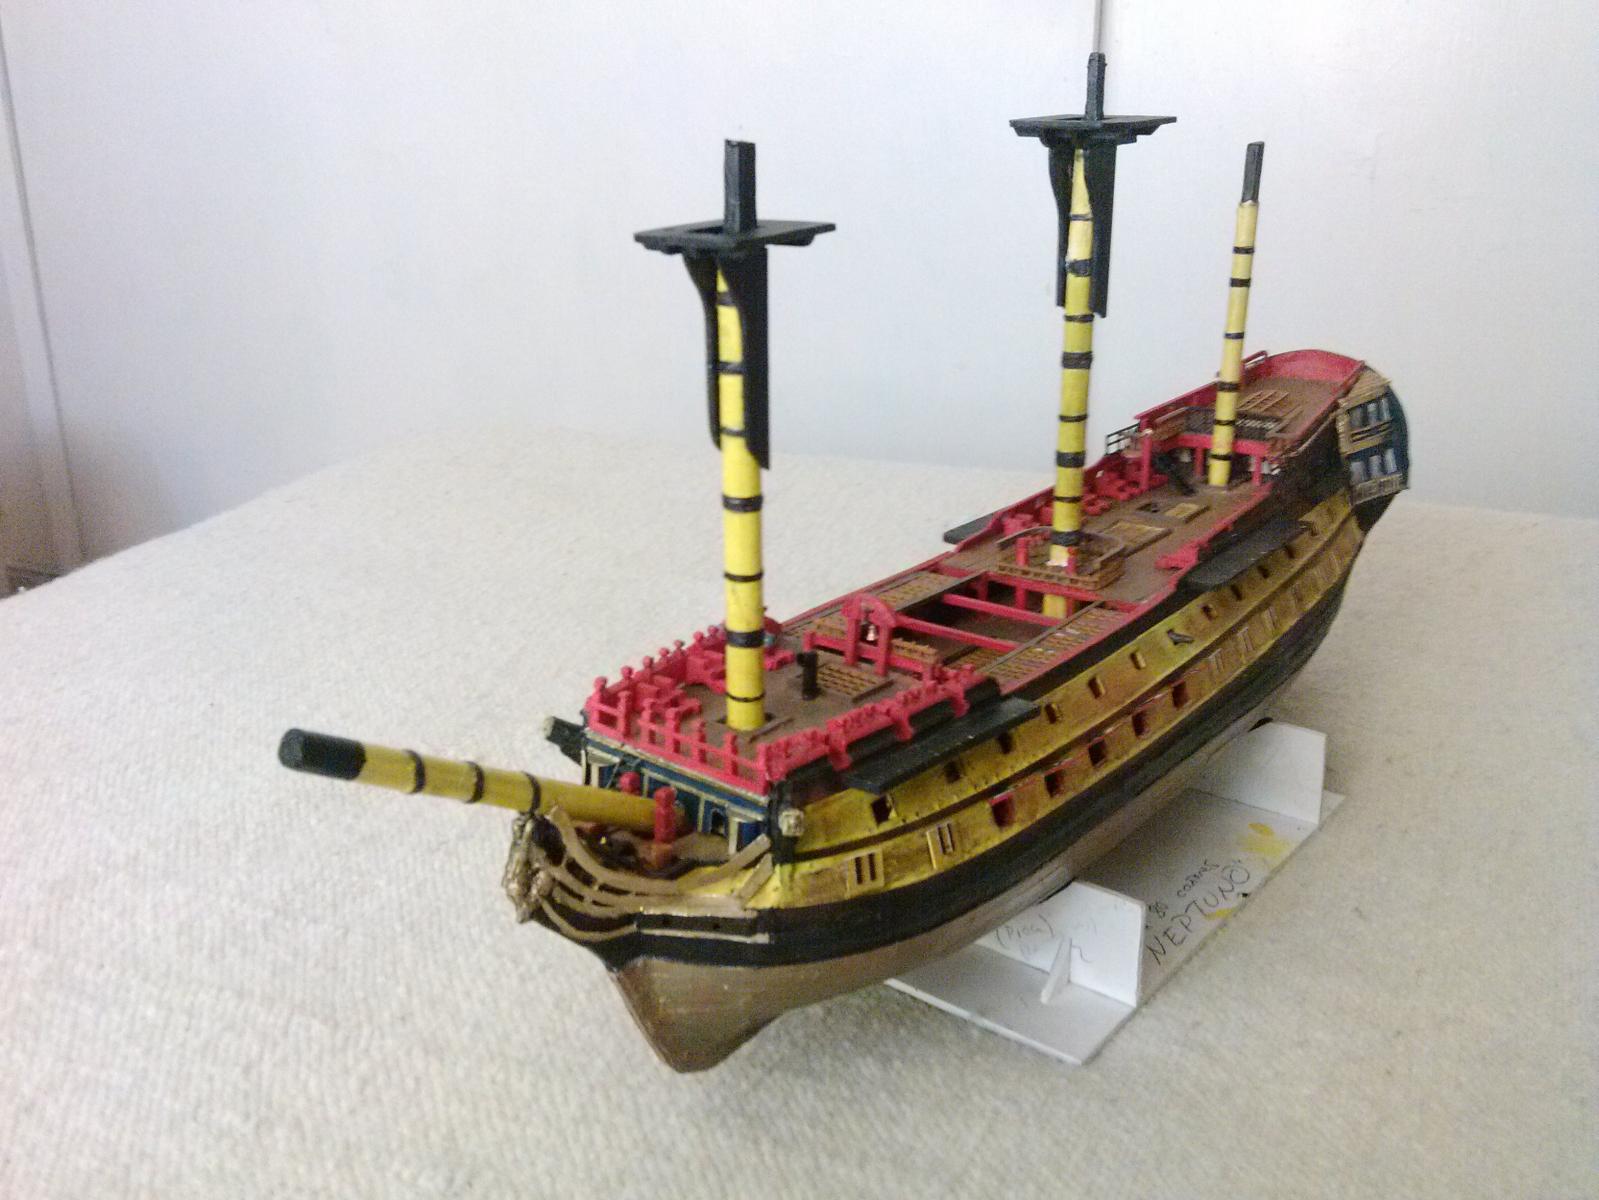
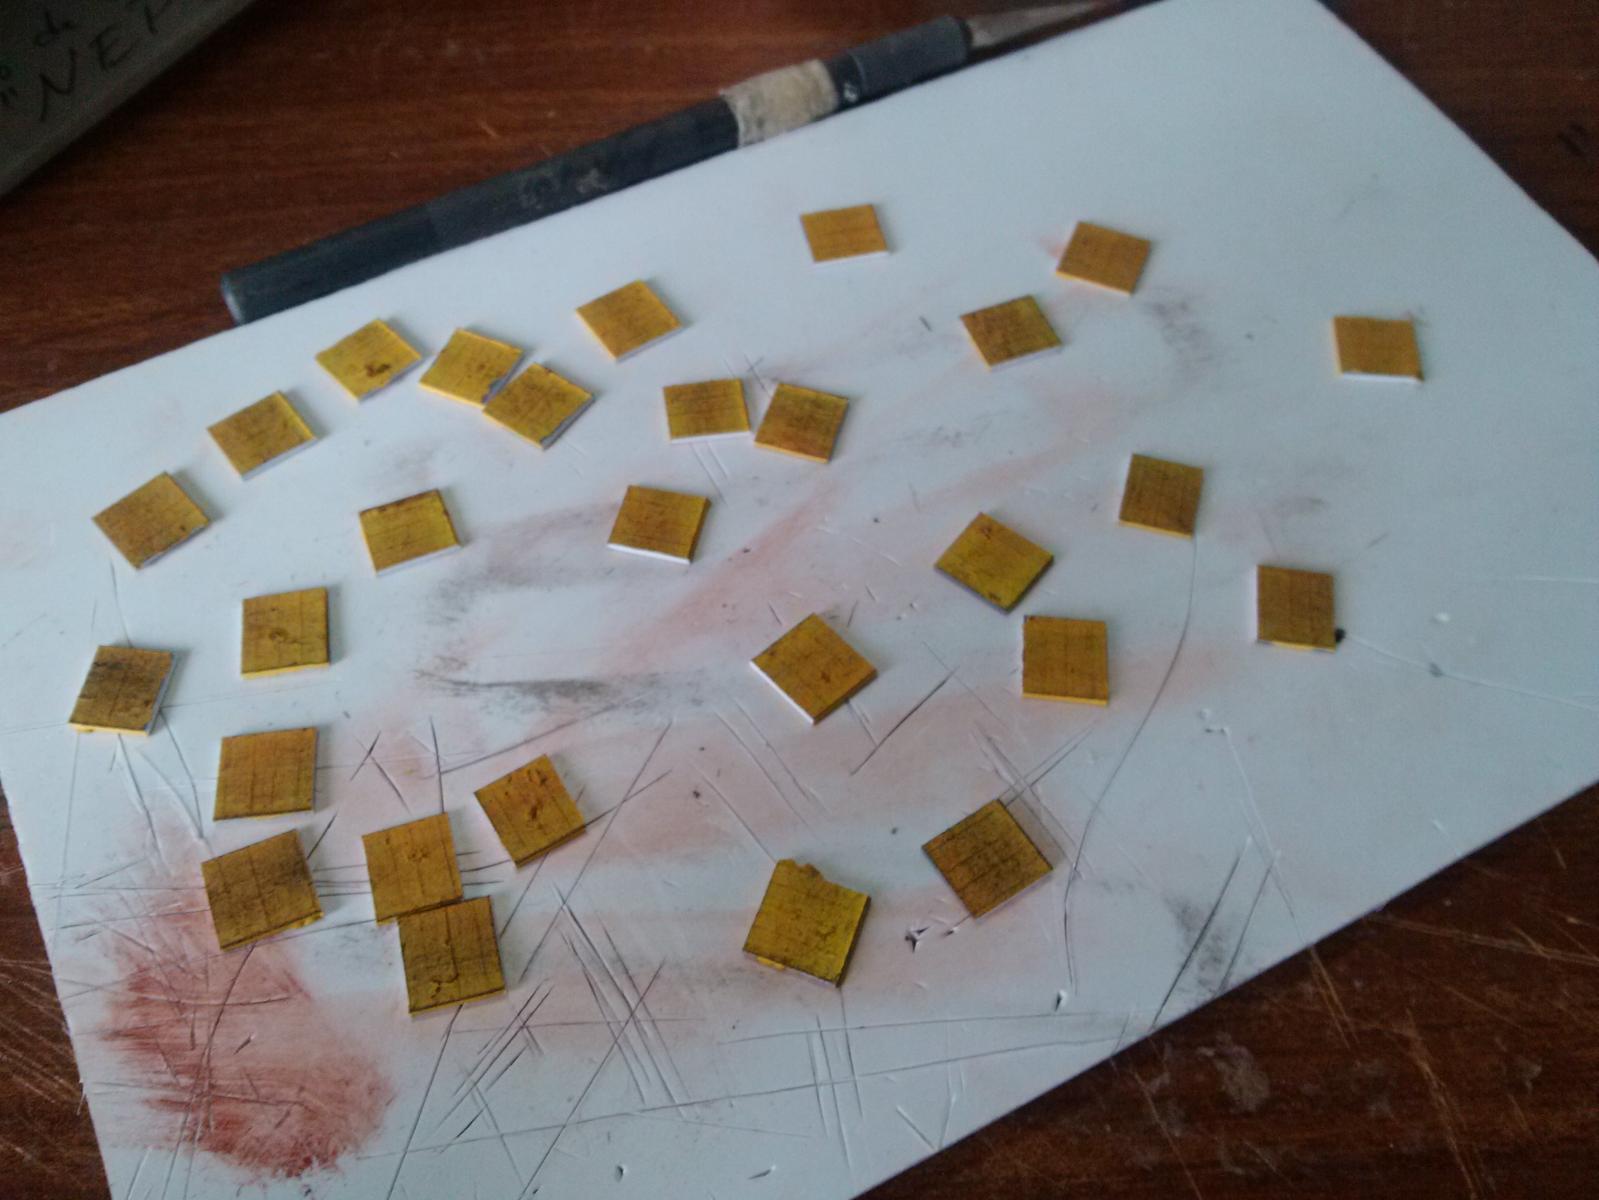
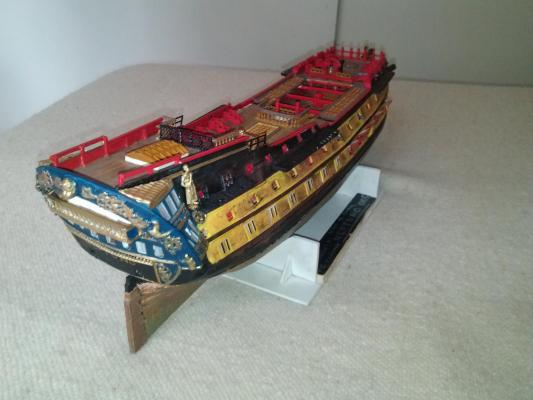
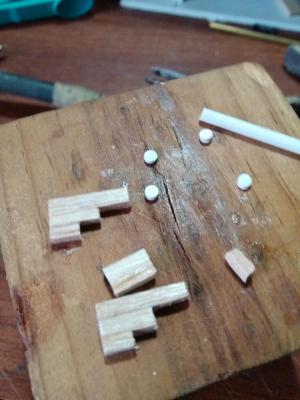
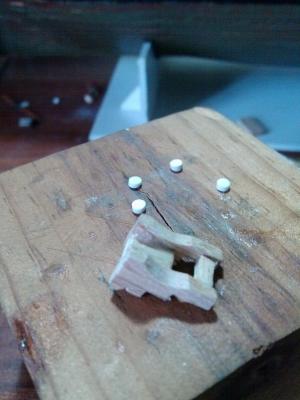
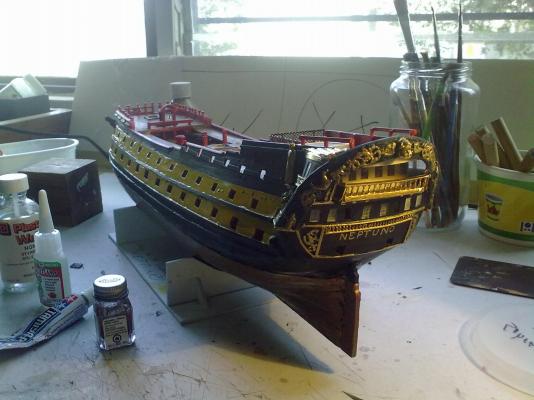
Parts of the gun carriages. 1 down, seventy nine to go... And the finished product...


- 43 replies
-
- 2
-
-
- neptuno
- ship of the line
- (and 1 more)
-
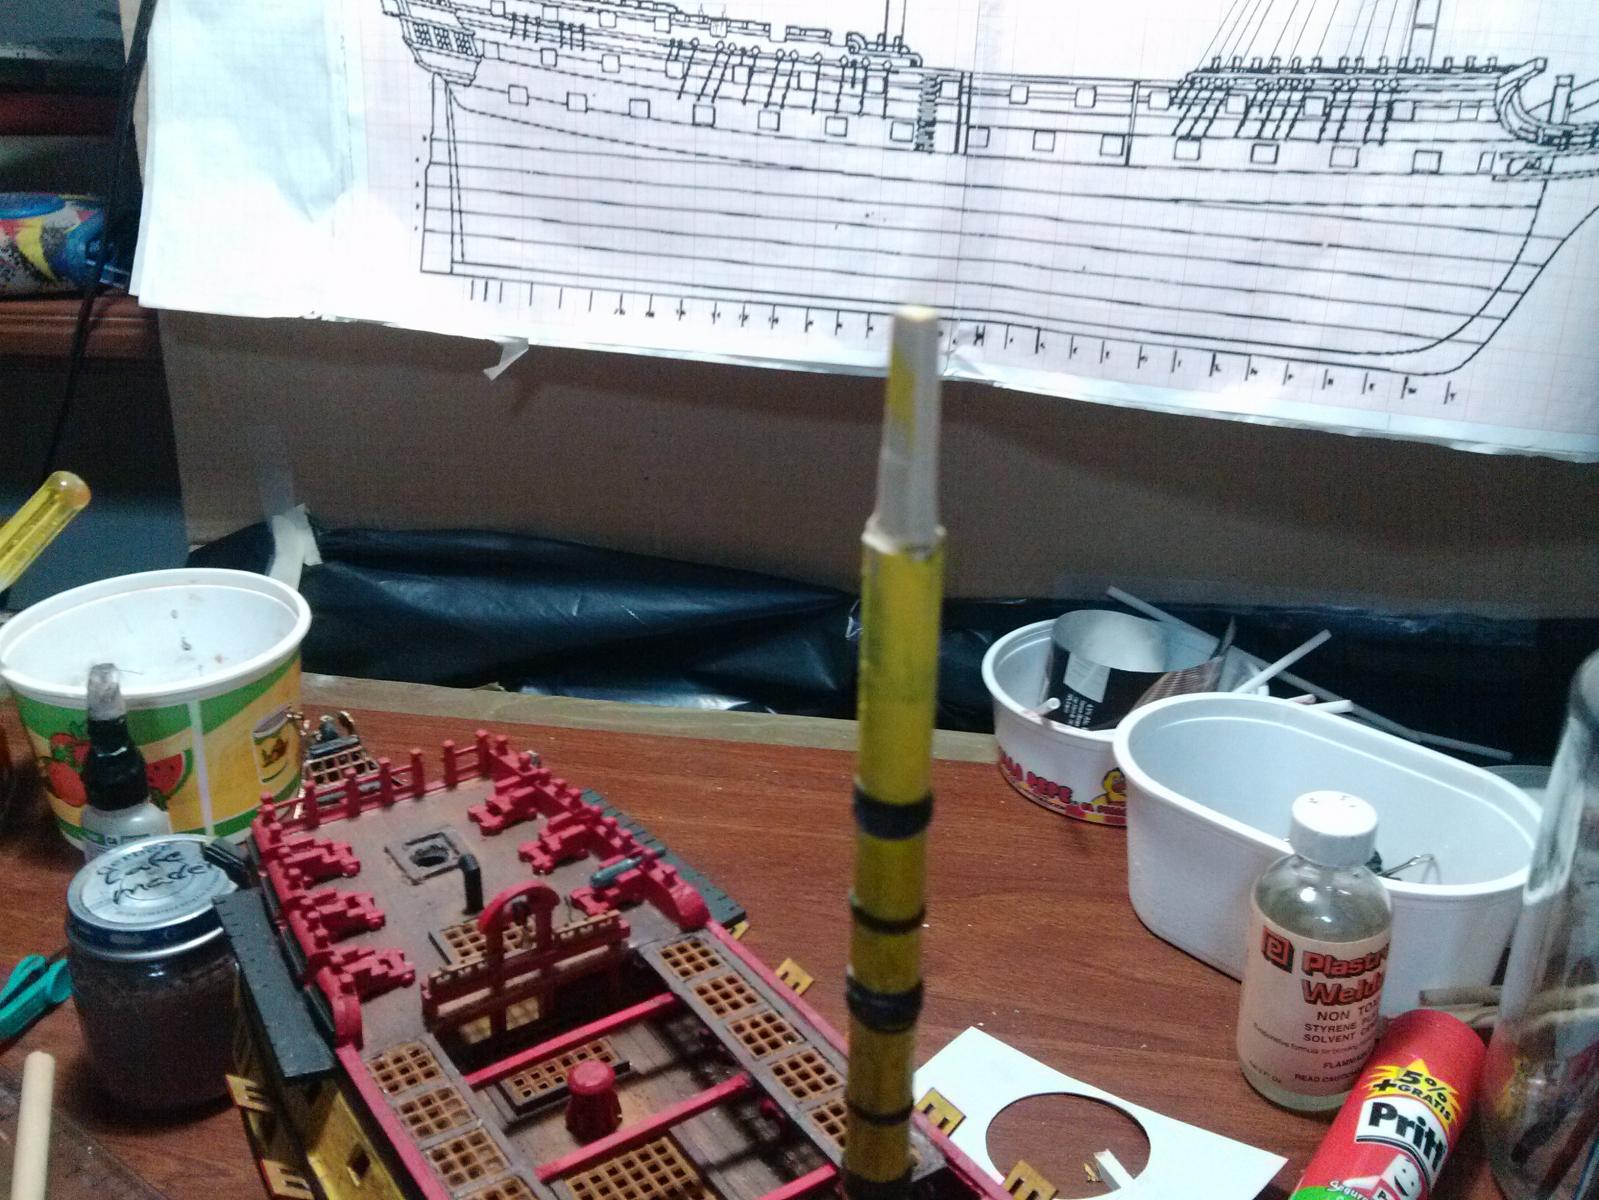
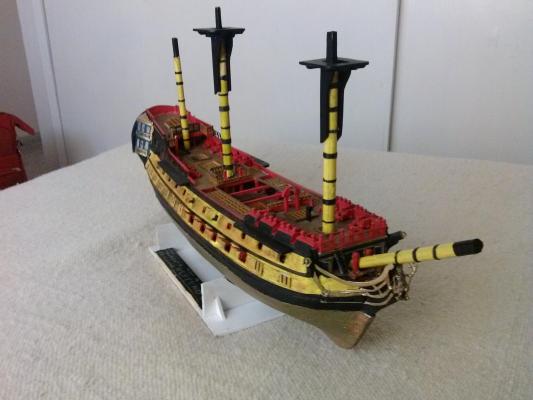
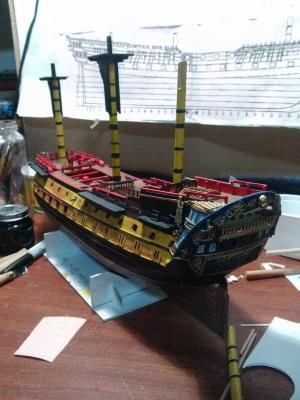
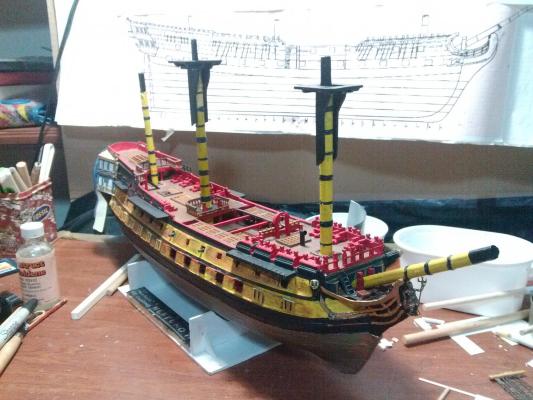
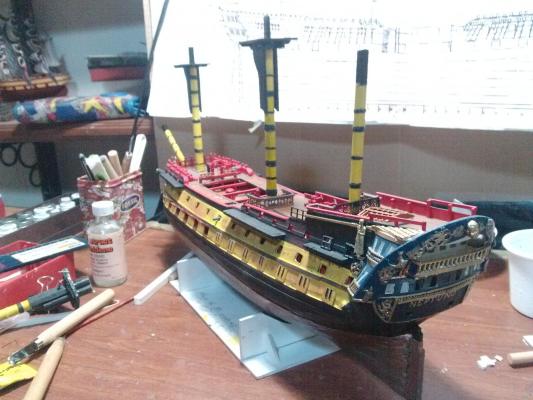
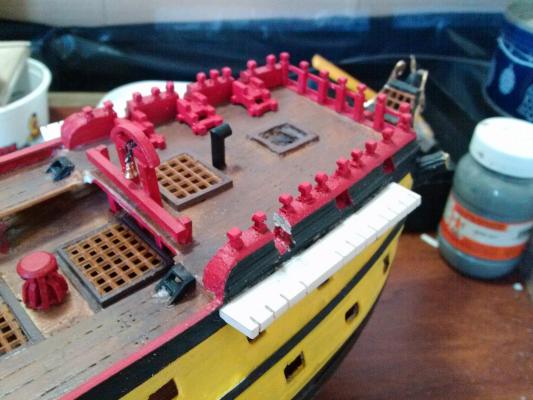
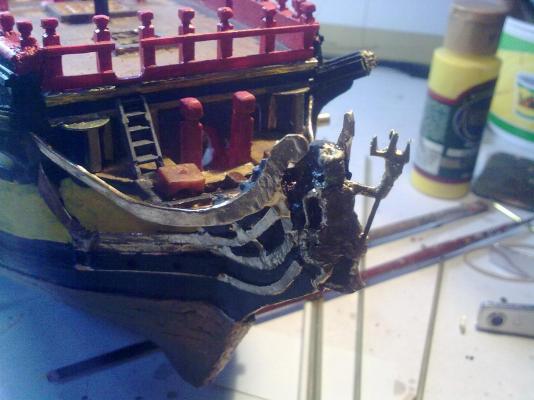
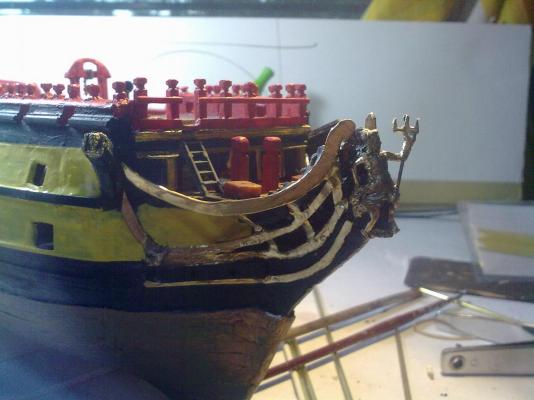
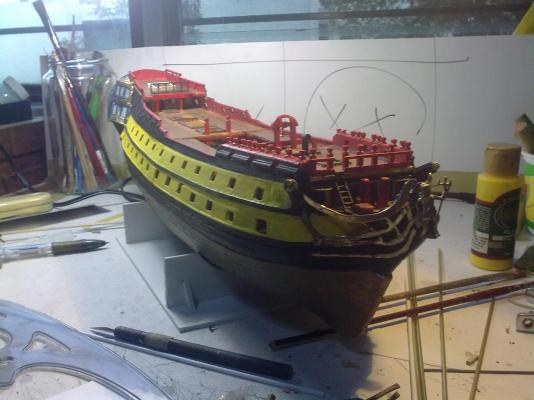
Here are, at last, the updates to my Neptuno project. Railings for the main mast


- 43 replies
-
- 2
-
-
- neptuno
- ship of the line
- (and 1 more)
-
Trafalgarhero reacted to a post in a topic:
HMS Bellerophon by freewheelinguy - FINISHED - Victory Models - Semi-scratchbuilt
-
Trafalgarhero reacted to a post in a topic:
Le Superbe by Blue Ensign - FINISHED - Heller - PLASTIC - Built as "Le Praetorian", after Boudriot
-
Alas! Holiday is over! Back to college and routine, see you in the summer! I leave you with a few updated views of my project...

- 43 replies
-
- 2
-
-
- neptuno
- ship of the line
- (and 1 more)
-
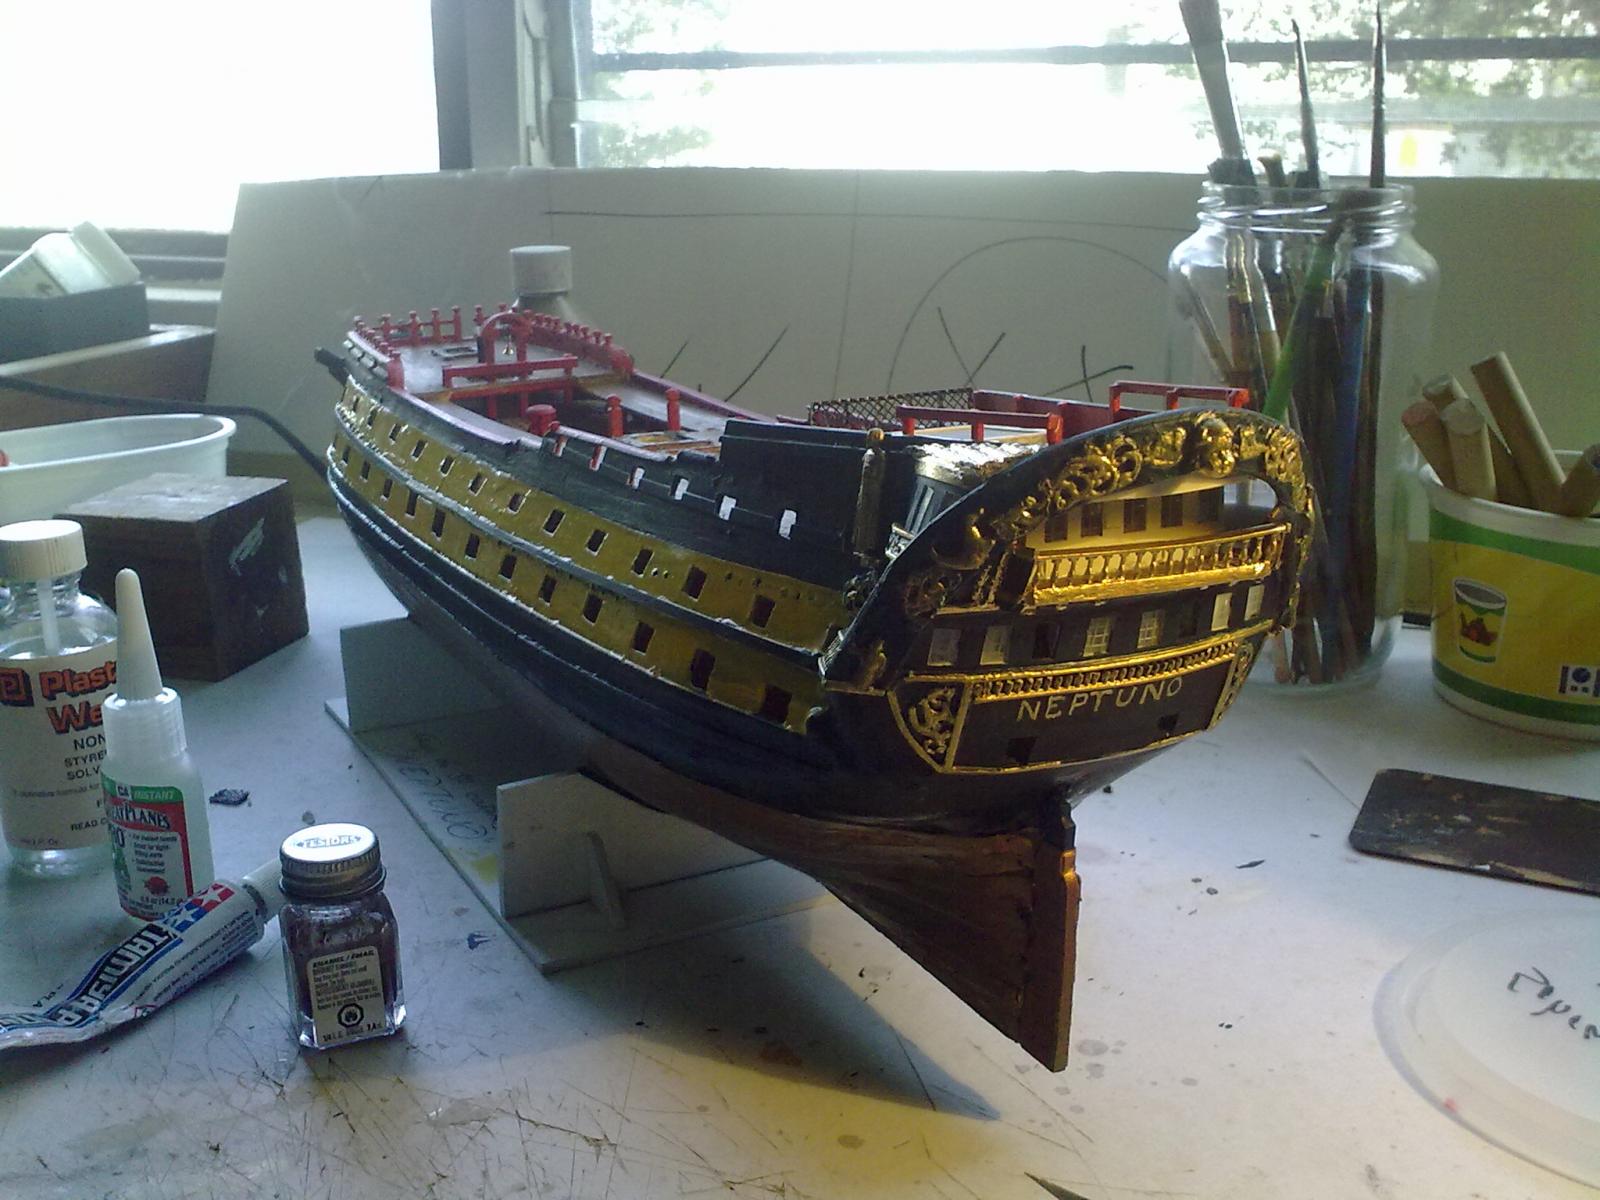
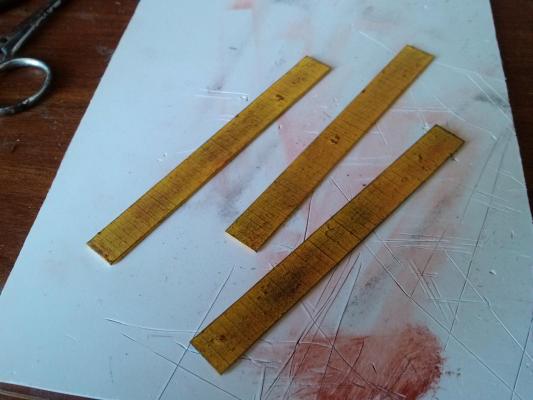
Correcting the paint lines of the yellow stripes along the gunports. In order to achieve a perfect line I masked the lines a little bit higher and then painted the whole thing black. This method seals any crevices and imperfections, and even if some of the paint leaks under the tape it won't matter, since it is the same color. After dry, I used a flat, pale yellow color, consistent with the era. Here is the old version... And the new one...


- 43 replies
-
- 2
-
-
- neptuno
- ship of the line
- (and 1 more)
-
Trafalgarhero reacted to a post in a topic:
Neptuno by Trafalgarhero - 1/120 scale - PLASTIC - Ship-of-the-Line
-
World War II british light cruiser HMS Dido. Am I right?
-
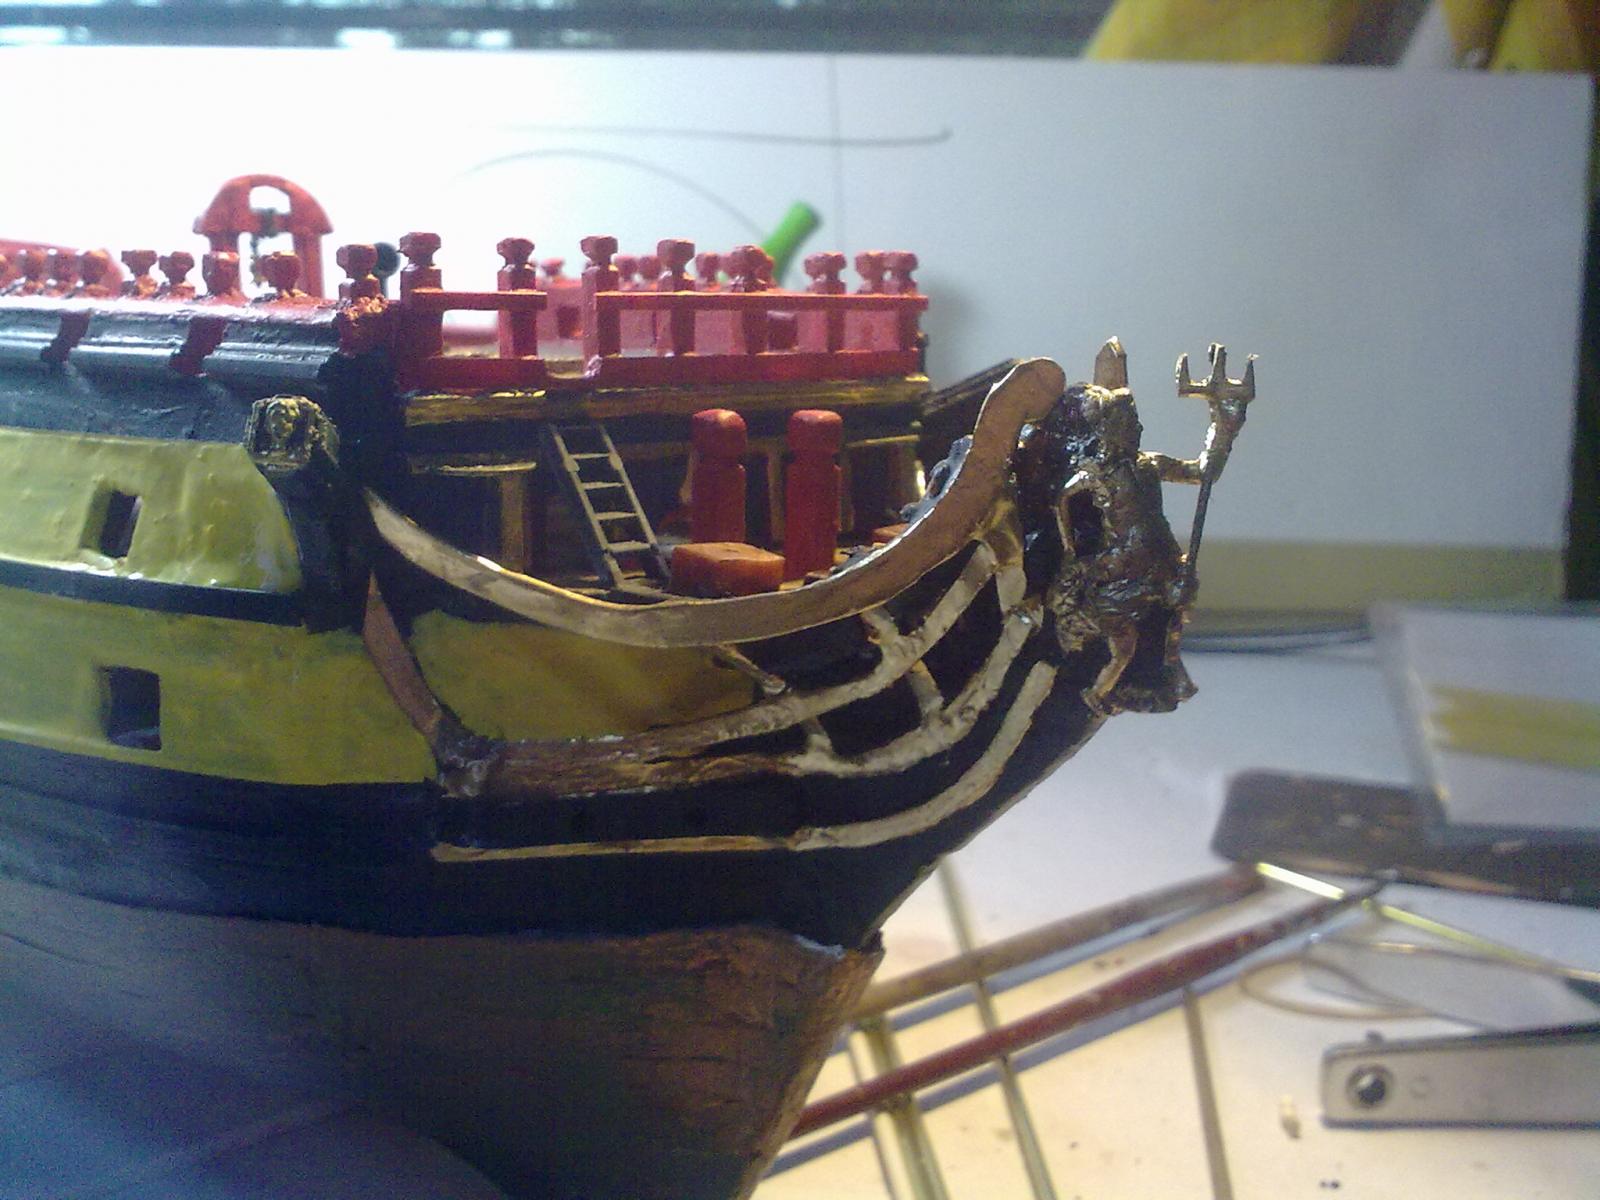
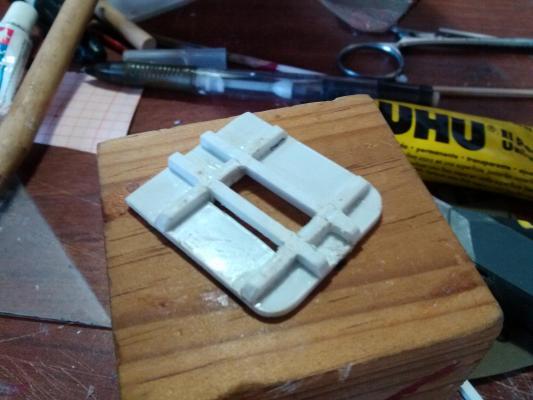
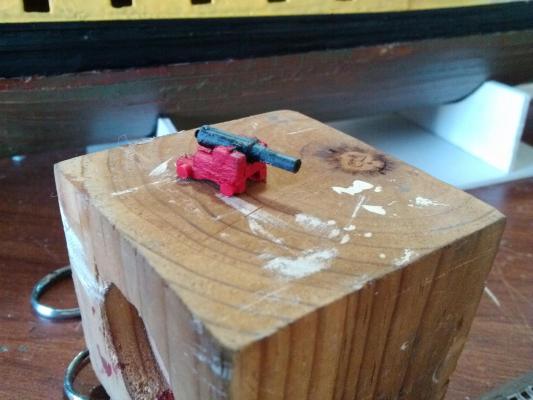
The rudder. I simply did not want to risk it to get it wrong, so first I went for a commercial piece. Sadly, the ones from Artesania Latina, Caldercraft and other model brands are metal die cast, usually the wrong scale or simply too crude. I wanted something very fine and detailed. In the end, I cannibalized an old kit for the rudder's wheel, and the stand and log case are made of styrene.


- 43 replies
-
- 2
-
-
- neptuno
- ship of the line
- (and 1 more)
-
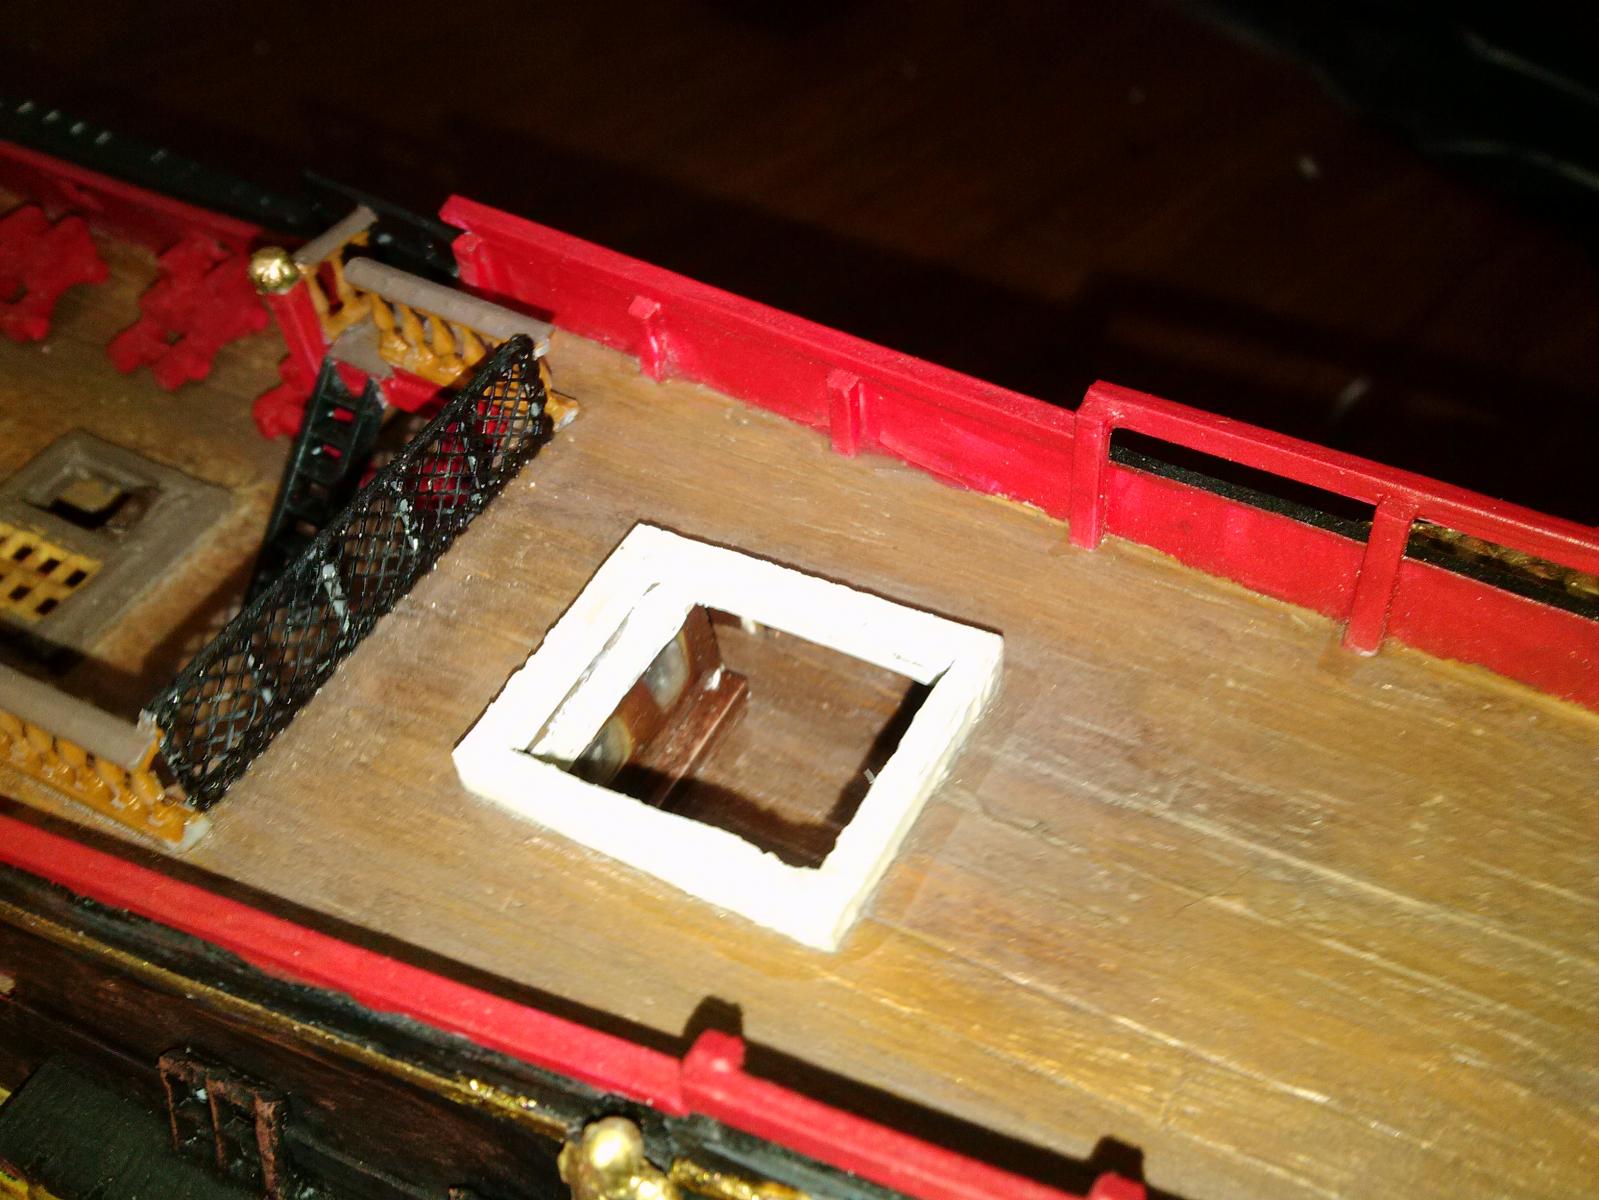
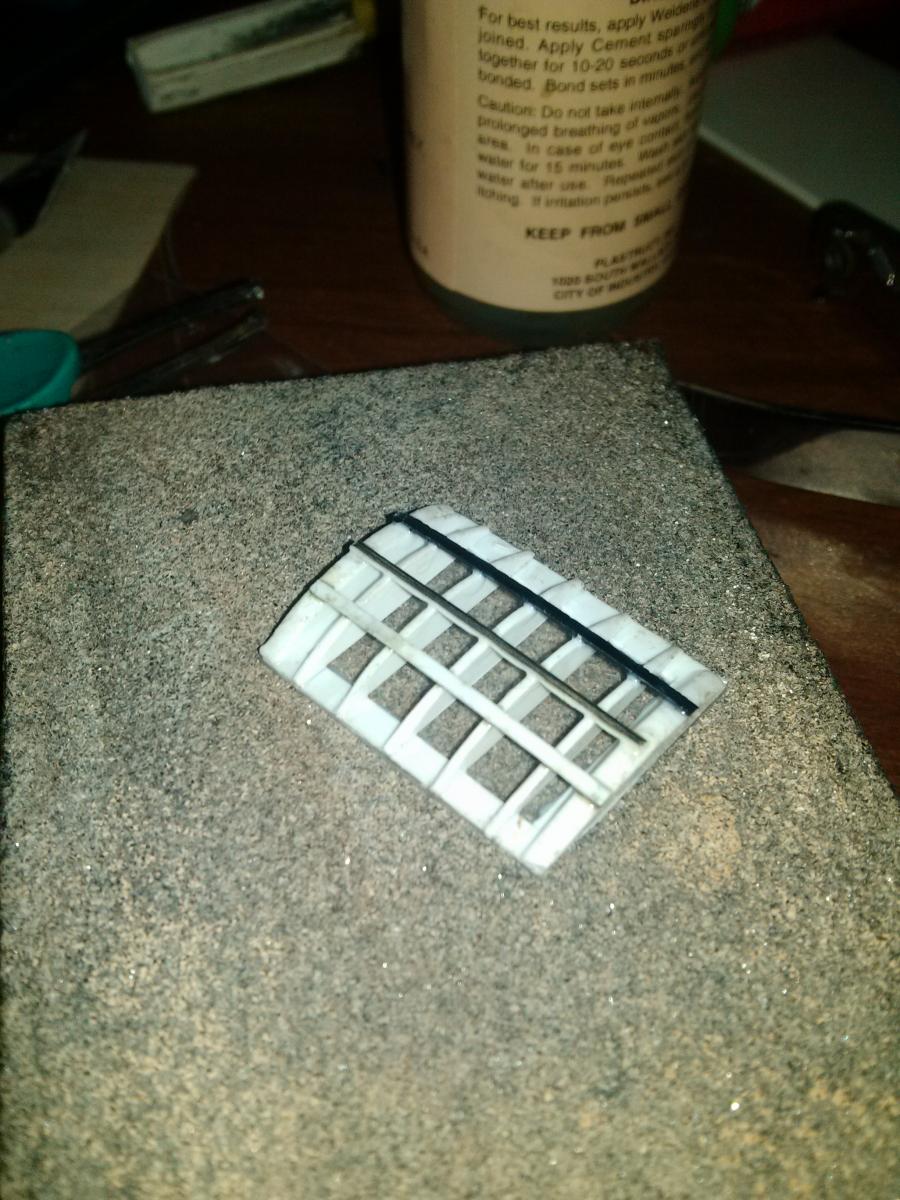
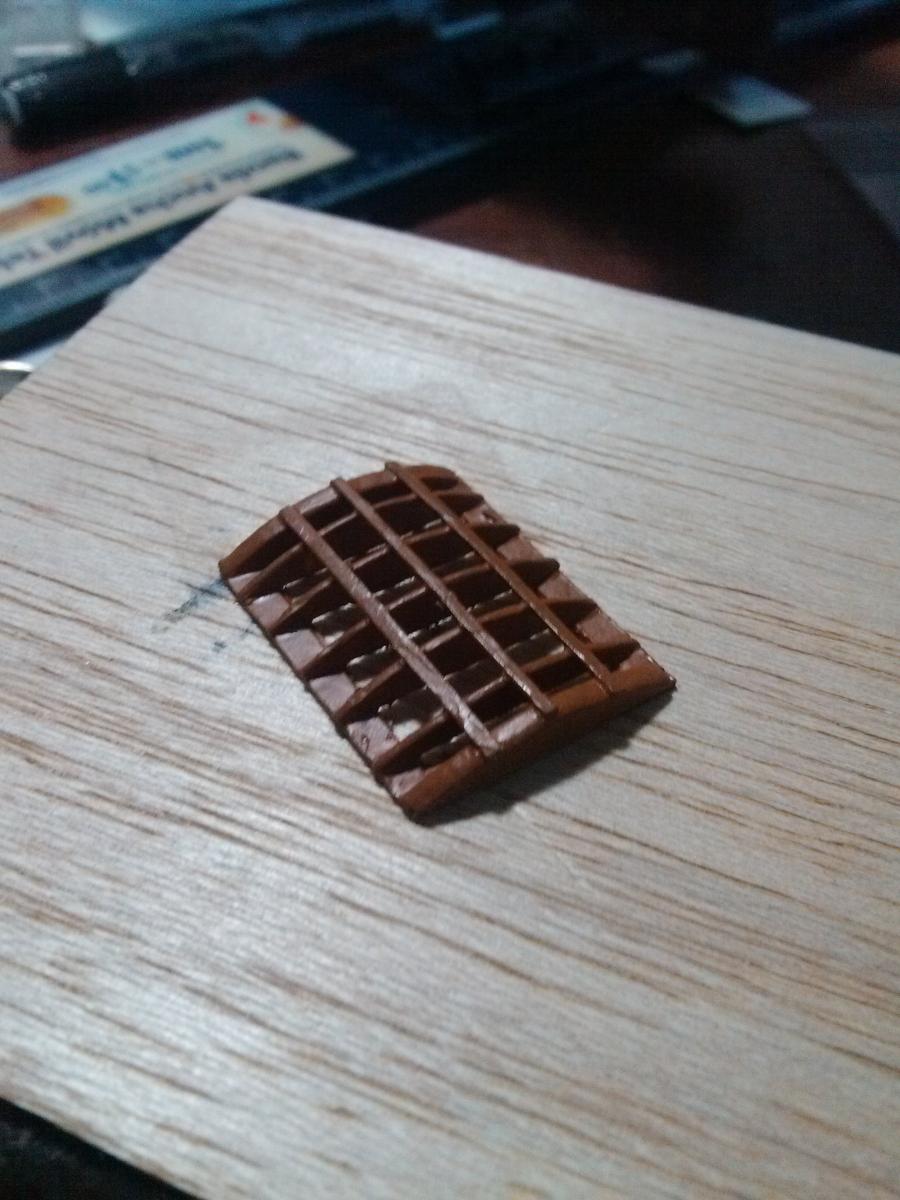
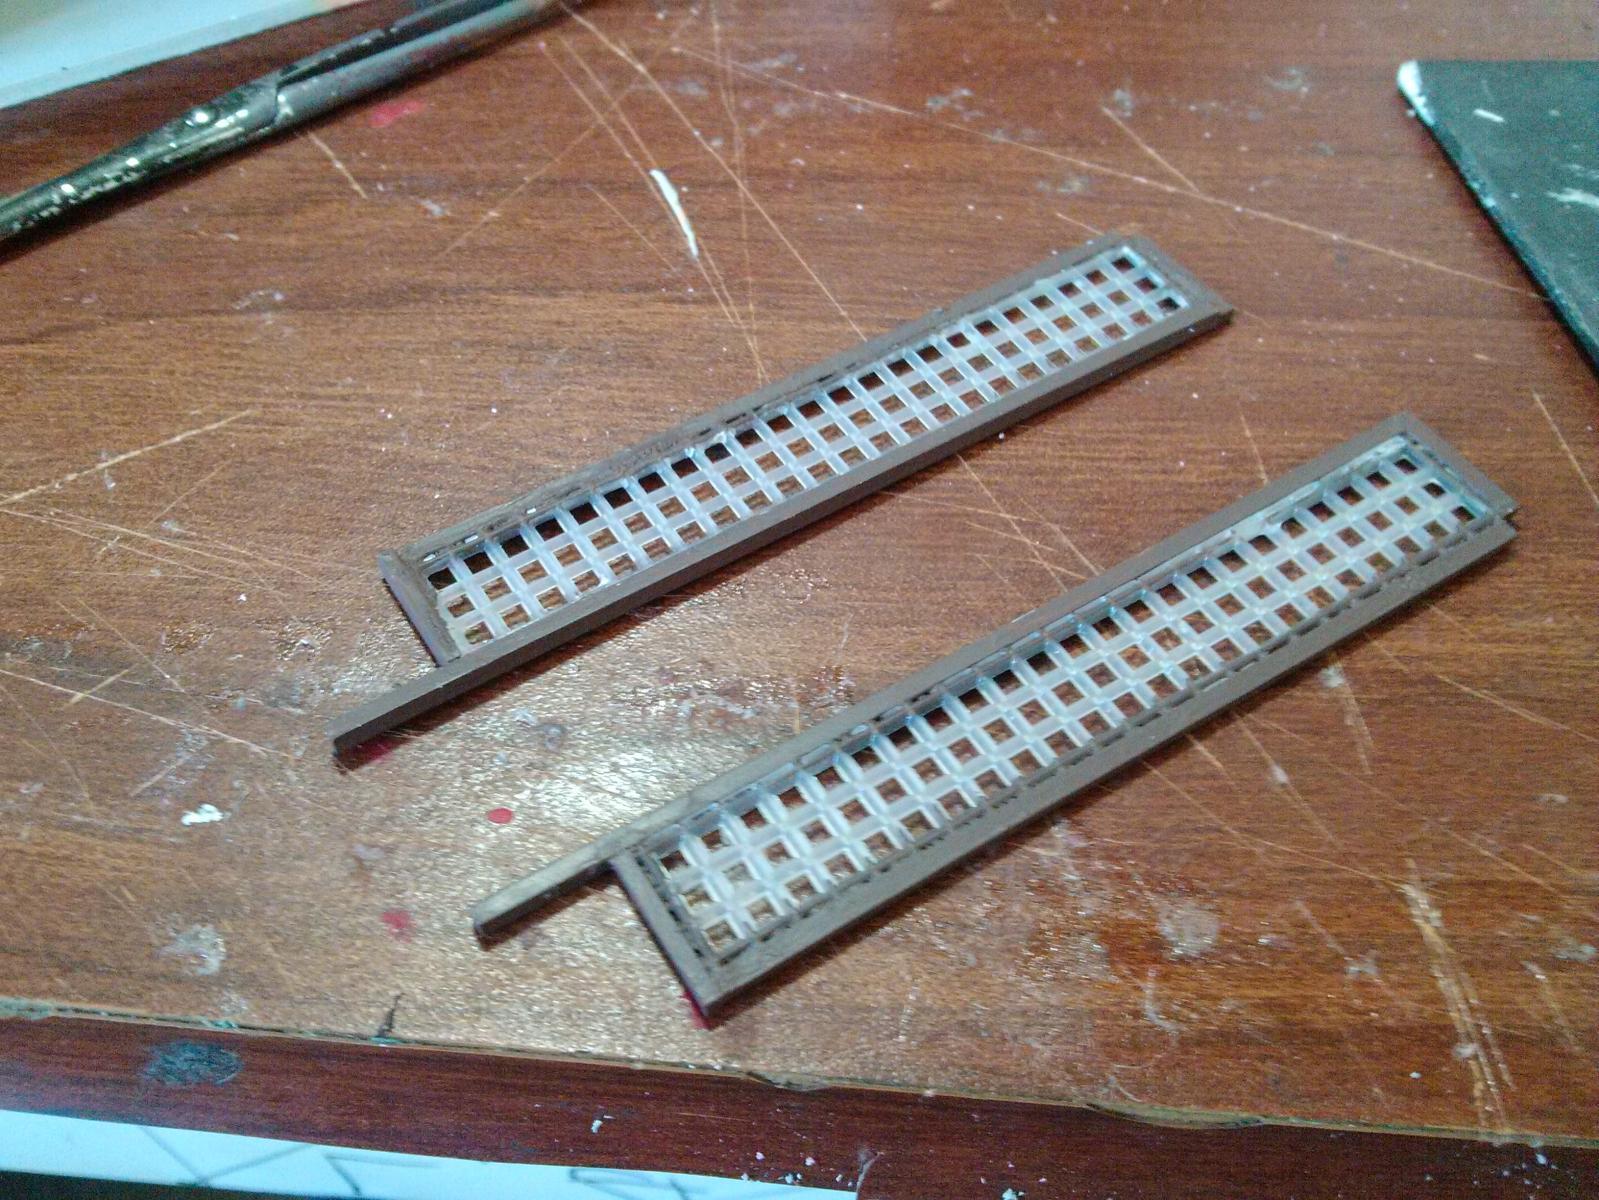
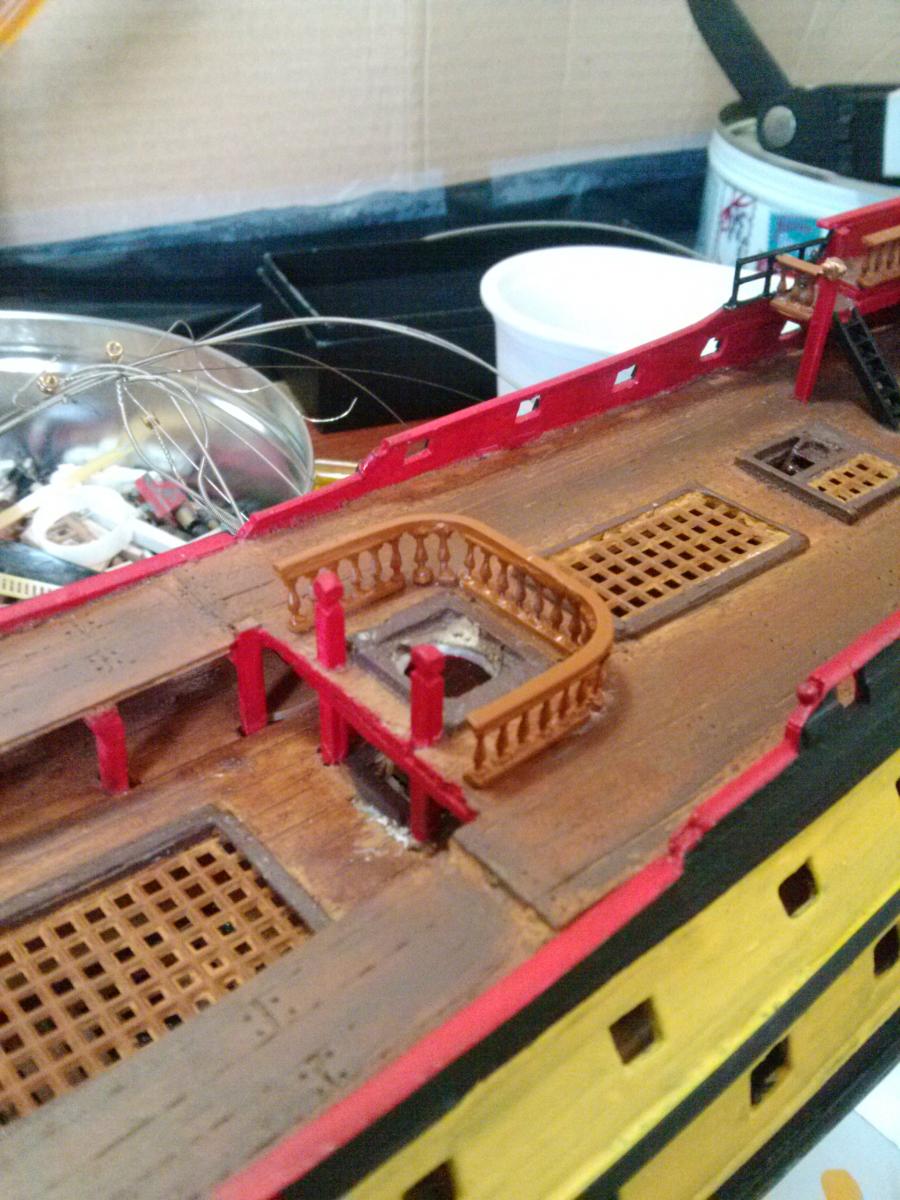
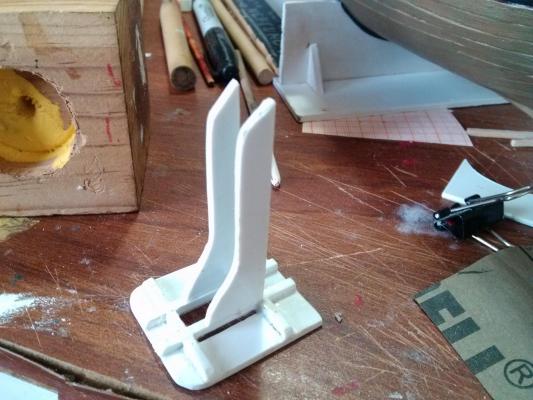
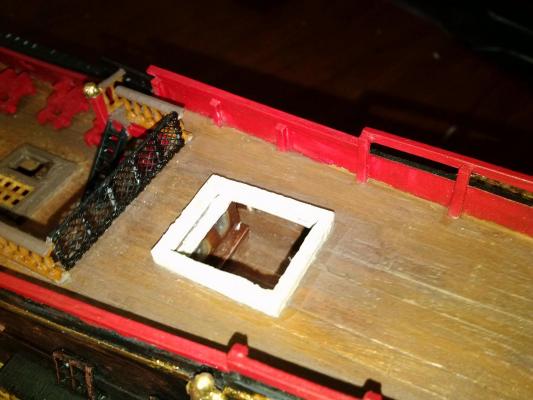
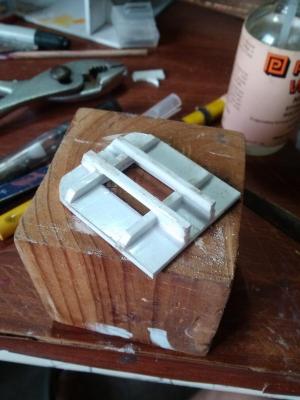
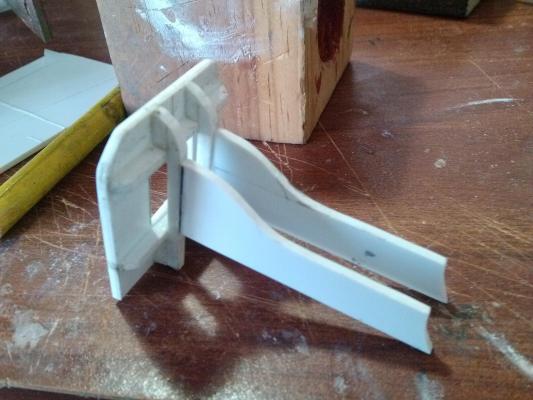
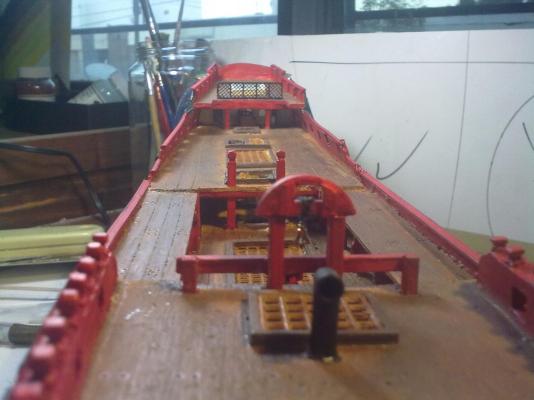
Making the skylight for the quarterdeck. First, the frame: Securing the clear styrene window to the frame, I used Master Modeler's Styrene Weldener instead of CA glue, since I want the piece to be absolutely clean. Skylight into place


-
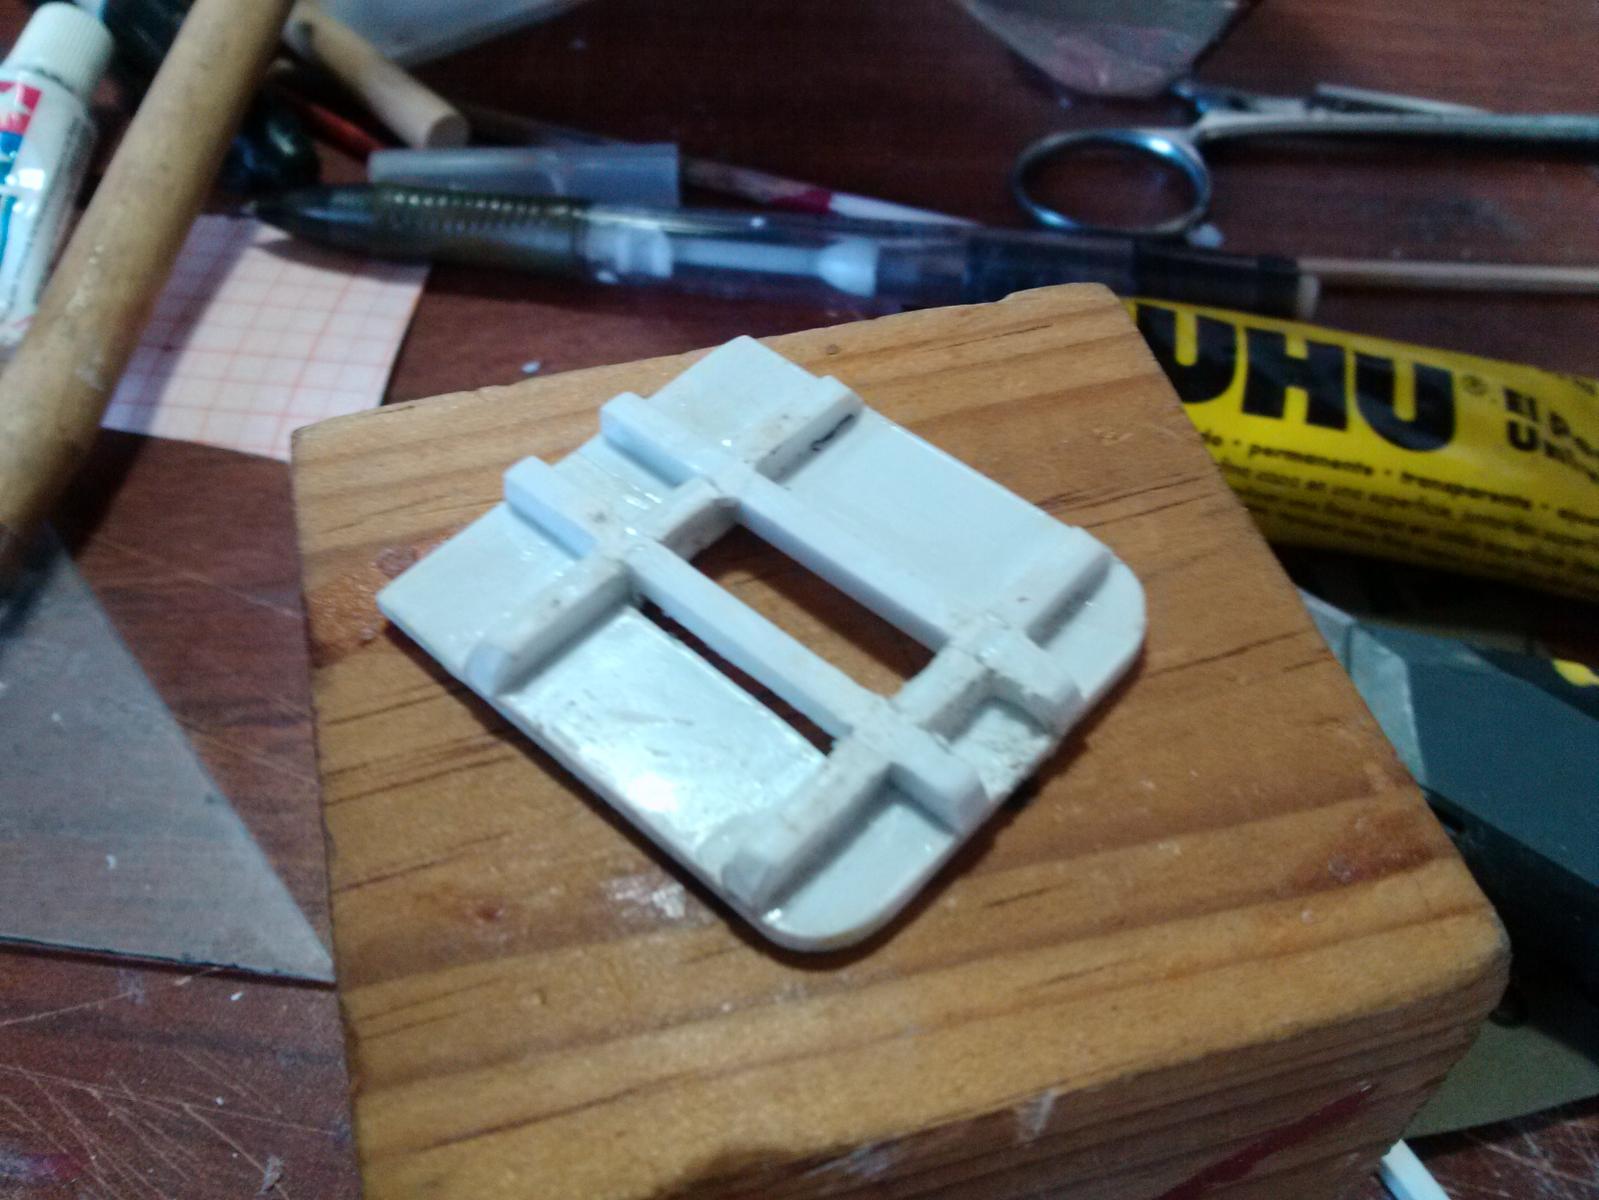
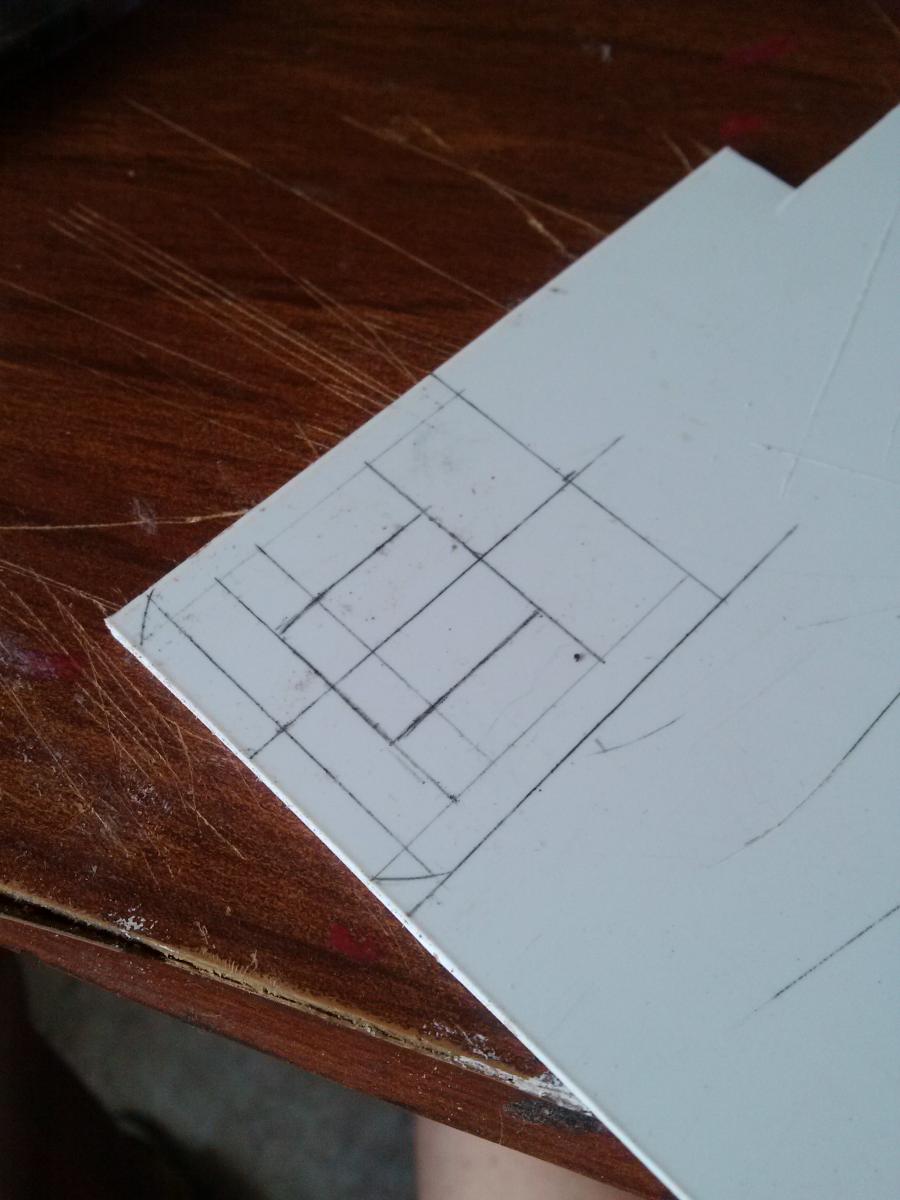
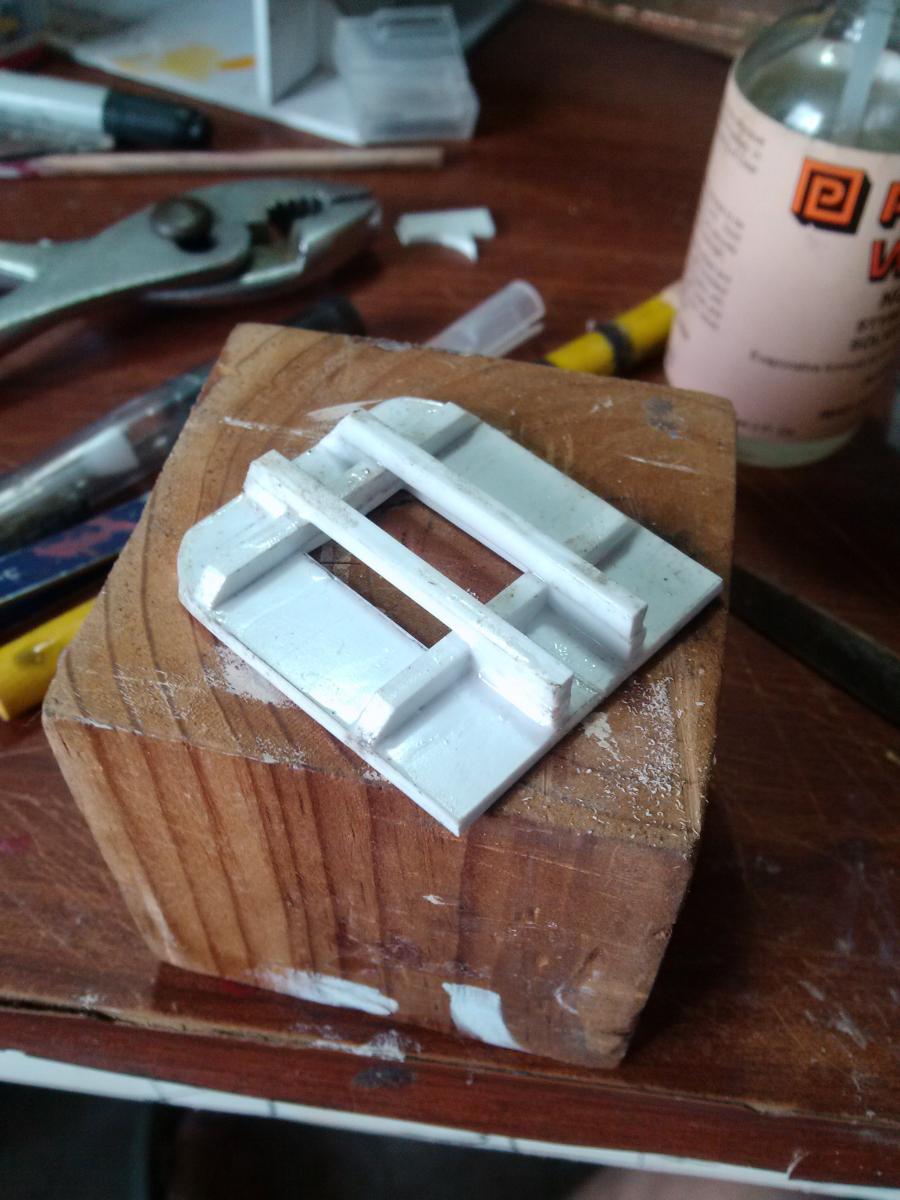
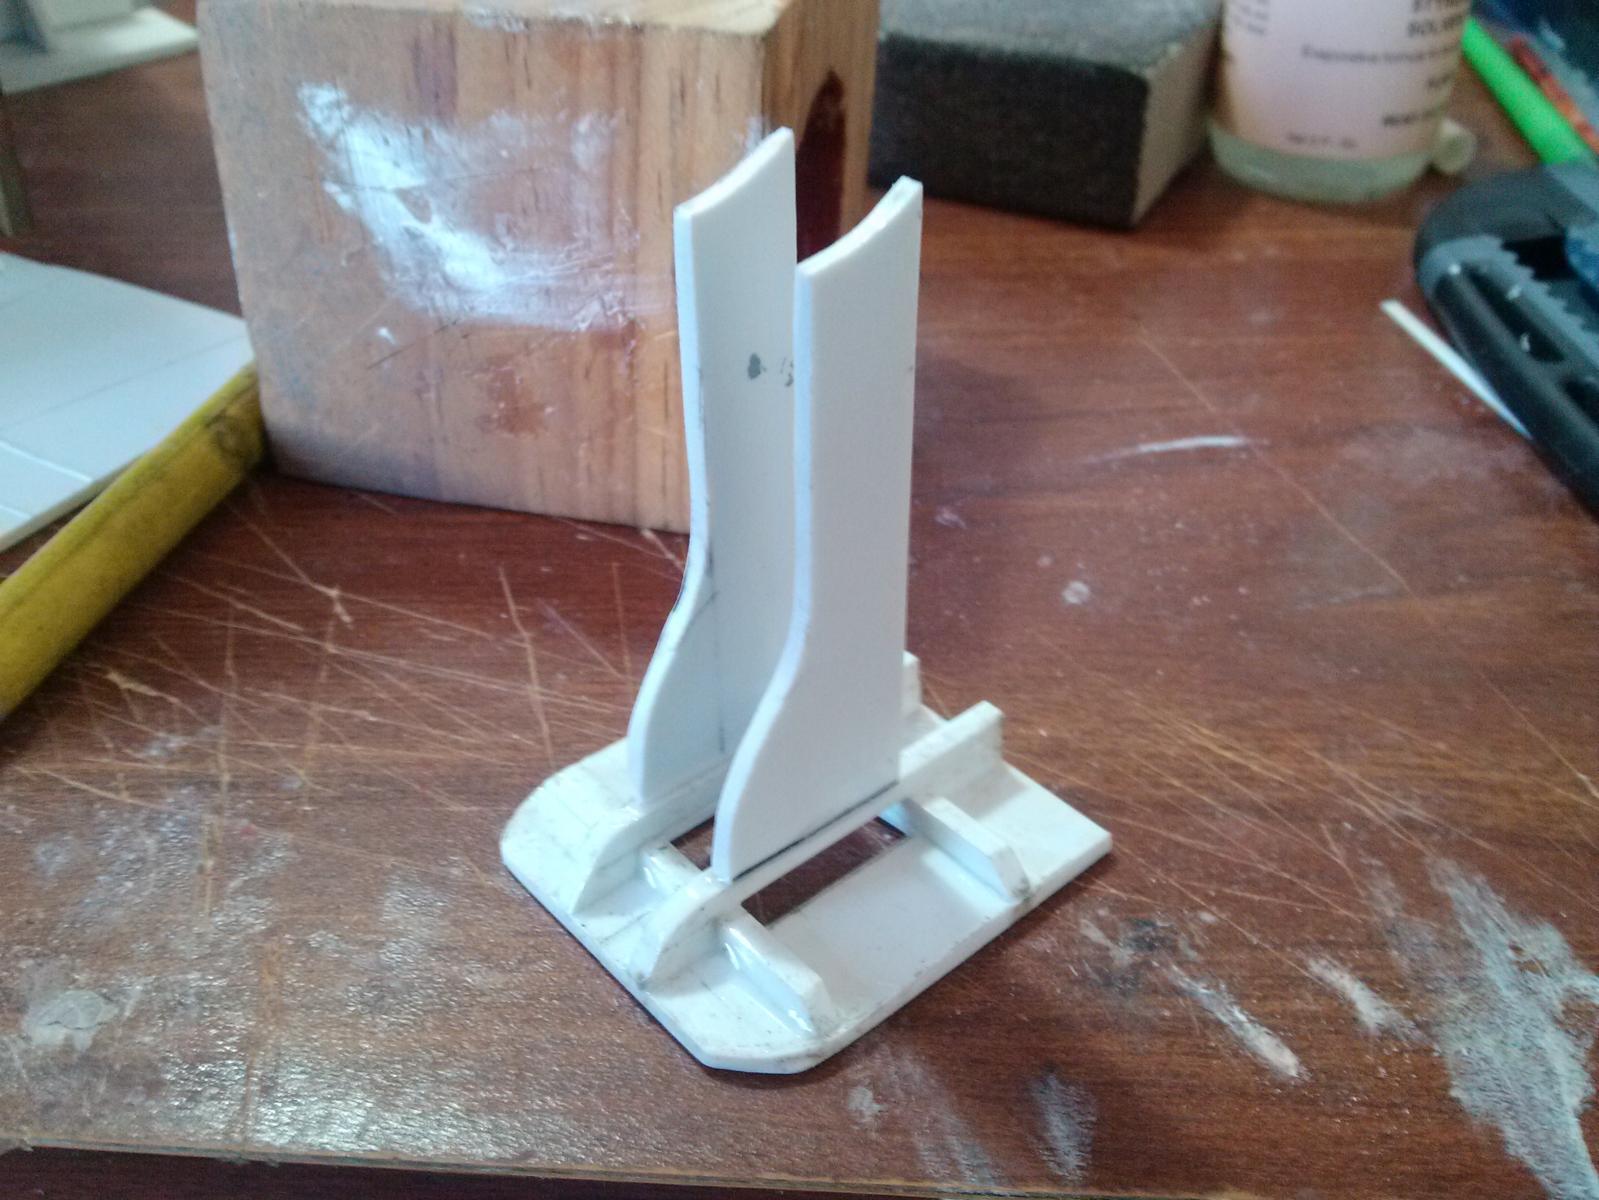
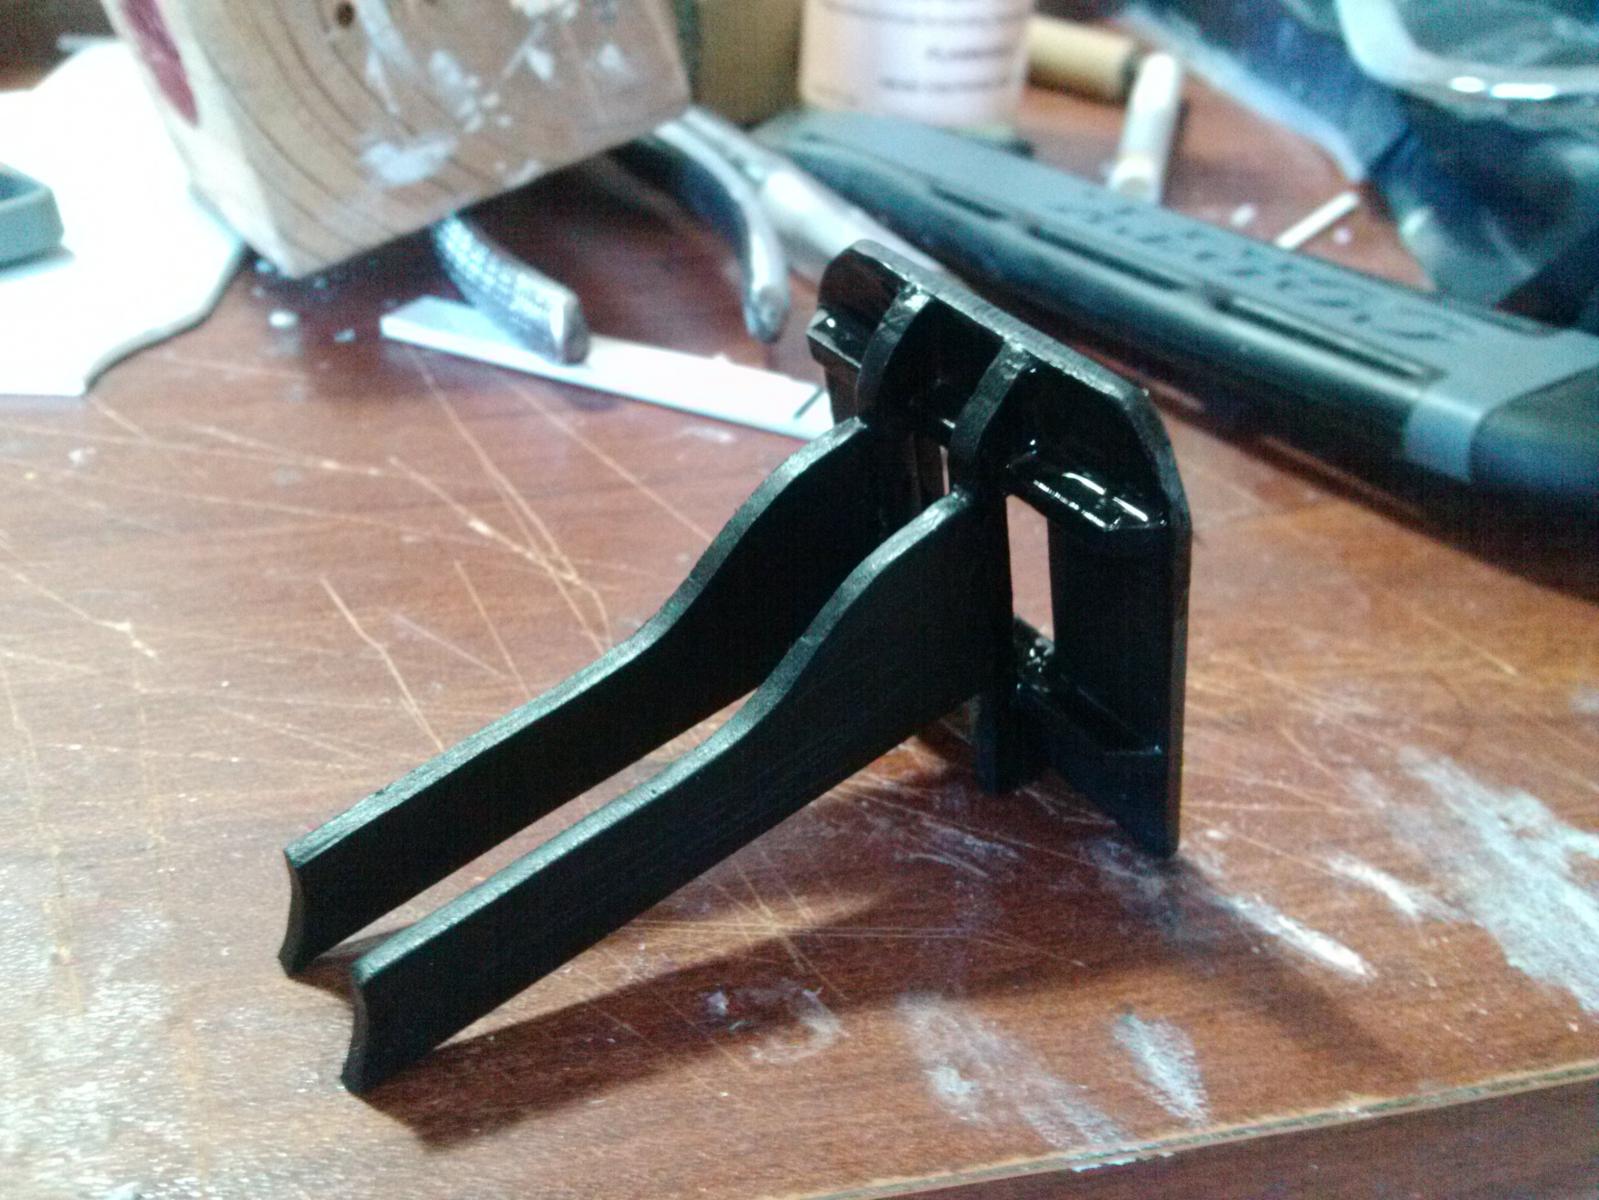
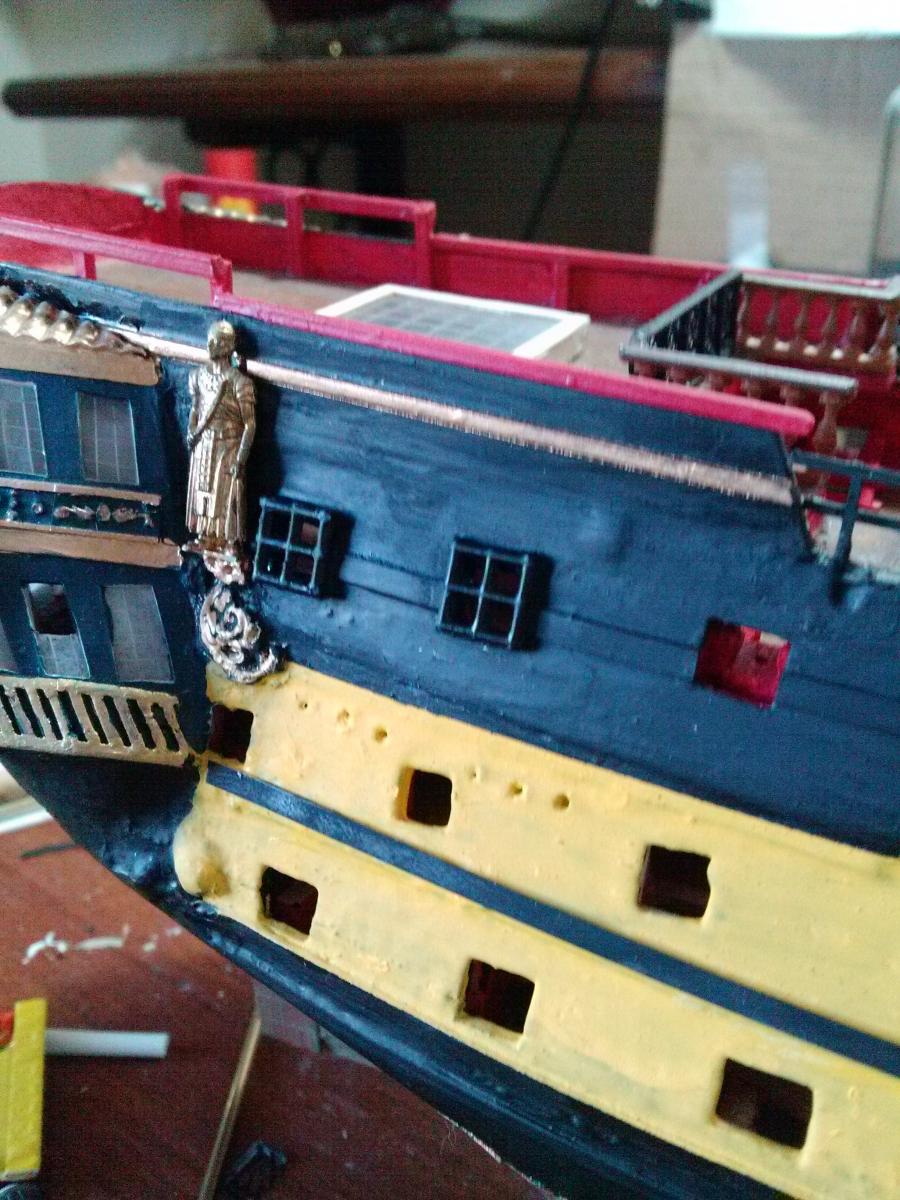
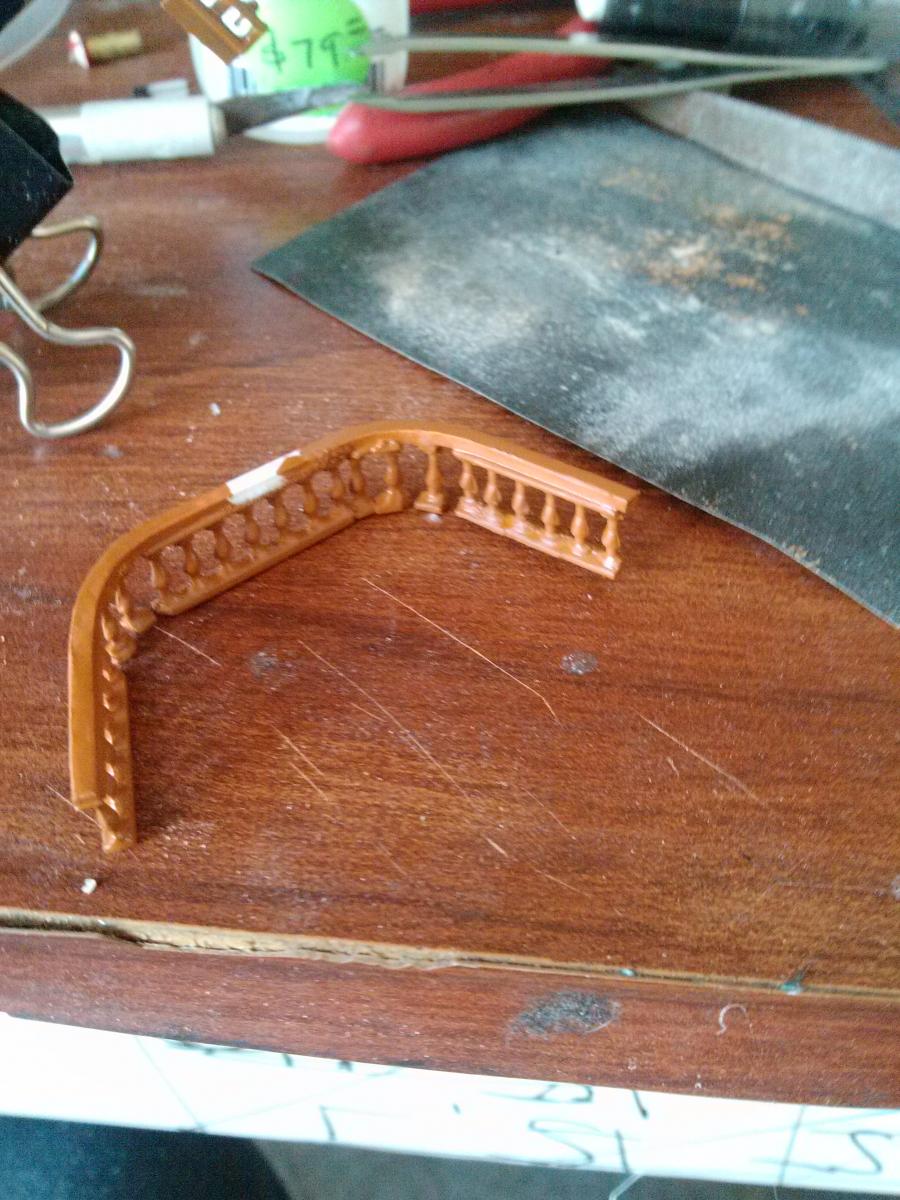
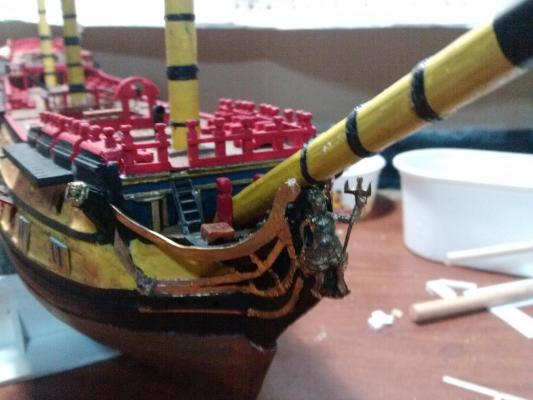
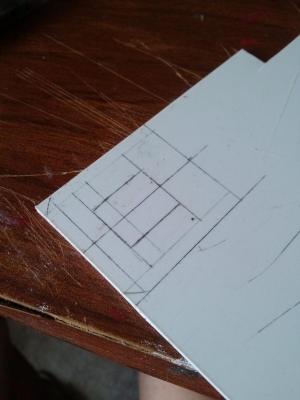
The final carving for the captain's private gallery were tricky to make. After drawing the pattern, I transferred it to a thin styrene strip using carbon paper. Then, with a stencil and a hard tipped pencil, I drew the pattern over the stryene, so it would bump into the other side, finally I glued it to a thicker styrene strip. Here is the result.


-
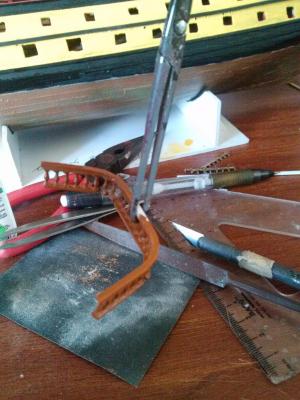
The forecaste rail, done. I filled the gaps between the inner and outer rail with epoxy, minding the gunports.


-
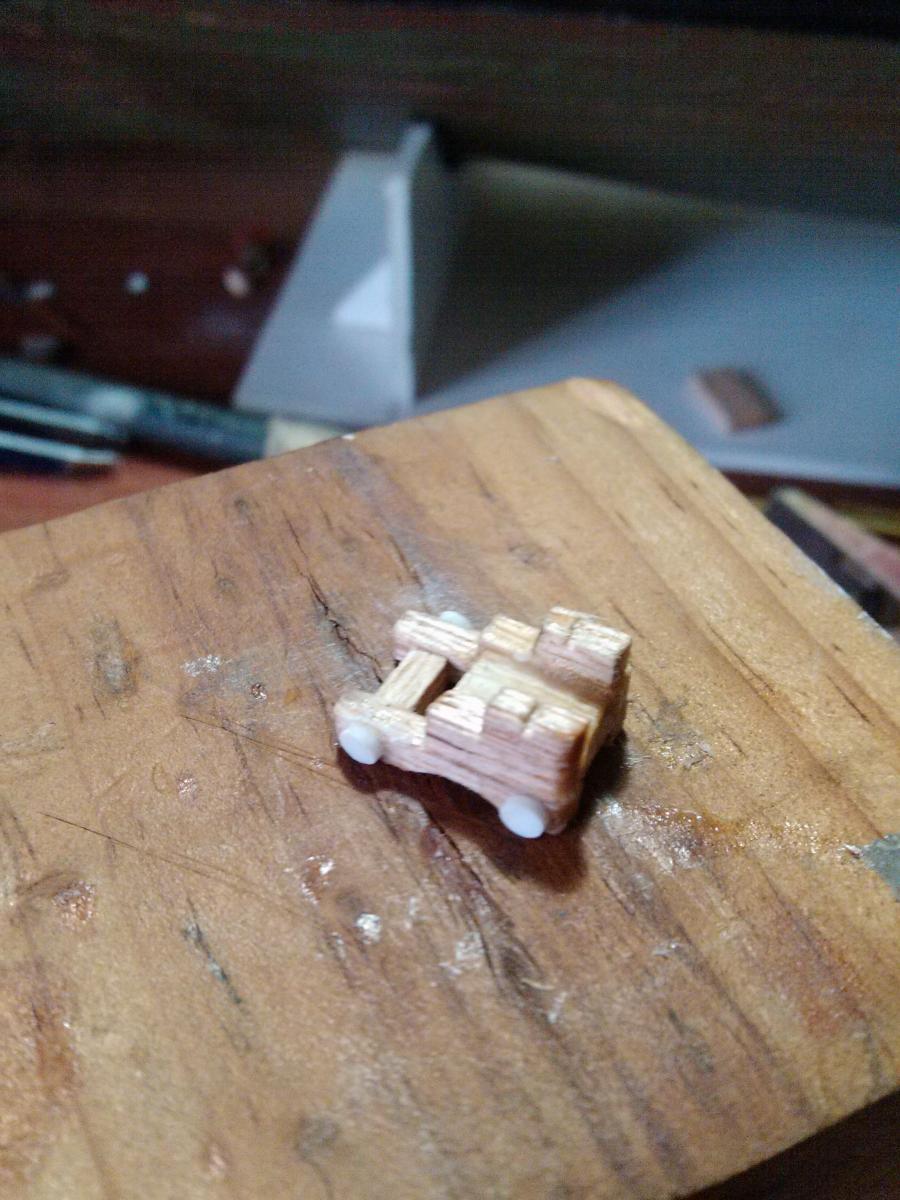
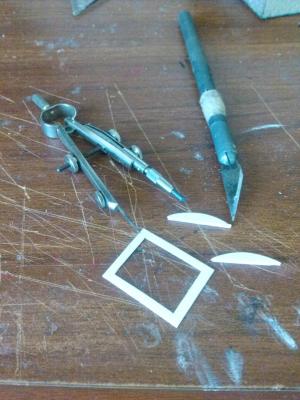
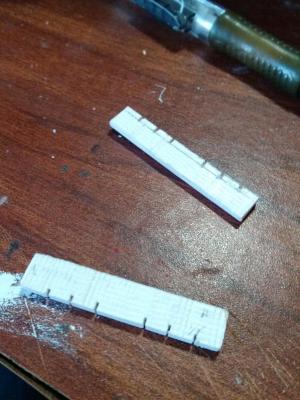
So here it comes a test for my patience. The forecastle bitts along the rails. Again, the bow rail had to be corrected...I guess one of the troubles that involve making a little-known ship is the lack of proper documentation, but there again...here goes nothing! Cutting off the original rail... The bitts, each on one stage of the making process: Styrene strip cut to length, marking the position of the head, first slot filed off and finished bitt, still unpainted. I used a regular triangular steel file. Bow rail: Bitt along the forecastle side rails...eight more to go!