HOLIDAY DONATION DRIVE - SUPPORT MSW - DO YOUR PART TO KEEP THIS GREAT FORUM GOING! (Only 72 donations so far out of 49,000 members - Can we at least get 100? C'mon guys!)
×


olliechristo
-
Posts
412 -
Joined
-
Last visited
Content Type
Profiles
Forums
Gallery
Events
Everything posted by olliechristo
-
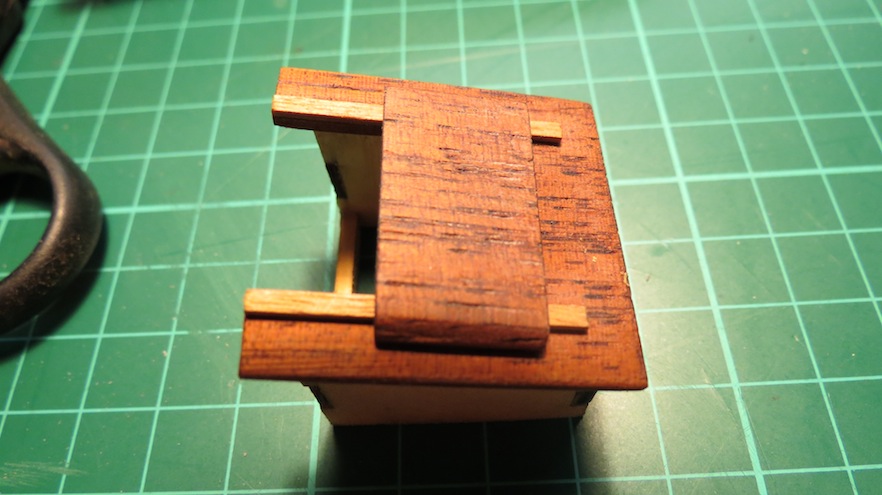
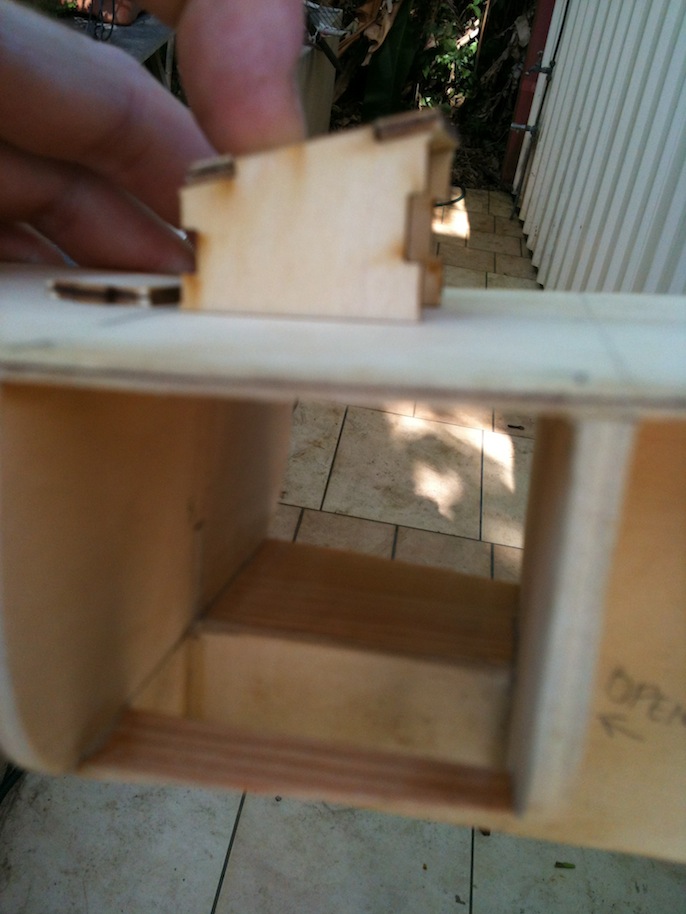
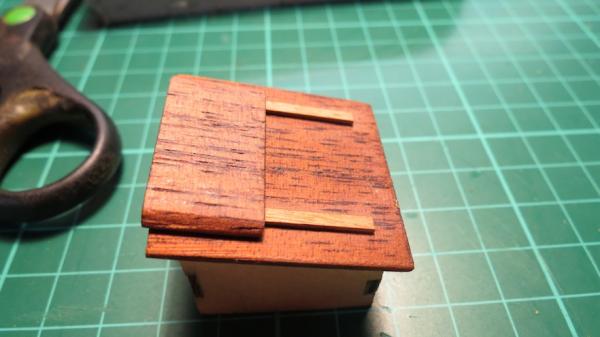
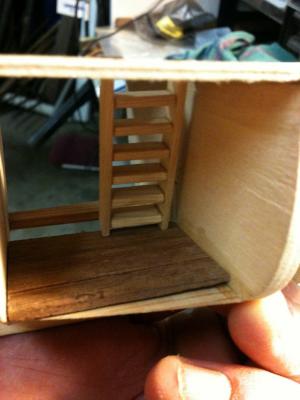
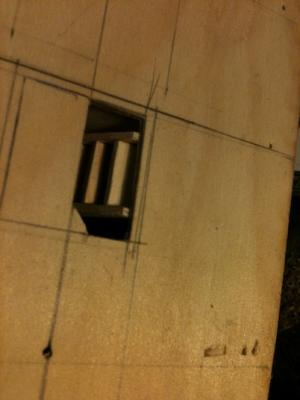
 Thanks so much Jim Lad and ringbolt.. Pictures helped heaps and i found some more that helped too. Thanks everyone who has replied.. Wouldn't be going as nicely without your help.. I want to make this boat something special.. And very happy so far.. I am ready to start planking but waiting on a mini plane from The States. So will continue on fixtures and fittings etc.. Spent about 3 hrs after work today and had a good go at my companionway.. The picture in instruction book didnt look that great did it? Very happy with the hatch and the way it slides. Also it will let some nice light through to below.. Regards Ollie
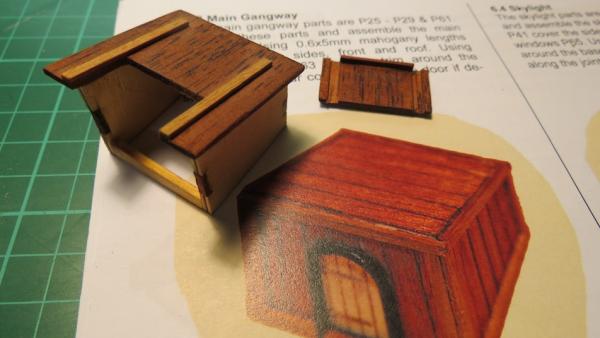


- 803 replies
-
- 1
-

-
- colonial cutter
- modellers shipyard
- (and 1 more)
-
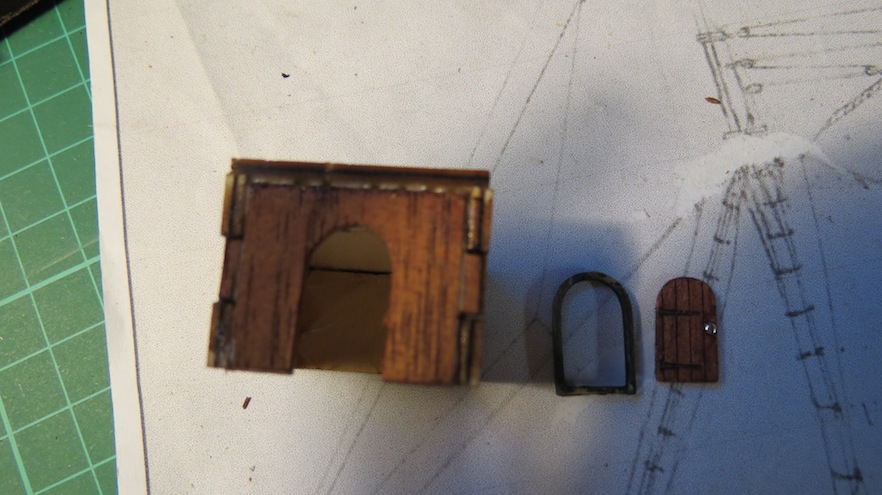
Well yet another thing to ponder.. And another question. I had been looking at the gangway door thinking it looks very small... Then i noticed this model by dave it is the same ship and i think it suits it quite well what he has done with his door. Any thoughts regarding what would be more authentic? Regards Oliver
- 803 replies
-
- 1
-
-
- colonial cutter
- modellers shipyard
- (and 1 more)
-
I have been getting some inspiration from this lovely photo of inside the Endeavour replica.. I am not sure what colour to do walls in interior but im thinking of planking them horizontally and painting white or raw timber perhaps, any suggestions welcome.. Thanks so much everyone.. Ollie

- 803 replies
-
- 4
-
-
- colonial cutter
- modellers shipyard
- (and 1 more)
-
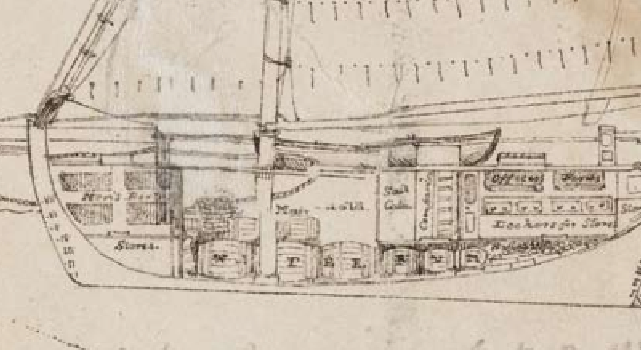
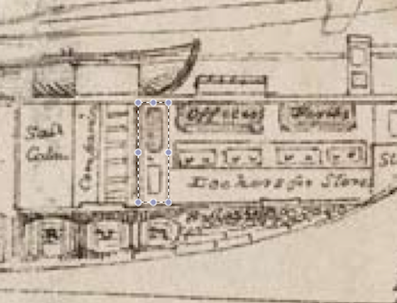
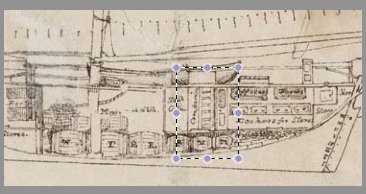
Now im finishing the interior and the plan i have is hard to read at best... Could anyone guess what the fixture i have circled would be most likely.. I have thought a lot, it seems like its next to the stores and perhaps the galley. Maybe a sink or wash area or perhaps some sort of closet.. I will just adlib it if its too hard to judge.. Here is the link, on this PDF you can zoom in, but quailty of original image is still poor.. http://www.anmm.gov....s86_Mermaid.pdf
- 803 replies
-
- 2
-
-
- colonial cutter
- modellers shipyard
- (and 1 more)
-
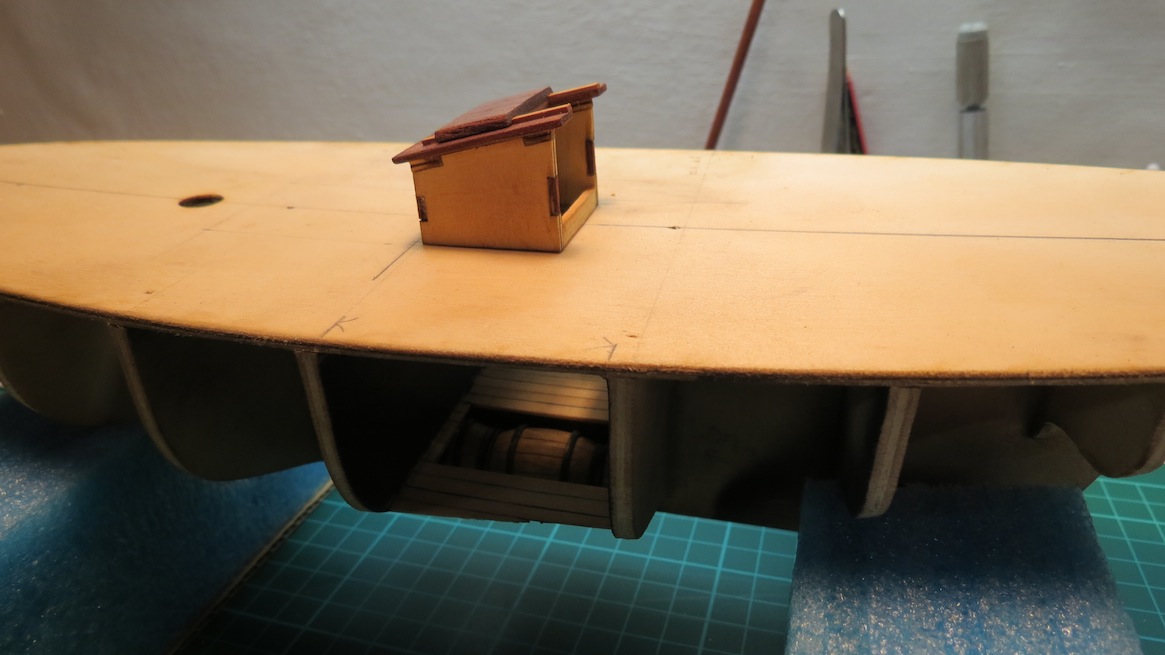
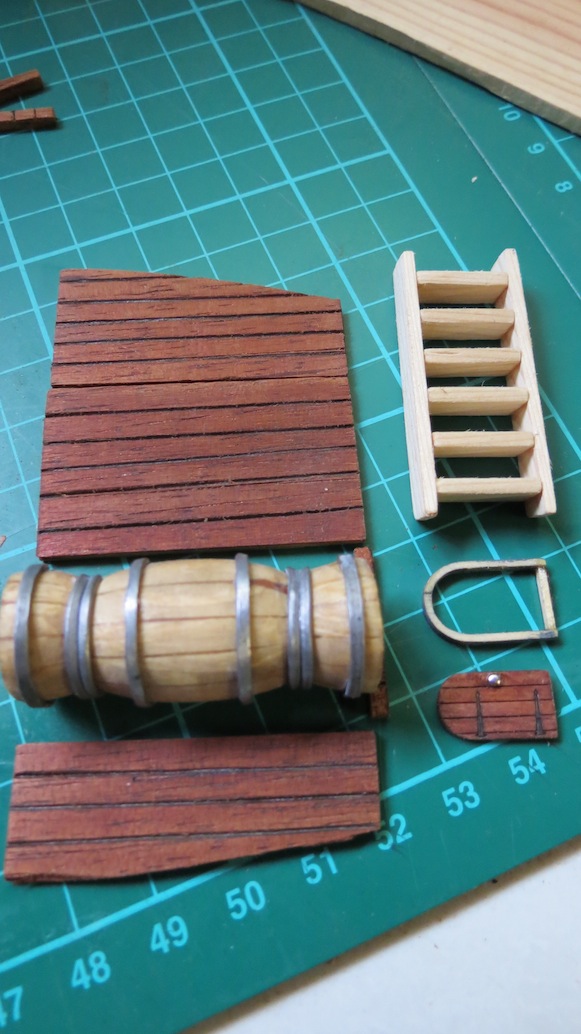
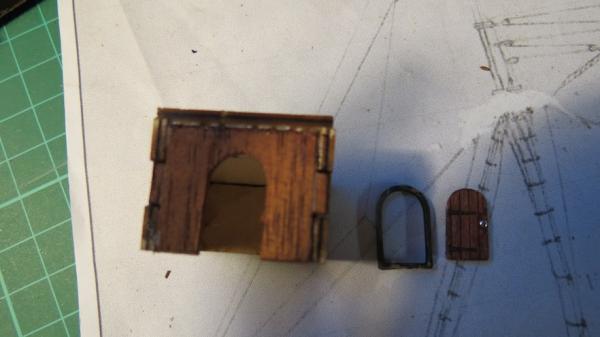
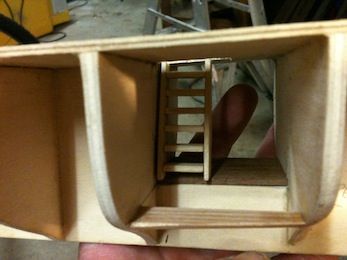
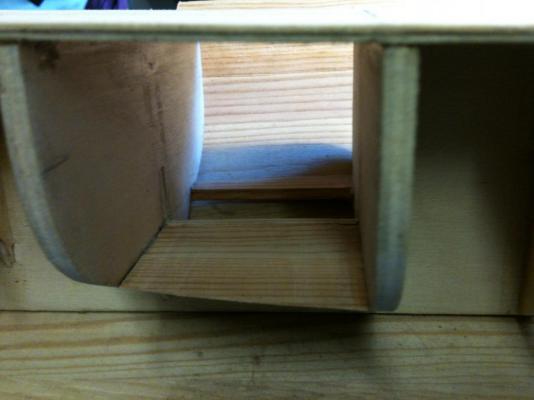
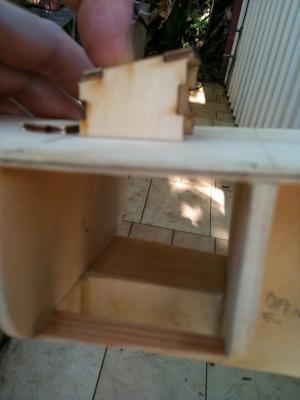
Hi all, so i made good progress tonight. I satin clear coated the interior deck and stained the stairway. Also did a bit on the gangway. I needed to cut new front panel as i cut up original to make the door as it had great detail from laser cutter..
- 803 replies
-
- 2
-
-
- colonial cutter
- modellers shipyard
- (and 1 more)
-
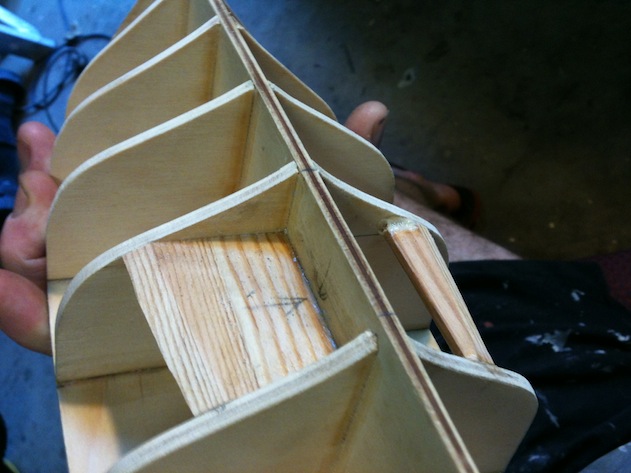
Thanks Tom and John I have made another step and put interior floor in, will do a few more hours tonight after work.. Regards Oliver


- 803 replies
-
- 2
-
-
- colonial cutter
- modellers shipyard
- (and 1 more)
-
Looking great! Just discovered your log and had a look at what you have done so far.. will be watching your progress. i too am building my first wooden model ship.. Your doing really well from what i can see.. regards Ollie
-
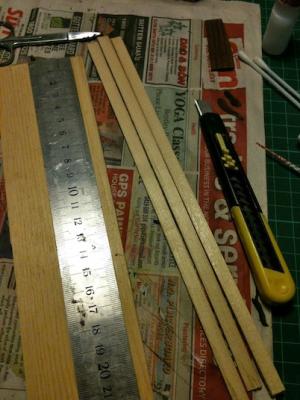
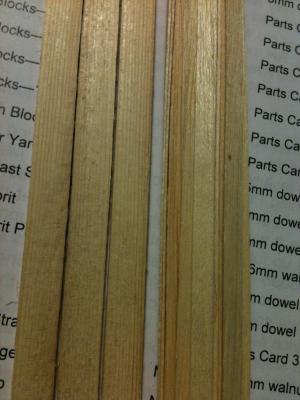
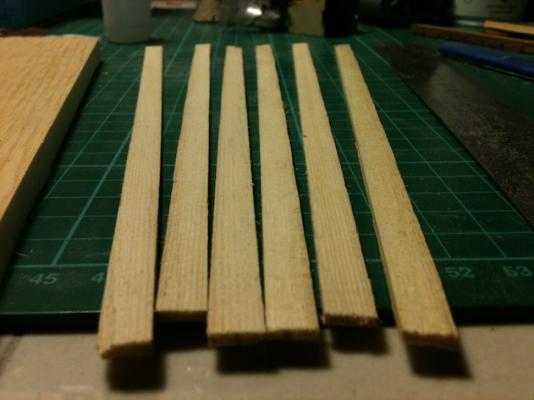
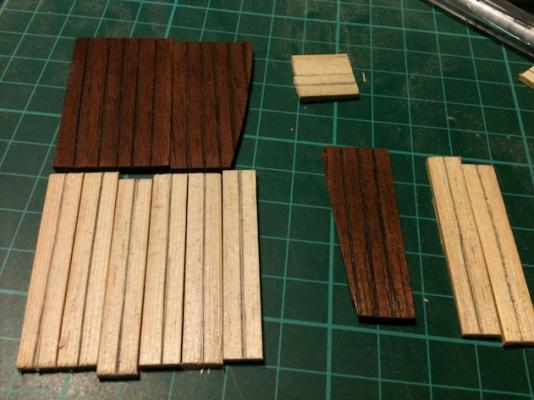
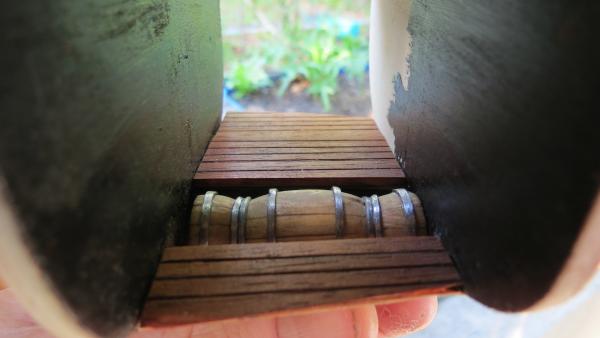
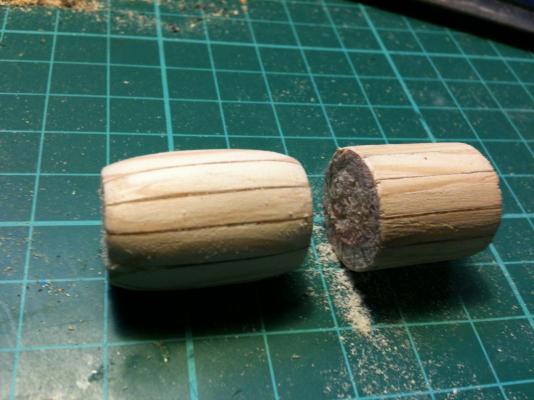
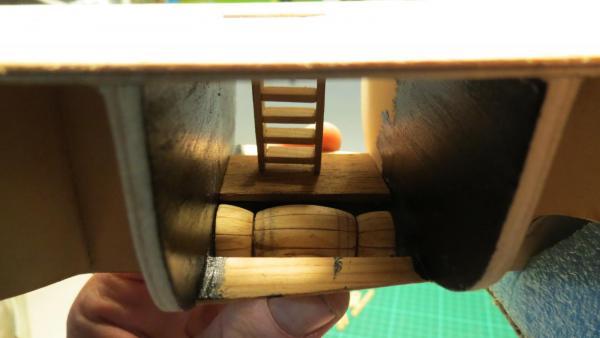
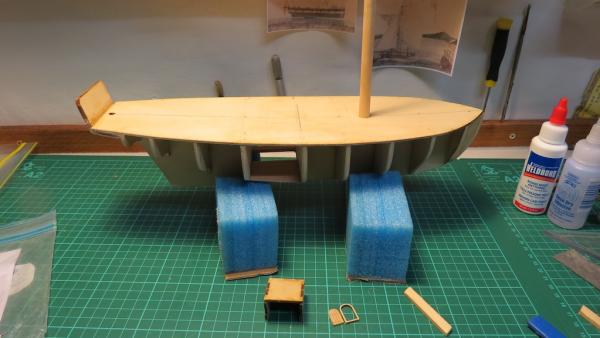
I decided the decking was way too dark and after looking at some interiors of other ships of similar era i decided it needed to match the top deck, so into the wood pile and I hand cut strips down with a craft knife that resemble the kit supplied decking very well.. quite happy now.. I presume decks below are almost identical to those above? anyway this is what is going in now.. The barrels are done now... moving forward.. Thanks all, happy crafting.. Ollie
- 803 replies
-
- 3
-
-
- colonial cutter
- modellers shipyard
- (and 1 more)
-
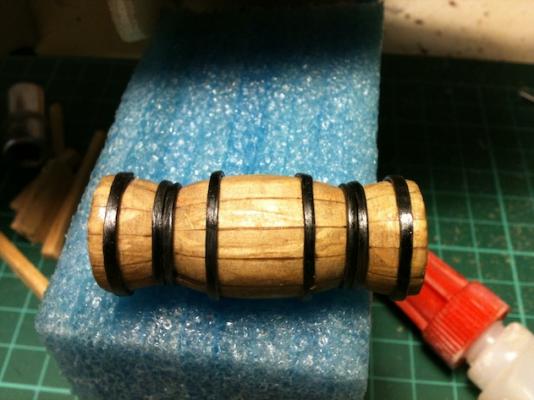
Thanks again, i have one more question. I am customising the main gangway door to be open, just wondering would it most likely oprn outwrads or inwards? I am getting closer to getting the below deck work sorted and back to the plan.. More work to be done on barrels, including filing down bands thinner and painting them darker.. Many thanks and regards Ollie

- 803 replies
-
- 4
-
-
- colonial cutter
- modellers shipyard
- (and 1 more)
-
Thanks Rowan. Wow sounds like you have a lot on your plate. Mine arrived fast,, good luck with your choice on starting.. i've got a long way to go Jim, thanks mate. i have only cut half of size of gangway, would there be room to stand inside or just straight through door onto ladder? cheers guys.. appreciate the support, have made some progress today and more pics to come.. Regards Ollie
- 803 replies
-
- 1
-
-
- colonial cutter
- modellers shipyard
- (and 1 more)
-
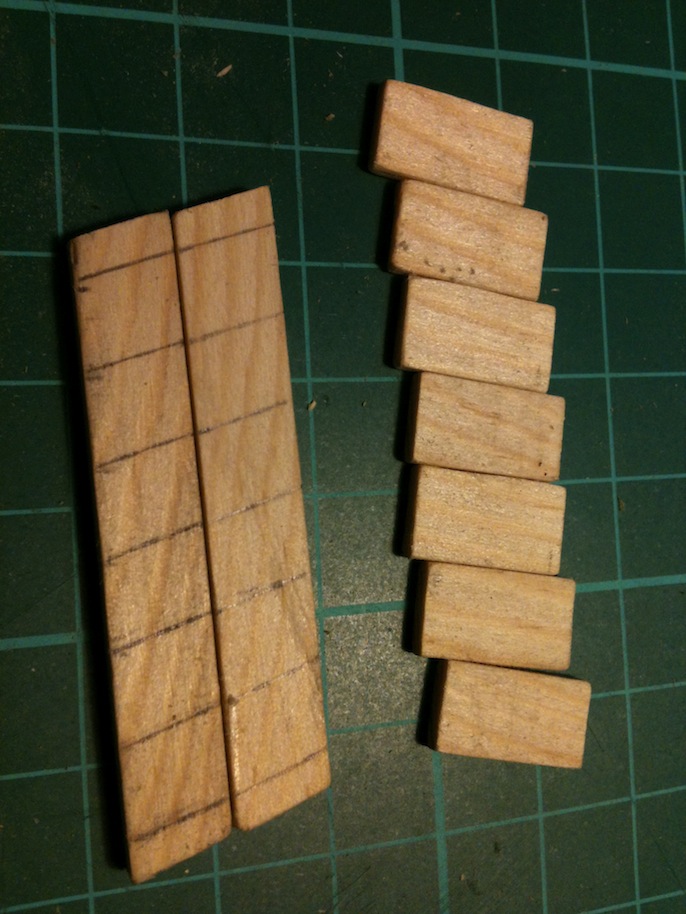
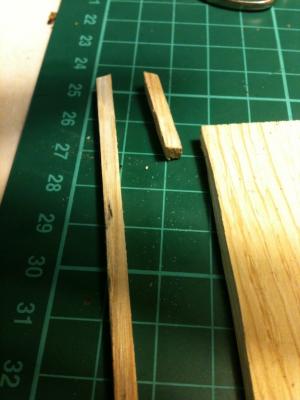
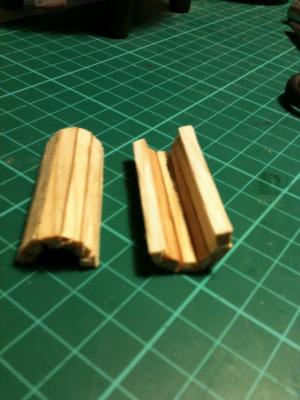
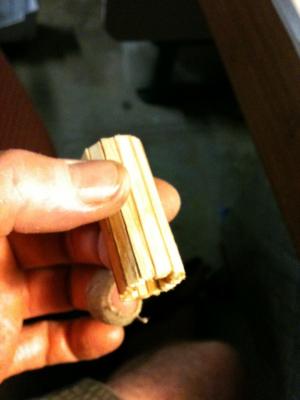
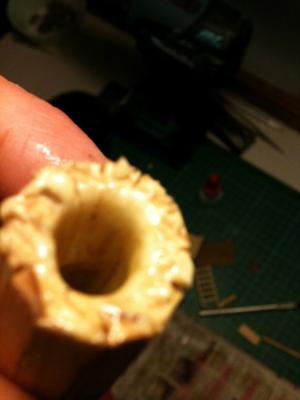
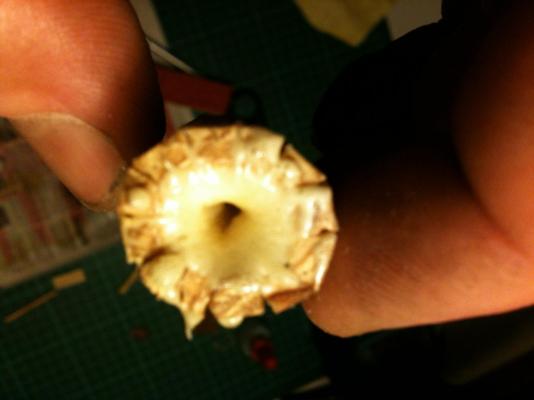
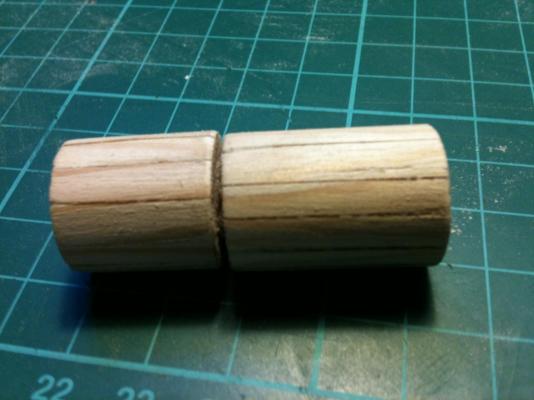
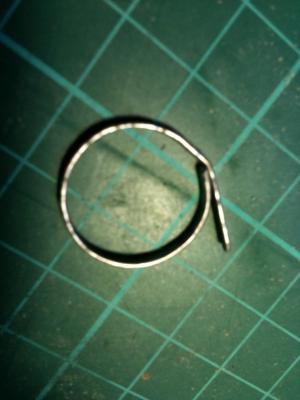
Thanks so much Jeff and ZyXuz. I appreciate it... I only use basic tools and a keen eye. I am well into scratch building the barrels for under floor.. It s been 3 hours at least over 2 evenings.. I cut strips at angles and made them all in one tube.. because the lengths are wedges, when i sand the curve at ends of barrel it gives the appearance of planks narrowing and in fact they do, just not as they really woud, but working at this size you cant build like you would a fulll size item, so one has to improvise a little. I used "sika" super glue. it is good quality, then i filled tube with an expanding glue that helped hold the small bits together.. These are not going to be seen from alll angles so i thought better not get too carried away,, i tend to do that.. The bands i'm not 100% sure on yet, i made prototypes out of hammered soldering wire but think i need a thinner guage,, the effect is great.. and very nice to bend around two angles

- 803 replies
-
- 13
-
-
- colonial cutter
- modellers shipyard
- (and 1 more)
-
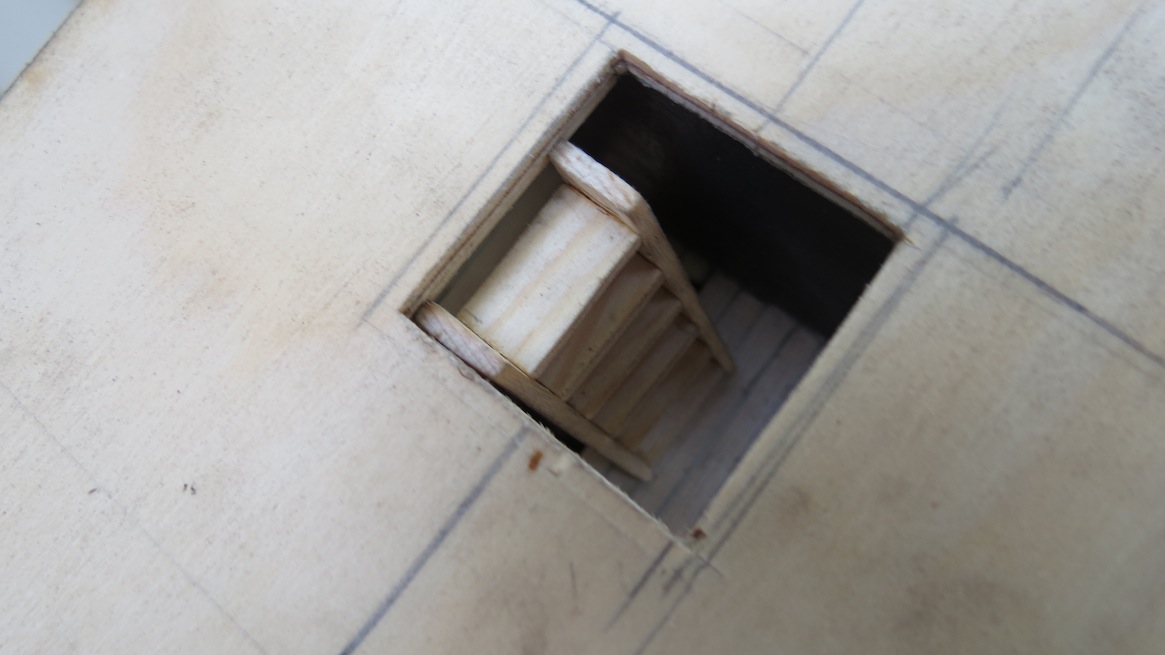
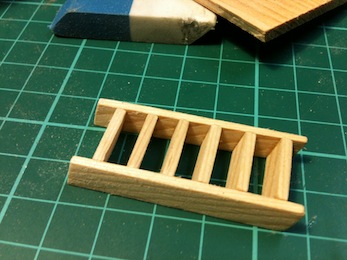
Well after work today i scratch built a stairway from some cypress of some discription it has a nice fine grain.. They are built at 75degrees and seem about right, number of treads are matched with that in the picture.. about 6. Next i will be scratch building some barrels to go in hull and trim out interior before planking, regards Ollie

- 803 replies
-
- 6
-
-
- colonial cutter
- modellers shipyard
- (and 1 more)
-
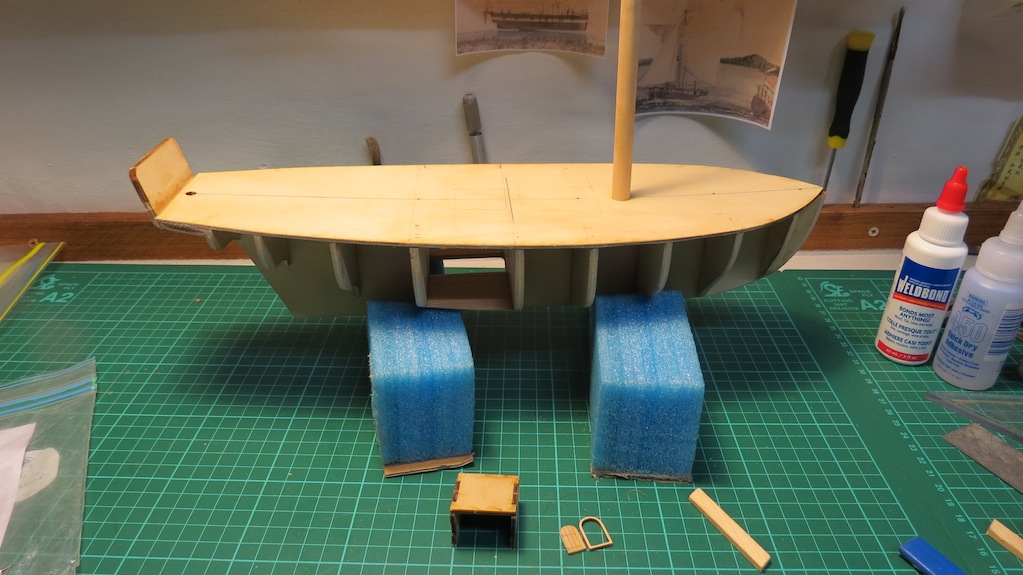
Thanks so much Jeff, appreciate your comments... I assumed a steep angle would be the case and yes a rectangular opening, that makes sence.. You have helped me already.. Much thanks. Ollie I look forward to any more replies that anyone has.. I am very appreciative.. I have made sure mast fits as the deck hole was way out with groove below originally.. and well its looking like a ship for a moment.
- 803 replies
-
- 3
-
-
- colonial cutter
- modellers shipyard
- (and 1 more)
-
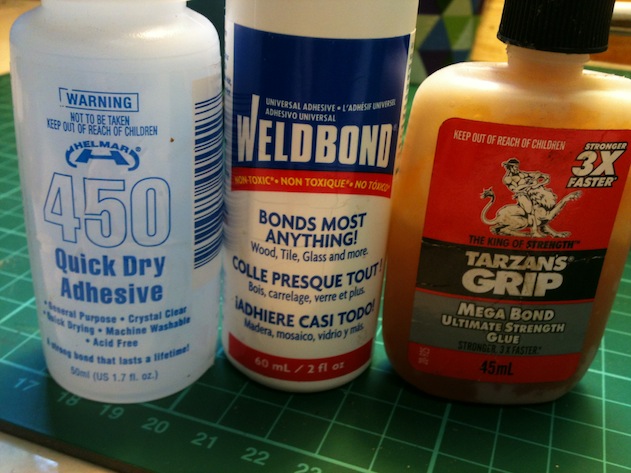
Thanks Brian, these are glues i have already, any one of them work great but i will get some "titebond"
- 803 replies
-
- 2
-
-
- colonial cutter
- modellers shipyard
- (and 1 more)
-
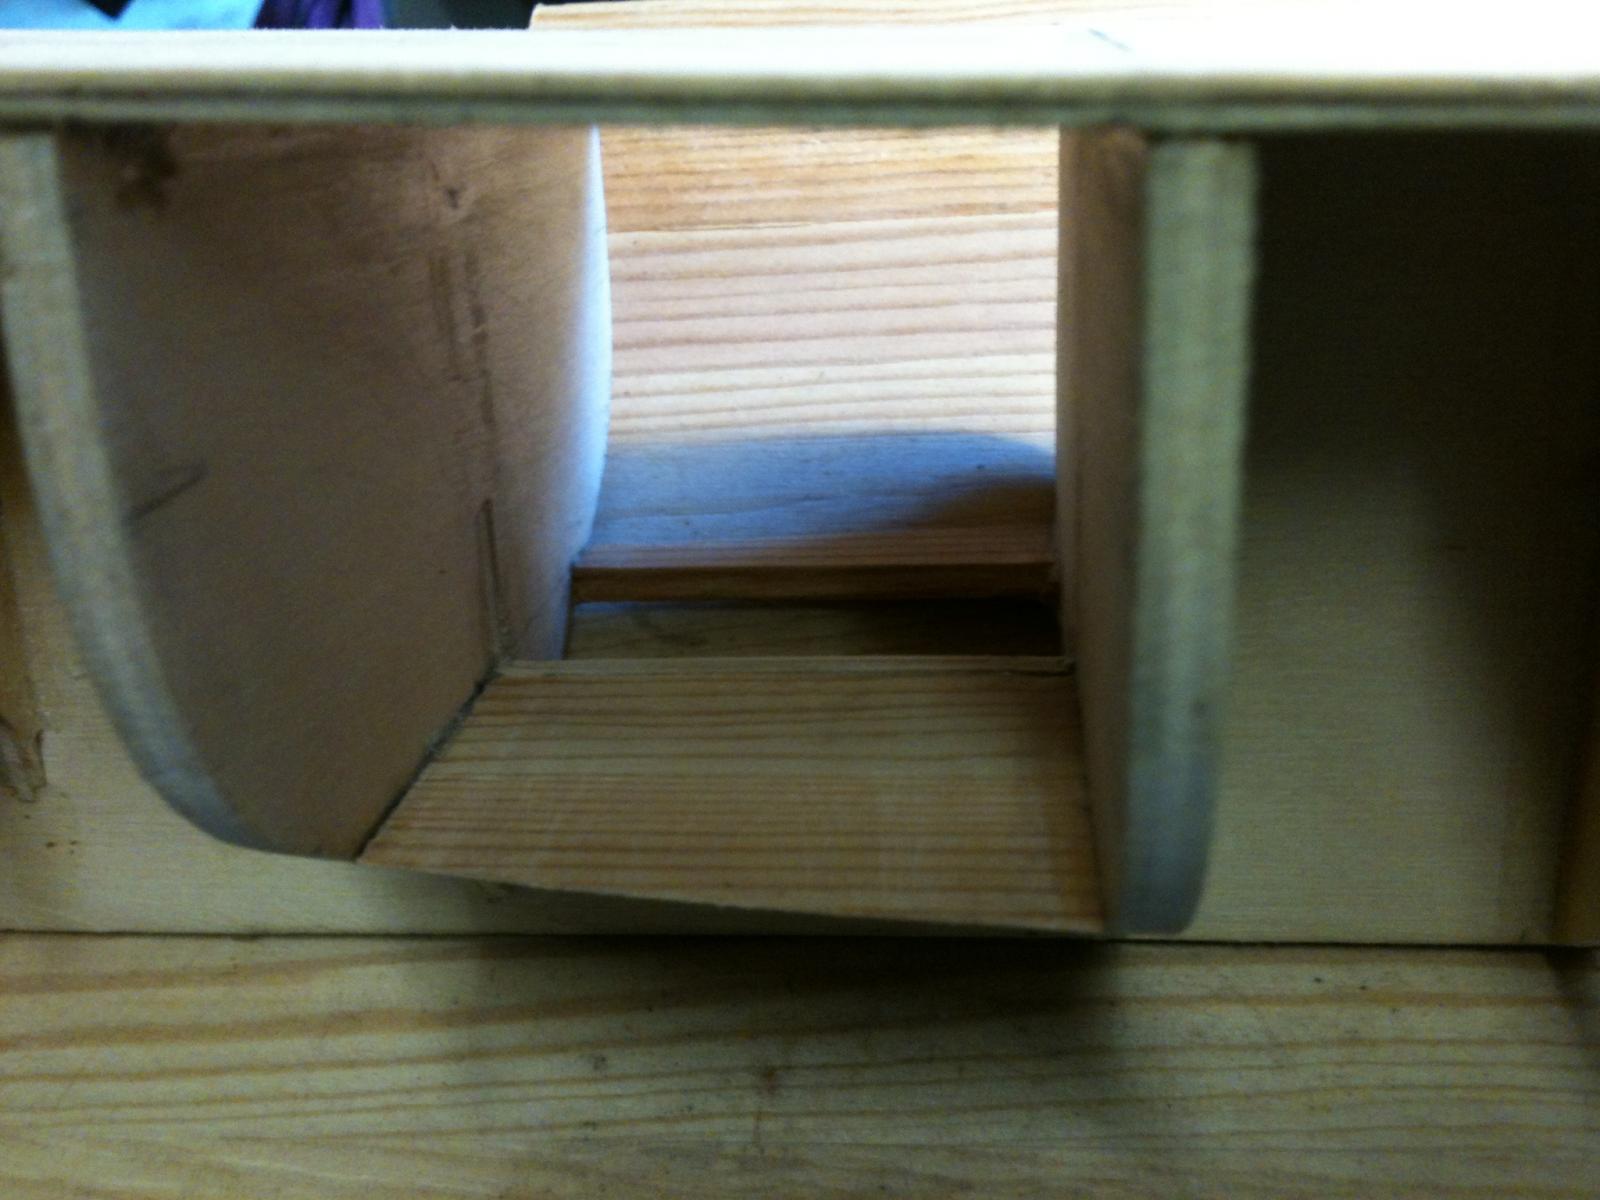
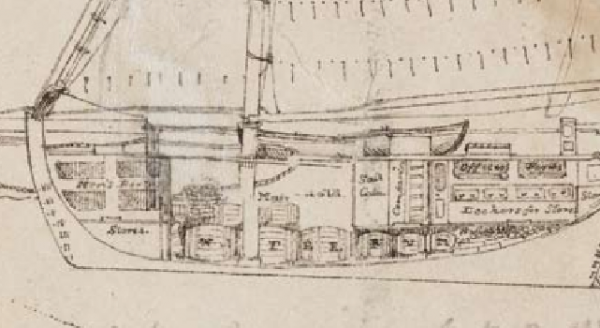
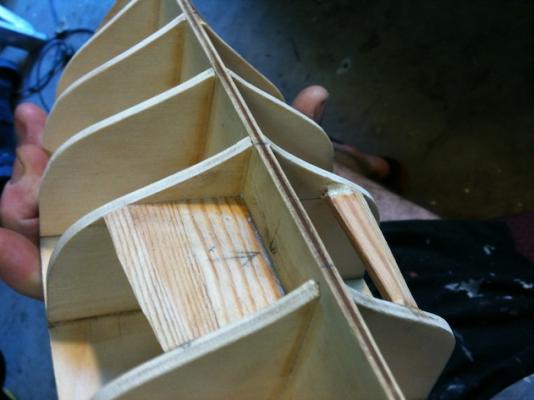
Now i have started my modifications... I am painting and coppering one side of the hull and other side being left timber finish with a cut away of hull to show planking and some of interior. (including stairs or ladder and rum kegs in bottom of hull) It as all still very strong.. here lies my first ponderings... I have some pictures to work with but the detail is very grainy. I can make some of it out... sail cupboards on left anothe rcupboard on right perhaps.. What im wondering in particular is would the main gangway have stairs or a vertical ladder coming straight down into below? I am thinking stairs as it would be very hard to bring large items or take injured or sick crew up a ladder Also wondering how much platform and what sort of opening would lead to steps / ladder. A round hole through deck or rectangle? Any help or ideas would be very much appreciated.. Thanks Ollie

- 803 replies
-
- 4
-
-
- colonial cutter
- modellers shipyard
- (and 1 more)
-
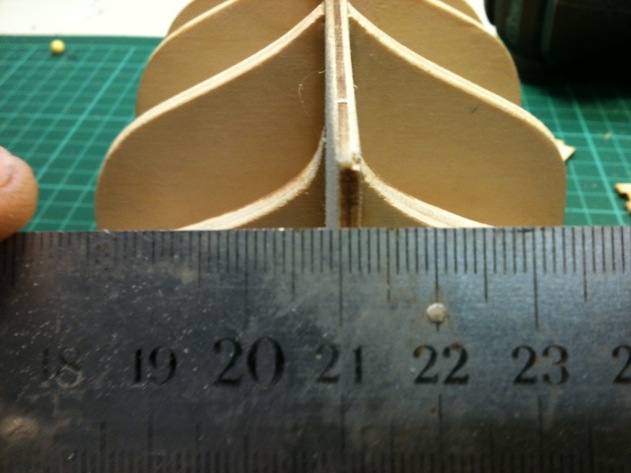
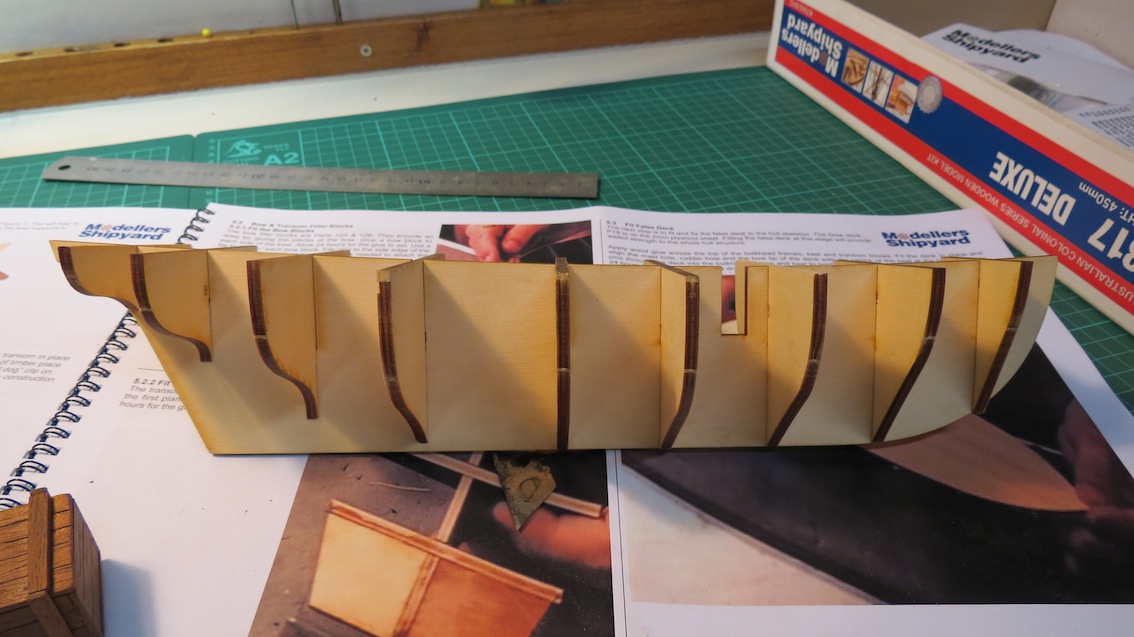
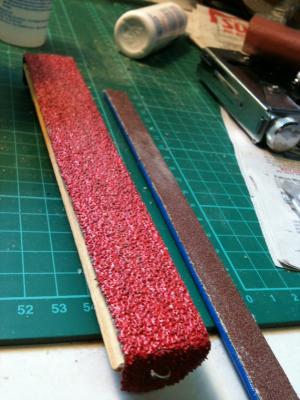
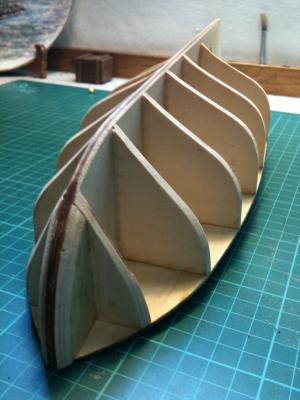
Hi guys, im off to flying start and starting to understand how it goes together.. I have done the fairing and removed deadwood, i'm happy with how it is going. I am using a few different glues that are very strong and set fairly fast... I saved a lot of time with fairing by making two tools - 40 grit paper on a piece of quadrant so it can curve sidewards as needed and 40 grit on a piece of stiff plastic that can bend longways.. They are great... I dont mind that the edges are a bit coarse as this will help glue adhere..


- 803 replies
-
- 3
-
-
- colonial cutter
- modellers shipyard
- (and 1 more)
-
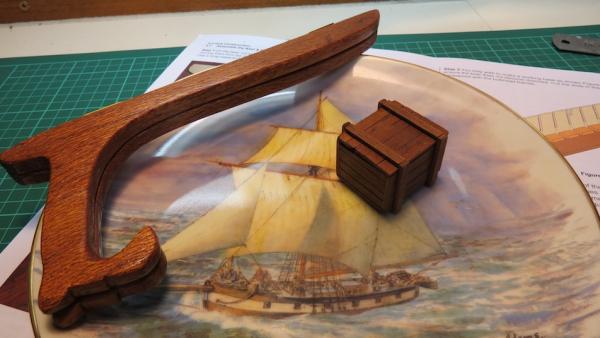
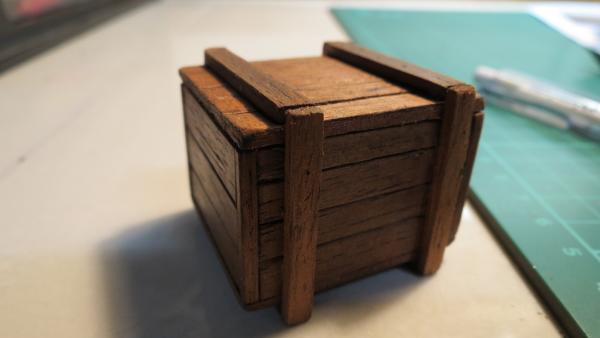
Hi everyone. Before rushing into buying my kit i first wanted to setup a really good work space, so i built/renovated one.. Kit arrived yesterday - 17 Oct 2013 And did some scratch building of smalll items to get back into fine timber work... I made a shipping crate out of some old timber that has been sitting for many years from dads instrument building years.. (western red cedar) I believe. I found these series of 8 collectors plates and 5000 were made, based of paintings done by an Australian Maratime artist, Dennis Adams (1914 - 2001) He studied at the Royal Acadamy in London. I got one for a good price on ebay and made a local timber "Silky Oak" (from a old house renovation) into a plate stand.. It is good inspiration for the build and will look great with it finished.. I have fitted and tweaked some parts but no glue yet. I am not familiar with the all the terminology as its not only my first build of this calibre and i dont know that much about sailing... I love to learn and am very handy, though i am glad i have you guys to help me out.. i can see many moments of perplexed pondering... Hrs count so far - 1.5 Hrs. Regards Ollie


- 803 replies
-
- 4
-
-
- colonial cutter
- modellers shipyard
- (and 1 more)
-
Just sensational Greg. i really like the way you are going about things.. Will be watching this build closely. Regards ollie