


Geoff Matson
-
Posts
715 -
Joined
-
Last visited
Content Type
Profiles
Forums
Gallery
Events
Posts posted by Geoff Matson
-
-
Nice to see you jump into the deep end of the pool!
- Der Alte Rentner and GGibson
-
 1
1
-
 1
1
-
-
-
-
Nice save on the eagle
- GGibson and Der Alte Rentner
-
1
-
1
-
-
I like the contrast in the wood colors. It really looks good
-
Nice job on the windows. They came out great.
- mtbediz and Der Alte Rentner
-
1
-
1
-
-
If you want to leave the model in the natural wood state, instead of styrene, just make your windows out of wood using Hunt's method. Have good time with your family
-
I built my windows following Hunt. It is not that hard. I made the frames and checked the fit and then glued in the window dividers. I also used the styrene for the bow parts. I gave them a coat of flat white paint and then when ready I installed them. It made painting them white very easy and no masking or taping. When I painted the hull I painted the white first, when dry I taped it and then painted the black. I know it looks overwhelming, but once you get stated it will go quickly. Just go slow and easy.
-
Don't let it get to you. You are doing fine. NO LESS ELEGANT APPROACH. You owe it to the rest of model to make the windows just like you did the whole model so far. You may have noticed I have not made much progress lately. Just like you and your windows I'm hug up on the rigging part. I too get mind cramps trying to figure out how to do things. I think I have my problem solved and hope get back to the rigging. Look at other builds and you will figure it out.
- mtbediz and Der Alte Rentner
-
1
-
1
-
I would be more inclined to have a fresh new kit. That way I can make my own mistakes. Bob's cd's made a great introduction to building the kit. I learned a lot that made future model building easier. There is always a lot of discussion between kit and scratch building. However, most of us try to improve on the kit and end up making changes that introduce us to scratch building. I would recommend you buy the new kit and invest in the cost of the course.
-
-
-
Great solution to your problem
-
-
These are the challenging parts of model building. Don't overthink the process. With all the planks, sanding, etc. No two models will be the same. You have gotten this far. Just step back and rethink the process. You will come up with right solution to your problems.
-
Nice solution to a solve the problem.
-
It sure is nice when things are working out and you can see your results and you progress. Everything is looking great and it shows the time and planning you are using to do the planking.
-
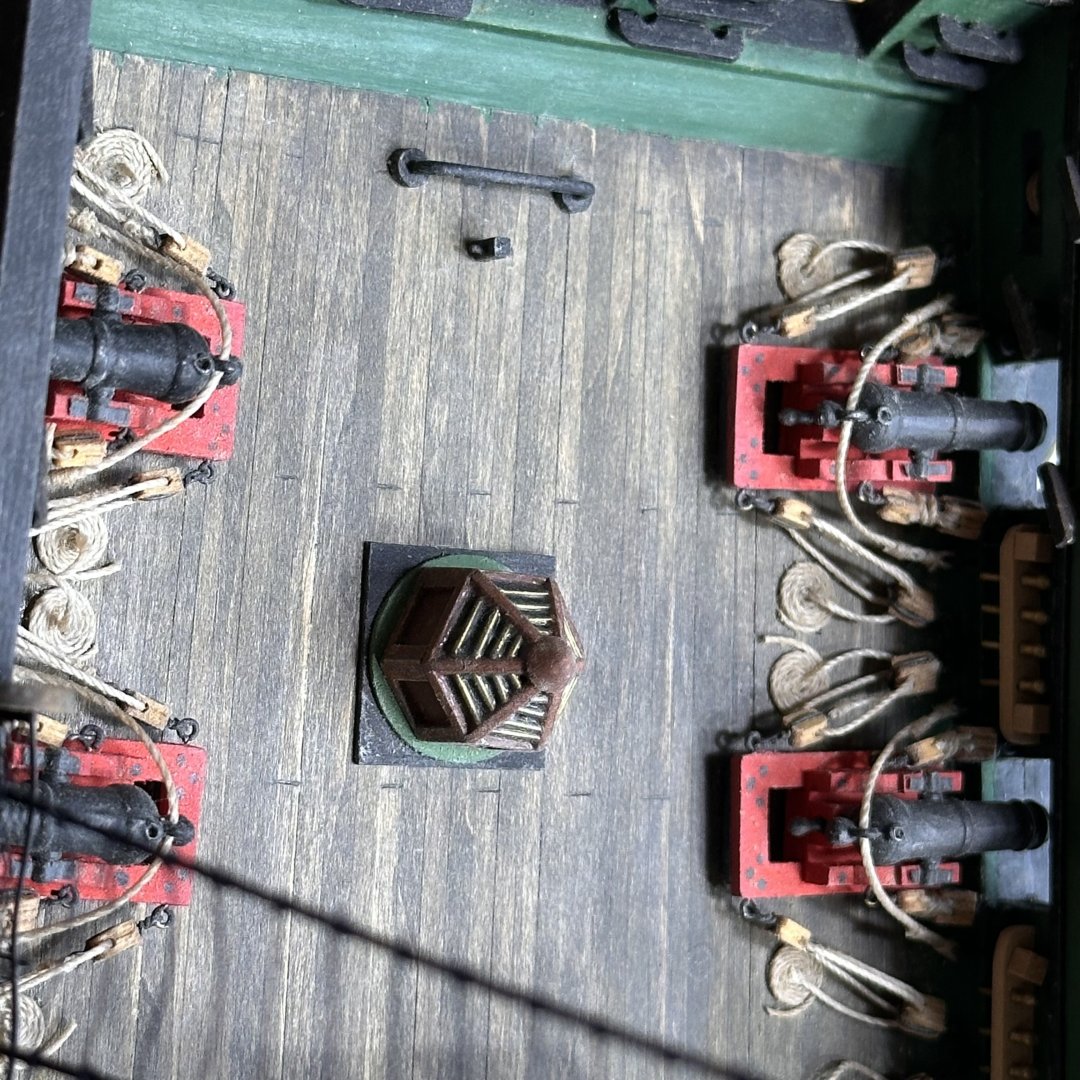
It is really nice when things come together for you. The hatches look great. Again, all these mini models that make the ship look great. Remember the old days of plastic when all had to do it just glue the part on the model instead of making it?
-
I like it. It looks great. Thanks for the airbrush info.
-
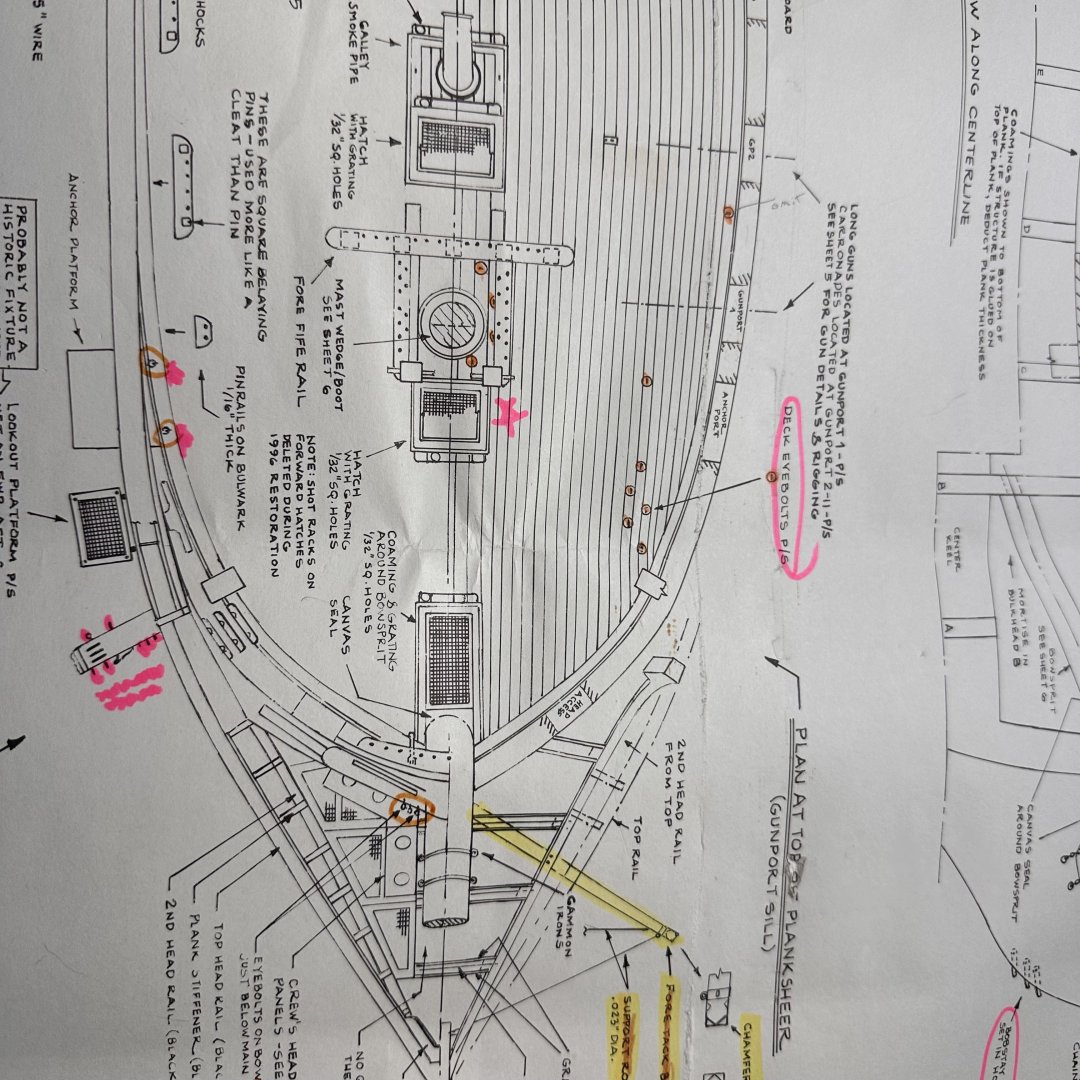
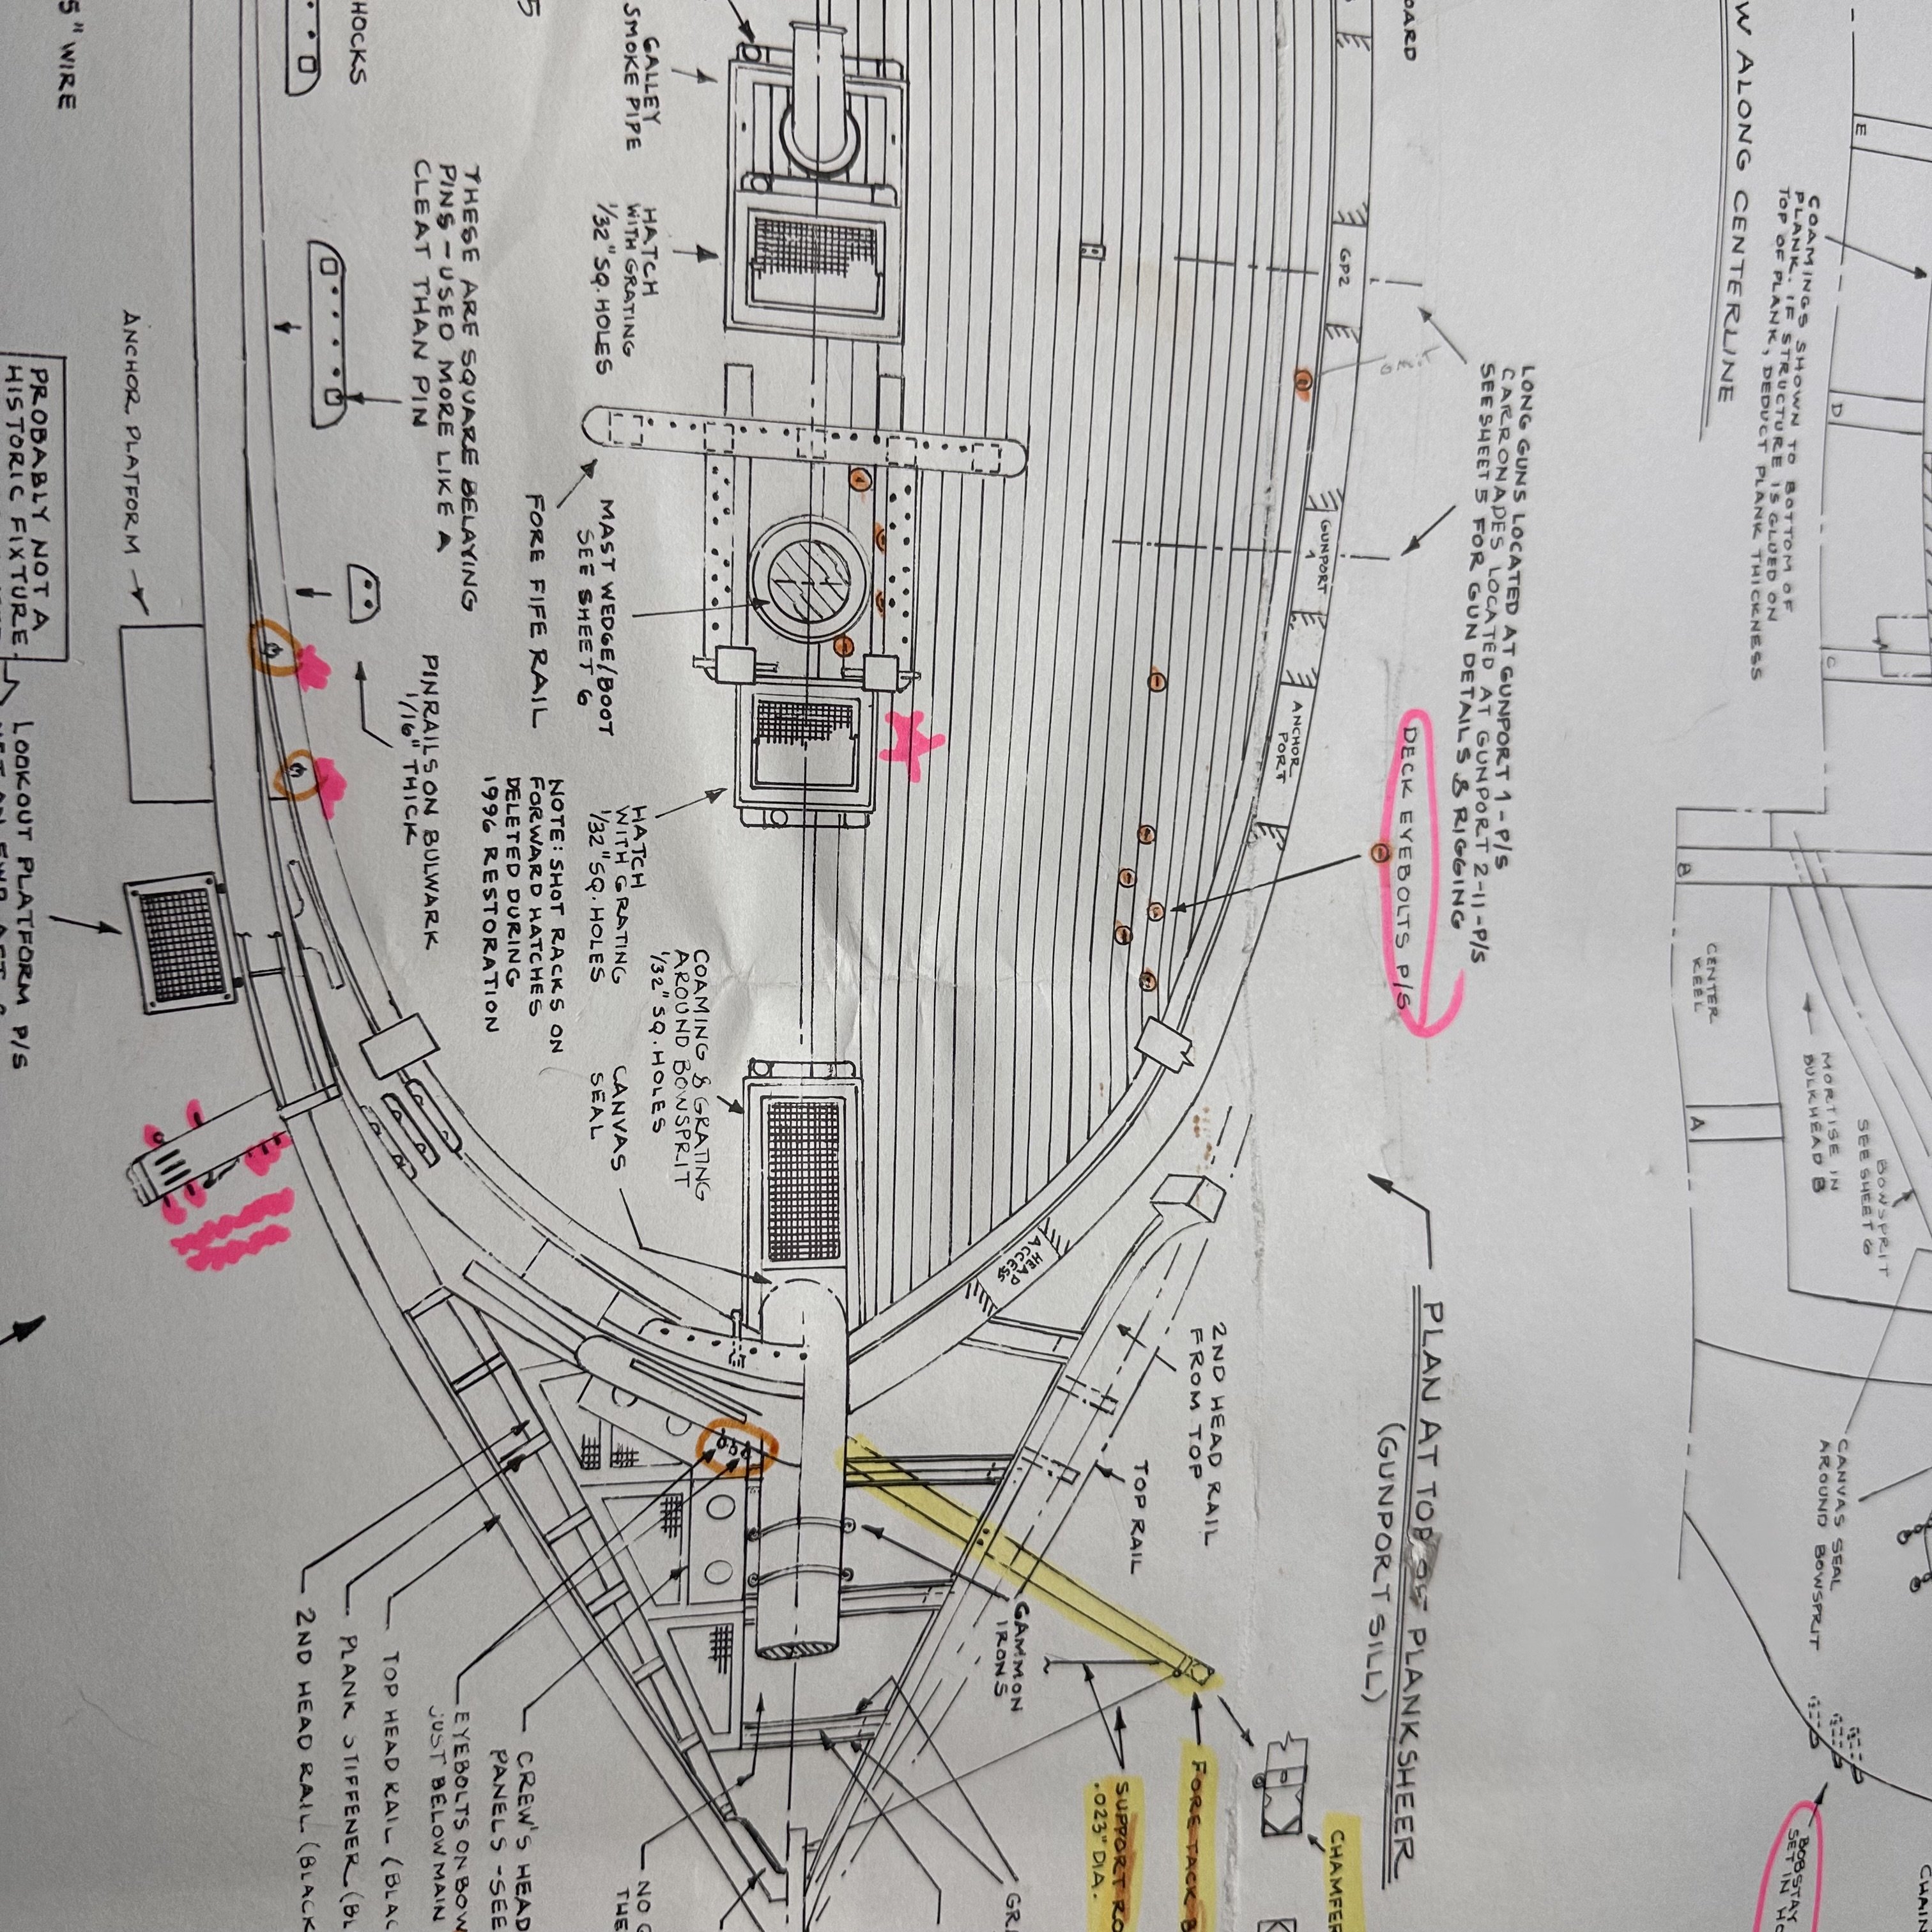
I planked my deck using Bob's practicum and the ship plans. The bow is wider and stern is narrower. I planked from the center of the deck outward to the water ways. I then tapered the planks to fit accordingly at the bow and stern to the water ways. I hope this helps you. My way is not right or wrong, but it is the way I understood the practicum and the plans. There are a number of outstanding builds of the Constitution on MSW any of which will help you with your Constitution.

-
Thanks for your interest in my build. I pretty much followed the Hunt Practicum for the deck planking. Yes I tapered the planks. I did not scribe any of the joints they were made by the individual planks. I used Bobs staining methods. Only problem now a days, is that Floqual paints are out business. I painted the mixture on and then scraped it with a razor blade. I was amazed how much it looked like the real planking on the Conny. Bob hit a home run on that part. I promise I will look back and try to find pictures of the decking. Because of the tapers it is kind like doing the hull planking, The only problem with Bob's pacticum is I feel he fell short on the rigging part. That is where I am right now and still hung up some parts and trying to figure out how to do things without turning it into a spider web. I did find a picture on the internet that shows an unusual picture of the rigging and I think I am on the right track as I am rigging from the bottom up and from the inside out. Take a look. Again, thanks for your interest.


USS Constitution by JSGerson - Model Shipways Kit No. MS2040
in - Kit build logs for subjects built from 1751 - 1800
Posted
It is amazing all the added details us modelers can add to a model. Great job!