

Hollander-jan
-
Posts
106 -
Joined
-
Last visited
Content Type
Profiles
Forums
Gallery
Events
Posts posted by Hollander-jan
-
-
-
Hello to all off you. After a verry long period of not feeling good Iplan to take up the build off my ship. Have to get in to it again and make myself again familiar with the plan. This will take a week or so. My planning will be "take it easy" all the parst are in good condition but have to sort them out and see where I can get back in to the build again. I hope that all off you will give me advise when I come to questions and problems with the build for now I hope to see you on my log again as I get posts off my progress.
Jan
- Dubz, egkb, Ryland Craze and 1 other
-
 4
4
-
Hello tkay11 here I am back. How are you? after more than a year. planning to take up where I left off. I will take it easy and get all the stuf and tools in good shape before restart the build. Have to get in to it again. I hope to speak to later on and off course all the other Sherbourne builders good by for now.
By the way you made good progress on the build have to look in to more in detail. Looks verry good.
-
-
-
Thank you all for the well wishes it is great to read them. Today I have put all the stuf and the boat, tools and so on in an ordened fasion in the drwawers of my desk and on shelfs in the study, the boat is in plastic because of the dust.
 I hope to be back in the autem but I am not sure. I wish you all the best and happy building.
And thanks again for all you well wishes.
be seeing you on MSW.
Jan
-
Because of my health and lots of other things I have had to stop for a while. I wil be back as soon as thing going better.
will be looking at the builds of others so I am not lost in cyber space.
jan
-
-
-
Gregor,
This thing about your lovely carronades is just for the fun of making arguments not for historicaly right or wrong. You do what you want to do and in my opinion you do it very well and it all looks good. We all live now and nobody can tell exactly how this particular ship was armed, because there are no records. And beside that it must have a hell of a job to manage it and at the same time to do the difficult thing of sailing it and fighting and chasing the bandits.
You keep doing what you think is nice and we all be pleased with the way you do it because there is no doubt about that.
cheers
Jan
-
Gregor
A good read is http://www.grantvillegazette.com/articles/Naval_Armament_and_Armor__Part_Two__Ready__Airm__F -there are 5 articles 1 and 2 are about guns powders recoil etc etc.
Having read these I think that the carronade is given the time we talk about a good choice for the ship Sherbourne. Les crew to man the gun a much more controlled elevation. But I still have my thought on the recoil. The shot uses more powder, the gun by construction will take more recoil, but the gun is lighter so the impact of the recoil must be in the rigging and the incline of the deck. If the ports are opposite each other there was no much room to manoeuvre such a recoil. And besides that a full broadside fire, if ever done by a ship like this, would I think damage the ship ore parts of it at some point.
But that is all theory I like the look of the guns at your ship, and it give futher builders more choice to make it there build in some way.
Jan
-
Very well done a brilliant dissension I like this experiment. (it is not an experiment but a well thought out and argumented alternation ) It looks ok and although it is a bit heavy on the ships timbers it could well be the case after she was modernised. Congratulations on my part Gregor.
-
Gregor,
If you bought your guns by RB in Poland did you get not carriages with them? I bought my gun there also (see my log) and they came with very ok carriages.
Jan
-
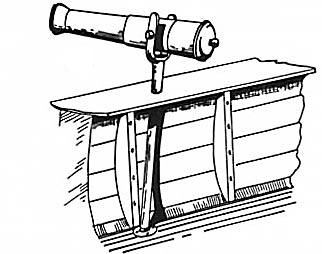
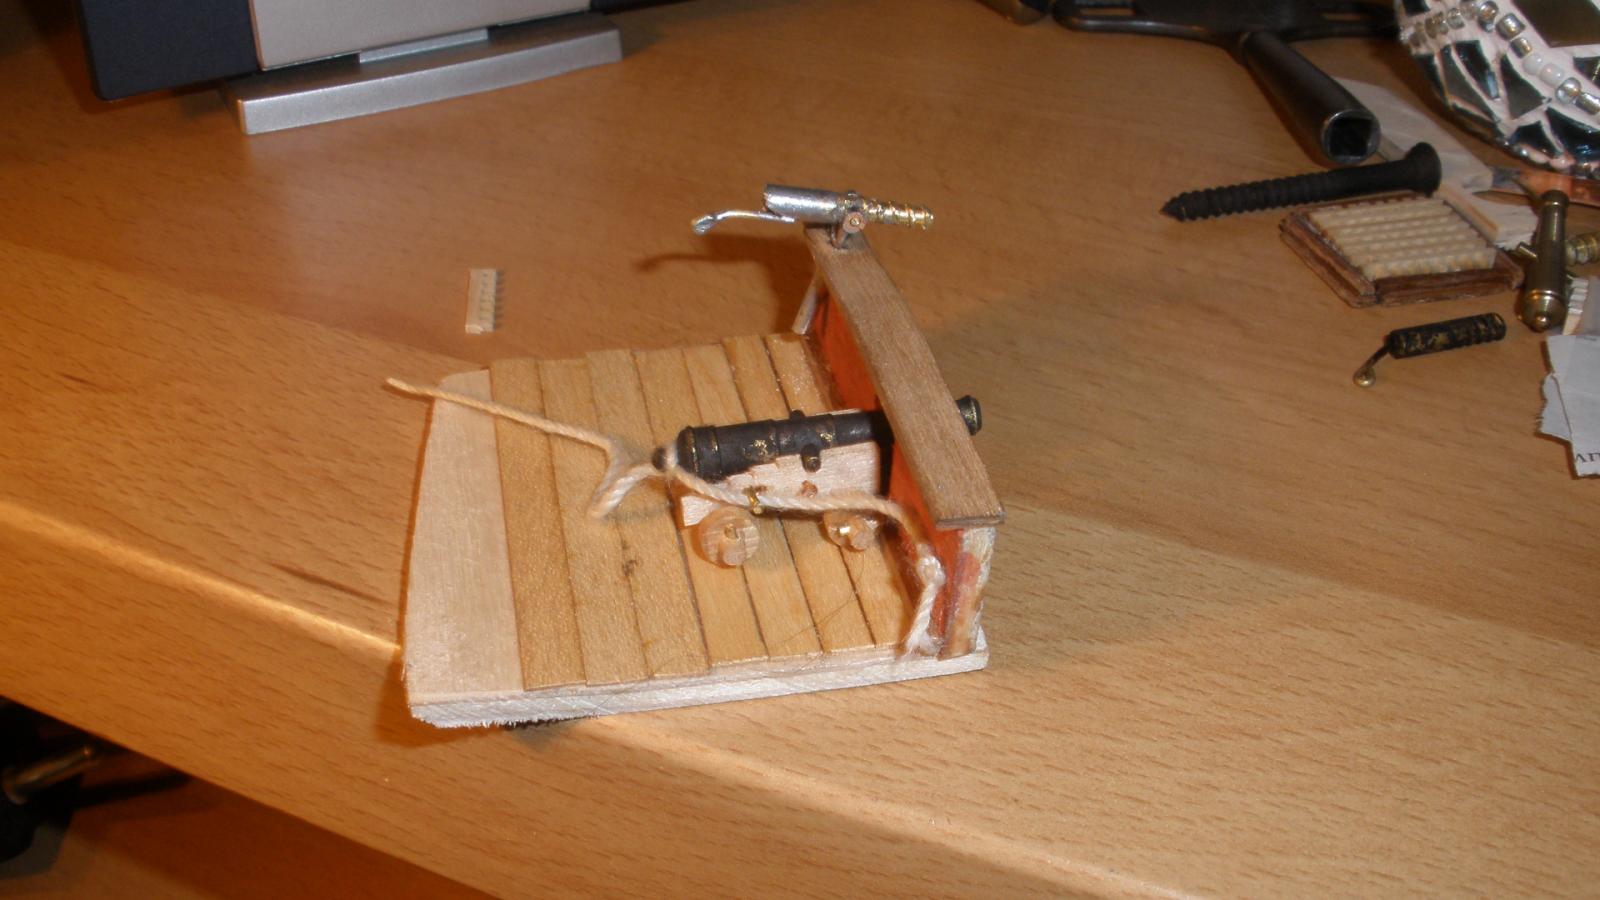
I did some extensive research on swivel guns. And I came to the conclusion that they where, in my opinion support guns meanly for anti personal shots. So in the engagement ship to ship. When a ship was close enough the swivel gun was put into action to damage the ship with all sorts of loads. And on the other hand mainly to fight the seaman a board the engaging vessel. It was surely not a ship sinking gun, although a small vessel was in danger even for this small gun. Based on this research I will make them detachable and transportable from side to side, or from bow to stern. Not in the way as this picture shows but is something similar way. In all of my research it not clear if this was the case on cutters but I can imagine that it was. A small vessel as the Sherbourne must have spare on weight and ammunition to be fast and more guns would not support that, even as the the cost and the cost of crew to maintain and man them. So cutting on two or three swivel guns would be considerable as long as they where to use on either side ore on bow and stern.
I invite every one to comment on my view, and to convince me of an other approach in the use of swivel guns aboard a ship like the Sherbourne.

Jan
-
-
-
Tony, Fun it is hard work man
 No it is fun but it is all so G....d... small, and when you take a picture in close you see what is wrong.
No serious now. I have tried some other approach to the swivel but with no success so I returned to the proven solution you made and it worked but when I saw it on the jig I made, you had to be 2.50 meters (is that over 7 feet? ) tall to reach it. Smaller OK that next one was smaller. But as you will know scratching is one make all the same is two.
I put some pictures on maybe today maybe tomorrow.
Jan
-
I have decided to scratch the swivel guns and make a detachable mounting. Therefore I will take the mounting of Tony and my own research as an example. Of course it will be another mounting but the principle will be the same. Detachable is what they are I think (have been in reality) I have looked at several swivels and have to decide yet which one it will be.
example A
example B

this one has a plate for mounting
example C
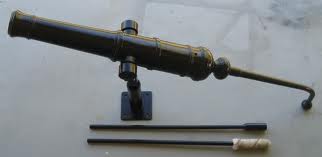
The gun in picture B has the most potential for me to scratch.
It will be a lot of sawing an filing because I have no late
Jan
- Mirabell61 and egkb
-
2
-
-
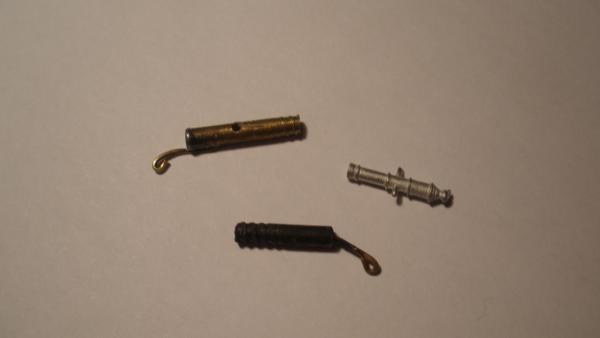
In my search for a non chemical blackening processes I have reached a goal. I have found a way to do it all me it not be as good as chemical it is cheap and well to do at least for cannons.
Clean the object well with ammonia and acid, I did half an hour in lemon juice. Don't touch it after the cleaning. Take the object with clippers to a flame ore a torch and make it red hot. After it is red hot put in soya sauce, the black sauce for oriental food. let it cool for half a minute and take it out with clippers make it hot again. repeat this two or three times. Rinse with clean tap water and the result is a black brass object.
The result is well enough for the price and satisfying for me.

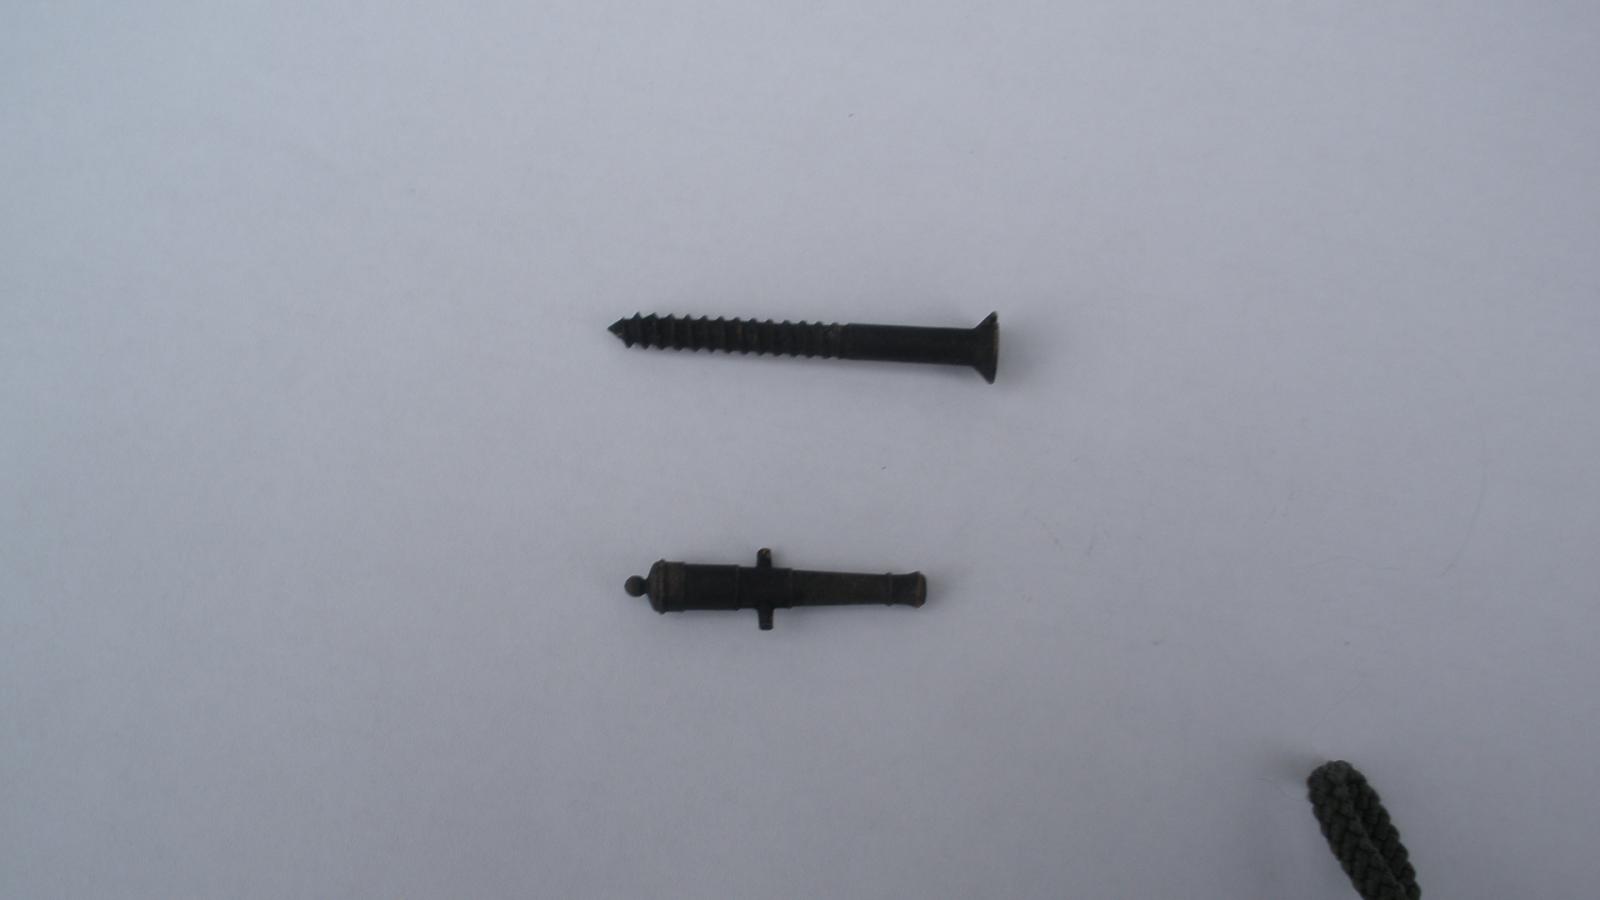
the second picture is a comparison between different sorts of brass a cannon and a screw both brass. The screw is blacked better then the cannon although treated in the same way, it must be the composition af the alloy I think. The screw has to withstand more force than a model gun so I think it will be off an other composition of materials.
I did this search because I was convinced that there must be a way other than chemical, not that I am against using chemicals ore painting. The search was fun to do and gave me a lot of information.
Jan
-
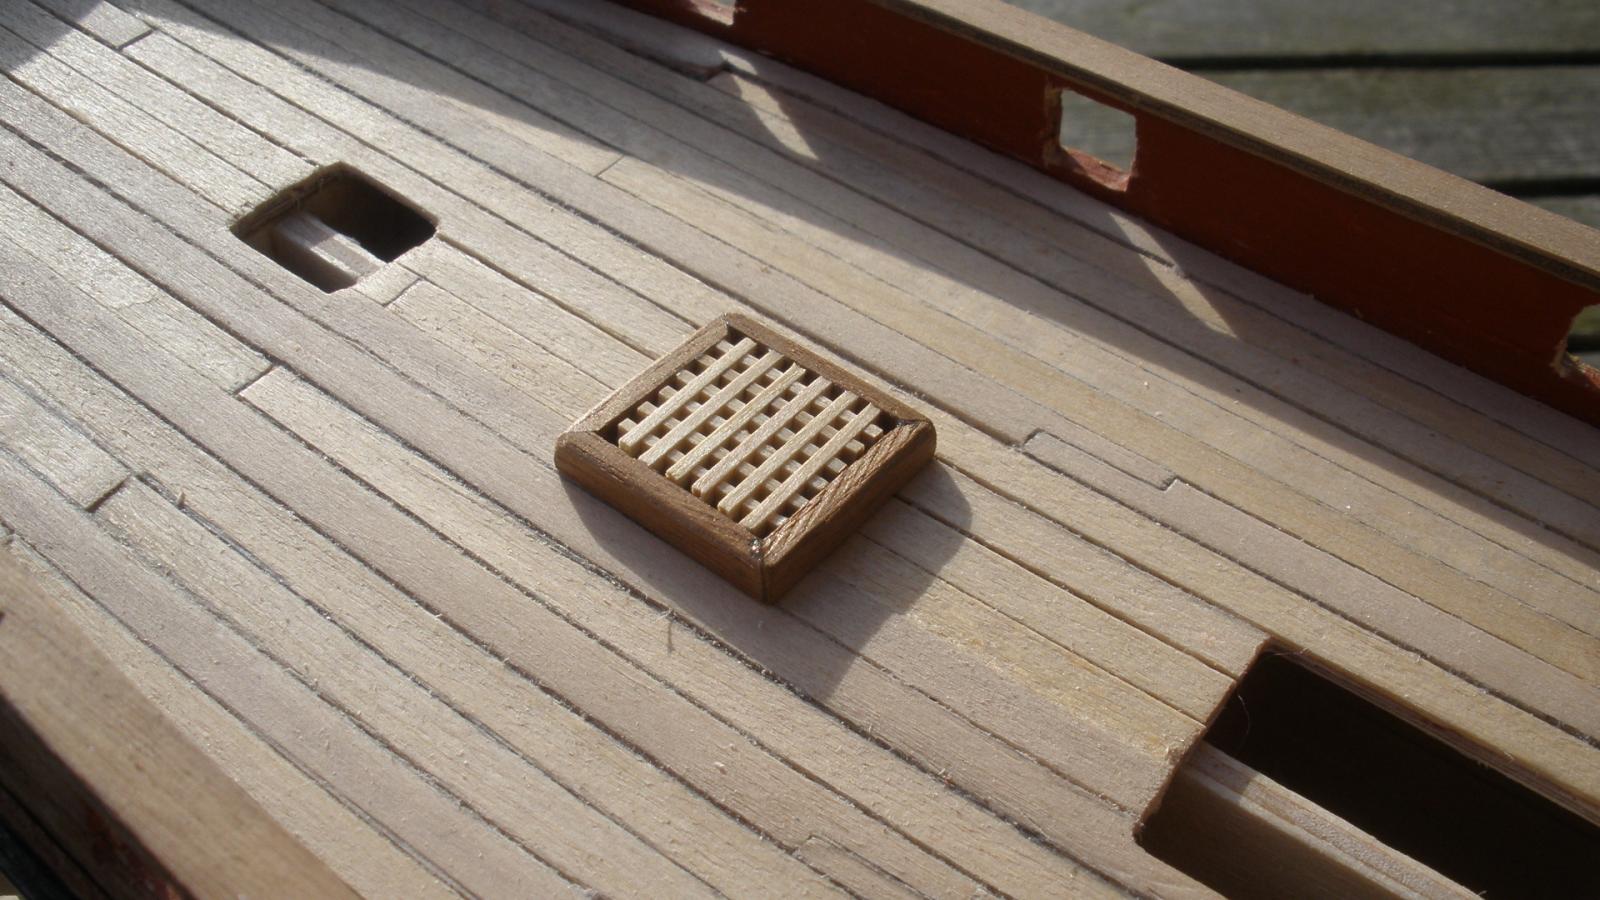
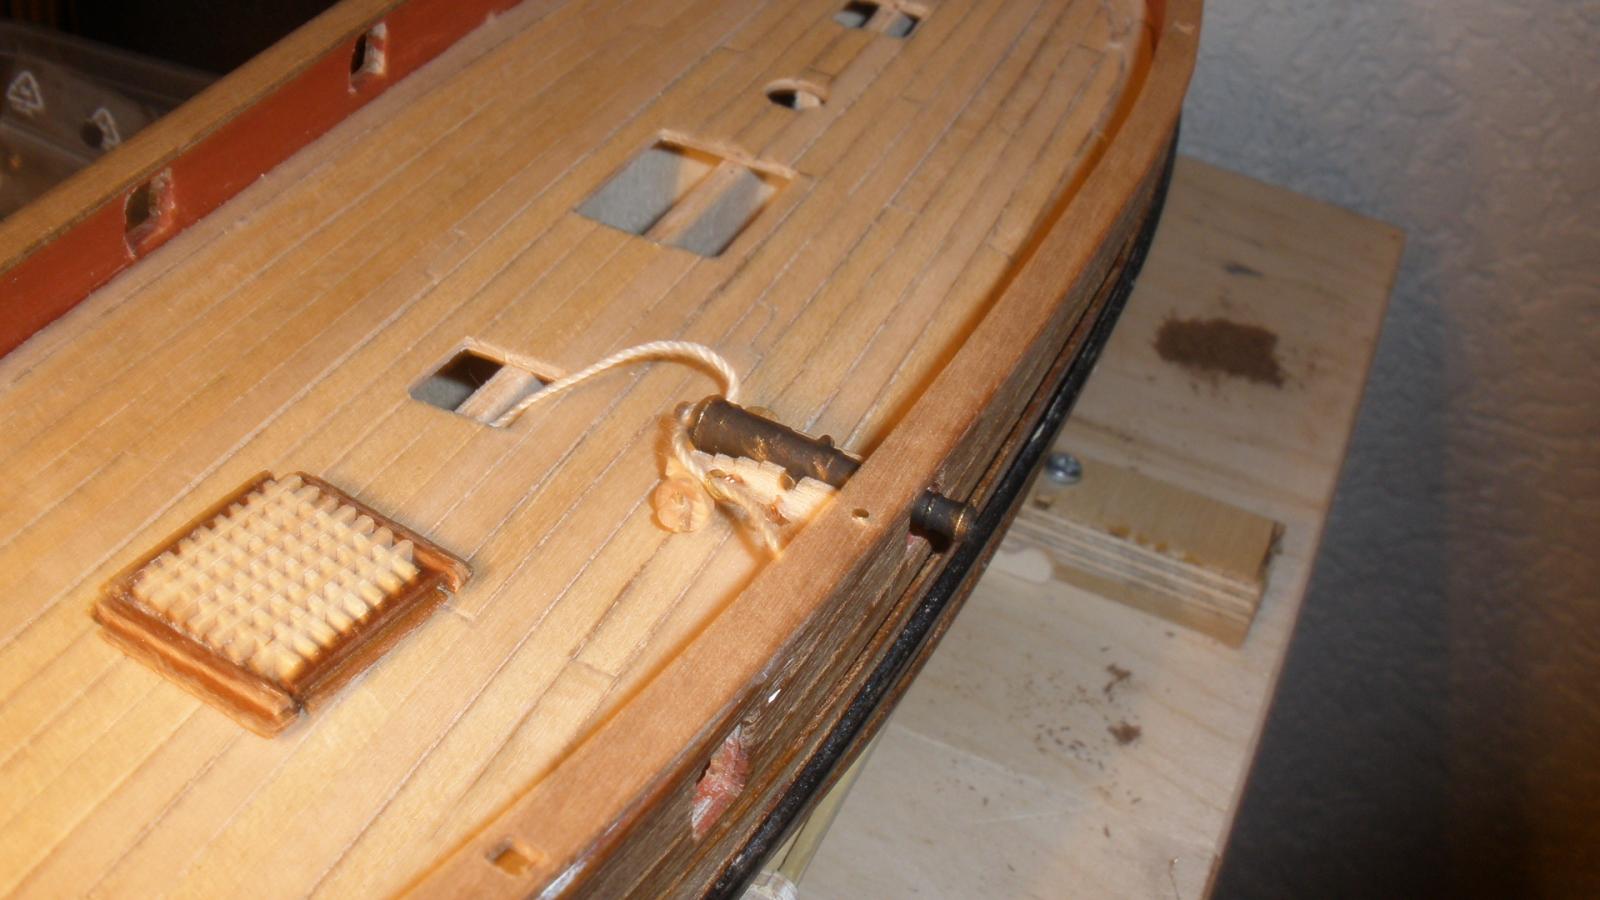
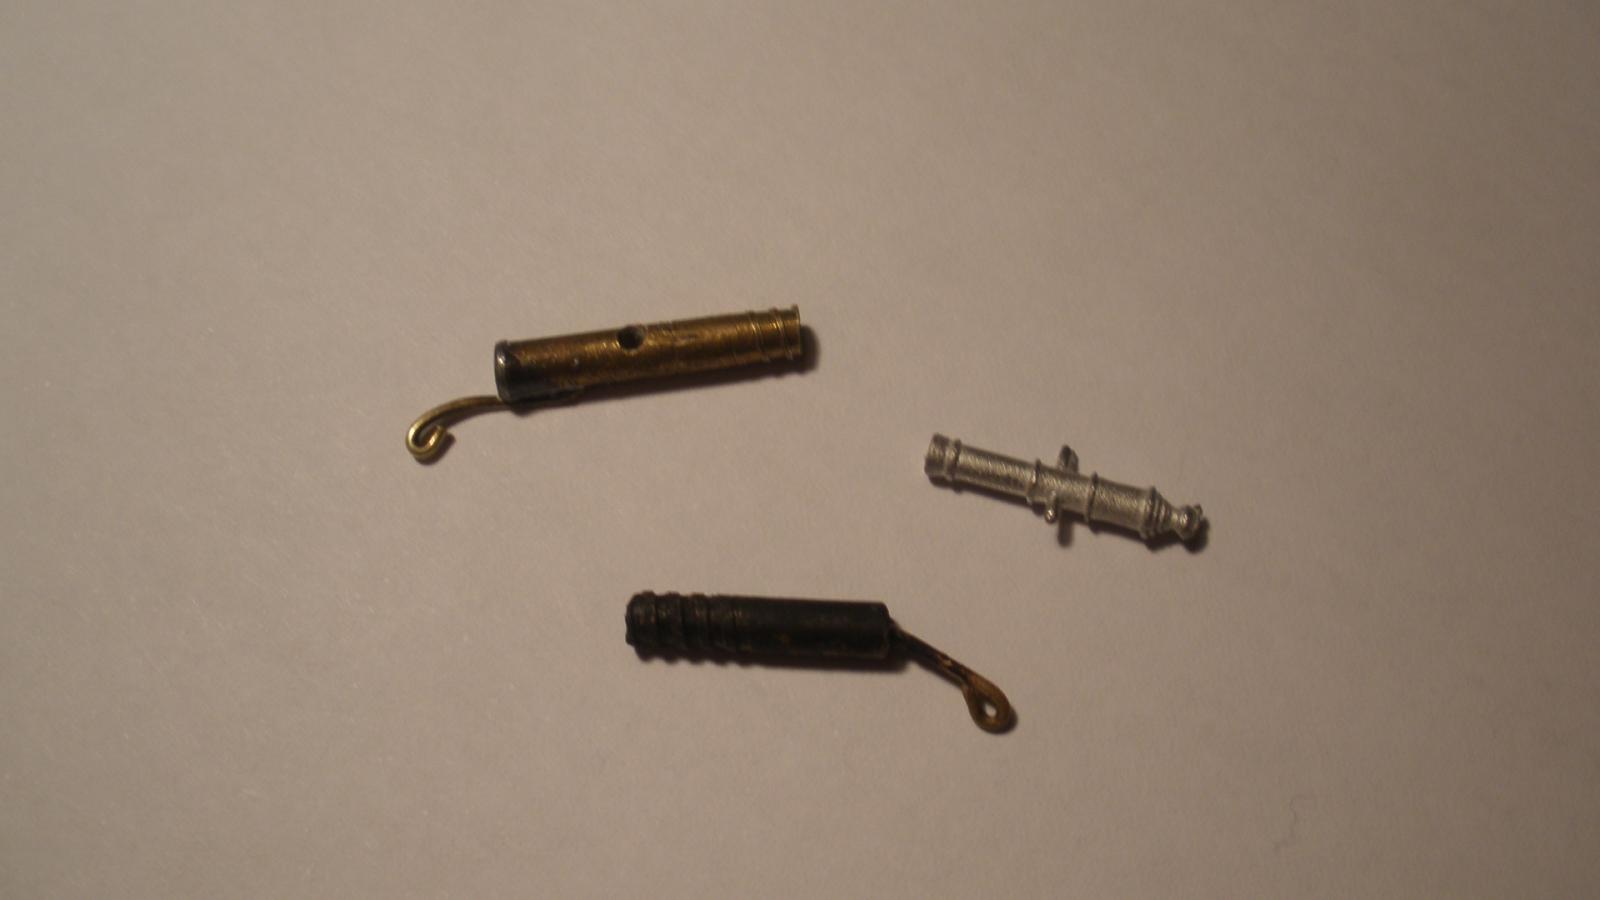
After an attempt to make the gratings witch where not good enough and discarded I took up blackening of the guns and experimented with several methods. I and up till now with a kind of bronze colour more experiments will follow. Beside Gun Black knowes enyone a easy method for blackening?
Swvel guns was next don't like he ones and mounting of the kit swivels. I make my own mounting lots exempels on the net. The gun itself is an other story. Here are two attempts to make an acceptable gun.
The kit gun is foor comparison.
I know that the brass one me be oversized but is a bit easyer to make, the black one have to get trunions The hand handels can be better.
Jan
-
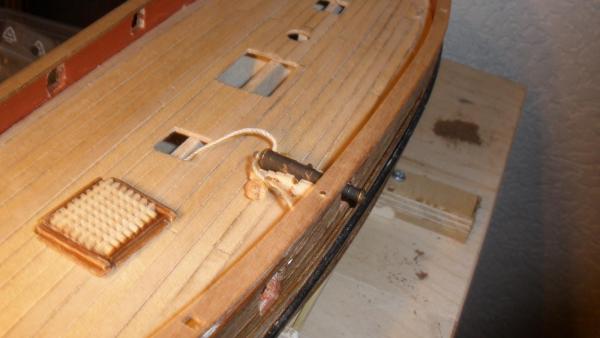
Thank you Kester,
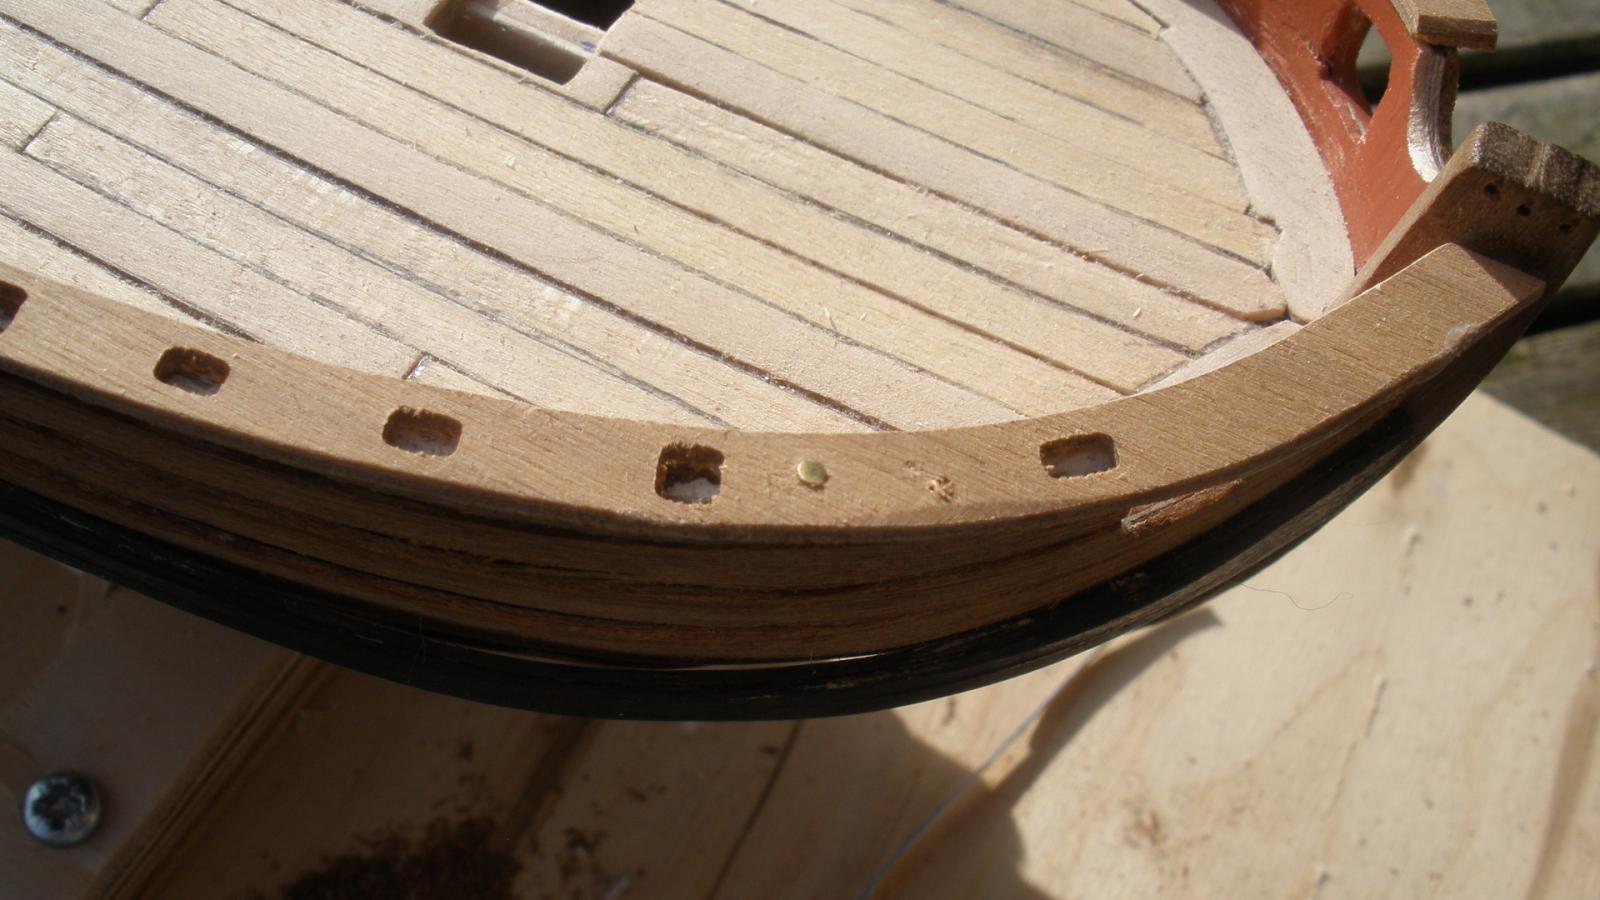
It took me 4 days to see how it must be done. Only to find a way out of the problem. I build a rig for the boat where it would be solid and not got left or right, only down force was permitted. Fitted several times dry and drilled the four holes two on each side very carefully.
Then I put it up in the rig and glued the rail after I was sure it would go in the right place the nails holding it in place. I had to make good contact with boat and rail, there was no way of getting clamps on, weight was the only option. So I did put almost 5 kg of weight on it for a good glue / rail / boat contact. After 2 hours al was ok and a sigh of relief
It all worked out the way I had thought and planned it, but you are right some bravery is involved. On the other hand Cutters are strong vessels

Jan
- egkb, Stockholm tar and tkay11
-
3
-
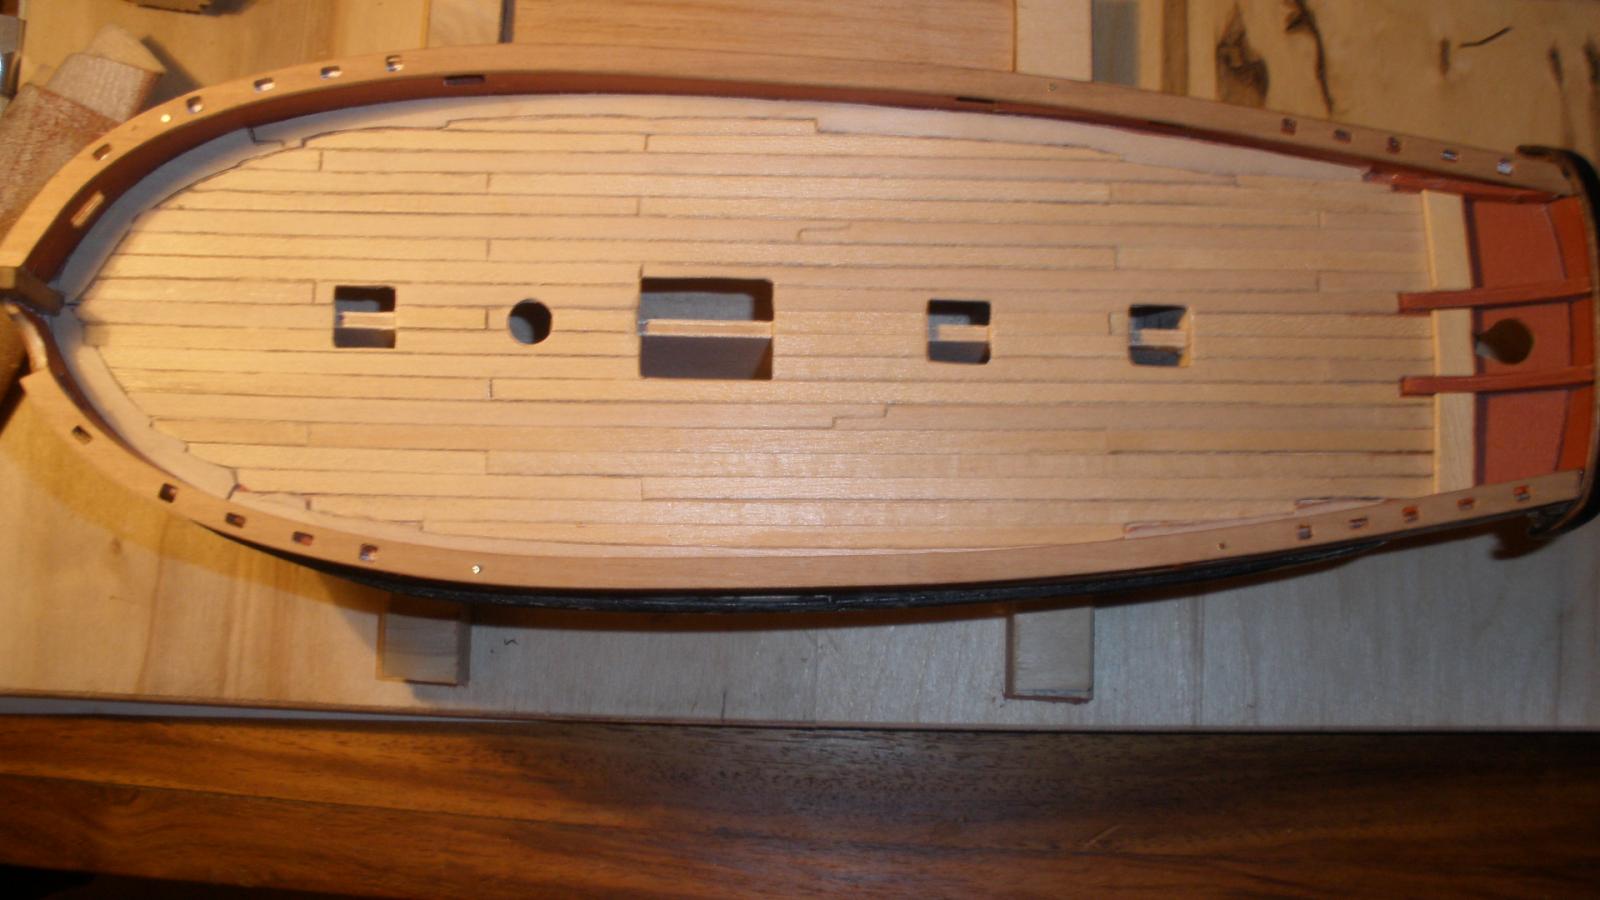
The top rail is on here are some pictures of the weight I put on to get the two glued on in one go. The are fixed with two nail on each side. Spot on and no glu stains on the ship. Used pva as a glue.
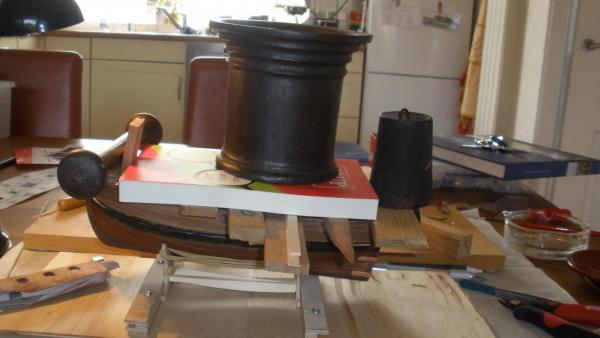
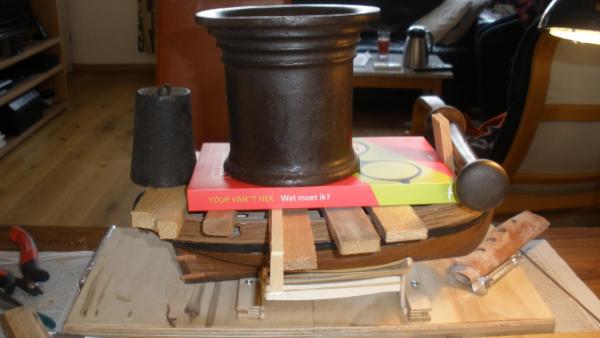

BTW the rudder broke of
 have to do it again.
Jan
-


HMC Sherbourne 1763 by Hollander-jan - Caldercraft - 1/64
in - Kit build logs for subjects built from 1751 - 1800
Posted
there has been a delay in comming back because off an operation on my yes (catarac) it is done now and all I need is new glasses so it will be a short while and I start to build again see you all.
Jan