


CaptMorgan
-
Posts
159 -
Joined
-
Last visited
Reputation Activity
-

 CaptMorgan reacted to usedtosail in USS Constitution by usedtosail - FINISHED - Model Shipways - scale 1/76
Well, the soaked and bent waterways held their shape just fine. I did add a strip to the corner of the transom for the ends to fit in, so I re-soaked them and stuck them out the transom to get more curve in the stern.
I also soaked and bent the other side pieces to the bulwark supports.
While those were drying, I made up two templates from manila folder for the two bow waterways.
I used the templates to cut these waterways out from some basswood sheet material, which is actually excess laser cut pieces from the kit. I glued these to some thinner sheets after getting them to shape inside and out, to get them to the same height as the other waterway pieces.
I also made the waterways for the gun deck, using the one piece I had left from the kit and another that I had. These will go on when I can get into that area more easily.
I cut the miter joints into the transom waterway and the ends of the two side pieces, and scarf joints in the other ends. I cut some of the scarf joints on the drill press with the end mill, but the two in front I had to do by hand. They came out the same in either case, not great, but OK since the pieces will be painted. I will need to practice a lot more before attempting these for wood that is to be left natural.
I then started gluing the waterways in. Here are the two starboard side pieces being glued in. Being able to clamp that stern section so it was tight to the transom filler was a huge relief, as otherwise I don't know how I would have gotten that area to stay down.
After I took this picture I could see that the middle sections were not being held down tight enough, so I broke out the bigger clamps. Why I didn't start with these I don't know, as they were perfect in not leaving any marks on the wood.
And to be fair, here are the port side pieces being glued in.
And finally, the bow sections being glued in.
OK, here we go on the kit bashing part. I removed the bulwark supports to show the open waist area, and I have marked the deck beams that I will remove to add the gun deck. The beams will be replaced later with new beams made from basswood strips, as they will be shown in the open main hatch.
Tomorrow, I will remove the marked deck beams. I sure hope this works.
-
 CaptMorgan got a reaction from DaveG in USS Constitution by Jeff - Model Shipways - Scale 1:76
I just recently found this forum (MSW) and will be following your build closely. I am currently debating on doing this ship as my next project. Currently building the AL Constellation. (Sorry - not real impressed with the kit but learning a lot).
Your work is EXCELLENT and I can only hope to follow your lead. I have a long way to go....
Thanks for posting your build....
-
CaptMorgan reacted to usedtosail in USS Constitution by usedtosail - FINISHED - Model Shipways - scale 1/76
I faired the hull from the keel up to about the wale, then turned the hull over and faired the rest of the way up. I then started framing the bow. I first cut out the main frame pieces, after gluing up three strips of wood for the knightheads. The timberheads I could make out of a single piece of wood. One thing I did was to hold the pieces together to make sure the notches all lined up at the same height then sanded the bottoms flat.
When I was satisfied with these, I fit them into the bow filler block notches and cut out the stiffener pieces that go between them. This took a couple of tries because these pieces as shown on the plans are too short and don't reach all the way to the rabbet. I modified the new pieces to end at the rabbet, then glued them to the stem and the first bulkhead, using clothes pins and a binder clip to hold them at the right height.
I then added the upper piece that forms one side of the head entry. I clipped a batten between the adjacent pieces to get the correct location for the top of this piece.
If you look closely at the picture before the last one, you can see that the port knighthead was curved too far back at the top and didn't make a nice curve with the timberheads on this side. Instead of replacing it, I added some wood to the front and removed some from the back to get it into the right shape.
I added the side pieces for the bridle ports and the upper support pieces
Then the top and bottom of the bridle ports. I faired it all and here is how it came out.
I have some more design work to do before I can tackle the stern framing, but that is next.
-
CaptMorgan reacted to dcbriski in Constitution by dcbriski - Model Shipways - 1812 configuration
Gun deck is roughed in. I have to decide if I want to add the diagonal knees. If I can see them when the spar deck is planked I will otherwise I wont. The gun will sit just a bit lower than actually shown. I set the level of the floor using the pieces shown. The base of the gun port is set roughly 2.5 ft from the floor or so. Enjoy.
-
CaptMorgan reacted to usedtosail in USS Constitution by usedtosail - FINISHED - Model Shipways - scale 1/76
First, an update on the stern filler blocks. I ended up spending over an hour fairing these even more, once I started running a plank strip across them. They have a much nicer flow and a better transition from the rest of the stern bulkheads. The little shelf for the ends of the planks at the transom filler is now even on both sides. These are also now glued into place.
After making the stern filler blocks, it was time to make the bow filler blocks. Piece of cake, I thought. These have a much flatter profile than the stern so there shouldn't be so much sanding. Ha! I had not counted on the little notches, which made this a harder job than I thought.
OK, to start, I cut out the blanks for each filler block from the supplied block, cut out the rough shape with the hand saw, and sanded in the final shape using the disk and belt sander, just like the stern blocks. These both came out pretty well, so it was time to carve the slots. I marked them on the top of the blocks using the cut out piece from the plans as a template. I cut a slot on each side using a razor saw and started removing the material in the slots with some small chisels. Well, these came out pretty rough as you can see in these pictures:
I slept on this but decided the next day that they were not acceptable. I had bought a few end mill bits to use in the drill press, and I figured this was the job for them. I had to figure out how to hold these odd shaped pieces in the vice I had and then it hit me. I could reuse most of the pieces I already had by cutting off the top 1/4" and mill a 1/4" piece of basswood sheet to replace it. The sheet I could hold flat on the XY table that I have under the vice on the drill press. So that is what I did. I used the table saw to cut most of the tops off, then sanding the rest off in the disk sander. I milled two piece of 1/4" sheet, using a 1/8" end mill bit for most of the slot, and a 1 mm end mill bit to clean out the corners.
These came out so much better, I was rather excited. I carefully glued the milled pieces to the rest of the filler blocks, making sure the slots were in the right place in relation to the rest of the filler block.
The next day, I sanded one of them down and it fit like it was supposed to.
I started sanding down the second one and managed to round over the top so it was ruined. OK, I thought. If I can do this once I can do it again. So off came the top, another sheet was milled and glued on. When I sanded this one it looked good, but when I fit to the stem, it was too small. Apparently in all the sanding, I was removing little bits of the original section and in the end it came out too small. Another lesson learned.
So it was time to start over with the second bow filler block. I had a couple of scrap pieces that I glued together to form a blank. I sanded one end flat for the top and milled the slots first, while I still had a nice rectangular block that I could hold in the vice:
After that, it was just a matter to cut out the rough shape and sand it to the final shape. And here is the result of a week of work:
They are just glued on and there will be some fairing left to do, but I am relieved that they are finished.
While the glue was drying on various pieces this week, I also did some fairing of the bulkheads. I glued some sand paper to this sanding stick and used it to fair down the bulkheads. As I noted in a previous post, some of the bulkheads were not wide enough in some places, so in these areas I glued some thin basswood strips to build them up, then sand down to meet their neighbors.
After the bow filler blocks dry, I will do more fairing then start the bow and stern framing.
Thanks for watching.
-
CaptMorgan reacted to Modeler12 in USS Constitution by Modeler12 - FINISHED - Model Shipways
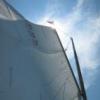
Here is one more picture showing the five out of the six sails she will carry.
Today was slow going. Needed to do some 'chores'.
But I am constantly finding more eyebolts and blocks I need to add. But then I also have some eyebolts on deck and on the masts that I don't know what they are for.
Better more than not enough???
BTW the neighbors across the street are really nice people but I am not promoting their house, even if it were for sale. Termites, you know?
I even found one in my sails. But that was another story here on this forum that turned not to my liking. Besides the SF Bay Area also has earthquakes, strange people and sky-high prices. Don't come to live here, please!
Sorry I added some windmills in the picture above. There is one on either side. They happen to be of the same scale as my Connie. The small one to the right is similar to what my ancestors used to grind wheat in Holland.
-
CaptMorgan reacted to Modeler12 in USS Constitution by Modeler12 - FINISHED - Model Shipways
The main topsail has landed!
This was a bit tricky since there are two halliards, one on each side. The first part is looped around the topmast, comes down to the double block on the spar, goes back up to a block on the crosstree and then finally down to the deck. A bit of juggling.
I did this to hold the whole works in place for now. Next comes taking care of all those 'extra lines'.
But now I need a glass of sauvignon blanc to cool my nerves.
-
CaptMorgan reacted to Modeler12 in USS Constitution by Modeler12 - FINISHED - Model Shipways
Step two. Putting the main jack on the mast. This was not as difficult as it was with the mizzen.
The jack is rigged but not yet in its final position. The braces will take care of that.
The starboard main shrouds are still swaying in the breeze. Again that is until all those lines coming down from the topsail are belayed.
-
CaptMorgan reacted to BRiddoch in USS Constitution by BRiddoch - Model Shipways - Scale 1:76
Completed hull planking and applied a few coats of Wipe-on Poly.
Bob R.
-
CaptMorgan reacted to Modeler12 in USS Constitution by Modeler12 - FINISHED - Model Shipways
And a couple more. These are for my friend down under who at one point thought I was either brave or crazy to put sails on this spider web of rigging.
Next comes the topsail for the main. It will be a slow process.
-
CaptMorgan reacted to Geoff Matson in Constitution by Geoff Matson - Model Shipways 2040 - 1/76 scale
My name is Geoff and I have been building the MS Constitution. I basically followed Bob Hunts practicum. I am now ready to begin the masting and rigging part. I am very impressed with the other Constitution build logs and look forward to see them all develope Here are a few pictures of my progress so far. Thanks Geoff
-
CaptMorgan reacted to BRiddoch in USS Constitution by BRiddoch - Model Shipways - Scale 1:76
Thanks all. Anyway, I did not like the direction the instructions were taking me on installing the upper Gunport lids, so I jumped on the first plane to Boston to see how they were really installed. Just kidding. I happened to be in Boston in November and was treated to a after hours tour by MSW member popeyetosea. I took the attached picture of the actual upper lid and modeled based on that.
I painted the lids and installed the hinges, drill holes for the eyebolts using a #79 drill bit, and installed the eyebolts to the lid. I then installed another eyebolt to the curtain and glued the lid in place. From there I simply rigged with black thread and coated it with CA and paint to simulate the wire rope look.
Bob R.
-
CaptMorgan reacted to Alexi in USS Constitution by Alexi - Model Shipways - Tribute to the Conny
Update: planning for gundeck.
I can't stand the idea of spending so much time and effort on this model only to put in the "dummy" guns with their blind boxes as supplied in the kit. No judgement on any other builders who went that route, just for me - the whole appeal of the Constitution is in her fighting history and significance for our nation's history. Her design was unique in her era in that she was faster than most ships larger than her, and much stronger and well armed than ships her size or smaller. Her array of 24 pounders is one of the most important details of her design and therefore my neurosis won't let me follow the kit for her guns...
In order to build out her gundeck, I have had to take into consideration some structural changes and additions. The spar deck beams and center supports from the kit supplied bulkheads must be removed in order to have adequate access to the gundeck. Also, the model is constructed such that the top of the bulkheads at the level of the gundeck actually corresponds to the top of the gundeck planks on the real ship (see sheet 2 of the plans).
Also, Bob Hunt's practicum uses the spar deck waterway as the point of reference for all the hull planking. This waterway sits on top of the spar deck beams, which must be removed. Therefore, a lot of careful planning is needed in order to not destroy any dependencies.
I started the process by adding basswood blocks between the bulkheads at the level of the gundeck to strengthen the hull, as the bulkheads will become much weaker and prone to warping or breaking after the spar deck beams are removed. This process also gave me the opportunity to correct small errors in alignment in the bulkheads. These elements are structural only and I didn't care if they are perfectly symmetric or aligned.
My 5 year old son, Sam made one of the pieces and put his name on it.
I purchased a set of plans from the USS Constitution museum which contain numerous sheets from various times in the history of the ship. I believe most of the plans are from the 1920 restoration, but I could be wrong. In any case, they show a different configuration to the spar deck beams than the MS 2040 kit, and also show that there was a series of hatches through all the decks that were positioned directly above and below each other to allow cargo and supplies to be winched from the hold all the way to the spar deck if necessary. I plan on leaving the main hatch on the spar deck open so a portion of the gundeck can be easily seen. I thought it would also add depth to the model to leave this 'cargo' hatch on the gundeck open, so a small portion of the berth deck could be seen. I plan on leaving the berth deck hatch closed (although going down to the orlop deck was a temptation).
In order to do this some minor surgery was required. The following photos show in sequence removing the spar deck beam and center support of bulkhead J (taking care to leave enough at the bulkheads to allow correct placement of the spar deck waterway), removing a portion of the center keel down to the level of the berth deck beams, and finally removing a good portion of bulkhead J.
I have cut a piece of cardstock that simulates an open main hatch. In some of the photos you can see how I try to envision the final appearance of the model using this 'guide'. Here you can see the added depth that will be seen down to the berth deck.
Then I added larger stengthening blocks at the level of the berth deck which will eventually hold the planks and closed berth deck hatch.
This photo shows the support blocks being placed with a slight slant to keep the curvature of the berth deck.
Fairing and sanding is still required, but I hope this will form a solid structure to base the finished deck planks on. Next is more structural work to support the bulkheads prior to removing the spar deck beams and center supports...
Merry Christmas, everyone!
Alexi
-
CaptMorgan reacted to JeffT in USS Constitution by Jeff - Model Shipways - Scale 1:76
Here is another quick update. I finished the skylight and started working on the gunports. I have decided to model the majority of the gunports closed since I think that if you've seen one, you've seen them all. There really isn't much to see anyway besides a barrel and a wooden block. They are also easy to knock off the hull. I will probably leave the last 2 or 3 on each side open. The upper half of each gunport has some rigging I'm assuming is used to open and close the port. The practicum suggest to use white wire and then paint it black. I chose to use black 34 gauge wire, therefore no painting is necessary.
The following pictures show the method used to build the skylight. It took me a couple of tries to get it right. For some reason the six-sided shape was difficult for me to wrap my mind around.
Using the pattern provided with the practicum, I cut out the first piece and then traced it to get the second piece.
I used a razor saw to cut a groove for the 6 sections on top. Then I shaped the top using a number 11 exacto.
I used styrene to add the raised detail to the edges of both the top and bottom piece.
Then I glued the two pieces together, painted, and added 4 pieces of wire on all sides of the top. The little round piece on the top was made from a piece of 1/8" dowel.
I glued the skylight to a piece of styrene cut from a sheet and painted green which was then glued to a square piece of construction paper. The whole thing was glued to the deck.
-
CaptMorgan reacted to Modeler12 in USS Constitution by Modeler12 - FINISHED - Model Shipways
Another minor delay in setting the sails.
I noticed that I had not yet rigged the topmast back stays for the fore and main masts. Then I remembered that I ran out of rope for this. So back to the ropewalk to make some more. It had been quite a while since I had used it and it took a few tries to make enough for what I need.
I bet this is the only ropewalk made with Knex parts. After a few trials I even added a motor on the carriage and rigged my variable speed hand drill to drive the stationary end with the gears. Any way it works.
After I have make the rope I will stain it with General Finished Ebony water based stain.
-
CaptMorgan reacted to usedtosail in USS Constitution by usedtosail - FINISHED - Model Shipways - scale 1/76
Adding the bulkheads:
This was pretty straight forward. I had made these Lego corners for a previous build, but they were about half as tall as I needed for this one. A quick trip to the attic to find more of my son's Legos and I had what I needed.
And here they are all attached. Overall, this process took a few days as I was only adding them two at a time and letting them dry a few hours before the next two. The deck beams seem to have a nice run to them without any high or low spots. I know the sides of the bulkheads still need some fairing, which I will get to soon.
While this was going on, I started making the transom filler block. I used the supplied basswood block and cut out the templates from a copy of the plans, which I glued onto the top and bottom. I then used a disk sander to thin the block down and rough in the shape, then a variety of sanding blocks to get it close to the final shape.
I drilled the rudder hole, which is at a slight angle, by holding the filler piece in an adjustable vise and setting the angle to match the stern post angle, then hand drilling a series of small to large holes, finishing the hole with a couple of rat tail files. I used the raw kit supplied rudder to test the fit, so I left it a little tight, since the rudder stock will be sanded round later.
I test fit the transom filler piece to the stern, using the center line on the plans to line up with the center line of the last bulkhead. Getting the piece to be aligned horizontally was a bit of a challenge, but I used the transom pieces as guides, so that when they were level all the way across that was the right angle for the filler. I had to reduce the thickness of the filler a bit more and may still take some off before adding the transom pieces. I glued it on with white glue but did not find a good way to clamp it, so I held it in place until the glue was tacky.
I am working on the two filler pieces that sit under this piece and will have pictures when I finish them.
-
CaptMorgan reacted to usedtosail in USS Constitution by usedtosail - FINISHED - Model Shipways - scale 1/76
To continue on dealing with the gun deck, I set up my Dremel tool in the Workstation with a sanding drum to sand down the area on the bulkheads to be removed. This set up let me quickly switch bulkhead sides and change bulkheads by raising the Dremel tool. There is a hole in the base of the workstation that allows the drum to fit into, so I could get the whole width of the bulkhead in one shot.
The drum doesn't fit in the corners, so after doing what I could with the Dremel, I put the bulkheads in a vise and used a razor saw to cut out the material in the corners.
I then used a flat file to clean up the cuts.
When I had all of the bulkheads cut, I stacked them together and aligned the top rails, then used a flat file to get the cuts even. Here is the before picture:
And here is the after. I think I could do more clean up but I don't want to remove too much, so I am going to wait until the final sanding after removing the center posts for any additional material removal.
Finally, to remove the material on the hull former, I just used a razor saw to cut close to the lines, then a sanding block to finish off the cuts so they were all straight. I had to deepen the notch for the main mast, which I did with some careful chiselling. Well, not really so careful, but the pieces broke off cleanly and I was able to cut the notch out with a razor saw at that point and glue the two side pieces back in. For plywood, this stuff splits pretty easily.
The next task will be to carefully glue the bulkheads to the hull former.
-
CaptMorgan reacted to JeffT in USS Constitution by Jeff - Model Shipways - Scale 1:76
Another update. I am continuing to work on deck details. I have finished with the capstan and the mast boots and I'm now assembling carronades. The practicum was really confusing for carronades. It suggested edge gluing 2 pieces of 3/16 stock to make the center piece and then glue the sides to the top of the center piece. The plans show that the side pieces are glued to the edges of the center piece and not the top. Also the centerpiece should be 1/4" stock. I went with the plans. The assembly is pretty straight forward so I won't go into great detail. I have all of them built and painted now and I'm currently adding the casters and barrels. I had a heck of a time finding a color that looked right but settled on what you see in the pictures. I still need to build the ships wheel and will need to rig the carronades. There are 80 blocks that need to be rigged. I need minions to do that stuff. The blocks provided in the kit are a bit large and honestly just look plain ugly, so I will order some replacements. Thats it for now.
These are the parts for the carronades.
Parts with one assembled and painted. My adviser has suggested I leave the brass unpainted since its pretty.
Some partially assembled. You can also see the capstan and one of the mast boots.
The following is my highly technical way of painting a bunch of little things. These are the casters for the carronades.
Two-sided tape on card stock.
Primed.
Painted.
-
CaptMorgan reacted to Modeler12 in USS Constitution by Modeler12 - FINISHED - Model Shipways
I have added another video to my collection. It has to do with attaching shrouds, deadeyes and lanyards to a ship model. I did this because I wanted some more practice what is coming up with my model.
I also posted this elsewhere.
-
CaptMorgan reacted to Modeler12 in USS Constitution by Modeler12 - FINISHED - Model Shipways
Thanks Graig,
Actually making these coils was another interesting project. I made a video and if you fast forward towards the end you can see how I did them. I am sorry about my shaking hands, but I am not very good in front of a camera.
Here is part of the collection. My first attempts were horrible, they are the ones towards the left top.
-
CaptMorgan reacted to Modeler12 in A video about making metal hooks and . . . . .
I have made a short video about making various parts out of metal wire. Some of the topics I included seem to be of interest right now, but I also included some hints, how to blacken metals and a few others.
I show what I typically do and don't want to give the impression that it is the best or only way, of course. In fact, I welcome suggestions and your input about how to . . . .
After all, that is what this forum is all about.
-
CaptMorgan reacted to greatgalleons in Niagara by greatgalleons - FINISHED - Model Shipways
bell and ladders
-
CaptMorgan reacted to guraus in HMS Victory by guraus - scale 1:48 - plank on frame
Thank you all.
Here is another update...
Regards Alexandru
-
CaptMorgan reacted to greatgalleons in Niagara by greatgalleons - FINISHED - Model Shipways
after marking the line I used black ink to paint the hull above the waterline.
-
CaptMorgan reacted to greatgalleons in Niagara by greatgalleons - FINISHED - Model Shipways
I have made some planking pins using a 1 1/2 inch straight pin. Its bent and soldered at the bends in order to hold the planks onto the bulkheads while the glue dries. I have been using these pins for years on double plank builds, keeps me from putting holes in the final planking.