HOLIDAY DONATION DRIVE - SUPPORT MSW - DO YOUR PART TO KEEP THIS GREAT FORUM GOING! (89 donations so far out of 49,000 members - C'mon guys!)
×


newbee
-
Posts
180 -
Joined
-
Last visited
1 Follower

Recent Profile Visitors
1,574 profile views


-
 GrandpaPhil reacted to a post in a topic:
Golden Hind by newbee - OcCre - 1/85 - improved version
GrandpaPhil reacted to a post in a topic:
Golden Hind by newbee - OcCre - 1/85 - improved version
-
BLACK VIKING reacted to a post in a topic:
Golden Hind by newbee - OcCre - 1/85 - improved version
-
Knocklouder reacted to a post in a topic:
Golden Hind by newbee - OcCre - 1/85 - improved version
-
Mr Whippy reacted to a post in a topic:
Golden Hind by newbee - OcCre - 1/85 - improved version
-
Mr Whippy reacted to a post in a topic:
Golden Hind by newbee - OcCre - 1/85 - improved version
-
Mr Whippy reacted to a post in a topic:
Golden Hind by newbee - OcCre - 1/85 - improved version
-
Mr Whippy reacted to a post in a topic:
Golden Hind by newbee - OcCre - 1/85 - improved version
-
Mr Whippy reacted to a post in a topic:
Golden Hind by newbee - OcCre - 1/85 - improved version
-
Mr Whippy reacted to a post in a topic:
Golden Hind by newbee - OcCre - 1/85 - improved version
-
Mr Whippy reacted to a post in a topic:
Golden Hind by newbee - OcCre - 1/85 - improved version
-
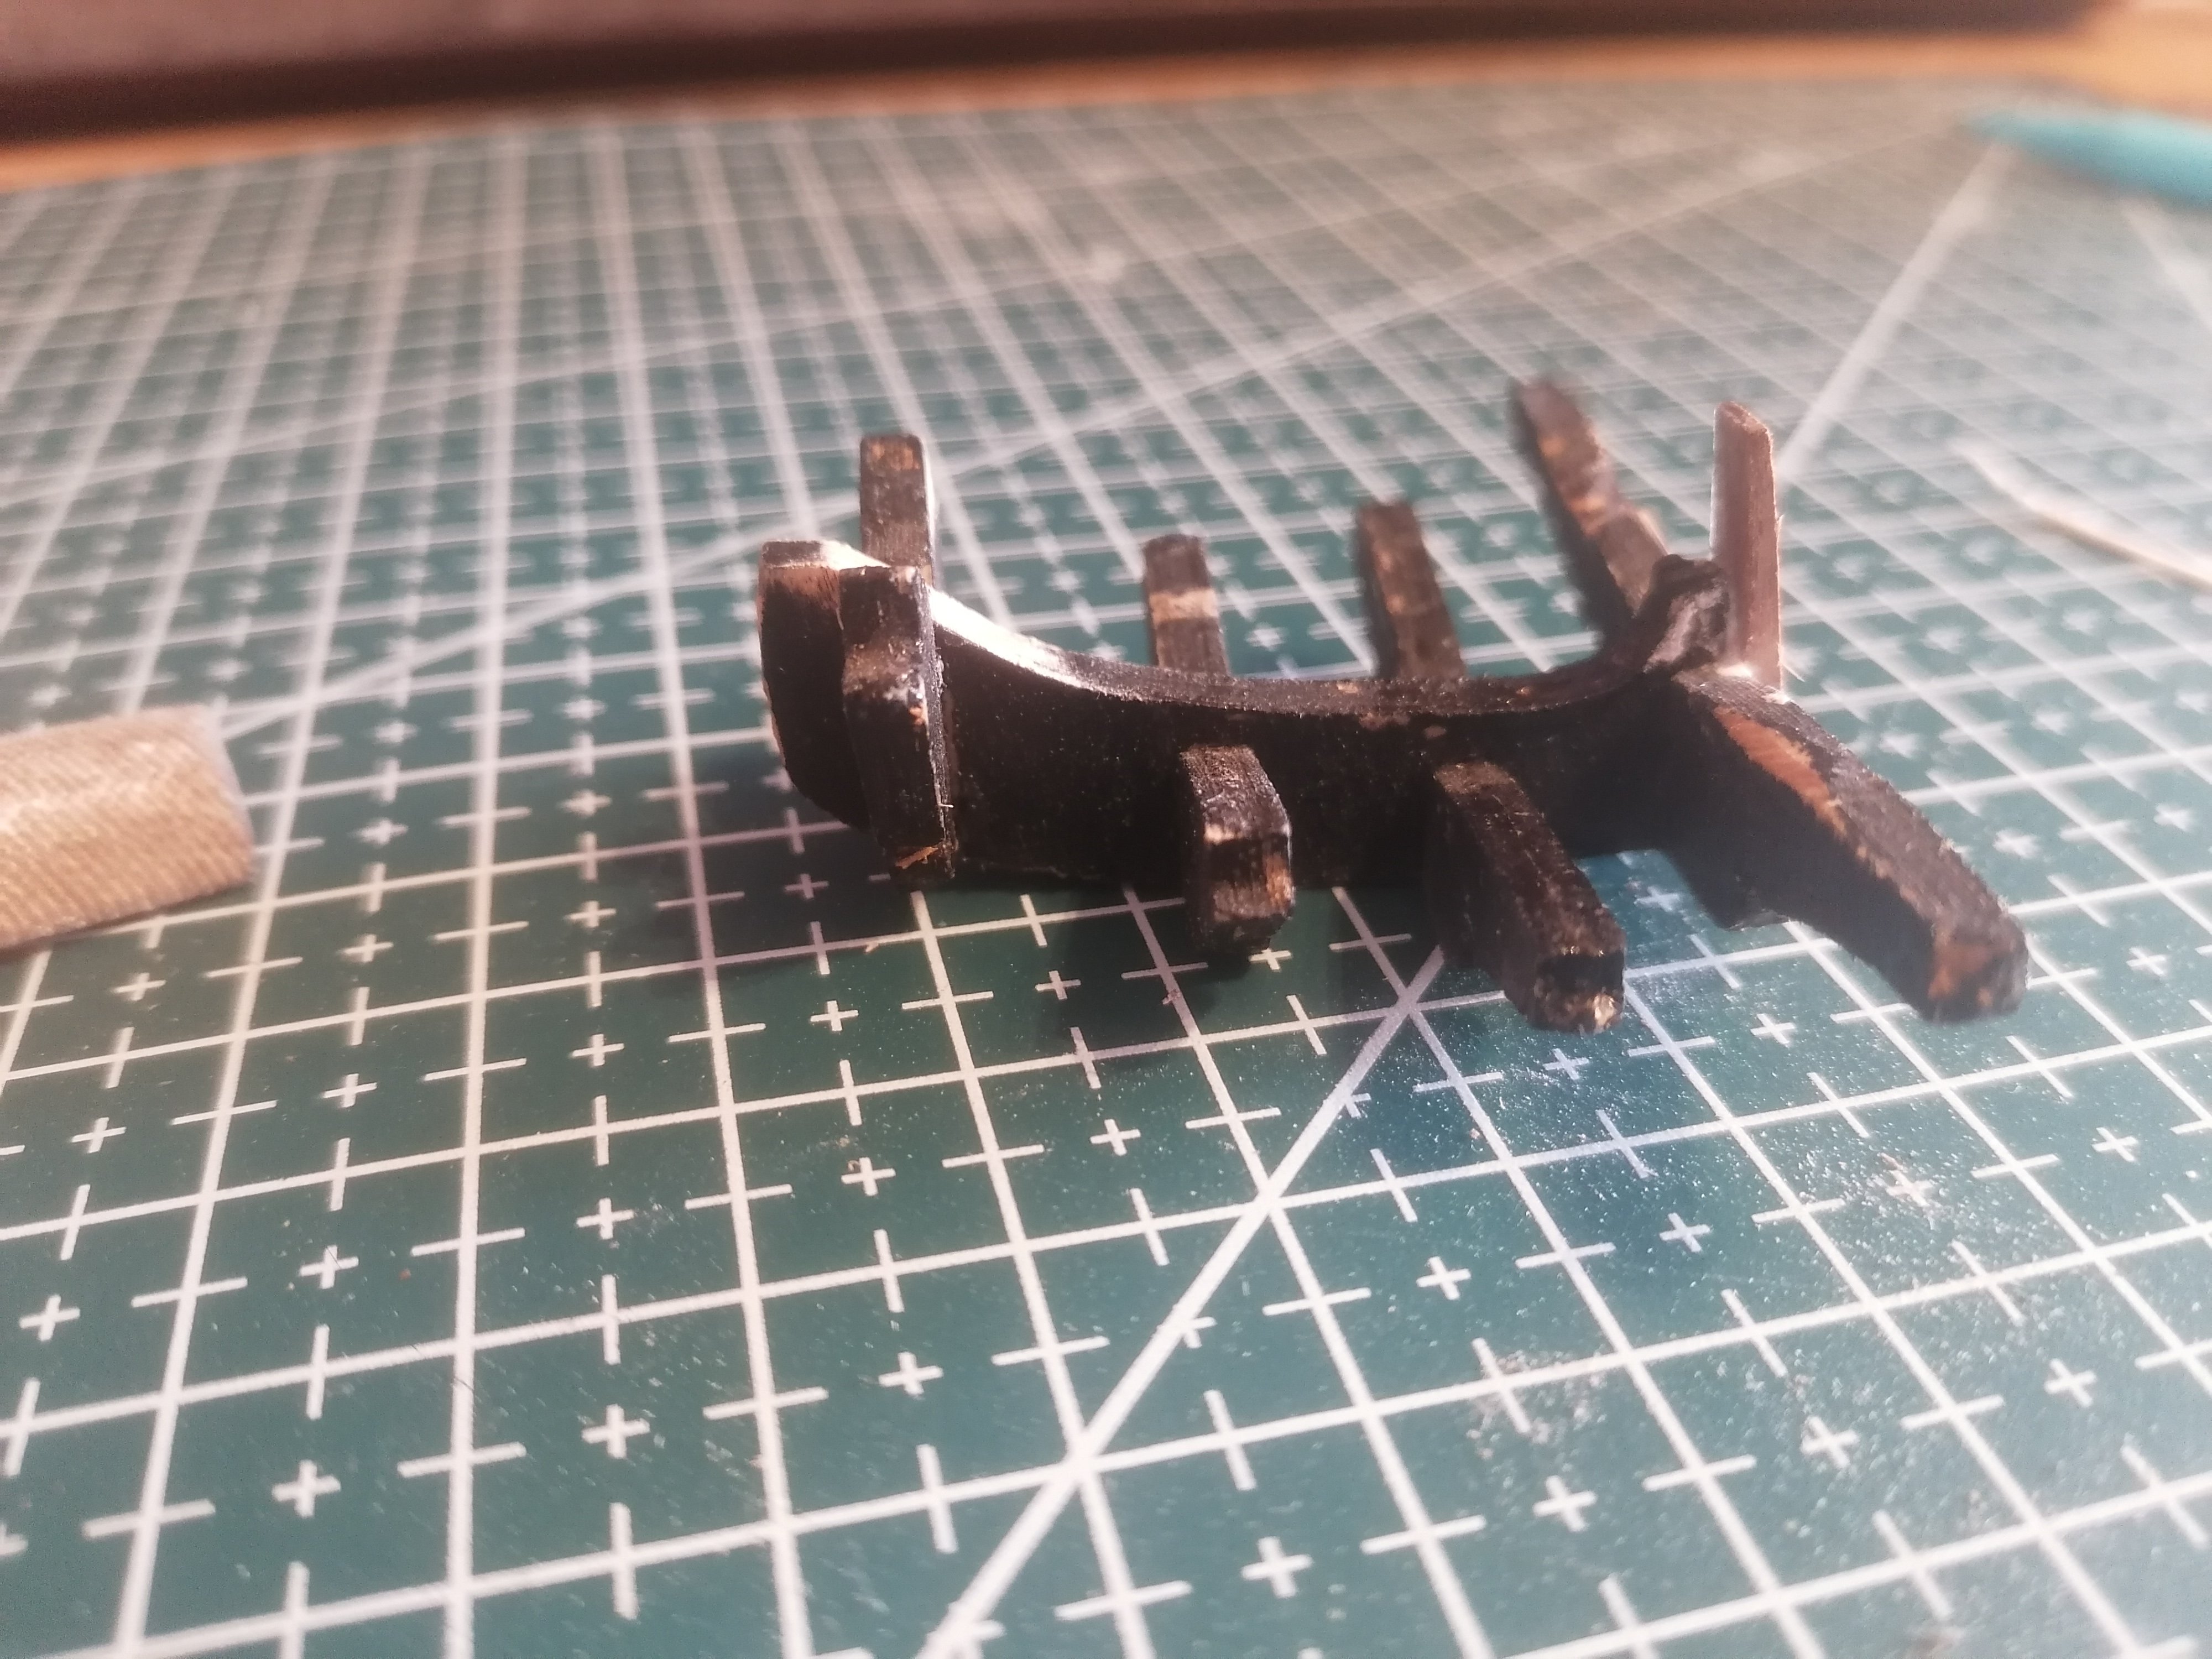
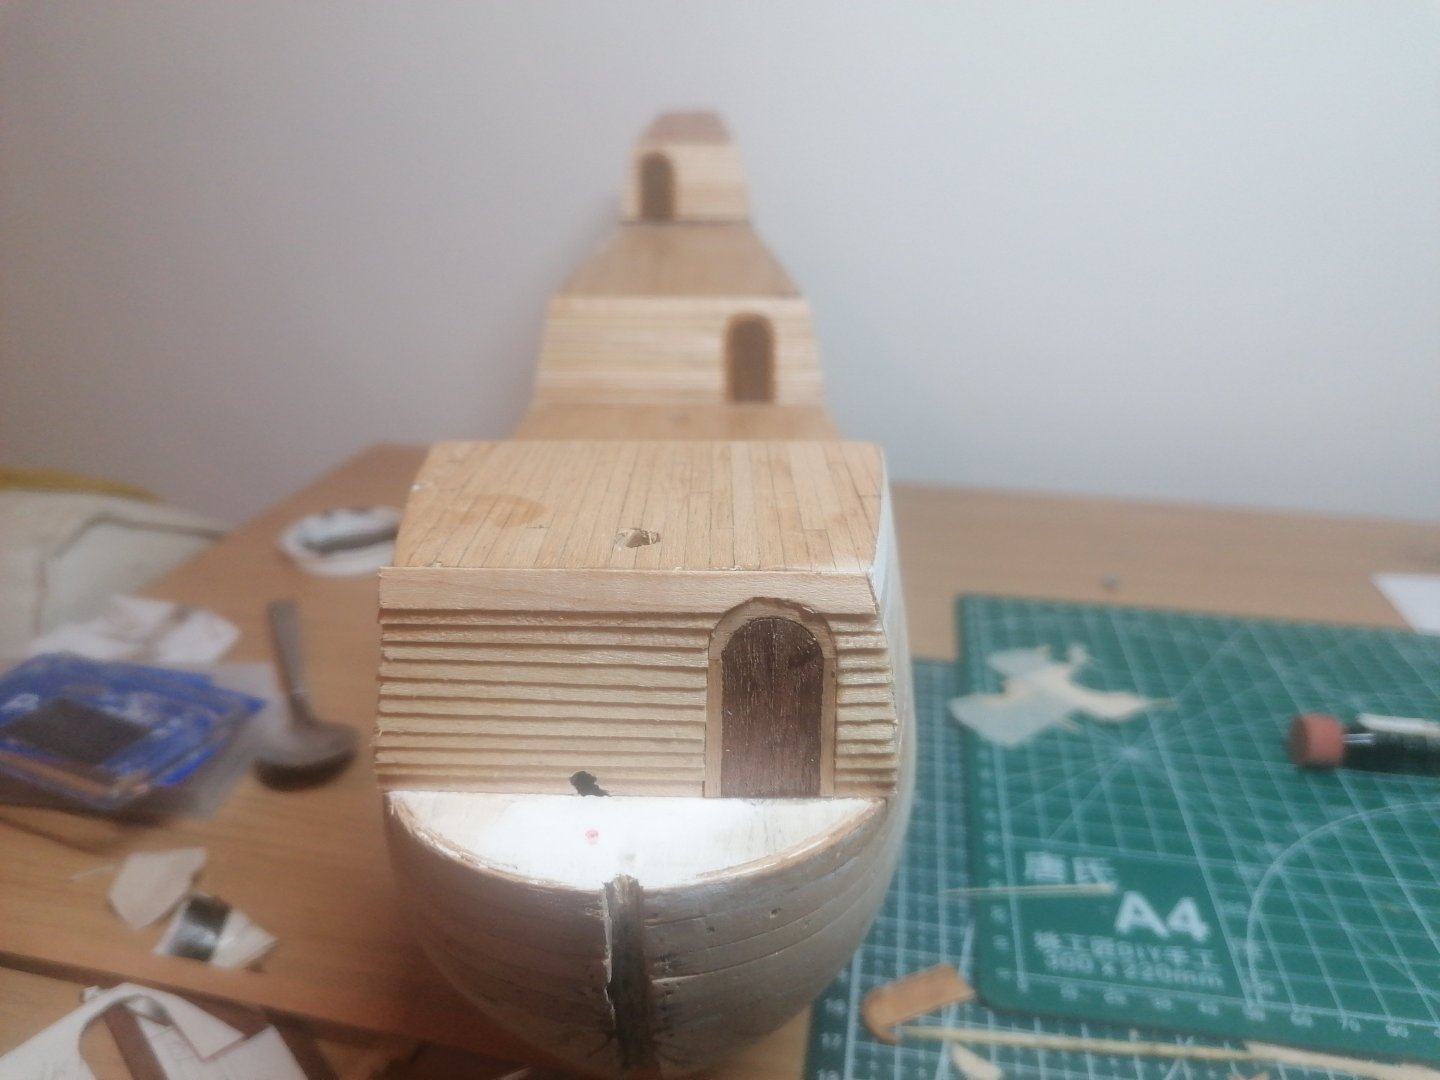
I am attempting to redo last night's post. Firstly, thanks for the likes. Progress has been slow as I am having to try remembering what I have done and what I was thinking to do next. After 16 months or more this is more difficult than I thought. I have built up the bulkhead aft of the main deck with the door fitted. I decided to simplify my original idea and forget the strips on either side thinking they probably will be hidden. I had also planked the fore deck, (this is my name for the planked section between the foc'stle and the sprit deck), and planked the bulkhead. I then strted again on the sprit deck frame. My original version was too narrow aft so had to be redone. I first laid 0.5 x 5mm to form the edges and cut 0.5x3mm strips to run between them to fit across the notches on the beak or maybe it should be called the head timber? And then constructed the basic shape of the frame. I next added a 1x1mm strip to the lower edge to hopefully give something for the lower plank to glue onto. I was reluctant to glue anything yet but they dry fit together quite well. In between waiting for glue to dry and working on how to get the shape of the beak, I added the stern chaser gun port lids as I figured it would l be easier to plank around them than vice versa. Well that was, I think, what I was trying to post last night. I have since had to strip off the planking on the foc'stle bulwark and the decking as I have discovered that the deck is 2mm too low down. The sides of the foc'stle need to be 28mm deep front and back to allow for the strips I want to use. More on this next time. I'm hoping it's not too long. in


-
To be able to reply to my last post I had to submit it again. After almost an hour of adding another it's suddenly disappeared. It's too late at night to start again so will try again over the next few days. Thanks for the likes so far. They really appreciated.
-
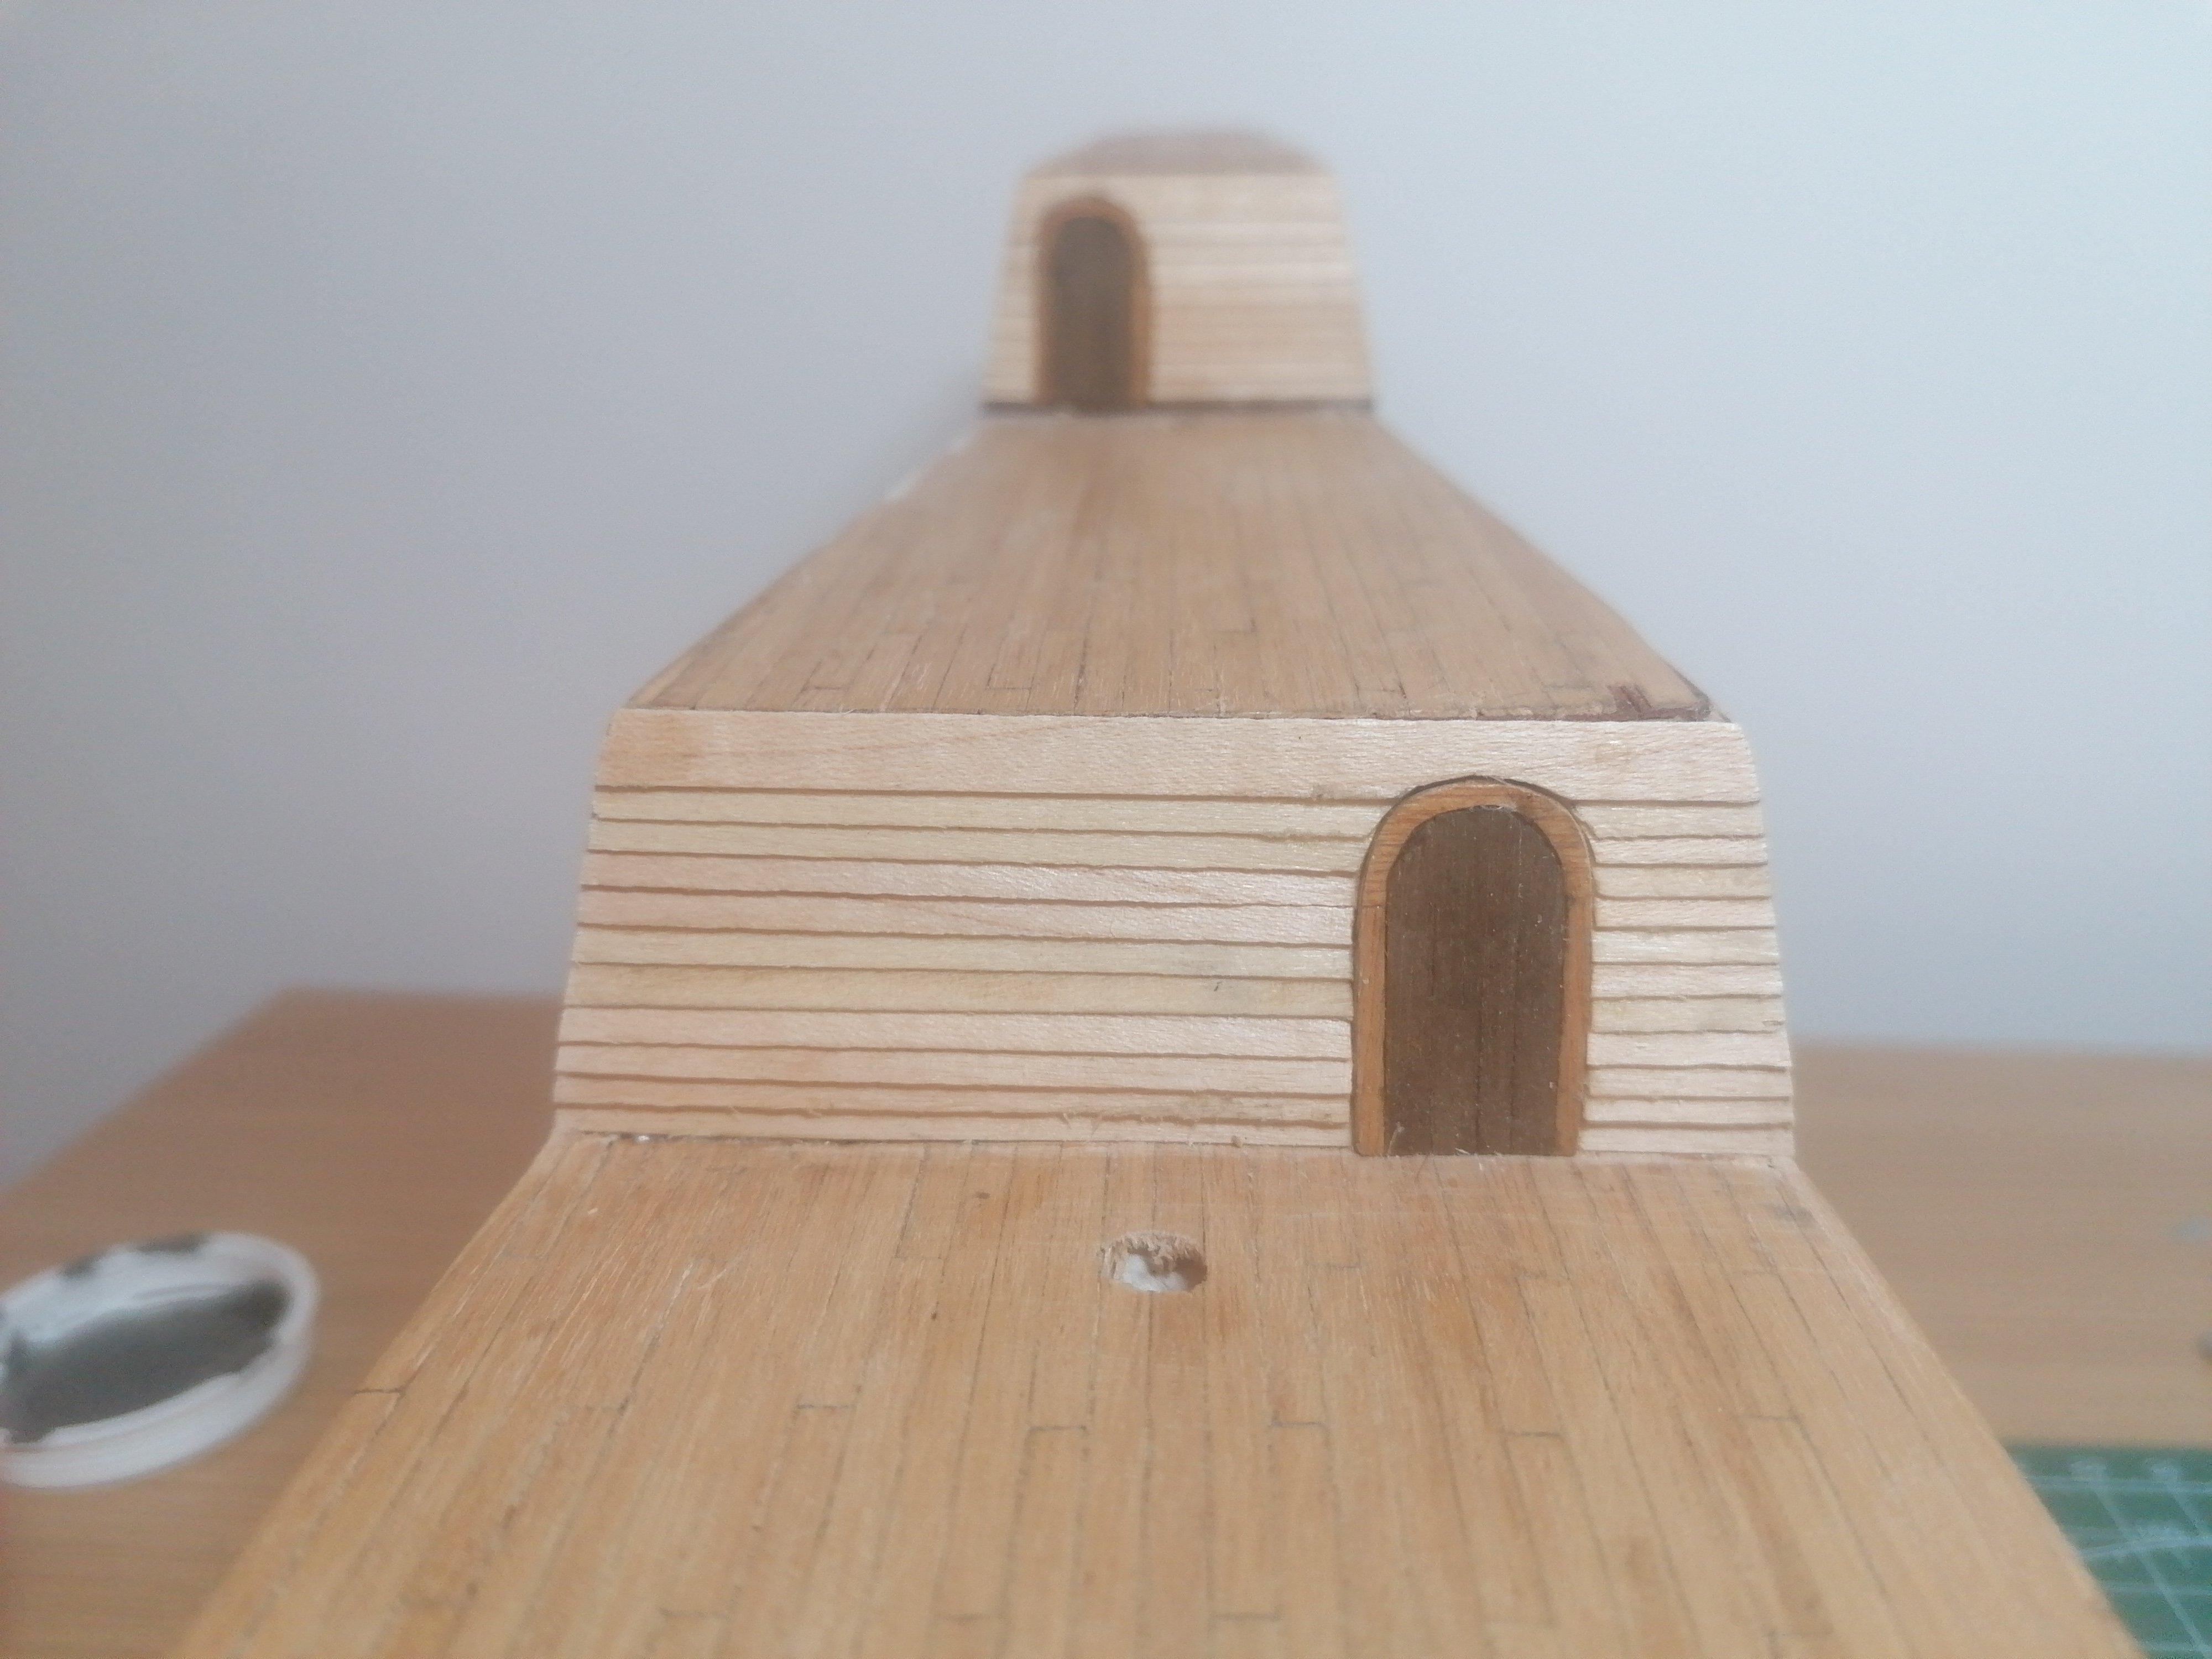
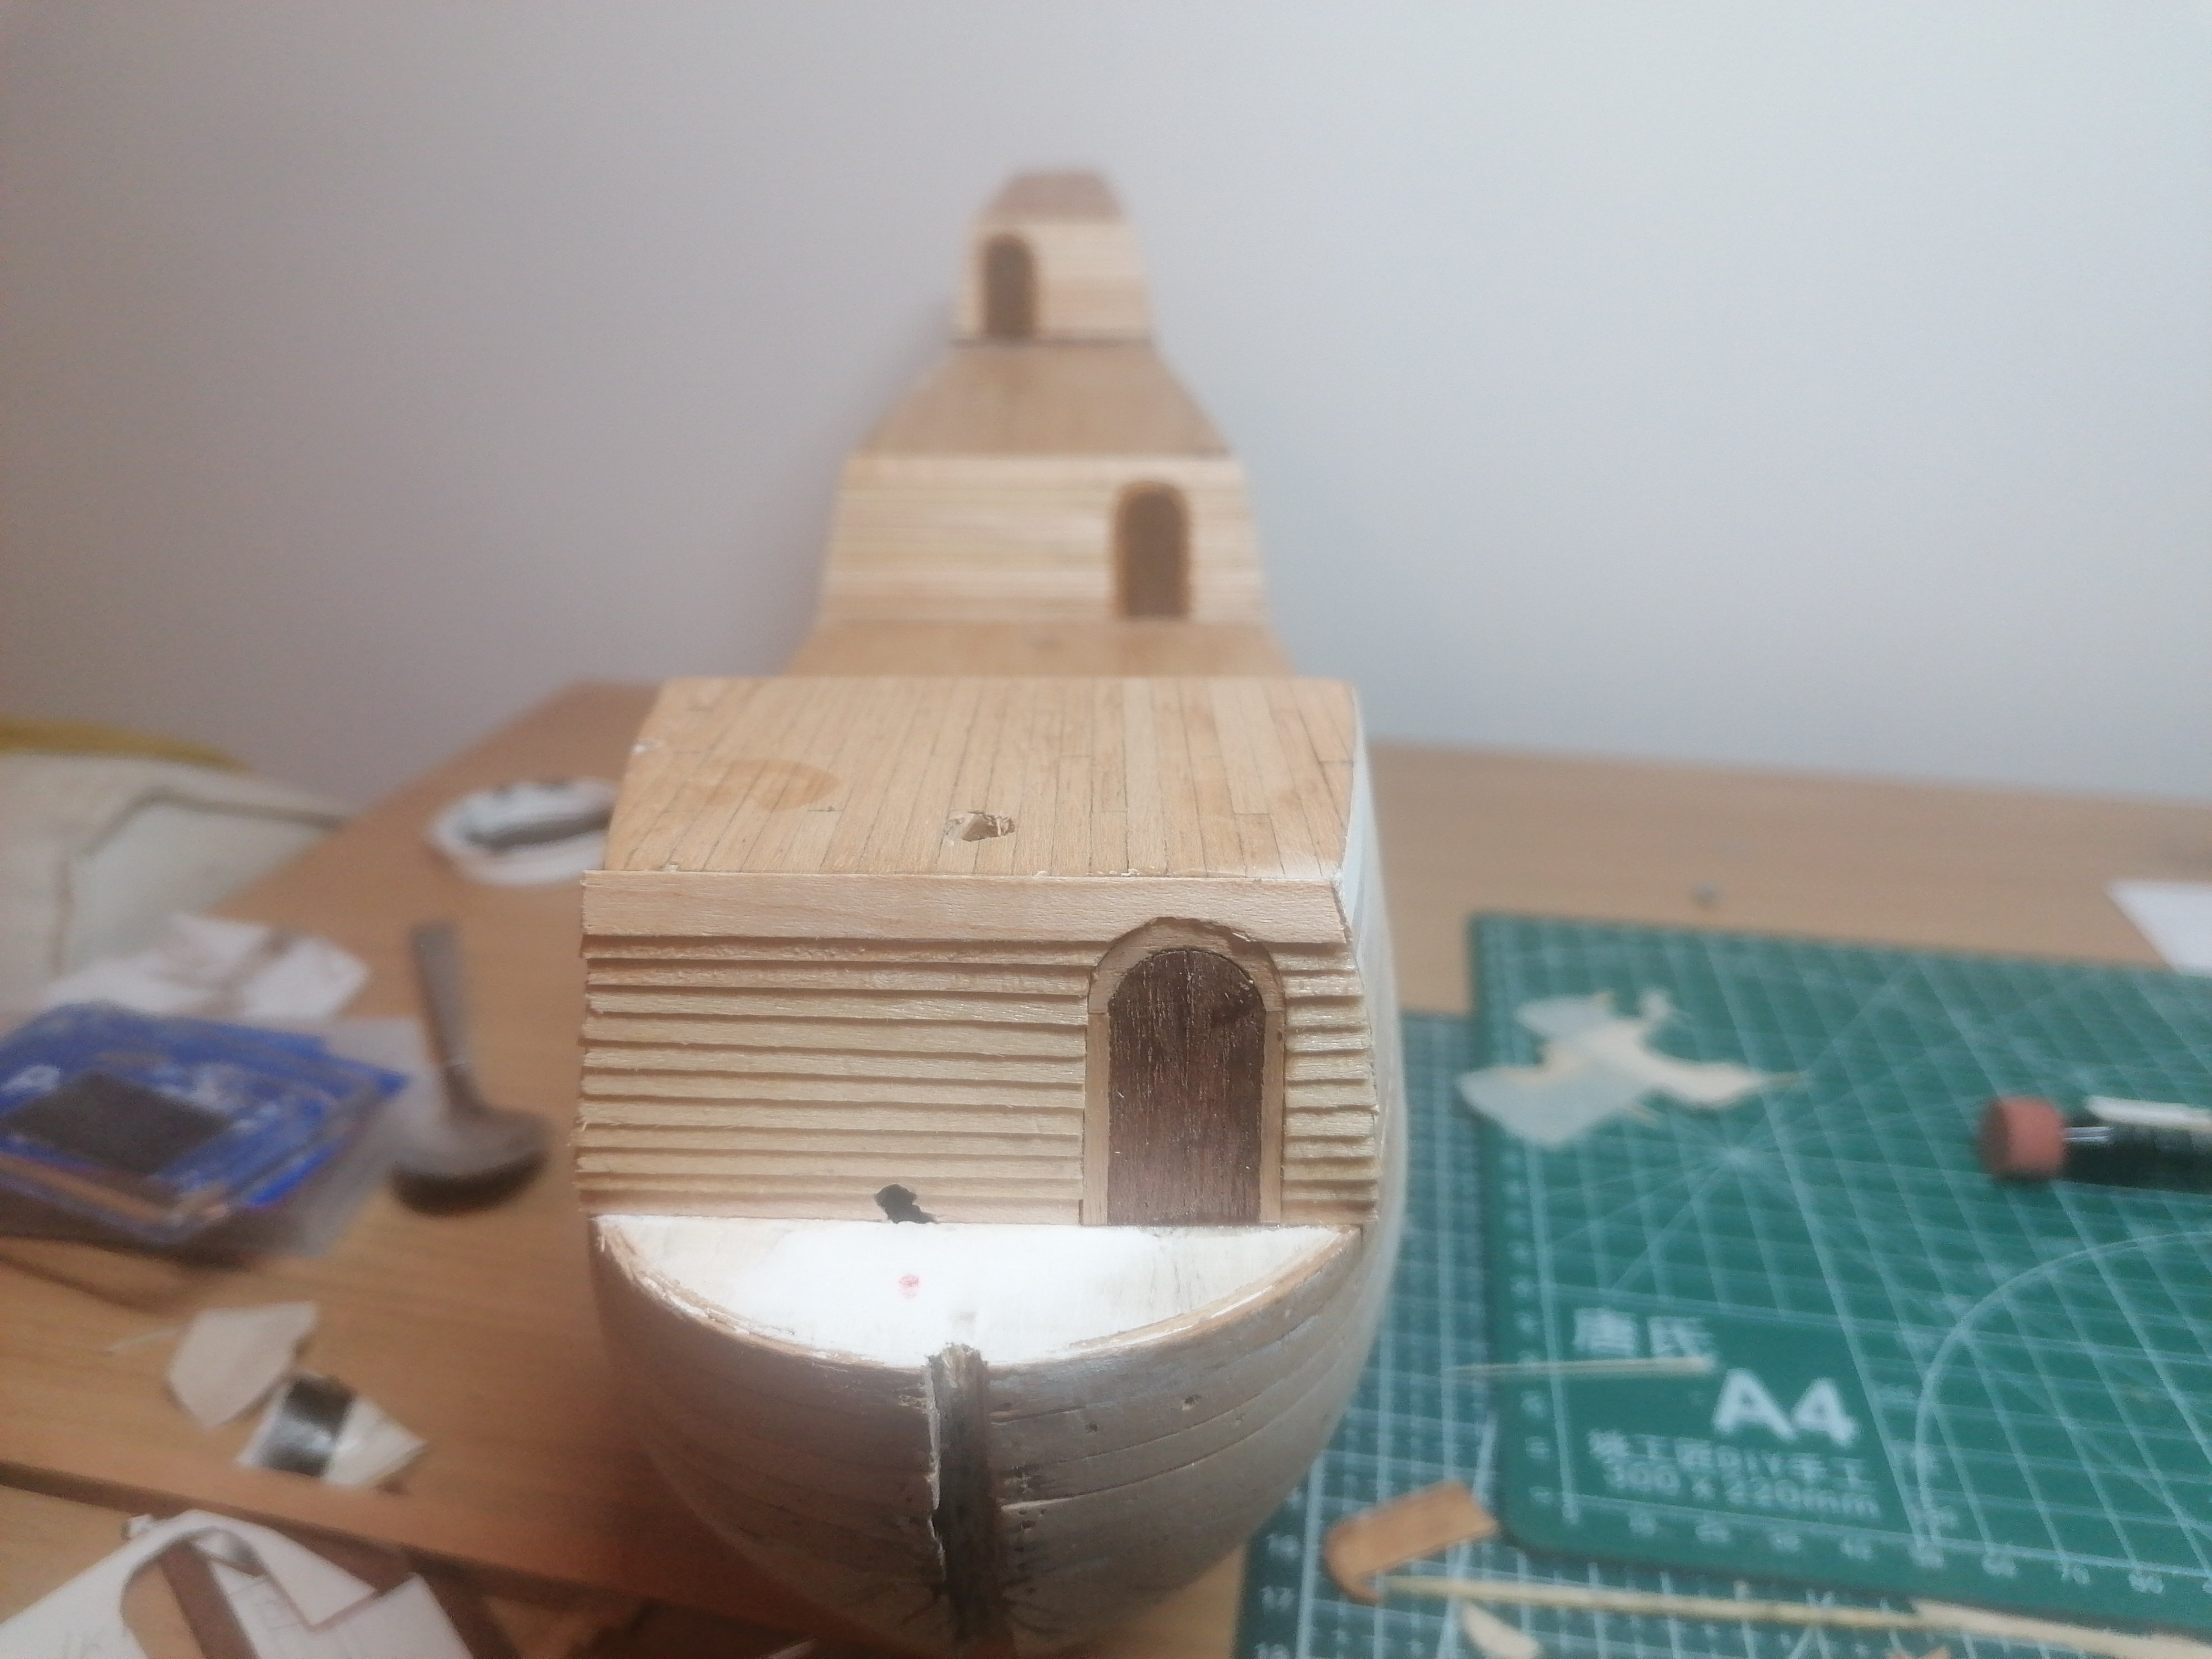
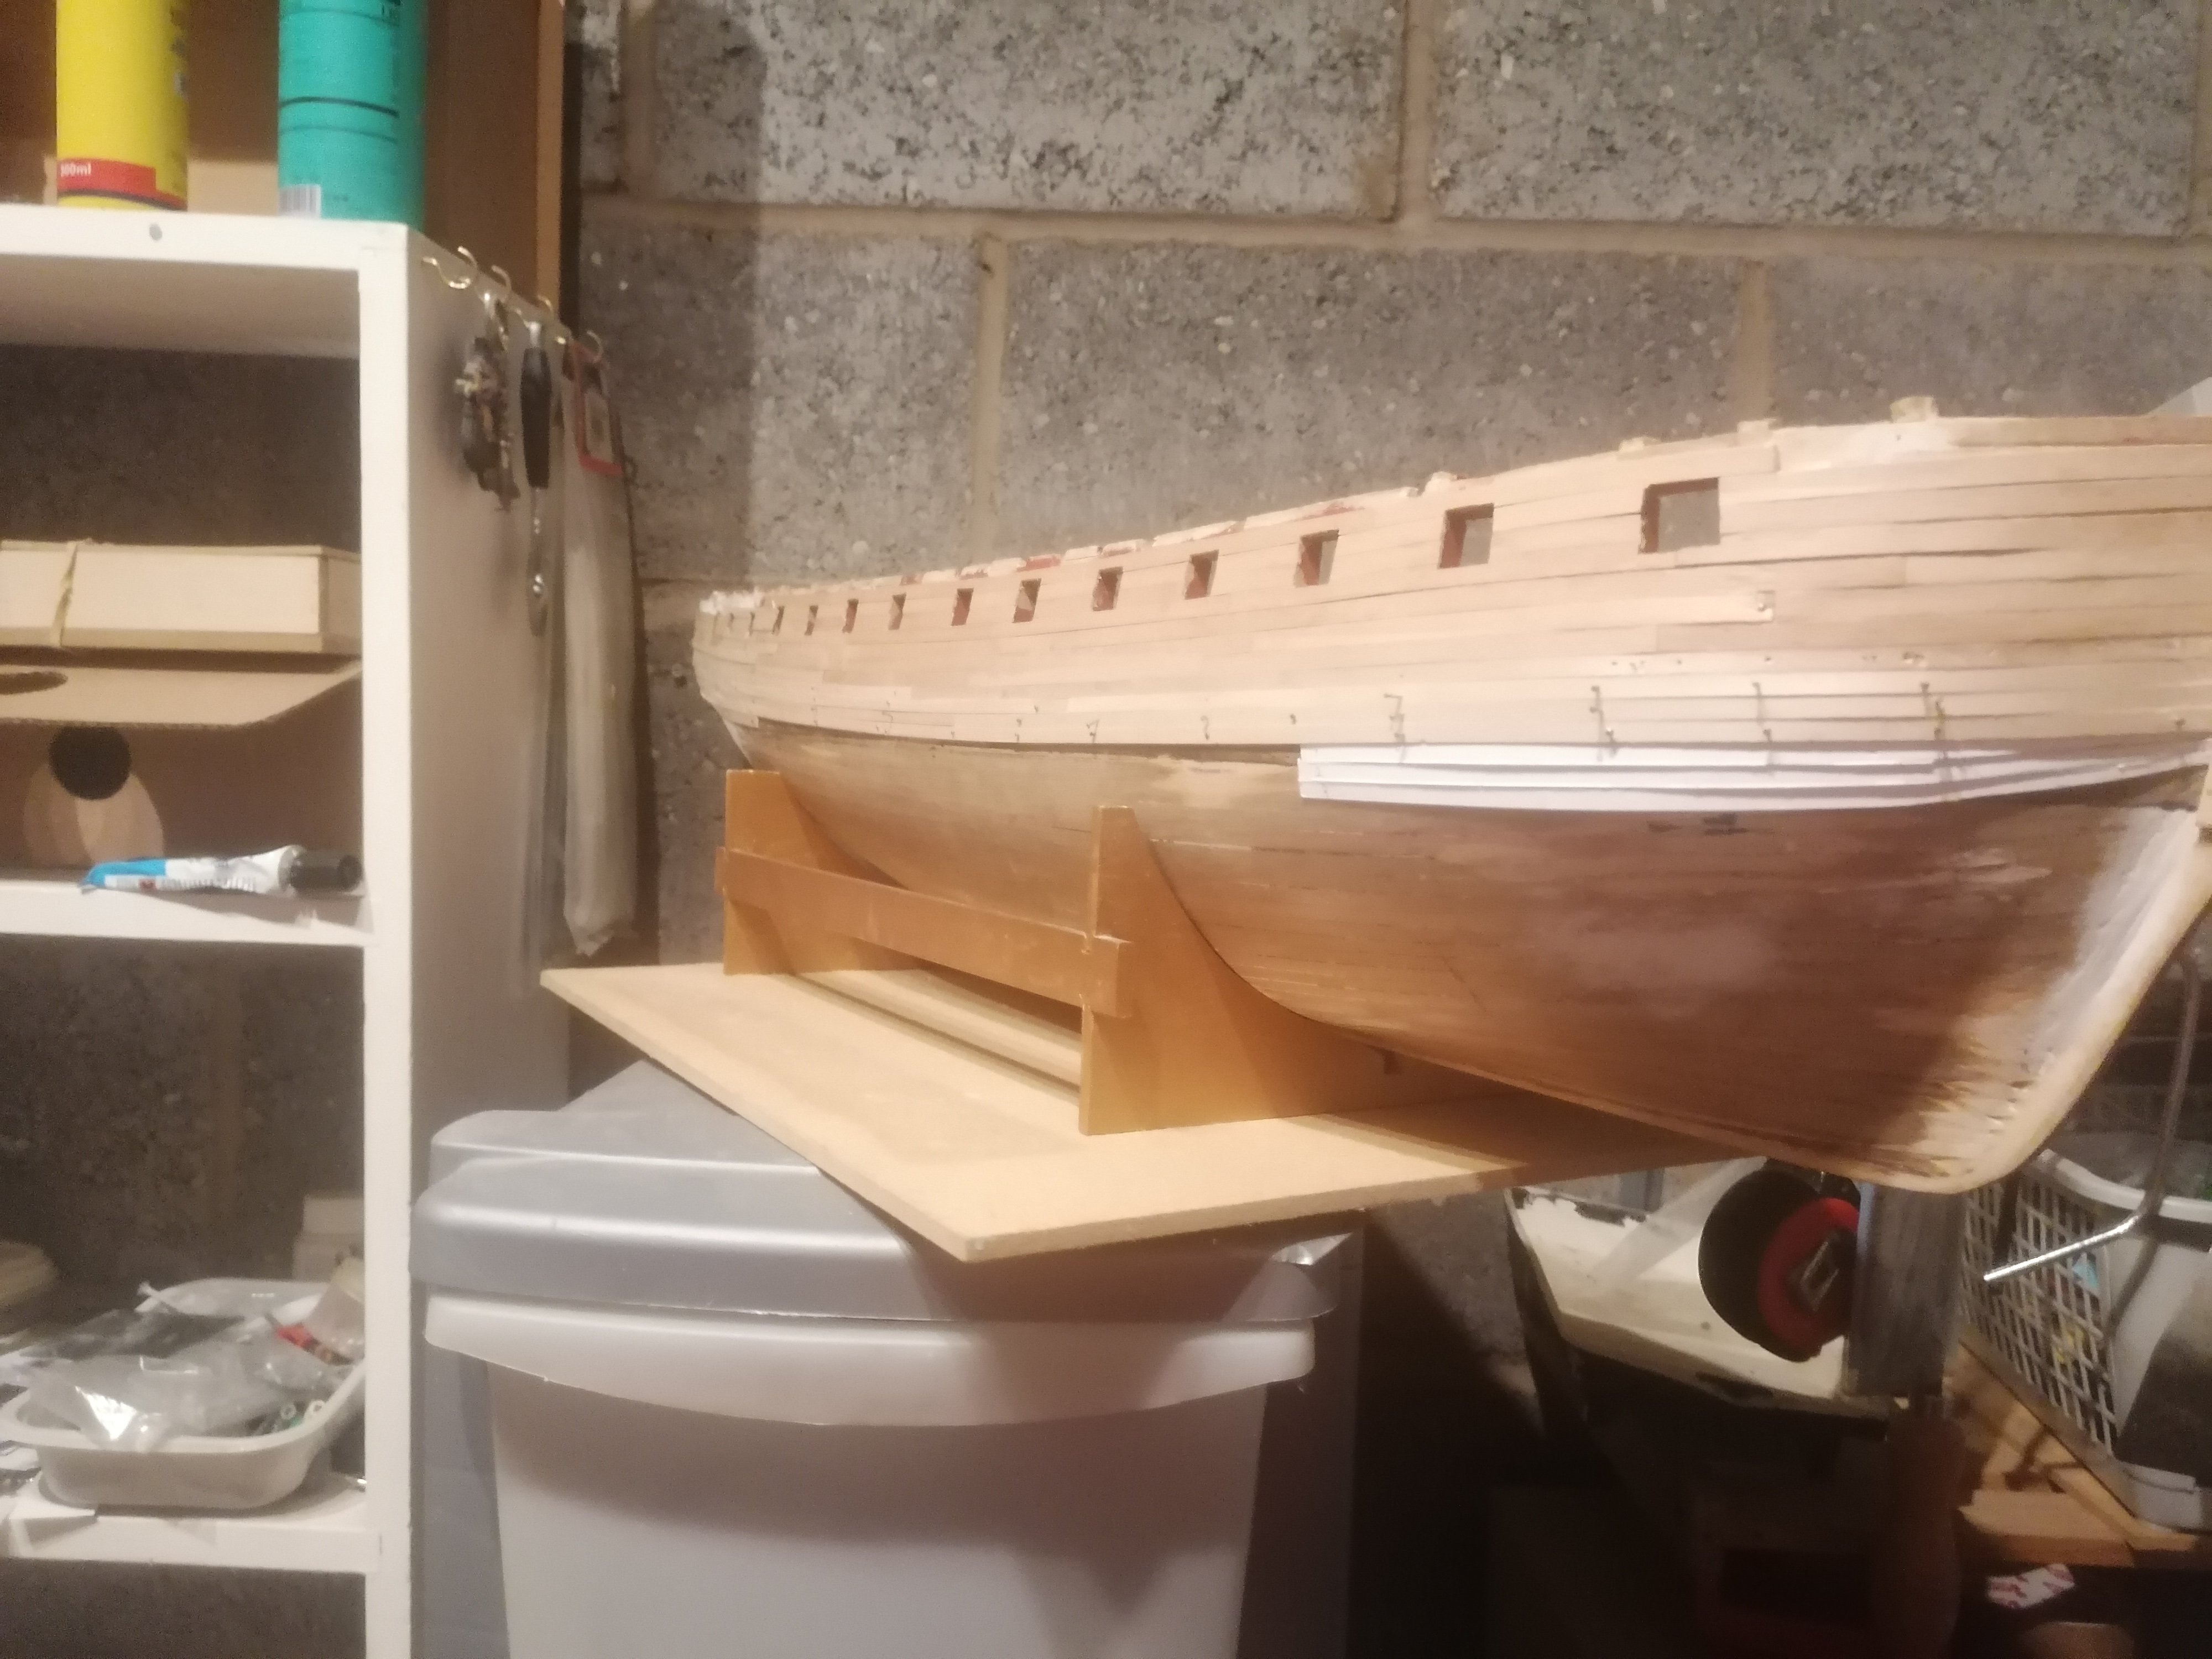
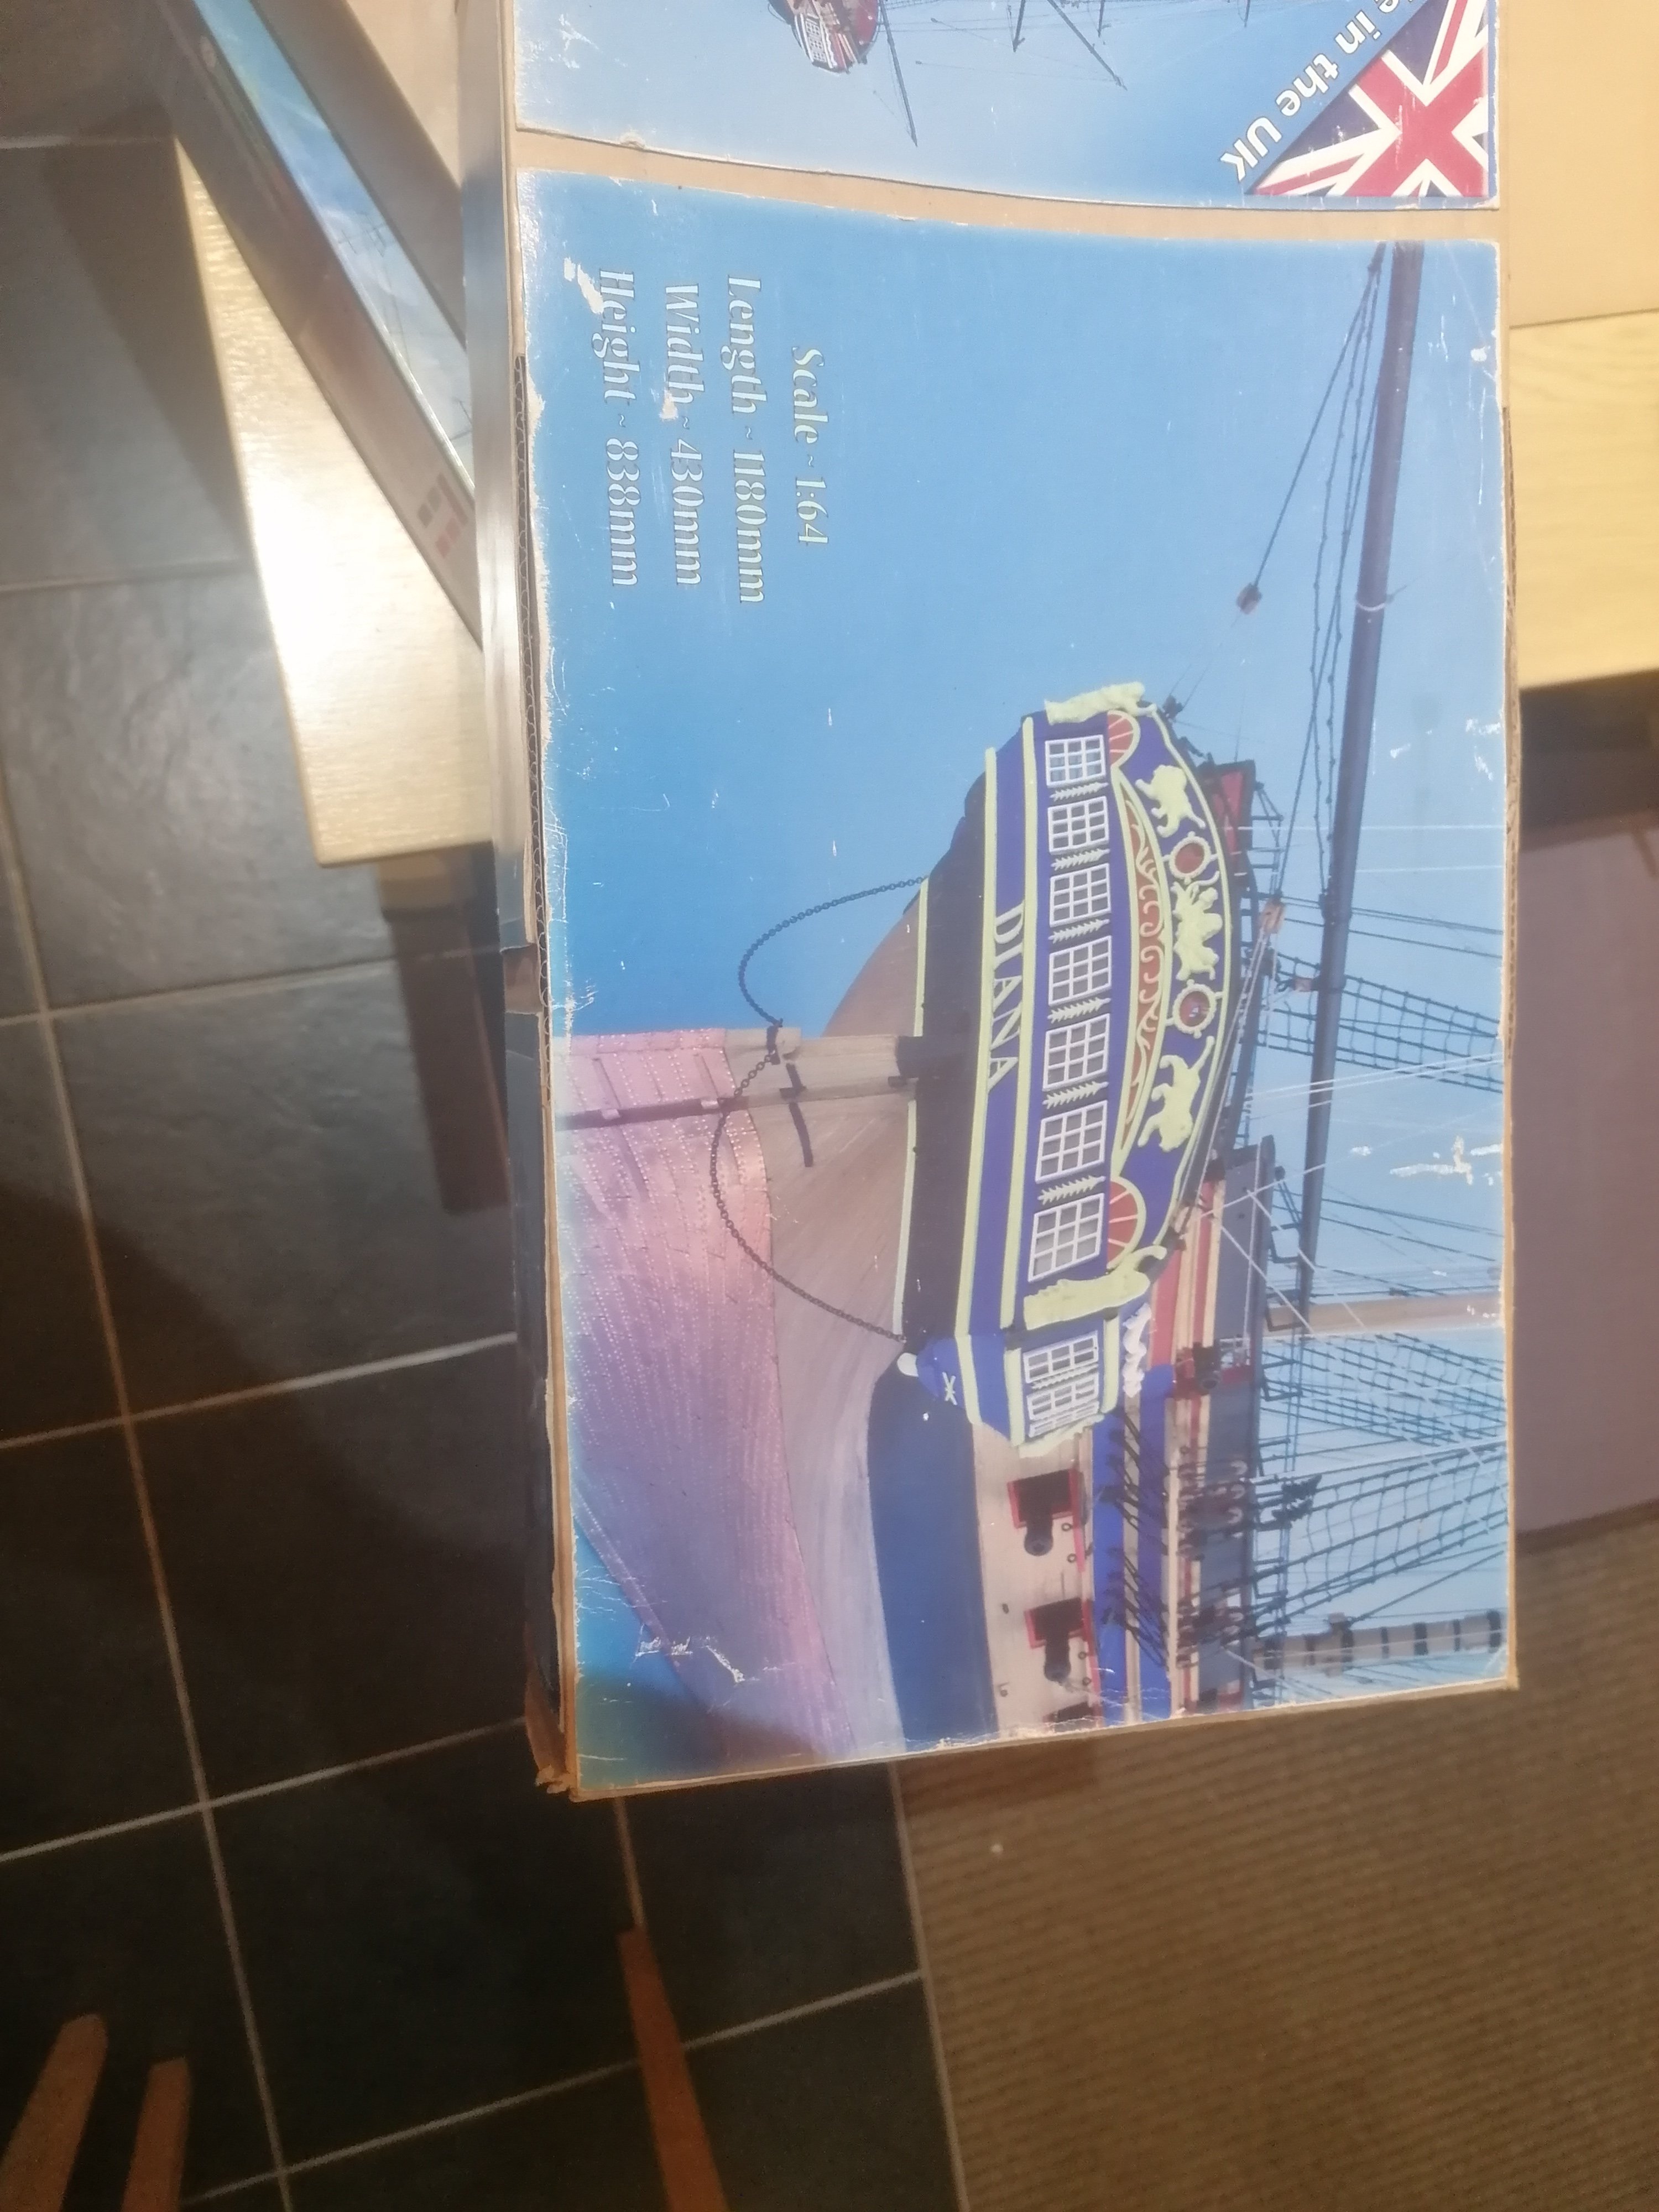
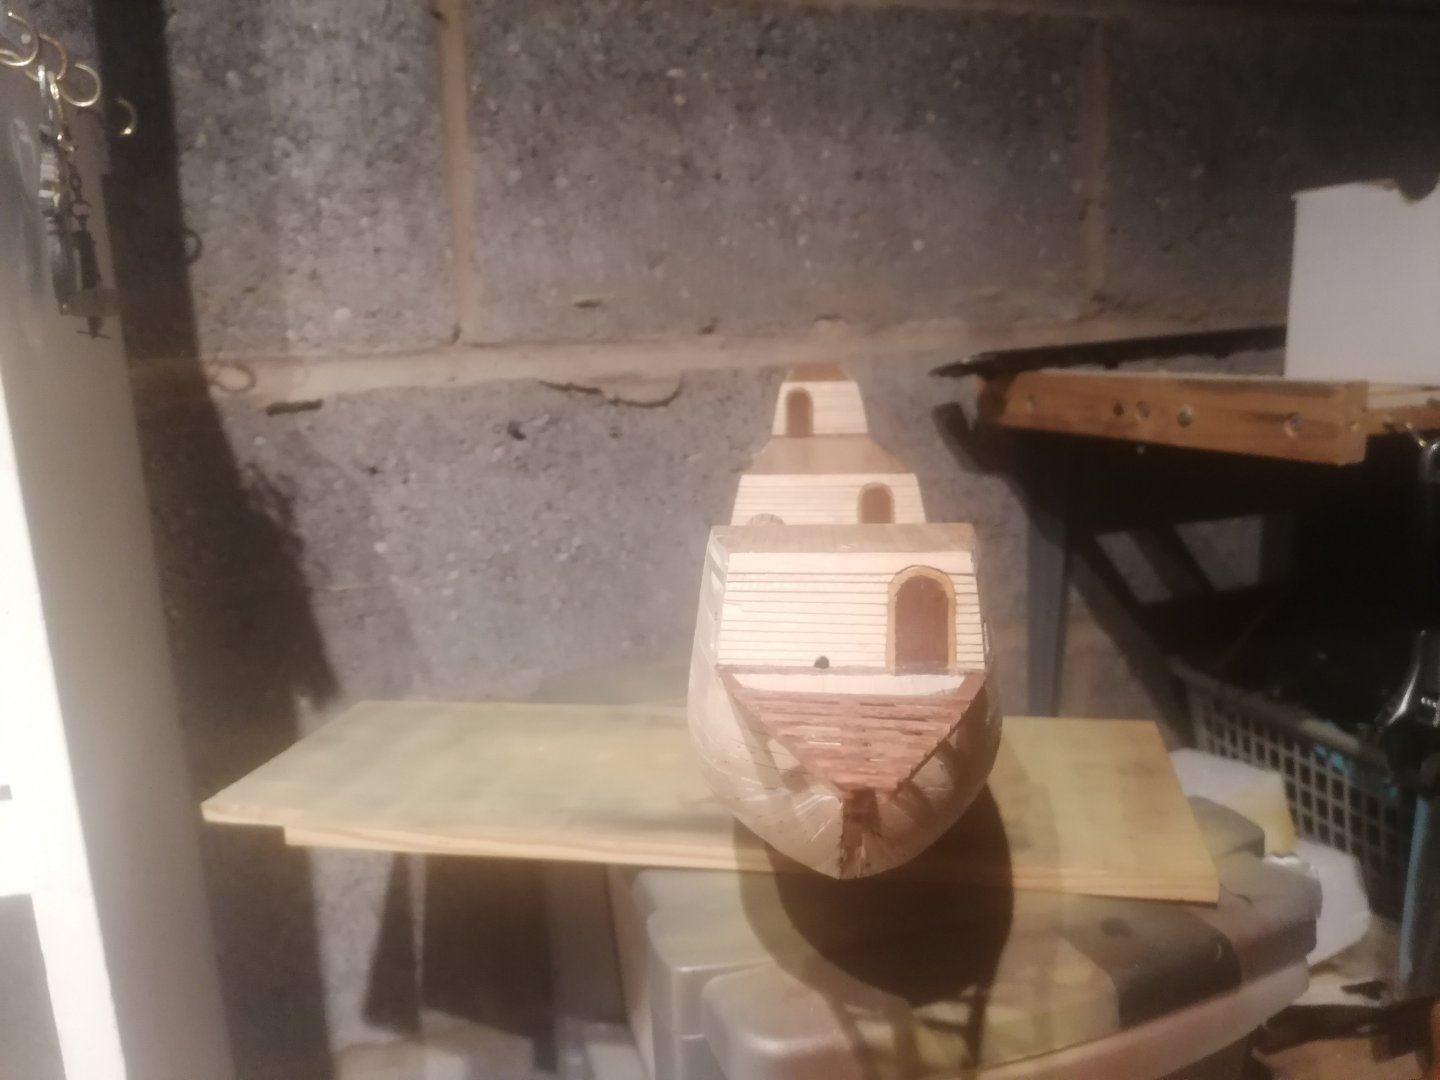
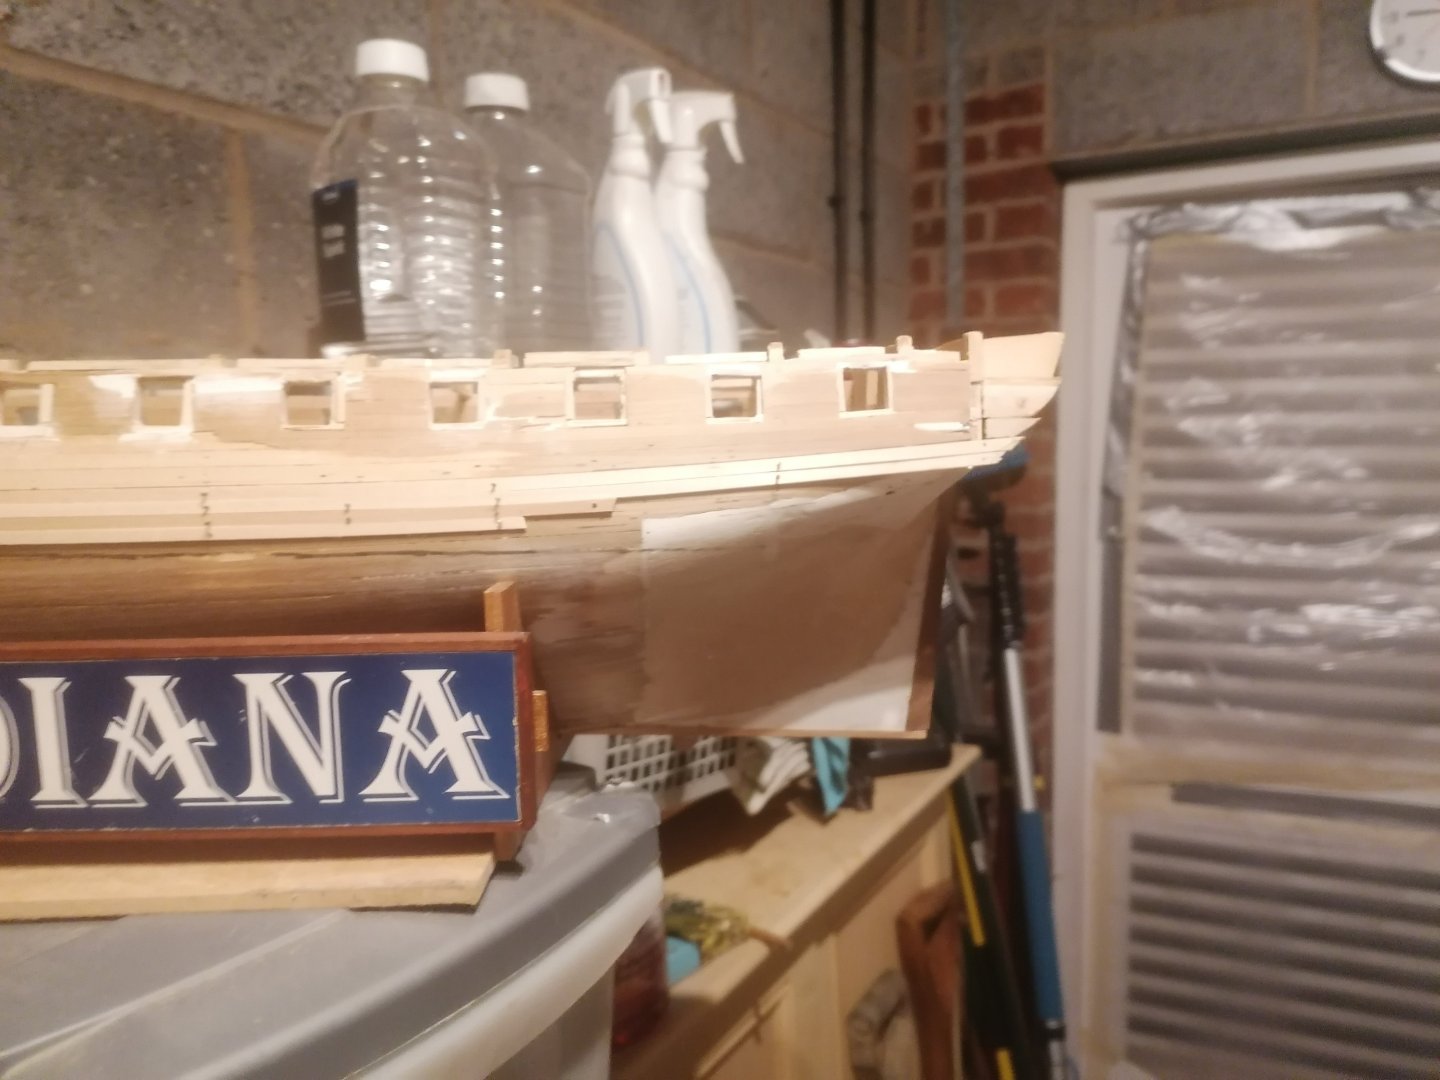
Having taken a much longer break than I had intended I am at last returning to this build. She has been in the garage for a good time and finally I heard her calling to get finished. The bulkhead's I was having trouble with was really caused by me trying too hard for perfection. I intended to have a strip of timber at either side of the bulkhead's and clinker build the planks between them and the doors. After many failed attempts I gave up. Upon return to this build, I realised that the details wouldn't be seen anyway so I have simply built up the planks from either side of the doors. When she was built there was no door allowing access to the sprit deck so this has been added since being on display in London. I was planning on finishing her as launched in 1973 but didn't like the idea of the door not being fitted nor the entire decks and fittings being painted red. I have, therefore, taken her back to how I think she would have looked if she was really an Elizabethan race galleon.
-
Having taken a much longer break than I had intended I am at last returning to this build. She has been in the garage for a good time and finally I heard her calling to get finished. The bulkhead's I was having trouble with was really caused by me trying too hard for perfection. I intended to have a strip of timber at either side of the bulkhead's and clinker build the planks between them and the doors. After many failed attempts I gave up. Upon return to this build, I realised that the details wouldn't be seen anyway so I have simply built up the planks from either side of the doors. When she was built there was no door allowing access to the sprit deck so this has been added since being on display in London. I was planning on finishing her as launched in 1973 but didn't like the idea of the door not being fitted nor the entire decks and fittings being painted red. I have, therefore, taken her back to how I think she would have looked if she was really an Elizabethan race galleon.

-
I am sorry but I should have added this before. I am afraid that nothing much else been done since my last post as I've had to take time out from the build. I will be resuming working on her in January /February all going well. I will be reading up to better understand the planking process and will report back once I resume the build. In the meantime, I want to thank you for the likes and advice and wish everyone all the best for the festive season. Cheers for now. David.
-
Many thanks for the suggestion. I was actually thinking about running a 1 X 2mm strip along this edge for the lower planking to butt against but I have still to finalise the curve of the lower countrr. It looks ok ish but I think it still needs a slightly deeper curve. Your final comment is interesting though as, having looked on Saturday morning at the mess I had made removing the planks on Friday night, including leaving a 12mm gap between frames 16 and 17, I thought if I can't fix this then I will finally concede defeat. Thankfully I was able to repair the damage done. It's funny but this has given me more strength to hang in there. The next task is to build up the lower 2 strakes of the wale and sand them smooth to fit the 1st strake of walnut below. I will also take your point on the width of the plank for each belt. I am afraid my knowledge is limited so will need to do a little more research on techniques and terminology of the planking . My few previous builds I had basically followed the instructions and improvised the spiling and tapering of planks without letting it get too technical. So maybe it's time to understand better. Thanks again for the advice. David.
-
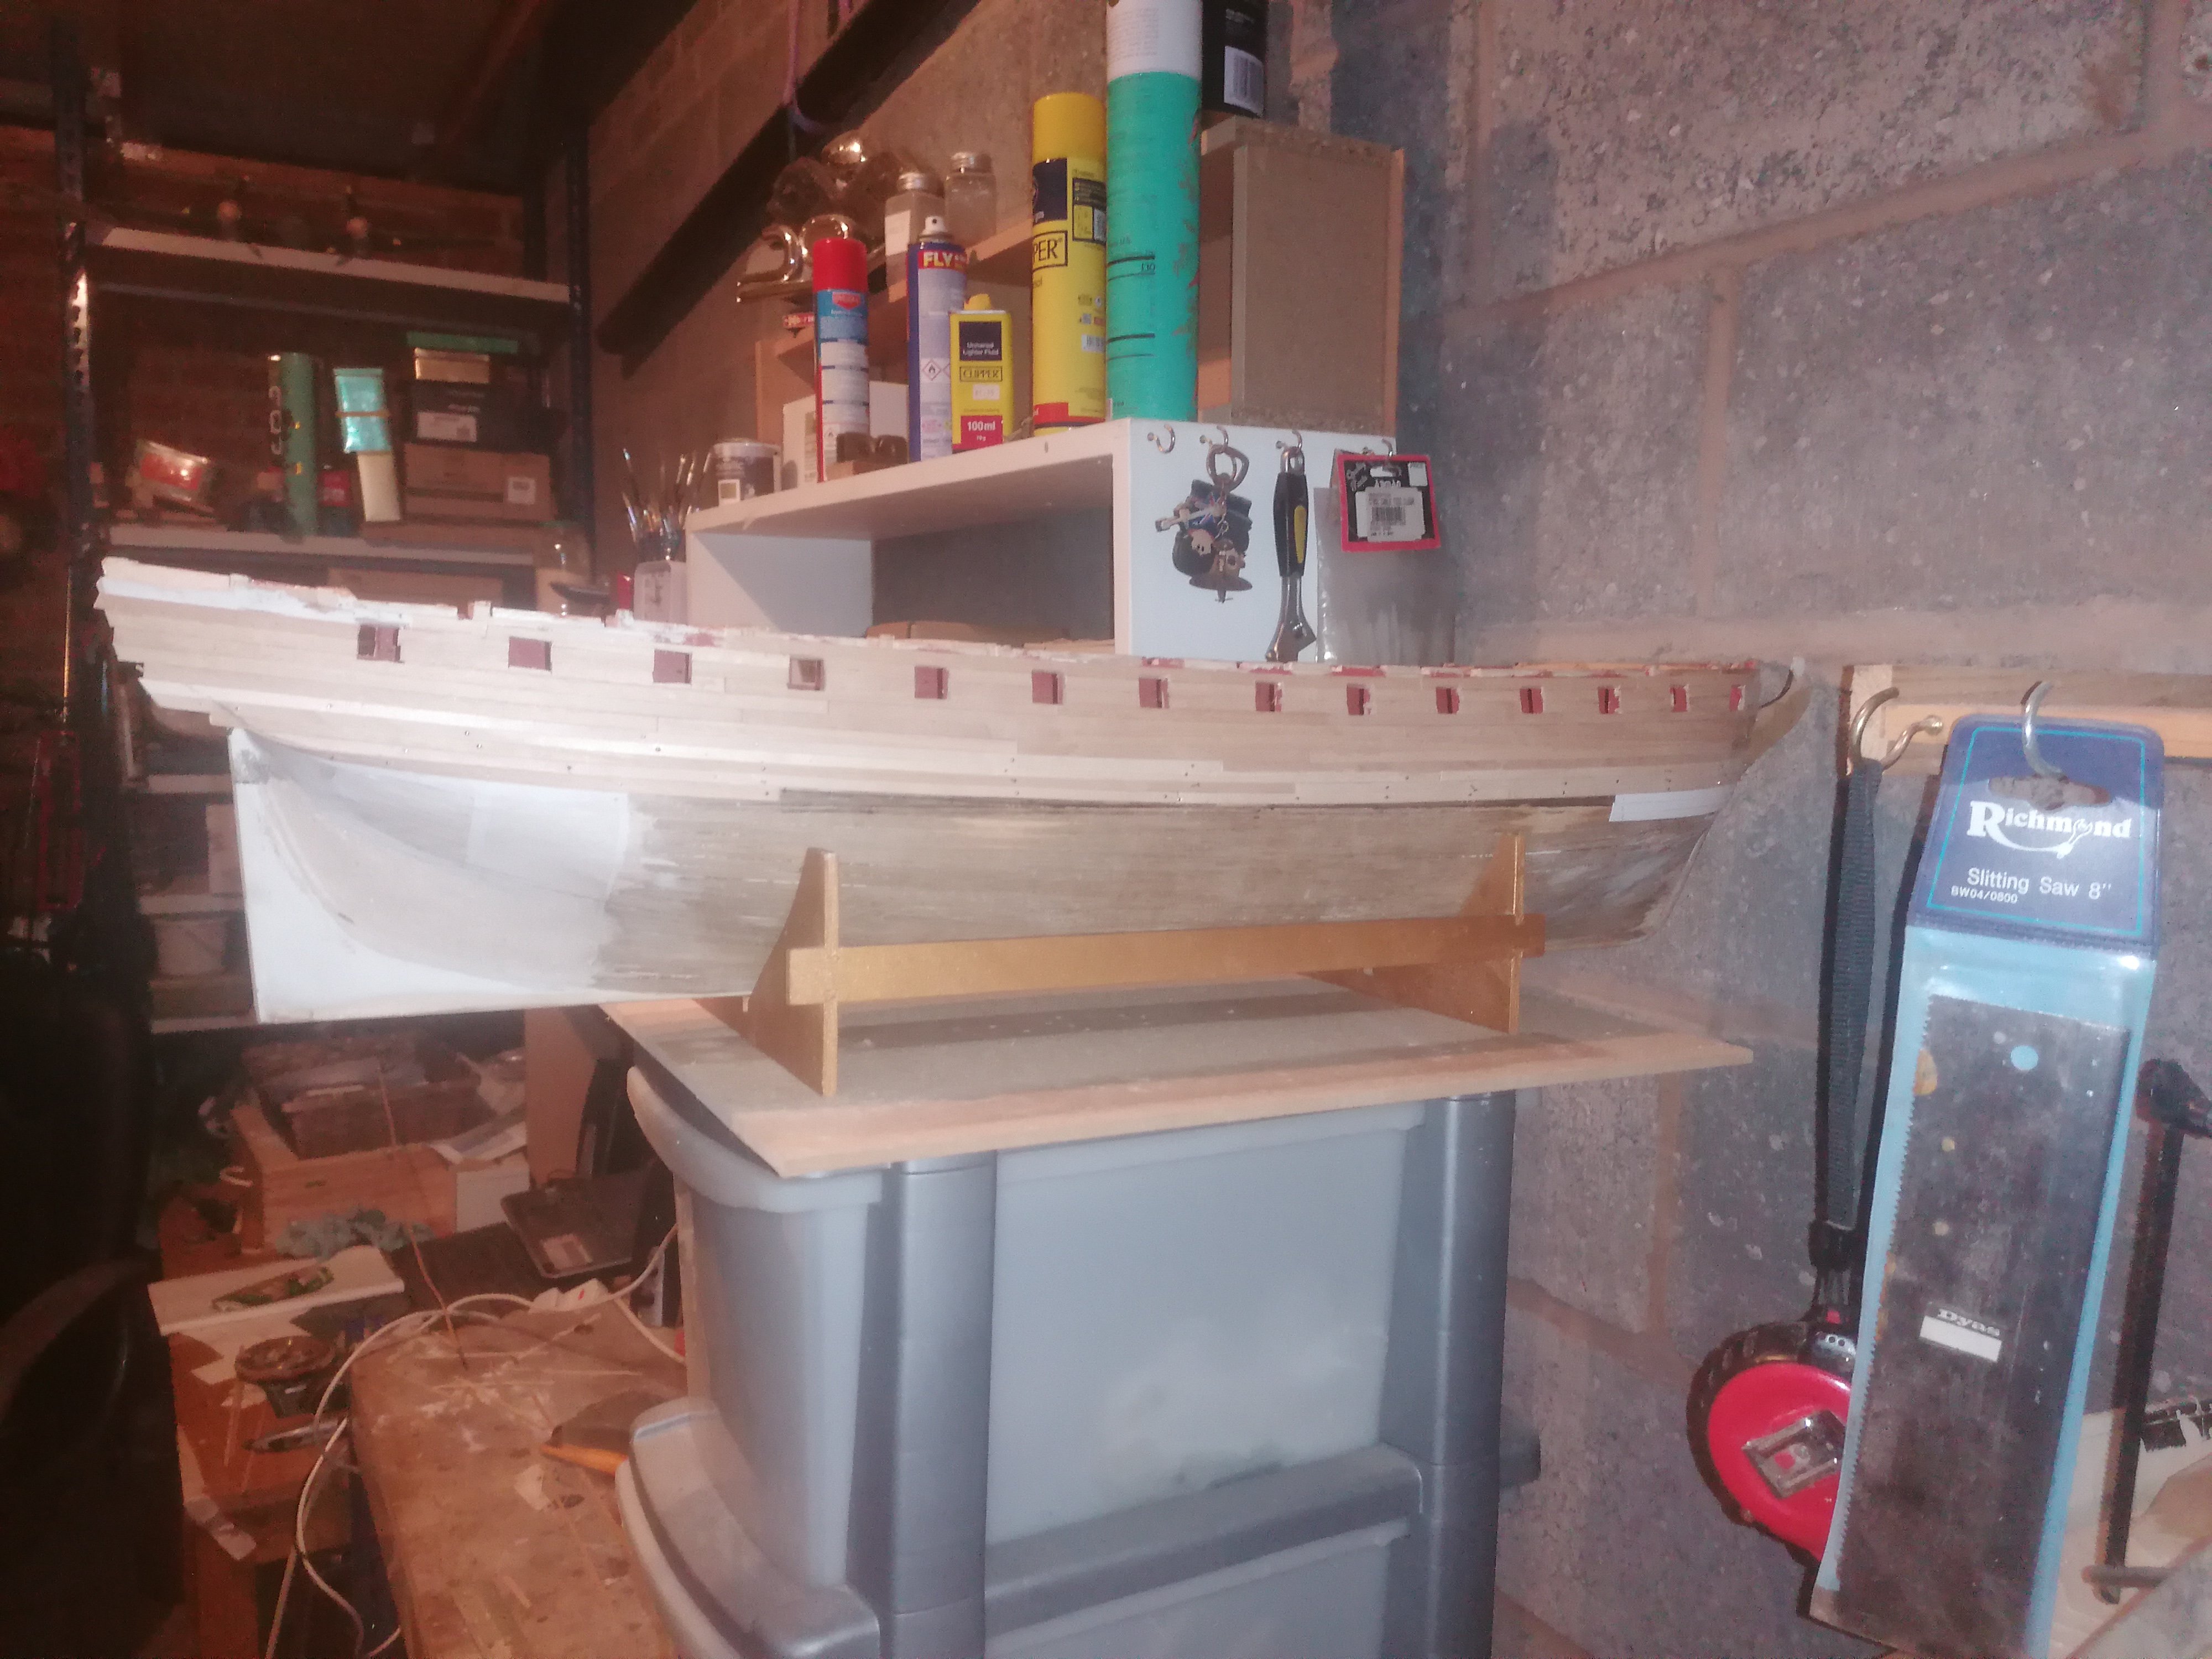
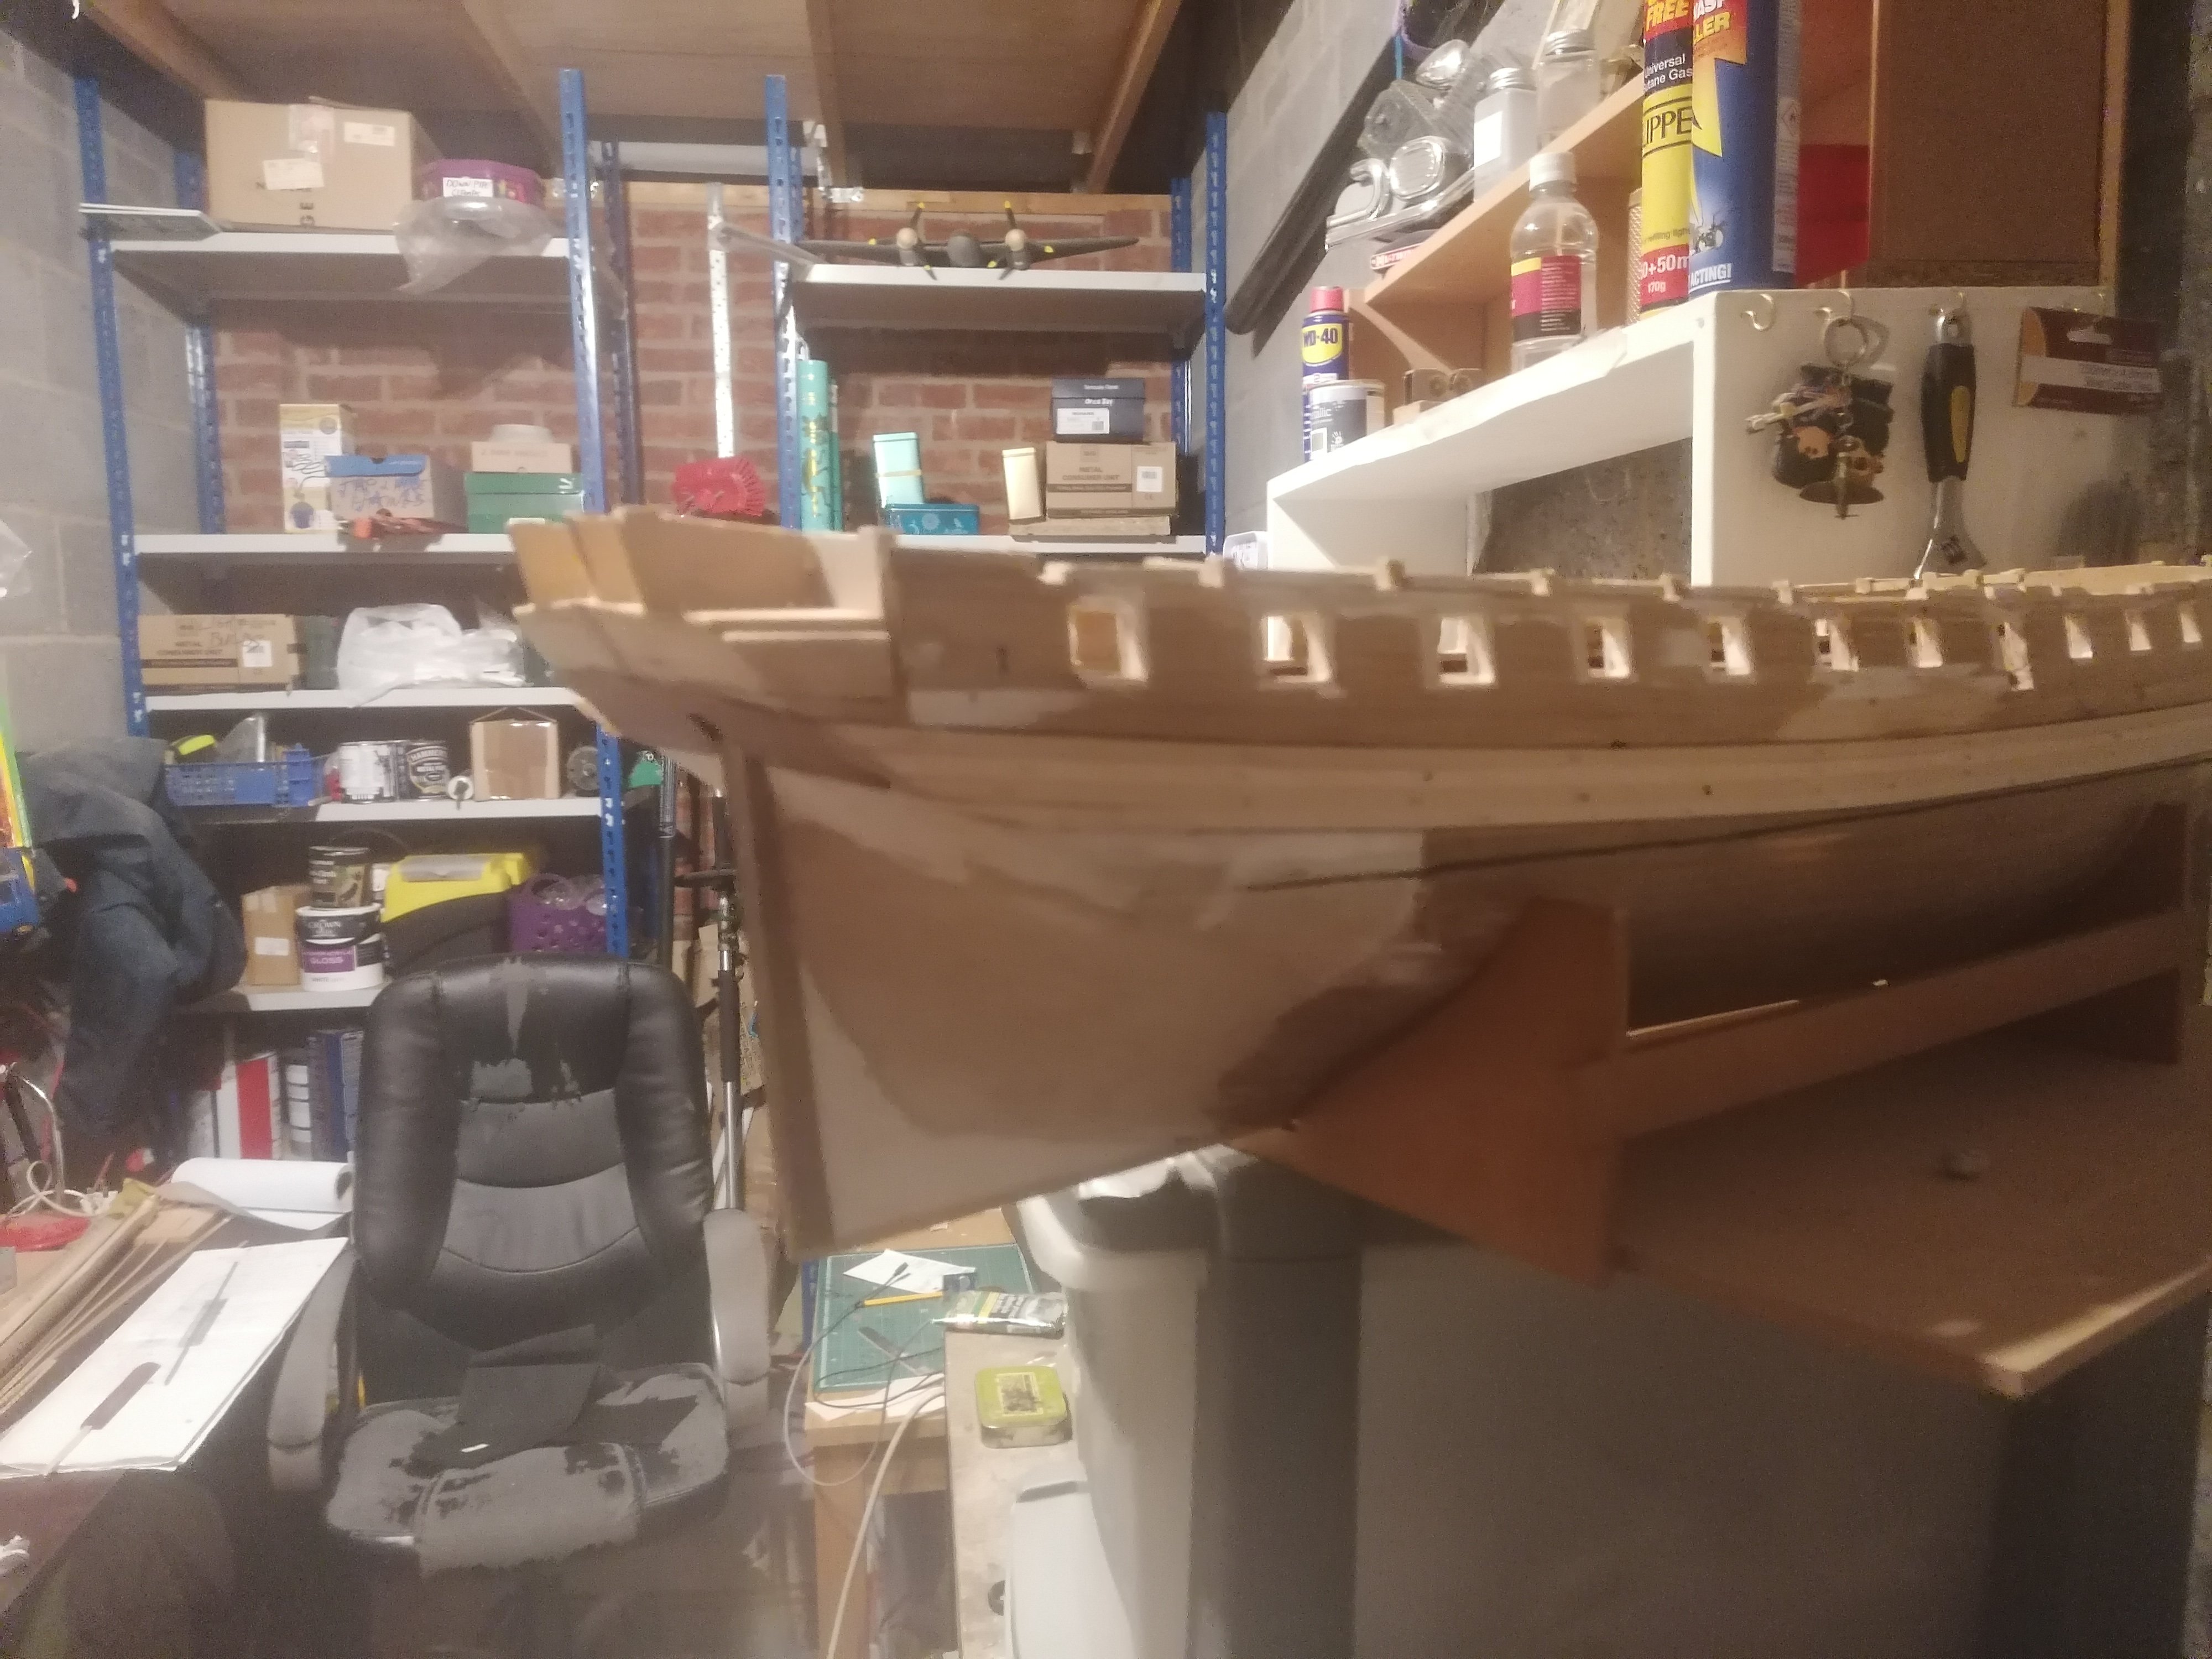
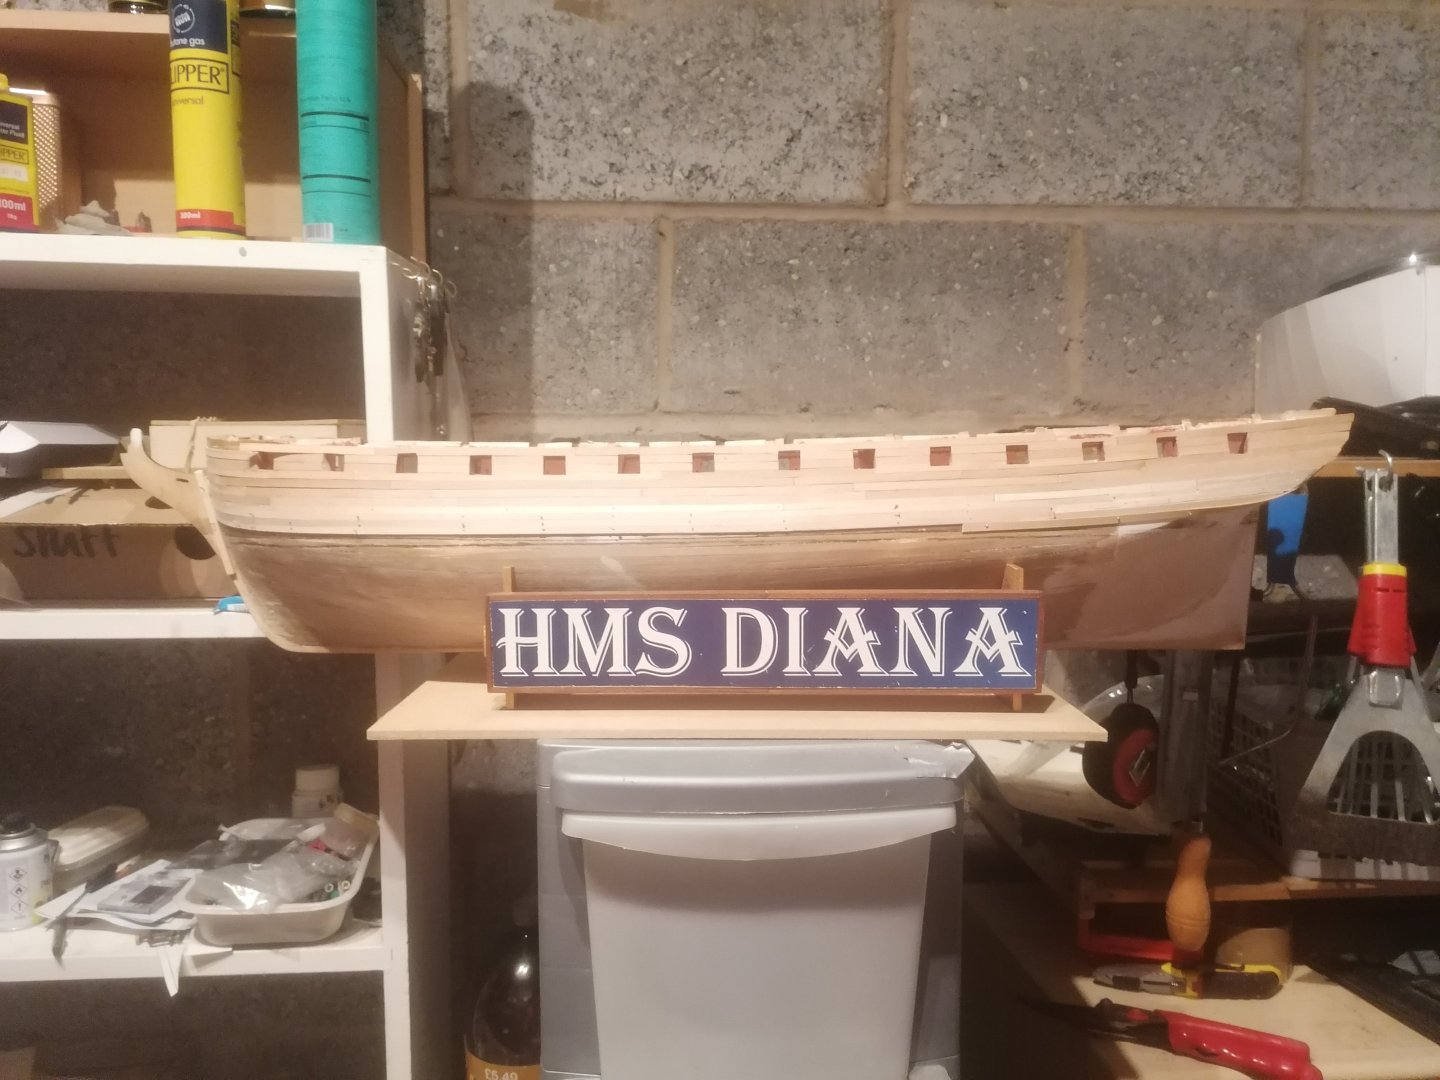
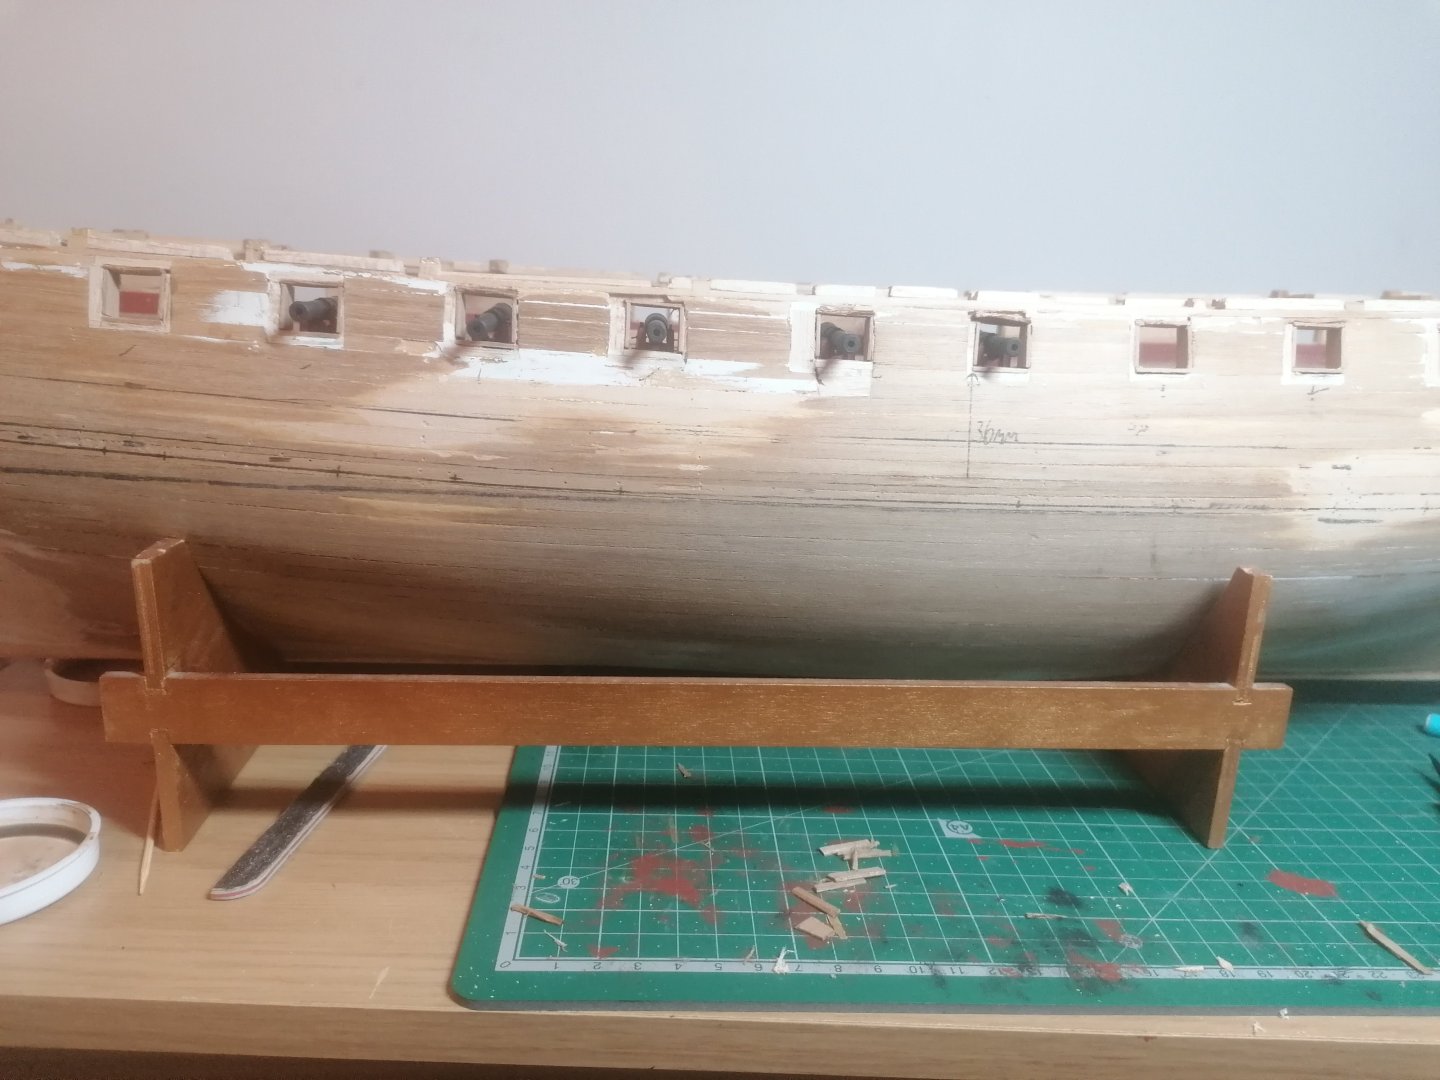
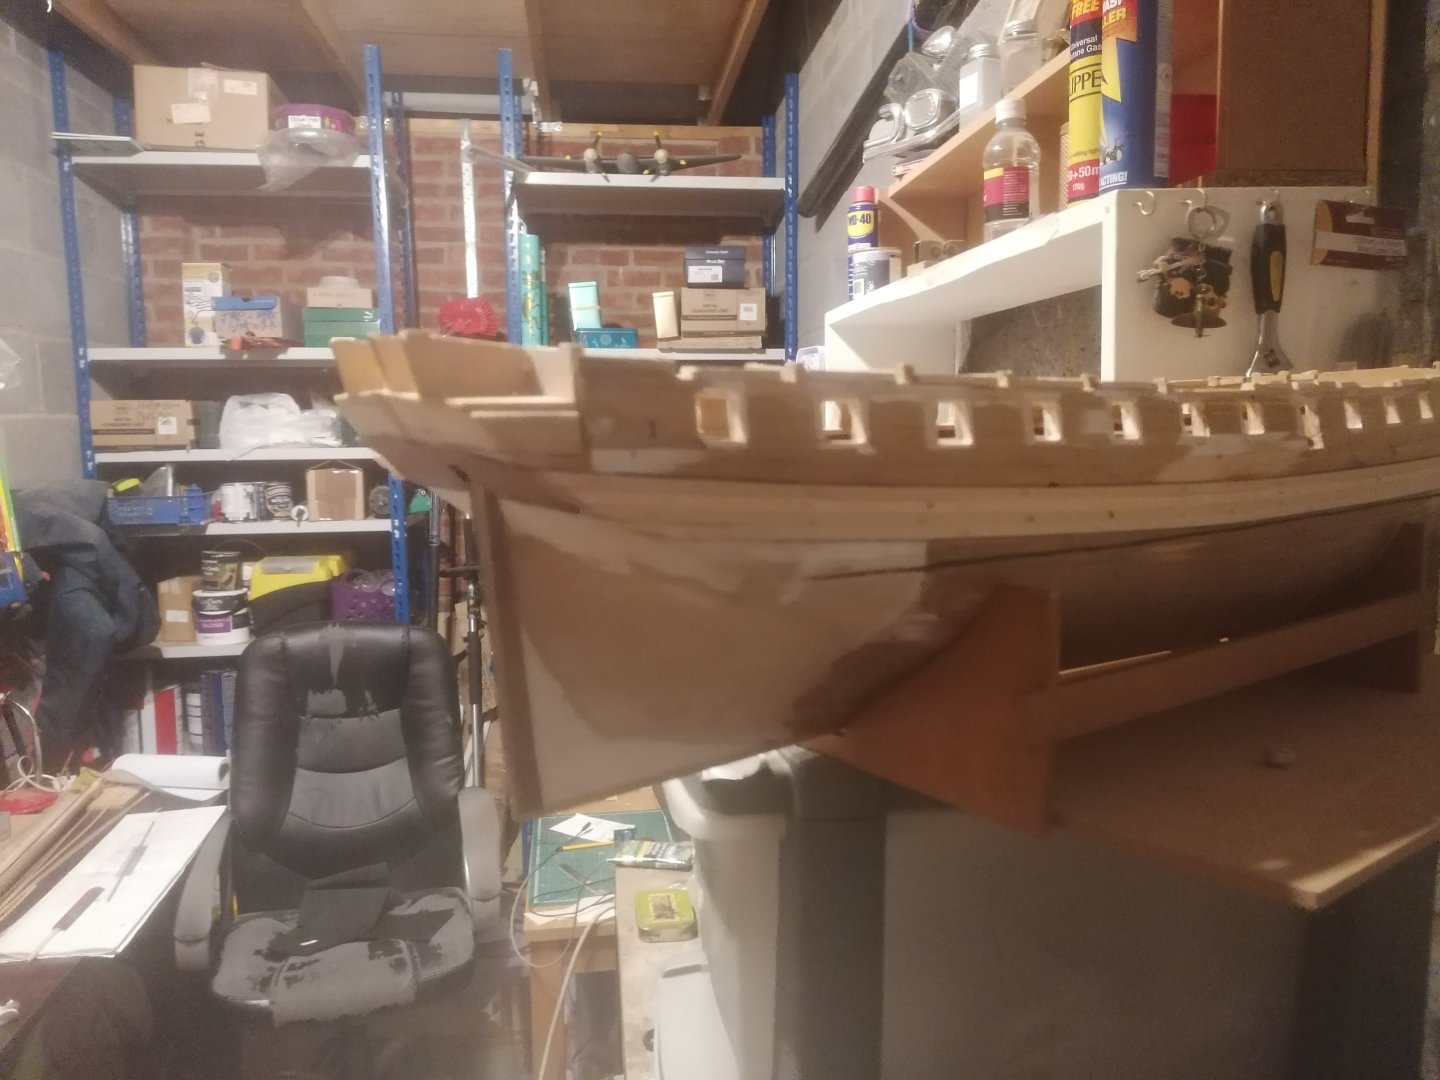
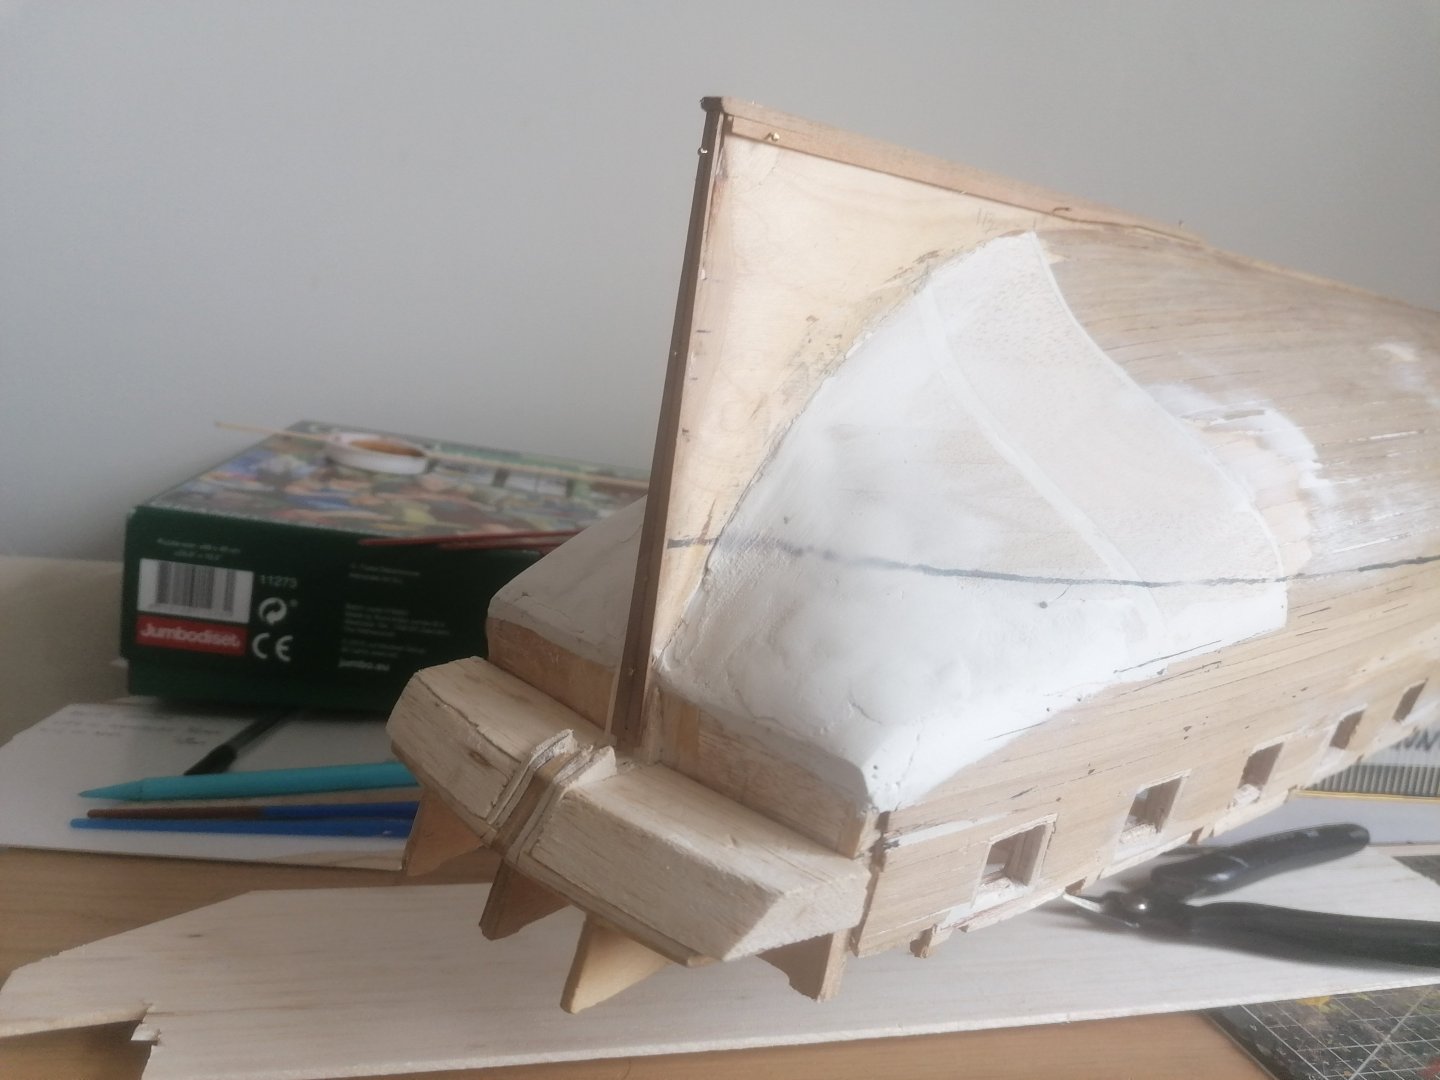
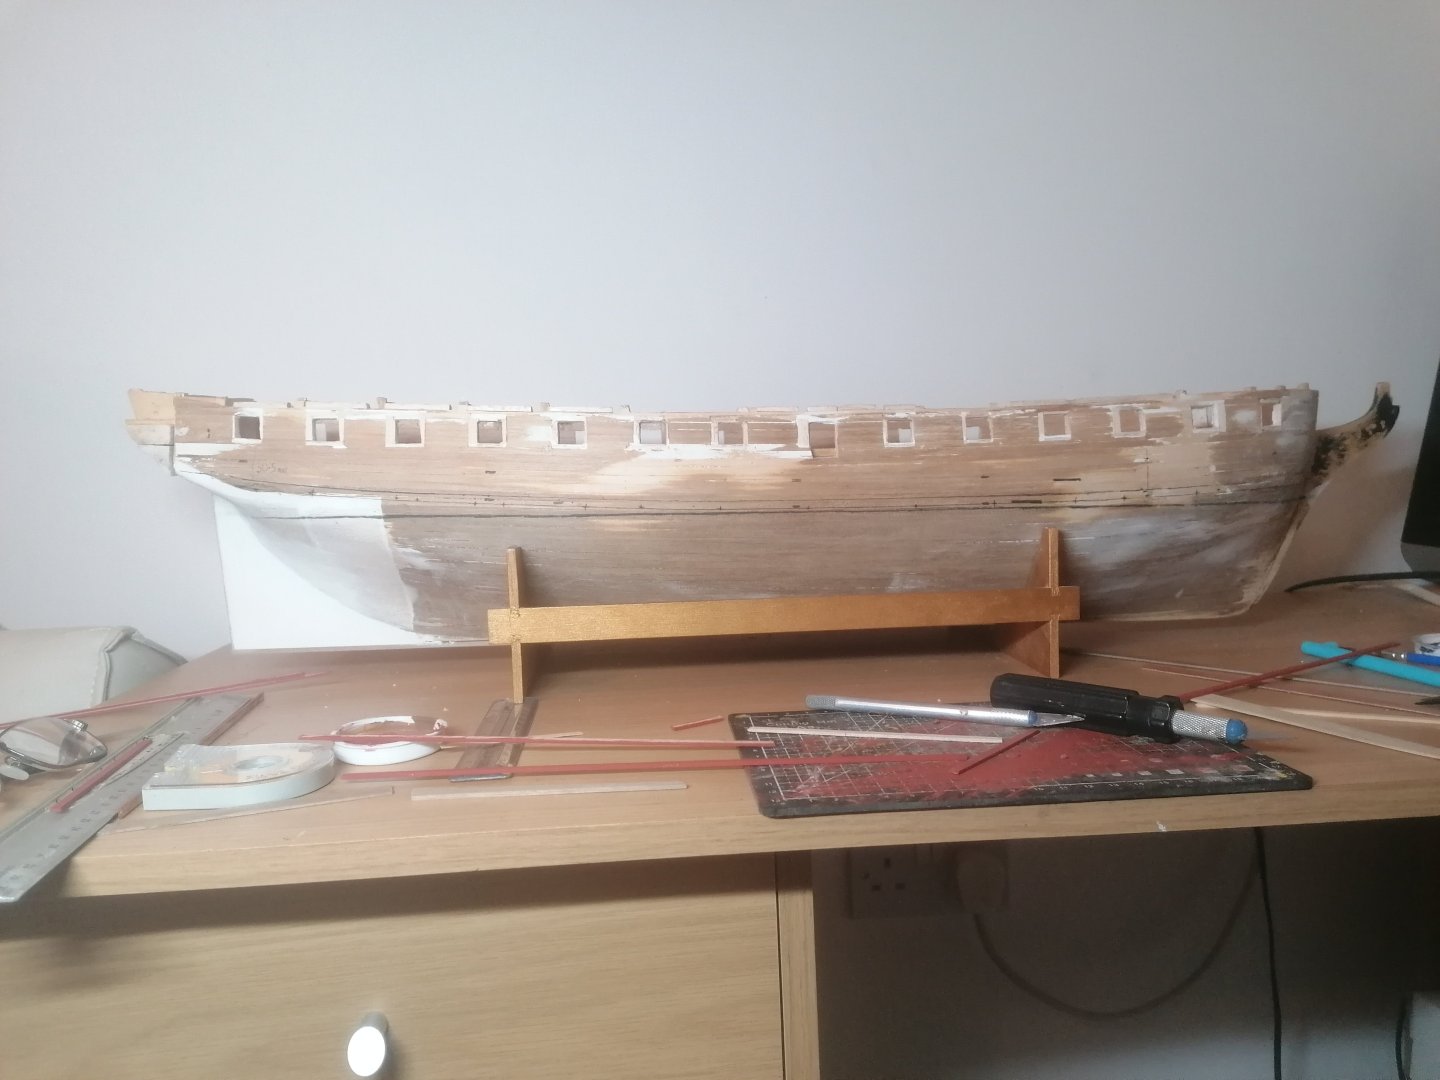
I can't believe it's been so many weeks since my last post. I'm sorry it's been so long. Having looked at the head timbers I realised that I will need the hull planking completed, at least as far as the hole for the bow sprit. The head timbers have been put to one side for now. I still haven't taken any photos of the guns yet but I have added the breeching ropes and made up a few of the single and double blocks with hooks. The 3mm single blocks seem a little large to me but at least they are workable. Again these these have been put aside so I could again start on planking the hull. The first strip I pinned was the lower strake of the wale position and worked my way up from there on both sides. This was where I ran into a problem as there was a 1.5 to 2mm bigger drop between the gun ports and the wale on one side. I removed these strips and redrew the waterline. This time I checked the distances between gun ports and waterline and was happy with them being equal. I now had several lines marked on the hull from various posititioning of the wale and the thick line of the waterline. To overcome this I ran masking tape along the waterline and painted dark oak woodstain above which worked well to highlight it. I then proceeded to run planks above the wale with 1 X 5mm beech. I cut smaller sections for the bow of 6mm, 8mm and 10mm long with the idea of having the butts staggered along the hull. The rest were cut into 12.5mm lengths. As I completed this to above the gunports I realised that I needed some space above to allow construction of the foc'stle and quarter deck bulkheads. I also realised that this will at least need to be started before the upper deck can be added to avoid the gundeck being covered in dust. This was when I realised that this deck isn't quite symetrical either. While I work out the best way to proceed with this, I started filing down the rough edges around the gunports. Having painted them previosly proved to be a great guide to not filing / sanding too much off. Next up was to finally get the stern shape sorted. I ran a strip below the wale and again found the triangle gap at the edges of the stern counter. I looked again at photos of other builds and every one seems to have there own way of working around it. I was not happy with the idea of having the planking twisting and bending so much and thought there must be a better way. I started sanding either side of the stern post to achieve a flatter surface at the stern. This reduced the size of the gap a little but I found it could be reduced completely if the outer edge sits where the wale is. The answer was to not have the sides curving towards the water line but, have them running straight as far as the wale and then curving slightly beneath. Great, I thought, until I realised that to sand the sides, I would have to remove all the planking on one side as far as gun port 10. Coincidently, this side was 1.5mm or so wider than the other from the stern post. So, Planking removed and the hull sanded down, I added filler where needed and, once dry, sanded it again. I then re drew the shape of the wale and relayed the planking. Above the wale is glued but the run of the wale is still only pinned. There are several sunken planks along both sides of the hull but these will be filled with more timber before the lowere planking is attached. I have marked out the run of the 4mm strips below the wale on one side but to achieve 15 planks on either side of the stern post they need to be reduced to 3,8mm or 3.6mm for 16 each side. That's a job for tomorrow night though. As always there's a few photos. She still looks a bit of a mess but I'm confident she will look much better once the rough edges have gone. I've also looked at shaping the lower 3 planks below the wale at the bow. I've used paper as a template for now but I think I will need to spile at least the first 2 strakes top and bottom rathe than just the top. Cheers for now. David.


-
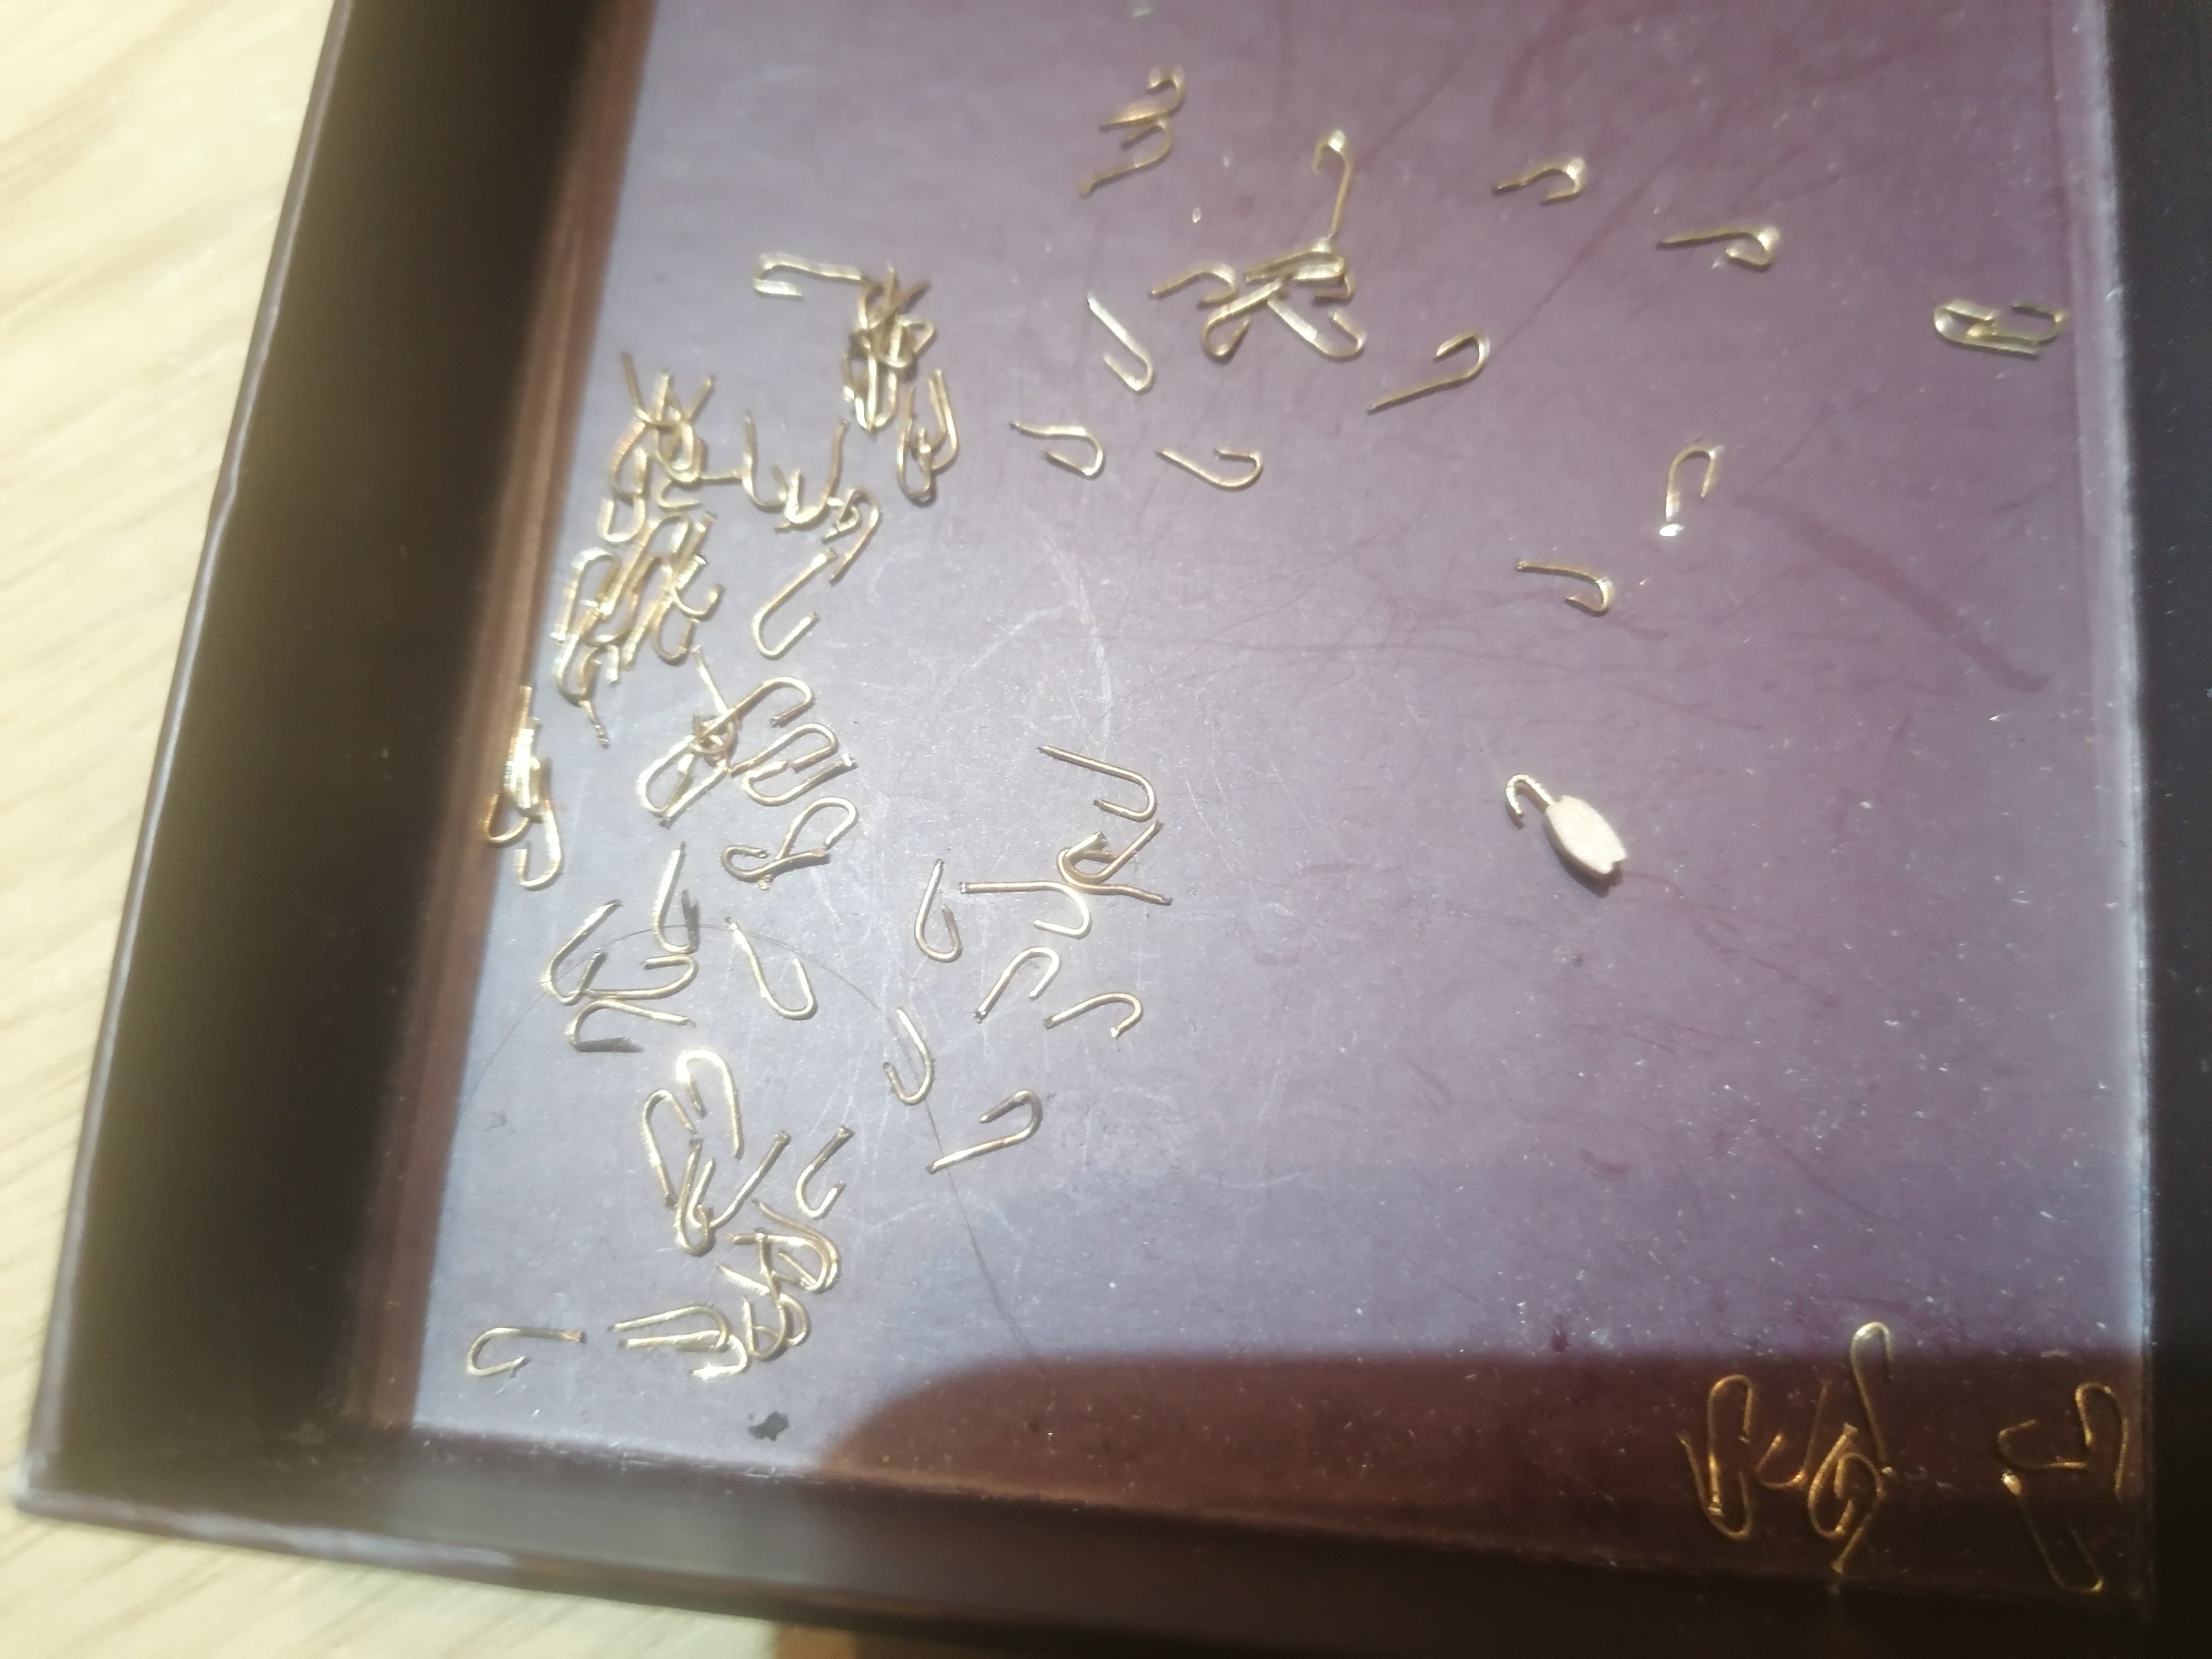
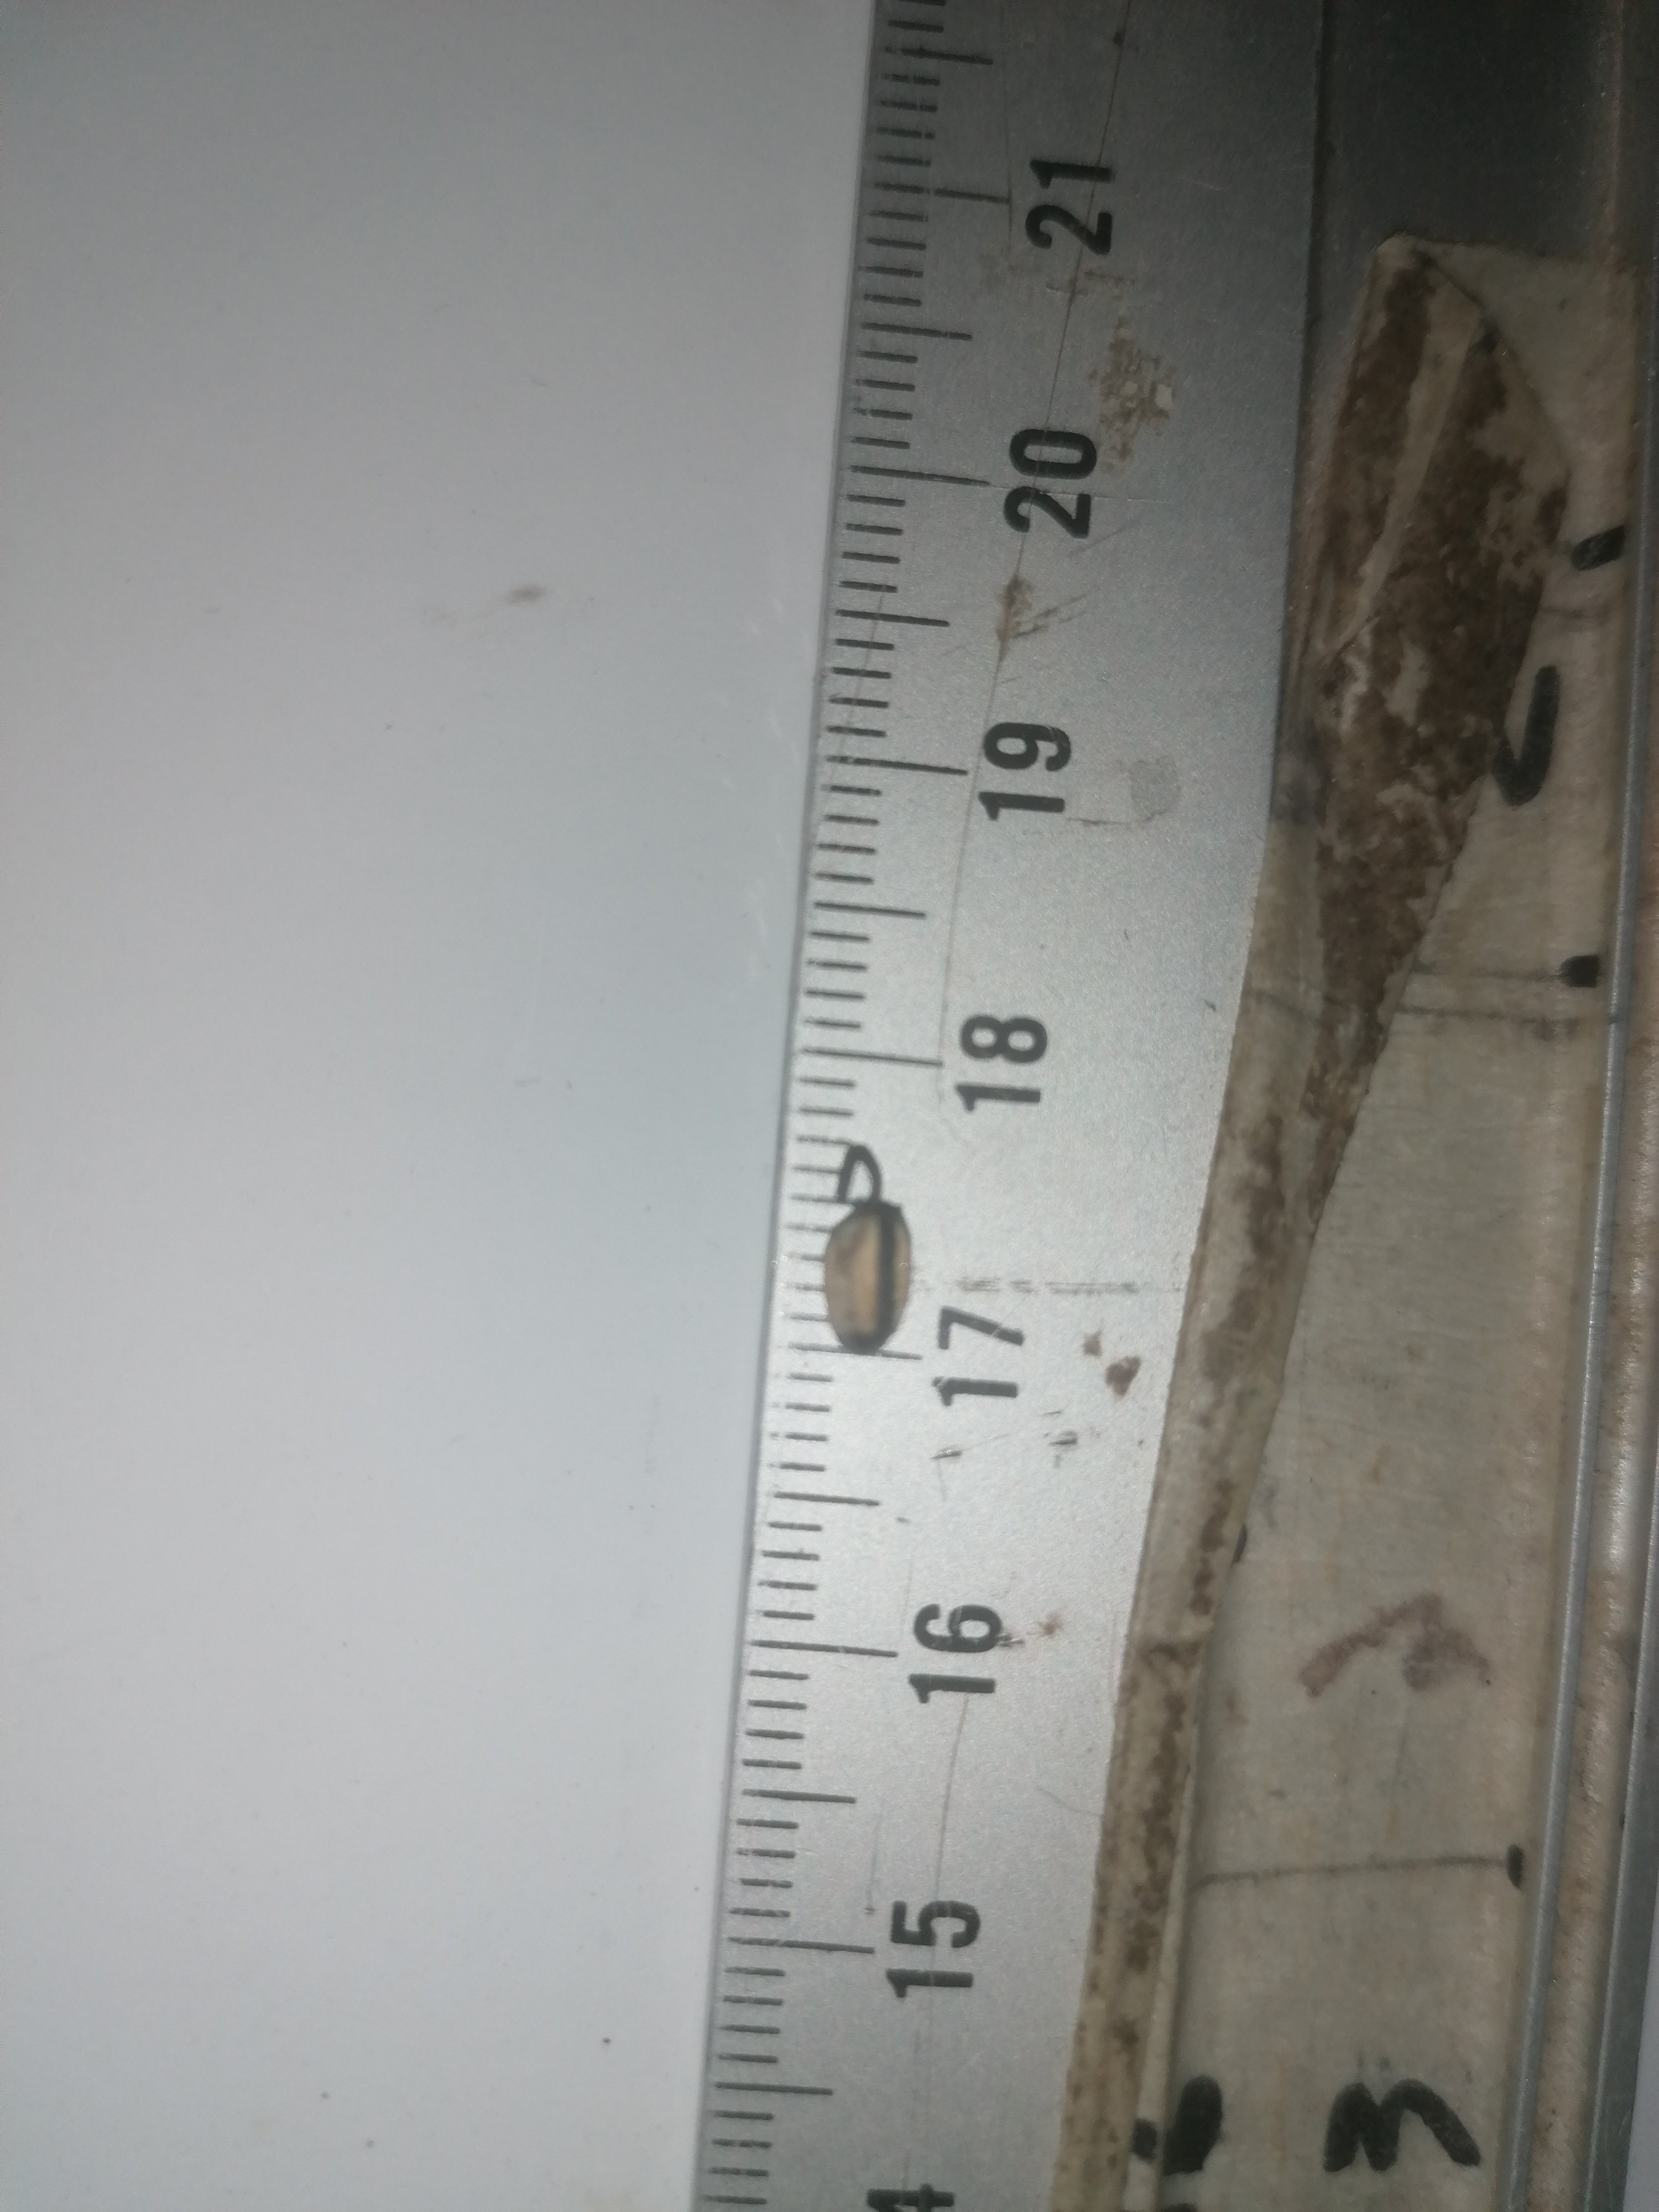
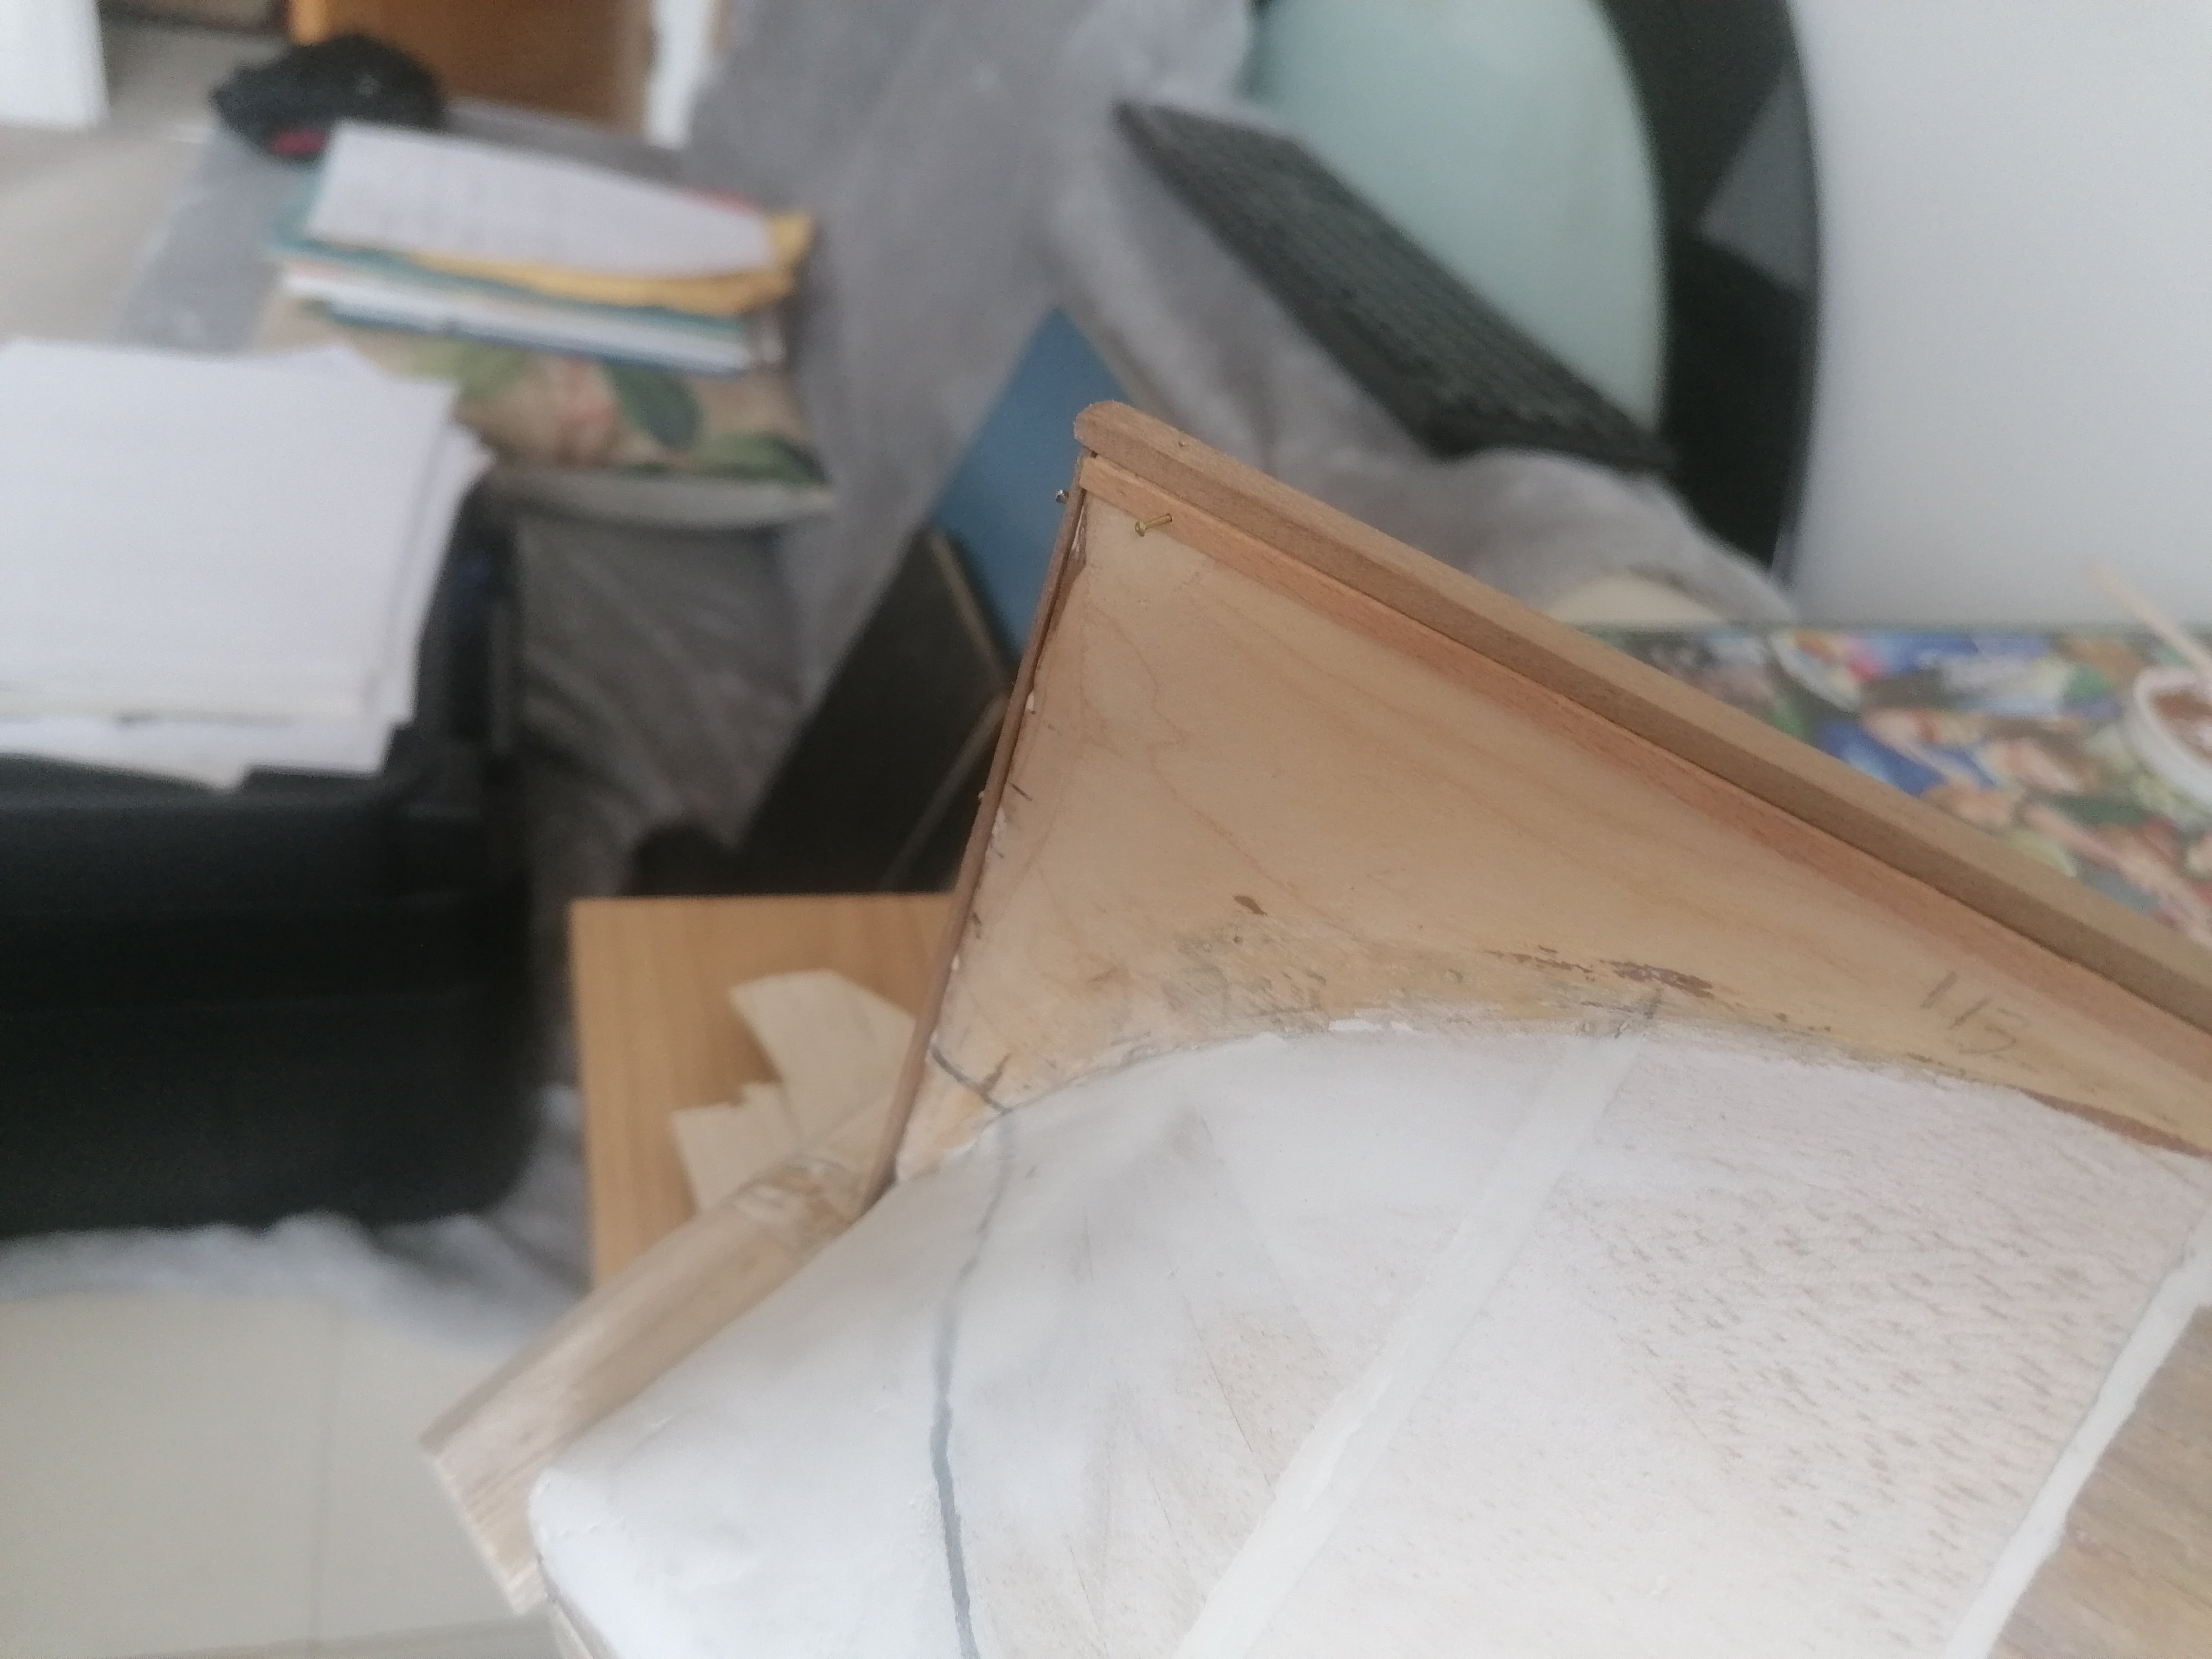
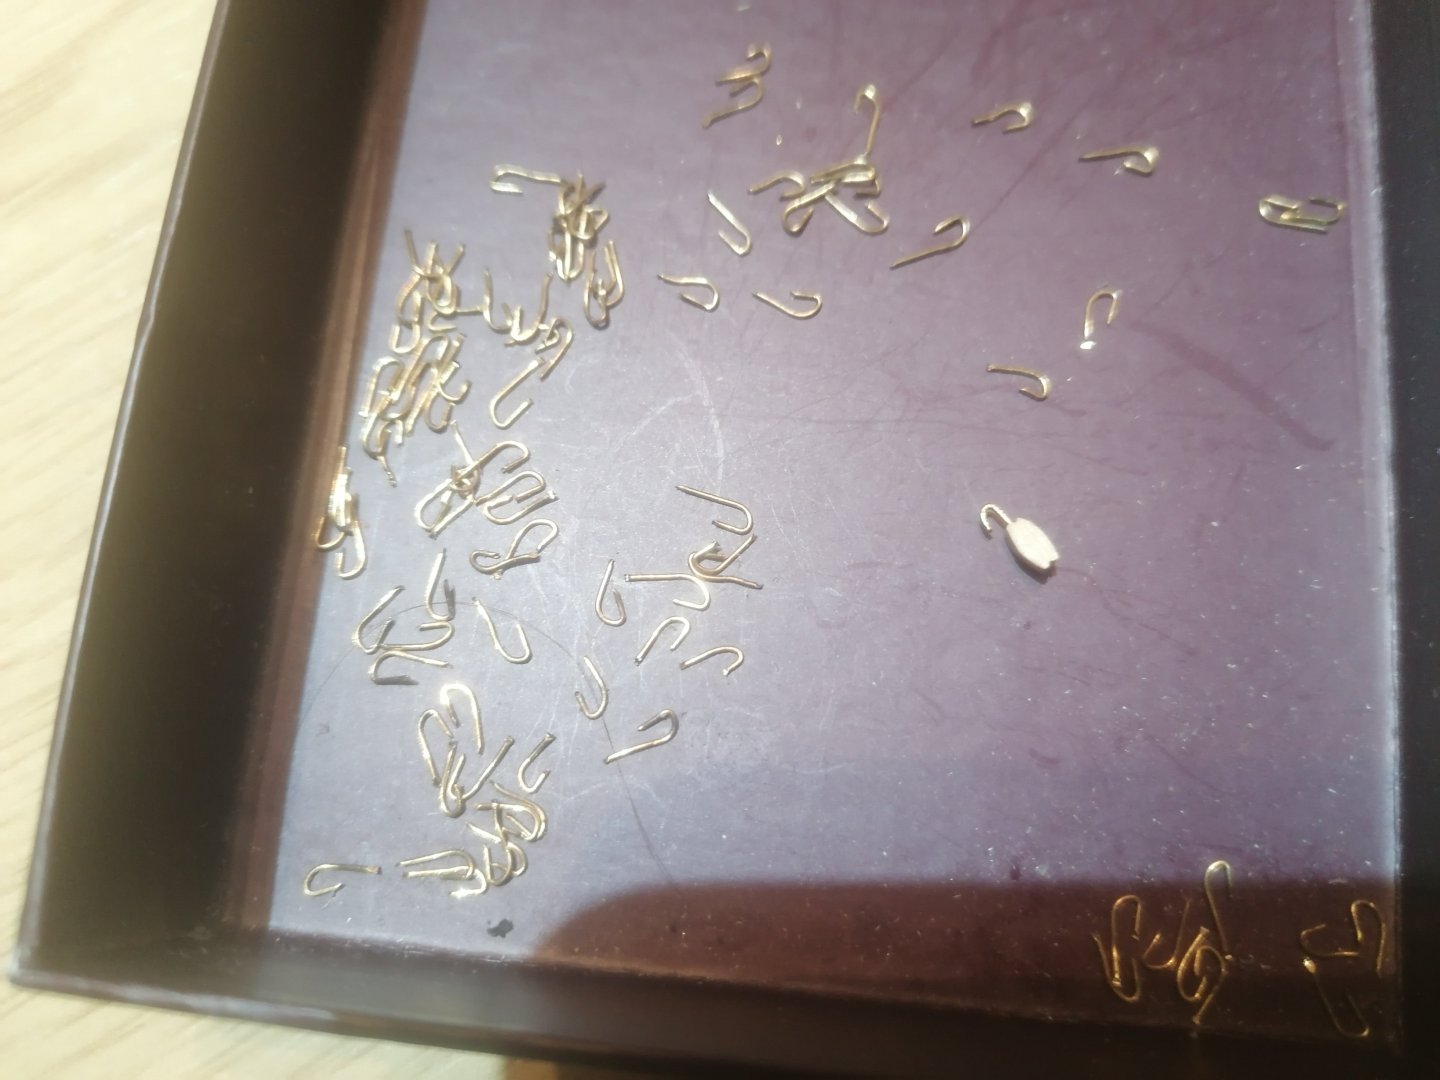
This is the 2nd part of last nights update. The 5mm rigging hooks I have are much too long for the gun tackles and the 3mm double and 2mm single blocks are very square looking. I tried making my own version of a blockbuster to round them off but after an hour of trying it had very little effect. I decided I would need to sand down the sides with the holes to give an oval appearance. This was much easier and quicker than I expected so I prepared a dozen or so. I then looked at making the hooks myself with the thinnest brass wire I have. The shortest hook with an eye was still nearly 5mm long too. I looked online for a way of attaching rigging hooks to blocks and came across a video by J Brent. With this knowledge I formed small hooks from the wire but without an eye on the end. I glued 0.5mm black thread to simulate the strop around a 3mm double block and drilled a 0.5 mm hole through the thread on the furthest edge from the holes and cut a hook to size and glued it in place. this seems to me to look acceptable for the main guns but will need to be more precise with the upper 9lb'ers. I then attempted the same with a 2mm single block but after several attempts I gave up and have ordered 3mm single blocks instead. These, I hope, will be easier to manage. I next turned my attention to the prow of the ship. The head timbers had already been glued together but had originally been glued between where the bowsprit hole should have been and the highest point of the bow. The main head timber had also been cut flush with the aftermost timber. I managed to seperate the parts of the assembly without causing any further damage to the parts. The rear most timber had some damage but a little filler will fix this. I checked the fitting of the main timber onto the false keel and found, with the addition of a tapered strip of wood added to the rear of the structure it fitted ok apart from a small amount of sanding on the lower front edge. However the top edge didn't look right at all and didn't extend far enough forward. I made a cardboard template which I cut to fit the space, followed by, another template from 3mm balsa. The original main head timber was not only too short but also too high so I trimmed the balsa to a more acceptable height, and cut away the excess on the main timber. (It's strange but I only needed to remove a couple of mm but it looked like it should have been a lot more). Once happy with the shape, I marked the shape of the forward edge of this timber onto the template and cut off the end of the template and glued it onto the end. I hope the photos show this better than my explanation. Well that's me pretty much up to date so far. so thanks for the interest and likes again. I will try to make my next post shorter and sooner than these have been. David.


-
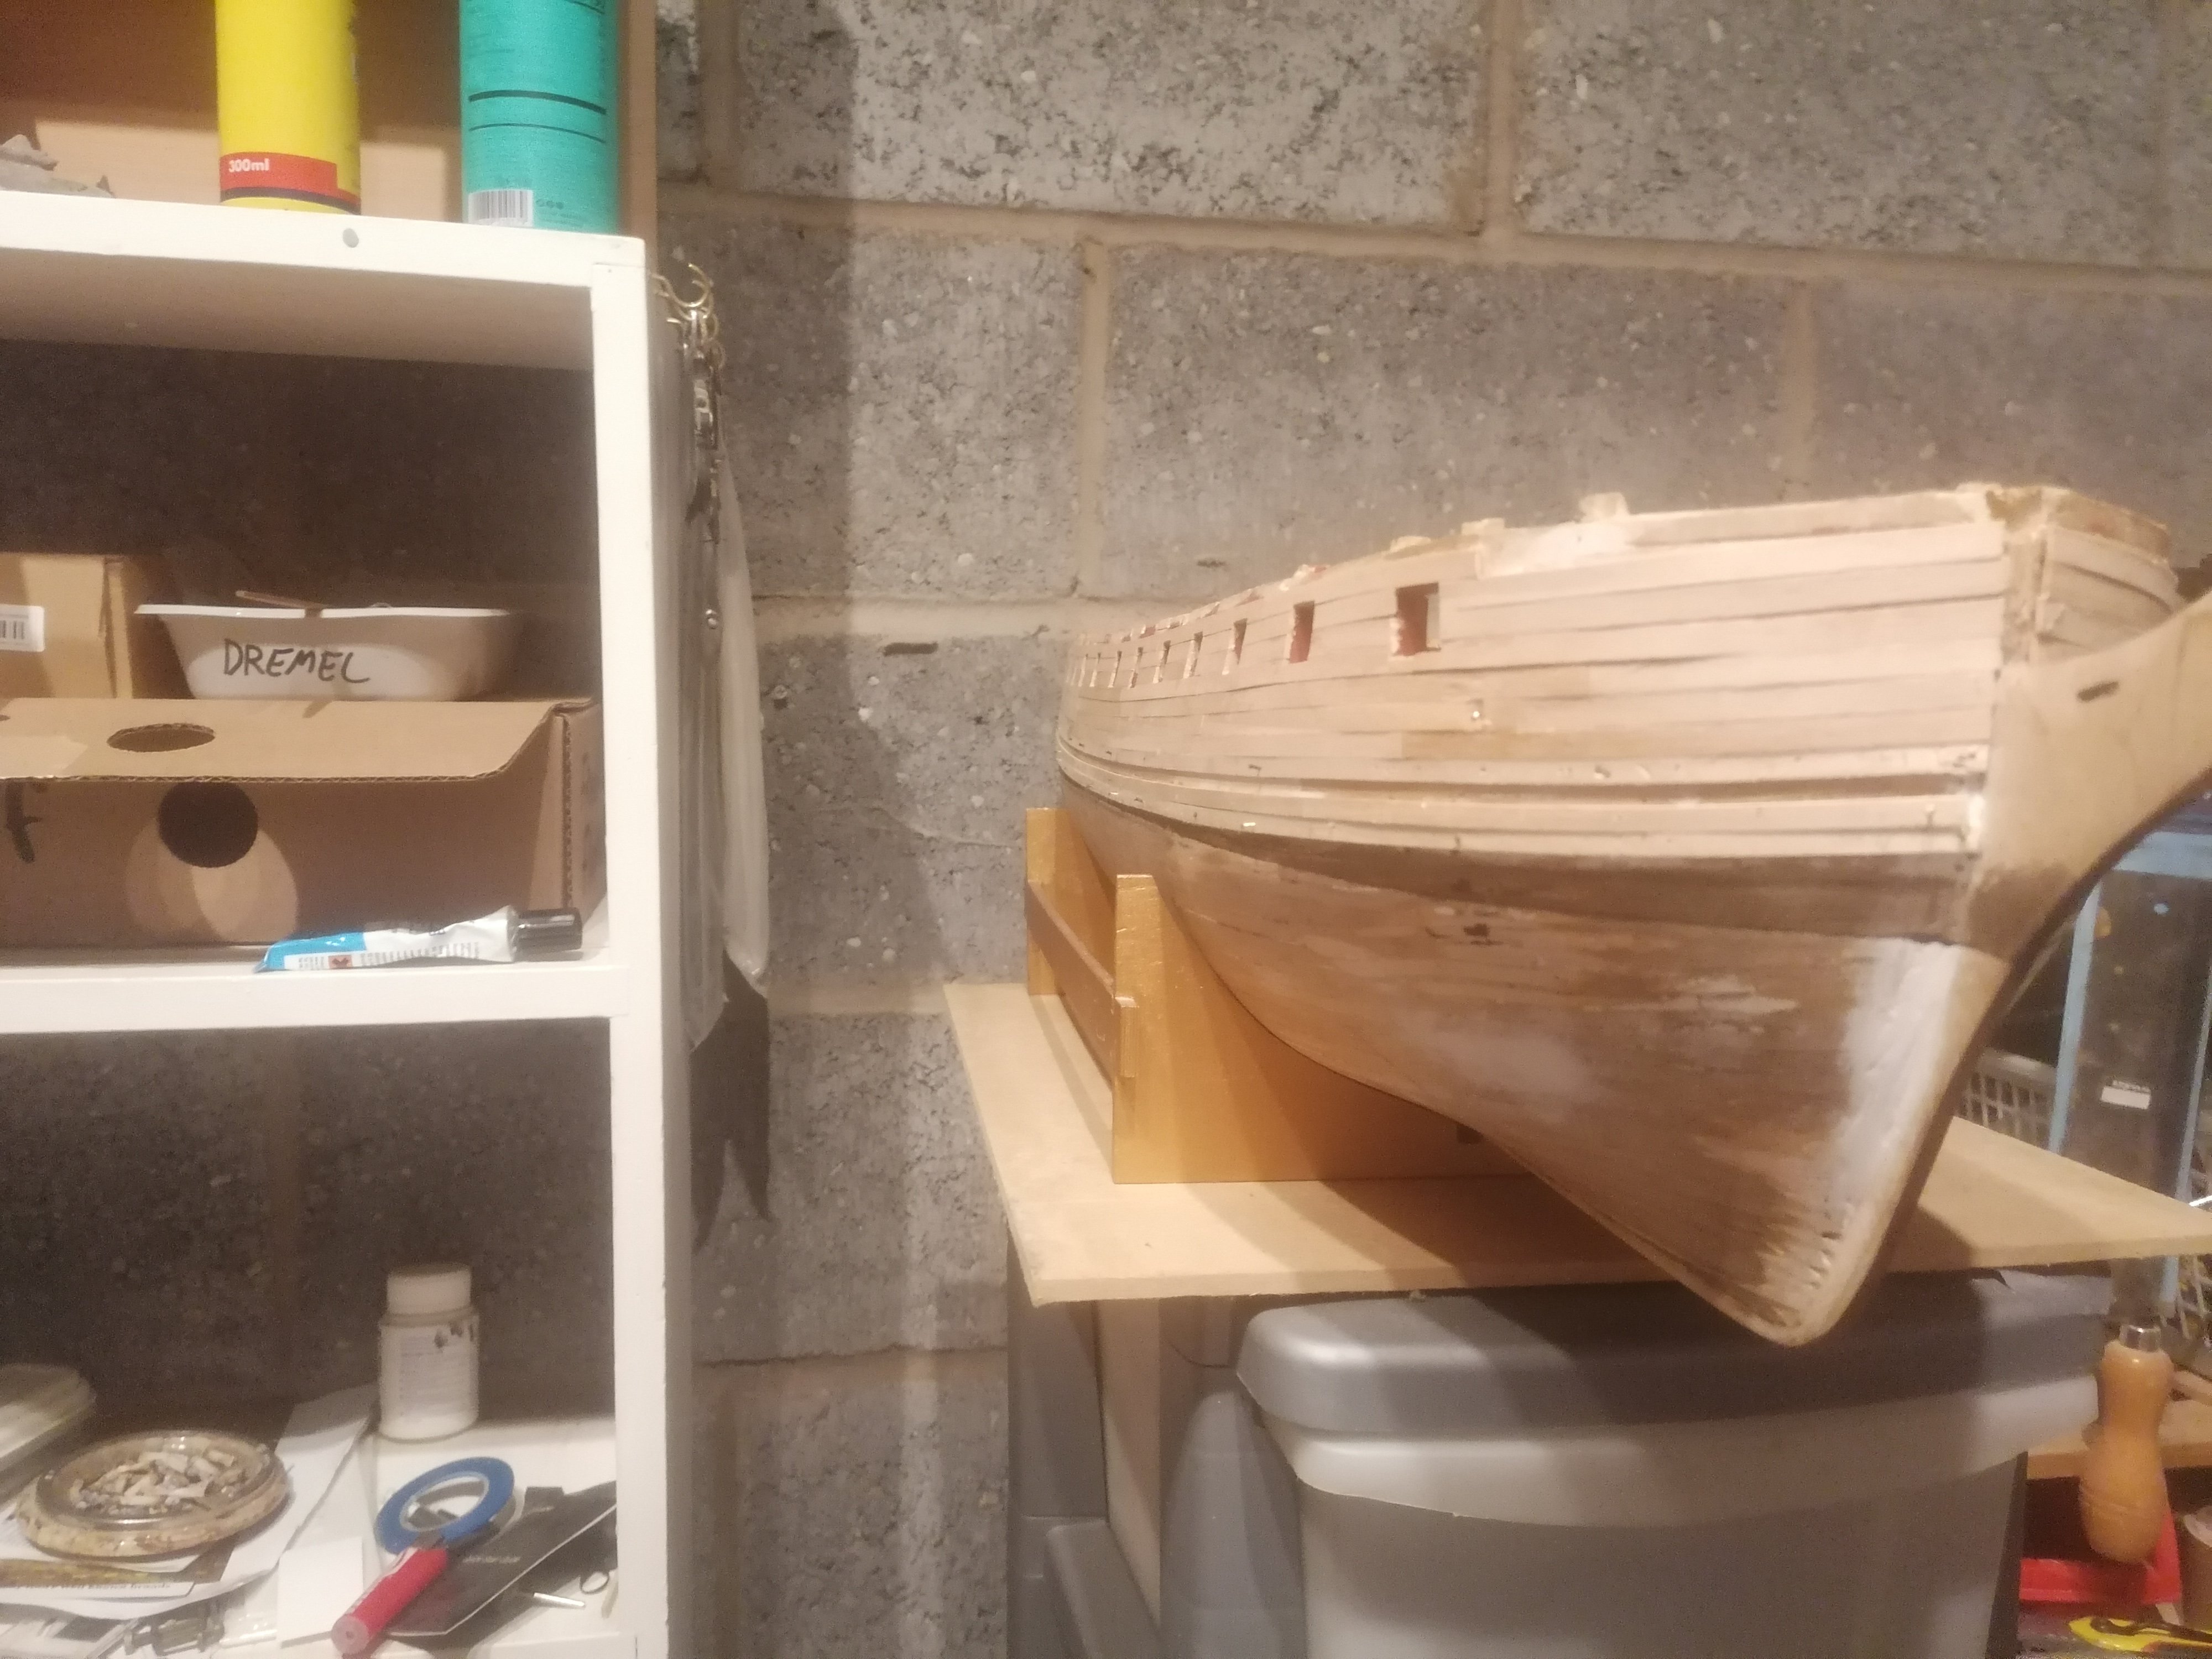
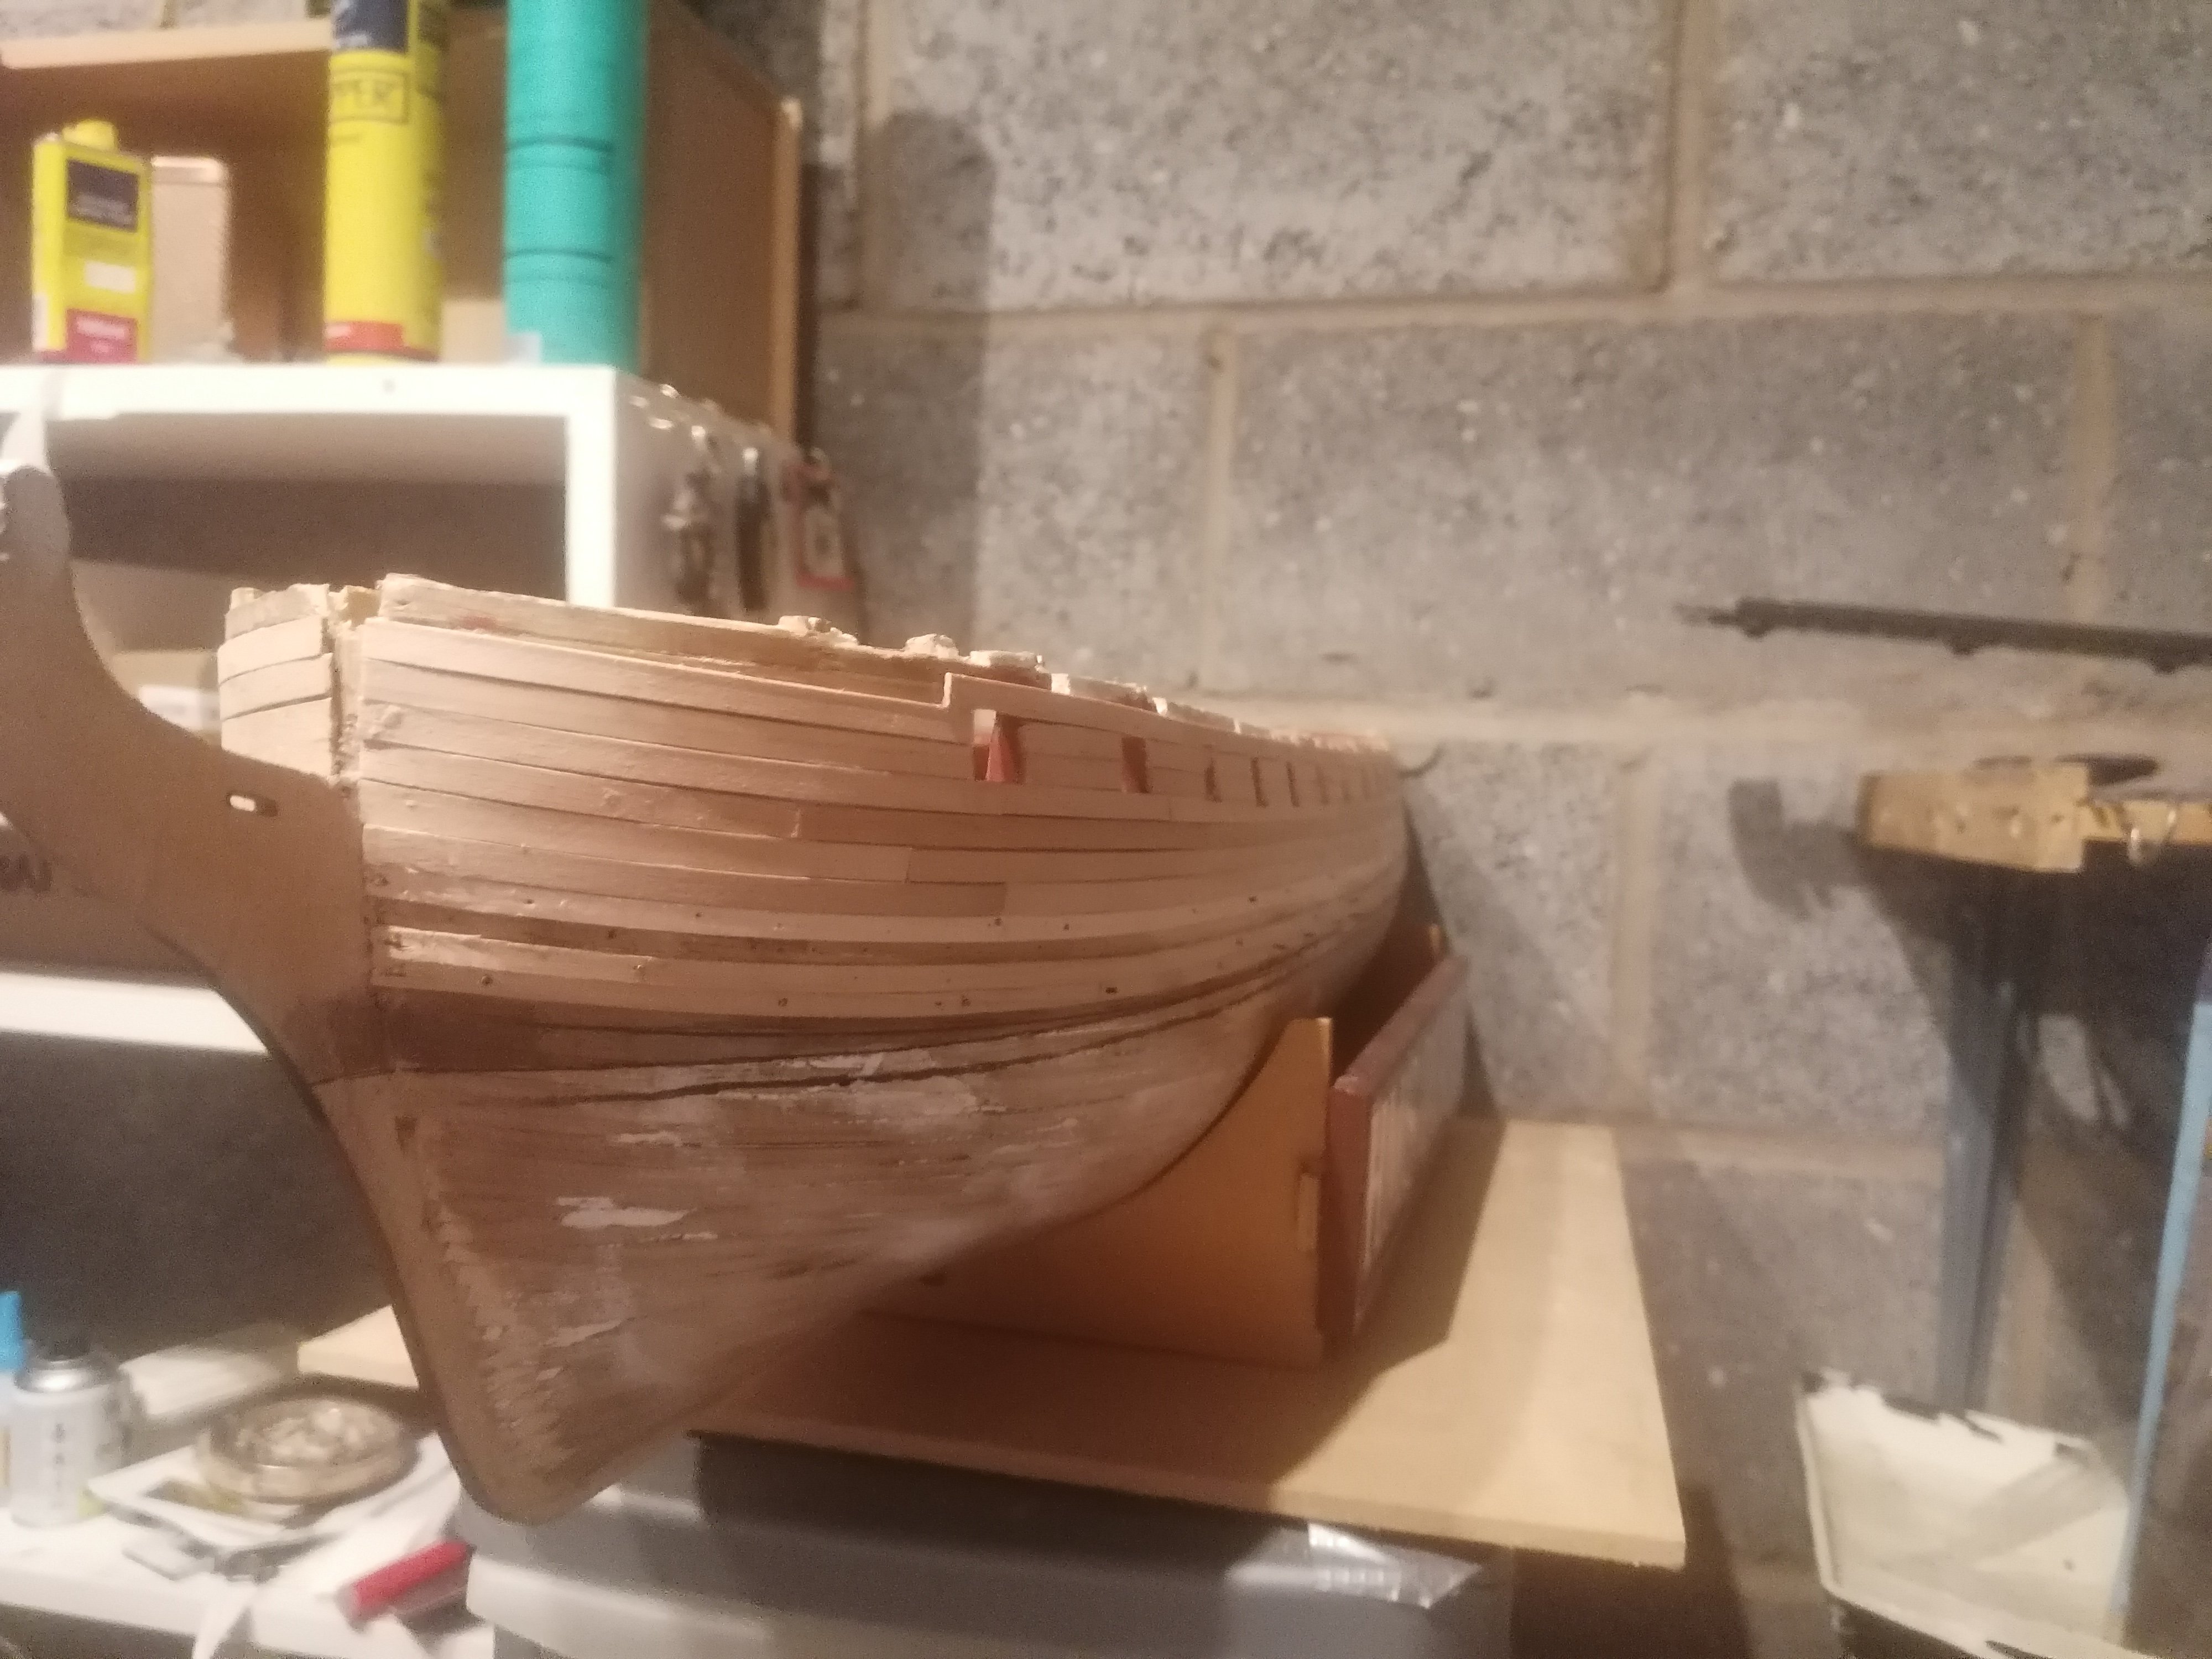
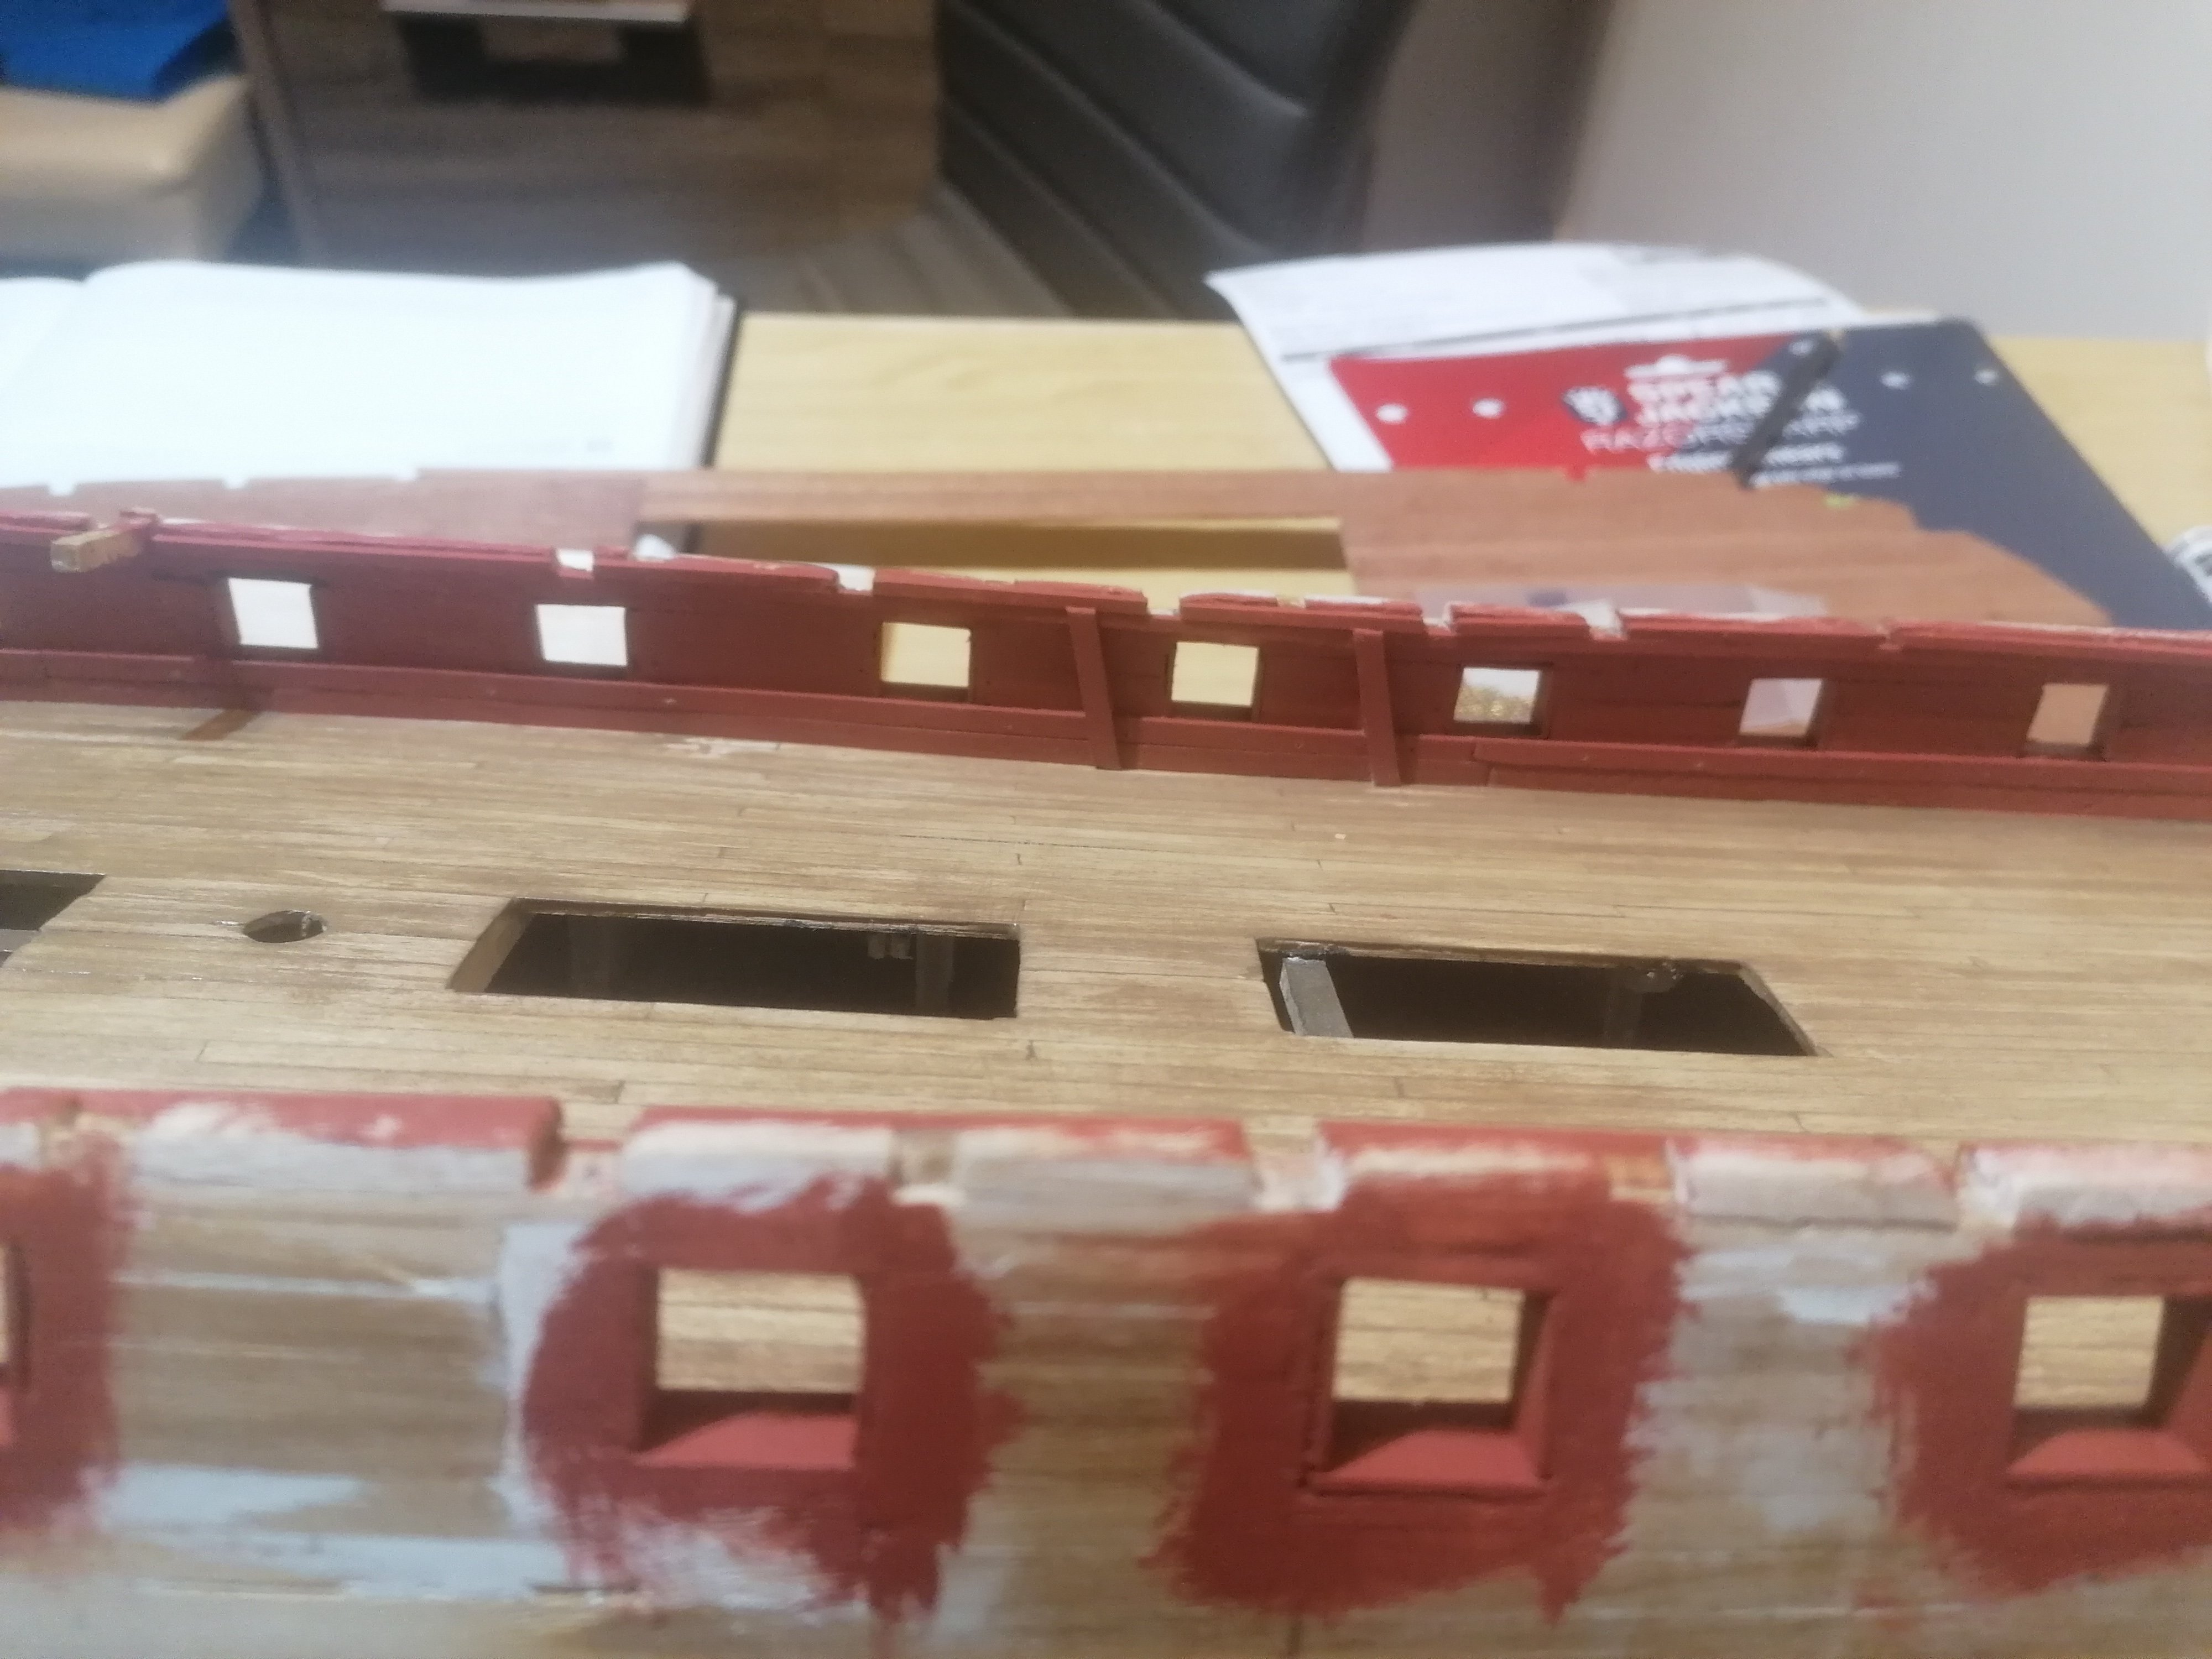
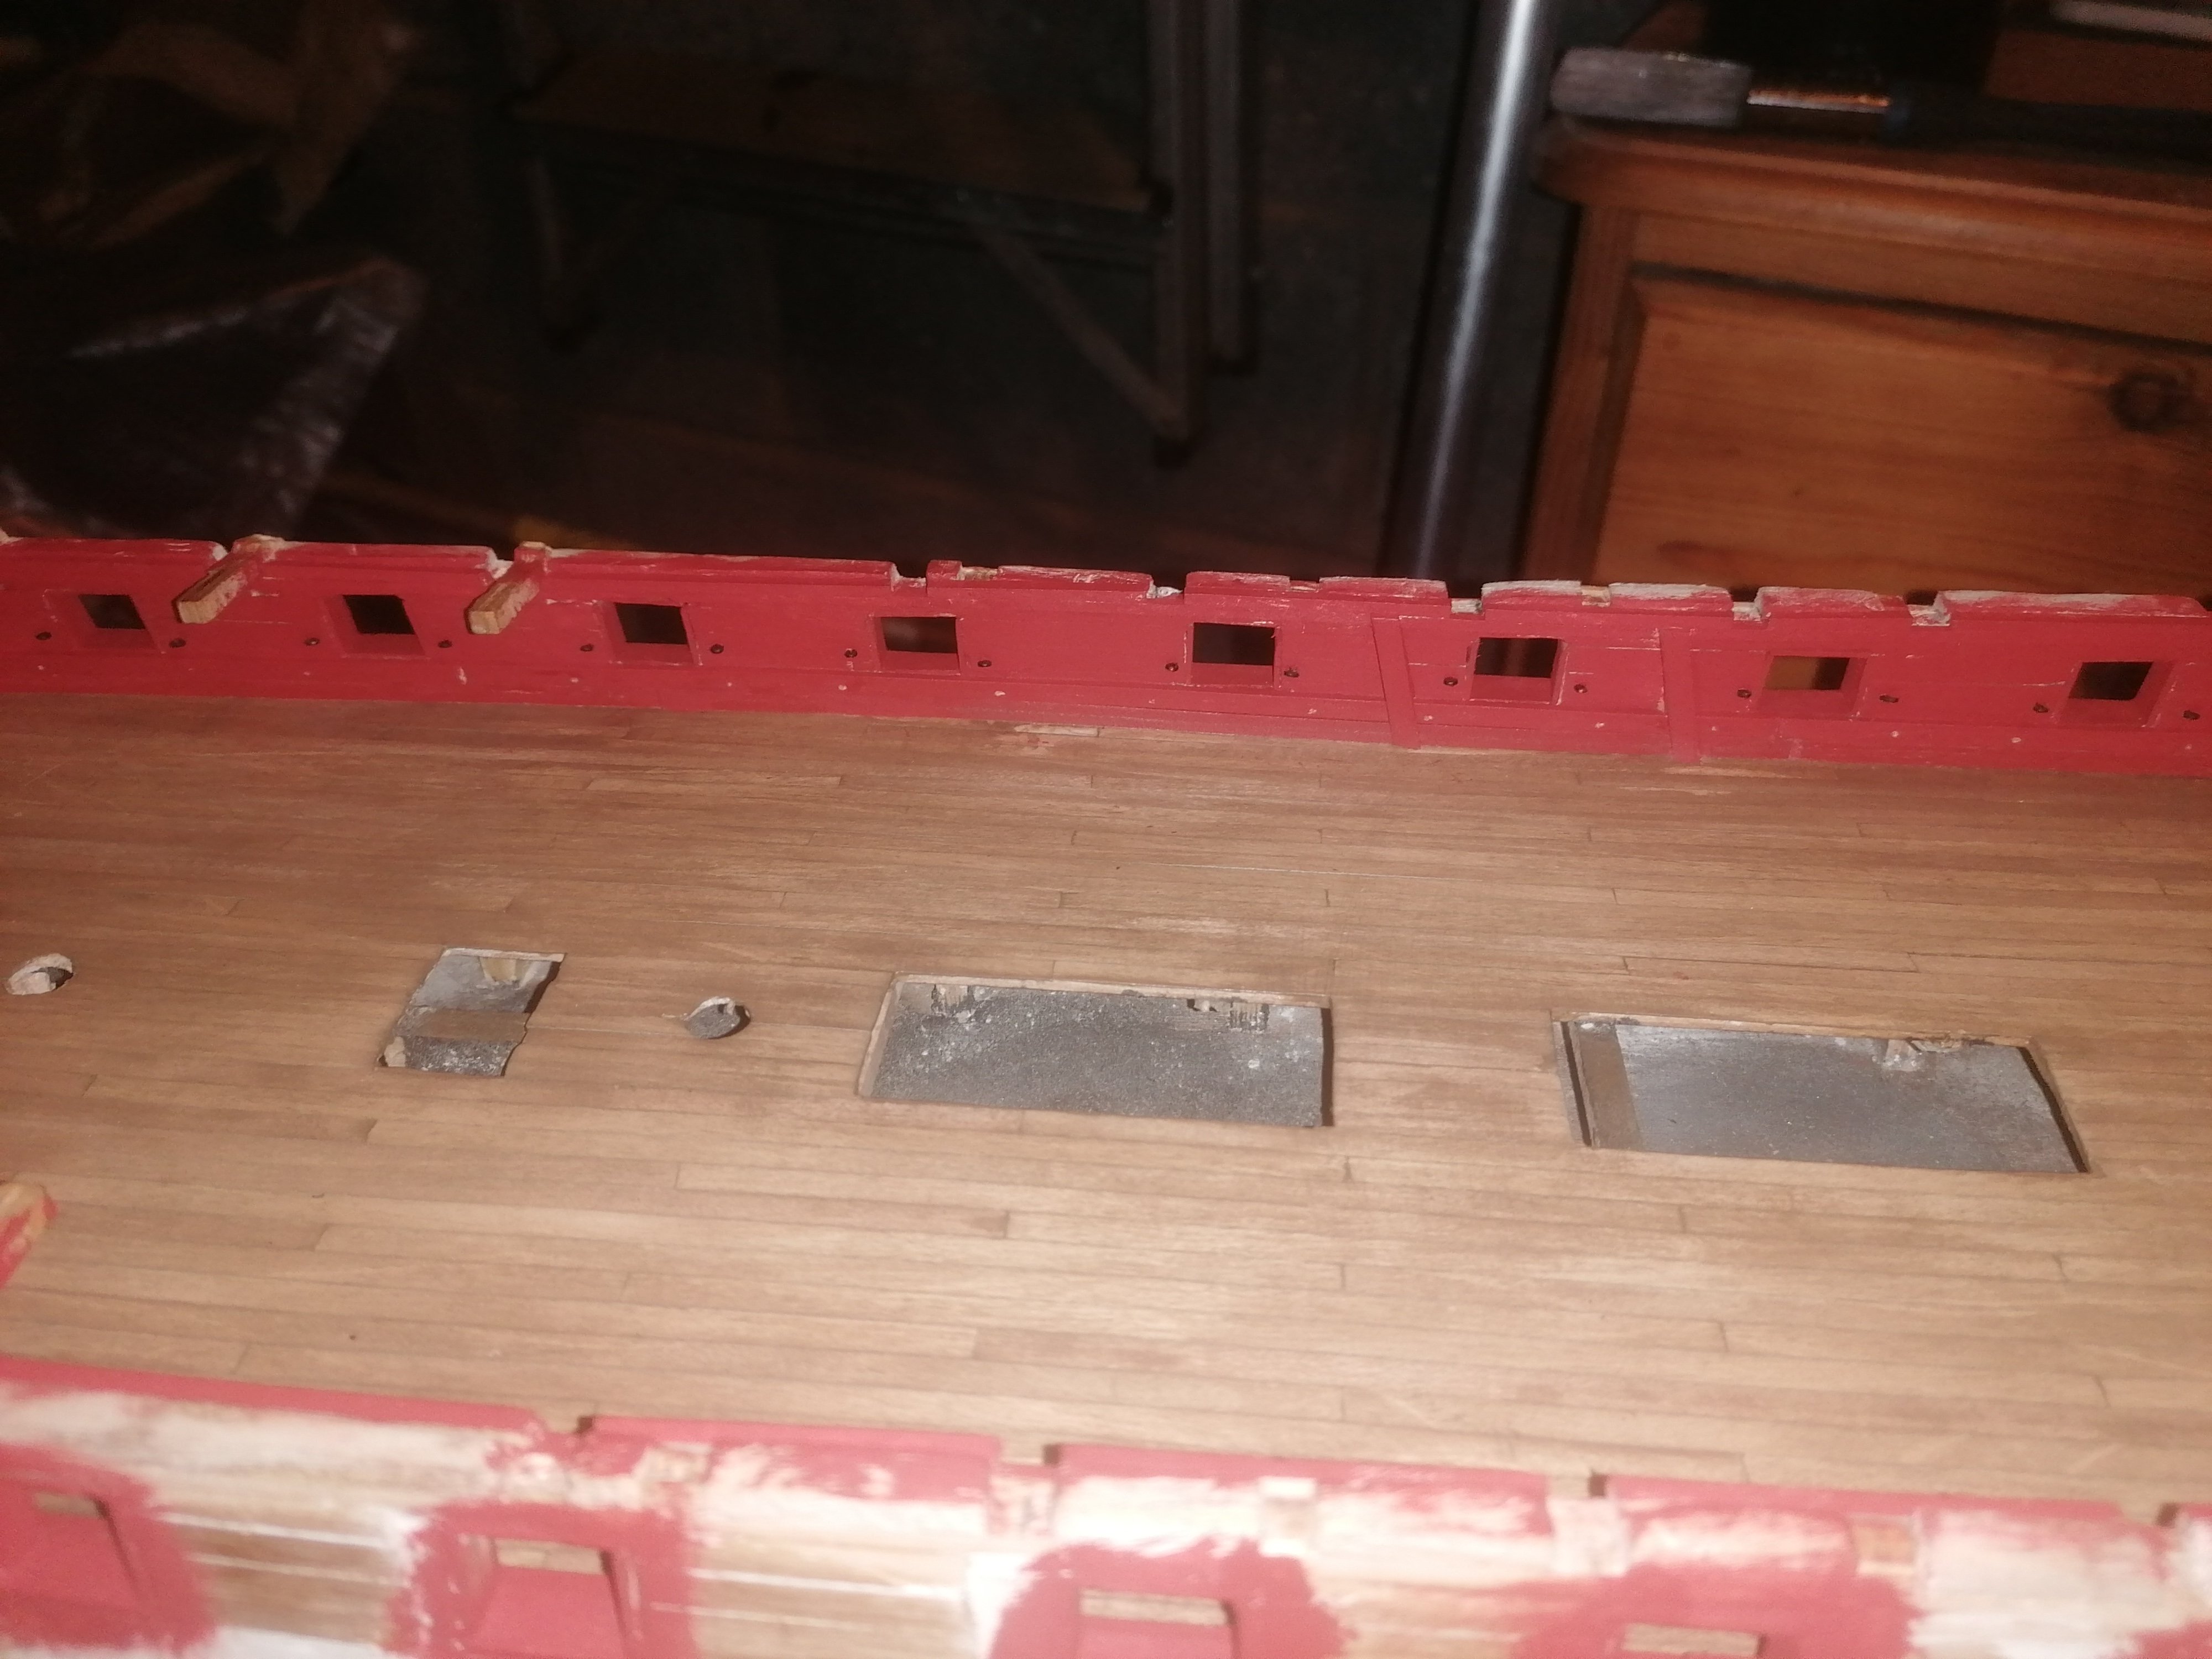
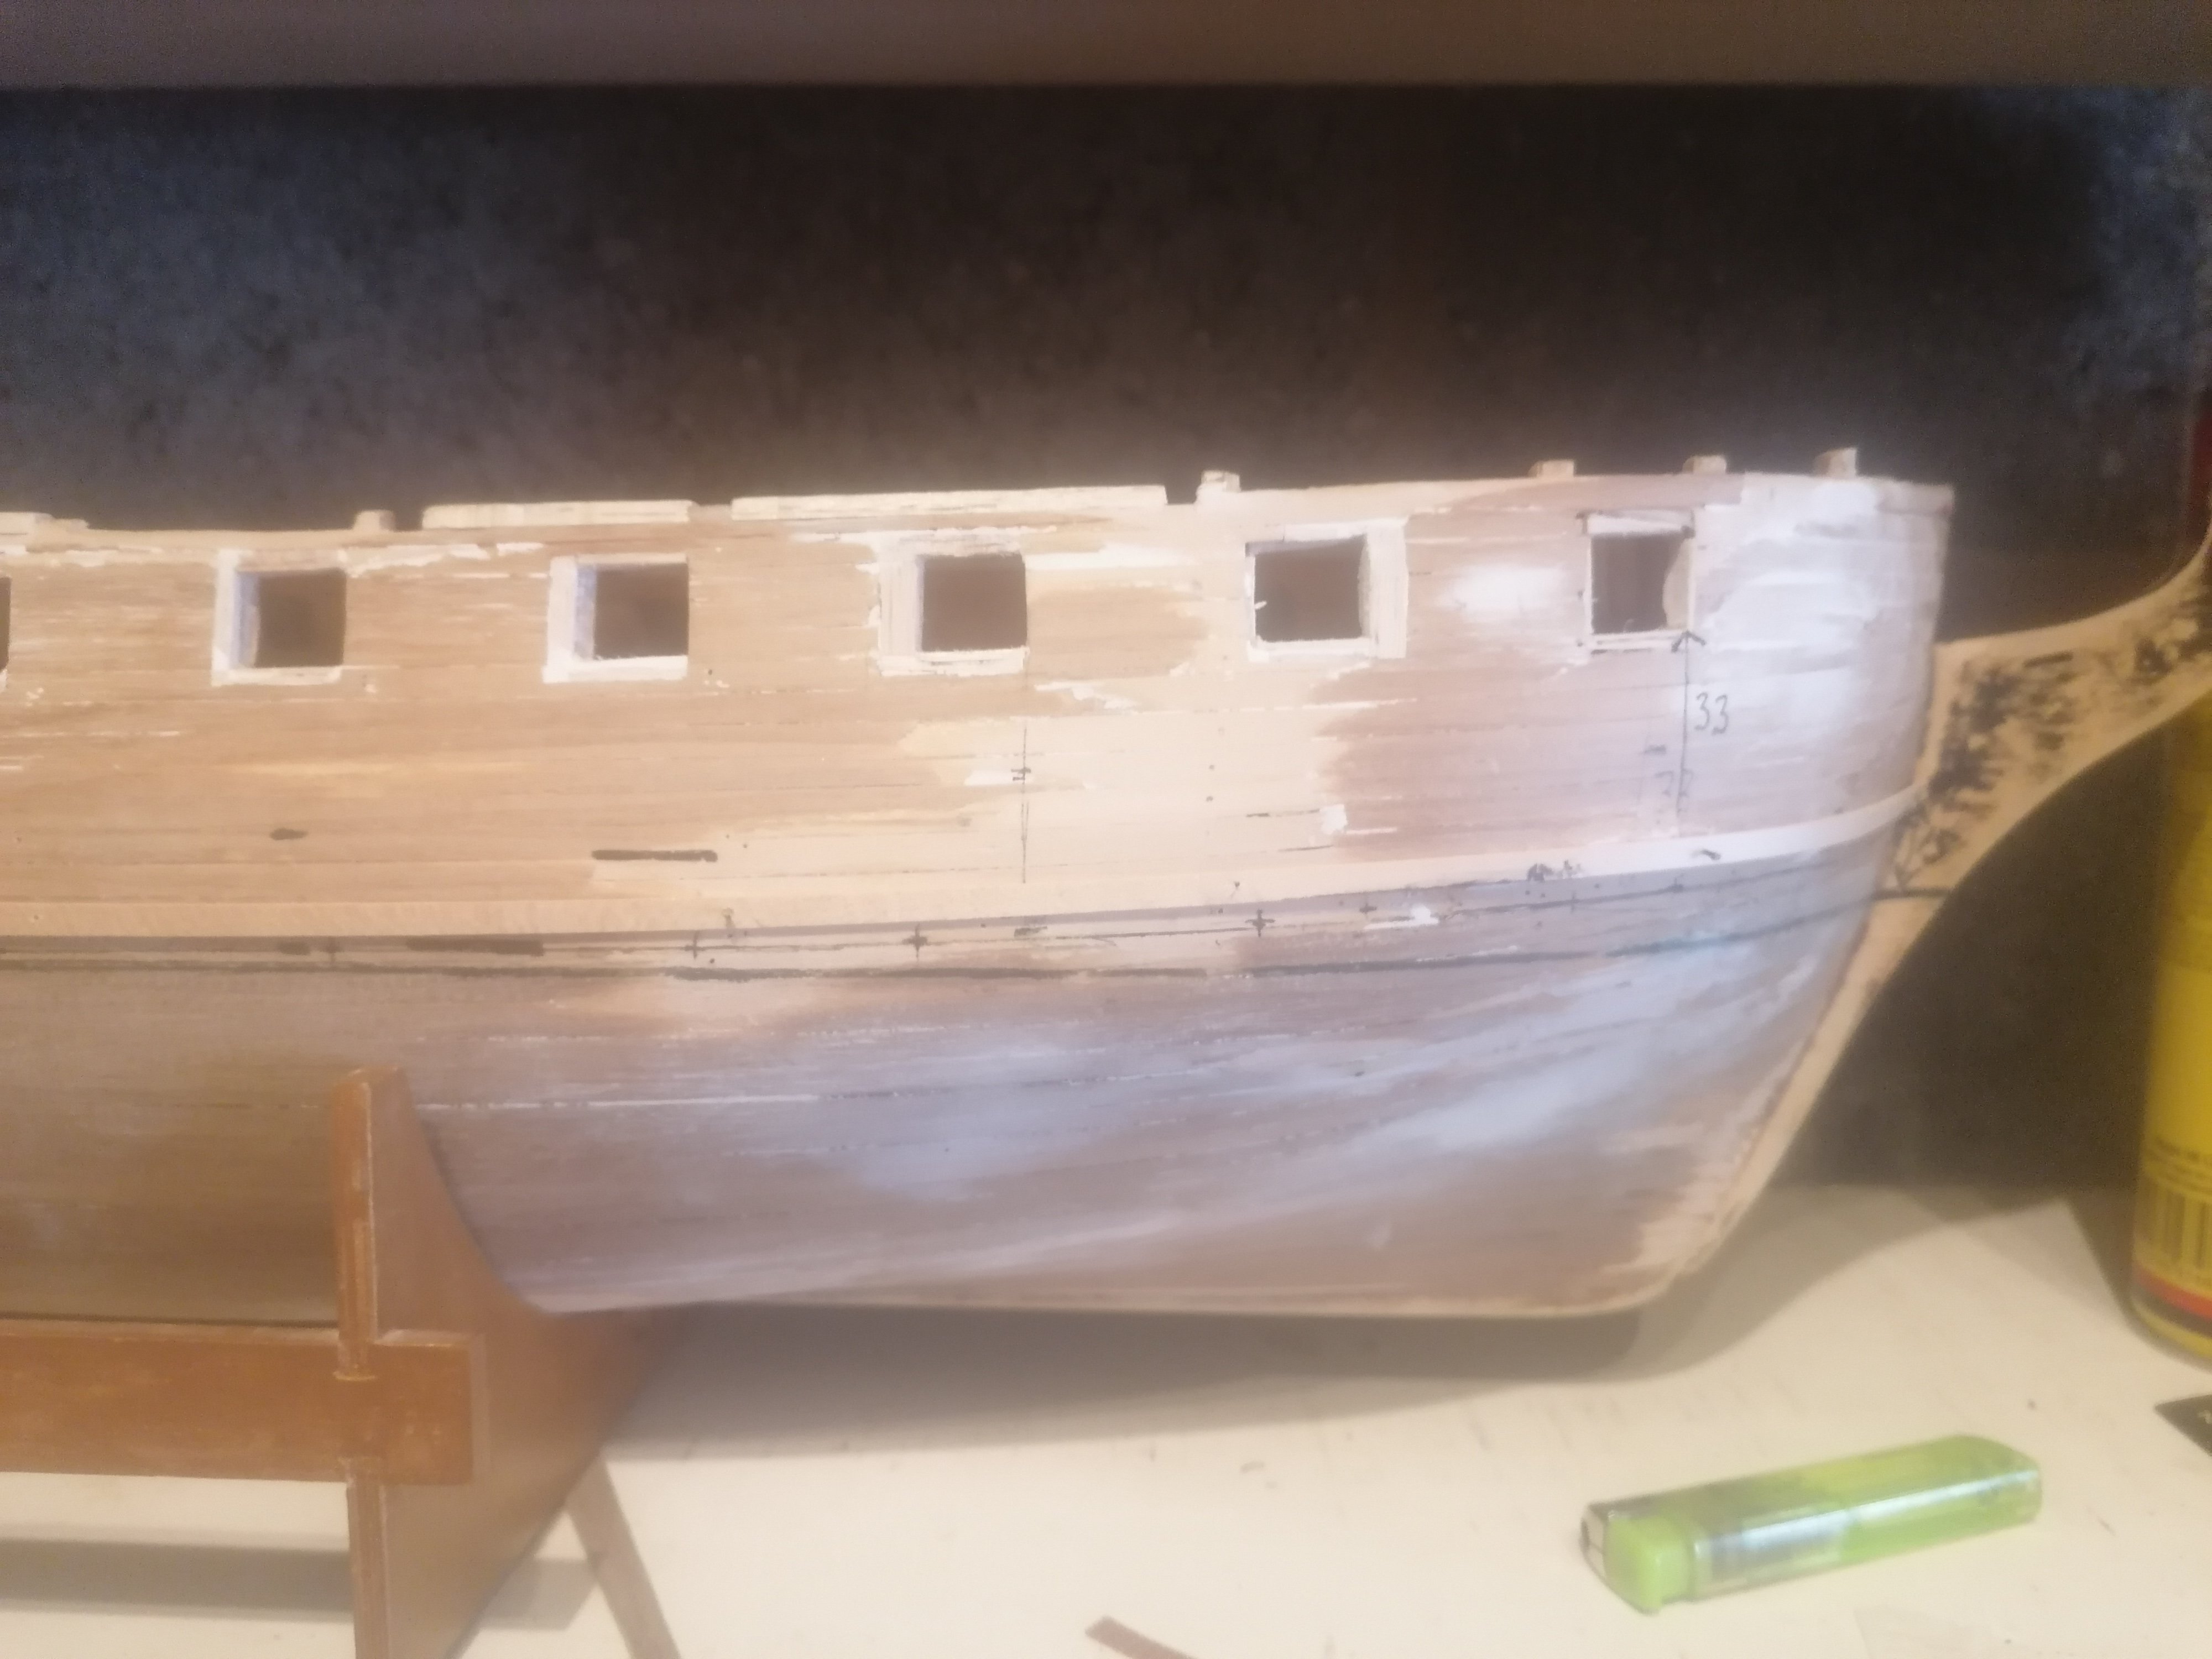
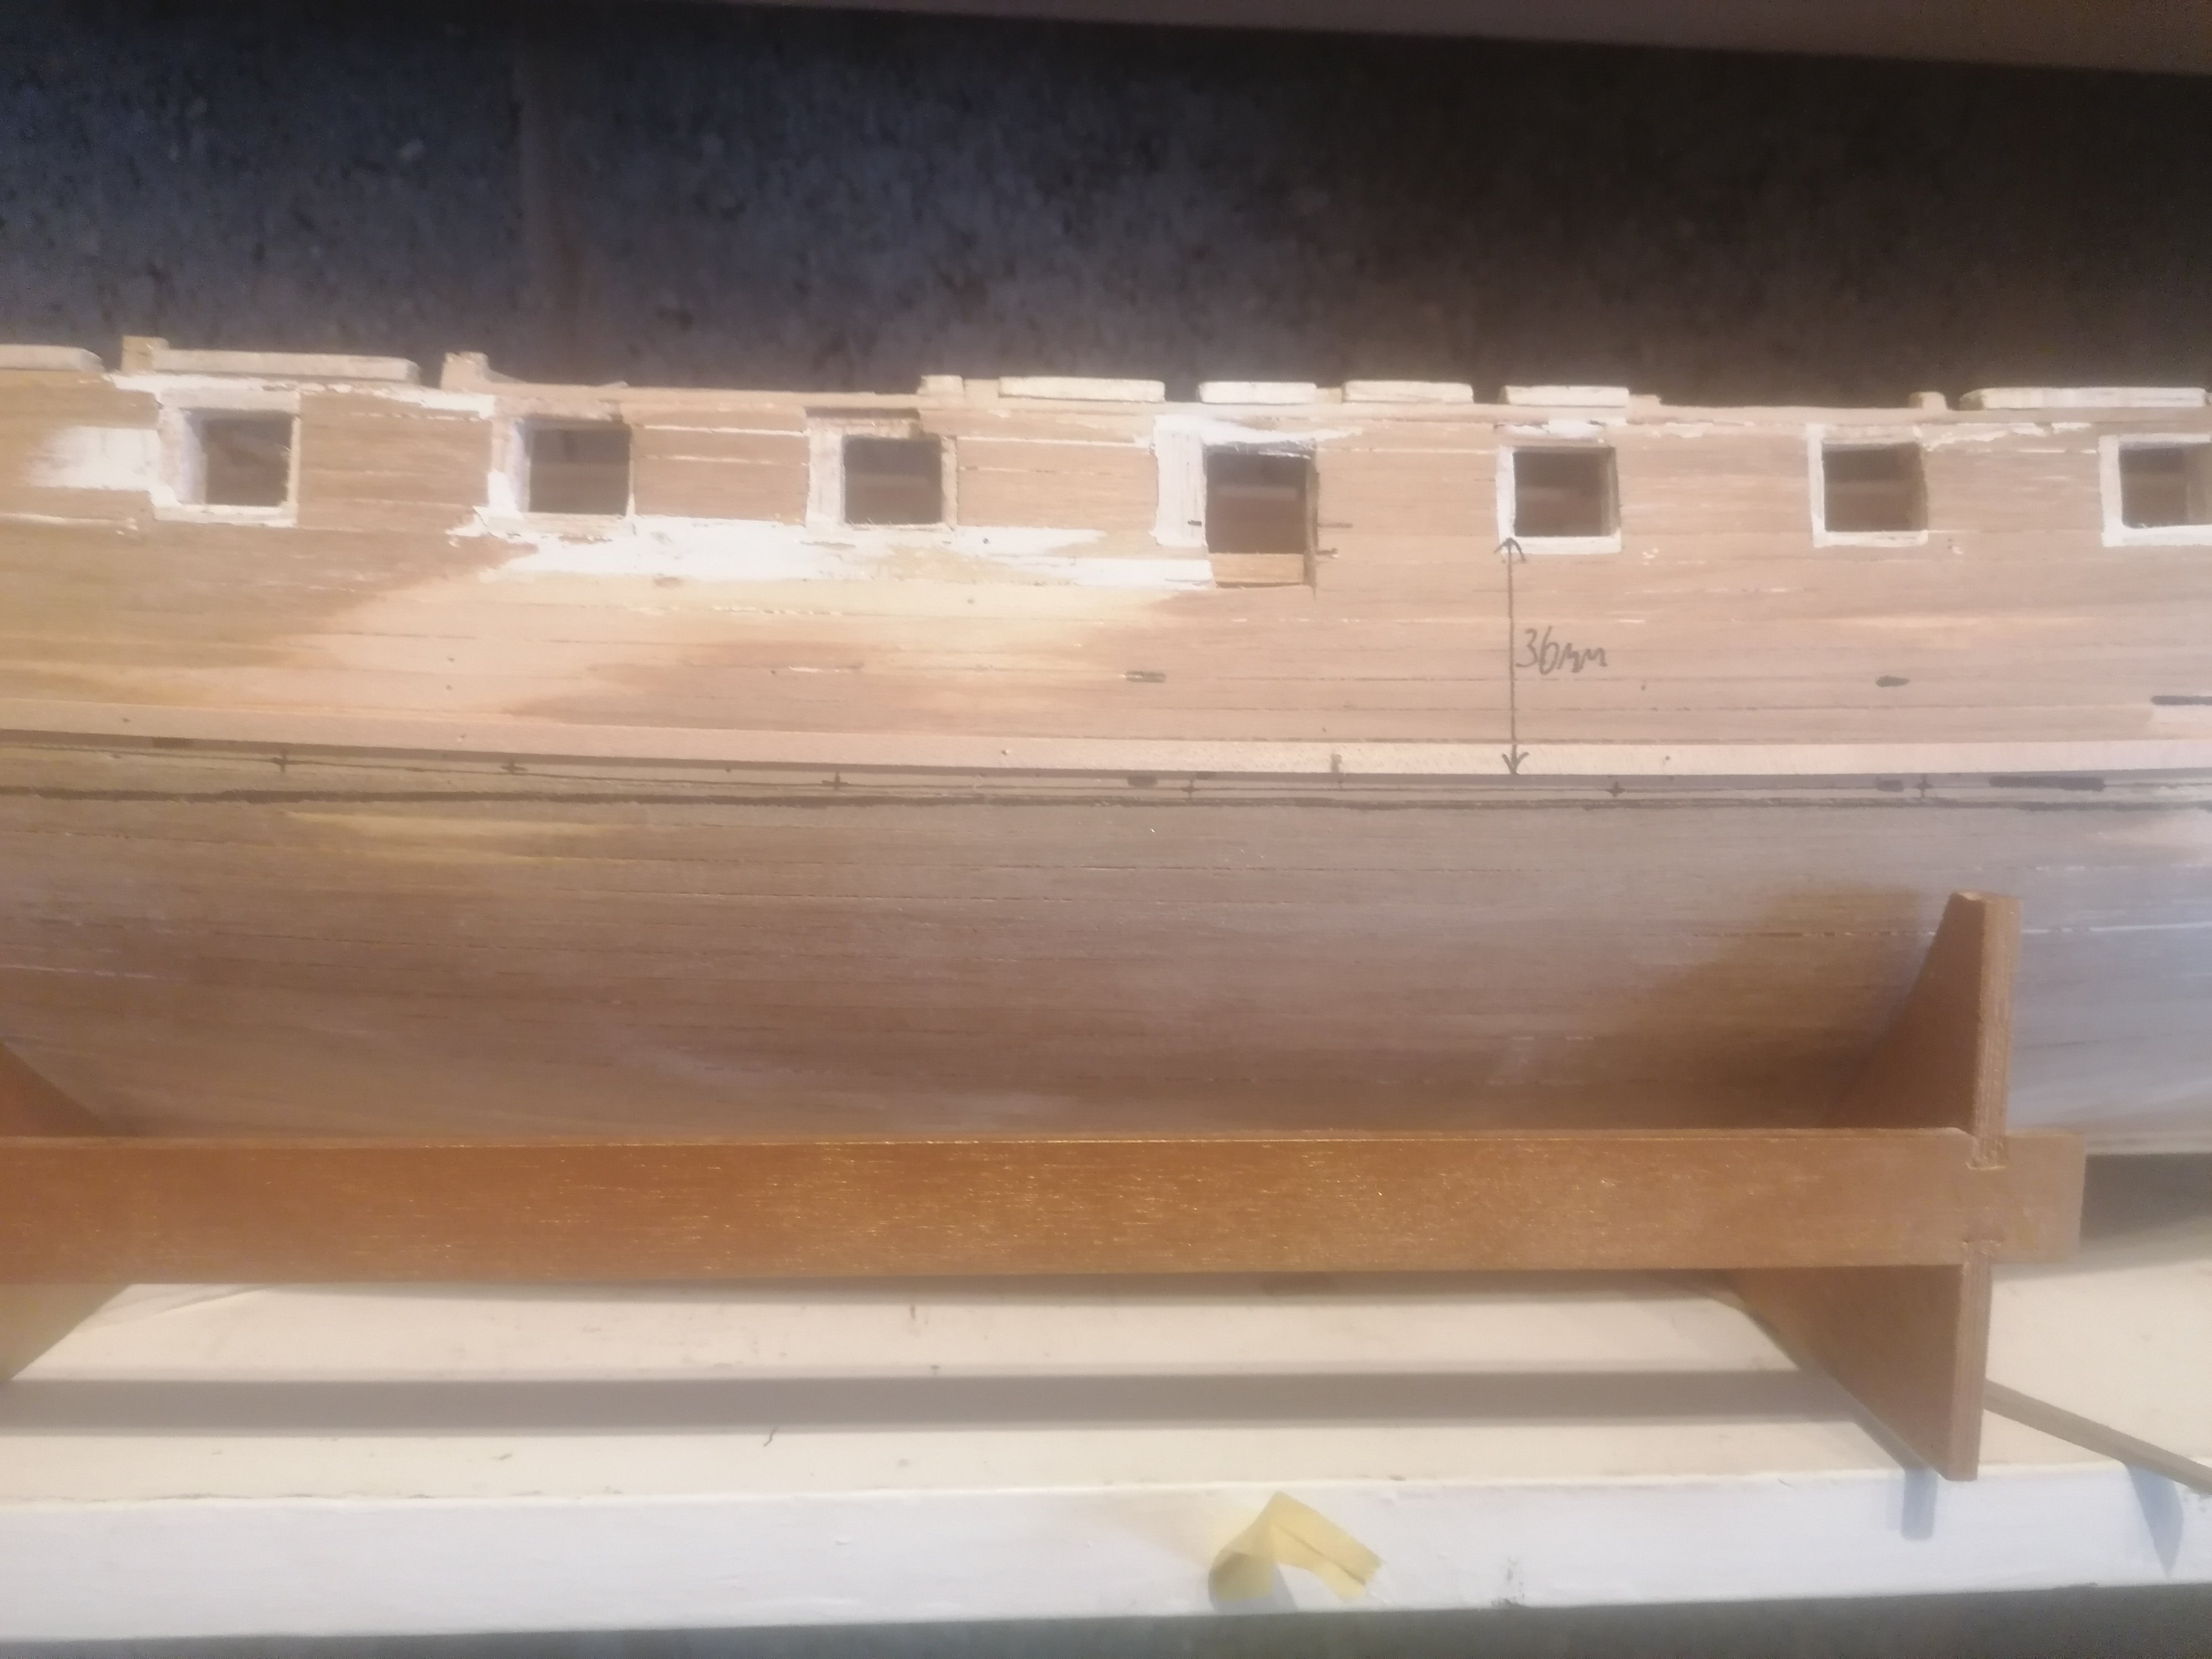
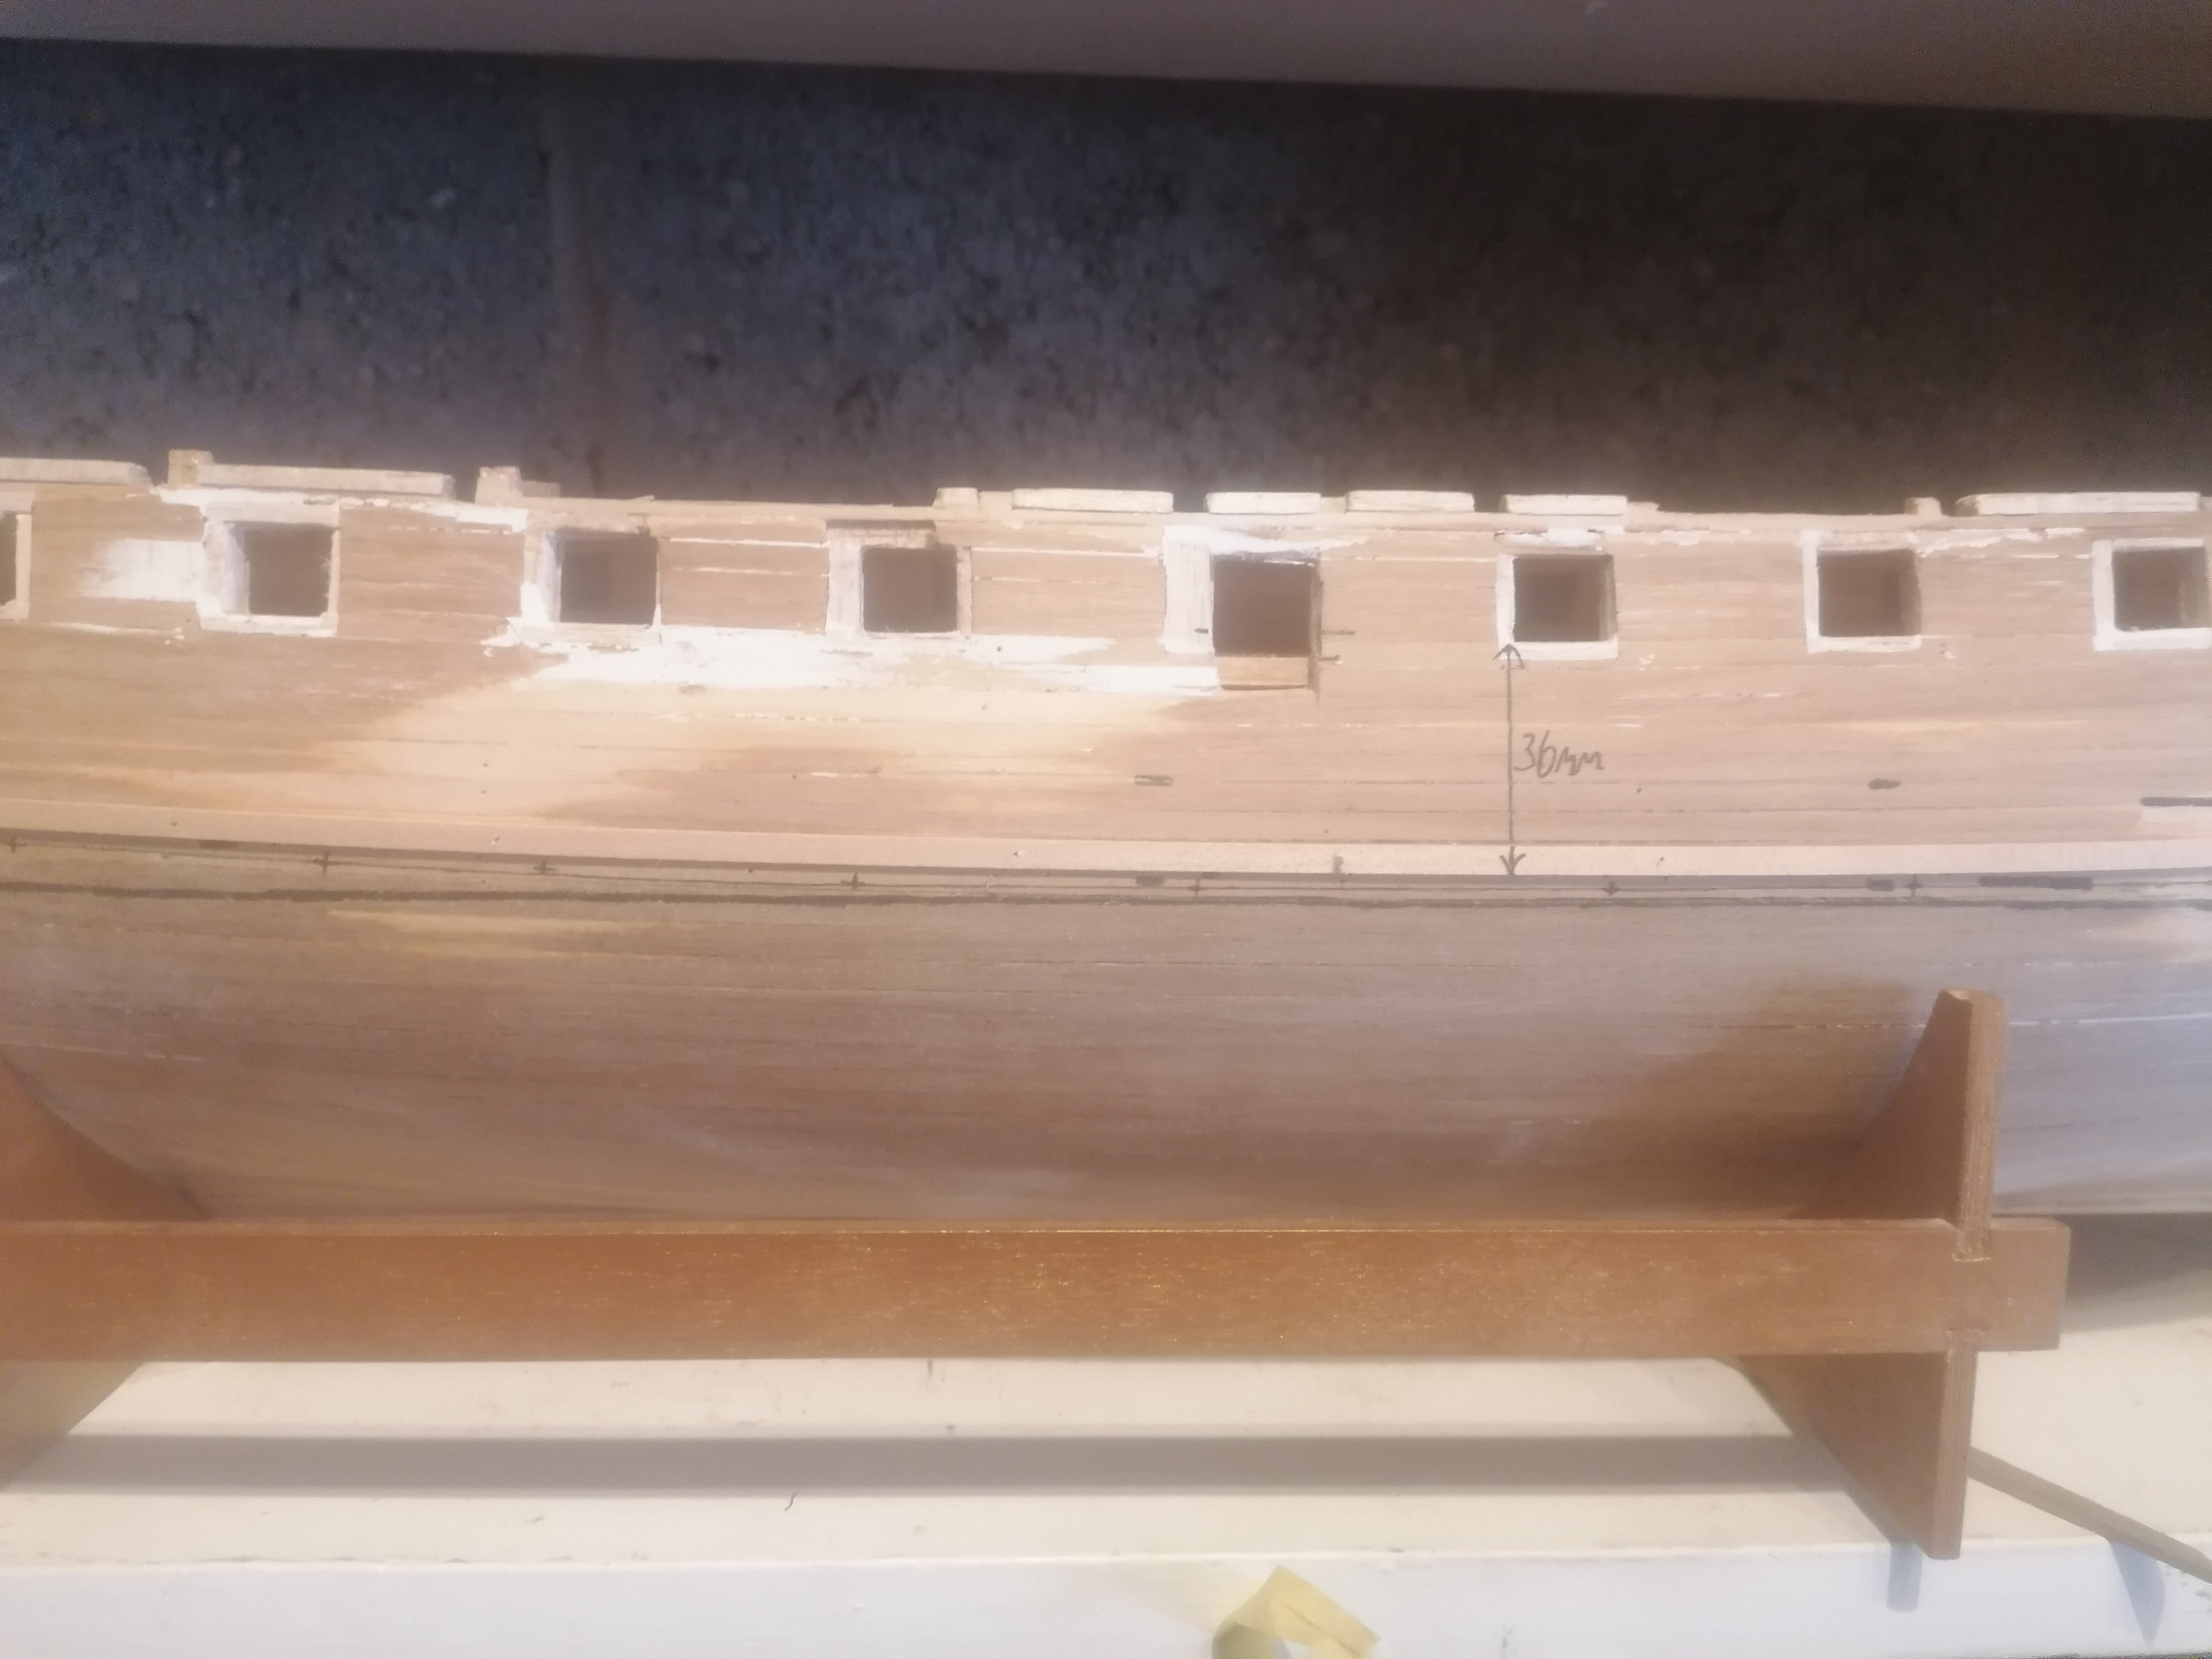
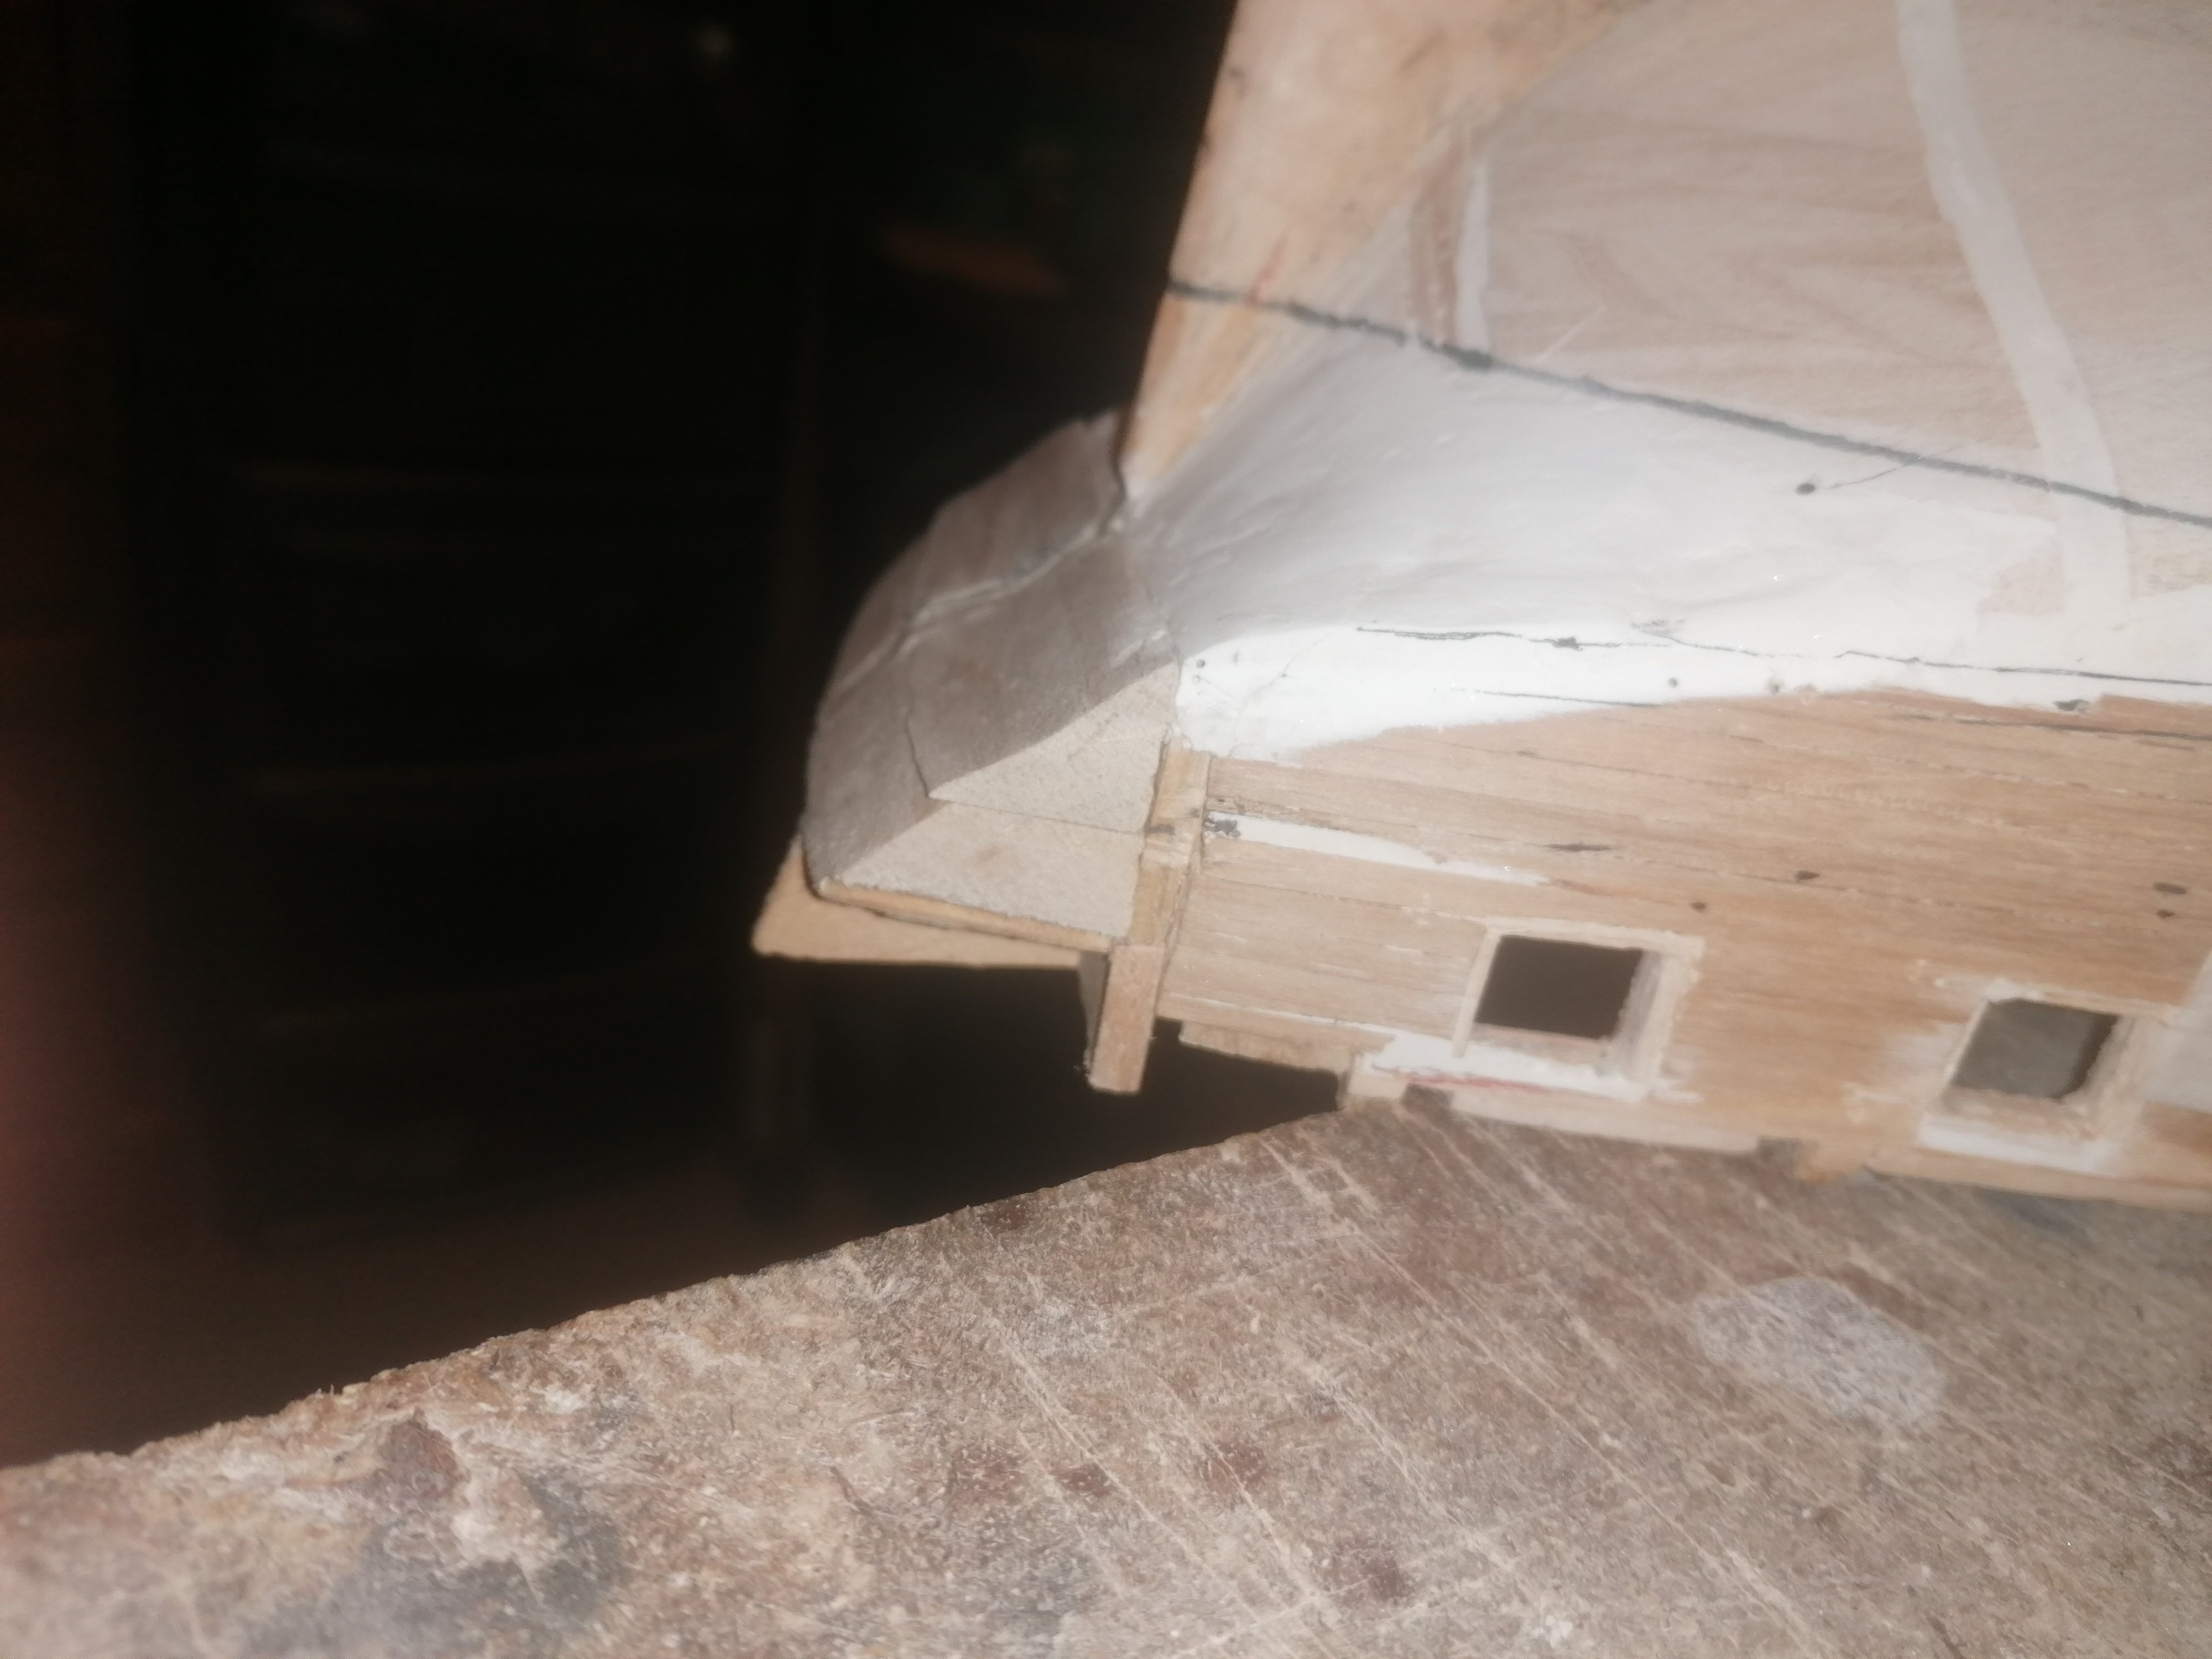
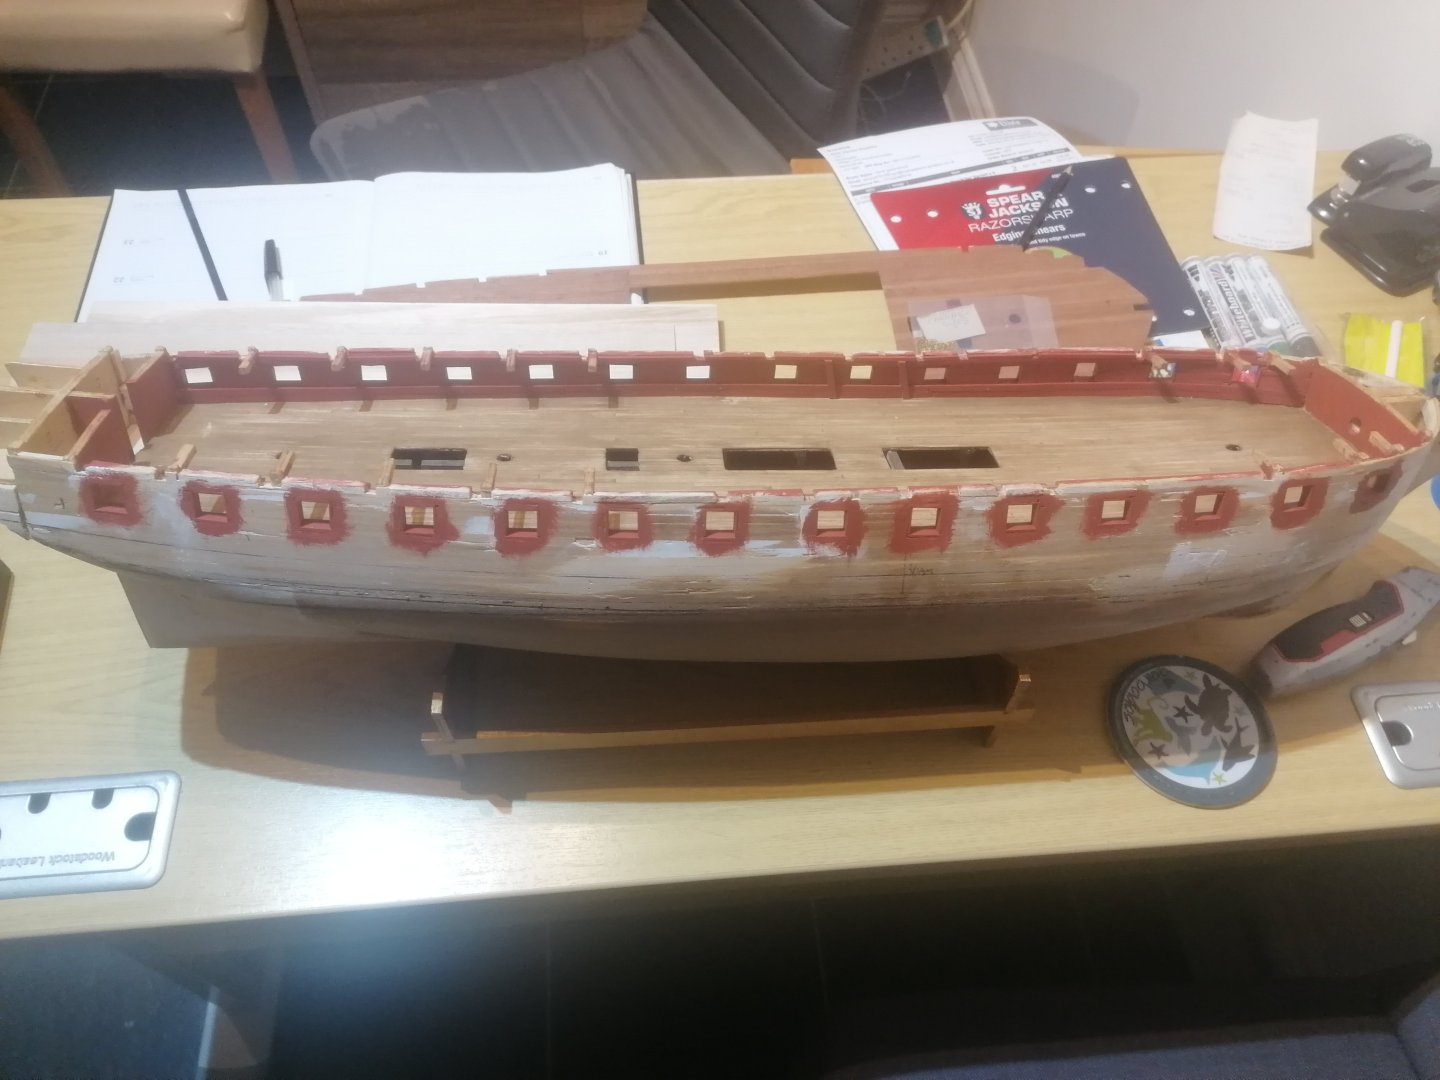
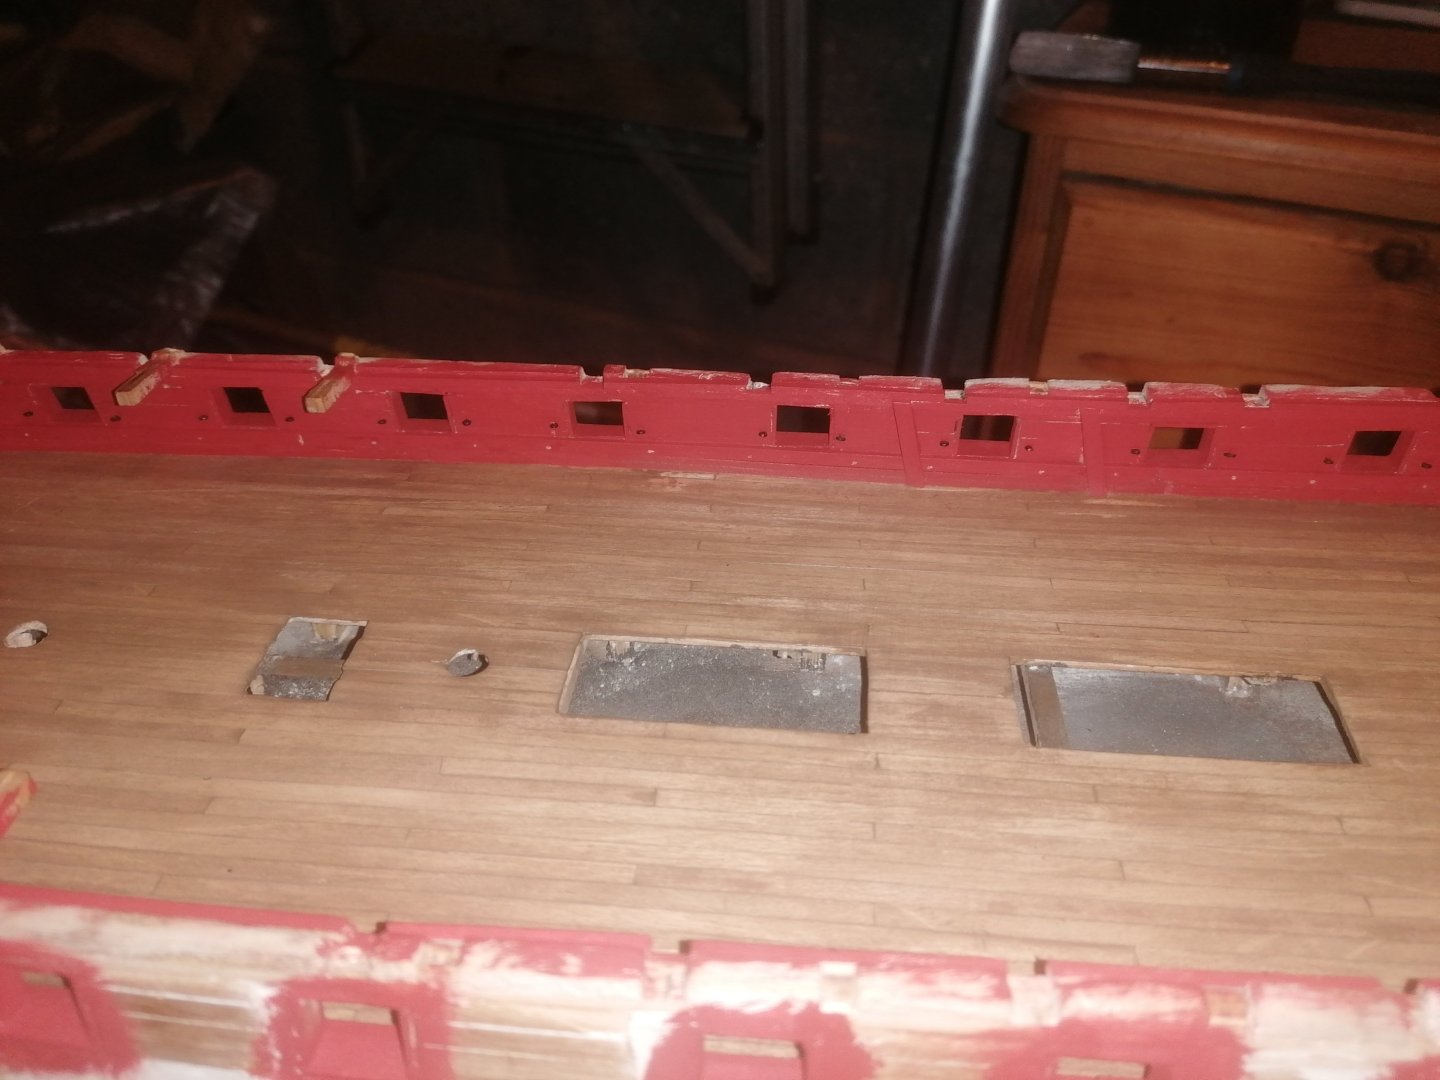
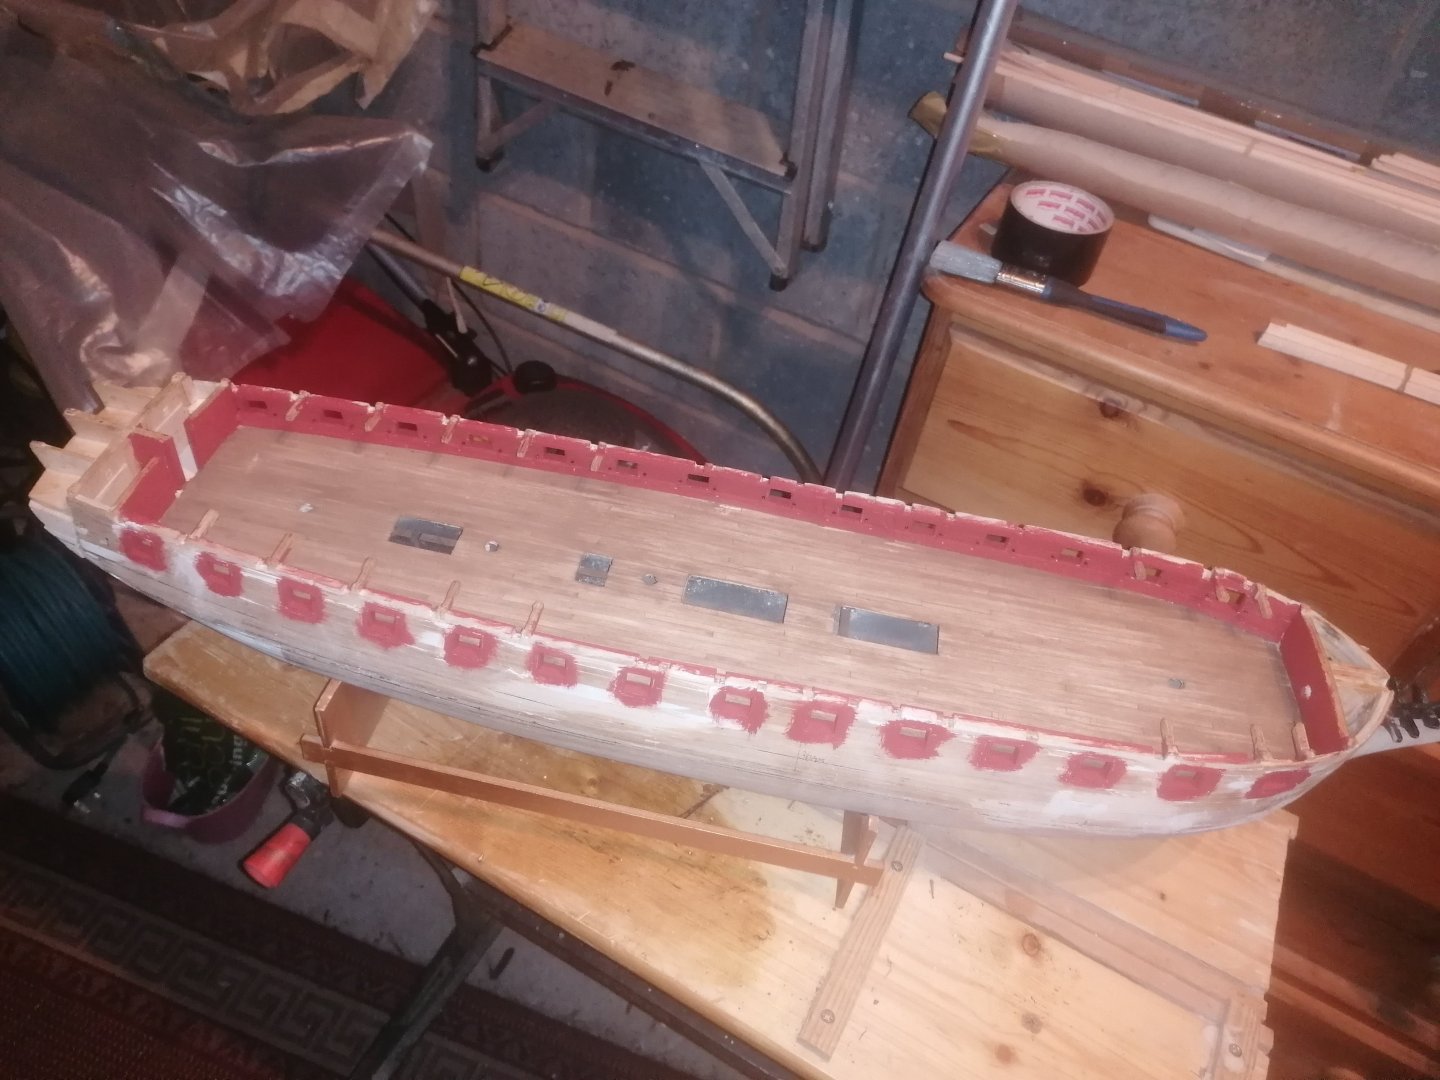
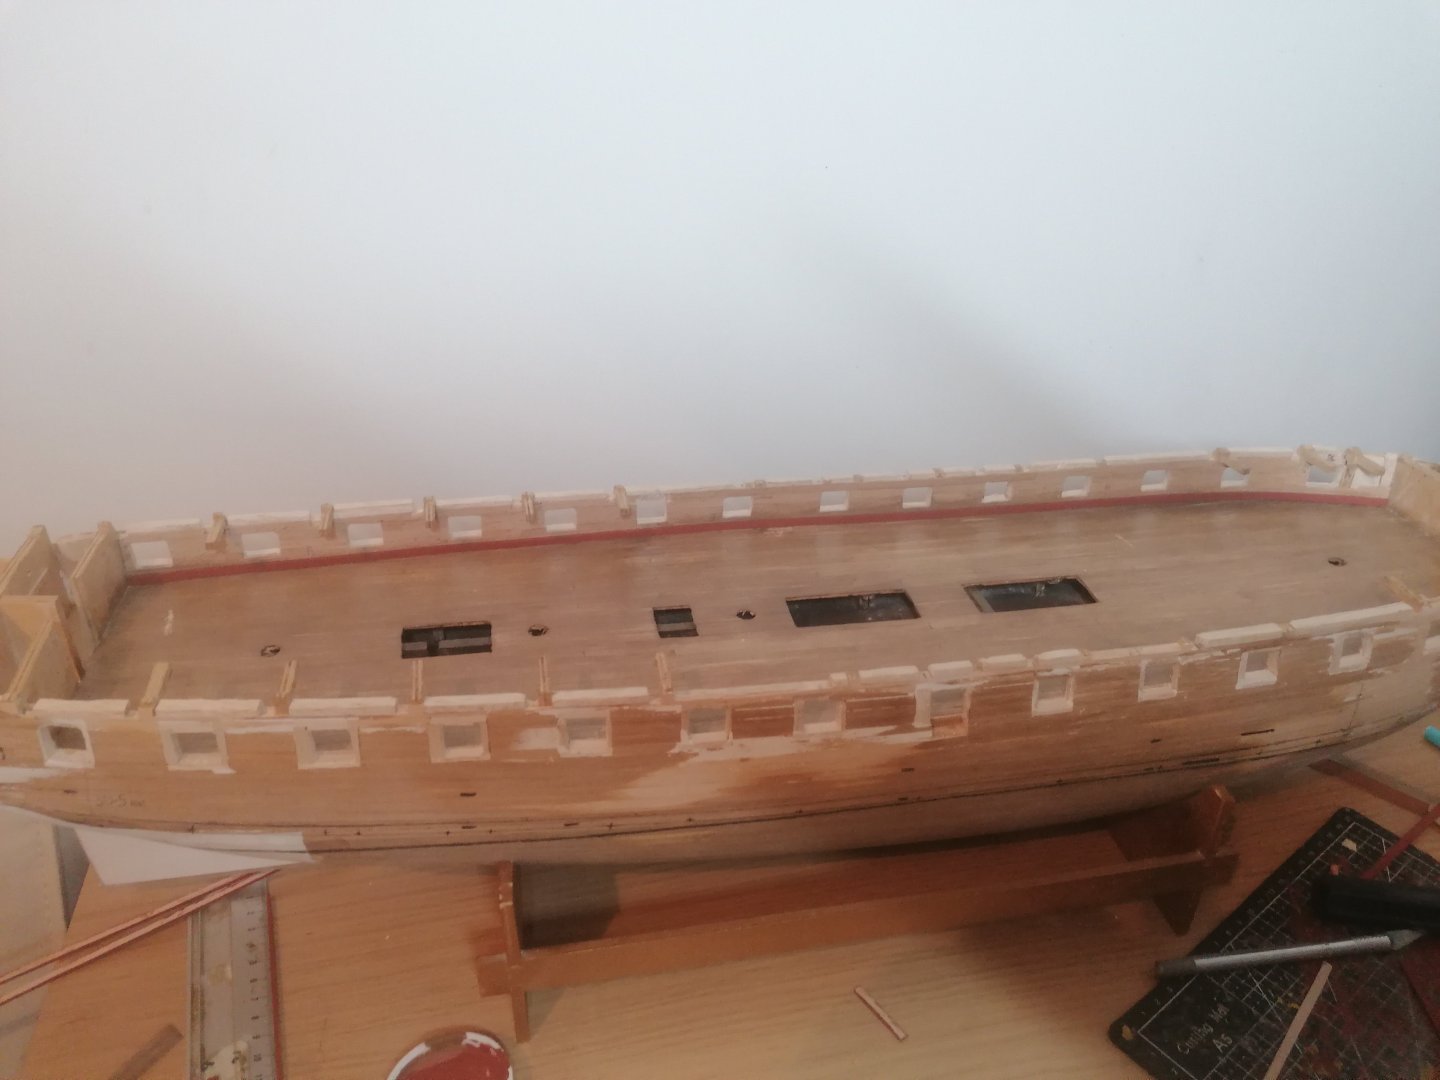
Finally, I am back with an update, I just haven't had the time for a while. I have achieved a decent amount during this time. The gun ports have been framed as well as I can achieve. They are not perfect but they are, I think pretty much ok considering. To aid with getting the dimensions of the gunports correct, I bought electronic callipers. As they were quite cheap, I tested them on known sized items and they were spot on. I now wish I had them earlier as they would have been even more useful. I measured each of the gunports and found 1 or 2 were slightly larger than they should have been but the rest were either slightly smaller or correct. These were easy to fix but the larger ones would mean the linings may be more visible on the inside. I didn't have much choice other than to add a little extra thickness but in the hope that they shouldn't be too noticable once the top deck is fitted and the guns are in place. I pinned a strip of 1.5 X 4mm strip on top of the lower spirketting strip to act as a guide for the lower sills and, once I had either fine sanded or filled the gap, I glued the lower sills in place and sanded them flush with the hull. I then added the sides and finally the top. This was then lightly sanded inside and, filler applied to the outer hull and then also sanded smooth. Once this was completed I marked a small strip of scrap 2 x 4mm to line up with the edge of the gunports and drilled the holes for the eyepins for the out haul tackle followed by fitting the upper run of spirketting. There seem to be many variations of how and where the breech rope should be attached but I have decided to fit the eyepins 6mm above the deck. My logic being that, when the gun is fired, if the breech rope is too high up then the rear of the carraige could lift up. (As this build is beginning to feel like a prototype, any thoughts/advice are welcome.) Once these were drilled, I added the skid beam clamps using two 2mm wide strips. the lower one is 1.5mm X 2 running beneath the the deck beams and the second of 2 X 2mm running above this but between the beams. Not that it will be seen though. Once completed I painted the sides with the red ochre along with the insides of the gunports and outside edges. I still need to apply a second coat yet. I started to turn my attention now to planking the hull above the wale but realised I cant do this before I have completed the stem which I have sanded ready for the planking. Unfortunately, the walnut strip I ordered has a heavy grain and is much lighter in colour than I wanted. While I figured out what to do with this I started looking at the gun tackles. The 5mm rigging hooks are way too long to have on either end of the blocks and I can't spend a fortune on smaller ones so I started browsing online for an alternative. This will now have to be continued, hopefully tommorow, as I need to be getting to bed now. Here's some photos of where I have got to at this point. Cheers for now. David.


-
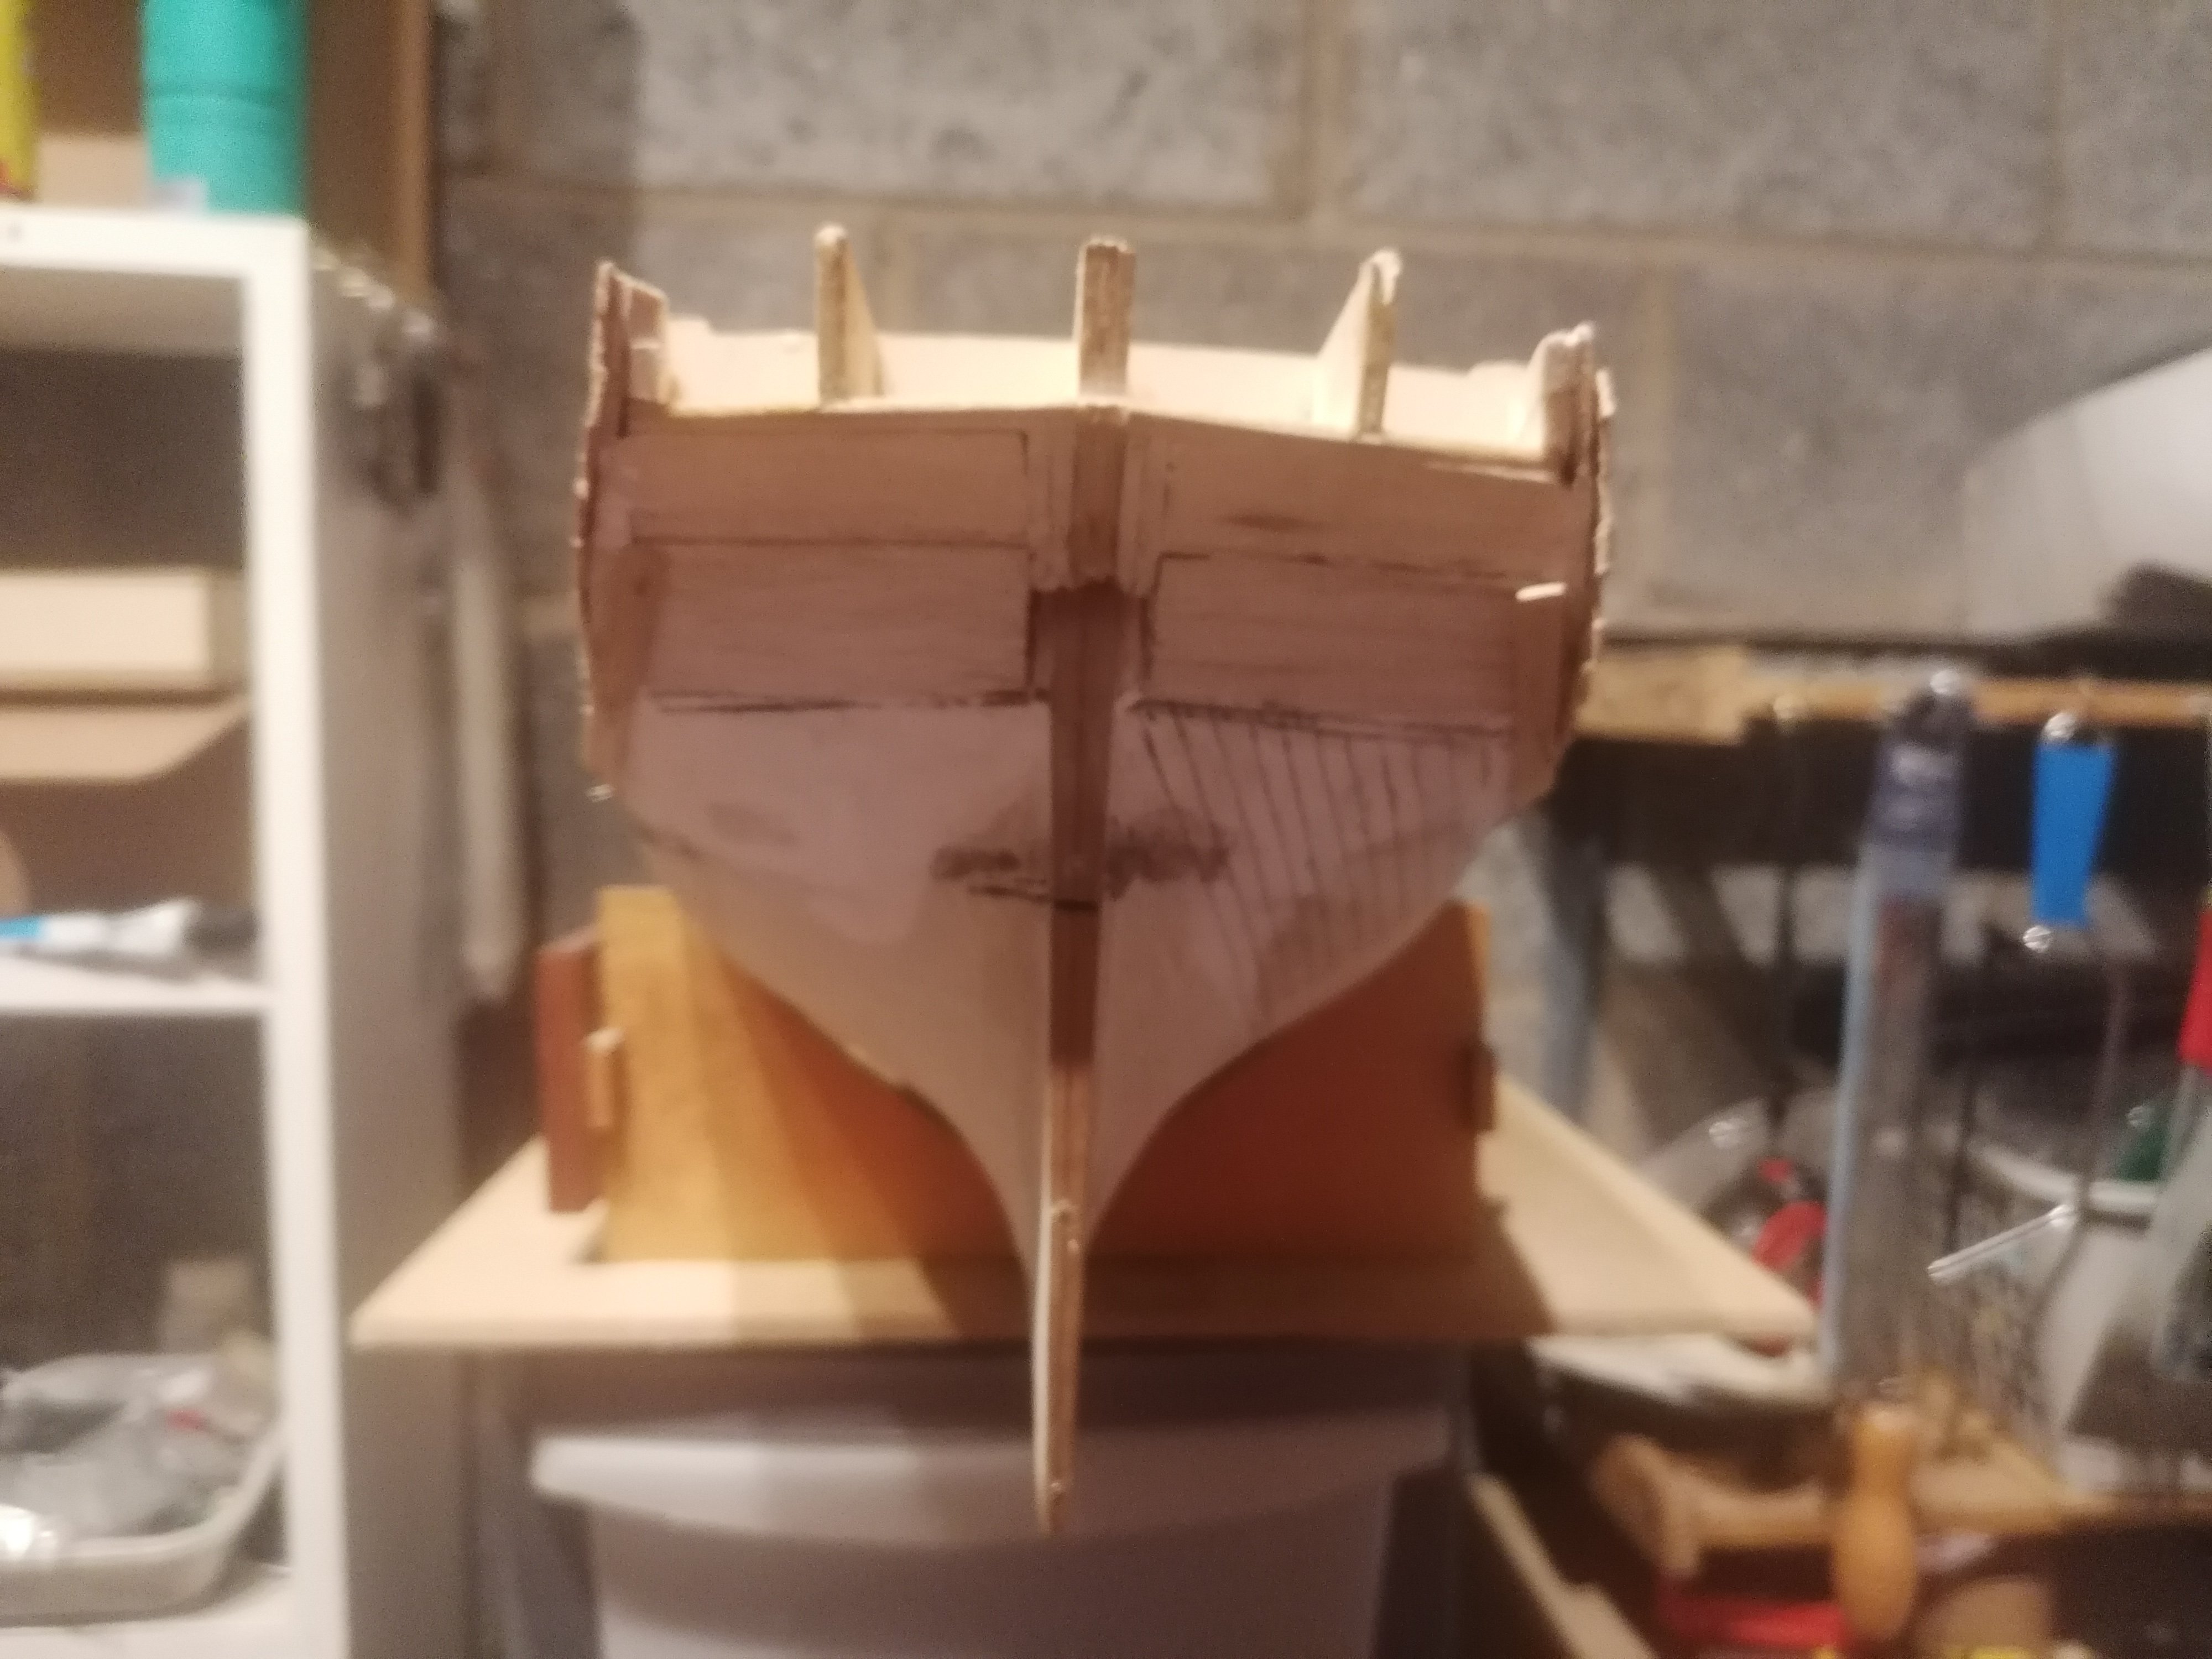
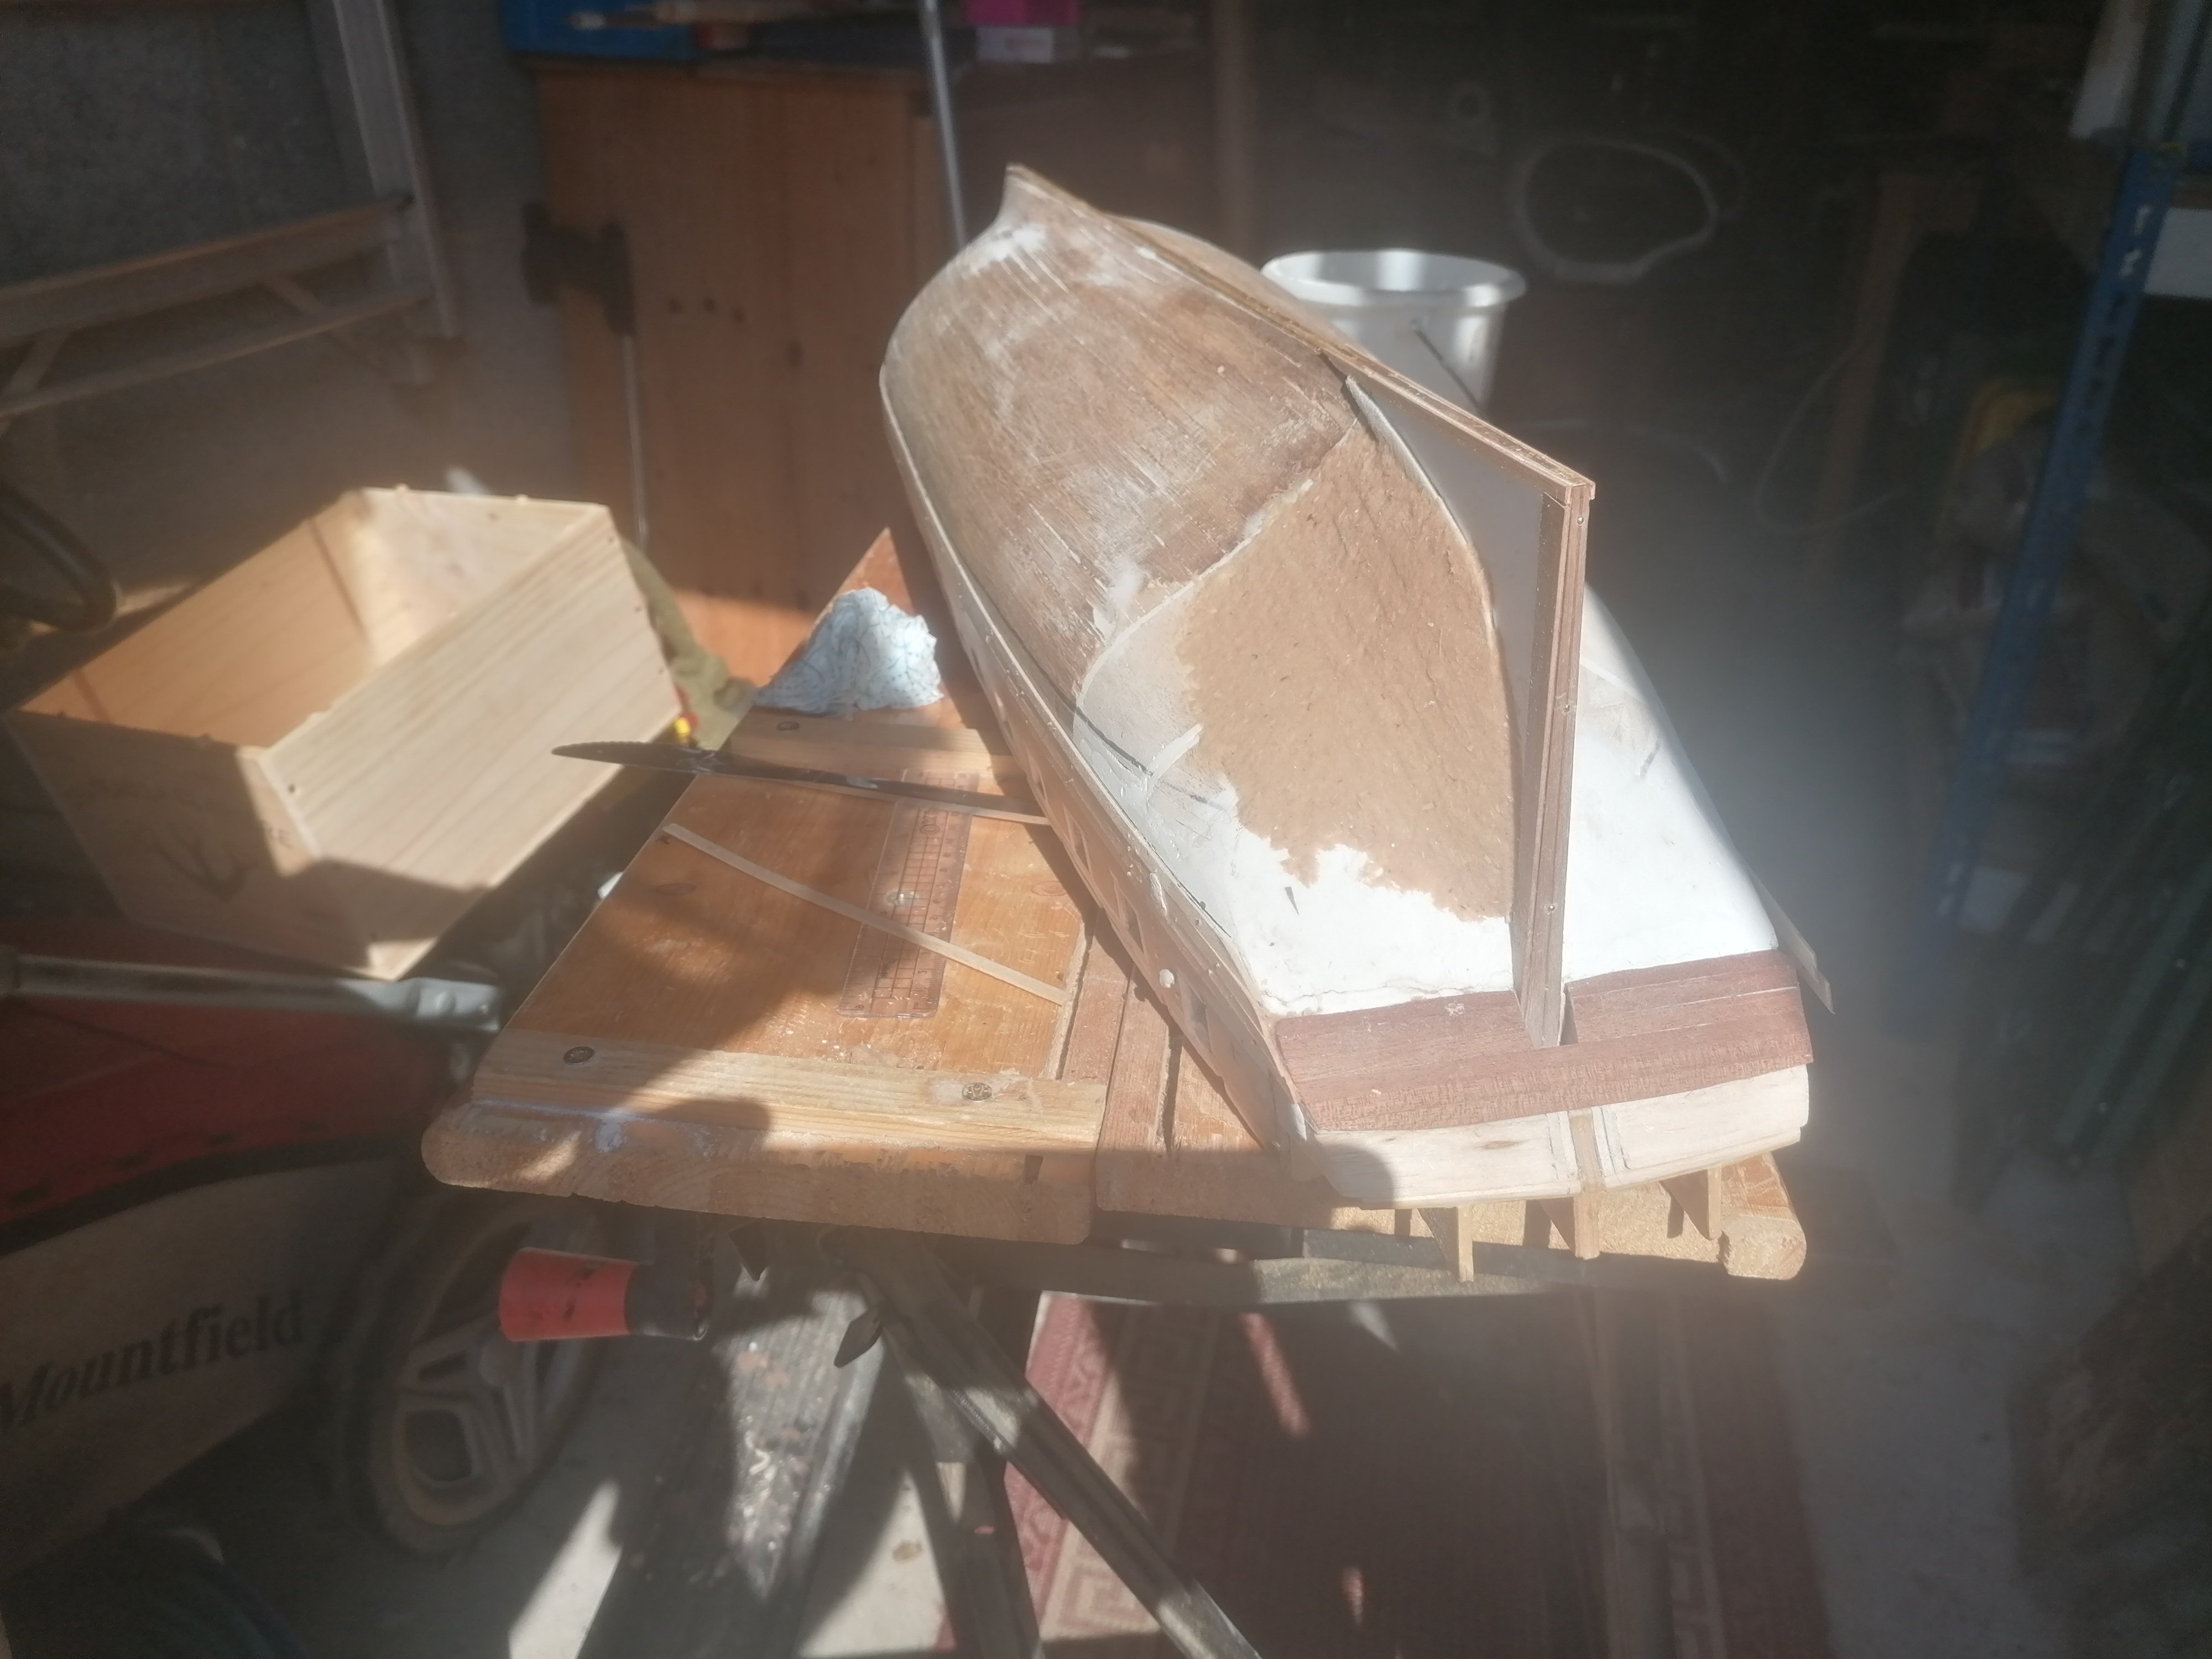
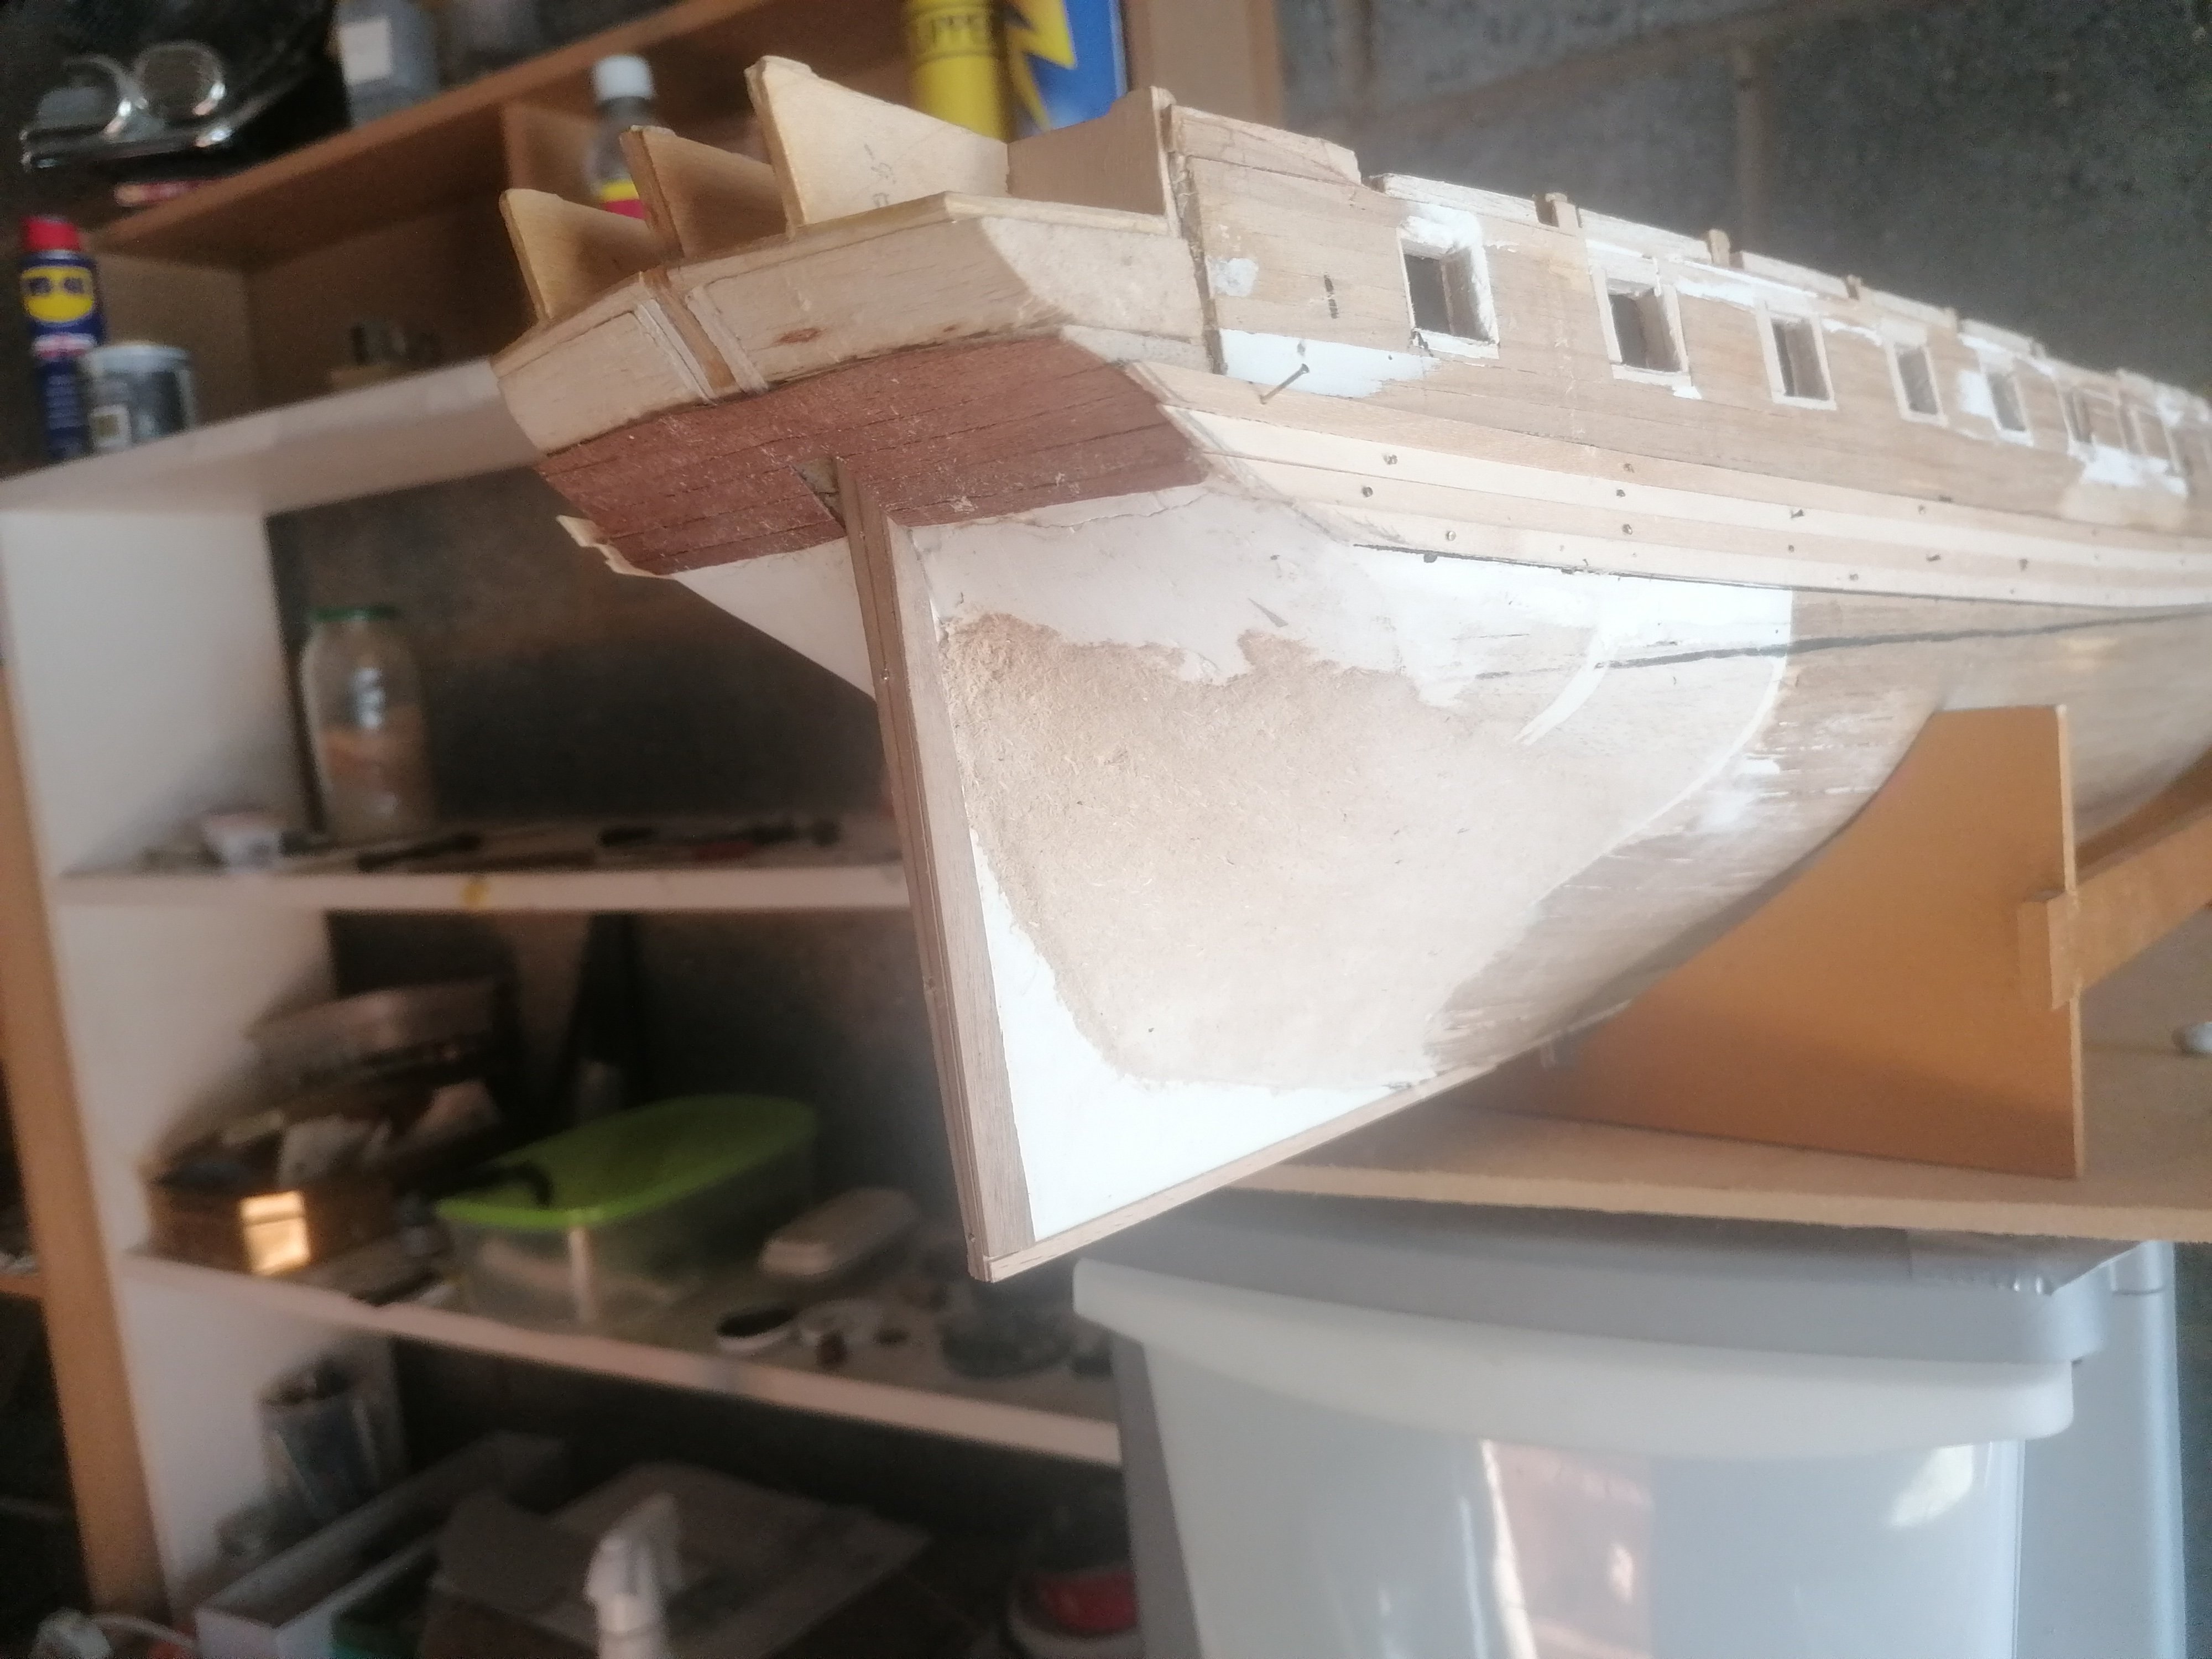
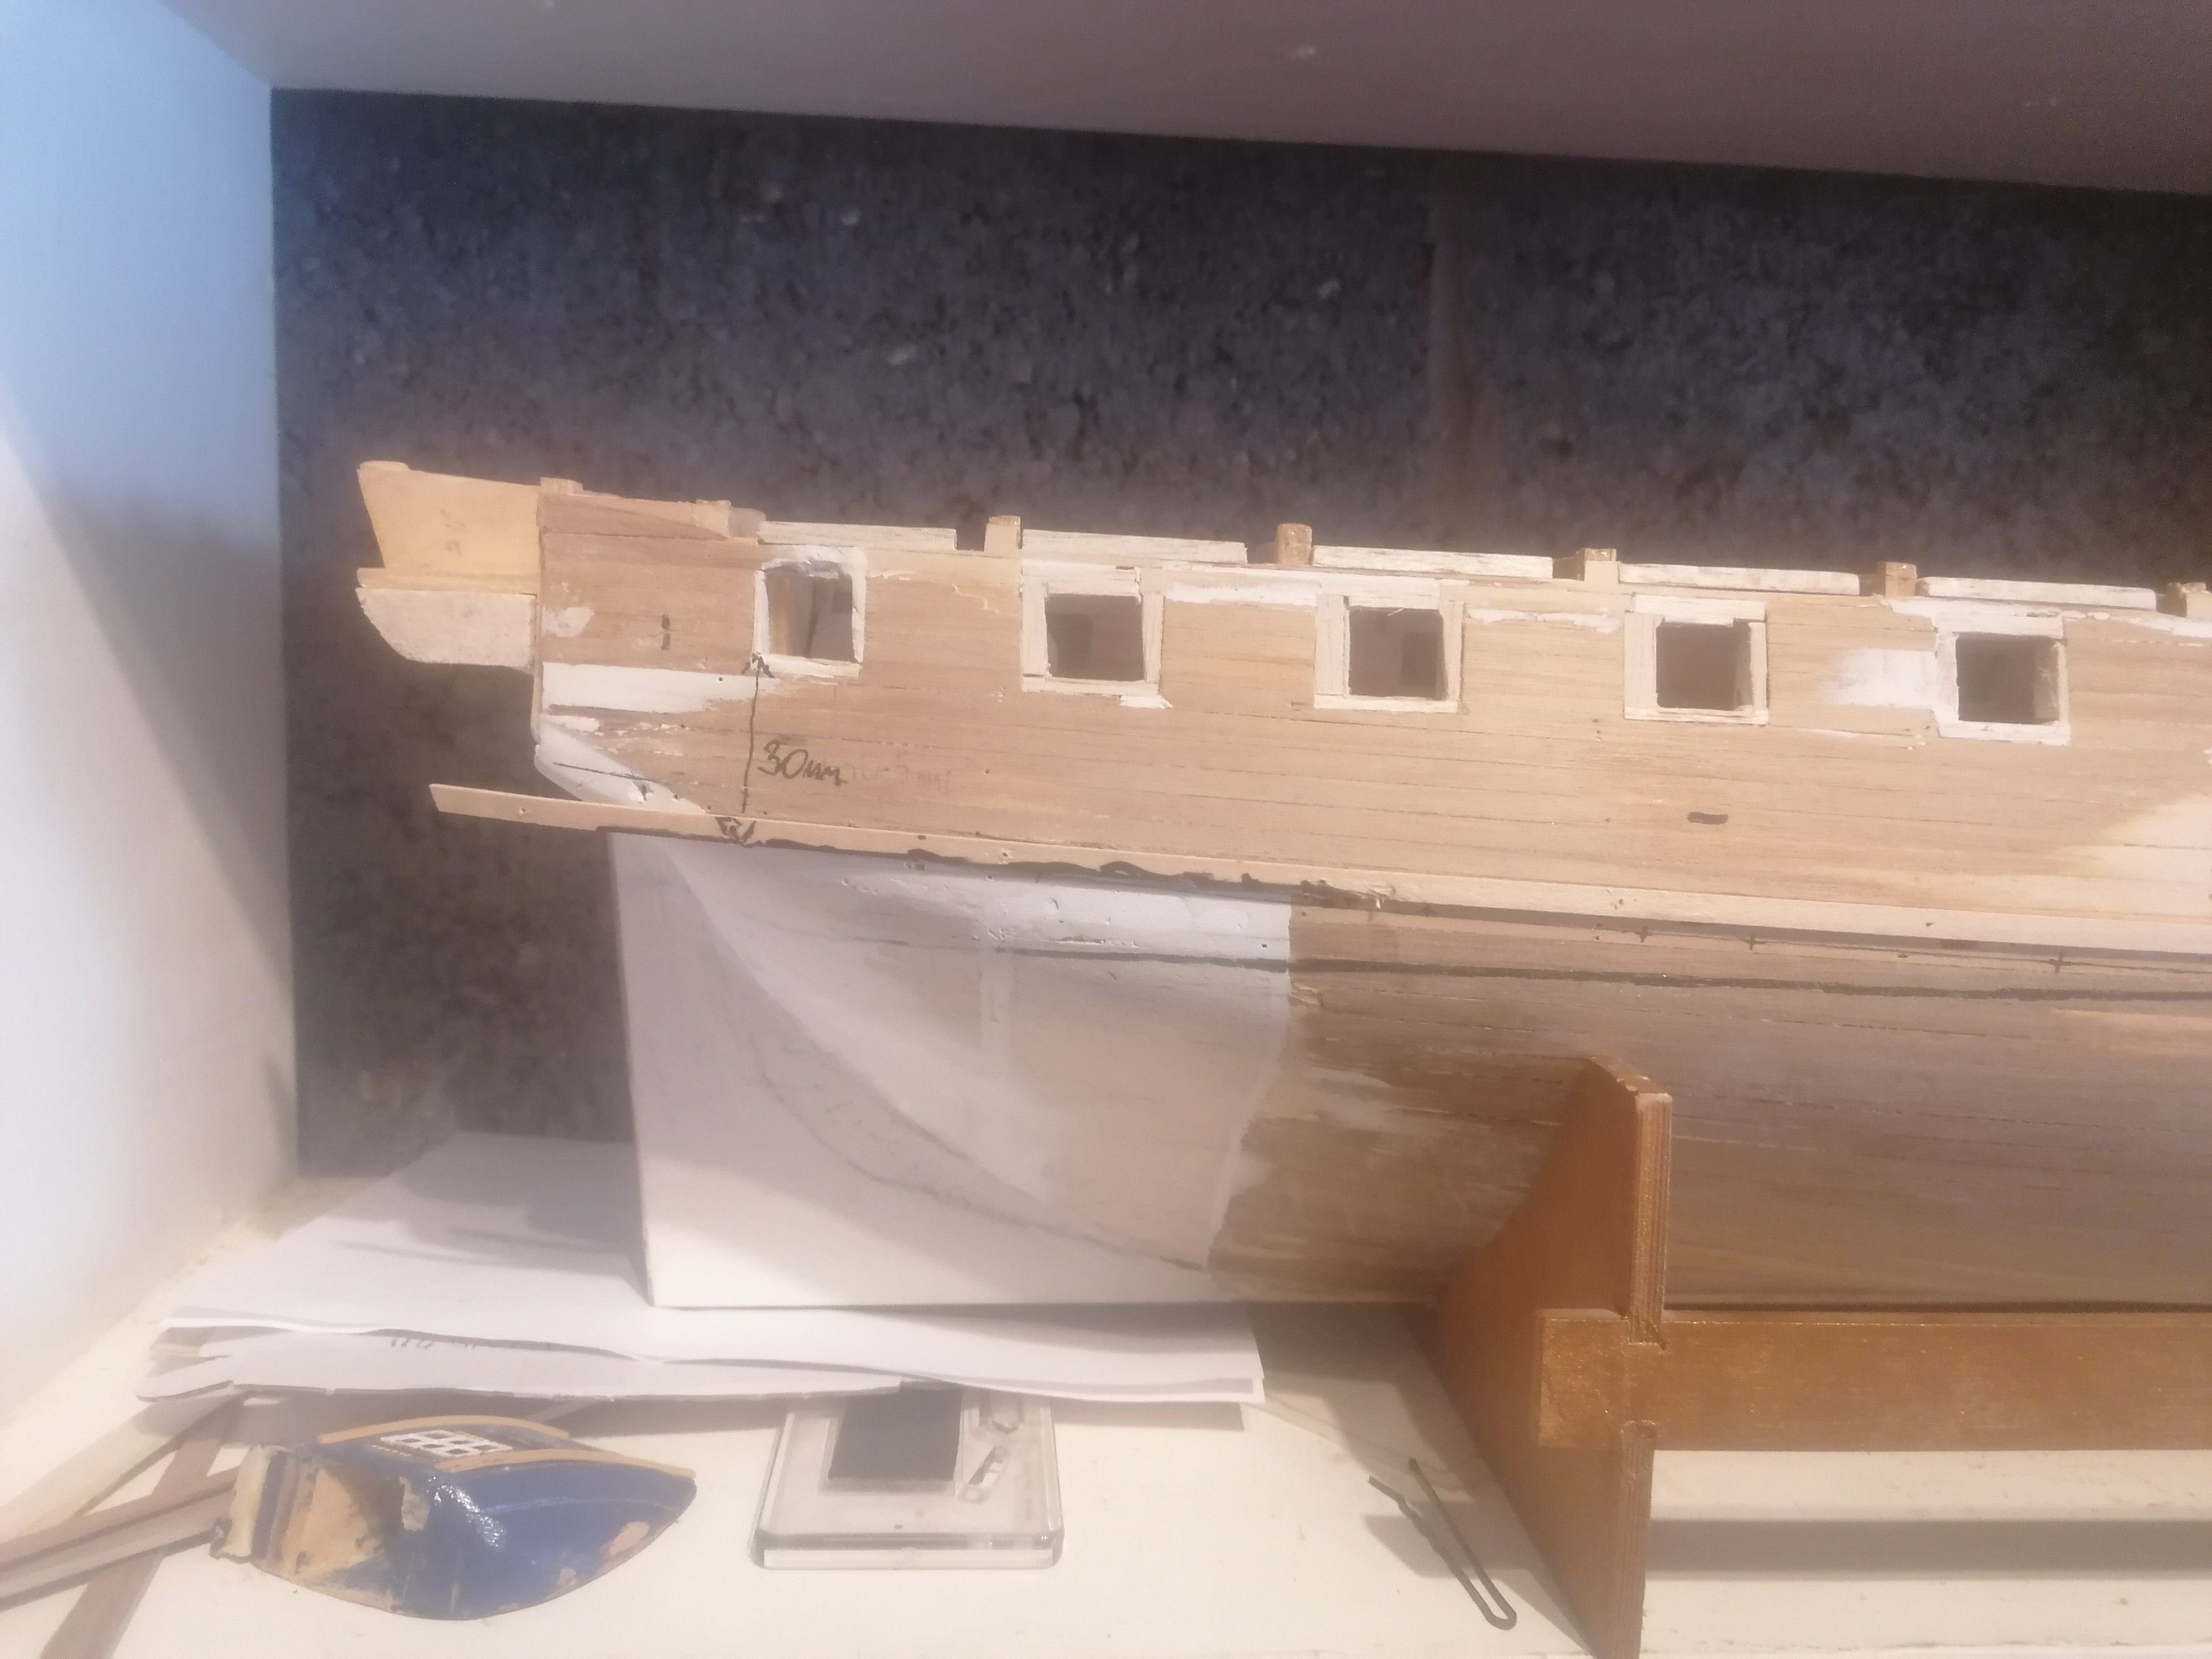
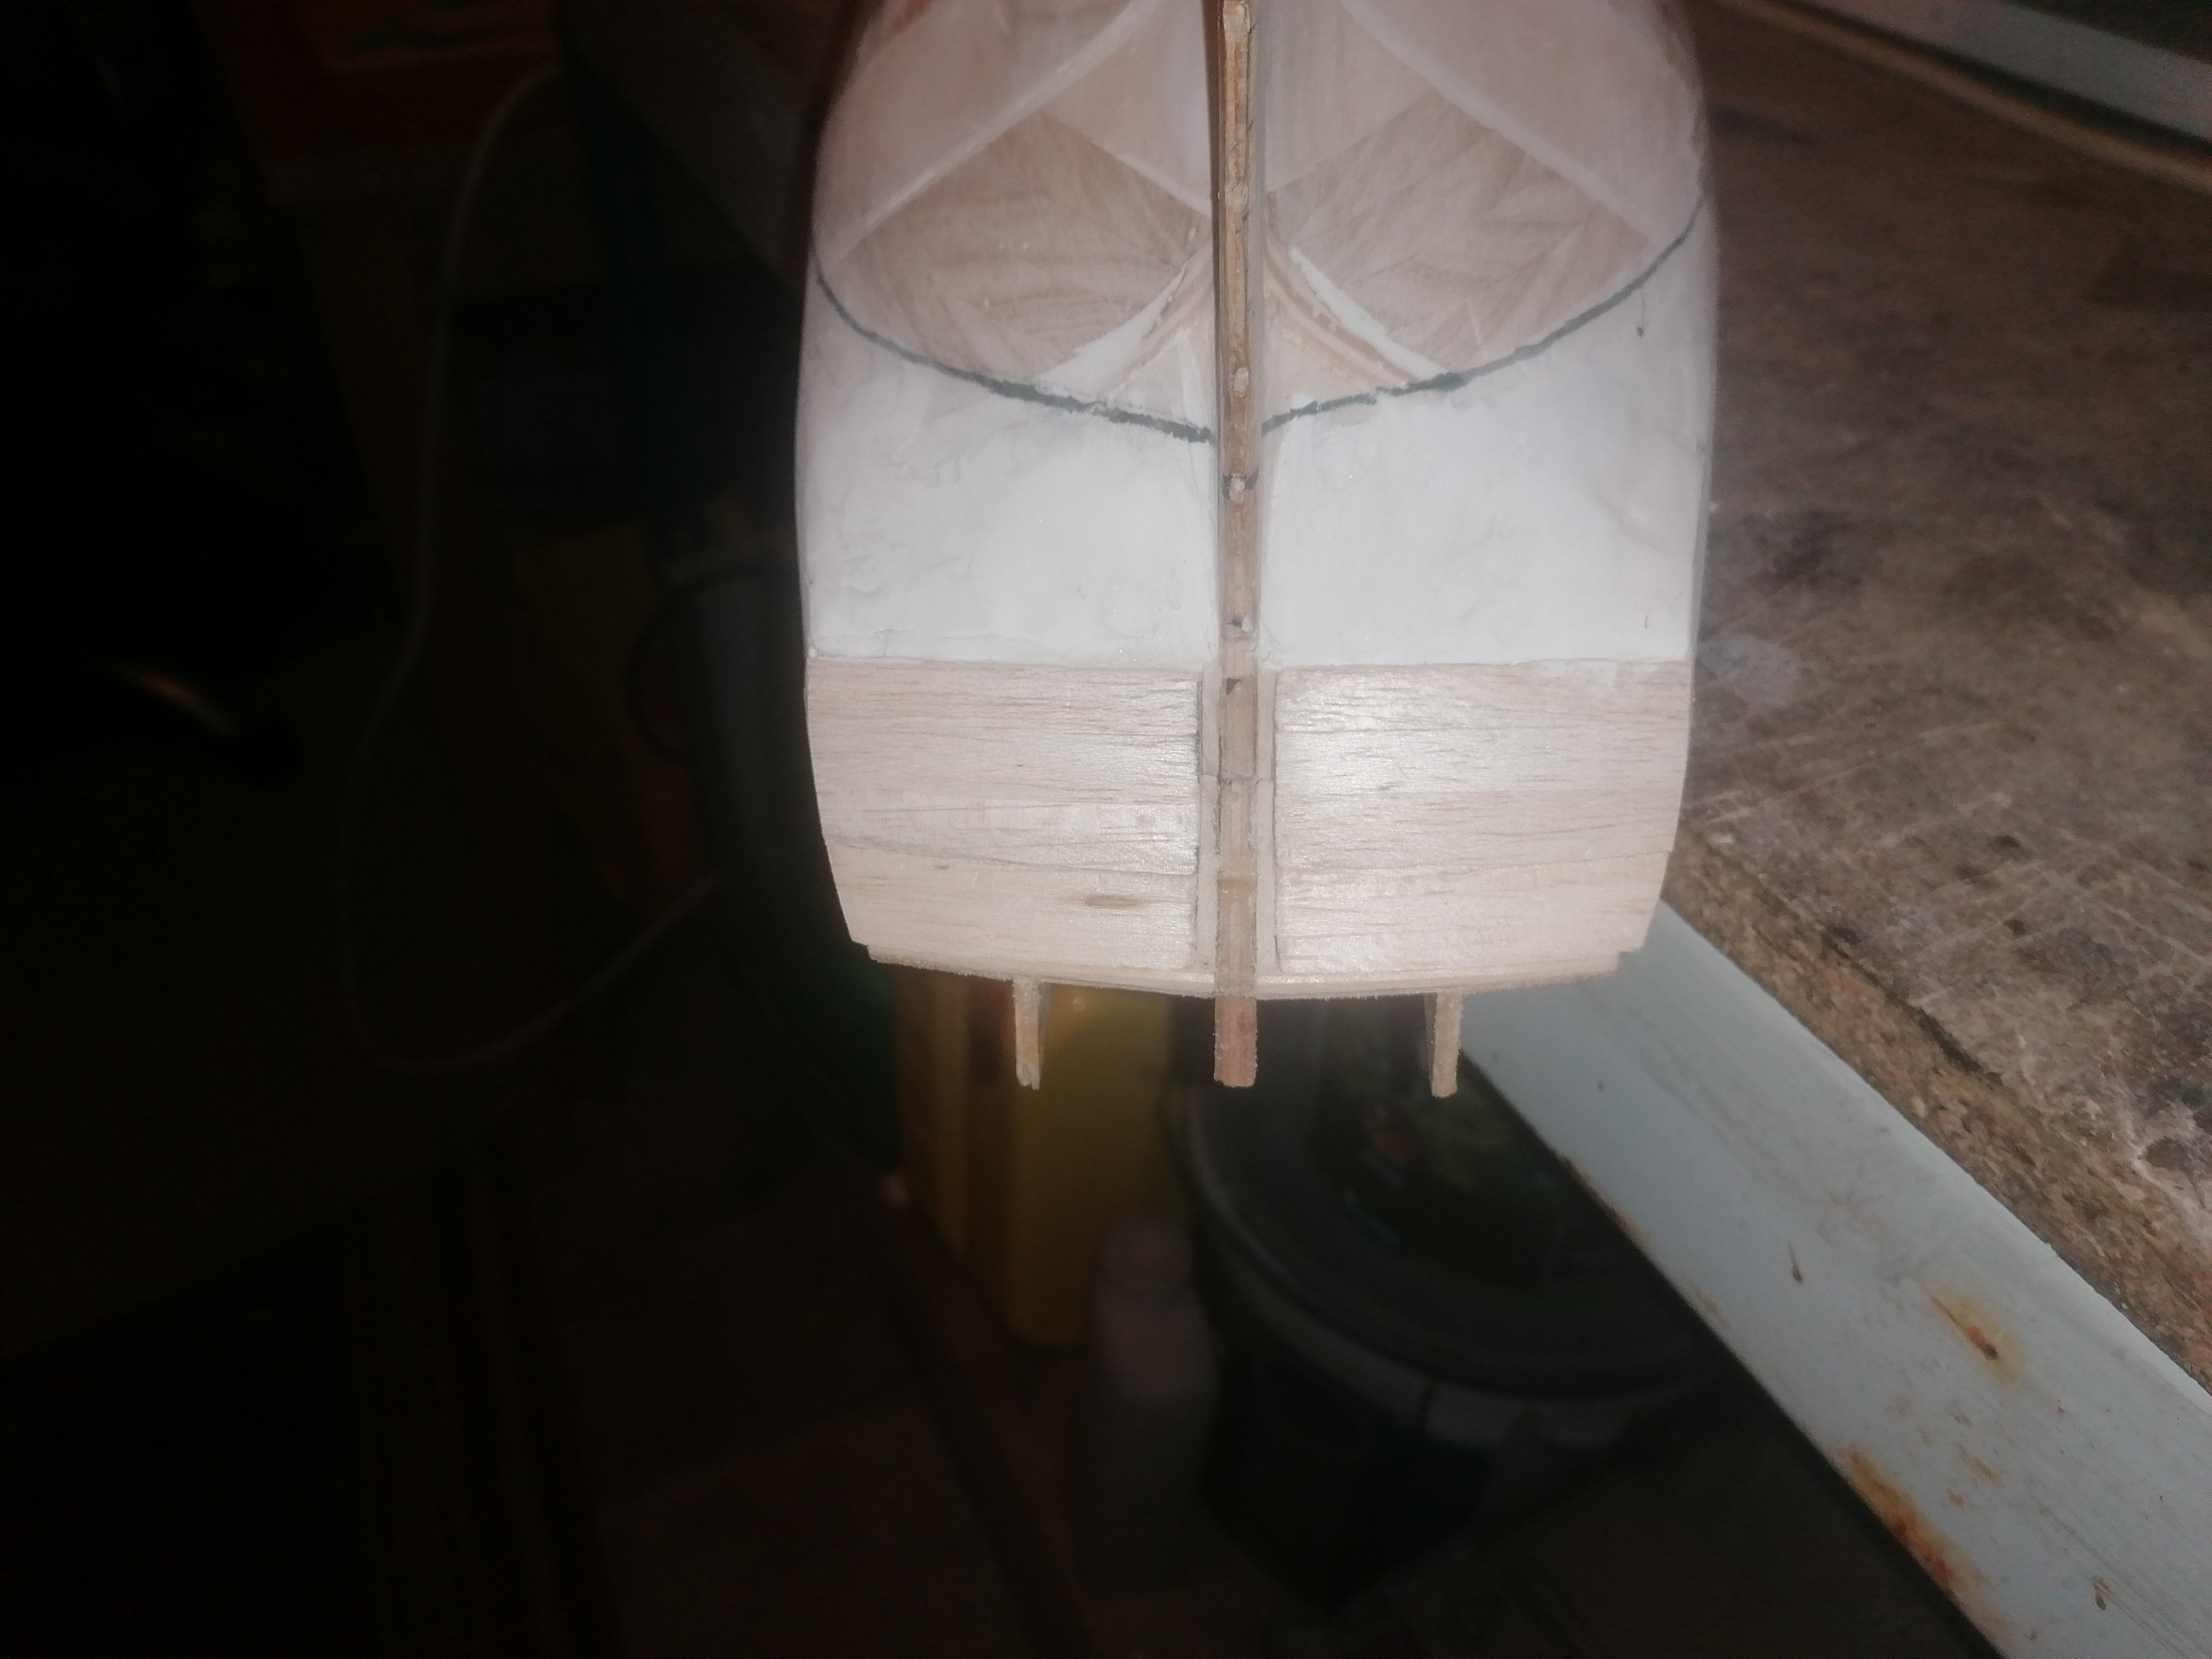
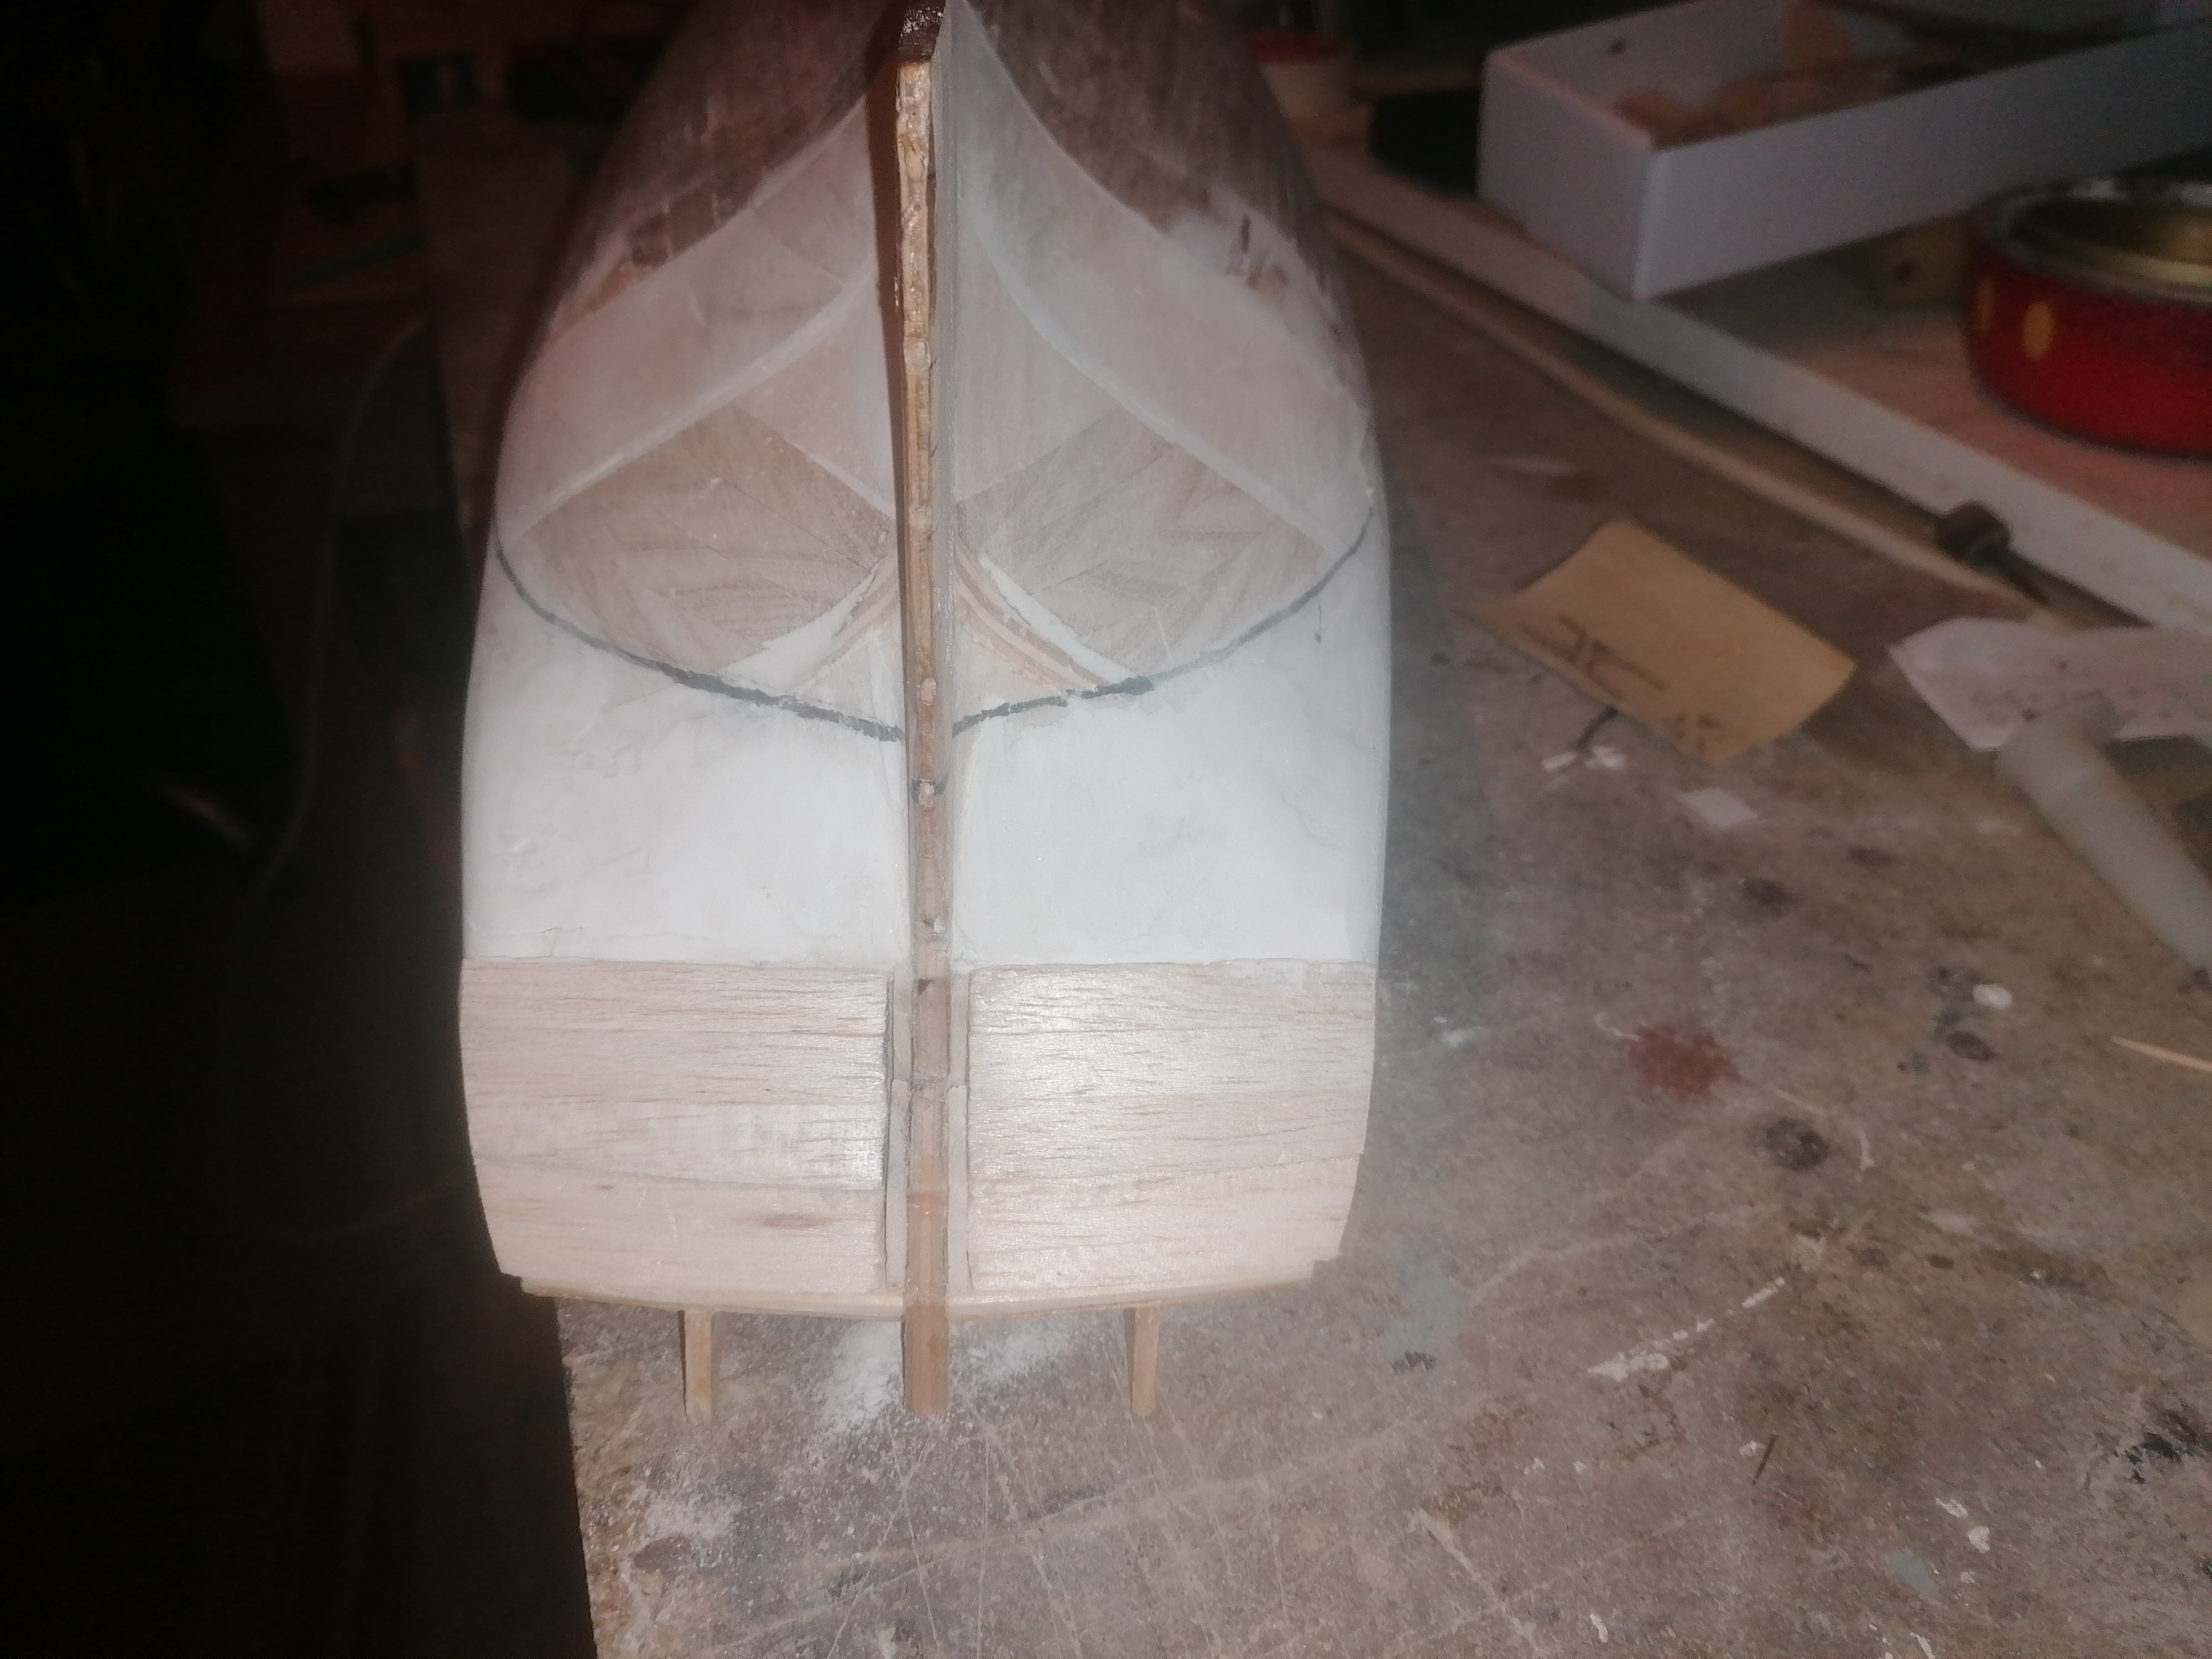
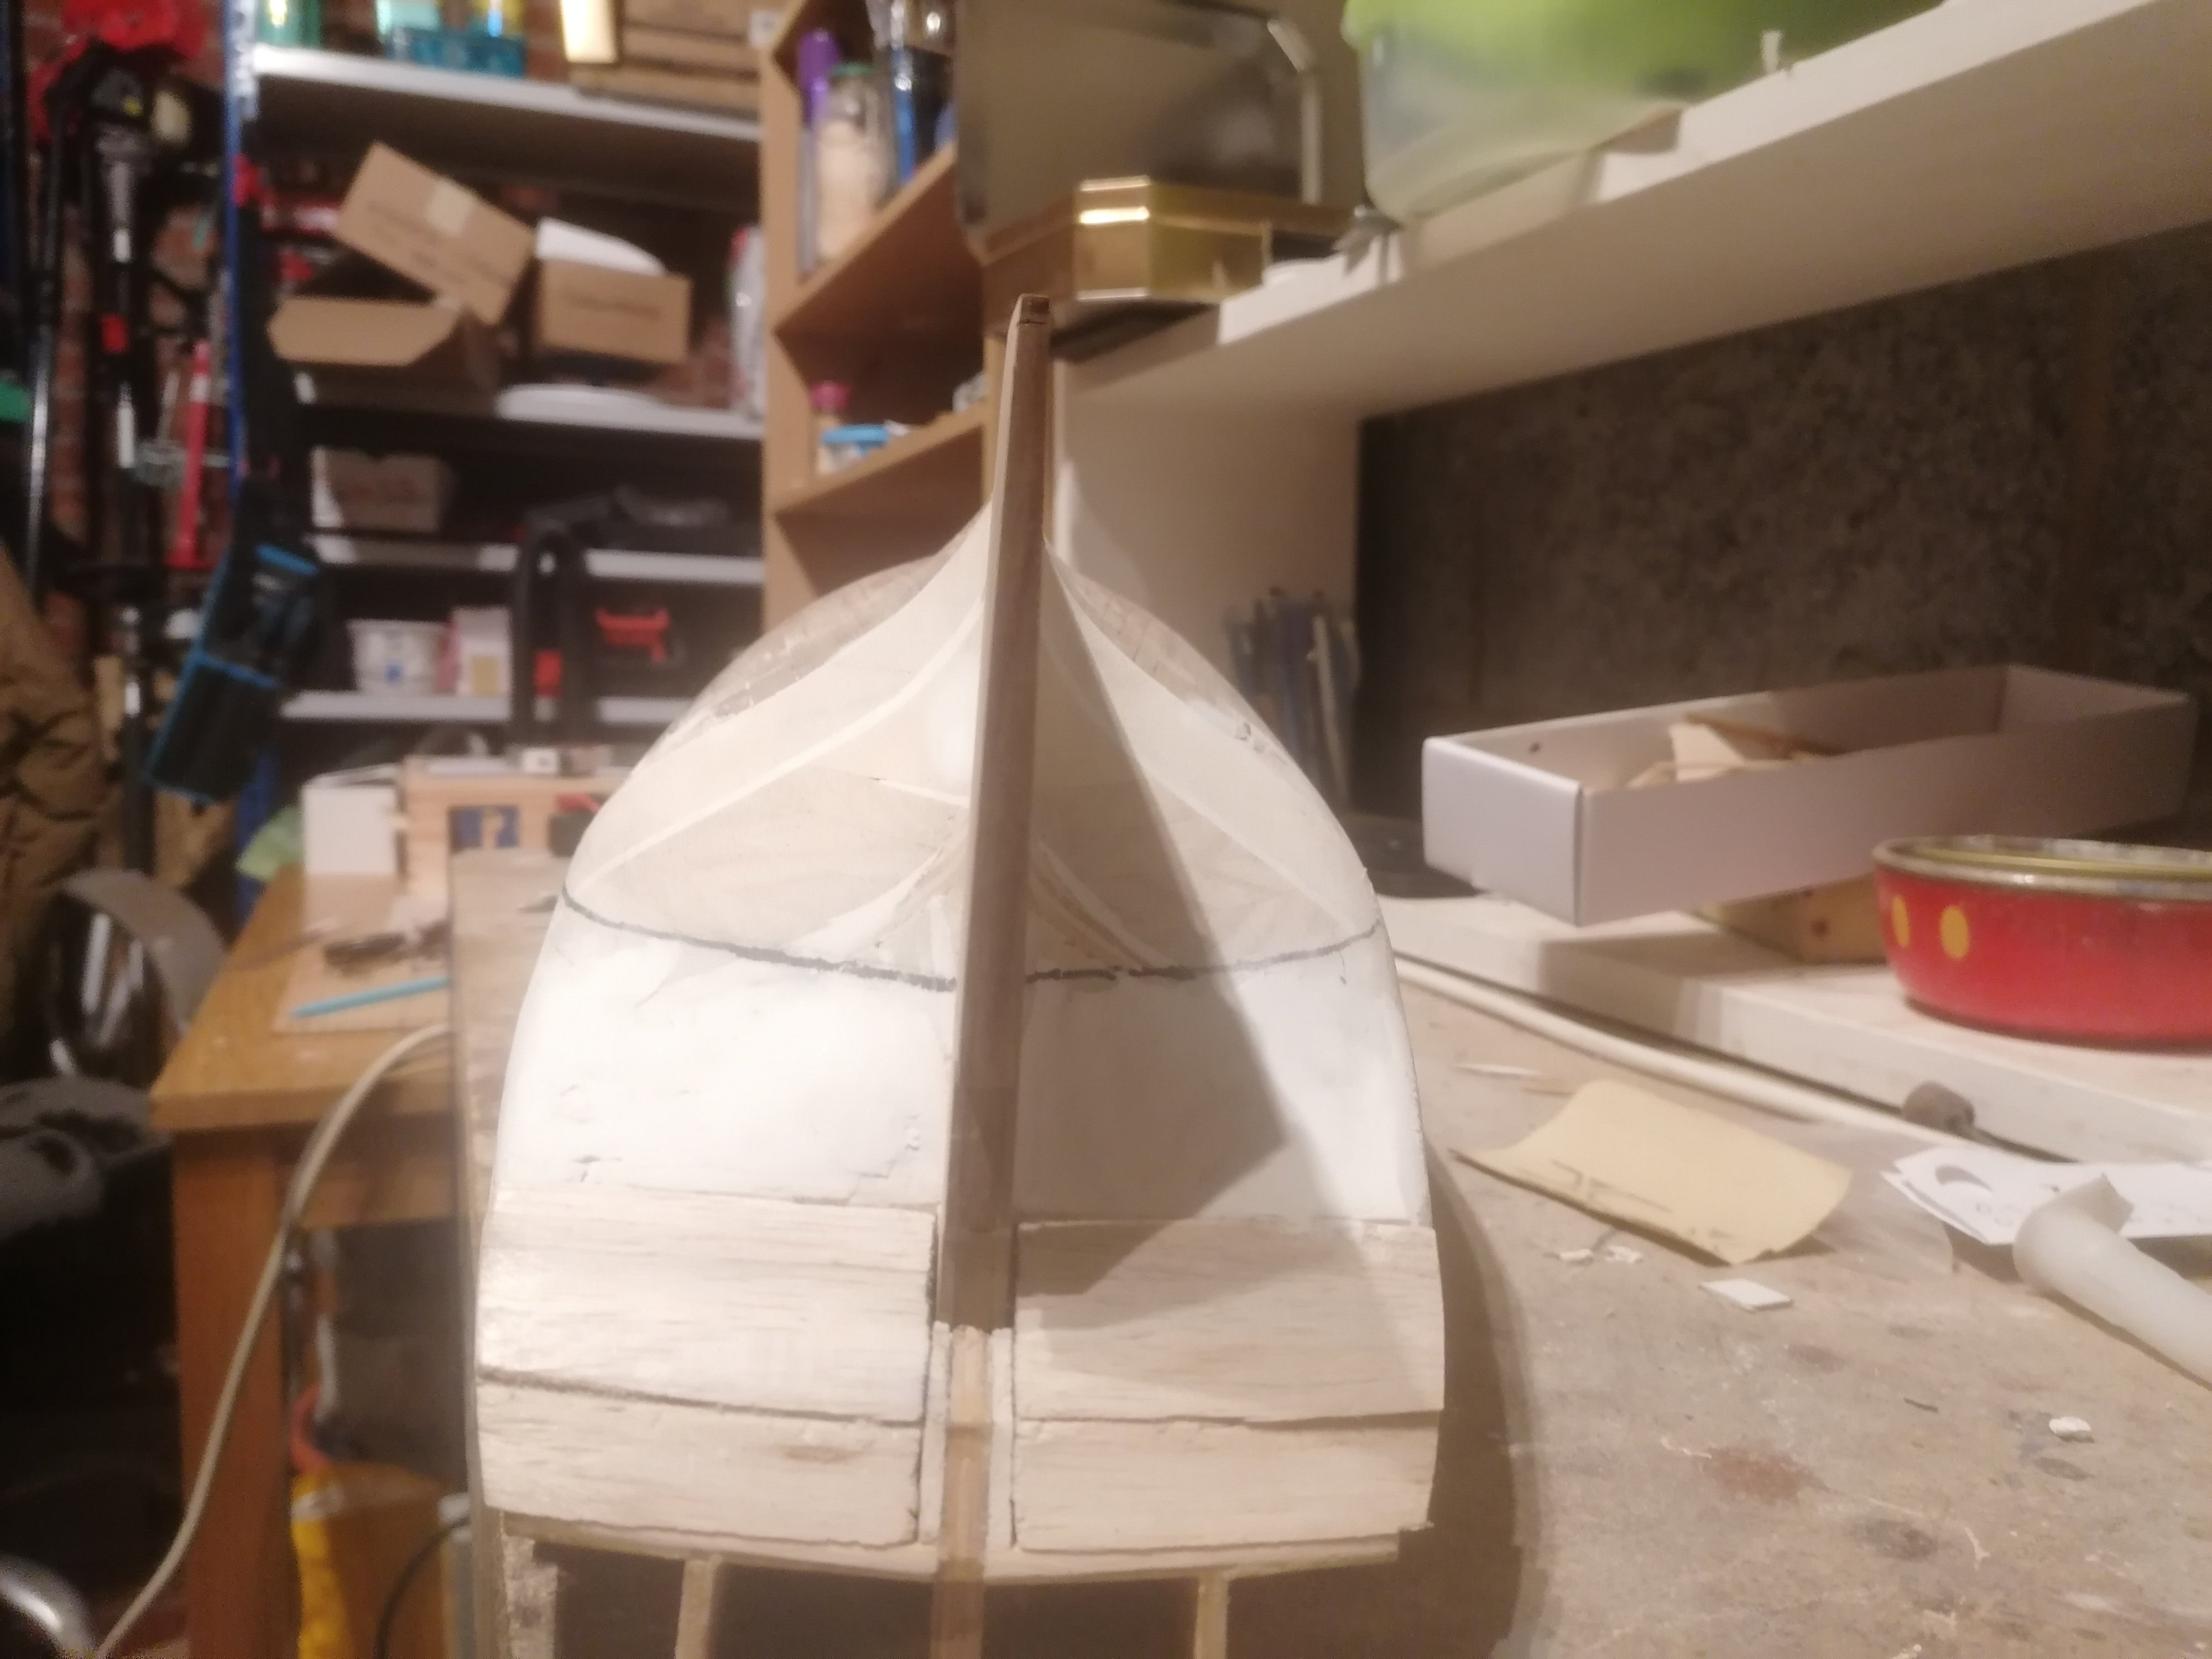
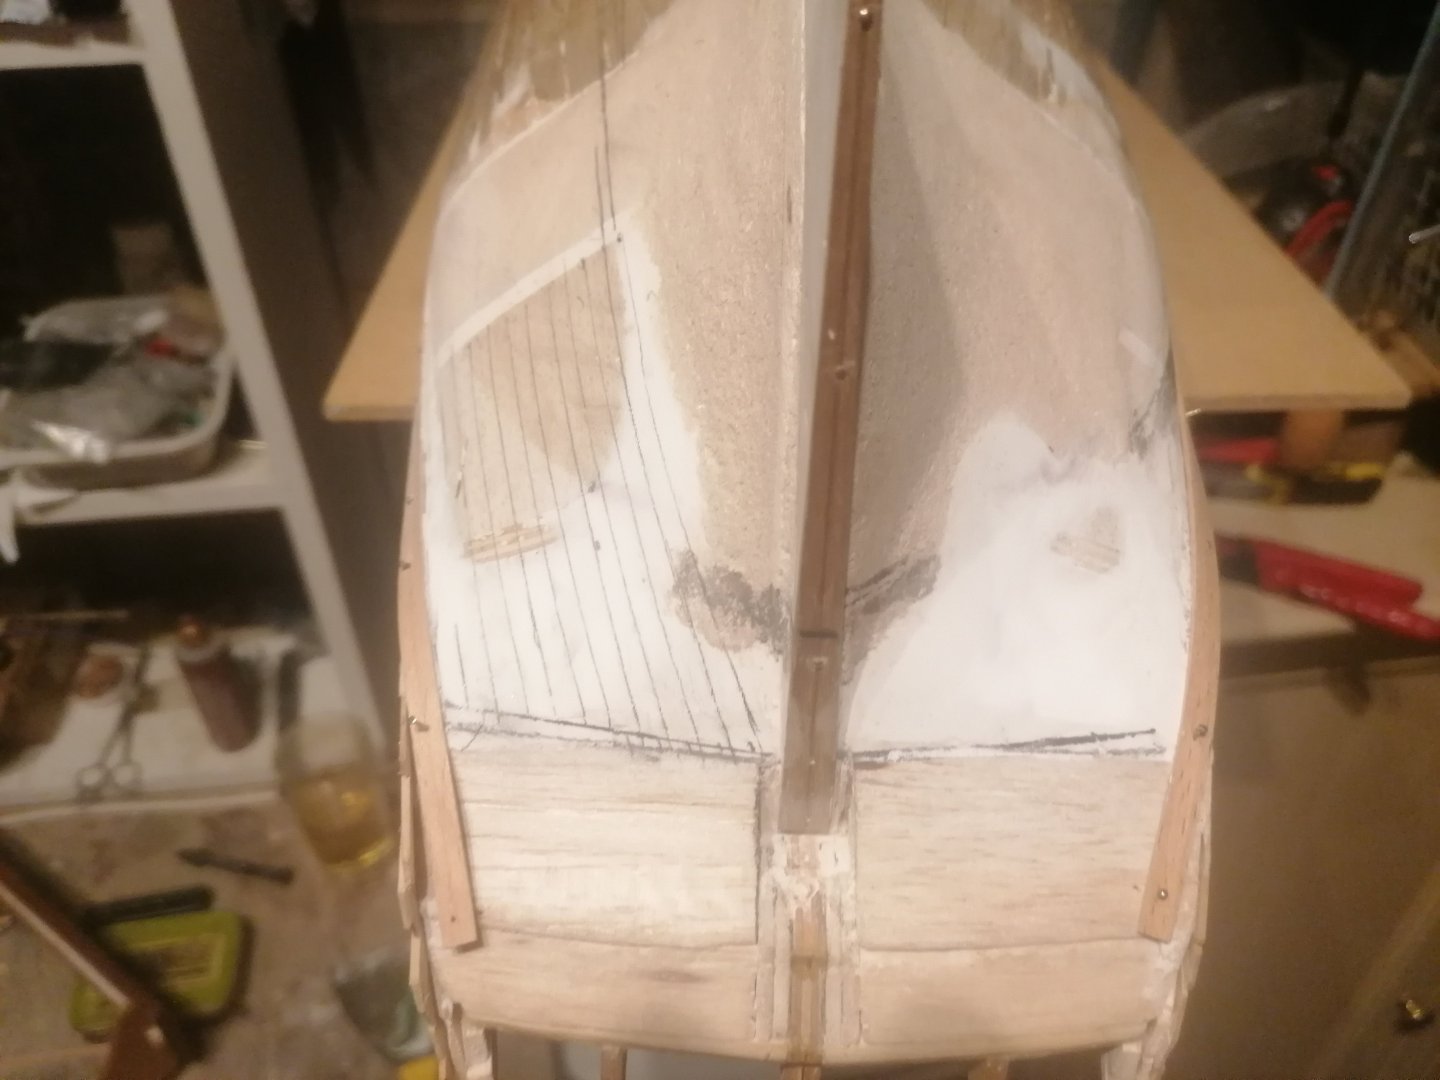
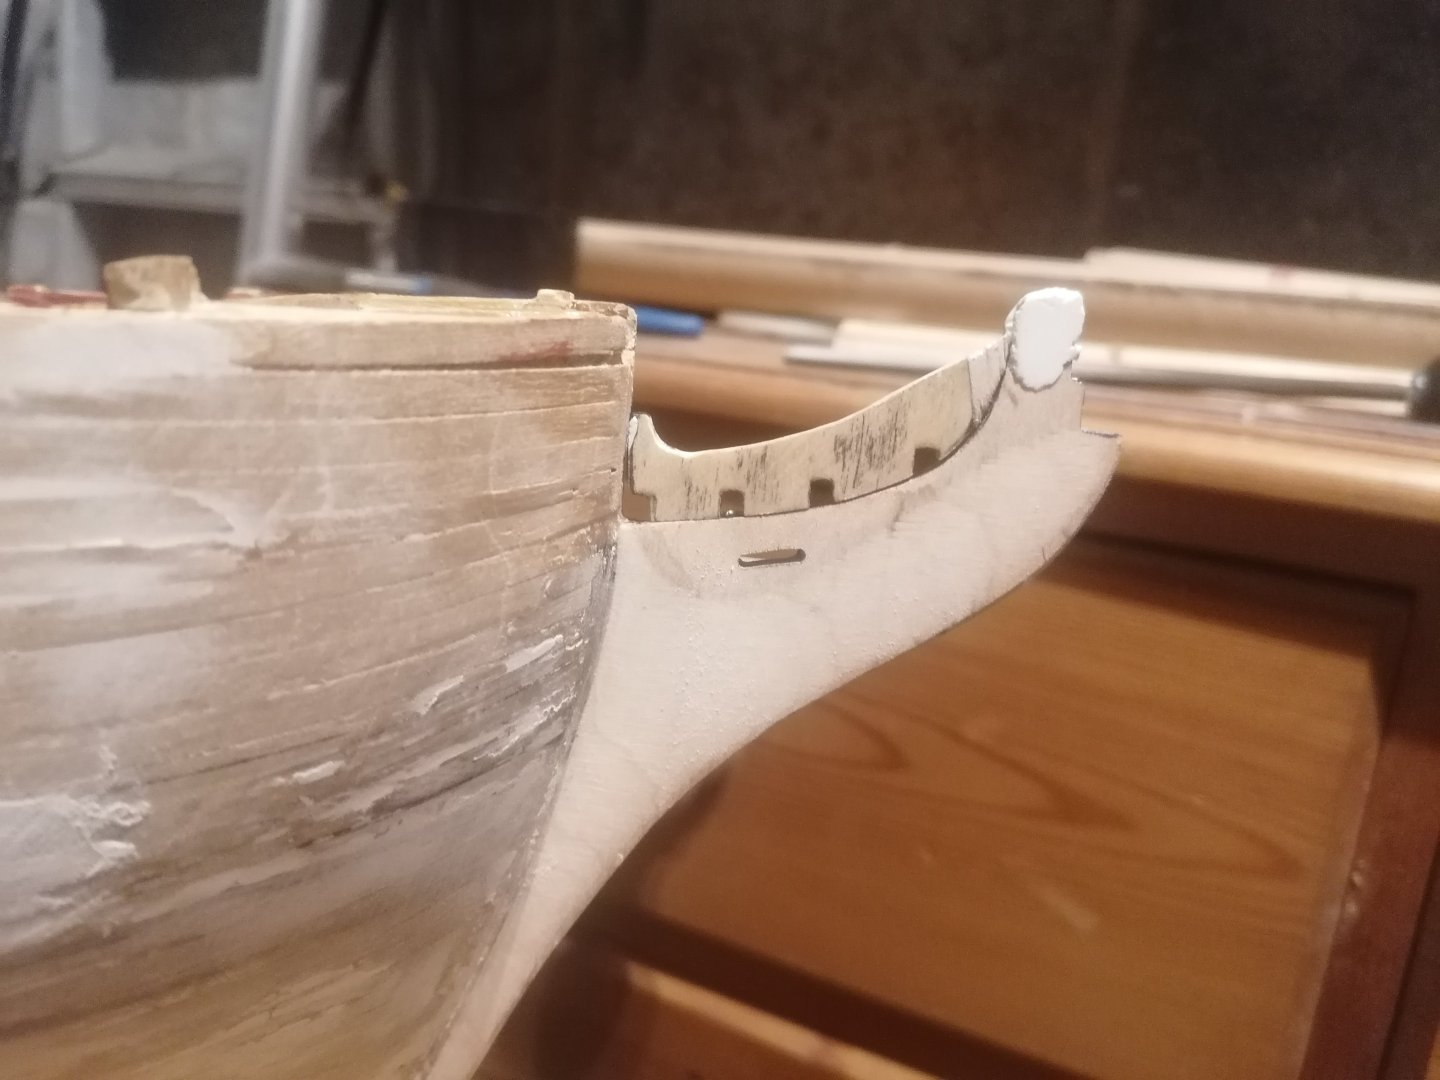
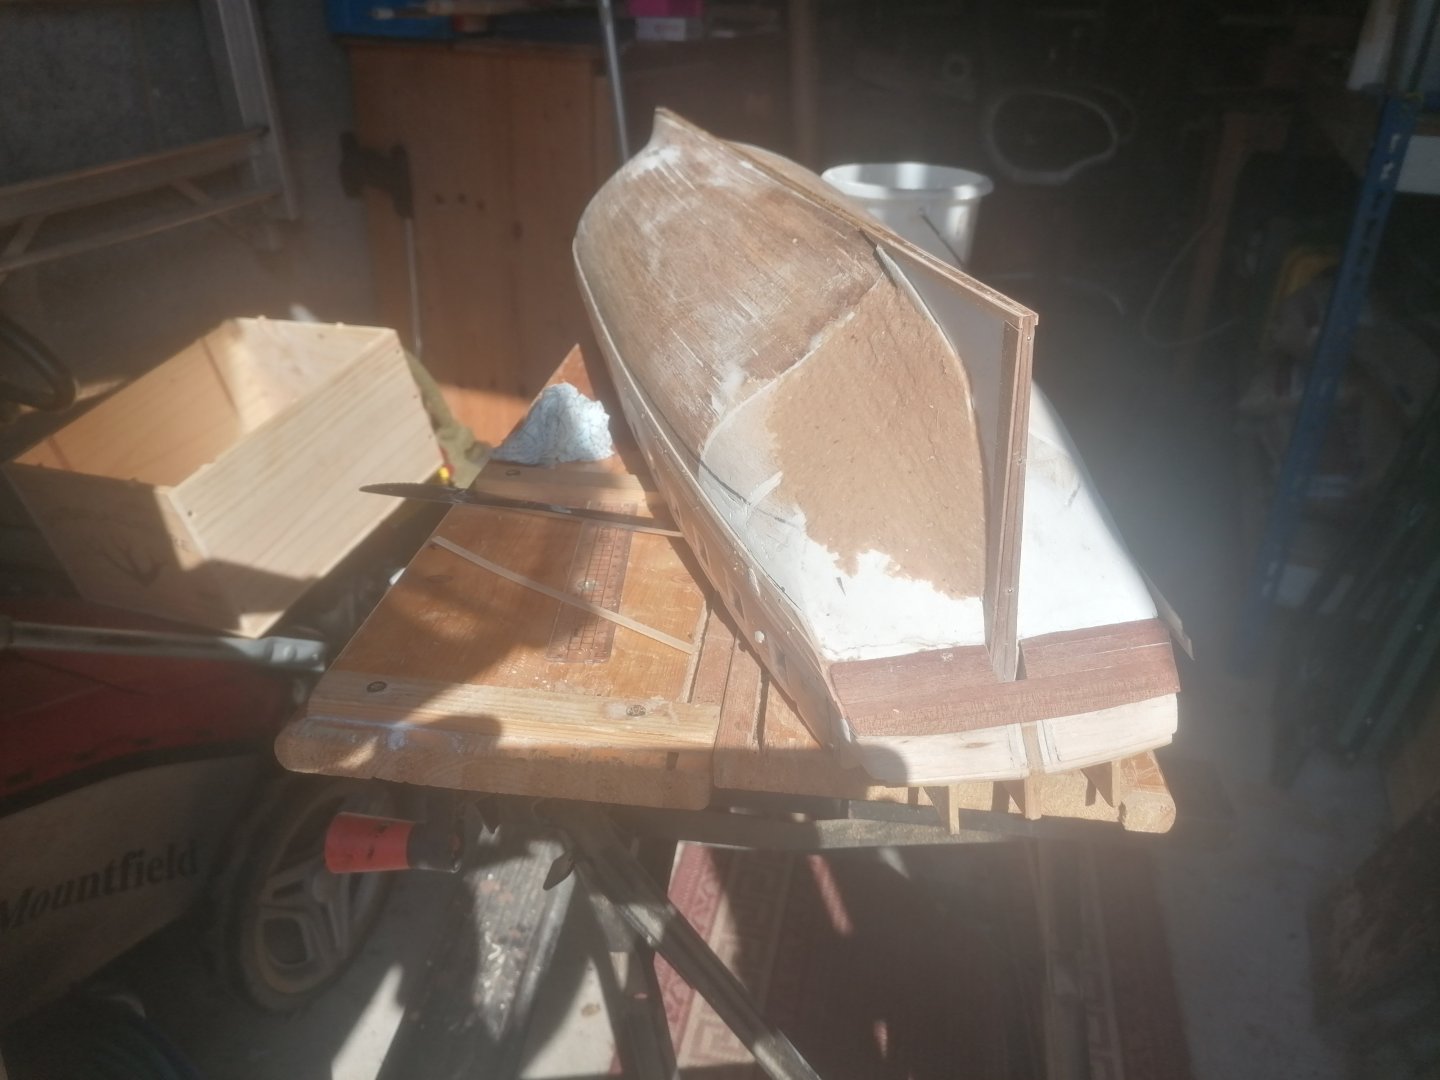
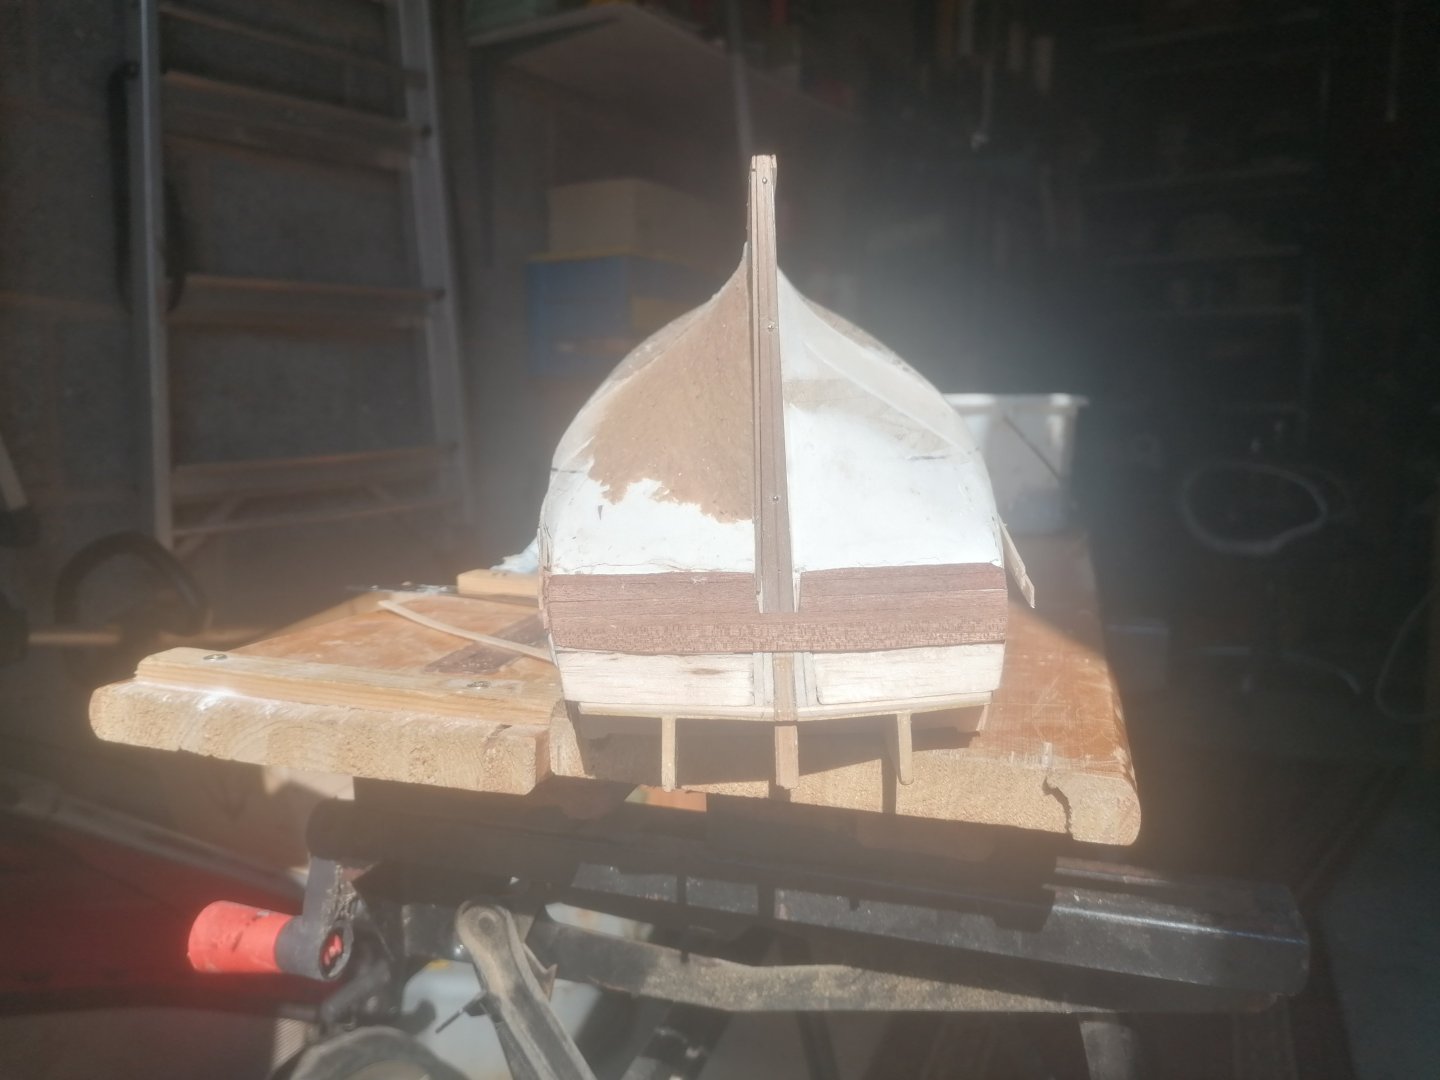
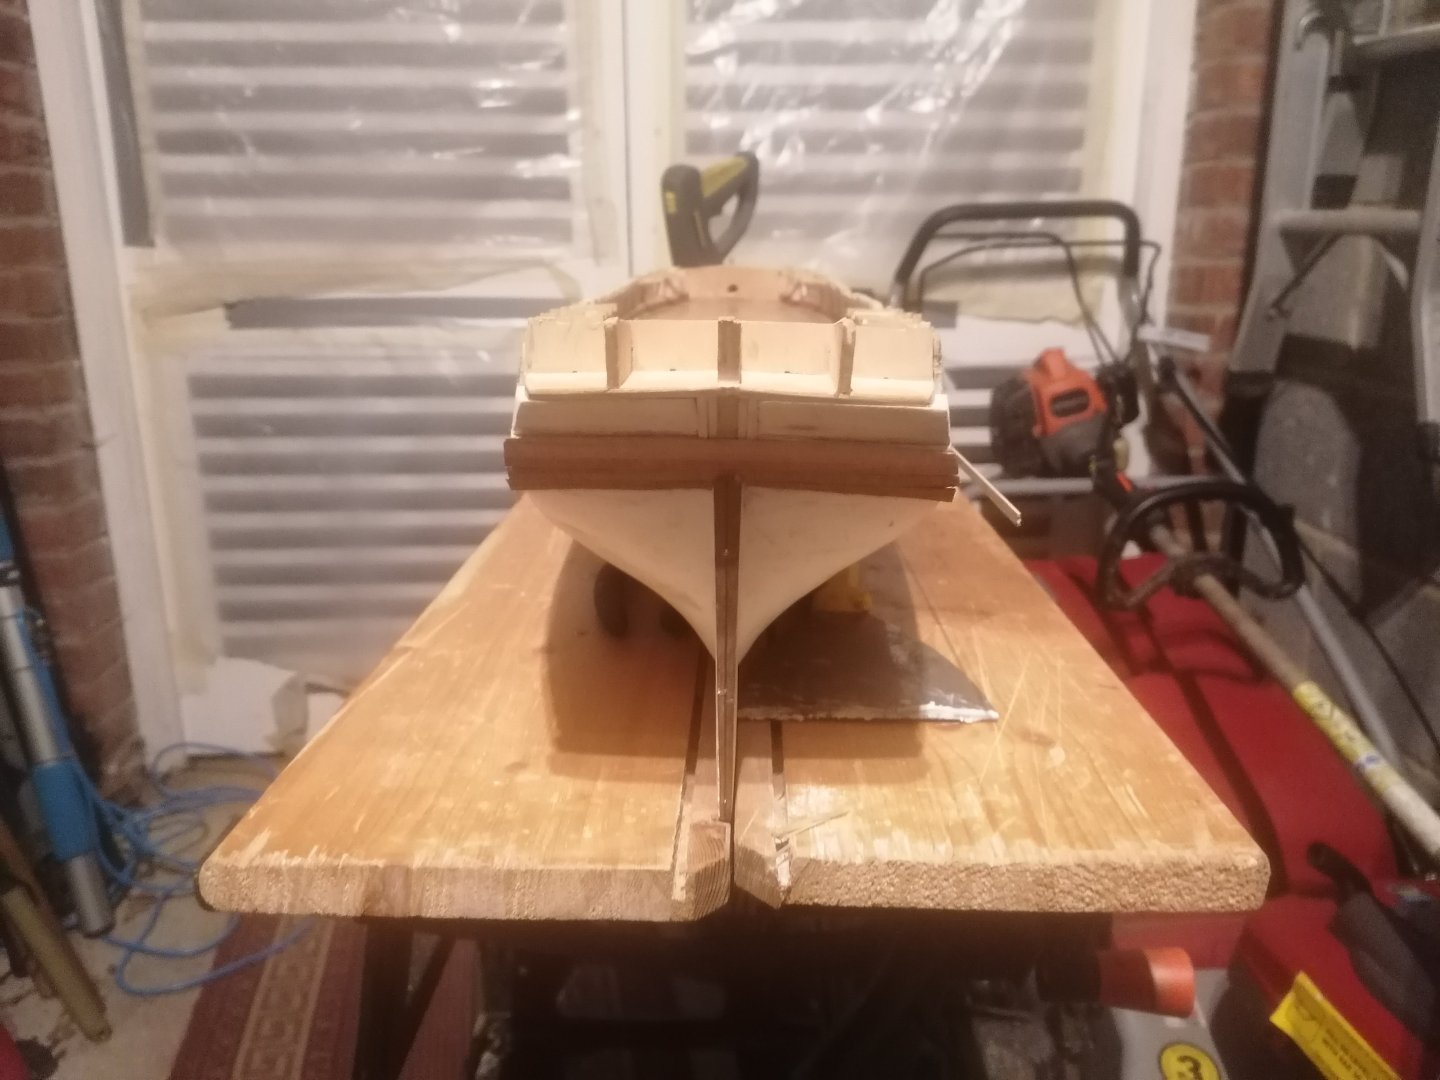
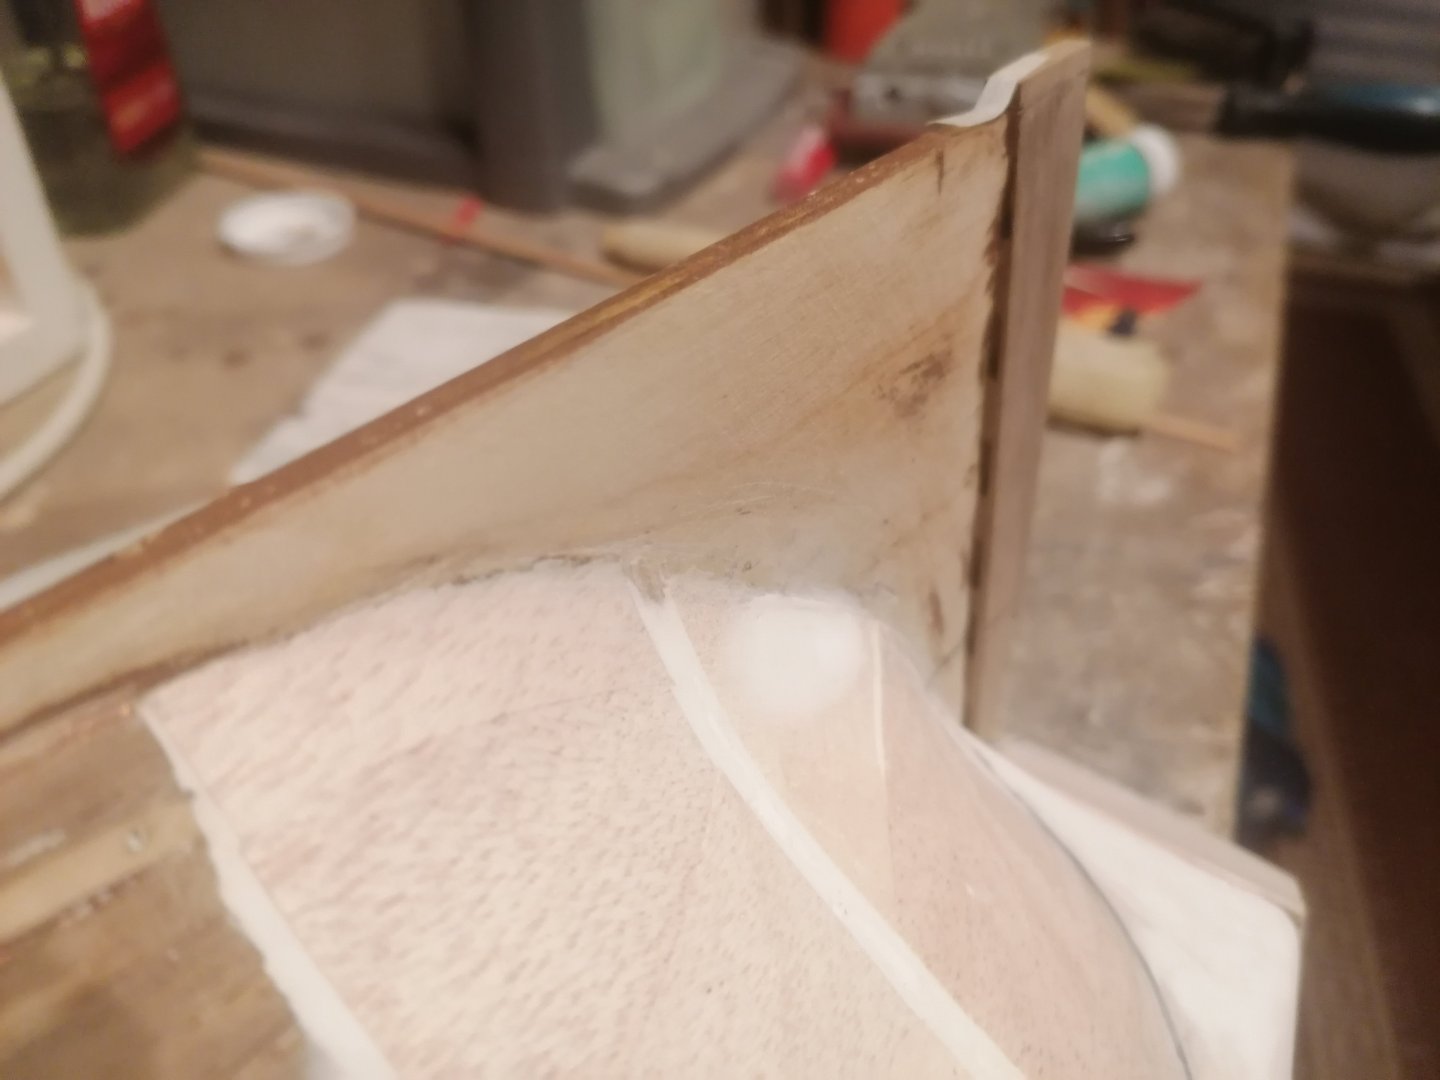
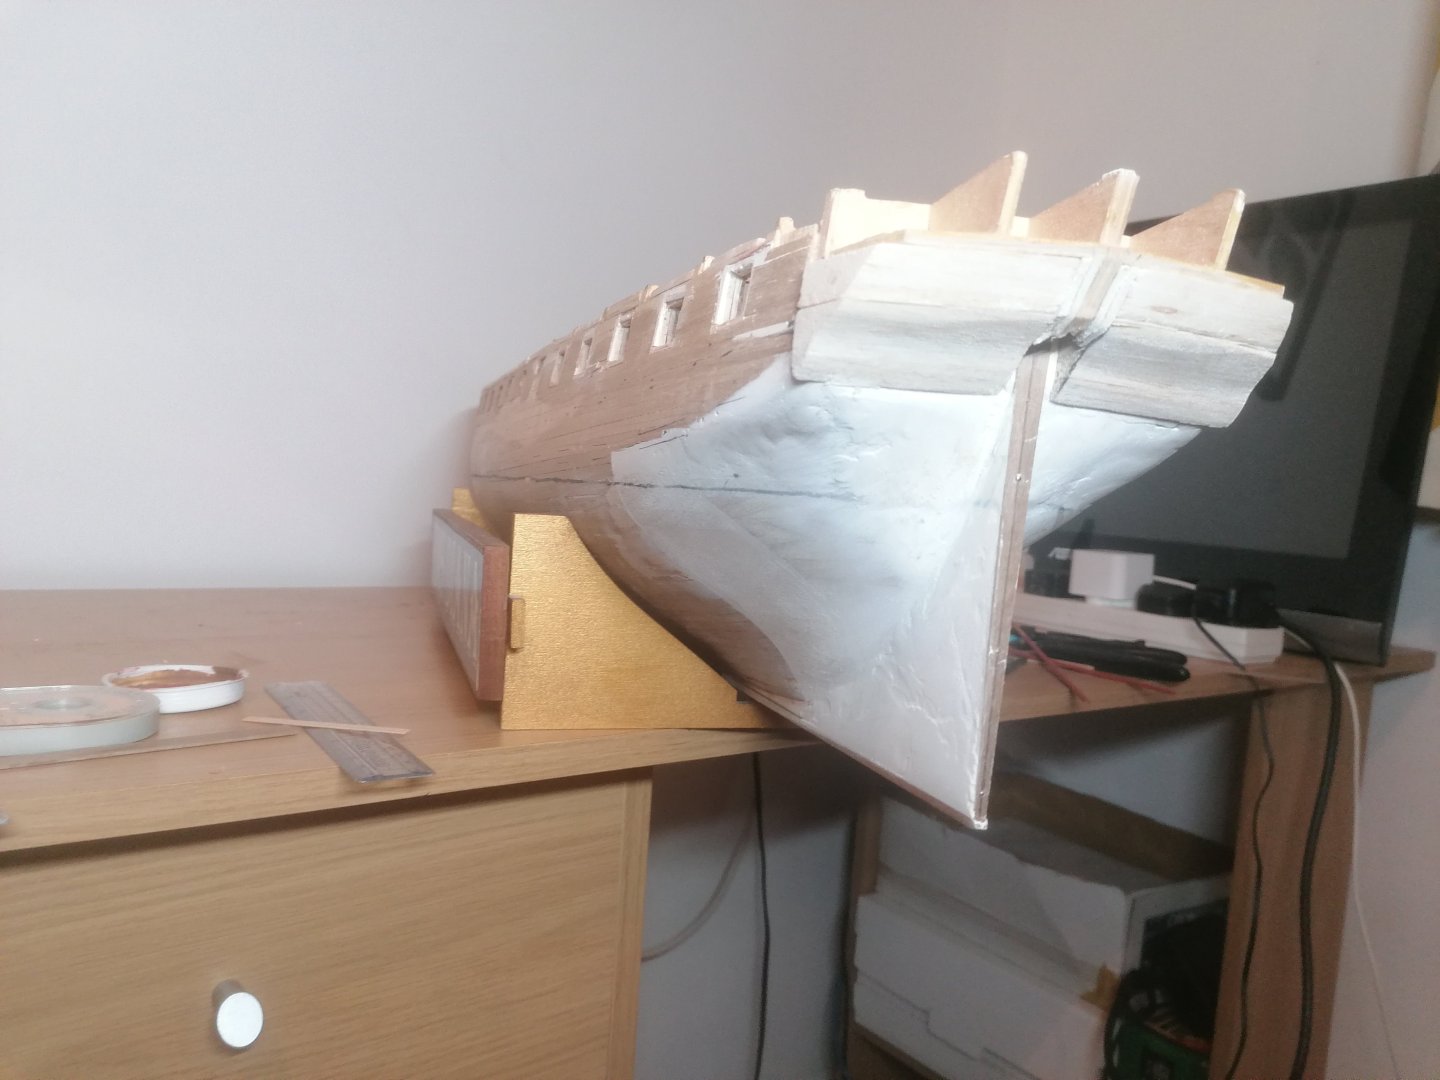
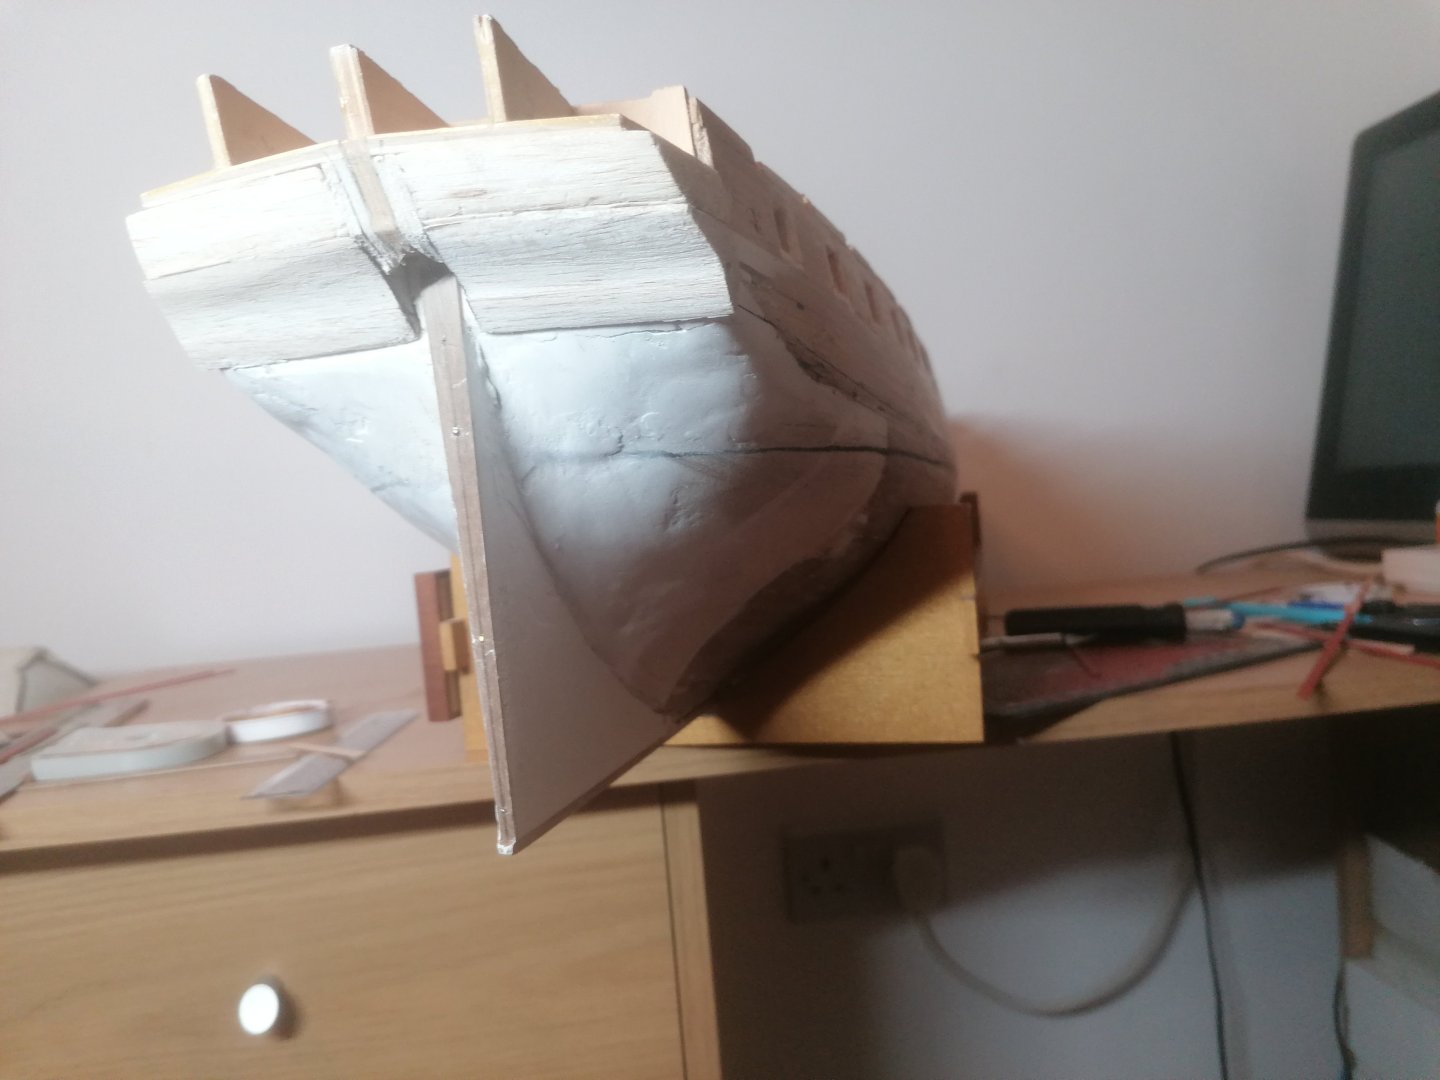
Since my last update, and, thinking I had the correct shape of the stern, I pinned the 4 strips that will form the planking that the wale will finally sit on. I then ran a another strip below the wale and found there's a triangular shaped gap petween them and the stern counter wher the lower strake curves beneath the wale. I can't provide a picture of this but hope I've explained it well enough. While I ponder over a sollution to this, I tested fitted the run of planking beneath the stern counter and found that along the width of the stern counter ehe planking will be ok, the planking butting up to the stern post was not going to fit at all. I completely missed the dotted line representing the termination points of the primary planking. I possibly missed this as I thought the deadwood section should be quite large and thought the curve on the side profile should be the best fit. Unfortunately I was completely wrong. I have spent the last weekend reworking this. I started by tracing the curve I had and the curve as I now realise it should be. I made a cardboard template and cut out 2 sections of 2mm balsa wood, tested them for fit and then tapered the stern facing edge before supergluing them in place. I made a mix of balsa dust, water and PVA glue and applied it generously between frames 14 and the top of the stern post. I used an old knife and some kitchen roll paper to soak up the excess water as I squeezed this mixture to the hull. This was repeated several times until, with the aid of a 1mm strip of wood being pressed to follow the approximate run of planking from the stern post, until I had, I think, now achieved the real shape I need. Having squeezed as much liquid as I could, the hull was left in full sun yesterday and today to dry out. After all the reading, saving photos and taking notes, There was one photo that really shows the shape of the deadwood area which was DaveBaxt's. It's taken at the precise angle to see that the deadwood actually tapers to the stern post rather than being flat. Which I refound while looking for what I'd done wrong. I must have over a thousand photos, both taken and saved and hardly any help show the 3D shape. Anyway, I believe I finally have the shape sorted with only a little smoothing off to complete. on wards and, hopefully upwards from here. Cheers for now until next time. David.


-
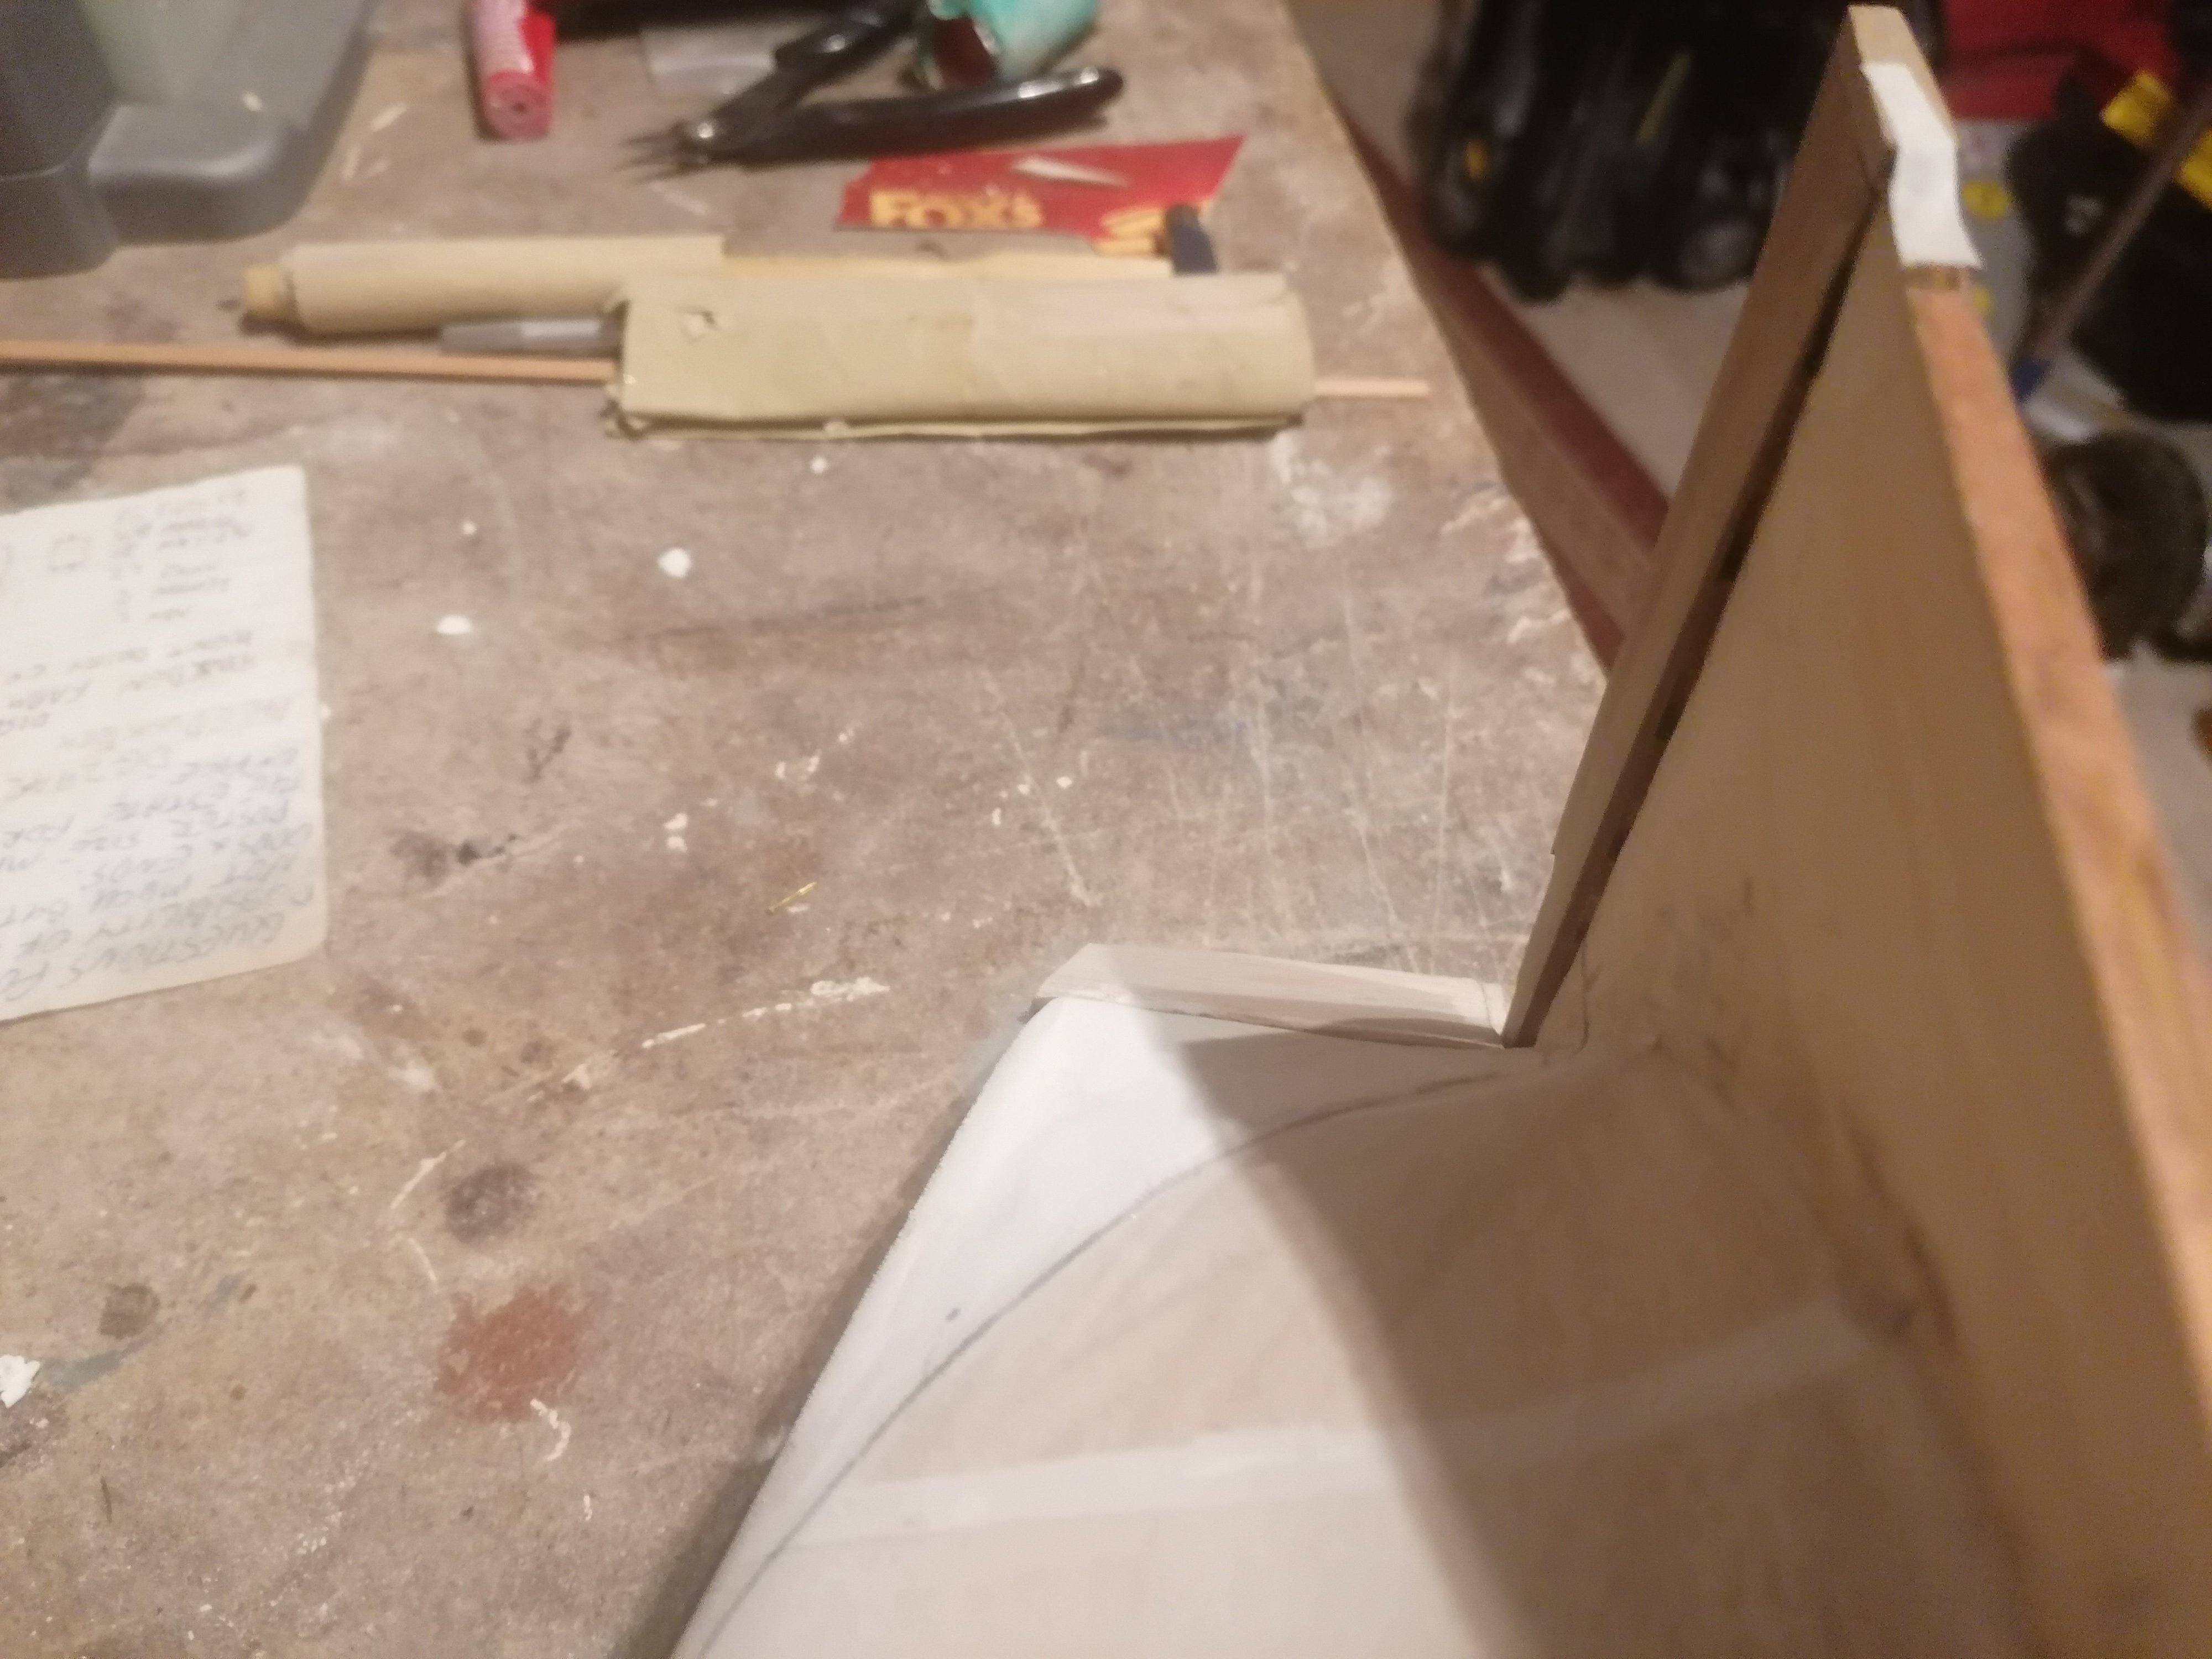
I should have mentioned as well that I am contemplating tapering the cut water and the stem but as yet am not sure by how much. I like the idea of adding the shapes of the timbers on the stem while also creating almost a rabbet line for the final hul planking so fit into. Whether I am able to achieve this is another matter but it's just a thought for now. David.
-
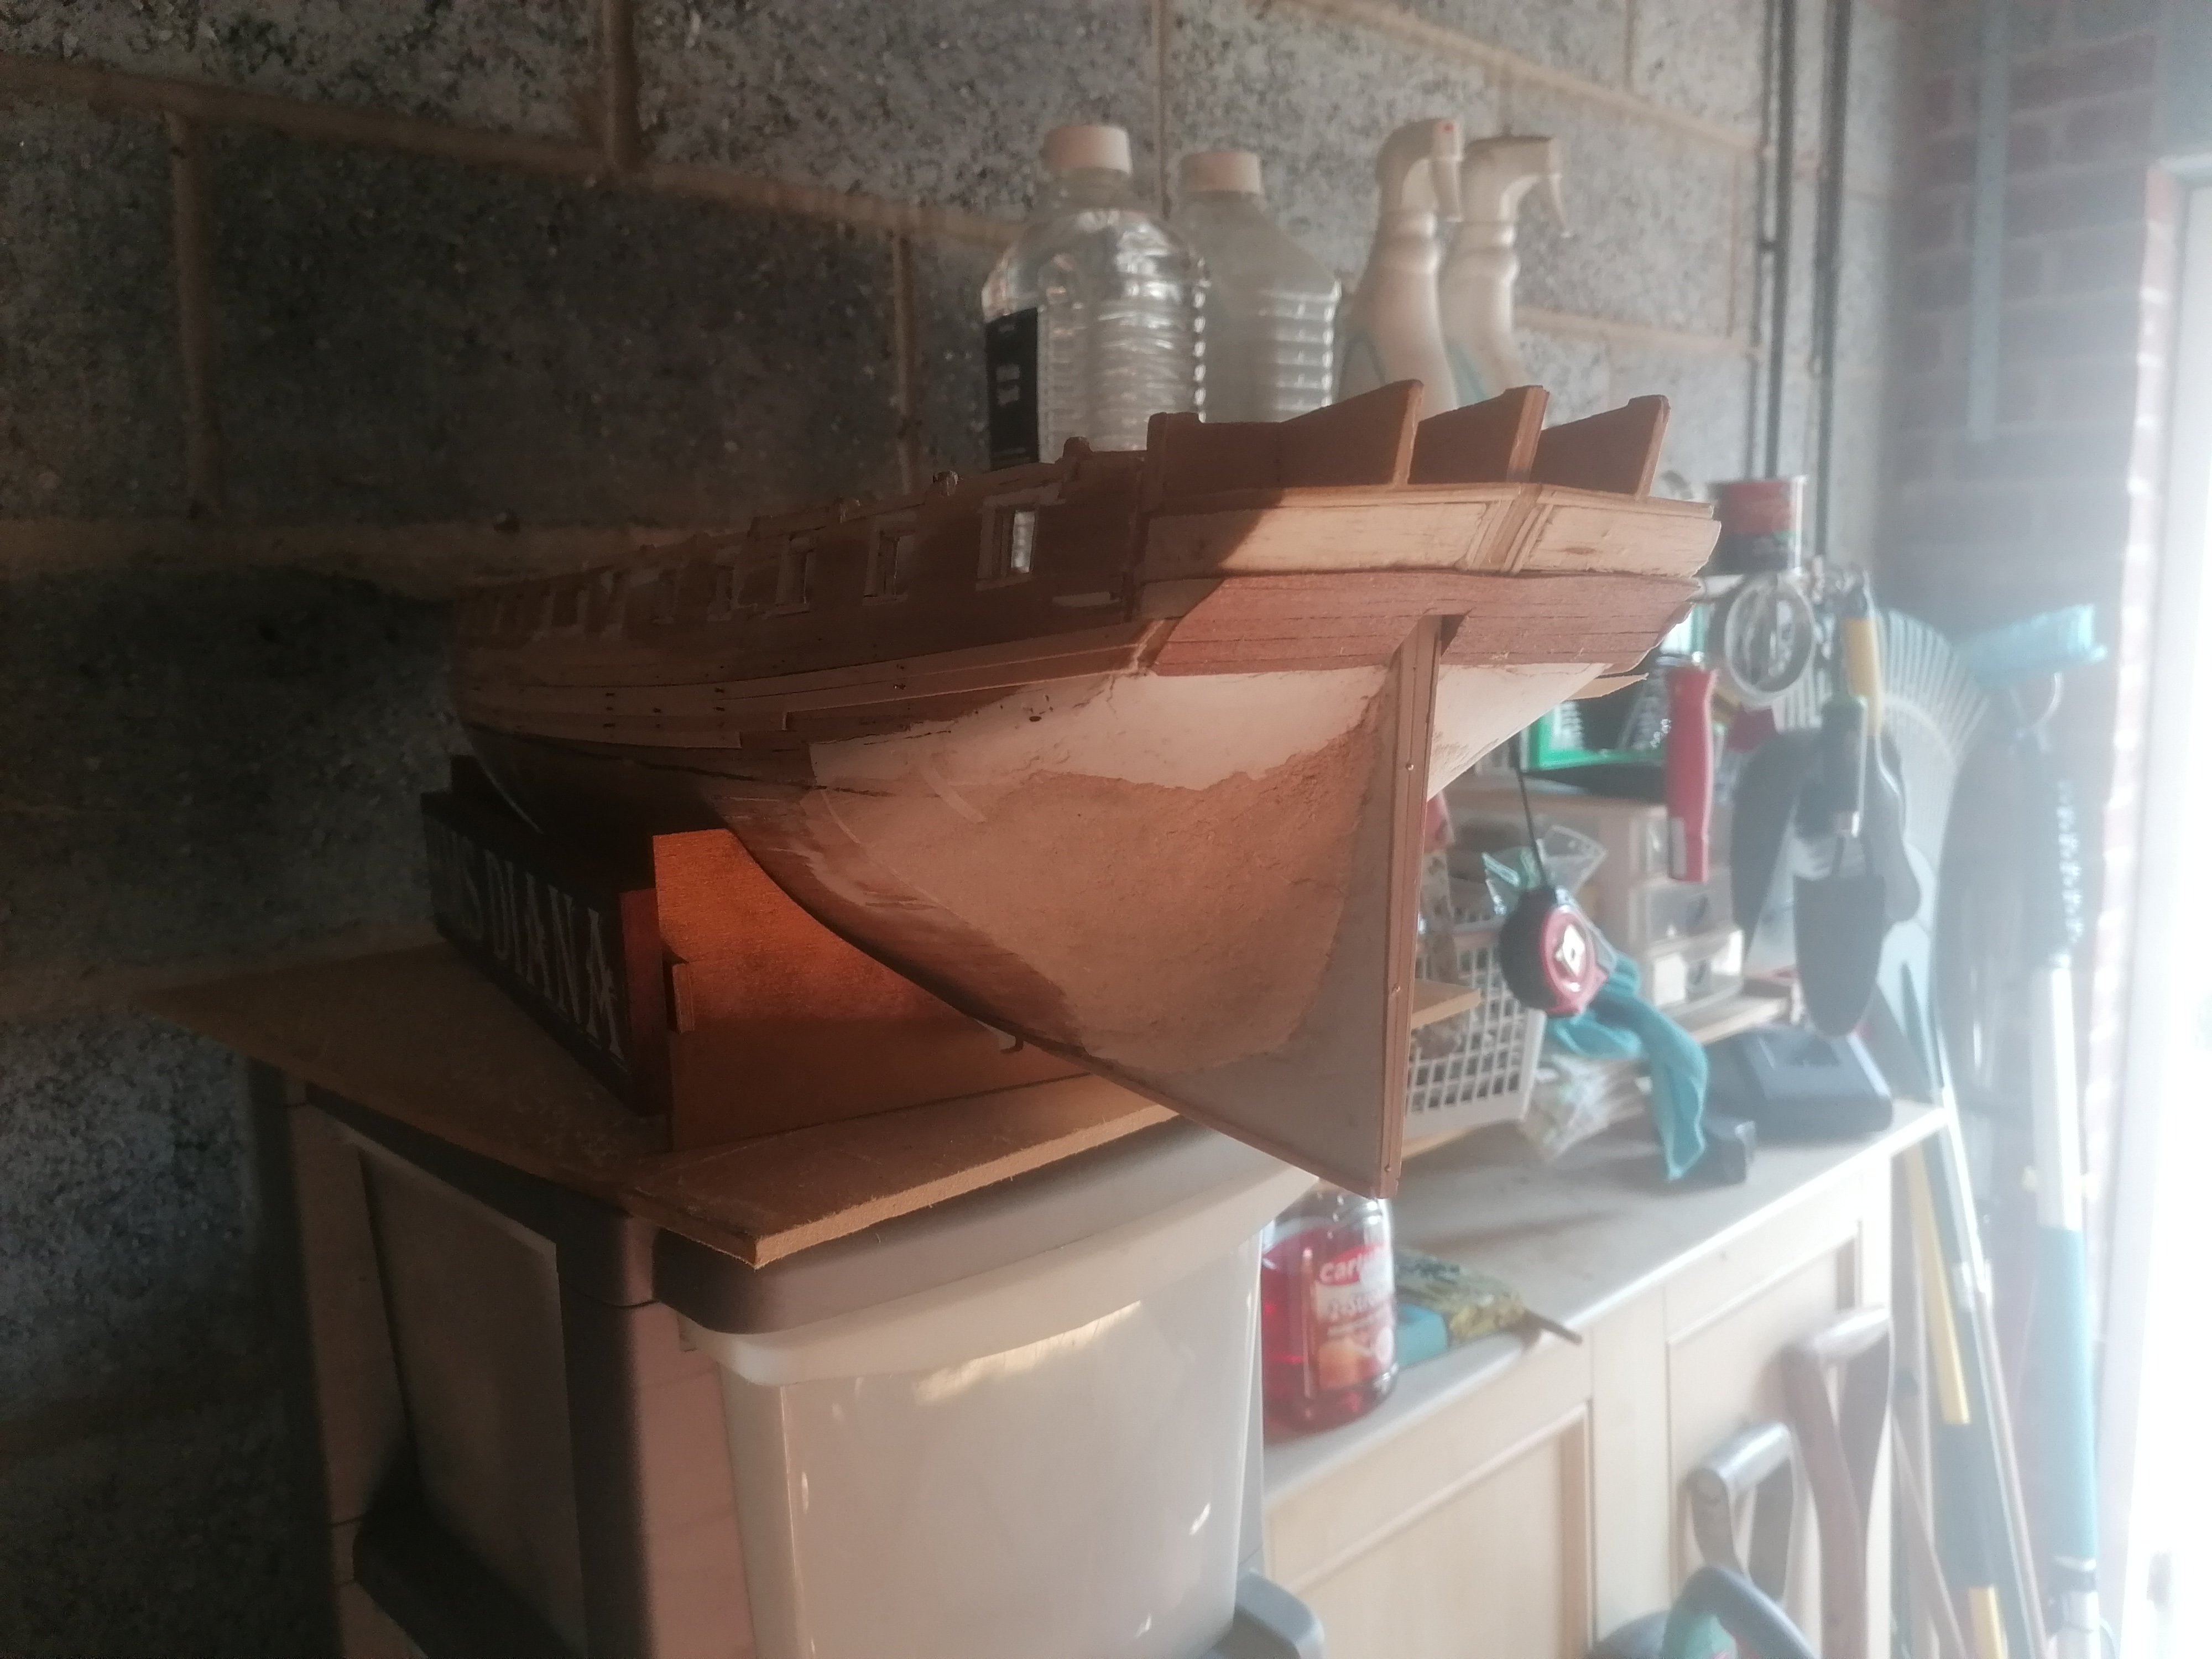
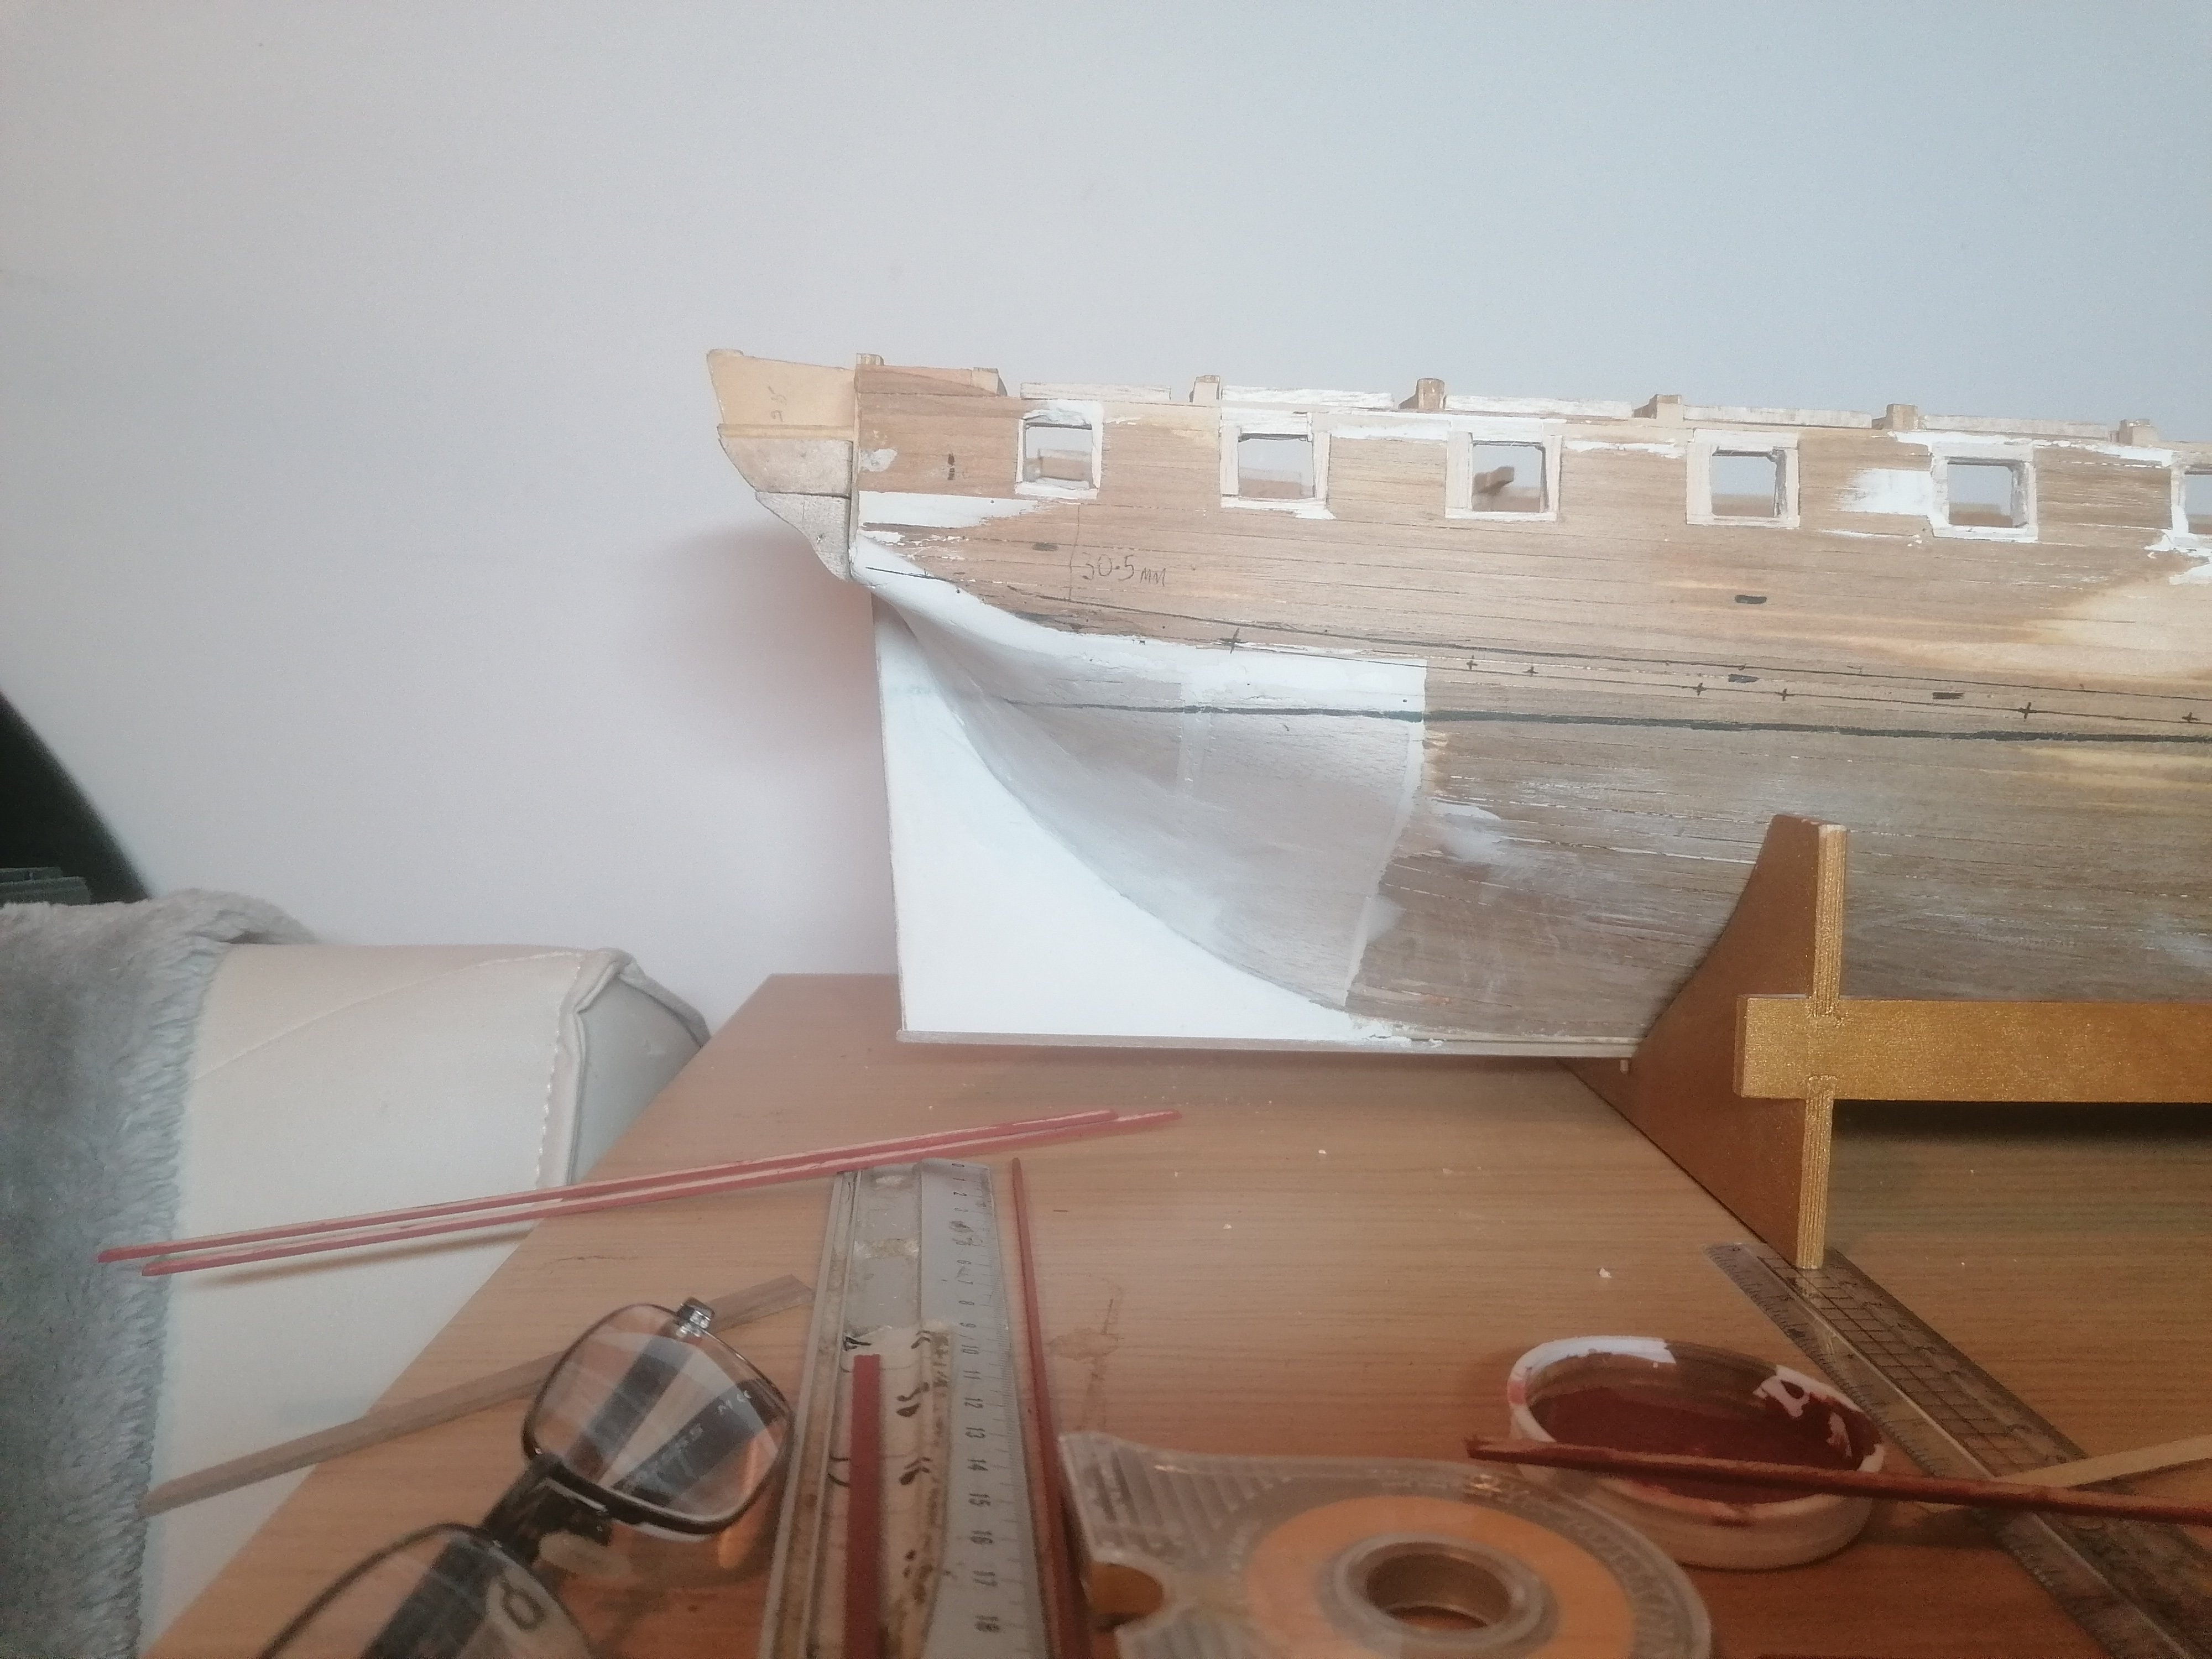
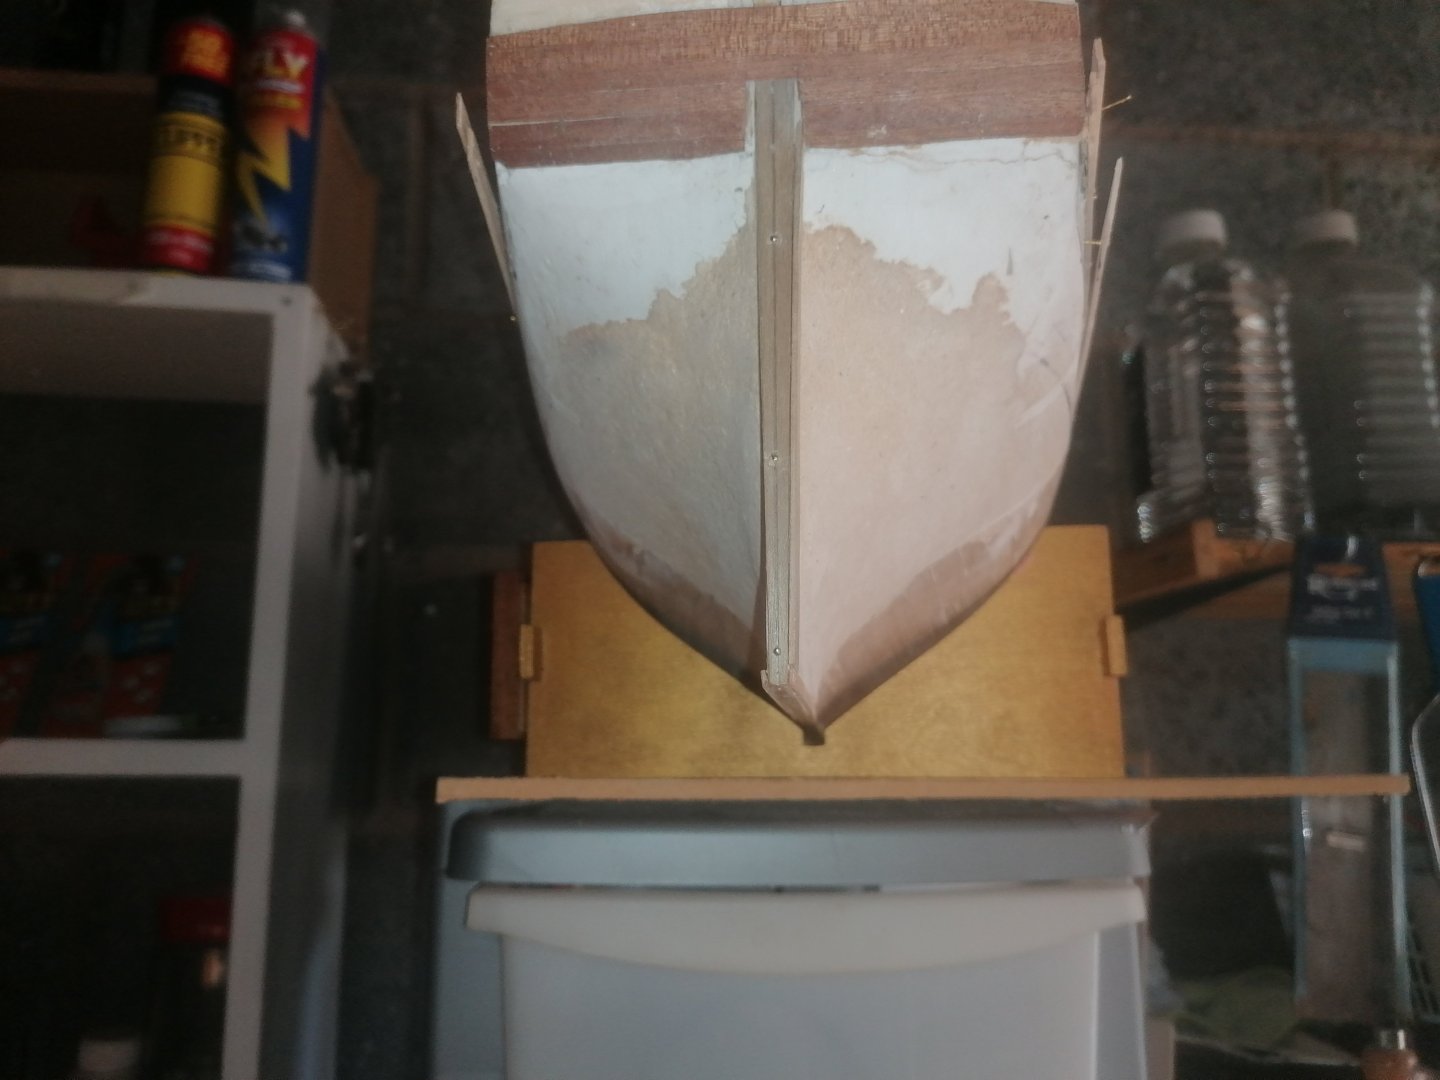
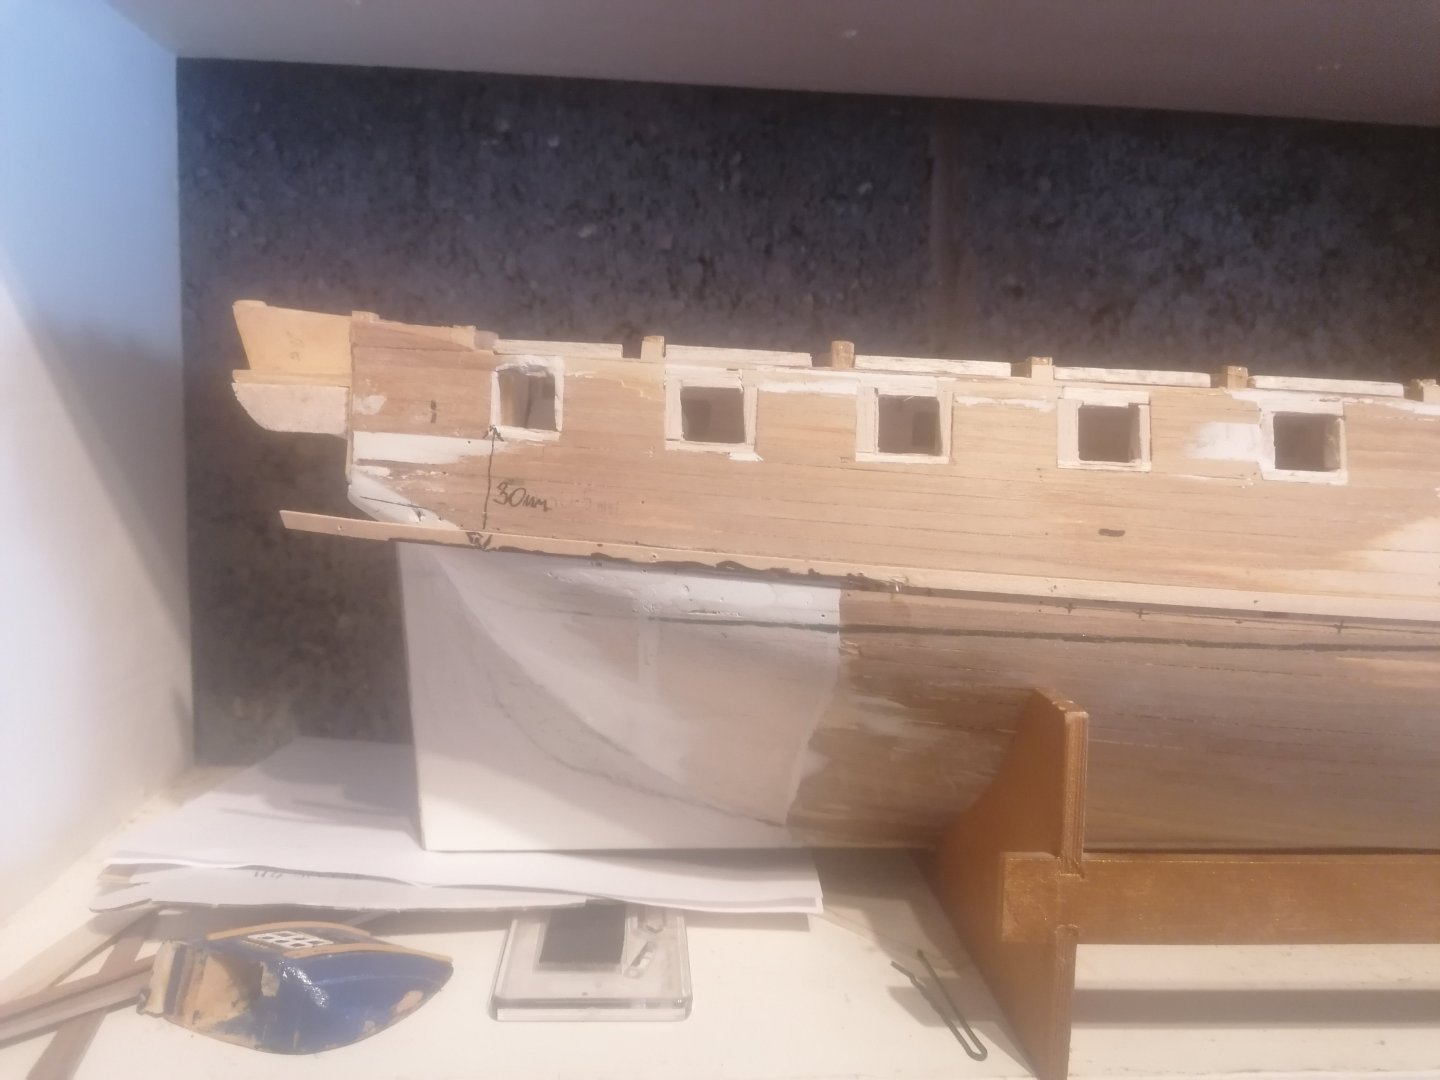
I am afraid this is just another brief update. Progress has been slow. I have sanded the hull down a little more, and, I am now much closer to the shape I am trying to achieve at the stern. After more reading up and looking at photos, I deciced to hopefully get the shape of curved lower stern counter. I then glued 0.5 X 5mm mahogany strips to it. When I test fitted it didn't look right. The wale also didn't line up where I wanted. I then realised that the lower edge of frame 17, while I tried shaping the hull below, was running horizontally accross the stern rather than being curved downwards from the centre to 2 or 3 mm lower at the edges. I removed the lowest strip from the lower counter and replaced it with 10mm wide strip. I then shaped it to drop 5mm on either side to allow room to modify it. The 5mm drop was too much so I reduced it to 3mm. This, combined with the wale actually curving up at the stern looks like being pretty much ok. I had seen on the side view that the wale appears to curve up towards the stern galleries but thought it was more of an optical illusion due to the several curves of the hull in this area. Tomorrow I will re test the line of the wale and am hoping to find I have got it nearly correct now. One thing I have meant to have mentioned earlier in this log. My choice of the strip wood I want to use. I have noted that many of you prefer to use boxwood for the visible planking of the hull, which I understand, however, the box I received had been faded a little from sunlight and I liked the look of what appeared to be walnut below the wale and a more yellowy brown colour above. Hence my decision to use beech above and walnut below the wale. I hope the photo shows the effect well. Should I not be happy with this effect I could always paint it in yellow ochre if needed. Thanks, as always for the likes. david.


-
Since my last post I have made some progress all be it a little slowly. I added more filler beside the deadwood to try and achieve a better curve so as to not have any gaps beneath the second planking. This is still work in progress, as this area is still not as even as I need. While this filler was drying, I started to plan the deadwood itself. It needs to be widened at the top of the stern post and taper down towards the keel. My initial thought was to pin the back of the stern post onto the false keel and then add balsa to each side and then sand it to shape. I soon realised this wasn't so practical, so, looked at an alternative. To take a break from thinking of this, I started on the first run of spirketting on the gun deck. I was thinking of top and butt planking for this, but, although I would like to give it a try, I decided against it partly as I would need to order more wood but mainly as after painting it would hardly be noticable. I cut 22cm lengths of 1.5X4mm lime strip, lightly sanded them all over and painted them. once they were dry I again sanded them down and applied a second coat of red ochre. I then applied a thin bead of pva glue, smeared it evenly along the inside edge removing any excess and clamped it above the deck. It was only after doing this, I discovered that the deck was not completely even but sags very slightly in a few spots. Only 0.5mm at worst, but still noticable. As I am not entirely happy with the staining of the deck, I may sand it down again and replank it but without any stain, just varnish. Returning to the deadwood problem I thought that instead of using balsa, I could use more filler, Fill ine deadwood area and then shape the whole thing. The filler I have is drying out now but I added some pva glue to it to hopefully allow it to adhere better. I will find out if it worked tomorrow. It seems to be shaping up ok though. There is still a little more sanding and filling to do but the shape is definately getting there. Here's a few photos until next time. Cheers all. David.


-
Thank you for the kind comments and likes. Thanks Jason, I understand what you meant now. I had never noticed the wale levelling off at the stern. If I had known that I definitely wouldn't have even tried to explain it. Special thanks are due for that. Thanks for your words too, Bill. I haven't quite started over with this build. I did take her back as far as I felt confident to do which at first was stripping off the upper deck and, unfortunately, the bulwarks above too. Effectively I have got back to, as close as I can, the first planking. Due to the original errors with the bulkheads there were some bulges and hollows to sand or fill. In places the original 1st planking is 0.5mm thin now so, Ive had to tread very carefully. The stern needed much work to get any kind of correct shape not helped by my over sanding in places. As far as cost the cheapest I have seen the kit for is about £580. At the bring and buy stall at the model show, the asking price was 150. I offered 120 and got it. I have since spent around 180. I would have expected to spend at least the same replacing the kit timber, cannons and carraiges. I still need a little more timber, definately a lot of rigging thread (again this would have replaced the thread supplied). All in I think I'm running in at 300 to 350 spent but still well below the kit price without any extras. Of course 6 months of spare time's involved but the experience and learning more than compensates for that. It's possible that I have not quite finished going backwards as I'm not too happy with the shaping of the gunports. I will see if I can improve them or, as a last resort, remove the inner lining and balsa strips between and build them up from deck level again. I have attempted this before and know it's possible and should not set me back too far, maybe a week or two. I want to get her looking as good as she deserves. I've said before that the beauty of a wooden kit is if you make a mistake you can always make a replacement. You cant do that with plastic kits so easily. For now I am rounding off and curving the lower stern counters and, I hope, finnish shaping the stern prior to starting the 2nd planking. Thanks again. David.
-
Thanks again for the likes and comments. Jason, I noticed a while ago that the wale position would be critical to the shape of the stern both below the counters and also the position of the stern facia and galleries. It's taken so long to build up the rough shape of the stern to get to where I am now. The position of the wale now allows me to finalise the area beneath the counters. I still need to work out the correct shape of the deadwood but this should be a little easier now I have a better shape above. Please forgive me for asking but I don't understand what you mean about the wale looking like a flattend S. Do you mean looking at it edge on? ERS Rich. Thanks for your input too but, as I had to remove the top deck, along with the foc'stle and quarter deck bulkheads, I didn't have an accurate profile to measure down from. Just 0.5 to 1mm stubs where the frames were cut off at deck level or damaged while I removed the deck. With hindsight I should have maybe thought of marking the waterline earlier but, there were so many problems to sort out, I didn't even think about it. I think the original builder assumed, as I did with my first wood kit, that everything was cut perfectly to fit together and give the perfect shape. I have now used the waterline to position the wale as, on the drawings, the gunports don't sit flush with the deck so are of no help. Another point to add is that I have one almost intact quarter gallery which, although will be scratch built, does seem to fit at the moment between the stern facia and the rear edge of gunport 14. As I've said earlier I've named myself newbee for a reason so any advice, suggestions or help is always very much appreciated. No pressure on me but I'm hoping to start the second planking next week and thinking of laying the wale first, marking it and then I'll see the best direction to go. Thanks again to you all for your interest. David