


newbee
-
Posts
170 -
Joined
-
Last visited
Content Type
Profiles
Forums
Gallery
Events
Posts posted by newbee
-
-
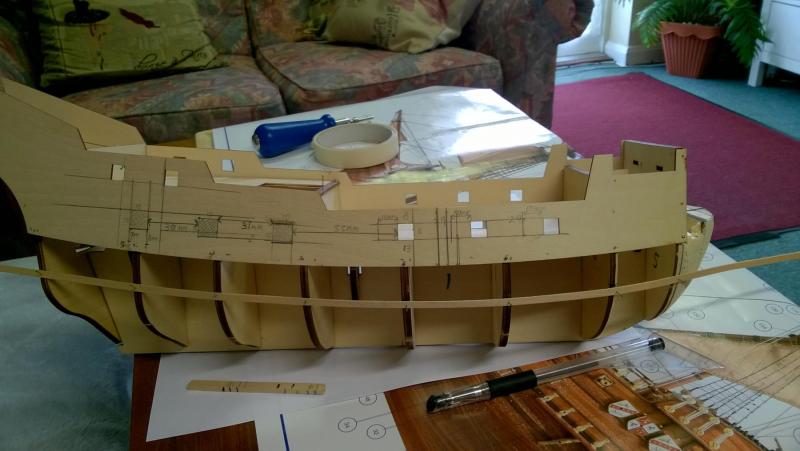
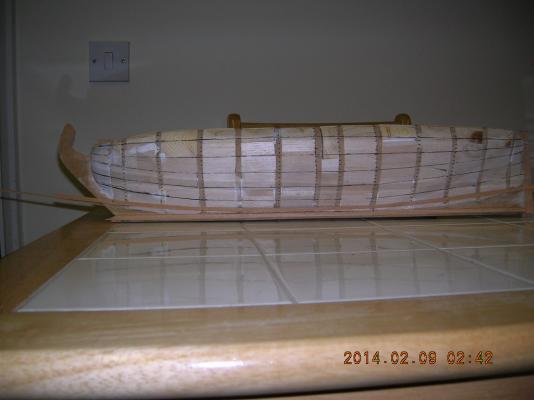
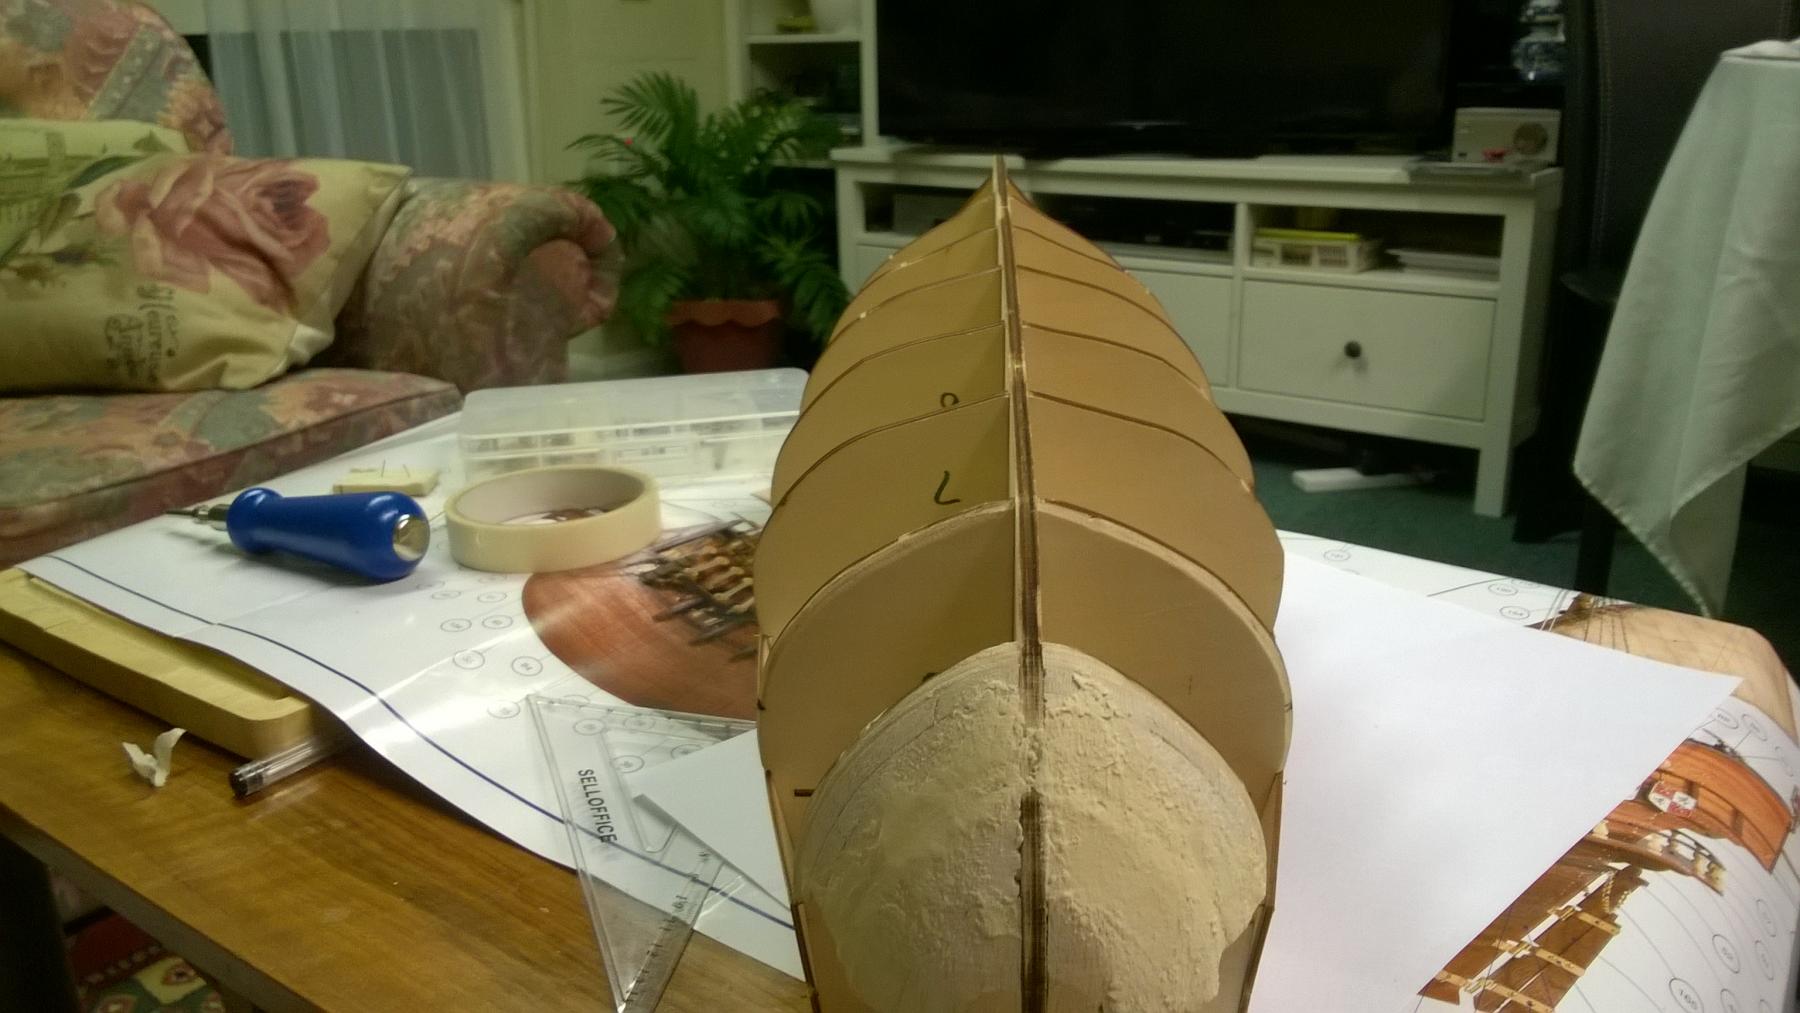
I was planning to have posted sooner but as I thought to change one thing I found the effects would have consequences later. As a result I have taken more time over planning and doing little bits in between. I have all the decks planked and they are now sanded down. The bulkheads have also been clinker planked but still nee to be trimmed. I have the deck gratings ready to fit though I have not decided whether to varnish the decks yet. (With the golden Hind I added no varnish as I liked the natural look). Any advice on this would be appreciated. Also now the decks are sanded the caulking effect looks really out of scale. I have also realised that by moving the main deck gun ports further aft the lower deck ports will not line up properly especially considering the rubbing strakes. The stern has also been planked having first pencilled in lines at 45 degrees as a guide.
One thing (of many) I learned from my only other wooden kit build, the Golden Hind, was to test ideas or make changes before fitting anything together permanently so please forgive the delay in my progress. I am enjoying the challenge of this ship and, though I was 95% happy with my first kit, I want to be 100% happy with this one so I am treading, I hope, a little more carefully. Also as I do not have a workshop or real modelling equipment I can only sand parts down out side in daylight and dry. Not easy when working 9 to 5 especially in winter in the UK.
One frustrating though highly enjoyable thing about the posts here is I find it so easy to look for one thing and get distracted with the quality and ideas within different builds that I end up forgetting what I was looking for in the first place. (Many pleasant hours spent here).


-
Hi Jason. Welcome aboard my post. You will have to have a proper look at this site and the ships that have been built. Maybe you will get the bug in the future.
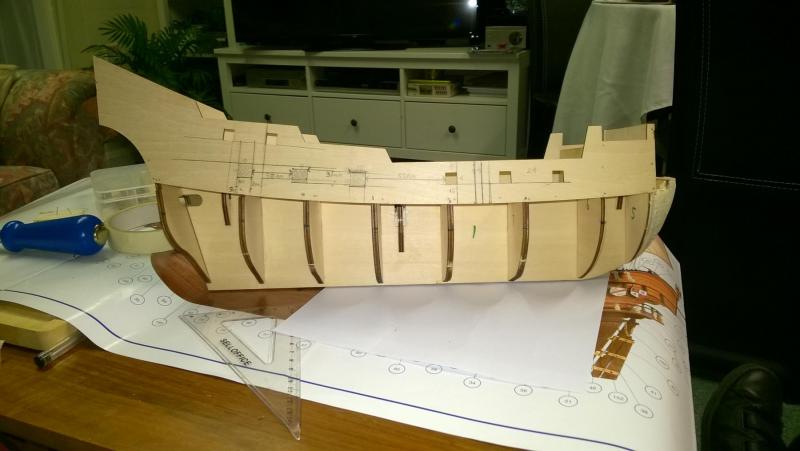
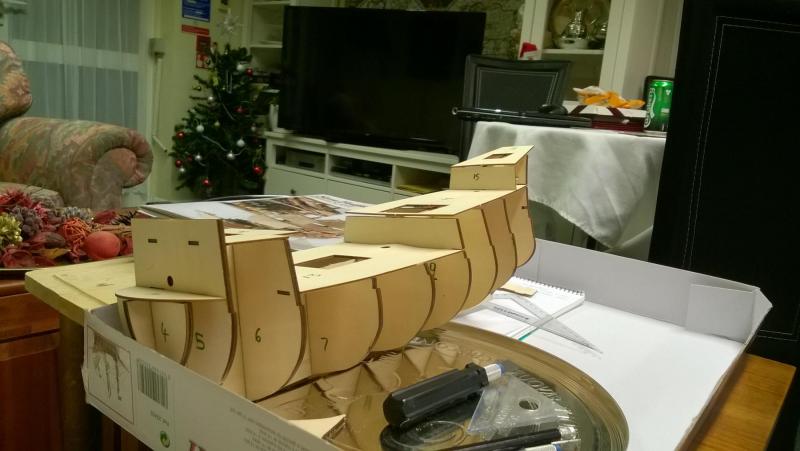
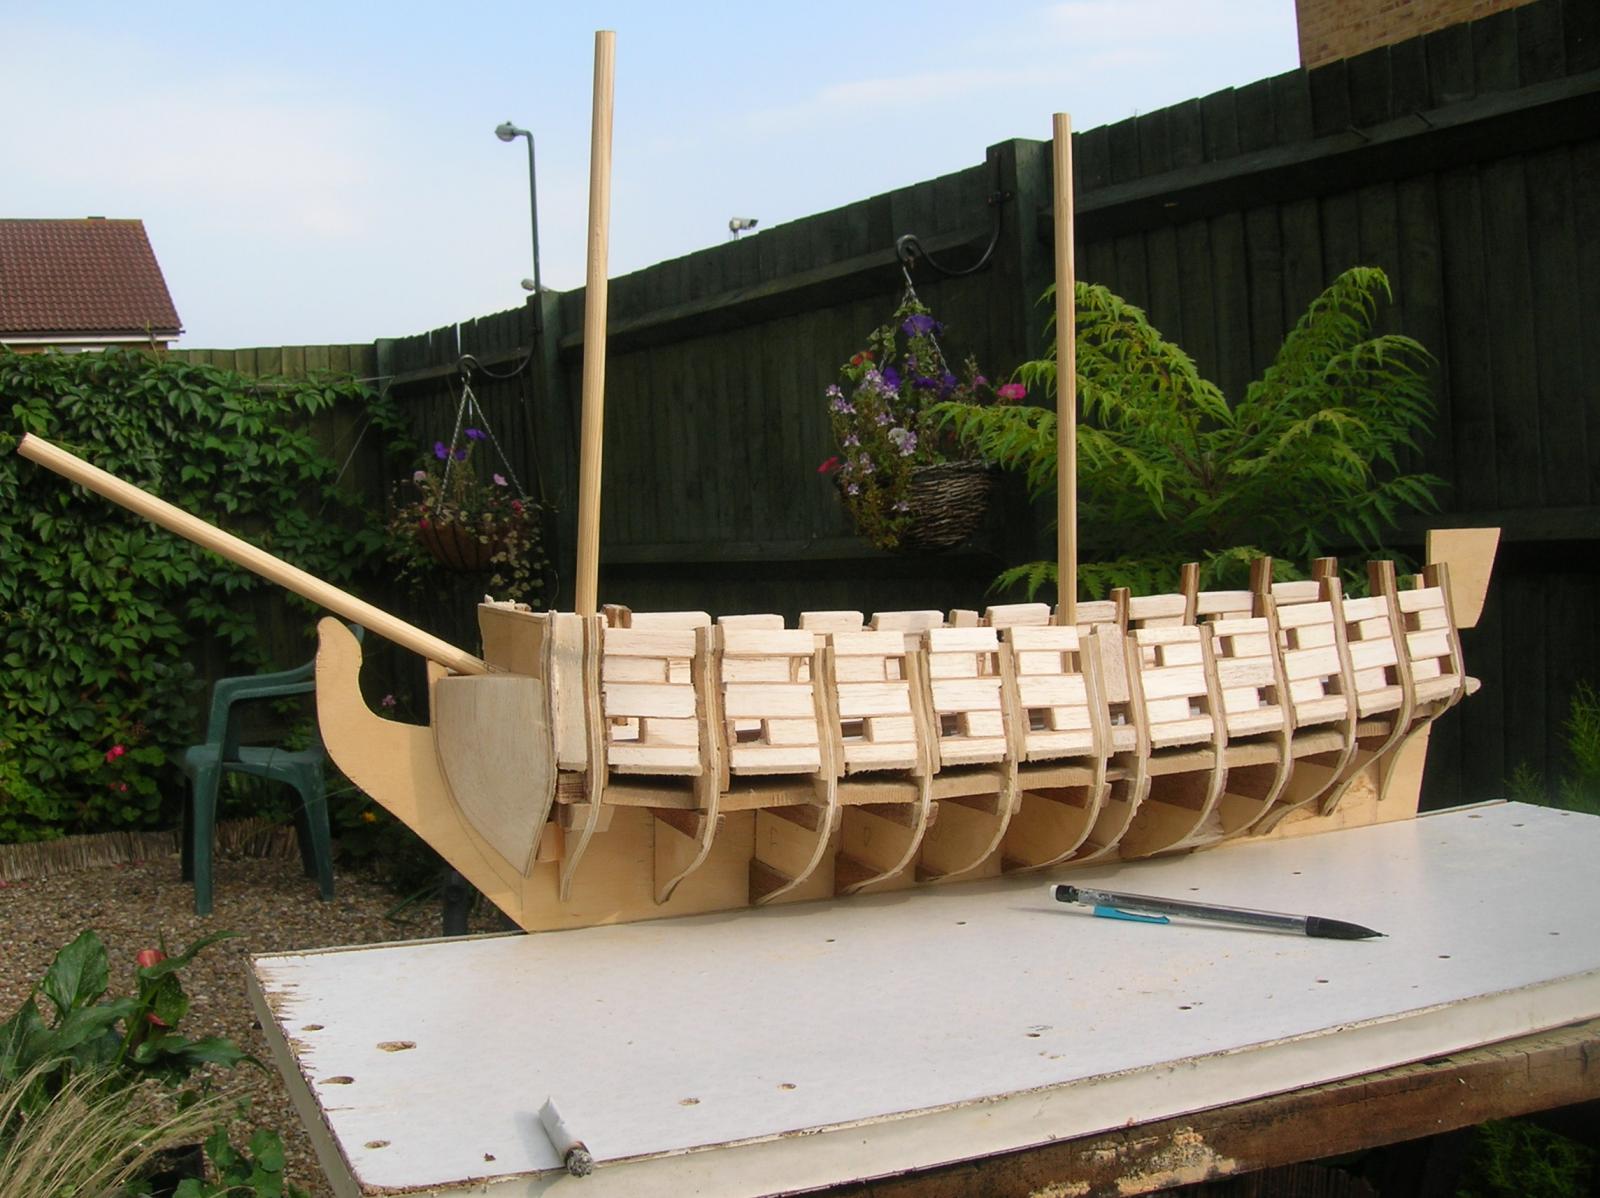
I've made good progress this afternoon. I have fitted the supports for the false lower gun deck using 3mm balsa stock and have the deck sections from 2mm thick balsa sheet ready to fit once the bulkheads and upper decks are installed. I've also moved the main deck gun ports 10mm towards the stern. The next step will be adding the rest of the bow and stern filler blocks followed by building up the hull between the lower deck and main deck. I will use 5mm high balsa strips above the deck but will leave extra space around the gun ports so the hull does not appear too thick if it is still visible after the planking is done
-
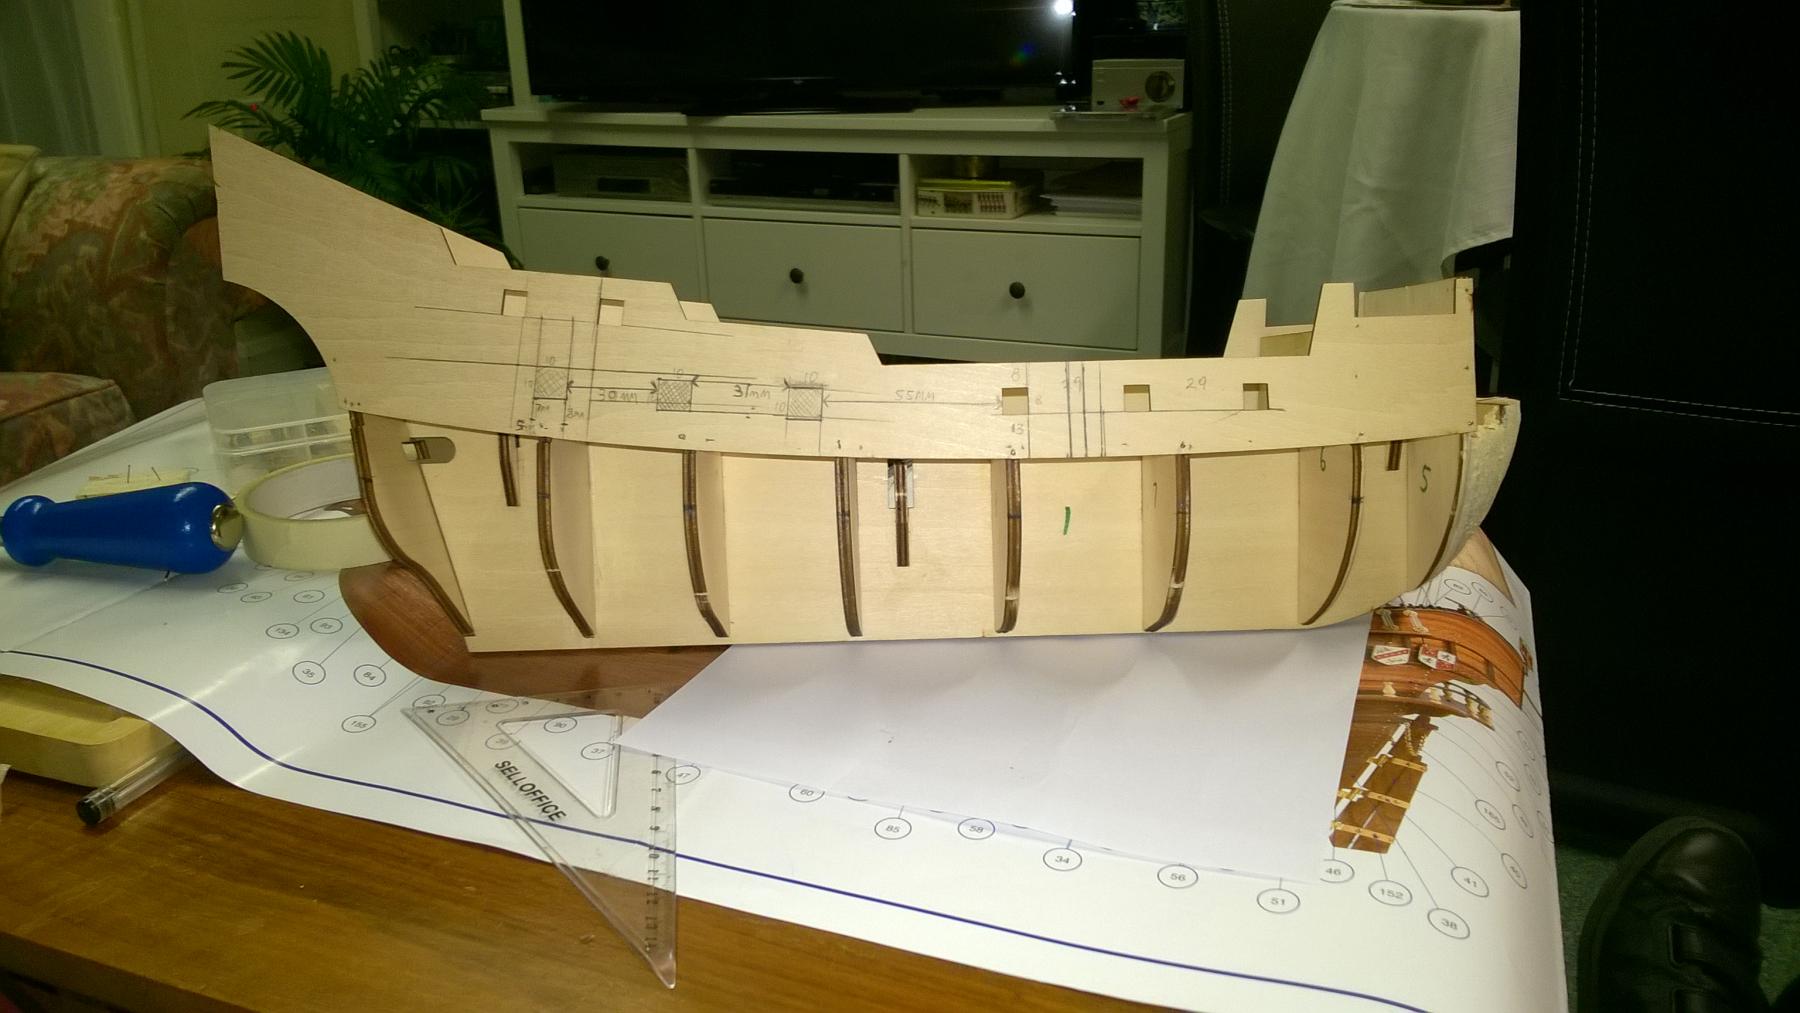
Over the last week I have been working out exactly how I want to continue with this build. having dry fitted all the frames and decks in place I realised that the keel was slightly kinked at both the stern and the bow. I tried adding some small planks to ensure all the bulkheads were in their correct positions but this made no difference. I took time out from this and decided to add the filler blocks at the bow and also to work out where and how to place the lower gun deck. I added the bulwarks and found that I now have a completely straight keel. However, I do not feel confident yet about gluing everything in place yet.
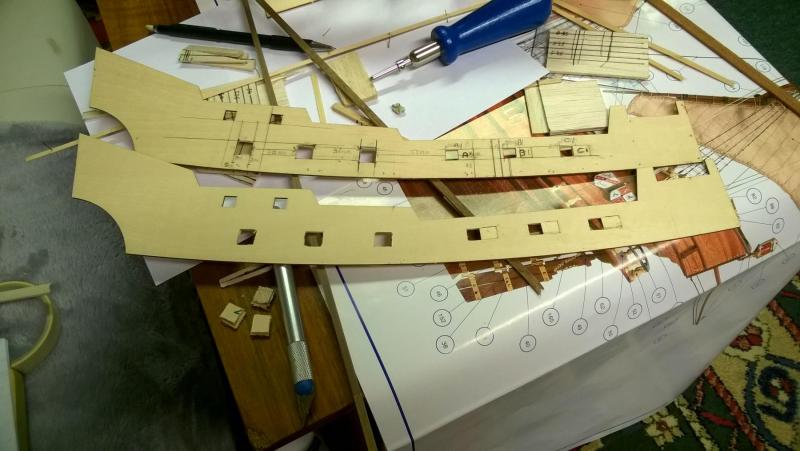
I have also changed my mind about not using the bulwarks as supplied. I shall however move the 3 main deck gun ports 1cm aft to avoid the foremost cannon blocking the ladder to the fore deck.

-
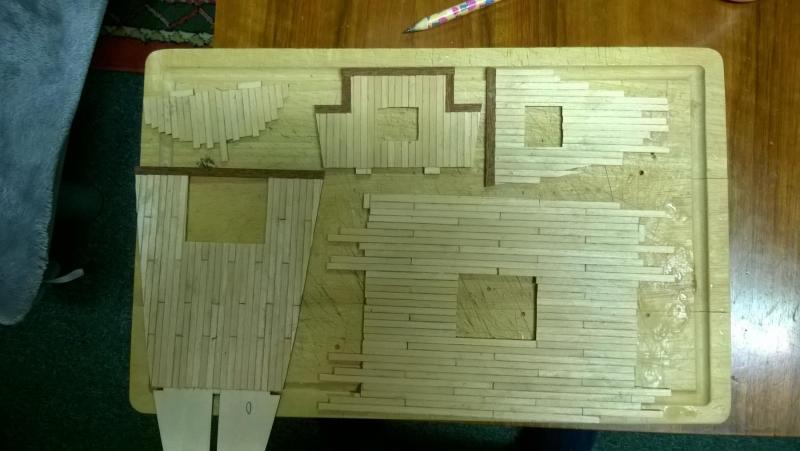
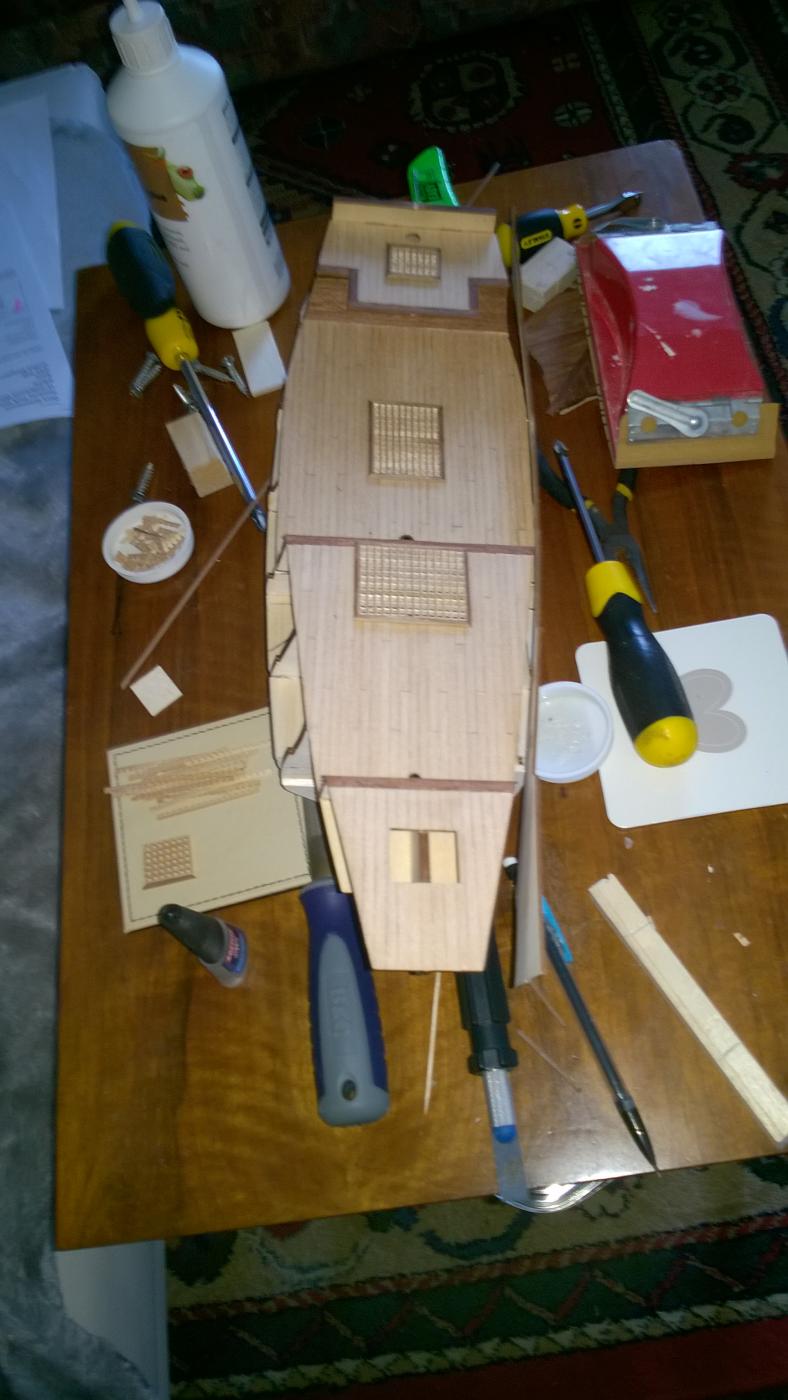
Over the last 2 days I have planked the decks in between figuring out how to get the look I wanted. (Thanks to everybody who has previously posted their build logs. I think I have seen them all and hope to learn bits and pieces from most of them.) and also what I am going to do with the hull. I have decided that I shall double plank the hull. I am also considering ditching the plywood bulwarks an planking these sections as well. I do not feel comfortable with trying to cut out the gun ports after they have been fitted. Thinking of gun ports I would still like to have some of the lower deck cannons showing. For this I am now considering installing dummy carriages and mount cannons to them towards the end of the build.
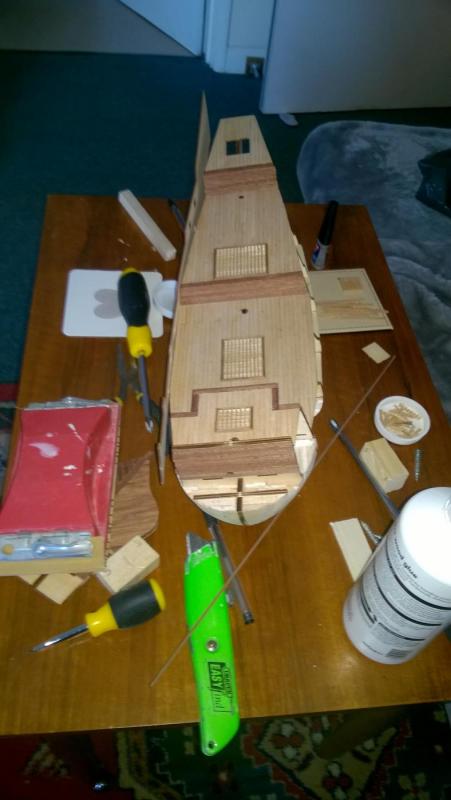
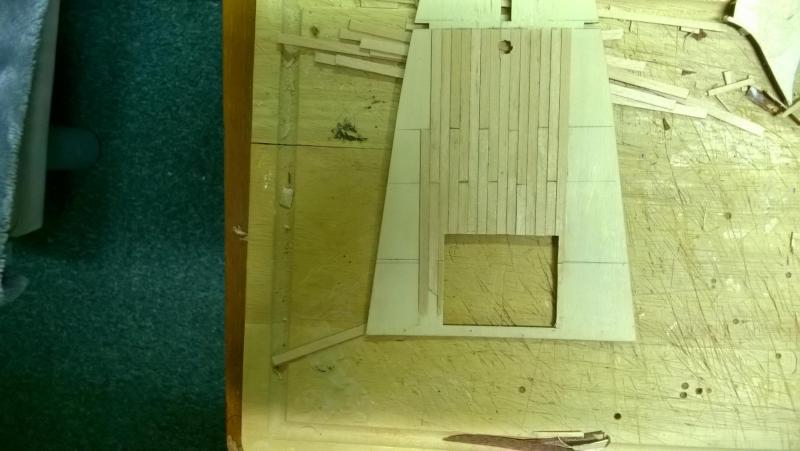
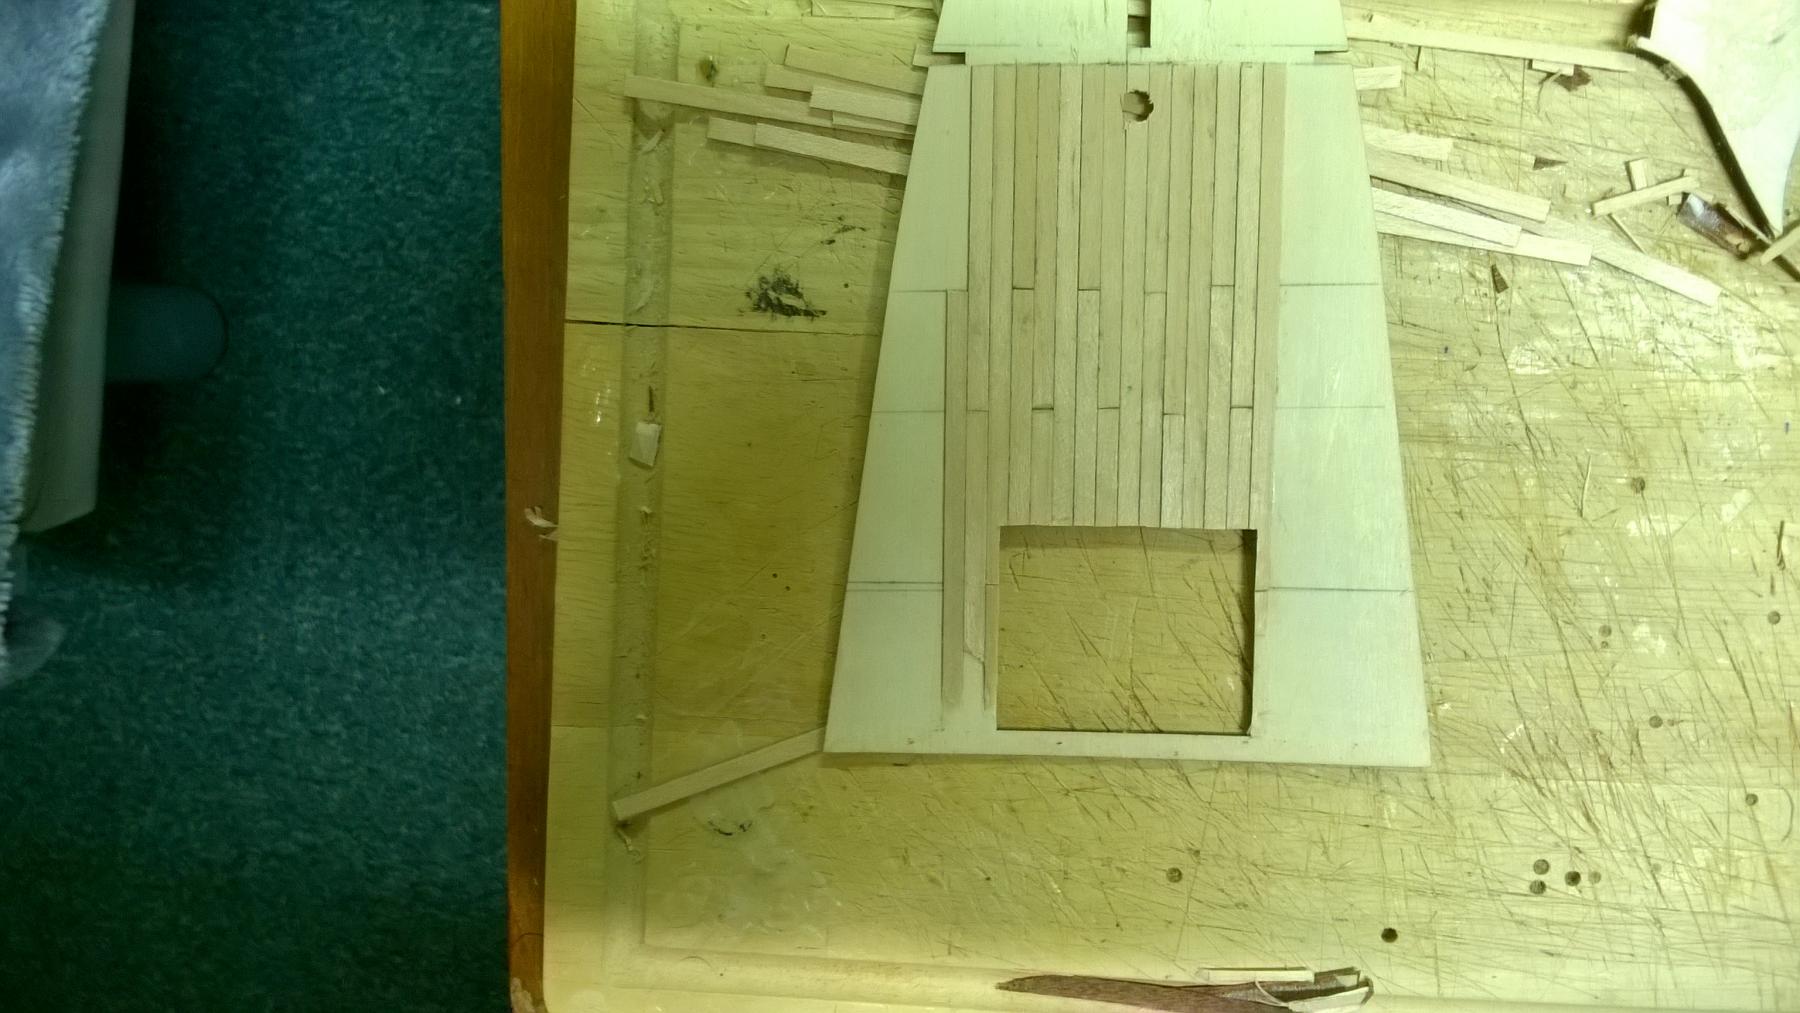
Meanwhile back to the decks. After a couple of dummy runs I finally decided to have 3 planks between butts. I tried having 2 and then 4 but neither quite looked right to me. I laid some planks down and marked lines across the decks to help line the planks up.
For the foredeck, Poop deck and the bowsprit deck I did not butt any planks together due to the shortness of these decks. The next stage is trimming and then sanding these decks smooth.
I also still need to file the bulkhead slots down a little more as when they are all in place the keel becomes slightly kinked. Without the bulkheads in place it looks fine so I think it just a case of the bulkheads fitting too tightly. I will need to be very careful not to have them too loose or uneven.
-
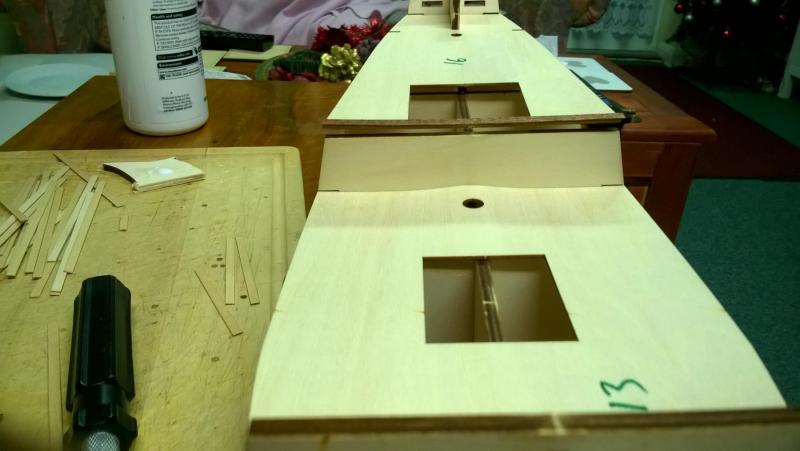
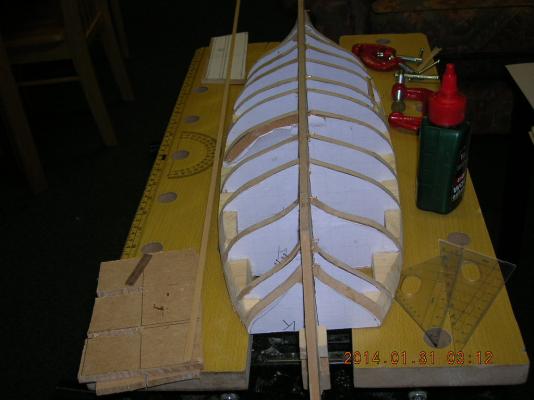
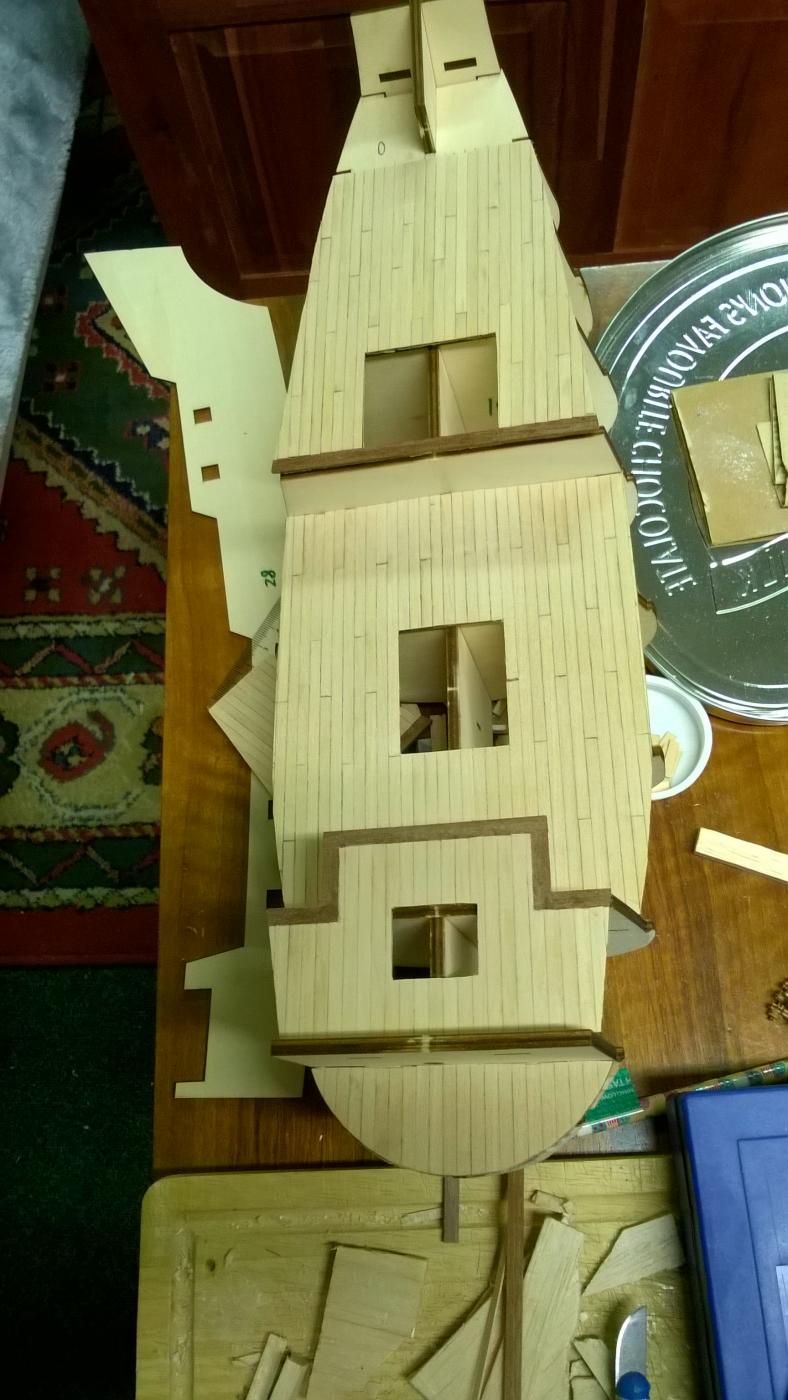
Having dry fitted the bulkheads and decks I found that the aft of the main deck formed a bulge with the false keel. I wondered how I hadn't noticed this the first time. I fliiped it over and the bulge had disappeared. I also found the poop deck seemed a little concave where it joins frame 12. I solved this by taking the point off the bottom of frame 12 and it now lies flush with the false keel. However now piece 22 will not quite be flush where it fits against the false keel and also the supports either side of the cabin door to the balcony may not fit either so I will need to be careful when I get to the planking here. I am hoping a couple of wedges will sort this later.
Now I am happy with the decks fitting I have started planking them. I really like the idea of showing the treenails in the planks but at this scale and also using 4mm wide planks I think they will look out of place. I started to plank as per instructions but have found that if I line them first I can do a better job of getting the plank edges straighter. Once the quarter deck was lined I realised that I hadn't taken the photos of the dry fitting.
-
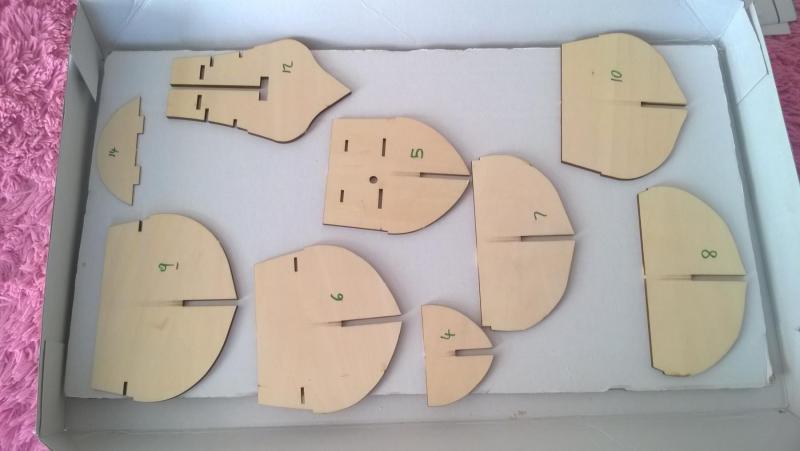
Many thanks EJ and Rexy. This build should get underway in earnest over the coming days. I have already numbered the main parts to avoid confusion later and attached the mast supports. I have also dry tested the frames. when I cut away the tabs holding the frames and sanded the rough edges I found them to be too tight fitting to the false keel so filed the notches very slightly on both frames and keel. I again dry fitted The bad news was that frame 11 got really jammed and I thought I might damage the false keel trying to remove it. The good news is that I checked it's alignment and luckily it is true perpendicular so have glued it in place. My first bit of luck. One thing I should add at the beginning, before this kit arrived, all the photo's of the contents I could find looked as if the sheets of wood were laser etched rather than cut. I was, therefore, highly relieved to find they were cut. The next thing I shall do is dry fit again and check if the decks will be curved or flat as this time I am considering planking them prior to fitting. However that is a job for tomorrow.
.

-
Firstly I would like to thank you for the kind comments I recieved when I attempted a scratch build of a 50 gun ship. After 2 failed attempts I realised that my knowledge of boat building was nowhere near being close to succeeding though it was fun attempting it. It has also provided me with a lot of extra timber which, having read a lot of posts, should prove very useful. So now it is back to building a kit.
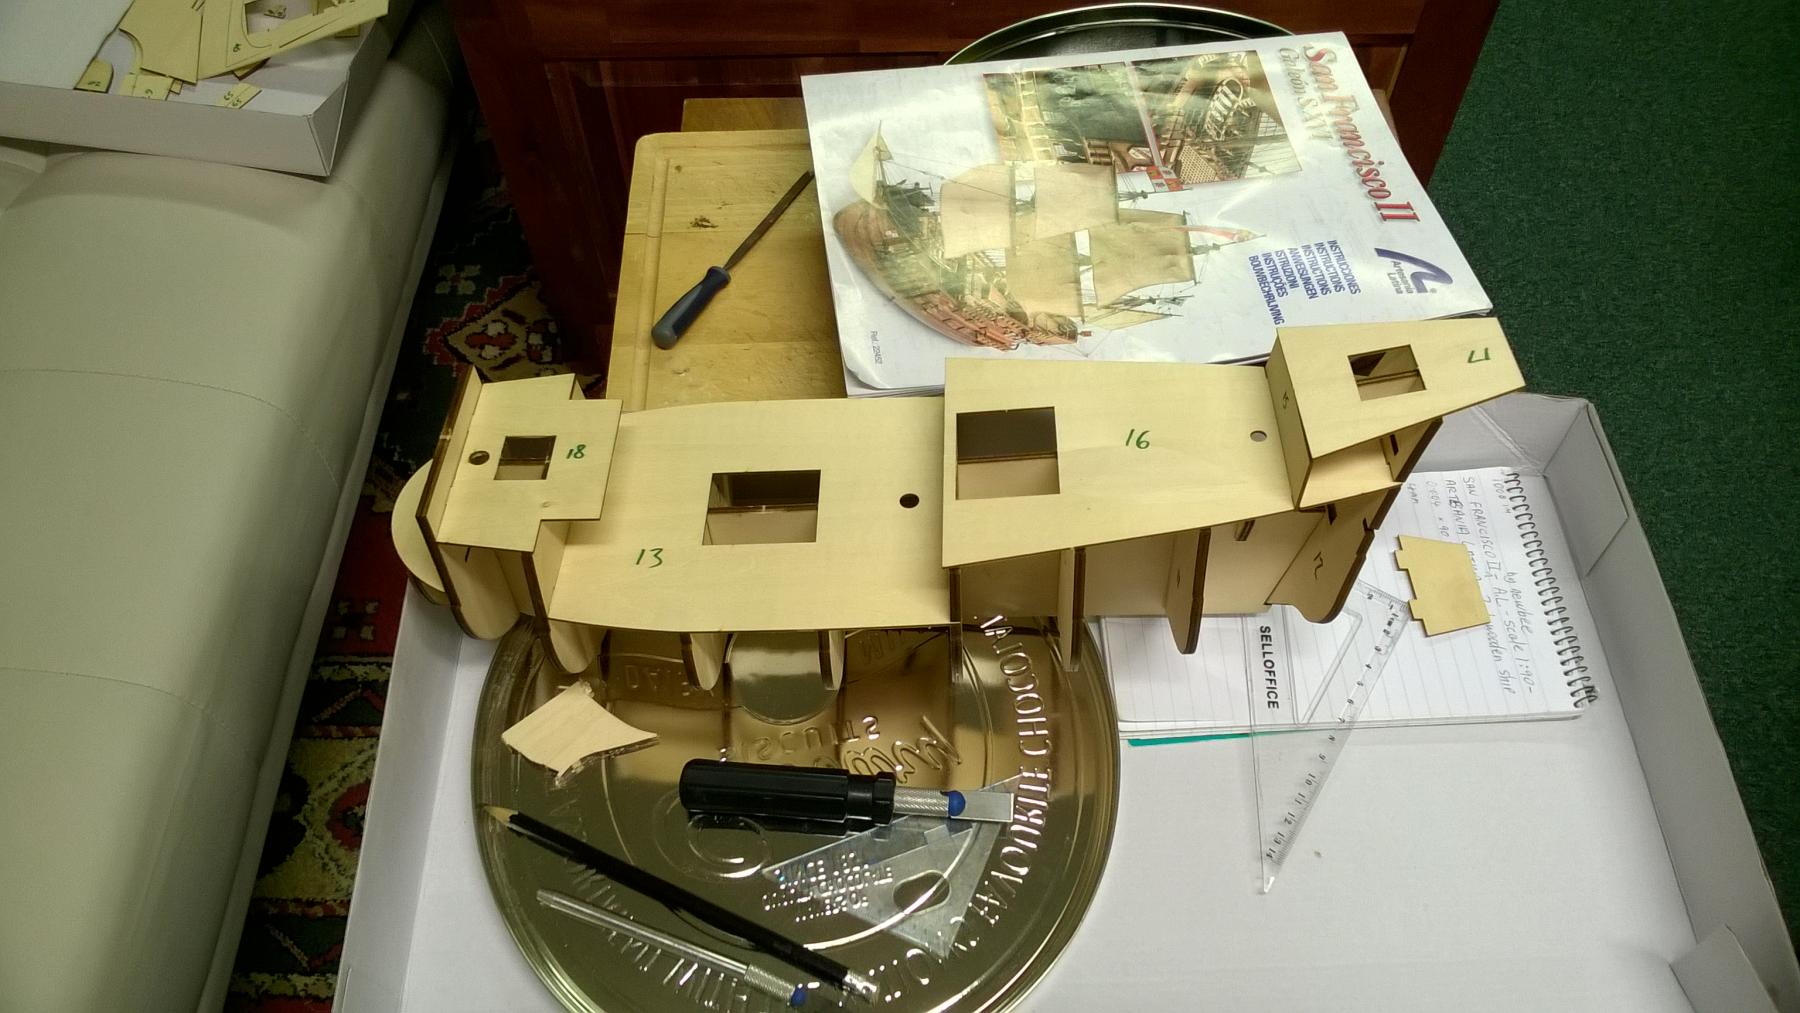
At first sight the kit looks well organised and the plastic boxes will be very useful for the smaller bits and pieces. However on closer inspection this version only has the crude metal gun carriages which I am hoping to either make or buy as wooden ones. The deck planks at 5mm wide look way to wide for the scale but I have plenty of 4mm strips which look closer to scale despite only being 1mm different. I was pleased to see the gun port frames and lids are separate and I hope to have some open on the lower gun deck as I have 12 cannons already made up though not historically accurate. I also have several widths of 1mm mahogany which will allow for double planking of the hull. My previous completed ship kit was the Golden Hind by Mamoli and I found the 1.5mm lime wood planks hard enough to work with never mind 2mm thick mahogany. I have also noted that several people had trouble cutting out the gun ports and I plan to add extra balsa between the frames and improvise a small deck area under the ports to mount the extra guns. I hope this should also allow me to plank around the gun ports rather than cutting them out.
-
Many thanks for your kind comments. It does feel that I am getting somewhere but you are right Druxey, All good things do take time. I have learned alot since beginning this build thanks to this site especially.
The next step has become sanding down the inboard sides as I have reallised that instead of being 4mm thick they are between 6 and 9mm at present. I am guessing this will take another week or so but, I have a feeling that the the hull is thicker at lower gun deck level than at the rails so I need to check by how much.
When it comes to the planking I am planning to use 1mm x 5mm and 3mm mahogany strips for the outer hull and 1mm x 5mm beech strips for the inner with 0.5mm x 5mm maple strip for the decks. the beams will be 5mm x 5mm walnut, I think. These will be sanded down to taper at the ends to obtain the curve of the decks.
-
Unfortuneatly it has been a while since my last post but I have progressed steadily, though slowly, I think.
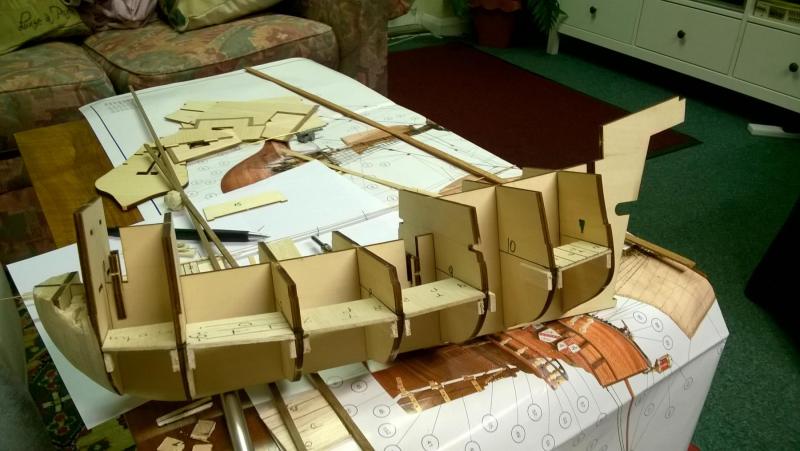
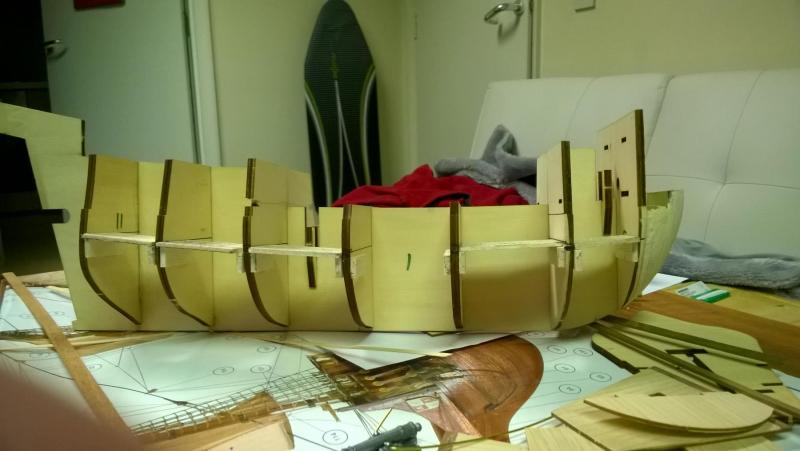
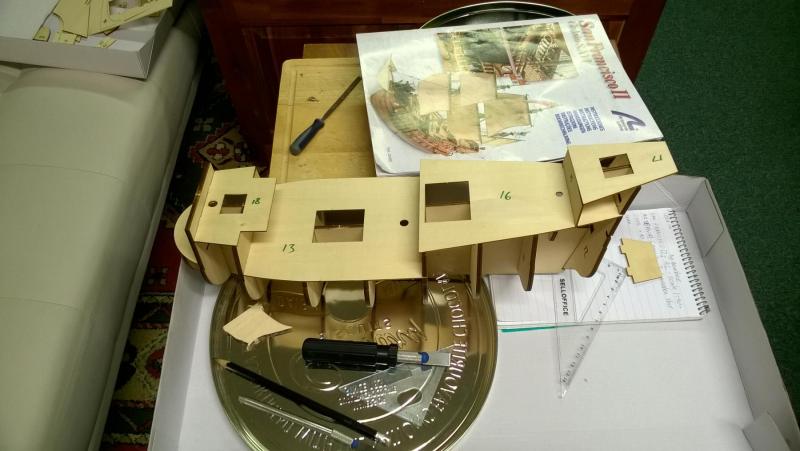
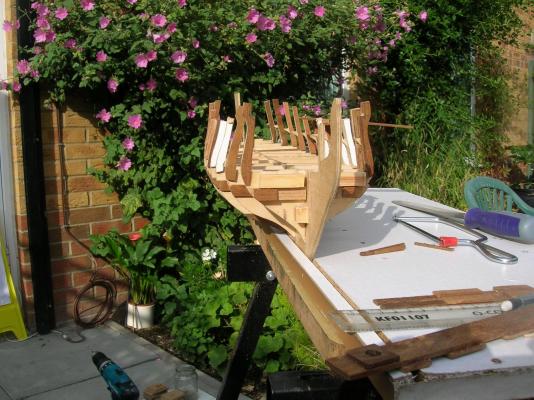
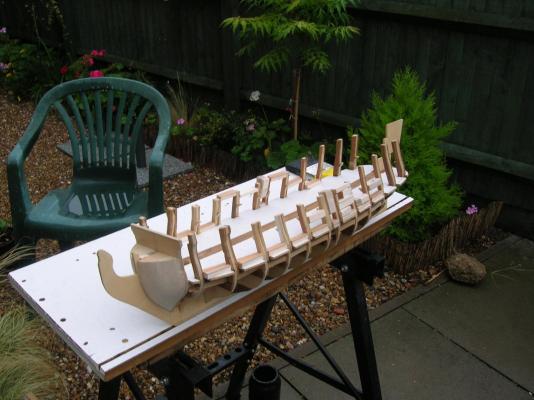
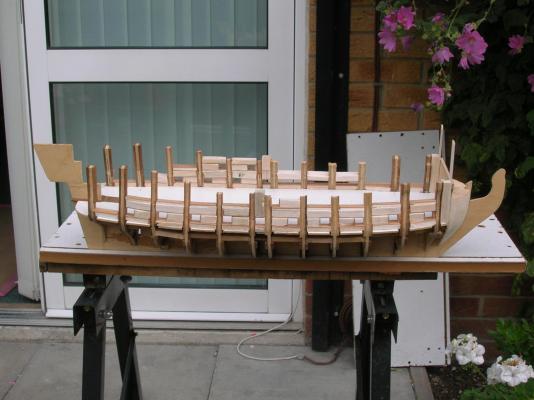
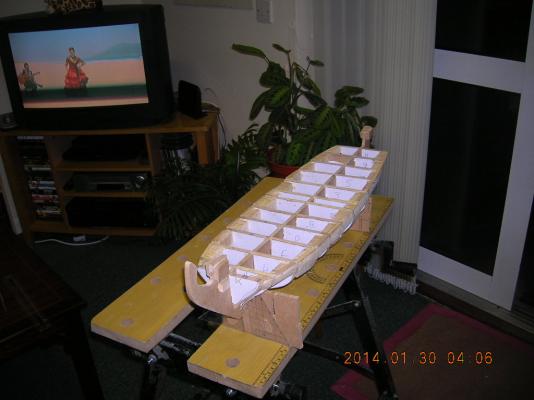
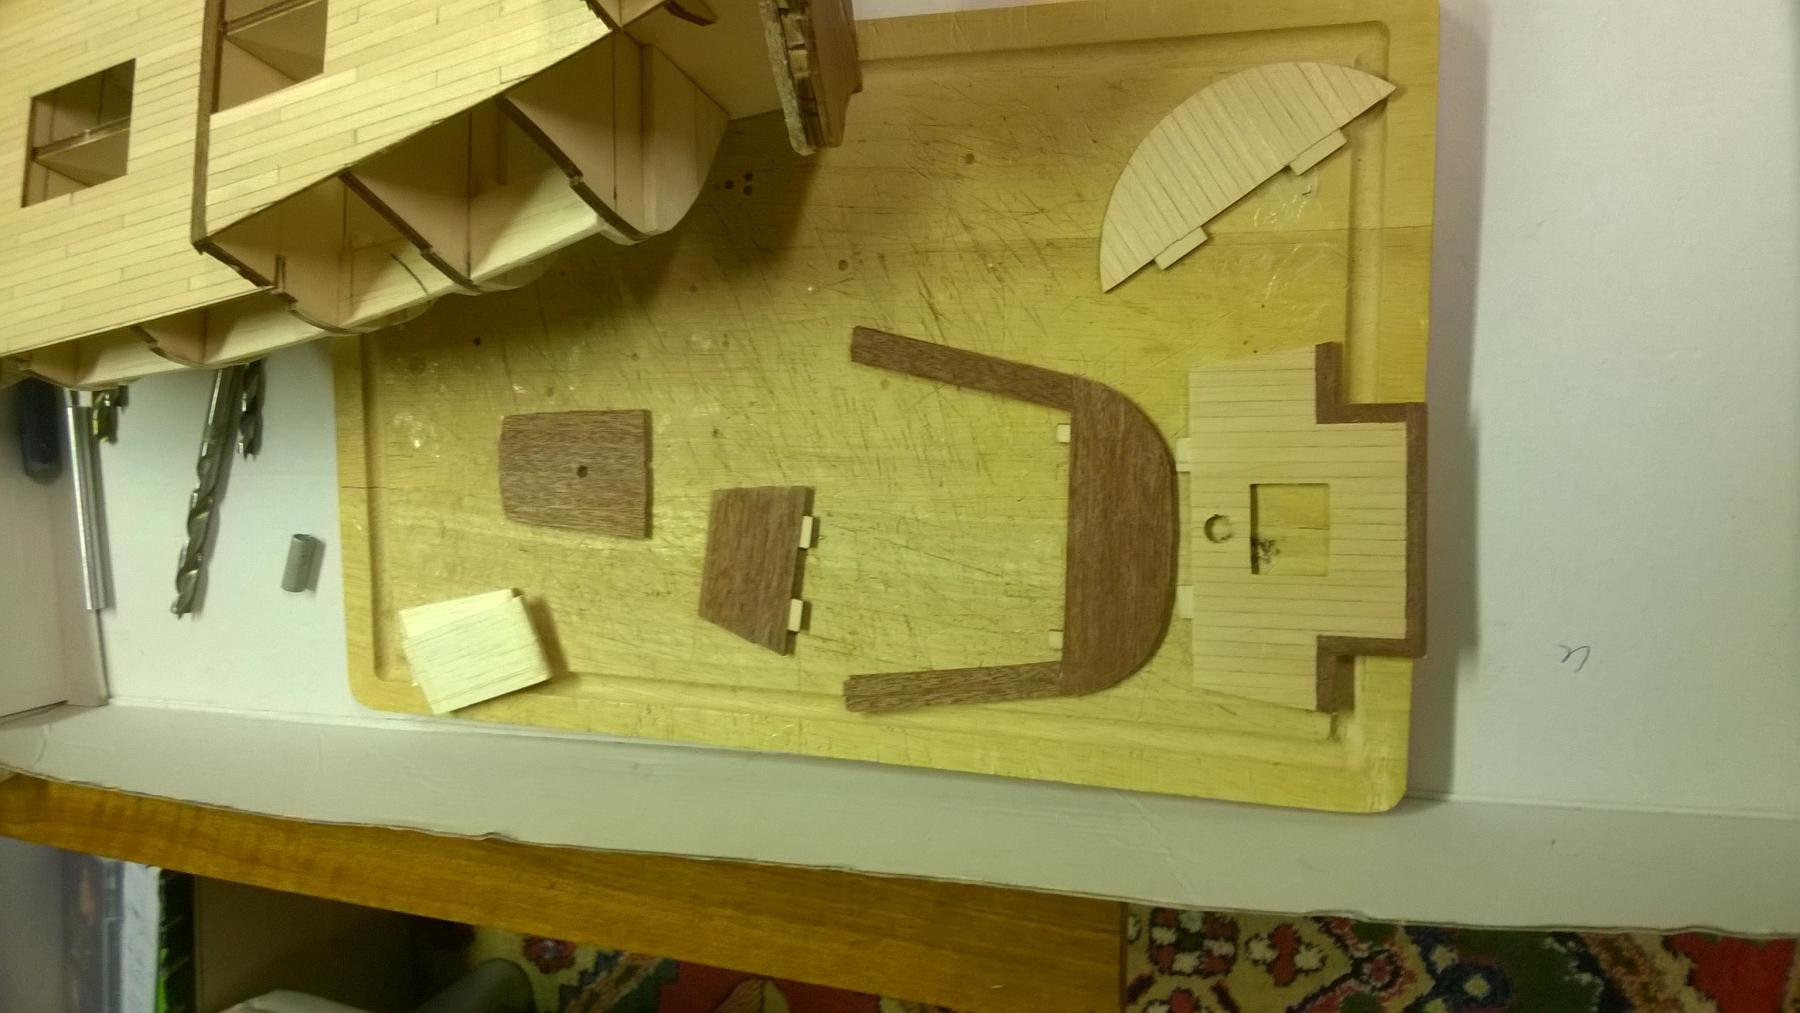
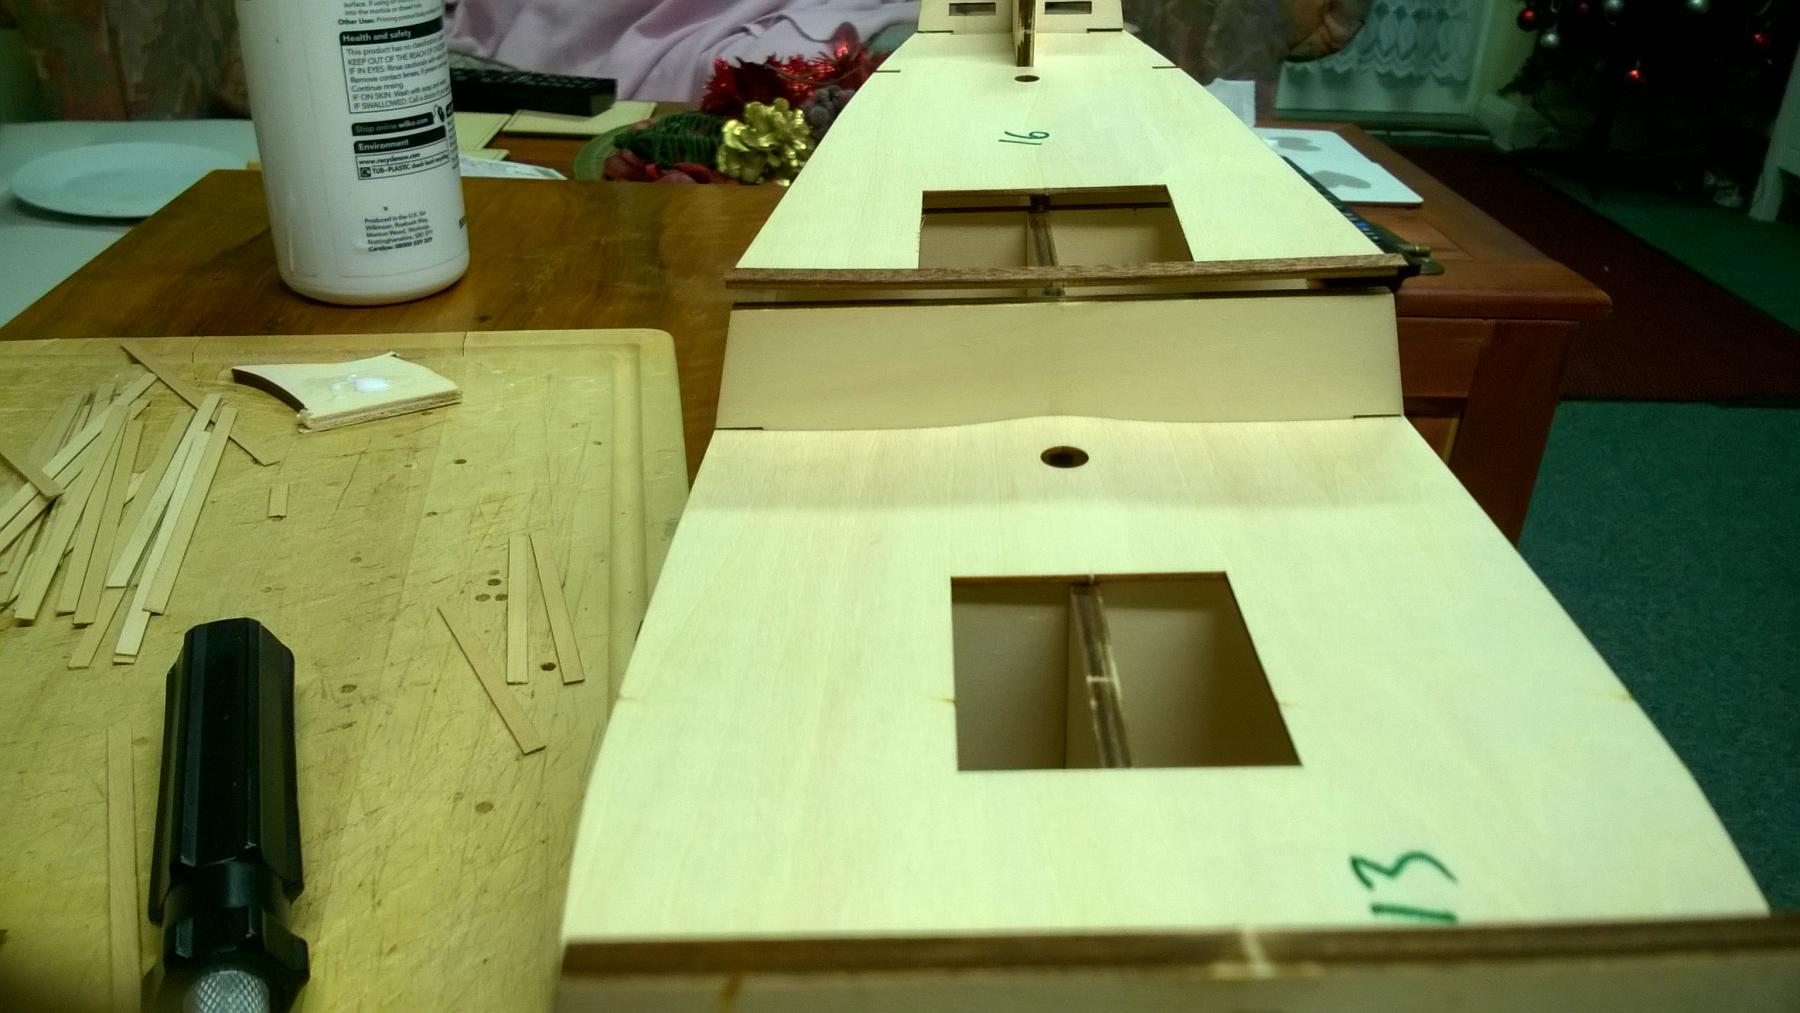
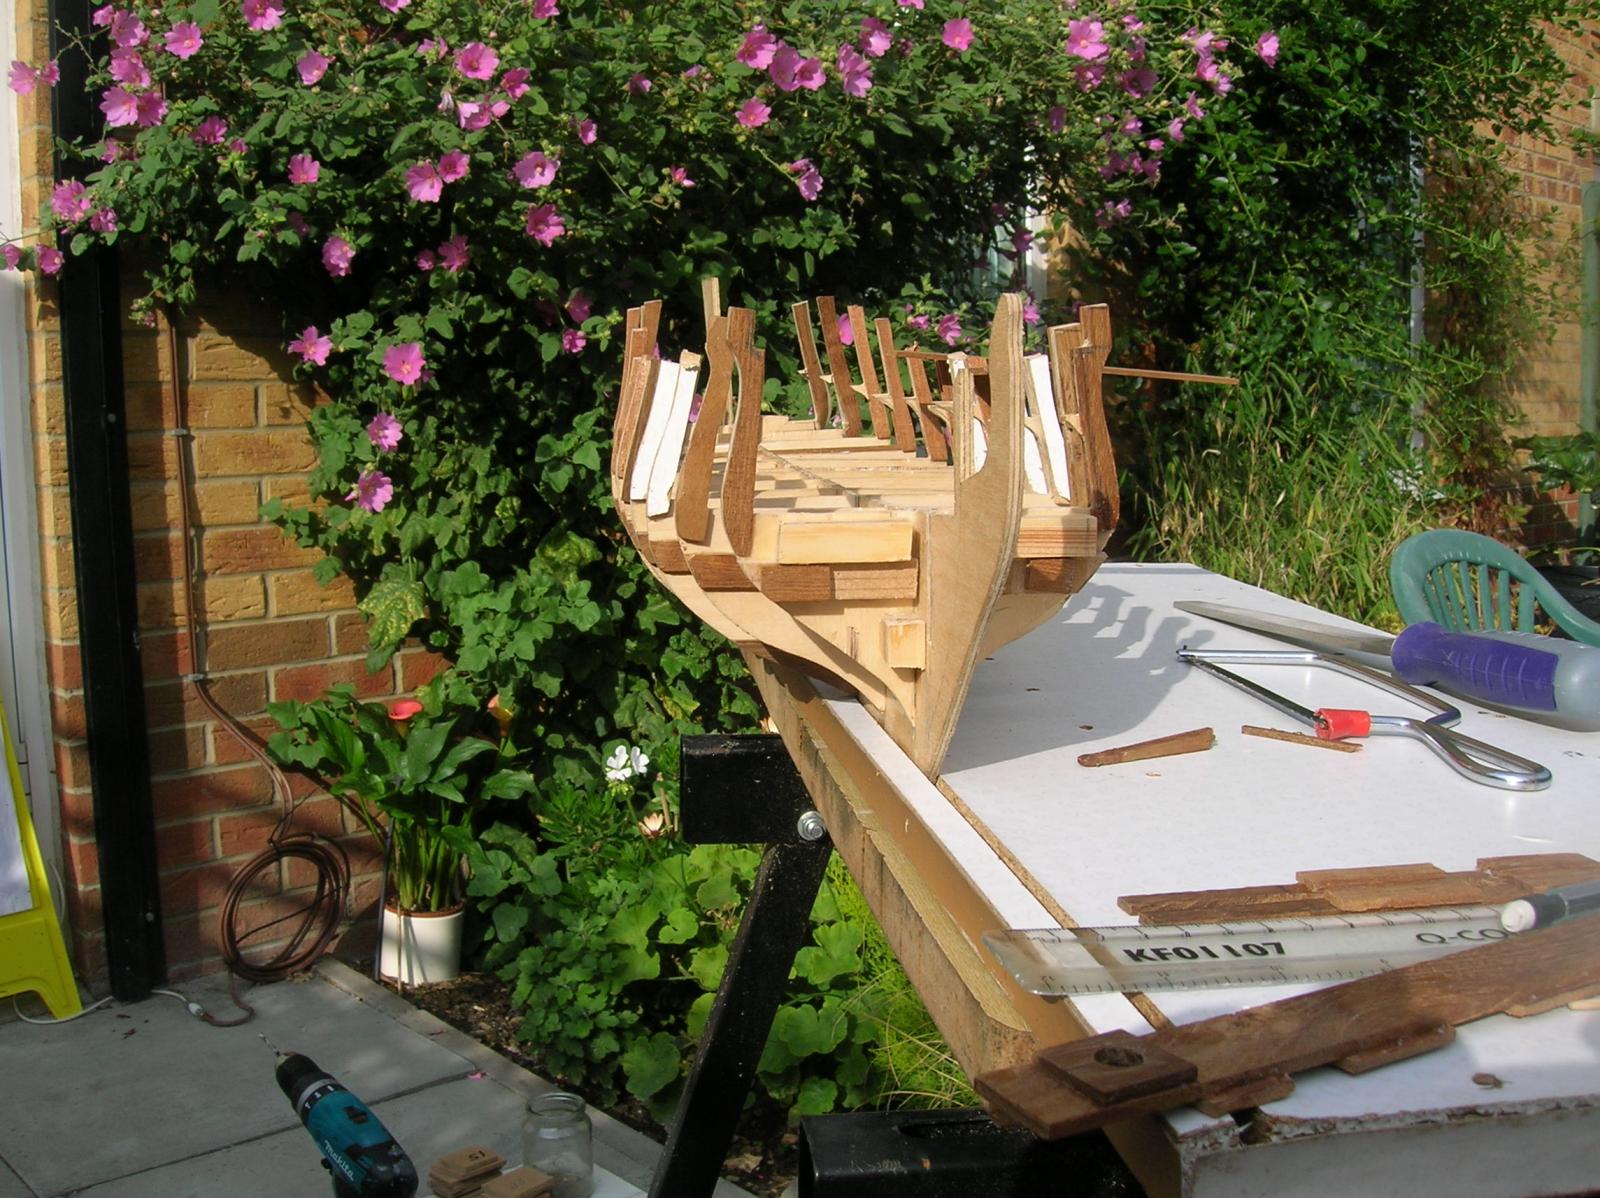
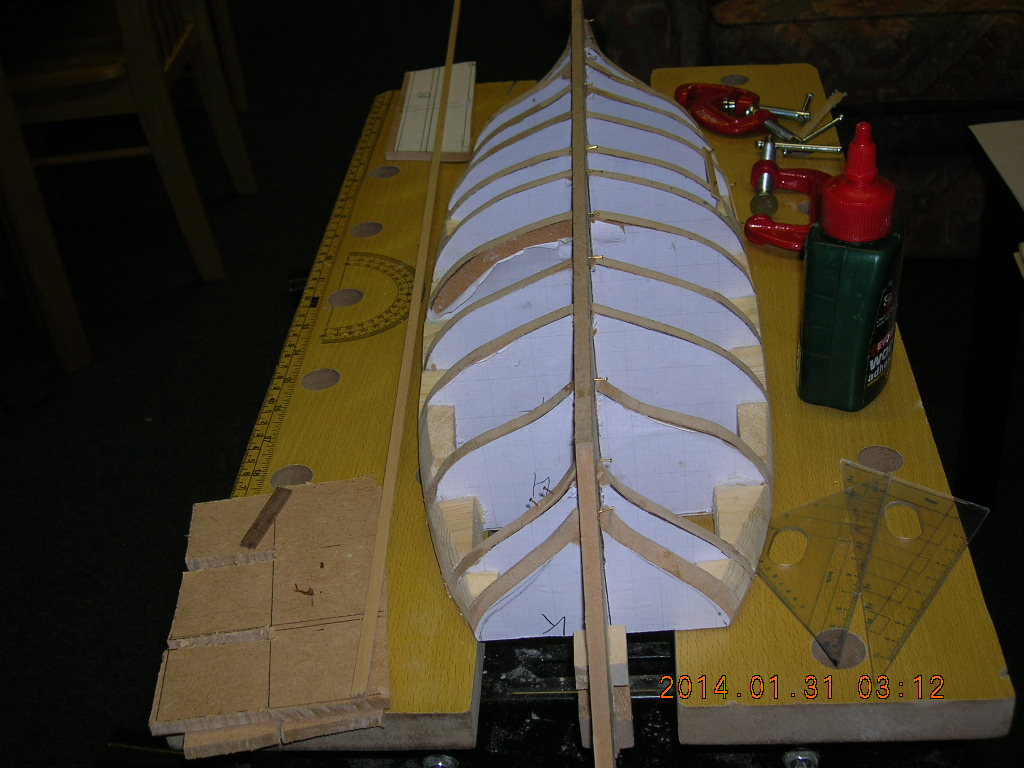
I finally got the basic shape of the bulkheads before cutting out the middle of them. I then decided to strengthen them by adding strips of wood either side. However, they were still too delicate and in order to sand the sides safly.I then added the lower gun deck as 3 sections. I used a 2cm wide strip down the middle into which I drilled out the holes for the masts. I next built up the sides using balsa strips. While doing this i created the gun ports by adding birch strip on top or below each layer as well as on the ends of the inner sections. Once this was completed i now have a sturdy structure which can be easily sanded to the final shape. I am not happy with the supports for the upper gun deck i left on the bulkheads and so have removed them. Instead I shall fit 2mm strips and add the beams accross them.
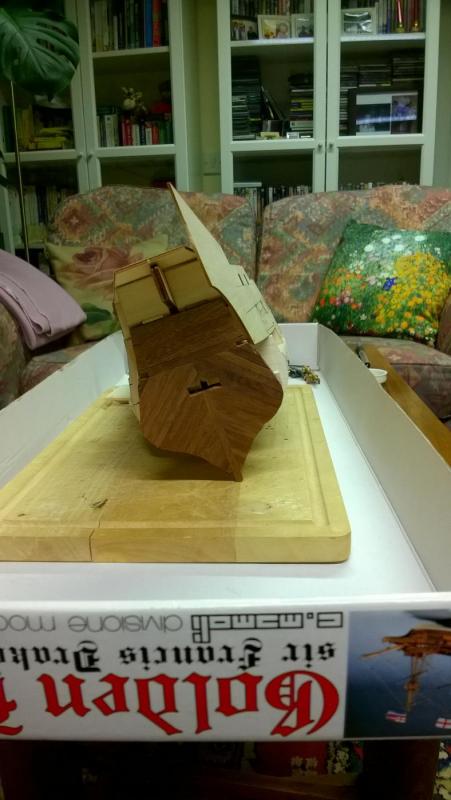
My next task is to add the stern filler blocks and then start the planking.This will be followed by construction of the stern galleries. My plan for these is to build from the poop deck downwards and finnish with the entire stern section fitting behind the final bulkhead and removing that part of the false keel. That is the plan though it is not finalised yet.

-
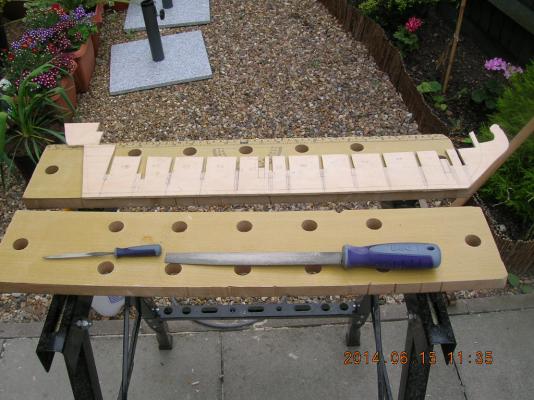
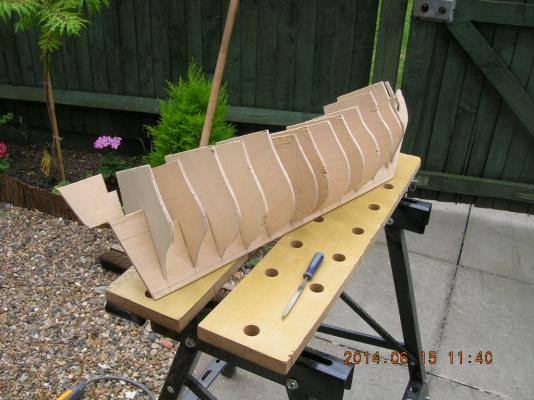
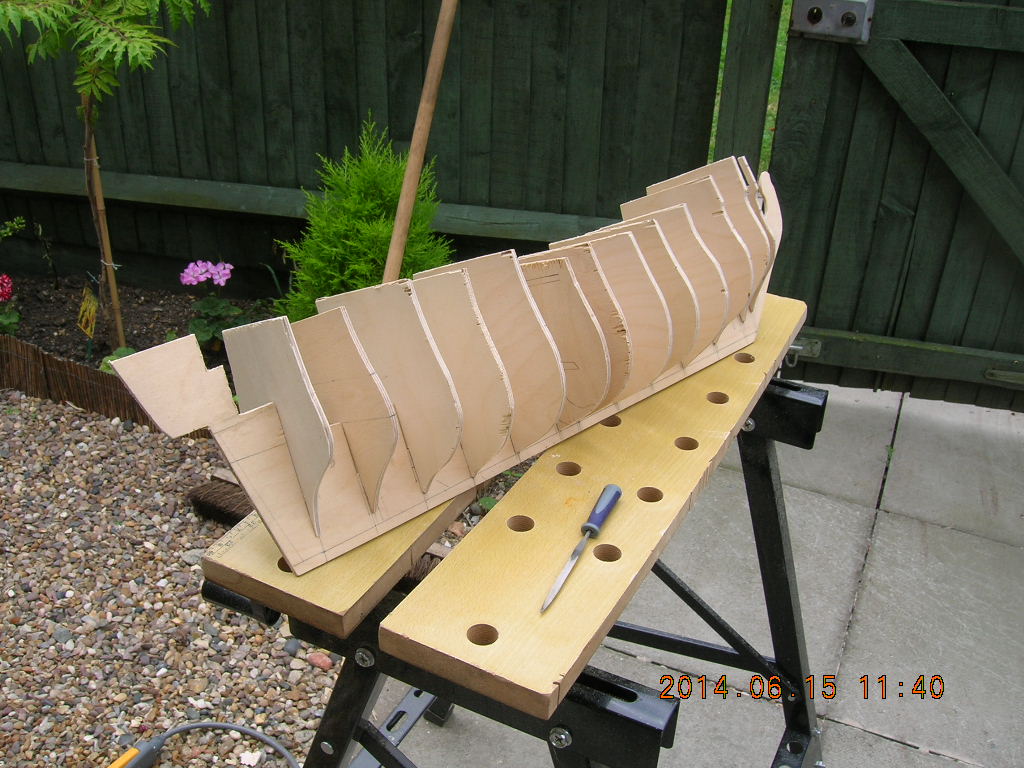
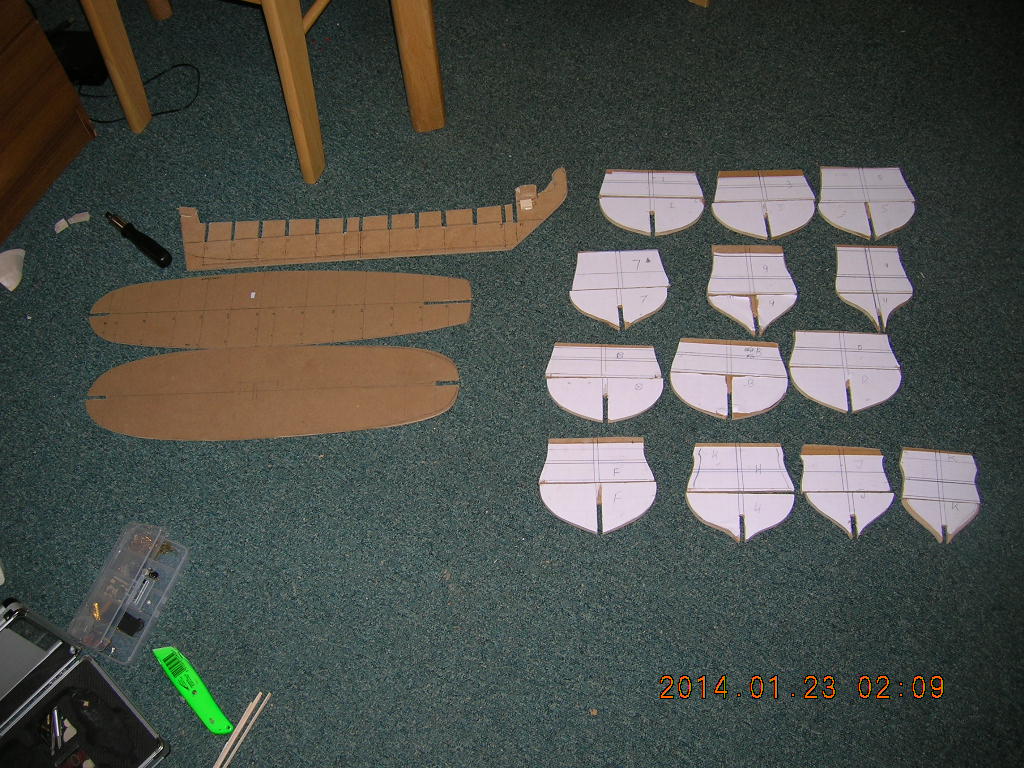
Finally I have cut out the basic shapes of the false keel and 13 bulkheads. Unlike my first attempt the bulkheads are not too tight and should be easy to fix in position with some scrap wood. I am having trouble cutting out the middle of the bulkheads as the plywood is too brittle for a jig saw so am using a junior hack saw and files but even then it is too easy to break. Really glad I ordered an extra plywood sheet and have plenty in case i break a few more. I think the shape of the stern looks better this time as I have slightly altered the last 3 bulkheads to give a larger dead wood section which seems to improve the shape of the hull. I will be really happy to complete this stage as it seems to be taking an age.


-
Thanks again for the info Druxey.
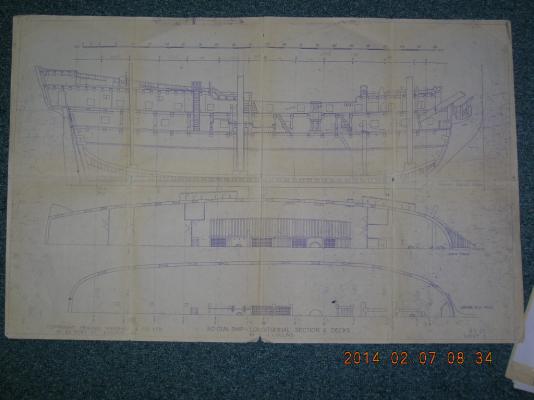
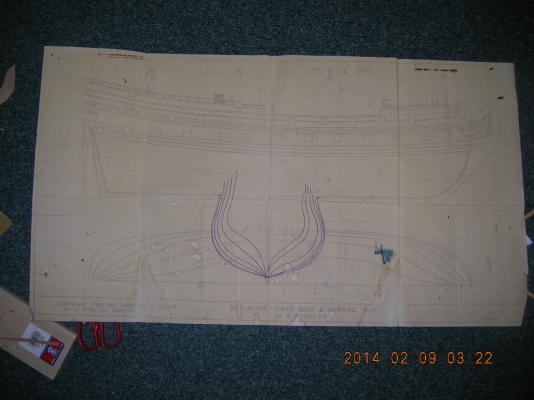
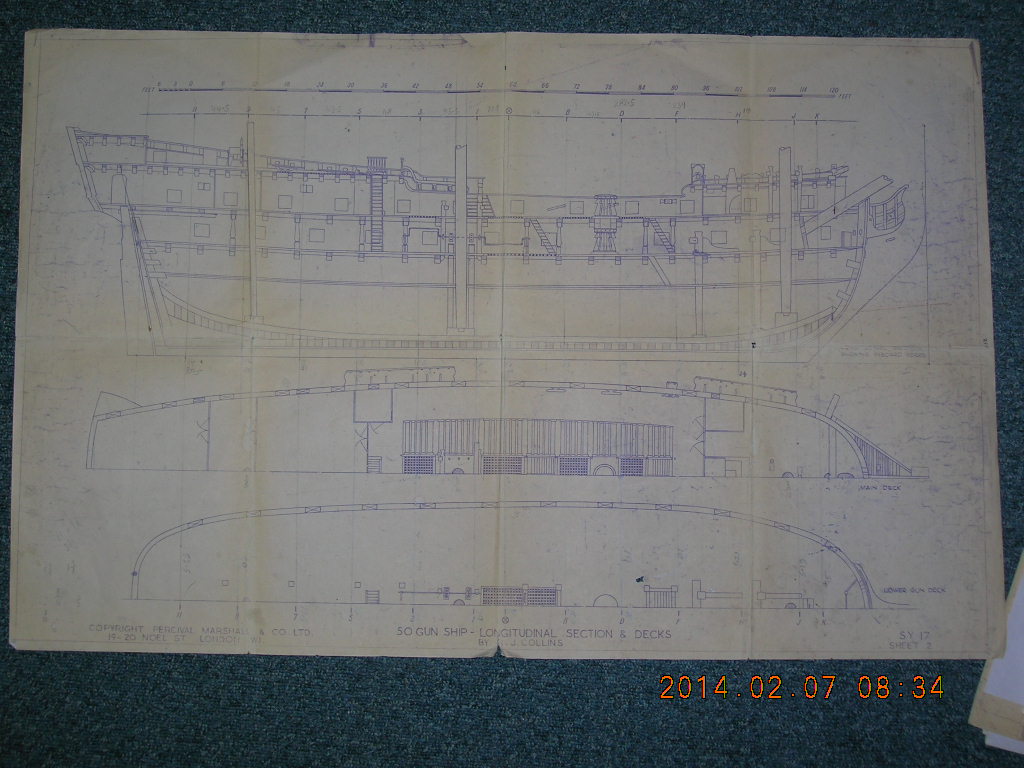
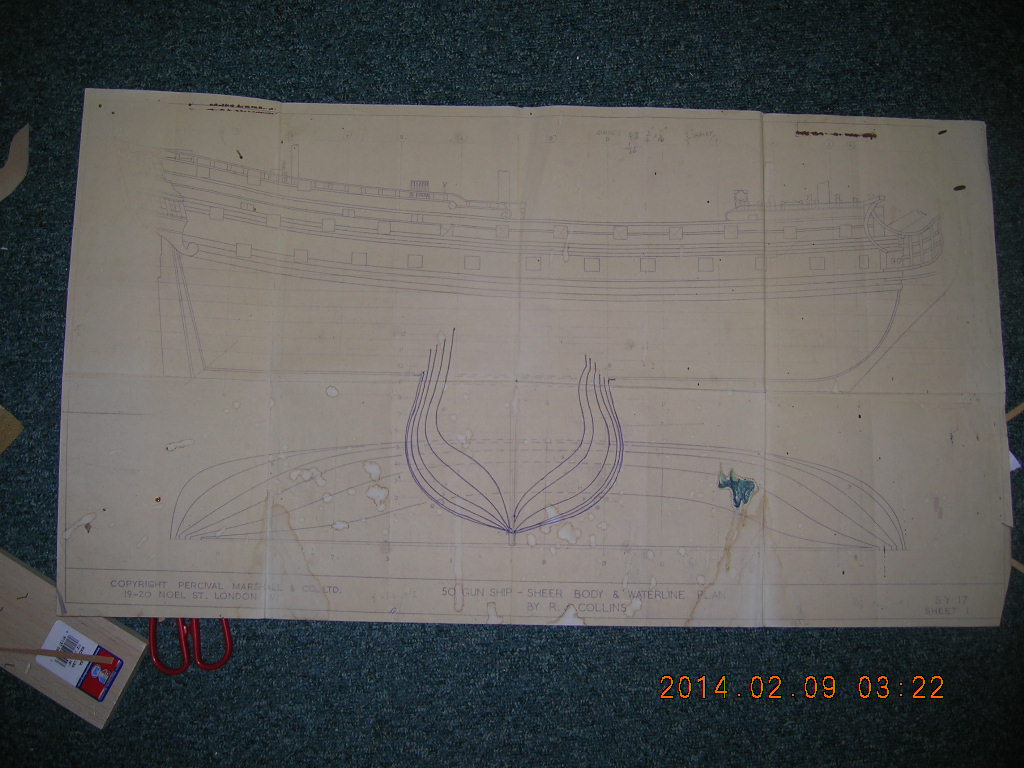
I have all 5 drawings but, unfortunately, there is no bow or stern view included. The bulkhead sections had been drawn over by a previous owner of my copies and to compound this the sections towards the stern do not seem to show much deadwood, I think that's the term, where the keel at the stern remains flat up to the curve of the hull, Neither do they show the stern area between the waterline and upper gun deck. This was where I had the greatest problems probably compounded by not having the full shape of the stern above the lower gun deck.This being the main cause of re-starting this project. However I was fairly happy with the shape I had at the bows, I will see if I can find the copies of the model engineer.
-
After much consideration and reluctance I have scrapped this build and re-started from the beginning. I have now completed the drawing stage and started cutting out the false keel and 13 bulkheads. I have also abandoned the idea of building up to the lower gun deck in the first phase and will instead continue with the bulkheads continuing above the final deck positions with a view to trimming them back down to size later. The idea being that, with the full frame structure, I will have a better idea of creating the shape of the hull especially sloping aft up to the top of the sternpost. (This was the main reason for starting again.) I have also used 4mm plywood instead of 6mm MDF as the thickness of the keel with 1mm strip either side appeared too thick. photos will follow when the cutting phases are complete.
-
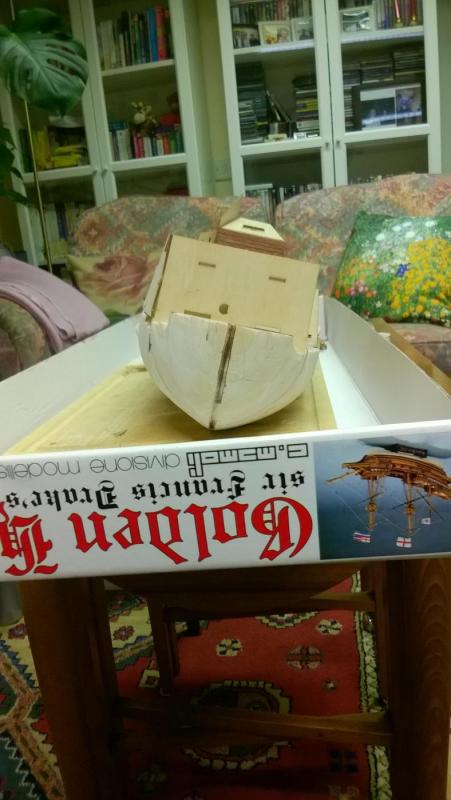
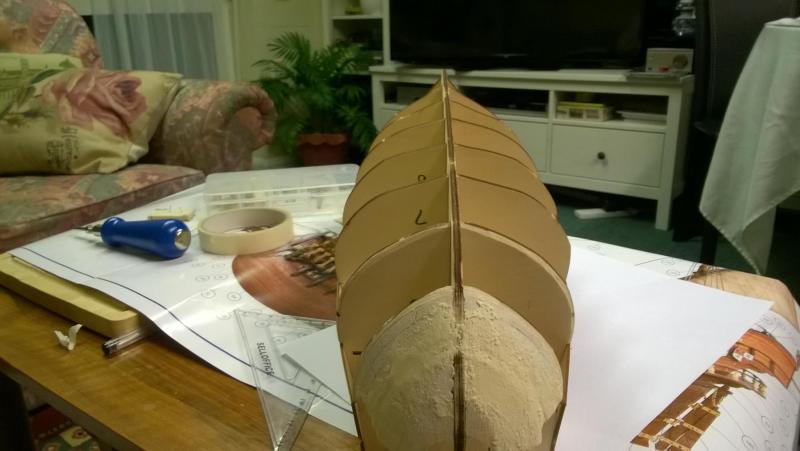
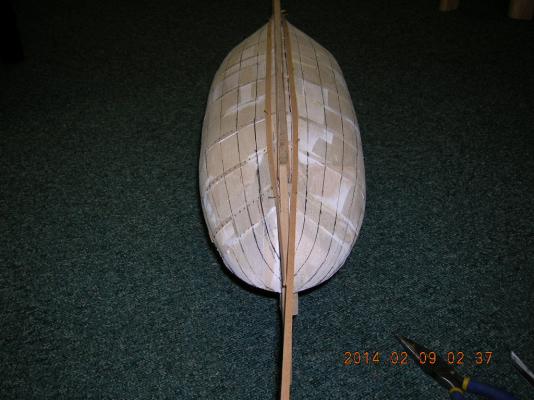
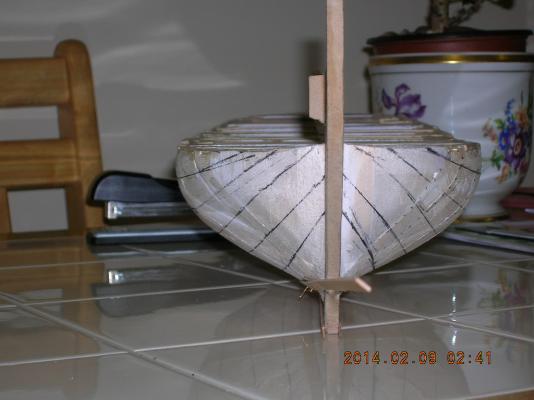
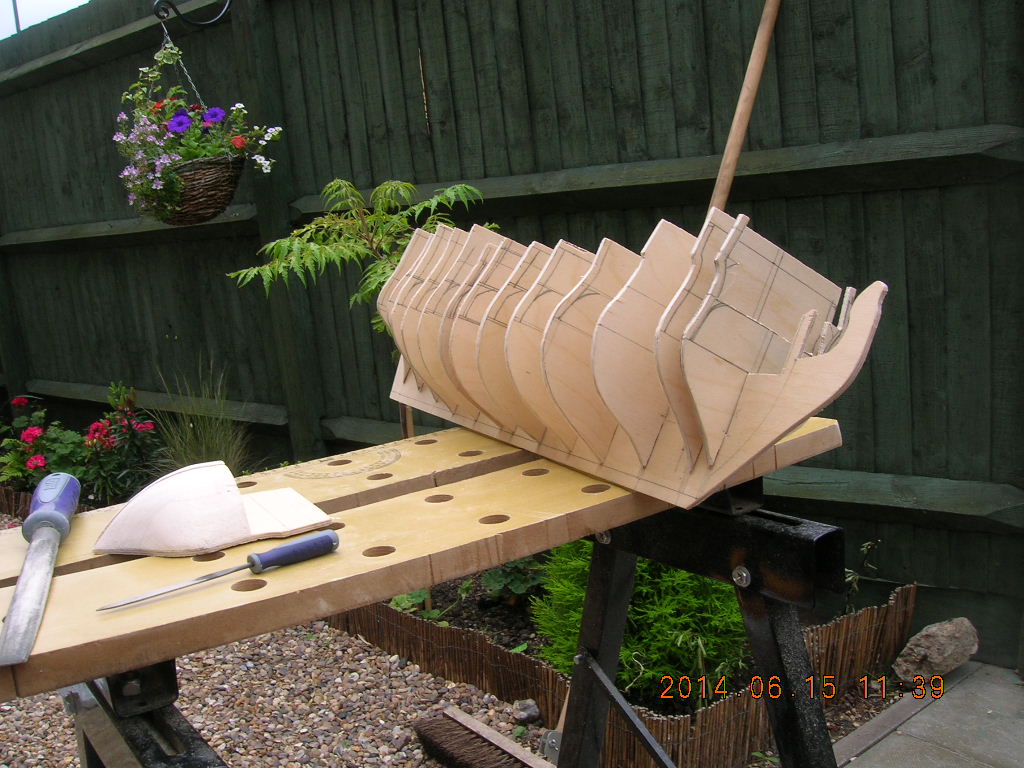
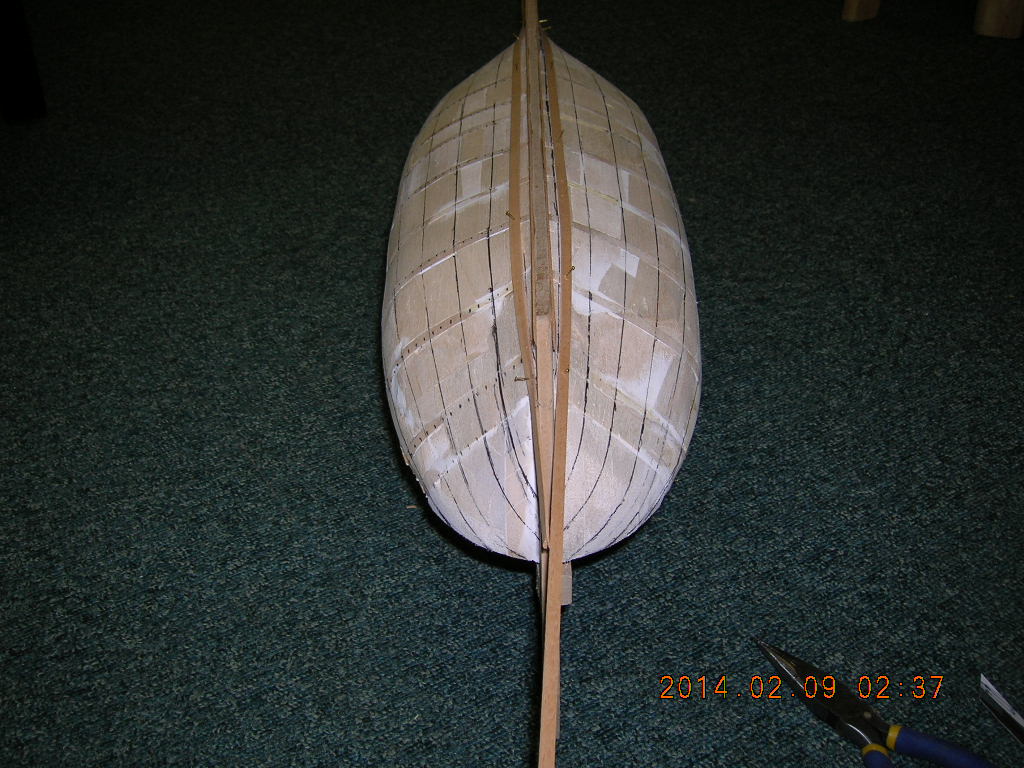
Thanks Alan. I will try to post the drawing I have but here is the latest view with a line marking the possible curve for the stern. As you can see I was a little heavy handed with the sanding but a little balsa sheet and filler can fix it.
I have tried to add a couple of pictures of the drawings I have and since my last post have sanded down the stern either side of the keel and have divided up the hull into planking segments into 20mm bands in the midships. I hope these add to this post ok. Lines on the stern have not been continued yet as I am still not completely convinced the hull is correct yet.


- qwerty2008 and mtaylor
-
 2
2
-
Firstly I wish to thank everyone for the welcome. This is my first ever build log so it may take a while to find my feet. I am working from drawings that I received from a friend although as there is no stern or bow view I think at least 1 page is still missing. After much trial and error through the drawing and cutting stages as well as materials I have now achieved the basic shape of the hull although the stern will be work in progress for a while yet. I am currently waiting for my first delivery of timber which will include 5mm x 1mm beech strips for the first layer of planking as well as 5mm x 5mm walnut strip for beams. As you will notice I am also building the hull in stages starting with the keel to lower gun deck. This was decided (after filling the spaces between the top of the bulkheads with pine blocks) and the rest with balsa that I should have a strong enough base to mount the upper halves of the bulkheads as well as adding more if required. Once the planks arrive I shall complete the shaping of the hull and decide whether to take the curve of the stern higher,(I'm afraid I'm not sure of the term for this) It doesn't quite look right to me.

- Omega1234, qwerty2008, mtaylor and 1 other
-
4


San Francisco II by newbee - FINISHED - Artesania Latina - Scale 1:90 - 2nd wooden ship
in - Kit build logs for subjects built from 1501 - 1750
Posted
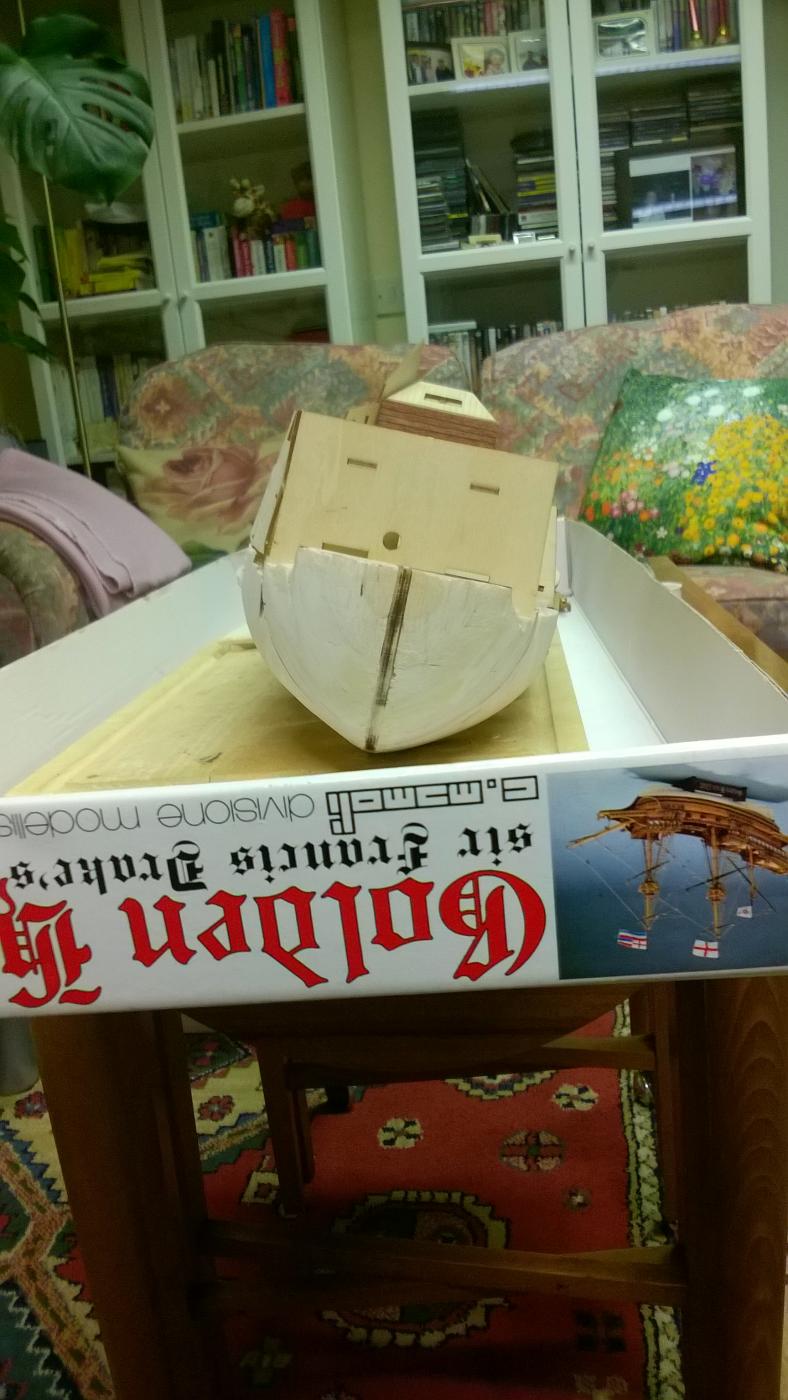
Many thanks for your kind words EJ. You are quite right about the learning to be had here.
Having filled the bow sections I have now ordered some more balsa blocks for the stern. I ended up using 5mm sheets for the bows but the stern is not so suitable for this. I have also ordered smaller belaying pins. The ones in this kit are 10mm long which would mean 90cm in real life. I will now have 5mm long ones which though still out of scale will look a lot closer. As well as these I also have 1 cannon with carriage, though it is 40mm long when complete, but a Spanish 2 wheeled version which, I am hoping, will look more realistic especially compared to the crude metal ones included in my kit, There are also 20 cannon barrels for the lower decks on their way. The idea with the carriage is to basically customise it to fit and then reproduce it for the upper decks. This leads on to another problem. The 3 aft main deck gun ports were cut out of the bulwark by measuring their positions from the full size picture to place them. However when fitting the bulwark the rear most 2 ports coincide with bulkheads 10 and 11. I now need to decide whether to leave them as they are and have these ports closed or adjust them away from the bulkheads and have them open. I will plan this on paper before going any further with this, especially as their positions will effect the lower gun ports. This will keep me busy for the next few evenings while I wait for my deliveries. I also hope to build up the lower gun deck sections for the gun ports to fit in to. In the mean time tonight it is back to reading and admiring more posts and pictures.