jspector
-
Posts
24 -
Joined
-
Last visited
Recent Profile Visitors
668 profile views


-
 yvesvidal reacted to a post in a topic:
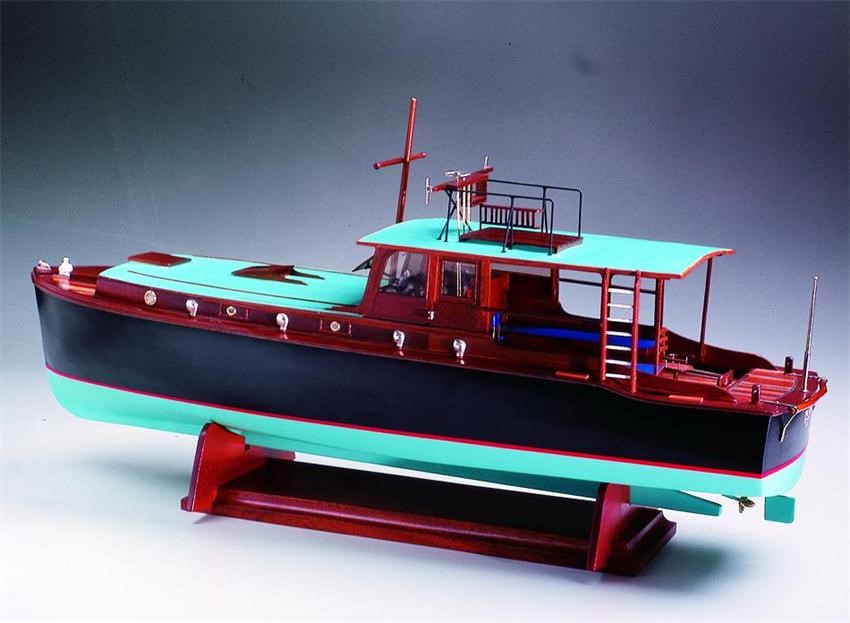
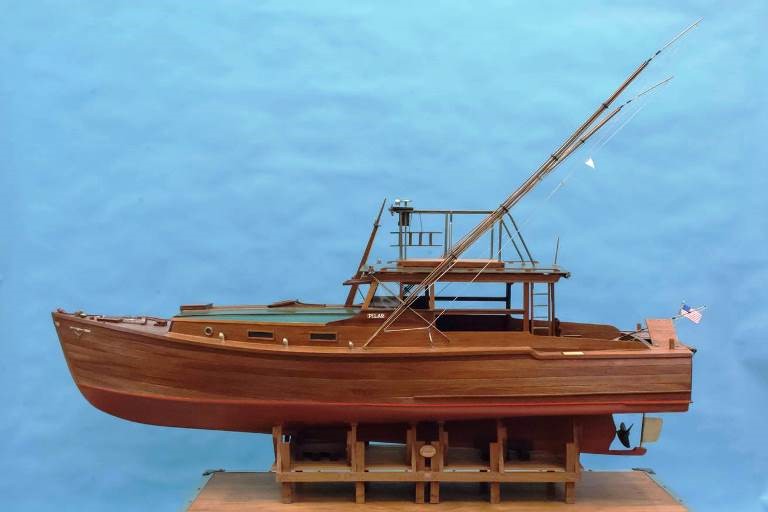
Pilar 1934 by jspector - Constructo - Scale 1:27 - pleasure yacht as specified and commissioned by Ernest Hemingway
yvesvidal reacted to a post in a topic:
Pilar 1934 by jspector - Constructo - Scale 1:27 - pleasure yacht as specified and commissioned by Ernest Hemingway
-
IgorSky reacted to a post in a topic:
Pilar 1934 by jspector - Constructo - Scale 1:27 - pleasure yacht as specified and commissioned by Ernest Hemingway
-
IgorSky reacted to a post in a topic:
Pilar 1934 by jspector - Constructo - Scale 1:27 - pleasure yacht as specified and commissioned by Ernest Hemingway
-
IgorSky reacted to a post in a topic:
Pilar 1934 by jspector - Constructo - Scale 1:27 - pleasure yacht as specified and commissioned by Ernest Hemingway
-
BobG reacted to a post in a topic:
Pilar 1934 by jspector - Constructo - Scale 1:27 - pleasure yacht as specified and commissioned by Ernest Hemingway
-
 Hey Scott, You are too modest. Your metalwork looks near perfect to me! Thanks for the tip on the epoxy. The Aruldite is supposed to dry as a honey color, which would be fine for the brass railing.
 -
Hi Scott, Not only is your presentation here great, the build itself is remarkable. I am particularly struck by your metal work and painting. The brass comes as a rolled up wire, yet you were able to get it straight and so true to the instructions. I have been struggling with the railing. I had hoped to do a micro-solder joinery, but it did not stick. My glues and epoxies haven't worked. I just got Aruldite epoxy, which supposedly joins all metals, including brass. Enjoy the "King"!
-
This is a wonderful visual diary of a beautiful build. As I get ready for the next steps with the Pilar, I want to thank you for taking the time to reconstruct your log.
-
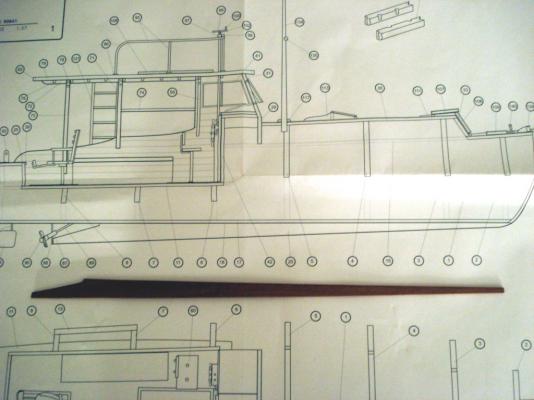
Pat, Here are some additional images to help you. The Constructo version does not extend out very far (see attached plan & photos).


-
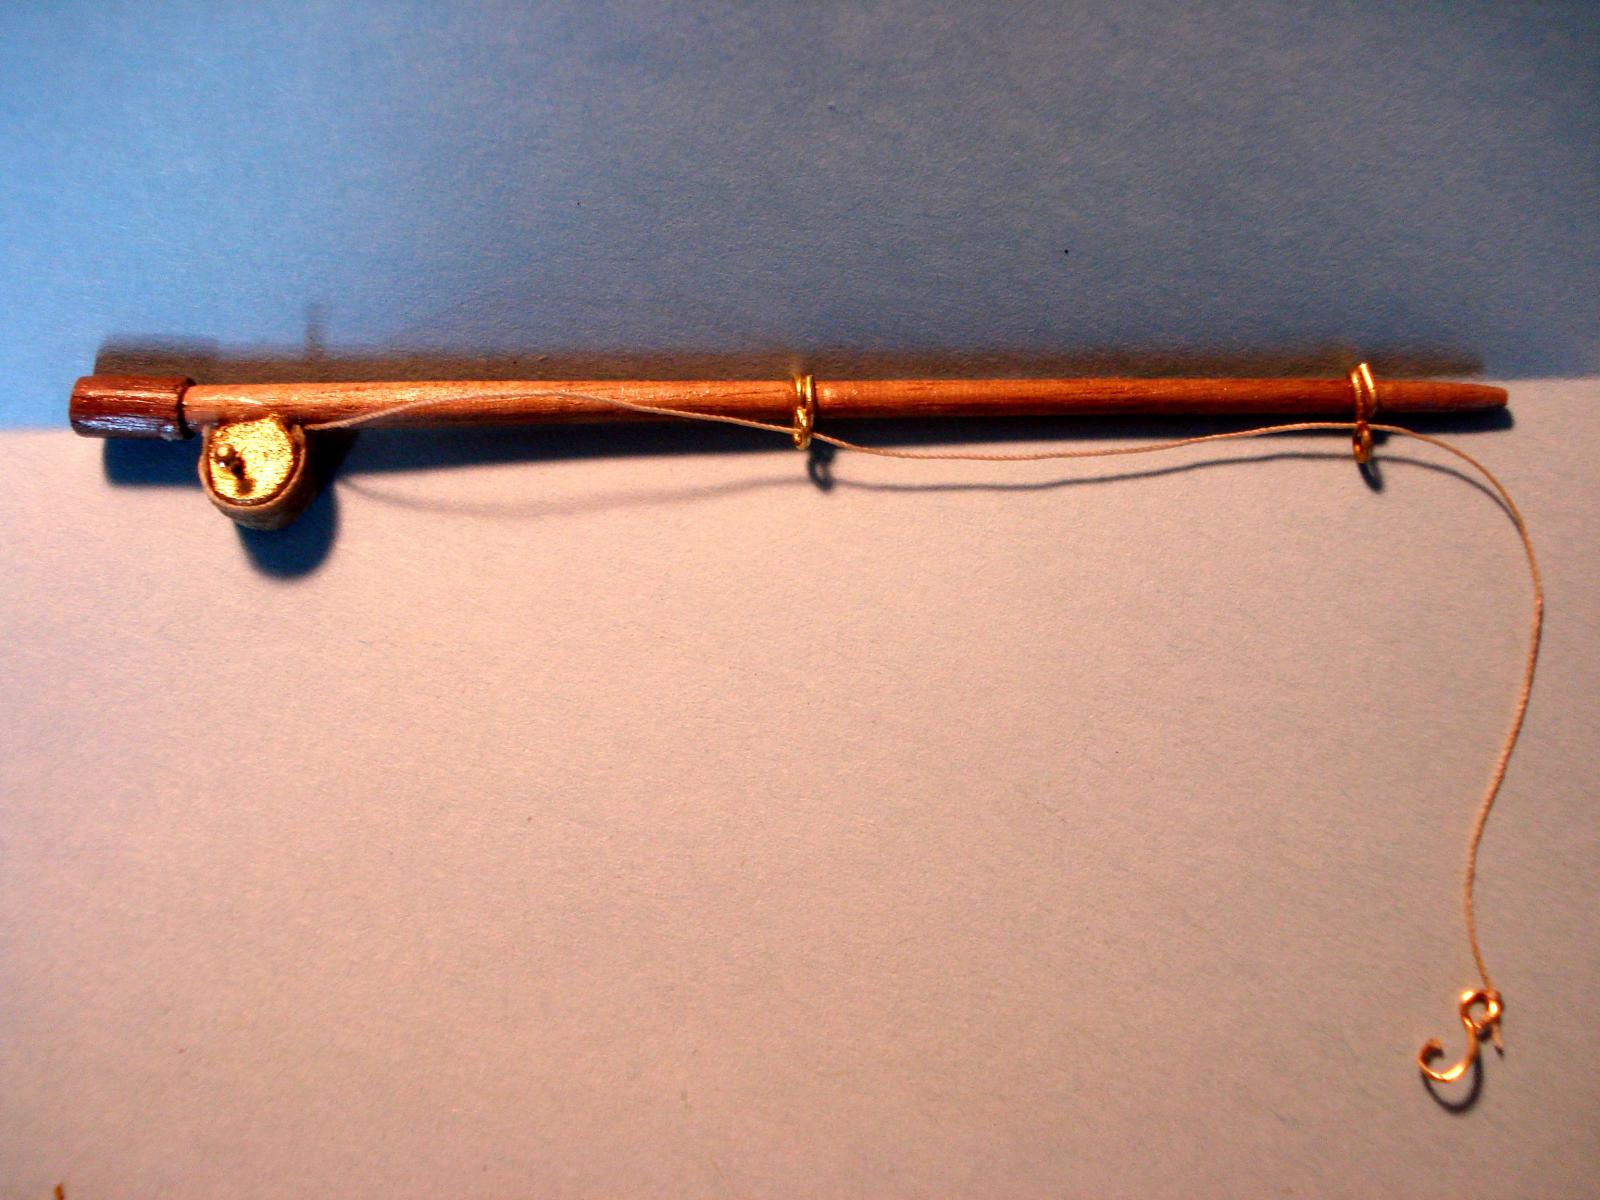
I decided to try my hand at a fishing rod for Ernest!

-
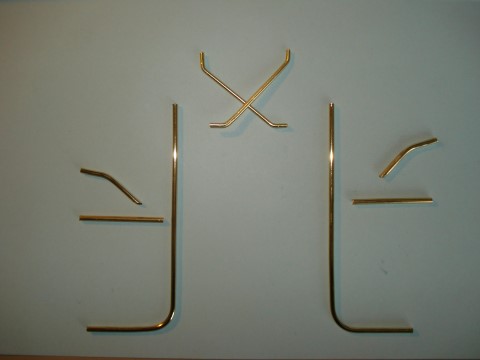
I learned another thing yesterday while working on the railings with 1.5mm brass tubing............a soldering iron does not work. I was melting the solder into the joint, rather than heating up the brass. The result was the solder either slide off or piled on. Even if the joint did stick, it immediately broke upon sanding it. As I couldn't get the railing red hot with my iron, I'll now attempt a butane torch. This is really jewelry making at this point, but - heck - its another interesting challenge!
-
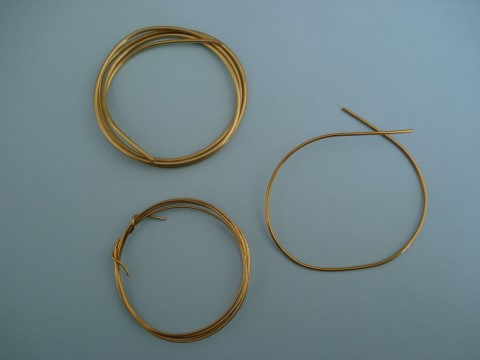
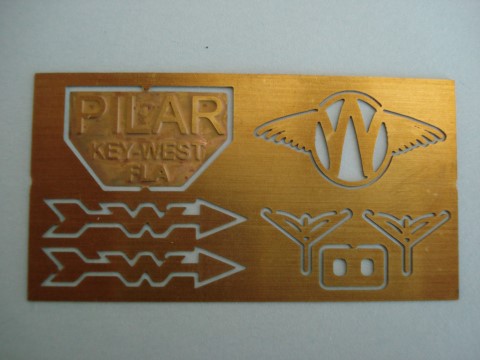
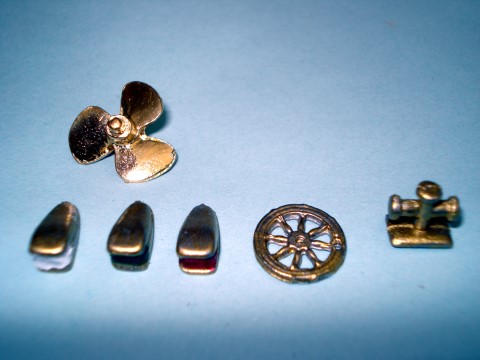
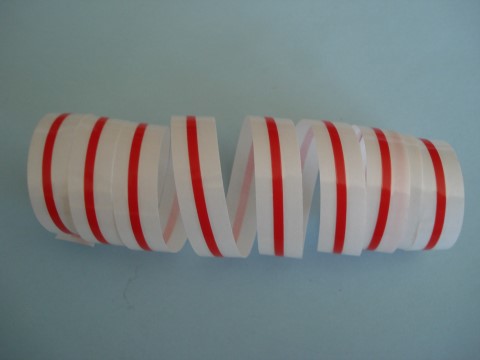
I wanted to add a number of images from the kit, and a few comments - First, the supplies brass "railing" from Constructo. Note how they expect one to perfectly straighten the curled wire. Kudos to those who can! I bought tubing and rod from K&S, 1mm, 1.5mm, 2mm. - Some images of the smaller parts: photo-etched and laser cut, instead of the stamped parts for the keel, bulkheads and majority of wood components. - First coat of a brass and acrylic paint for running lights, etc. from the Britannia grey metal. I'll straighten the lines on the next coat. - This striping will be fun! Supplies for soldering and airbrushing arrive today, so I'll be practicing these next days.


-
Here are some pictures.

-
Until the frames and keel are completed, along with milling of the finish planking and some other parts, much of the last week was in preparation. My friend and mentor is making an incredible effort to help me out by doing all of this milling (sorry for the broken blade!). - I purchased an Iwata dual-action airbrush and all of the accessories. Because of the size of the Pilar model, I decided to use the propellant cans for now rather than the investment in a good-quality compressor. -I found on-line a great color that seems to match the original in Havana. Also the red and black. The black is for the possibility that the hull planking does not go well. - I know I need to bolster the hull with wood blocks. I got some balsa wood as a shortcut because it is easy to sand. Then I tested the adhesion to the test planks. I was not too impressed as the top layer of balsa separated from the block. So I bought basswood blocks instead. -I worked on the components of the flying deck railing. I decided on a 2mm brass tube rather than 3mm because of the 1:27 scale. 2mm x 27 = 54mm = 2". The support rods and wheel shaft will be 1.5mm. -Cornwall Models and Cast Your Anchor have had some interesting parts that I can substitute or add, such as the glazed airports, a brass horn, and base flanges for the railing. More later....
-
yvesvidal reacted to a post in a topic:
Pilar 1934 by jspector - Constructo - Scale 1:27 - pleasure yacht as specified and commissioned by Ernest Hemingway
-
yvesvidal reacted to a post in a topic:
Pilar 1934 by jspector - Constructo - Scale 1:27 - pleasure yacht as specified and commissioned by Ernest Hemingway
-
Update: I've sent to my new MSW mentor a box containing the broken keel, bulkhead frames, plans, instruction book and xerox images of all the defective pieces. When the pieces are fabricated and the new planking milled, all the woods will be of a higher quality and more accurate. To help in deciding what deviations from the kit to make in my version, I was sent the following article on the Pilar (thanks Tarbrush!): http://www.woodenboatrepair.com/articles/woodenboat0713.pdf
-
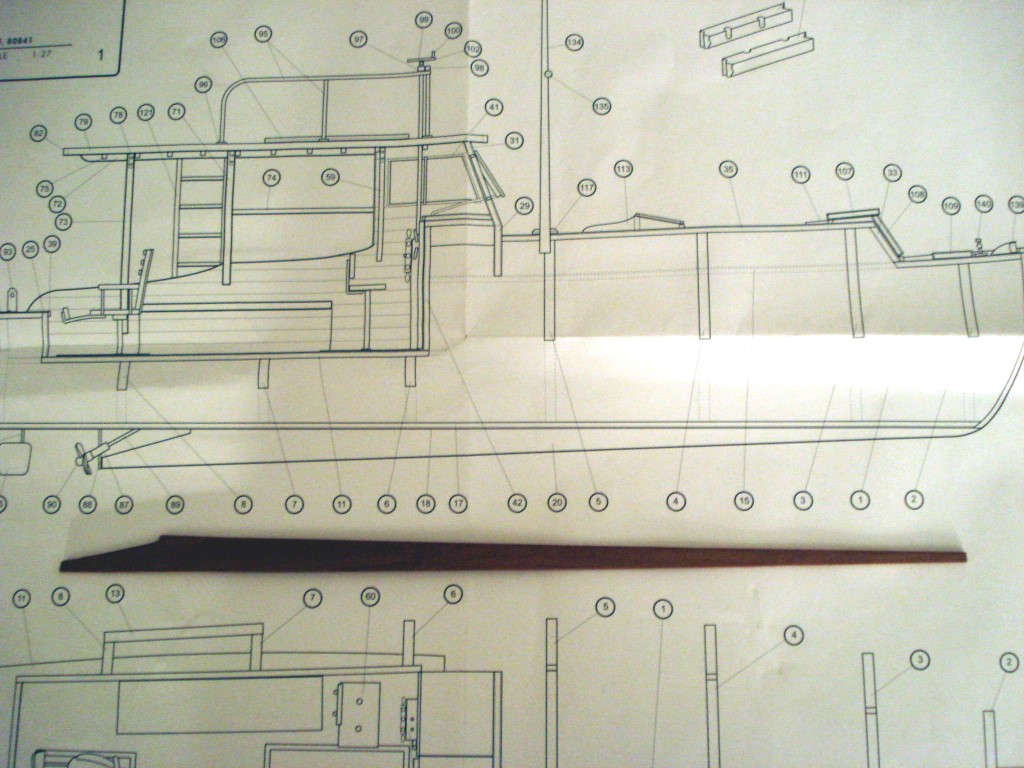
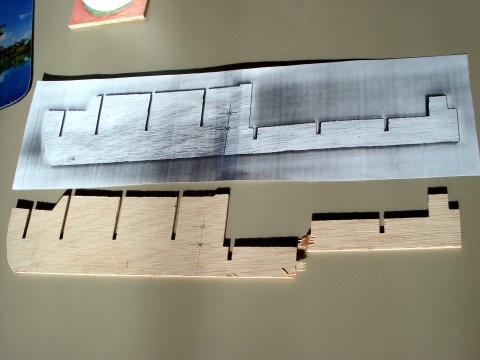
I removed the wood boards from the vise and clamps. When separating the boards, the keel came out in two pieces, having broken near the stern. Luckily, again on great advice, I made a Xerox of the keel last night and now have the blueprint and the two parts of the keel to now figure out to fabricate a replacement. I'm also concerned that the bulkheads will also meet the same fate when planking. There is so much to learn. So much for beginning the kit this week!
-
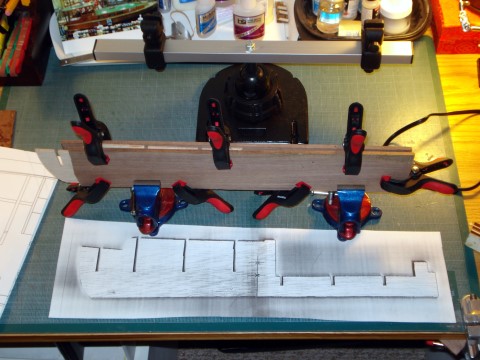
The 4" test piece was soaked in warm water for about 3 hours. I then used the electric plank bender and the curving block. In applying light pressure and heat, I was able to nicely achieve an arc to the wood. Unfortunately, the inside surface of the soft wood laminate had buckled slightly. When I lightly bent it back to a straight line, the middle ply cracked. So, the straightening of all the large pieces (decks, keel, etc.) is going to be a delicate process. A good soul has offered to recreate the keel in a stronger wood for me. For now though, we'll try to straighten the original keel as planned. I soaked the whole keel for about 5 minutes in very hot water and placed in between two slightly warped walnut boards. Their warp was great because I could use it as a "mold" to bend the warped keel in the opposite direction. (see photo). The keel is being dried now. Behind the assembly, you can see the new keel vise that I'll use for the assembly.
-
This morning, I placed the keel in a vise and rechecked the line. It is very, very warped and I am worried. It will need to be corrected first...the frames are not going to straighten anything. The idea I now have is: 1. Cut to size and glue as horizontal supports a number of popsicle sticks between each frame. 2. Prepare the decks as per the instruction steps and hand fit into the frames. No glue yet. 3. Square everything up 4. Pin frames to keel temporarily but not the decks 5. Sand carefully and hand fit again 6. Install basswood blocks as right-angle bolsters on either side of most of the frames. BUT....before I try this, I am thinking about whether I can correct the warp by soaking and bending the keel, pinning it to dry with a weight on it. Or, carefully use the electric plank bender to dry it straight. I am testing a piece of the sheet three-ply wood to see whether the soaked piece will delaminate. We'll see later today
-
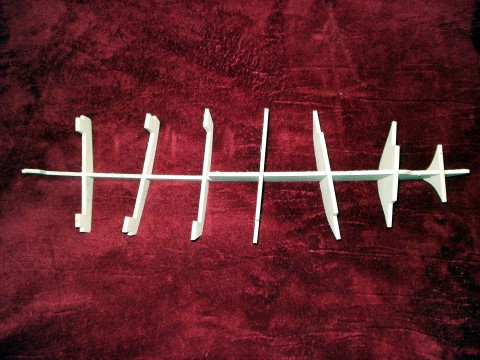
Today I began the kit by cutting out the keel and 9 bulkhead pieces. The good news is that the cutting was easy. Though not laser cut, the stamped cuts were clean and even. The bad news: the keel is warped and the bulkheads are very loose in their slots. Not thrilled with the quality of the wood. Soft, almost like balsa, three-ply. This will make for an interesting process of setting the bulkheads to the keel! The deck situation is at various heights, so using a cardboard false deck doesn't seem to be the solution in setting everything at right angles. I'll await my basswood blocks for the bow supports, and use that as a basis for setting a true line for the first bulkhead.
-
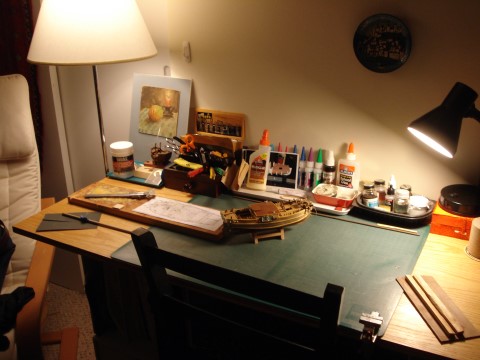
http://tinyurl.com/ncdzfm5 The above link to the Pilar's FaceBook page deepens my quandry as to (a) the woods I should use on the model and whether I should change the color scheme to the pictures of the boat in Havana. Obviously, if I do paint it, then all the work I will be doing on the planking won't be seen. Now, I've certainly built some custom things for models that only I will ever know because they are hidden within the kits I've made. But all that planking just to paint it? Not so sure. In the meantime, I'm working on getting the proper quality woods. One of our fellow MSW 2.0 members has offered to mill strips for me...a real gesture of kindness. He'll give me recommendations of woods that best match the pictures of the original and/or the kit instructions. What I have been doing in the meantime is order some more tools and supplies, such as wire bending pliers for the brass trim. I am trying to reconcile the instructions showing side portholes and the original boat having windows. As windows would only show an empty interior of air and bulkheads, I decided to compromise and order portholes that have glass inserts that look good, but I'll block behind with translucent film.. They are slightly larger (3mm x 5mm rather than 2mm x 4mm) and should finish off the sides nicely. I found on-line brass tubing of 2mm for the railing, and a small pipe bender tool to fabricate the top deck rails.. I have been fascinated by the various methods of clamping planks for the second planking. For the first planking, I guess I'll use brass or black nails, snipped off after the glue dries (or should I pull them to make sanding easier?). For the second, I thought I'd use small model railroad track spikes, as one member suggests. So I bought a package of spikes from MicroMark. What I didn't do is look closely at the size of what I ordered: micro-spikes at about 2mm in length! So much for that! They'll be returned and I'll place a new order today for the right length. Along with the clamps I have now, I should be all set to begin the keel and bulkheads after another read of the instructions. Here's an image of my work station in our small back bedroom.