
Search the Community
Showing results for tags 'Shipwright Series'.
Found 17 results
-
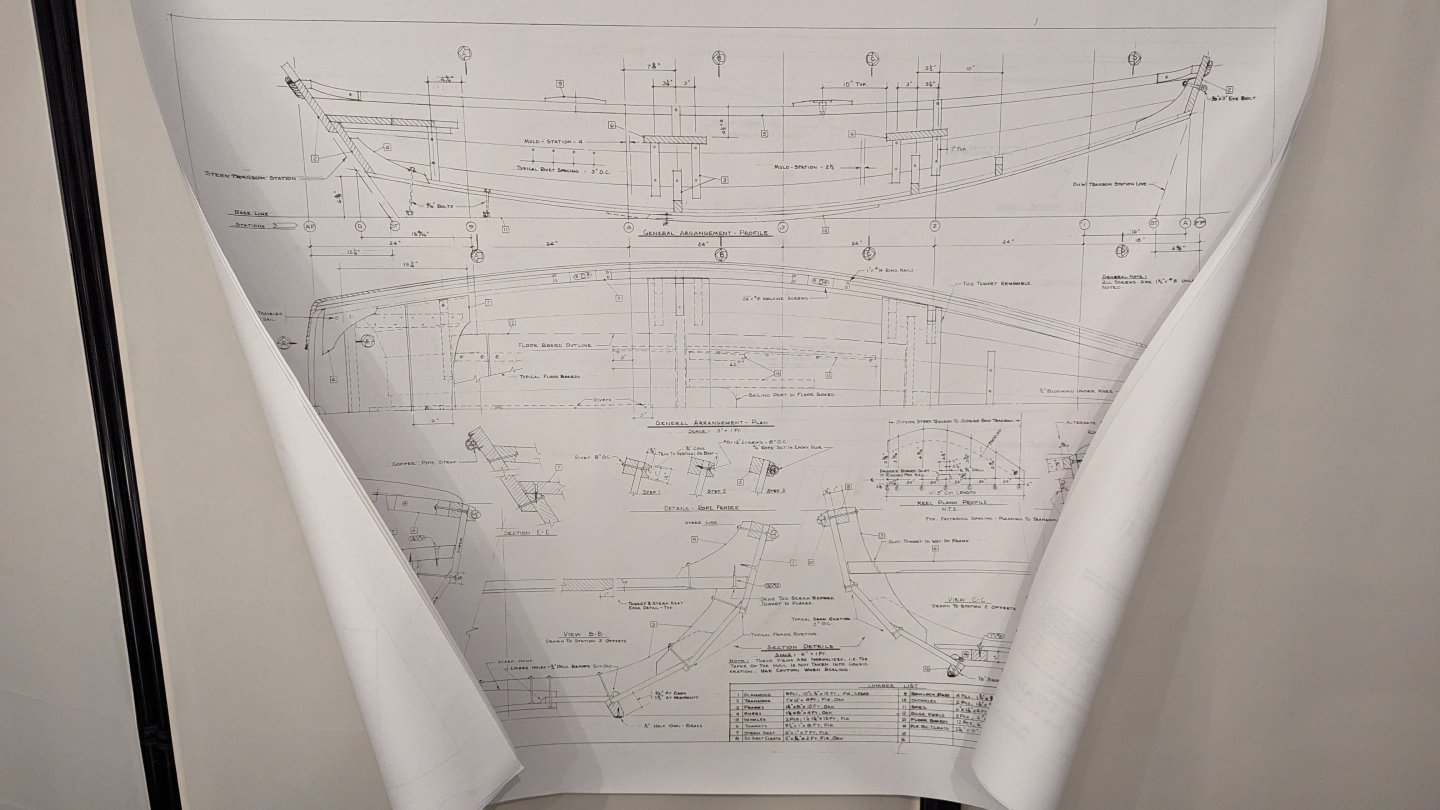
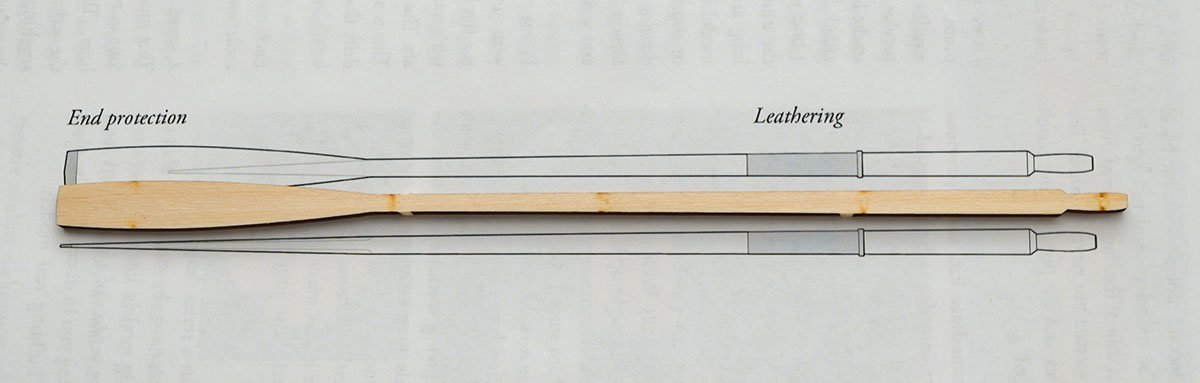
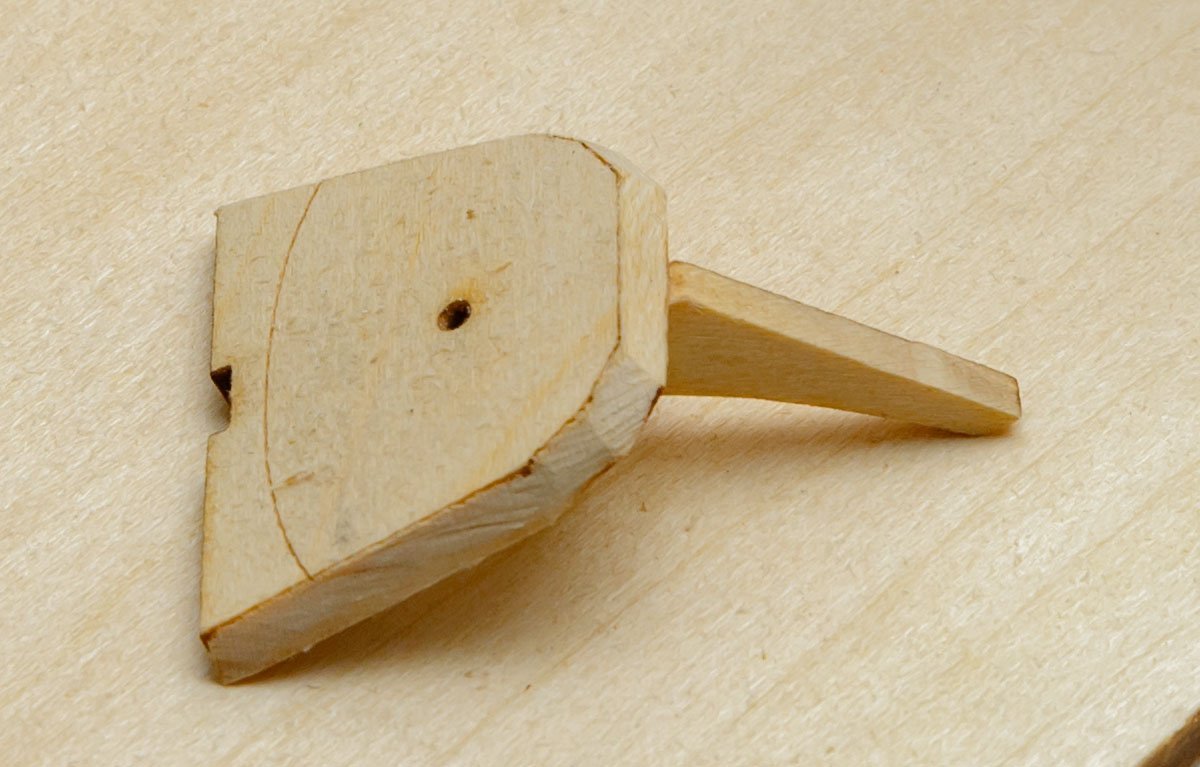
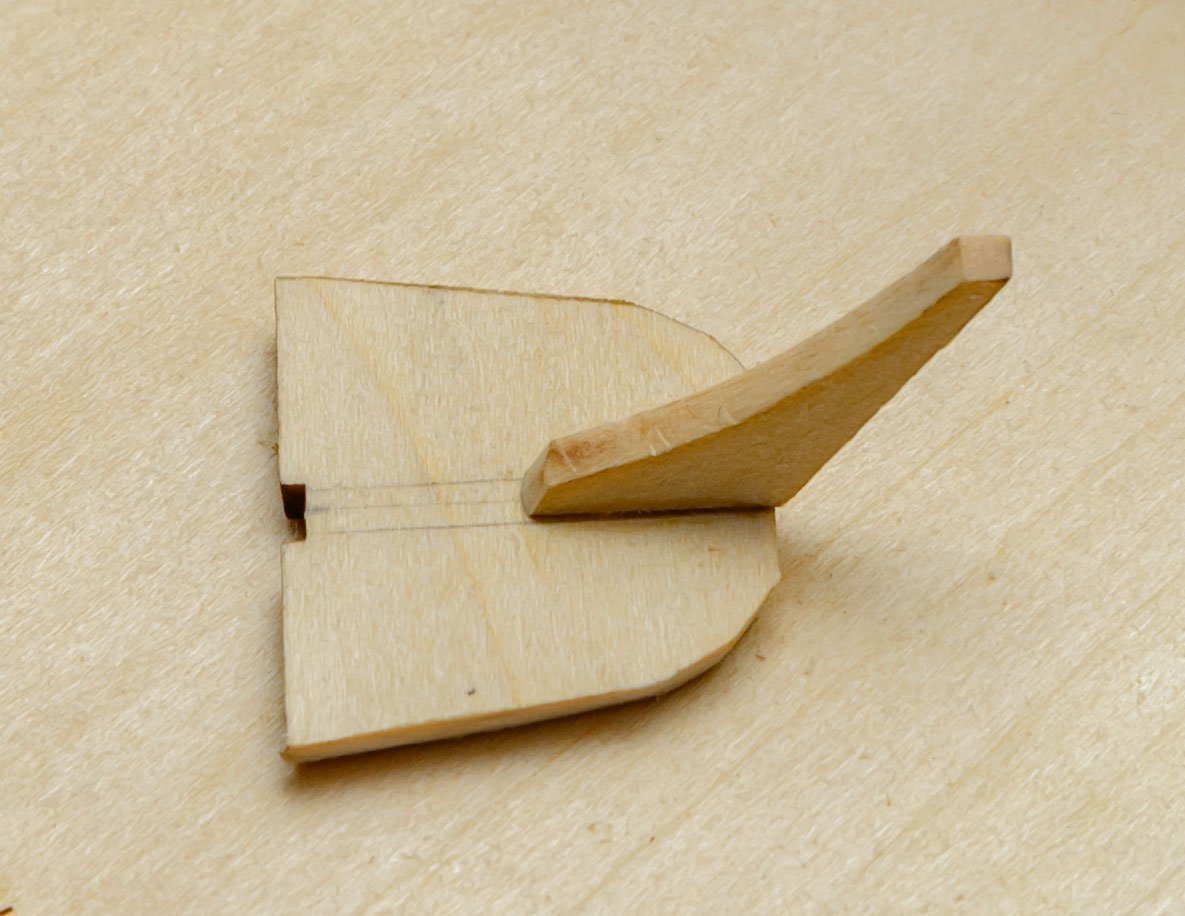
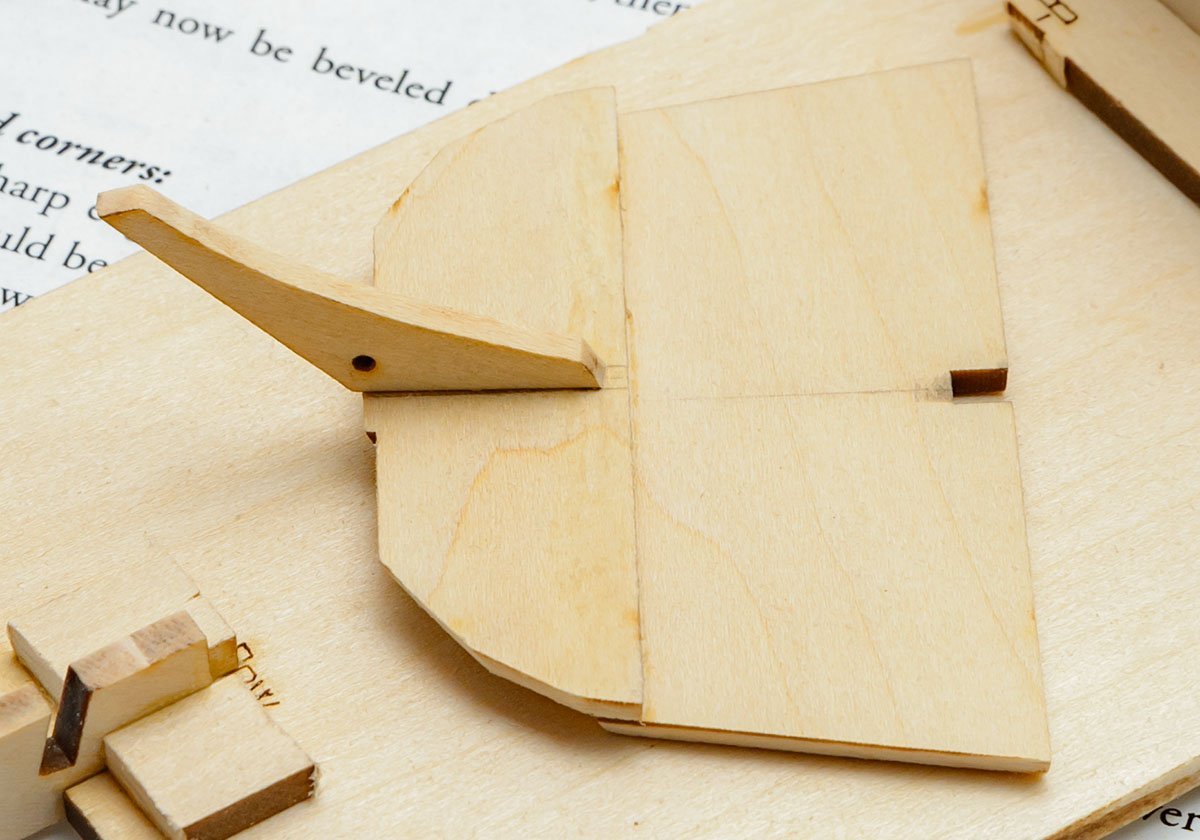
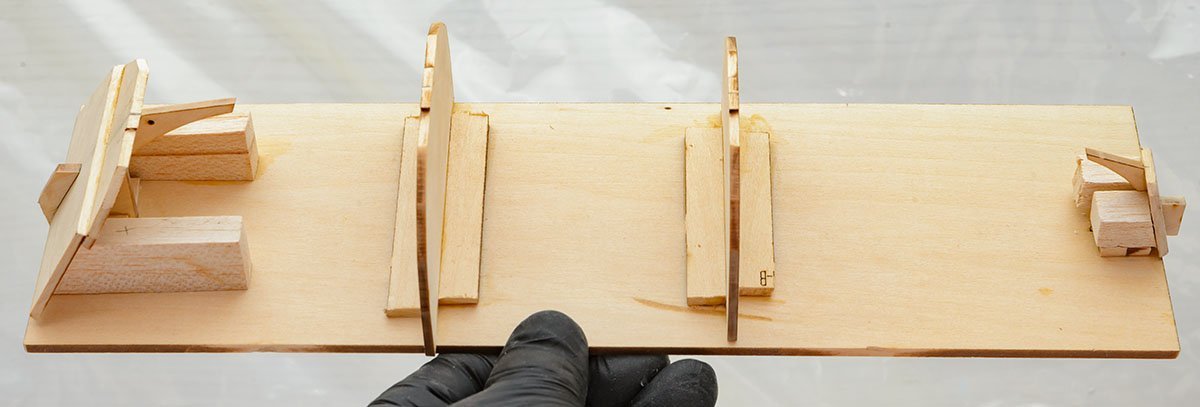
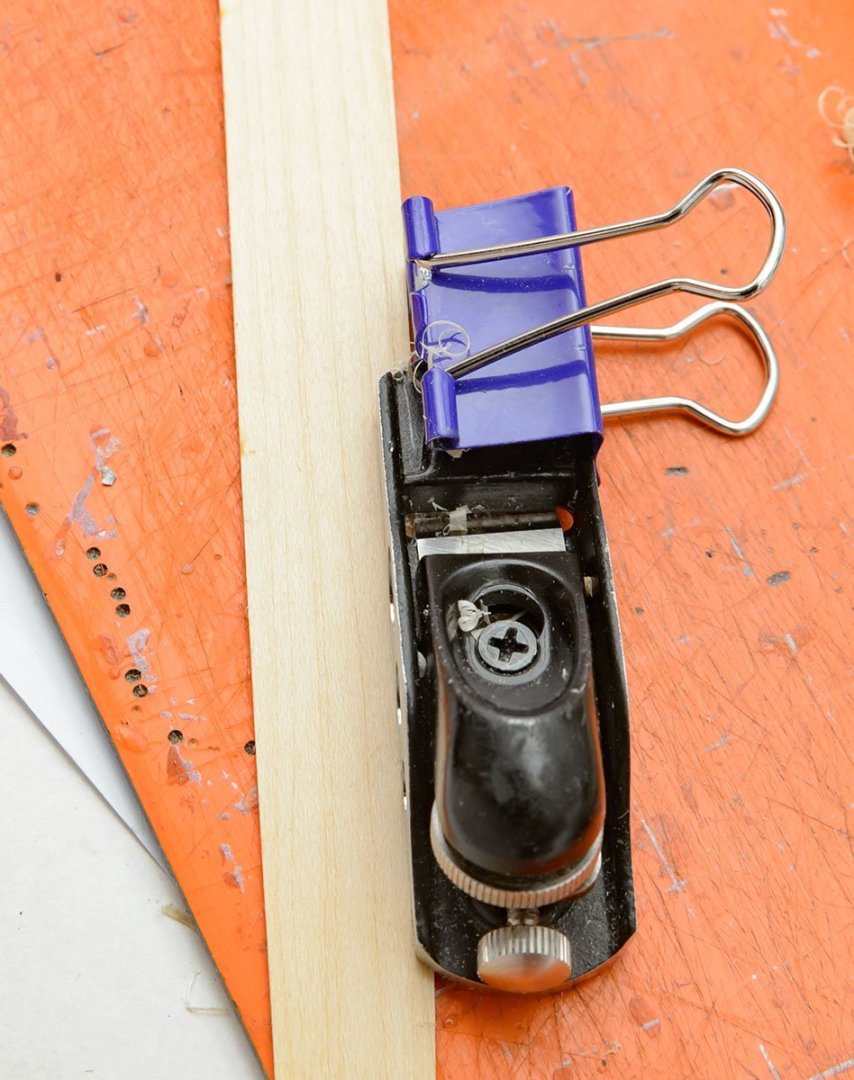
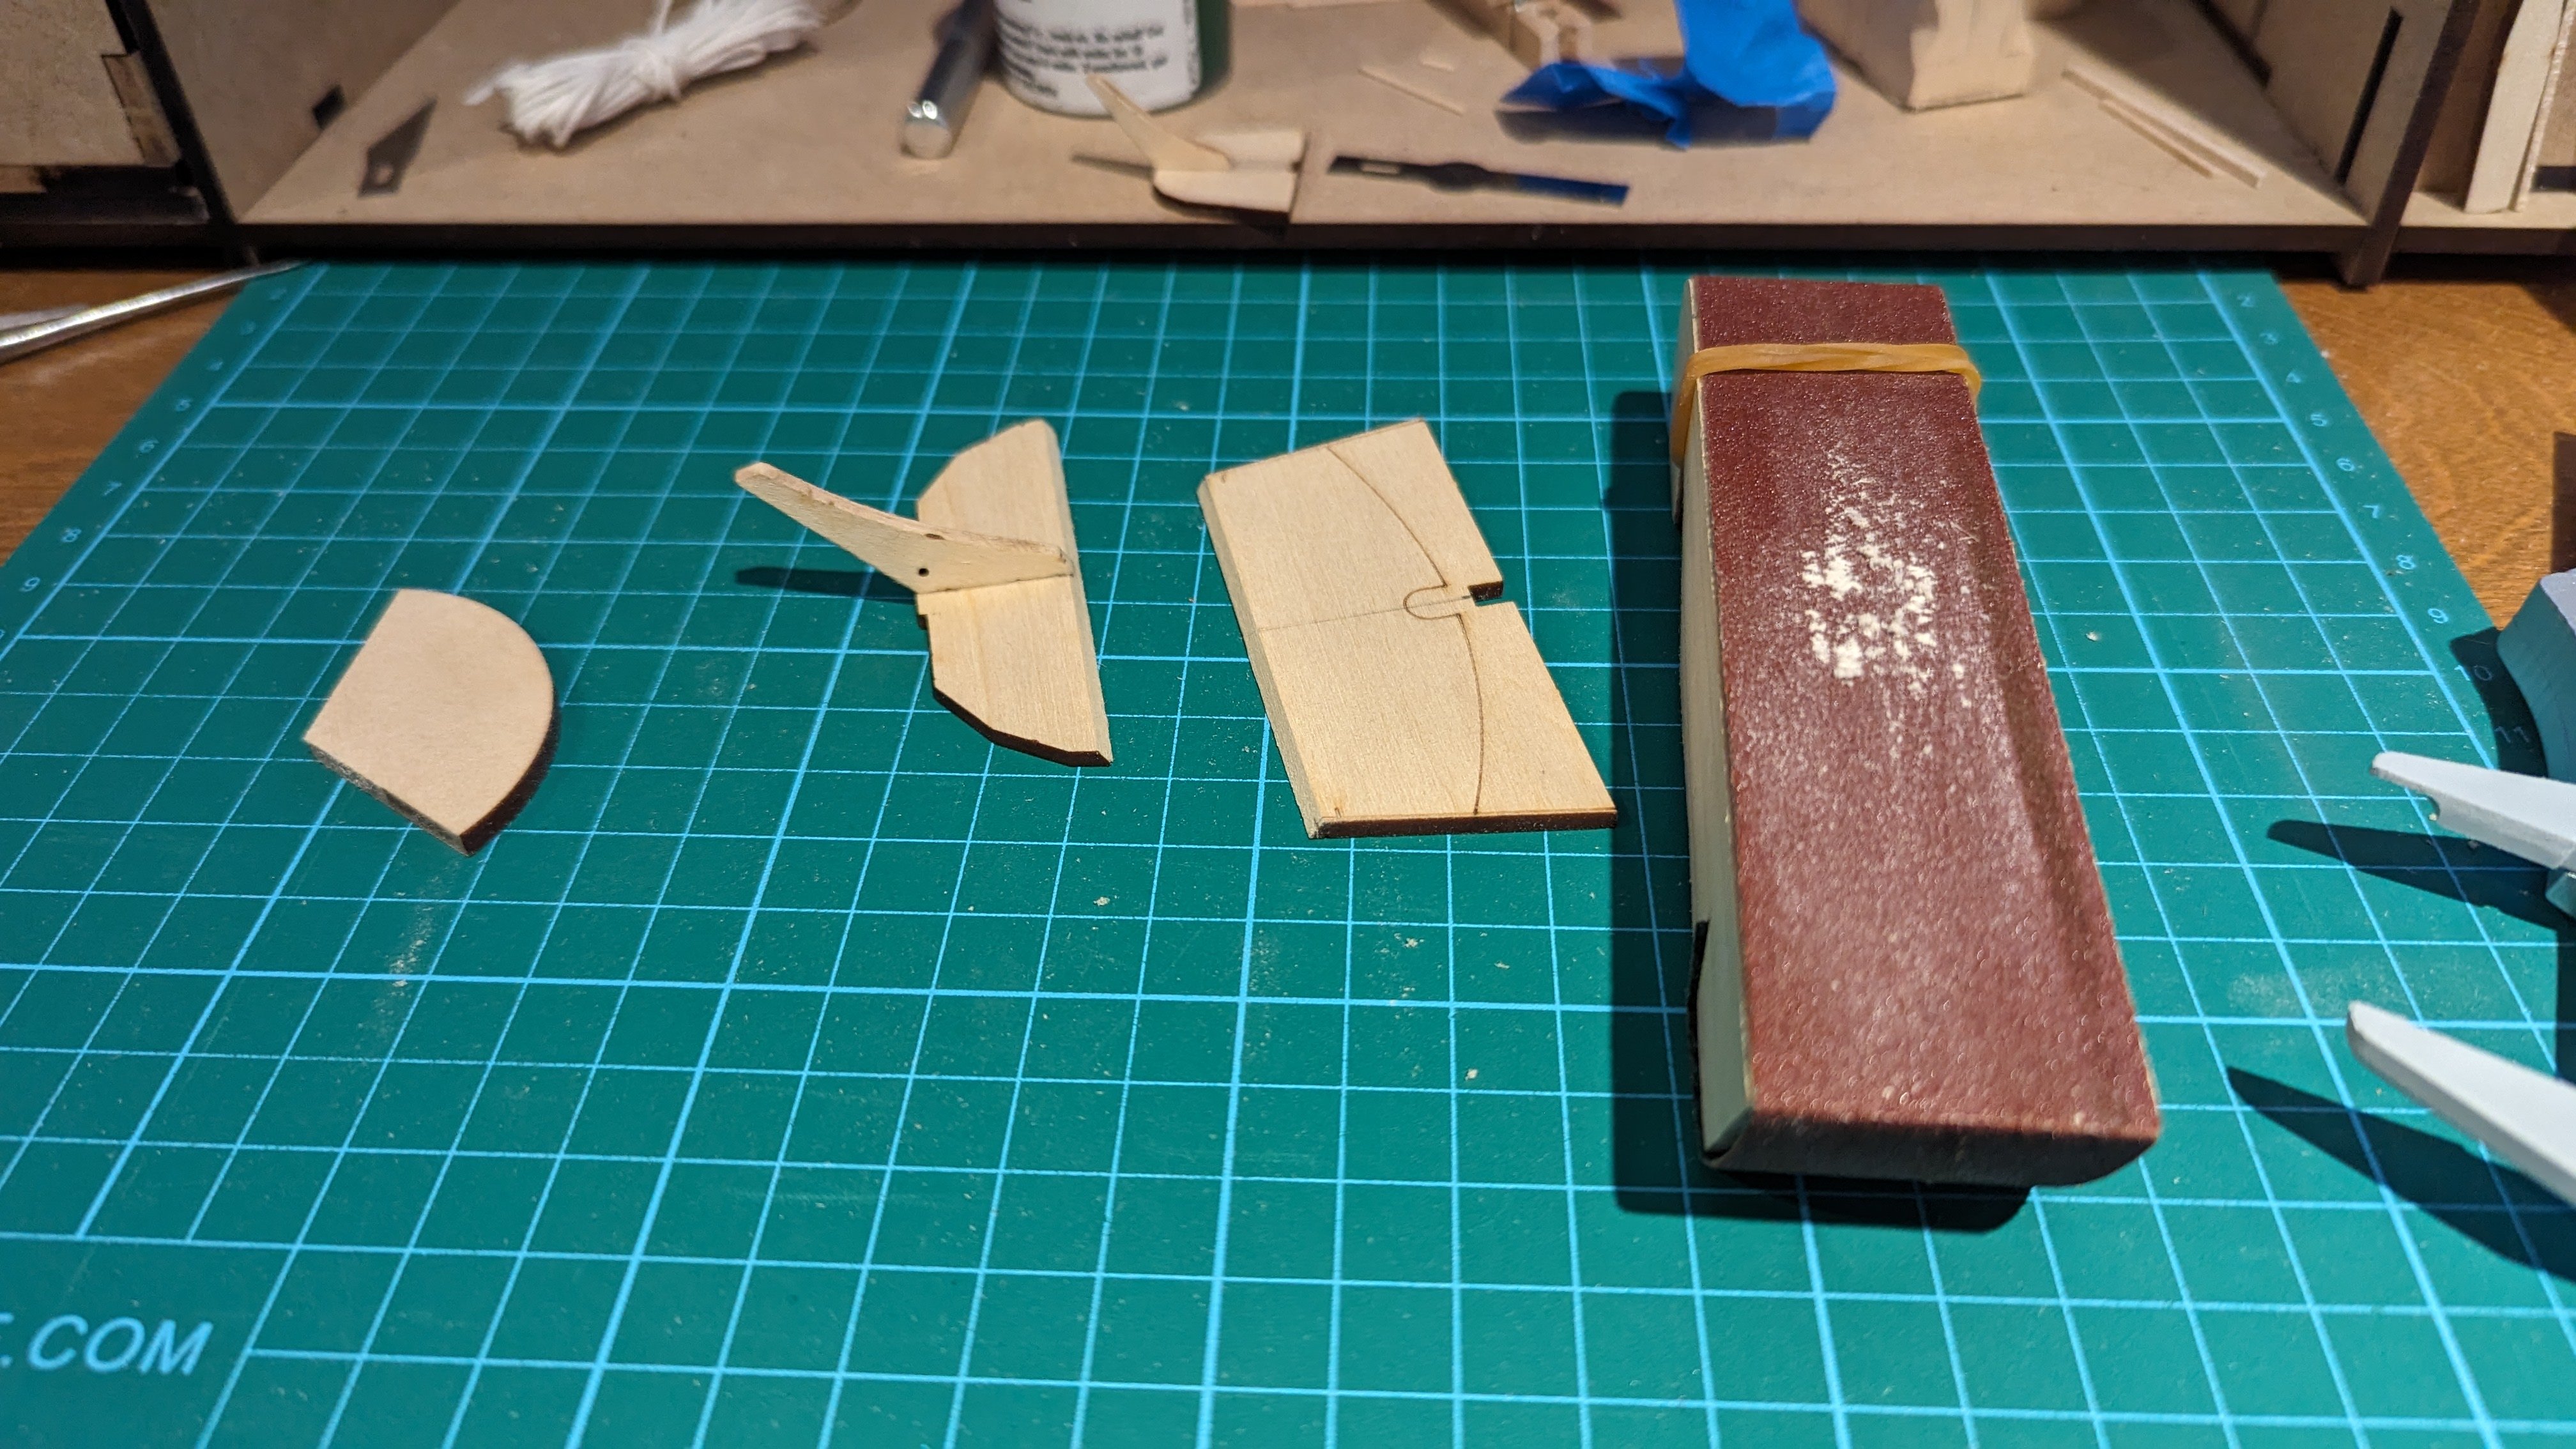
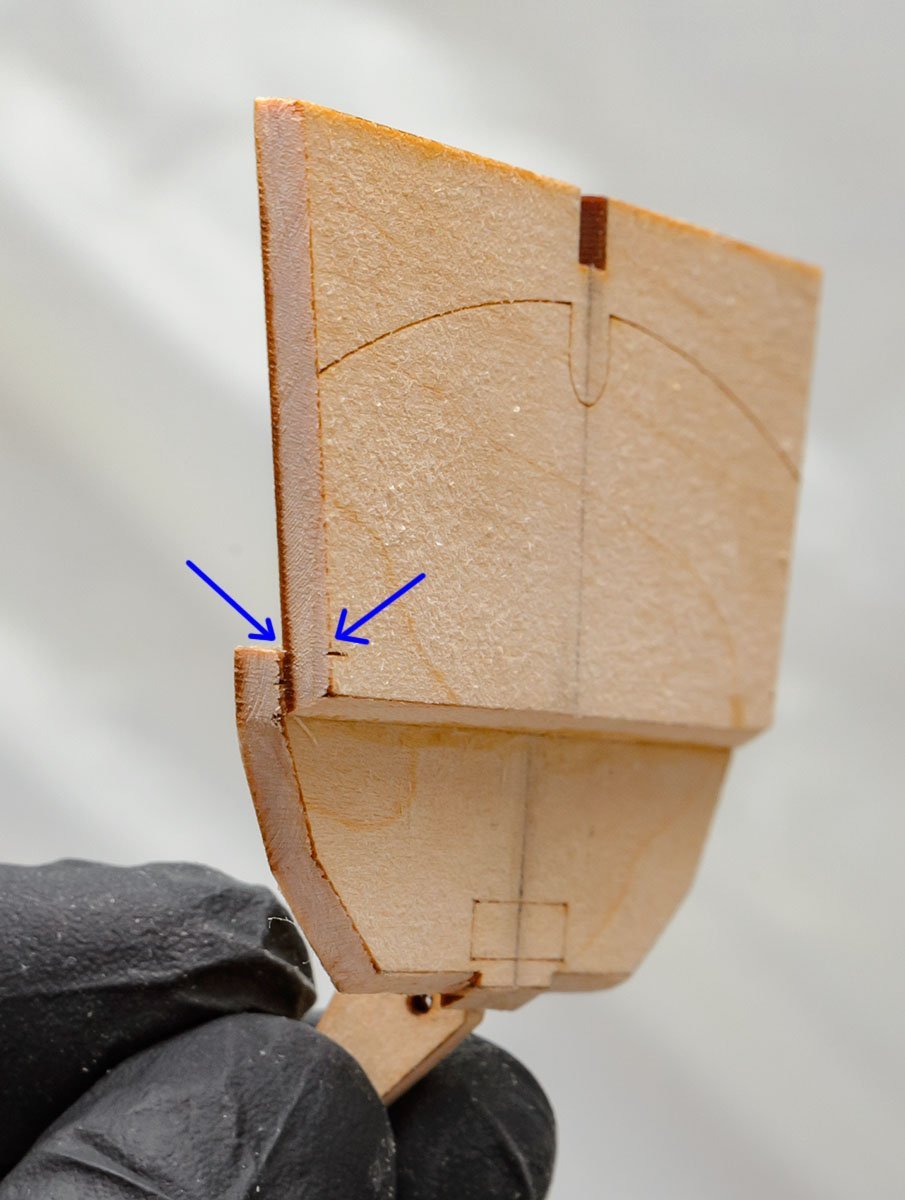
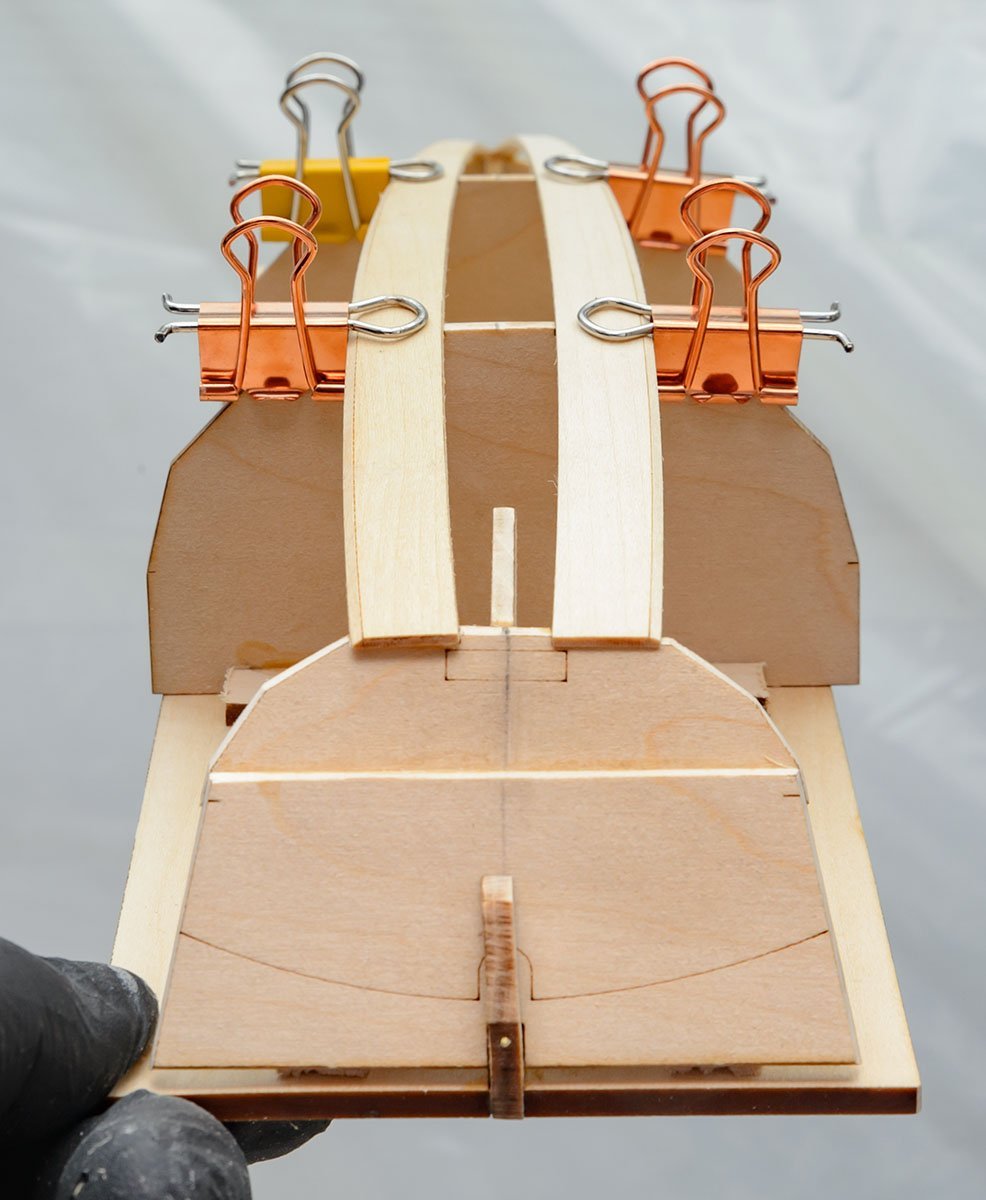
 On to my second build, and the second in the progressive Shipwright series by David Antscherl. I spent some time looking into this one a bit more first, and I find it particularly exciting. First, I have a designated spot to display it, and secondly, it's based on a boat with prints. As mentioned in my previous build, this hobby has given me the drive to build a full-sized boat. I bought the plans which will help in building the model, but is also something I think would be nice to build with my daughter when she's older. Having both a full sized and a scale model of the same boat makes this build all the more interesting! (Even if it's the better part of a decade before I start). I'm not too deep into the build, and I don't expect either my work or personal schedule to lighten up much until after September so progress won't be quick. On a positive note, I seem to be done with medical tests and appointments for the foreseeable future and have successfully navigated the slow recovery from my most recent procedure. Of course I hurt my neck and back on the weekend working in the yard which has been ruining my sleep. I seem to be having a rough few months. Log #1 The full plans designed by Simon Watts were only $30 (USD) and have already helped quickly clarify things 2 or 3 times before barely getting started. I have them up on a room divider close to my workstation. Three of the drawings were E sized and so far those are the only ones I've printed. After cleaning up the transom parts I needed a sturdy way to bevel the edges. I find the bevel guide a great idea and a very helpful addition to the kit. I used the build board from the dory, and some rubber cement to attach a piece of sandpaper to it. The biggest thing to note here was the incorrect instructions that specified to face the etch marks away when beveling the lower aft transom. However, pictures and other build logs (as well as the full sized drawings) determined this was wrong. This worked very well for the bow and lower aft transom; however, I was getting a rolling bevel on the upper aft transom so I switched to a sturdier block. This was possibly due to it's larger size and I also noticed a slight curve in the build board I was using to sand. Center-lines are marked and knees are glued. Another thing that the drawings helped clarify was the orientation of the transom knees. I also needed verification that the lower aft transom knee was going on the right piece since it appears shorter and doesn't appear to reach the top of that piece in the instruction pictures. The next time I get back to it, the glue will be dried, I will drill out the transom hole, bevel all the edges and complete the aft transom by attaching both pieces. Then it's just a matter of assembling the building board and planking will be right around the corner. The only thing confusing me tonight was the note on making two angled razor saw cuts in the lower transom. It's kind of just glossed over, but after looking at it about three times I think they're trying to tell me to make it the same angle as the bevel. The sole purpose being to separate the side bevels from the center tab. This makes far more sense than some of my first thoughts. I'll double check some other logs or comments here before going ahead with that to be sure. Thanks for looking, Matt
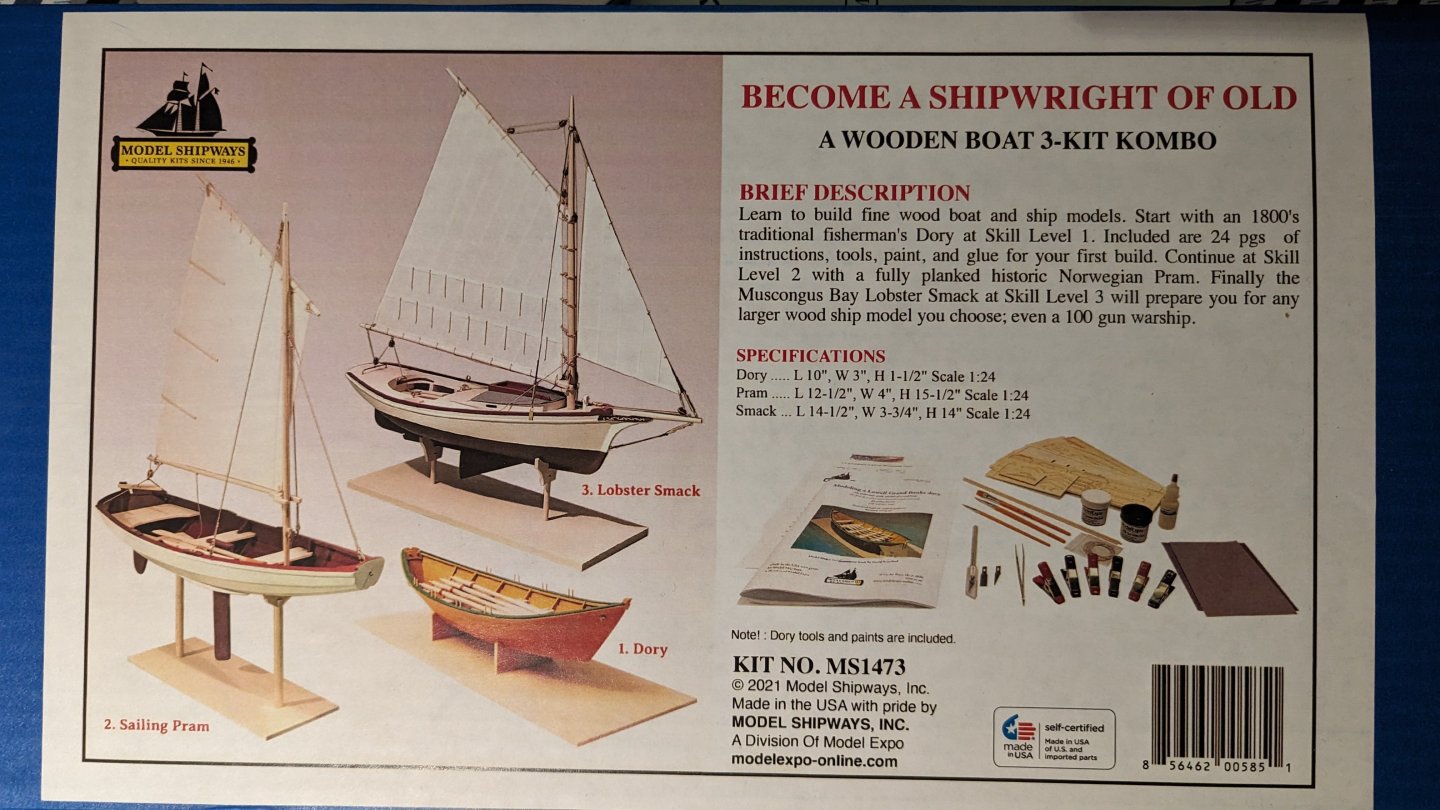


- 86 replies
-
- 4
-

-
- Model Shipways
- Norwegian Sailing Pram
- (and 3 more)
-
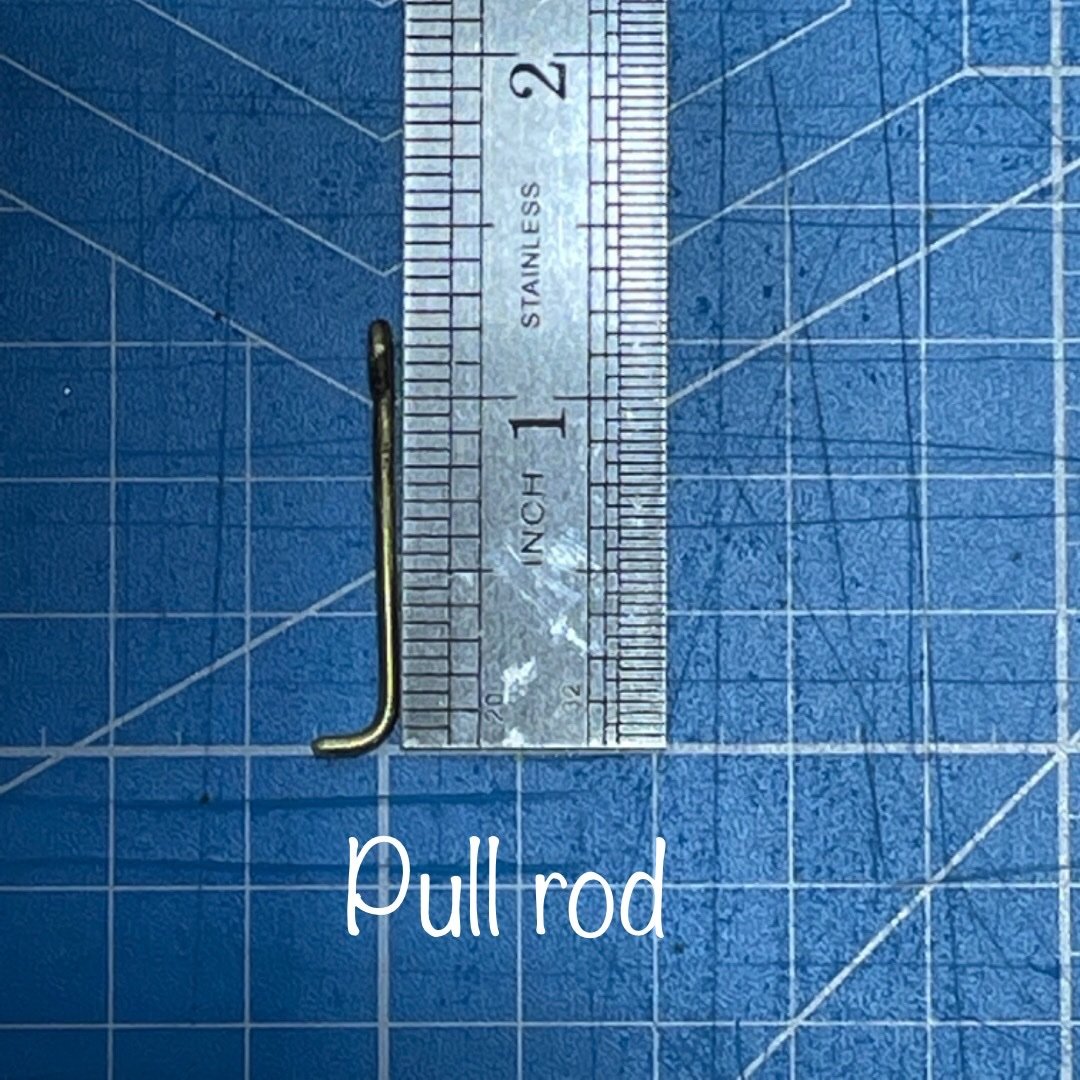
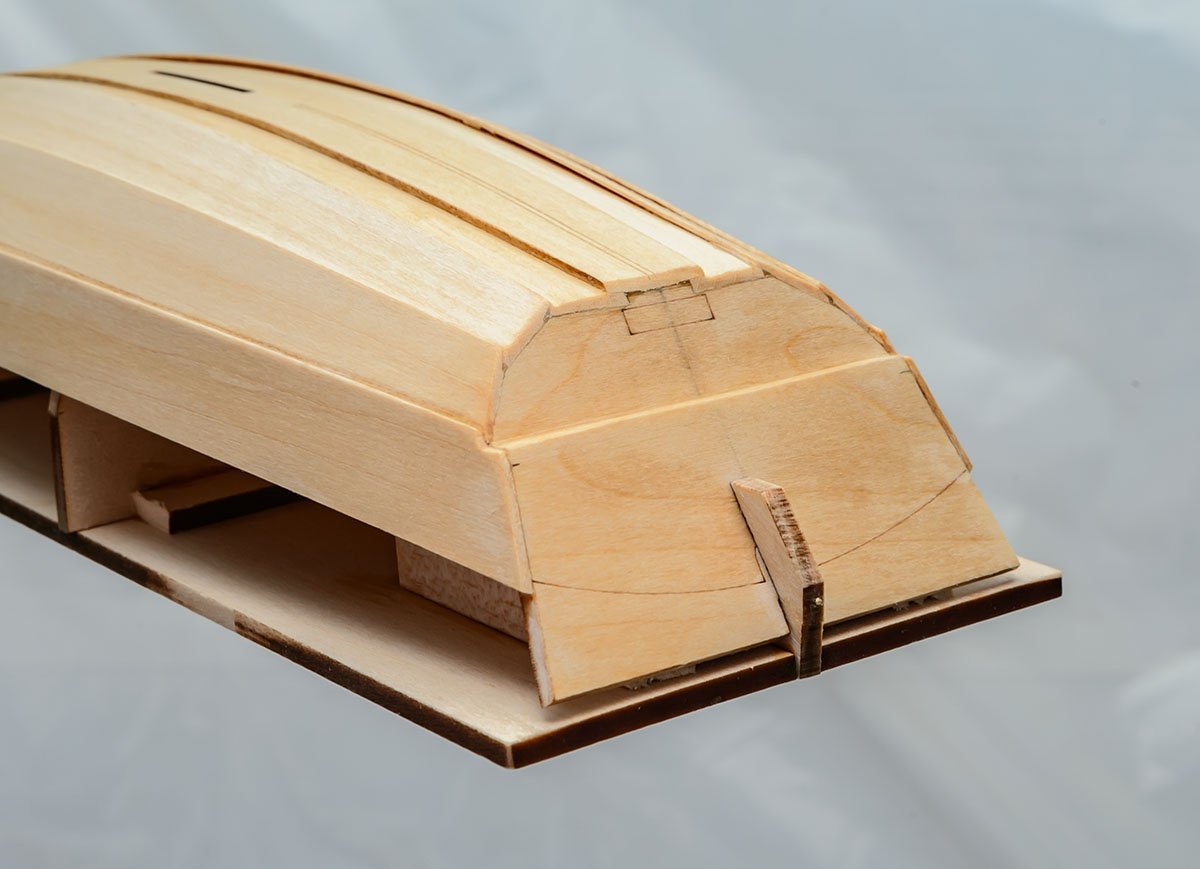
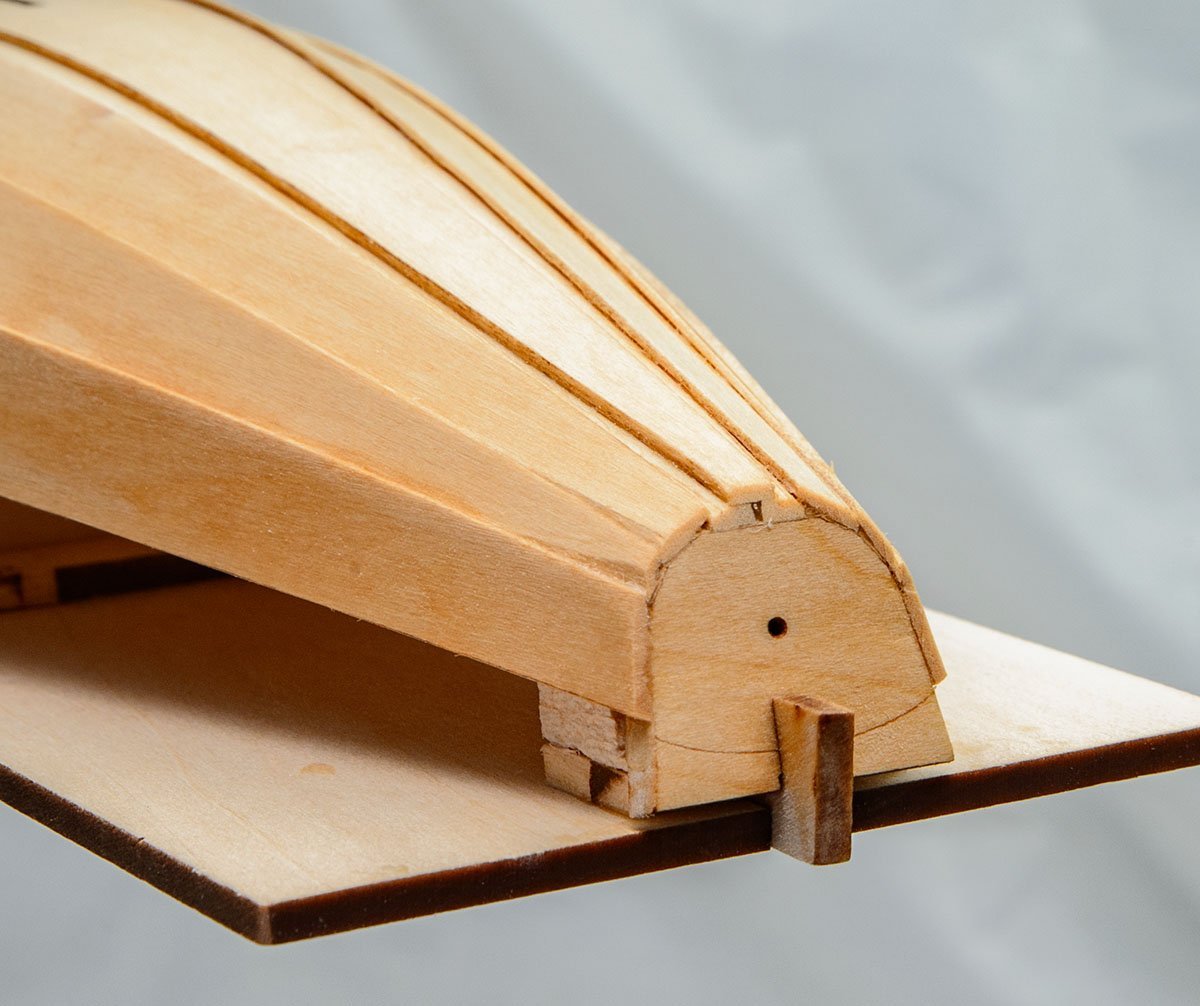
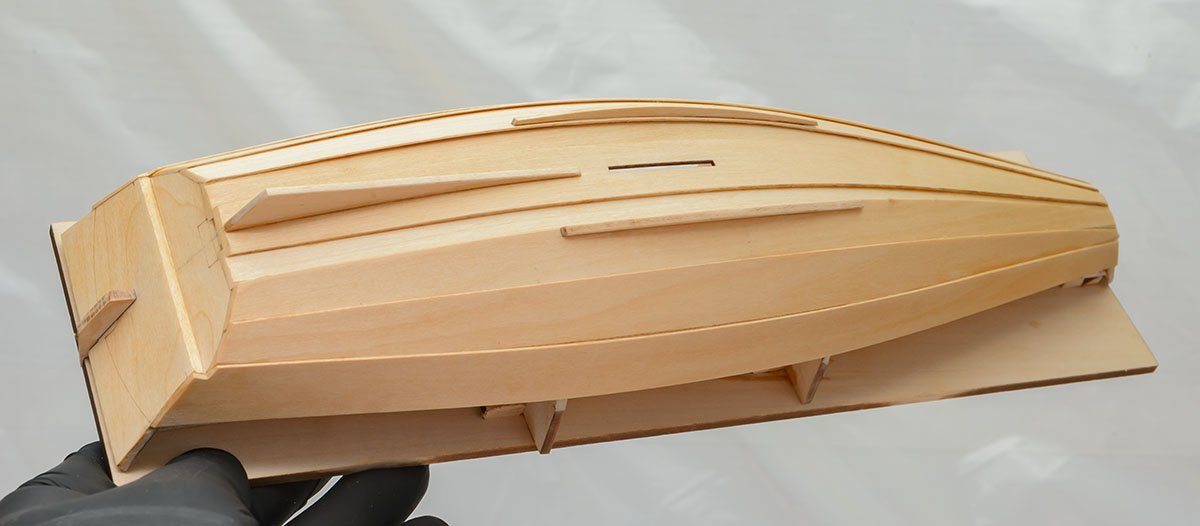
 To make progress on my Pram and Sherbourne, I needed a small miter box (to cut copper tube for the Pram, to cut masts for the Sherbourne). It came in but it turned out the narrow saw I had would not work with the miter box, so I had to order another saw. While I ordered the saw on Amazon and have Amazon Prime, it'll be another week or so before the saw arrives. While waiting, I decided to start on the Lobster Smack, the third kit in the Model Shipwright Series. Some notes and heads up on this one: - I chose to keep the centerboard glued into place. A challenge of doing so is that the centerboard then becomes an easy thing to crack or break (it’s terribly thin basswood) and it gets in the way of banding and clamping pieces after gluing. I think there’s may a 50% chance it survives the build. It might end up being in what appears to be its raised position by its absence. - This model has lots of thin basswood. That makes it easier to shape pieces (and some pieces have to be shaped quite a bit). But it also means it's pretty easy to sand through the planks when finishing the hull (I did not do that because I learned from my half hull build when I did it). - Like other Shipwright Series models, do not assume any “to scale” drawings are actually to scale (I don’t know if other Model Shipways models have the same problem). I had to zoom to around 103% to get something close, at least when I had a point of reference. It’s frustrating for the price they charge these models that they don’t have better quality control. Drawings to scale should be to scale. - I was completing the Pram and Smack before completing the Sherbourne because I wanted to get some practice on rigging before doing it on the Sherbourne. It's not necessarily that the Sherbourne is more challenging (in some way it's less challenging because the instructions and plans are so complete), but because I'd rather make a mistake on the Pram or Smack than the Sherbourne. One bit of frustration with the Smack (and Pram) compared to the Sherbourne is that the rigging instructions for the Smack are incomplete at best. I ended up having to turn to the instructions on the Pram to figure out how to rig the sails (they end up using a similar technique which is explained more completely for the Pram - so if you're just building the Smack, open up the instructions online on the Model Expo site for the Pram when you get to the rigging section). Unlike the Sherbourne, there are no rigging plans for the Smack. There is a sheet, but it's more to know how to shape the sails and part out the masts. There's maybe one drawing of a bit of the rigging (really more about passing line through some blocks), but that's it. When reading the instructions, I've learned that you need to keep track of the name of a particular line that might be tied off somewhere and named in one paragraph and then the description of where it goes might be explained several paragraphs later, just using the name of the line. Just follow the name of the line through the instructions to follow where the lines is supposed to go. I'm sure this is obvious for people with lots of experience working on boats or building models, but it's a little frustration when this is supposed to be an "instructional" model kit to have the instructions so confusing. I suppose compared to many model kits (not including Vanguard's) these are more complete than some models, so in a way if you can't get past these fairly complete incomplete instructions, maybe you won't do well on a non-instructional model kit with few instructions at all. I've seen some kits that seem to only have a bundle of material and a set of plans to follow. - One thing to make note of is that the metal - I think it's called Britannia metal (which replaced lead in old models I believe) - is pretty soft and kind of lousy. The rigging line supplied with the kit and the holes in some of the metal parts the rigging needs to go through are not quite lined up with each other (the line is way thicker than the hole). As a result, I had to bore out some holes a bit to even hope to get the line through a part. Well that then structurally weakened the metal (way more so than I would have thought given how much thickness remained). And just when tightening a piece of rigging (just a tiny bit so it didn't sag) the metal failed. Be careful. - For future builders: This kit does offer opportunities for kit bashing since some of the details are pretty basic (e.g., doors and hatches that are just square pieces of basswood with no detail at all). I thought for a second about trying to mimic some builds, but I bought the Shipwright Series just for some extra practice and I have other models in the queue I want to get to. Here’s one build that’s really nice with lots of added details someone might try to emulate: https://modelshipworld.com/topic/37380-muscongus-bay-lobster-smack-by-desertanimal-finished-model-shipways-124-moderately-bashed
- 59 replies
-
- 2
-
-
- muscongus bay lobster smack
- Model Shipways
- (and 2 more)
-
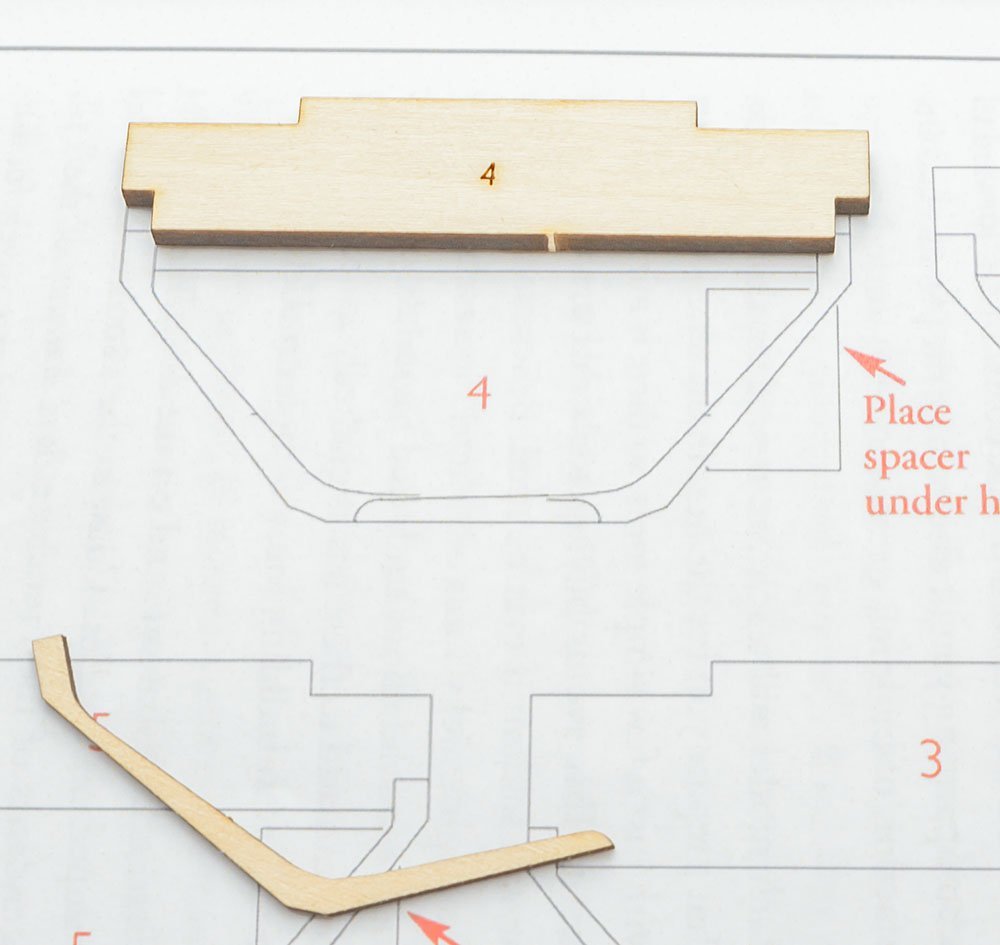
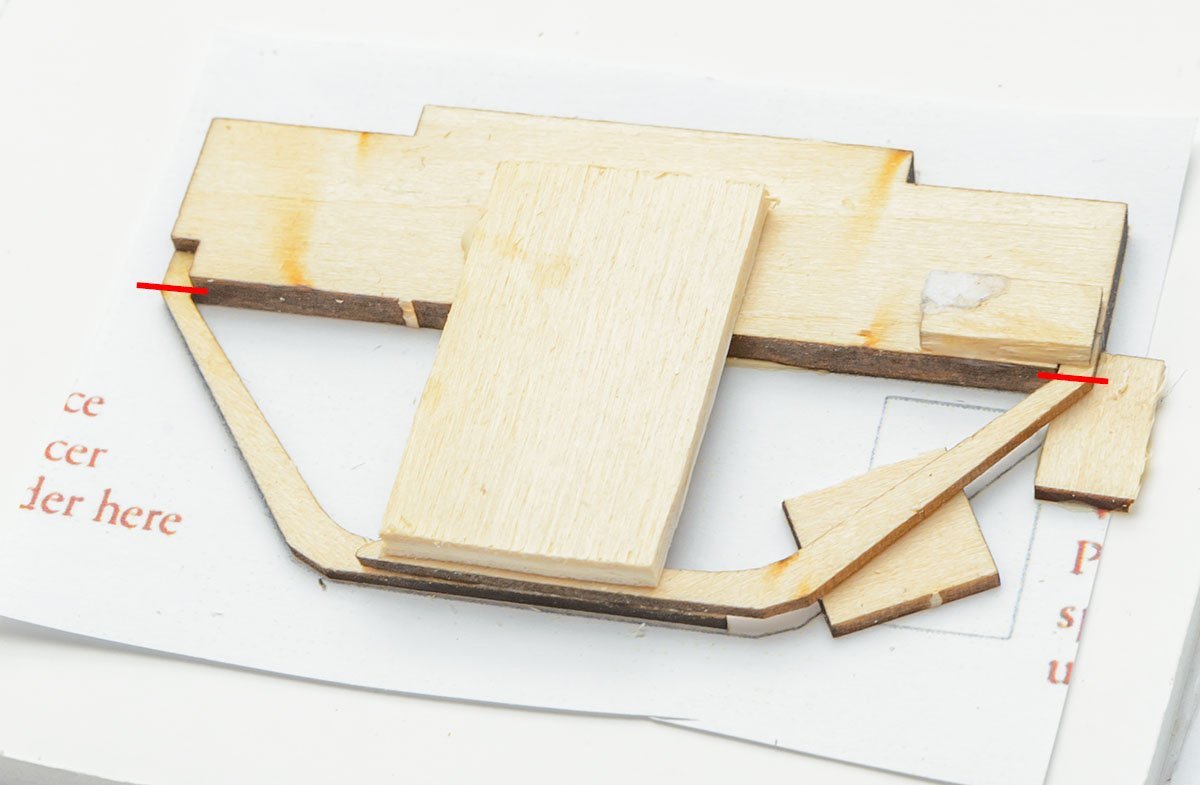
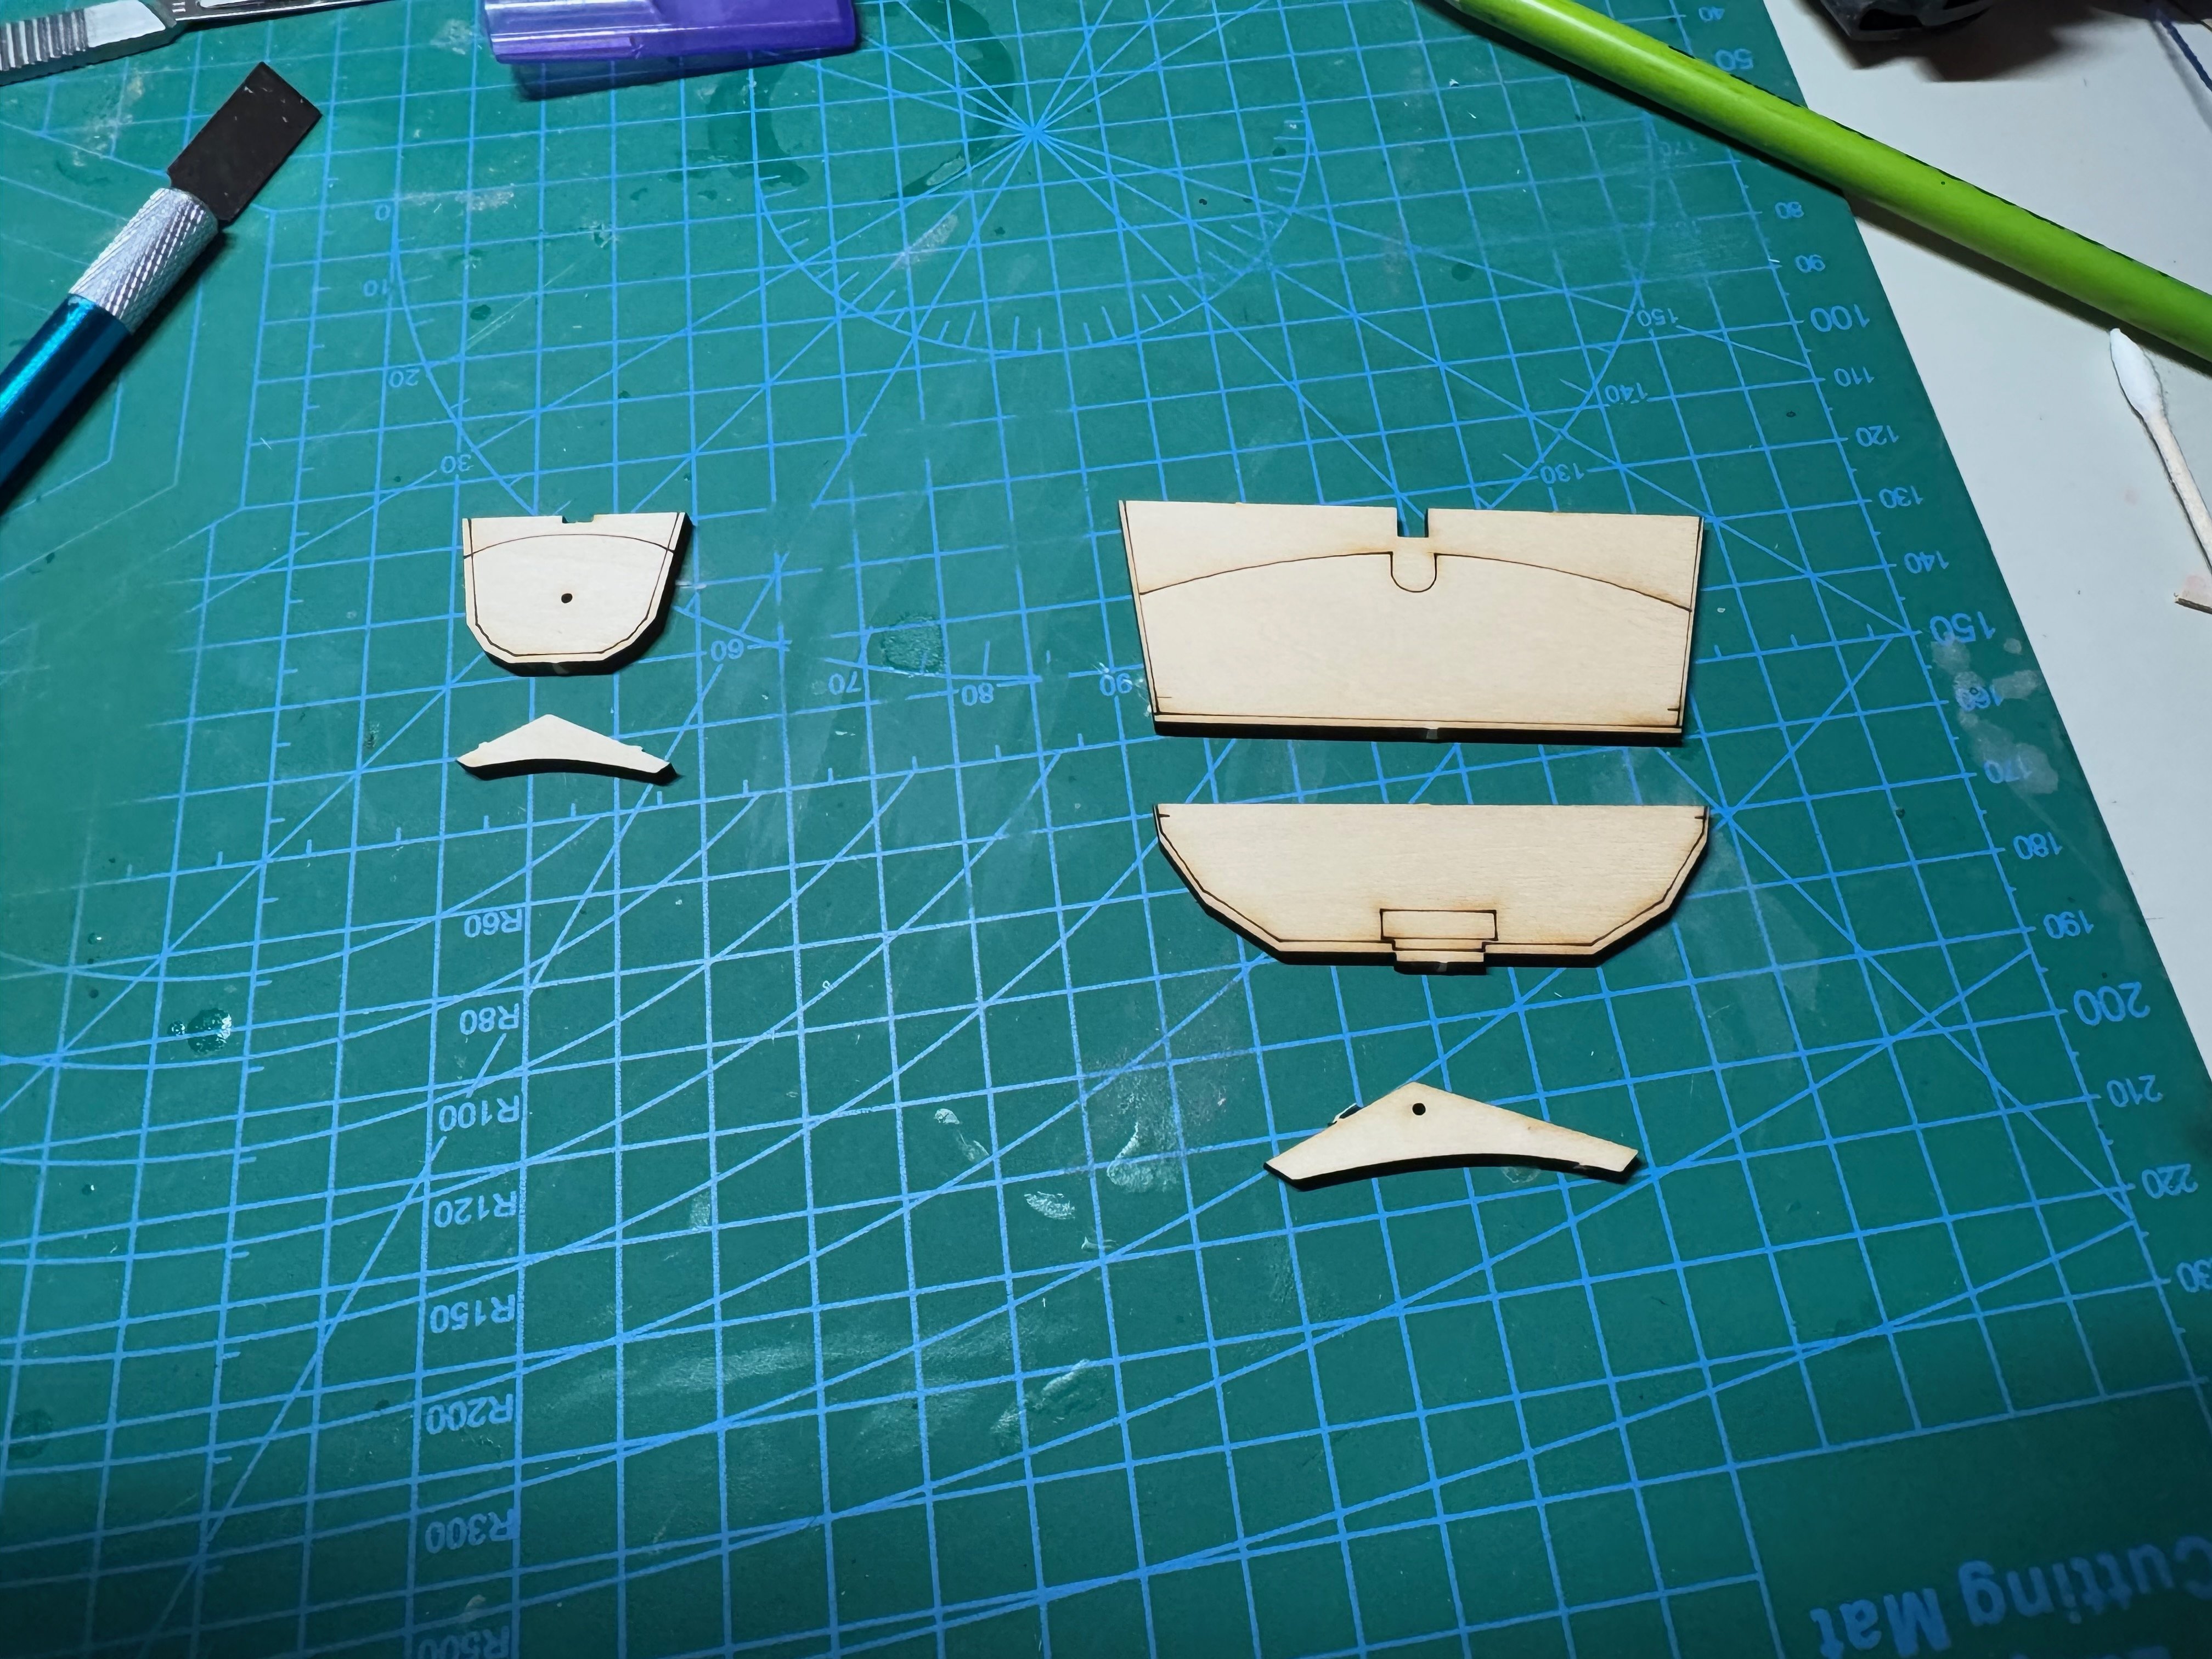
 Hello all! It's time to start another one of these as I just got the boxes with the pram and smack in it! 😁 I just want to start this out by asking for a suggestion on desk vises. Specifically ones that will work for the pram, smack and then the larger size ships I will be doing more of in the futures. I used to have a nice ball vice to use for stuff but not sure if I want something as mobile as that for this hobby. I've been going through the other build logs for it and read through the instructions already! Pretty excited to work through this one. One thing I've kind of annoying so far is that it's not clear at all which pieces are which on one of the wood sheets. There are multiple pieces that look like they could be the transom knees... or they could be stern/bow quarter knees... I thought it was the ones right next to the bottom half of the stern transom but it looked much smaller than in the pictures so I went with the two from the empty sections shown below. It looks correct comparing the transoms to the pictures in the book so we move forward! Will update soon. Thanks in advance for all the help/suggestions!
- 55 replies
-
- 4
-
-
- Norwegian Sailing Pram
- Model Shipways
- (and 2 more)
-
Next kit on deck in the Model Shipways Series. A few notes and lessons learned: Some folks put tables of contents on their opening post that they update. I thought I'd put some notes on key points folks might look out for if they work on this model. I did that post-mortem for the NRG hull. I'll doing this as I go for the Pram. - Definitely check out several build logs as you go along. While there are detailed instructions, sometimes they are a bit confusing. And in one of the first steps, the description of what to do is opposite to what they show in the photos. I decided to follow the photo, which was what a lot of the build logs do here. And one log that chose to follow the written instructions ended up having to hack things later. - I found another place where the photos do not align with the instructions. A photo shows the wrong part attached to the lower stern transom. - The build board is not very sturdy and it’s easy to break the holders on the building board for the bow and stern transoms. Just think of them as a surface for holding rubber bands and/or clips and to help set the spacing between the bottom planks. - It’s easy to misposition pieces that will support other pieces later. For example, I had too much space between the two forward-most bottom frames so when I tried to add the mast step several steps later I had to unglue (with isopropyl alcohol) the forward-most bottom frame and reposition it back a mm or two). - Another example is the positioning of the seat frames. It's not entirely clear from the instructions where these should go. It's more following the photos than anything else, unless I missed some key to unlock. I recommend skipping ahead several steps and getting the seats. You can figure out where the seats need to go and hence where the seat frames need to go better if you do them together than trying to position the frames and them hoping that things fit. You do need to (probably) sand and shape the seats to get them to fit, even if the seat frames are positioned perfectly. But doing the seats and seat frames together will probably result in a better final product, and a bit less frustration. - Model Shipways paint is not the best. It’s a bit thick and gritty. Definitely need to thin with water. I’m using it because it came with the three-kit Shipwright combo. Also, the basswood isn’t the smoothest wood so it doesn’t matter as much as it might if the wood wants “fuzzy”. - A heads up: when you get to using the copper tubing and copper rods, the instructions don’t seem to give the right thicknesses. There are three kinds. Use the one that fits for a particular step. - The instructions say to tape the sail material to a cutting board. They do say that it needs to be a clean one, which mine was. But it was a used one. Maybe it was my particular cutting board, but because it had been used, when I taped the sail down and then brushed on watered-down glue to stiffen it, when I took the sail off the green cutting board there were some green stains on the sail. I tried to airbrush paint the sails but that didn't work. So I'm having Model Expo sent me a new sail. Next time I'm going to try to first put some Saran Wrap down on the cutting board, then tape and water-glue the sail. Hoping the Saran Wrap won't stick. If someone has other suggestions, please let me know. - One challenge is rigging the mast. I'm gathering that on this kind of boat, the mast is just in place when using it since the mast just rests in a circular slot - it's not glued or otherwise secured (if you let go, it will just tip over). A challenge is that since the mast is not secured in place, you need to hold the mast and then try to figure out how long and how tight the rigging lines (one in front, two on the side behind it) need to be and secure the rigging line and knot them off. You're running out of hands unless you have someone helping you. The quad hands (from quandhands.com) are a lifesaver (I actually got a quint hands from them). Buy it directly from them because a lot of the ones sold on amazon seem to be knockoffs (same yellow base without the quad hands logo and seemingly poor quality based on some reviews - people thought they were getting a real one).
- 63 replies
-
- 6
-
-
- Norwegian Sailing Pram
- Model Shipways
- (and 2 more)
-
 I started another project, the Model Shipways Grand Banks Dory. There are many build logs with kit pictures, so I won’t include here. I’m planning on replacing all the basswood anyways. I usually have two projects (wooden ship and plastic airplane) going, but for a bunch of reasons, thought I should try doing two ship models at the same time. Rationale: · I got a really good deal on it at a club auction · I’ve wanted to try one of David Antscherl’s kits · I think I have my jointer and bandsaw finally tuned right, and wanted to try milling some wood · I’ve found working with laser cut pieces on the longboat a little frustrating. I’m sure I will get better at it with some more practice, but wanted to get a sense of the comparison between cutting the parts out myself vs cleaning char off laser cut pieces. · I want to build with boxwood and some contrasting wood, and wanted to see how well patterns made from scanned laser cut sheets would work. This was particularly important on this model as the plans in the instruction book don’t include all the parts. · Main reason: I’m planning on starting a fully framed Echo, but want another project going so I don’t try working on Echo when tired or distracted. This seemed a good opportunity to pilot building two ship models at the same time. If it isn’t going to work for two fairly simple kits (longboat and Dory), I shouldn’t try it with Echo. So far, so good. I started with the stand as a test for the jointer and bandsaw. The wood is a piece of pao ferro that I had on my shelf. Very happy with both tools. The bandsaw got knocked out of alignment during the house move a few years ago, and is finally dialed back in. The jointer was never fully adjusted and is finally working the way it should. Scanning the basswood laser cut sheets has also worked well. The burn marks are thin enough and in the right place to get good patterns. For the first few pieces (hull bottom, stem, transom, stern knee) cutting the parts out has been very straightforward and taken less time than cleaning char. For some parts like the longboat frames this would not be true. I’ve also been making some progress on the other two projects and will update the logs soon.
- 32 replies
-
- 11
-
-
- Grand Banks Dory
- Model Shipways
- (and 2 more)
-
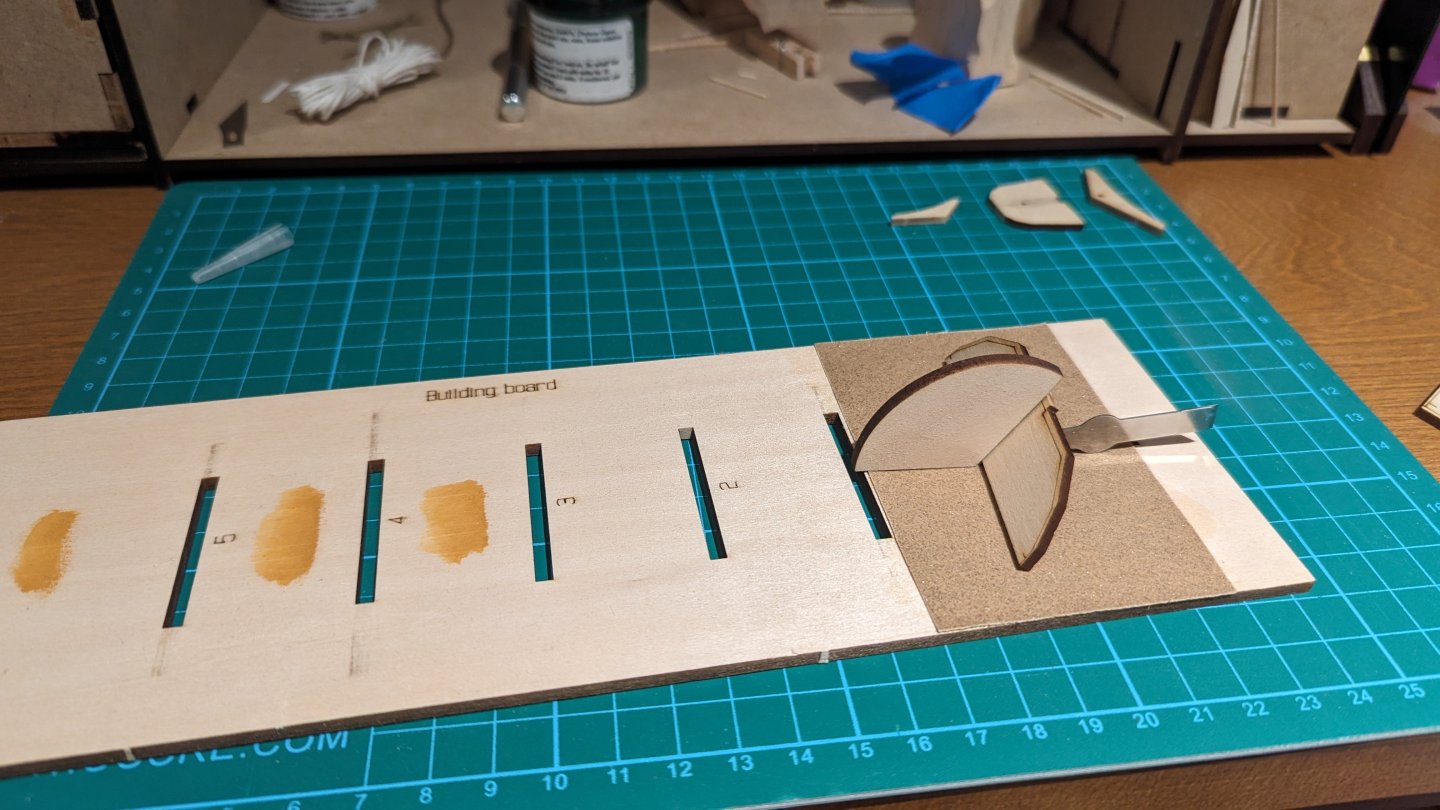
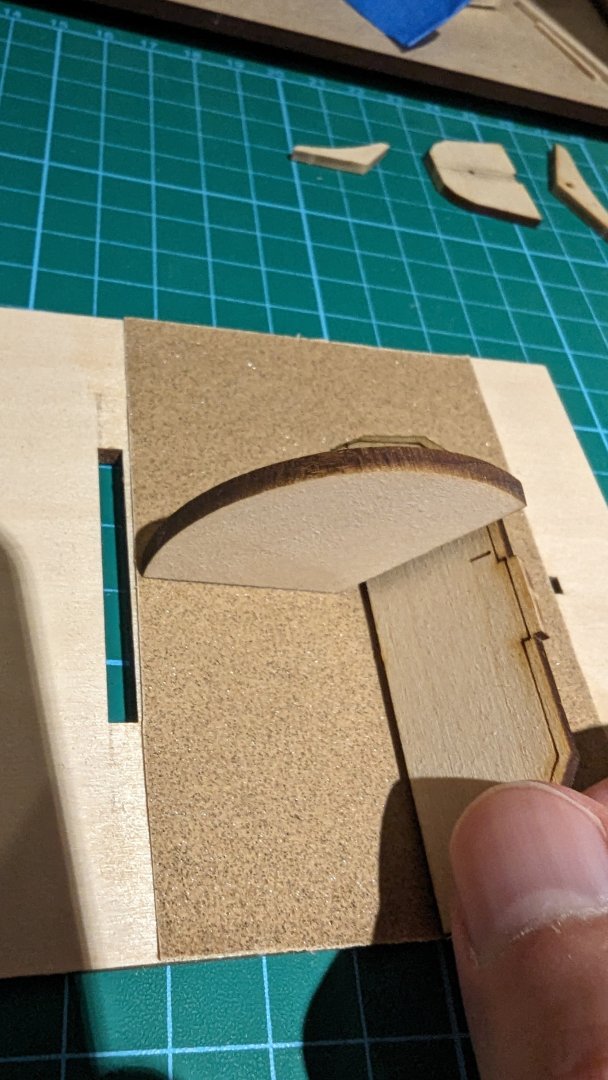
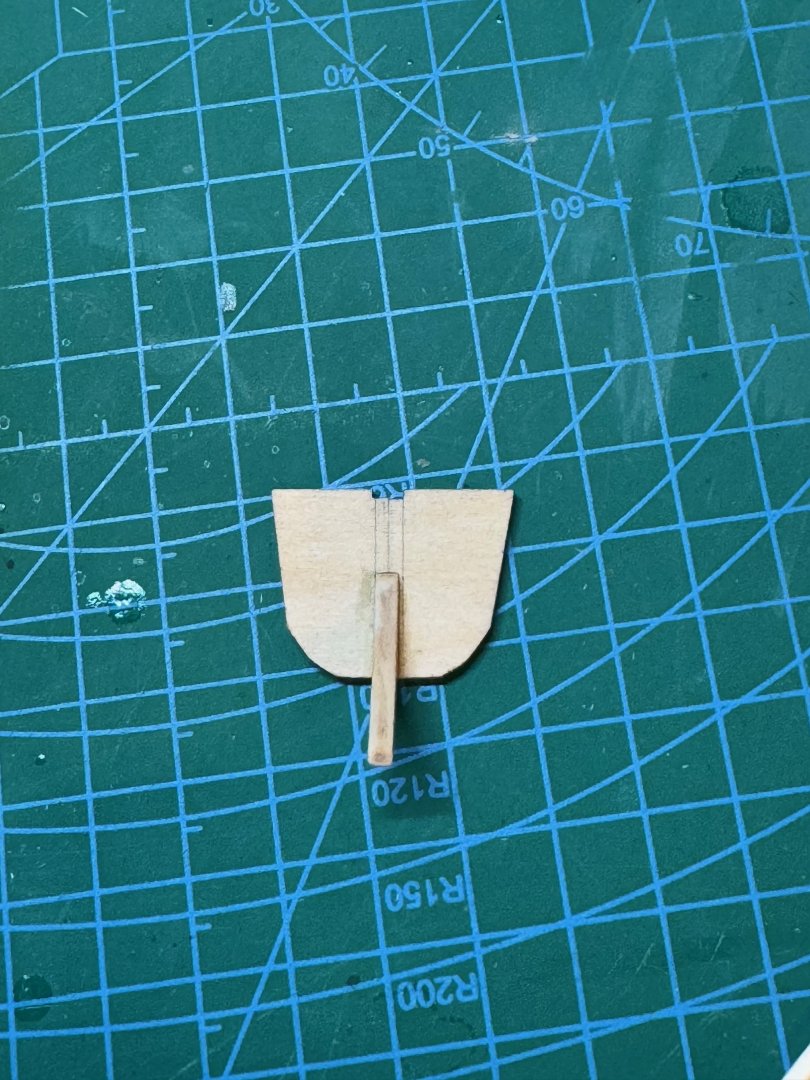
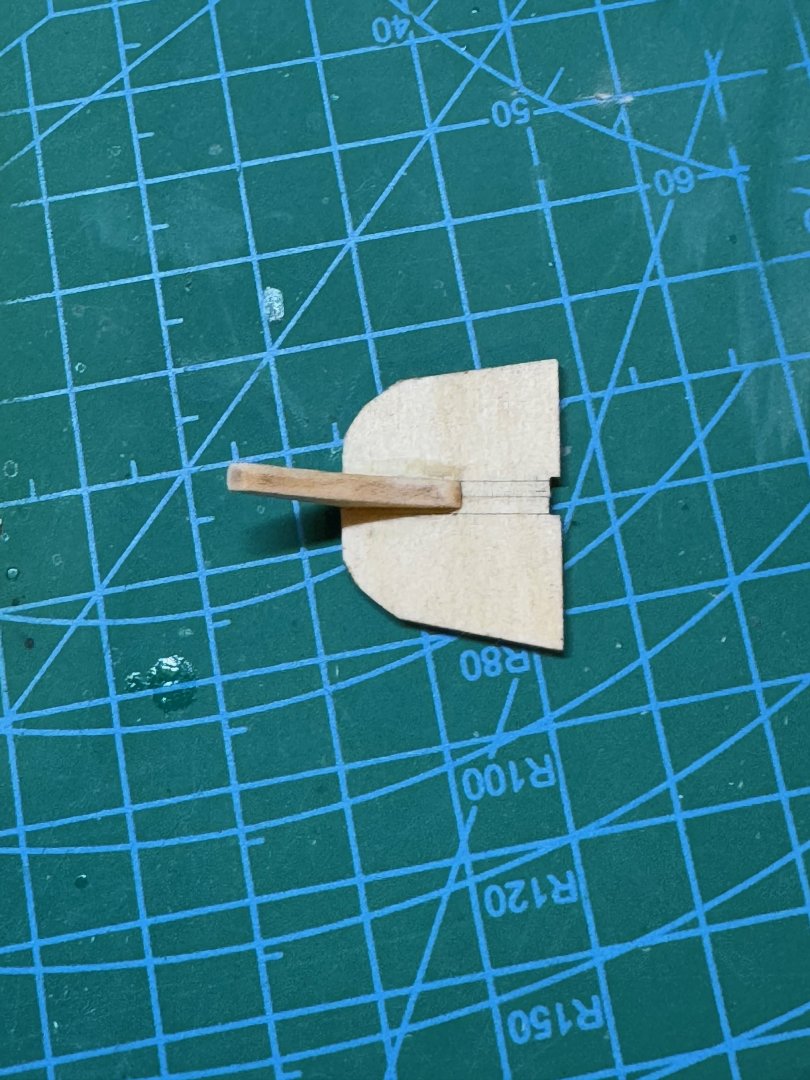
 I thought I would start to work on the Norwegian Sailing Pram in tandem with my Half hull planking project as I can optimize my time while glue is setting. Instead of doing a out box photos, I decide to just get right into the build. Yesterday, I cutted out the knees and transom pieces from the kit. I rounded first removed the char, and then proceed to mark out the center, and on the transoms. I also marked the upper stern transom with a 1/8 inch line so I can attach the lower and upper transoms together. I then glued on the knees. I then proceeded to bevel the transom, being careful to keep the facets intact. This concludes steps 1 - 4 in the documentation.

- 6 replies
-
- 5
-
-
- Norwegian Sailing Pram
- Model Expo
- (and 2 more)
-
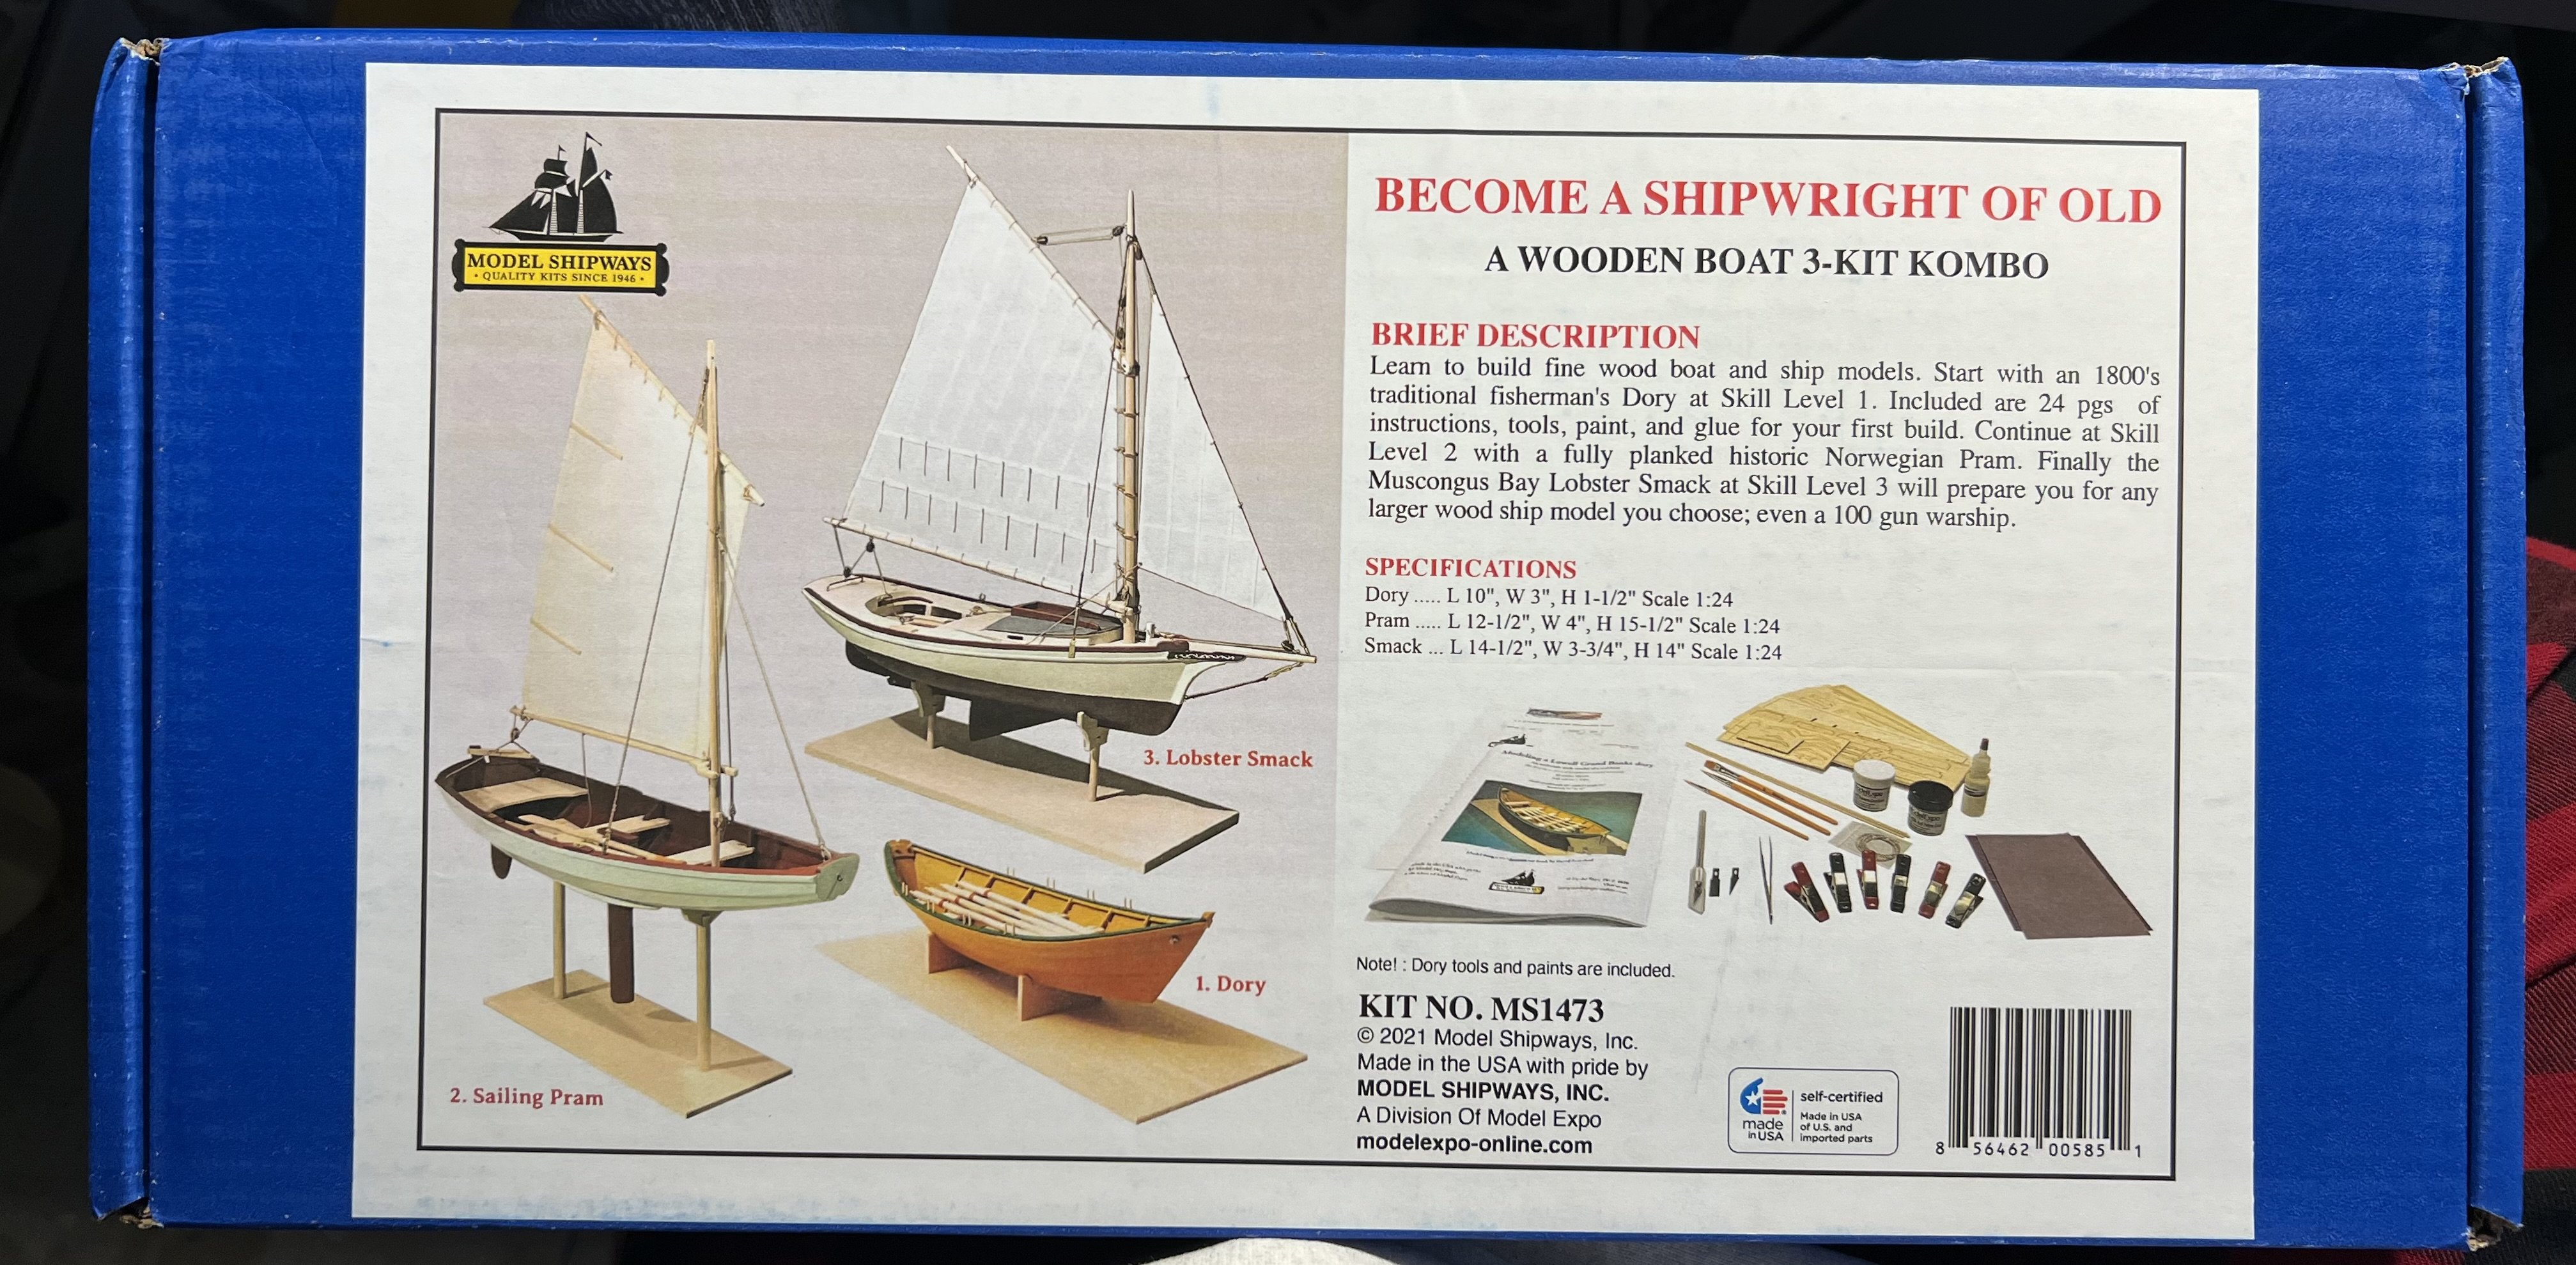
Okay, so after deciding to purchase the Duchess of Kingston by Vanguard Models to be my second build (while continuing to work on my Vanguard Sherbourne), I reflected on my mistakes (that I certainly learn from) and how often they occur and considered how much I just spent on the Duchess and what a more serious mistake might mean, and decided to maybe get some more practice on less expensive models first (well, second, third, and fourth). I just got the Model Shipways Shipwright Series, which consists of the Lowell Grand Banks Dory, followed by the Norwegian Pram, and then the Muscongus Bay Lobster Smack. I know these model might be a bit more “old school” than the more modern Vanguard designs. But I figured they’d force me to do something different, mistakes would be on a far cheaper model, and they’d be easier to work on while also doing my Sherbourne. I wanted another model (in this case three small ones) to have something to work on while waiting for glue and paint to dry on my Sherbourne parts (like I am now).

- 28 replies
-
- 5
-
-
- Lowell Grand Banks Dory
- Shipwright Series
- (and 3 more)
-
 I’m starting my third model after reading through the manual and checking out other build logs.
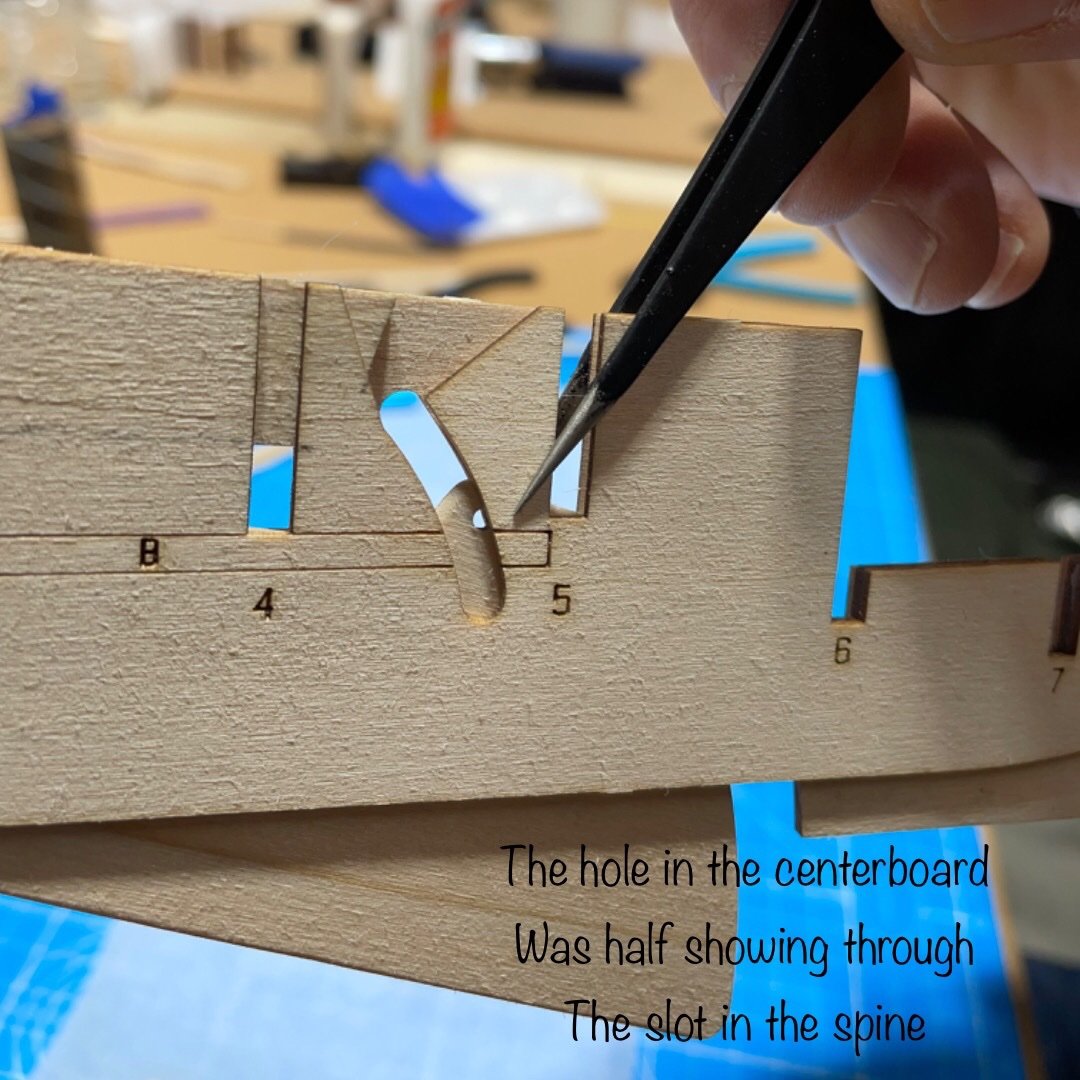


- 49 replies
-
- 8
-
-
- muscongus bay lobster smack
- Model Shipways
- (and 2 more)
-
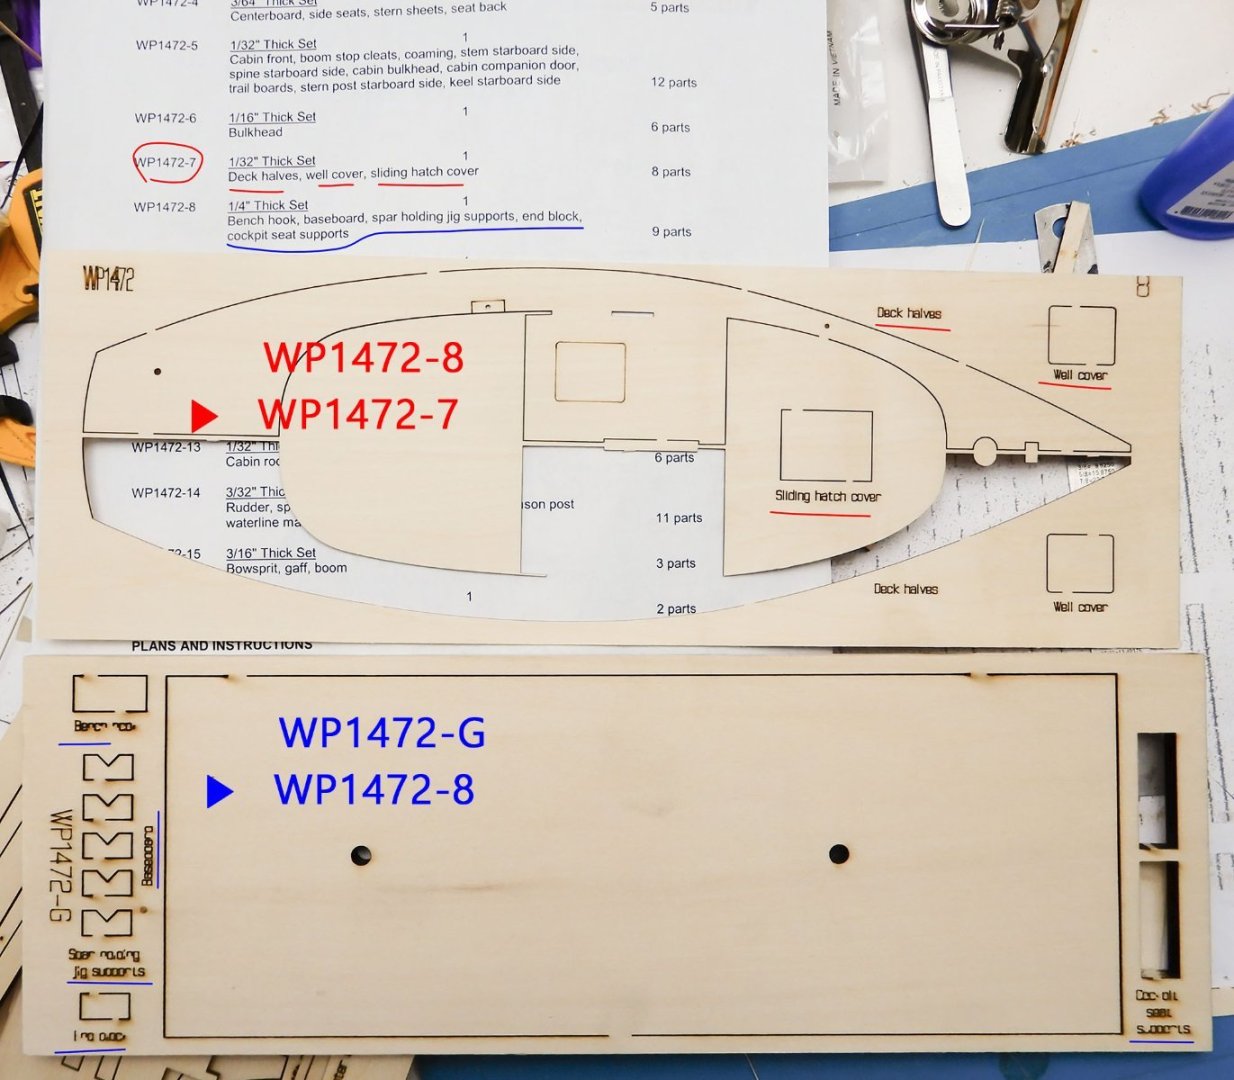
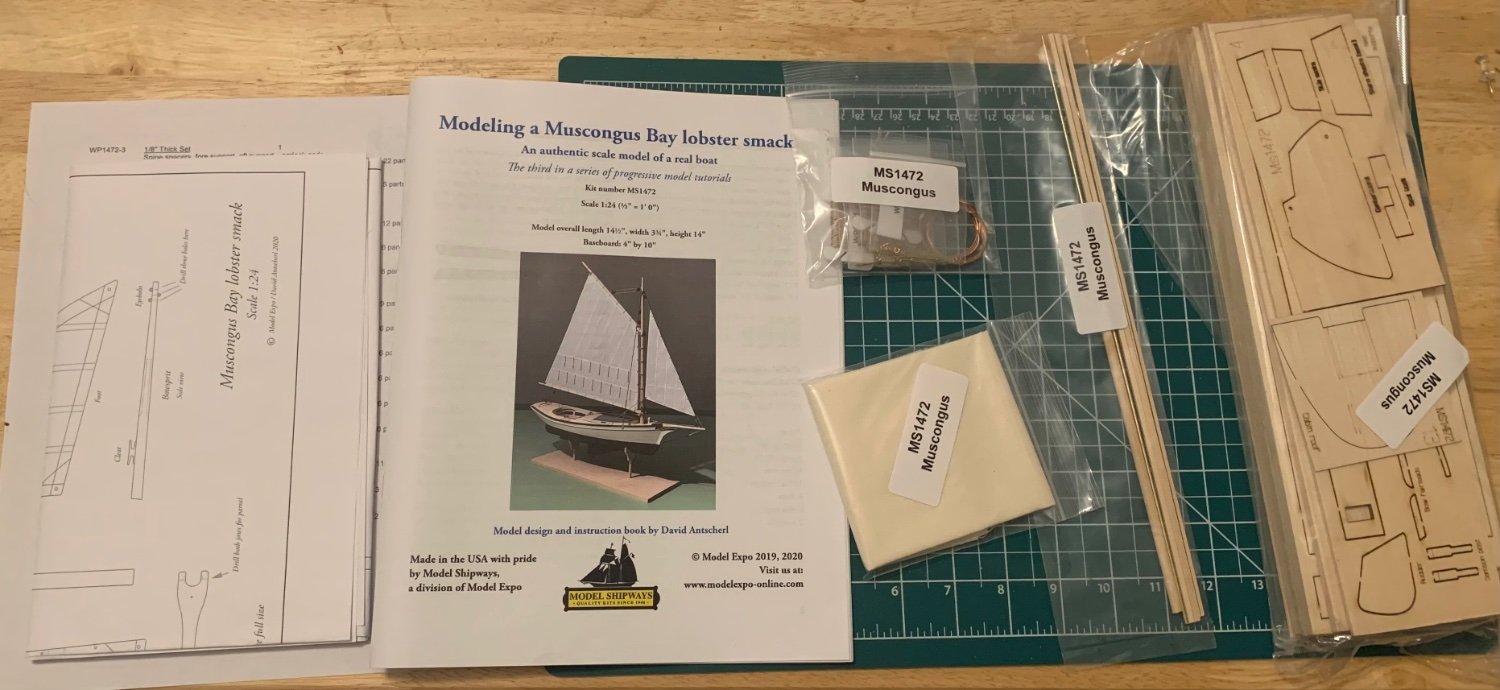
 It may be too late, but thanks to Bryan Woods for watching my build log. It is good to check every part in a new kit, but this case is a bit embarrassing. When I checked the part list paper of the Smack kit, I found that part 7 (WP1472-7) was missing. I stopped to build it and requested a replacement part from Model Expo. Two days later, I was building the kit. I decided to build until I needed the missing part. I suddenly found that the part list was misprinted. (Check the above picture) All the parts were in my kit, and there was no more obstacle to finish my project! I request an order cancellation to Model Expo... 🤣 It is time for another sprint. 😎
- 1 reply
-
- 8
-
-
- Model Shipways
- Muscongus Bay Lobster Smack
- (and 1 more)
-
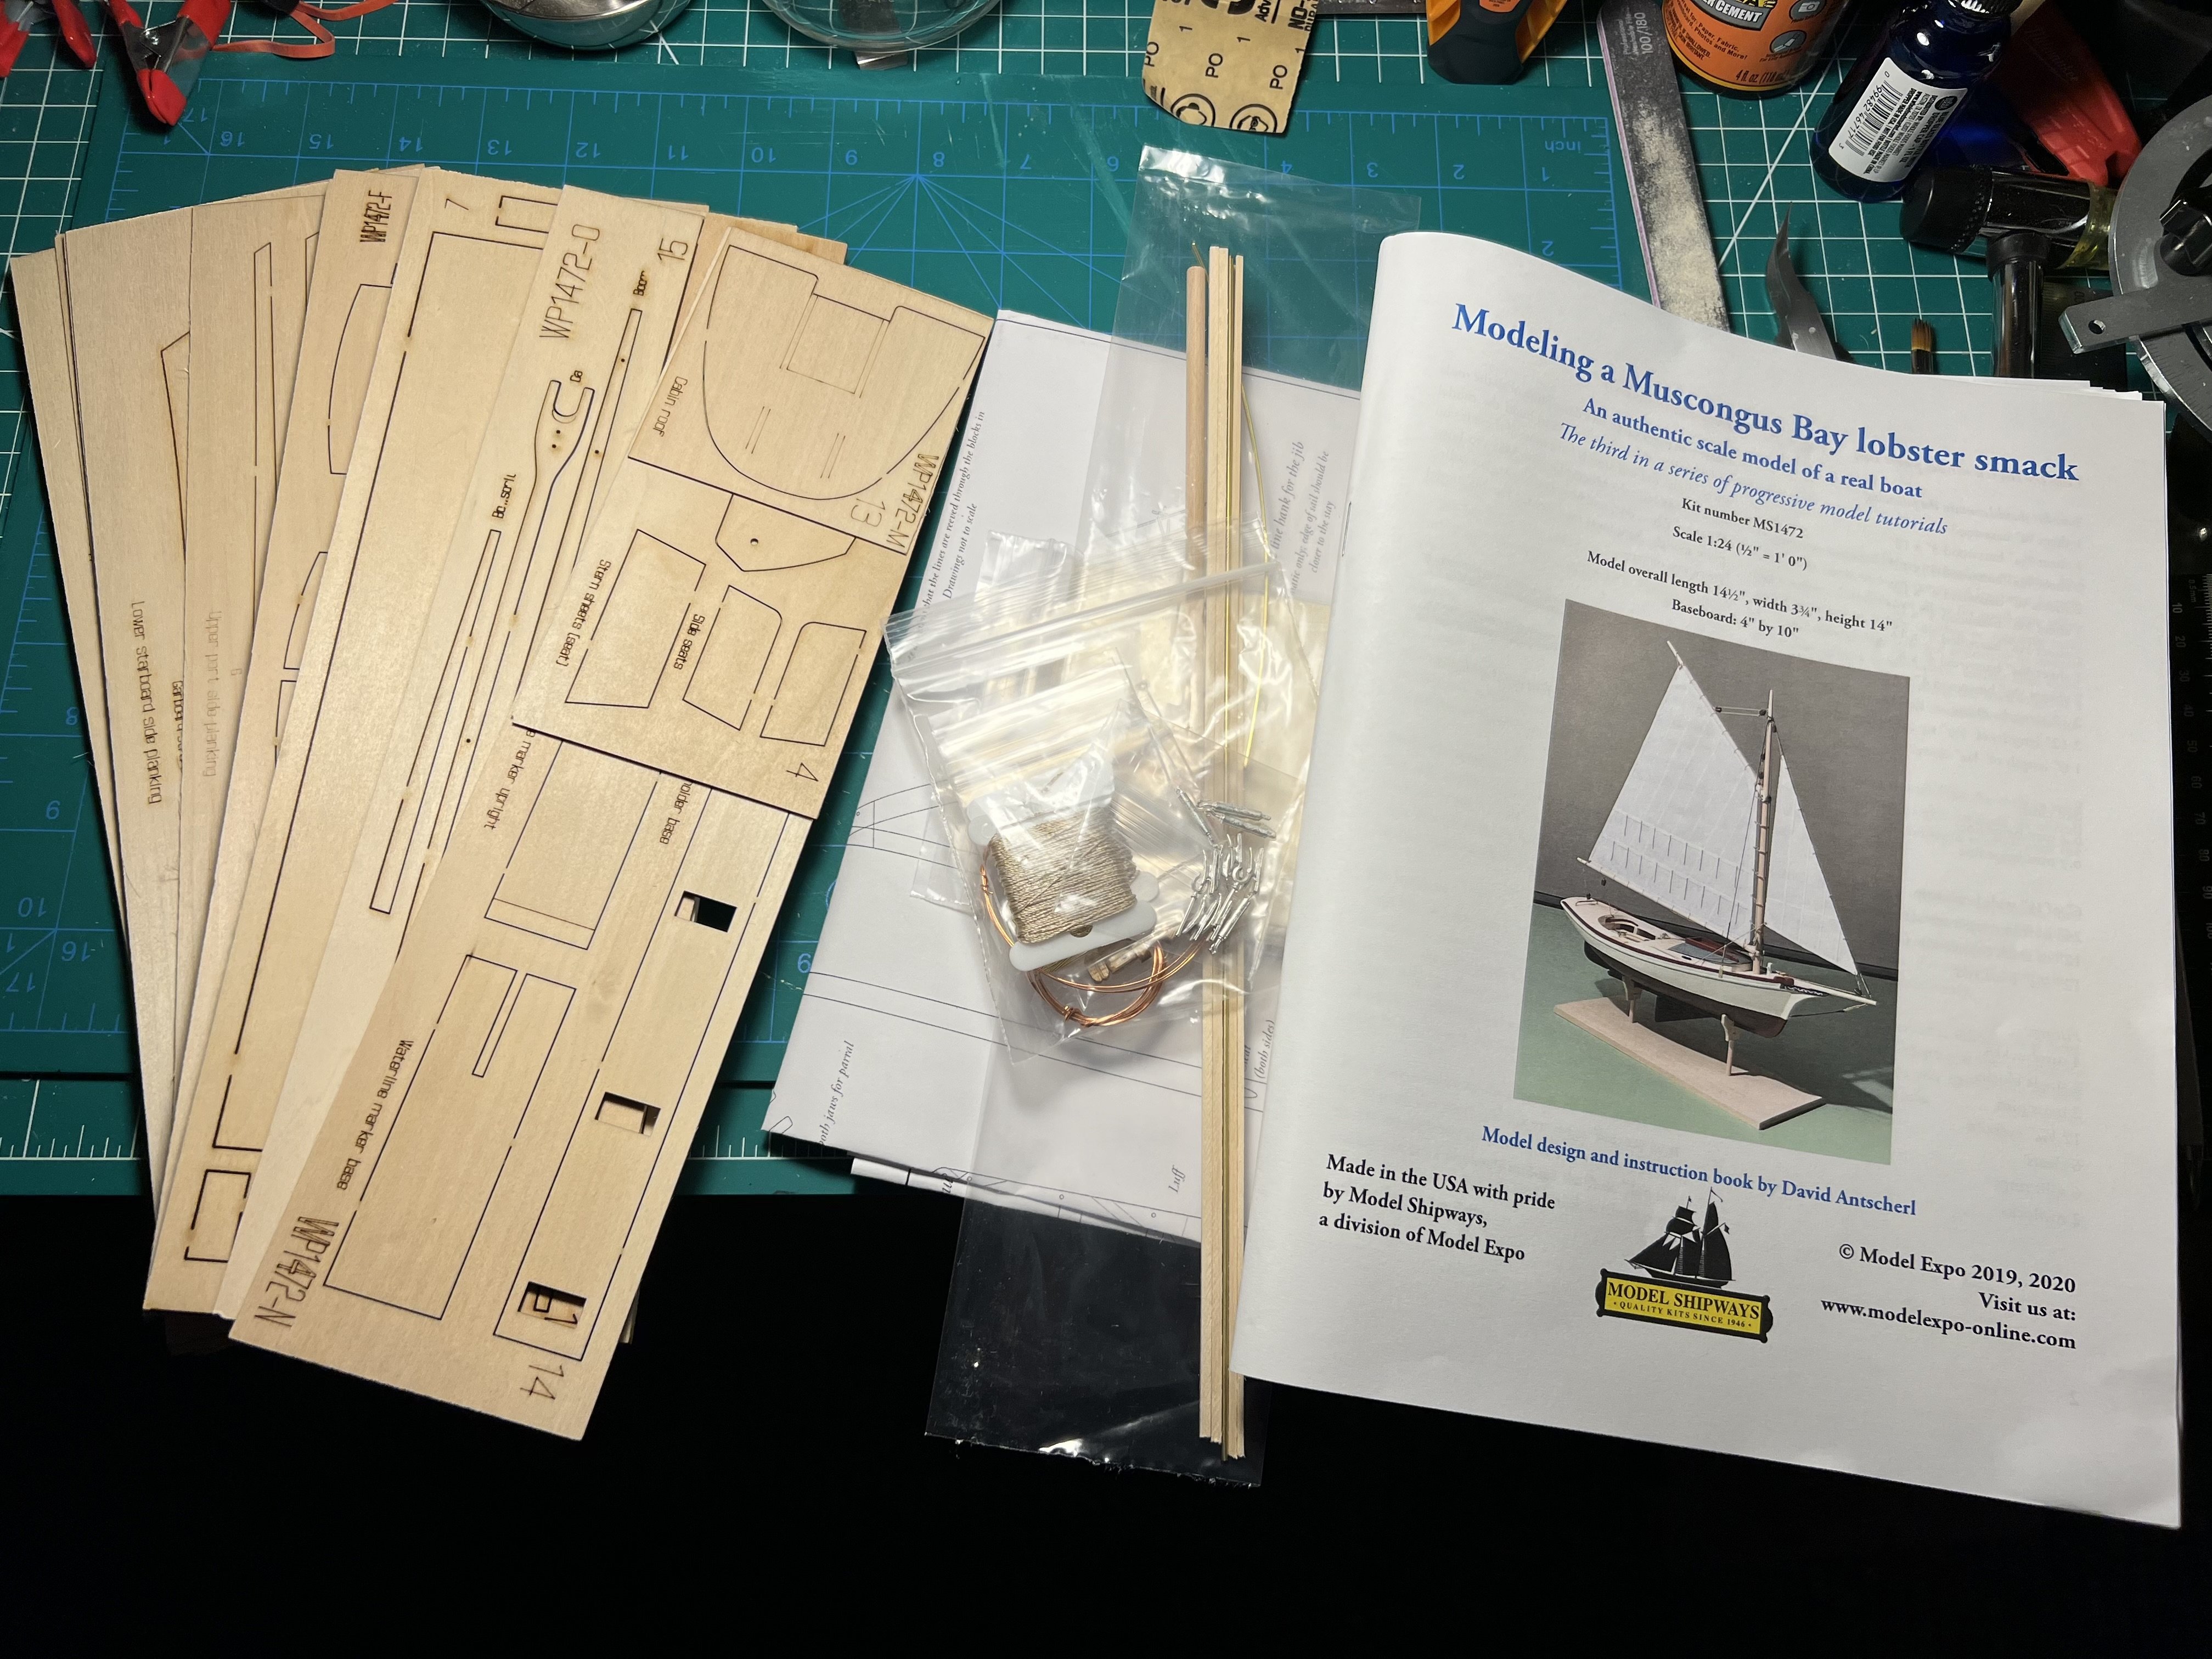
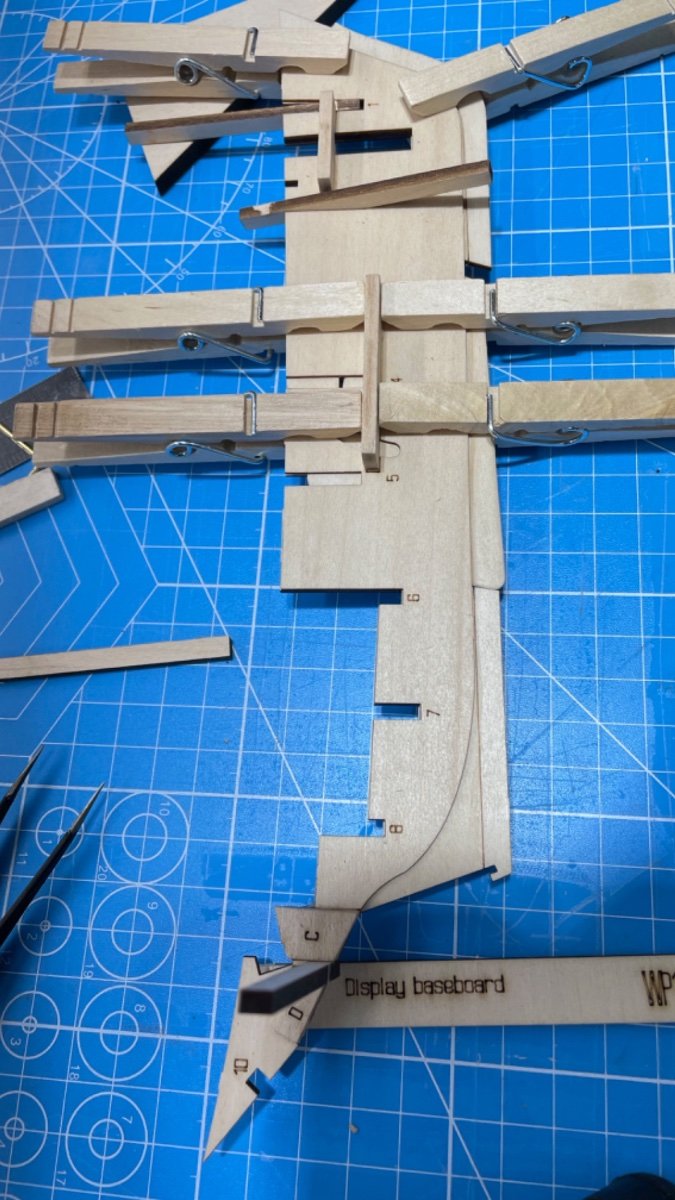
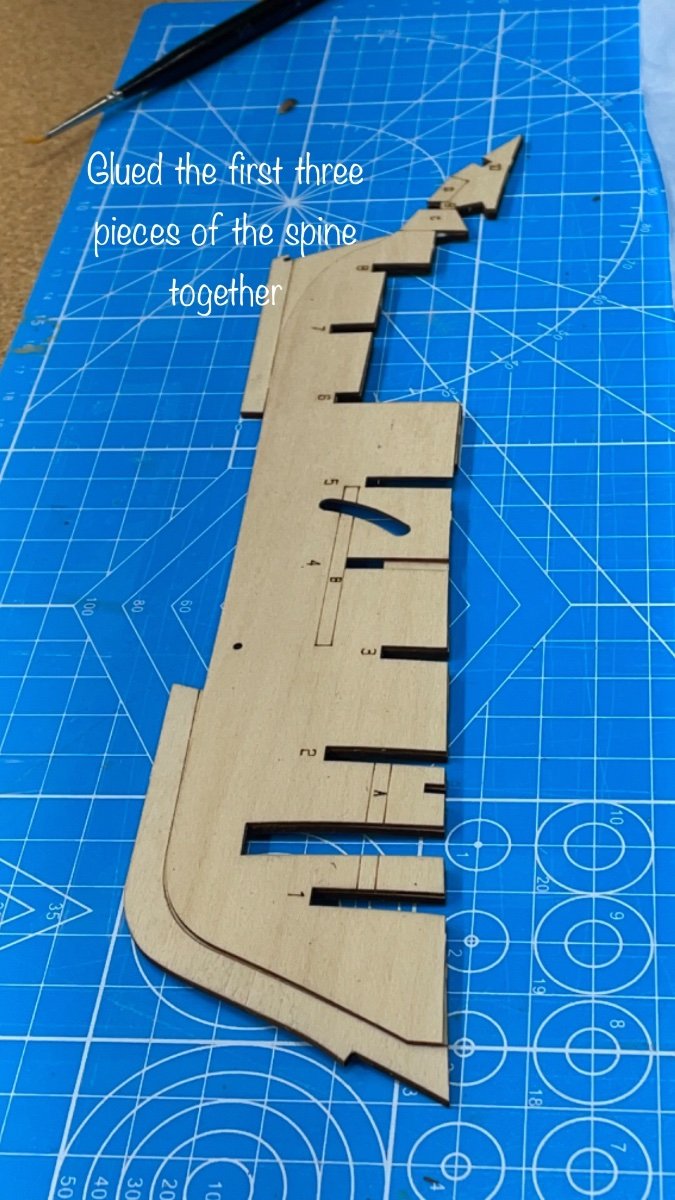
 Hello again, I’m back with the beginning of the third and final model in the Shipwright Series kit by Model Shipways: the Muscongus Bay Lobster Smack. It would appear that I’ve fallen slightly behind my cohort here as I’ve been away on vacation for a short time. I’m catching back up on everything Happening in the other build logs and have some really good work to live up to. So far all I have done is take a quick inventory to make sure everything is included and accounted for. I’m eager to get started. Most importantly, though, is that I’m going to take some time to read through the instruction booklet and familiarize myself with the first few steps before getting started. It’s a practice that served me well in the first two models and I see no reason to rush in on the third (even though I desperately want to get straight to the cutting, sanding, and gluing). I suspect this build will be at a bit of a slower pace than the Pram was because I’m transitioning between a very hands-on phase at work where I could have my evenings to myself and into a more creative phase where my evenings are going to become busier with recording or expanding ideas.
- 38 replies
-
- 5
-
-
- Model Shipways
- Shipwright Series
- (and 2 more)
-
 Hi there - new member and new to the world of wooden model ship building. Like many new builders I have some experience with plastic models, and went to school for aircraft maintenance. But knowing that wood requires an entirely different skill set I wanted to start fresh at the beginning and set myself up for success. My interest in wood actually started back in the spring: after a visit to the Mystic Seaport Museum's model workshop and a long discussion with a gentleman (I can't remember his name) they had a free raffle for what I believe was a Midwest kit (I remember the signature yellow box, but not which model). I didn't win, but was inspired to get a beginner model anyway. After trying to find the same kit they were giving away I naturally found my way to the Model Expo website and was very pleased to discover their Shipwright Series. I ordered the 3-kit combo and as the cool weather begins I hope to enjoy the journey of developing the skills of this wonderful hobby. Beginning with the Dory has been a pleasure so far - glad to report I'm really enjoying it. Started the kit yesterday afternoon and have completed the bottom planks, stem, and transom. I also installed the frames on the building board. So far everything looks as though its dried square. I will come back tonight to remove the remaining char and make sure everything had stayed in place.
- 19 replies
-
- 9
-
-
- Grand Banks Dory
- Model Shipways
- (and 3 more)
-
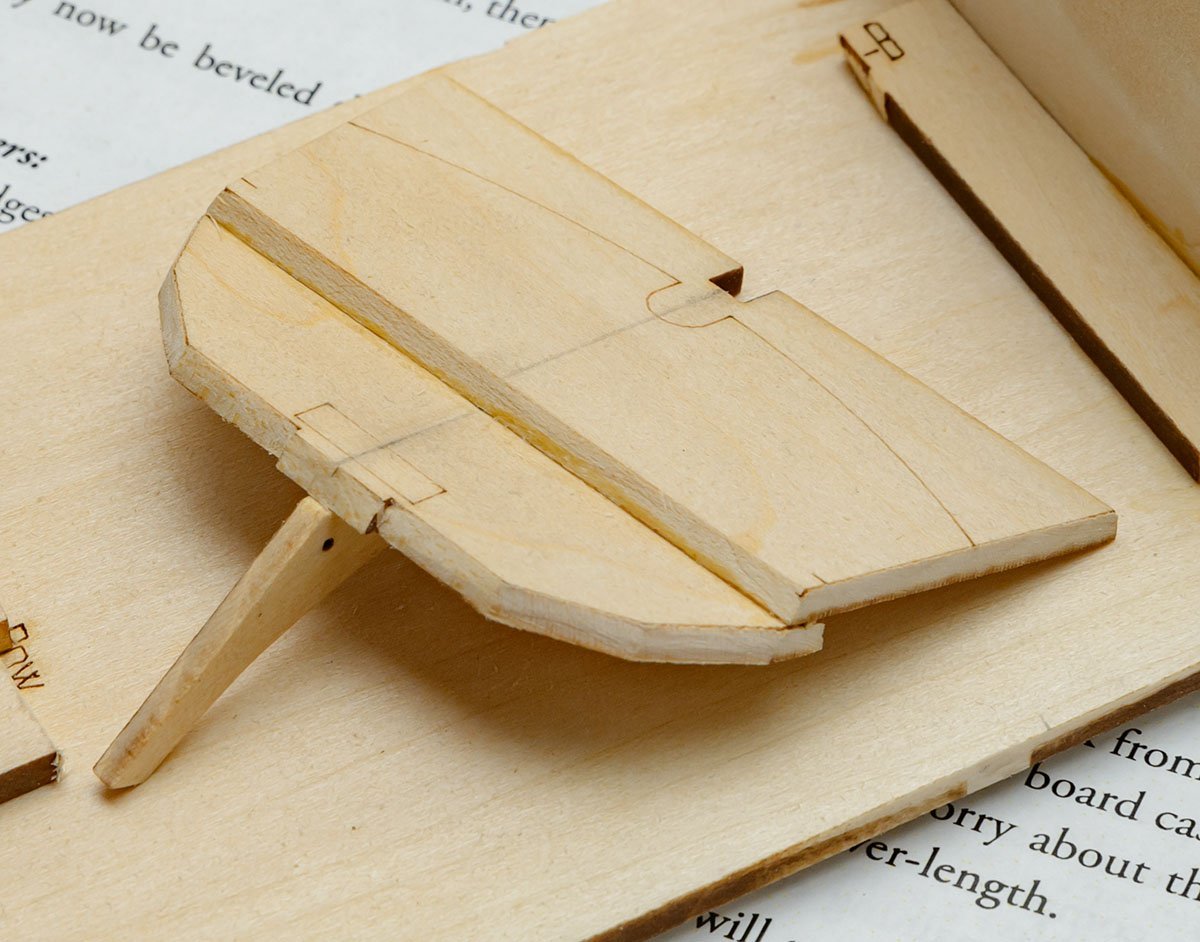
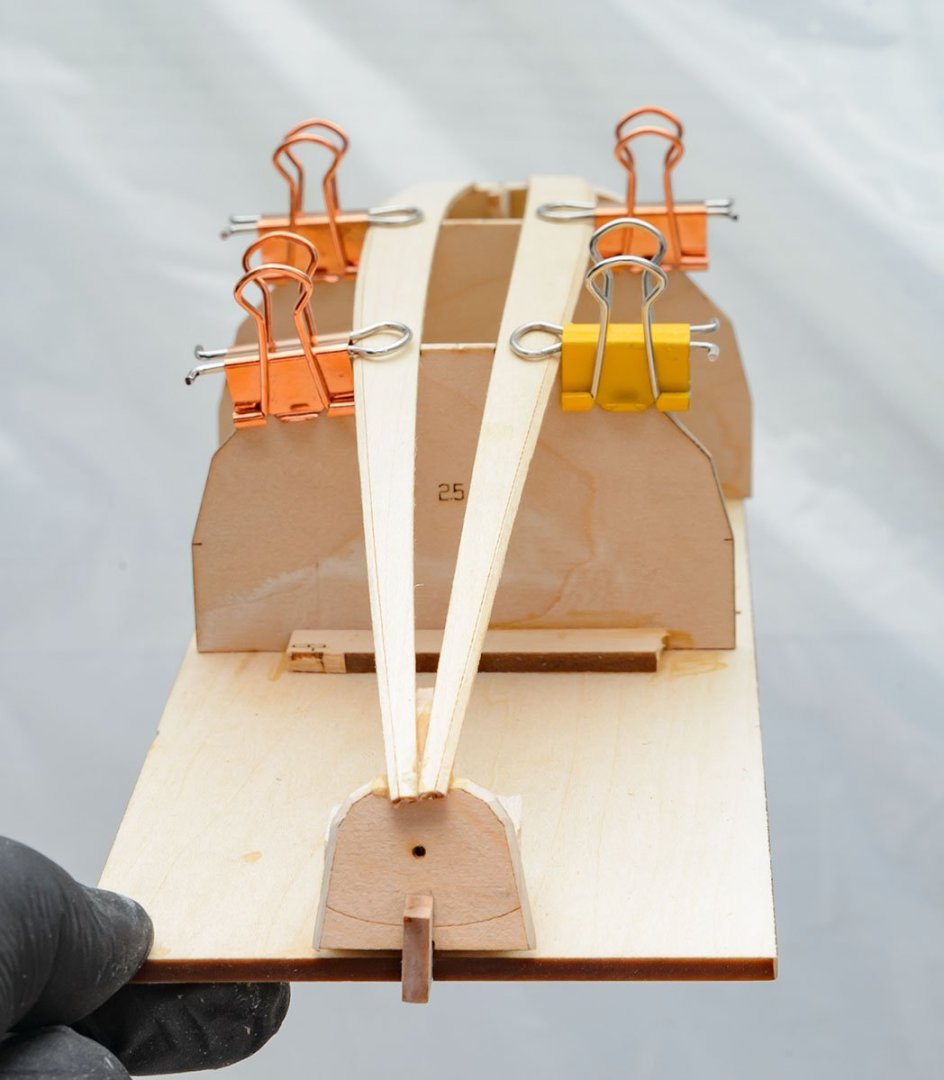
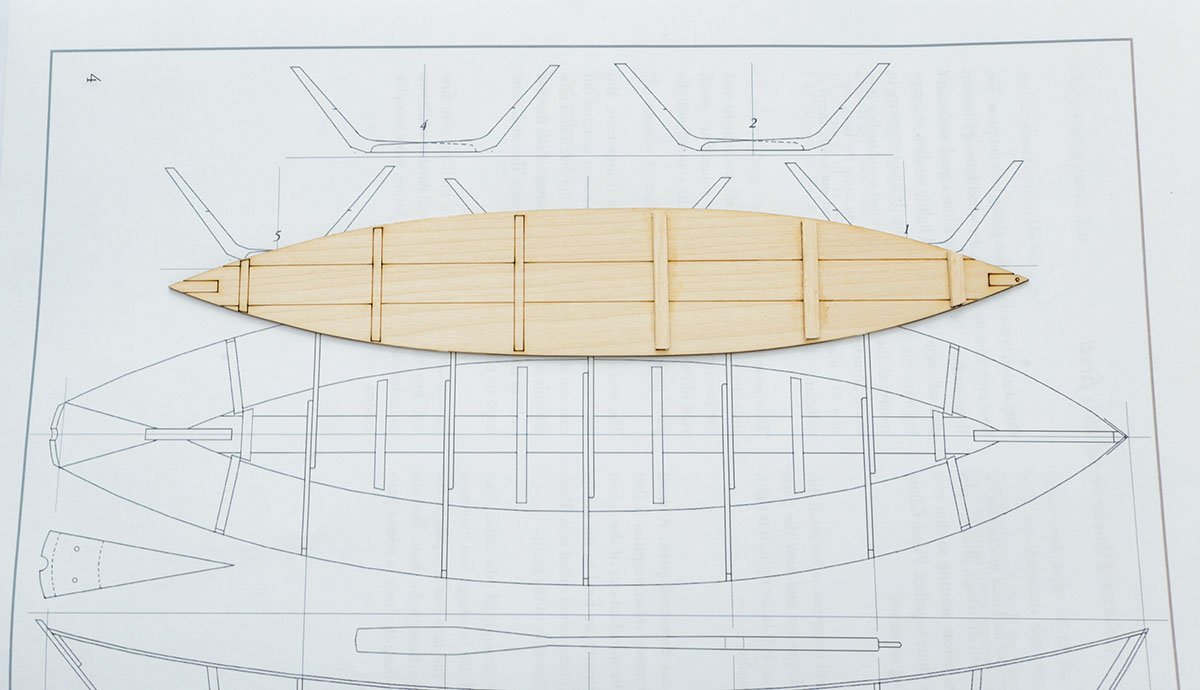
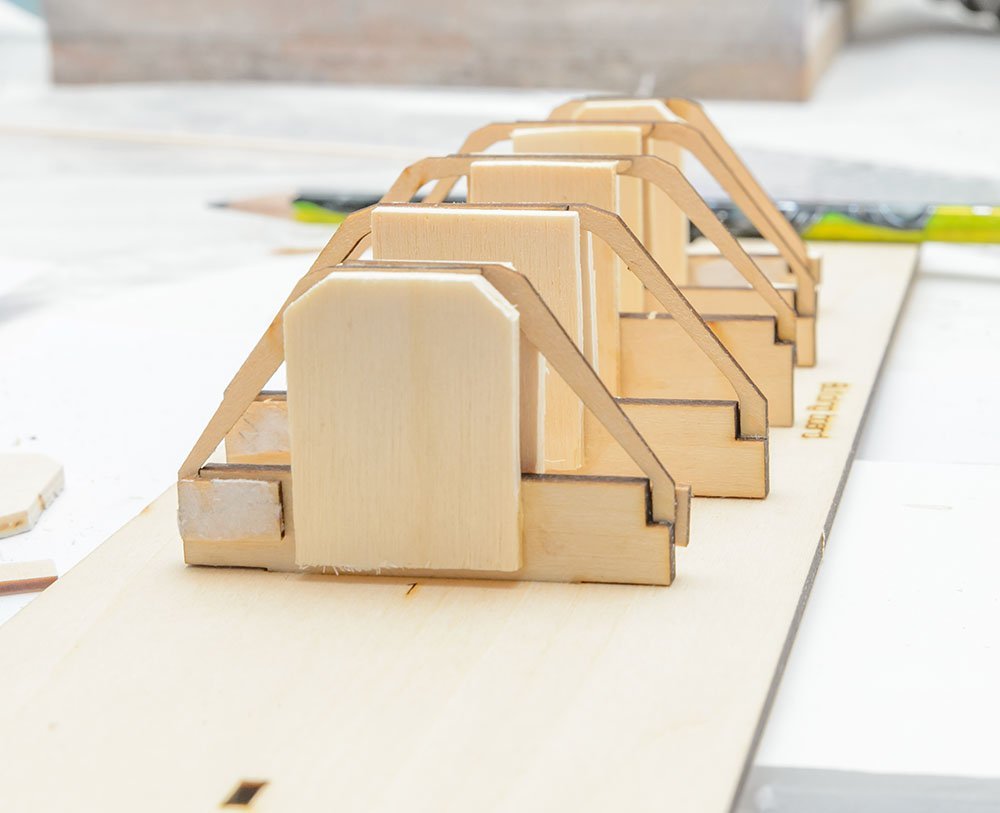
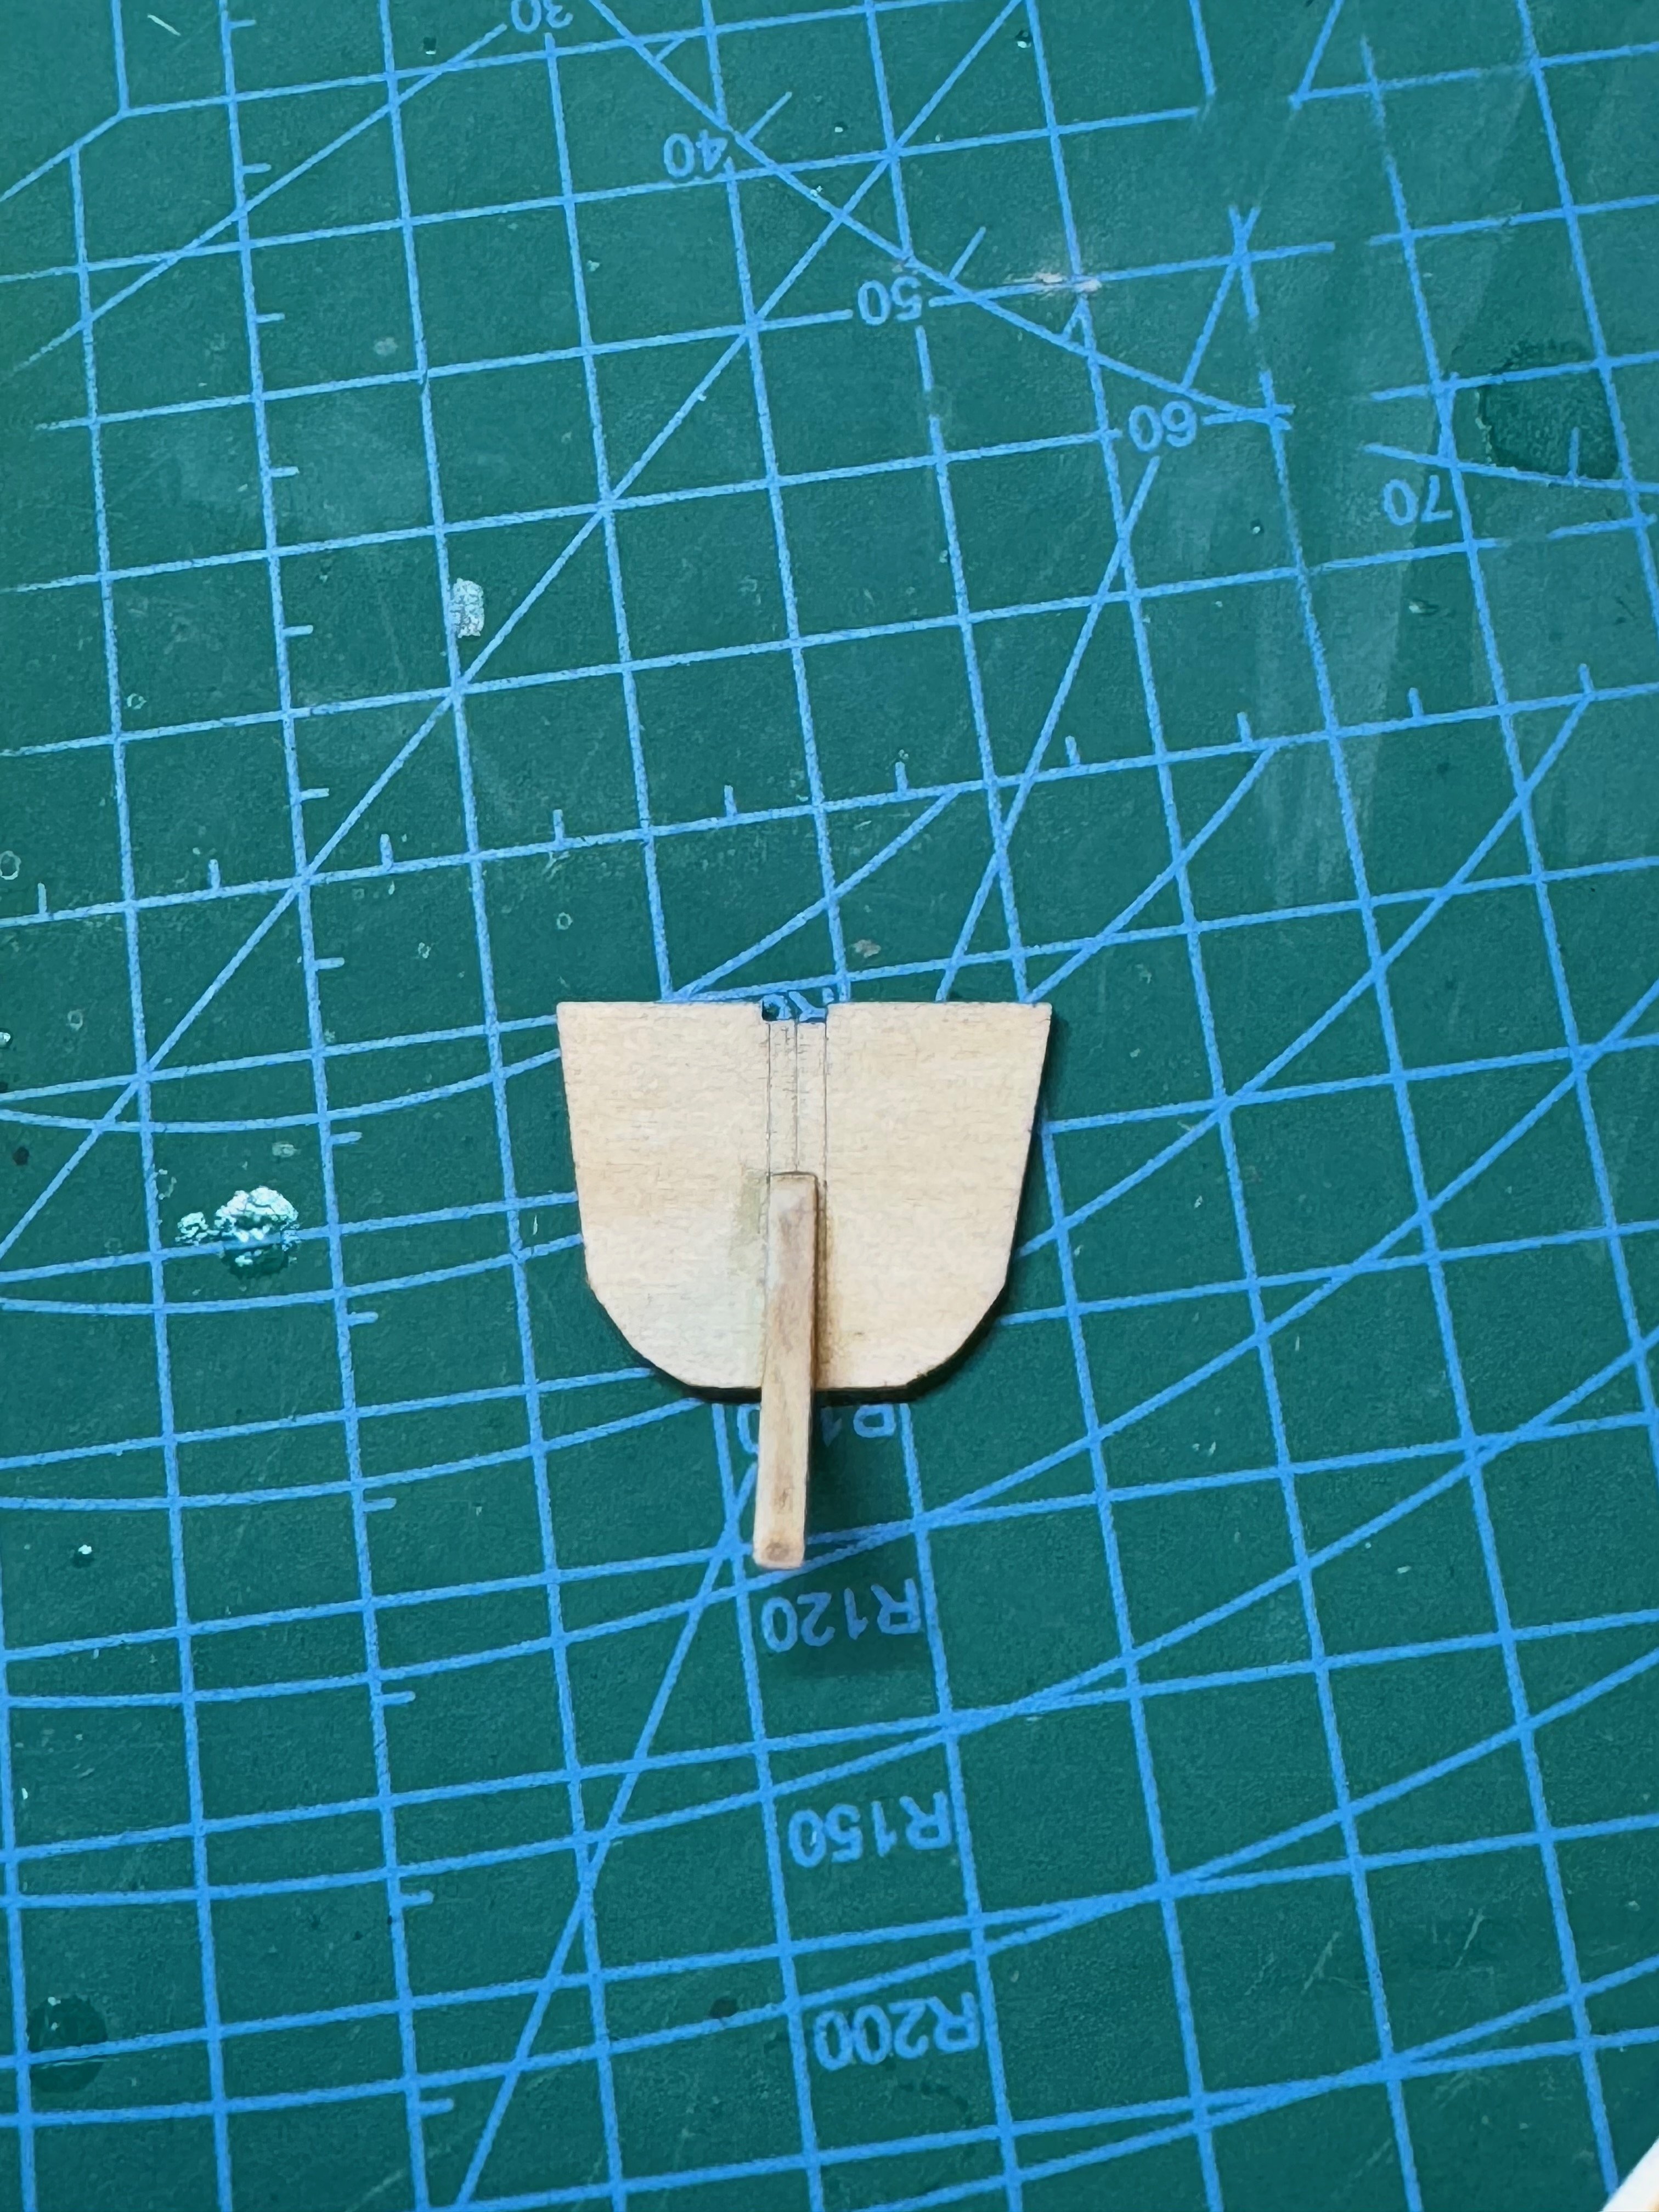
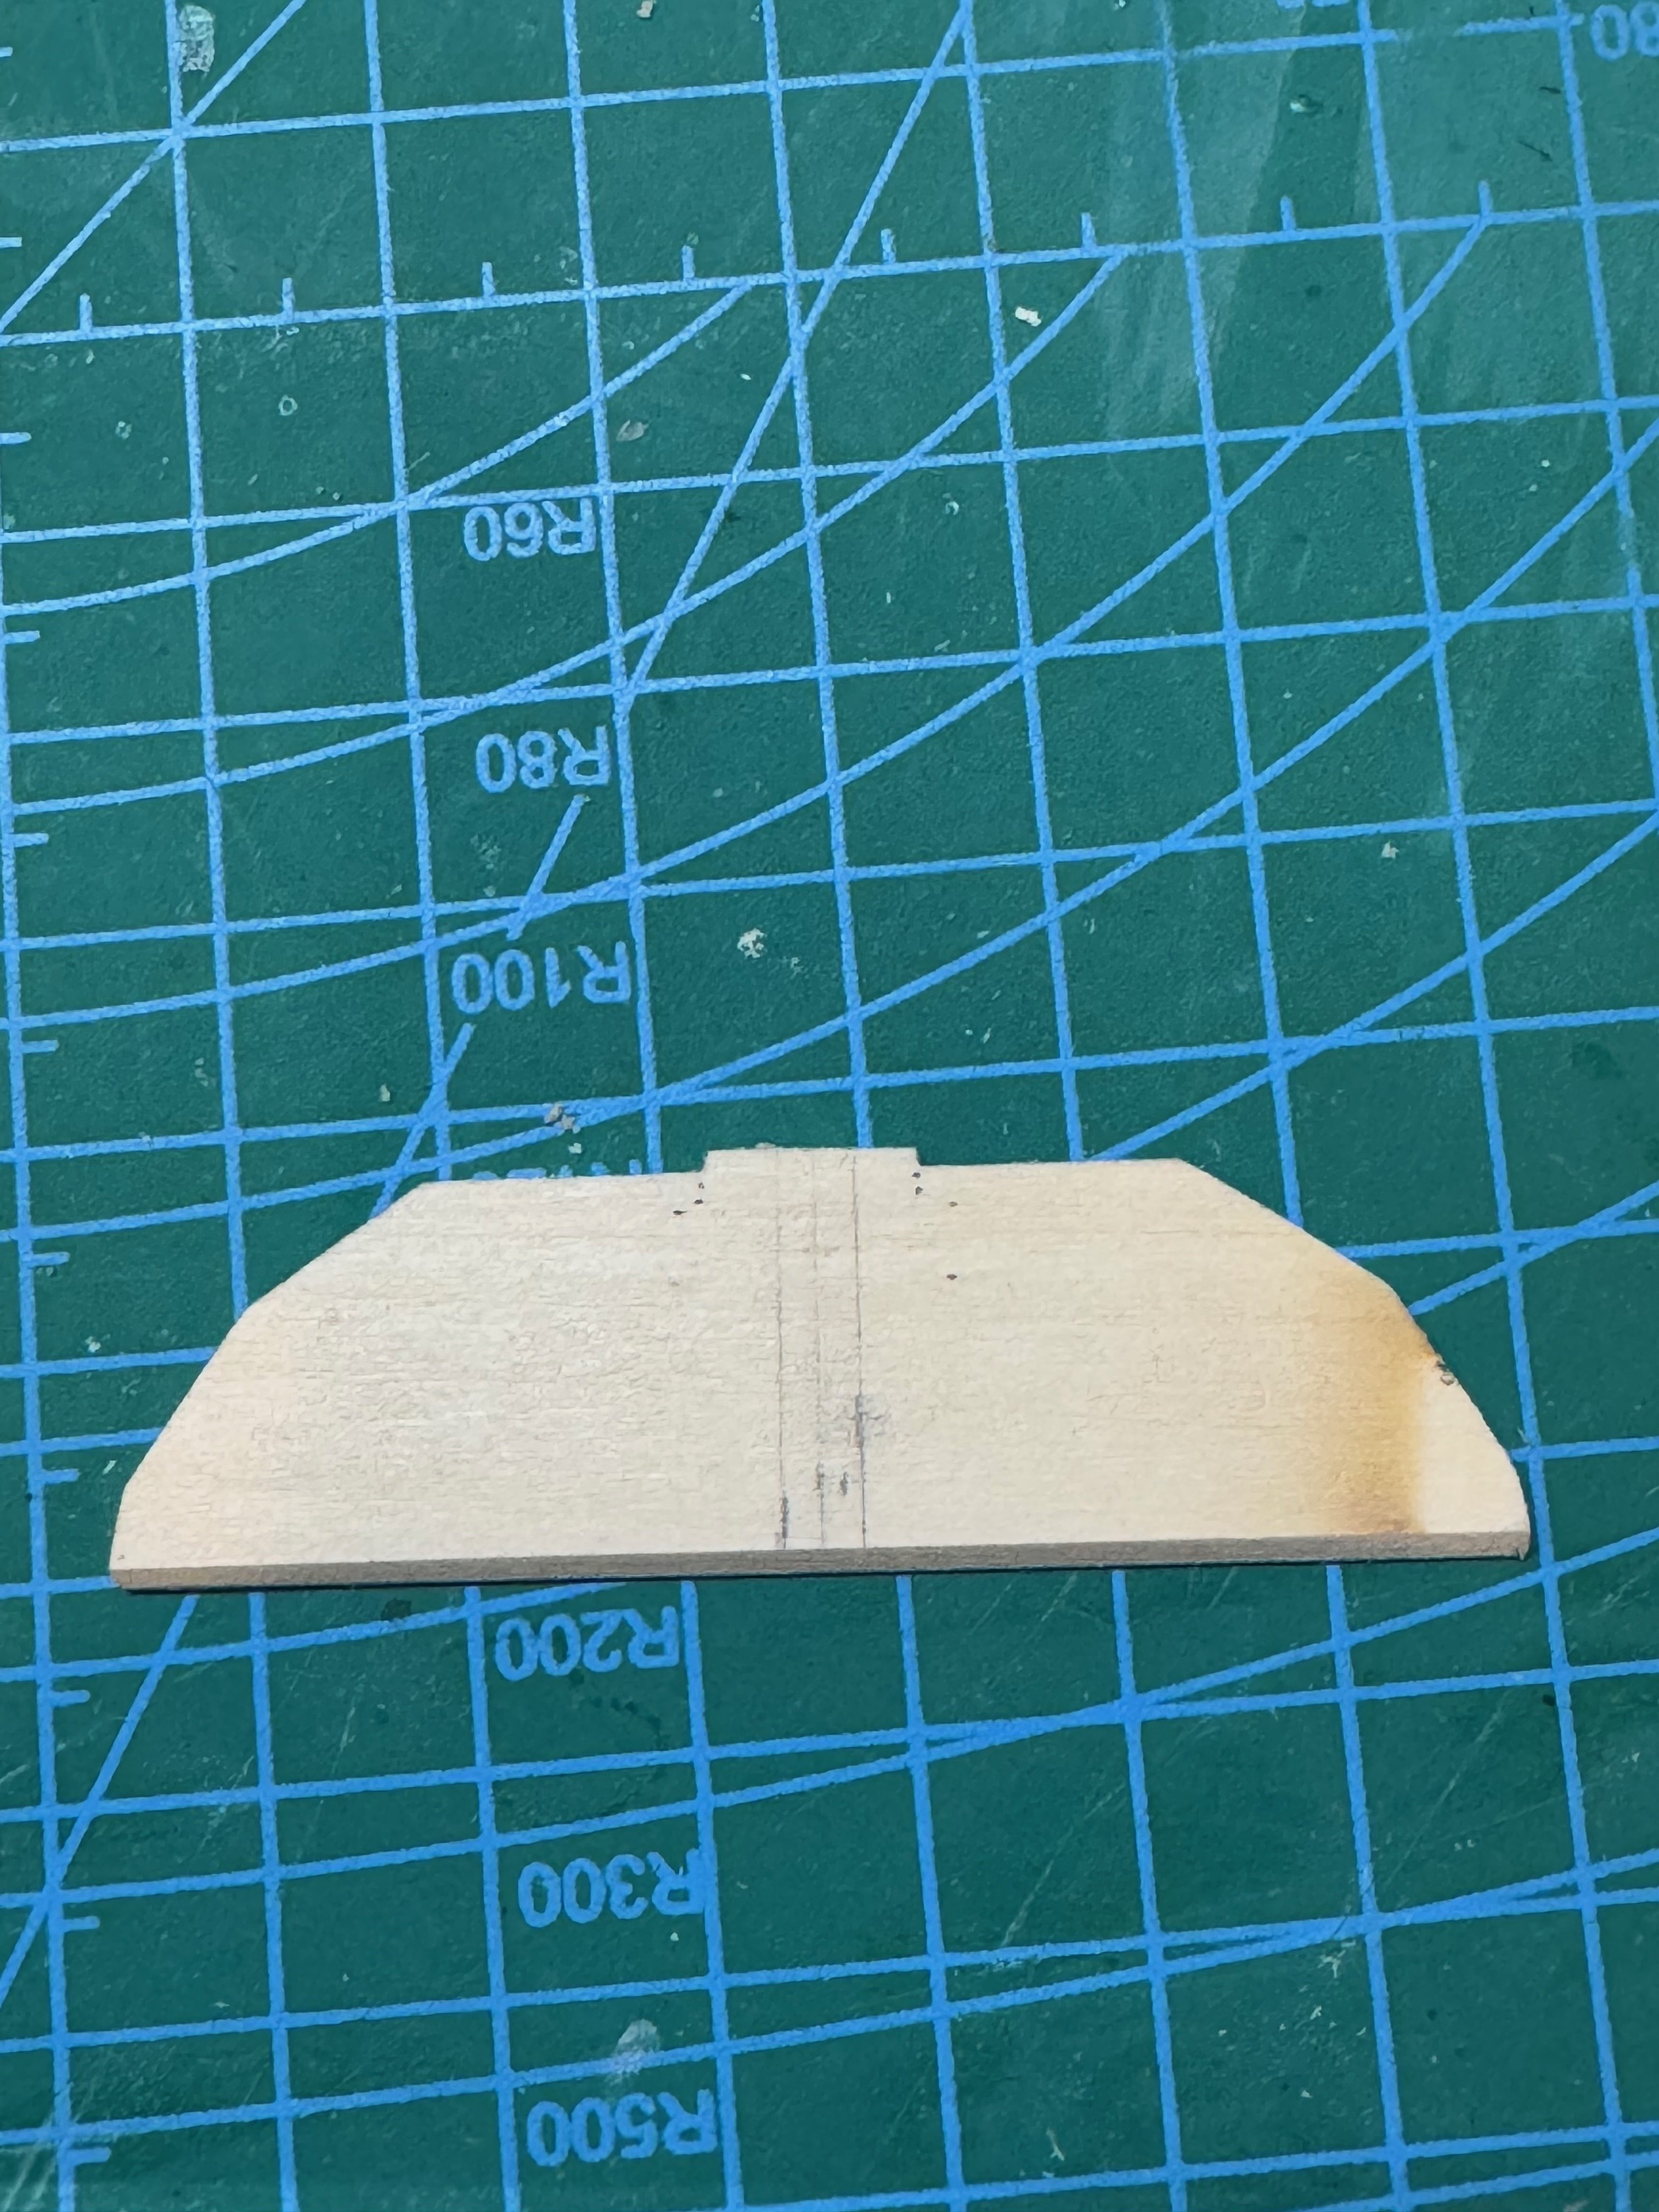
Following some encouragement in the new member introduction post Decided it was time to start a build log here. I already completed the Lowell Grand Banks Dory which I’m quite proud of. The Pram will be my second model, and in fact only the second model I’ve ever attempted of any kind. Let’s get into it. Day 1 was a simple matter of beveling the bow and stern transoms as described in the instructions. Just like the dory, I’m impressed with the detail provided and find it very useful. I also attached the knees and drilled a hole as directed through the bow transom knee. There was a little bit of tearing out, but I pieced the splinters back in place and glued them back down. Day 2 involved assembling the build board. I took the helpful advice of Ryland Craze given in the build log by Zack Soderquist and added some scrap to the board so that the transoms would sit flush. All added pieces are 3/64 thick. You can see that I also had to add some tape to make the stern transom support fit snugly, without the need for glue. Disaster struck after this picture was taken and I broke the thinnest part of the stern transom support, something I saw commonly happen in other logs and which I was trying to avoid. A little gluing back together and it works fine. Day 3 saw sanding and bending of the bottom boards. I treated them exactly like the Dory, soaking and bending over the frames with elastics. Those are now set to dry overnight. That brings me pretty much up to present. I decided to bend the keel board after the bottom boards because it’s going to lay on top of them anyway, counter to what the instructions say. I also can already tell I’m going to have a gap between the stern transom and the keel board so I’ll try to sand the notches a little deeper before gluing the bottom boards in place. I may also consider adding a little spacer between the bow transom knee and the keep board to fill up the gap that’s going to be present there.


- 38 replies
-
- 9
-
-
- Norwegian Sailing Pram
- Model Shipways
- (and 2 more)
-
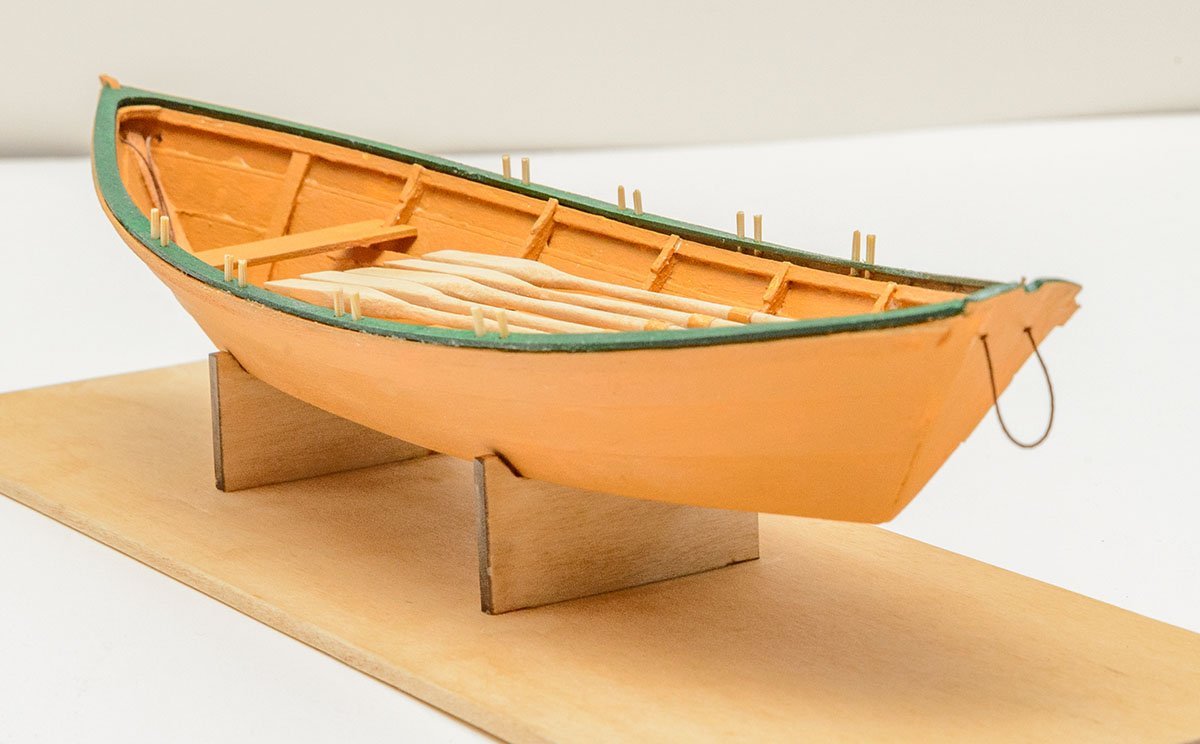
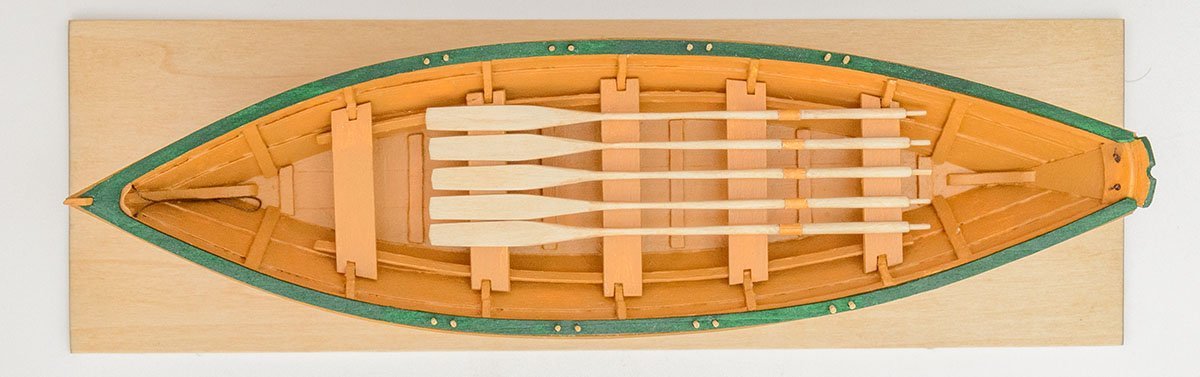
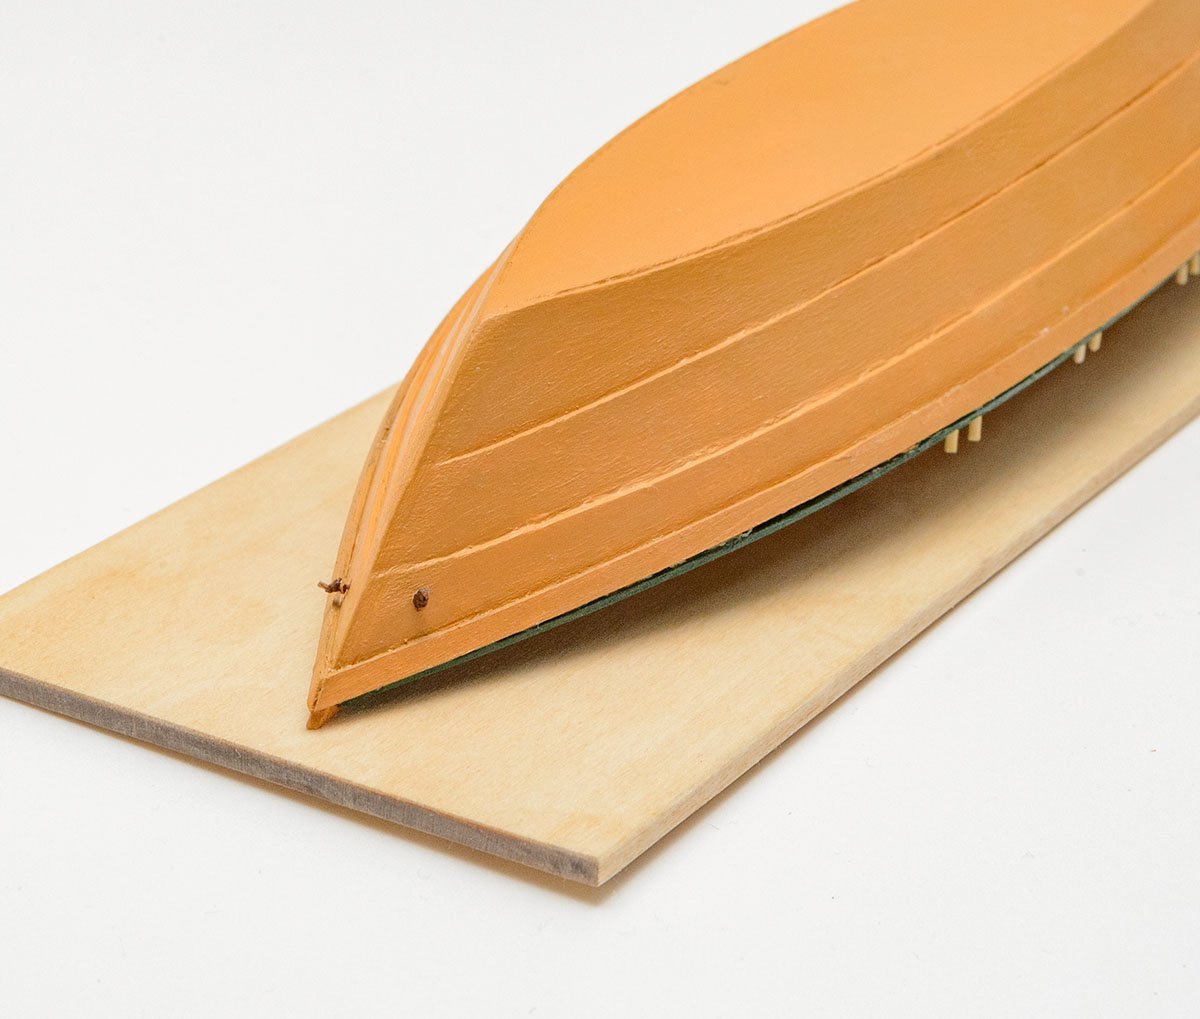
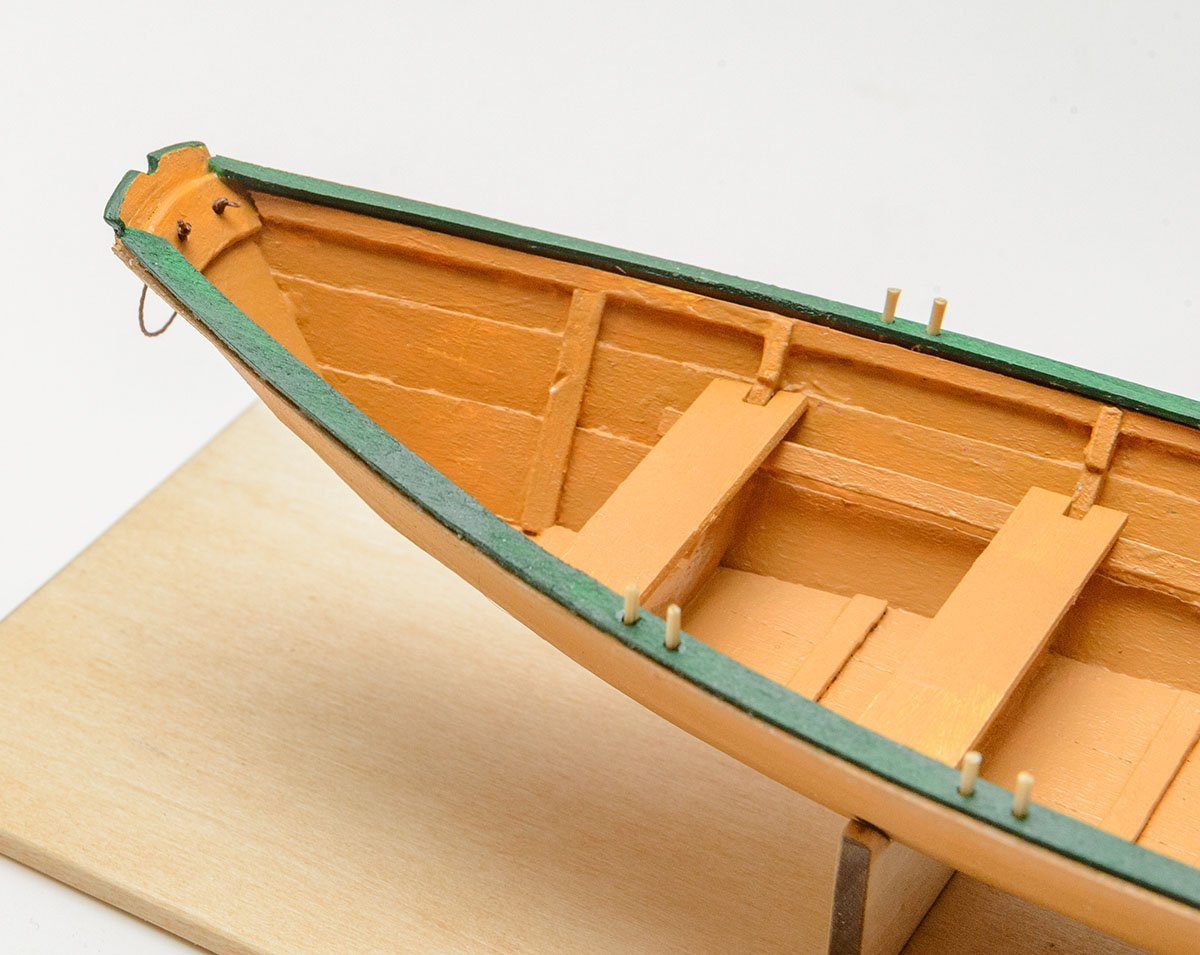
The next is the level 2 Norwegian Sailing Pram. Unfortunately, this kit also has some minor laser cutting issues. Don't forget to enlarge plans in the instructions! My ratio was 102.85%. Bow transom. Stern transom. I made my life better again. Bottom planks. It is a bit tricky to make rabbets and gains. I didn't want to order an expensive Veritas plow plane, so I modified my Veritas block plane. Planking is done. Skeg and bilge keels. Finally, I removed the building board. I'll print the enlarged plans tomorrow. 😴


- 4 replies
-
- 7
-
-
- Model Shipways
- Norwegian Sailing Pram
- (and 2 more)
-
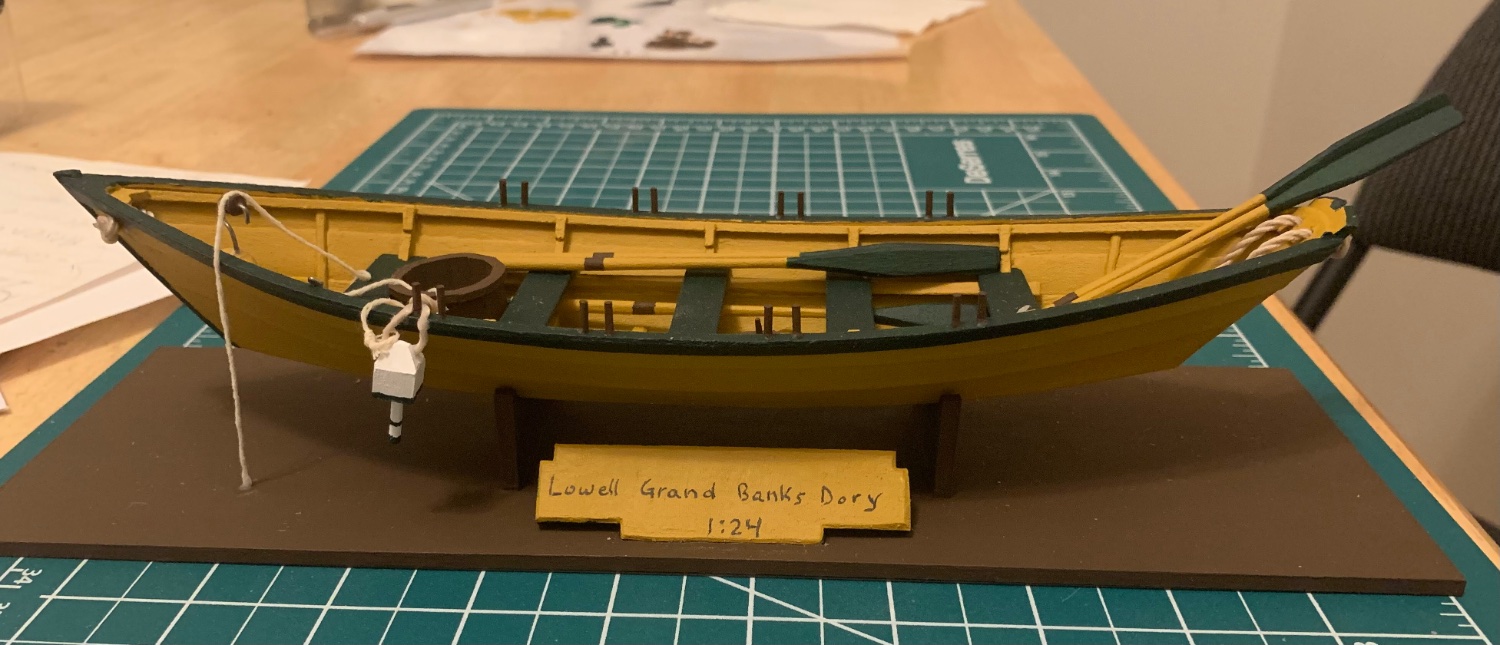
IMPORTANT NOTICE DOWNLOAD ALL THE PDF MANUALS FROM THE MODEL EXPO WEBSITE AND PRINT PLANS YOU NEED. ALL THE 1:1 PLANS IN THE PAPER INSTRUCTIONS FOR THE THREE KITS ARE WRONG. (NOT EXACTLY 1:1) CHECK THAT THE PRINT SCALE OPTION IS DEFAULT OR 100%. ------------------------------------------------------------------------------------------------ While I was frustrated that I lost the figurehead of the Papegojan, I tried another kit to recover my mind. I have no complaint about this kit is perfect start for beginners. Unfortunately, I found some minor errors, such as wrong laser cut or inappropriate plan size on the manuals, so I'll leave only a few short pics to help other builders. The plans in the instructions are downsized. I scanned it and enlarged it to 102.9%. I guess that the prototype sample by the professor is different from the mass production version. It is a simple tip to make my life better. This is a critical error. The guiding line on one side of the planks goes inside because both plank sheets are identical. I would say that the kit manufacturer forgot to reverse the opposite sheet. The risers goes here. The Lowell Grand Banks Dory is done!

-
- 11
-
-
- Model Shipways
- Lowell Grand Banks Dory
- (and 2 more)
-
 Well, I have put off starting a build log for long enough. Part of my reluctance is due to my slow build speed and the limited time I have towards modeling I want to spend on the model vs. typing up notes and photos. The other is that most of my internet access is through a mobile phone which isn't the most fun to write a build log from. But now with the preamble out of the way... into the build. I have dabbled in modeling for awhile off and on. I have build a few plastic models, a few ships in a bottle and have been working on a couple of larger models from Model Shipways and Billings. I recently got back to the modeling table and seeing the great reviews that that Shipwright Series was getting I figured I should build my way through the Dory, Pram and Smack to gain a firmer foundation of skills before continuing on my other builds. I ordered Model Shipways kit no MS1474 which has all three Shipwright Series kits and tools but does not include the paint. Upon arrival, I found the inventory to be complete and started by reading the directions cover to cover twice. I forced myself to slow down and read them rather than just skimming the photos and diving in. This was a big help. I also read many of the existing build logs to see where people had challenges etc. Then I started punching out the pieces for step one. At this point I am wrapping up the planking so here are a few notes from my build so far: 1) Cutting out the pieces from the back of the laser sheets was a new tip I picked-up. 2) The kit includes a back-up bottom piece. I was having a little trouble with lining up the planks and was tempted to just grab the back-up and start with that. That would have been a grave mistake. The bottom plank assembly was one of the easier steps encountered so far and learning to joint and glue the bottom planks was not only a good skill learned but gave me a sense of accomplishment and confidence going into the planking. It gave me peace of mind that if if did mess it up beyond repair I did have a back-up. Don't rely on your safety-net, but move forward confidently knowing it is there if you slip-up. 3) When placing the stern knee and transom I could not find how far back they should be set on the bottom. I checked many build logs but didn't find conclusive answer so I tried to place them far enough off of the bottom to just barely need sanding and that seemed to work out well when it came time for faring. 4) When assembling the frames, I found that the cross pieces were all longer than the pattern on page 5. Some build logs have shown builders modifying the cross piece but I opted not to. I don't know if that was correct, but I figured that it would be easier to deal with the wider width of the overall frame than trying to modify the cross piece and ensure that the rib's notch was square. 5) It wasn't clear in the instructions or in build logs if the the ribs should be flus across the entire bottom or if they started to rise at 45 degrees before the edge of the bottom. I assumed flush across the whole bottom, but my frames were mostly all too narrow. When gluing the frame pieces, I had them square in the notch of the cross piece and the two overlapping pieces of the bottom flush/square so it seemed correctly glued. After faring and placing the garboard, I think that they should have been wider, but the error (if it is) isn't noticeable to the casual observer. 6) In the planking process, patience is definitely key. Letting the soaked and bent board dry fully seems to take forever but is worth the ease when gluing the plank. There is likely a more expeditious manner but right now, I am bending a plank in the morning and evening and then gluing the next day such that in 2 days, I can complete one row of planks. 7) Clamping the ends is difficult. The first plank in the row is easier but its opposite requires some creative techniques. So far, I haven't found one that I love but I have found different ways to be successful. While waiting for planks to dry etc. ,I have considered moving ahead to the the oars, but those seem daunting... so I tried my hand at scrap building a bailer. I used margin material from the plank and rail sheets (WP1470). I based the dimension on a few photos of antique bailers for sale and ended with 9" by 7" with a 6" handle. The volume of the enclosed portion is 40oz. which seems a little small to me. I stained the bottom grey as some of the bailers appeared to have a metal bottom but it didn't show up with as much contrast as I expected. I used pre-stain, but still had some splotches from glue staining. Photos to follow.
- 23 replies
-
- 3
-
-
- Model Shipways
- Shipwright Series
- (and 2 more)
-
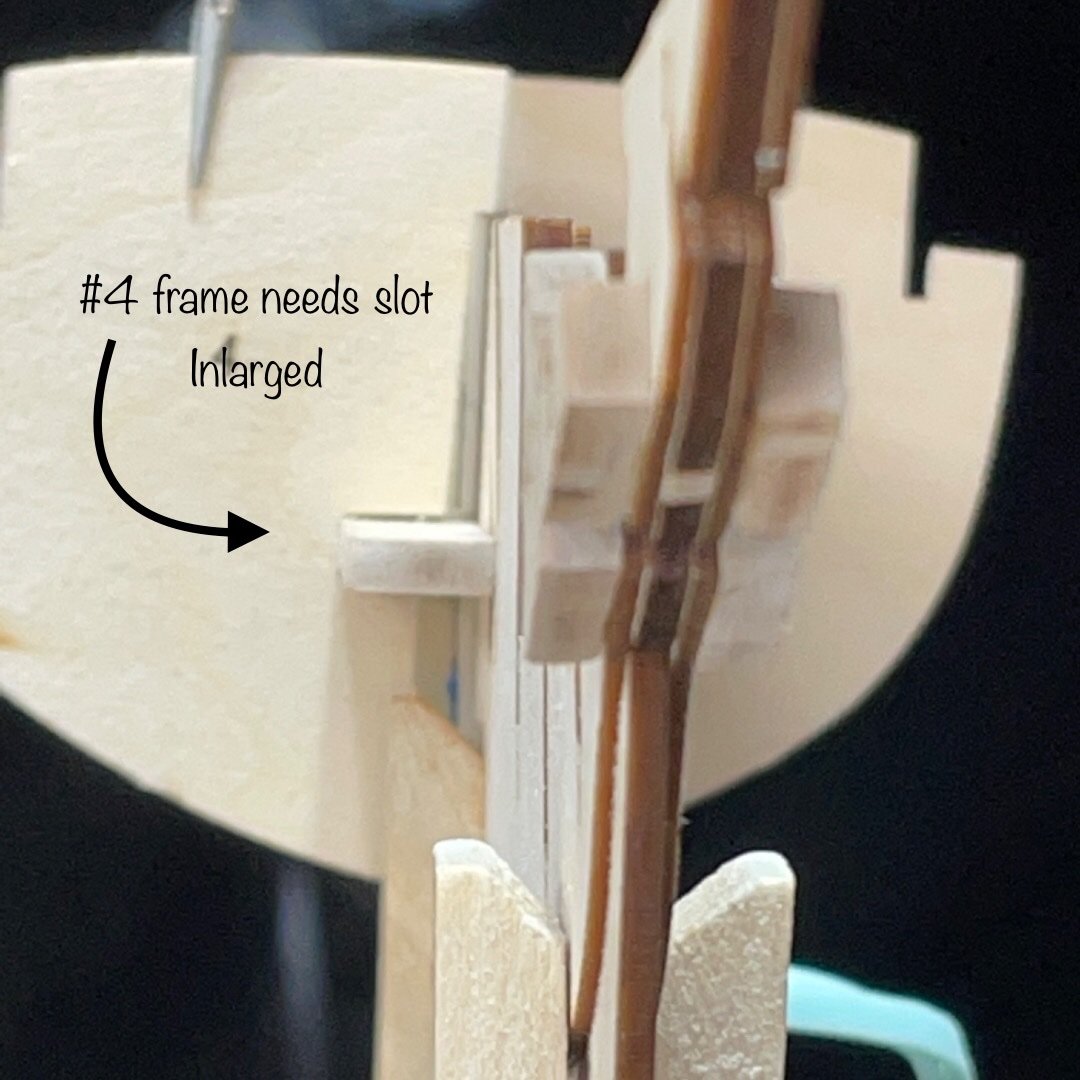
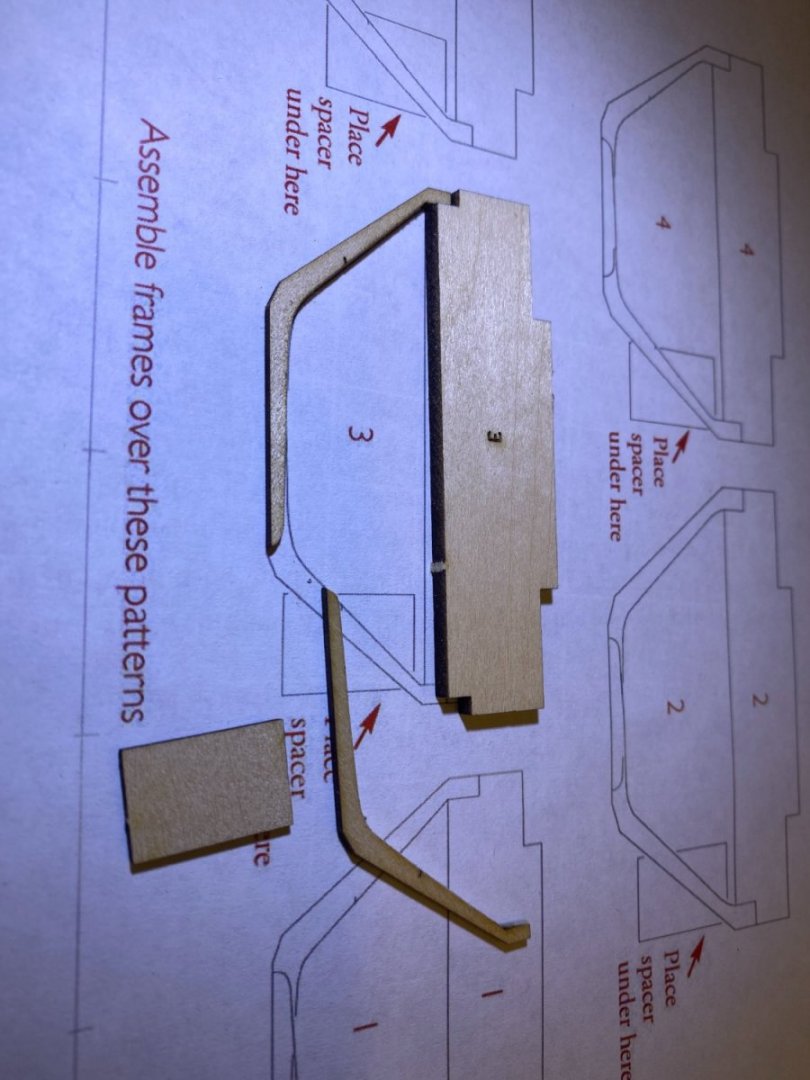
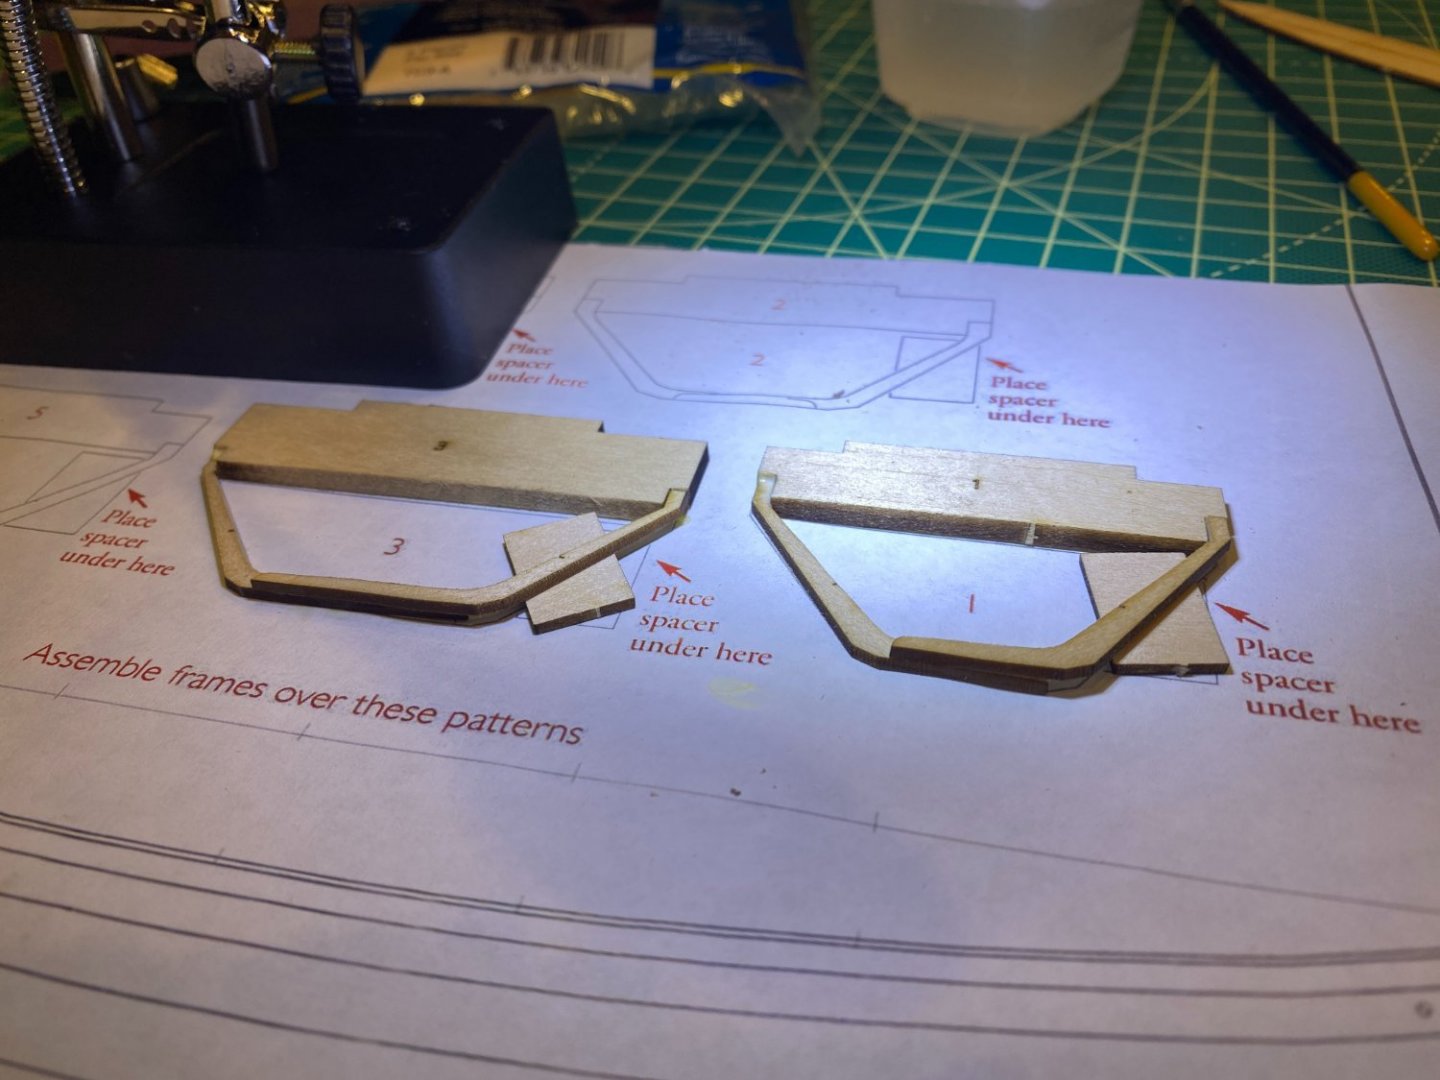
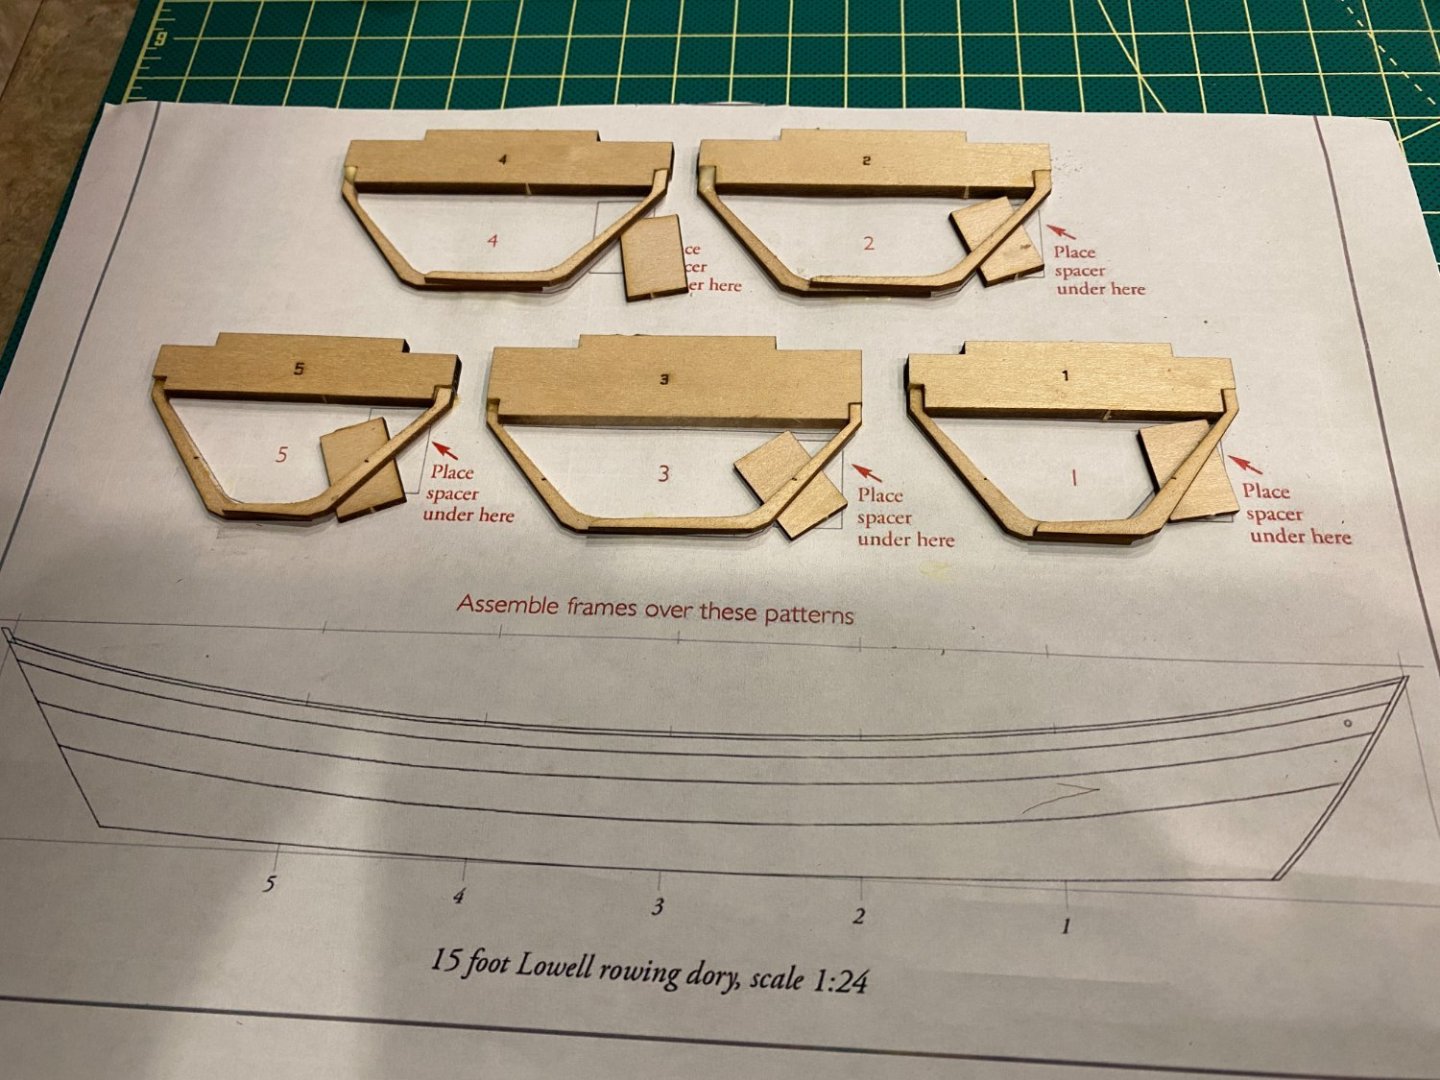
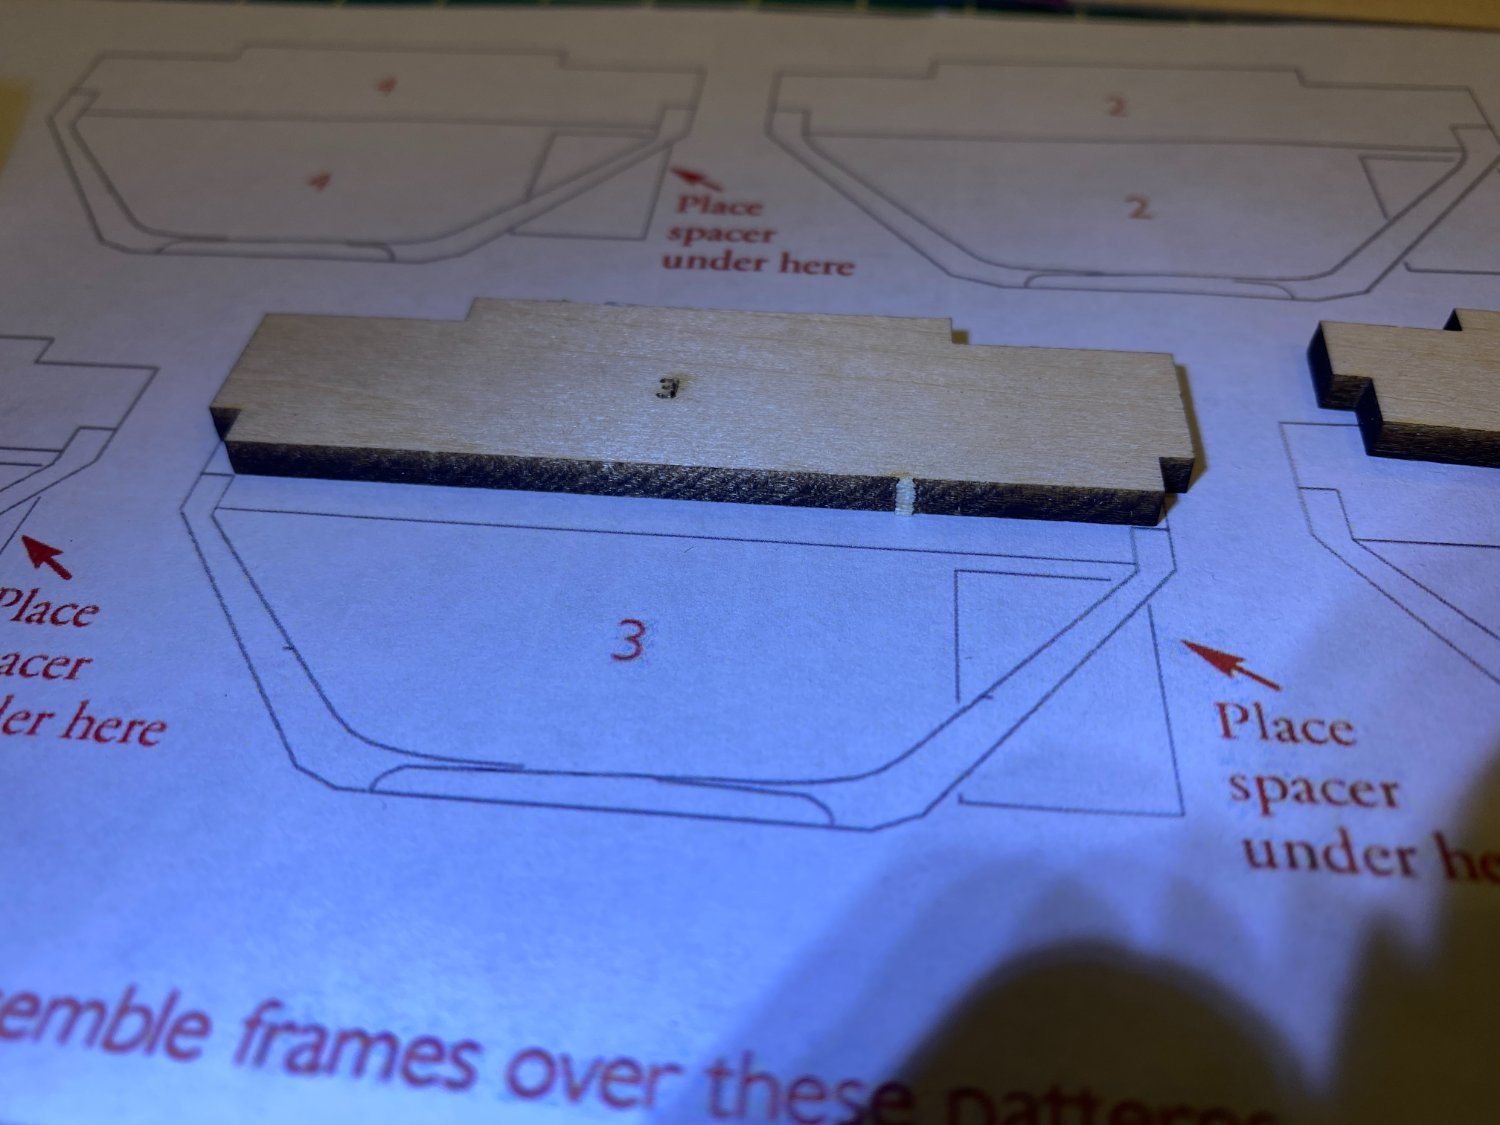
 I am new to ship models, and haven’t built any models in 40 years. My goal with this build is to learn/relearn basic skills. The instructions in this kit appear quite complete, and I am doing my best to fellow them. I’m also only buying tools beyond those in the kit as needed – which is a challenge because I love tools, and especially toolsets. Others have posted build logs for this kit, and I am not going to reinvent the wheel. I’ll skim through the parts that went well, and go into more detail where things went wrong or got confusing. The first step is to assemble the boat bottom. It’s just three pre-cut boards, glued together, which seemed pretty straightforward. The kit includes a single-board bottom in case the first step goes awry. I didn’t use it, except for protections during clamping. The next step is the frames. There are 5, and patterns are provided to build those. I immediately ran in to an issue, i.e., the template is not the same size as the provided parts. I made the best match I could – see pictures. I also had some difficulty keeping the bottoms of the frames aligned, and I know the frames are not quite right. Some closed up a little too much on bottom and some too wide. Further along in the build, I had trouble getting the pre-cut strakes aligned properly, which I suspect is caused by this error. I have heard (and now proved to myself!) that errors compound. Any tips on getting the frame construction right will be appreciated. Mostly how to overlay the two sides to ensure the result is level and symmetric. More to come ...
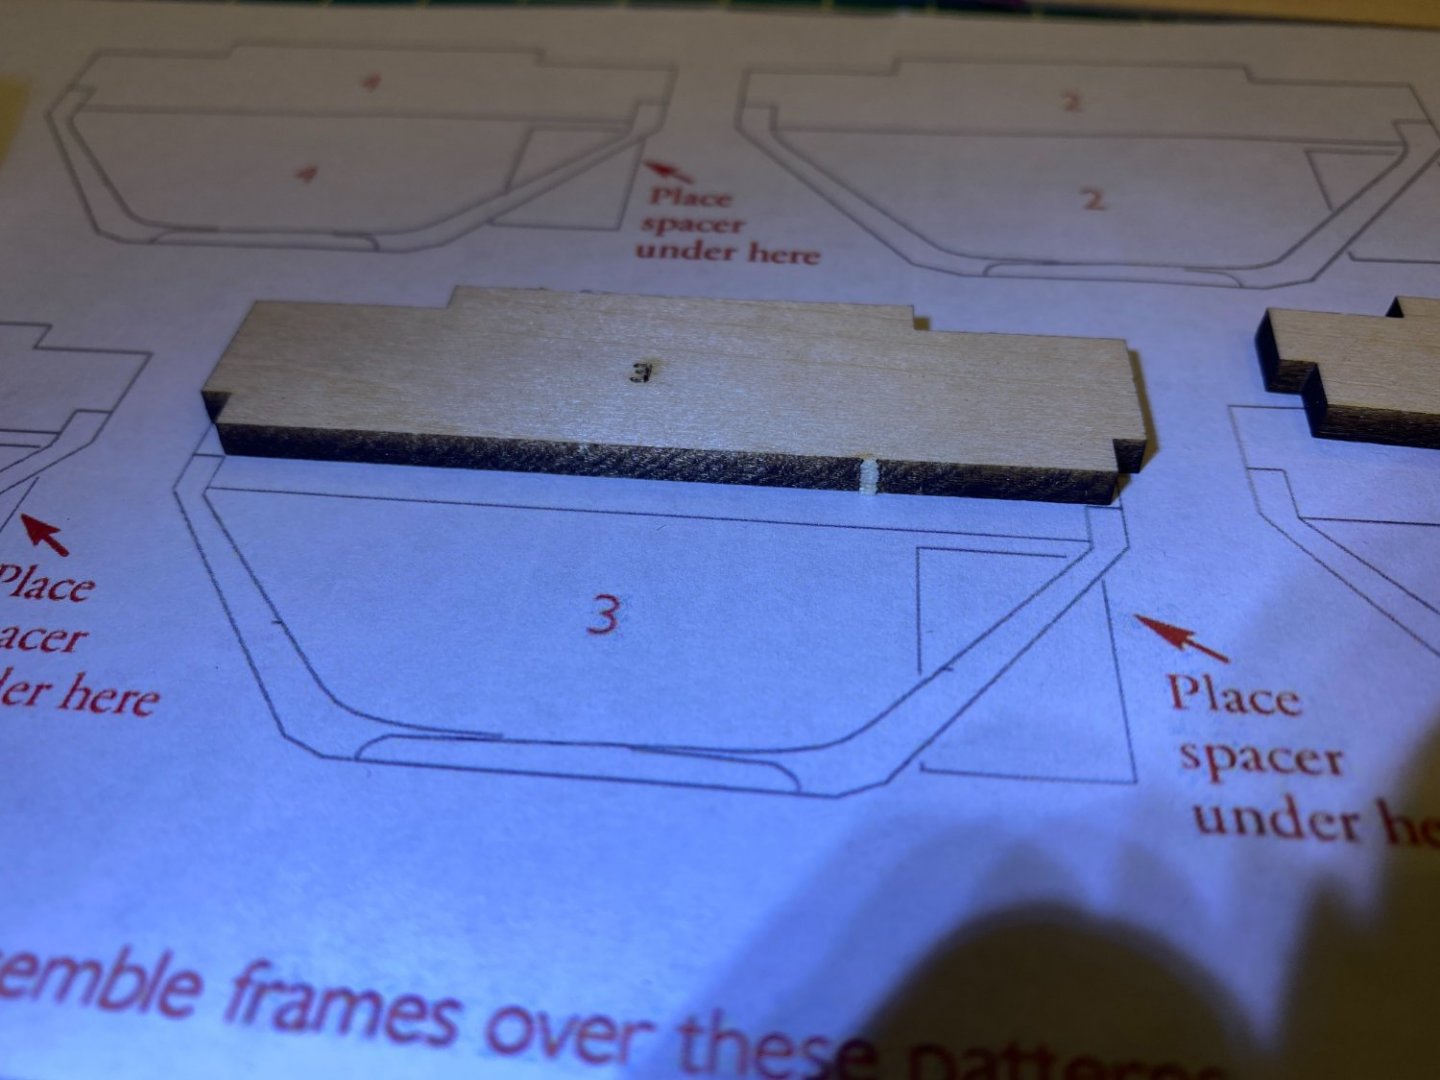
- 15 replies
-
- 6
-
-
- Model Shipways
- Shipwright Series
- (and 2 more)
-
 Well, after reading a few books: And the instructions: I thought I'd better get started spilling glue and sawing my fingers. I want to learn to build model fishing boats from scratch and this here, well it's the start! I hope I can handle level number 1. 😅 I'm going to keep a build log: And will always invite a few friends over to play some music as I create magic 🤘
.thumb.jpg.470a6f0e05f5b72bdf3b3f3e81bc18a6.jpg)
.thumb.jpg.2db2ba32ce003a78978cbe594729932e.jpg)
.thumb.jpg.9b8b429c7774b909fd641bb32bb1bc35.jpg)
.thumb.jpg.85fca6bbe641e98473ffd93515921dd5.jpg)
.thumb.jpg.278db2daeec72daf2105562d16aa1dde.jpg)
.thumb.jpg.c6947e5f1d1d1275b4f863958481195a.jpg)
.thumb.jpg.c8eef4c4b3b56458c34a16ddf137a4b4.jpg)
.thumb.jpg.946cd6bd07116f2b3da17da9cfc28f8f.jpg)
.thumb.jpg.42f971fad9a7b4004948a4c48502d685.jpg)
.thumb.jpg.94be63b090fa422a5e5ed995ed419ab5.jpg)
- 61 replies
-
- 4
-
-
- Lowell Grand Banks Dory
- Model Shipways
- (and 1 more)


.jpg.4c12e31d805e8b12af82870c7fe550ec.jpg)
.jpg.716c6c8e1d8e304edd357ab26152860e.jpg)
.jpg.55fce3a6f4abb2654e8beb73aaa075f8.jpg)
.jpg.788f2988d2e6531edd43af371e503135.jpg)
.jpg.394087c41d5eb3934dd3efa91ec440a4.jpg)
.jpg.502eec78ce6d886788766f4c2af8c3e5.jpg)
.jpg.669fcdc2363ca0eebb319a08d852f0b1.jpg)
.jpg.bc0e90c377d238071fbf110534b64ab4.jpg)
.jpg.f8ea3e2c600a05eca94b7dad6dd0abc4.jpg)
.jpg.85abe68e49166d10f226ad426ed93b0c.jpg)