Jump to content

Recommended Posts

Posted
4 hours ago, MBerg said:

What the heck is everyone using for 'nails' to hold the stay plates

I bought a bag of suitable-size brass nails, 0.7mm I think. Model Shipways seem inconsistent in the size they supply with the kit (of the two sizes they sell). Some people have had their smaller nails, which should work well. Most of us get the large ones, which don't.


Trevor

Posted (edited)

Thanks Trevor. I found some Amati pins/nails that based on the diameter in the desc. should do the trick.


I've been jumping all over the place here, I get to the forestays, needs pins, get to the pintles, need a torch. So far I have the base and supports made up, a partly carved mast (which I just realized I cut an inch short at 9" instead of 10" B)). I'm still waiting on pins, but the gudgeons and pintles are done now - or maybe not? Seems there's a bit of an issue, the 'straps' are too short. I double checked all the other brass pieces, and it seems these are the right ones. Anyone else have the same or have an idea of the issue?


Funny, in the picture they look just long enough, but the top one is right on the edge. I feel like adding a nail will split the wood. Seems these should be far longer than they are, unless I've done something wrong.

image.thumb.jpeg.5e6a03d7662e543d3f40fbd3faef613d.jpeg


Making them was interesting - I'm not sure how I feel about the metal work. It's satisfying, but a pain at the same time. I liked gluing everything together, on the contrary, cutting the tiny brass tube was horrible.


After I got a butane torch, I borrowed more of my wife's jewelry making supplies. I've also been getting some use out of the magnifying glass I bought a while back:


image.thumb.jpeg.5af5b45f41f23ec4f8601691a4fbcb1f.jpeg


Filing the tubes to length.

image.thumb.jpeg.57dc38b0de5bd031557ea545bbe4fc17.jpeg


Started with pliers to wrap the strap around the tube, ended up needed to adjust it and found that using my fingers worked the best.

image.thumb.jpeg.63a58ab6c452d9c443151ca66328b8c2.jpeg


Used a flashlight to hold everything steady for gluing


PXL_20250511_020159714_MP.thumb.jpg.07c8695090469ec7be847bd9e5705517.jpg


PXL_20250511_015856311_MP.thumb.jpg.dce4611e65a74aabf4391022642223a8.jpg


PXL_20250511_020221142_MP.thumb.jpg.f35a42d40b538876de3cf0f8f84d4630.jpg


PXL_20250511_020827557_MP.thumb.jpg.a2b316526adc8925a314dfc9cd9c22bc.jpg


image.thumb.jpeg.e4ab3d454b23ea7fac595bc02fdd2732.jpeg


The mast dowel grain is pretty wild. It was going to look cool, but it was difficult trying to carve. The grain was one direction on one side and the other direction on the other side. Cross section like this: /// I'm not sure I would've been able to finish it without breaking it anyways, and looks like there's a couple methods to get the mast. I'll likely pick up another dowel just to try both methods just for the experience.


Here's 3 pics, one of the 'front', 'side' and 'rear' of the dowel I had. Not sure if I'm explaining this right, but that's all edges of the grain. Having made bows before, I can tell about every couple millimeters of that dowel is a weak point.


image.thumb.jpeg.3ef8cb8ede4f3ebe051055fb5a5e3516.jpeg  image.thumb.jpeg.4d5052d2f8885424306f5d90ae1c68d5.jpeg  image.thumb.jpeg.7f5df763e2fc43db5a3649c5dc91844a.jpeg


The centerboard needs a bit of touchup, the base supports need shaping and I'll get this mounted, hopefully the pins show up soon and are the right size. I'll need to sort out the rudder problem, and then I think that's it for the hull work. All that's left will be the mast, sails, oars - home stretch.


Thanks for the help, comments, and following.


Matt

Edited by MBerg

On the slip:

Norwegian sailing pram


On the drafting table:

OcCre Polaris

Muscongus Bay lobster smack


Completed:

Lowell Grand Banks Dory

Posted
10 minutes ago, MBerg said:

in the picture they look just long enough, but the top one is right on the edge. I feel like adding a nail will split the wood. Seems these should be far longer than they are, unless I've done something wrong.

As best as I can figure, while the kit instructions call for the straps to wrap around the tube and pin (as you have made them), the kit-supplied straps are intended to bear their tubes+pins on their outsides, as the transom gudgeons carry their bits of tube.


Maybe its all part of Model Shipways' "apprenticeship" ... a step towards learning never to follow kit instructions blindly 😎


Trevor

Posted
4 minutes ago, Kenchington said:

. a step towards learning never to follow kit instructions blindly

Haha. You know, that thought crosses my mind more and more as I continue through these kits.


"You idiot, you fell for it again. When are you going to learn, the instructions are meant to trick you, not help you complete the build as best as possible!" 


I think a very likely scenario is that David (the maker of the prototype, kit and instructions) is not employed by model expo and they just kind of supply whatever is convenient and have no interest in fixing or improving the kits.

On the slip:

Norwegian sailing pram


On the drafting table:

OcCre Polaris

Muscongus Bay lobster smack


Completed:

Lowell Grand Banks Dory

Posted

Yeah, I certainly don't blame these things on the designers. The folks at Model Shipways are always trying to put another challenge in front of you. I'm working on the Philadelphia, following Olha's build, and her kit and my kit (and lots of others) had this fun one (see photo) to try to figure out. Instead of asking them to send me a new part - assuming they have new parts that fix this - I'm going to follow along trying to see how Olha fixes hers. Figure I'll learn something from that experience. I don't quite understand the business model that doesn't do a better job of quality control, especially for what are supposed to be model kits aimed at relatively beginning modelers. I'm sure there are people who buy these kits and don't find a web site like this and get frustrated or think they made a mistake and just move on to another hobby. So they sell one kit rather than possibly dozens of kits to someone. I can see advanced models just giving you the supplies and having you figure things out for yourself, but beginning/intermediate models should show a little bit of care and oversight. This model lists at nearly $300 - though I got it for half that. You'd think they monitor these websites. I'm sure they weren't exactly pleased to see that in Olga's first video of the group build that Model Expo / Model Shipways has been advertising just about every day that their biggest parts don't fit together at all. They literally have a Creed Bratten running their QA department.image.thumb.png.2870df27501fc33ee6ad14b709566d7c.pngowin

Posted

Woops! yeah, that's not a good look. Although they do also sell wood puzzles, maybe they're trying to mix the best of both worlds now. I feel vested in this now - I'll check out her channel to see what she does. Also good to know she made the lobster smack. I know the midwest is different than the model shipways, but it may still come in handy.


For the rudder, I looked back at the instructions and the notches that are originally put in the rudder way back on step 28 do say they are for the pintles. So maybe they're supposed to be inset in the rudder a bit. This makes sense, however the etched lines were way to small to fir them. I'm thinking I'll back up a bit here and increase the size of those notches. Since I need to do a bit of touchup on the daggerboard anyways, I can touchup the rudder too.


There's another issue where the rudder is 3/32" and the pintle is 1/16". So with the strap wrapped snuggly around the pintle, it's too tight of a slot to fit over the rudder. I was just messing with it and after widening the strap to fit around the rudder, the CA broke, the tube popped out of the strap. I may end up just fitting the pintle right on the rudder and then CA the strap over top of it. I'll fiddle around with this for a bit and see what I end up with... I am too particular for my own good sometimes. I hear good things about the fitment and quality of Vanguard, although I have some kit's ahead of me still, I'm really wanting to try them out.


Will report back when I've made some good progress - convinced the wife to do a quick shopping trip for mothers day earlier, and I got some replacement dowels... We went there for her, of course.....

On the slip:

Norwegian sailing pram


On the drafting table:

OcCre Polaris

Muscongus Bay lobster smack


Completed:

Lowell Grand Banks Dory

Posted
9 hours ago, Kenchington said:

As best as I can figure, while the kit instructions call for the straps to wrap around the tube and pin (as you have made them), the kit-supplied straps are intended to bear their tubes+pins on their outsides, as the transom gudgeons carry their bits of tube.


Trevor

Trevor is correct that the tubes and pins should be on the outside of the straps.  See the 6:30 mak of this YouTube video: 


Ryland


Member - Hampton Roads Ship Model Society

            - Ship Model Society of New Jersey

               - Nautical Research Guild


Current Build - Armed Virginia Sloop, 18th Century Longboat

Completed Build - Medway Longboat

Posted (edited)

Thanks for linking that vid. I had completely forgot about that one.


I have some good news. The pins I ordered from the UK worked. They're Amati, I'll post a pic of the package for any future victims of Model Expo. I got the nails installed on the stays; finished and installed the rudder. I was able to hold true to the prototype and instructions by completing the pintles as described.


It was fun fitting the nails, but I can't say I had fun fiddling with the CA and getting it on my fingers every few seconds - the gobs that come out, even with my 'precision tip' are far too large. I'm thinking there are better options out there than the gorilla glue tips for such ultra fine detail. I found the idea of using pipettes, which I'll try. It also looks like BSI has some precision tips. Something to experiment with in the future - I'd love to hear comments from the wise ones here. Also, if there's a trick to keep away, reduce or clean up the white powder CA leaves behind.


I'm very happy that I managed to keep the rudder as a working, and removeable part. I didn't bother marking out the transom for the gudgeons as instructed. I simply glued both on at the same time while hinged to the rudder. The bottom one ended up slightly crooked but it worked well enough and ensured the rudder was installed straight.


image.thumb.jpeg.7202468b2e3d1166c038e7fd4fc075b6.jpeg


Filed the rudder down a bit to seat the pintle closer. However I wouldn't advise doing this since there isn't a lot of room to work with and you could end up binding the hinges when fully assembled.


image.thumb.jpeg.8d8f405adcbde4e1c9d7683b7538b9cb.jpeg


Here are the nails I used:


image.thumb.jpeg.3137921761a3b5b1bf1041d460be763a.jpeg


image.thumb.jpeg.6874f5b4165e1ed19617b9c3a81d1214.jpeg


image.thumb.jpeg.5b6d9b8cc5014e396c3934a9441cbcc2.jpeg


image.thumb.jpeg.d49ef986118fc99b3e1a2774e1617e3c.jpeg


image.thumb.jpeg.5d6db8ac0bec658522424a130b1e0cb2.jpeg


image.thumb.jpeg.cc534063ca3b86c0f86bc47ecf816f09.jpeg


I haven't glued the base together yet, but it's shaped, and yes, my incredibly small workspace needs a cleaning up.


image.thumb.jpeg.f169e23bac04a0868cb5307bc39ee07f.jpeg


Thanks for looking

Matt

Edited by MBerg
Sans Proof Reading

On the slip:

Norwegian sailing pram


On the drafting table:

OcCre Polaris

Muscongus Bay lobster smack


Completed:

Lowell Grand Banks Dory

  • 3 weeks later...
Posted (edited)

Thanks!


I haven't gotten much done over the past week, but I've released all the wooden parts, and figured I'd force myself to organize my pictures up to the current point. This one feels a little picture heavy for the amount that was accomplished.


Log #15 - Oar pads & locks, mast


I picked up a few new tools, glue looper, Swann Morton scalpel, round nose pliers and some proper flush cutters (for wire/tube, I've been using the beginners kit ones from ME which I don't think are really appropriate for metal). First used was the glue looper which helped getting the oar lock pads in place. I applied each one differently, some techniques worked better than others. Using pins in the 'nail holes' to guide it into place with a small amount of CA on the pad help align it in the right spot. The looper helped apply just enough to make it stick, but not so much it spilled into the holes (there was so little glue, one or two of them actually came off).


The loose pads were trickier to get nailed down, but I managed to drive the nails (applying a bit of CA to the tip to ensure they would do their job). I also had the nails slightly longer than the hole so they would bite into the wood and act as a nail should. 100% unnecessary, but I clearly have psychological problems. They all turned out quite well and fairly straight (and I just noticed a small amount of flaking CA on the paint in one of the pictures, now I'll have to go clean that up).


I was debating for a while about what to do with the oar locks as I didn't really want them to be 'steel'. I ended up painting them with some gold OcCre paint I picked at the ME clear out sale.


image.thumb.jpeg.7588fcdfb79f9d834073682d4c6661b1.jpeg


image.thumb.jpeg.d5a0d585d92f70ce99e249a940111776.jpeg


image.thumb.jpeg.cd50c07552667fff1e8752003065256d.jpeg


image.thumb.jpeg.1166a4a19349fc246790ec9f36b4ddf9.jpeg


image.thumb.jpeg.2cec087b67645e75d82c334f51b3c60e.jpeg


image.thumb.jpeg.702e23ea9747472895030524f38795a0.jpeg


The Mast


This took the majority of my time. I made both the laser cut glued pieces and the dowel versions. I ended up using the dowel because it's size and taper ended up near perfect. Although the process was interesting, I struggled with the glued pieces. Getting the char off reduced the size too much and discolored it. I found drilling such a small hole in the glue seem to be more awkward than drilling into the round dowel (I used some tricks for that). The bottom end that fits into the mast step ended up way too small and the overall profile was an ellipse - although I don't think that's an issue as many, if not most masts are oval.


However, I finally got to use my Christmas present:


image.thumb.jpeg.5e463d9552168ab3a0c56fb370f0840d.jpeg


Comparing both masts:

image.thumb.jpeg.02df90457e43c4769a77cb653b25377c.jpeg


I wish I could remember who, so I could properly thank them, but one of the build logs had used a cordless drill to shape the dowel. I did the same and although it was far too dusty and time consuming for my liking, it worked perfectly. The process really sped up when I stopped using the same piece of sandpaper, and cut 5 or 6 strips to rotate as soon as they got 'clogged'. (Now I might need to put a mini lathe on my wishlist)


Drilling straight holes in the dowel took some ingenuity. With a press it would be much easier. I made a 'guide' out of a thicker piece of wood, placed the dowel in a vice and put the guide across the top to keep the drill straight. It would've worked even better had the top of my vice been perfectly level, but it worked well enough.


Making the guide:

image.thumb.jpeg.6ca5f22a4fd8645c43657663bd669850.jpeg


Using the guide:

image.thumb.jpeg.80fbabd88091b9c0095b9a609e82a81c.jpeg


Next, to make the perpendicular hole, I drove a pin through the current one and used that to rest it it on so it would sit perfectly level and I could drill perpendicular:

image.thumb.jpeg.20c447d157c936ff779ed48447e42171.jpeg


image.thumb.jpeg.bf7542ebafffcba24785a4700c54f025.jpeg


The round nose pliers came in handy for the eyelets. The eyelet itself was a U shape with one tip being longer than the other. That way, I was able to glue in one tip and then line up the other tip to push it all the way in. Applying the cleats has it's own miniscule and shaky hand challenges, but straightforward. Finally, to simulate the chafe pad (I went the 'copper' route instead of leather), I used some copper OcCre paint I had got for dirt cheap from... you guessed it.... the ME clear out sale.


First I simply used a toothpick to slather some paint on a piece of brown paper, wrapped the opposite side around a dowel to give it some memory while drying. Flipped it over, marked it out, cut with a brand new blade, PVA glue and voila.


image.thumb.jpeg.2b68c595ef6f621818242c08726c06ae.jpeg


I sent this to the wife with no context and she asked if my fake nail broke off :blink:

image.thumb.jpeg.c5ee2c0a1242c536318f3092174c5fcd.jpeg


image.thumb.jpeg.d3bc697da43674596d6c5914ad205514.jpeg


More gold paint, I cleaned it up after it dried, but didn't get a pic:

image.thumb.jpeg.4b6c1b741569266b4a9802f39daab37b.jpeg


image.thumb.jpeg.0ae7beb40781737adbc159ce4d508bde.jpeg


The stay plates swivel since I managed to get them on with only the nails being glued into the mast. Handy if I need to readjust them when rigging

image.thumb.jpeg.03da4f65591d246f5a44344099606ce5.jpeg


image.thumb.jpeg.3be7127b50cea2d3935710eac44cca1c.jpeg


image.thumb.jpeg.7edf0beb9aa04d09a7be04551ab365c9.jpeg


The color matches nice enough; though I'm not sure how durable the gold paint will be. I've yet to glue them in. I was thinking of using a rubbery/flexible adhesive so they could be twisted slightly though the longevity of those adhesives probably don't make them the best choice.

image.thumb.jpeg.aec31d077495e95880b85827af216569.jpeg


image.thumb.jpeg.d2e85e6486fe805763e2353243af7132.jpeg


image.thumb.jpeg.4b0d34026e27162ec175a472904d3f07.jpeg


image.thumb.jpeg.dff6bf49730f94f35f2e030ecee08e37.jpeg


As of this week, I've shaped the boom; just need to finish gluing and drilling. Need to shape the top spar and oars, then onto making the sail and rigging.


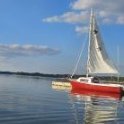
On a personal note, I found the time to get over to my boat for the first time this season. I stepped the mast and got the jib rigged up. I ran out of time and had to many questions to continue with the mainsail, boom, halyards, sheets, etc. I reviewed manuals, and reference pictures after I got home, and should be able to go back and finish it up when I have time for another visit. Maybe even get a little crazy and actually launch it!


Thanks for the comments, and likes,

Matt

Edited by MBerg

On the slip:

Norwegian sailing pram


On the drafting table:

OcCre Polaris

Muscongus Bay lobster smack


Completed:

Lowell Grand Banks Dory

Create an account or sign in to comment

You need to be a member in order to leave a comment

Create an account

Sign up for a new account in our community. It's easy!

Register a new account

Sign in

Already have an account? Sign in here.

Sign In Now
  • Recently Browsing   0 members

    • No registered users viewing this page.
×
×
  • Create New...