monkeyman
-
Posts
96 -
Joined
-
Last visited
Recent Profile Visitors
492 profile views


-
 morgan8er reacted to a post in a topic:
USS Constitution by monkeyman - Mamoli - 1:93 - cross-section
morgan8er reacted to a post in a topic:
USS Constitution by monkeyman - Mamoli - 1:93 - cross-section
-
Mbex reacted to a post in a topic:
RMS Titanic's Lifeboat by monkeyman - Artesania Latina - Scale 1:35
-
popeye the sailor reacted to a post in a topic:
RMS Titanic's Lifeboat by monkeyman - Artesania Latina - Scale 1:35
-
popeye the sailor reacted to a post in a topic:
RMS Titanic's Lifeboat by monkeyman - Artesania Latina - Scale 1:35
-
popeye the sailor reacted to a post in a topic:
RMS Titanic's Lifeboat by monkeyman - Artesania Latina - Scale 1:35
-
popeye the sailor reacted to a post in a topic:
RMS Titanic's Lifeboat by monkeyman - Artesania Latina - Scale 1:35
-
popeye the sailor reacted to a post in a topic:
RMS Titanic's Lifeboat by monkeyman - Artesania Latina - Scale 1:35
-
Wishmaster reacted to a post in a topic:
RMS Titanic's Lifeboat by monkeyman - Artesania Latina - Scale 1:35
-
Wishmaster reacted to a post in a topic:
RMS Titanic's Lifeboat by monkeyman - Artesania Latina - Scale 1:35
-
GrandpaPhil reacted to a post in a topic:
RMS Titanic's Lifeboat by monkeyman - Artesania Latina - Scale 1:35
-
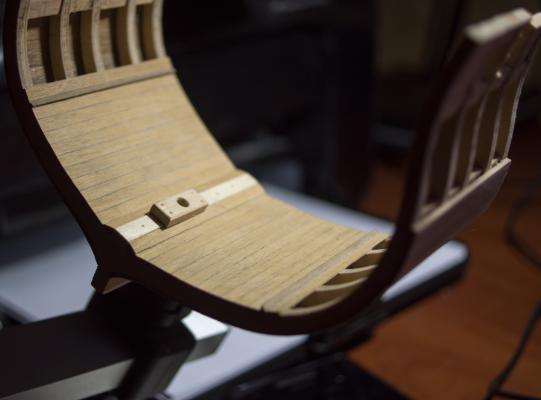
 Finished the outer planking and also did some reseach on gangway. On one side of it there's a hammock rail, but on the other side sometimes it's a wooden broadside and some - set of railings with net. On all modern photos there's a railing: Here's a close up of it: On old photos there's a broadside: I've seen tons of photos and broadside stuff magically appears and disappears. I assume it is detachable. Kit tells you to build broadside, not railings, so be it. Also, gangboard steps are white today and were striped before. Kit tells you to go with stripes and we obey. Finally I've made 2 modifications to the outside planking (besides the copper bottom, which comes soon): sliglty bigger wales and a waist rail at the base of the gangway, which is somehow not present in the kit: Don't mind the varnish coat. I've added it to see impurities better :-) Note to future builders of this model Don't worry, if your frame isn't perfect - you can easily fix it anytime. Mine was twisted a bit and I "untwisted" it with hair dryer. Just put it on one side, add some weight to the top (about 1 kilo is enough) and do a good warm up with hair dryer. Leave it for a while and your frame will become perfect after that. I'd recommend to do this after you finished with outer planking, because wrong planking can lead to more twist.
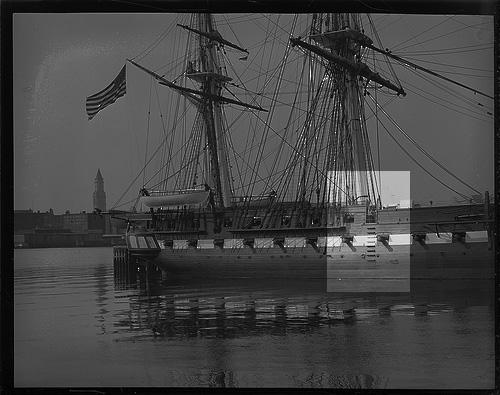

- 20 replies
-
- 6
-
-
- constitution
- mamoli
- (and 1 more)
-
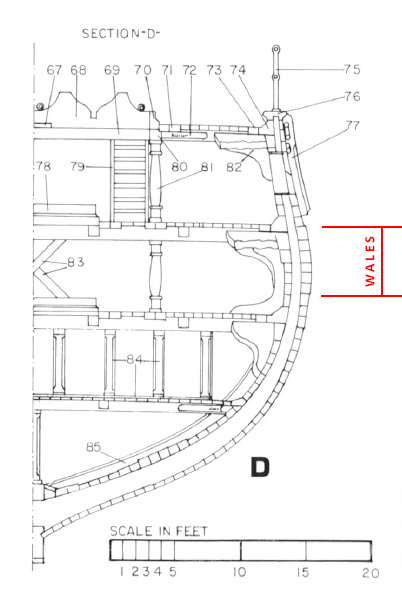
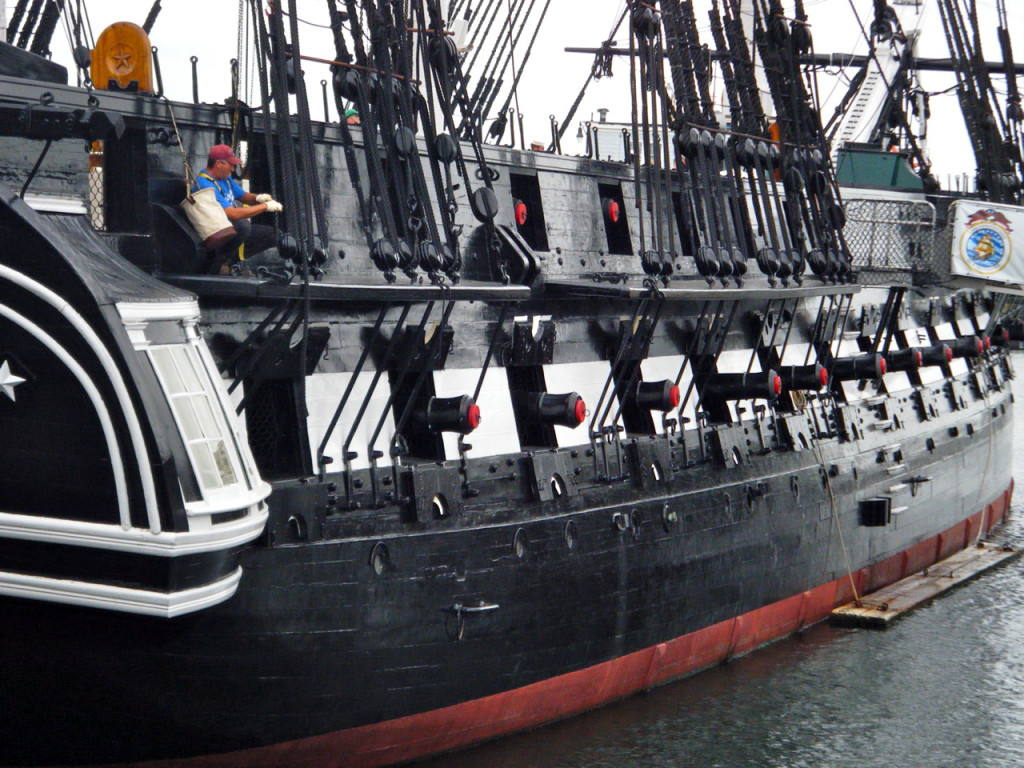
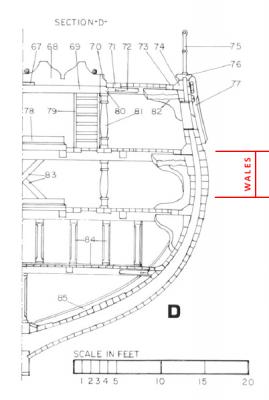
I've started with planking. Kit is pretty acurate in this, but I still found one issue with wales (a thick part). I've followed a kit from the start: But that's not right. Kit tells you to glue 4 planks, but actually it should be 5. Here's a plan from Anatomy book: When you put this on the model, it looks too thin. Guess, I'll add extra plank or two. Here's a photo of real ship: As you can see, the original wales are much bigger, than kit's (lower border is where the copper plates start). I've also completely replaced the mast stamp with the one closer to original:

- 20 replies
-
- 7
-
-
- constitution
- mamoli
- (and 1 more)
-
What?! Mounting bolts?! Please, I'm feeling myself SUPER lame comparing to this! This is SOOOOOOO superior!
-
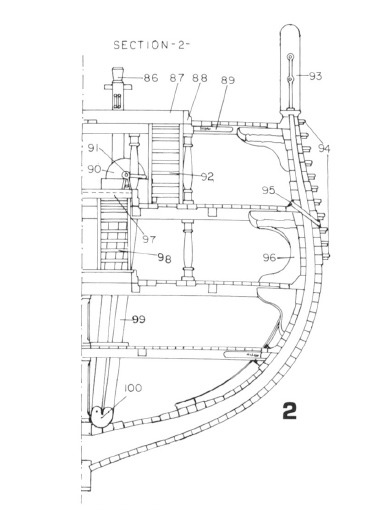
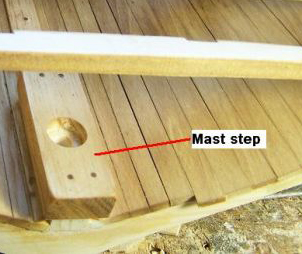
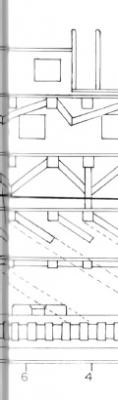
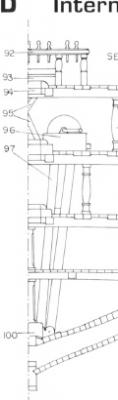
Thanx, pal! Really enjoying your work, so your compliments are very valuable to me. * * * I know, that most visitors love pictures from actual modellin and less theory, but I can't help myself, sorry :-) Did a little research on mast step, and it looks like, kit ofers pretty outdated vesion of it. Here's a picture of fine mast step from Tuffarts, which follows mostly a kit's version: Here're plans from Anatomy book (100 - is a mast step): And here's how it should look like on the model (taken from Model Ship Builder site): I'm going to follow the original (from Anatomy book), so this is mostly for those, who would want the same.
- 20 replies
-
- 5
-
-
- constitution
- mamoli
- (and 1 more)
-
Cannon looks much better now, good job, pal. Still one note: you've forgot to add 2 extra carved lines (groves) on sides. There were no grooves on real life Conny cannons, according to pictures, but since you've decided to add them, now you gotta carve 4 grooves, one per step. Sorry for being picky, just a fiendly note in case you've forgot to do this :-)
- 113 replies
-
- 2
-
-
- constitution
- mamoli
- (and 1 more)
-
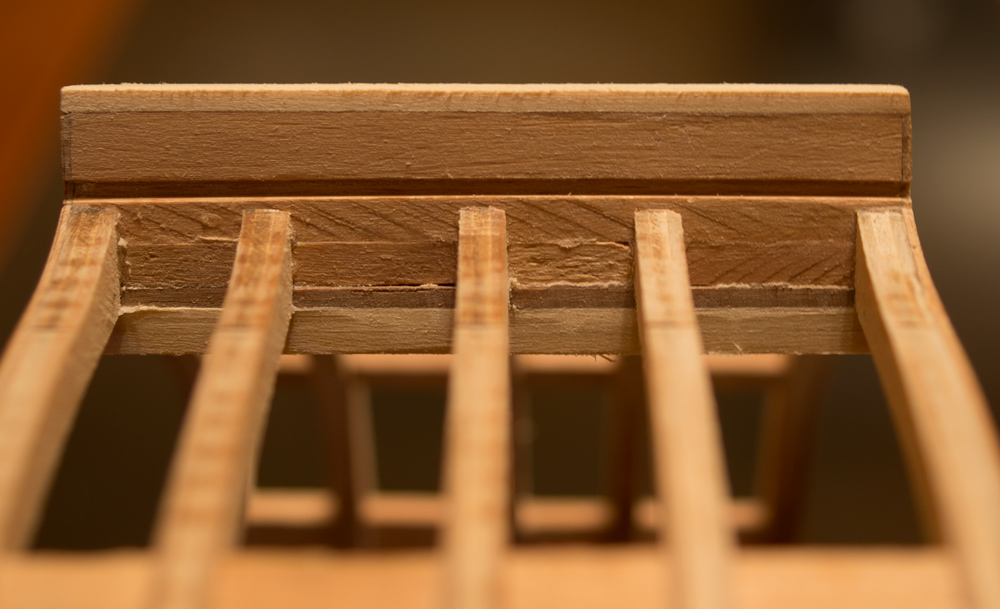
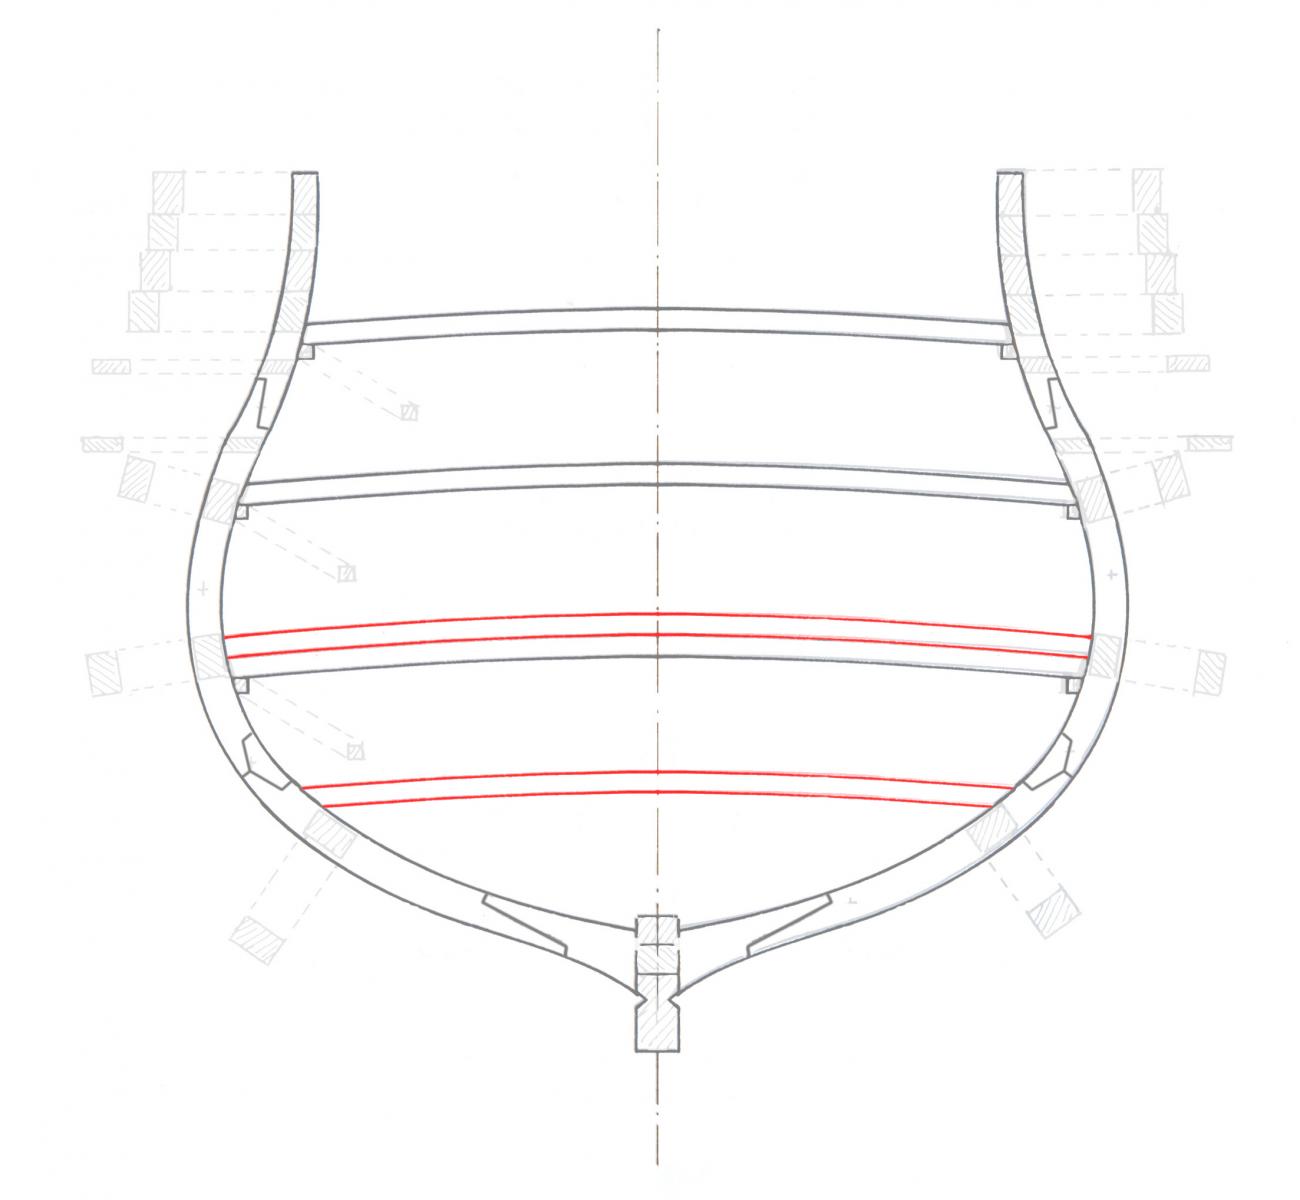
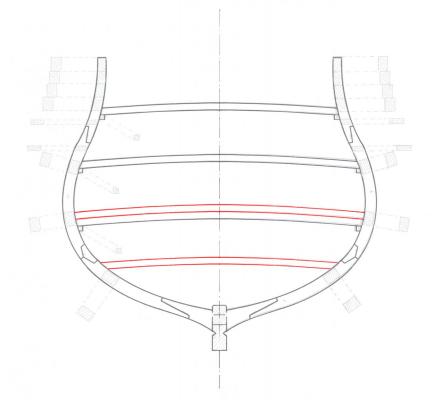
I've finaly put away my programming and got back to modelling. Spent today's evening to finish with bulkhead joints immitation and made a couple improvements to false keel and floor timber according to Anatomy book: Kit completely misses a plank below the keel, which is called false keel. As far as I know, it was present on all ships with metal bildge (bottom) and protected metal from impacts or such. And floor timber (middle, above bulkheads) should be 1.5 times higher, so I put another 2 mm plank beneath it: Also I did some calculation on abscent 4th deck and it actually fits pretty well. There's pretty enough space for it and I'm not sure, why model developers excluded it. Here's a new plan with 4th deck (note the red beams): You have to put 3rd beam a little higher (on a height of beam, actually) and put the the 4th beam at the same distance below it (1.9 - 2 mm). I compared the new plan with the one from Anatomy and it's close to perfect.
- 20 replies
-
- 4
-
-
- constitution
- mamoli
- (and 1 more)
-
monkeyman reacted to a post in a topic:
USS Constitution by Tuffarts - Mamoli - 1:93 Scale - Cross-section
-
Well, maybe steps were designed to impress too :-) Actually, the carriage itself is a simple base for main tool - cannon. First of all it must be stable, so, I guess, this is why they all have incline from rear part to the front. And how you design this were a matter of taste, probably. Some carriages were full of carvings, some were simple, some had steps. So might be no purpose at all, just... well, fashion of that time.
- 113 replies
-
- 2
-
-
- constitution
- mamoli
- (and 1 more)
-
Everything? How about bunch of drawings, carvings and stupid bow figure on almost every XVII-XIX century sailship? Take Sovereign of the Seas, for example :-)
- 113 replies
-
- 1
-
-
- constitution
- mamoli
- (and 1 more)
-
In my opinion, you've made carriages a bit taller. Here's a picture of real life cannons: Guess, you coud just remove the top plank and add 2 steppings for the other two planks. This way you carriage will have 4 steppings, like it should. It's also probably the easiest way to correct the height.
- 113 replies
-
- 3
-
-
- constitution
- mamoli
- (and 1 more)
-
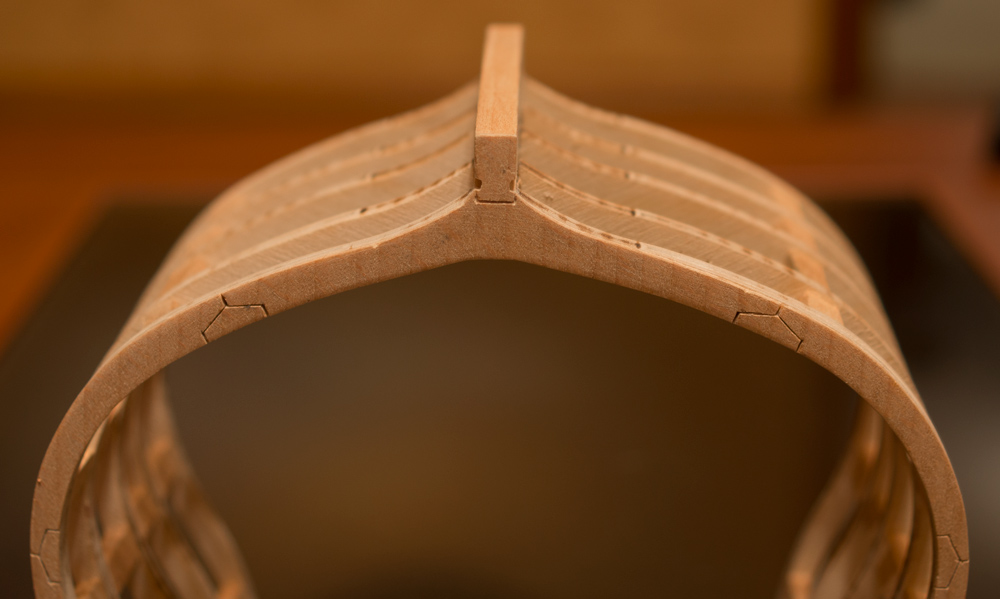
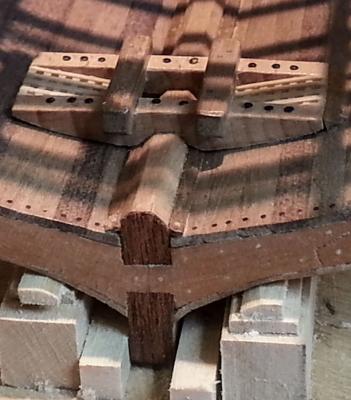
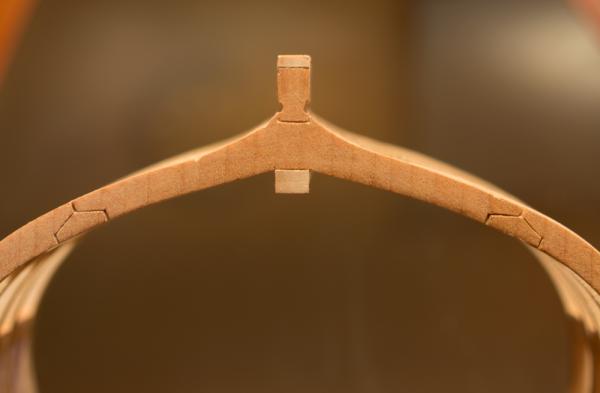
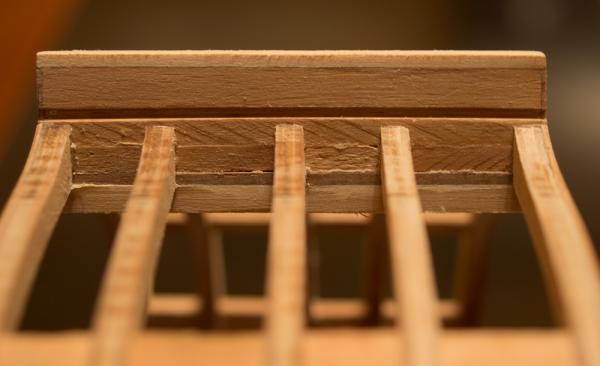
I've spent quite some time to create bulkhead joints imitation. First time I took plywood, but oversanded it and dark layer became visible. So I decided to replace it with vineer sheets and got myself 6 meters of natural 0.6 mm beechwood. It was too thin, so I glued 2 layers of it crossing fibers to make it more firm. Then I cut it using scissors, glued to the frame, sanded the edges and carved the joints with the razor. Here's a resulf: It's of course not perfect, but should look much better, when stained and varnished. I also found a good replacement for that sexy bandages from Mamoli's kit: Got it from local drapery. This is not tulle, but a fabric called "net". We have tons of them in different colors and cell sizes. Should look nice on the model


- 20 replies
-
- 4
-
-
- constitution
- mamoli
- (and 1 more)
-
Damint, my work stalled due to lack of stupid vineer sheets! They appeared to be hard to find. Will get back to Titanic's lifeboat for a couple days :-)
-
monkeyman reacted to a post in a topic:
USS Constitution by monkeyman - Mamoli - 1:93 - cross-section
-
Tulle! How could I've missed that! Thanx a bunch, pal, I'll try looking for right tulle. Got plenty of them here, in the local store.
- 20 replies
-
- 1
-
-
- constitution
- mamoli
- (and 1 more)
-
Just to make things clear, which deck is missing from the kit: The lowest (orlop) deck is absent. I'll try to reproduce it, for it seems, there's enough space for that. Hold will be smaller, but that's OK. Nothing but a bunch of stupid rocks and barrels out there anyway.

- 20 replies
-
- 5
-
-
- constitution
- mamoli
- (and 1 more)
-
Nope, also three. But might be easier to build extra one due to larger scale. Actually, Chinese version is a copy of Mamoli's, but with different building scheme, very different package contents and larger scale. I find their scheme of building of hull frame way better, than Mamoli's. The resulting frame is very firm and much easier to build. But quality of Chinese wood ruins all the advantage. You'll literally have to buy the new wood for everything, except mast and spars.
- 20 replies
-
- 1
-
-
- constitution
- mamoli
- (and 1 more)
-
Yeah, I did understand your point right away, but well... it just looks better, when all stuff unpainted to the edges, more natural. But that's your choice of course.
- 113 replies
-
- 3
-
-
- constitution
- mamoli
- (and 1 more)