KevinR
-
Posts
214 -
Joined
-
Last visited
Content Type
Profiles
Forums
Gallery
Events
Everything posted by KevinR
-
 Sorry for for not posting for so long. Life has gotten in the way. A kitchen remodel, den remodel and a grandson with a lot of health issues. I kept telling myself that, I will have plenty of time to build all of my models, when I retire. I really do not want to wait that long, so I plan to return to my shop and pickup where l left off. Of course a lot of junk has accumulated in my shop over the last couple of years and will need to be delt with first. So, keep watching and I plan to post updates soon.
 -
Thanks, I have been looking for plans for the power drill wood lathe.
-
Allan, The email is on the way. No rush on the sending the files, I am a long way from the rigging. Thanks,
-
Allen, I would like copies of what you have. It would be a nice addition to my reference material. Thank You,
-
Mark, Thanks for the advice. I remember reading to annel the brass before using, but, when it came time to do it, I forgot. Thanks,
-
Scott, I look forward to following your build.
-
Bob, Thank you for the info and link.
-
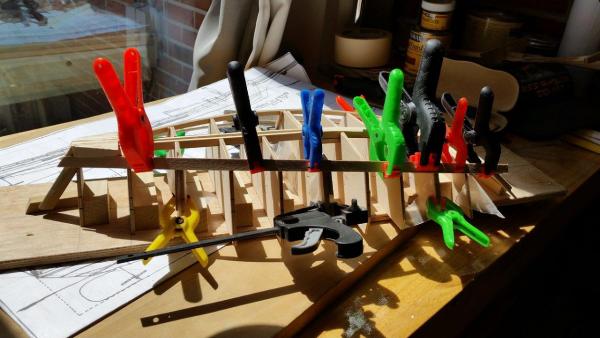
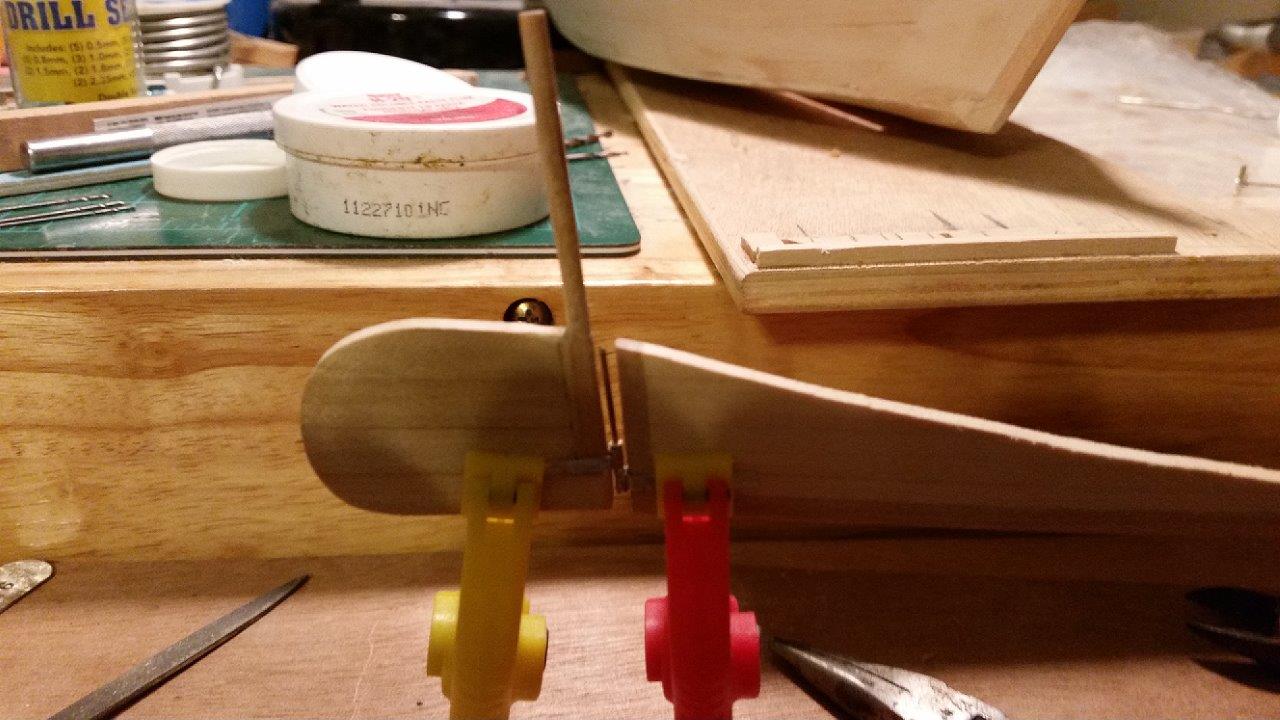
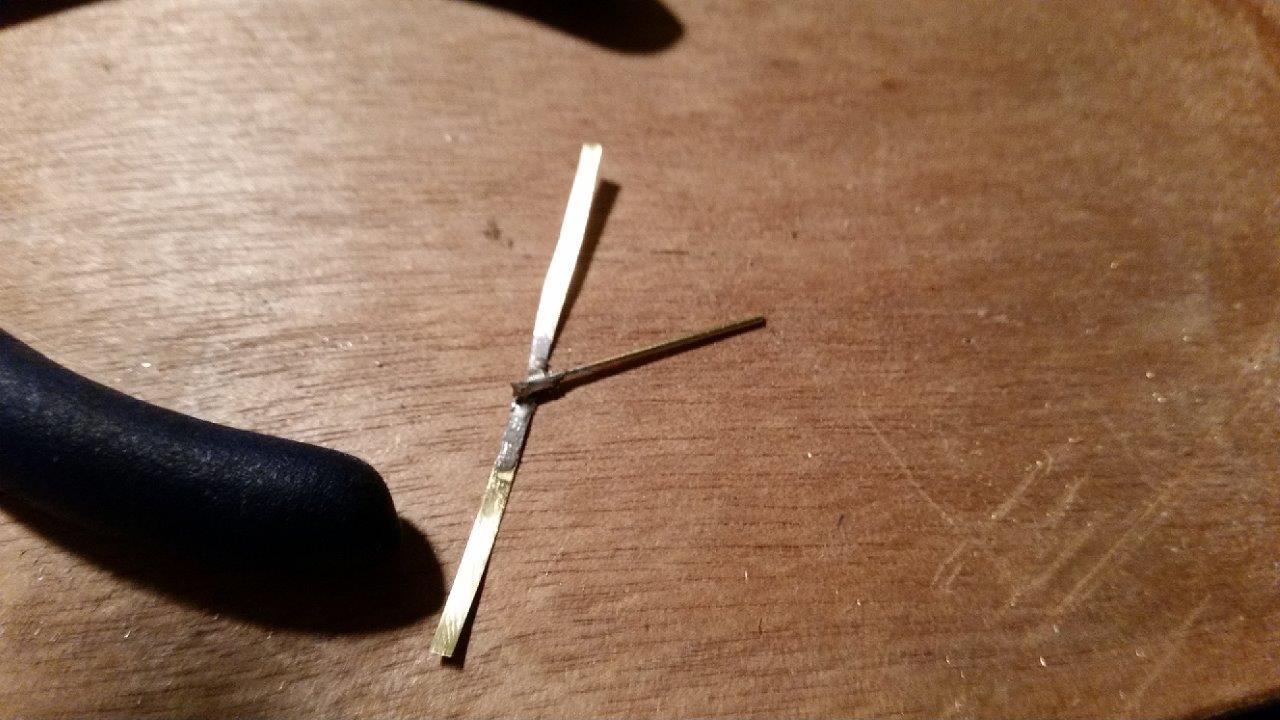
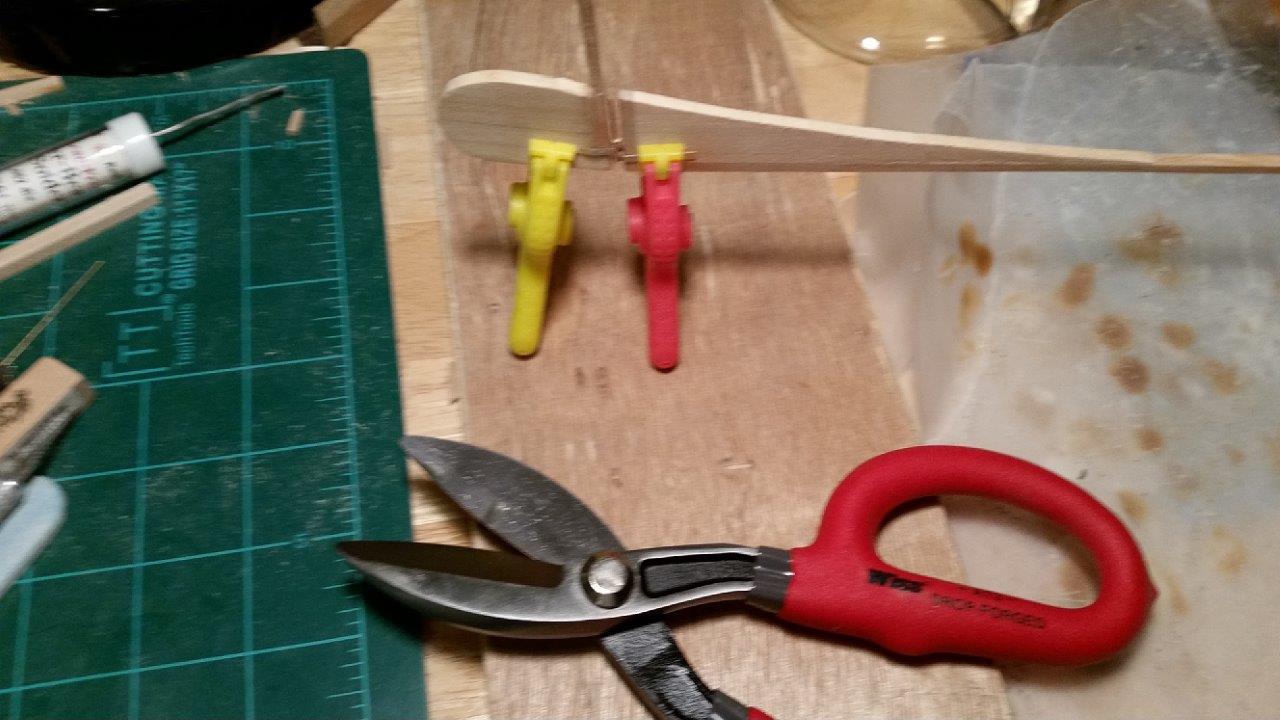
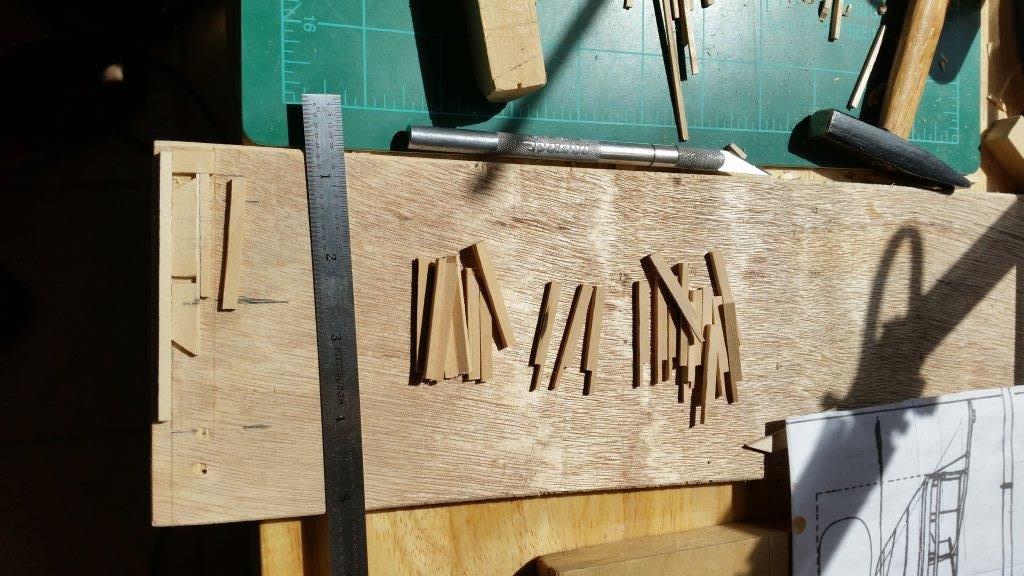
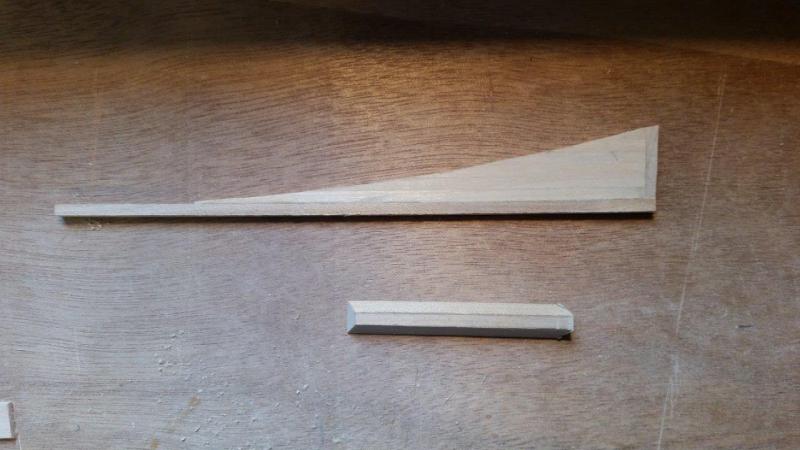
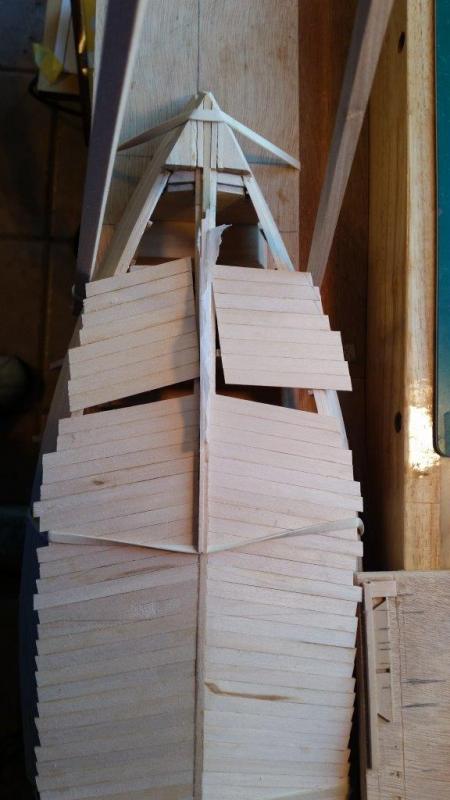
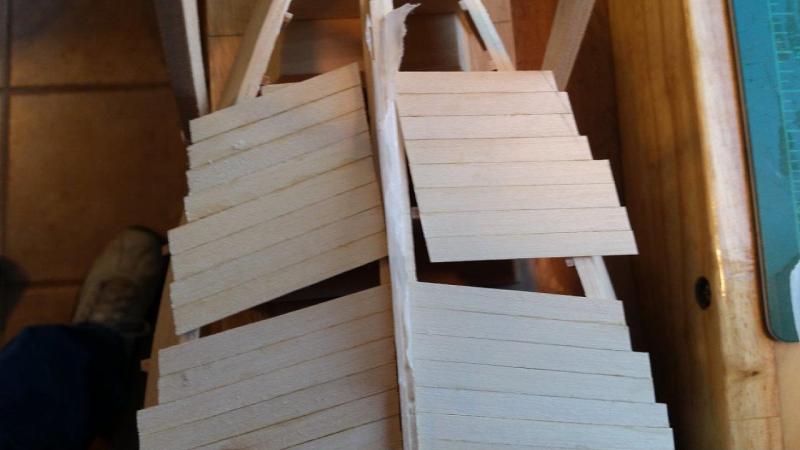
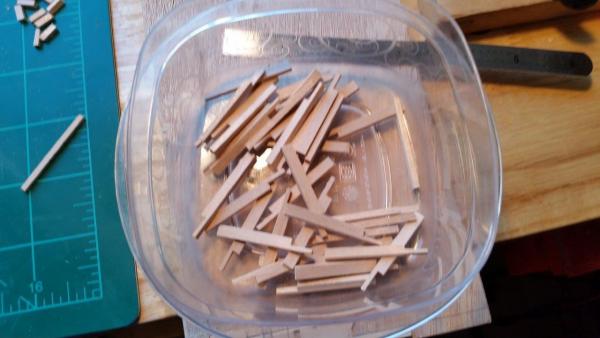
Hello Everyone and thanks for stopping by. Today I attempted to make my first metal parts, the Pentle and Gudgeon. The first try went well. It looked good until I tried to trim it with the rotary tool. It heated up and twisted in the vise. The second try went better (not smoother). I kept dropping the tiny parts on the floor. I had to re-cut a couple of times because I could not find it. I used a hand saw to cut the tubing this time and a lot more hand filing. I still need to notch the rudder so the gudgeon is centered under the rudder post. This is the tin snips I purchased to cut the sheet of brass. I am hoping I can find some smaller. This pair is too large and makes it hard to see the score marks for cutting. Anyone have a recommendation? Well that is it for today. Tomorrow is a holiday so I may get more time in tomorrow. Untill next time, Catch Yall Later,


-
I just bought the smallest pair of tin snips That I could find at the local Ace. Hopefully it is not to big to cut what I need.
-
Well I went to start making the pintle and gudgeon, but I could not not find the brass supplies I purchased last year. I ran out and bought more supplies. I am sure the missing supplies will show up next week. Now what is the best way to cut brass sheets? The straps for the pintle and gudgeon are 1/16" wide. Anyone with some recommendations?
-
Ron, You have convinced me! I have looked through my books as well and did not find what thought I had read. I am now planning on using wire rope for my shrouds. On an interesting note, about your note, someone gave me the plans for the Bugeye Edith Todd today.
-
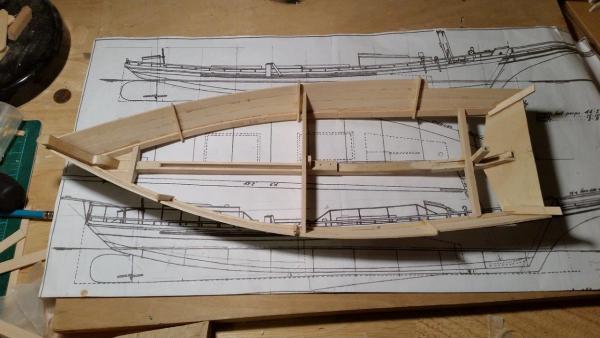
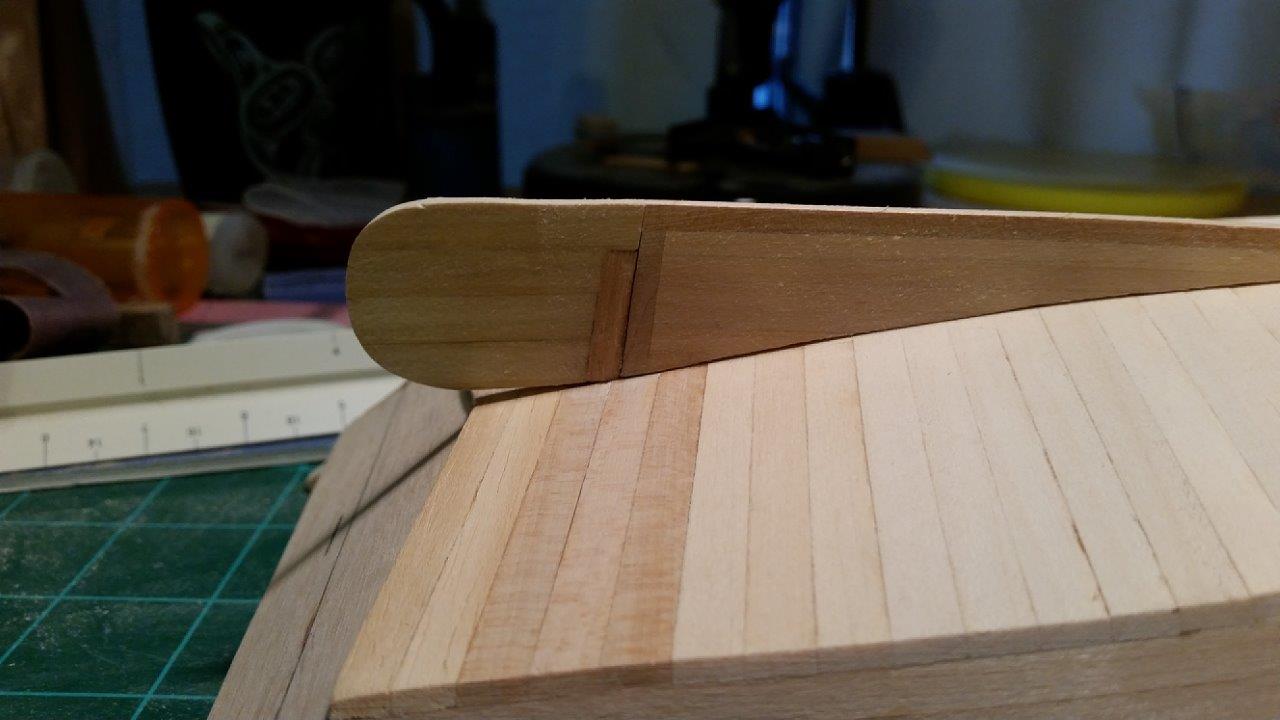
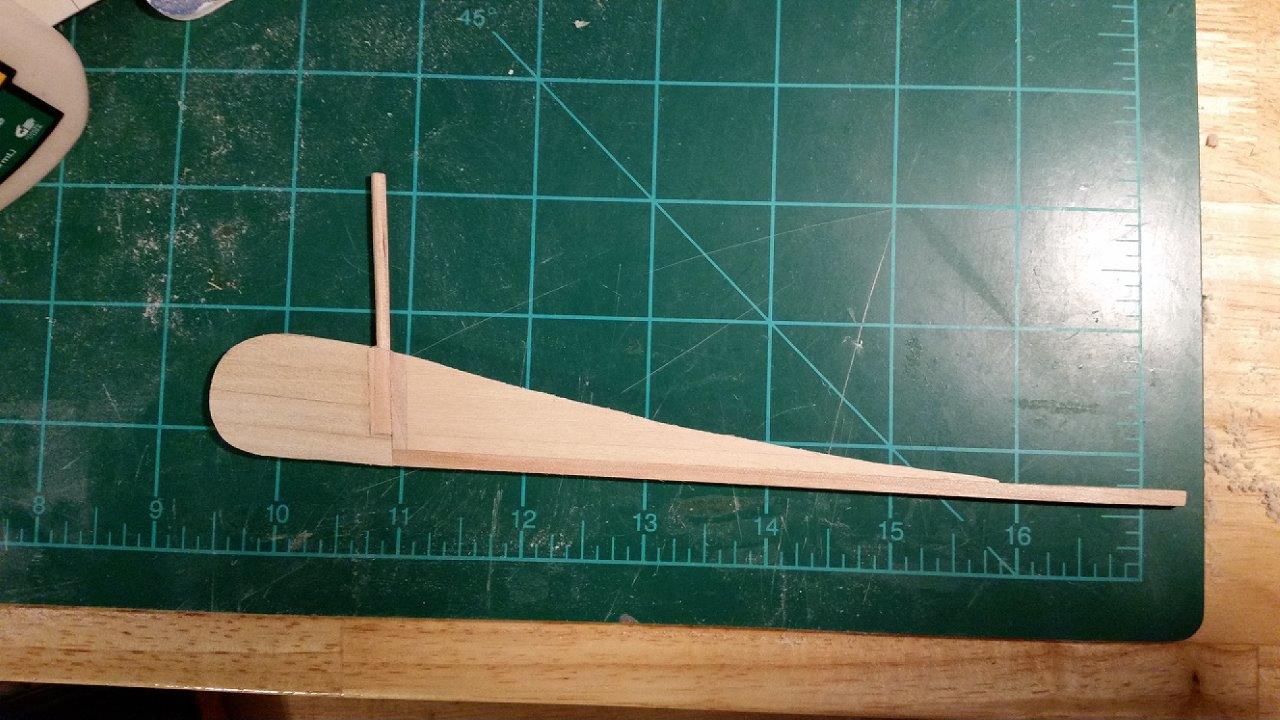
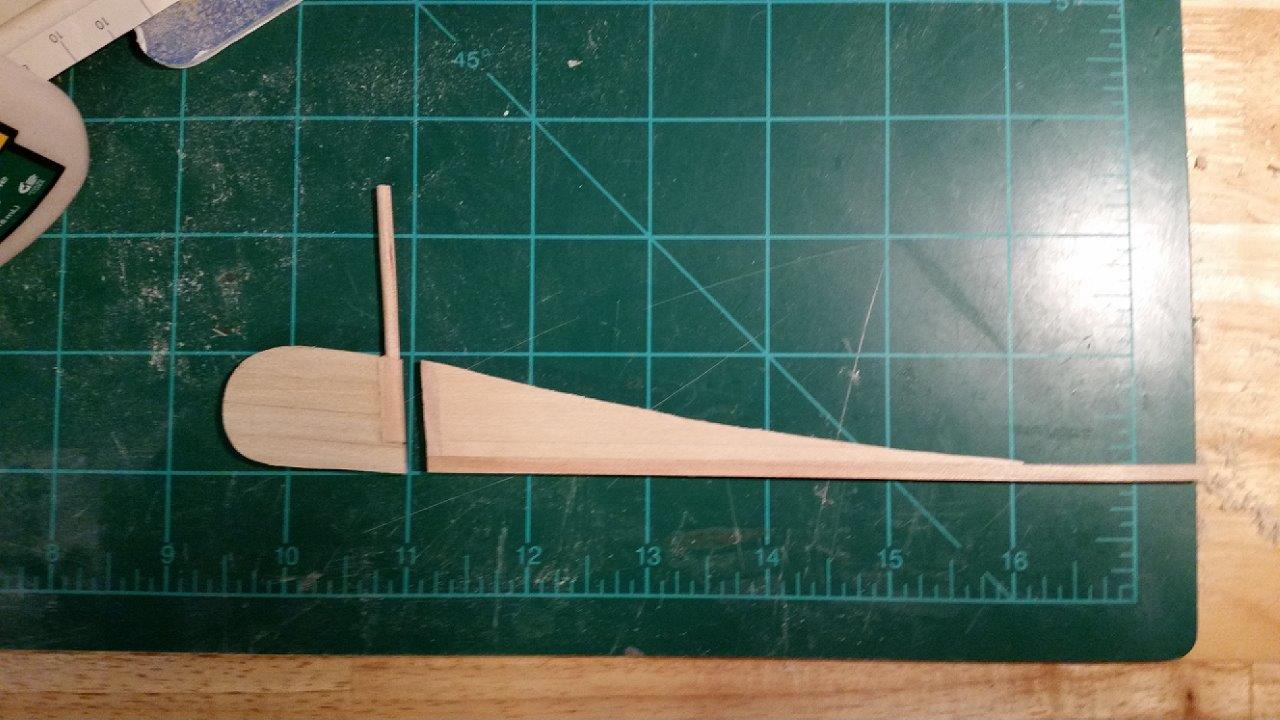
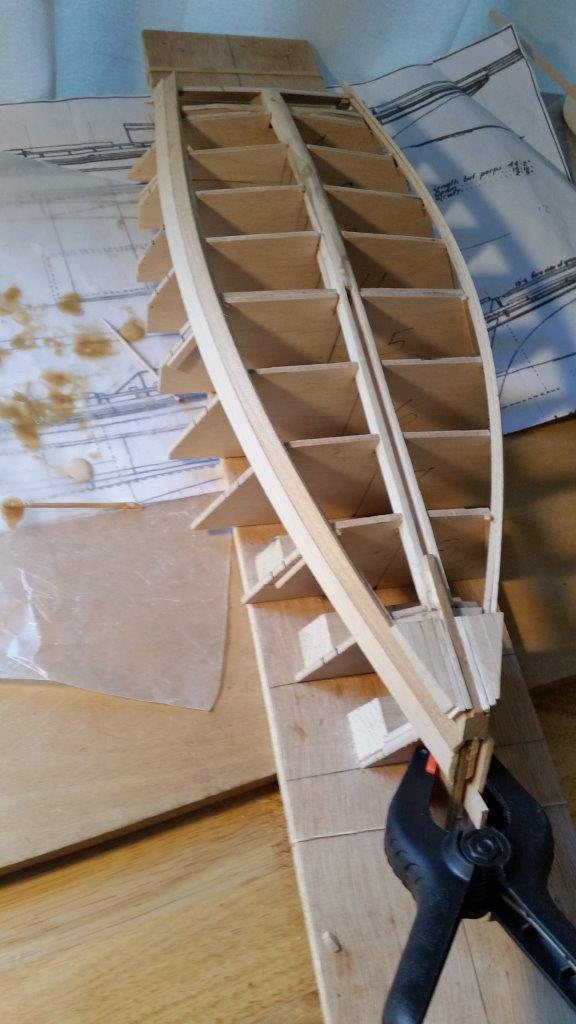
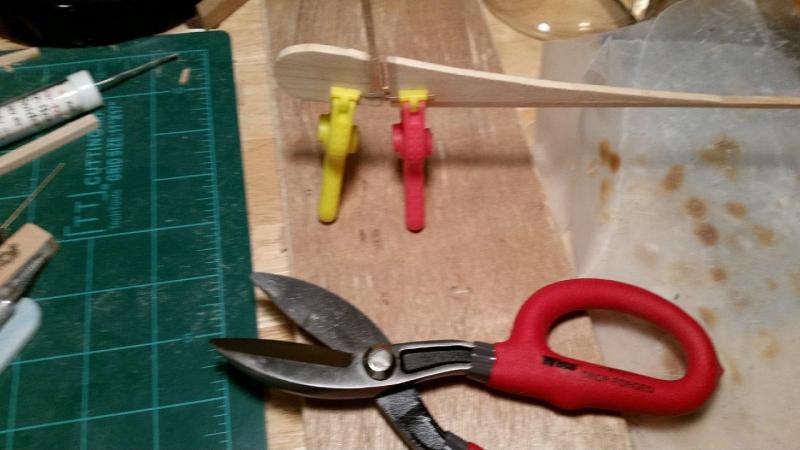
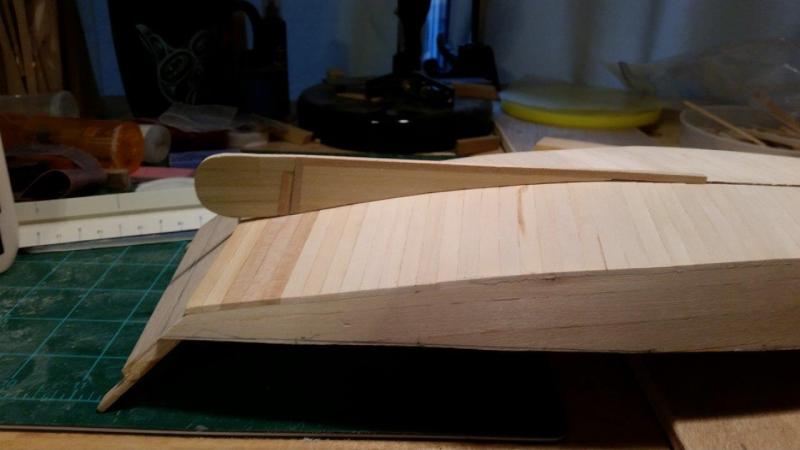
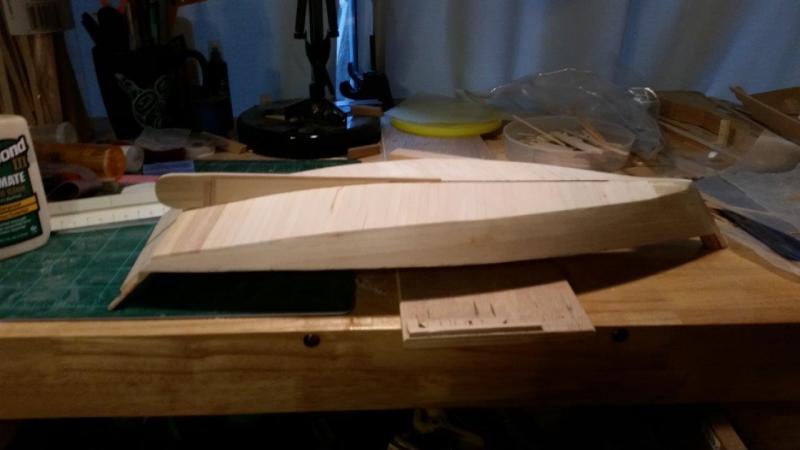
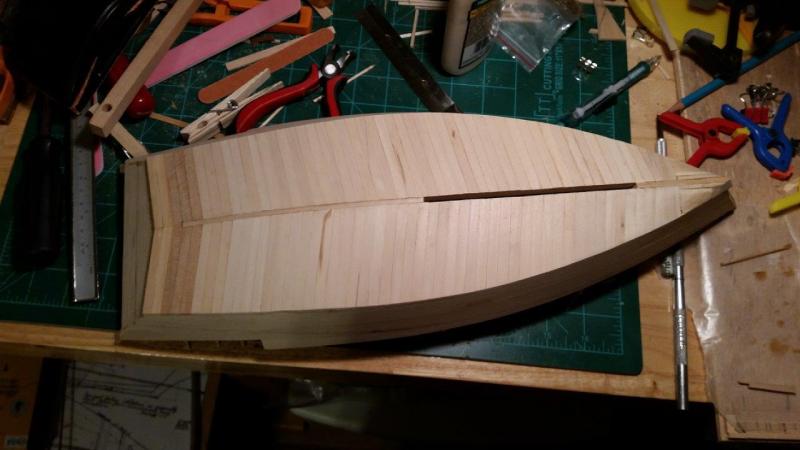
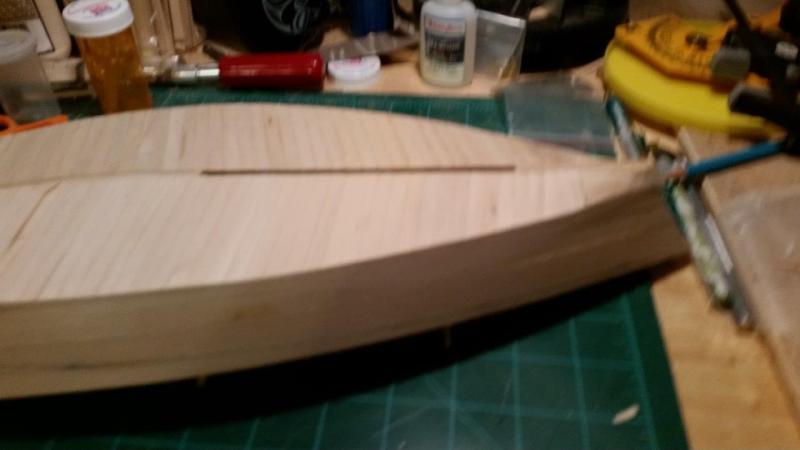
Hello Everyone and thanks for stopping by. Well I have just a quick update. I Competed building the rudder. I made it from 1/4x1/4" poplar, sanded down to 1/4x1/8" and then glued up. Sorry forgot to take pictures of the in-between. I then shaped it using my belt sander. This weekend I plan on starting on my attempts to make the pintle, and gudgeon for the rudder. This will be my first attempt at making metal parts, wish me luck. Completed Rudder and Skeg. Rudder and Skeg Dry Fitted. Until next time! Catch Yall Later,

-
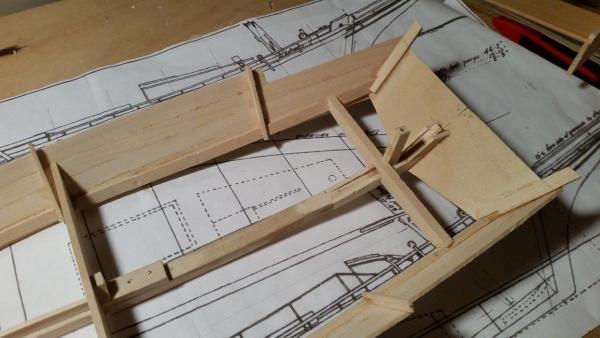
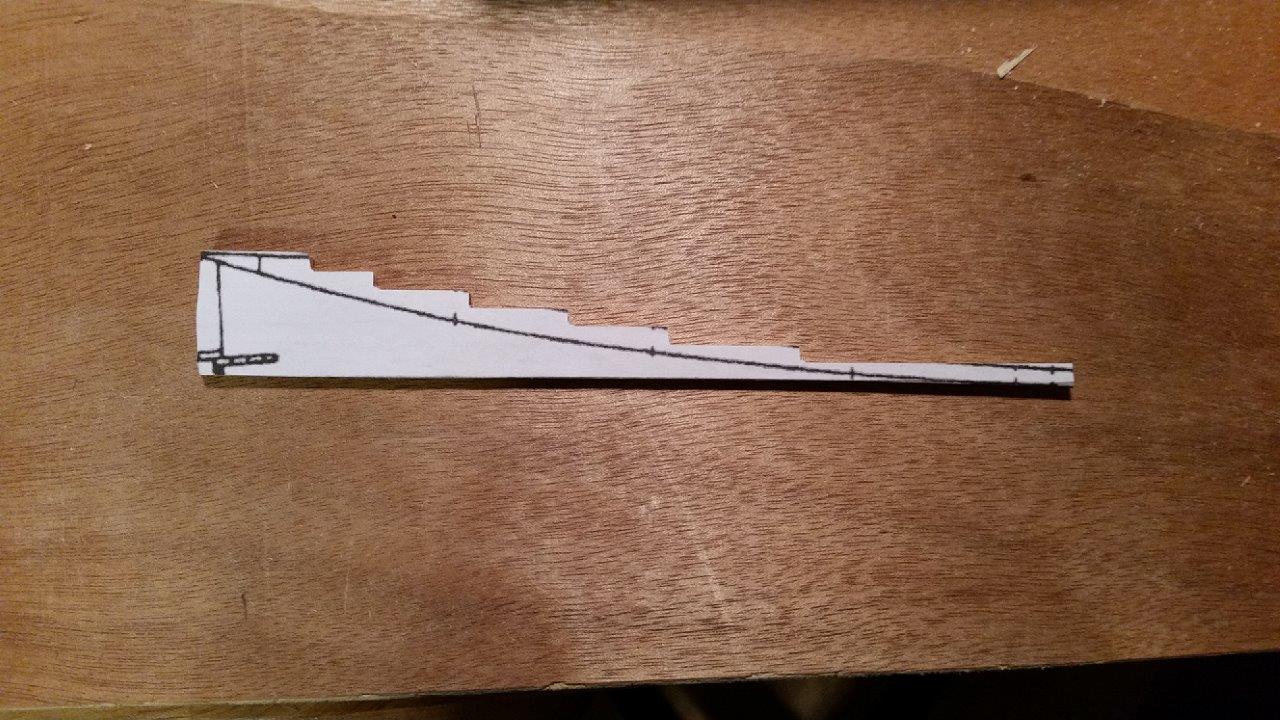
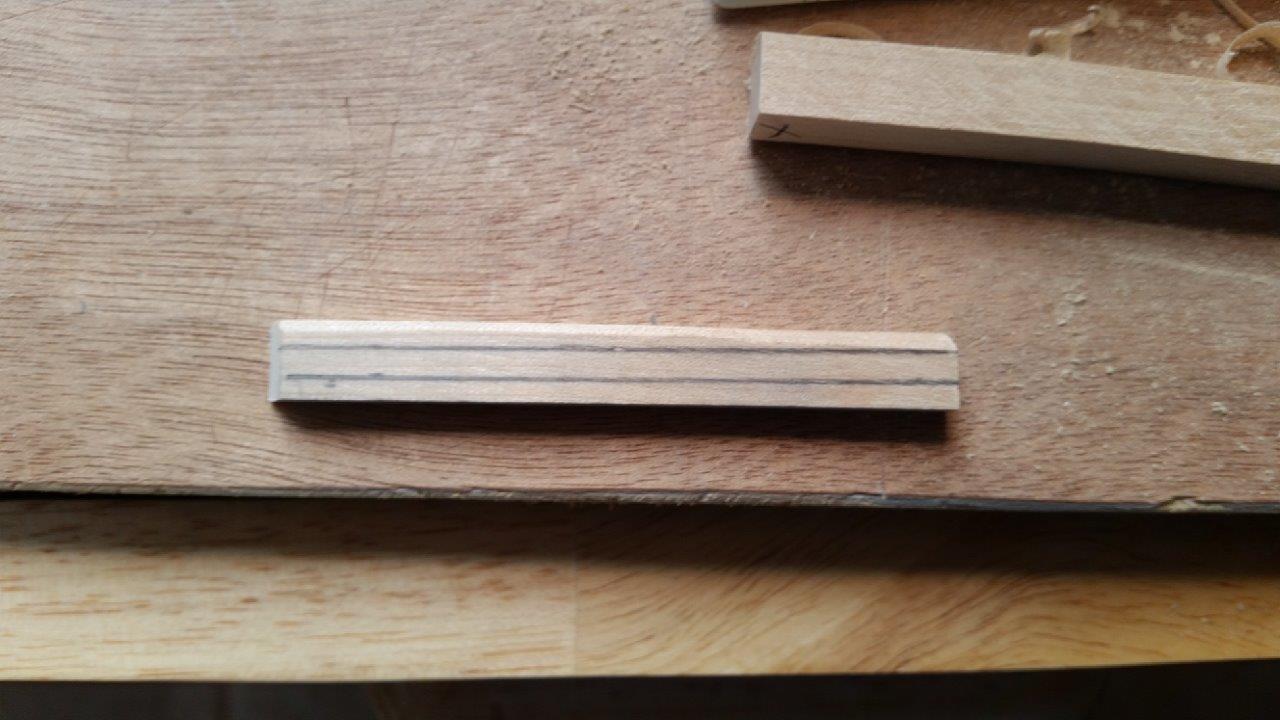
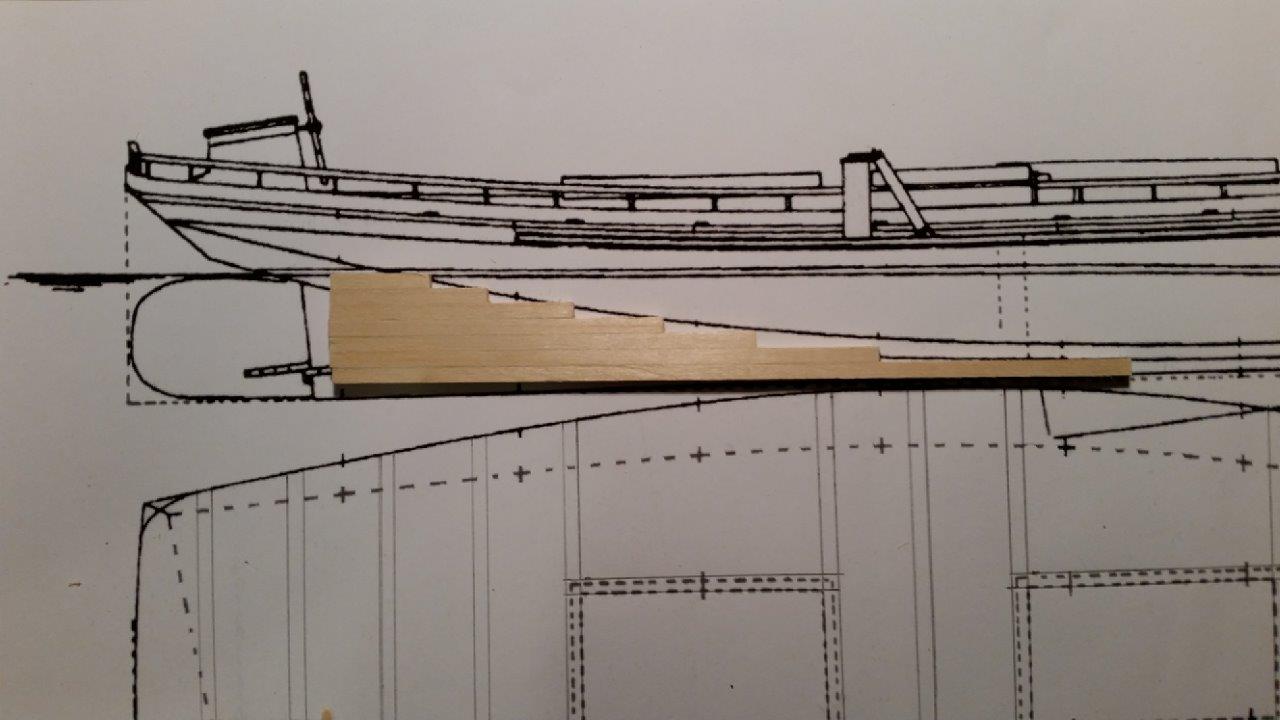
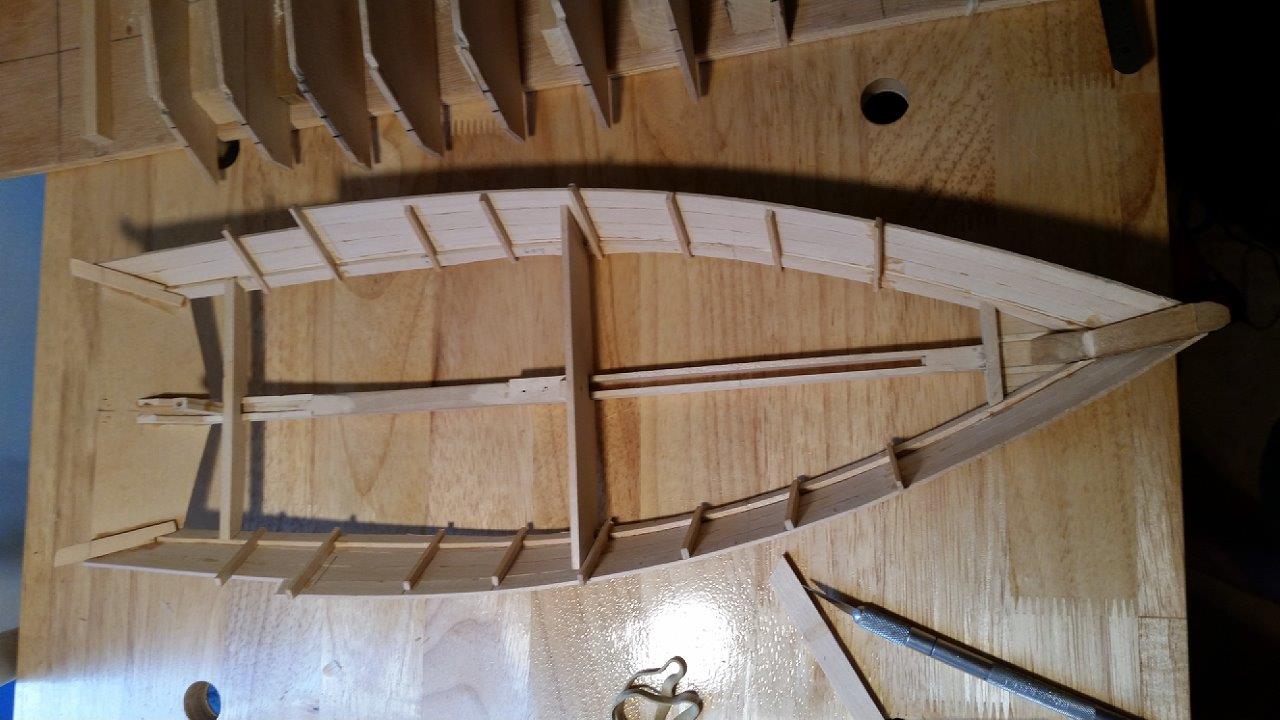
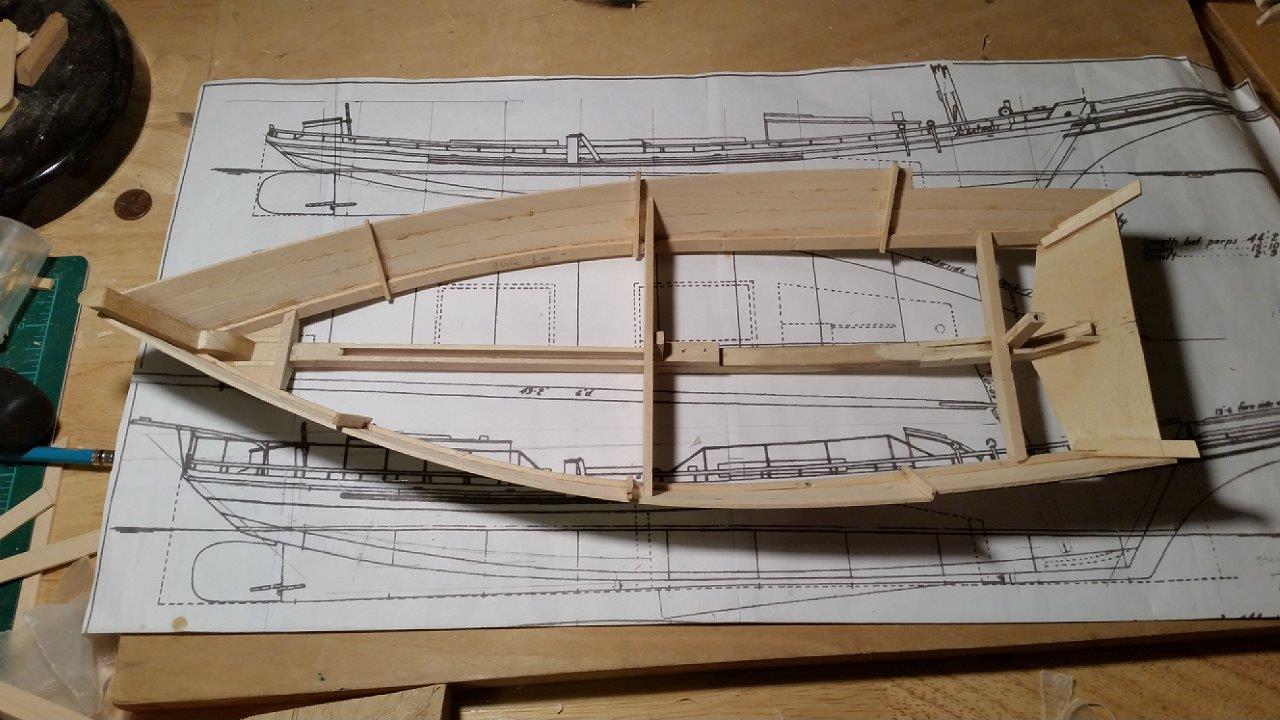
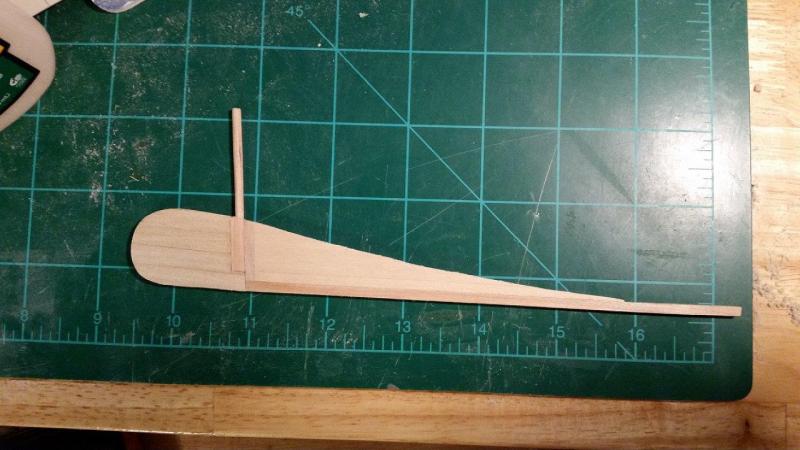
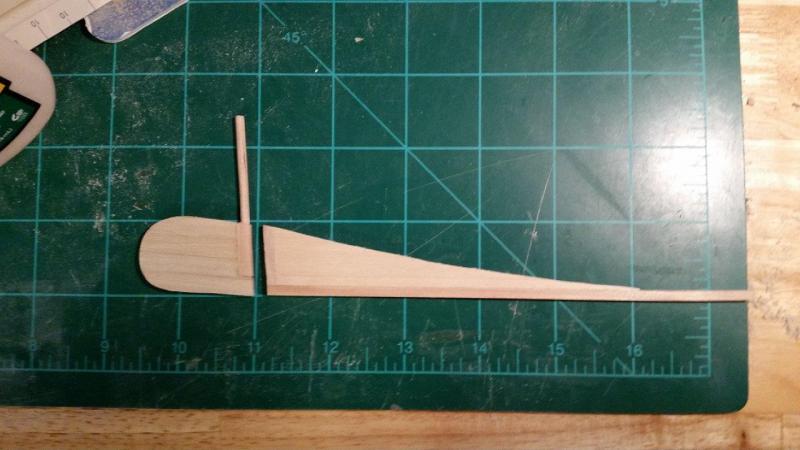
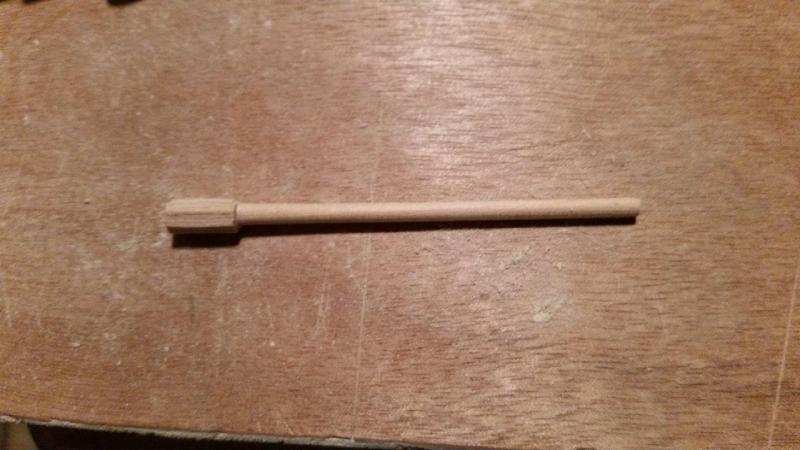
Hi! and welcome. I was able to accomplish some more work on my boat today. The skeg has been shaped and is ready to b glued into place. I am using basswood for most of the model. I have picked up some square poplar dowels of different sizes from the local Lowes. I use the poplar where I want something harder than basswood. I used a 1/8x1/8" strip as the keel shoe. The smallest poplar dowel is 1/4x1/4". I had to sand it down to 1/8x1/8". The stem facing was made from a 3/8"x3/8" poplar dowel. I first had to shave it down to 3/8/'x3/16", then taper the side into 1/8". I made the rudder post out of 1/4x1/4" poplar dowel, turning it in my drill. I decided to wait to add the skeg until I have the rudder completed. This way I can ensure a better fit. Skeg with the template glued. The Stem facing waiting to be shaped. THe Skeg shaped, with the keel shoe and the stem facing shaped and ready to be glued. The new Rudder post. Thank you for stopping by. I hope to have more to show soon. Catch Yall Later,


-
Ron, Please let me know what you find?
-
Patrick, I love the look of finished wood. However, I build ships for the history. Historically, skipjacks are painted inside and out, except for the mast. My plan is to paint everything as well. The hull will be white and red below the water line. The interior will be a light grey. The deck will be white. Ironwork will be black. In reality they were a pretty boring on color. The only wood that will be left bright is the mast, boom and jib club. Thanks for asking.
-
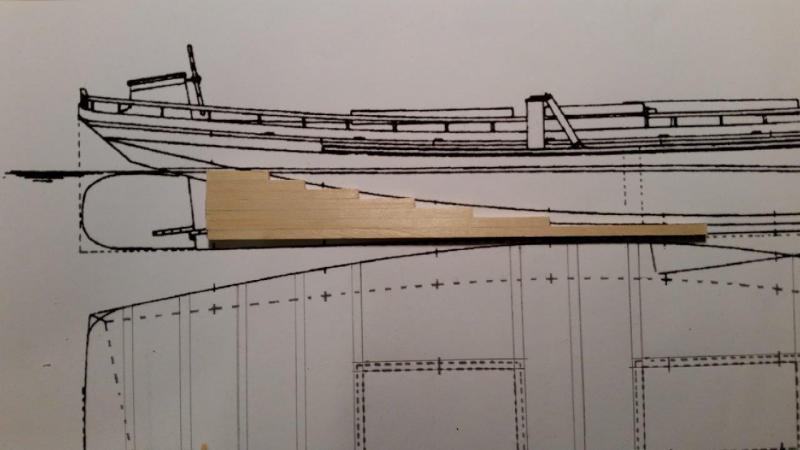
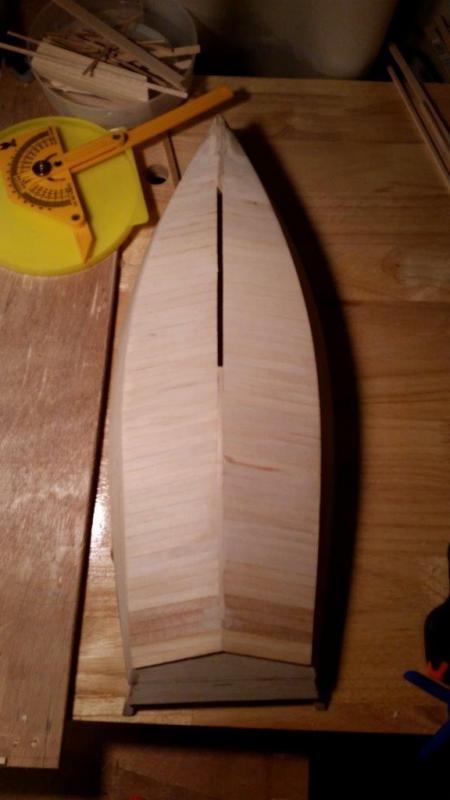
The sides have been cut down, so it now looks more like a skipjack. I am currently working on the skeg and the stem facing. Here is the skeg glued up and ready to b shaped. Well I have a snow day tomorrow, so my plan is to complete the skeg and the stem facing. I hope to have something for show and tell at the next club meeting. Catch Yall Later,


-
Ron, I do not believe that wire rope was originally used for standing rigging on skipjacks. Most Skipjacks were built on the cheap. I believe wire rope was not routinely used on skipjacks until the 1930s. (Unfortunately I cannot remember where I read this. I may be wrong.) Wire rope would have been an extravagance in 1890 - 1900.
-
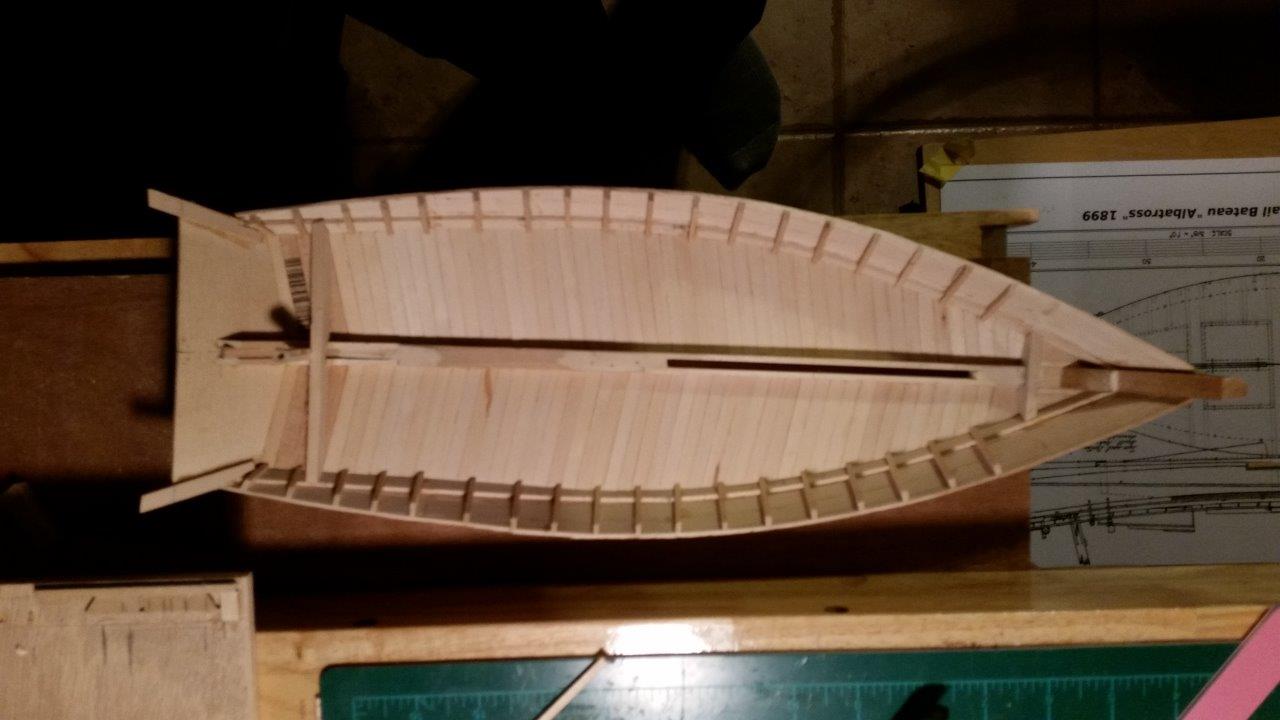
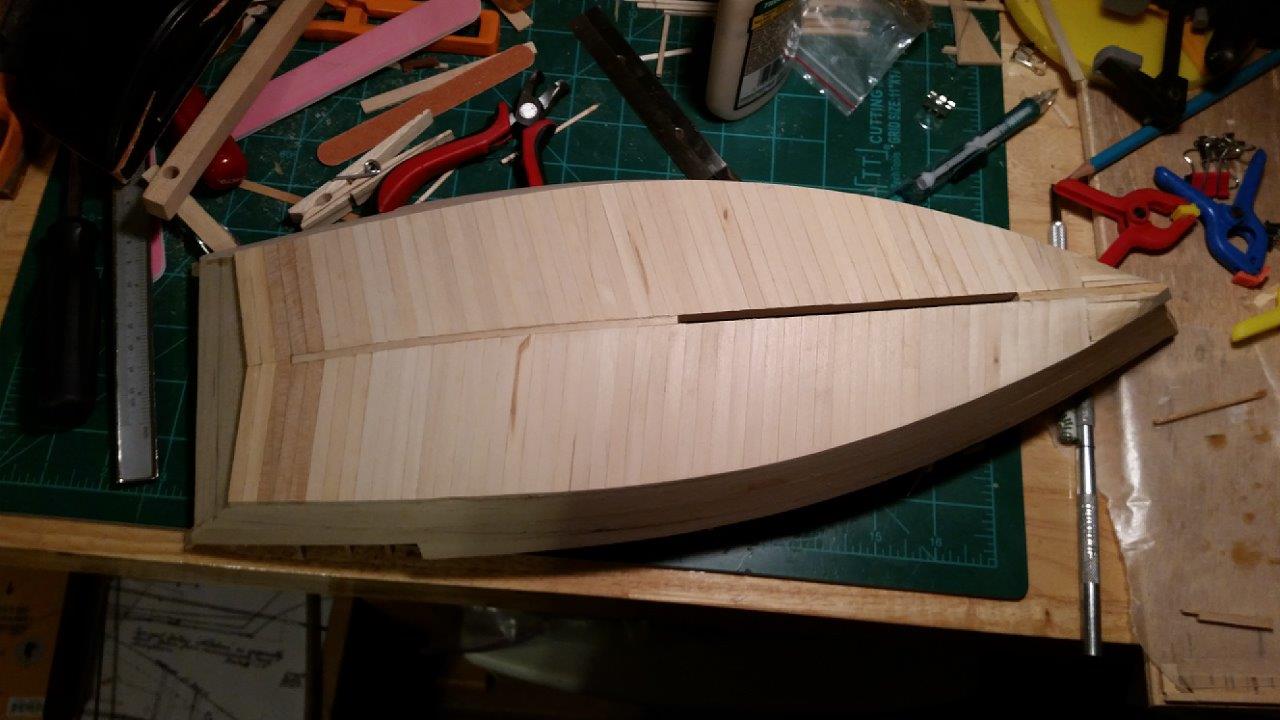
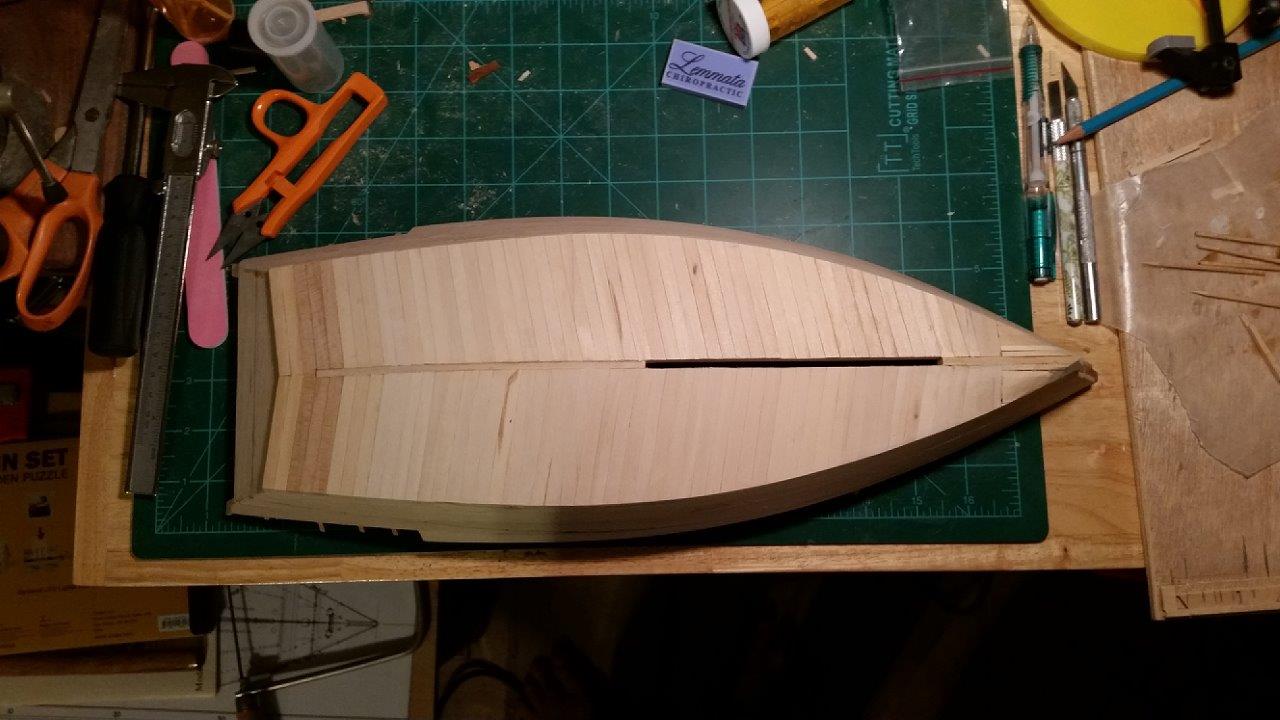
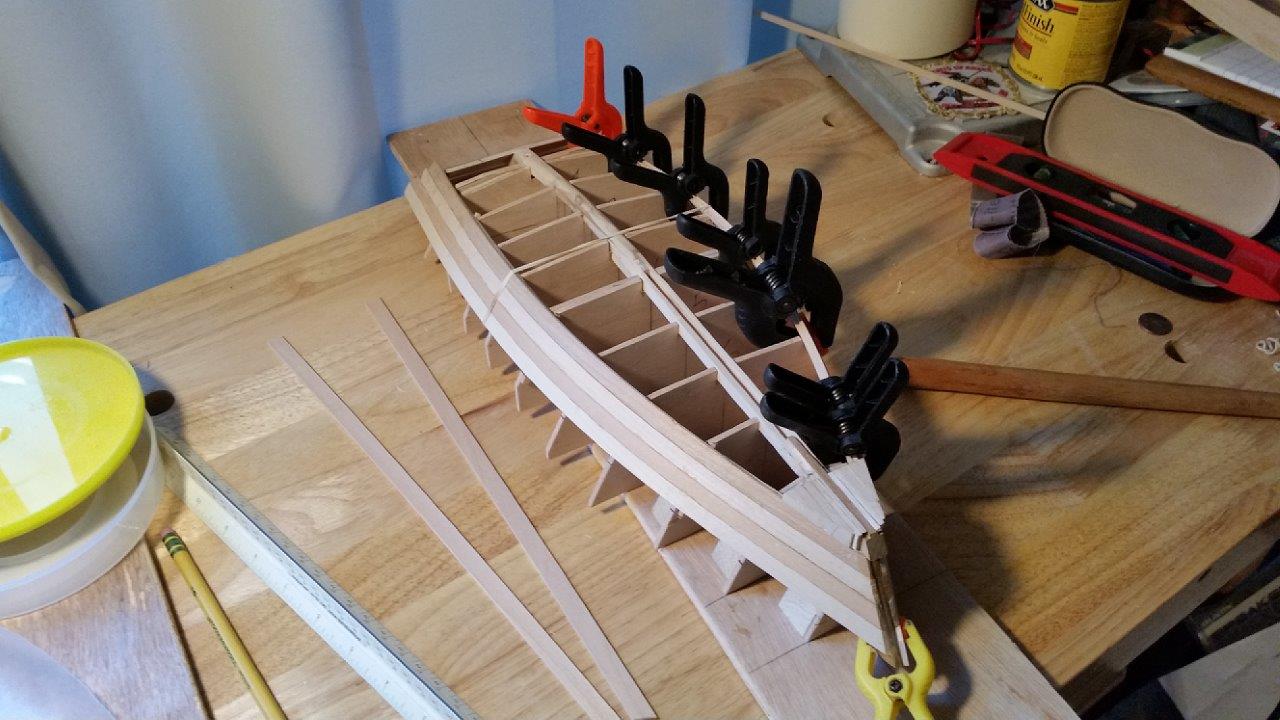
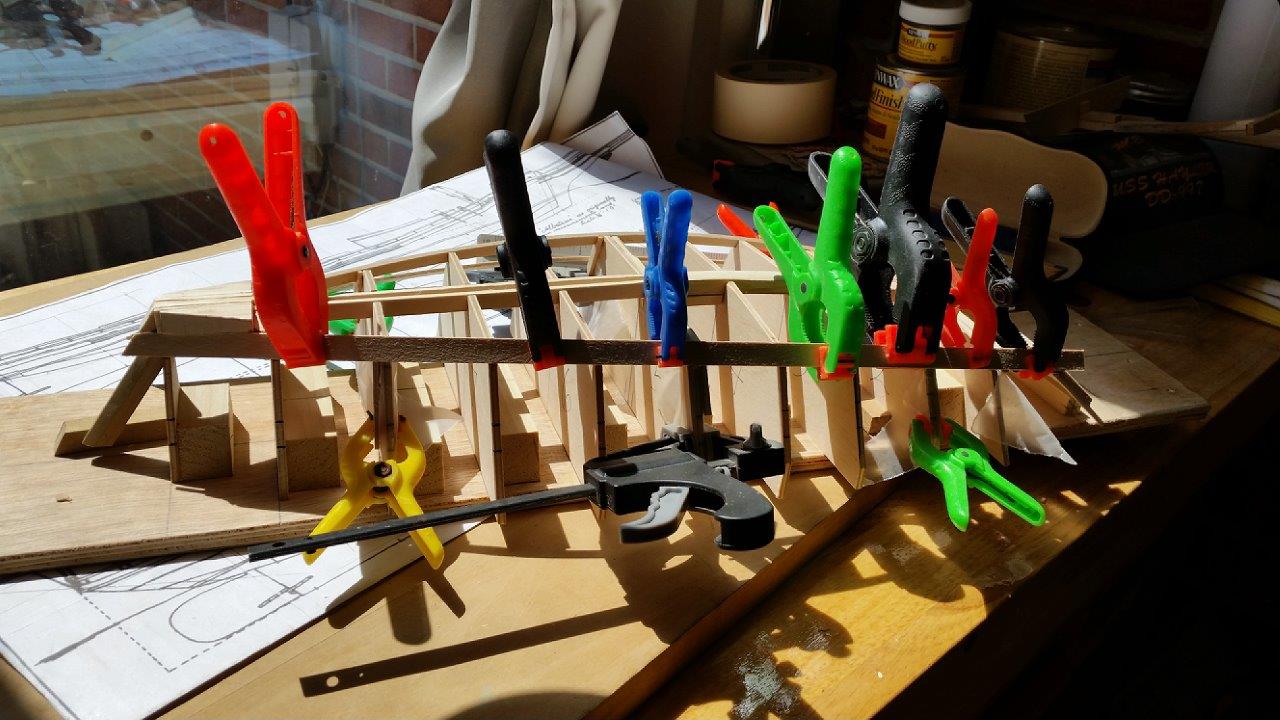
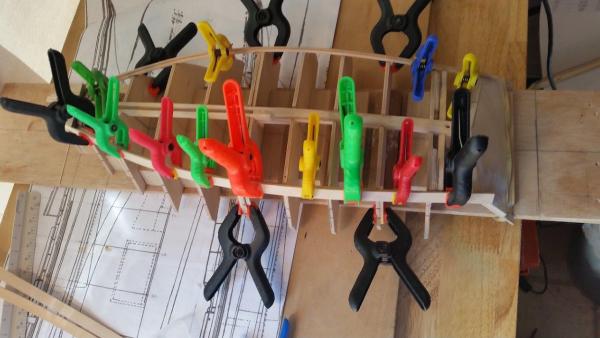
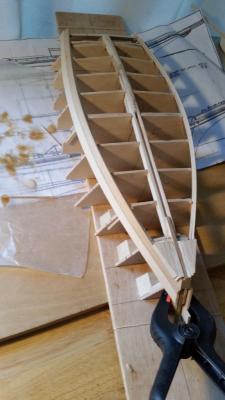
Thanks for stopping by. I know it has been a while since I posted an update. Life just keeps getting in the way. Well I finished adding the side frames to the 1899 hull and planked the bottom. The next step is to cut the side planks down to where they need to be. Then I will start working on the 1942 hull to get it caught up with the 1899 hull. I started out gluing on e plank at a time. Half way though the planking I started gluing multiple planks together. This made it easier to bend the planks to the chin log. This created a smoother planking. The finished planking. With winter here, I am hoping to spend more time in the shipyard. Catch Yall Later,


-
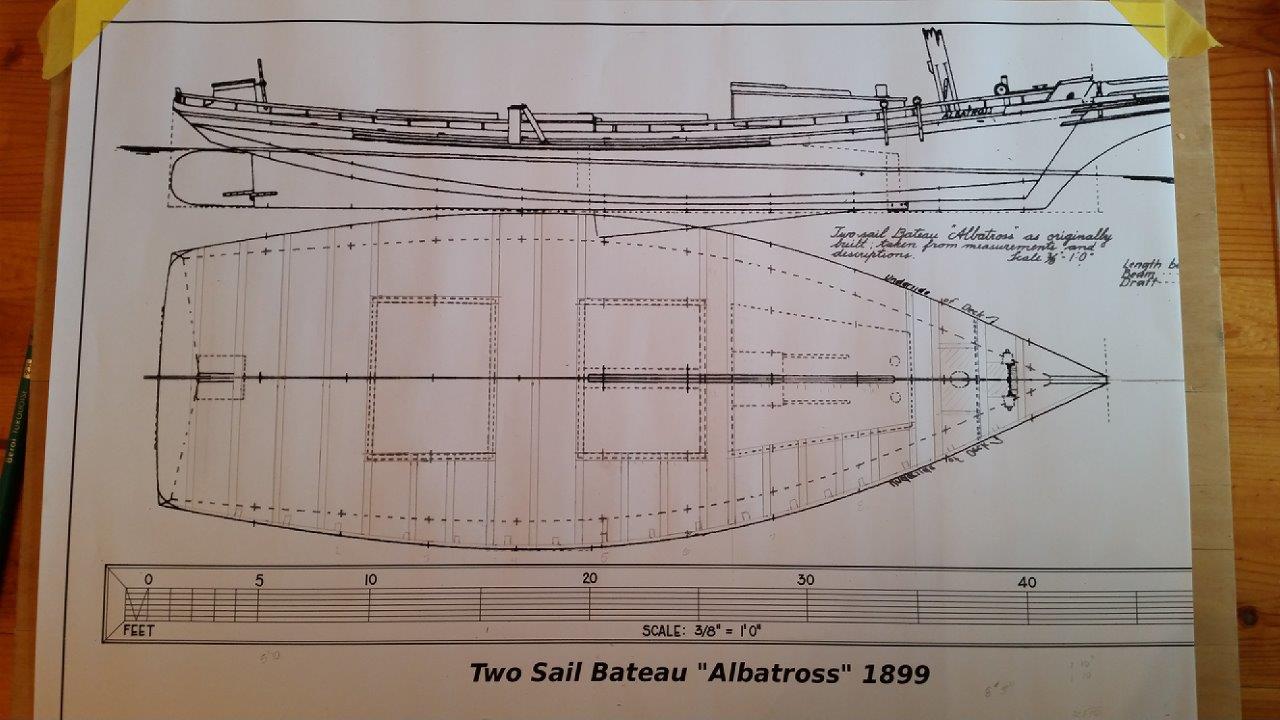
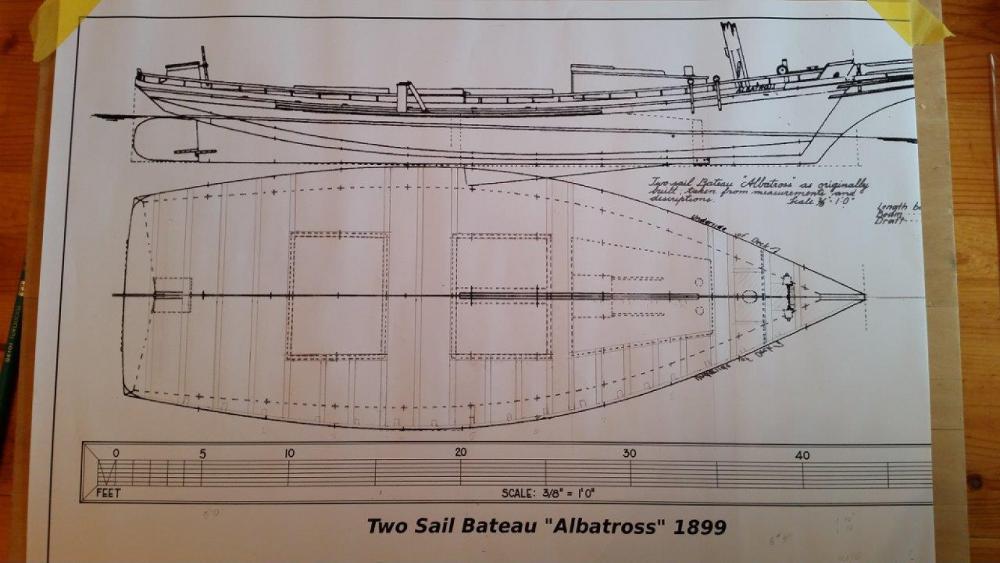
Hi everyone, Thanks for stopping by. I know it has been awhile since my last post and unfortunately I do not have much to report. I have concentrated mostly on the 1899 Albatross, drawing up the plans for the deck beams and started adding the side frames. That is all I have to report at this time. Catch Yall Later,

-
Rob, Welcome to the Skipjack club. I am looking forward to following your Willie Bennett build. Here is a item you may be interested in, Modeling Guide for Model Shipways Kit "Willie L. Bennett" by Ben Lankford.
- 45 replies
-
- 2
-

-
- model shipways
- willie l bennett
- (and 1 more)
-
David, Welcome and good luck on you build. I am looking forward to following your Willie Bennett build. The plans show the rabbet at about 1/16"x1/16". The plans are at the same scale as the model. You should be able to take your measurements off of the plans without adjustment. You may also be interested in the following book. "Modeling Guide for Model Shipways Kit 'Willie L. Bennett'" by Ben Lankford. http://www.amazon.com/Modeling-Guide-Shipways-Willie-Bennett/dp/B001QK3VE0
-
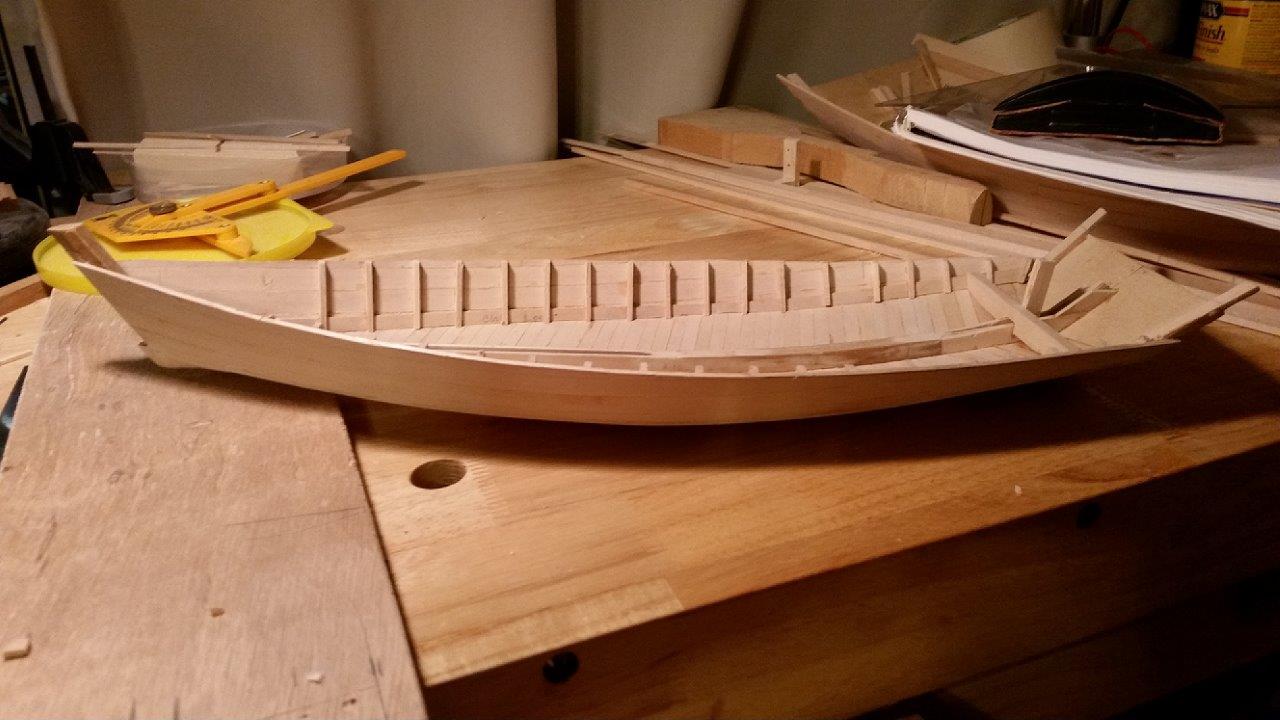
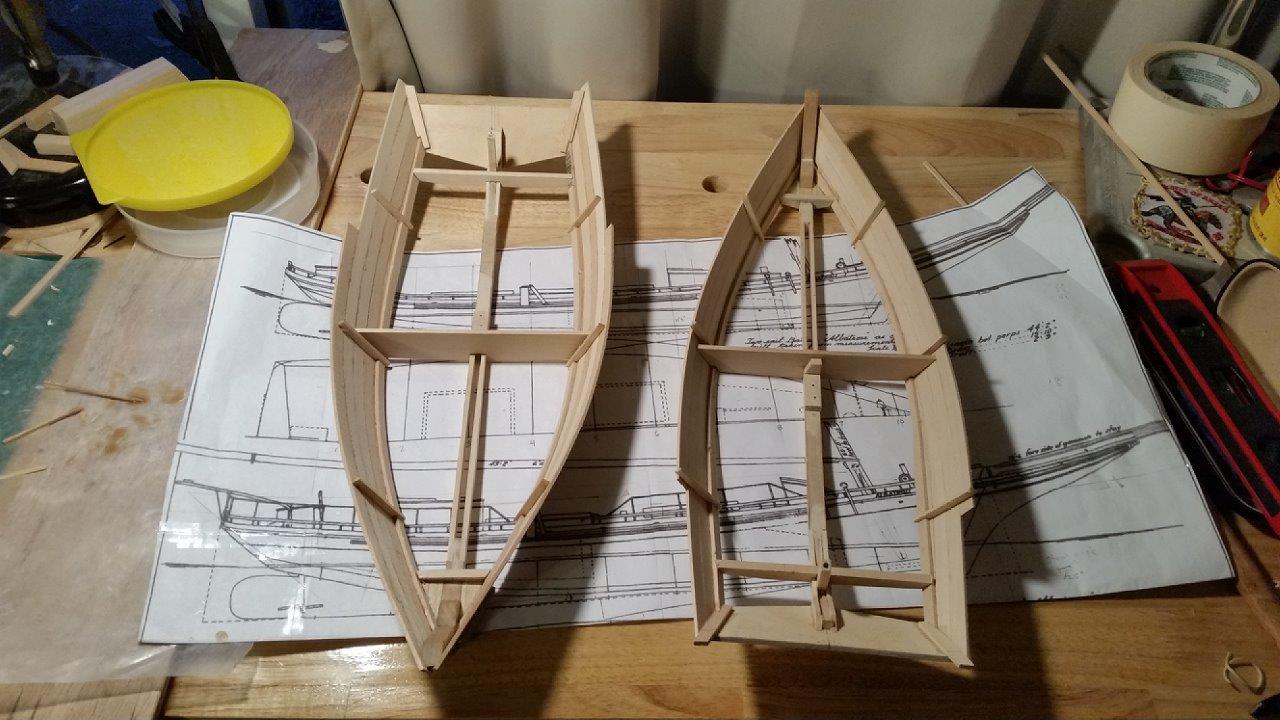
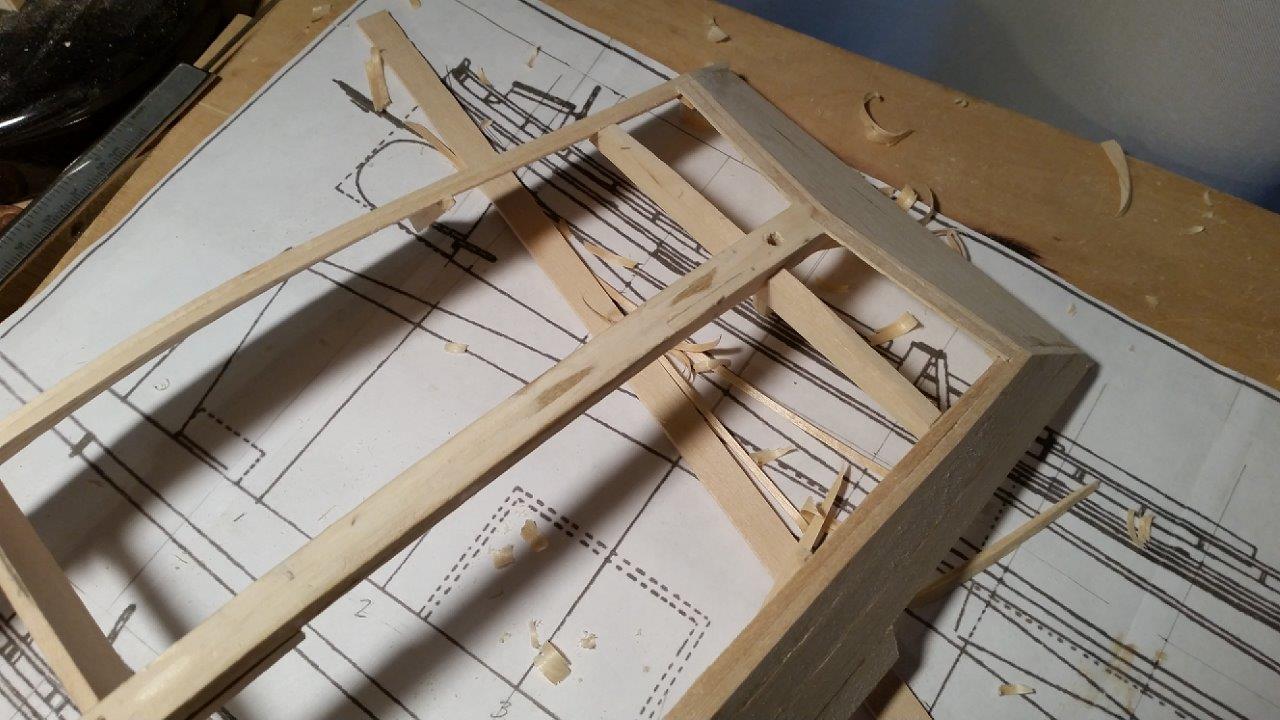
Hi Everyone, Just a quick update. All of the side planks have been added to the 1942 Albatross. Gluing the planks on. The 1942 and the 1899 Albatross with the side planks completed. The next step is to add the side frames. I still need to produce about 30 more frames. Well that is all for now. Catch Yall Later,


-
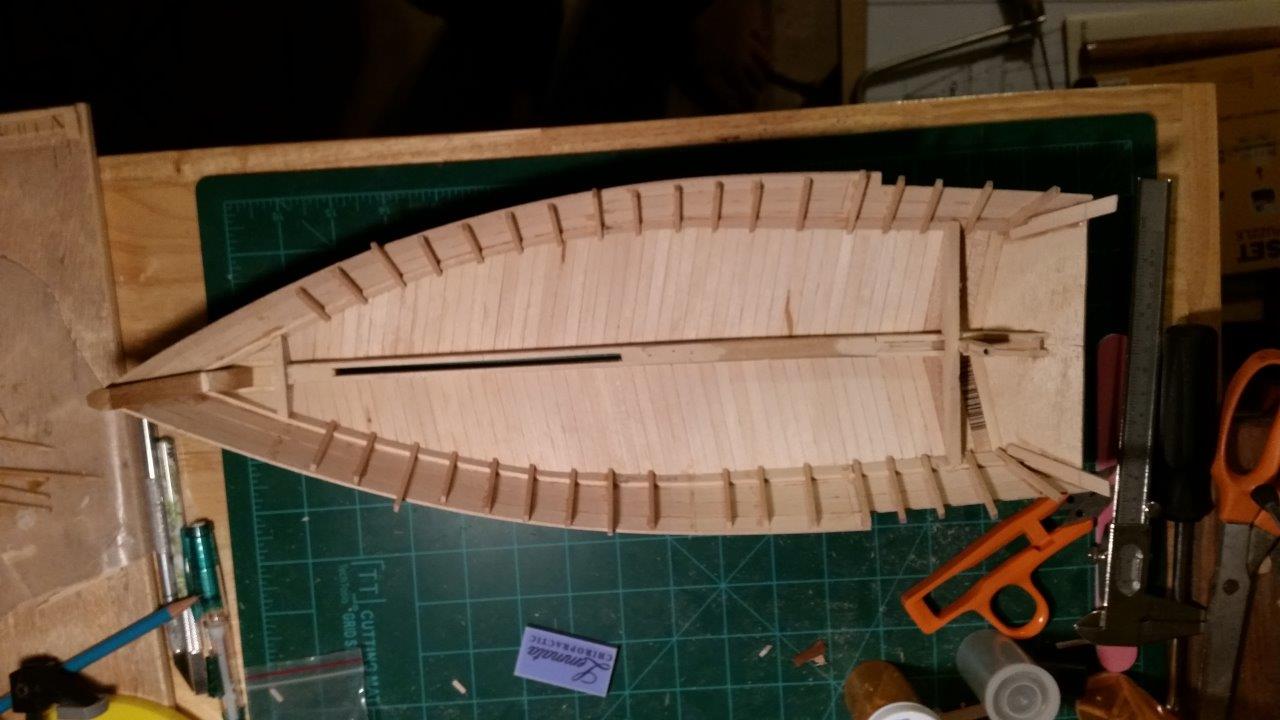
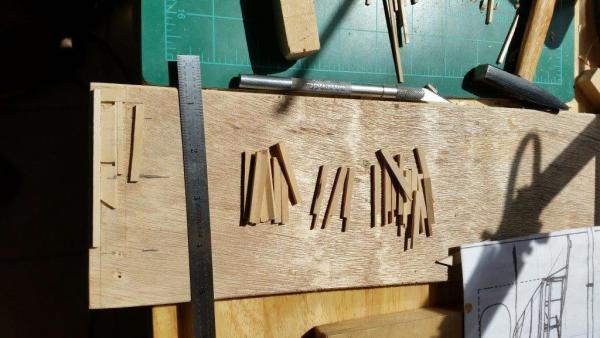
Thank you for stopping by. Well I got some more done on my Albatross. I was able to get 2 planks on both side of the 1942 Albatross. While waiting on glue to dry, I worked on making the 40+ side frames for the 1899 Albatross. Gluing the second plank. 4 planks done. Making the jig to produce the side frames. The first step was to cut the 3/16" wide strips down to 5/32". Then cut a 3/32" notch on one end. The notch will go over the chin log. This will represent a 2-1/2"x5" frame. 40 Side Frames. I still need to add 3 rows of planks onto the 1942 Albatross. I hope to complete that by next weekend. I also need to make the side frames for the 1942 Albatross. Catch Yall Later,
-
Chris, Yes, $2500 is a low price for a nice boat. However, I believe the price is low because the Skipjack, Blue Crab, is a wooden boat. The Upkeep for wooden boats is rather high. The skipjack hulls are very shallow, so the headroom in the cabin is probably only about 4-1/2 feet. This would not be the most comfortable boat to cruise the bay in. Skipjacks also require an experienced captain.The Deadrise type of hull (almost flat), has some sailing issues. You can see the flat/v-shape hull in several of the small sailboats such as the sunfish.The skipjacks are fairly good sailors, they just have one drawback, like the sunfish when they get to much wind they will capsize. Unlike the sunfish, you can't stand on the centerboard and right it. Sailing a skipjack is not for a novice. Matter of fact, I understand that the standard procedure on the skipjacks was to reef the sails before furling them for the night. That way if there was to much wind in the morning they did not have to worry. http://www.stardem.com/news/local_news/article_50ab1065-1924-5ec1-86ce-32fb0616d30b.html
-
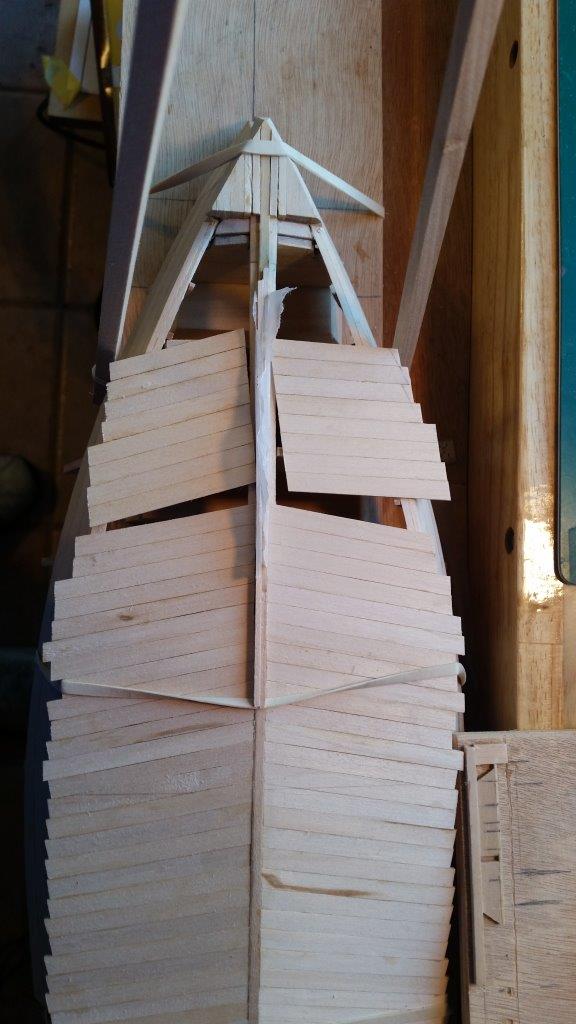
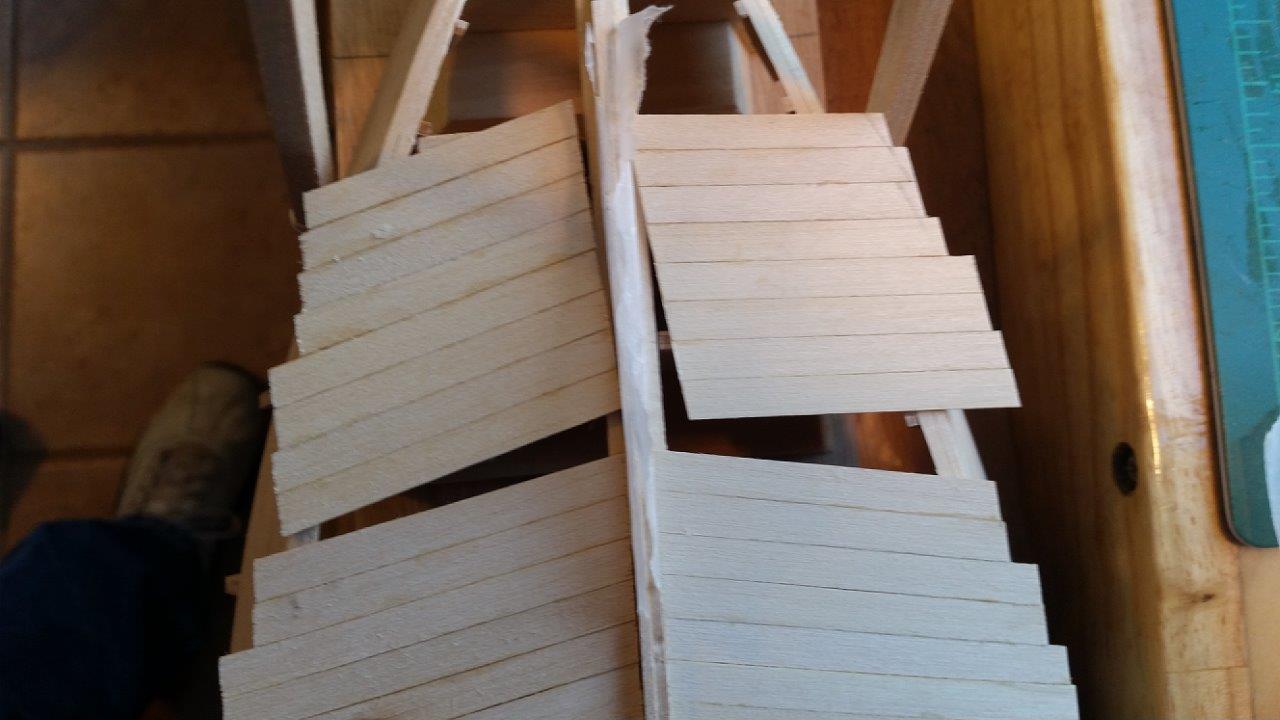
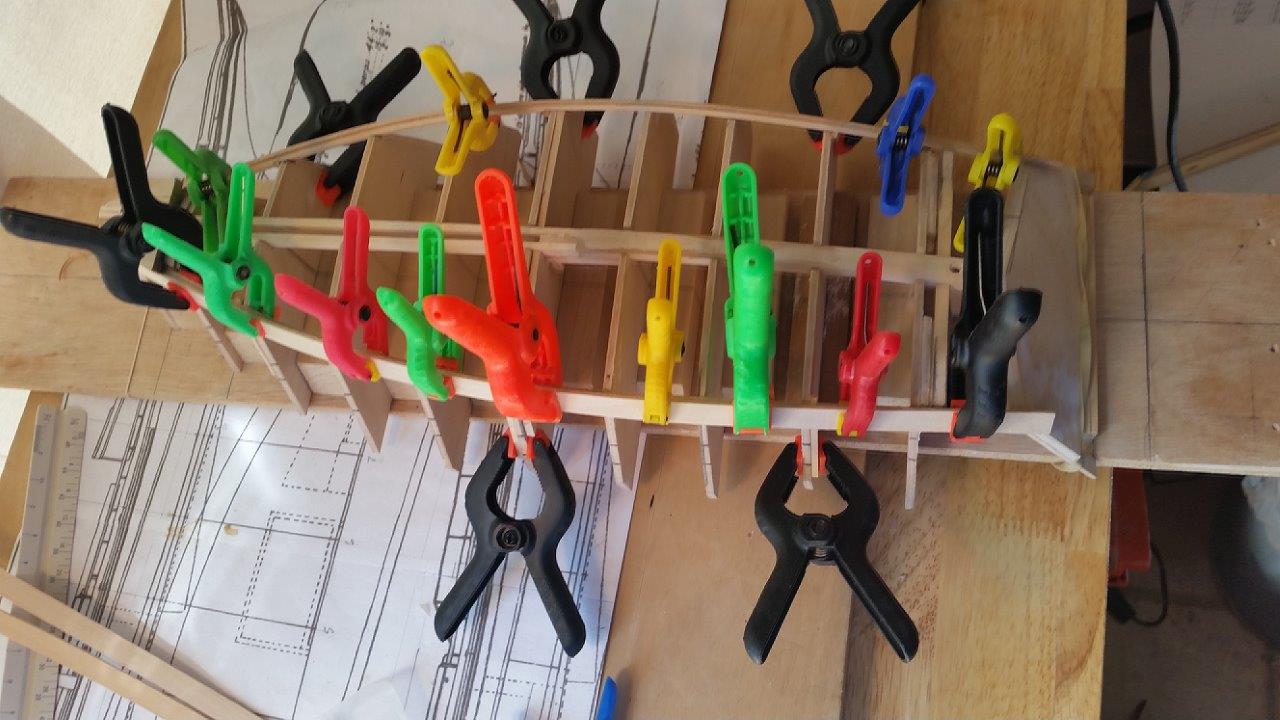
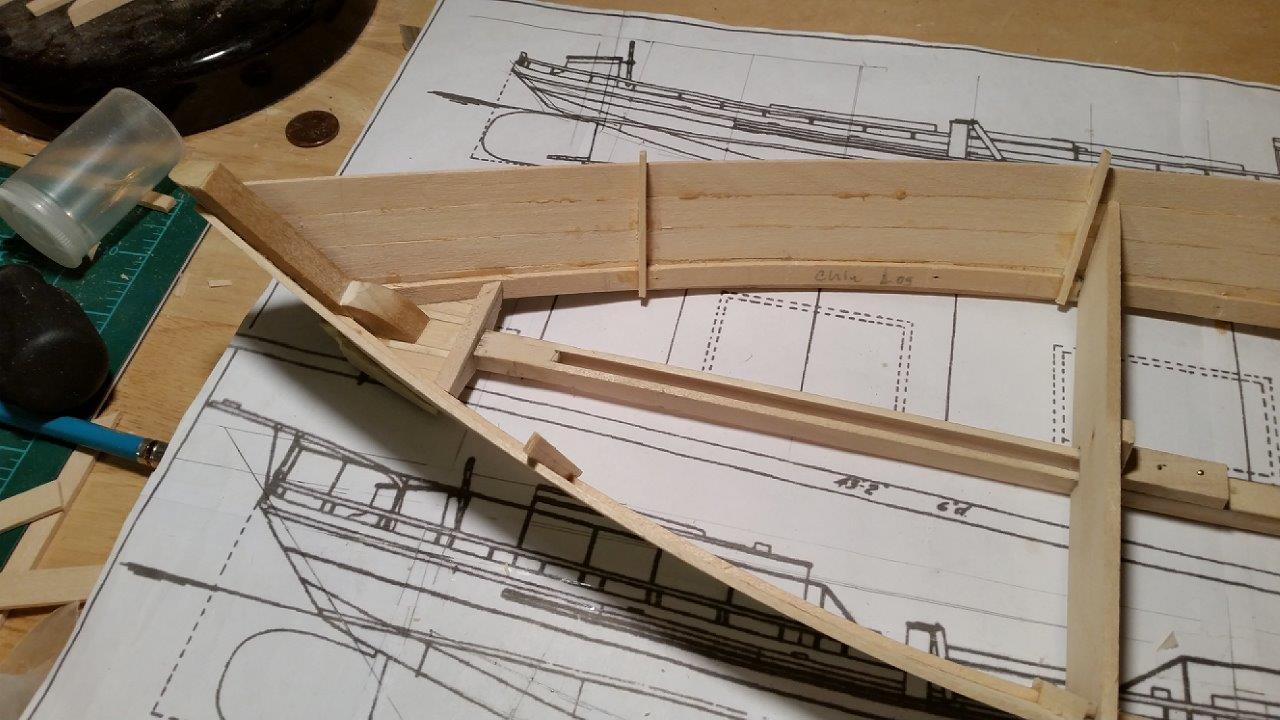
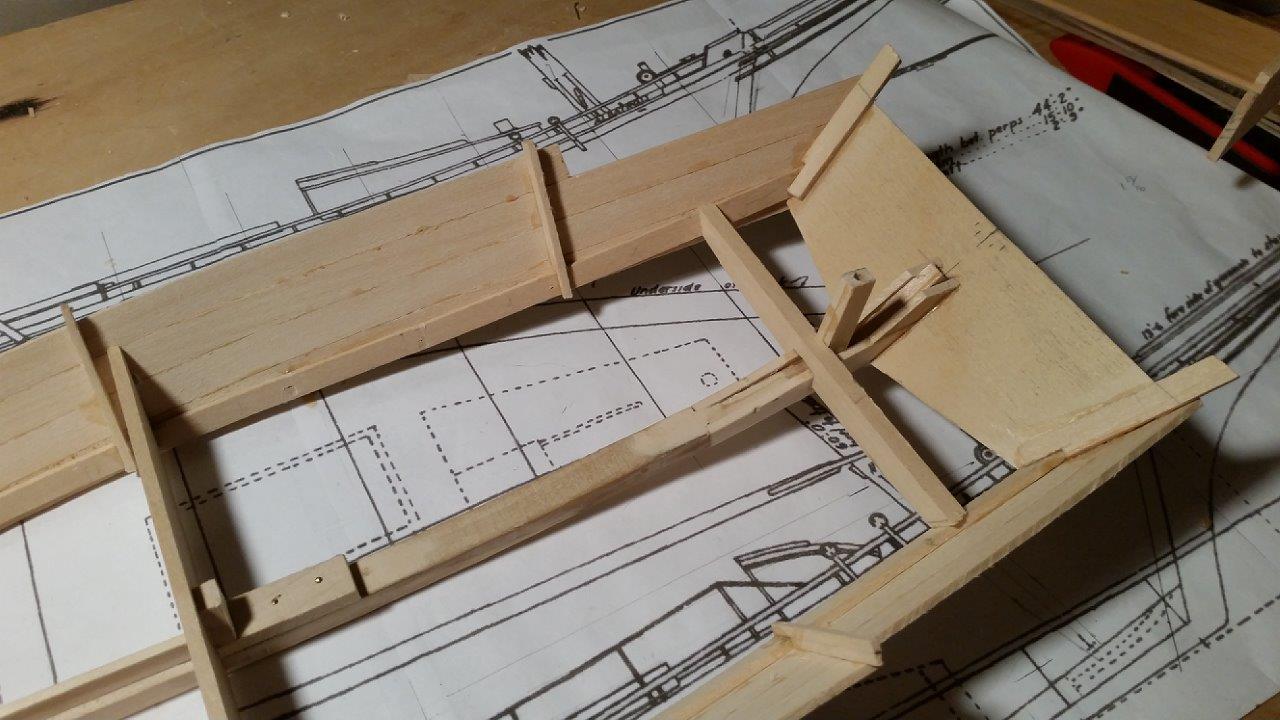
Good Morning All, Thank you for stopping by. Well, I have finished the side planks on the 1899 Albatross.She is ready for the bottom planks. I am working on the 1942 Albatross this weekend. Last night I soaked the chin logs and nailed them to the forms to get the correct shape. I will get them glued into place today and start on the the side planks. Gluing the first plank onto the 1899 Albatross. I added 3 of the side frames on each side to help hold the planks straight. They are not substantial. Their actual dimensions were some where about 2-1/2" x 5" The rest of the side frames will be added later. The completed side planking on the 1899 Albatross. Bow Details. Stern Details. The Chin logs and side planks sanded down and ready for the bottom planks.