DONATION DRIVE - SUPPORT MSW - DO YOUR PART TO KEEP THIS GREAT FORUM GOING!
×


James H
-
Posts
6,121 -
Joined
-
Last visited
Content Type
Profiles
Forums
Gallery
Events
Everything posted by James H
-
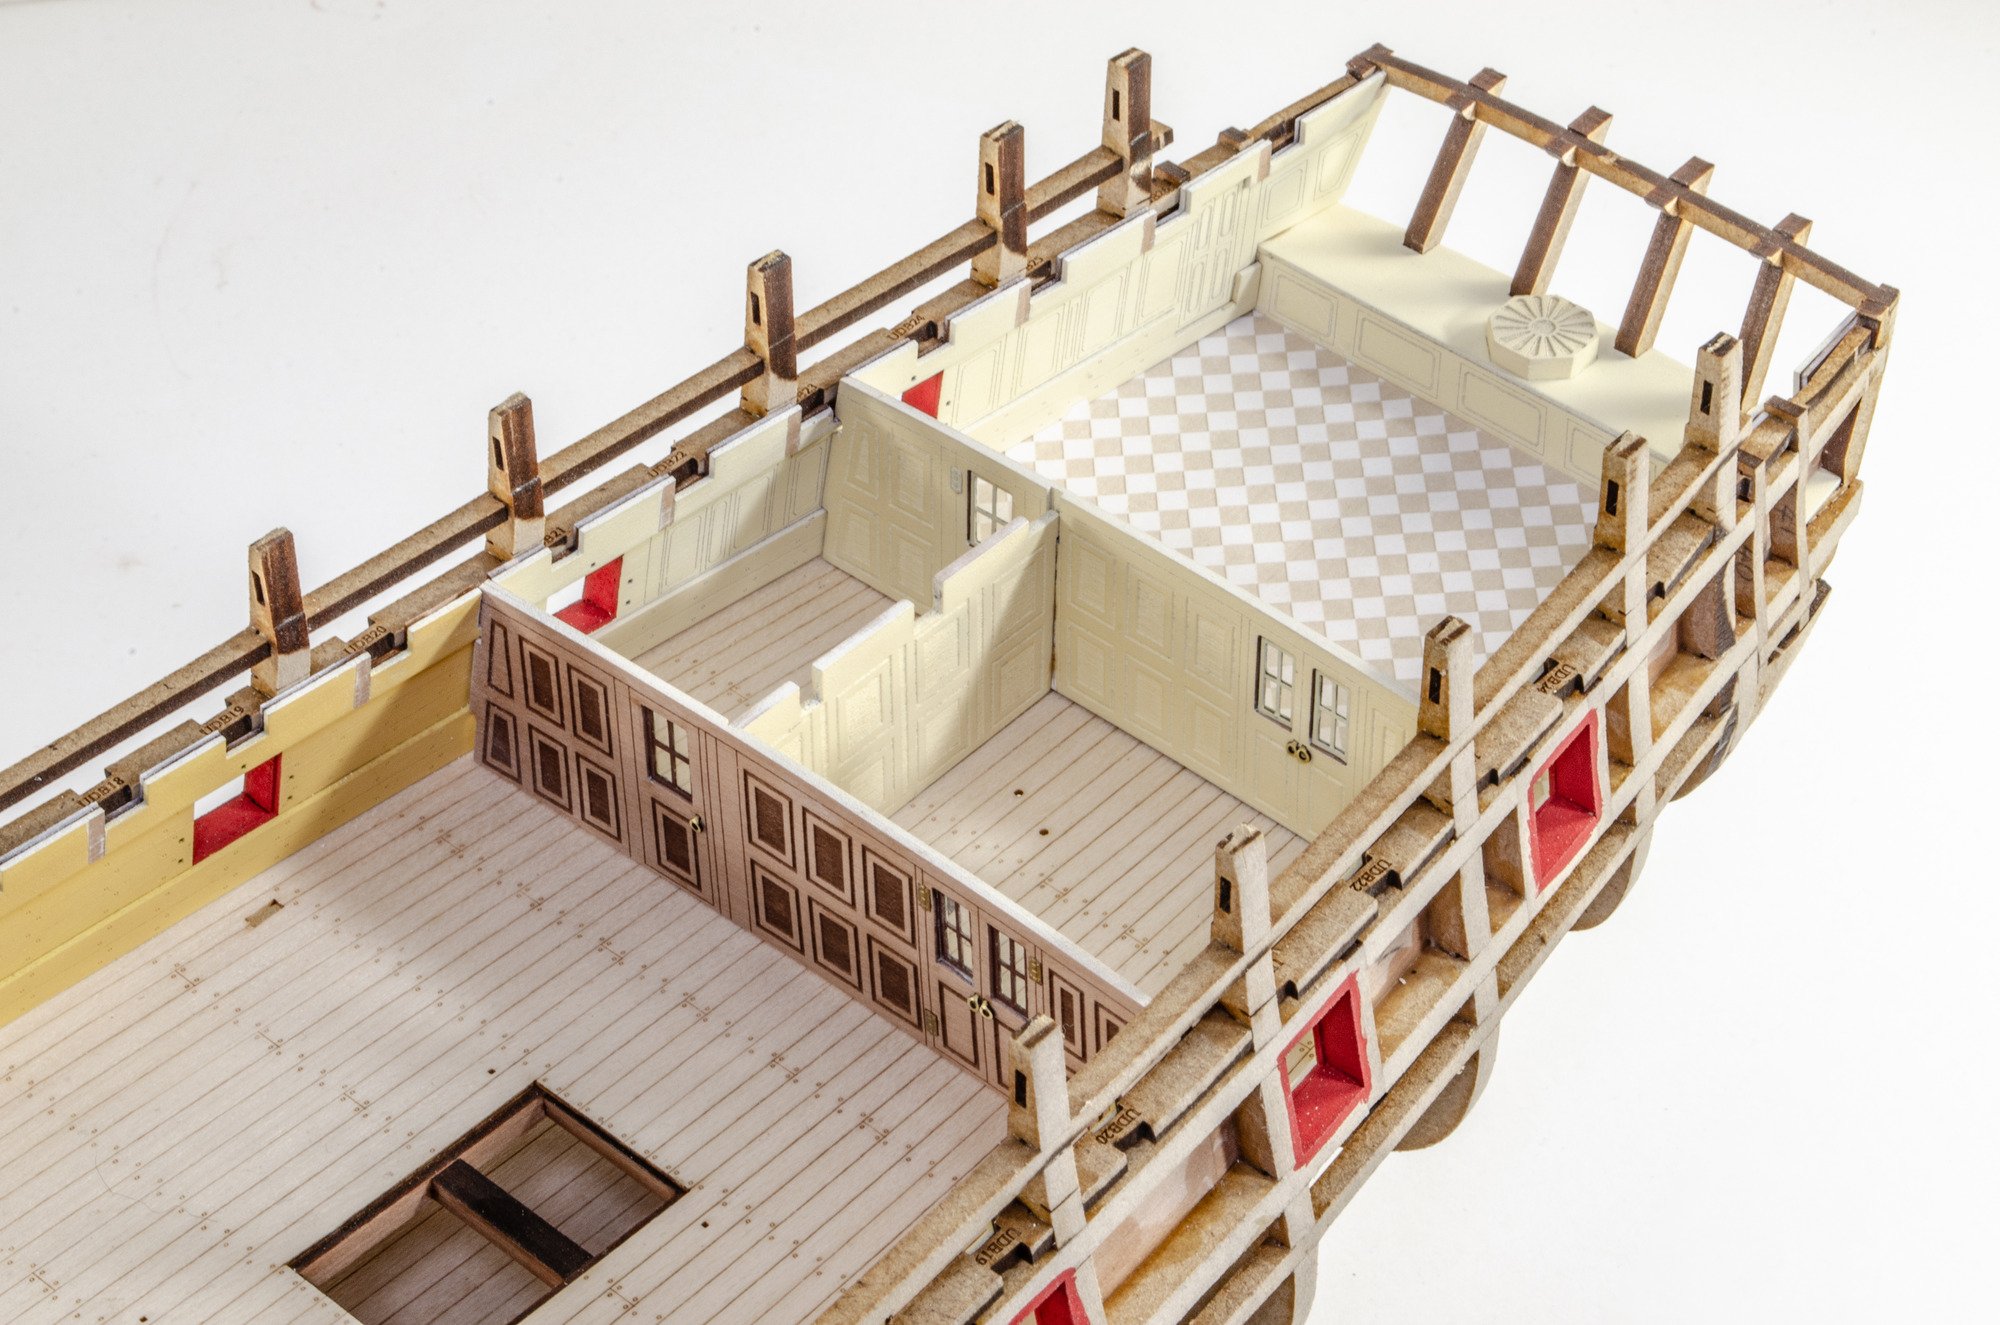
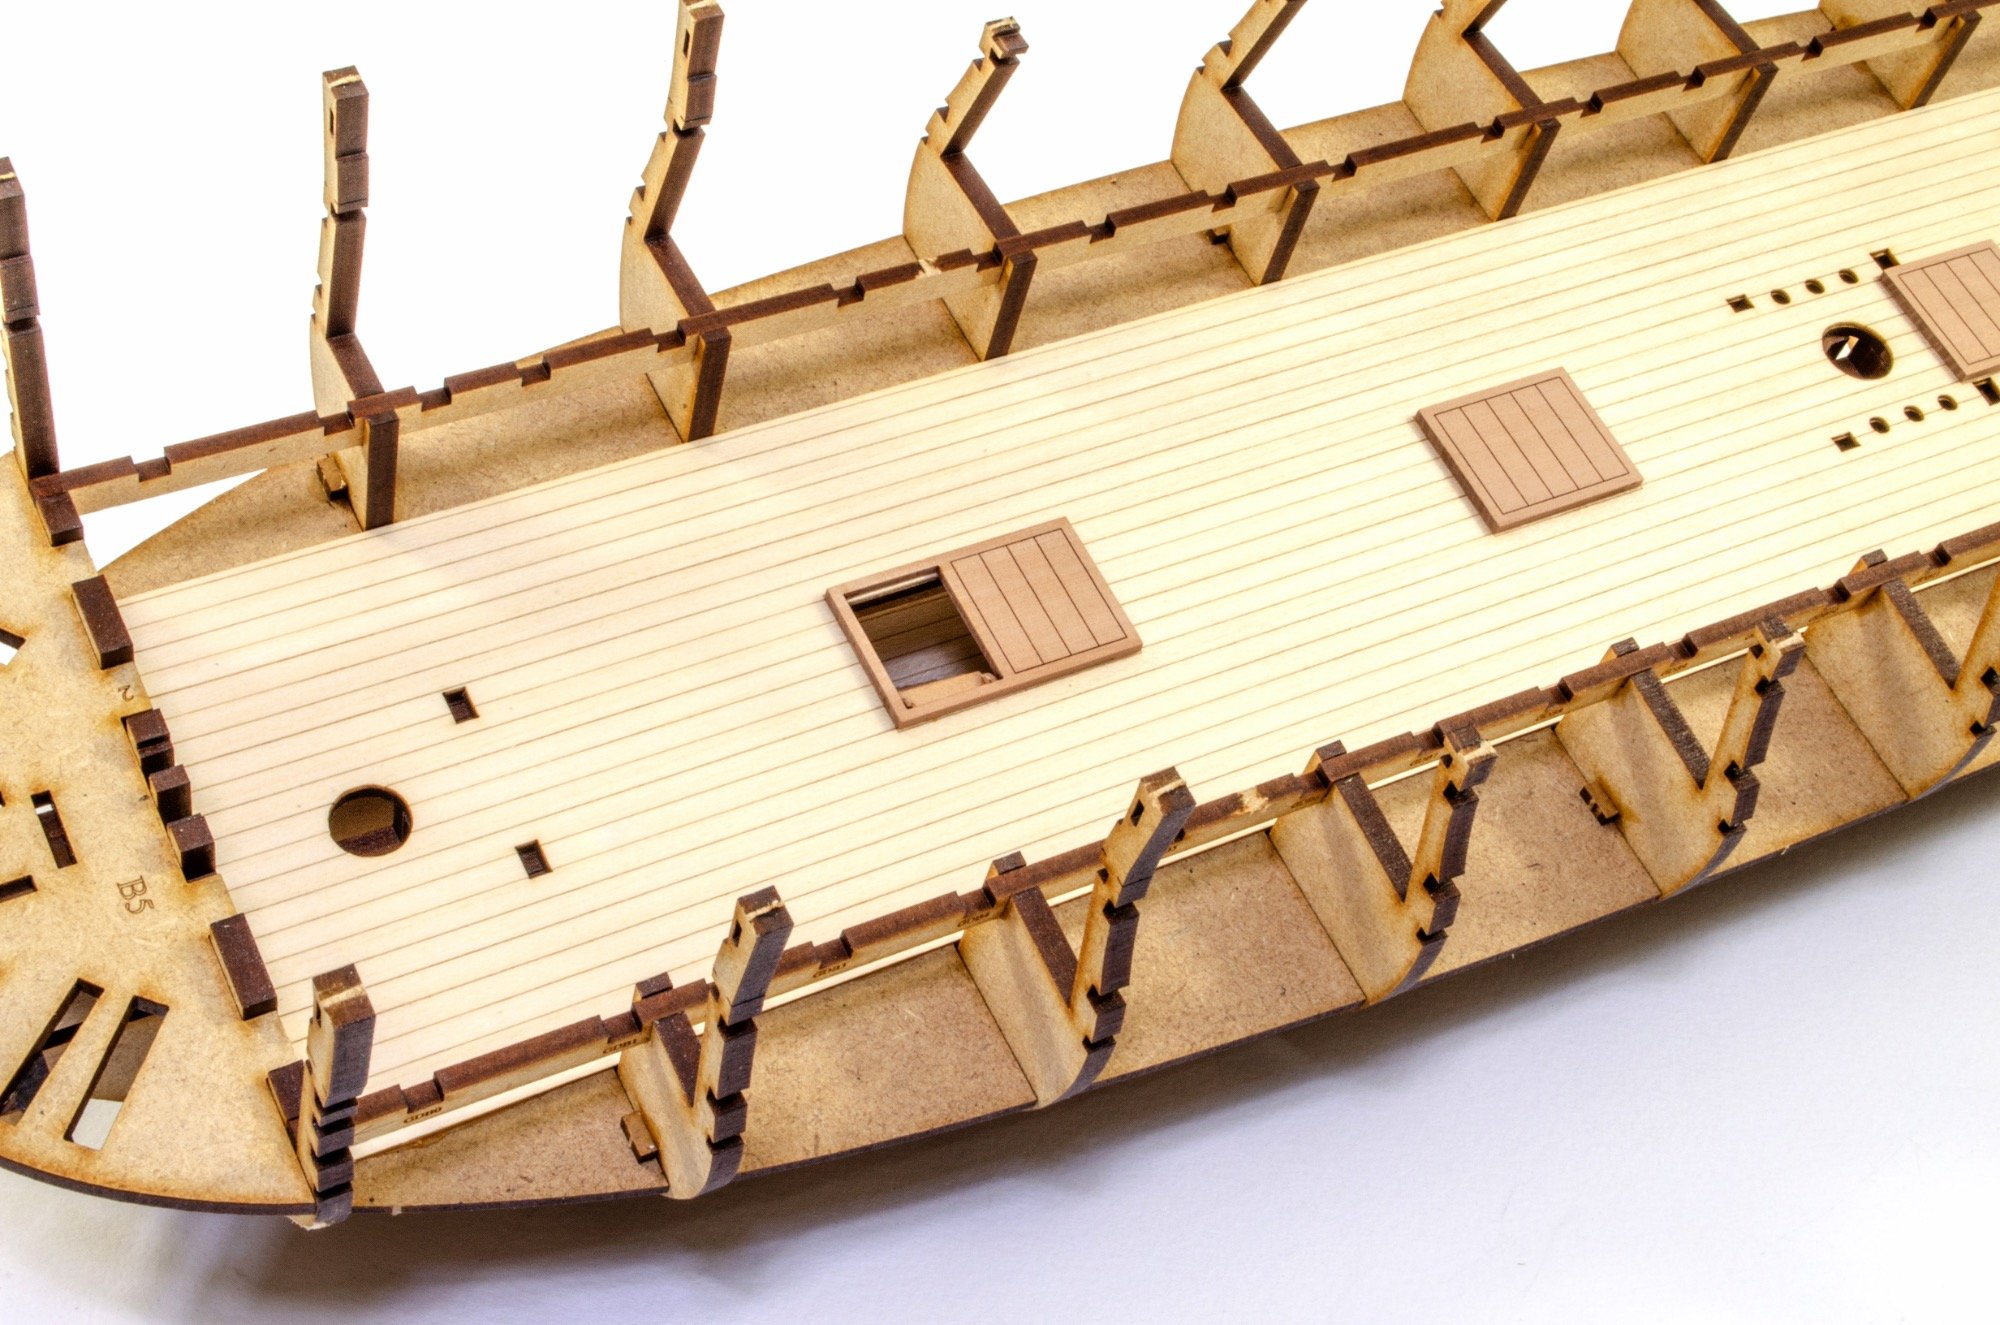
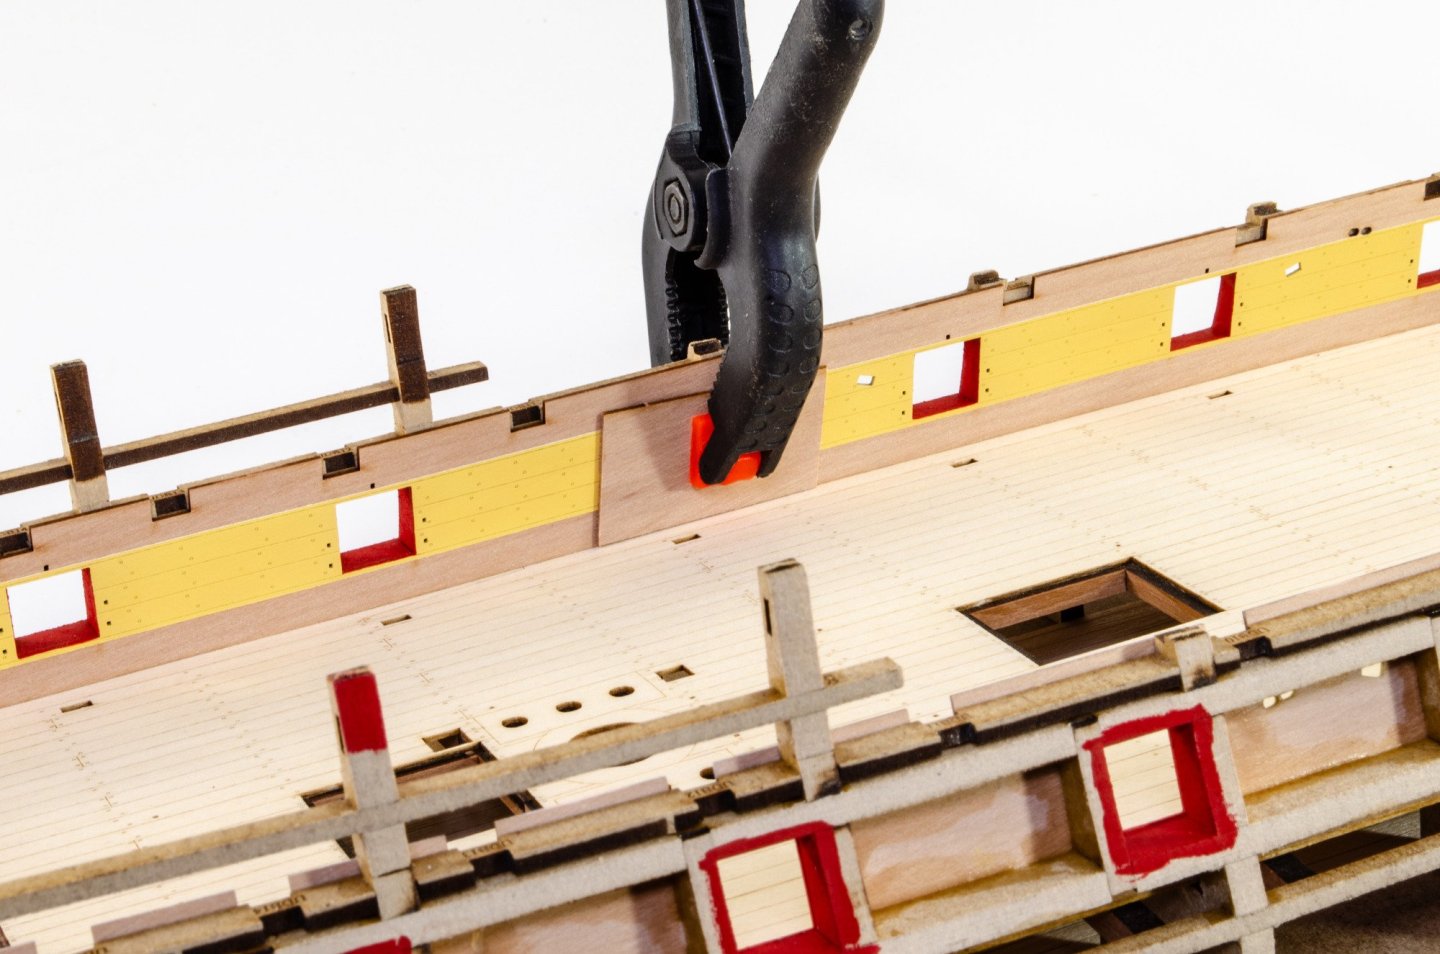
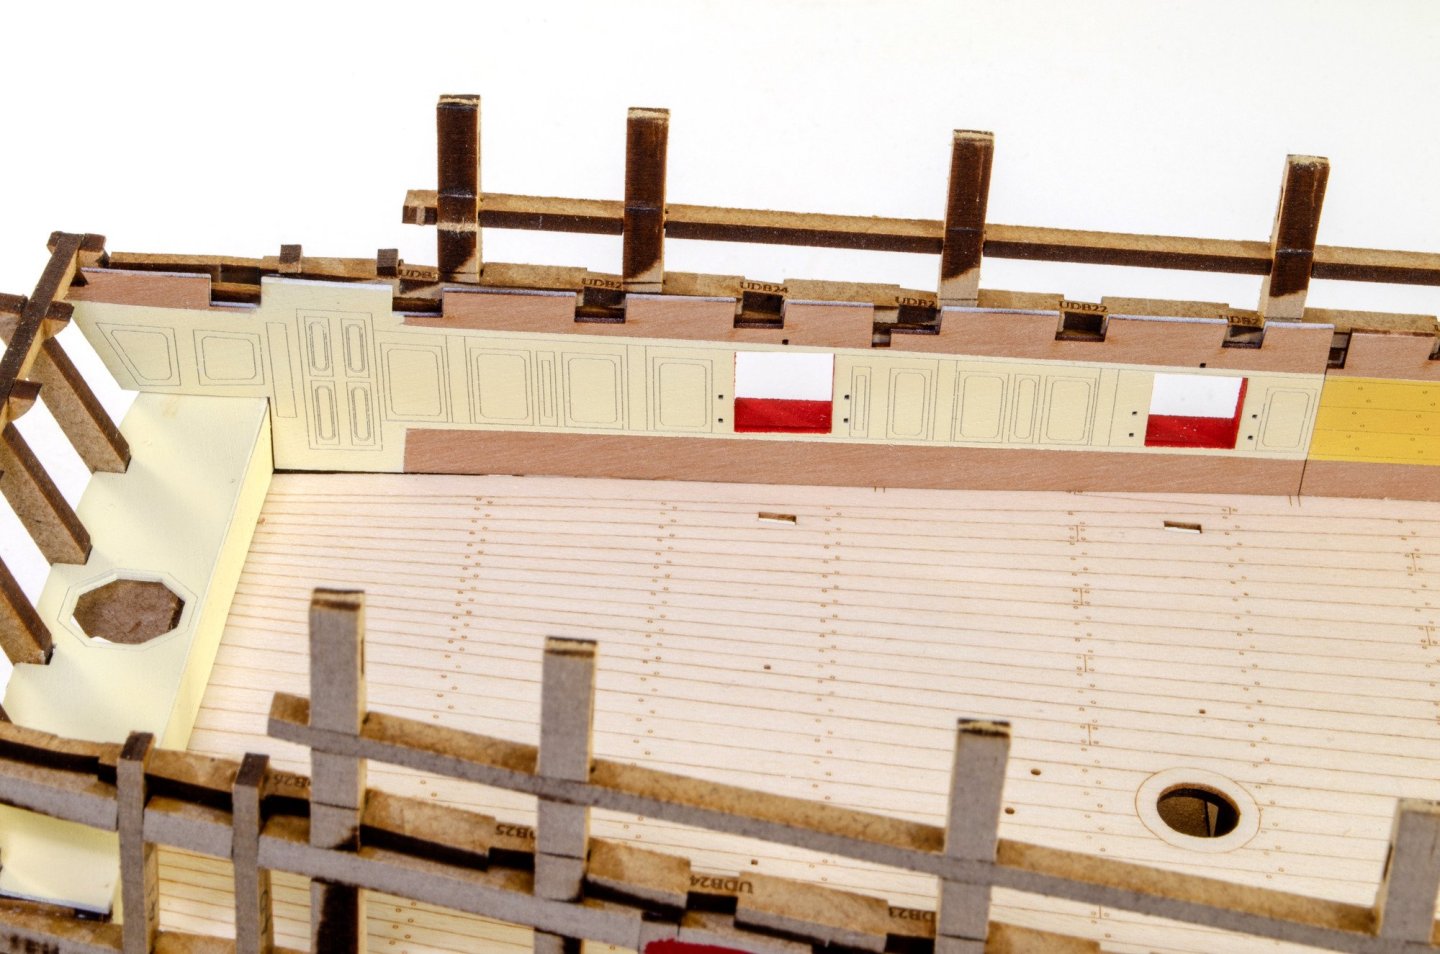
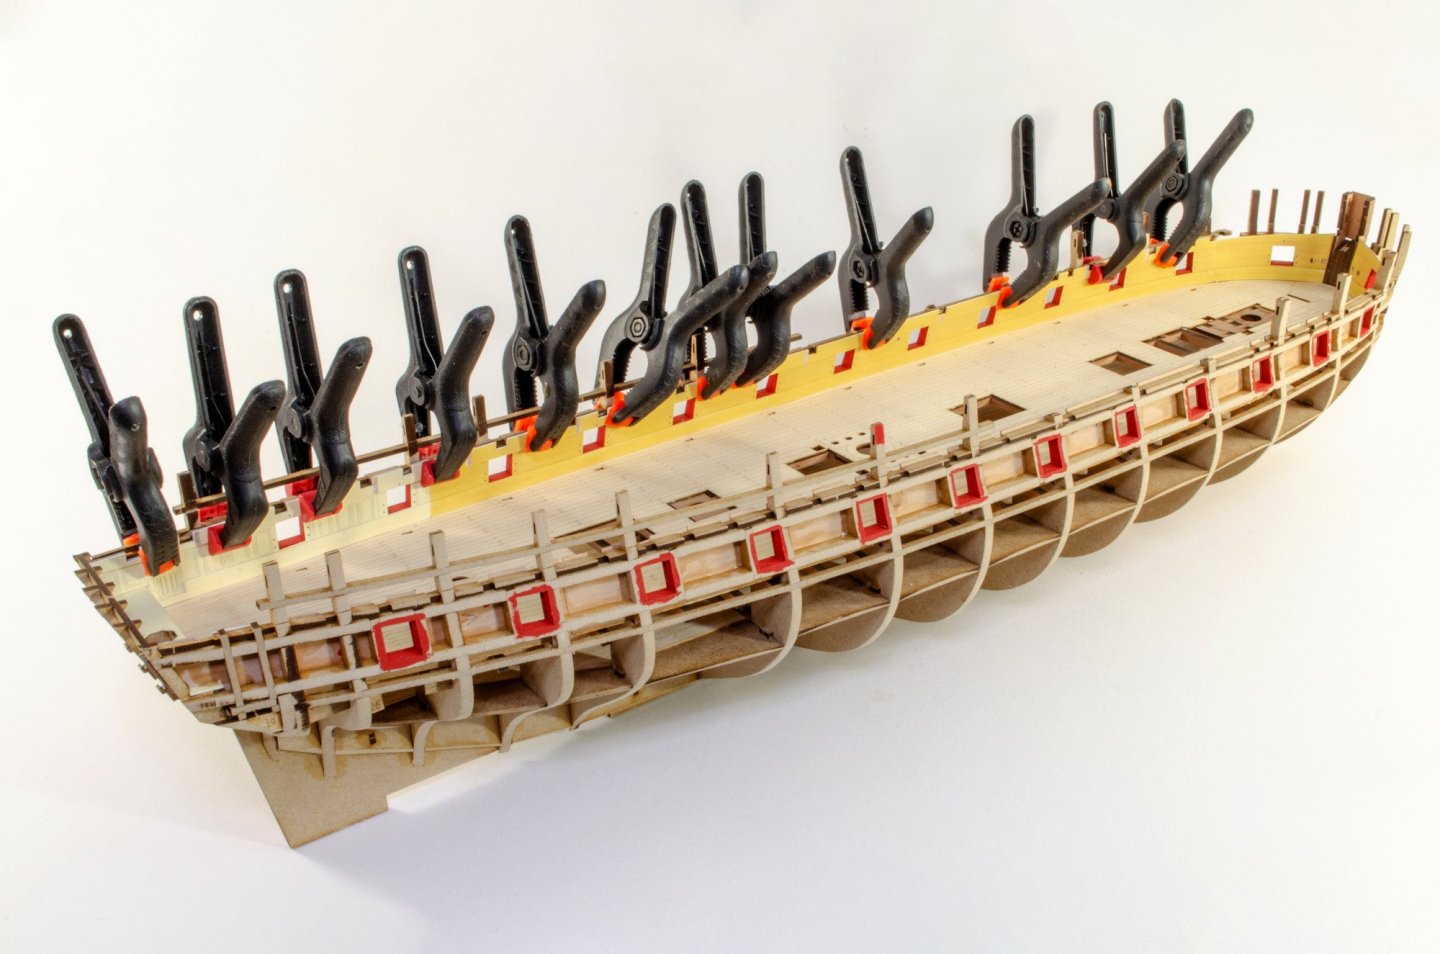
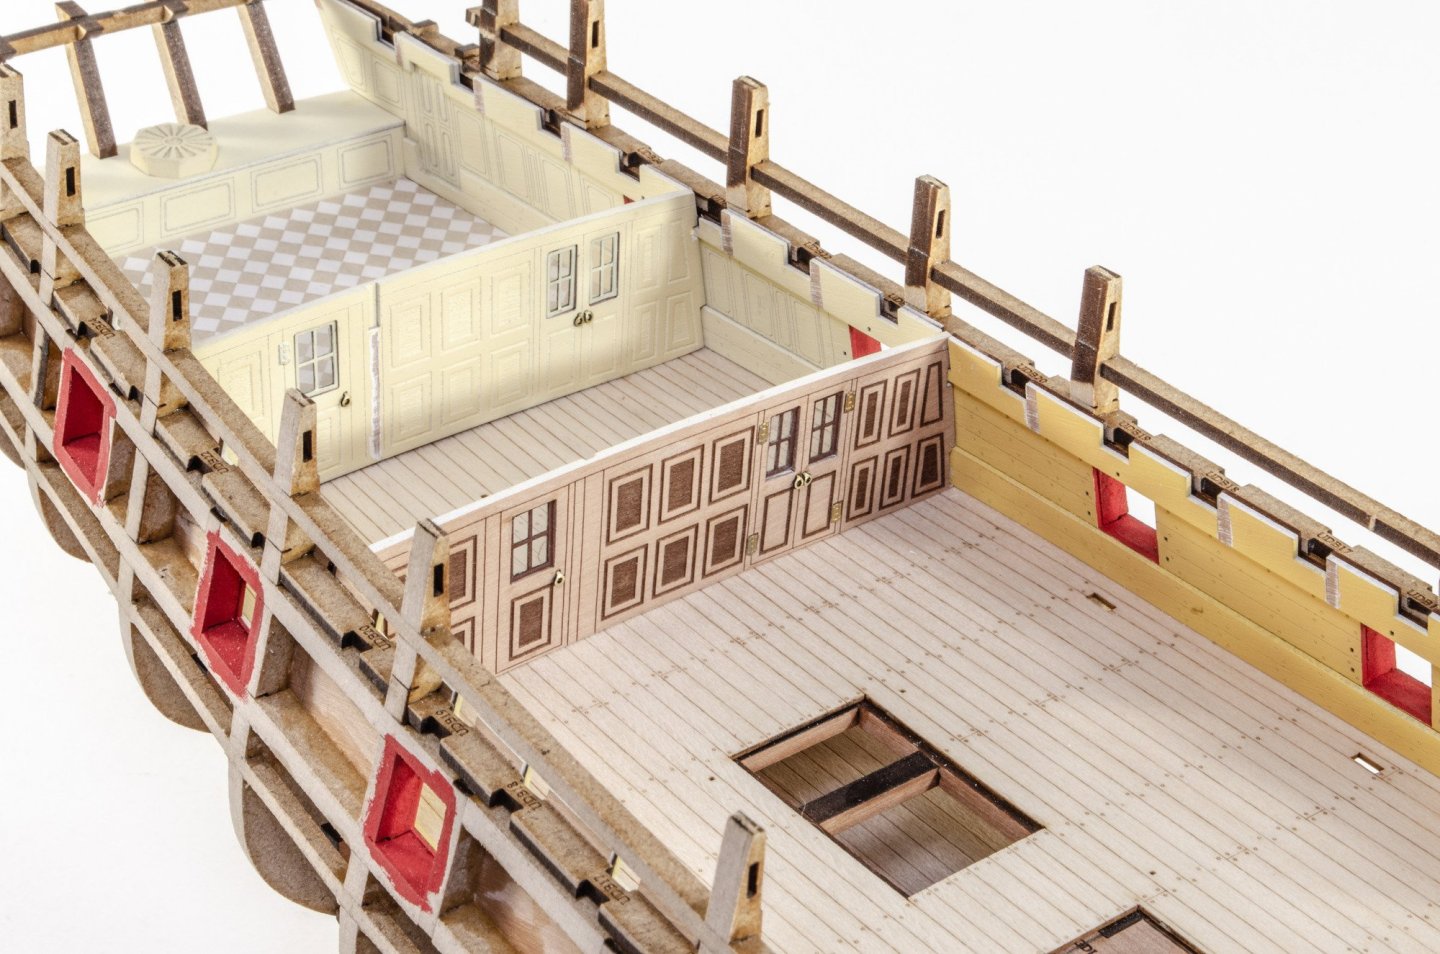
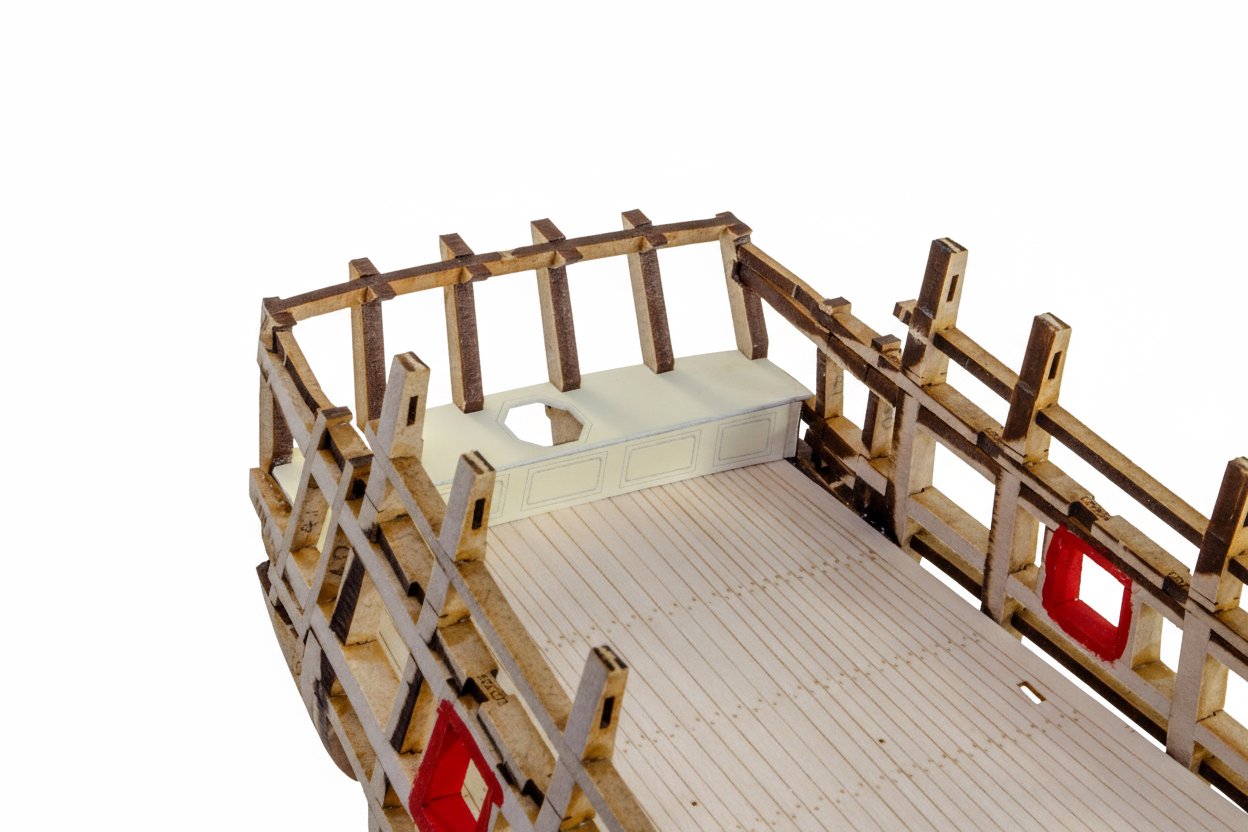
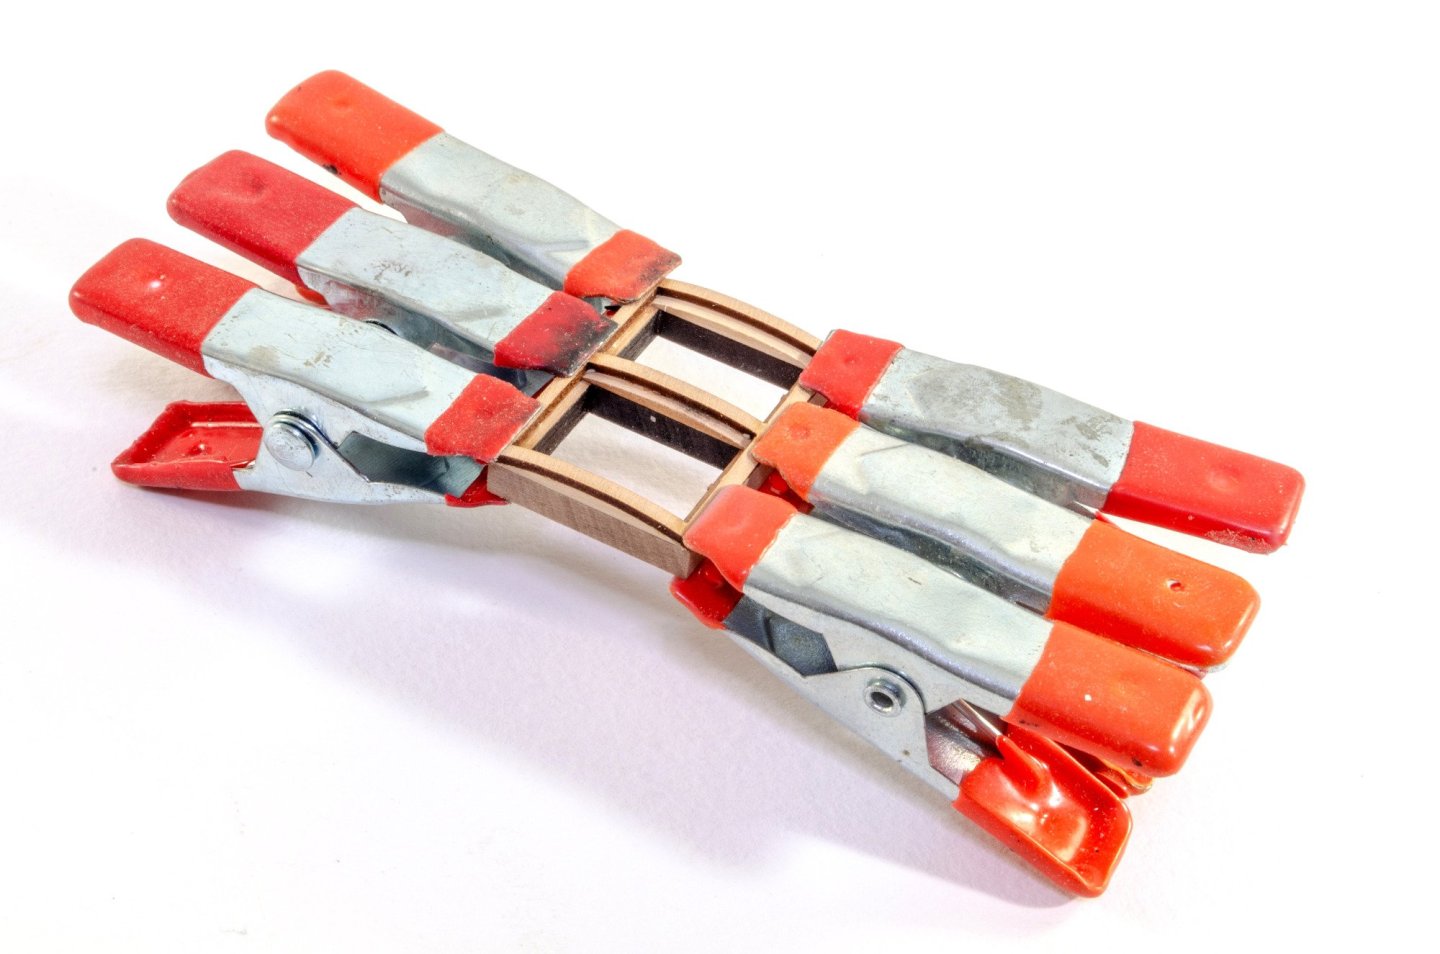
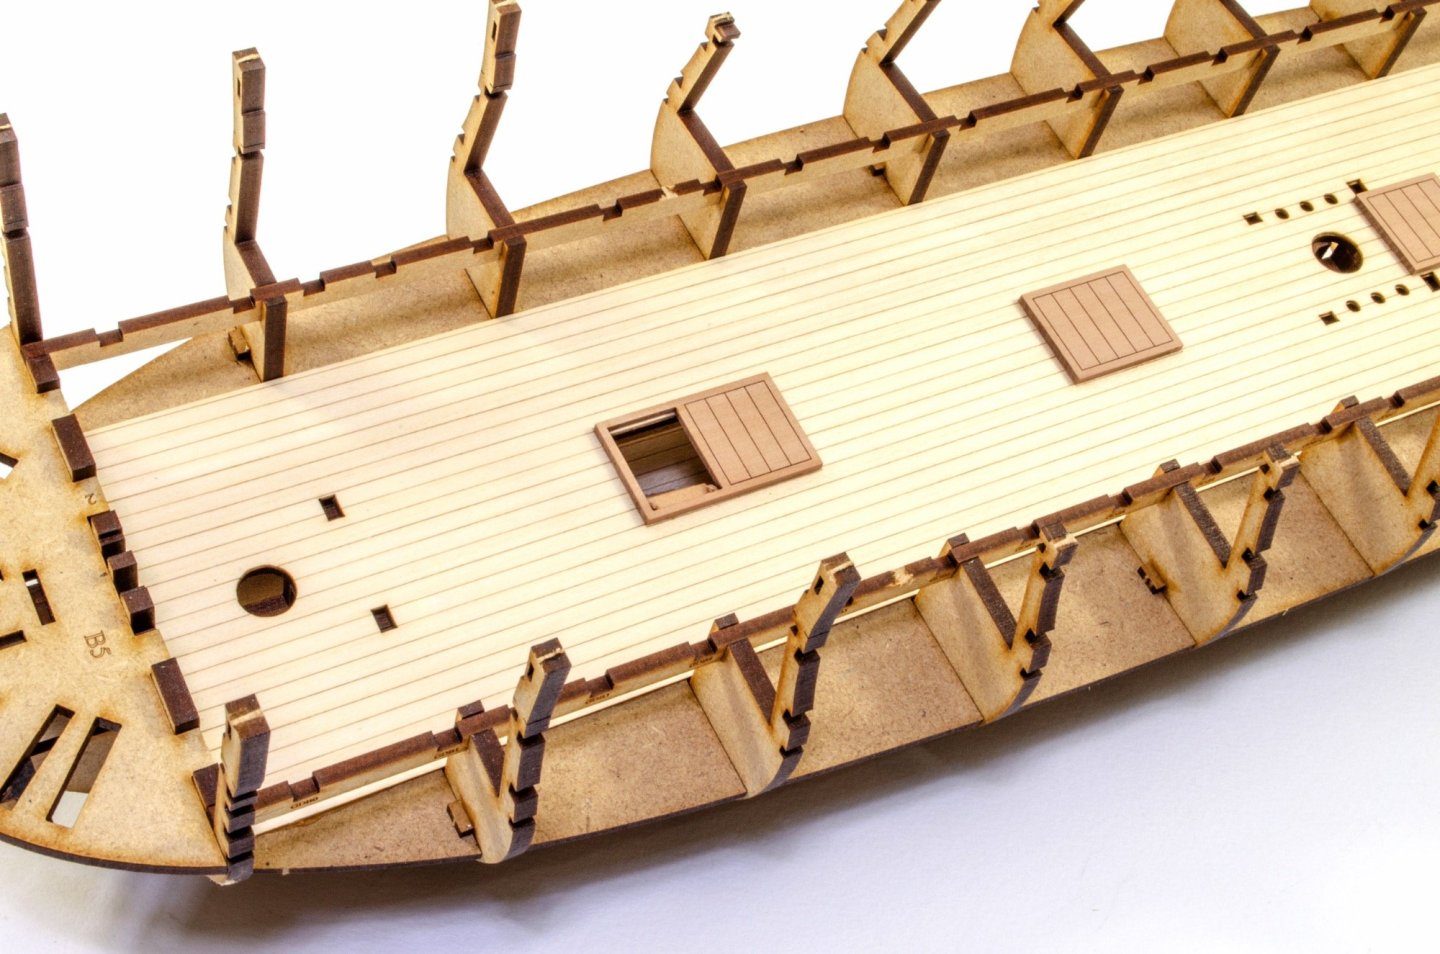
 Ok, I appreciate I'm actually going back a few stages, but the last update simply showed the stage where I was currently at. This update and a couple more or so this week, will bring the build right up to date to where I am at this moment, with the upper deck beams in place and the inner bulwark sandwich temporarily in place. Surprise has no ply sub-deck, and this makes fitting the engraved lime deck extremely easy. Just a bead of glue was applied down the centreline and then the deck was dropped into place and aligned using dowels and a couple of bitt posts. Some small weights were added to the centreline, ensuring good adhesion. Some cabin work is now added. Here you see the sill at the stern. The inner bulwarks are now pre-painted and then fitted. The unpainted areas are for the spirketting etc. After dry alignment, glue is painted into the rear frame areas. This was you get everything right first time, with no compromise. Scrap wood is used to protect the painted areas from the clamps. I painted the rear cabin in a homemade ivory colour, made from white and a touch of ochre. The inner bulwarks are now at completion. The bulkhead screens are now built and fitted with the PE window frames, complete with 0.2mm acetate panel fitted between the PE parts. More in a day or two...
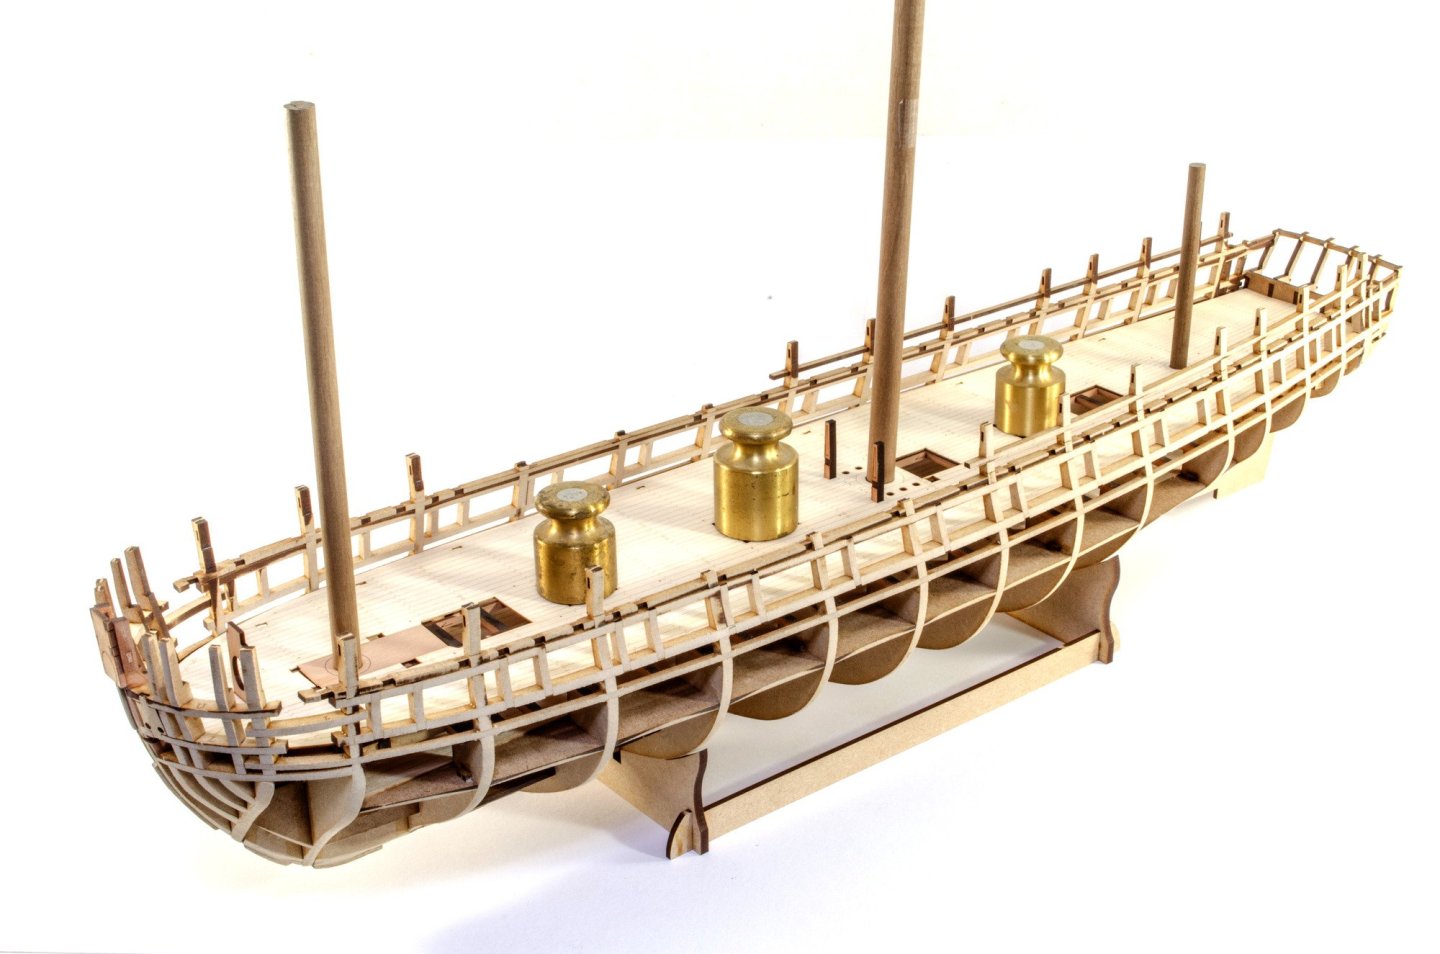

- 145 replies
-
- 39
-

-
I did feel the need to remove some comments. Some members need to keep their thoughts in check.
- 104 replies
-
- 11
-
-

-
I've hidden some comments. Let's stay on track please.
-
Browsing Experience
James H replied to mrcc's topic in Using the MSW forum - **NO MODELING CONTENT IN THIS SUB-FORUM**
Glad it's sorted! -
Browsing Experience
James H replied to mrcc's topic in Using the MSW forum - **NO MODELING CONTENT IN THIS SUB-FORUM**
Can you flush your browser cache and cookies? Try with a different browser too and let me know what happens. -
It's not uncommon for companies to keep their development quiet until an announce close to release. I actually suggested to Chris about 4yrs ago about keeping mum for the largest part of development but I feel he's was right about the direction he took. With projects like Surprise, Indefatigable, and Sphinx, the R&D is extremely expensive. Many modellers don't realise the ongoing costs of a project, and the companies reliance on existing kits to help fund stuff like Surprise etc . It's only natural to rethink and do what most other companies do. I will still do a build log though, but not publish until a kit is announced....then it will be a busy and intensive build log period!
-
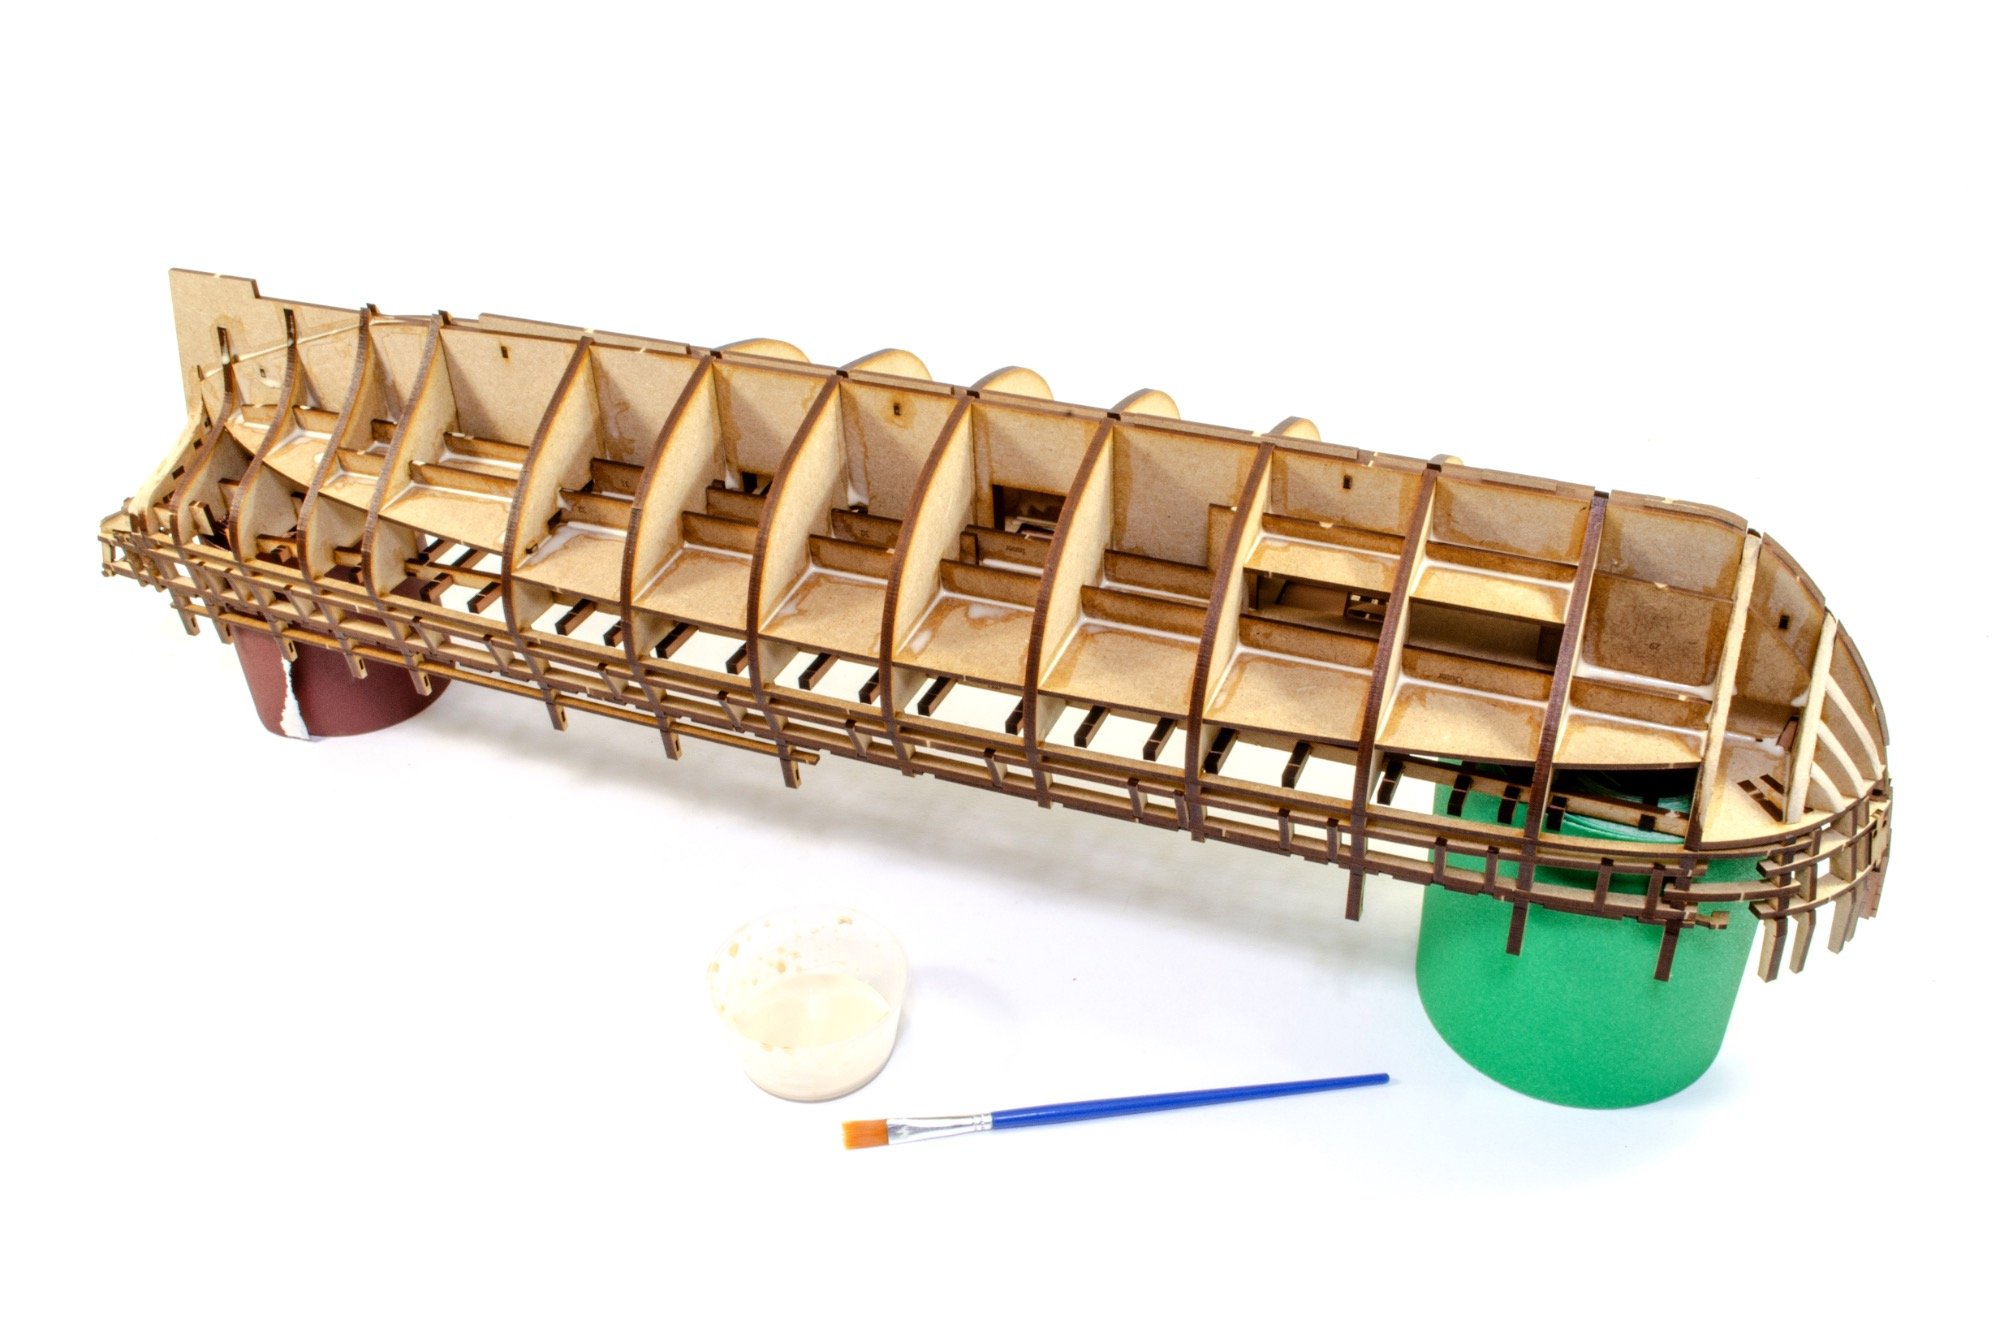
The deck is fitted out first as deck beams need to be fitted over this area, followed by the jigs (again) which will maintain the widths/shapes as the hull is then planked and the exterior bulwarks added. You can always mask off the deck area while you work on the exterior.
-
Just a note. I painted the cabin areas in an ivory colour that I mixed from white, with a touch of ochre added. The subsequent deck beams and knees will be in a more pure white colour.
-
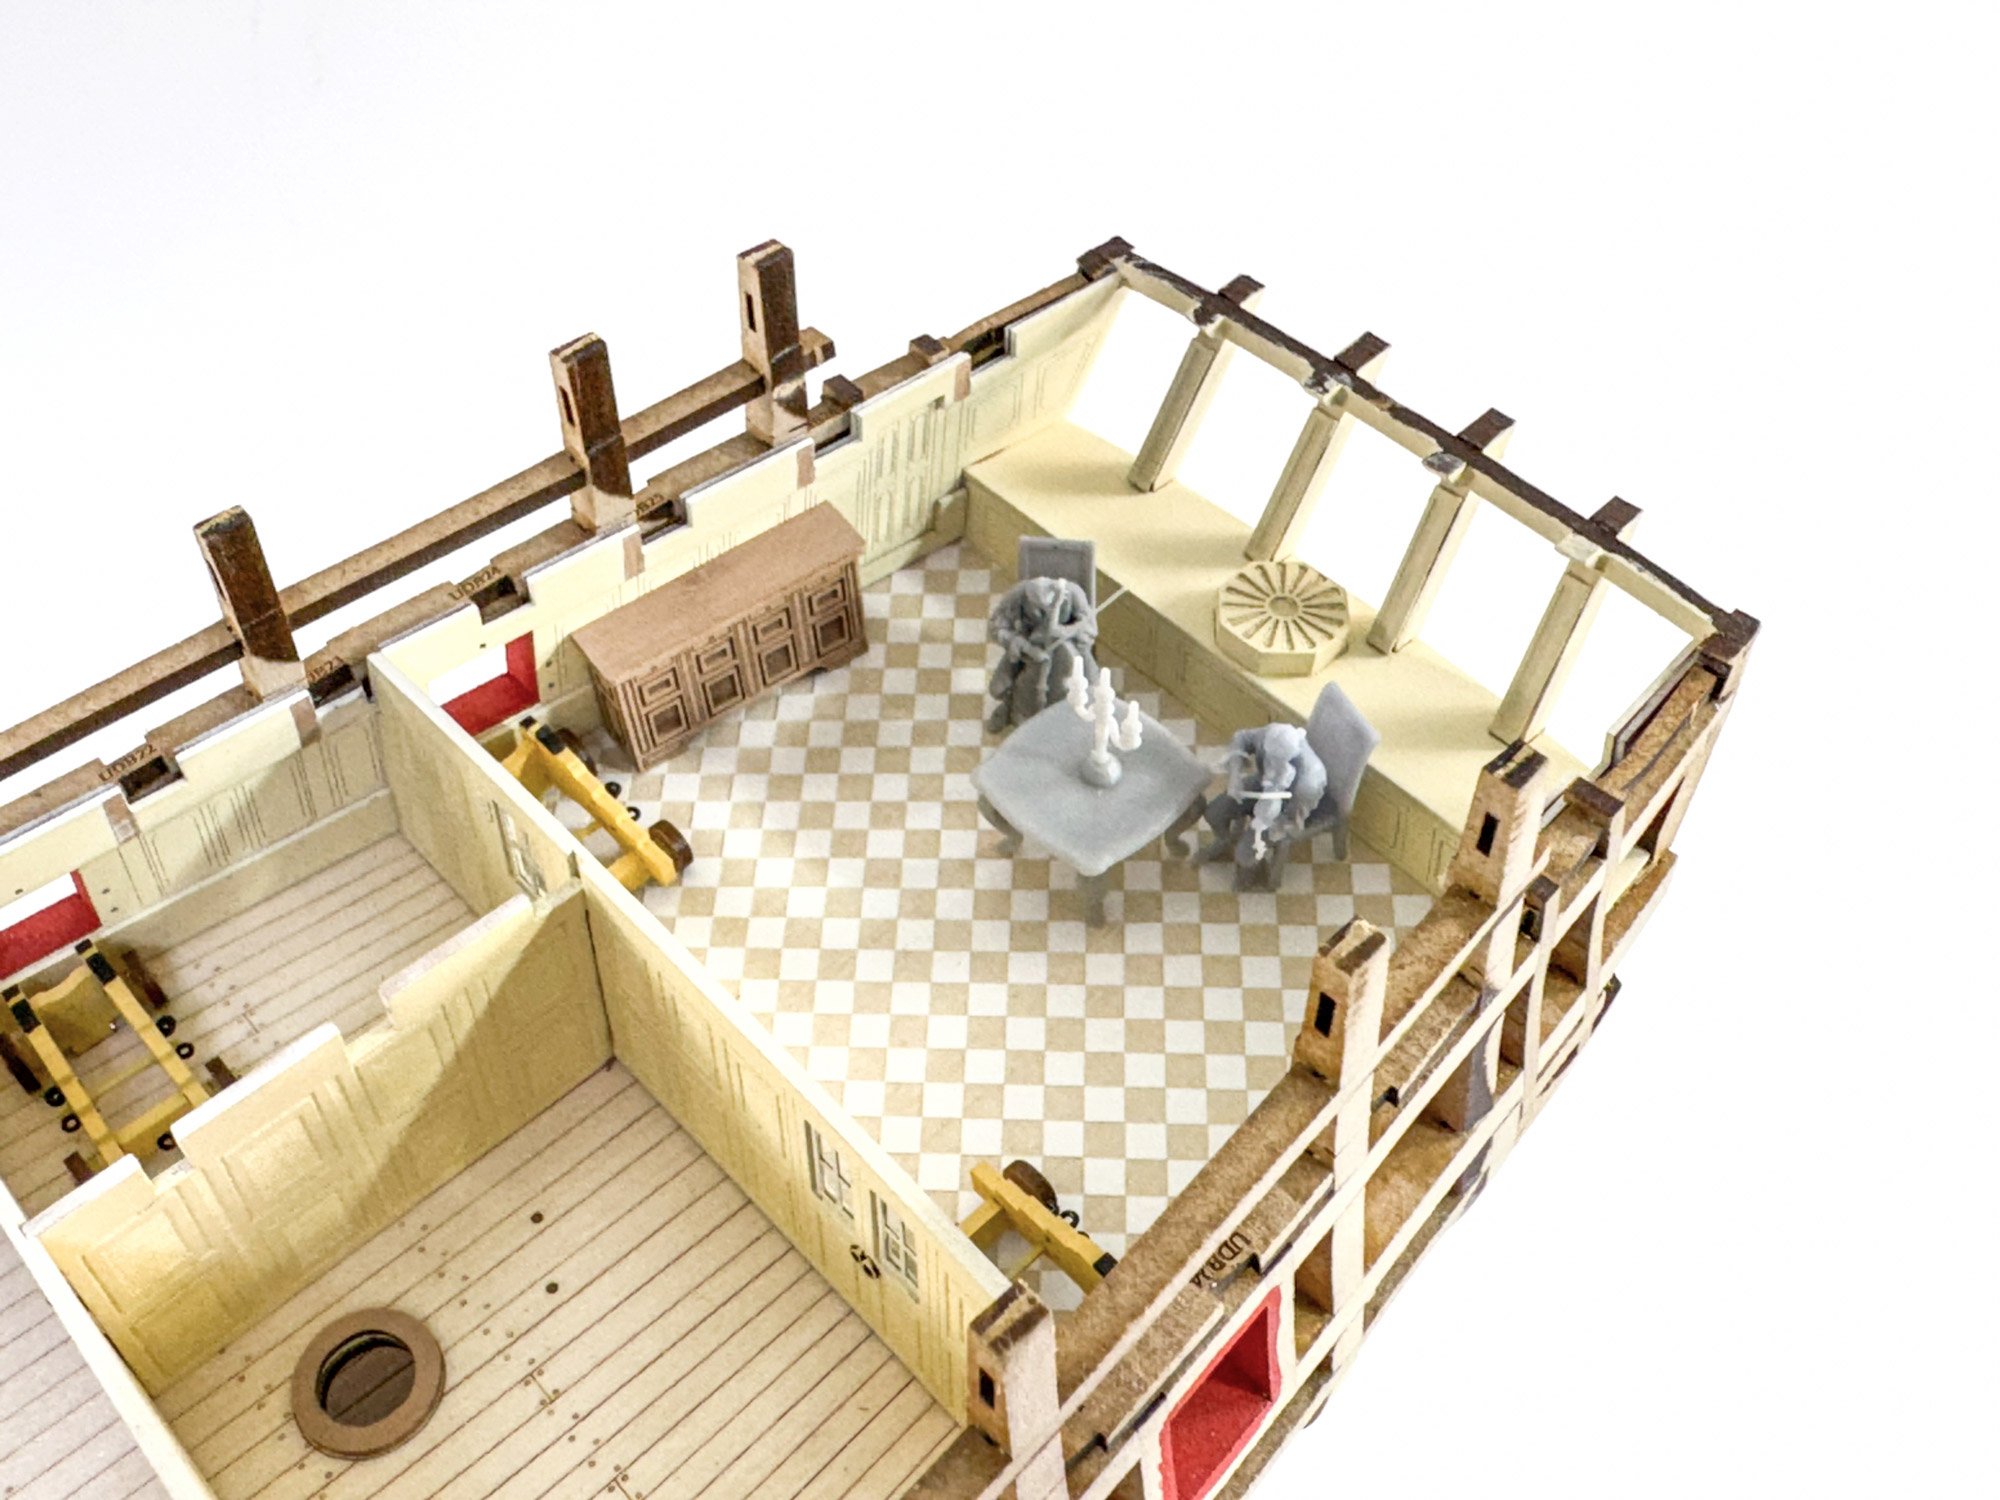
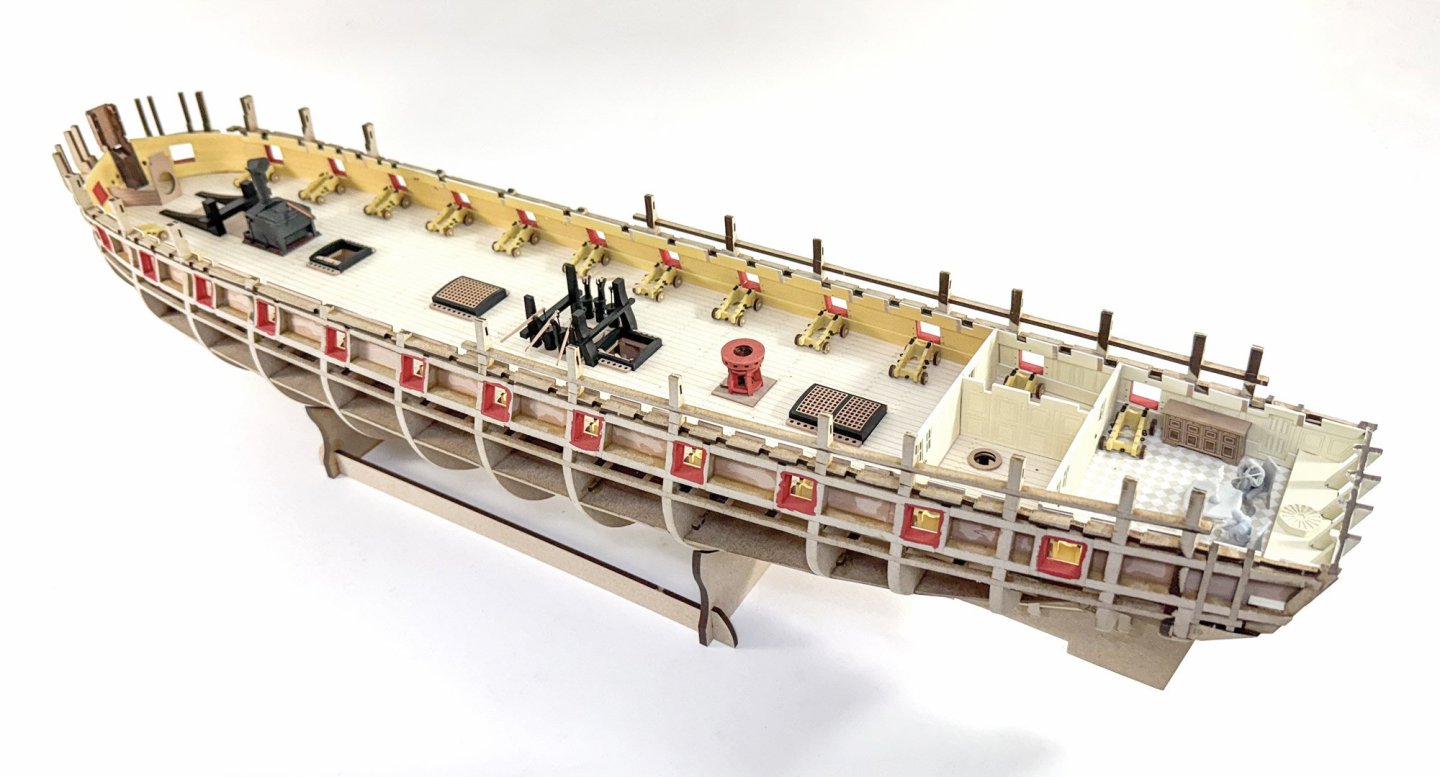
I'm aware that I need to get an update done. These photos represent what Surprise currently looks like. Over this week, I'll prep some closer detail shots of construction etc that got me to this place. As you can see, she's changed quite a lot. The fit has been great throughout. I also need to paint those figures too! Please excuse photo quality. I did these with my phone.


- 145 replies
-
- 34
-
-

-
Looks perfect to me!
-
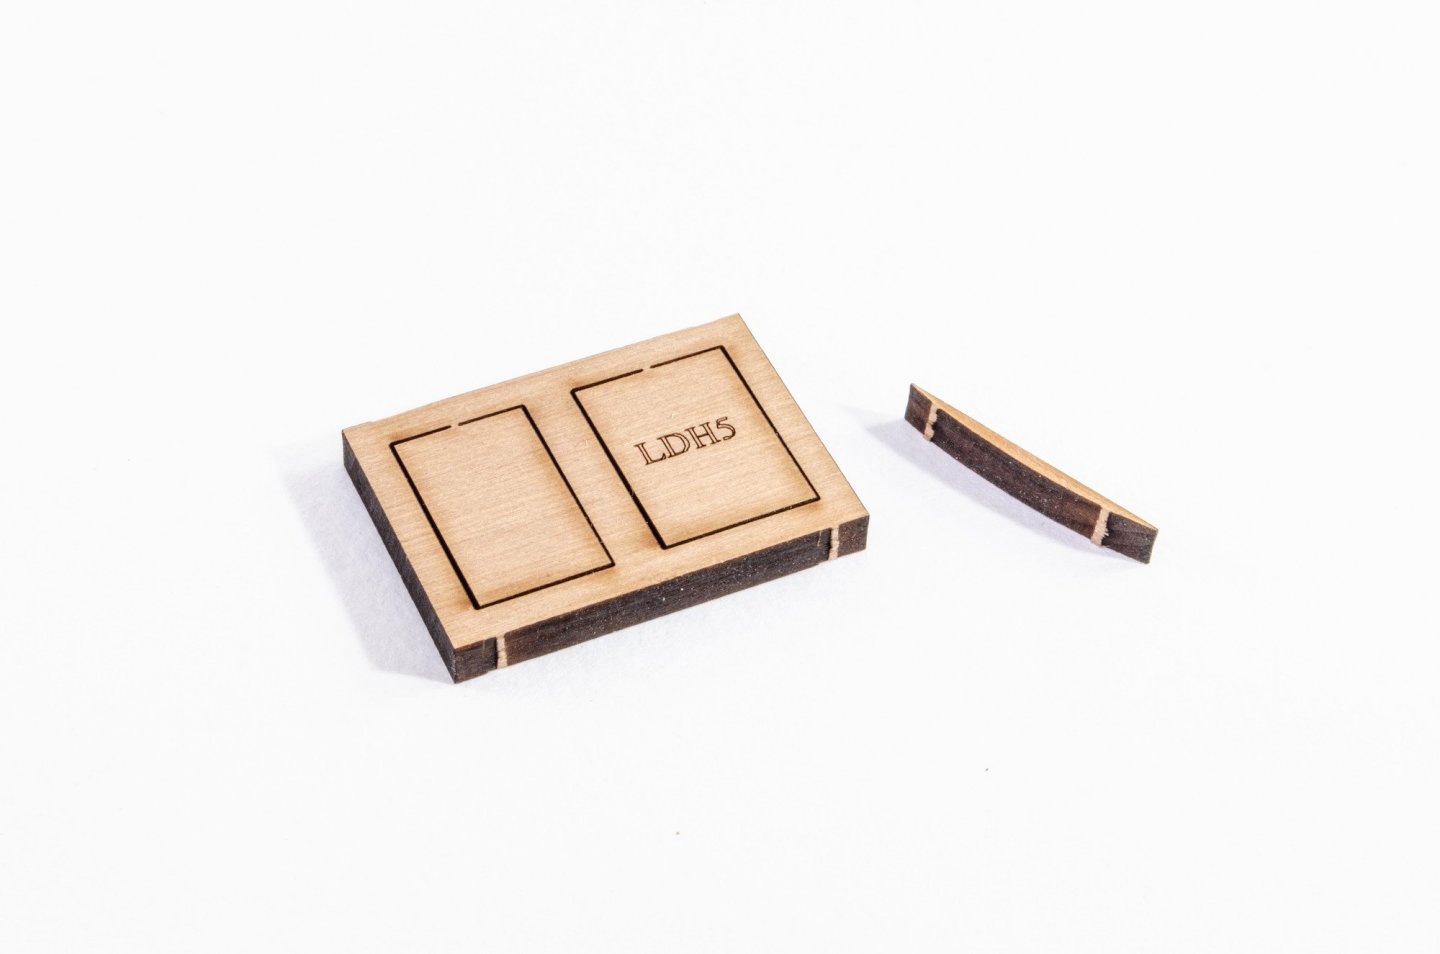
And these photo will need no explanation. These were made while waiting for other things to set etc. Until next time.

- 145 replies
-
- 39
-
-
-
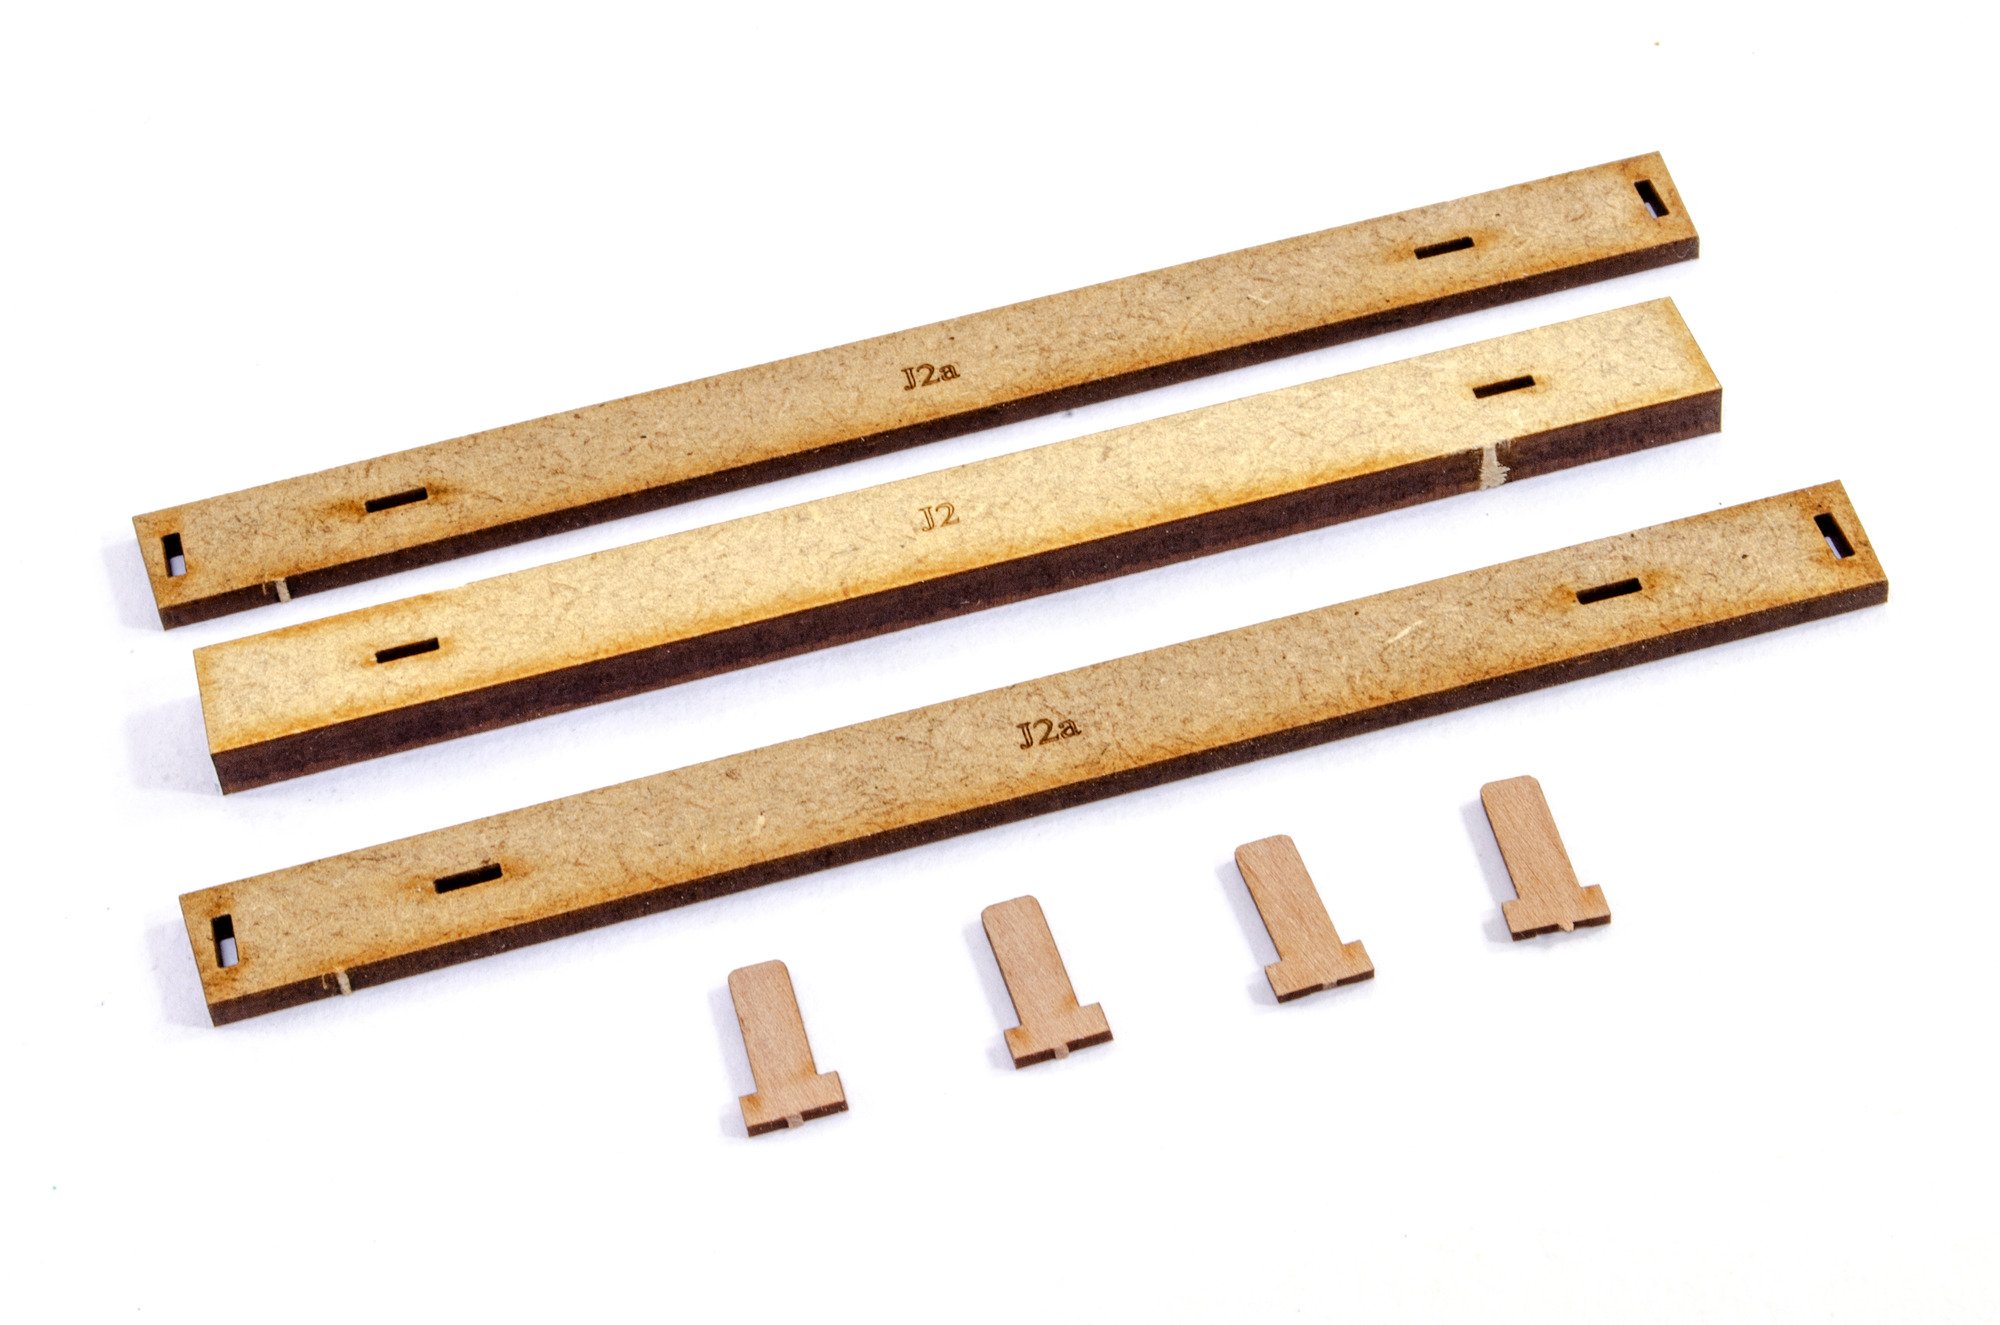
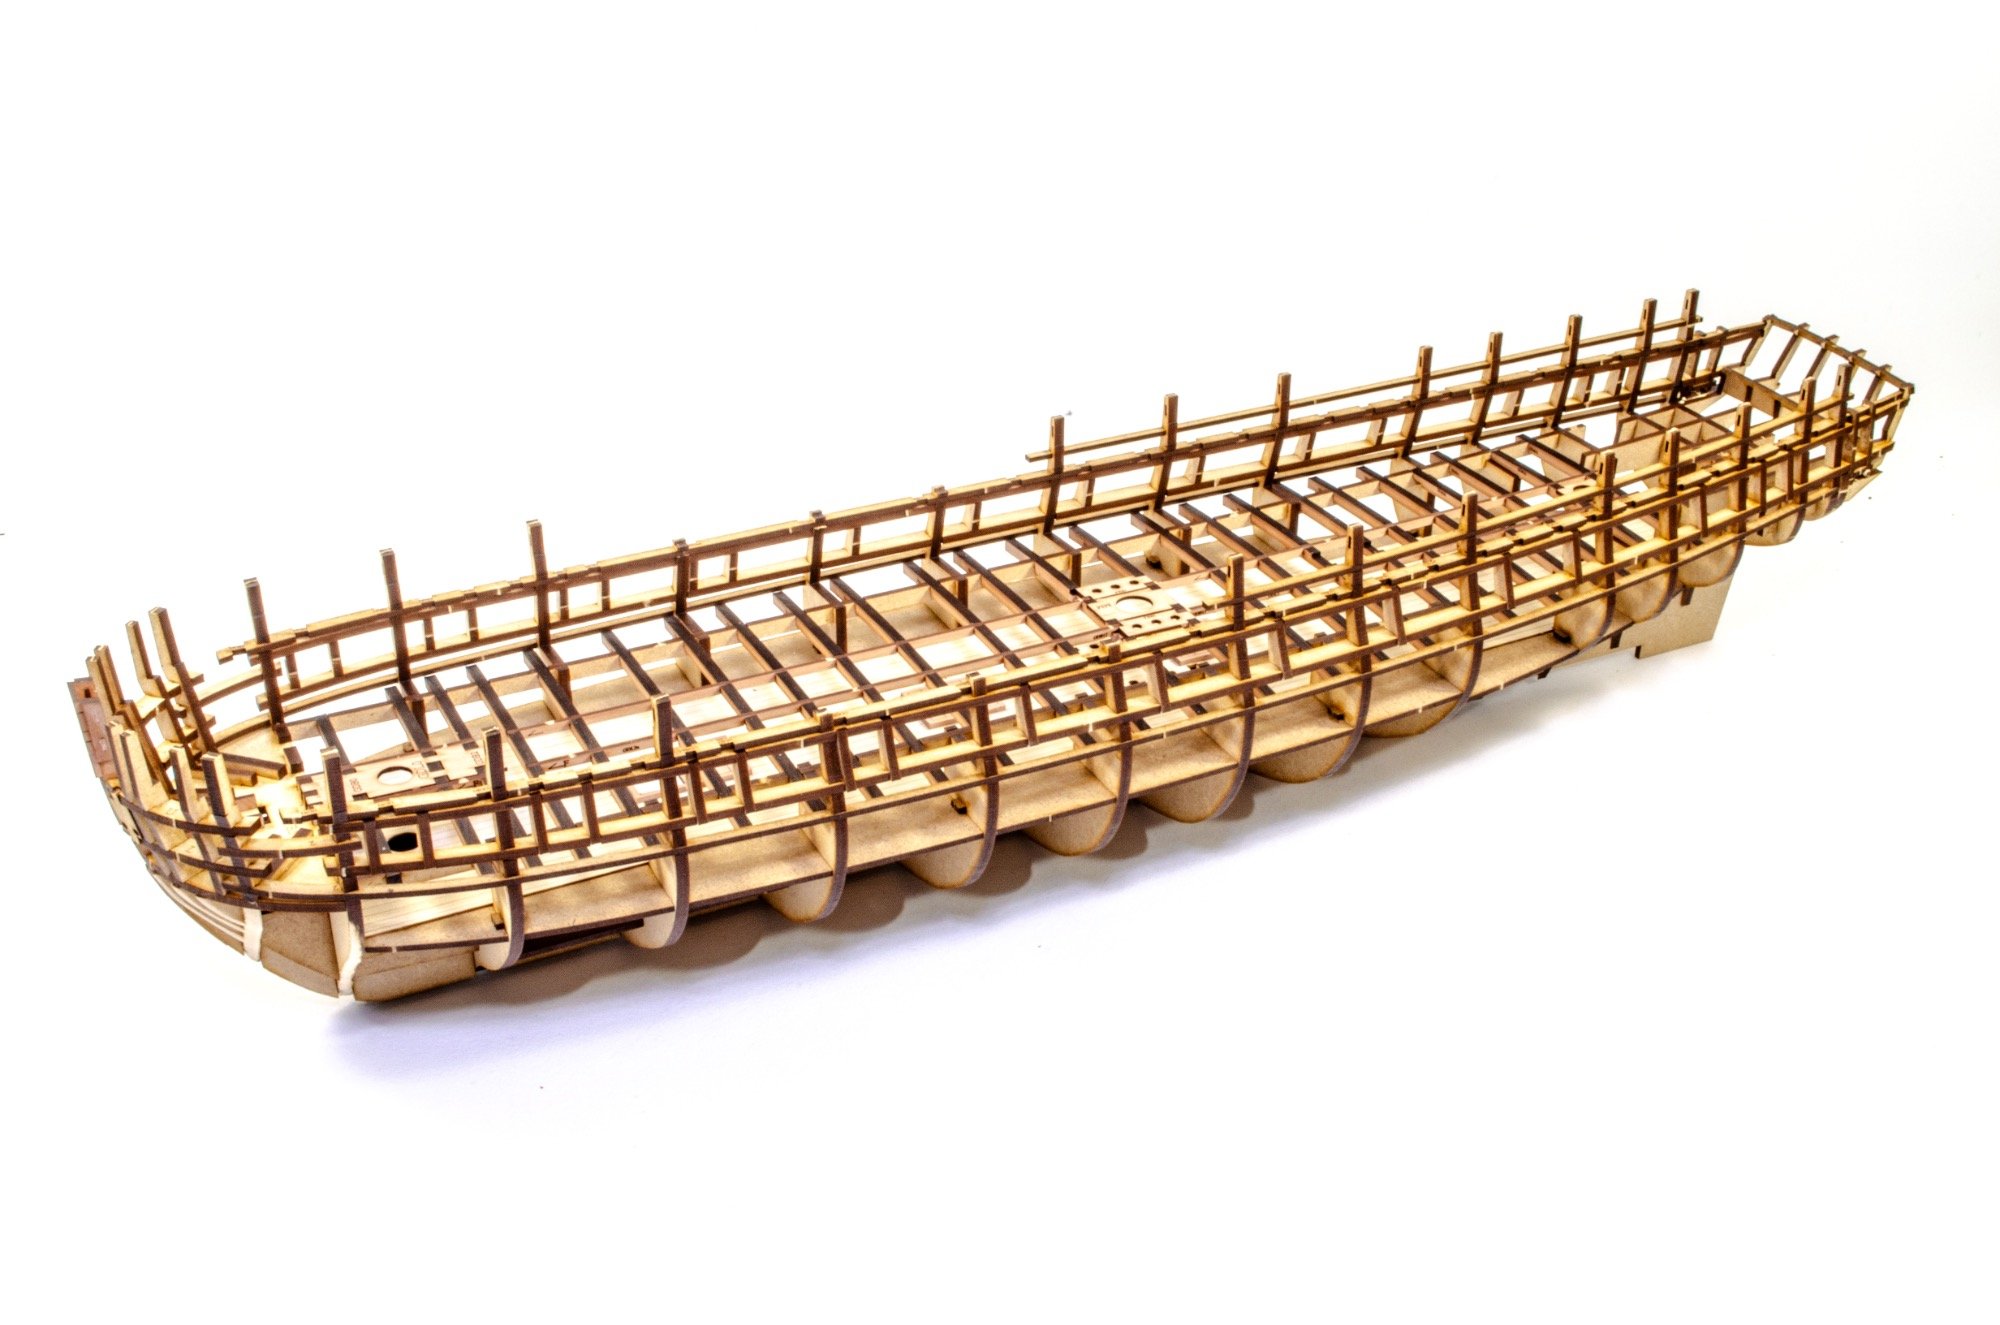
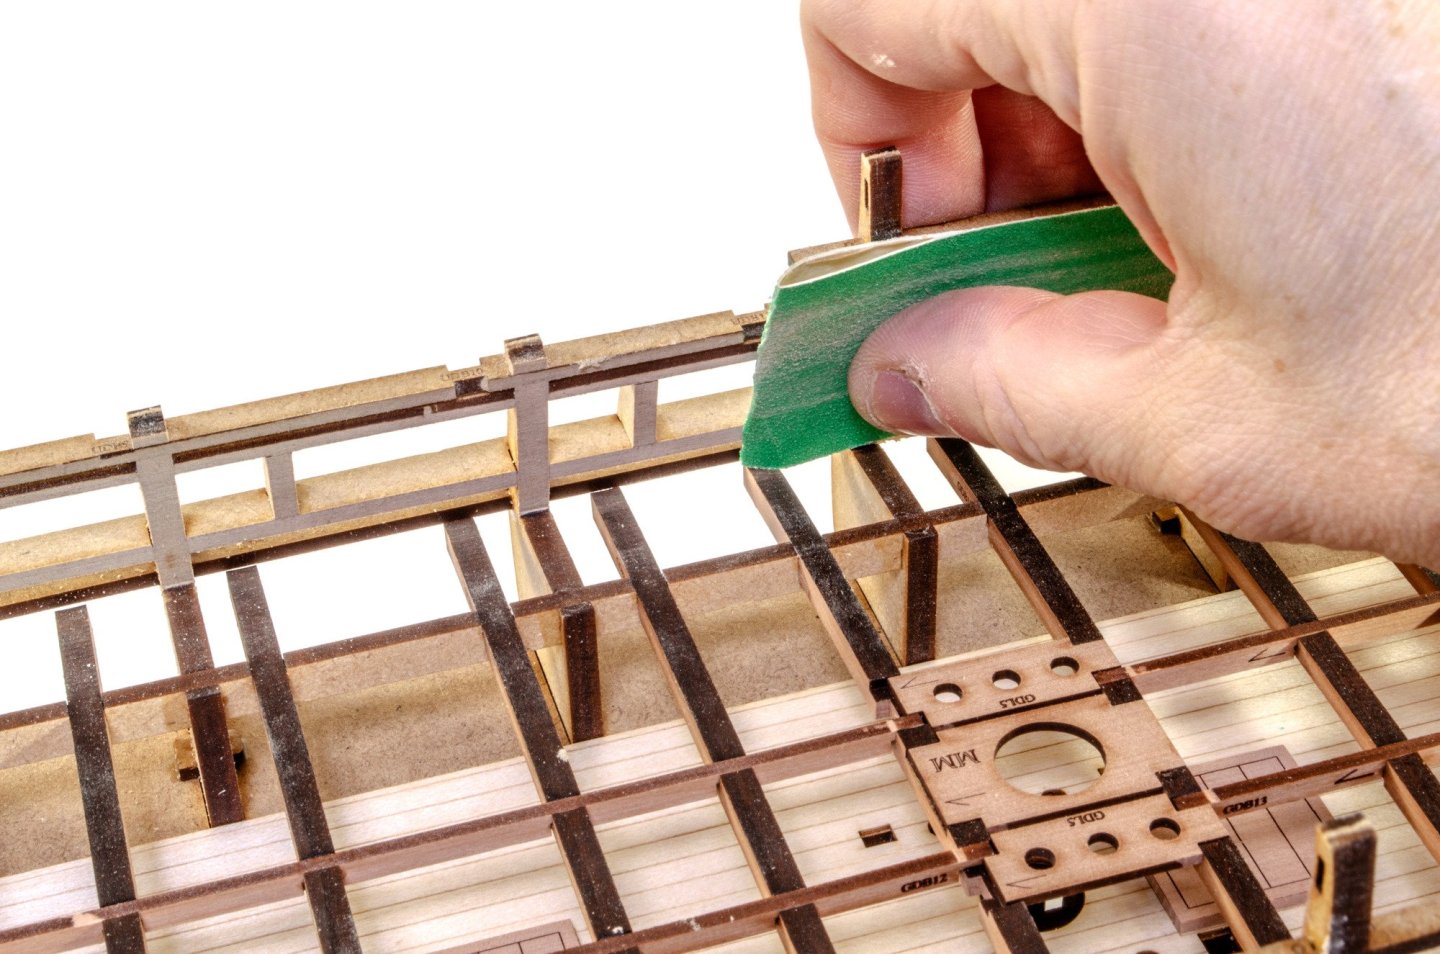
Time for an update. I've been away for just over two weeks and since returning, I've fought bad weather (for outside MDF sanding) and my head being crushed (metaphorically) from my new job. Ok, here we go. As the basic hull framing is now complete, it's time to prep it for the flat stuff (bulwarks, planks etc.). For this, I used 120 grit aluminium oxide paper, wrapped over a bit of thin ply. The inner bulwarks are easy to sand flat, with no protrusions etc...just a levelling of the various elements of the frame. Aware that the bulkhead ears are always going to be vulnerable in some modeller's hands, jigs have been supplied that you clip to the protruding ears. These are now clipped to each of those areas. The hull is now faired. To do this, I used a combination of sanding paper, sanding sticks, and a sanding mouse. A strip of lime was used to gauge removal of material. Before I do anything to the interior, I need to take the inner bow bulwarks and soak these so they can be clamped into the areas to retain their new shapes. These are left for 24hrs to return back to their pre-soak size. Pear does expand a LOT when soaked.


- 145 replies
-
- 26
-
-
Work area pictures only
James H replied to Johnny Mike's topic in Modeling tools and Workshop Equipment
A luthier too? -
Unicorn Models are a banned manufacturer on MSW. We neither allow or condone promotion or links relating to them.
-
and that’s an understatement!
-
Possibly ‘Advanced’
-
The decal sheets are printed by Eduard and Chris has already taken delivery of 500. If you want to use something different, maybe look at Letraset or something, or have custom decals made.
-
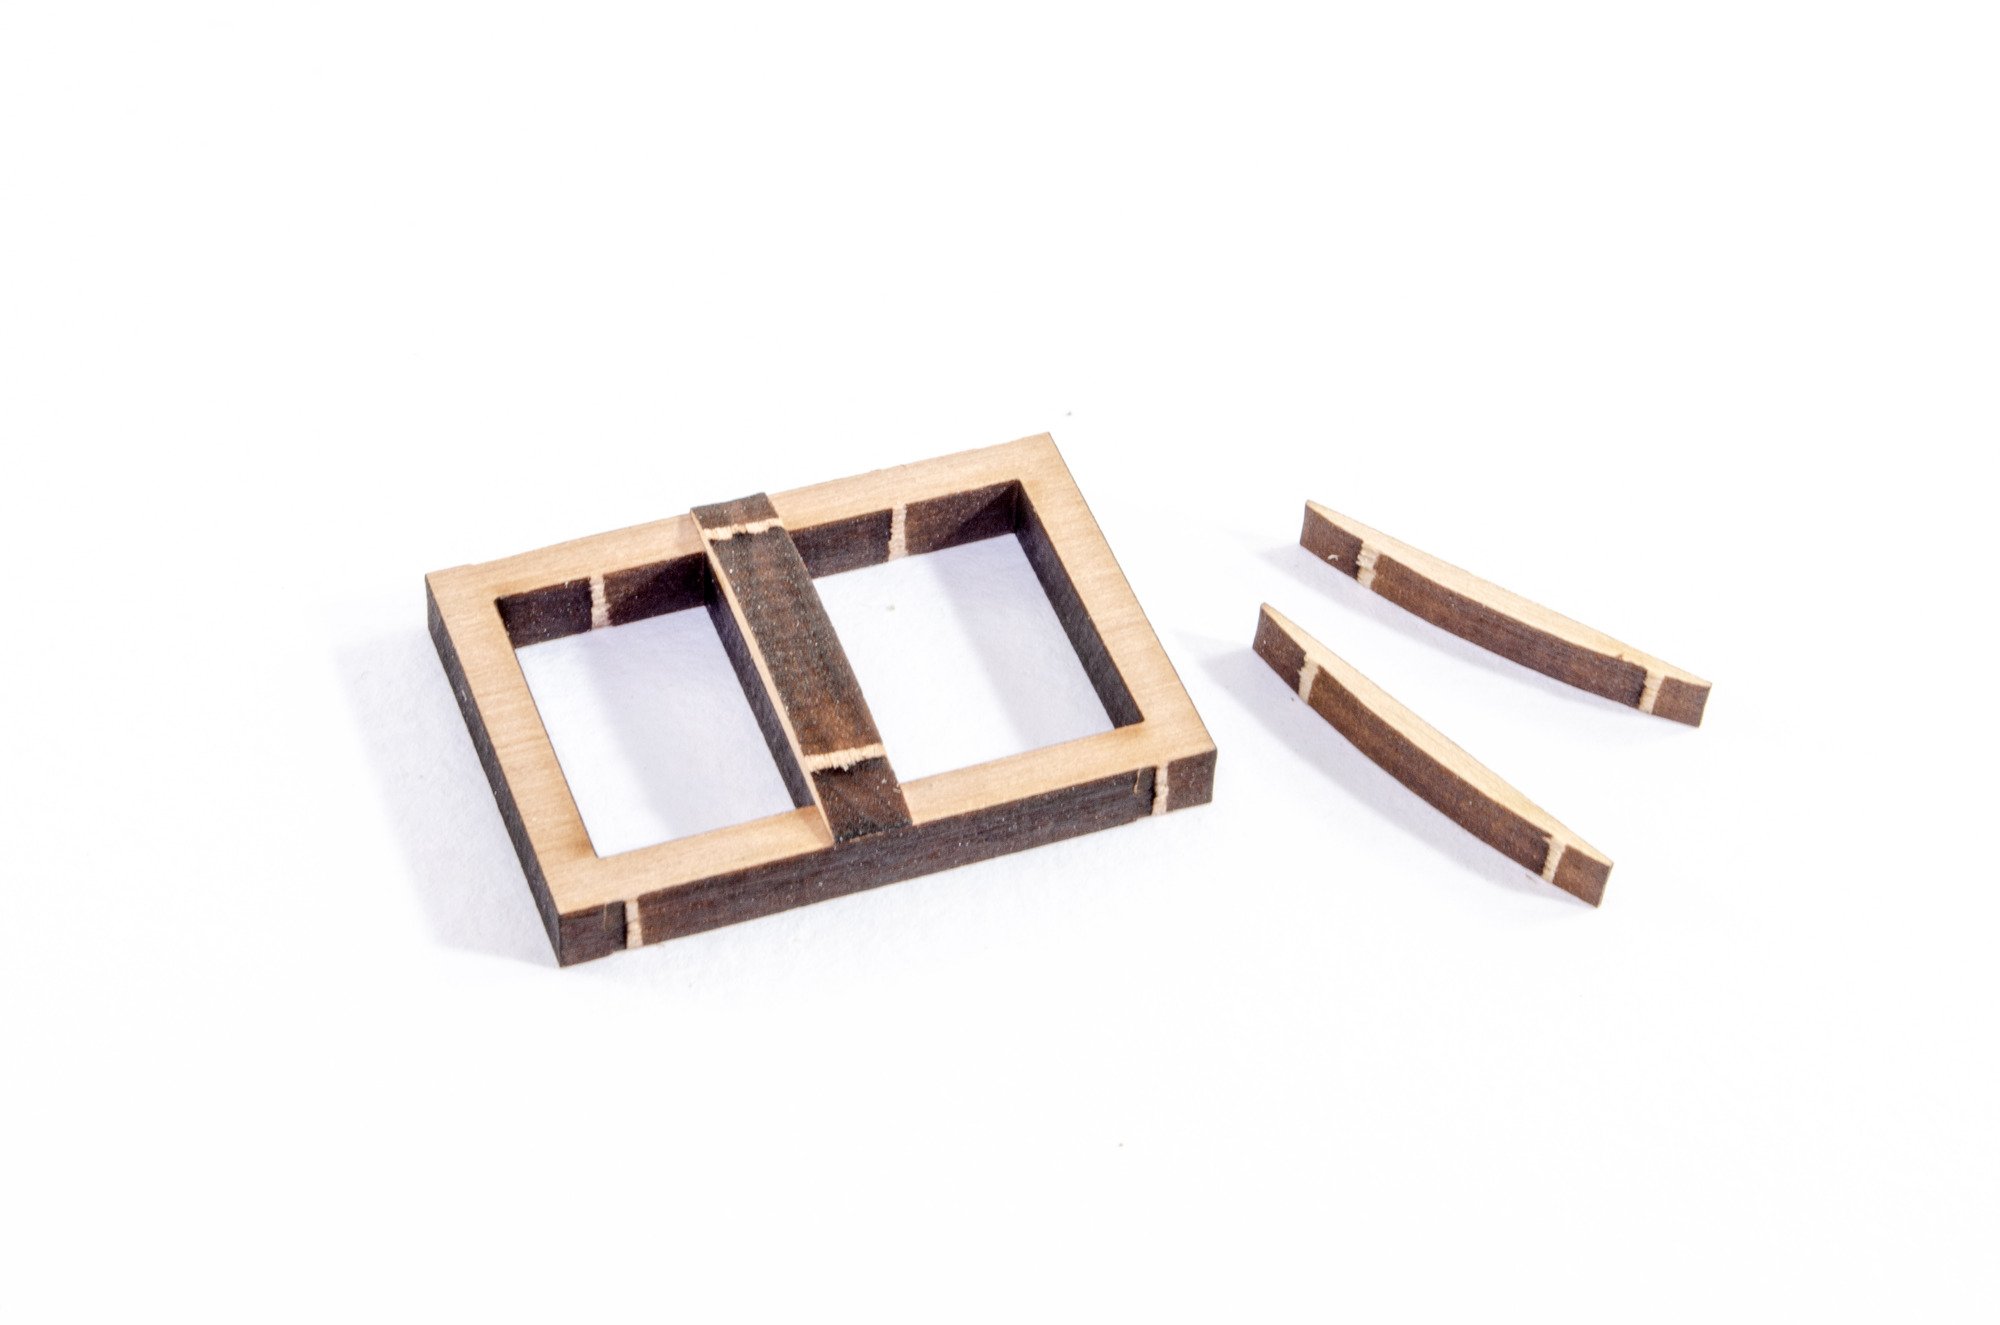
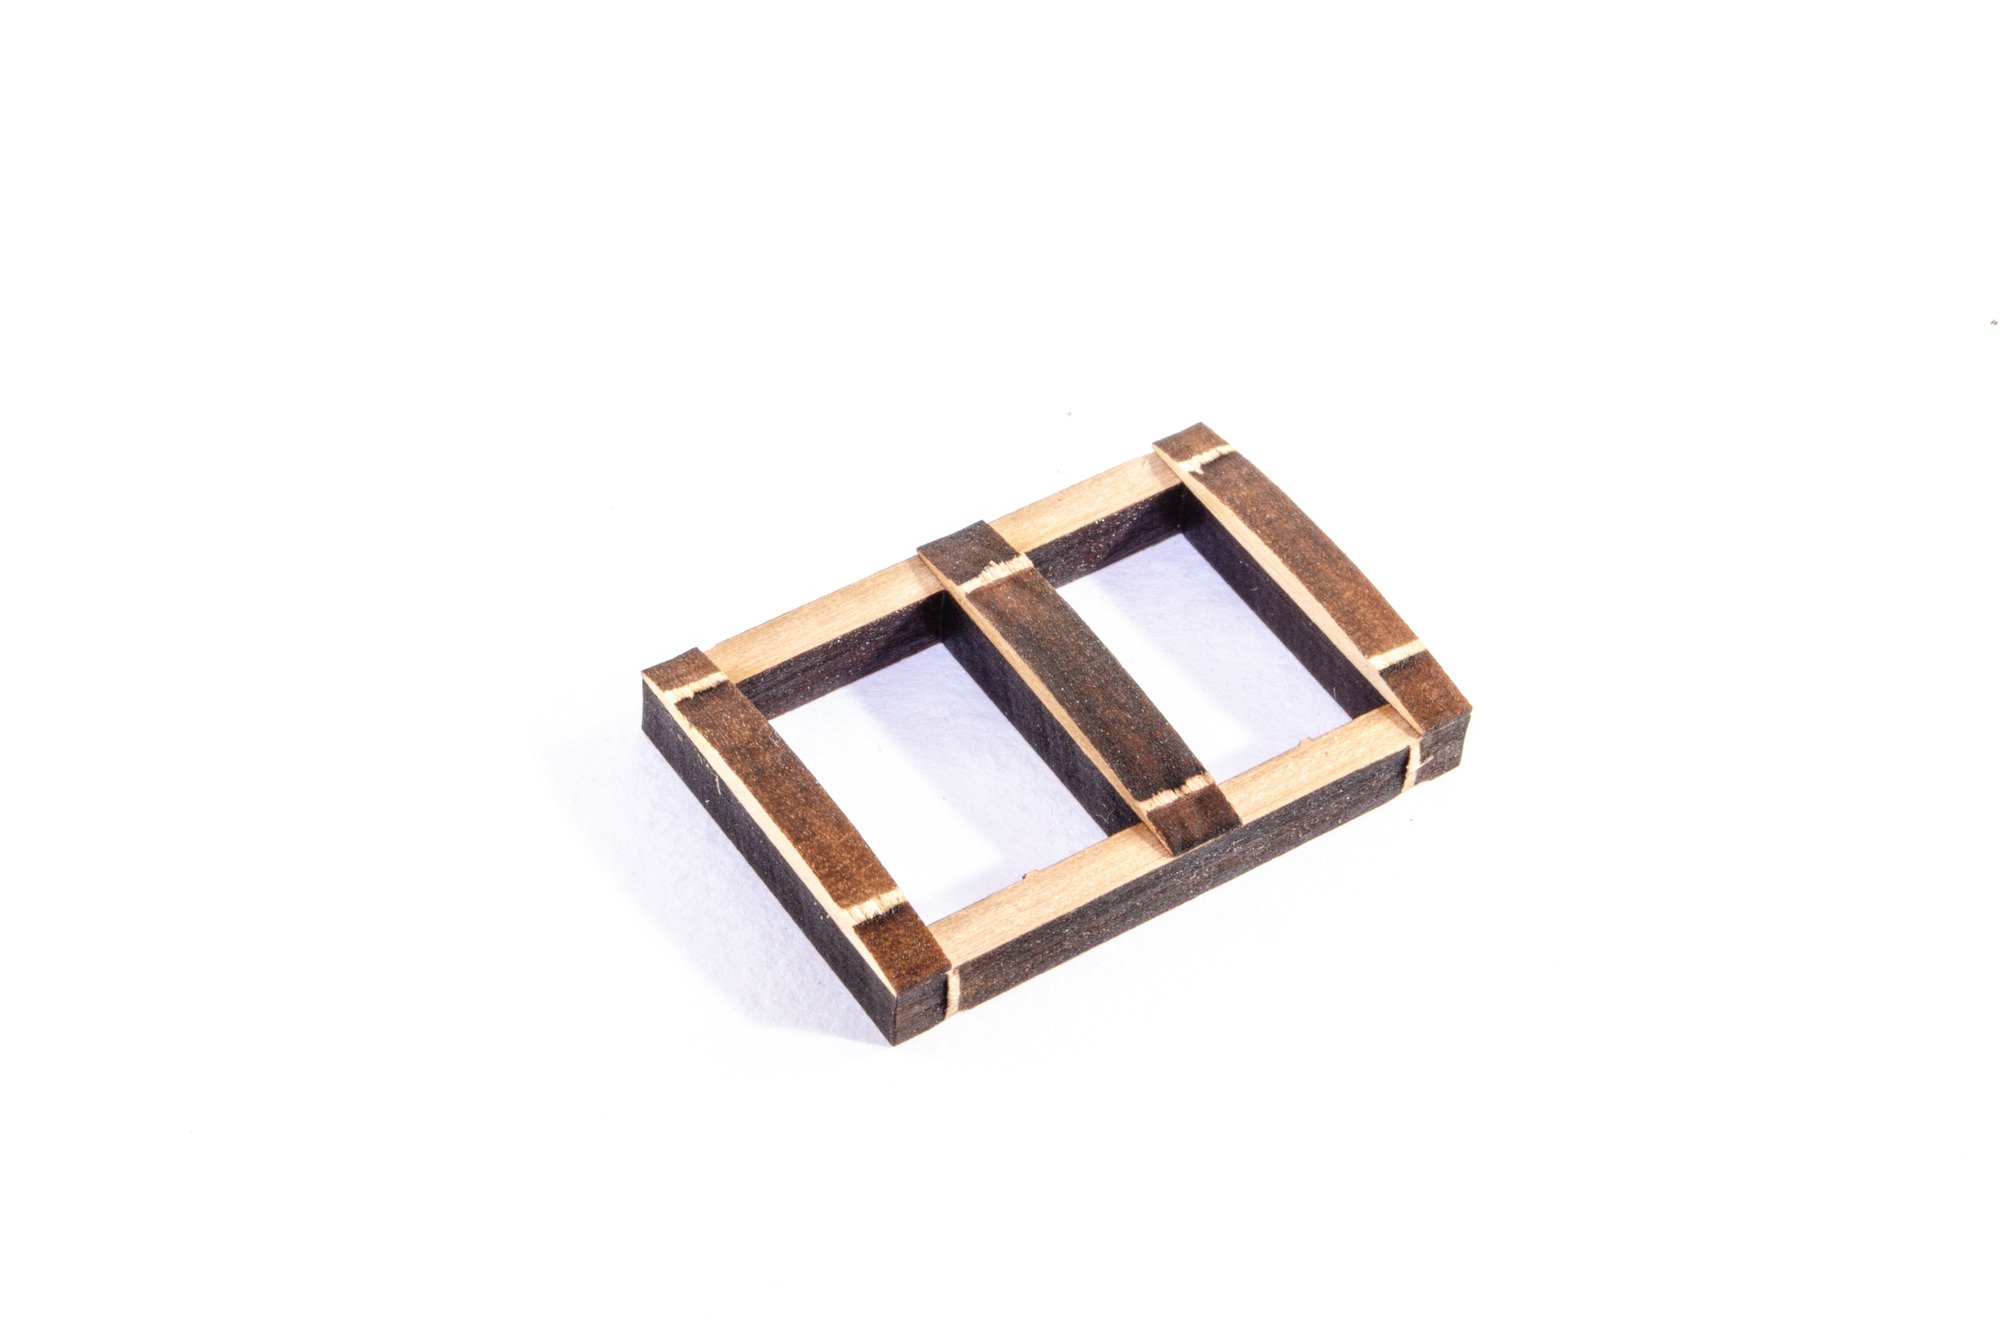
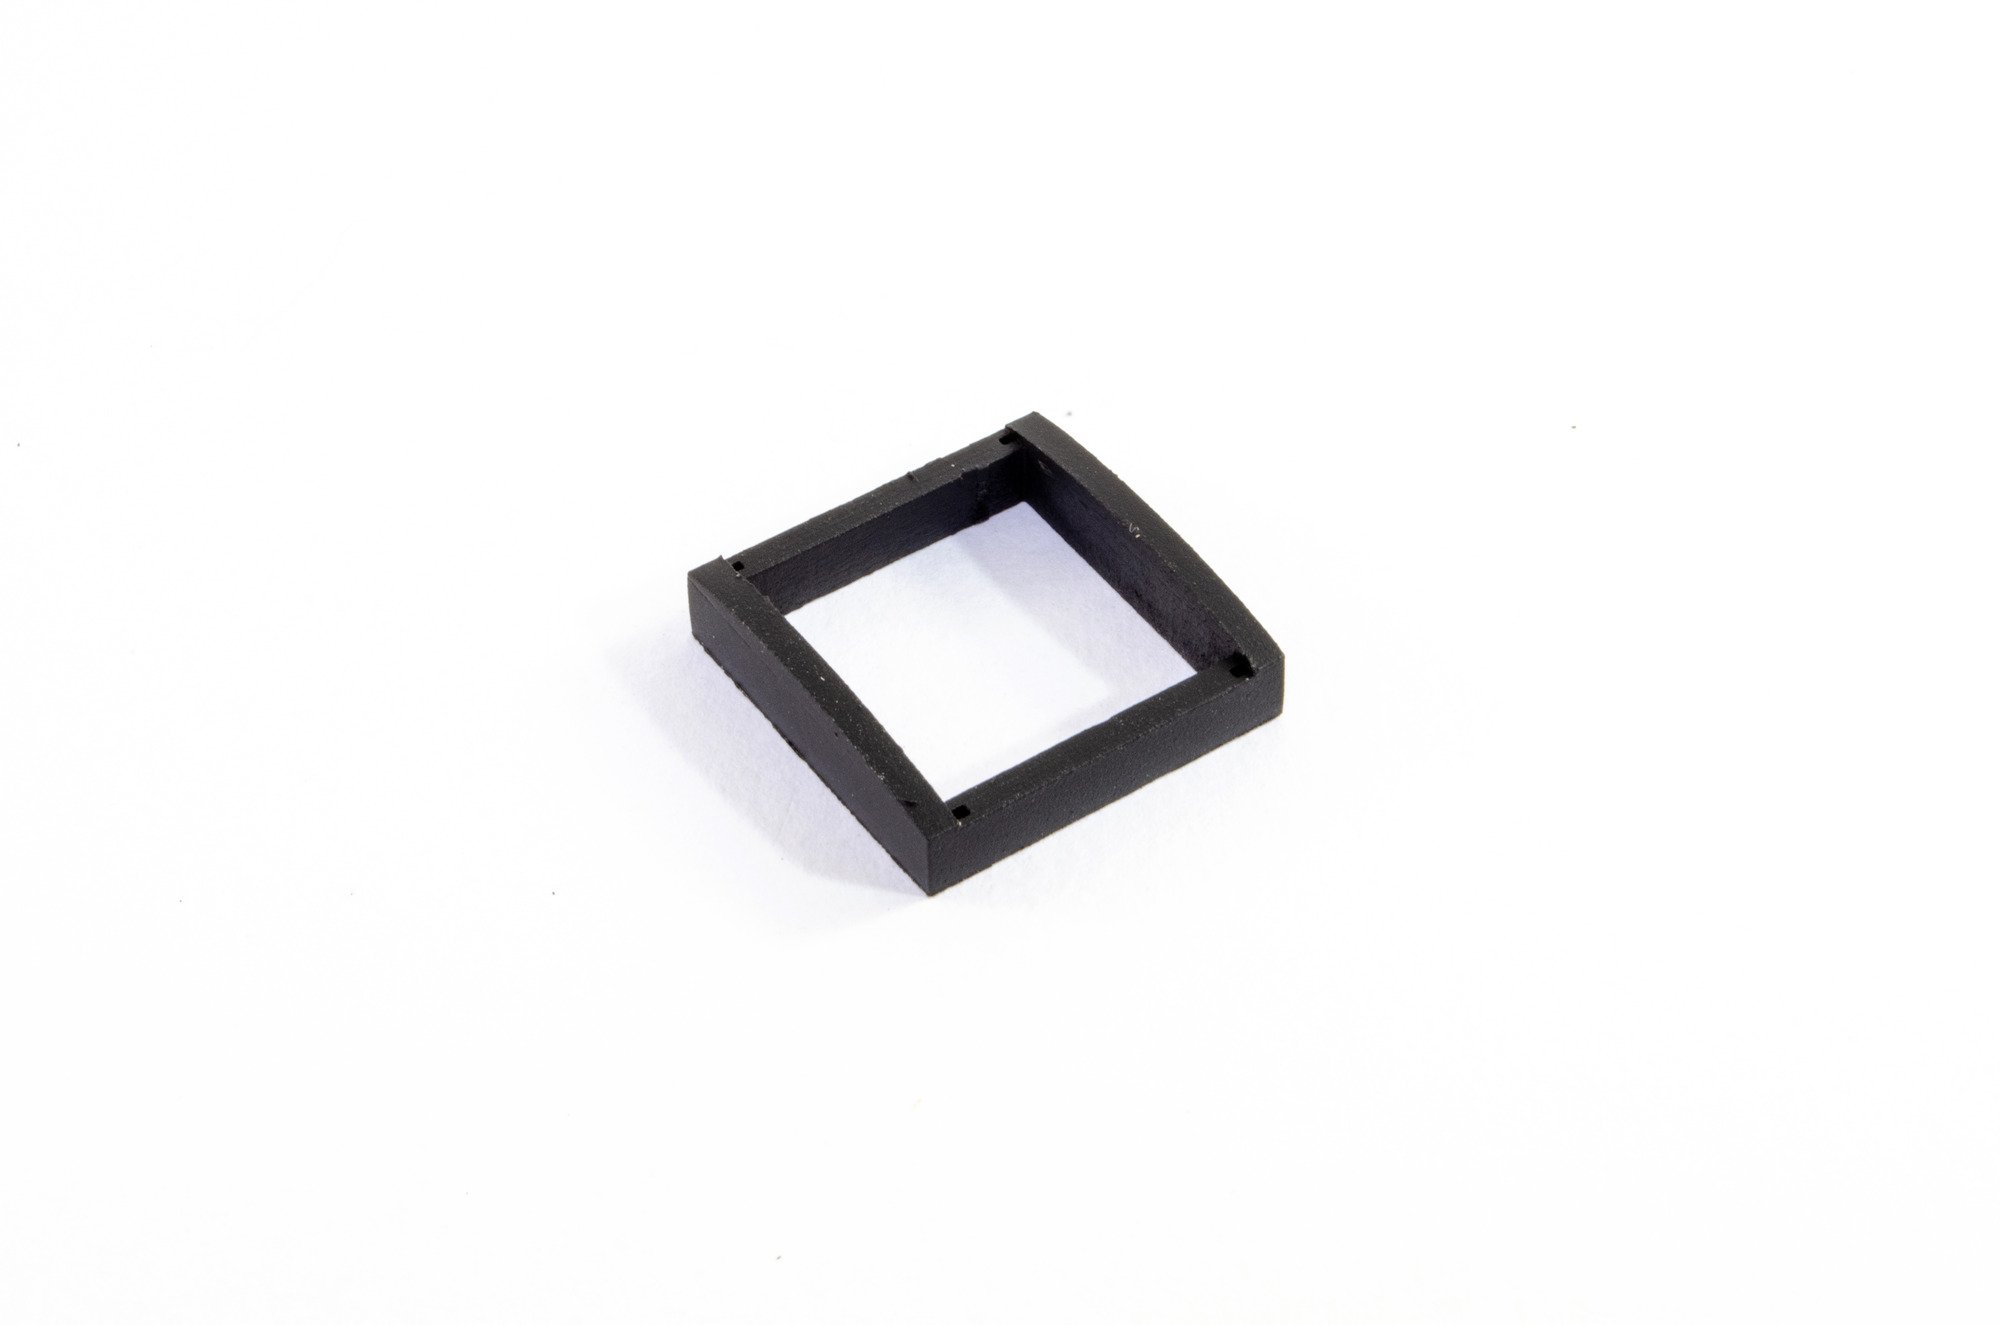
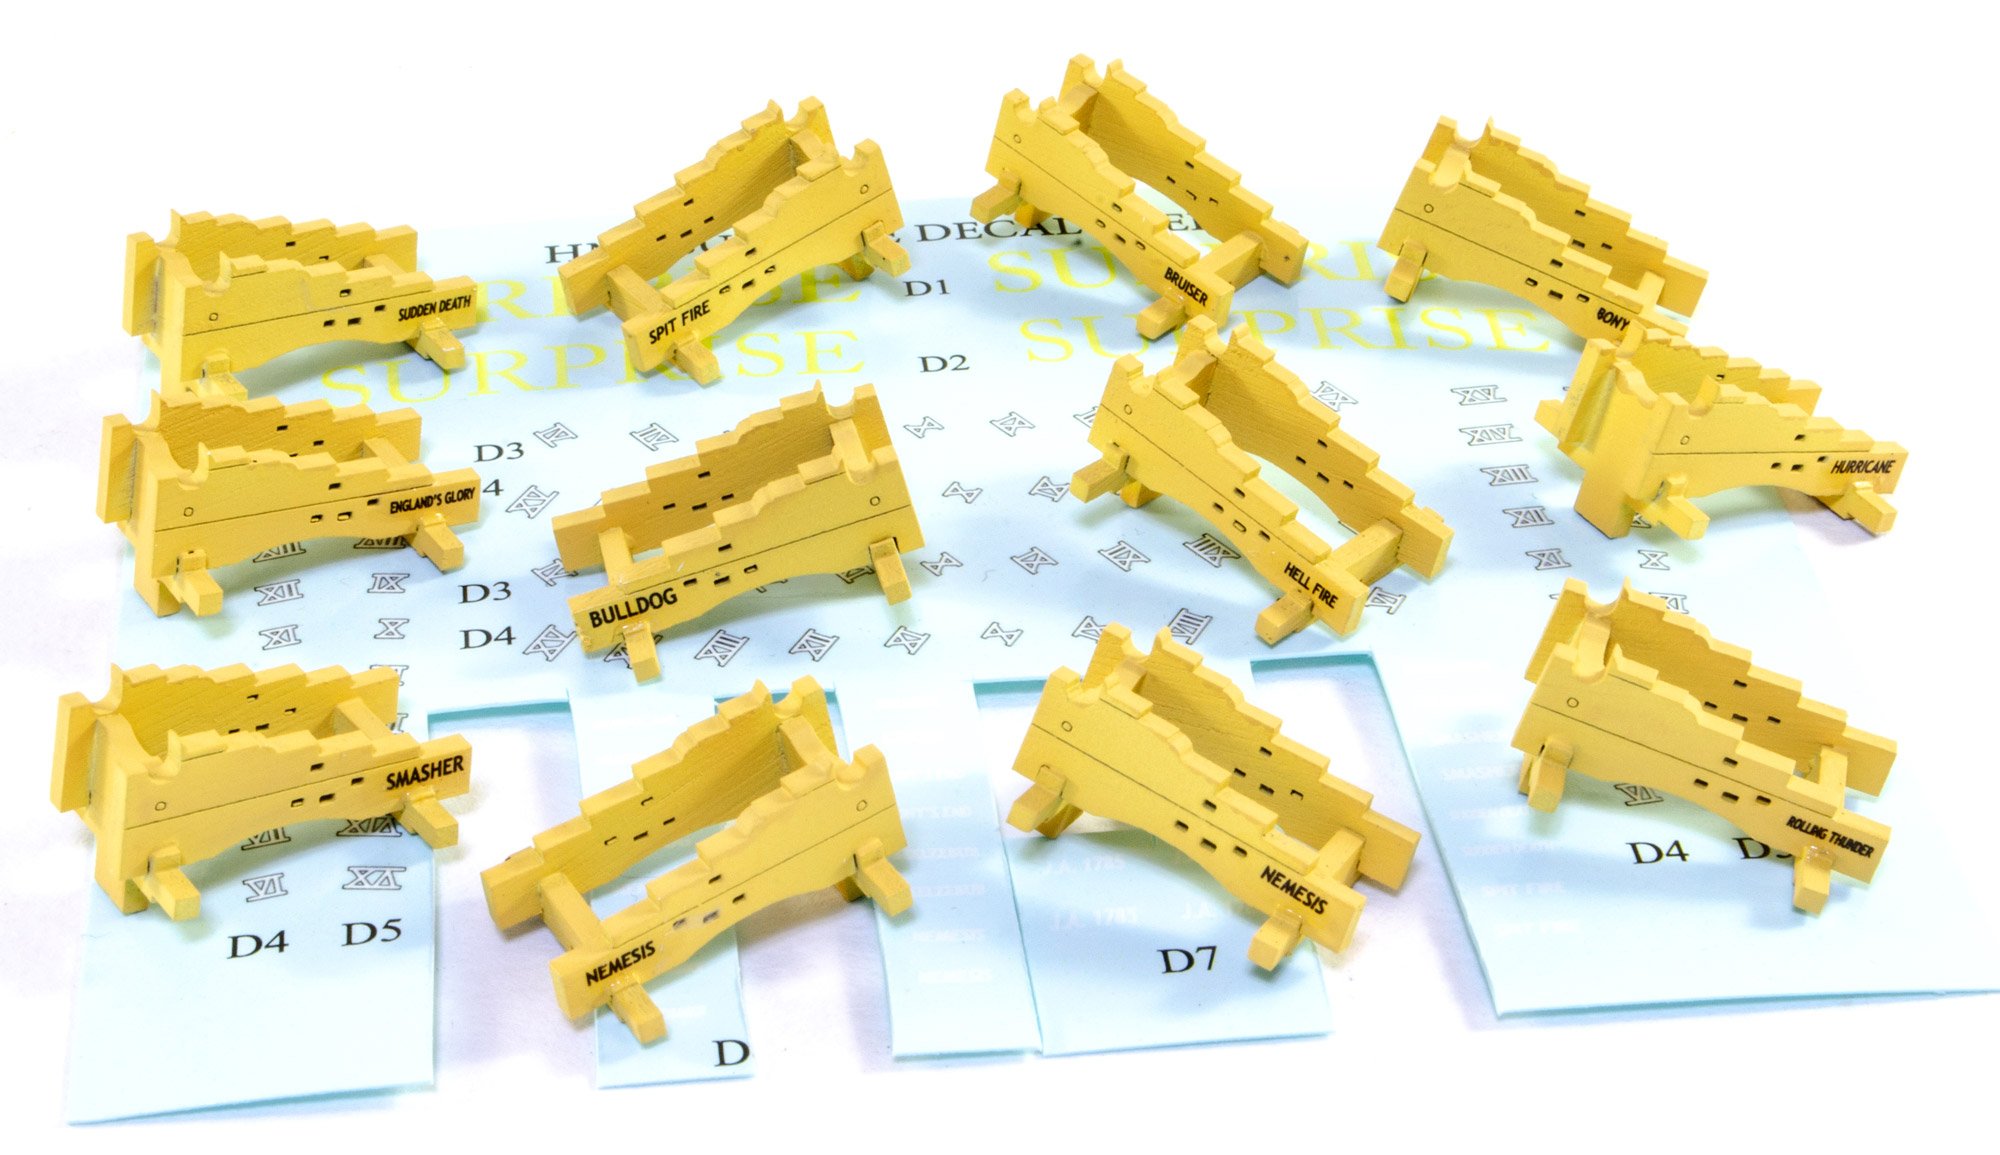
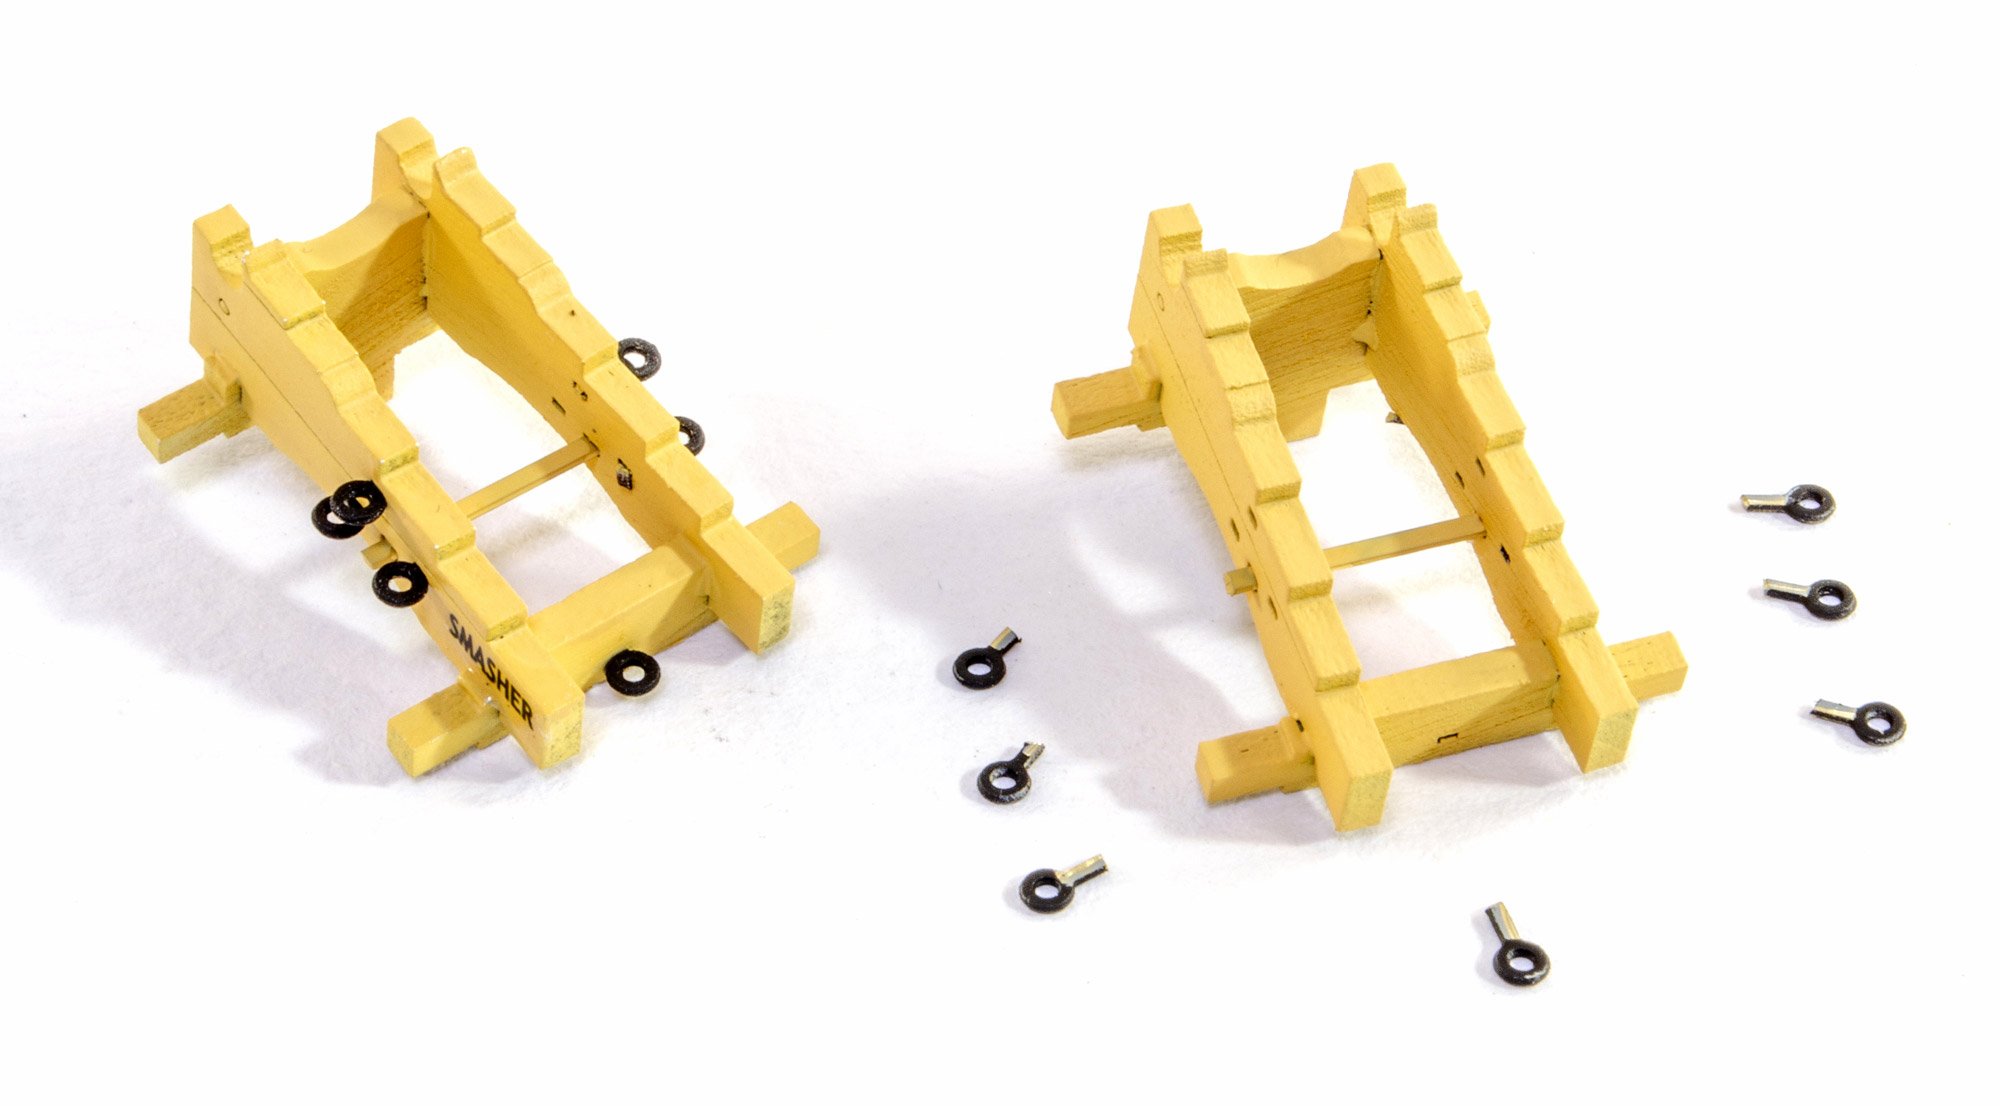
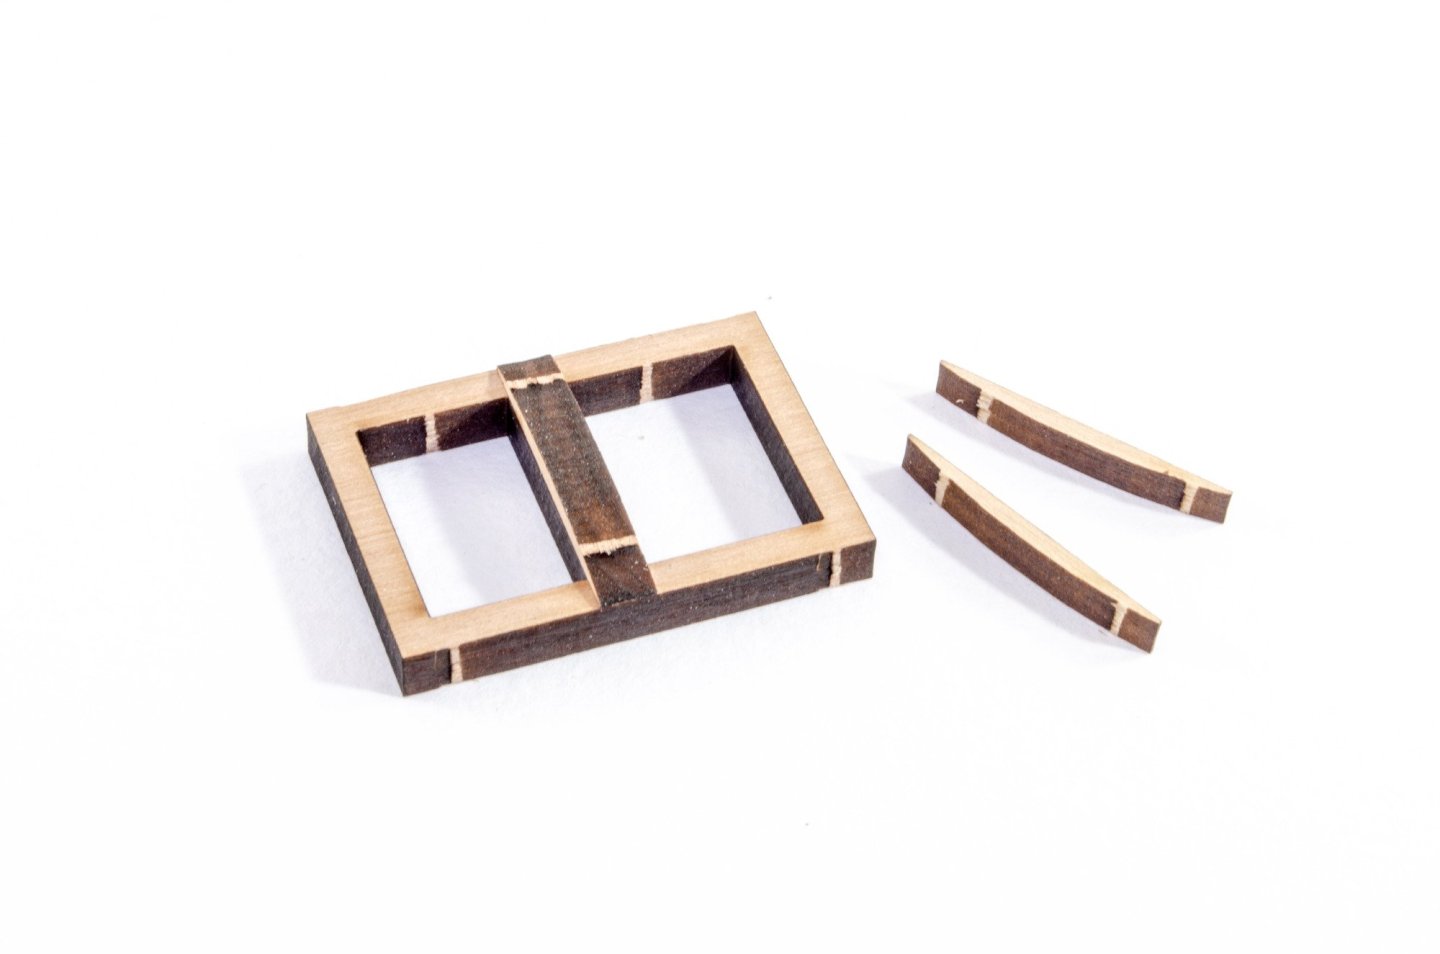
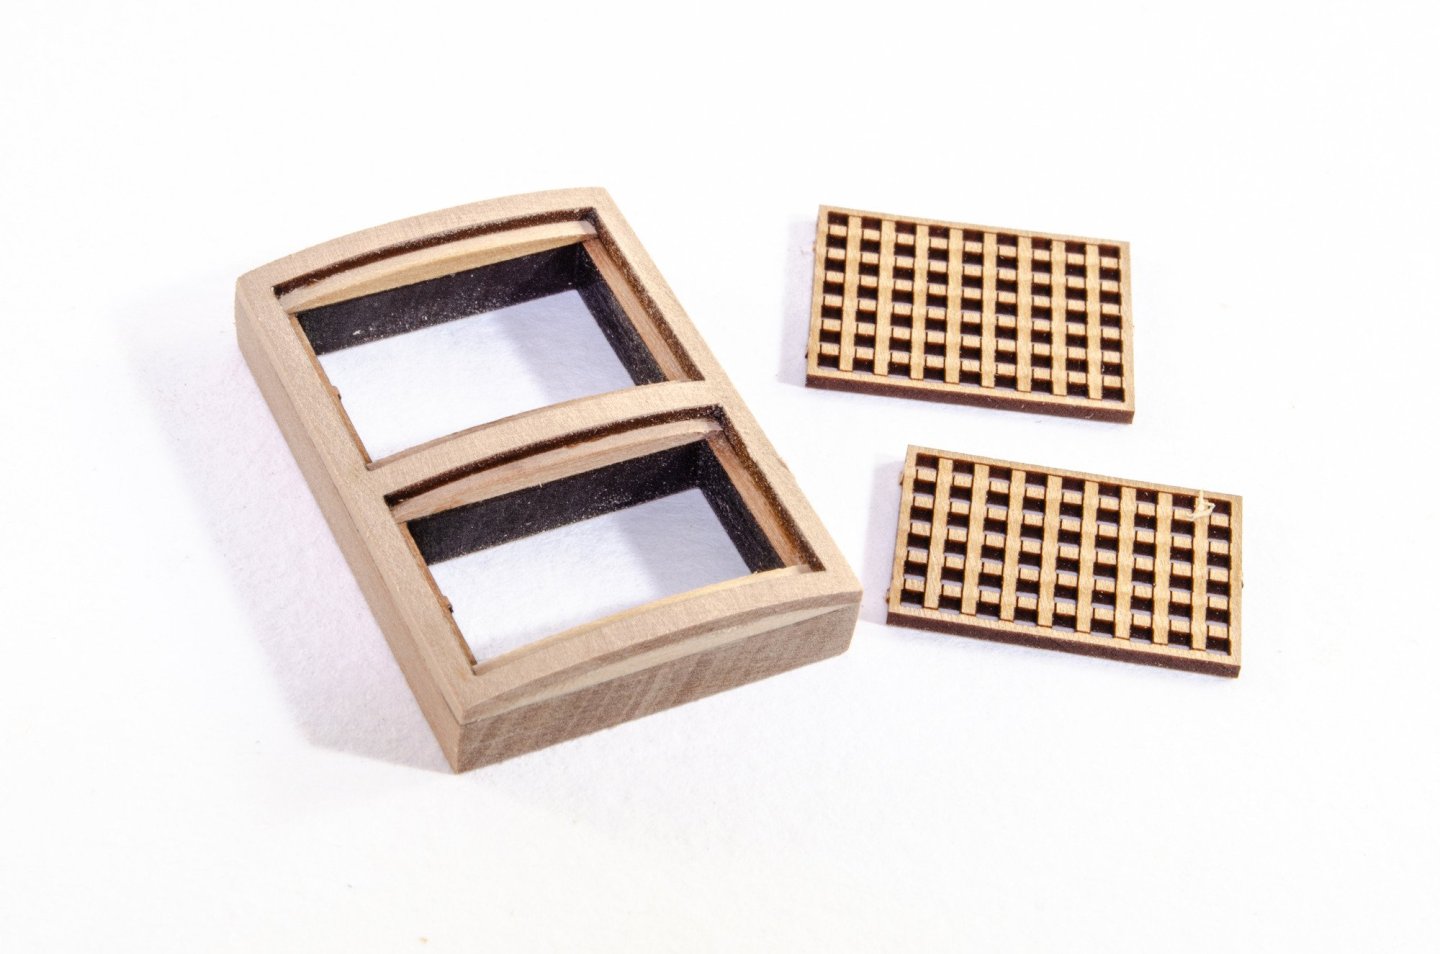
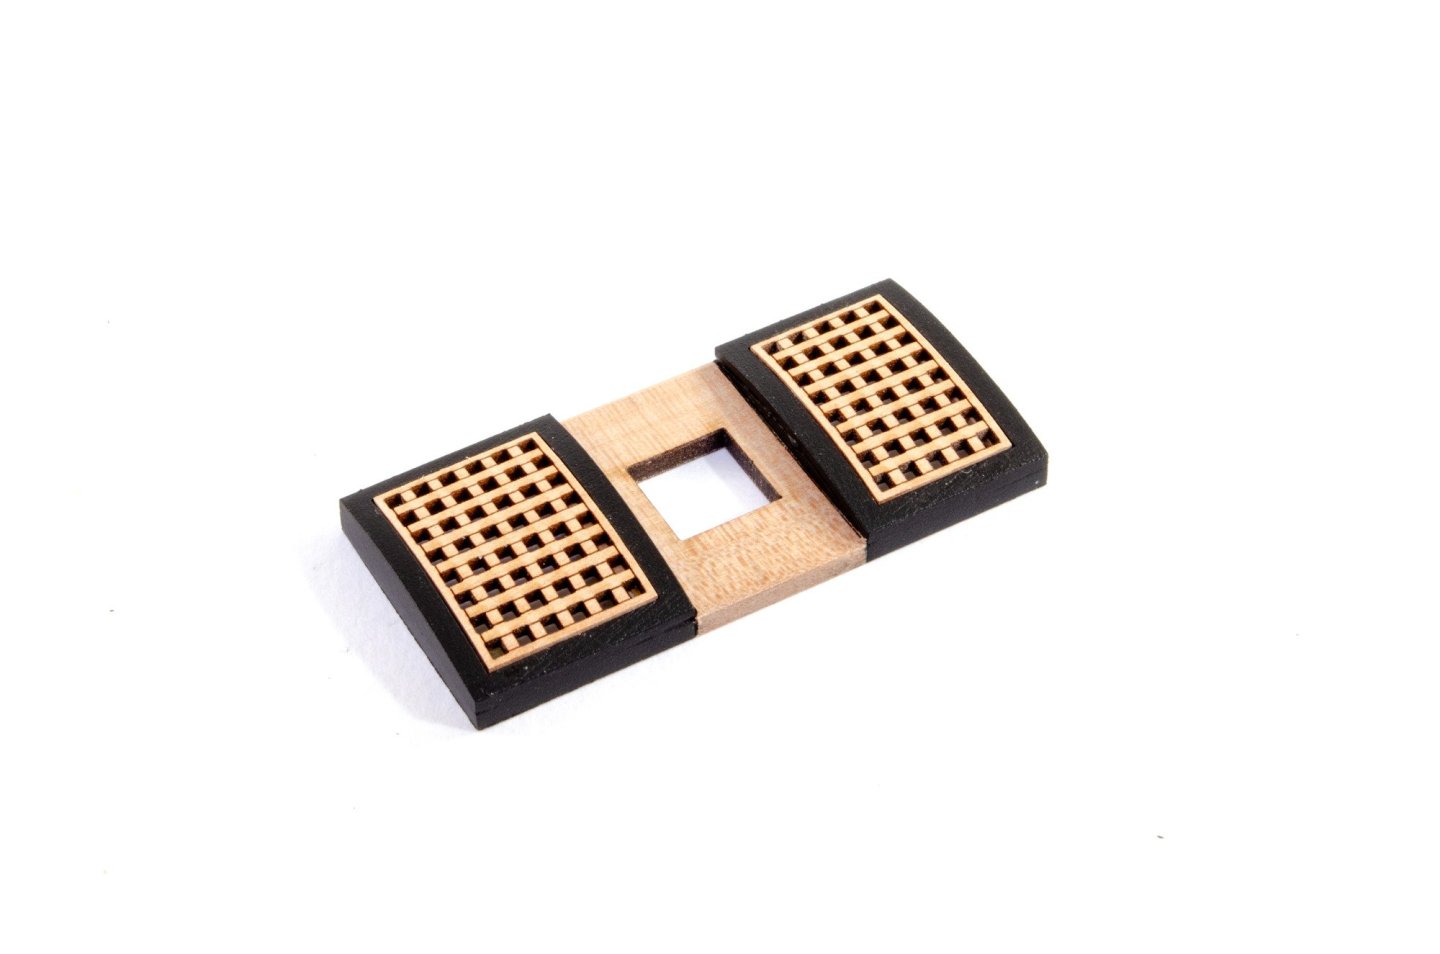
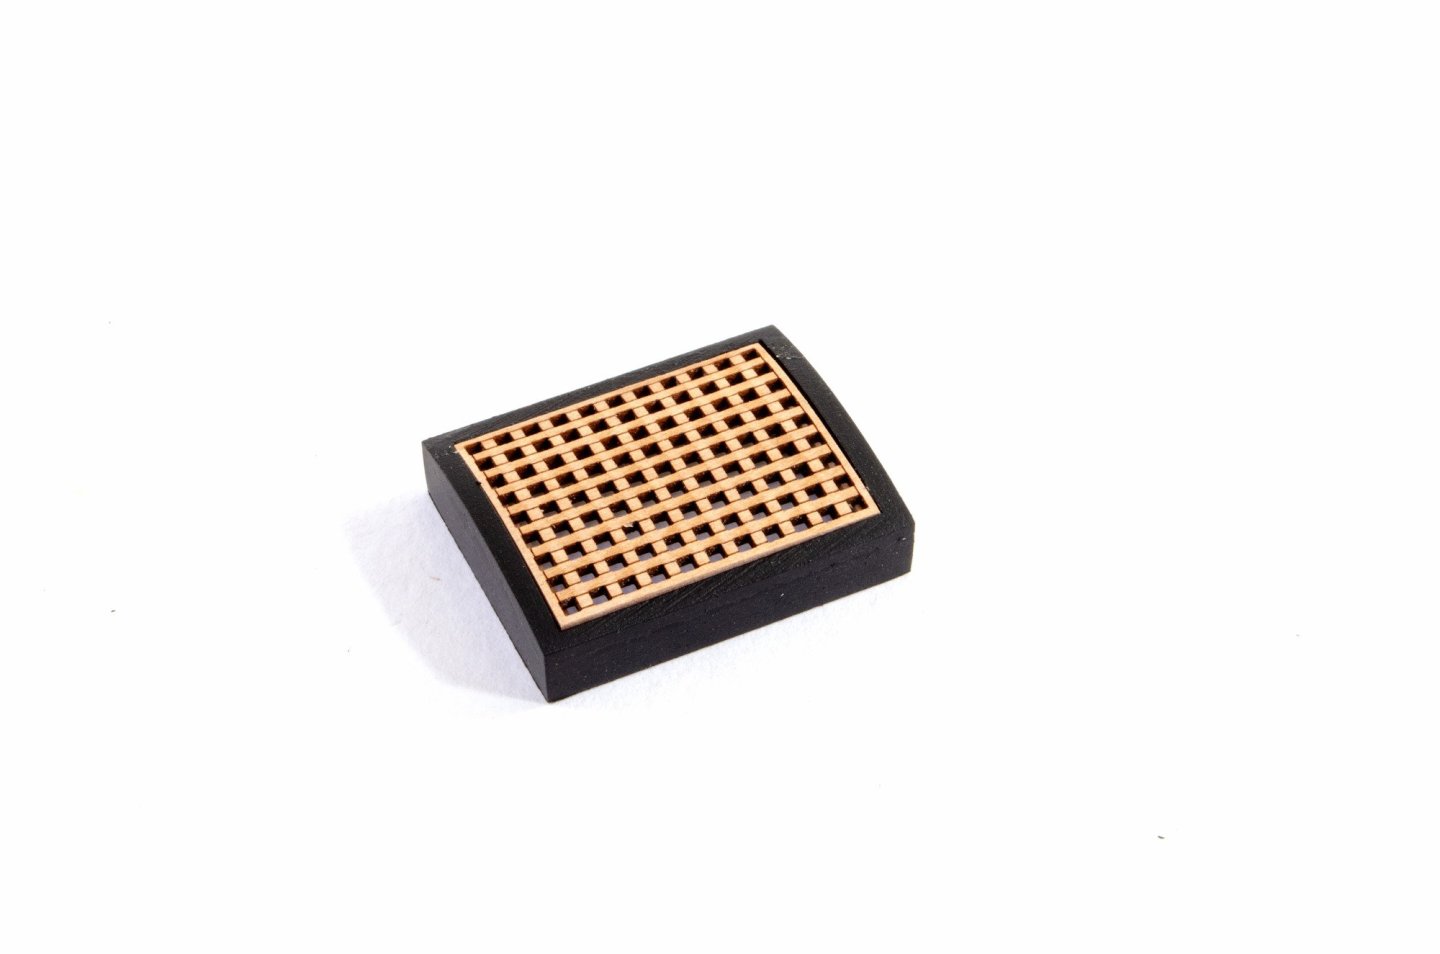
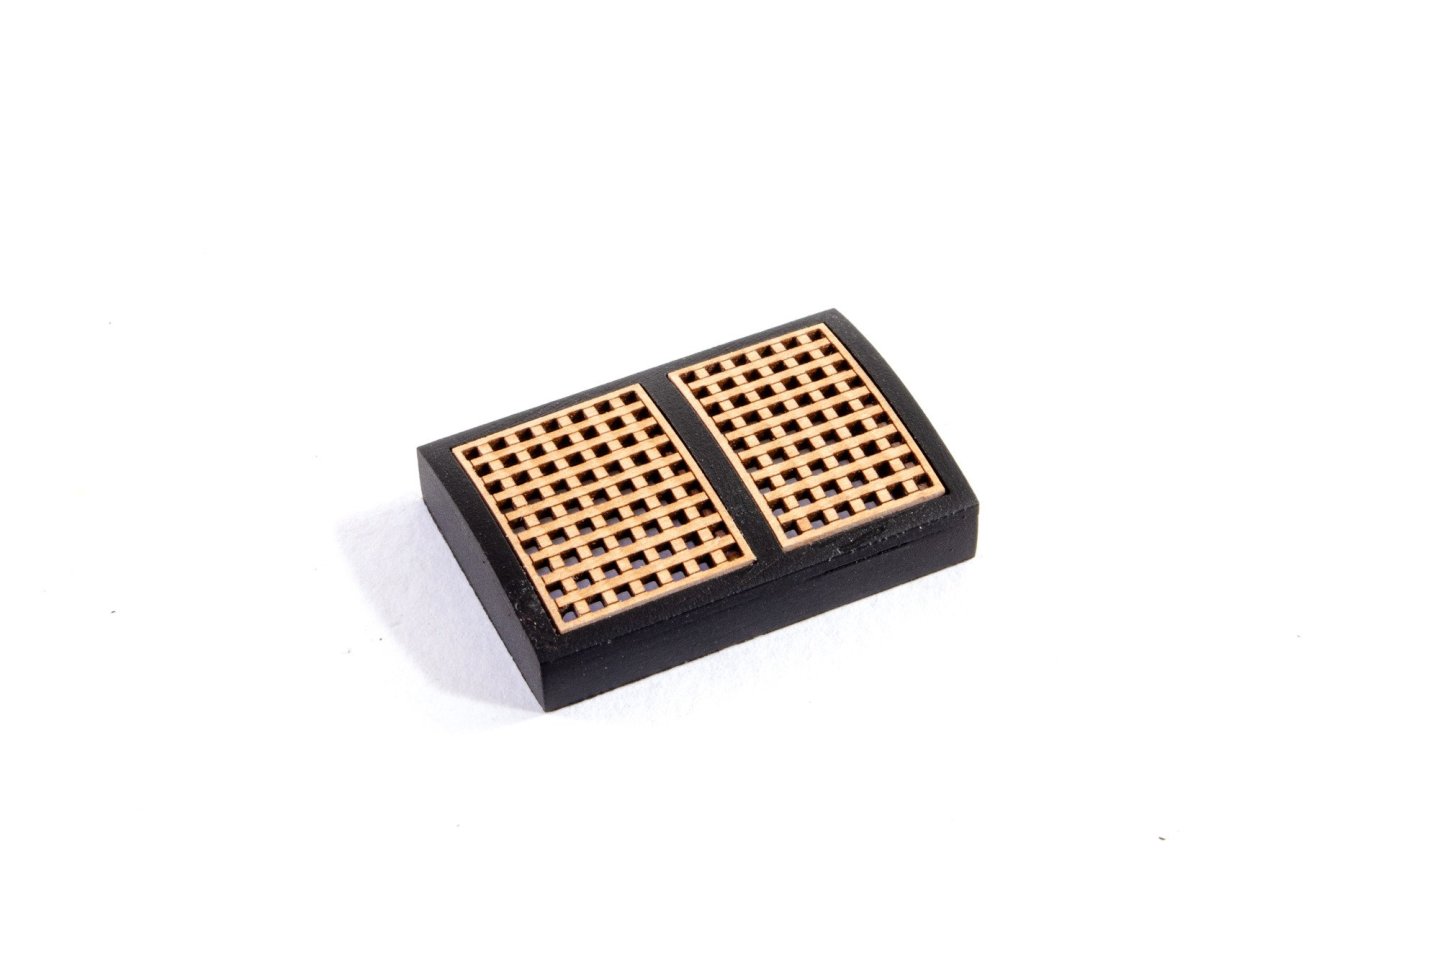
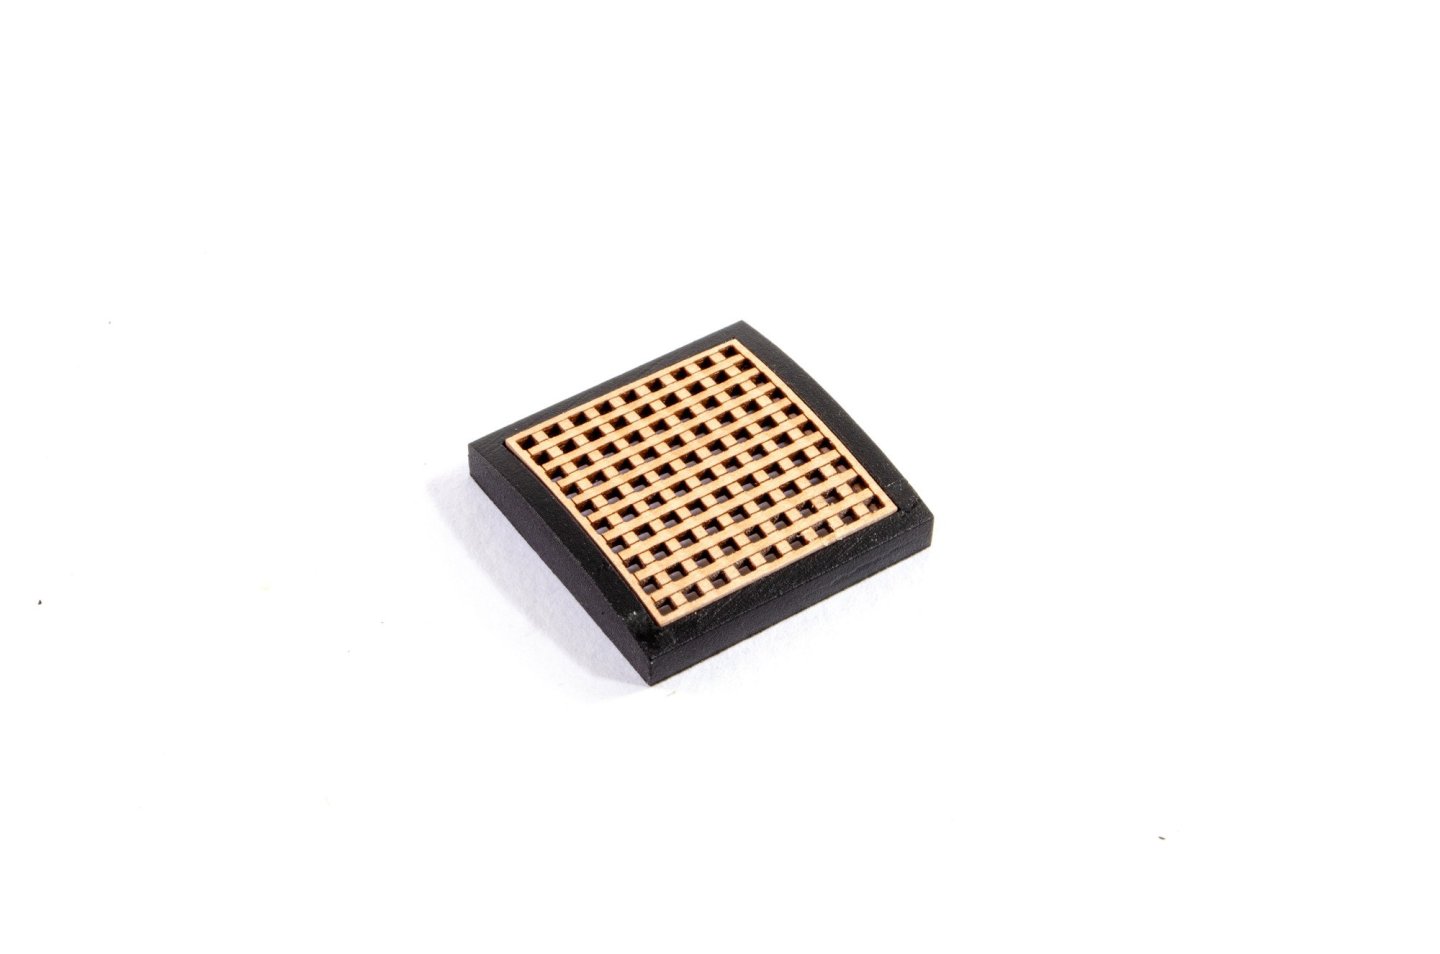
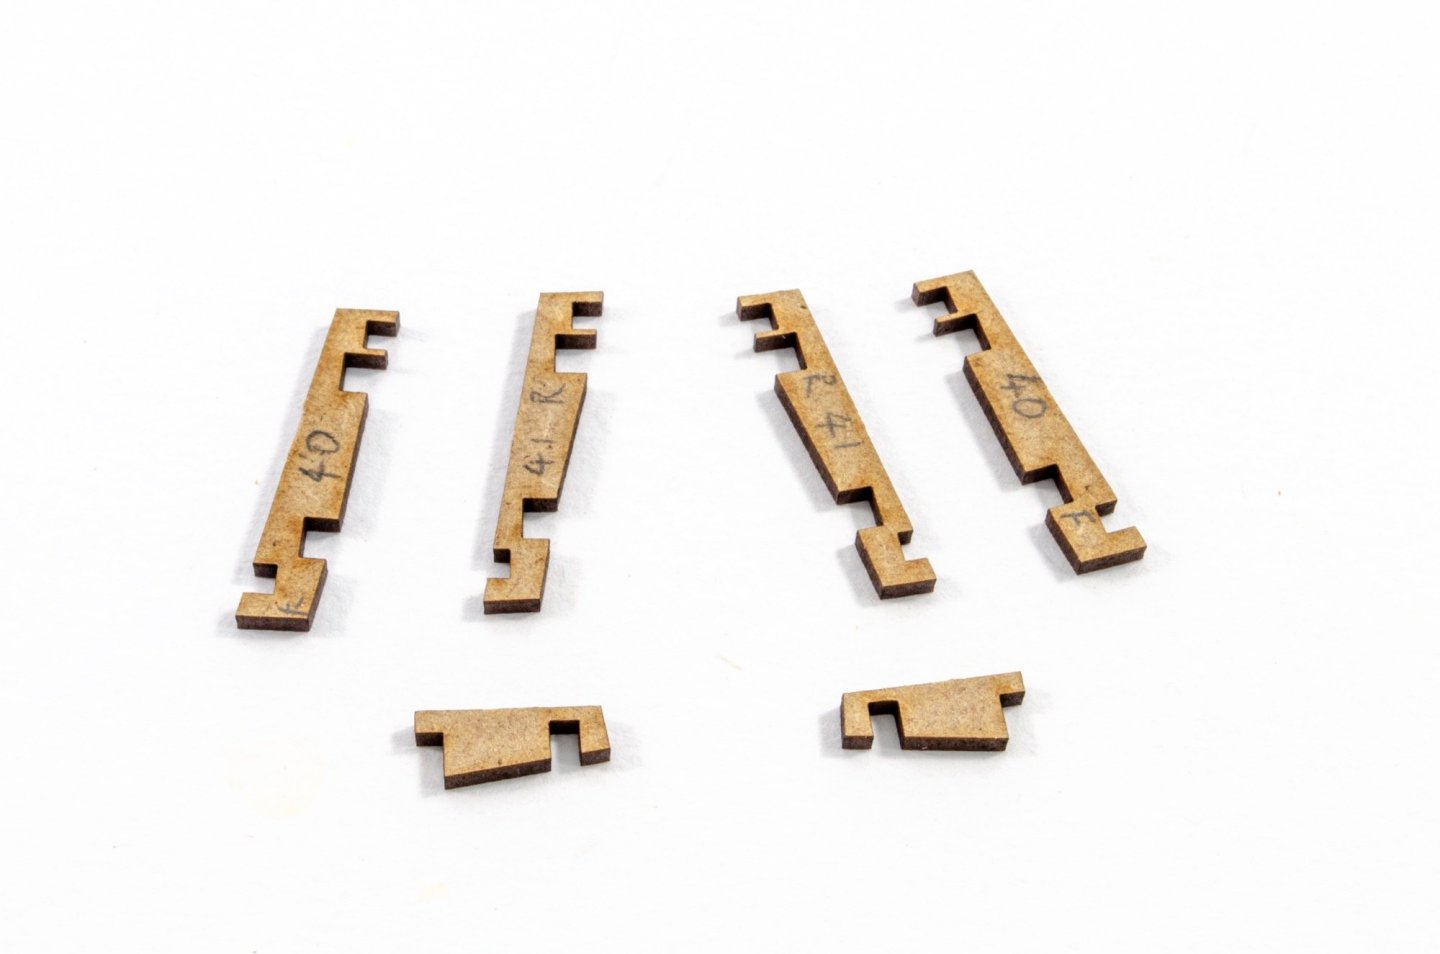
For the last day or two, I've been concentrating on some of the smaller stuff, as I usually do at this stage in a VM build. I like to get some stuff out of the way early, such as guns, grates, etc. This update will look at the main guns and the stern chasers. The main guns are constructed like Indy, meaning the barrels aren't actually fitted until the model is almost complete. This means the capsquares in the carriage sides, are open at the front, allowing the builder to slip the barrel through the port and glue the part in place. The stern chasers are more traditional. Here, the barrels are fitted through whole capsquares during assembly. Fourteen on the main guns come complete with name decals. When the cart is painted, some gloss varnish is applied and when set, the decals are added to the carts before being sealed and matt varnish applied. Here you can see the names. PE is used for eyelets and the small stop bar which sits between the sides. The latter is painted ochre to match the cart. Wheels are now added....remember, large ones at the front, so as to deal with deck camber. The barrels are NOT glued at this stage. The carts will plug into slots in the deck, and the barrels will be one of the very last things you fit as you build Surprise. Chasers: Almost identical in formula to the main guns, except the barrel is fitted as you close the carriage sides. I'm currently working on carronades. I might be able to update today, but maybe not. I have a visitor later who operates the Modelkits Stuff YouTube channel, and he's coming for a preview of the work and sheets of parts etc.


- 145 replies
-
- 35
-
-
-
Chris loves a bluff bow.
-
Bulwarks
James H replied to sgrez's topic in Building, Framing, Planking and plating a ships hull and deck
I use Titebond. I'd also suggest removing that and trying to manipulate the front into a curve first. As it's thick ply, I'm out of suggestions. I don't know if soaking would ruin the part. I'm be inclined to make that part from two thinner laminations which will be easier to bend. -
I can definitely say the frame is solid!
-
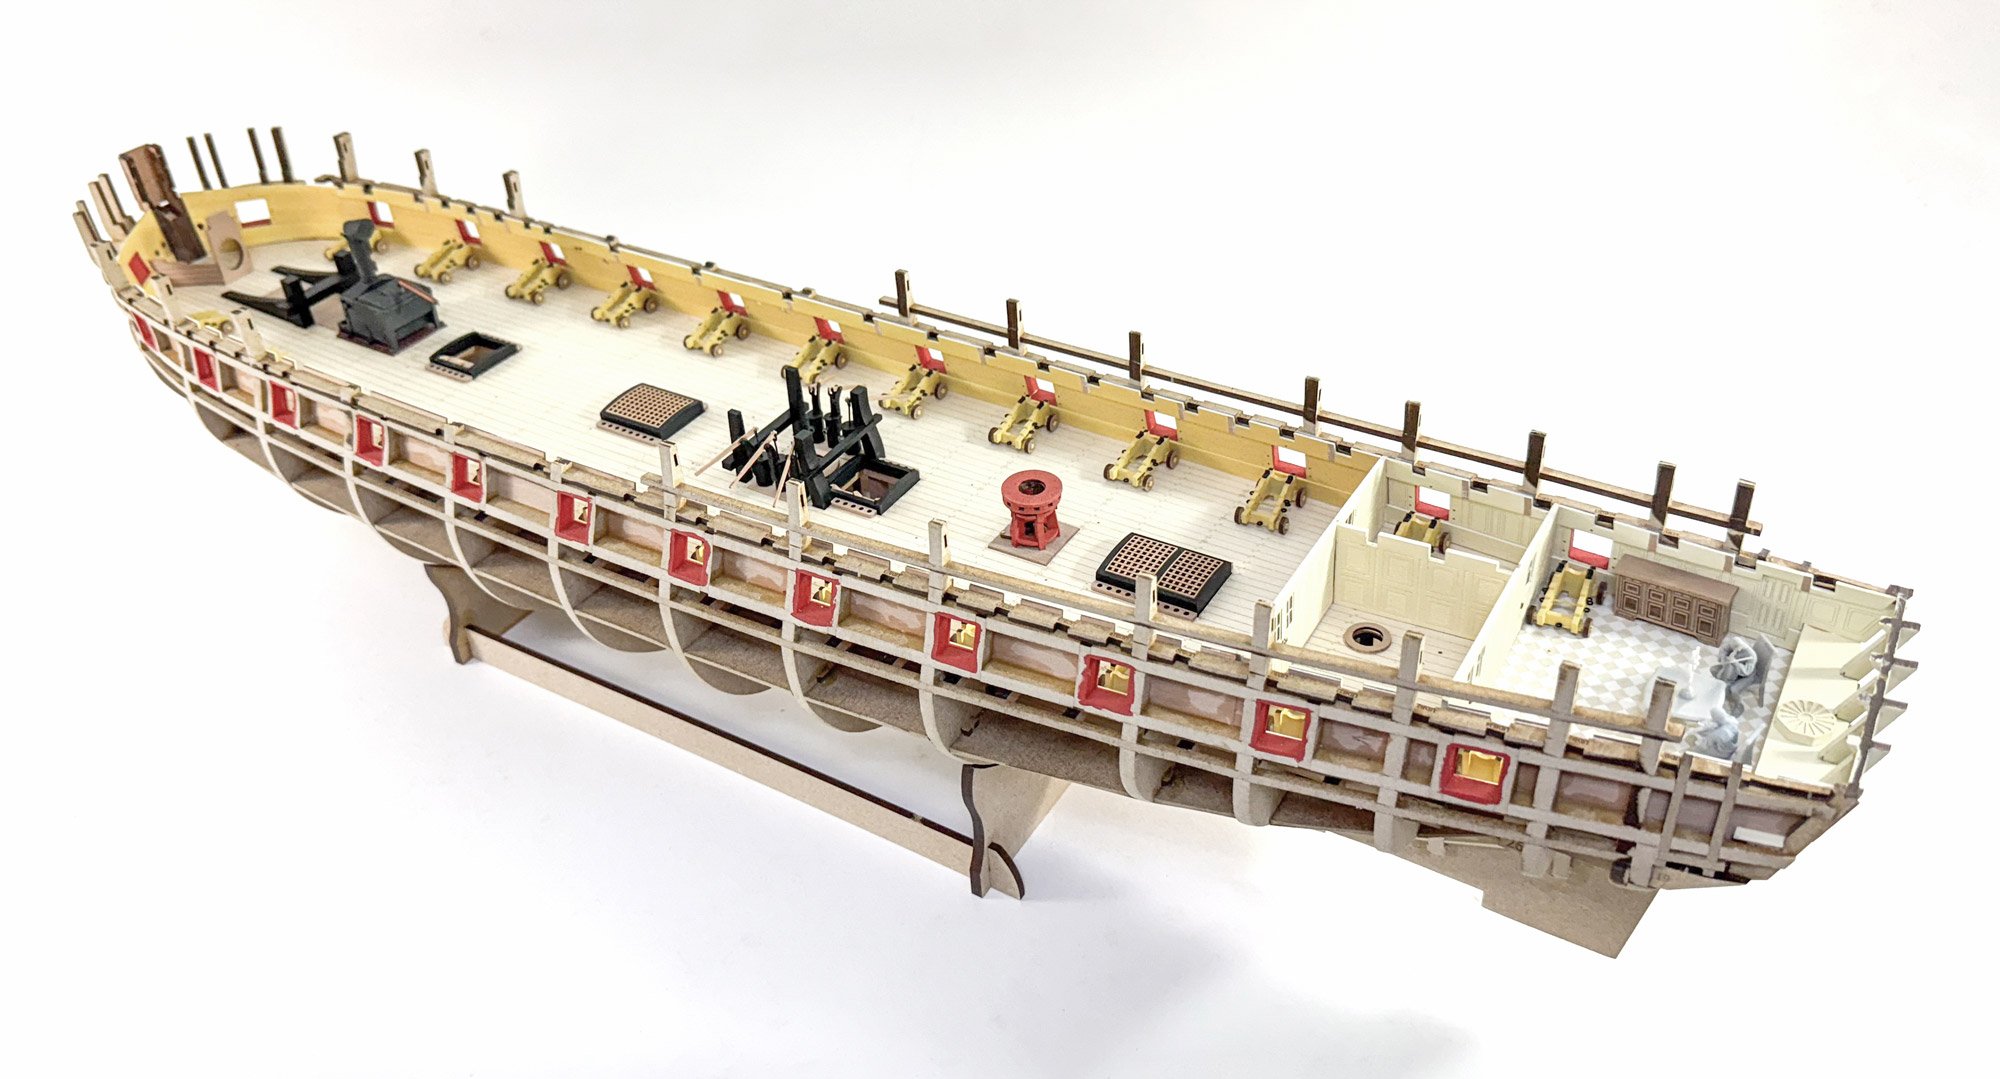
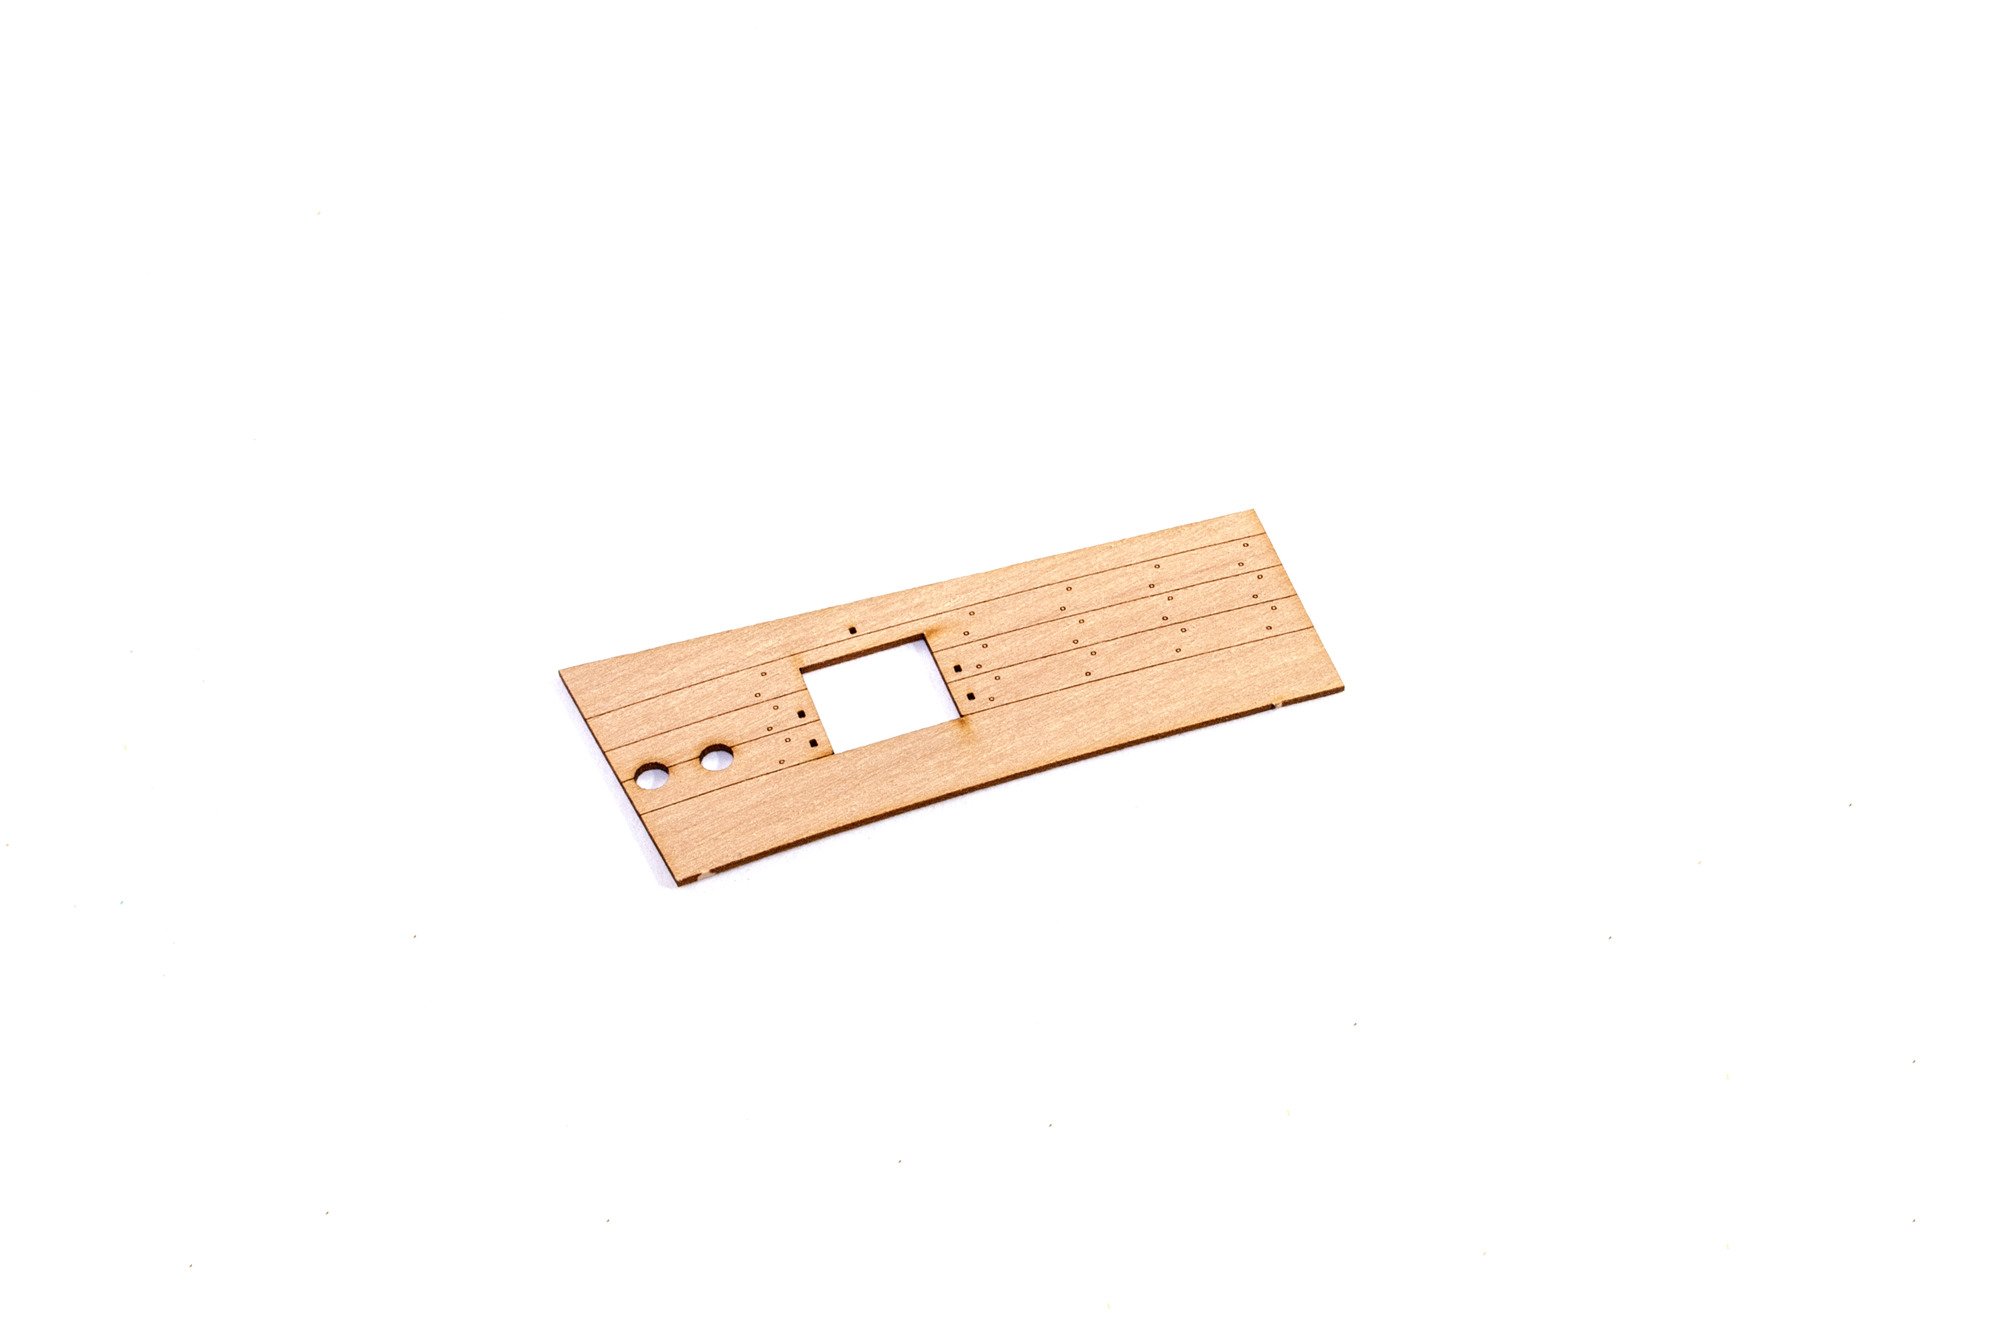
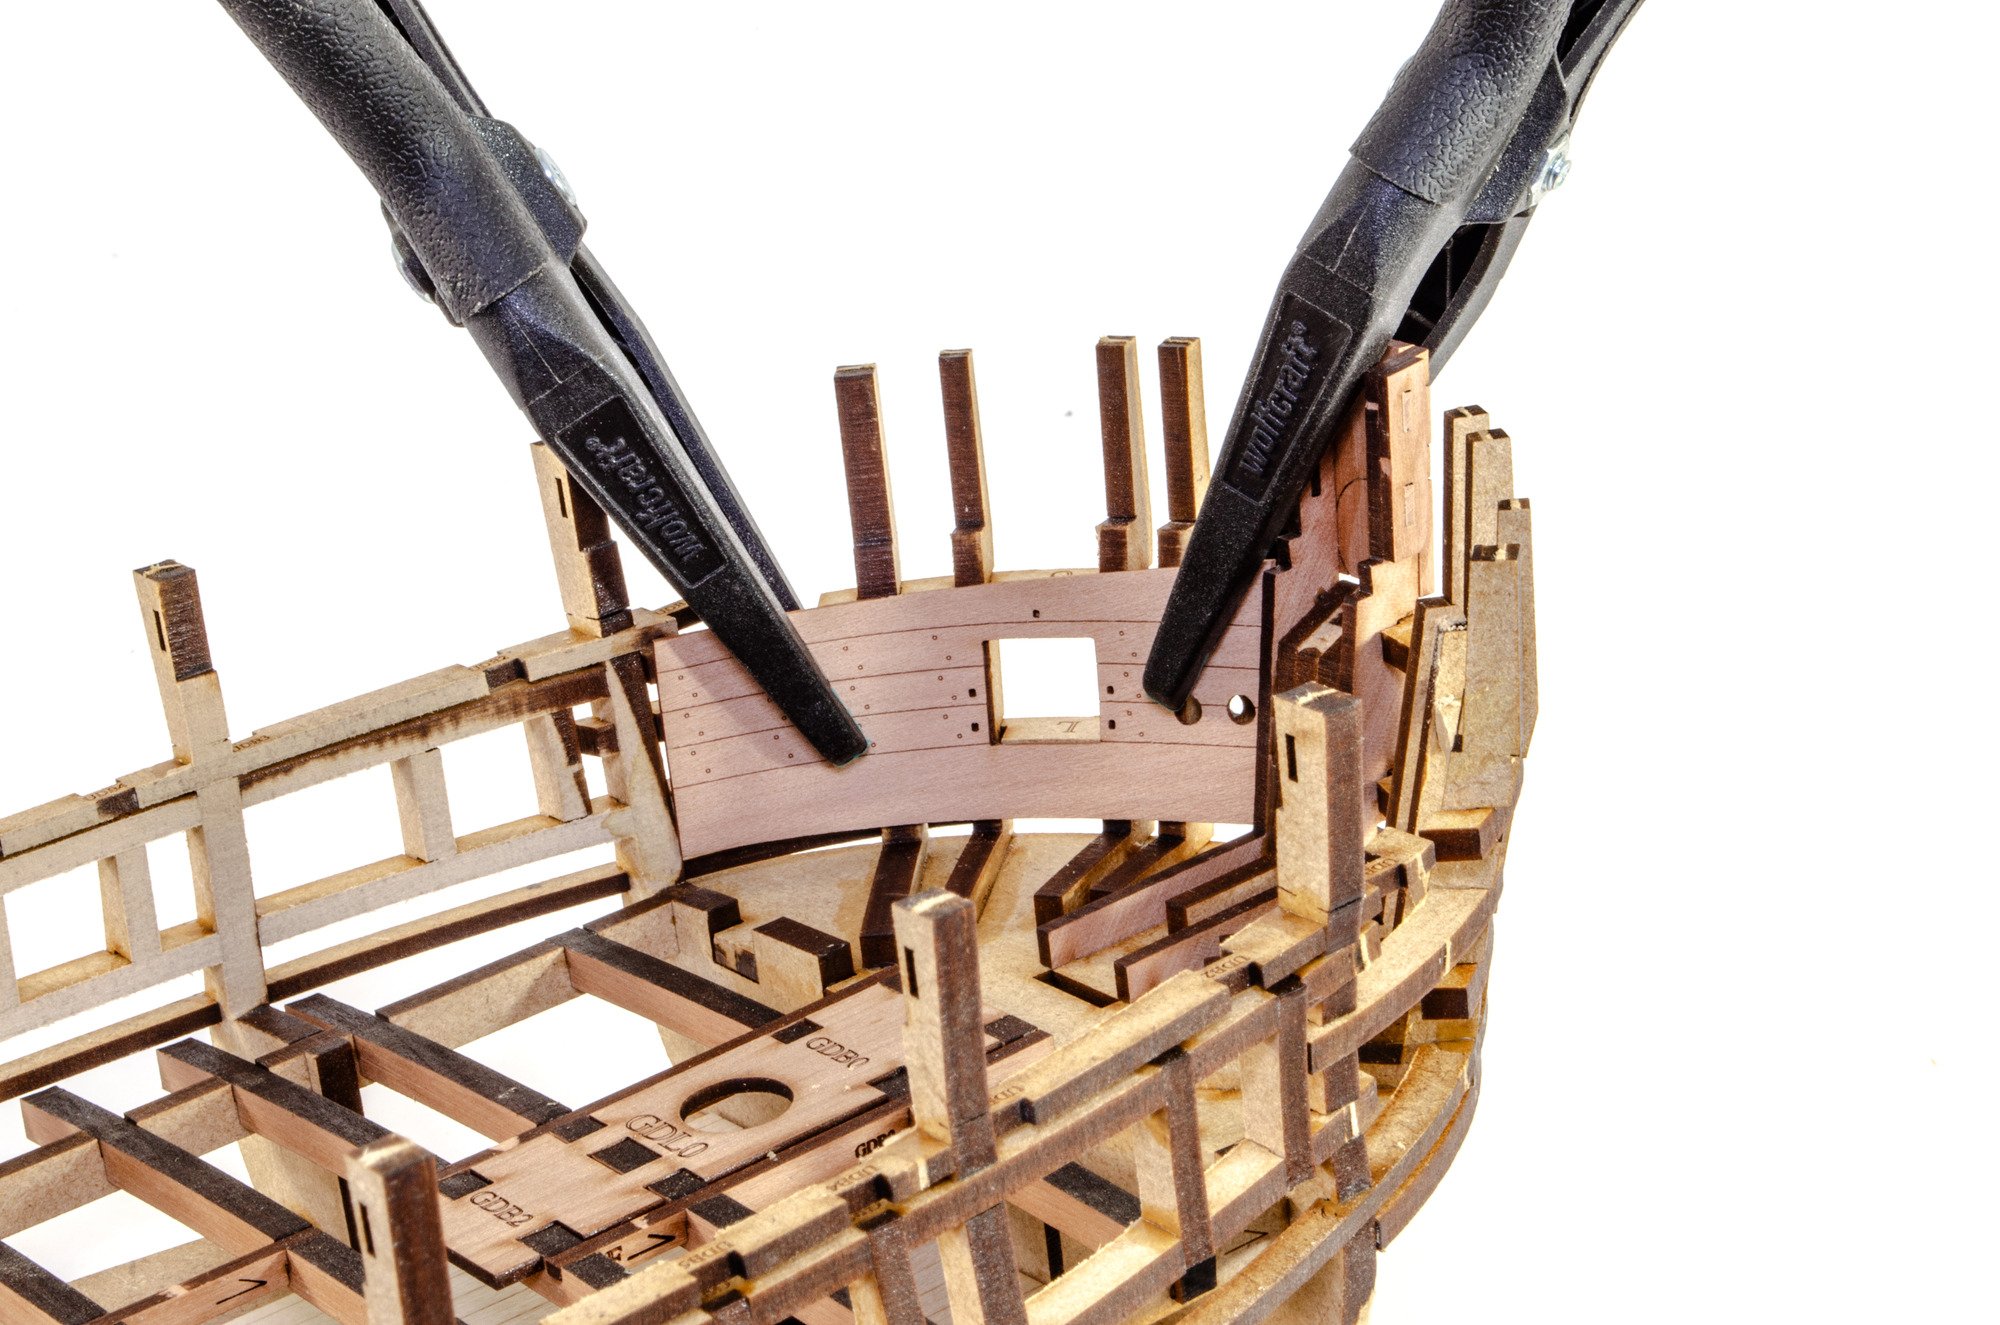
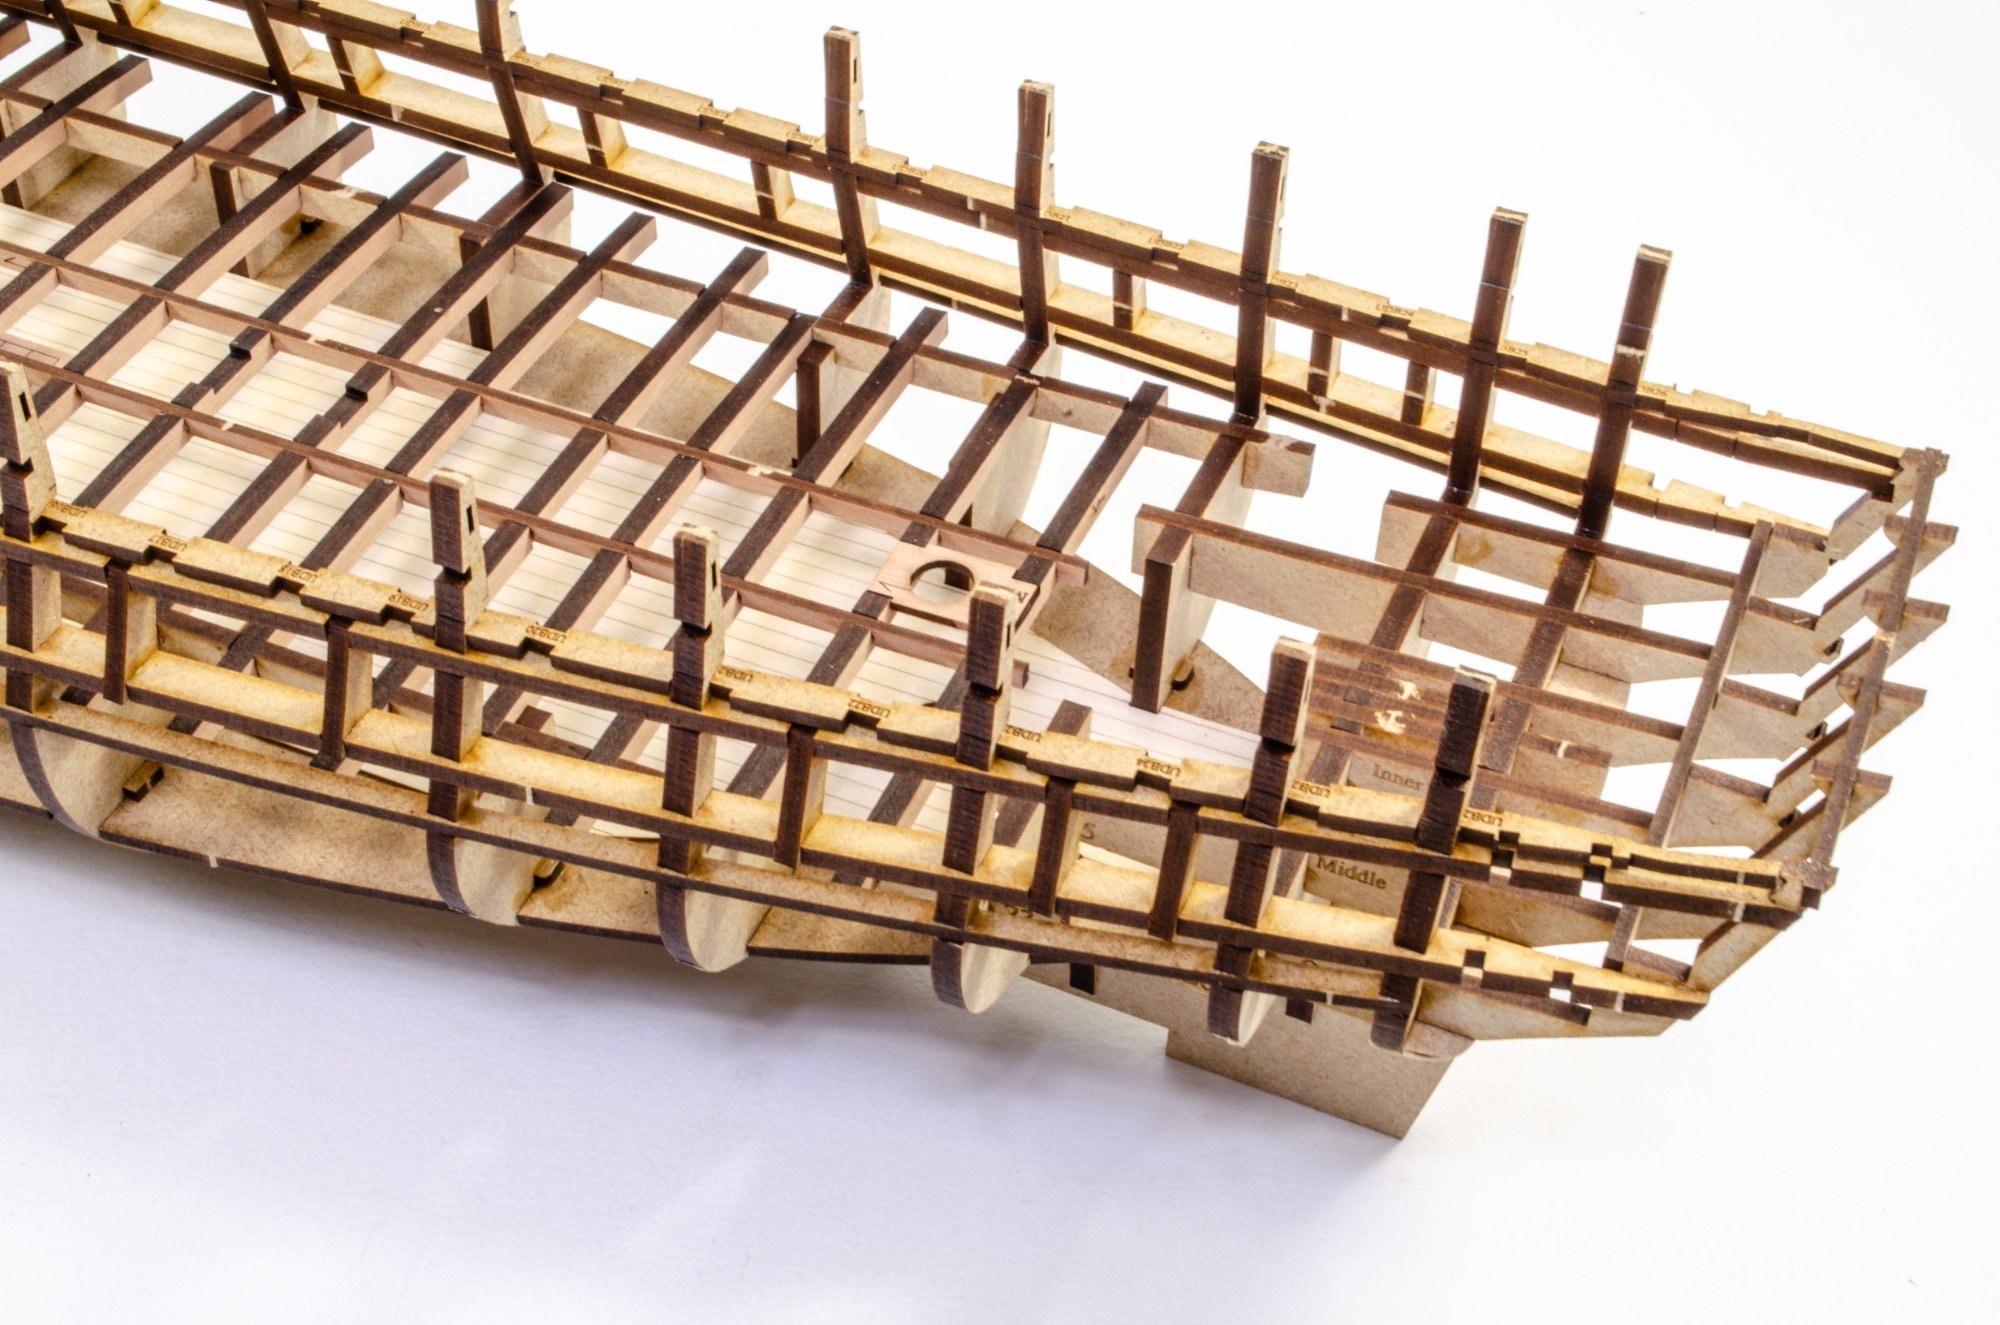
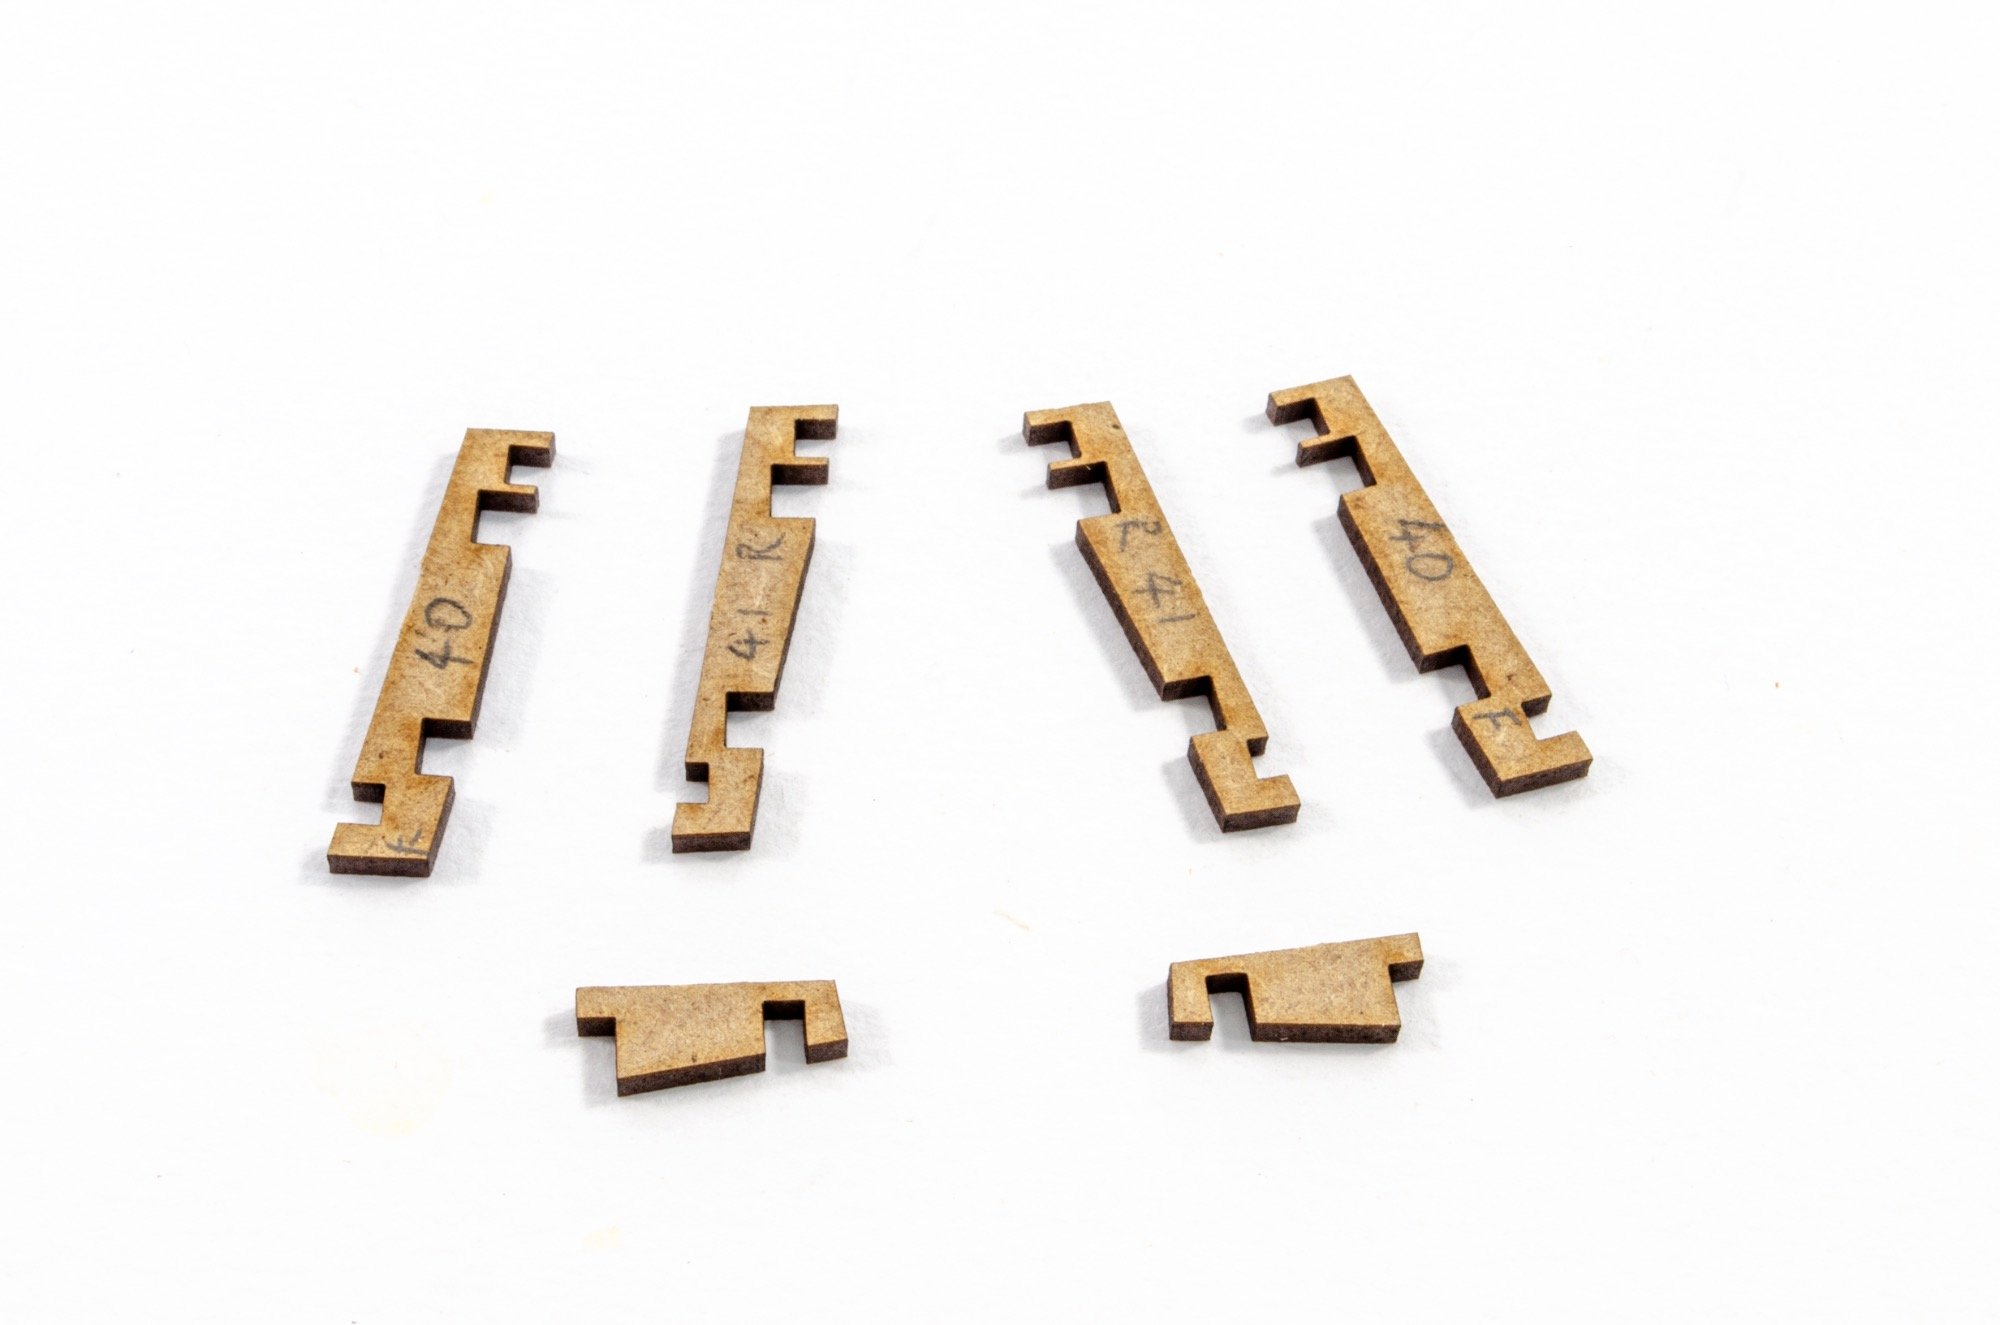
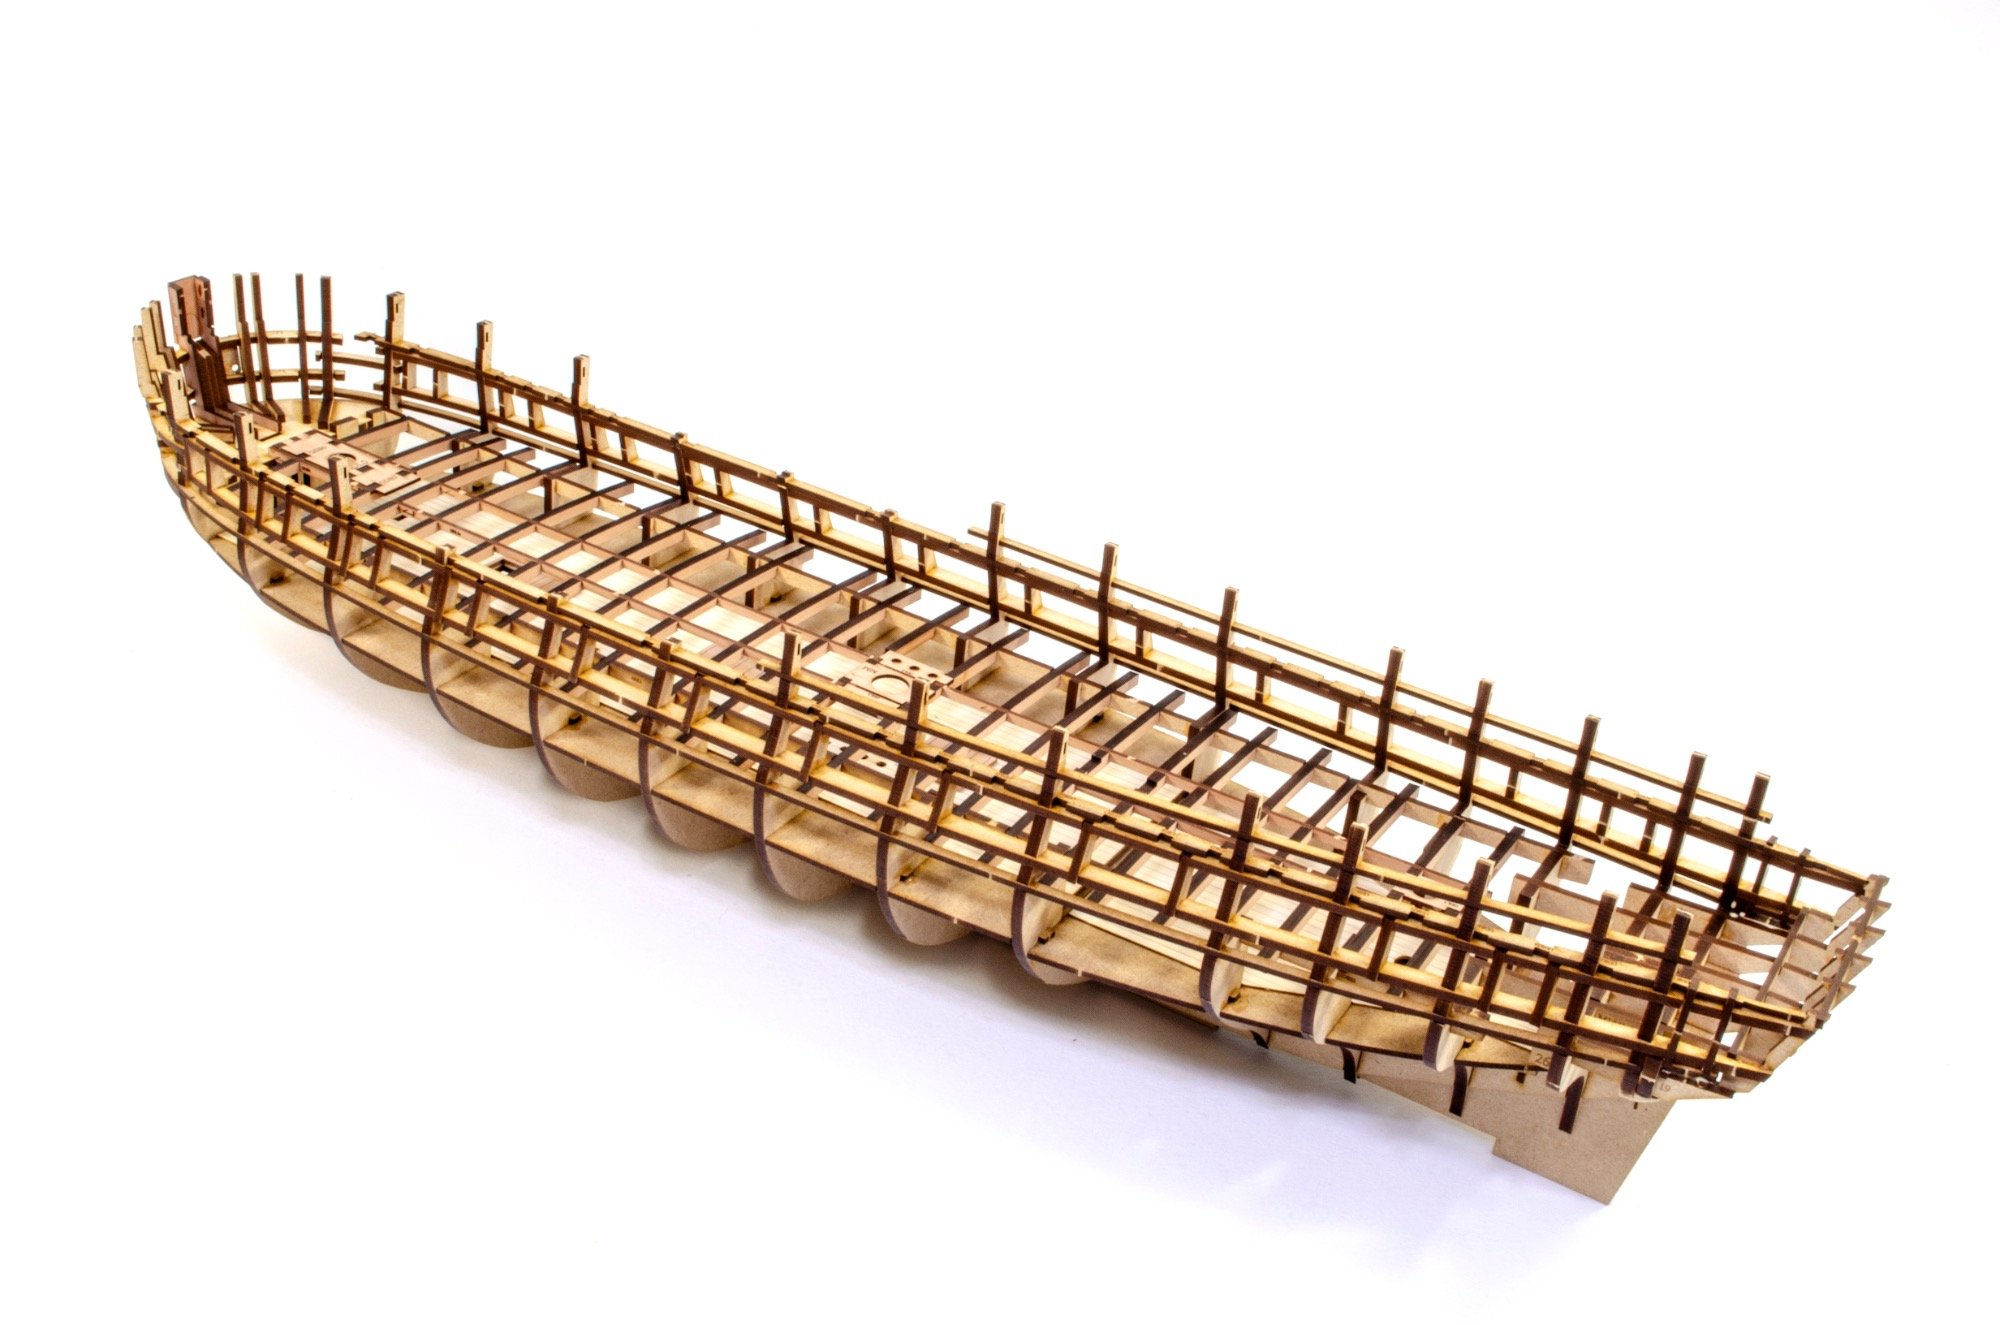
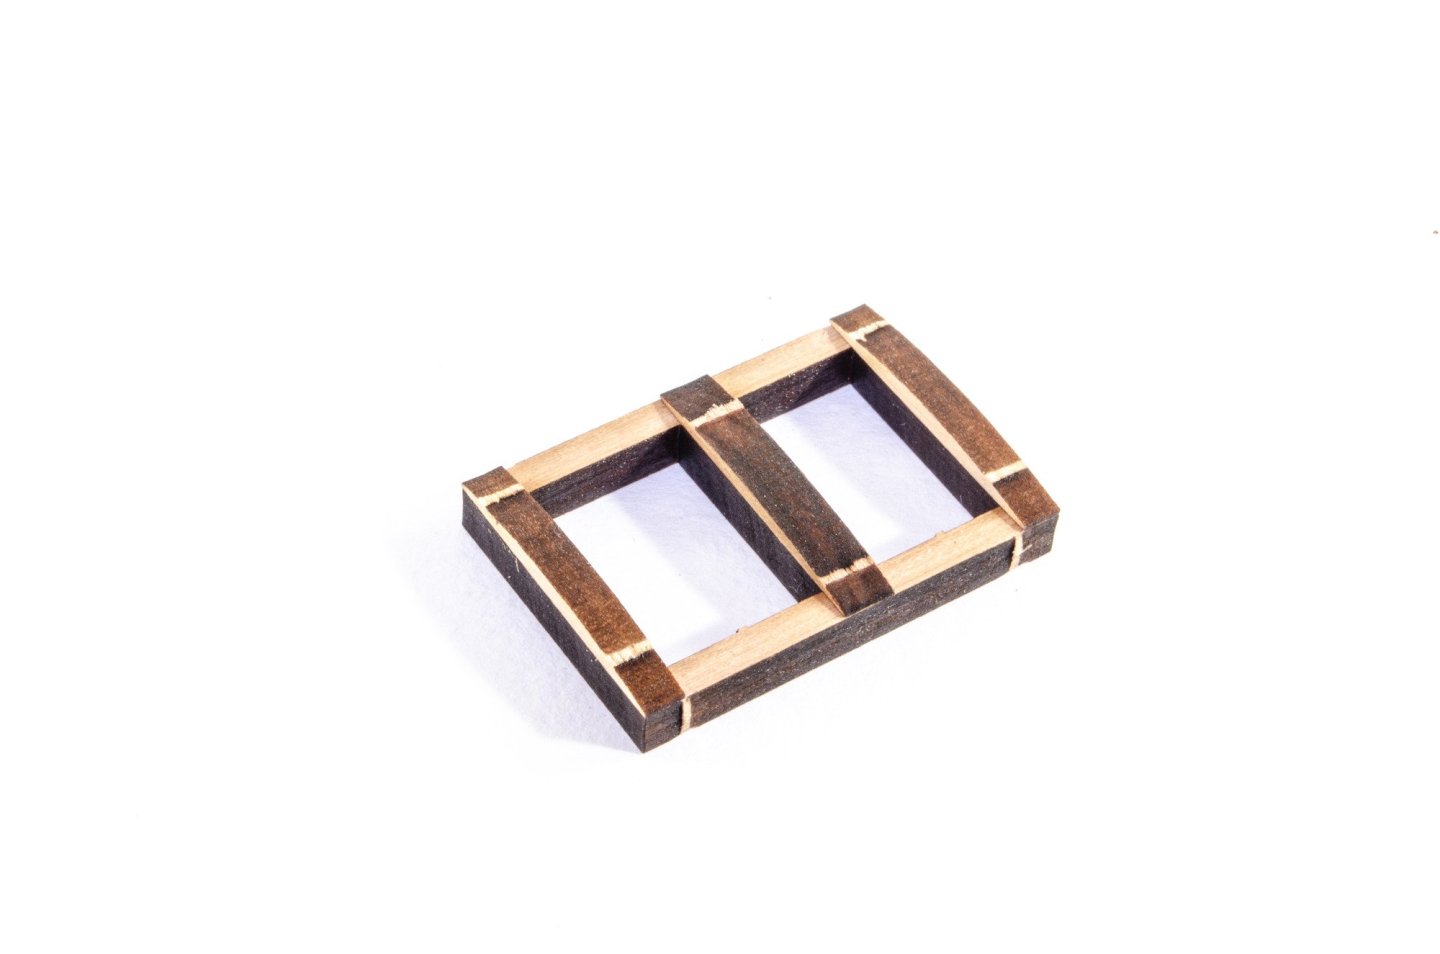
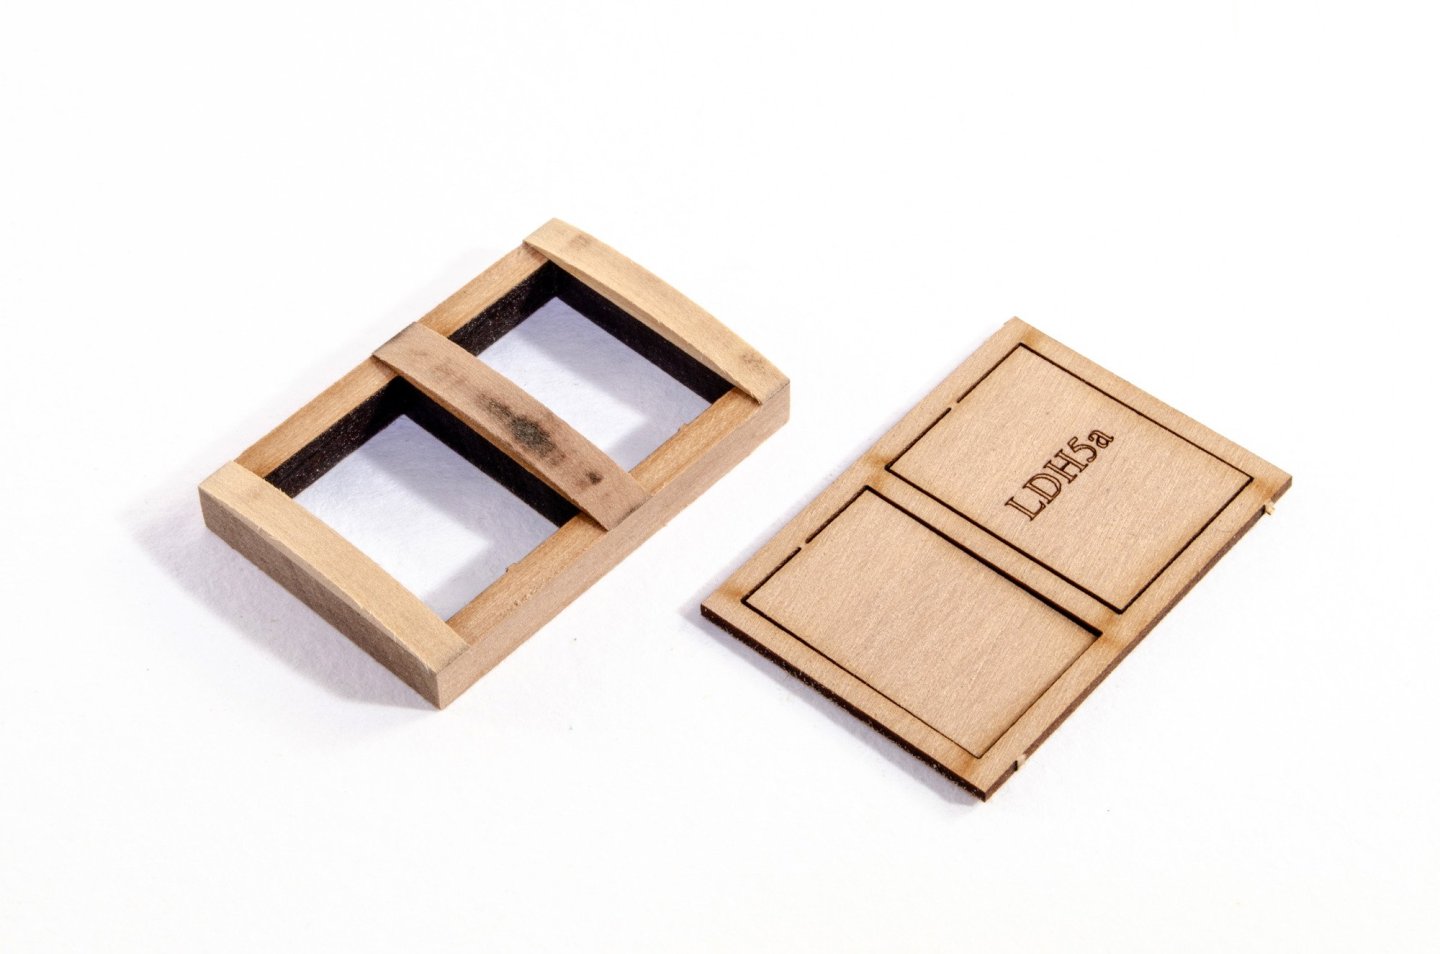
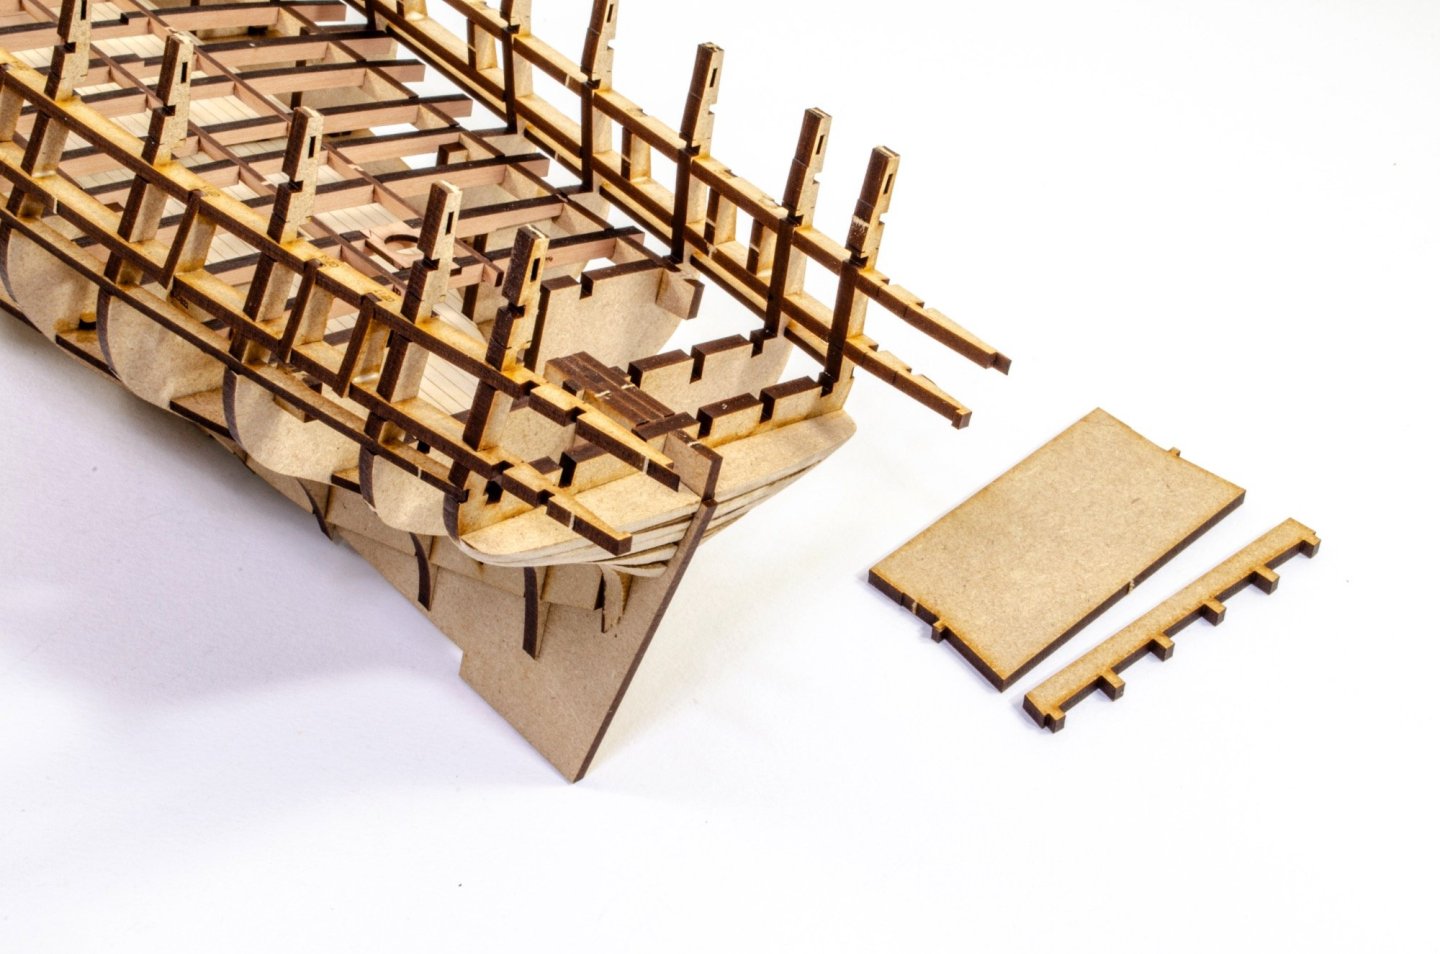
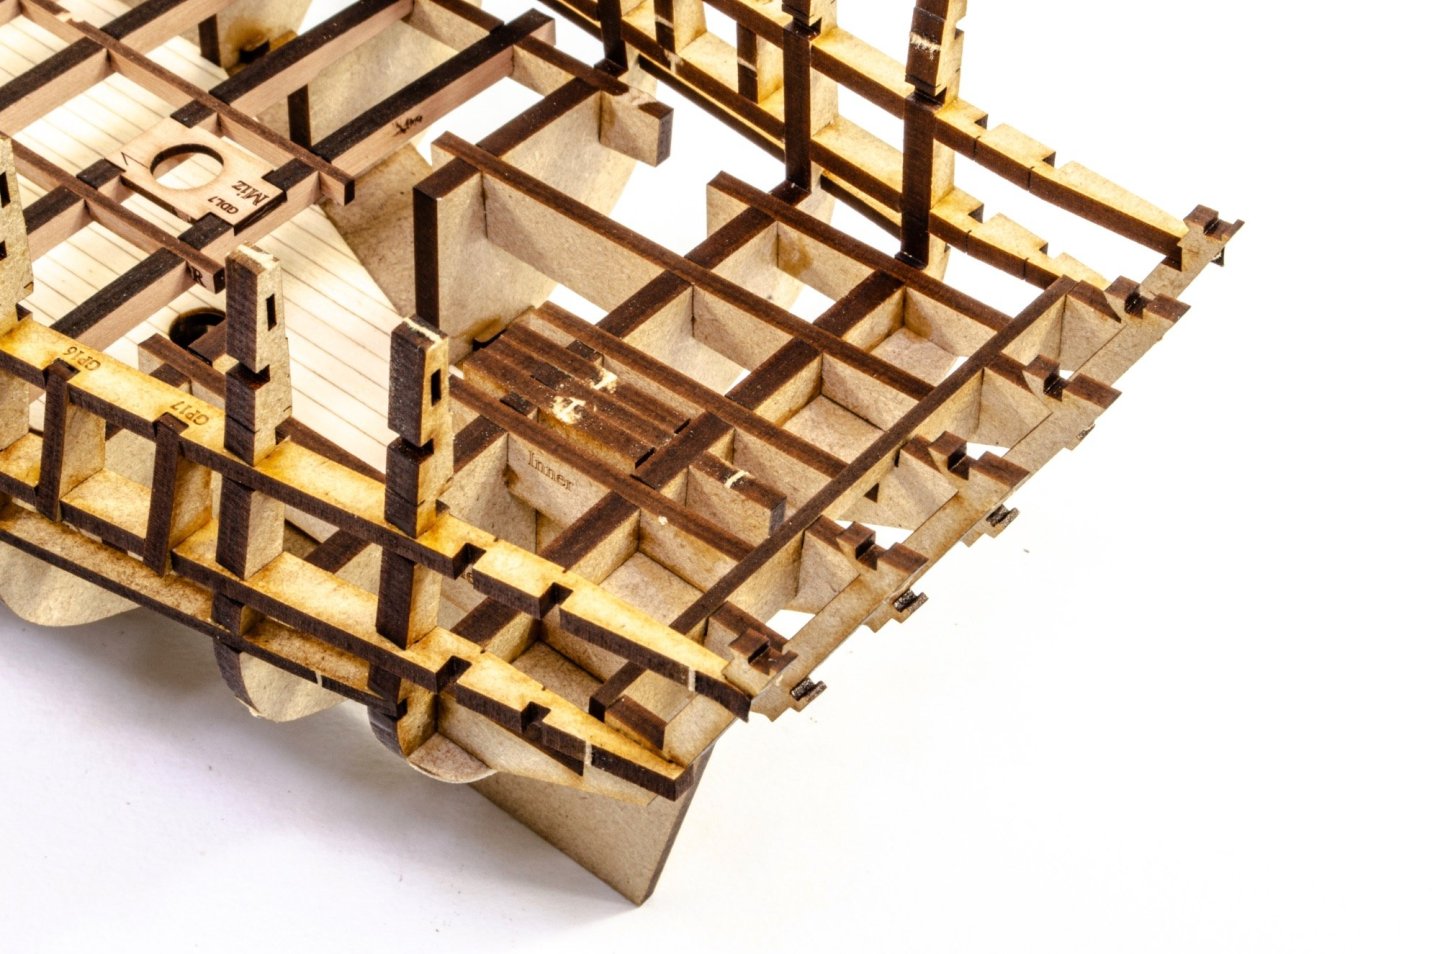
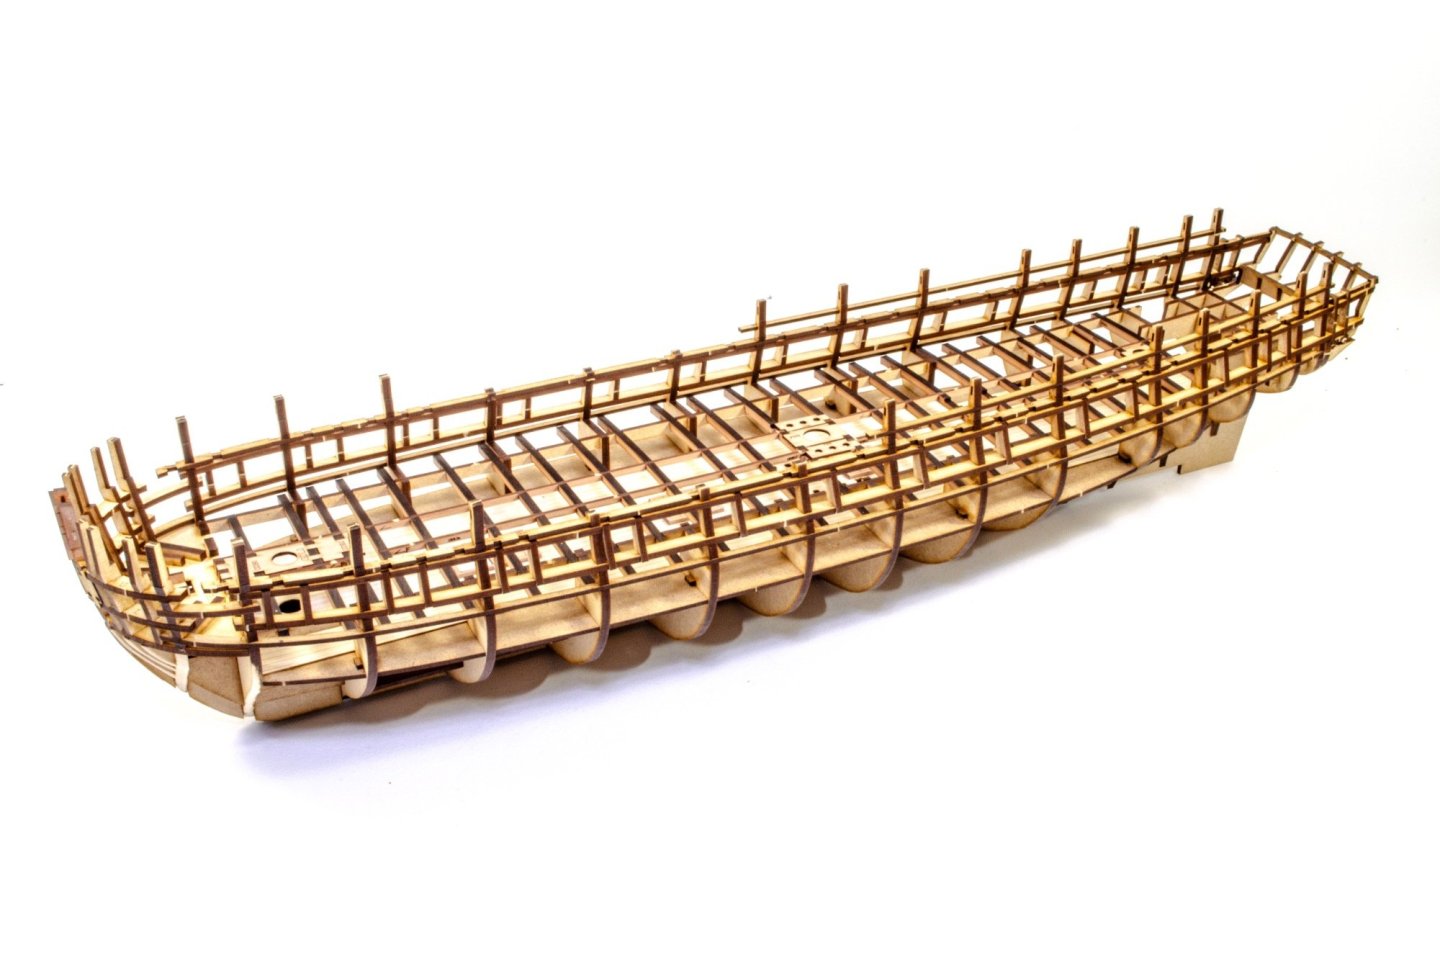
I've worked quite quickly here, so I thought I'd bring you totally up to date with work on this. This does mean my next updates will be in real time, with some work on furniture and fittings while the hull sits on my shelf. I'm also aware that because so much of the skeleton is built at once, that you may need to look closely at the photos for the changed. I'll eventually add some arrows on a good number of these pics, so it's evidently clear as to what you're looking at. This photo shows the hull with all the cannon ports installed. A total breeze to do this. Just remember that every vertical port piece is unique to its position. I now focus on the stern. These parts are very obvious. Note the inner, middle, and outer engravings, and all will be fine. The blank panels can now be removed from the stern bulkhead, allowing the previous parts to be fitted. Just take care with the strips protruding at the rear. These are quite strong, but exercise caution. These parts are now slotted into their respective positions and glued. Another two horizontal strips now sit atop the previous ones (slotted into the bulwark ears), from bow to stern. You can see the deck beam positions engraved on them. The quarter gallery doorways are now installed. Note another horizontal strip fitted to the outside of the rear bulwark ears, strengthening that area. NOW....we can glue! Your keel should be 100% straight by now, so it's time to solidify the hull by painting in some slightly dilute wood glue into the various joints and seams. I now leave this to set for a number of hours, while I edit the photos and do this update. Here is HMS Surprise as she currently looks. She's sleek and very impressive! More, when I've created the content 🤪


- 145 replies
-
- 43
-
-
-
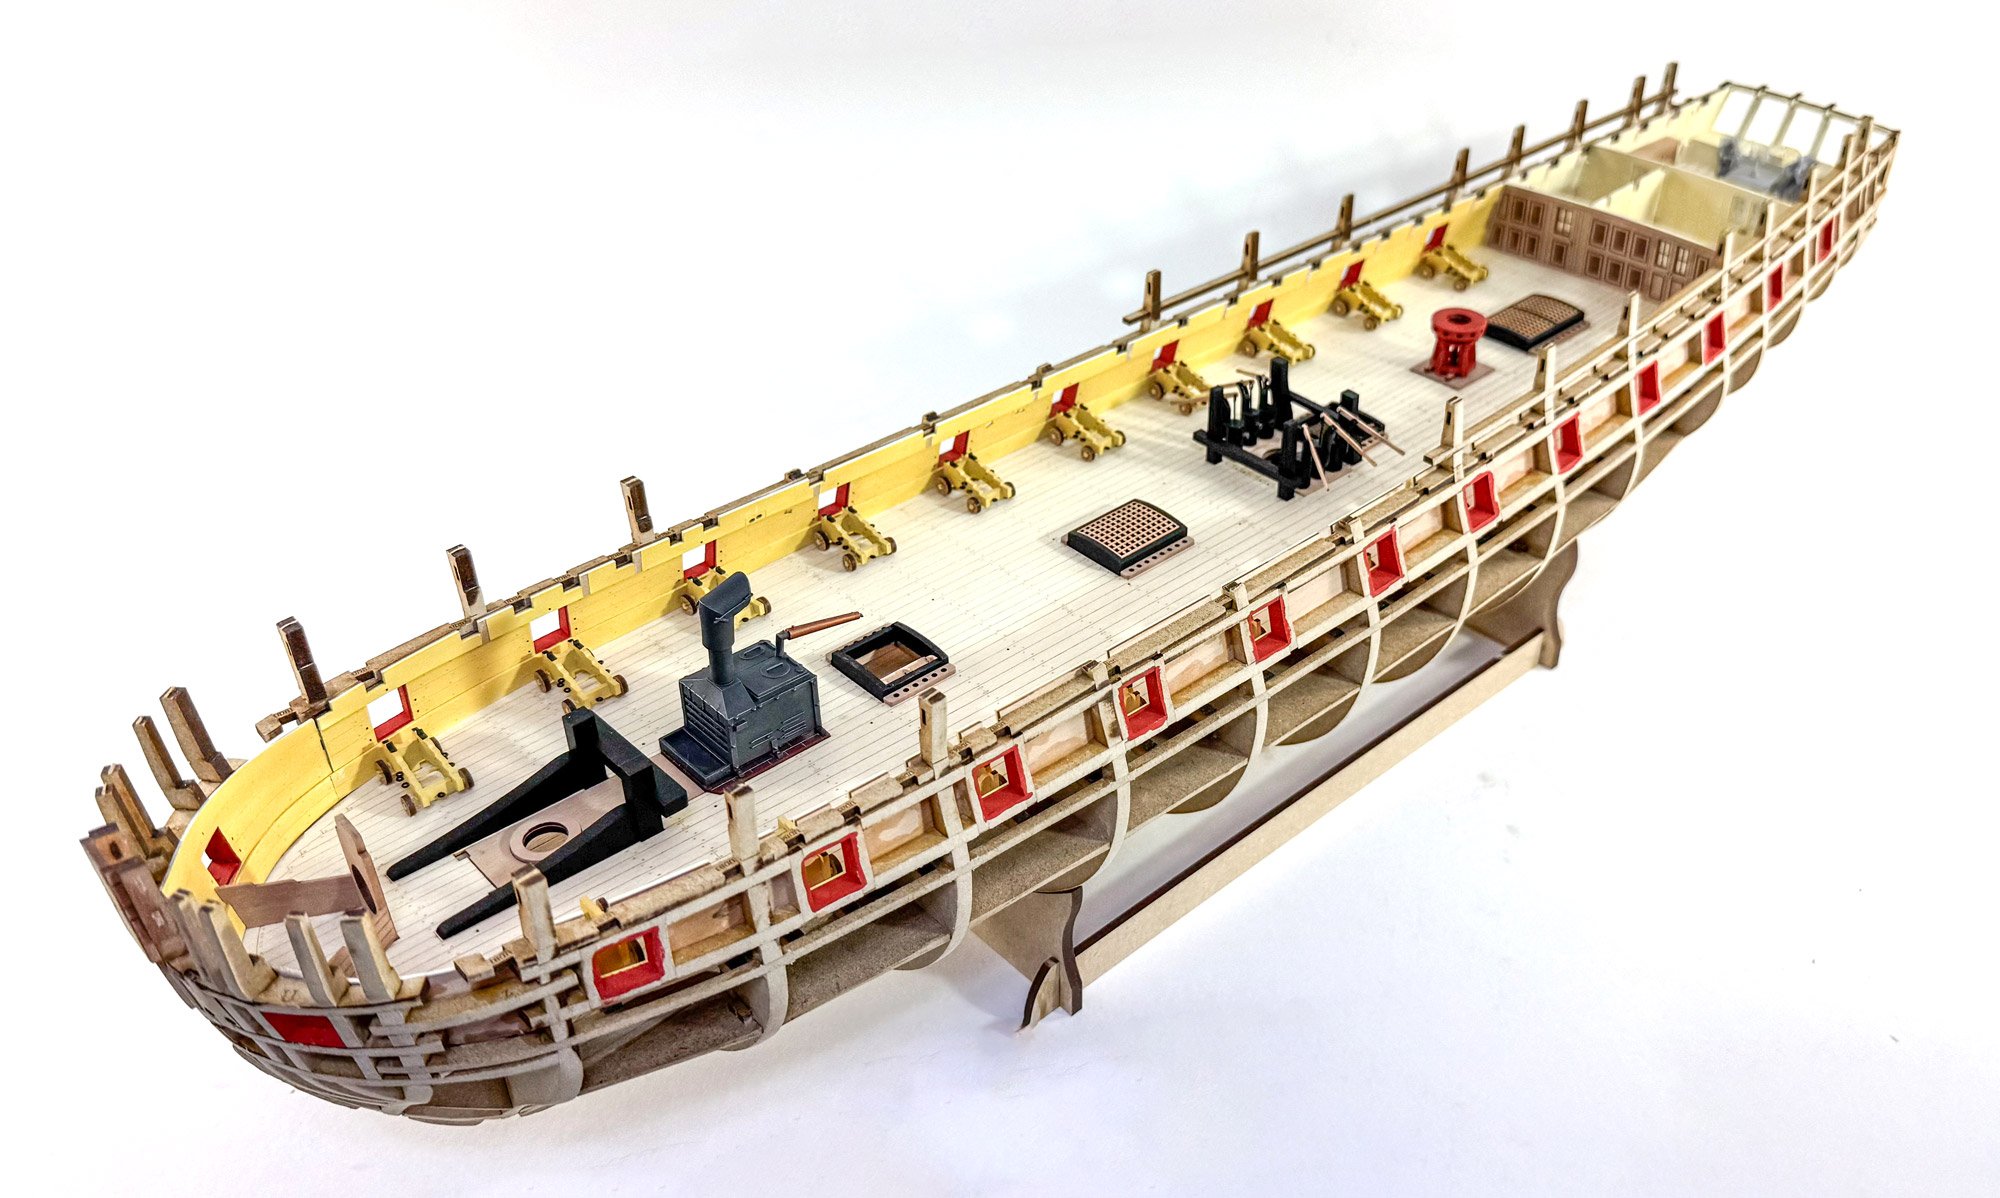
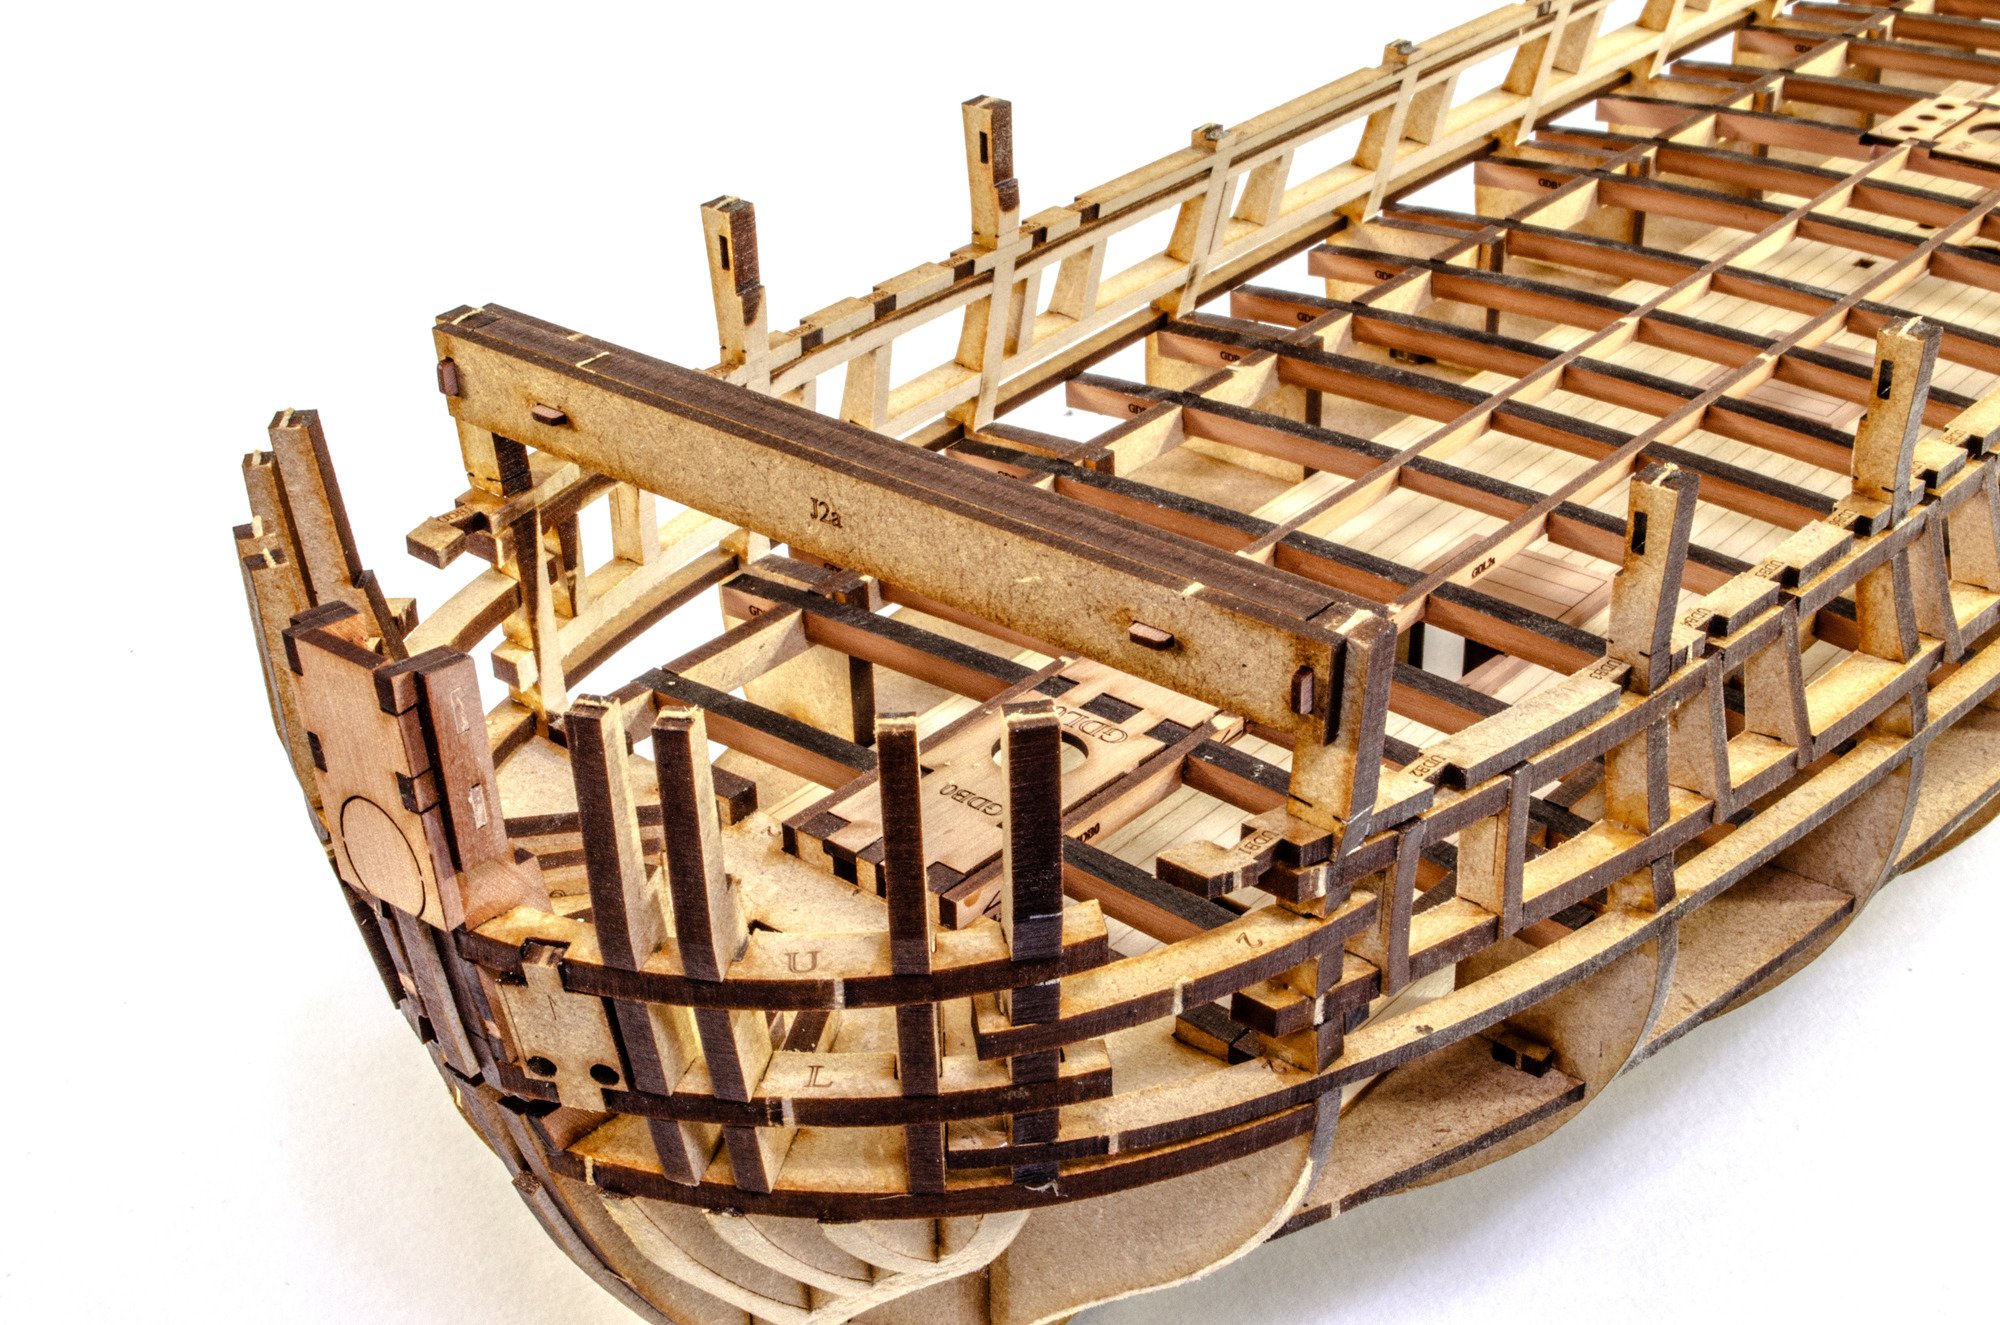
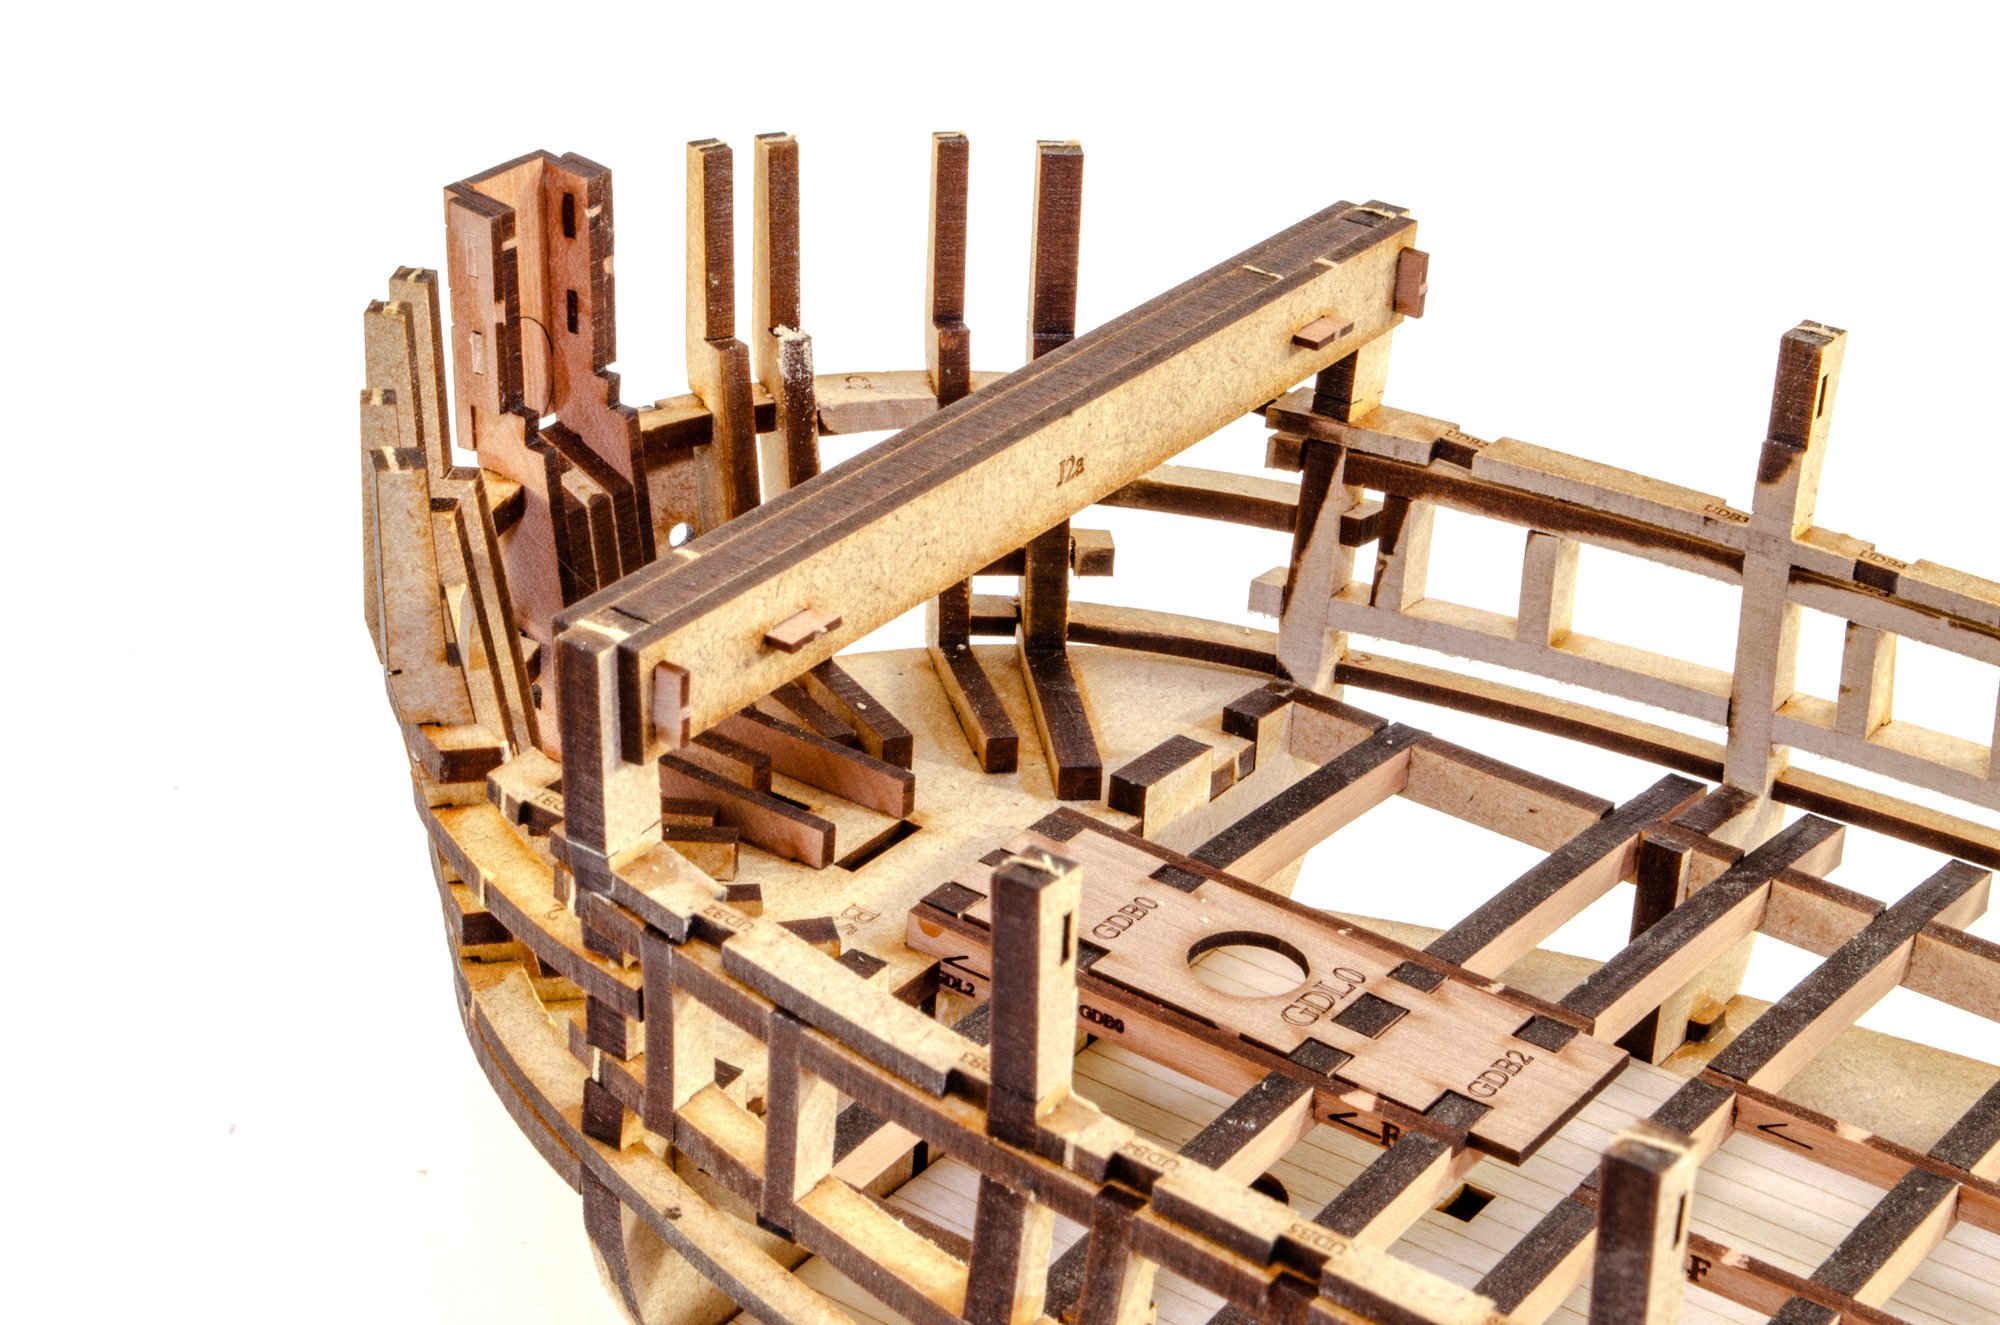
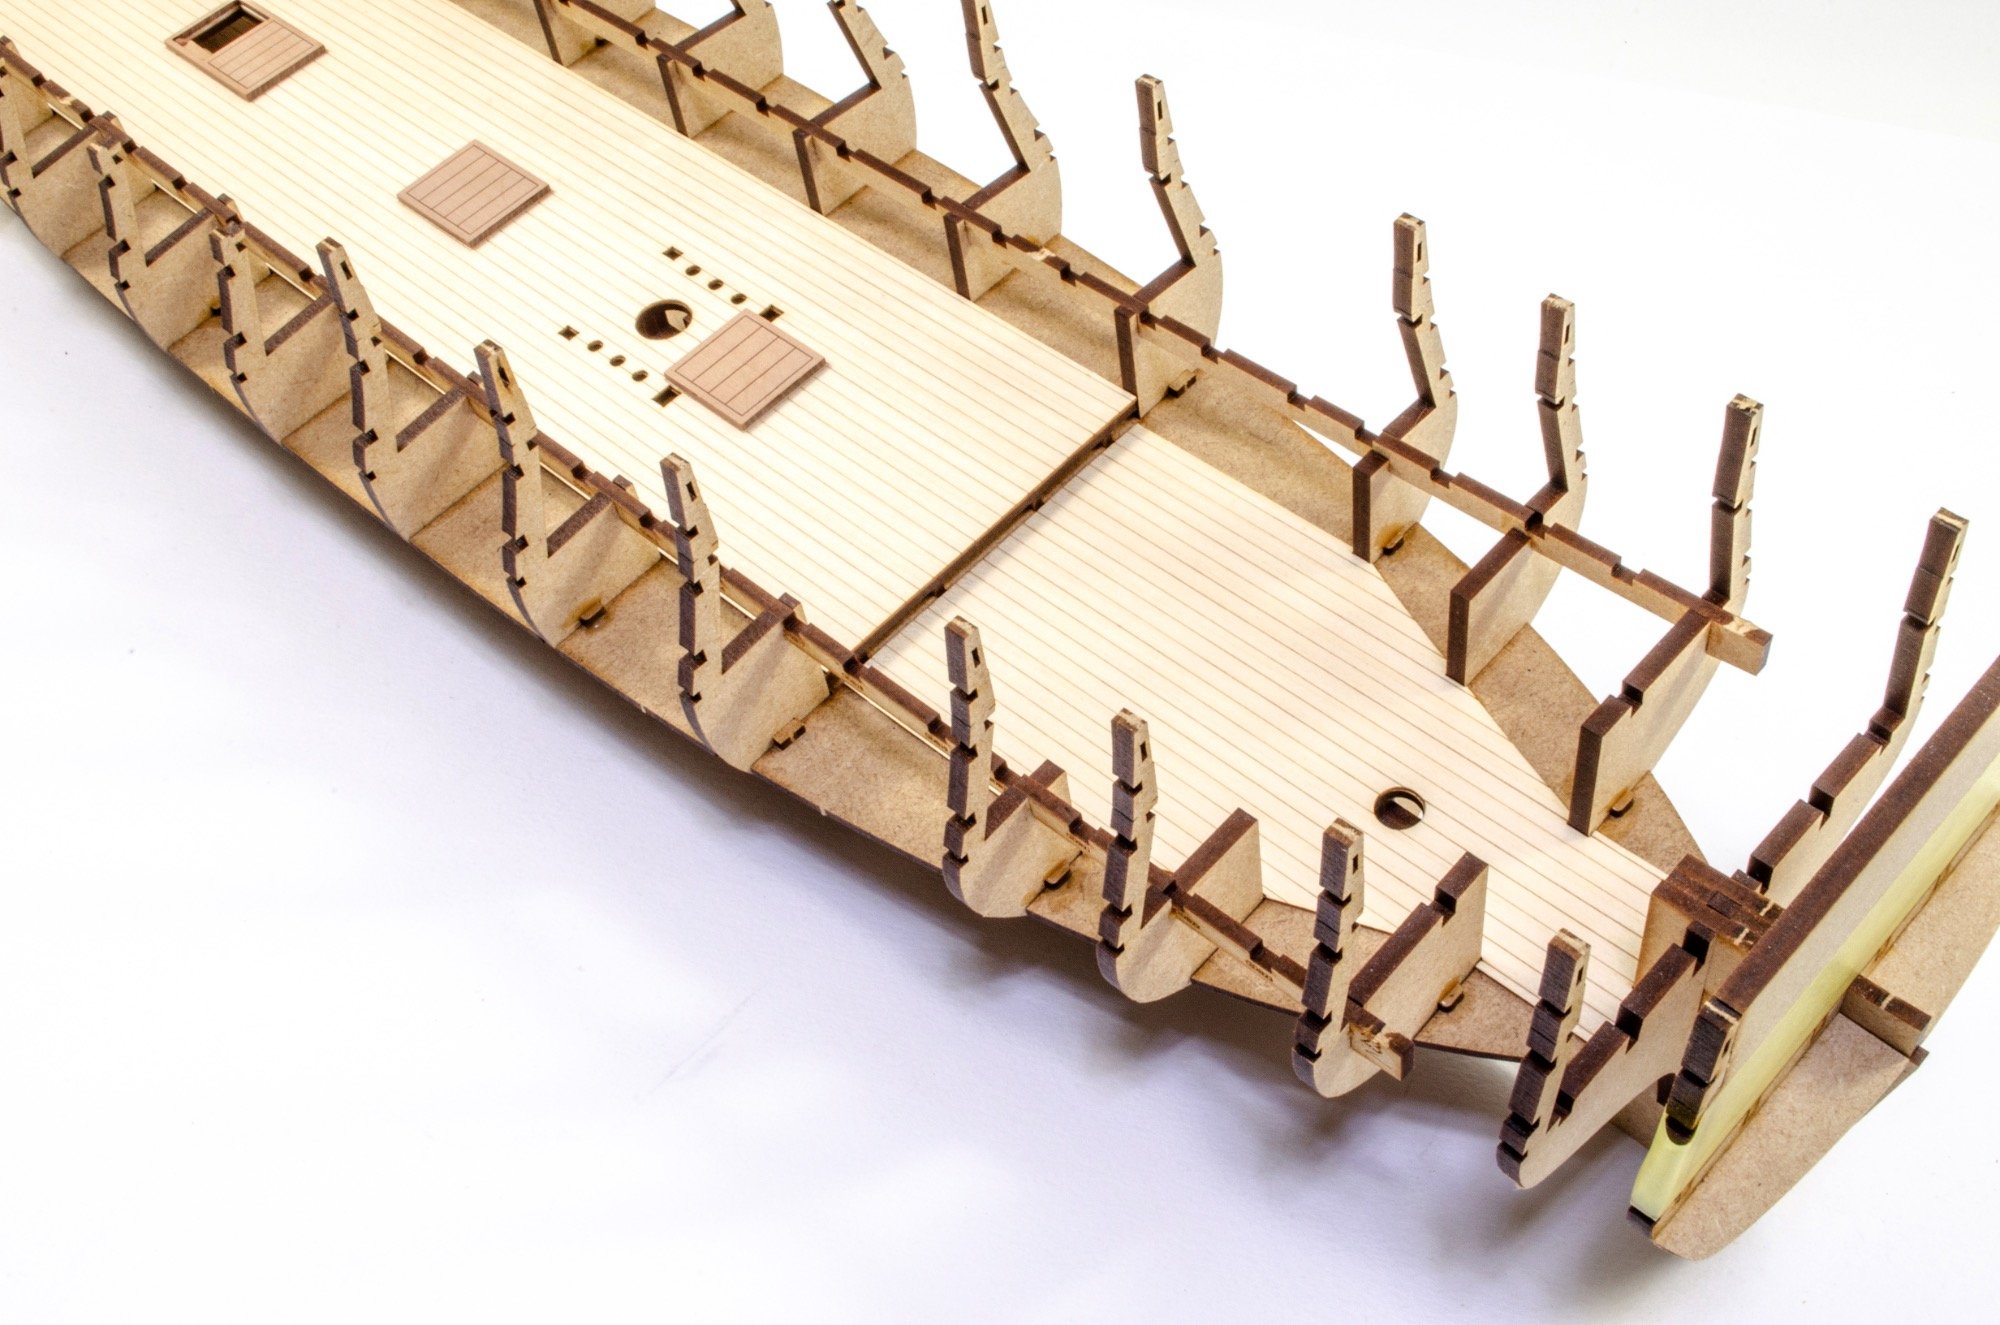
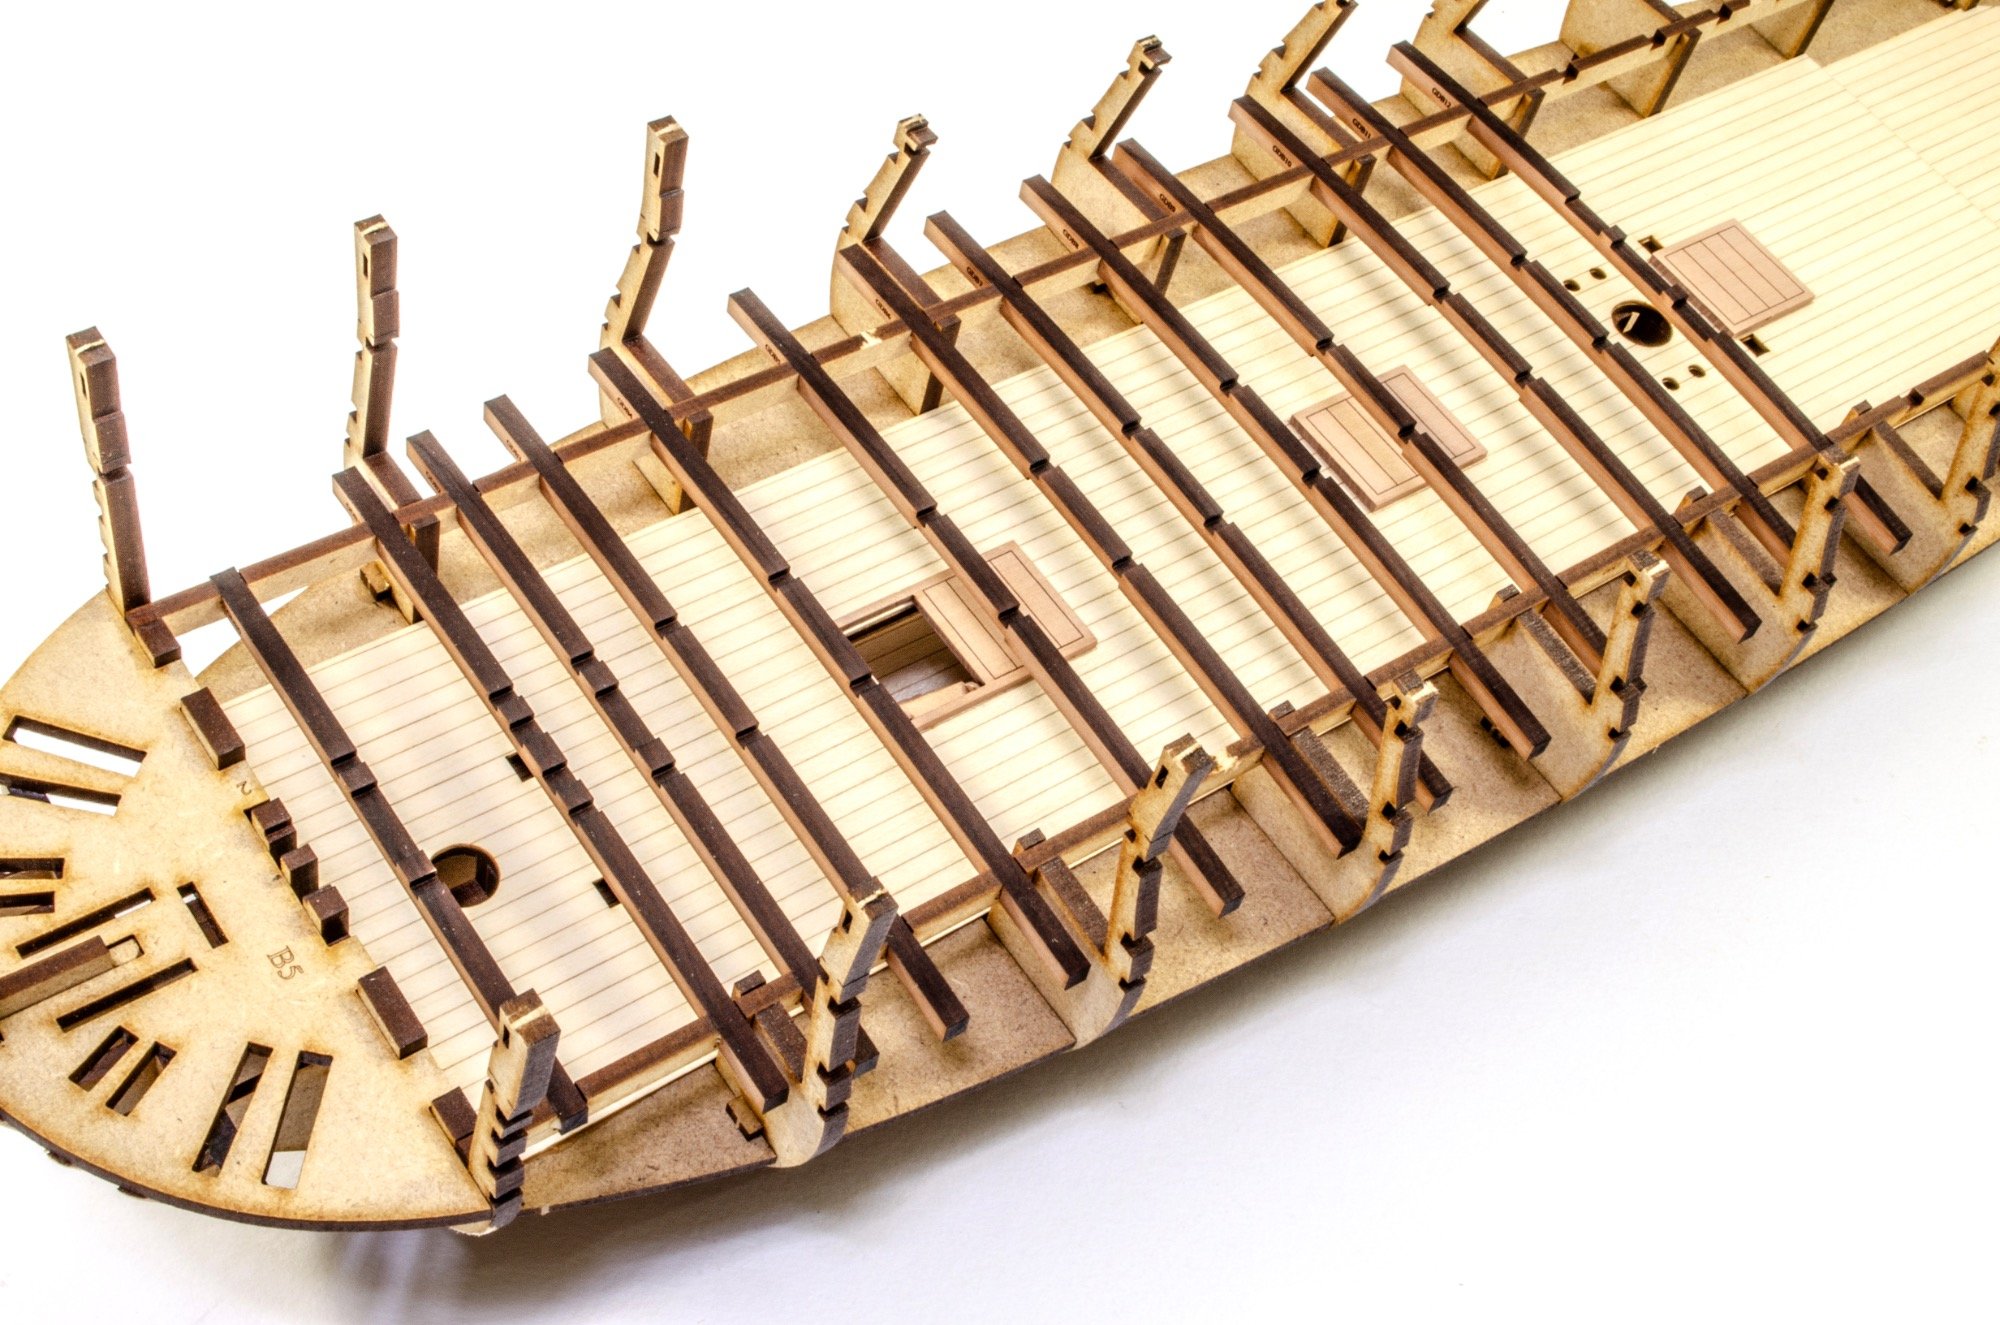
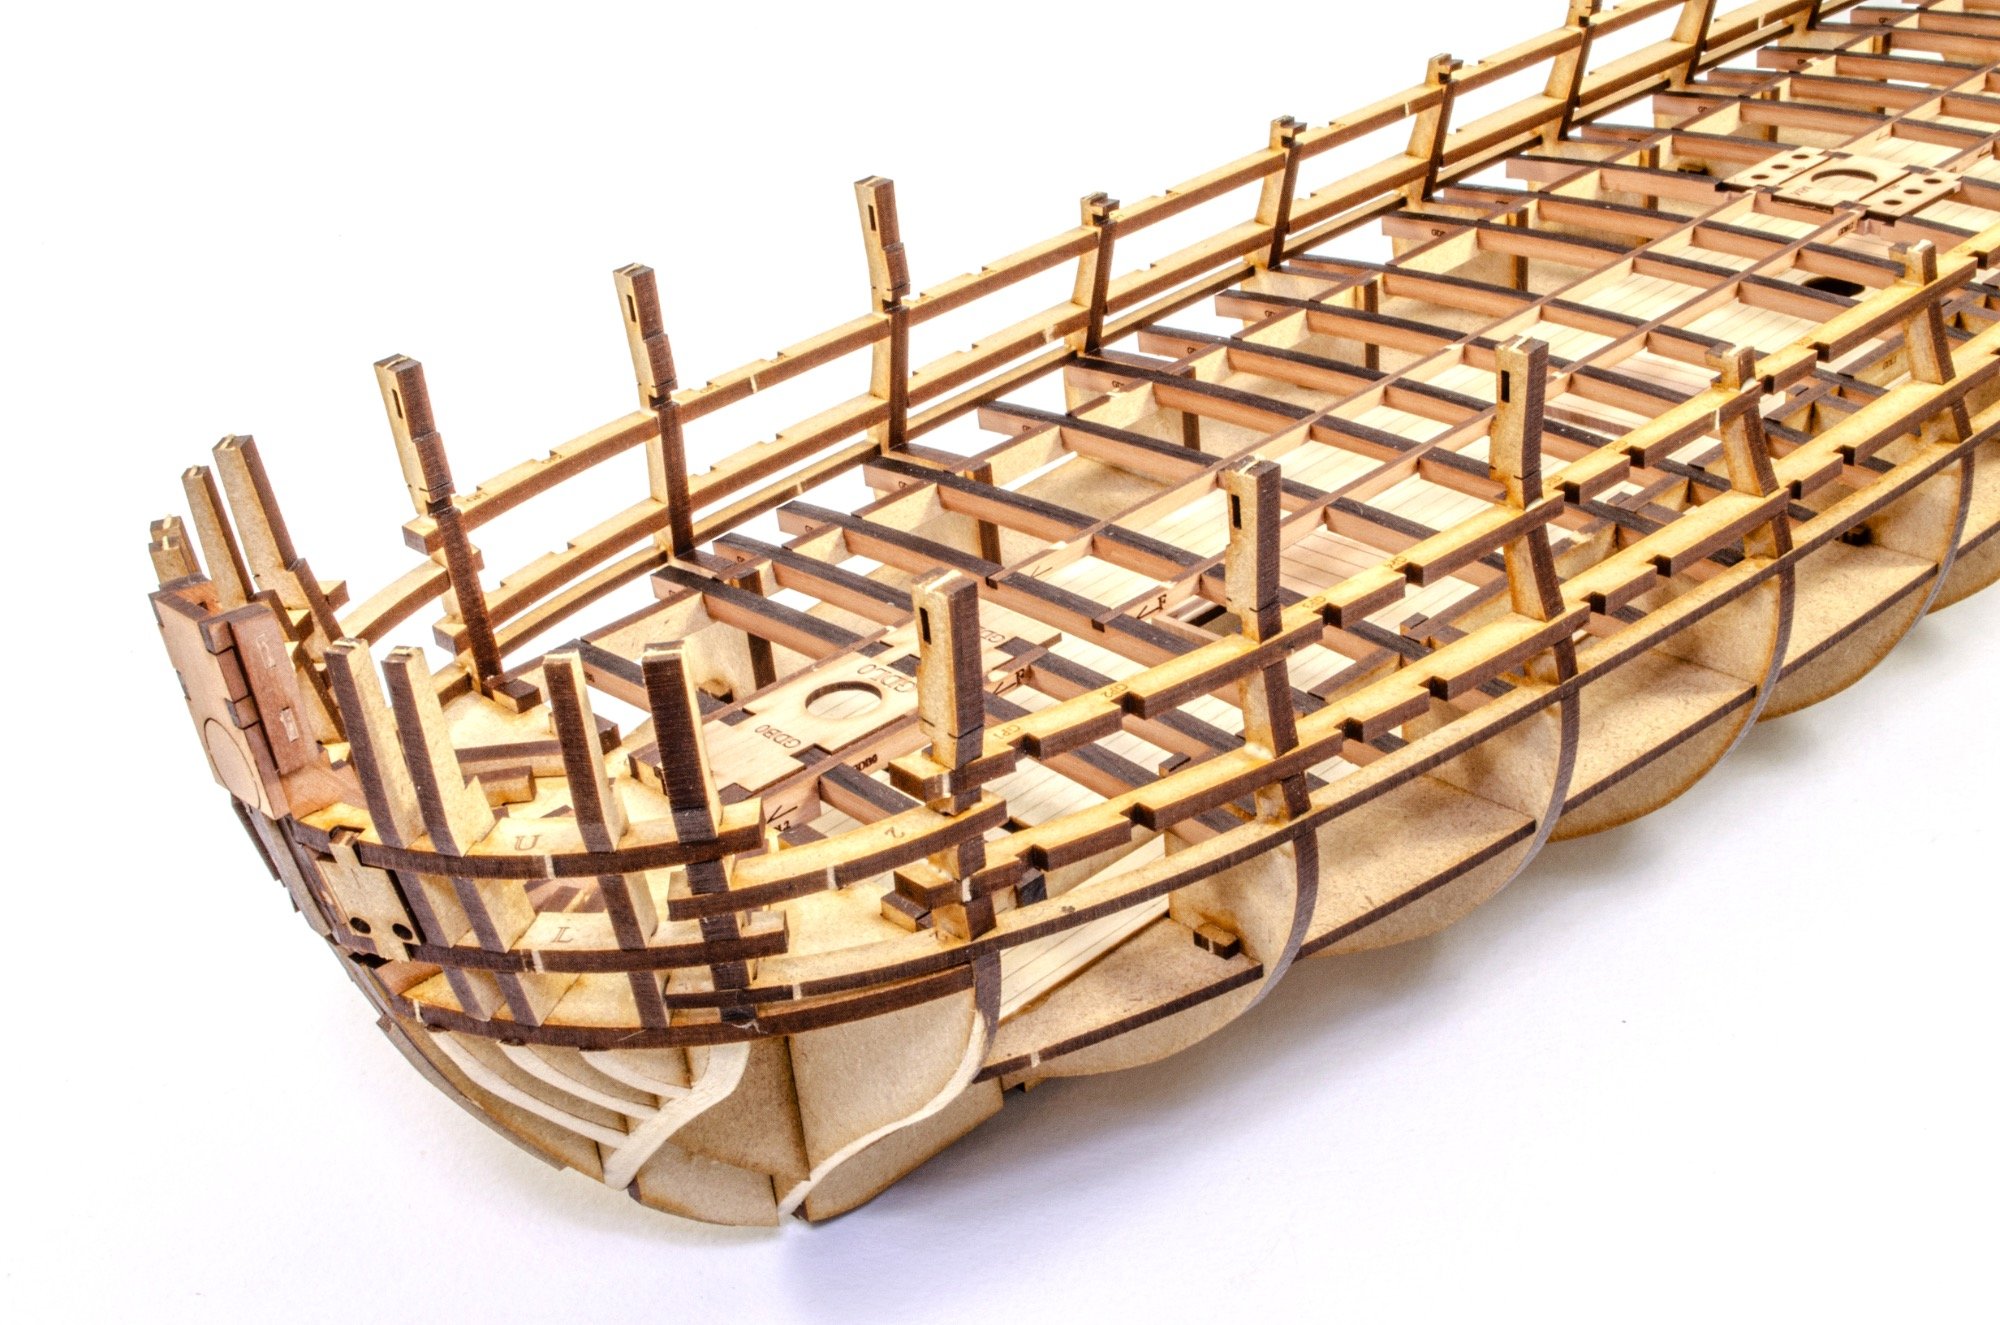
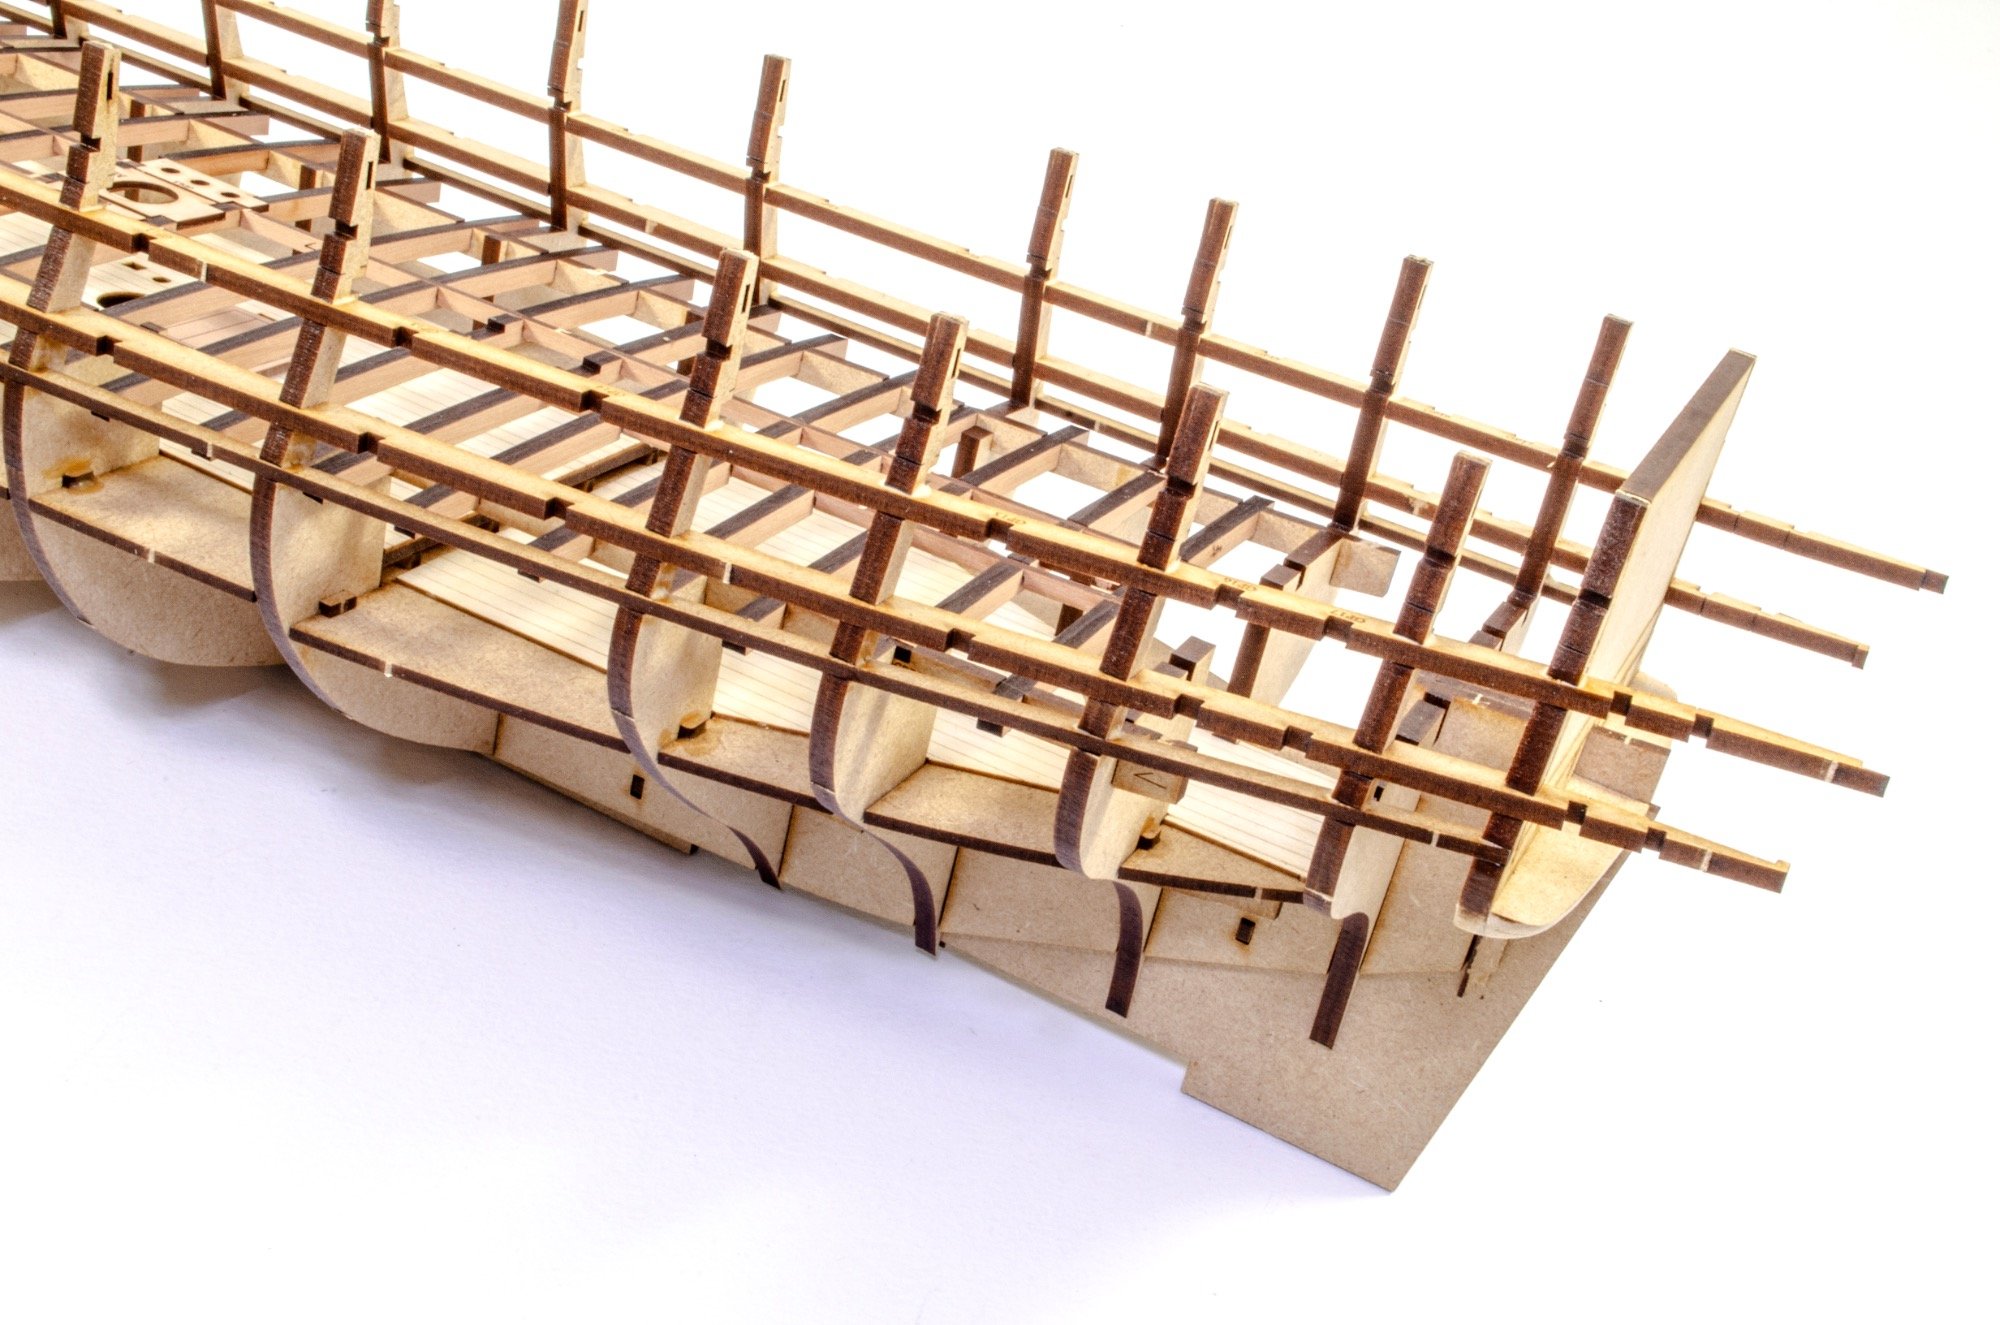
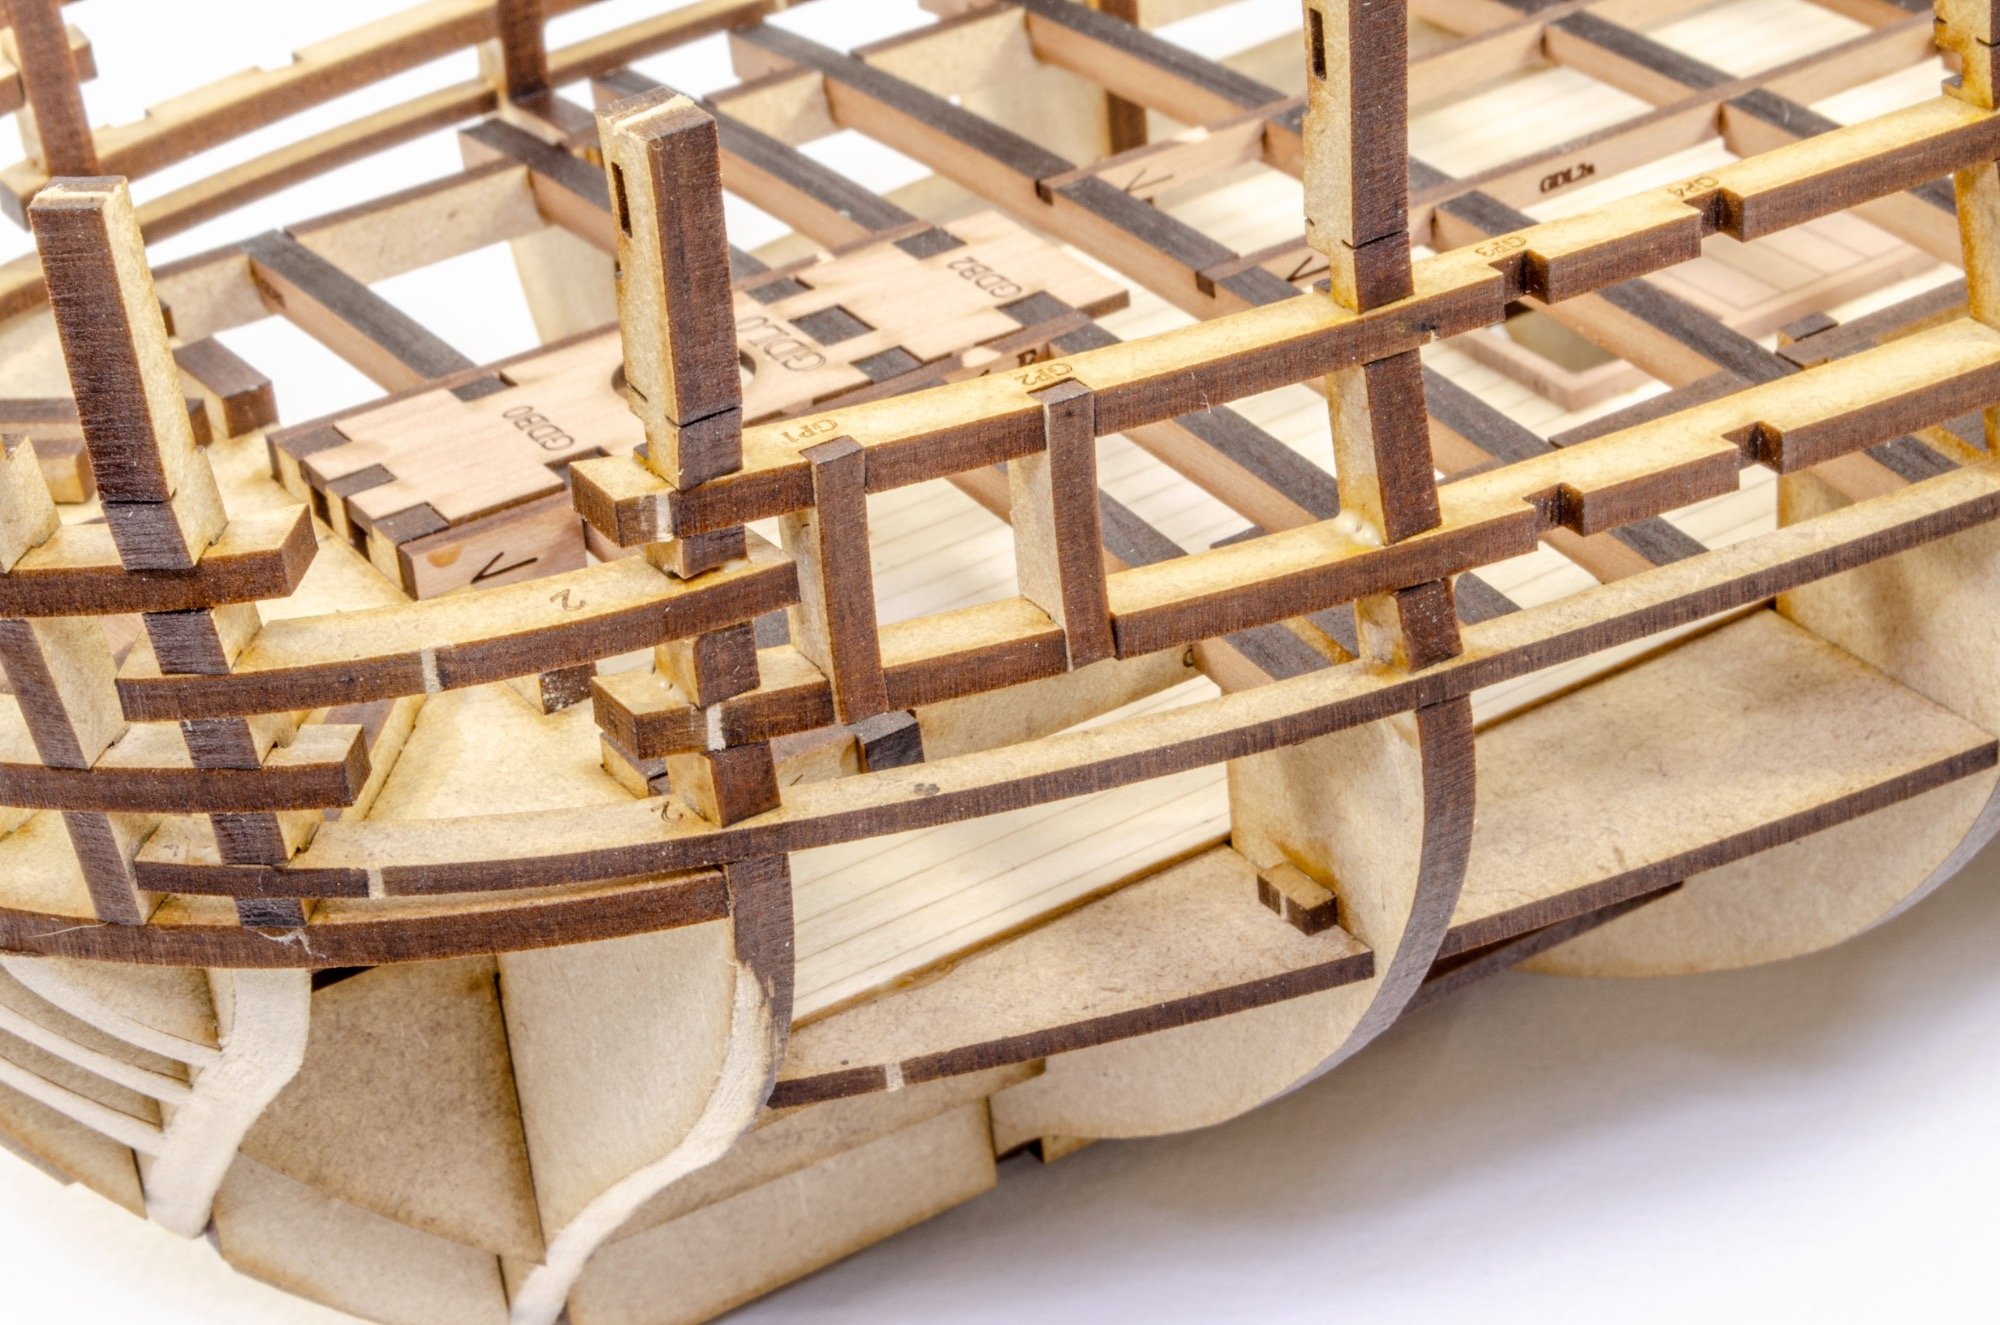
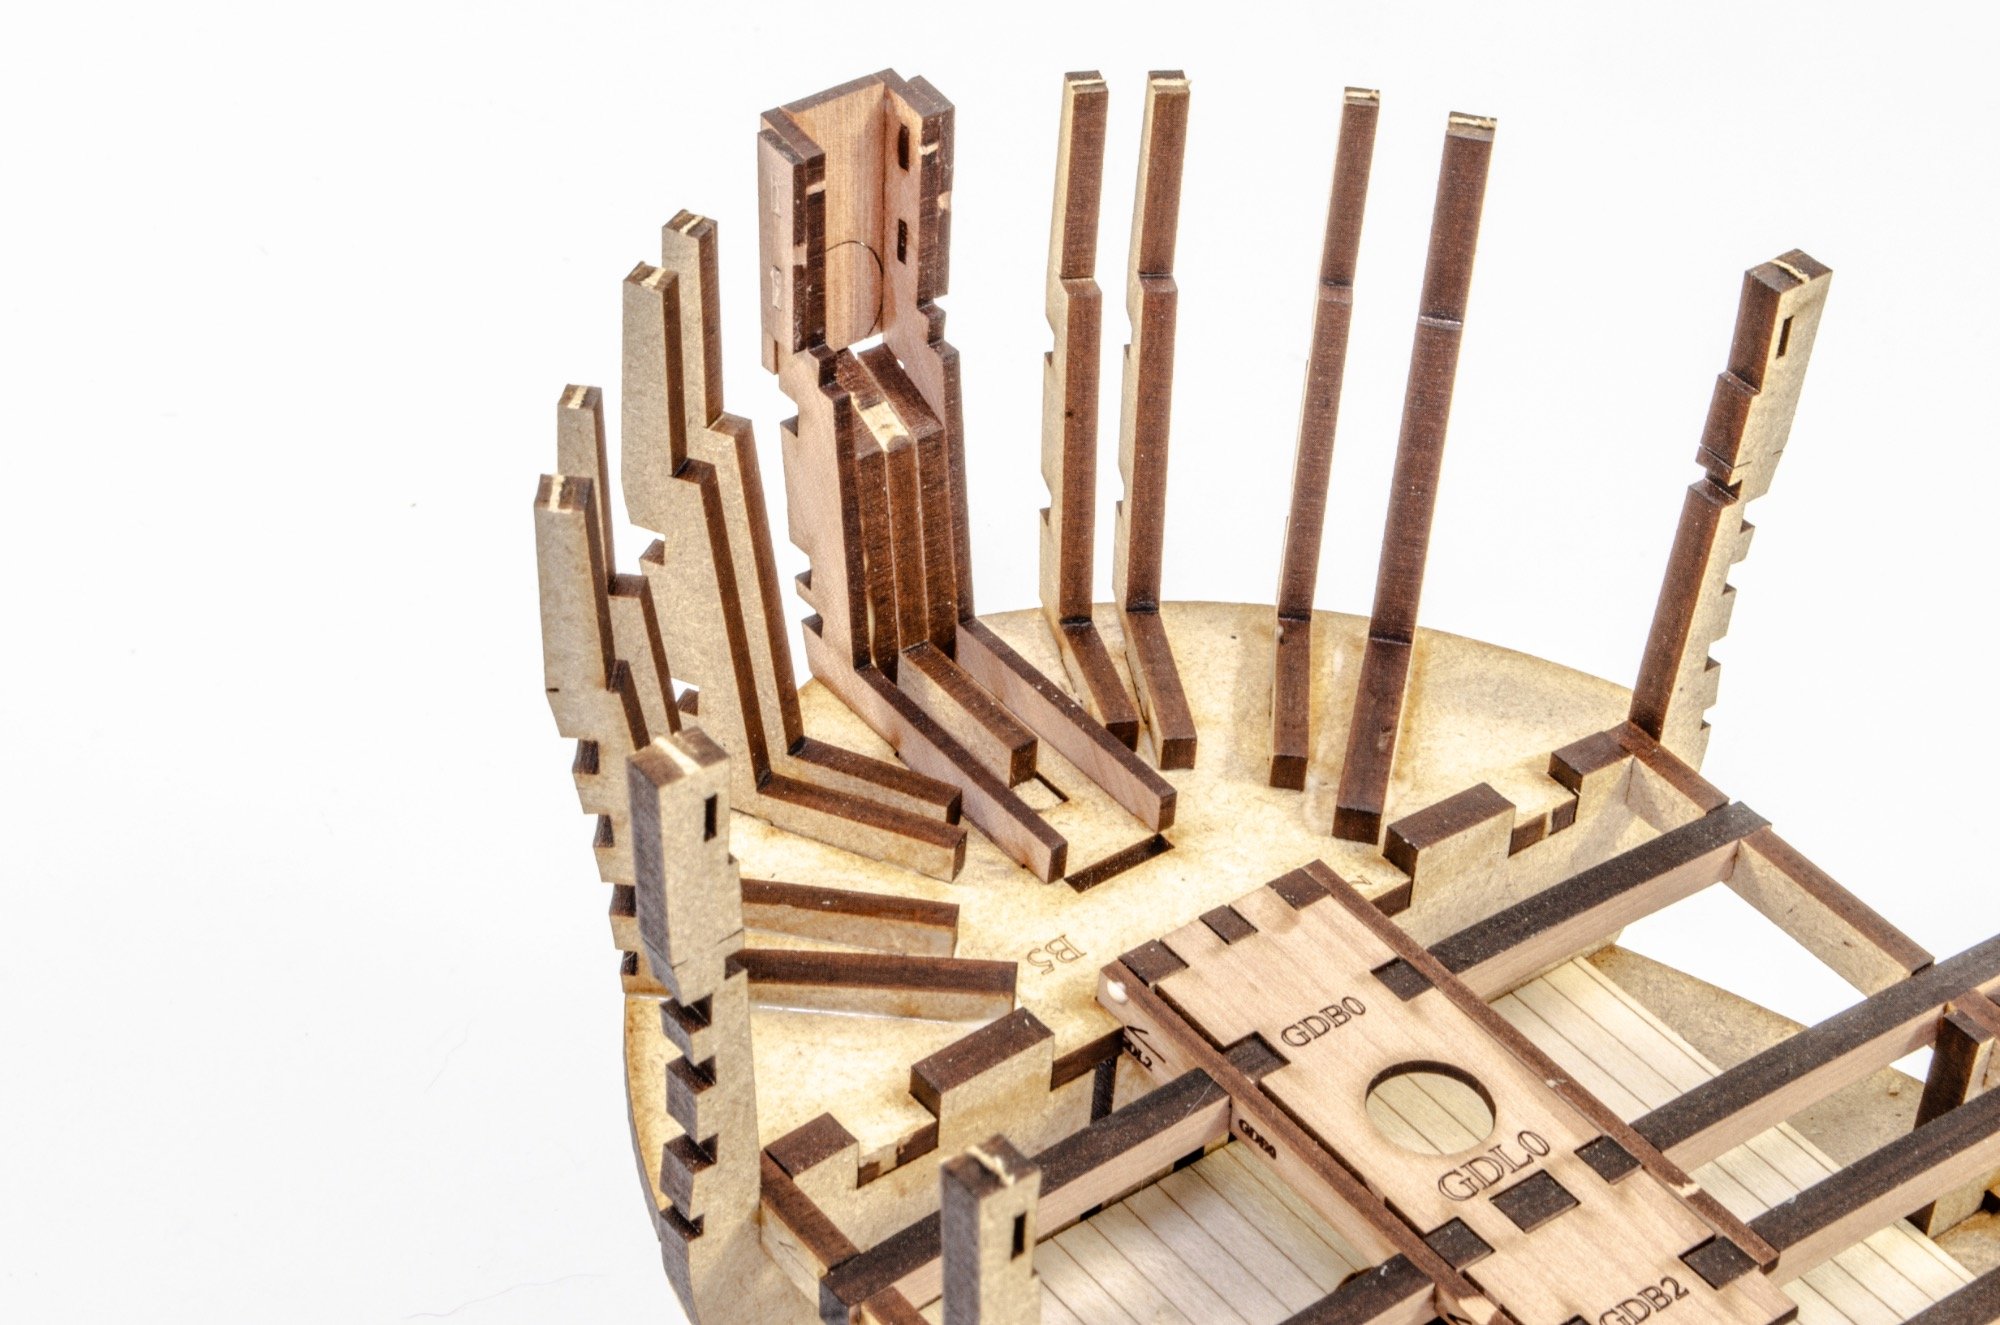
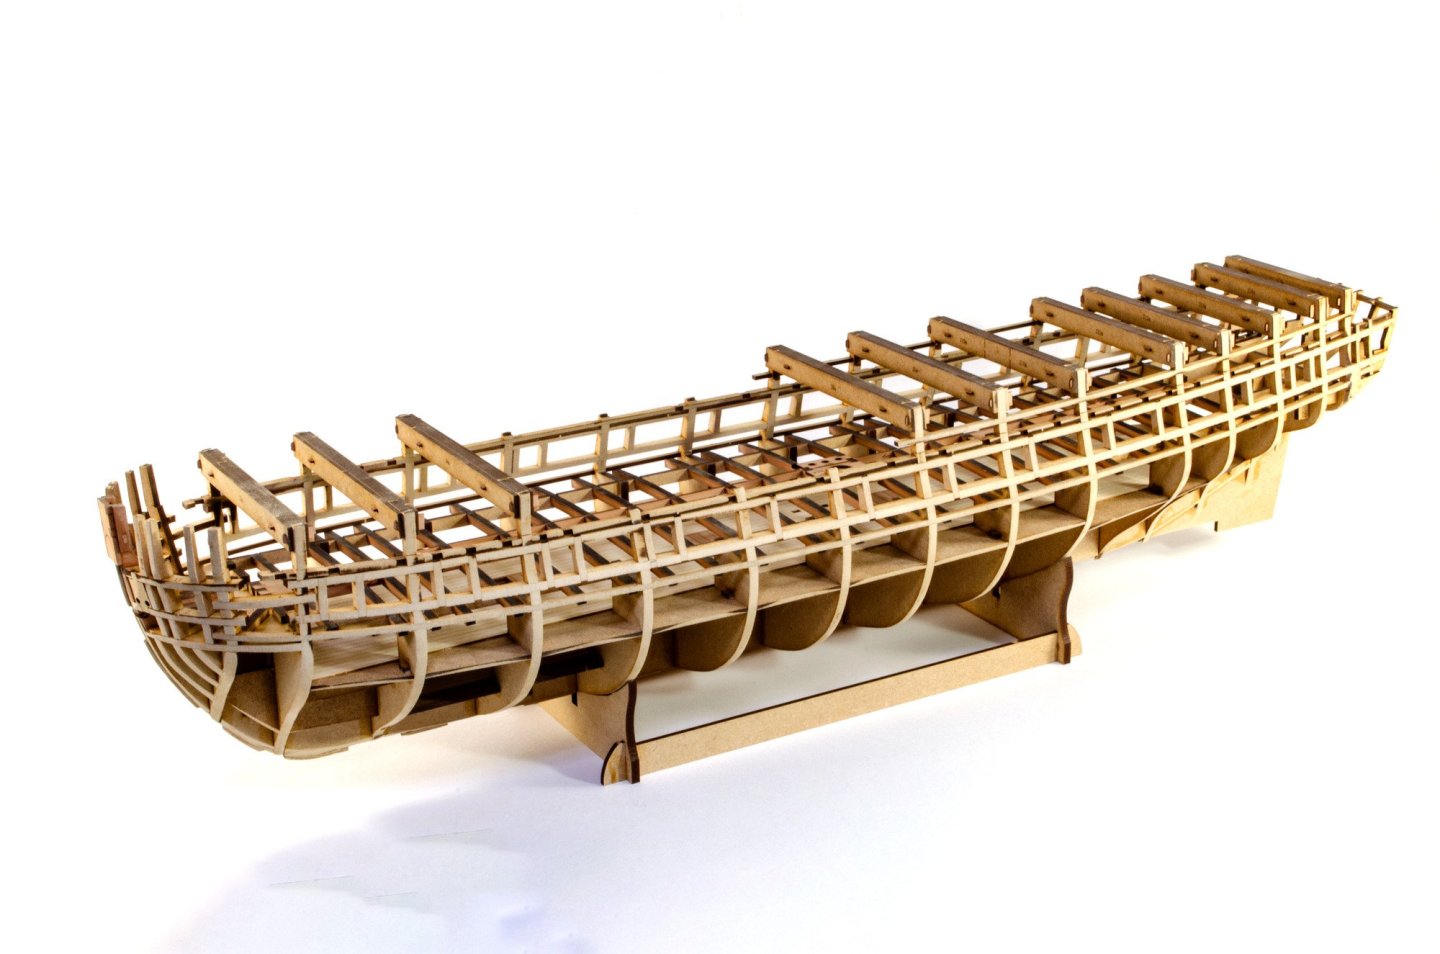
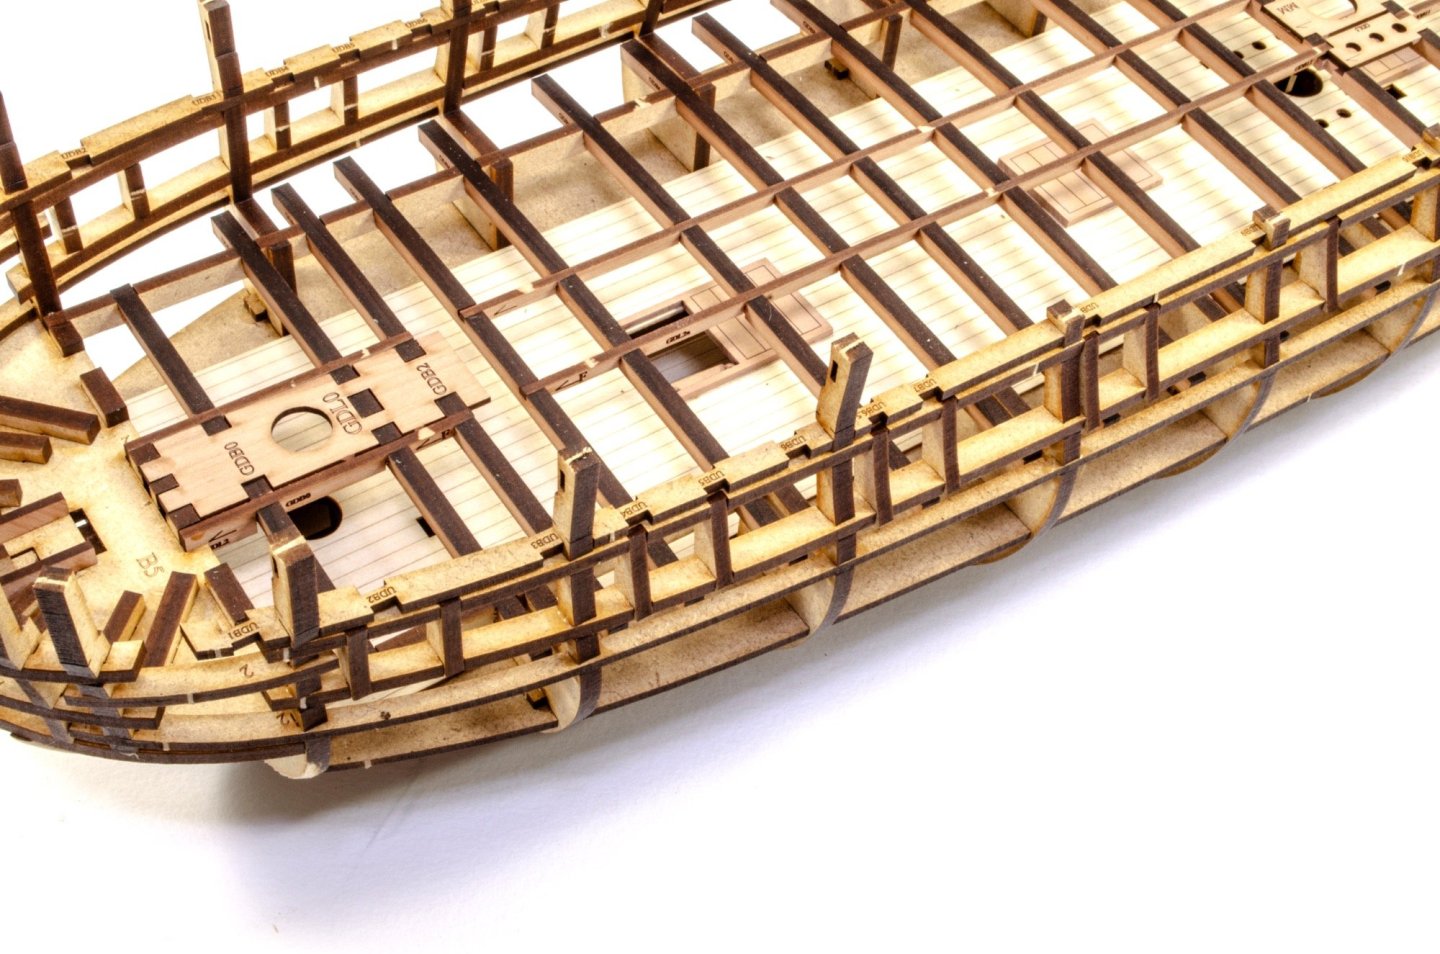
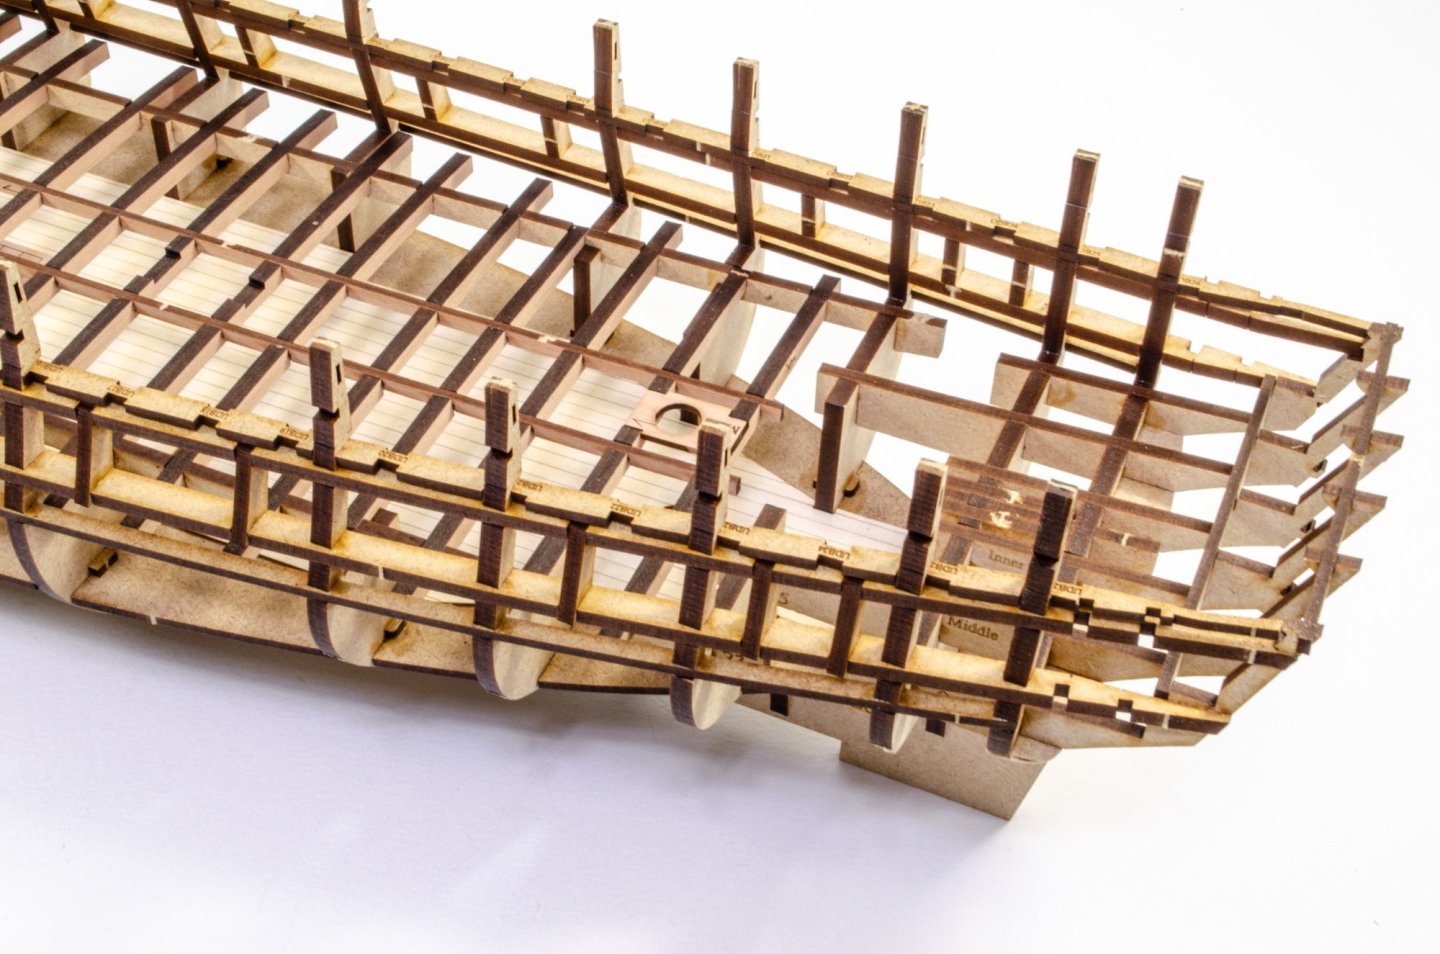
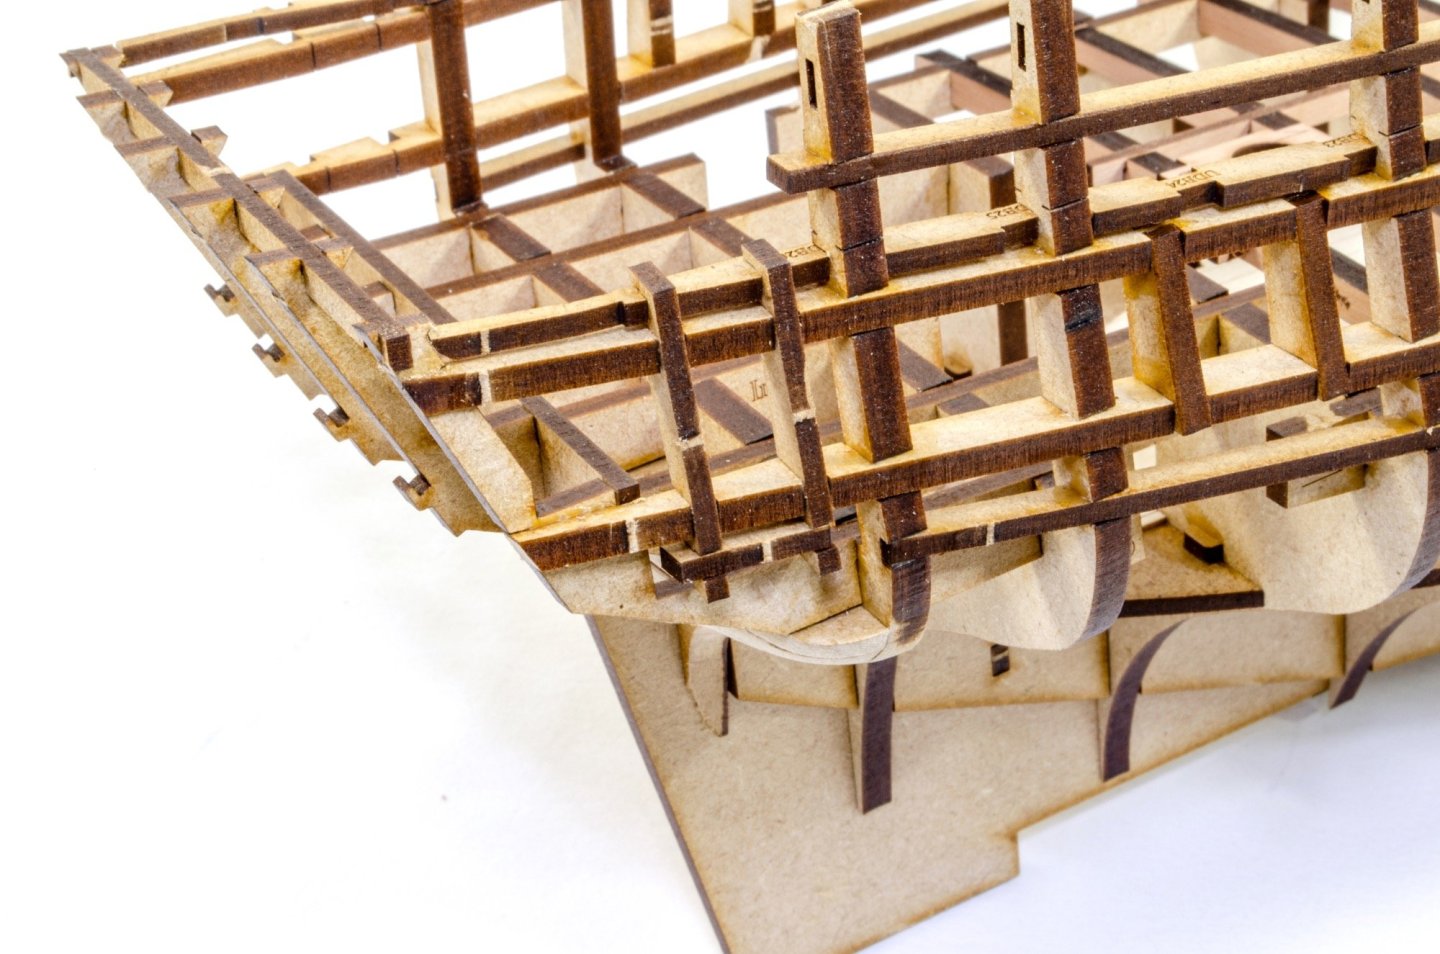
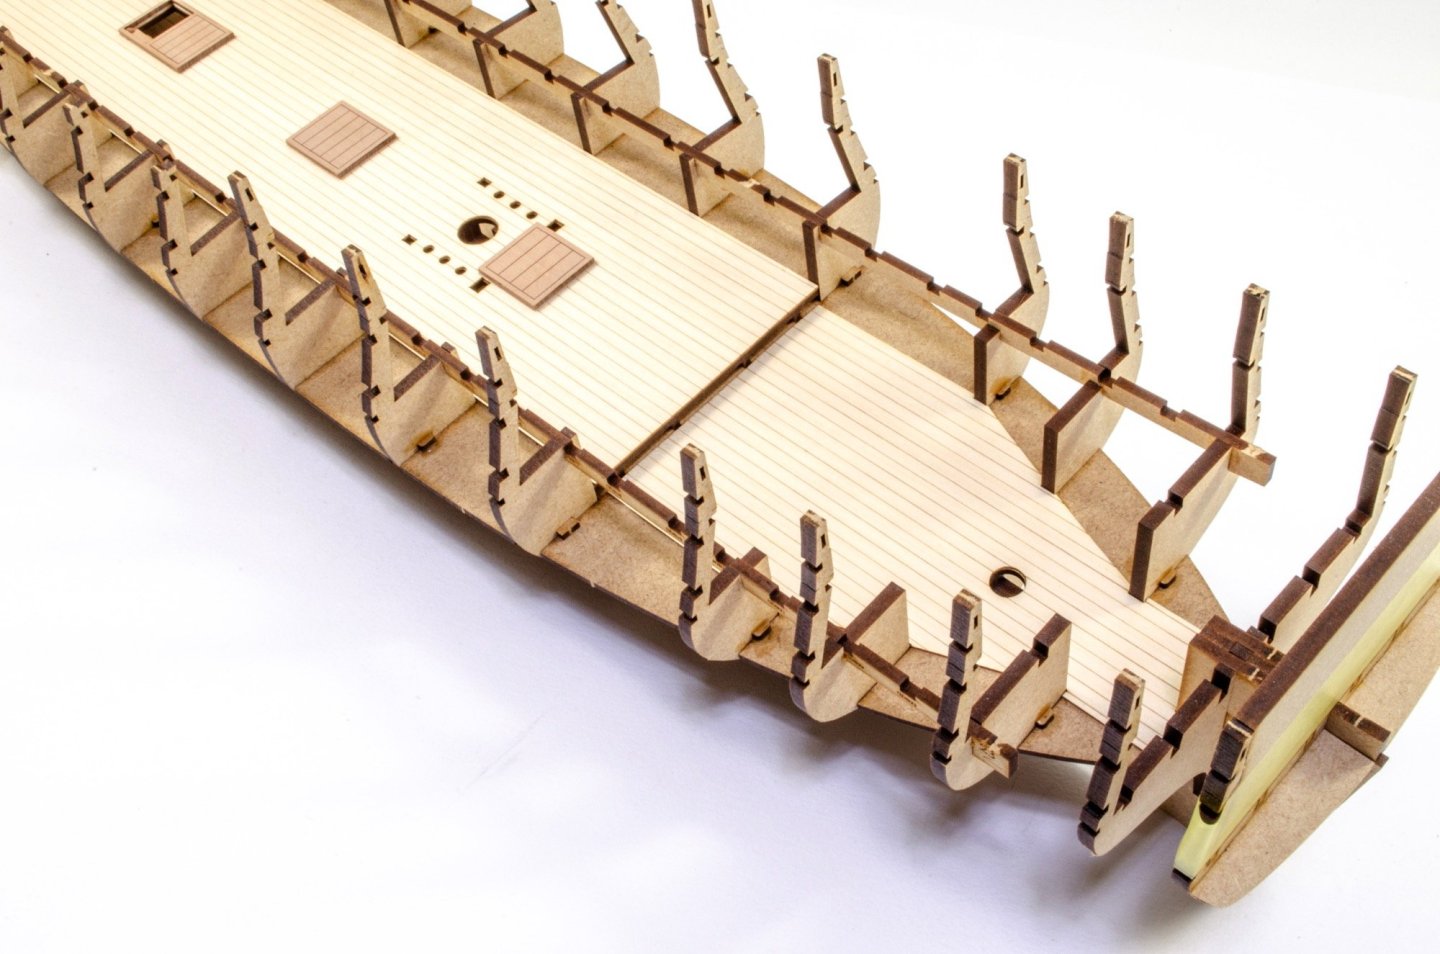
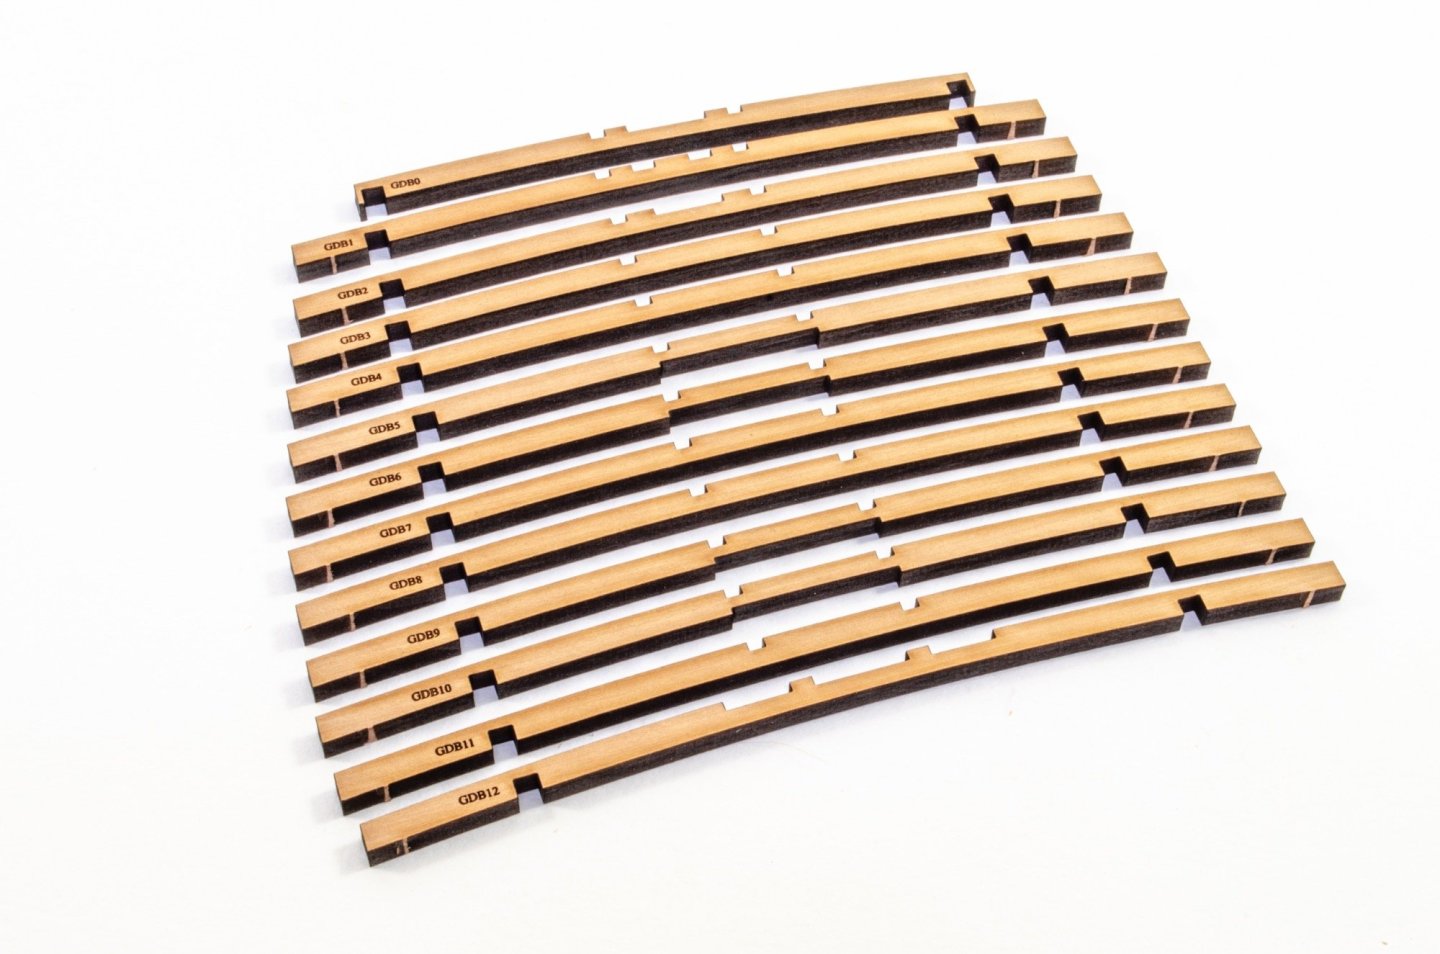
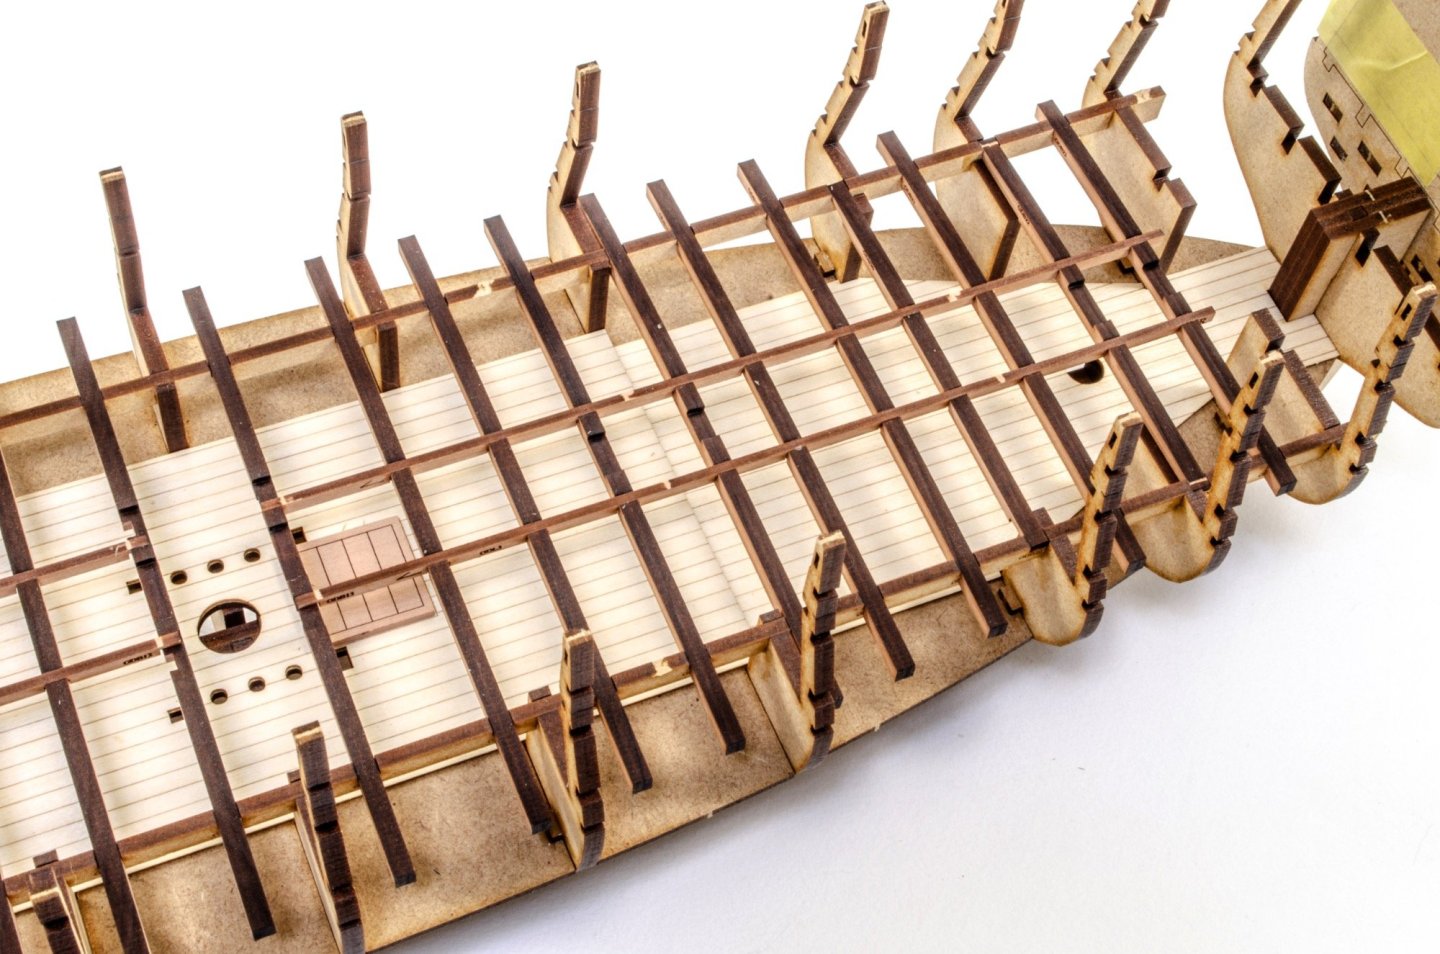
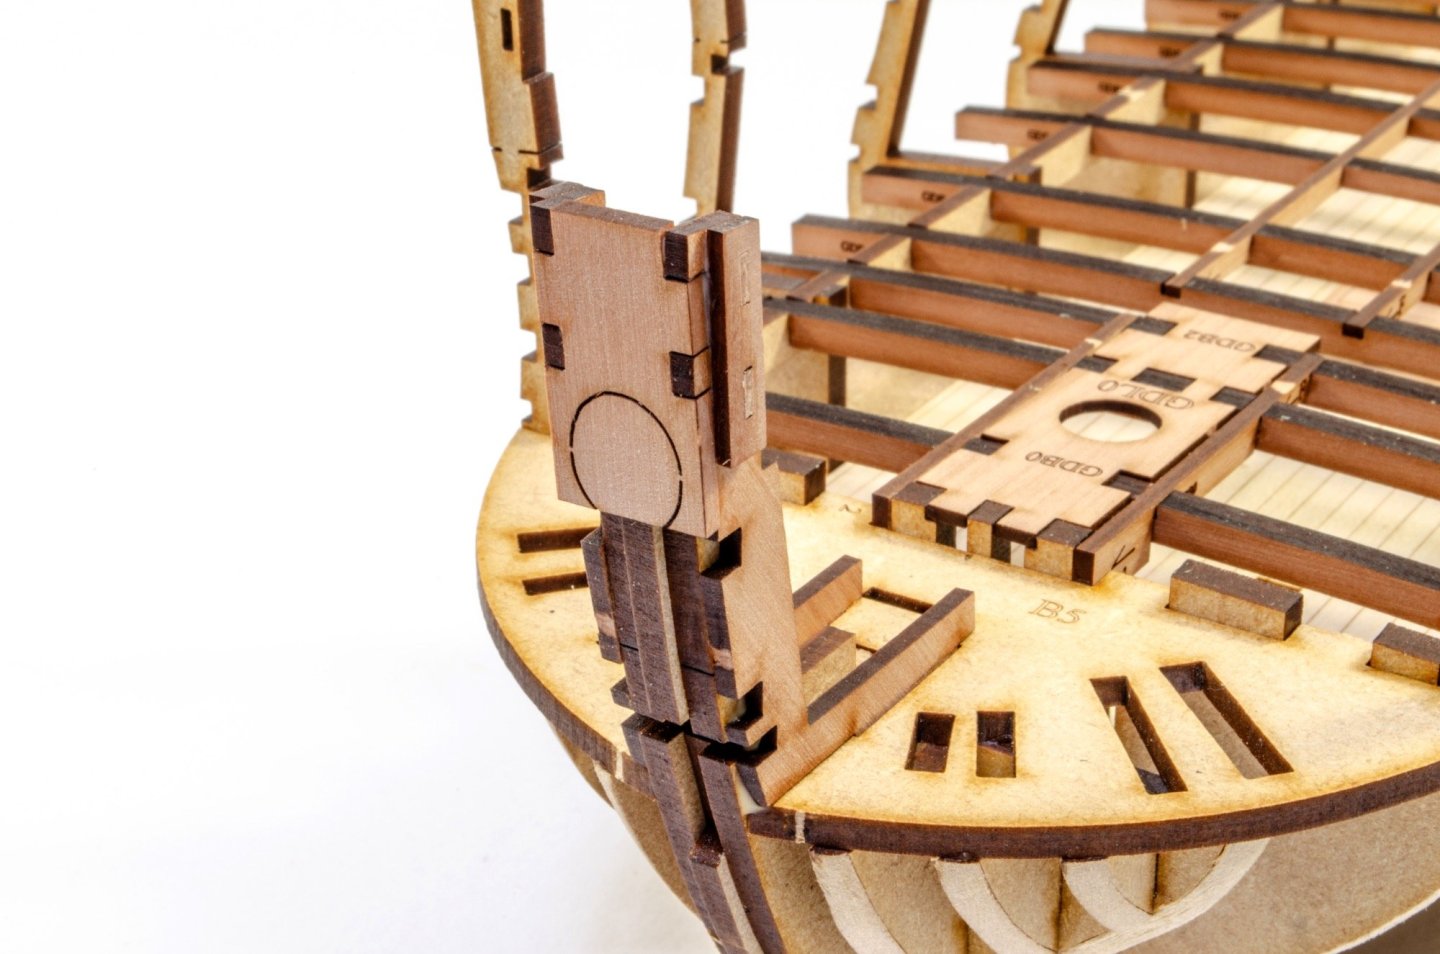
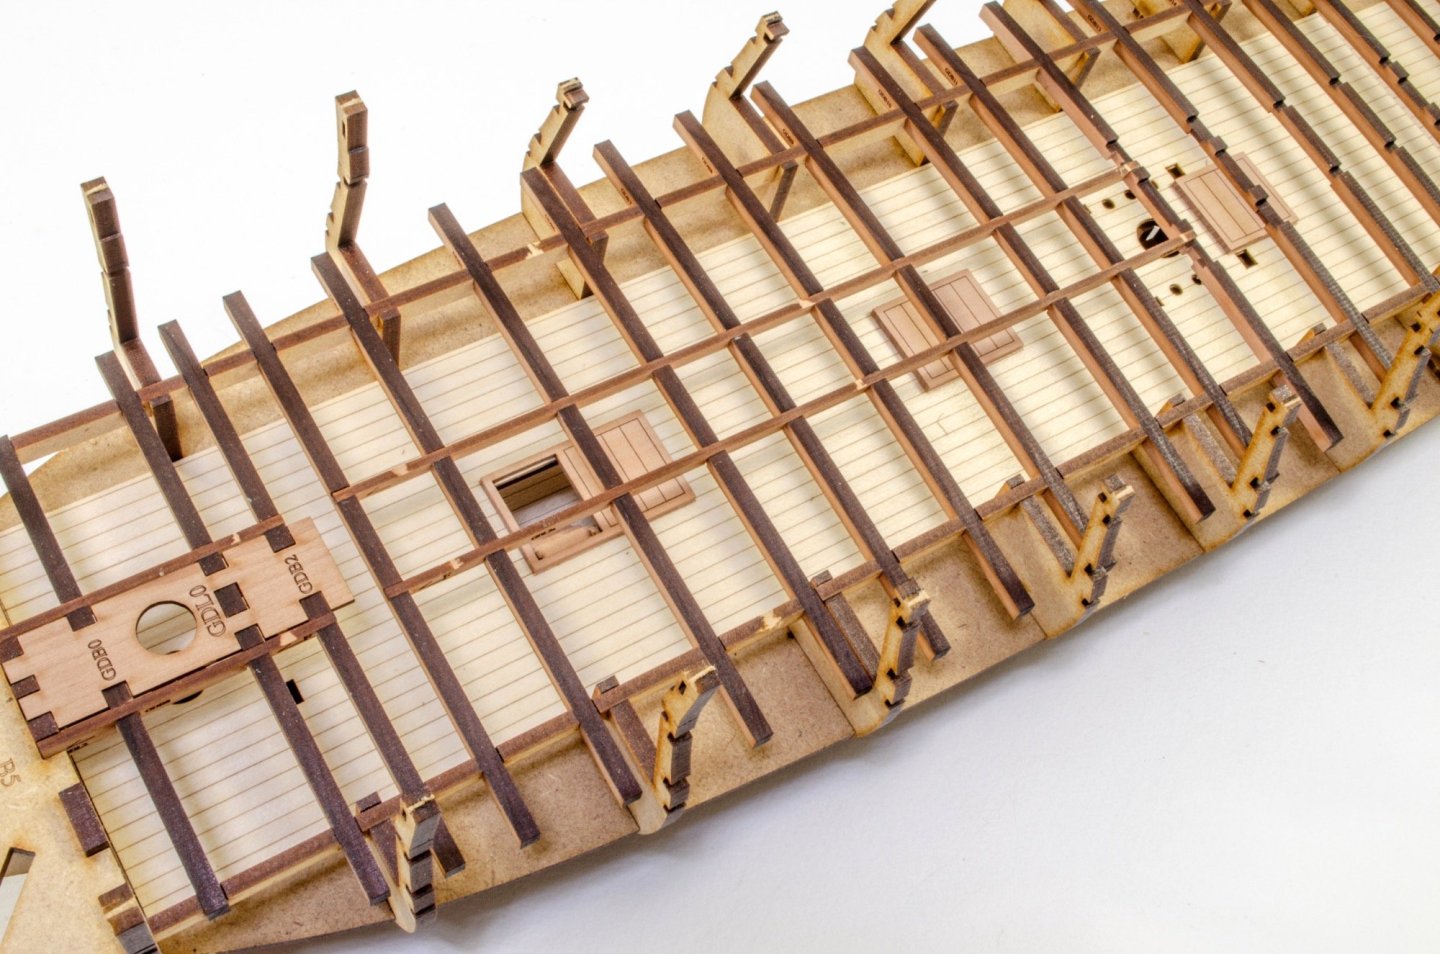
The hull is coming along quite quickly, so I'm almost catching myself up on updates. As you can see, this is quite abridged, and I'm more showing key elements of the work so you can see the main progression. Remember, at this stage, I haven't even flipped the hull over and painted in glue. Allowing some movement at this stage can be helpful in ensuring that anything not quite seated, should be able to joggle itself. Also, aligning the bulkhead ears with the longitudinal strips will also help to positively and accurately ensure that everything else is correct. Here you see the hull with two full length longitudinal beam sat across the bulkheads. As well as being another alignment tool, these also serve as the footings for the gun deck beams. Those strips are also engraved with the gun deck beam numbers, so you'll have no problem identifying which beam locates where. The beams are all cut from 4mm pear and are numbered. You can tally these with the numbers on the strips I just mentioned. These can all now pop into place with glue. This is about 2/3 of the beams you will need to fit. With all the beams securely glued into place, more longitudinal strips slot in across the deck beams, as well as per parts through which the masts will fit. The bow on Surprise is quite round, so we'll do things a little differently here. The bow starts with the foremost posts being built and installed. The small doublers on the outside of these will provide a point for the bulwarks to positively connect to, while the bowsprit will fit through the blanked off hole that glues between those posts. I'll leave the blank in place until the bulwarks are complete. The bow is formed from these pieces, plugged radially int the bow base, as shown here. These are then bolstered with reinforcement strips, including the hawse hols positions. If you look carefully, you see the port side one installed. Also note that three more longitudinal external strips have now been installed on each side, with the upper two providing the top and bottom to the gun ports we'll now add. The gun port parts are all unique to their particular position. The longitudinal strips have the gun port vertical part number engraved onto them...GP1, GP2, GP3, etc. Here, GP1 and GP2 are fitted, creating a complete gun port. And STILL the majority of the hull elements aren't glued! More later.


- 145 replies
-
- 30
-
-
-
I'm doubting it. August is almost done for me due to my holidays, and after that, there's 4 straight months to Christmas. Not a lot of time for me to completely finish and rig a model of this size, and for the kits to be made, plus the manual etc. to be made and delivered.