MORE HANDBOOKS ARE ON THEIR WAY! We will let you know when they get here.
×


Mike Dowling
-
Posts
1,234 -
Joined
-
Last visited
Content Type
Profiles
Forums
Gallery
Events
Everything posted by Mike Dowling
-
What's happening Al. I'm getting lonely!
-
Hi all, just though I would let you know that I have tried some of your solutions. I appreciate the jig bit but big bends are easy just with some round objects and a bit of weight. For the horrible small bends I am finding that, with the lime wood I give them a really long soak and then bending carefully with hands and thumb nails is working better than a manual plank bender. The problem really with the small bits is that you can't put them in a jig so it seems some of them either need overbending so that when they relax they are about right or having a couple of goes at them until the bend is right. Just though you might be interested.
-
Haven't had time to do my homework today - sorry teachers! I will try harder tomorrow. Funny really, I l always used to say that!
-
Many thanks again everybody. I have read loads and tried lots but I will try a kettle or steamer and let you know how I get on. It has been suggested to me that it may just be the particular wood I have got which could be right. I haven't had this problem before but I haven't had anything quite so thick to bend round such acute angles.
-
Thanks very much all, I'll do some more homework tomorrow.
-
Thank you very much, a great suggestion! Trouble is I am in Highland Scotland and we are very short of suppliers up here. It's a bit like Alaska!! My problem is in the transom area where you have to bend and twist! Sounds like a dance eh? Anyway thanks so much for the reply, if you think or more please let me know.
-
So, I am having real problems bending 2mm lime wood for planks. If I try to bend them dry they snap. If I bend them wet they desperately try to return to their unbent shape. I realise I am doing a large scale kit model so the wood is quite thick but I have tried a manual plank bender both wet and dry, I have tried a steam iron but so far limited success. Any bright ideas out there?
-
I have tried several times to bend these beasties while dry and it just won't work!! I'll have to bend them wet and hope they don't 'unbend' too much while drying so that I can stick em on!
-
Thanks Dom, I will have a bit of a practice on dry wood and let you know how I get on. It might be the wood, I have not had such a problem before. I guess because it's a large scale kit the wood has to be thicker and whilst 2mm doesn't sound much it is quite a lot to bend. I did try using a steam iron earlier but didn't have any joy with that.
-
I have tried both. Obviously the wood widens more when wet but it seems to bend better with less risk of breaking and when left to dry the 'spread' seems less although I'm not sure.
-
Yes, that is the machine I have. I had a bit of a play yesterday and reckon I can probably manage with it for the really bendy bits. I suppose there are not too many of them. I can always use the 'Dowling' method for the bigger curves. Thanks for your help though.
-
When I said sideways spread I mean that the pressure from the manual bender does cause the wood to flatten slightly and therefore increase its width. Albeit a small amount the effect would become cumulative over a number of planks. Anyway, thanks for the link. If yours gathers dust how do you do it or what do you use instead?
-
I have got a manual plank bender. The problem with this, which I did mention earlier in my log, is that it does spread the wood sideways a little bit. It is effective but the spread progressively becomes a problem. That said, were can I get an electric plank bender?
-
Thanks CF, I think I understand the bending bit. You are saying I have to bend them and wait until they are dry. If so I had better go and but some curling tongs! It's just a shame that the bits I need to bend always seem to be on the end of the 'strake'! On the open side, in a way it's easier because they will nearly all be quite short. It's the port side that worries me more as it will all be covered. If I follow the wonderful and gorgeous instructions such as they are I will need as many stealers as strakes. Captain Al will have the same problems and his is only single planked. The garboard plank for us gets done in several pieces because of the same process as above. I know it's not the way the experts do it but it does seem to be a means to an end so to speak. With regard to the placing of strakes for the cutout, the instructions are relatively good with a fairly straightforward progression at the bow and effectively two at the stern. There actually given measurements for once!
-
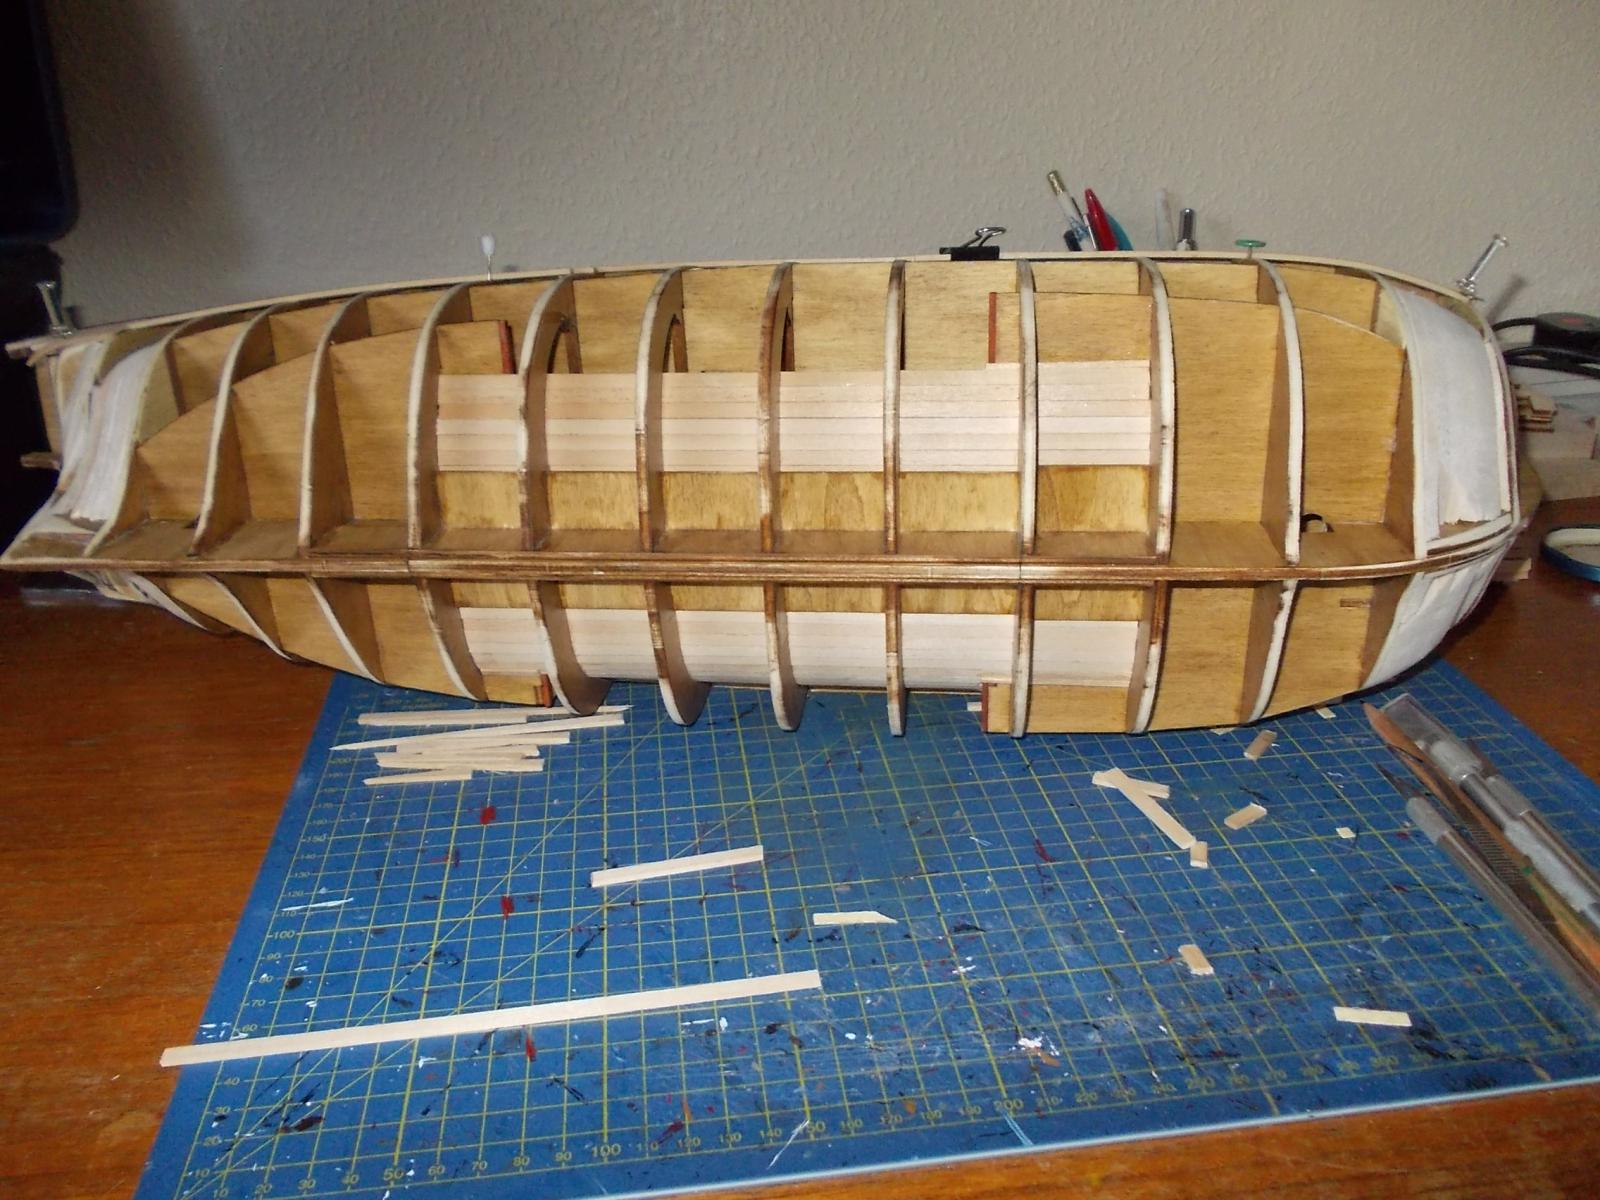
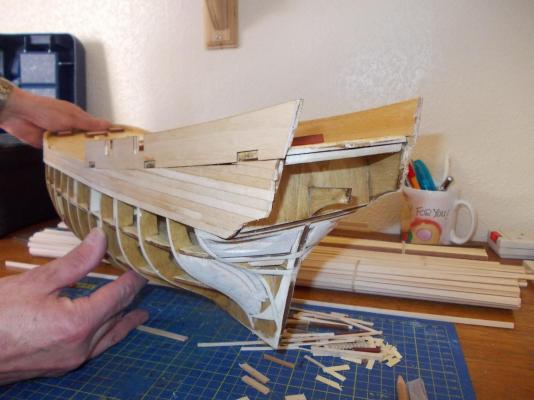
Hey everybody!! I though, just for a change, that you might like to see my bottom!!! Before it gets covered up!

-
Sorry mate, lost me again there! Soak, bend, apply while wet but don't glue? I tried that with a small test piece but, whilst drying it has sort of unbent itself which is not helpful.
-
Thank you very much CF but you didn't make any suggestions as to what to next and I value your expertise. Fifthace, I ordered map pins on Saturday which I still think is a brilliant idea of yours but I'm not sure they are going to help much with the really bendy bits. A thought! Does one soak, bend and then dry or, soak, bend and apply whilst damp. I would tend to the latter but what do others think?
-
Here are my first bits of planking basically the same both sides so I won't bore everybody. What I would like is some advice now. Do I keep working downwards for a while or start again at the false keel and work upwards? Goodness only knows how I am to bend this incredibly tough wood (2mm x 5mm lime) around the stern end and get it to stay put when glued.
-
Thanks Bindy, I can't believe how much weight I'm losing over this, and it's supposed to be fun!
-
Now CF, don't be mean! I promised you pictures when I have done a wee bit of trimming!
-
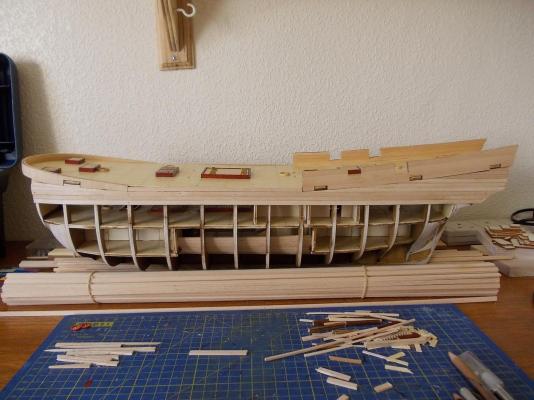
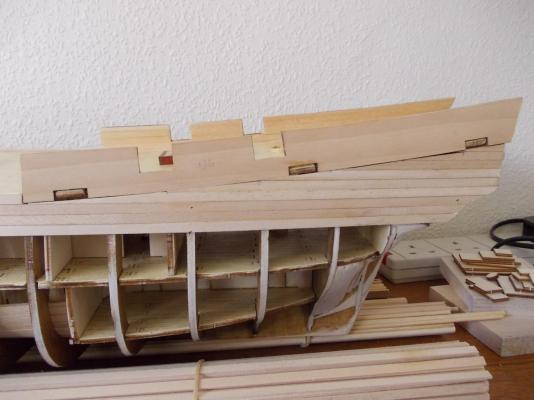
Just to let you know out there that planking has commenced!!!!! I decided n the end with various advice to do the first plank according to the strange instructions. I can see some logic to them because of the open starboard side. I do have the advantage with the OcCRe kit over the AL kit that mine is double planked which theoretically means I can cover up my mess second time around. Anyway, just wanted to let you know and I will add some pics when I have done a bit of 'trimming' - not in the nautical way but with a knife!!
-
Hi there, I think you should be grateful for one layer but, having said that I reckon two layers gives me the chance to cover upper the mess I make first time. Dom and I have been having an off site discussion about all this. I can't think it would make much difference if you do a second layer, the veneers are only 0.6mm ish and I think I would rather do that than copper.