HOLIDAY DONATION DRIVE - SUPPORT MSW - DO YOUR PART TO KEEP THIS GREAT FORUM GOING! (Only 24 donations so far out of 49,000 members - C'mon guys!)
×


dcicero
-
Posts
267 -
Joined
-
Last visited
Content Type
Profiles
Forums
Gallery
Events
Everything posted by dcicero
-
Hi, Ryland. Just wondering ... Where did you get those little true squares in the pictures from February 27? Those look really handy, but I have no idea where I could find them. Enjoying the build very much! I've just started my longboat, so I'm watching all the activity here with great interest. Dan
-
I've been warned so many times not to glue the masts in that I'd be scared to do so! For alignment, I use the little jib described in Mastini's Ship Modeling Simplified. It's just two small dowels of equal length, placed parallel to each other and pinned together at one end. It's a little bipod. With the two ends placed against the bulkheads, the pin should be right in the middle of the mast. It's really easy to check alignment as you work. On my Scottish Maid, the foremast alignment was a little tricky. I used the shrouds to hold it properly in place and checked as I progressed with the "mast alignment tool." Worked out just fine. Dan
-
Furled , unfurled or no sails -Preference
dcicero replied to Canada Steve's topic in Masting, rigging and sails
Generally, I like the looks of a ship model without sails for many of the same the reasons people have posted here: sails on models are often out of scale and distracting; sails on models displayed on pedestals just don't look right; sails on models obscure the rigging. That said, I do think sails look good on models of small boats. It's easier to get the scale right. The sail plan is simpler on these vessels, which means the sails can actually be rigged completely and properly. Dan -
Another quick update... Practice may not make perfect, but it sure does make "better." Here are the port ratlines. They turned out better than the starboard ones. I was able to go back and correct some of the errors on the starboard side and they do look presentable now. Next time I have to do this, I'm installing the ratlines when I step the masts rather than after everything is in place. Working in the tight quarters around the main yard was nerve wracking. Dan
-
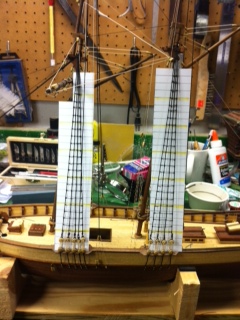
Just a quick progress report... I finished rigging the ratlines last night and applied some dilute white glue (50/50) to the whole thing. I still have to trim the excess thread from the first and last knots, but that will take just a minute tonight. The shrouds look a little wavy in the pictures. In real life, they're less so. As I went along, I checked alignment against the templates and found I had to push and pull them around a little bit to keep them even. Overall, I'm happy with the results. The process did speed up as I went along because I got really fast at telling when I'd tied a knot incorrectly and could correct the error before it became a problem. The starboard side is done. Now it's over to the port side to finish this part of the model off. Dan

-
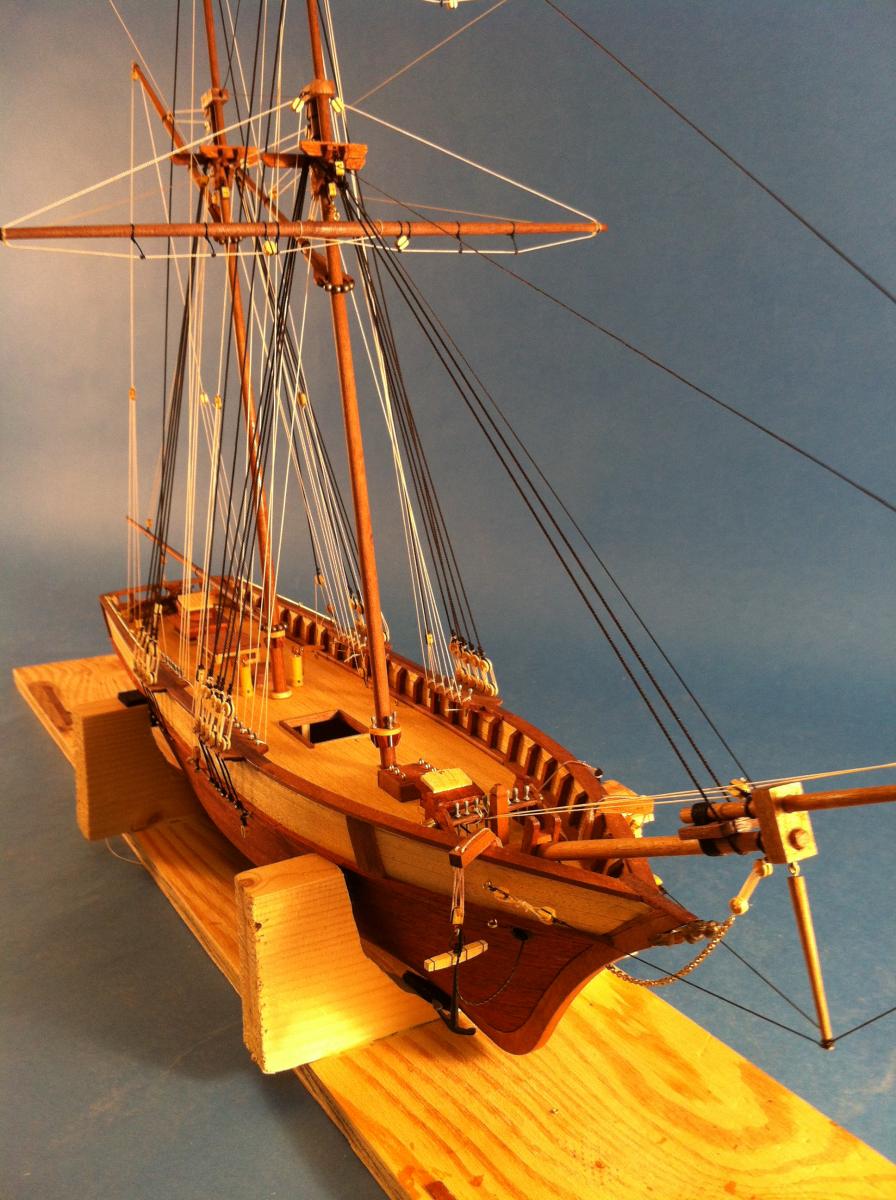
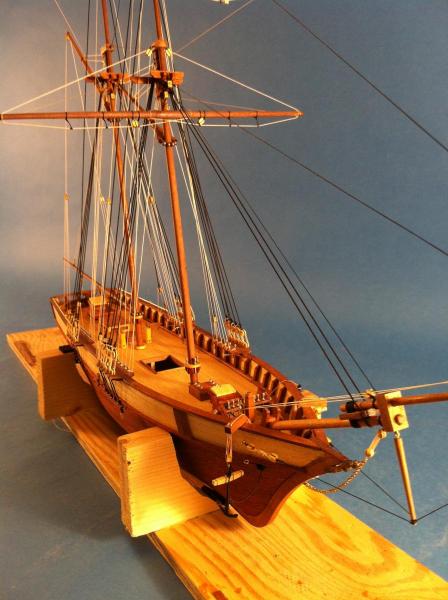
I'm building Scottish Maid right now. Why did I buy it? Well, I wanted to learn to build ship models. This one didn't look too complicated and the price was right: $40.00 from Model Expo. (How big a mistake can a guy make on a $40.00 kit?) I've been building for a long time now. (I hate to admit how long...) And am almost done, but I wouldn't recommend AL kits to anyone and I think this will be my last one. A lot of people complain about the quality of the wood in the kits. I didn't find that to be a problem. I used it and it worked out okay. There wasn't enough wood in the kit, though. I had to buy more walnut dowels for the masts and spars. The instructions are horrific ... and there aren't enough of them. They come down to a series of pictures of the hull being constructed. Essentially, "build it so it looks like this." There are no rigging instructions. The plans for the hull are okay, but the rigging plans were terrible. Not only were they technically incorrect, they were also contradictory. For instance, if you rigged any spar in accordance with the plan, you couldn't complete the rigging because almost all the attachment points, block types and whatnot were wrong. I used Rigging Period Fore-and-Aft Craft by Lennarth Petersson to get me through the rigging. I think another reason for the popularity of the AL Bluenose is that a lot of modeling books use it for instructional purposes. The best of those books is Frank Mastini's Ship Modeling Simplified. I've used that book extensively, even though I wasn't building the Bluenose. When I look at the amount of time I've spent on this kit, it makes buying a quality Model Shipways kit look cheap. Scottish Maid has turned out well, but the quality of the documentation in the kit really made the process a lot harder than it needed to be.
-
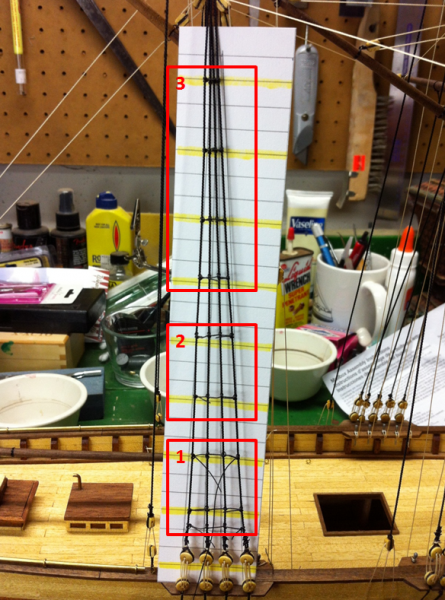
Jan: I found that too. I had the picture of the knots next to me as I went along. After a row or two, it was second nature, but how those knots are tied ... well, the forgetting curve is a lot faster than the learning curve. One thing I left off my last post... I tried using dilute white glue to hold everything together after completing a row. I can't figure out if I'm diluting too much or too little. Seems like using the glue actually loosened everything up. The ratlines in Box 3 have no glue on them. There is glue on those in Box 2. (The ratlines in Box 1 just need to be replaced...) Dan
-
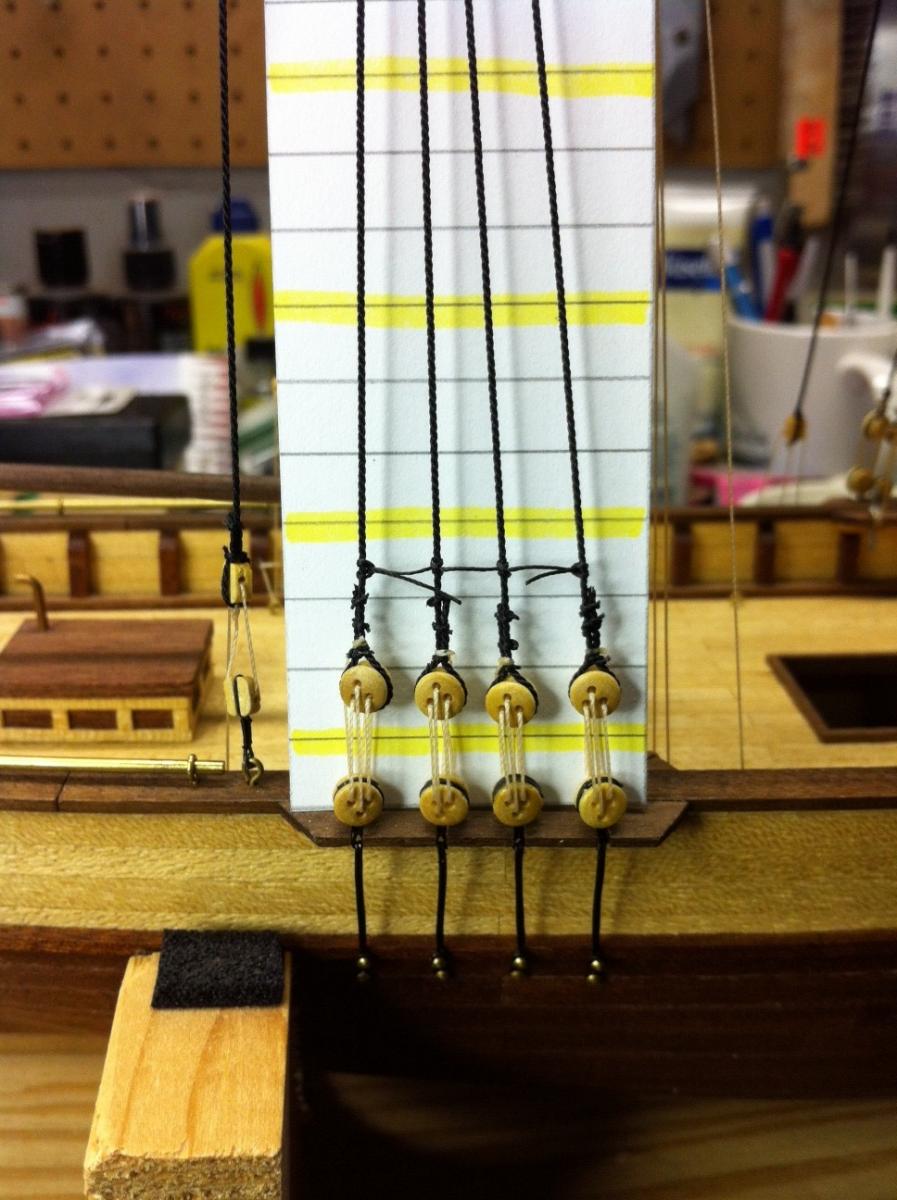
Thanks again to everyone for all the help. I've learned a few things, as the photo below illustrates. Get the thread a little wet before using it. That'll get the kinks out of it and make it a lot easier to work with. Use a template to get the vertical spacing right. Use a template to ensure the shrouds aren't being pulled together. Do every fourth ratline and then go back and do the rest. Things tend to go a little faster with a little experience. Although it probably won't make much difference to people looking at the model, I really do like the idea of not having loose ends hanging off the sides of the ratlines. I was determined to get the cow hitch - clove hitch - clove hitch - cow hitch series right. I've found that it's not that tough once you get the hang of it. Box 1 shows my first attempts: loose knots and ... what's that? A string ball? Box 2 shows subsequent attempts: properly tied and tighter. (These were done after I learned I should get the thread a little damp to take the kinks out of it and make it easier to work with. Box 3 shows what I consider to be properly done ratlines. The knots are tight, the they're not pulling the shrouds together and the knots are properly tied. If I can just replicate Box 3 about a thousand times, I'll be good to go! Honestly, this is about the most mindless part of my entire building experience. It's pretty relaxing. Once you get the hang of the two knots, it goes pretty quickly. I'm a little anxious about rigging the foremast ratlines. Scottish Maid is a clipper schooner, so I have the foremast yards right in the way, along with all the other rigging. I'm hoping my experience with the main mast will serve me well on the trickier foremast. Next time, I'm going to do all the ratlines when I step the mast and rig the shrouds... Dan
-
I'm doing my ratlines now and it'sthe last bit of rigging to be done. I'm not having any trouble maneuvering around the other rigging. Dan
-
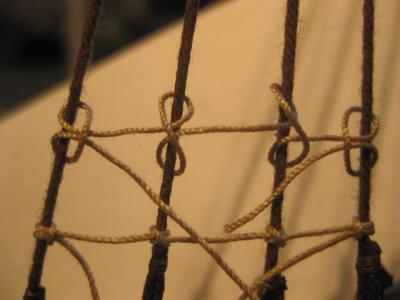
Thanks for the tip on wetting the ratline thread. I think I'm going to have to do that, based on my work last night... First, I learned how to tie the two knots invoved in rigging the ratlines: the cow hitch and the clove hitch. I found a good video explanation of the clove hitch and as you can see in the photo below, those knots look pretty good. (Here's a link: http://www.ehow.com/video_2355229_tie-clove-hitch-knot.html) As for the cow hitch, that one was pretty easy to figure out, but hard to get to lie correctly. You can see that in the photo too. Maybe wetting the line will help that out. I'll try that tonight if I can fit it in. I tied four knots last night. Took me about 30 minutes. I'm going to have to get faster at that if I'm ever going to finish this job. That said, most of my time was spent figuring out how to do it. Repetition is going to speed this up a lot. I'm also going to take the suggestion of putting the vertical lines on my template. I can see how it would be easy to pull the ratlines together and distort the shrouds without some kind of guide. Dan
-
Last night, I started tying knots. I found this picture somewhere on Model Ship World. (I'm sorry, but I forget where...) And I liked the looks of these knots. Two things became clear pretty fast. First, it was hard to tighten the cow hitch. I'd put some tension on it and it'd look good, but as soon as I let go, it loosened up. Second, I'm not sure how to tie those clove hitches. Mastini recommends simple overhand knots in his Ship Modeling Simplified book. Those are certainly simple, but they don't look as good as those clove hitches. Not sure which way to go on those two issues. Also, Mastini recommends using tan thread for the ratlines and that's what's shown in this picture, but most of the models I've seen use the same color for the ratlines as for the shrouds. I think I'm going to go with the darker color, but I'd be interested in the opinions of others. Finally, getting the right tension on the ratlines between the shrouds seems to be a challenge. Anyone got a good method for that? Or is this just a task that requires a lot of fiddling to get right? Dan
-
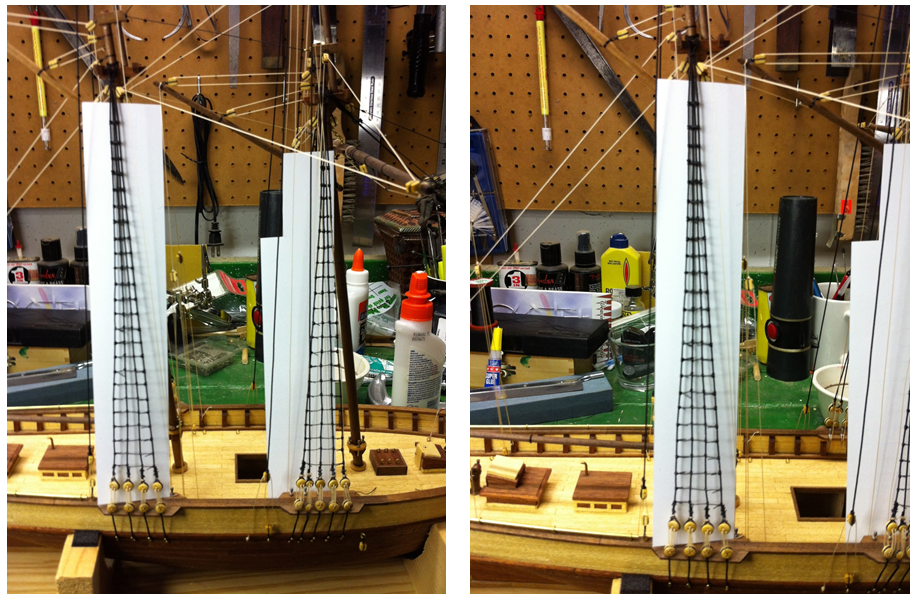
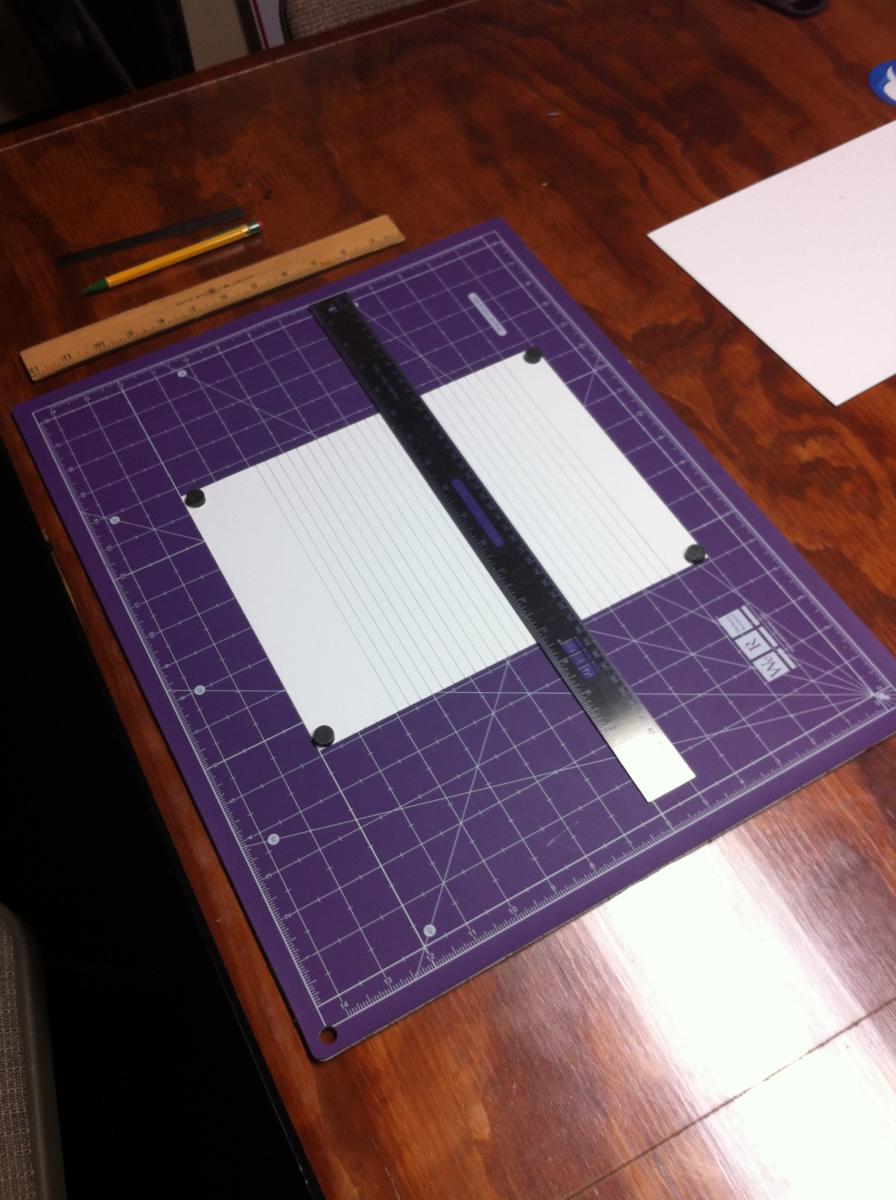
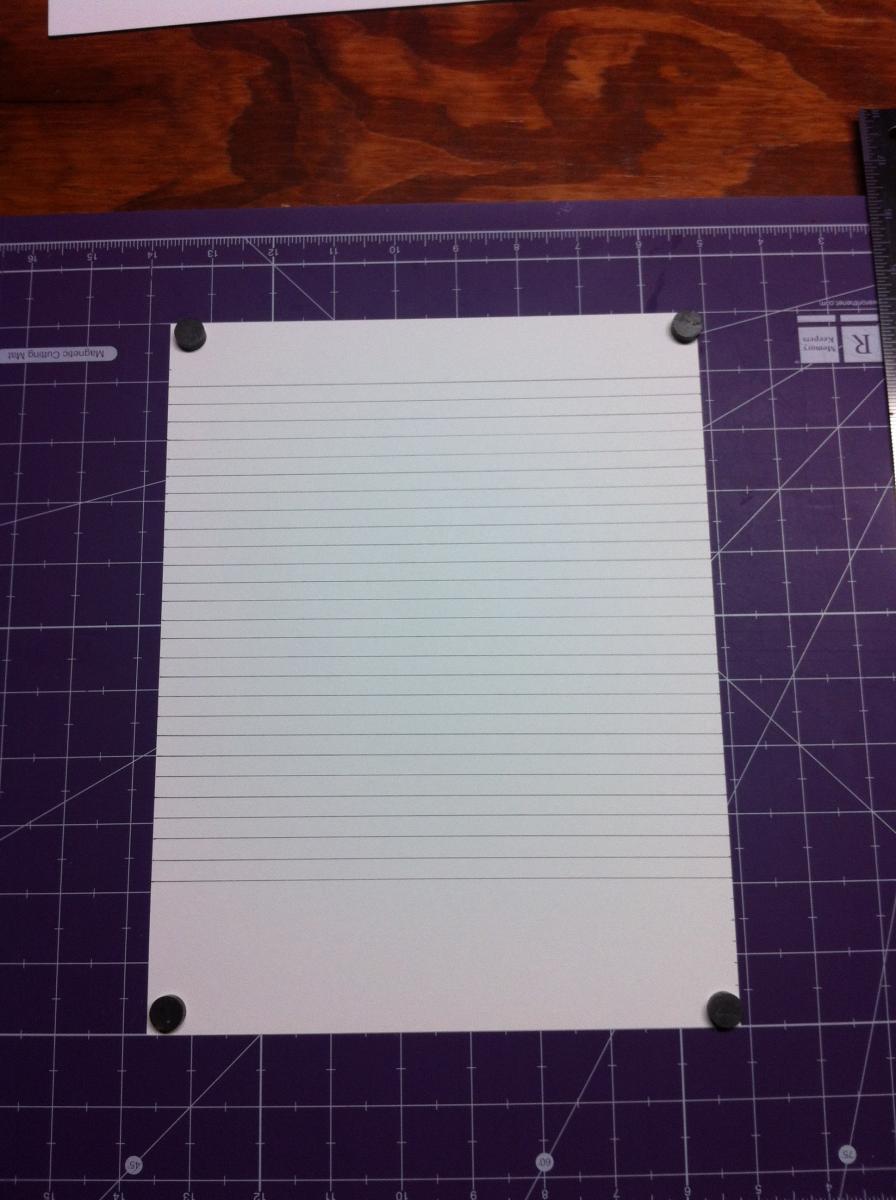
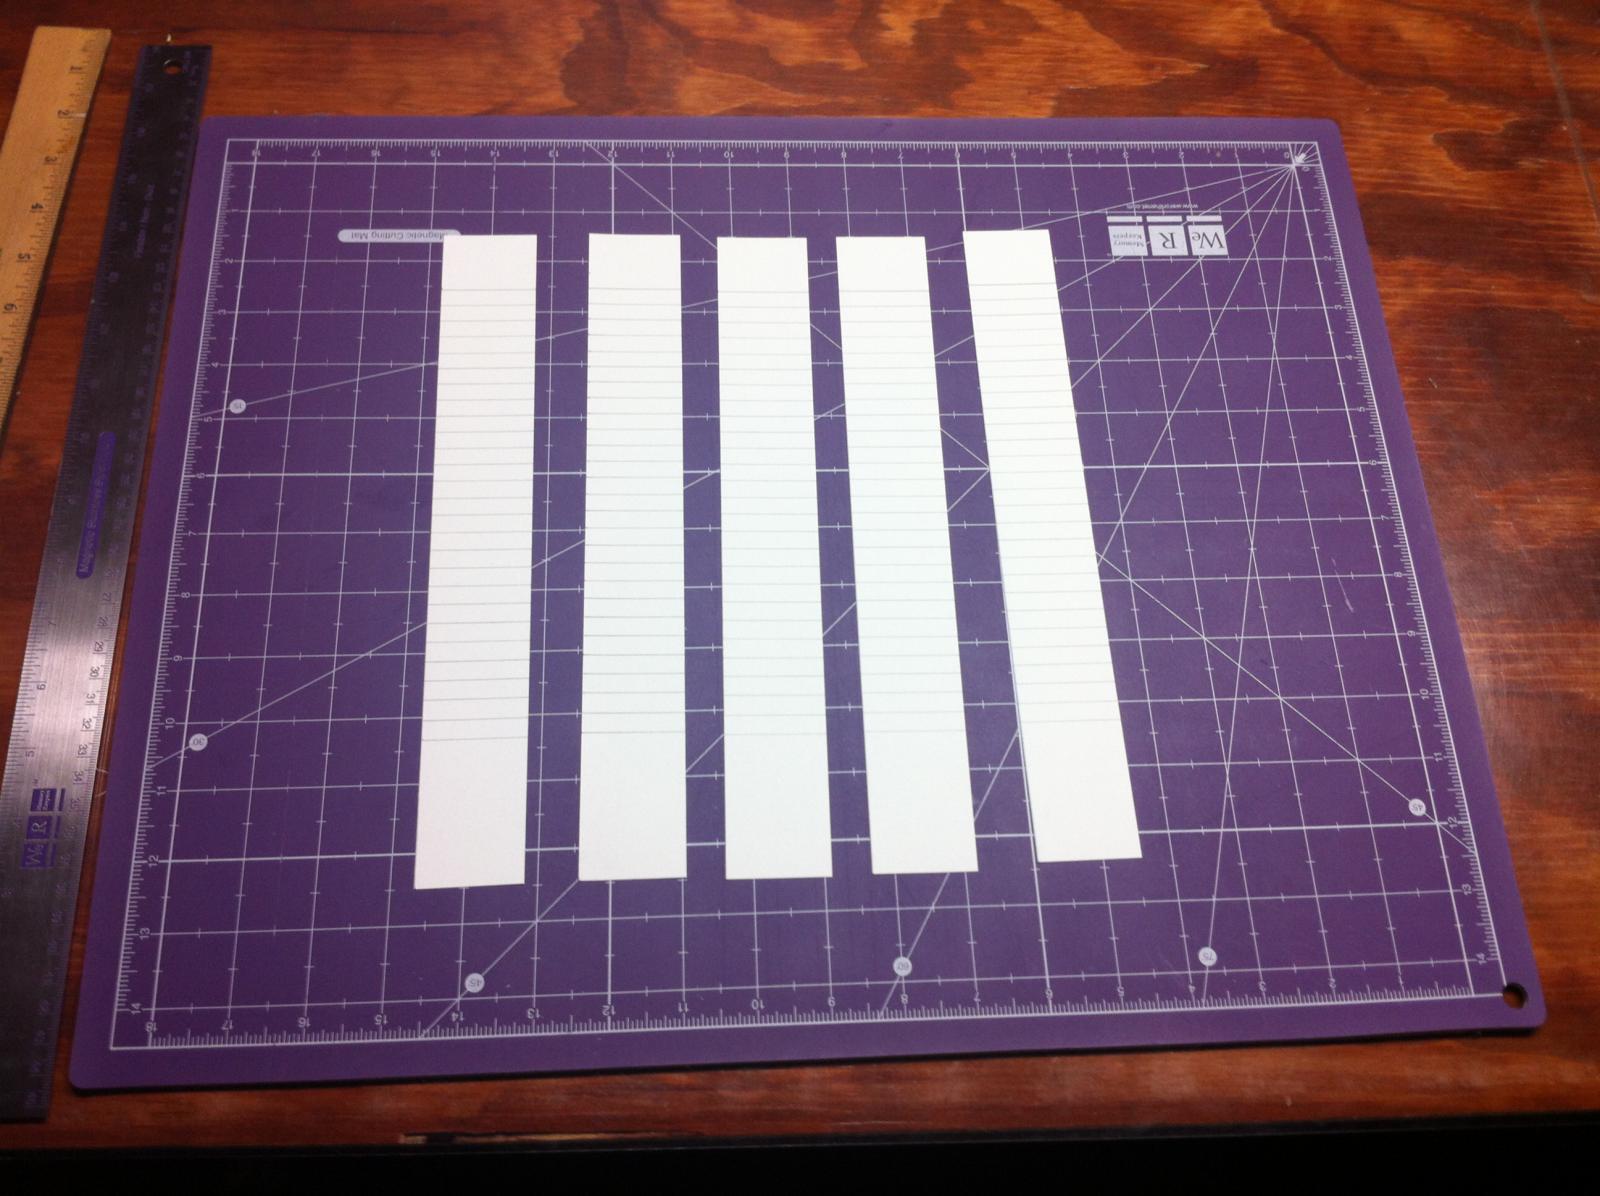
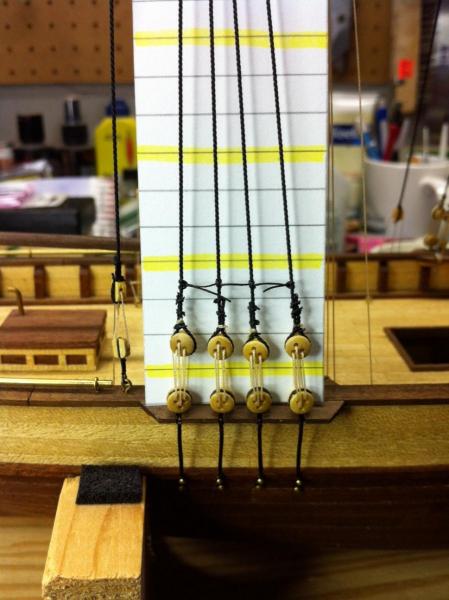
Based on the recommendations from you gentlemen, I started on the ratlines. Scottish Maid is in 1:50 scale, so the spacing between the ratlines should be 0.32 inches. Luckily, I have a ruler graduated in 10ths and 100ths of inches, so ruling those lines on a piece of cardstock was simple. Then I cut templates about 1.5 inches wide, whcih will fit nicely behind the shrouds. You can see the final result.


-
Thanks, Grant. I'll try that. Dan
-
I did a presentation on masts and spars for the club I belong to. (Shameless plug for the The Nautical Research and Model Ship Society of Chicago.) I've attached the presentation. I use a small lathe made by Harbor Freight Tools, a digital caliper and a file. Hope this helps! Dan Masts and Spars.pdf
-
Thanks, gentlemen. Grant, I continue to be amazed at your HMS Victory. It's truly inspiring. That's exactly the template I was looking for. I'll make one up and get started. Dan
-
I've reached the point on my Scottish Maid that I need to rig the ratlines. I remember reading a method here on Model Ship World that involved using graph paper to make a template to keep them properly spaced. Before posing, I searched for those posts and couldn't find them. Anyone recall that method? It made all kinds of sense when I read it, but I need a refresher to actually do it. Thanks! Dan
-
Now that's something I could really use. I've struggled with that kind fo fine detail work. I think your rigging bench is exactly what I've been looking for. Dan