HOLIDAY DONATION DRIVE - SUPPORT MSW - DO YOUR PART TO KEEP THIS GREAT FORUM GOING! (Only 24 donations so far out of 49,000 members - C'mon guys!)
×


dcicero
-
Posts
267 -
Joined
-
Last visited
Content Type
Profiles
Forums
Gallery
Events
Everything posted by dcicero
-
Bill: I'll second the recommendation to make a trip to the Museum of Science and Industry. The U-505 alone is worth the price of admission. Dan
-
Thanks, David! Dan
-
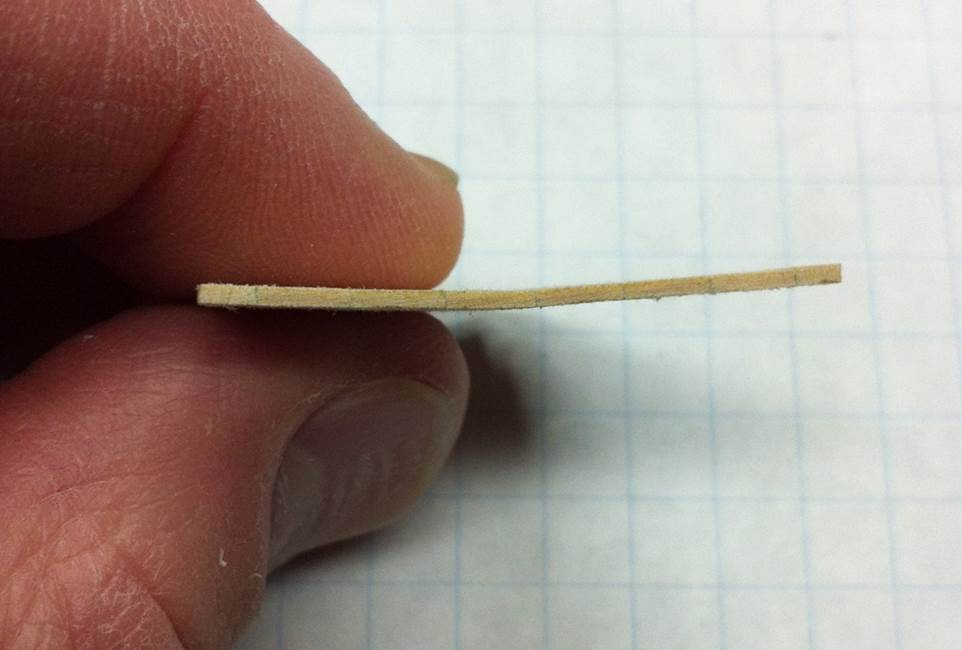
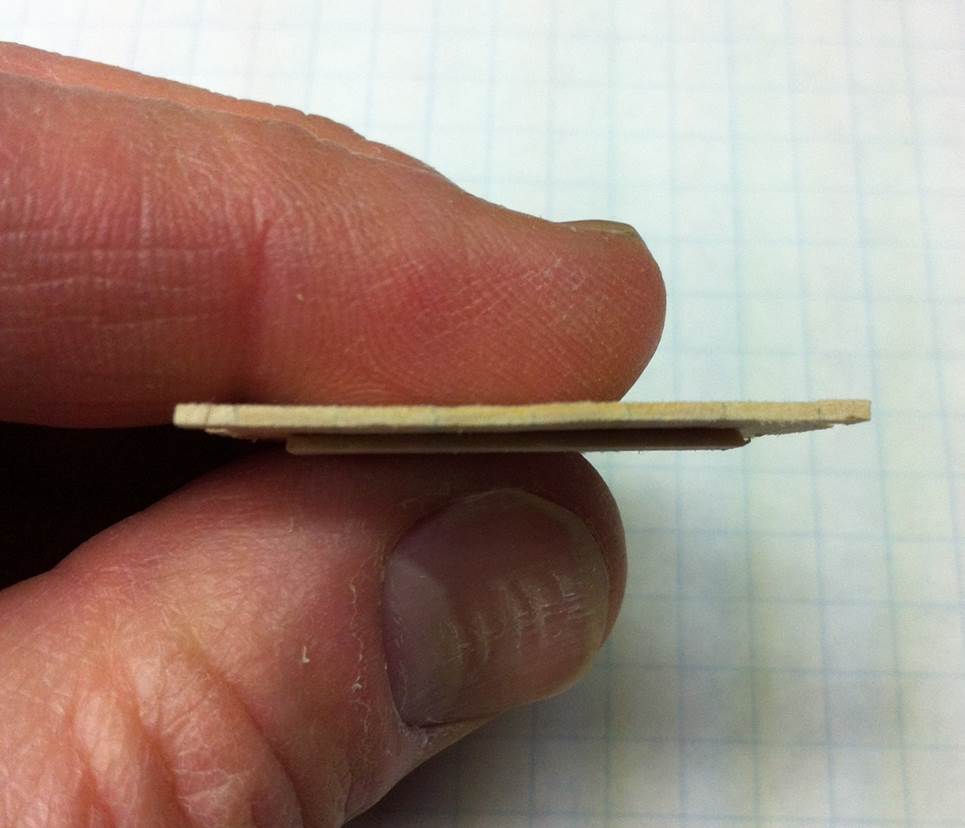
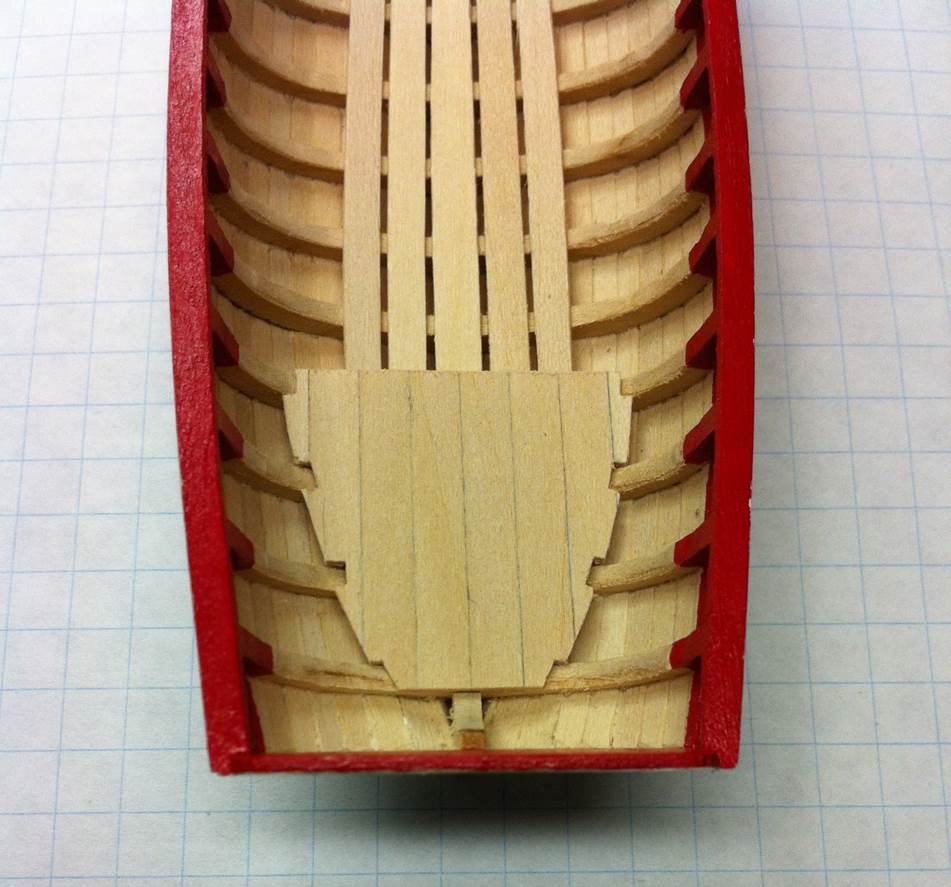
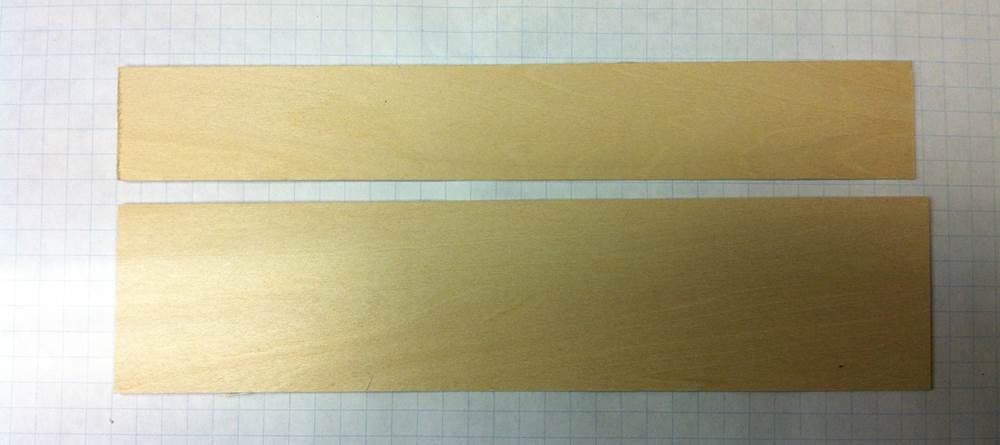
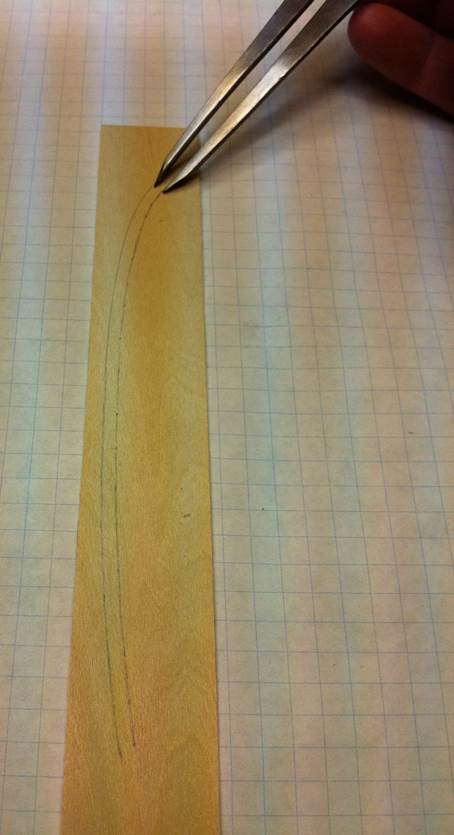
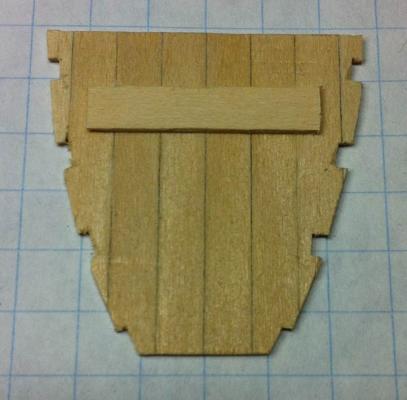
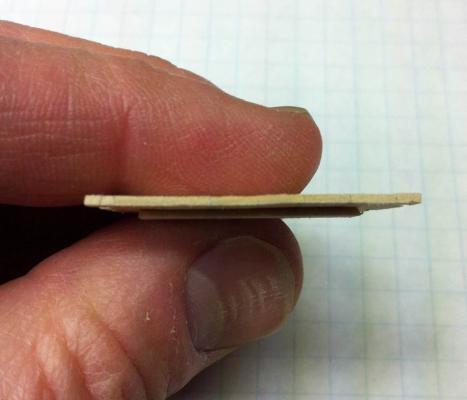
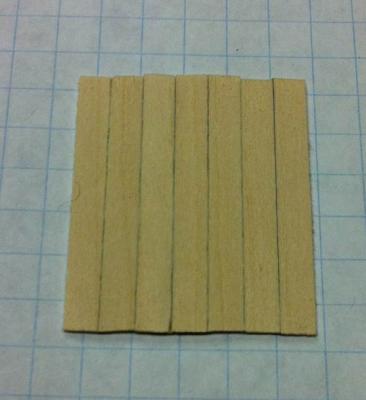
The aft platform is in ... and the forward one has been made and is ready for installation. I saw The Lego Movie this weekend with the kids. (Don't laugh. It's really very good.) There's a lesson in the movie about following the instructions and how that's not always the best plan. Ignore that. Follow the instructions. Here's why. Instead of following the instructions, which say to make the template then make up the blank for the platforms, I did the opposite. I looked at the photos, counted the number of planks I needed and made up the blank. Then, while the glue was drying, I made up a template to allow me to cut the blank to shape. Bad plan because, in truing up the edges of the planks, I needed more planks to make a proper aft platform. See? Not wide enough. I made another blank, wider this time, and everything worked out fine. I did make one, small alteration. When I glued the planks together, even though I let them set up under a weight, there was some bowing of the platform. I put a small piece of planking material on the bottom of the platform, between the frames. That flattened it right out. Here's the final result. Dan

- 175 replies
-
- 7
-

-
- 18th century longboat
- model shipways
- (and 1 more)
-
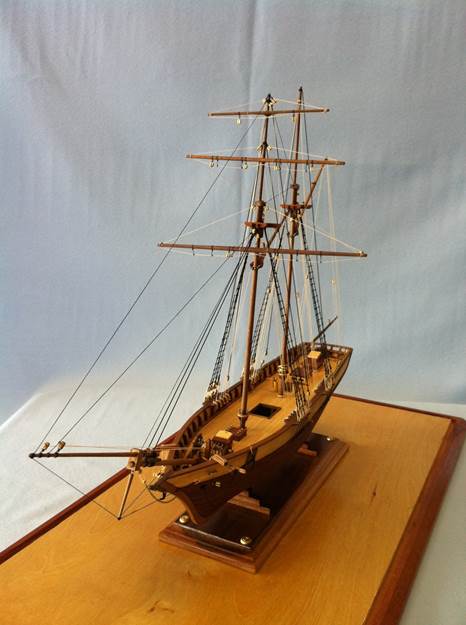
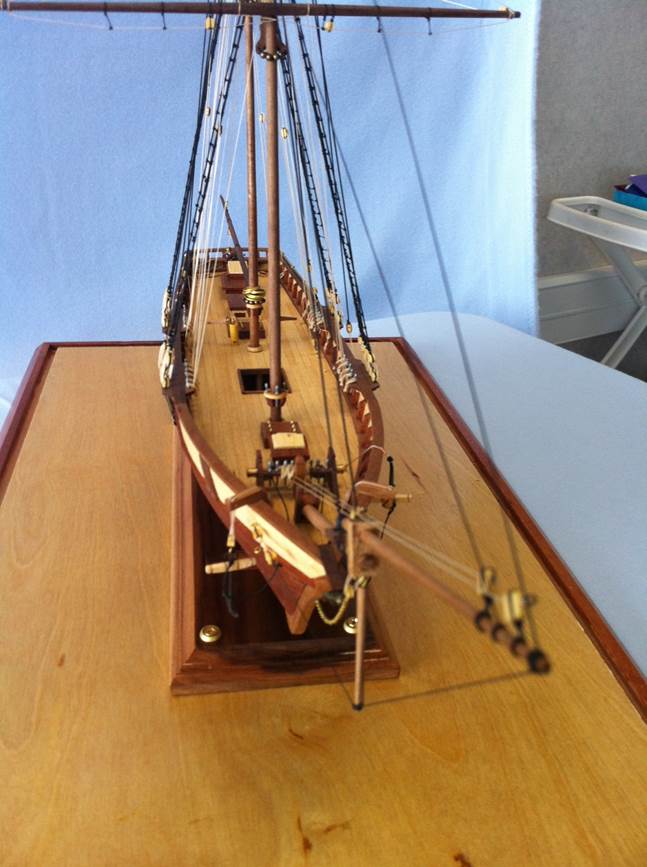
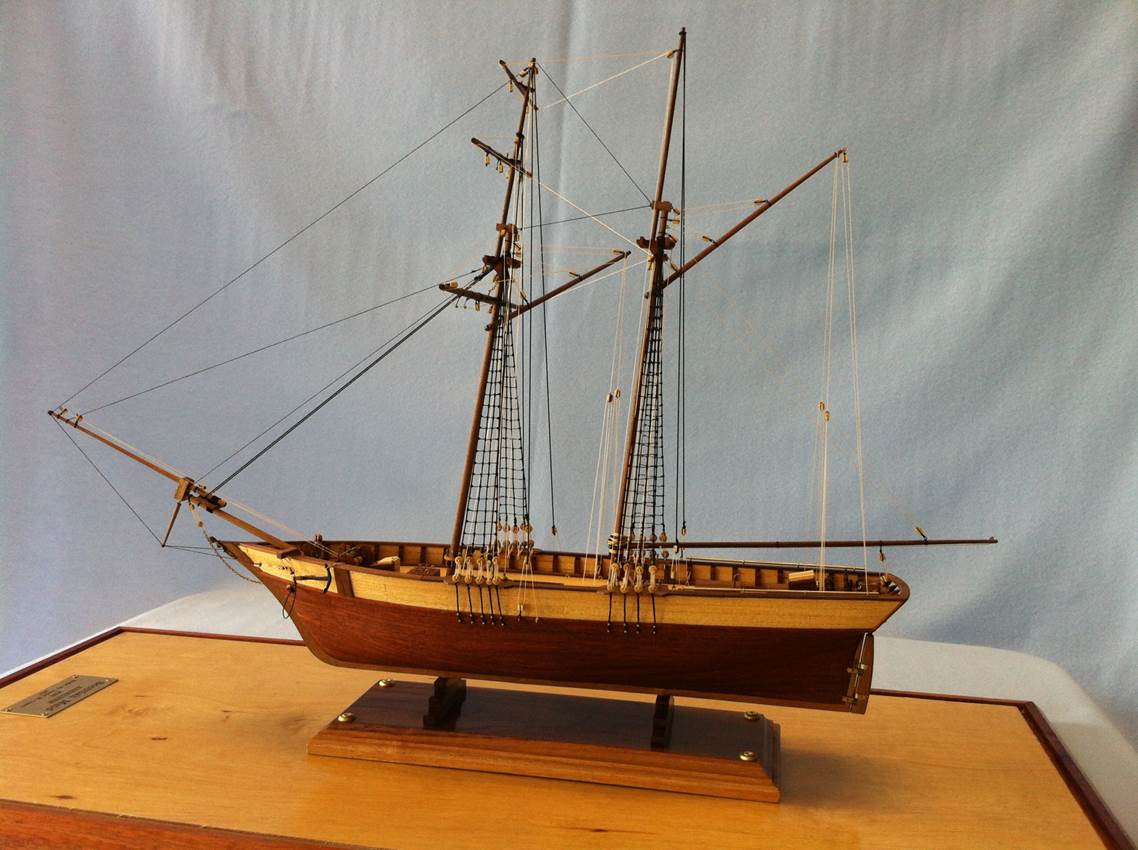
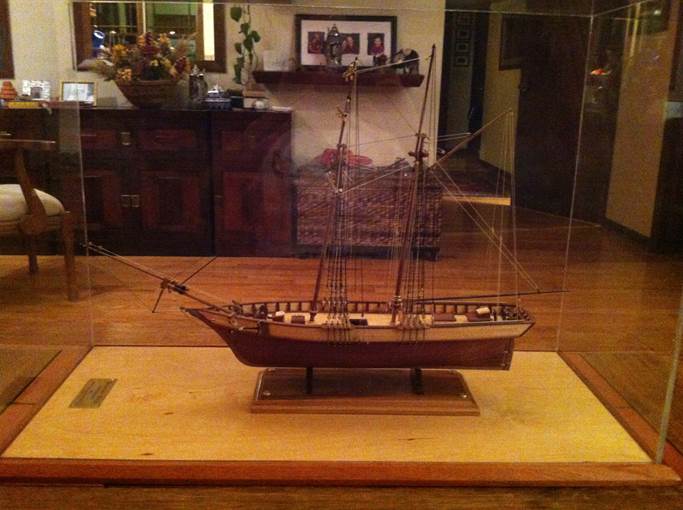
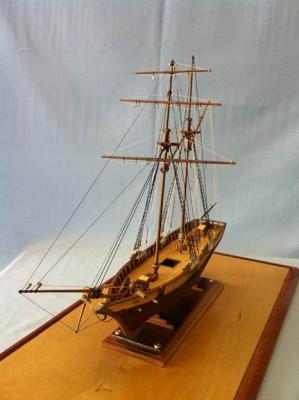
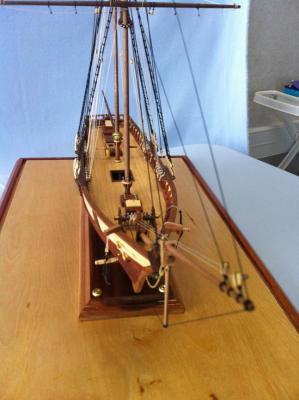
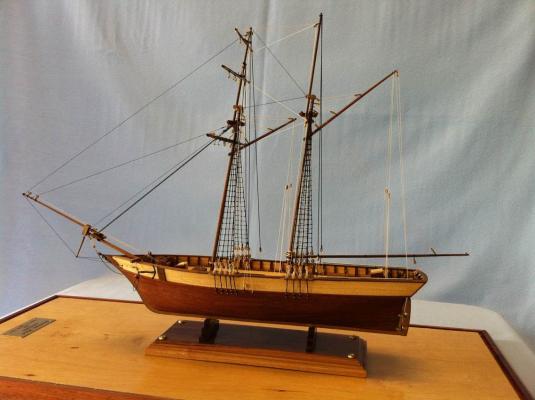
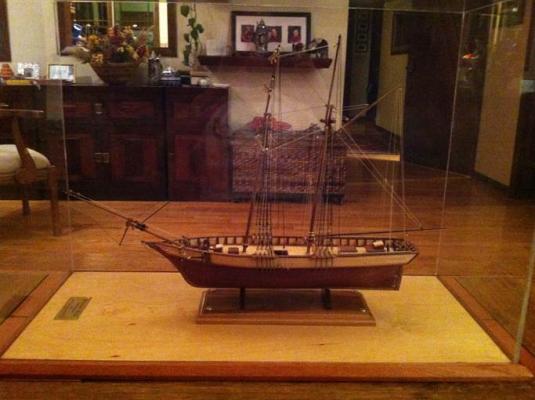
Great job, Jesse! The waterways and bulwarks are a pain to install on this model. I ended up scrapping the ones in the kit and making my own because I couldn't get the kit-supplied ones to line up properly. And the "instructions?" Ha! They could have just left them out of the kit. That said, it does build into a very nice model. Here's mine. Dan
- 607 replies
-
- 1
-
-
- scottish maid
- artesania latina
- (and 1 more)
-
What a great tip! Thanks! Dan
-
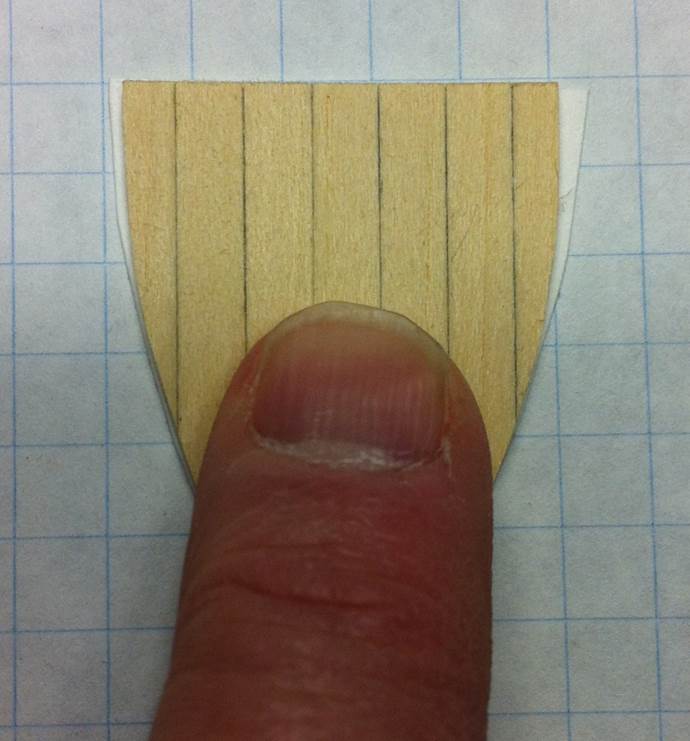
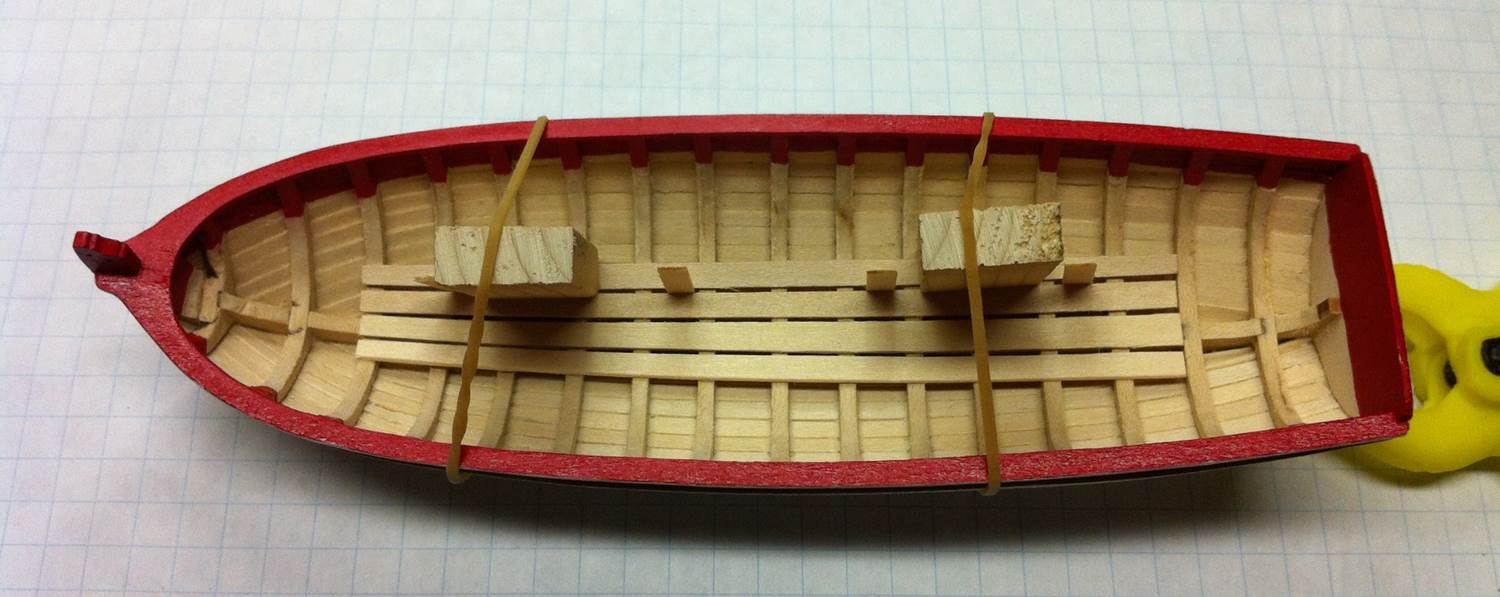
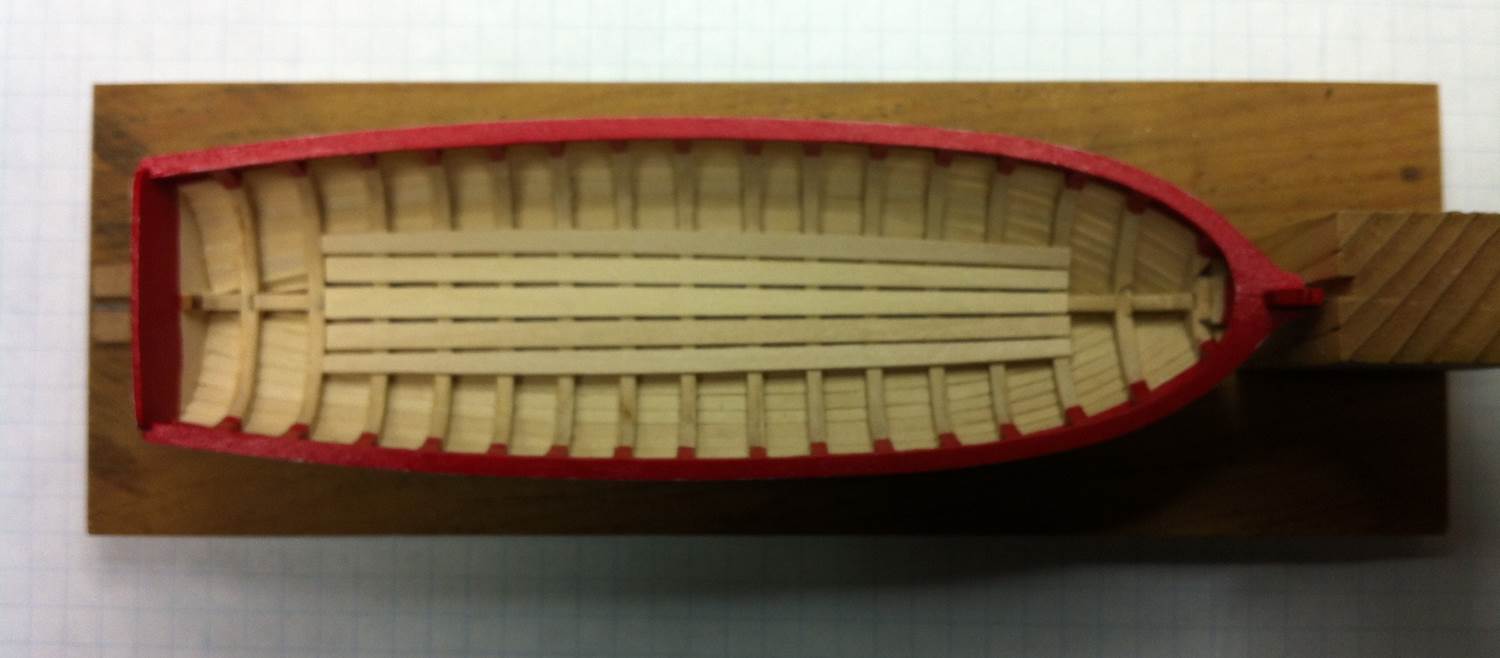
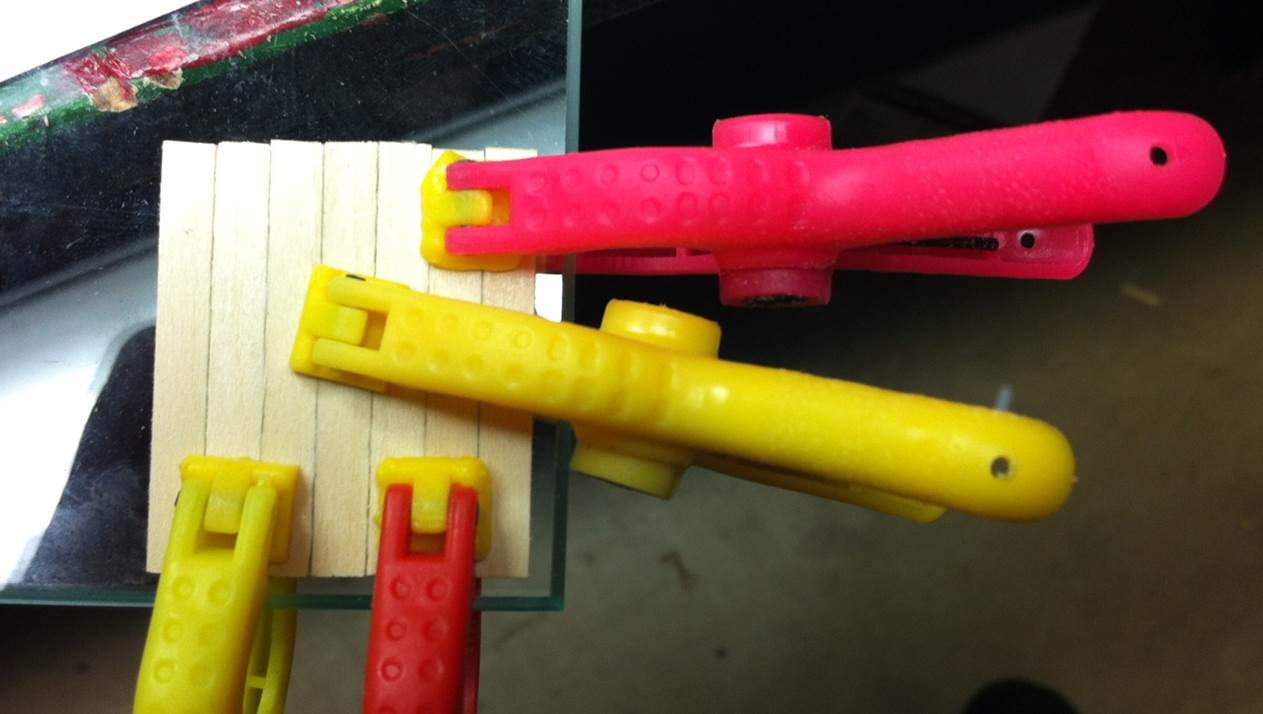
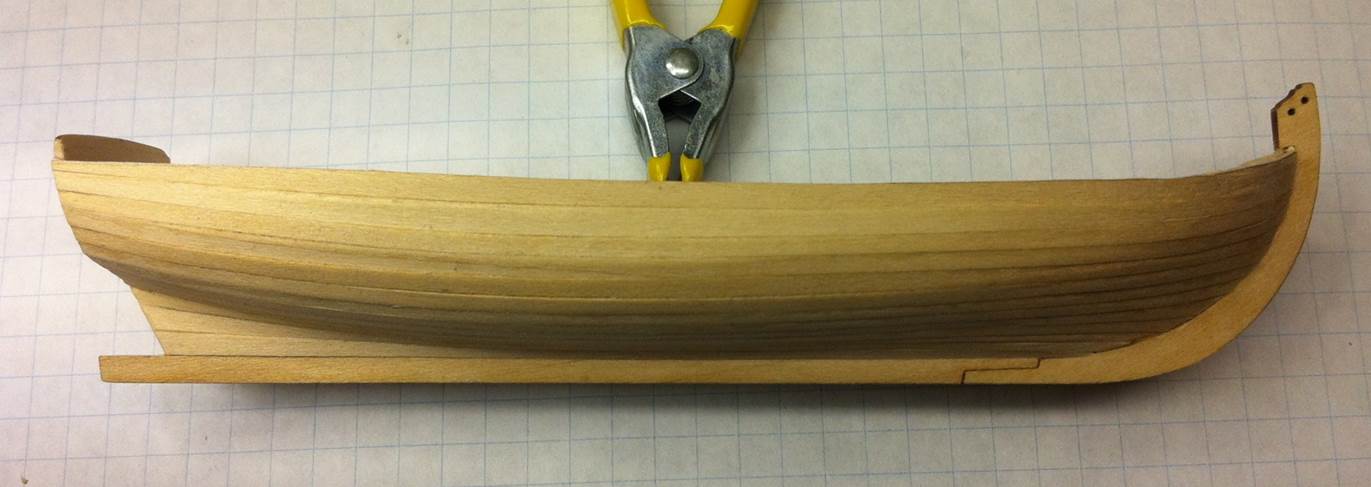
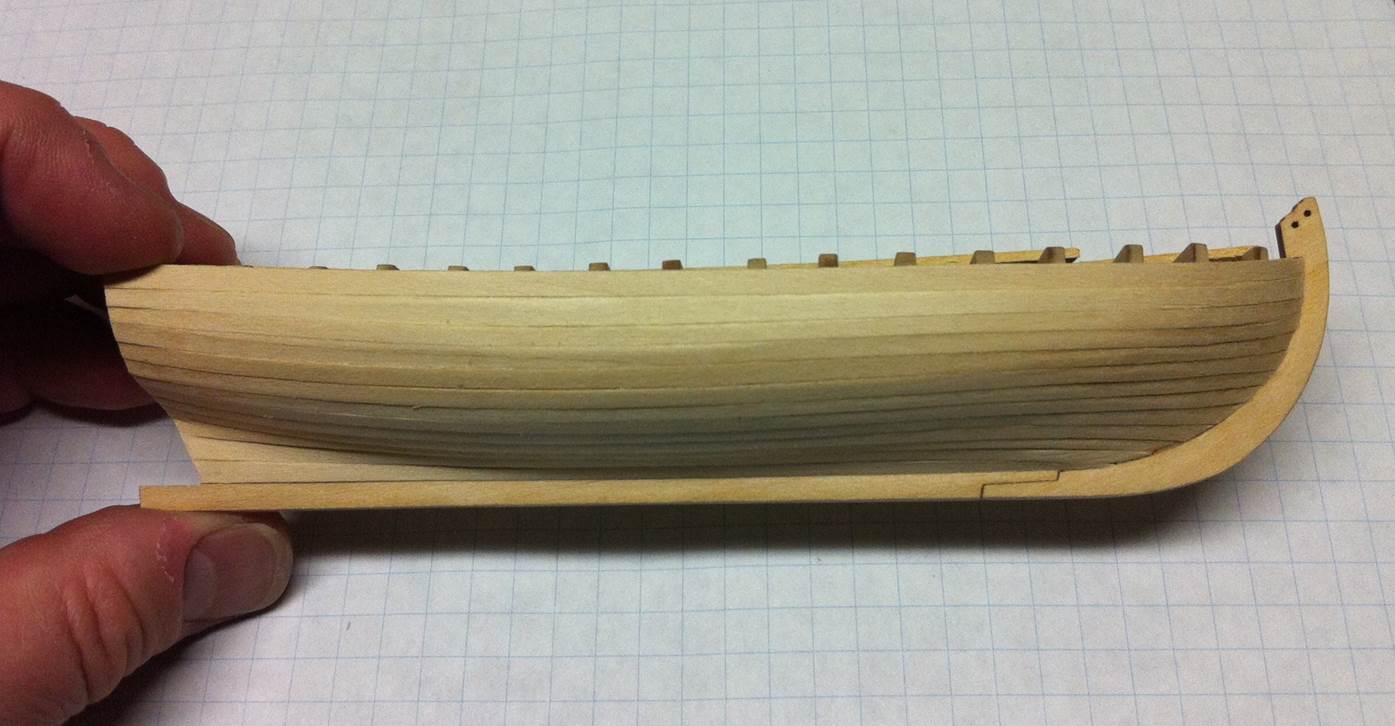
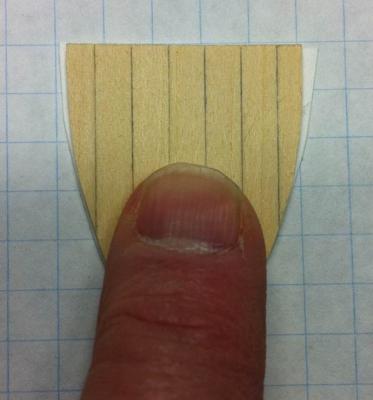
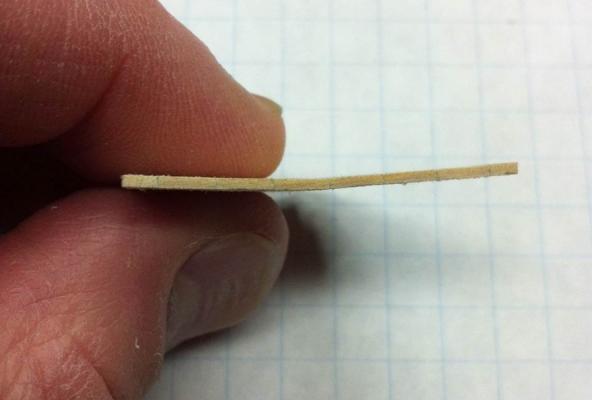
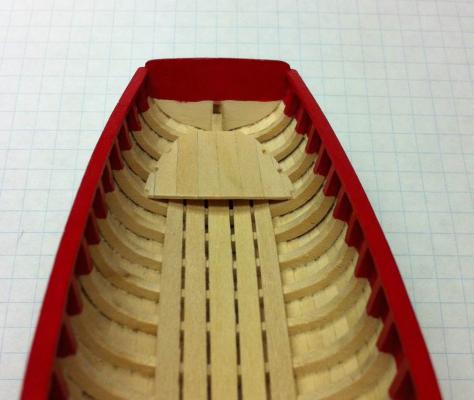
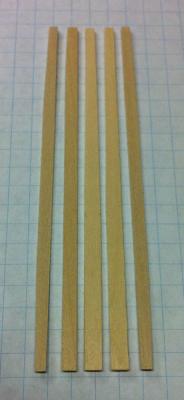
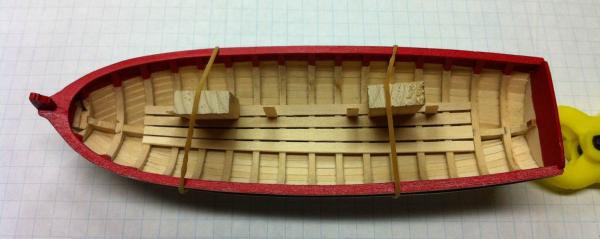
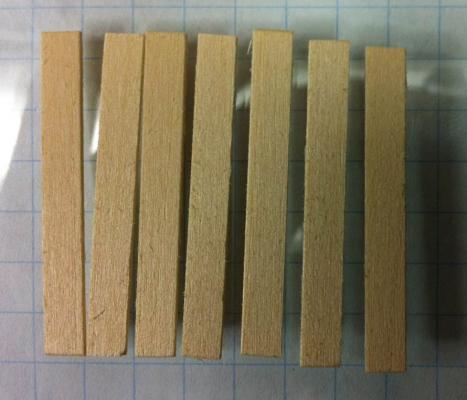
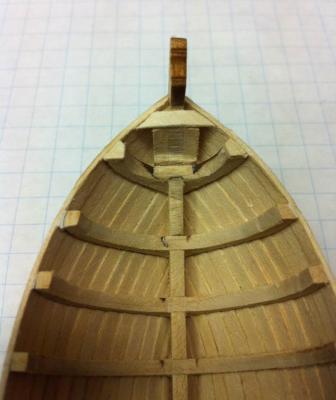
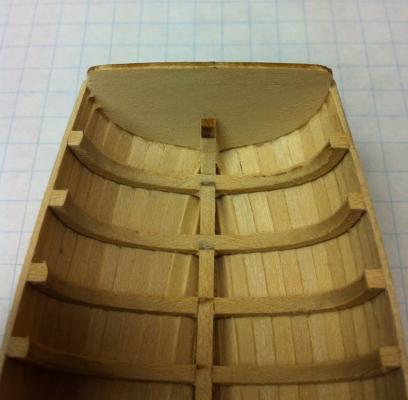
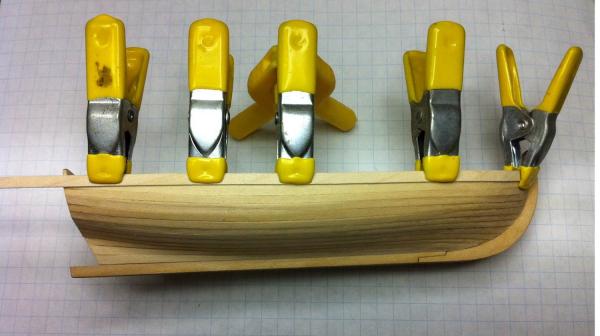
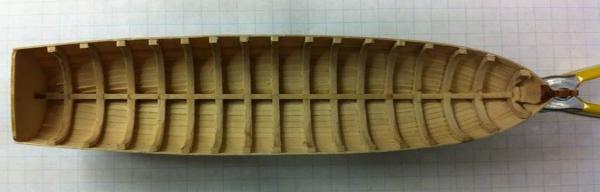
Well, I got the floor boards in. I followed the plans closely on this and tapered the boards. The center board is tapered toward the bow. The boards just outboard of the center board are tapered on one side only, toward the bow. The outboard ones are tapered fore and aft on one side. Here's what they looked like before they were installed. Getting them lined up was easy. I used some excess planking material as spacers and some small blocks and rubber bands to hold them in place while the glue set up. And here's the finished product. Next came the aft platform. Again, this was pretty simple. Cut some planks to length... Use a pencil to mark one side of the planks to simulate cauking and glue them together. I used my glass plate again to keep everything flat. And here's the final result. This is the blank. I need to cut it to shape. I was going to do that yesterday, but got waylaid by the flu. No building got done yesterday. My intent was to bring the plans into work and make a couple of copies so I could cut out a template ... and then I forgot to bring the plans in. Doh! Maybe I'll get to that tonight... Dan


- 175 replies
-
- 1
-
-
- 18th century longboat
- model shipways
- (and 1 more)
-
Anyone got a good source for #69 and #70 drill bits? I have a drill bit set that has those two sizes and I use them all the time. I've broken a couple of them and would like to replace them, but I don't want to buy an entire set of drill bits to just get the two I use all the time. Dan
- 162 replies
-
- 1
-
-
- 18th century longboat
- model shipways
- (and 1 more)
-
Thanks, Toni. I puttered around with the model last night and made the decision to stop puttering around with the waterline. It looks better than it did and, like you say, if I keep raising it, I'm going to have a problem with the rudder. Thanks, too, for the compliment on The Fife Rail. Our meetings start at 7:30 PM, which is about Francesco's bedtime. He toughed it out as long as he could, but eventually... Both he and Nicolas had a good time, but it was a late night for them. They were both asleep in the backseat before we were out of Westmont. Dan
- 175 replies
-
- 3
-
-
- 18th century longboat
- model shipways
- (and 1 more)
-
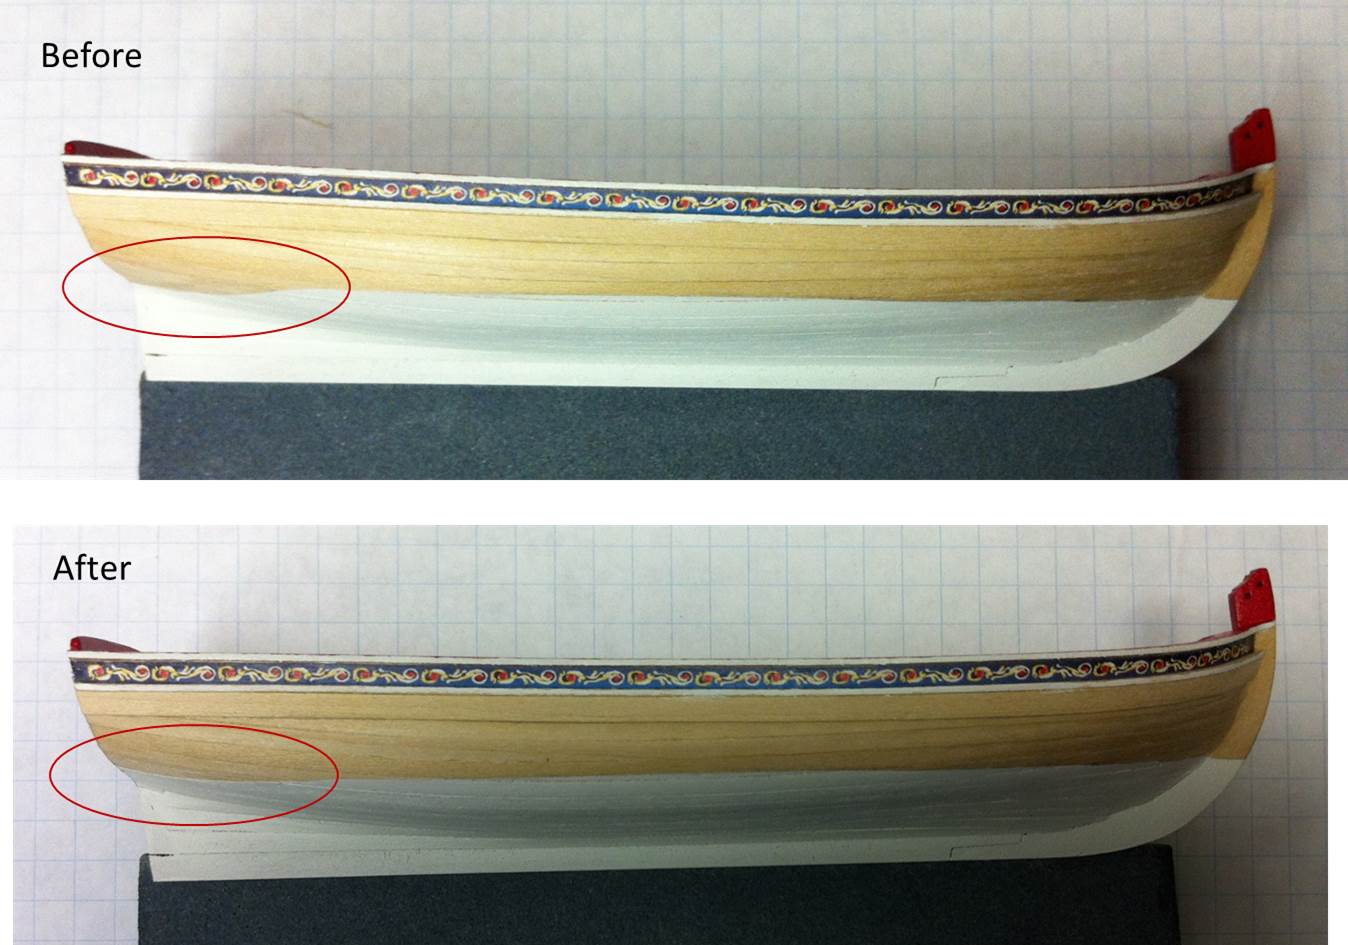
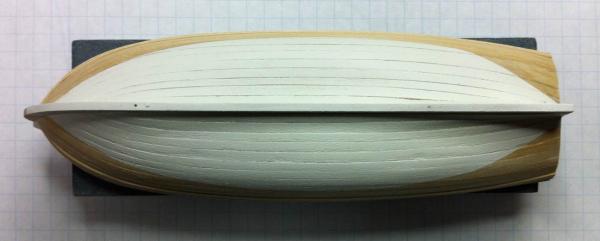
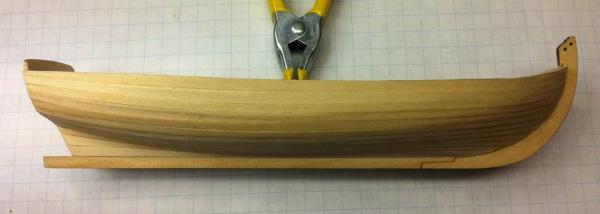
Taking Toni's advice, I practiced with the airbrush before pointing it at the model! That was time well spent. In the end, the masking tape came off just fine. I got a nice, sharp line. Thing is, the line wasn't exactly where I wanted it. I swear, I looked this over ... and over ... and over before putting paint on the model. When I pulled off the tape and looked at the waterline, it dipped quite a lot at the stern. I masked it again and ran it up a little higher at the stern and it looks much better. One more run at this should have it dead straight. Here's a view of the bottom of the boat, before fixing the waterline. So what's the trick here? I thought I'd gone down the right path with my waterline marker. Looking at it with the masking tape on, I thought I had a nice, straight waterline. When I got done painting, it wasn't what I wanted. This is one of those fixable errors, but it would have been nice to get this one right the first time! Dan

-
I've been putting it off: painting the bottom of the boat. There are reasons for this. First, getting the waterline on straight has been weighing heavily on my mind. How should I do that? Second, masking the area off and not getting paint under the tape or ripping the paint off removing the tape or God only knows what else could go wrong... Third, I need to airbrush that paint on, but I've never used my airbrush before. I could spend time learning how to use the airbrush, but I really want to move forward on the Longboat. The result of all this: paralysis. Last night, I hoisted myself off my half-moons and started. I strapped the model to the building board with rubber bands and leveled it out on the kitchen counter. Then I constructed a High Speed, Low Drag Waterline Marketing Gauge using the Legos that the kids have strewn all over my house. I drew on the waterline and then used Tamiya 6 mm masking tape to tape off the waterline. Only concern I had was where the tape buckled on the inside of the curve around the bow. I used a bone folder -- a piece of polished bone used to make very precise creases in book binding materials -- to burnish the tape down. Tonight -- assuming I get the time to do it -- I'm going to putter around with the airbrush. I have the Model Master Acryl paint. (Heretical, I know.) I got some Model Master Acryl thinner so I can clean the airbrush. (I think I can spray that stuff without thinning it. I'll see how that goes. If all goes well, I'll get the bottom of the boat painted this weekend and move along to the next stage. One of these days, I'm going to be able to see around corners. That's my issue right now. Almost everything I'm doing, I'm doing for the first time, which means I have to learn how to do it, mess it up a couple of times and re-do it. That stretches out the timeline. It's fun -- don't get me wrong -- but frustrating at the same time because I'd like to be making more progress more quickly without sacrificing quality. It reminds me of a line from Chaucer: "The lyf so short, the craft so longe to lerne." Dan


- 175 replies
-
- 4
-
-
- 18th century longboat
- model shipways
- (and 1 more)
-
Your Bounty Launch is really making me want to build one myself. You're doing a tremendous job on this model. Dan
- 78 replies
-
- 1
-
-
- model shipways
- bounty launch
- (and 1 more)
-
Thanks again to everyone who helped out with the research associated with Taggart's Eagle Scout project. It's finished off now and they had a very nice ceremony at the VFW Hall. I thought everyone here might want to see the write-up that appeared in the local paper. Dan 11212013 The Voice _Tag's Eagle Project.pdf
-
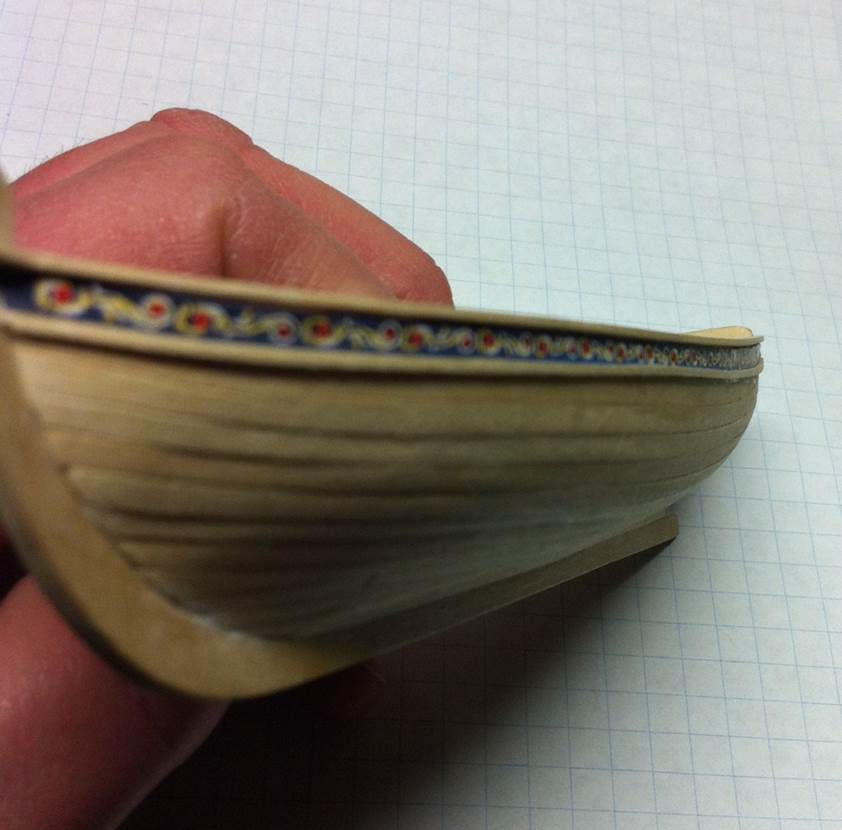
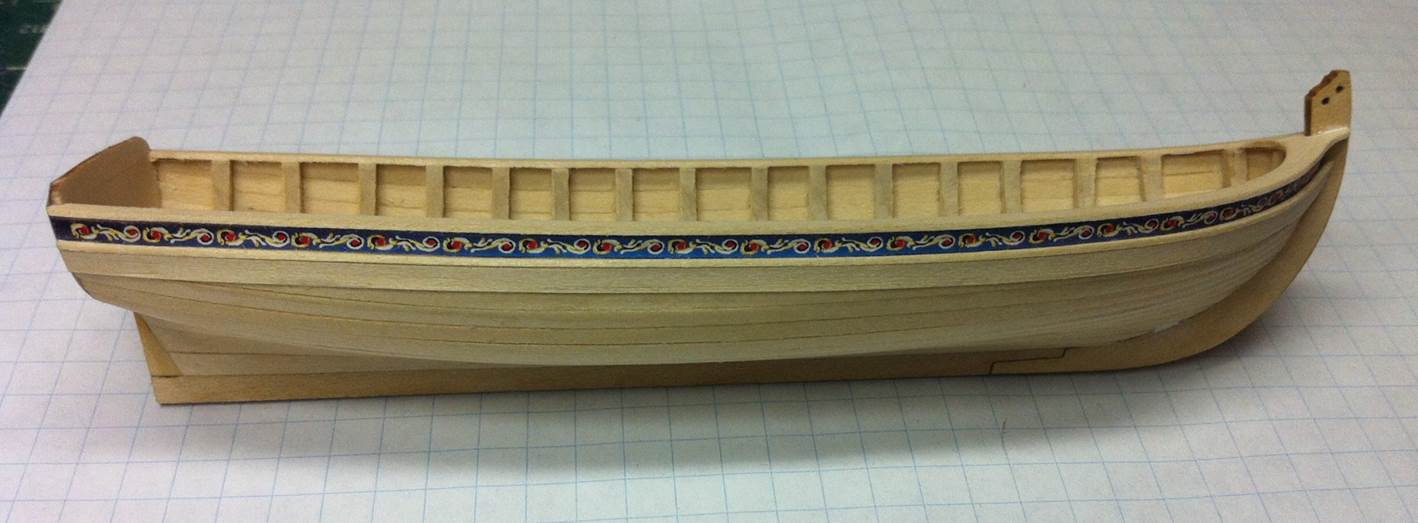
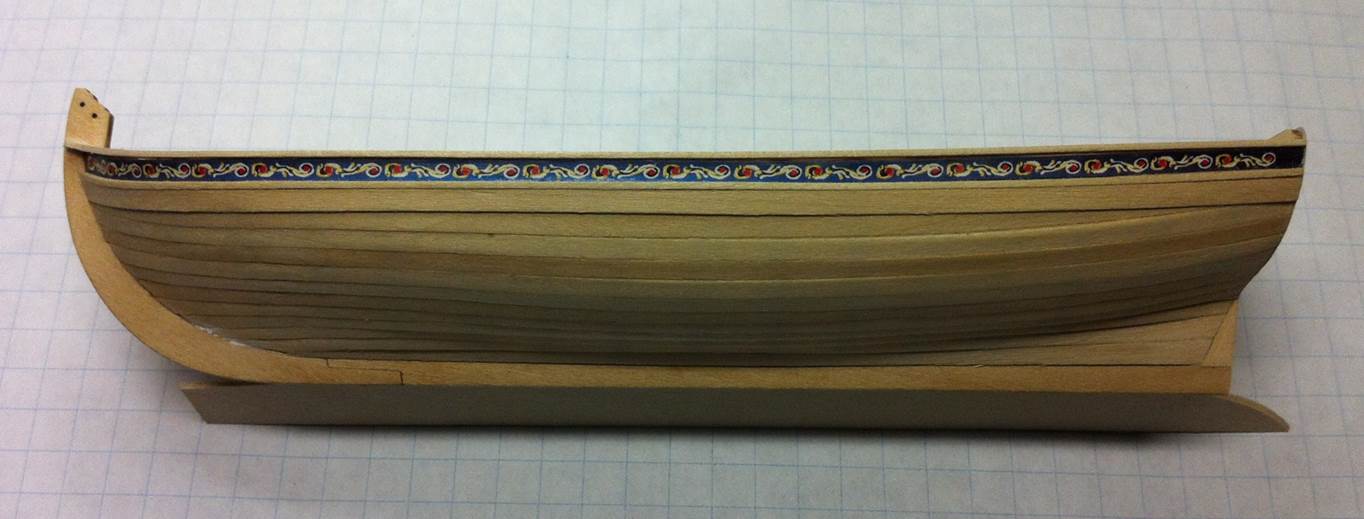
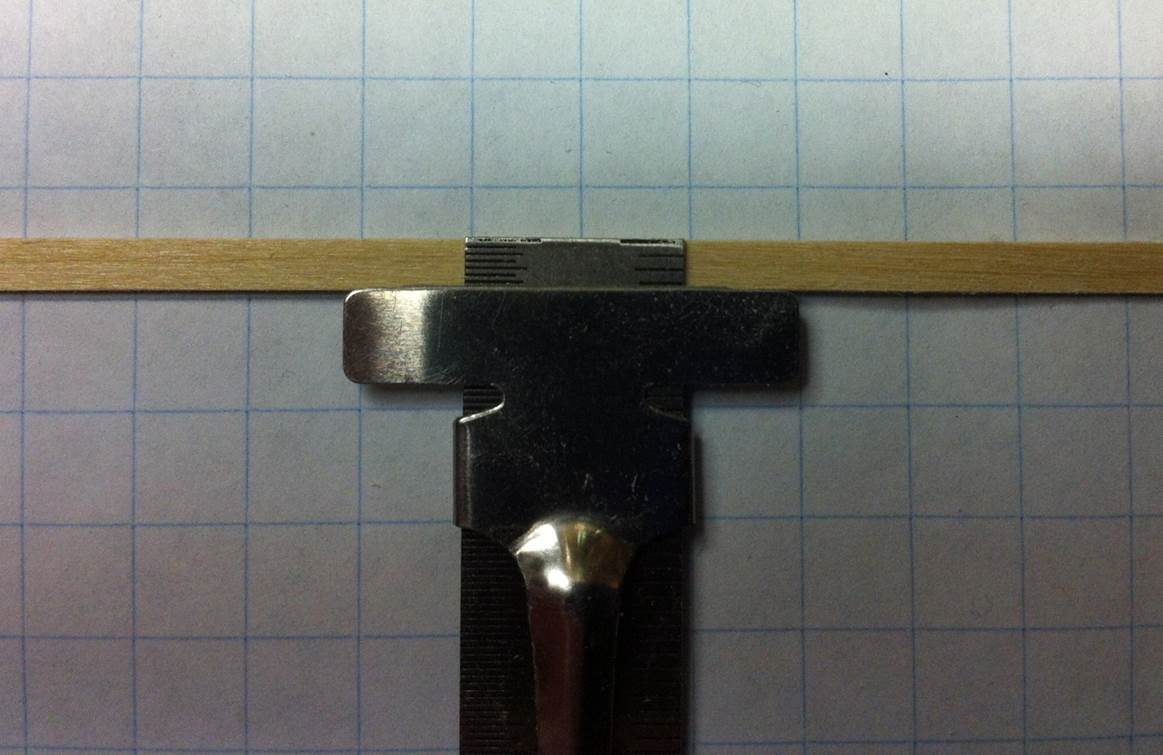
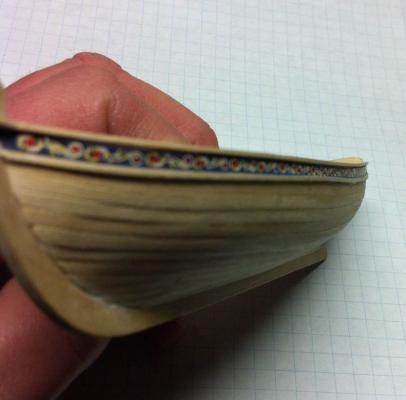
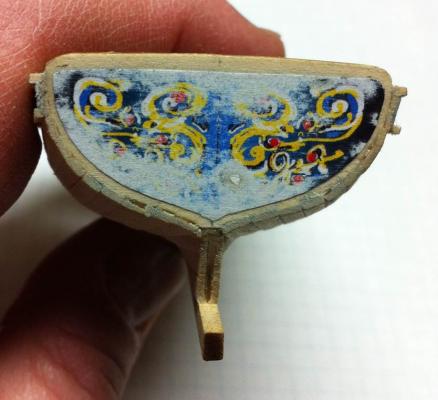
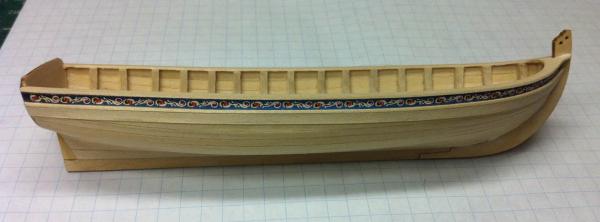
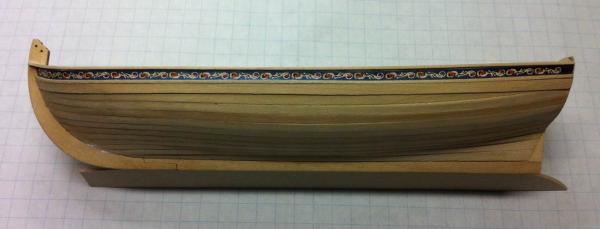
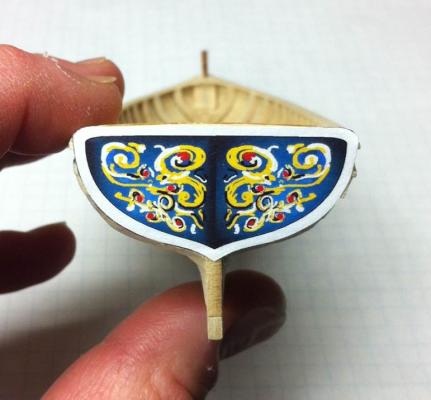
There's a company here in the US that makes posters with demotivating statements on them, a kind of antidote to all those motivational posters one finds in many offices. This one's my favorite: This is the story of my modeling life... My work serves as a warning to others. Following Chuck's earlier advice, I sanded the caprail down more, as far as I thought I could go without doing more harm than good to the model. They're as narrow as I can make them now. After attaching the friezes and then adding the rail below them, I noticed some inconsistency along the length of the boat. Here's a photo of the port side from the most unflattering angle. I wrote an email to BobF and asked his advice. He told me that, if I'd been using white glue, I should be able to loosen it up with water and adjust the rail. I had used white glue, but I was still a little concerned that I would mess up the frieze by messing around with water. Not to worry, though. Using a small amount of water and a little piece of boxwood I had around, I cajoled the rail back into true. When the glue dried again, it was in the right place. Reading Chuck's instructions again and looking at some of the other logs here, I became convinced that I'd done the stern frieze incorrectly. According to the instructions, the white stripe around the frieze should be 1/32" wide. Mine was more like 3/32", so I decided to re-do that too. I cut out a larger frieze, with the white part. I sanded the old one off. This would be the third time around for that stern freize. The first I removed by wetting it, which caused the transom to swell and threatened to loosen the planks surrounding it. Sanding it off got around that problem. Note, I also put the stern block in place and trimmed the false keel down to the right length. I wanted to add the extra plank shown in the NMM photos and which Bob had installed on his model. Bob helped me out with dimensions for those planks and I carefully made up a couple. I cut them down to a width of 3/32" first and then sanded them to 1/64" thickness, a time consuming project which, if done too fast, results in splintered planks. My advice: go slowly. Here are those planks, installed. You can see the marked improvement in the rails below the friezes. And here's the new stern frieze. I did plank the hull from the bottom up and that resulted in an odd-looking run of planks at the sheer. The friezes and the extra plank go a long way toward correcting that odd appearance. The run of planks looks much better now, I think, and the extra plank is more consistent with the prototype. Straightening out that rail makes a world of difference and I think the stern frieze looks quite a lot better now too. (There's still some trimming needed on that frieze. That'll be done tomorrow.) Then it's off to the paint shop for the boat! Dan


- 175 replies
-
- 5
-
-
- 18th century longboat
- model shipways
- (and 1 more)
-
I've always been attracted to this boat. The story of HMS Bounty is one I never tire of. I learned about the mutiny reading Nordhoff and Hall's Mutiny on the Bounty (actually, the whole trilogy: Mutiny on the Bounty, Men Against the Sea and Pitcairn's Island) as a teenager. I enjoyed Caroline Alexander's book a great deal and have John McKay's Anatomy of the Ship volume The Armed Transport Bounty. There are others out there that I enjoyed to a lesser extent, but still worth the time: The Eventful History of the Mutiny and Piratical Seizure of HMS Bounty: its Causes and Consequences by Sir John Barrow (1831) and Captain Bligh and Mr. Christian: The Men and the Mutiny by Richard Alexander Hough (2000). That Model Shipways kit looks great and I'll be following your build with great interest! Dan
-
A little more progess has been made ... and more questions raised. I got the caprail installed and I think it looks great. Lots of sanding involved in this, but nothing difficult at all. And then it was on to the friezes. I was dreading this step because it really looked like it was going to be a tough thing to pull off, but, in the end, it went very smoothly. I cut the friezes out and attached them with white glue. The stern frieze was a little more difficult and here's where the question comes in. Looking at the other pictures here on the forum, it looked as if Chuck attached the colored part of the frieze and painted around it. It looks like Toni adhered the entire frieze, with the white part, and then cut around it. Looked to me like this was a judgement call ... so I made the call and adhered just the colored part of the frieze. Did I make the right call? Aligning the frieze, I found, was the most difficult part of the operation. What you see above is my second attempt ... in keeping with my practice of building everything at least twice. The glue dried so fast on the first attempt that I couldn't nudge it into place. I removed it, cut another frieze out and attached it as you see above. Based on Bob's recommendations, I used a small amount of Elmer's White Carpenter's Wood Putty to fill in the small gaps at the bow. (You can see that filler in the pictures.) Now that I've made this call on the stern, I'm going to need a little bit of putty there too. As for paints, I couldn't find a place that had the Badger paints, but after discussing what I was looking for with the guys at Al's Hobby Shop, I chose Model Master Acrylics. That's my next step! Dan


- 175 replies
-
- 2
-
-
- 18th century longboat
- model shipways
- (and 1 more)
-
I printed up a couple of copies of the Long Boat friezes, figuring I'd have to do some experimenting to get this part of the model right. I sprayed two coats of hairspray on one of the sheets. There was no color bleeding whatsoever, so that was good. The paper did crinkle up a little, but I doubt that's going to do any harm. The paper is still plenty flexible, but now the friezes themselves are "fixed." Now that it's completely dry, I might put a heavy book on the page to flatten it out. Probably not necessary, but it couldn't hurt. One other thing I was thinking about... I've got to paint this boat. I was considering getting some acrylic paints from Badger. Here are the colors I chose: Anyone got any thoughts on this? I think these are the only colors I'll need. And I see Model Expo sells a paint set for the Long Boat ... for about $40.00. Anyone know what's in that set? Anything different from what I've chosen? Dan

-
Got the caprail finished off last night. (Only had to scrap and remake one of them!) Toni's advice is good. Make that caprail good and wide. It's easier to make it more narrow than to make it wider ... which is why one of mine had to be scrapped. I thought I'd made it wide enough, but it was too narrow at the bow and patching it up wouldn't have looked good. The better solution was just to throw it away and make a new one. Now on to the friezes. The instructions call for a fixative to be applied. What fixative have people used? Is this something easily obtained at an art supply store? Thanks! Dan
-
Looking very good, Ryland! Dan
-
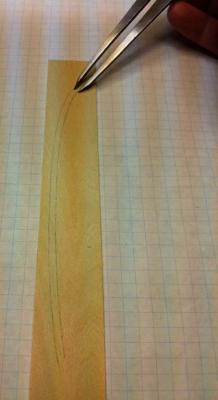
Not a great deal of progress to report, but here's what I've been working on lately. I cut the top strake down ... too much. Certainly it needed cutting down at the transom. There was no room for the caprail otherwise, but, when I laid that batten down to mark the sheer line, it looked like I needed to take some off the bow too. I went at it, cutting down below the notch in the stem. When I'd done that, I realized that 1) I'd taken all the sheer out and 2) that the stem was now far too high. If I'd left it like that, the caprail wouldn't even have covered up the notch in the stem. Time for some surgery... I built the top plank up again and repaired the frames that I'd cut down too far. I also reinforced the filler pieces at the bow. Here's what it looks like now. And here's the stern, the part I did right! So here's what the sheer line looks like now. Not really very pronounced... And then I started making the caprail. I ripped the thin board wide enough to make one of the caprails. Then I traced the outline of the hull. Then I drew a second line 1/8" inboard of the first. I'll make the other side tonight. I need to get a strip of Evergreen plastic to use as a spacer, like BobF did, so I can sand this down to its final shape. As for the sheer, I think I need to use the caprail to identify any high or low spots on the sheer line. I'm having a hard time seeing it the way it is. I may make the sheer a little more pronounced, but I'm worried about making it uneven -- port to starboard -- and feel I need some kind of reference to check against. The caprail should do that for me. Dan


- 175 replies
-
- 2
-
-
- 18th century longboat
- model shipways
- (and 1 more)
-
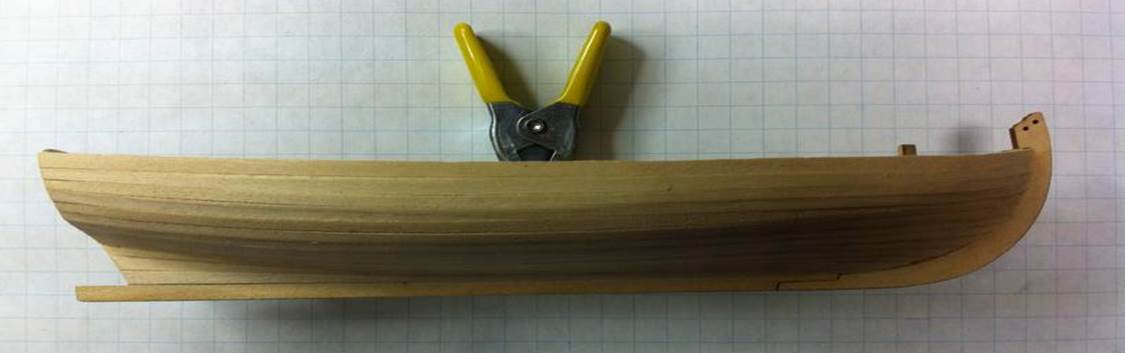
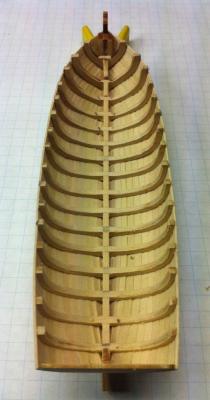
Thanks, Chuck. Here's a picture of the hull with all the frames sticking up. Last night, I did what I should have done from the start: layed a piece of planking along where the sheer line ought to be. I clamped it in place and then marked the line. Then I cut down the bow and stern to match that line. Here's the hull after cutting the top plank down to the sheer line. The result looks a lot like your prototype. There's more room at the transom, certainly. The sheer line is not very pronounced, though. I may increase that some. Dan

-
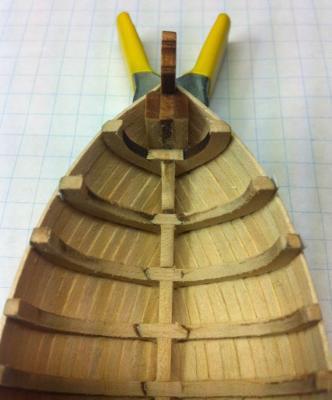
I've thinned all the frames out. Tonight I cut down the ends of the frames. I only snapped off three of them. You can see one of them in this photo, glued back in. Here's the question. It's time to, as Chuck says in the instructions, "sand the tops of the frames and the sheer to get a smooth run bow to stern." One could, I think, say I have that now, but in other photos, it looks like the top of the top plank should be a little lower on the transom. Mine is level with the top of the transom. I'm thinking I need to taper the aft end of that plank to give myself some room on the transom for the cap rail. Am I thinking about this correctly? Should it be about the thickness of the cap rail? (That's my guess.) Dan

- 175 replies
-
- 2
-
-
- 18th century longboat
- model shipways
- (and 1 more)
-
Your Scottish Maid is really looking wonderful. And I really like the sea you've carved. I remember seeing a picture of a similar base in a ship modeling book I read back in high school, many, many years ago. Even at that age, I was struck by how it brought the model to life. I wish I knew the name of that book -- I'd checked it out from the library -- because I'd love to read it again and figure out how the model builder had done it. He'd placed his model in a calm sea, anchored. He'd carved ripples around the anchor chain which I thought was a very nice touch. Dan
-
Thanks, Chuck. I have those little sanding drums, so I'll give them a try. Dan
-
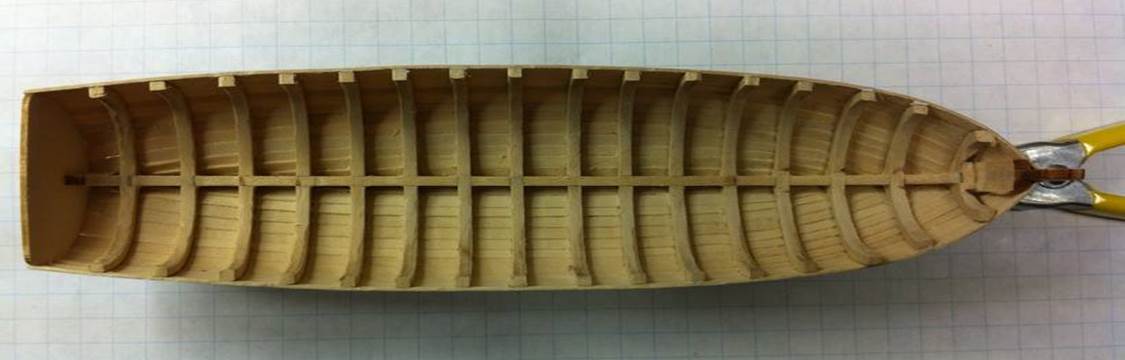
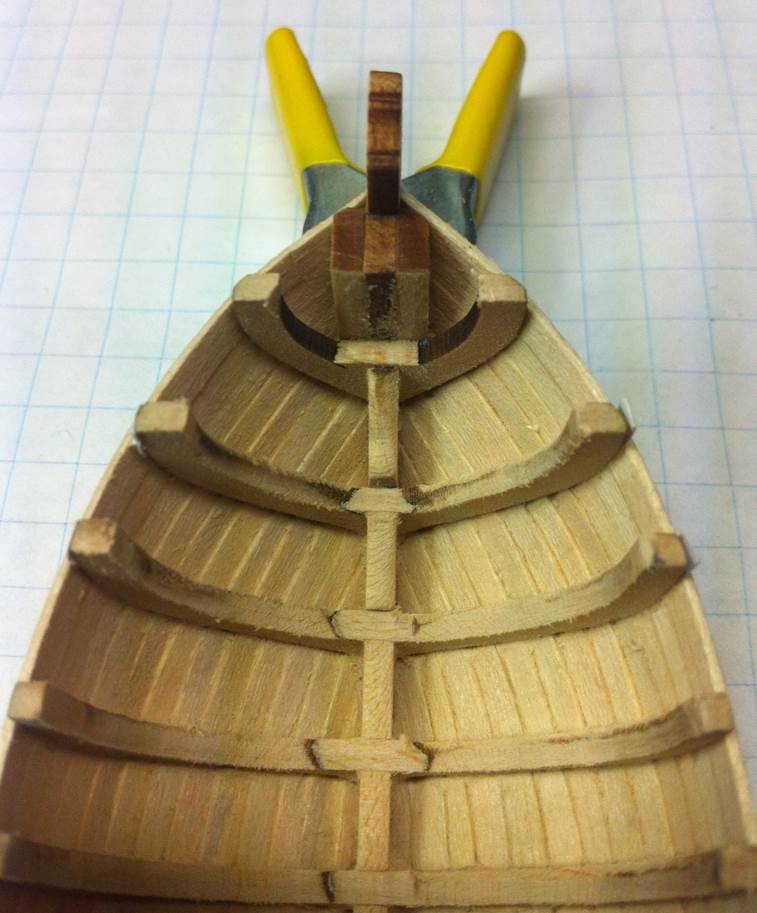
Thanks, Geoff. I'm going to have to look around at Home Depot for those cutters. I did some more fairing of the frames last night. It is slow work. I used some Dremel sanding disks (220 grit) that fit my Harbor Freight rotary tool. That helped out a lot, as you can see. I followed up with a lot of sanding with my good old sanding stick. I put a rounded end on it using my belt sander. That allowed me to work on curved surfaces a little better. It's still slow work, though. And it's rough with any of these methods to get in the tight spots at the bow and, to a lesser extent, the stern. Anyone got a good method for doing this? As you can see, there's still some thinning that needs to be done on those forwardmost franes. You can still see char marks from where the bulkheads were broken out. Farther aft, those marks are gone because I could think the keelson down to the top of the frame. Dan
- 175 replies
-
- 1
-
-
- 18th century longboat
- model shipways
- (and 1 more)
-
I have a little cutter, Toni, that I think will work for thinning the frames. I'm going to try it on one of the scrap pieces of bulkhead to see how it works. The cutter is for my Dremel. I'll have to see if it fits in the Harbor Freight rotary tool. The Dremel, is such a great tool. I've had mine since about 1983 and it works as well today as it did back then. Dan