HOLIDAY DONATION DRIVE - SUPPORT MSW - DO YOUR PART TO KEEP THIS GREAT FORUM GOING! (Only 24 donations so far out of 49,000 members - C'mon guys!)
×


dcicero
-
Posts
267 -
Joined
-
Last visited
Content Type
Profiles
Forums
Gallery
Events
Everything posted by dcicero
-
Thanks, Bob and Paddy! Found my first error in the tables today. I was measuring from the tops to the bottoms of the frames. For the after frames, the correct measure is from the top of the frame to the bearding line. There's not a great deal of difference, but the after parts of the planks will be a little wider as a result. Luckily, I hadn't put anything in place permanently when I found the error. Dan
-
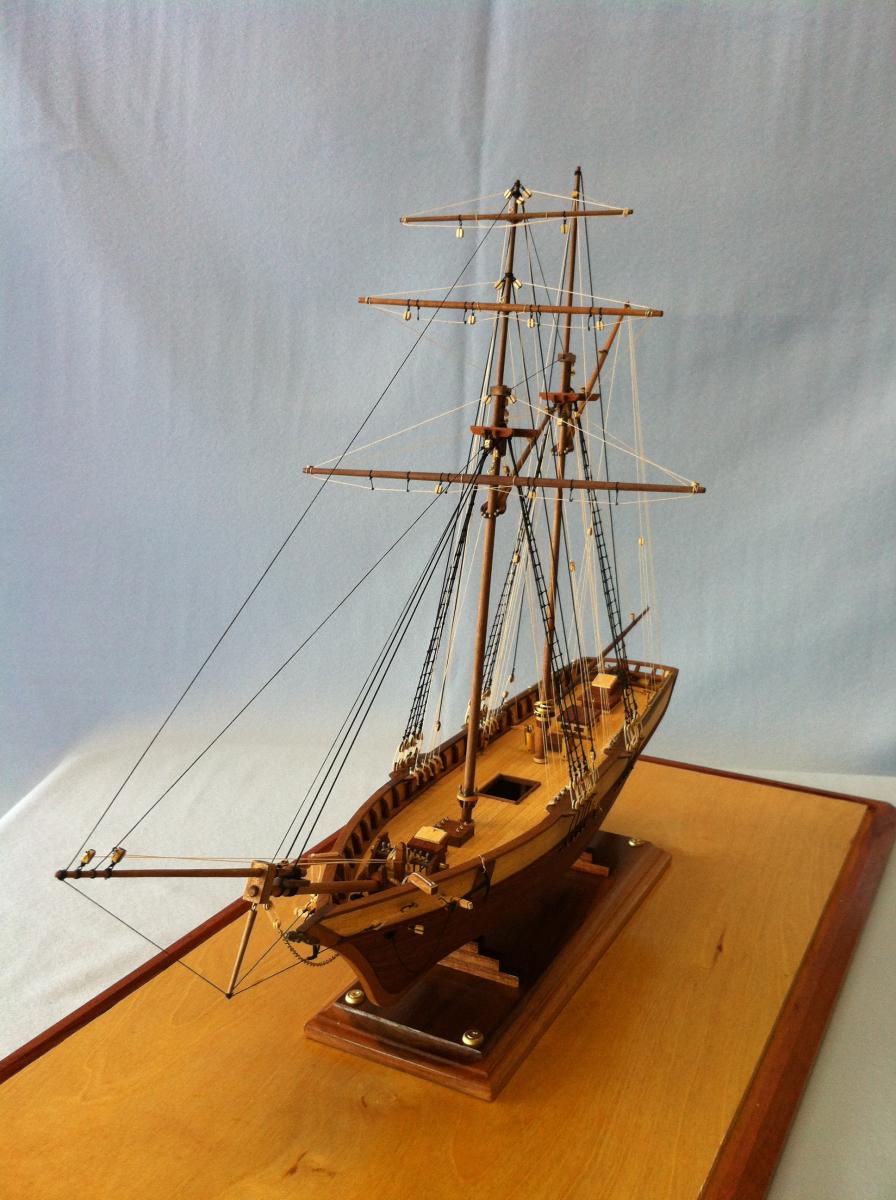
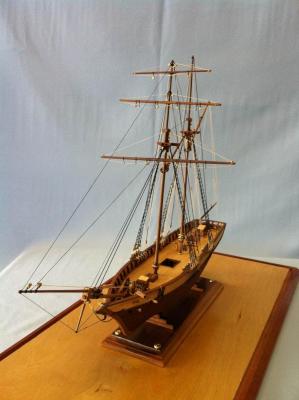
Yes, it was from the Artesania Latina kit, but pretty heavily modified. Hull construction followed the kit closely, but fitting, masting and rigging was almost all scratch built. The rigging diagrams provided were pretty awful, so I made heavy use of Rigging Period Fore-And-Aft Craft by Lennarth Petersson to get the rig correct. The diagrams for fitting out the masts and spars were qusetionable too. I learned by experience to go with more reliable documentation -- like Petersson's book -- to save a lot of time, frustration and effort. Dan
- 89 replies
-
- 1
-

-
- scottish maid
- clipper
- (and 2 more)
-
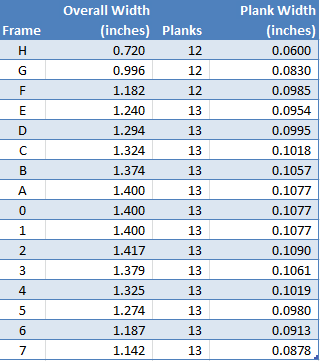
It's been quiet around here lately! Here's an update on my progress ... slow, but steady. I used the tick strip method described by Bob. For each frame, I measured the distance from the bearding line to the top of the frame. Then, laying the tick strip on the plans, I shortened that length by the distance from the top of the frame to the wale. Then I measured the length of the tick strip and recorded it. I've decided to go with 13 planks on each side, so I divided the total width by 13 to get the width of each plank. (At the bow, forward of the end of the garboard strake, there will be only 12 planks.) Initially, I measured out those plank widths on the tick strips with the intention of transfering them to the frames, but I found that really tedious and I wasn't sure that it would help me all that much with the actual planking. This differs from Bob's process ... which means I'll probably pay for my errors later! Now that all that measuring has been done, I've developed this table, showing the widths of the planks at each frame. Next step: cutting some planks and fitting them in place. Dan

- 175 replies
-
- 1
-
-
- 18th century longboat
- model shipways
- (and 1 more)
-
I'm watching your build with great interest, Fraser. Earlier this year, I finished my Scottish Maid and it's nice to see another one coming along. Dan
- 89 replies
-
- 1
-

-
- scottish maid
- clipper
- (and 2 more)
-
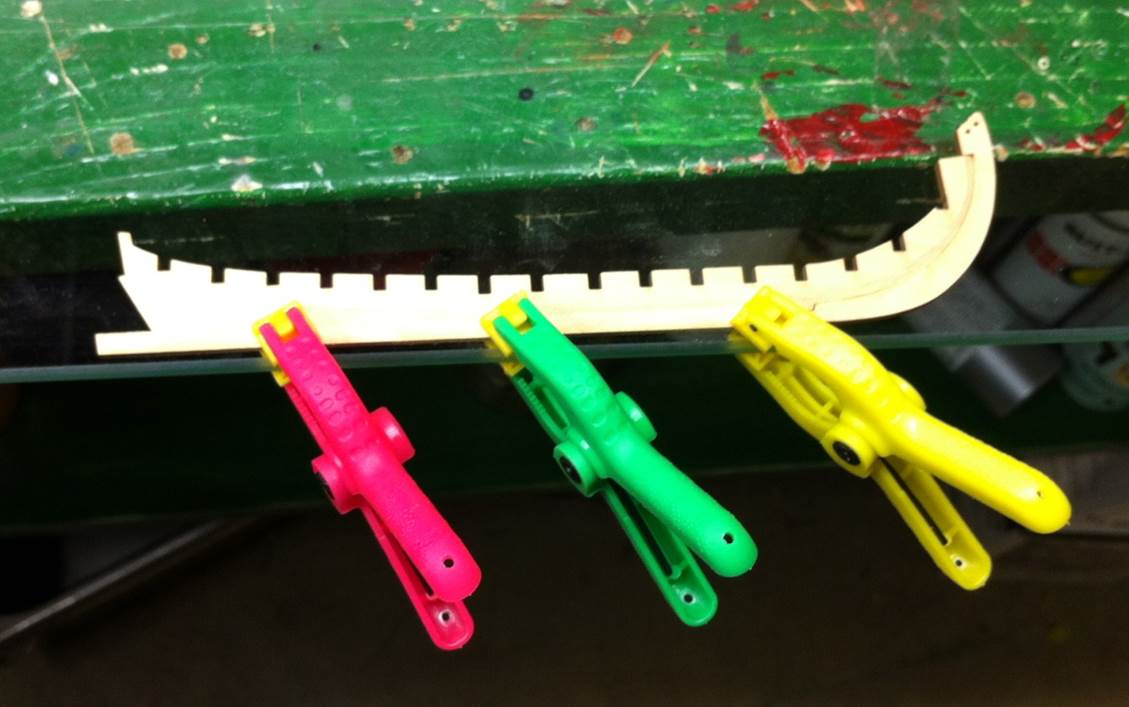
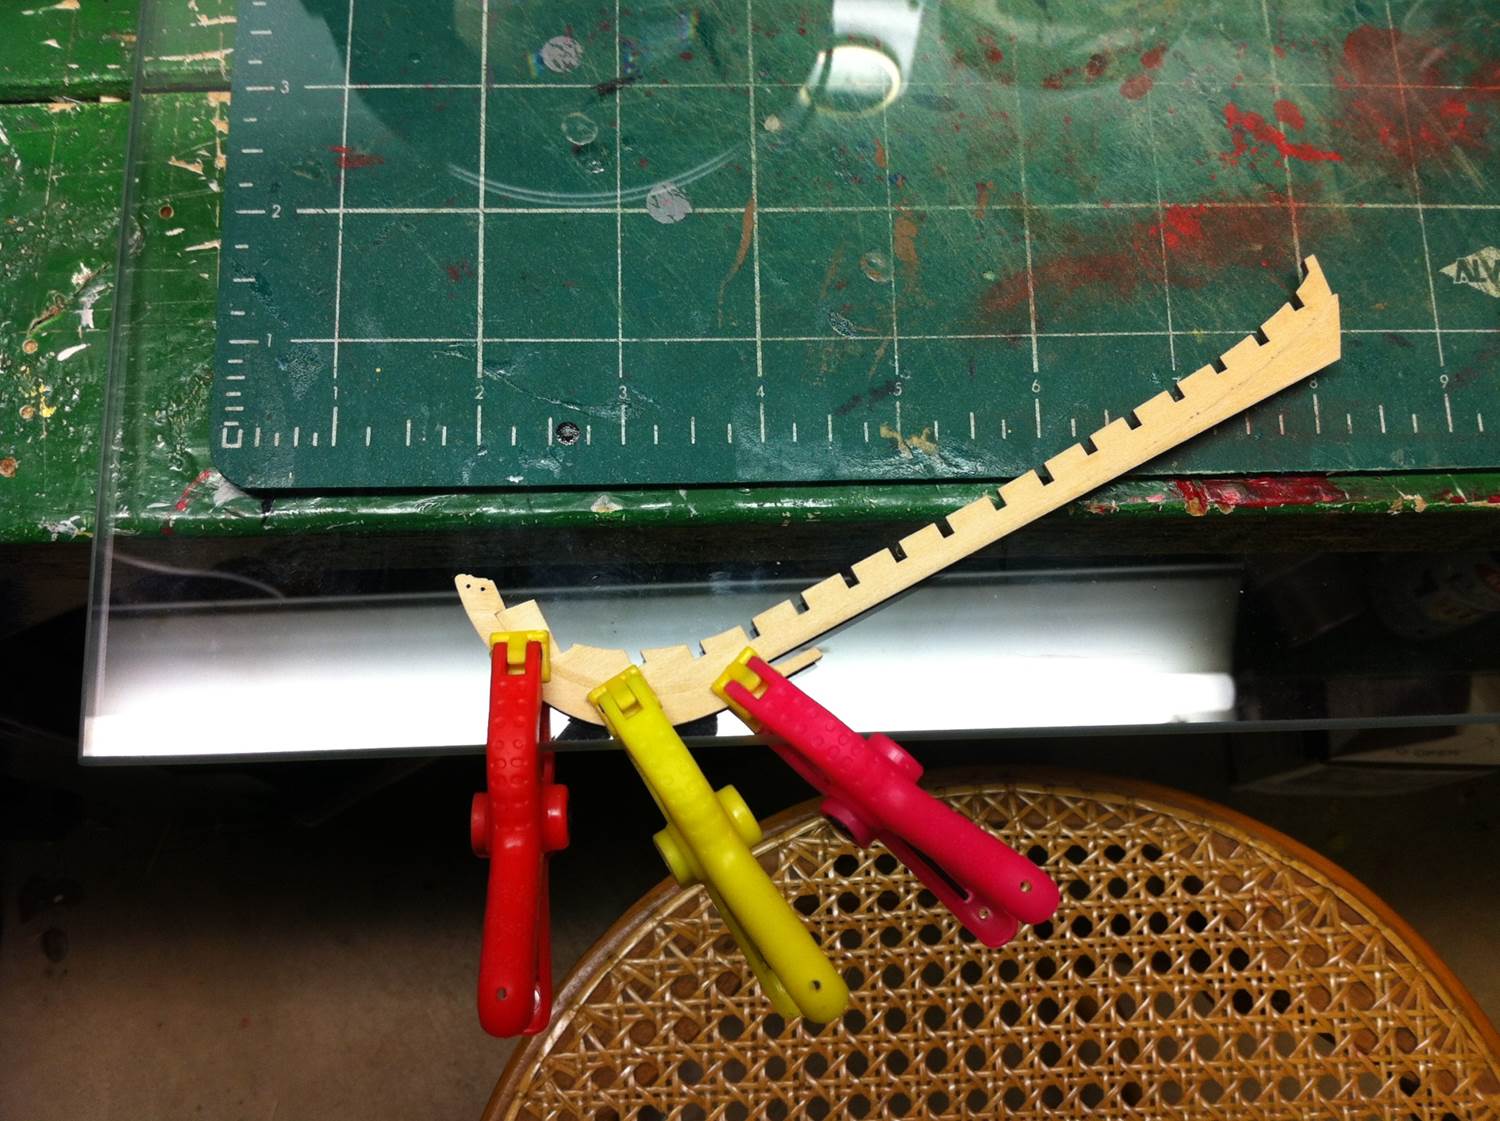
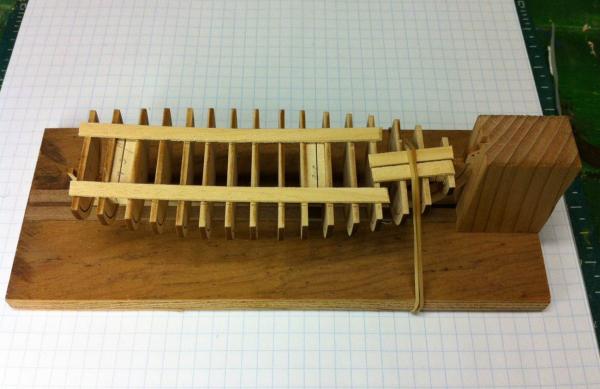
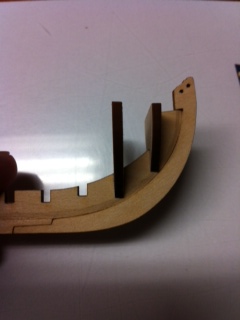
Thanks, Toni and Bob! I decided to go the "strips across the top" method. Here's a picture of the model with the last two strips strapped down in place. I checked it this morning and everything is nice and stable. This'll make fairing the bulkheads less stressful. Dan
- 175 replies
-
- 2
-
-
- 18th century longboat
- model shipways
- (and 1 more)
-
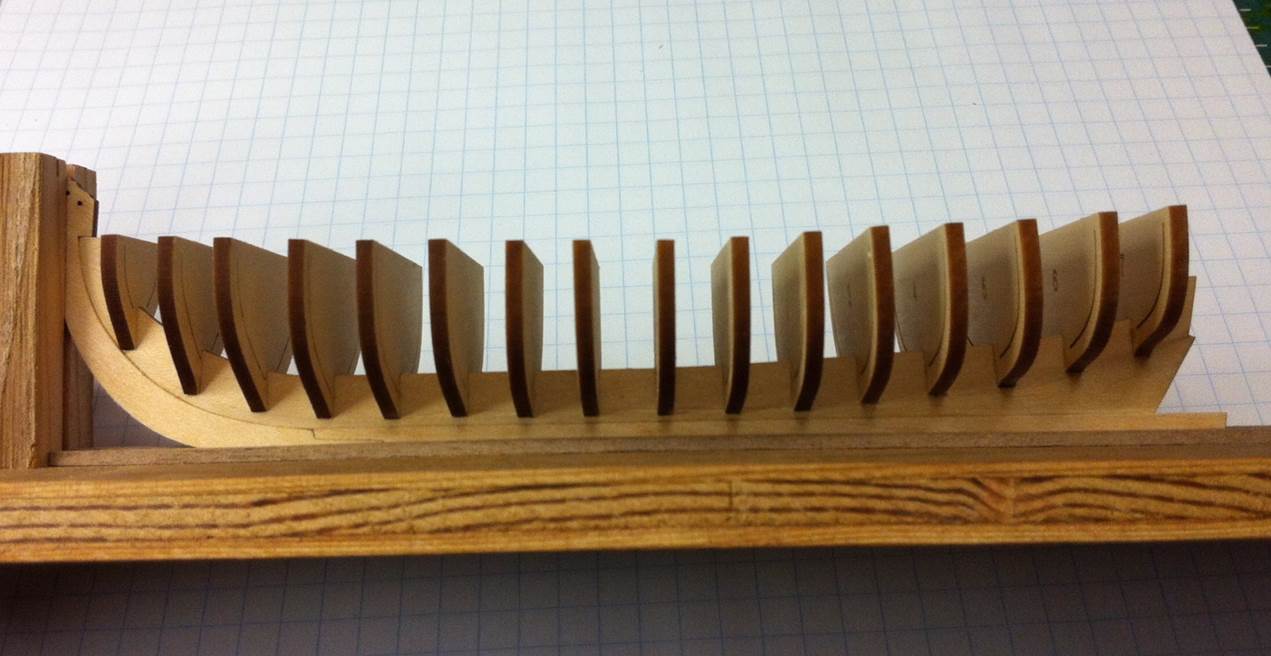
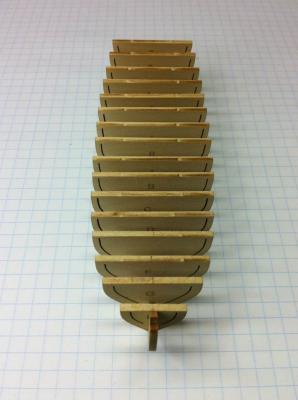
Just a quick update. Got all the bulkheads in place. I started installing the spacers in between the bulkheads last night. I was a little concerned about them pushing the bulkheads out of true. I didn't force them between the bulheads, but I made them out of basswood which expands when exposed to the glue, just like the bulkheads did. I'm thinking I like the idea of just running some strips across the tops of the bulkheads to provide stability rather than putting the spacers between them. Probably doesn't make much difference because the goal is just to stabilize the bulkheads and give them enough rigidity to withstand the fairing process. Dan

-
Can't say anything about the model because I haven't gotten that far yet, but I would think the floorboards would be flat. If they curved, I would think all the gear in the boat would slide to the center. Dan
-
By the way, those bulkheads are perpendicular to the keel former. I couldn't get a good picture showing that and the depth to which the bulkheads extended. What's one to expect from any iPhone? Dan
-
Thanks to everyone for all the encouragement! Bob, I hear what you're saying about the glue swelling the basswood and making the bulkheads fit too tightly. I found the same thing. I'd dry-fitted the bulkheads and they were snug. I didn't want "snug," so a loosened them up a little. (Putting any pressure on these tiny, fragile parts seemed like a recipe for disaster, so I thought it better to have a little wiggle room in there.) When I applied the glue, the wood swelled and the fit was snug again. I took my time with the alignment ... a necessity, really. In getting the third and fourth bulkheads in place, I broke a cardinal rule: never work on a model when the kids are around. My two boys -- ages six and eight -- require a lot of attention. Better to just work on the models after they've gone to bed and avoid the mistakes that happen when one is distracted. Anyway, I fit the next two bulkheads and helped put together a Lego model and helped with some other little project. Here are the results. When I got a quiet minute to look at it, I thought: "Holy c*%^!" Those bulkheads don't extend down to the bearding line! How am I going to plank that? I should have deepened the notches on the bulkheads! Then I looked at some of the other builds. Bob's had some really good pictures of this phase of construction. And I now see that the bulkheads should be this high. This, I guess, is one of those things that come with experience: the ability to see how something's going to look before the actual construction is completed. That's one of the things I really enjoy about building. Dan
-
That is a great tip! Dan
-
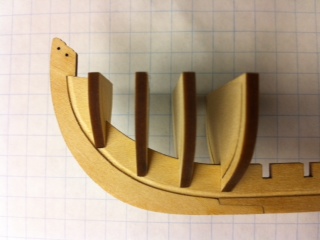
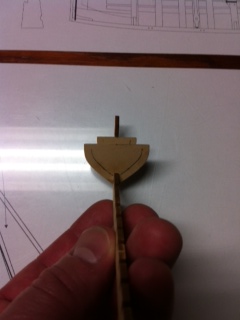
Tonight, I tapered the keel former to make the aft end 1/32" wide. (Thanks, Bob!) The operation was successful and nothing was snapped off in the process. I tried to get a picture of that, but it was hard to get one that really showed anything. Then I started fitting bulkheads. The first seemed to go just fine. The second ... well, I had a question. It fit fine and I got it aligned. I applied a little glue and slipped it into place. That's when I noticed this. The top of the keel former is higher than the bottom of the frame. When it comes time to snap off the inner portion of the bulkhead, isn't that going to be a problem? Then I looked at where the bottom of the bulkhead meets the bearding line. That looks normal. Am I over-thinking this? Or do I have to adjust something? By the way, I also drilled the holes for the mounting wires. You can see them in this photo. Dan
-
Hi, Bob. Nope. You're seeing what I did accurately! I just tapered from the bearding line down to the bottom of the keel former. If I have to taper the bottom of the former aft down to 1/32", then I need to do a little more work. Thanks for letting me know before I made a mistake I couldn't correct. I think I can do that taper without ruining anything in the process. Dan
-
Just beautiful, Mike! Dan
-
Yesterday, I pinned the scarf joint. That worked well enough, but there's not a lot of room to work with there, so you need to be careful to make sure the drill bit goes in straight and plumb. Mine was off a little bit and you can see some deformation in the groove formed between the keel former and the false keel. I doubt it's going to make any difference, but it just a warning. I also drilled holes for the mounting posts. That operation went fine. No pictures of that, but maybe when I get back to the workshop a little later in the week. Dan
-
Fitting the false keel required some sand-fit-sand-fit too. I really made an effort to get the two pieces to fit together without forcing them. I figured the last thing that little joint needed was a torque that was going to force it apart. In the end, it worked out really well and was glued together using the glass plate again.

- 175 replies
-
- 2
-
-
- 18th century longboat
- model shipways
- (and 1 more)
-
Then it needed to be glued to the stem. I used the glass plate to get the alignment, port and starboard, perfect. There was a lot of sand-fit-sand-fit to do before that stem piece, when put up against the false keel, showed no daylight between them. When that was done, a little glue and some clamps and that was all there was to it.

-
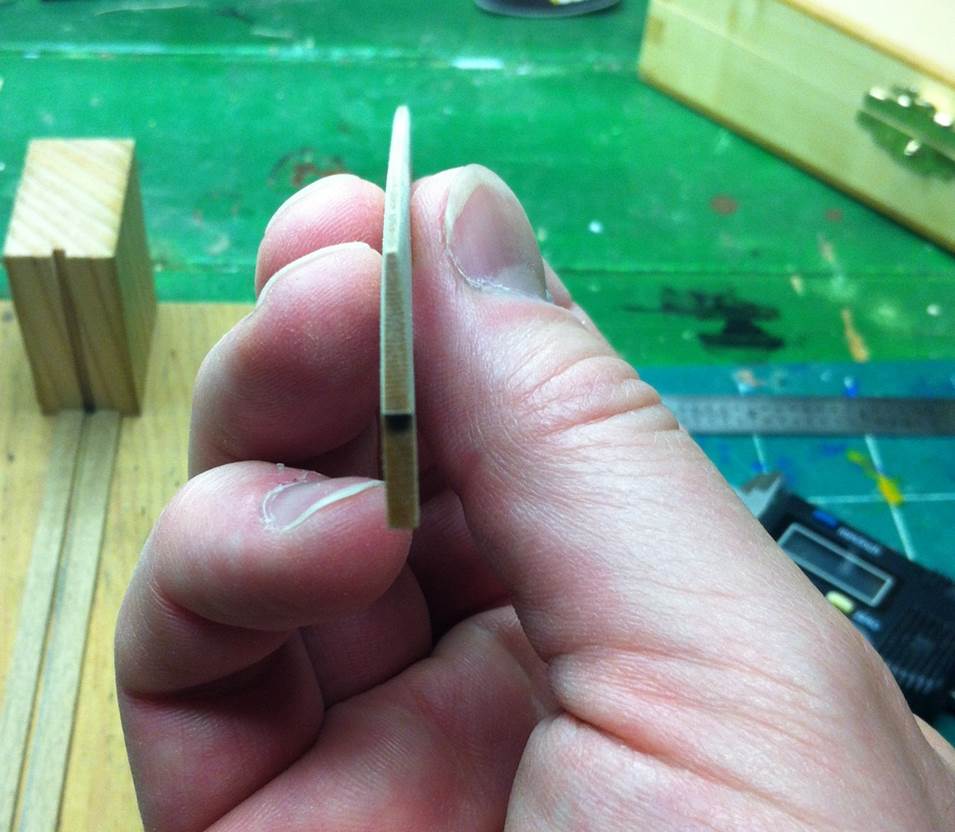
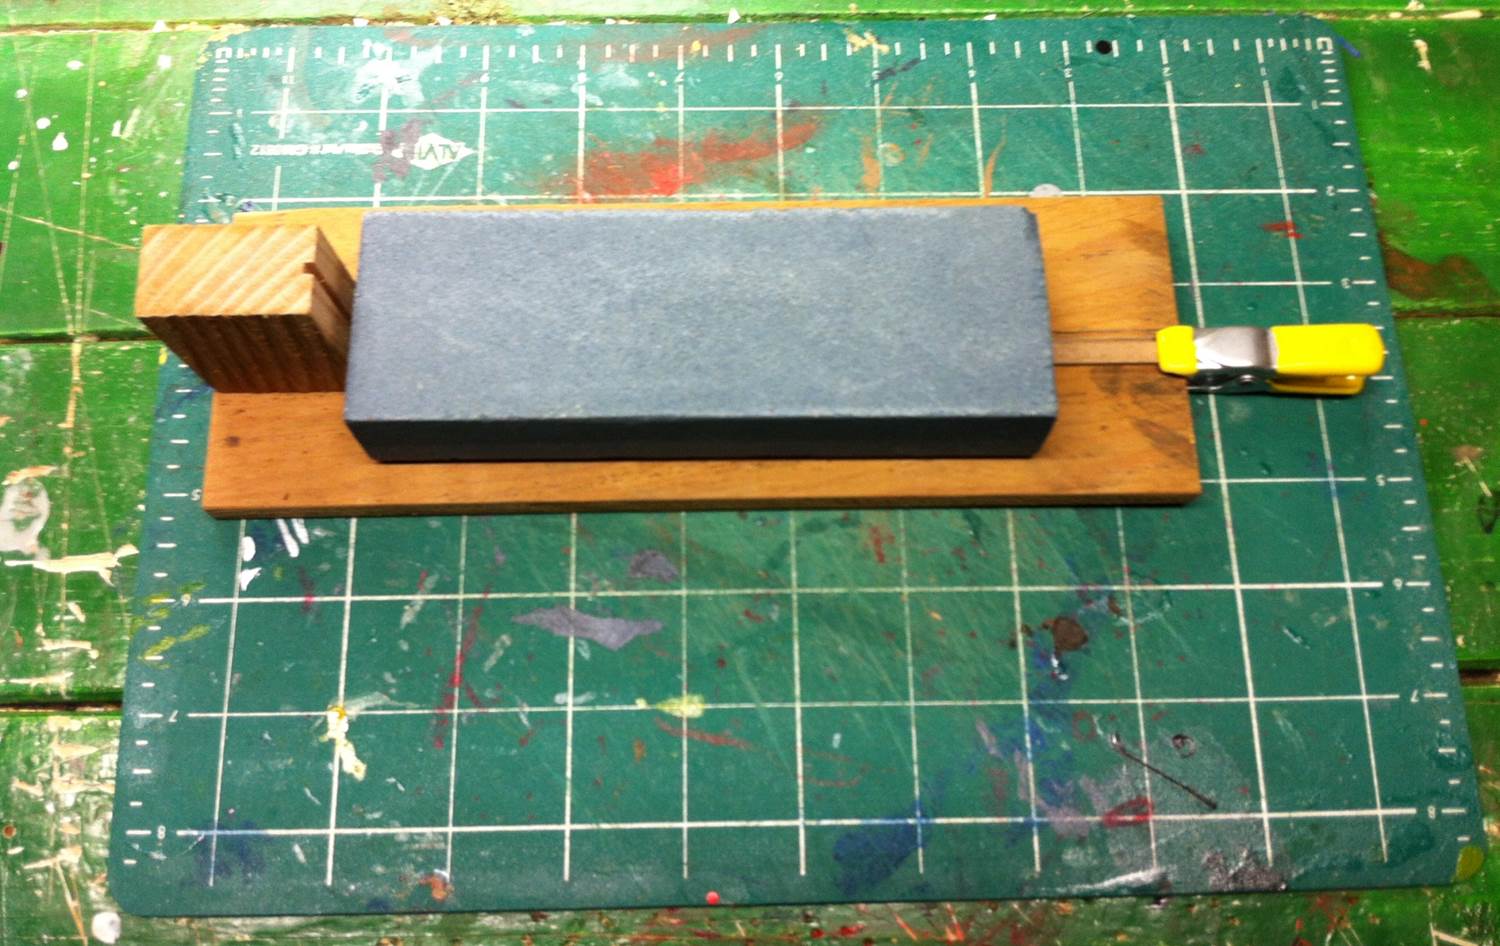
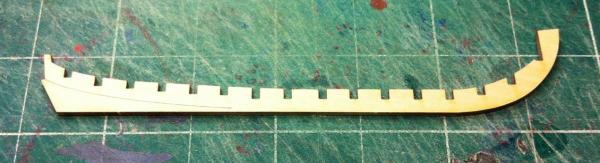
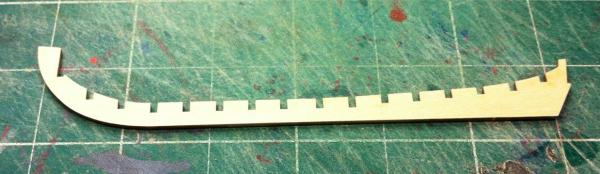
According to the instructions, the keel former needs to be tapered from 3/32" down to 1/32". I was pretty nervous about getting this right, but it really wasn't that difficult. I extended the bearding line all the way around the stem and then, using a sanding stick, slowly and carefully sanded the taper that would form the rabbet into which the planks will fit. As others have noted, the stem is very weak and a lot of care is needed to avoid snapping it off. Again, calling on Bob's knowledge, I got myself a Bob Filipowski Autograph Model glass plate. This is a 12" x 12" x 1/4" piece of plate glass, bought from The Glasshopper in Aurora, IL for $8.00. In this photo, you can see the taper. I didn't find that 1/32" to be so narrow that I worried about a good joint with the false keel and stem.

- 175 replies
-
- 1
-
-
- 18th century longboat
- model shipways
- (and 1 more)
-
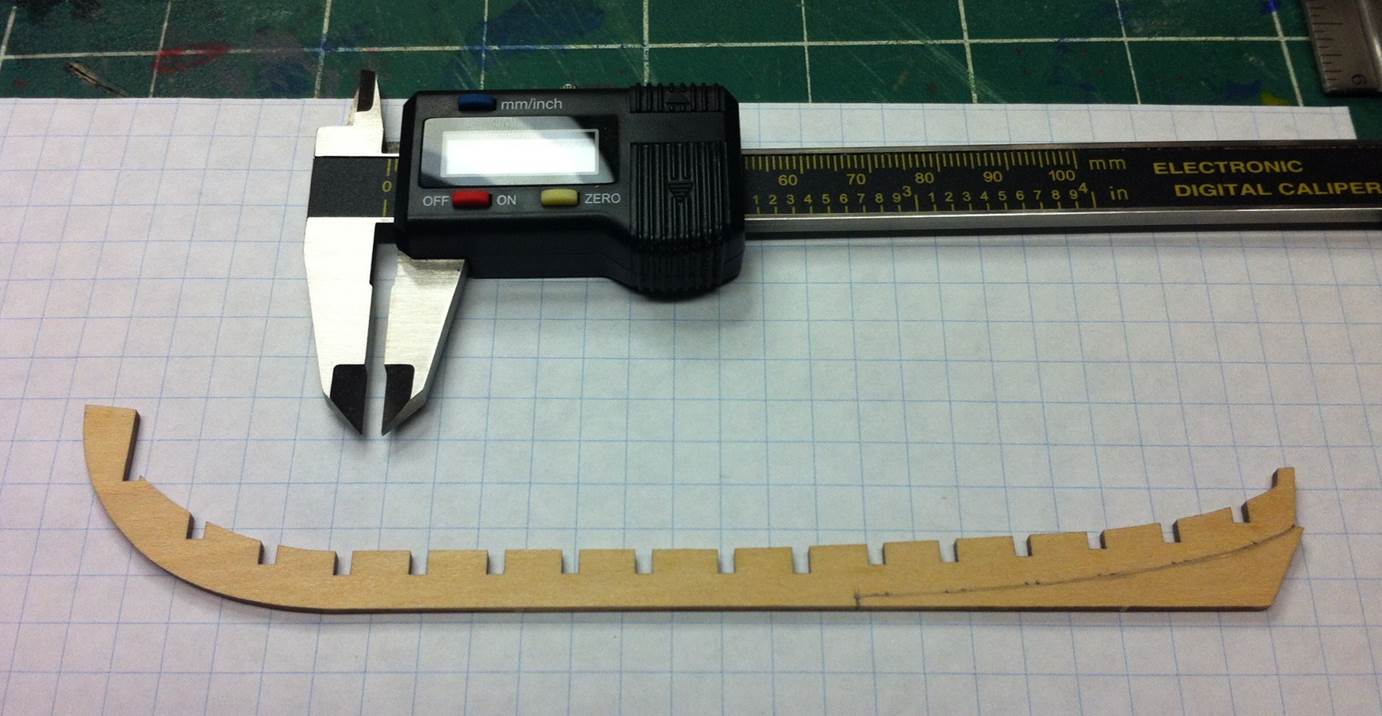
The bearding line needed to be transfered from the starboard side to the port side. I took a series of measurements with my digital caliper and transfered them from one side to the other. Then I connected the dots.

- 175 replies
-
- 1
-
-
- 18th century longboat
- model shipways
- (and 1 more)
-
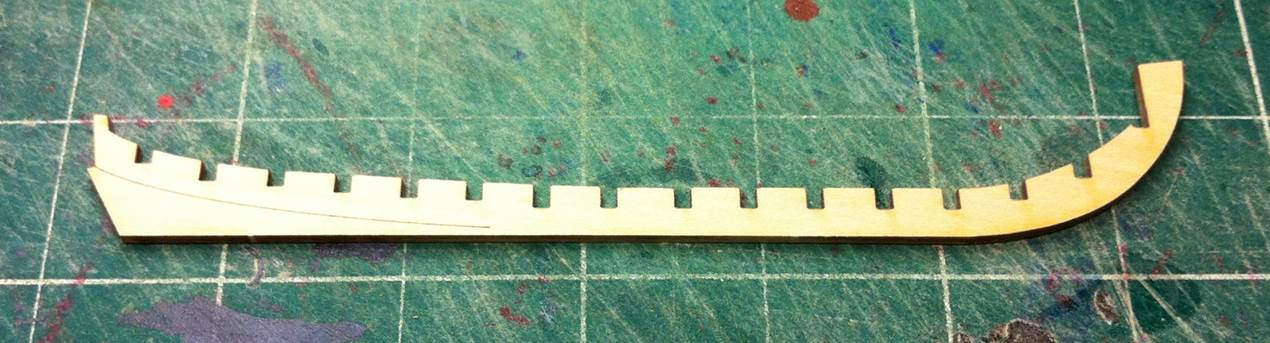
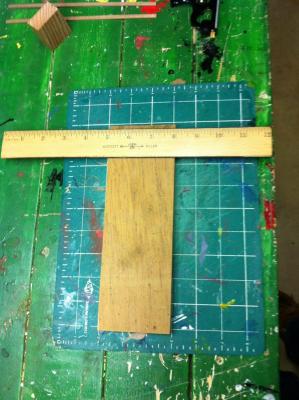
There are a lot of burn marks on the basswood sheets that, like others have said, need to be taken off. Because I don't have scrapers like Bob used, I used regular old sandpaper, taped to a sanding stick with double-sided tape, a technique I learned from Bob Filipowski.
-
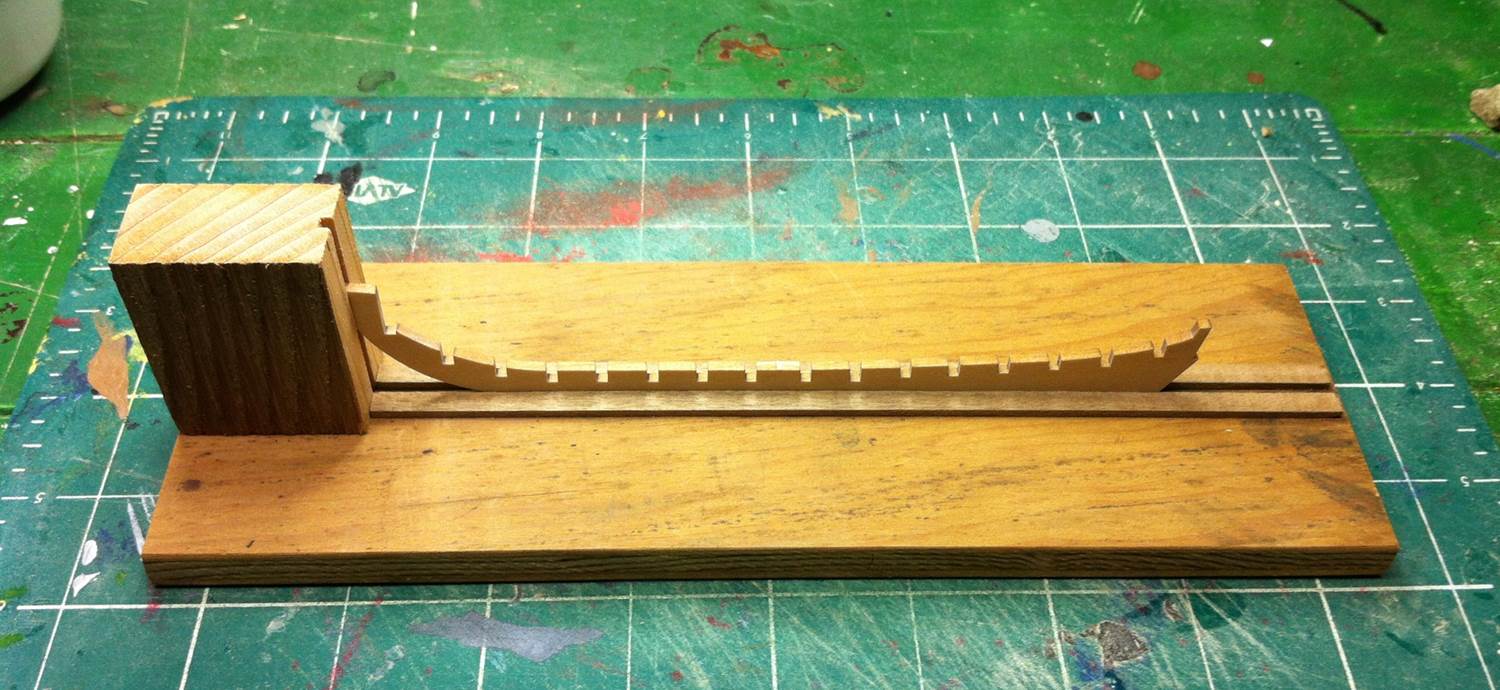
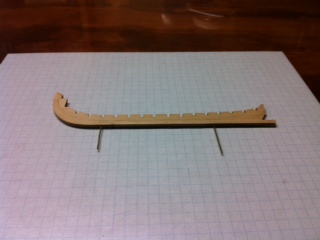
Here's the completed building board, with the keel former in place.

- 175 replies
-
- 2
-
-
- 18th century longboat
- model shipways
- (and 1 more)
-
Then mark a line parallel to the groove in the stem block. Glue a wood strip along that line. Then use the basswood sheet as a guide to place the other strip, parallel to the first, forming a groove within which the keel former will sit. Weight it down until the glue sets up.

- 175 replies
-
- 1
-
-
- 18th century longboat
- model shipways
- (and 1 more)
-
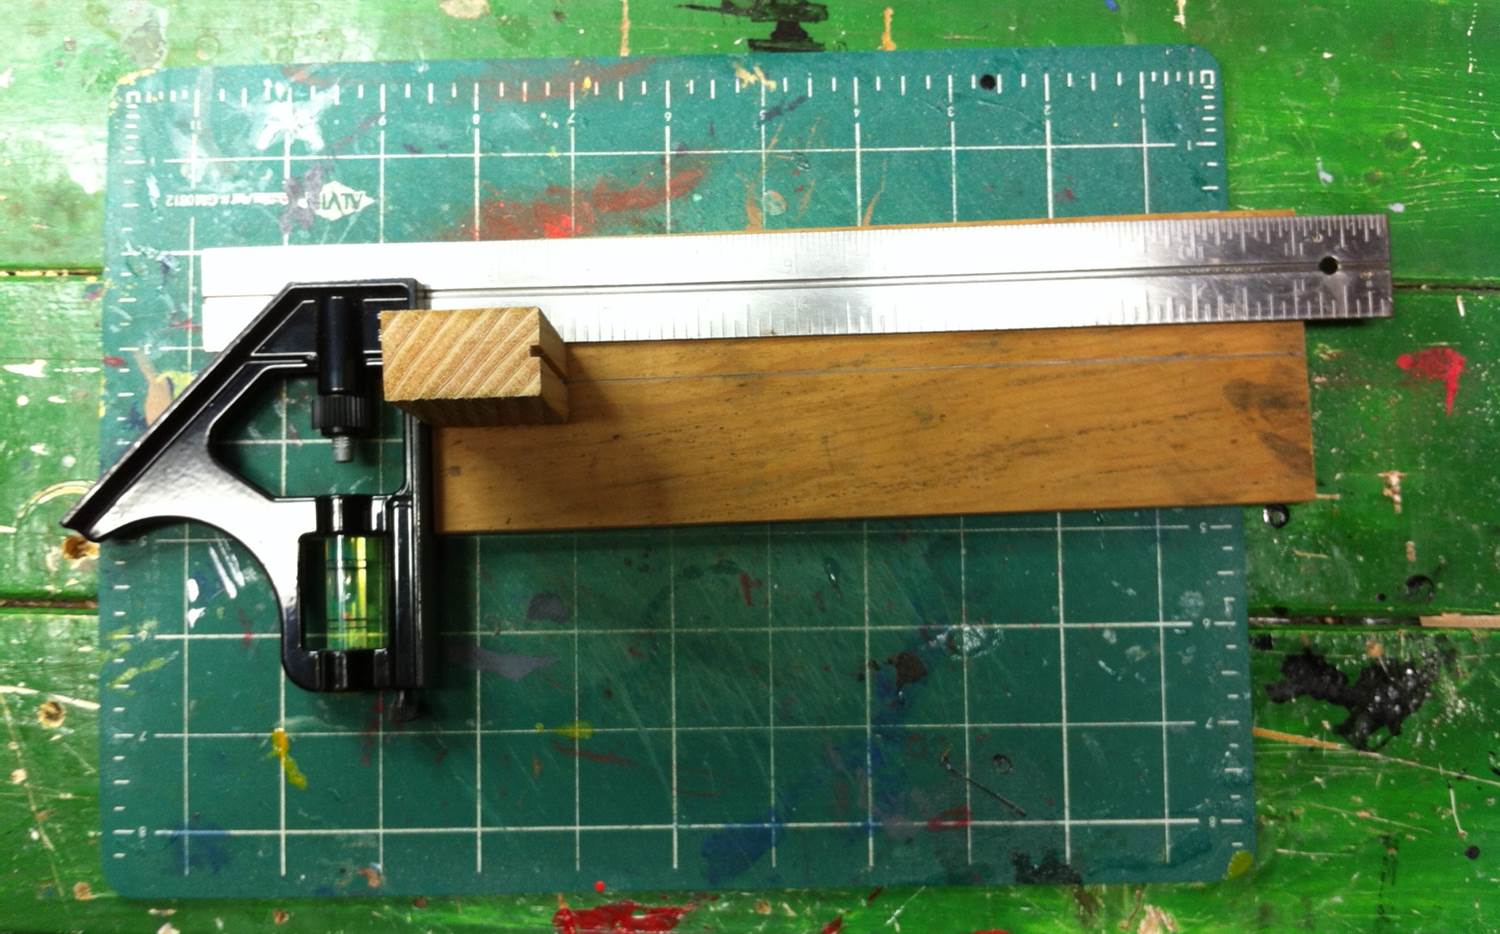
Mark a centerline on the board and mount a stem block square to the end.

- 175 replies
-
- 1
-
-
- 18th century longboat
- model shipways
- (and 1 more)
-
The path I'm on with the longboat is well-worn by now. This may well seem redundant to those who've been following the progress others have made. As I said at our Nautical Research and Model Ship Society meeting last Saturday, I've been stealing shamelessly from others here, mostly from fellow Tri-Club members Bob Filipowski (BobF) and Toni Levine (tlevine). I started with the building board. Kurt Van Dahm, President of the club, provided the materials to everyone participating in the group build. First step: find the center of the building board.
- 175 replies
-
- 1
-
-
- 18th century longboat
- model shipways
- (and 1 more)
-
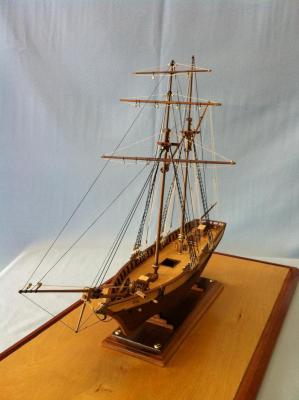
It's time I got around to working on my 18th Century Longboat. I'm about six months behind my fellow Tri-Club Members. (I'm a member of the Nautical Research & Model Ship Society of Chicago.) My excuse? I was finishing up Scottish Maid. This was my first model -- since I was a teenager, anyway -- and it took me eight years to finish. Granted, my wife and I had two kids during that eight years and there were several years when nothing got done, but still -- start to finish -- eight years. I think it turned out really well, though. I entered it in the 37th Annual Model Ships and Boats Contest and Display. On May 18th, it was awarded a Gold Award and I got received the Best Novice Builder Award. I'm still walking on air. It was the culmination of a lot of work. The ship was judged by people who really know what they're looking at and the contest was held in Manitowoc, Wisconsin. I grew up near there, in Green Bay. It was like being recognized by the people of my native land. (For those who don't know, life in Wisconsin, is very different from life in Illinois, where I live now. I live near Chicago, a city of 2.6 million, about 8 million in the metro area. Green Bay, when I was growing up, had a population of 47,000. There is no metro area ... unless cow pastures count.) Anyway, while others in the Tri-Club were making progress on their longboats, I was toiling away on Scottish Maid.
- 175 replies
-
- 6
-
-
- 18th century longboat
- model shipways
- (and 1 more)
-
I agree on the base: looks great. I like the longboat too! Dan