MikkiC
-
Posts
129 -
Joined
-
Last visited
Content Type
Profiles
Forums
Gallery
Events
Everything posted by MikkiC
-
San Martin by MikkiC - Dusek - 1:72
MikkiC replied to MikkiC's topic in - Kit build logs for subjects built from 1501 - 1750
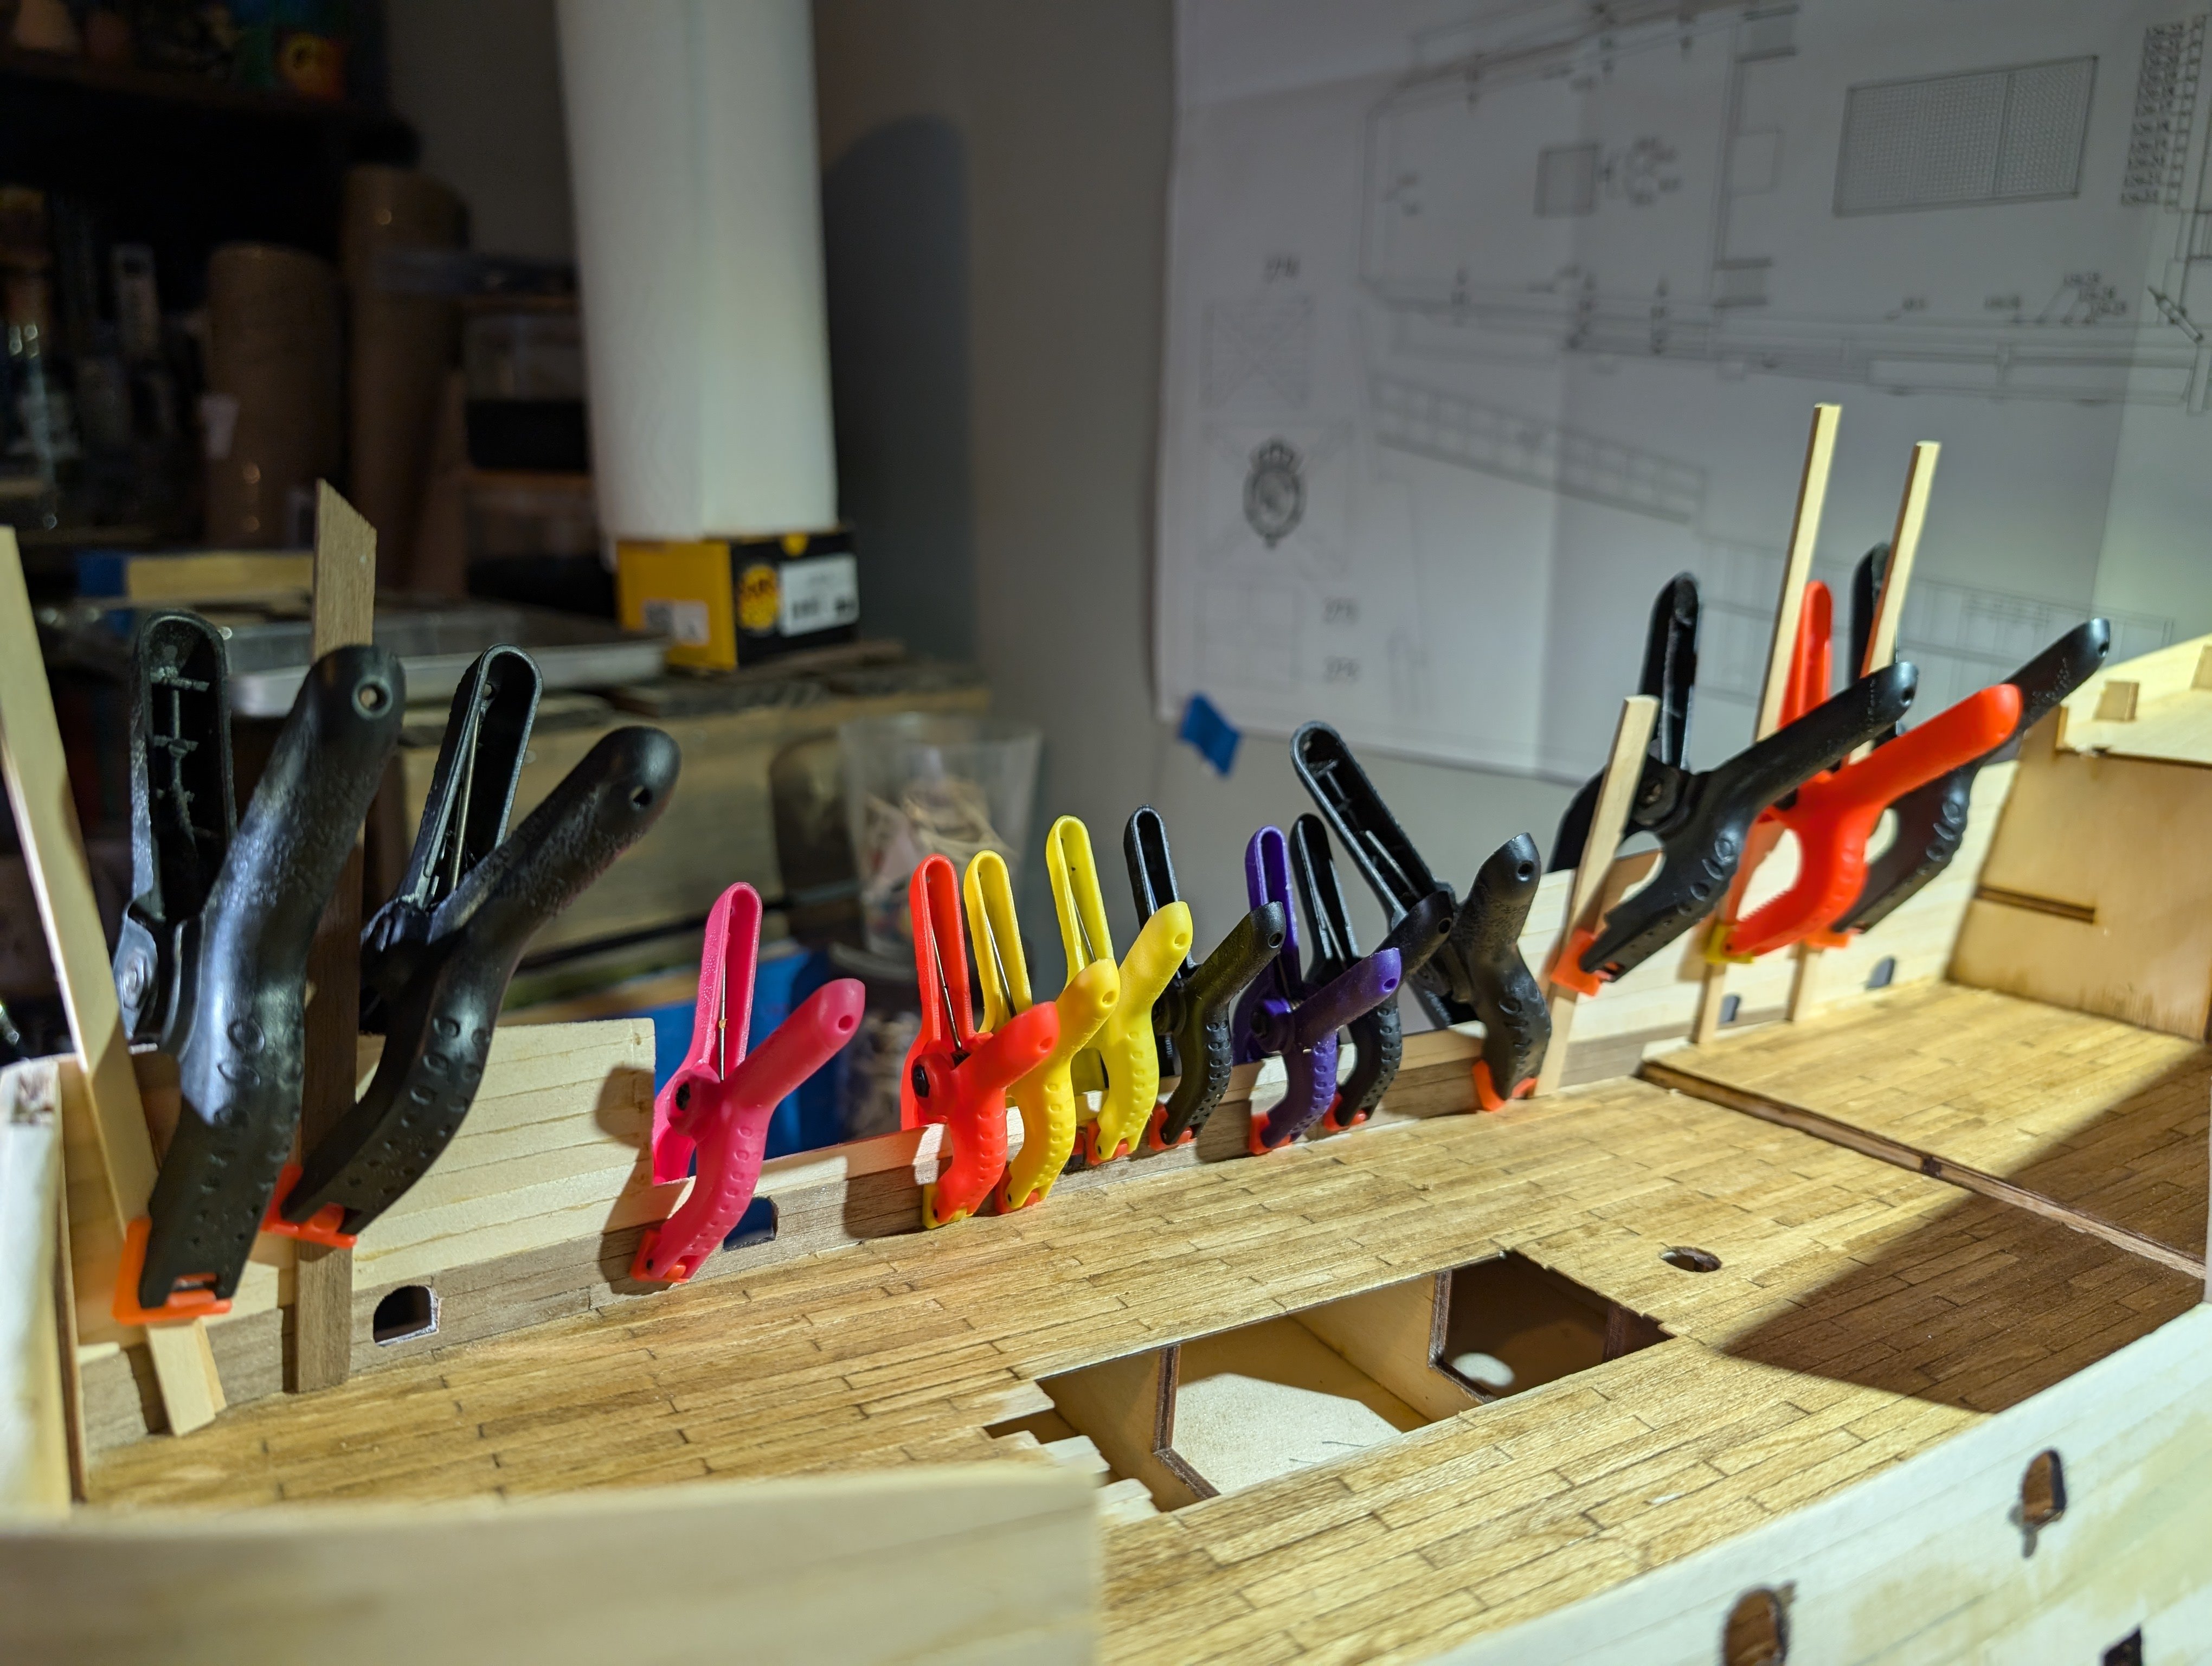
I haven't made much progress as I've been busy with other things. I can't get used to this "adulting." I've been trying for a few decades, but I haven't progressed all that much. 😁 The first layer of the hull is finally complete, sanded, and patiently waiting the next layer. I chose 1 x 5 x 500mm walnut. Why? Because I don't have the means to mill my own lumber (yet 🤞). I bought it from Model Expo. The quality looks good. I finally got the deck glued in. I used 0.5 x 5 limewood and stained it golden oak. I didn't score any of it with a pencil. This result just happened. I'm not convinced about the colour, but I'll know better once I see some fittings sitting on it. I'm working on the inside a bit so I can put in supports. I will definitely crush the sides otherwise. Onward.....
-
Nice! Once we get into the rhythm, they go more quickly than annoyingly slow. 😁
- 86 replies
-
- 2
-

-
- San Francisco
- Artesania Latina
- (and 2 more)
-
Looking good. I, for some reason, always enjoy rigging.
- 86 replies
-
- 1
-
-
- San Francisco
- Artesania Latina
- (and 2 more)
-
I assure you my German is worse! 😁 You're doing just fine. I know what you mean and I'm sure others do as well.
-
Very nice. Welcome
-
Try a light sanding after they're dry and reapply? Sometimes that works. The stain doesn't look too uneven in the pics though.
-
The masts and spars....not up there with my favorite things to do. They look good
- 86 replies
-
- 1
-
-
- San Francisco
- Artesania Latina
- (and 2 more)
-
Looking good Patrick. I have a few "things" for target practice with that Tiger II, but Google maps can't find a route from Pennsylvania to Belgium. Do our places really exist if Google can't find a route? 😁
-
San Martin by MikkiC - Dusek - 1:72
MikkiC replied to MikkiC's topic in - Kit build logs for subjects built from 1501 - 1750
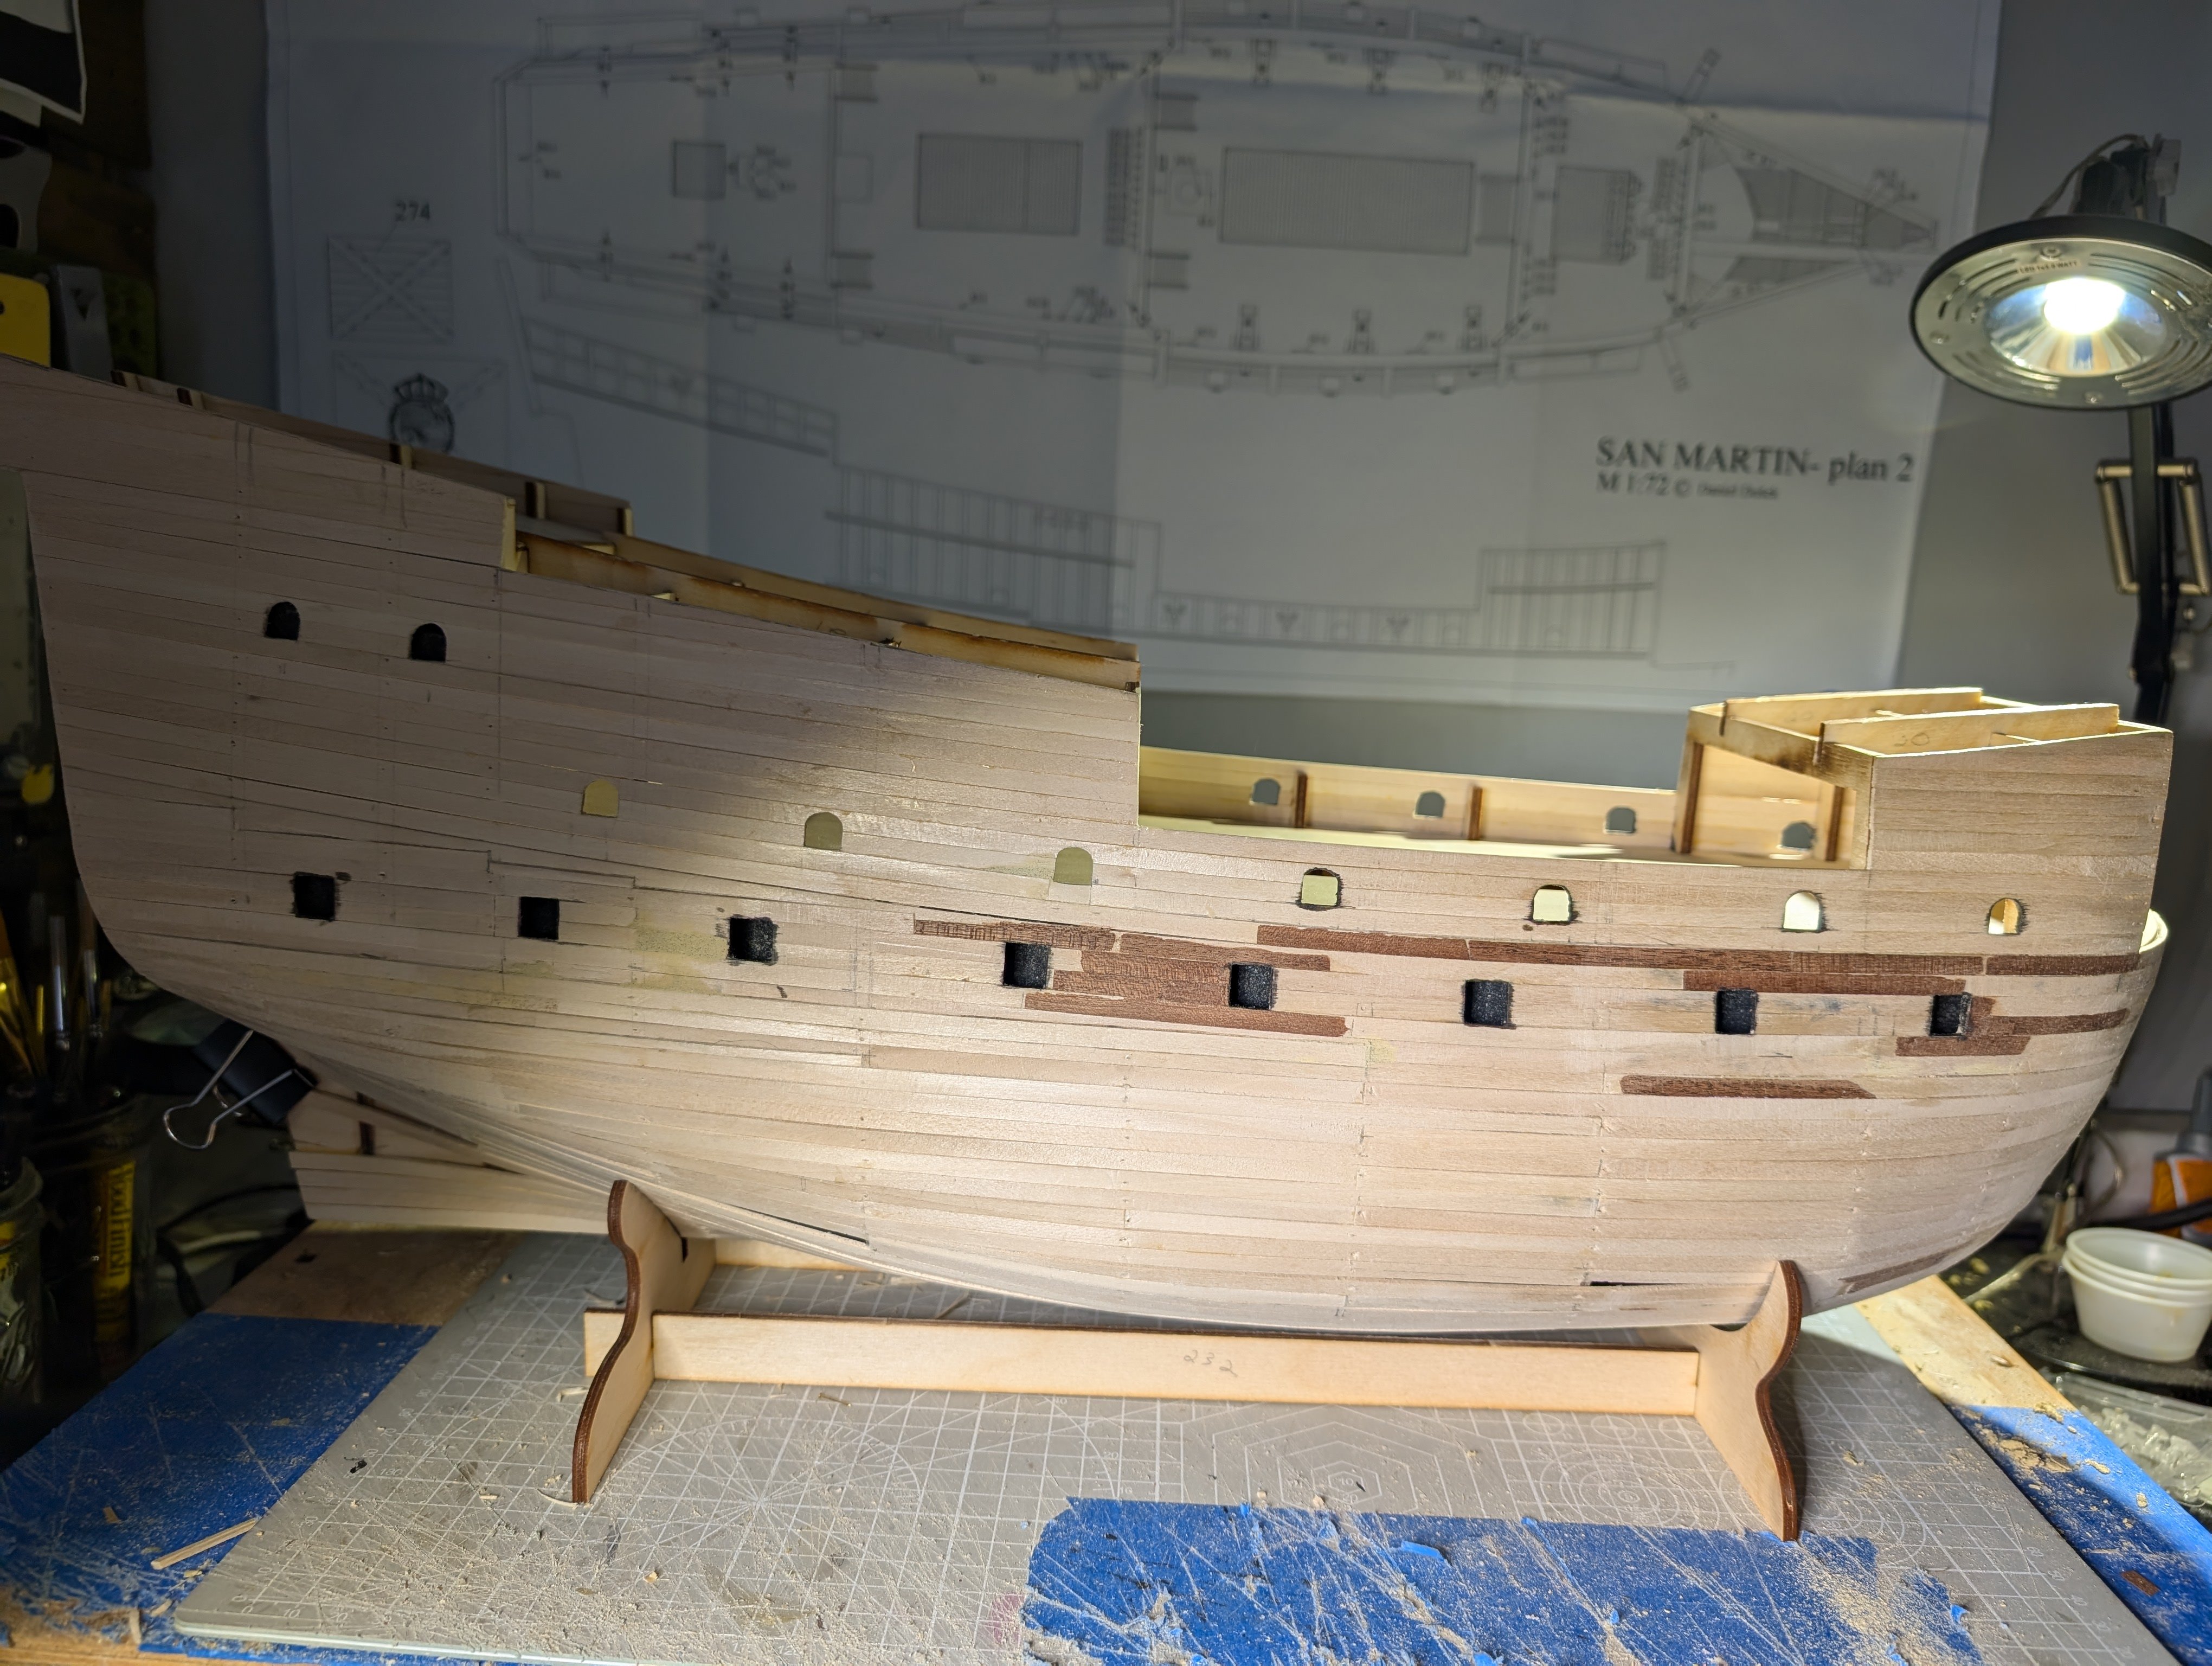
Still working on 1st layer of hull. I know. It's been a hot minute, but work, life, end of summer outdoor stuff, etc. It's almost completed and ready to sand. I haven't been able to find wood for 2nd layer yet. Everyone in U.S. is out of the size I need. I plan on working on deck next. Need to cut away supports, plank decks and inside of bulwarks, and put supports in before 2nd layer of plank. Oh, and I have to deal with the keel.
-
Eh we all make mistakes. It's all part if the learning curve. The other option is to carefully remove the planks with a very sharp knife. Heat might help. If you can cut underneath it to loosen it some, you might be able to pry the wood off..... Or just leave it and keep going. 🙂
- 210 replies
-
- 1
-
-
- San Martin
- OcCre
- (and 1 more)
-
San Martin by MikkiC - Dusek - 1:72
MikkiC replied to MikkiC's topic in - Kit build logs for subjects built from 1501 - 1750
@Ondras71 I find this kit rather awkward, different from other galleons from shape to construction. My kit was only a partial, so aside from keel, bulkheads, and few odds and ends, I basically have to build most fittings. I like what you've done with the stern doors and the painted decorations. The colours look great. -
San Martin by MikkiC - Dusek - 1:72
MikkiC replied to MikkiC's topic in - Kit build logs for subjects built from 1501 - 1750
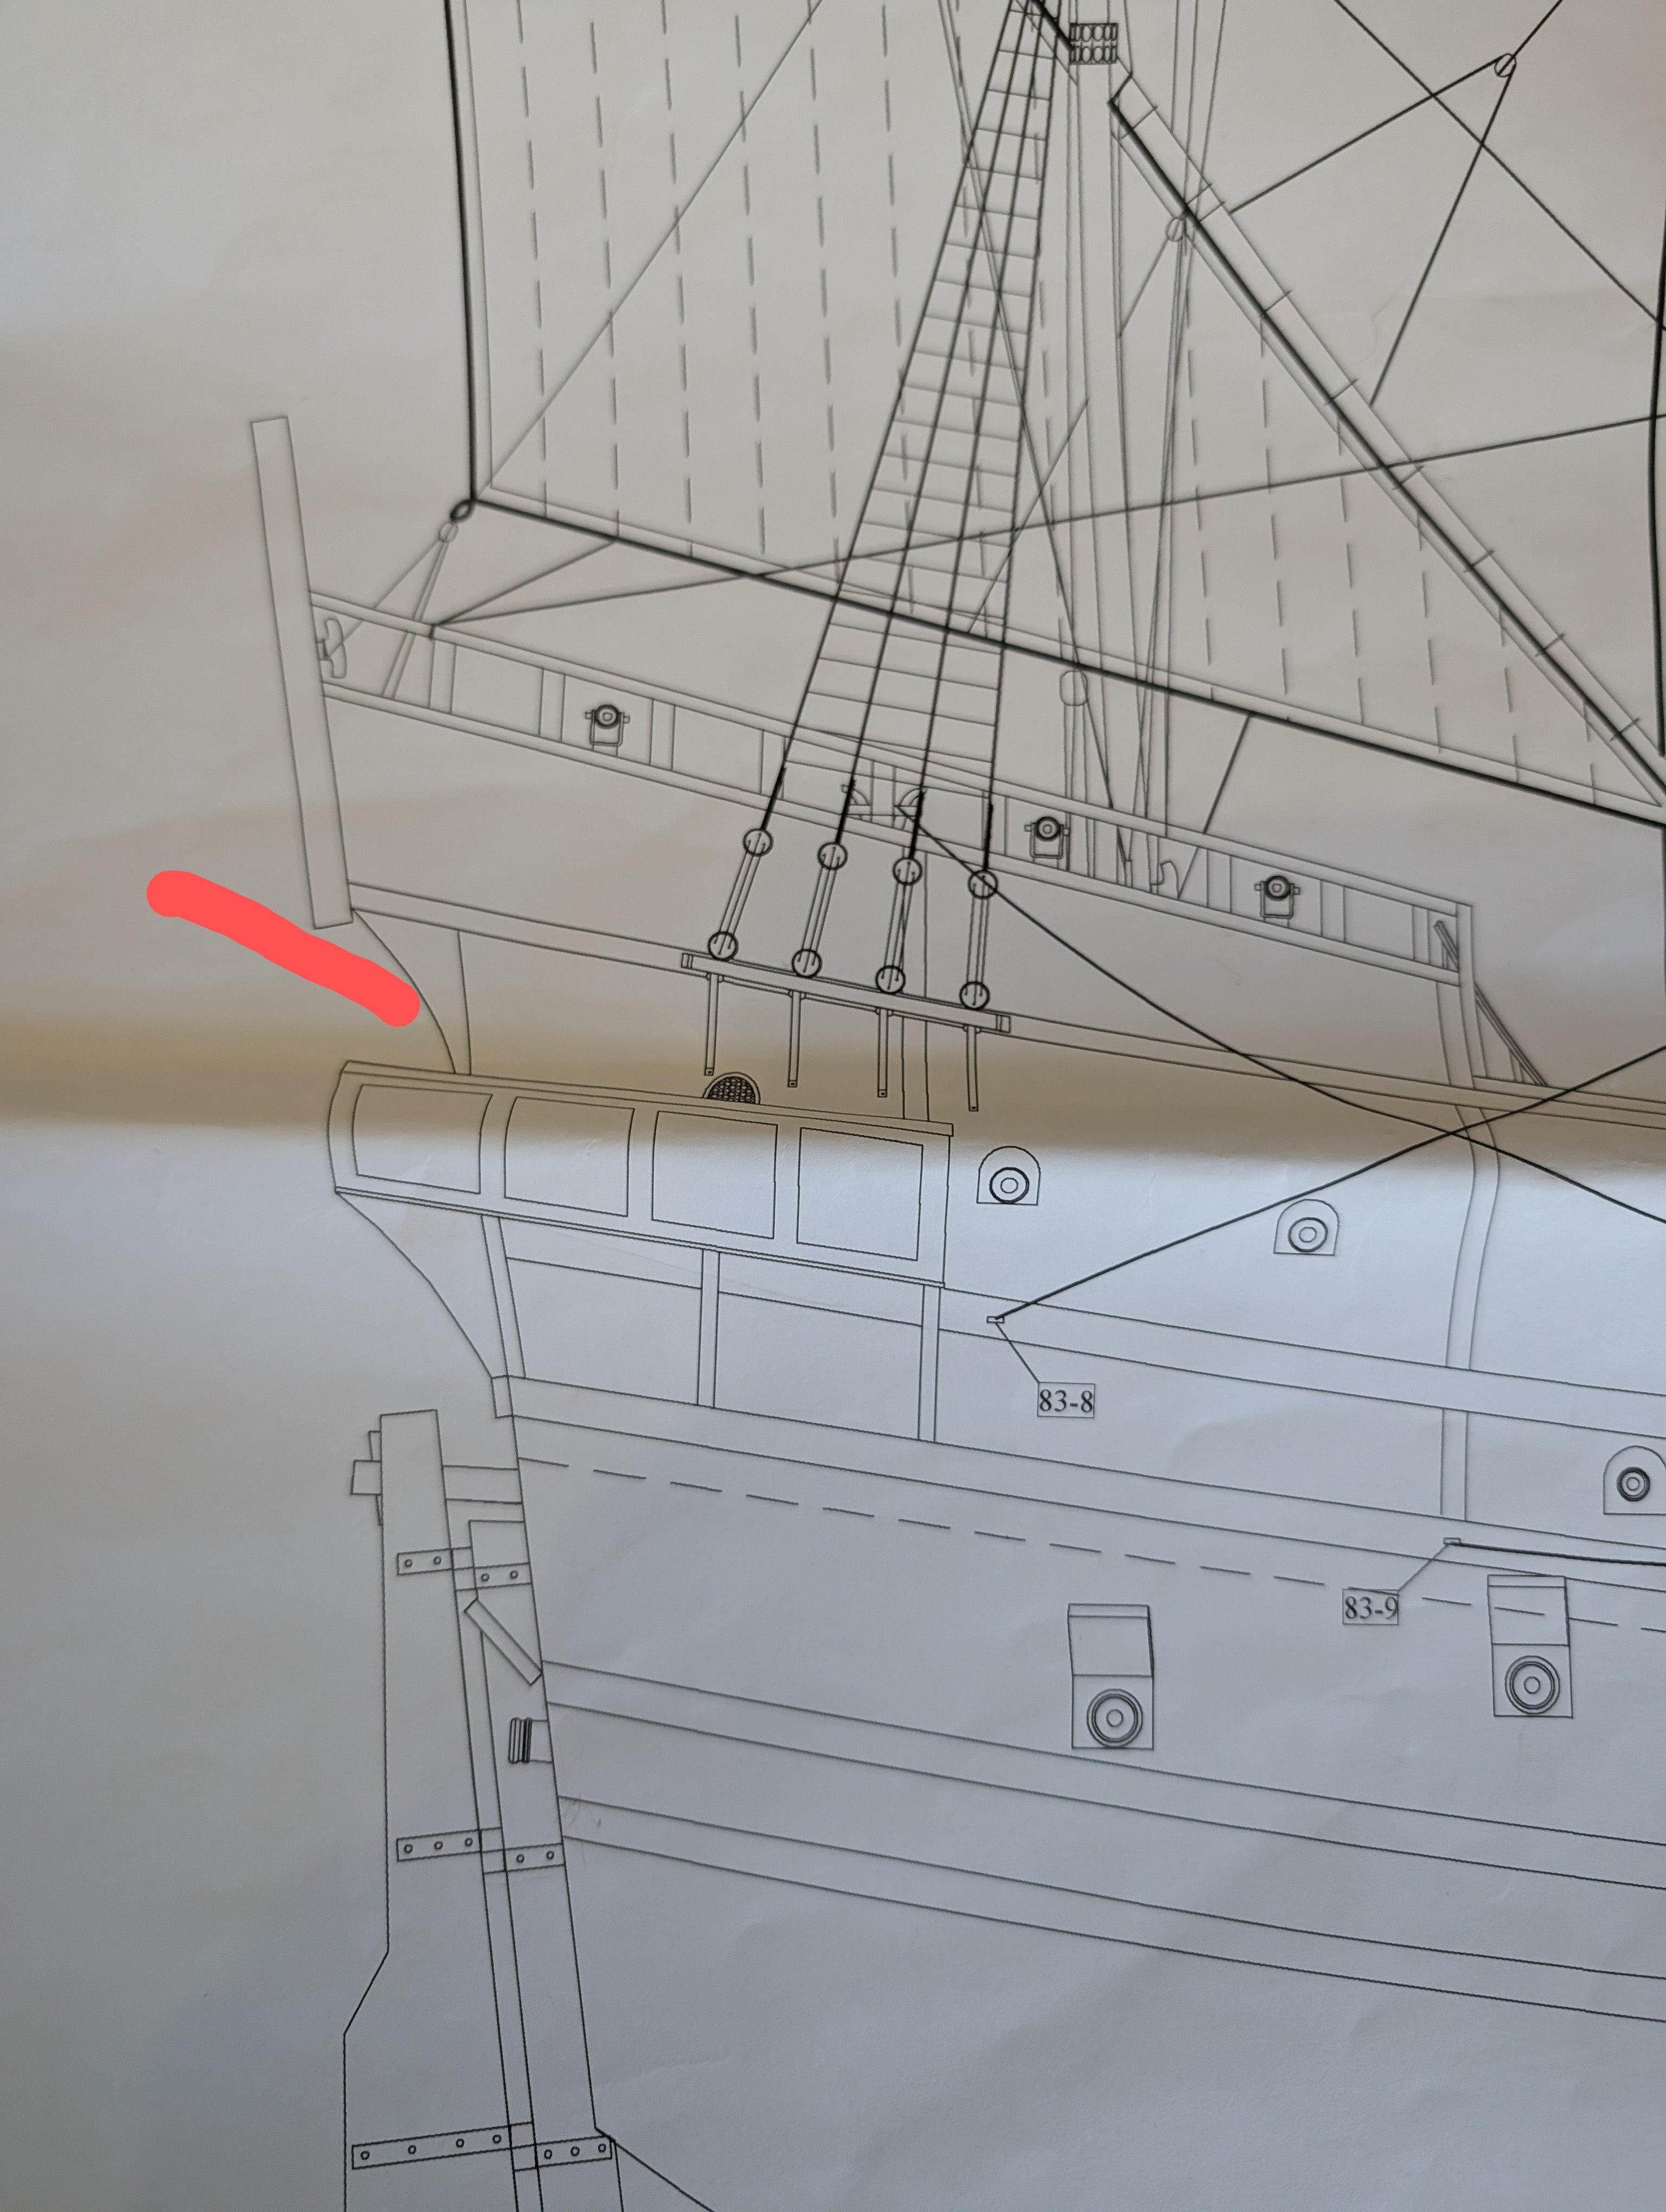
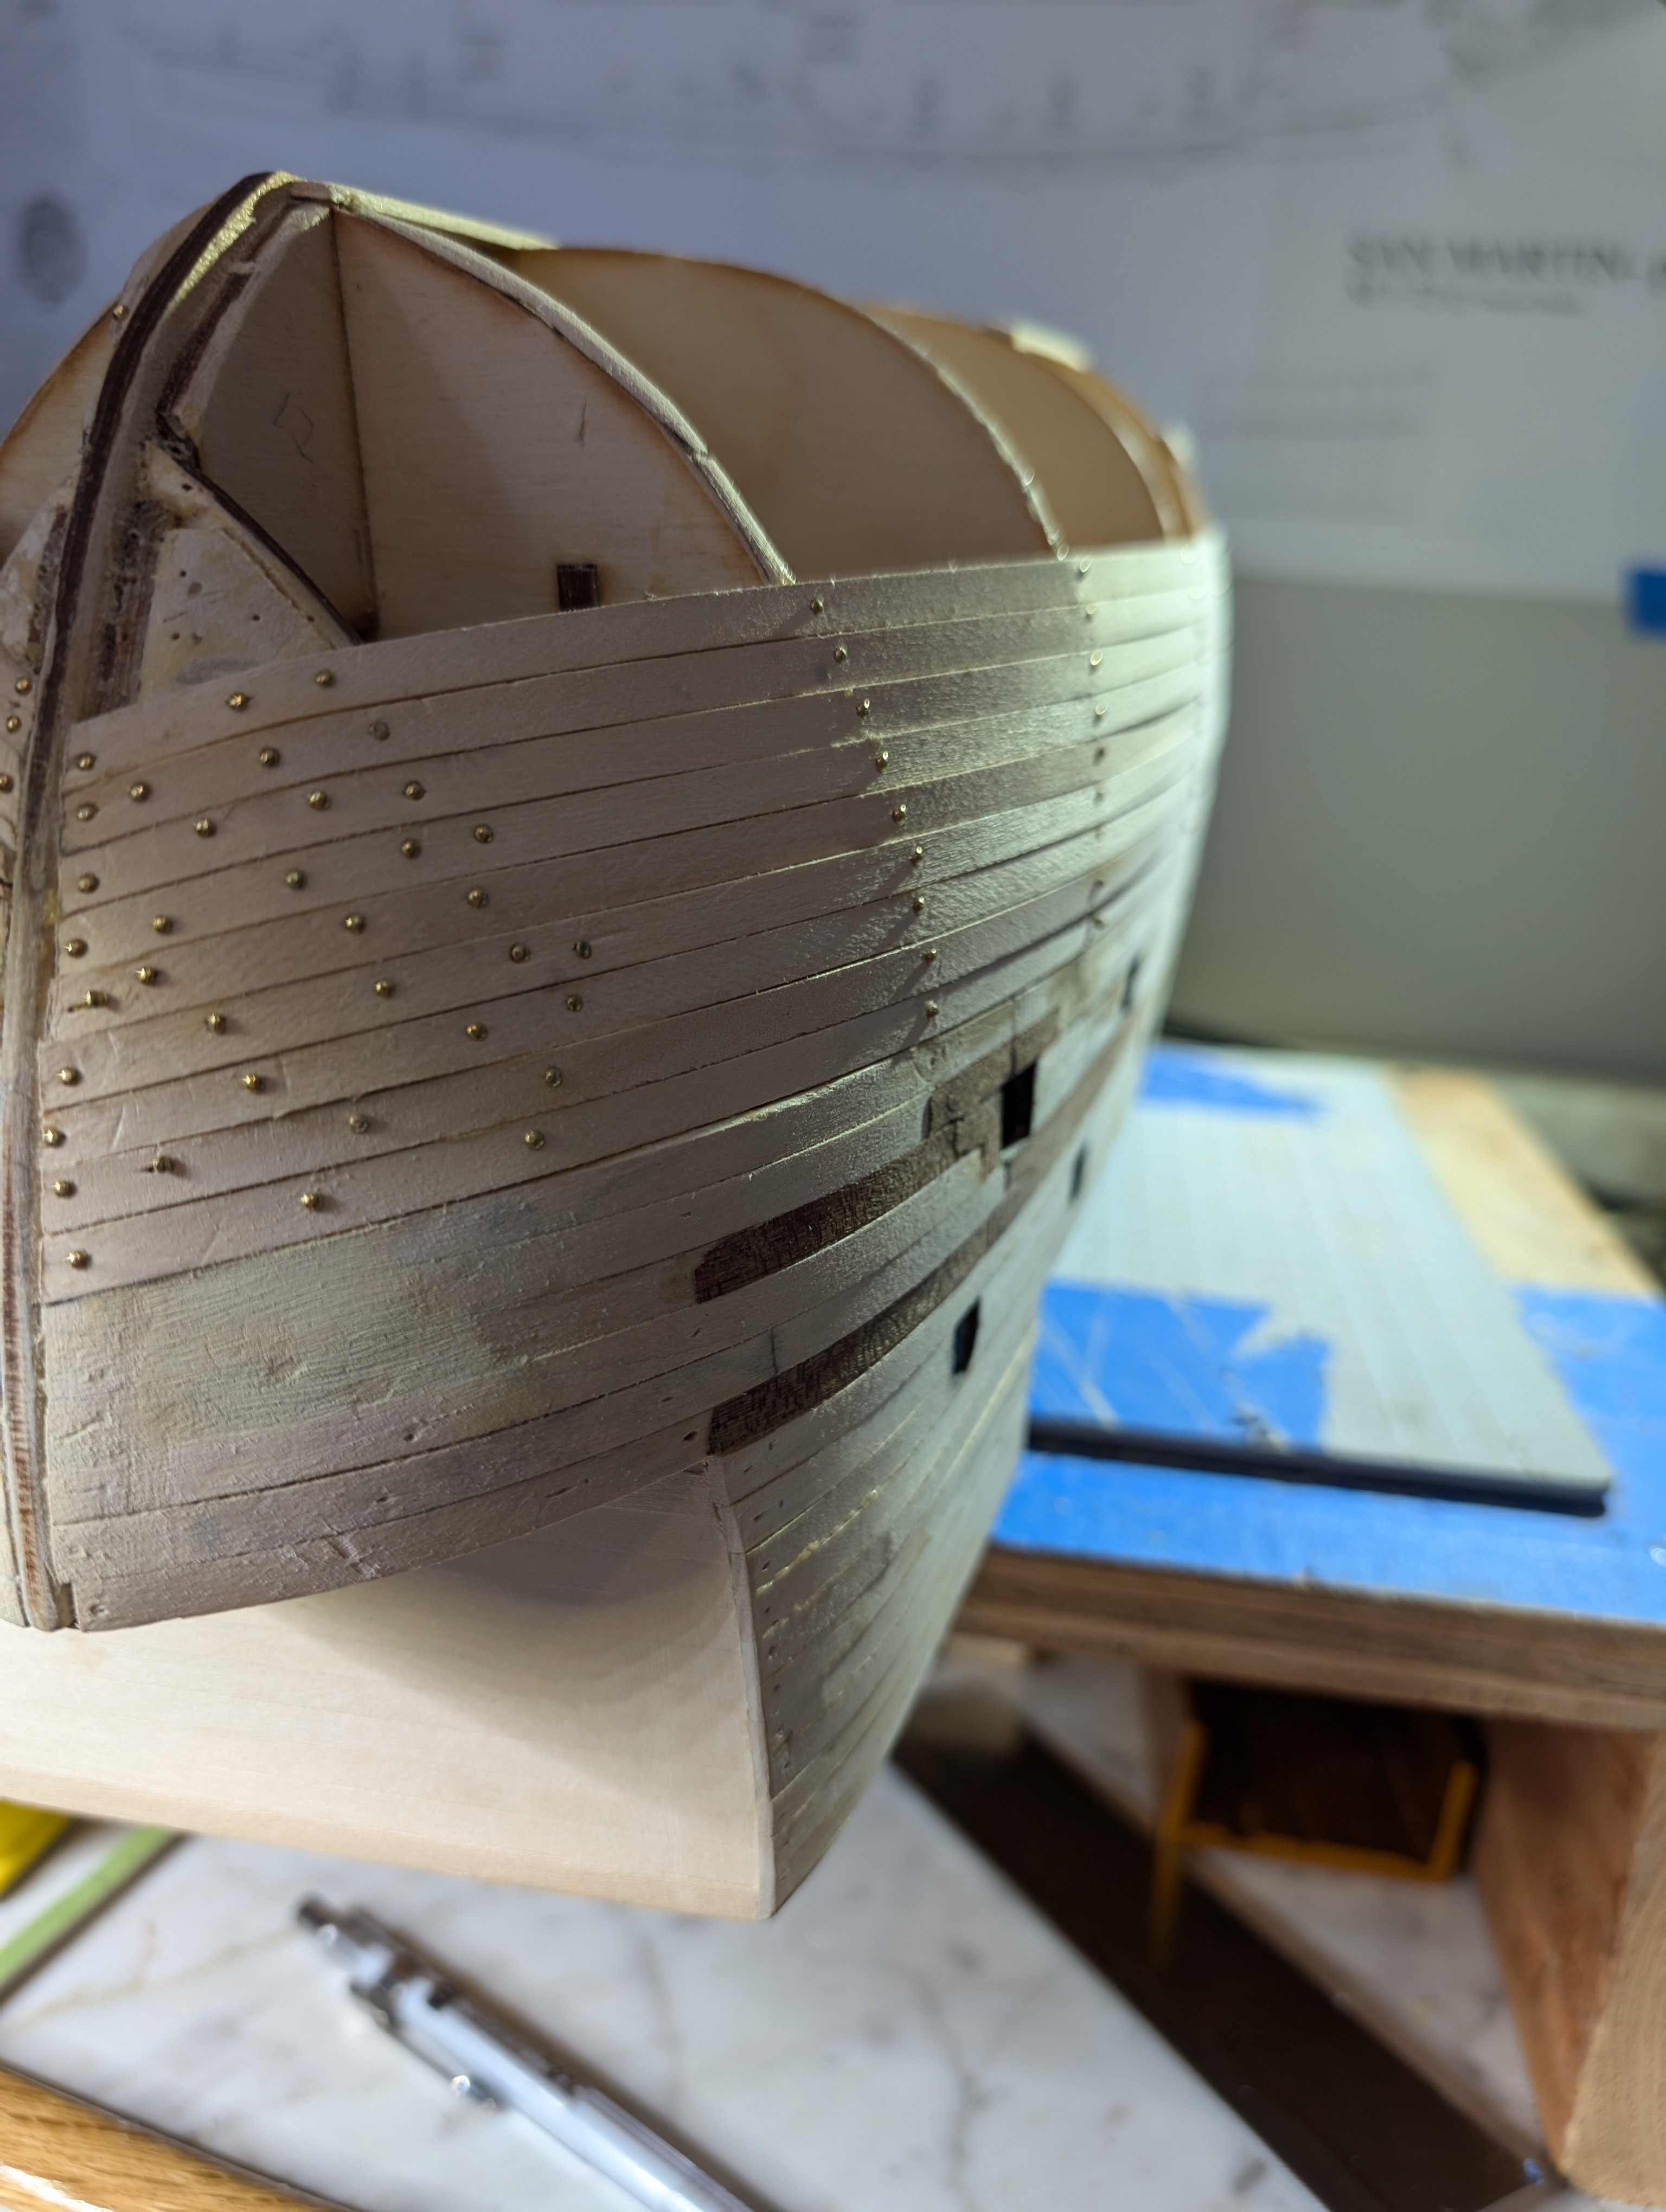
I want to smooth out that awkward looking bungle so that the transom doesn't hang below its supports thus creating a nice, cleaner line.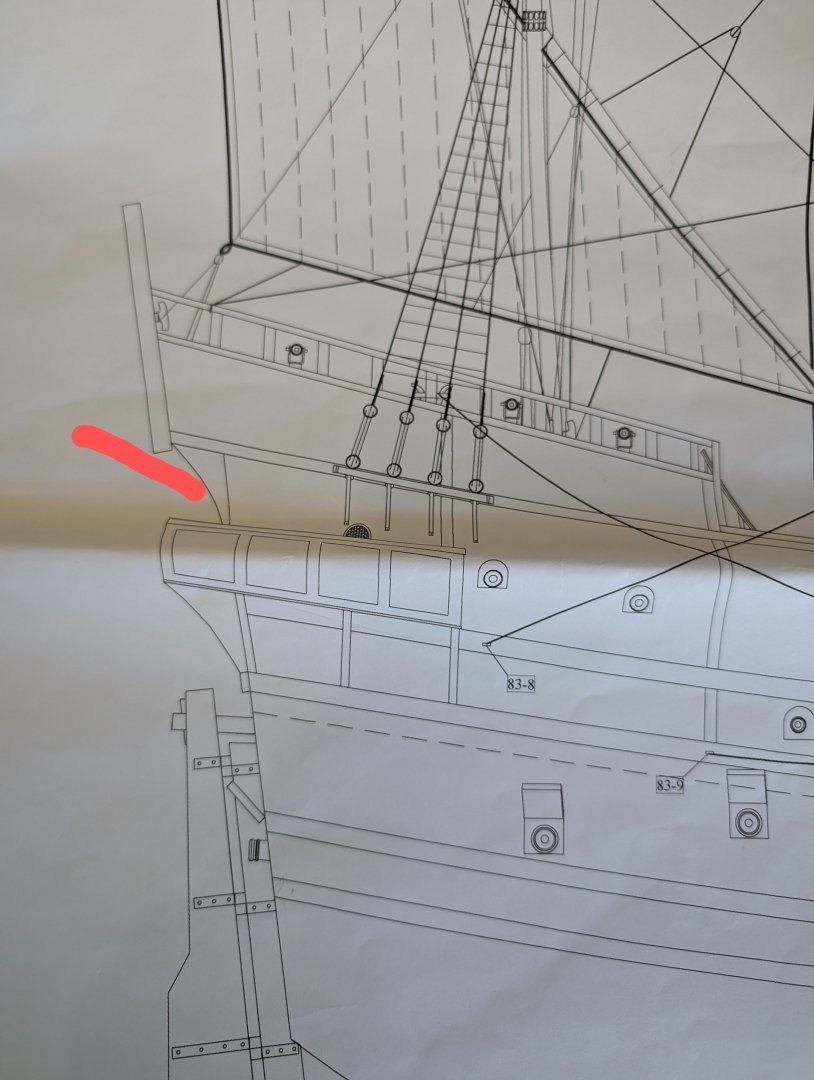
-
San Martin by MikkiC - Dusek - 1:72
MikkiC replied to MikkiC's topic in - Kit build logs for subjects built from 1501 - 1750
Thoughts???? I'm looking ahead a little, and I still have to attach the transom. This doesn't look right to me, but if I'm wrong, please tell me. The plans kinda have it slapped on the back like so: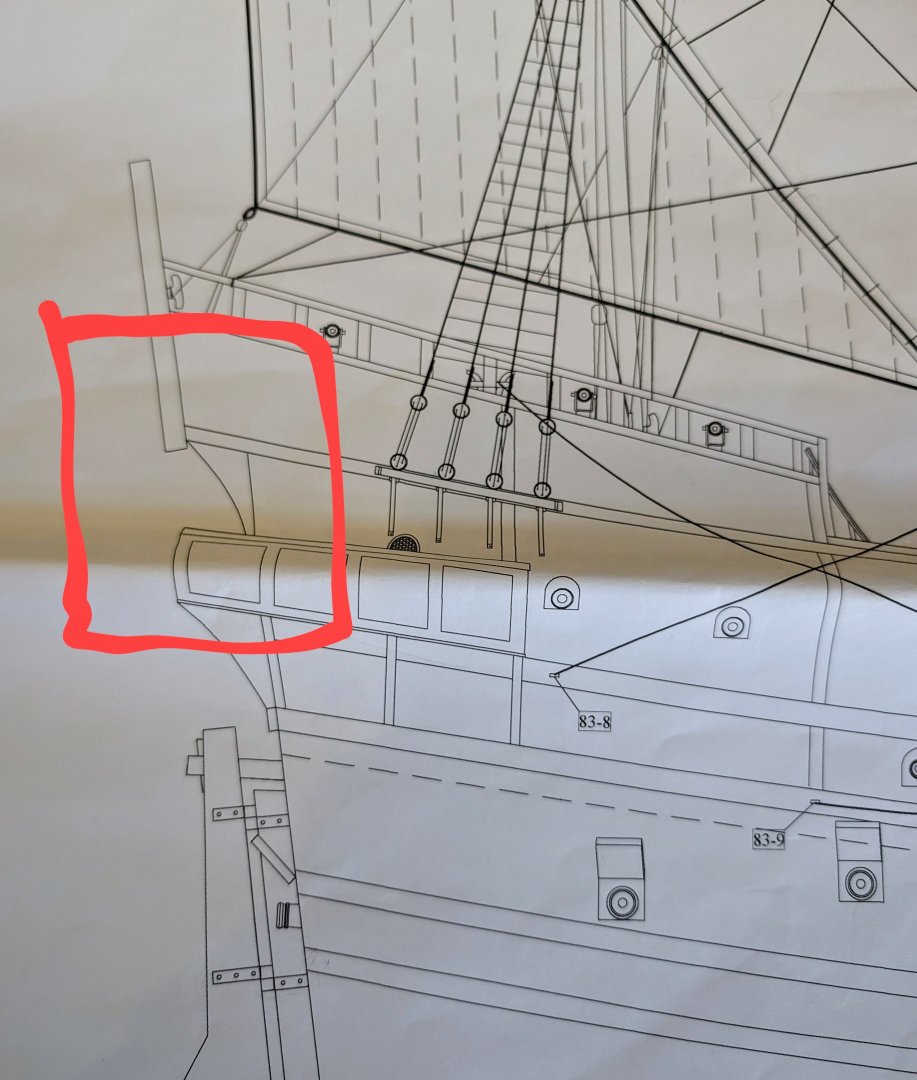
-
The good news is it's not concrete. It's just paint. 🙂 You have this in hand. Of that, I am certain.
-
This look great and like it's fun. Not sure how I missed this until now.....
- 86 replies
-
- 1
-
-
- San Francisco
- Artesania Latina
- (and 2 more)
-
San Martin by MikkiC - Dusek - 1:72
MikkiC replied to MikkiC's topic in - Kit build logs for subjects built from 1501 - 1750
Feeling a little more normal now. Wow. My brain sometimes confounds me. Hahaha. Nonetheless, I can proceed.
-
I love the views from above her. The lines, shape are magnificent.
-
San Martin by MikkiC - Dusek - 1:72
MikkiC replied to MikkiC's topic in - Kit build logs for subjects built from 1501 - 1750
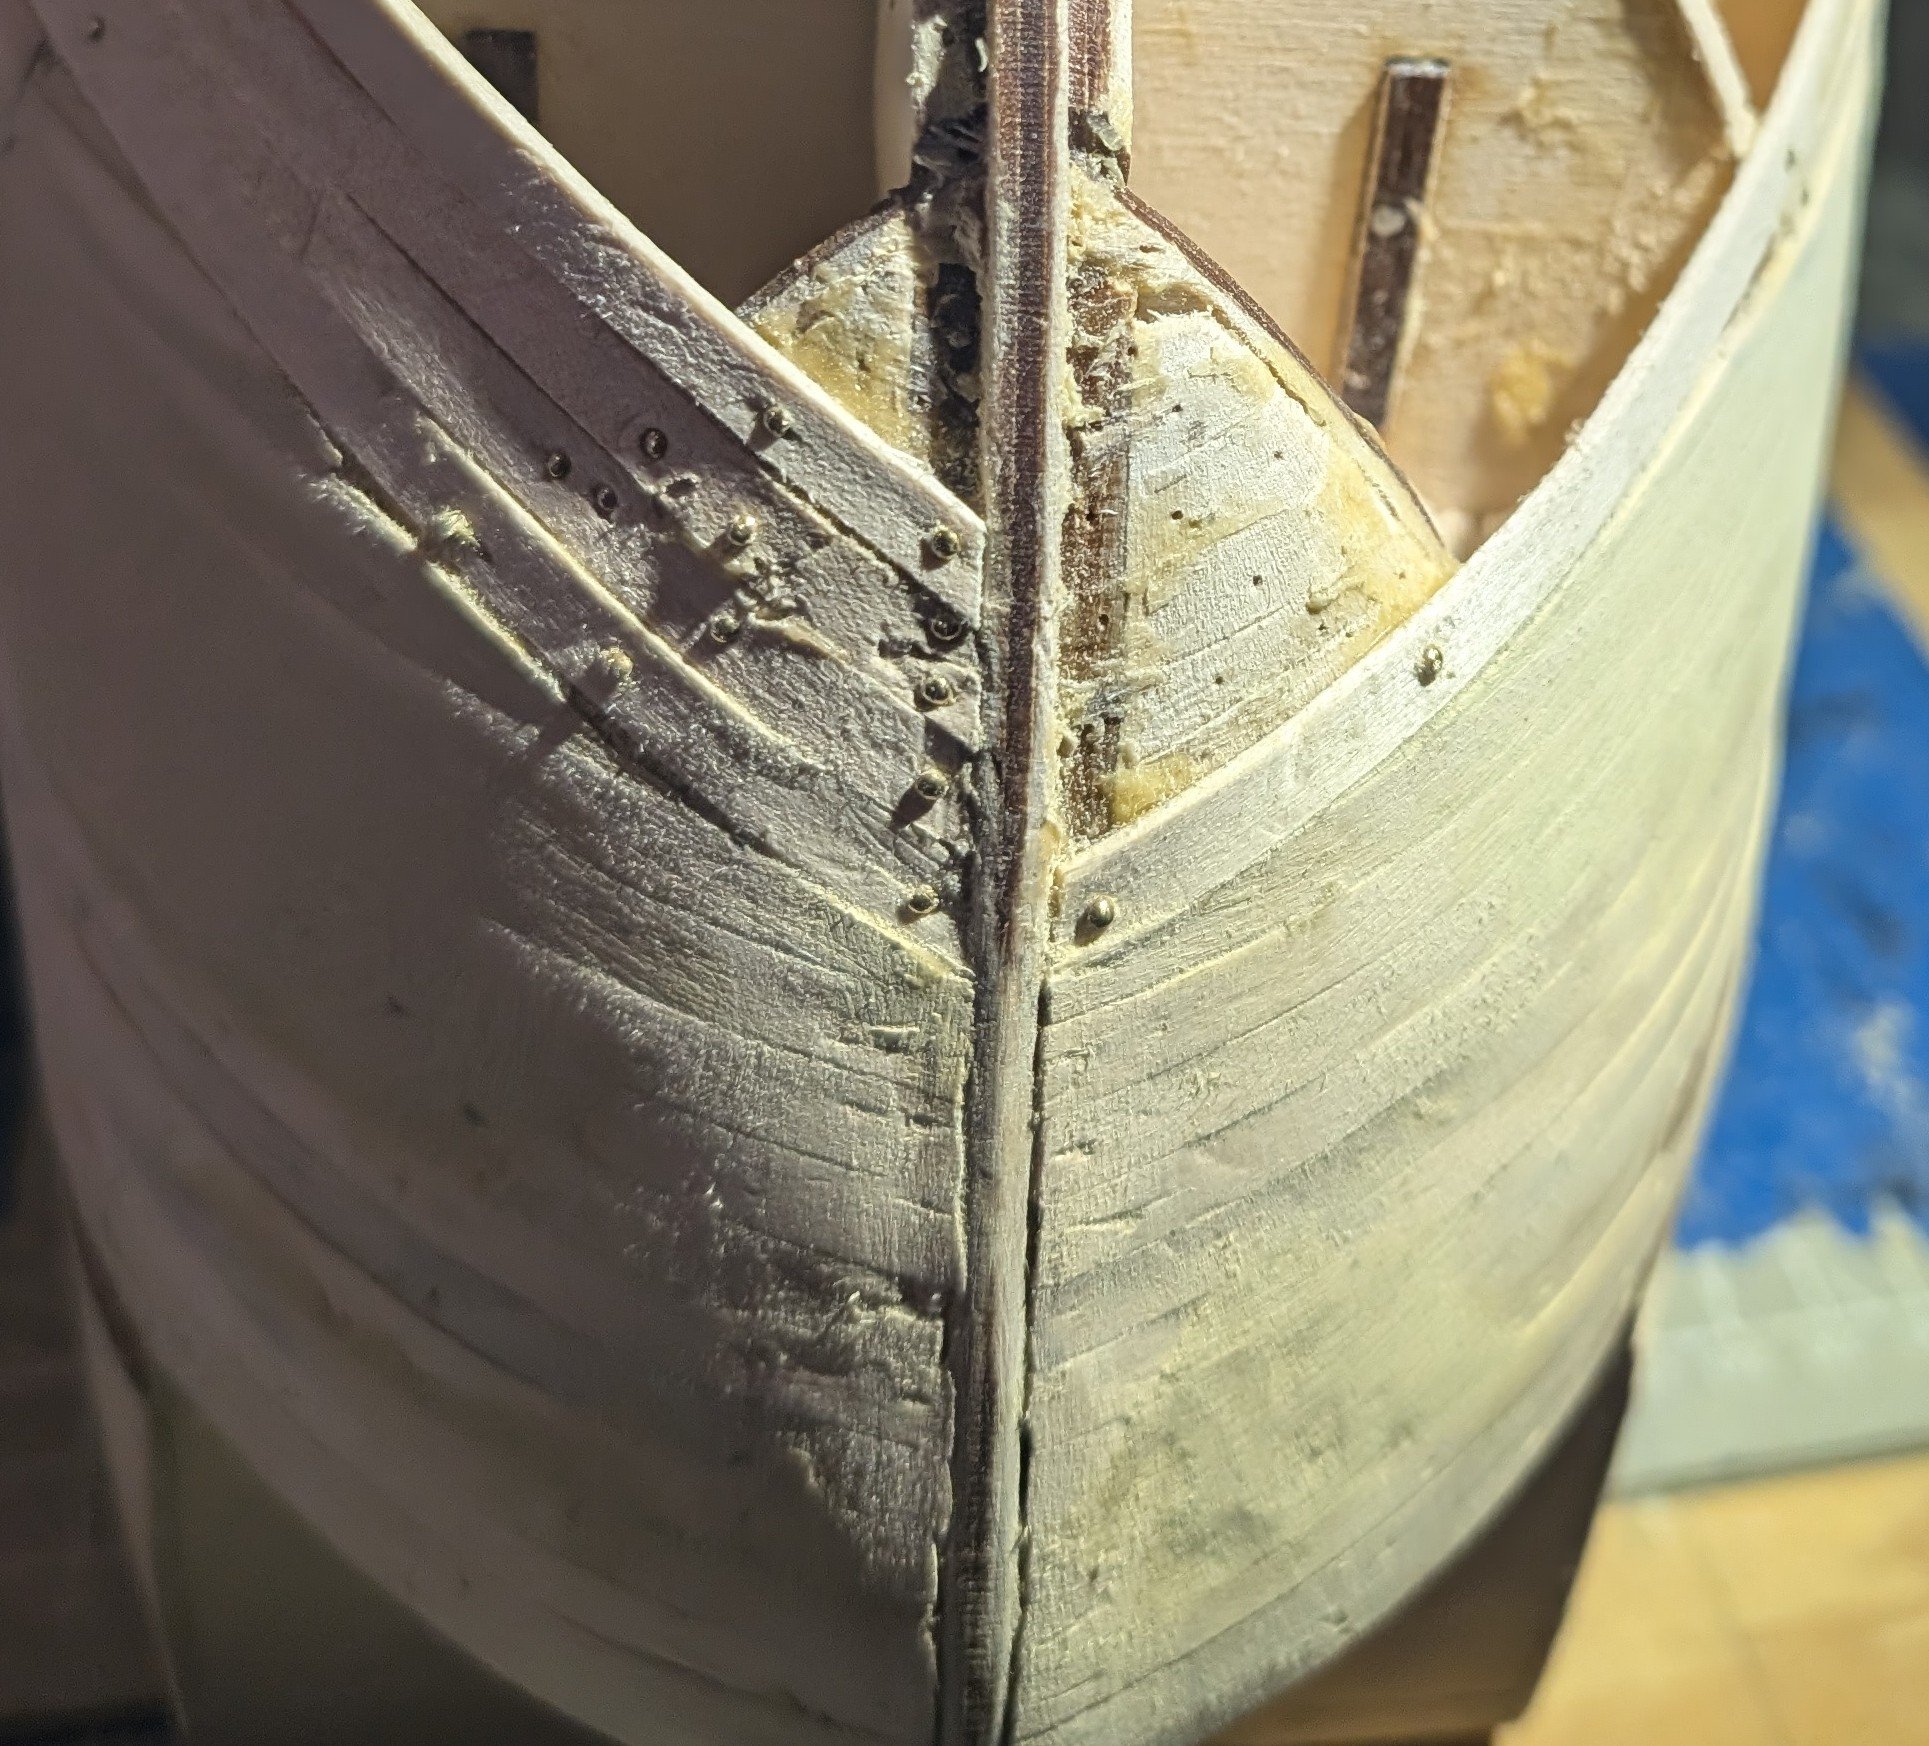
Well the mortgage company requires I pay them so my dogs have a roof over their heads and a yard to run in, so I had to put off the fix and go to work. 🙂 The fix is underway. I still have the other side, but this is much better. I tore out more than I originally thought I would. Eh, no biggie.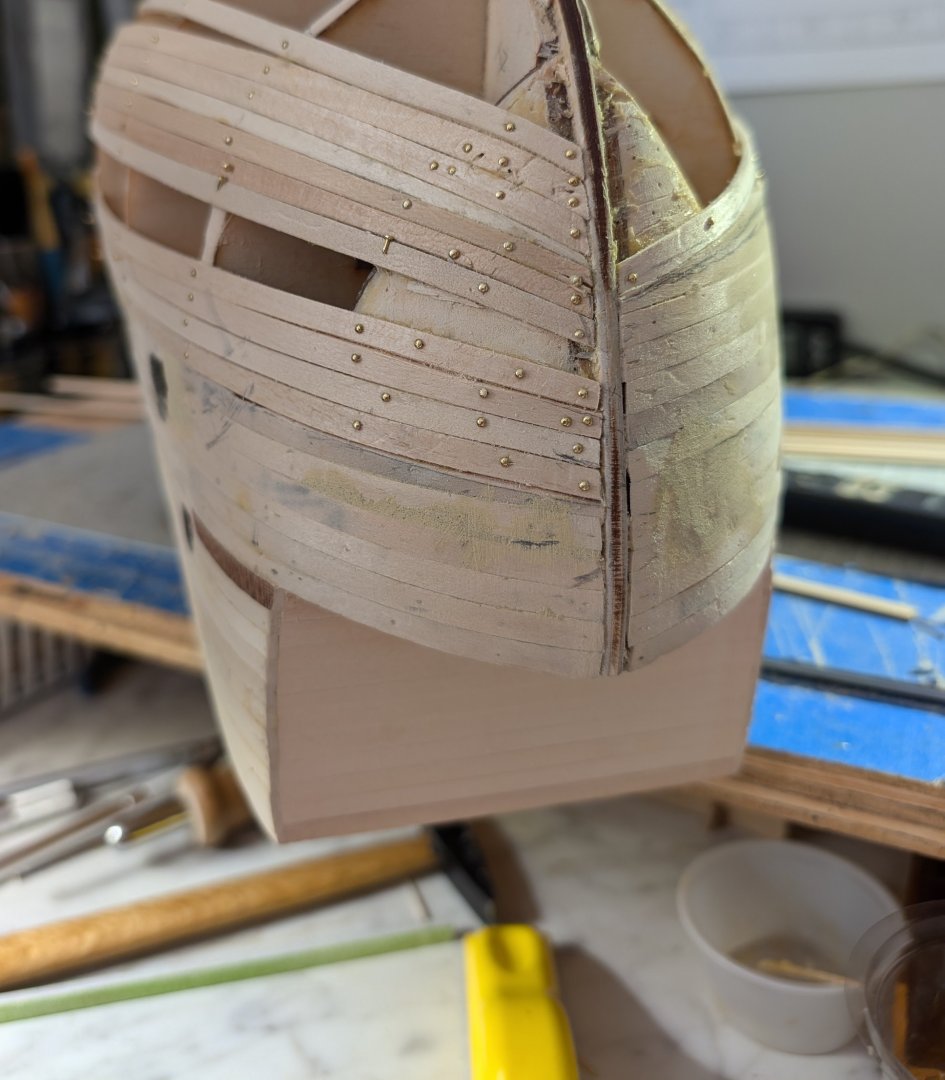
-
San Martin by MikkiC - Dusek - 1:72
MikkiC replied to MikkiC's topic in - Kit build logs for subjects built from 1501 - 1750
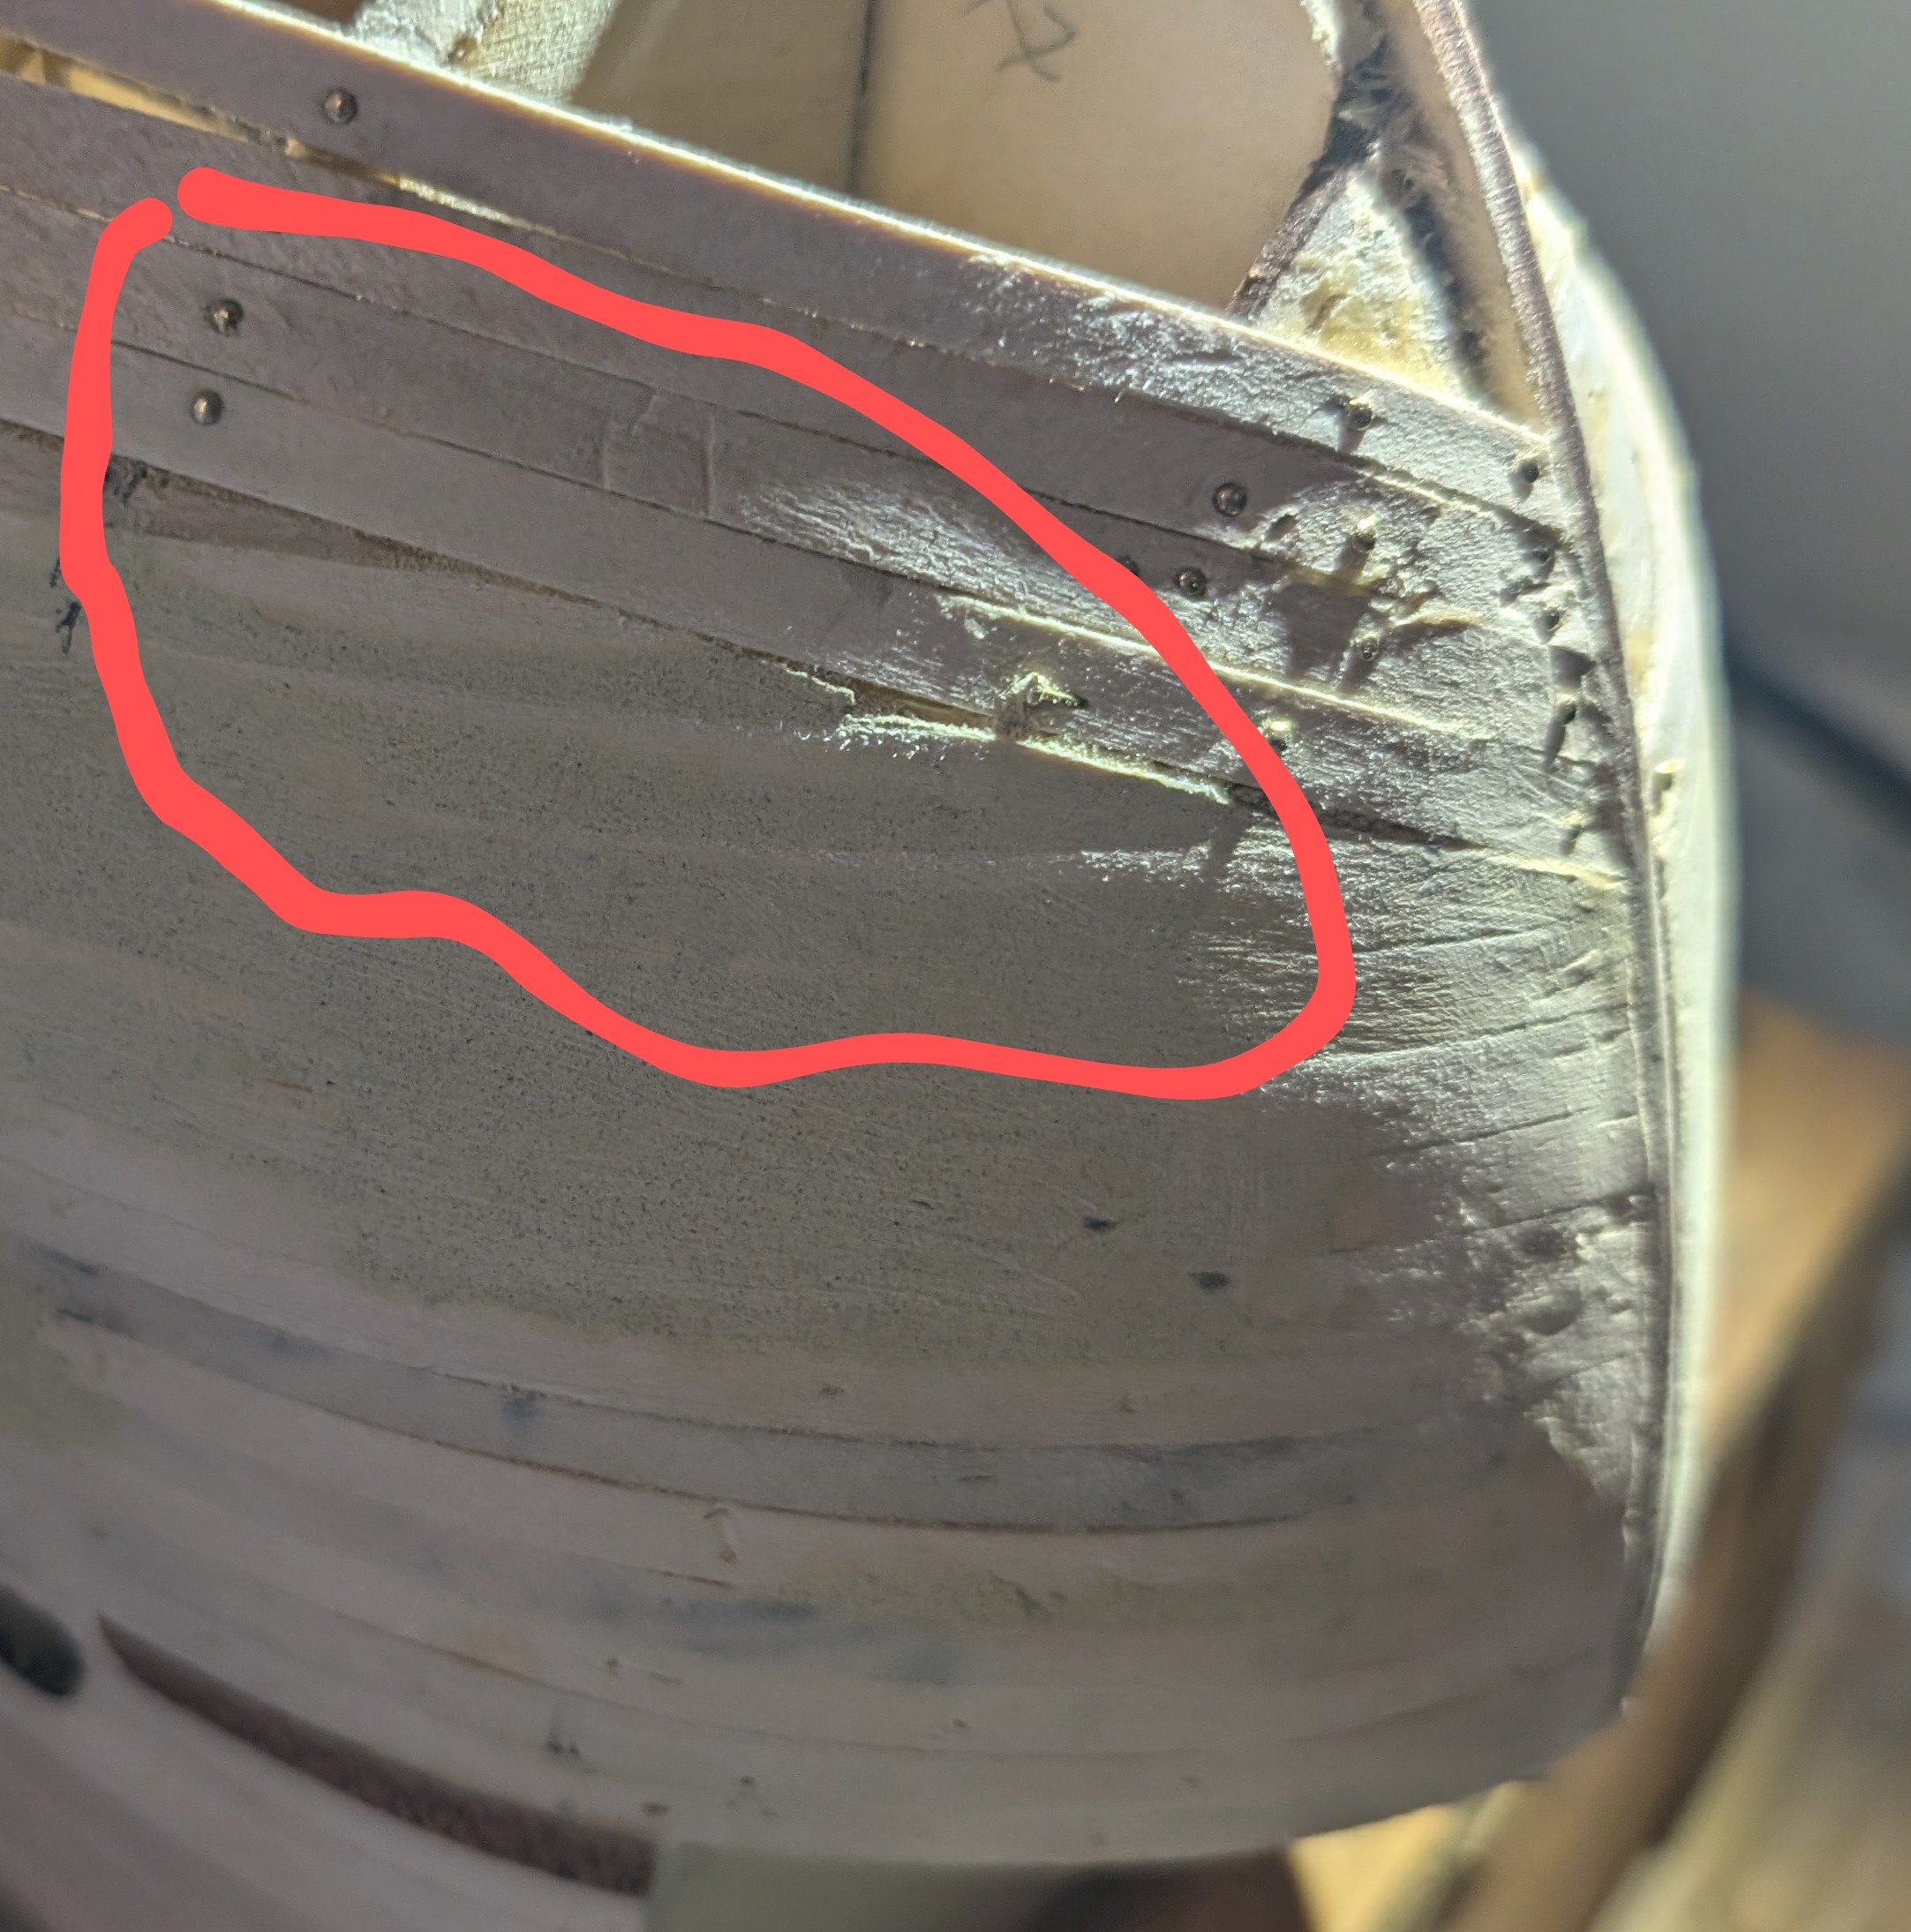
Whoopsie!!!!! I was impatient (always a disaster 🙂) waiting for wood, so I pieced together some of the planking with what pieces I had. What was I thinking? I ripped off about 5 planks on each side. The curve was all kinds of wrong. Now that I have a better layout, I have to fix a few. It's definitely fixable but annoying. Thankfully this is getting 2 layers, but I need to get this layer solid and sound. Lesson learned.

-
And.... I've never put a waterline on any ship I've built, and I've never regretted it. I think it would hide your beautiful work....which would be a shame. That's just my opinion.
-
Yes, agree completely with @druxey. The slightly faded colours give it a more aged, authentic feel. I'm a big fan of black micro makers for outlining when warranted. They work really well. She looks fantastic.
-
Yay for painting! I think painting adds another level that inlays, whether wood or...gulp...paper, just can't provide.
-
This is stunning. Your work and attention to detail are truly amazing. I've been following this from the beginning....albeit quietly. This ship is on my to-build list. I'm not brave enough to attempt a scratch build....yet.
-
Agree with Todd...mighty nice shipyard you have there. I've yet to use powertools on any build....yet. Build looks fantastic. Your work is impressive.