threebs
-
Posts
297 -
Joined
-
Last visited
Content Type
Profiles
Forums
Gallery
Events
Everything posted by threebs
-

USS Delaware 1817 by threebs
threebs replied to threebs's topic in - Build logs for subjects built 1801 - 1850
One of the ship's sunk was the Merrimack. Except for a set of loft plans of her class ship the Wabash, I can not find much about her. How closely would the USS Kearsarge resemble the Merrimack? -
USS Delaware 1817 by threebs
threebs replied to threebs's topic in - Build logs for subjects built 1801 - 1850
I am building all of the US warships sunk at Norfolk harbor in 1861. Still have the Germantown, the Merrimack, the Columbia, the Raritan, the Dolphin, and the Plymouth. -
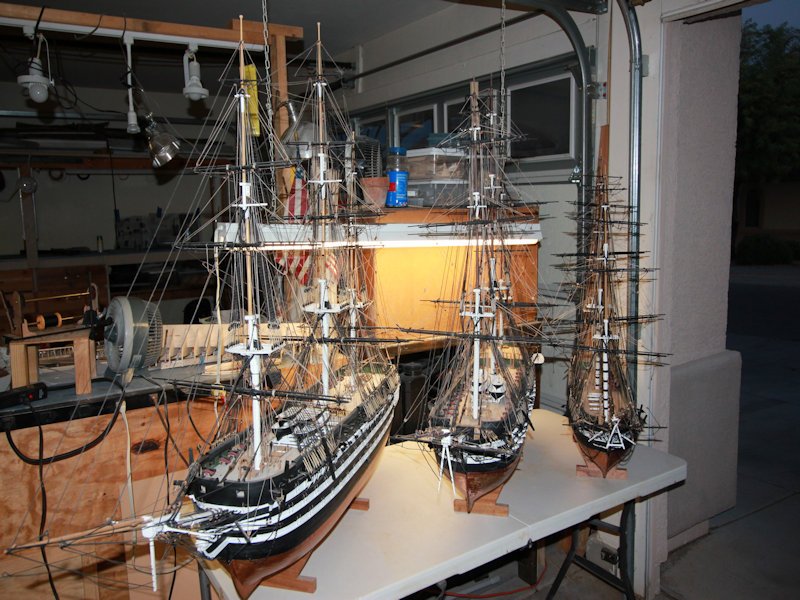
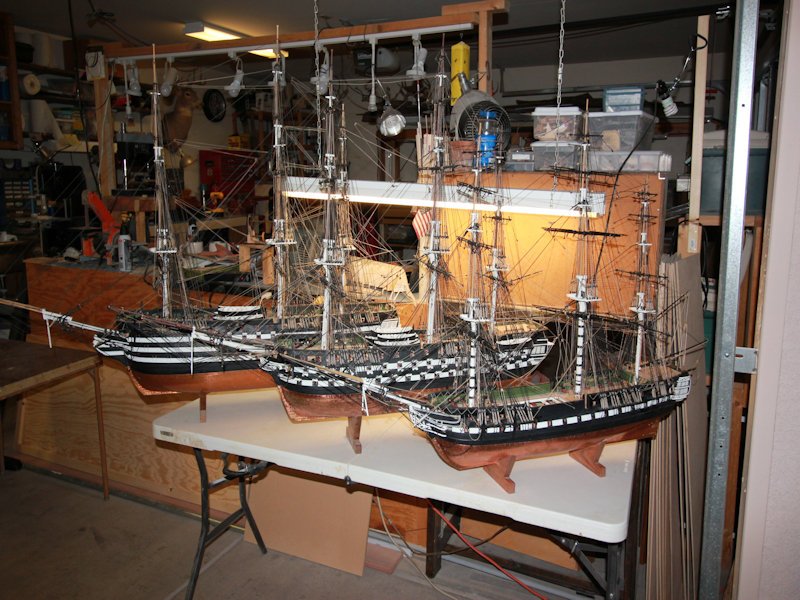
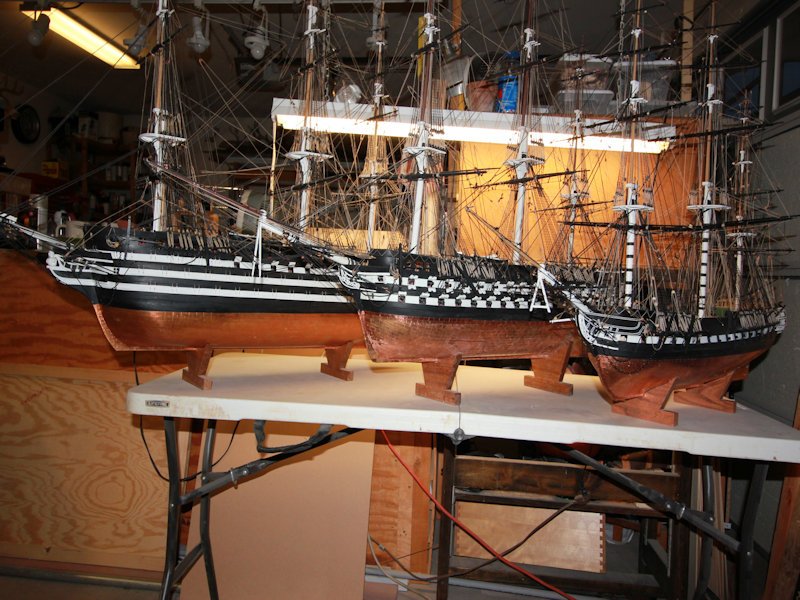
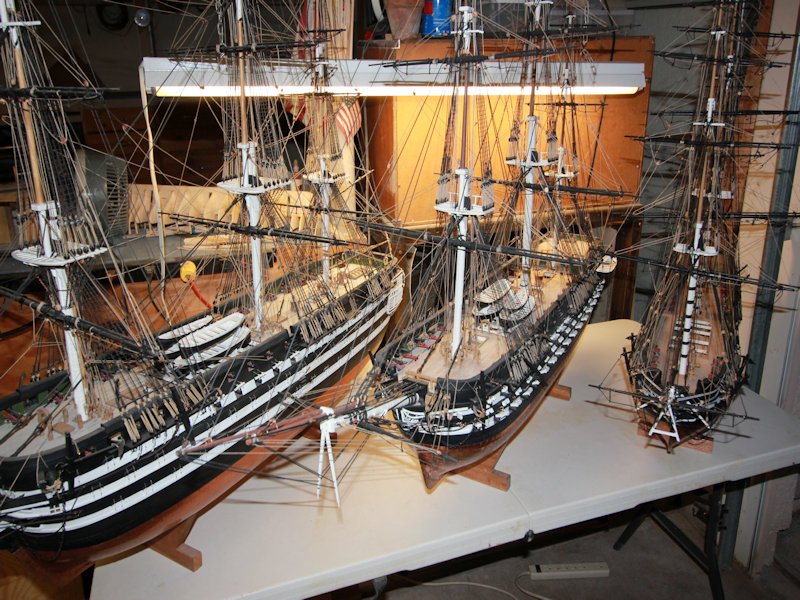
Been a long time since I posted a build here. I believe I will start up again and see if I can drum up some interest. I have finished 3 of the 11 ship sunk at Norfolk harbor in 1861. The Pennsylvania, The Columbus and the United States.
-
USS Columbus 1819 by threebs - 1/72 scale
threebs replied to threebs's topic in - Build logs for subjects built 1801 - 1850
I made an offer to start build logs on the United States and Delaware on this site a few days ago. Seems to be no interest in them, so I will just go back to my other forums and concentrate my efforts there. -
USS Columbus 1819 by threebs - 1/72 scale
threebs replied to threebs's topic in - Build logs for subjects built 1801 - 1850
Hello everyone, I am not sure why I stopped posting to this site, except I remember it was sort of difficult posting photos here, boy, not anymore! I have finished the Columbus now, And I have posted three photos of my United States build and the start of the Delaware 90 guns of 1817 I have the bulkheads cut out for the Germantown, the bulkhead patterns for the Columbia and Raritan ready to transfer to plywood. If anyone is interested I will start build logs for all of them.


-
USS Columbus 1819 by threebs - 1/72 scale
threebs replied to threebs's topic in - Build logs for subjects built 1801 - 1850
As much as I appreciate the "likes" i get on my posts they are just not the same a a personal "atta boy" post I can actually read and enjoy. Might as well have a robot on the other end making generic comments about my work, The whole concept of "likeing" simply escapes me. -
USS Columbus 1819 by threebs - 1/72 scale
threebs replied to threebs's topic in - Build logs for subjects built 1801 - 1850
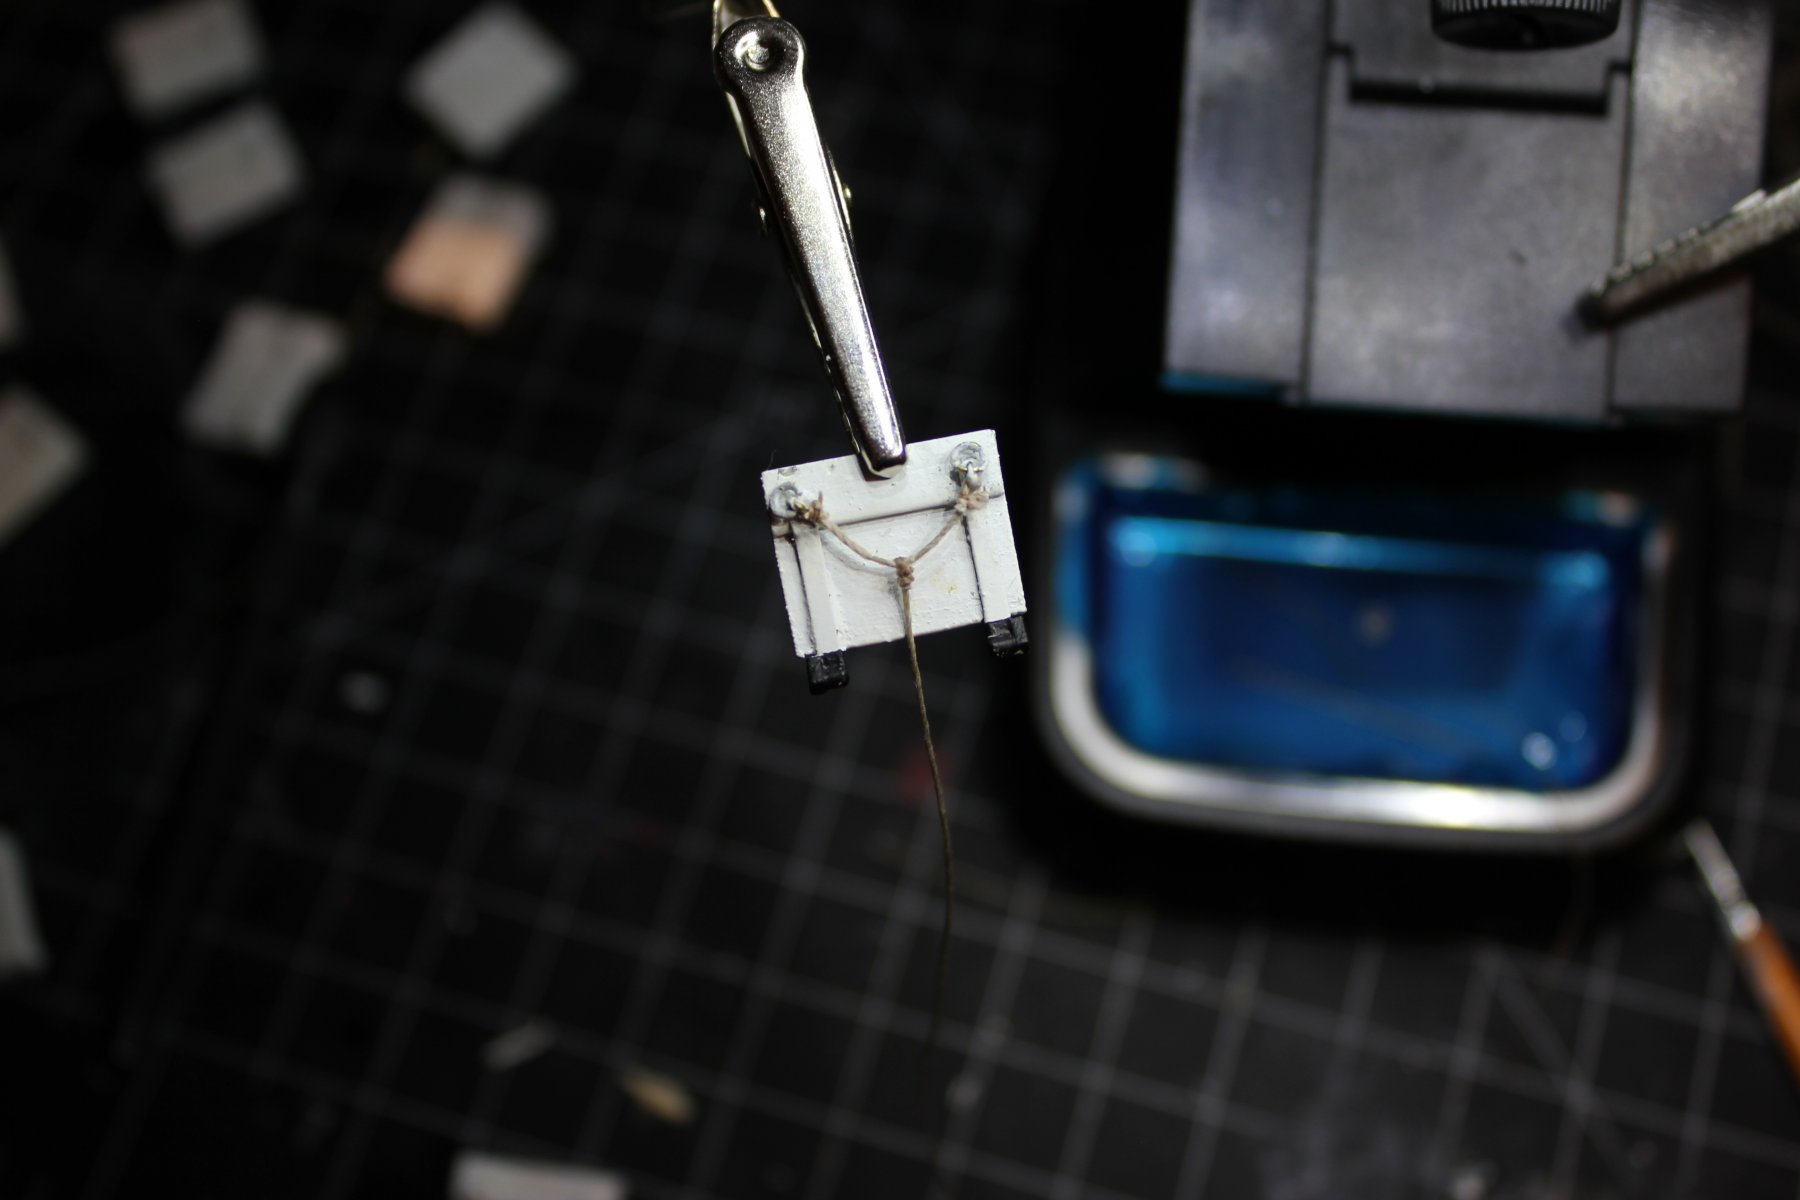
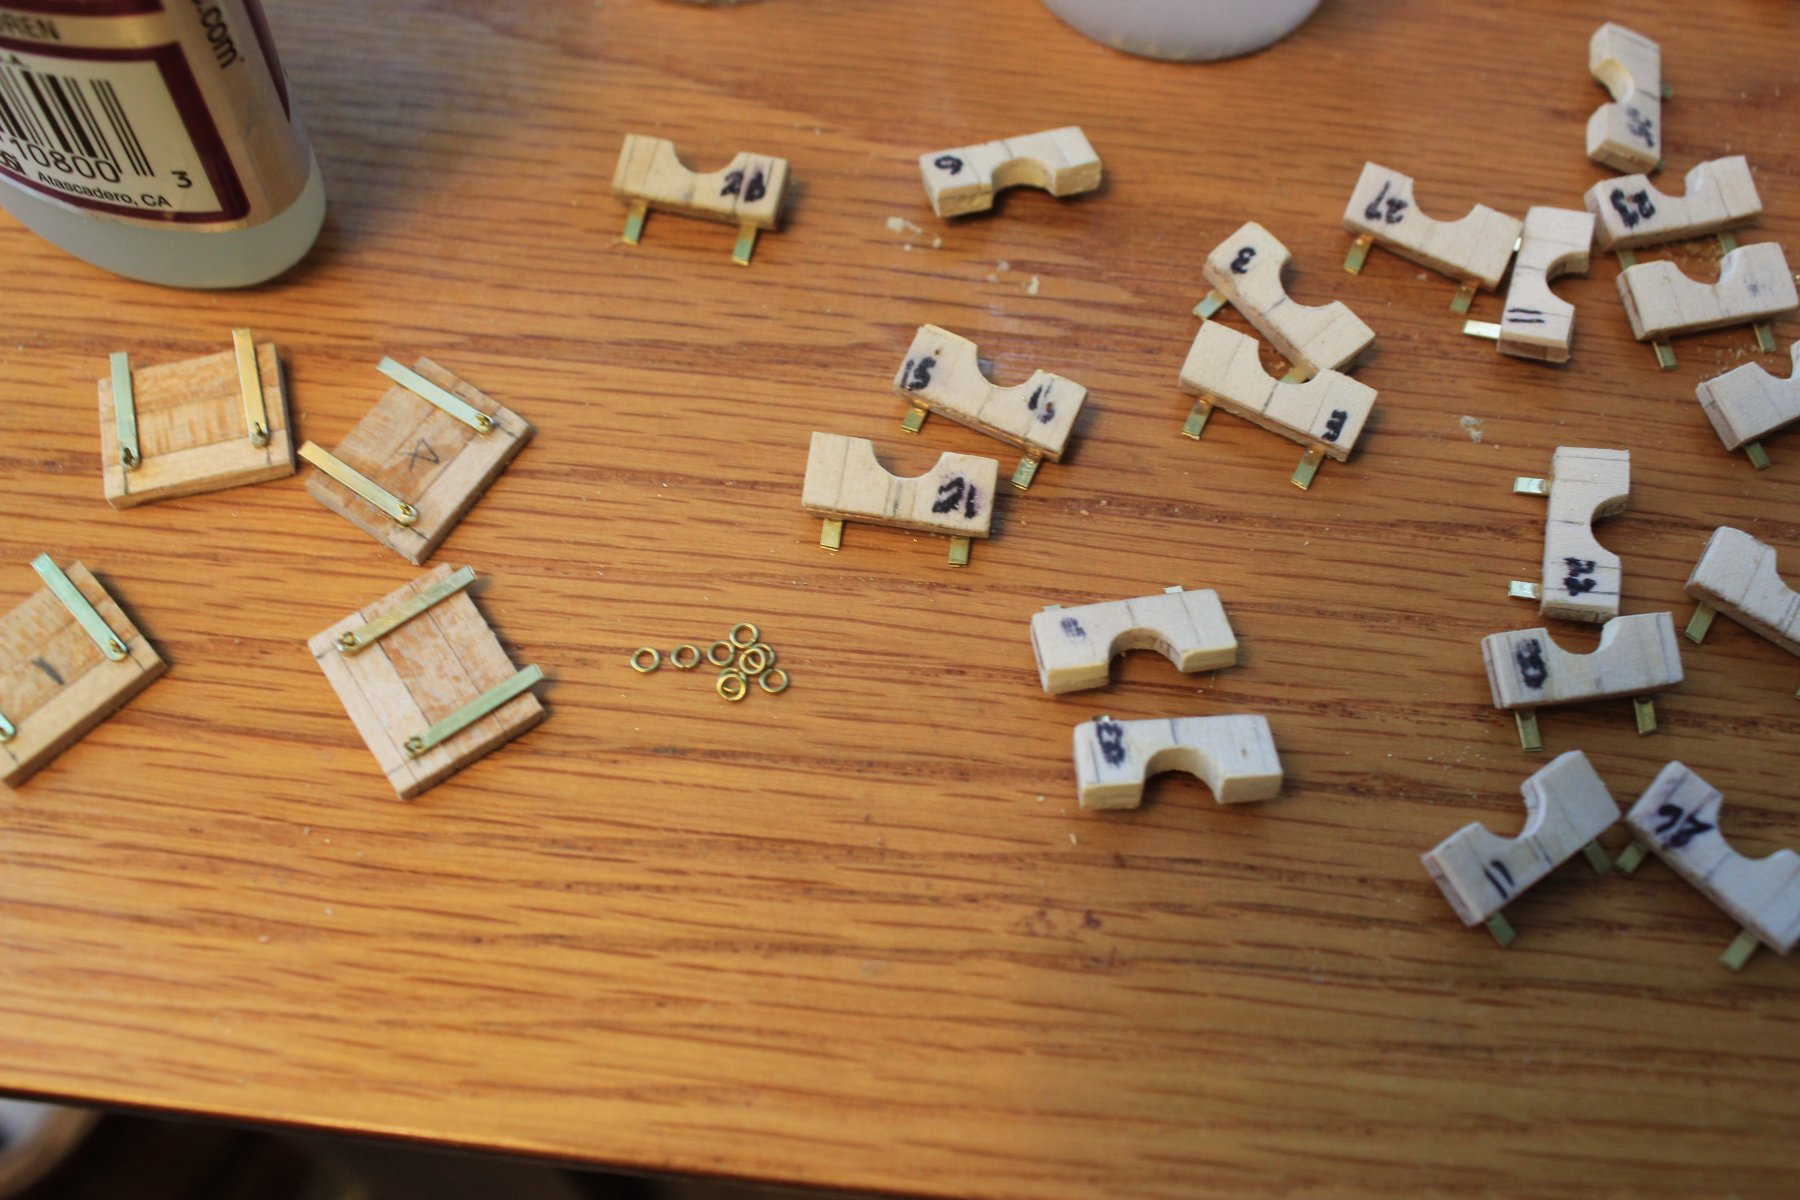
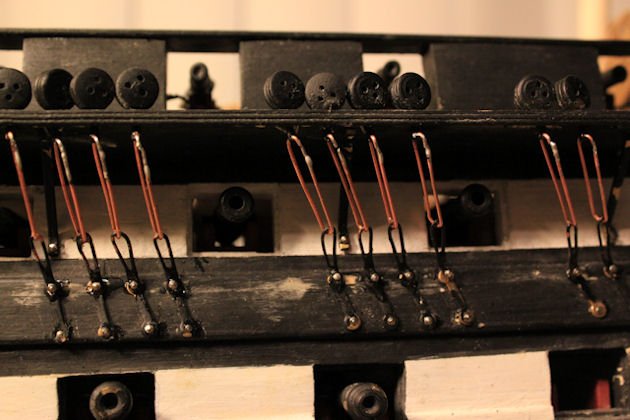
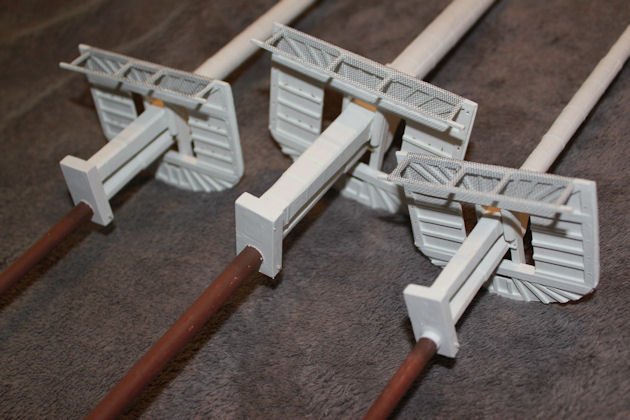
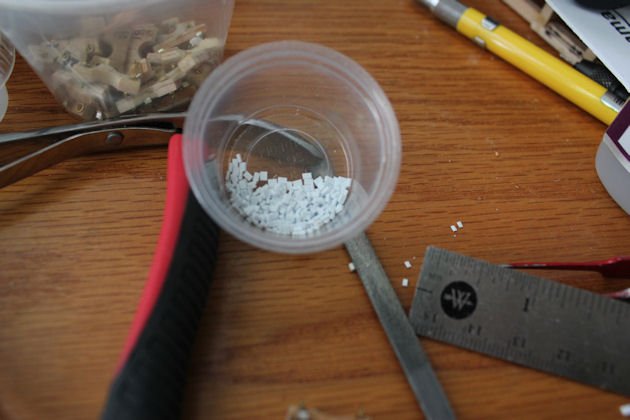
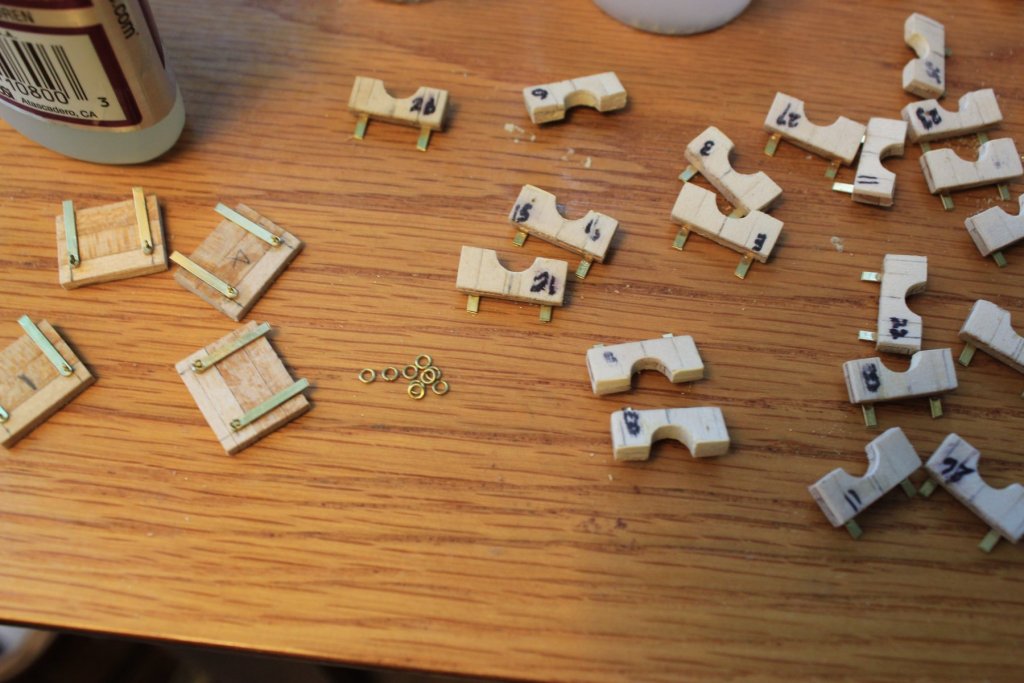
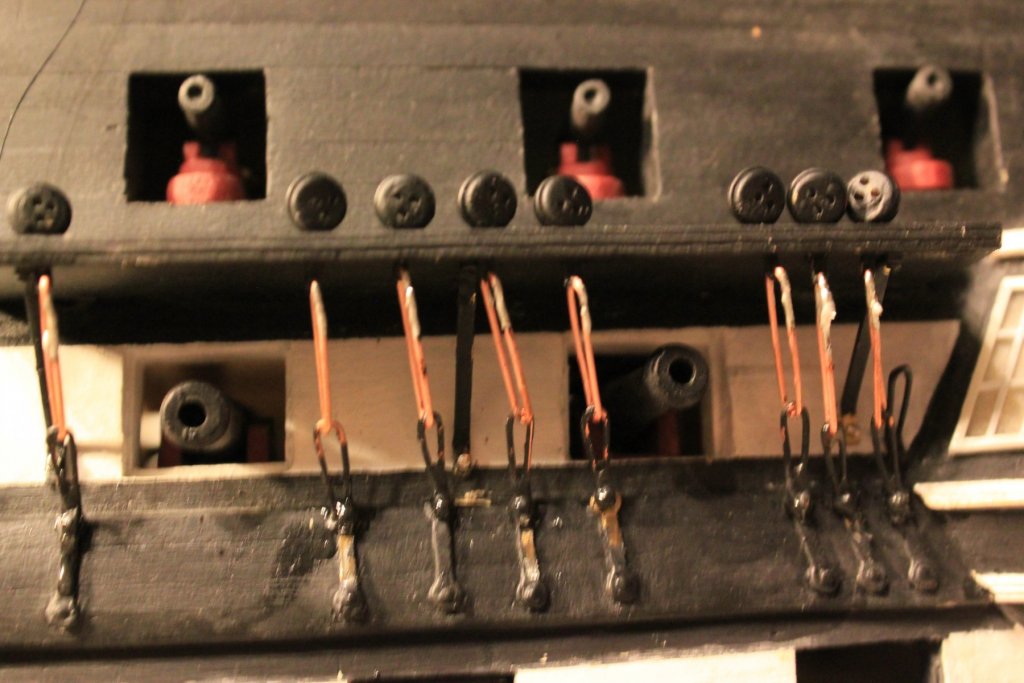
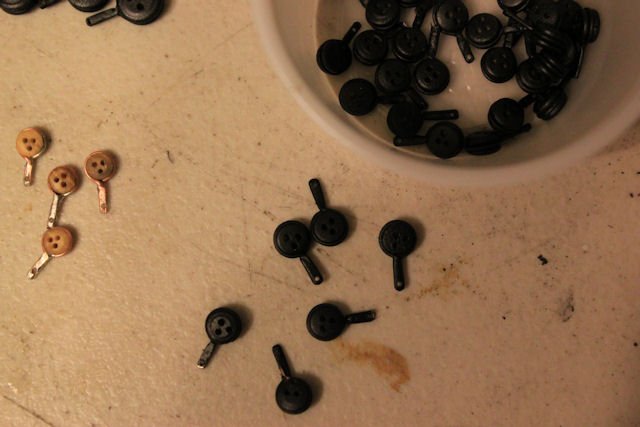
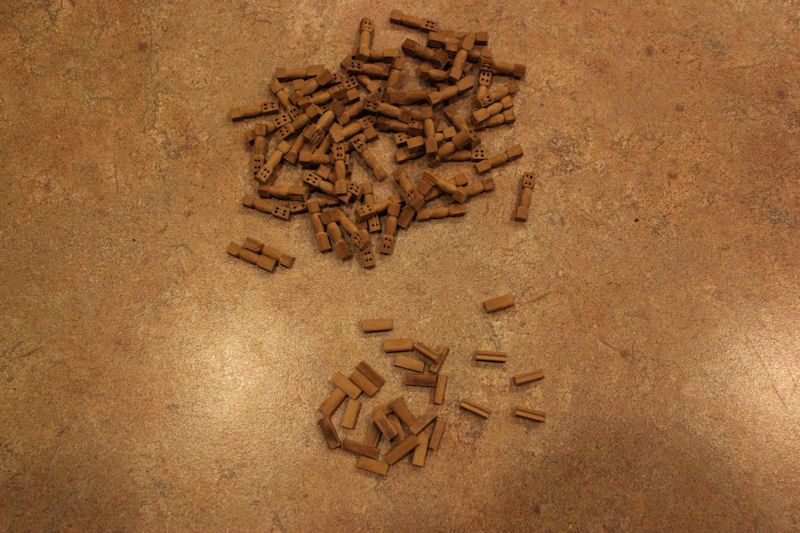
These plastic side hinge pin pieces should be the last bits to glue onto the gun doors. That is 4 each for the 32 double doors and two each for the 34 snigle doors, you do the math, I would be to intimidated if I actually knew how many it was, lol!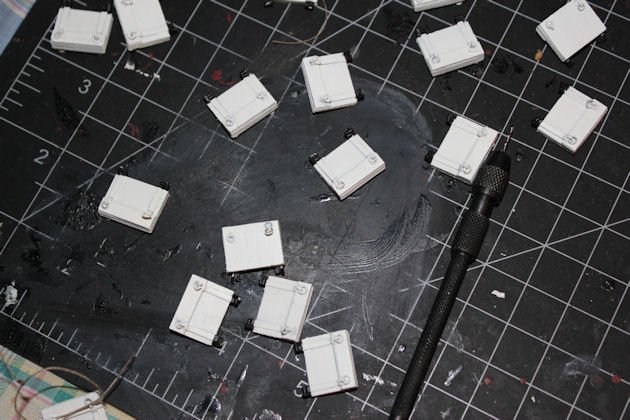


-
USS Columbus 1819 by threebs - 1/72 scale
threebs replied to threebs's topic in - Build logs for subjects built 1801 - 1850
These plastic side hinge pin pieces should be the last bits to glue onto the gun doors. That is 4 each for the 32 double doors and two each for the 34 sigle doors, you do the math, I would be to intimidated if I actually knew how many it was, lol!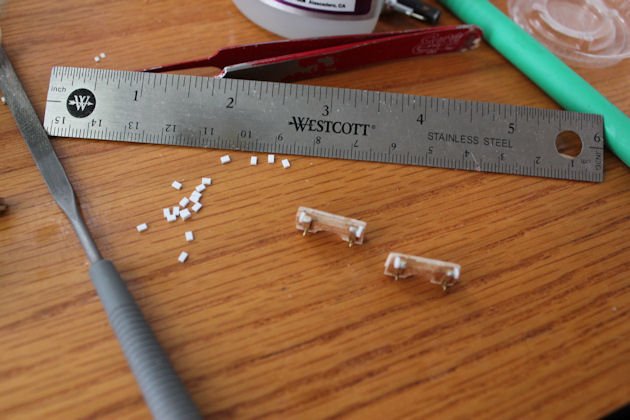
-
USS Columbus 1819 by threebs - 1/72 scale
threebs replied to threebs's topic in - Build logs for subjects built 1801 - 1850
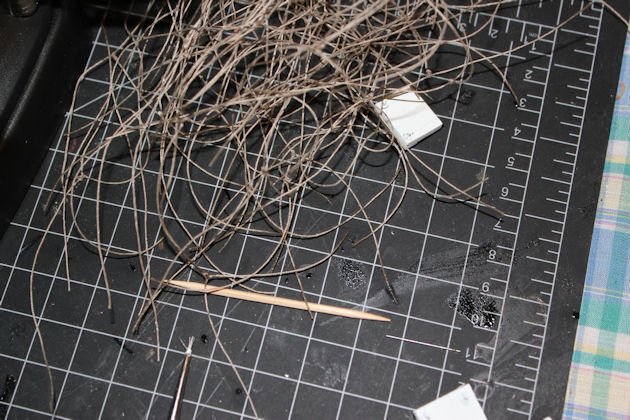
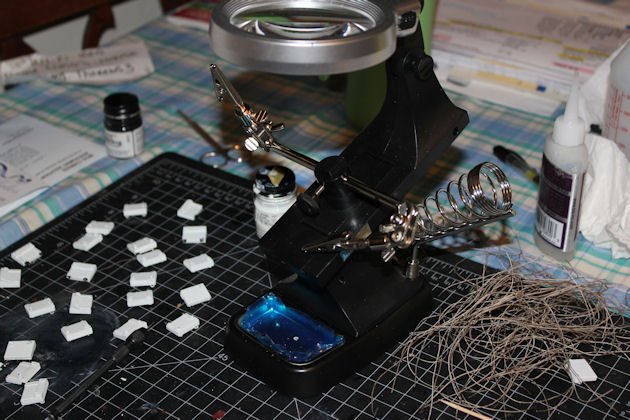
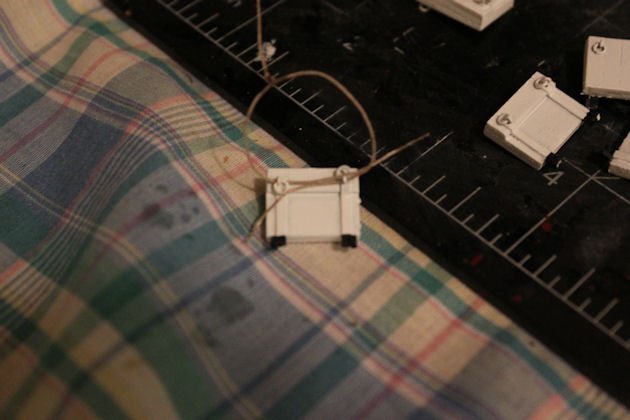
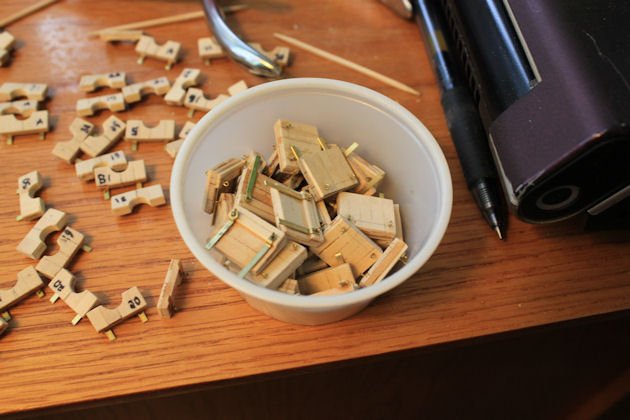
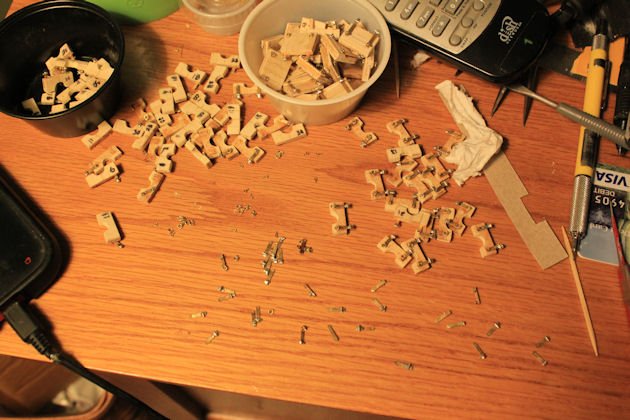
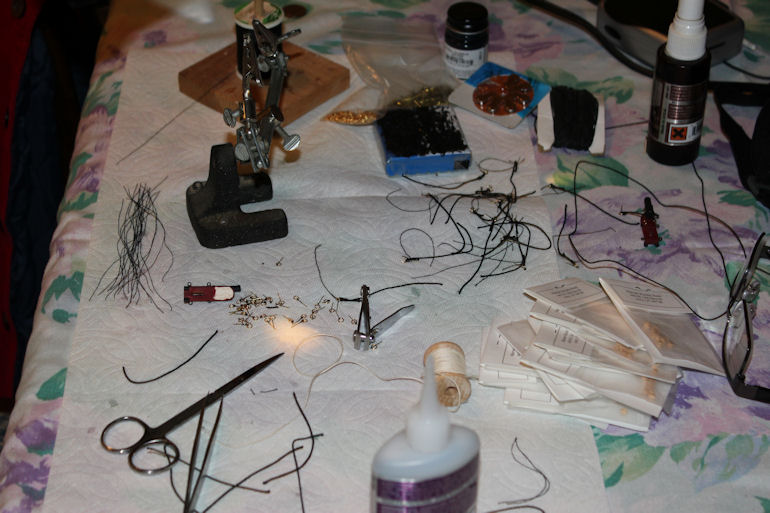
I have a little build station on an end table next to my couch where I sit with my leg up. I constructed all of the half doors and the hinge straps from here. I super glued all the straps to all the doors, then soldered the hinge pins to the the ends of the straps. The heat melted most of the straps off ans I had to re glue almost all of them over. I Used a fresh bottle of super glue and they do stay on better than before. The last photo shows the straps with pins soldered on, after the heat melted the glue.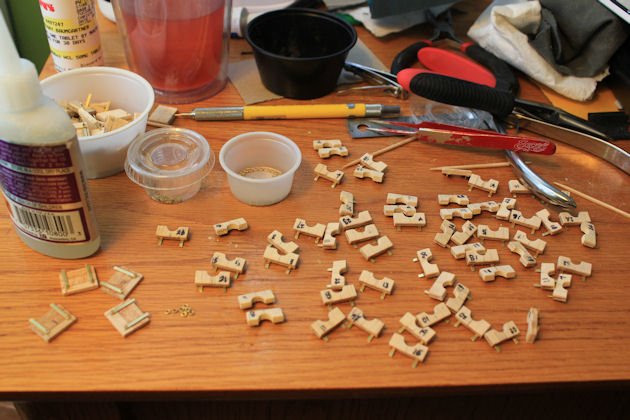
-
USS Columbus 1819 by threebs - 1/72 scale
threebs replied to threebs's topic in - Build logs for subjects built 1801 - 1850
I will have more time to work on the ship now, I broke my ankle 3 days ago, lol. Surgery in 2 days. I chased a dog running in traffic to a house about a mile from me, I let him in the gate, he had dug a huge hole under the gate, so I put a couple head sized rocks in the hole, but, it looked like he could still get out, so I went to the front of the house and got a big 100 pound rock and as I was rounding the corner I stumbled on a drip irrigation line. I drop the rock to keep from going face first into the iron rail side fence, and, pow, landed on my ankle. I will still help dogs get home though, life happens, and you deal with, move on. -
USS Columbus 1819 by threebs - 1/72 scale
threebs replied to threebs's topic in - Build logs for subjects built 1801 - 1850
I get more responses on my other build site than I do here, so that one gets more attention. Starting the bulkheads for my USS United States now, just working out how to cut the keel bulkhead. There will be a new site for that build, although it will not get much posting as I will only work on it occasionally until this build is done. -
USS Columbus 1819 by threebs - 1/72 scale
threebs replied to threebs's topic in - Build logs for subjects built 1801 - 1850
Yeah, but, I post to another build site and the photos post much smaller, you click on them to get a larger print. On this site the "blow up" is the same size as the posted photo. Perhaps I need to reduce the pixels on this site, Just a little more work is all, lol. -
USS Columbus 1819 by threebs - 1/72 scale
threebs replied to threebs's topic in - Build logs for subjects built 1801 - 1850
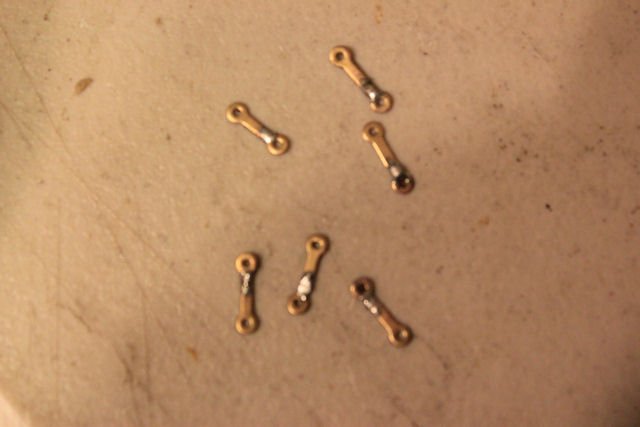
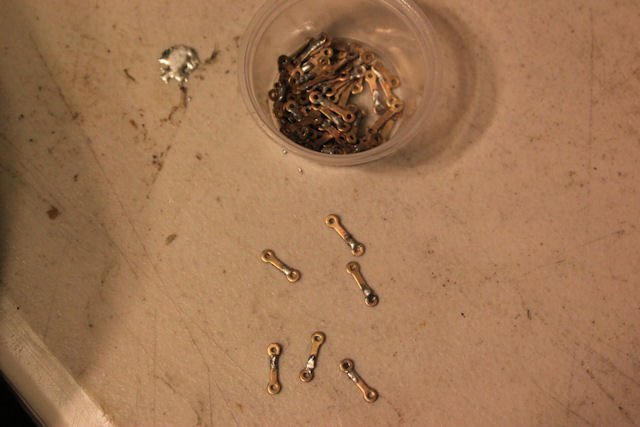
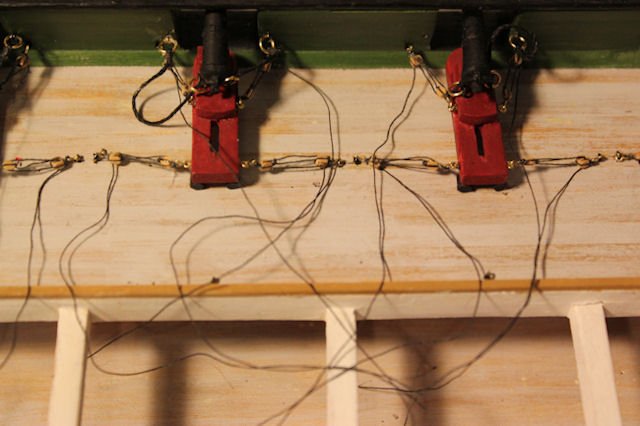
Some rough soldering of upper chains they need some smothing with a dremel tool and then paint. The chains need some straightening as well. Let me know your thoughts?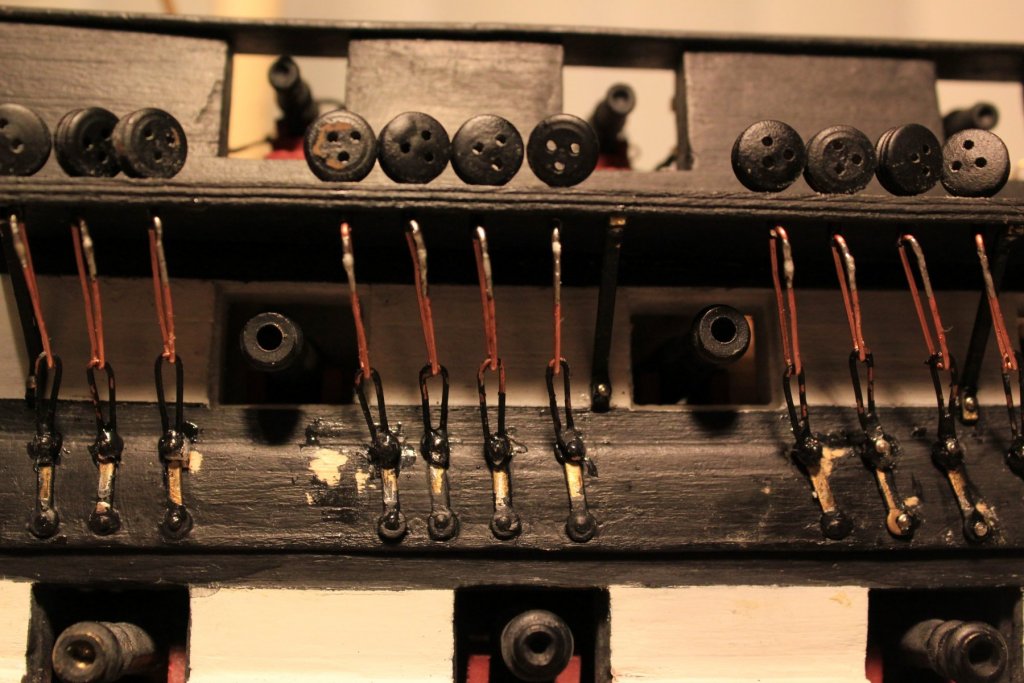

-
USS Columbus 1819 by threebs - 1/72 scale
threebs replied to threebs's topic in - Build logs for subjects built 1801 - 1850
I was looking at the top half of the chain connected to the dead eyes, and I don't think it is square stock like in the photo of the side of the Constitution's hull. I think the blue Print view shows a side on view of another link of chain, a skinny oval like on the Pennsylvania. The way it attaches to the bottom chain link and the Dead eye just does not look like it would work What do you guys think?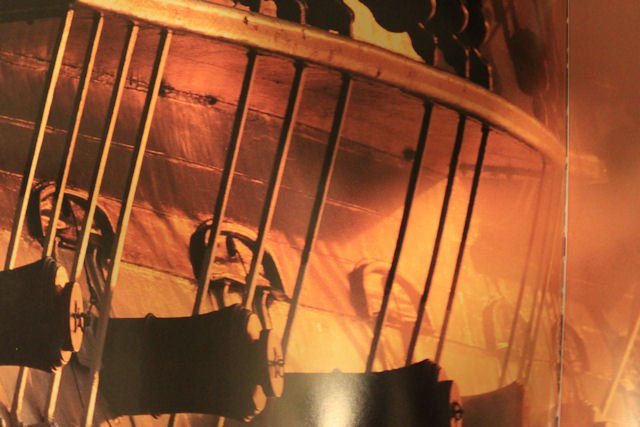

-
USS Columbus 1819 by threebs - 1/72 scale
threebs replied to threebs's topic in - Build logs for subjects built 1801 - 1850
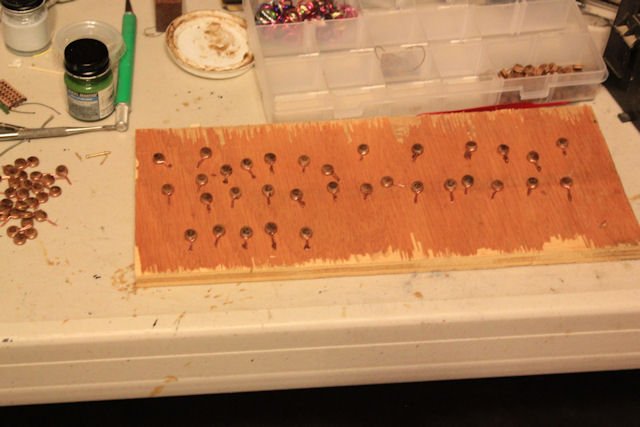
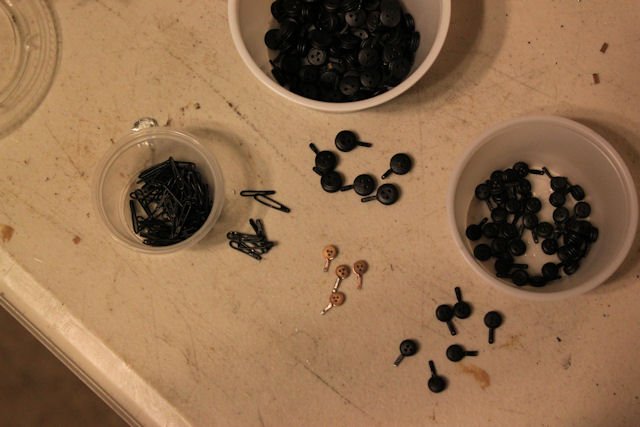
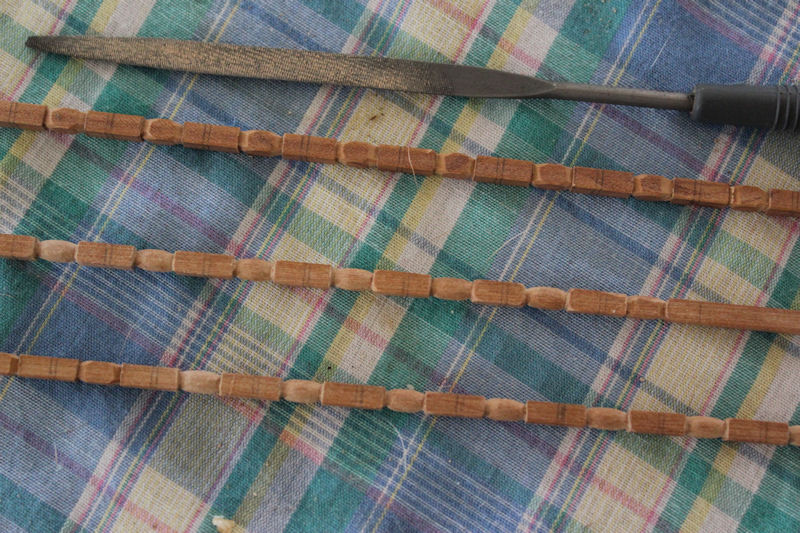
been working on deadeyes and chain. the bones had to be cut down 3/16 of an inch and resoldered, now I need to file them smooth and paint them. 'I did a simple twist of copper wire around the deadeyes, soldered them and drilled the holes by hand. The loop chain are 1/2" long and also soldered at ends and hand drilled holes. There is one more section of chain, but, it is just square stock. I am going to cut sown stick pins for the "bolts". I am also putting the rudder on and smoothing out the copper tape where it peeld back from handling.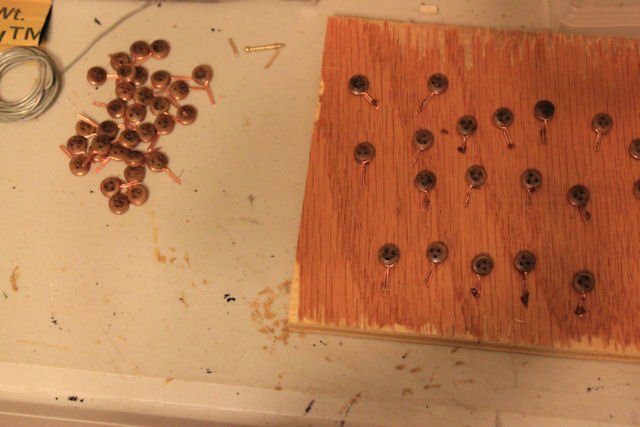
-
USS Columbus 1819 by threebs - 1/72 scale
threebs replied to threebs's topic in - Build logs for subjects built 1801 - 1850
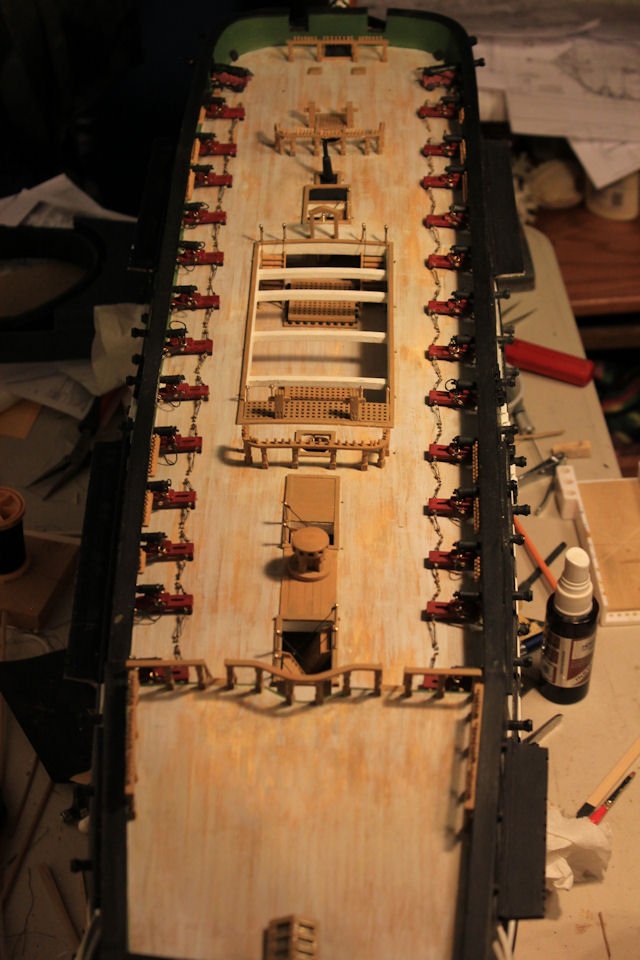
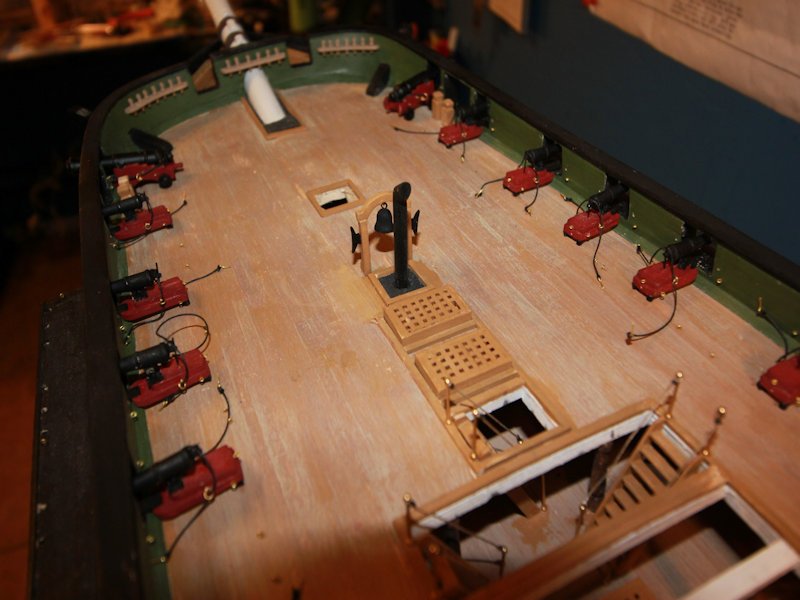
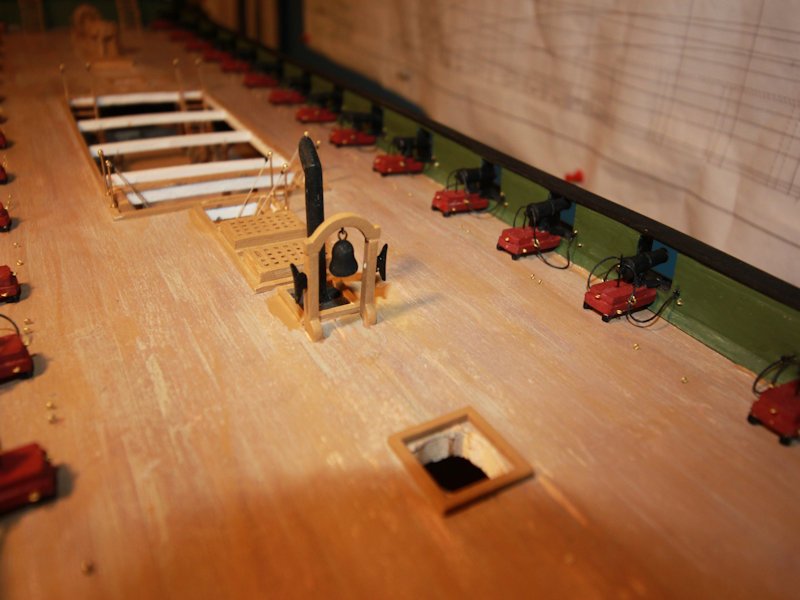
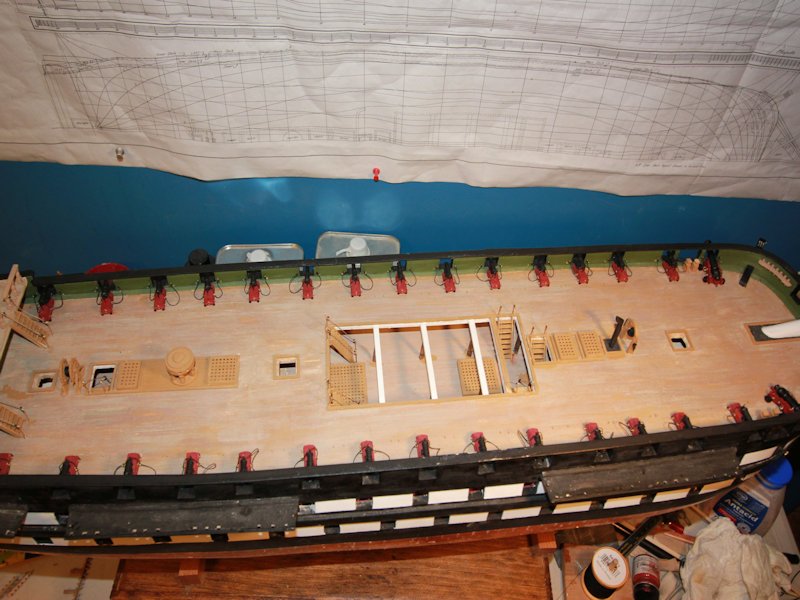
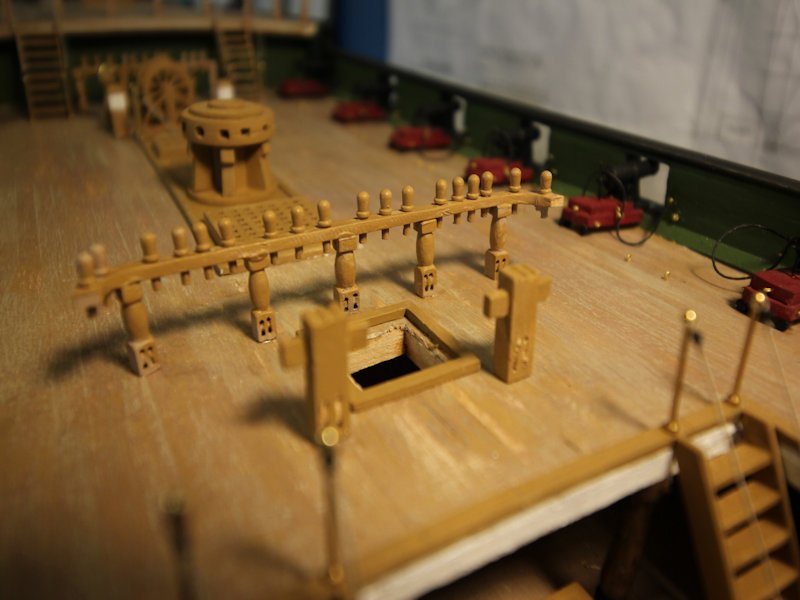
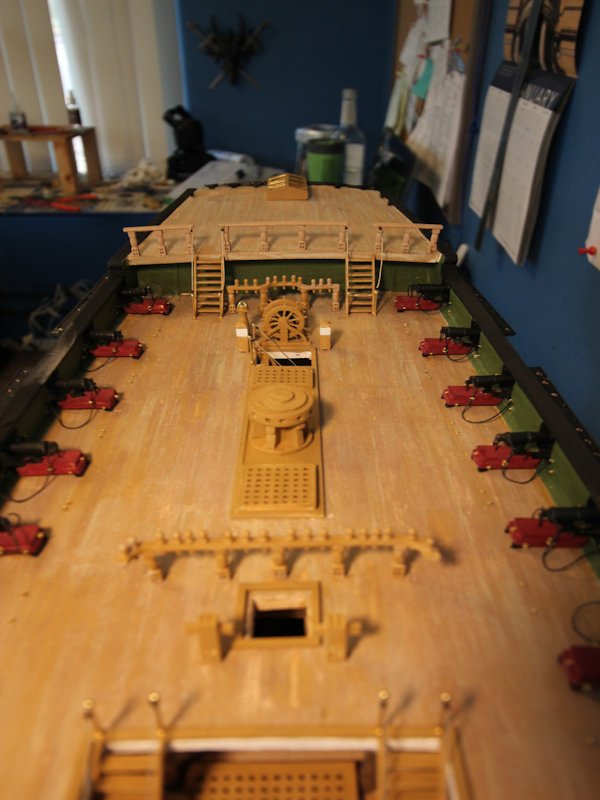
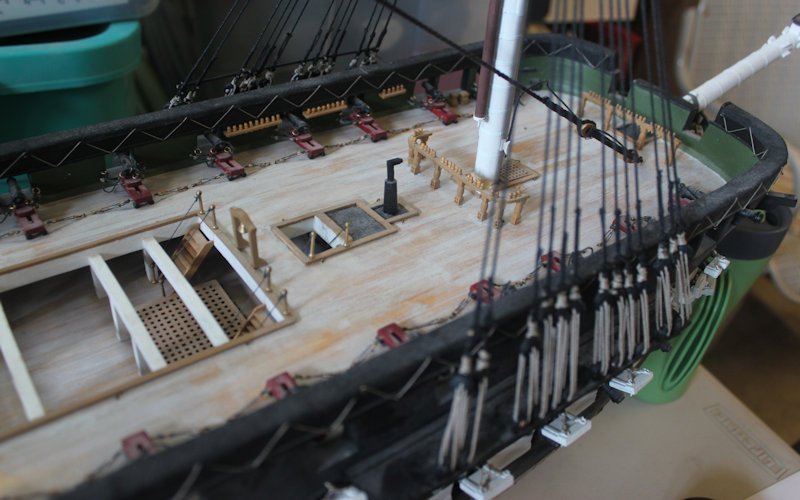
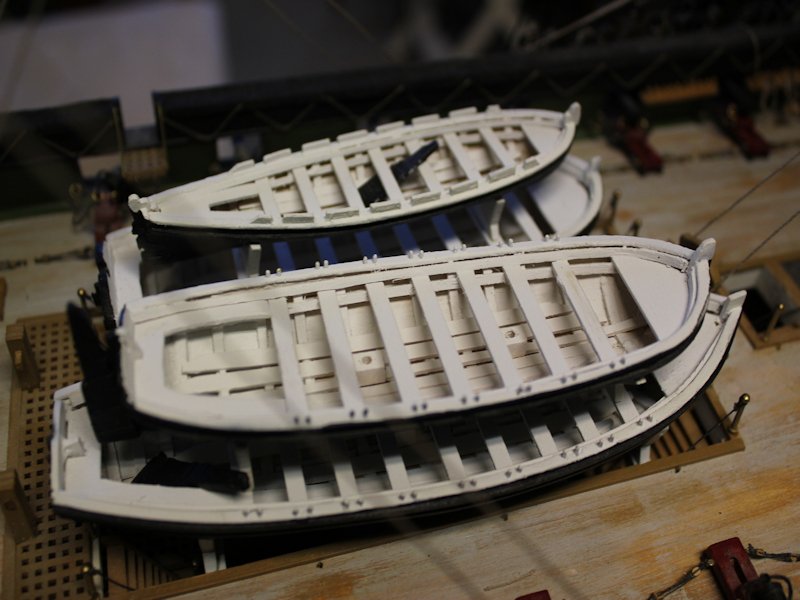
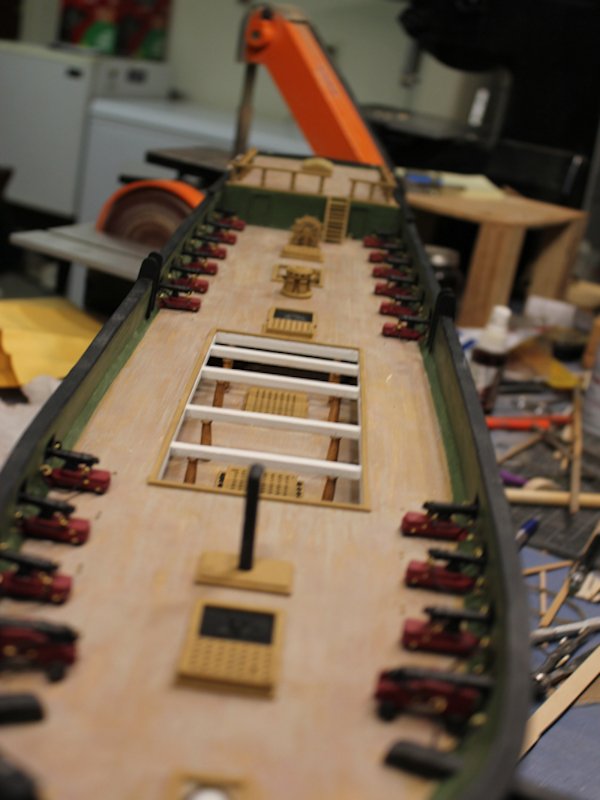
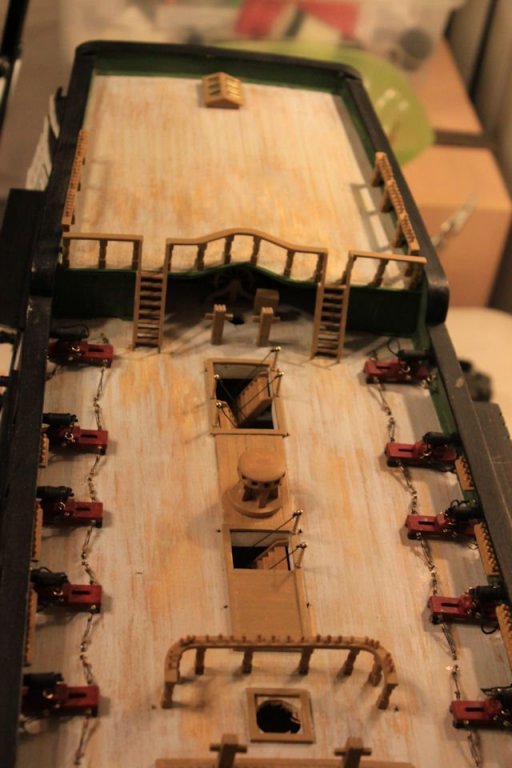
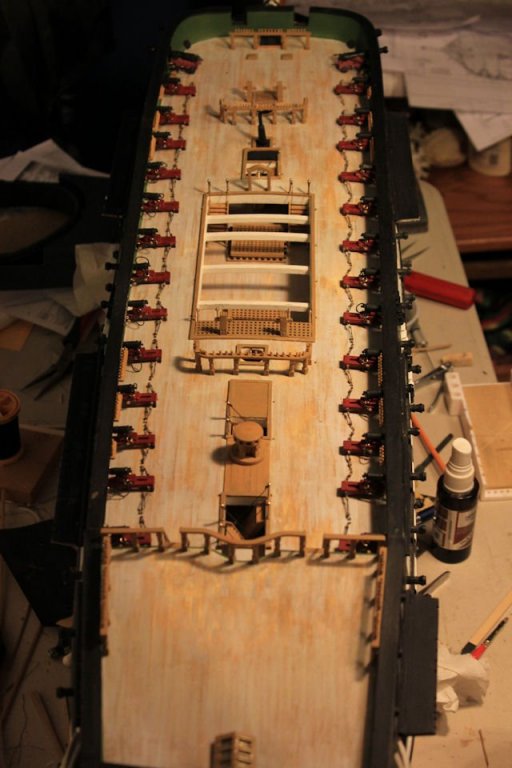
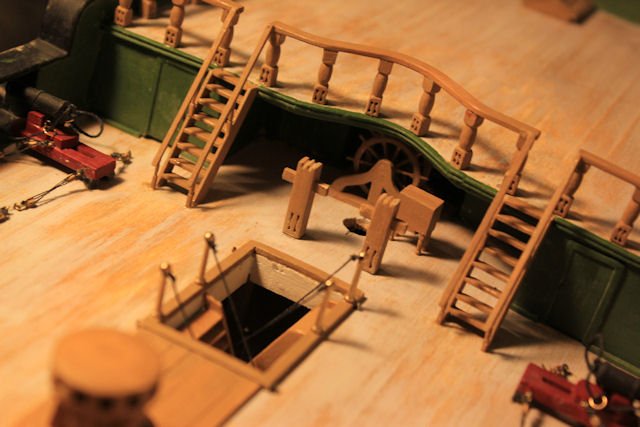
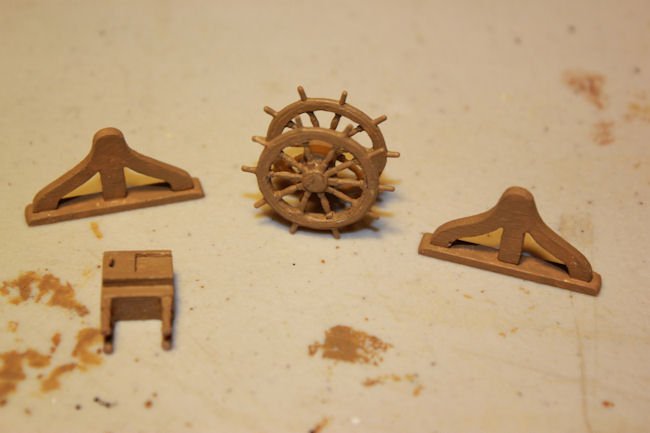
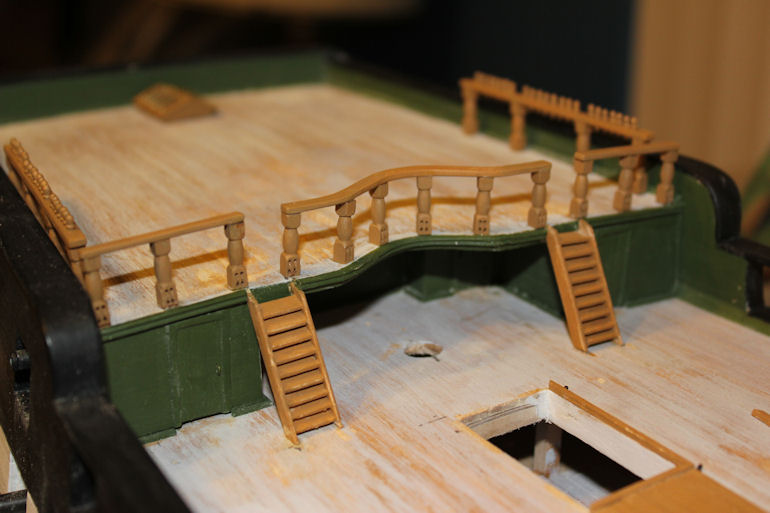
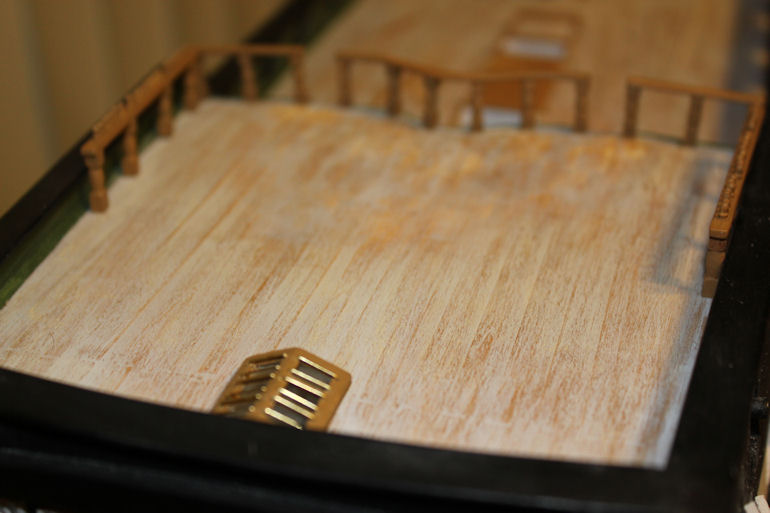
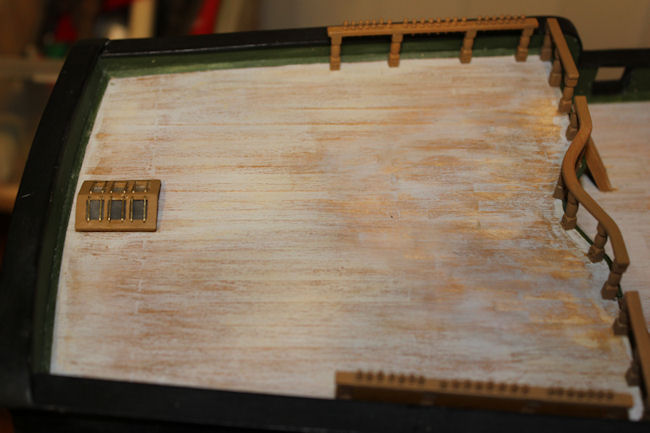
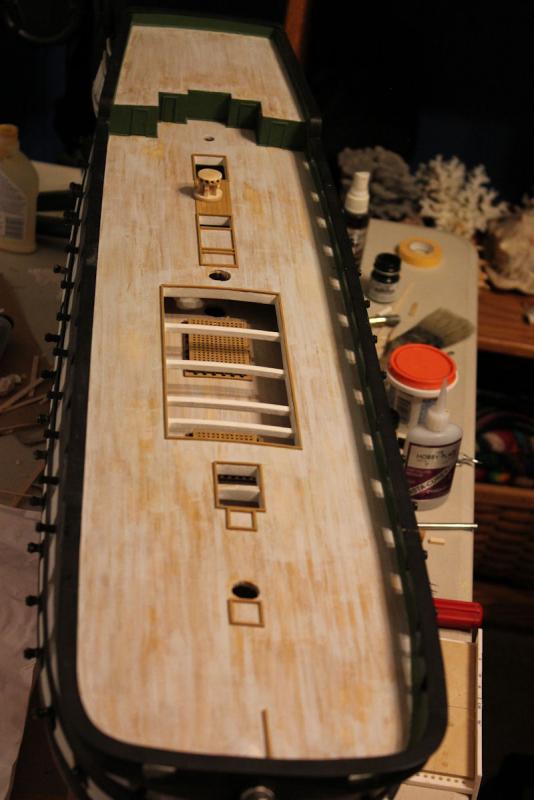
spar deck furniture is done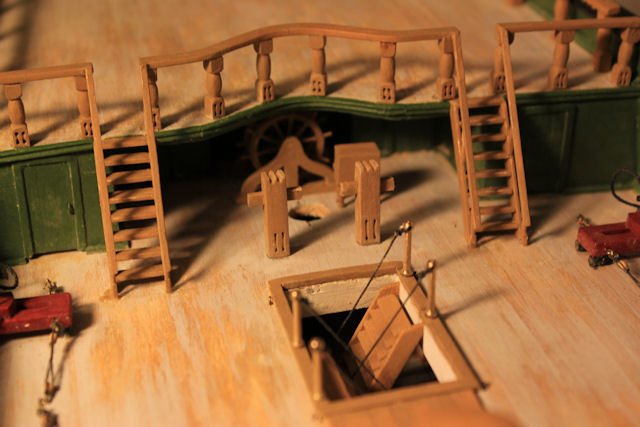
-
USS Columbus 1819 by threebs - 1/72 scale
threebs replied to threebs's topic in - Build logs for subjects built 1801 - 1850
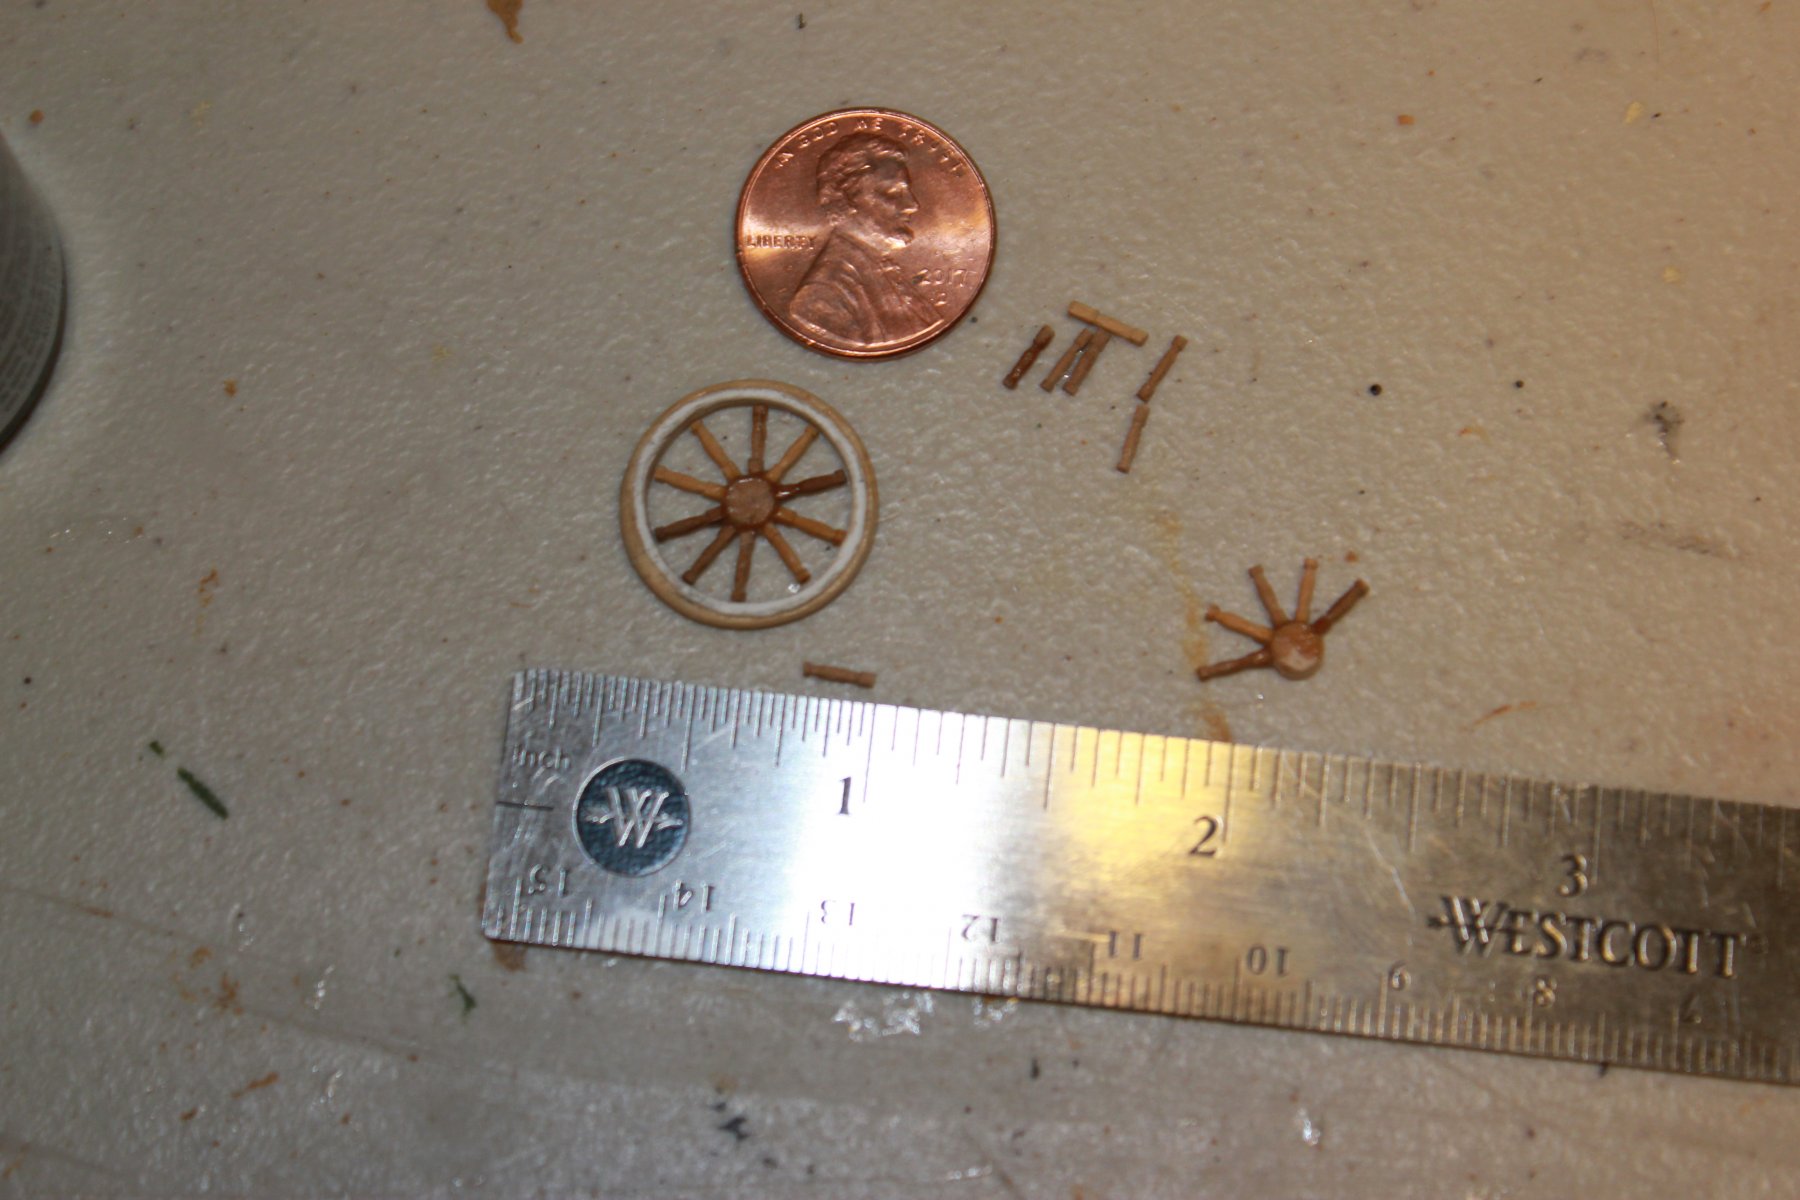
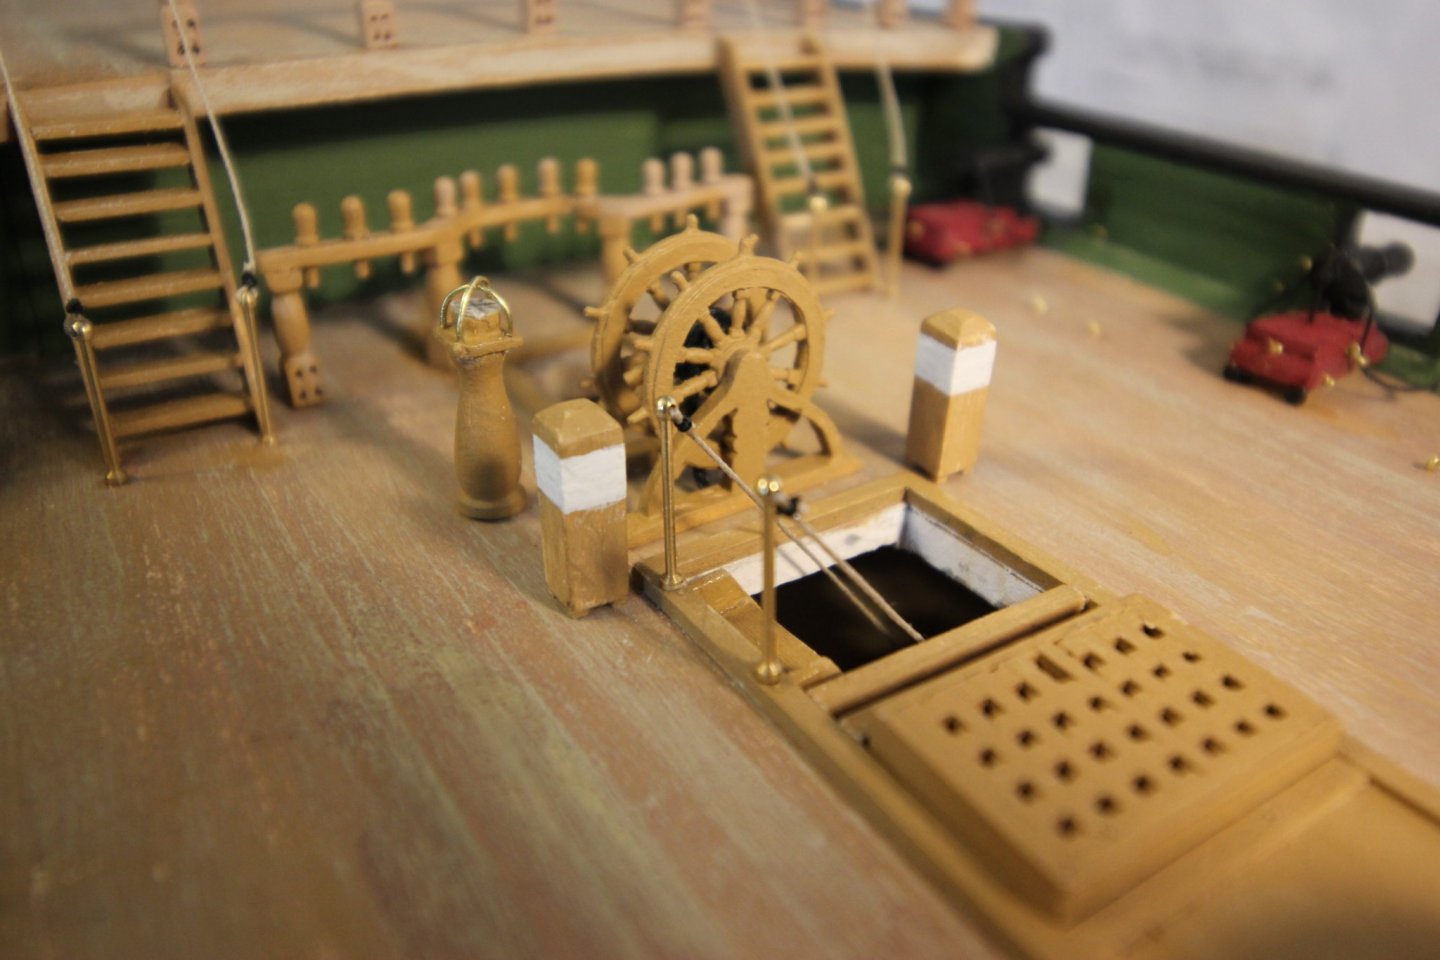
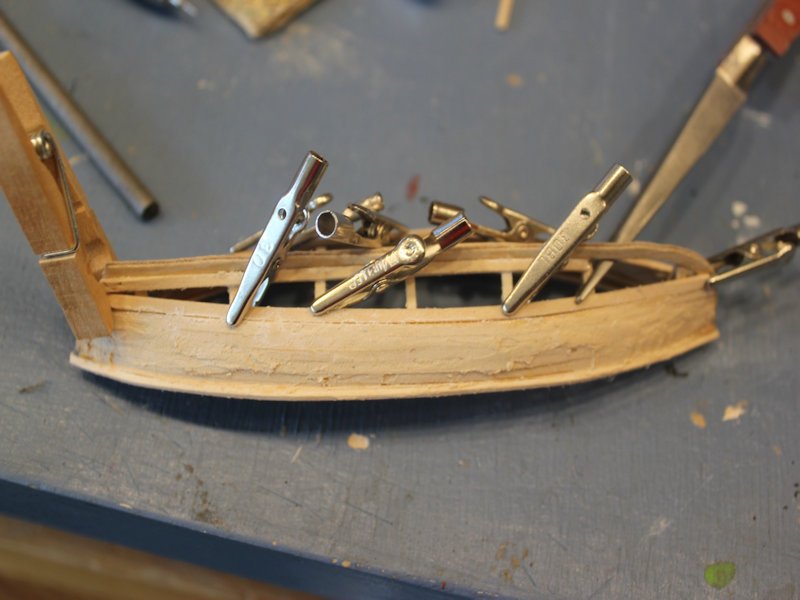
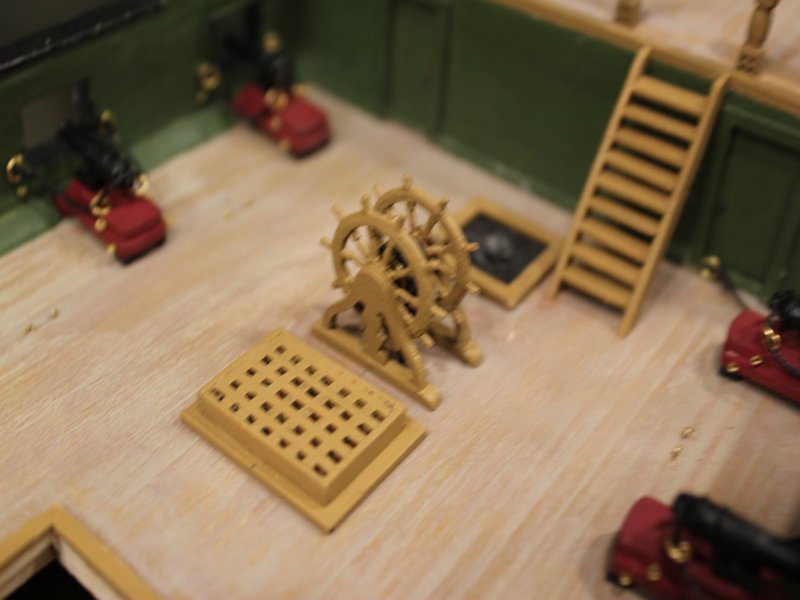
Small setback, my ships wheel assembly got knocked to the carpet, and, well, my dachunds think anything I drop is food, so...... one wheel got crunched before I could get it away from the dog, lol dont know how to delete this photo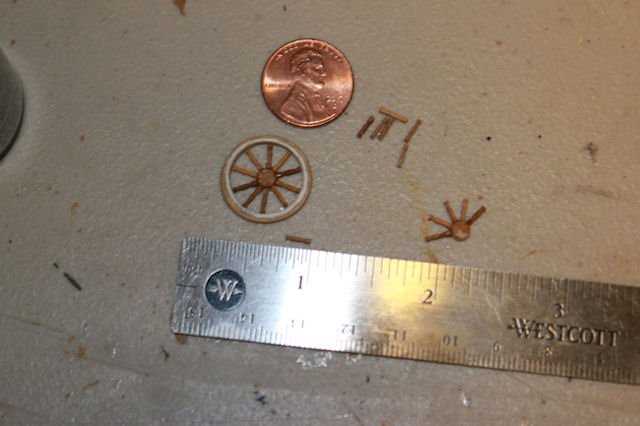
-
USS Columbus 1819 by threebs - 1/72 scale
threebs replied to threebs's topic in - Build logs for subjects built 1801 - 1850
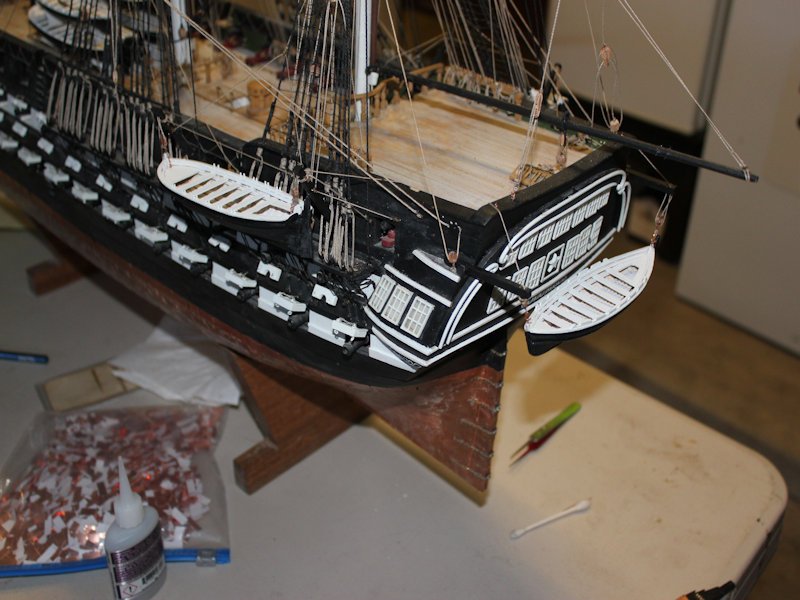
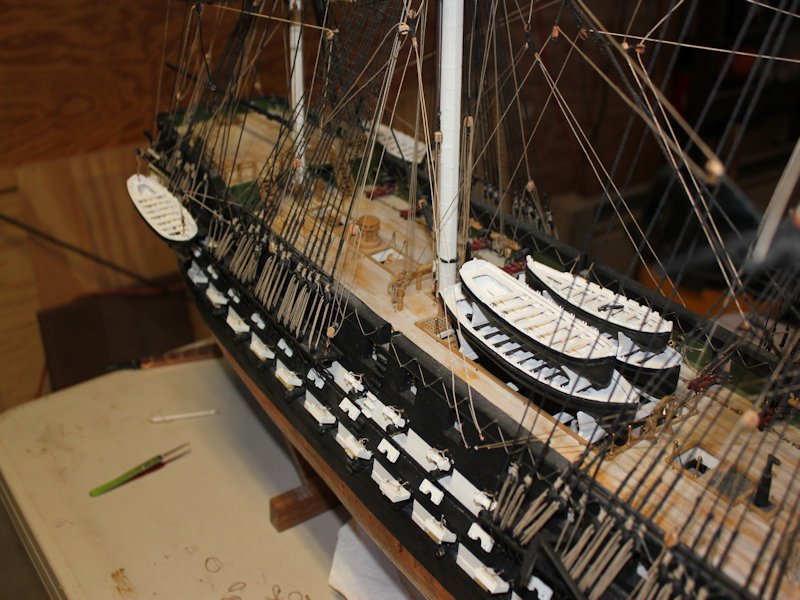
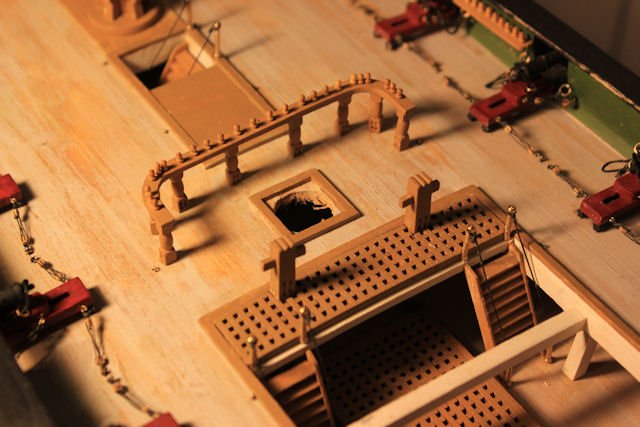
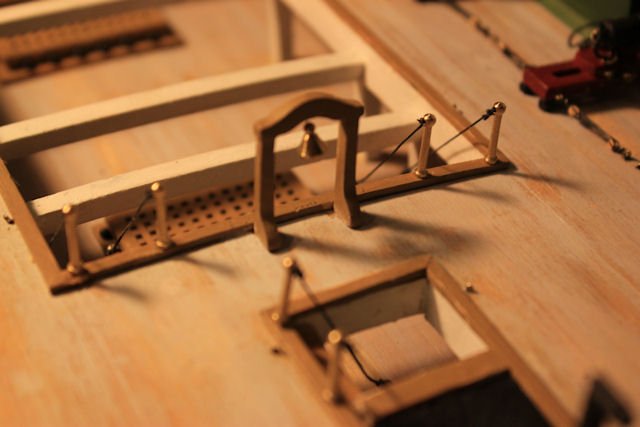
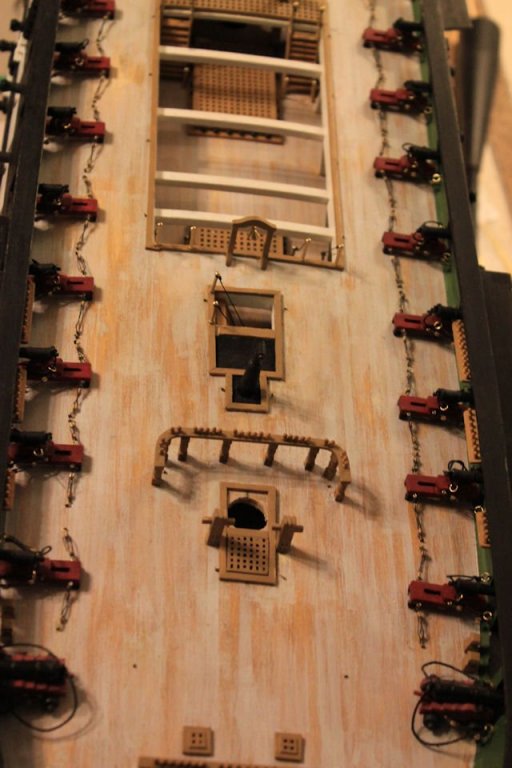
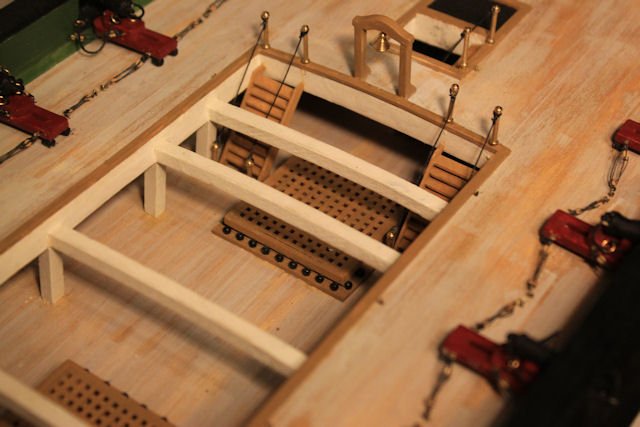
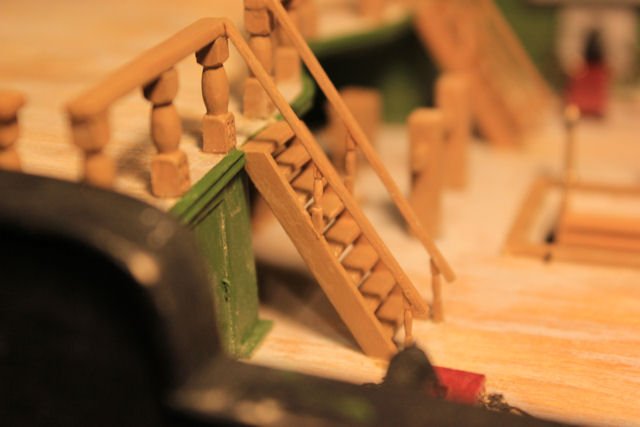
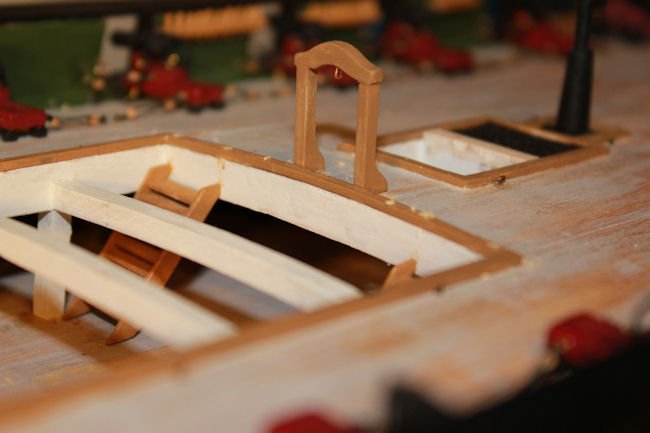
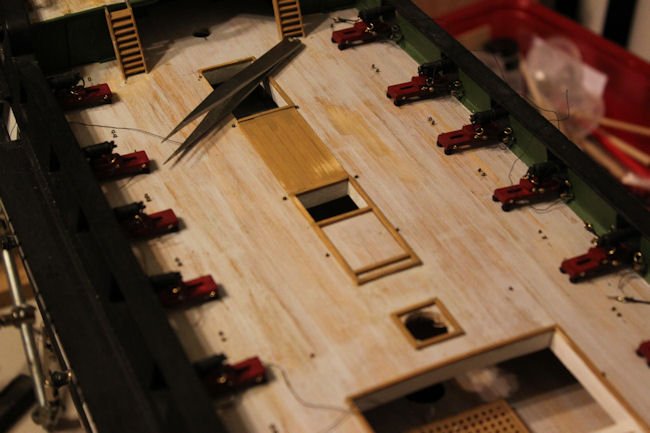
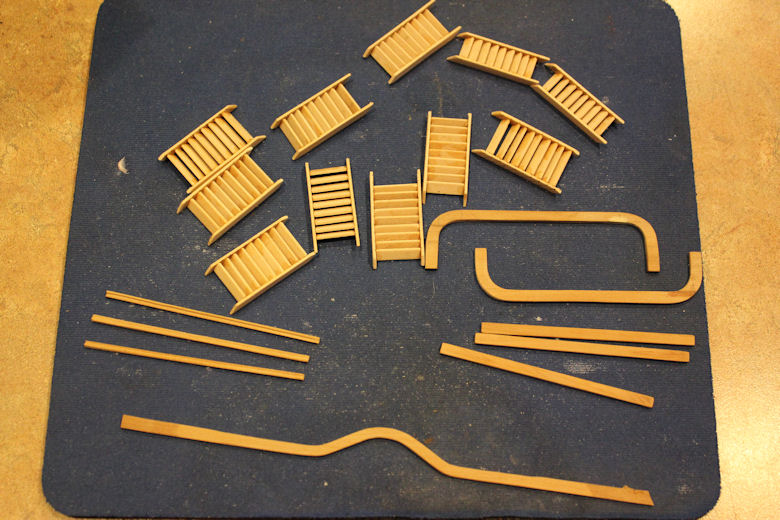
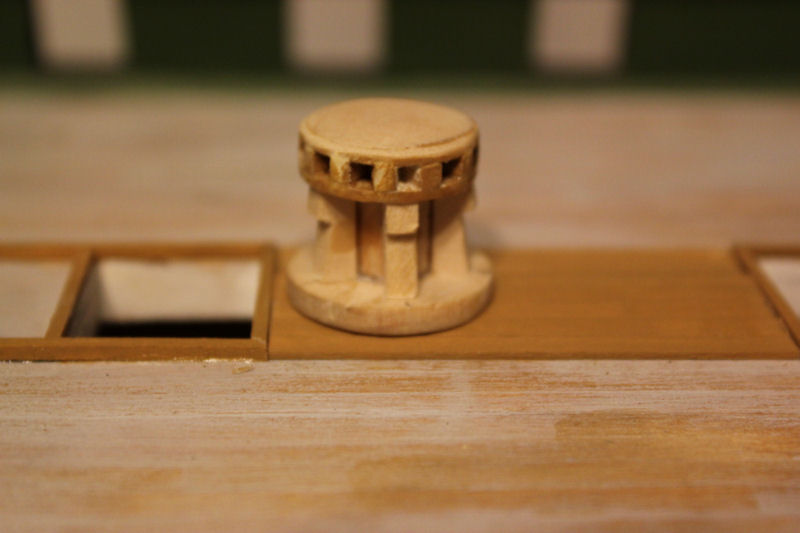
I thought the spar deck furniture would be a snap, forgot about redoing ships wheel from 8 spokes to 10, Five trys to finally get them all roughly the same length and spaced around the outer wheel. I have the binnacle done too. Also the ships bell tower and the hatch behind the stove pipe covered. Working on railing for steps coming off the quarter deck, and the platform and rope ladder fron the wale steps, over the wale cap and down to the deck, which is just a rope ladder. Also the rope railings on the ladders I do not have enough brass posts to "fence" off the Main hatch. Might leave it off like I did on the Pennsylvania.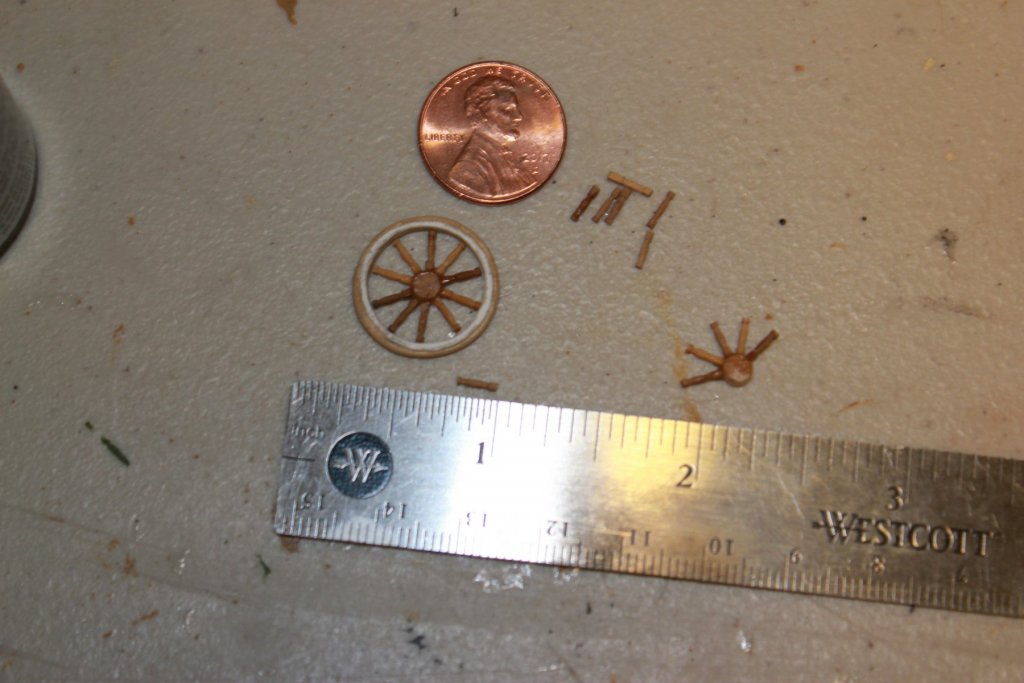
-
USS Columbus 1819 by threebs - 1/72 scale
threebs replied to threebs's topic in - Build logs for subjects built 1801 - 1850
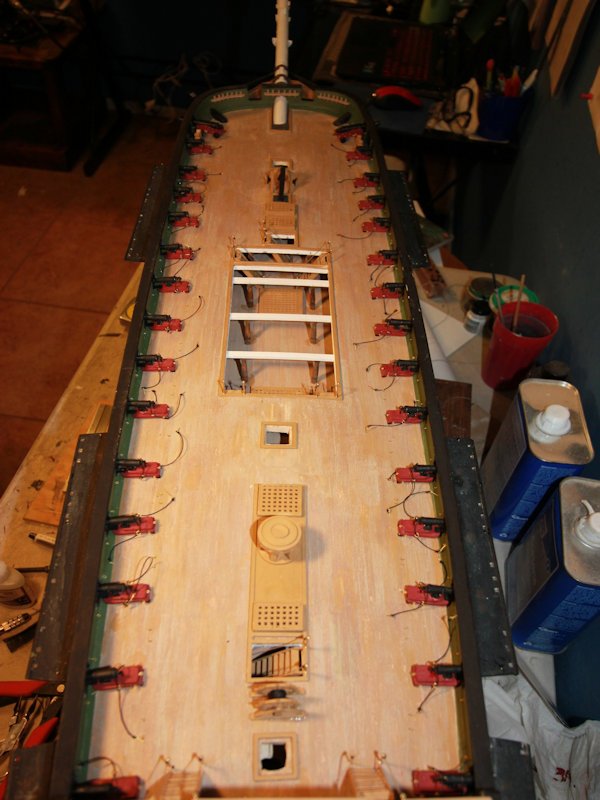
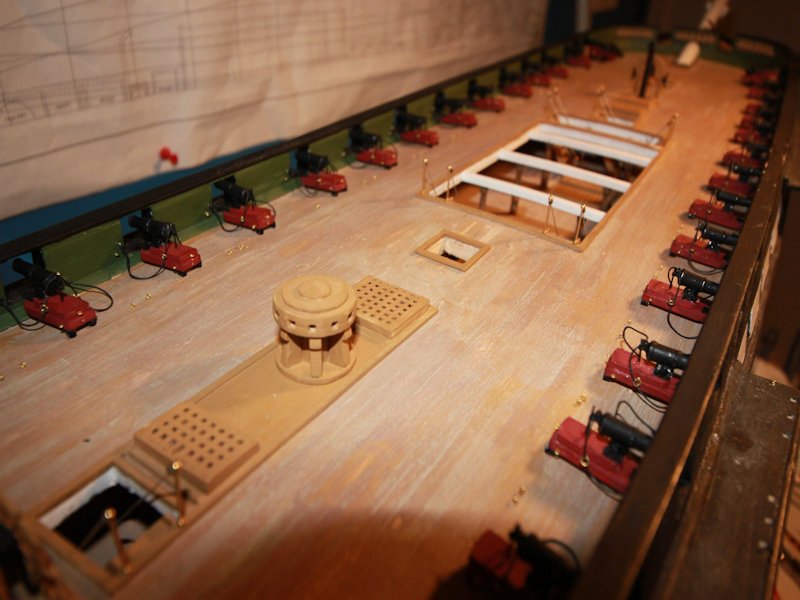
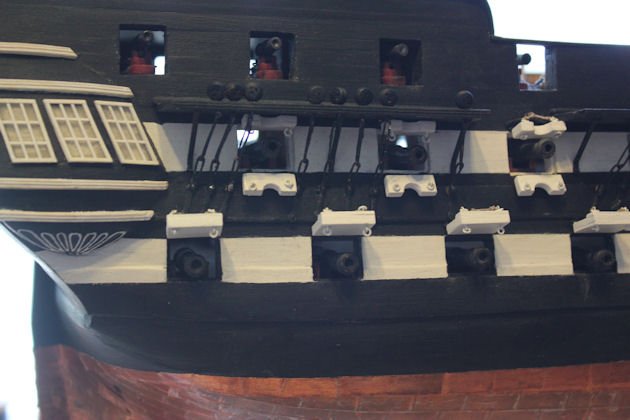
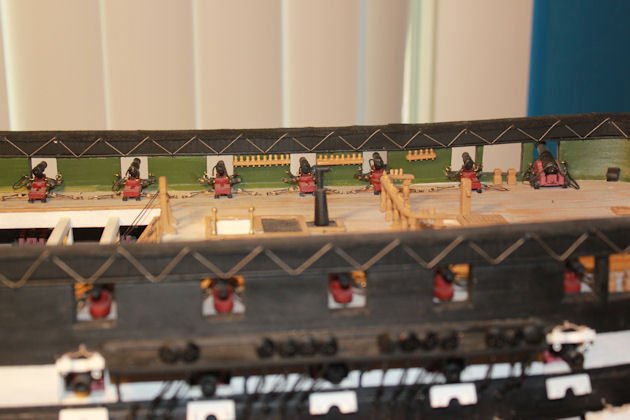
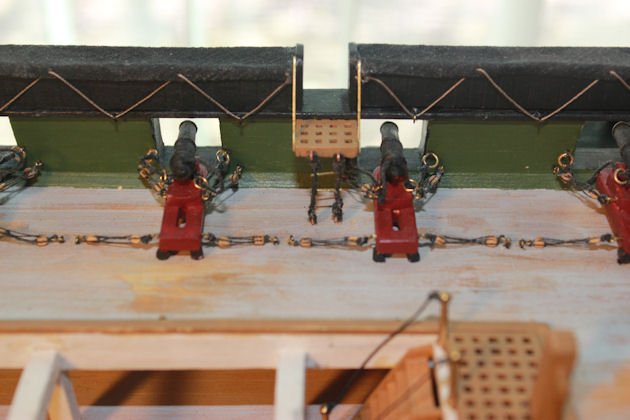
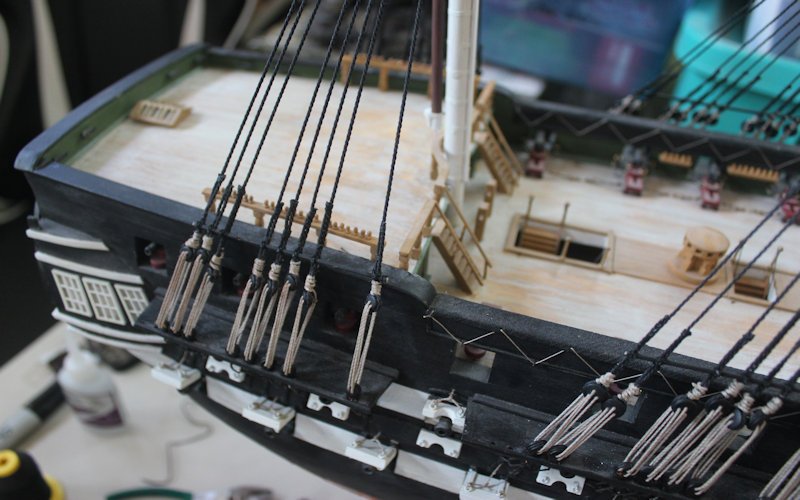
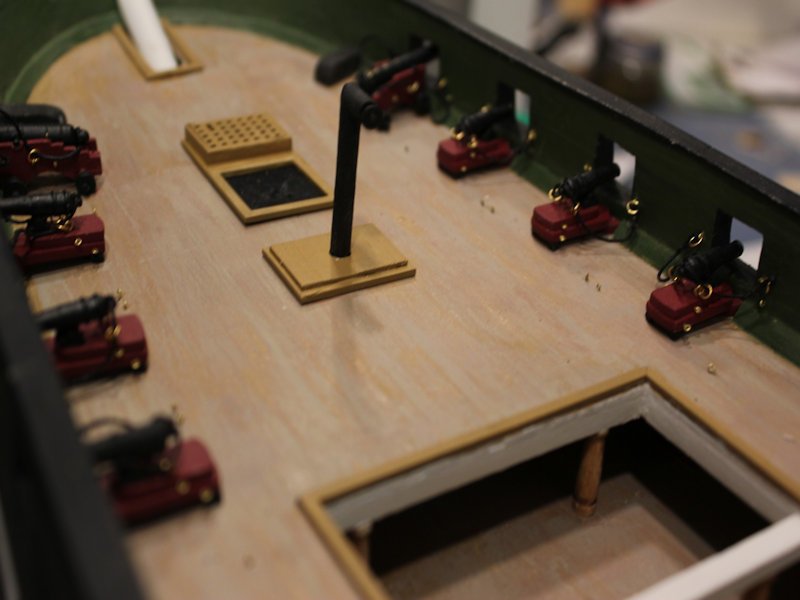
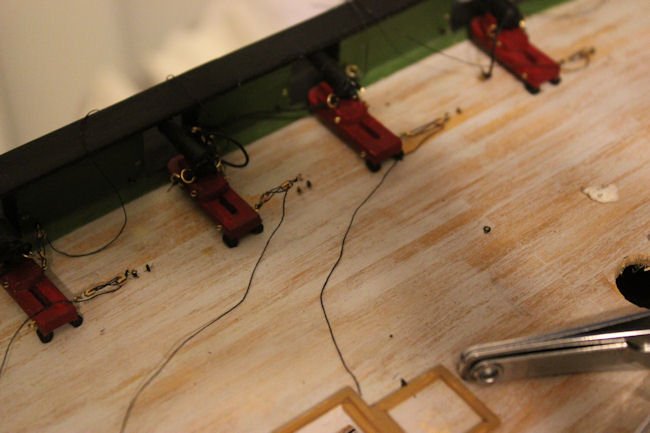
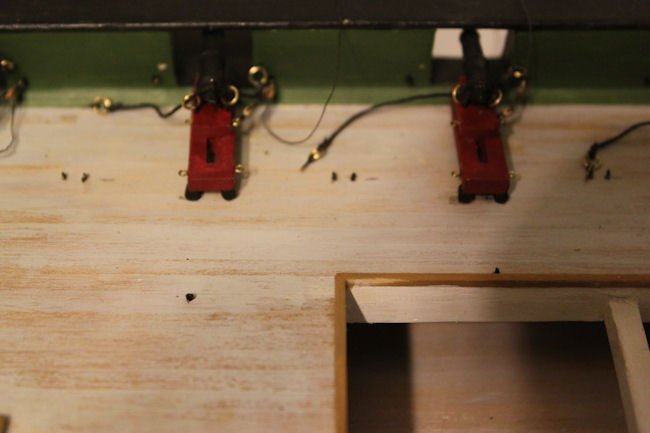
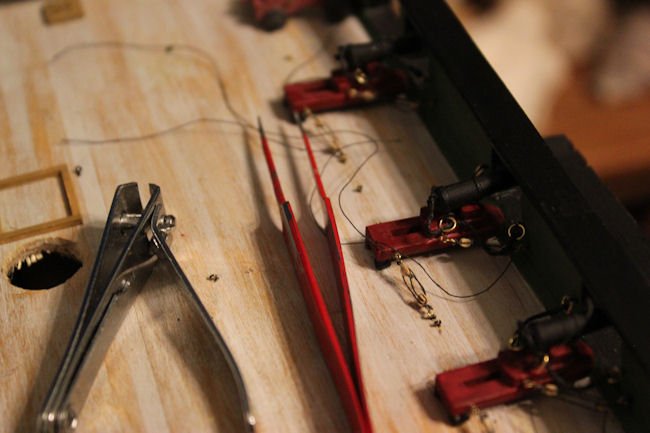
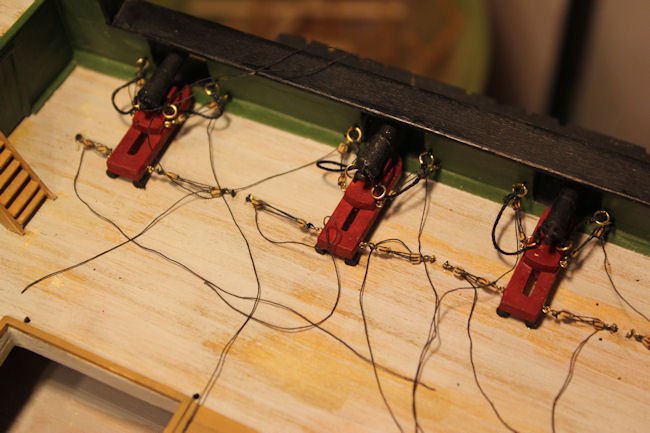
carronades getting rigged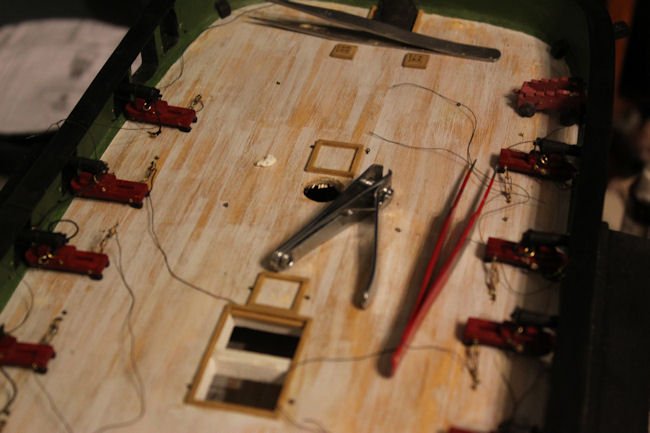

-
USS Columbus 1819 by threebs - 1/72 scale
threebs replied to threebs's topic in - Build logs for subjects built 1801 - 1850
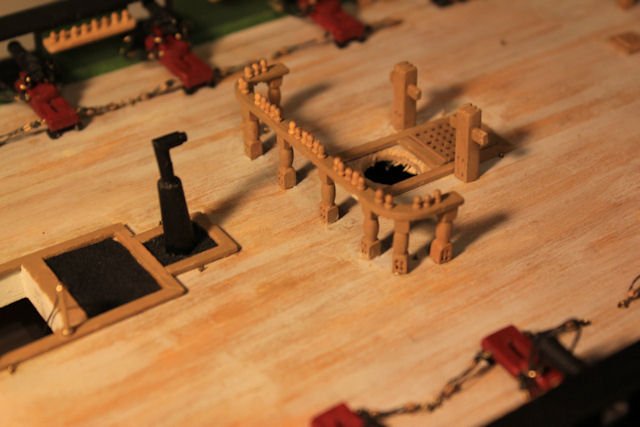
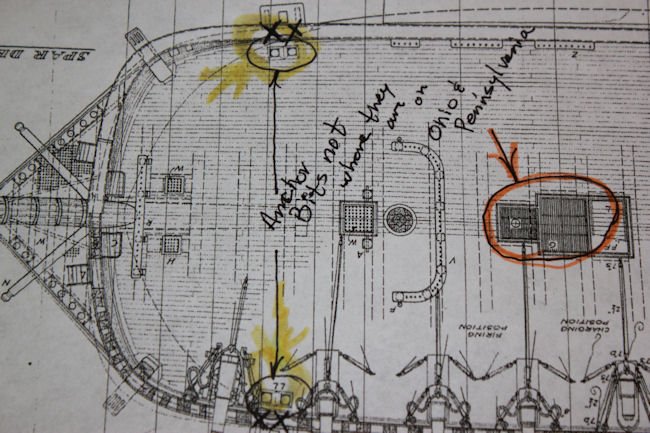
Now that I am installing the deck furniture on the spar deck, I have noticed a few things now that I look closer that I did not really notice before. Just forward of the main mast is a section of grating that appear to have 2 bits projecting out of it as they do near the fore mast. As the ladders seem mounted in front of this section of grating am I correct to think that this grating is more or less battened down all the time? And I will need to make a frame work under that section of grating to make it appear as if it is holding that grating in place. At the bow where the stove pipe pierces the spar deck, the covering appears to be something other than the normal wooden grating. Both the small section and the larger one behind it seem to be a metal mess or something fairly fireproof so the heat in the galley stove does not set it afire? That sound right to you guys? All so, the anchor bits where the wales are pierced for the anchor fluke seem to be more in board than on other large US warships such as the Ohio and the Pennsylvania who's bits are part off the hull and appear where I have marked them with a black "x" I am lead to believe this is just a variation between certain ships. The framing or the spar deck openings need to be widened as they are too skinny to mount brass posts to for the ladder railings. I will do this as I breathlessly await your sage answers to these questions.

-
USS Columbus 1819 by threebs - 1/72 scale
threebs replied to threebs's topic in - Build logs for subjects built 1801 - 1850
I had all 210 single and double blocks rigged to make carronade tackle out of 4 mm blocks. they were just too big. I started over with 2mm blocks and I will be rigging the carronades in the next day or two, THEN photos will be coming as I put the remaining deck items on and move to the gun port door hinges, another chore I do not like, lol -
USS Columbus 1819 by threebs - 1/72 scale
threebs replied to threebs's topic in - Build logs for subjects built 1801 - 1850
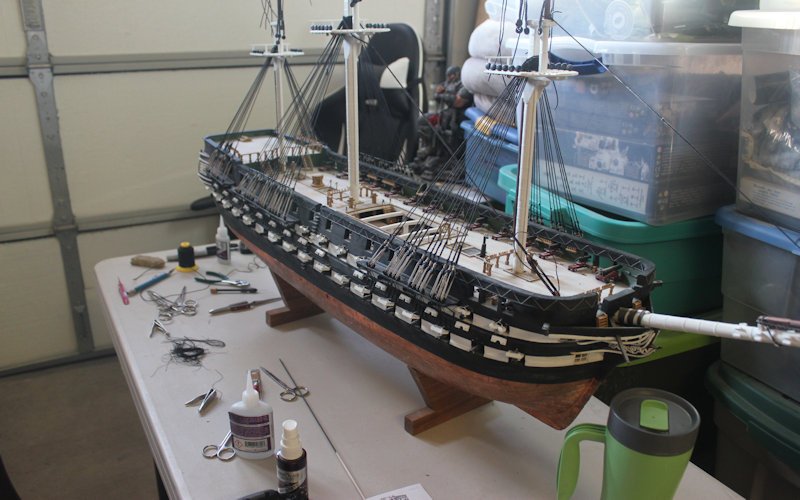
Thumb has healed better than I expected, just need nerves to heal, be some time yet. Been able to work despite all that as you can see in photos
-
USS Columbus 1819 by threebs - 1/72 scale
threebs replied to threebs's topic in - Build logs for subjects built 1801 - 1850
Build will slow some, run my left thumb across the top of the blade on my mini table saw. Yeah, I know, stupid. Forgot to lower blade height to just barely clear t he top of the board as I usually do when I change blades or board thickness. Doc says 2 months complete heal, except 100% feeling will take as long as 6. Had six stitches, does not hurt very much, just aches a bit. I can still use my thumb, just can not hold small objects tight to file or carve, so, I am moving on to shaping lower mast, chain wales, and install carronades. -
USS Columbus 1819 by threebs - 1/72 scale
threebs replied to threebs's topic in - Build logs for subjects built 1801 - 1850
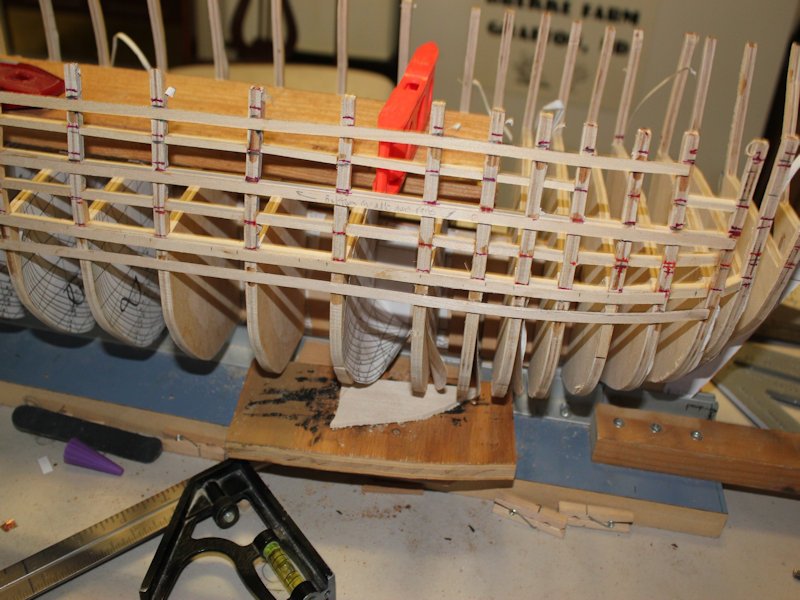
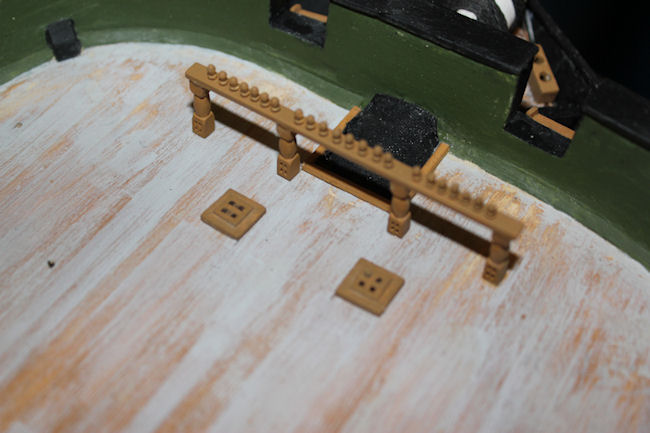
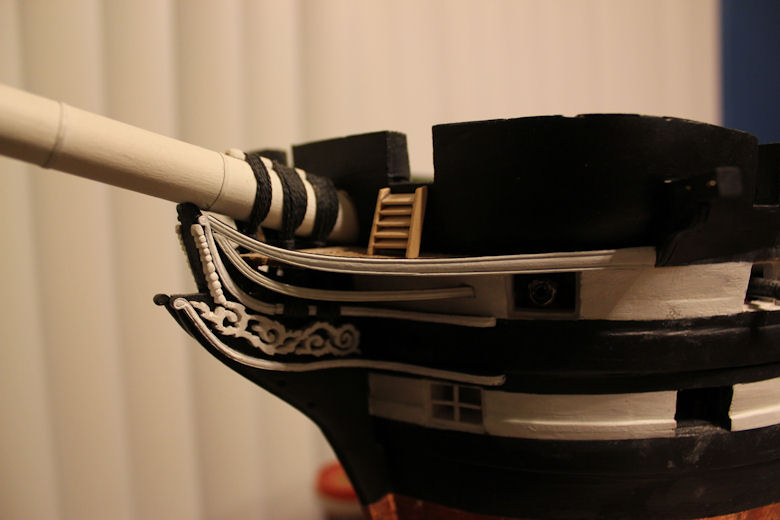
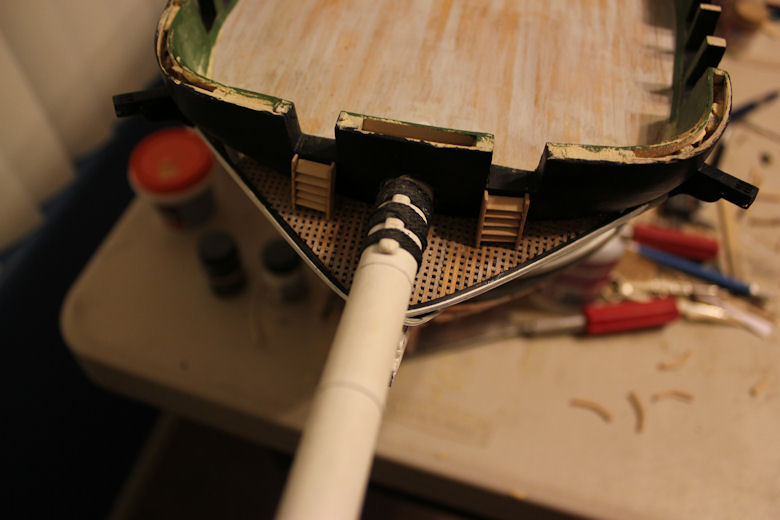
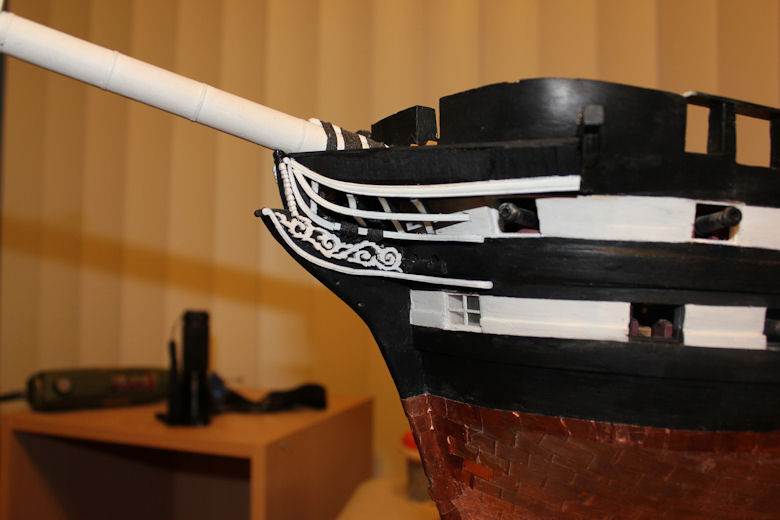
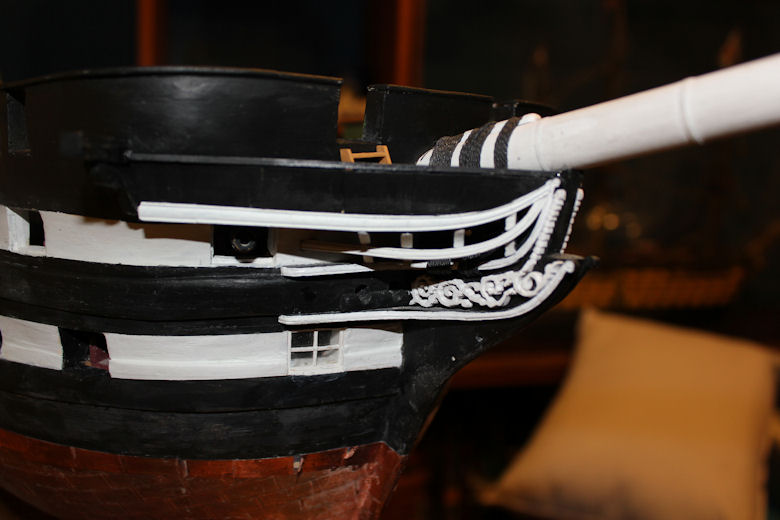
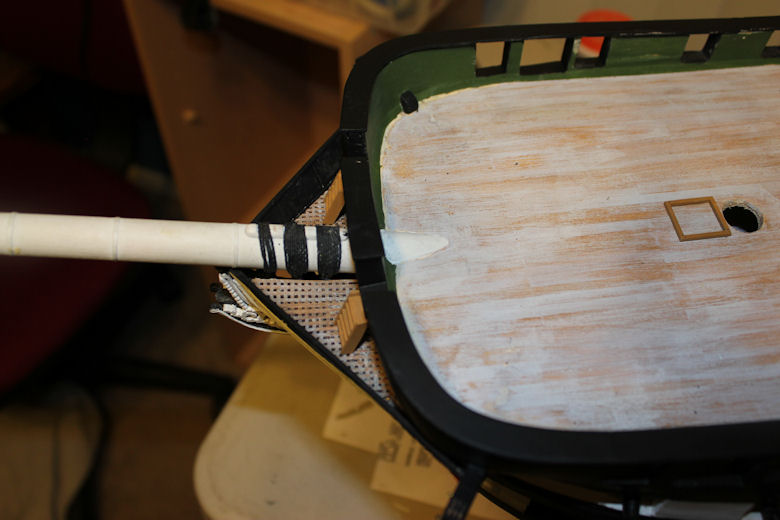
yeah, been a while since last post, have done a lot since then, including redoing entire port side that was 1/8 inch to high, don't ask me how it happened, but I somehow got it on the bases crooked. I am drilling holes in the pin rails now, I will finish the deck furniture deck framing around the masts. The head rails were a real bitch to fit properly, not the horizontal ones, the vertical timbers.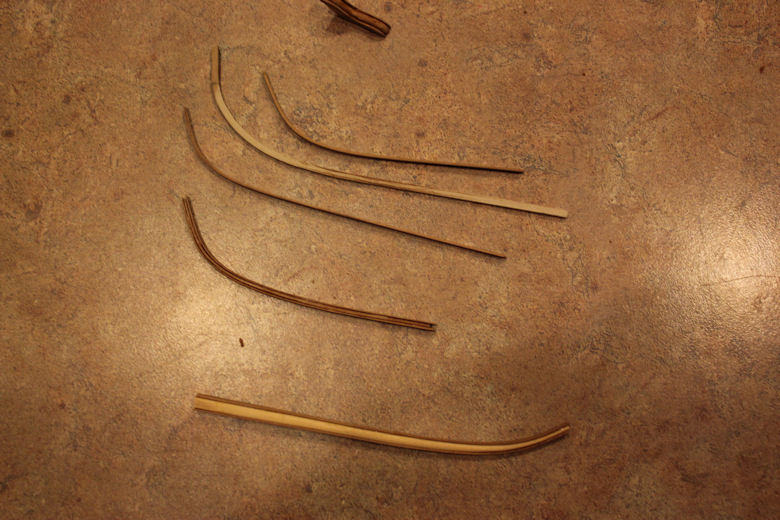

-
USS Columbus 1819 by threebs - 1/72 scale
threebs replied to threebs's topic in - Build logs for subjects built 1801 - 1850
I have run into something of a conundrum. I Am getting to the point where I will be installing the cannonades on the spar deck. However, the Chapelle plans for the Columbus show a gun port height of 3 feet, whereas all the plans I have seen of 32 pounder cannonade show a height if about 3'8" from the bottom of the casters to the top of the max diameter of the barrel. Chapelle's book also shows a cut away view of the gundecks of the Delaware that give a much higher gun port dimension for it's spar deck cannonades. I have made all of my cannonades as you can see from previous photos, but, Once I cap the spar deck gun whale, the cannonades I made will not fit. I suspect that the plans of the Columbus spar deck gun ports is incorrect, and, I believe I will deepen the gun ports to fit the cannonades I made, What do You guys think?