

prutser
-
Posts
33 -
Joined
-
Last visited
Reputation Activity
-

 prutser got a reaction from EJ_L in Soleil Royal by Hubac's Historian - Heller - An Extensive Modification and Partial Scratch-Build
This firm has started new .Look at google : S.T.A.B Paris.Not everything is available yet.Perhaps the Soleil plans will be obtainable again some day .Regards, Richard
-
prutser got a reaction from EJ_L in Soleil Royal by Hubac's Historian - Heller - An Extensive Modification and Partial Scratch-Build
Hello Marc.Maybe once I'll build a S.O model myself I am in possession of plan drawings made by S.T.A.B of Paris Scale 1:88, just like Guido Vallone's model. I don't know if they are right but I could make a model of Vallone's model. Perhaps this drawings can be obtained second hand somewhere as I cannot find them on the website of S.T.A.B anymoreRegards, Richard
-
 prutser got a reaction from Archi in Soleil Royal by Hubac's Historian - Heller - An Extensive Modification and Partial Scratch-Build
I was impressed by the Soleil Royal model made by Dr Vallone which can be seen in the books of Vincenco Lusci ,also with the wide stern like Berain.Good luck with your build!
Regards, Richard
-
 prutser got a reaction from mtaylor in Soleil Royal by Hubac's Historian - Heller - An Extensive Modification and Partial Scratch-Build
This firm has started new .Look at google : S.T.A.B Paris.Not everything is available yet.Perhaps the Soleil plans will be obtainable again some day .Regards, Richard
-
prutser got a reaction from mtaylor in Soleil Royal by Hubac's Historian - Heller - An Extensive Modification and Partial Scratch-Build
Hello Marc.Maybe once I'll build a S.O model myself I am in possession of plan drawings made by S.T.A.B of Paris Scale 1:88, just like Guido Vallone's model. I don't know if they are right but I could make a model of Vallone's model. Perhaps this drawings can be obtained second hand somewhere as I cannot find them on the website of S.T.A.B anymoreRegards, Richard
-
prutser got a reaction from EJ_L in Soleil Royal by Hubac's Historian - Heller - An Extensive Modification and Partial Scratch-Build
I was impressed by the Soleil Royal model made by Dr Vallone which can be seen in the books of Vincenco Lusci ,also with the wide stern like Berain.Good luck with your build!
Regards, Richard
-
 prutser reacted to dvm27 in Royal Barge scratch built by David Antscherl - FINISHED
Below are some photos of a Royal Barge, 1823, built by David Antscherl. The techniques of construction are identical to those in his new book The Greenwich Hospital Barge of 1832. The clinker planking and delicate fabric covered awning are what drew me to her. Perhaps this belongs in the completed models section but I have added some construction photos because I thought many readers might be interested in them.
-
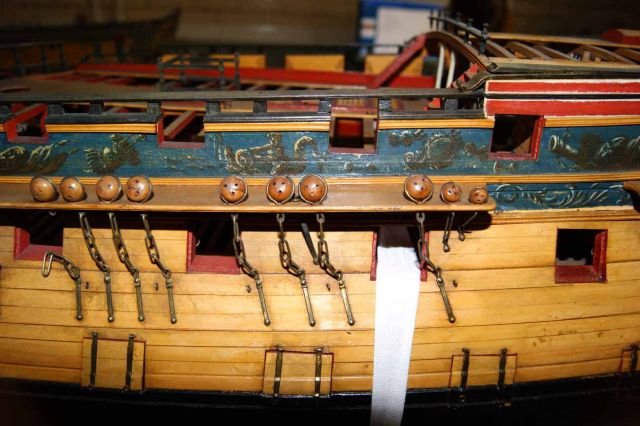
prutser reacted to tomsun in De Zeven Provinciën 1655 by tomsun - Scale 1:60 - according to drawings by G.C. Dik
Inside planking finished and the breast hooks, deck hook, the step and step hook for formast and mainmast in place, the steps and the hooks are made of Beech wood
-
-
 prutser got a reaction from Piet in De Eendracht by kay - 1:50 - a dutch flagship
Hello Singidunum.You can find this technique in the NRG build log "HMY Royal Caroline" by Tarjack.Regards, Richard
-
prutser reacted to IgorSky in Jolie Brise and Fastnet Rock Lighthouse by IgorSky – FINISHED - Scale 1/3000 - BOTTLE
Then I put the cork and sealed it. All - this model is complete!
-
prutser reacted to WoodButcher in Antares by WoodButcher - FINISHED - SMALL - Motor Launch
The original plans had the cabin sitting on top of the decking, but I decided to inset it into the deck, as I thought it would give me cleaner joins (the straight lines from the sticks of the deck beside the straight lines of the cabin walls), and I wasn't looking forward to shaping the deck curve on the bottom of the windscreen. This meant instead cutting a straight V into the forward deck, which was relatively easy.
and then placing the planks on the side decking beside the cabin, thus giving a tight fit.
The cabin build was difficult, as I had to use the deck V to give the angles of the windscreen (side to side) and somehow hold the sides in place at the same time to attach the windscreen to them. But eventually it all held together.
Note that I am using three-ply for the beams to give more room for gluing ( and measurement errors). I should have done this for the hull frames, but we live and learn.
But - as I feared - the pre-constructed cabin really didn't fit properly. There was a gap between the windscreen and the forward deck, and a gap from the rear of the cabin to the well sides, and the whole cabin was 3 - 4 mm off to one side as a result of the centre of the deck V being offset..
Rather than start building a new cabin from scratch I decided to bite the bullet and site the front of the cabin on top of the deck, add extensions to the back to make it longer and commit surgery upon the side deck planks to make the cabin placement central.
The irony of the cabin extensions was that, in order to add pieces to lengthen the cabin I had to use two-ply to hold the extensions in place. Which was where the cabin building started.
After a lot of hacking, cutting, sanding, guesswork and gluing I had a cabin that fitted reasonably well and that would allow me to progress.
-
-
-
prutser reacted to WoodButcher in Antares by WoodButcher - FINISHED - SMALL - Motor Launch
And so to the planking.
I started from the stern working outwards from the keel and downwards from the deck, arranging that these should meet on the chine line. I cautiously advanced the two rows towards the bow because I really had no idea what should happen to the chine angle as it approached the stem, nor what the shape of the planks would be as they curved inwards - only that there would be some narrowing. But narrow them all, or just one or two?
Because the sticks are short the maximum span a single plank could have was three bulkheads. To allow for the interlocking planks some (at the bow and stern) only spanned two bulkheads.
Where one of the bulkheads was lower (from the bottom) than it should have been I could leave a gap between it and the plank if the offending bulkhead was in the middle of the span. But if it was at the end of the span I had to chop a small sliver of wood to go under the plank to make it (sort of) align correctly.
With the shorter pieces of planking the problem of uneven bulkheads was yet more acute.
From the top where you can't see the joints it doesn't look too bad.
But once you can see the joints its a real mess!
So - as I expected it was time for vast quantities of filler to cover up my sins.
And then lots of sanding.
-
prutser reacted to WoodButcher in Antares by WoodButcher - FINISHED - SMALL - Motor Launch
The plans suggest the next step is attaching the hull planking, from the keel upwards. Because I didn't trust the squareness of the jig I decided to put the planking just under the deck first, to ensure the bulkheads were held solidly in place. If you look at the paper glued to some of the bulkheads you'll note there is an notch for an extra thick plank. Since I was using wood of a given thickness I decided to use a double thickness layer instead. I started with the first layer. Which meant getting into wood bending.
I tried the trick of wrapping sticks in a wet flannel and microwaving them, but this didn't seem to work at all. So I tried soaking them in hot (boiled) water for five minutes and shaping them after that. This worked, and I discovered - to my delight - that once the sticks were dry they remained quite malleable. I.e. having shaped them in a jig or otherwise I could further bend them (adding a second curve, adjusting the first curve) to some extent and they would stay in shape.
This addition to the model really began to show up errors in the alignment of the bulkheads. In particular the top edges of the deck were uneven, and the curve from stem to stern bore some resemblance to a sine wave.
Knowing that I didn't need to be precise with my bending I began to mass-produce bent sticks.
Firstly from the jig - leaving aside the aforementioned malleability - this was still the appropriate method for bending to double curves. And for bending where one end of the stick needs a stronger curve than the other
Eventually I tried soaking the sticks in cold water (for about five minutes) and this worked equally well as hot water. So I began mass-production of single-curve sticks. Although some decided to shape themselves to double curves when forced into the vice anyway.
The bending was not always successful. The quality of the sticks varied. While most were reasonably solid, some snapped, some were a bit thin or narrow and some were too rough. And some didn't bend smoothly - they adopted a rather sharp angle at one point.
-
prutser reacted to Omega1234 in Majellan by Omega1234 - FINISHED - 1/200 - Luxury 37 m Motor Yacht - Miniature
Hi folks
Thanks for all your likes and comments!
Woohoo!!!! After a few failed attempts, I've finally managed to pull together two reasonably passable 5-bladed propellors for Majellan. At the moment, they're temporarily fitted in the hull.
Have a squizz at the photos and you'll see that they look the part, albeit maybe not totally accurate in terms of the directions of the blade's pitch, (i.e. I think that the real ship would have left and right handed props to counteract the torque...maybe.. don't quote me on it, because I really have no idea what I'm talking about ), but at least they look ok from about a metre away.
Cheers and all the best!
Patrick
-
prutser reacted to NenadM in Cutty Sark by NenadM
Cleaning and color correction - done.
Making anything/something is, finaly, next on line. I think stairs to fore and after deck are next
@Carl
That craftman art was made from olive tree, by Greek monk Grigorie, making it 60 years, XIX/XX century ... Almost sure without, or almost without tools. During my visit I can not find custos to ask him more about (?)
-
prutser reacted to Omega1234 in Majellan by Omega1234 - FINISHED - 1/200 - Luxury 37 m Motor Yacht - Miniature
Hi folks
Not long to go before Majellan's finished!
I've added the anchors into the anchor-wells and added the capstan drums and bollards (temporarily placed at this stage) at the focsle. At the rear, Majellan's tender and one of her jet-ski's are ready for launching on the rear fold-down deck. The second jet-ski will be mounted some distance behind the hull; once the display stand has been built.
Enjoy the rest of your weekends!
Cheers
Patrick
-
prutser reacted to Omega1234 in Majellan by Omega1234 - FINISHED - 1/200 - Luxury 37 m Motor Yacht - Miniature
Hi everyone and thanks for all of your comments and Likes!
Well....look what Majellan's naughty rich guests have done. They've dragged their chairs up to the tiny piece of deck in front of the Bridge's windows. What's more, one cheeky guest has even brought up her own umbrella to shade from the sun! And all of this in full view of the Captain!
Outrageous, I say!
Anyhow, in reality, I've added the umbrella, a table and an assortment of chairs to bring some 'life' to this part of the bridge deck. To further add atmosphere, the chairs are haphazardly pointing in different directions, as if to give the impression that the guests have just left in a hurry.
I hope you enjoy the photos.
Cheers
Patrick
-
prutser reacted to Omega1234 in Majellan by Omega1234 - FINISHED - 1/200 - Luxury 37 m Motor Yacht - Miniature
Hi folks!
Well......my mama always said to share. So, here I am sharing some more photos of Majellan's exterior.
Most notable are the test fittings of three of the four umbrellas. The fourth umbrella is lying off to one side whilst its glue dries.
I also reckon that the small area of deck directly in front of the Bridge's windows looked a bit bare. To address this, I'm toying with the idea of placing a small arm chair, along with a table for the odd guest, or two, to enjoy a sip of their cocktails whilst Majellan's underway. You can just make out the table and chair in some of the photos.
By the way, the third last photo is my absolute favourite, so far. Why? I dunno. I just reckon it is, that's all.
Thanks for all of your comments and Likes, as well.
Cheers and all the best!
Patrick
-
prutser reacted to Omega1234 in Majellan by Omega1234 - FINISHED - 1/200 - Luxury 37 m Motor Yacht - Miniature
Hi everyone
Thanks for all of your comments and Likes!
Just a quick update - Last night I added the four life rafts (two on each side) that hang off the sides of the Sun Deck. The close-up photos show that they still require some 'tidying up', but, that can be done later.
Have a great weekend, folks!
Cheers
Patrick
-
prutser reacted to DSiemens in 20 Gun Frigate by DSiemens - FINISHED - BOTTLE
Thanks Patrick. Those stairs were no joke. I think I put them in three different versions before I got to this one. They really do add to the ship though.
Thanks Mark. I'll let you in on a little secret on this one. The cannon on deck in the second picture down is actually 3D printed. That photo was actually for a comparison of my usual method using wire, rectangular pieces of wood and bamboo skewers as compared to what could be done on a printer at this scale. None of the final cannons will be 3D printed on this ship but I plan to use them on future builds. I contacted a 3D printer just to see what could be done. I pushed them to their limits with this job. They had to use a $20,000 machine and special material to print it. At one process they need to wash off the wax filler user to keep the shape. To do that with these cannons they had to wash them in a coffee filter to be sure they didn't lose any. To paint it I dipped a needle in paint and just tapped the cannon. Here's a picture of the unpainted cannon. The measurement shown is millimeters.
-
prutser reacted to DSiemens in 20 Gun Frigate by DSiemens - FINISHED - BOTTLE
Got quite a lot of work done since the last post.
-
prutser reacted to DSiemens in Olympic 470 by DSiemens - FINISHED - BOTTLE
I got creative on the painting. I went with a mixture of the London 2012 olympic look updated to Rio 2016. At this point I don't know what the Rio boats will look like.
Boat ready for bottling. I used some real thin thread for the stay lines. The cables on the real boats are very thin. Also the lines used in the boats are all sorts of different colors. I assume it's so the can quickly know which line is which. This added some fun contrast to the boat.