HOLIDAY DONATION DRIVE - SUPPORT MSW - DO YOUR PART TO KEEP THIS GREAT FORUM GOING! (Only 24 donations so far out of 49,000 members - C'mon guys!)
×

bensid54
-
Posts
531 -
Joined
-
Last visited
Content Type
Profiles
Forums
Gallery
Events
Everything posted by bensid54
-
 I have another video on you tube this one has all the oars working but as you can see I have a learning curve in front of me. Patrick can you do me a favour and put the video on for me? Thanks
 -
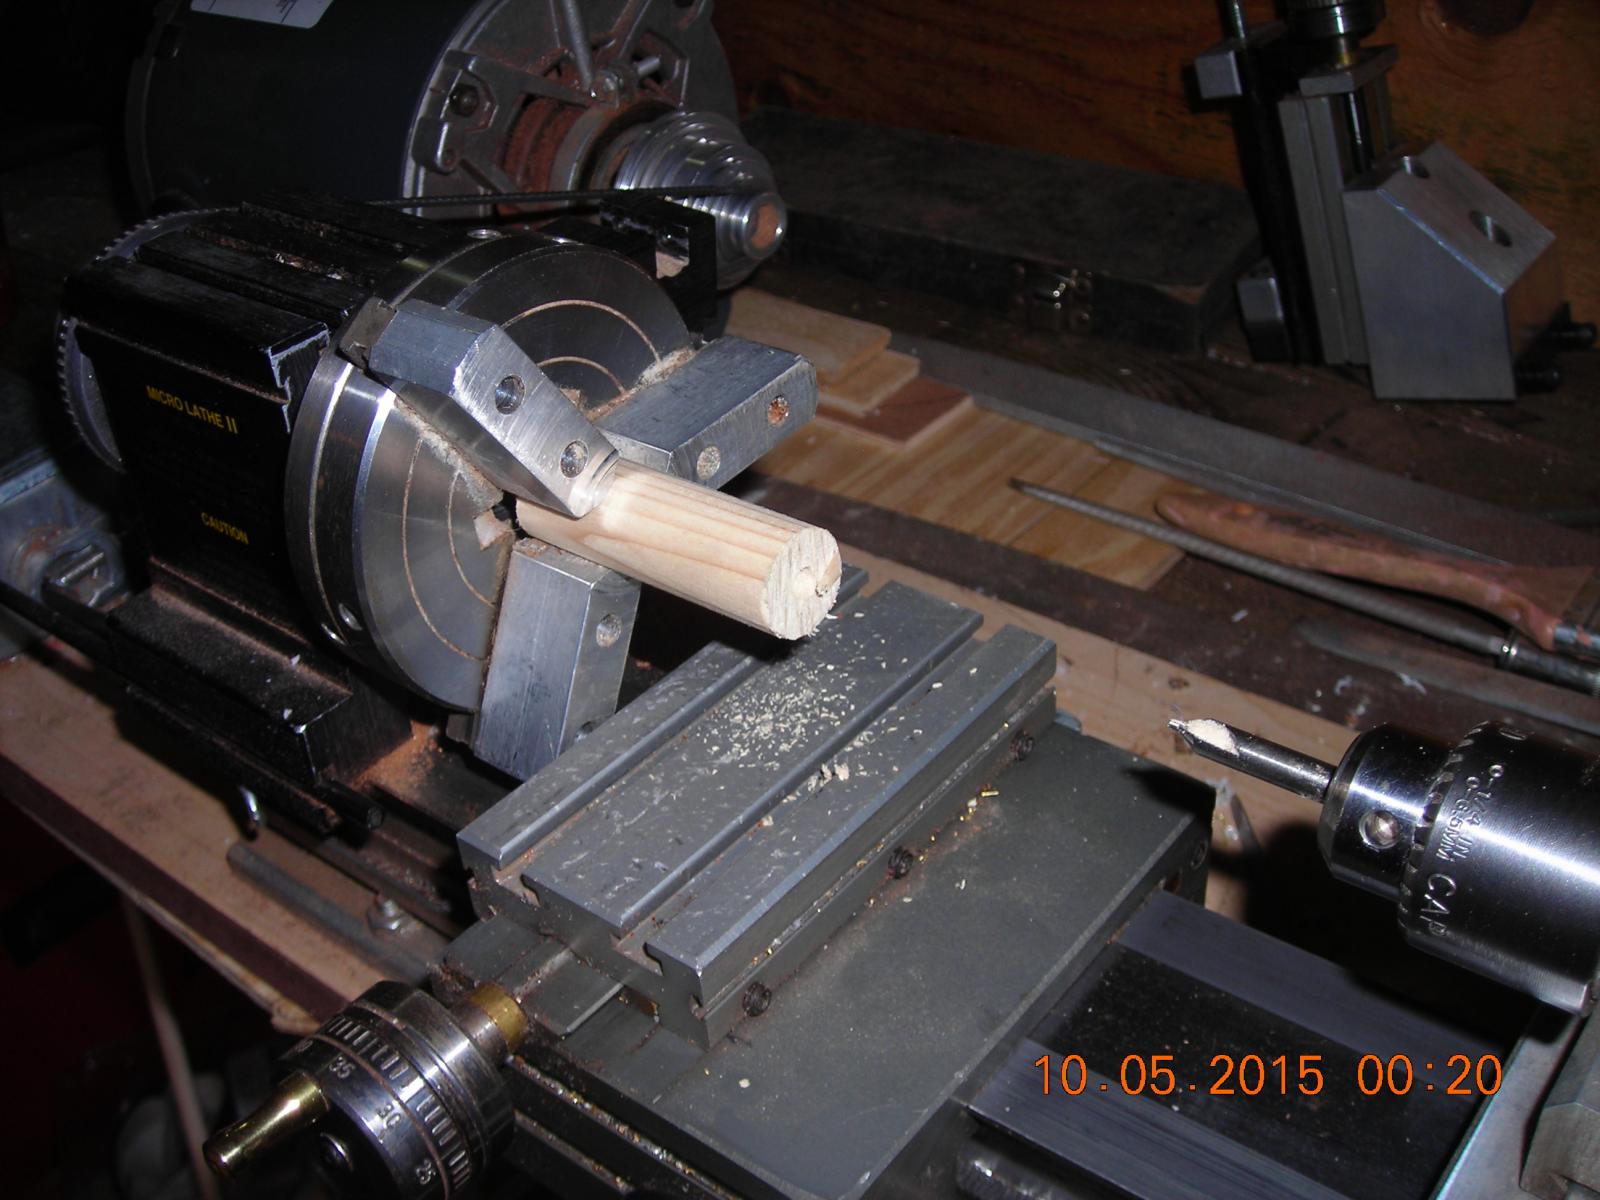
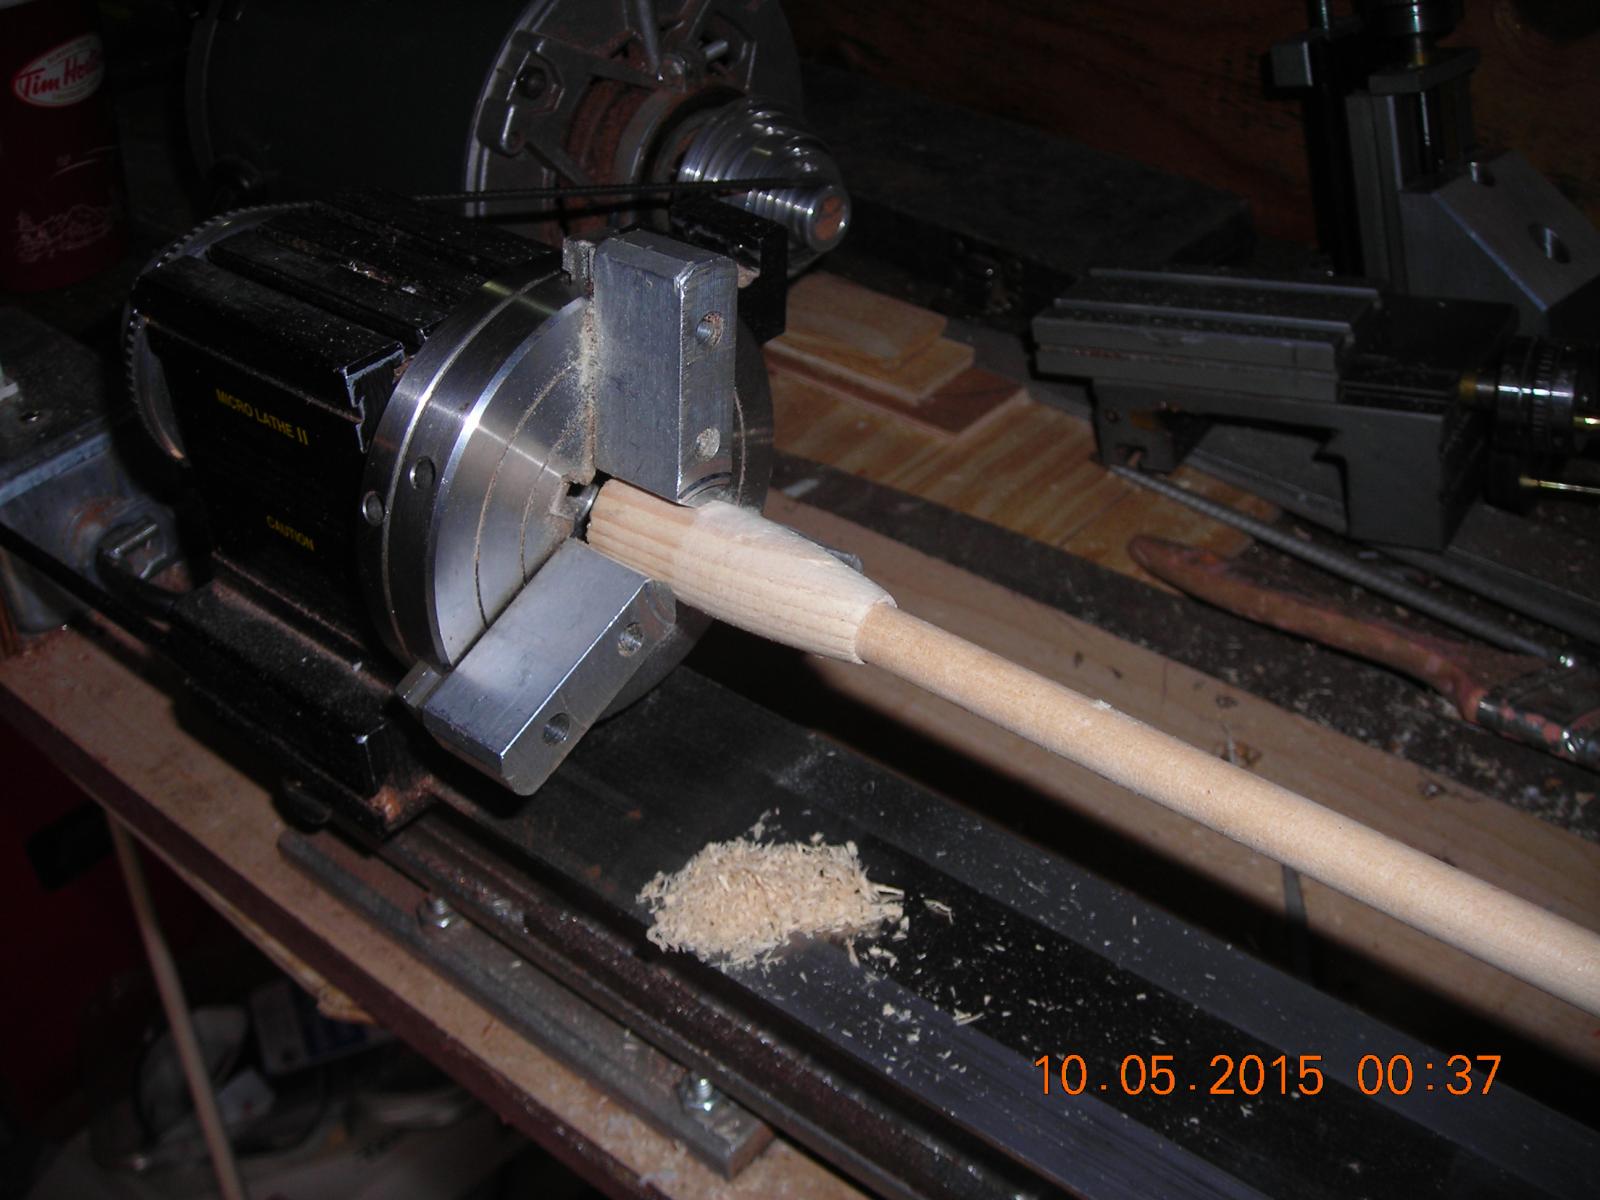
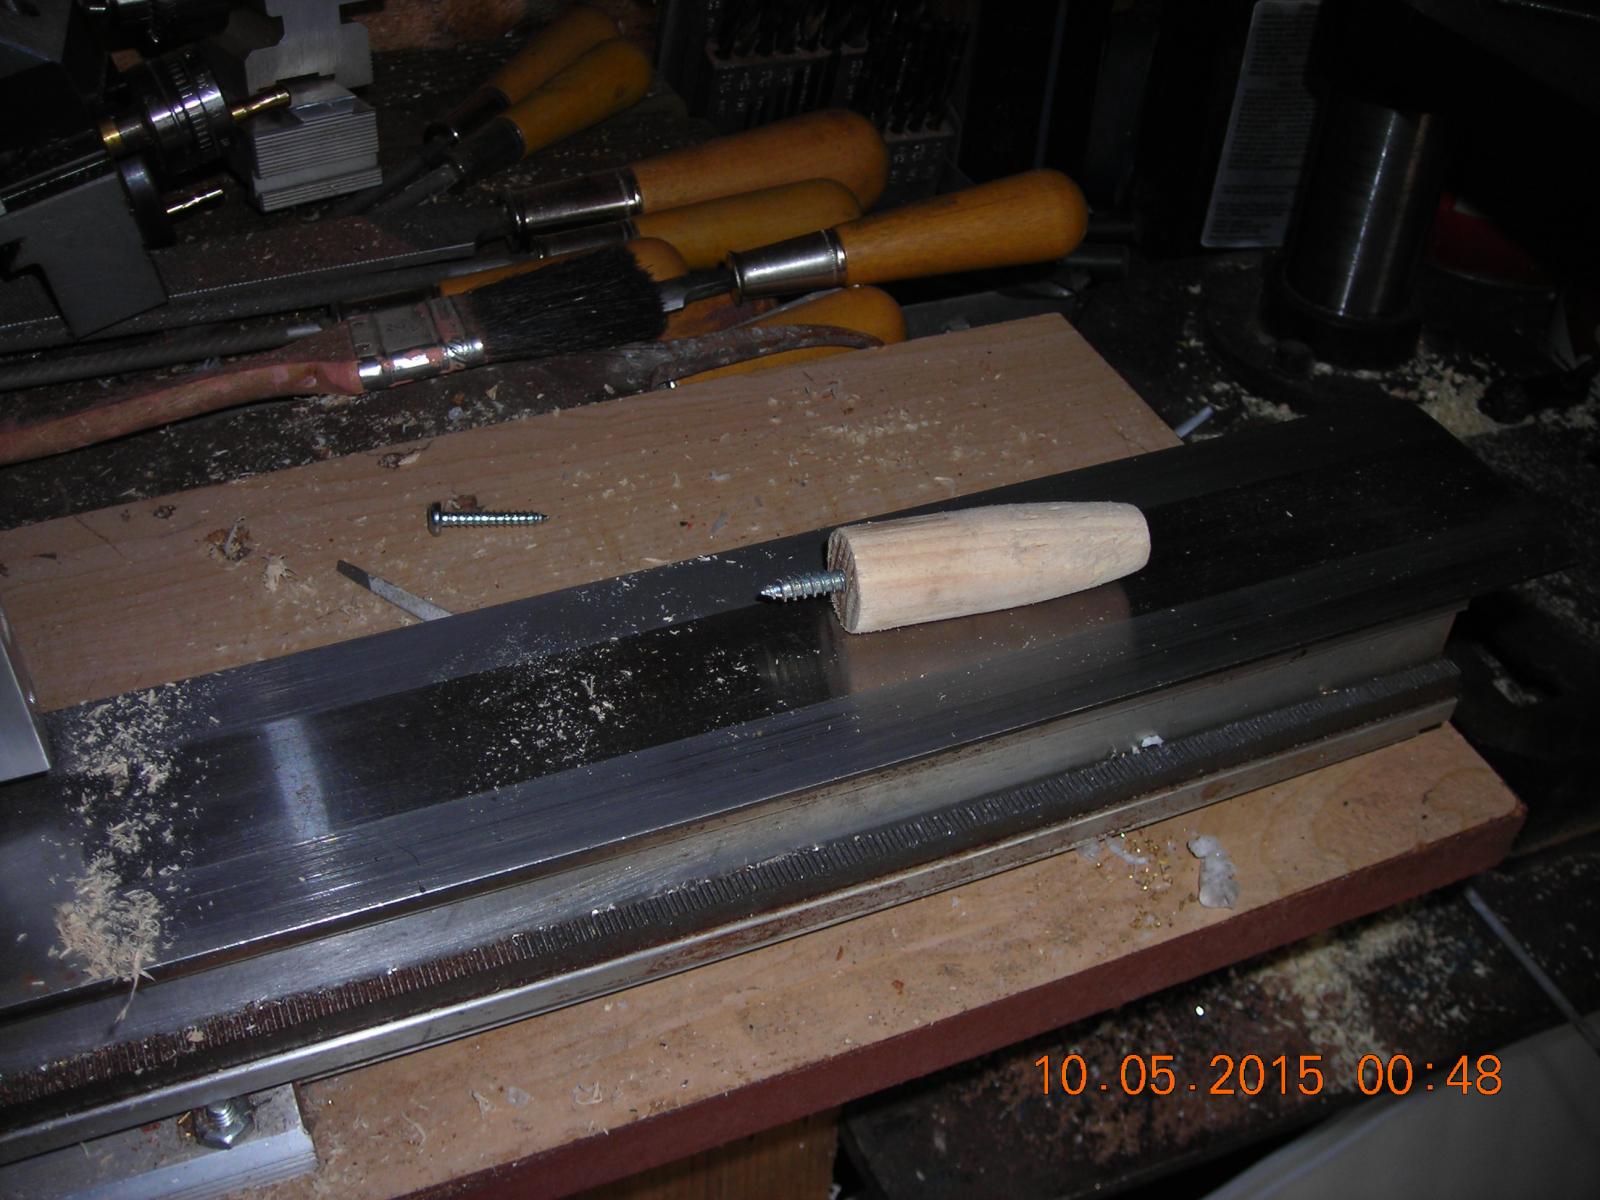
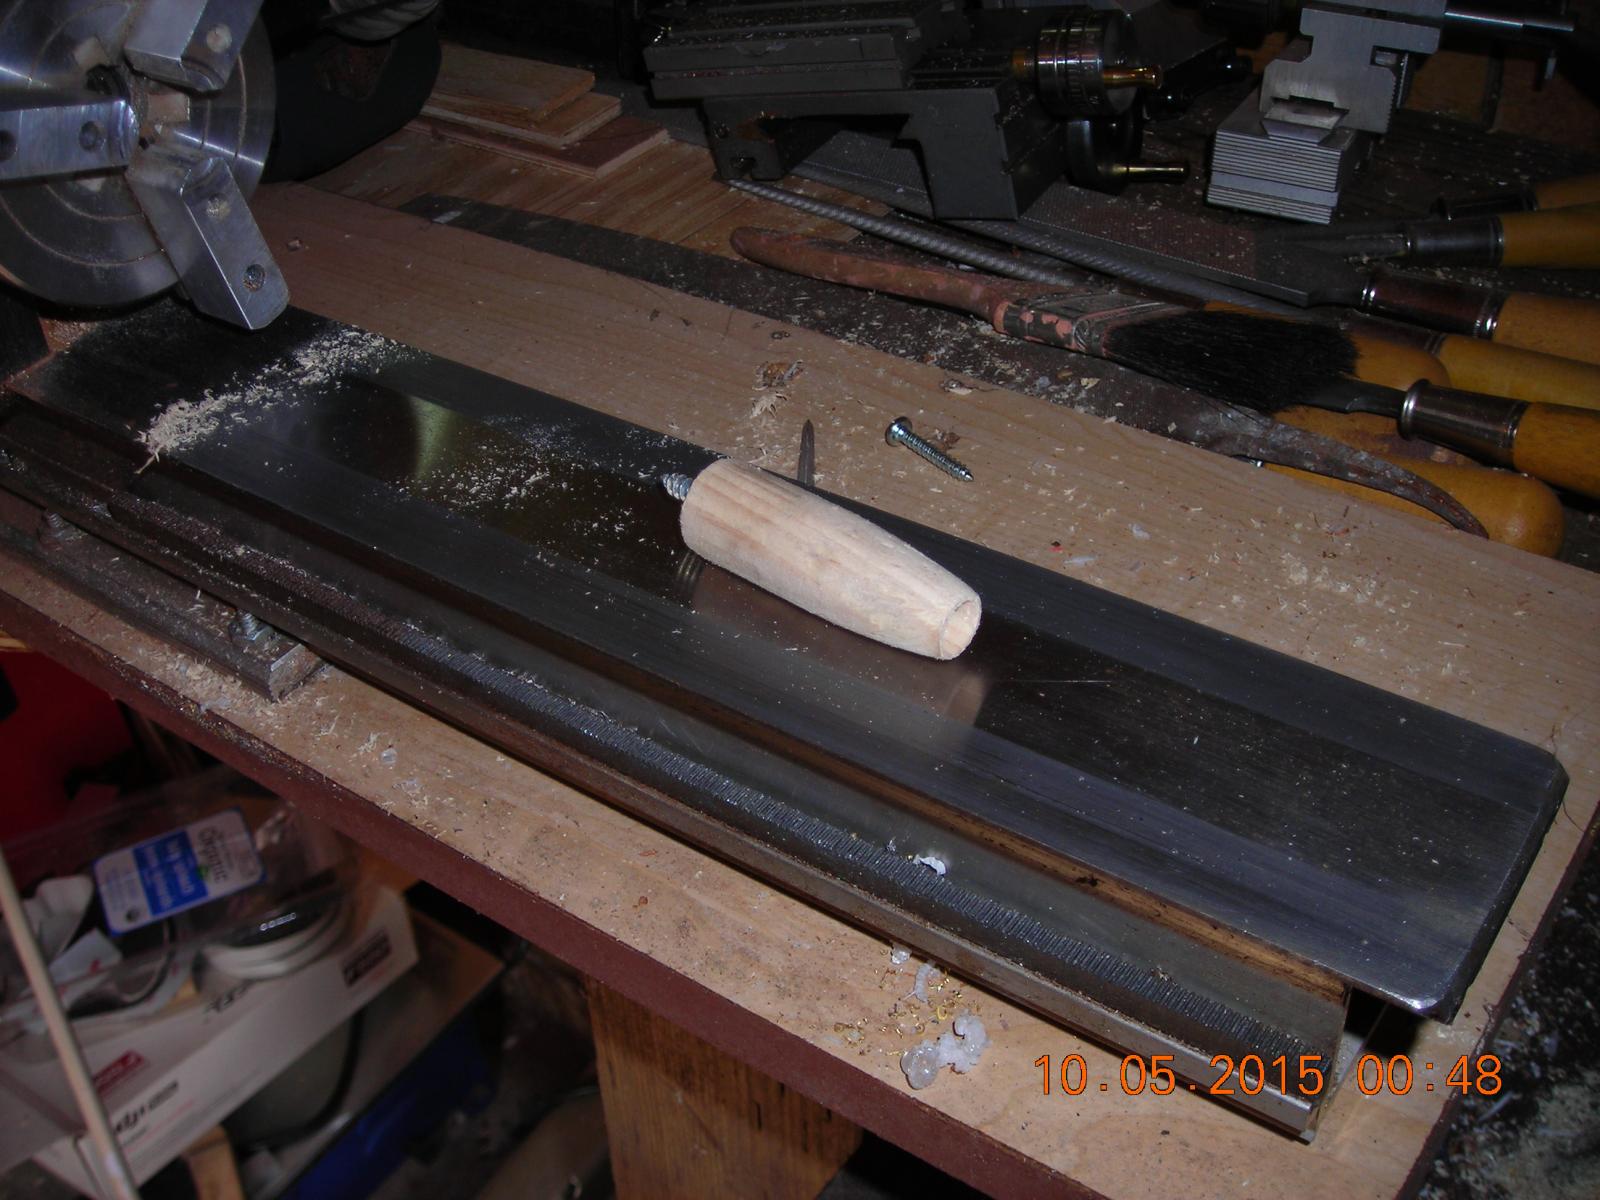
While I was waiting for the epoxy to dry I started to make the mast/deck retainer, I took a 3/4 inch dowel cut it to about three inches long, drilled it out to almost 3/8 then used a boring bit on the lathe to make a good fit for the mast. I drilled the other end and installed a cut off wood screw leaving it about 5/8 of an inch proud and also tapered the piece but I want to taper it better which I will do later. How it will work is the mast will be secured to the deck by the ropes going to the mast and the base will be inserted one inch into the piece I just made, where it will be able to rotate which will in turn allow the threaded piece to be turned into the 1 inch dowel below deck thereby fastening the deck to the hull which is lined up using the dowels I installed at the bow end of the deck. I hope I explained that OK if not pictures always tell a better story.


-
Thanks Steven I guess I would have to do what I did with the Bireme and that was make the boat I'm building fit the RC equipment. I'll check out the website and get an idea how big I will have to make it. I looked at the sites you posted and it looks like the hull underneath the planks will have to be my own design but the exterior could be made to look like the real thing, should be fun.
-
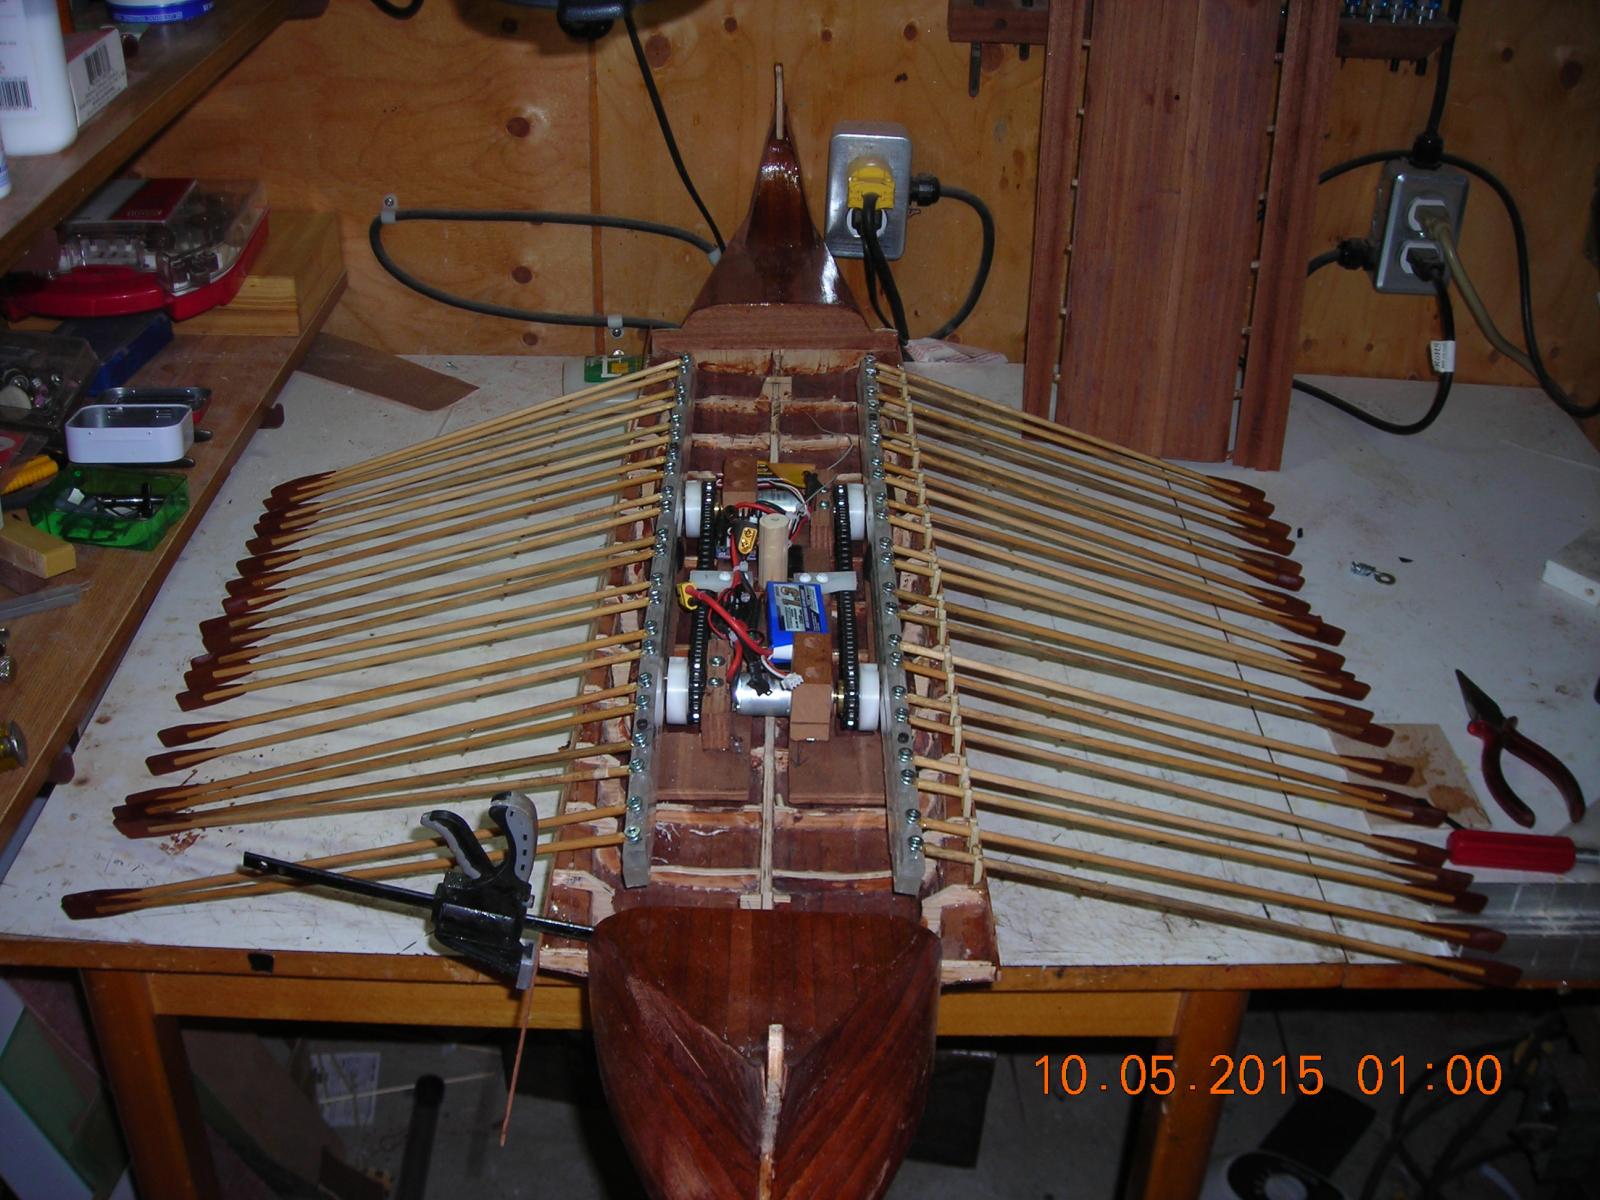
Sizing up the oars and balancing dip depth I hope to have a video in the next few days of both oars in operation.

-
Thanks Steven, didn't the Viking ships have a plank deck that was removable? I believe the long ships did and if that's the case it's a perfect place to hide RC equipment. I plan on having pins come up the middle of the Viking rower to operate the oars and to make the oars retract using compressed air on a bellows type system that will slide the oars through the rowers hands into the ship and use sail power. Once I'm done building this one I'll ponder how I can do a Viking ship and based on what I'm thinking I may have to make my work area larger. Your knowledge and experience regarding Vikings could be very handy thank you.
-
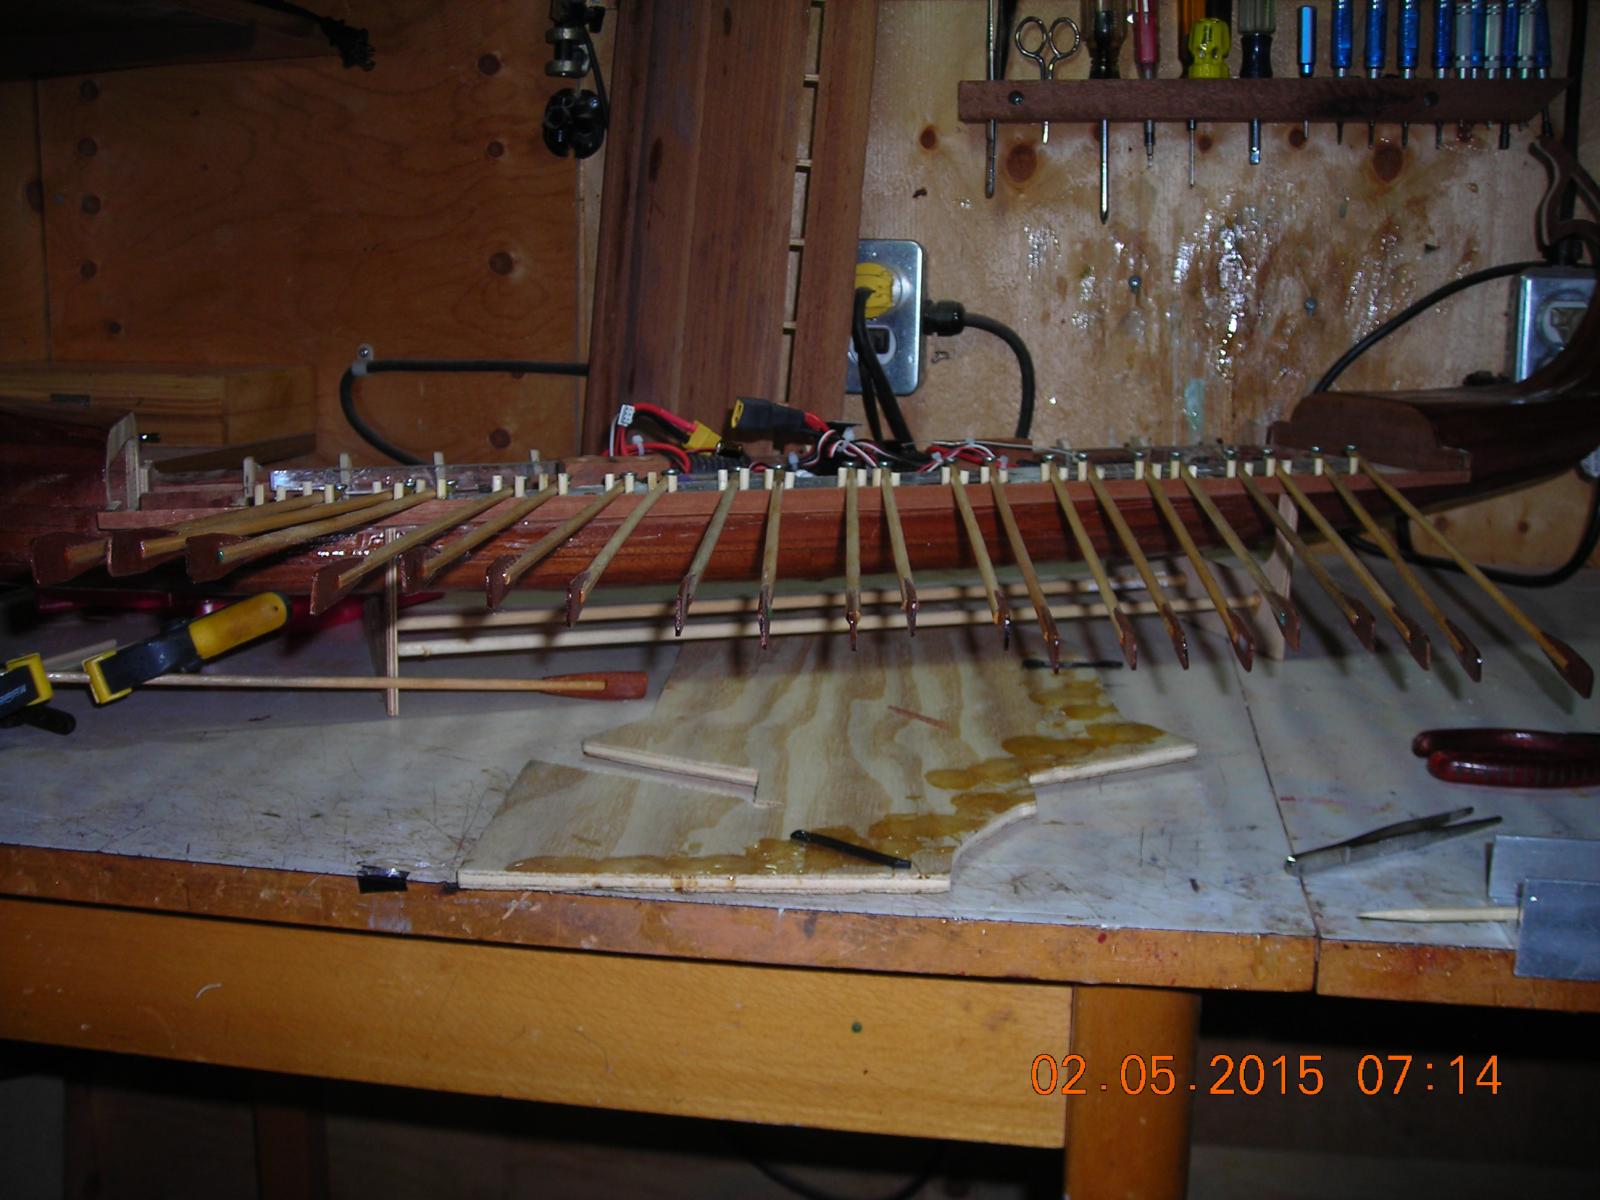
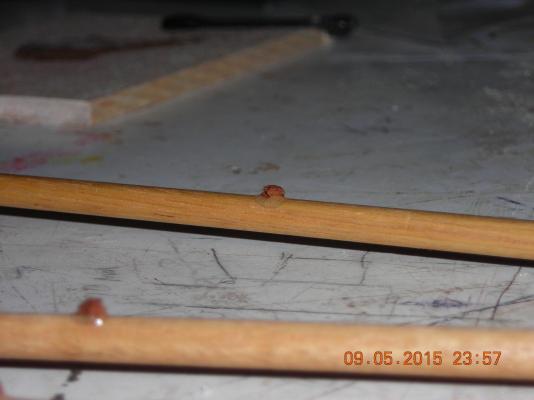
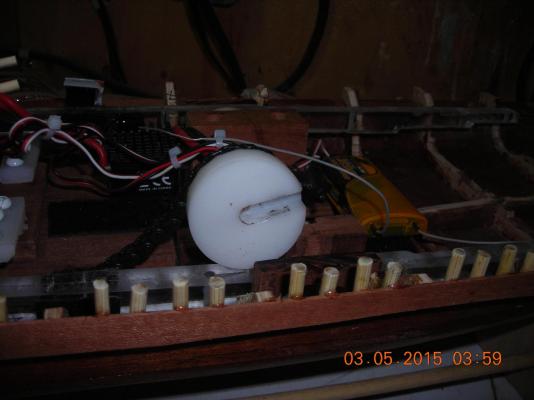
I have installed my drip blocks on all 44 oars now I'm hoping by breaking the smooth oar surface these blocks will force the water to drip off at this point, sort like speed bumps for water. I will once again need to clear coat the oars and now I need to find a clear coat spray to do the hull too, any suggestions?
-
Great information Steven and very helpful I will do my best to make the oar pouches look like the real thing. When I asked if there was smaller warships maybe I should have said rowing ships with less oars! I have tossed around the idea of making a Viking ship for a number of years and after what you and others have told me and what I'm learning about this ships construction then I think the Viking ship would be my next rowing vessel.
-
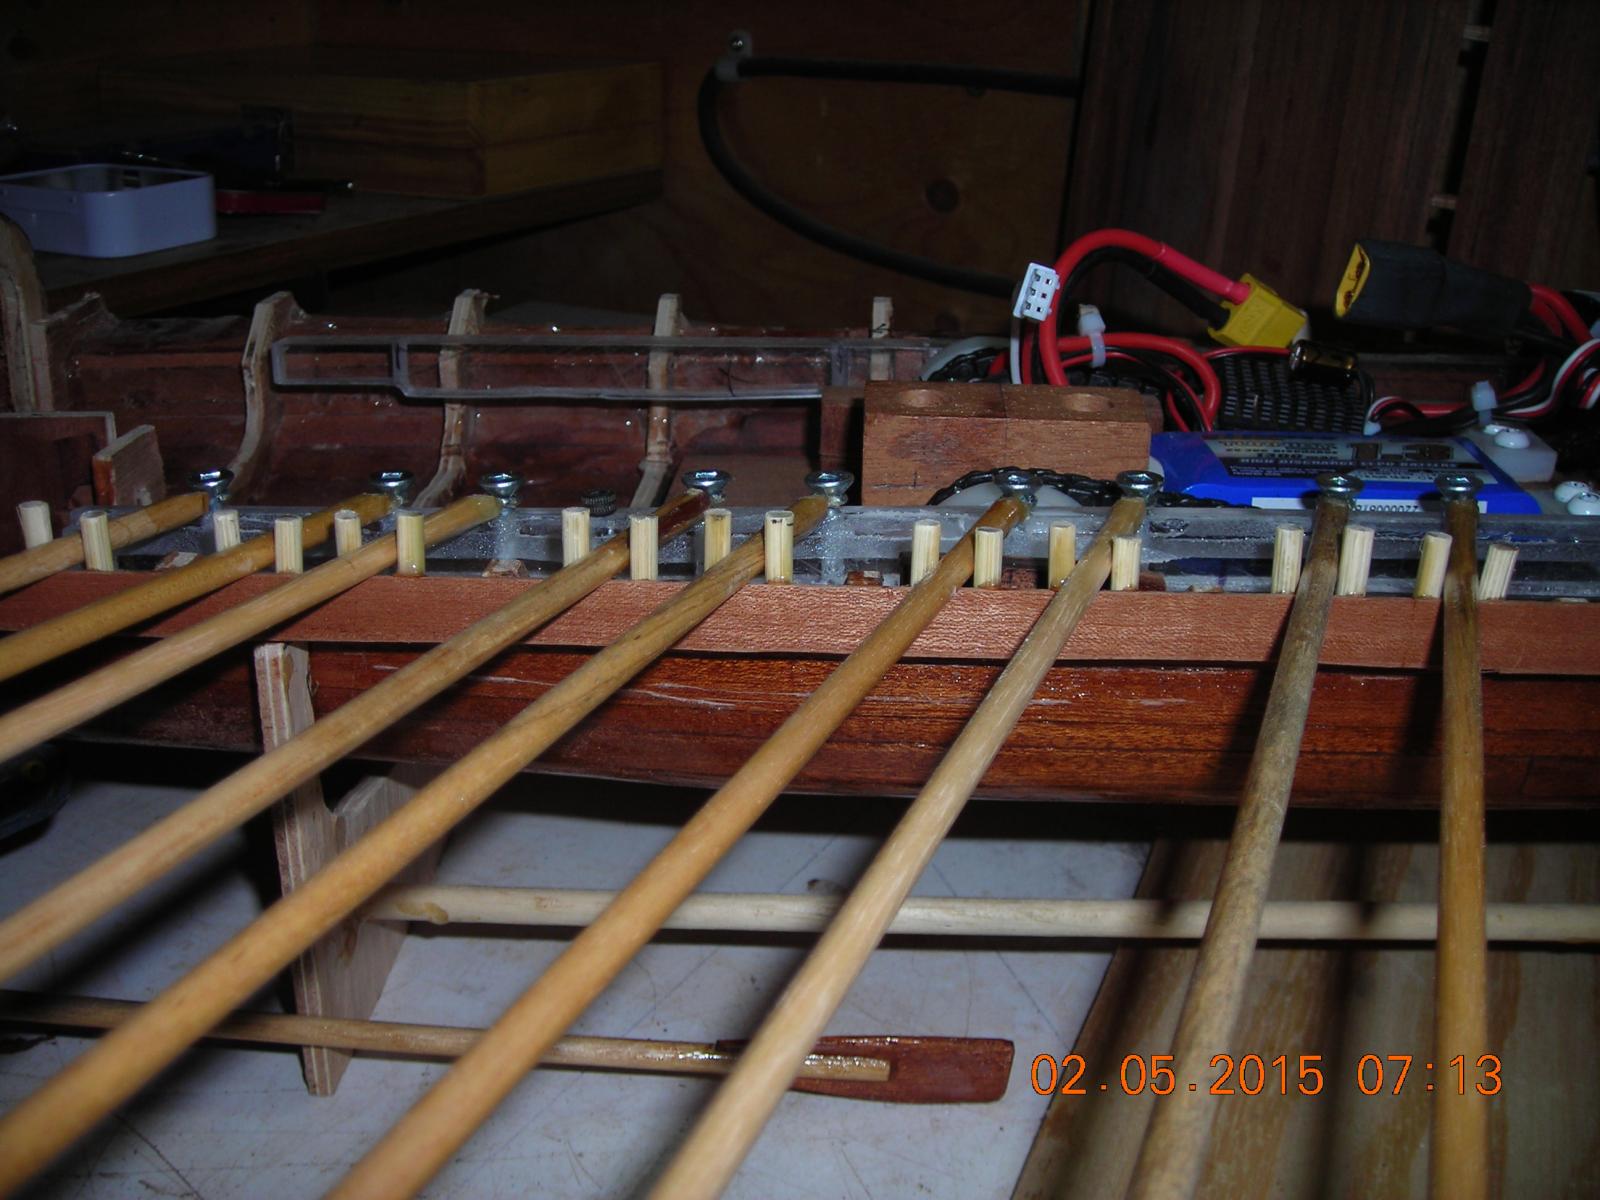
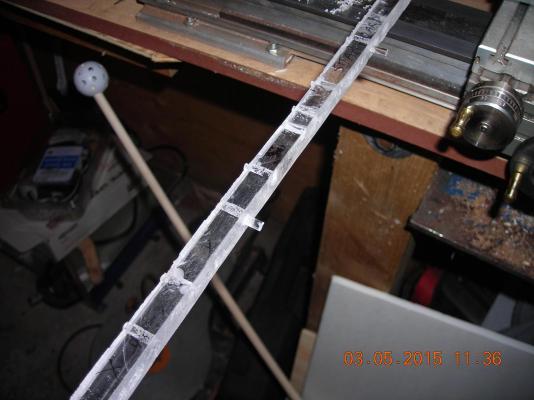
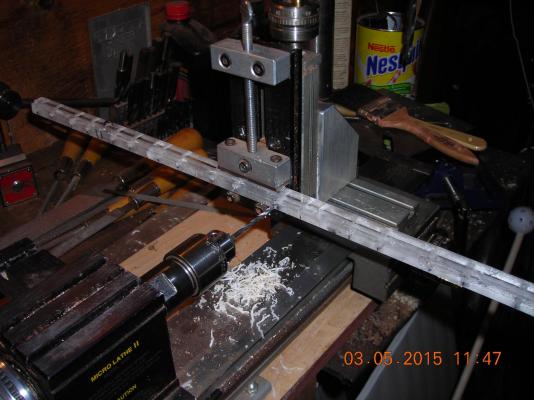
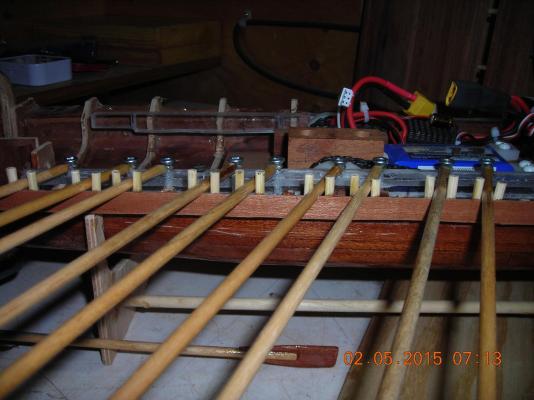
Had to file down all the oars at the eyes end otherwise the oars will not dip far enough into the water. The other picture is the assembly of the Starboard side oar rack, this one I split in one place and broke in half at another due to the fact I didn't run the drill through each hole twice. When I was running the tap through the rack I thought it seemed tight and found out that was a fact when during one of the taps the rack split in half so I had to glue it all back together, that's the good thing about plastic you can fuse it back together easily. The next rowing ship I make the mechanics will be mainly aluminum and should be quicker to build.

-
Very interesting info Steven thanks so much for that information, based on the scale of my ship I wonder what realistic looking material I can to make the leather oar pouches with? The good thing about using leather pouches is it will help the looks of the vessel by hiding the thoe pins and also give a dampening effect to any oar bounce. Steven can you tell me what the smallest oar powered warship was? Maybe another project down the road!
-
So based on what you have researched Ben that tells me the scale is 1/24 which is the scale of model cars. 80 feet is a lot of boat for 44 guys to be rowing I gather they were meant for short sprints via oars, glad this ship is closer to a replica of the real thing than could have hoped for thanks for the info Ben.
-
I really don't know what scale it is Ben I took some plans and photocopied them up until I had a size I thought I could work with, it is 42 inches long so I'll have to figure out the scale from there when compared to the original ship.
-
Very good questions you two, the freeboard is about 3/4 of an inch I will adjust the top speed so the splashing will be kept to a minimum, the oar cycle should be tight enough to reduce flinging around of water and the oars will be just above level at the highest point of their cycle to hopefully reduce water from streaming in the hull from the oars. One more thing I will do is glue a small barely visible square of wood on the underside of the oars to create a drip barrier and hopefully the water will drip off there. The drip barriers will have assistance from the oar mechanics because at one point in the oar cycle above the water level the oars get a small but sudden quick movement due to an imperfection in the racetrack and hopefully this will knock off any water drips. If all of the above doesn't stop water ingress then I will make a foam barrier for the oars to slide into. Any suggestions regarding something I missed or overlooked would be greatly appreciated.
-
This is what the oar ports look like now, I may fill in the empty spots later. Starting on the oar rack for the other side, this part of the build should go fast because I've got the bugs worked out of the other side. I sat today and fiddled with the radio settings and I have them close to balanced but I'm sure that will be a work in progress once it's in the water. I will get a video of both sets of oars working very soon.

-
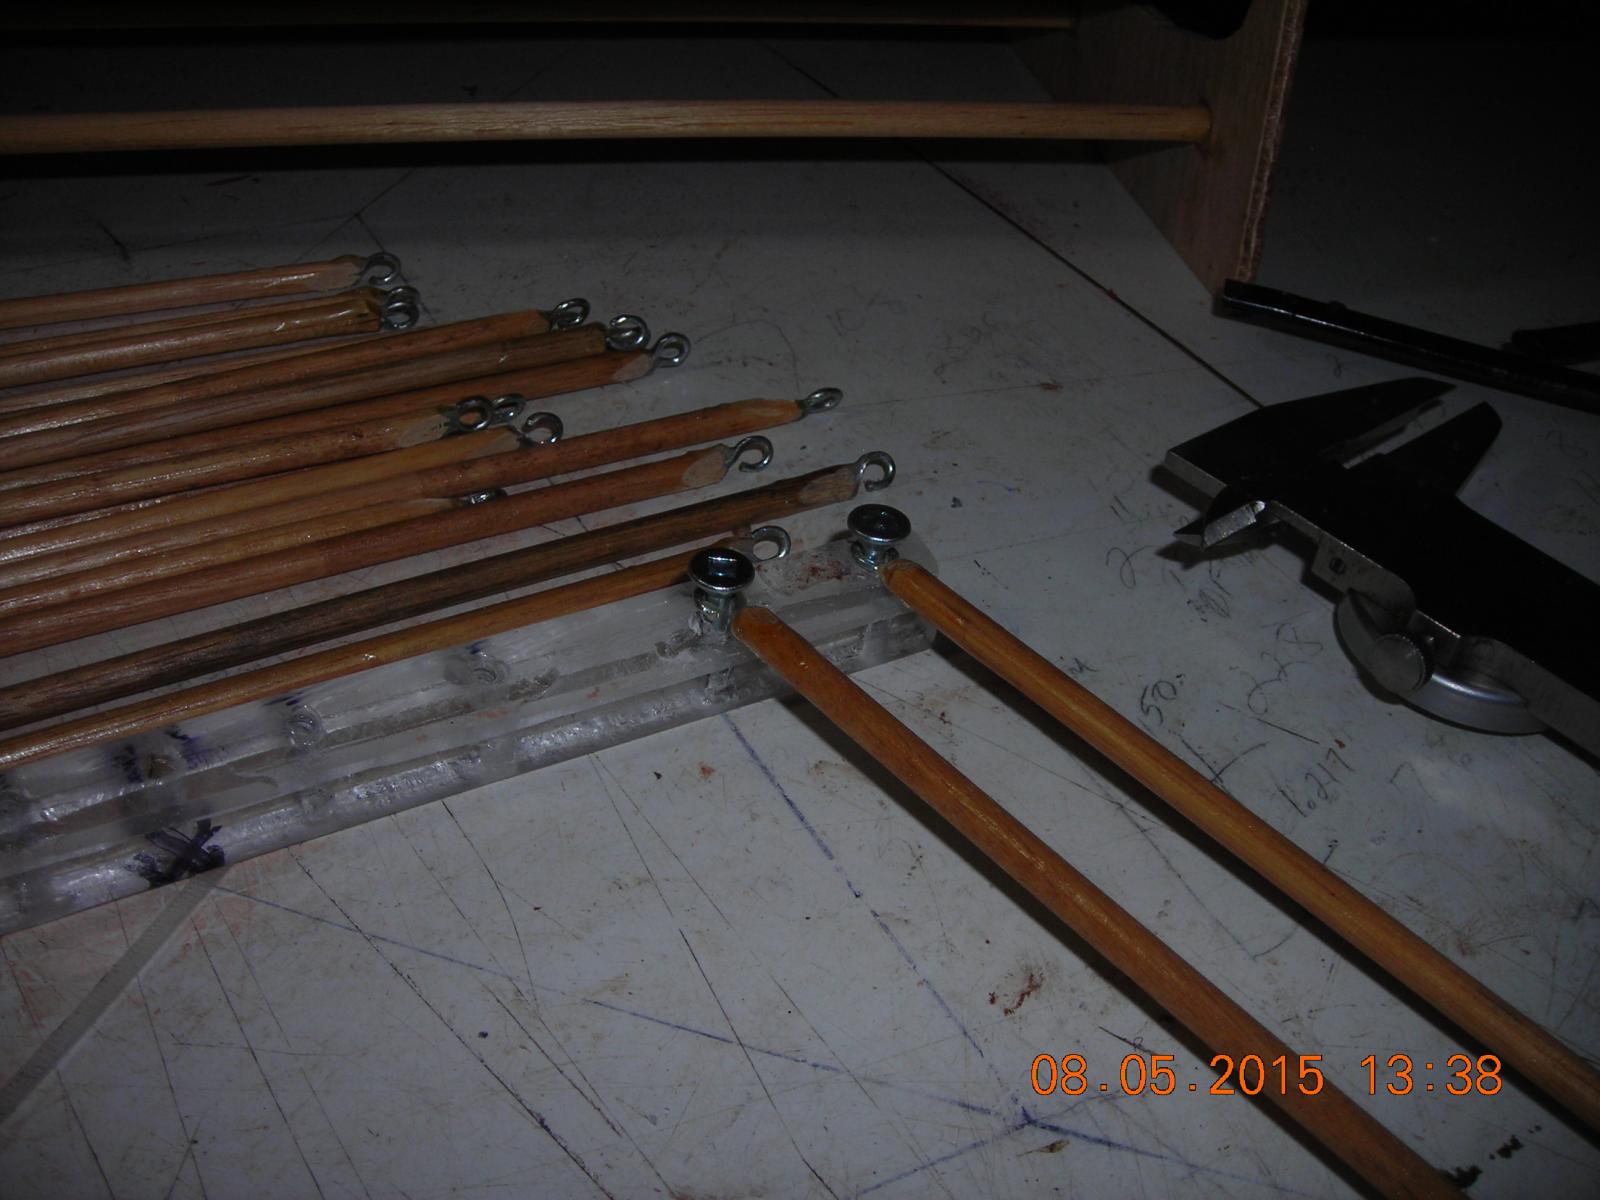
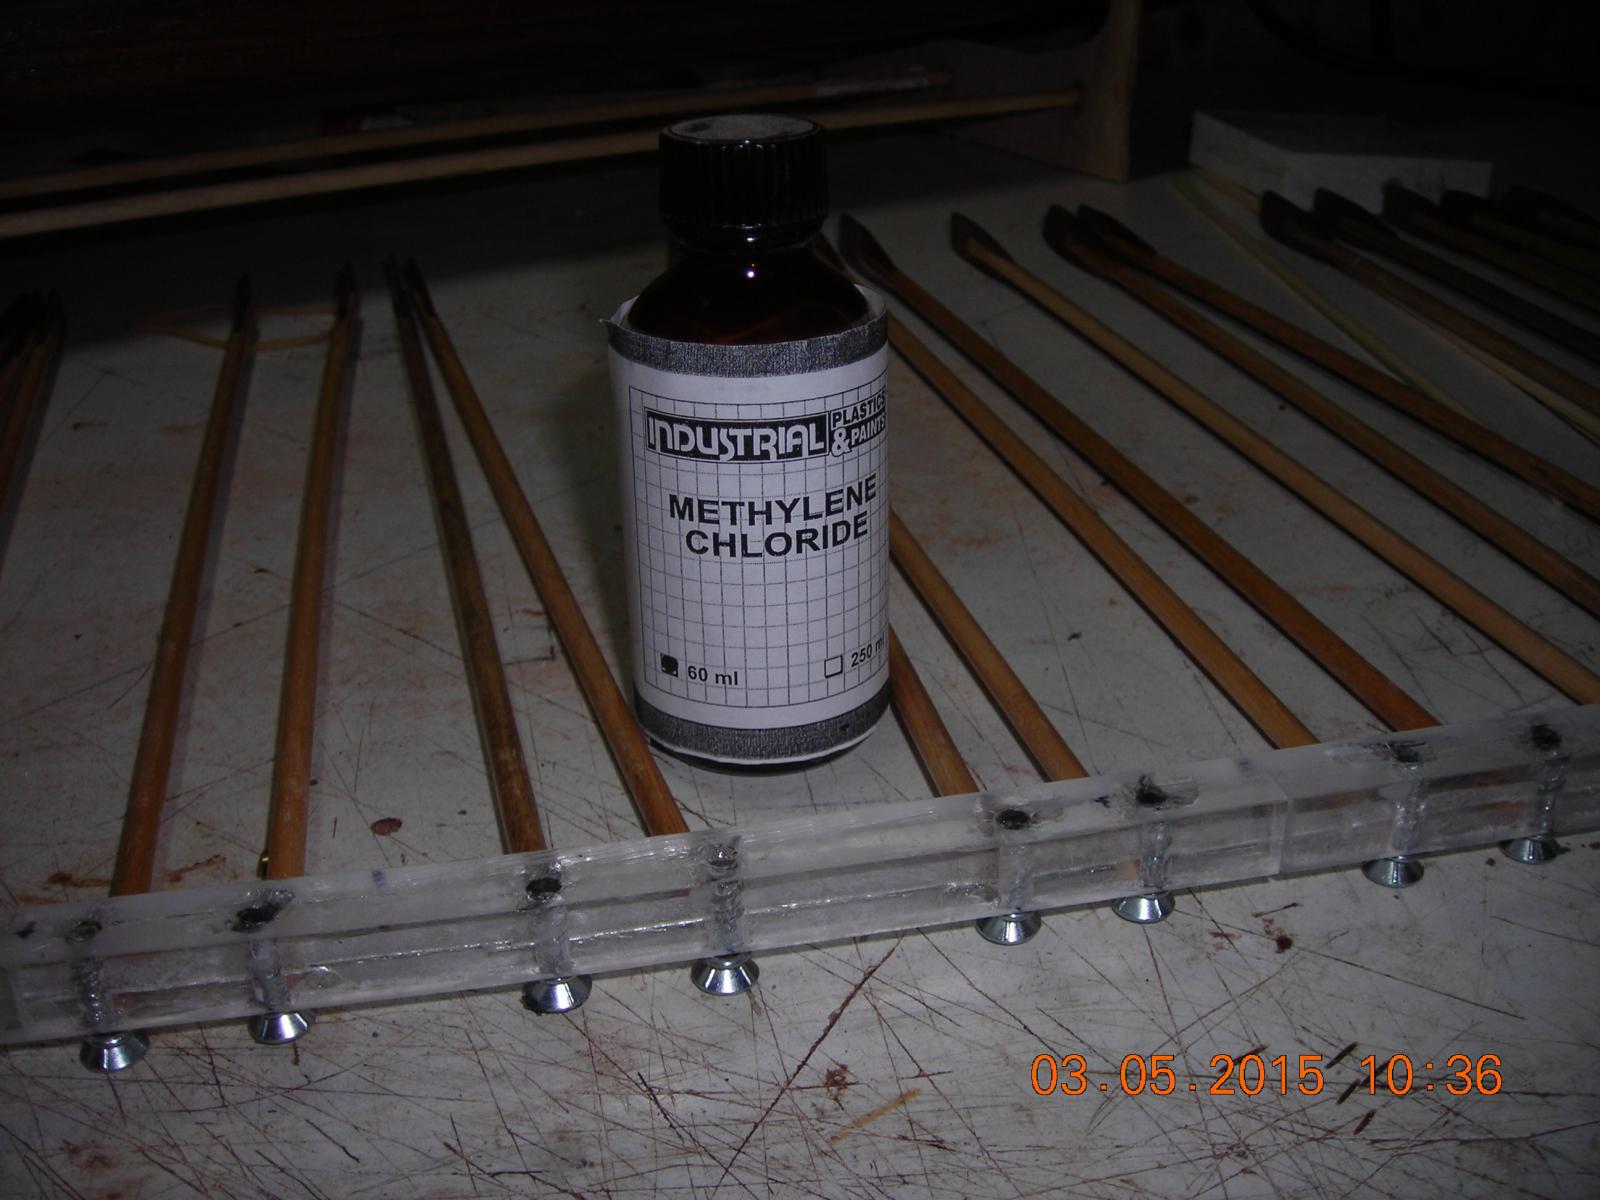
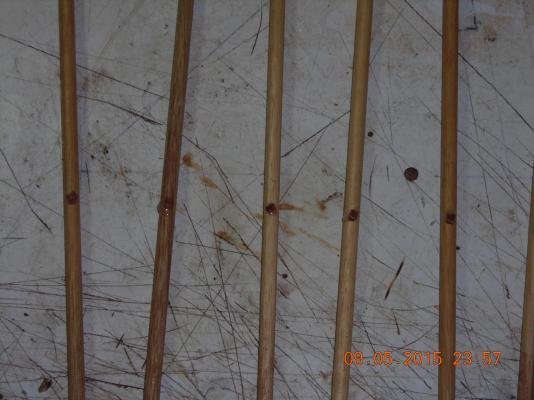
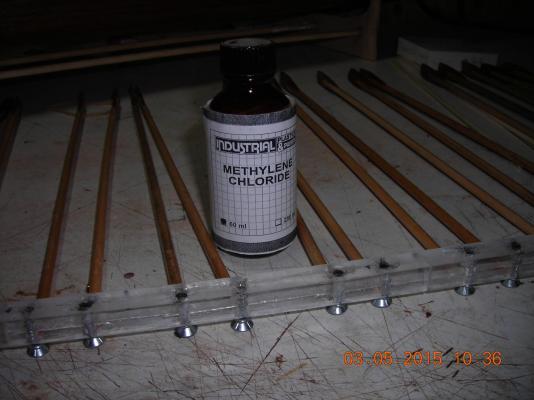
I've used screws threaded into the oar racks to secure the oars to lock the screws in place after the final adjustment I take a needle type applicator and pour this fluid into the screw bores. The solvent in the picture actually dissolves the plastic so it runs around the screw threads, sets and locks the screws in place.
-
Thanks Mark but it's all related to size, something this small can behave badly with a combined slop of .002 when that is the point where the movement and load is highest and it ends up looking a lot worse than what it is. Working out the kinks has taken the majority of my time it seems because I've made and remade several different parts more than a couple of times over.
-
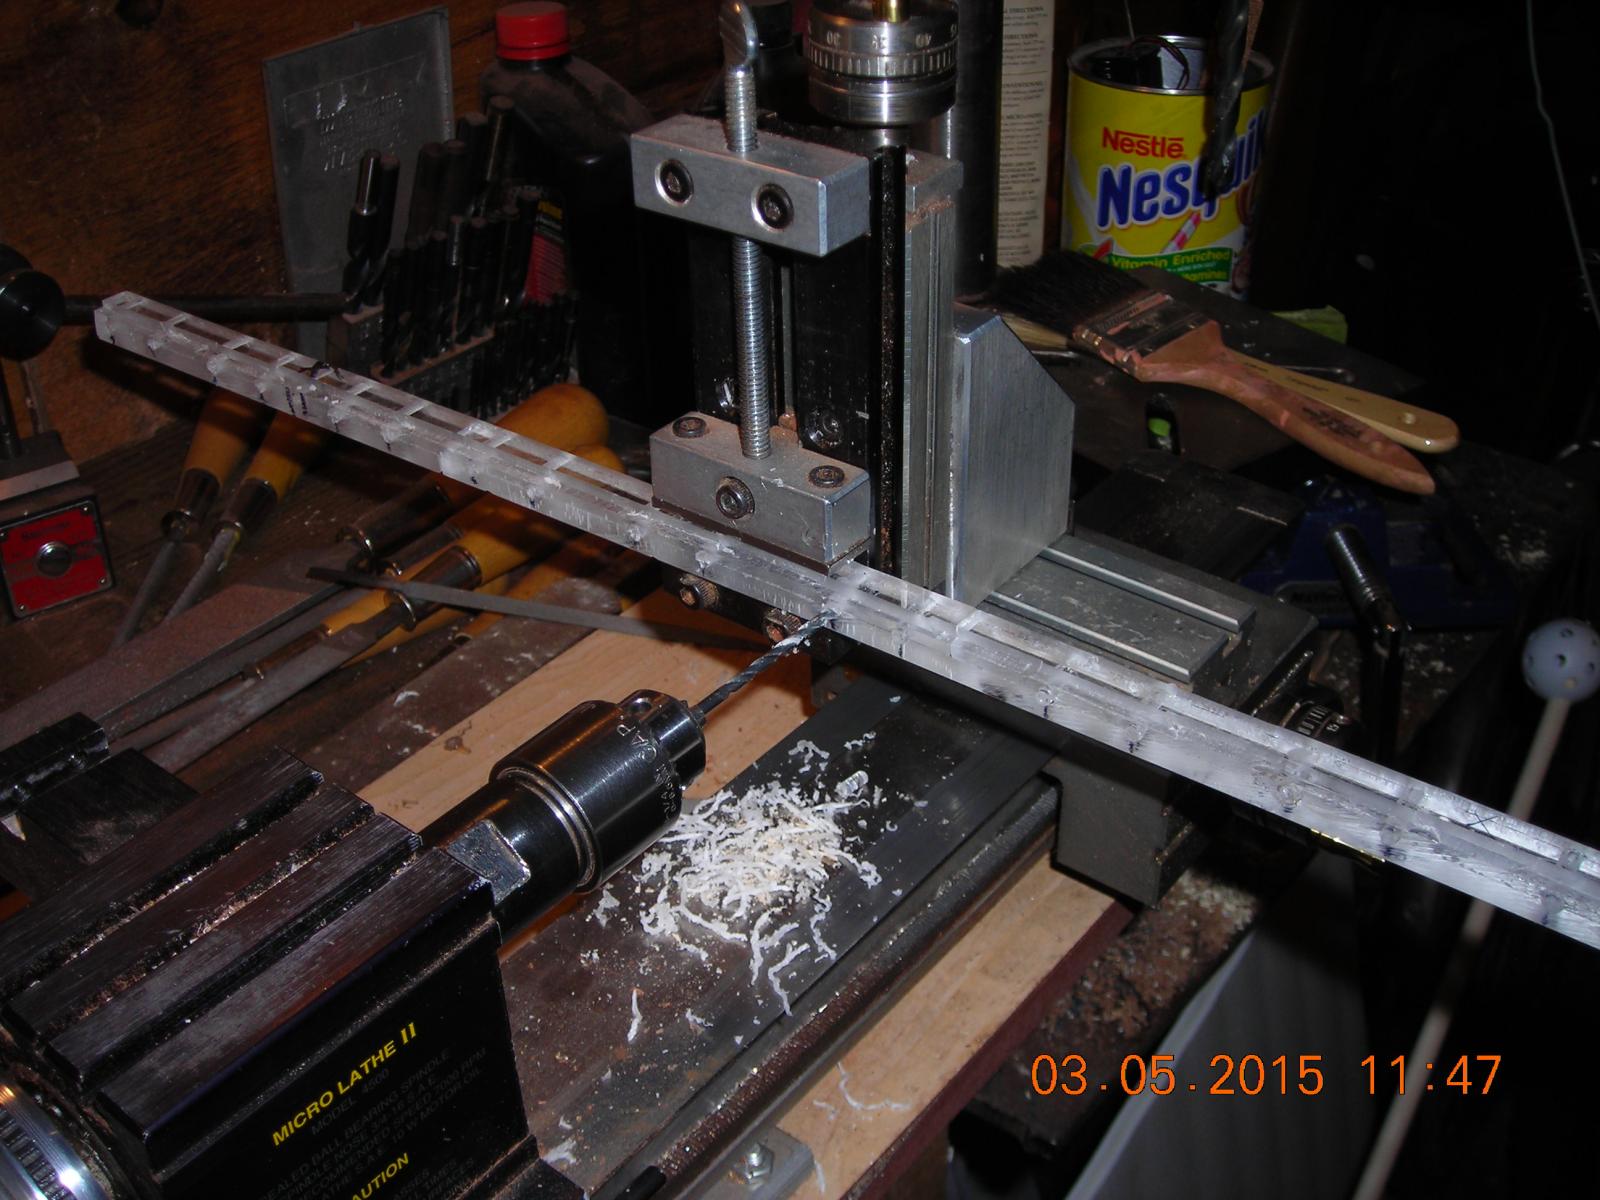
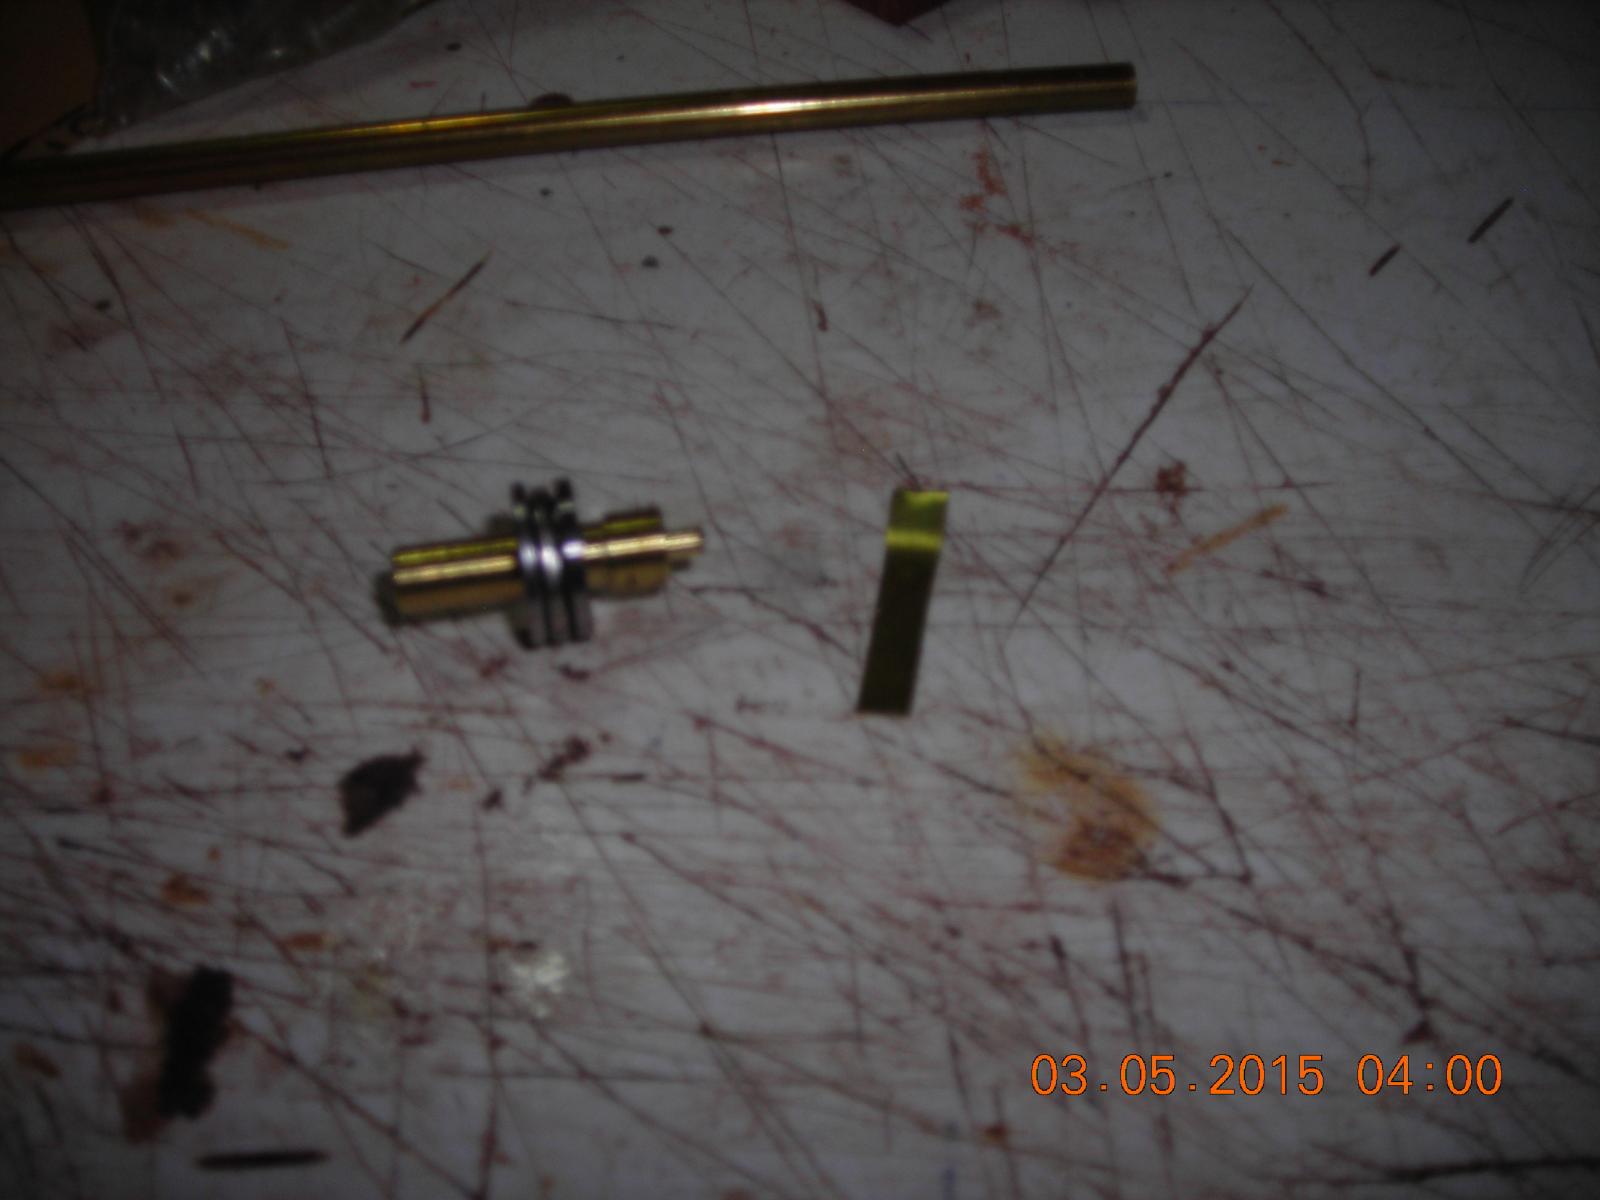
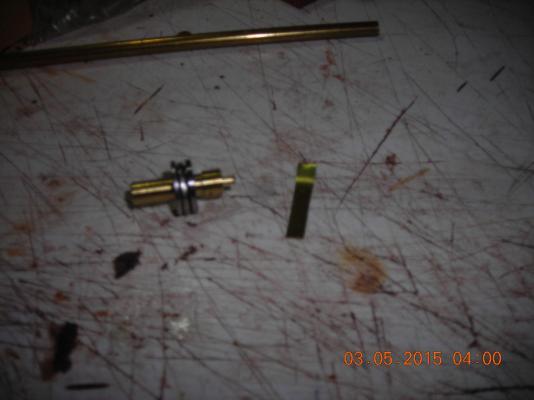
One picture shows the drive disc bearing and sprocket bore which due to my poor machining the sprocket bore was .001" oversize, so I trimmed a 1/4" long piece of .001 shim stock and made a press fit for the bearing and took the slop right out of that part. The other picture shows the idler axle which thanks to my machining was also .001 too small so out came the shim stock again for a quick fix, now there is no idler slop and no deflection caused by a stronger spring in the drive disc.

-
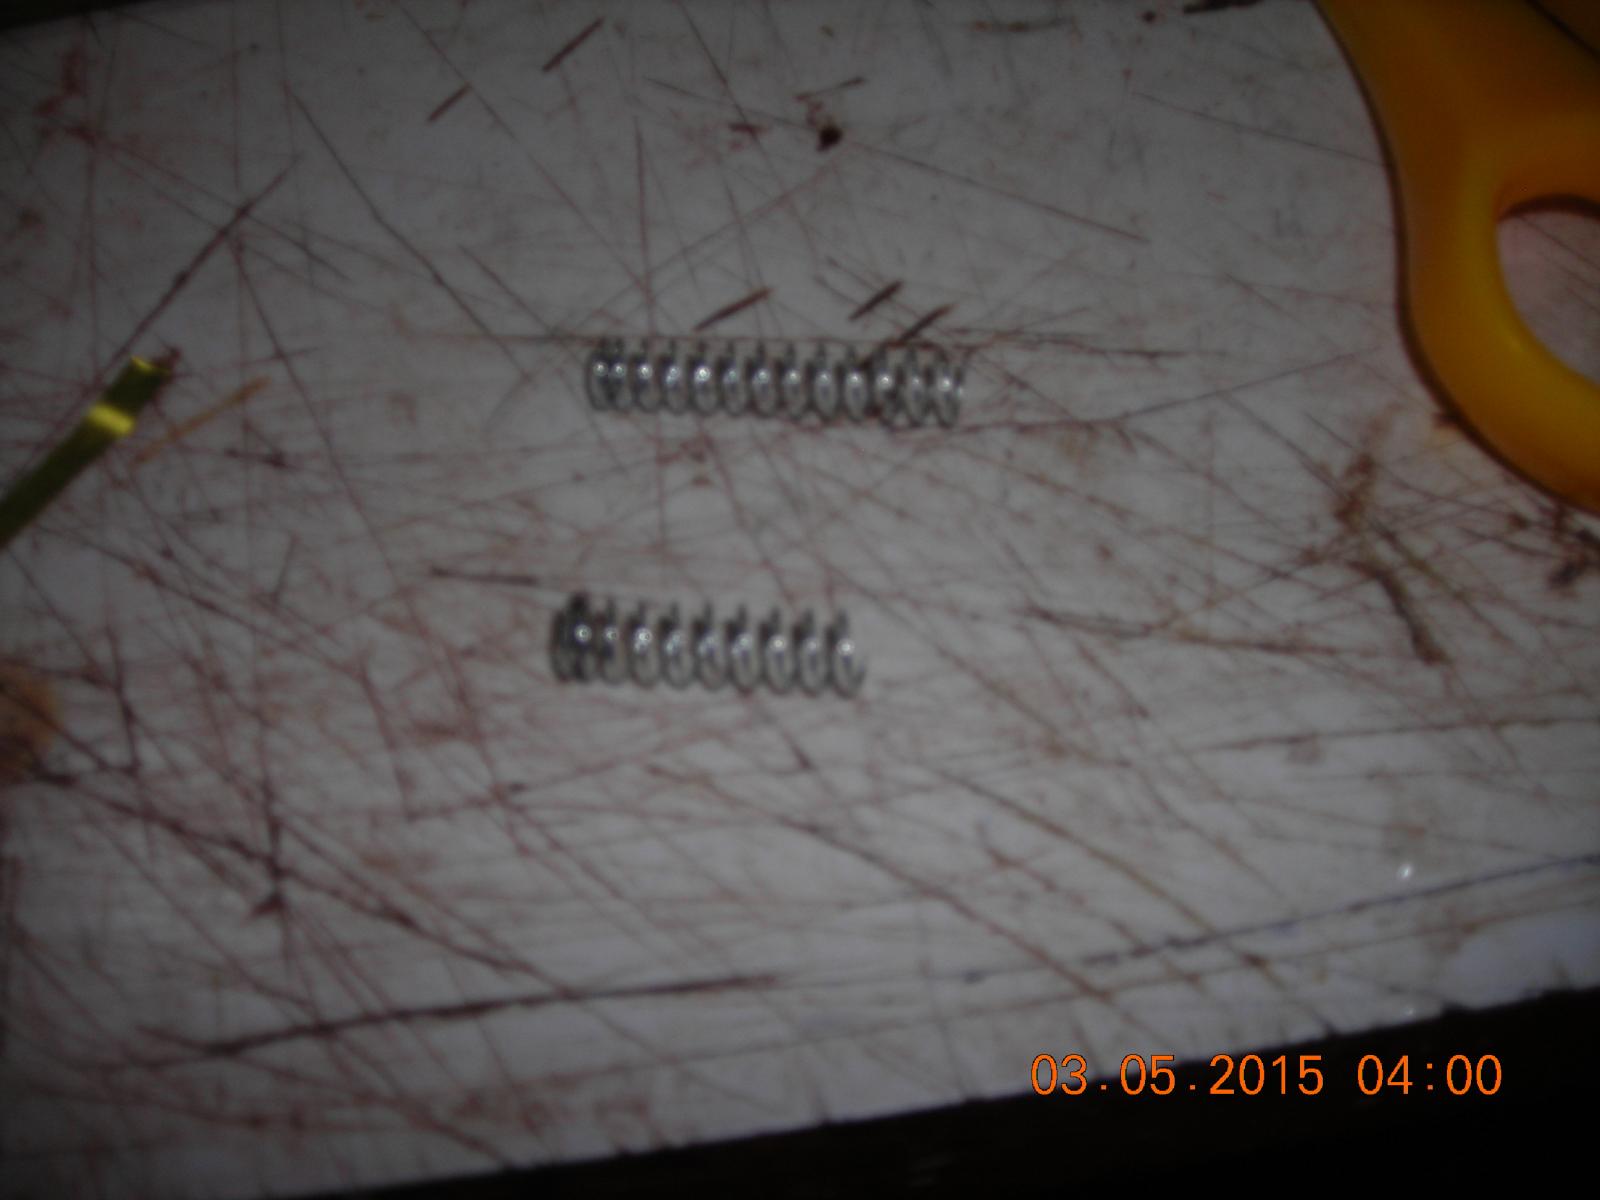
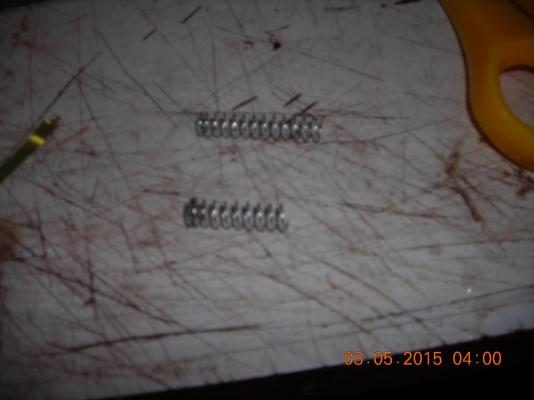
Removed the drive disc idler on the port side and the motor drive disc too. The spring length has been a balancing act from the start, initially I used the full length of spring but found that was too much stress on everything else plus put too much strain on the motor too. I cut them shorter, bits at a time until I thought I had it right then as you can see from my previous post pictures they were not strong enough to raise the oars the way I want them once it was all together. Now the springs are 3/8" longer than before and that looks like the sweet spot I need. In the one picture you can see the short one that didn't have enough push beside the one I'm using now which is 3/8" longer.
-
My all time favourite Lightfoot song, better do a build log on that one! I have a hull in the attic waiting to become a freighter or something of that nature so maybe I could get some tips from your build log Ben.
-
Lol Patrick and Mark I know what you mean I can get a song stuck in my head for a whole day. I remember when I was driving forklift on graveyard shift of a fish plant it was a twelve hour shift and the job of the women there was to pop the heads off the herring and squeeze the eggs into one chute and the waste into another all night long. So for fun I came by one of the Girls and sang I'm so tired by the Troggs, well needless to say by the end of the night the girls within earshot of my singing were ready to kill me come morning.
-
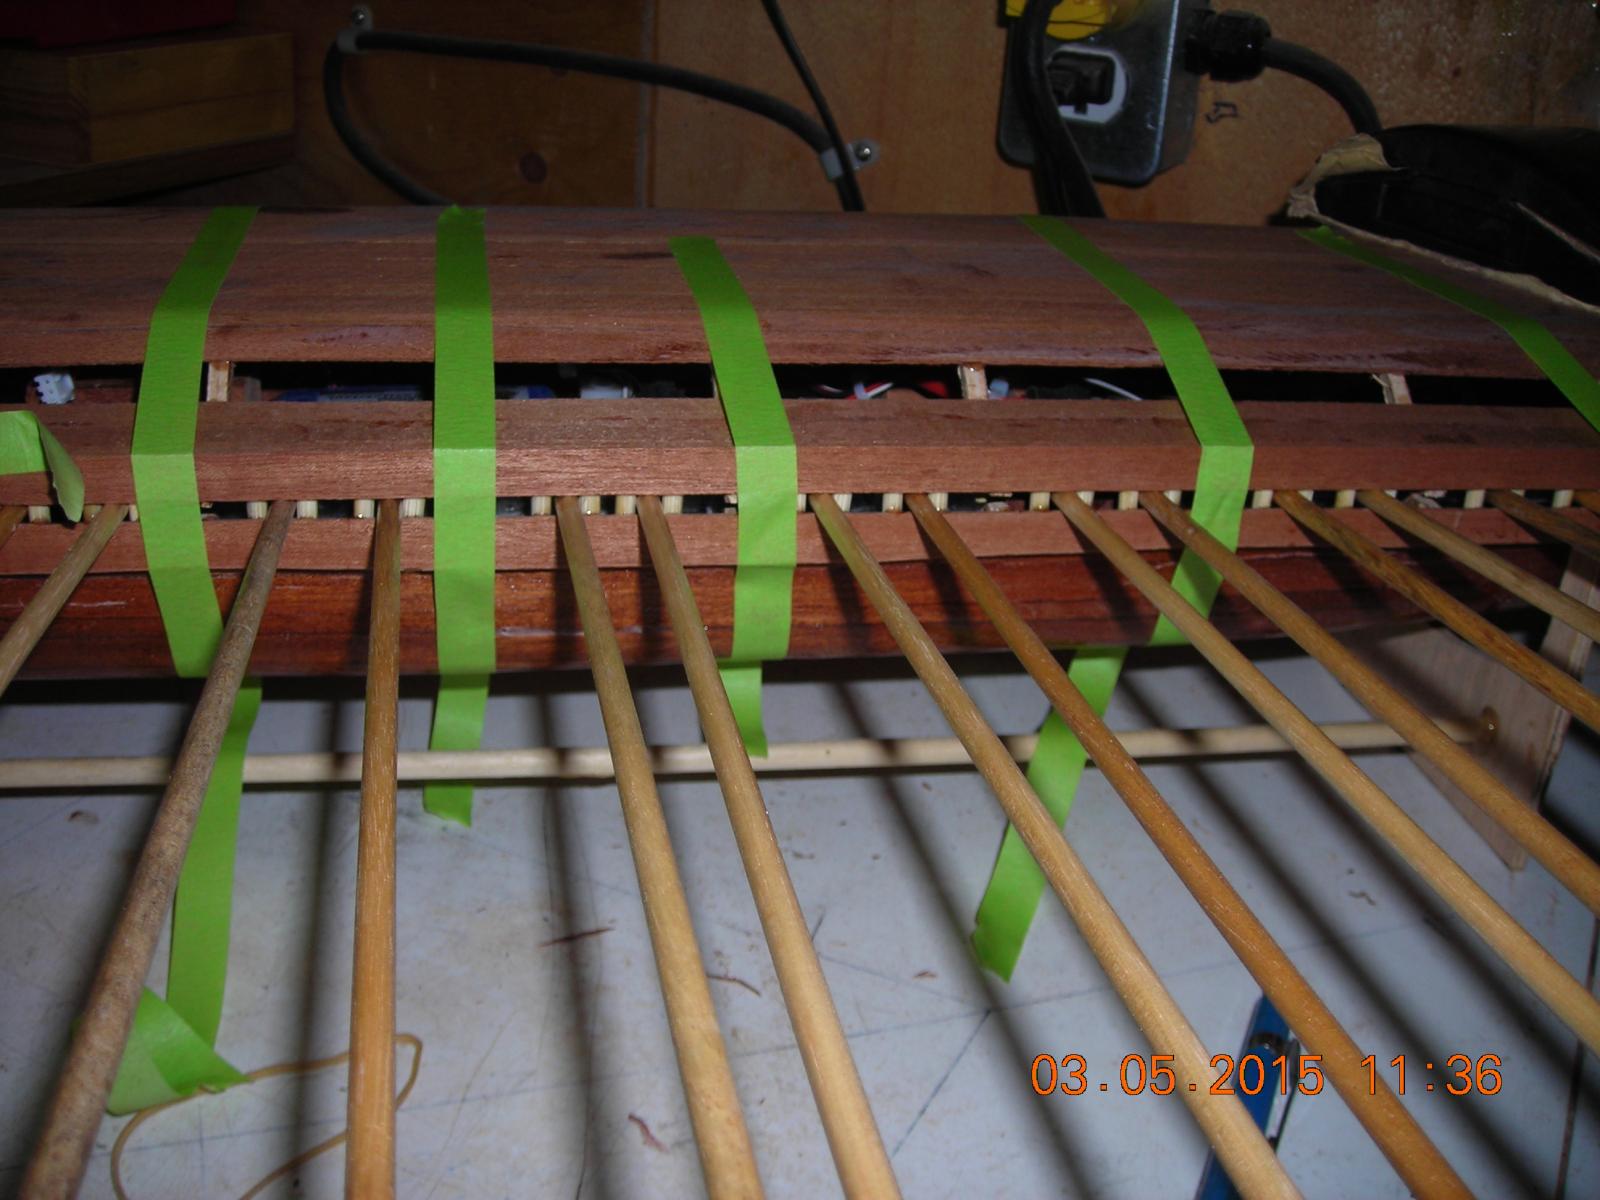
In the one picture it shows the alignment dowels installed on the port side, now I've been informed they are called "Tholes" so of course the whole time I'm making and installing them I was singing "I'm a Thole man" by the Blues Brothers. The oars were moved to the maximum in each direction for each side to properly fit the Tholes so the spacing would be correct and the oars won't bind. In the other picture you will notice the oars are deeper at the stern than they are at the bow, that's because I reduced the spring tension too much and now with the weight of the oars they are pulling the rack up into the spring loaded slot of the drive discs too far. Once I pull the motors and idlers out to repair this problem I will also have to repair the racetracks to make them work smoother with the increased spring tension, I hope this will be the last adjustment in this department.

-
Well Ben I've been pulling wrenches for the last forty years so all the mechanics on my ship I've seen used on one machine or another over that period of time. My task was how to marry them to all work together, and from my experience I've never actually seen the racetrack concept being used but after a lot of head scratching I came up with that idea and it was nice to see it actually worked. Although I will admit I did redesign the steering column under warranty for a major truck maker to stop it from pounding out the steering box the next year this manufacturer implemented my design in all their trucks that required it, I think I've blown my own horn enough there's more I could tell you but I'm already too long winded and sorry if this was starting to sound arrogant or boastful but it sure was starting to look that way to me.
-
Thanks Mark and thank all the rest of for opening my eyes about how many are following this thread.