HOLIDAY DONATION DRIVE - SUPPORT MSW - DO YOUR PART TO KEEP THIS GREAT FORUM GOING! (Only 24 donations so far out of 49,000 members - C'mon guys!)
×

bensid54
-
Posts
531 -
Joined
-
Last visited
Content Type
Profiles
Forums
Gallery
Events
Everything posted by bensid54
-
 Thanks Bob it's been baby steps all the way but once the oars are where I want them it should go much quicker after that.
 -
I don't always post what I do on this because there is a lot of hit and miss, so when I think I have something worthwhile then I post. It has been an obsession to get this done and I don't want to make any mistakes because I plan on long term fun sailing this ship. Thanks Patrick I'm glad to see you still taking an interest in my build!
-
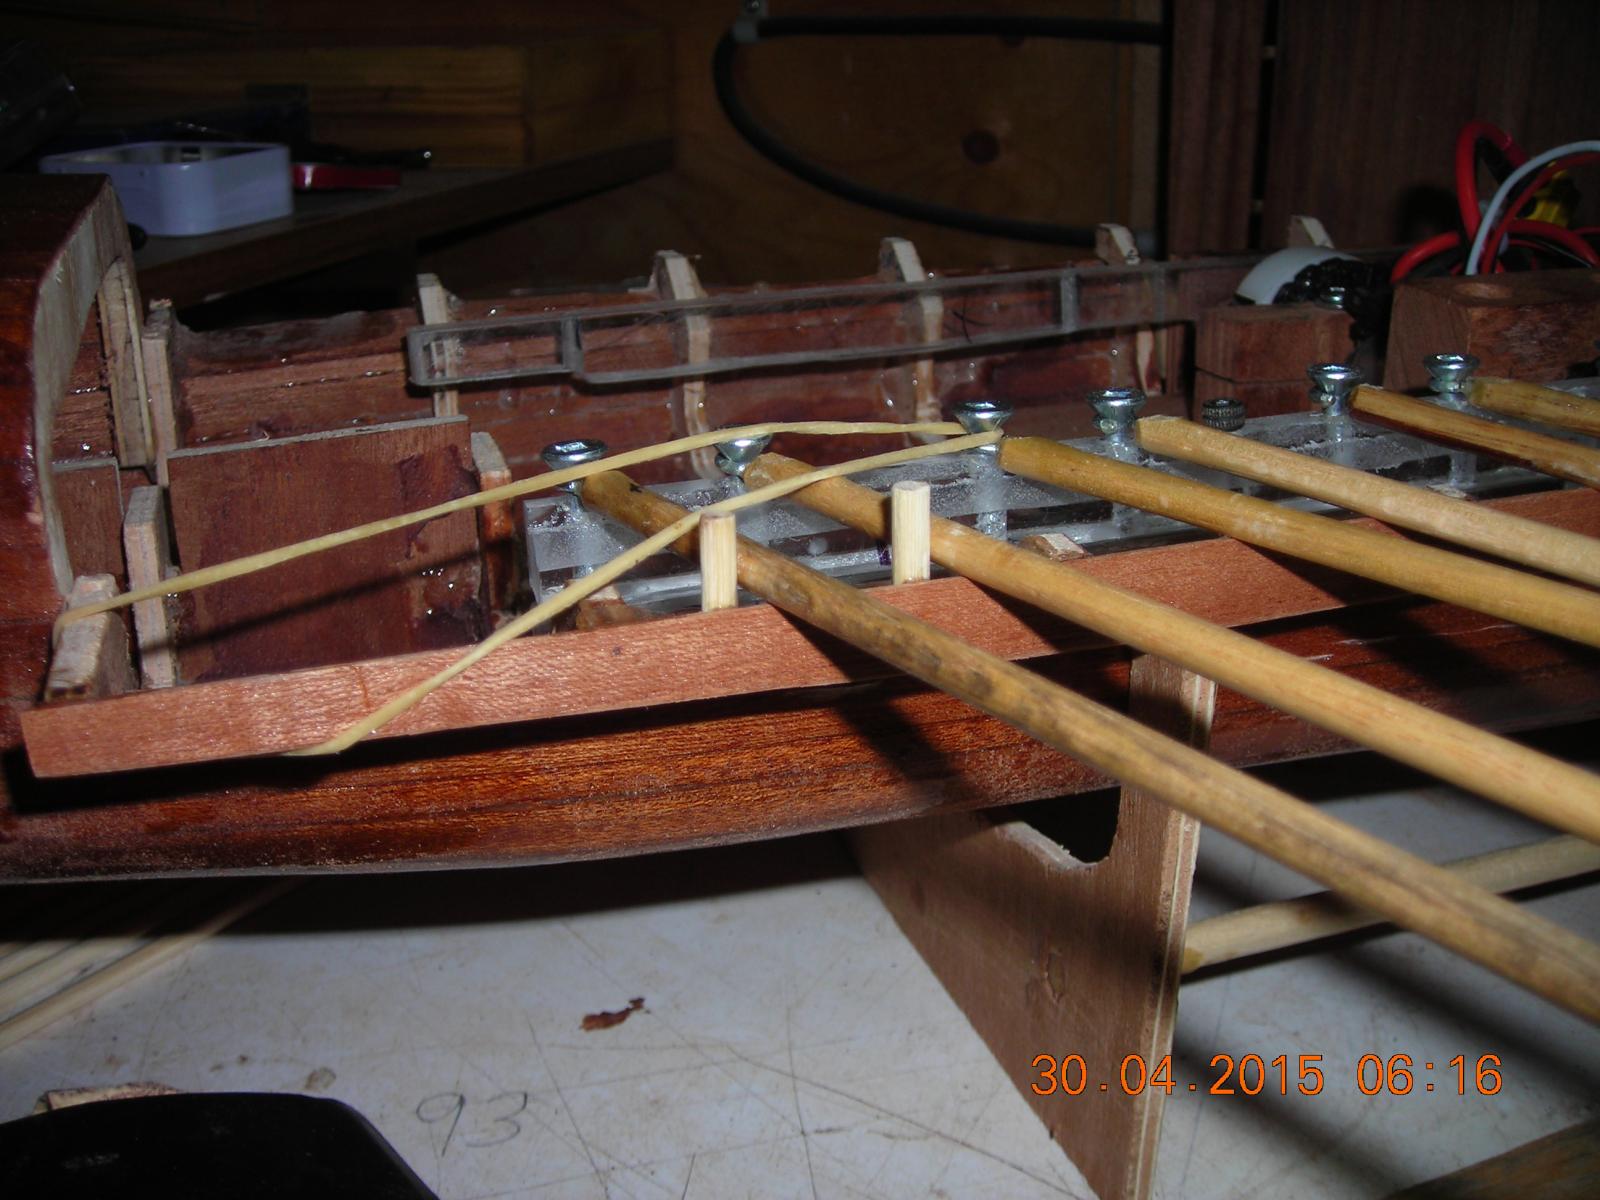
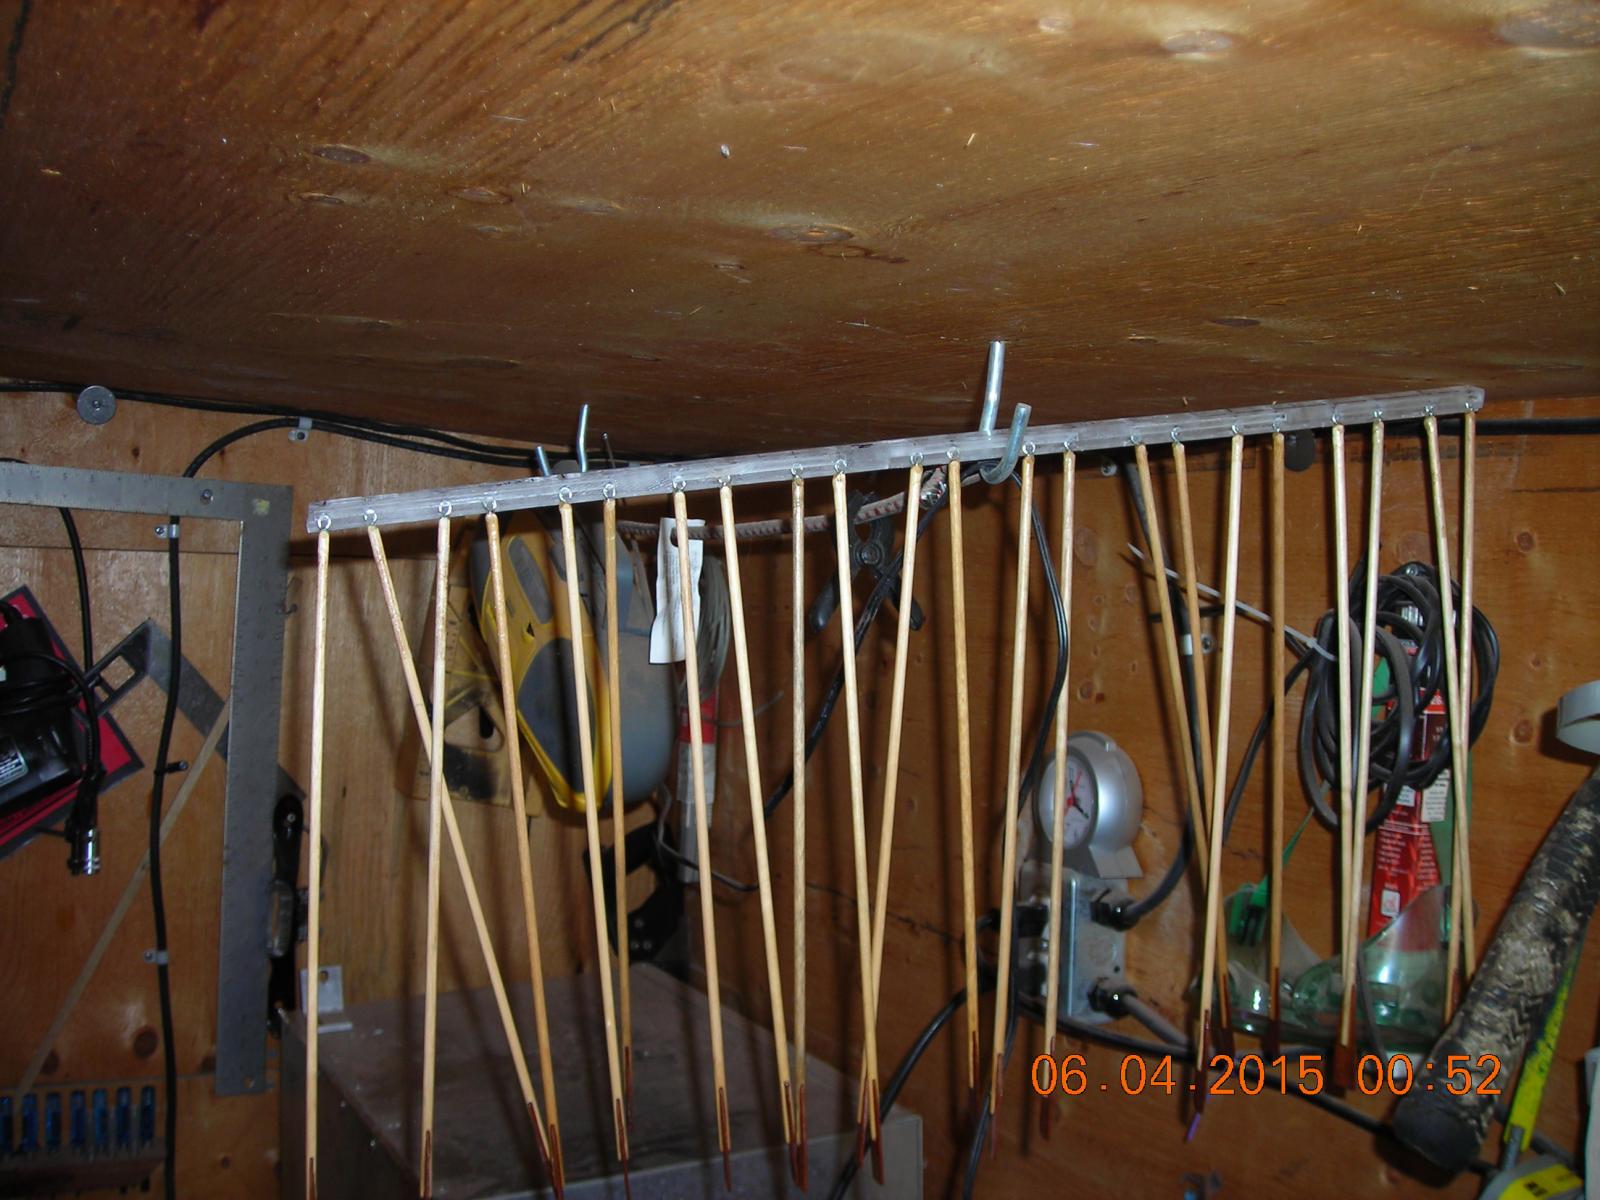
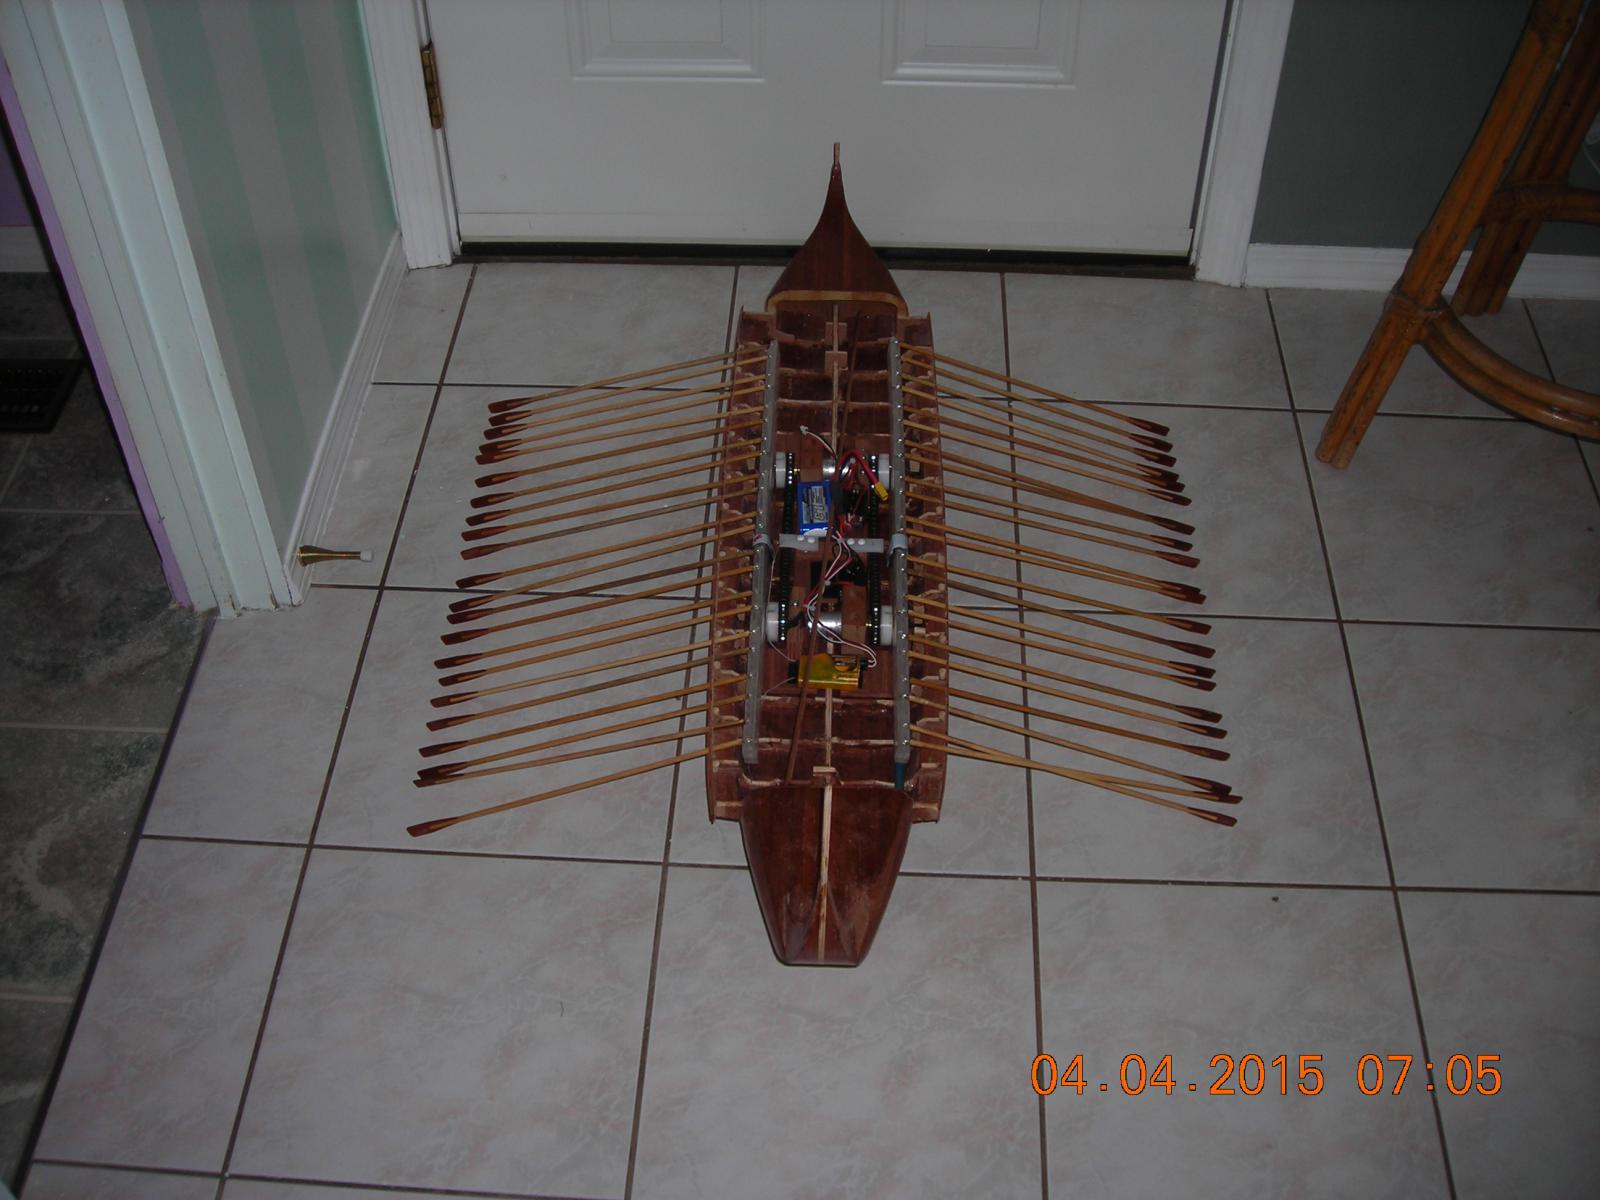
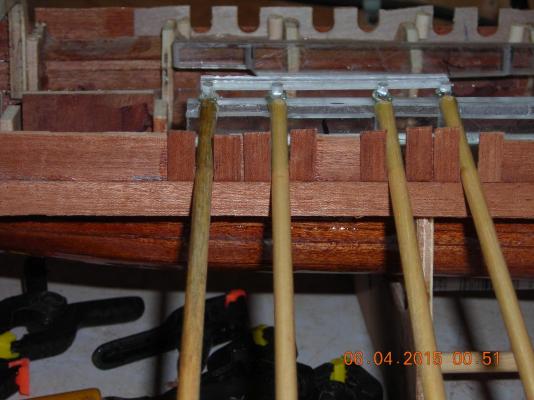
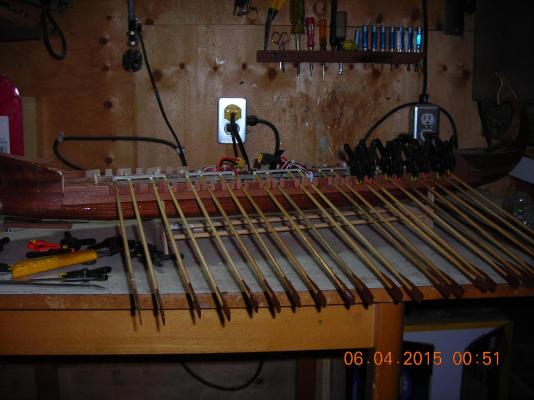
Since my last post I replaced the pins with #8 screws with a bit of a shank on them this seems like the final go with that design. Next I started making 88 oar alignment dowels and gluing them in place two at a time so the epoxy can set before doing the next two in line, should have those done in the next two days I hope. The picture shows the start of my oar dowels.

-
Thanks Bob very kind of you, I have rethought the oar pins replacement and decided to go with #4 tapered wood screws it will be much faster, easier and give the same results.
-
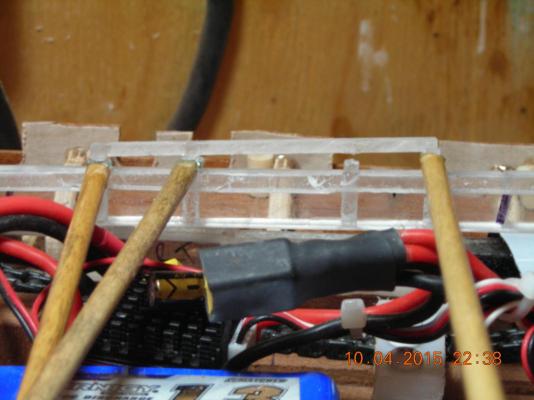
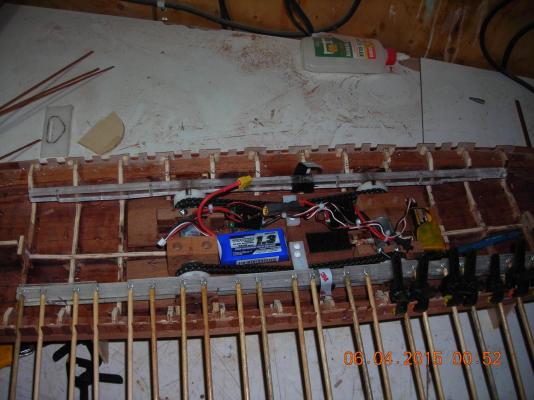
Yesterday I shortened the disc springs to reduce the deflection caused by springs because they were too much for the job they were doing and it did reduce the strain so I let the one side run for a good five minutes. After turning off the power I noticed one of the oar pegs was broken off as you can see in the one picture, so I had a closer look at where it was mounted and around the peg itself was some cracking. After separating the rack halves I noticed one of the rack alignment pins had broken off but the other four were fine, for now. So based on my findings the oar rack pins will not survive in the long run and it was time to break out the engineer hat. The last picture to look at shows the threaded pin replacements, all 44 will need to be turned down to size and cut to length, it should also reduce the oar rack height. The alignment pins will now be steel two for each side each and the Velcro will no longer be used. This is the reason I made the mechanics so easy to get at because I knew it would be a lot of alteration before I got the results I needed.


-
Thanks Steven it has been a lot of head scratching and pitching out parts that just wouldn't cut it, hopefully it will start looking like the real thing soon.
-
Thank Patrick I'm looking forward to that too, I will do a dry run before I put it in the water and video that. Right now I'm still finishing the oar ports and once that's done I will video the dry run, operating the controls will be a whole new learning curve for me because it will function like no other RC boat I've had or flying RC for that matter.
-
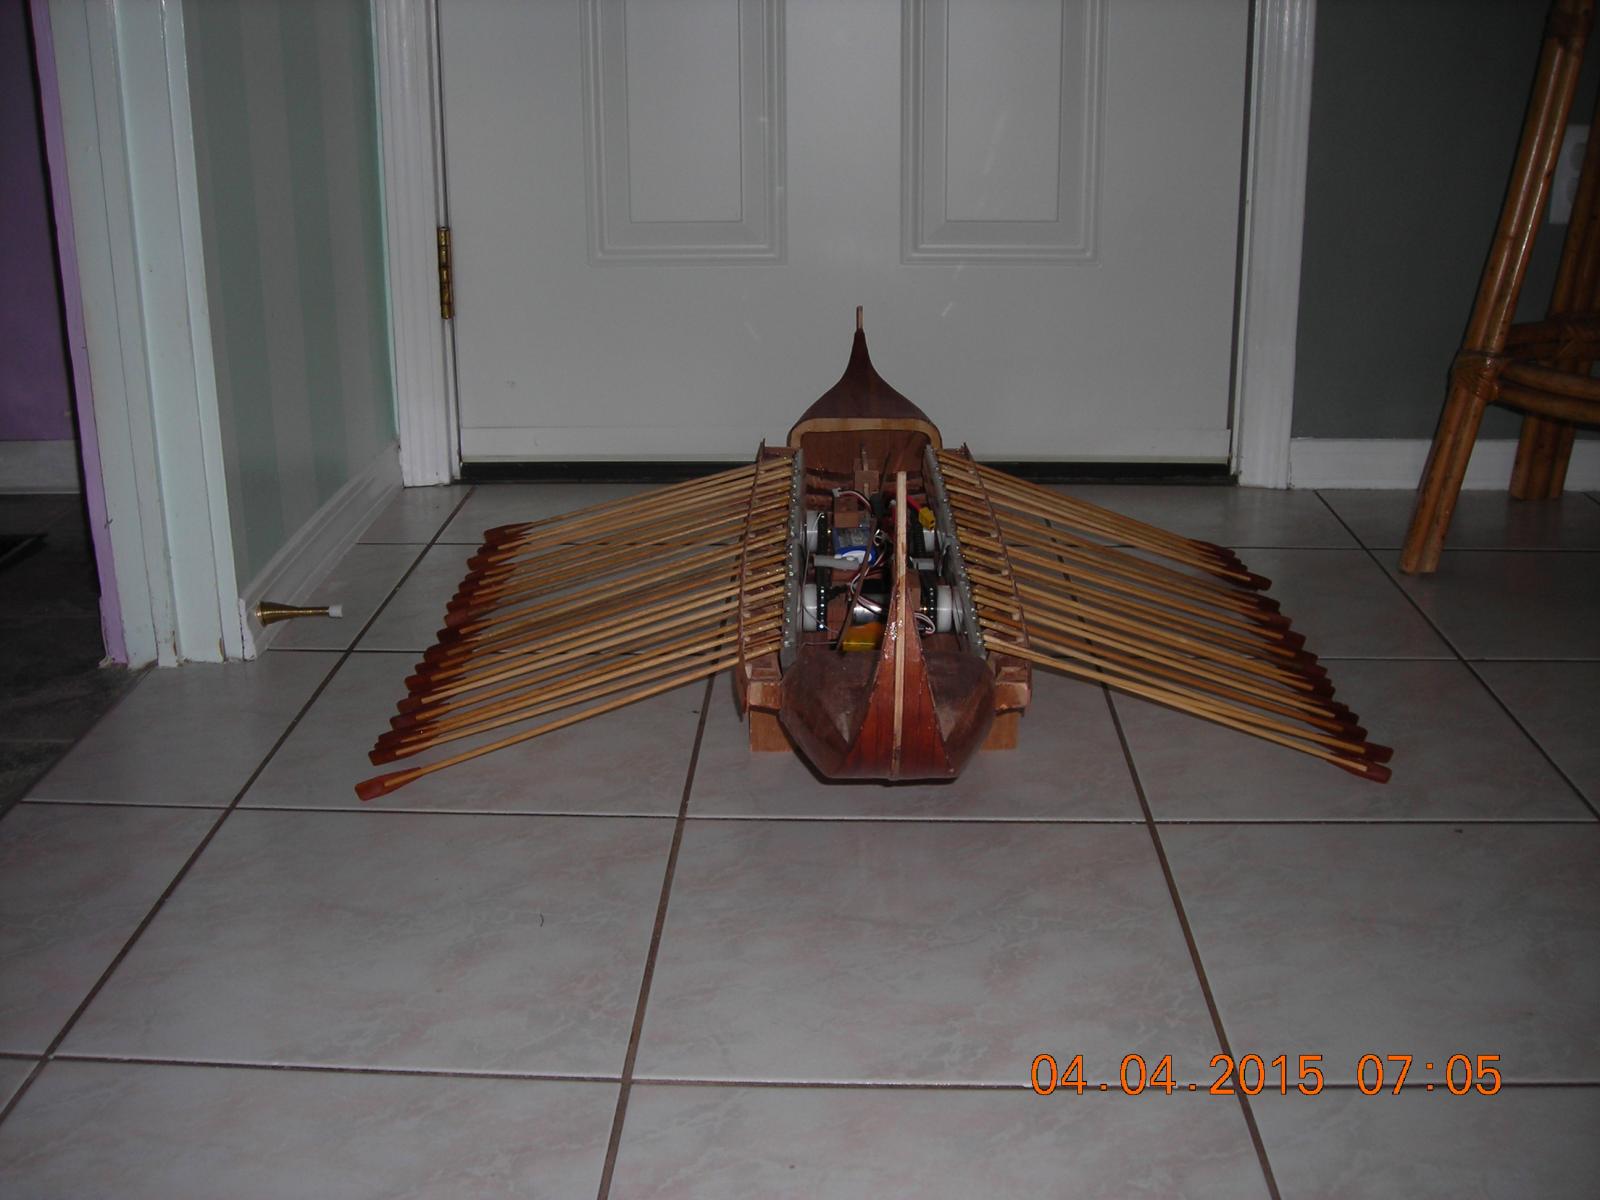
They did Steven but the oars can independently move forward or backward they can dip in the water starting at the bow or starting at the stern, I will be able to make it travel backwards, forward, wide arcs, small arcs in any direction left or right heading forward or heading backwards. The setup I have will also allow the ship to spin circles in any direction I will post another video once I can demonstrate that, how all this can be achieved is by using the CCPM helicopter mode of my radio system you can actually mix the two channels to facilitate the function I mentioned above. Thanks to both of you for the kind compliments!
-
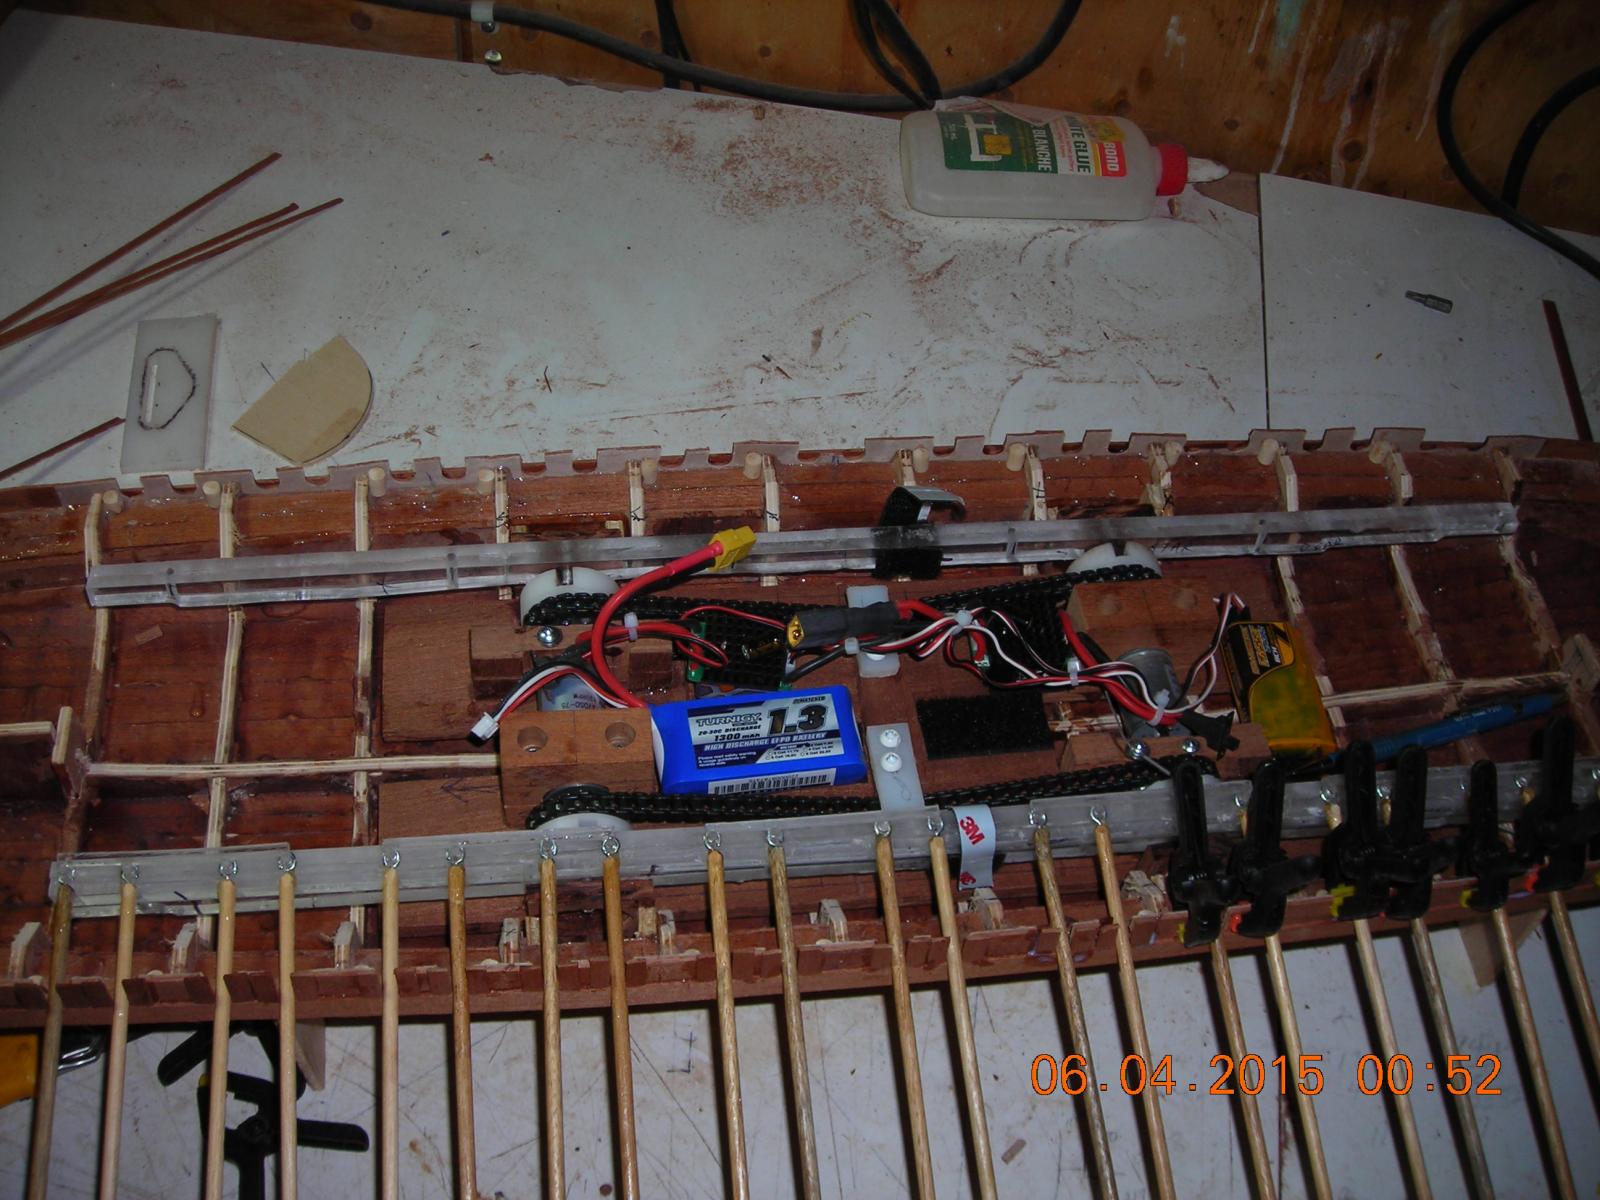
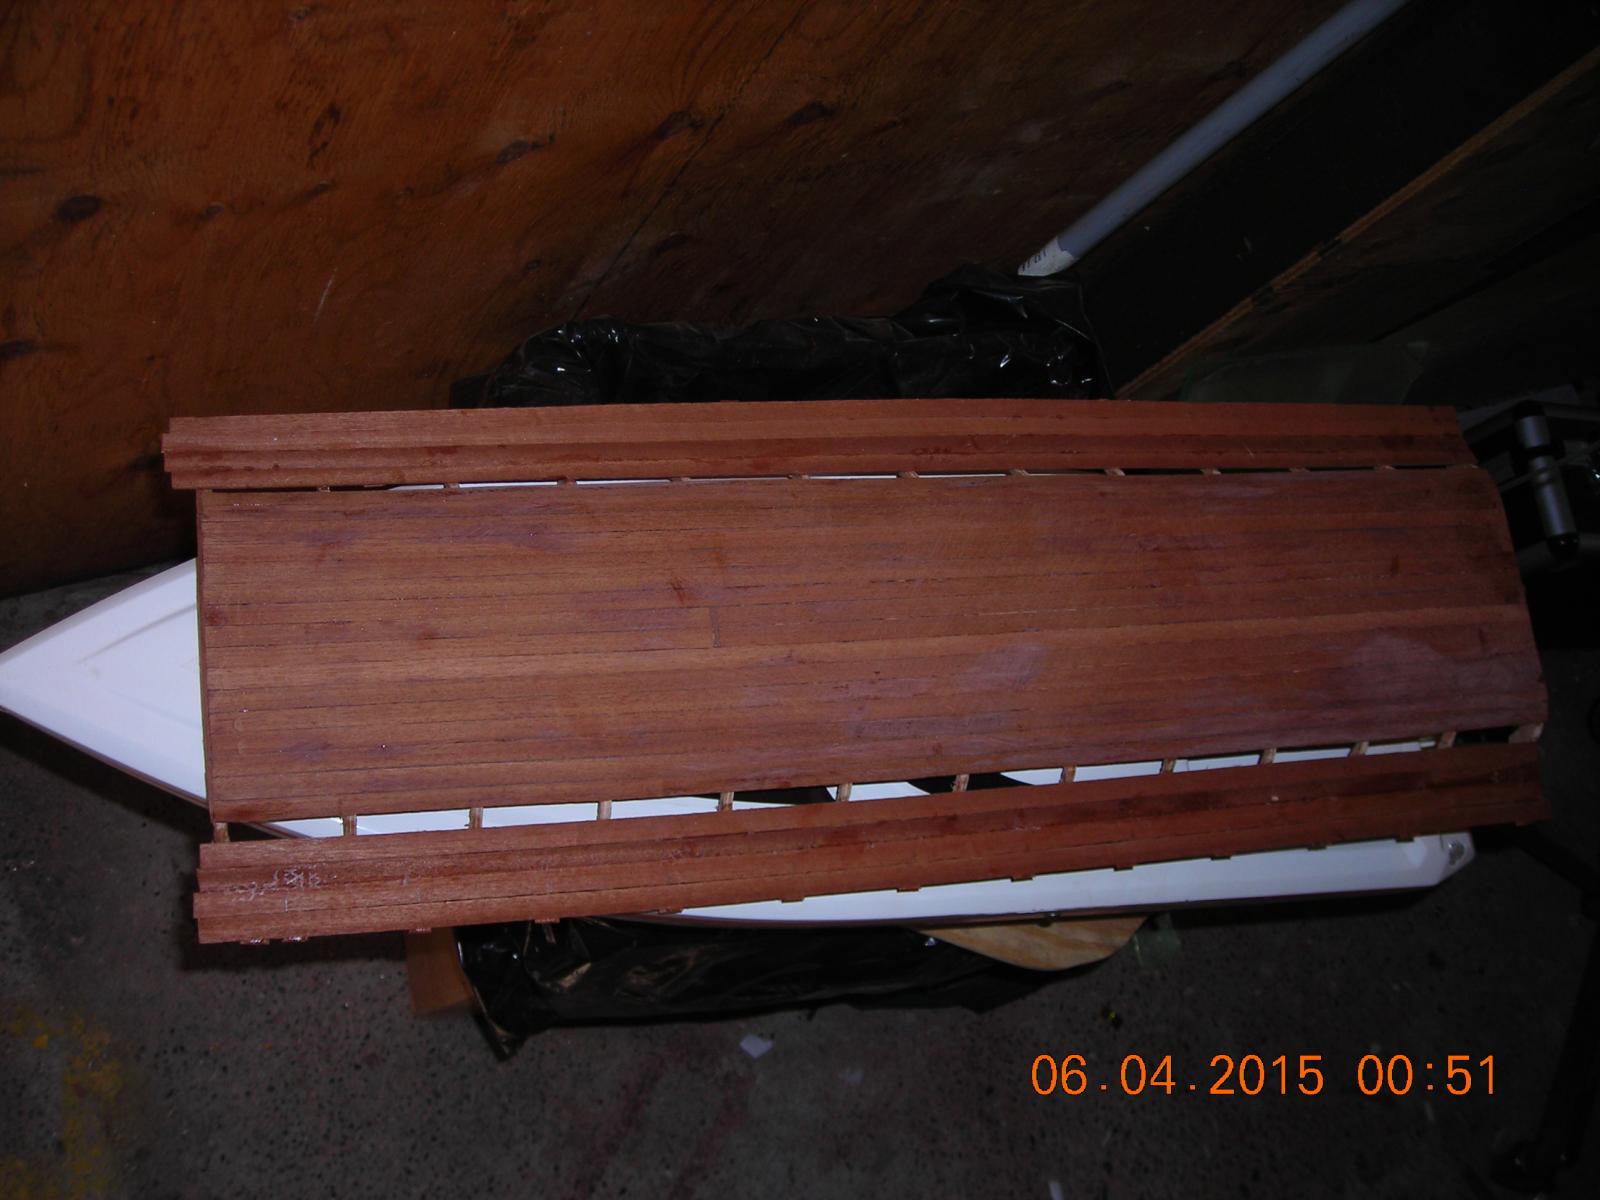
The completed half rack and the other half of the rack in the boat that it is fastened to.

-
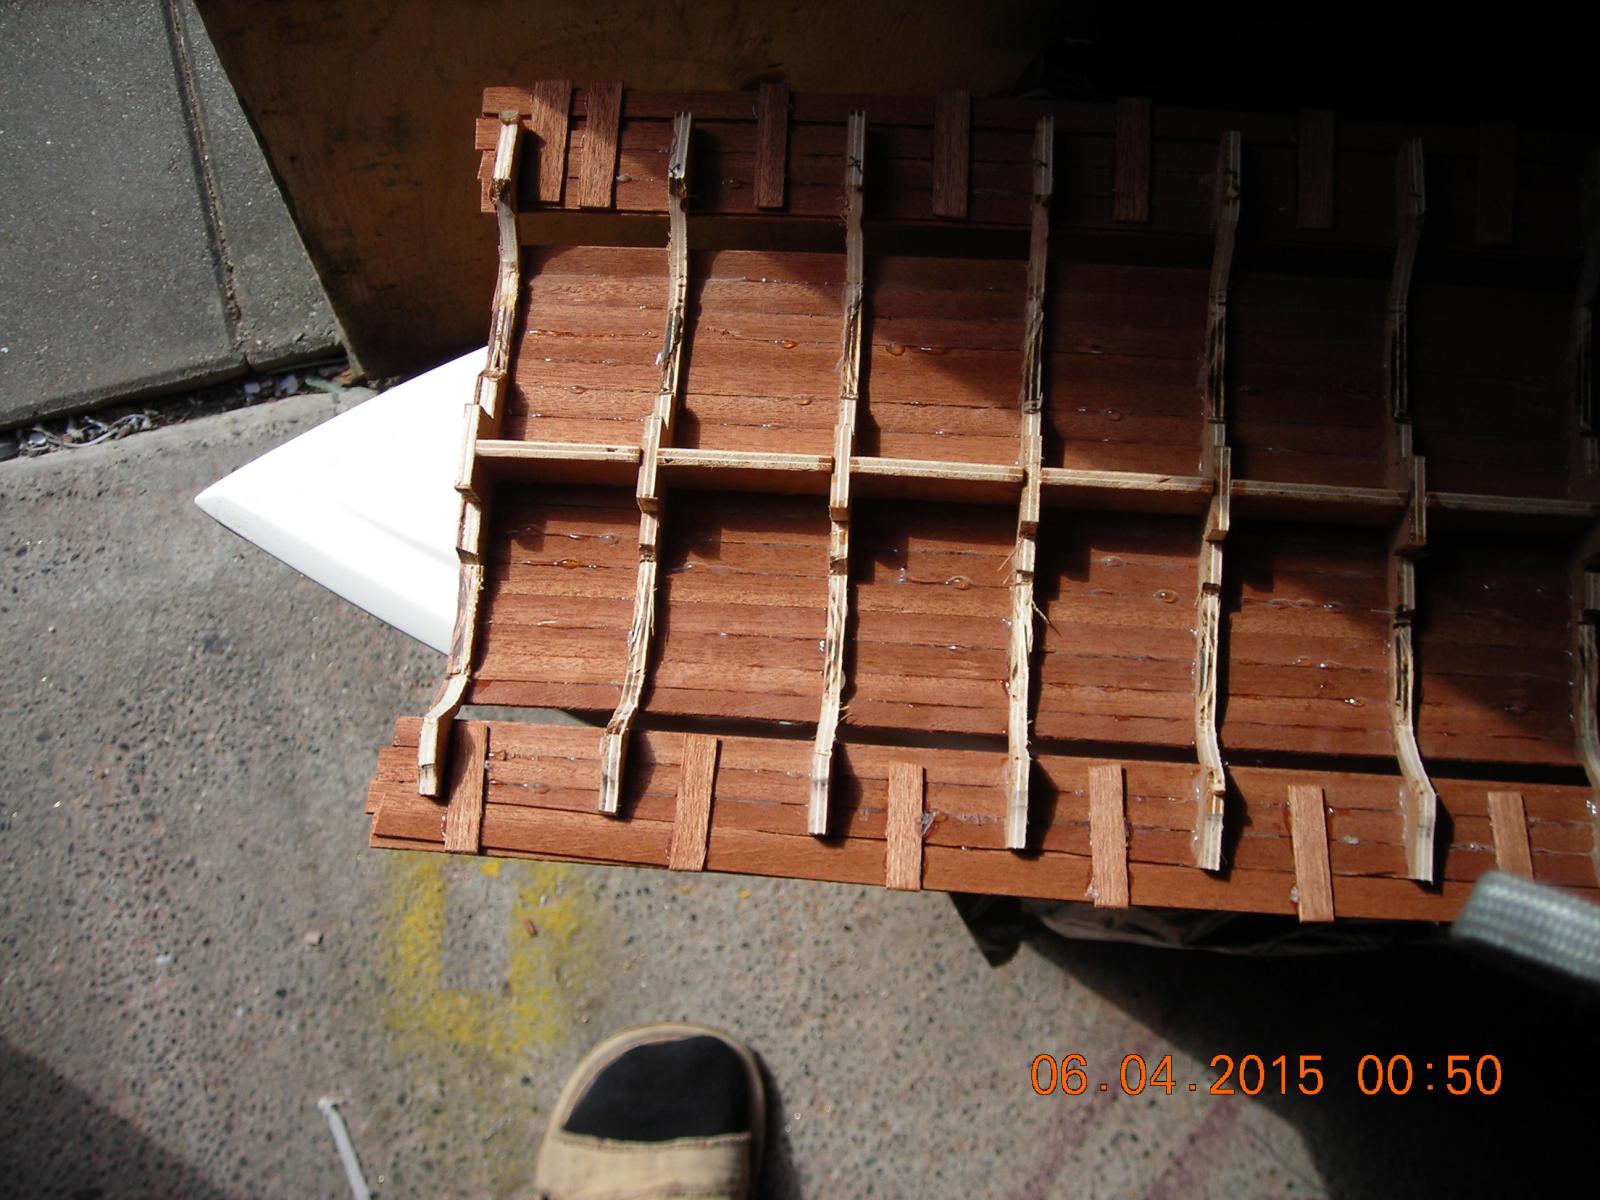
Making the oar fulcrums or oar ports they will be shaped and beefed up with epoxy to improve strength and look.
-
Well Bedford I do have a means of quick oar removal that I am presently finishing I'll have to post pictures of the progress. Carrying the ship on it's side was something I didn't consider but it does make sense, if I do that then I will have to make the mast removable or fold down against the deck. I will have to build a case specific to this ship because after all this time and work I need to protect it as best I can. I will need to make the case able to double as an assembly and display case. Interesting but the case itself will take a whole new set of ideas so I can use input there.
-
I kept my ears open and luckily I have no pets and my only child at home is 26 so I felt fairly safe doing that. Patrick I got a chuckle out of your comment but the oars I don't think would be good anywhere but water. One wrong move while packing the ship to the pond and I could destroy several oars especially with the momentum the finished hull could have. My next step is the final boxing and aligning the oars after that I will finish the removable deck to make the RC part complete then I have to make the sail and finishing touches. I think I will need to make a carrying case for transport but for now I'll carry it to our complex pool for the sea trials, I will be doing a video very soon of the complete oar operation which I think you will both find interesting.
-
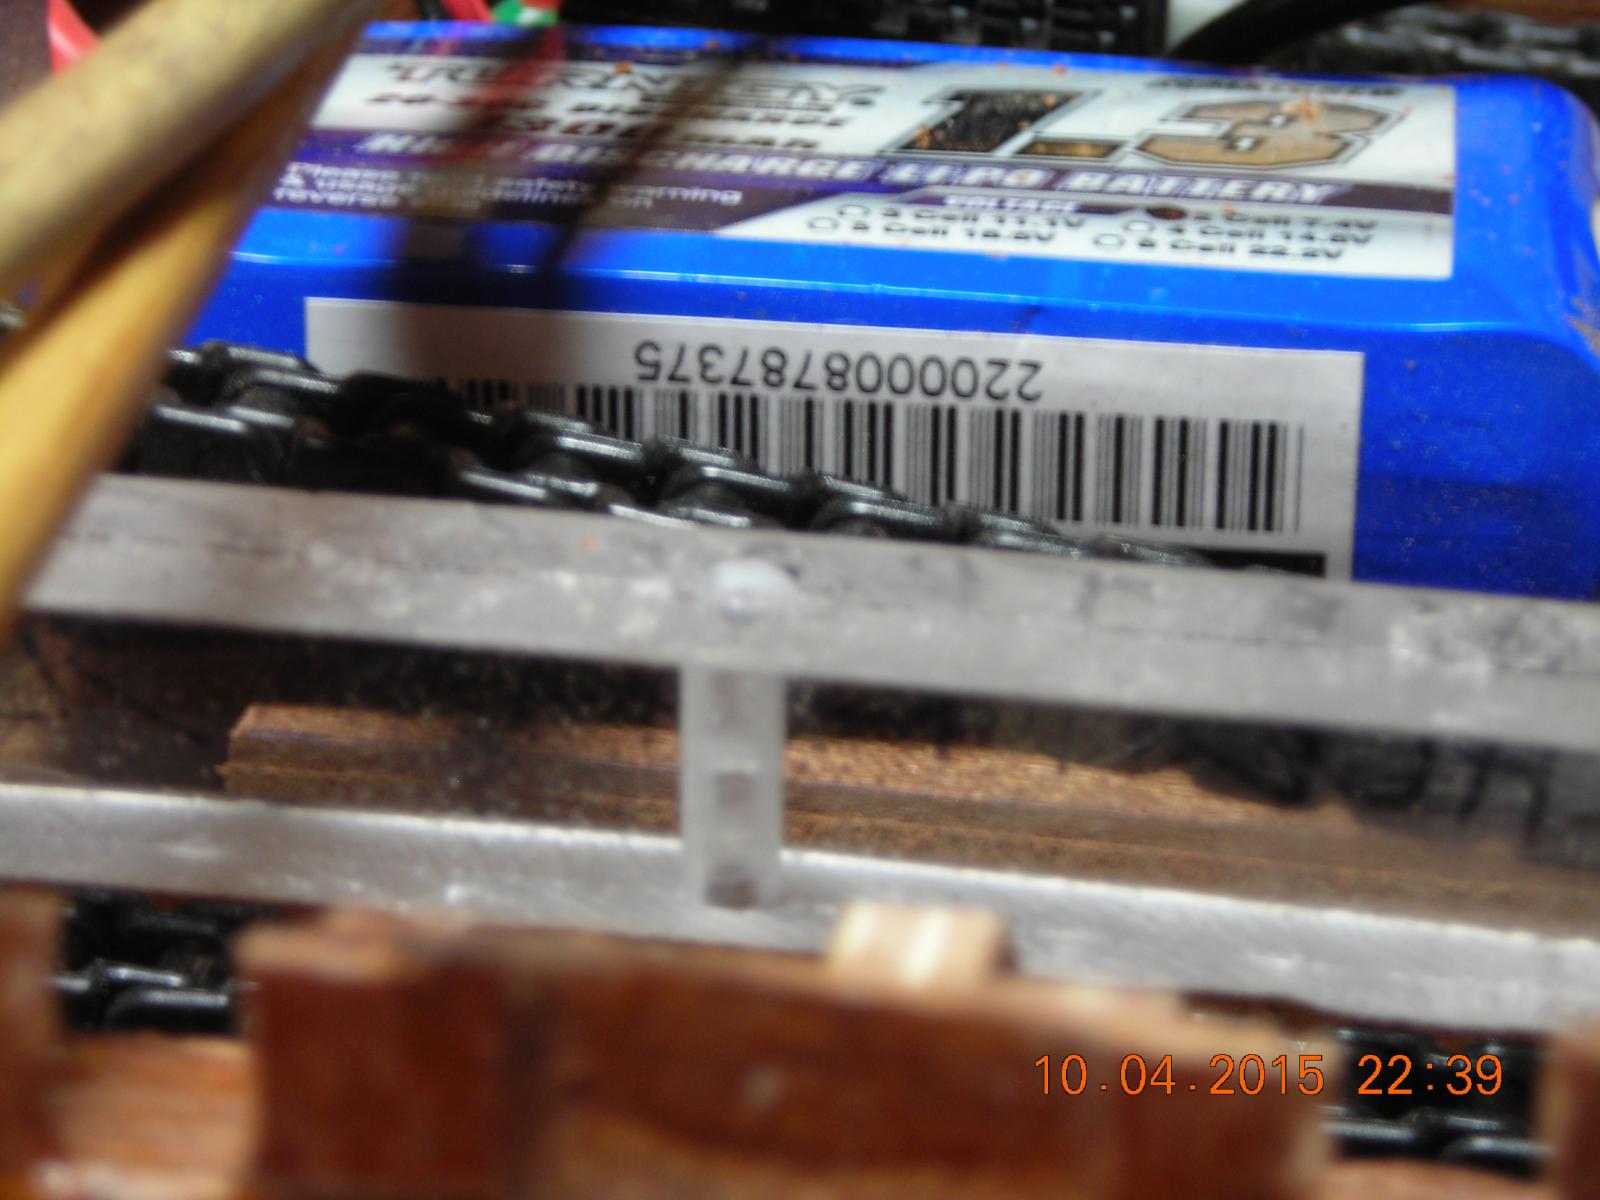
I think with the present battery I would be lucky to get five full minutes, I will likely have to look into a new bigger battery once I get to that point or wire two more small batteries like the one in it to balance the load but keep the battery height down. I intend to reduce the friction as much as possible with lube and fitting parts just a little loose. Thanks again for posting the video for me.
-
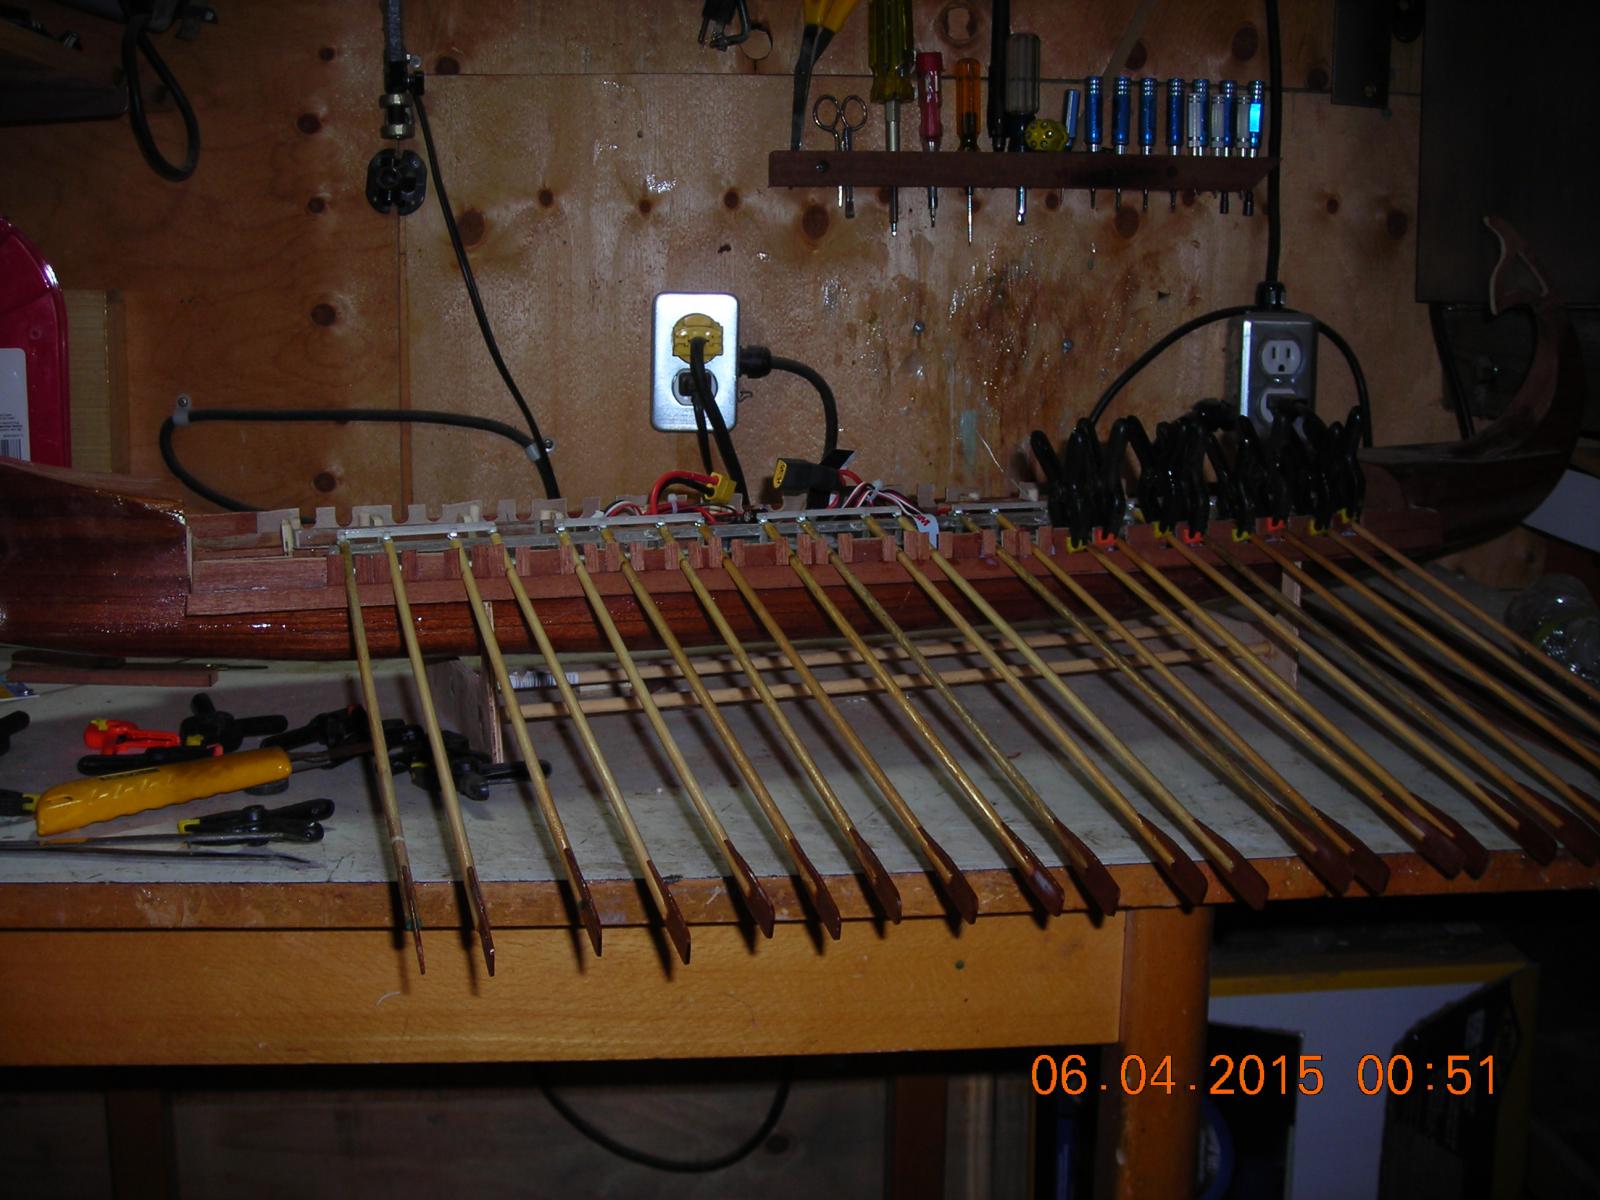
Patrick I have another video to post, it will be the last one for a while thanks for your help once again. I set all the oars in place to see how deep they will dip and what is needed to level end for end, properly space them and make sure all oars hit and leave the water at the same time. It should be moving four times faster than what you view in the video.
-
Absolutely Bob it was a very satisfying moment but I also have a new video preview of how the oars will look when it's finished. Patrick my good man would you be so kind as to upload this new video for me? Thanks to all of you for your kind comments and Patrick for your assistance.
-
Yes I hope to place it onboard today to check out the stroke length and take another video. Thanks for all your help Patrick I don't know why this website won't let me copy and paste, maybe it has something to do with my anti virus.
-
That's it thanks Patrick! I'm using the radios helicopter mix to get the racks to operate the way I want them to. Still some more fine tuning once I get everything mounted.
-
Finished the mechanics but as usual this website won't let me copy and paste anything so Patrick will download my latest video from You Tube it will be greatly appreciated. I'm finding the longer I run it the more the bugs are getting worked out of it.
-
Well Mark I've tried copy and paste many times but all I get is to do is paste it to a board then after that it all freezes and nothing co-operates.
-
Thanks Bob now I will have to take up drum lessons!
-
Thanks Patrick, this thing took a lot of head scratching starting last August when I checked into RC rowing ships. I found the oar operation with the ships on You Tube were choppy or would only go in circles, that was something I wanted to get past and I think this is it. I still have a lot more head scratching to do because I have to remake the oar ports to be removable with the top part of oar rack and have them dip deep enough plus come out of the water just under level.