HOLIDAY DONATION DRIVE - SUPPORT MSW - DO YOUR PART TO KEEP THIS GREAT FORUM GOING! (Only 24 donations so far out of 49,000 members - C'mon guys!)
×

bensid54
-
Posts
531 -
Joined
-
Last visited
Content Type
Profiles
Forums
Gallery
Events
Everything posted by bensid54
-
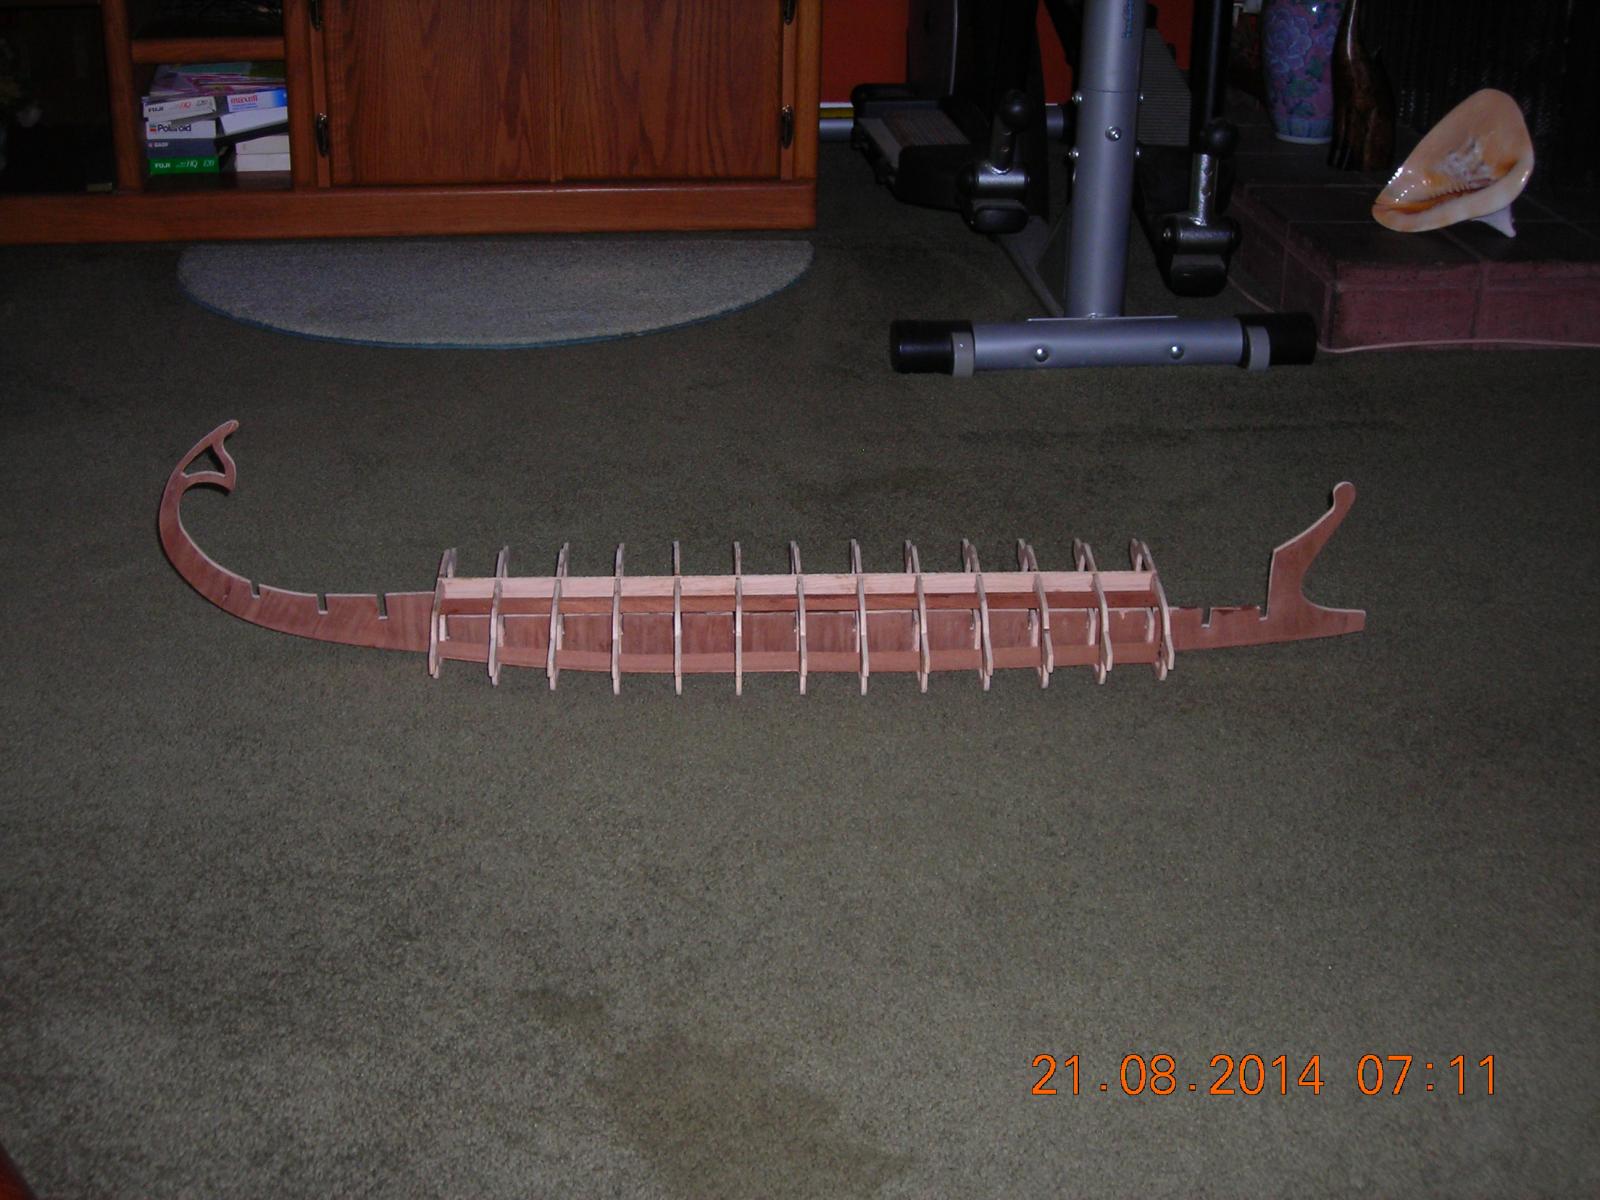
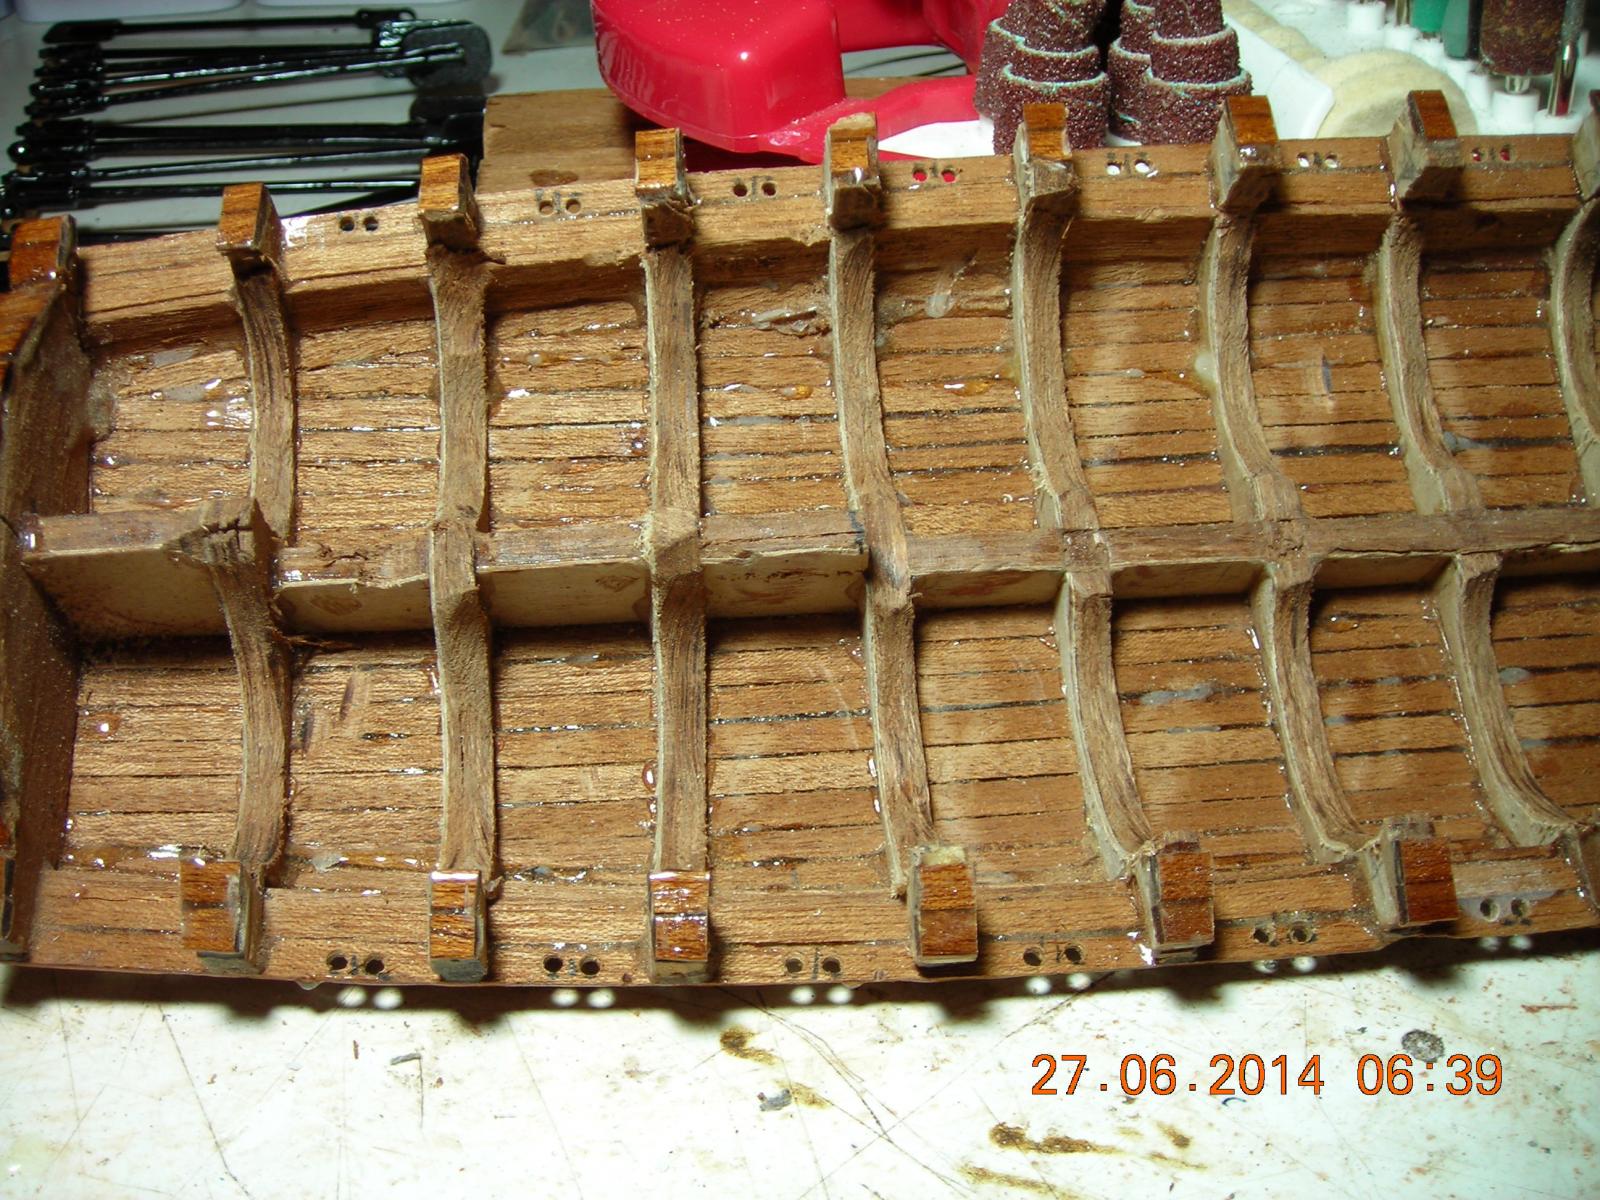
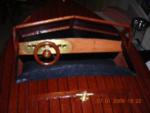
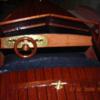 All bulkheads in place and as you can see the deck is dead level because it will be my my reference point when it comes to motor and oar rack installation.
-
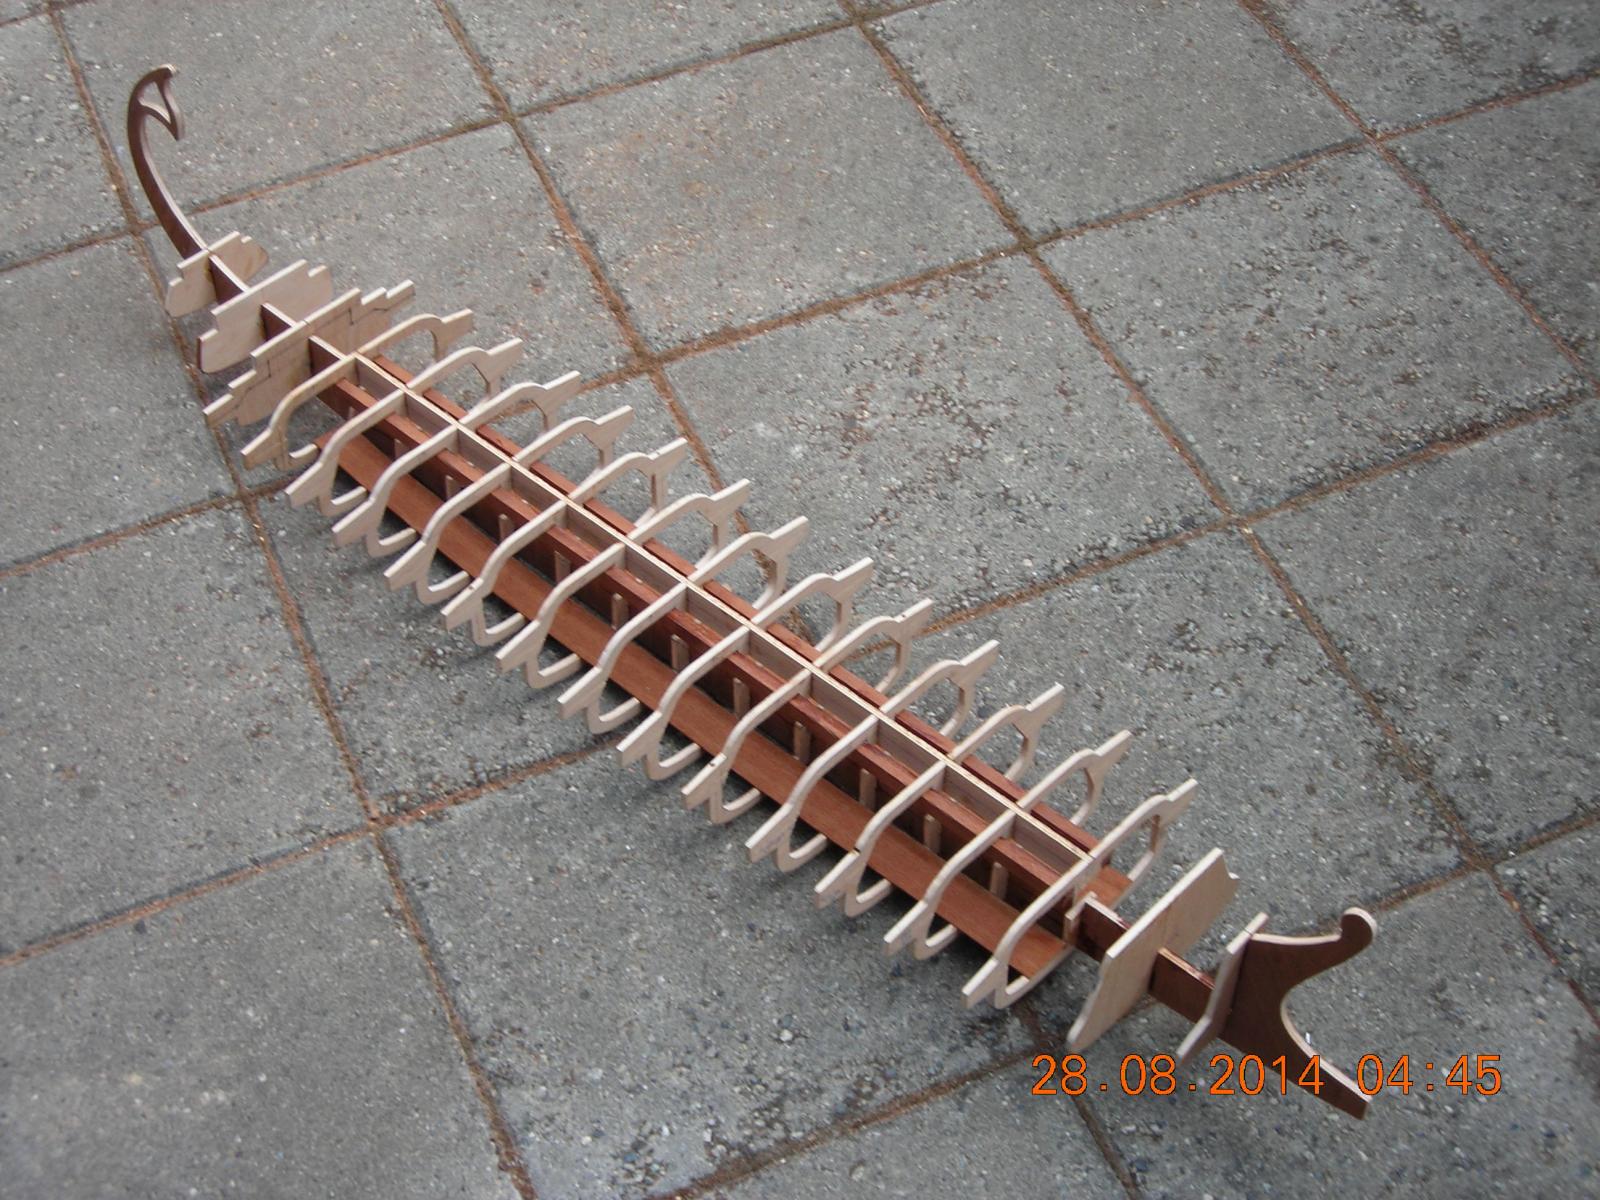
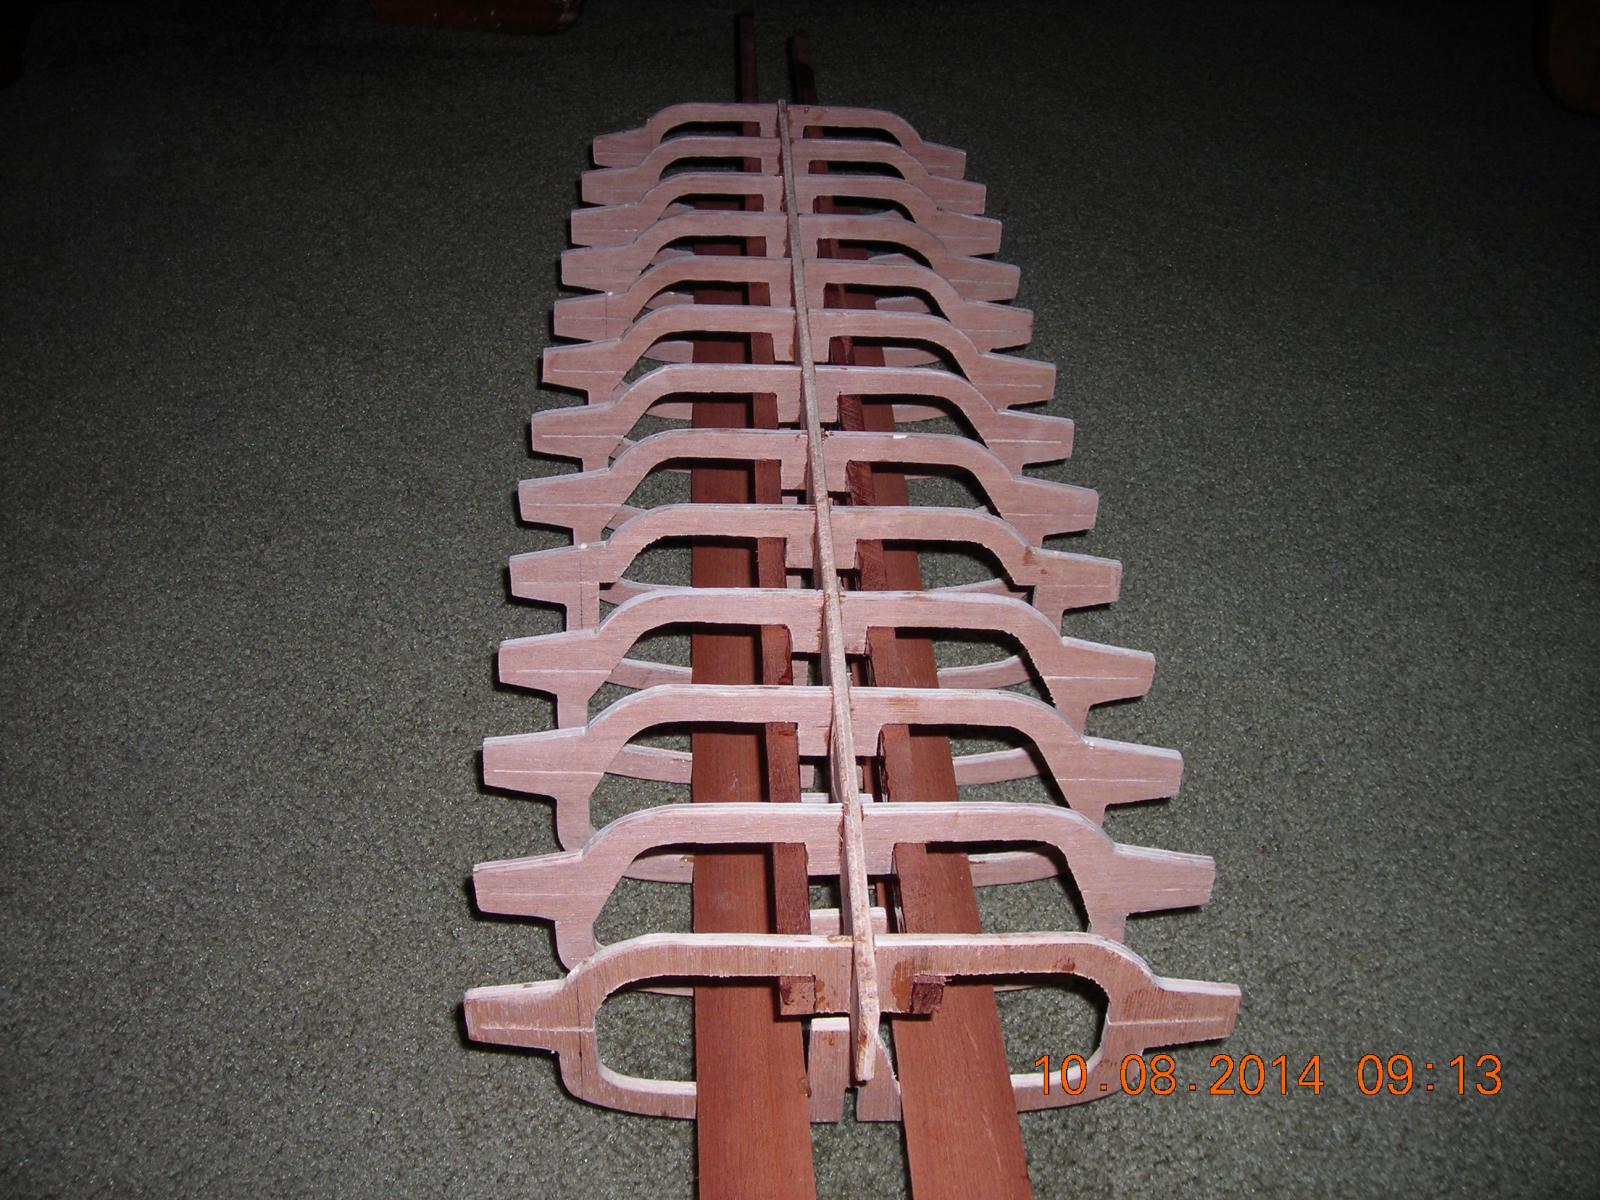
Thank You Omega1234 it does sort of look like a centipede now that you mention it. I plan on taking my time to get the look of it just right so it could be put on display when completed. The mechanics will be fun when the time comes, the plan is coming together and when it's done the rowing action should be smooth with no jerking or sudden movements over any phase of the rowing cycle. I'm going to have to watch some rowing videos to get a pattern for the oars to travel in. The oars will be designed to be removable because otherwise I'm bound to break a few when transporting it to the pool or pond.
-
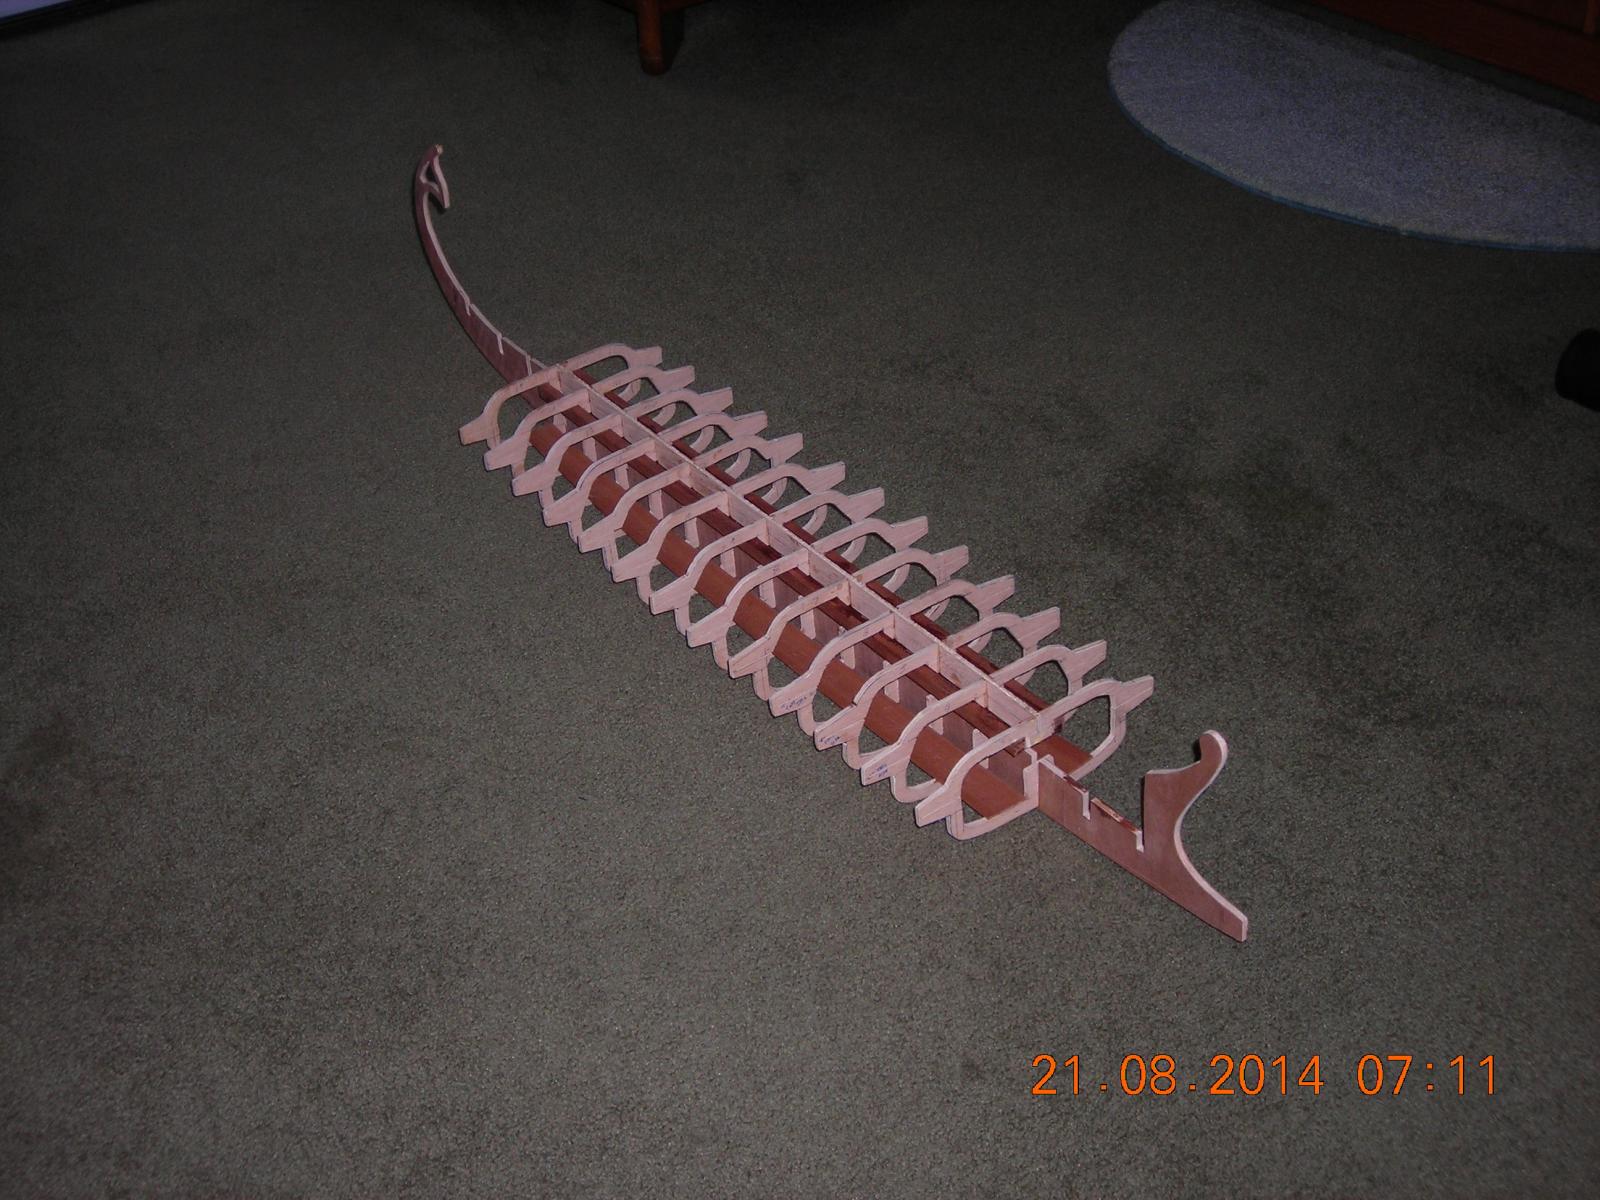
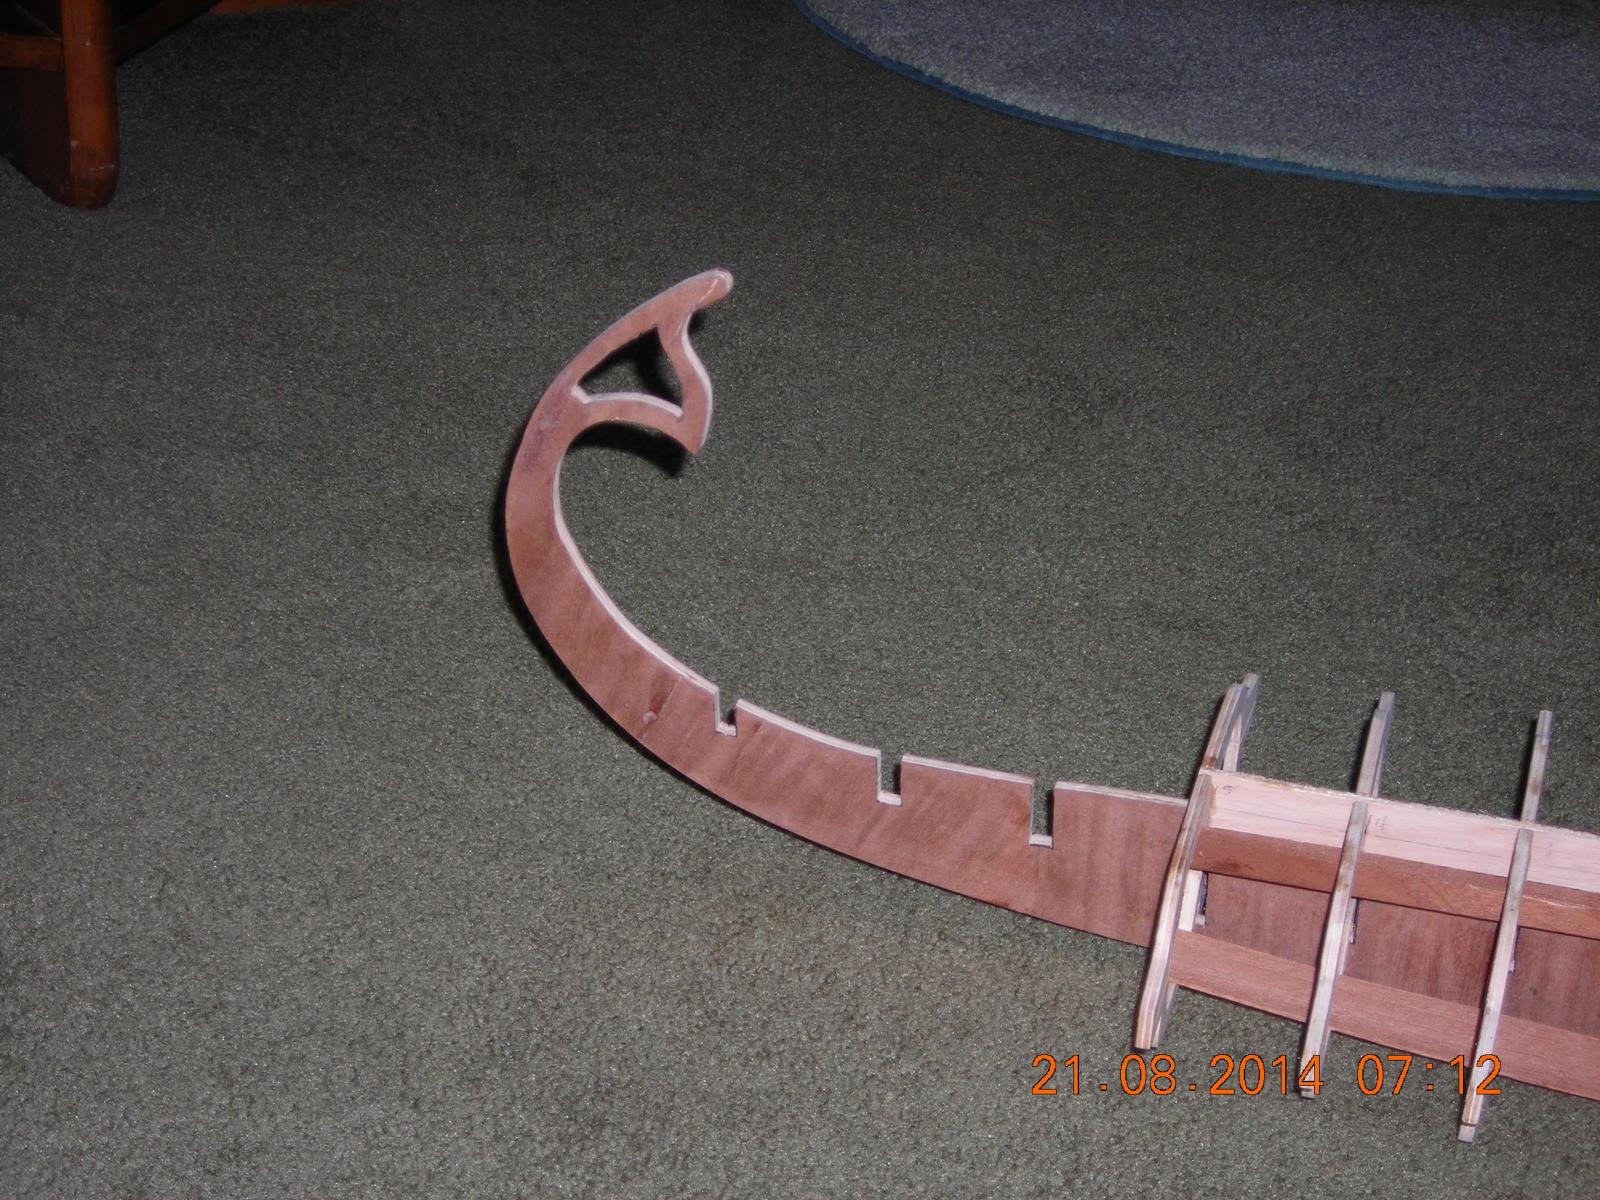
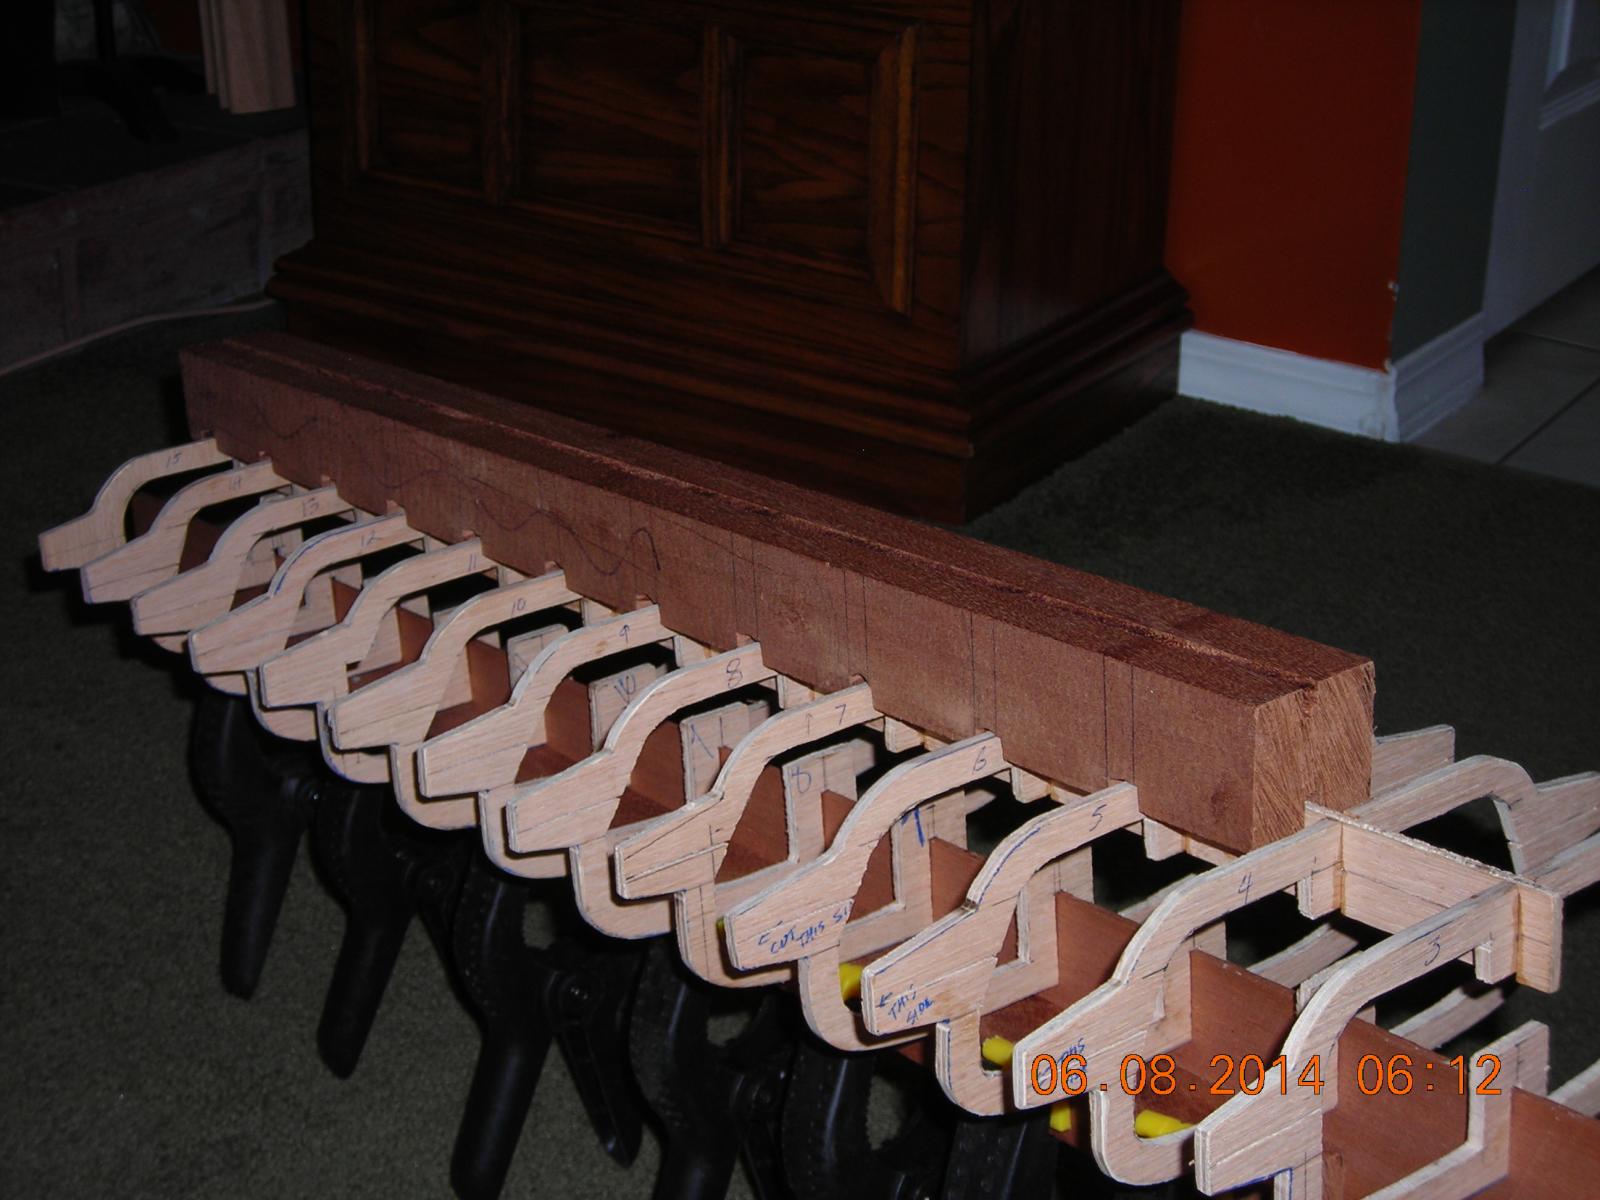
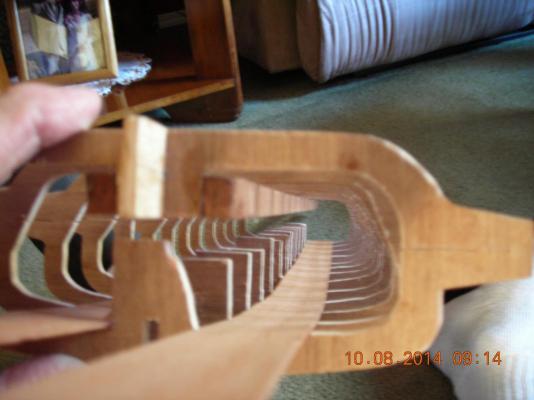
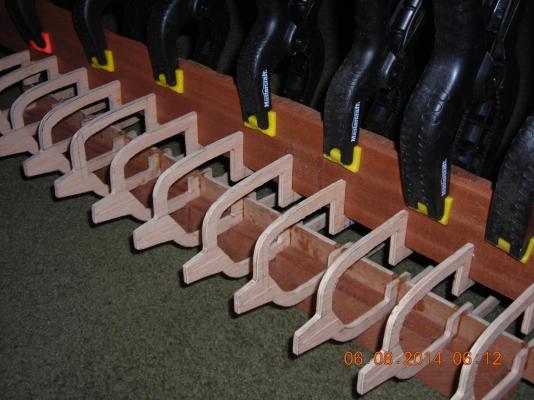
Backbone / Oar module prior to finishing and mating with the keel. The keel is presently having veneer applied and will be fitted to the Oar module when finished.


-
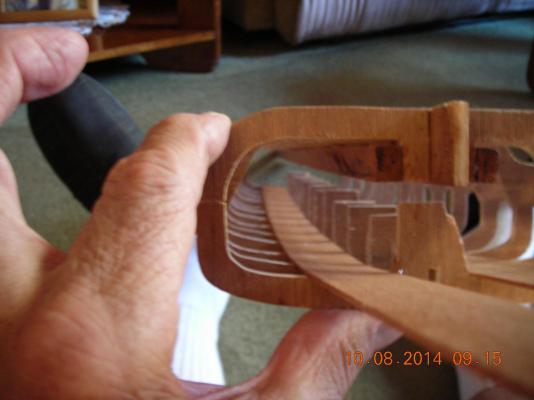
Keel alignment guide with clamps to hold it all straight. It will be assembled as is until I feel comfortable to remove the guides.
-
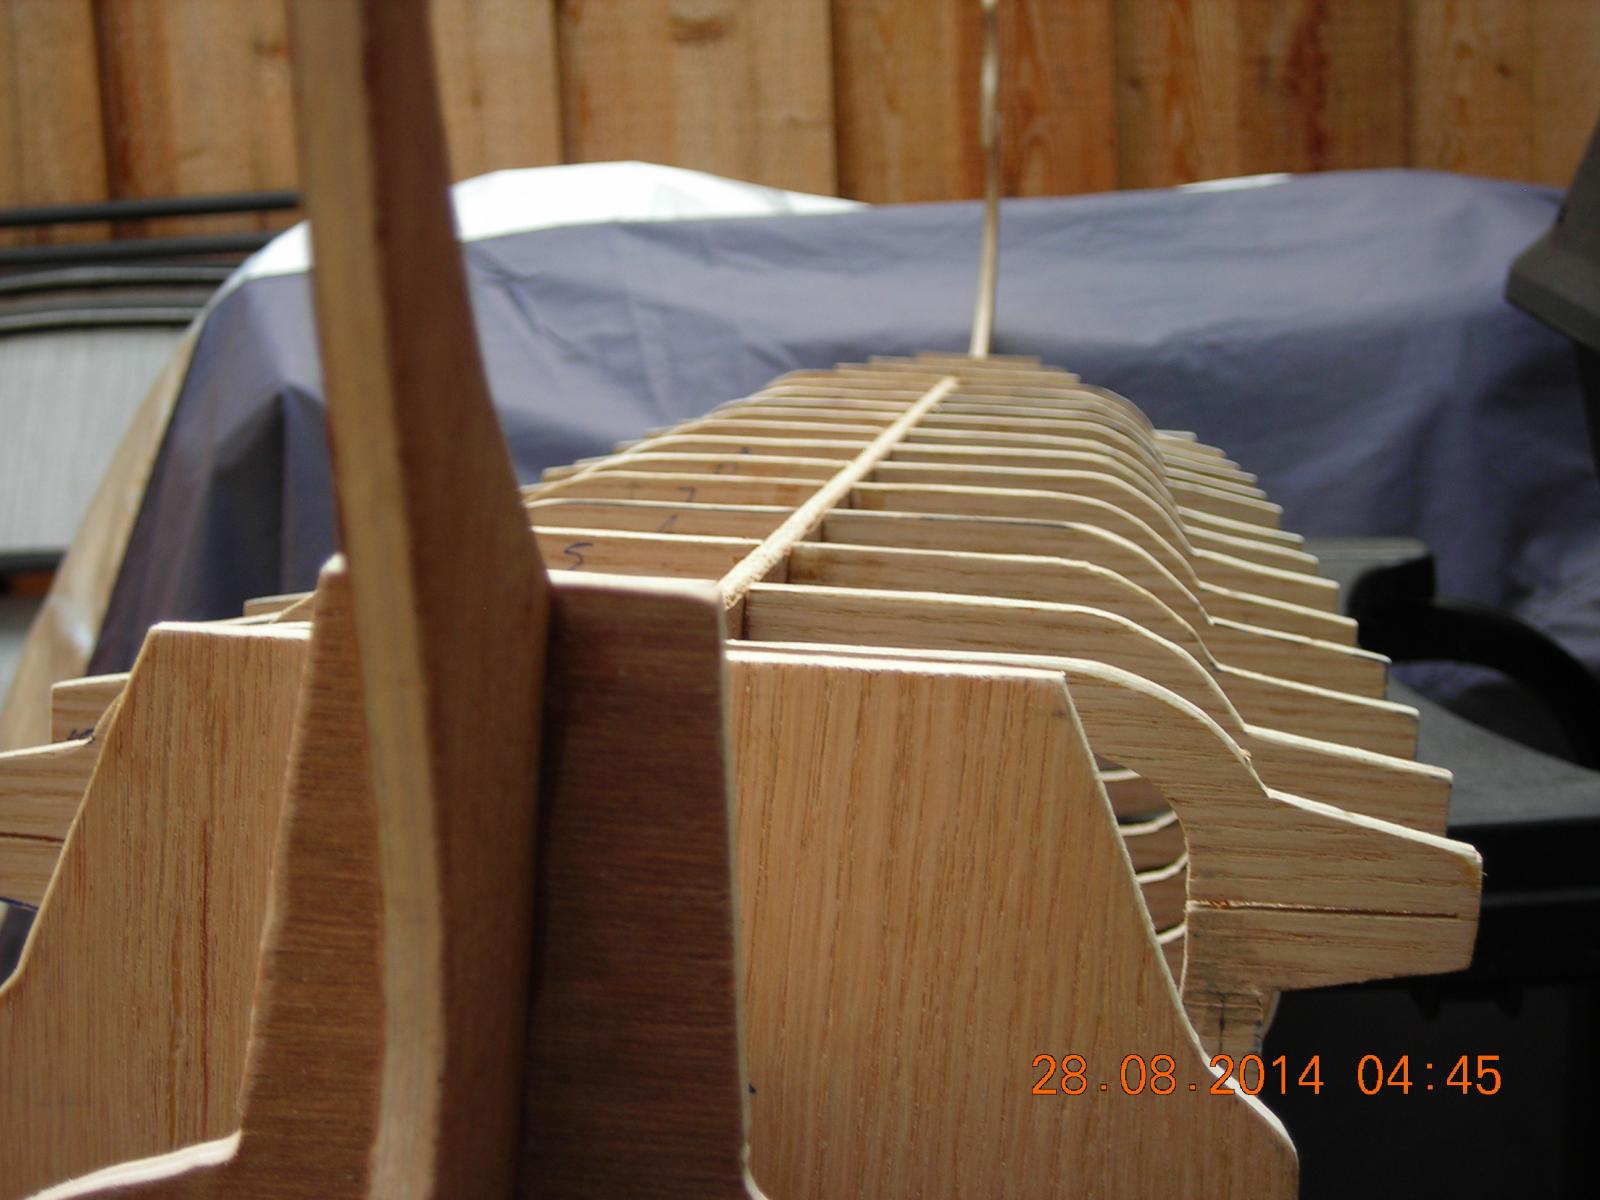
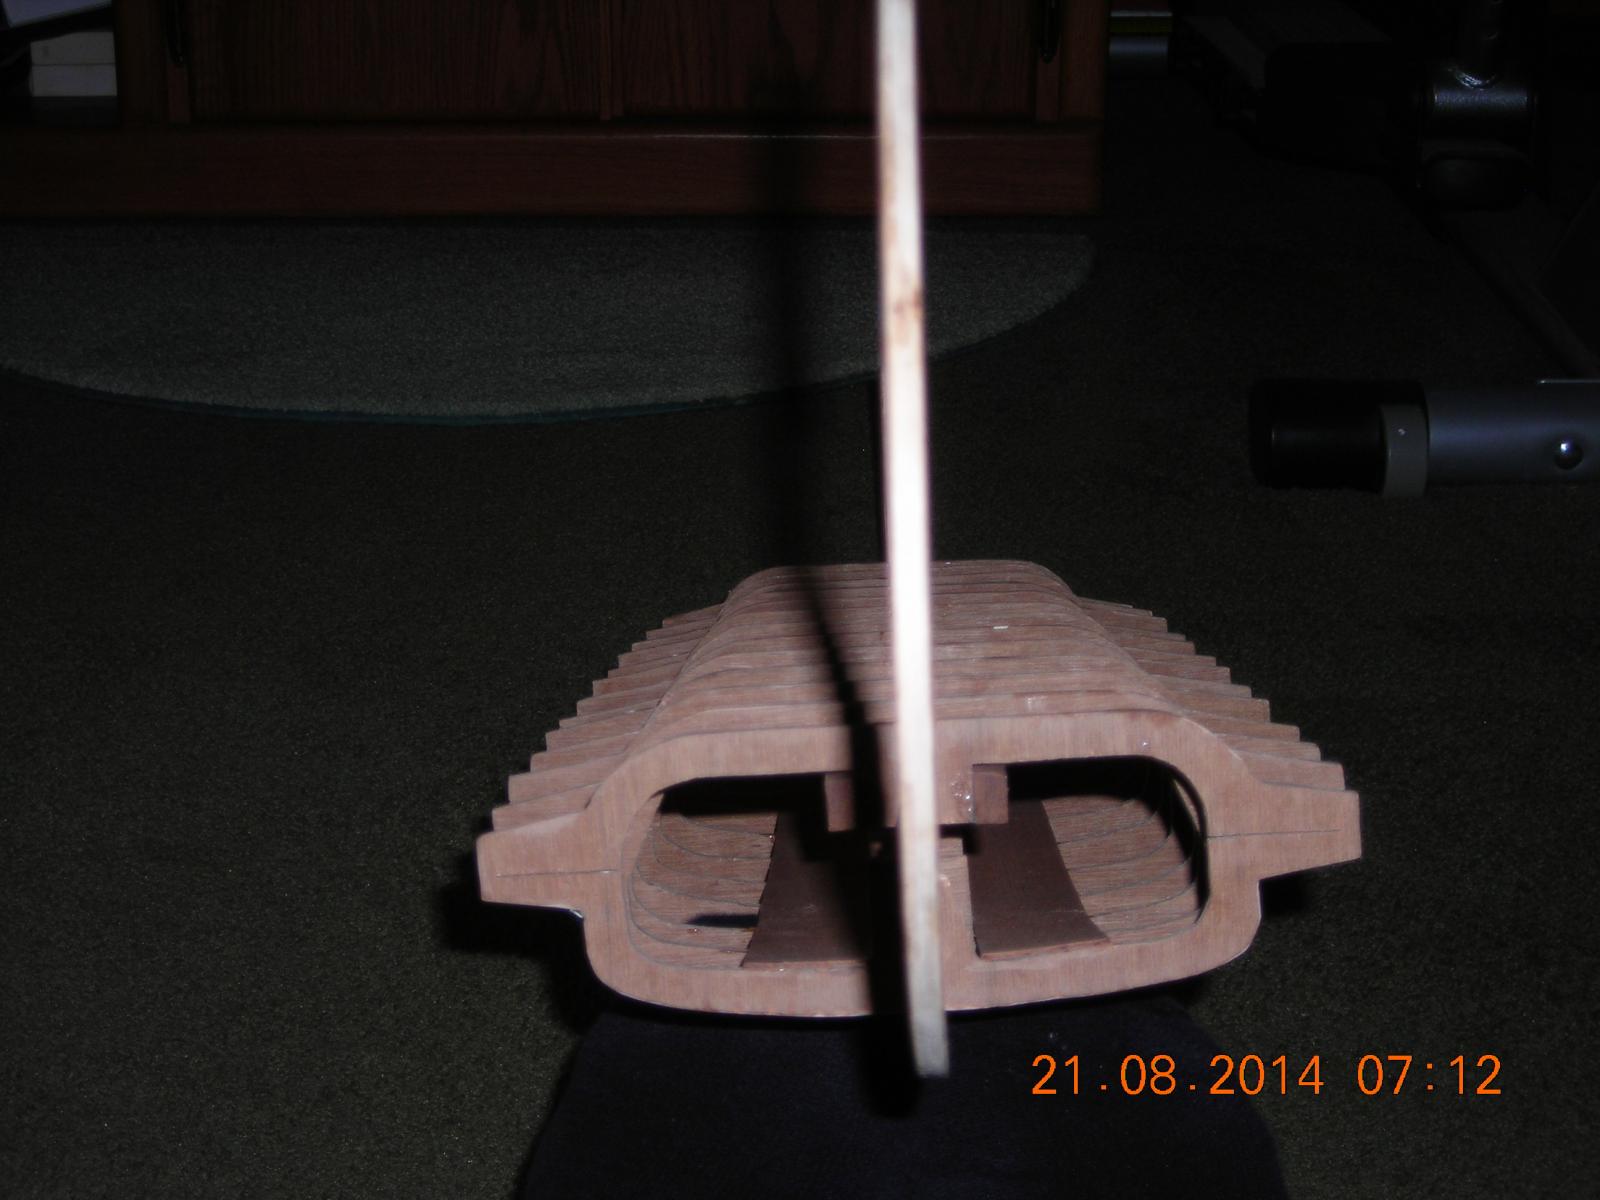
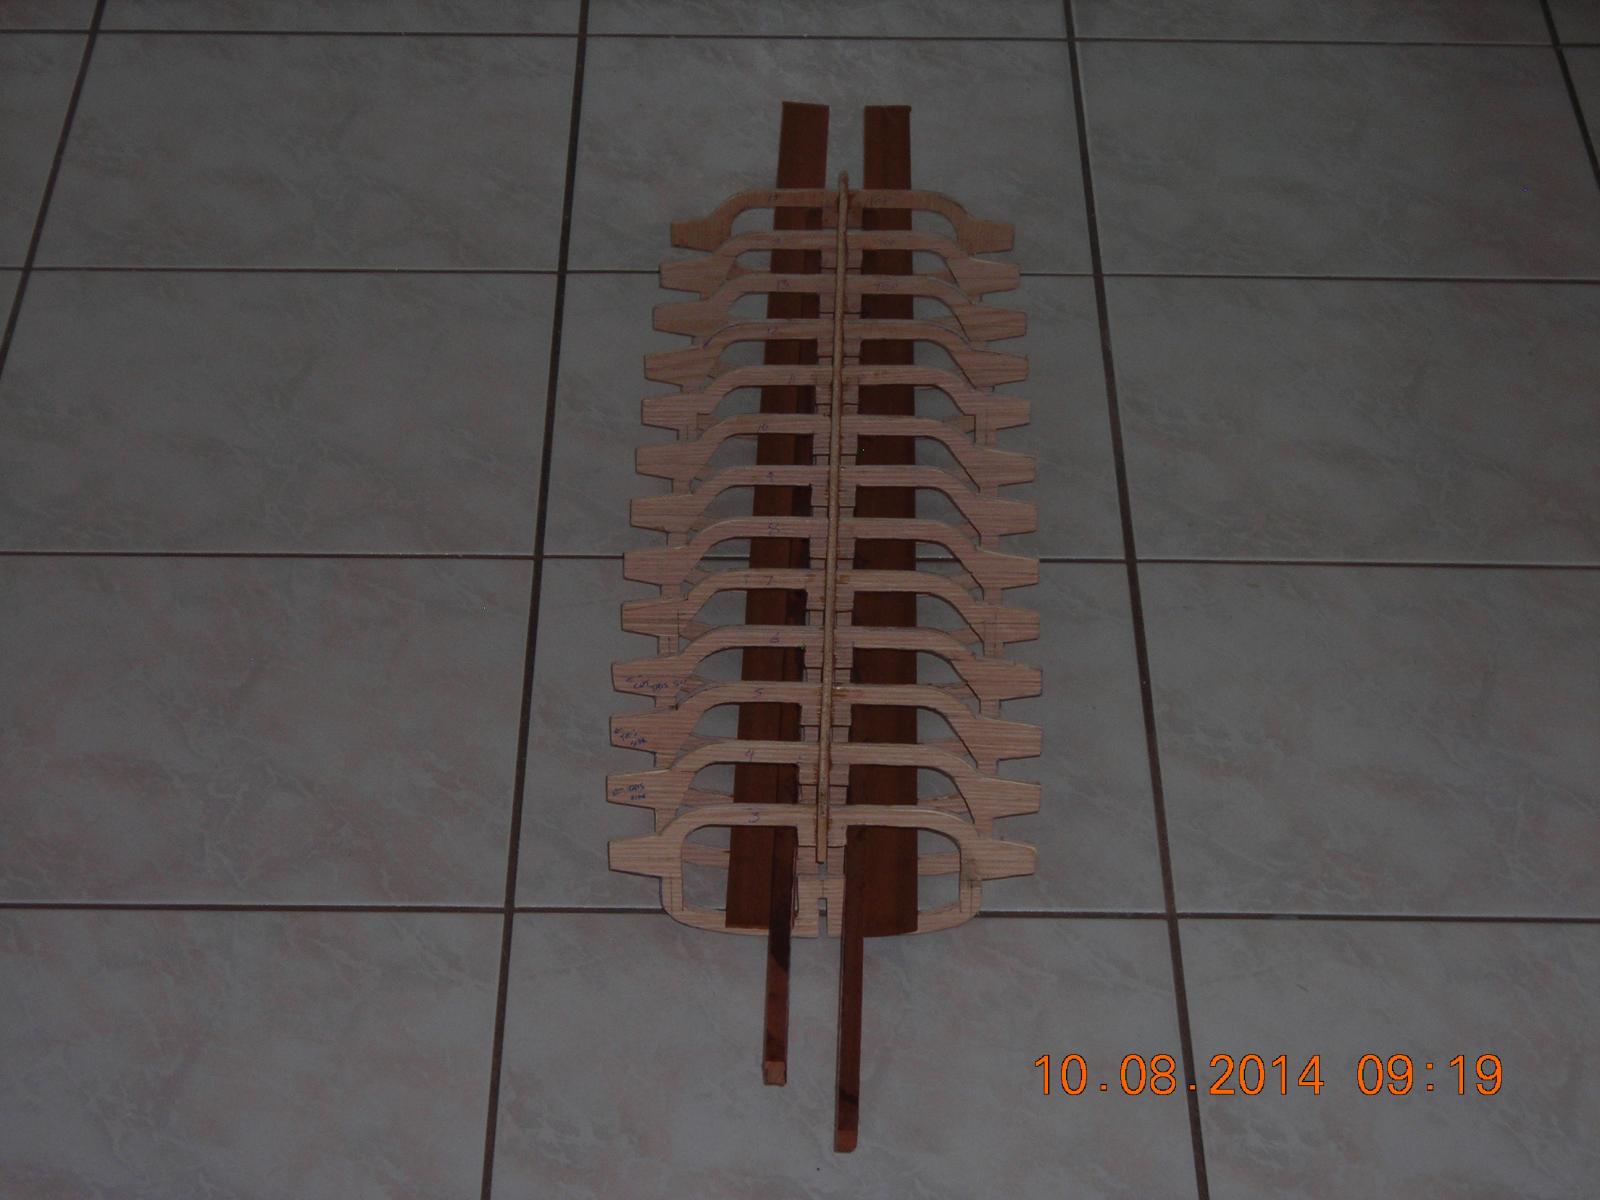
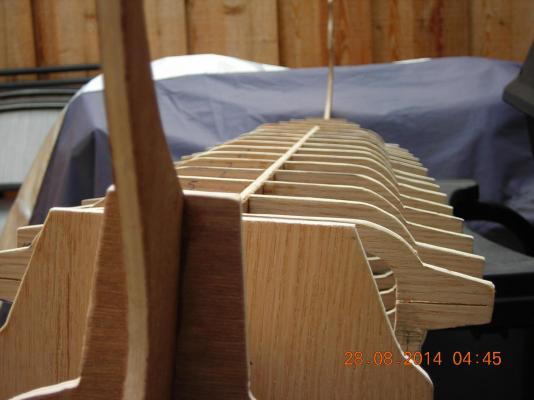
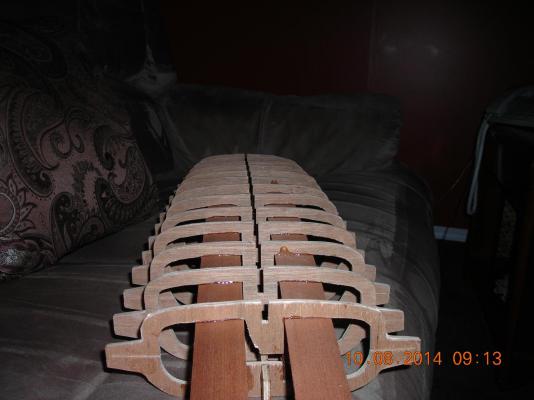
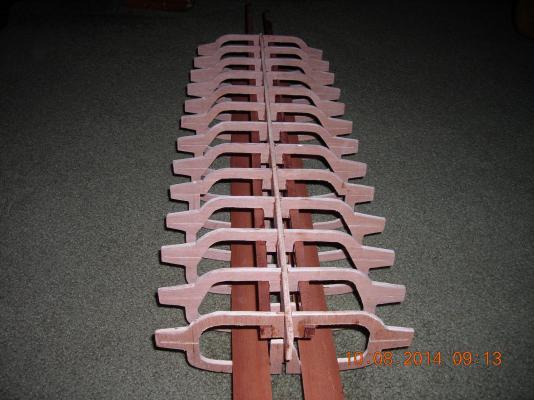
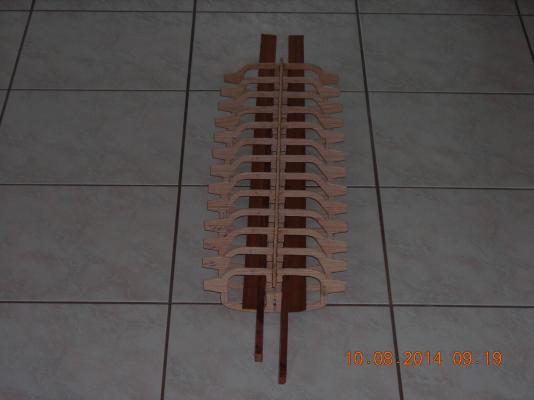
Bulkheads and backbone glued together with slotted building jig for oar module.
-
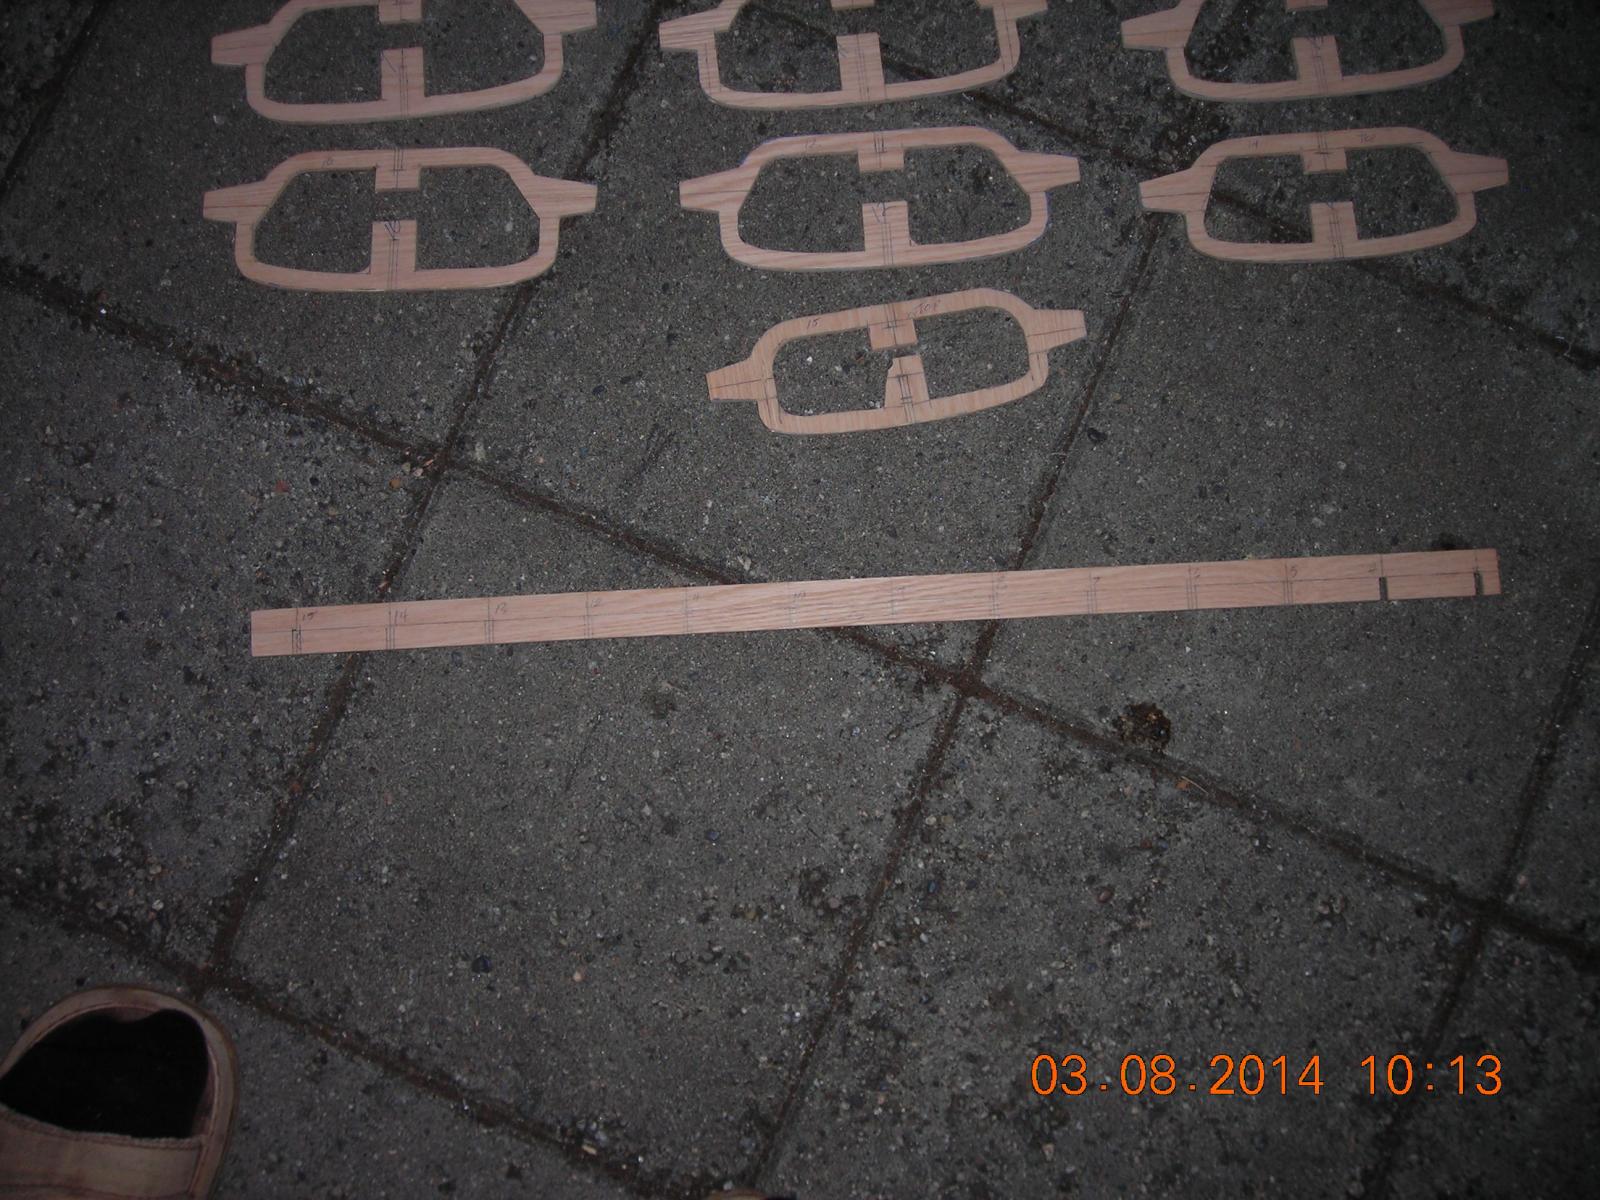
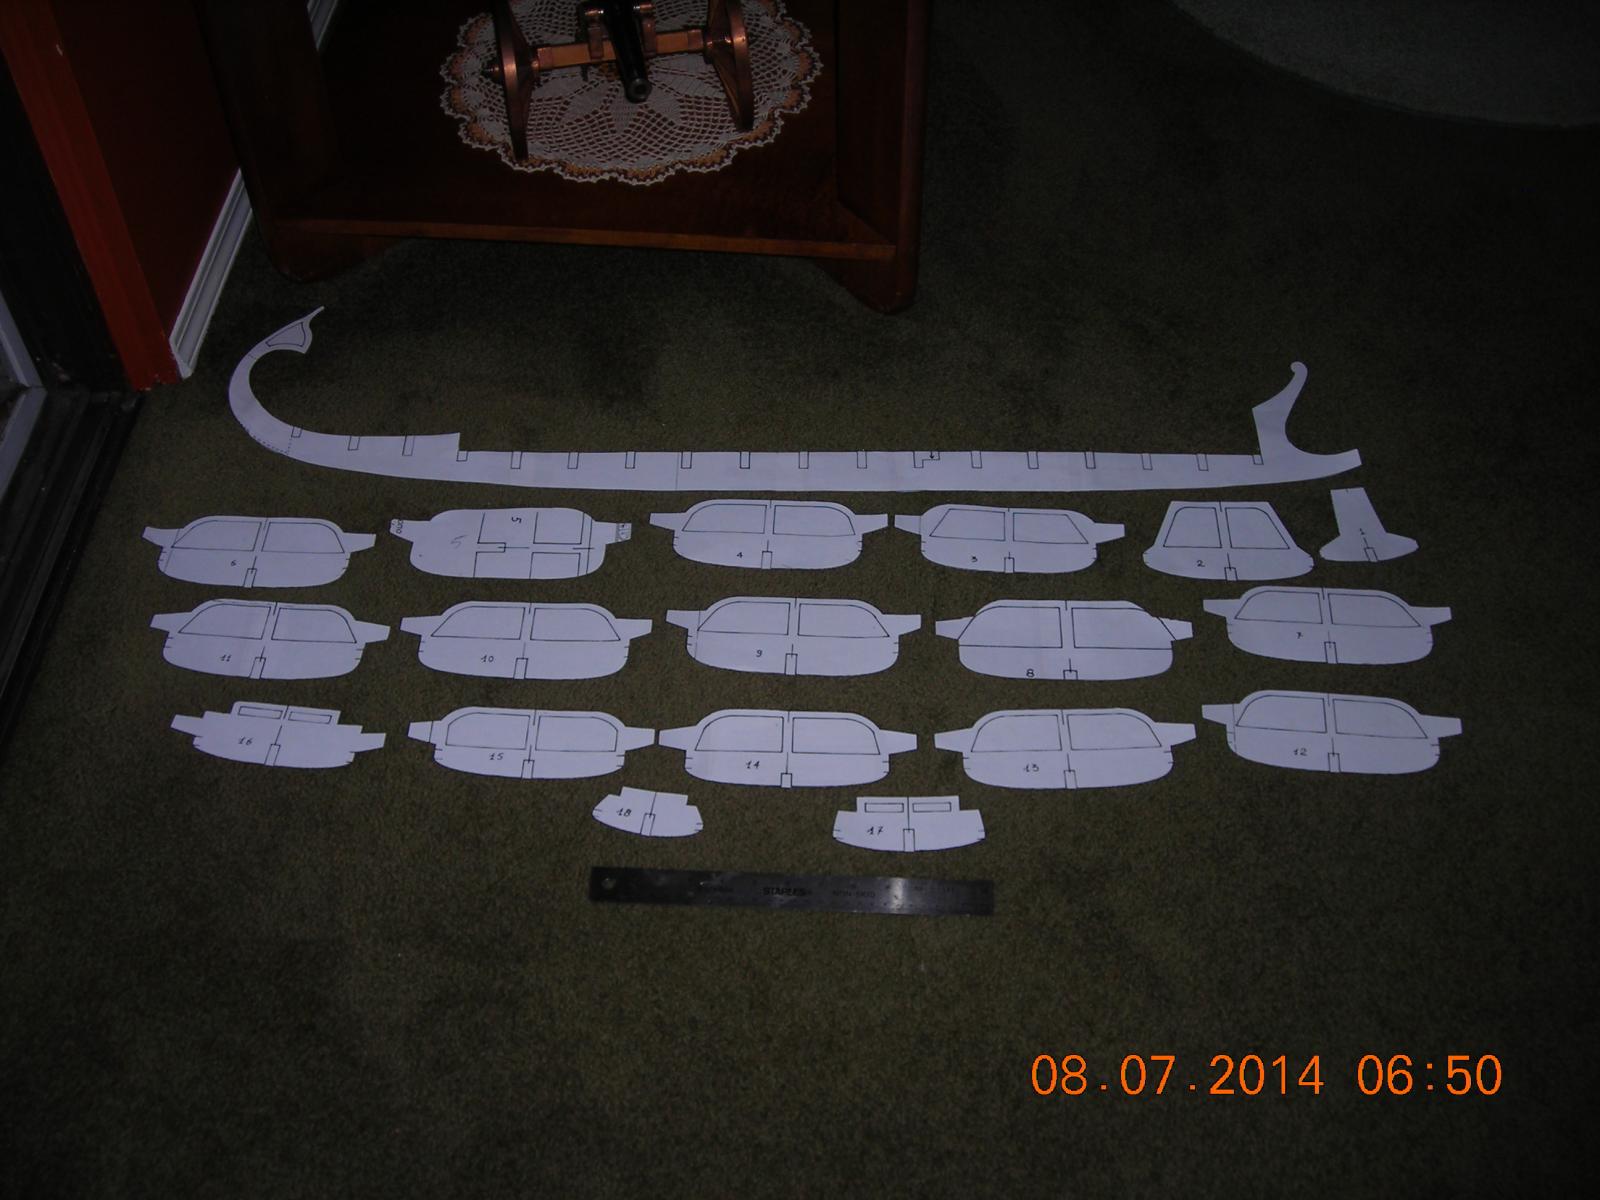
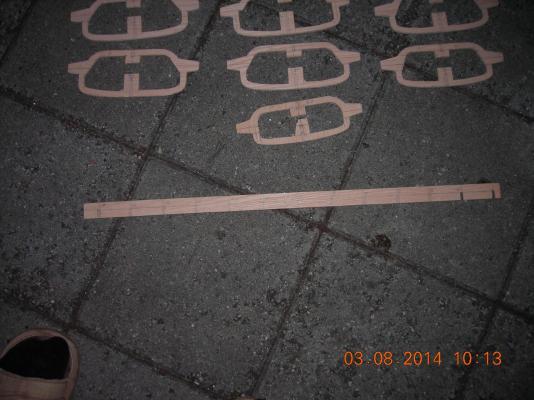
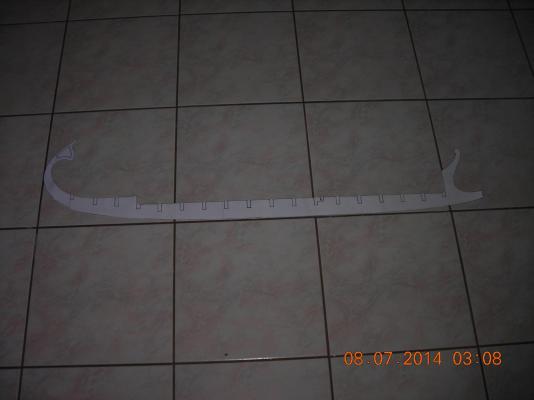
This next picture is the measured and cut "backbone" ready to be slotted for the bulkheads.
-
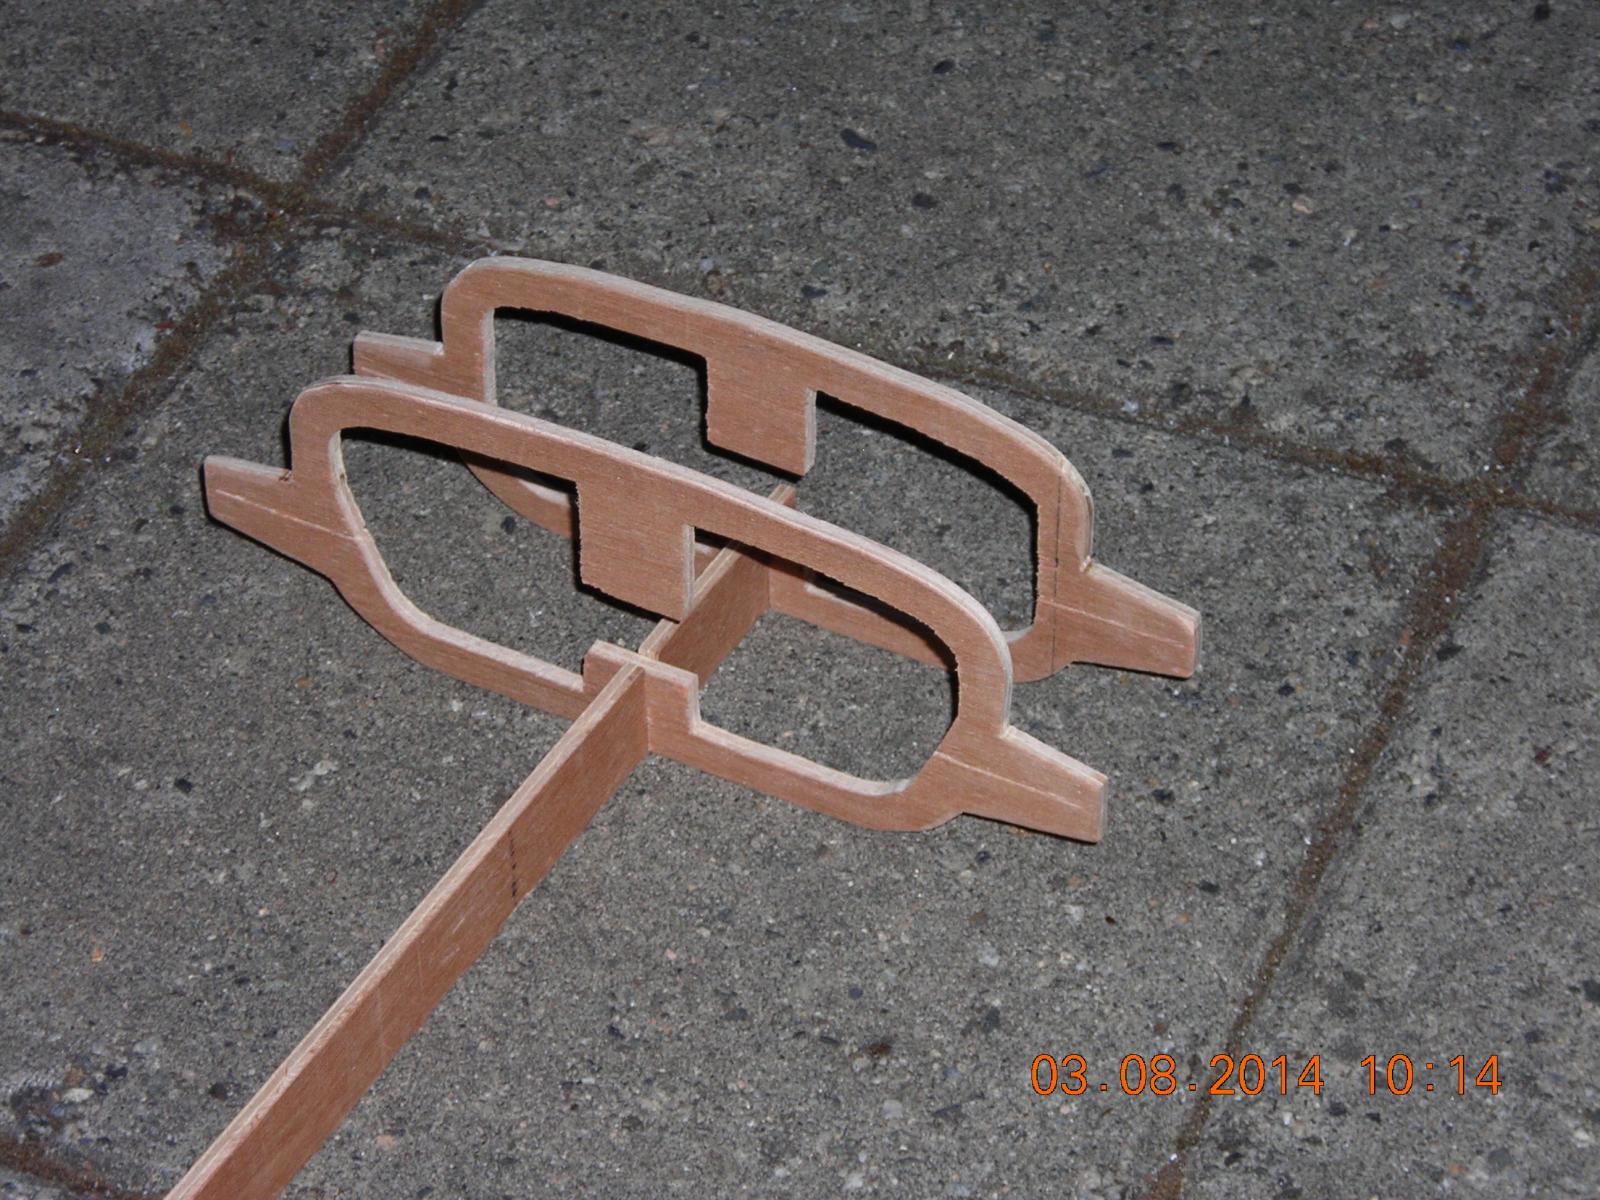
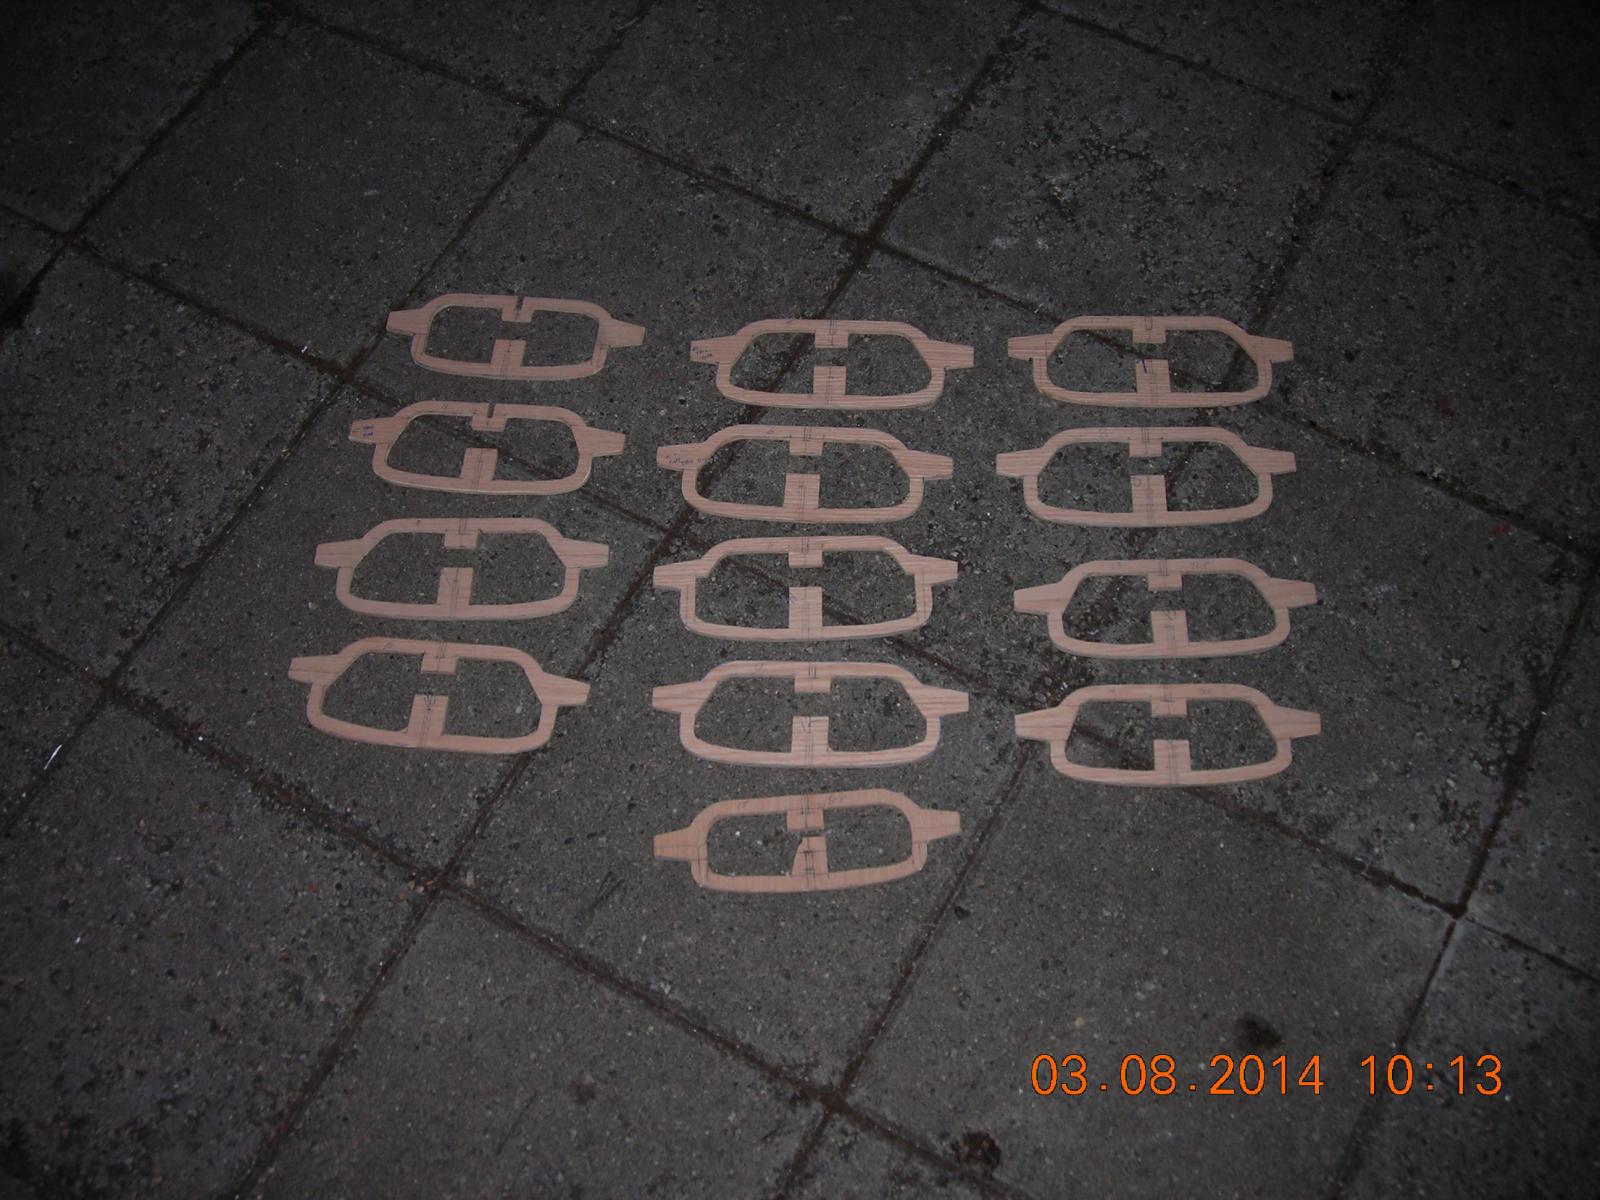
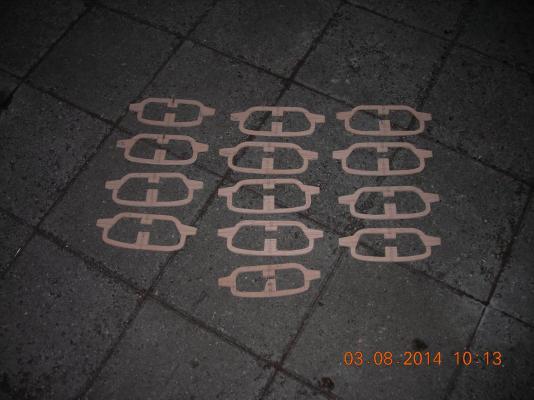
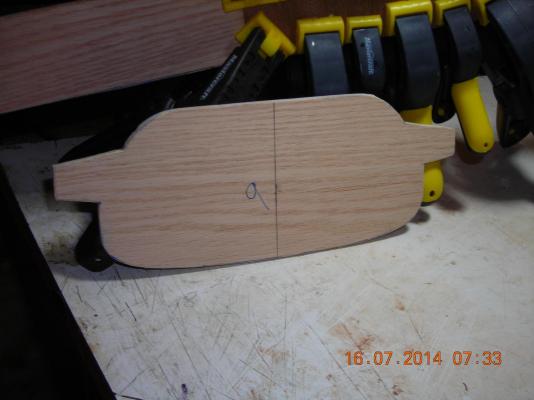
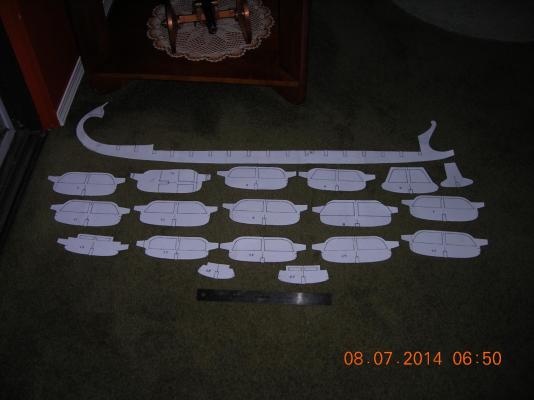
The bulkheads after careful cutting and measuring. I use my Robi scroll saw for the bulk of my hobby work and this time I'm using a narrow fine blade so that I may be more exact with cuts.
-
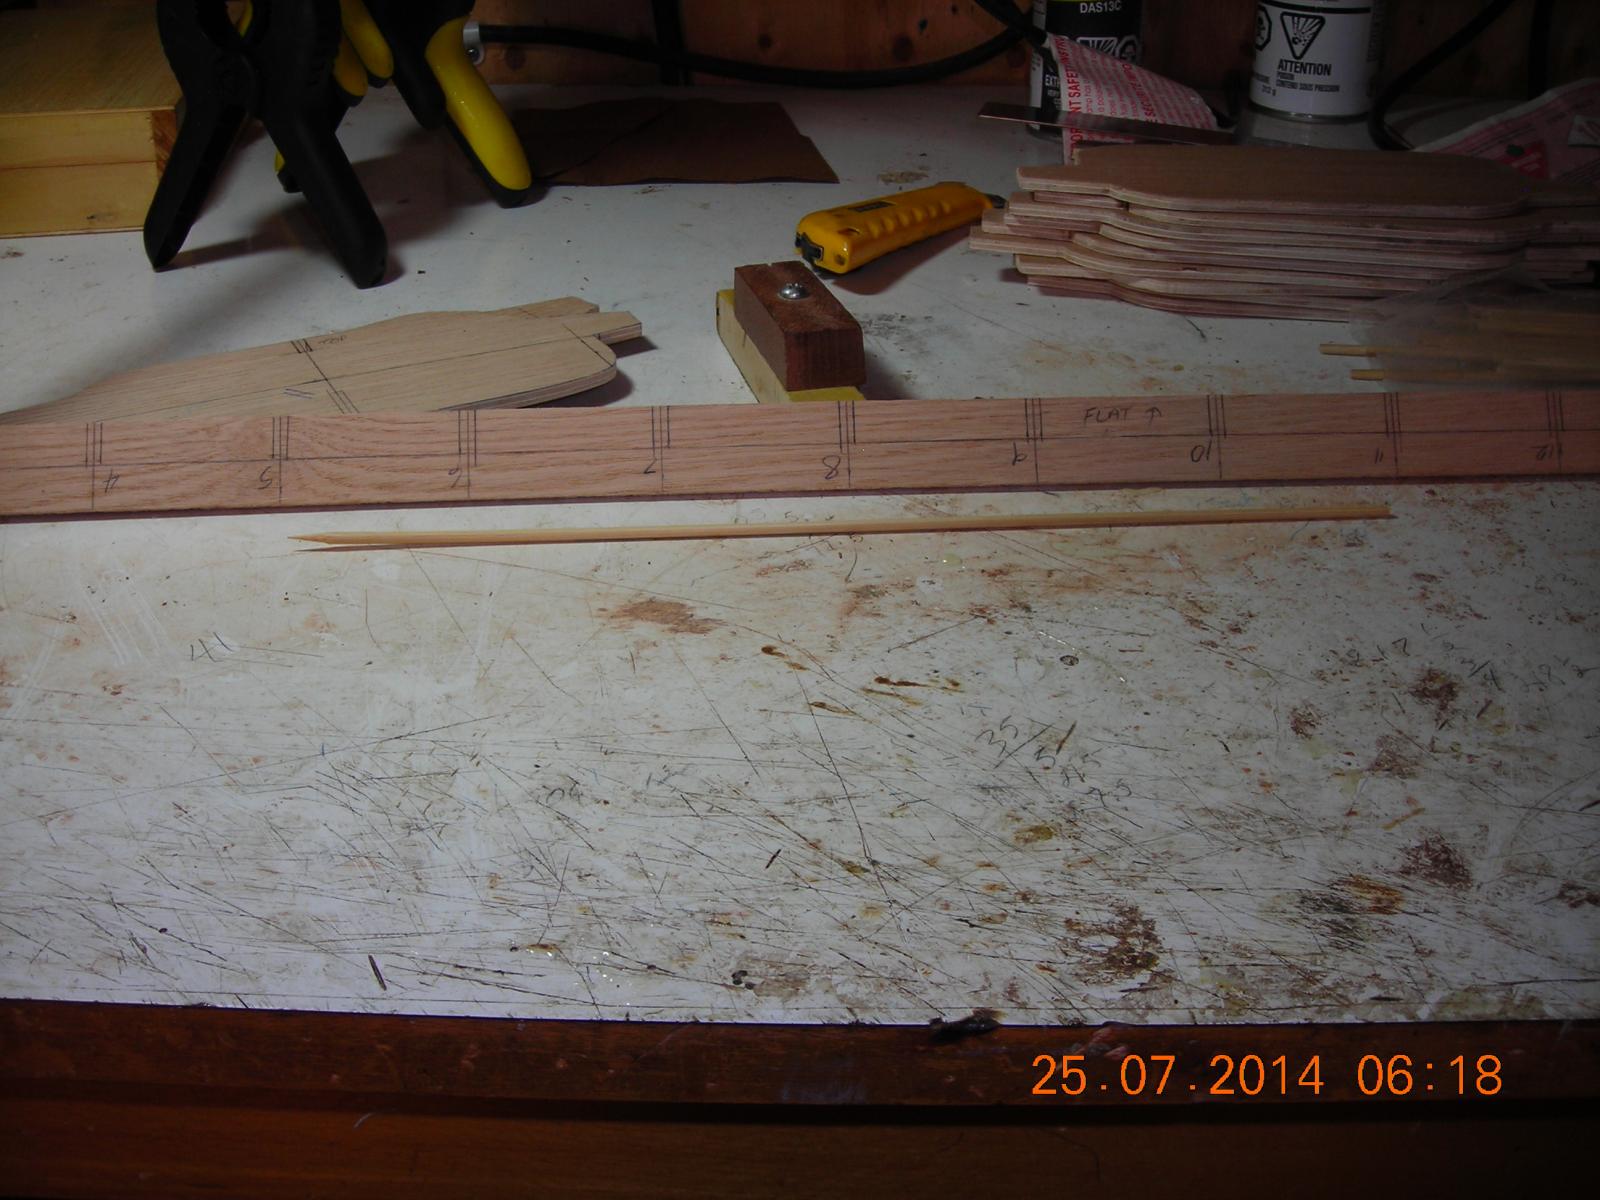
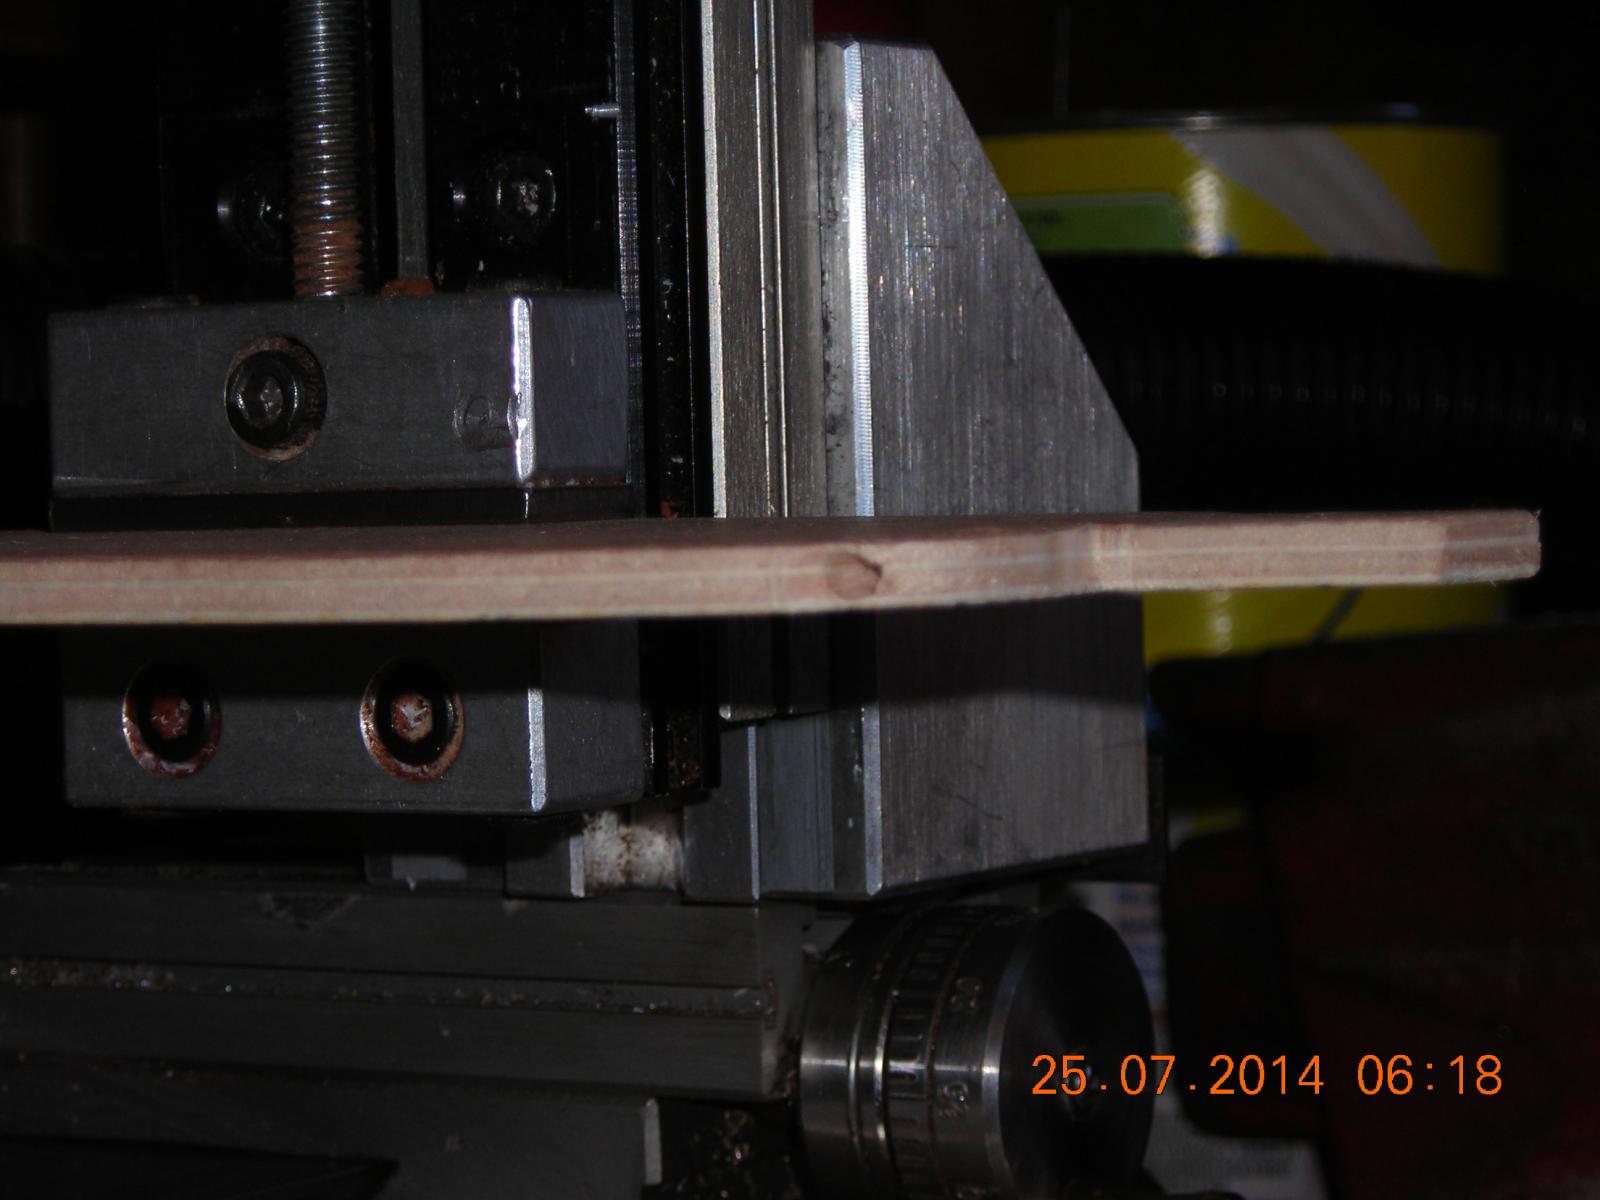
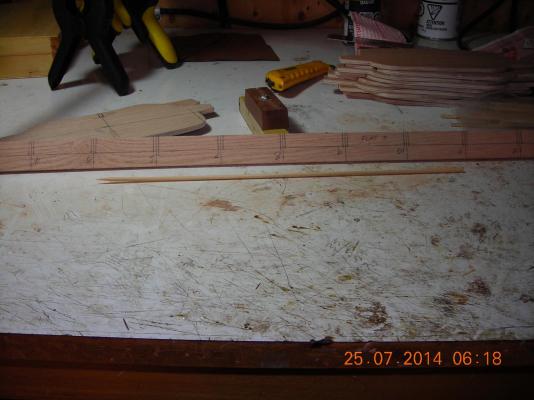
This is the backbone of the build. Because I'm working with mechanics that require things to be square and inline I'm using the only flat surface the boat has and that is the deck. This beam will be directly below deck the bulkheads and all the rest of the ship will conform to it.
-
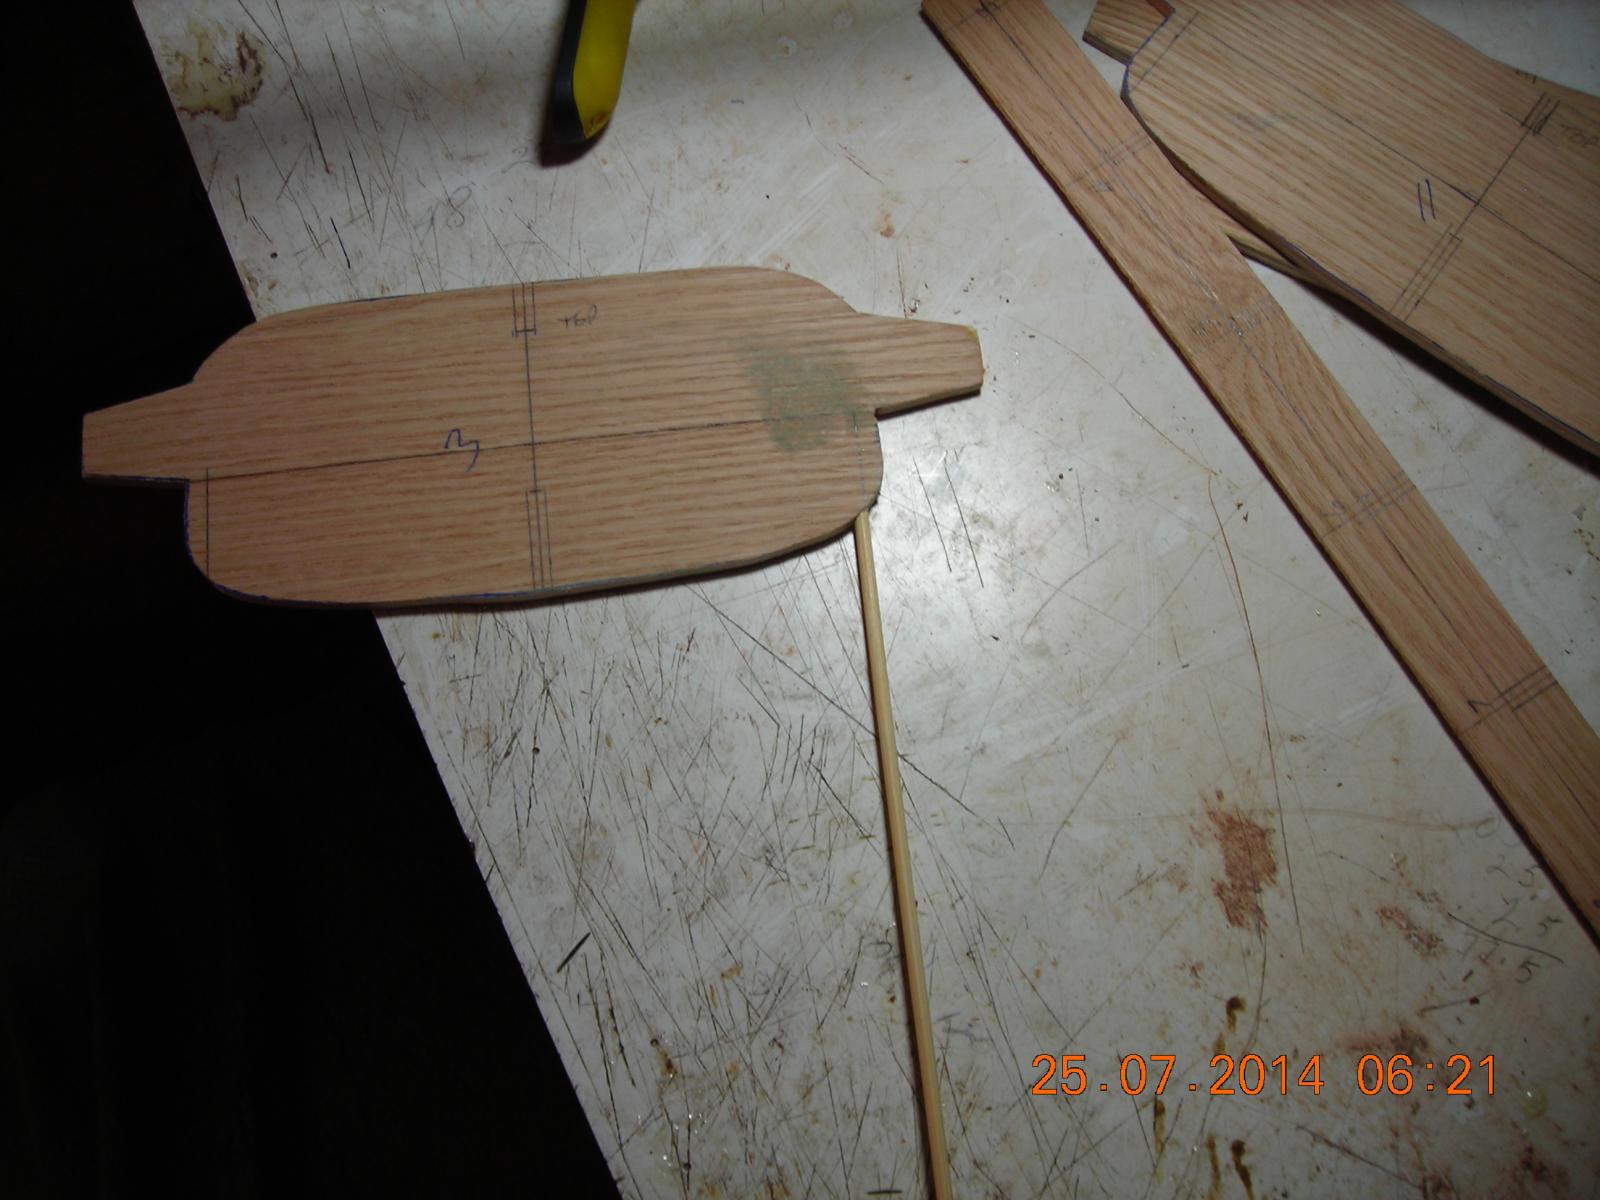
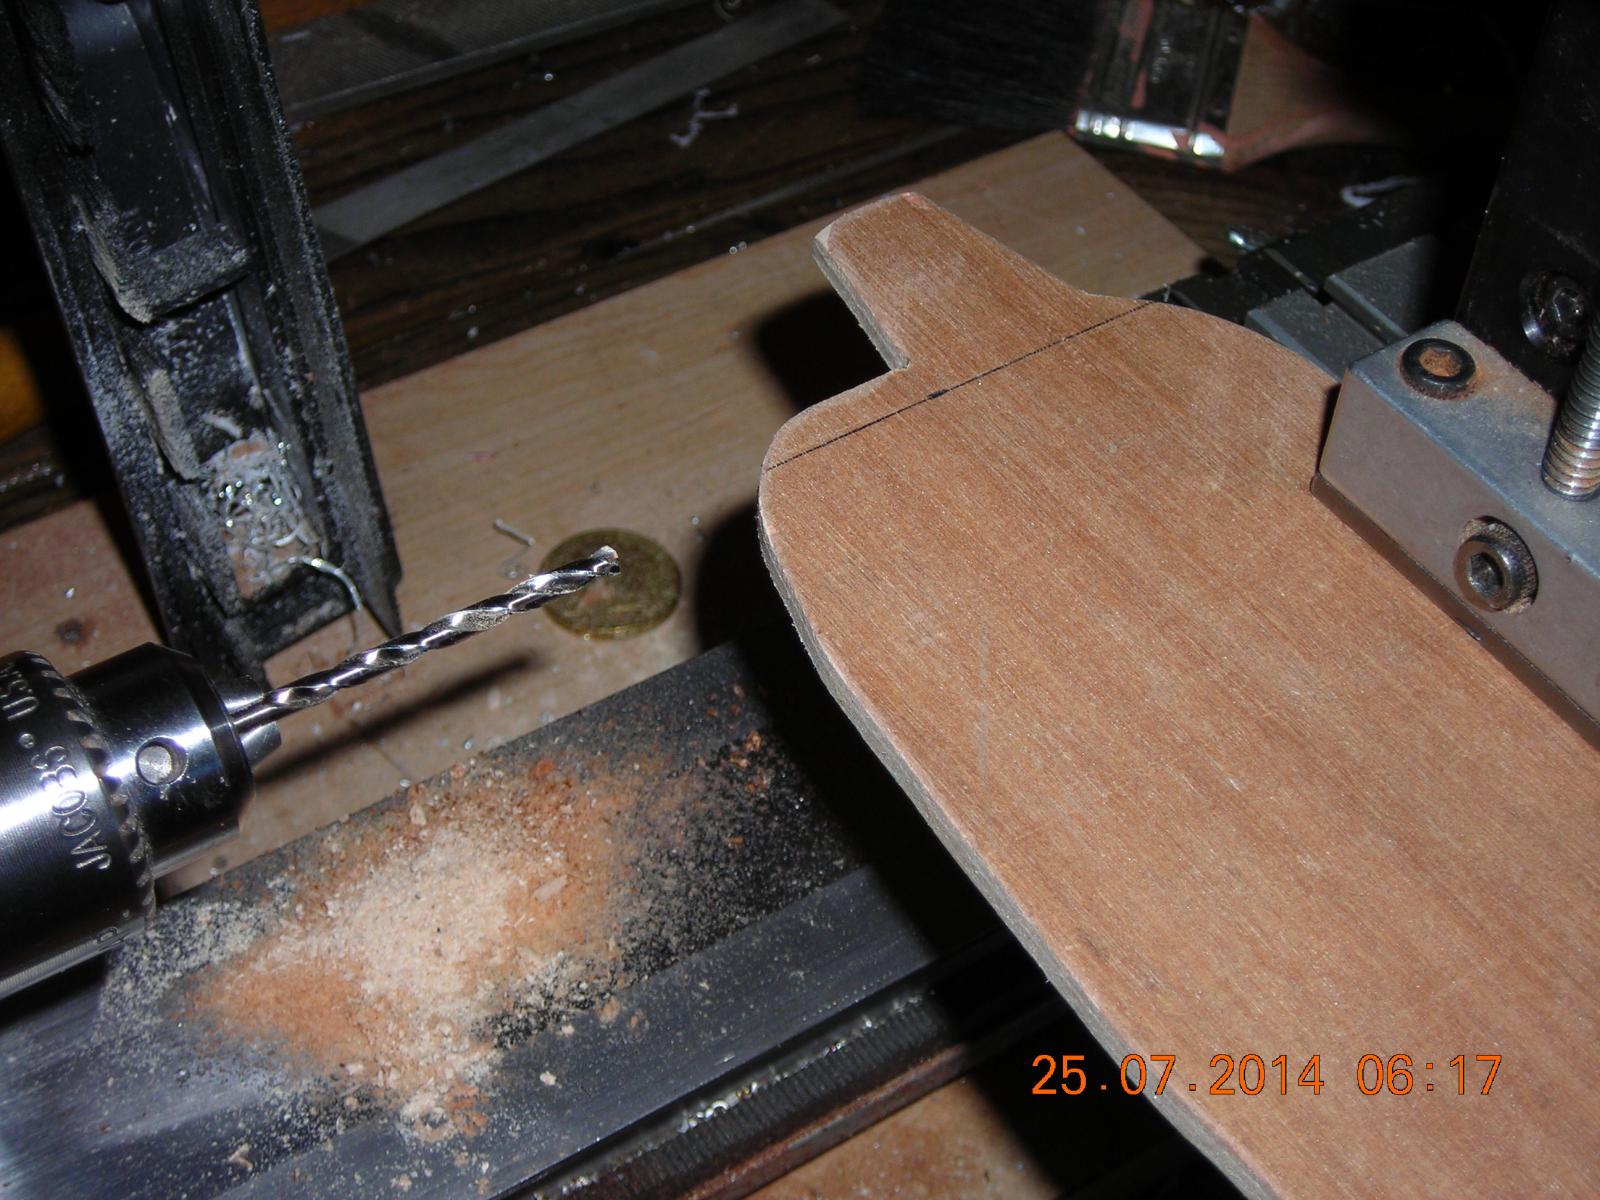
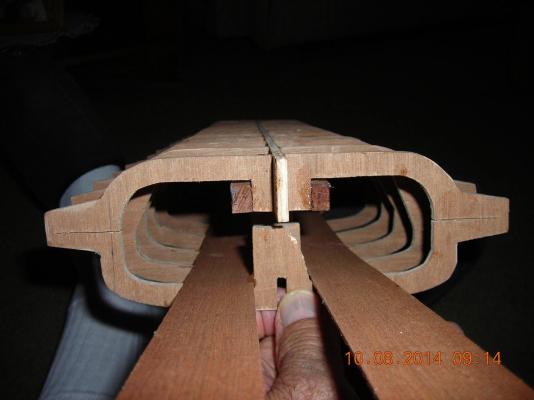
The drilled bulkhead with the dowel temporarily in place, it will look much different once it all come together.

-
The drilled hole with only 1/16 of an inch on either side for the dowel.
-
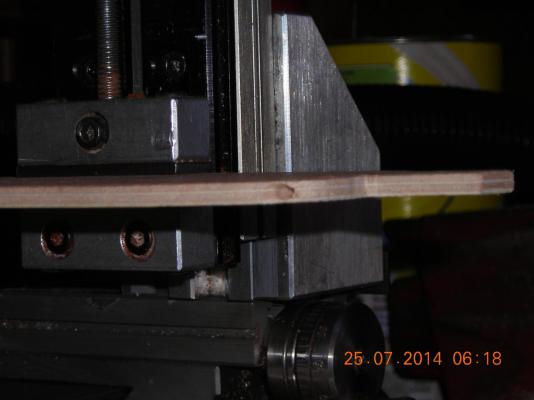
No idea how to post pictures in line so I will do it one post at a time. Drilling the bulkhead on my mini lathe.

-
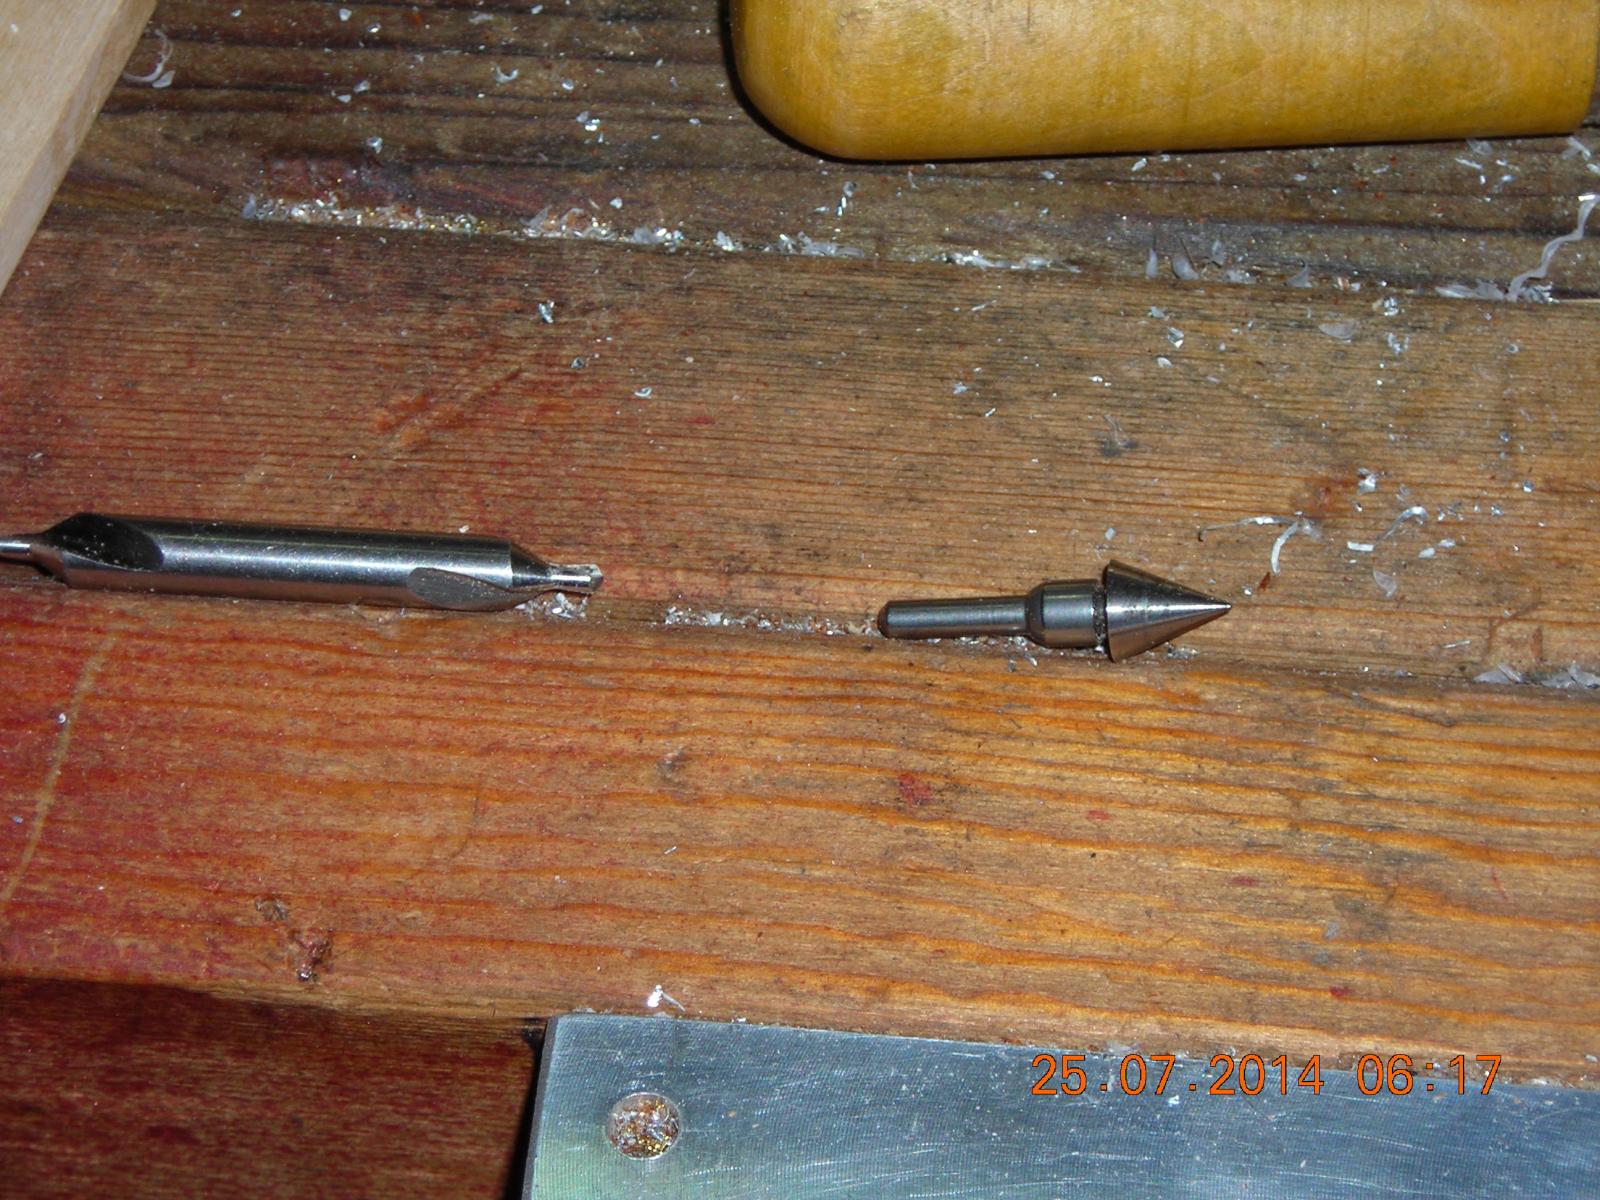
Here is the bit on the right I use to find centre the bit on the left is for drilling the pilot hole.

-
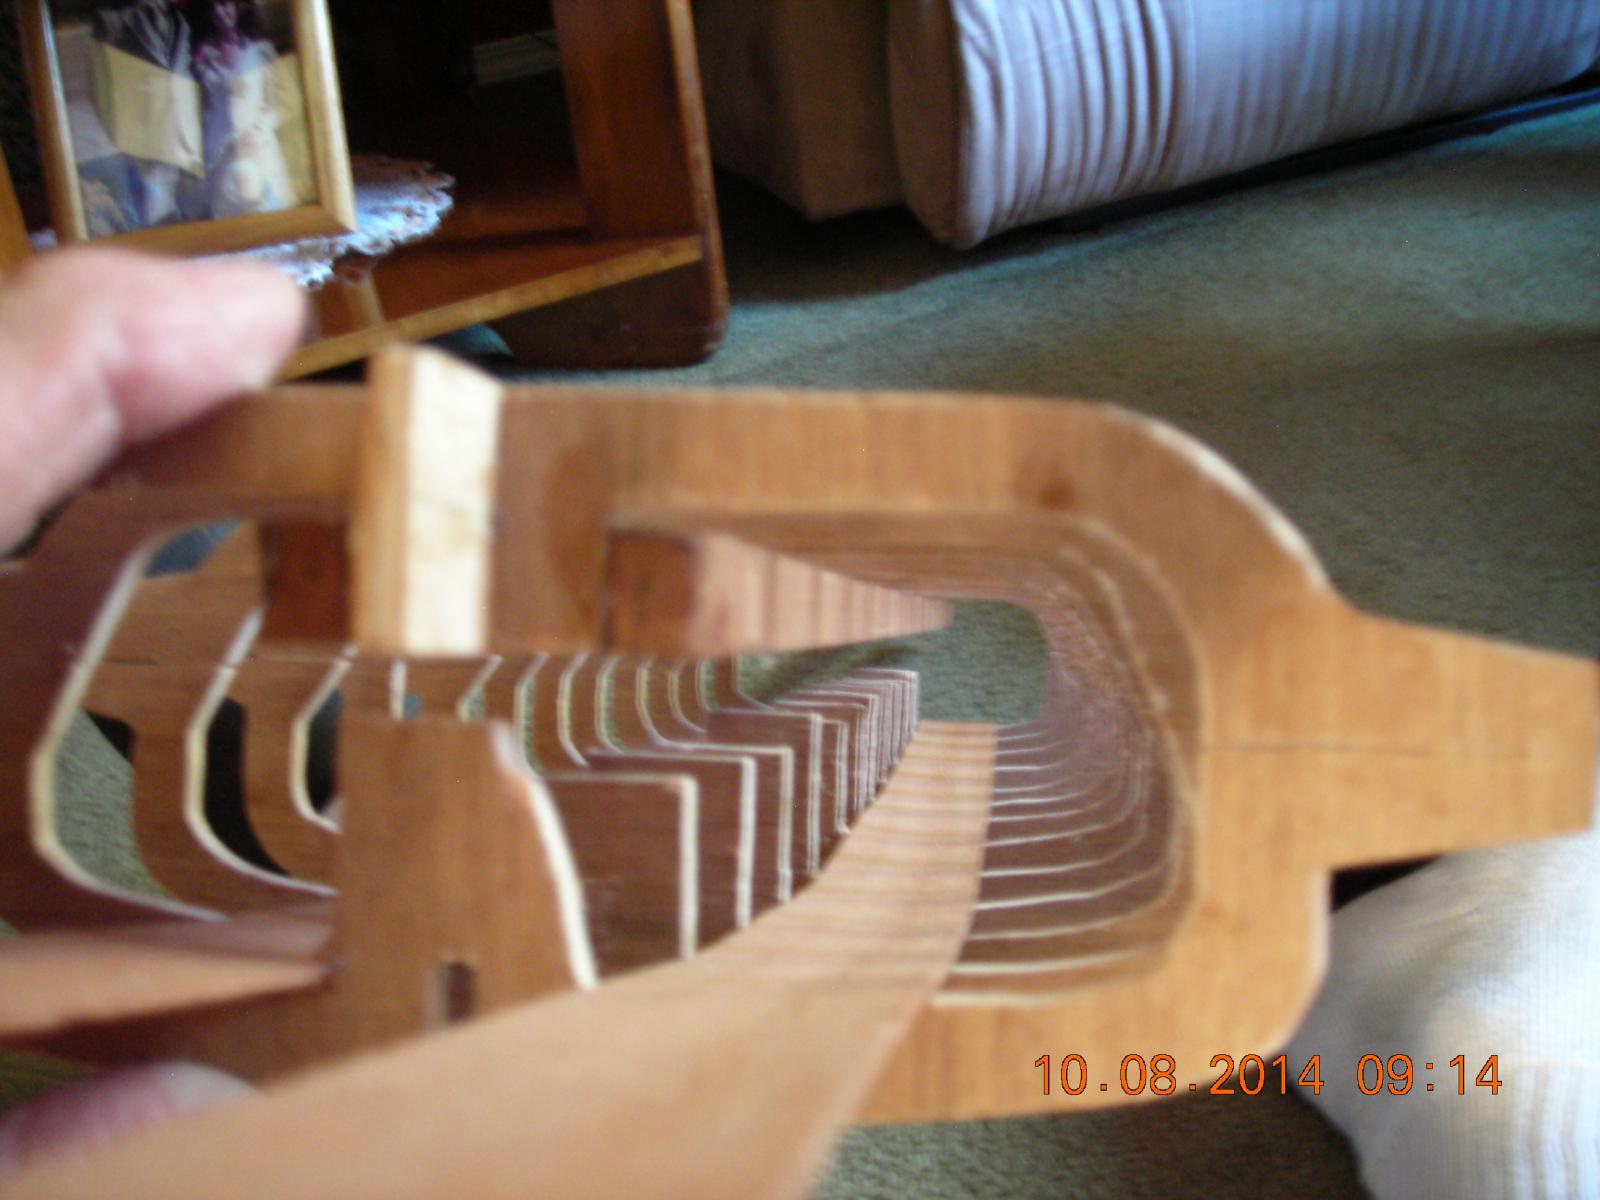
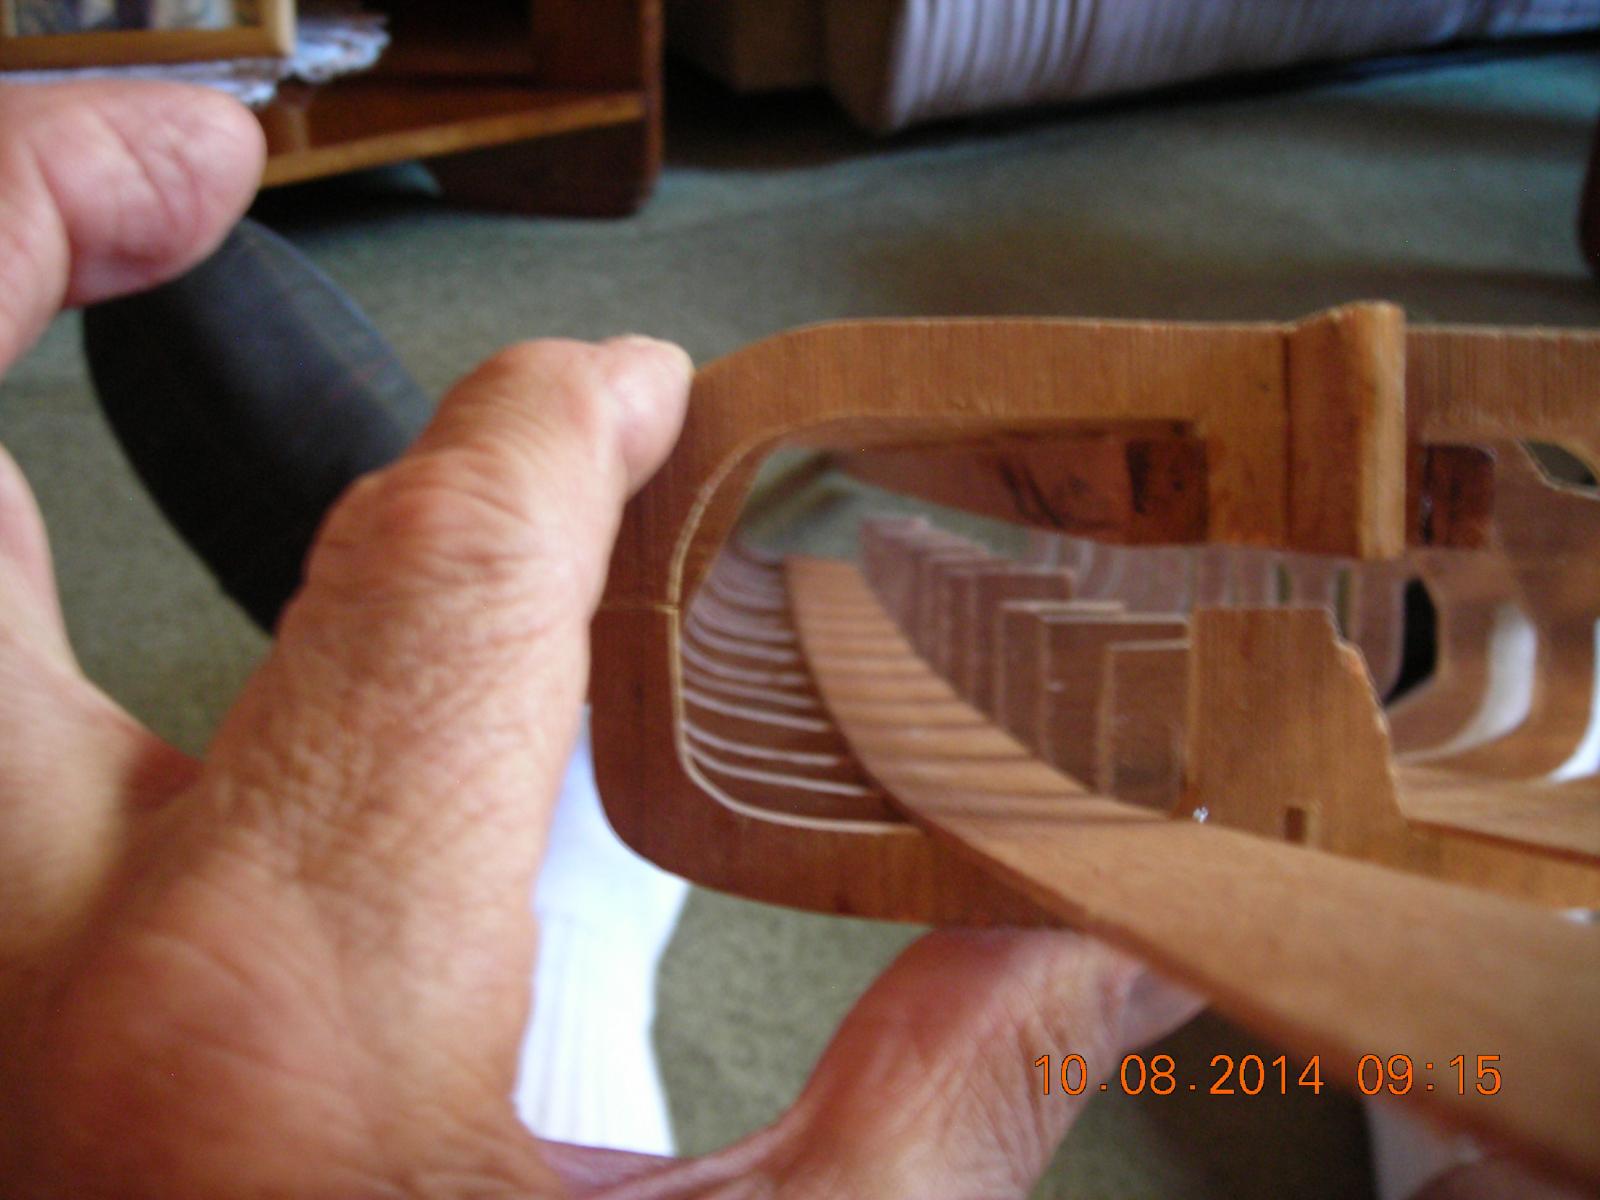
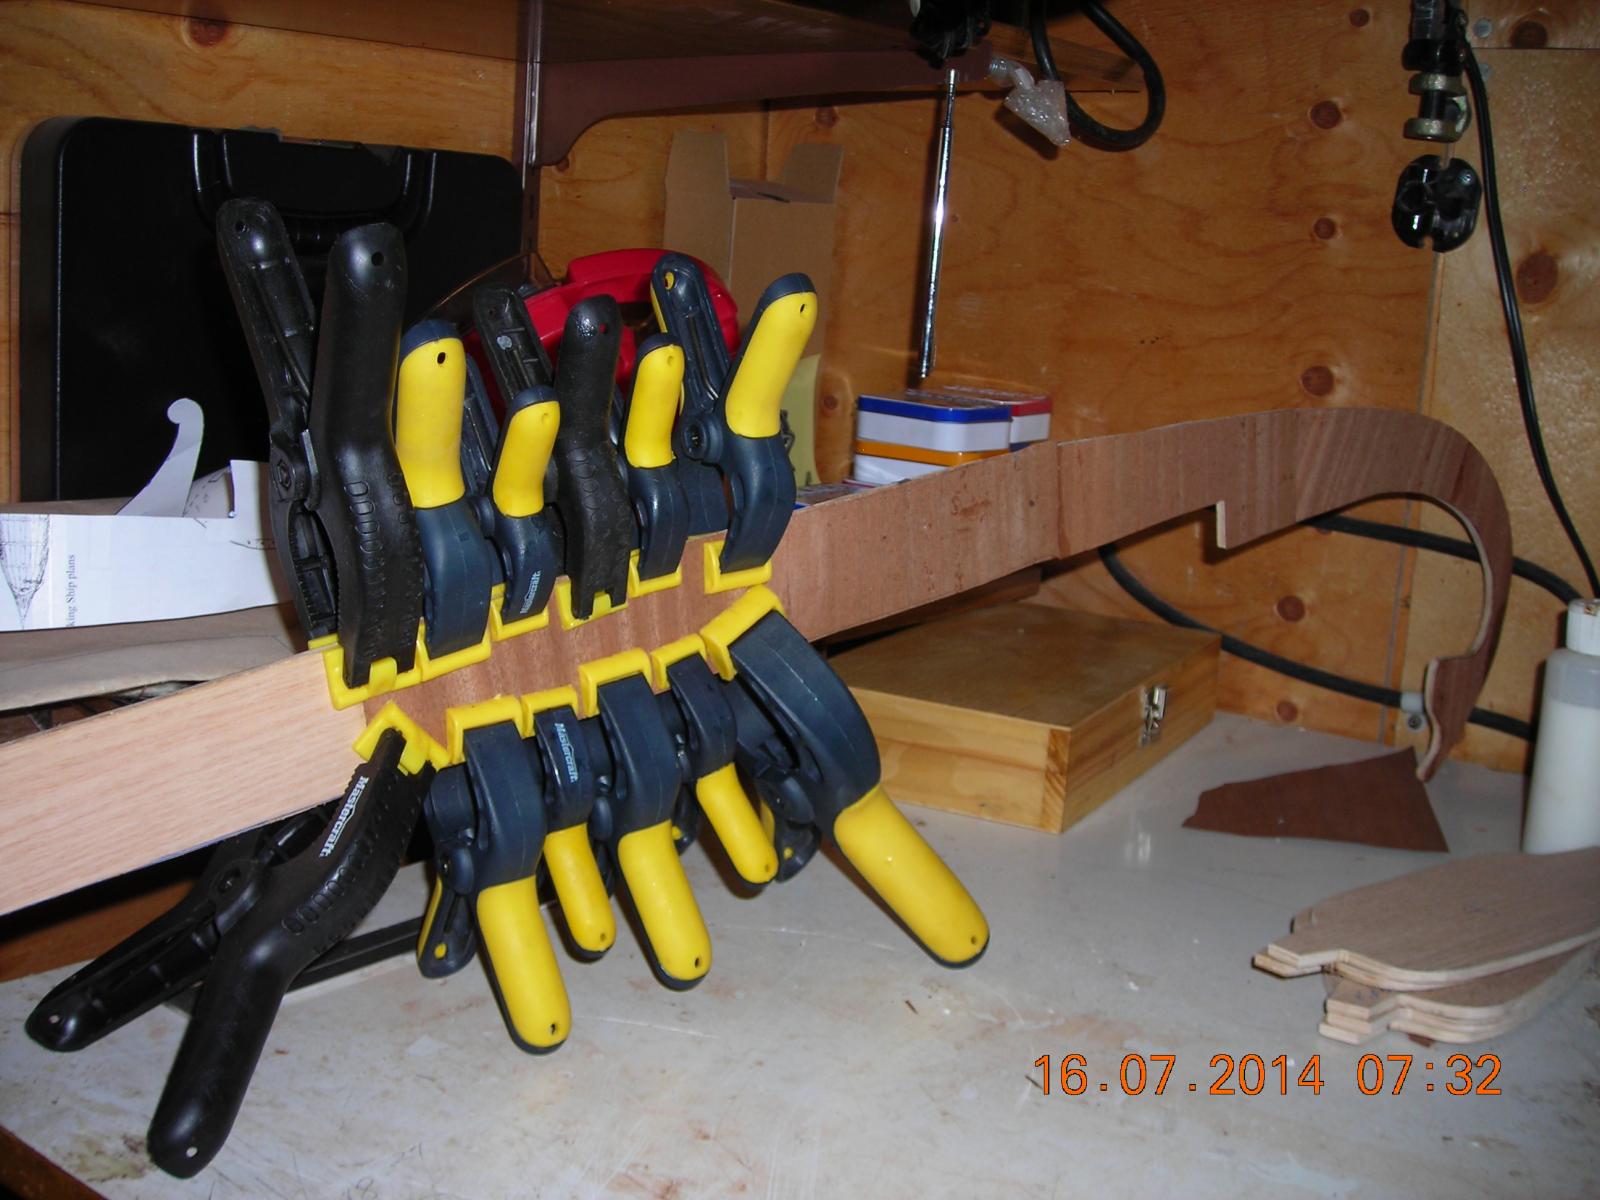
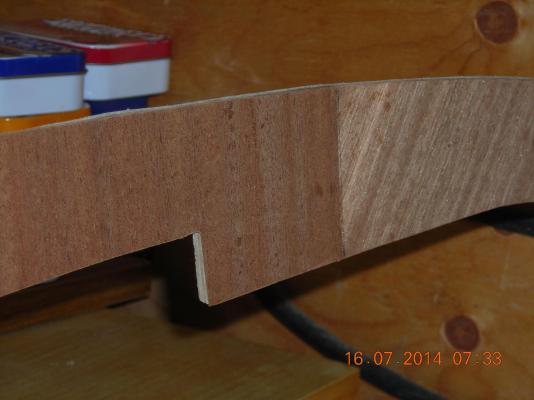
The keel and ribs have been carefully cut out keeping between the lines to the best of my ability. The keel is being veneered gradually with African Sepili as shown in the picture, using thinned white glue and many clamps side by side. One picture shows the veneered portion of the keel prior to final sanding, I'm happy with the results so far. The ribs/bulkheads are flat on the deck surface so those surfaces will be reference points in regard to marking the centre lines for all ribs/bulkheads. This is the part of the build I'm being very careful to get right so I won't have more problems down the road.

-
The first one will sit until some time after this one is complete. I have traced all the patterns minus slotted areas onto a 4x4 piece of oak plywood then I will use African sepili hardwood veneer on the ribs and keel to give them the proper look and thickness. This is going to take some time but I will do a better job of posting my progress with more detail.
-
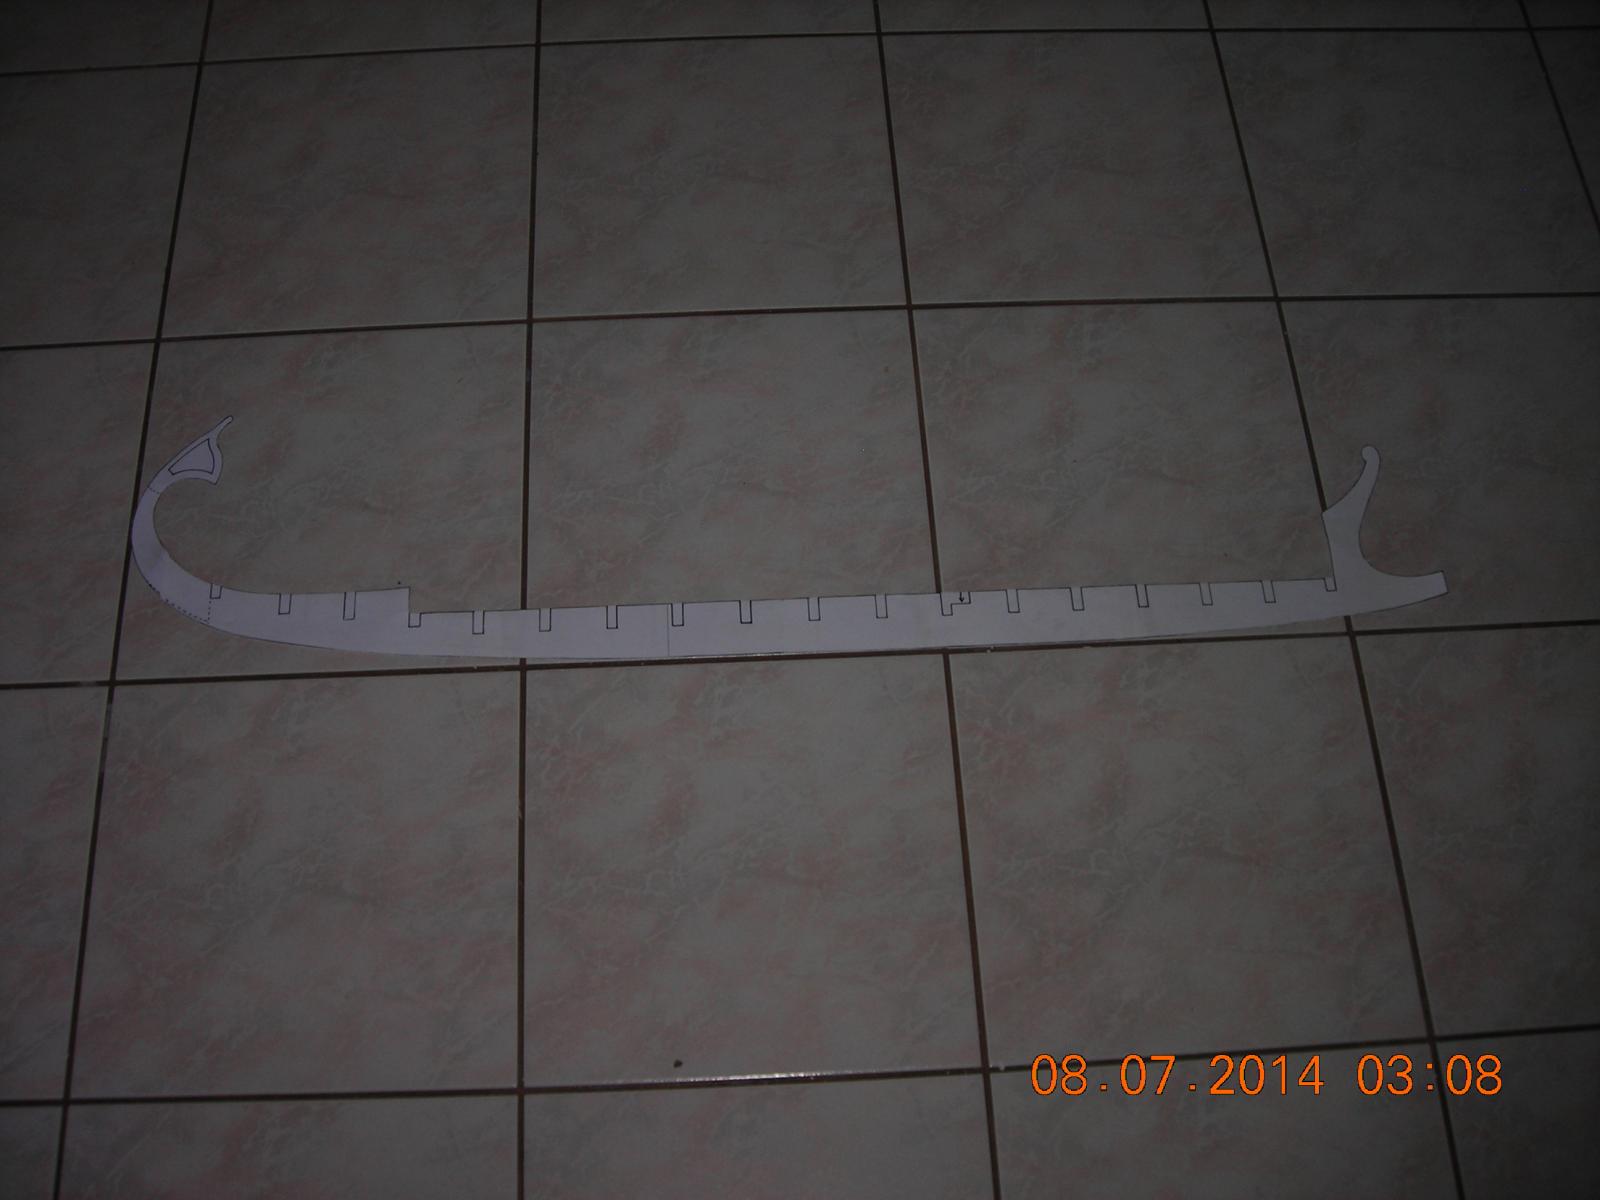
Used the original plans blew them up 200 per cent and cut out the patterns and taped together the keel all this took about four hours. The new Bireme will be 42 inches long and power will be motors plus gearbox which are on their way here.
-
I thought I would have enough room at first but it didn't work out that way and if I do make the mechanics to place in the boat it just won't look right. I was debating doubling the size and today ordered two gear reduction motors and speed controls which will have plenty of torque to move a bigger boat. This one I will make to look scale now that I've had a bit of practice building Biremes.
-
I'm going to scrap this hull and start over it's size is too restrictive for what I want to do.
-
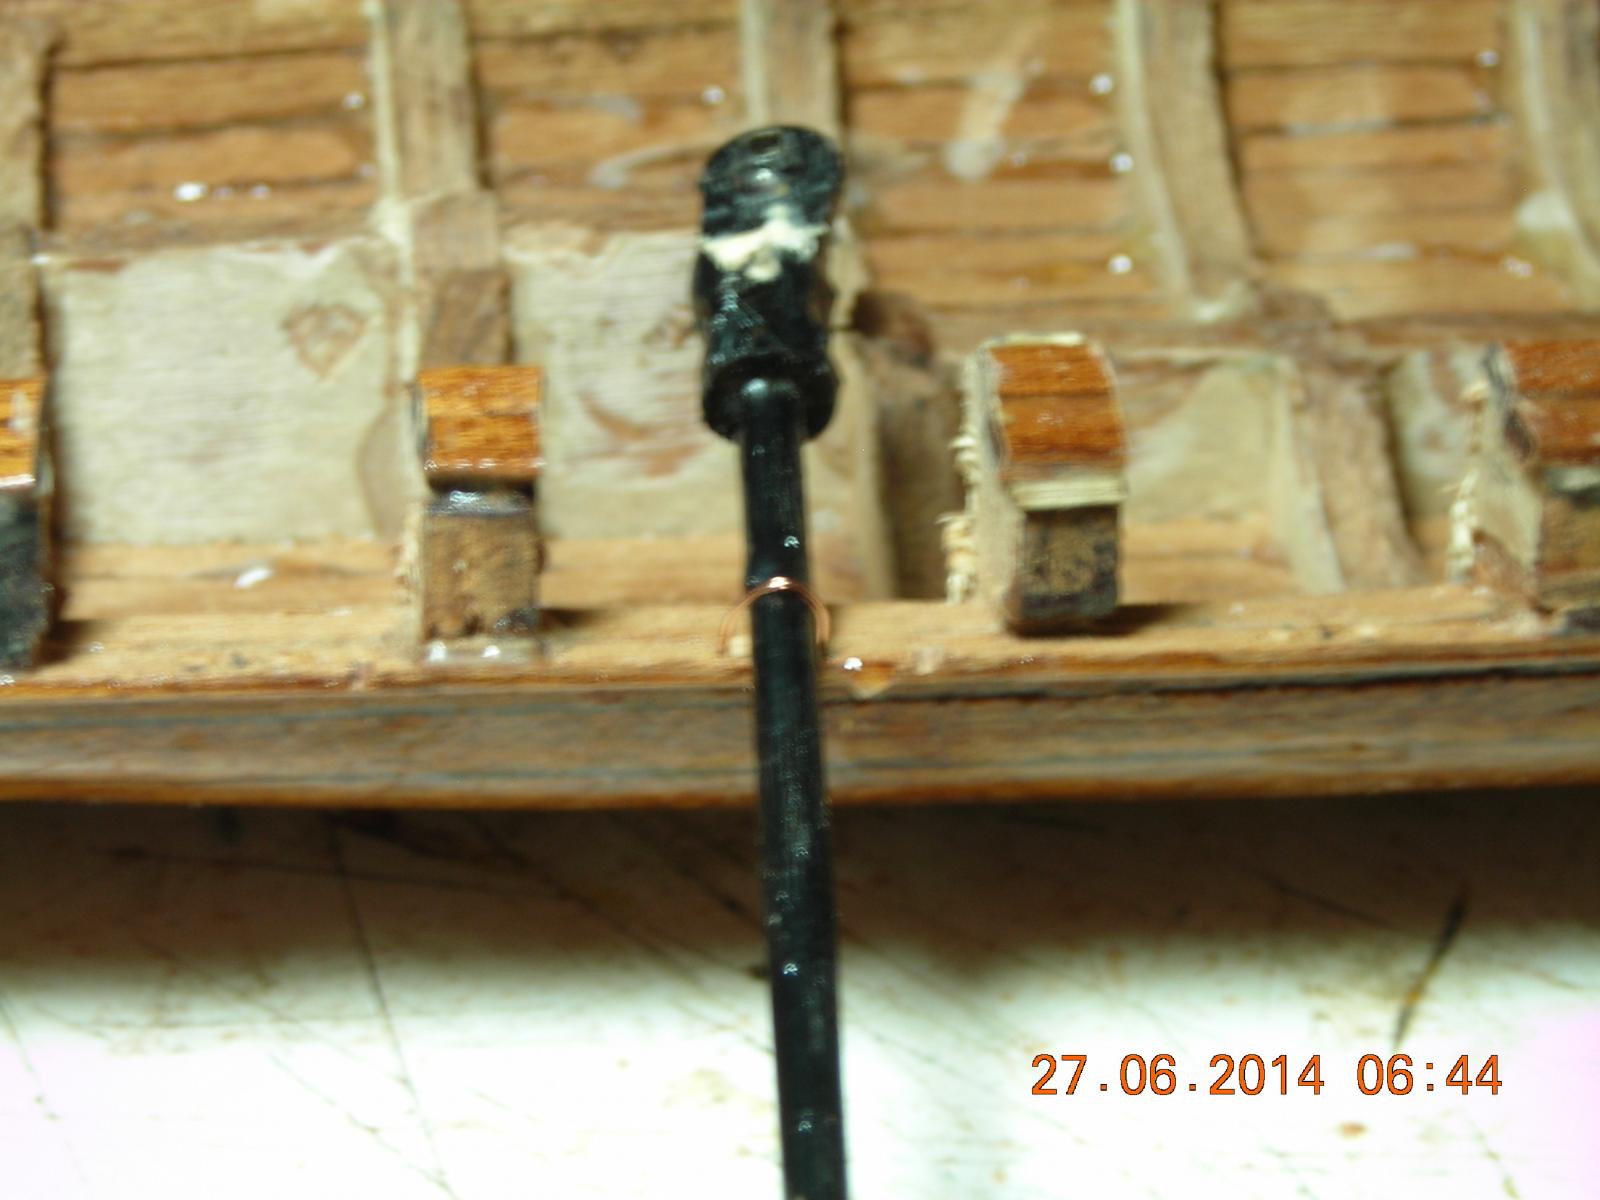
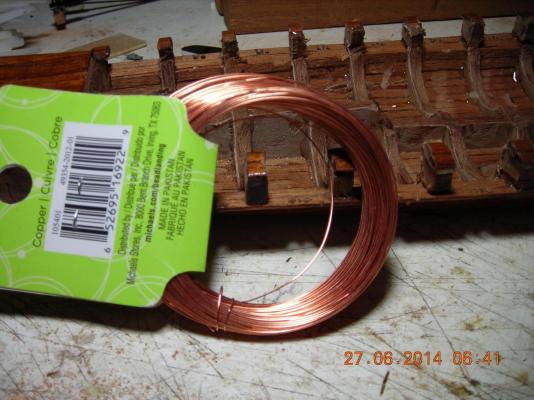
I have drilled holes on the port and starboard side to be my oar locks, the wire you see will become the oar locks themselves and finally what the oars and locks will look like in place. Next I will drill and install the guide pins for the race track and after that mount the racks and oars in the boat.


-
Thanks Tim.
-
Can't download video from you tube but you can watch the build on another website. I'll be posting there because for me it works and at that website and not being able to download from you tube will compromise this thread. Thanks to all who followed this thread.
-
Can't download my video from You tube to this post. If you go to "Bireme oar rack" on You Tube I explain the oars and rack plus what I'm going to do. I will be posting more on you tube when the next stage is in progress I'll let you know then.