HOLIDAY DONATION DRIVE - SUPPORT MSW - DO YOUR PART TO KEEP THIS GREAT FORUM GOING! (Only 72 donations so far out of 49,000 members - Can we at least get 100? C'mon guys!)
×


Shazmira
-
Posts
1,303 -
Joined
-
Last visited
Content Type
Profiles
Forums
Gallery
Events
Everything posted by Shazmira
-
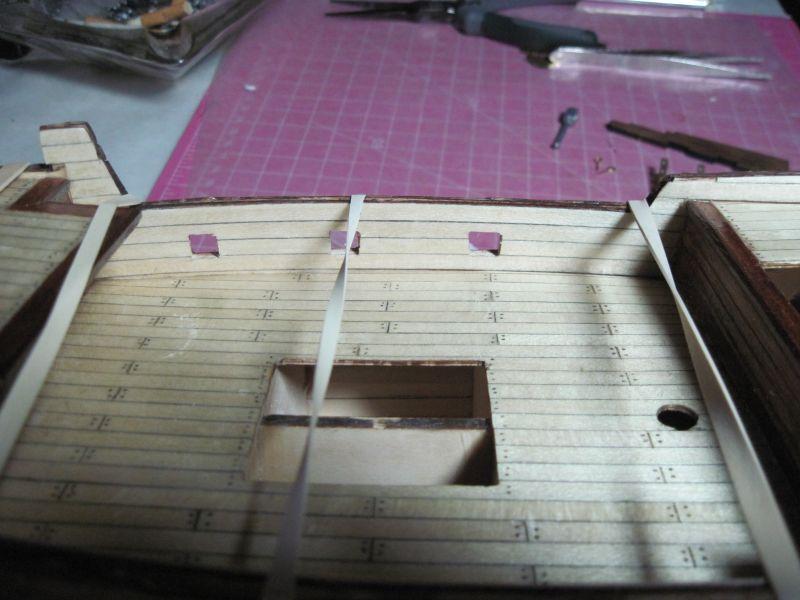
 Aaron, To figure out where my lower gun ports went i taped on the two rubbing strakes. Then I just looked at the pictures and laid out the bottom pieces of those gun doors until I thought they looked correct, used a pencil and traced around the inside dimension of the door, then measured that tracing to the proper distance and marked that out. Then began drilling the holes and cutting them out. In my pic they don't look real straight, but they actually are, I used a level when I laid out the rubbing strakes, I think my camera angles make some things look a bit more wonky than they really are. I do like the way your cherry looks on that hull, will be excited to see it when it is stained.
 -
Thanks Russ, I will do that when it is time to attach to the ship, I think it will make it easier to get it to lay the way I need it to in order to get nailed
-
Bedford, I never thought about using the nails....I think that would have worked much better and allowed the hinges to seat up in the gaps cut into the rudder better. I considered heating up the brass, but had no idea how hot would be too hot and didn't figure I could afford to mess up a hinge, as I have no idea how I would get a replacement part. I wish I had a tool that could get me a tighter bend (corner) on the hinges. I think then they would lay in those gaps batter as well. So tell me, is mine okay, or should I take it apart and redo it?
-
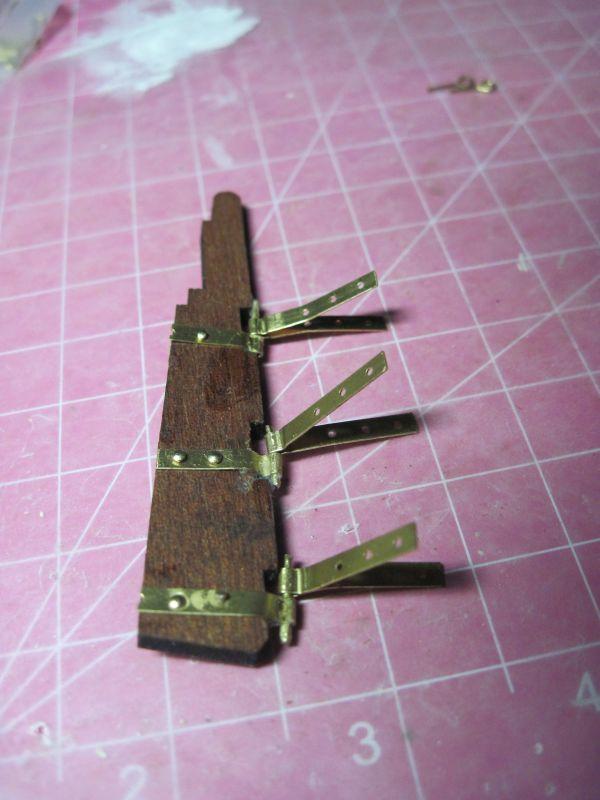
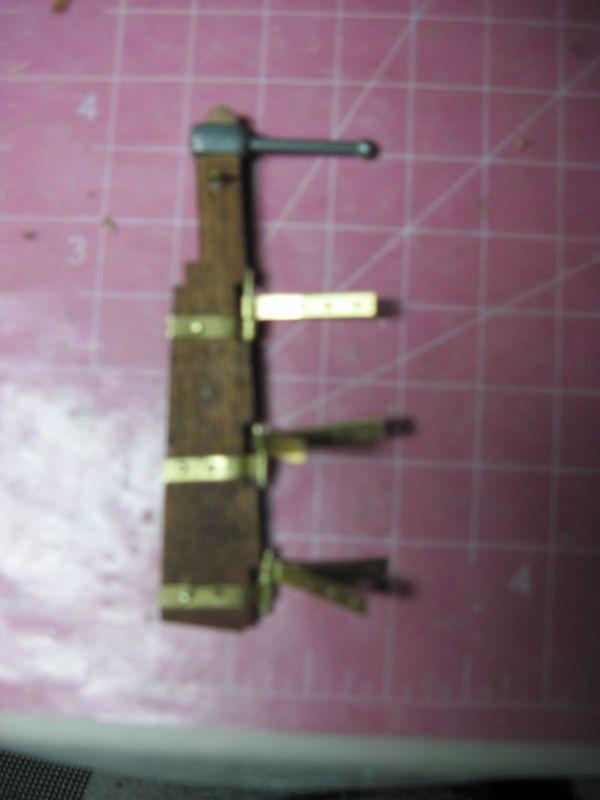
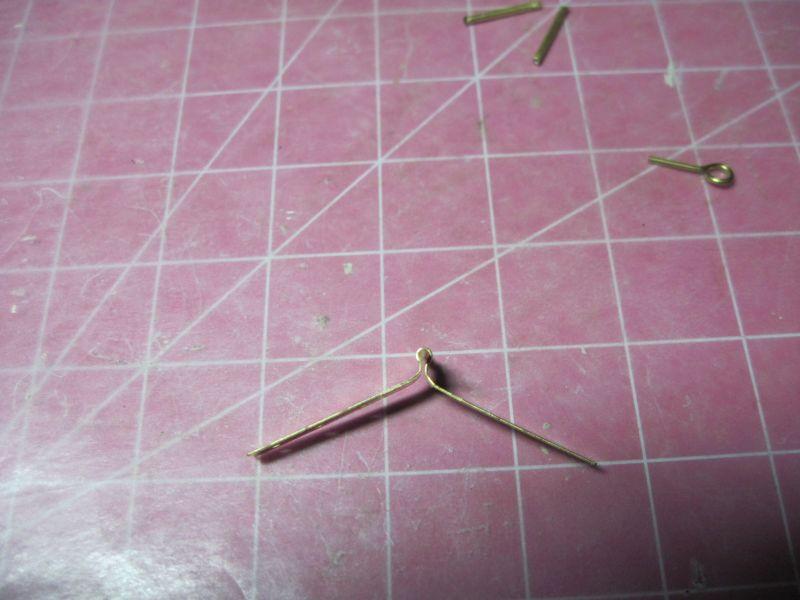
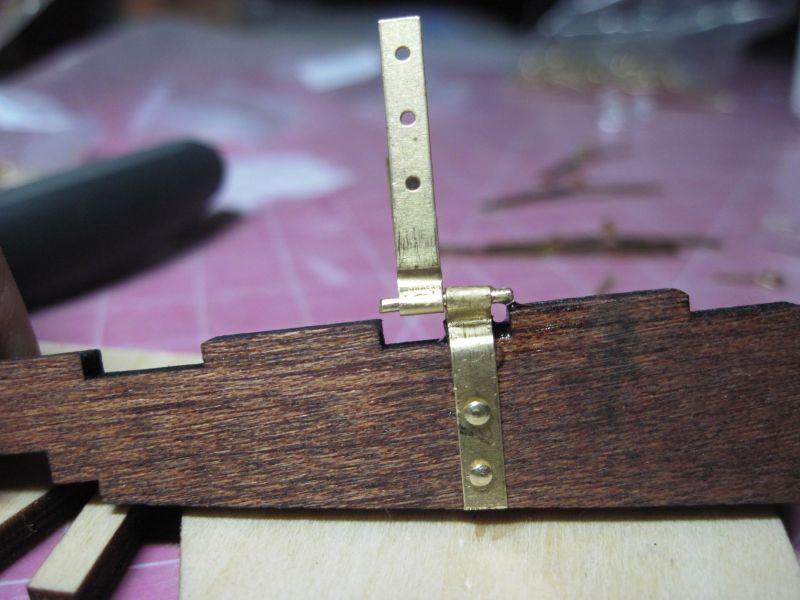
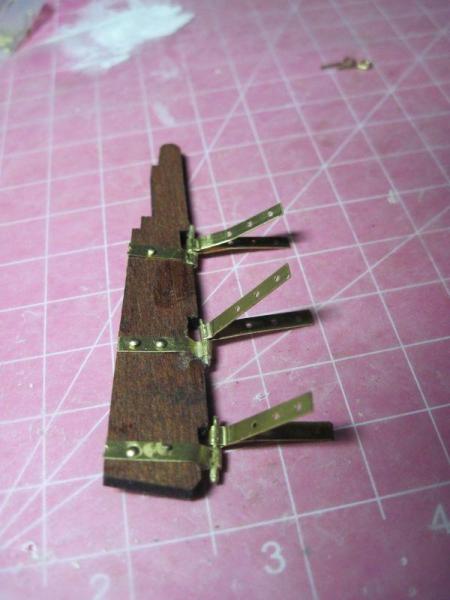
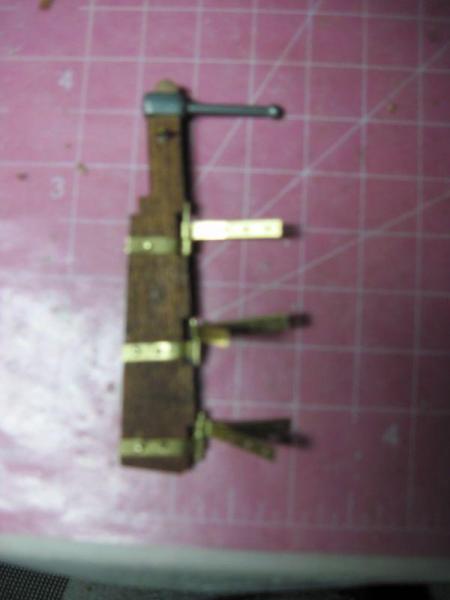
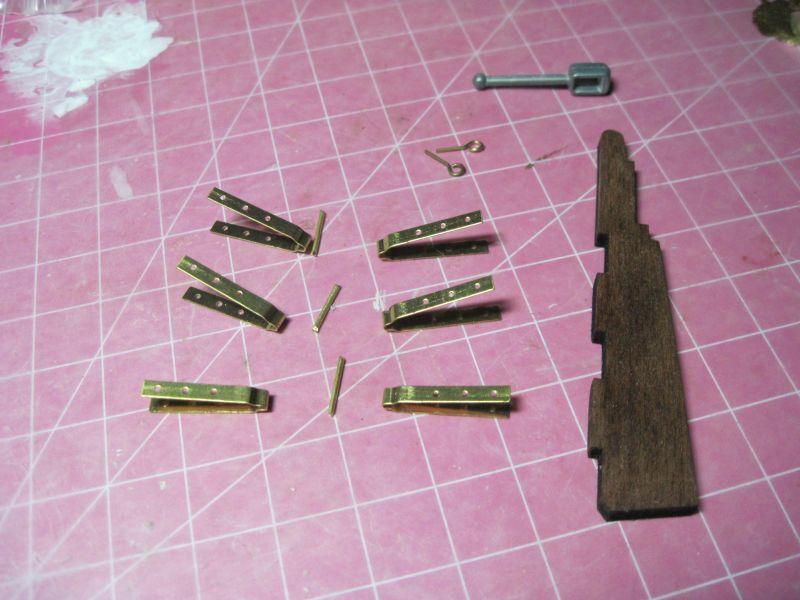
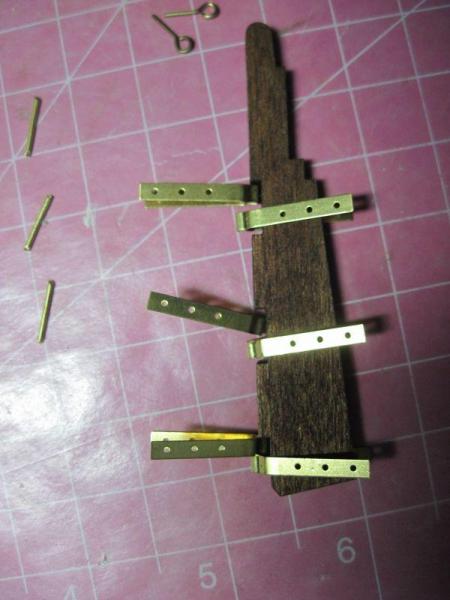
Sam,love your mock up, thank you very much for the visual aid...I always learn better when I can see it. After I posted my question I sat down at the table and scratched my head for a bit while looking at the parts. Knowing the concept was one thing, putting that knowledge into something that works was something else lol. I ended up doing pretty much what you said, only I glued the bottom half since the instructions put both parts of the hinge on the rudder, and the second loose side of the hinge to be nailed to the ship...hope that makes sense. First I opened up the hinges flat so I could get a sharp bend. Then I slid the "pin" in the channel and crimped it with a pair of wire cutters...very gently so as not to cut the soft material That seemed to give me a much tighter channel to hold the pin, so I tried attaching the first hinge, with the aid of a drop of CA glue to hold the bottom of the pin in the lower hinge half Seemed to work so I did the other two hinges in the same manner Carved down the tip of the rudder a bit in order to get the handle on...will need to paint that...but not sure what color
- 773 replies
-
- 1
-

-
- san francisco ii
- artesania latina
- (and 1 more)
-
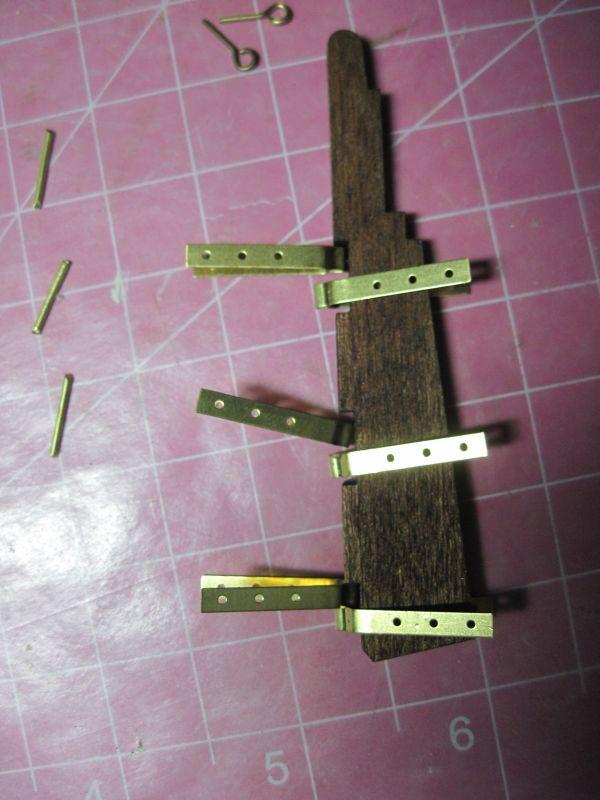
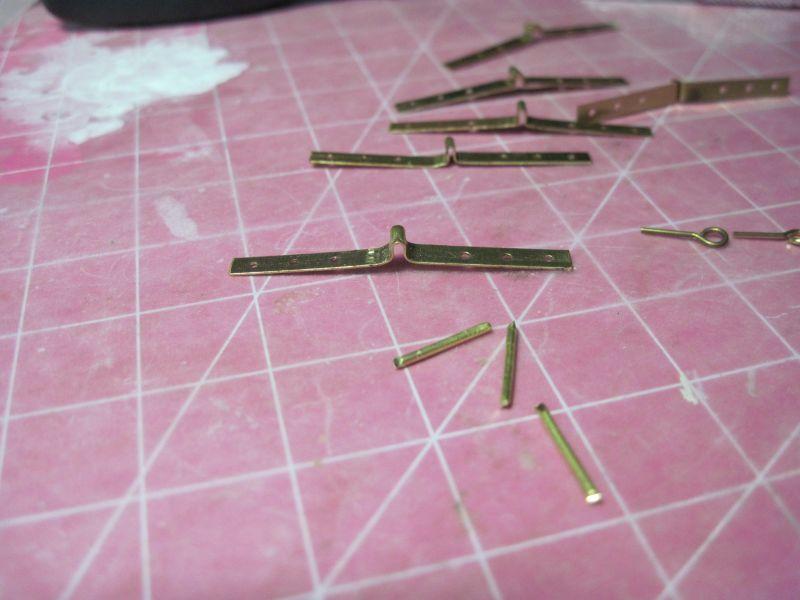
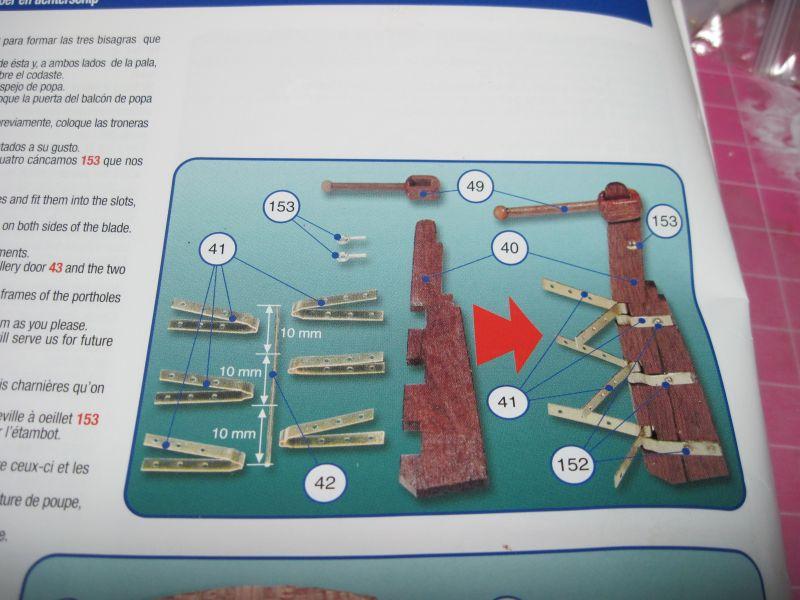
Now I am quite stuck. I am trying to assemble the rudder pieces (I think that is the correct terminology) But I don't have a clue how to do this properly. I can;t figure out how to "make" my hinges at all. If I just try to squeeze the channel around the wire I can't seem to get it tight enough to hold the wire in place. I don't believe I am supposed to glue the wire in, then the rudder would not move on the hinges as it should. My pieces for the hinges are too long as well, and extend over the end of the rudder. I suppose they can be trimmed off if I need to. Please someone tell me what I am missing here.... This is the parts the instructions call for These are my parts The instructions say to make the hinges using 10mm of the provided wire, then to attach the 3 hinges to the rudder at the notches. But it is obvious that the hinges are longer than my rudder. But does appear by the instruction photo that they may have been trimmed to length. But how do I use the wire to make the hinges????
-
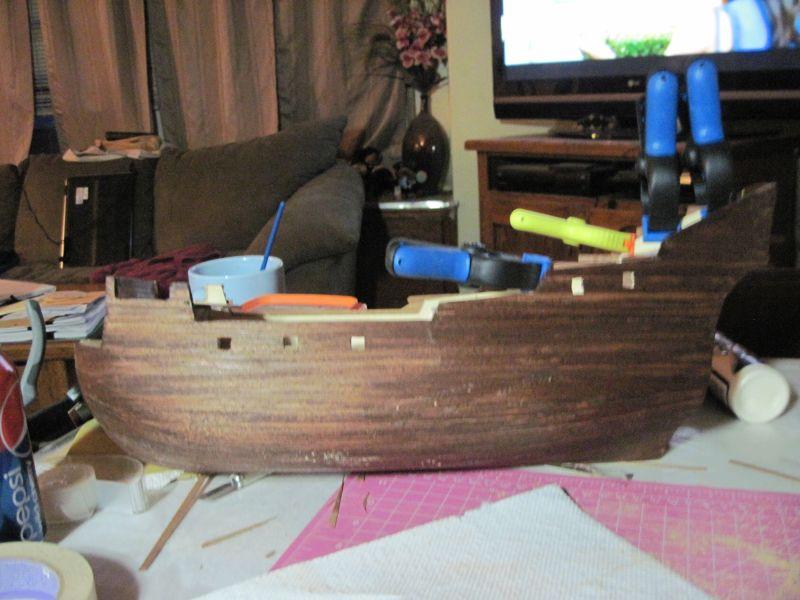
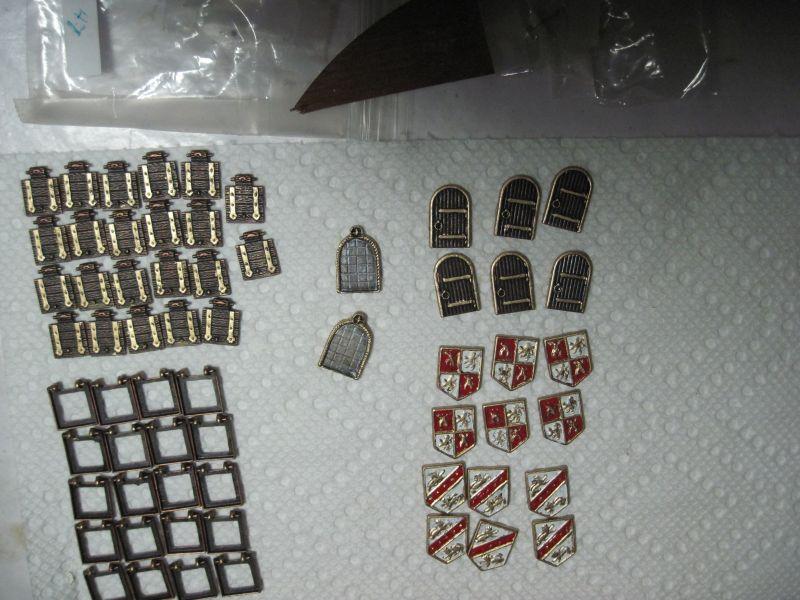
Kept busy today, finished lining the bulwarks Worked on the pieces for the bow Got the false keel attached Then spent some hours doing some painting of small metal parts
-
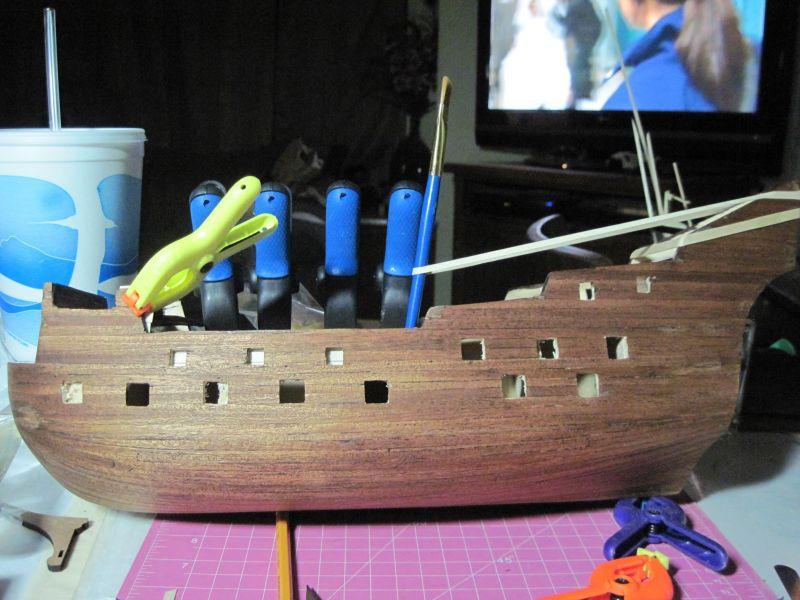
Aaron, yes, my upper gun ports are 8mm x 8mm and the lower are 11mm x 11mm
-
Steve, for me, that modern design is just missing something...I think it is the stupid, yet romantic notion of pirates and all that draws me to the galleons. For some reason it is their shape that mind's eye finds most pleasing. I know when I was looking at kits to buy, it was always the galleons that I was drawn too. I am already trying to decide which kit to tackle next I know I want one that is bigger and more ornate but don't want it so difficult that it will be out of the realm of possibilities for me to complete. Everyone, any suggestions on which model to tackle next would be greatly appreciated...and if I know how much I need to spend I can start saving now so I can purchase her when the SF is near completion
-
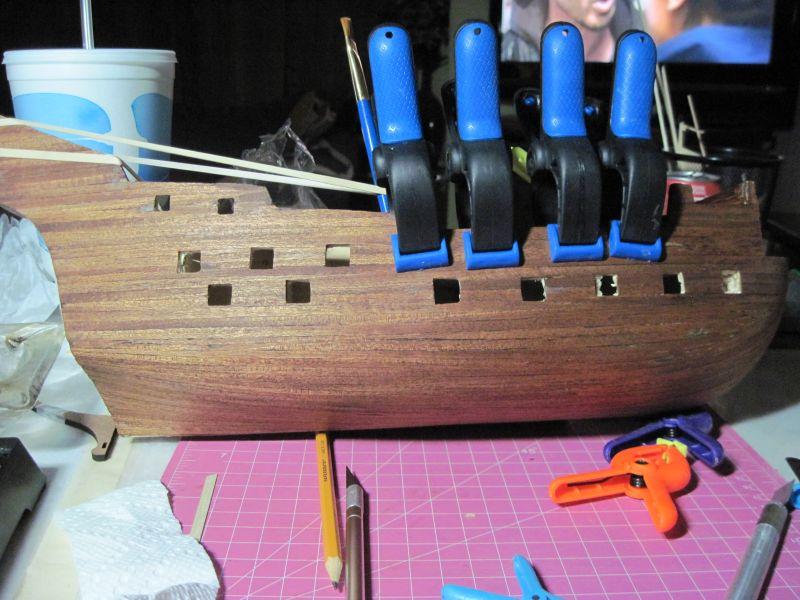
Spent today cutting in the gun ports on both sides,and a bit more sanding of the hull. Have now begun the lining of the inside of the bulwarks. Steve, tell your female friend she should try again, and this time not to get overwhelmed by the instructions, but to give them a complete look over then to take each step as it comes. I'm sure of course you will have her check out MSW and all the build logs here that are of much more benefit than the instructions anyway. Thanks to Crackers, Russ and everyone else chiming in as well. Honestly it is you guys that are keeping me building, even though I know that compared to some logs on here mine pales in comparison. But I intend to see this through and learn from each of my mistakes, I expect the next build to look better
- 773 replies
-
- 1
-
-
- san francisco ii
- artesania latina
- (and 1 more)
-
Toni, I am double planking...ordered new strips of basswood for the first, and mahogany for the second. Had I realized how much spiling this bow required, and known in advance what exactly that meant I would have ordered my strips in varying widths as well. Now that I know better I think it would make sense to have a supply of some strips onhand, before beginning another build. Don't see myself converting to the dark side, no place, and no money for all the equipment that would be required...but I do see the benefit of kit bashing now, and foresee I will become heavily involved in that side of things
-
Barehook, ok I am going to show my ignorance here. I tried your technique....it worked soso. I came back here to see what I did wrong, and I realized you said to use a wide plank for the spile. My question is this...where do you get the wide planks? Did your kit include some of these or is this a scratch build? My kit does not have any wider planks provided for this technique.
-
Buck, much further west of you. I am 30 miles east of the Colorado border and 20 miles south of the Nebraska border. I live out in the boonies in an old farmhouse between the tiny towns of Atwood and Ludell. So let's see you should have earned yourself a snowday or two this week as well? KSN seemed to show the Wichita took the brunt of that snowstorm. We managed to pick up 10 inches or so out here. I teach in Colby, luckily they called off school so I did not have to make the 45 min drive in to work.
-
Steve, gee, what a way to burst a girl's bubble I was not thinking about the glue not holding if I stained and clearcoated first. So thank you for throwing your 2 cents in, I think you just saved me a major headache down the road. According to your post it is ok to apply the stain as long as it is not a sealant? If I am understanding that correctly then I will go ahead and apply the stain once I have the port holes cut, but I will NOT apply the clear coat, Aaron, I am not sure I like being your guinea pig lol, as for snow days...after having 2 of them I am feeling a little cabin fever begin to set in And I have to admit, living out in the country relying only on a wood stove for heat definitely has its drawbacks! It took only a couple trips, in the middle of the blizzard, to the woodpile to keep the fire roaring and warming for me to stop enjoying that romantic notion.
- 773 replies
-
- 1
-
-
- san francisco ii
- artesania latina
- (and 1 more)
-
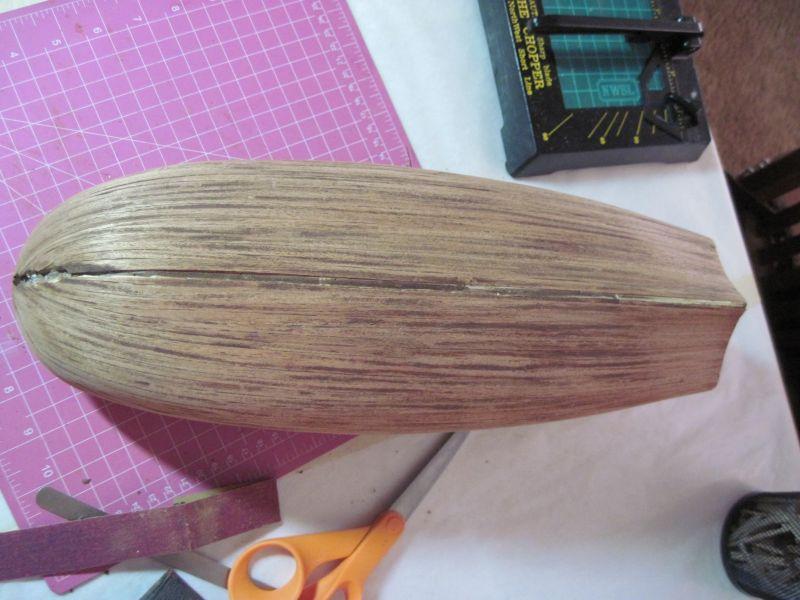
Andy, I did test the stain on a small piece of the mahogany, used red mahogany stain and I liked how it looked. Unfortunately it is kind of like painting a room. a little looks good, but when the whole room is done you don't like it. I really liked it on the sample I did, but when I stained the whole shop I thought it looked much too dark and ugly for my tastes lol. It was probably more historically correct than the light finish I have decided to go with. But I am a woman, and you know how women are, we constantly change our minds, and we like things just because we like things . I find it amazing that for all I learned from reading things on this site, I still find myself making some of the same mistakes I have seen others make! Oh well, at least maybe I can learn from my own mistakes. Yes, Russ, that second planking is soooo very thin, and I messed up on the tip of my stern and went too deep, luckily it was only the last 1/4 inch, so a bit of wood putty will hopefully correct that error.
-
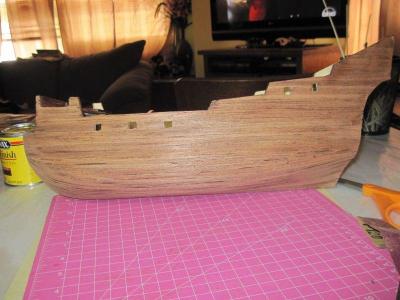
Still sanding away to get rid of the dark streaks in the wood so I can restain again. Tonight though I am marking and cutting the other 22 lower gun ports. I thought I would wait, but I am intending to stain and poly the hull before I start adding pieces to it. I think I will achieve a nicer finish to the hull that way. So I am cutting the gun ports now so I dont mess up the finish later. At least that is my plan, hopefully it all goes according to plan. Keeping my fingers crossed anyway.
- 773 replies
-
- 2
-
-
- san francisco ii
- artesania latina
- (and 1 more)
-
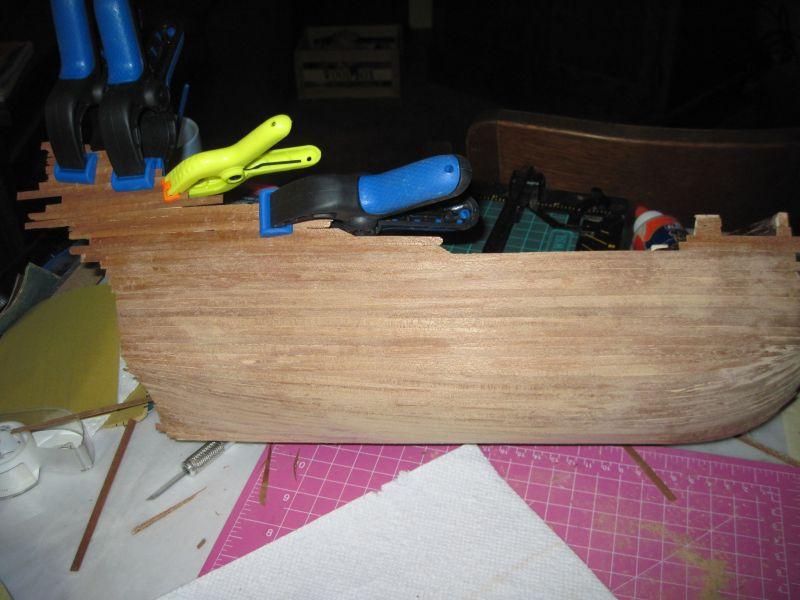
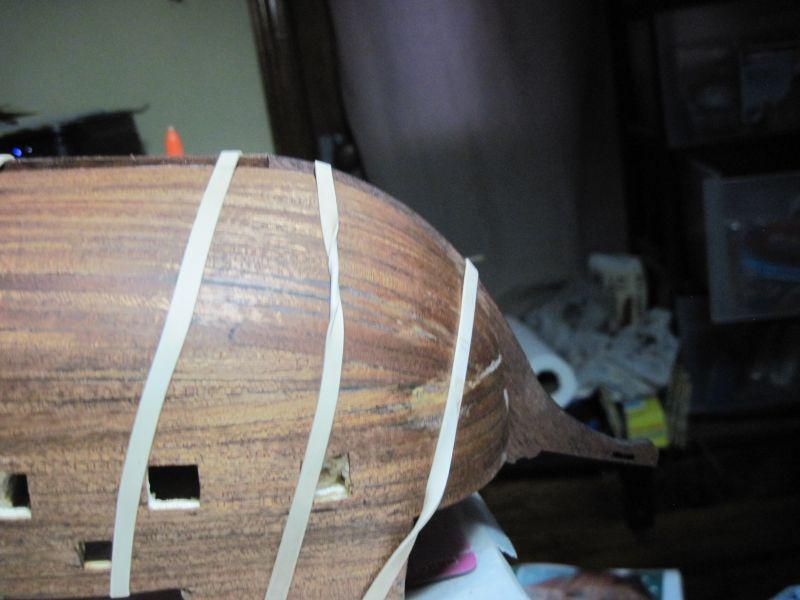
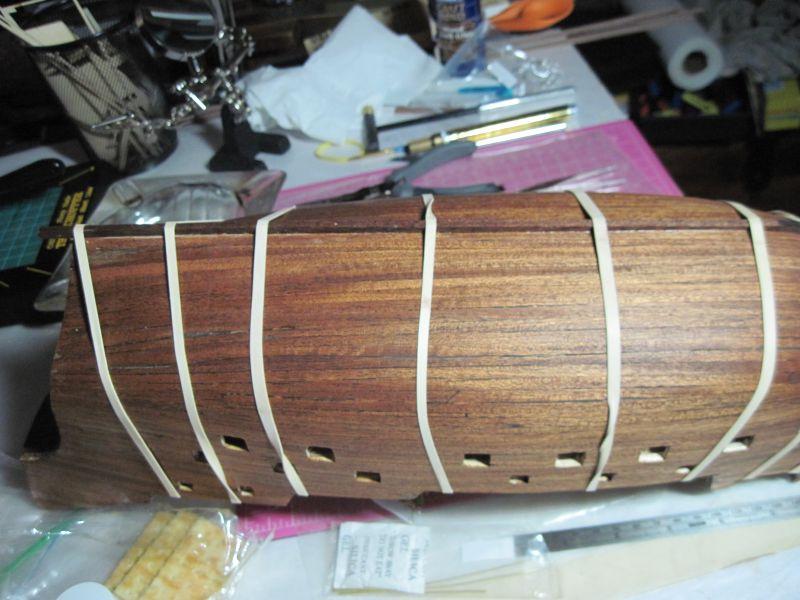
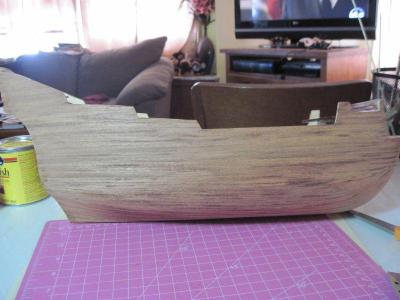
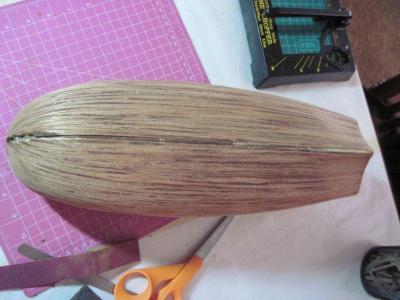
Well thanks to a couple of snow days I managed to complete my planking ahead of schedule. I am not tickled pink with how it turned out, but I think it is serviceable for a first attempt. What it looked like when I went to bed last nite Decided to stain this morning...hate it! Spent the day sanding off the stain....ugh, almost as bad as planking lol Beginning to look better, but I am still working on it


- 773 replies
-
- 3
-
-
- san francisco ii
- artesania latina
- (and 1 more)
-
I considered cutting them before the second layer, that way I could hide any errors. The problem was my instructions and plans do not have any details on where they are supposed to go. I decided I would do as you are planning and cut them after I put the strakes on. I figure that way I can get them centered and in the correct place. But now I am thinking I will lay out the strakes and mark them on the hull, cut the port holes, then attach the strakes. I am worried that working around those strakes might cause me to cut the holes improperly or damage the strakes themselves. My kit was short one length of the wood those strakes are made of, so I can't afford any mistakes with the pieces I have.
- 773 replies
-
- 1
-
-
- san francisco ii
- artesania latina
- (and 1 more)
-
Surprise Discovery of AL Charles Morgan
Shazmira replied to Shazmira's topic in Wood ship model kits
Bob, now you have me worried....guess I better read through the instructions and see just how bad they are. Hopefully, someone here will have been through this build before and can offer help when I get stuck. -
Thanks everyone for your support...I am feeling a bit...I don't know, less excited I guess...the tedium of doing this planking somewhat correctly, or at least nicely enough to get a good result, is wearing on me...I so very much want it to be over!!!!!!
- 773 replies
-
- 1
-
-
- san francisco ii
- artesania latina
- (and 1 more)
-
Surprise Discovery of AL Charles Morgan
Shazmira replied to Shazmira's topic in Wood ship model kits
Wow, thanks for the replies...my own frugal mind hates the thought of throwing her away...and I still love the lines of the ship itself...guess as soon as I finish planking my San Fran, I will start the Morgan, and build the two side by side. Maybe I am a gluten for punishment, but I am also a bit impatient and am not sure I can keep plodding away on one while knowing the other is just sitting there waiting for some love and attention -
I would suggest you PM Vulcanbomber, I am betting she could send you some sort of template.
-
Sarah, Thank you, and yes I did manage to work it out without getting that clinkered look. Just took some time and trial and error, a lot of error Aaron, I tried using pins both ways. If I went through the basswood I tended to "chew" up the edges of the strips, so I have opted to use only masking tape. holds well since the strips are so thin, and doesn't damage anything.
- 773 replies
-
- 1
-
-
- san francisco ii
- artesania latina
- (and 1 more)
-
the strips are so thin that when I try push pins it splits the wood, I found the masking tape holds pretty well at this point.
- 773 replies
-
- 1
-
-
- san francisco ii
- artesania latina
- (and 1 more)
-
Buck, hello there...so where abouts in Kansas? I also see we have some other hobbies in common as well.
-
Look at Vulcanbombers build log for her San Fran I, she built a new wooden rowboat because she did not like the metal one that came with the kit. You boat is coming along great!, Wood filler and sandpaper will make all those trouble spots fade away, not to mention that many will be covered by other things yet to be attached to the hull.