HOLIDAY DONATION DRIVE - SUPPORT MSW - DO YOUR PART TO KEEP THIS GREAT FORUM GOING! (Only 13 donations so far - C'mon guys!)
×


Shazmira
-
Posts
1,303 -
Joined
-
Last visited
Content Type
Profiles
Forums
Gallery
Events
Everything posted by Shazmira
-
Wow! Just checked them out. I love the HMS Royal William....now to find the money to fund it!
-
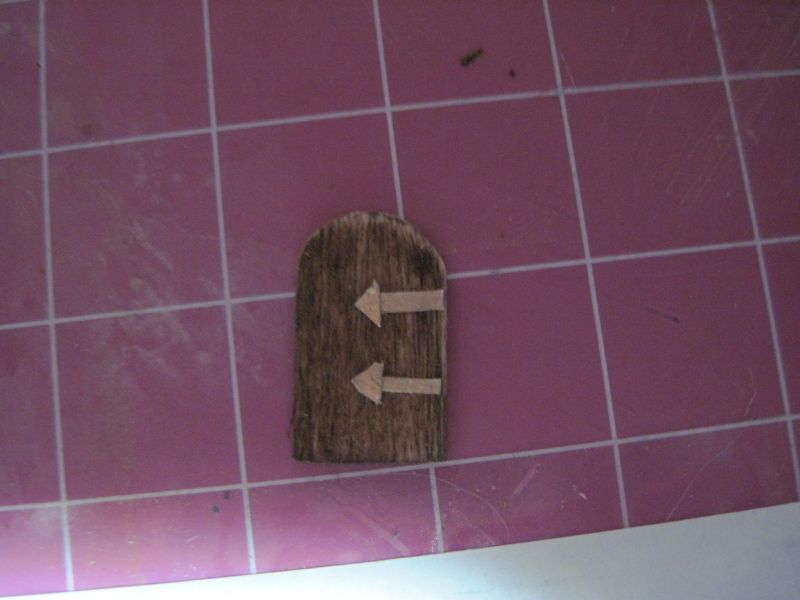
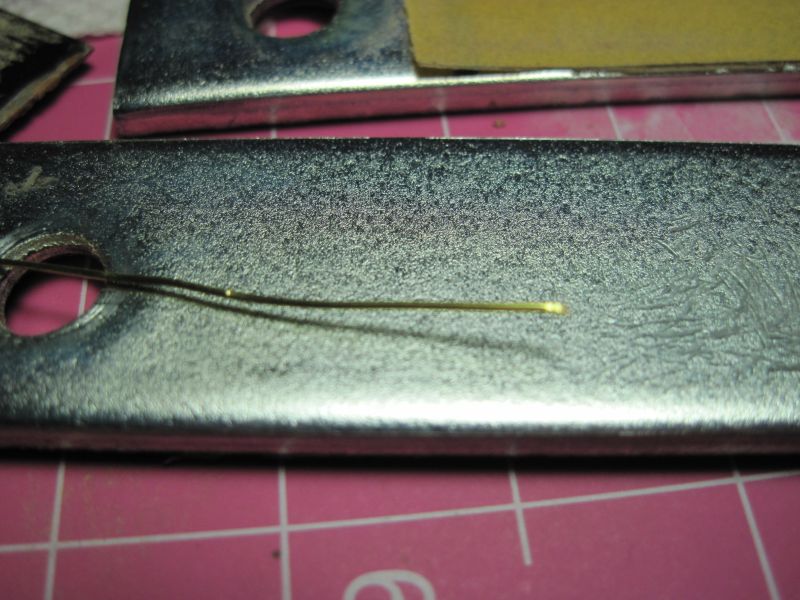
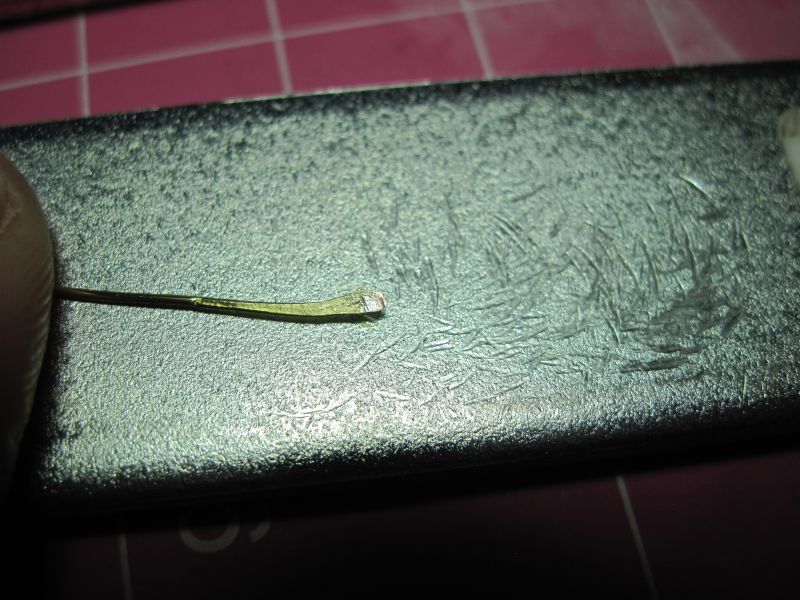
 Yep, paper backed by two-sided tape. I found if I laid my strip of paper on the two-sided tape it was easier to cut such small pieces. The tape gave the paper more stability, and about the correct amount of thickness. For the color I just blended gold and black paint together until I had something that looked less gilded. For the door pulls I just wrapped some brass wire around the end of a drill bit and cut it into rings. I think Russ is right though, I need to round off those corners some. Maybe I can still modify it as it is since the poly will be completely dry when I get home from work tonight. If not, well sandpaper should take off both the poly and the paper and I can make some new hinge plates with rounded corners. Sjors, I think this is much more than a virus...was dreaming all last night about how to make my own windows...I think I have come up with a solution...I just need to find some yellowed (so it looks like there is a light on) film of some sort, and then I can do the leaded strips using thread, probably dipped in a gun metal colored paint. Now just to find the proper film. My next major hiccup is finding either a replacement piece for the frame of the upper gun port, or figuring out how to make my own frames. One of my dogs...I am betting the pug seems to have eaten one of the frames I can do a lot of things, but digging through dog poo looking for an 8mm square metal piece is not exactly in my wheelhouse!
- 773 replies
-
- 1
-

-
- san francisco ii
- artesania latina
- (and 1 more)
-
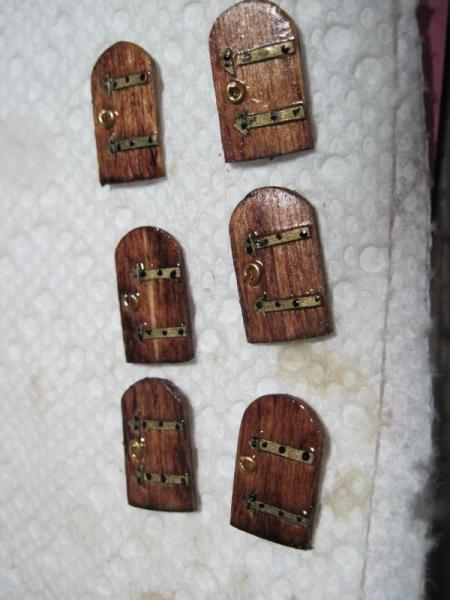
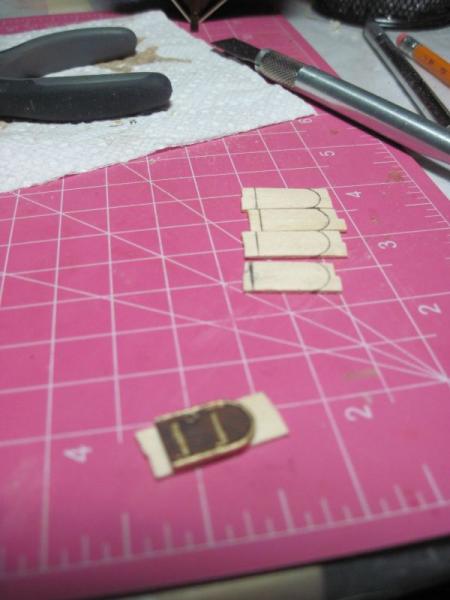
Here is my second attempt at the doors.....the poly is still wet, but I think I am getting closer
- 773 replies
-
- 1
-
-
- san francisco ii
- artesania latina
- (and 1 more)
-
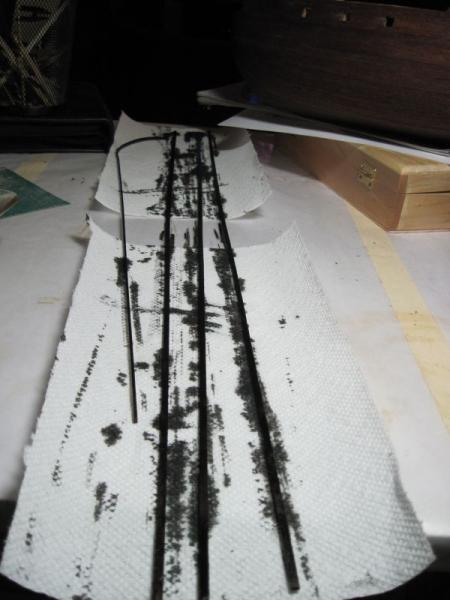
$15 for 6 brass sheets 4x10...that is too much? First attempt at paper hinge plates (not sure what the proper term is). Don't like it so I am still experimenting. Did get my first rubbing strakes put on today....no pic yet as everything is taped up and drying. But at least this time I have them in the right place
-
I actually went looking online at the photo etching stuff, decided that was too pricey for me, and not sure I really want to go that far. But I did find brass sheets at .005 thickness 4" x 10". 6 individually wrapped for only $15 including shipping. I think I will invest in those for the future, I think at that thickness I could cut through it easily with an exacto blade and form my own little parts. for now though, I think paper will suffice.
-
Thanks Russ, the thought of paper or tape had not occurred to me. I was thinking everything needed to be brass colored. but black would be acceptable too, thank you so much for that idea!
-
Mark, ssshhhhhh 42 rocker will hear you, and he will be calling me again from the dark doorways of my imagination to come join him and all the rest of you there . Still don't know how these will look or work out yet, but I pretty much dreamed what I came up with so far last night, hopefully tonight I will dream up the second part!
-
You guys are a laugh riot!!!!
-
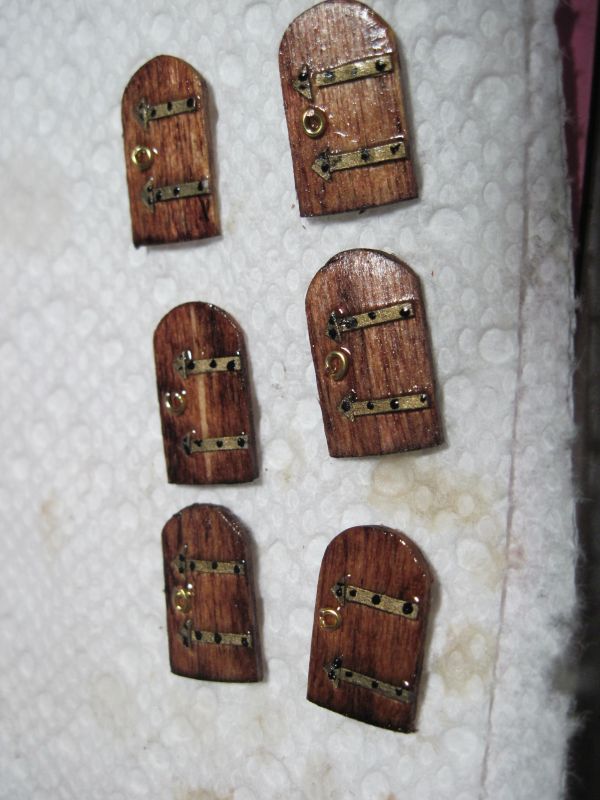
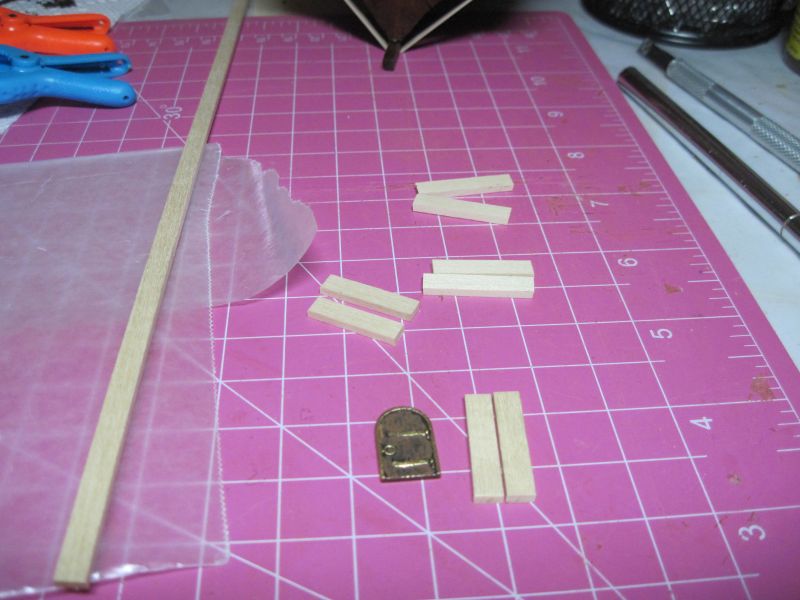
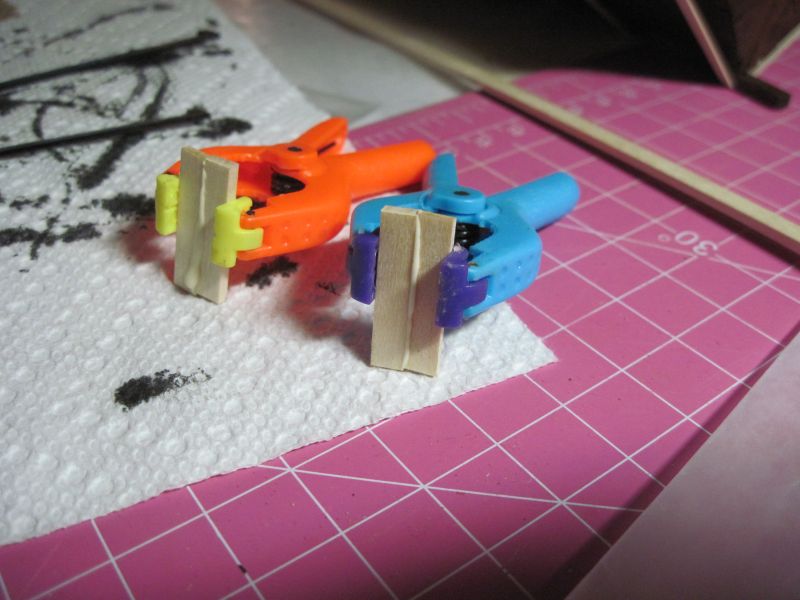
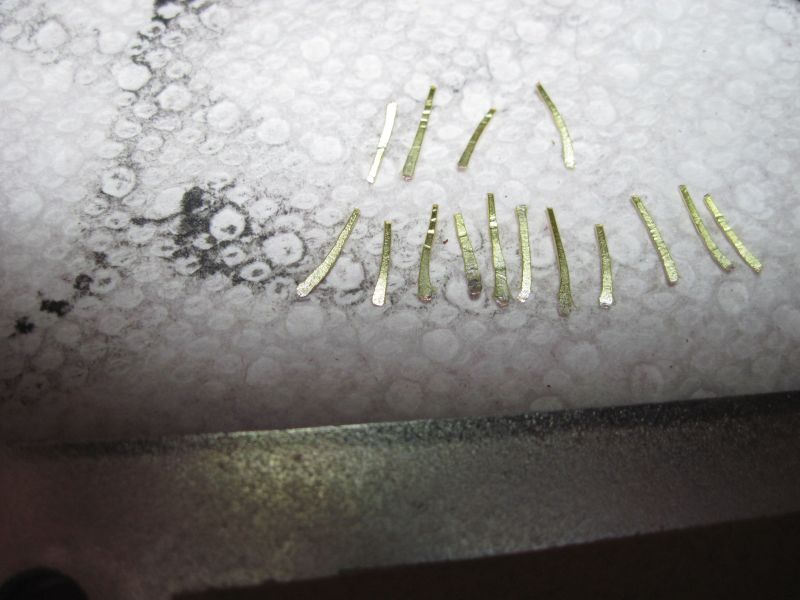
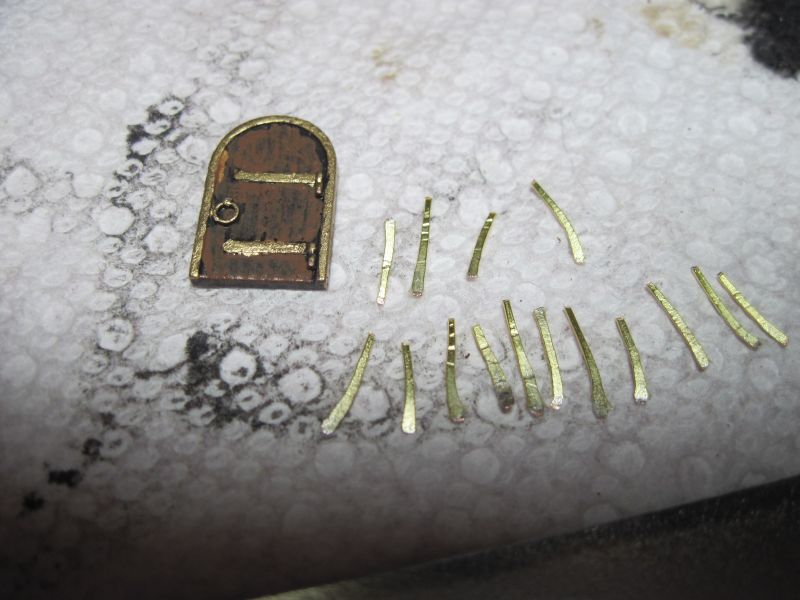
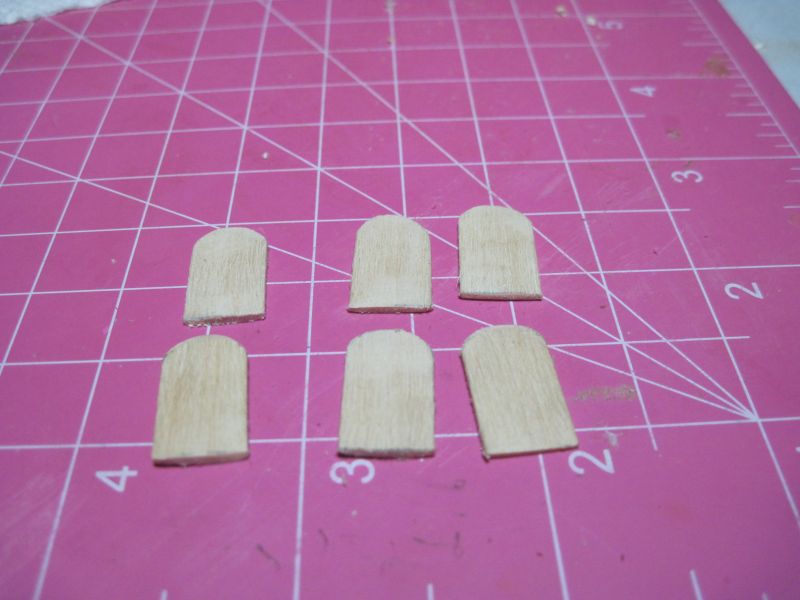
I am tickled pink by all the compliments....I have seen your own builds, so all I can say is thank you very much!!! Today I began my own kit bashing, I have never been very happy with the die cast cabin doors provided in the kit, so I spent the day working on fashioning my own instead. I needed something to do while I wait for glue and stain to dry First I started by cutting legths of left over basswood planking strips, 2 for each door then I glued the edges of the strips together and clamped While the glue was drying I took some 25 guage brass wire And began flattening it with a hammer I cut these flattened bits to length I plan to work on these a bit more, but I want to use them to simulate the brass hinge plates on the doors. By now my wood doors were dry so I created my own fancy little jig to hold them so I could use a #5 chisel blade and "plane" them to the proper thickness. sanded the doors and used the kit-provided doors as a template Cut and sanded to shape Stained, and am now waiting for that to dry to continue


-
Sam, just planning on a satin clear coat of poly for the top coat. I would really like to put it on now, but I have been told if I do then I will have trouble getting everything else to stick to it well. So, I will wait and do the finish coat once everything is attached to the hull. And I believe you are right about the minwax red mahogany....it has some serious issues at least as it applies to ships Randy, I m thinking next time I might just try the tung oil. I like the idea of letting the natural wood come through, I just worry that I wont be able to get glue to stick to it at all. Russ, that thin veneer is both a blessing and a curse that is for sure. I do like how it is easier to bend and fit along the curve of the hull, but it splinters and peels so easily on the raw ends...Seems I am constantly losing little chips and bits off the end pieces. I need to find a way to prevent that from happening!!! Robert, thanks for the link to your build, I will most eagerly go look through it!
-
Andy, from your fingers to Murphy's ears I m hoping today and tomorrow I can actually make some new progress instead of redoing previous work. But I do have to admit, all the practice is making me better!
-
Sjors, nope, no gaps this time...I really am happy with that! And you know I believe I have a pair of those gloves out in my old tackle box....think it might be a good idea to go dig them out, thanks for the suggestion!
- 773 replies
-
- 1
-
-
- san francisco ii
- artesania latina
- (and 1 more)
-
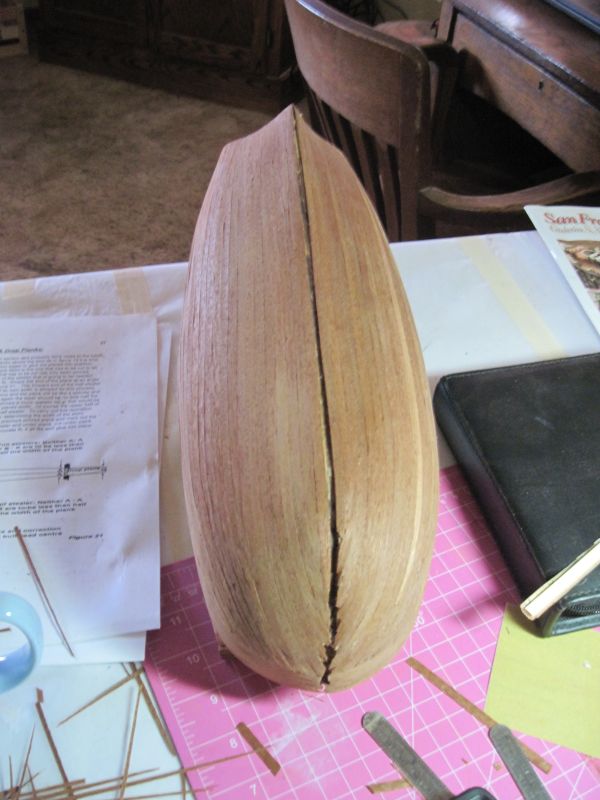
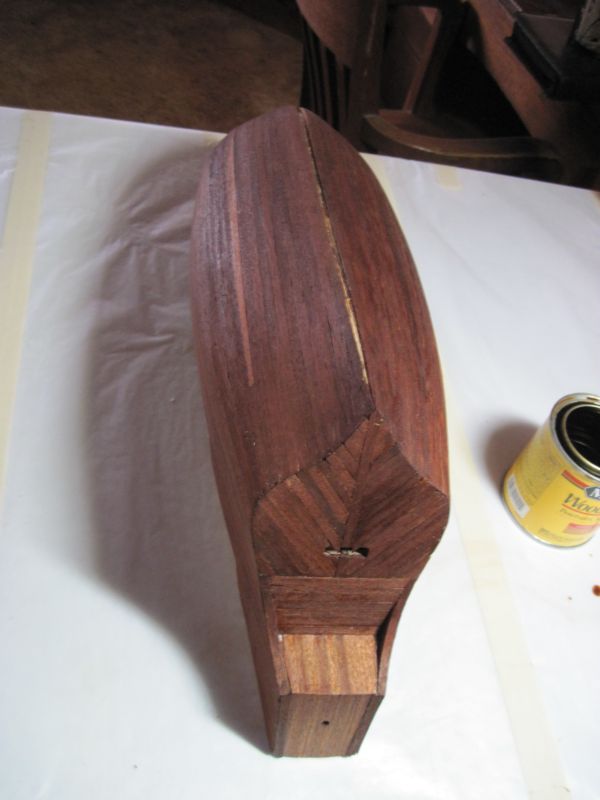
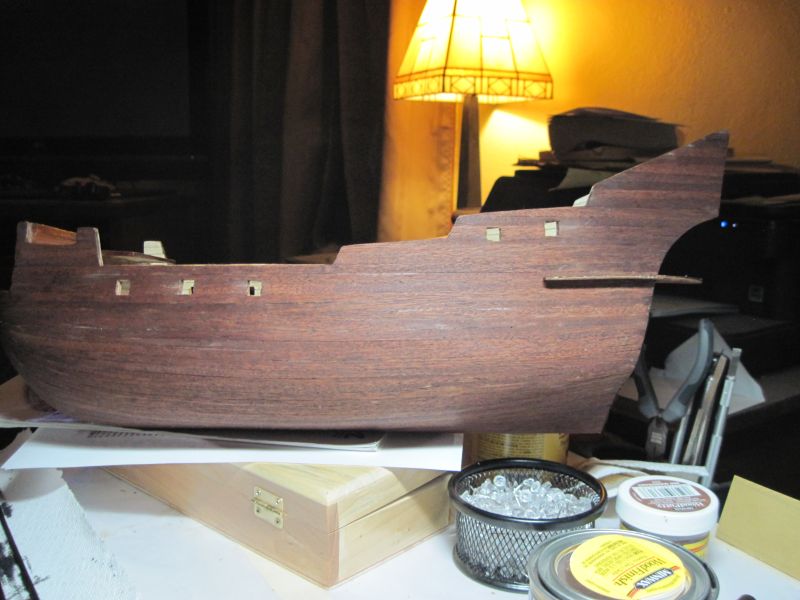
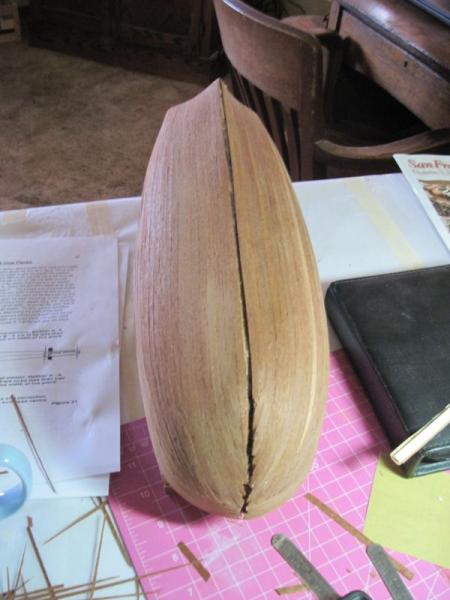
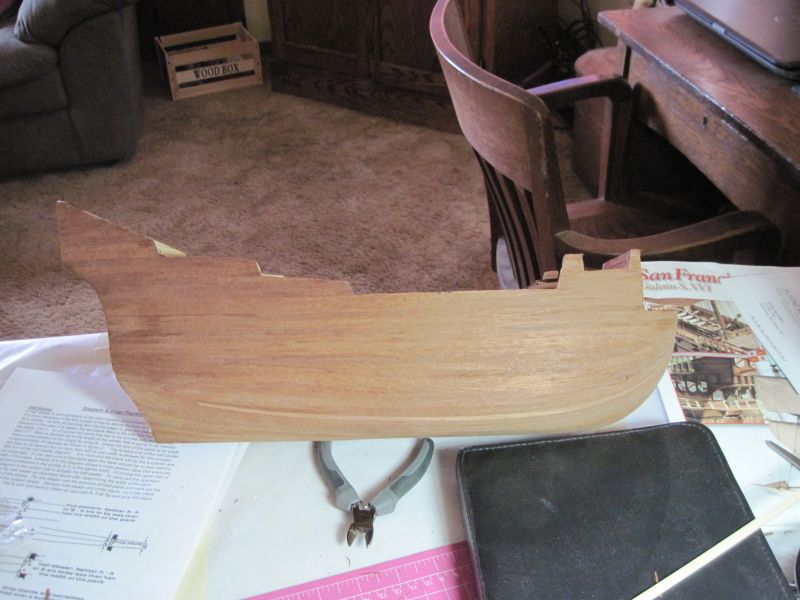
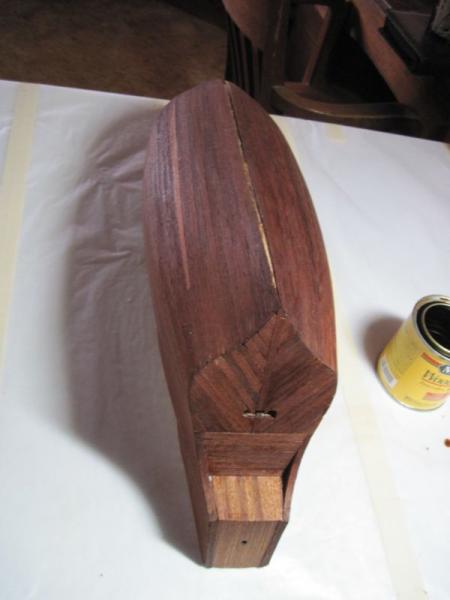
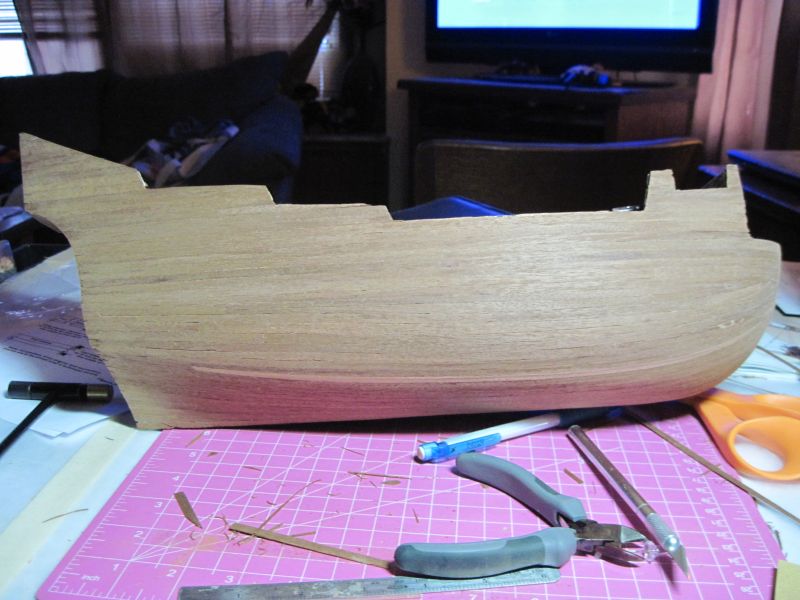
Sam, no, the first time I stained I used the red mahogany and it turned out almost black...I did not like it at all. This time I used minwax golden oak...just enough color to bring out the deep red of the mahogany strips. I like it much better. Randy, Russ, and Sam, thanks for the compliments. This time I am actually pretty happy with how it turned out. Third time is the charm, not perfect yet, but passable I believe. Spent the night with steel wool and another coat of stain. Then cut out the upper gun ports. I had to trim the back deck some to get it to fit correctly this time, but want it to be in correct alignment so I can add my rubbing strakes tomorrow. This time I intend to make sure everything lays out correctly before I cut new lower gun ports no sense making THAT mistake again!!!! Will also need to reattach my false keel and bow parts first thing in the morning, then do some reading in the instruction manual and see what if anything else I need to dry fit or mark so this time the holes will be in the proper places!
- 773 replies
-
- 2
-
-
- san francisco ii
- artesania latina
- (and 1 more)
-
Finally! I made some progress!! now I am almost back where I was before the faux pas with the gun ports. Finished the planking Got her all sanded and smoothed First coat of stain on
- 773 replies
-
- 2
-
-
- san francisco ii
- artesania latina
- (and 1 more)
-
Sjors, I can only hope to become as skilled as you are! Your work is first class!
-
Keith, i originally stained it the dark mahogany color and I absolutely hated it. Seems the mahogany strips really suck up and hold the dark stain, so as you can see from my log I sanded it all off. I wanted a rich, deep, warm brown but what I got was almost ebony; too dark for my tastes. This time around I am going to use a golden oak stain to just bring out the natural beauty of the wood, I think I will be happier. There is a log on here from fish, aka Aaron, and he used cherry to plank his SF, last I looked he had it stained as well and the color is gorgeous, you can see it here http://modelshipworld.com/index.php?/topic/228-san-francisco-2-by-fish-artesania-latina/?hl=%2Bsan+%2Bfrancisco As for Pugs, they are a pure joy. It seems they are always happy-go-lucky and full of joy, nothing ever seems to bring mine down at all! You can be having a miserable day but when he greets you with his dopey looking face and lopsided grin you just can't help smiling back. Biggest negative, he acts like a vacuum cleaner and is always wanting to pick up and eat the wood shavings and bits that fall around my work station. Wouldn't be a bad thing except it all seems to make him sick later...no fun to clean that up Going to hit 80 today! I still hope to finish my planking today, really want to move forward on her now, but I also think another spin on the motorcycle is a must as come the weekend the temps will drop back down to the more normal 40s. I will get some new pics posted yet today, I promise!
- 773 replies
-
- 1
-
-
- san francisco ii
- artesania latina
- (and 1 more)
-
Sam, I am impressed with your ingenuity and skill. I am not up to the task of building new gun port doors from scratch regardless of how much better they might look than what is provided in the kits. My only concession is to at least paint the provided parts to make them "mine". More power to all the builders such as yourself who bash kits so well. I will continue to follow these so one day...I too can join the bashing!
-
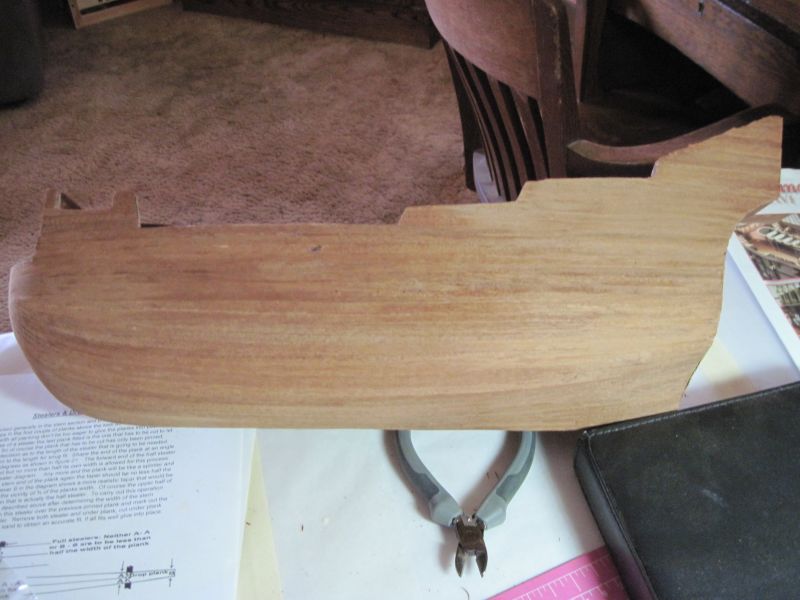
Making progress, have one side re-planked now and am quite happy with the result. I expected to have the whole thing re-planked by now but am finding my hand does not cooperate real well yet. I can only work about 30 min and then have to take a break...but I have no fear that I WILL get this done! Besides, it is not like I have a deadline to meet
- 773 replies
-
- 1
-
-
- san francisco ii
- artesania latina
- (and 1 more)
-
Aaron, Enjoy these days of your life...there will be plenty of time for model building in the middle somewhere.
-
Augie...hahahaha
-
What offer code?
-
Thanks for everyone's input....I am seriously perusing my choices of kits from those suggested to find the kit that appeals to me, then watch for it to hopefully go on sale or found on ebay. At the same time I am beginning my research into the dark side....thinking a cross section just might be do-able
-
Maltbyguy. If I use super glue or crazy glue I too suffer from allergy symptoms. My throat and sinuses completely close up up on me making breathing difficult. I have used the CA glue from pro adhesives, the same one from the link Long9ron posted on the first page of this thread; I have of course, regardless of how careful I was managed to get this CA glue on my skin and have suffered none of the usual reactions to it that store-bought super glue causes. So as lamarvally sggested, it is possible that the "specialty" glue has different components or at least a different mixture that makes a difference. I have also found I do not have the same allergic reaction to the glue used to put on fake fingernails....however, I am not so sure that particular glue has the permanent holding power of CA glue, but could be used to hold quickly in place while a PVA glue was used for the permanent bonding.
-
Randy she is looking good!!!! You have a great start!!! Kudos for being brave and doing a single plank, my hat is off to you.
-
42rocker, scratchbuilds oh my but then again hmmmm very very tempting.......