robipod
-
Posts
202 -
Joined
-
Last visited
Content Type
Profiles
Forums
Gallery
Events
Everything posted by robipod
-
 Here are some more images from my visit to Victory back in the 80's. That's a long time ago now...
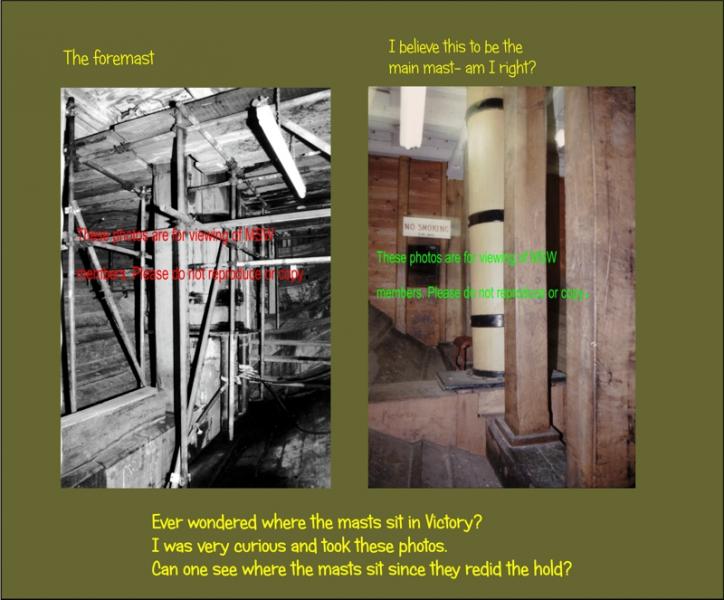
-
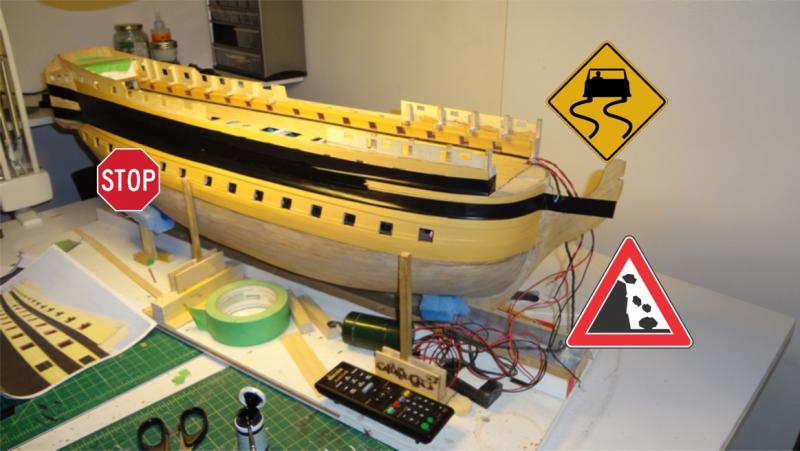
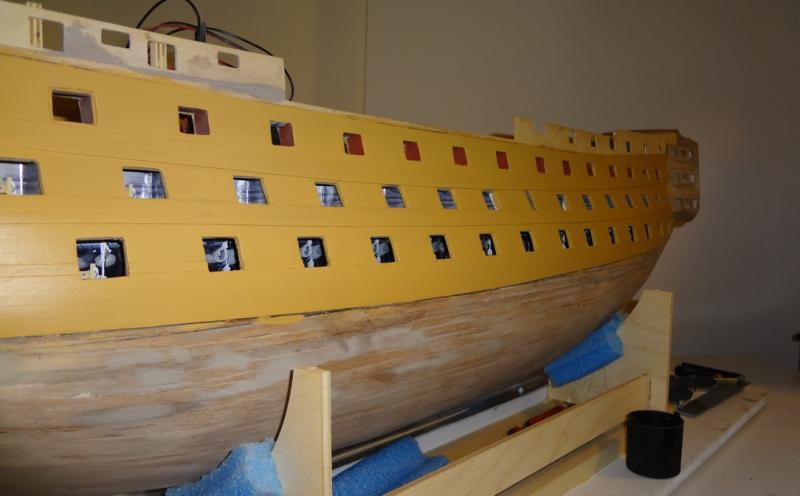
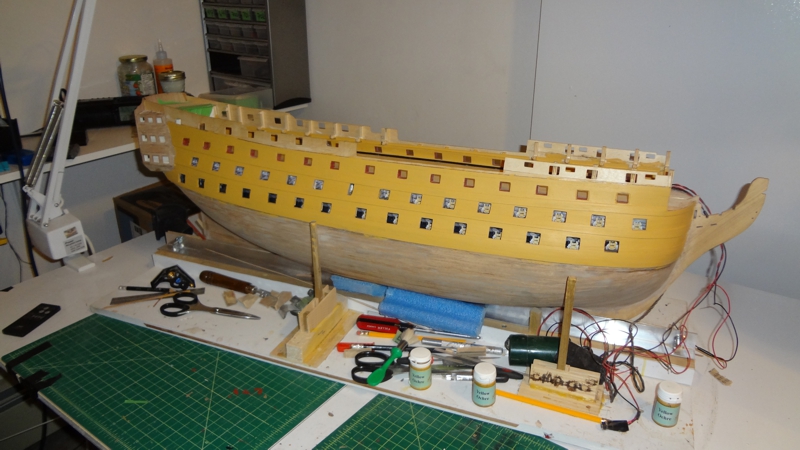
Tried my first horizontal black line. Came up with the "brilliant idea" of using electrical tape to define the line. It seems to fit perfectly. It even stretches to match the curve of the hull but It doesn't work. Thought you should know. Have some fix-up to do. LOL... oh well... the yellow ochre works really well.... needed some fun so made this up
-
Dave : thank you for the info on how you painted. Aprreciate. I am working around the gun ports at the moment a ndheading towards painting black shortly. I find the Admiralty paint by caladercraft dries quite fast when applying with my brush. Did you use their paints and have the same type of problem? I am pretty sure the problem on my side was I painted sections from top to bottom. Perhaps one should paint in long horizontal strips. Painting the black stripes will be a bit easier I am thinking.
-
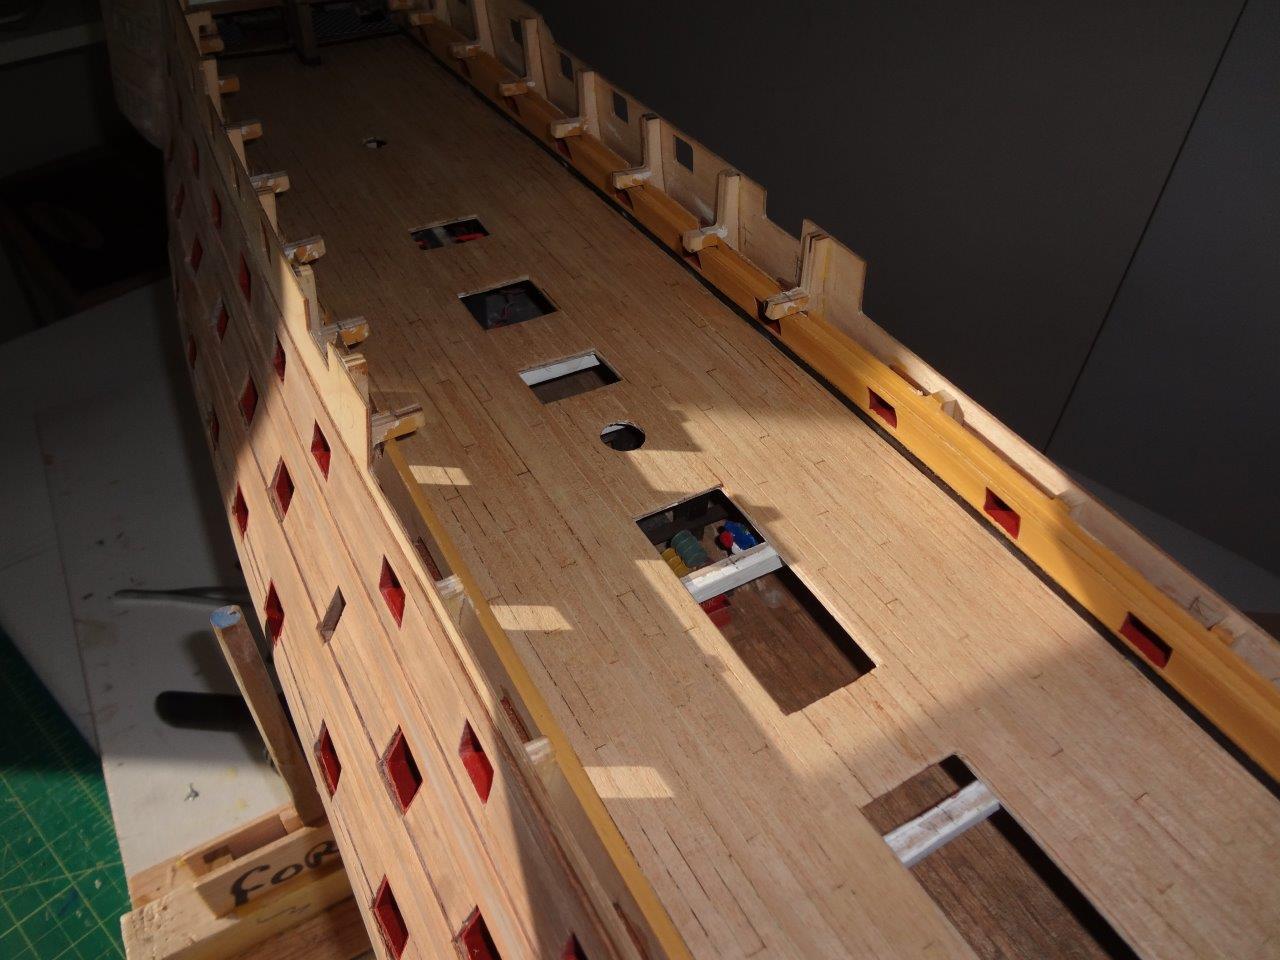
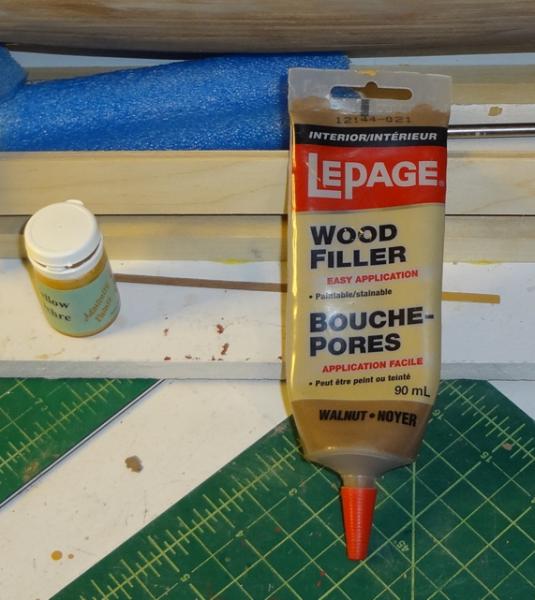
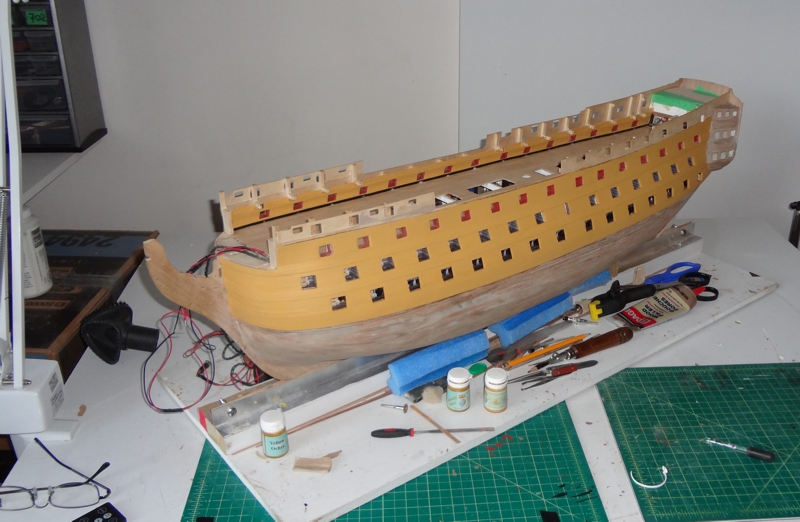
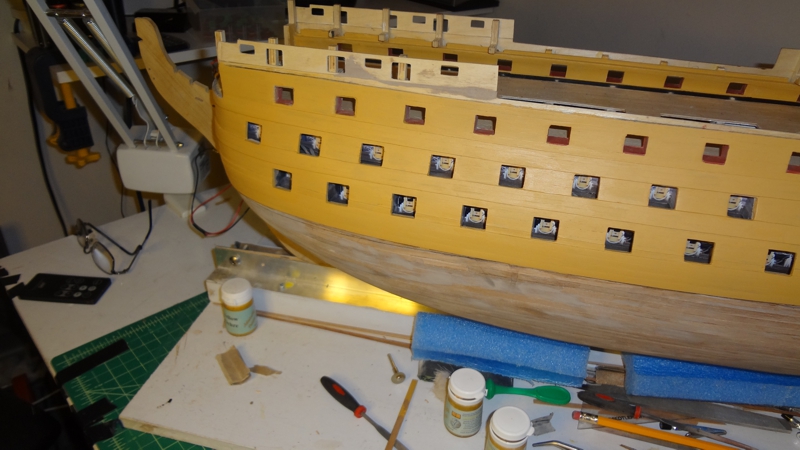
Second coats of Admiralty Yellow Ochre done. On both sides I might add. Did the final filler. Did not mention that I've been using LePage Wood Filler (interior) 90 ml tubes. They come in different colours. I have been using walnut. I like the wood filler as opposed to the plastic wood by the same company. This filler dries fast and is easy to manipulate with the fingers. Yep, I get the fingers dirty. I use my finger to spread the filler on the smaller seams. The plastic wood is just too hard when it dries. This wood filler is relatively soft when it dries. Much easier to work with. Here are two images. The touch-ups along some of the planking seams and then the result. I am very pleased with the result. I wanted to keep the seams appearing to a very minimum. I know long term drying will wreak havoc on it. Oh well, looks good now. Here is the side with some filler and a bit of sanding. Oh, I did the filling, sanding, and painting all this evening. That's what I mean by fast drying filler. Figure the sides will look great when I put the gun port linings back in. Here is the result tonight. Decided to throw in a picture of the filler. It is upside down so you can read the packaging.. LOL...
-
Thanks Gil appreciate your comment. Will just take my time. Am enjoying the build in between my snowboarding. I read you are spending time on your real boat. Awesome! just made a backup of your current build if you need it.
-
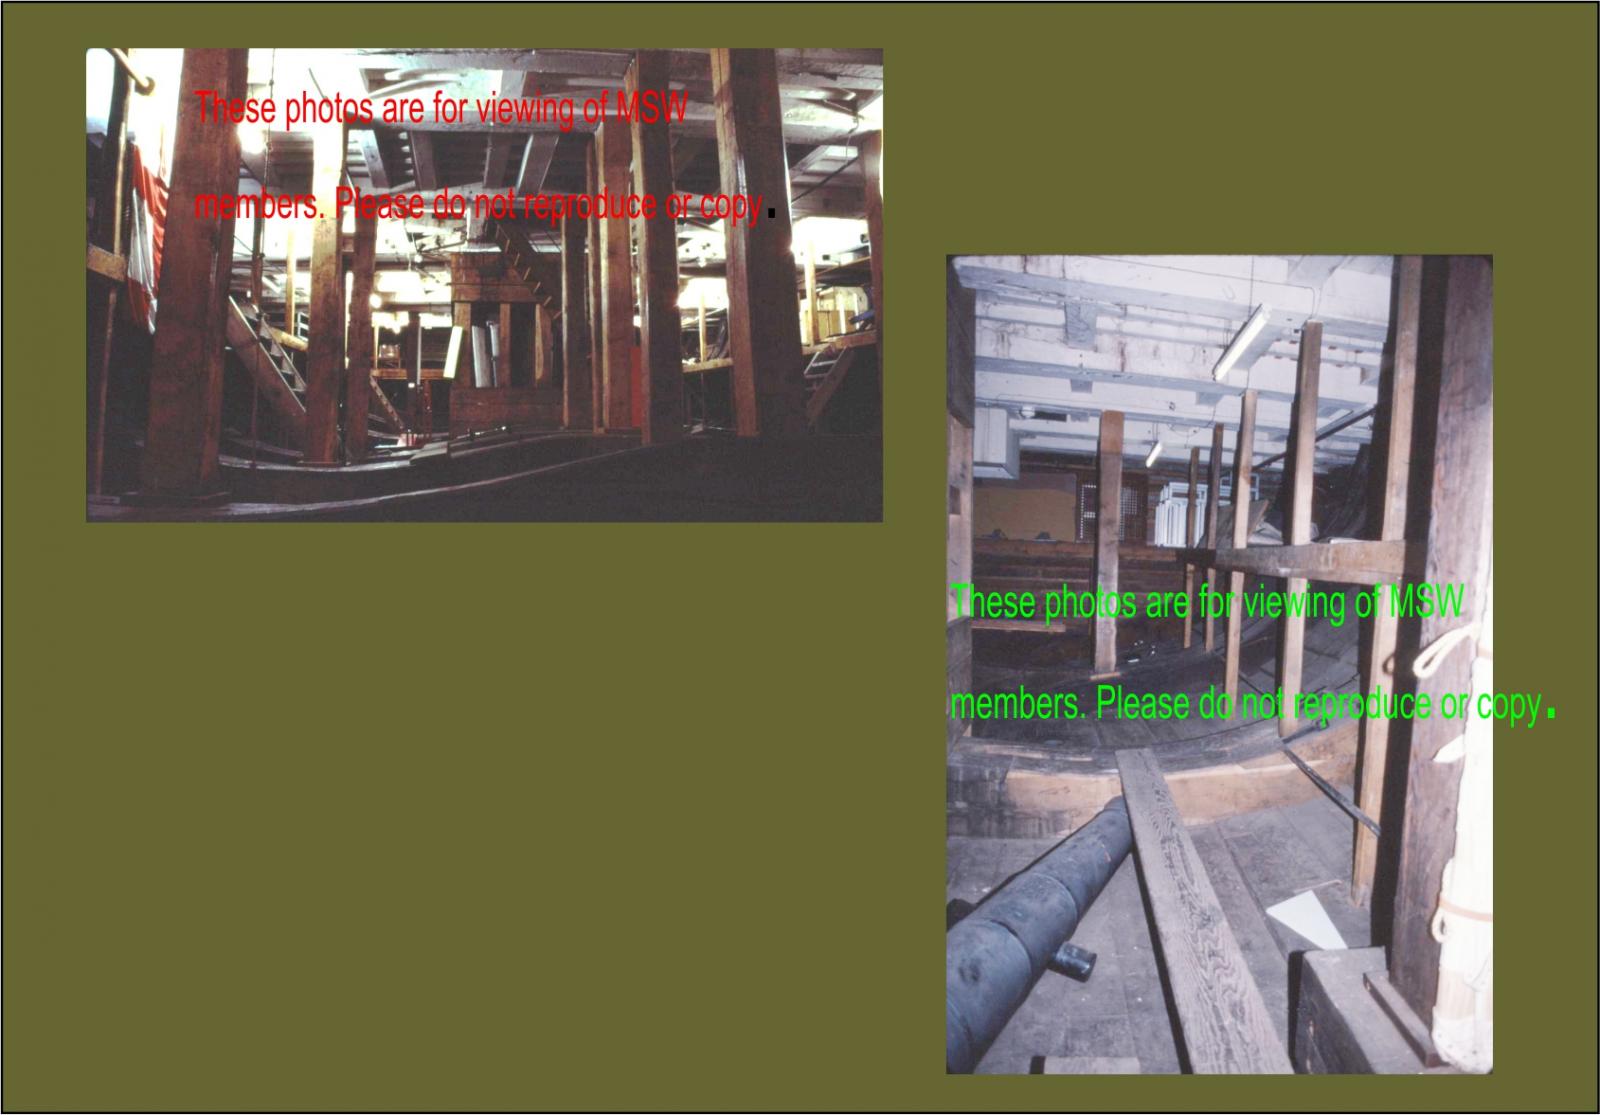
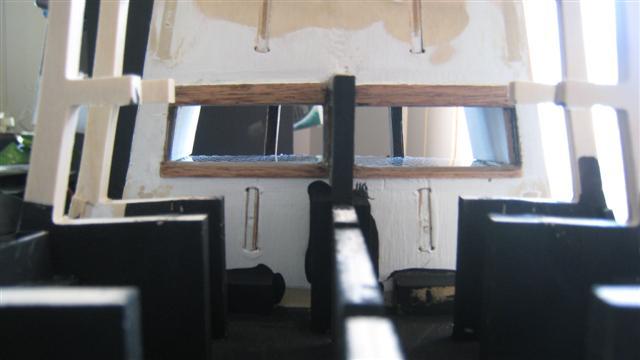
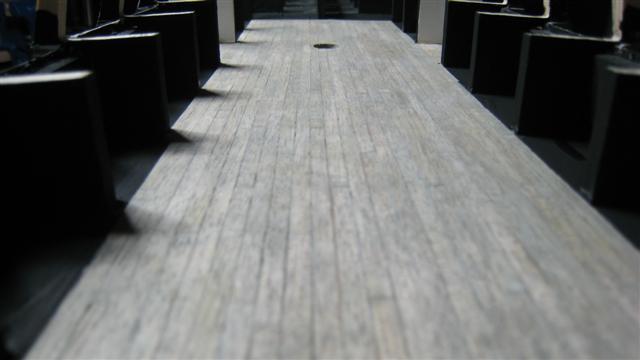
Here are a couple more inside shots of HMS Victory - the real one
-
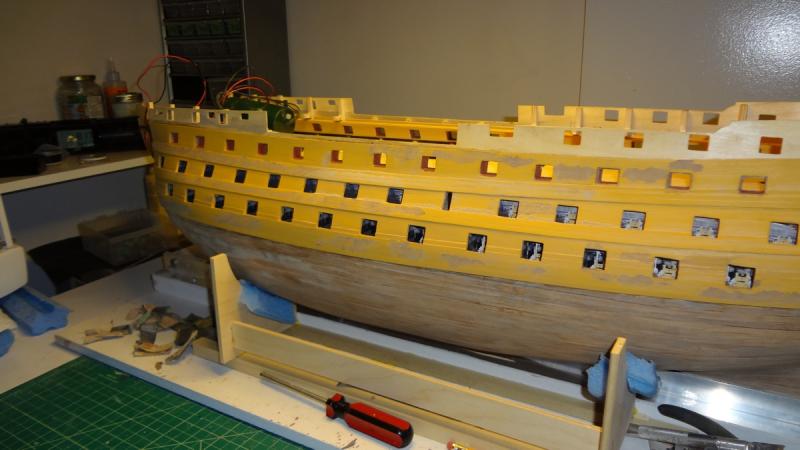
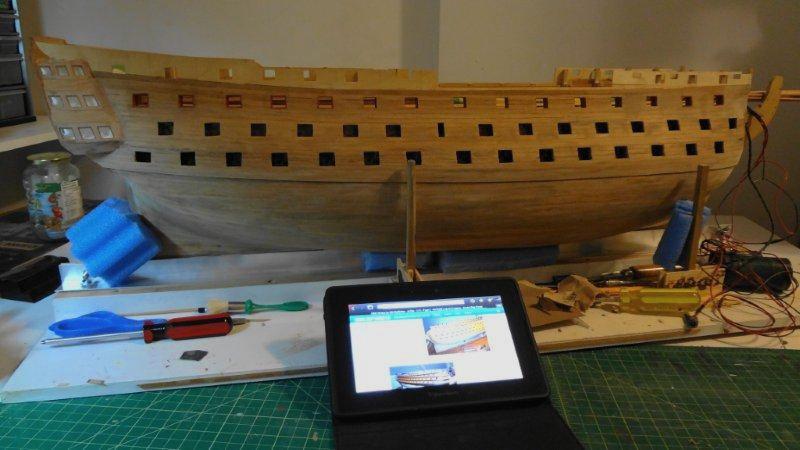
Port side first coat.. I watered down the paint a bit for this first coat. Seems to be ok? Have touch up on red ochre but this is just the first coat of yellow. My goal was to keep a smooth hull so the planks other than wales did not show up on the paint job. Am pleased with this result so far. I can't believe how much time I took sanding and filling even little spots. Have a few to fix up but won't be major. No puns intended.
-
First coat of caldercraft admiratly yellow ochre. Am pleasantly surprised. Will have some sanding and fix up but very little. Better do the other side too.
-
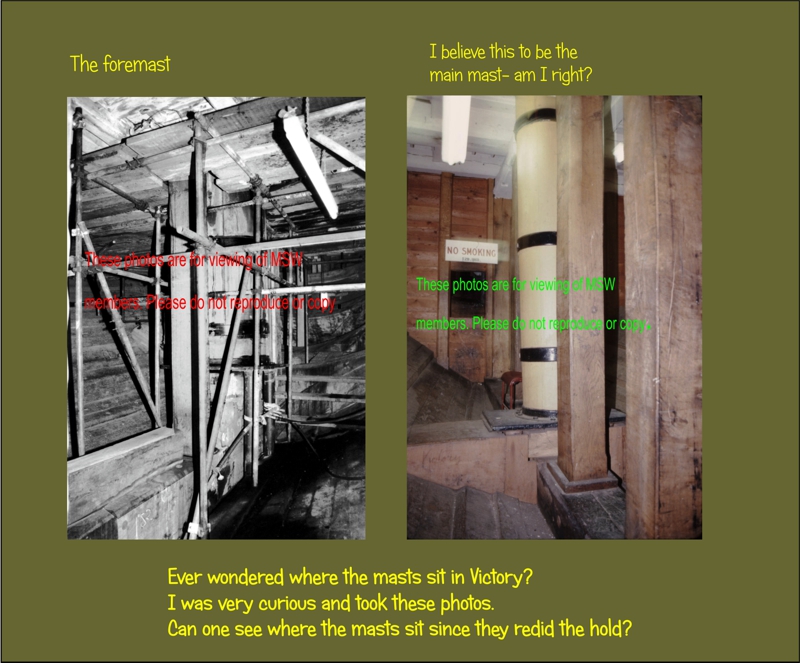
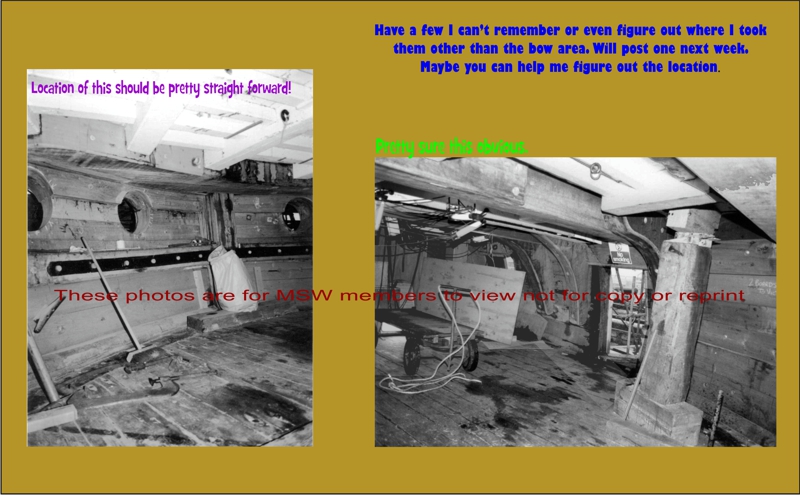
Konstantin I should have mentioned above the photos are at the beakhead on my trip in '83. (the trip date is in my huge preamble... LOL... guess it was too much to say at the beginning). As indicated, I was told this area had not been worked on since about the extensive 1815 refit. I took the pictures. Have more. Will post one a week. I had flown over the pond just to see Victory and ended up running out of colour film while on-board and threw in b&w. Back then, they did not allow photos to be taken so I felt pretty fortunate that the staffer who took me around after the official tour allowed me to shoot away. Rob
-
Figured you might be interested in these photos of mine from a visit to Victory... Enjoy .. If I remember correctly you are seeing the fixing of the refit of 1806 or 1815 in Portsmouth.. could be wrong...
- 295 replies
-
- 1
-

-
- victory
- caldercraft
- (and 1 more)
-
Dave: The stern looks awesome. Hope mine turns out as well. Thanks for the tips. Will keep watching. Did you paint the hull before you finished the upper sides? Am referring more to the waterline to just above the upper wales. Was thinking today I should crack open the paint and do the yellow ochre before I set the red gun linings. Do you remember what you did? Thanks. Rob
-
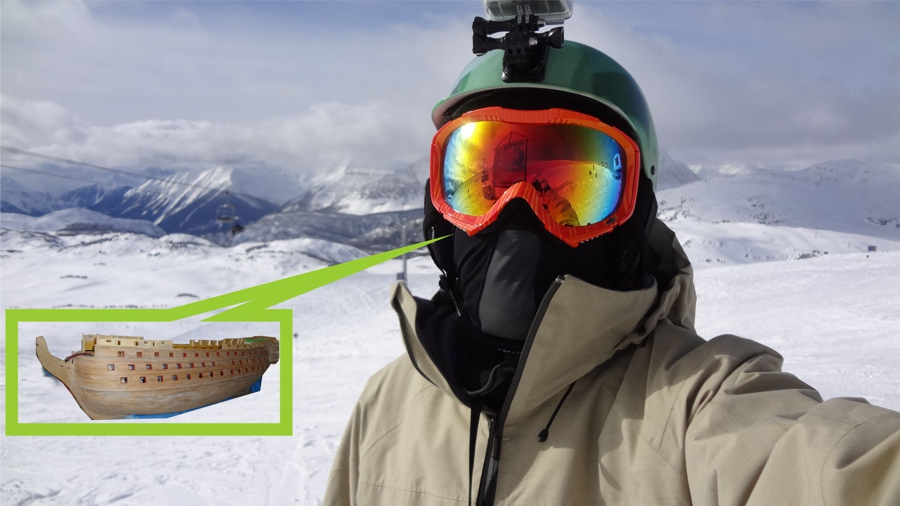
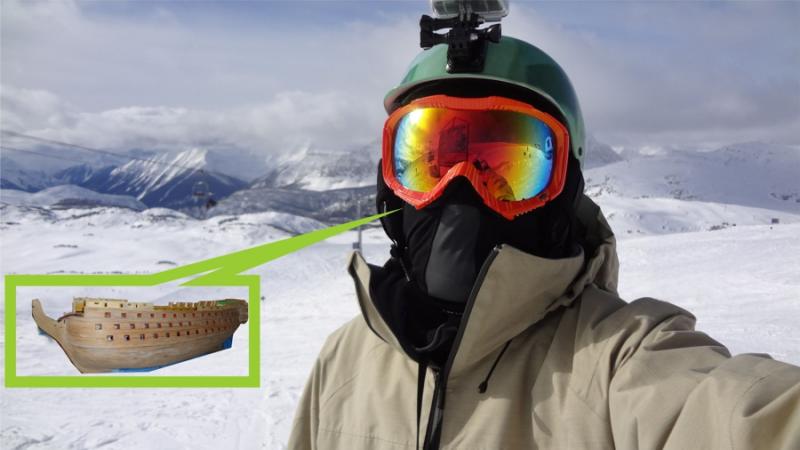
Thinking of either painting or starting copper tiles while away today... hmmmmm... probably paint... LOL... nope didn't think that much... like those two pirates on the top of the helmet...
-
Thanks David. Making these modifications make it really 'my build'... figuring all the things I had to do before sealing the lower decks was hit and miss. Looking back I would like to have lowered the canon mounts a bit but... can't do anything now... the big question for me is how is it going to look having the gun barrels stick out from the background. Guess if it really messes up I can always paint the inside flat black. But I suspect it will be ok. Just finished checking out the lighting system. Seems ok. Now to turn the page on the manual. Well, will turn it on Tuesday. Better get things ready for the day in the mountains.
-
I don't see filling seams with wood filler Josh. I've been spending lots of time looking at the hull with my lighted magnifying glass to try and find any seams or spots that are quite right. I figure at the scale we are doing these models most seams would not be seen. I take that cue from photos. Can't generally see seams etc. until really close up. Just a thought. I use LePage wood filler because it comes in different colours and in tubes. There is the plastic wood by LePage but found that way too hard to sand. It's not as forgiving. Also found that if I put some filler on my finger and rub the wood filler into the seams it works. I don't use much at a time though. Best part... it washes off the hands... You may not need any seams filled btw.
-
Wales done, gun port linings fitted but not glued in place. I will just keep them safe in their locations and when I get the sides complete will take them out to paint the yellow ochre. Now, will play with the lighting tonight just to check that i don't need any foil on more of the decks of the gun ports. [Oh, guess I didn't mention that I crushed some aluminum foil to give it many angles and placed them on the deck (back corner directly under the light beam of the LED) of the gun ports I have my 'flickering lights'. The flickering lights are not as bright as the non-flicker ones so I found this reflected the light quite well back in and around the inside of the gun port area. As a side point I got this idea from an ancient palace I visited in India where the builders had covered the whole ceiling with crushed glass - two candles lit the whole room - it was amazing how the reflected light bounced everywhere. As I didn't have much crushed glass- pop is in cans and plastic here -- figured I would crush the aluminum foil. As mentioned works quite well. You may remember from my early post that I painted the inside of the gun port pattern white where I had a 'flickering light'.] Onward! but first a shreddin' day tomorrow!

- 295 replies
-
- 1
-
-
- victory
- caldercraft
- (and 1 more)
-
Josh - lookin' sweet. Are you sure this is your first build! Is that a ball mount you have mounted there? Now that is cool idea.
-
Josh - I was laughing at myself the other day when I was looking at the model and figured how far I've got to move the desk away from the wall after mounting the bowsprit. I may have to re-configure the room. Don't really have all that much extra space in there. If there is a table you can drill a hole and put something like I was able to do it will save so much time. Was looking at those 'kitchen lazy susans' at the stores but they just didn't seem solid enough. My first models I created on the dining room table... that eventually was banned... LOL... Rob
-
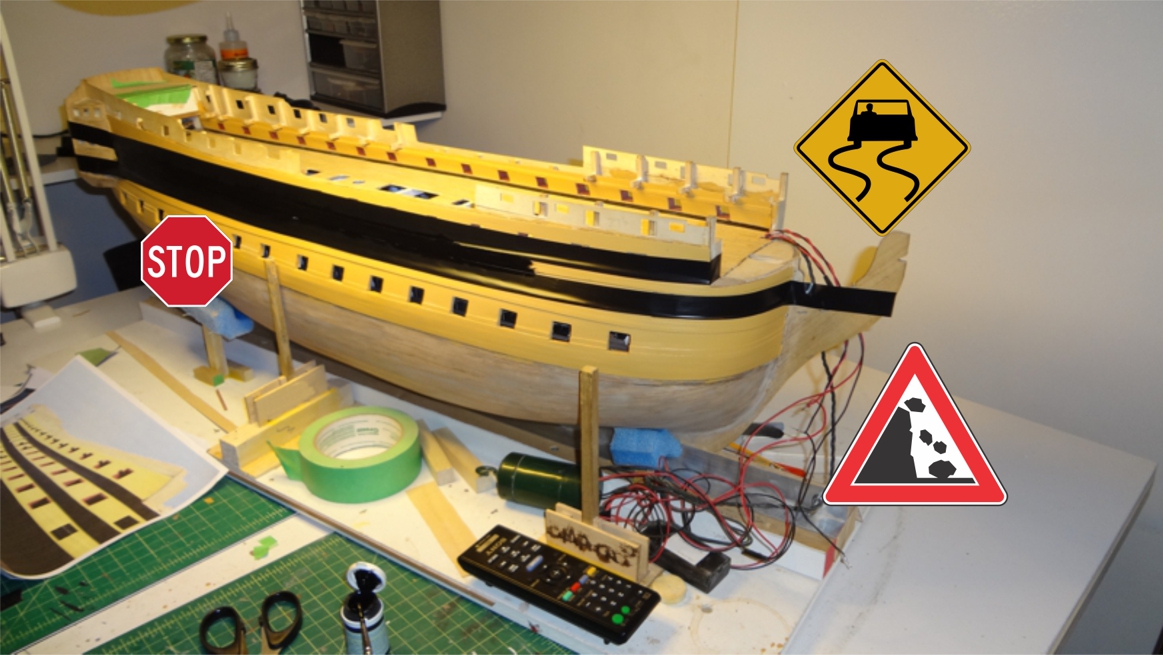
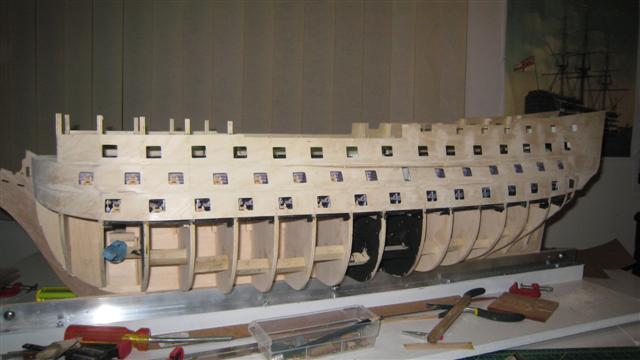
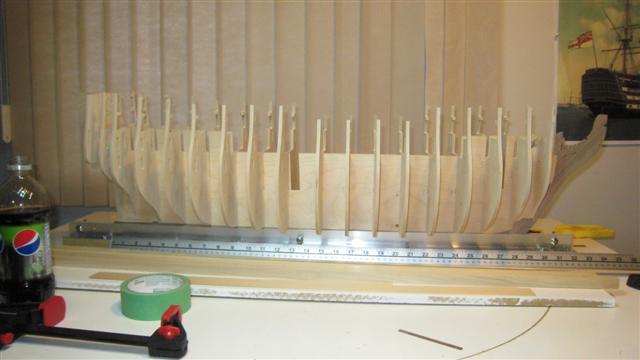
Have finished the wales! Yippeeeee! That took a bit but must admit that I went boarding more than I was intending... the snowfall in the mountains has been awesome. Not sure how all of you did your gun port linings but I decided to keep the frames not glued until this point in time. Starting to realign the gun ports linings. Am still happy with the 'fake' interior on the lower decks.

- 295 replies
-
- 1
-
-
- victory
- caldercraft
- (and 1 more)
-
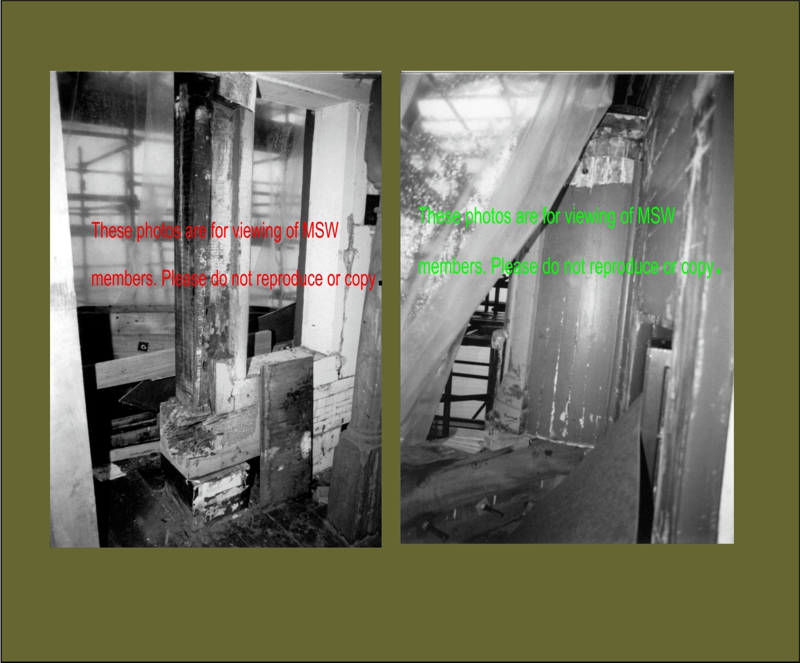
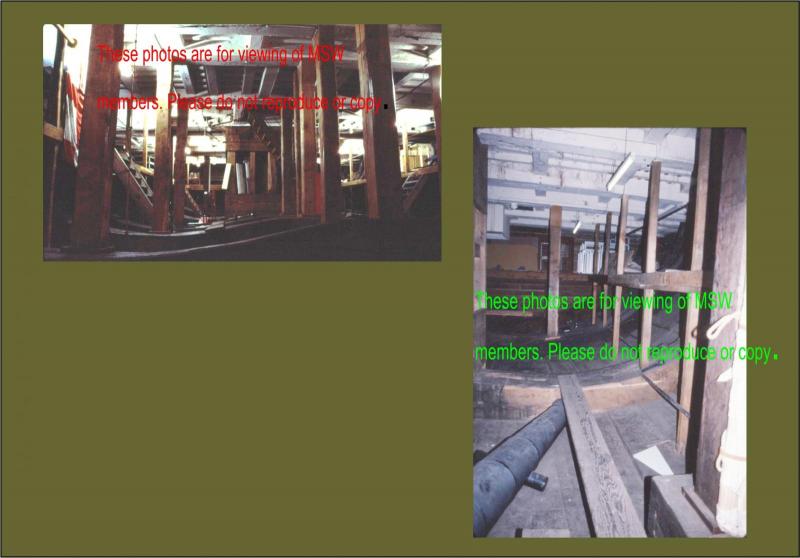
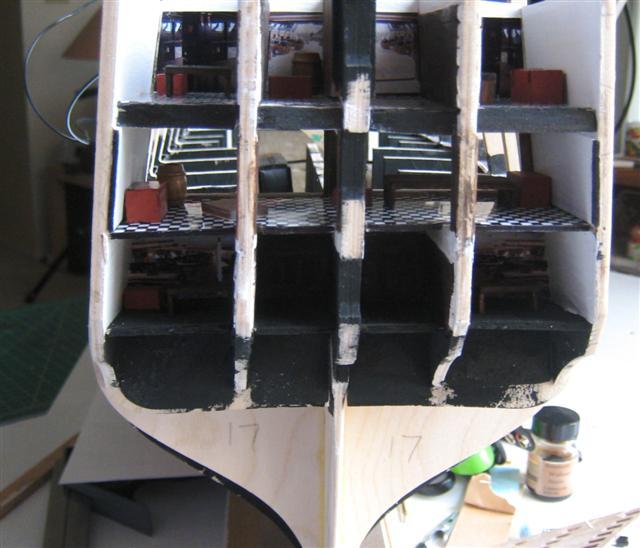
A comment to Fortress. Is there a reply somewhere that I'm missing.... If they had digital cameras and facebook etc. back in the 17 and 18 hundreds we would sure have all the information we ever needed on any ship of the line. As each one was different and as they were modified and fixed 'on-the-fly' after battle we will probably never really know the exact location or height of any specific original piece of the ship. I figure they may have changed things around on-board after the first time she sailed. That was the advantage they had. They could modify on the go, making their ships better for sailing and fighting. Doesn't that then give us the go-ahead to modify-on-the go. Make it work the best way we can. It is always going to be a guess because they built their ships so much differently than we do now. I am not too worried about the changes they've made over the current years. I just believe it is one awesome ship and we are fortunate that the Royal Navy has kept her around for so long. When I sat on the keel and saw the workers' markings from the original days back there in the 1700 's I was so caught up in the history that I was touching and seeing. It was an experience. Here is what I saw back on my visit to HMS Victory -- nothing compared to what you see now... the hold was completely open. She was under a refit and it was an inspiring visit. These are not pictures of the interior of my model Victory... LOL... it's the real one! Fortress, hope I am not being too harsh here. For you, it seems the changes made in somewhat recent times are 'not perhaps what they should be". I just don't know and do not know how we will ever find out. However, thank you very much for pointing out to me that that there is a difference in height. I did not know.
- 295 replies
-
- 2
-
-
- victory
- caldercraft
- (and 1 more)
-
Just finishing off the lower wales on both sides and reading Gil's uploads as I go along. It is just plank after plank. Lots of work on re jigging the gun ports with the new planks. But going to sunshine Friday so will be able to ride my other plank. http://www.skibanff.com/conditions/cams/
- 295 replies
-
- 2
-
-
- victory
- caldercraft
- (and 1 more)
-
Here is a very quick way of bringing up to date. Working on the wales at the moment. Am looking forward to painting the hull black/yellow. The lighting system worked out somewhat okay. Must admit I took lots of time making 12 gun ports flickering and when it came to the end I decided that the flickering lights needed to be supplemented. I know, less lighting the better for the ship when she sailed... so I went out at Christmas time and found a 24 light battery powered - all wired - LED system. It has created the lighting that I was expecting for the lower and middle gun decks. For the interior of the middle gun deck I strung a couple LED strips inside the middle gun deck (see following) and the electrical shop sold me an AC power adapter that will power all the remaining LED strings that I put on the ceiling of the upper gun deck. As these lights are very bright I painted them to cut the brightness and covered a few up. They only can be purchased in specific groups. Oh well. The video shows how the lighting is coming along. Back to the wales....

- 295 replies
-
- 1
-
-
- victory
- caldercraft
- (and 1 more)
-
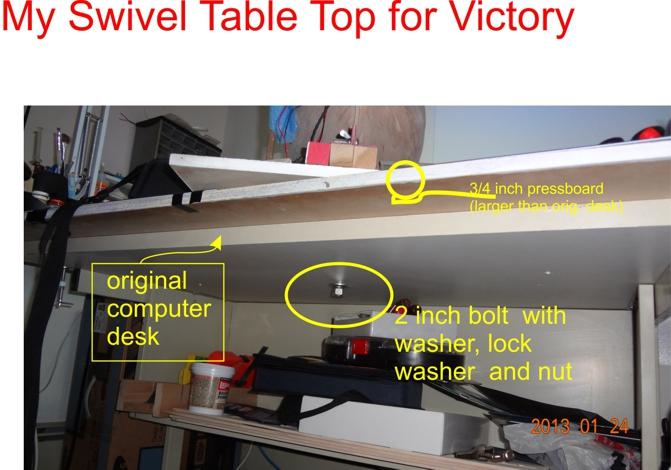
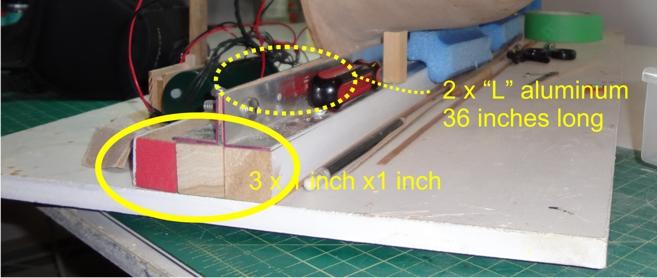
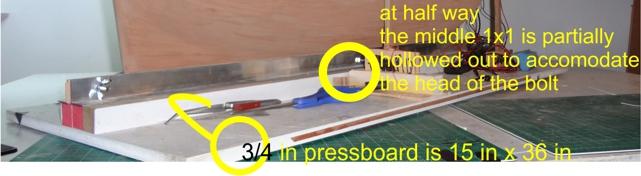
One item I did build that has come in so handy is a turntable for the model. I can remember my first ones and just cringed each time I had to pick up and turn the model around. Came up with this somewhat simple solution. Took a piece of 3/4 inch pressboard and made this up. Strongly recommend something to turn your model will save you time. I thought of letting everyone know this idea a we bit along in my build. Didn't think of it before. [the beauty of re-doing] You can see a video of this here: I sure progressed fast. LOL... That's it for tonight.

- 295 replies
-
- 2
-
-
- victory
- caldercraft
- (and 1 more)
-
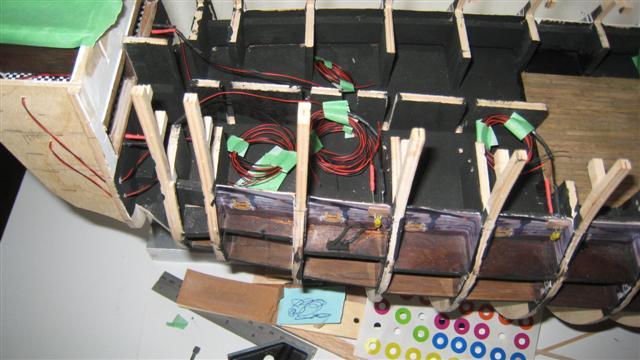
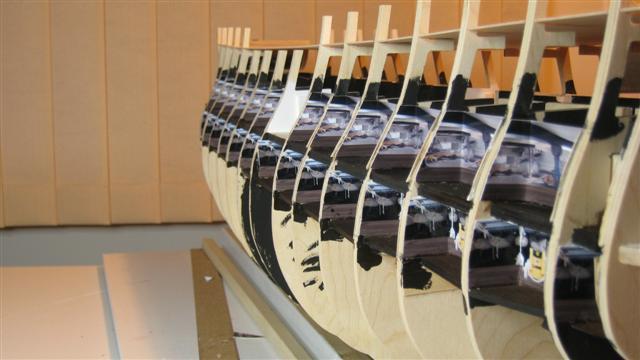
As I decided to add lighting to the interior (flickering - an ambitious project at the time). I had to put the LED lights and wires into the lower and middle decks. Decided to paint the interior of the gunport patterns white so they will reflect lighting. Here are the decks sealed now with the gunport patterns. Went a bit further and decided to open up the stern. I've done it now. Really opened it up. Laid the middle gun deck floor.
-
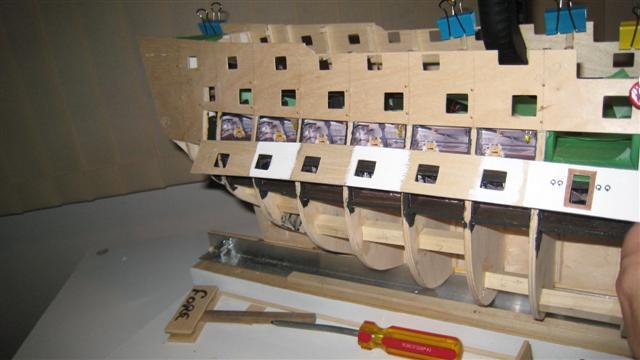
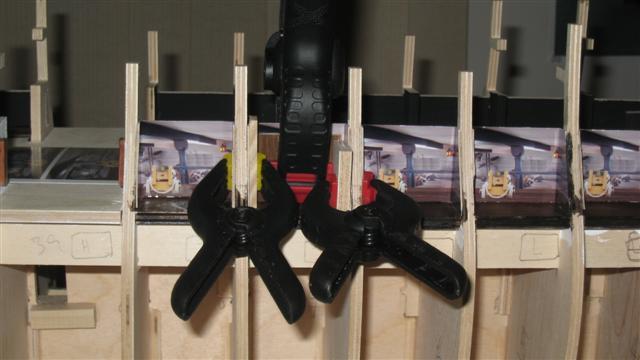
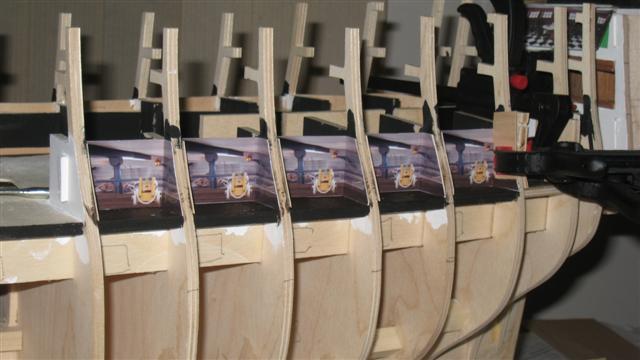
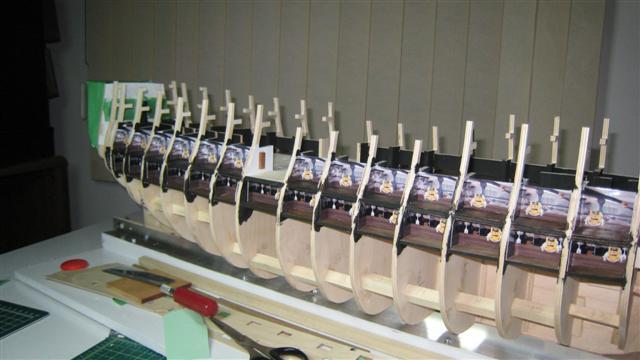
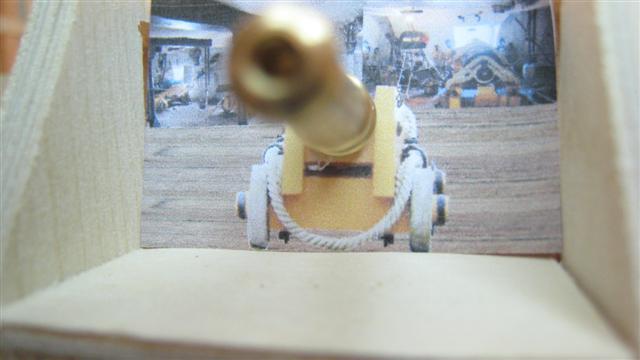
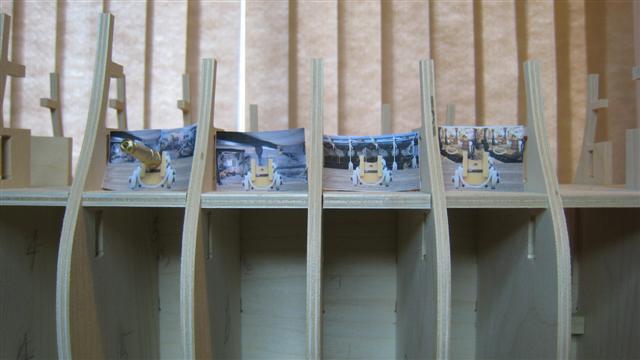
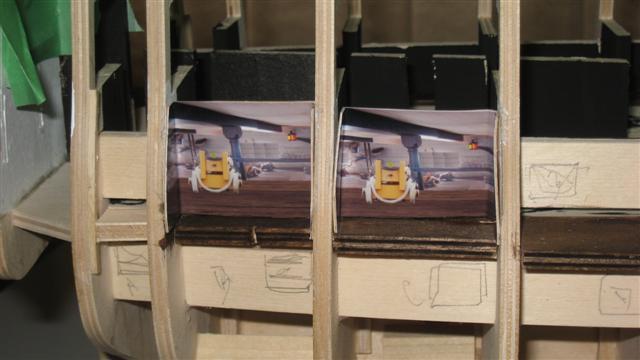
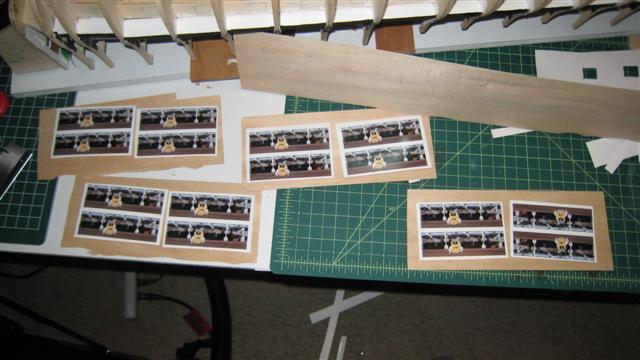
Here is a series of photos showing you the process I used to mount the interior gun ports. You can see the designs I chose.
-
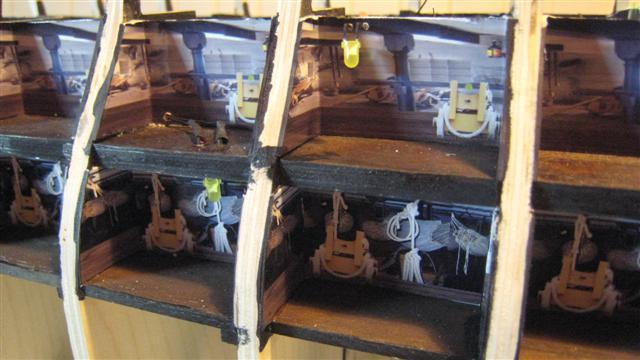
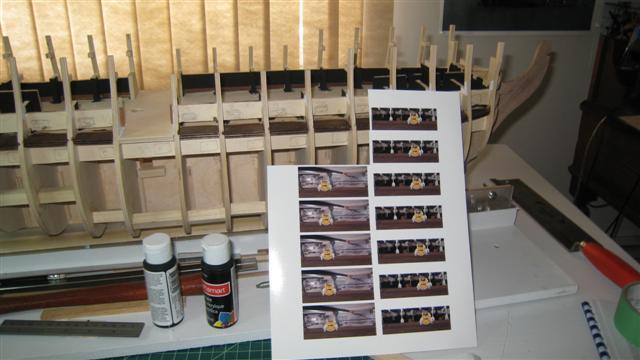
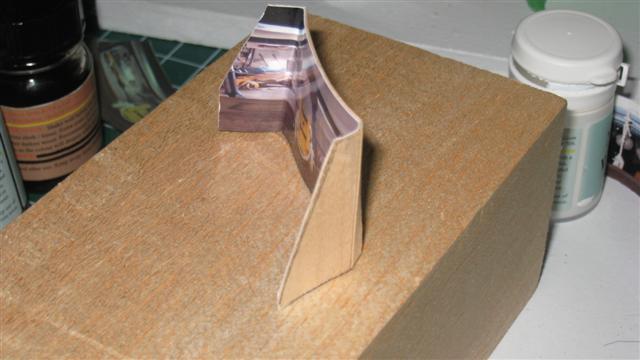
Now to look back and bring you up to date. The box arrived. The postal worker was very happy to only have to deliver it once.. Started to build the frames etc. and then really went to the modification department. I decided to make the gunports of the lower and middle decks a bit more interesting by creating an illusion of the ship's interior. To make this along the deck decided to use some .05 mm veneer that I got my hands on and use glossy photo paper in the printer, my Coreldraw program and some of the images from the internet. Had to choose what I considered best images to manipulate. As each deck is coloured differently on the interior I chose two different 'insides'. On the Caldercraft / Jotika lower and middle gun decks the dummy barrel strips run along the deck. By creating a 'photo curtain' I was able to transform the interior of the dummy ports. I created the 'deck interior' in Coreldraw and printed on photo paper. Oh, to seal the photo paper I used a spray can of Testors Decal Bonder spray. I figured after a few years without a seal, the paper might fade in the 'dark interior'. Well, my interior was going to be lit so it couldn't fade all that much. The spray seemed to work well. Won't know for sure for another twenty or so years. The paper is mounted on .05 mm veneer. Easy to cut and forms a stiff back.
- 295 replies
-
- 1
-
-
- victory
- caldercraft
- (and 1 more)