robipod
-
Posts
202 -
Joined
-
Last visited
Content Type
Profiles
Forums
Gallery
Events
Everything posted by robipod
-
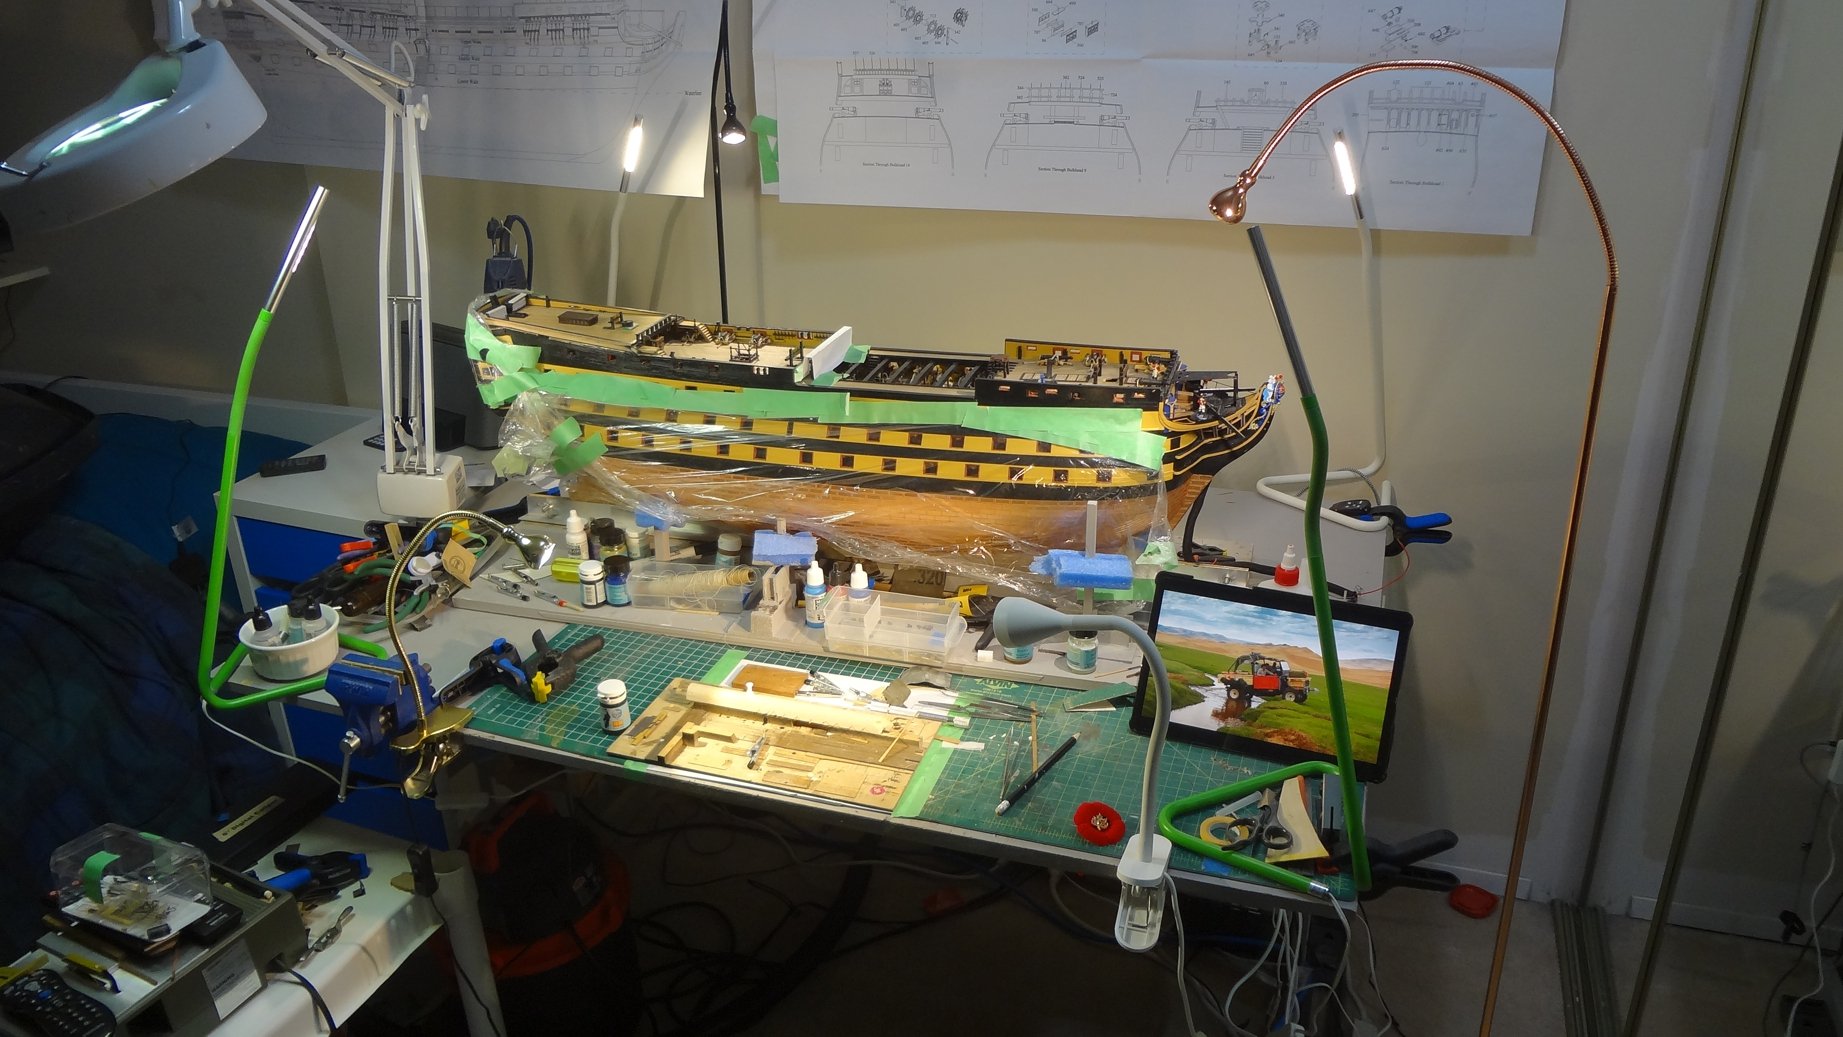
 Well, I'm back. The three year project is over. It took three and a half years. The hardest part was getting back into the build. I just couldn't seem to get anything done. Started on the caronades and had all sorts of problems sorting things out. Finding things. And more importantly getting the mind into it. Remodeled the shipyard and now have my own stadium lighting. (Ikea had a sale). Been working on the bow and stern. I find that doing one project at the bow and then switching to the stern helped with getting into the tedious and repetitive nature of building these. Starting plugging away about a month and a half ago. Got some done and thankfully called Ian and we had a meeting of the shippers. So here is my stadium lighting. This new layout is good but i find it a bit strange. LOL Drag my pictures. Cool Okay now what. Guess no text between images. Nothing stunning. Just picking away. Actually working on the water buckets at the moment. Guess i just do Submit. LOL!


- 294 replies
-
- 9
-

-
- victory
- caldercraft
- (and 1 more)
-
Did a bit more . Too much is getting in the way for the ship. LOL... Do you think there is anyone else in Calgary who would like to have coffee with us. We have a model ship world sub-group of two! LOL Just finished messing with the beakhead bulkhead decoration. Even have them mounted -- have to drill one more hole in a roundhouse. Have so much more detail to finish up on the deck though. Getting there ever so slowly!
- 294 replies
-
- 5
-
-
- victory
- caldercraft
- (and 1 more)
-
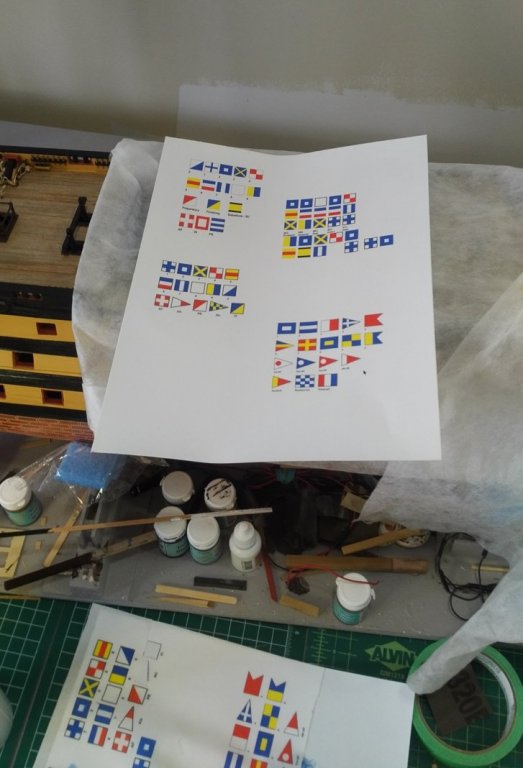
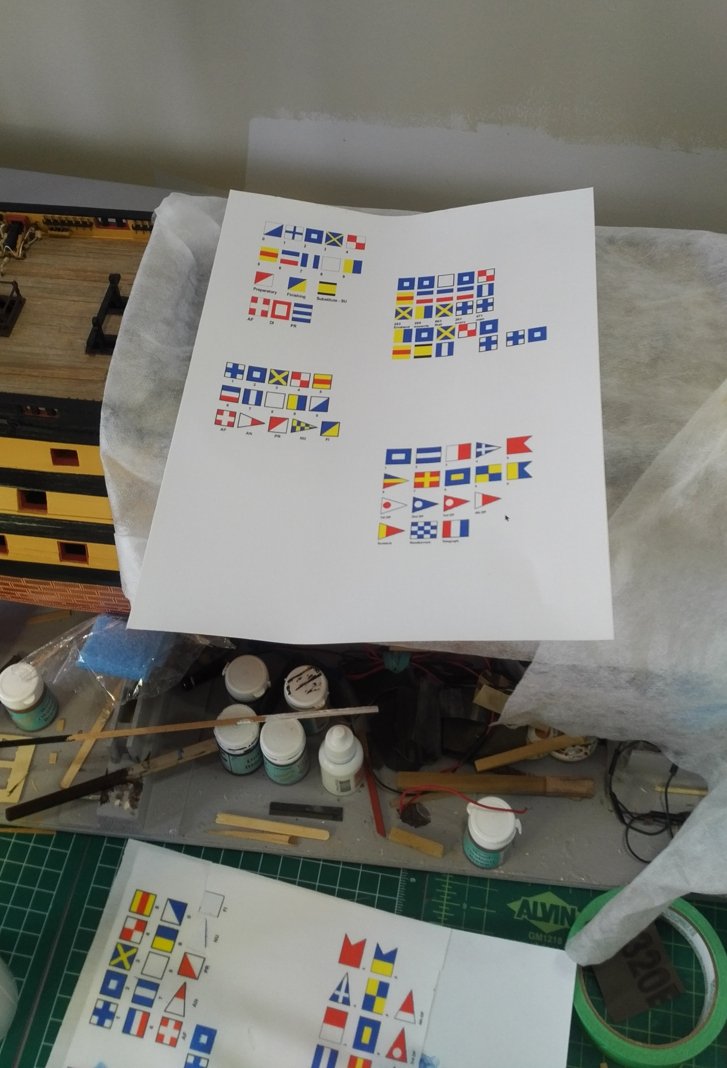
Oh my gosh... there are too many "FINISHED" and I'm just plugging away. Been taking a bit of time to get on the ship. It's been so hectic this past two years and another year and a half to go. Here's where I'm at. Working on the upper deck. Had fun with the flag locker and the flags. Printed flags on the inkjet fabric sheets by Jackquard (got them at Michael's). Sprayed the back with a cloth glue. Not much and then cut them out. Rolled them on a piece of wire. Them stuffed them in the flag locker. Hmmm. Now how do I preview this? Don't know the new site. LOL Since I don't know how to preview I just copied the files into the 'drag files' area. Let's see if it worked. There I am. Had a great visit with Ian a while ago. We better do this coffee thing again soon. I'm going to get really busy in the next week for month or so. I am now editing. The pictures have to be loaded last first. Now I know. that was easy, I just deleted and dragged them up in order... cool!

- 294 replies
-
- 7
-
-
- victory
- caldercraft
- (and 1 more)
-
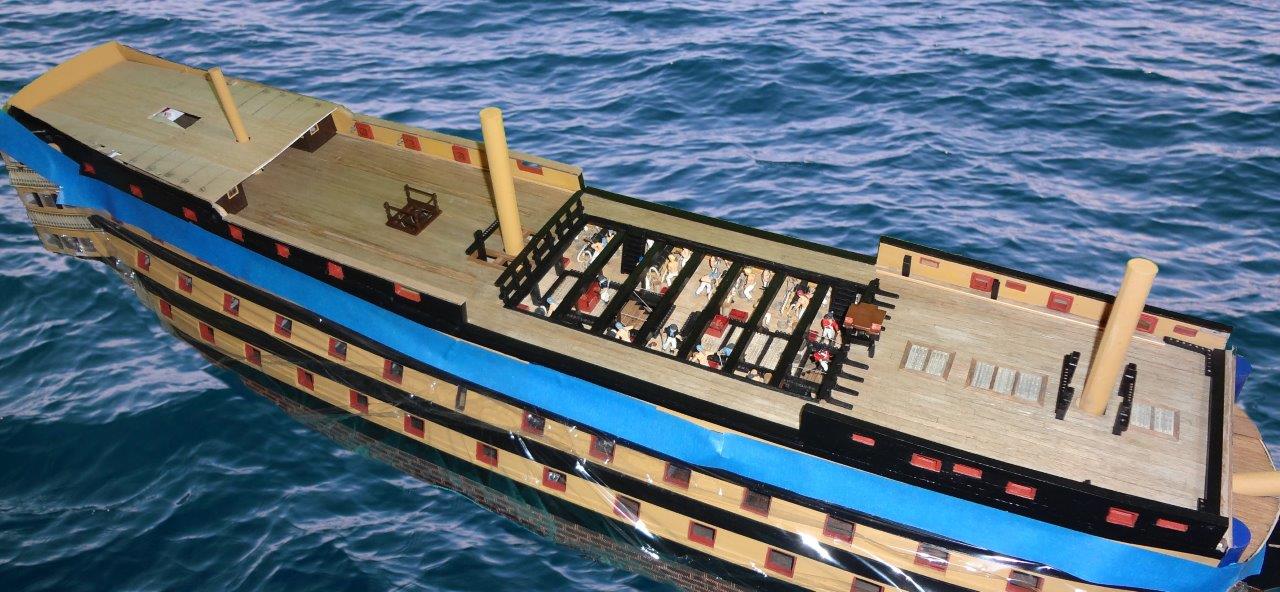
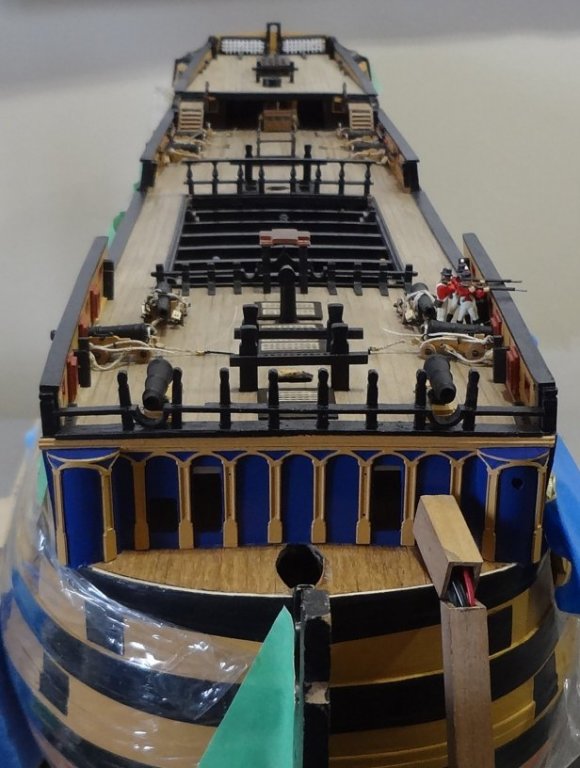
Still at it. Bit more time available. Have two more carriages to build and then rigging the cannons begins. Am still amazed how just plodding along eventually results the big changes on the deck. Finally got the time to have coffee with Ian. He will eventually get back to his Victory.
sm.thumb.jpg.1471179e633efd78adfc257b72b46b6e.jpg)
- 294 replies
-
- 5
-
-
- victory
- caldercraft
- (and 1 more)
-
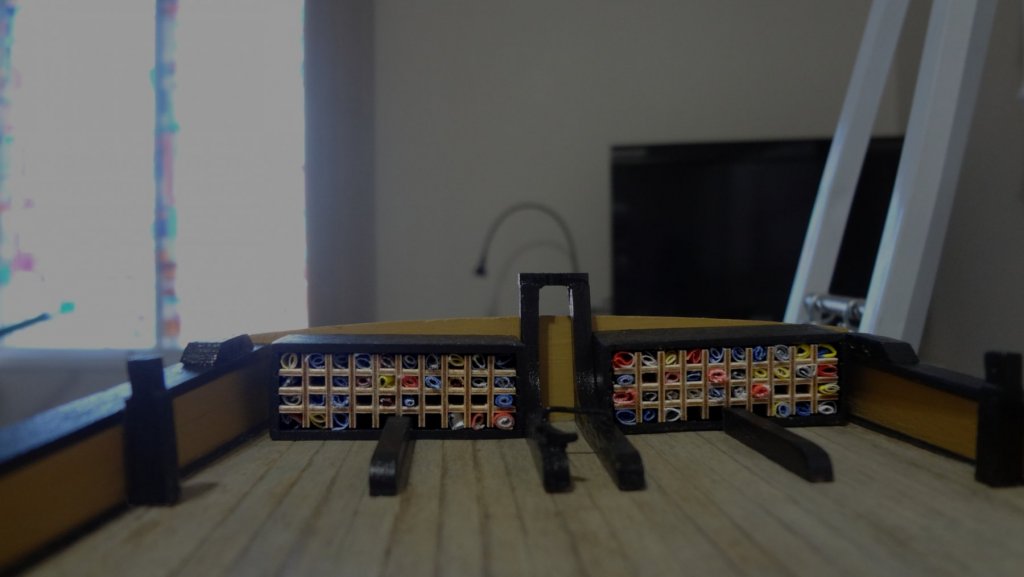
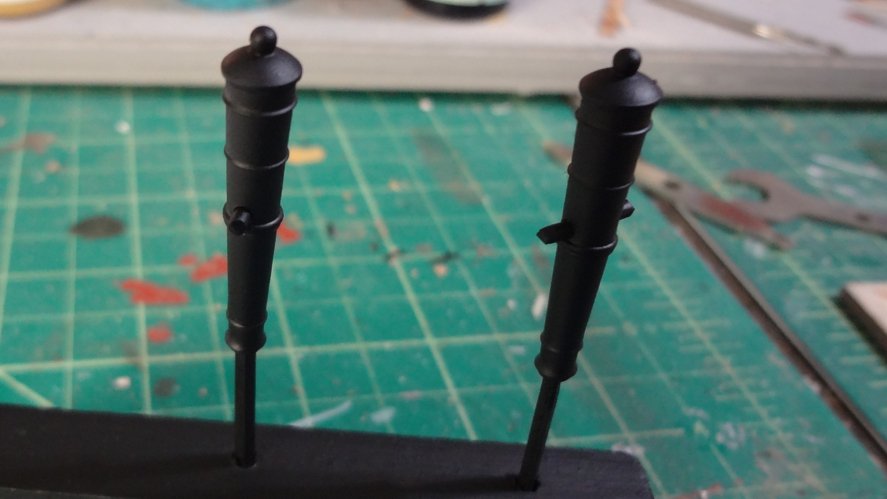
I don't know why my early posts were recopied. A bit confused. However, 1st part of the project I've been on is done that's been keeping me really busy for last 8 months. Looking at the cannons today. Ordered some blackening liquid but was totally disappointed in it. Tried to get Blacken-It but a supplier said it is no longer available. So after a couple evenings of liquid diet for the brass I gave up. Used the Tamiya fine surface primer for plastic and metal - the white coat. Then used Testors spray enamel - black for the coat. I think they turned out okay. Way easier than dipping etc. Now, should I use a clear enamel to 'seal' the cannons or are they already sealed. Hmmmm...
.JPG.cffb278a95858ee27e5ea7e3eb7a61f0.JPG)
- 294 replies
-
- 5
-
-
- victory
- caldercraft
- (and 1 more)
-
Continuing the main deck. Snowboarding is getting in the way.
- 294 replies
-
- 4
-
-
- victory
- caldercraft
- (and 1 more)
-
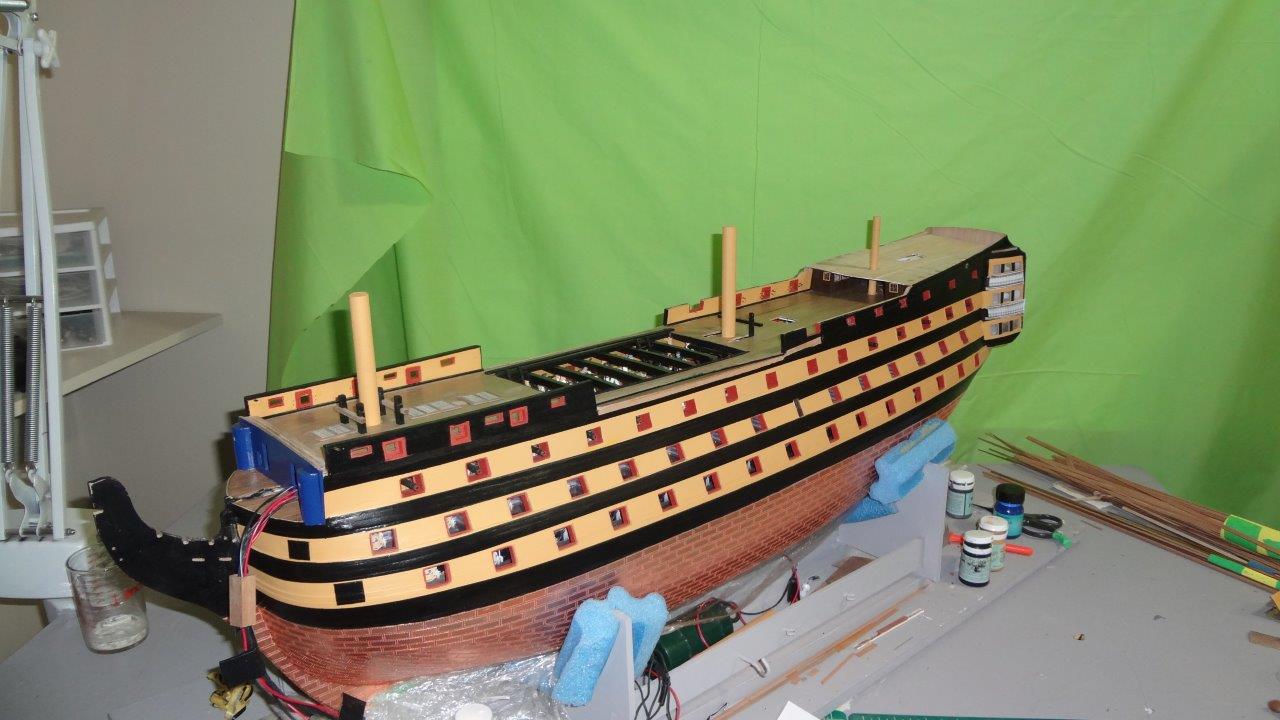
Slowly, but it is interesting how relatively quickly this deck is going. I've not spent that much time. Again, just shows me half hour here and there keeps the elements going into place. (messed around with the green backdrop for a diversion tonight ) There's some flash 'burn' on the forecastle deck and a green tinge from the backdrop that I have way to close so I can chroma key in the ocean) Must note that the kevels are just sitting on the deck for the moment - not mounted)
- 294 replies
-
- 3
-
-
- victory
- caldercraft
- (and 1 more)
-
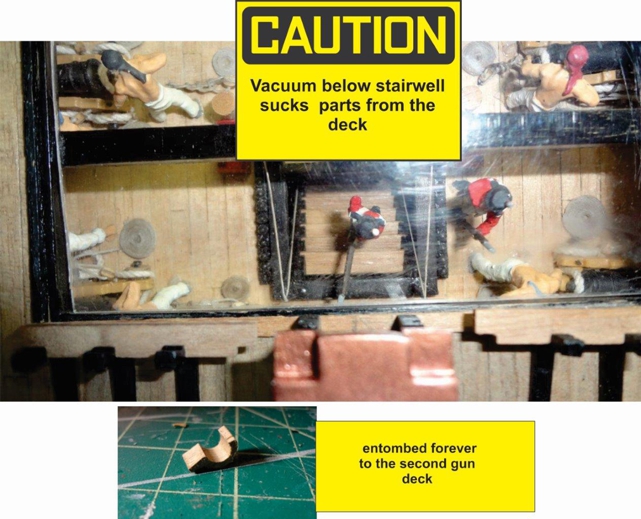
Am positive there is a giant vacuum cleaner inside! Took the cover off for ten minutes. LOL
- 294 replies
-
- 4
-
-
- victory
- caldercraft
- (and 1 more)
-
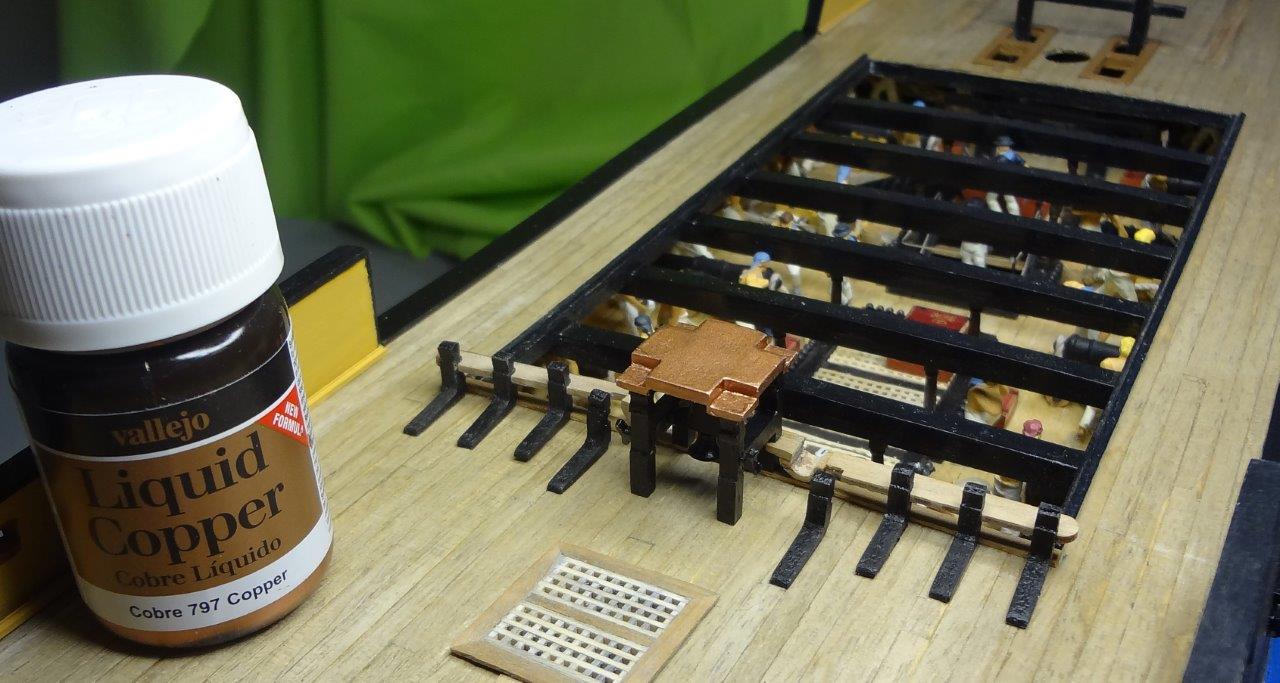
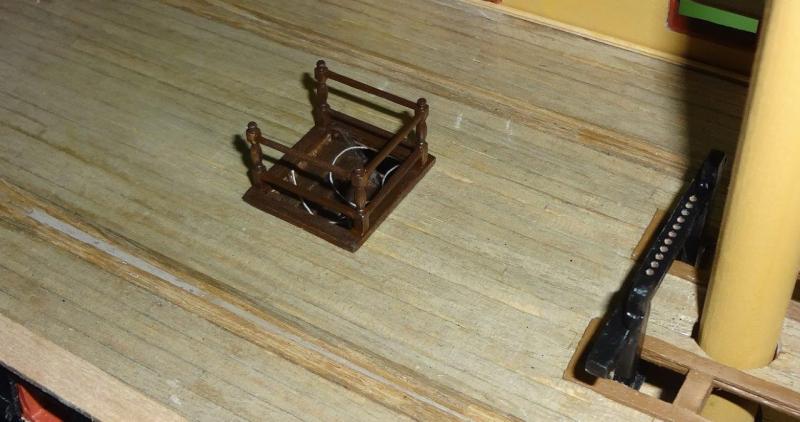
Bit more. Pulling together the forecastle beam assembly. Dry fitting here. Will likely do final sometime this week. Found this Vallejo liquid copper and used on the belfry assembly. Not bad. Did four coats of primer then three of the liquid copper. Dissolved one of my brushes in the alcohol that is required for clean up if using the liquid copper.

- 294 replies
-
- 3
-
-
- victory
- caldercraft
- (and 1 more)
-
I hope the both fronts are a bit better than this Ian! Oops... my Sunday evening break from a database. LOL dahhhh

- 294 replies
-
- 1
-
-
- victory
- caldercraft
- (and 1 more)
-
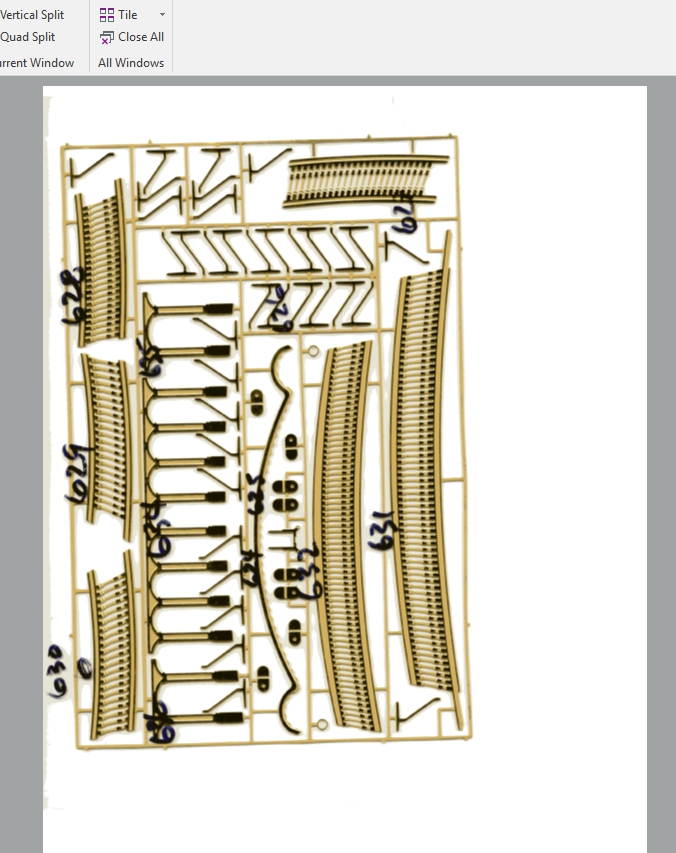
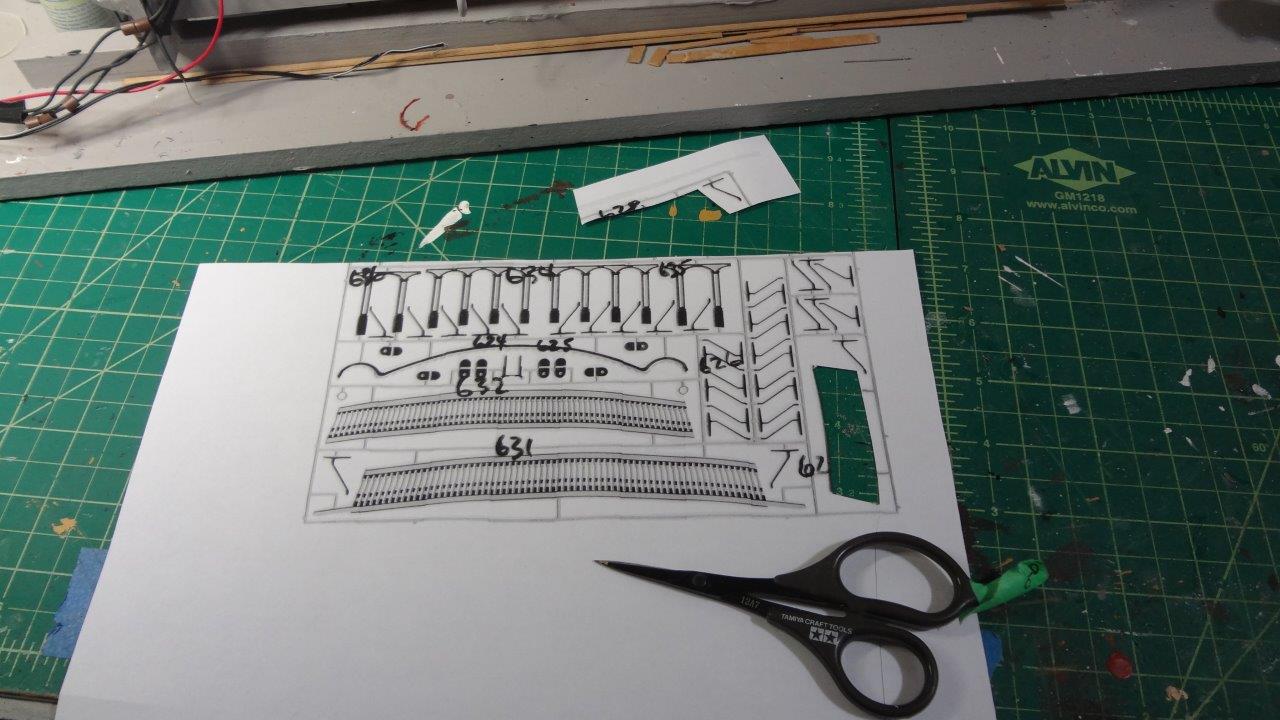
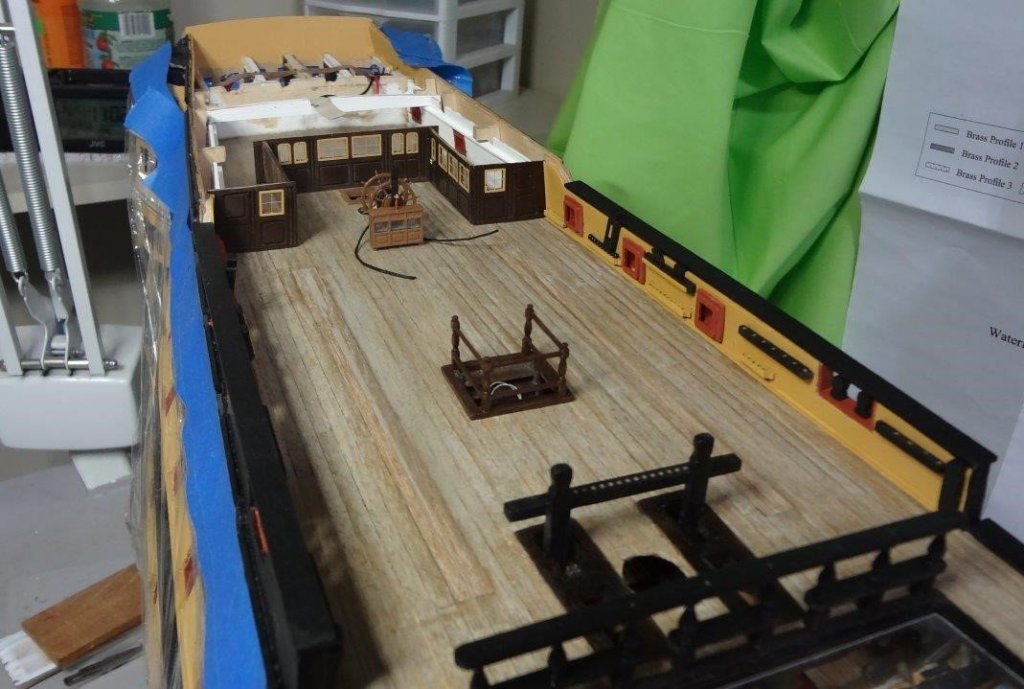
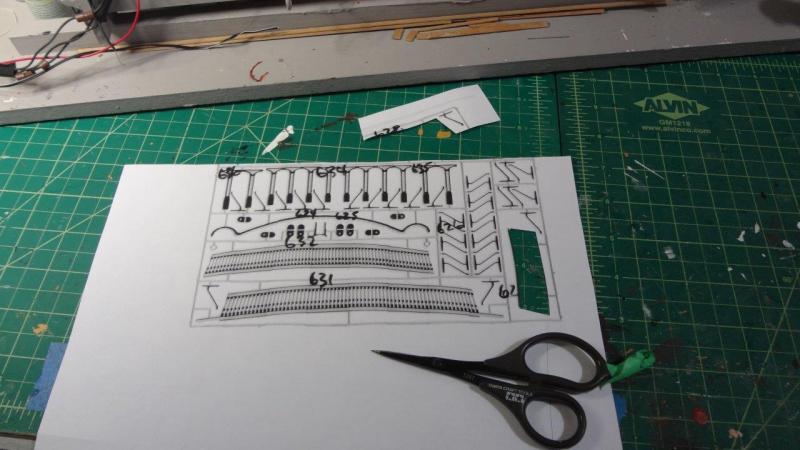
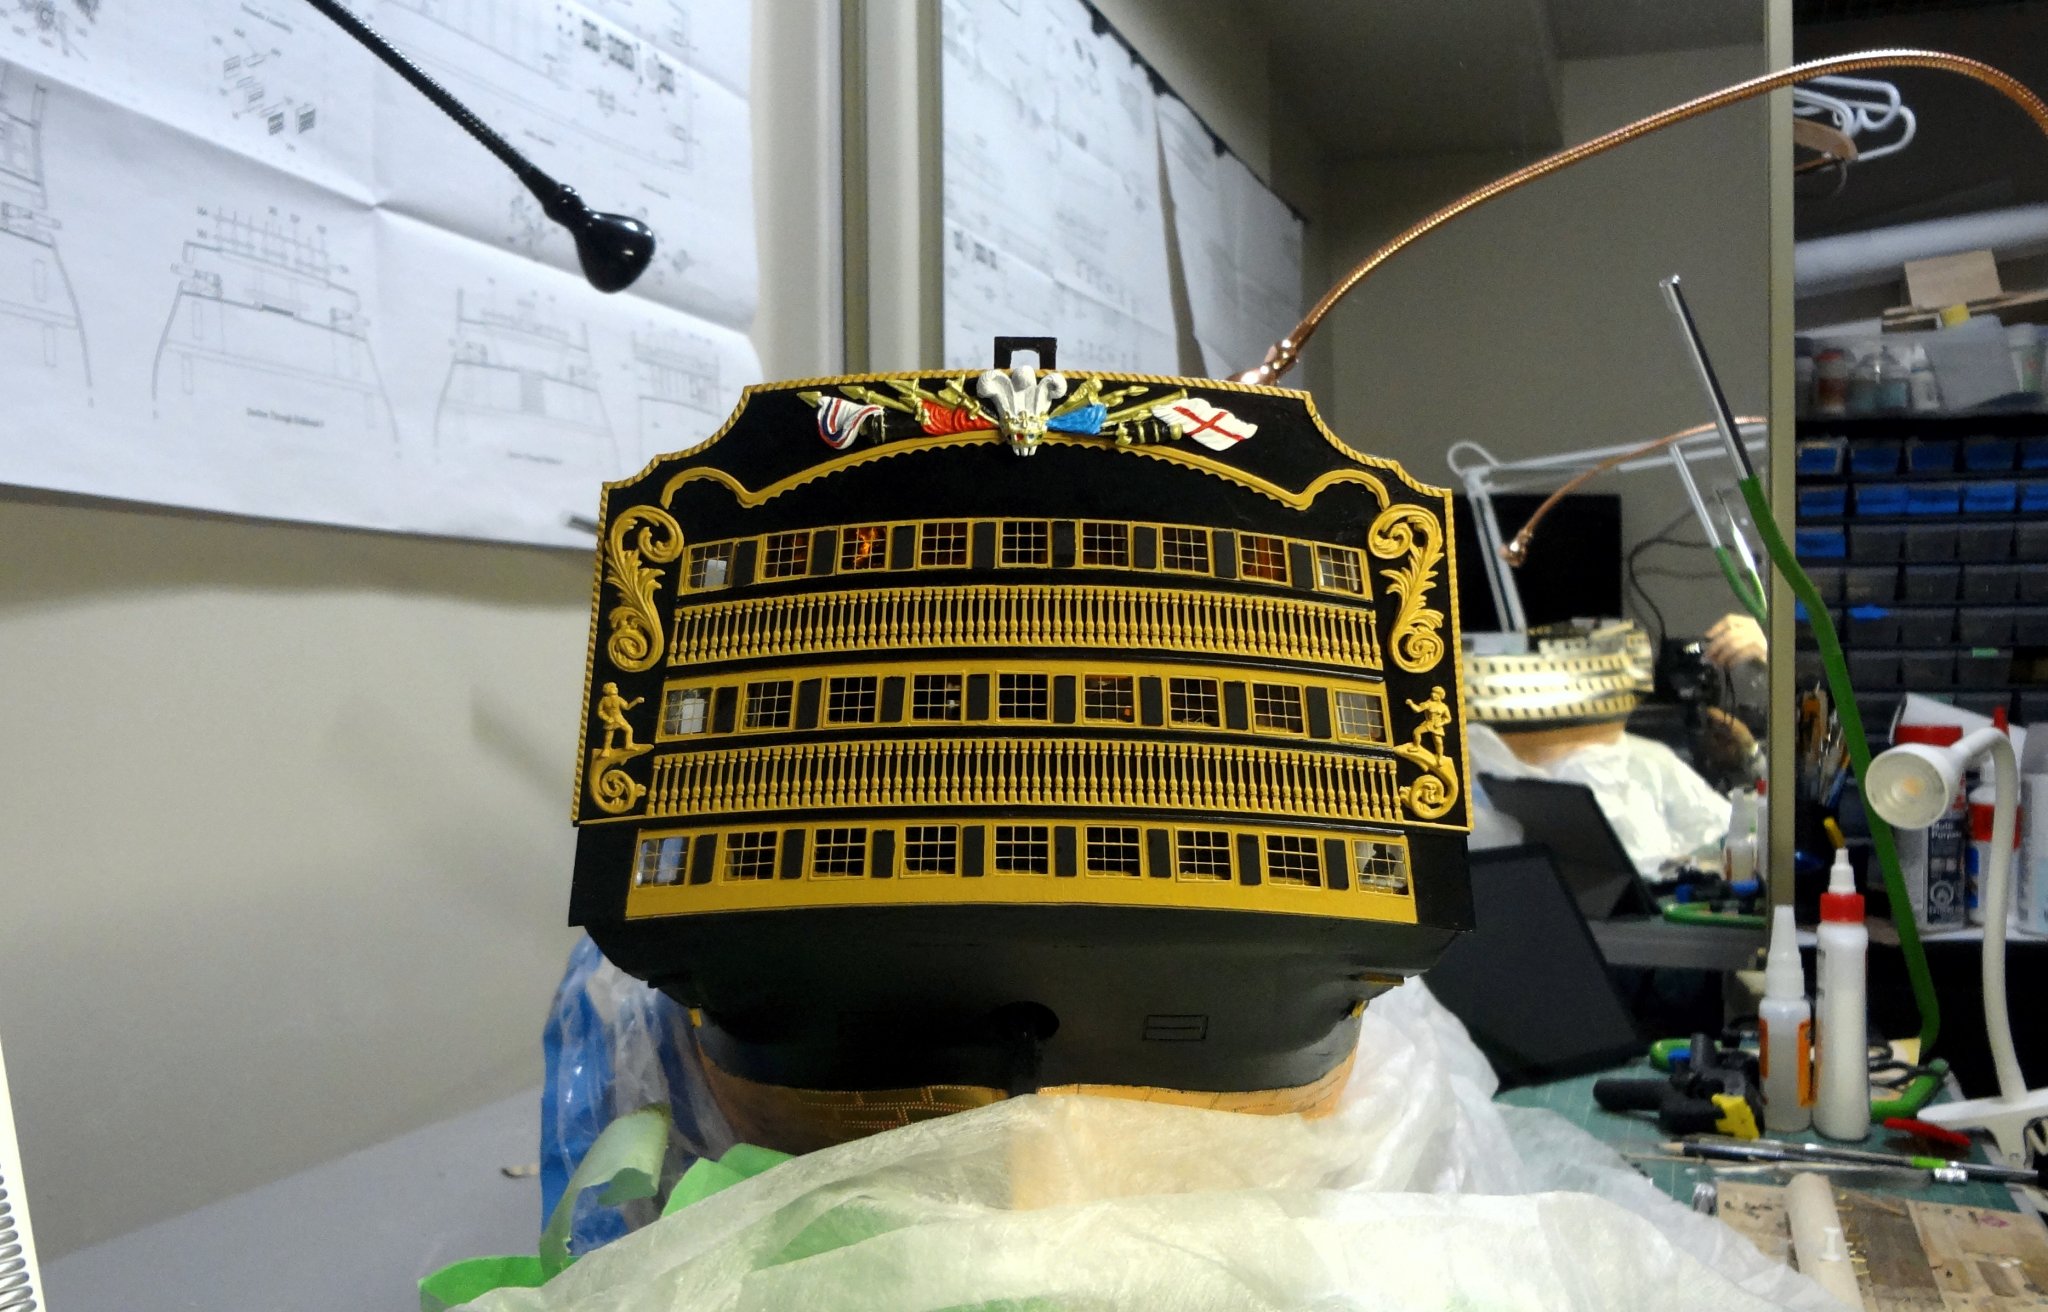
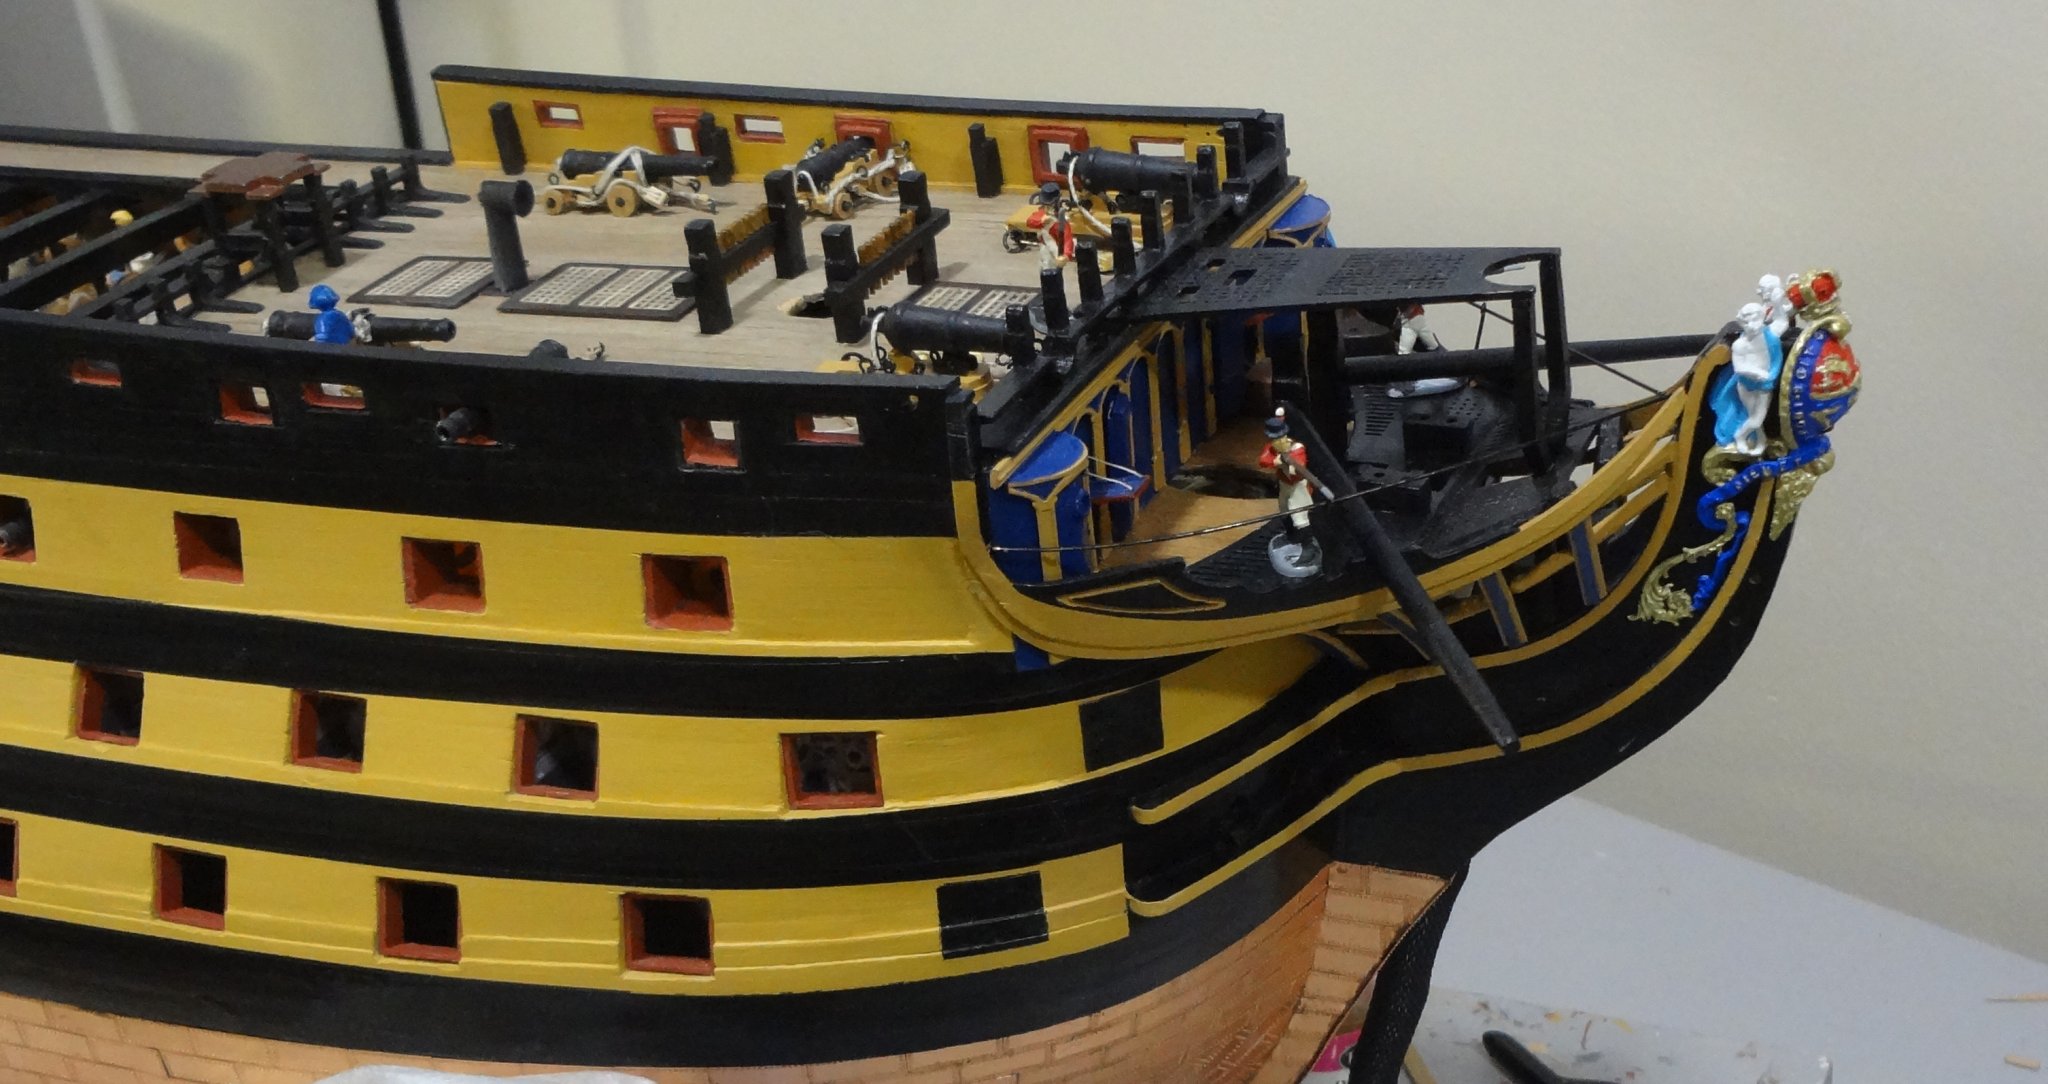
Nick: Patchy is a great word! Thanks for the comment re "the real Victory". The beakhead did work out okay. I took your suggestion and have been working on placing the brass rails to the hull. I can't imagine doing it later on in the build. One thing I found is that brass along with super glue on bare wood is very hard to move after it sits for even a few minutes. Pulls a layer of wood off with it. LOL... It was a shock. Thank goodness I only had a mm or so to move it. (messed up the angle between gun ports on one piece. My daytime and most evenings other project is going strong for another six weeks but we just got hit with some timelines that may mean the second phase will start right away versus a few months. Ian will understand.. Yep, patchy! Must admit, I'm a bit frustrated by my pace, but my other activities are just too much at this time. And to add to it, we've had 12.5 feet of snow (cumulative this season so far) at the mountains I ride so you can imagine it's pull... I don't need a to wake me up to drive there. But, this week has been pretty good and took three evenings. A whole three evenings to plug away. For me "an evening" is time after 9:00 or 10:00 p.m. LOL (I just realized, it's like when the kid was growing up... Yikes!!) Took the tarps off. And did some painting and fix-up. (A diversion more than anything) Was working in the galleries and sorting out the painting and alignment of the quarter gallery 2nd and 4th skin false baluster patterns. Decided to scan the brass sheet 1:1. After making a pdf (in this case) I printed the sheet. And I cut the pieces out that I want to align and there you go! Lined up using the paper parts. Might prove to be useful elsewhere. In review: 1. Scanned sheet with the scanner 1:1 - created a pdf (the brass is still inside the plastic bag) 2. Printed the sheet and cut out the "parts" 3.taped in place so I could figure out the colour patterns 4. Took this picture before the new tarps went up. (please excuse the green background - didn't pull across all the way -)


- 294 replies
-
- 5
-
-
- victory
- caldercraft
- (and 1 more)
-
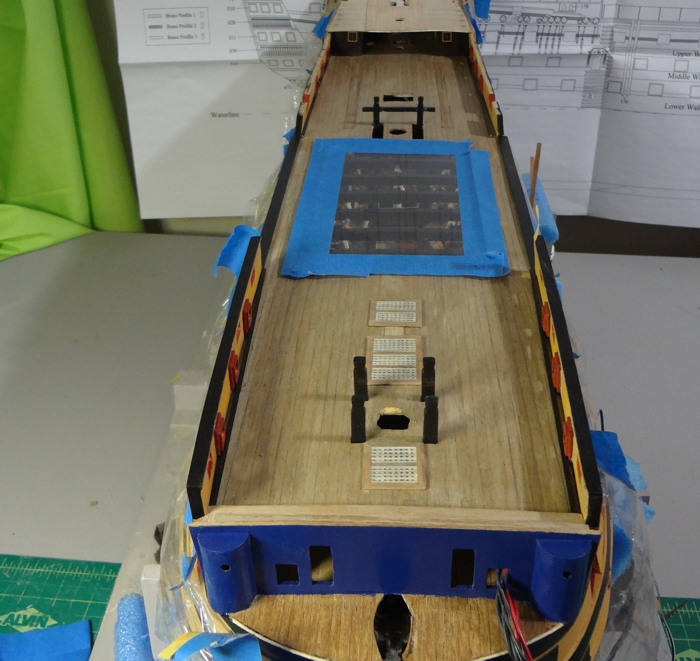
Got a bit done this weekend. Not much. But every bit moves me along. For anyone who is just starting. Just plodding along, no matter how little, eventually gets complete. Even if it takes years. Hmmm... that's like life. Cleaned up the deck and area for the picture. I won't be able to find anything now. LOL Just working on the main deck. Lots of paint touch-up required. Sanded a few spots on the deck that will clean up with another coat.
- 294 replies
-
- 5
-
-
- victory
- caldercraft
- (and 1 more)
-
Lawrence re picture on ocean - have a green cloth on wall. Took picture of the model, deleted the green background and superimposed my model on an ocean picture. Have too much on the go -- getting there ever so slowly. Thanks for comments and likes. Going to post some new pics this weekend I hope. Was able to get a few hours in the shipyard. Boarding is great this year too! Four and a half foot settled base already. Hope you are keeping well these days there in Ontari ari ari o.
- 294 replies
-
- 1
-
-
- victory
- caldercraft
- (and 1 more)
-
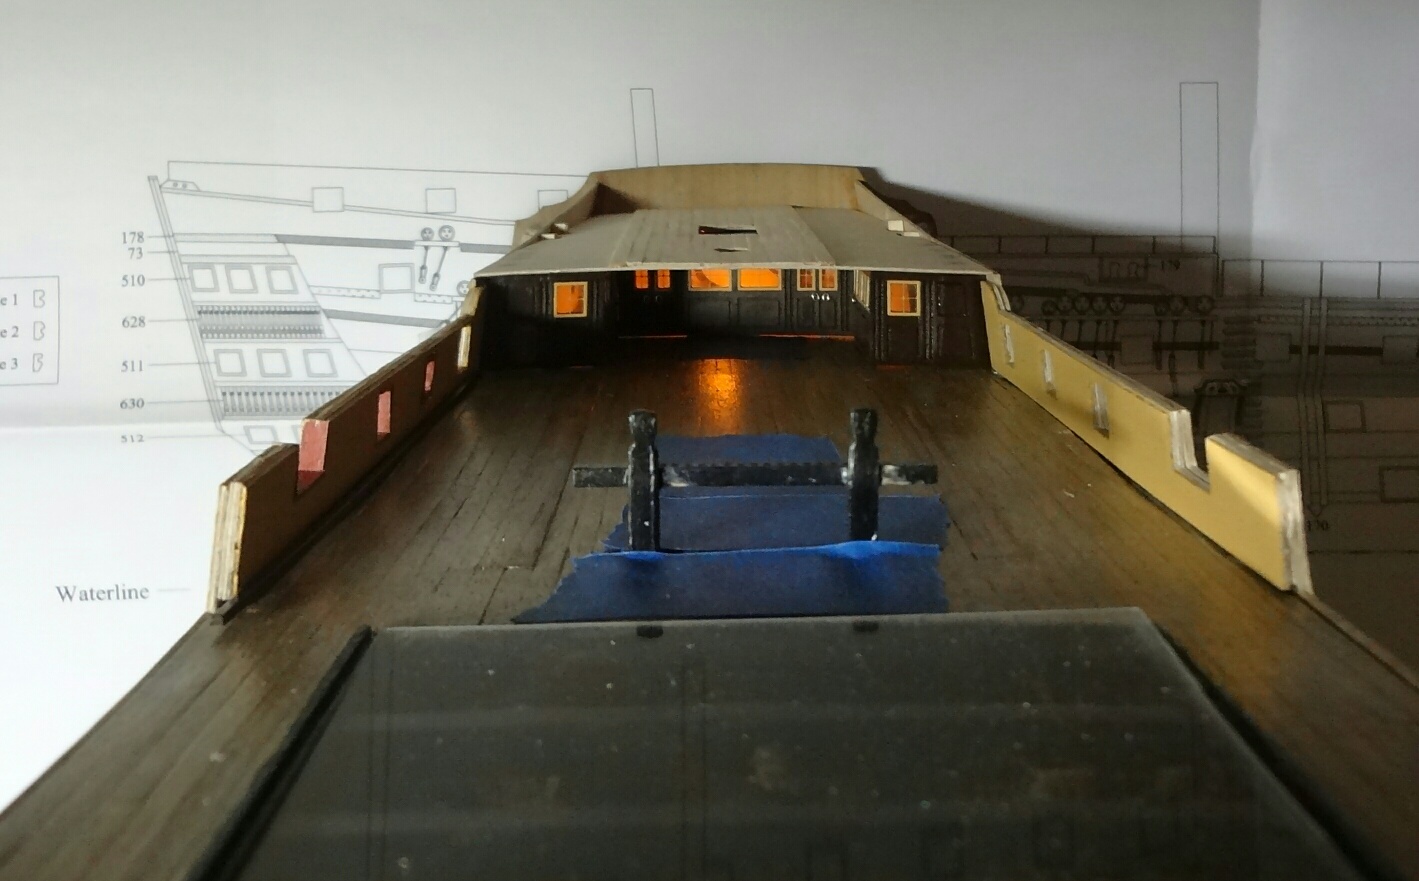
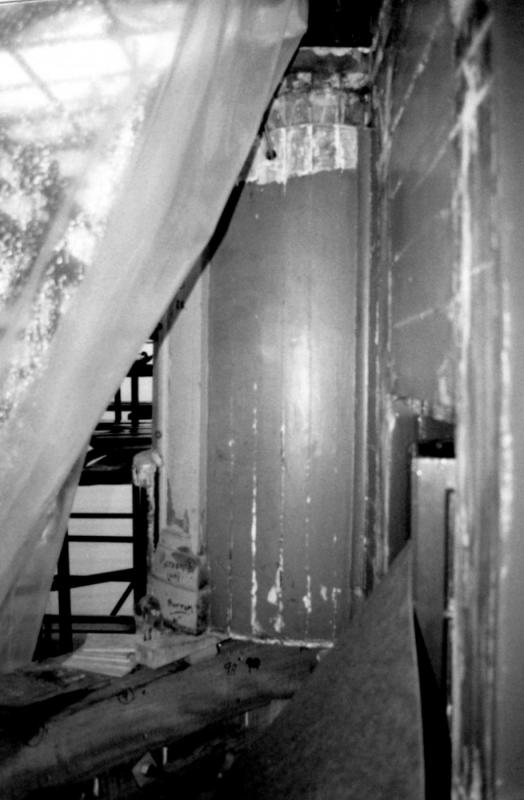
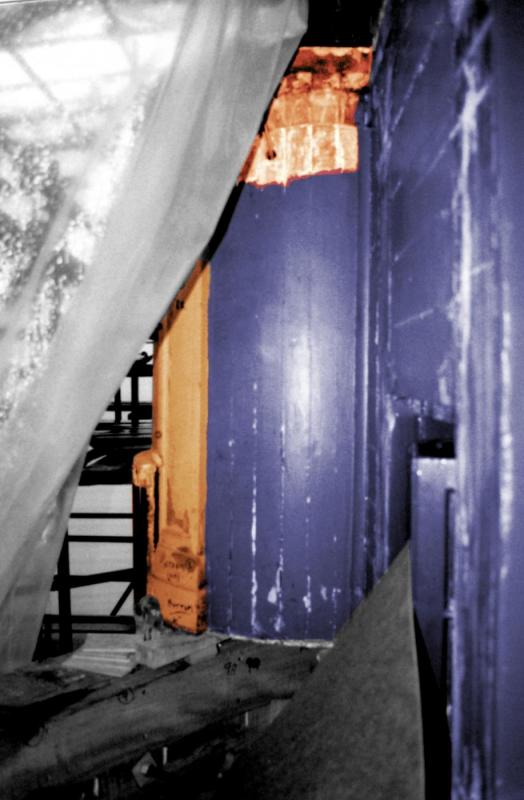
Having a bit more fun colourizing another photo. Here is looking out from inside. Adding the colour makes a big difference for me.
- 294 replies
-
- 2
-
-
- victory
- caldercraft
- (and 1 more)
-
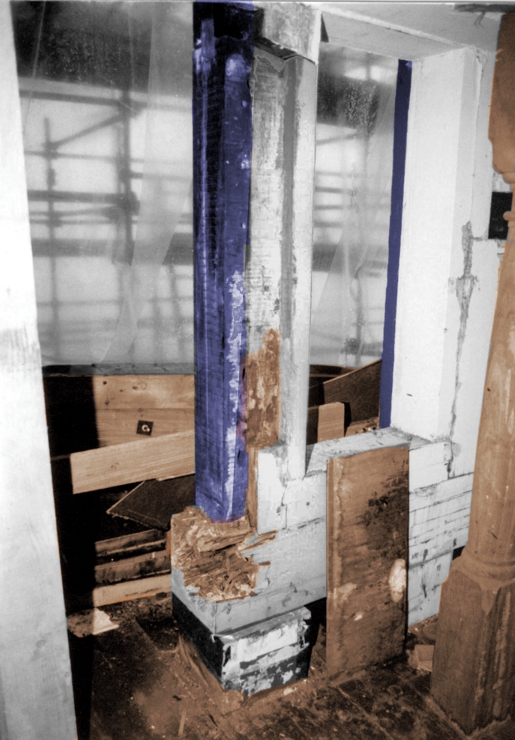
Went back to my pictures in the 80's. Here is the real roundhouse. In black and white, and I coloured it using colours from Victory.
- 294 replies
-
- 4
-
-
- victory
- caldercraft
- (and 1 more)
-
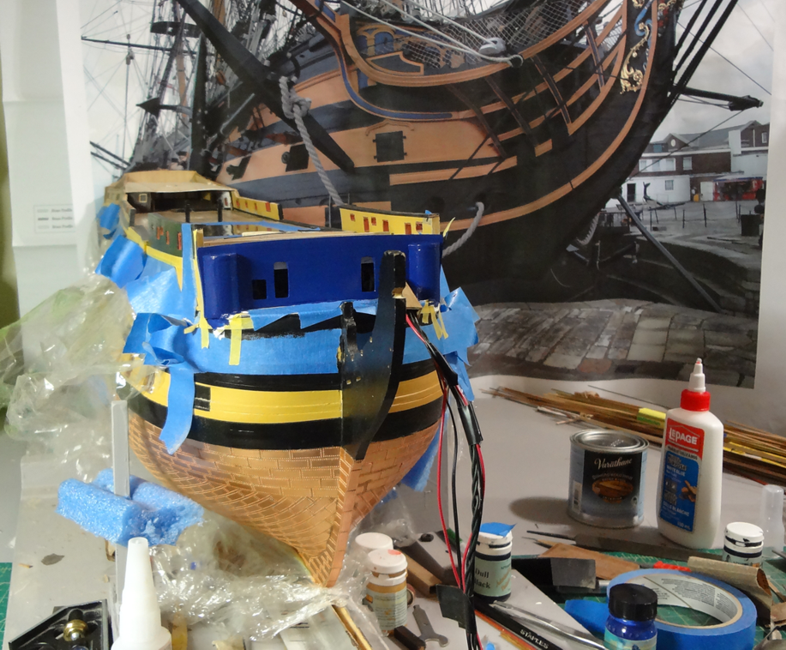
A paint job.I put a white base coat on the beakhead figuring it would make the blue a little punchier. Did anyone else do anything similar? 24 hours between coats. Best have coffee with Seventynet ) Oh, darn, I have to drill those holes -- meant to do before painting. Better do that before the next coat of blue.
- 294 replies
-
- 5
-
-
- victory
- caldercraft
- (and 1 more)
-
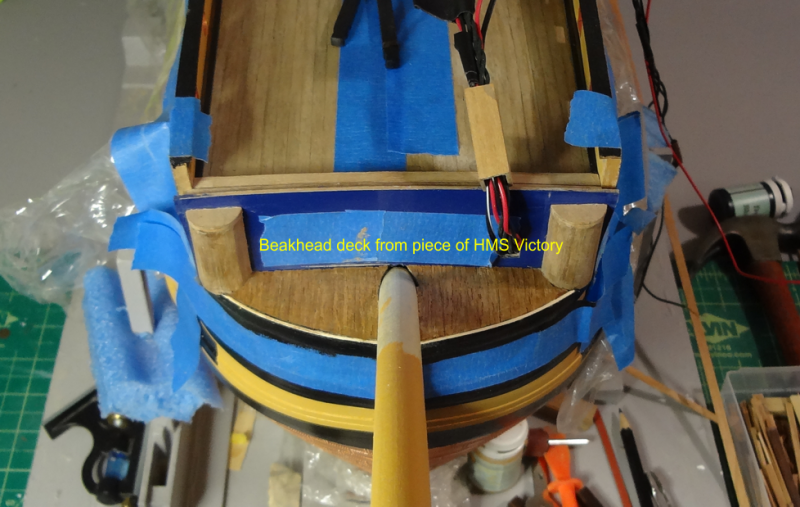
My goodness. It's Christmas day. Merry Christmas to everyone. I've been way to busy on my other project. Half way there. Have been able to squeeze a few sessions in the shipyard. Actually, it's really good way of relaxing from the project I'm on these days. Been working on the beakhead and in particular the beakhead deck. Got the deck done with pieces from the real Victory. Still some work to do around the bowsprit opening. Lots to do still. Will I ever get this done? Been working on the rest of the upper deck as well. Plugging away when I can. On top of my project, snowboarding season opened early this year. We have had awesome conditions since the first of November so any time I can get to the mountains, the shipyard stays dormant. And I've been taking days in the mountains.
- 294 replies
-
- 3
-
-
- victory
- caldercraft
- (and 1 more)
-
That is one nice completed model Fortres! I have not been able to do anything on the model for quite some time. Am on a project to save the province. LOL... Can't really say too much other than I am really busy, six to seven days a week. What's with this retirement thing. Hope to put some time in on Victory soon. Do apologize to all for not even catching up. But I did have coffee with Ian when he got from Van. I should have another coffee with him! All of you keep going. I will try to post something. 12 more weeks till snowboarding too! Yikes, it's going to be a really busy winter.
- 294 replies
-
- 2
-
-
- victory
- caldercraft
- (and 1 more)
-
Lookin sweet Robert. Can't wait for the next stages! Keep posting.
- 521 replies
-
- 2
-
-
- caldercraft
- victory
- (and 1 more)
-
Nick Just got back and you are finished! It's truly magnificent. We started about the same time and now I see how far I've fallen behind. Best part is I can see what you've done so I can figure out where I won't mess up Thanks for keeping us informed with the log. Am looking forward to your next build! We are fortunate to have this forum available. It's been an absolute pleasure following the build over these years. Rob
- 83 replies
-
- 1
-
-
- finished
- caldercraft
- (and 1 more)
-
Lookin really nice Ian. See you mounted the quarter galleries. Like the deck angle. Back in a week. We will have to do coffee! We have been here for three weeks. One to go! Lol
- 191 replies
-
- 2
-
-
- victory
- caldercraft
- (and 1 more)
-
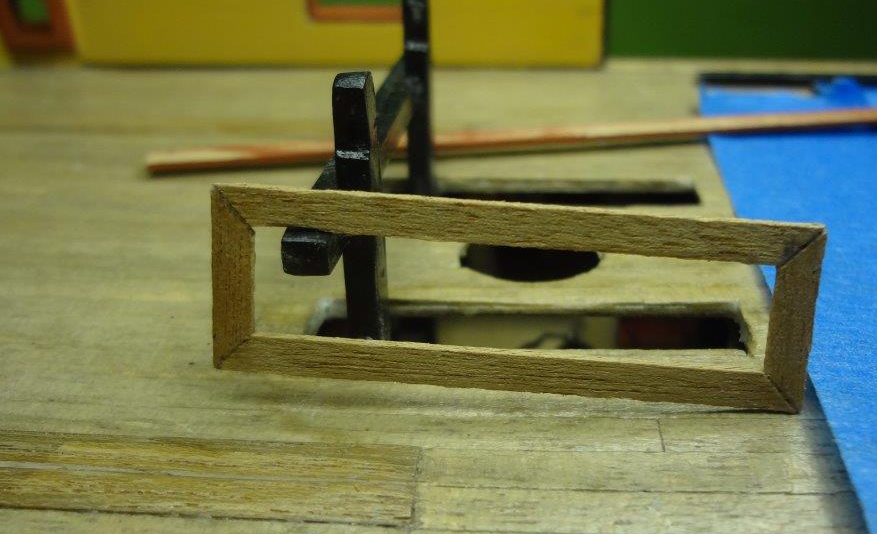
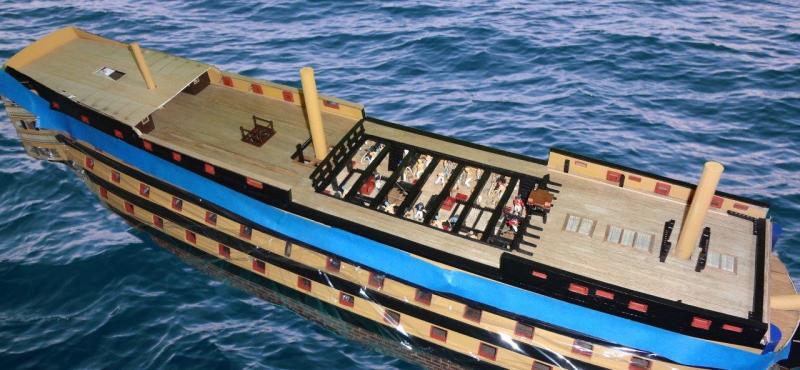
Was not planning on led under poop deck. So much for planning. Made a start at planking the poop deck 'off ship'. It's flat now but it sure wasn't when I looked at it next morning. Painted the underside white to give it some moisture and clamped it down on the table top. Can't imagine the shape if I hadn't caught it next morning. Have left it to sit for a few weeks clamped to the desk while I complete a task away from the shipyard. Lol I stopped planking where i am because i relized that i will have some difficulty nailing it to the crossbar if i plank the whole width. Will mount as is later and finish planking when deck is fixed. I am not planning on lighting the three lanterns at the stern Just placed items on deck to see how it will be and have to admit am pleased. On another point i am not so sure I would put three coats on the deck of satin finish. It almost looks like a sheet of ice. Hmm maybe I will sand this deck a bit. Hope it doesn't wreck it.

- 294 replies
-
- 4
-
-
- victory
- caldercraft
- (and 1 more)
-
Very little Ian. The clamps appear to deal with it okay. I am going to put some type of waterway on the deck so will fix any gap. But I don't see anything at this point. Maybe the longer ones will pose a problem. Not there yet. Maybe later this weekend will find out. Was thinking about the lower decks and wondering if it could be done too with their longer length. It might be worth looking at by someone who is at the earlier stage.
-
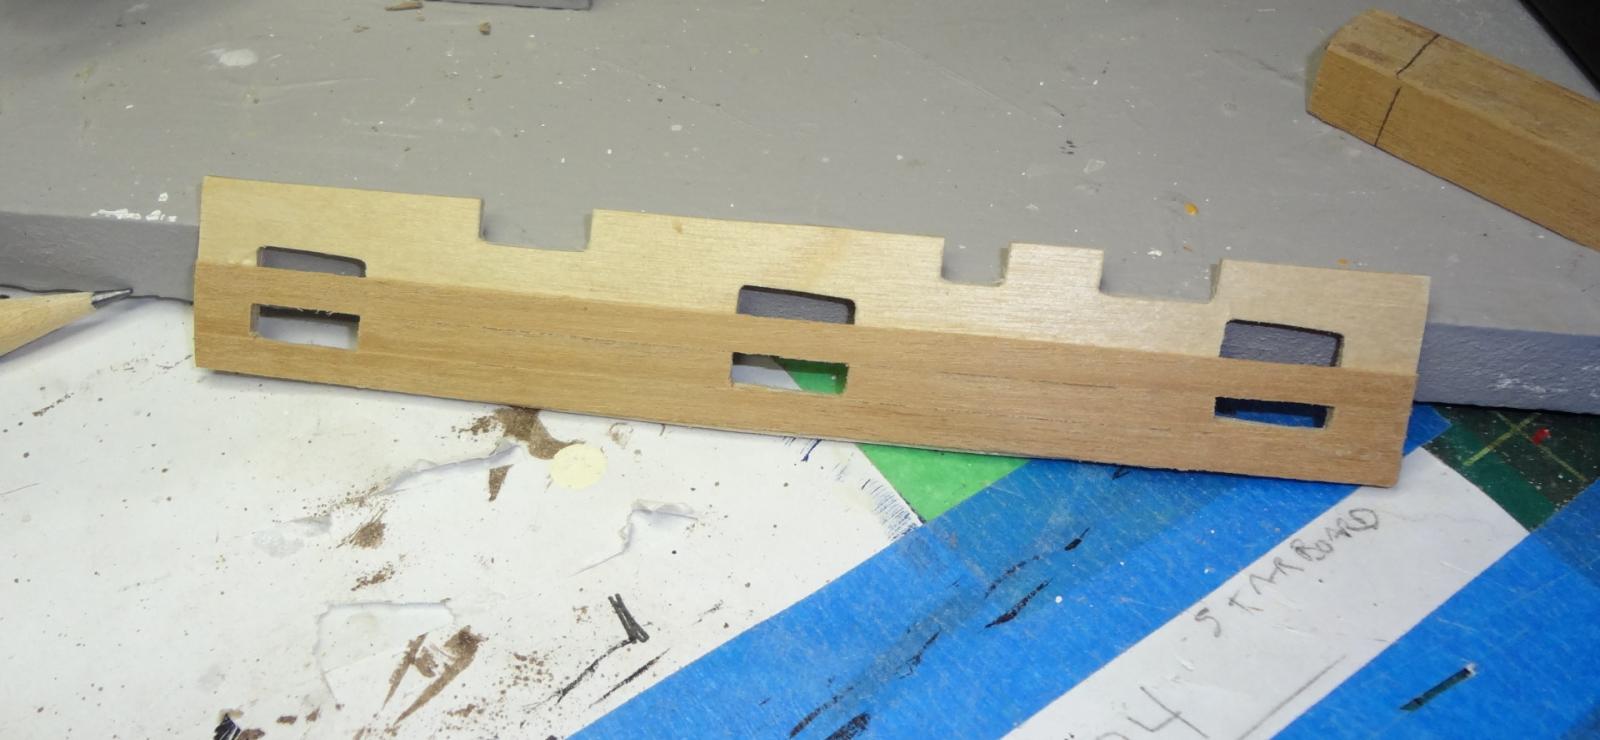
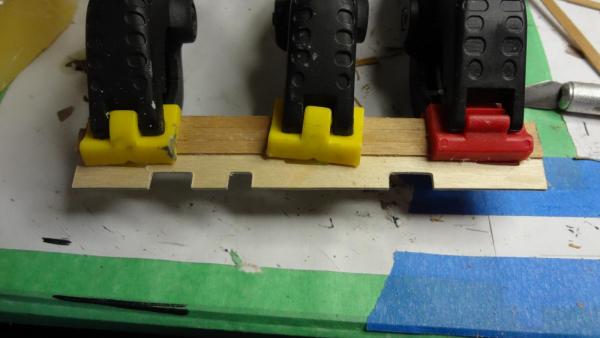
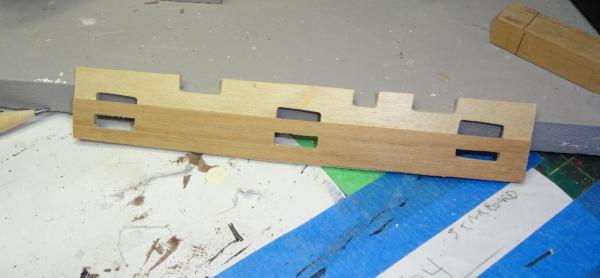
It's taken me how many years to get to this point? Decided to pre-line the inner bulwarks before mounting. Seems to be working okay. Way easier cutting and finishing than when installed.
- 294 replies
-
- 3
-
-
- victory
- caldercraft
- (and 1 more)


sm.jpg.d7cb2fed1136660214b68a2a509ce801.jpg)