HOLIDAY DONATION DRIVE - SUPPORT MSW - DO YOUR PART TO KEEP THIS GREAT FORUM GOING! (Only 20 donations so far - C'mon guys!)
×


MD11pilot
-
Posts
110 -
Joined
-
Last visited
Content Type
Profiles
Forums
Gallery
Events
Everything posted by MD11pilot
-
 I didn't want to be excessive with the treenaiing so I just used the bulkhead lines established with the butt joints.
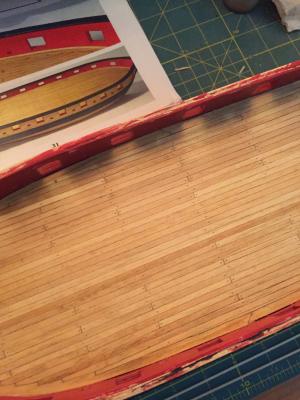
-
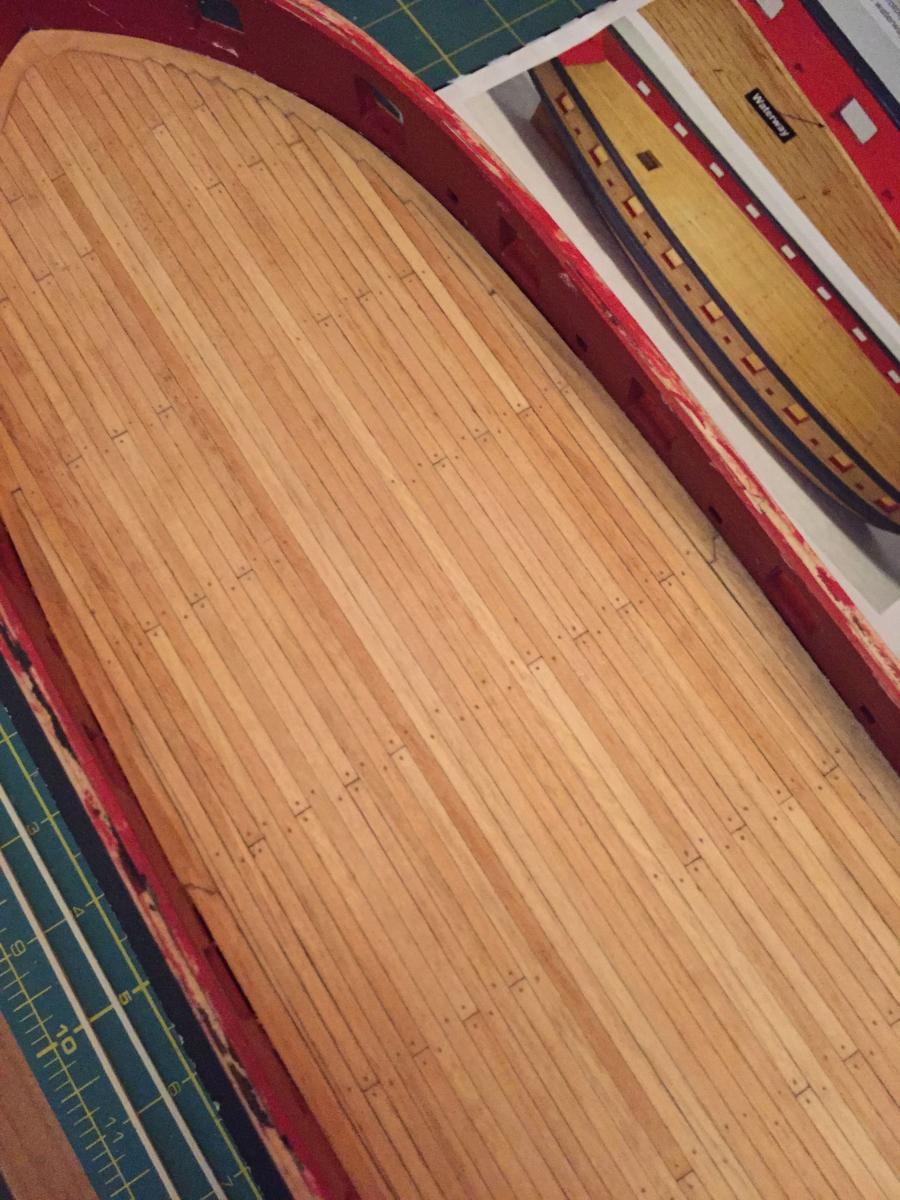
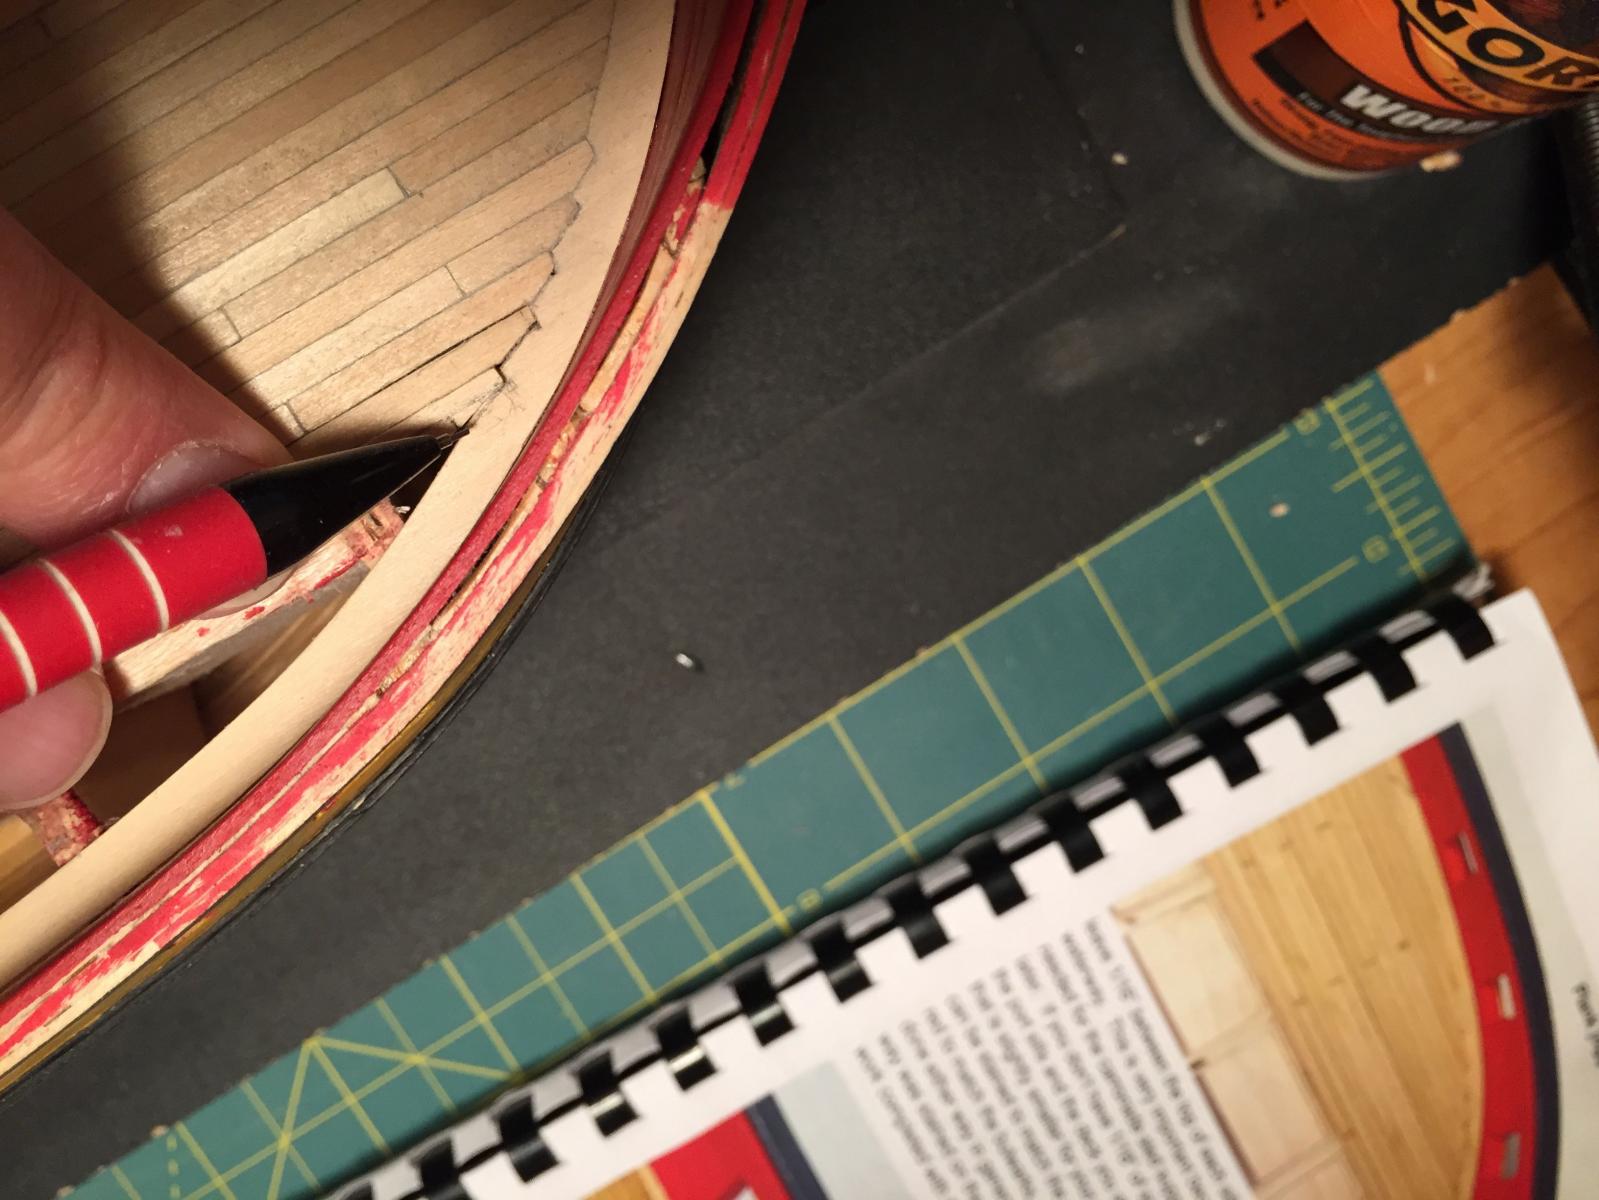
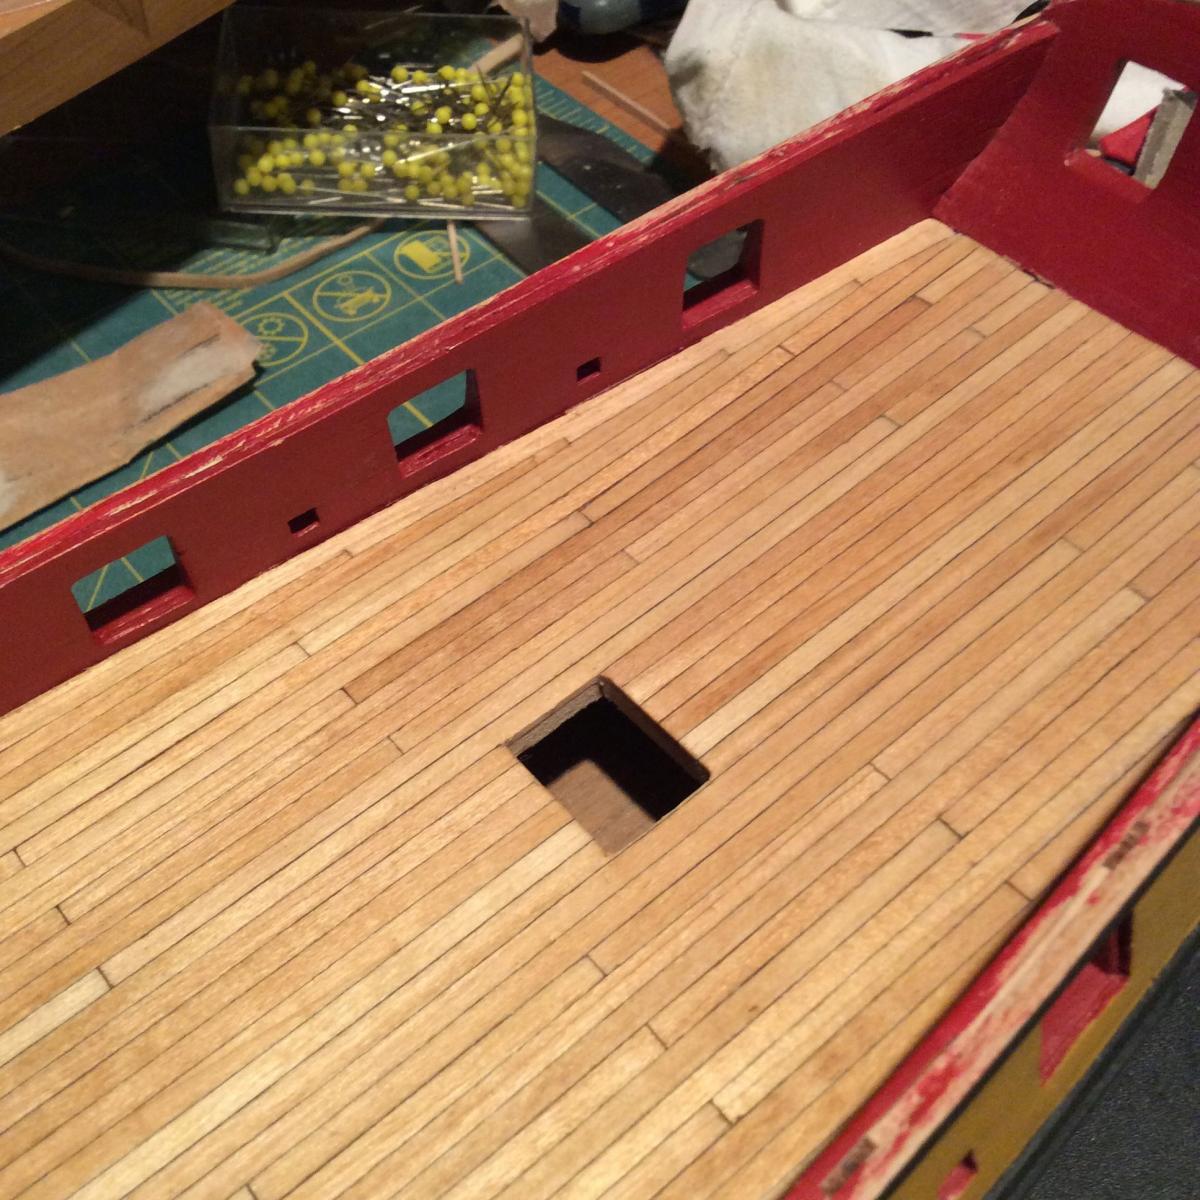
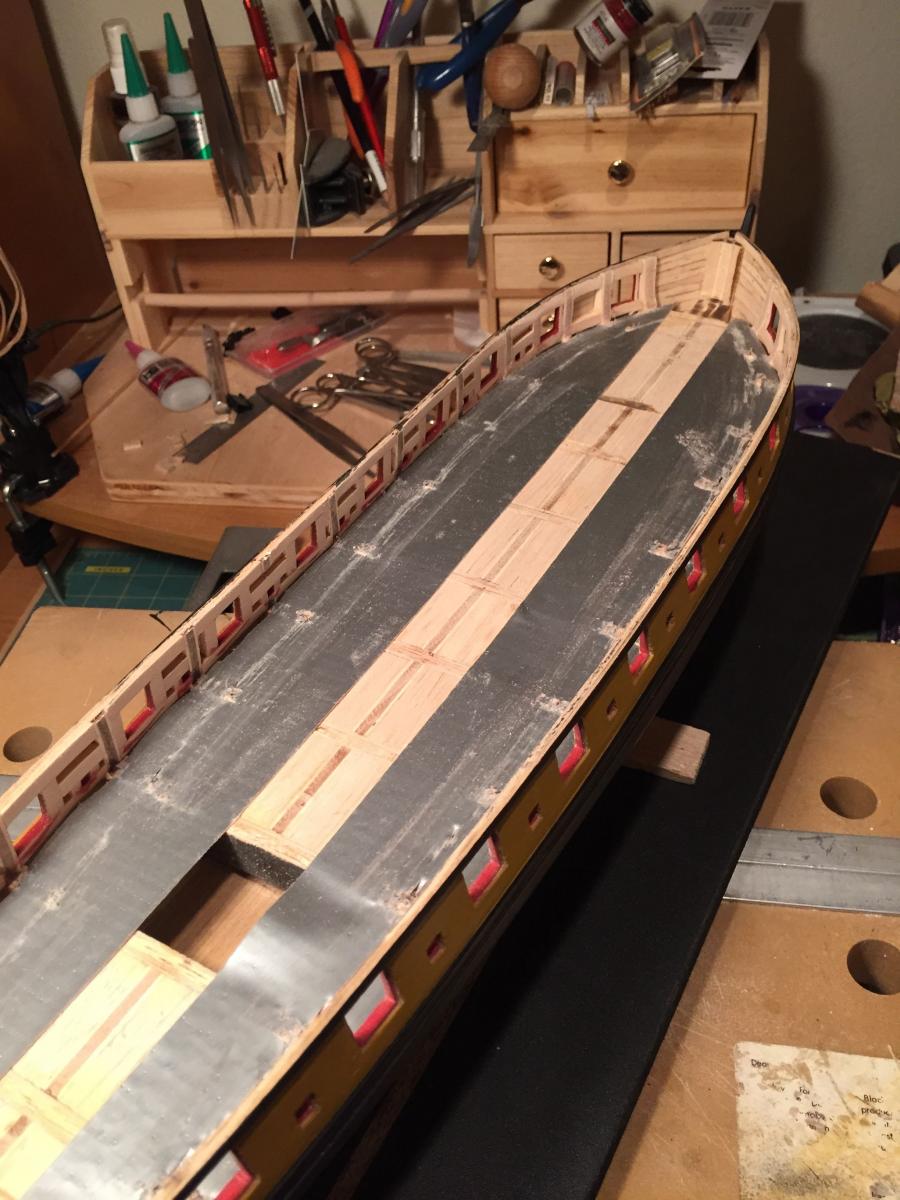
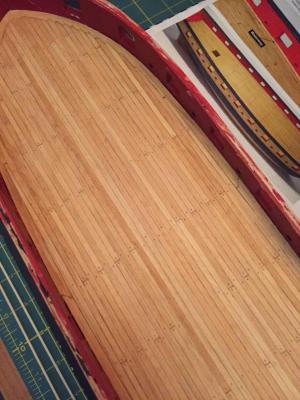
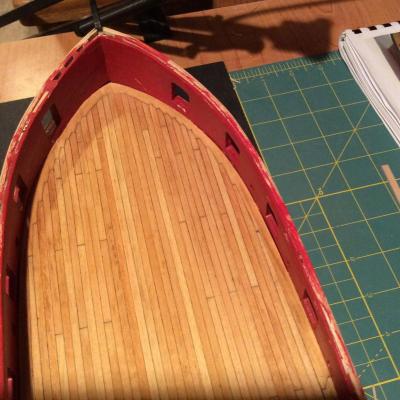
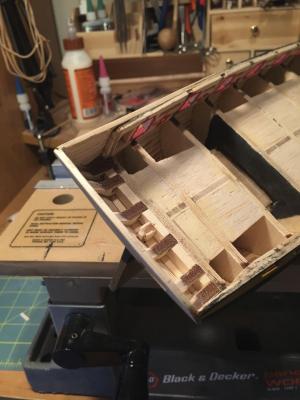
My first attempts at "joggling" or "nibbling". Followed the instructions and it worked out OK. The planking is all laid in, and you can see the results of the joggling fore…. And aft….. To finish the deck, I scraped it with the blade from my hand plane and a utility knife blade. After some sanding I finished the deck with pre-stain conditioner and a 50-50 mix of Minwax Natural and Golden Oak stain.


-
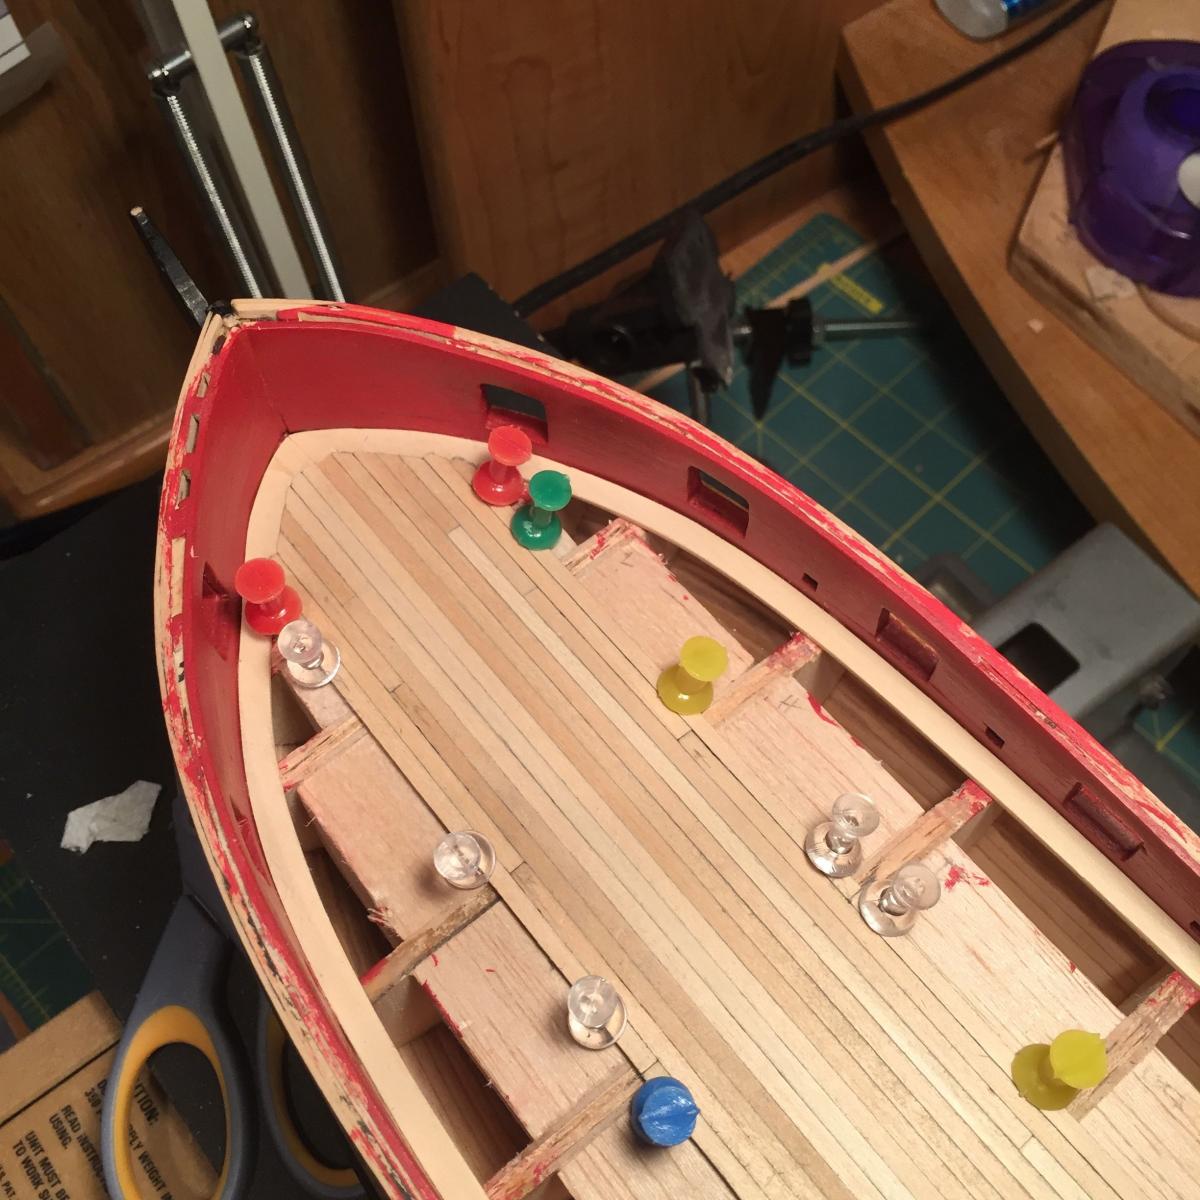
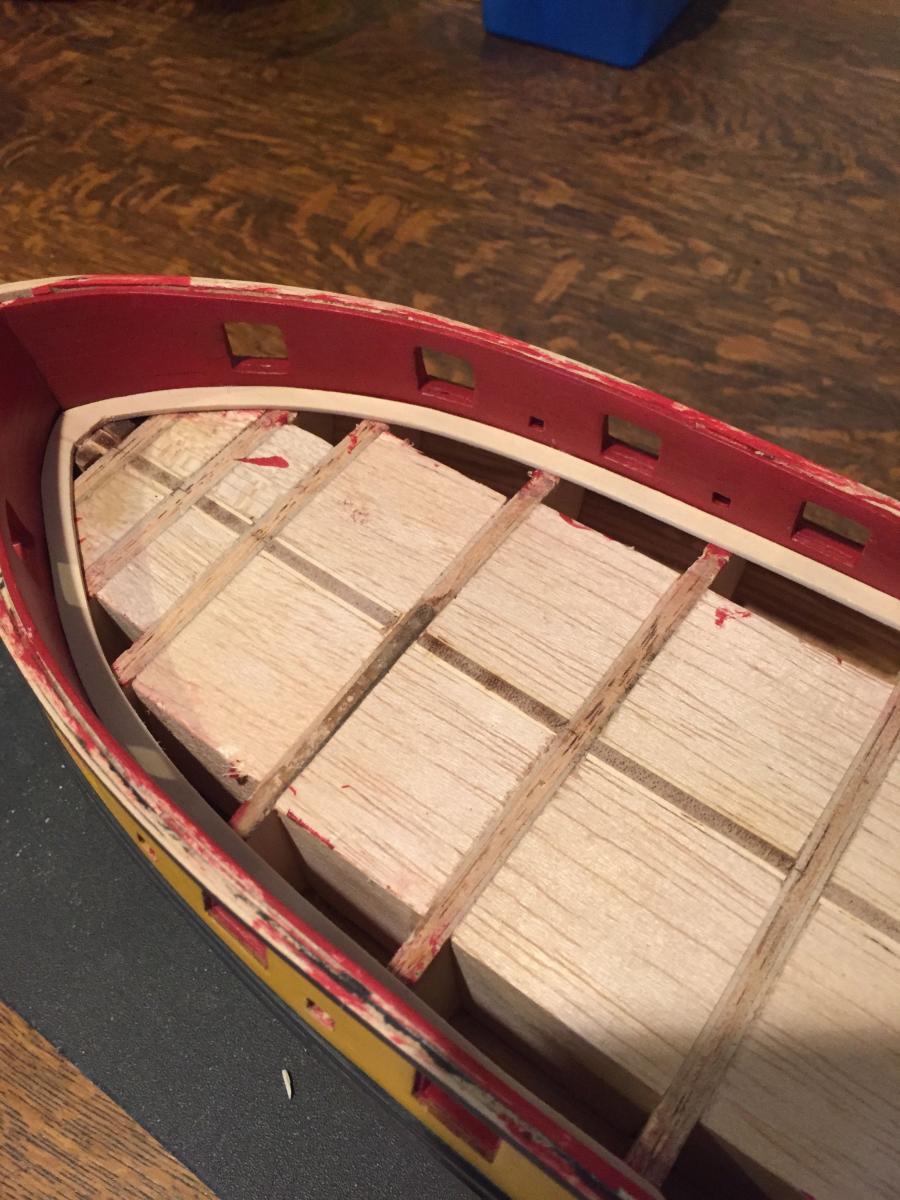
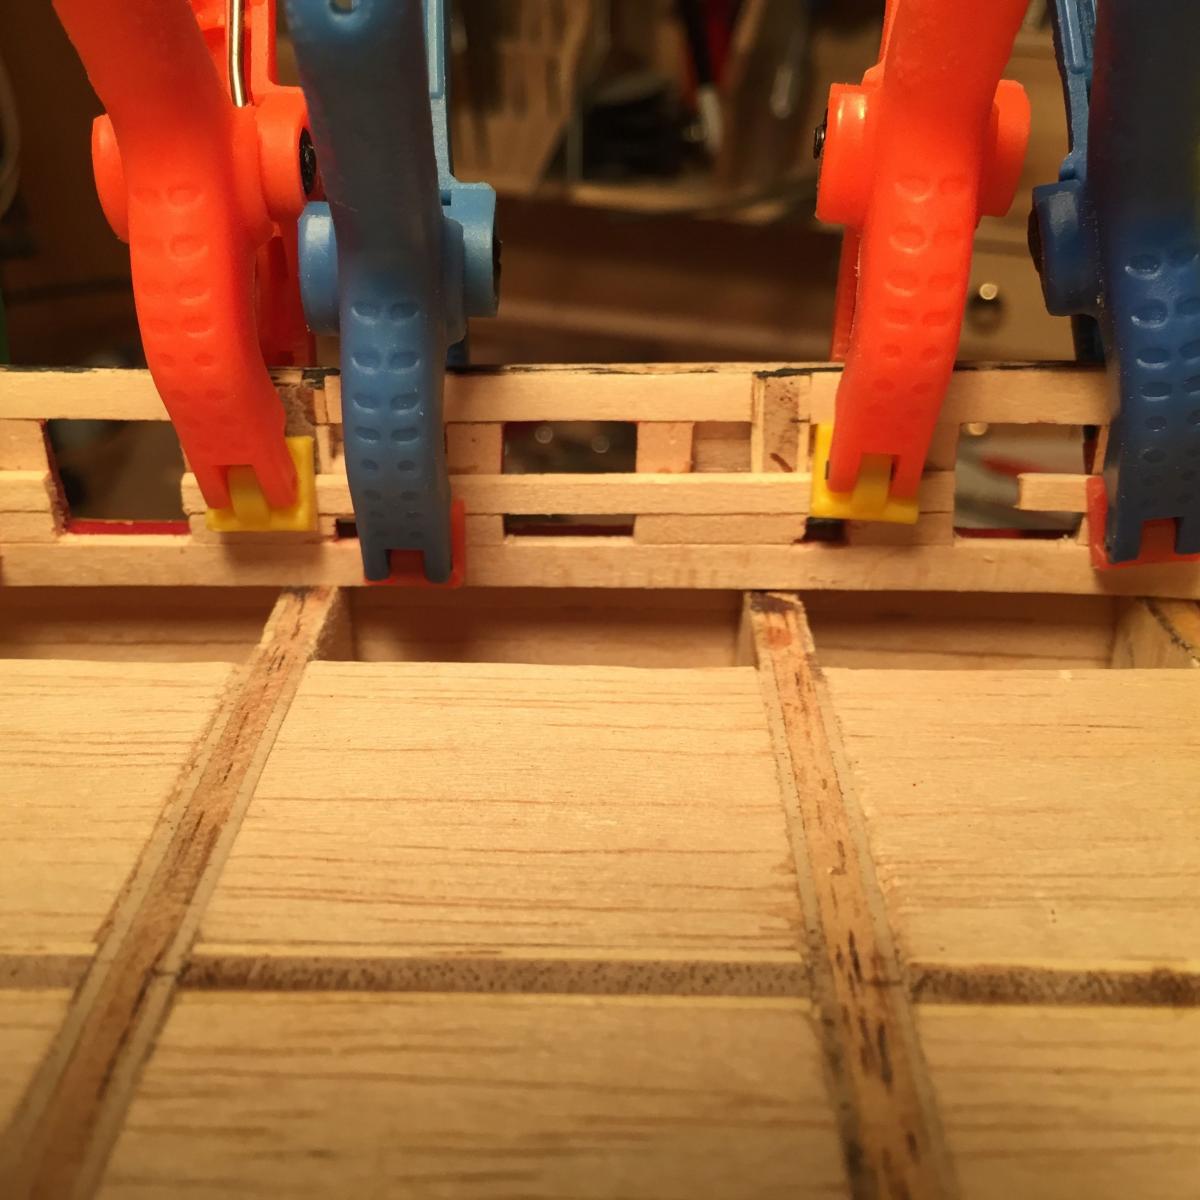
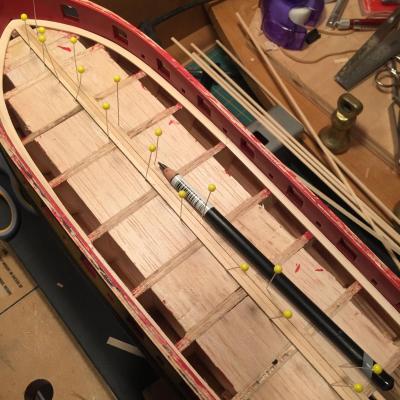
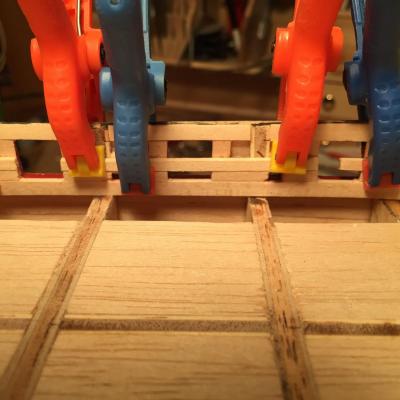
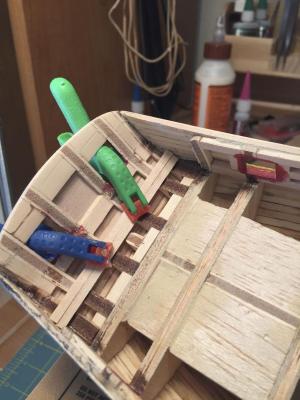
Push pins inserted into the balsa blocking was a nice way to clamp the planks. For this reason alone, if you are just starting your Syren don't scrimp on the blocking between the bulkheads.
-
Continuing out from centerline, and beginning the 3 butt shift pattern. I was really worried that I would mess up one of the joggled plank ends and have to start the deck all over again. But I took it slow and survived.

-
I chose to do my deck in a "3 butt shift" pattern keeping all my joints on top of bulkheads. For me, this adds enough artistic appeal, while keeping the difficulty to a minimum. The idea of joggling into the margin plank was intimidating, but I have to keep reminding myself that this project is supposed to teach me all the all the skills I will need on other projects. I used full width planks from bow to stern instead of tapering. I do like the tapered deck planks others have used, but at my skill level I opted to joggle full-width planks fore and aft. As Sal suggested in his log, i laid in the first 3 planks on either side of the center line with no butts. Most of these planks will be covered in deck furnishings so the effort would be wasted. Also, applying these planks as full length pieces gave nice straight lines to work out from. I used the #2 pencil method of simulating the caulking. The first, full length planks go in….
-
At this point I have to give a special "Thank you" to Sal. Sal, your careful planning and thorough discussion of your deck plan made my job a lot easier. I shamelessly "borrowed" a lot of your ideas and research. I hope you will take it as a compliment.
-
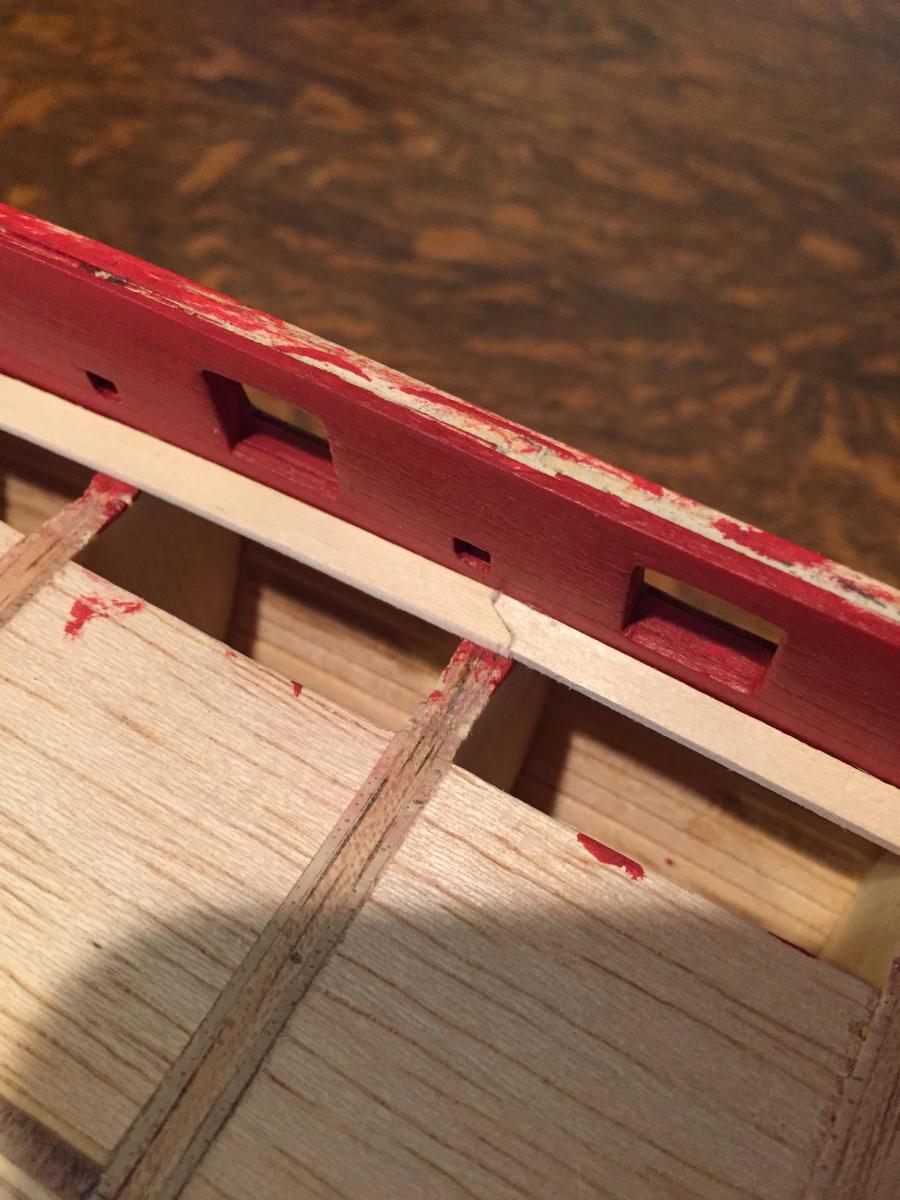
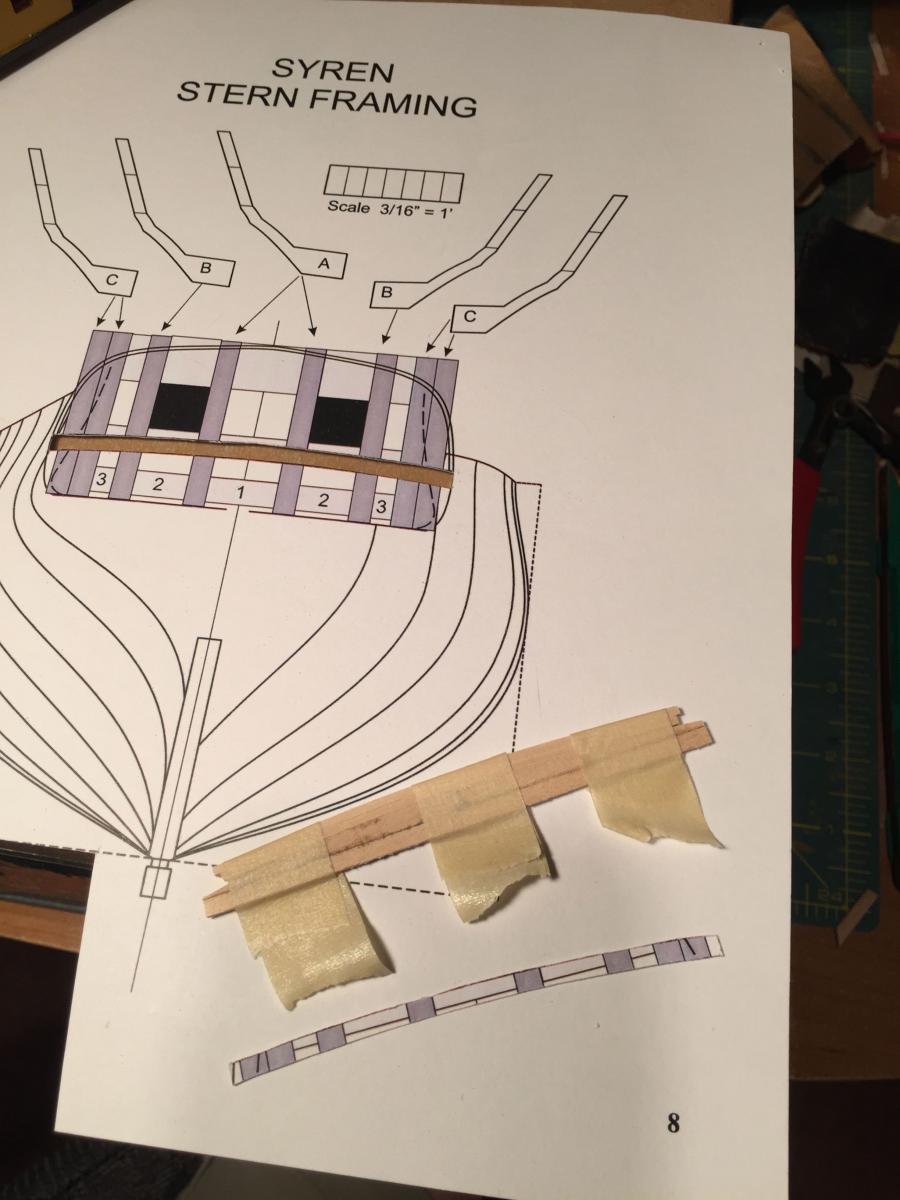
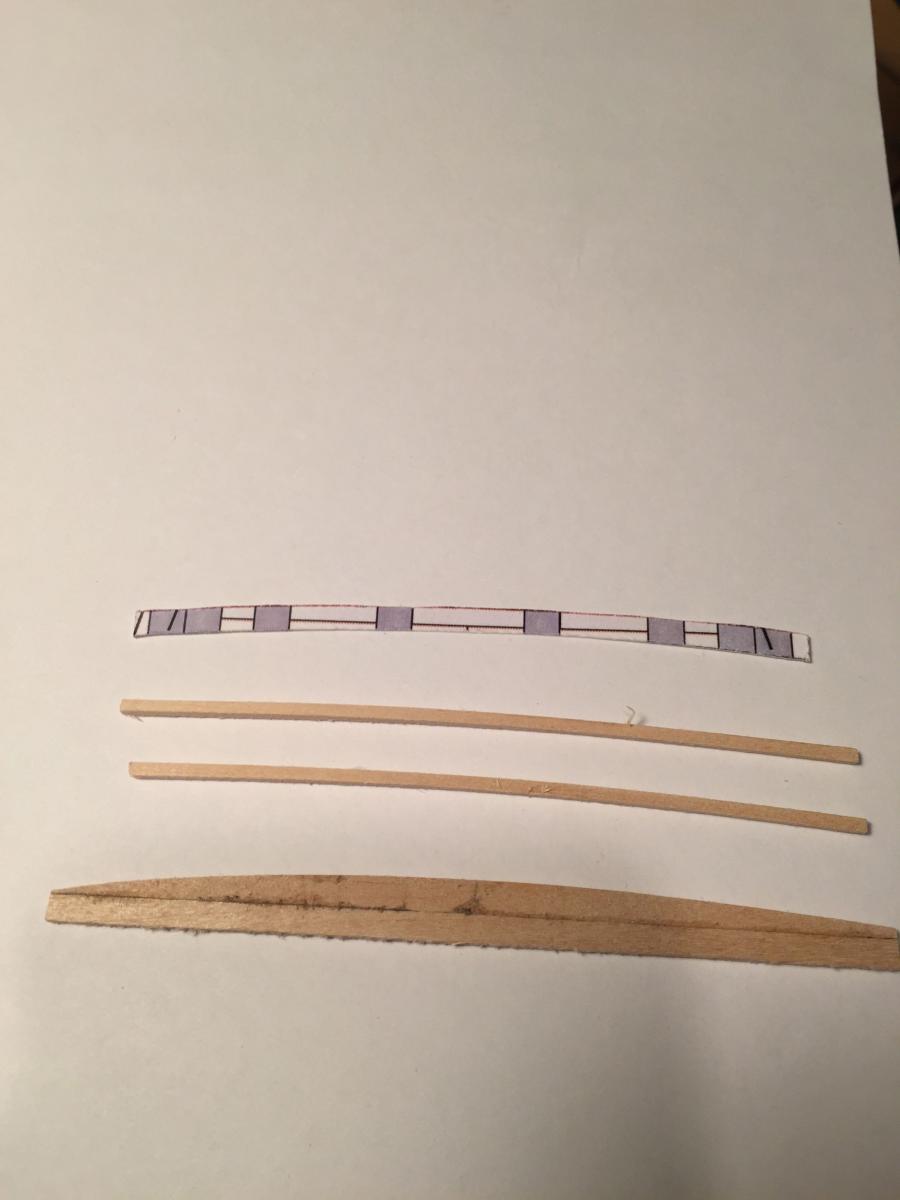
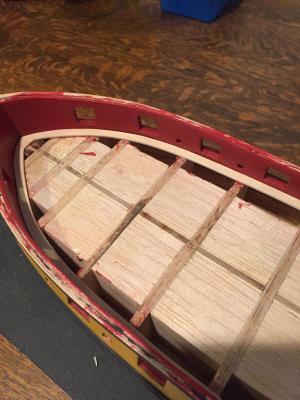
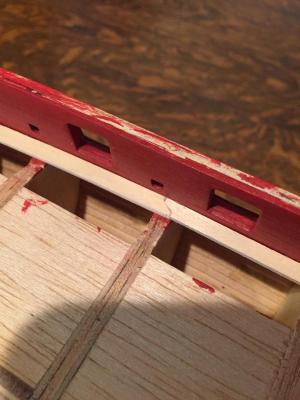
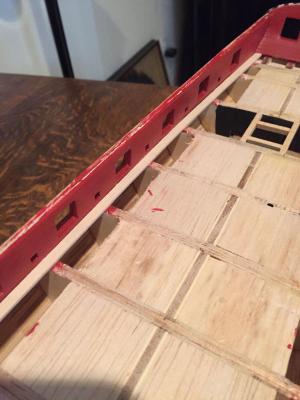
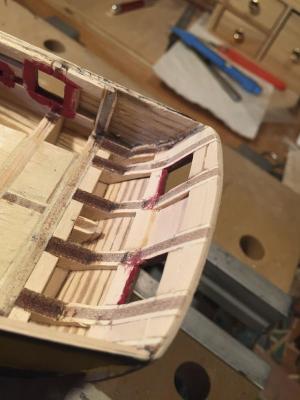
Like a few other Syren builders, I decided to delay the installation of the cap rail. I'm not careful enough, and just know I would beat the heck out of the rail while planking the deck. So, my next step will be the deck. The laser cut margin plank didn't come close to matching the curve of my ship so I had to cut my own. I placed the scarph joint one bulkhead farther aft than in the plans so that the "straight" piece wouldn't have to bend much.
-
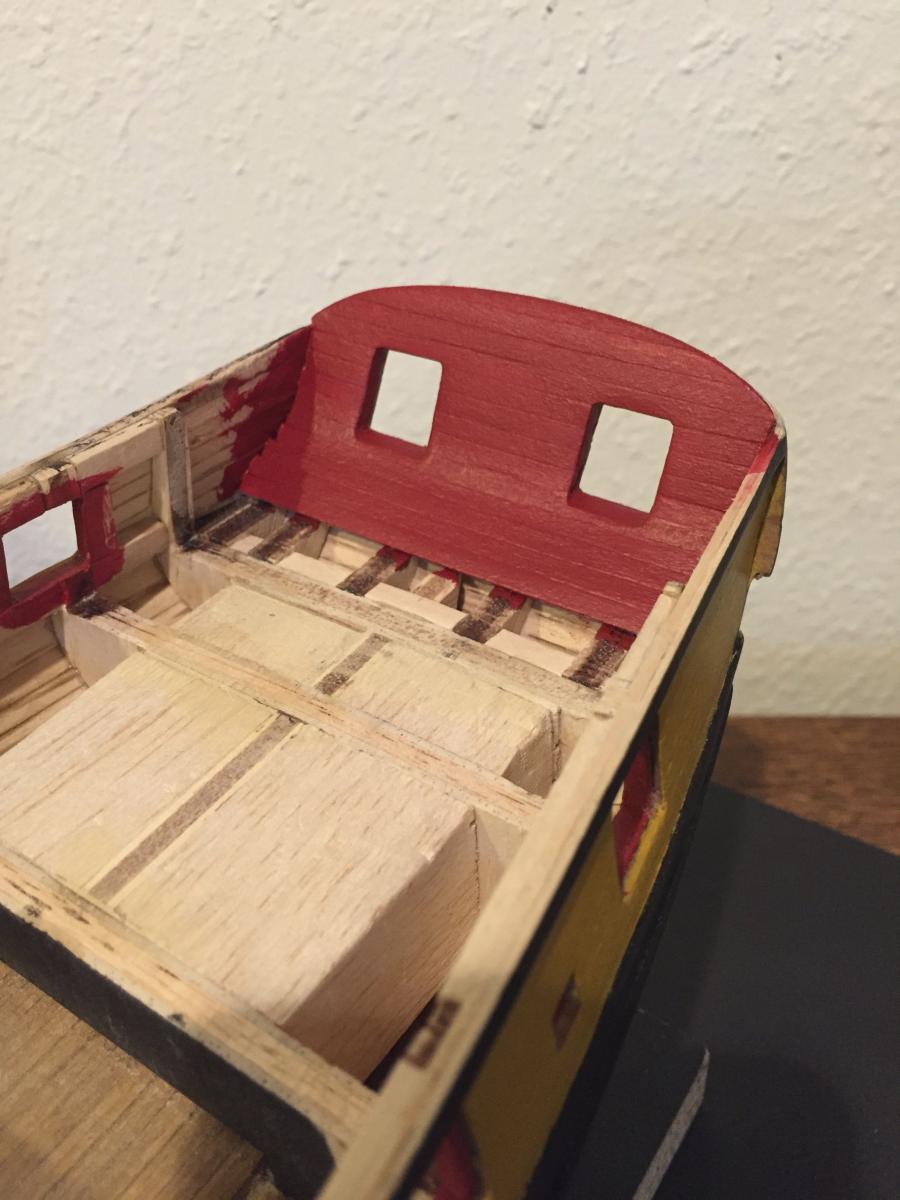
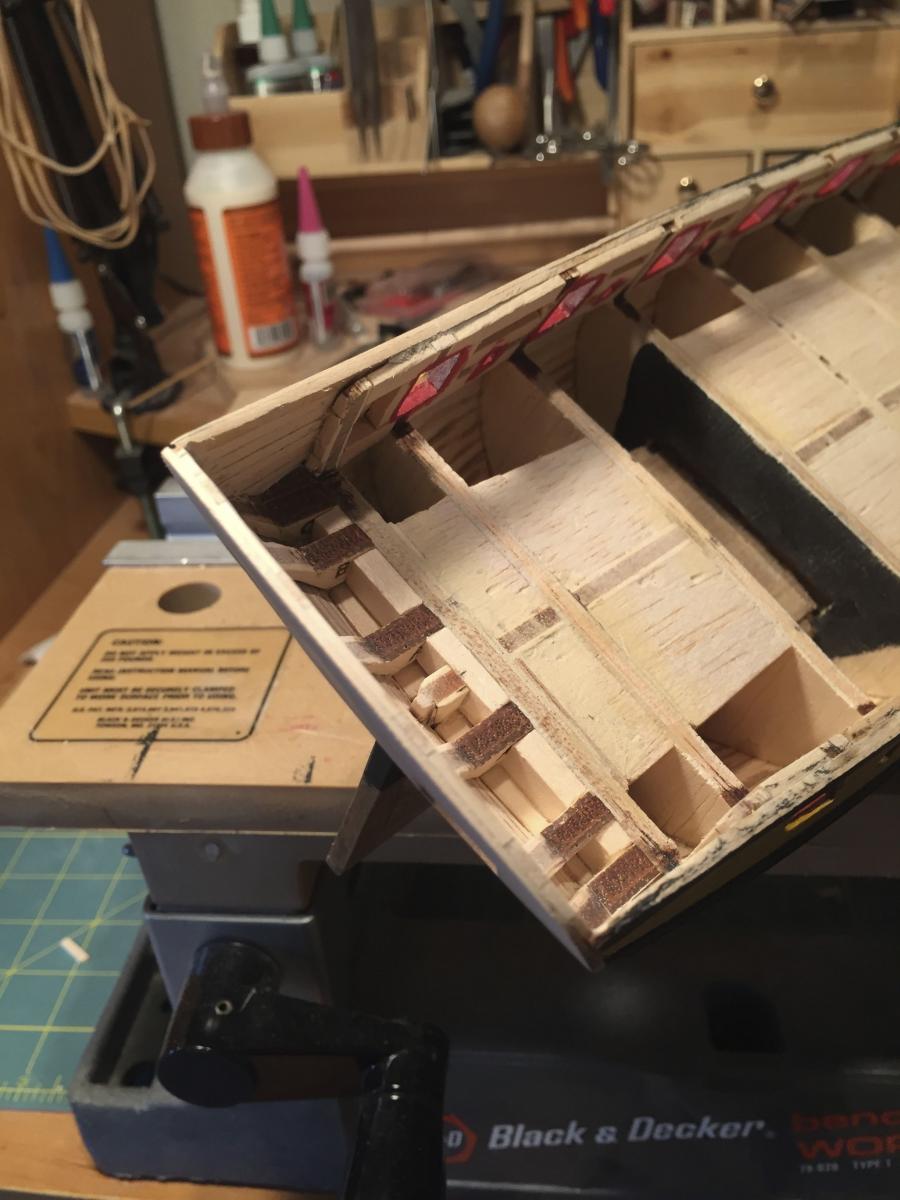
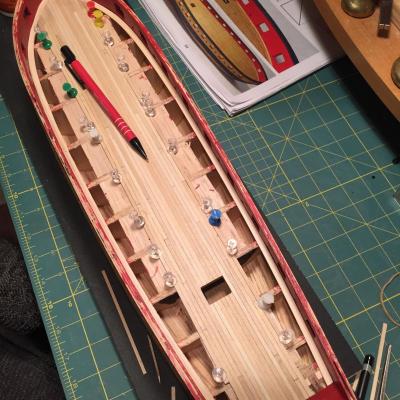
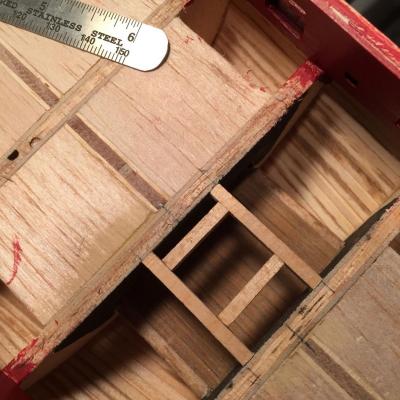
Added the companionway framing….
-
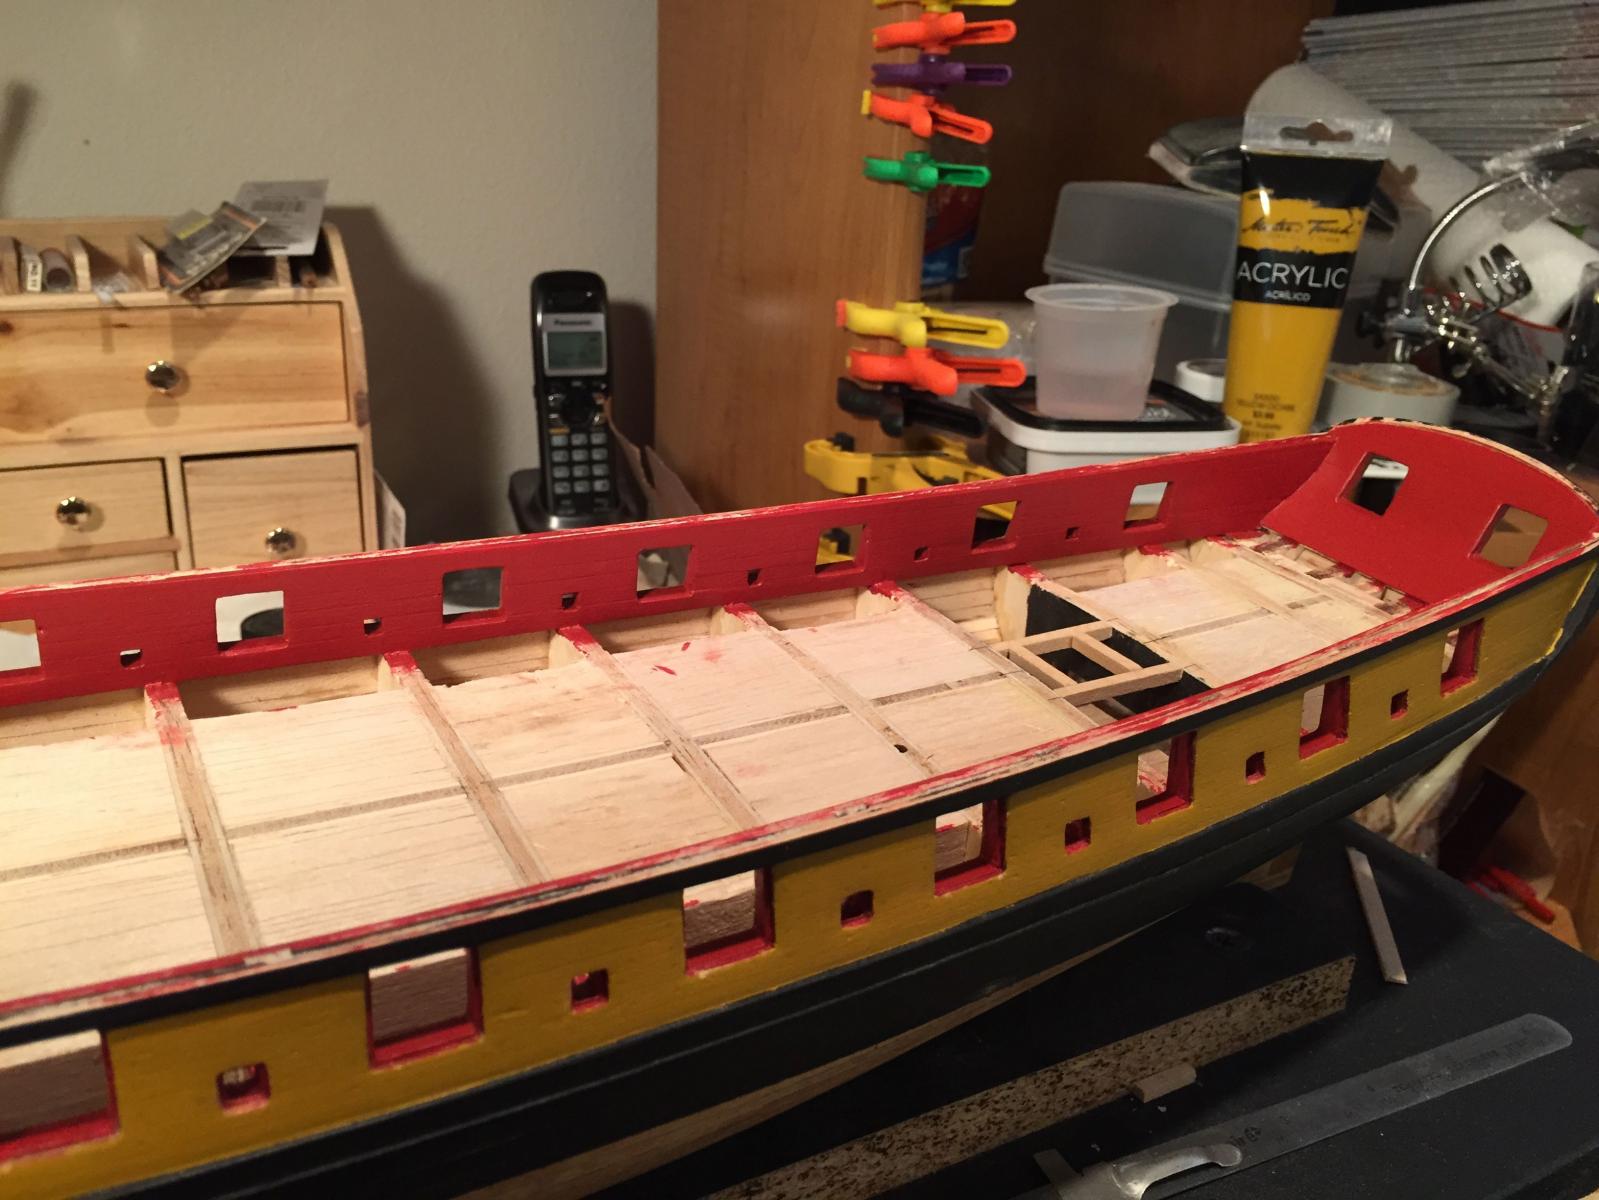
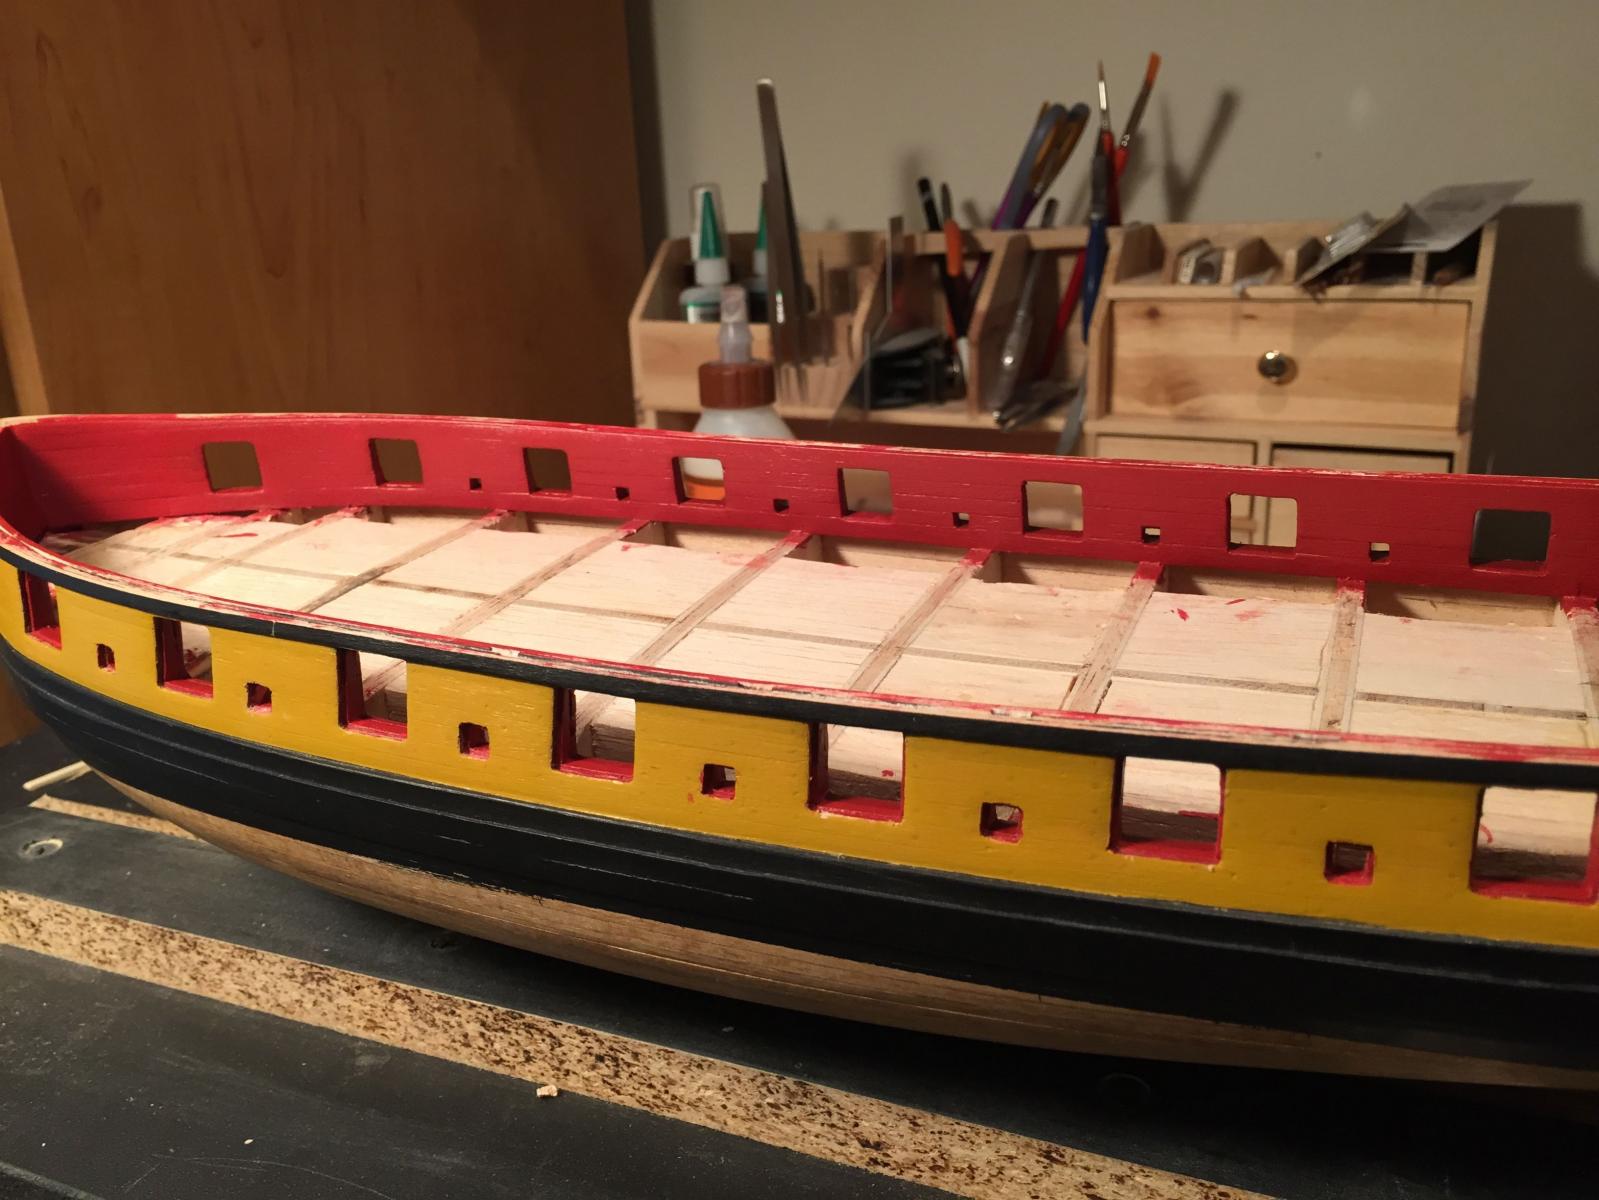
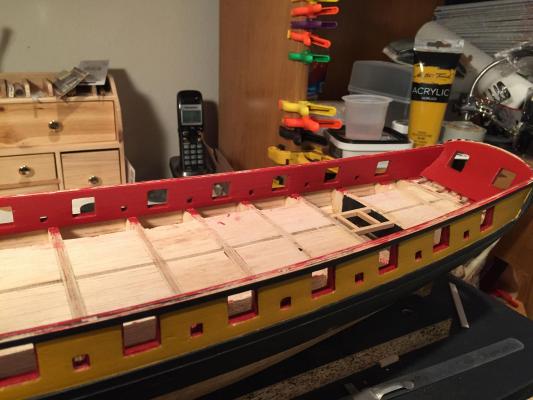
Interior planking complete and painted…..

-
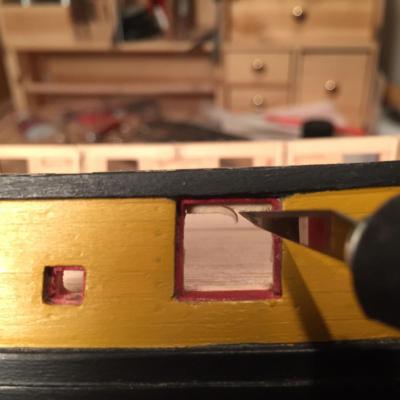
Preparing for the interior bulwark planking. I couldn't stand the thought of thinning down the bulwarks with a sanding block, so I used my electric detail sander. To keep the edge of the sander from chewing up the deck framing too much, i laid down a layer of duct tape. Then the planking is laid in. Since the interior planking is flush with ports, I elected to overlay the planking over the ports, then cut flush with the hobby knife and sand to match.

-
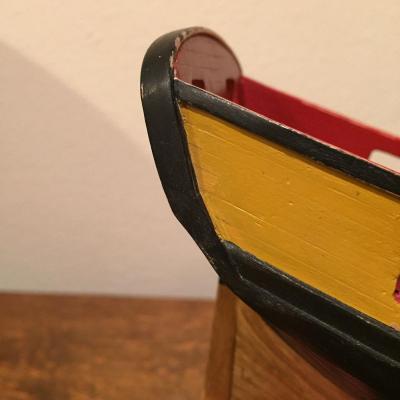
Cap rail and "fashion pieces" added. Like most folks, it took a couple tries to get the cap rail right.
-
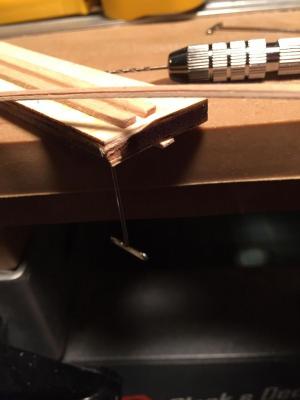
I wanted to add beading to the moulding strips, as pictured in Chuck's instructions. I tried to create the bead on the strips freehand, but just couldn't get a straight line. My stylus would follow the grain and drift off the centerline ruining the piece. So I made a very simple jig out of scrap material. It's nothing more than a couple pieces of planking glued on top of plywood creating a channel just wide enough for the the moulding strip. I predrilled a hole to tightly hold a T-pin just poking thru the center of the channel. By pulling the strips thru this jig I was able to get a decent beading effect. Adding the moulding to the transom...

-
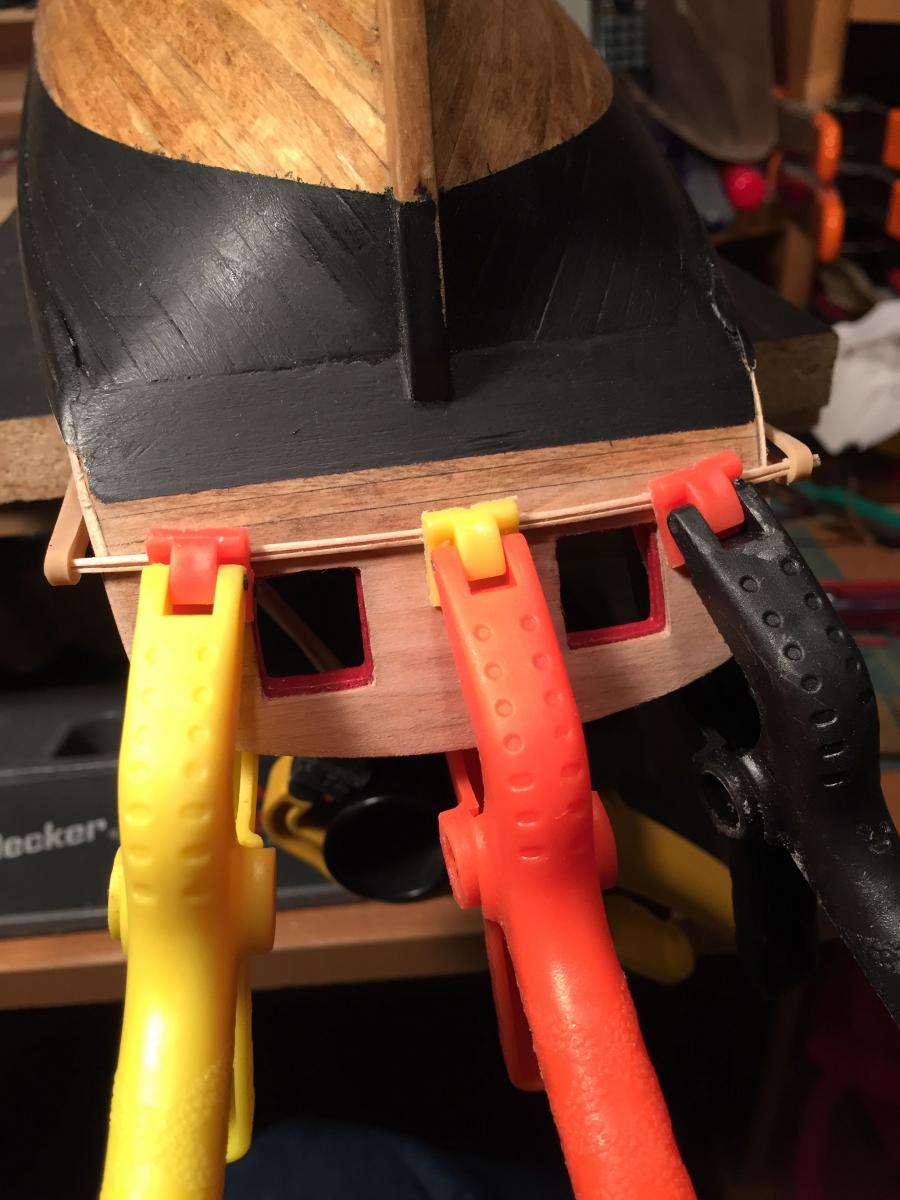
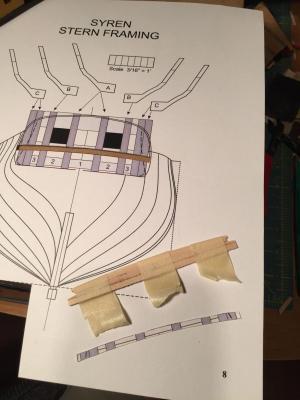
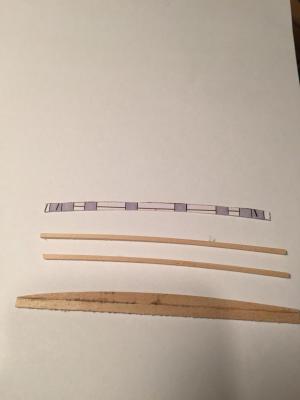
Next I worked on the moulding strips for the transom. I wanted to prebend the strips to ease the process of attaching them to the transom. So I made a simple jig, using the plans to create the correct curve. After soaking the strips, I attached them to the jig and let them dry. As you can see in the picture, even after drying completely, the strips did not hold the curve completely. So if you use this technique for your ship, exaggerate the curve a little bit on your jig.
-
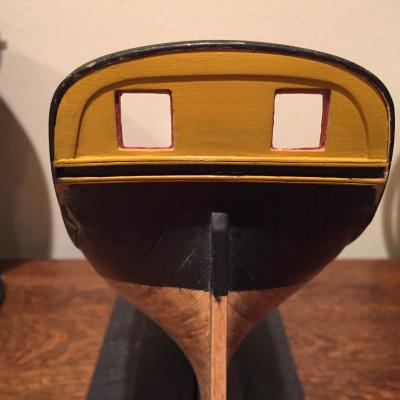
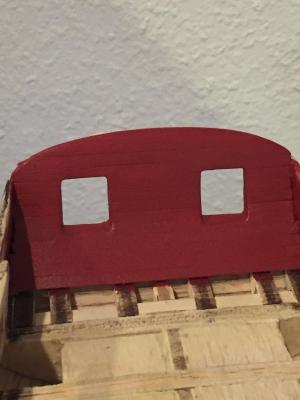
The Interior of the transom is planked and painted.

-
The transom is thinned down to proper thickness.
-
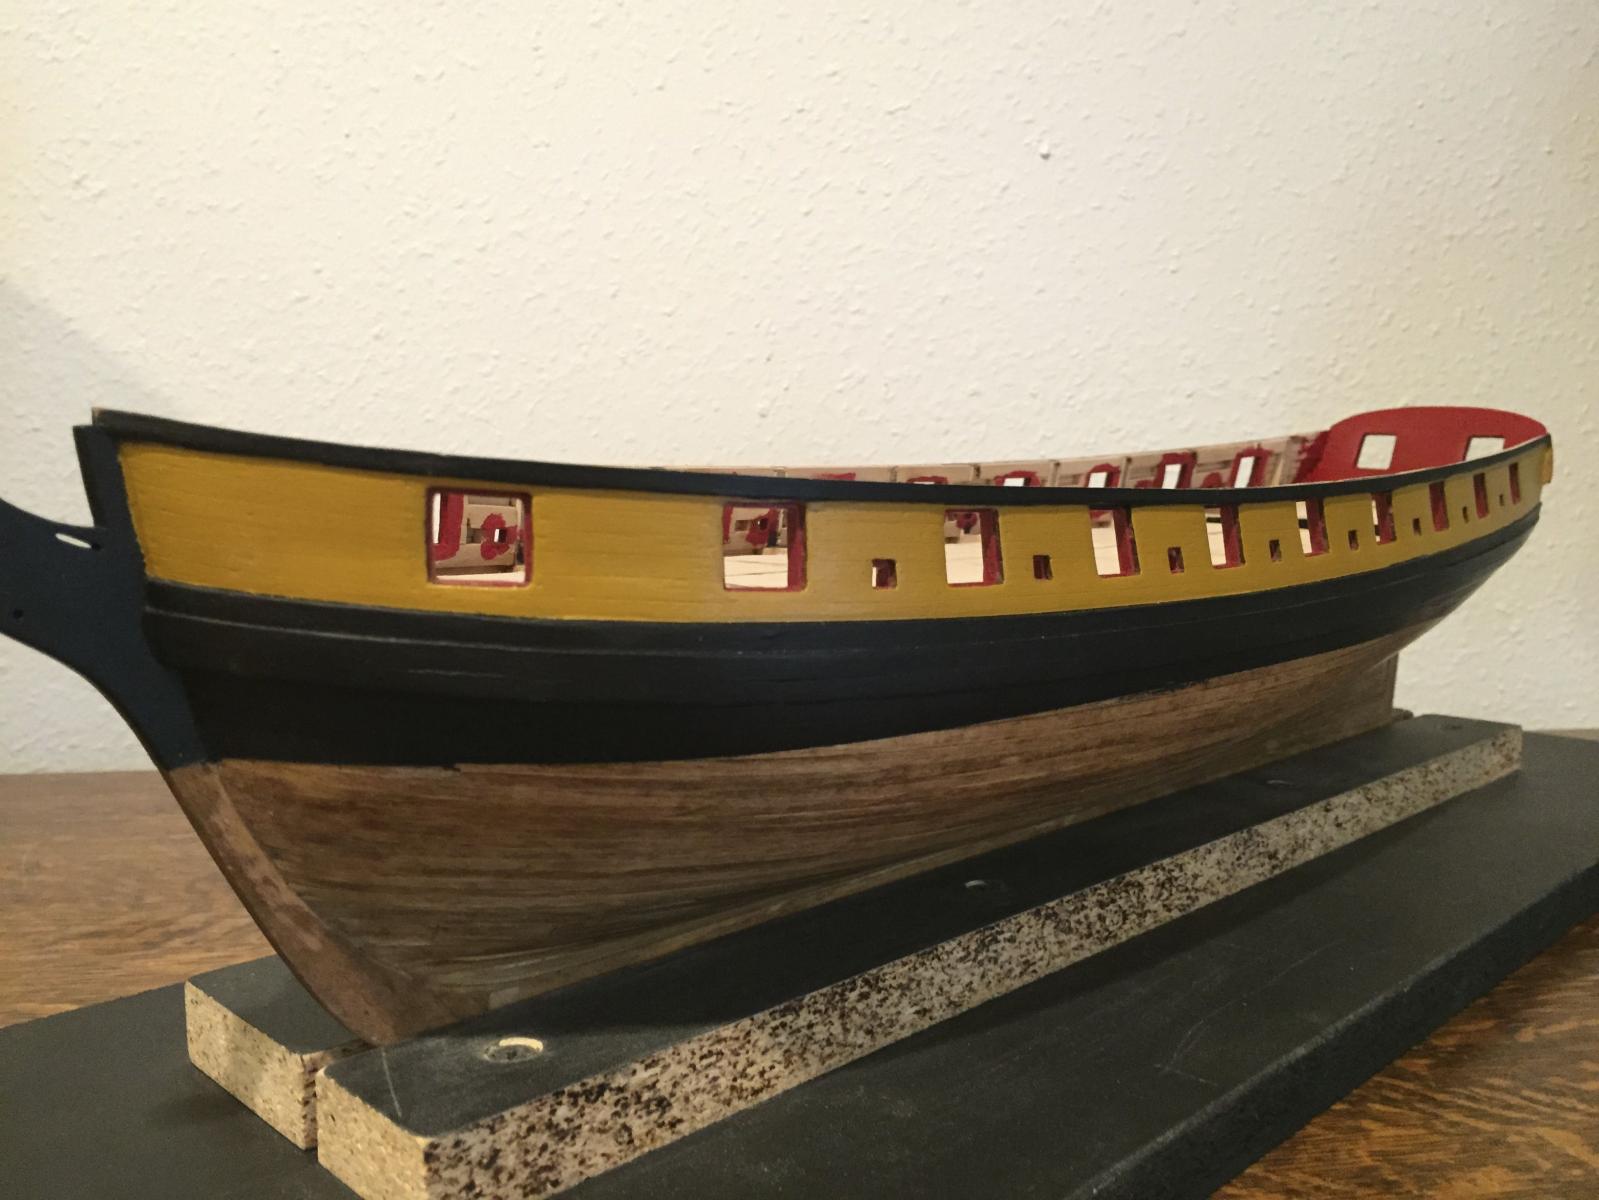
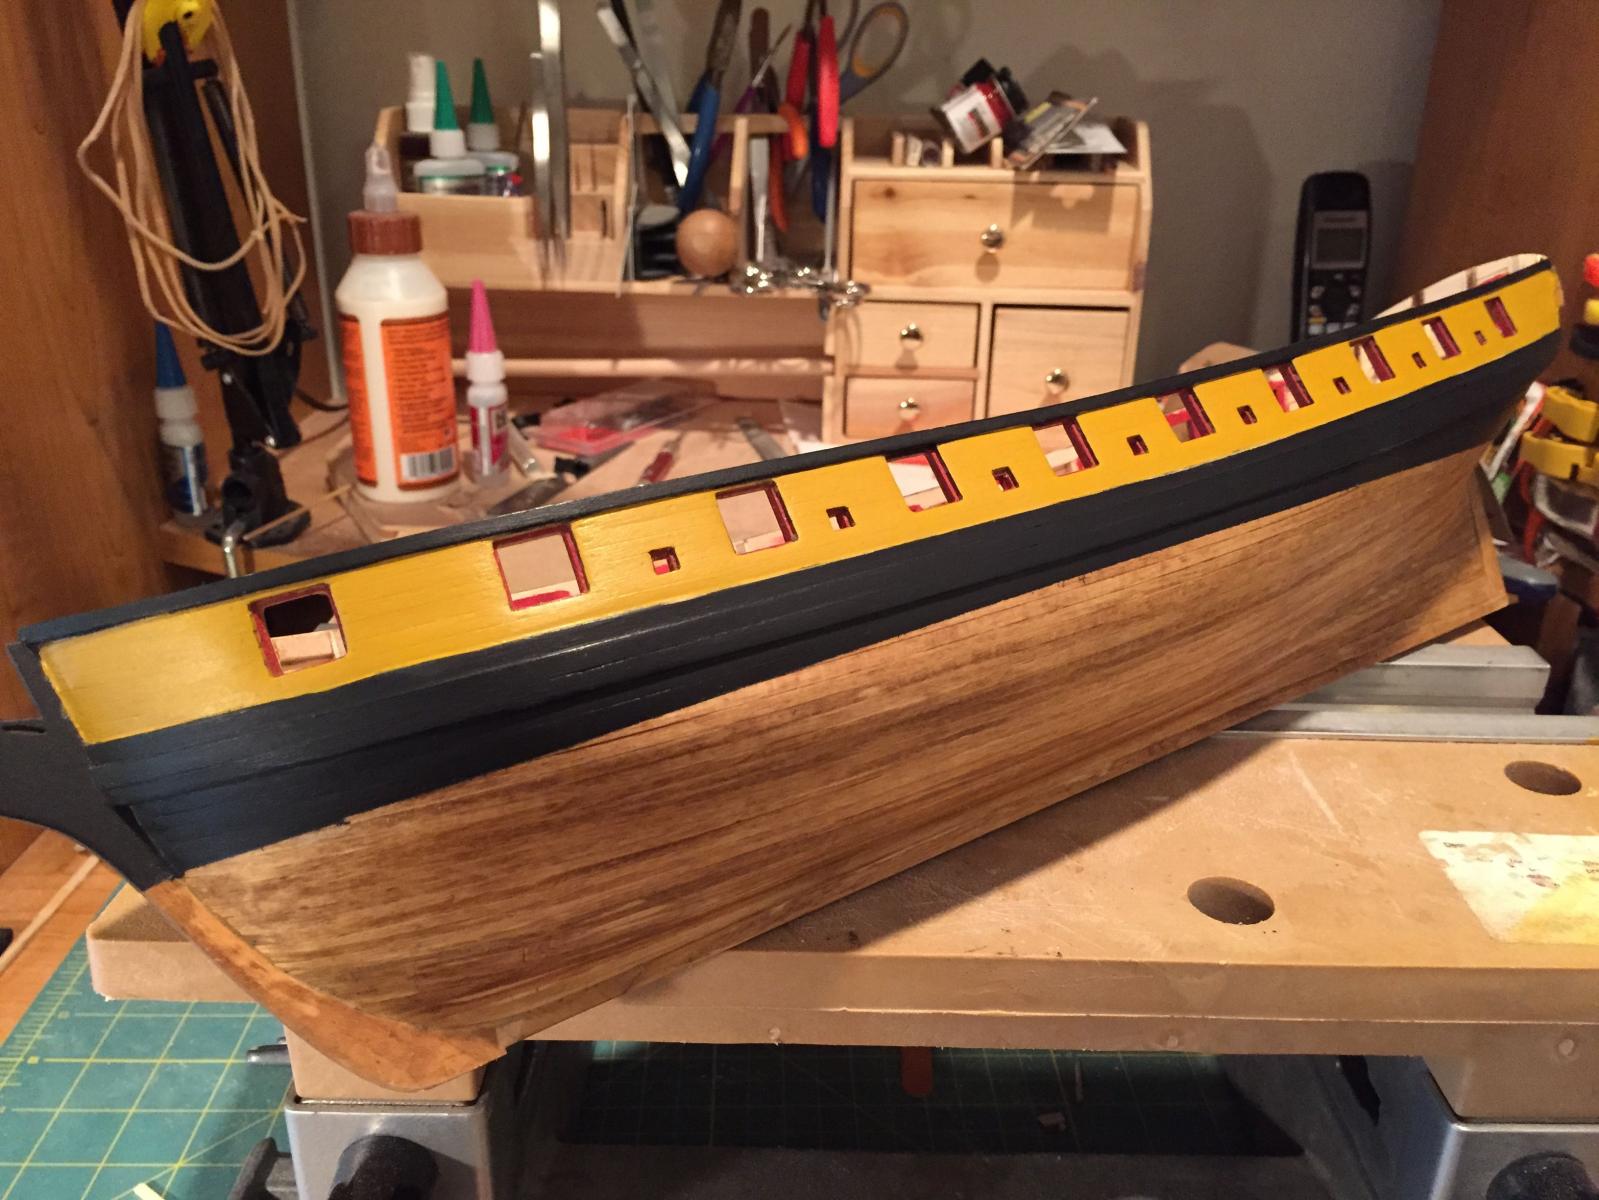
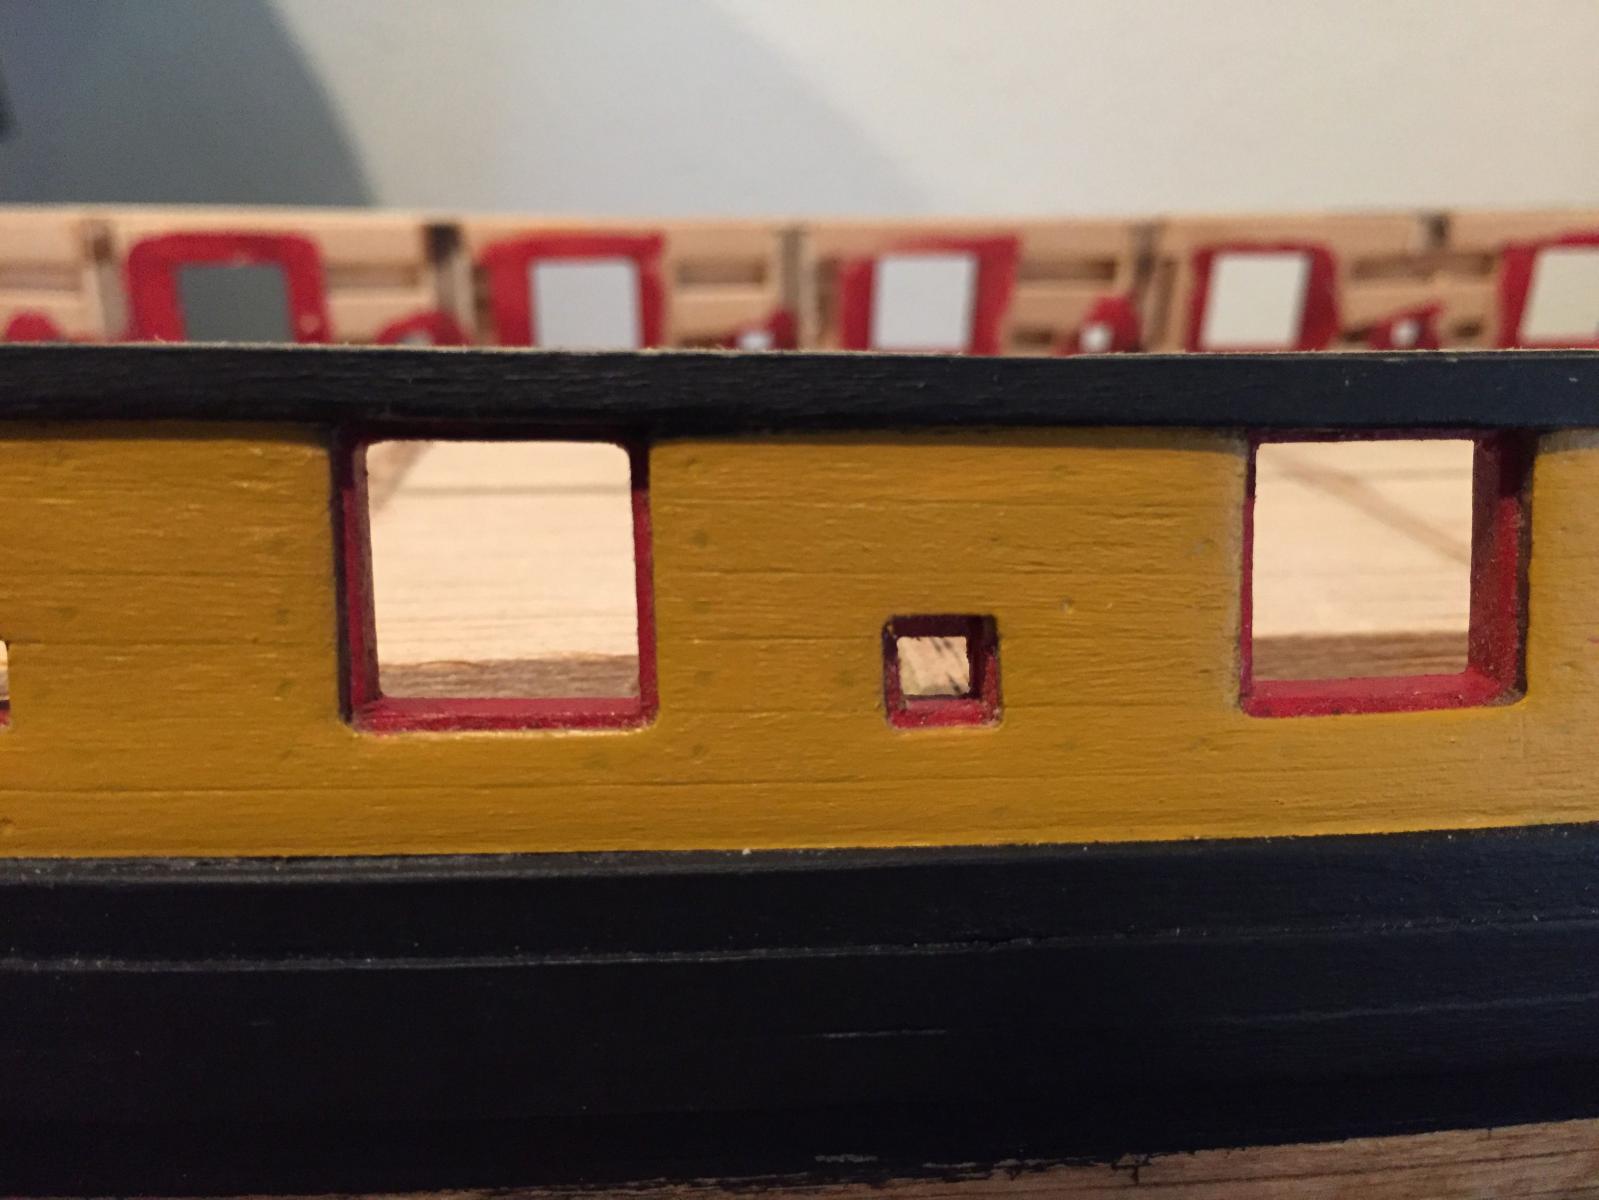
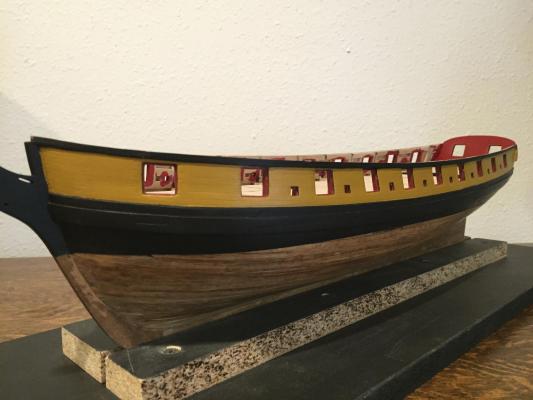
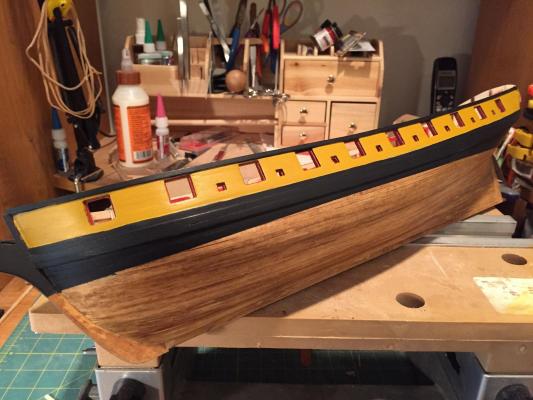
Okay, I admit it - I'm really lousy at keeping my log up to date. So here's some catching up... After completing the exterior planking, I paused for a couple days just looking at the ship and taking stock. Unfortunately, I didn't like what I saw. Specifically, the treenailing was garish. Too big, and too dark. So I made the decision to paint the planking yellow ochre, thereby covering up my mistake. I actually like it painted, even though that was not my original intent. The treenailing faintly shows thru the paint giving a nice effect in my opinion.

-
Congratulations on the new Syren kit Gundorph! I'm looking forward to your build.
-
Welcome to the Syren club Gundorph! I'm looking forward to following your progress.
-
I love building logs that show the actual techniques and tools used to perform difficult operations instead of just the final outcome. Thanks for the great ideas and nicely done!
- 659 replies
-
- 3
-

-
- syren
- model shipways
- (and 1 more)
-
Model paint data base
MD11pilot replied to jbelwood's topic in Painting, finishing and weathering products and techniques
This is a really nice resource John! Thanks. I'm trying to find a color match to the tannish-yellow I've seen on photos of the Brig Niagra and this is helping a lot. -
Hey Augie, after returning from my sabbatical, I spent a pleasurable hour this morning catching up on your new (at least new to me) project. You've been a busy boy!! As always, nicely done. I look forward to following along for the rest of the project and gaining inspiration and knowledge from your comprehensive building log.
- 2,191 replies
-
- 4
-
-
- confederacy
- Model Shipways
- (and 1 more)
-
That looks perfect Brian. Thanks for the link.
-
Thanks for the suggestion Augie. I suppose that's a special order item. I doubt Sears has those bits on the shelf.
-
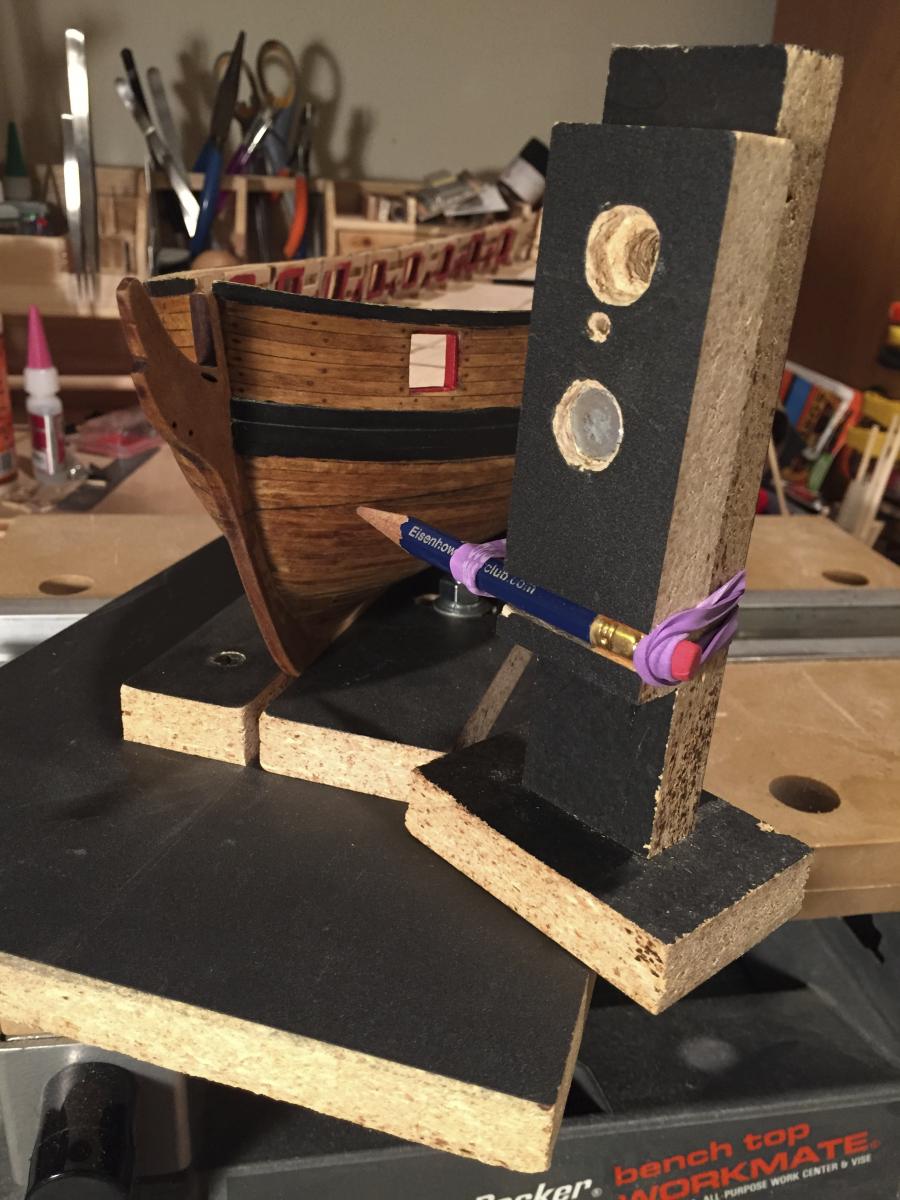
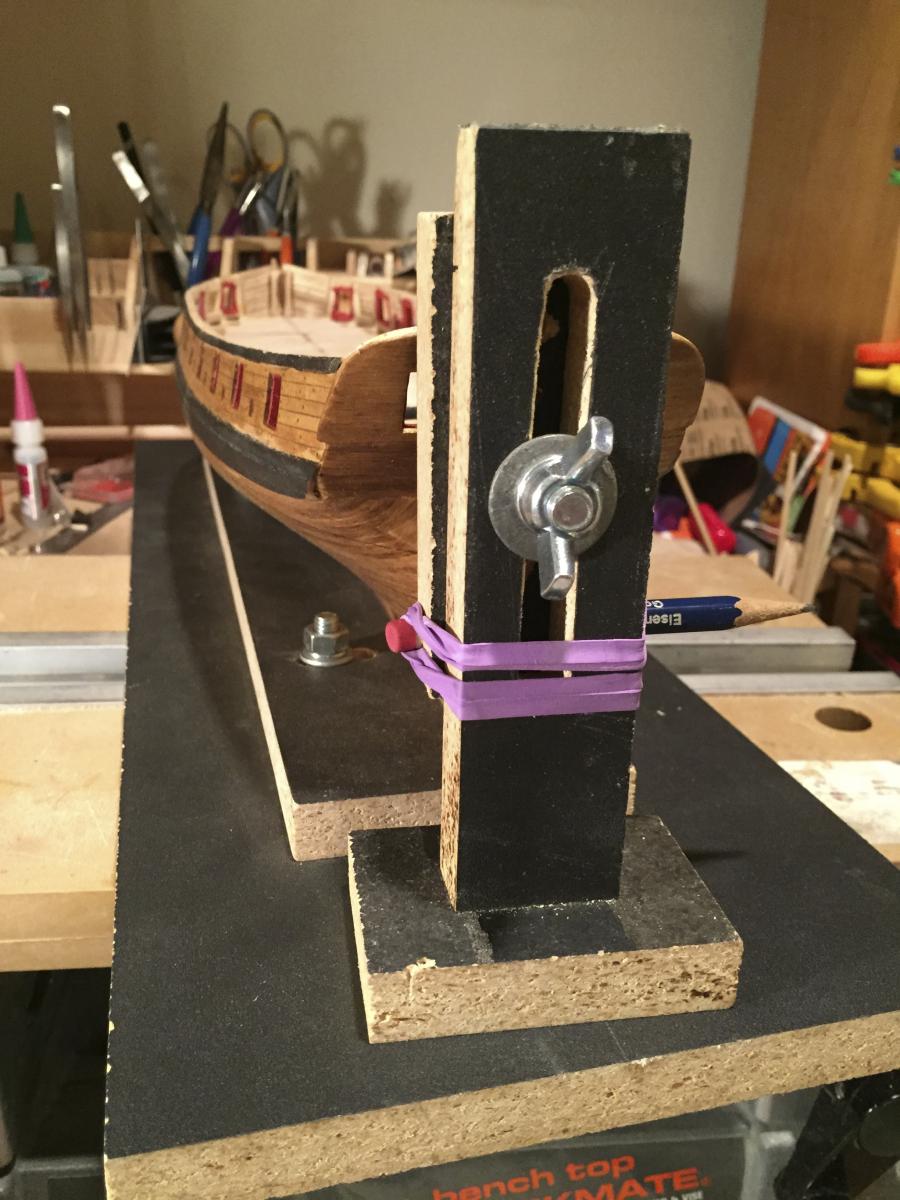
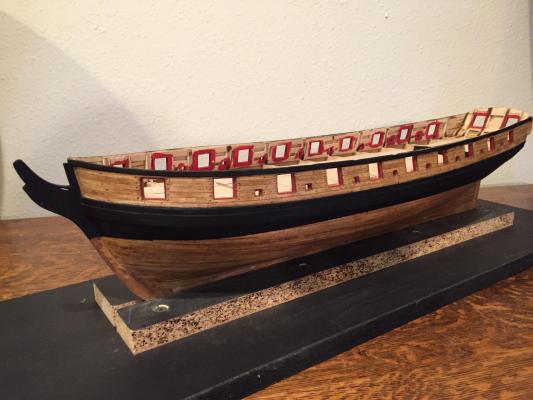
I painted above the waterline, actually going about 1/8" below the line to make sure there were no uncovered areas when the coppering reached this area. I was cheap and used regular masking tape. I tried my best to get good adherence with the tape but still had some bleeding under the tape. That's not a big deal on the hull where it will be covered with copper, but it's a really big deal when it bleeds on to the planking around the gun ports. That ended up costing me extra time doing extra sanding. I've read about good results using Tamiya masking tape on other building logs. Probably a good investment. And that brings me up to date.
-
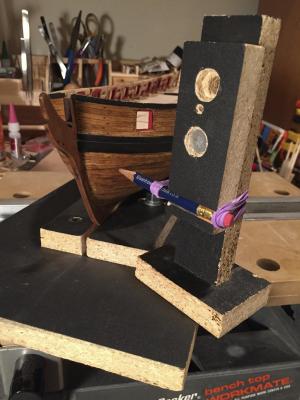
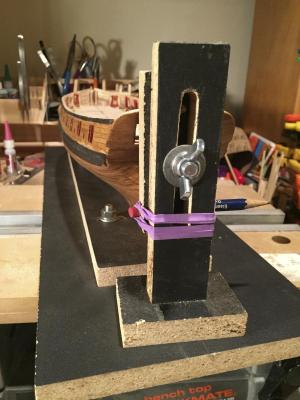
So far, I've been building on top of my "DeskMate". But to draw the waterline, I finally had to put together a building board. I also used some scrap MDF to make my waterline marking jig borrowing ideas from the many samples on the website.