MD11pilot
-
Posts
110 -
Joined
-
Last visited
Content Type
Profiles
Forums
Gallery
Events
Everything posted by MD11pilot
-
 Adding the stern post….
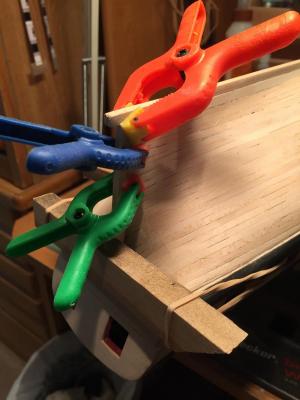
-
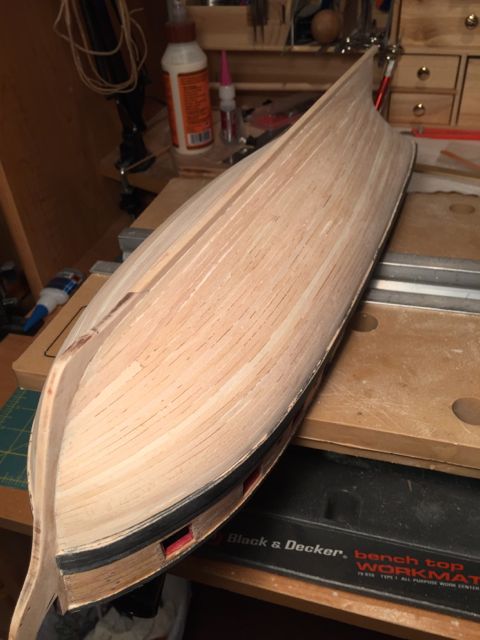
Hull planking complete. I learned quite a bit. Even tried a couple stealers. Now just need to do a lot of sanding.

-
The tight curve at the stern gave me the biggest challenge. I didn't take any pictures, but here's how I handled it. After gluing the plank on from the bow to near the stern, I'd leave the last couple of inches hanging free. I would wrap a very wet piece of paper towel around the plank and let it soak for while (20-30 minutes) until vey soft. That would allow the plank to form around the tight turns. As one plank was soaking, I'd start working on the next plank on the opposite side to keep the job moving.
-
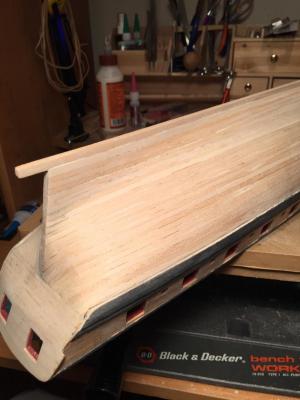
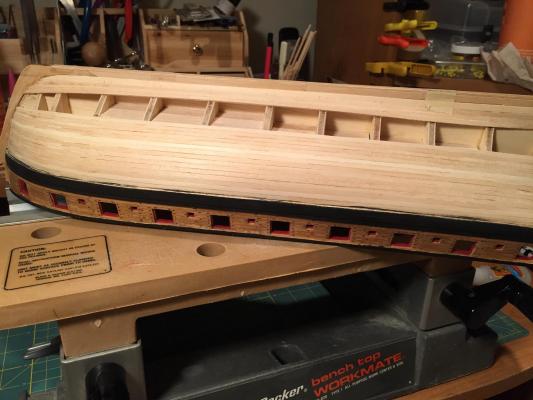
Planking nearing completion. Even though the hull will be covered with copper, I am trying my best to do a decent job of the planking as a learning exercise for future projects.
-
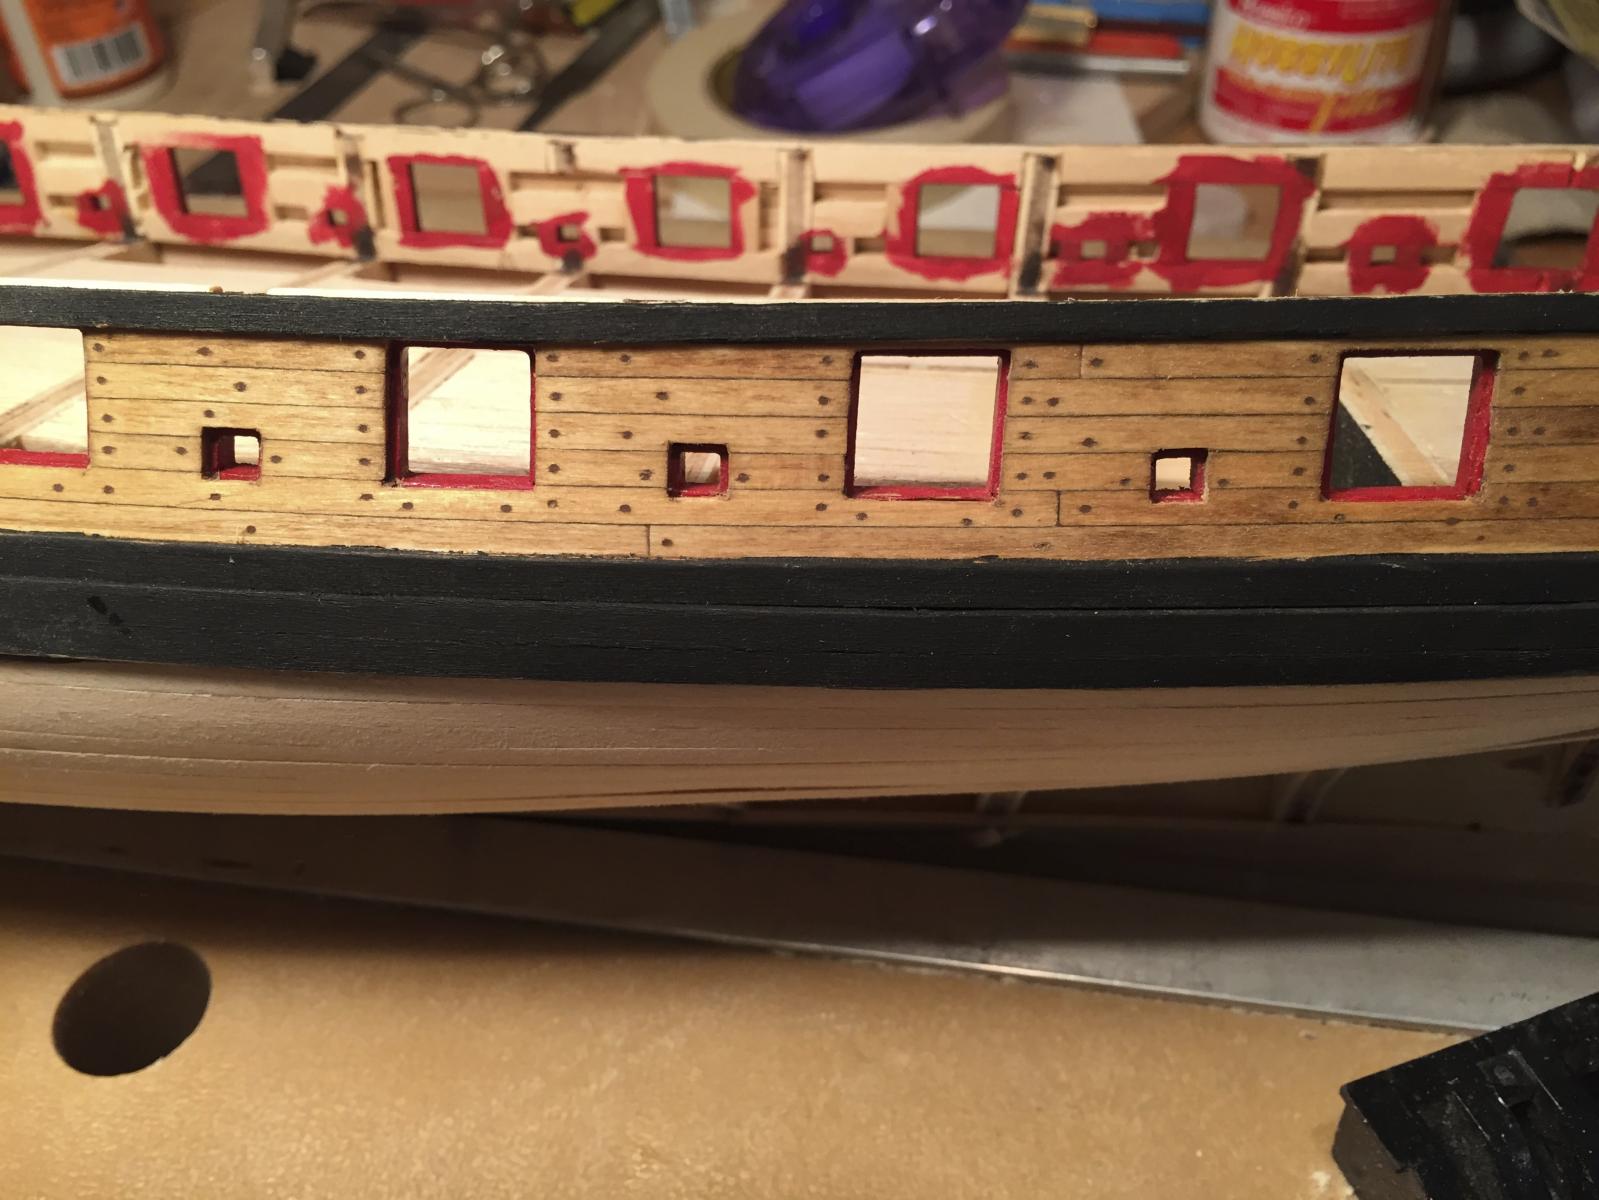
The instructions show the wales painted black at this point. There really is no problem waiting to paint and stain until a bit later. You will do some painting after the hull planking is complete. But, it is very satisfying seeing your treenailing framed by the nice black wales. For that reason I went ahead and painted the wales.

-
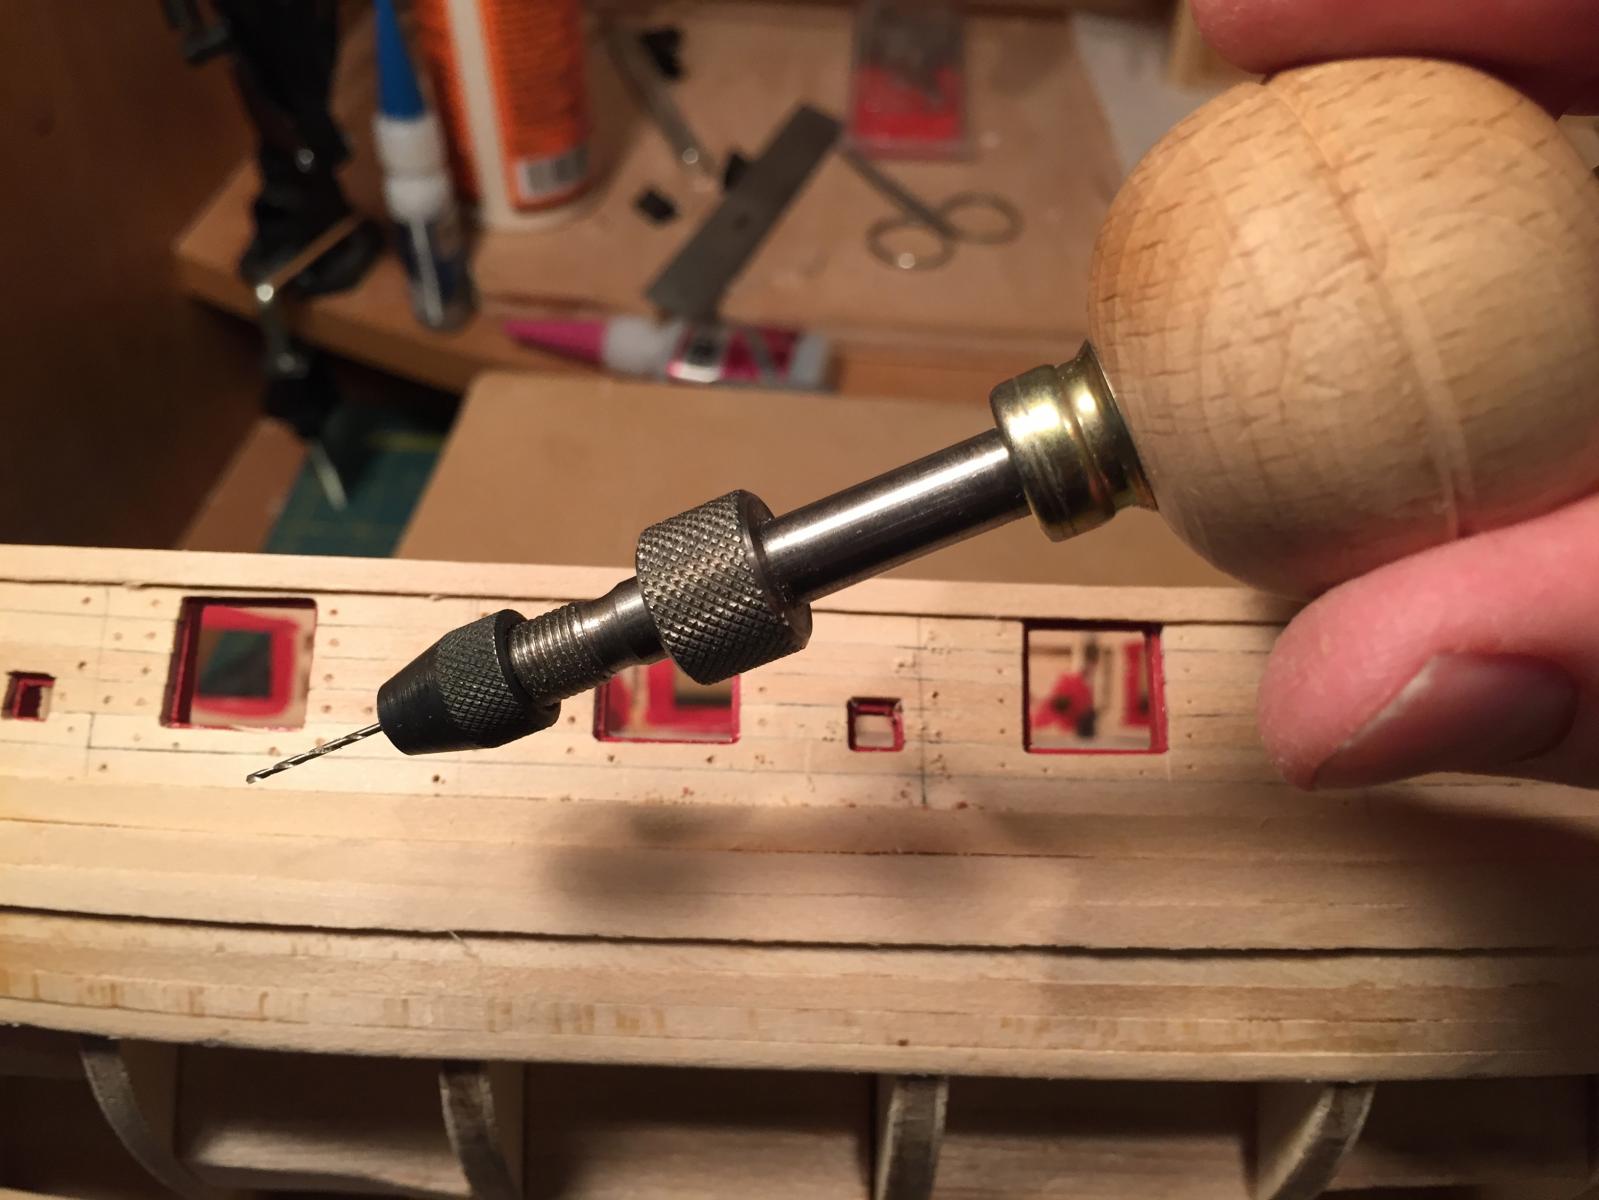
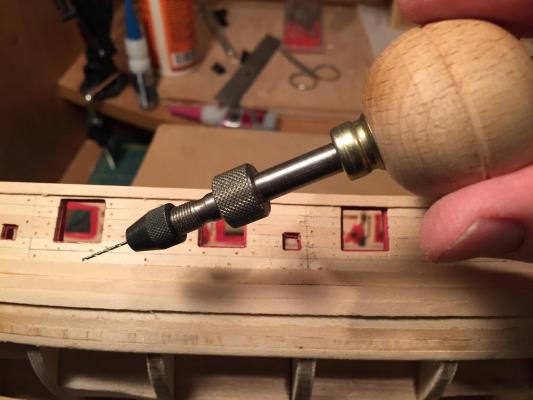
Paused the planking to add the tree nailing. I used the technique used in the instruction manual of drilling holes and filling them with filler. I first tried a 3/64" bit, but that turned out to be too big for my tastes. A 1/32" bit worked well. I used a pin vise drill. I bet a Dremel tool with a flex shaft would have been a lot easier but I couldn't find my extra small chuck adaptor to hold the very small drill bit.
-
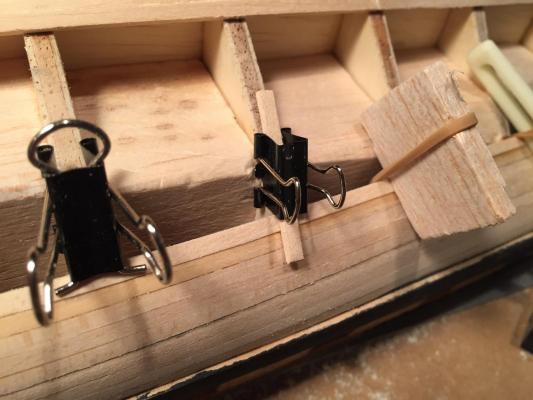
Here's where it got interesting for a new guy -- the mysterious world of planking the hull. I don't have a lot to add to the instructions and the excellent build logs of the experienced folks. I would like to hear from others on their techniques for clamping the planks. I found the "binder clip" plank holders a great help at the beginning, but needed other methods when the hull got "curvy" or the balsa blocking got in the way. Here's a pic of a few ways I found to clamp the planking with appropriate inward and downward pressure. The binder clip upside down A small binder clip with a piece of planking A piece of scrap wood pulled down snugly with a rubber band T-pins are useful in some situations
-
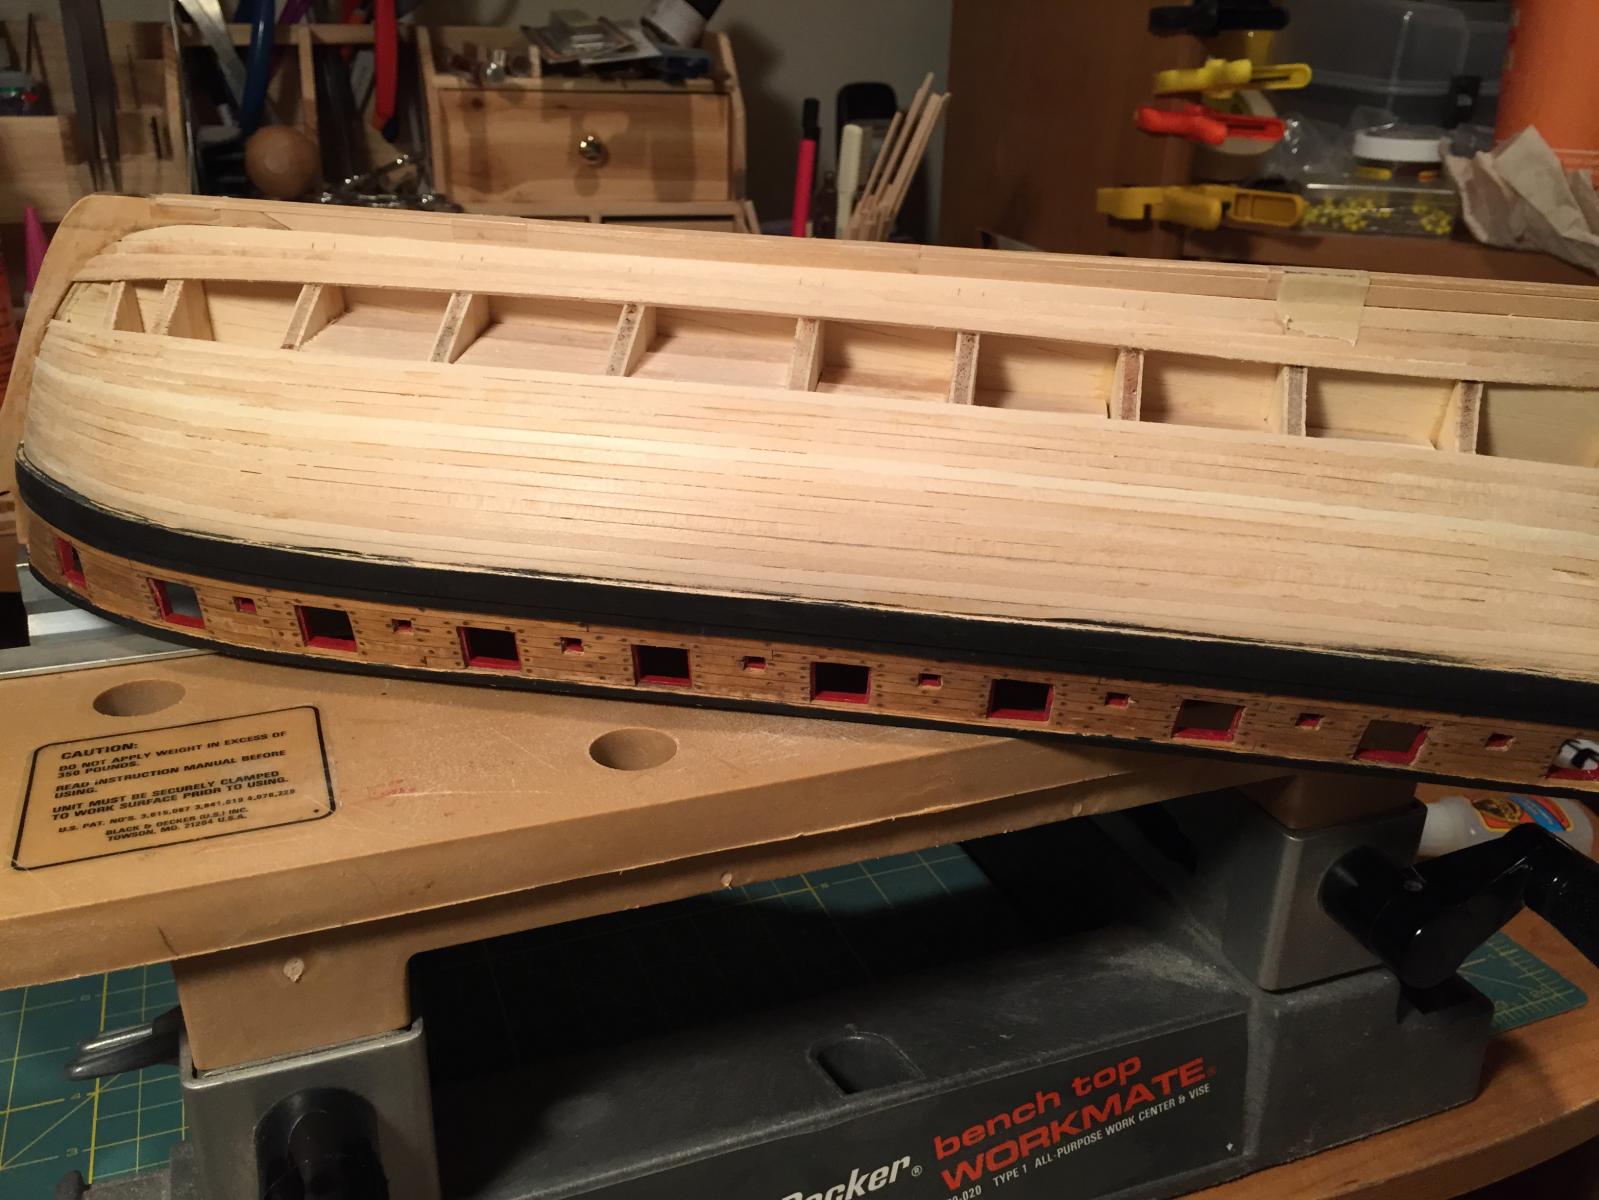
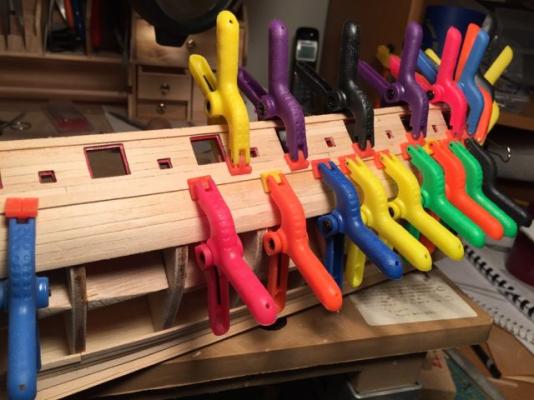
Then moved on to more planking and the addition of the wales.
-
Stern planking was pretty easy compared to other sections.
-
Hi gang, it's been a while. I've finally resumed building and have a little progress to report. I warned you that I may set a record for the slowest build in history. First of all, I have been catching up on all the Syren build logs and I am just stunned by the precision and quality of the work I see on your pages. You folks are a true inspiration to newbies like me. So, here we go...
-
Hi Robert, I'm very much a novice so my advice isn't worth much, but I found that if you clamp that warped former while you compete the first few steps, the warp will come out. And when you add the stiffening blocks between the bulkheads, you can tweak it a little more simply by adjusting the "tightness" of the blocks. Good luck with your project. Mine has been "on hold" for the best part of a year due to a variety of higher priority life issues. Hope to get back at it soon.
-
Ha! Another Eric O. I'll have to follow your log just in solidarity with my Swedish twin.
-
Thomas, I'd be very interested to know how you thinned the horse shoe hinges. Dremel?
-
US Brig Syren by roger
MD11pilot replied to roger's topic in - Build logs for subjects built 1801 - 1850
I was not a member during MSW version 1.0 so I never had the pleasure of your build log. Thank you for taking the time to repost all these pics. A truly beautiful project! -
The yards looked really good on a paper towel. They look fantastic suspended on the masts! Keep the pics coming, Augie. Those of us that are far back in your wake appreciate the motivation.
- 1,668 replies
-
- 1
-

-
- syren
- model shipways
- (and 1 more)
-
Alright! Another Syren. I'm looking forward to watching your progress. Welcome to the Syren gang!
-
I'm enjoying your build, Rod. Really nice work. I liked your hint about the zip ties as a tool for spacing the ribs in the long boat -- simple yet very effective. I can't even imagine how hard it would be to row a ship as big as the Syren. Heck, just carrying the oars around would be a major chore. You'd think they would just tow with the ship's boats, like in the opening scene of "Master and Commander." The crew would definitely deserve an extra ration of grog after a couple of hours on those oars.
-
I like your new avatar. Any special significance for you? Or is it just a cool pic of some big guns?
-
Sailing a square rigged tall ship
MD11pilot replied to Spellapeaka's topic in Nautical/Naval History
Enjoyed that! Thanks. -
...and if she doesn't have a good side you can always claim you were going for the "post-Trafalgar" look.
-
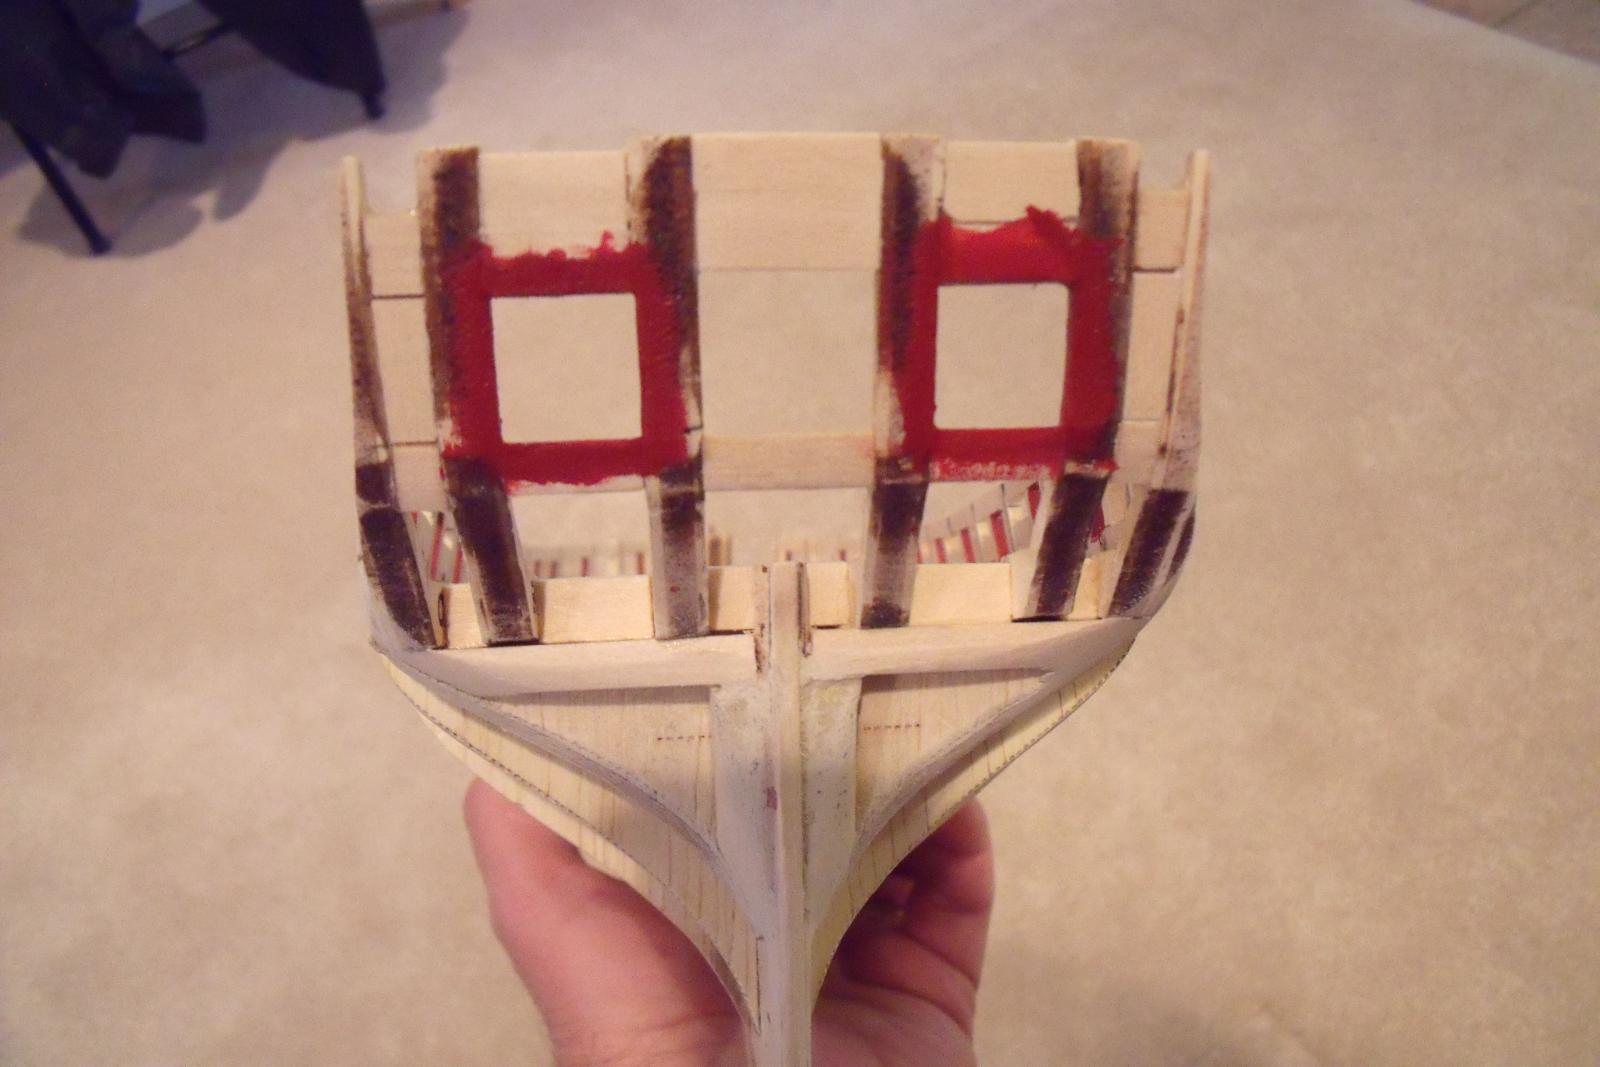
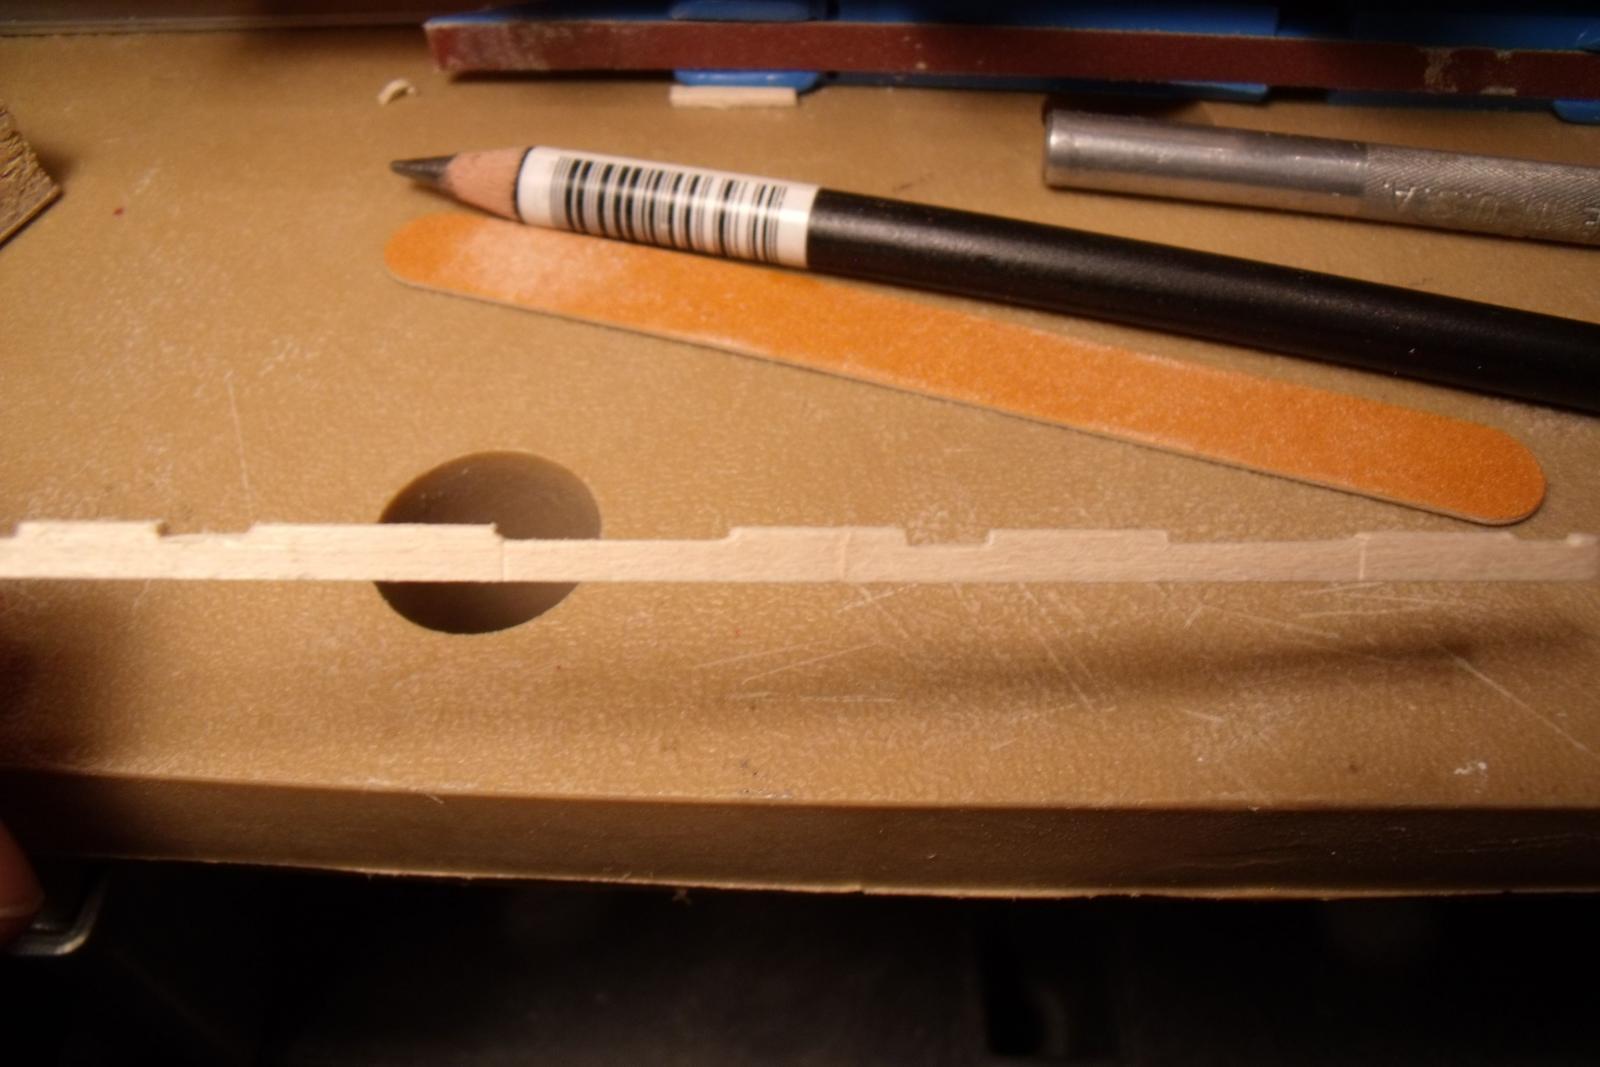
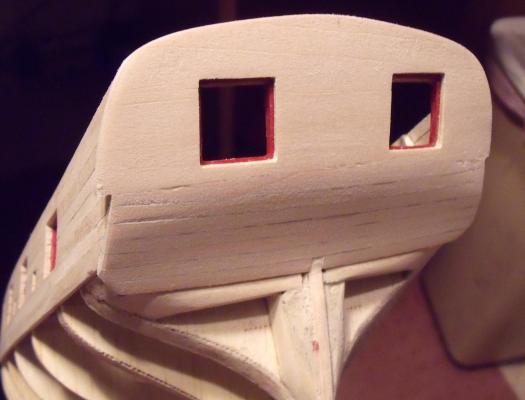
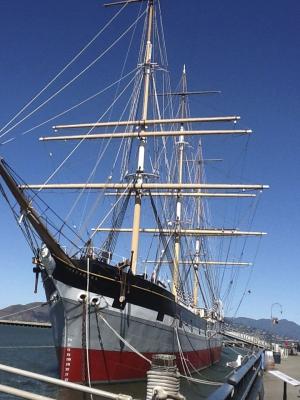
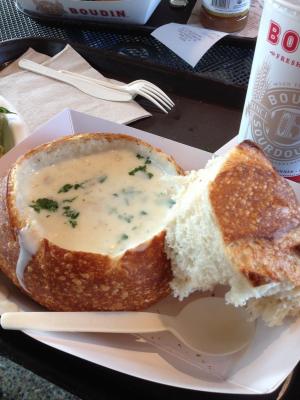
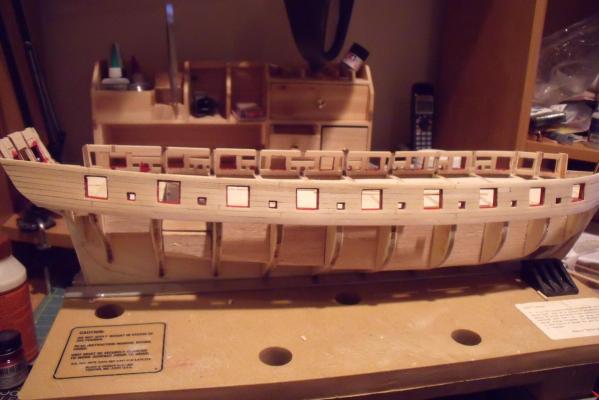
Been out of town a lot lately so the build is progressing at a snails pace. Before I left I was able to finish the stern framing. Seems like a simple step, but had it's own little challenges. Getting those gun port sills and lintels level fore-aft as well as side to side on the steeply sloping stern frames was tricky. Plus, the lintels are not directly over the sills, so getting the required spacing was an unexpected problem. I clamped a piece of wood across the back of the stern level with the sills which allowed me to use those gun port spacers I made earlier. Then it was off to work...... Had a nice layover in San Francisco. I always stop by the Balclutha. It's a giant iron monstrosity of a sailing ship but still fun to look at. I spent a lot more time staring at the rigging now that I'm into this hobby. And who could go to San Fran without getting some seafood and sour-dough bread. It's even better to have them at the same time! Back home after a couple weeks. Time to get to work. Next step is to establish the proper line for the uppermost wale plank. I first pinned a batten following the reference marks on the bulkheads. Since I'm new to this and have very little personal opinion on how things "should" look I could find no reason to stray from that line. It looked pretty good to me. So the wale planks went on, and I got to work on the gun port planking. Chuck makes a couple of statements in the instructions about each plank being a little project, and if you're not satisfied with a plank, throw it out and try again. Now I know what he means. Each plank on the second row will usually touch four or five gun or sweep ports. Cutting the notches is precision work and if you mess up one of the notches, the whole plank is ruined. One of those first planks took me five attempts. I almost threw the whole damn model in the trash. But you do get better, quicker, and more precise on each plank. So, If you're a newbie like me, have faith and do NOT throw the model out the window. For no particular reason I started on the starboard side. I should do all my "firsts" on this side -- planking, coppering, rigging, etc. I have a feeling this ship is going to have one side that looks much better than the other! Starboard gun port planking on and a light first sanding. Port side planking in progress. I expect it will go much quicker.


-
The drum-type grinding machin №2
MD11pilot replied to toly.kol's topic in Modeling tools and Workshop Equipment
I am sooo jealous of the mechanical aptitude of many of the members here. Very impressive Anatol! -
Stunning build, Nico! Thanks for sharing.
-
Ken, seems like I've been out of town a lot lately too. We can compete for the longest Syren build in MSW history.
-
I am in awe Danny. You inspire us mere mortals to try for a higher level of precision. Thanks for taking the time to put together this very detailed build log. It's a true pleasure to peruse.