HOLIDAY DONATION DRIVE - SUPPORT MSW - DO YOUR PART TO KEEP THIS GREAT FORUM GOING! (Only 24 donations so far out of 49,000 members - C'mon guys!)
×


Harvey
-
Posts
73 -
Joined
-
Last visited
Content Type
Profiles
Forums
Gallery
Events
Everything posted by Harvey
-
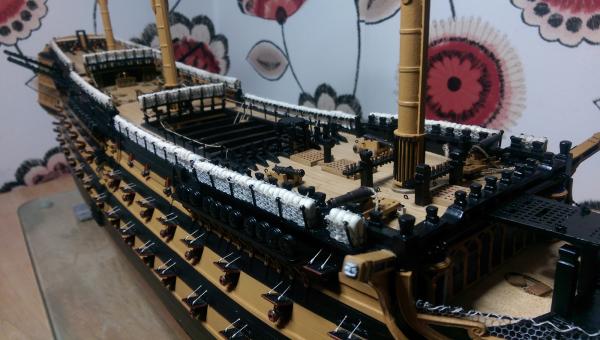
 Hi Just a quick one. Finnished fitting the shrouds on the fore mast,And have served the rope for the main mast ready for fitting.
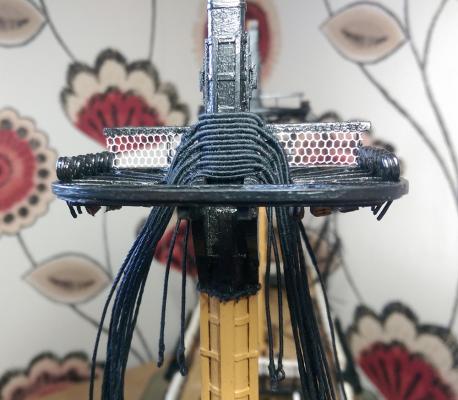
-
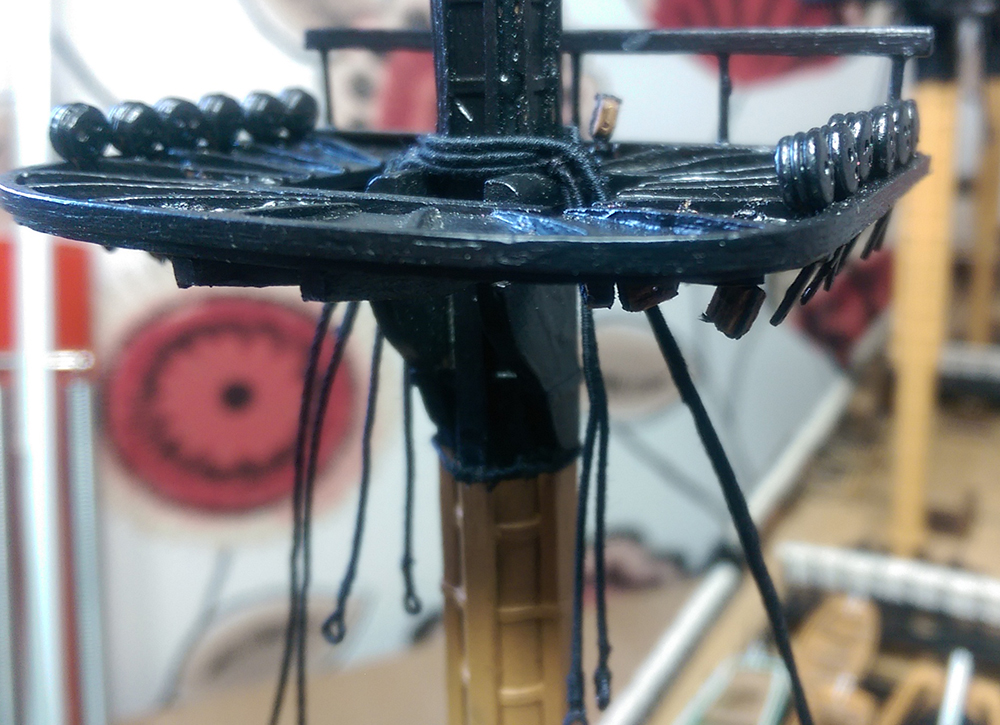
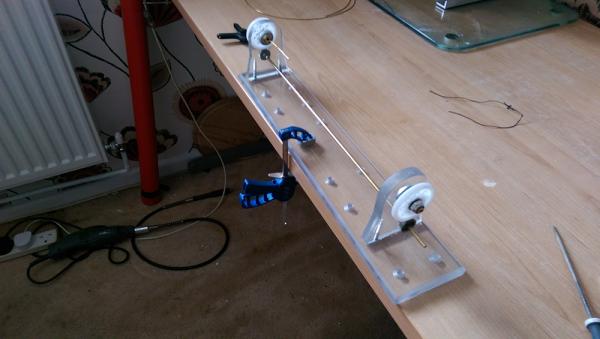
Hi Serving machine worked well not going to fit a motor I will turn it by hand for now. That is the last of the serving on the fore mast shrouds Pendant of tackle fitted and the start of the shrouds,the serving is hard to see.

-
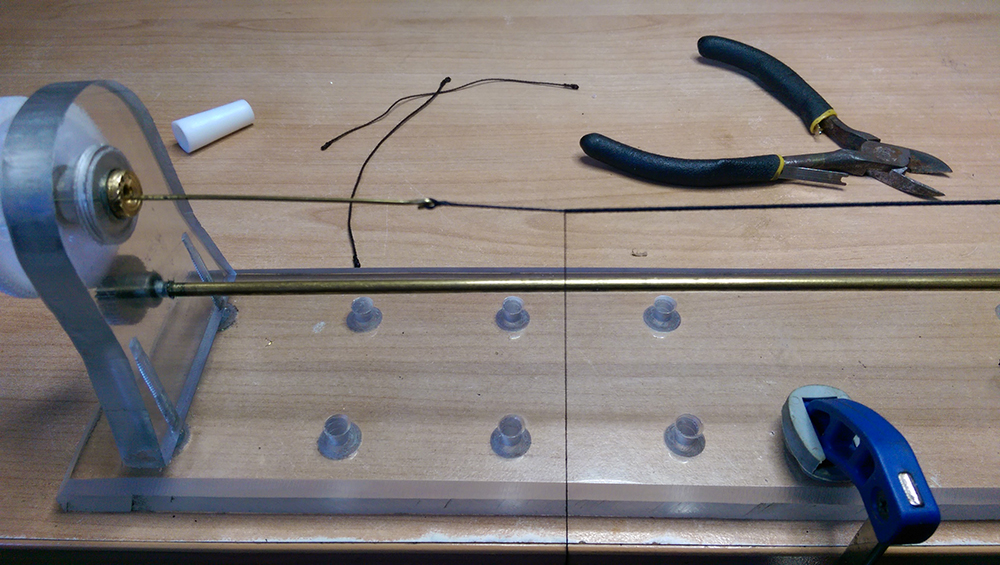
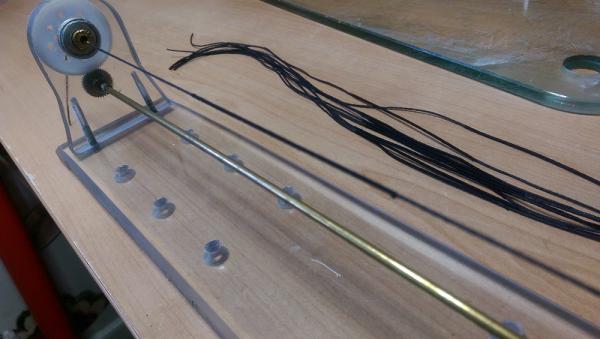
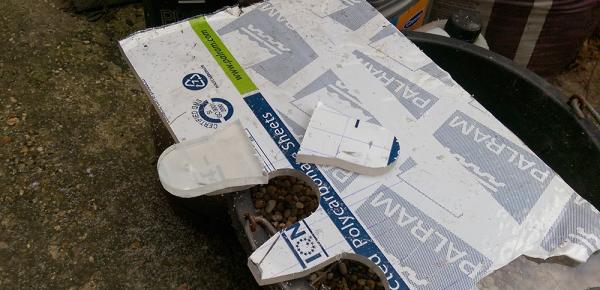
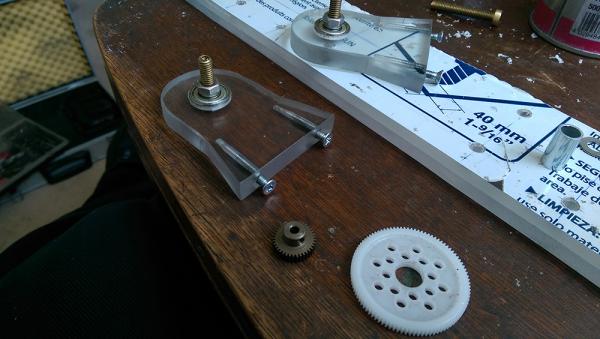
Hi Time for an update Have not done any building on the ship, Took me long enough to make up my mind whether to serve the rope or not. The answer was yes of course must serve the ropes glad I came to the right decision. I used polycarbonate as I had some lying around Modified a wood working drill bit to cut the hole for the bearings which game from some old kid’s roller skates The gears had to buy from local model shop the rest I had at home, the centre axle is an m8 brass bolt drilled with a 3mm drill, drilled and taped the up rights with m6 for counter sunk bolts. It’s a bit basic need to fit a turning handle but done a few test runs and works well, but now I am thinking about fitting a small 12v motor variable speed with reverse. All for now


-
Hi Kevin On the Real ship the four outer blocks were double blocks on the fore mast looks to me you have single blocks, At this stage on my build. This might help. http://www.jotika-ltd.com/Manuals/Victory_Rig.pdf
- 1,319 replies
-
- 3
-

-
- caldercraft
- Victory
- (and 1 more)
-
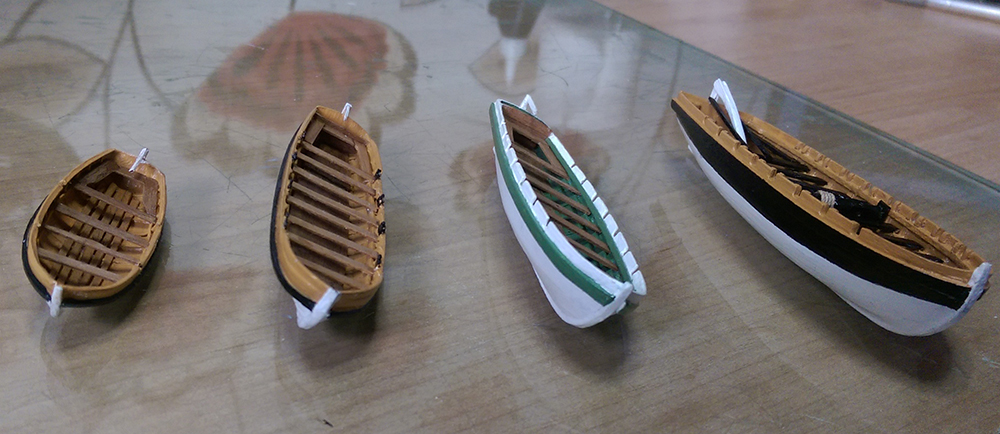
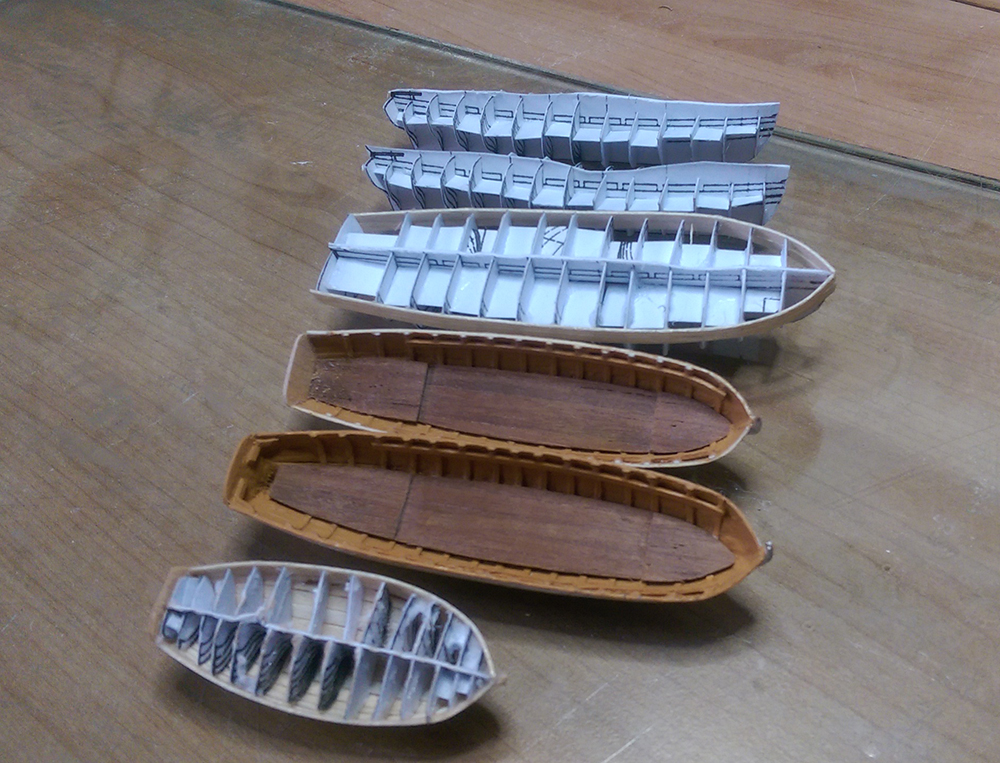
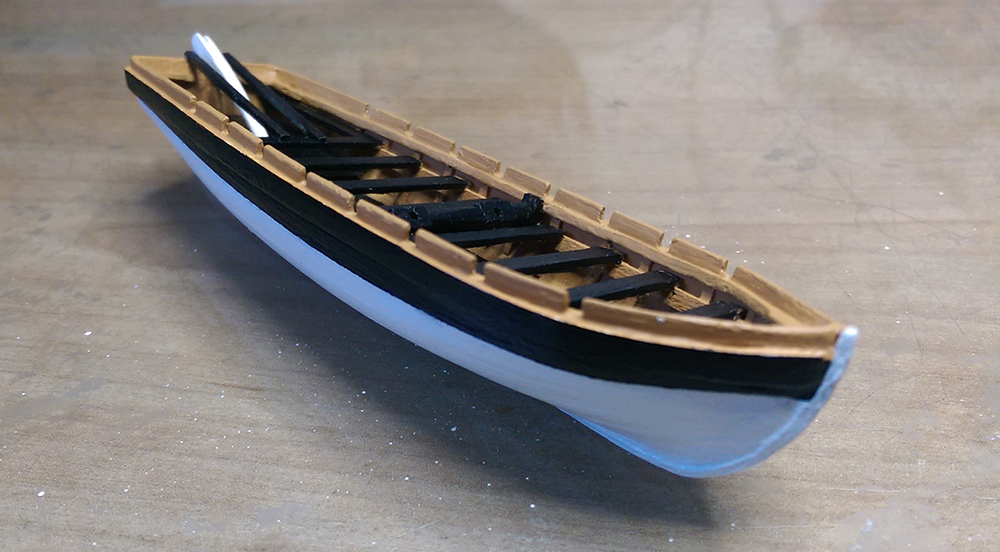
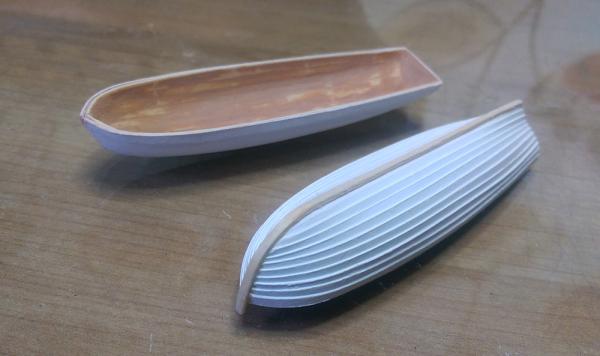
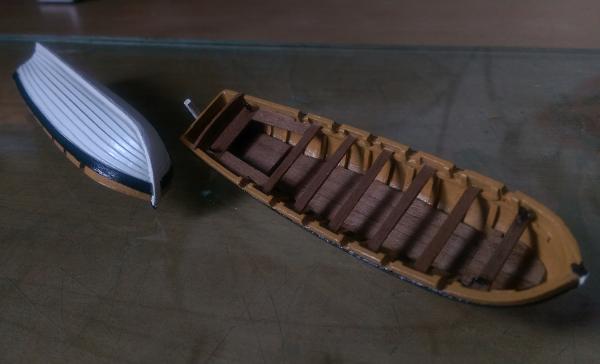
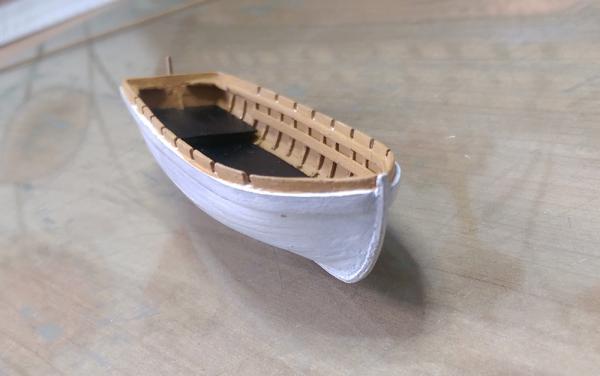
Hi OK so I lied I decided to do the two cutters as I made my mind up on the size to make them ,In the end I went for 28 ft as this made more sense on how they looked on the rear davits. Made the same way as the other boats but then I cheated and used card for the clinker planking. The finished cutters still a little shiny because the varnish has not dried fully. All of the ships boats I might add some more detail later,Still need to make the oars.


-
Thank you for your kind words Grant much appreciated. Doing the boats have kept me sane since I have been off work recovering from radiotherapy.
-
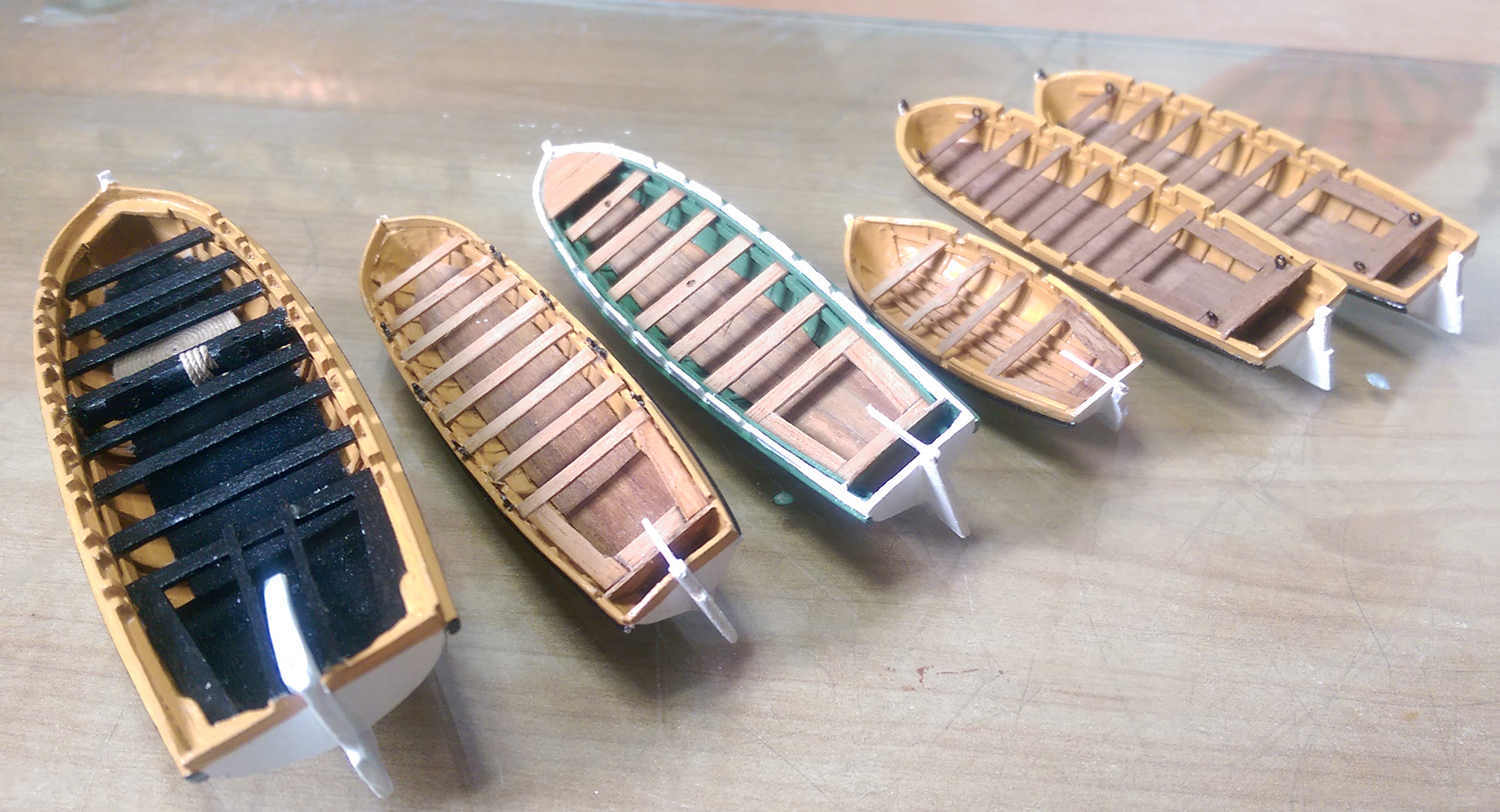
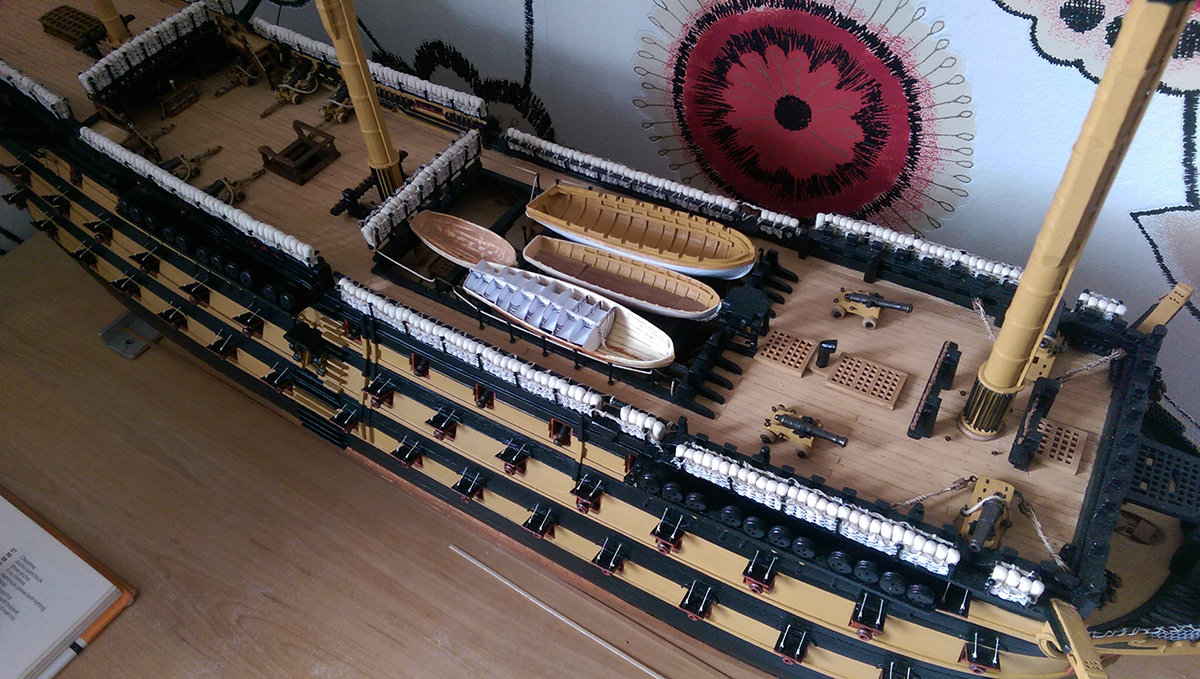
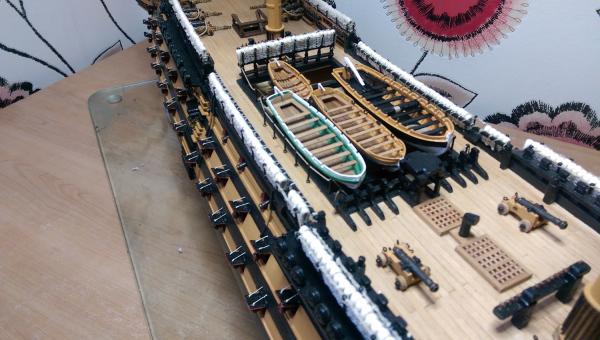
Hi 4 of the boats are done, Still need to make the oars and some fittings but very happy with how they look on the ship perfect size I think. Only the 2 cutters to go might leave them for now and start the Rigging.

-
Hi I have resized the ships boats and reasonably happy with how they fit on the ship as shown in the AOTS book. Making a new launch the same way as the last launch I made, but just a little smaller, and managed to modify two of the other boats. The only thing still can’t decide on the size of the rear cutters weather go with 30ft as they are in picture or make them 25ft


-
Hms Victory boats
Harvey replied to Harvey's topic in Discussion for a Ship's Deck Furniture, Guns, boats and other Fittings
Hi You are right about the cutter size 25ft the AOTS book must be wrong see 17 Going to make cardboard shell of all the boats @ the new size i will post a picture when done. Thank you again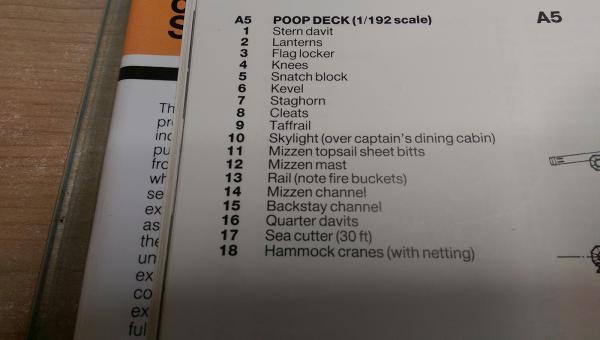
-
Hms Victory boats
Harvey replied to Harvey's topic in Discussion for a Ship's Deck Furniture, Guns, boats and other Fittings
Hi Grant Thank you so so much for the help In the AOTS book On the quarter davits it shows sea cutters 2 @30ft, and on the skid beams it shows 34ft launch - 28ft pinnace - 32ft barge and 18ft cutter, but on the plan view of the ships boats I think the pinnace and cutter are the wrong way round! I think I have got my head around what i will do. In the book the quarter deck cutters go from the back stay channels to the fire buckets measure the distance on my ship and blow up the image until I get the right size. will let you know if this looks right. Thanks again for your time. -
Hi Grant Thank you so so much you for your help yet again about size of the ships boats. If I can decide on the size and what I am building as I am still confused, it would be nice and try clinker plank. I will explain more on the other post. http://modelshipworld.com/index.php/topic/10689-hms-victory-boats/#entry322988
-
Hi I need some help on ships boats for the Hms Victory scale 1.98 what size in mm and what sort. the best i can fine is 1x launch 1x barge 1x pinnace 3x cutters 1@25ft & 2@18ft. tried scaling from AOTS but the sizes don't work out!
-
Hi Time to confess my mistake the above picture is of the barge not the cutter so I only need one,got my drawings mixed up,I thought they were a bit small so now I will start the cutters this time I will make all 3 at the same time.
-
Hi Two of the cutters so far will go on the stern davits made the same way as the launch. Might take a break from the ship's boats and start on the rigging

-
Hi Thanks again Grant for the push to scratch build I think they will turn out much better than anything you could buy. Some new pictures of the launch so far I still need to do some finnishing and fine detail. Next I will do the cutters using the same method as the launch.

-
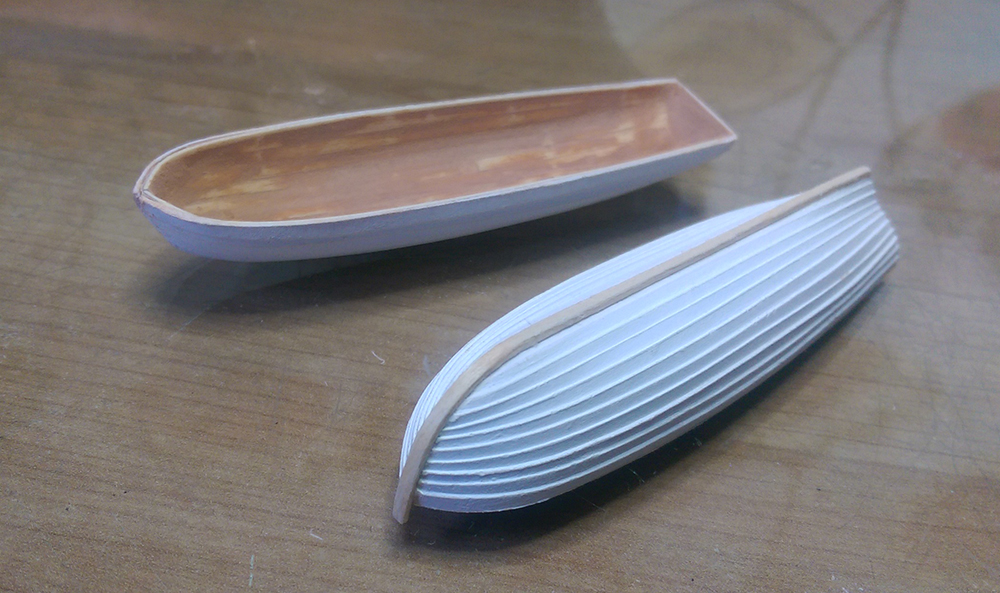
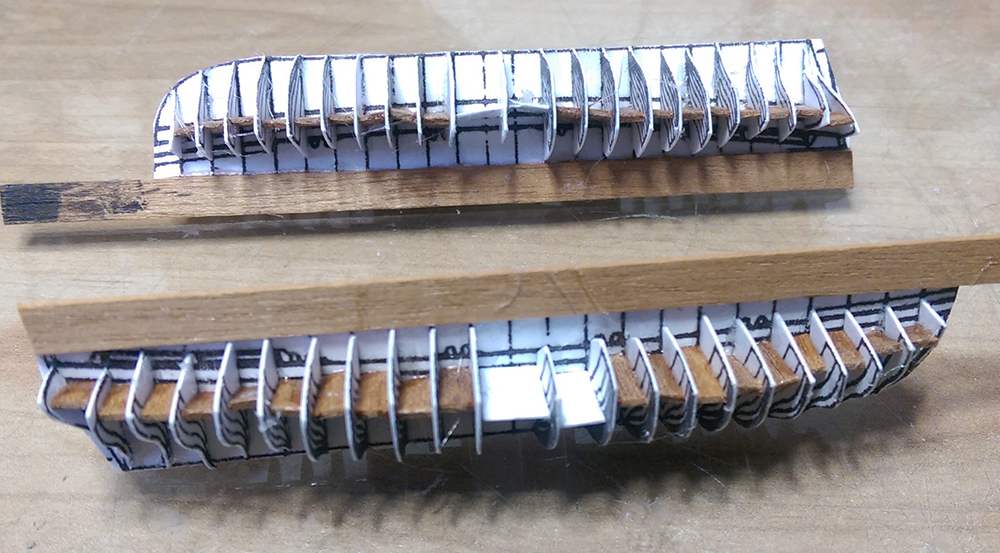
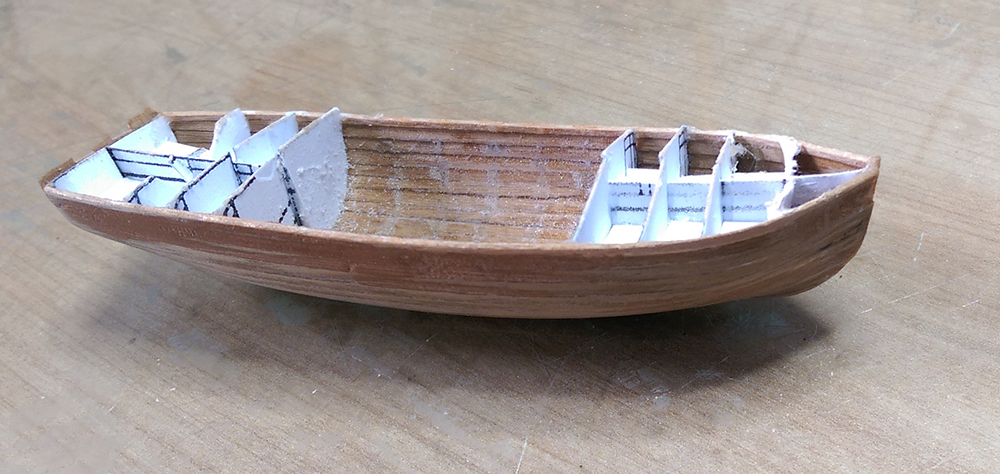
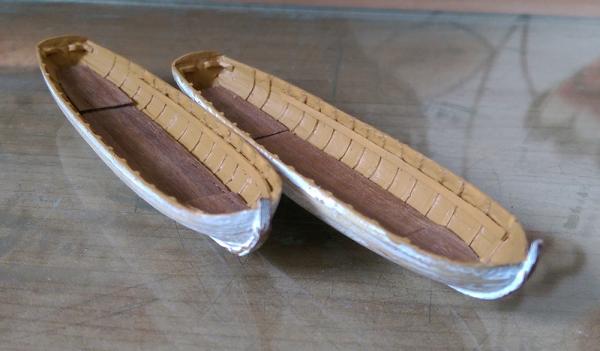
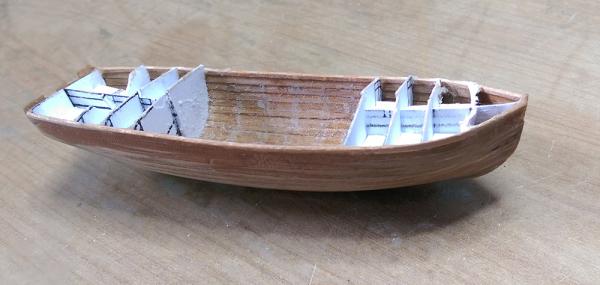
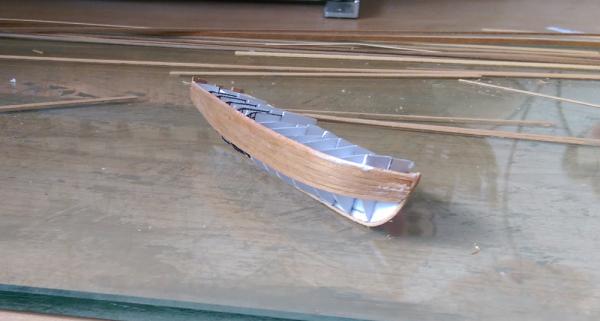
Hi Thank you for the comments and likes. Some new pictures Taking out the card was tricky but do a little at a time. Putting in some braces worked well. I them used some wood filler because the hull is too thin to sand.

-
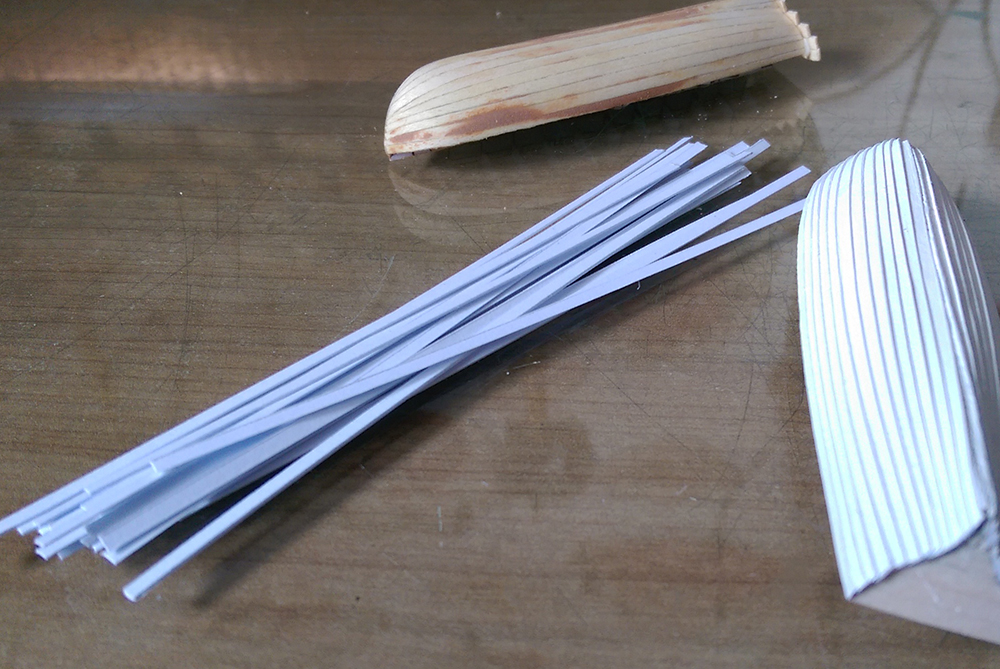
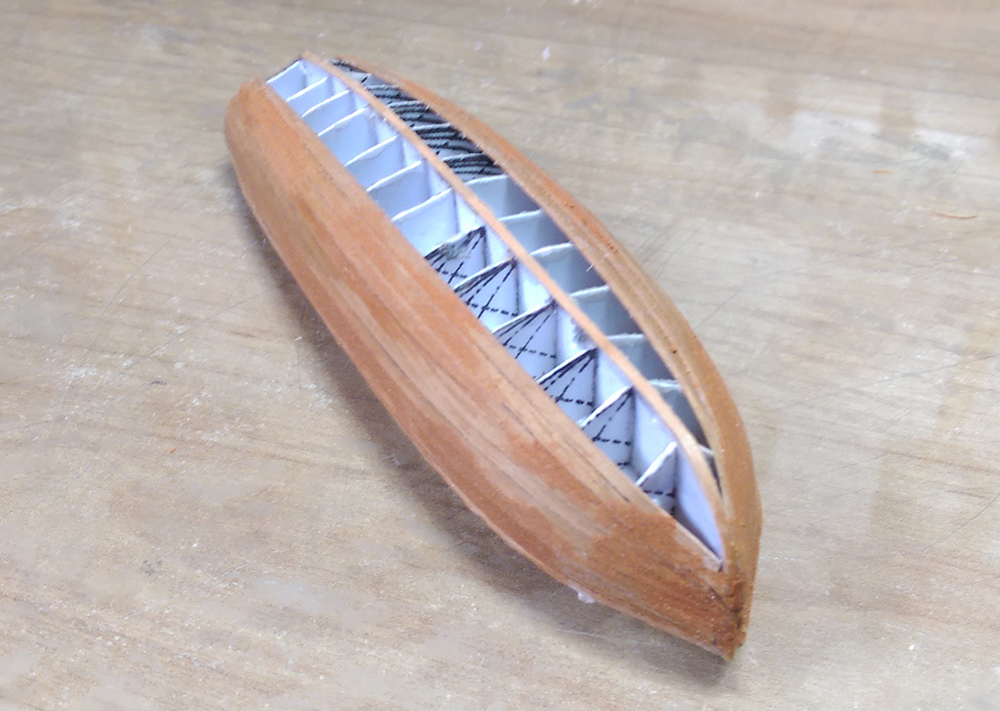
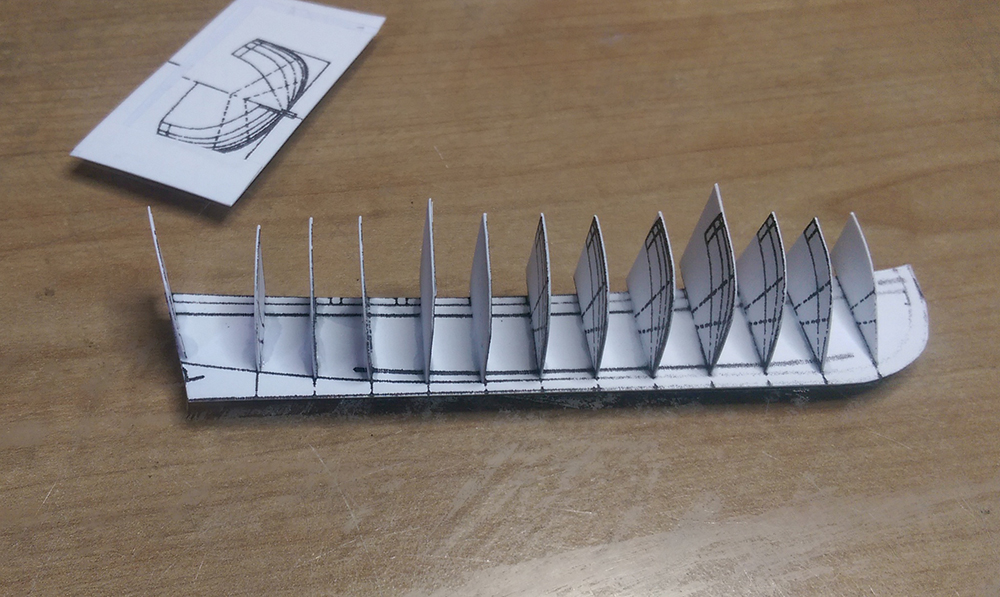
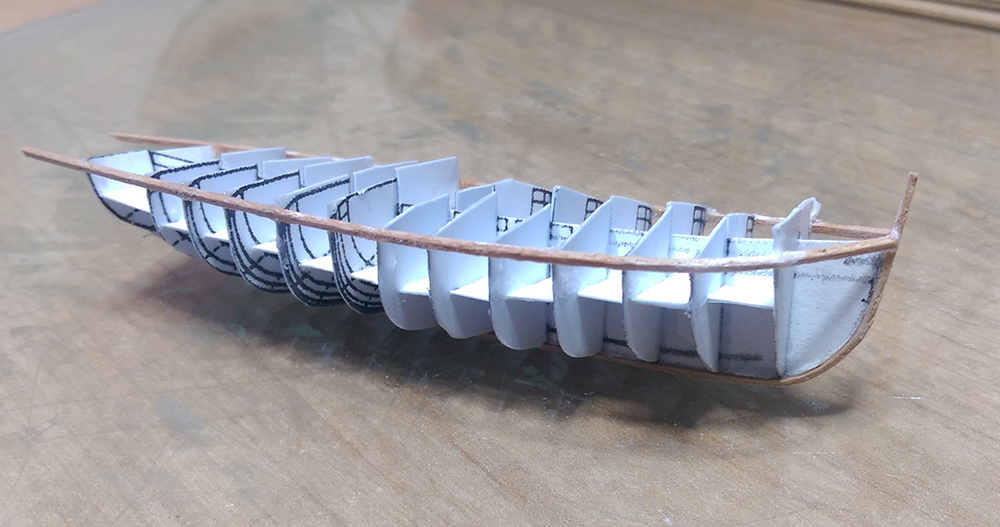
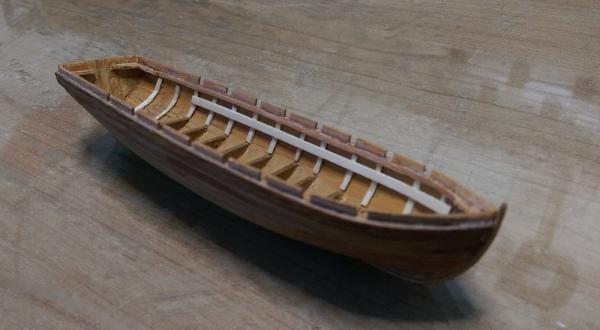
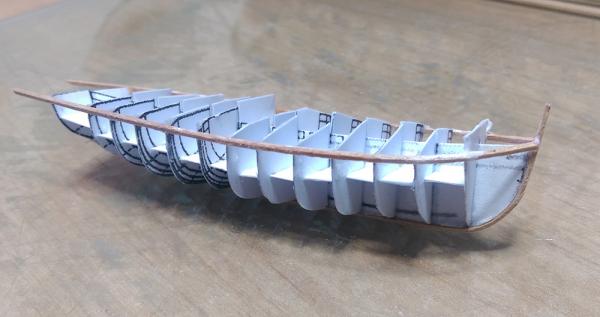
Hi I have spent a bit of time fitting blocks and eyelets ready for the rigging. Now it’s time to have a go with the launch. I have taken gjdale’s advice and have decided to have a go at scratch building. So here we go Started by printing out some formers and sticking to some card, cut out and glue together. Don’t need to say too much here the picture’s says it all. Started the hull planking with 1mm - 1mm sq to give an outline shape to work to then the rest of the planking I used 0.5mm - 3mm walnut.

-
Hi I have thought about scratch building but not sure of scale. Its a good idea, I will see if I can get my head around it thanks for the comment.
-
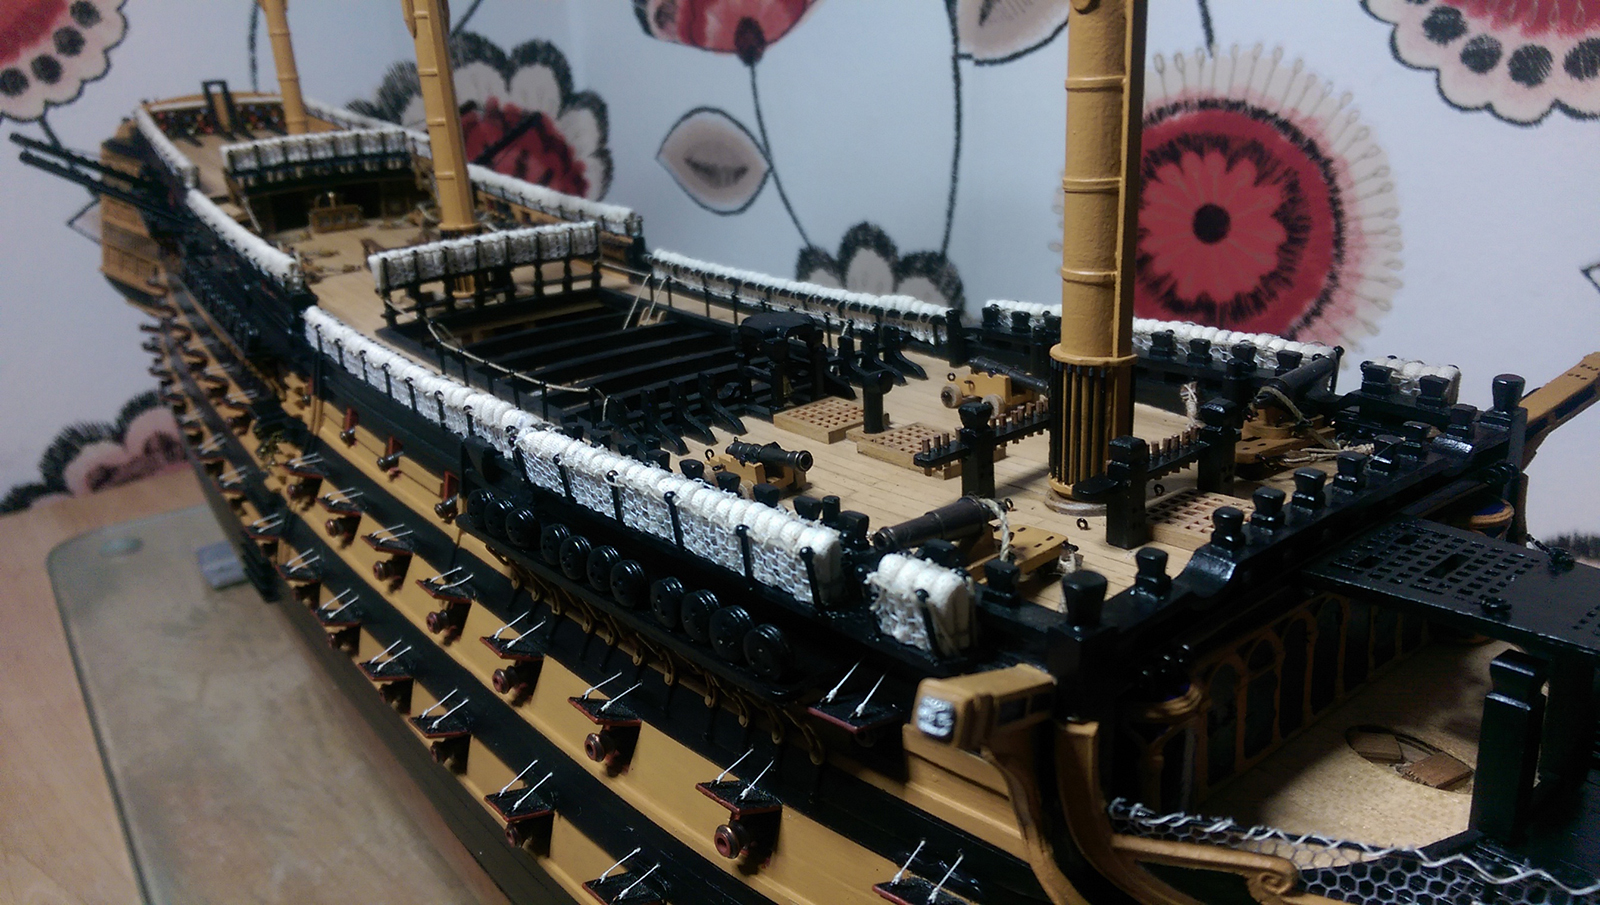
Hi Finally the hammocks are done.About time only taken a week Trying to decide what to do next I should start looking at the ships boats,been looking at the set of 6 wooden boats from cornwall model boats but can't find much info on them and at £68.00 don't want to take a chance.
-
Hi Dragzz Just been looking at your build so far, doing a great job keep up the good work. There is one thing that I feel I should ask about and that is the sweep of the deck at the forecastle in the pictures it looks like it has too much making the deck to high. Not sure if the part numbers are the same as I have much older plans but does the part number 66 pressed wood fit at the breakhead bulkhead. Sorry if I am wrong.
-
Nobody mention hammocks!!!! Seems to be taking a long time.

-
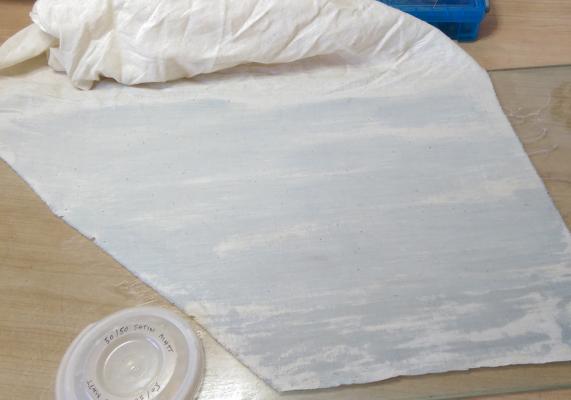
HI The hammocks I have tried to do these before several times but gave up. Now I think I am happy with what I am doing, found an old sling from the first aid box, and to stop the edges from fraying when you cut to size I brushed clear varnish (water based) over the cloth on a piece of glass. Note peel off before it dries. Next cut to size and I used a drill 1.6 dia to roll the hammock around and stuck with clear glue. Fold over and tie. I found that if I did not tie it would push the netting out too much. Then trim to length, a spot of clear glue to fit when all the hammocks are done I will give them all a coat of clear varnish.


-
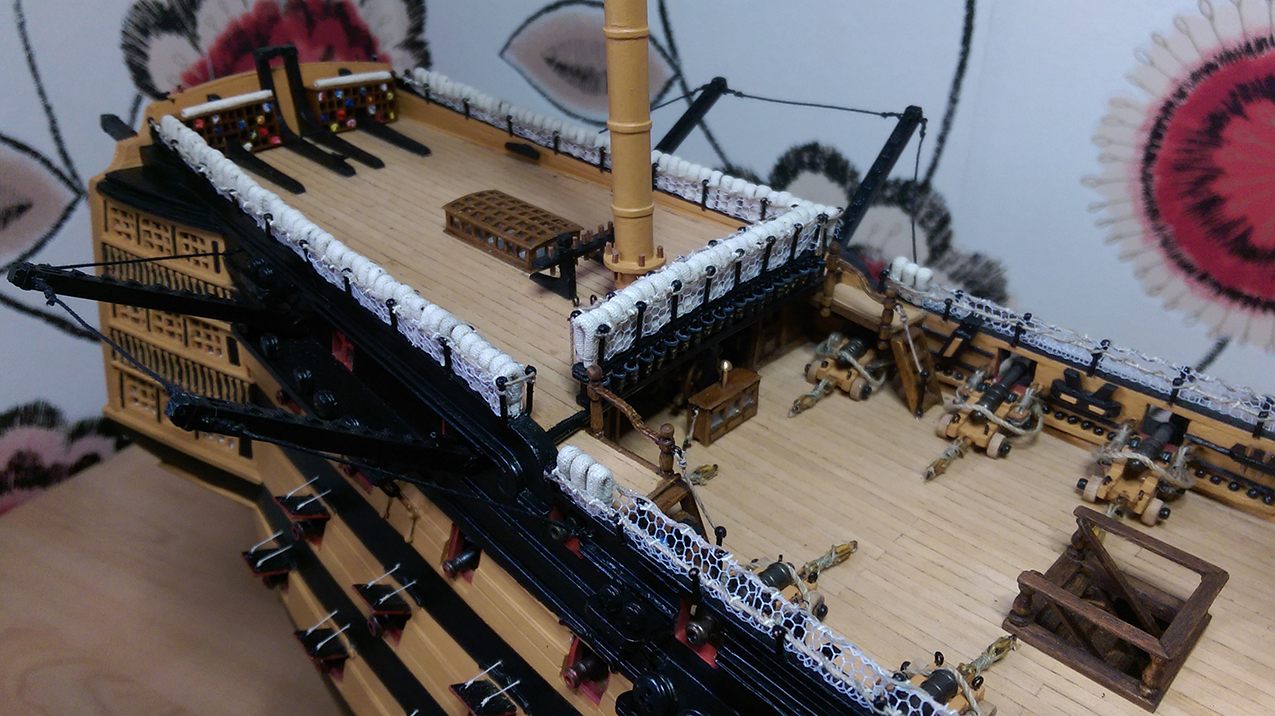
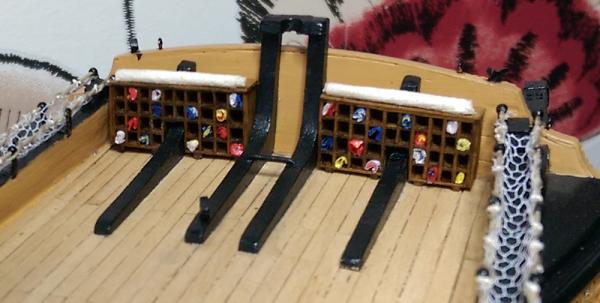
Hi On a roll this weekend finishing jobs I have been putting off. I have finally finished the flag lockers, Thank again to captain steve for the advice he gave me back in october about tissue paper. It looks batter on the ship than in the picture. I think there is enough flags what do you think?
-
Hi Thank you Captainsteve I will take on board what you said, nice to know about the belaying points. I mainly changed the pins because they were to big and looked out of place, before I had 8 points now I have all 17.
-
Hi Thank you for your likes Dafi,Captainsteve,gjdale. The new pin racks before I only had half the amount of belaying points for the rigging well worth the time to remake.