HOLIDAY DONATION DRIVE - SUPPORT MSW - DO YOUR PART TO KEEP THIS GREAT FORUM GOING! (89 donations so far out of 49,000 members - C'mon guys!)
×


Rich_engr
-
Posts
322 -
Joined
-
Last visited
Recent Profile Visitors
1,453 profile views


-
 Nightdive reacted to a post in a topic:
HM Cutter Sherbourne by Rich_engr - Vanguard Models - 1:64
Nightdive reacted to a post in a topic:
HM Cutter Sherbourne by Rich_engr - Vanguard Models - 1:64
-
Nightdive reacted to a post in a topic:
HM Cutter Sherbourne by Rich_engr - Vanguard Models - 1:64
-
Nightdive reacted to a post in a topic:
HM Cutter Sherbourne by Rich_engr - Vanguard Models - 1:64
-
Nightdive reacted to a post in a topic:
HM Cutter Sherbourne by Rich_engr - Vanguard Models - 1:64
-
rcweir reacted to a post in a topic:
HM Cutter Sherbourne by Rich_engr - Vanguard Models - 1:64
-
Dan Poirier reacted to a post in a topic:
HM Cutter Sherbourne by Rich_engr - Vanguard Models - 1:64
-
ccoyle reacted to a post in a topic:
HM Cutter Sherbourne by Rich_engr - Vanguard Models - 1:64
-
cotrecerf reacted to a post in a topic:
HM Cutter Sherbourne by Rich_engr - Vanguard Models - 1:64
-
chris watton reacted to a post in a topic:
HM Cutter Sherbourne by Rich_engr - Vanguard Models - 1:64
-
chris watton reacted to a post in a topic:
HM Cutter Sherbourne by Rich_engr - Vanguard Models - 1:64
-
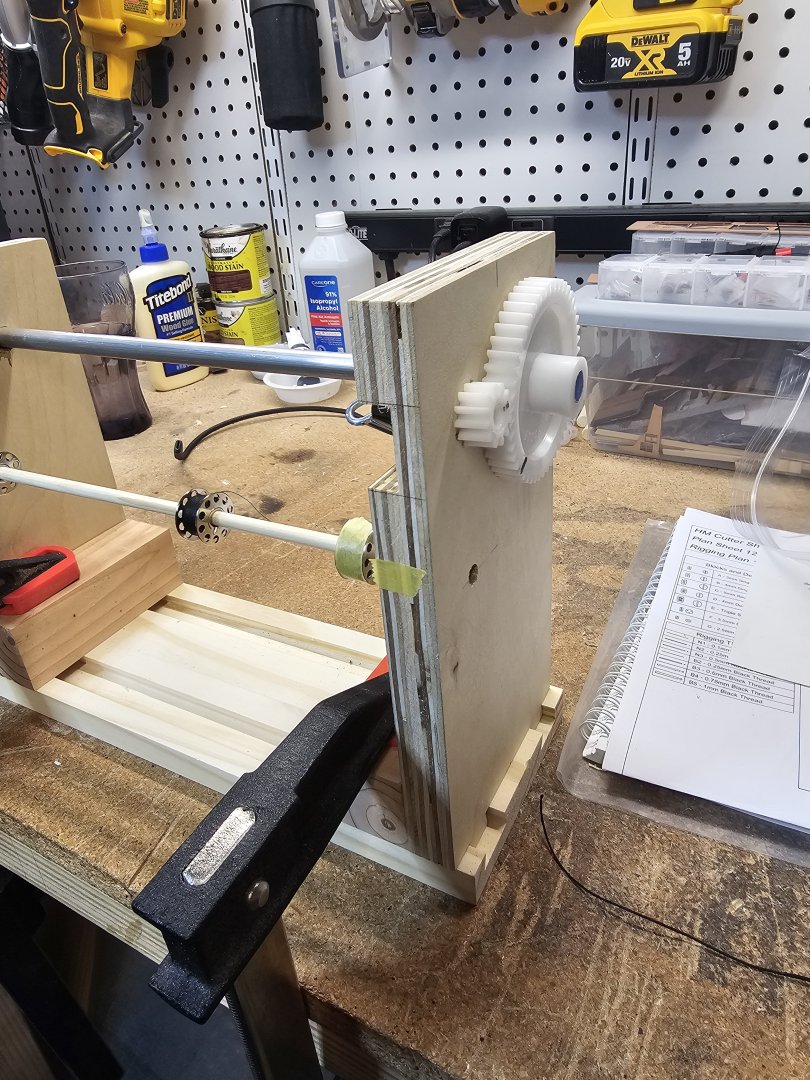
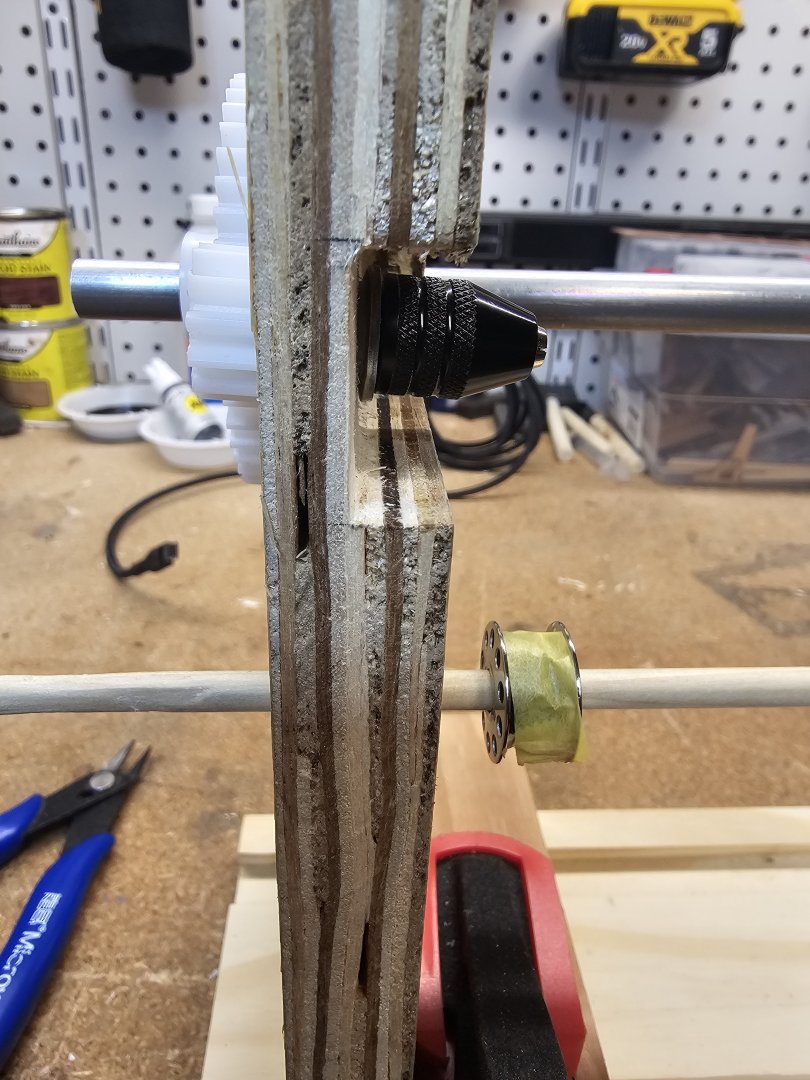
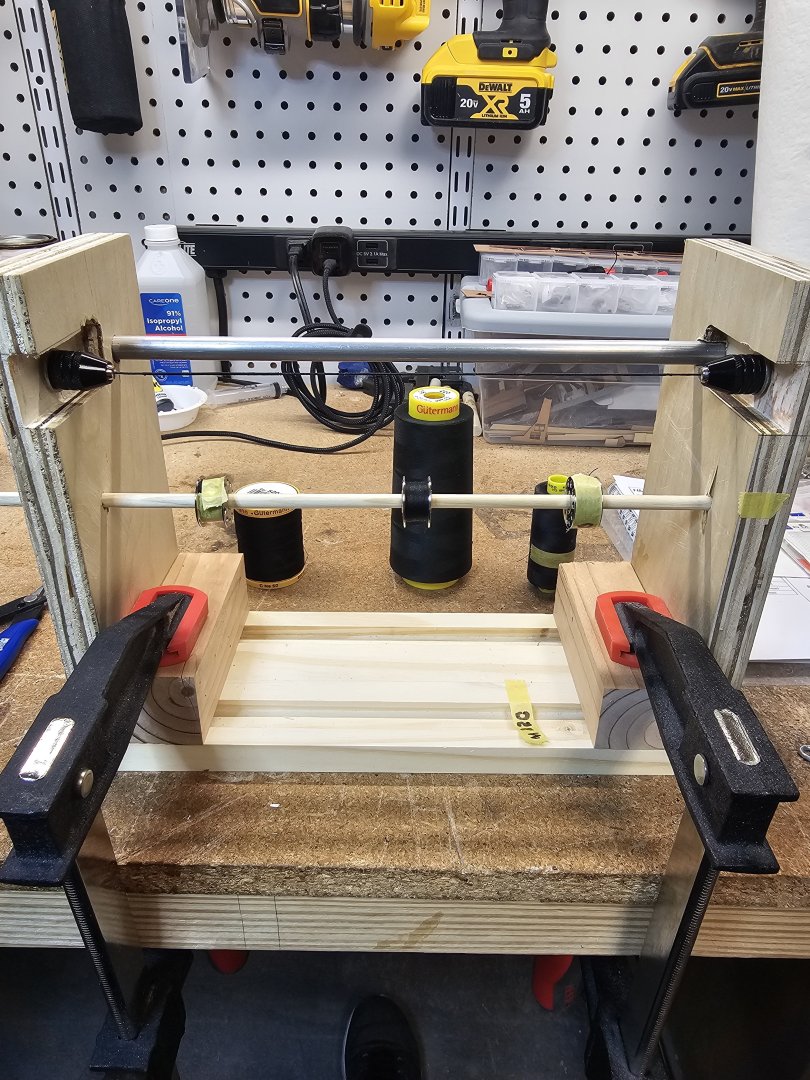
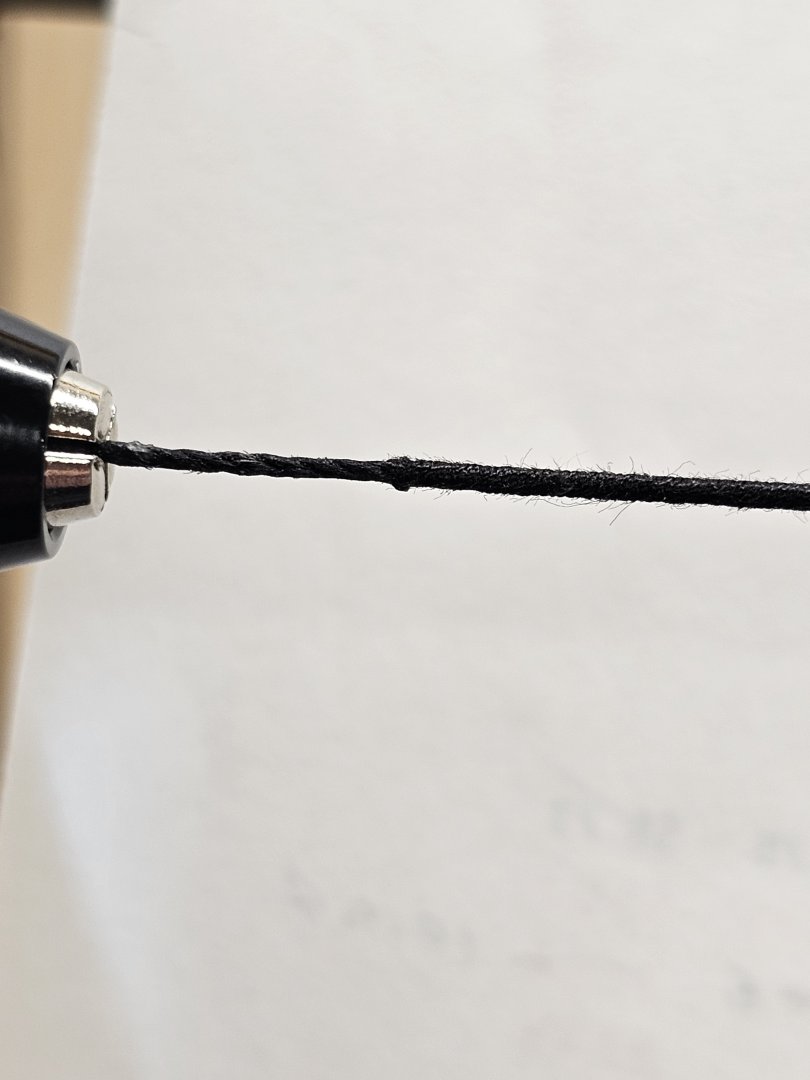
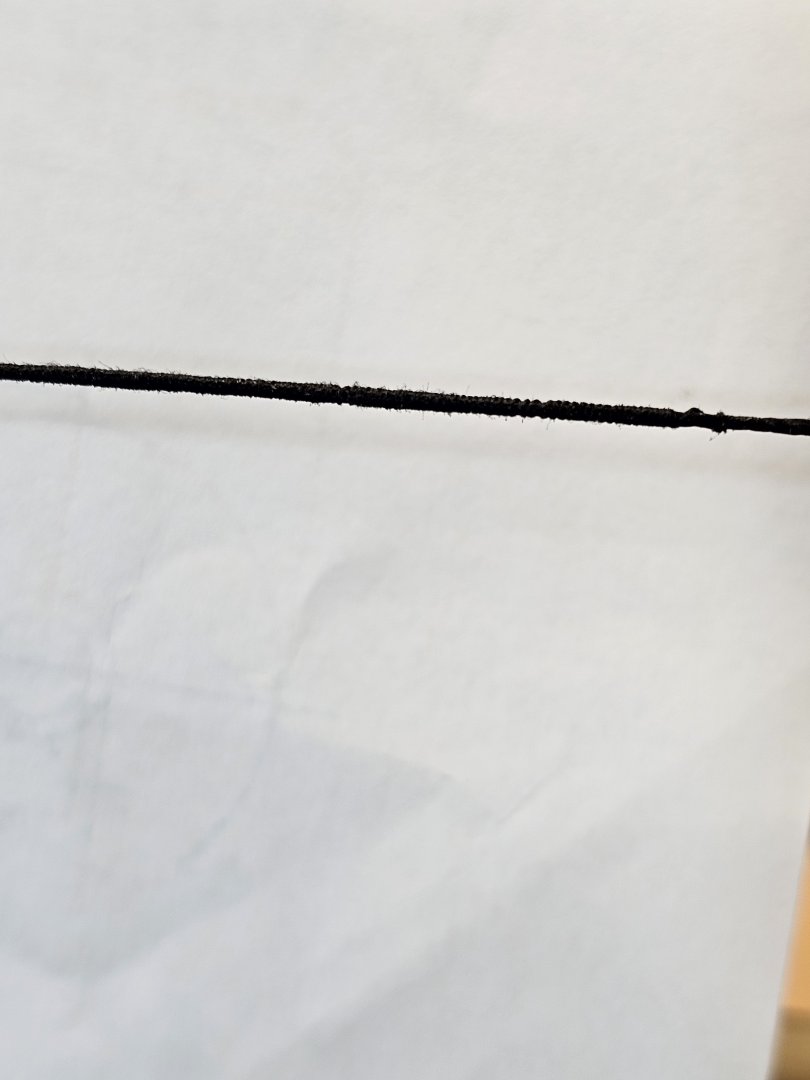
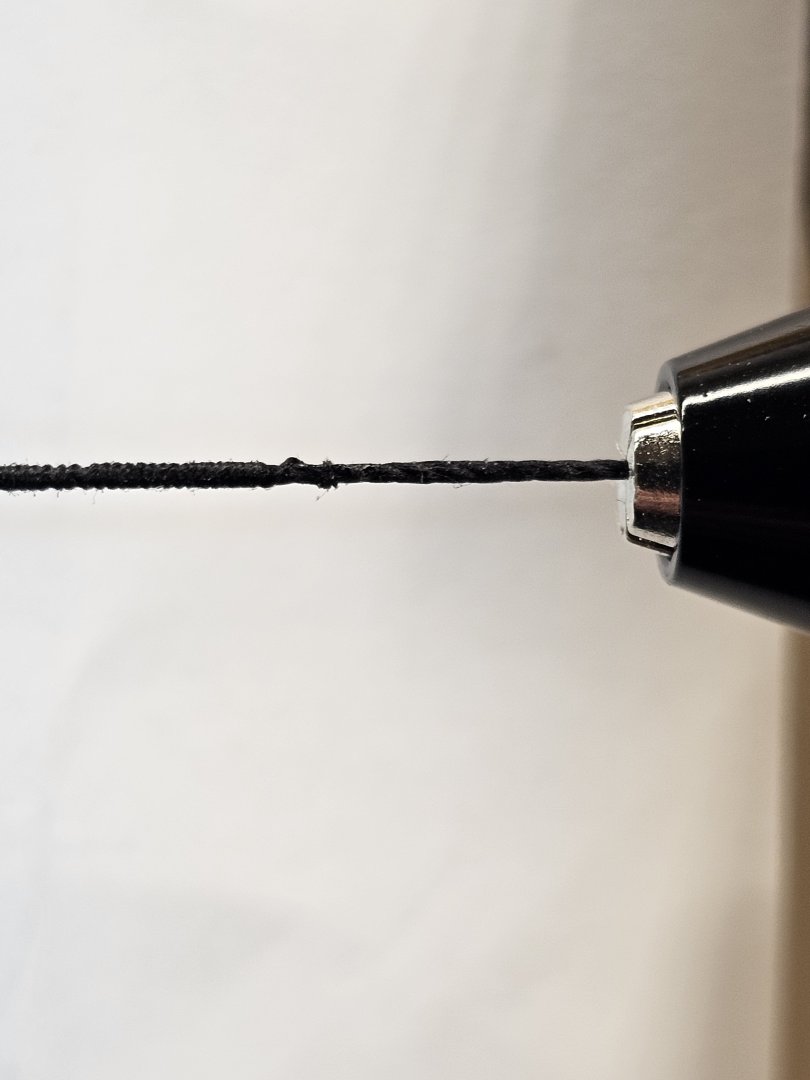
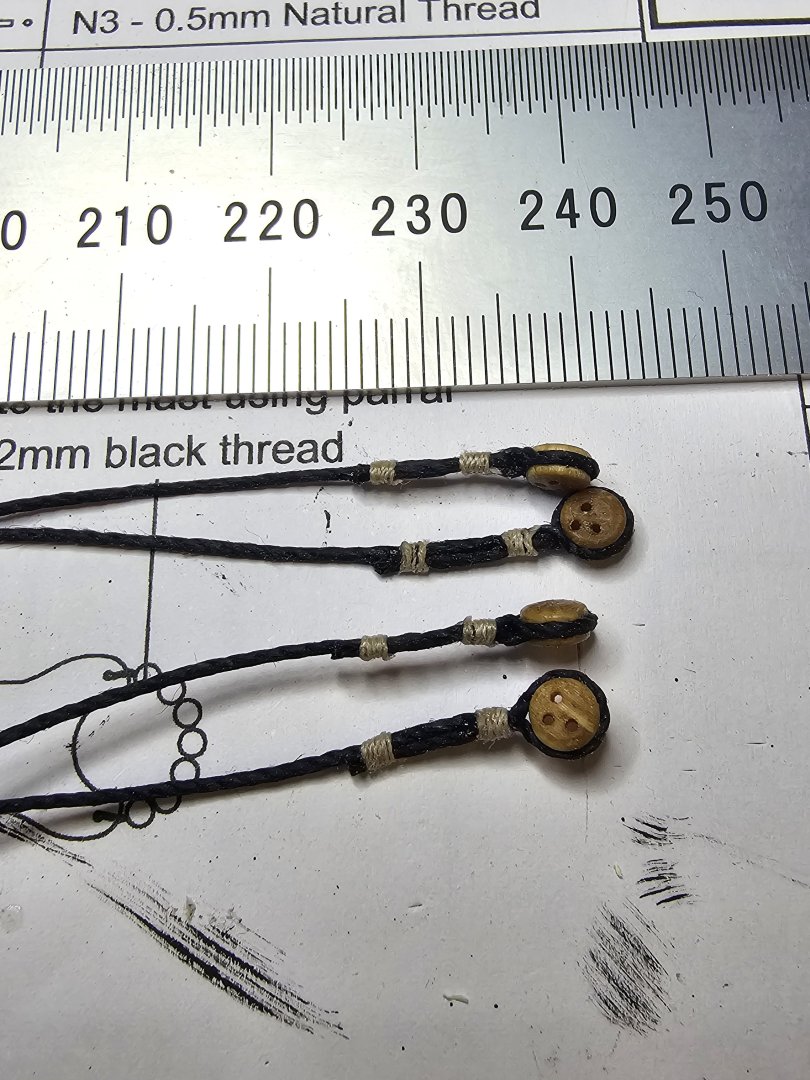
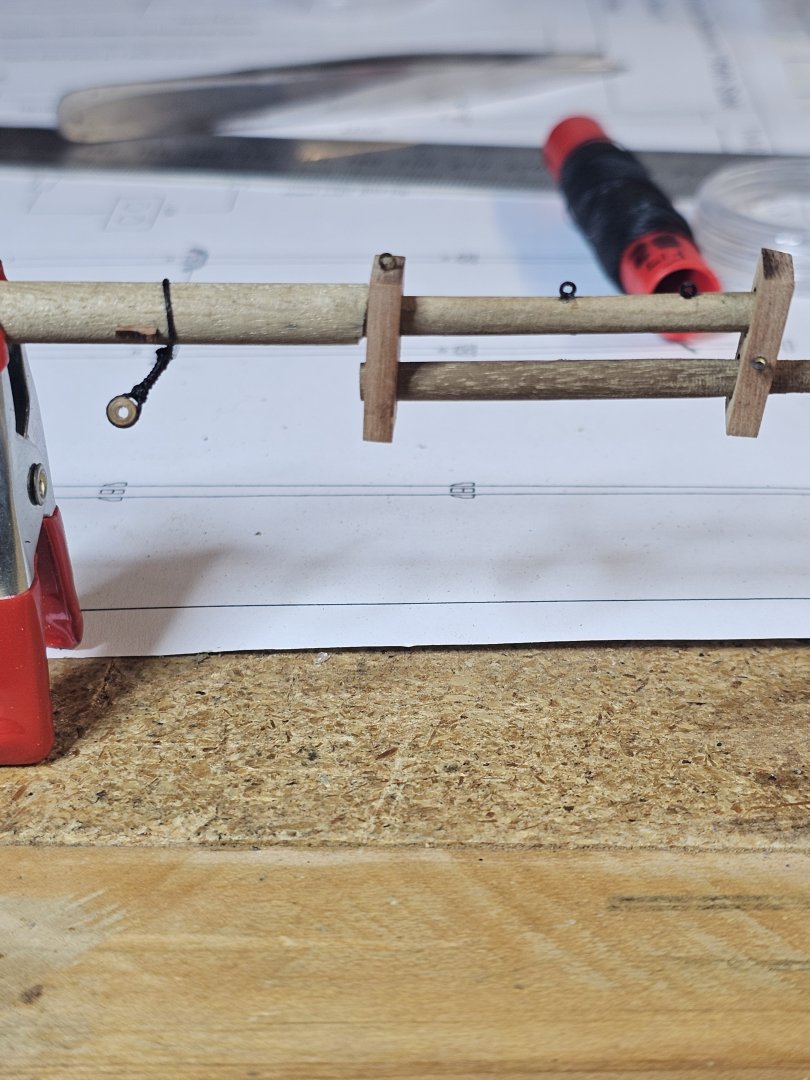
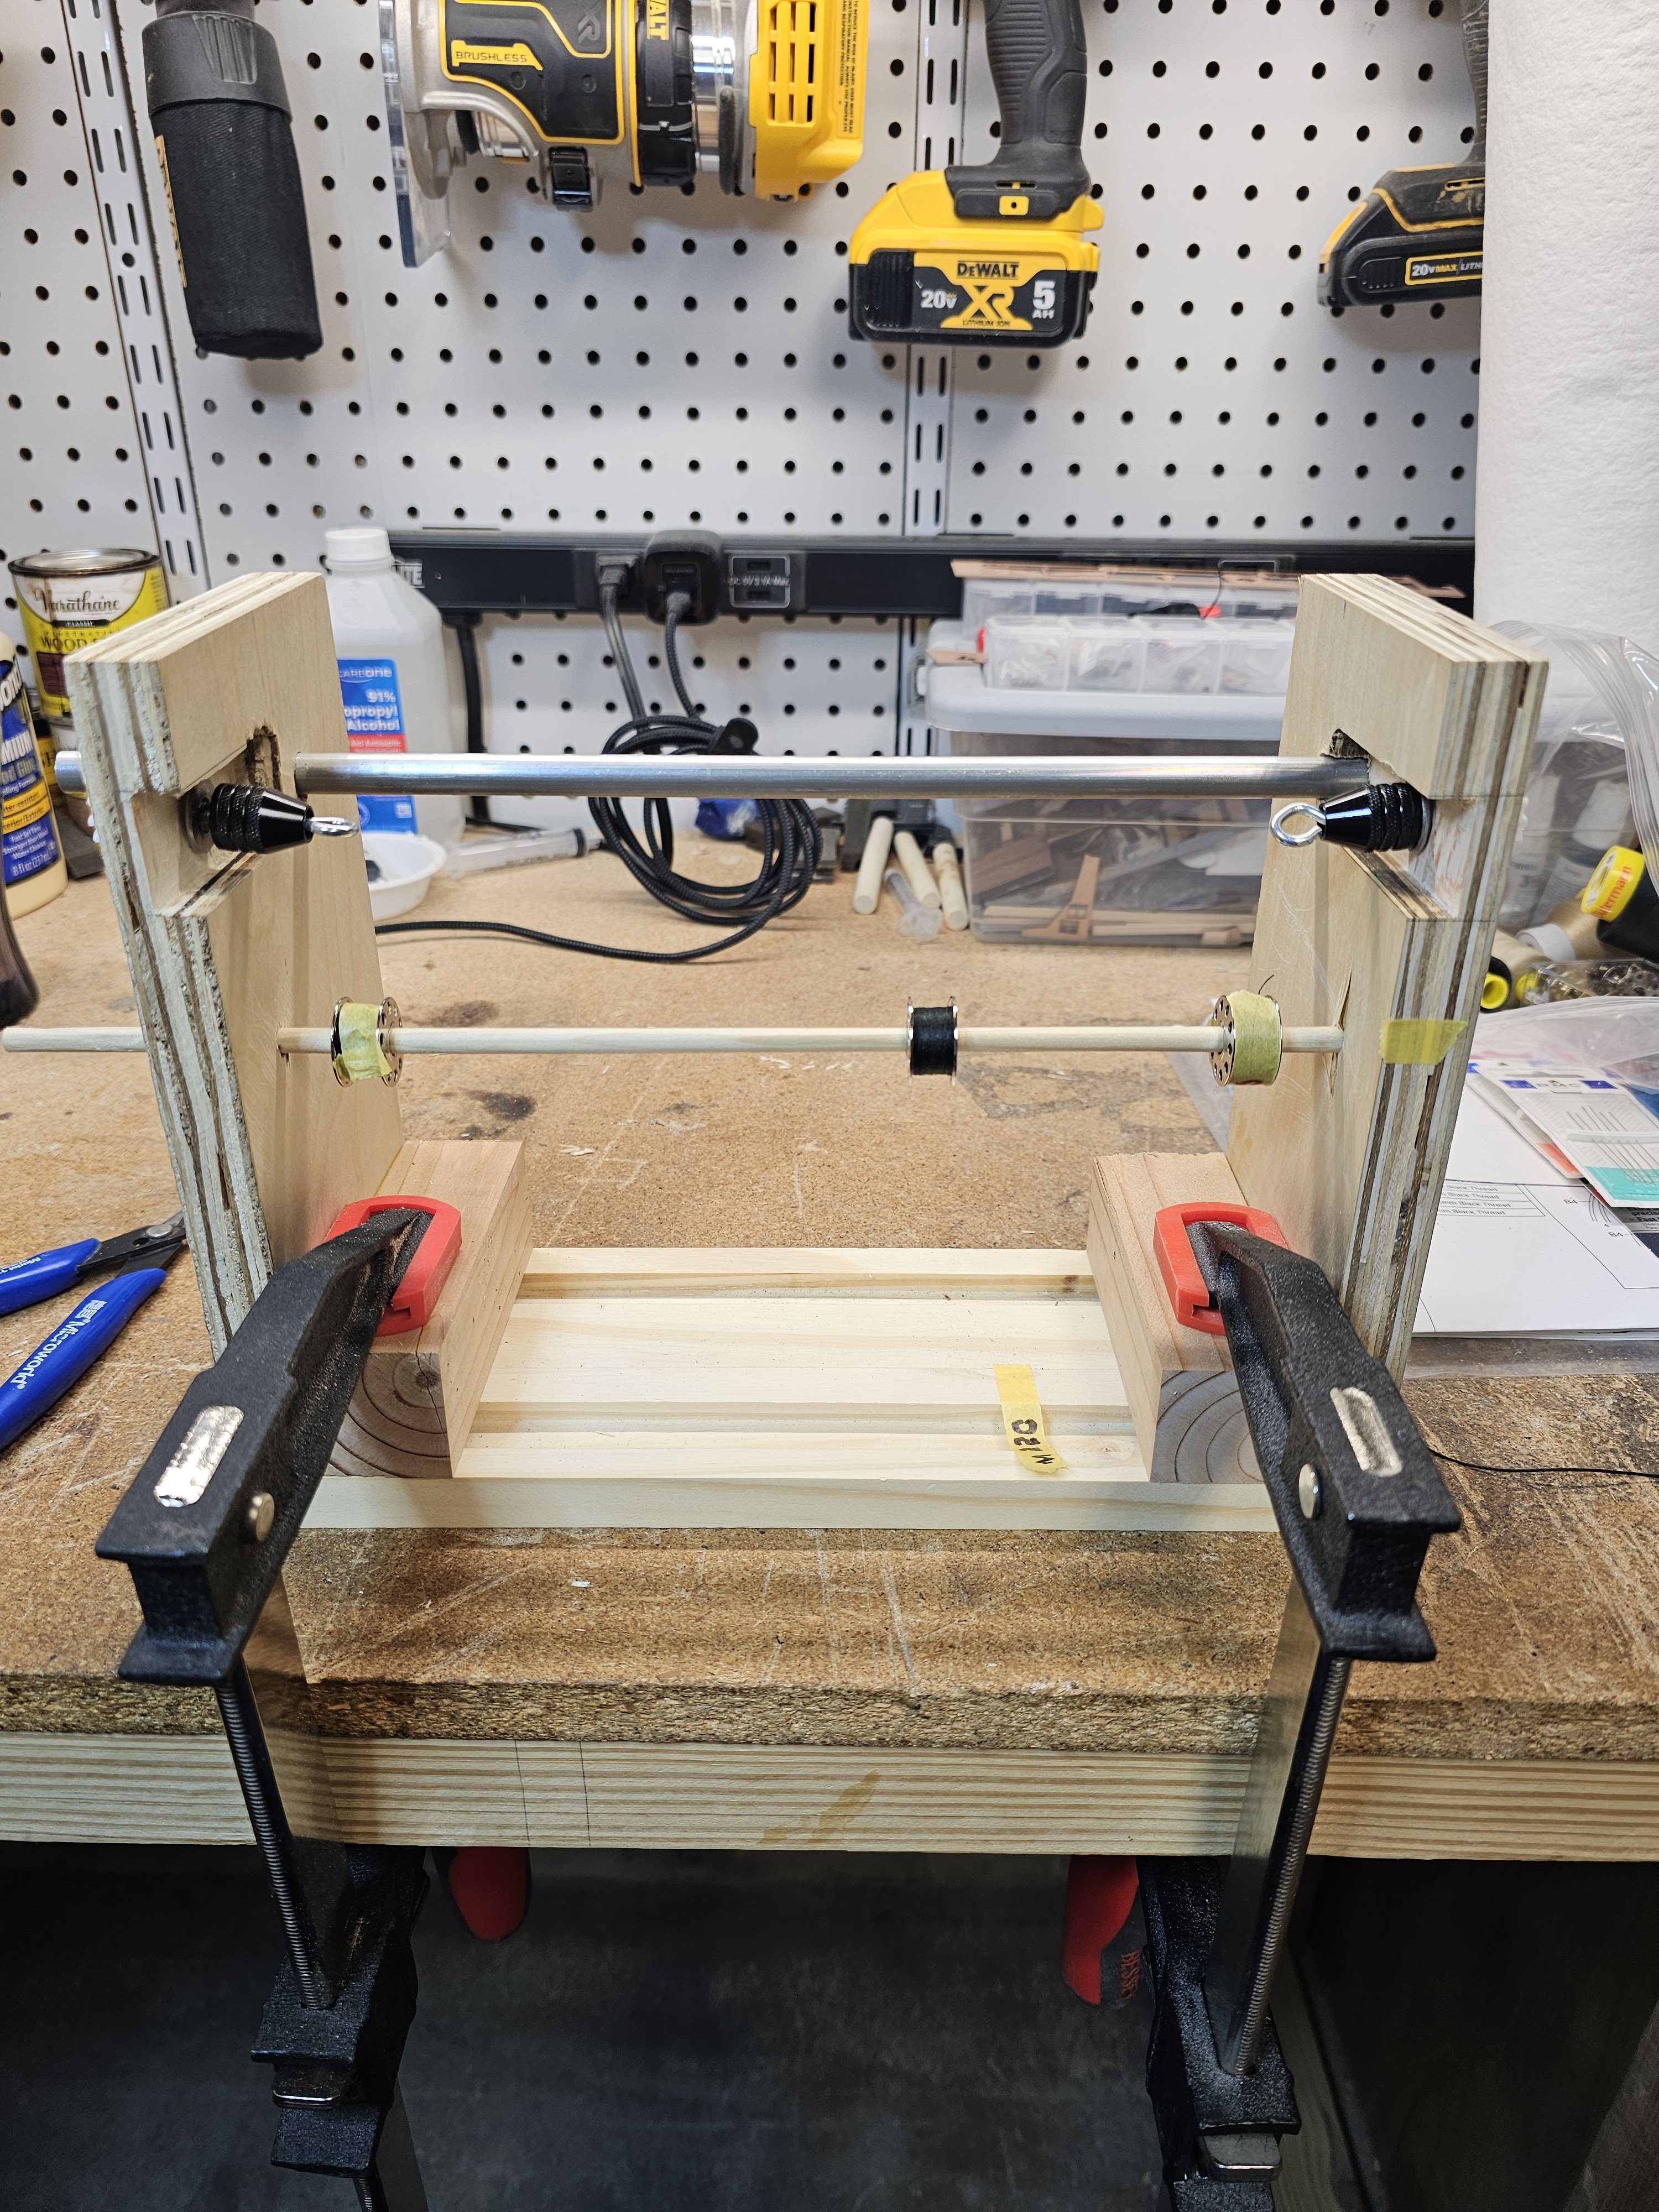
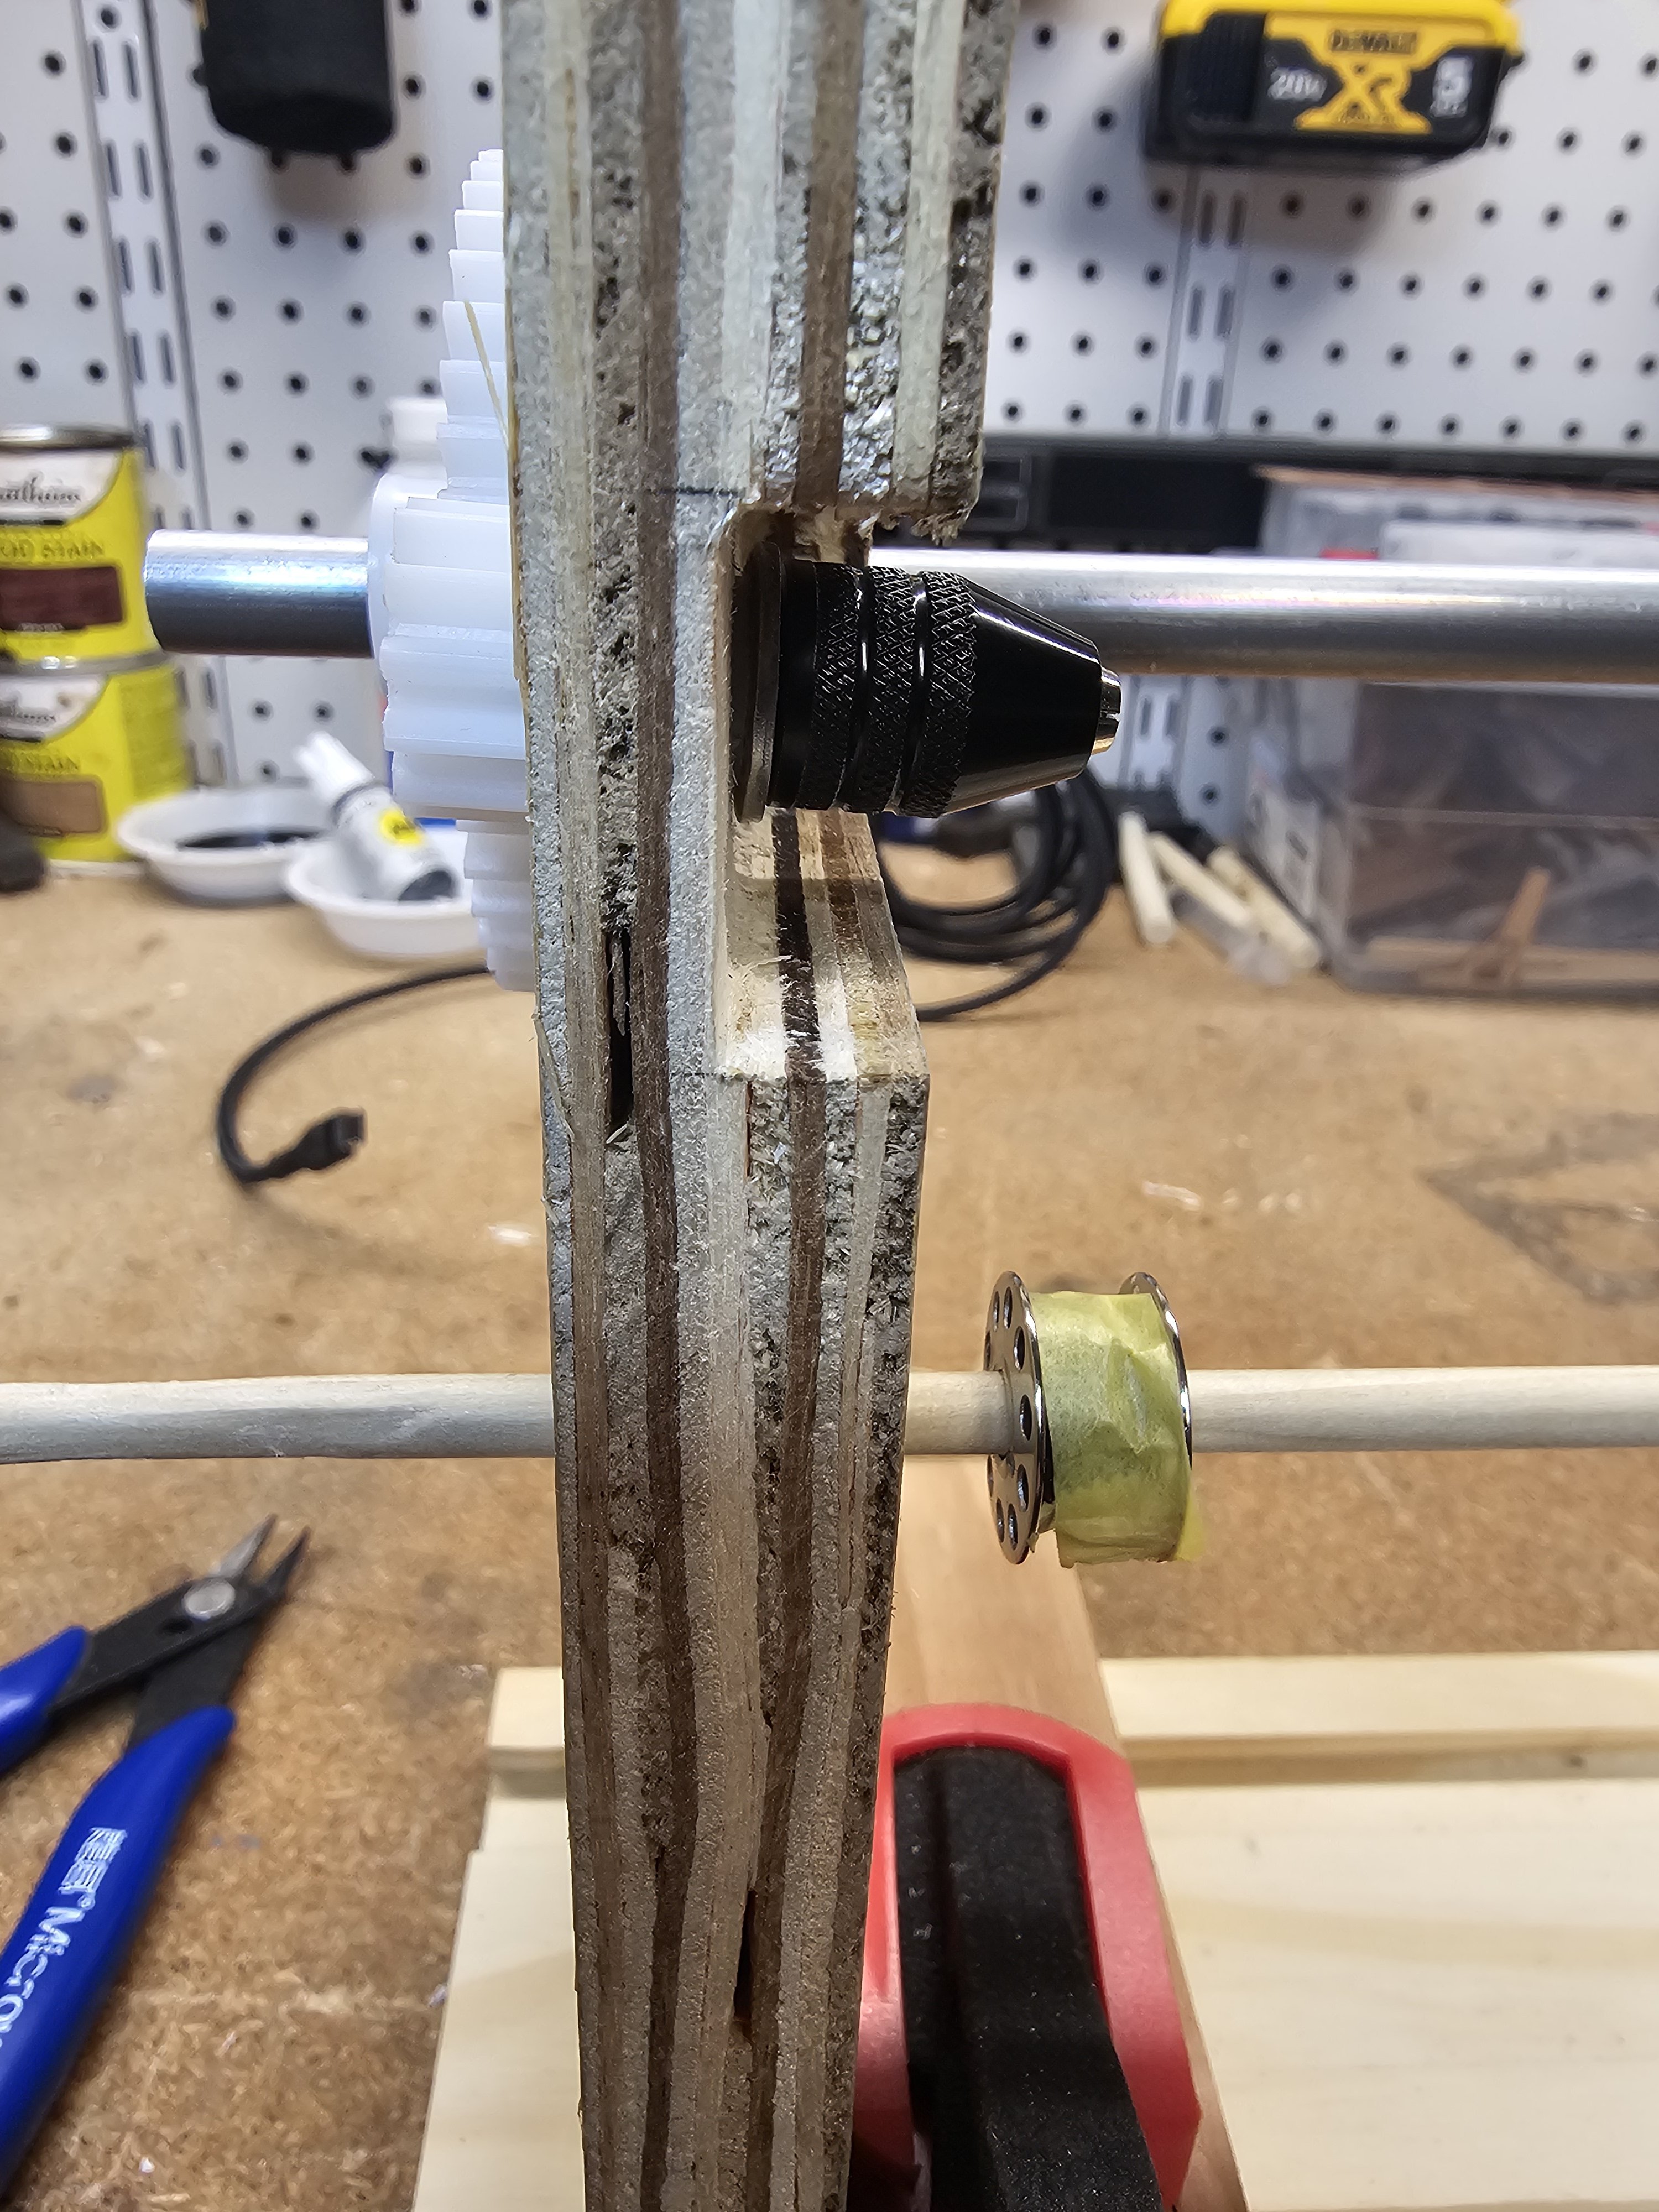
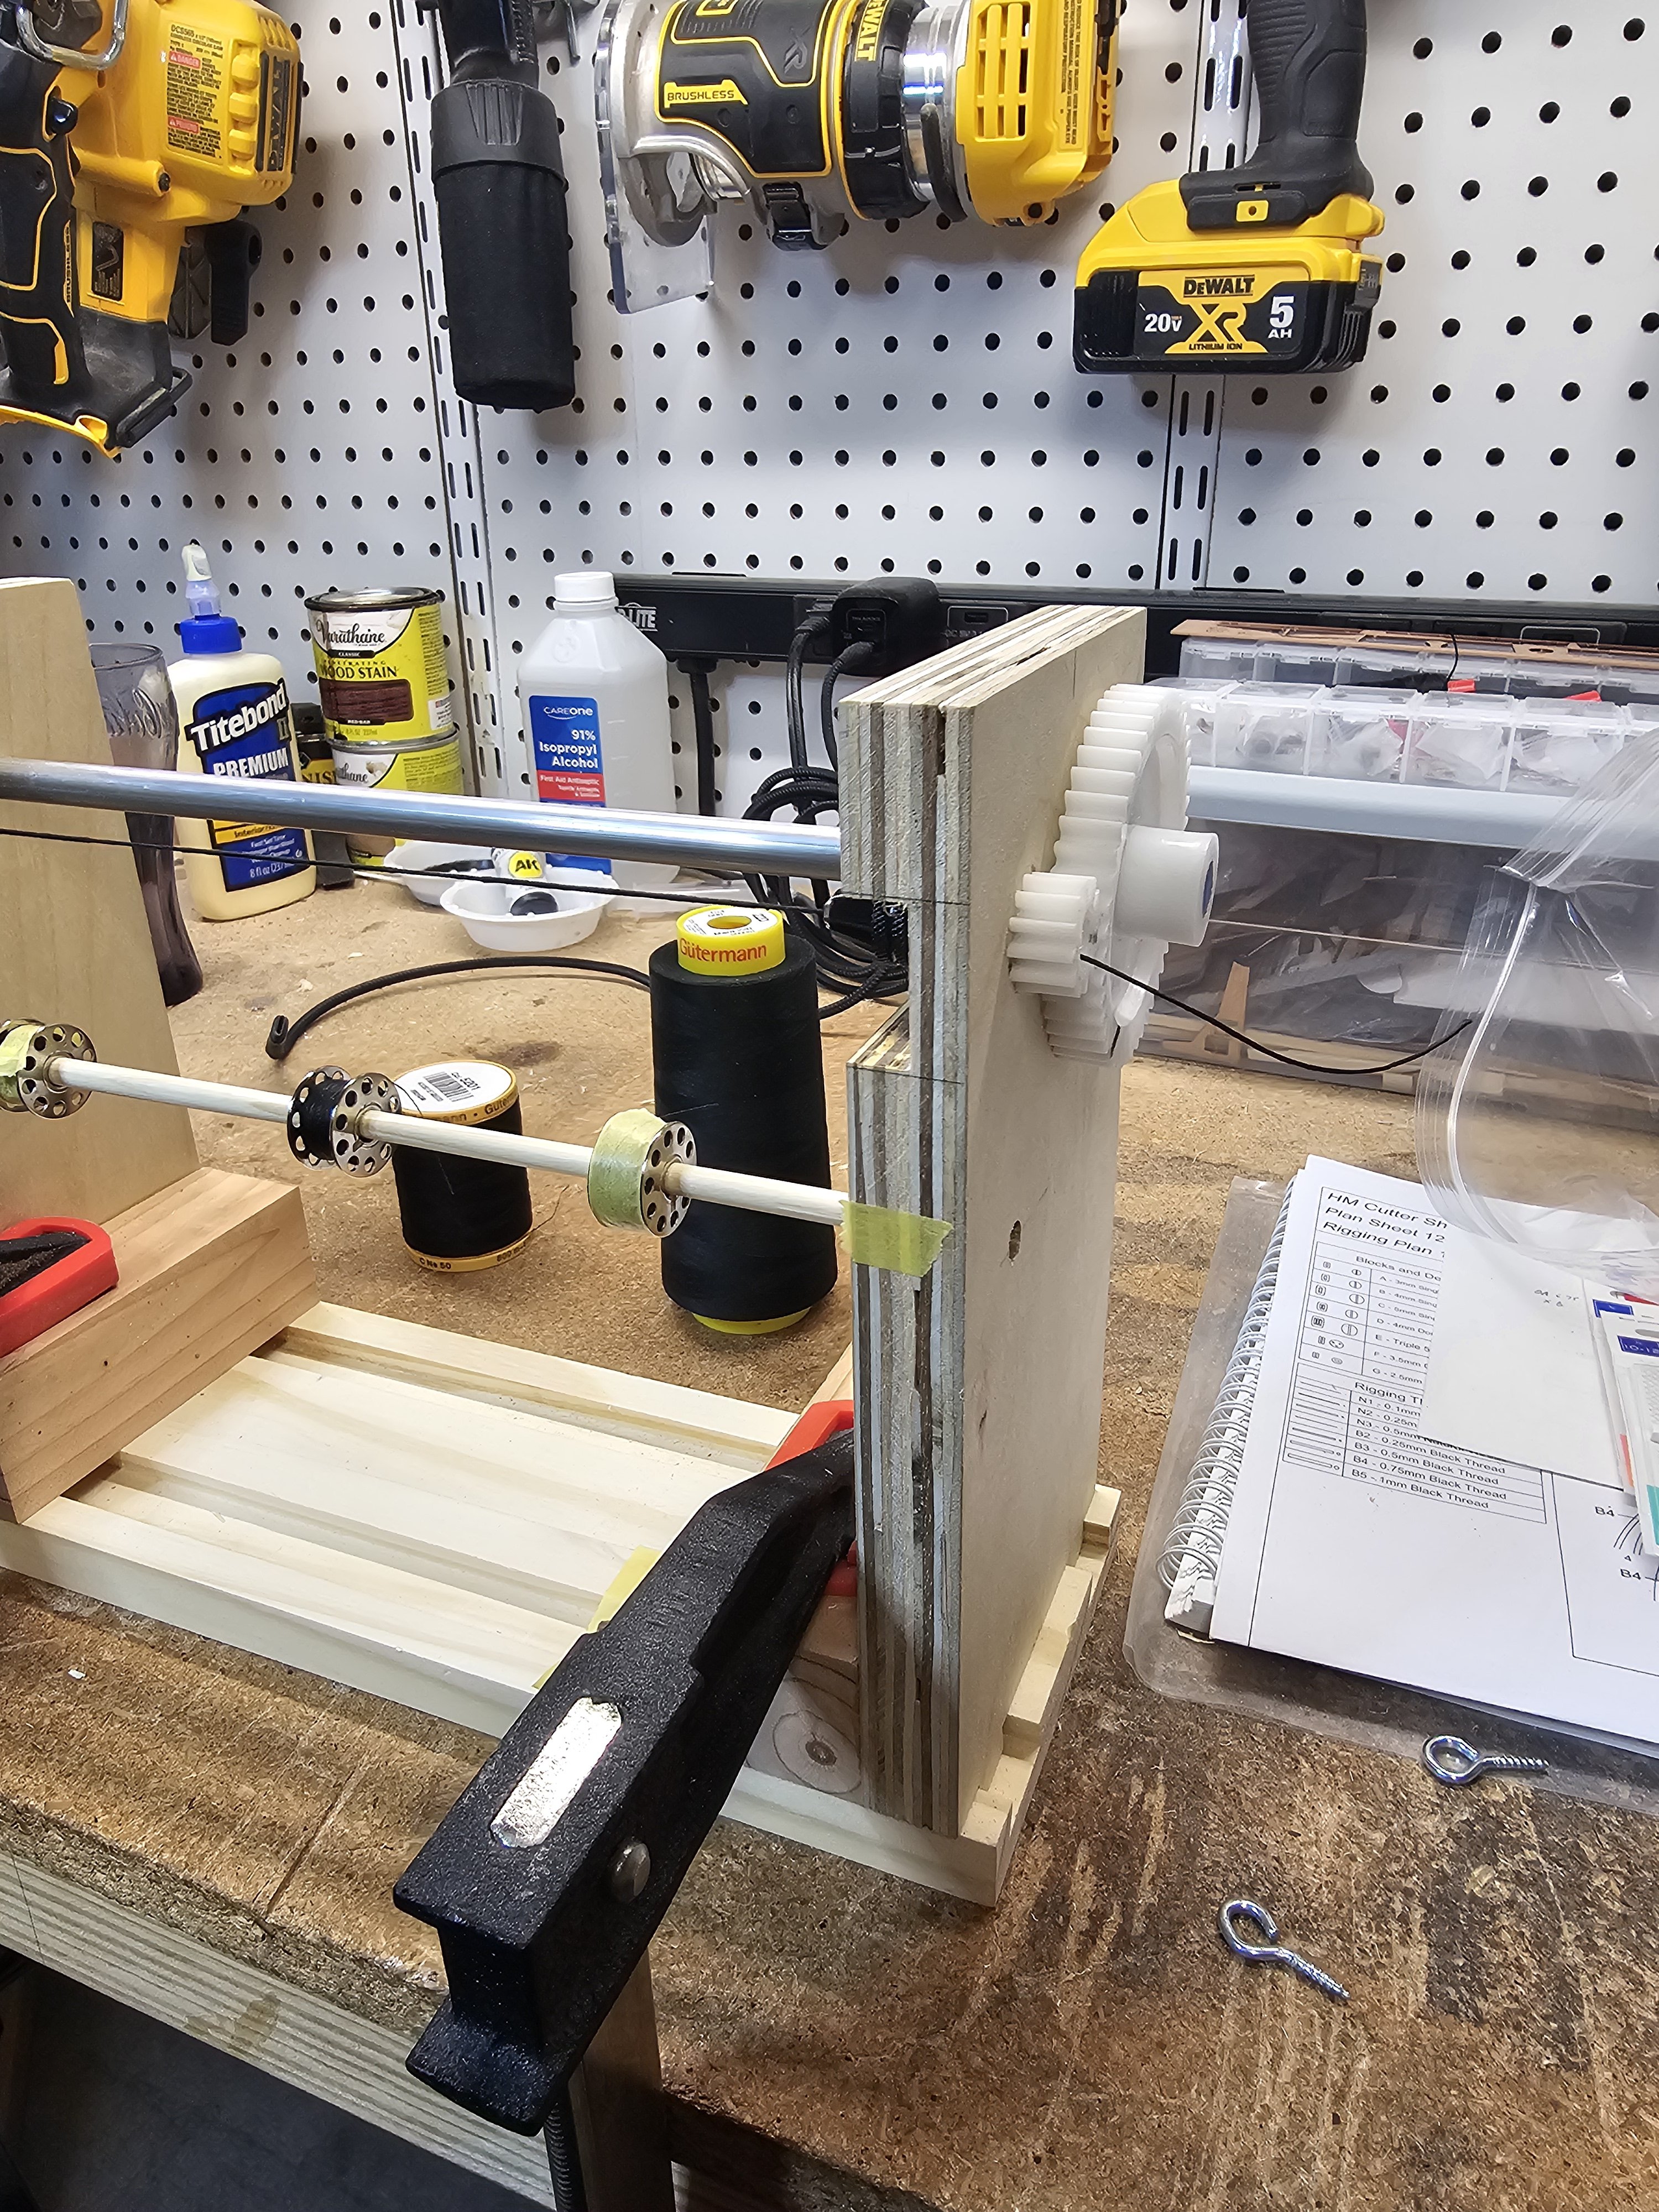
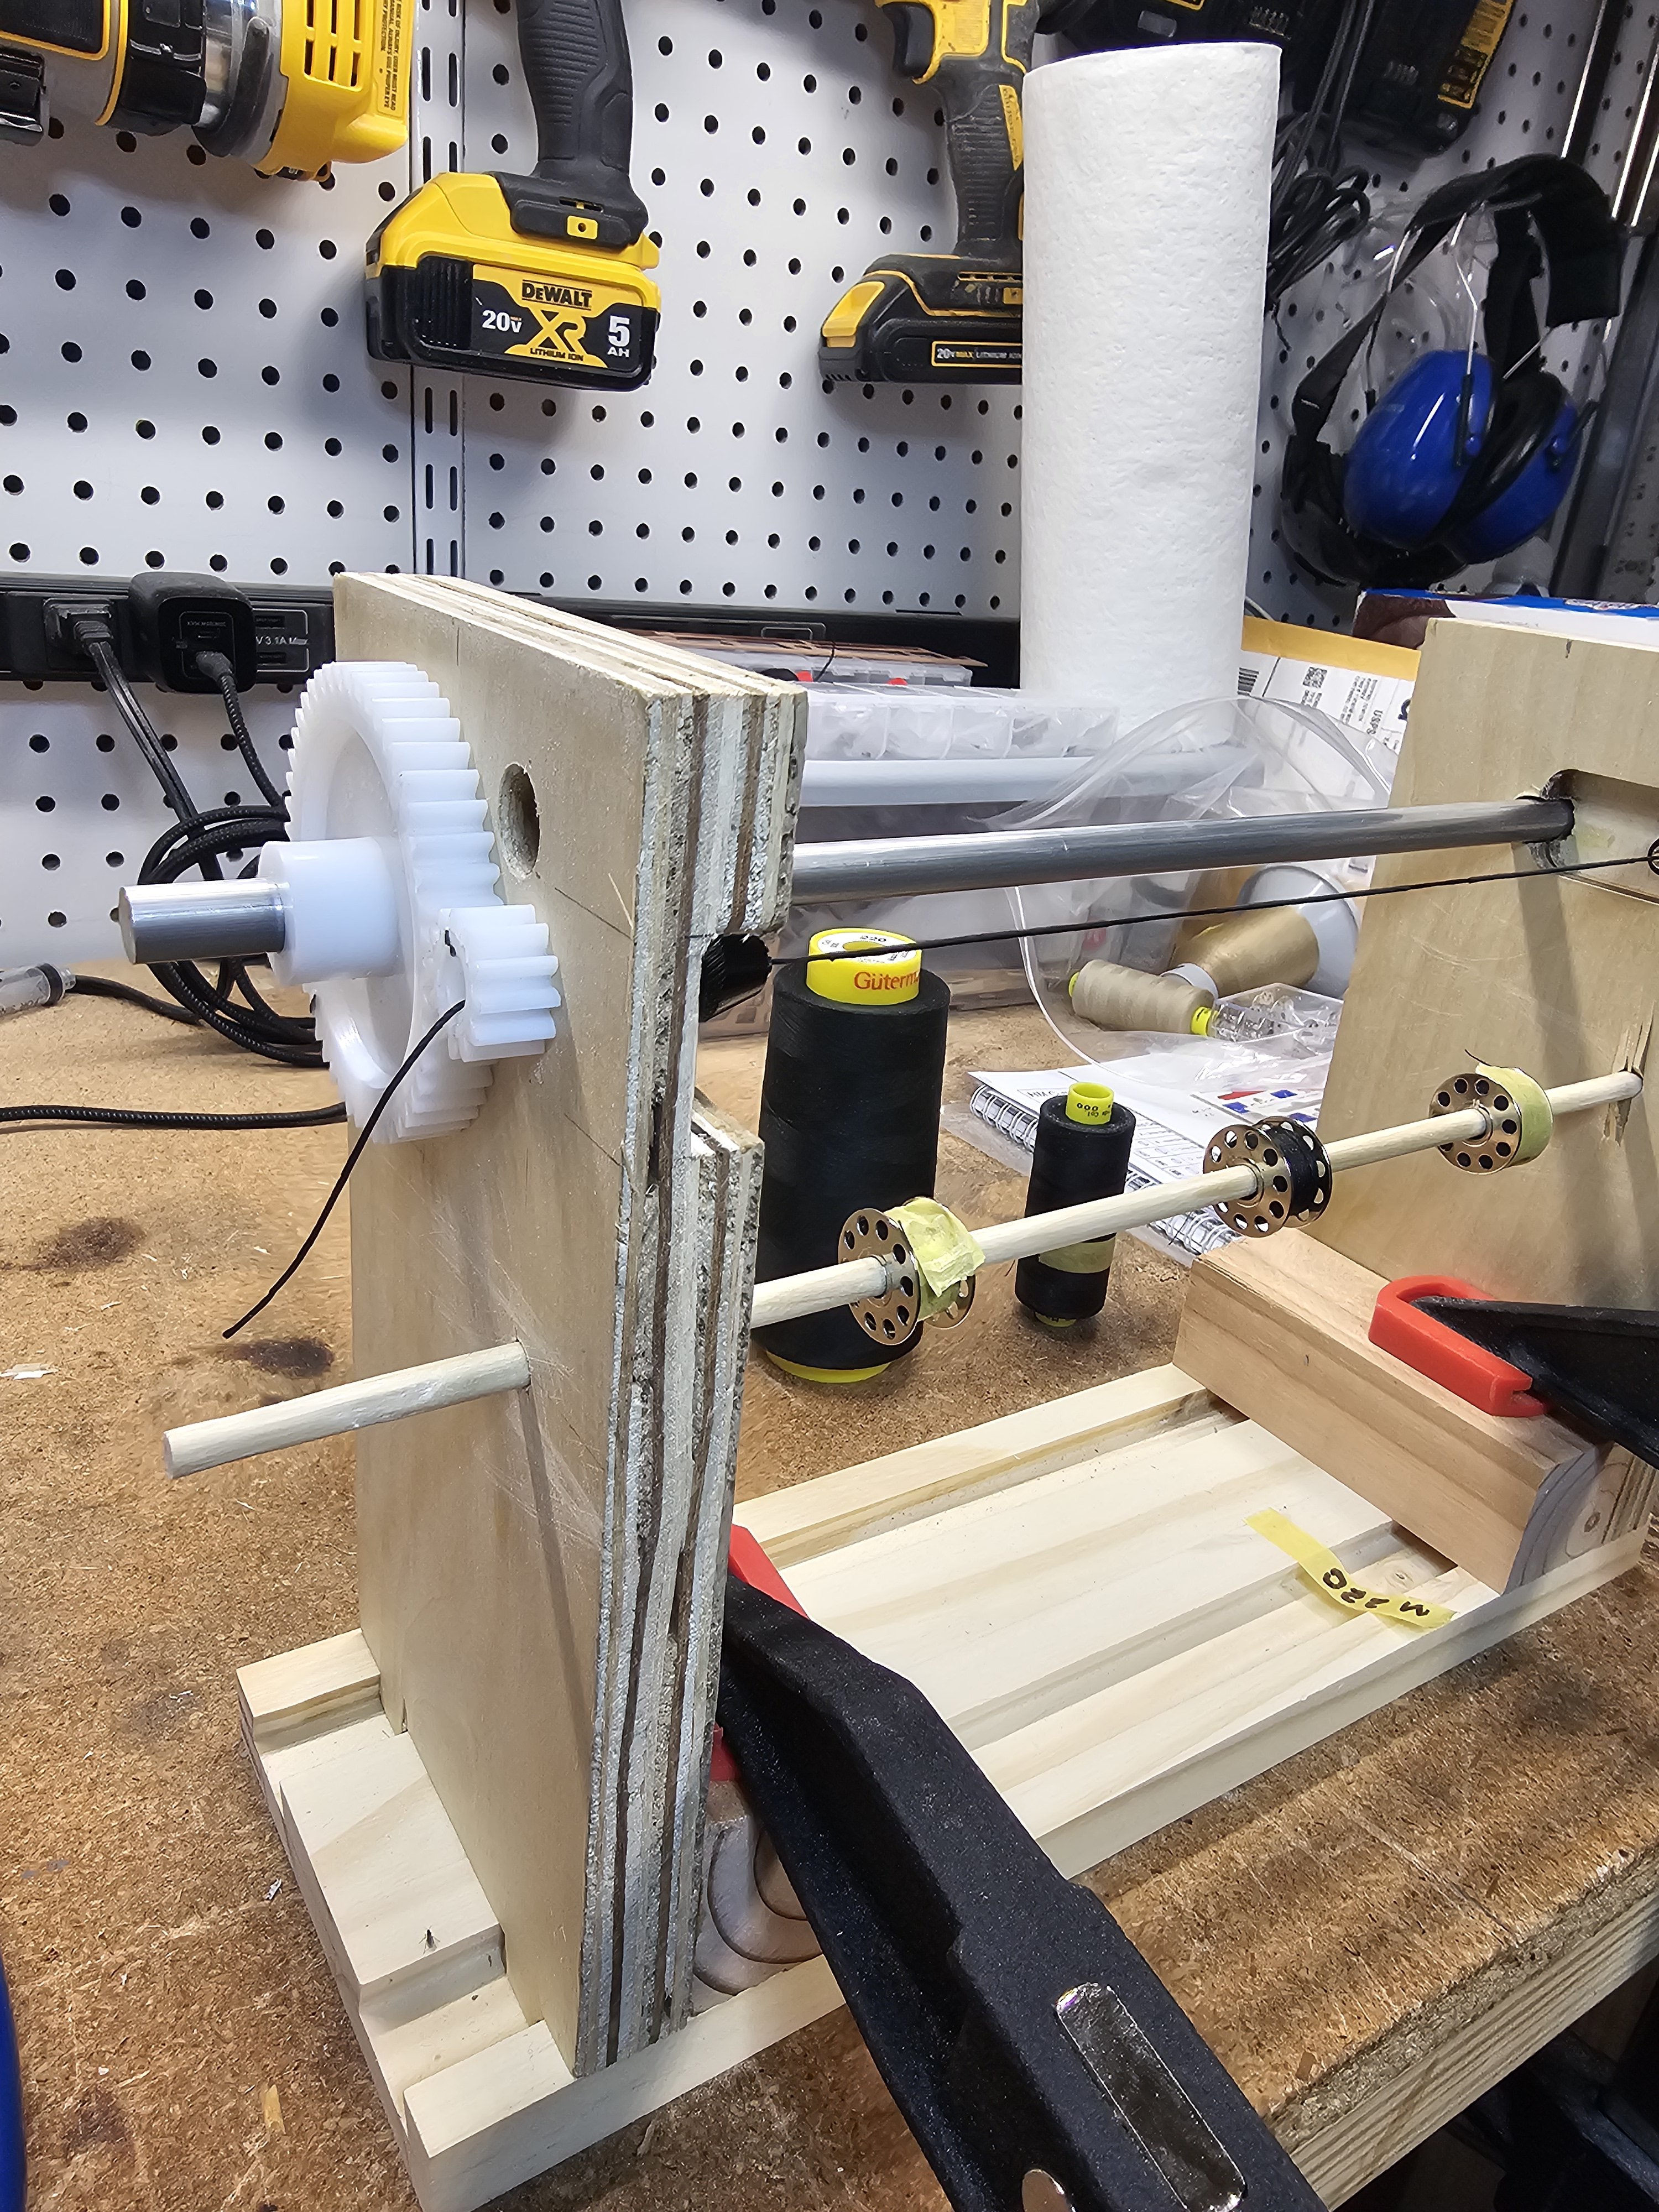
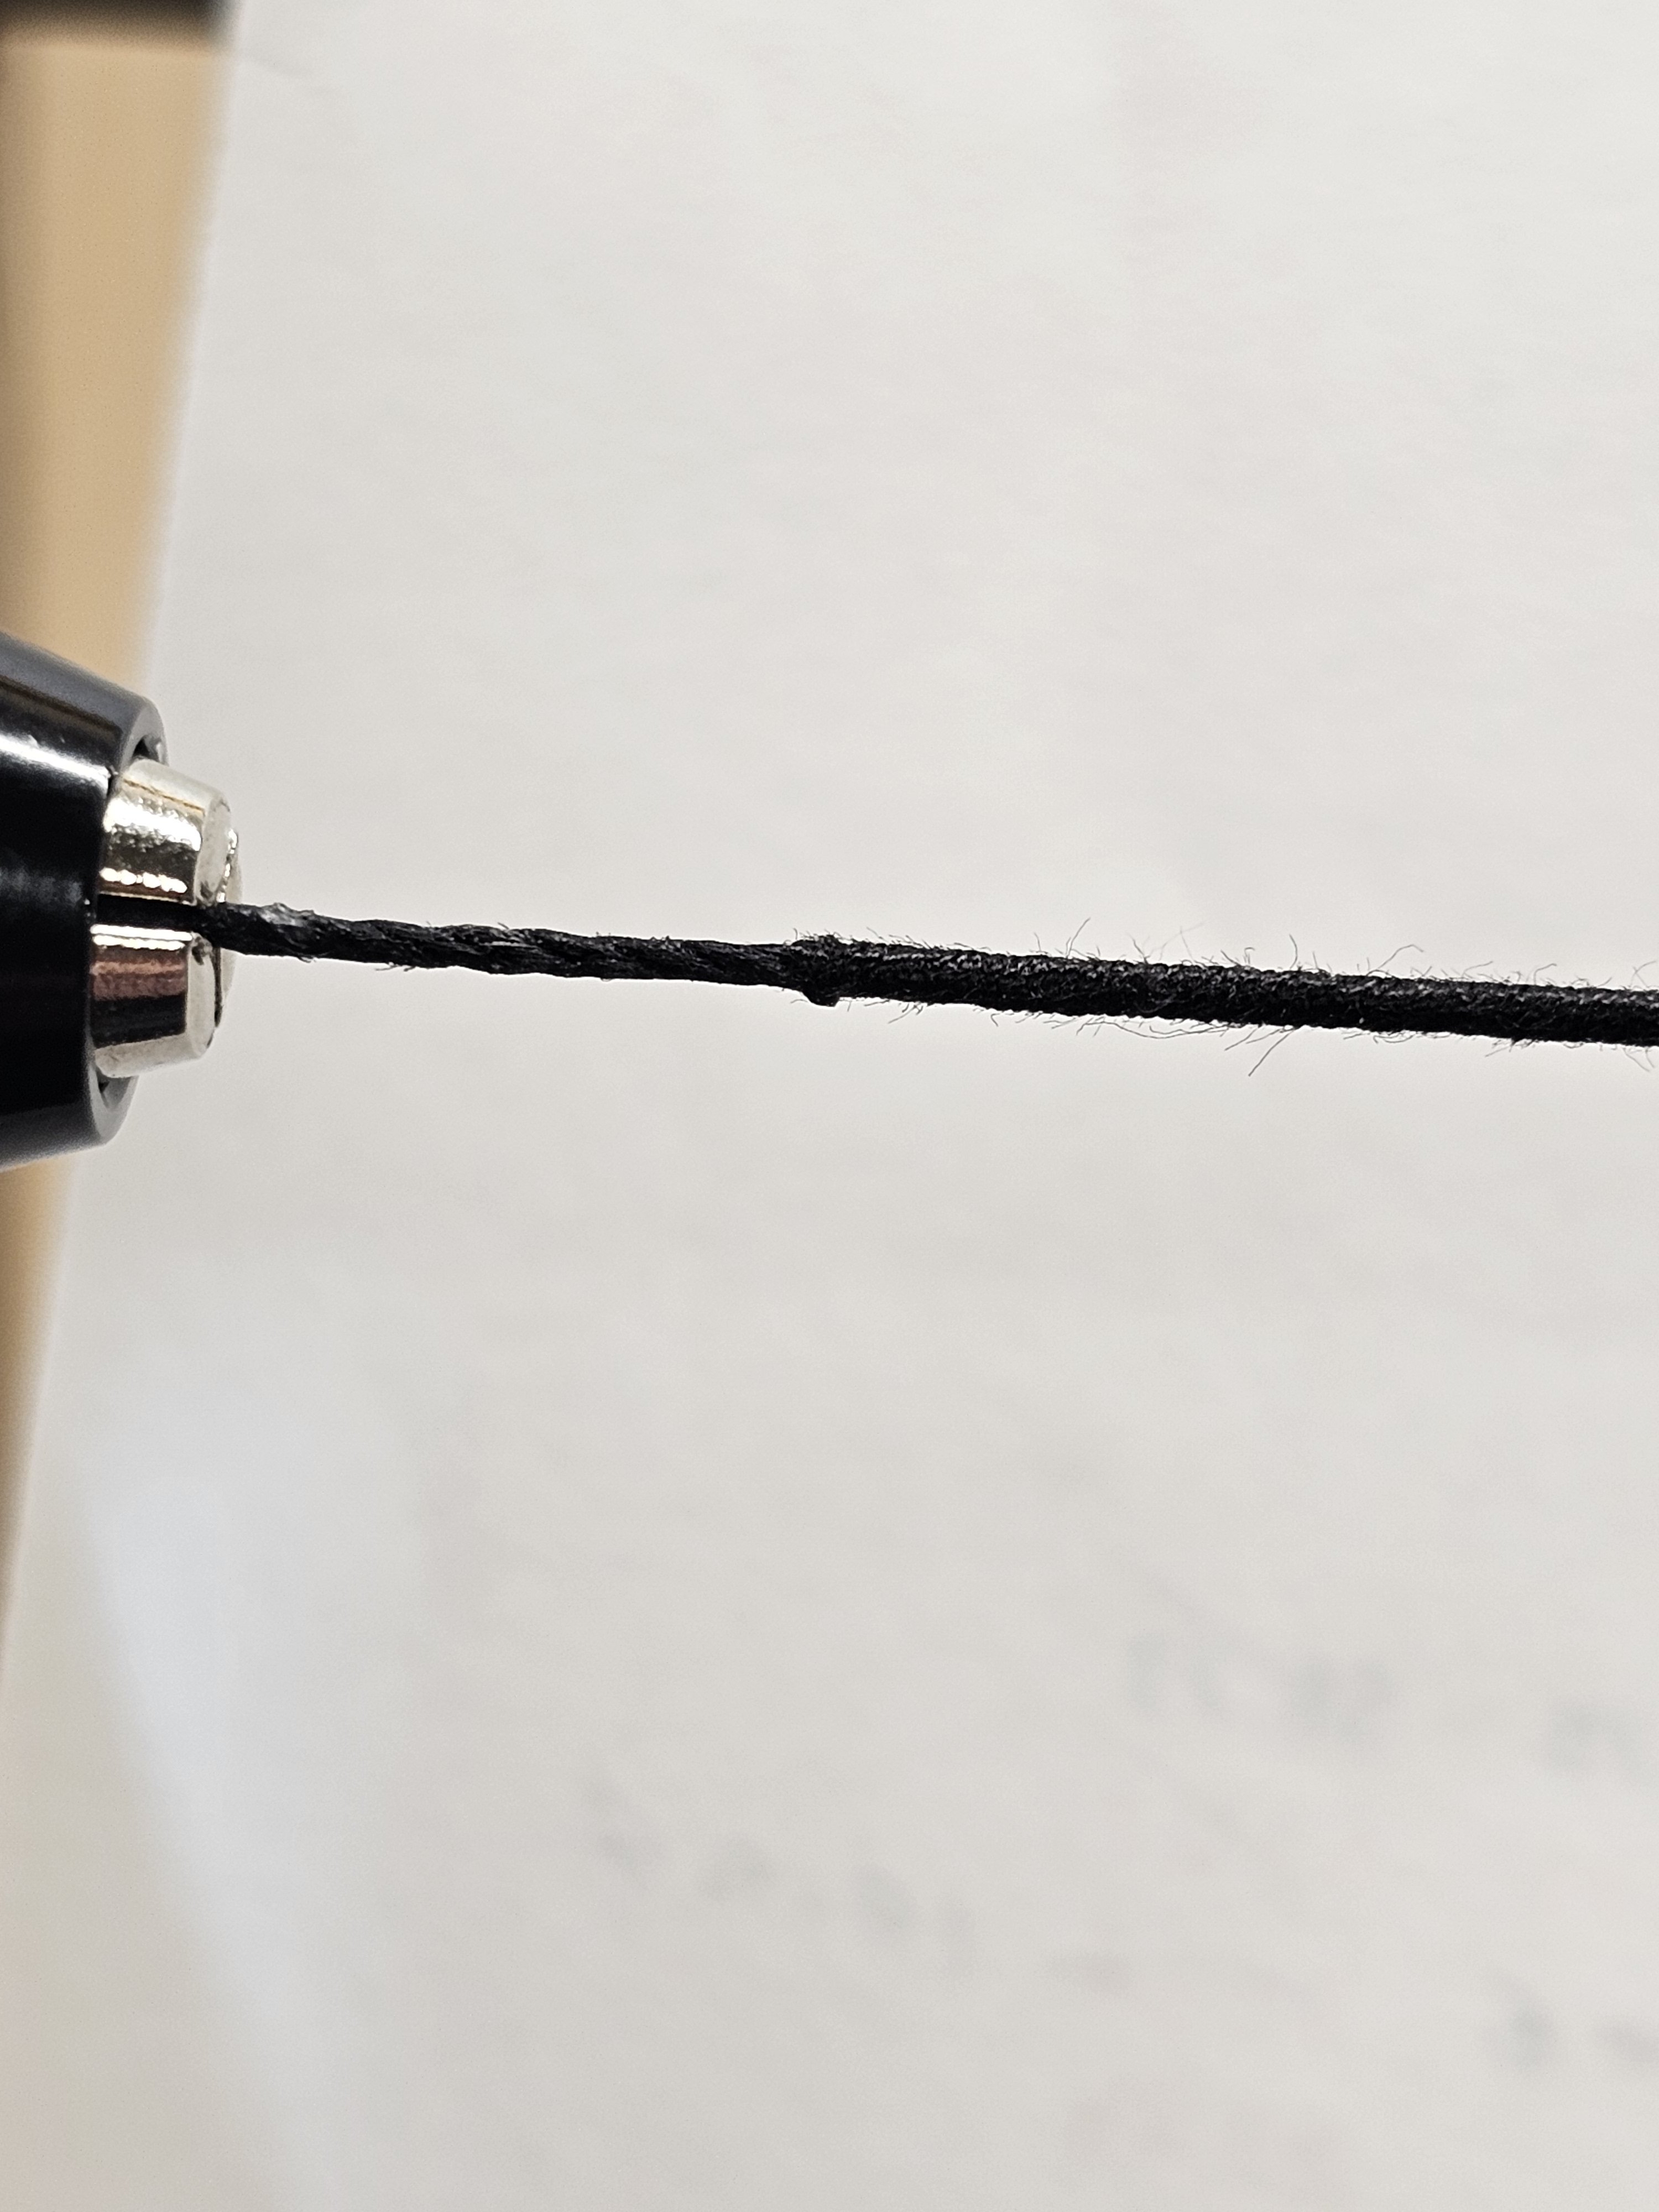
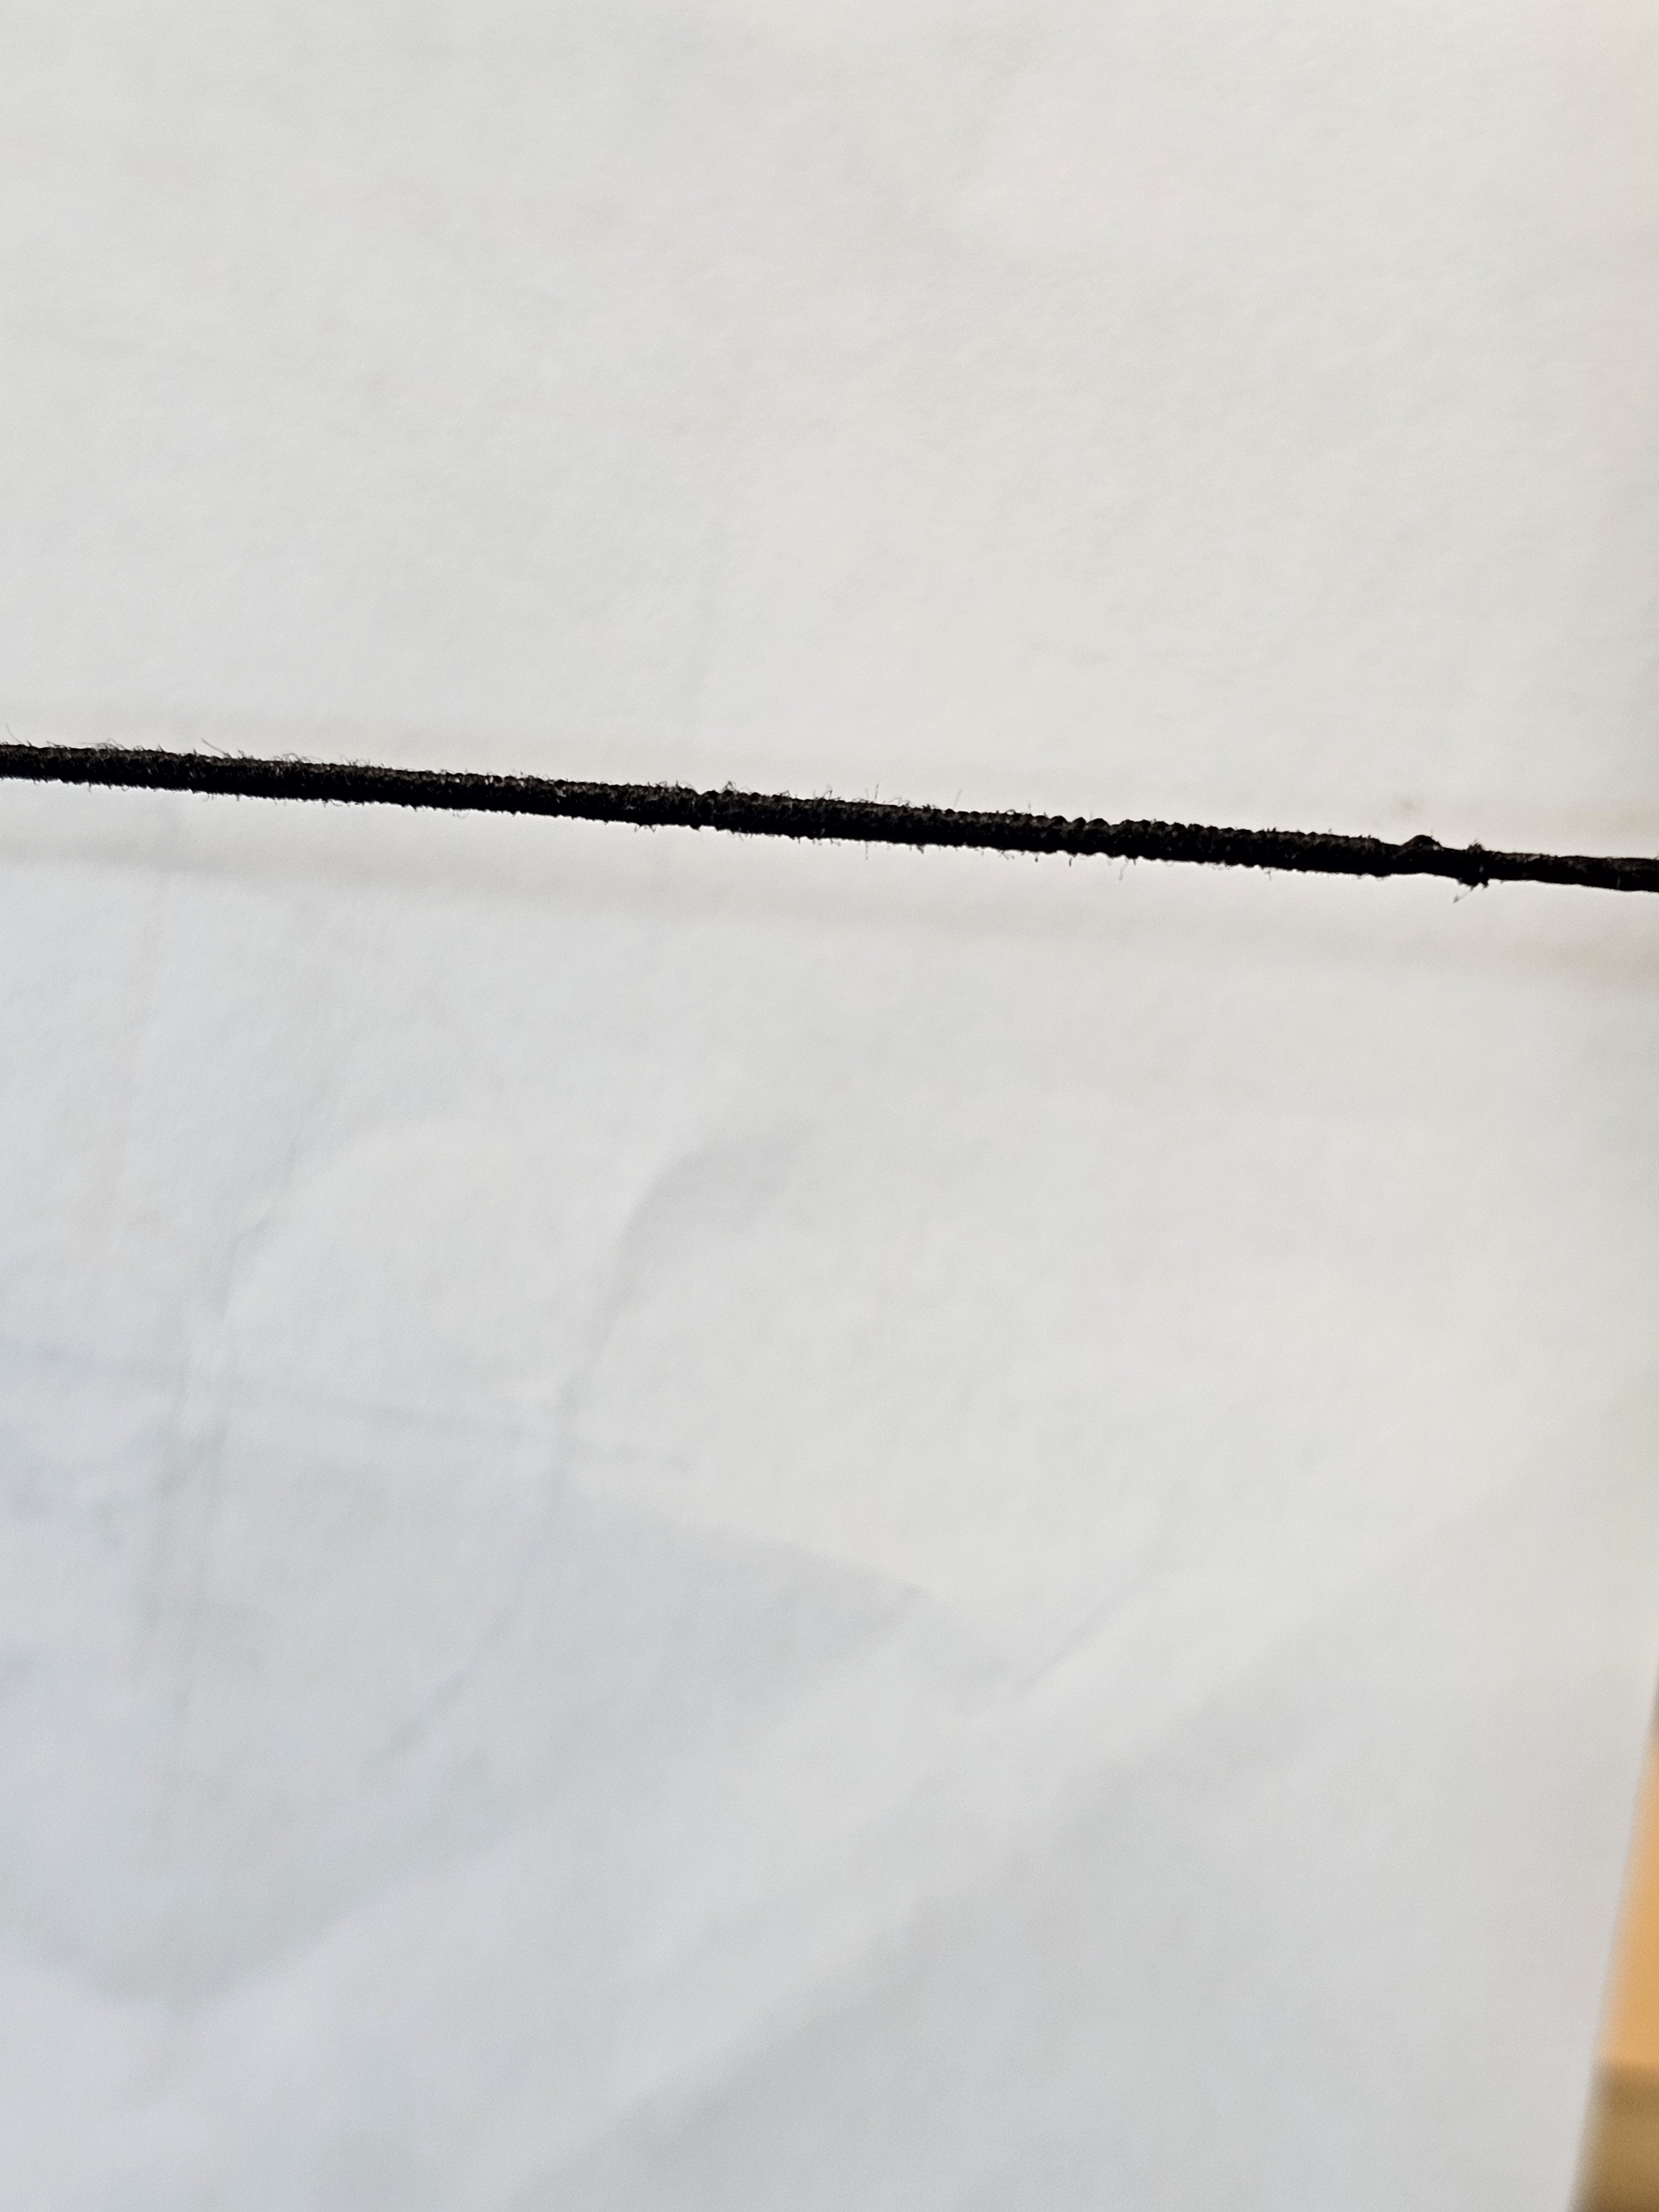
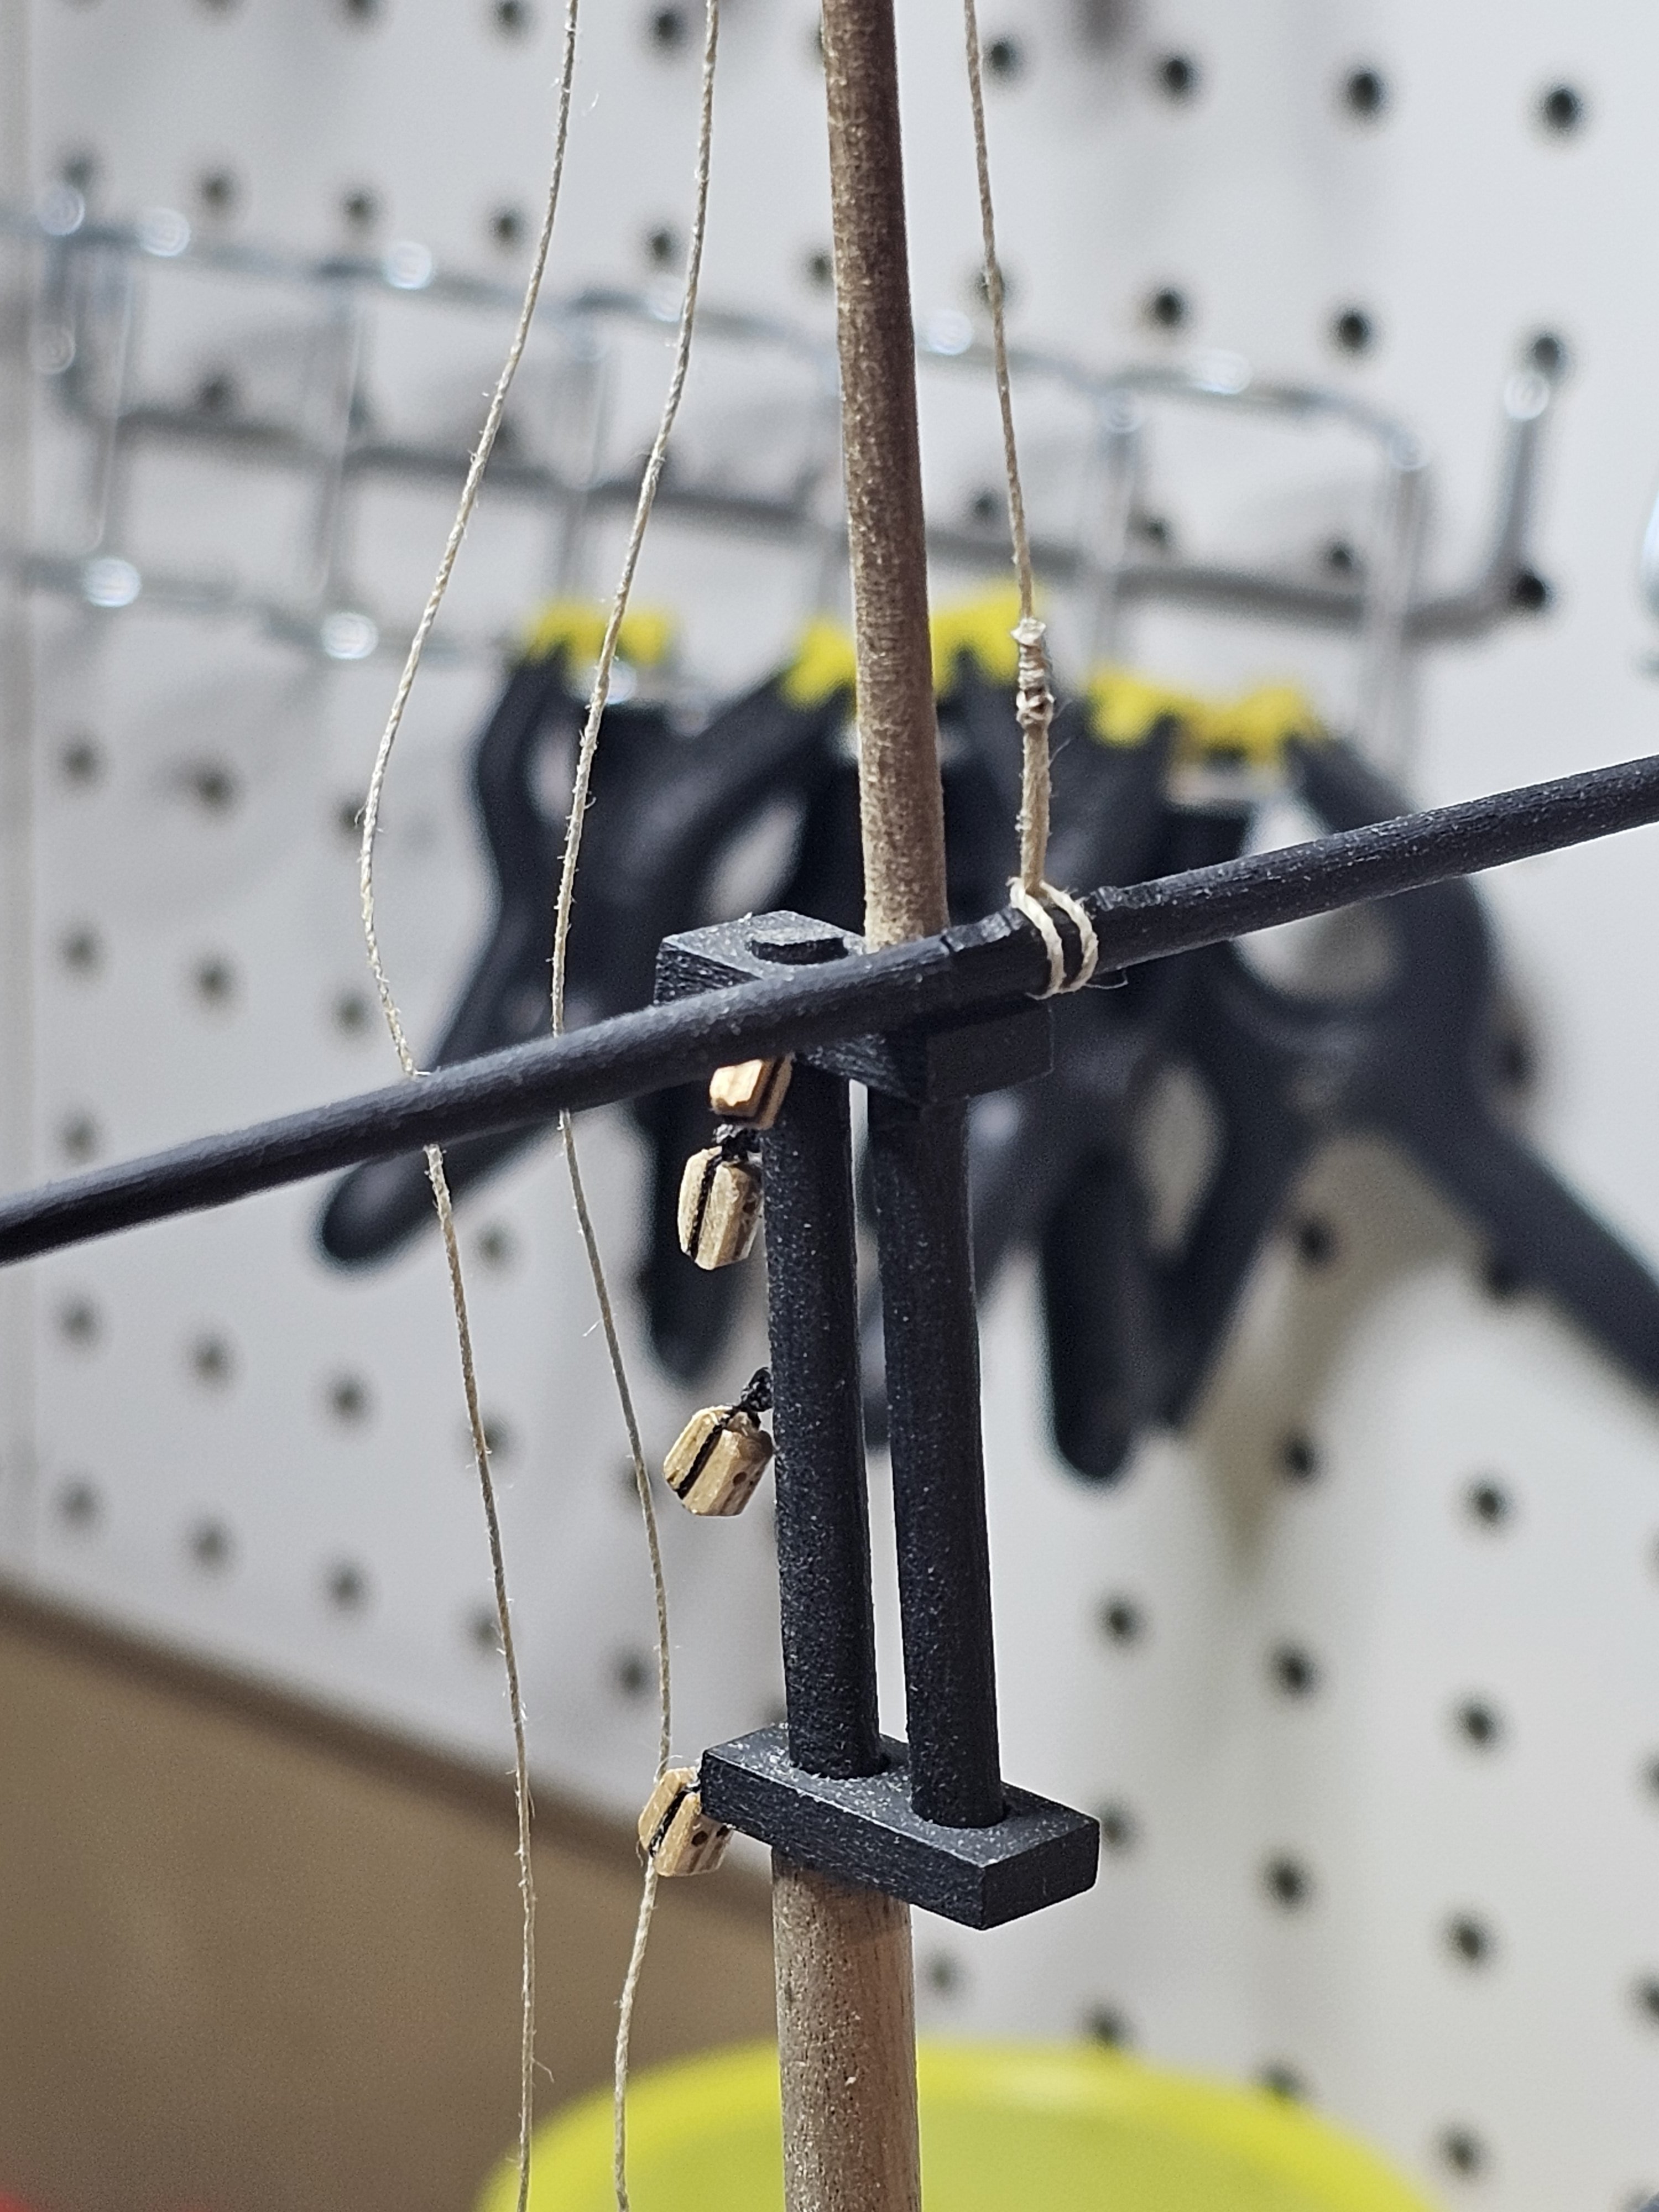
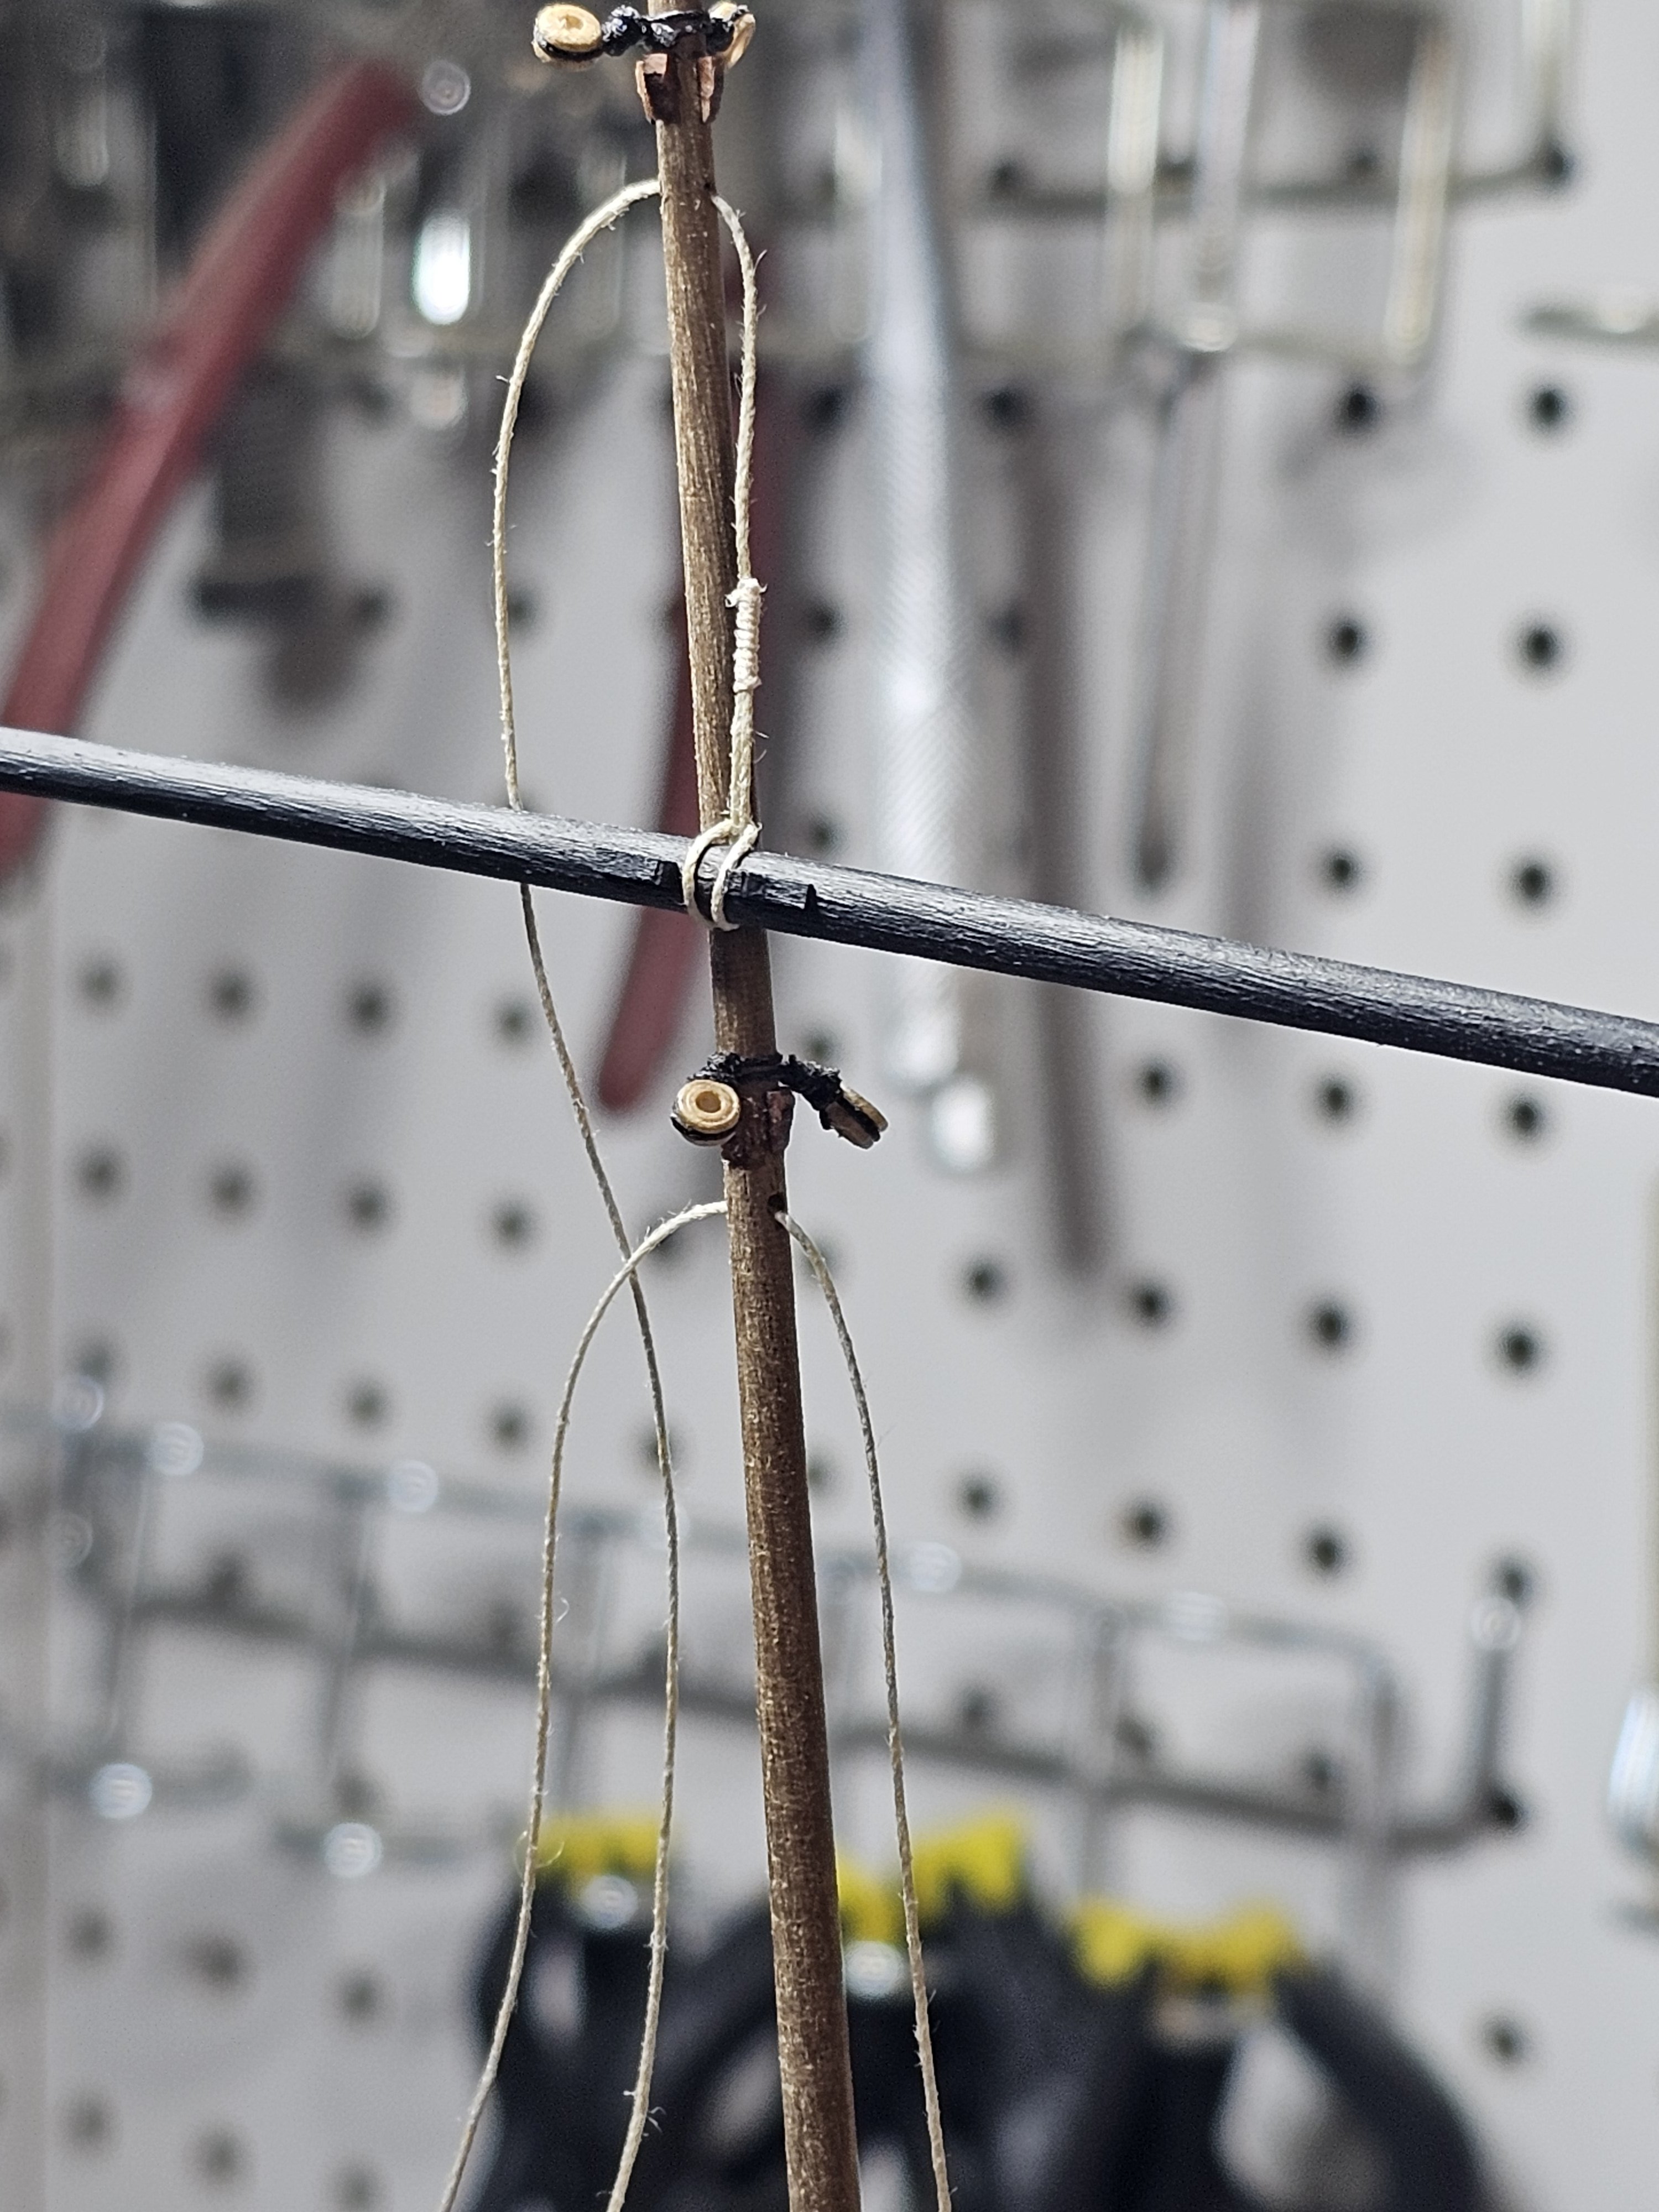
 Did some more work on my serving machine... Sliding dovetail joint in base so I can adjust lengths to be served (each chuck at the ends is drilled thru in order to run continuous-lengths of rope to be served- just need to hang spools at each end). Gears are 4:1 ratio, so I get 4 turns of serving per turn of the big drive gears (probably add a handle later). Could be motorized, but I'm not going to get that involved with this. Using the thick line for the shrouds as a test piece, I did some samples of Gutermann brand thread for the servings. Left side: 50wt all-purpose, Tex-20, 876yds Middle: Mara 220, Tex-13, 5468yds Right: Mara 150, Tex-20, 1093yds *Tex # is some standards thread size/diameter... lower tex #, thinner the thread For this model, I'm liking the Mara 220, mostly due to minimal fuzz and it's finished texture (just needs some wax or post-treatment to cut fuzzy down a little). All the threads I tried are very similar in size, especially at this scale. I also purchased some spools in beige/tan so I can do my own hawsers and breech lines, etc.
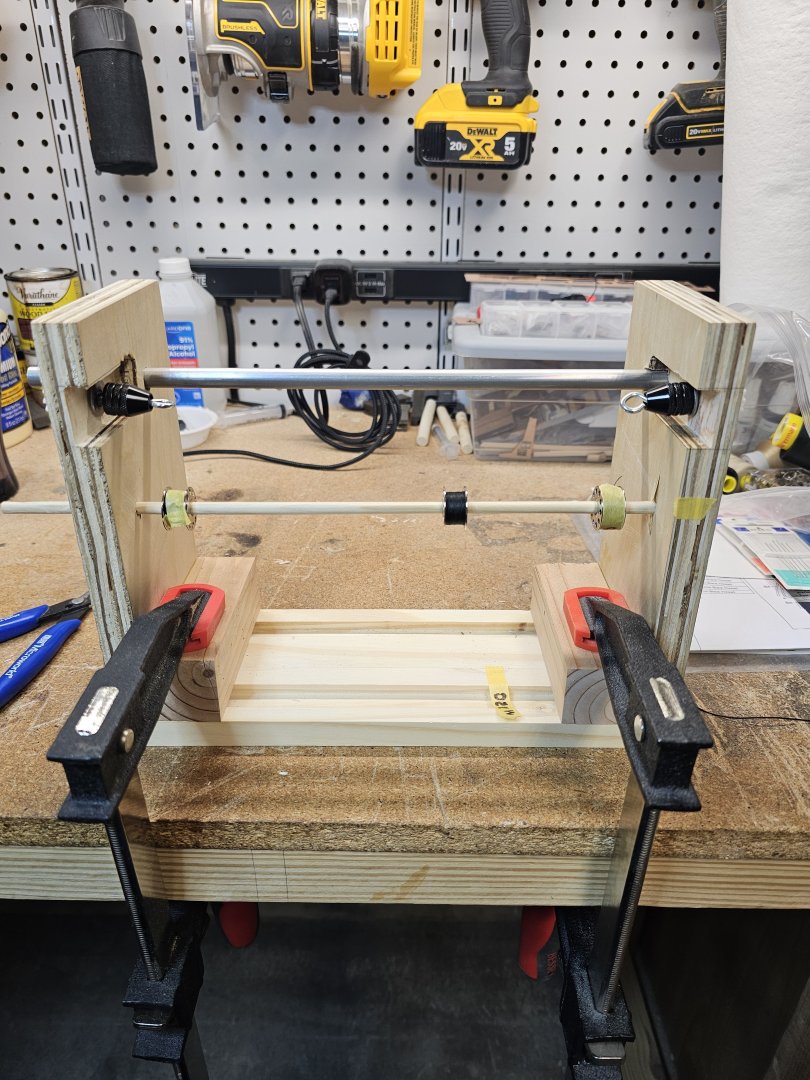


-
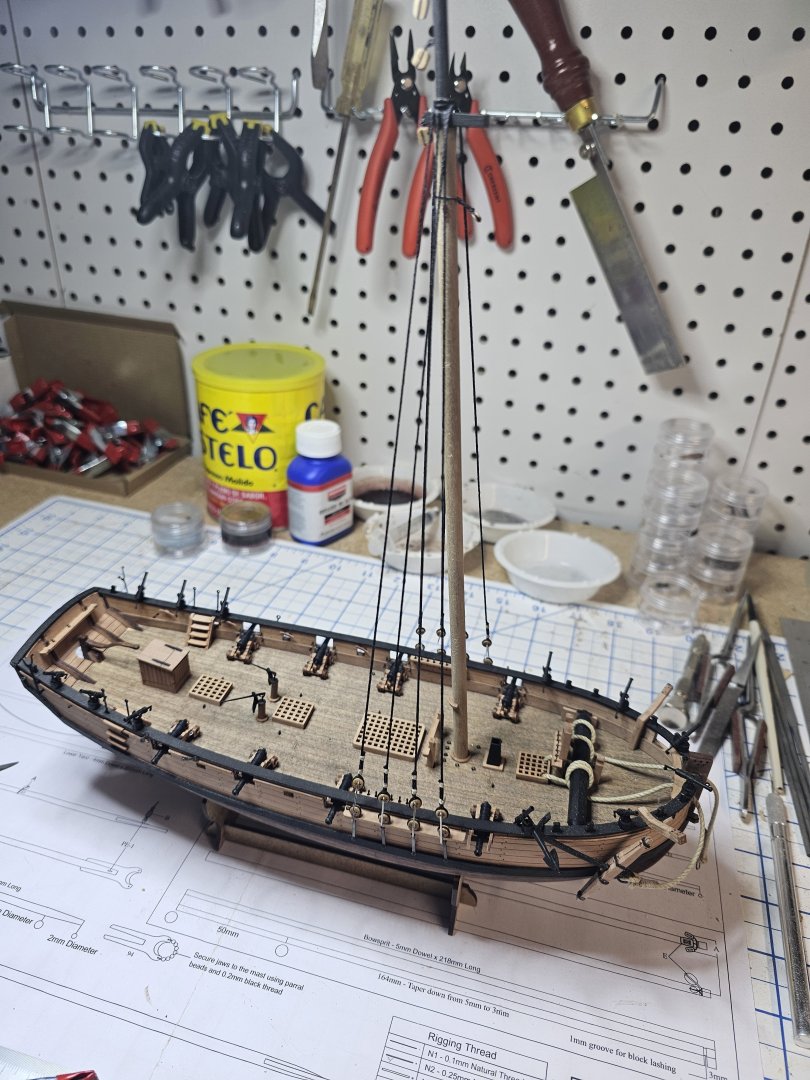
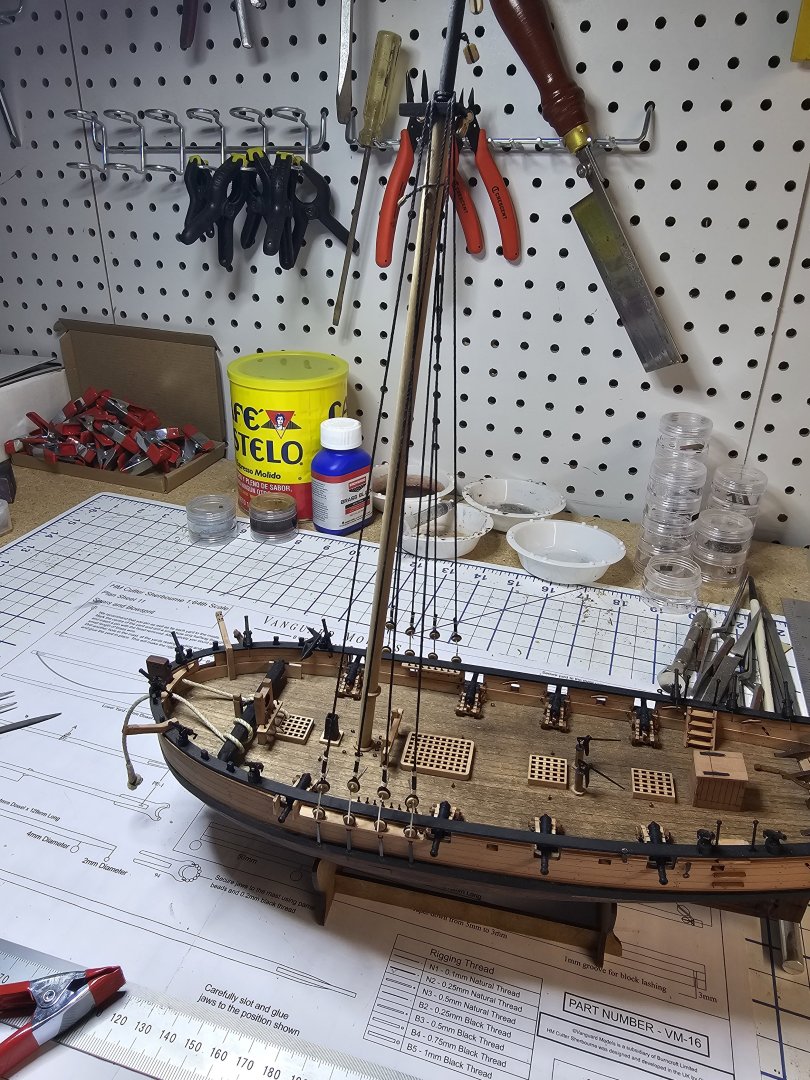
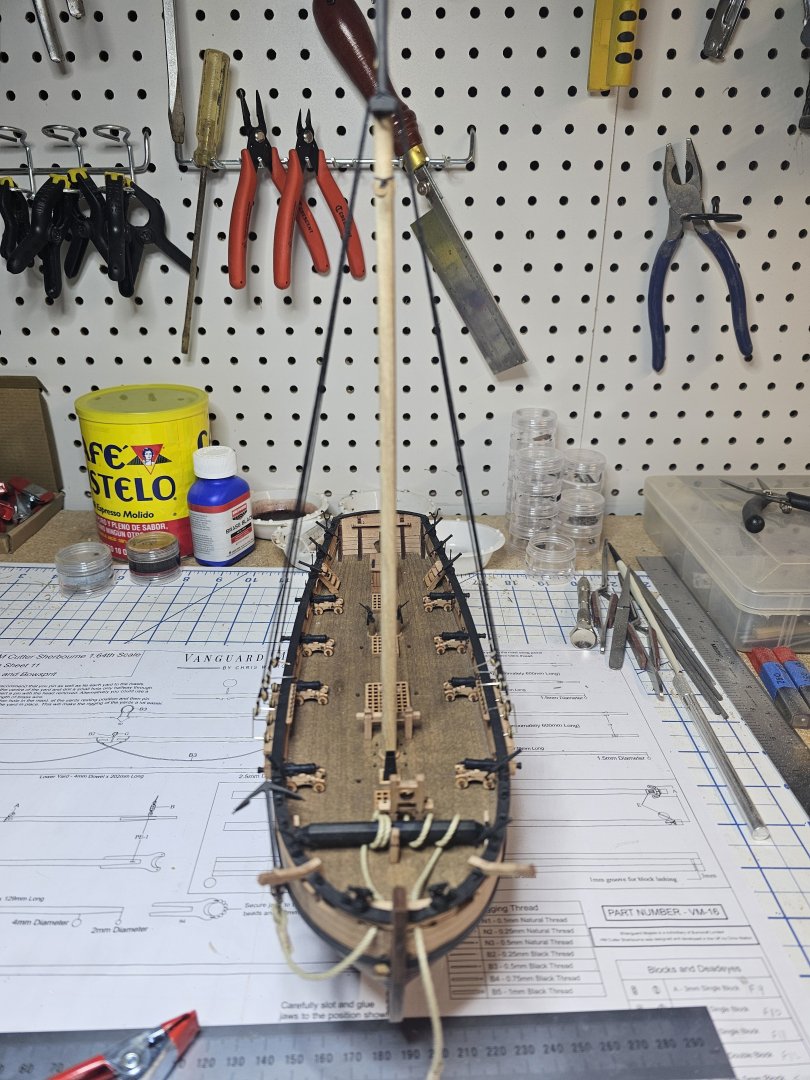
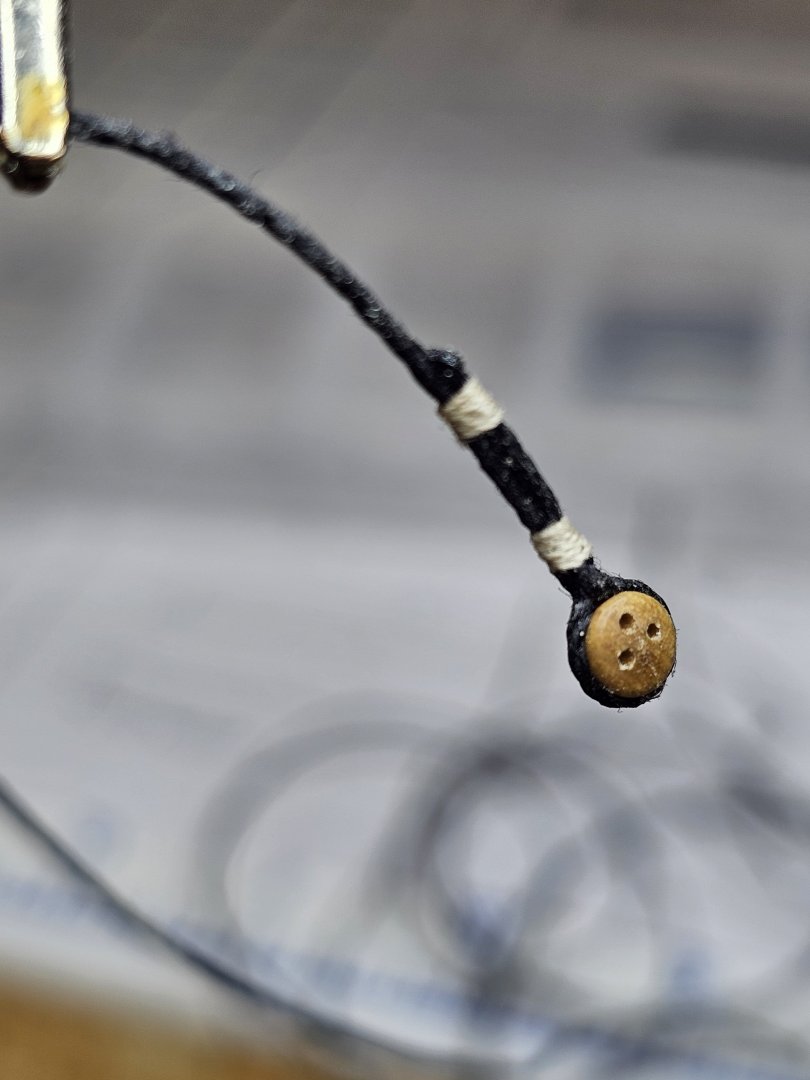
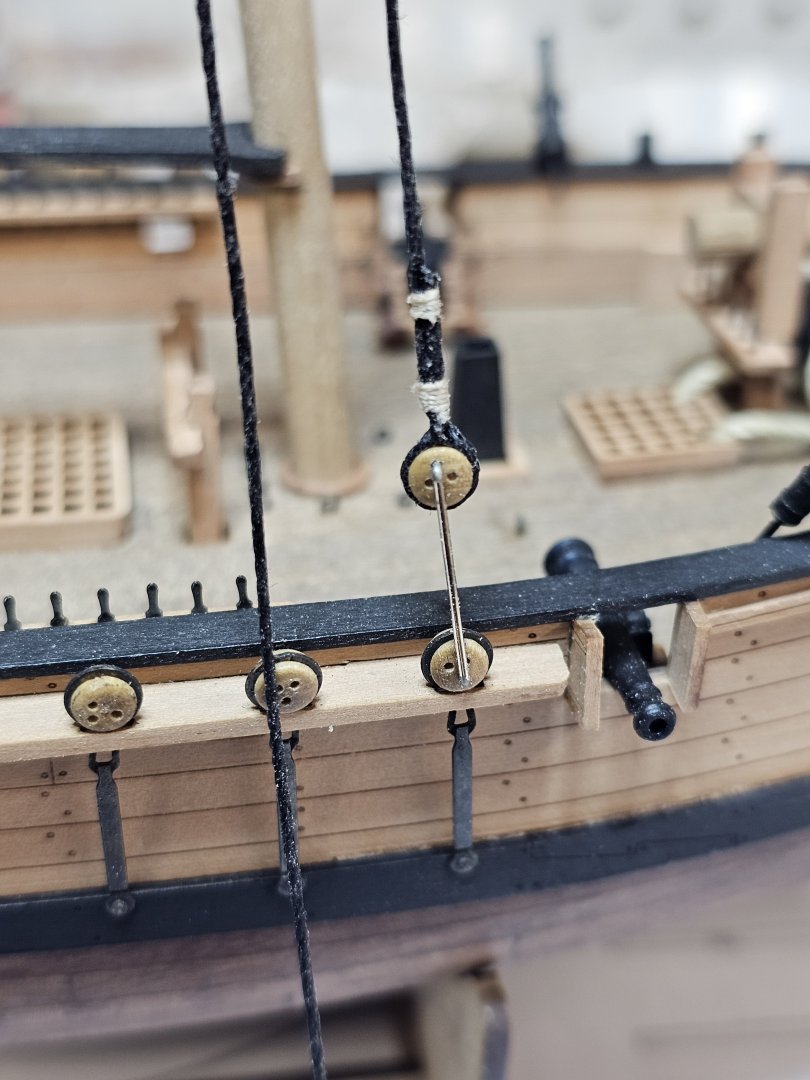
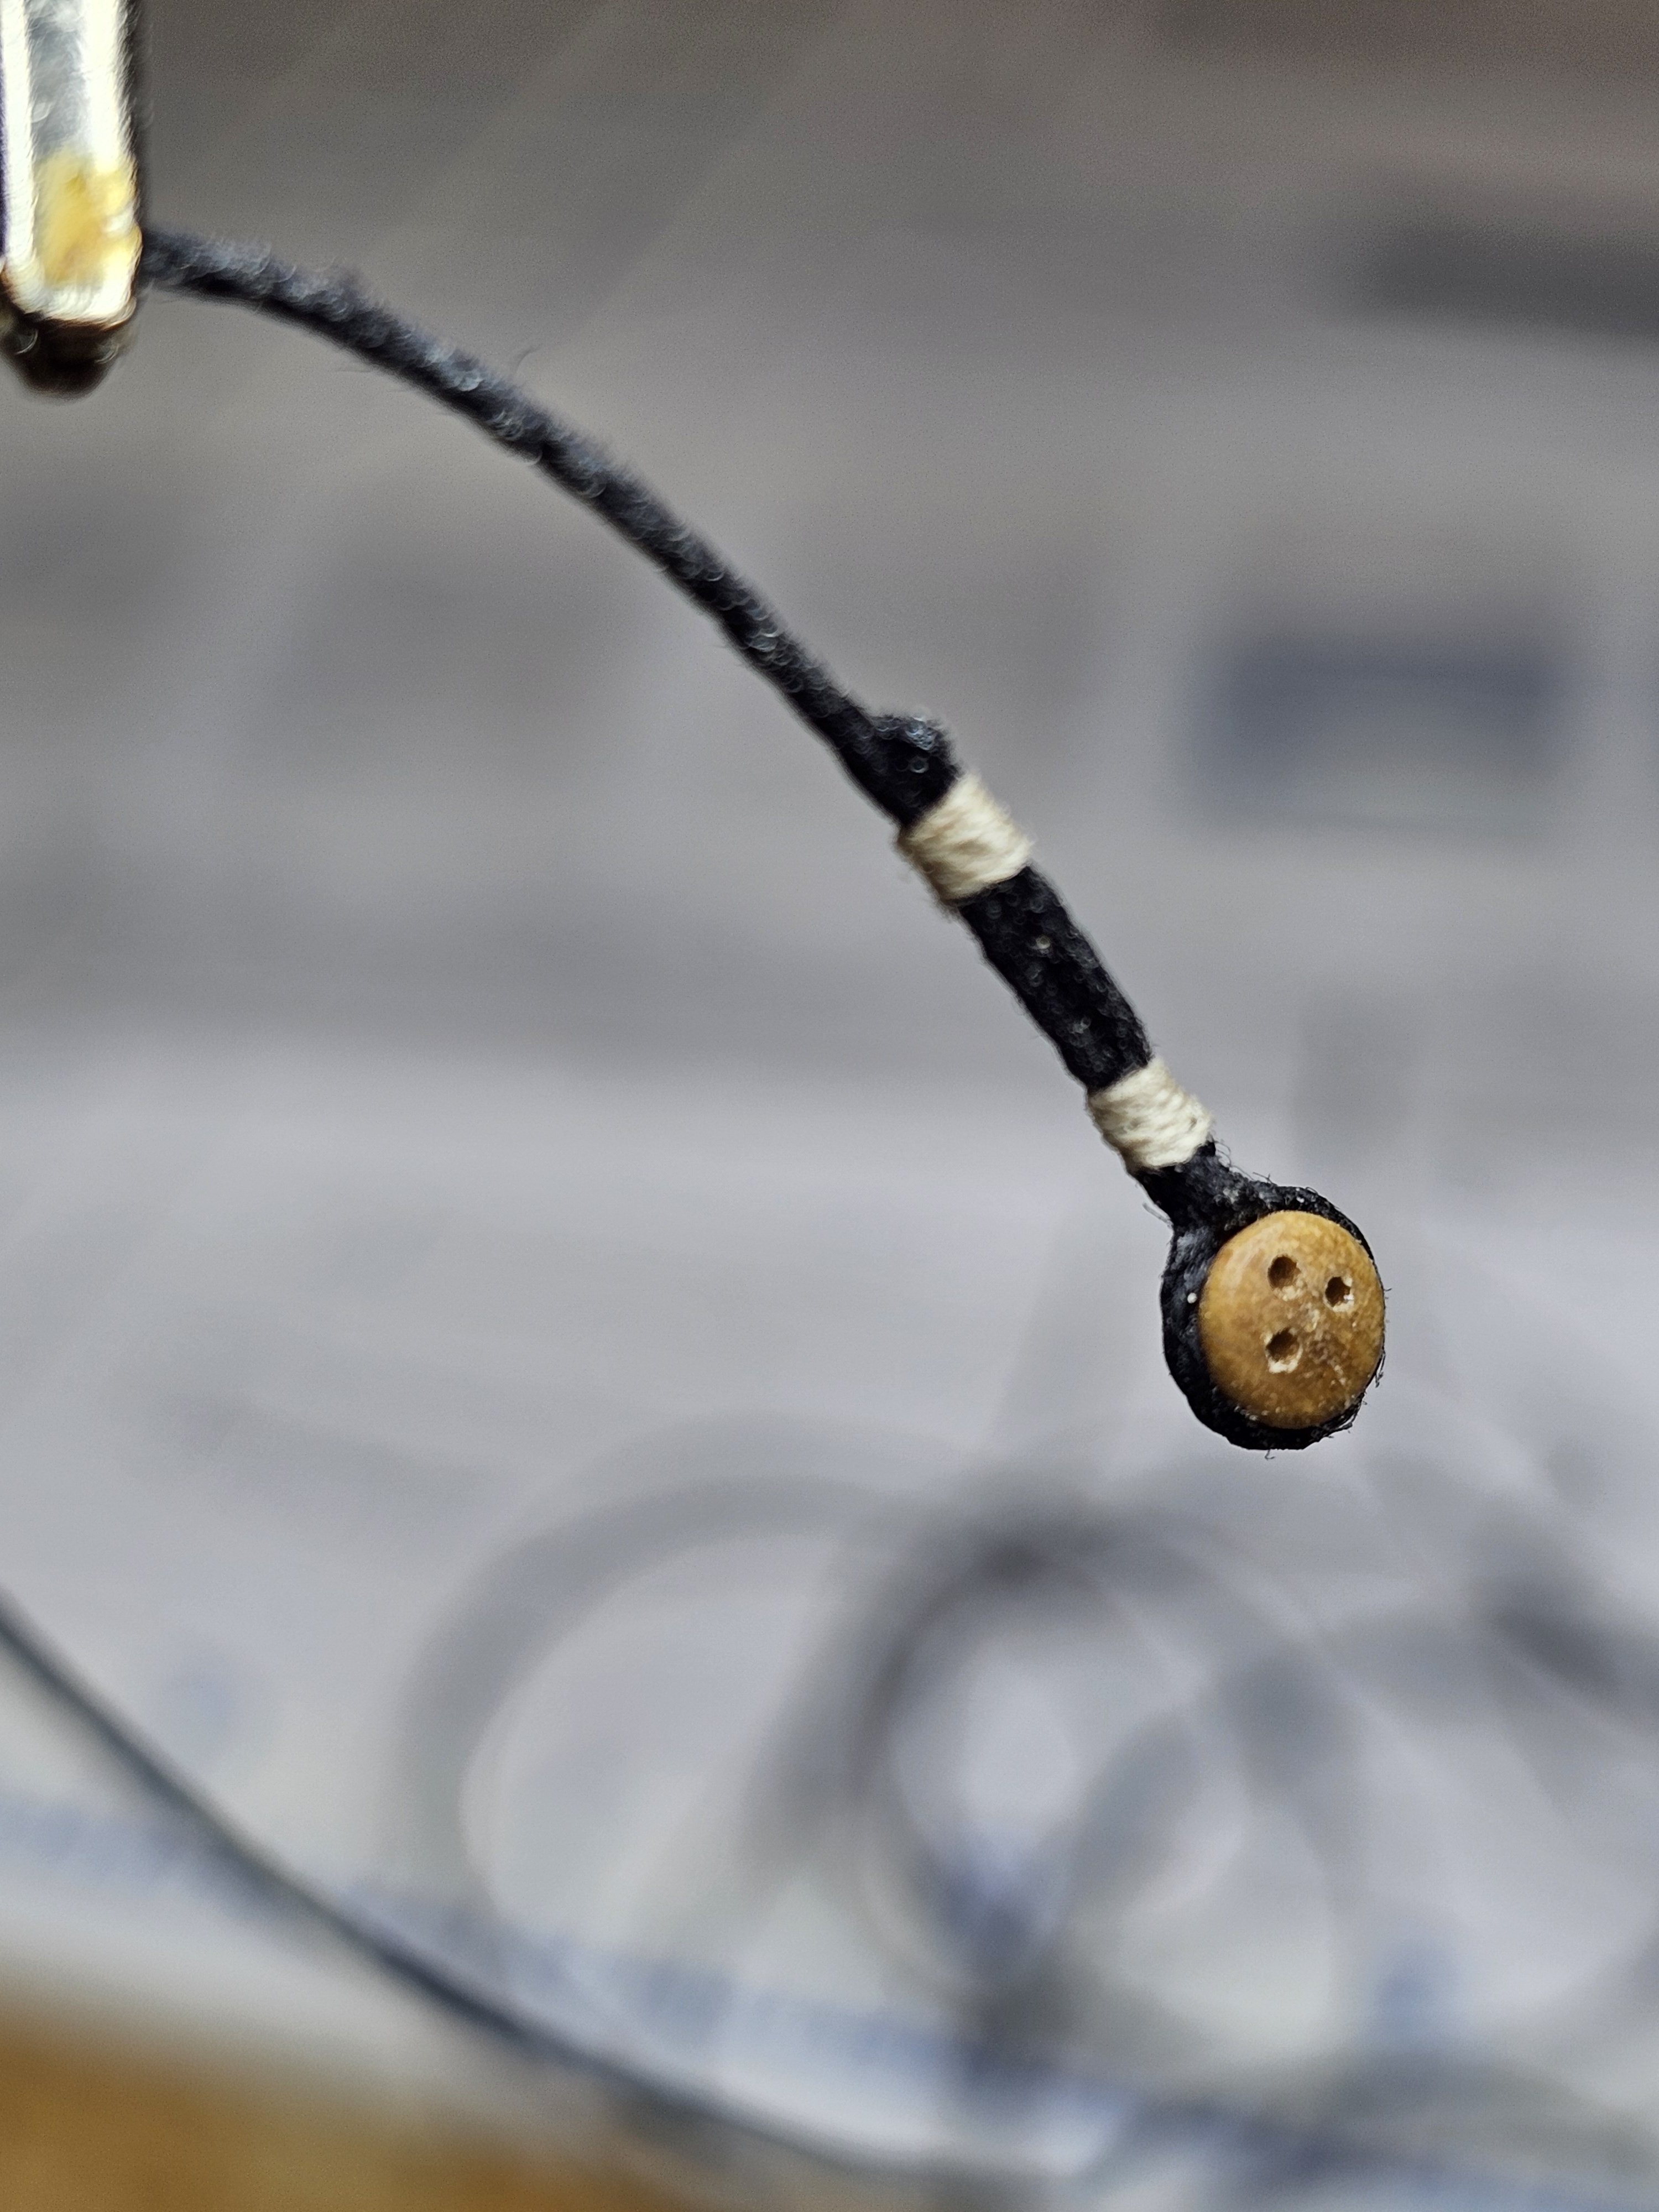
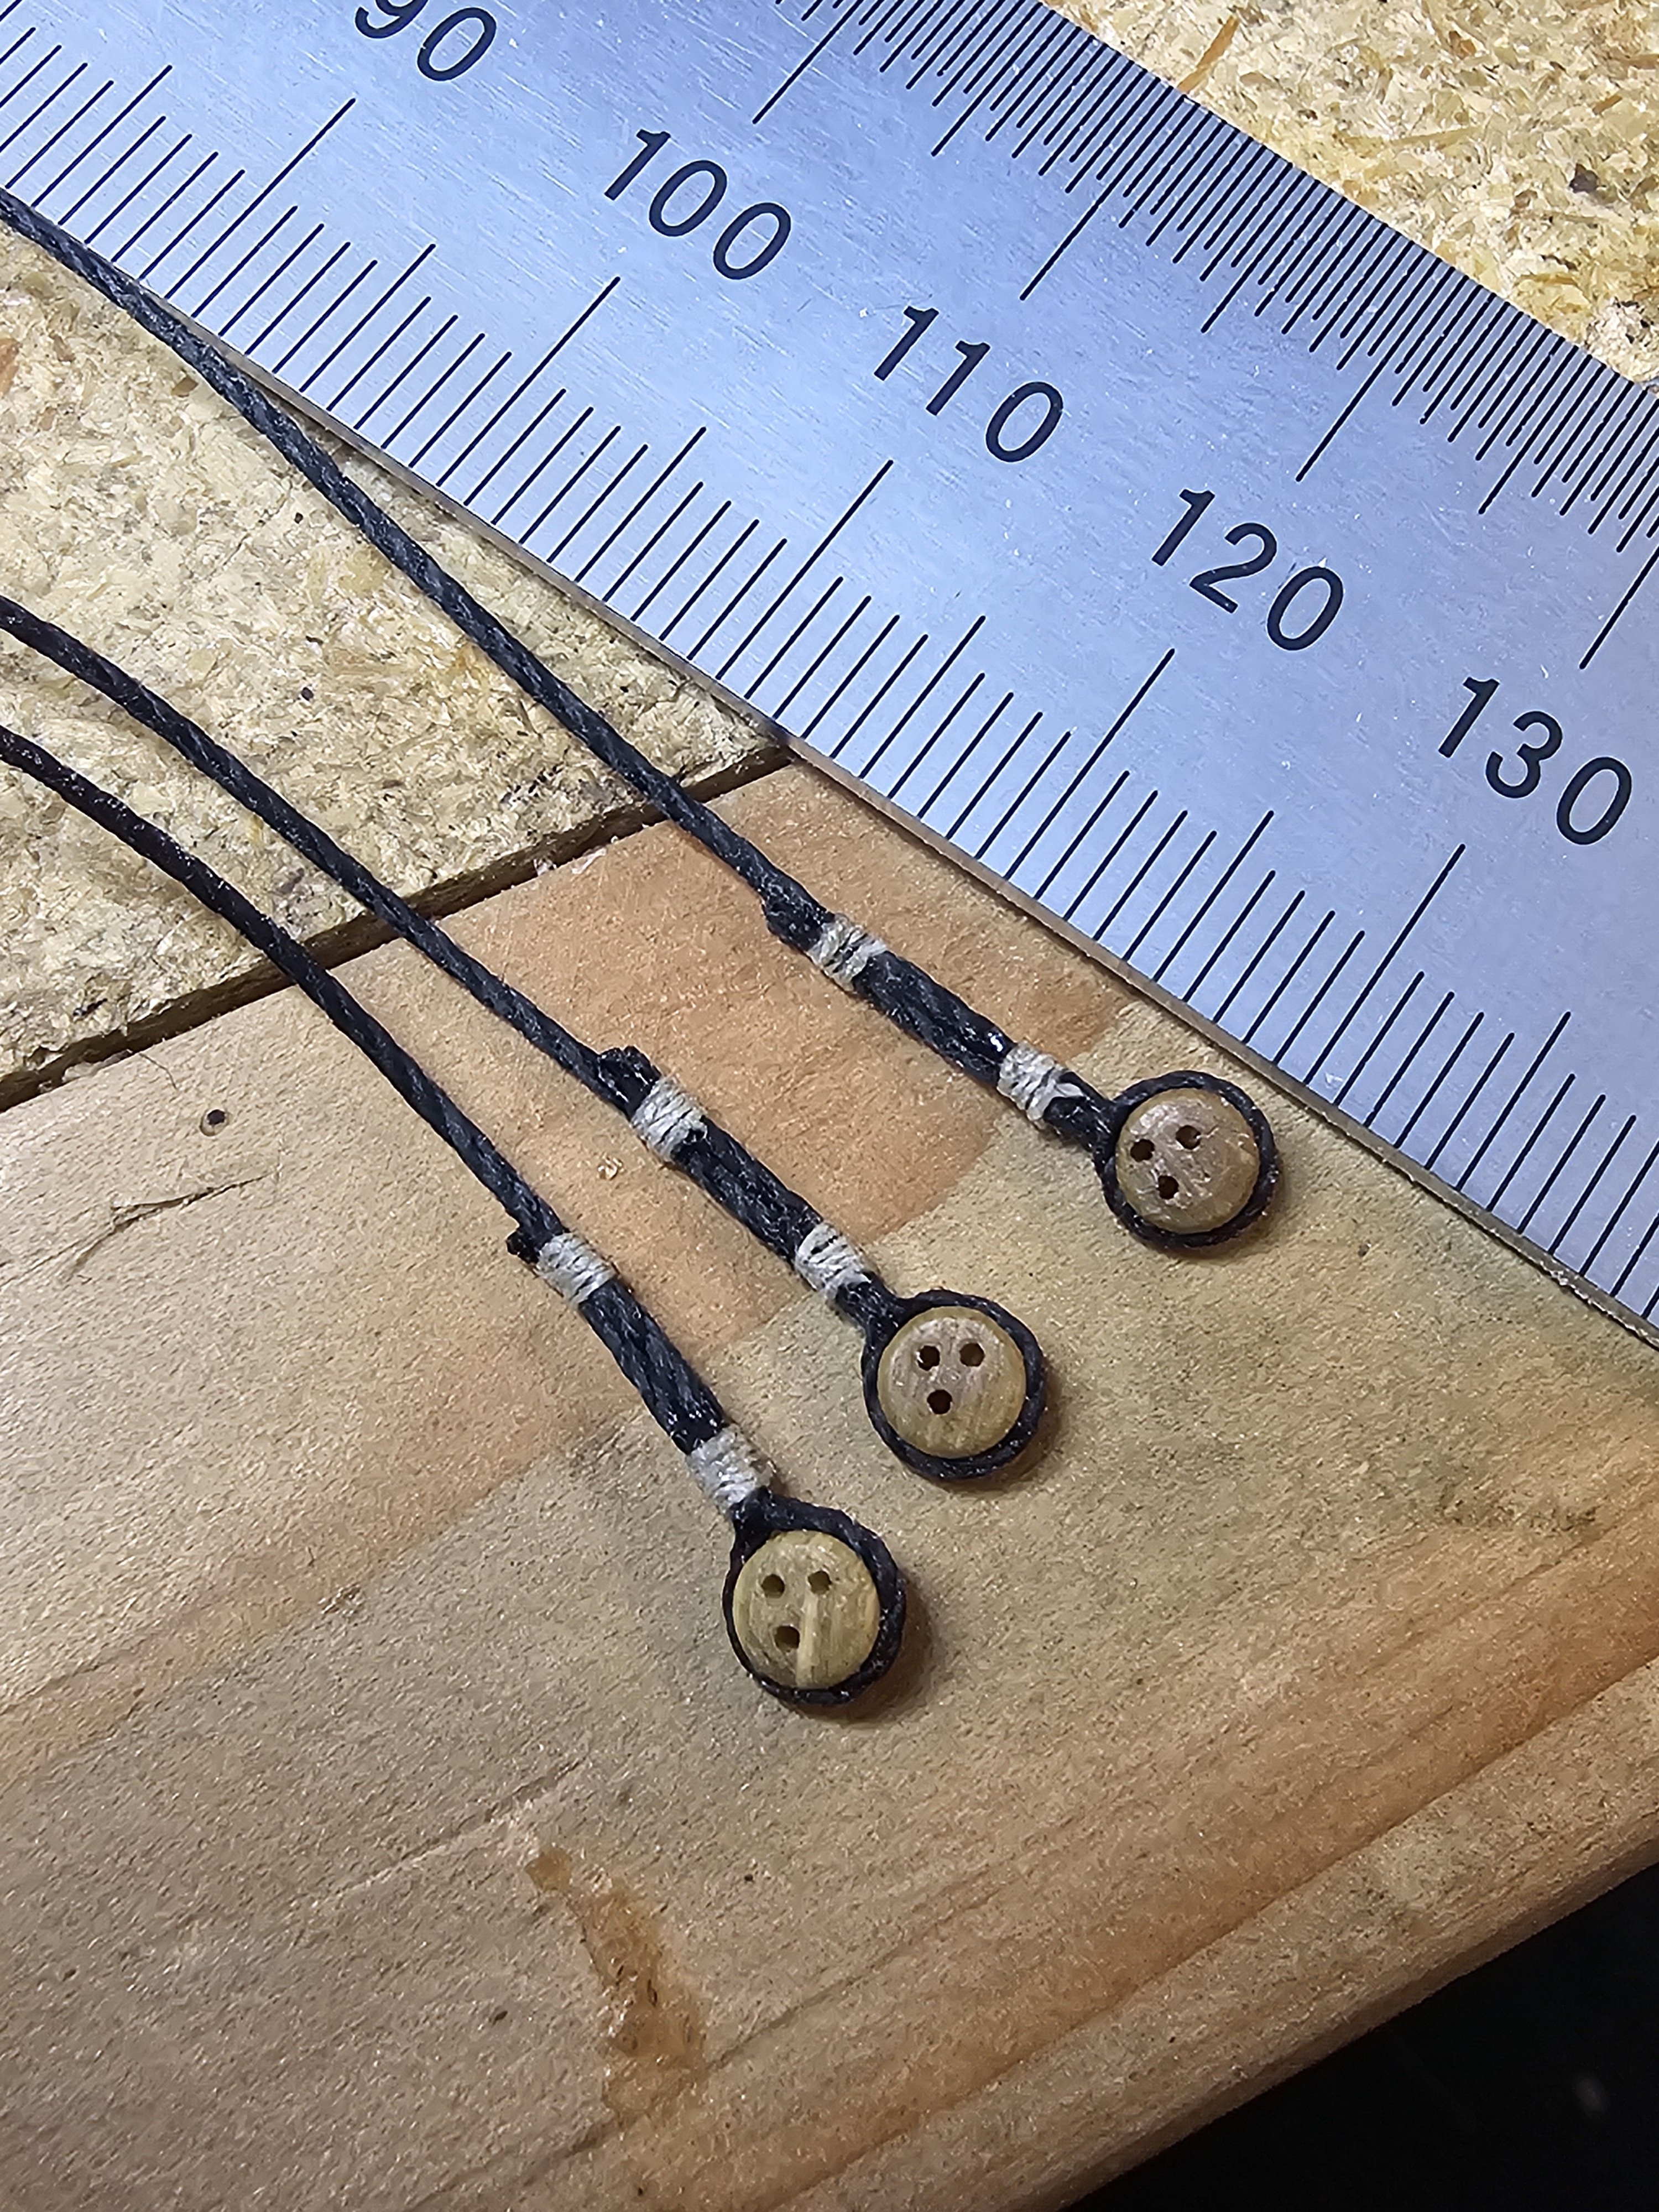
Deadeyes and shrouds ready to go. Pins are judt to hold shrouds in position so I could check the lengths and lanyard distance- trying to be as even as possible (close, but good enough for now). So far this is the farthest I've gotten with a wooden kit (my Niagara only has the hull, no spars or rigging yet). This kit design definitely helps with building some confidence while making things relatively simple- I definitely need that before I tackle more involved builds! And it's rewarding to see things move along a bit faster too- fully rewarding throught the whole build thus far 😊

-
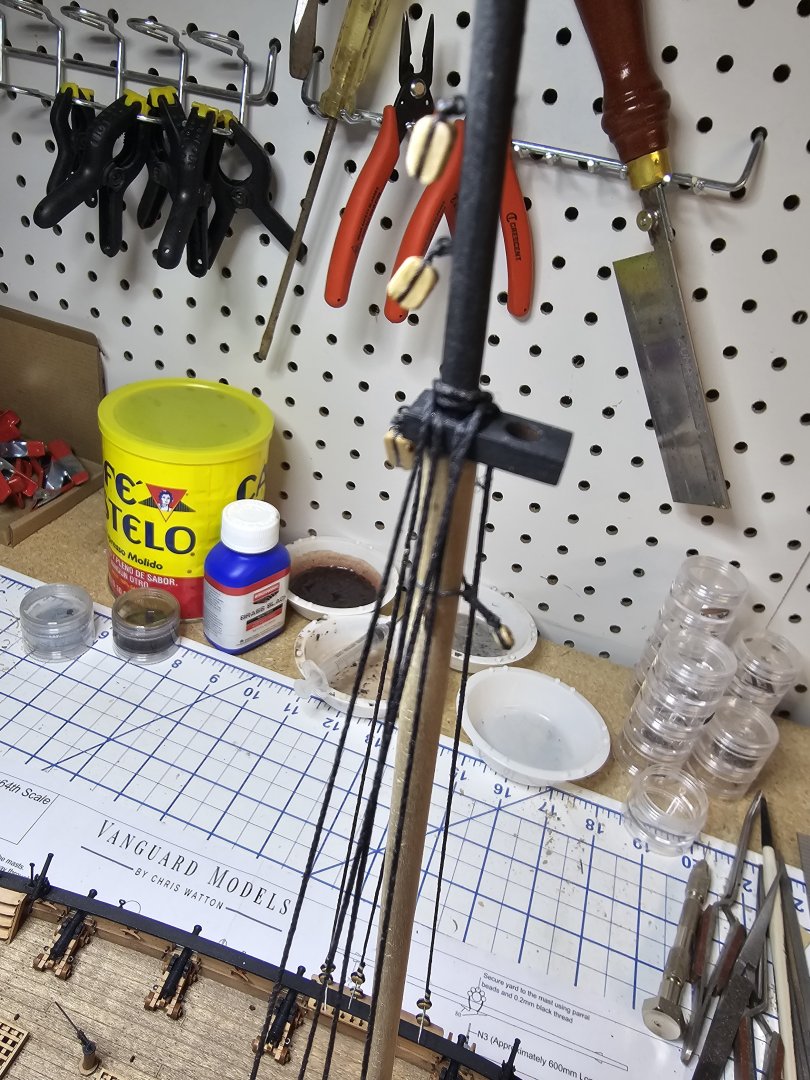
Started prepping shrouds- going to get as much rigging done off the ship before packing up and moving across country (job hunting in order to leave the state of Md). Using a straight pin to set the lanyard distance before installing the deadeye on the other end. Also ordered some parts to make a serving machine (more details/pics on that hopefully later this week once parts arrive). Going to try some Semperfli fly-tying line to serve the shrouds, etc.

-
Chris, thank you for the condolences. Yeah, it's been sooo weird, empty, and sad... but today's the first day I haven't broken down, so I'm getting thru it a little at a time.😊
-
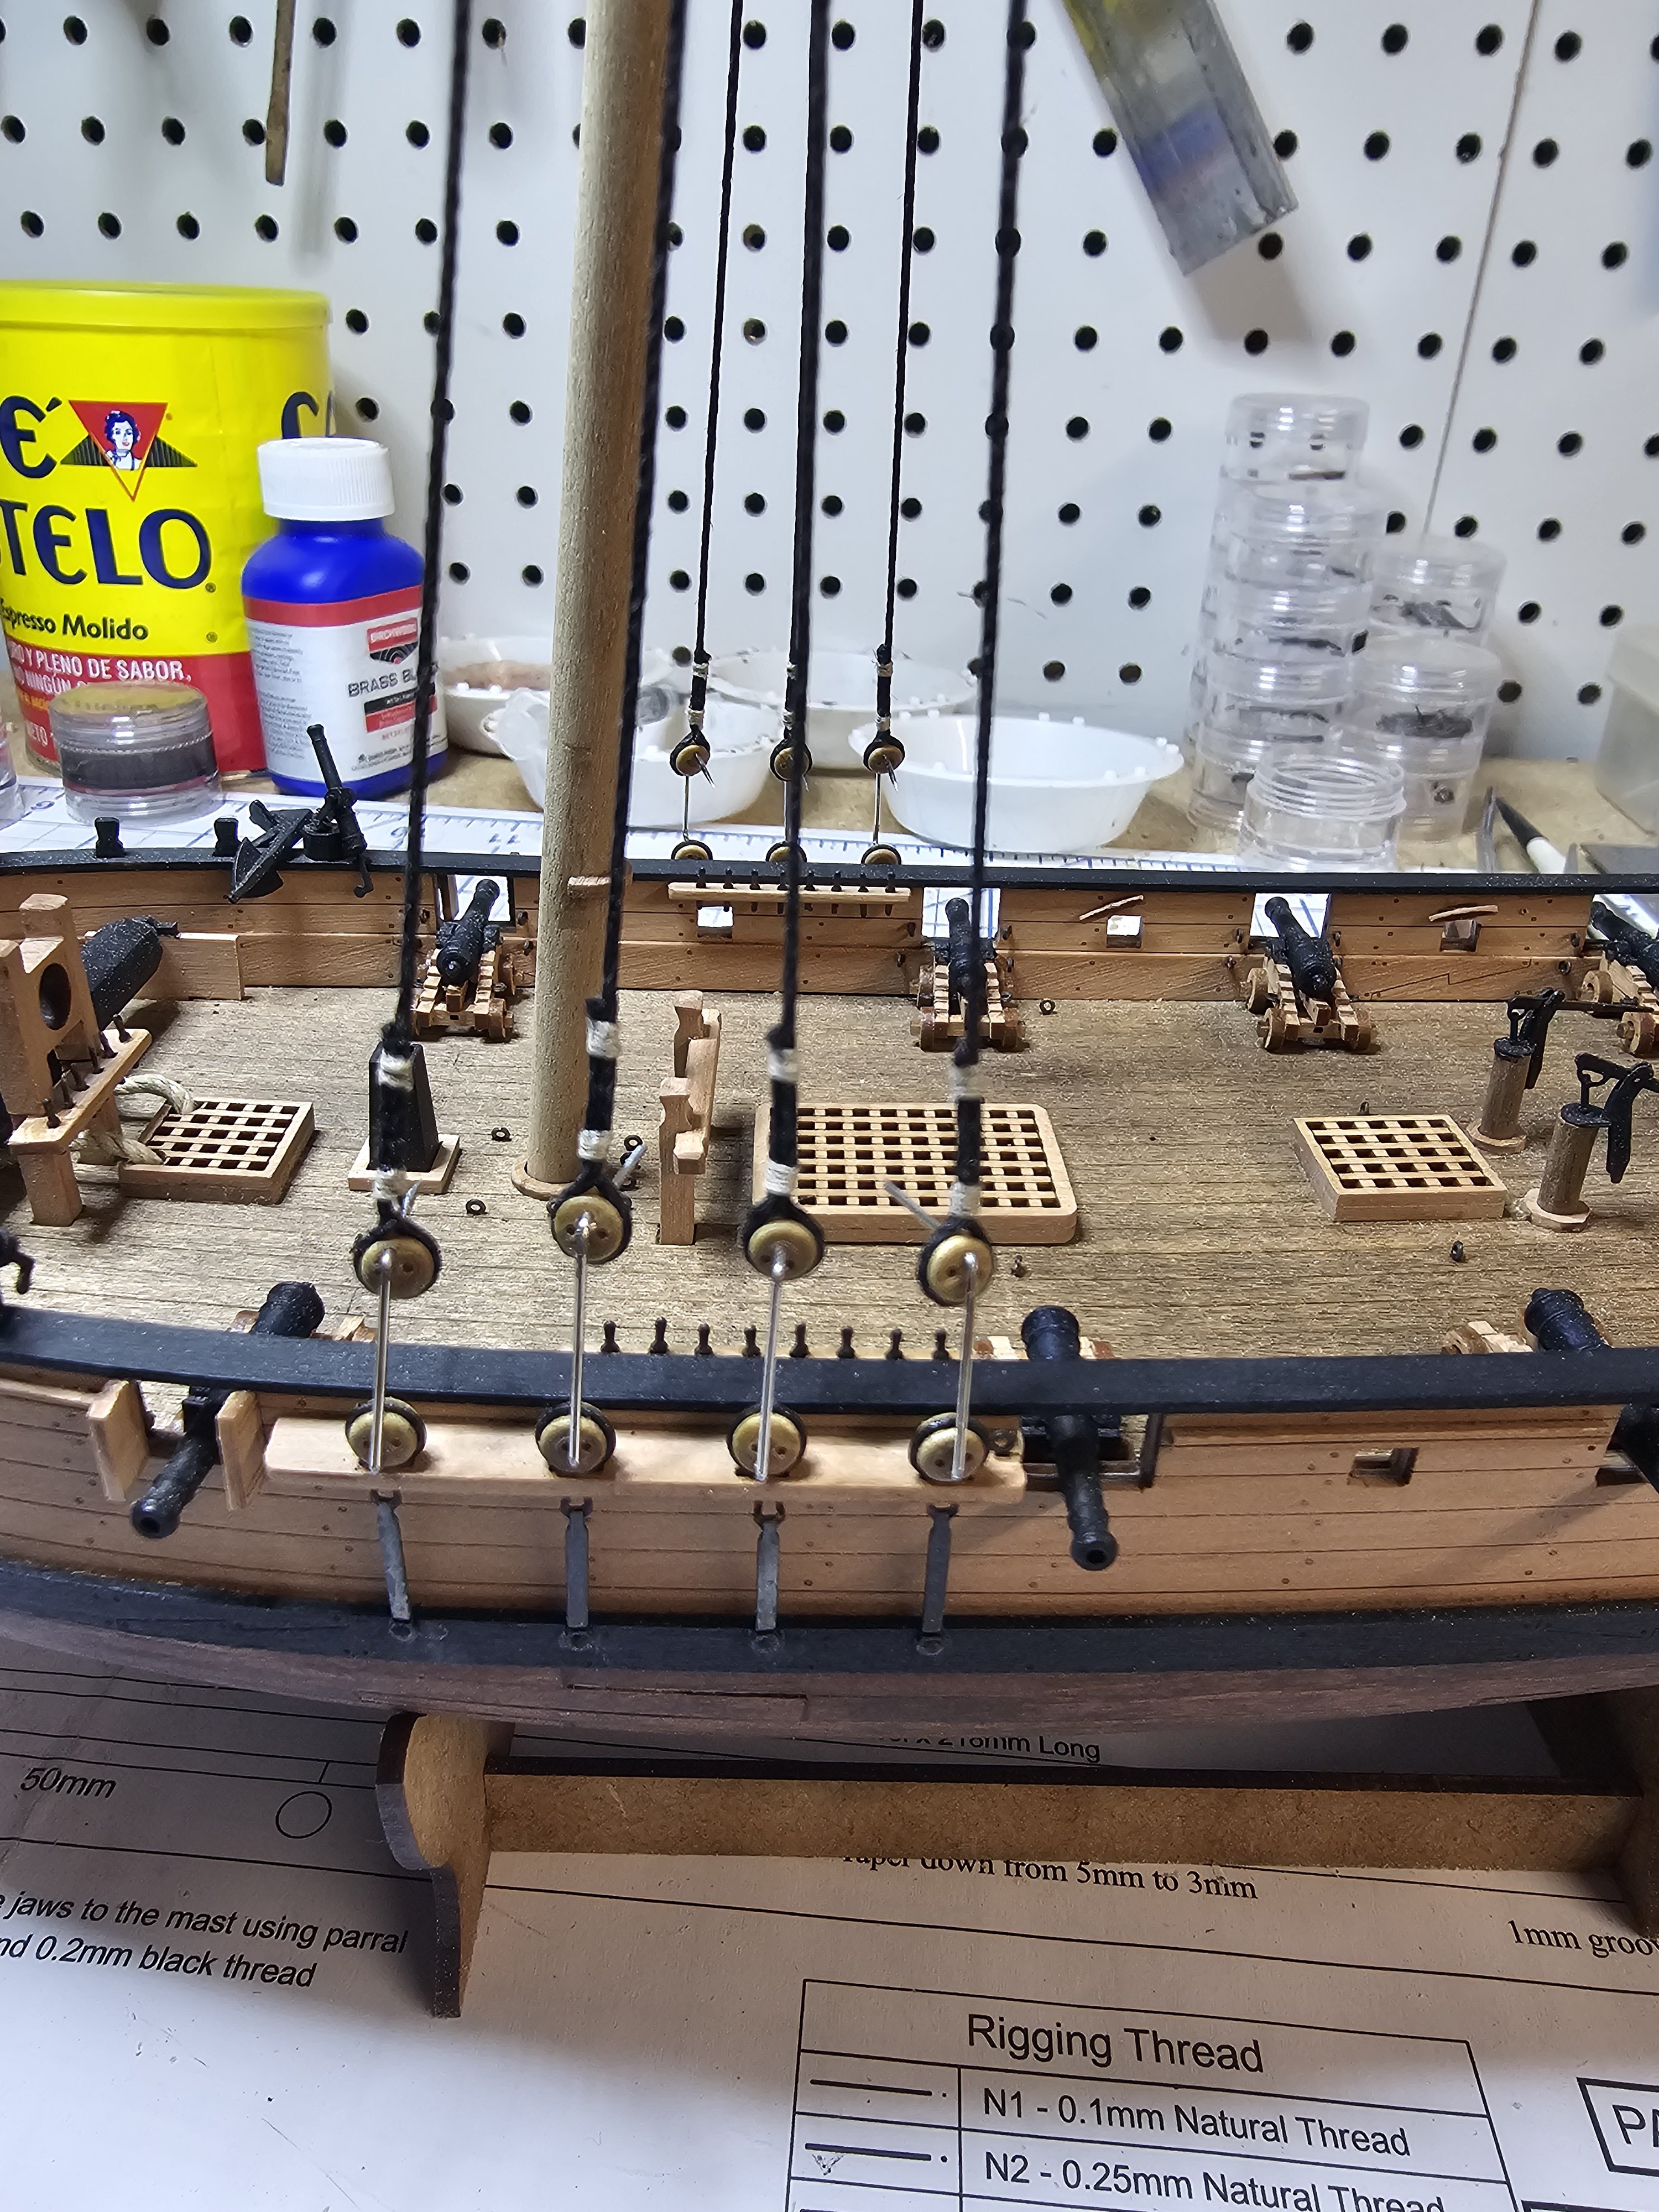
Been a really crappy and sad week- Monday I had to put my dog Dharma to sleep. She was 18, she's been my family/daughter for 16 years (rescued her a year or two prior to starting my Niagara build). Rather cruel how time flies! So, spent the whole weekend with her and extra Love and snuggles... As a break from my sobbing and the unsettling stillness and quiet in the house, tonight I finished all the spars and getting ready to install the mast and begin rigging. I also prepped the shroud pairs (1 deadeye at each end). Nothing is pinned/attached just yet- getting a feel for how she looks and making sure things 'work' together.


-
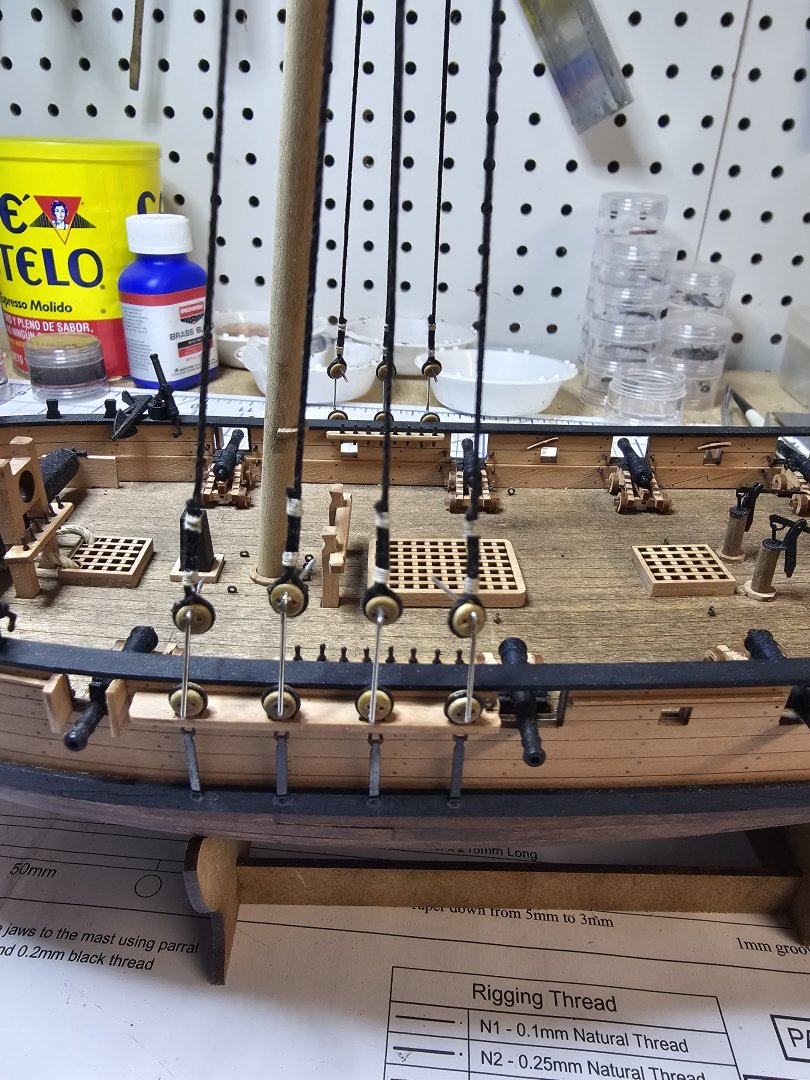
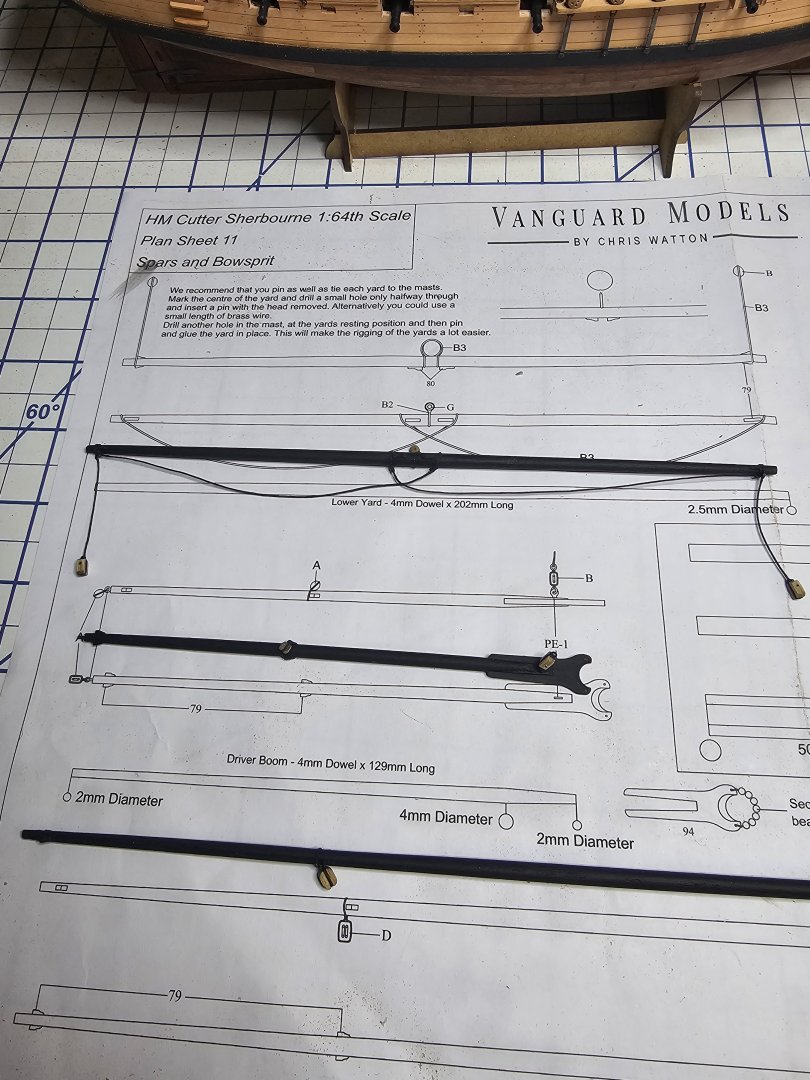
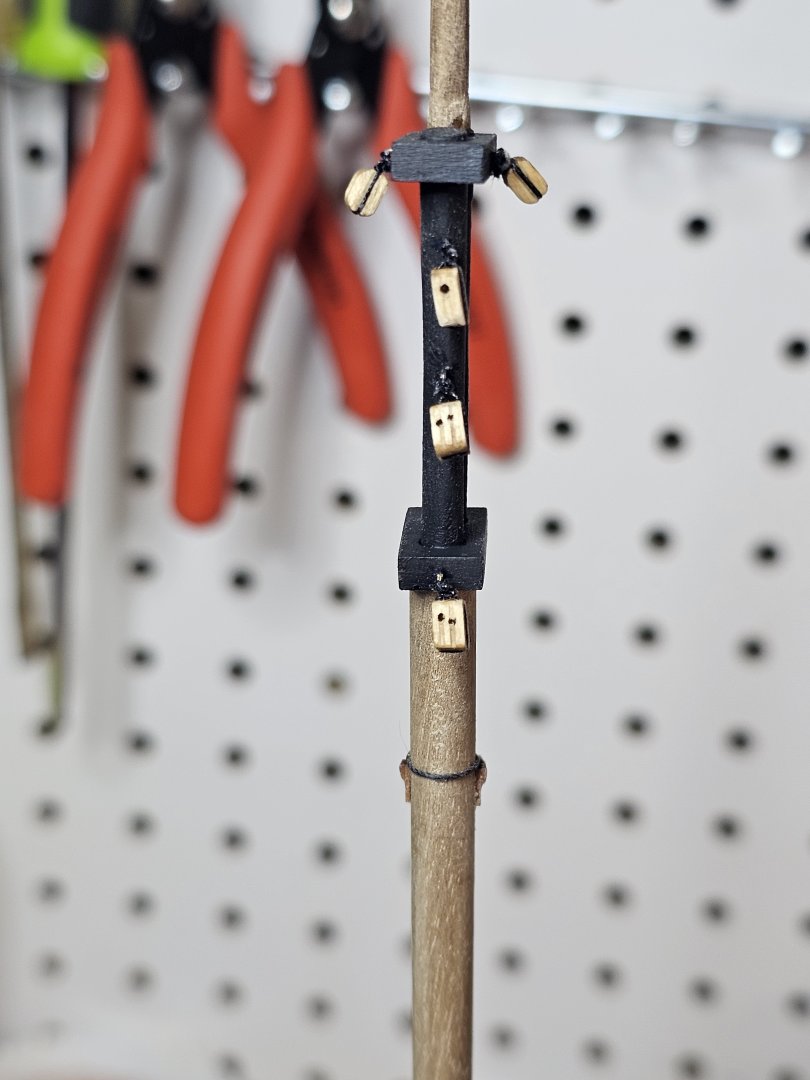
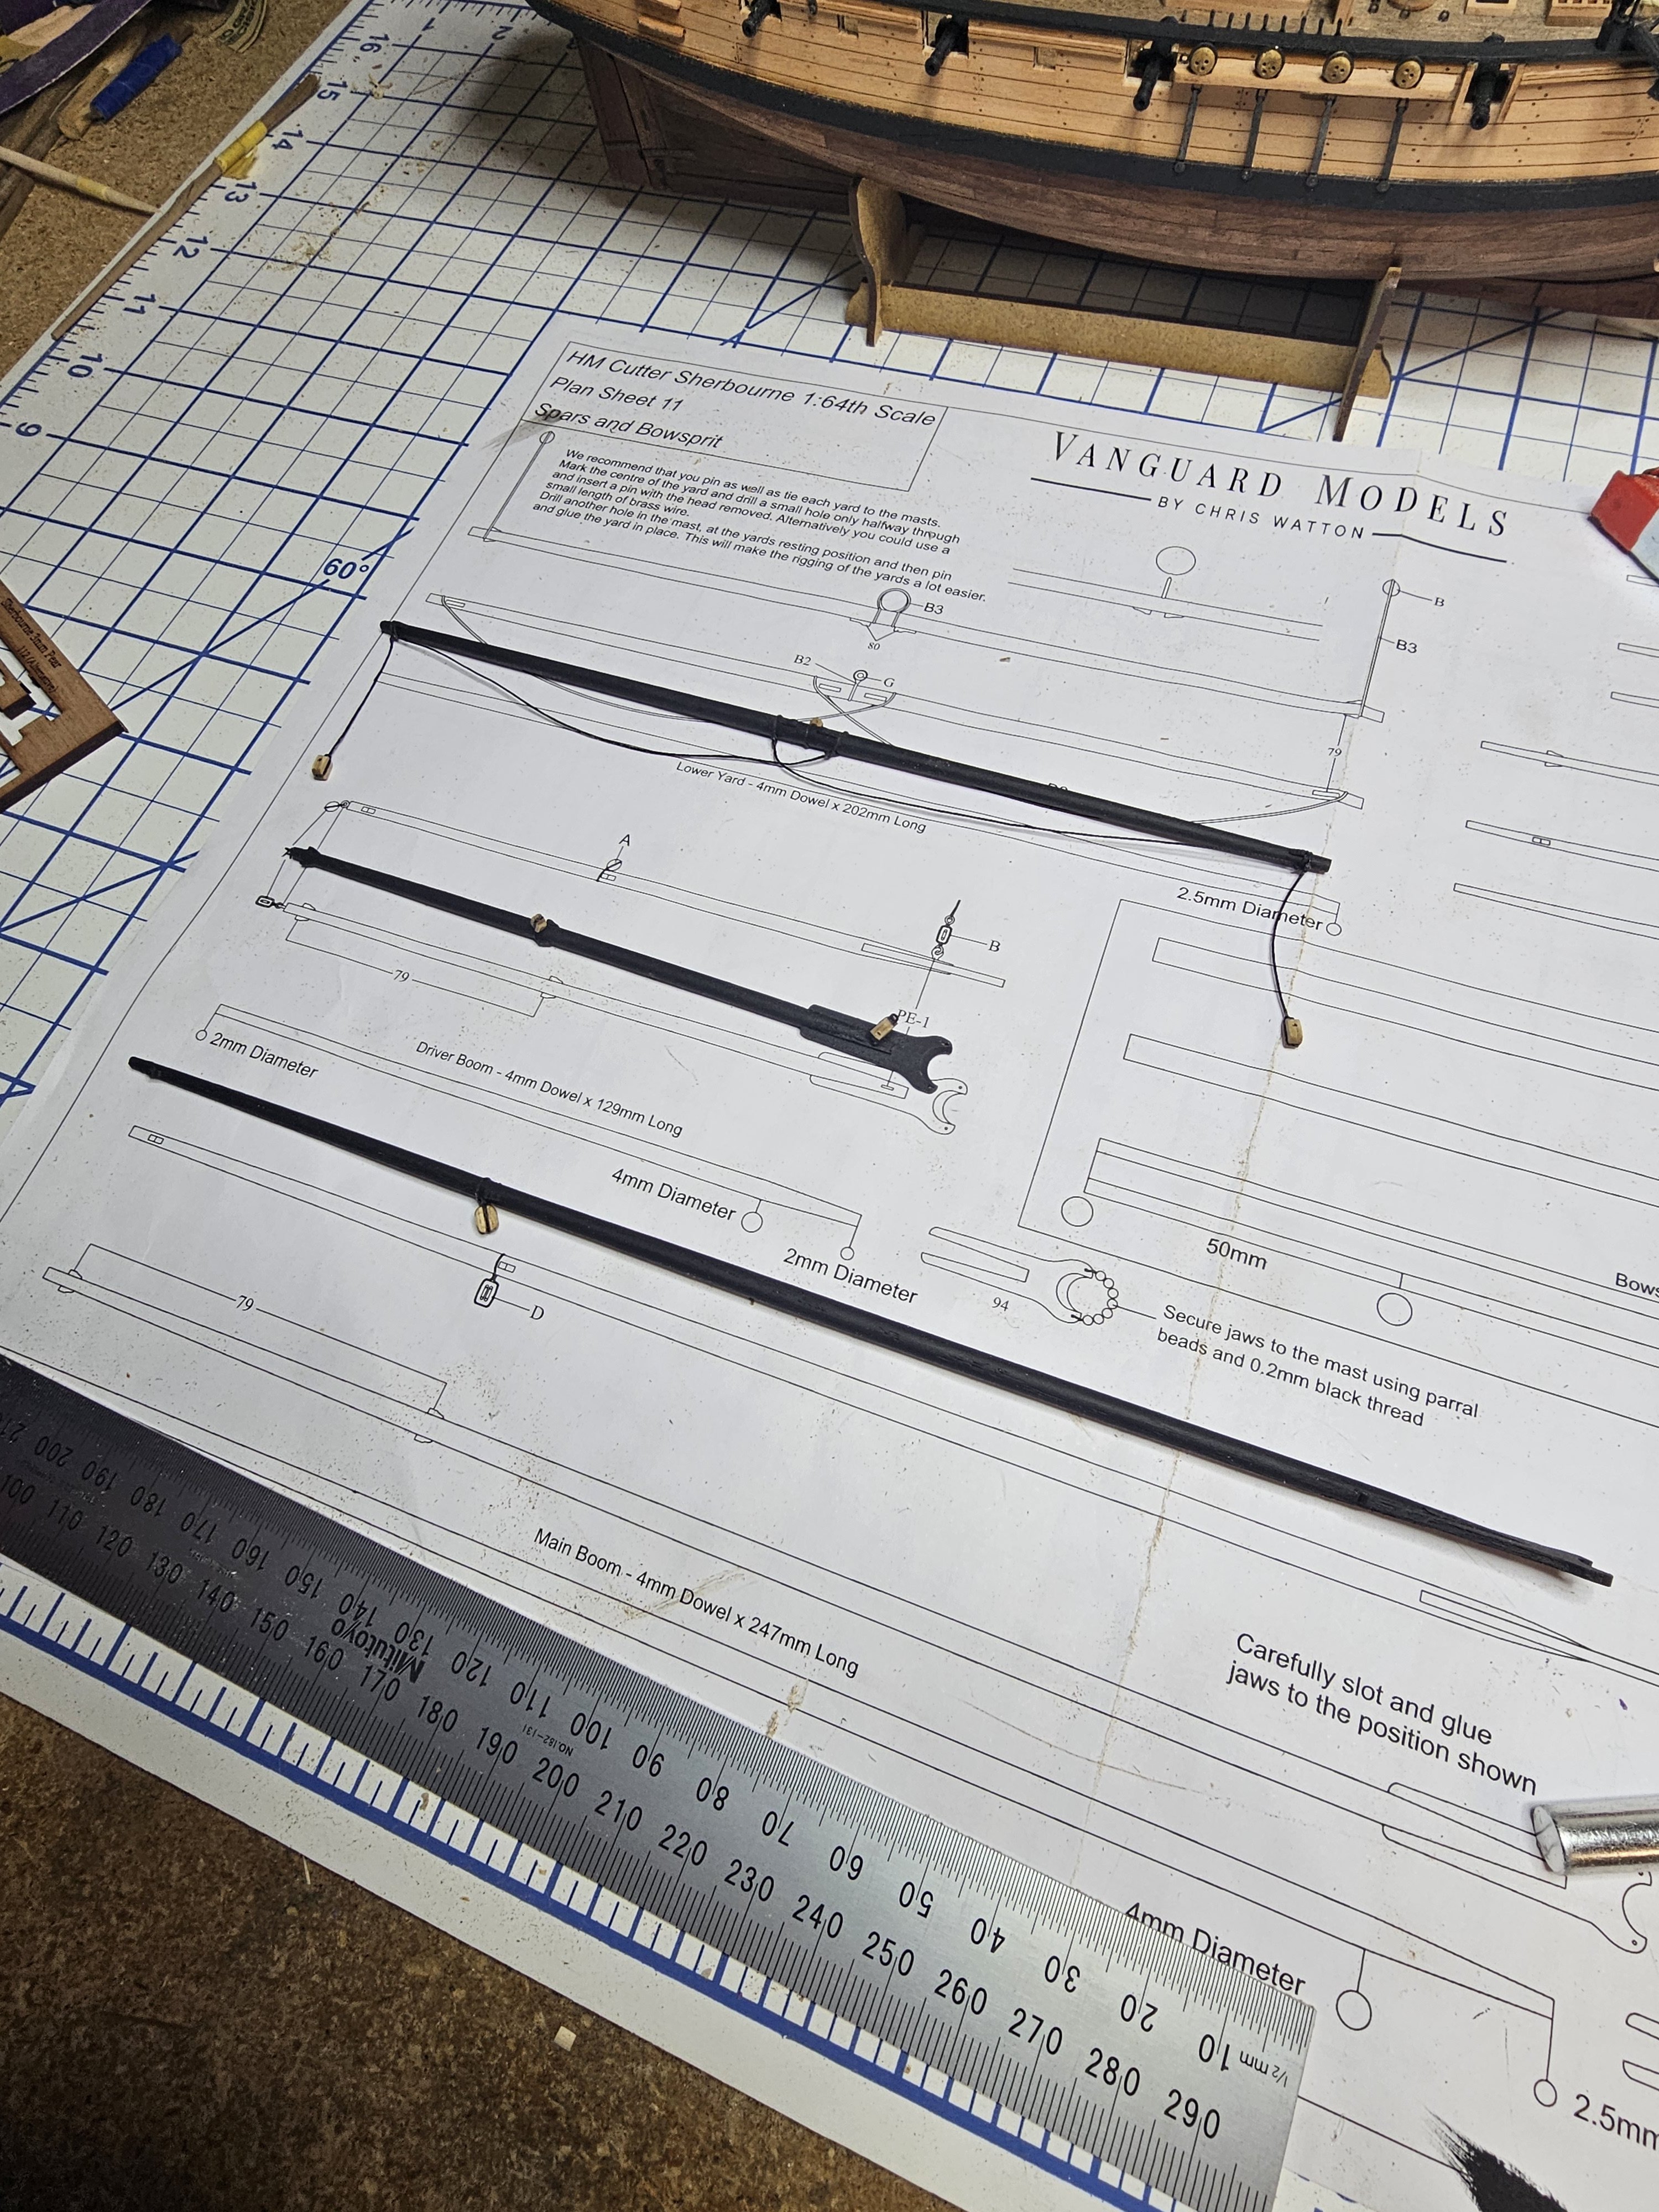
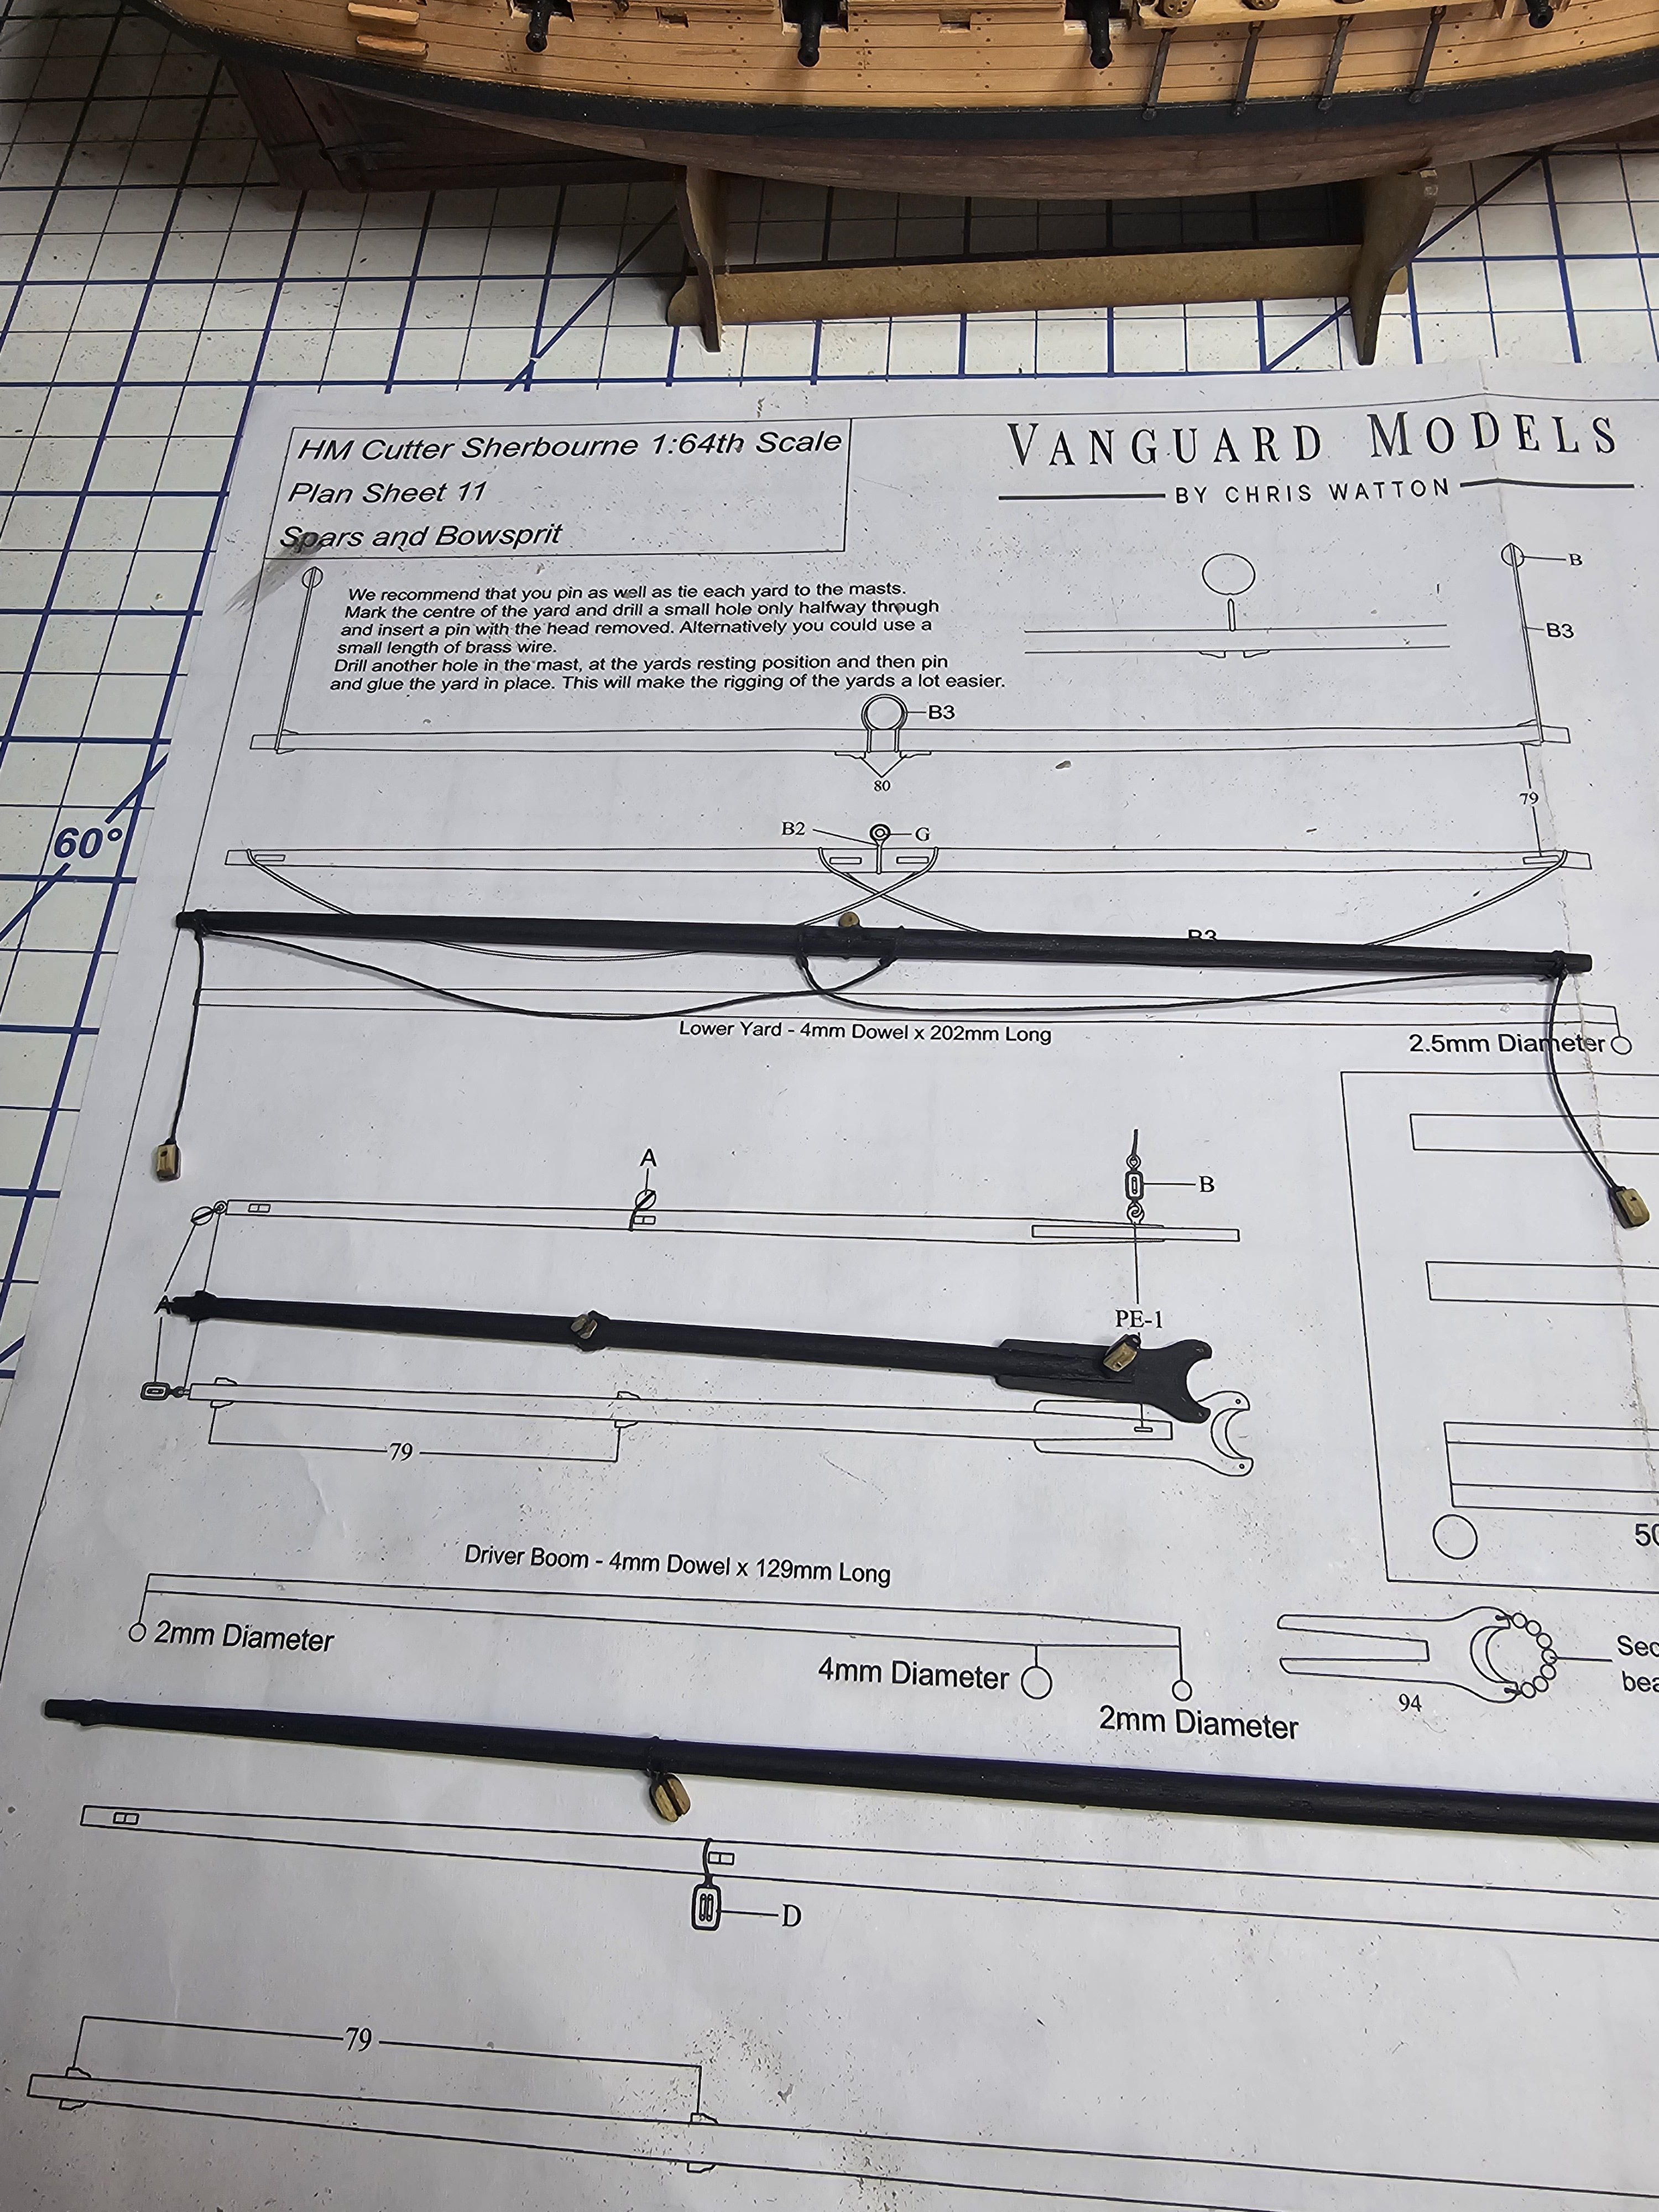
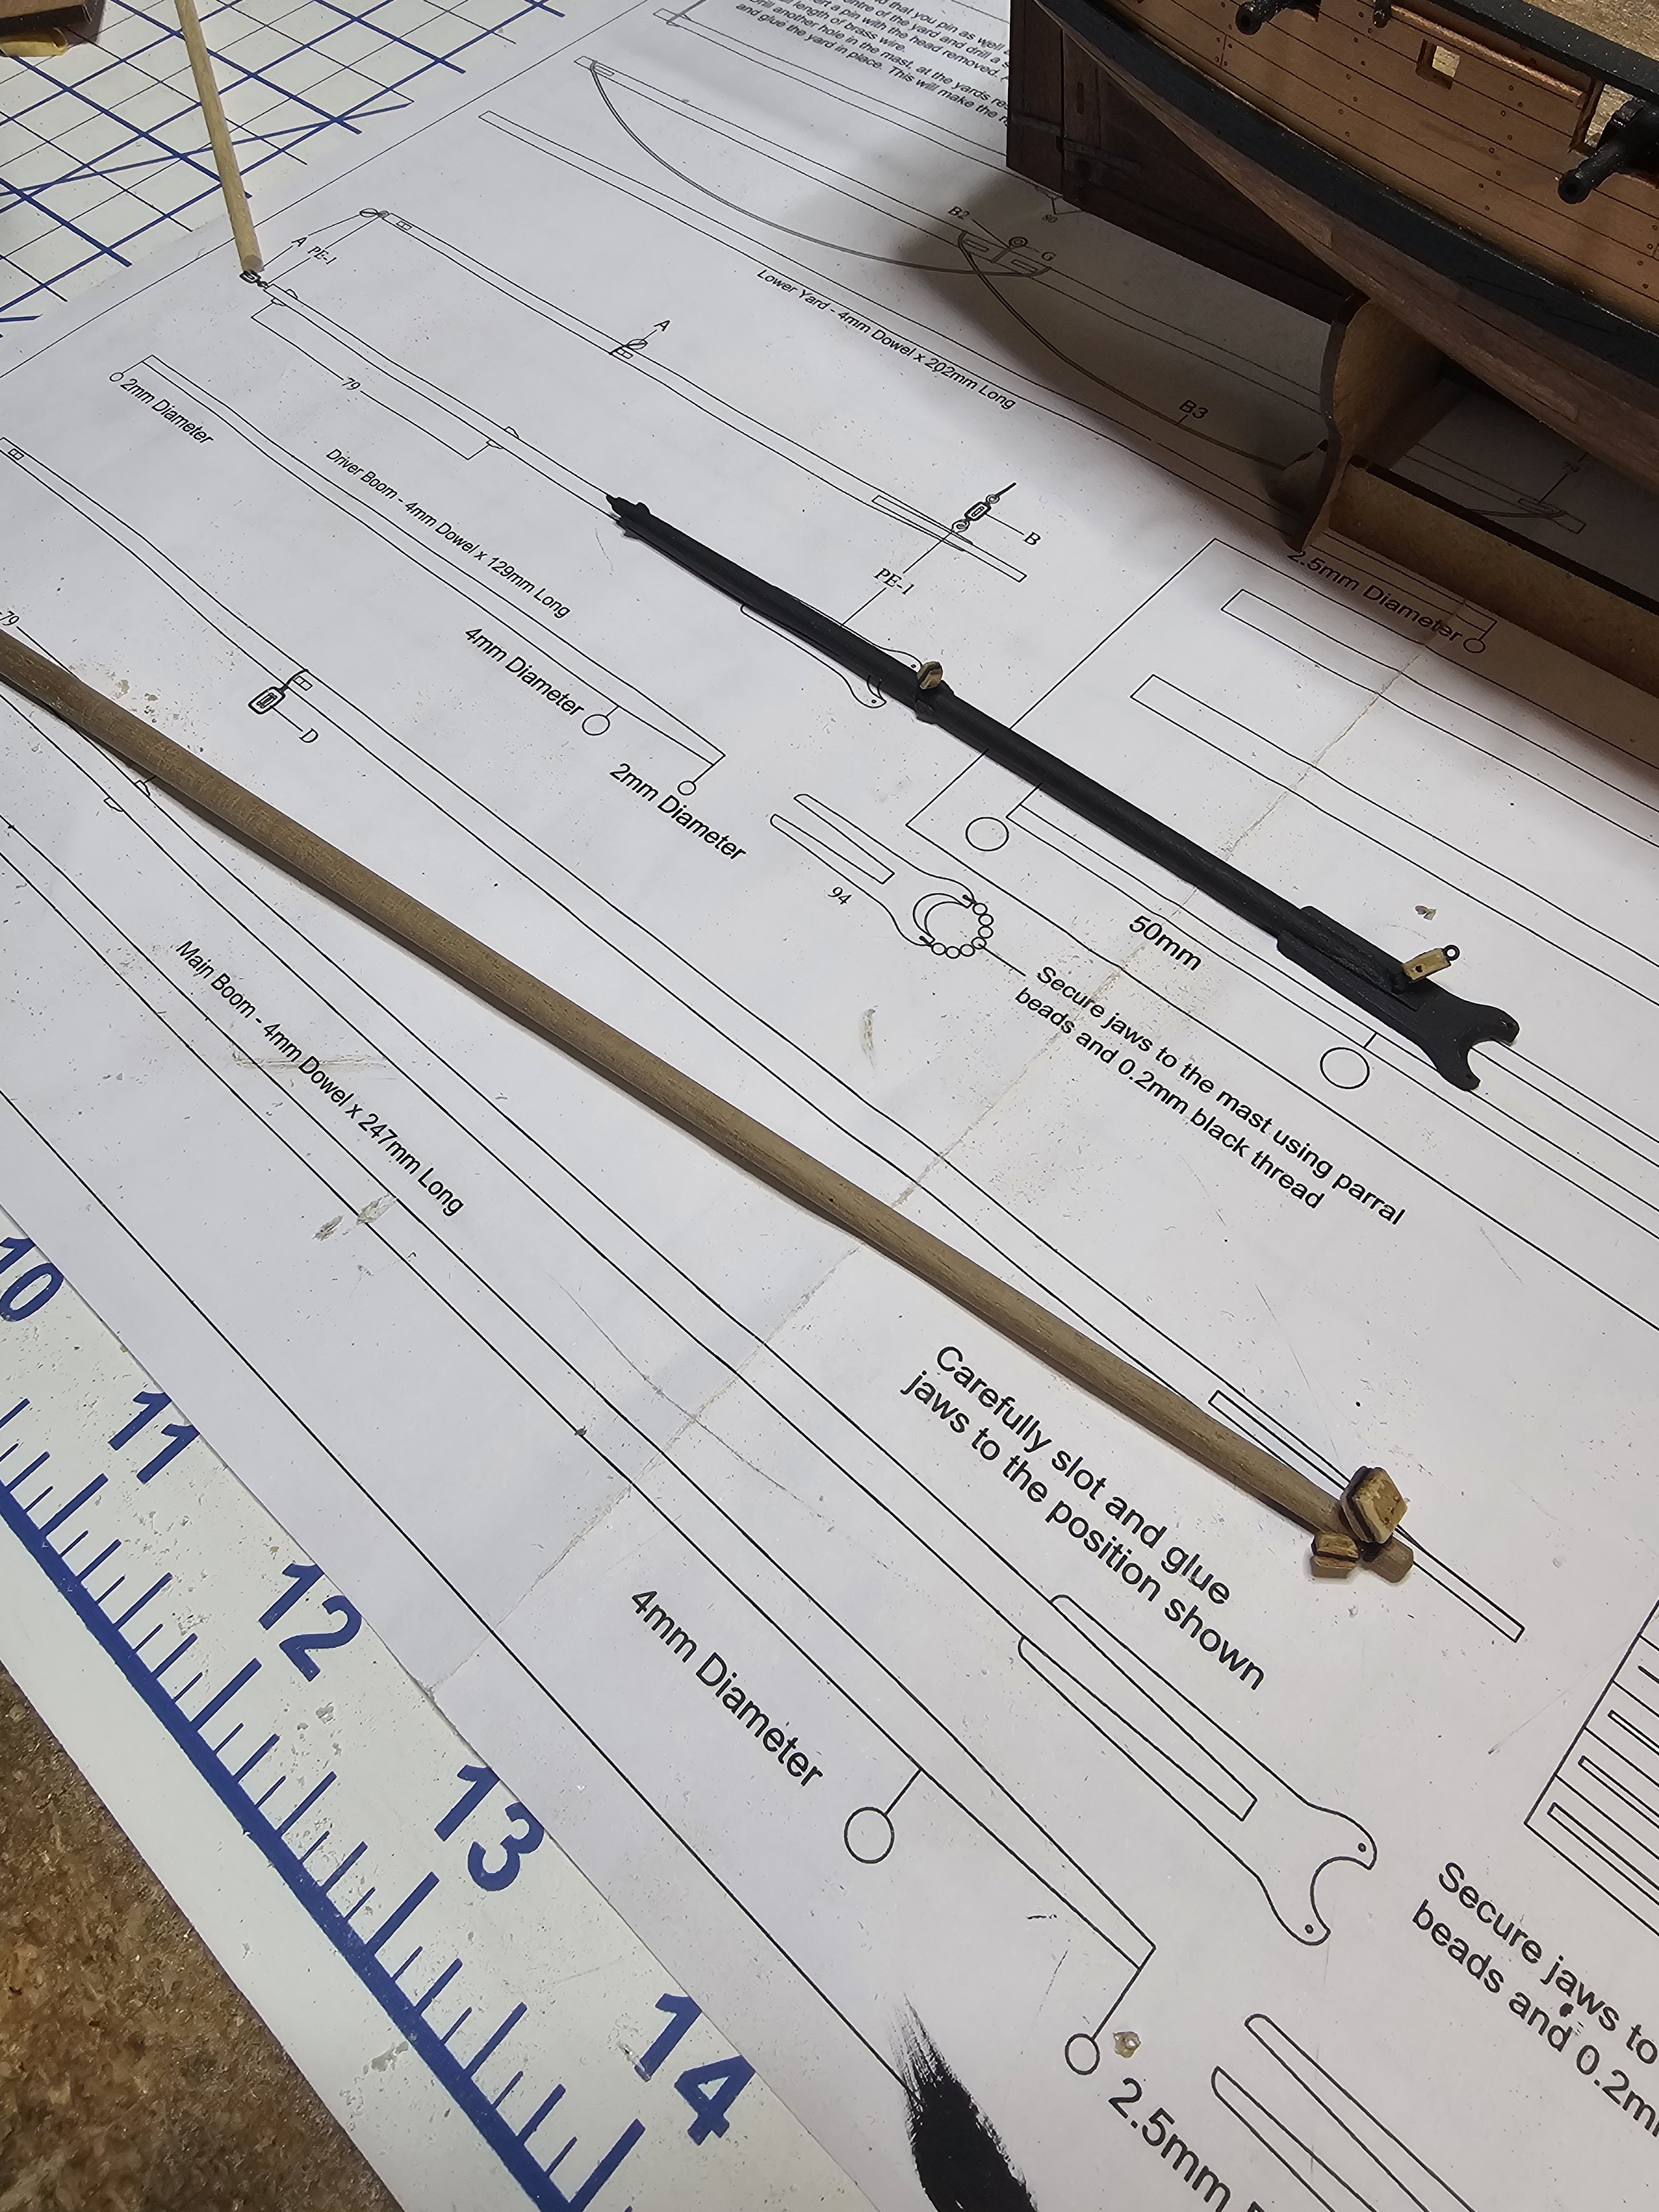
Finished the mast (minus the mast cap). Blocks attached too. Main and topmast are not glued together (will do that once I get the shrouds going). Next up is shaping and assembling the bowsprit.
-
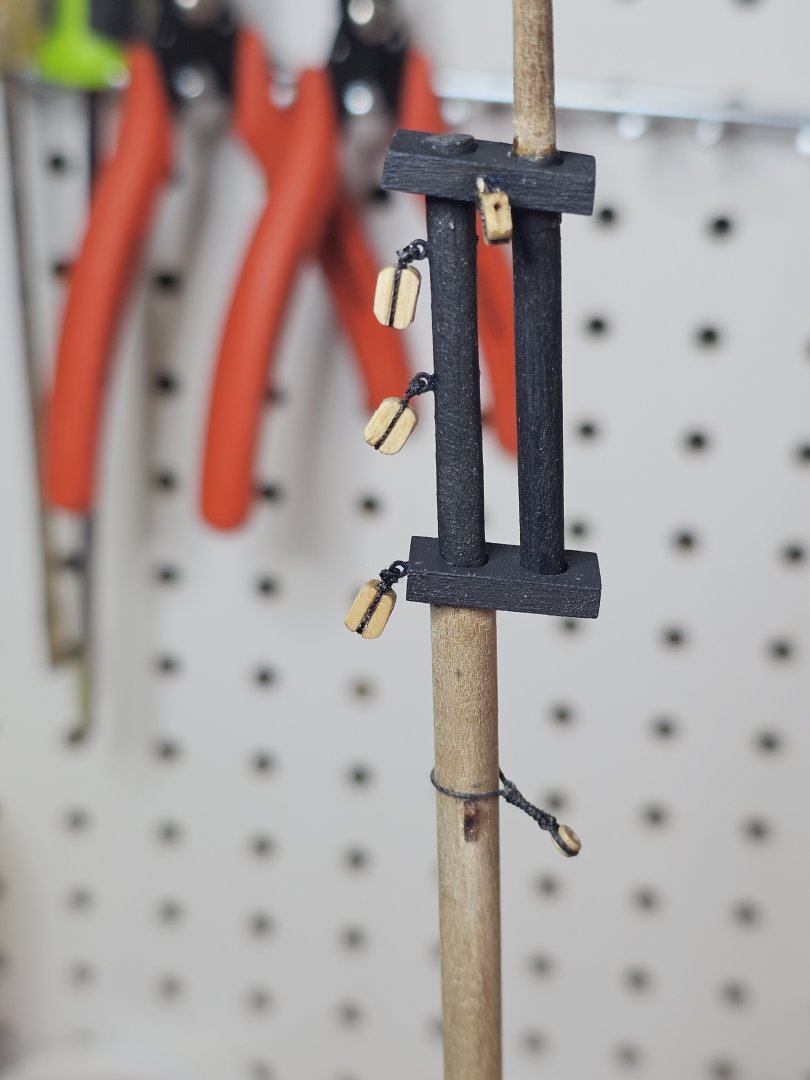
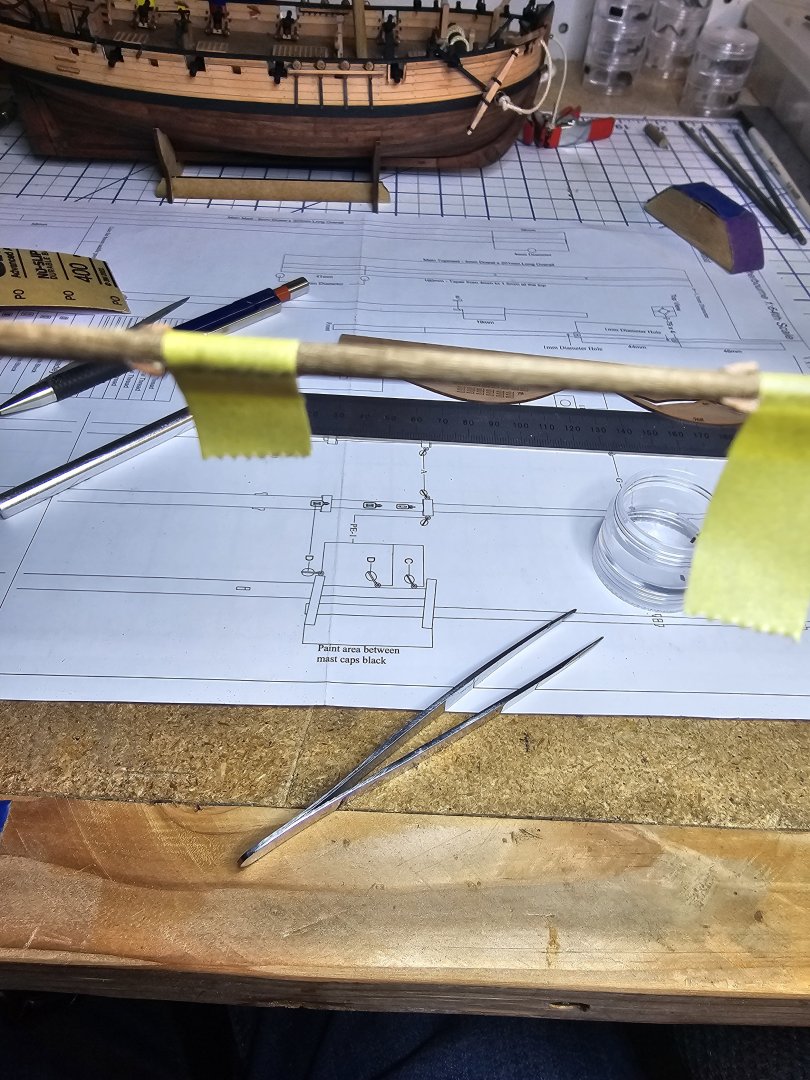
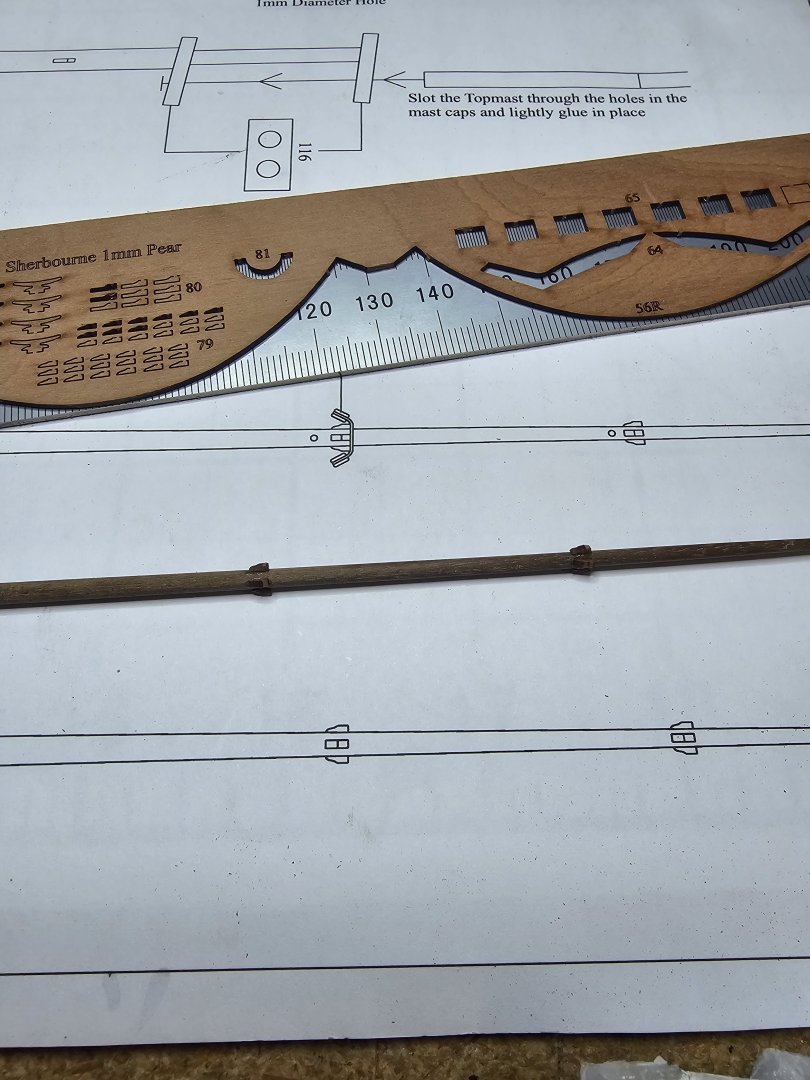
Worked on the main mast and topmast today. Cleats were tricky because of their super small size, but so far so good. First time tapering a mast: taped off one end of the topmast, chucked it in the hand drill, then ran a sanding block along the length... not sure if this the best way, but turned out ok. Drilled the holes, attached the eyebolts, and the lower pendant (square knot around thimble and mast, then seized). Few spots to even/level, but workable. Won't assemble the whole mast until after doing lower shrouds, etc.
.thumb.jpg.20d79d61582755fad0e3ca541f2270fc.jpg)
-
Not sure exactly... lol... just looked at some pics of how it's done and tried to replicate that. After my 'knot' I used a small but of CA to glue the free end, then whipped the end. Anchors will be attached/rigged as the very last thing so they don't get in the way of actual rigging.
-
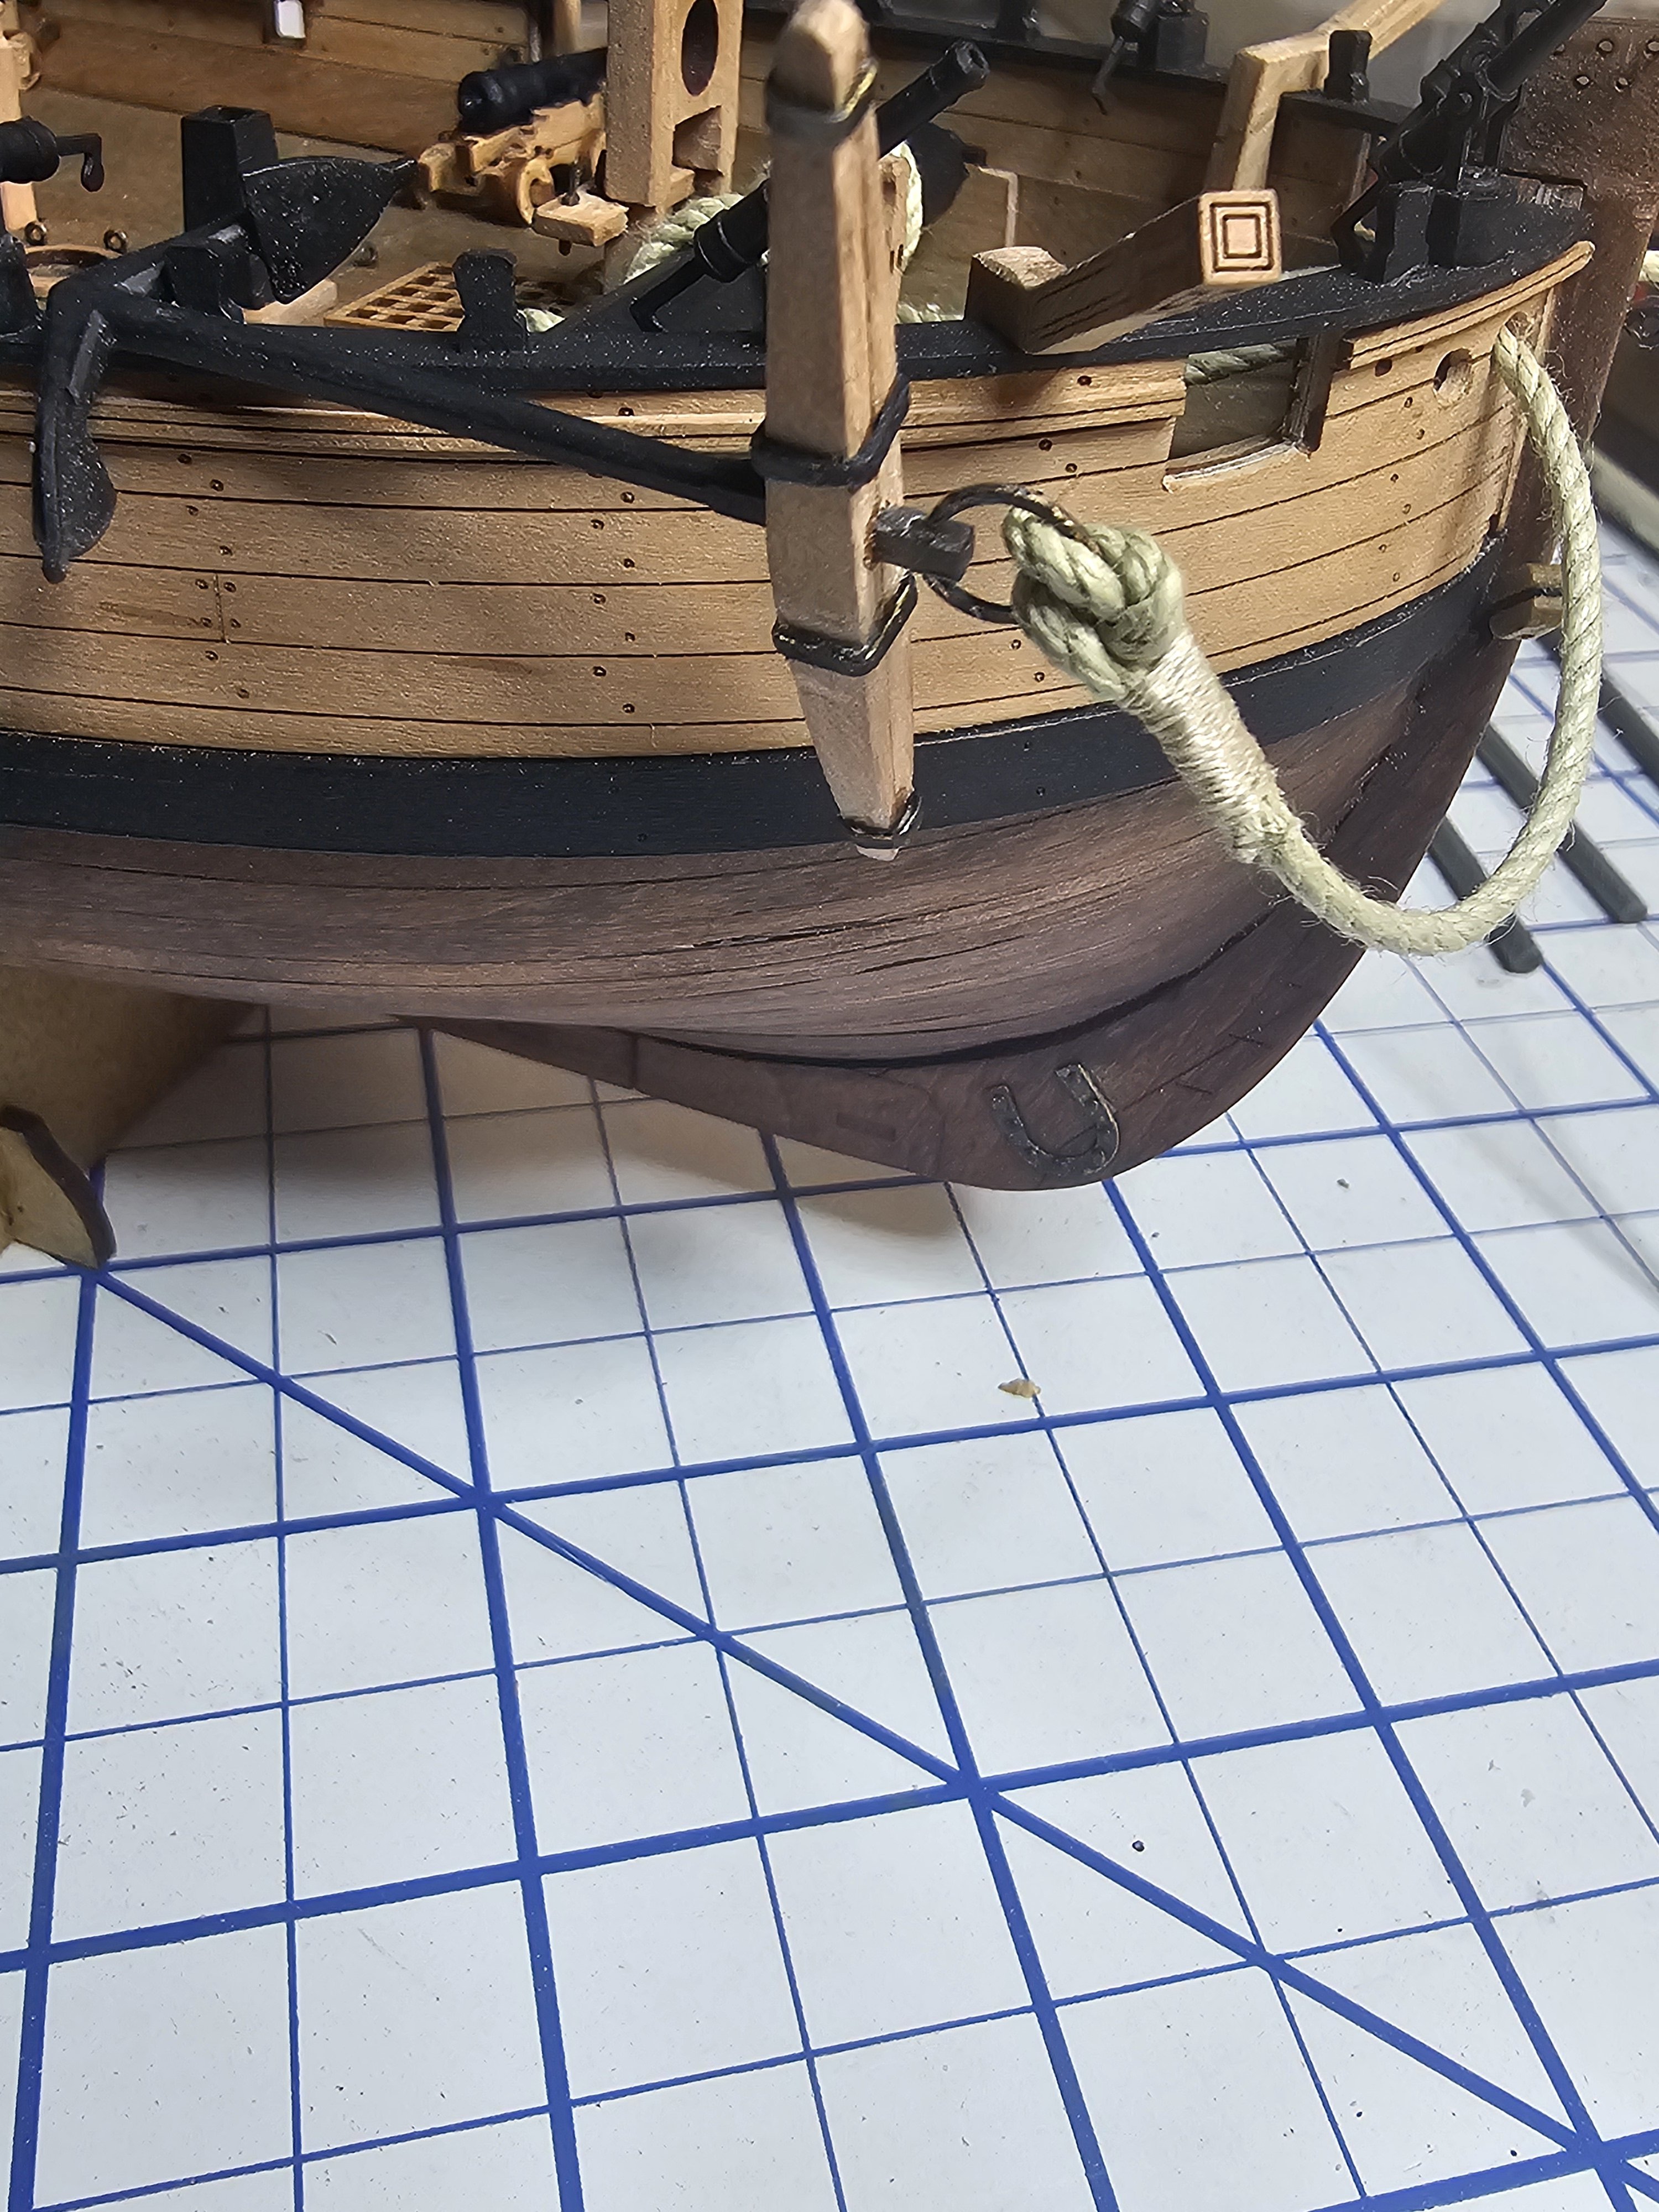
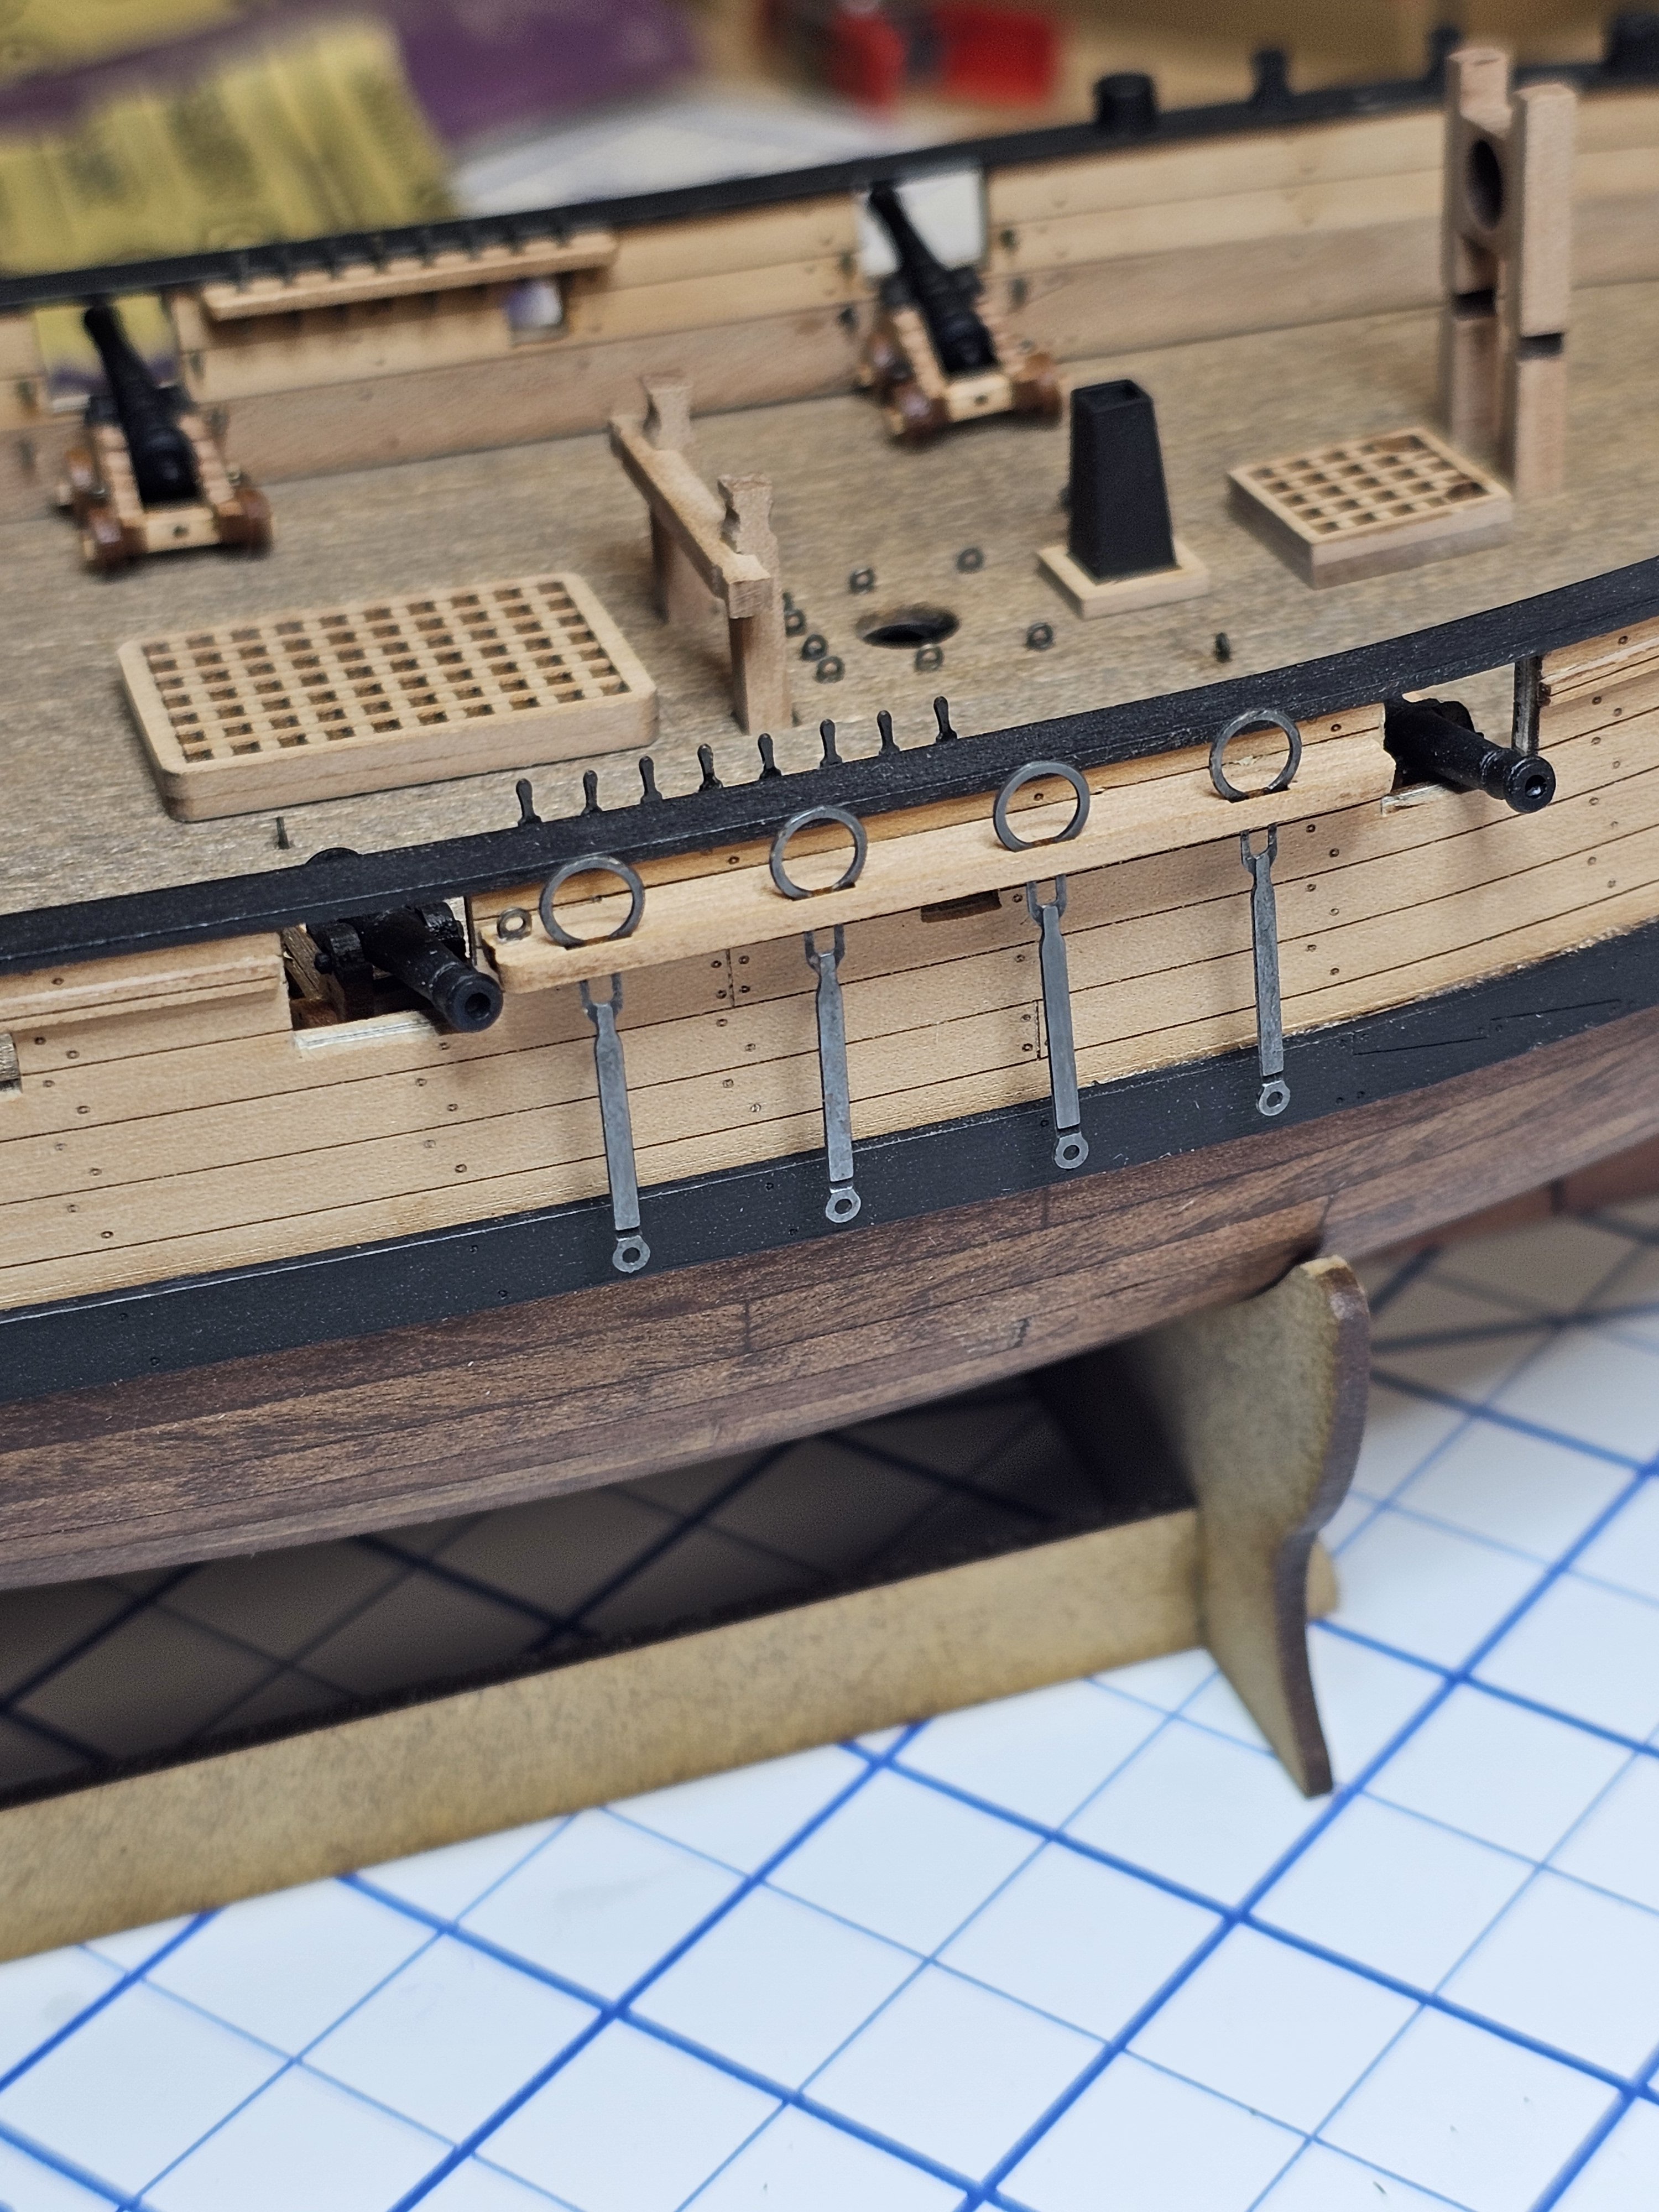
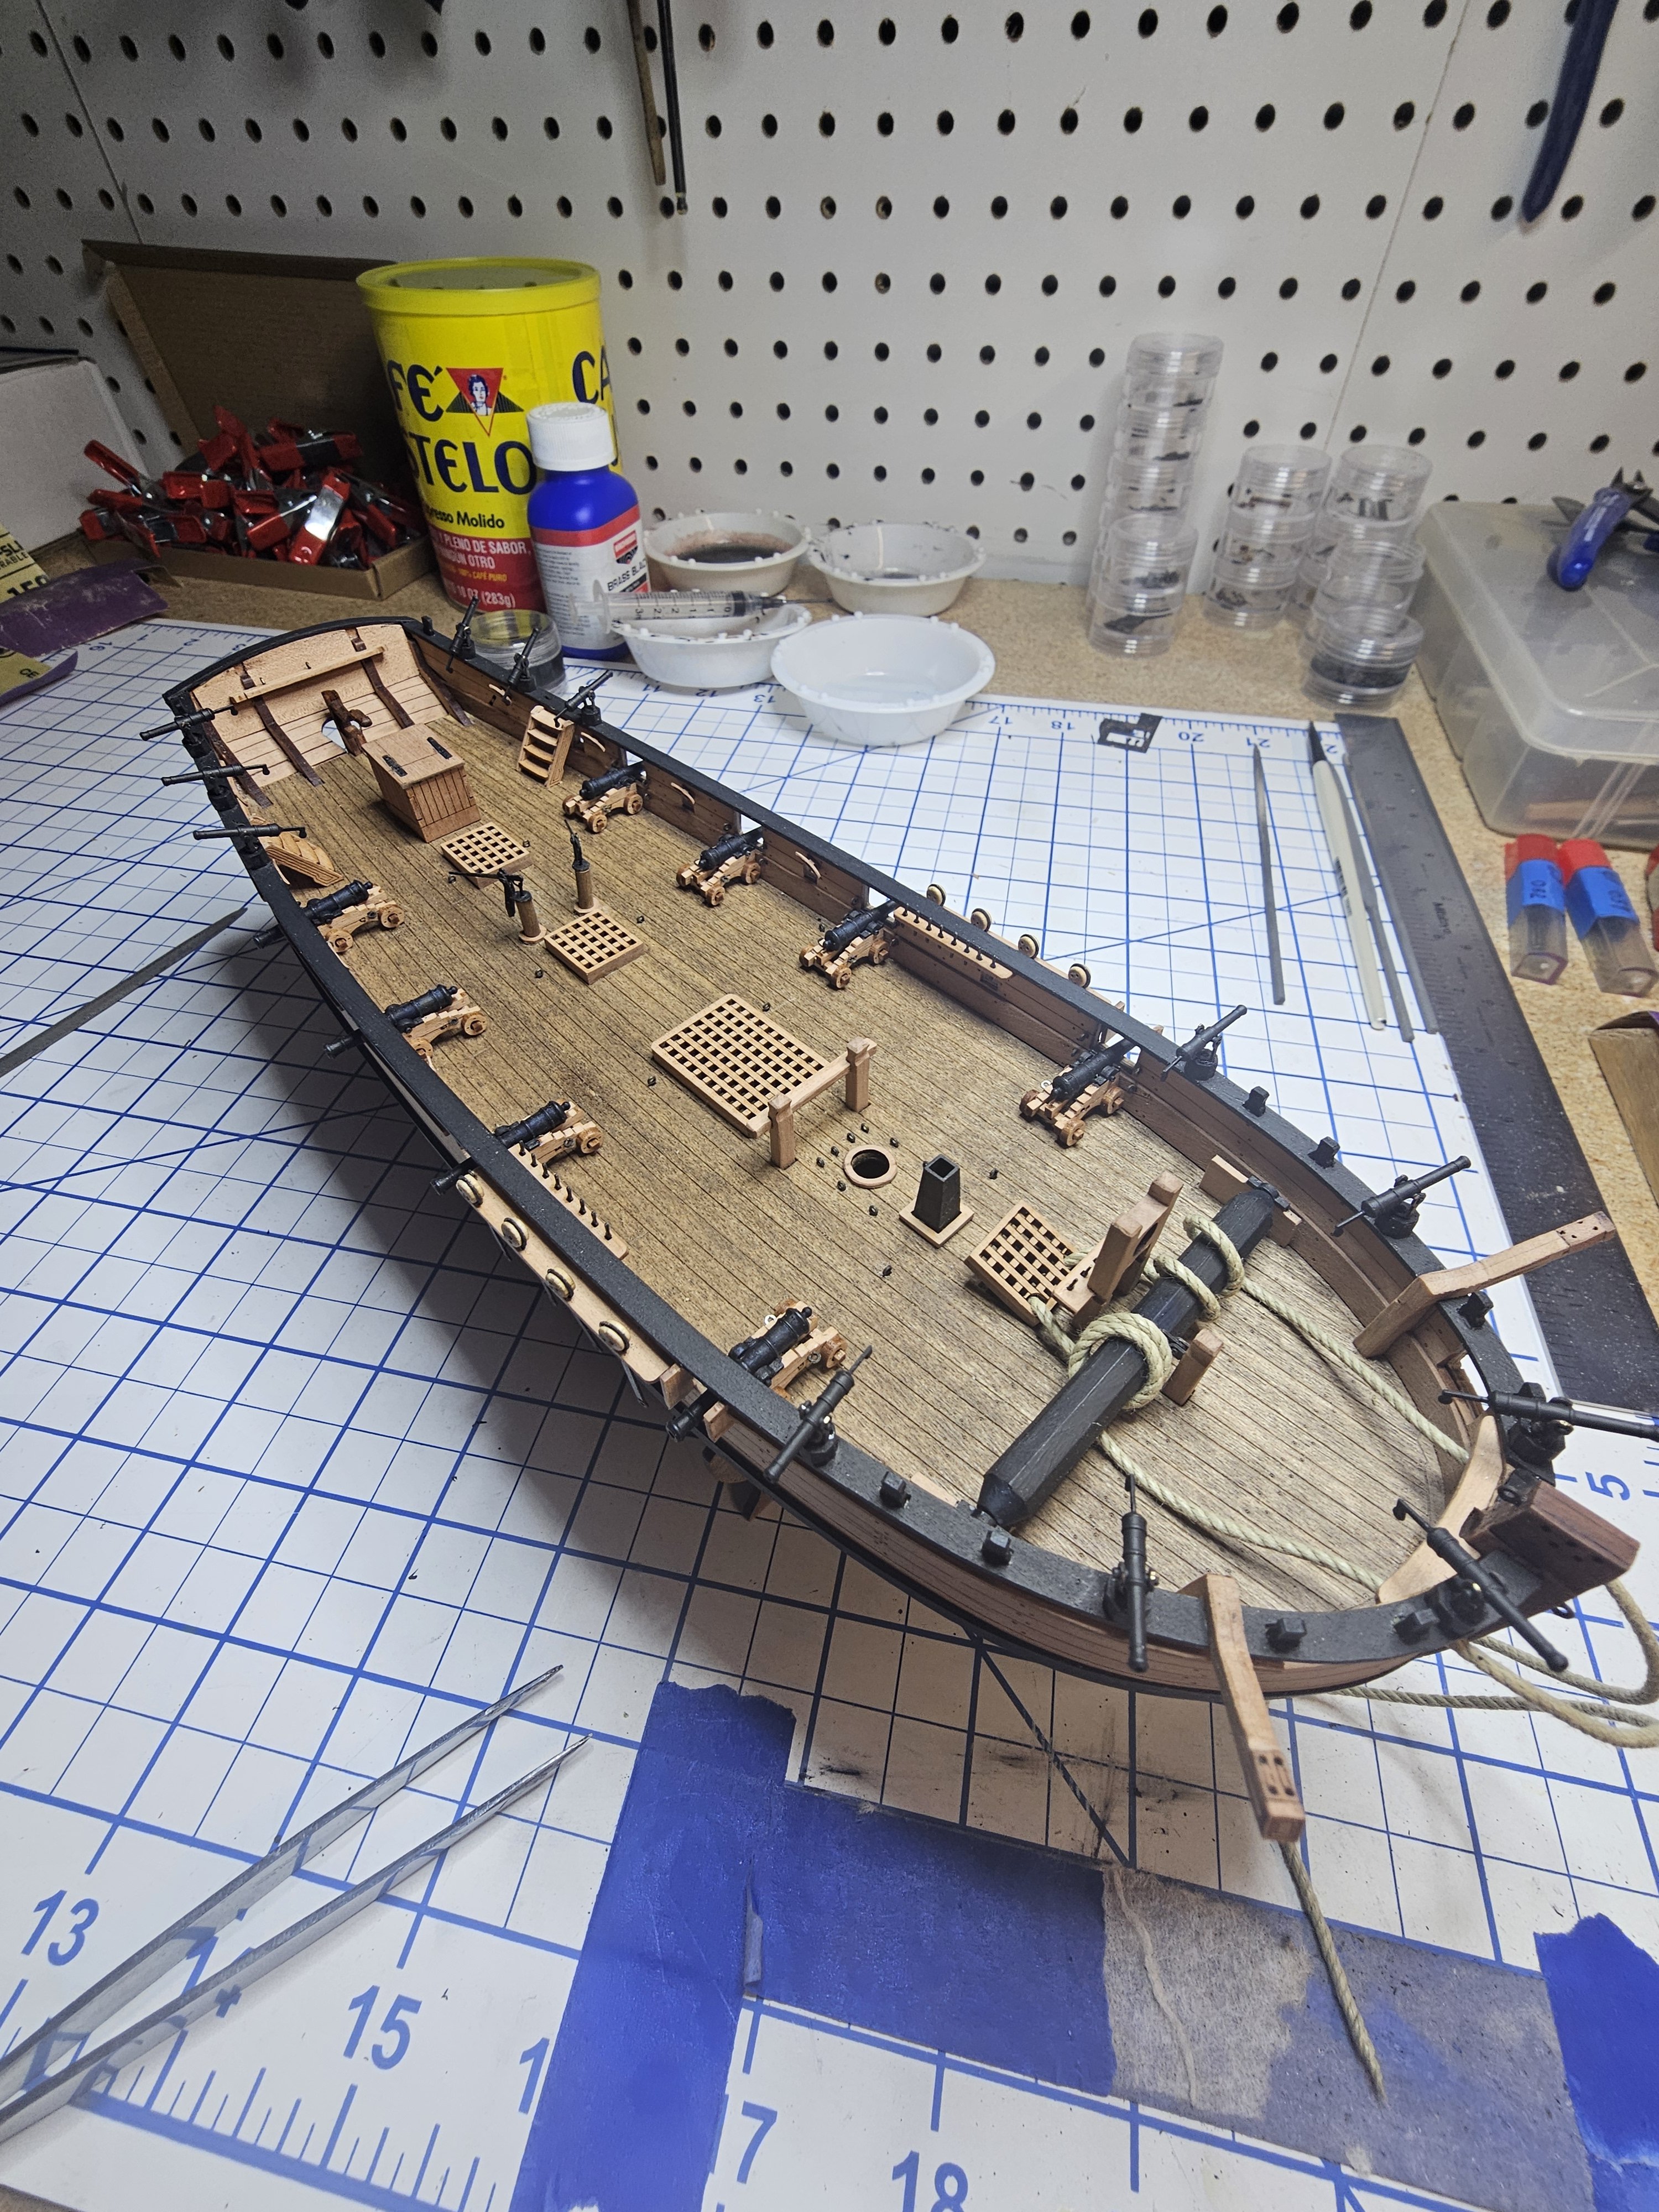
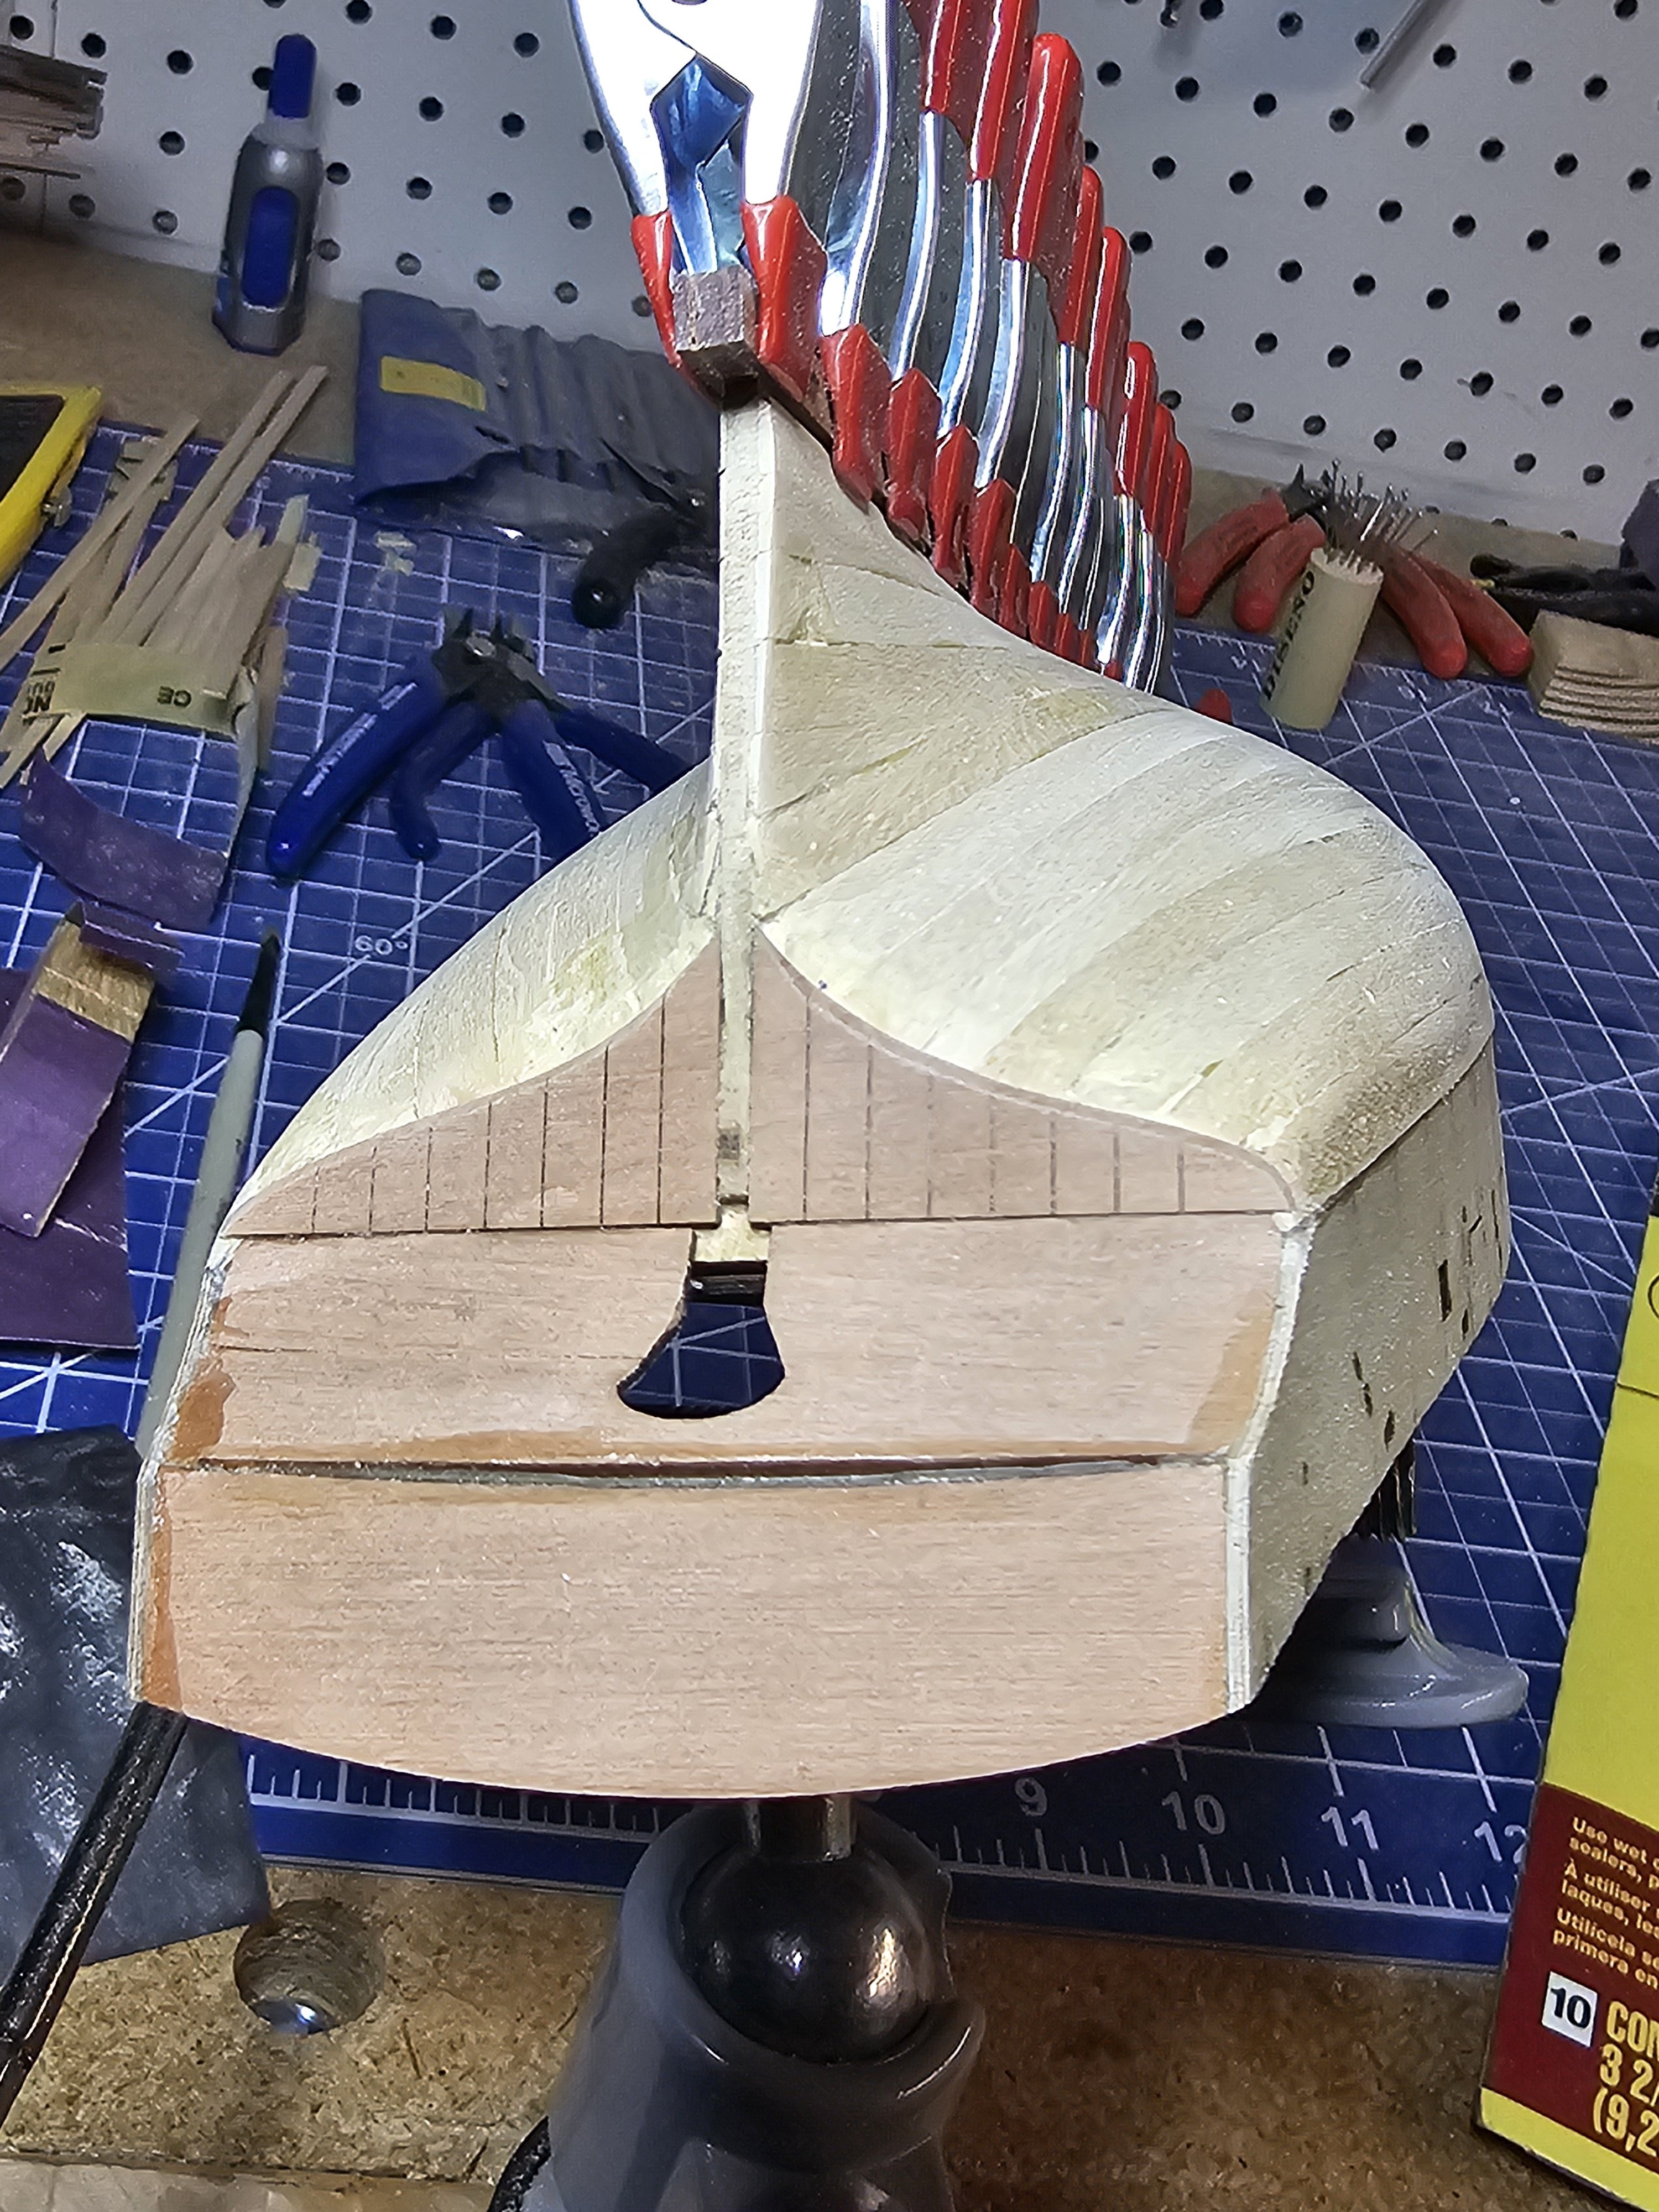
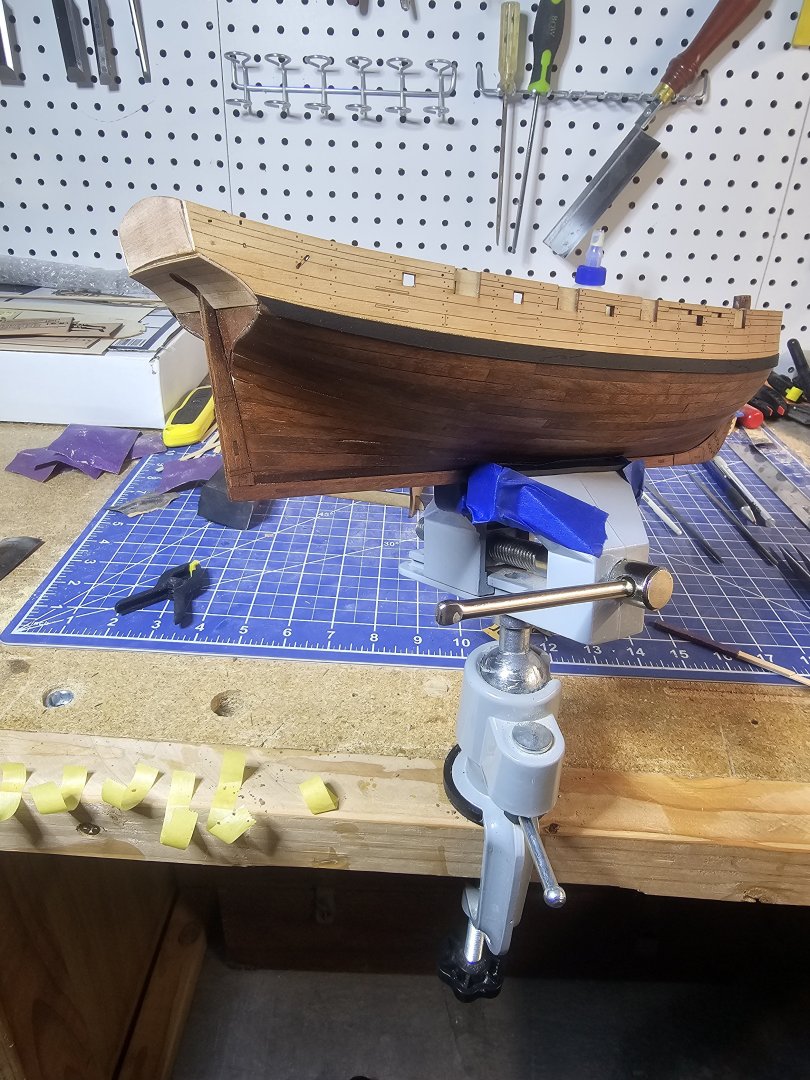
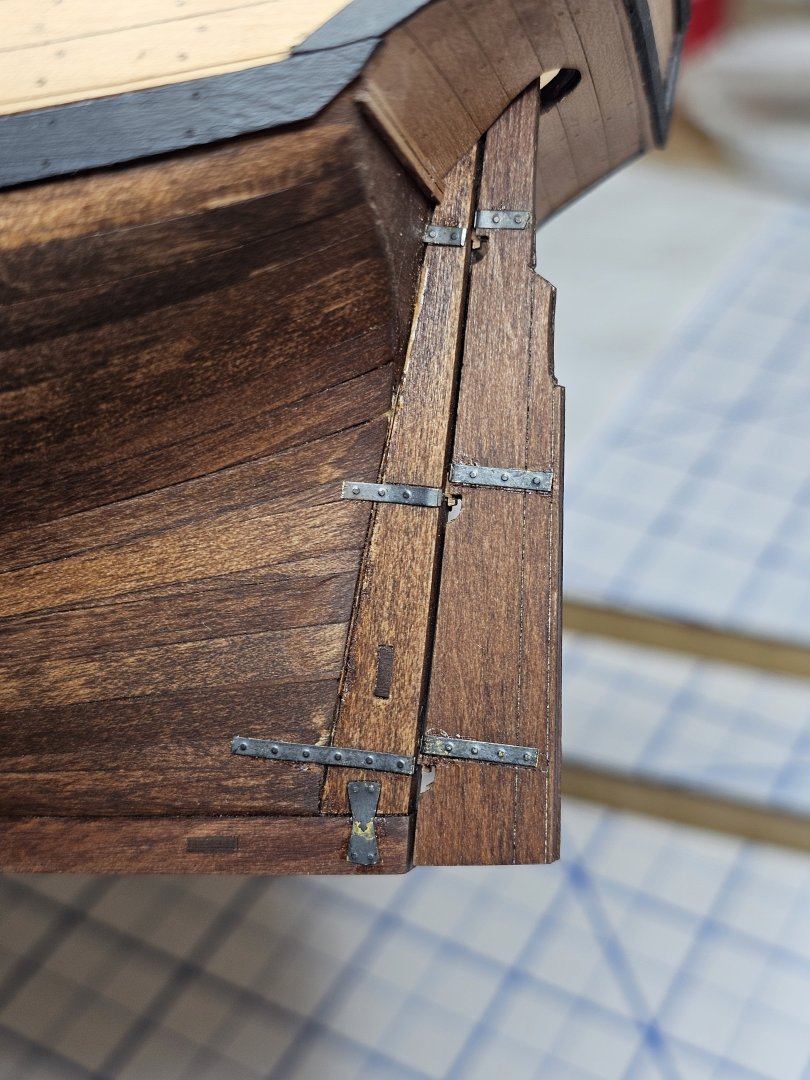
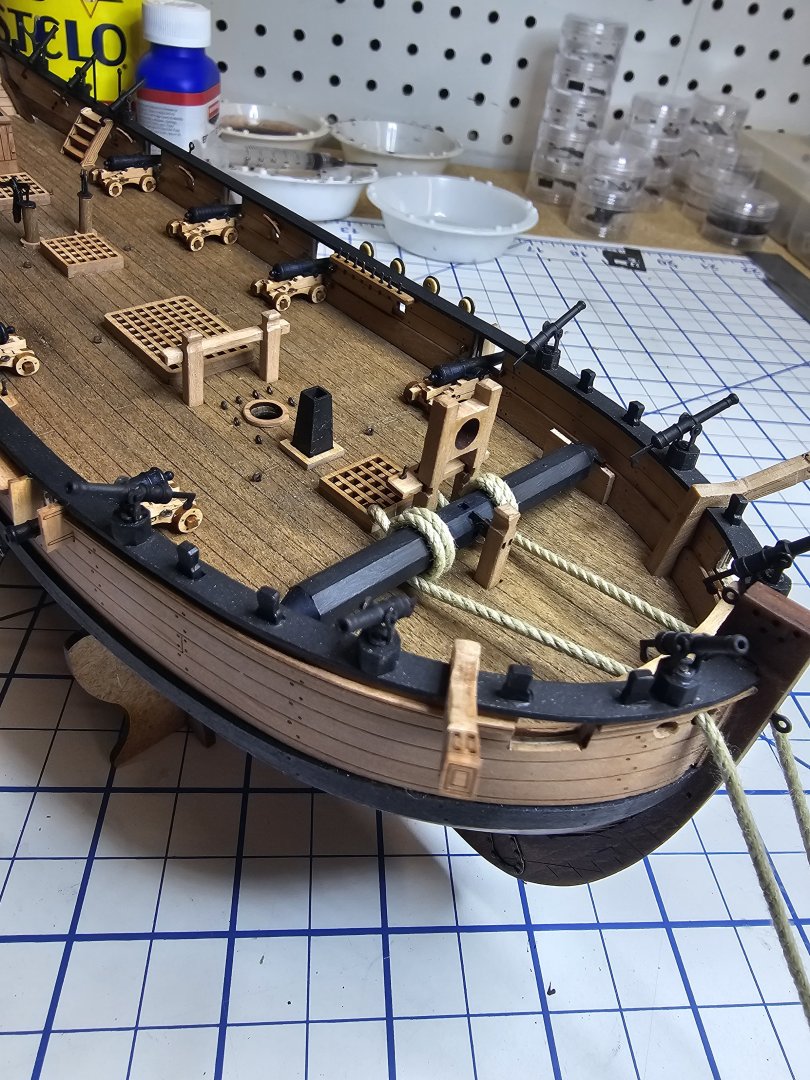
Next up with finishing the hull, etc, I installed one of the two anchors. Slight deviation on these- i used some leftover strips from the PE brass sheets, blackened/paint touch up (instead of the black cardboard provided). The rough/worn look to these fits with the overall scheme I think.

-
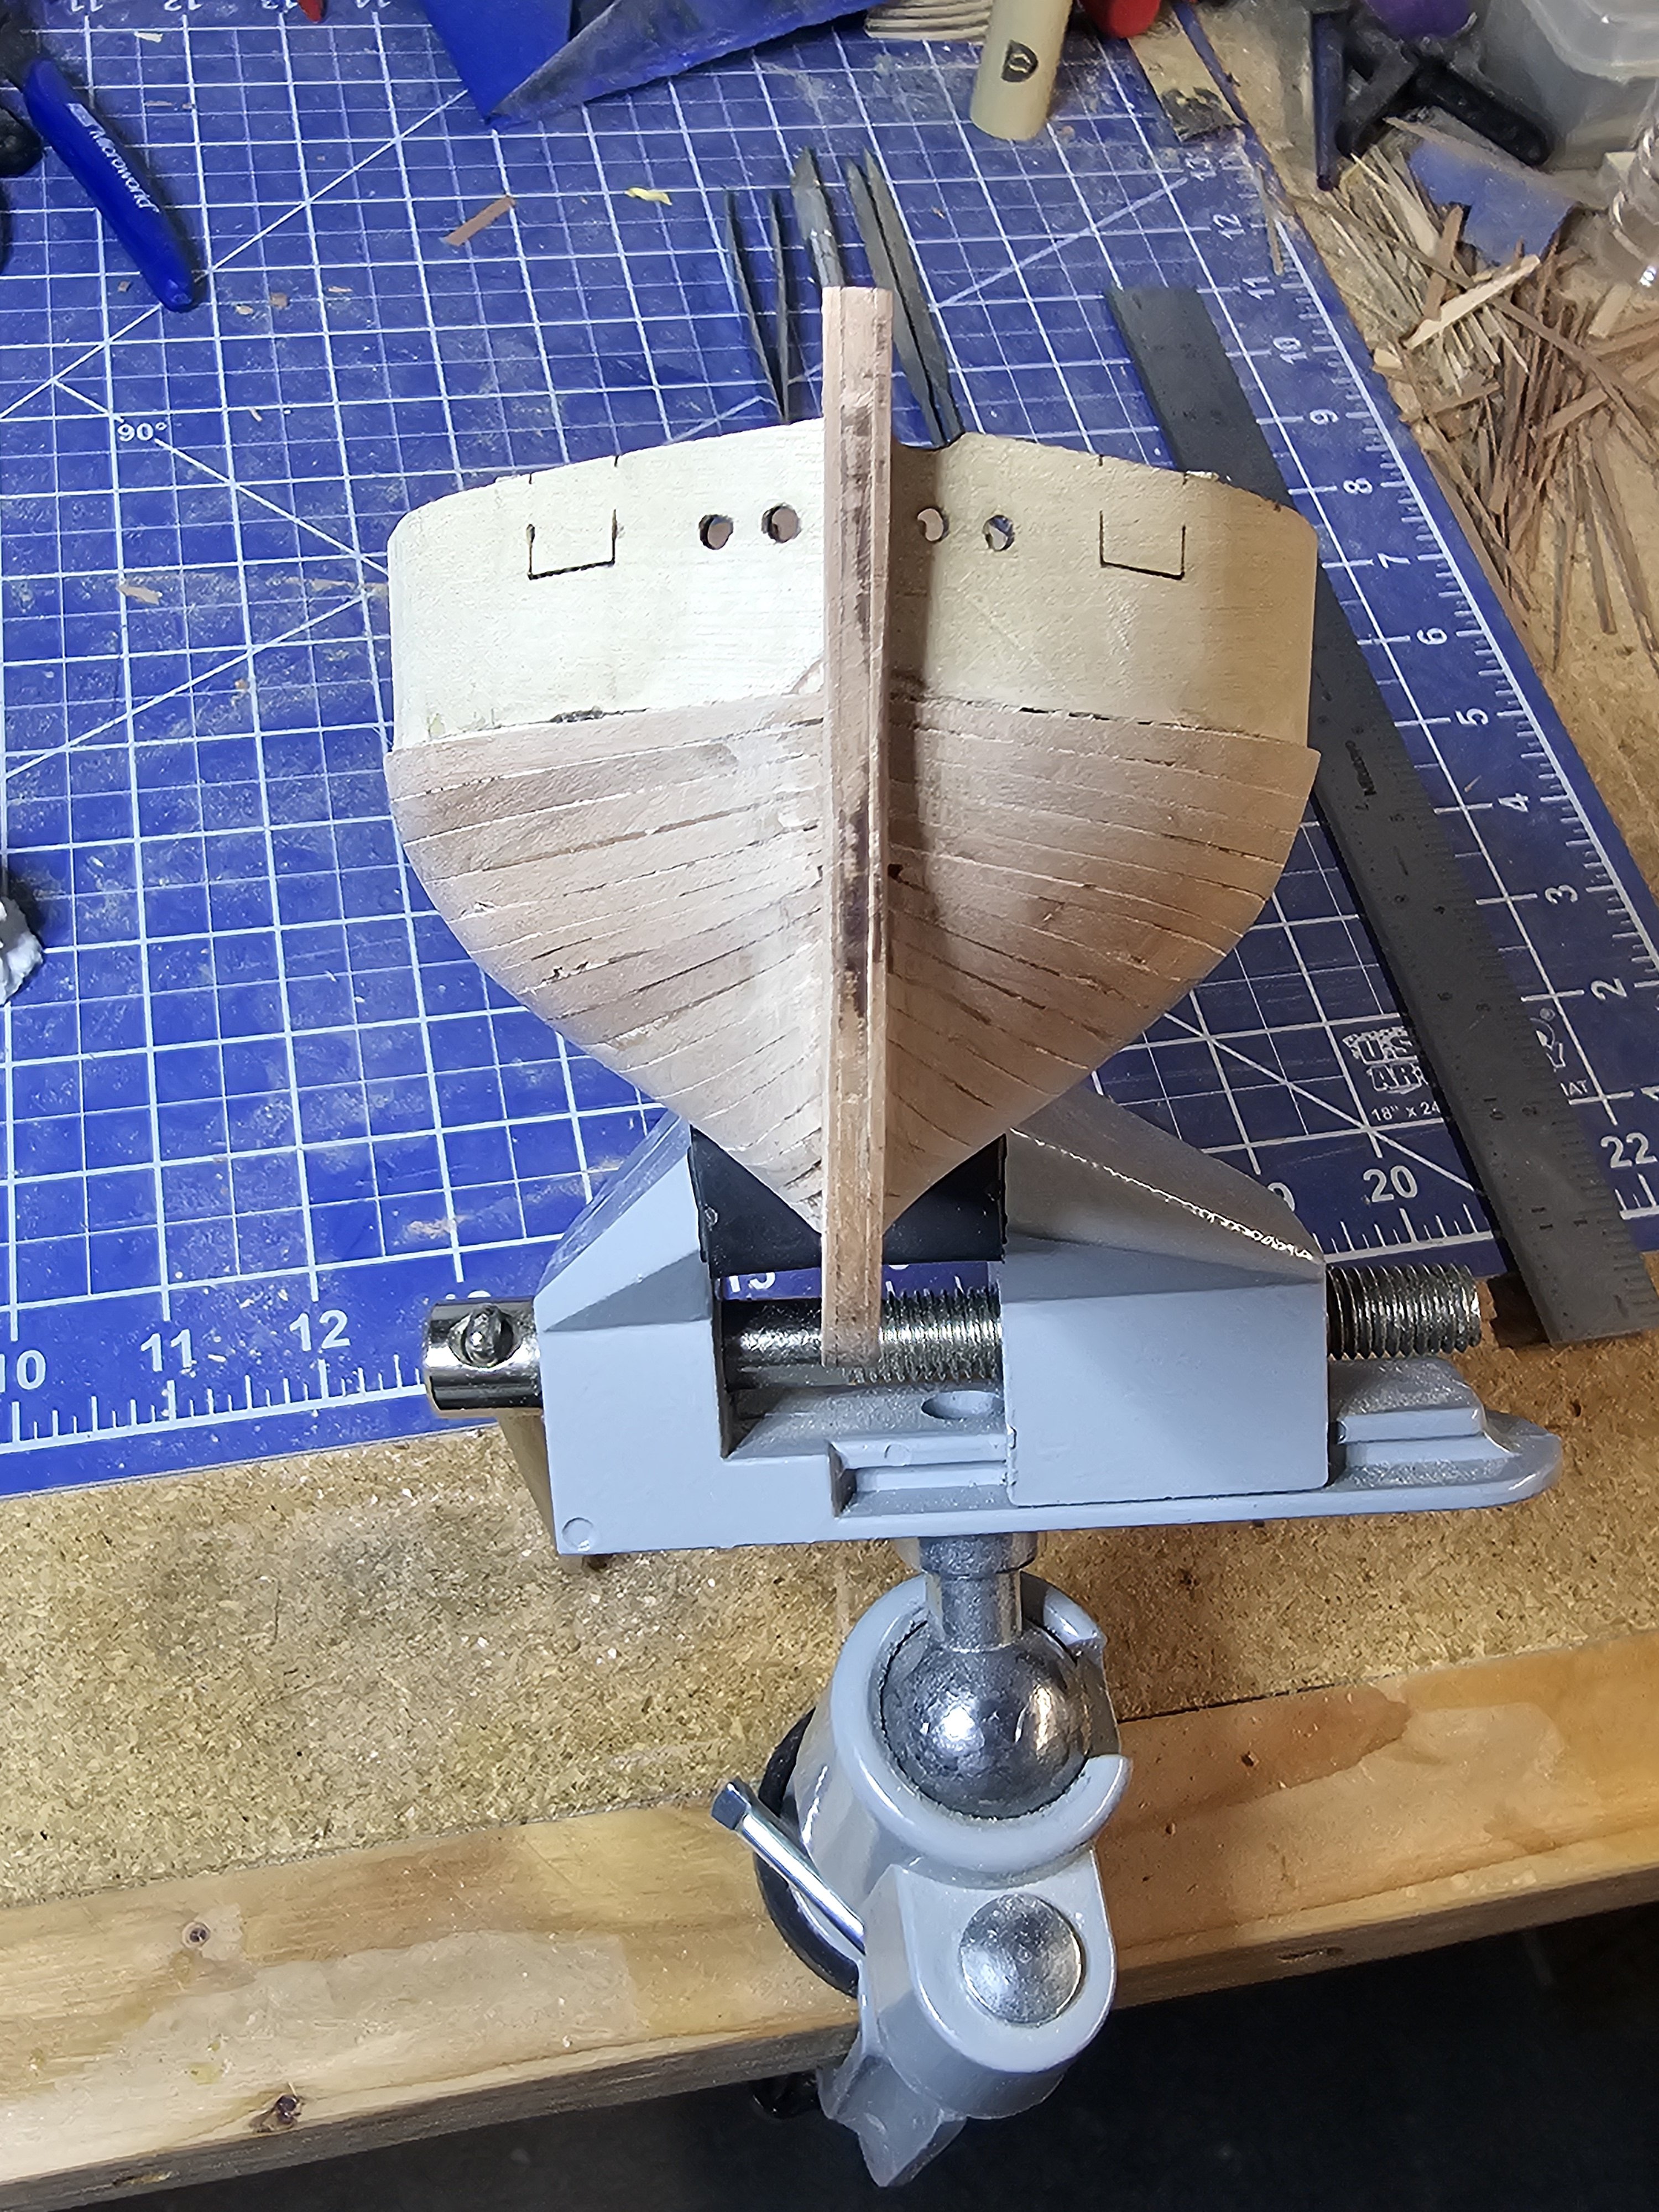
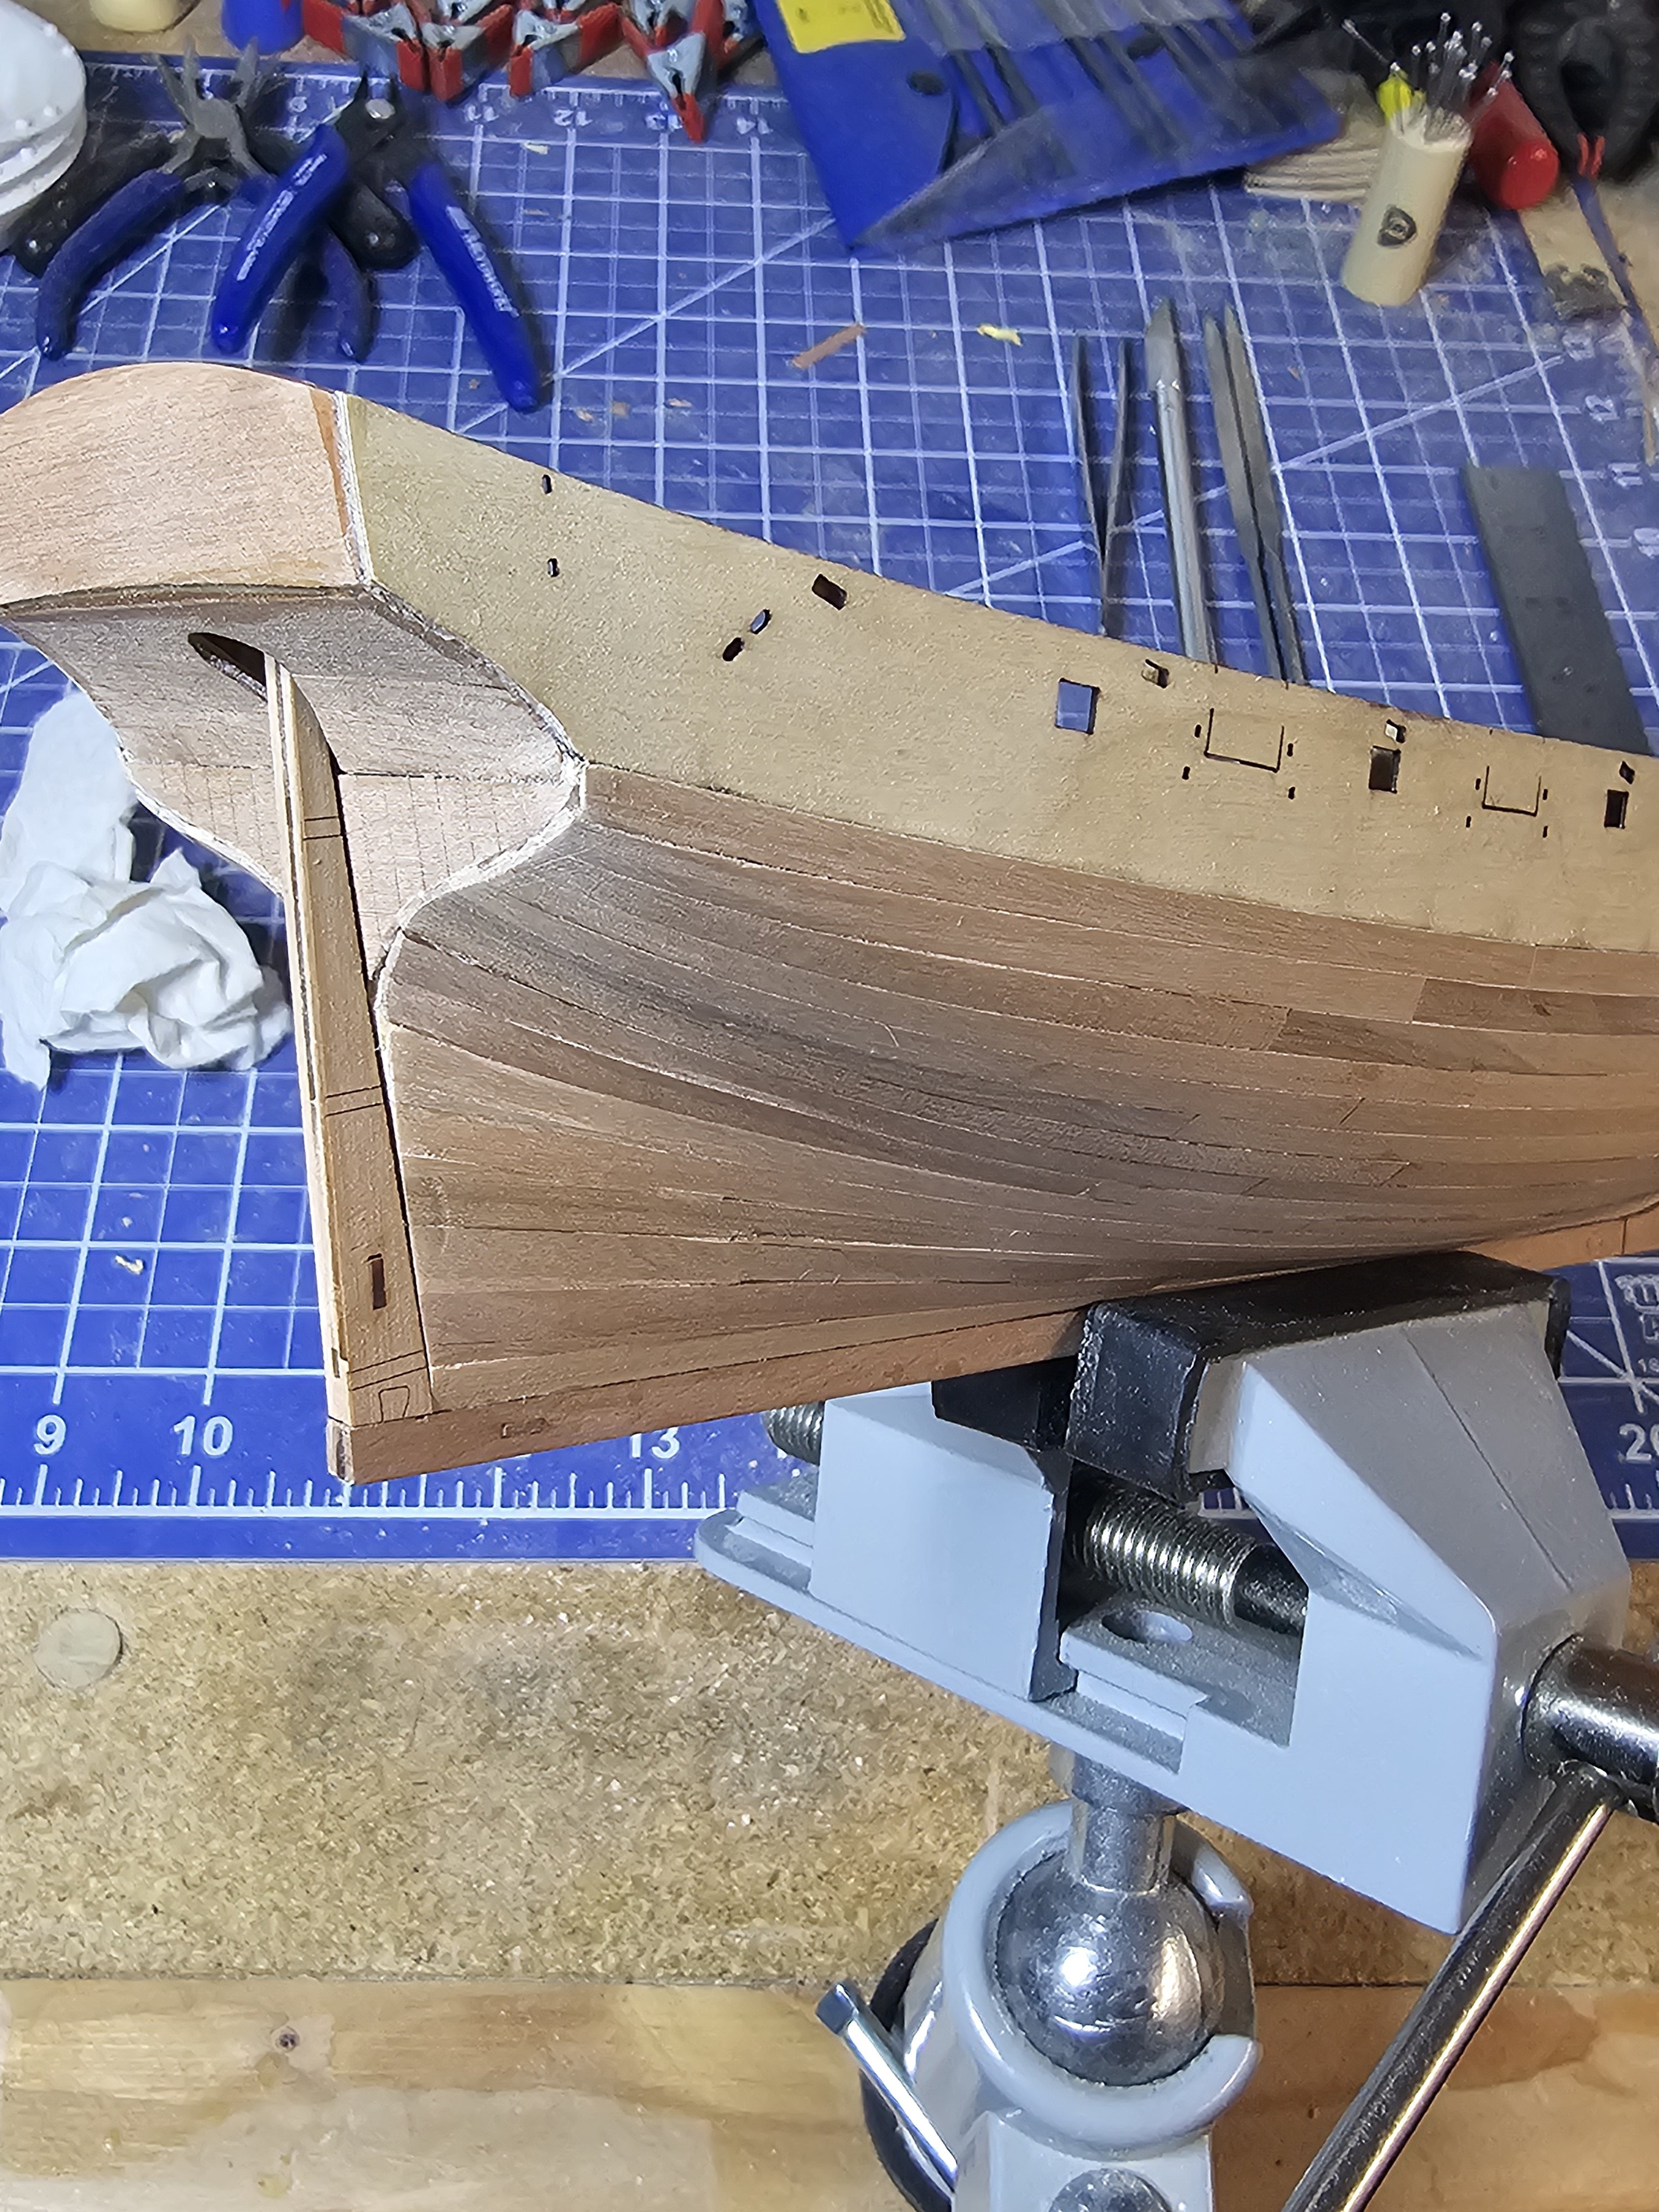
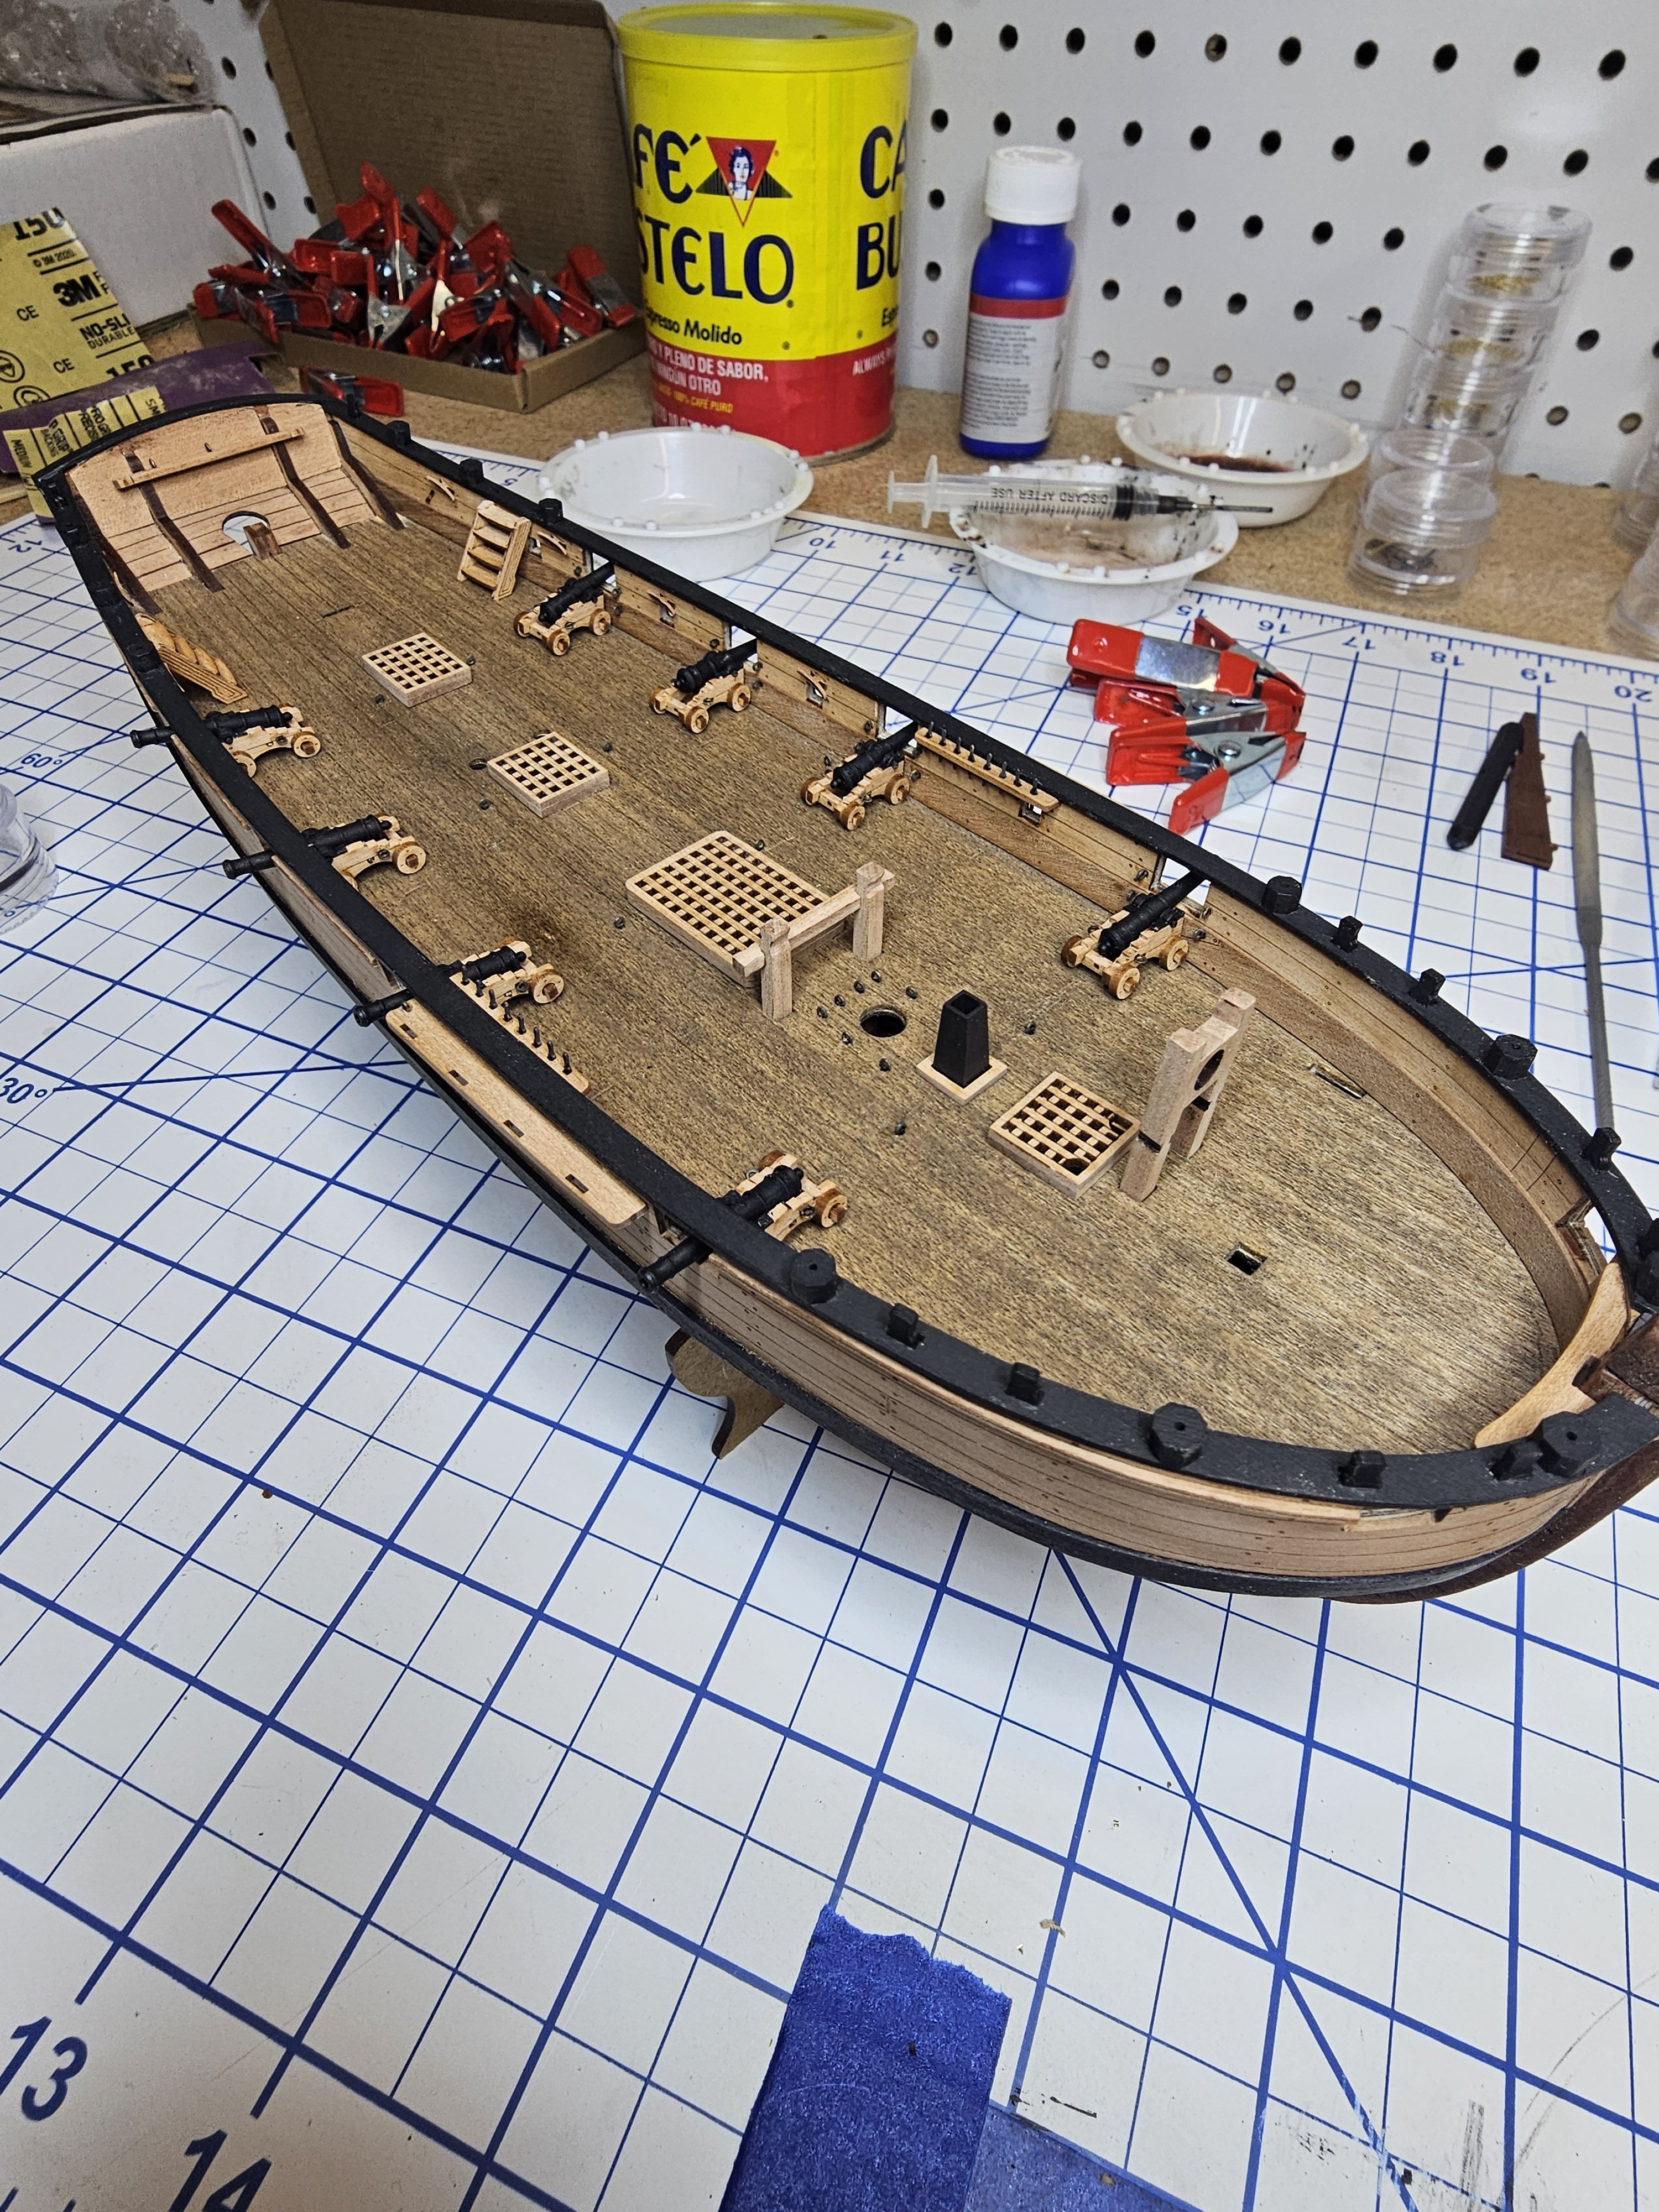
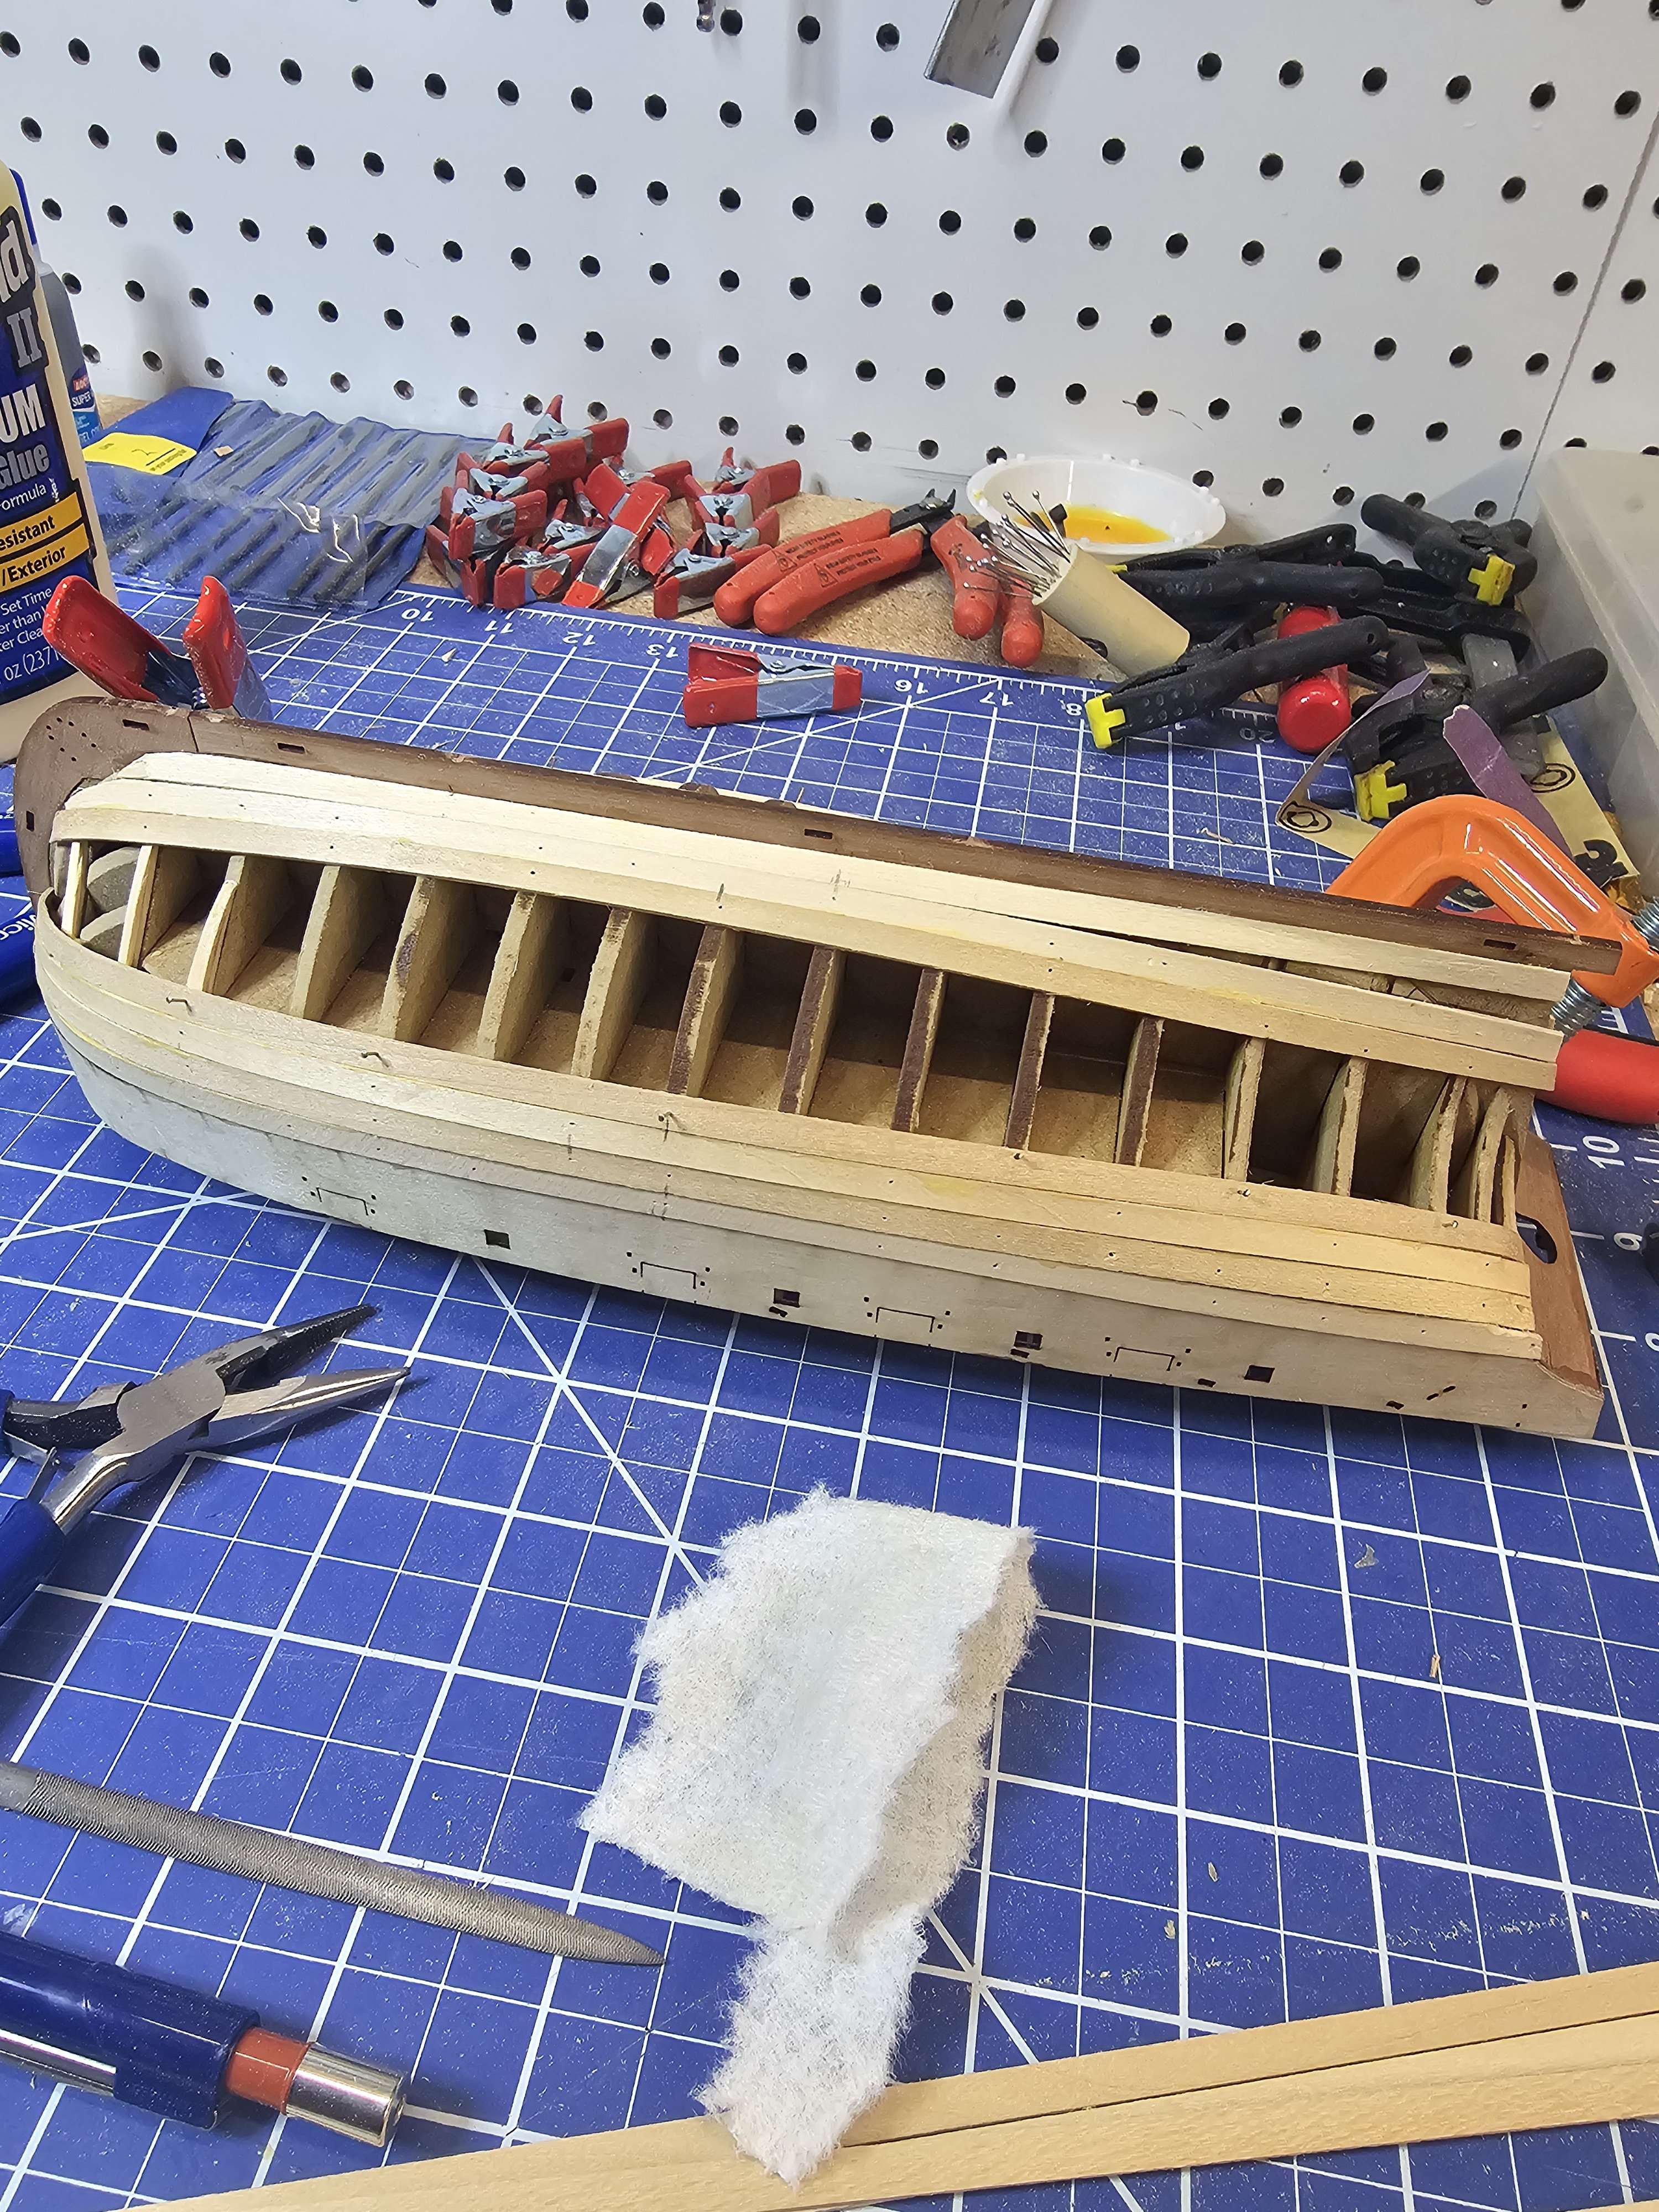
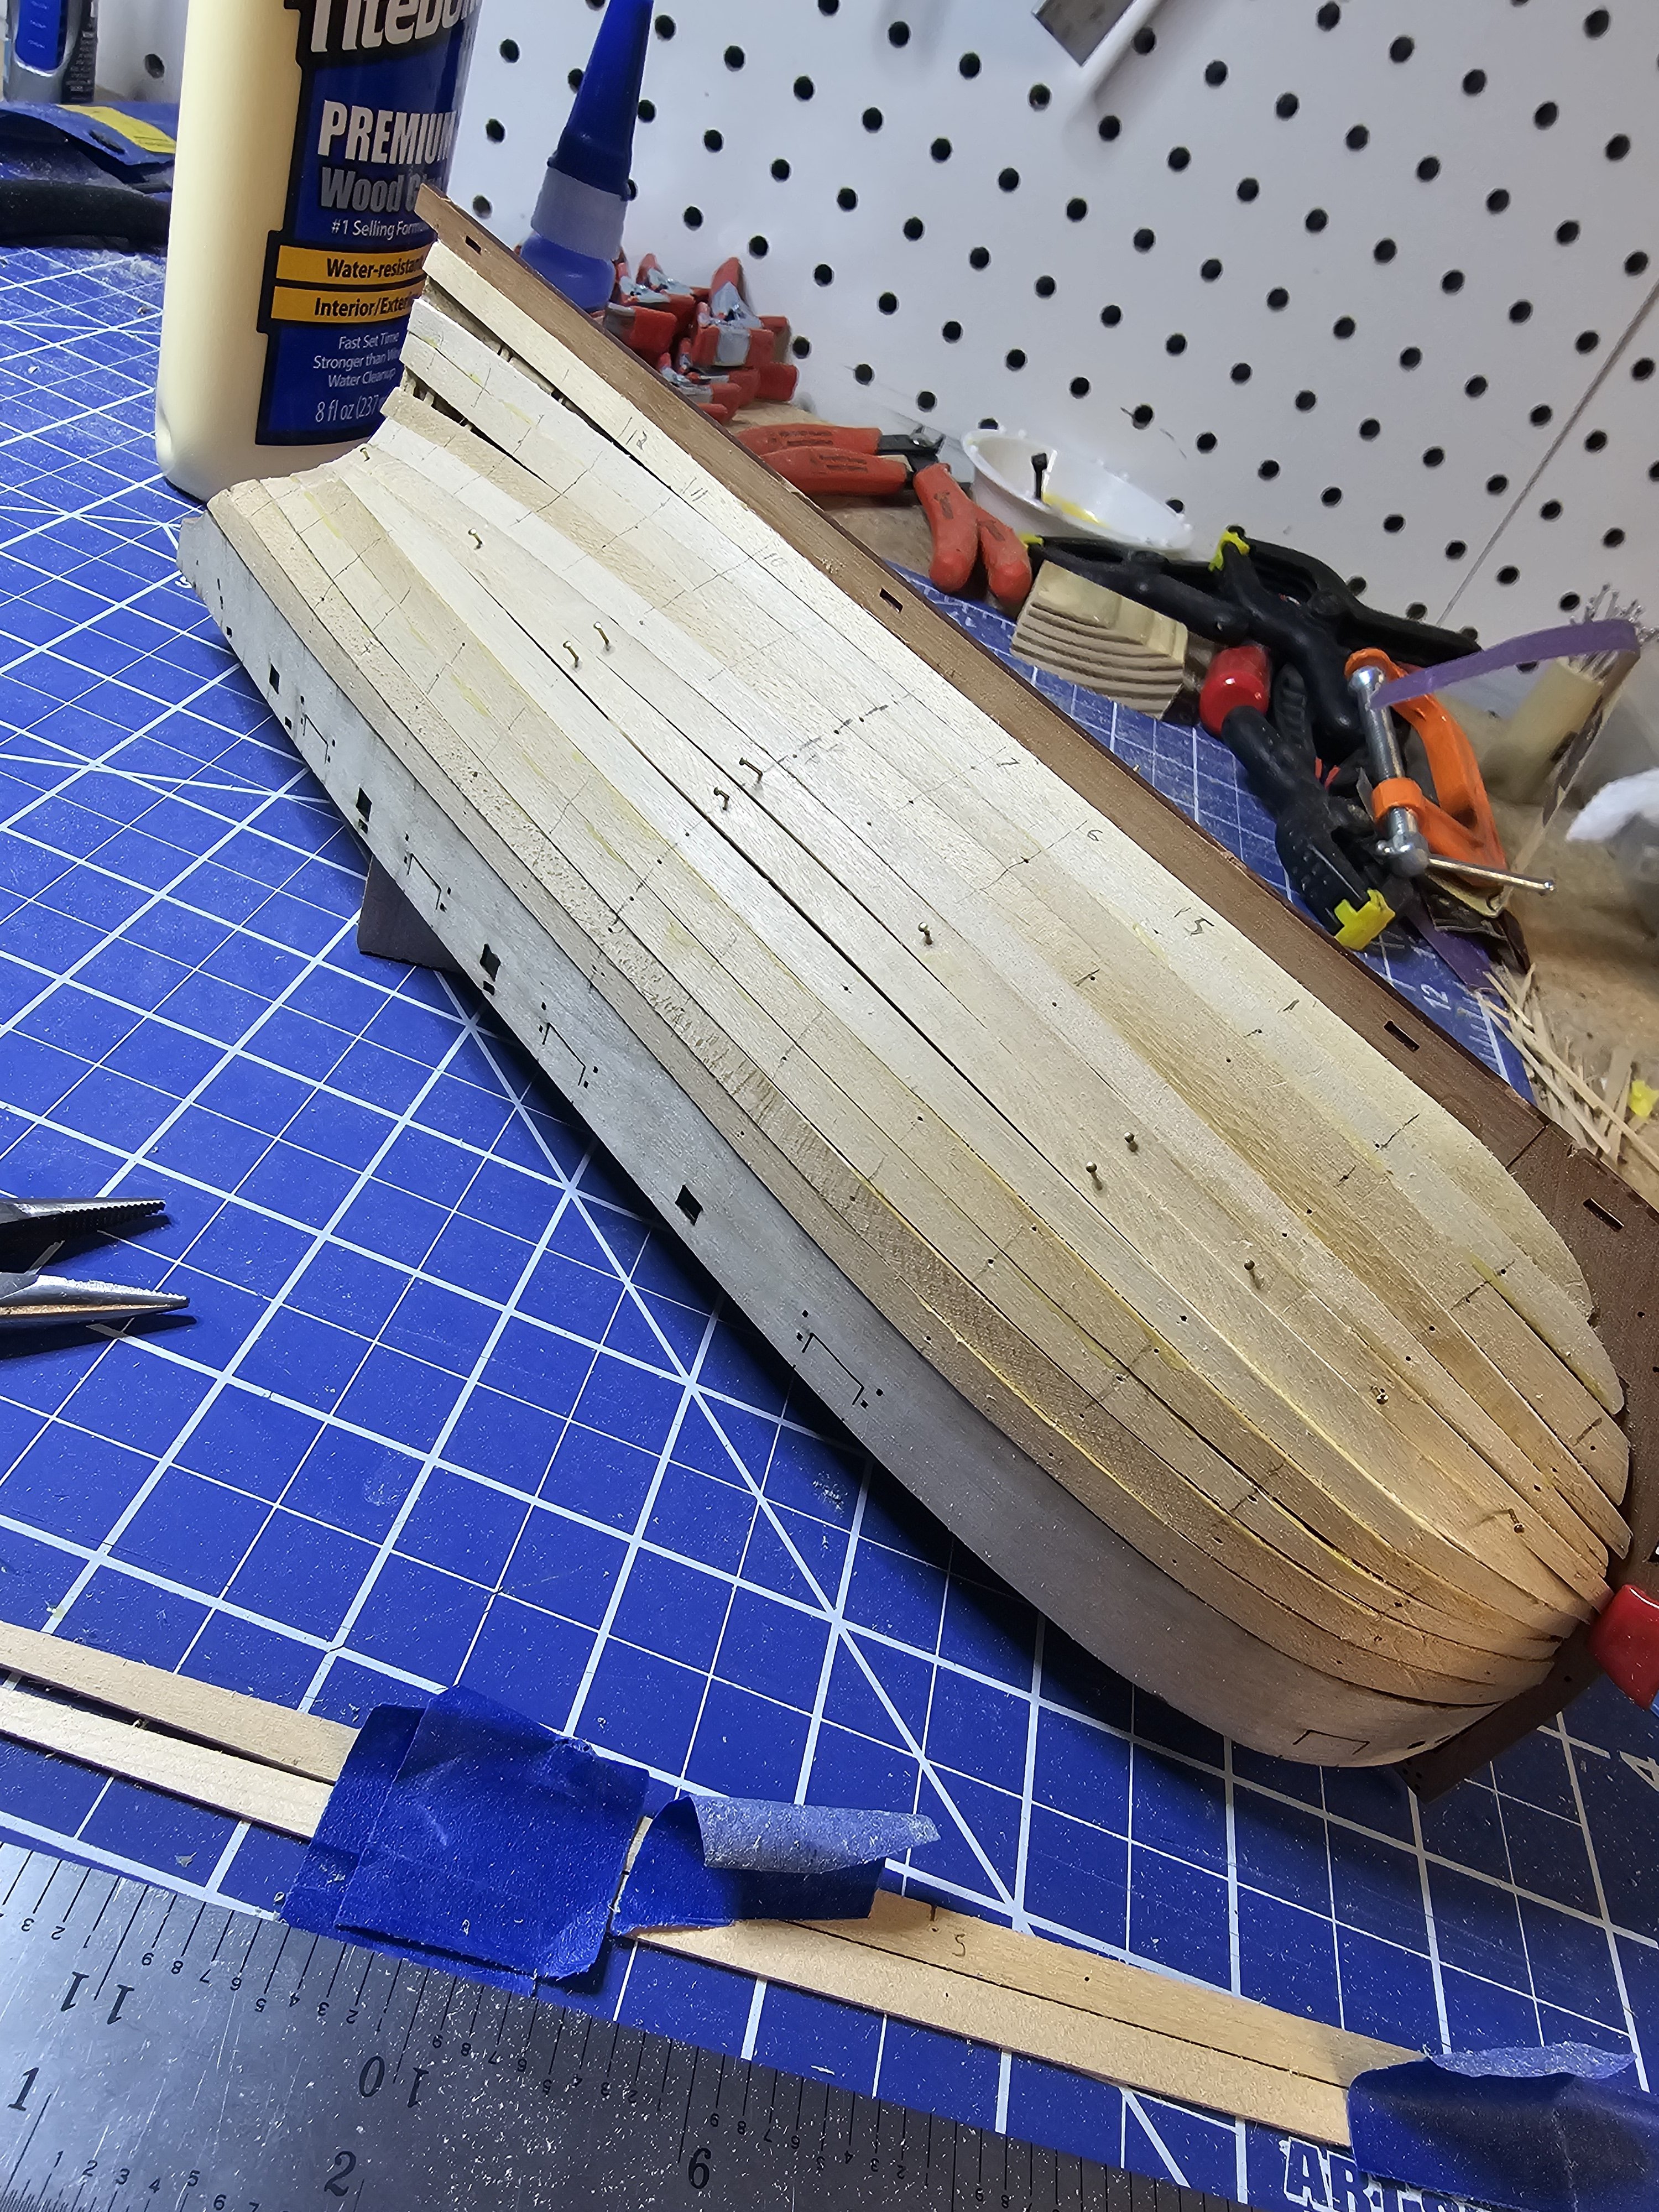
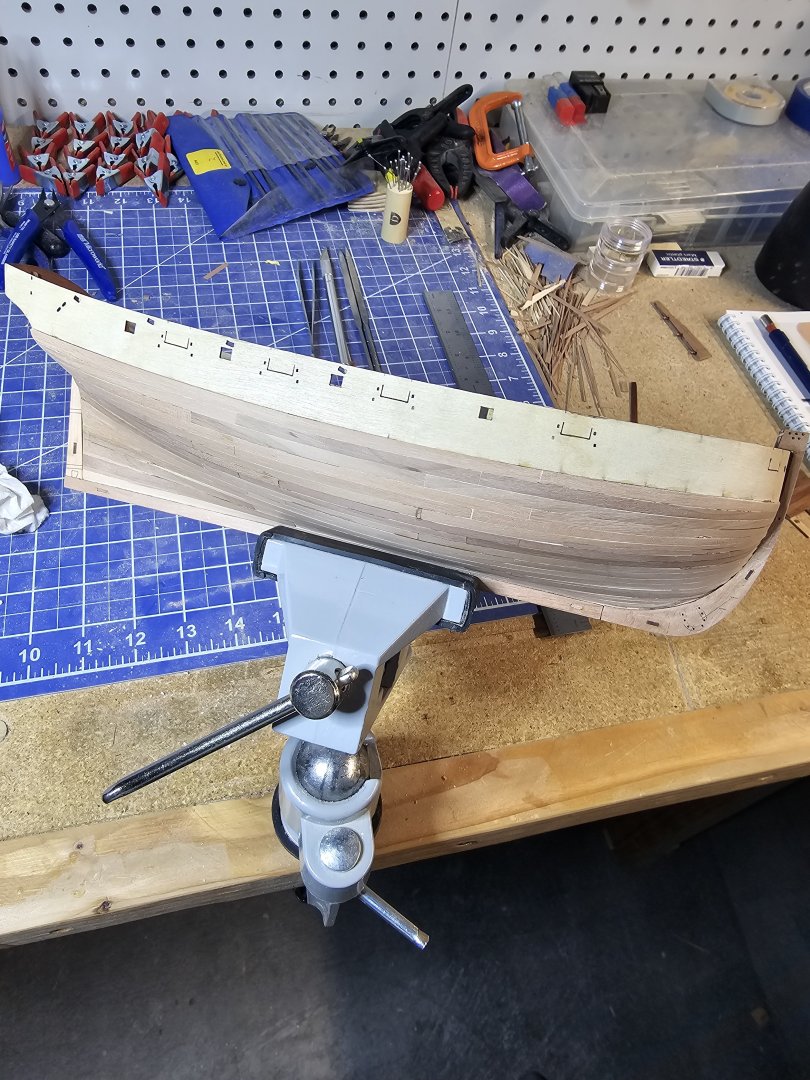
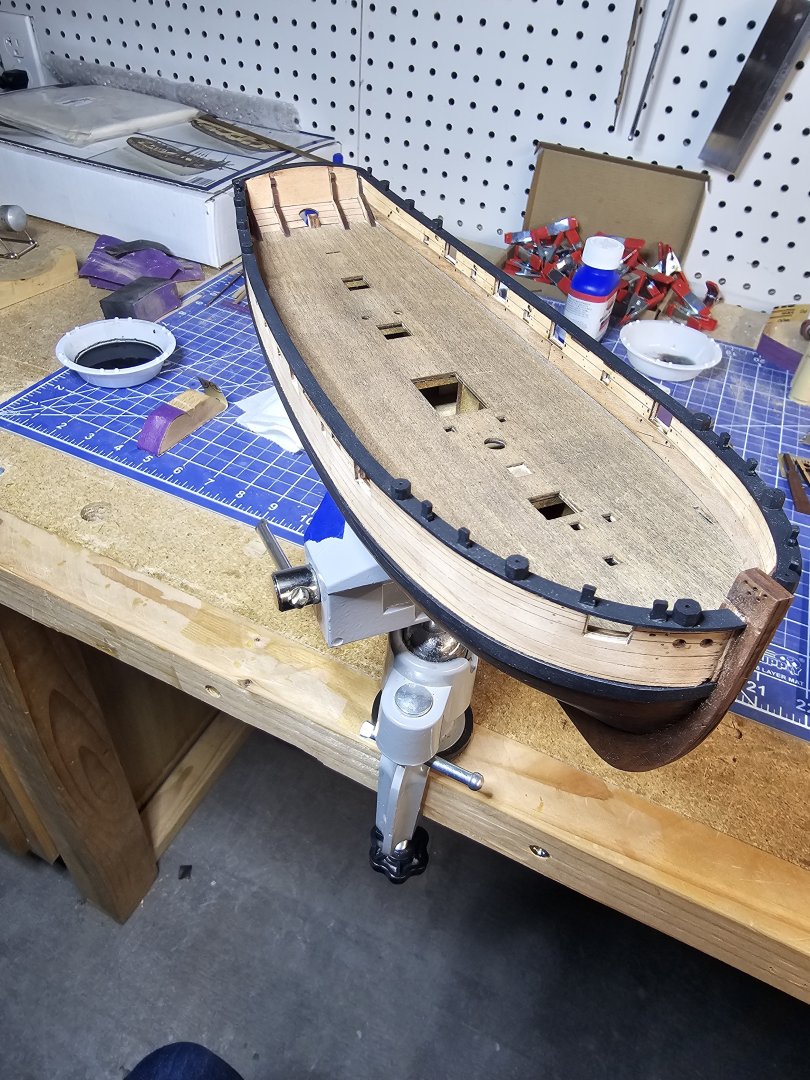
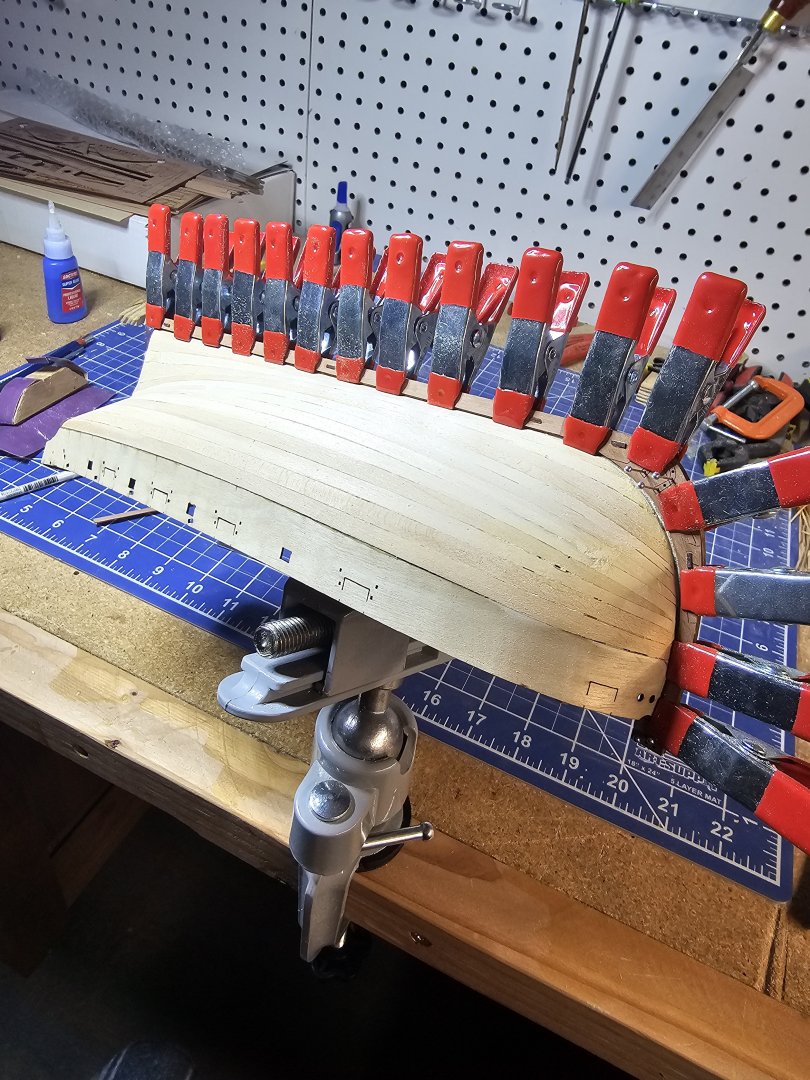
The instruction manual describes the planking process. Yes, plank widths will vary slightly from one bh to the next... since the bow is curved, a lot more tapering is needed (stern needs barely any tapering, and actually widens, hence using stealers between planks). There's TONS of info on here to help with planking. For Sherbourne, the this are laser marked where to taper to aid with the fairing, and i think it calls for 12 planks (1st layer, 2nd layer was 13 for me). For this particular hull shape, zero tapering for majority of hull length midship, but quite a bit (~4-5 bulkheads or so) at the bow.
-
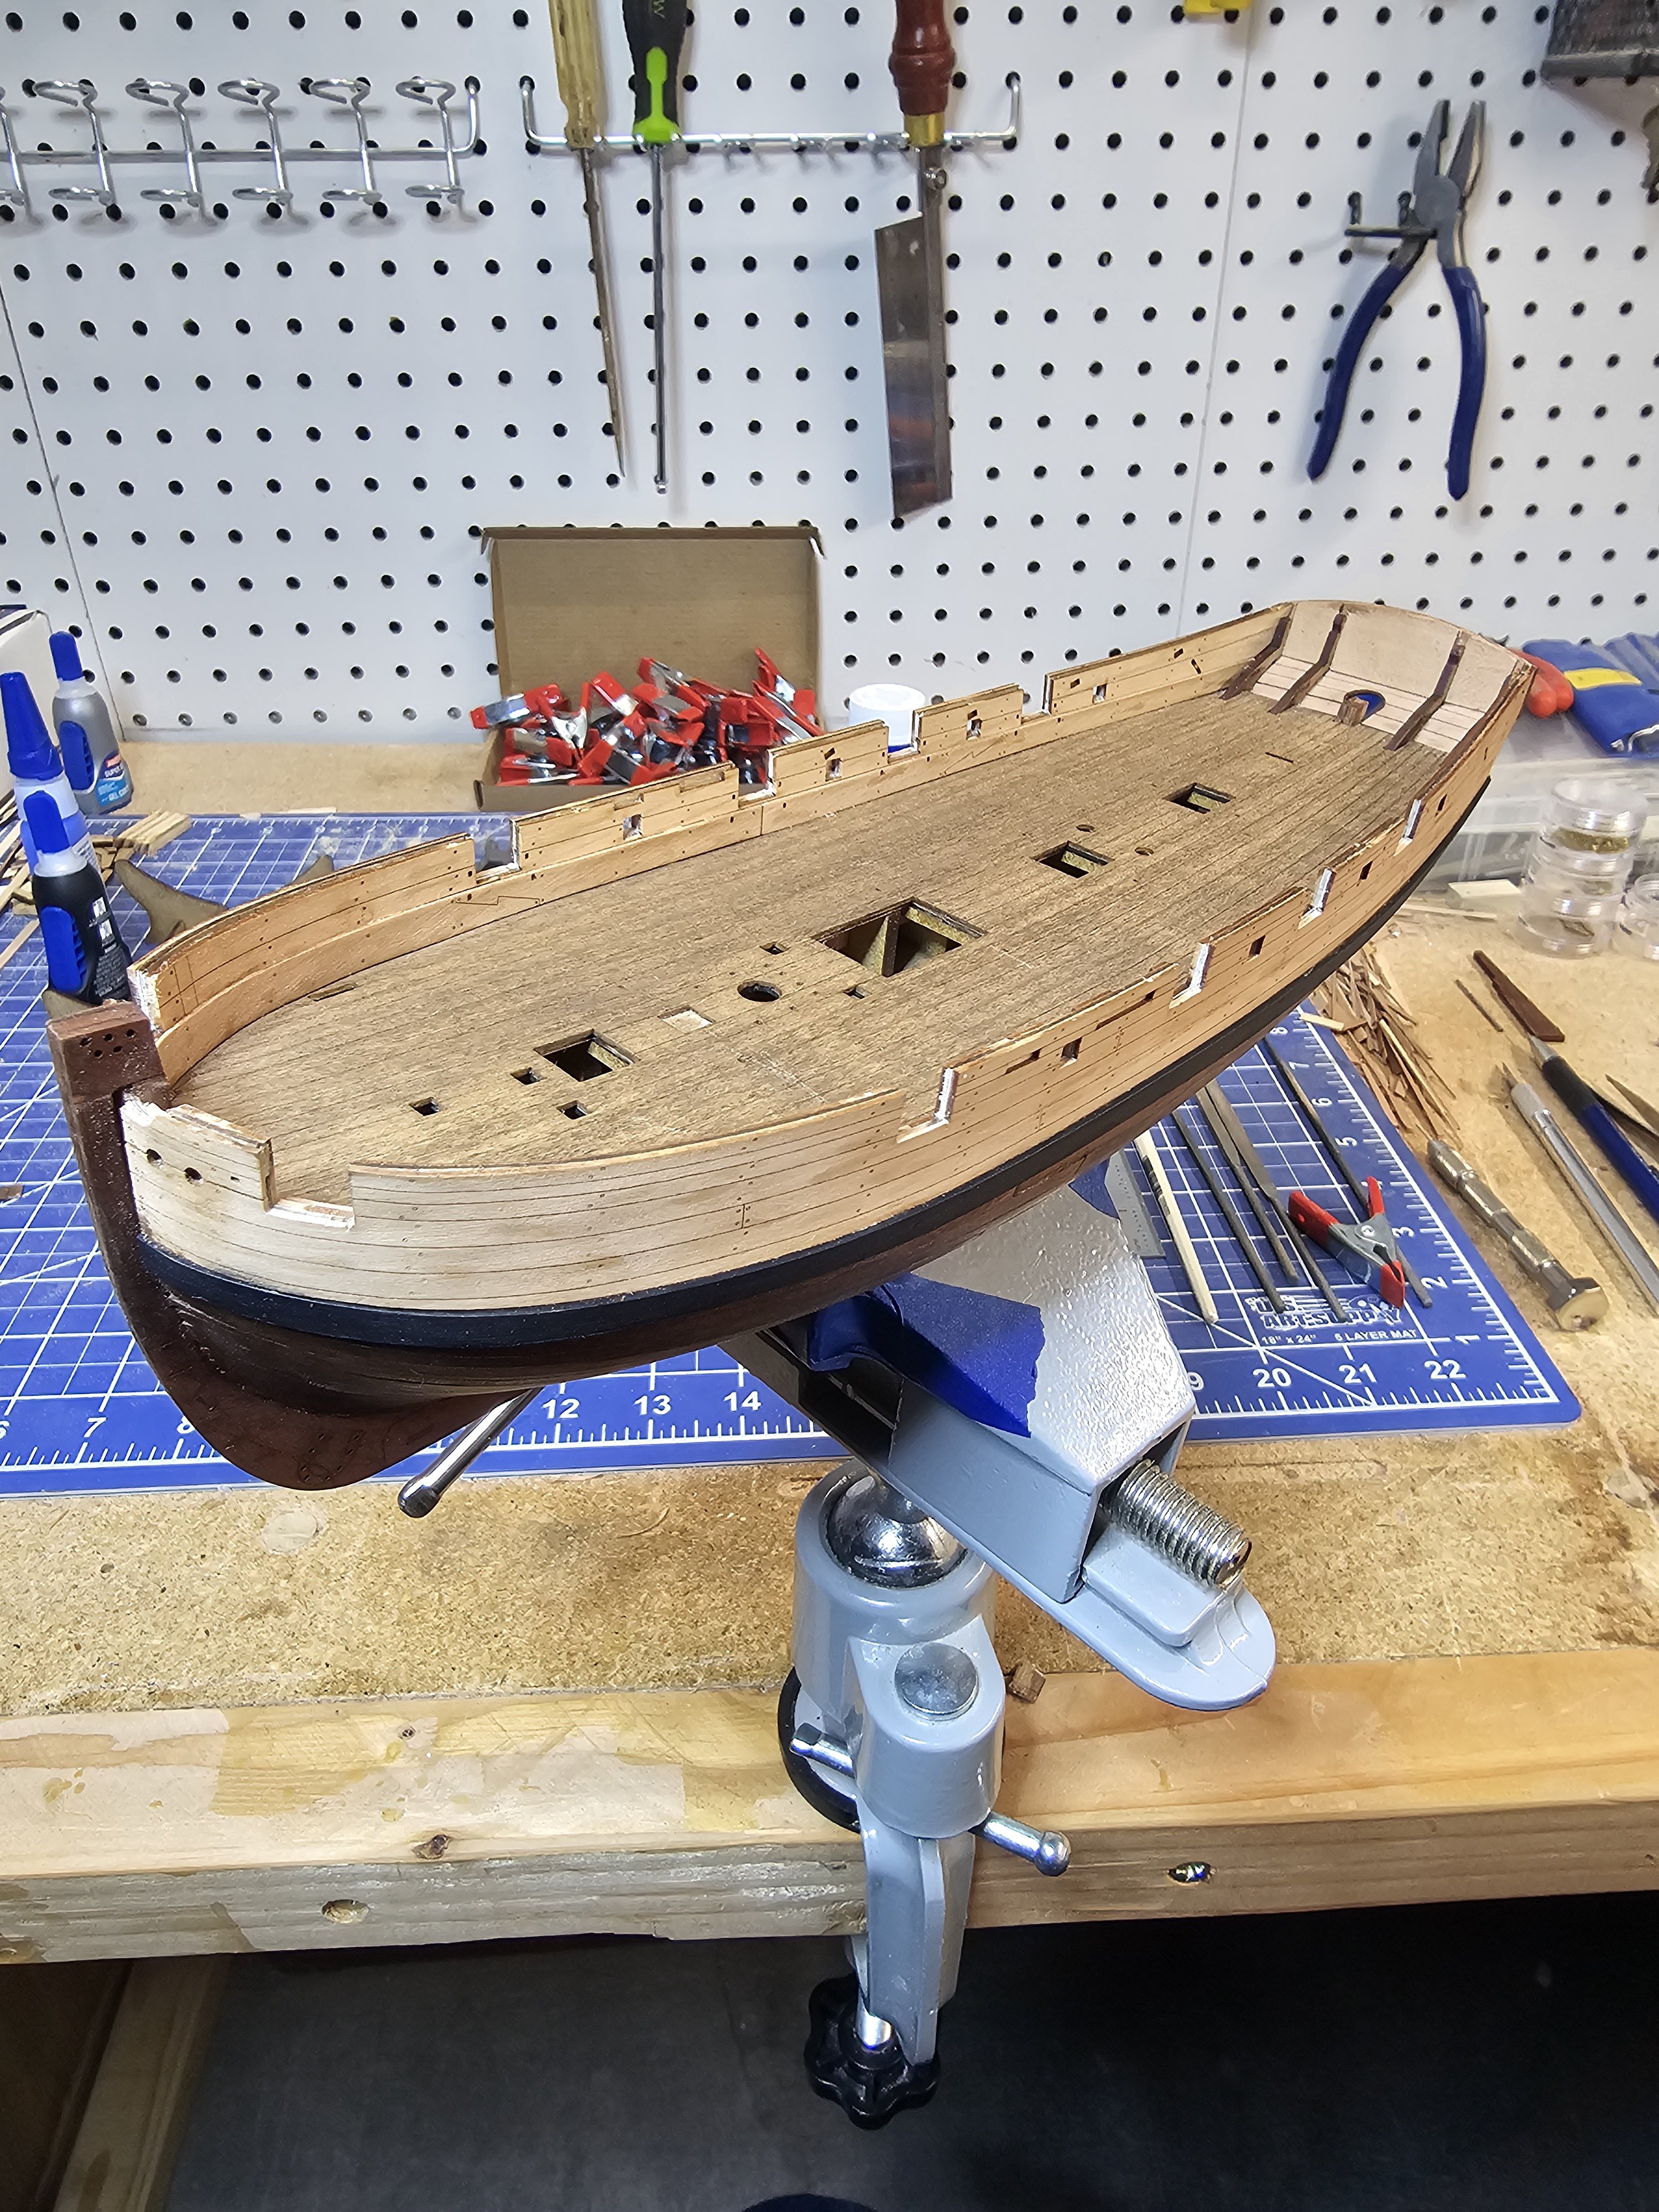
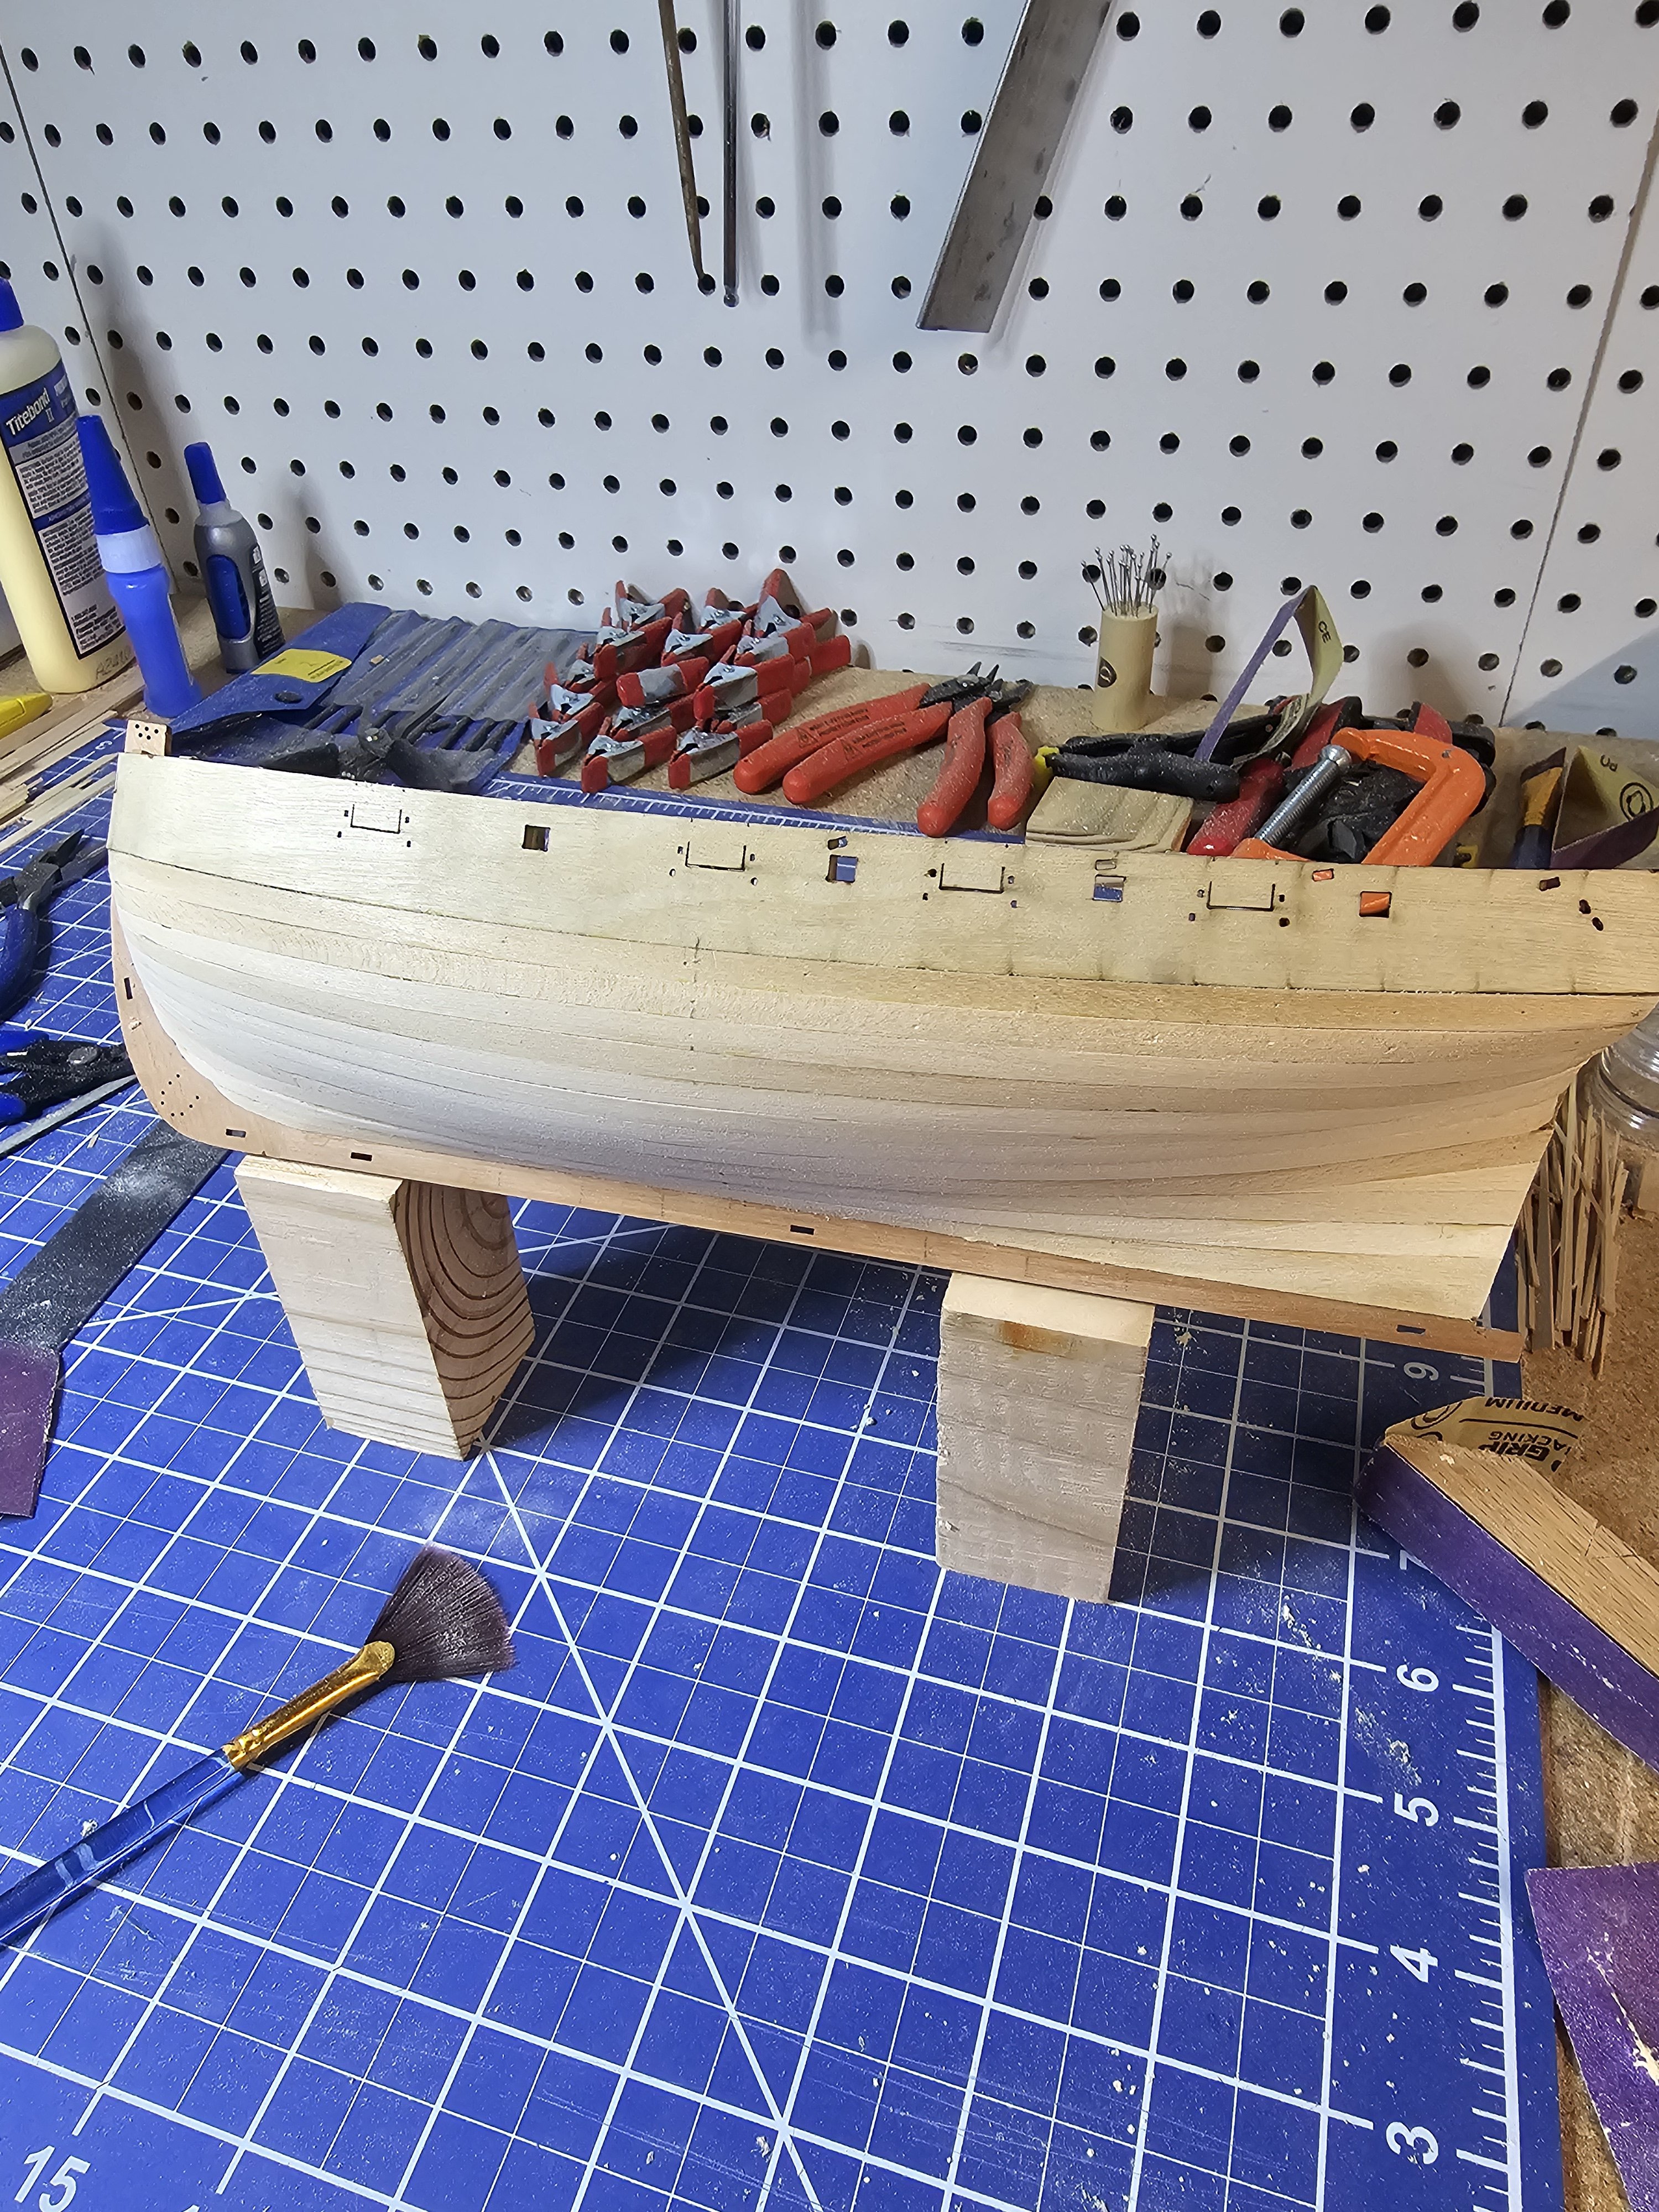
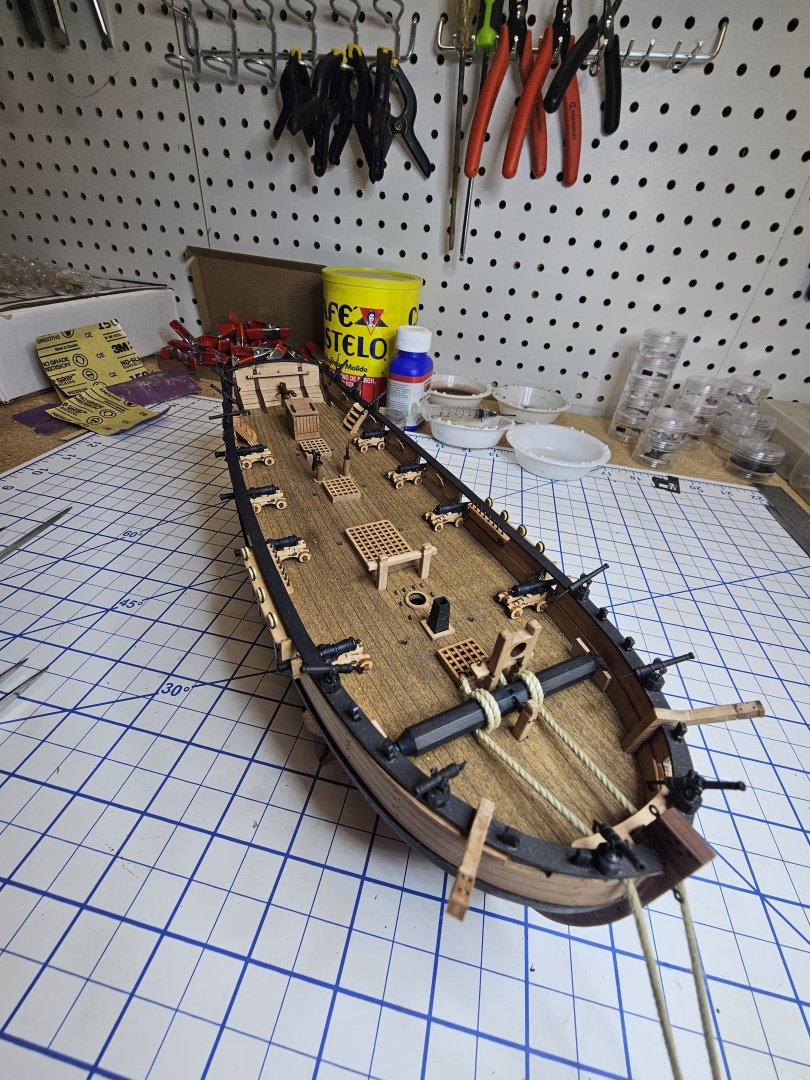
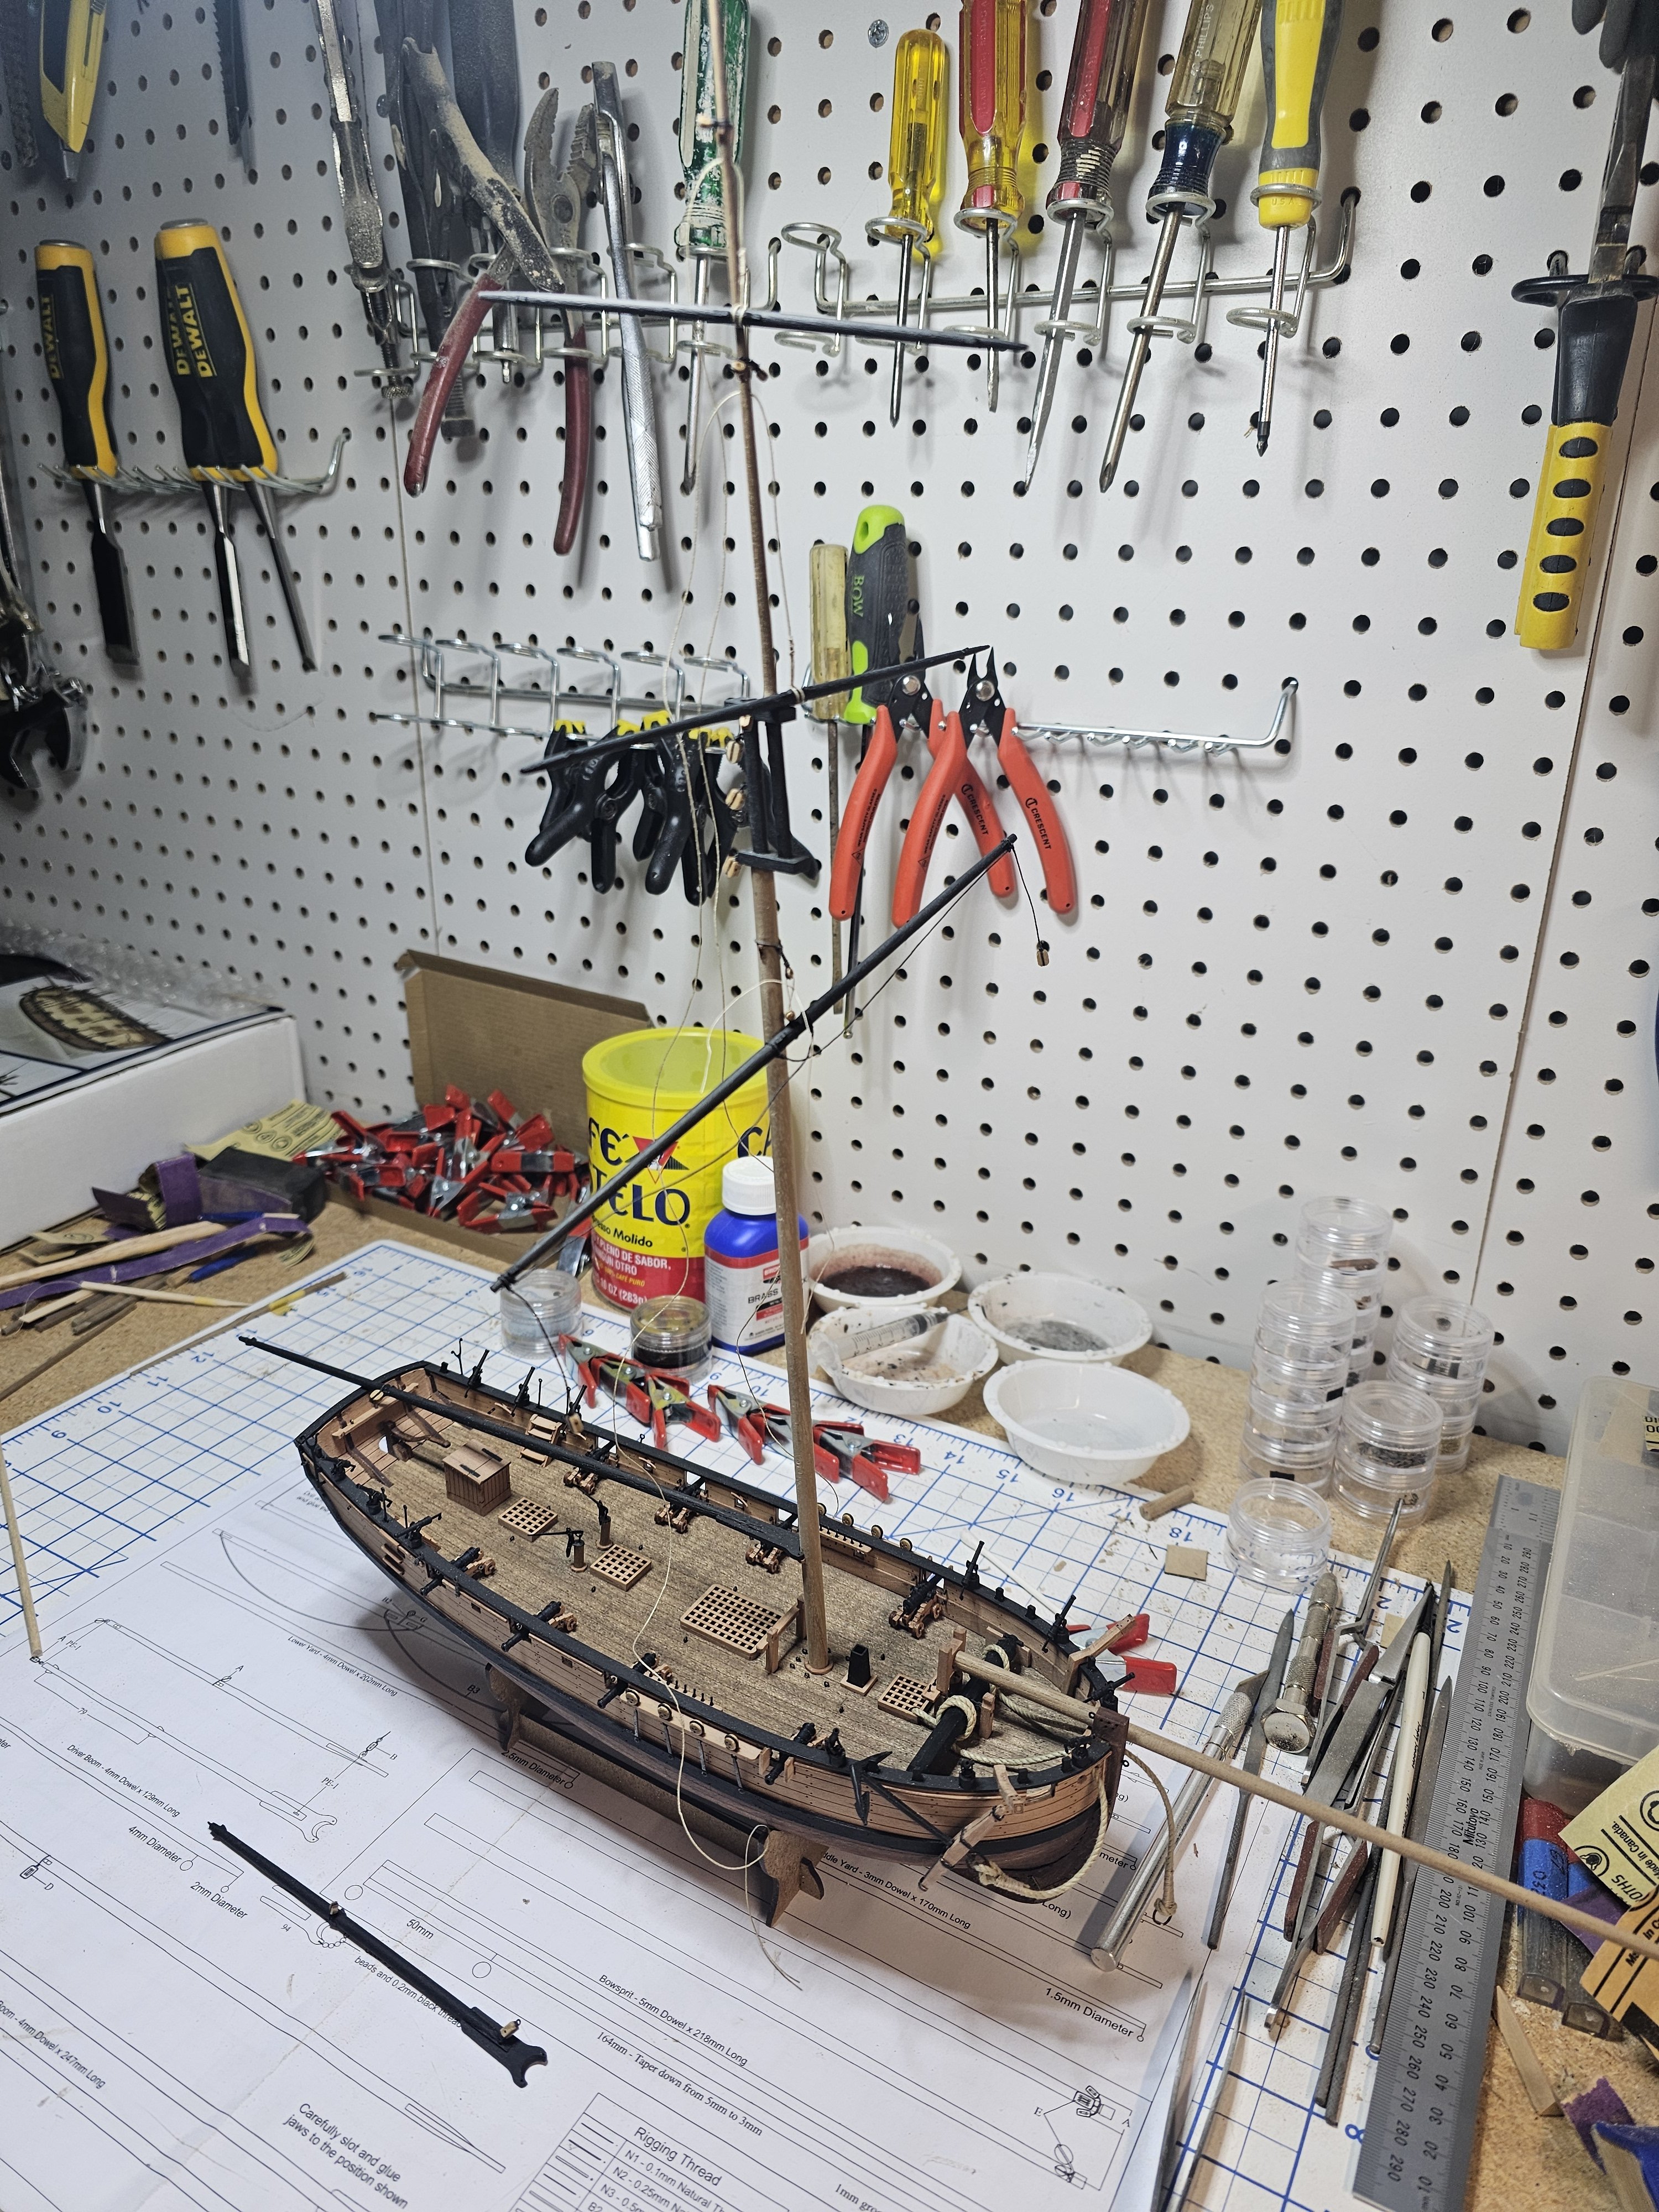
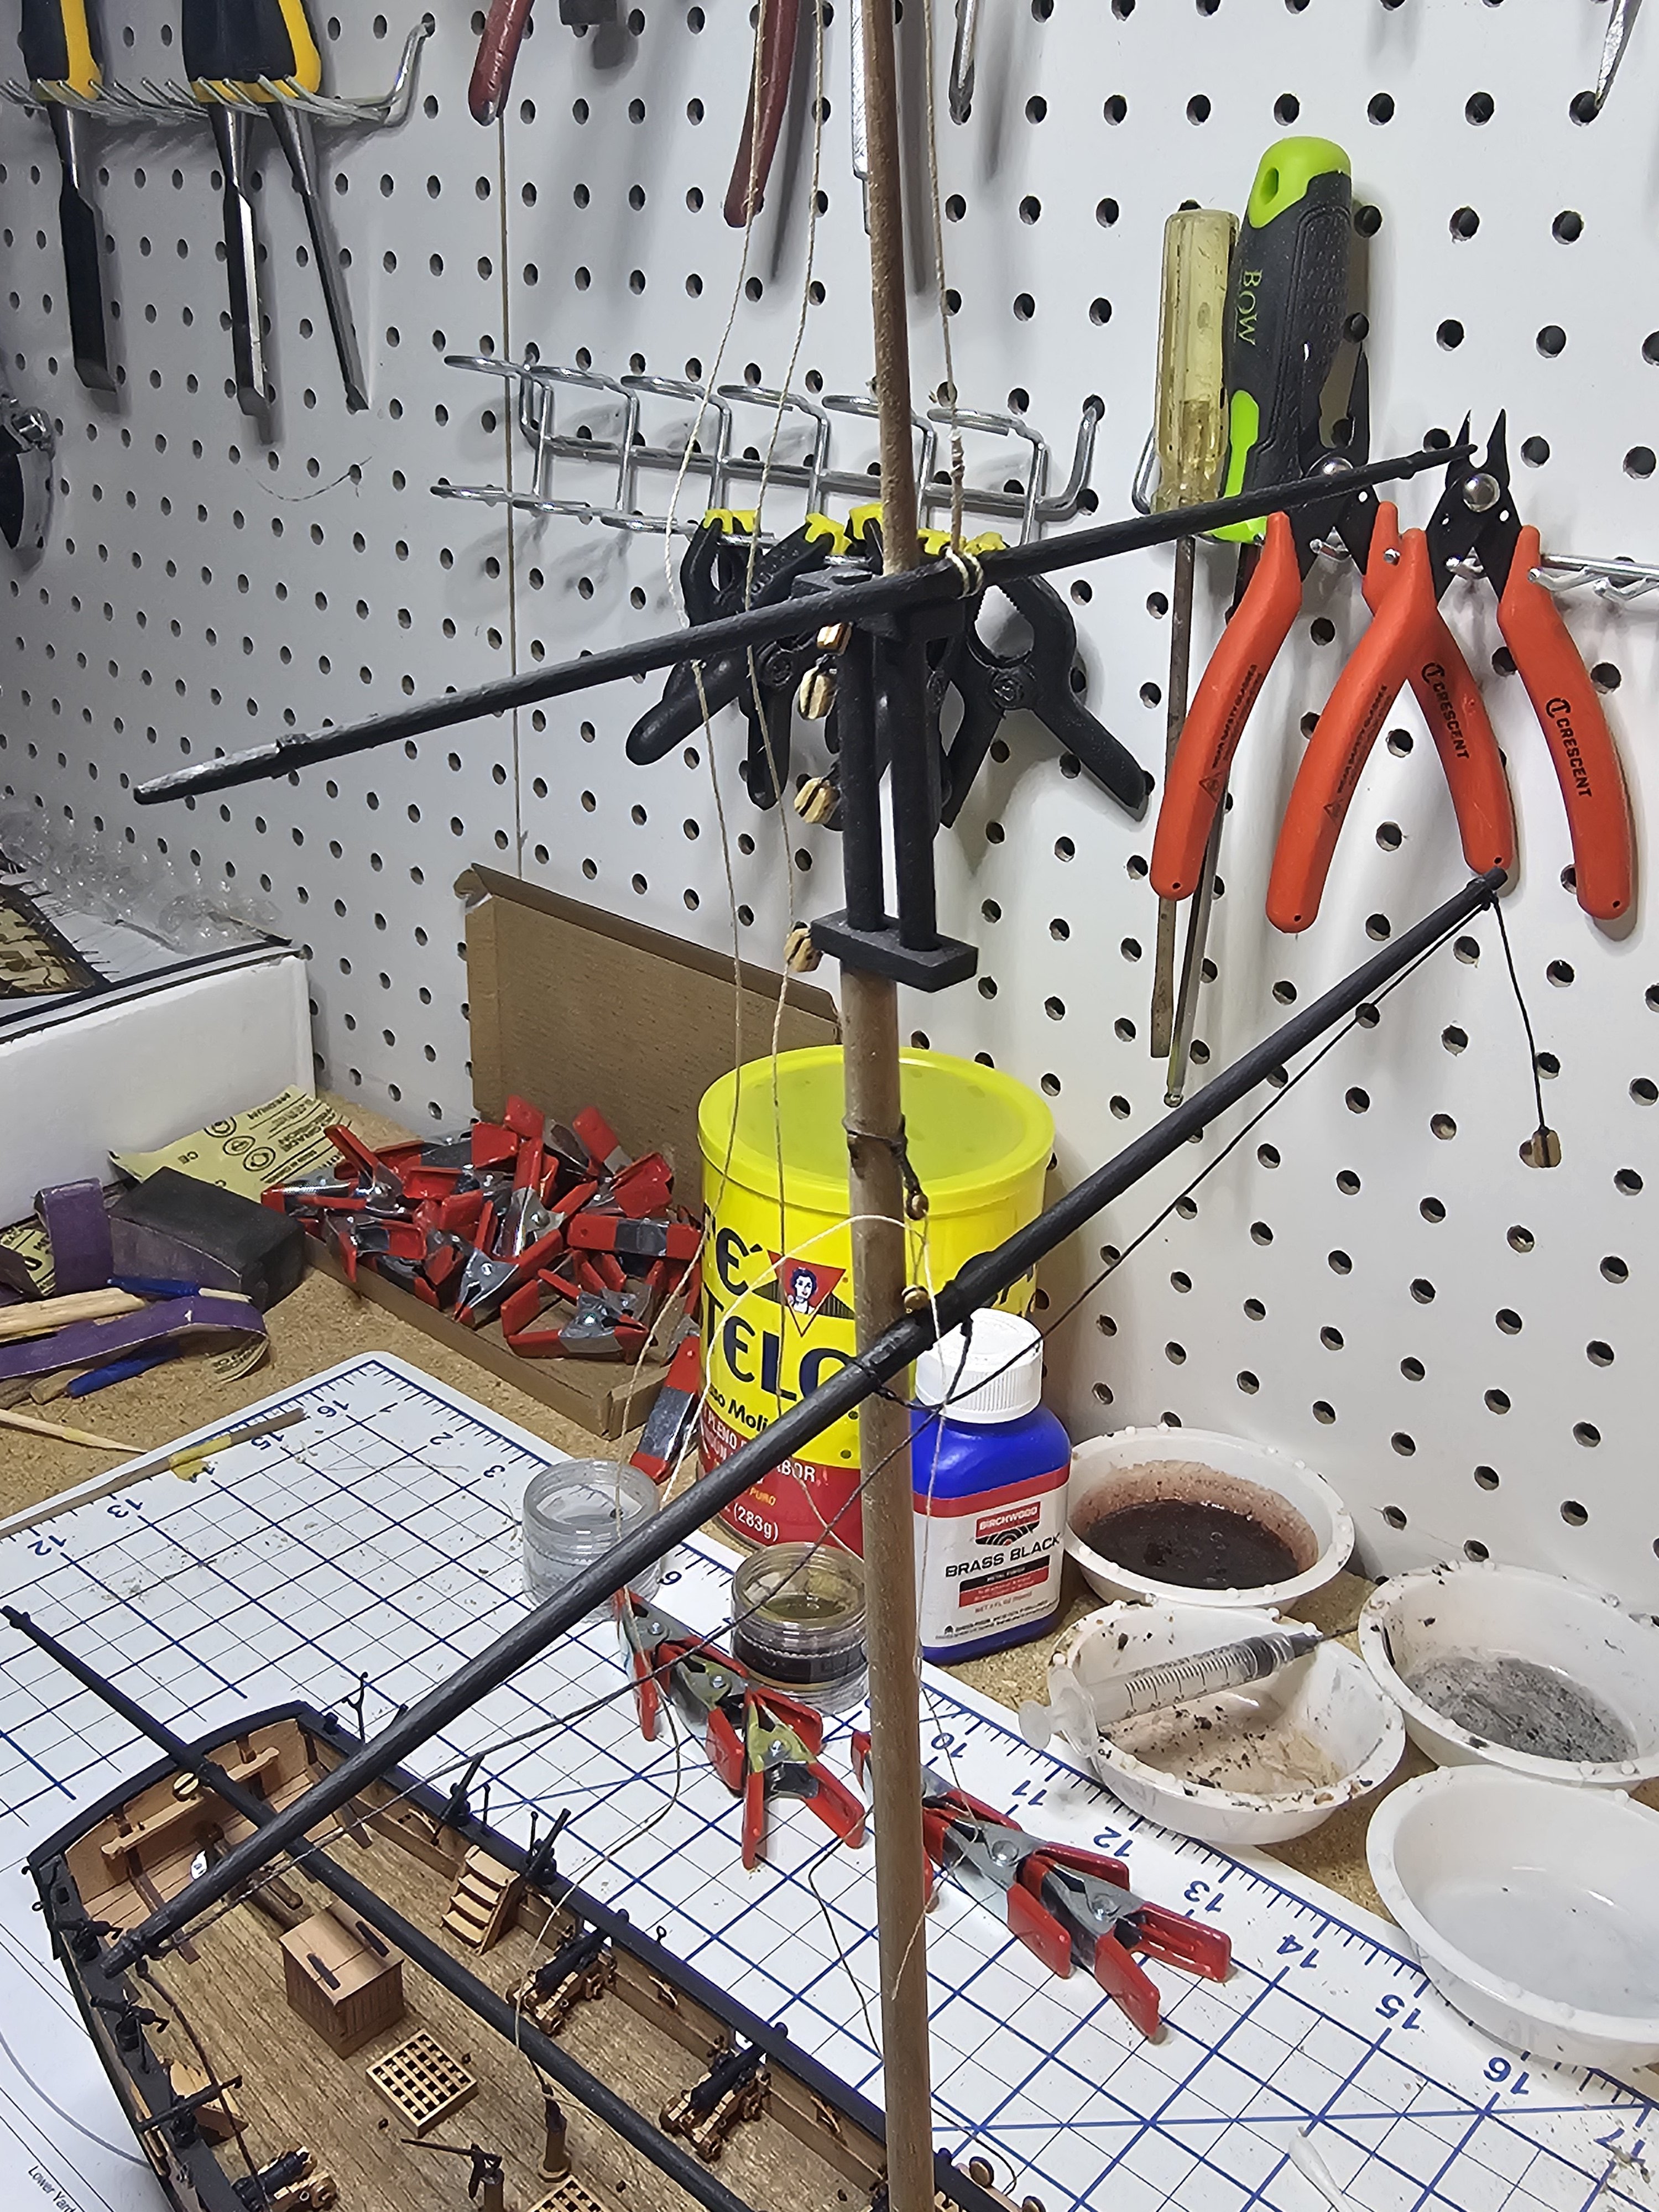
Now that hull and deck are mostly finished, onto the mast and spars... Also semi-thinking of adding sails (furled on the yards/boom, etc)... haven't decided yet... if I do go with sails, have to do them before adding the standing rigging I think...
-
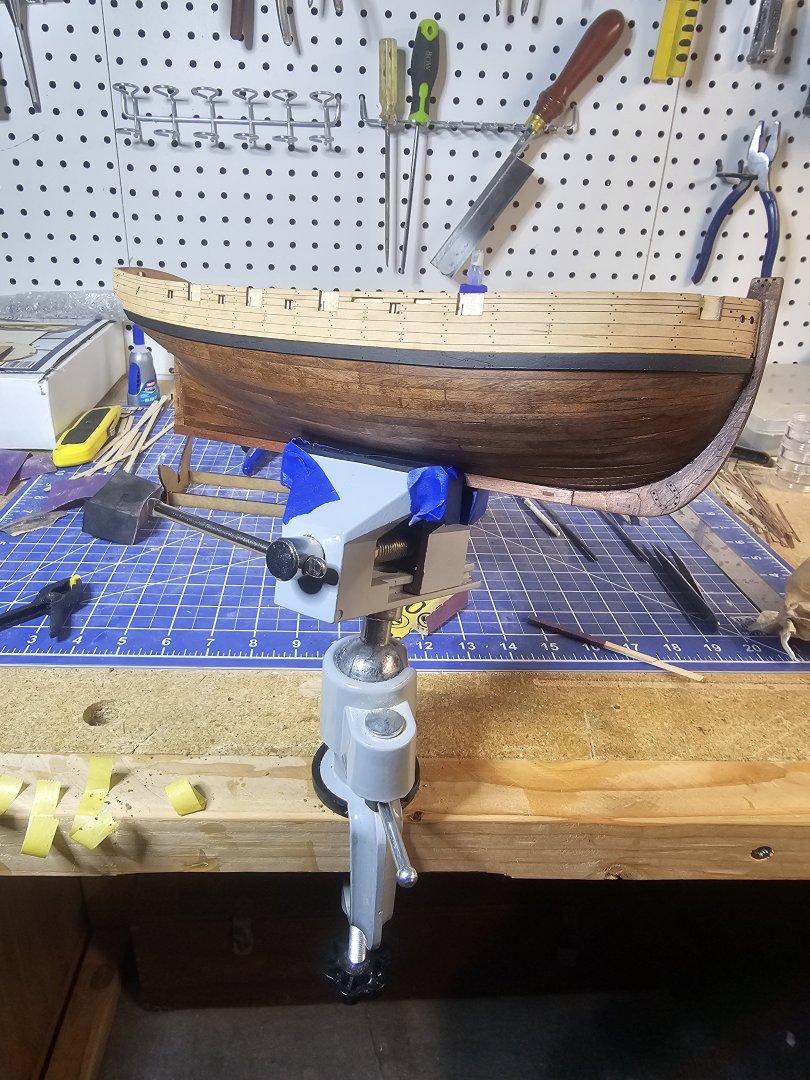
Chris, Thank you! It's slightly darker than I wanted, but still ok! Tried over a dozen combinations of stains on some of the scrap pear wood to see how they'd look... unfortunately Lowes only had a few in the 8oz cans (don't need a whole quart). So it's a good idea to test paint and stains on scraps of the actual wood to see how they'll turn out! 😉
-
I'm trying to be as clean as possible, yet I'm still fine with the blemishes (gives it character I think). That's one of the reasons why I chose to stain the hull- show of the small errors and flaws, yet blend together so it all works as one.
-
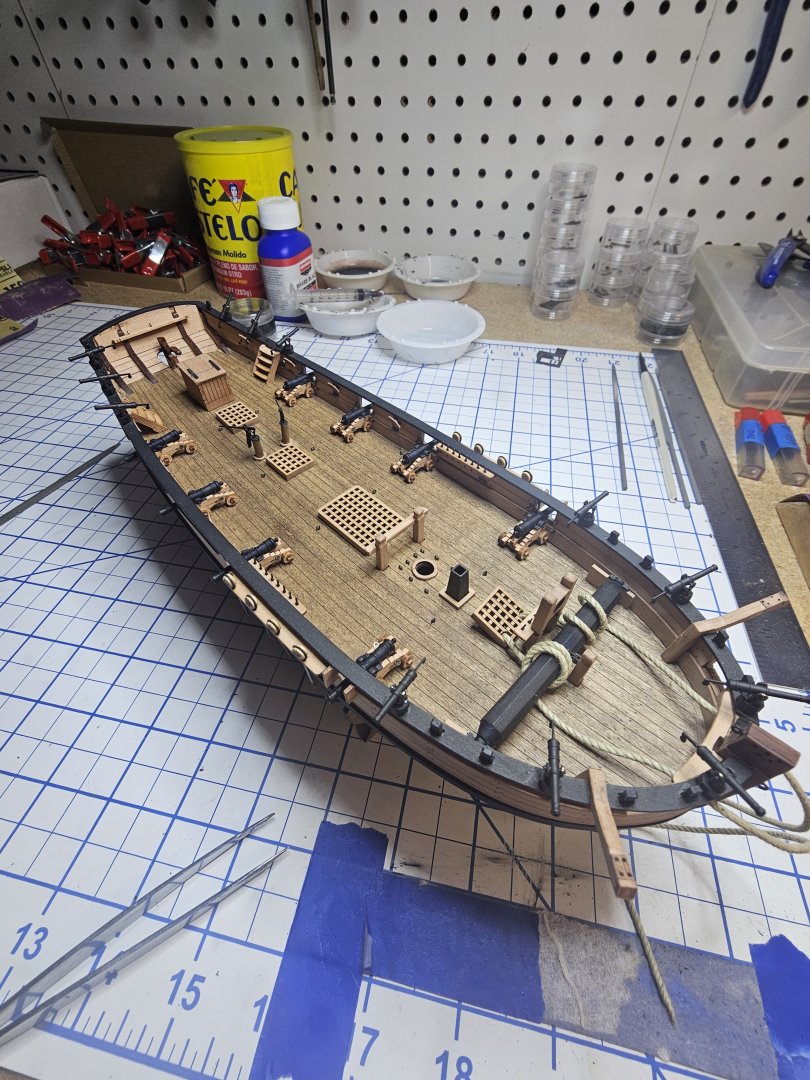
Hull stain was English chestnut (minwax) Deck was weathered oak first followed by red oak stain (by minwax). LOTS of wipe/rub to get the look and coloring I wanted. For blackening the brass I used Birchwood-Casey (several dips in the solution, then wiped/rinsed). Solid black would be too dark, so I like the rusty steel/gunmetal look the parts took on.


-
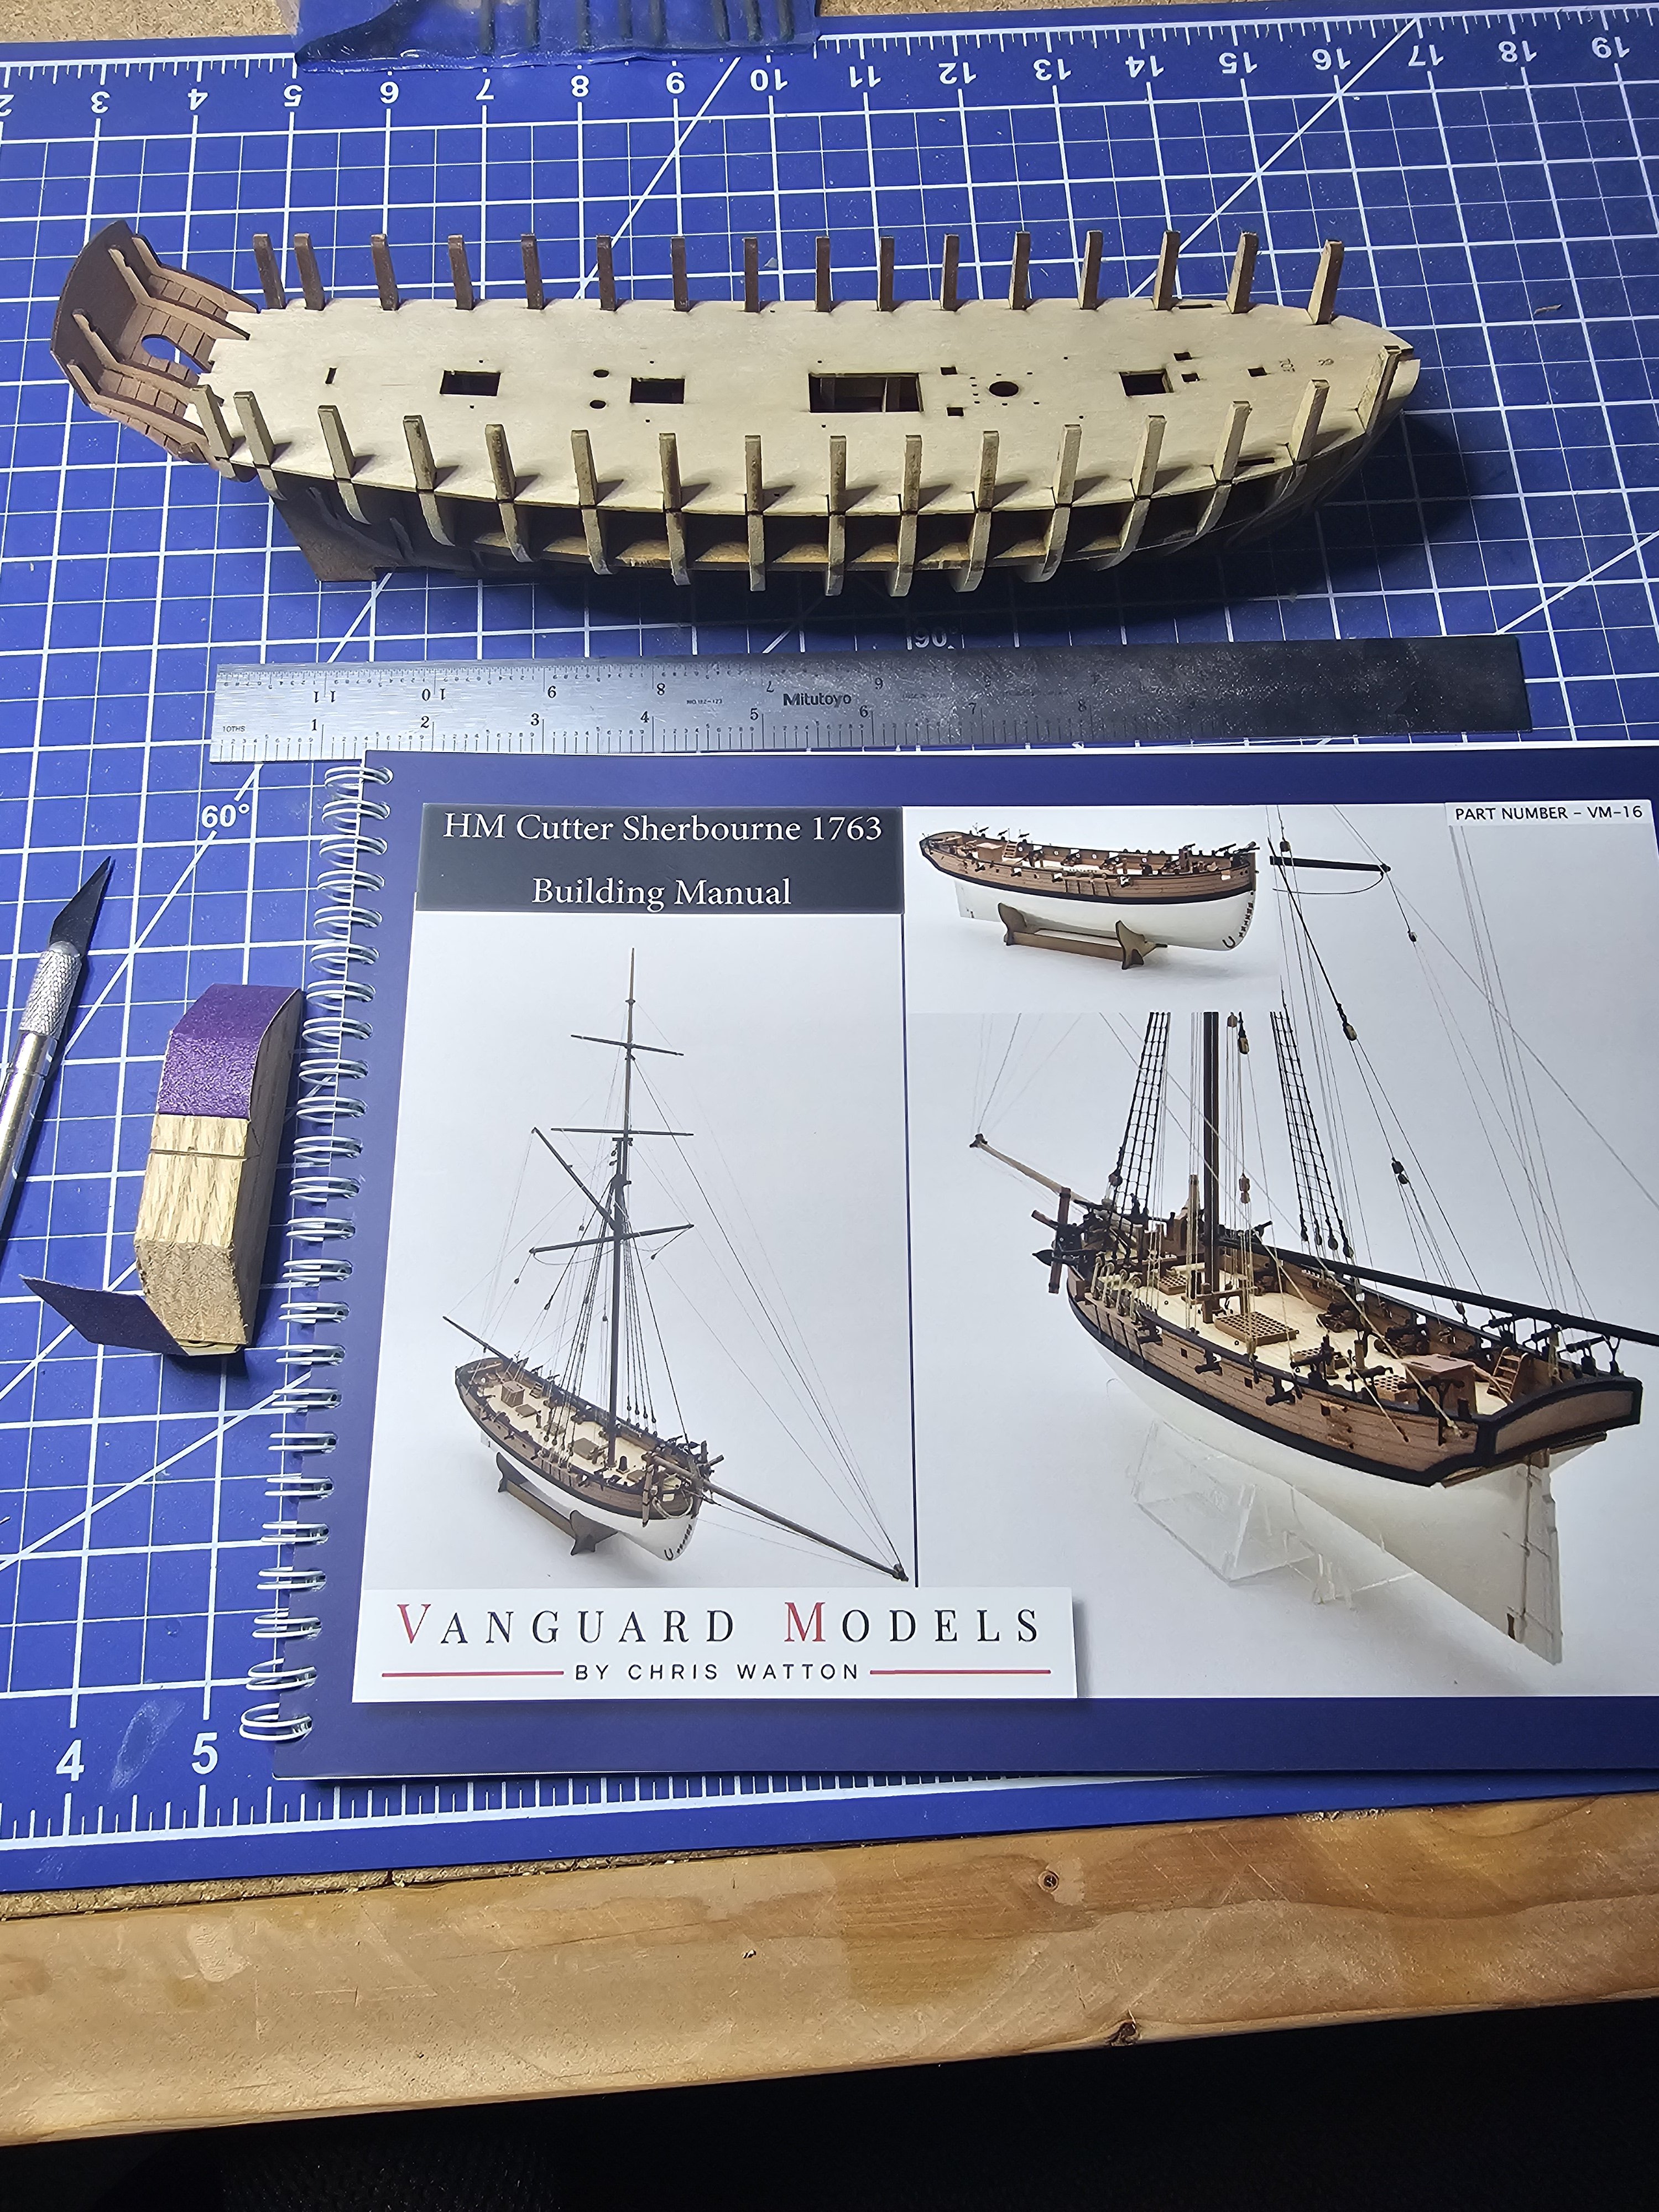
Back on MSW after quite a few years break from working on my MS Niagara... Decided on Vanguard's Sherbourne since it's an entry-level kit with much simplified rigging compared to the Niagara (get some basic skills in first before finishing that one). Started Sherbourne in January while taking some pics along the way. The kit is done exceptionally well- materials and instruction book are 1st rate!!! Chris does an excellent job with his products and kit designs! Highly recommend!!! So far, no problems with the build (recalling it's of the lessons I learned from Niagara, yet learning new stuff as well) Only major change from the original kit is my color scheme (decided to stain the hull and deck, and keep most wood as natural as possible, sort of a rustic/worn look to it)


.jpg.55196569ef0ed24172fbd51e92489170.jpg)