Rich_engr
-
Posts
322 -
Joined
-
Last visited
Content Type
Profiles
Forums
Gallery
Events
Everything posted by Rich_engr
-
 Hey guys- I'm back!!! Sorry for the long delay- been just tied up getting settled, work, move, etc... But now that things have calmed down a bit I can start setting up my new shop finally!!! I'll be able to work on my build in the evenings/weekends now that I have some free time. Btw, I'll be going to the Annapolis Sailboat Show on Sat!! And I'm finally going to enroll in my first sailing lesson for the summer too! (Yeah, this has nada to do w/ my build, but I consider this an update of sorts~~)
 -
Lol- I'll be on the USS Iwo Jima (LHD-7) tomorrow. Right next to us is the Bataan (LHD-5), an Arleigh-Burke destroyer, and two carriers (Roosevelt and GW bush). Royally cool!!!! Tons of ships, real up-close, but unfortunately I can't take any pics (I asked if I could, but it's a no-no bc of security). Seriously, it's a kid's dream to actually get to go on the things I made models of as a kid, and actually do work!!! I was grinning from port to starboard this afternoon walking (while lugging equipment) down the pier!!! It's funny how they look smaller up close and when you're walking right next to them, but it's still super cool!!!!!!!! Definitely gets me anxious to get back to my Niagara. Unfortunately I doubt I'll have the time to go see her in Erie, but maybe one of these days I'll get up there again. Btw, I'll definitely have to read the Blue Jackets handbook so I can get myself accustomed to Navy customs and etiquette- show (and earn) my respect for our fighting forces and help me understand what our Navy is really all about.
-
Thank you all for the condolences- pets truly are a part of the family, and although we were sad to see her go, it was a relief as well. Moving a hundred ships in a truck? Omg I'd be a nervous basketcase!!!! At least I know who to call in a few years~~ And a Happy New Year to all of you as well!!! So far this is shaping up a LOT better than last year! I know my Thanksgiving was FULL of thanks for a whole new change in my life's direction, and I am grateful every waking moment! (Christmas just kind of slipped through the cracks due to us leaving TX on Christmas day, but we're still treating each day like Christmas!) Btw, I might get to go on a "big ship" this week while in port, so I hope to find out tomorrow if I'm going! Totally cool stuff!!!
-
OK!!! Finally done with moving, and most of the unpacking is complete!!! All arrived safe and sound to my new place- hope to get the full shop all set up once again soon. Drive was ok, just LOTS of hard work loading, unloading, and re-reloading (had to get a storage unit on Christmas day bc we had too much stuff). Only thing that happened is that one of our old cats passed away the day after we got up to VA (15 yrs old, and she knew it was time to go). But it feels good to finally be done with moving, and now I can get back to normal business (work and my build). After moving and transporting just the hull, I'd definitely have some ship-transporting professionals move my ship once she's completed- I'd be terrified to move a complete ship!!!
-
Sam- that kind of situation would royally suck. And, my mom's b-day plans were nixed due to the ice/snow today (I'd have to drive across the Potomac bridge, which is a long, rather tall bridge that is 1 lane in each direction, with no median). But yes, my Niagara arrived fully intact. I found an apartment yesterday, so I'll be moving the house from TX to VA over the Christmas week. I'm just praying that the roads are ok for that 3-day trip (again), and I'll be in a Penske truck too.... fun times... So needless to say, building won't resume until maybe sometime in January once I'm settled in and have time to relax.
-
First day went well- lots of paperwork, forms, access badges, etc... totally insane! Spend mornings on base, then go back my office to do training, etc. (no room for me yet on base- ppl r cramed on top of each other there, which makes for a close-knit group). Still gotta find a more permanent place to live- I'll be checking out apartments on Sat, then my mom's b-day up in Annapolis on Sun. Obviously haven't taken a single piece out of the bins, other than to check for shipping damage... But once I'm 100% settled I'll get back to it!!!!!
-
Arrived safe and sound! No damage at all. Drive was good- no problems, other than my heater clonking out and car overheating. Def ready to start work Monday!!
-
Ok folks... this is THE weekend to make the cross-country drive! Finally got my clearance and all is set and ready to go- I start work on the 2nd!!! My Niagara is all packed up, along with all parts, tools, and fixtures. Let's hope that the roads and traffic are kind!!! So, for the next few weeks or so (possibly longer), I will try to get some mini-work done on the bowsprit in the evenings (Thanks to Bob and his idea of using the drawings and applying them as templates to the wood.) The rest of the large-scale production will resume once I have a more permanent place to live. But as always, I'll be checking the site and following along with everyone else (and wishing I had my shop up and running!).
-
Yeah- I'm with Larry on this one. Definitely looks like an approach we can tackle. I like it!
-
Nice work Bob!!! Your pictures of the bowsprit will definitely help give some good insight into its shaping! Planking and everything else seems to be coming along really well! Great work!
-
Larry- unfortunately I'm still waiting for my revised start date... per the original offer, my first day would have been TODAY... but everyone's anxious- me, gf, family, neighbors, and future employers (as well as MSW shipmates)... just waiting for the gov to do its thing (super slow bc of the shutdown and major backlog)... Hrm, I like the idea of checking to see if the hobby shop has the correct size of wood for the bowsprit- I think I may have to stock up too. (Yeah, don't know what it is about the bowsprit, whether it's the shape, dimensions, small details, or what, but that thing is scary for some weird reason!) Perhaps it's something I can whittle on in my room in the evenings once I actually start work. And don't worry about DNA being a part of the build- if a CSI ever needs proof, all they have to do is take a cotton swab to any ship build. (Heck, the plastic ones from my childhood still have full fingerprints in the glue!!!) Mmm- Scotch and a cigar... that sounds good, but for now I'll settle for a Miller Lite~~ Those planking lines are really looking great- you'll probably finish before Christmas.
-
Larry- great work on the planking! Halfway done- that's definitely a milestone to celebrate!!! I really like how your planks terminate into the rabbet at the bow and along the transom- very clean and neat! (and to think you did some of this without your plank bender too!) Great work!!!! I agree about the bowsprit- that thing still scares the bejeezus out of me still for some reason... but I'll have to face my fear someday (just not today, obviously!). You'll get there too, and you're doing a fantastic job thus far!! She's looking good!
-
Tony- excellent progress there with the fixes and the improved sub-deck. You've definitely got the hang of it, and most of that is patience and being able to see and fix one's mistakes. I think you're on the right track now and can pick up some steam. I know- the basswood is a bit too soft- always fuzzy and can't quite get that exact sculpted look. This being my first wood kit ever, I am still highly inexperienced with the different types of wood and grains, but I think hard woods are the way to go next time. But for planking the hull, once all the planks are in and the hull is sanded, there's not much of a problem, especially since the hull is painted. And yes, I am still highly envious of your shop- well-equipped, spacious, and clean. (Mine's all packed up into two plastic tupperware bins for the time being...) It's great to see you moving along- looking really good!!!
-
Wow- amazing what an airbrush can do! Looks good- did you use the ME paints, or something else? Decking looks good too- are you going to taper and/or add butts to the planks? For the caulking on mine, I just used a dark brown colored pencil. Great to see yours coming along there!
-
Lol- yeah, regarding those chores, I'll pencil you in once I get a chance (did I mention I also do paved walkways?). HAHA!! But I think we finally got it all done today, since the agent is taking the pictures and listing it tomorrow. I wonder what happened with your bender- maybe a wire broke inside or something (did you get zapped at all???) I love that little bugger- really helps with all sorts of bends (even edge bending, like I used on my foremost nibbing strakes). I hope you get your new one soon! But if you can't work on planks, there's tons of other little parts you can work on, which is another thing that's nice about this hobby: you don't necessarily have to go from Step 1 to step 2 to step 3...., but you can move around a bit which adds to the fun variety!
-
Lol- I showed them one full pic (taken around late August- it's prob in my log). It was when they asked what kinds of stuff do I like to do, hobbies, etc... that's when I whipped out the phone and showed them. They were a bit impressed, and the program manager was like, "Wow!! That is detailed!!" with eyes almost bulging out! So yeah, I think it helped some. Plus, my other interests line up with theirs (biking, shooting, outdoors, etc.), the job (detail, precision, drive for excellence, in addition to Navy-related work), and what's in the area (close to water, gorgeous scenery, family). My soon-to-be supervisor also has a salt water aquarium (we used to have a 50 gallon one), so that was nice little way to connect/establish excellent rapport. Yes it is driving me nuts with my ENTIRE shop and build packed up here in the garage!!! After extensive yard work, cleaning the whole outside of the house, going room-to-room and packing, cleaning, and repairs, all I want to do is sit down and work on my ship (which I can see from here, sitting in its clear plastic bin with tools, parts, and some books), which is probably why I check in here quite often and drool at everyone else's work! lol~~ (Plus, the waiting part is driving me nuts, and I was supposed to start a week from tomorrow, but that might be pushed back.) Which is why I'm glad to see you and the rest of MSW making great progress!
-
Larry- awesome work on the planking!!! She's really moving along and taking shape!!! I'm sorry to hear about your plank bender- I'd be lost without mine!!! But I'd probably stay away from using the soldering iron, since it's not quite the same thing... (Did you try to remove the round head from the bender and attach it to the iron??) Great work though! Heck, by the time I get up and settled, and get my shop set up, you'll probably be planking the deck and then some!!!
-
Coming along nicely! Luckily it's the 1st planking, so I wouldn't worry about it too much, just as long as you have a good foundation for the 2nd final planking. I believe you mentioned earlier that the mast was a giant dowel- would it be possible to buy a long piece that is square, which might help with the shaping??
-
Yes, ME = Model Expo. (Of course, doing an Amati or Mamoli kit would be a change-up since it'd be in metric, not english measurements...)
-
Aw, man- that sucks! Your framing looked good- what was wrong with the bulkhead??? From your pics, everything looked like it was shaping up very well!! Thankfully ME is awesome with their parts-replacement and customer service!!! So "projects and attempting to date after divorce"- that'd be time consuming and I can only imagine your difficulties (not to mention one's focus is all over the place). Perhaps try the Zen approach to modeling: relax, breathe, and center the mind. I find connecting with the wood to be very soothing and almost meditative. It definitely helps wash away the stress and scatter-brain. We're all pulling for ya, so don't stress about the build (or life)- we're here for ya!!!
-
Wow!! I just started following this log- awesome work!!! And BIG!! She reminds me of an R/C (plastic hull) kit I had when I was a kid of the Stars & Stripes. She was over 3 feet long and about 5 feet tall. The sails were so large that she wanted to blow over every time I had the window open!! How do the Italian kits (Amati, Mamoli) compare to the ME kits? It looks like it's well supplied and are the instructions really good? Love those J boats!!! Absolutely gorgeous!!!!
-
Larry- that's what my gf and I keep saying, that we're just cleaning the place up for them and not ourselves... lol~ funny how stuff works like that. Mark- thank you. Yes, the bench is coming with us (it's obviously not where I build- garage has zero climate control). But we're getting there slowly but steadily. Realtor wants to get final pictures on Friday so she can list the house, which may/may not have to be delayed until I know 100% for certain that everything with the job is all-clear. Still, pressing ahead like we have good sense. Either way, the house needs prepping to sell/move.
-
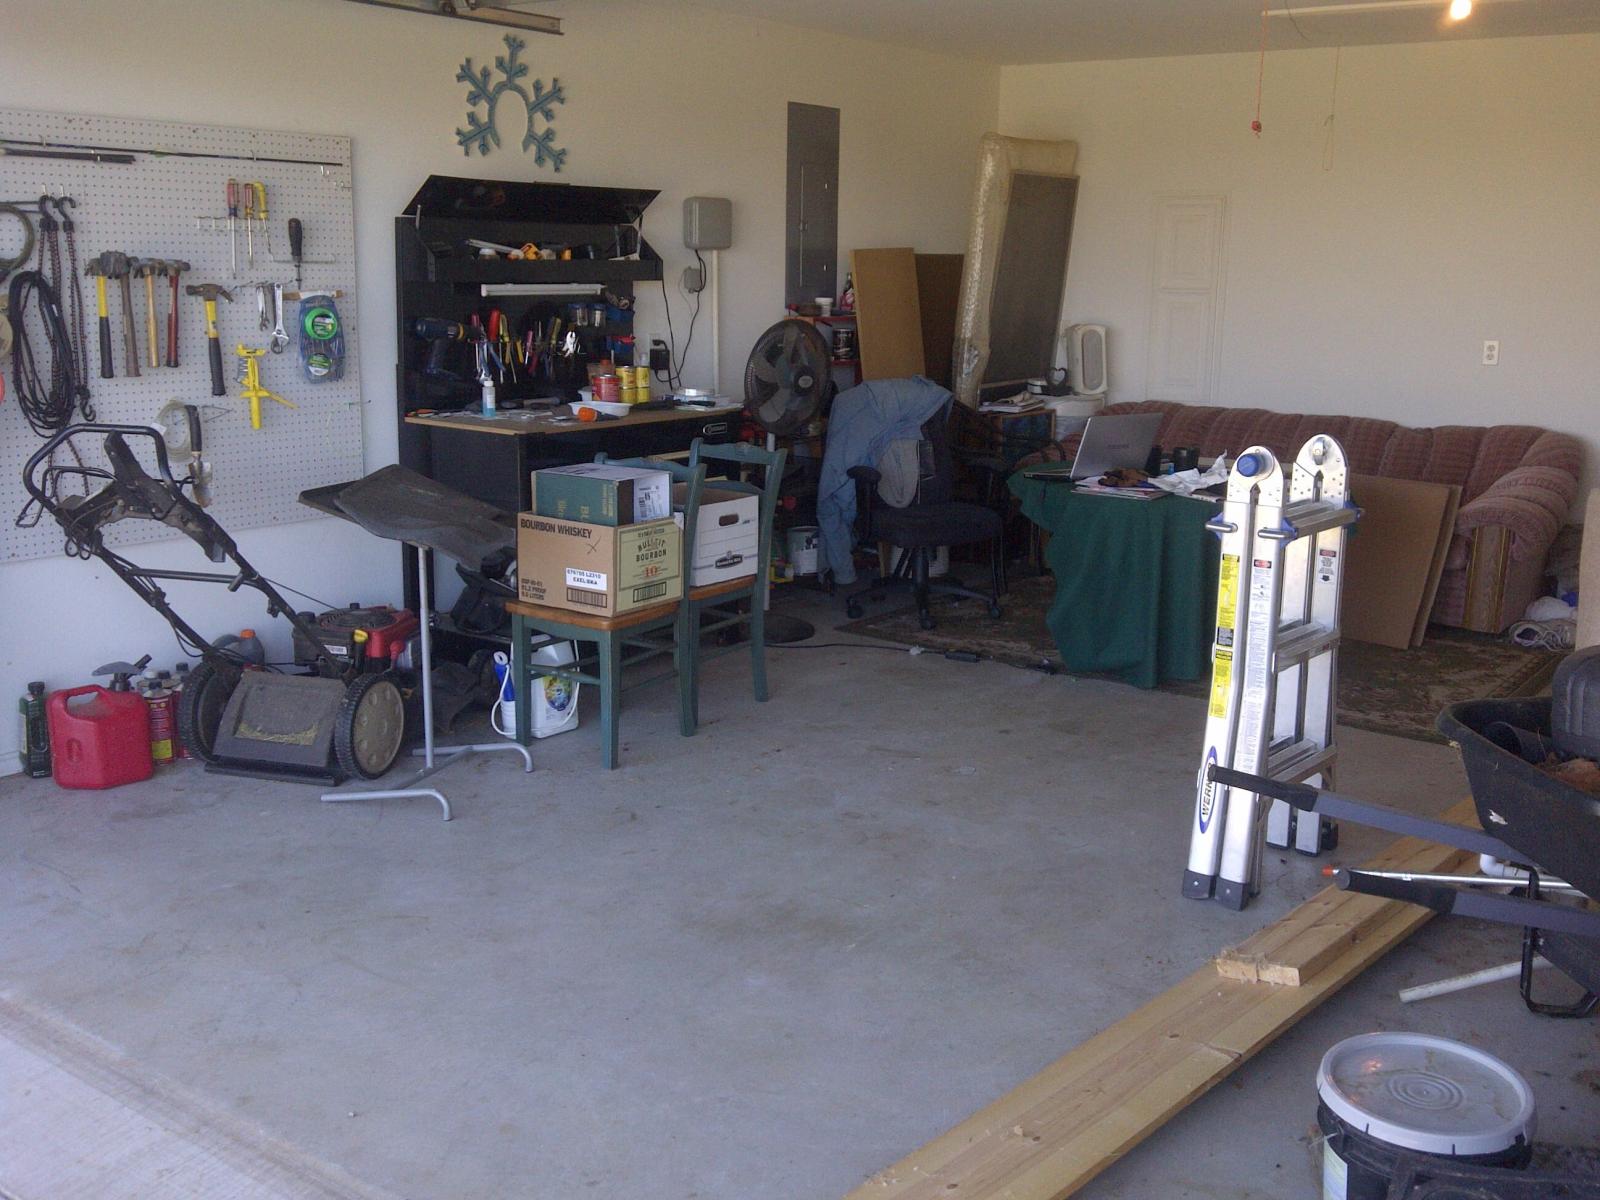
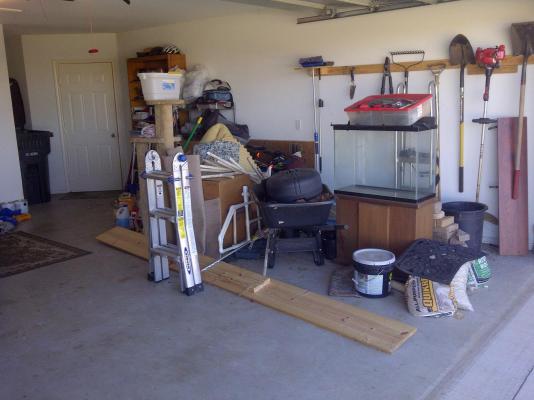
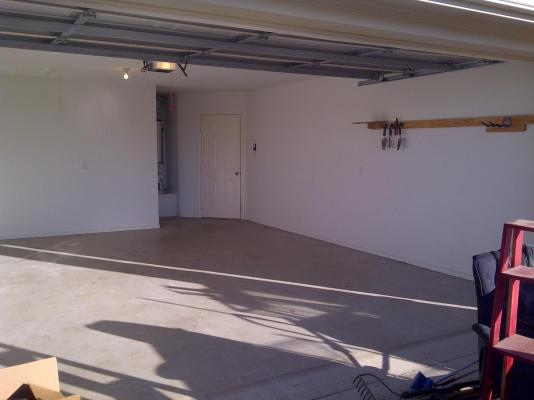
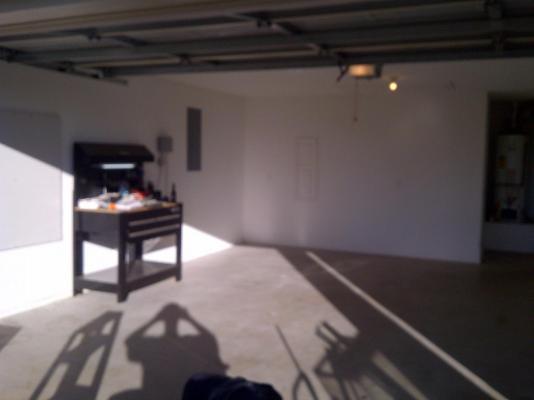
Finally got the garage done yesterday- took about 10 hrs! I dragged every single thing out and emptied it, then swept all the crud, spiderwebs, dust, etc., then sorted and packed a bunch of stuff. By 10pm I was whipped! But it's done, and all that's left is the attic and some small stuff here-and-there in the house. So it only took us about 2 weeks to get the entire house and yard ready to show (and it was a bit of a mess beforehand). Here's before: Here's after emptying and cleaning:

-
Laying the deck off the ship first may help with the planking, but could also cause some height issues later on. Planking the deck on the ship and then staining/cutting holes, etc. isn't too hard- the curves are gentle and there's room to work. Are you going to include butts in your deck planks, or run them as full-length strips?
-
Ahhh... still cleaning/packing the house... also waiting for the final word on when I'll start (still haven't processed my "stuff" yet)... Original plan was to leave here next Friday (the 8th), but that might be pushed back a few weeks because of govt shutdown, so just getting as much of the house in order as we can. Shop is 100% torn down now. Just a few plastic bins of all of my stuff and half of my workbench is all that remains~~~ Should be putting the For Sale sign in the yard next week, but might have to delay that until I'm 100% certain of the job and when I start. soooo may variables right now~~