Rich_engr
-
Posts
322 -
Joined
-
Last visited
Content Type
Profiles
Forums
Gallery
Events
Everything posted by Rich_engr
-
 Small build update: instead of putting the caprail on and doing those details (catheads, stairs, etc.) or finishing the ship's bell, I decided to start with making the channels after going to the zoo since it was a nice day out. I first had to laminate two 1/4" x 1/16 boards together to get the thickness I needed for the proper taper. Then used the dremel and sanded down the taper. Next up is figuring out the curves so they'll fit the hull and have the correct shape. I may hold off on installing them until I add the caprail. But I wonder if I should have the bowsprit done first before adding the caprail (tricky to install with all of the cleats & fittings)....? Btw, still waiting for the final word on the job.... grr~~~
 -
Sam- wow! That's some gorgeous woodworking skills there!!! I love the detail and extra touches- she's a very fine piece of art! I can't wait to see her rigged!!!
-
Larry and John- I feel the same way about personal protection and today's unfortunate state of things. Unfortunately I don't own any firearms (yet)- definitely once I get back to work. But at least I'm rather knowledgeable and comfortable with a gun, and an ok shot for having gone to the range only 3 times in my life (roughly fist-sized groups or so at 20-25ft with a Glock). Yeah, today it's insane out there, and now with the DC Navy Yard thing (I used to go to a club by there when I lived near DC), along with all of the others (which personally I think smell as funny as a rotten herring), you can't be too careful and trusting people is getting hard to do. If only Homey the Clown were here to whack everyone with his sock (Homey don't play that!)..... knock some sense and morals into people before all goes to poo-poo~~~
-
Lol- thanks for the laughs!!! Sam- I didn't even catch the potential inuendo there- lol~~ And it IS true- you do NOT mess with Texas!! Everyone's packing heat, cops don't mess around, and despite it's being in the South, we don't put up with BS. Joe- yeah, I only had two carry-on pieces of luggage, so it was either I pack my suit or a 12-pounder, which I doubt would have made it through the x-ray. Course, now that I think of it, if the situation had escalated, I could have thrown 40's and bags of Doritos at them. Btw, the first officer to arrive on scene with her tazer drawn was rather attractive (like in CSI). And I'm being very modest here. But don't tell the Admiral! Anyway, gotta keep looking for temp housing just in case. So far they're still hooked! I didn't get to go in the shop yesterday since I had to get groceries and grill some burgers. Tonight we might make some pulled-pork bbq.
-
I agree Sam- support on here has been phenomenal! Yeah, caught with my pants down and no gun! Apparently these two crackheads pulled off a few robberies like this in the area lately... If this happened in Texas, it'd be a whole different outcome!! But, so far I'm getting good feedback from the company- they're still pushing forward and trying to get their govt customer's approval. So if things keep going as well as they have been, it looks like something definite in a few weeks! I definitely feel good about this one, so staying super positive and proactive with all the details. Anyway, gotta contact all my schools to get transcripts, etc... maybe I'll push a few parts around in the shop later.
-
Lol- thanks guys! Yeah, the robbery thing was a bit freaky (just heard the commotion while doing my business- tried to be verrrry quiet in case one of the thugs busted the door open and caught me off-guard!). But so far I've had some good feedback from the interview- they're now passing my info along to their customer (again) to present me as a good candidate. The people there are great, and the area is perfect! They did say that I could start work in about a month after/if I receive an offer, which is at least something to aim for. I'm basically ready to go- I could start anywhere in about a week (just waiting on offer and then gotta find an apartment). So just going through some stuff here and maybe poke around the build a bit...
-
Hey- I'm back! Trip and interview went really well- now just gotta wait and see (said it could take up to a month for me to start if they make an offer)... Also checked out the area- gorgeous scenery and nice, friendly people! Only negative thing was that I just happened to be using the restroom in a convenience store (right after the interview thankfully) as it was being robbed by two guys with guns!!! (did NOT want to pop my head out, but luckily no one got hurt!) So cops, detectives, statements, and being on the other side of the crime scene tape was a bit weird- felt like I was in a CSI episode (and my hotel was right next door too~)... But other than that, the interview and everything was great!!! Now back to your usual programming, and I'll try to get some building done here and there. Thanks for the well-wishes! I felt everyone's positive vibes~~
-
Oh, and regarding all of the bacon, last night I made honey-glazed salmon and bacon-wrapped asparagus!!

-
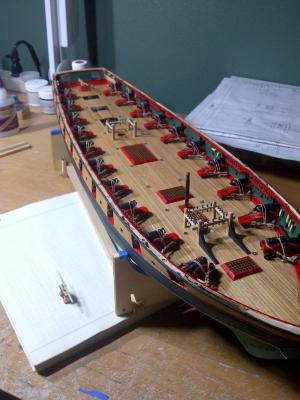
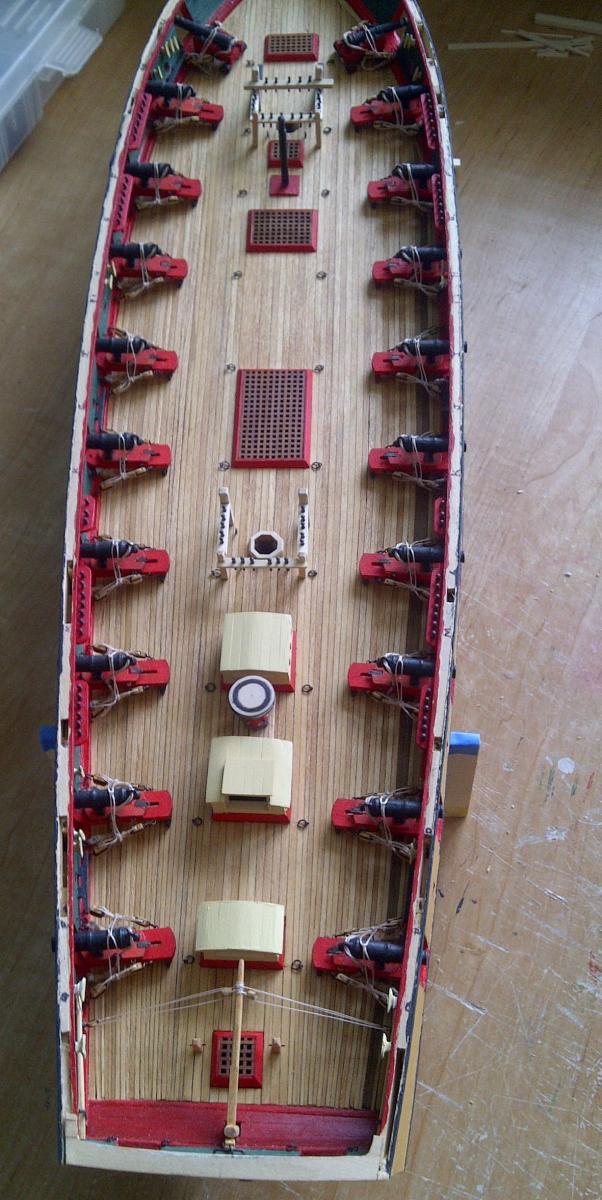
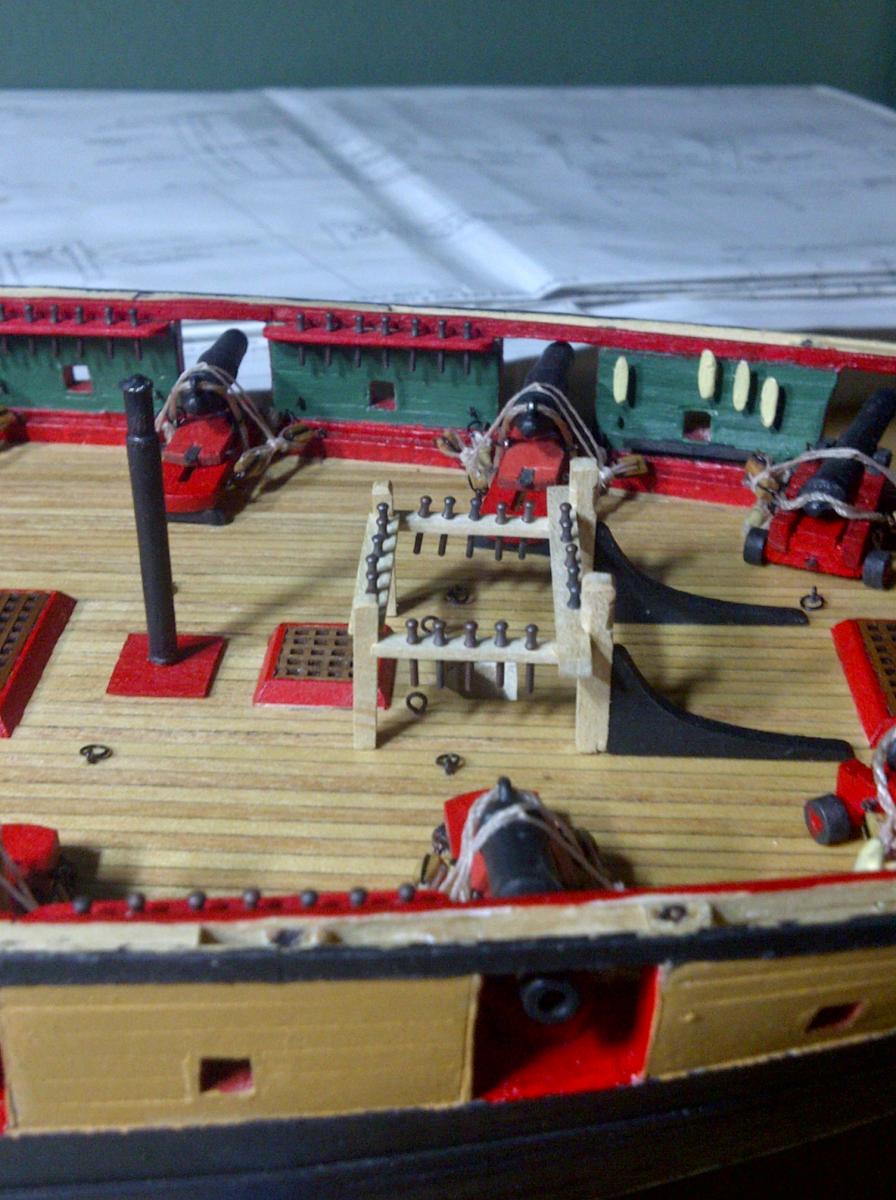
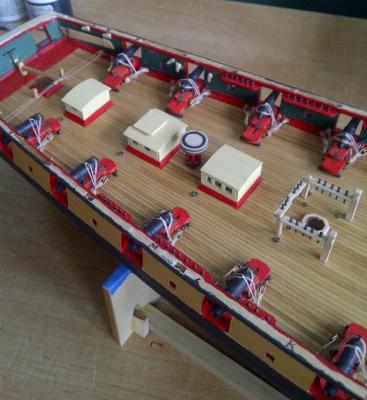
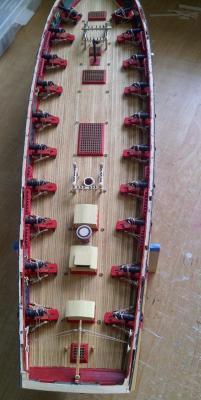
While preparing and packing for my flight tomorrow and the interview on Friday, I thought I'd share a few pics of where I am: Deck structures installed (capstan is just placed on deck, and I still need to finish painting the top). Depending on how the interview goes, there may not be any work done for the next month or so, which would actually be a good thing!! Thanks for the support- you guys ROCK!!!!


-
John- awesome pictures! Especially those of the life size mast sections- that'll definitely help with figuring out the details! Great job!!!! Larry- awesome that you're lowering the pain meds! You'll be back at it in no time!
-
Bob & Sam- thank you for the wishes! Yeah, it's been an up-n-down type of spring/summer for everything (build, job, home, everything). But I'm still staying positive and focusing on things to settle and return back to normal, although in a better position than before. Did not get structures installed yesterday- was cleaning and making travel arrangements (prices weren't too bad considering it's only a week's notice). But I'll be checking in this week, so perhaps not too much building going on. (Plus, if things turn out well on Friday, it'll be wham-bam load up a truck, list the house, and then hit the road!) Have a great Labor Day weekend!!
-
Terminator movies do kick butt, and the Alien movies were good too (AvP did a really good job of tying the two together!). Event Horizon was a good scare/freak-out too (Omen/Exorcist and a spaceship). Job Update: They called back this afternoon- want to do an interview next week!!! So I told them Friday!! Now I'm making travel arrangements. Awesome!
-
Thank you for the birthday wishes Joe! It was a relaxing day despite hauling books down from the attic in 100+ degrees (it was so hot up there my body instantly began to sweat pools- drank about a gallon of water), although there was no steak or wine (didn't get to the store in time), so I settled for pizza, beer, and watched Terminator 2: Judgement Day (which, if you all know, Skynet takes over the world on August 29, 1995). Job Update: This morning HR from Dahlgren emailed me and said they'll get back to me next week to find out when my in-person will be (gov't and the holiday, which I figured). She said, "they are still very interested in keeping things moving forward" with me, which is awesome news!!!! So next week I'll hear something for sure, whether they can get me in for an interview next week or the following week!!! Build Update: After cleaning the house today (gf might come back tomorrow, so gotta remove all evidence of the "wild parties" lol~), I'll go ahead and pop the deck houses in and get some pics. So who knows- I could be nearing the end of my "5-month sabbatical"... lol! (don't want to jinx it, but I'm aligning my energies into the positive and making this real!) I'll keep everyone (friends, family, and of course MSW) posted!!!!
-
Lol- thanks for the birthday wishes everyone!!! Yes, a job offer or interview would be a great present!!! It's been a good relaxing day (well, if you count getting soaked in gallons of your own sweat while going through books in the attic when it's 102 degrees outside as "good"), and I'll prob go ahead and grill myself a steak for dinner and have some wine. Haven't been in the shop today- maybe tomorrow. My plan is to have the hull and deck complete before I move (transporting ships with masts and spars attached is a little too delicate for my taste). But I'll get some pics up tomorrow after the houses are installed.
-
Lol Larry! They were actually pretty simple to make- you'll have no problem with them!. Mine weren't too far off from the plans. Just a sharp exacto blade and a sanding block is all you need for those. Anyway, off to put the neighbor's dogs to bed, then watch a movie and have some ice-cream before bed. Tomorrow will be climbing in the attic sorting stuff and packing/cleaning so I'm ready to go once I get some job offers in.
-
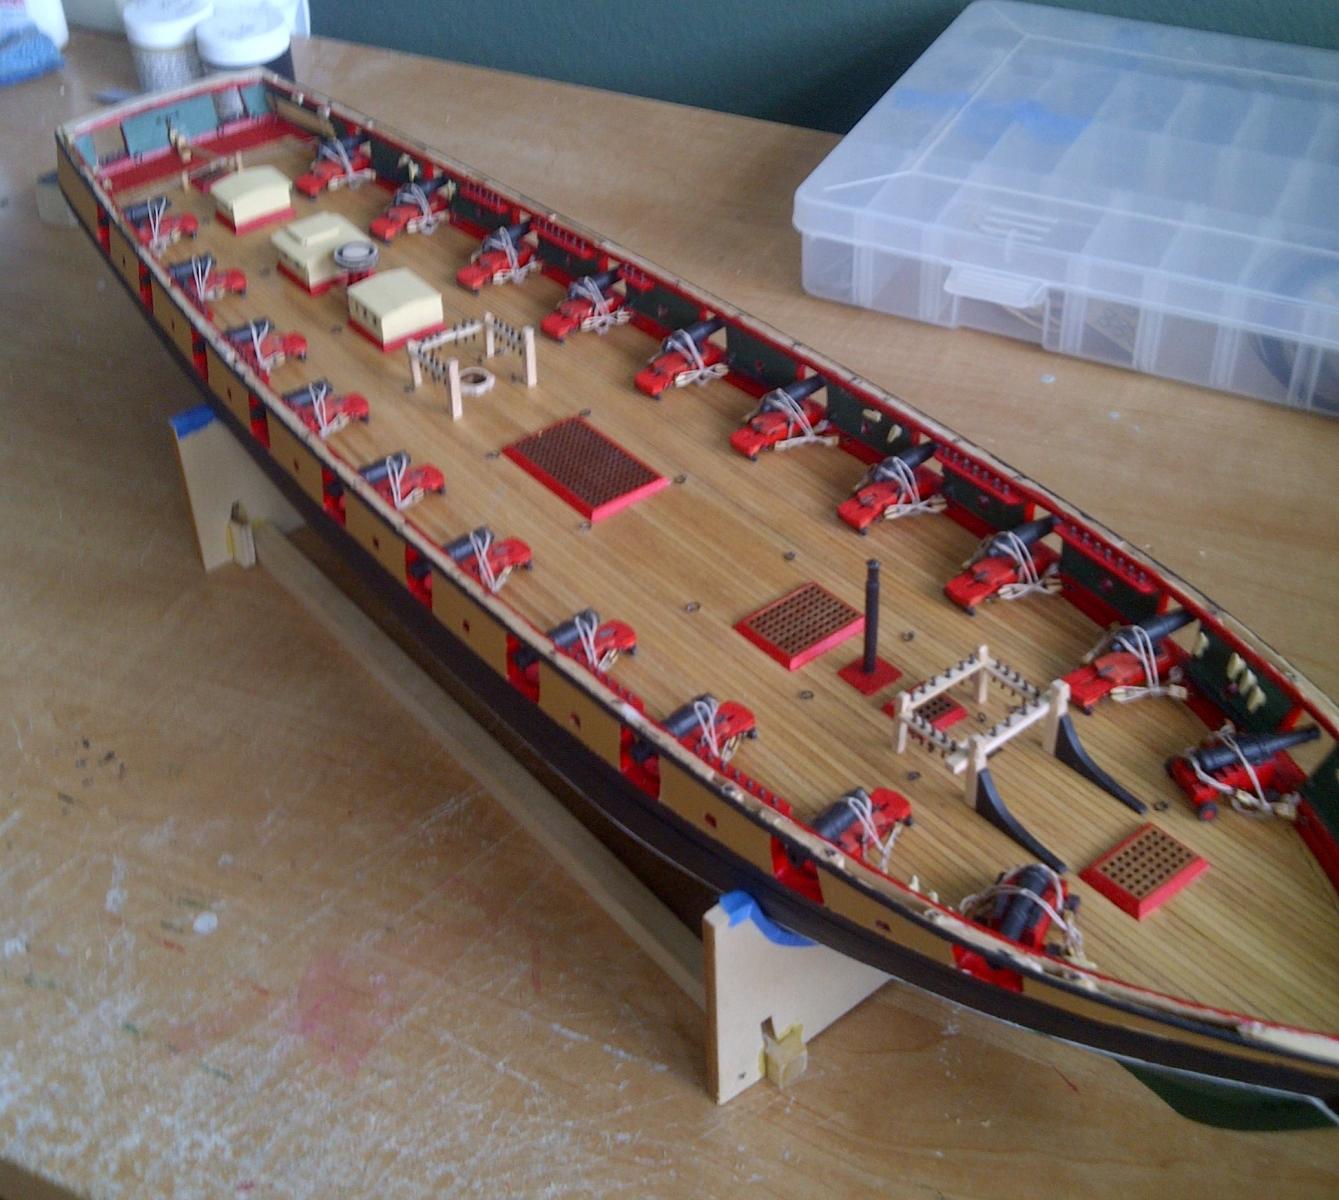
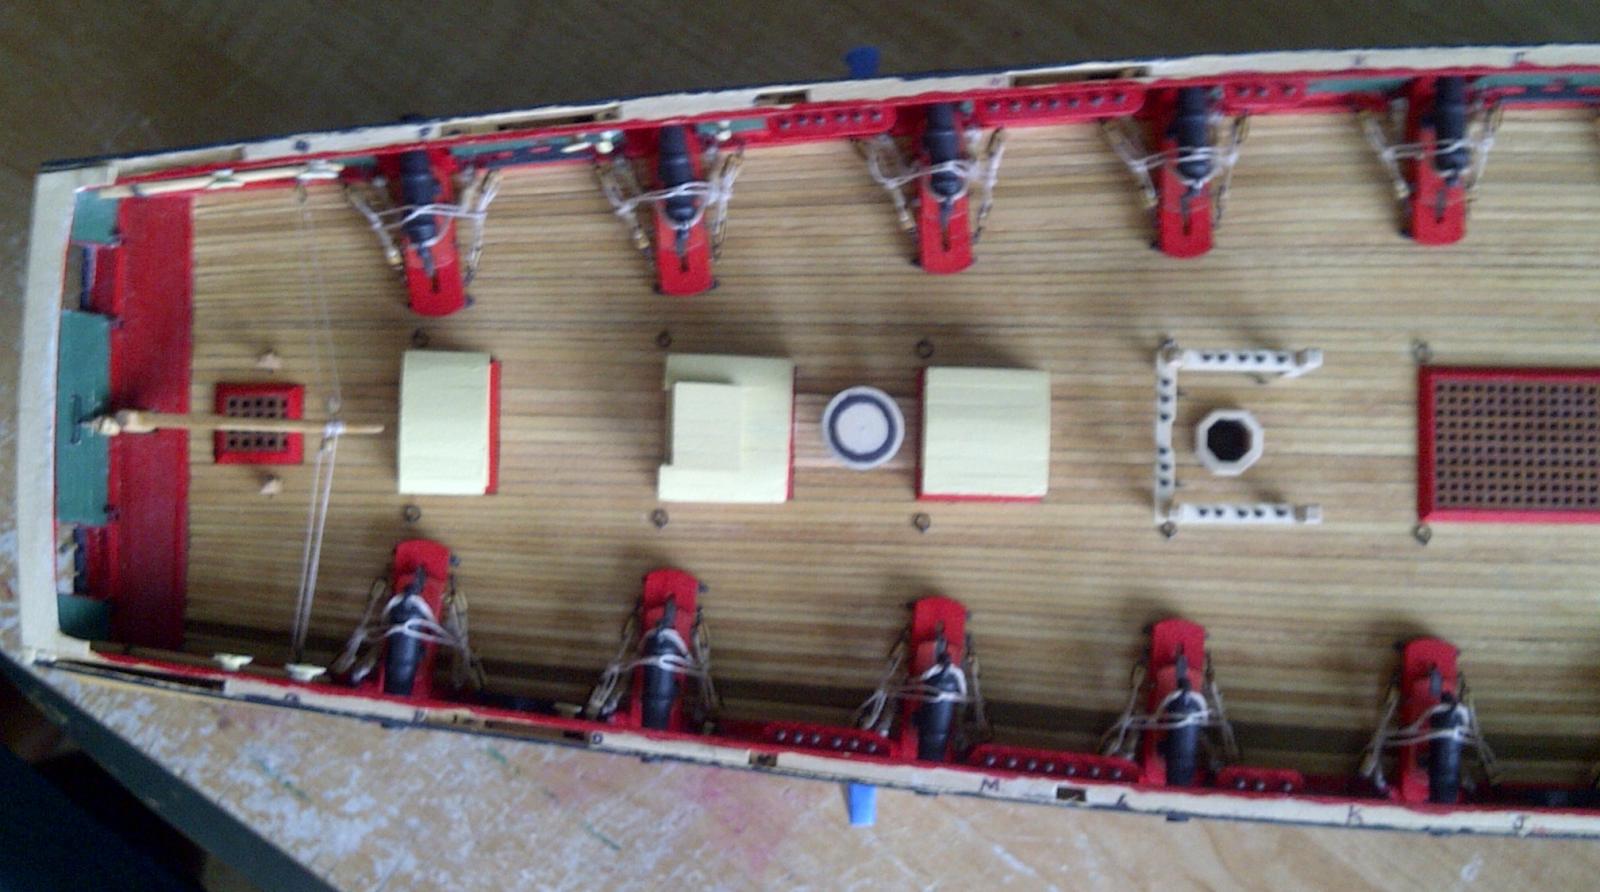
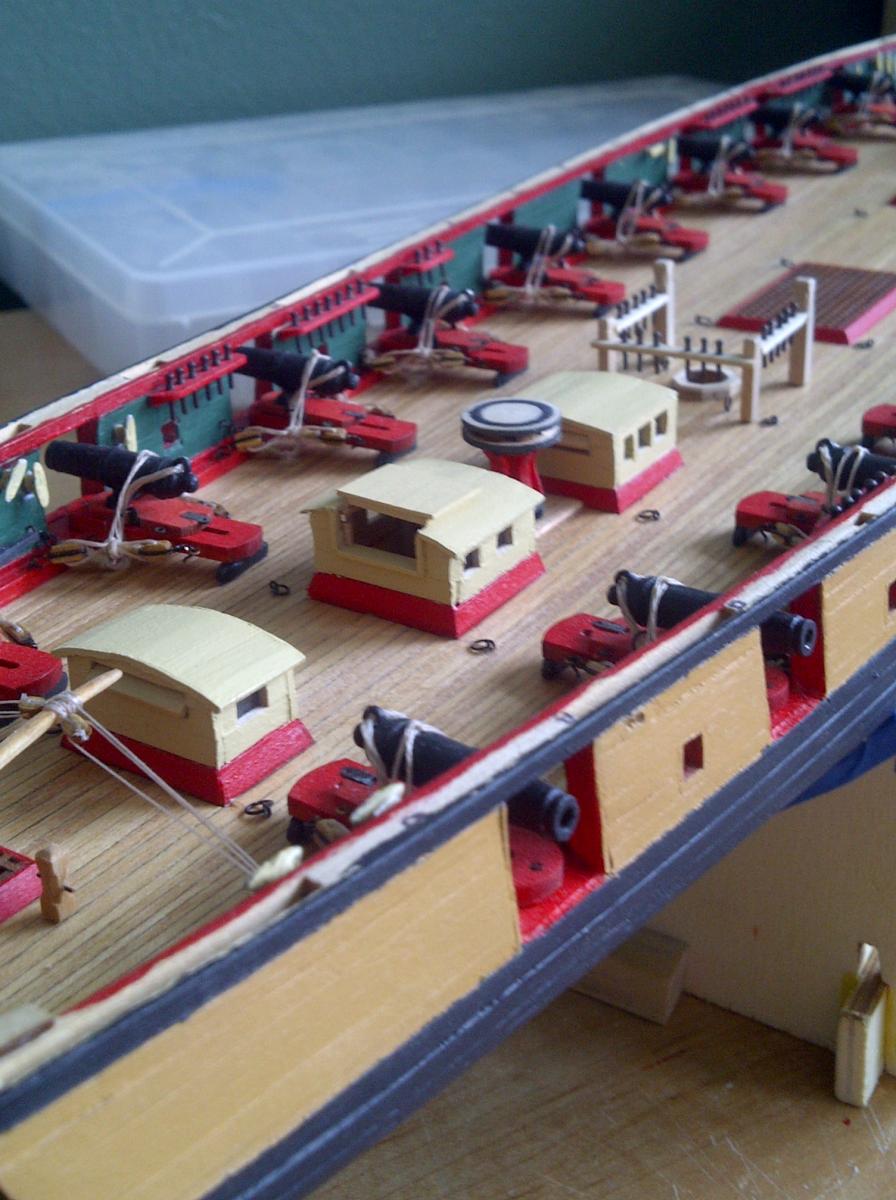
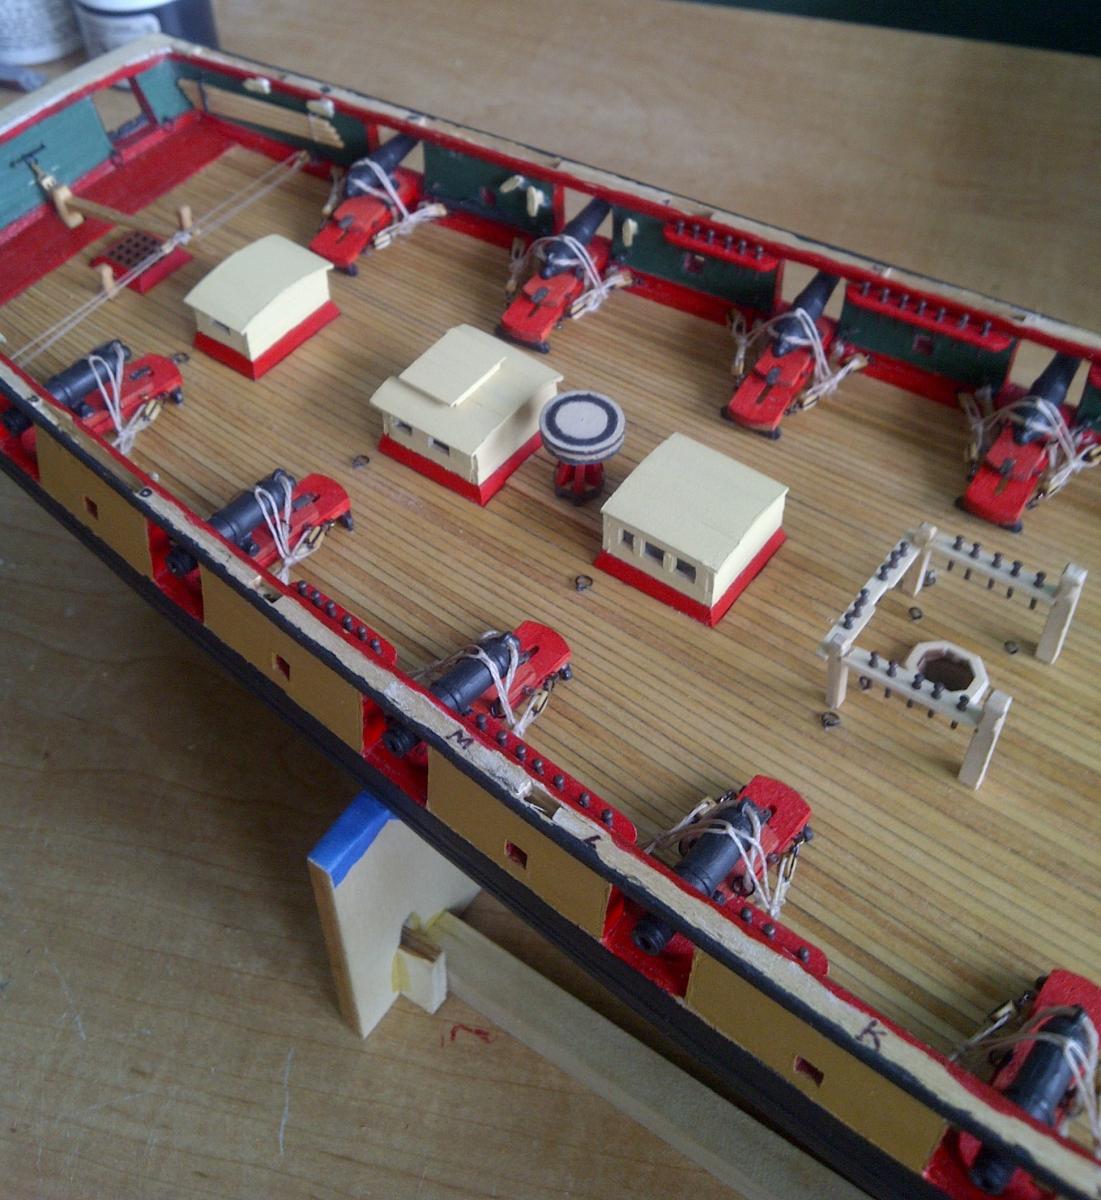
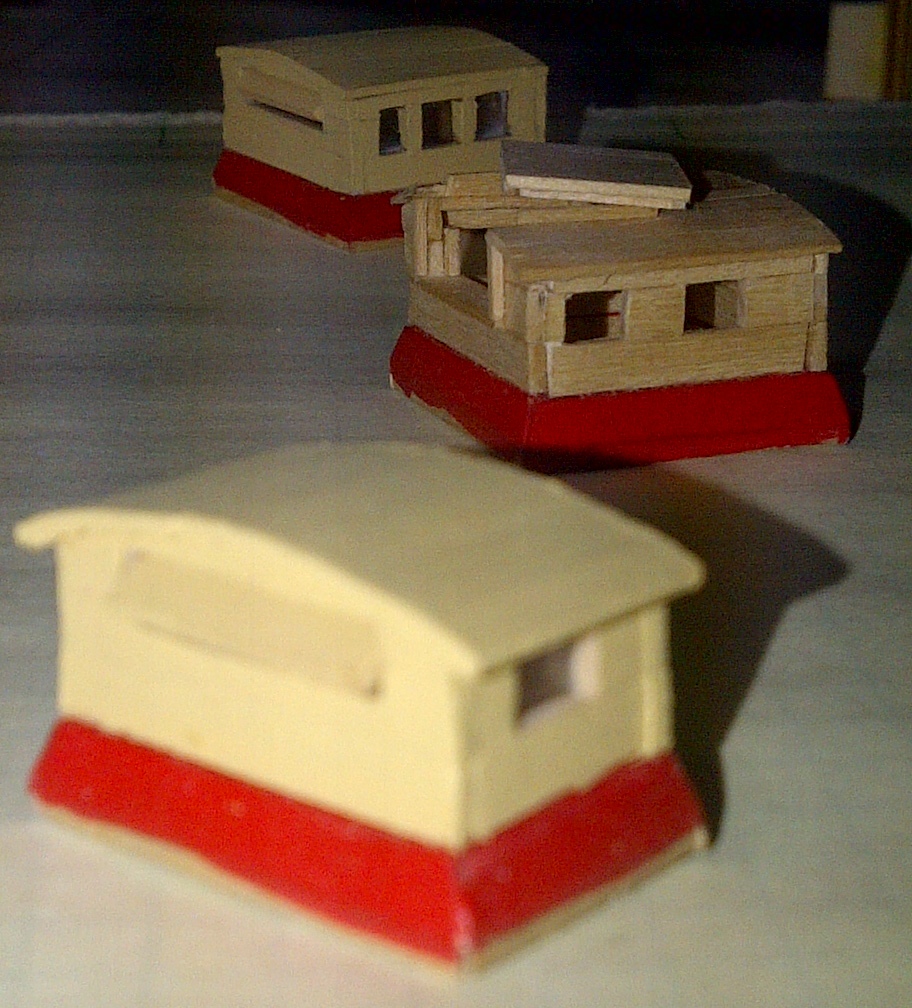
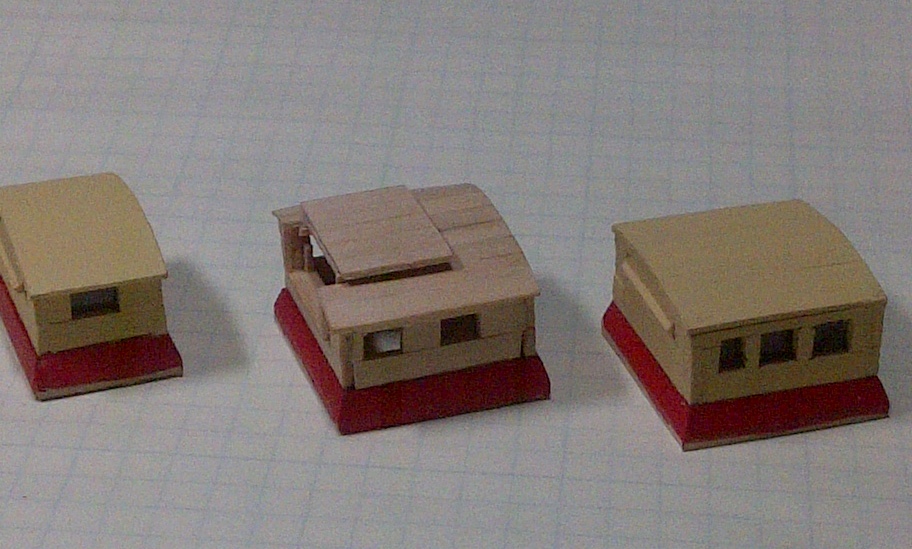
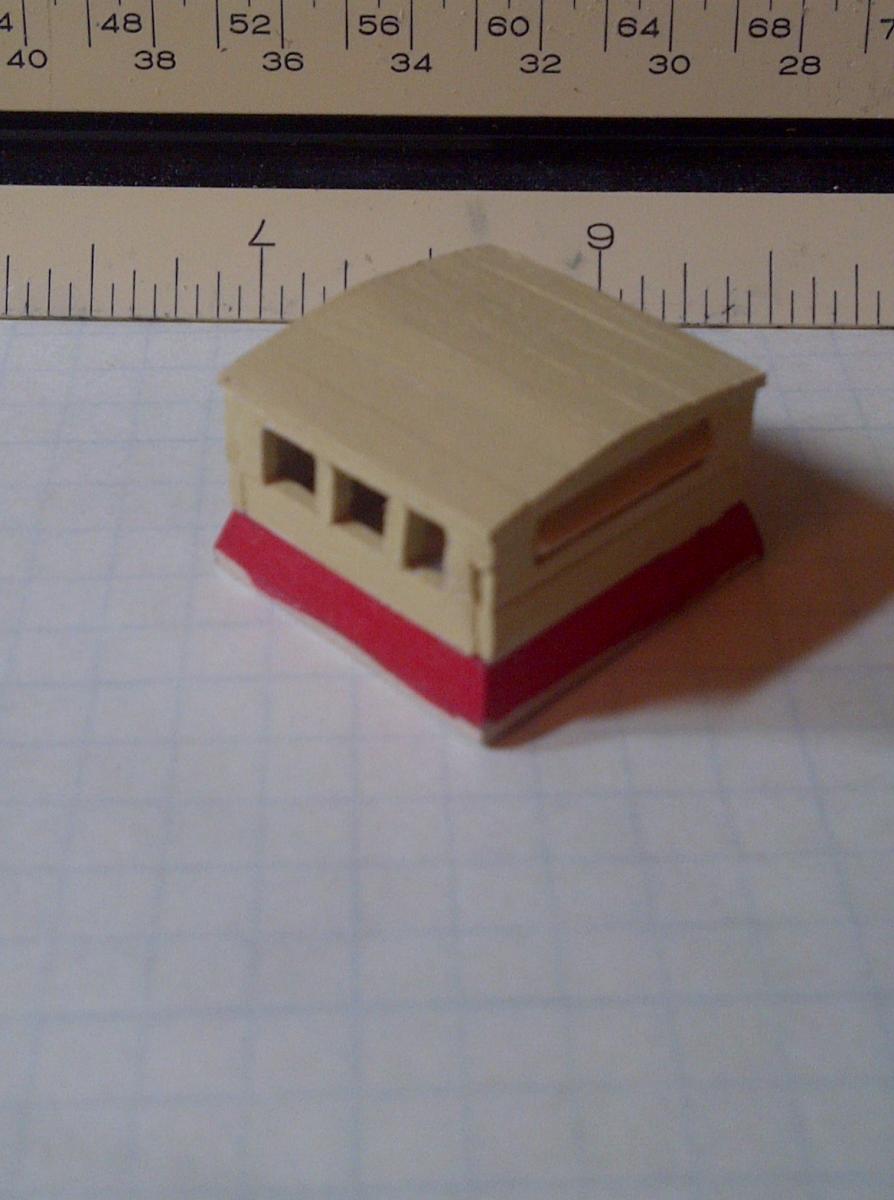
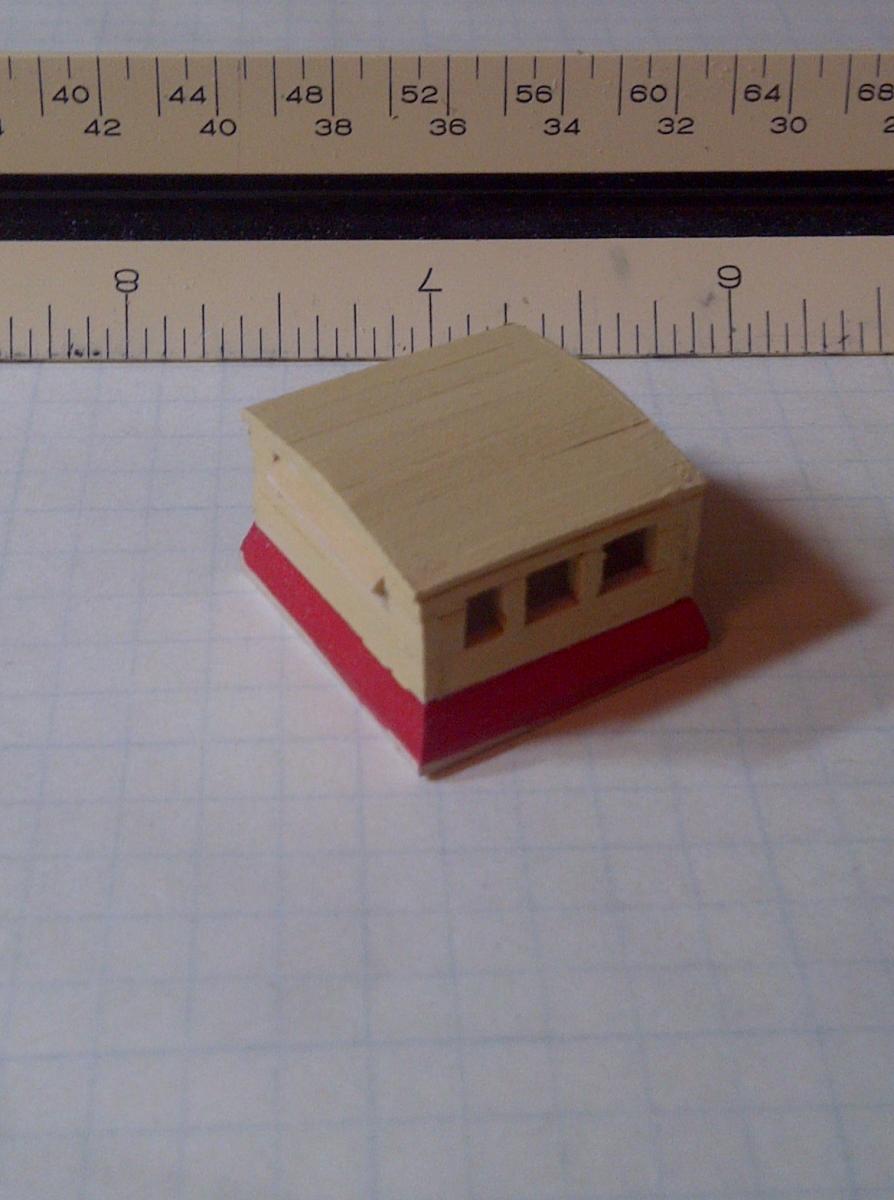
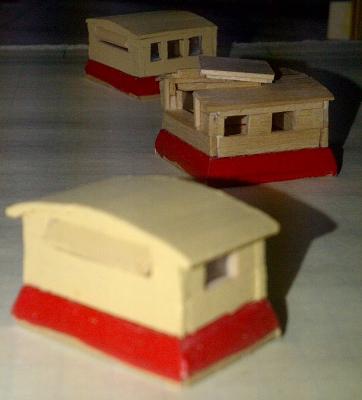
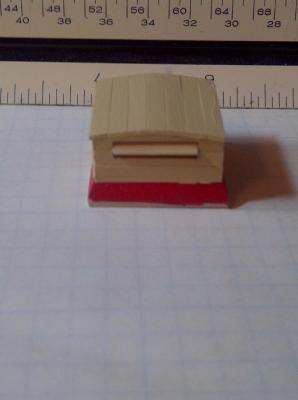
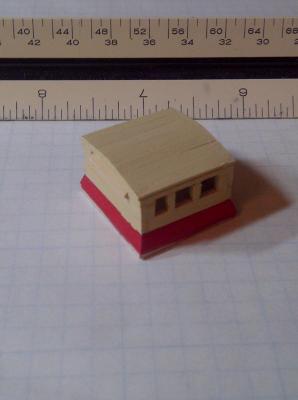
Ok... back to ship modeling!! Here's the completed deck structures (I did get the companionway painted). I did not install the bars in the windows- just used some clear plastic from a package for the glass panes: I'll probably go ahead an install them later today/tomorrow. Next up is to figure out the ship's bell & forw'd riding bitts (installation will wait until the bowsprit is done). Then it's adding the remaining eyebolts & hardware on the outside of the hull (for the bobstays, bowsprit rigging, etc.), as well as the steps on the side of the hull.

-
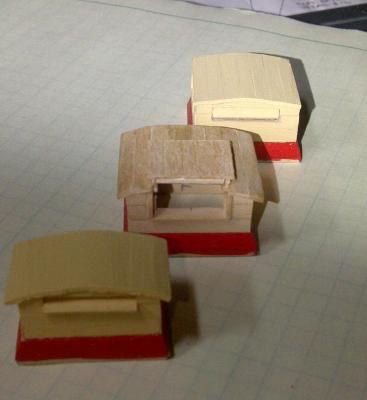
Thanks guys!! And to mini-celebrate, I'll make some BACON and eggs for lunch!!! (Beer and fish sticks for dinner~~ lol!) Yesterday I managed to complete all 3 deck structures- I'll get some pics up here in a sec.
-
Wayne- thanks!!!! It's been a long, sloooow build, but definitely have made some progress lately! Pretty soon it'll be masts & rigging!!! Quick job update: the place in Dahlgren called back and said all was excellent!!! They're checking with their customer, then they'll bring me out for an actual interview as soon as next week possibly!!!!!! Praying all stays well!!! Thank you all for the support you have shown me! Even if this one doesn't turn out, I know that I have lots of fellow builders wishing me the best, just as I wish all of you the best!! So we'll see soon enough!
-
Bob- my pins are 5/16 (8mm), which would correspond to about 20in on the real thing. The BOM for the kit calls for part # WP0410, but doesn't say what size (part doesn't come up in a search on ME). However, the 12mm (15/32) would make the pins 30in in real life, which does sound too big. I heard typical belaying pins are between 16-18 inches in length, so by that measure the 8mm would be correct. Btw, the fife rails are complete, as is 90% of the deck furnishings. I only have the hatch on the companionway to complete, along with the ship's bell and riding bitts on the bowsprit (ladders as well, but I'll do those after I install the caprail). John- thanks for checking in!!! That's awesome that you got to go to the Niagara museum- I was there in Erie a loooong time ago in high school and got to go aboard. Little did I know that I would be building her decades later... Good luck with the Morgan- that's one kit that grabs my interest as well- maybe a future build. I see you're in Willis, TX? You're a couple of hours south of me. lol! Anyway, I'm going to try to get the deck stuff finished this week, but of course I'm still dog sitting, and gf + neighbor are still out of town (may come back this weekend, but we'll see). Phone interview yesterday went great!!! It was the best one I've had thus far, so I'm praying that it turns into the real thing!!! (Btw, the position is at the Naval Weapons center in Dahlgren, VA- I'd be testing comm systems, radars, etc. onboard ships & subs!! How bada@@ would that be if I got the job!!!) But still keeping things positive and moving ahead!!
-
LOL!!! Sam, unfortunately my gf left me with just 3 dogs, 2 cats, and an empty fridge for the week or so... therefore I took some "shore leave" and procured the eggs, bacon, and beer. But the peace and quiet has been nice- haven't been able to deeply focus on anything in a while, so the space is nice while she's out of town helping some neighbors in El Paso. The mom (who is the sister of one of our neighbors) died 2 months ago, and the dad was killed in a botched kidnapping one or two years ago, and our neighbor is guardian of the 2 kids, one of which has cerebral palsy (?), and my gf went down to help them clean their two homes (were hoarders apparently)- loooong story... So I'm at home watching our 3 dogs + 2 cats and the neighbor's 3 dogs (along with job search), so naturally the quiet is welcome. Good news though- got a call today from a company and they want a phone interview either tomorrow or Monday, so at least it's something!!! We shall see..... So maybe tonight I'll get back to my deck houses...
-
Larry, I'm probably going to use some thin clear plastic for the glass panes, like the type from some packaging (was thinking of some leftover clear/brown polycarb, but it's too thick). I'm debating on whether I want to put the bars in the windows or not... I didn't go in the shop yesterday, so maybe tonight I will finish the companionway (I'm watching the neighbor's dogs so I gotta check on them this week). That's a rather impressive operation you had going (3+ TONS of lead?!?!? wow!). It sounds like you should have patented your plating process, but who knows- maybe it's not patented and you can still claim it? Still, it's amazing to hear and learn of everyone's backgrounds on here- very interesting facets of this hobby and forum! Hope the meds kick in and you get better soon!
-
Ouch! Please take care and get better soon Larry!!! Don't know anything about shingles, but doesn't sound like fun. Getting paid to model, huh??? Hrmmm... that wouldn't be too bad of an option for me, but 1: I doubt anyone would buy my beginner's work; 2: prob wouldn't pay all that well, and 3: that'd turn my loving hobby into a job, so after work was over, then what would I do?????? lol~~~ Speaking of cannon balls, where would they be stored on deck anyway???? Would some racks need to be made, like what's seen in some pics of some Syren builds? Would be interesting, because maybe that could be an addition to the deck features.
-
Thanks guys! Yeah, it wasn't as bad as I thought (luckily it was too small, but I could have corrected one that was too big by replacing a section of decking). So now that little issue is taken care of, later today I'll finish the companionway, which may be a little tricky due to the hatch opening. We'll see how it goes... Also, yesterday I picked up some 3/8" square stock to replace the round dowels for the masts. I couldn't find any 5/16" for the next size dowel, so those spars/topgallant sections may have to wait a little. Nevertheless, still trucking along on the build in the evenings after the job search. Hanging in there!!!
-
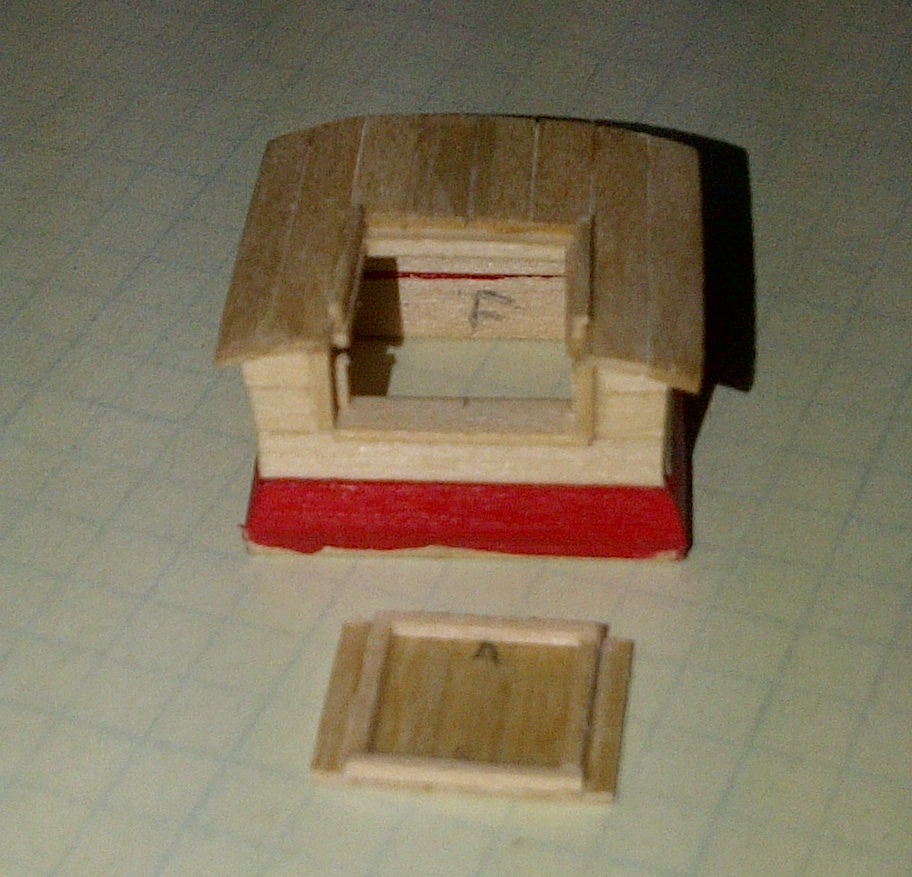
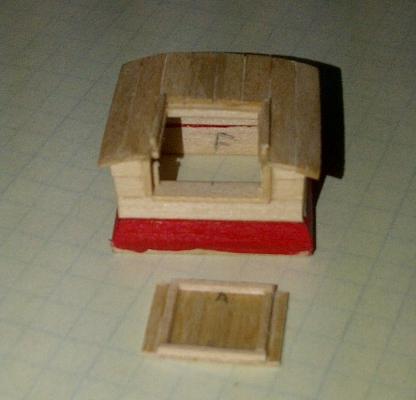
Here's what I was able to accomplish last night: the salon deck structure. I was working on the companionway, but realized something was a bit off... After staring at my deck cutouts, the coaming structure, and then the plans again, I realized that I made the opening in the deck about 1/4" too short!!! This should have jumped out at me in my pictures, looking at the drawings, measuring, etc... somehow that one slipped through! But no need to worry- I removed the section of deck where the capstan goes (with the extra deck support planks) and cut off the extra length. After replacing the deck piece, I was left with the correct slot length for the companionway. I was able to make and paint the coaming. The rest of the structure will be completed tomorrow-ish, followed by the captain's skylight.

-
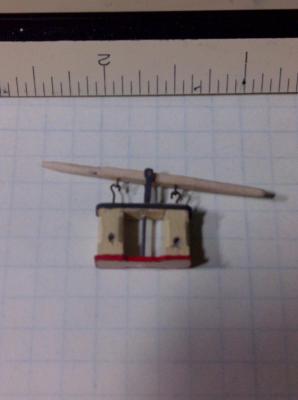
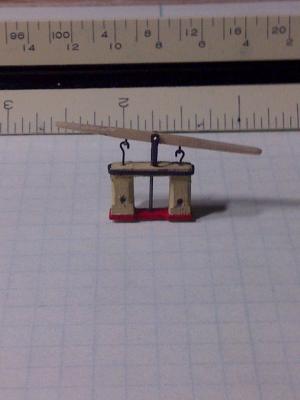
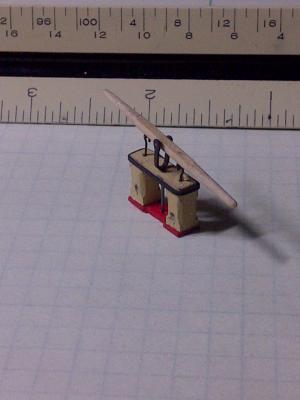
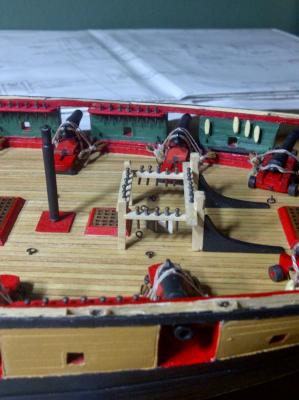
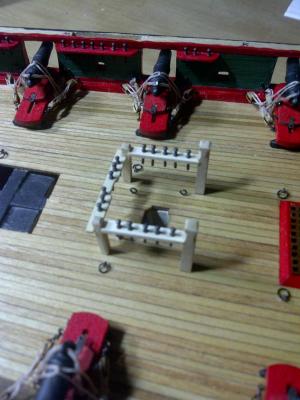
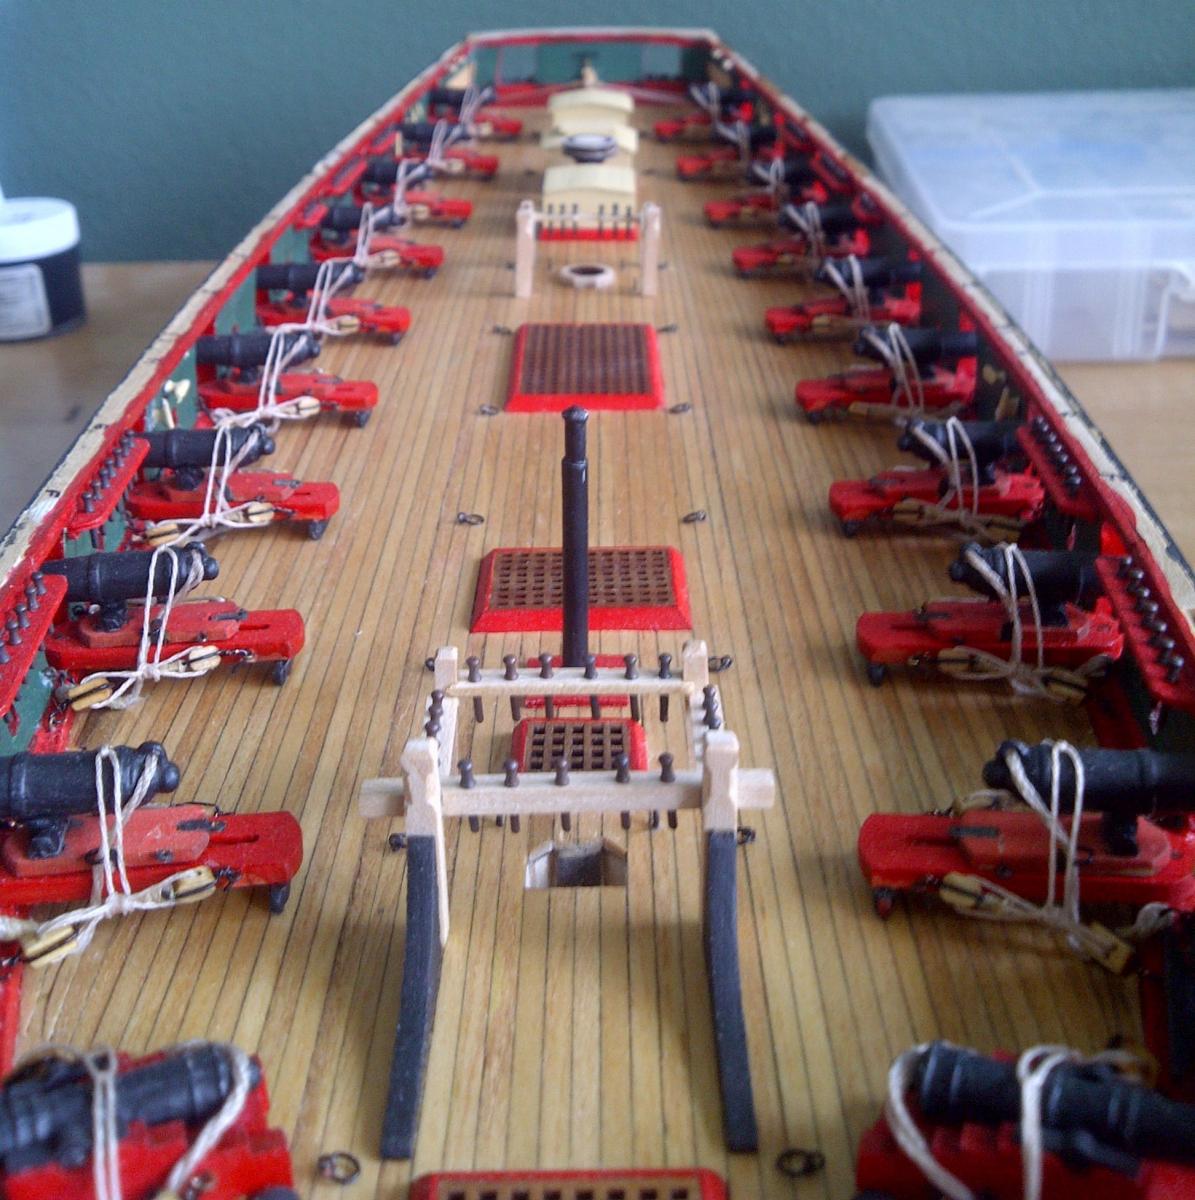
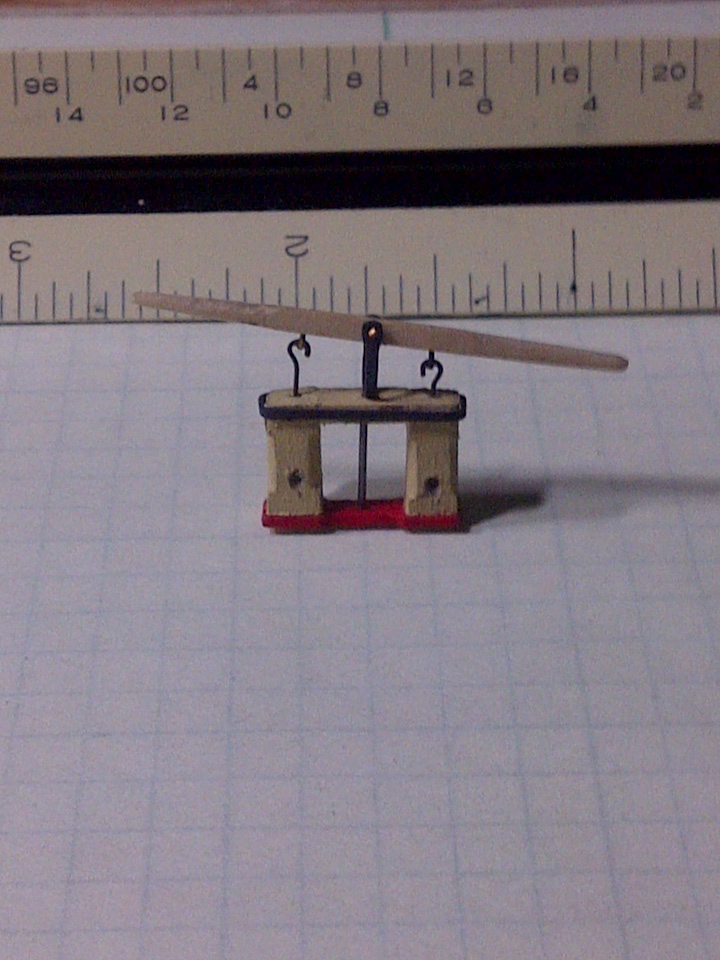
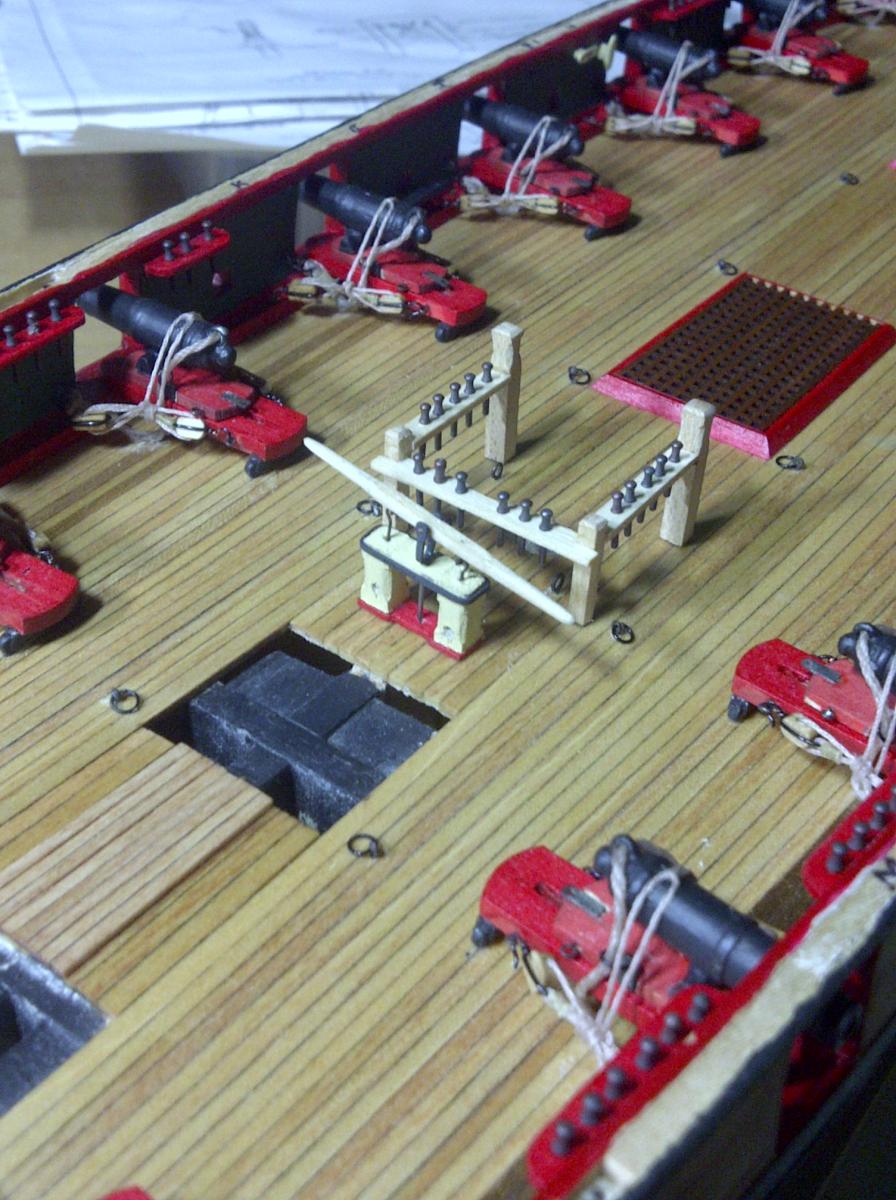
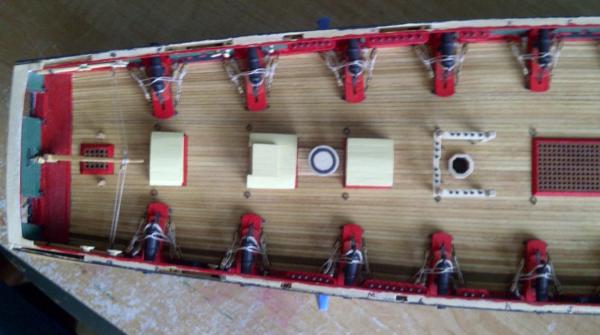
Alrighty.... for a real update on the build: The past few evenings have been very productive building all of the deck fixtures and test fitting before installation. Bilge pump I made on Saturday. Forward fife rail is installed Aft fife rail is installed Bilge pump is not installed yet (have to add coils to fife rail first) Here's a view of where I was as of Sat night: Last night I was able to make the coamings and support frame for the three deck houses- I plan on having these done by mid-week.