


DORIS
-
Posts
711 -
Joined
-
Last visited
Content Type
Profiles
Forums
Gallery
Events
Everything posted by DORIS
-

ROYAL CAROLINE 1749 by Doris - 1:40 - CARD
DORIS replied to DORIS's topic in - Build logs for subjects built 1501 - 1750
For a change I finished some decorative panels in the stern cabin.- 883 replies
-
- 6
-

-
- royal caroline
- ship of the line
- (and 1 more)
-
ROYAL CAROLINE 1749 by Doris - 1:40 - CARD
DORIS replied to DORIS's topic in - Build logs for subjects built 1501 - 1750
And now, how I continued with RC:- 883 replies
-
- 5
-
-
- royal caroline
- ship of the line
- (and 1 more)
-
ROYAL CAROLINE 1749 by Doris - 1:40 - CARD
DORIS replied to DORIS's topic in - Build logs for subjects built 1501 - 1750
Thank you dear friends, I am pleased and honoured, that you like my sculpting and videos. I have started with sculpting during HMS Victory build and enjoyed this work a lot. http://modelforum.cz/viewtopic.php?f=177&t=39660#p747633 After some years and quite long training I have improved my sculpting technologies, but still have to learn and look for ways to improve my work. With a fully-round figure I make the second half after baking the first one.The clay is sticked onto the baked half of figure and here is shaped the same way (as you could see on videos) till it is ready for baking again. Some parts are made separately and after baking attached to the sculpture. It is possible to use modeling clay to stick other parts and then you have to bake the whole statue again or you can use super glue. http://modelforum.cz/viewtopic.php?f=177&t=43575&start=390#p1054822 I am going to create another video where you will see a technology how to create full-round statue.- 883 replies
-
- 3
-
-
- royal caroline
- ship of the line
- (and 1 more)
-
ROYAL CAROLINE 1749 by Doris - 1:40 - CARD
DORIS replied to DORIS's topic in - Build logs for subjects built 1501 - 1750
Thank you for your comments, dear friends, your words mean a lot to me, I am very honoured and have a great motivation to work. About diodes: I use common LED orange-yellow colour. There are two types of LED - brighter/strongly luminous (used in interior of cabins) and classic with normal luminosity (used in lanterns and outside parts of the model). Inside the model Royal Caroline there are four separate electrical circuits, each one has 2 or 3 LED connected in series with resistor before first LED (+). Kind regards, Doris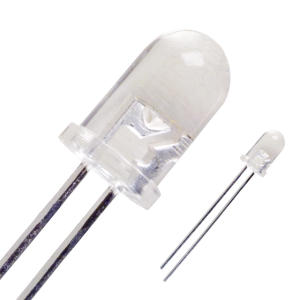
- 883 replies
-
- 2
-
-
- royal caroline
- ship of the line
- (and 1 more)
-
ROYAL CAROLINE 1749 by Doris - 1:40 - CARD
DORIS replied to DORIS's topic in - Build logs for subjects built 1501 - 1750
You are welcome. This modeling clay is something like FIMO, in our country named Modurit or Modelit. It is quite sticky so I use cold water to eliminate this. It is not problem to soften this clay after a long time, I bought it about five years ago and still it´s O.K.- 883 replies
-
- 2
-
-
- royal caroline
- ship of the line
- (and 1 more)
-
ROYAL CAROLINE 1749 by Doris - 1:40 - CARD
DORIS replied to DORIS's topic in - Build logs for subjects built 1501 - 1750
Part 9 -modeling the visible part of the second wing and improving details, the final adjustment of whole shape Finished sculpture ready for baking: Pegasus is ready for baking in the oven and after that I will paint it and place onto the base of one from my sailing ships- 883 replies
-
- 12
-
-
- royal caroline
- ship of the line
- (and 1 more)
-
ROYAL CAROLINE 1749 by Doris - 1:40 - CARD
DORIS replied to DORIS's topic in - Build logs for subjects built 1501 - 1750
Part 7 -modeling limbs Part 8 -continued modeling limbs .- 883 replies
-
- 1
-
-
- royal caroline
- ship of the line
- (and 1 more)
-
ROYAL CAROLINE 1749 by Doris - 1:40 - CARD
DORIS replied to DORIS's topic in - Build logs for subjects built 1501 - 1750
Part 5 - continue with shaping the wing, mane and tail. Part 6 - finishing left wing + starting work on the limbs- 883 replies
-
- 1
-
-
- royal caroline
- ship of the line
- (and 1 more)
-
ROYAL CAROLINE 1749 by Doris - 1:40 - CARD
DORIS replied to DORIS's topic in - Build logs for subjects built 1501 - 1750
Part 3 - continued shaping of the head and body + defining the shape of a wing Part 4 - shaping the wing- 883 replies
-
- 1
-
-
- royal caroline
- ship of the line
- (and 1 more)
-
ROYAL CAROLINE 1749 by Doris - 1:40 - CARD
DORIS replied to DORIS's topic in - Build logs for subjects built 1501 - 1750
Today I am bring a video of how I make sculptures out of modeling clay: I will insert here some videos, so you can enjoy the progress from the beginning to the end. Pegasus - sculpting step by step from modeling clay Part 1 - defining the basic form: Part 2 - shaping the head and body- 883 replies
-
- 8
-
-
- royal caroline
- ship of the line
- (and 1 more)
-
ROYAL CAROLINE 1749 by Doris - 1:40 - CARD
DORIS replied to DORIS's topic in - Build logs for subjects built 1501 - 1750
Hello dear friends! I am glad, you like my work. That´s a great honour for me. Thank you very much. Appreciate your comments a lot. I still try to improve my work and technologies to reach better result. Really enjoy creating paper models and decorations from clay, that is my favourite hobby. That´s not my dog, I suppose the King could have his own dog in fact, so this one belongs to the King. I like animals but we have only parrots at home.- 883 replies
-
- 3
-
-
- royal caroline
- ship of the line
- (and 1 more)
-
ROYAL CAROLINE 1749 by Doris - 1:40 - CARD
DORIS replied to DORIS's topic in - Build logs for subjects built 1501 - 1750
After modelling several crew members I continued with quarter galleries and the stern. Window panes are made of plexiglass again, the structure of frames is made of card and covered with wooden-look foils.- 883 replies
-
- 5
-
-
- royal caroline
- ship of the line
- (and 1 more)
-
ROYAL CAROLINE 1749 by Doris - 1:40 - CARD
DORIS replied to DORIS's topic in - Build logs for subjects built 1501 - 1750
Captain and lieutenant: And that´s me.....as a 4cm tall figure on the model....- 883 replies
-
- 12
-
-
- royal caroline
- ship of the line
- (and 1 more)
-
ROYAL CAROLINE 1749 by Doris - 1:40 - CARD
DORIS replied to DORIS's topic in - Build logs for subjects built 1501 - 1750
Thank you Anja nad Crackers, I am glad and honoured, you enjoyed the pics of RC. There is still a lot of what I should improve, so the motivation is large and i have to learn. I find a lot of great and awesome masterpieces here and that is a superb inspiration for me. Thanks a lot for this opportunity. I decided to create some crew members for RC to compare her size and a scale. I am going to make about 20 figures; will include the king, queen, princess, captain, officers, sailors...etc. Some of them will be created according the real people that I know. King George II. and the Queen Caroline:- 883 replies
-
- 7
-
-
- royal caroline
- ship of the line
- (and 1 more)
-
ROYAL CAROLINE 1749 by Doris - 1:40 - CARD
DORIS replied to DORIS's topic in - Build logs for subjects built 1501 - 1750
I finished the roof for main cabin. The red colour (vermilion) was used also on Clevely´s portrait of RC. The model will have an illumination from small LED diodes, here you can see the beginning of its fitting (it is not complete yet - stern and mast lanterns are missing) and functionality test....- 883 replies
-
- 13
-
-
- royal caroline
- ship of the line
- (and 1 more)
-
ROYAL CAROLINE 1749 by Doris - 1:40 - CARD
DORIS replied to DORIS's topic in - Build logs for subjects built 1501 - 1750
Finally the staircase was added. For some parts I used wood from walnut or fruit trees. All paper parts were repainted or finished by self-adhesive foils with wooden look.- 883 replies
-
- 6
-
-
- royal caroline
- ship of the line
- (and 1 more)
-
ROYAL CAROLINE 1749 by Doris - 1:40 - CARD
DORIS replied to DORIS's topic in - Build logs for subjects built 1501 - 1750
Hello dear friends, thank you very much for kind words and praise, I appreciate it a lot and have motivation to work on models and find new ways how to improve my work. I am really honoured to share my hobby with you all. To Anja: Great to see a lady here, my sincere regards to you. Looking forward to cooperation and sharing. Let´s continue with Royal Caroline... Completion of cabins - the bulkheads are from 3-4 layers of solid card with self-adhesive foil finish:- 883 replies
-
- 8
-
-
- royal caroline
- ship of the line
- (and 1 more)
-
ROYAL CAROLINE 1749 by Doris - 1:40 - CARD
DORIS replied to DORIS's topic in - Build logs for subjects built 1501 - 1750
Other decorations..... all is hand made from modeling clay:- 883 replies
-
- 15
-
-
- royal caroline
- ship of the line
- (and 1 more)
-
ROYAL CAROLINE 1749 by Doris - 1:40 - CARD
DORIS replied to DORIS's topic in - Build logs for subjects built 1501 - 1750
I started to make first sculptures and decorations for the front bulkhead of main cabin. They were made of modelling clay as at my previous models. .....after baking in the oven ( temperature at 150°C): .....and after painting:- 883 replies
-
- 17
-
-
- royal caroline
- ship of the line
- (and 1 more)
-
ROYAL CAROLINE 1749 by Doris - 1:40 - CARD
DORIS replied to DORIS's topic in - Build logs for subjects built 1501 - 1750
Later the background was repainted into pale blue colour, this should be more realistic according to the real ship.- 883 replies
-
- 4
-
-
- royal caroline
- ship of the line
- (and 1 more)
-
ROYAL CAROLINE 1749 by Doris - 1:40 - CARD
DORIS replied to DORIS's topic in - Build logs for subjects built 1501 - 1750
The work continues on planking the inside of the hull and interior of cabins, also there were added some parts on the bow and stern: Lower part of the stern was probably decorated with paintings. On my model the paintings are hand-made using Tamiya colours as usually.....- 883 replies
-
- 7
-
-
- royal caroline
- ship of the line
- (and 1 more)
-
ROYAL CAROLINE 1749 by Doris - 1:40 - CARD
DORIS replied to DORIS's topic in - Build logs for subjects built 1501 - 1750
The real RC had blue/turquoise upper part of the hull, so I used the same colour on my model: Before painting - the base is made of pale foil strips with wooden grain:- 883 replies
-
- 7
-
-
- royal caroline
- ship of the line
- (and 1 more)
-
ROYAL CAROLINE 1749 by Doris - 1:40 - CARD
DORIS replied to DORIS's topic in - Build logs for subjects built 1501 - 1750
The hull before painting of the upper part:- 883 replies
-
- 5
-
-
- royal caroline
- ship of the line
- (and 1 more)
-
ROYAL CAROLINE 1749 by Doris - 1:40 - CARD
DORIS replied to DORIS's topic in - Build logs for subjects built 1501 - 1750
The planking (made of foil stripes) was finally improved by painting (I use Tamiya acrylic paint): I decided to create treenails (used on English ships). On my model they are painted by 0,3mm wide tip of a micro-pencil. All are painted by Tamiya colours. The pencil tip was every time dipped into thin paint and after that was made one treenail on the hull planking.- 883 replies
-
- 8
-
-
- royal caroline
- ship of the line
- (and 1 more)
-
ROYAL CAROLINE 1749 by Doris - 1:40 - CARD
DORIS replied to DORIS's topic in - Build logs for subjects built 1501 - 1750
For planking there are used stripes cut out from self-adhesive foils with wooden look:- 883 replies
-
- 6
-
-
- royal caroline
- ship of the line
- (and 1 more)