-
Posts
692 -
Joined
-
Last visited
-
Back in the Shipyard 25 January 2026. Progress has been slow on the 2nd layer planking. Still carrying a trigger finger splint on my right hand. 6 weeks rest, specialist says another 3 months rest. So Xmas break, I cannot help myself, had to keep planking. Up to about 2/3rds the way around the bottom now. 2 sets of dropped planks up on the Bluff bow. Progress is slow(not pushing the finger/split too hard).
-
Bit of an update on the Build I've had to take some time off on doctors advice. 6 weeks at least to let my right hand ring finger hopefully recover from "trigger finger". Which is when the finger does not straighten with the others when opening ones hand. Basically, I've overworked the muscle which pulls the finger straight. As well, wife and I had a holiday planned overseas. So shipyard is on hold for a while, possibly a fer months.
-
DaveRow started following HMCSS Victoria 1855 by BANYAN - 1:72 and 3D Printing Cannons in Resin
-
 DaveRow reacted to a post in a topic:
3D Printing Cannons in Resin
-
 DaveRow reacted to a post in a topic:
3D Printing Cannons in Resin
-
 DaveRow reacted to a post in a topic:
3D Printing Cannons in Resin
-
 DaveRow reacted to a post in a topic:
HMS Sirius 1797 by paulsutcliffe - 1:48 - POF from NMM plans
-
 DaveRow reacted to a post in a topic:
Showing the teeth: Presentation of guns on models
-
Back in the Shipyard 06 October 2025. I cannot believe nearly a month has gone since the last post. Been a few things going on, slow progress. Bit of a catchup post below. The Sirius has been flipped/mounted on a new base for the 2nd layer of planking. There are 25 - 5mm wide planks from the Wales to Keel. So some need to disappear, "dropped" 8 Planks have been run into the Bluff Bow of the Sirius. 3 to the Stern to date. I'm using a Cada 4 - 3 planks between joints, staggered planking pattern, planks join every 4th frame(max. ~ 9.7 feet long). Some join over 8 frames for convenience of the build. I groove every 4th joint though. The shaping of each plank takes time to get them to lay as flat as possible. Especially around the Bluff Bow. The planks ending at bow are "hooked" to allow the plank behind to end at a half width. Well that's what I'm aiming for. Where talking in mm at the plank ends. At the moment I'm getting away with pre-bending the plank ends and pinning the open plank edge to hold the planks whilst the glue dries. A light sand and will/should result in a smooth finish. The Garboard plank is glued in place. If you look closely a Half Stealer was added in to the keel rabbit for the Garboard to lay naturally. Just to the left of the Red Pins, you'll see the first 2 dropped planks. They'll be another 2 planks dropped in the next set of 4 planks. A keen eye may see the gap above the Wales on the left. I need to cut a filler plank in "one day". A few of the first planks have been pulled around to the Transom. The 1mm Beech planks bent very well in this area. A timber strip to be added at the intersection when all planks on. Wales need to be finished off. Wel, the planking is not being rushed. A few o/s holidays coming up before Xmas.
-
Back in the Shipyard 10 September 2025. Since the last update, the Bow Gun Whales have appeared. With the aid of 3mm balsa as a filler, this provided plenty of support for the run of the inner planks. The Gun Wale was cut from 6 pieces of Rosewood, and used what I call a "scarf joint"(is that correct) on the side joins. The picture shows the finished product.
-
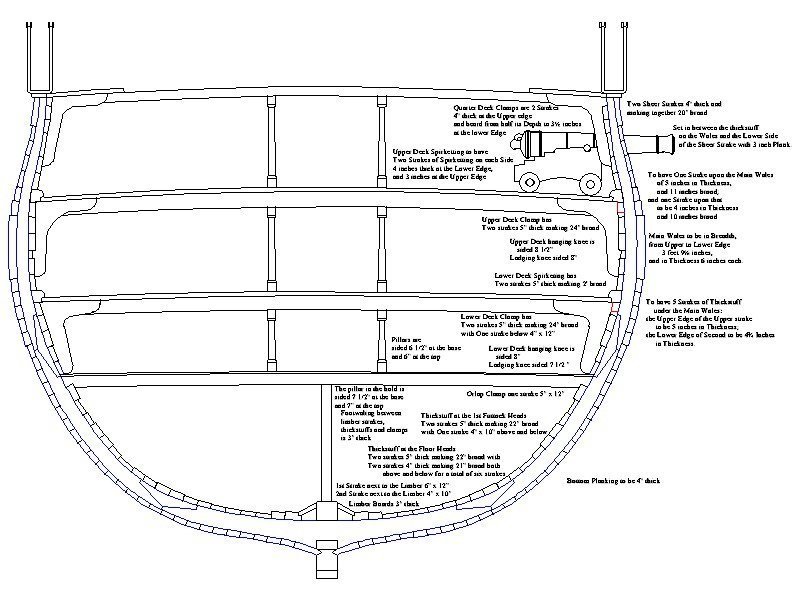
More progress from the Shipyard 28 August 2025. The last few days have been onto the "Wales", which run Bow to Stern, at around the max breadth of the hull frames. I'm basing the location & vertical depth from the RMG plan. They will be added on by: Two(2) strakes on top of the Main Wales. 11" & 10" broad(8.9mm @ 1:60). They may have been up to 3-4" in thickness. At 1:60 equates to 1.3 to 1.7mm. The Main Wales 3' 9" broad(1:60 equates to 19mm) and 6" thick(1:60 equates to 2.54mm) The larger the ship, it may also have had a number of lower strakes below the Wales. Visually, I'm going 1mm for the top Strakes and 2mm for the Wales. The above cross-section is not the Sirius(Berwick). I've included this section for reference to the location of Strakes/Wales & thickness, depth of them. The model Wales will be all up around 18mm in width/depth. The aim is to taper them a bit towards the stern as well. The top and bottom Wales are pre-painted black. I've enlarged the bow Rabbet to hold the strake/Wale ends firmly. All the above to strengthen a ship's hull structure. They were the thickest timbers on the side of a wooden ship hull. I've seen some discussion that Wales also prevented "hogging", when in heavy seas a ship may longitudinally bend up/down. And not to mention the Wales being at the widest part of the hull, were in contact when berthed, or rafted too other ships. Back to the Ship.
-
 DaveRow reacted to a post in a topic:
did wales ever taper at the bow?
-
Update from the Shipyard - Thursday 14th August 2025. The shipwrights(🤔) are back onto the planking. Started on the recess's in the Strake for the Mast Channels(3 per side). I am making use of the Gun Ports to hold the strake @ planking in place -> as in photo. More Planking: I've had a bit more of time at home of late, after a bit minor surgery. Just a bit of preventative stuff. So, plenty of time to add more planking to the hull. Before you fellas get into me re: the fact of mixing timber species for the planks. As this is a scratch build, I'm using timbers left over from my previous Kit Build Endeavour. I plan to stain the planks and "hopefully" blend the finish to a more "oldish look". Planning Ahead: And a bit of paper mock-up on the rear to see how the heck to build the window pop-outs.
-
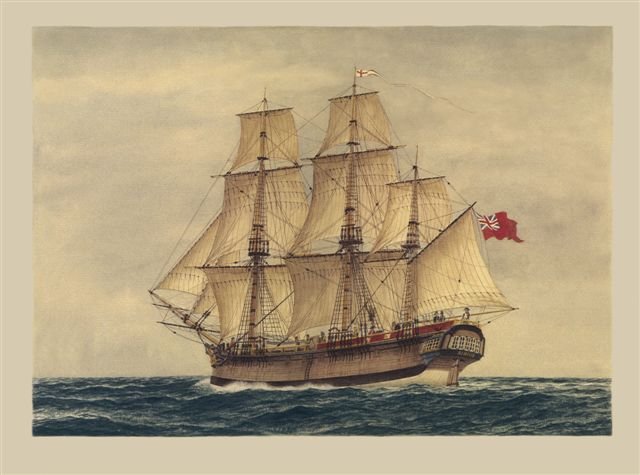
Hi Steve, Thanks for looking in on the progress. Watercolours, paintings, sketches !! I have several pictures/paintings of the Sirius. All "historical" representations I assume. Between them have 3 versions of bulwarks/rails. It's similar for "how many guns did she carry on board". By all references in the books I've read to date, All her "Berwick" guns were removed during the 1786 refit "Her commission stated that the Sirius 'would' be armed with four 6-pounder carriage guns, six 18-pounder carronades & eight swivel guns", a very light armament. "Then on 31 October orders were given to obtain: 10 more 6-pounders to be put on board....". But it was unsure how many actually made it on board as "with respect to the guns, camp equipment, tents etc that were ordered from the Tower,...he[Phillip] had not specified and quantity, therefore I cannot judge what room may remain[on the First Fleet ships] Bulwarks or Rails ! So back to the rear. I pondered for some time what to do back there. I wondered if I was on board for that arduous journey, most of the time out in open waters, what would I prefer on either side whist on watch back on the aft deck area ! However, I wasn't, but went for the Bulwarks anyhow.
-
Update from the Shipyard - Thursday 14th August 2025. The shipwrights(🤔) needed a break from hull planking. We decided to move onto the aft sides, top strake, boarded side rails with gun ports. From the RMG Draft of the Sirius(previous Berwick); not much detail on the side rails other than the height. Reviewing a number of colour paintings and the Sirius model in the Australian Powerhouse Museum(PM), I adoption the boarded side rails with 3 x Gunports per side. For me it makes sense the Sirius had solid side rails at the back for protection during the long arduous journey to the other side of the world. I filled in between the "Long Top Timbers" with balsa wood to provide a solid base to glue the outer side rail boards onto. I made a jig to hold the bottom & 2 sides of the Gun Ports to make sure all are the same. Finished Gun Port, ready for the outer boards to go on.
-
More progress from the Shipyard - Thursday 7th August 2025. A bit of a push over last week to get all the 1st layer planks onto the hull has been reached. I spent a few hours fairing(sanding) the planks today. I did carry the upper planks too far down the side. However, for the first layer it's been a good refresher on planking before the 2nd layer of planks. I'm pretty happy with the outcome so far. Port Bow Port Stern_Side Port Stern Starboard Bow Starboard Stern_Side Starboard side I'll be marking out the Wales & thickstuff's, Sheer Strake, and the Channels next
-
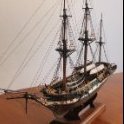
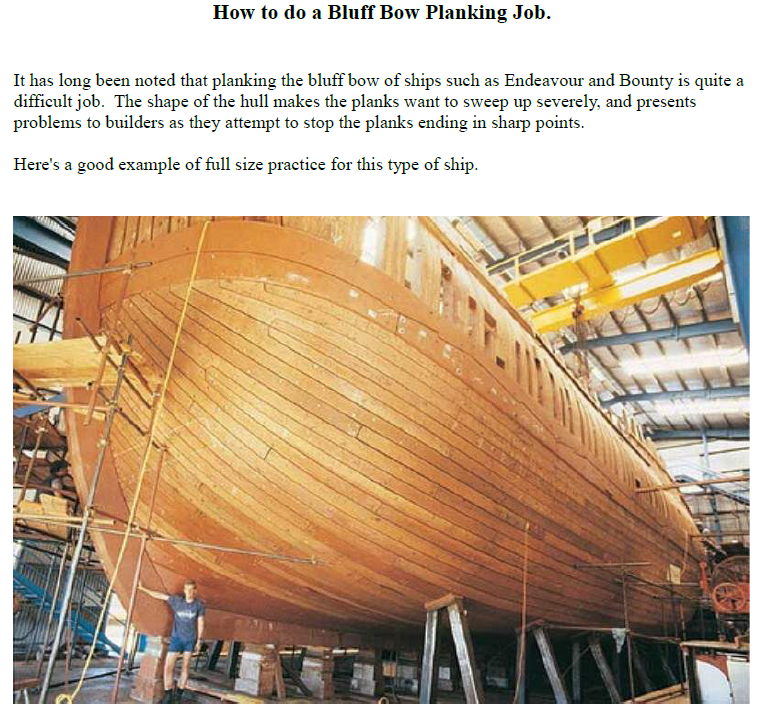
I should point out. The ship model in your pictures, has a finer entry bow. The HMS Sirius is a Bluff Bow ship. Very similar to the "HMB Endeavour" I build a while ago. I am trying to match the planking of the article below, which is the actual bluff bow "replica" of the Endeavour. Even with the replica build; "the Garboard strake has been allowed to creep up the stem, and if this had been kept a little lower they may not have needed as many dropped planks." (This was noted by a member of the Replica board) Most of my planking to date on my model, follows the natural lay of a plank over the frames.
-
More progress from the Shipyard. Slow progress on the 1st layer planking. Another 3 planks added from the keel. All 6mm wide. The first 4mm wide plank of 12 has been added, where they go over the curve section of the frame. As I had not kept the garboard plank shorter, the rest have swung further down. But being 1st planks, I have learn't.
-
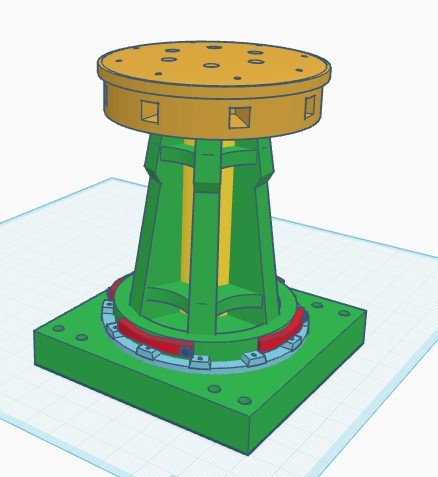
More progress from the Shipyard. Since last post, more first layer planks have been added to the hull. And some 3D items in the pipeline. I've made a start on a few planks against the keel. Also marked out the lines for the tapering of the planks(in groups of 6) I'm using 6mm and 4mm wide planks. 4mm where the hull curves most, 6mm on the straighter sections. I usually pin each plank onto a frame and use plastic clamps, in hope to get the planks butted up neatly. This doesn't always work, especially where planks are curving a lot. Sandpaper time then... Here we are transitioning from a run of 6mm to start of 4mm planks - stern port side. Here we are transitioning from 4mm into 6mm planks - stern starboard side. The next few pictures are some works in progress on creating 3D Models and Resin Printing. I'm hopeful that with the right details and finishes, they will look presentable installed on the ship. Also been testing some paint on the 18 pound Carronade Cannon Base. Come up pretty good I reckon. Bit more touch up to do underneath(for the beady eyed) Same for the 18 pound Carronade Barrels. And the 6 pound Cannon barrels. Have also developed a 3D Model for a Capstan to print & paint. And before someone asks, it does not turn - yet !! See how it turns out. Well, always more planking to get on with. Dabble with 3D development whilst glue dries.
-
A bit of an update from the Shipyard. Since last post of the actual hull, the gun ports have come to light. The side planking has been brought up level with the upper deck. The front/bow planking has been raised to where the Gunwale rises from the ships side to the Bowsprit area. Probably best to return to the hull bottom and finish off the planking(1st layer). 1 of the 12 per side Gun Ports cut into the first planking layer. Slowly The front/bow planking has been raised to where the Gunwale rises from the ships side to the Bowsprit area.
About us
Modelshipworld - Advancing Ship Modeling through Research
SSL Secured
Your security is important for us so this Website is SSL-Secured
NRG Mailing Address
Nautical Research Guild
237 South Lincoln Street
Westmont IL, 60559-1917
Model Ship World ® and the MSW logo are Registered Trademarks, and belong to the Nautical Research Guild (United States Patent and Trademark Office: No. 6,929,264 & No. 6,929,274, registered Dec. 20, 2022)
Helpful Links
About the NRG
If you enjoy building ship models that are historically accurate as well as beautiful, then The Nautical Research Guild (NRG) is just right for you.
The Guild is a non-profit educational organization whose mission is to “Advance Ship Modeling Through Research”. We provide support to our members in their efforts to raise the quality of their model ships.
The Nautical Research Guild has published our world-renowned quarterly magazine, The Nautical Research Journal, since 1955. The pages of the Journal are full of articles by accomplished ship modelers who show you how they create those exquisite details on their models, and by maritime historians who show you the correct details to build. The Journal is available in both print and digital editions. Go to the NRG web site (www.thenrg.org) to download a complimentary digital copy of the Journal. The NRG also publishes plan sets, books and compilations of back issues of the Journal and the former Ships in Scale and Model Ship Builder magazines.


