DaveRow
-
Posts
661 -
Joined
-
Last visited
Content Type
Profiles
Forums
Gallery
Events
Everything posted by DaveRow
-
 More ropes & blocks and more ropes & blocks. Getting very busy Dashi and looking great.
 -
Nice blockwork on the Fore Yard Steve. Long road ahead....
-
Dashi. Coming along very nice.
-
Hi Vinnie, How is the build going. Must be well into the rigging, time permitting ? Nice "Mouse"ing about by the way...
-
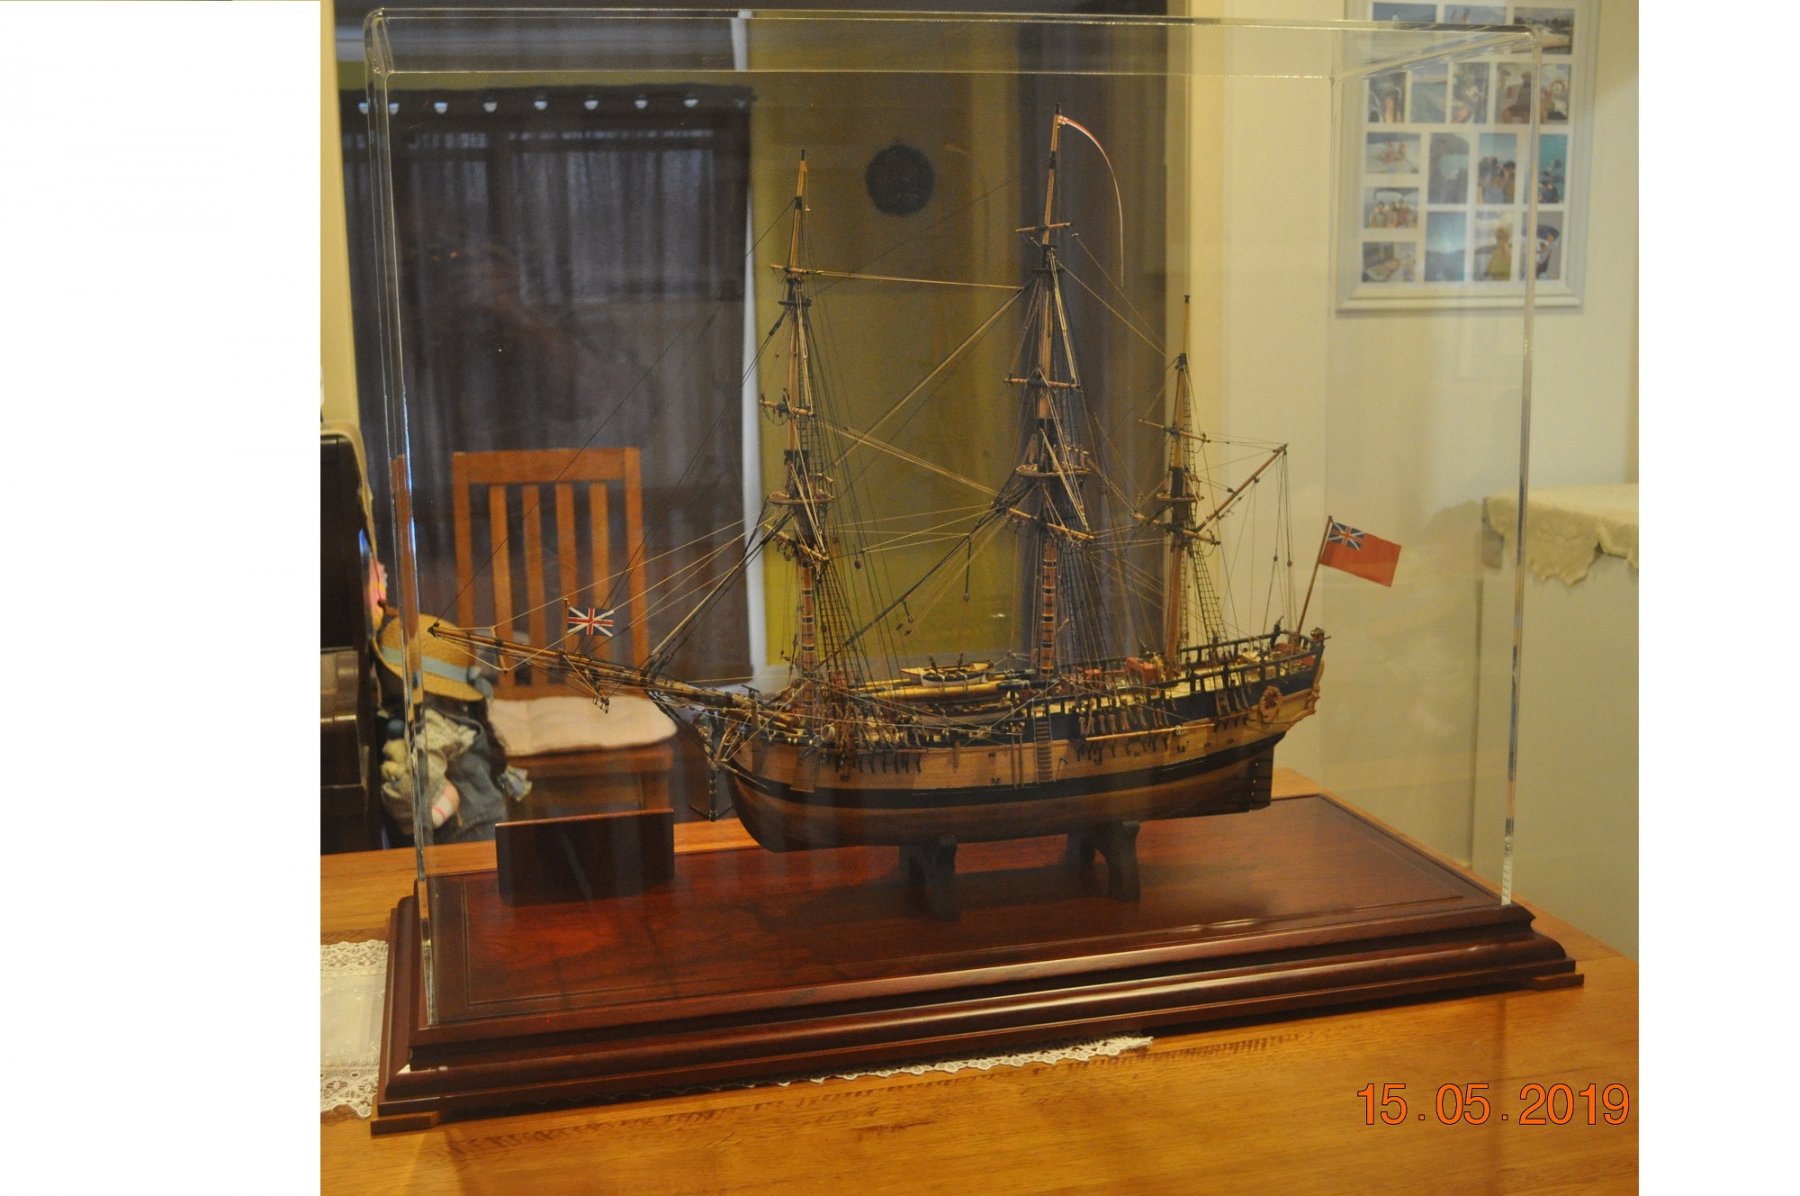
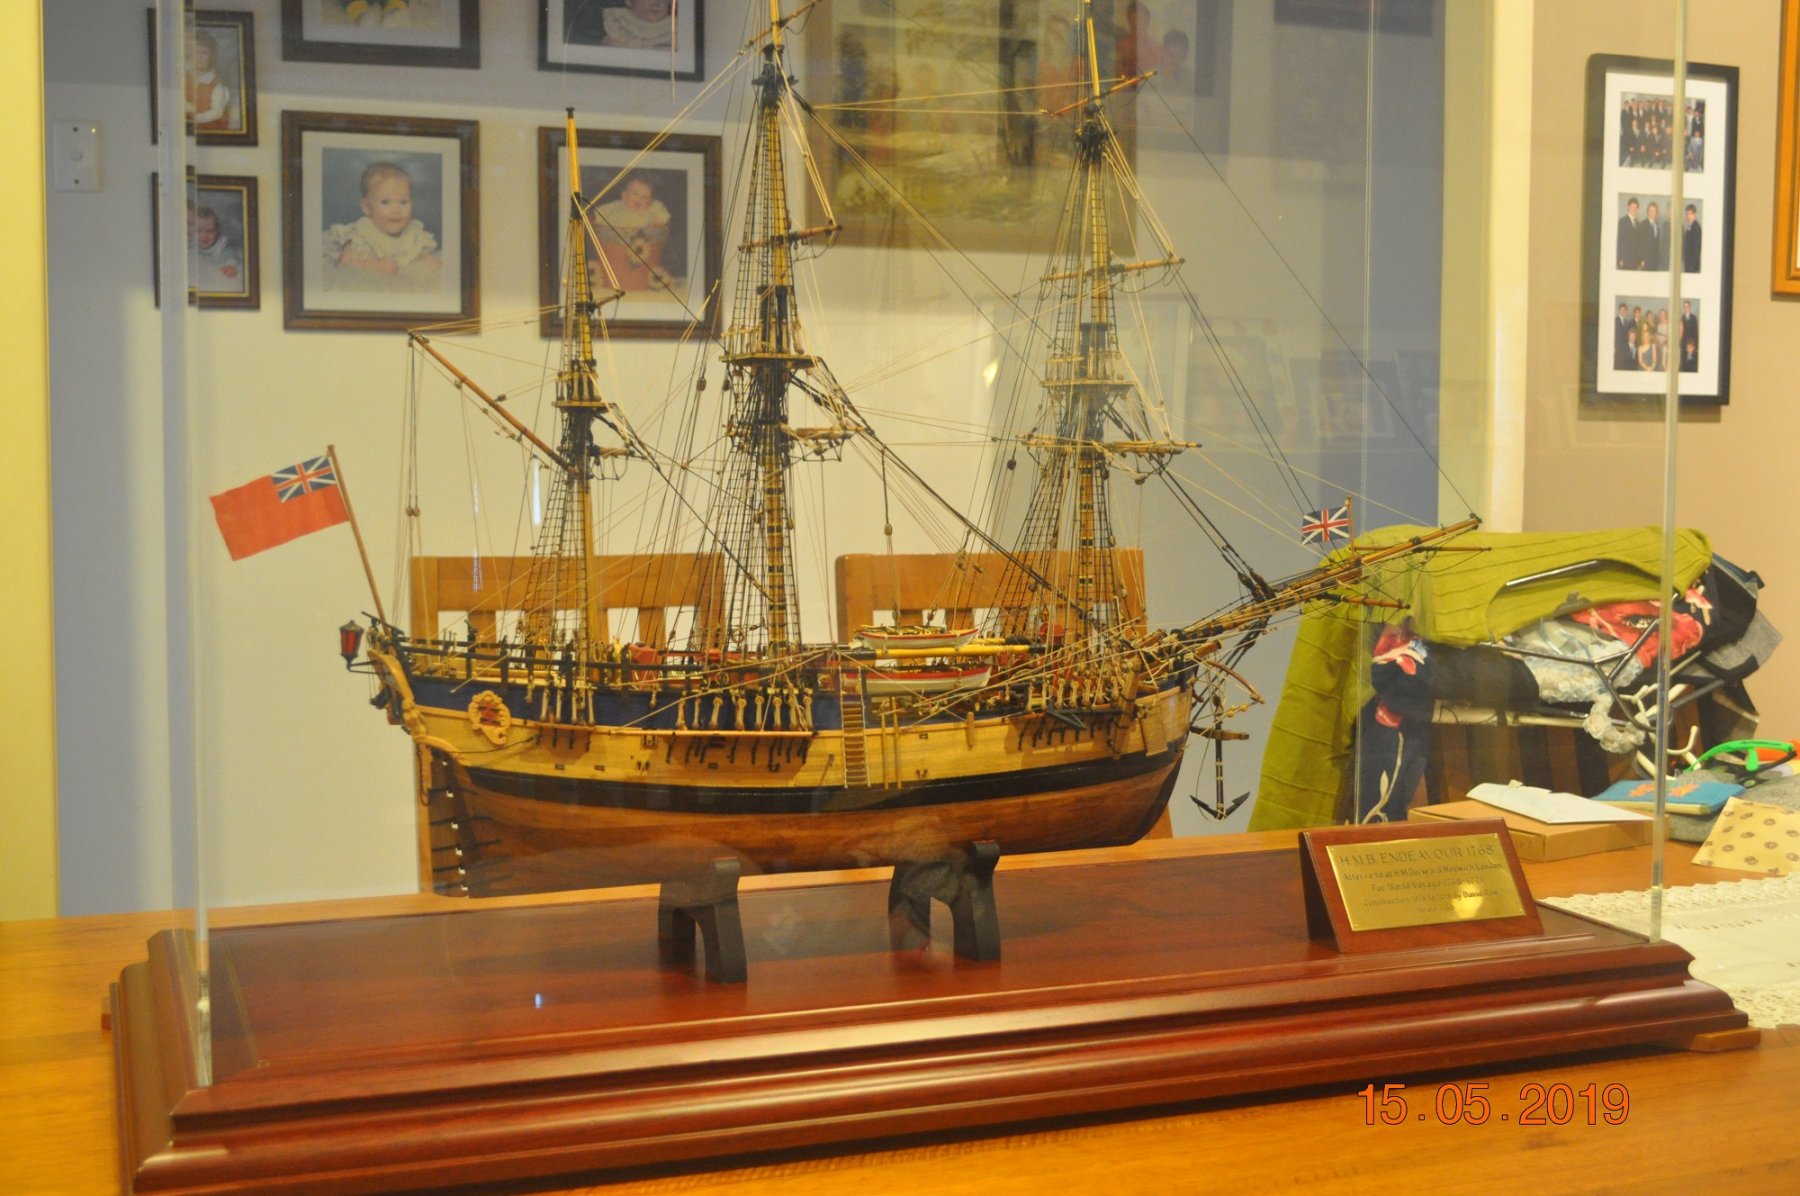
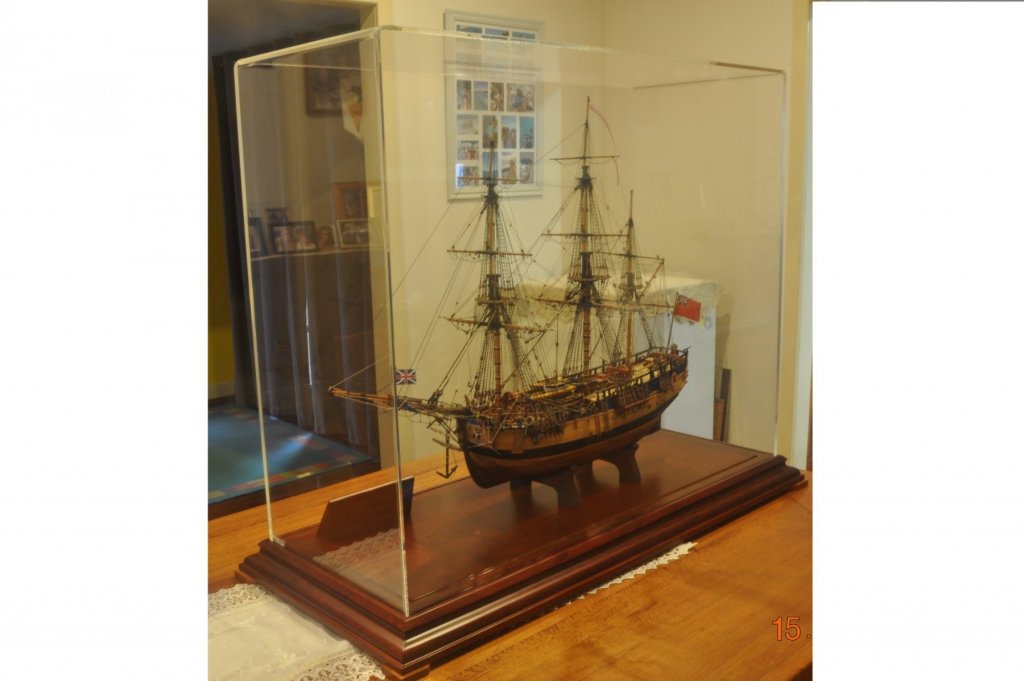
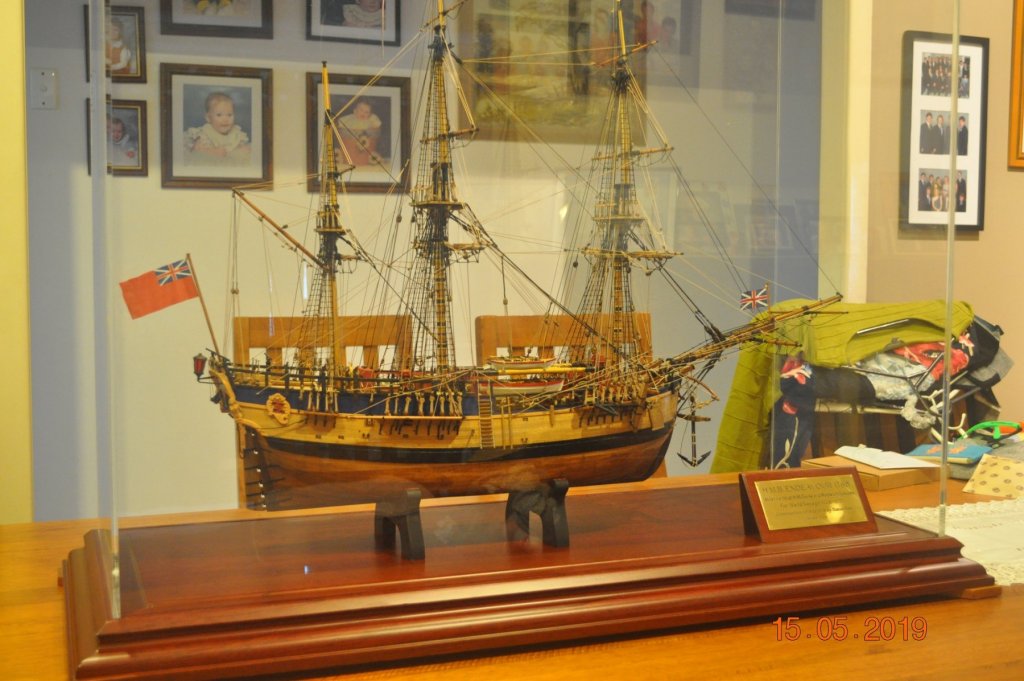
Shipyard Closing Down Well for a time being to refurbish the Entertainment Room for the Display Case to reside. And to explain, the Admiral, as my next project wants me to repaint a room and refurnish appropriately with a side bench_table for the display case to reside on. A few pictures of the Endeavour taking centre spot in the display case. Queensland Western Red Cedar Base with a Acrylic Case over. I learnt so, so much over the 5 year period constructing the H.M.B. Endeavour. I must say thanks to all those who followed the build, those who I/we shared information, and the general encouragement during the period. It would be a lonely life constructing a model without this fantastic Web Site "The NRG Model Ship World" and the members on it. To those other fellas currently constructing the H.M.B. Endeavour, good luck with the rest of build. Enjoy the final home run as I did. That's all Folks....

-
Hi John, Industrial Plastics Pty Ltd They were over at Murarrie, however moved end of January to new location. May of kept their phone no. 1300 465 888 projects@industrialplastics.com.au I emailed them for new location as well.
-
HMCSS Victoria 1855 by Banyan - 1:72
DaveRow replied to BANYAN's topic in - Build logs for subjects built 1851 - 1900
Enjoy the UK holiday Pat. Well earned break from the shipyard.- 973 replies
-
- 4
-

-
- screw
- gun dispatch vessel
- (and 5 more)
-
Hi Steve, That David Steel's book has a lot of answers. Nice going.
-
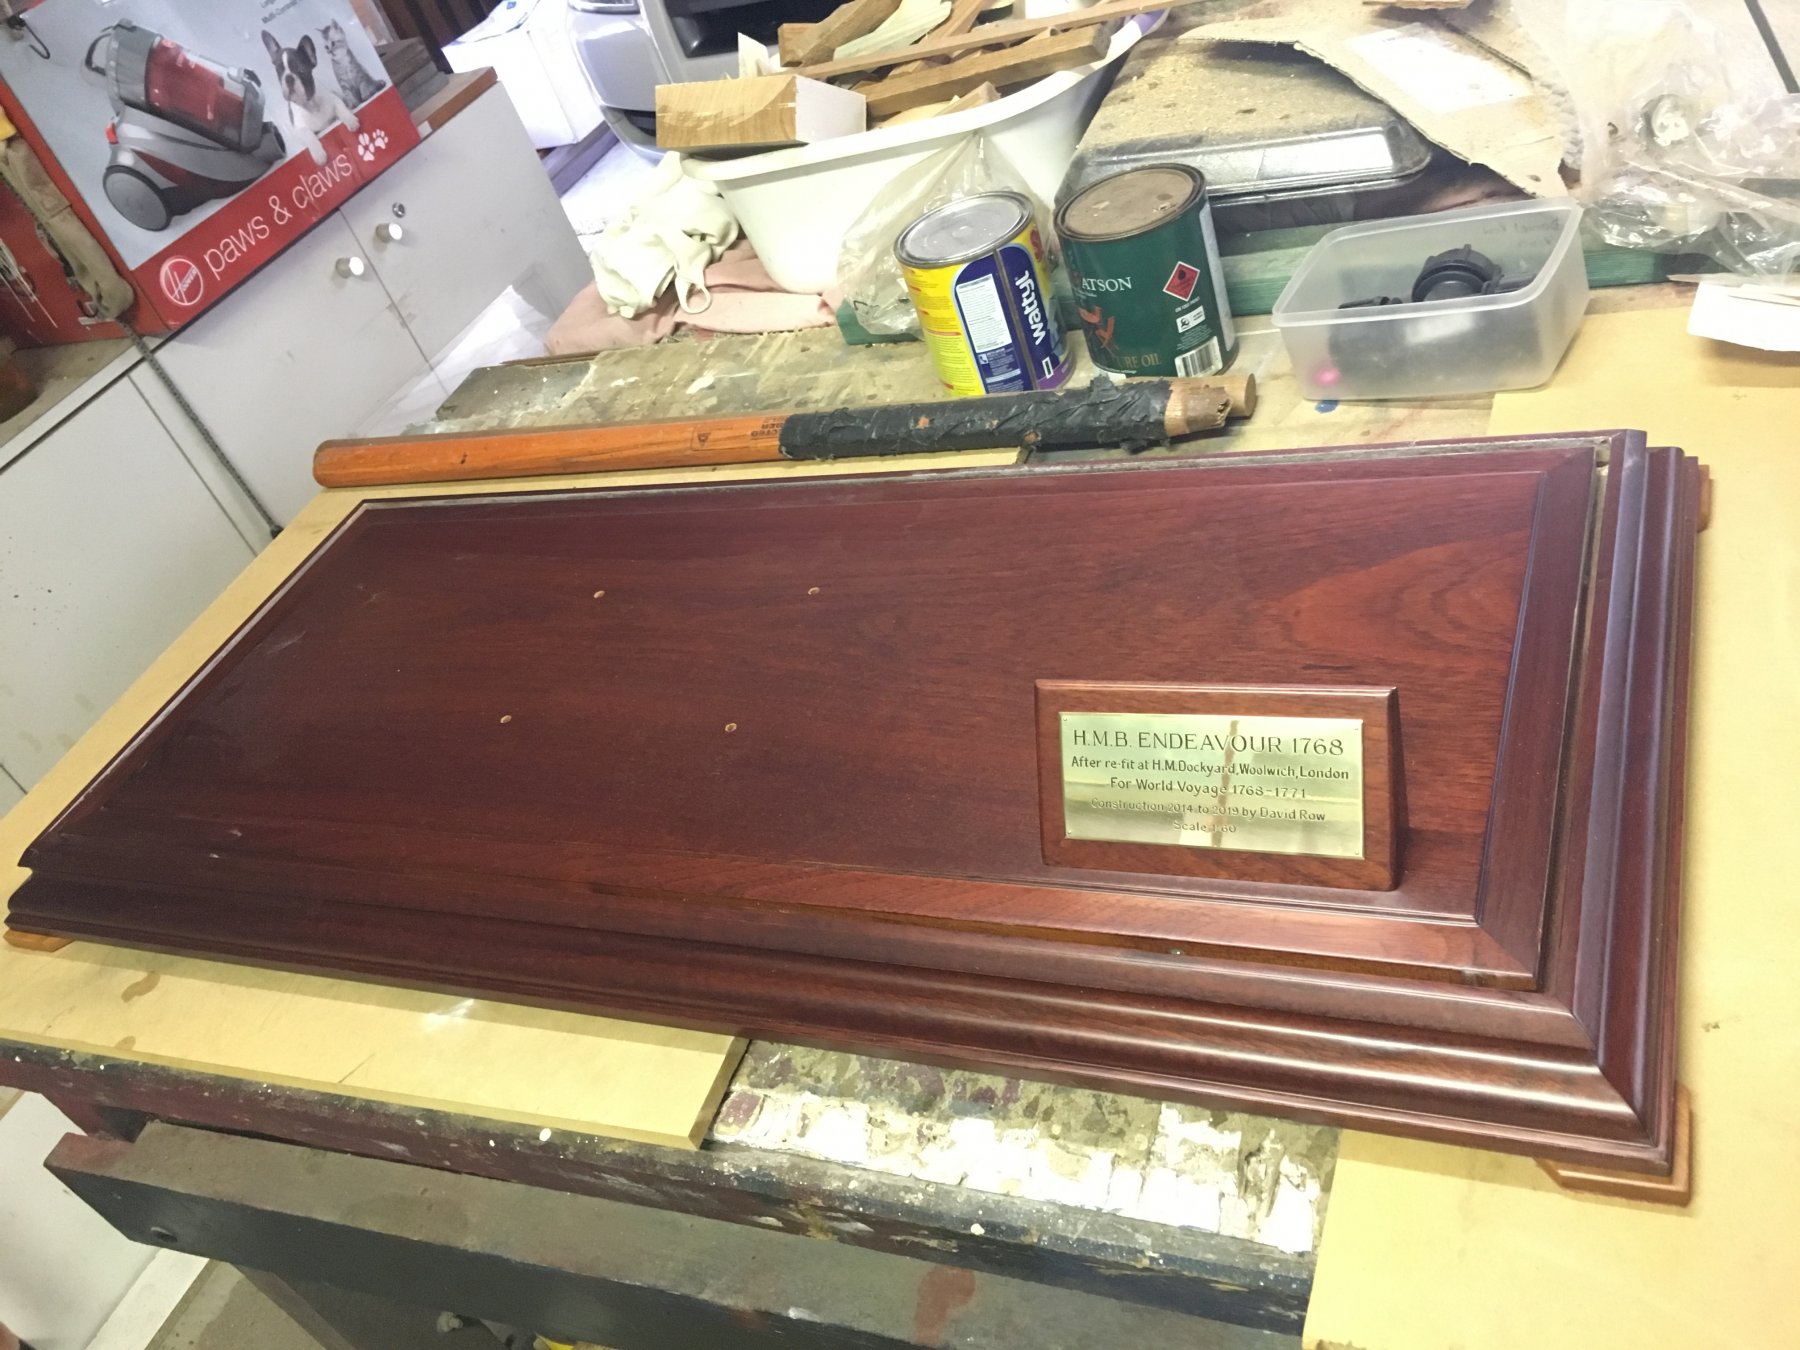
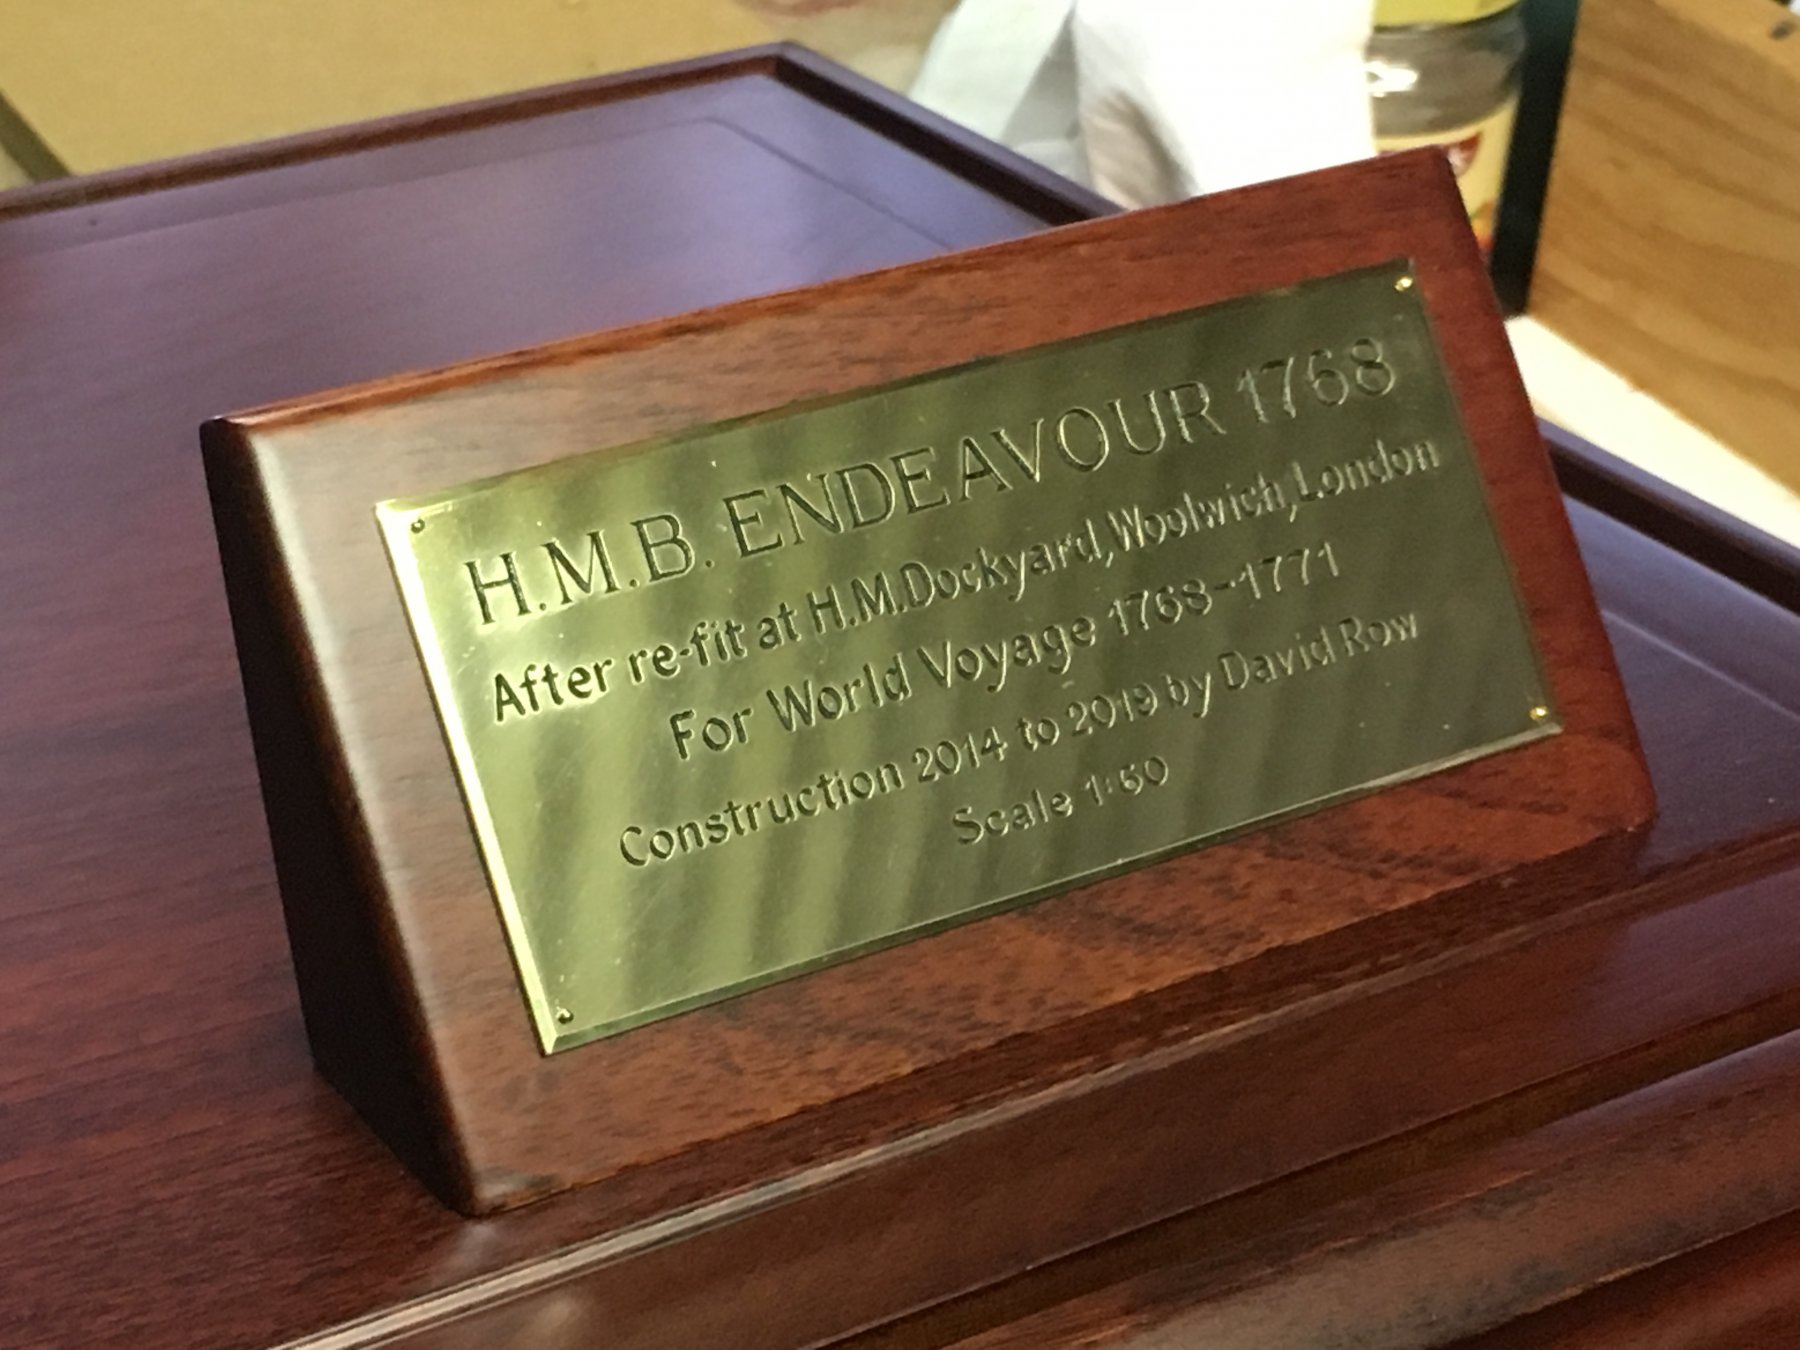
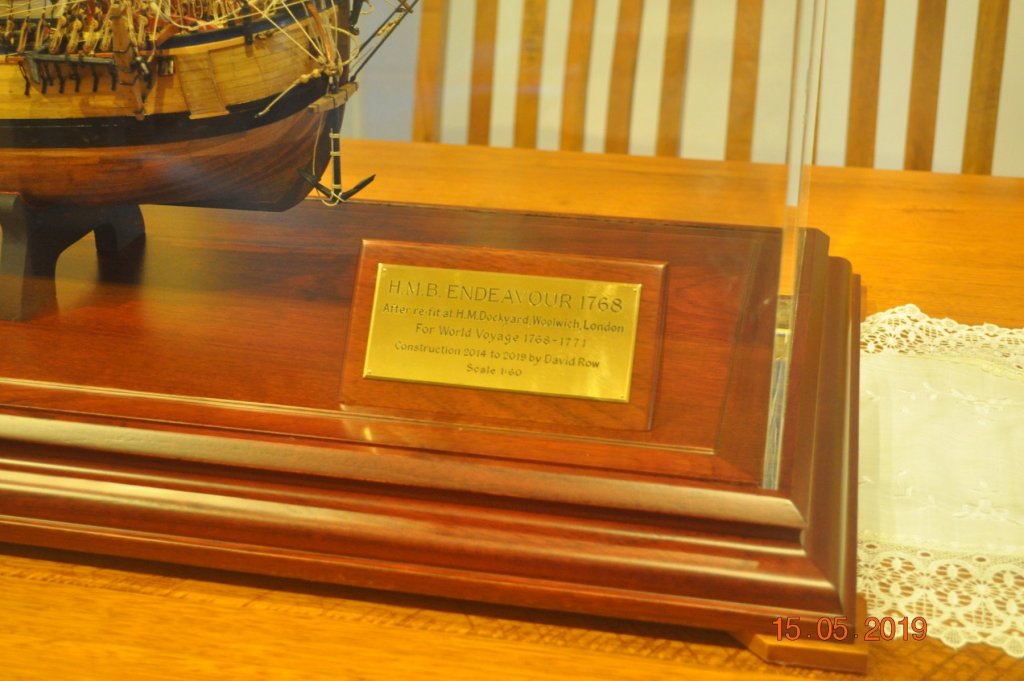
Shipyard Update Display Case - Base Below is picture of the base to mount the Endeavour on. I had a plaque engraved and located on the corner on the base. Next step to clean dust off the model, a final check over and Place the acrylic case over the top and lock it in place. Nearly finished.


-
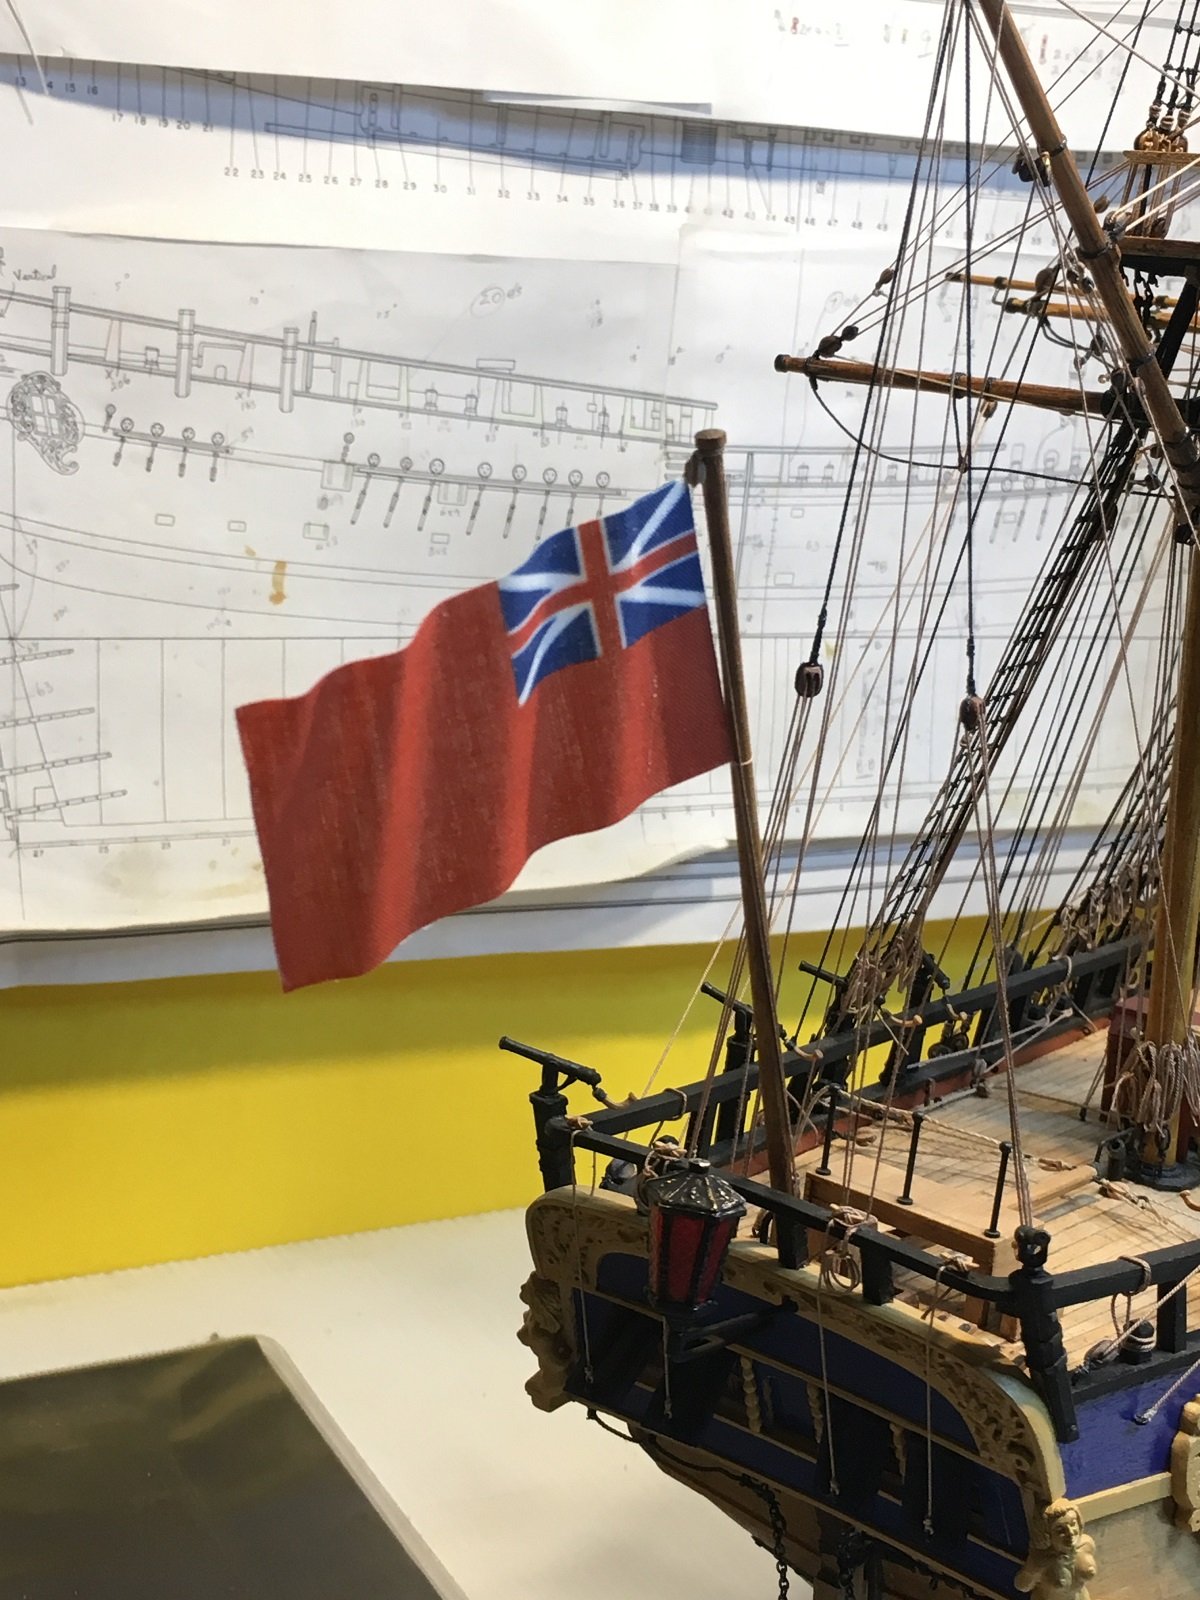
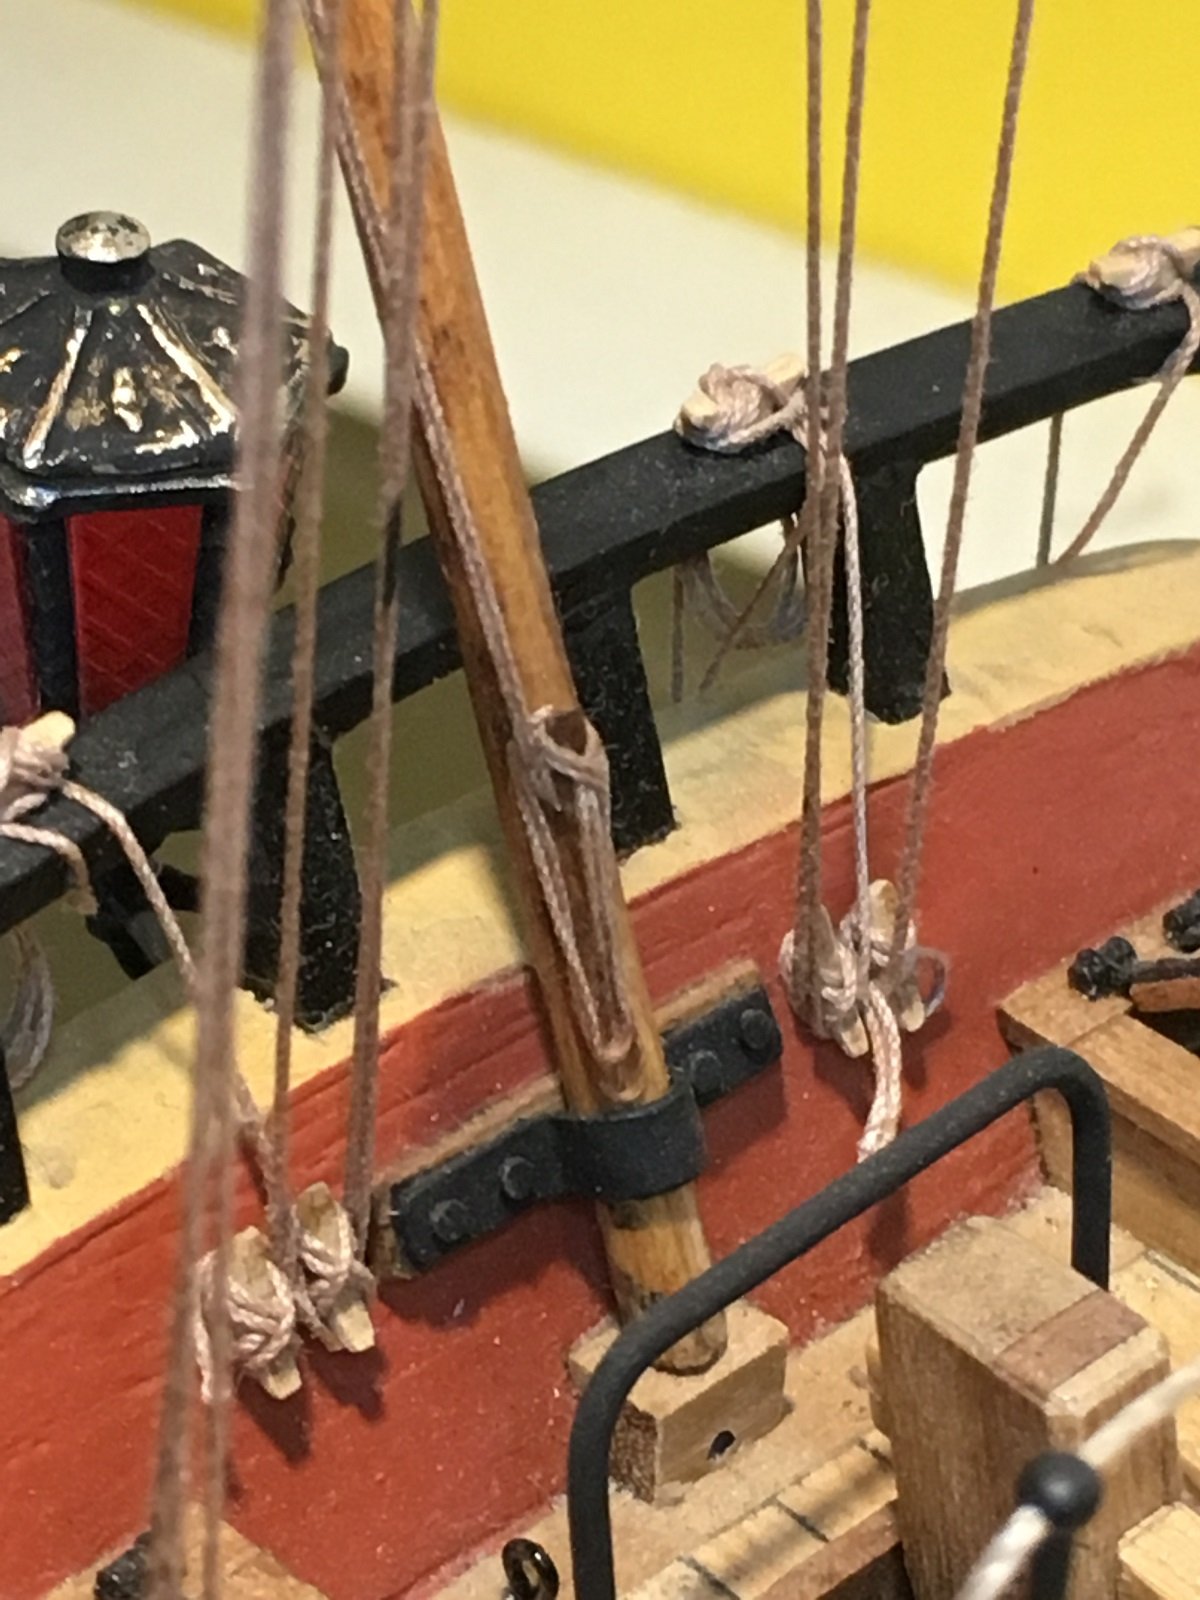
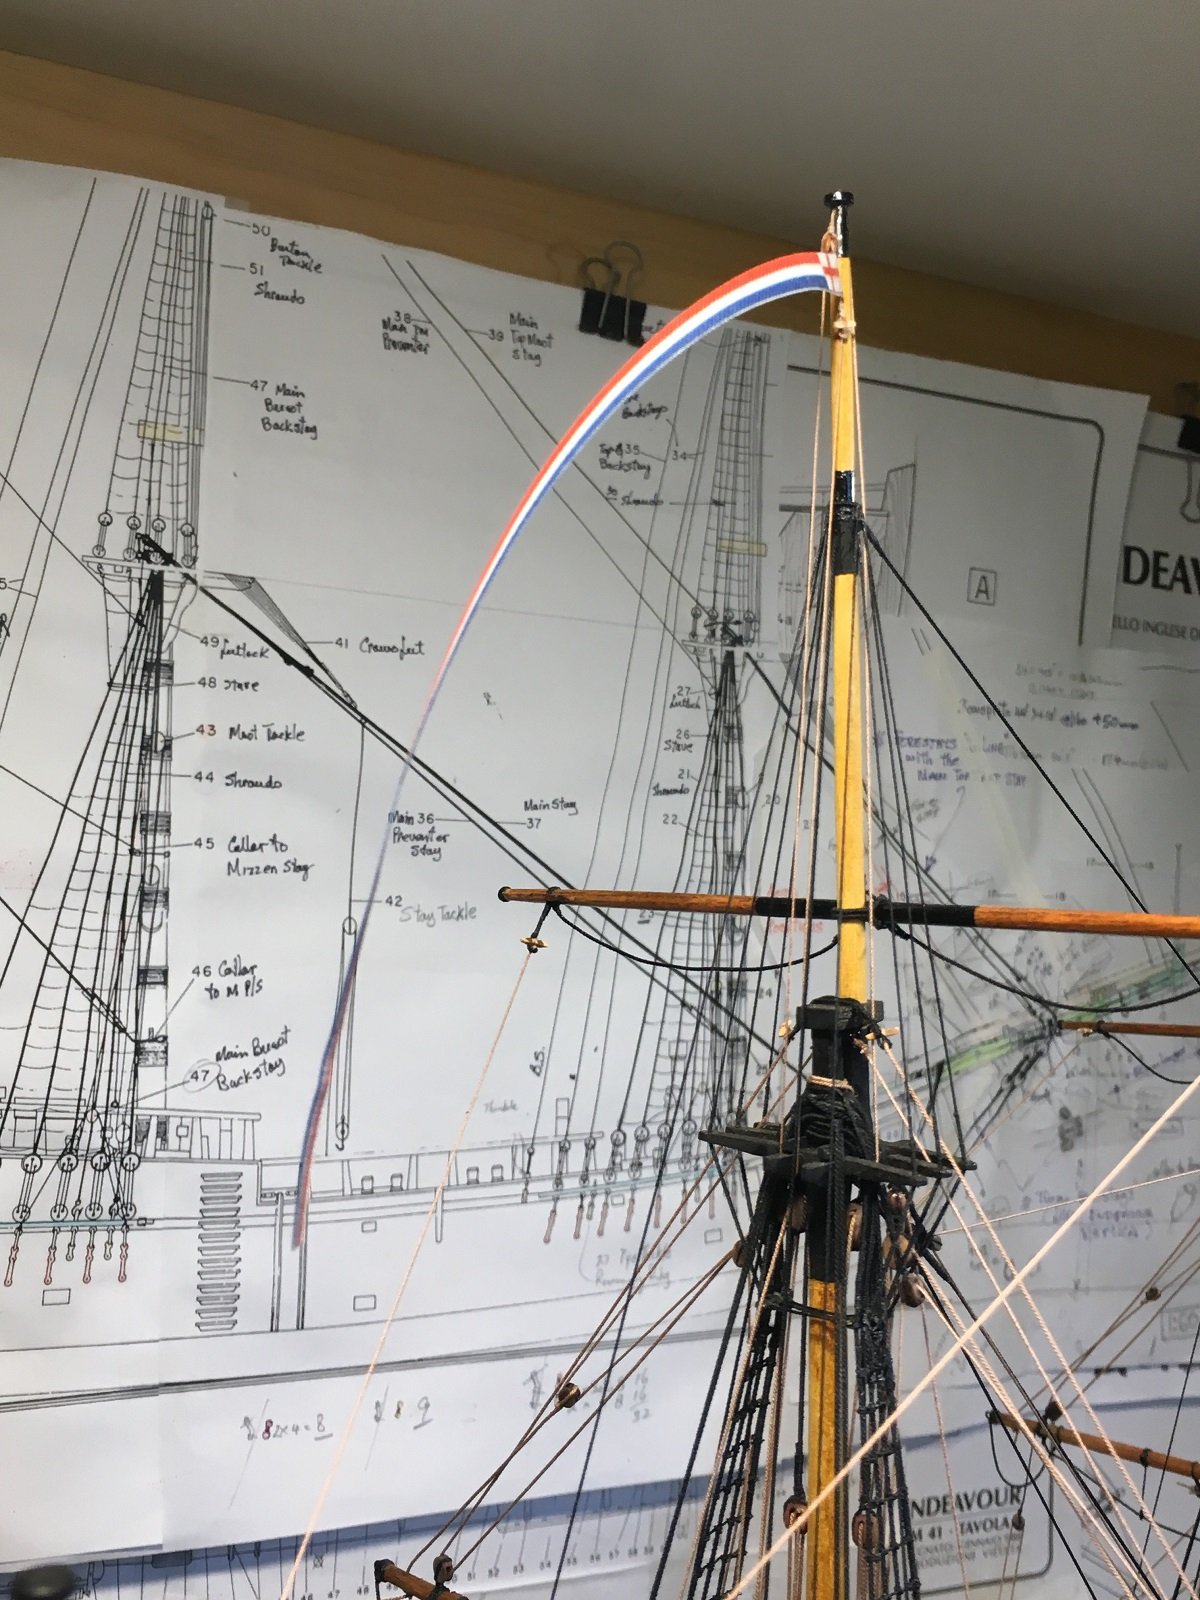
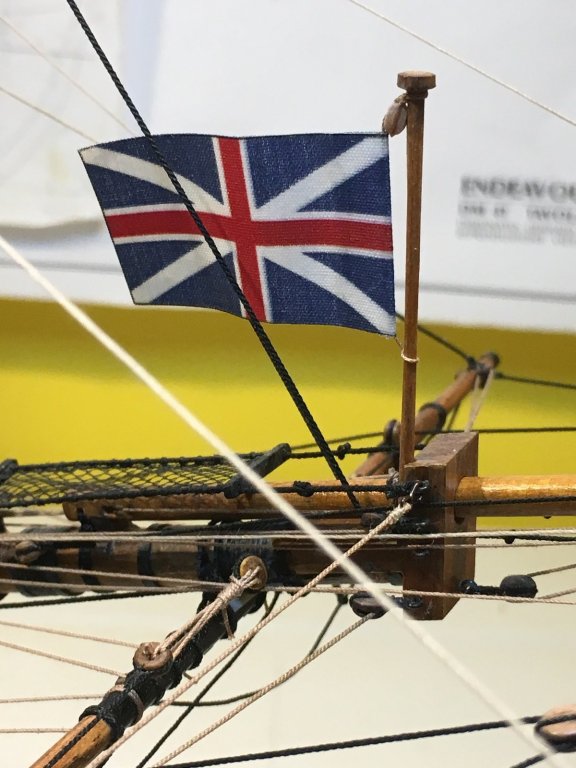
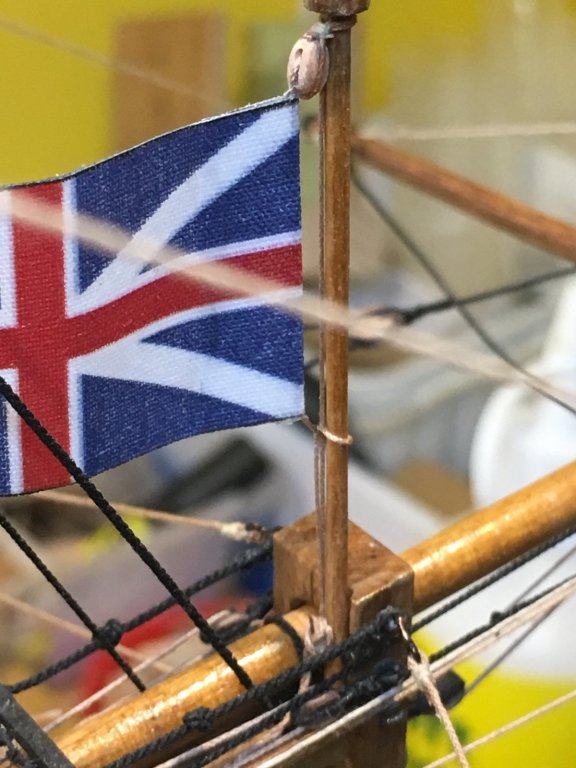
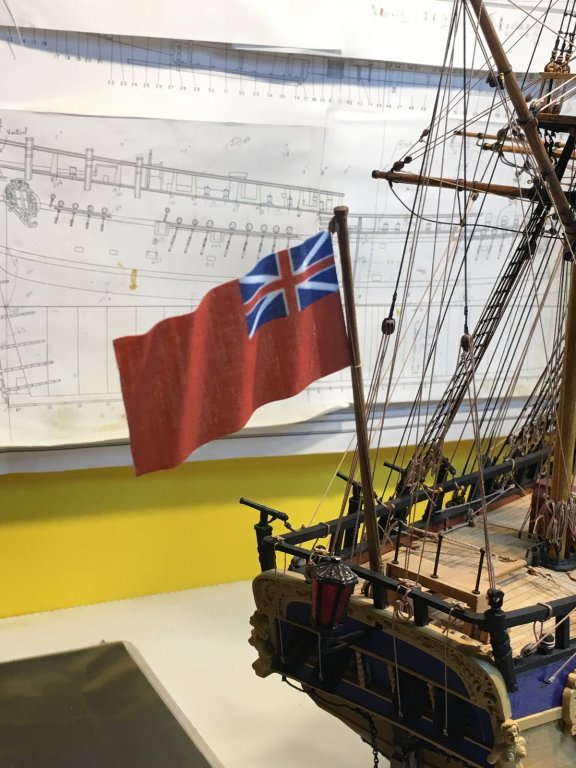
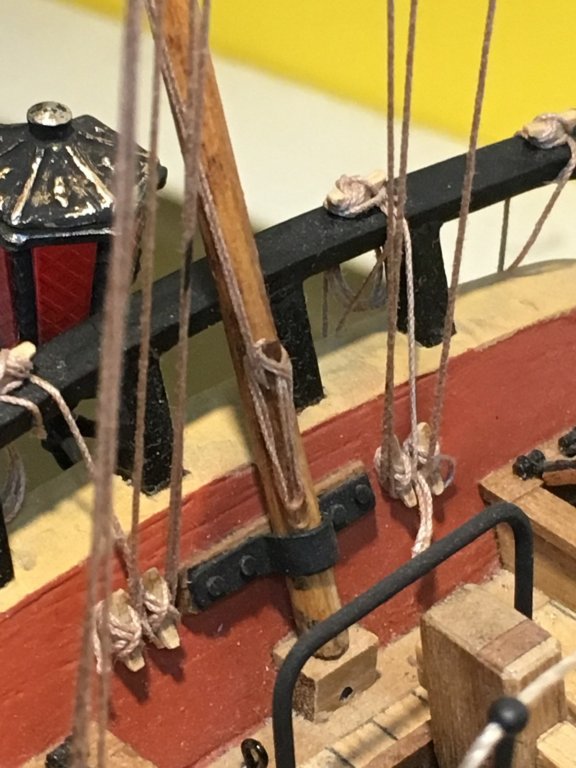
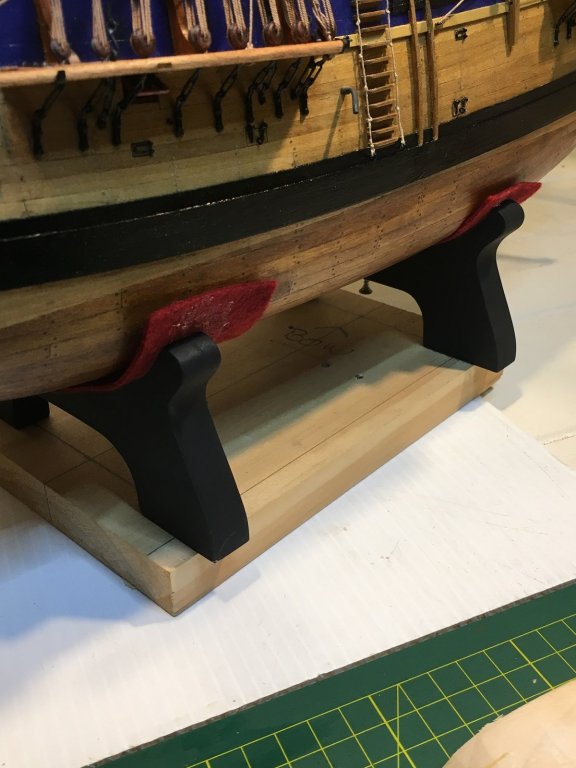
Shipyard Update Flags and Felt on the cradle frames Added Flags to the boat over the last couple of days. Put halyards on each. Bowsprit: Union Jack Stern: Red Ensign. On Main Top-Gallant Mast: Tri-Colour Pennant Felt added to the cradle frames: I am keeping the 2 x black cradle frames to mount on the Display Case Base. Still to trim the felt then screw these two frames into the keel. You can just see the screw in the middle of the stern frame. So close to finishing this build, I can feel the calm and solitude when she's done. Soon to be replaced with "what next".
-
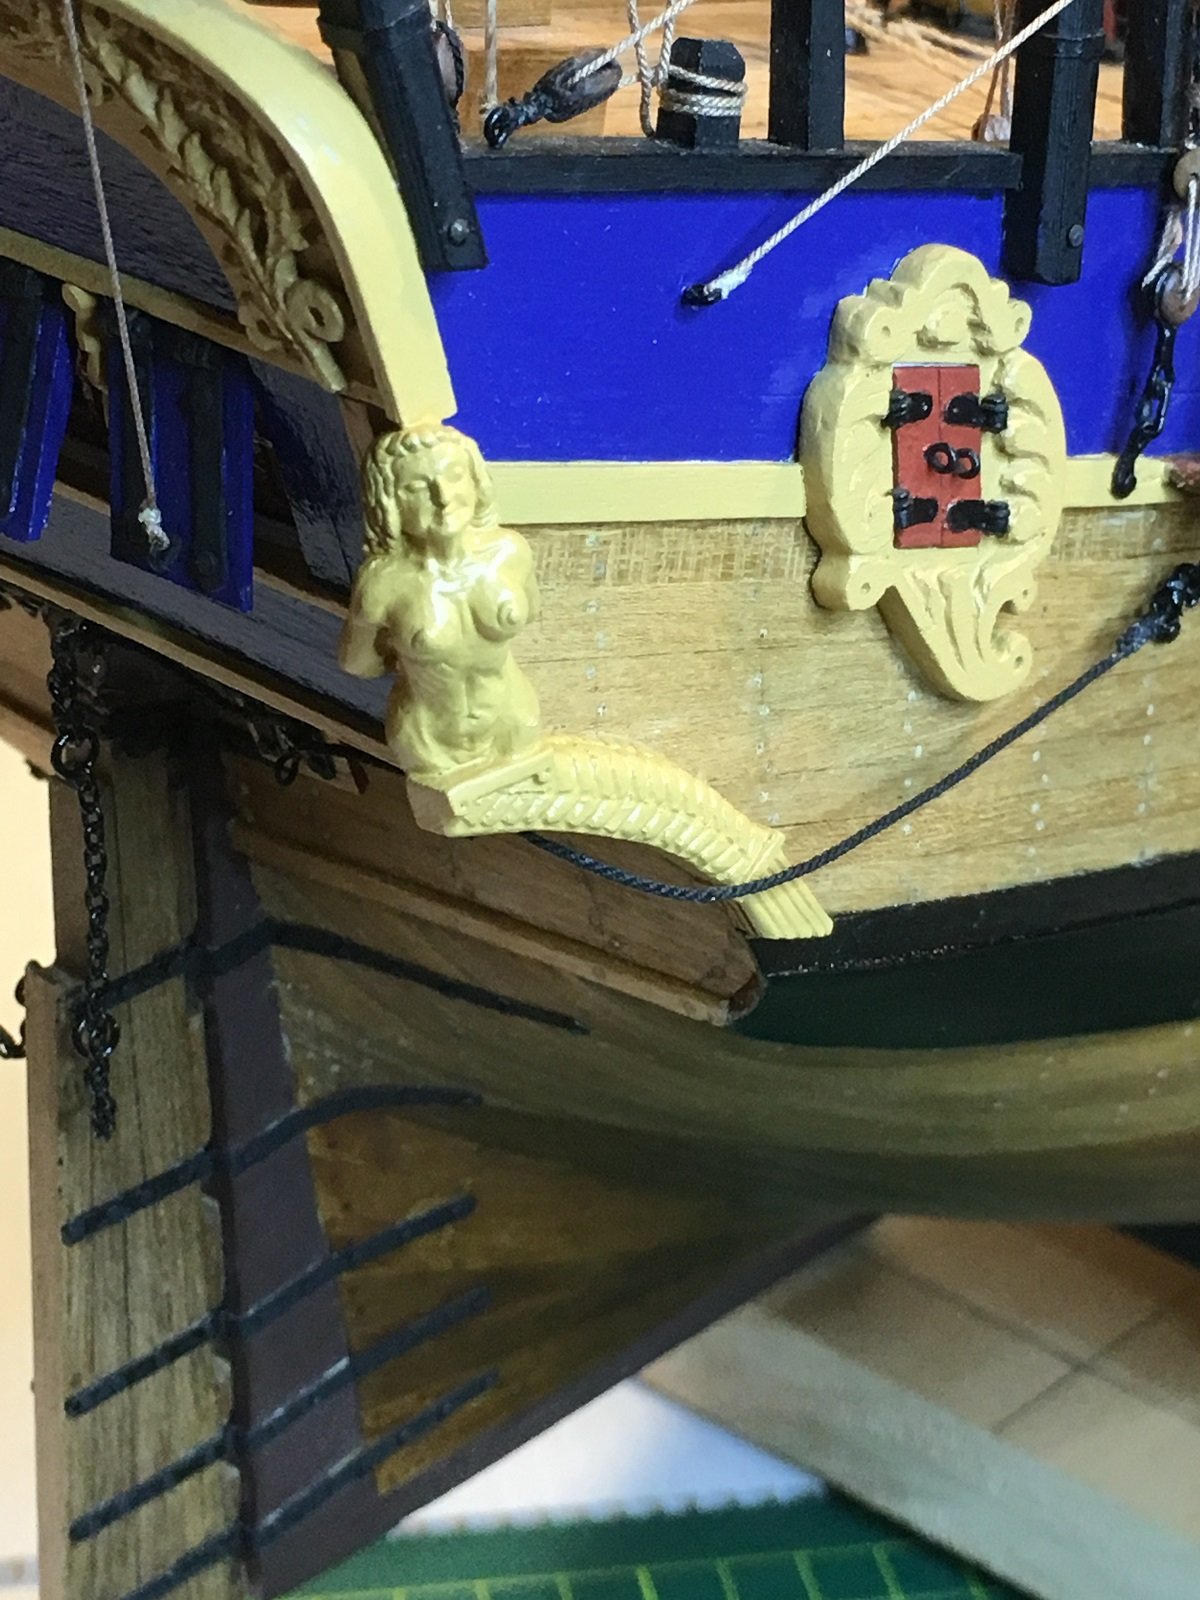
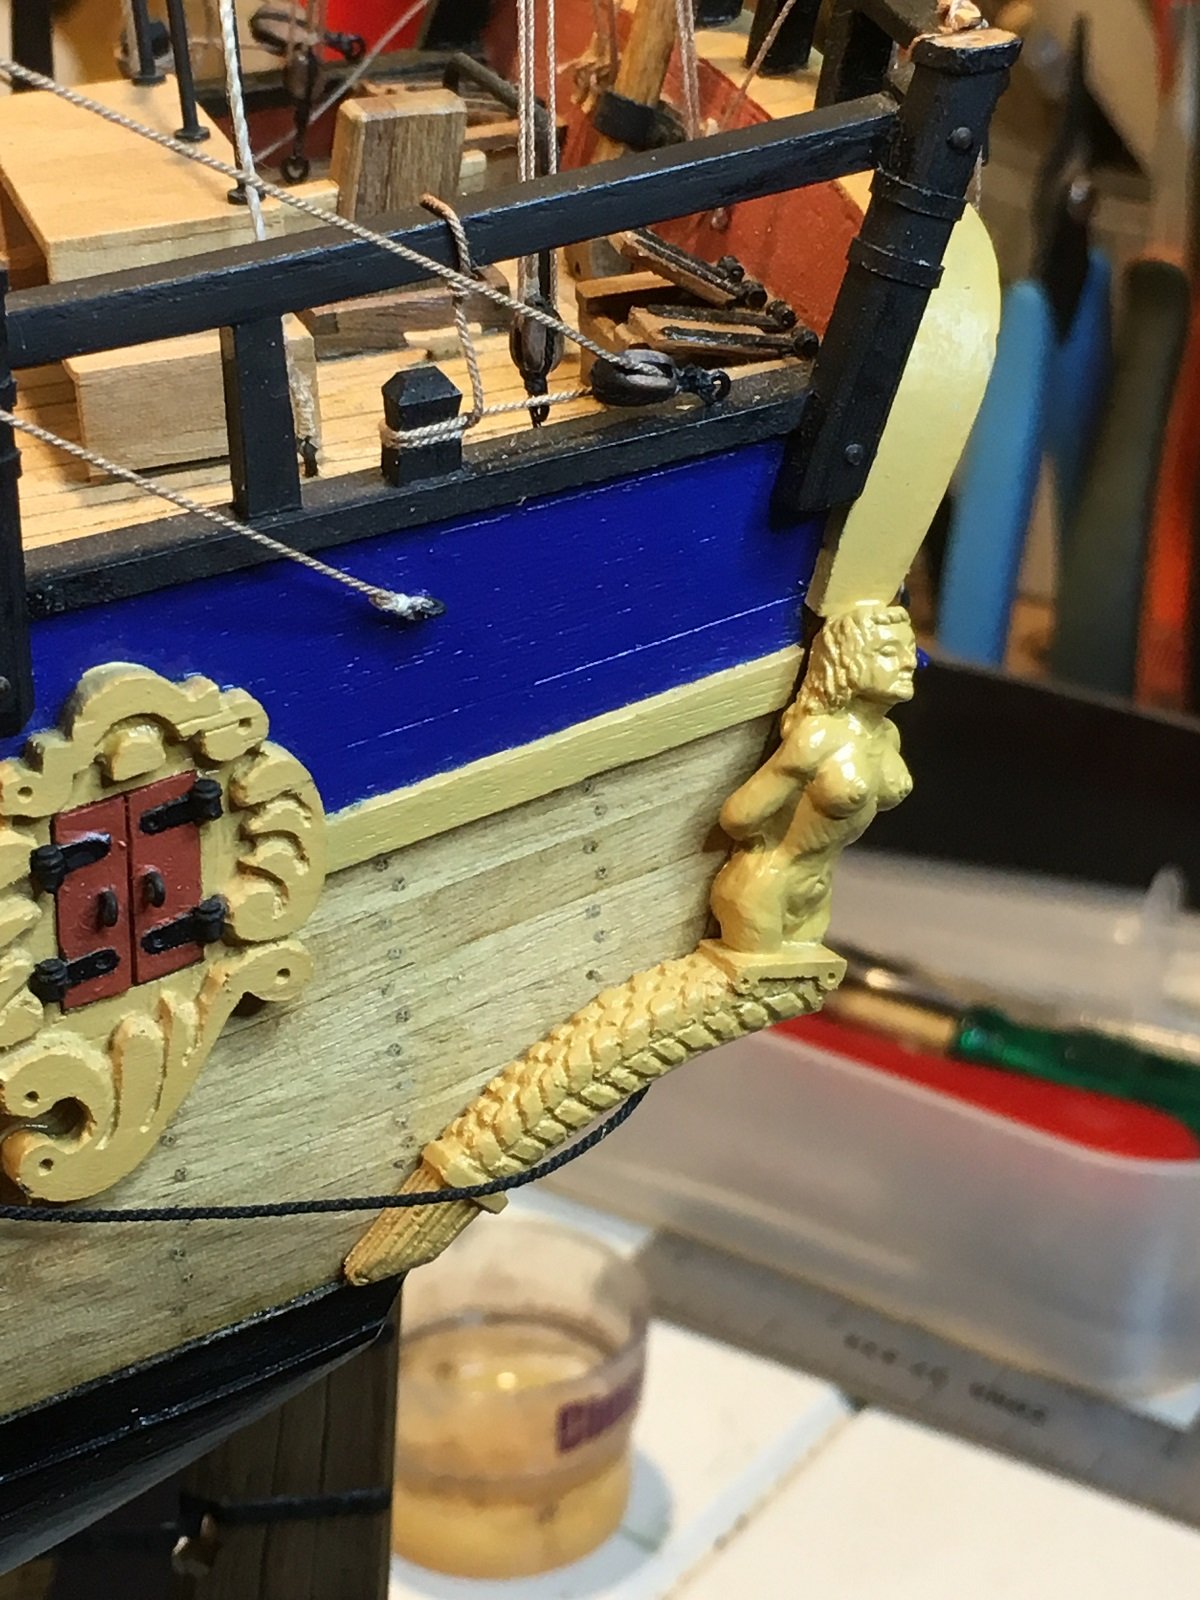
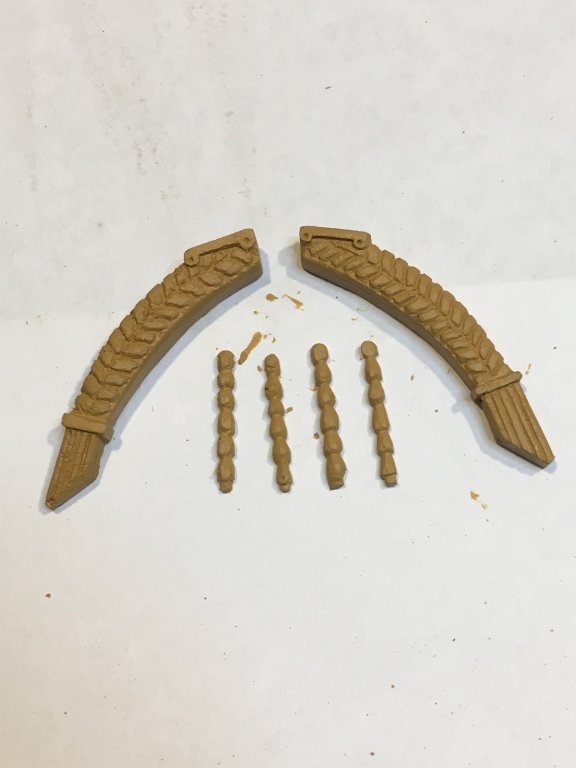
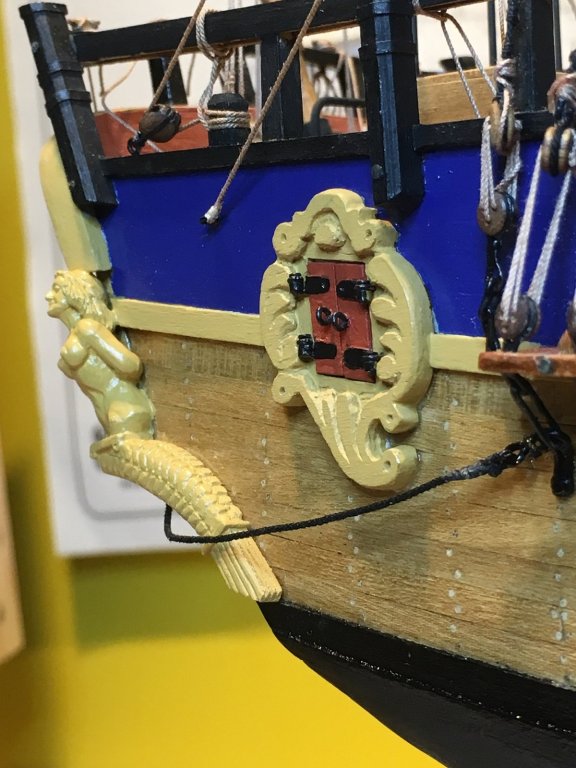
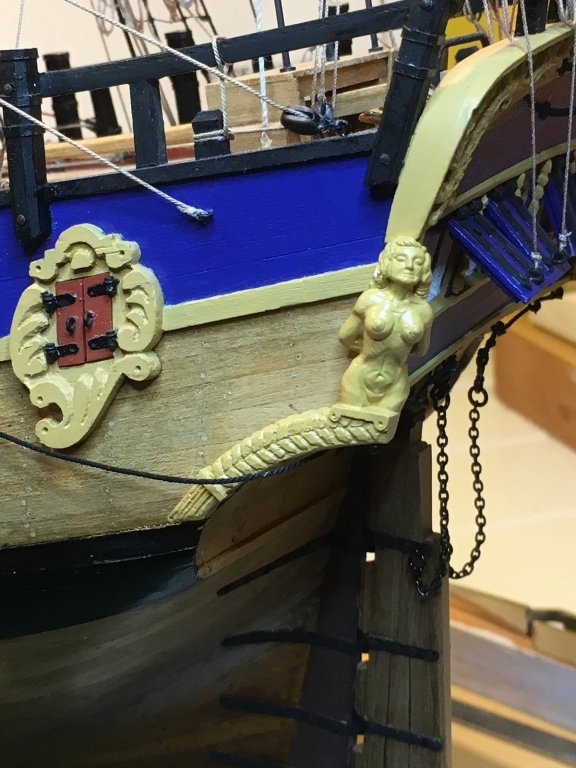
Shipyard Update Stern Figurines, Counter and Window Decorations. I have been procrastinating about how to do these for months(probably years). But the time came to make a decision, as my kit did not have these items included. After an attempt to engrave a figurine(failed) I bashed 2 cast figurines I had bought a couple of years ago(basically cut the legs off) I hand crafted from Pear Wood the Counter decorations under the figurines, and the Window Mullion Deco's. Many hours to decide on the overall shape and cut the patterns in. As an amateur at carving, fairly happy with the outcome. So how did they end up. Counter decorations for under the figurines, ready for fitting. Starboard Figurine Port Figurine Window Mullion decorations (4 off) Note: I do realise the Figurines are short in height and not ideal. The height restriction came about by the Taffarel being turned down either side(P&S) too far ?, thus shortening the height(length) for the Figurines to fit into. Now looking at it, I could of cut into the rail and raised the Figurines up. All a bit too late I'm afraid, as the shipyard is closing down on this build very soon. Not much to go now to finish off what started in April 2014 as a Birthday Present.


-
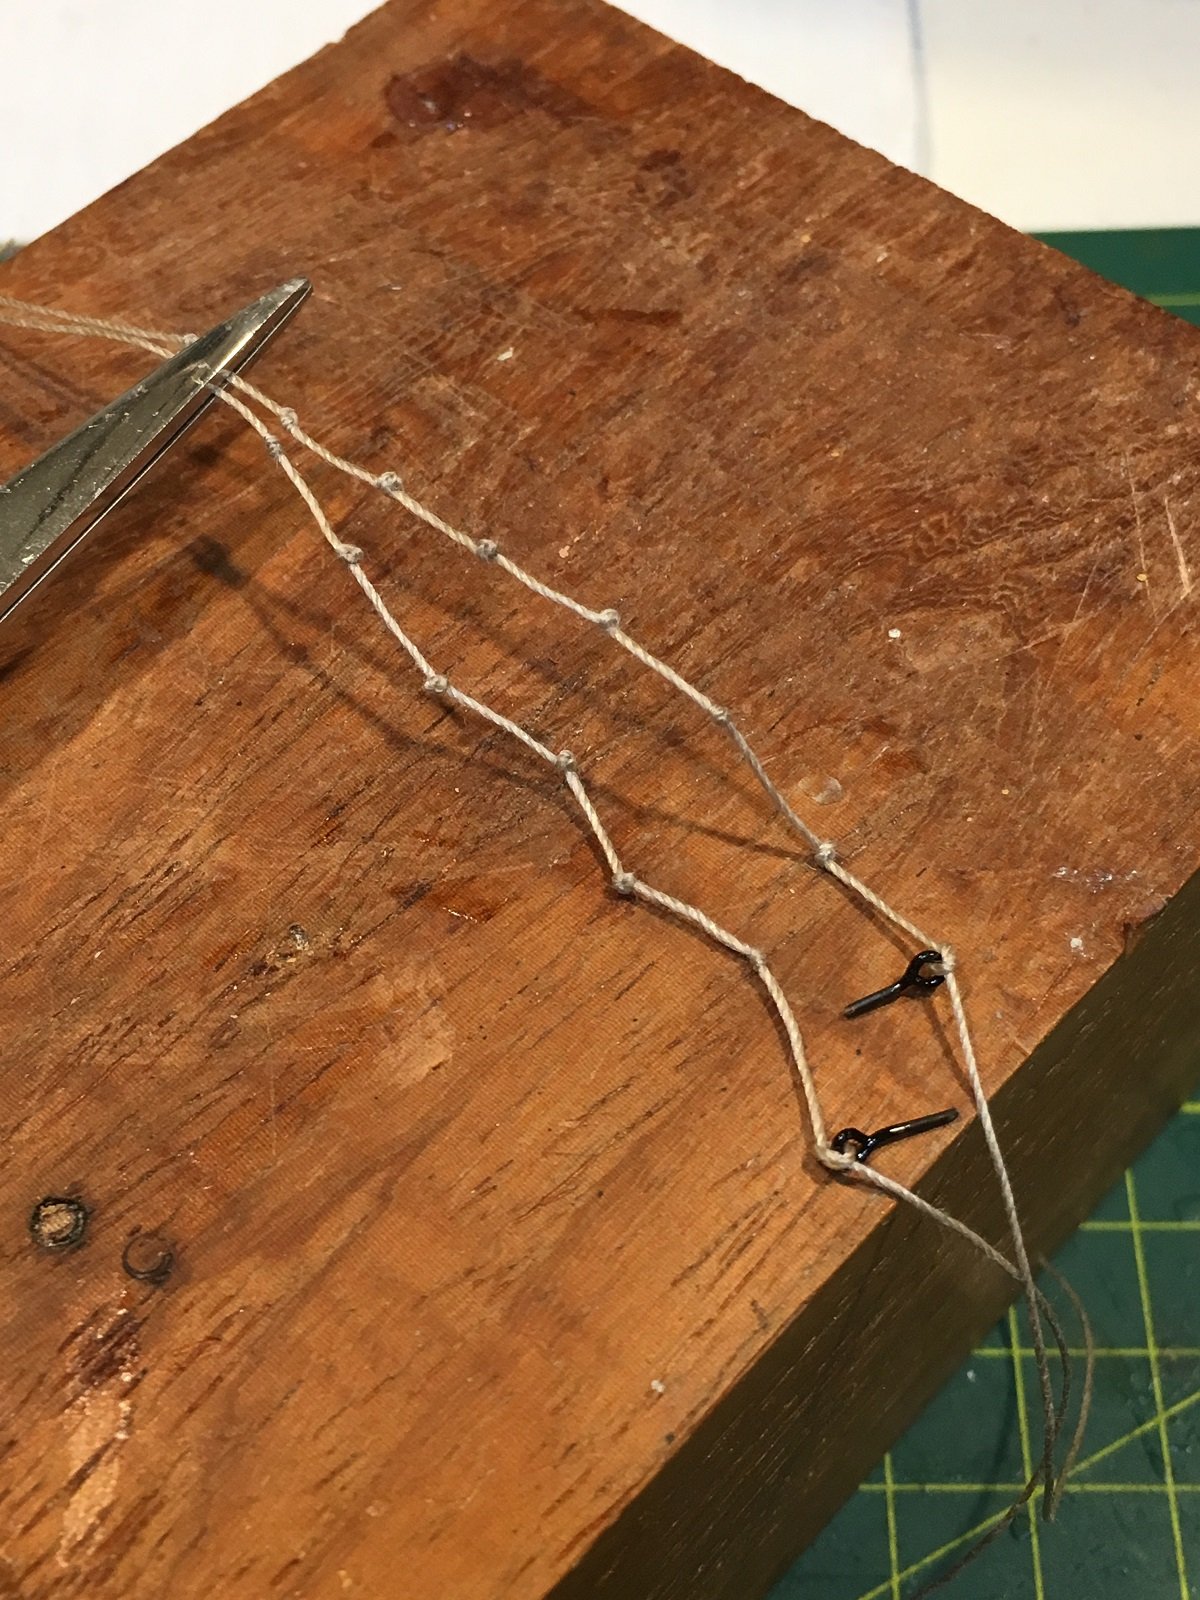
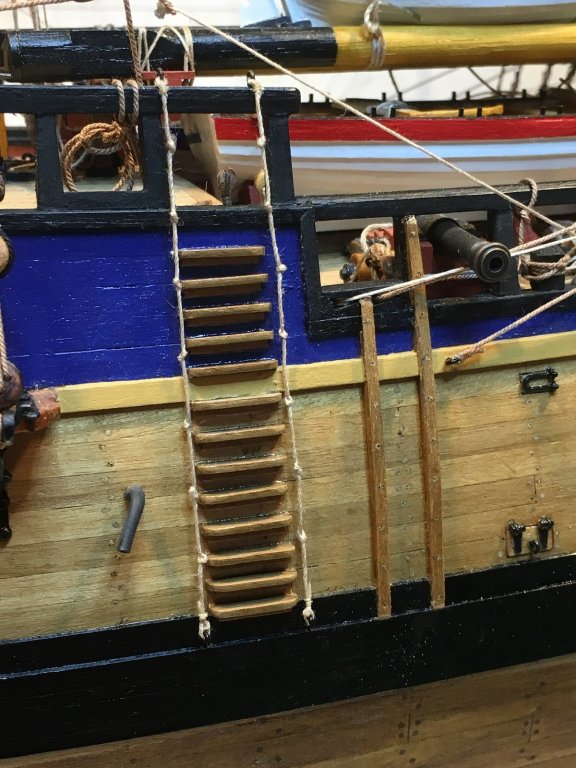
Shipyard Update Gangway Ropes Made the Gangway Ropes off line and tied to either side, as per pictures below. Starboard Ropes Above Port Ropes above

-
Hi Steve, Great work. Just gets busier and busier.
-
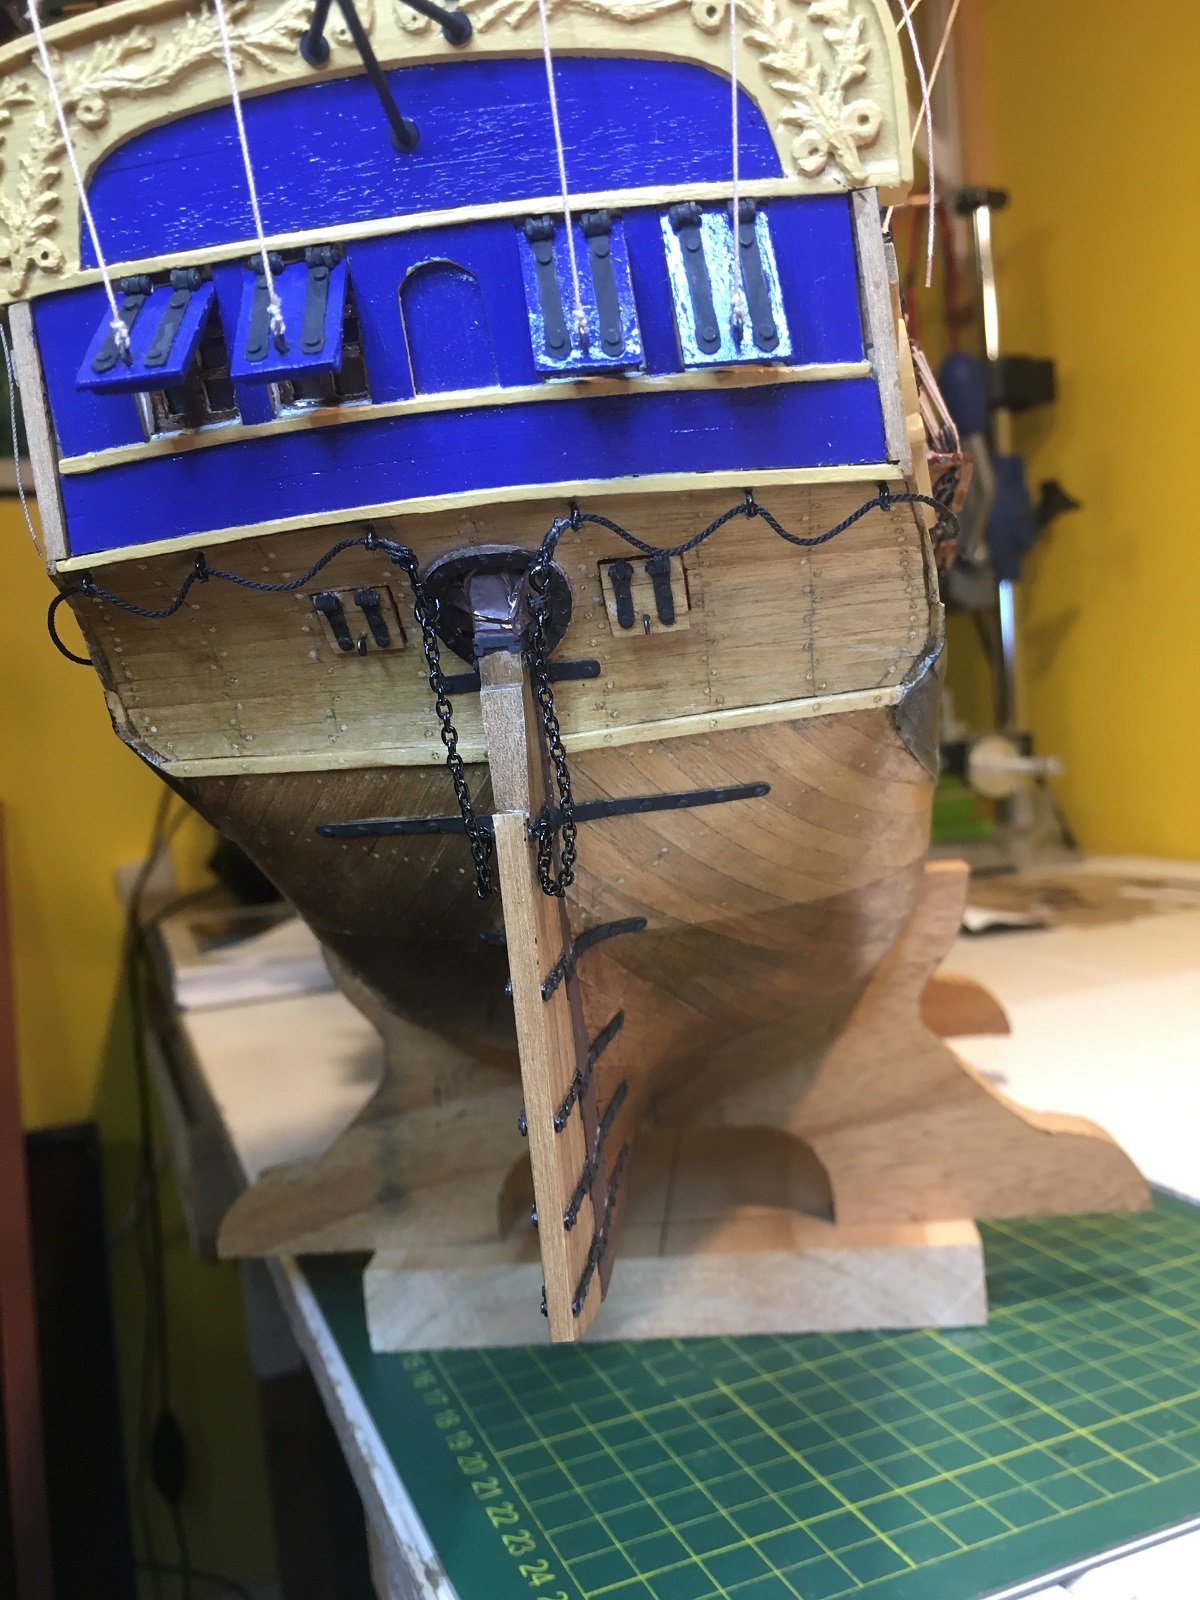
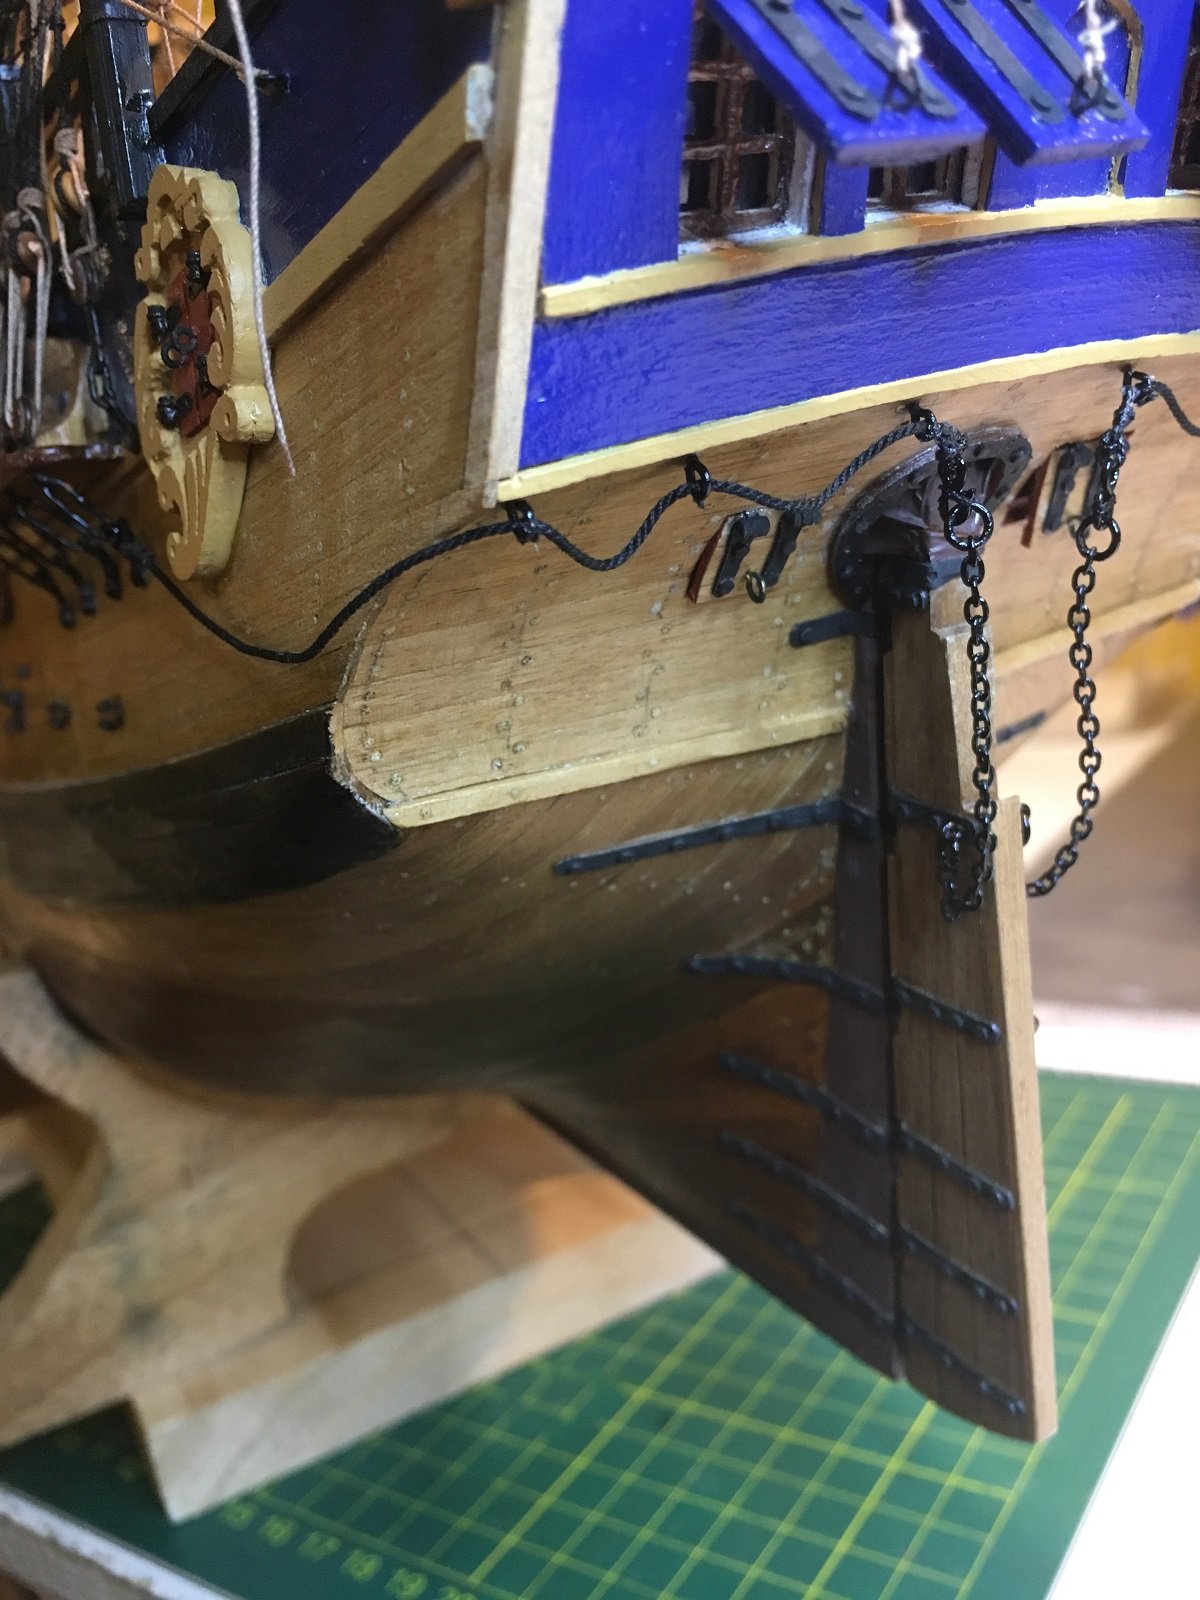
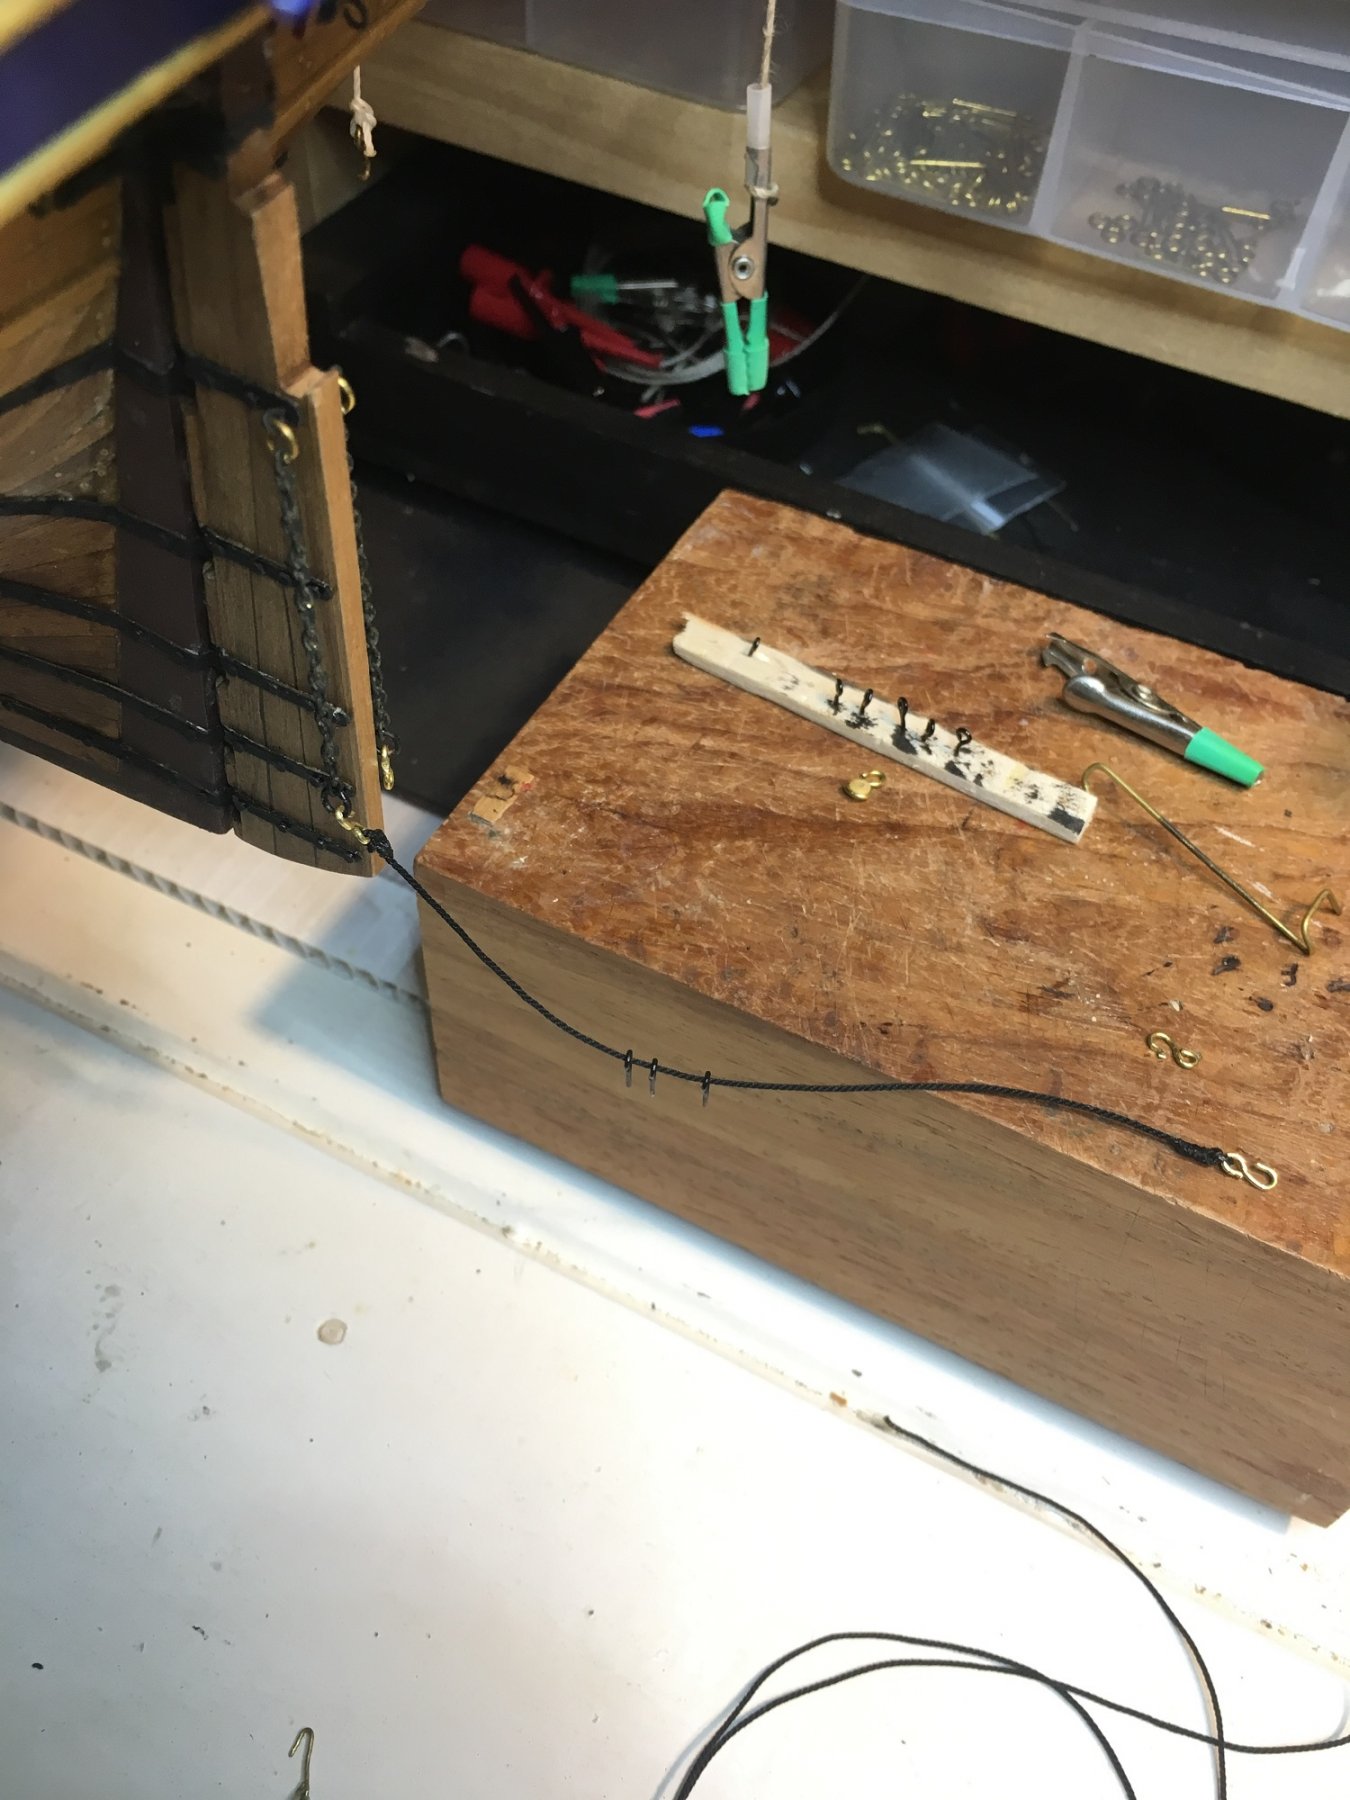
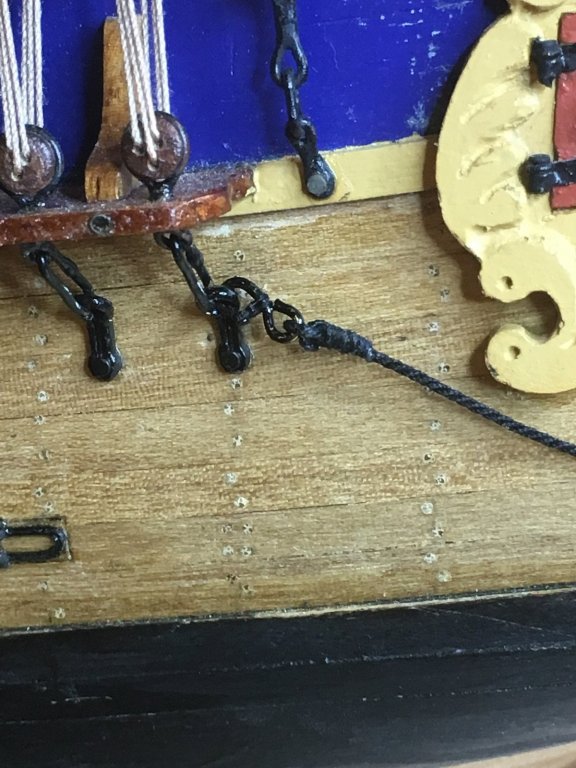
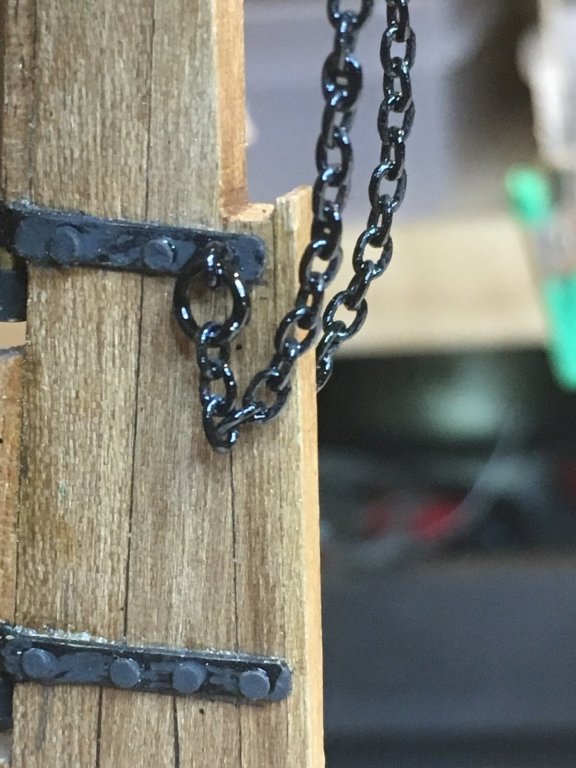
Back in the Shipyard Had a really nice trip to the USA. NYC, Washington, New Orleans and Aloha Island - Hawaii. So back to finish of this build. Added the Rudder Pendants according to James Lees “The Masting and Rigging of English Ships of War” Section on Rudder Pendants "Chains were shackled to eyes in the rudder, coming up each side of the rudder to under the transom. To the end of the chains large rings were fitted and into these rings were hooked the rudder pendants. These Pendants had a thimble in each end with the hooks set round the thimbles. The hooks were moused. The pendants were seized to eyes or hooks set under the transom – one by the side of the rudder post, one half way along, and one under the quarter gallery. The end of the pendants were seized to the aft end of the Mizzen channels." So below are a few pictures of the pendants attached to the stern. I wasn't sure if I should use a "Ships of War" detail on the Endeavour. But it all makes sense to have a means to secure and retrieve if the Rudder went adrift from the Gudgeon. I know the replica has a chain/rope from either side of the rudder, going up onto the transom top rail. This configuration I believe looks more realistic. I attached the end hook to the mizzen channel anchor point, assuming it was a solid point to take the load "if the rudder went astray" The chain with "that big ring" Another pic, the pendant running down the port side. Little prep shot laying out the pendant before attaching to the stern. One of the last things is do, is create the stern quarter figures. My kit didn't come with such figures, so scratch build.


-
Will be on shore leave in a few days. The Admiral and I are off to the Big Apple to watch some of the St Patrick's Day March on 16th March. Apparently it goes for 6hrs and we're not standing for that long in the 0 deg, but sure will be spectacular to watch. Afterwards, heading south(to warm up) via Washington, New Orleans, over the pacific via Hawaii too, what become famous through the lyrics from the band "Men At Work" The Land Down Under.
-
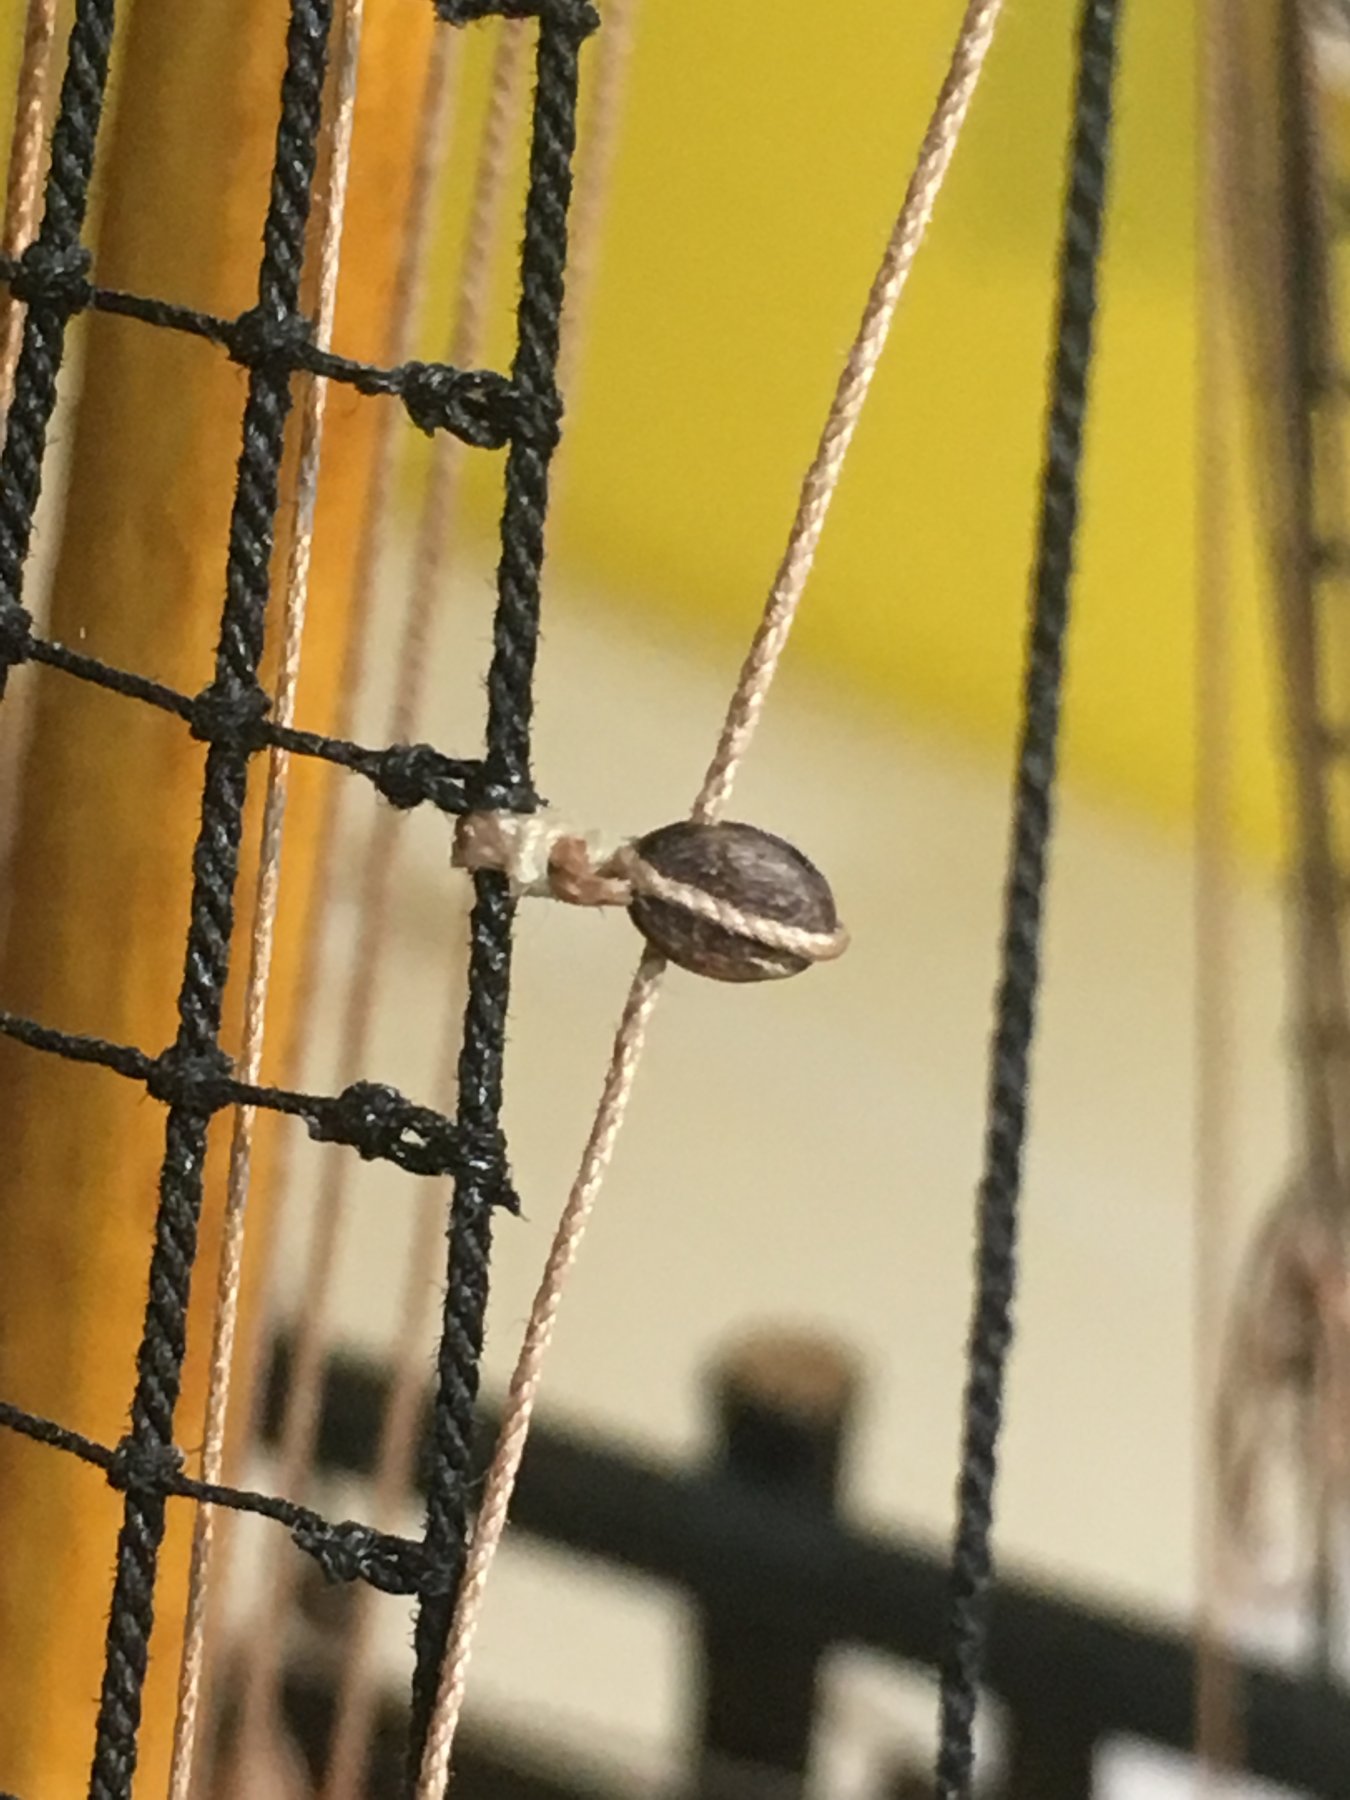
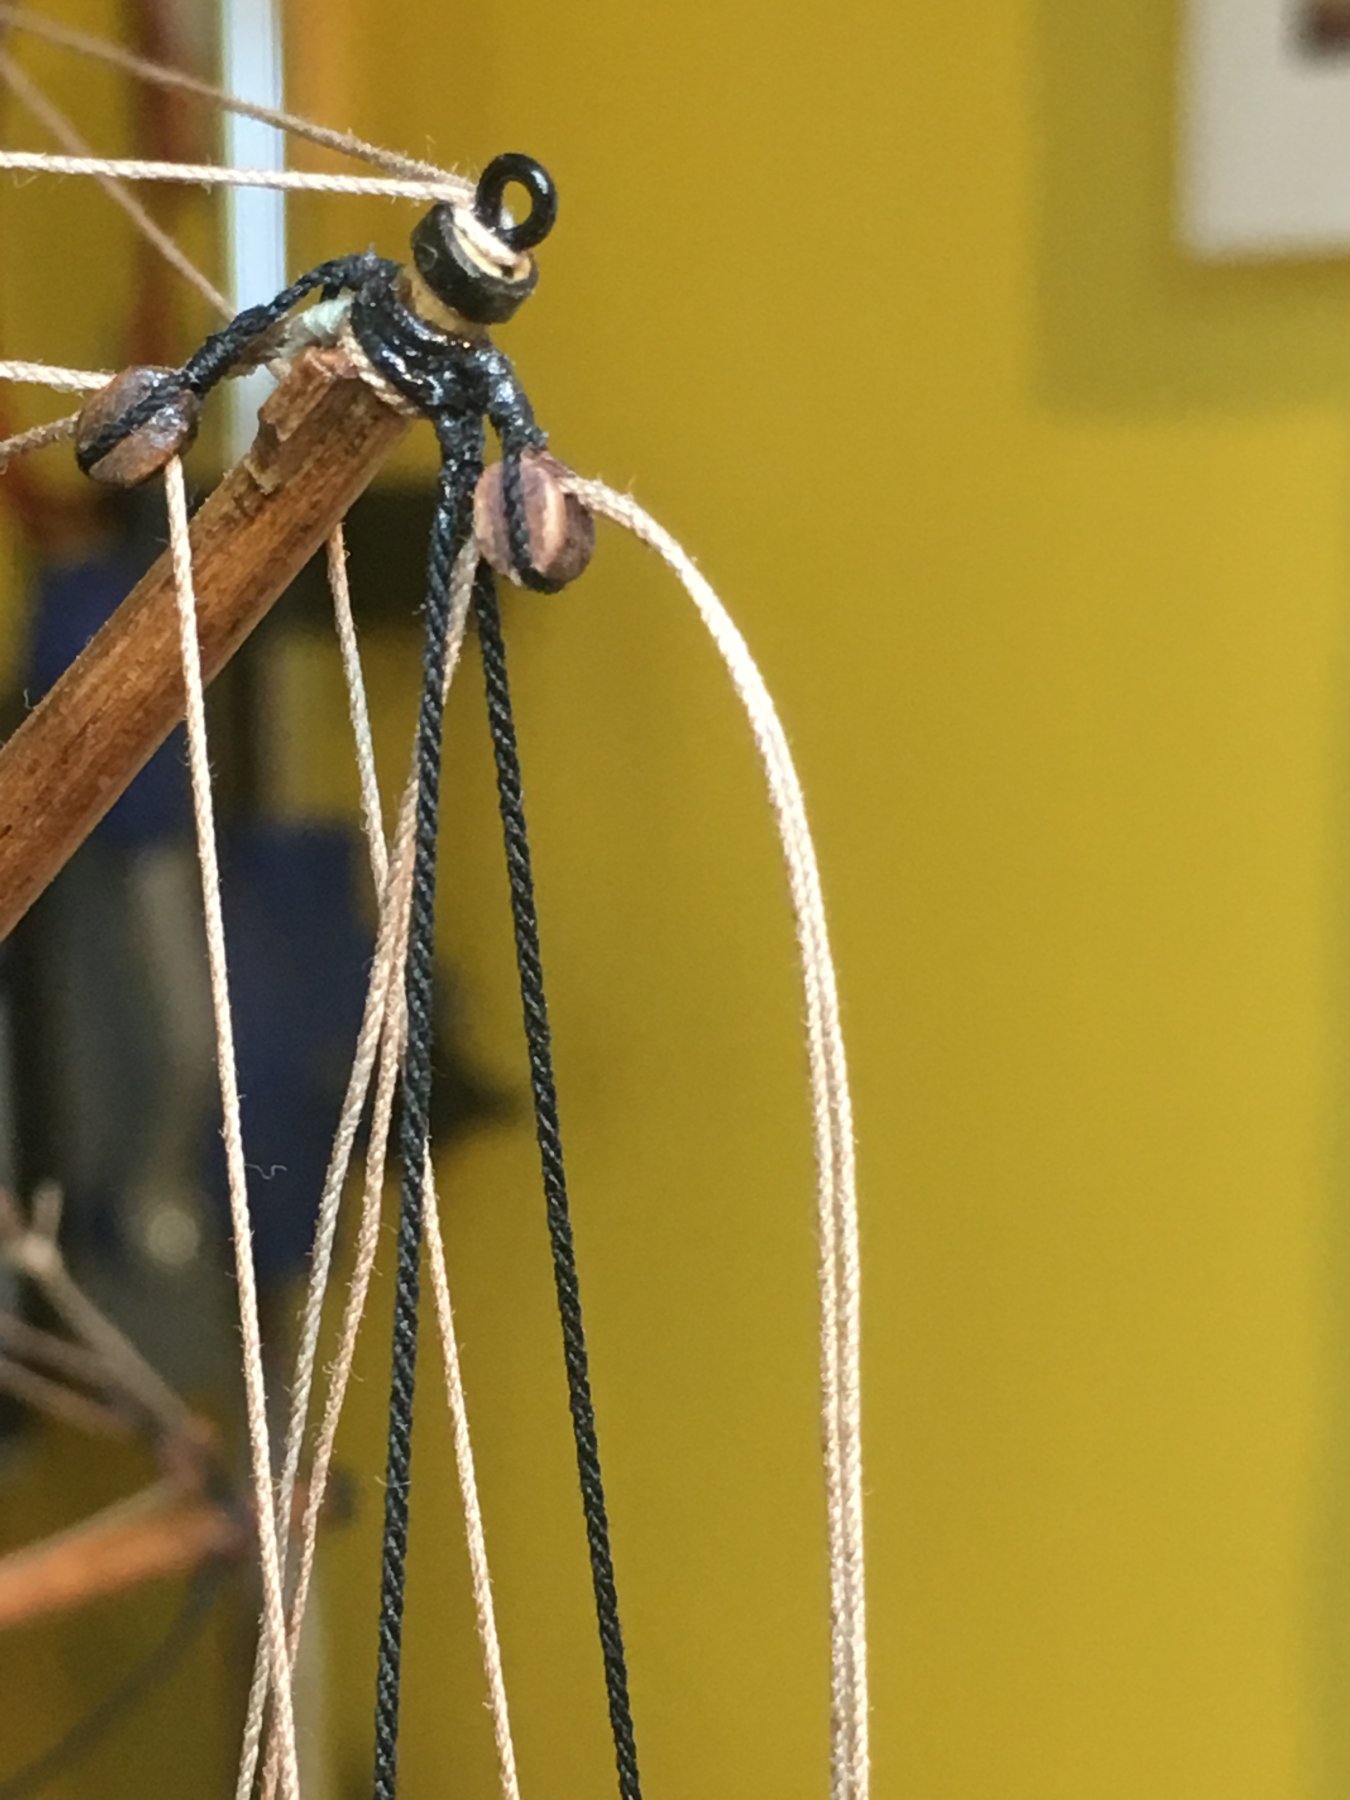
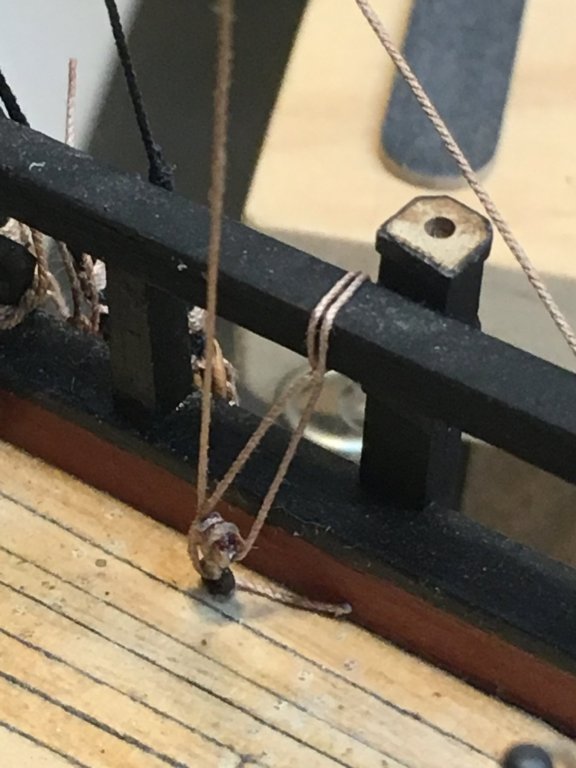
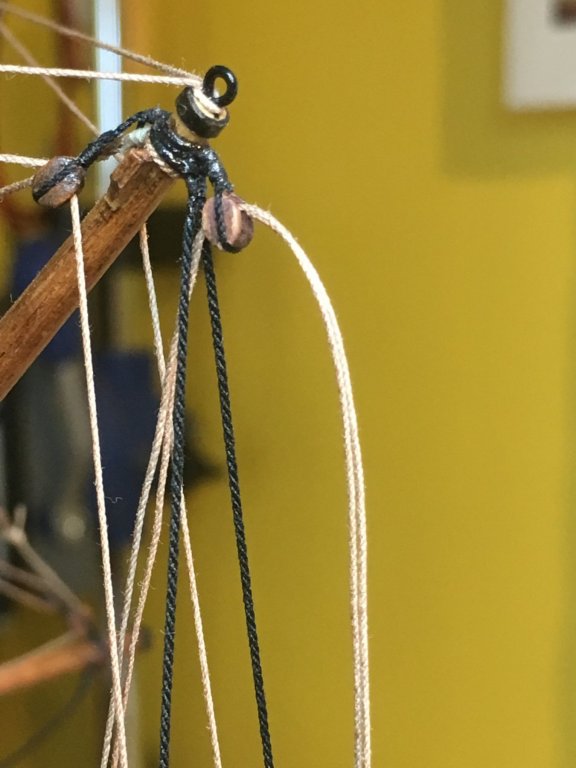
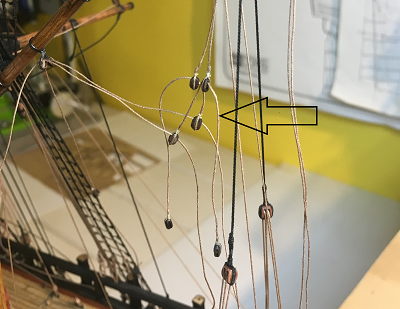
In the Shipyard Back onto the boat itself. Completed adding the Brails to the Gaff off the Mizzen. AoTS page 106 and 115 for ref. The ropes added were: Fancy Lines Port & Starboard(P&S) Throat Brails P&S Middle Brails P&S Peak Brails P&S A short rope(splitter) to the end of the Fancy line. Above: All the ends Brail ends pulled up to their respective 3mm blocks. The Fancy line connects to the Middle & Throat Brails. This is achieved via a short line(with a block each end) > arrow pointing to the rope, which splits the Fancy line in 2, with each end block for the respective Middle and Throat Brails. What mouth full, and I hope a reader understand how it all works, as it took me a while to work it all out. The Middle Brail comes down through a block seized on the back Mizzen shroud, and run down to cleat on the shroud. The Peak Brail I ran down through a block and tied off on rail. The Fancy lines(P&S) run up through the end of the Gaff and down to tie off on stern cleats. Another item ticked off.


-
Hi Pat, Qld Western Red Cedar.
-
HMCSS Victoria 1855 by Banyan - 1:72
DaveRow replied to BANYAN's topic in - Build logs for subjects built 1851 - 1900
Hi Pat, No idea about the funnel question you posted. The rigging screws for that scale come up great. Keep up the good work...- 973 replies
-
- 2
-
-
- screw
- gun dispatch vessel
- (and 5 more)
-
Your doing a great job on the rigging Steve. She'll be the real thing.
-
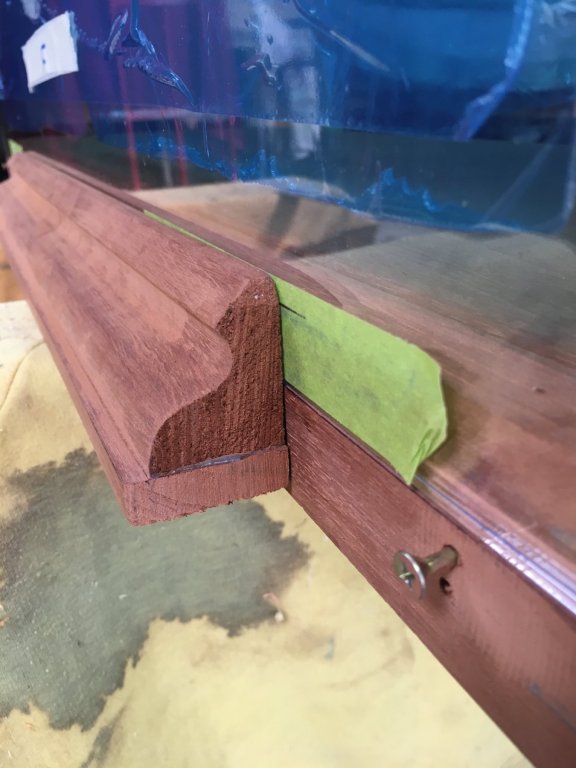
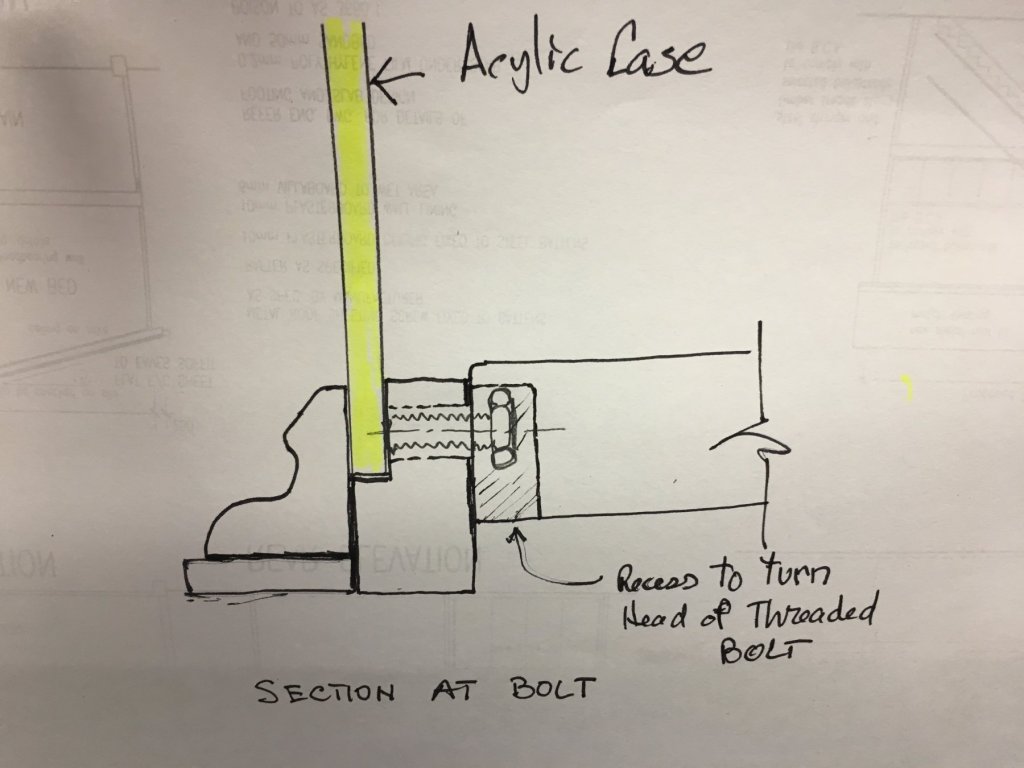
Back in the Shipyard Not much has ben happening of late on the actual Boat. I finally sourced more small link chain today to finish off the Anchors on either side of the Bow. However the Display Case is taking shape. A good mate of mine(you need a good mate like this) started on the base for the Display Case. Below are some pictures of the base under construction. Above: The base is made of several pieces of timbers. The large middle piece is 1 solid piece of 32mm thick, raised up 3mm to an outer rectangular piece to make up the inner width of the case. A 20mm deep "slot" has been routed on the outer edge for the case to sit over. Below the case is in the slot. Above: An outer stepped section(2 pieces glued together) will be glued in the position shown around the base, to cover the slot, base and bottom of the Acrylic Case. But not before the next step below is done. Above: We wanted the Case to be held in position to stop it being lifted up. The above sketch shows 1 of 4 bolts which run in a tapped epoxy plug, for the bolt to turn in. Each is accessible from underneath the base in a slot cut into the side of the main block of timber. When all assembled, no-one will be the wiser to all the work that went into the base(by my good mate Rhys) Smick eh!

-
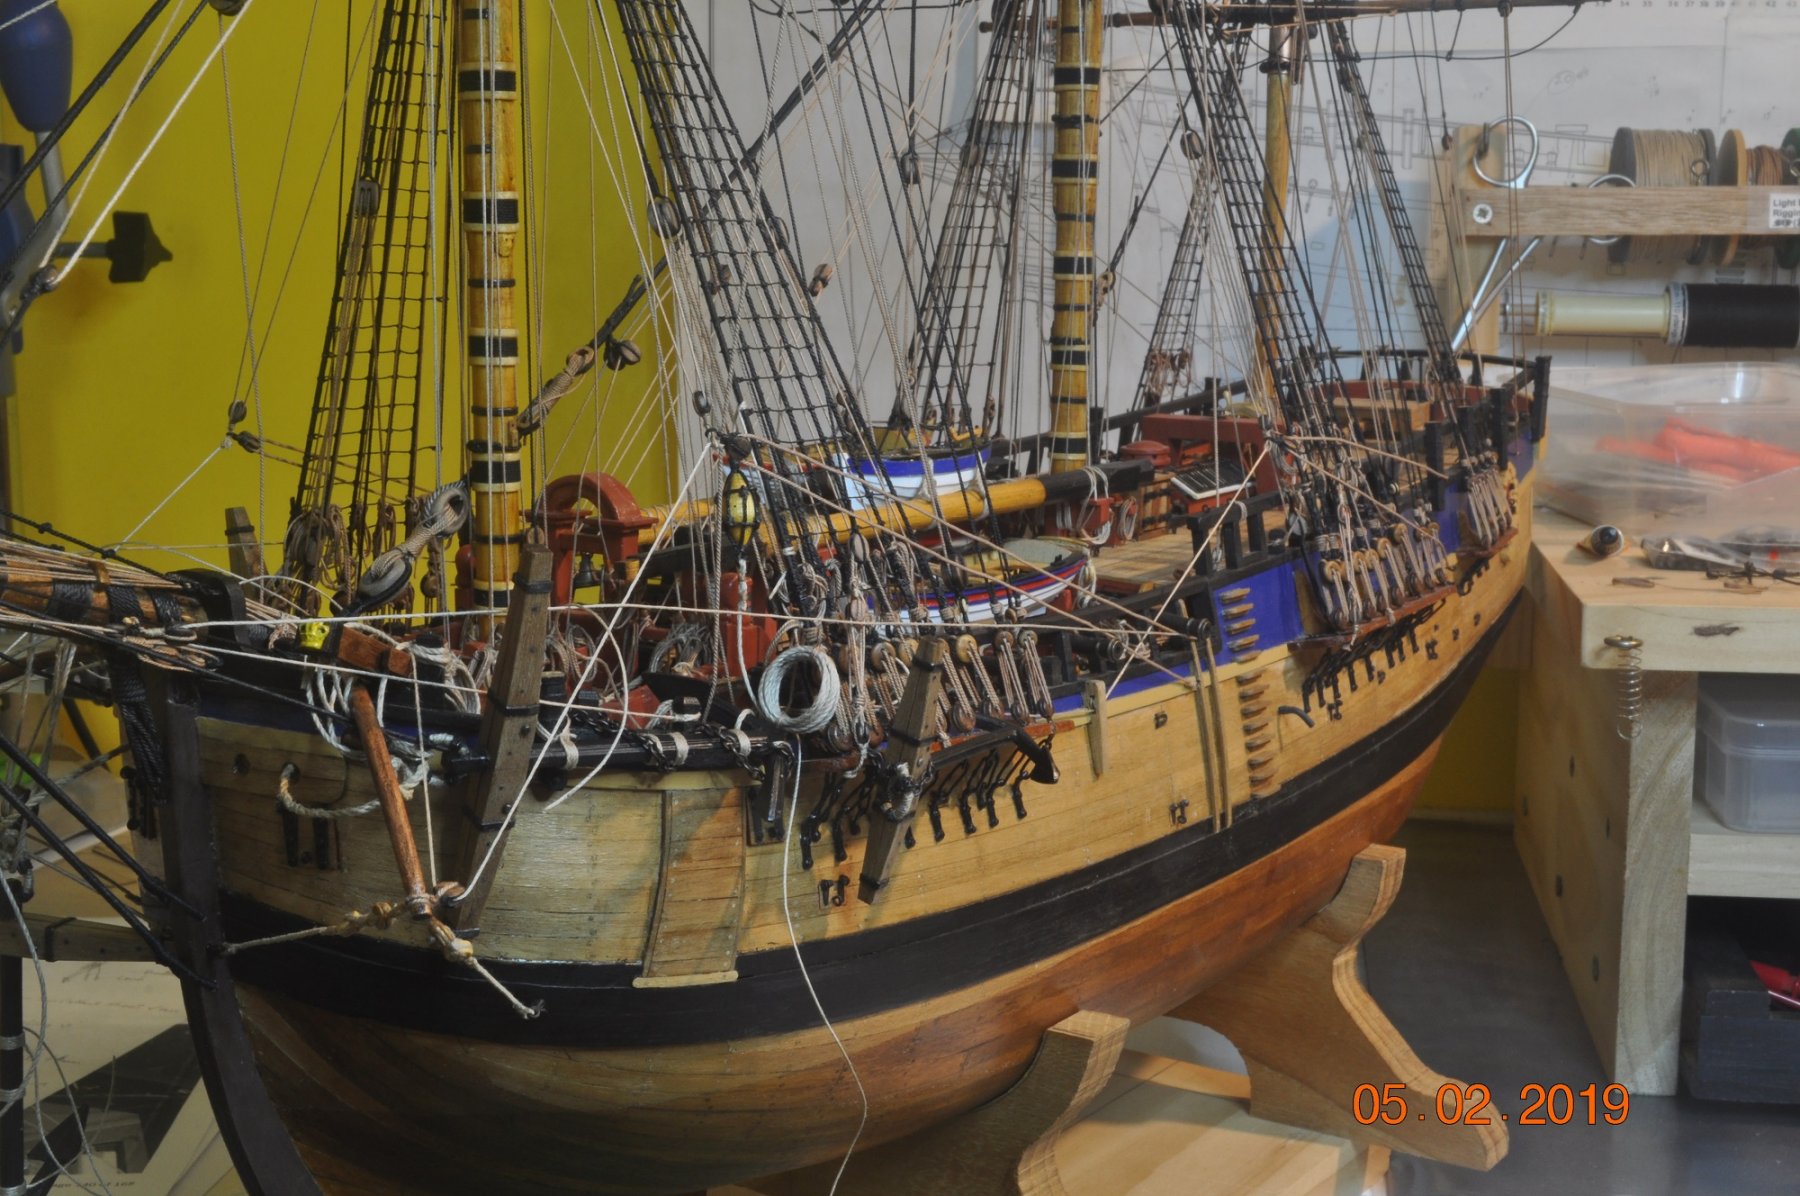
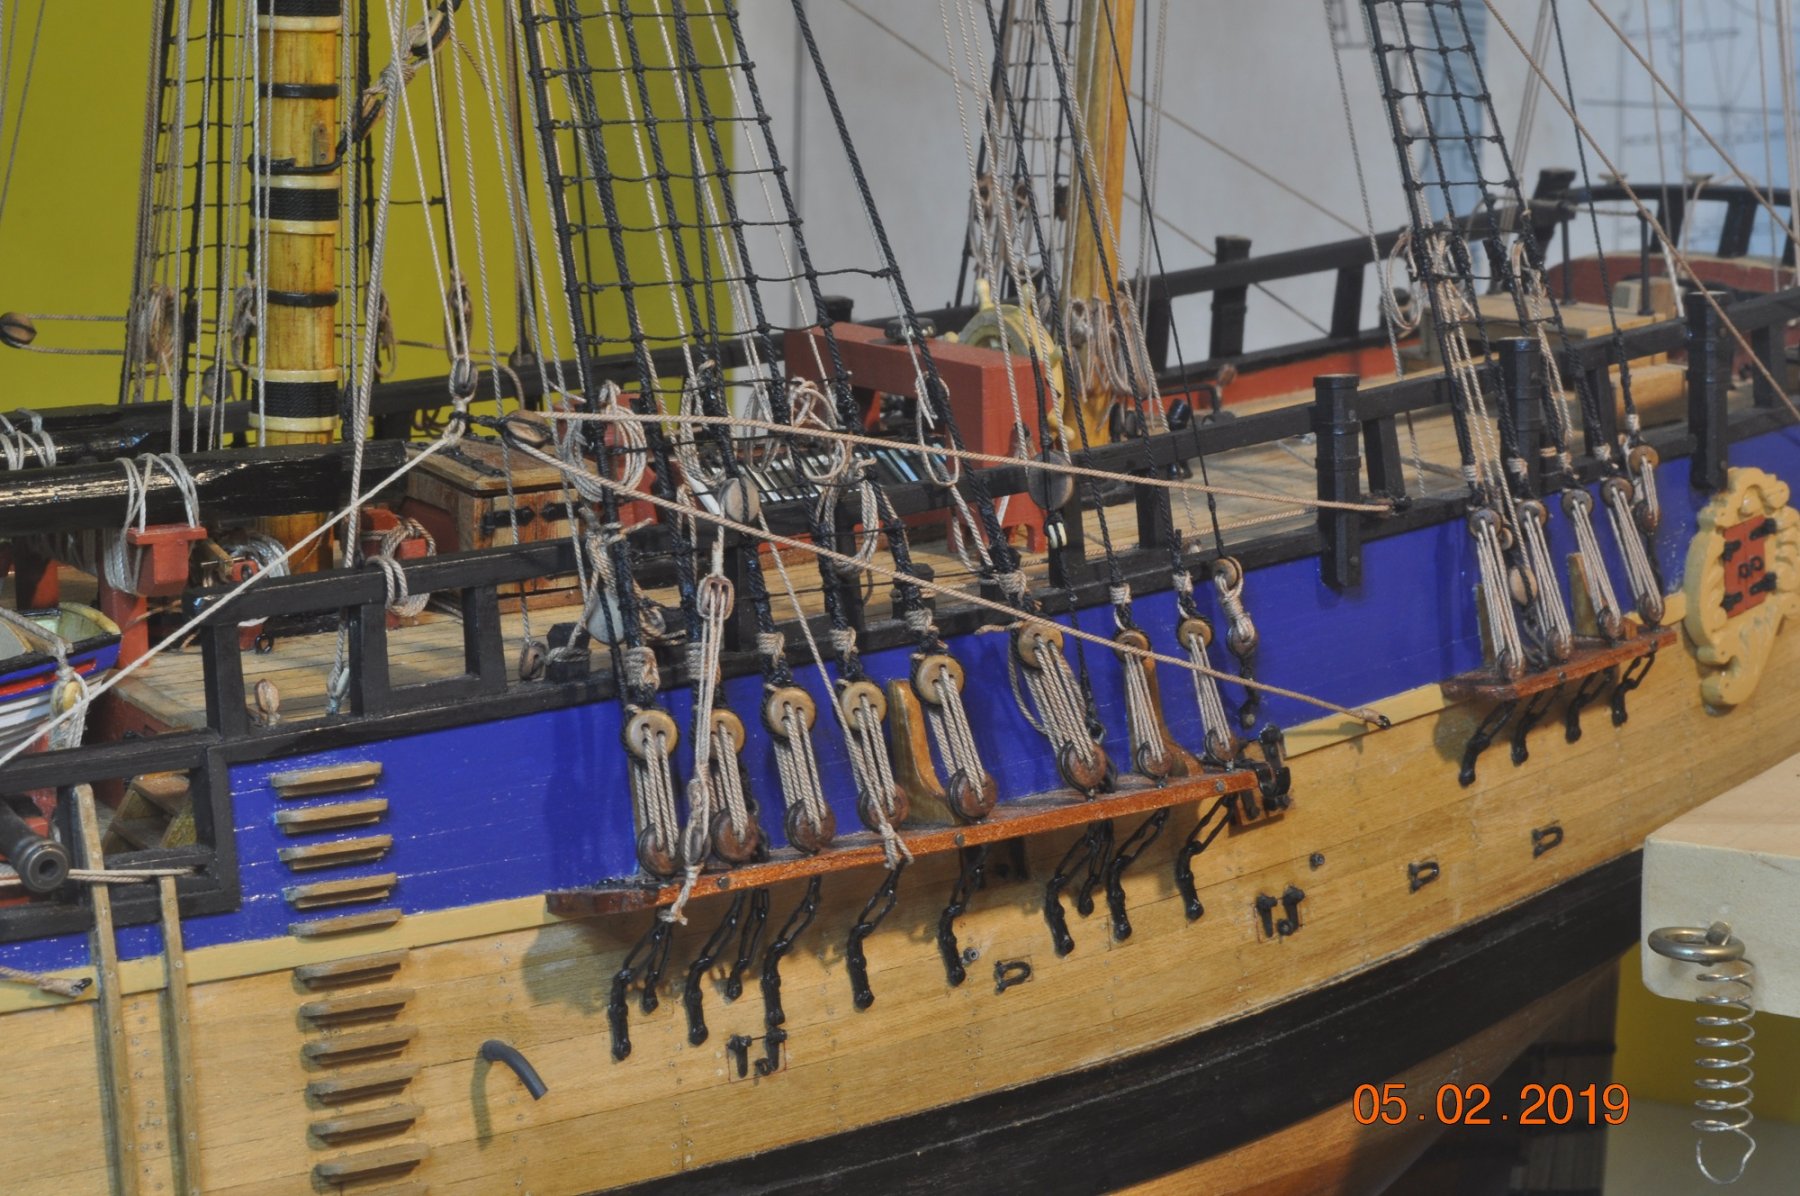
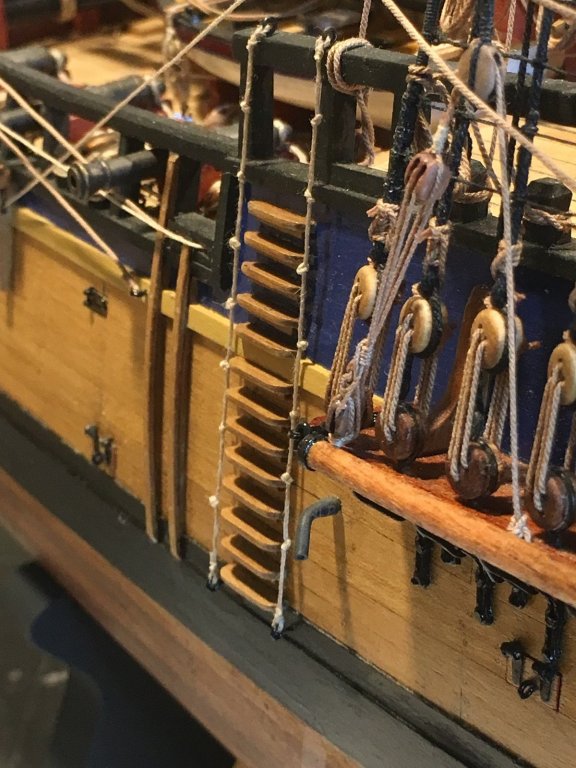
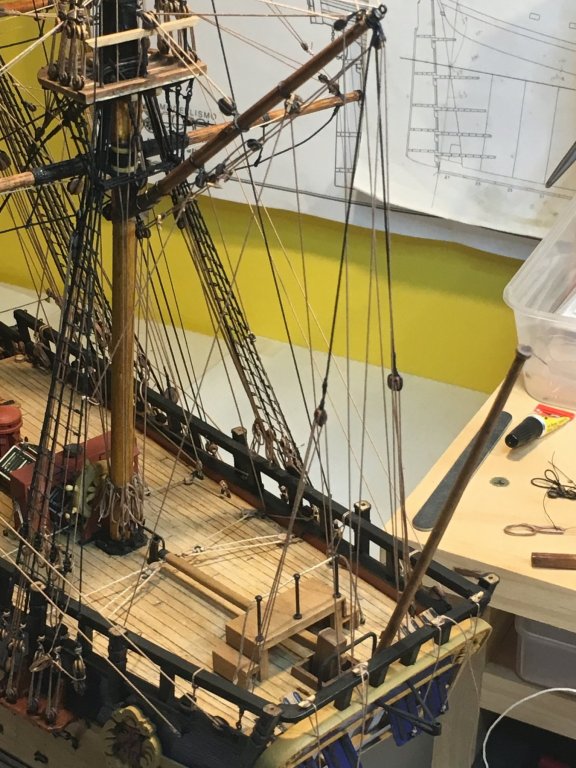
Shipyard Update: The days then weeks seem to go by without knowing these past 12 days. The shipyard has spent many hours tidying up the halyards, sheets, many other rope ends on the deck and shrouds. I can now see the sides of the hull again, party time eh !!. The Anchors are taking their place on the P&S Bows. Below a closer view of the Port Anchors(Sheet and Kedge). I have the Sheet Anchor tied up in place with chain. The Kedge Anchor: - tied to the Fore Port Channel. - I need to source more chain for the smaller Kedge Anchor, to wrap around the shank, Arm end and tie off to the bollards. - The Port Anchor Buoy is attached to the front Fore Shroud, with buoy-rope below coiled and attached the Sheet Anchor. The Starboard of Bow(not shown here) has a Sheet(hanging down) and Stream Anchor up on the Channel. Working on that side now Below the Port Main and Mizzen Shrouds, Channel and deck area. All the current ropes, ends coiled all tied in place. Much more to go, but getting there. P.S. I took delivery of the Display Case(top cover), Acrylic Box 900L x 350W x 750H. Still wrapped up in bubble wrap. Another job to get the base made.


-
Hi Dashi, Nice work mate. Check and doublecheck. Lots of steps to consider eh! Just the beginning, to where I was, what seems a long time ago.
-
Dashi, I definitely have been at the high end of the learning curve for this build. My build probably comes out as a bit of this and a bit of that, between AoTS, the Replica, David Steel's, Shardlow, Parkin and a few other books on rigging etc. If I got something right, it made sense to me to do it that way.?
-
Great work there Dashi. The rate your going, you'll catch up to me before I finish ?
-
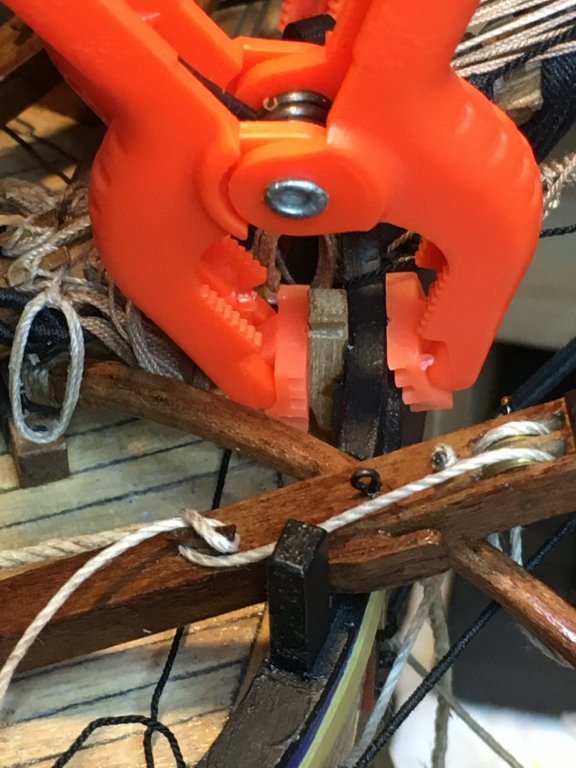
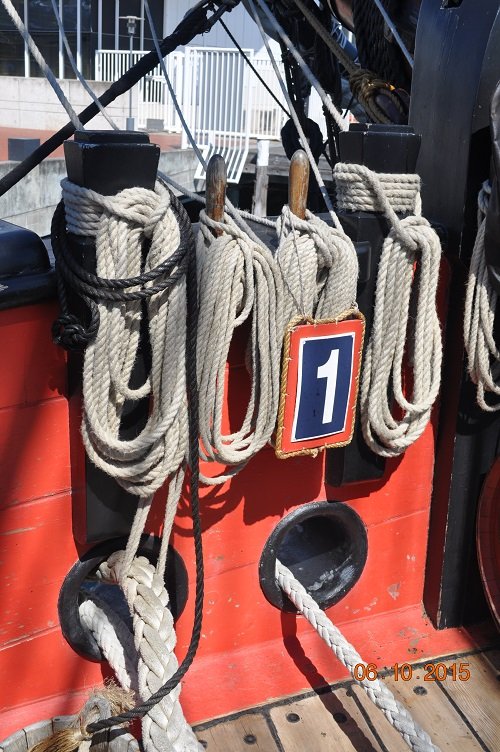
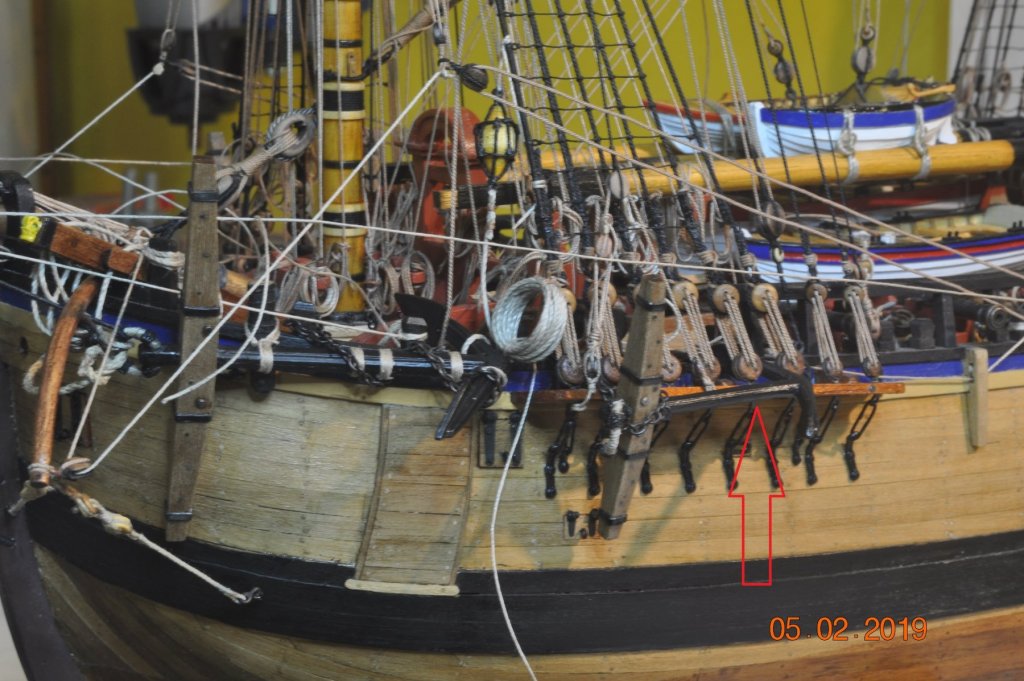
Shipyard Update Bow area: Bollards & Cleats for tying off. For a while I've not been happy with the number of rope ends, requiring tie points, just not enough. The NMM Endeavour Replica has this area on the Bow - Pic below, where 2 bollards and belay pins are located. I missed this on the early stages of the build, but makes sense for the multitude of ropes coming back from the bowsprit and yards, never ending. The AoTS does not indicate(that I have seen) any bollard or cleats in this "zone", but sure would come in handy. Bit late in the build to be adding in 2 bollards and belay pins, both sides of Bowsprit. Busy little area now and very tight. So I decided I could at least add 2 additional Bollards(below) to slip in behind bow and beside the Bowsprit. Extra Starboard Bollard(not painted yet) - clamp holding whilst glue drying. Another added to the Port side as well. Next, all going well to add the Anchors to the Bow area.