Vinnie
-
Posts
56 -
Joined
-
Last visited
1 Follower

Recent Profile Visitors
1,590 profile views


-
 GrandpaPhil reacted to a post in a topic:
Greek Bireme by Vinnie - Amati - 1:49
GrandpaPhil reacted to a post in a topic:
Greek Bireme by Vinnie - Amati - 1:49
-
GrandpaPhil reacted to a post in a topic:
Greek Bireme by Vinnie - Amati - 1:49
-
eatcrow2 reacted to a post in a topic:
Greek Bireme by Vinnie - Amati - 1:49
-
vossiewulf reacted to a post in a topic:
Greek Bireme by Vinnie - Amati - 1:49
-

Greek Bireme by Vinnie - Amati - 1:49
Vinnie replied to Vinnie's topic in - Kit subjects built Up to and including 1500 AD
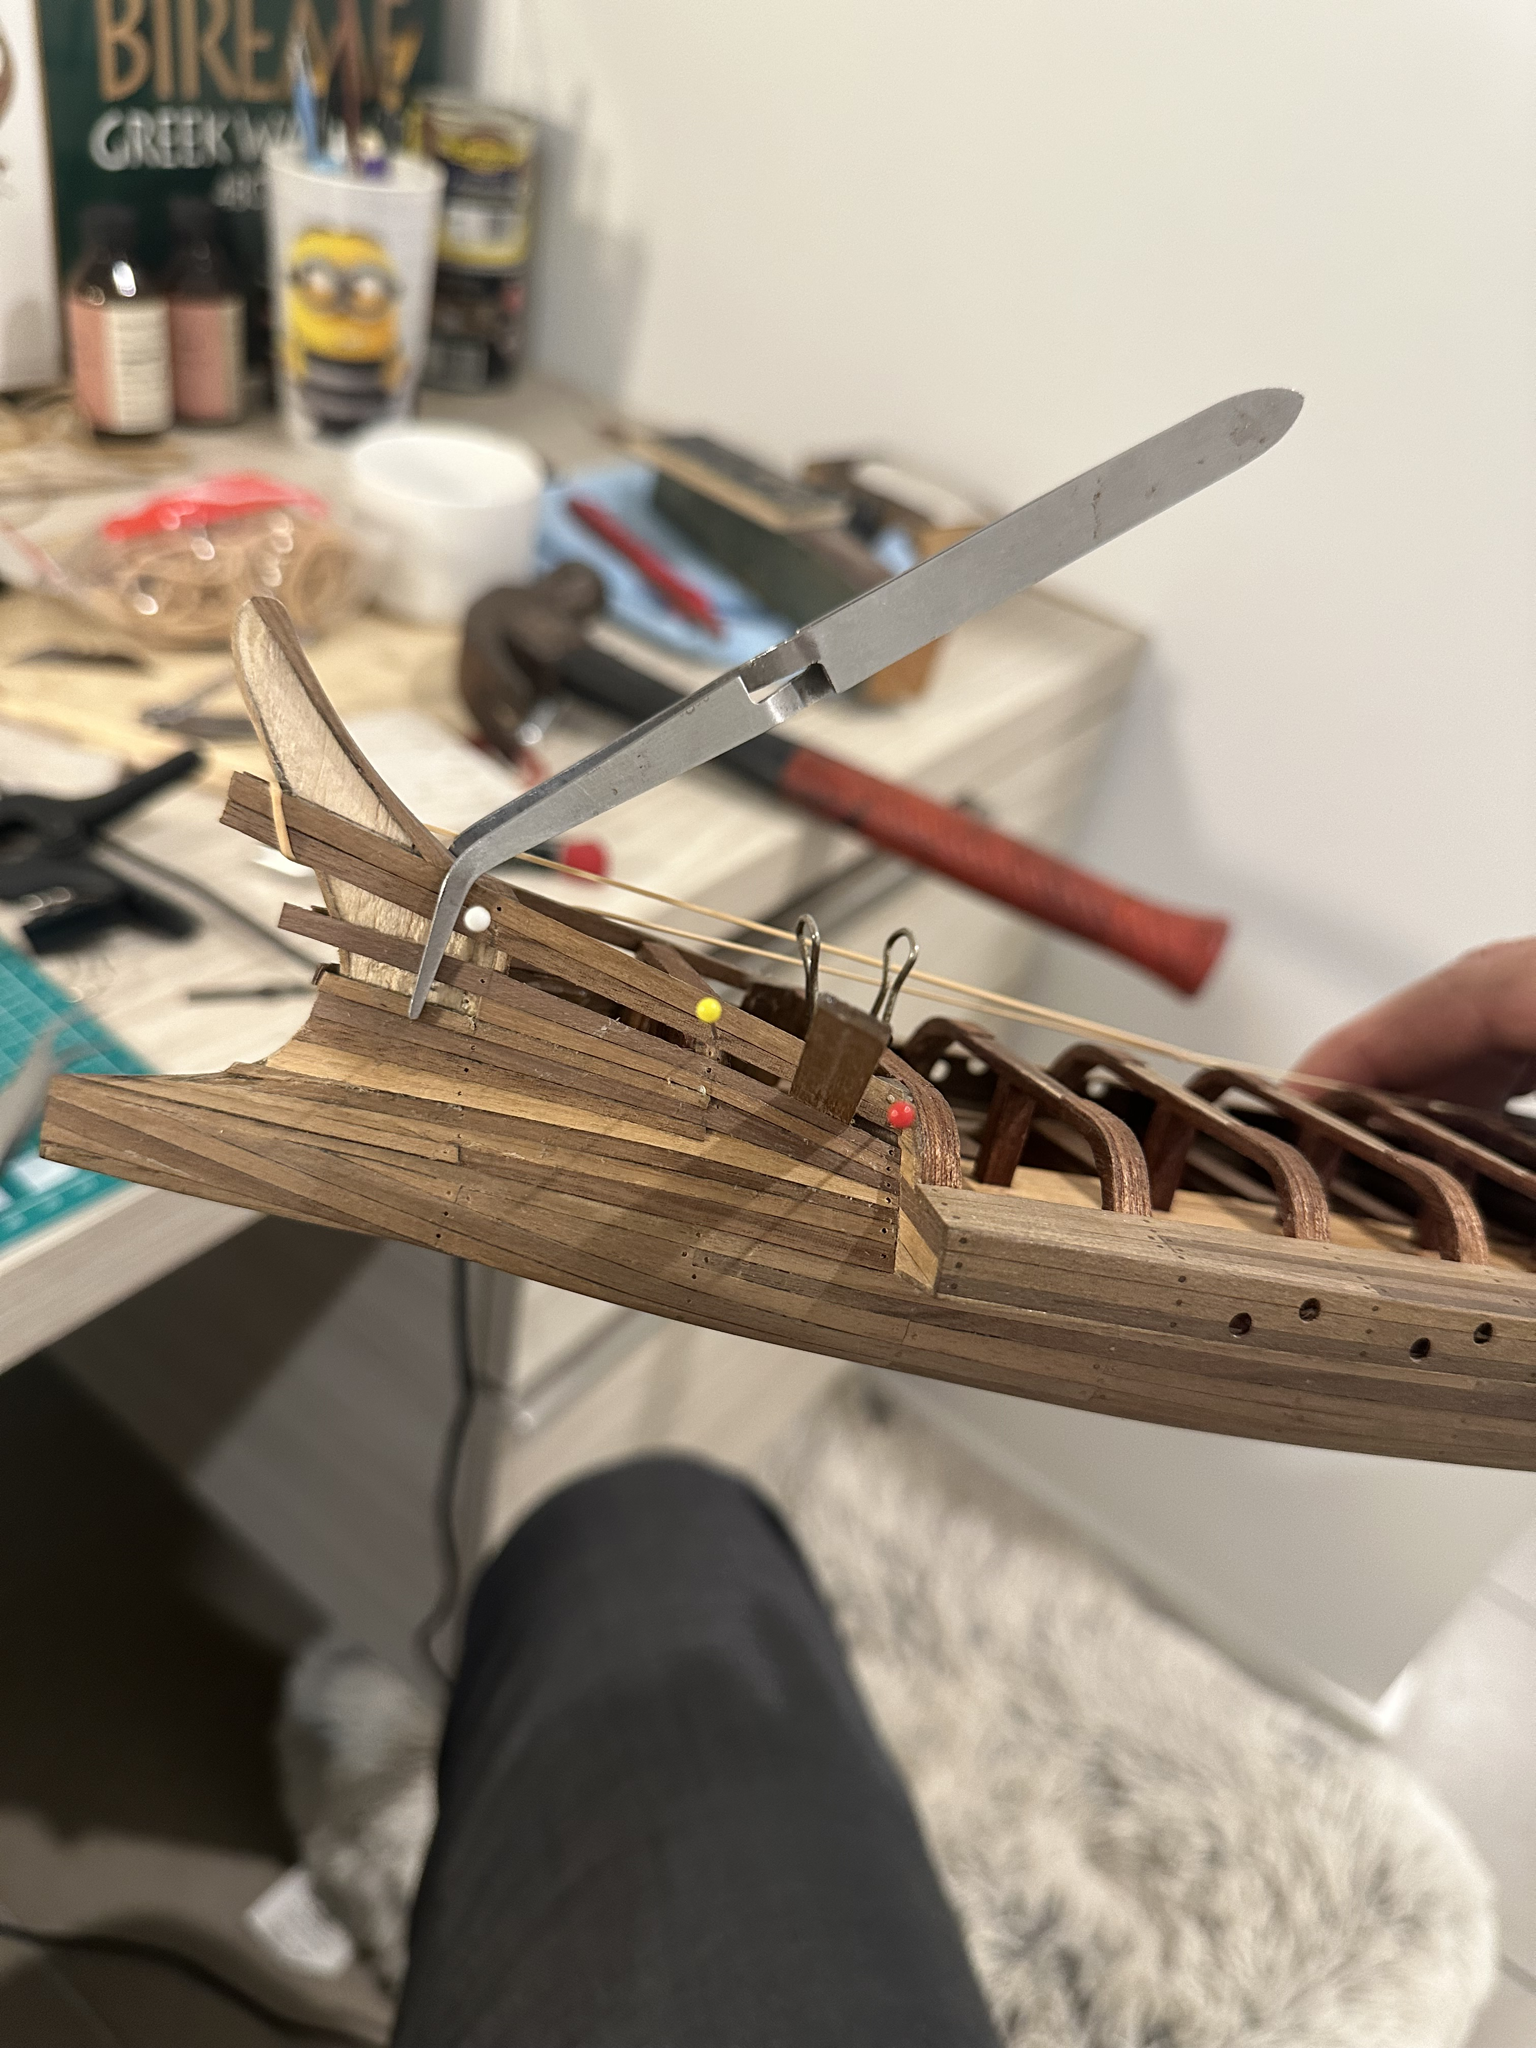
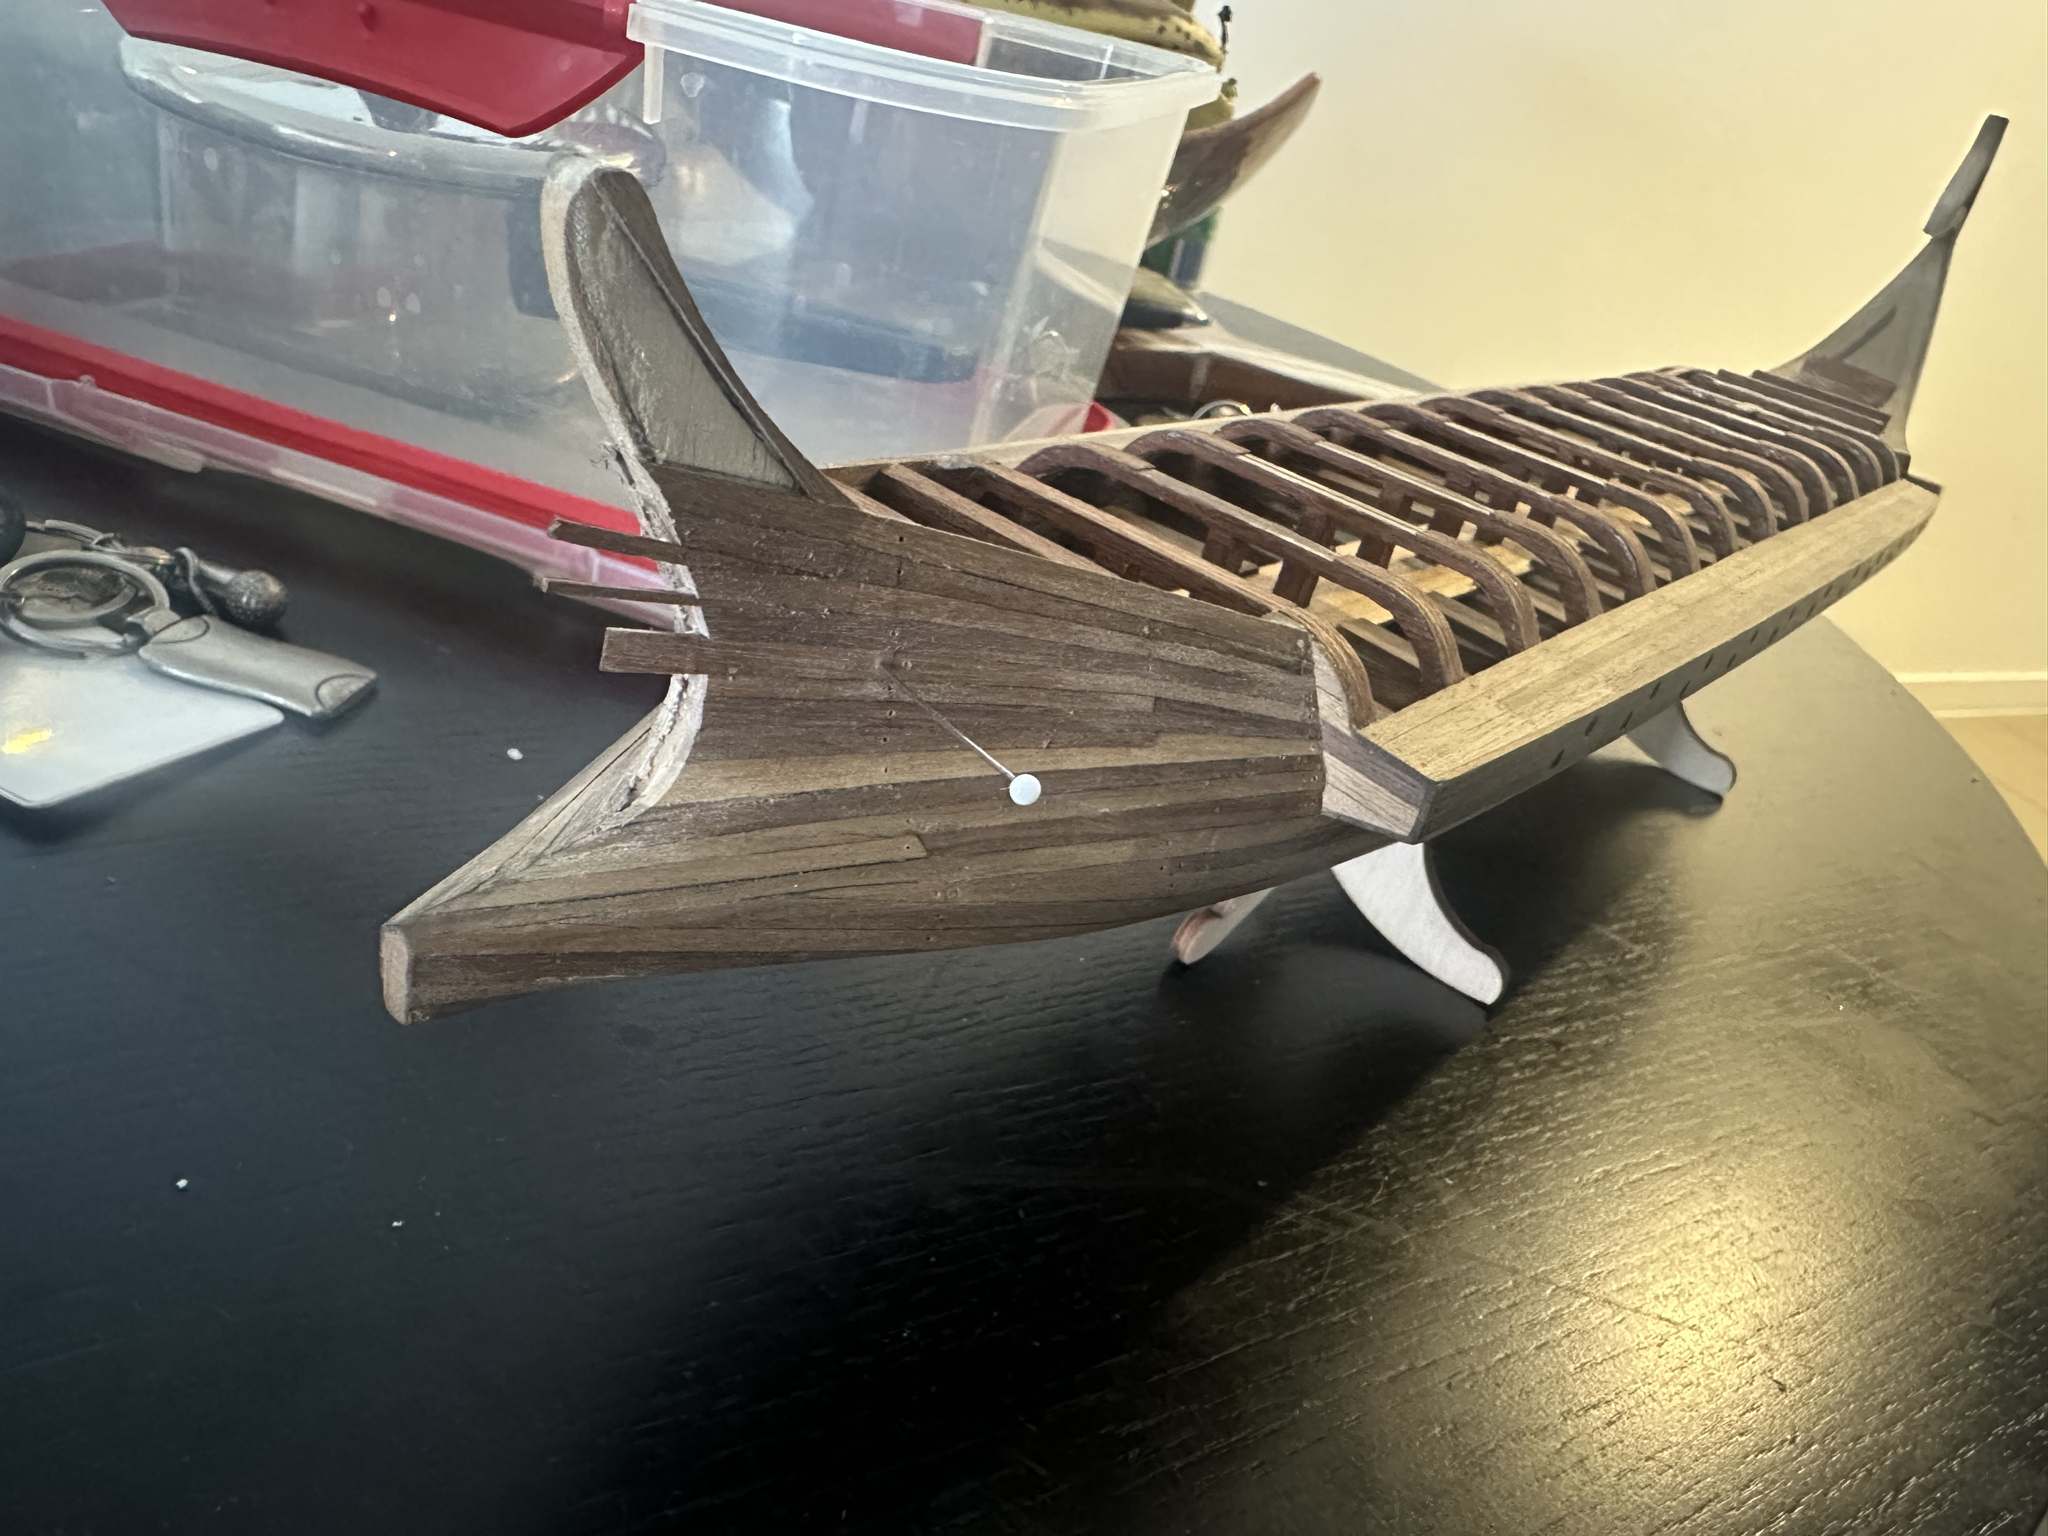
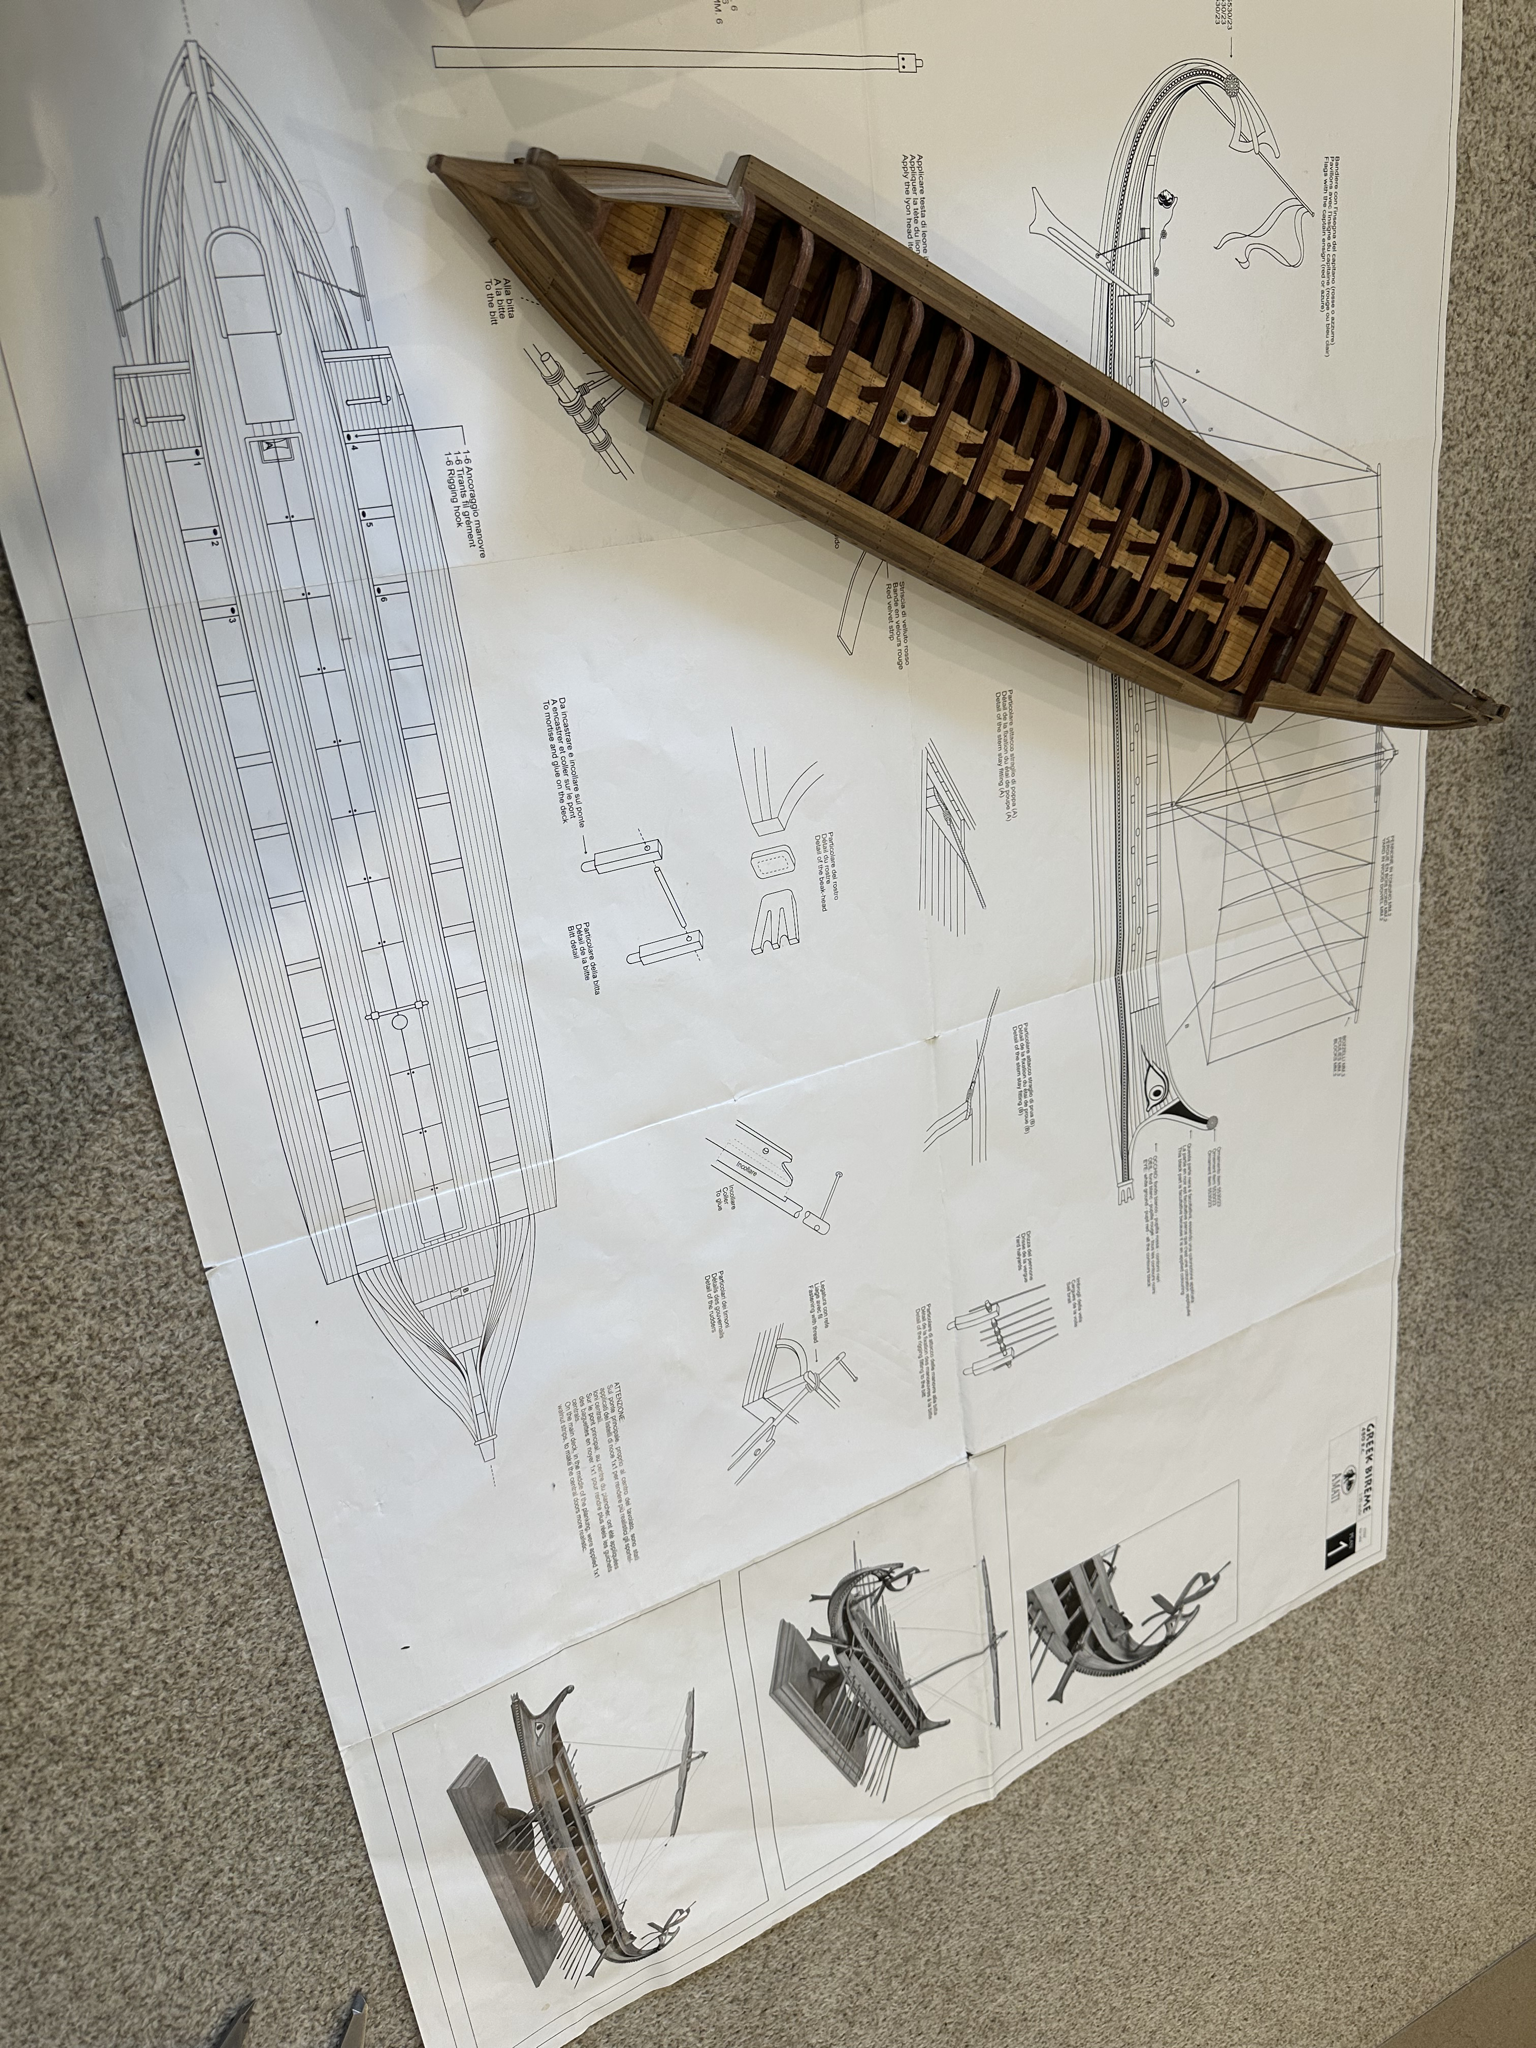
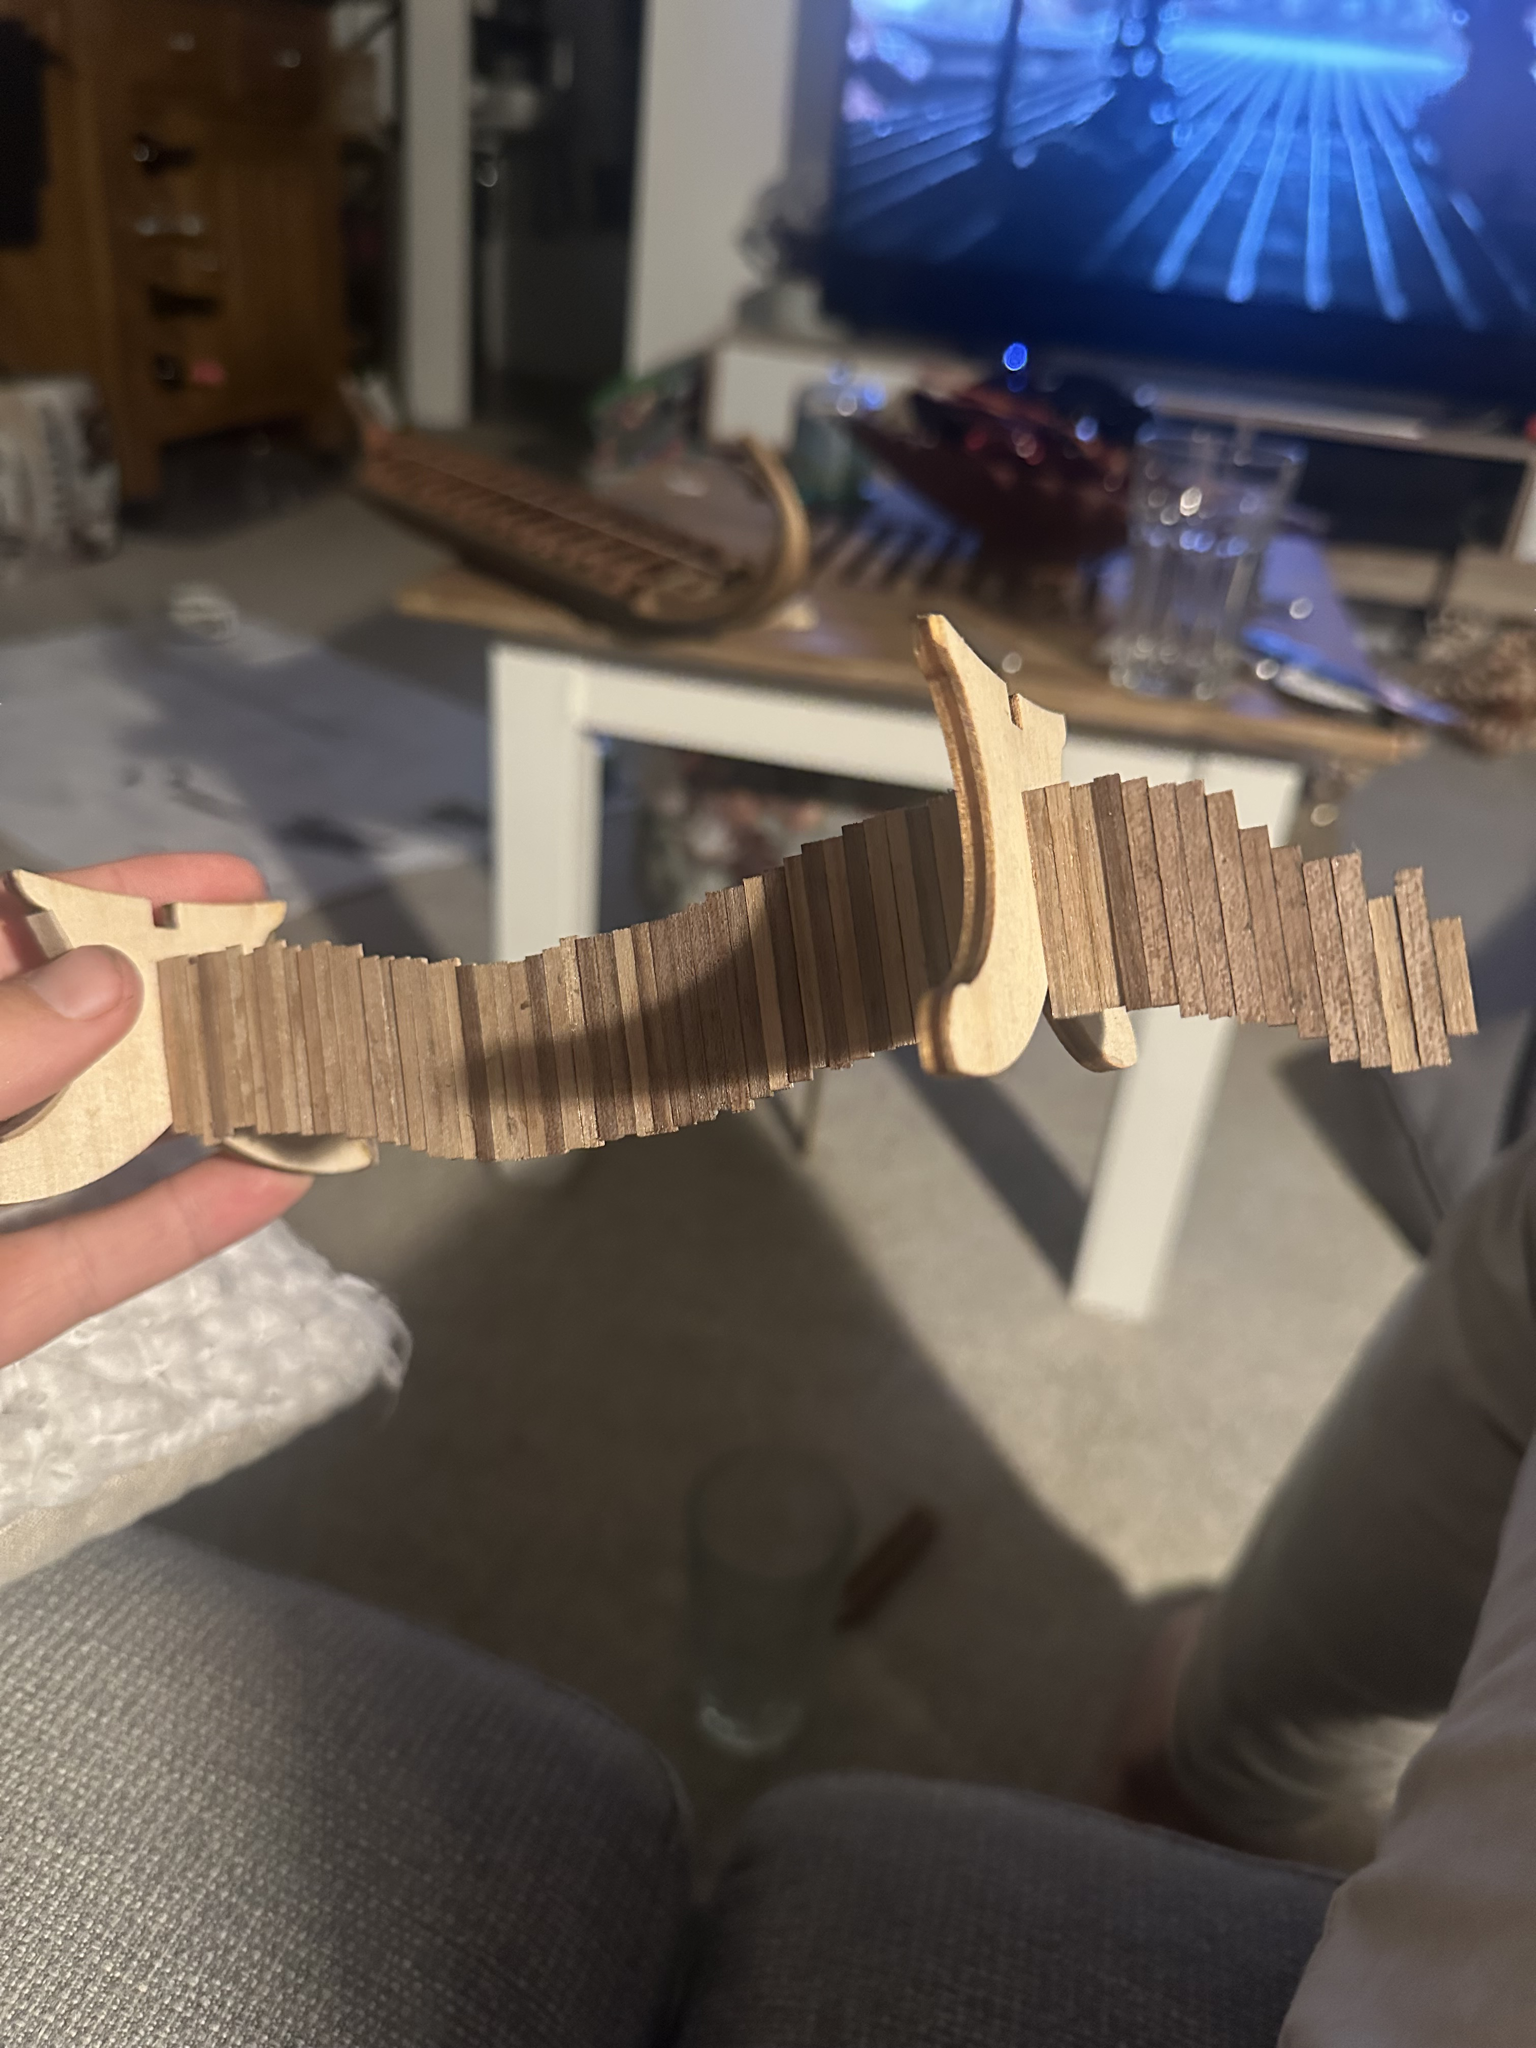
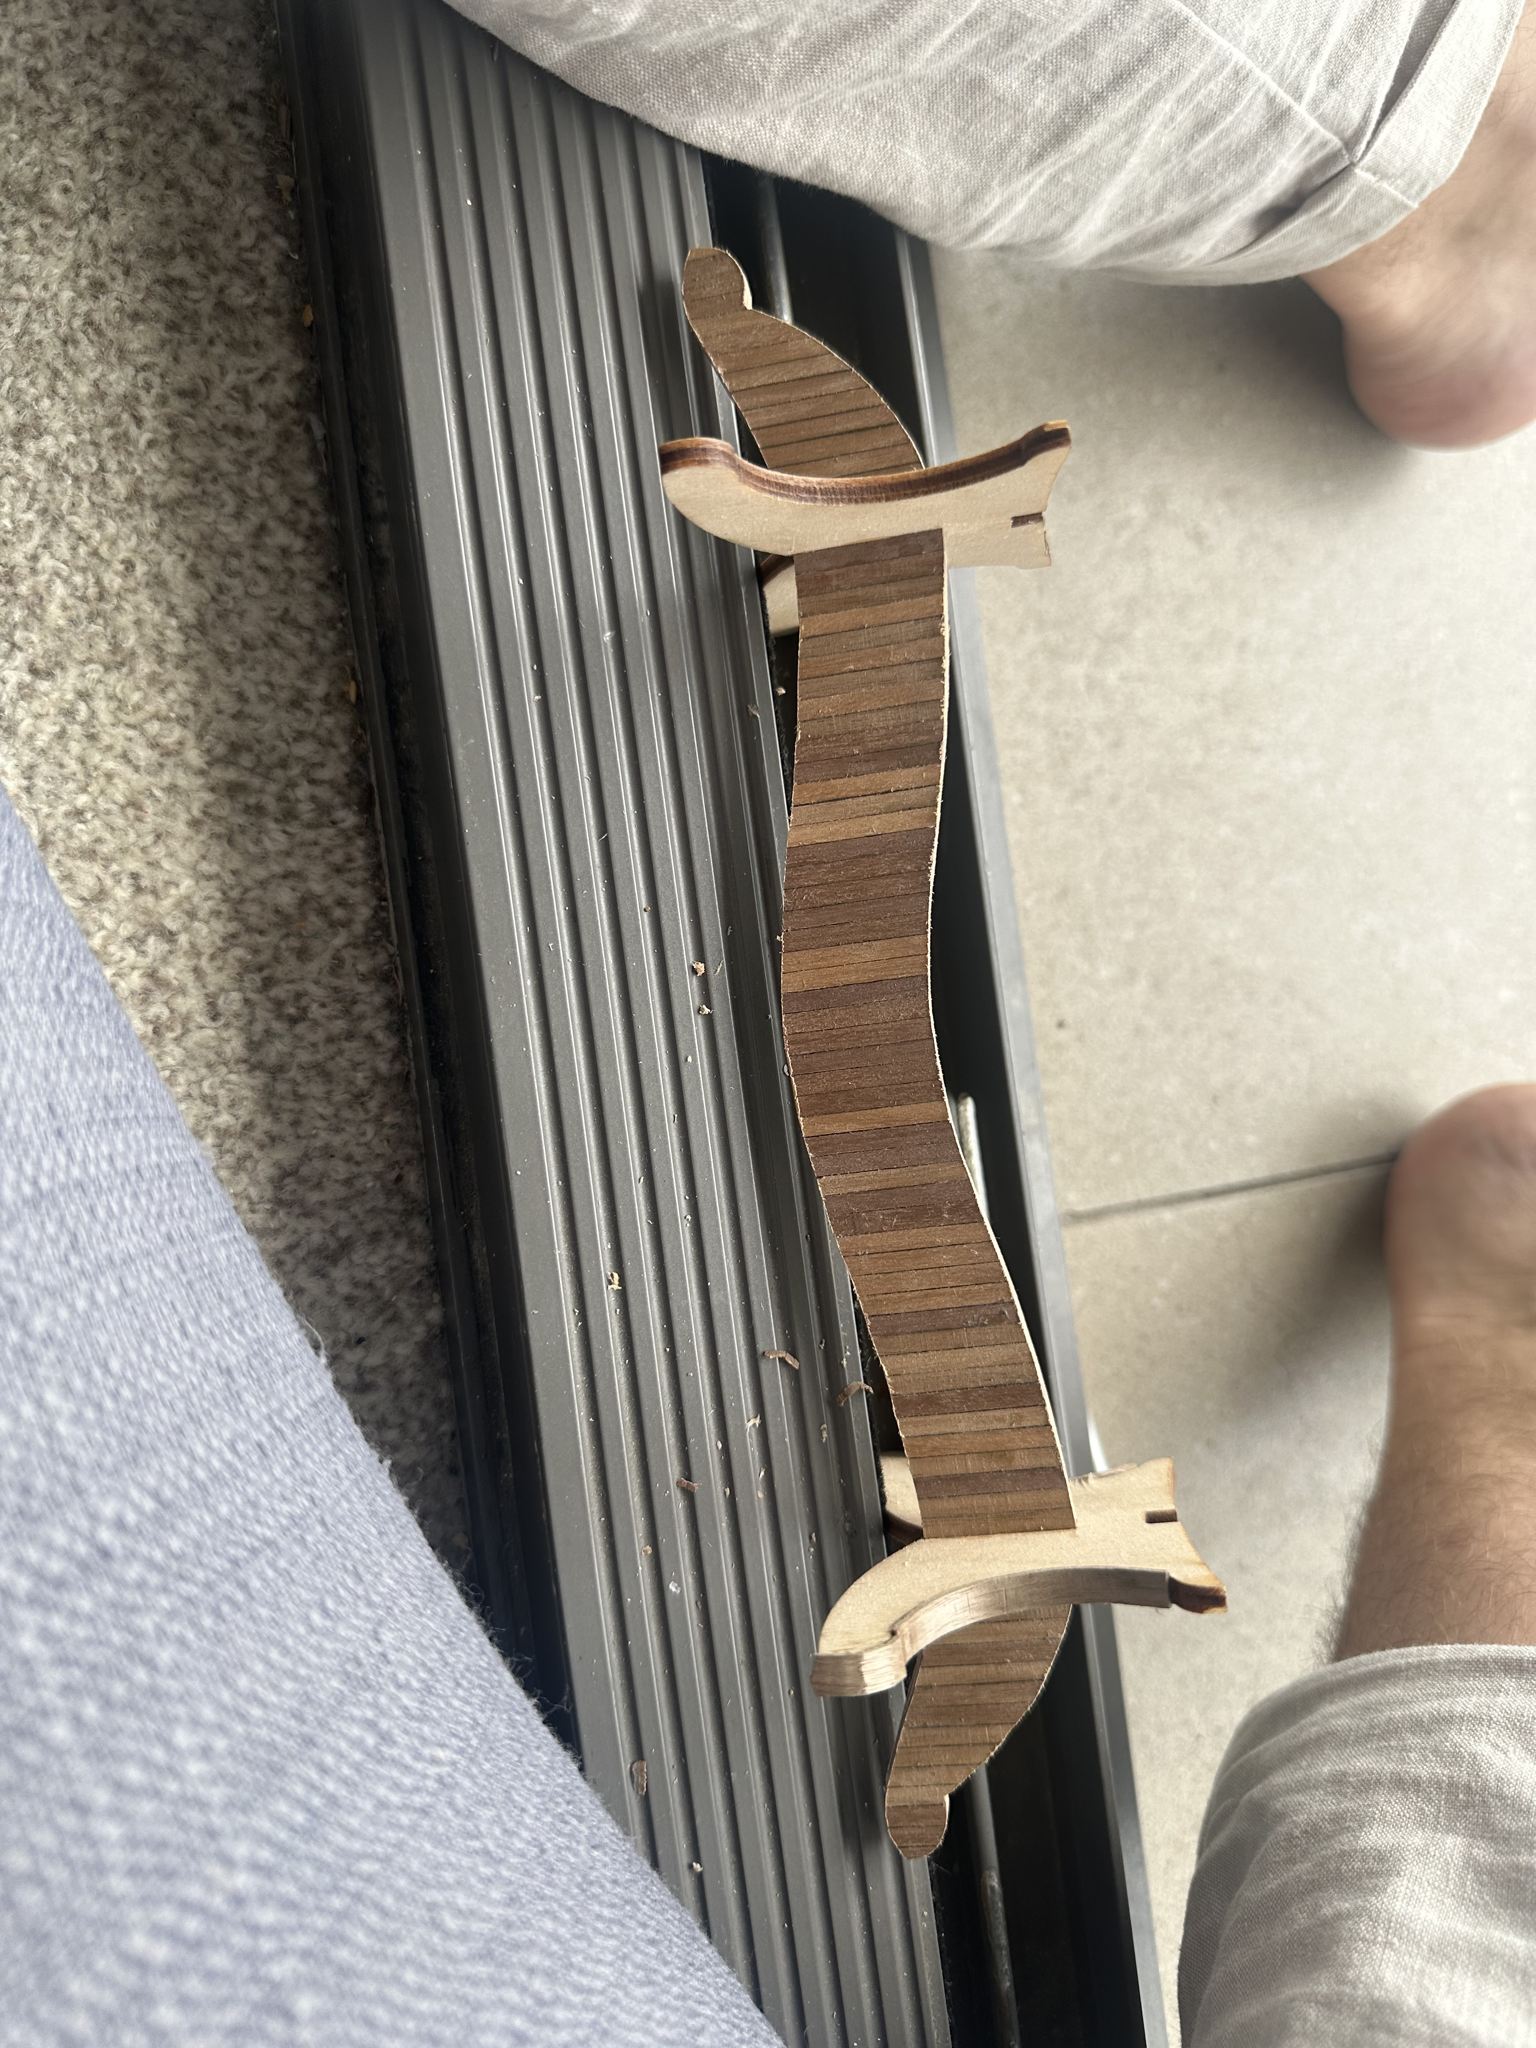
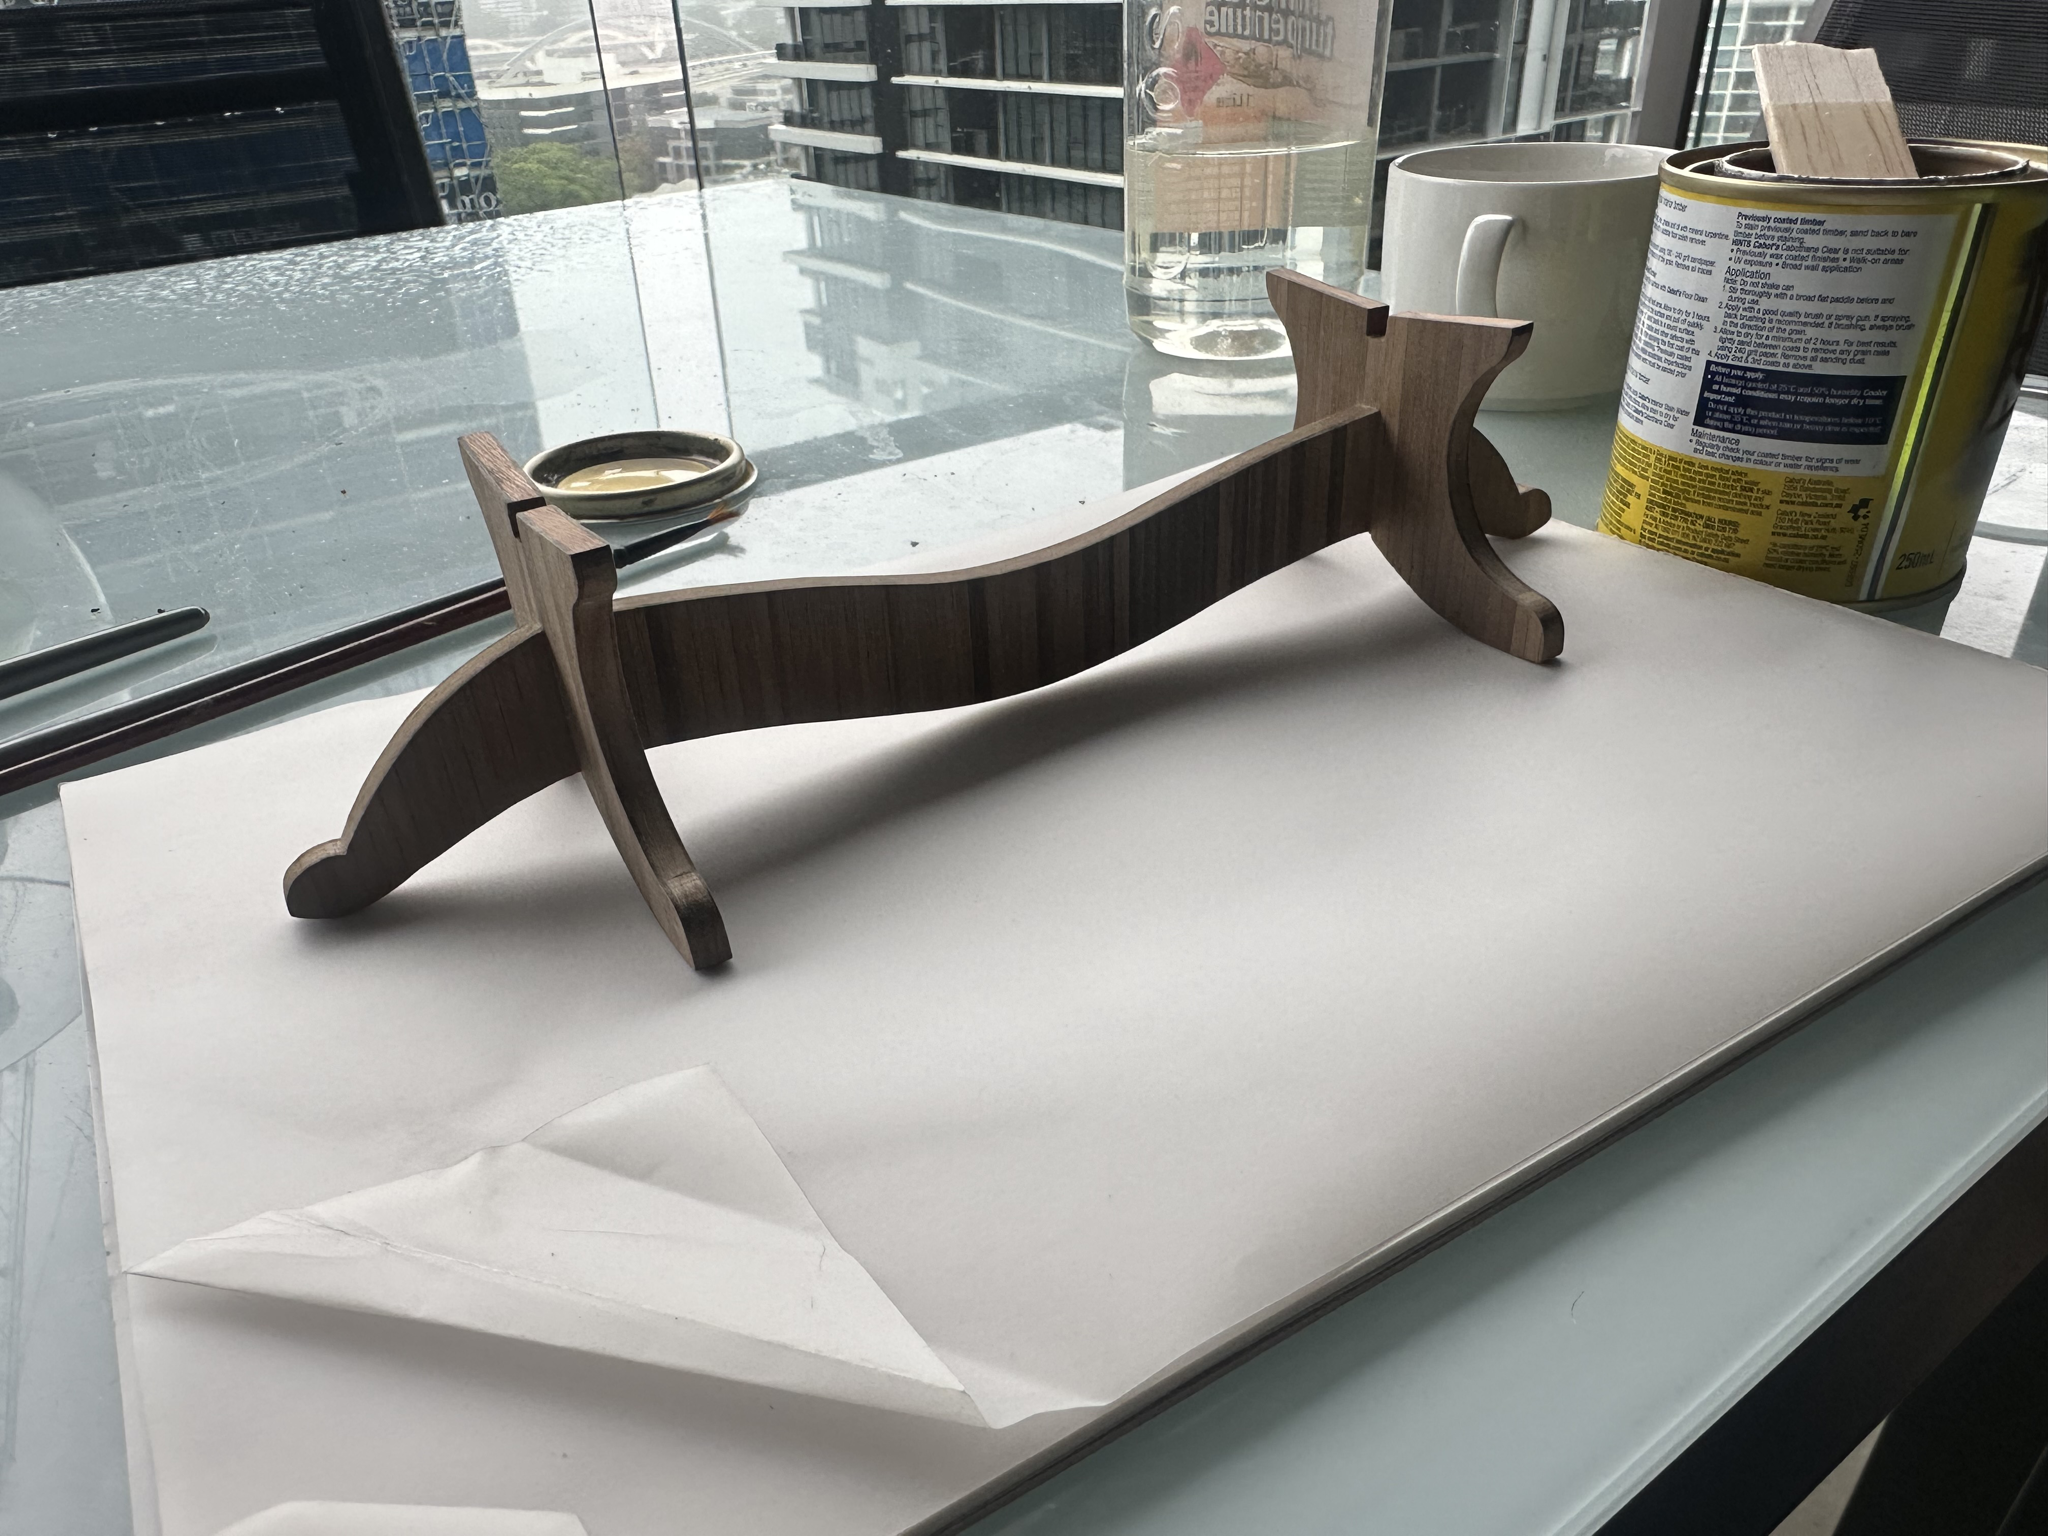
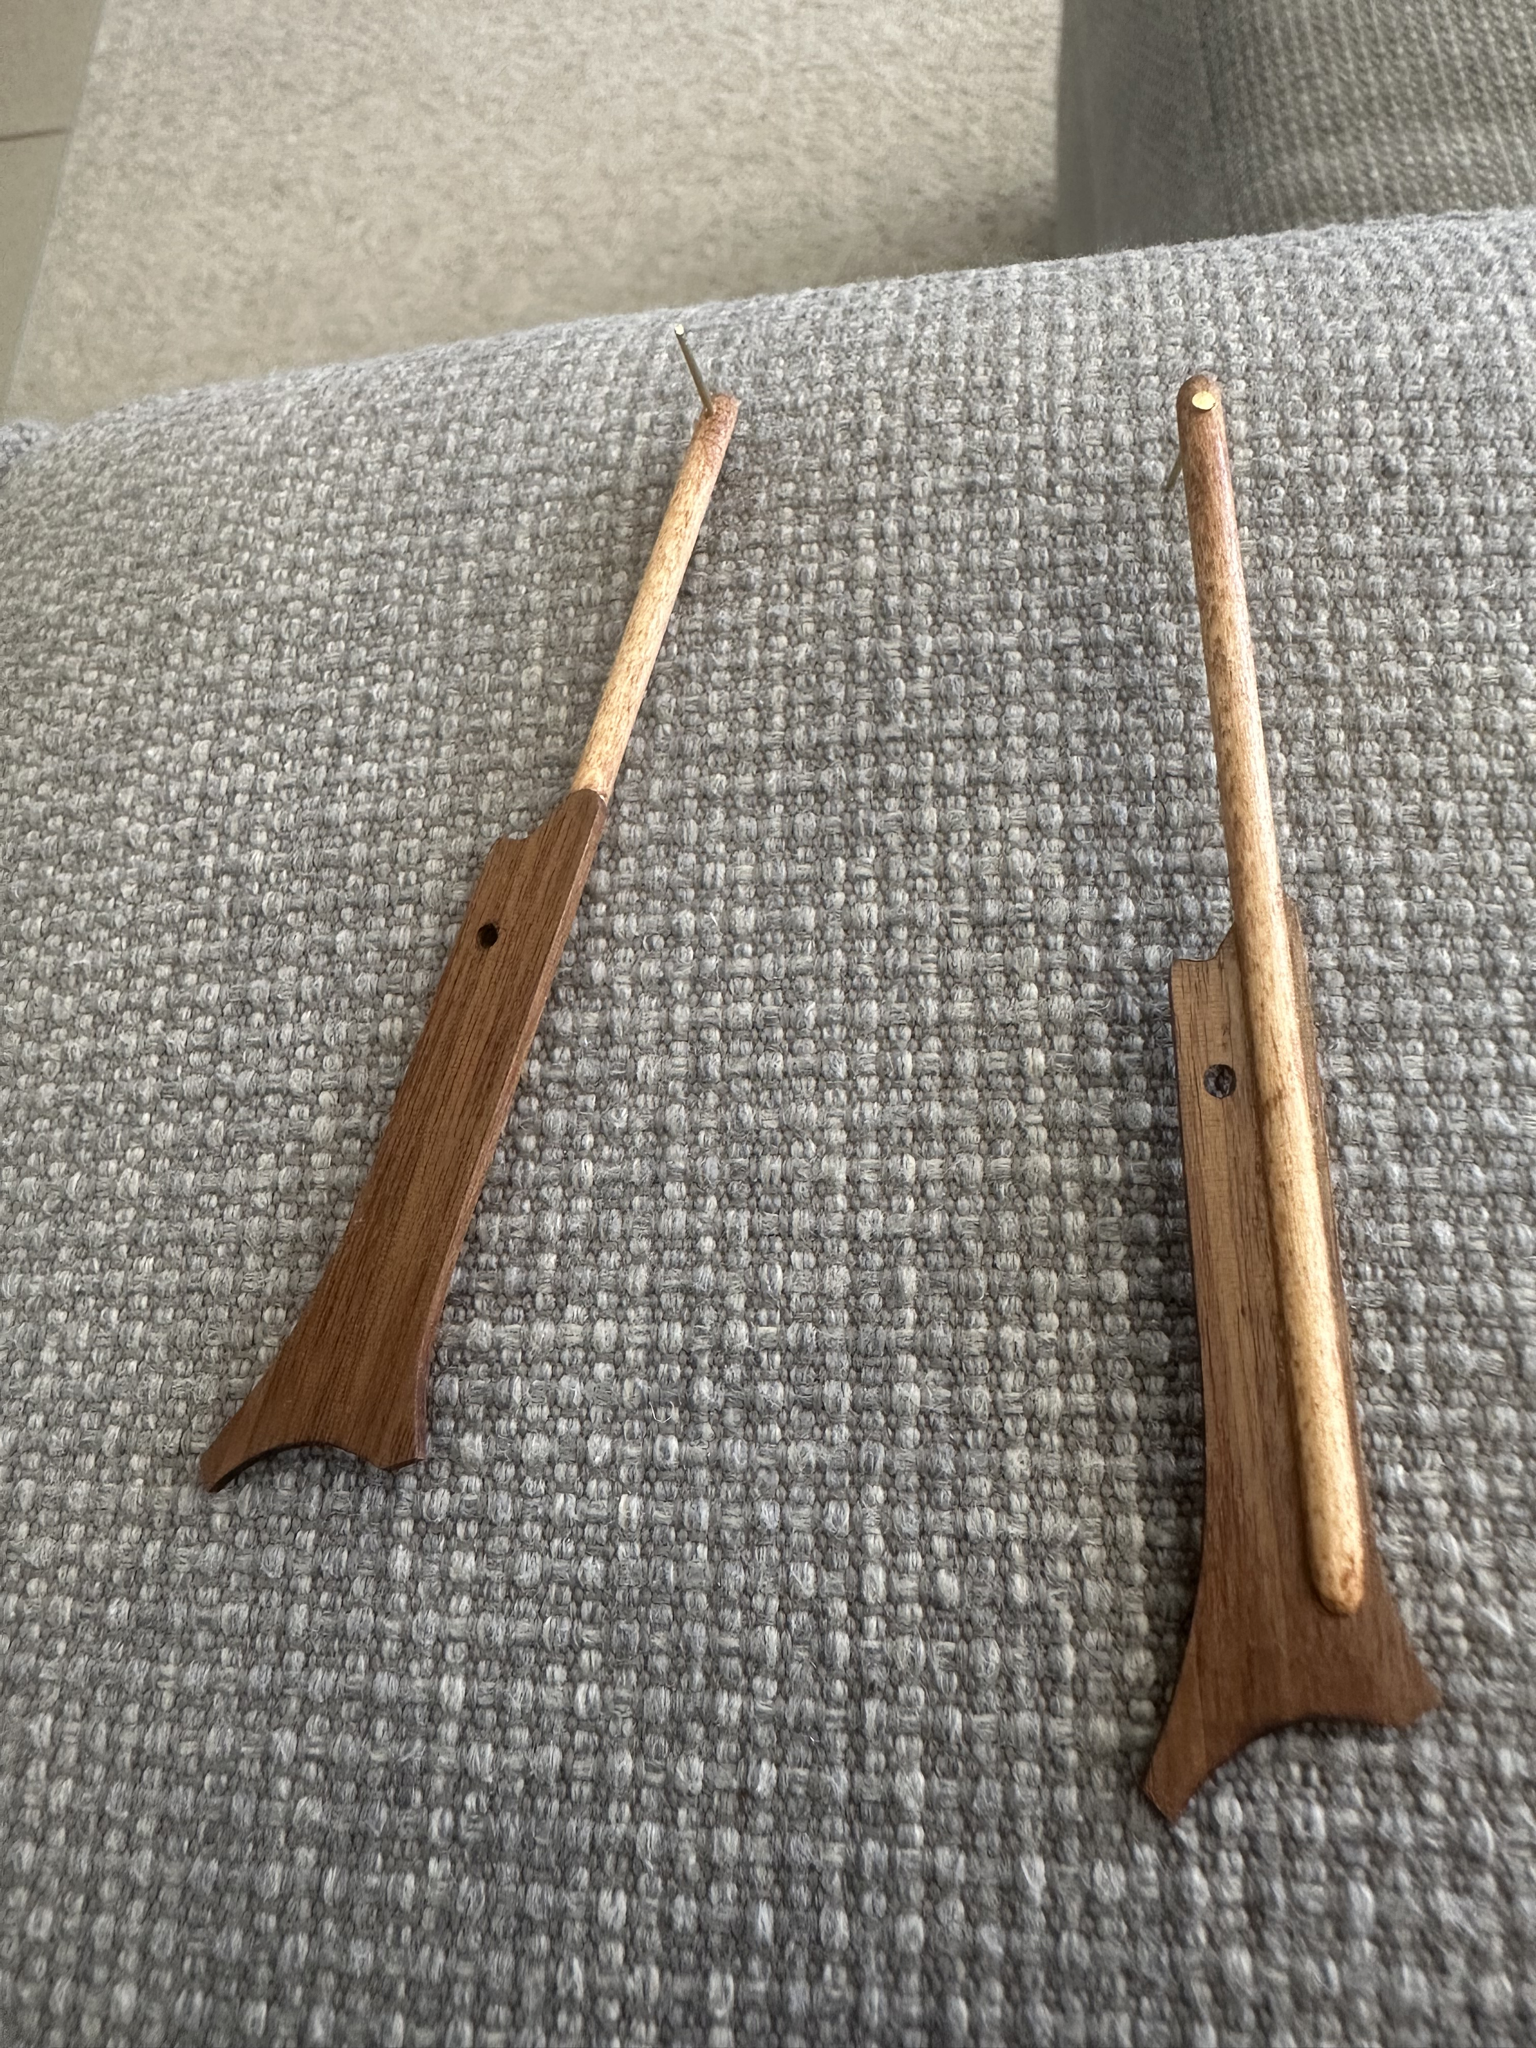
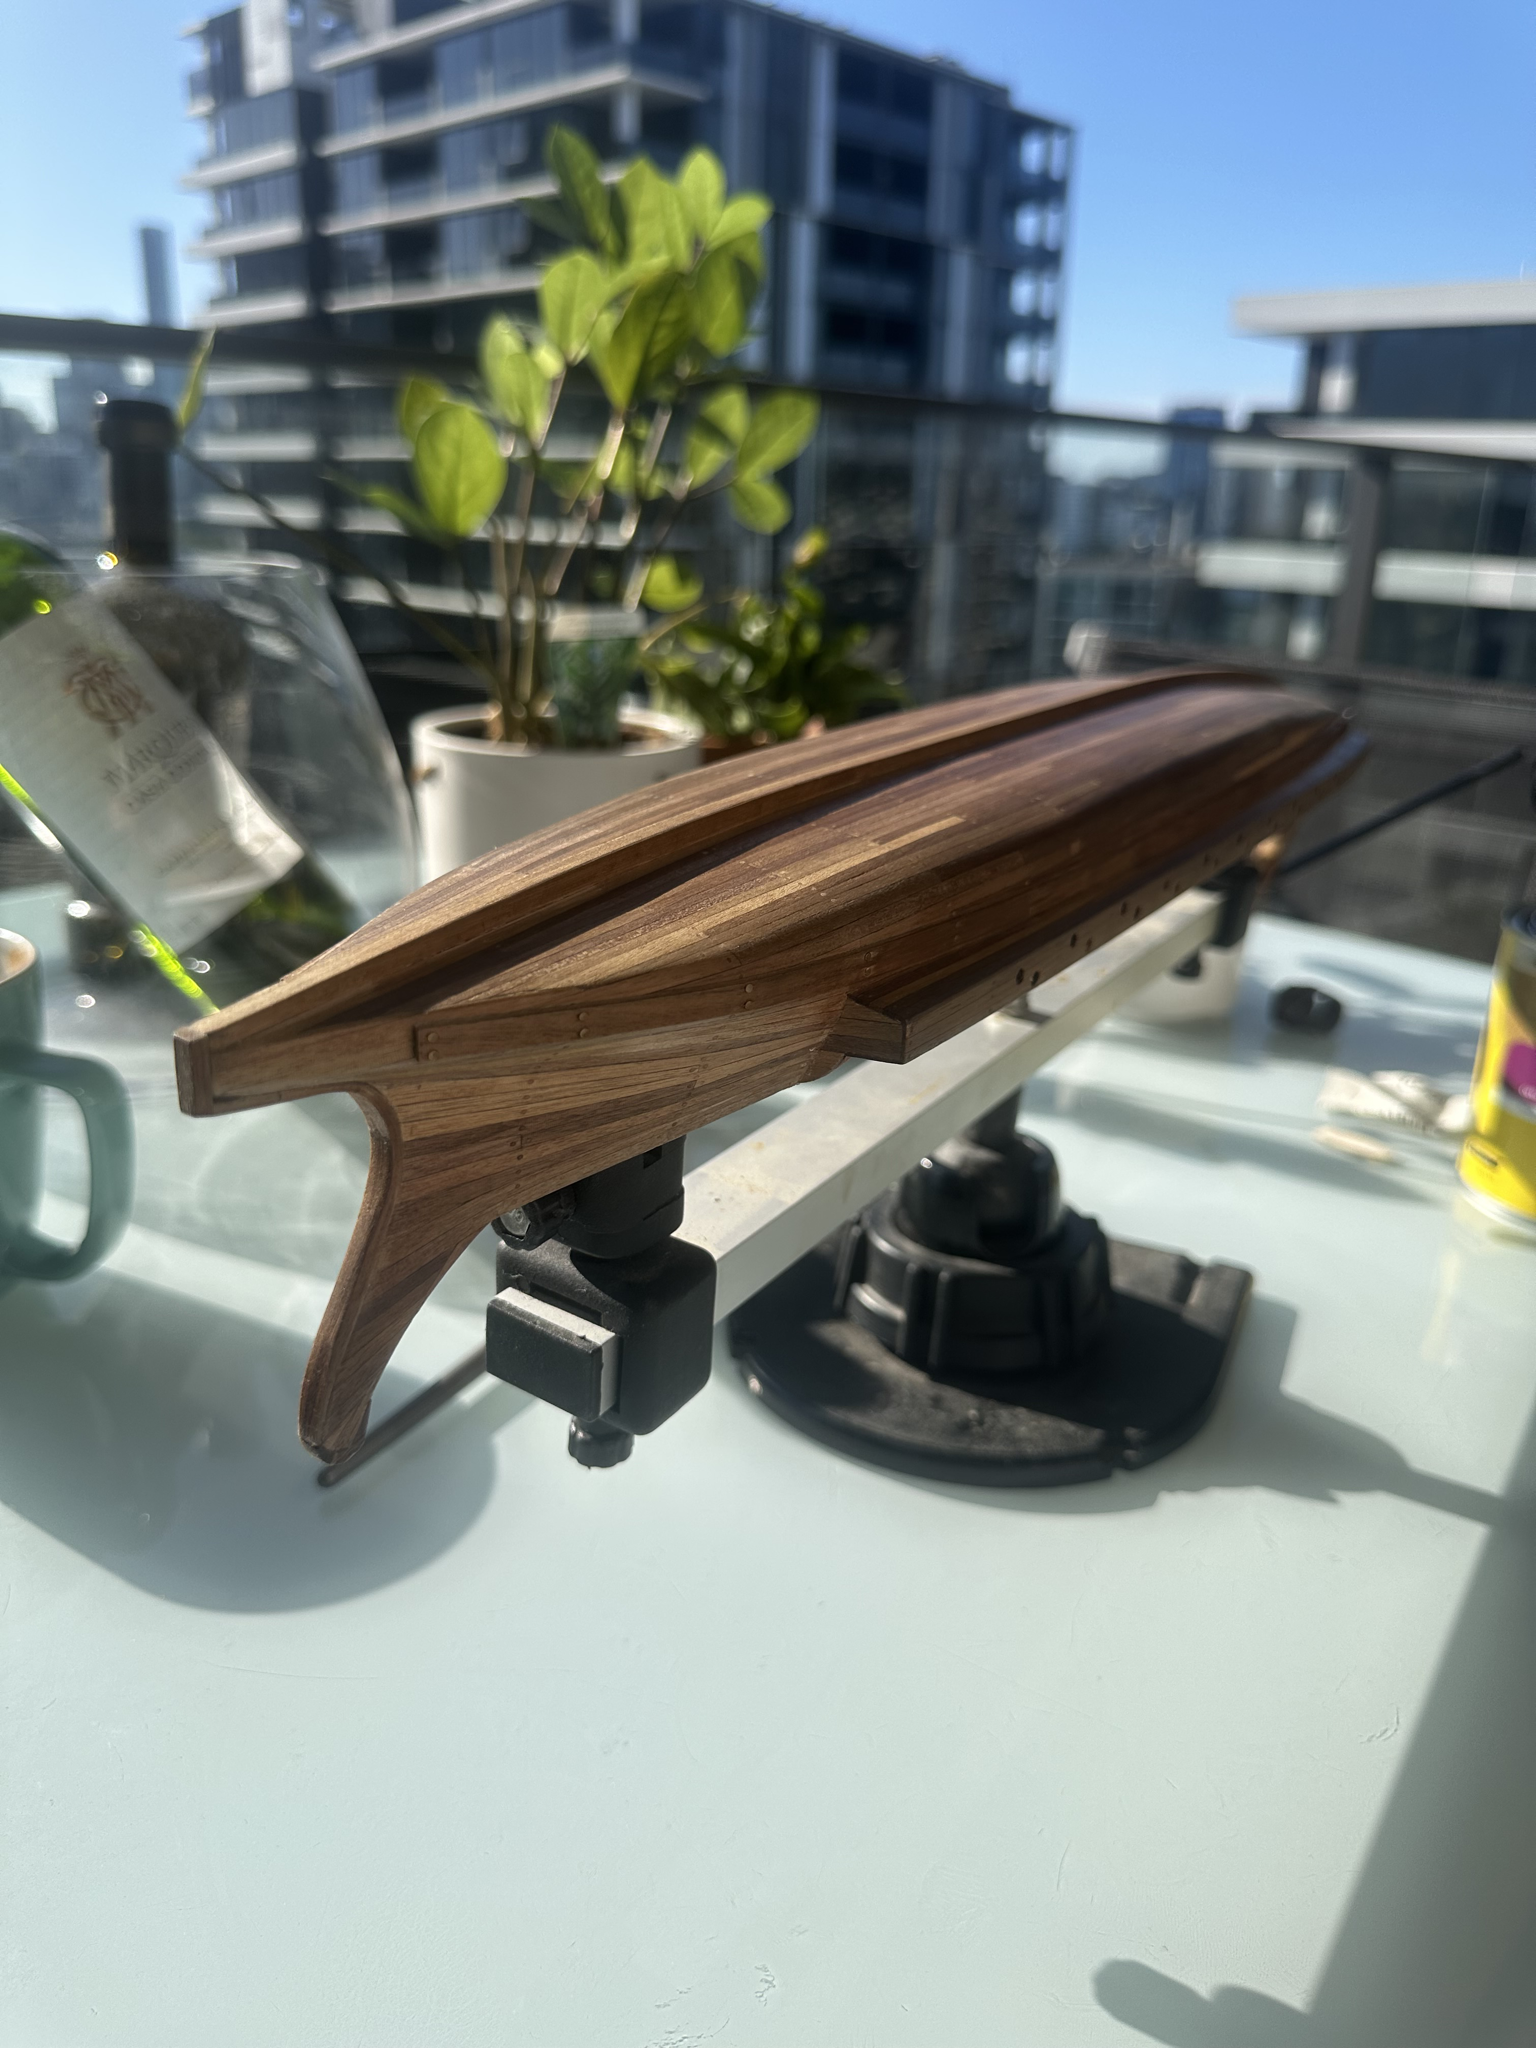
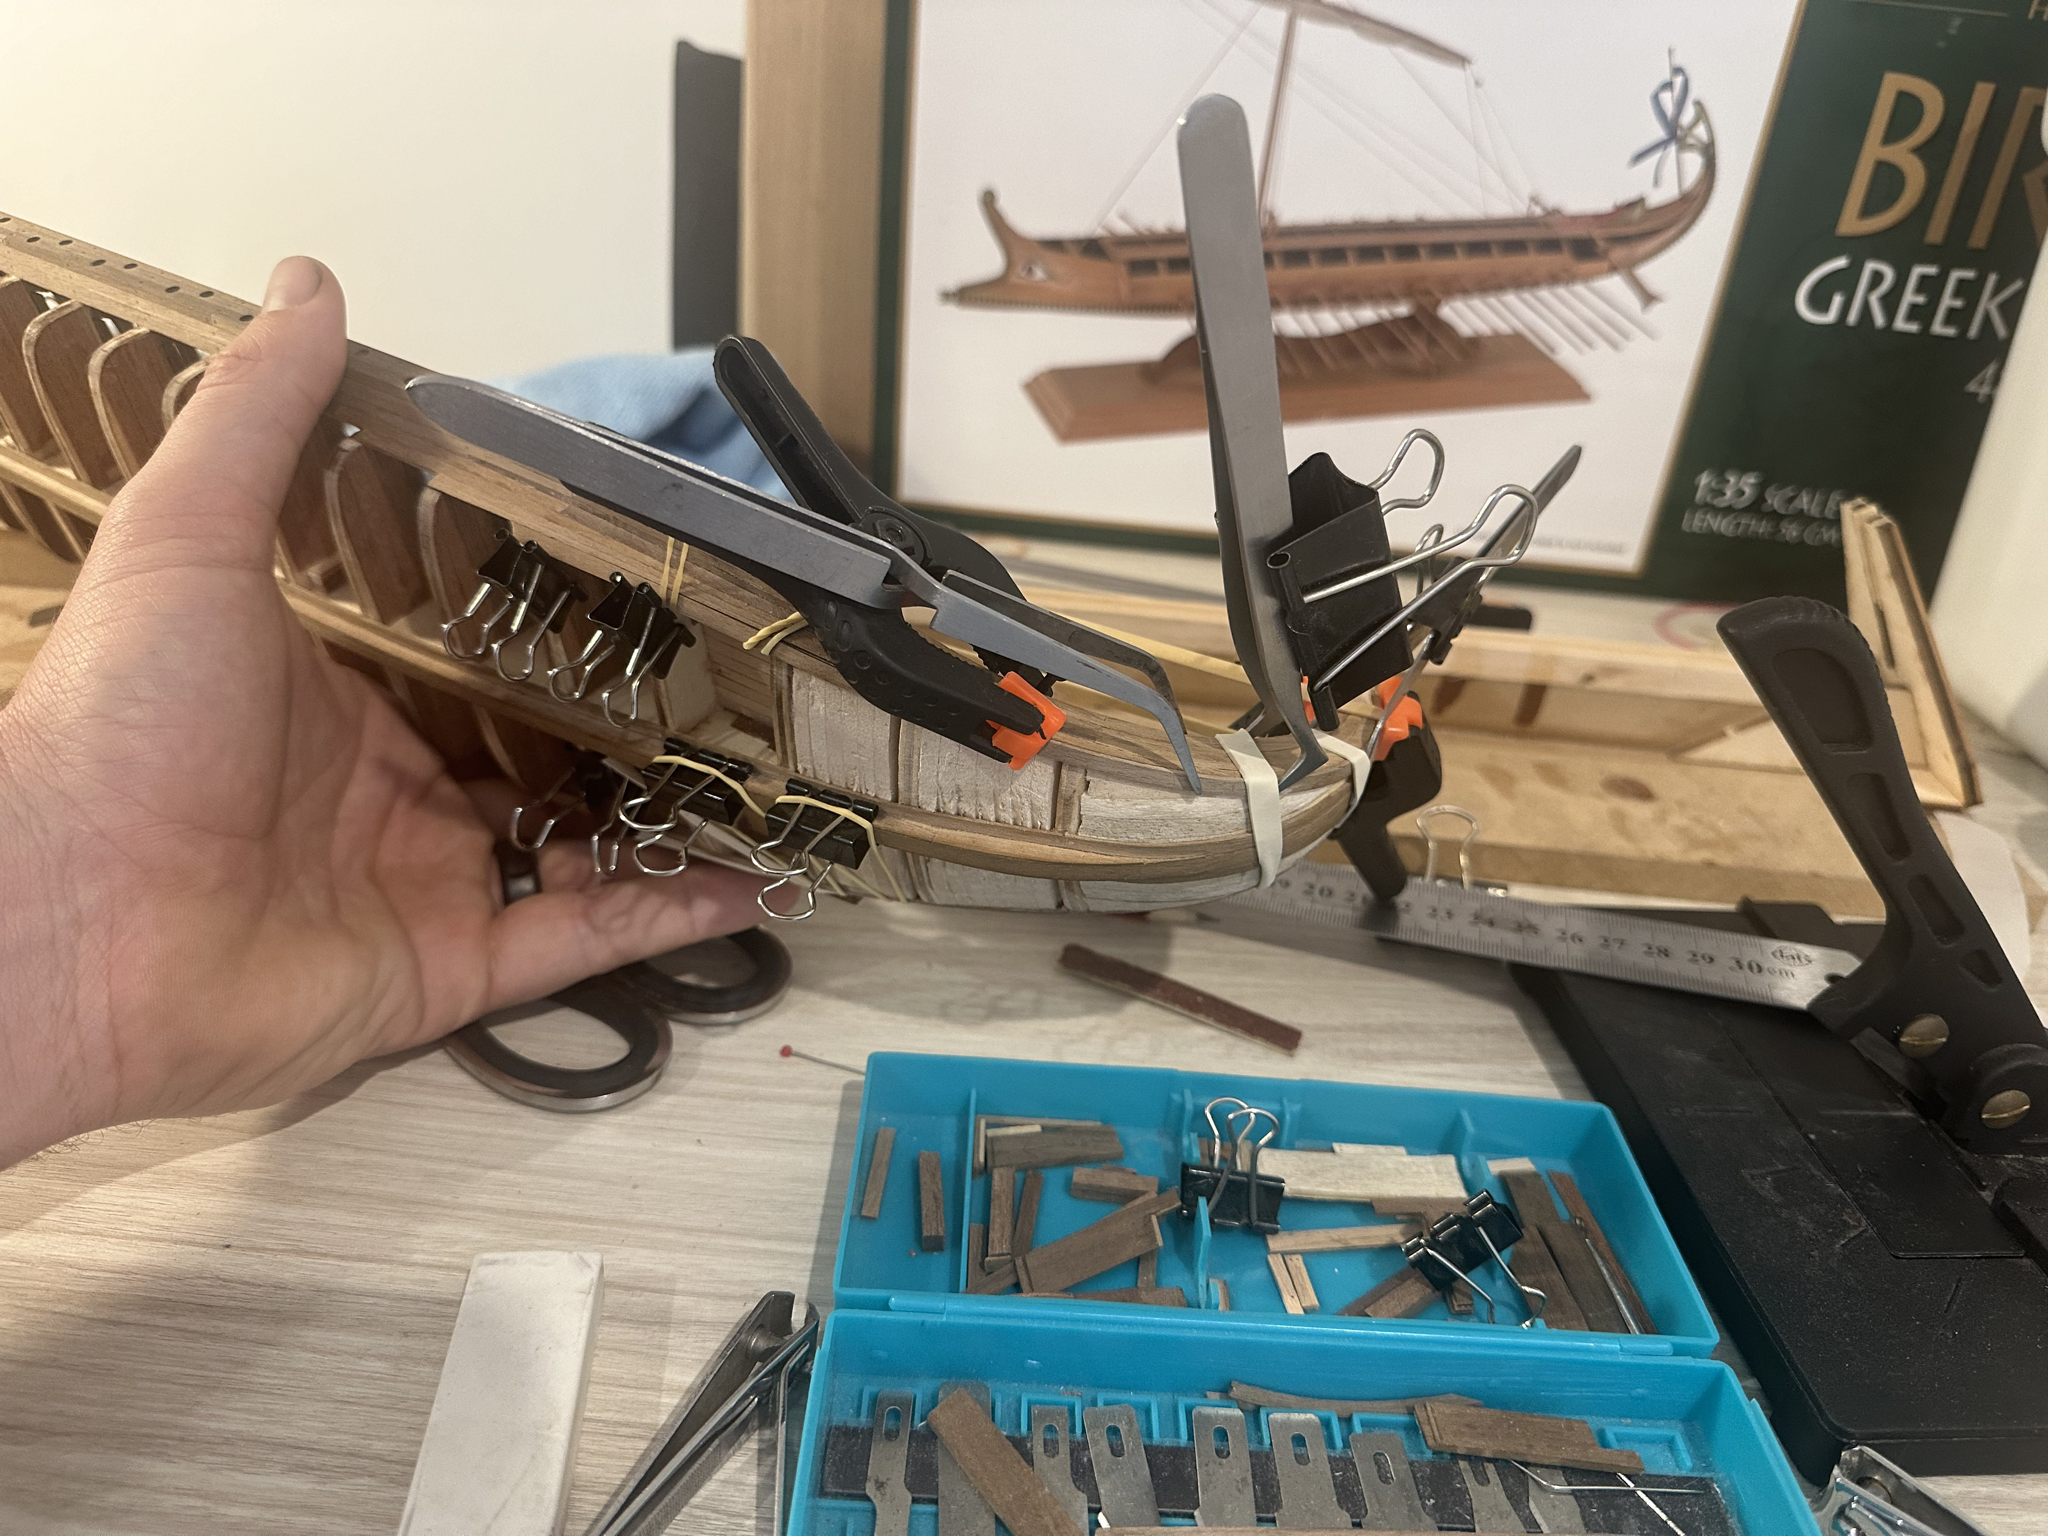
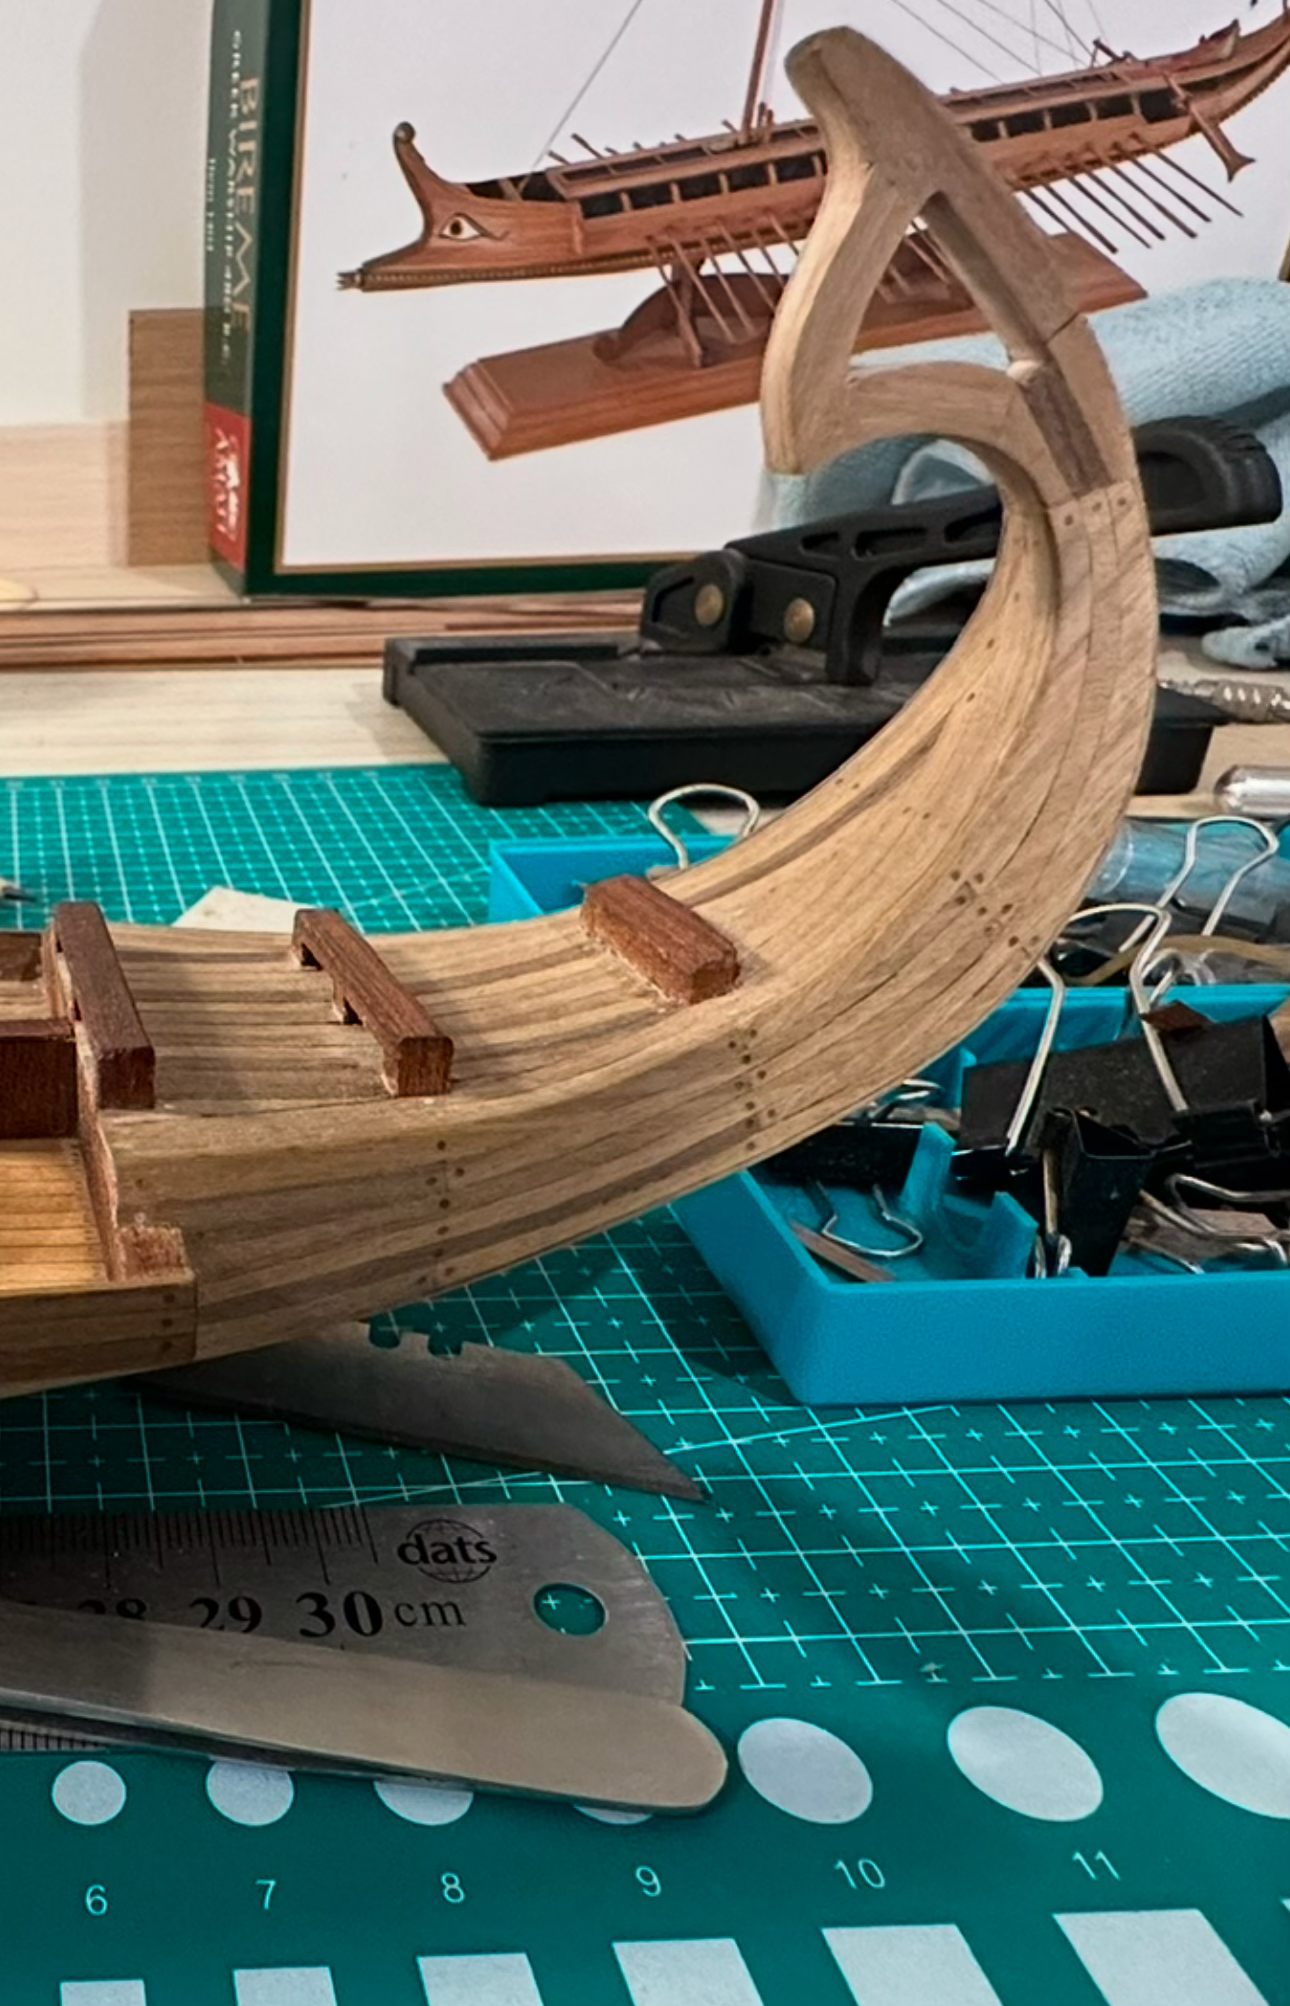
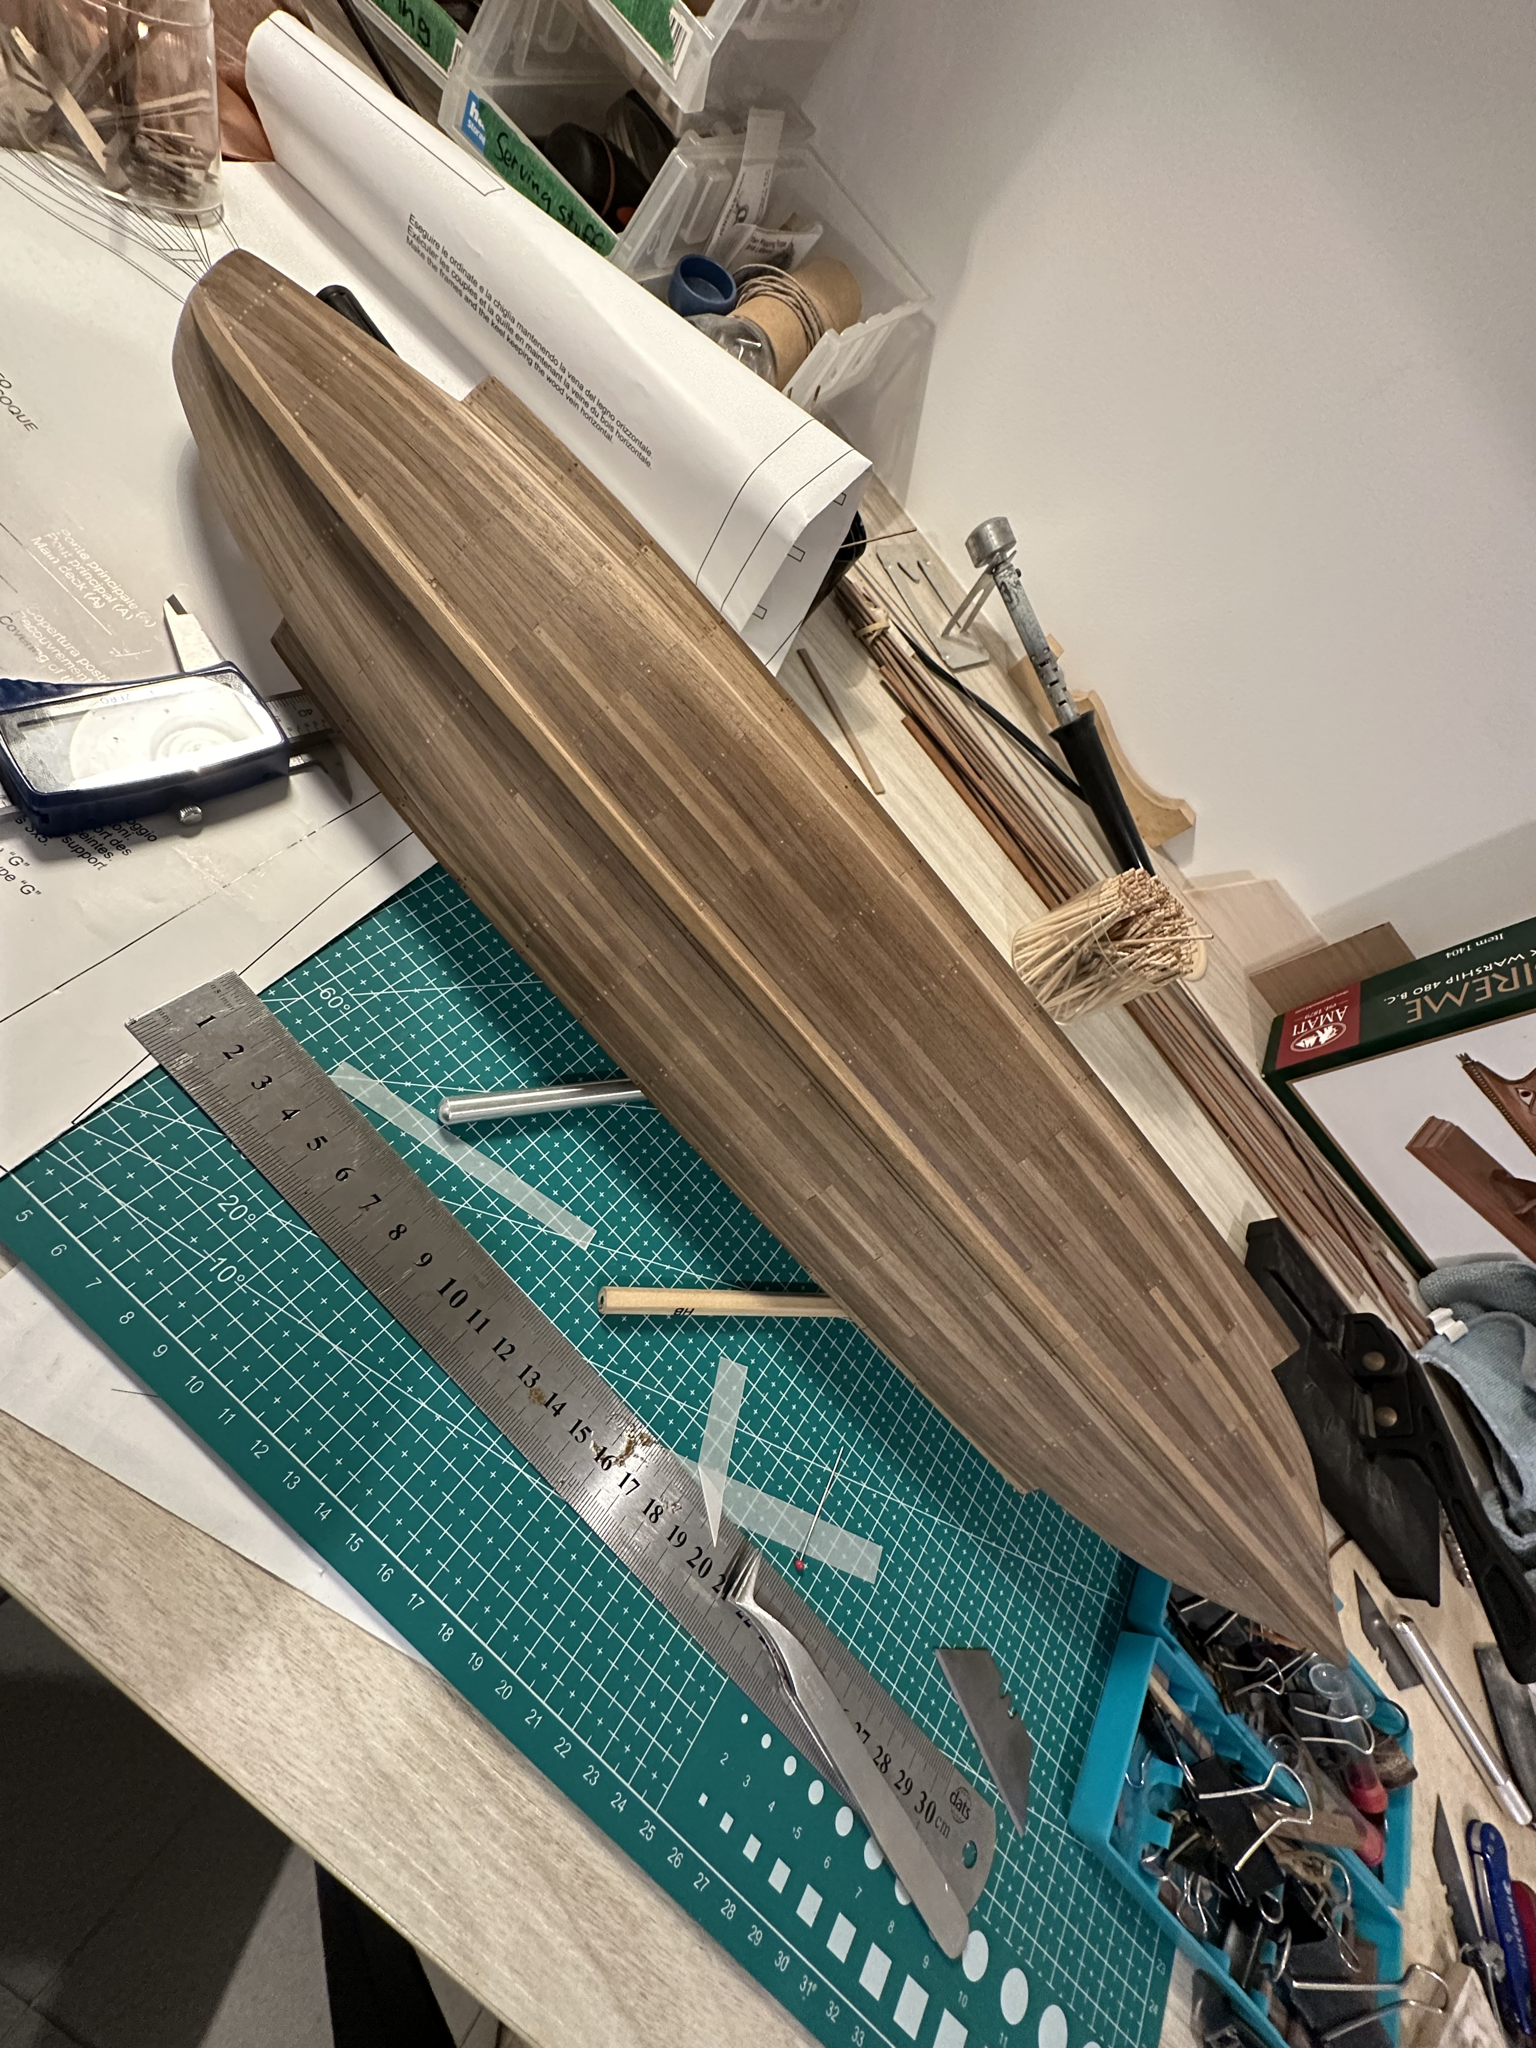
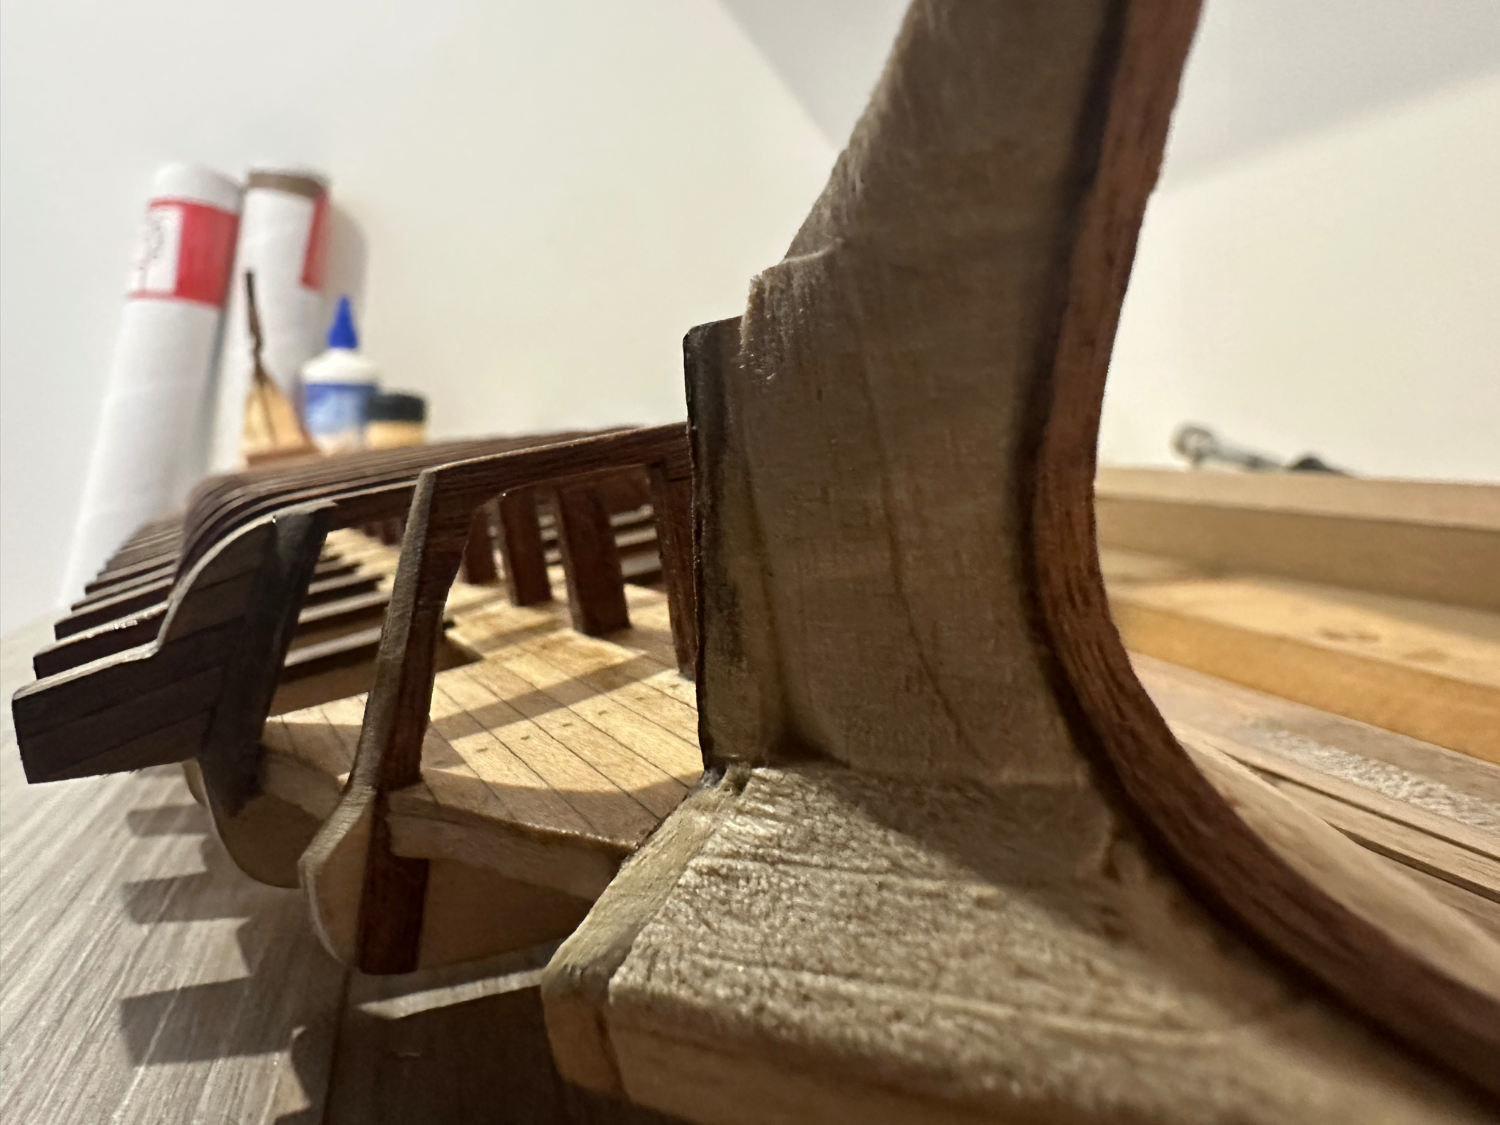
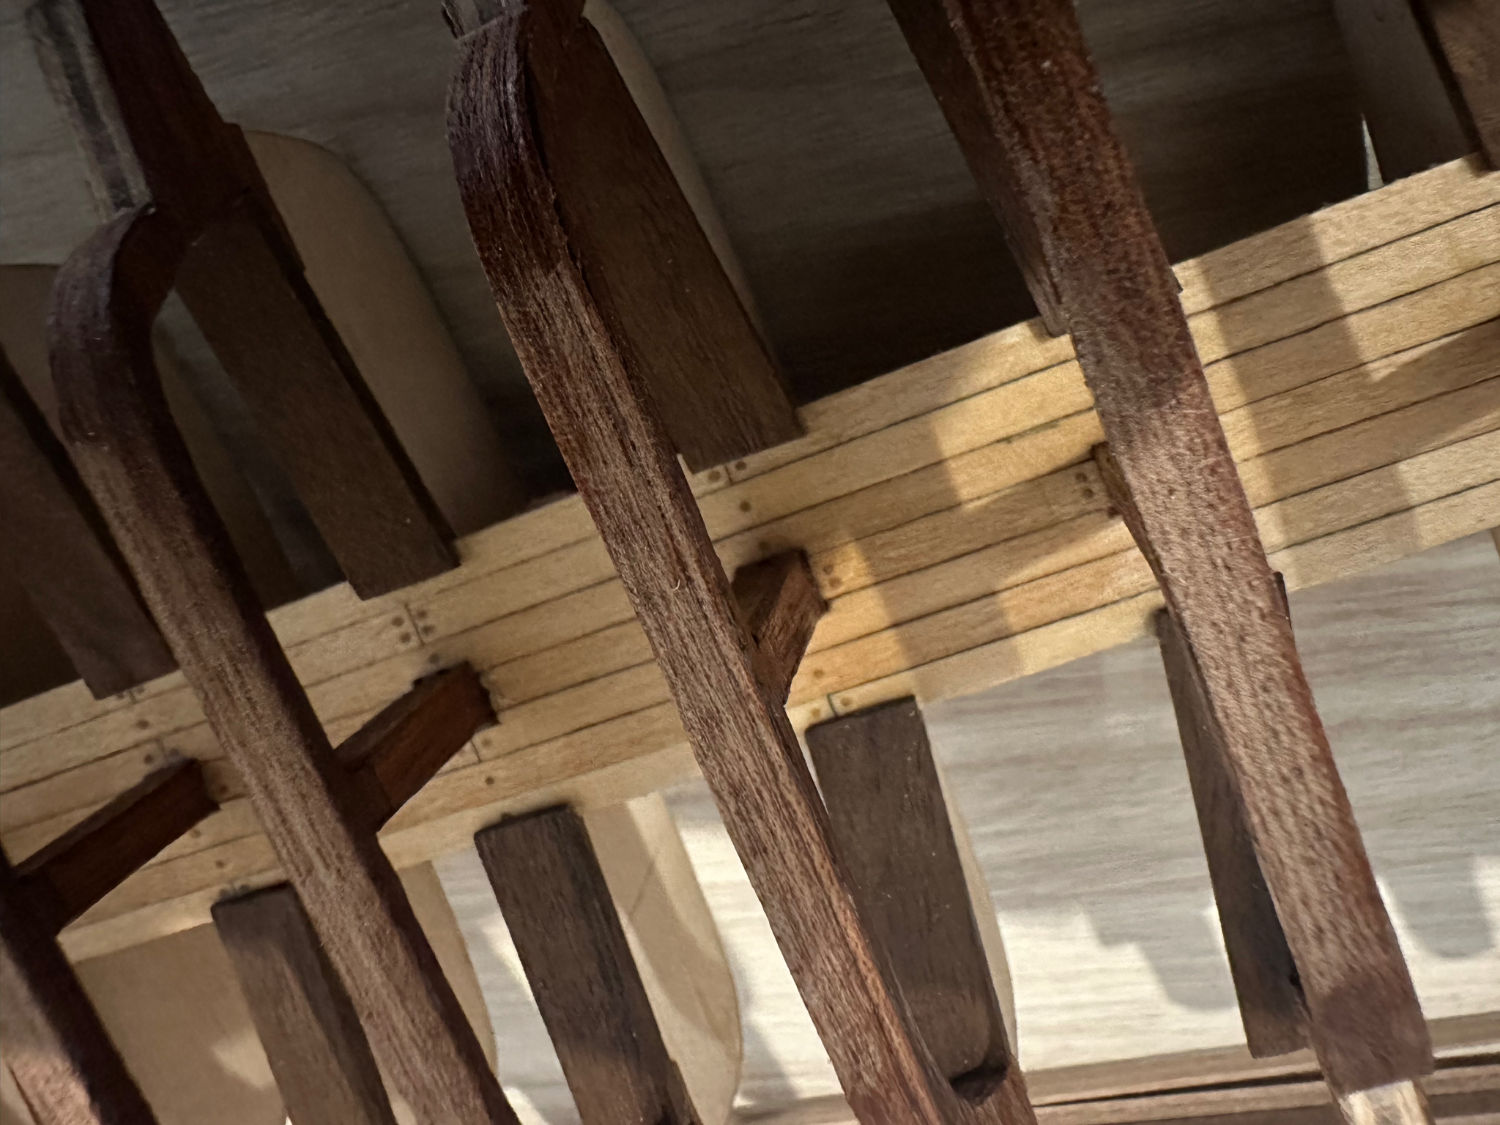
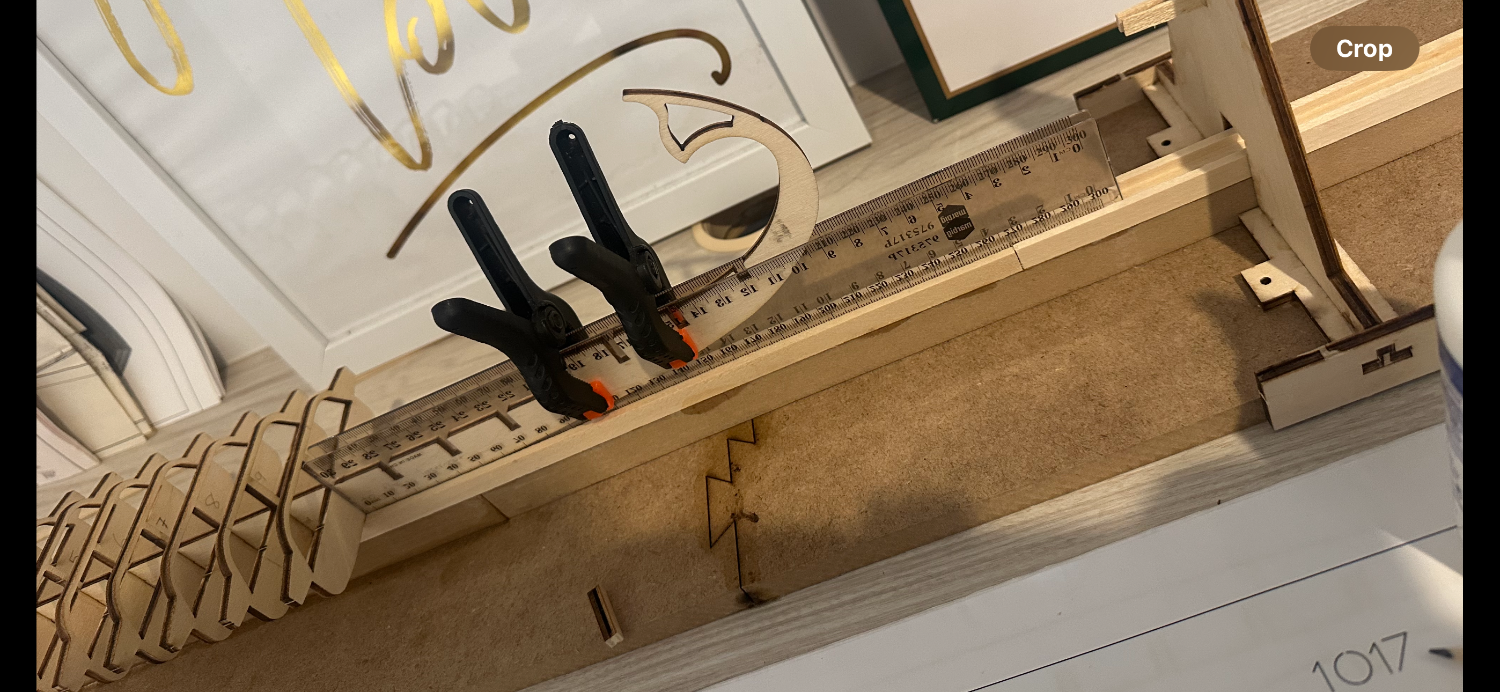
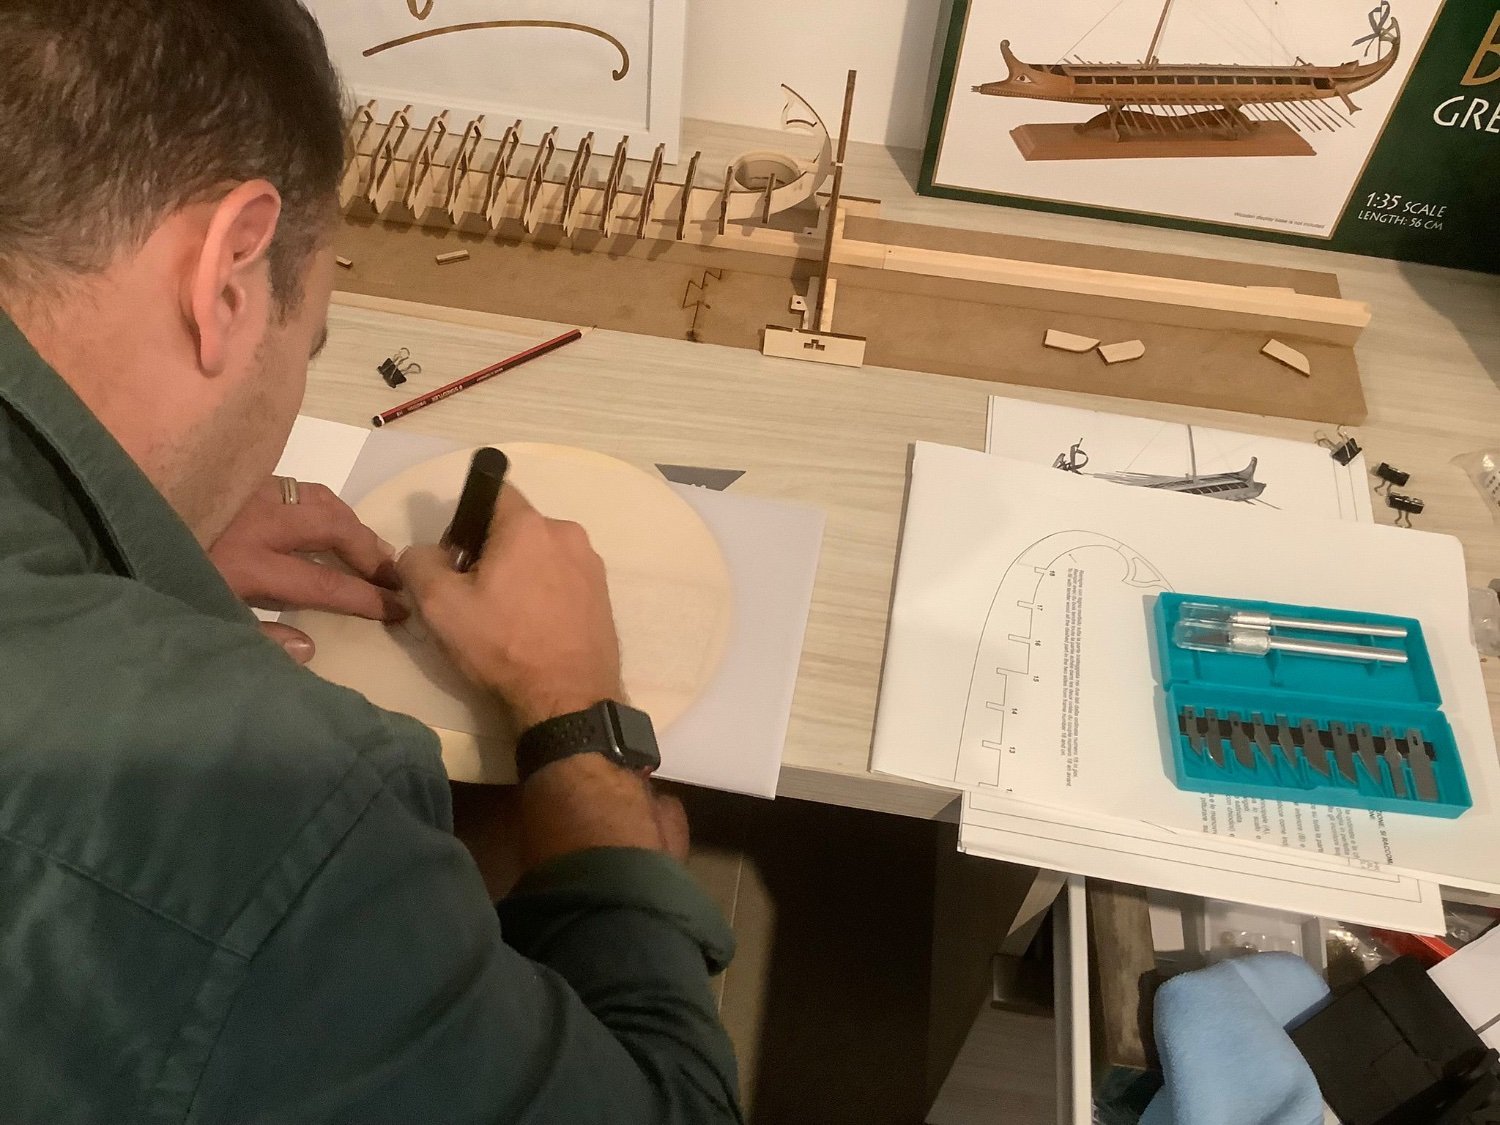
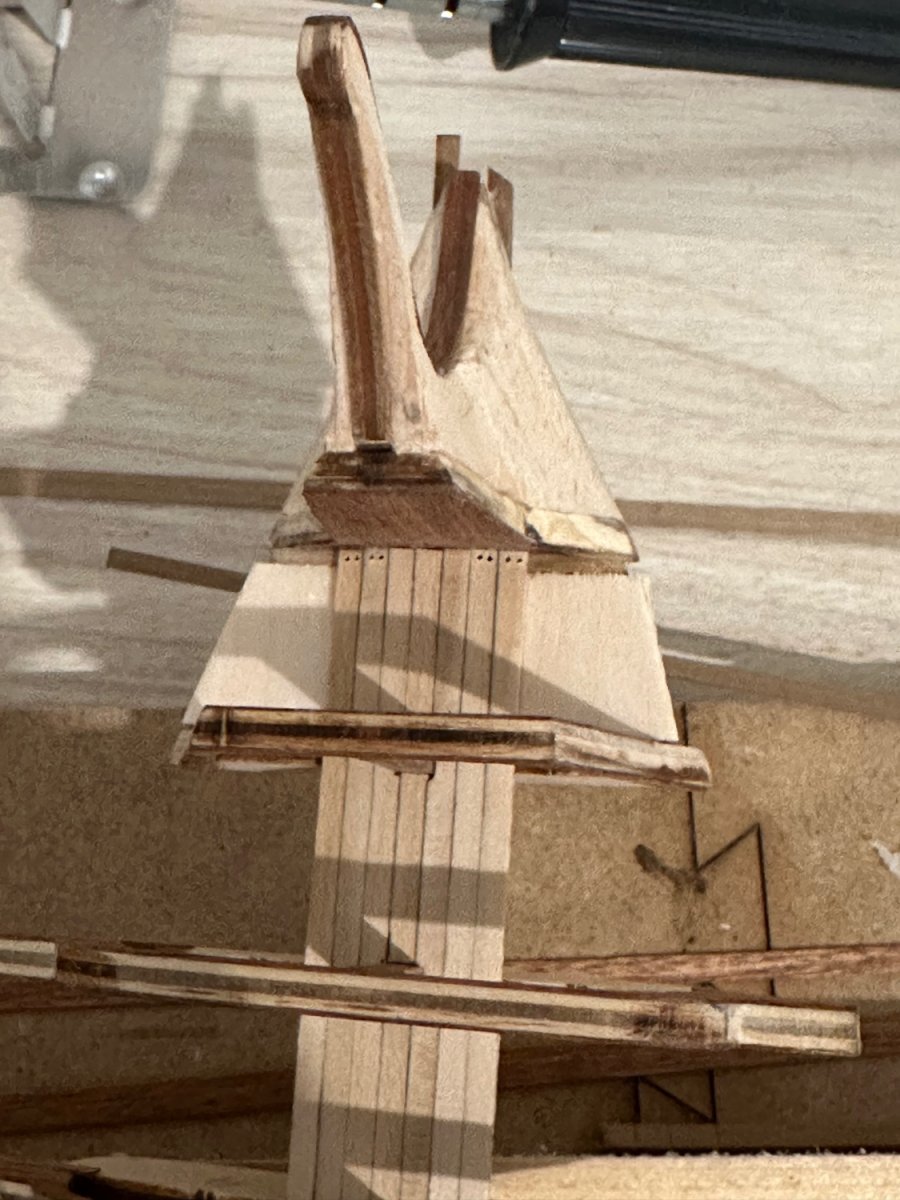
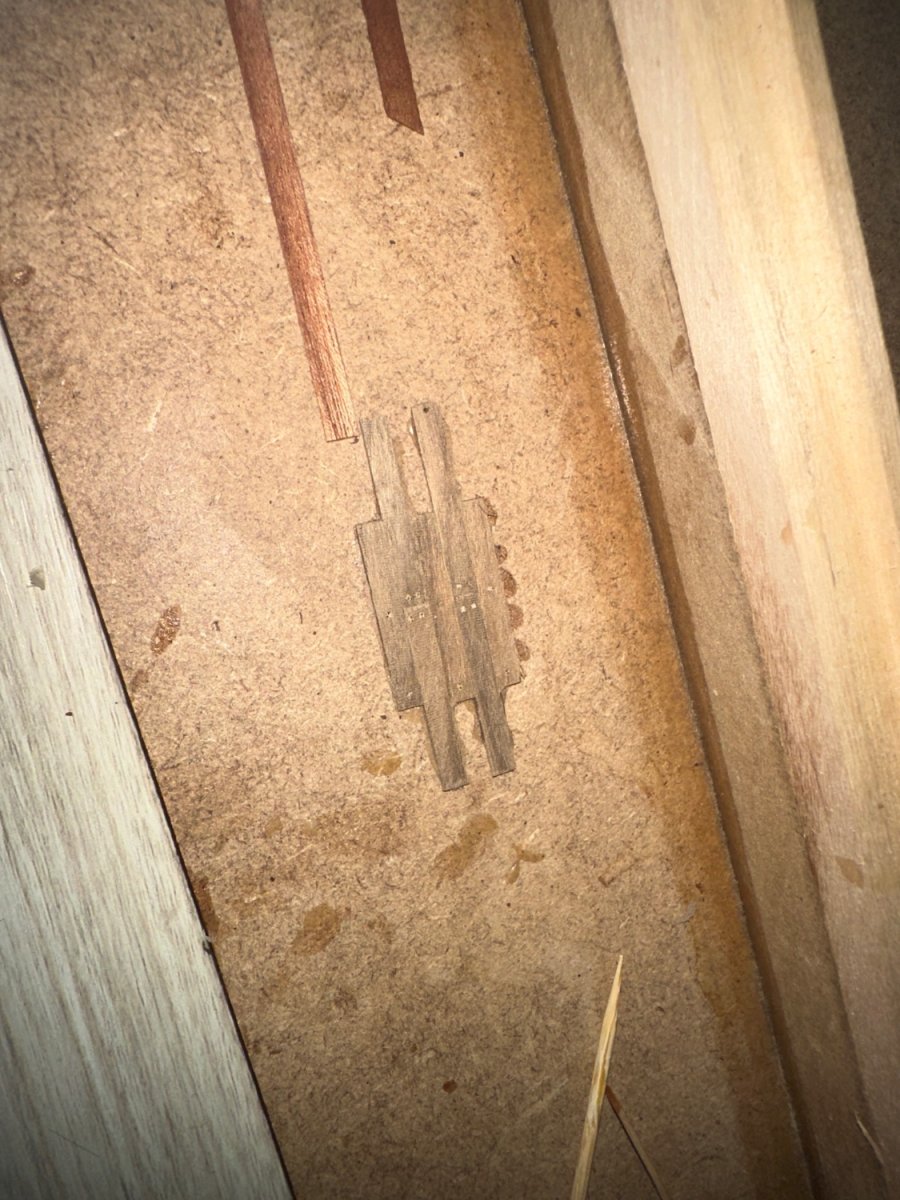
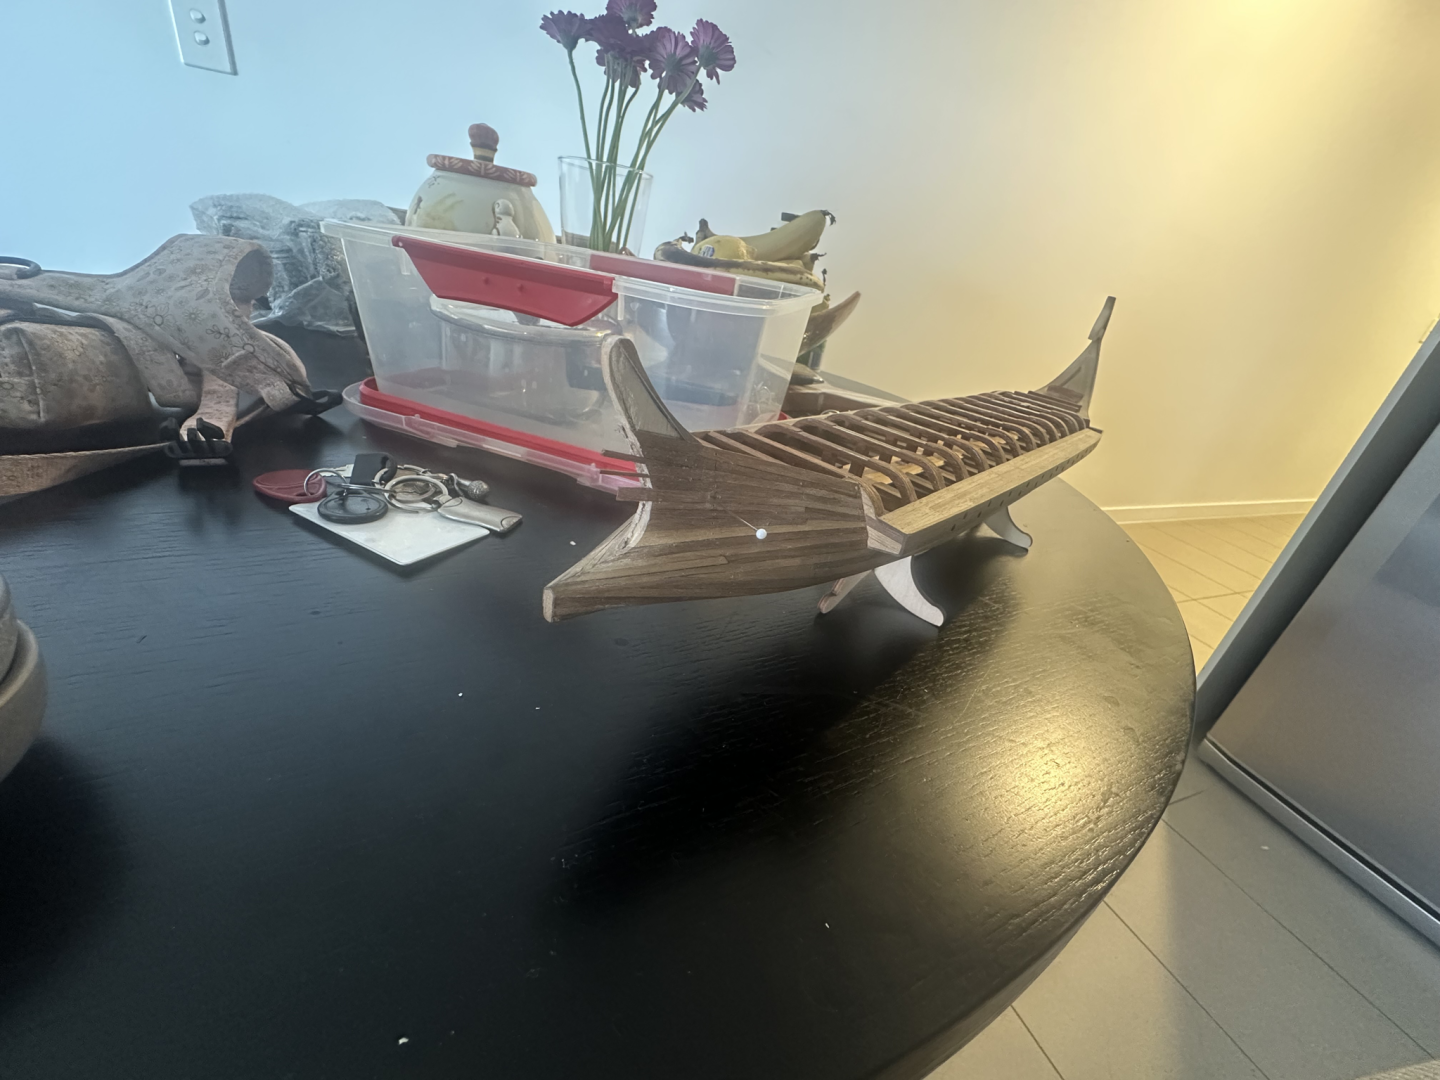
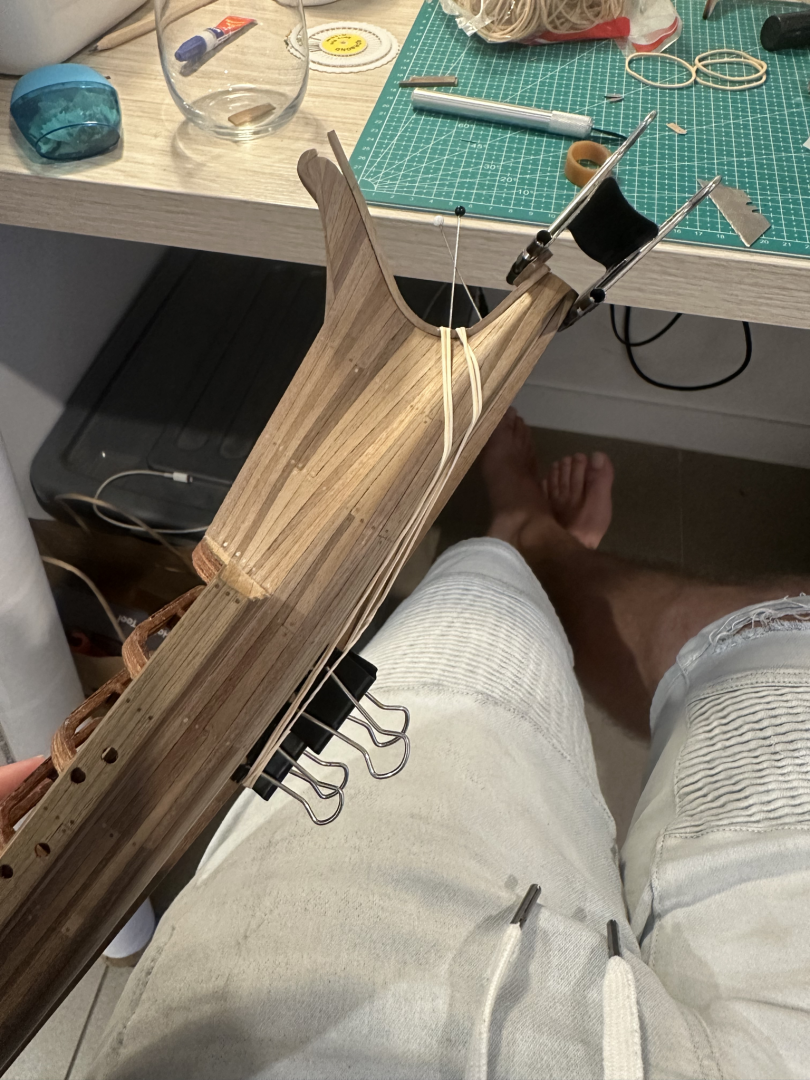
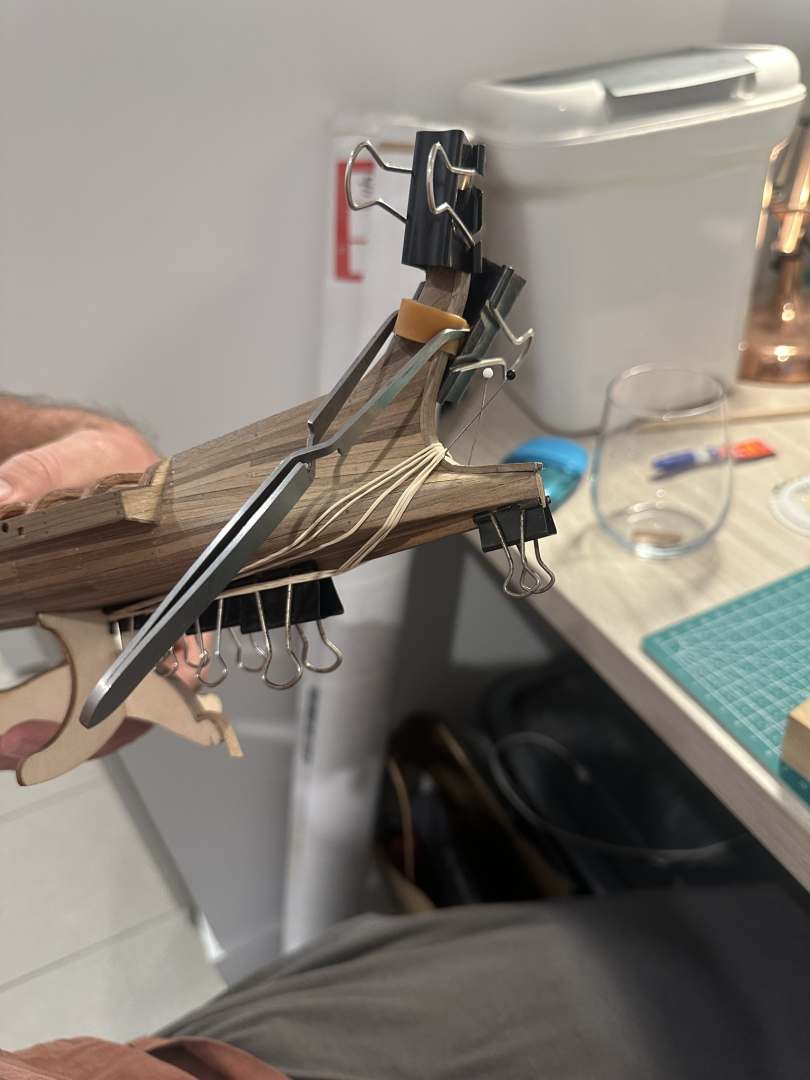
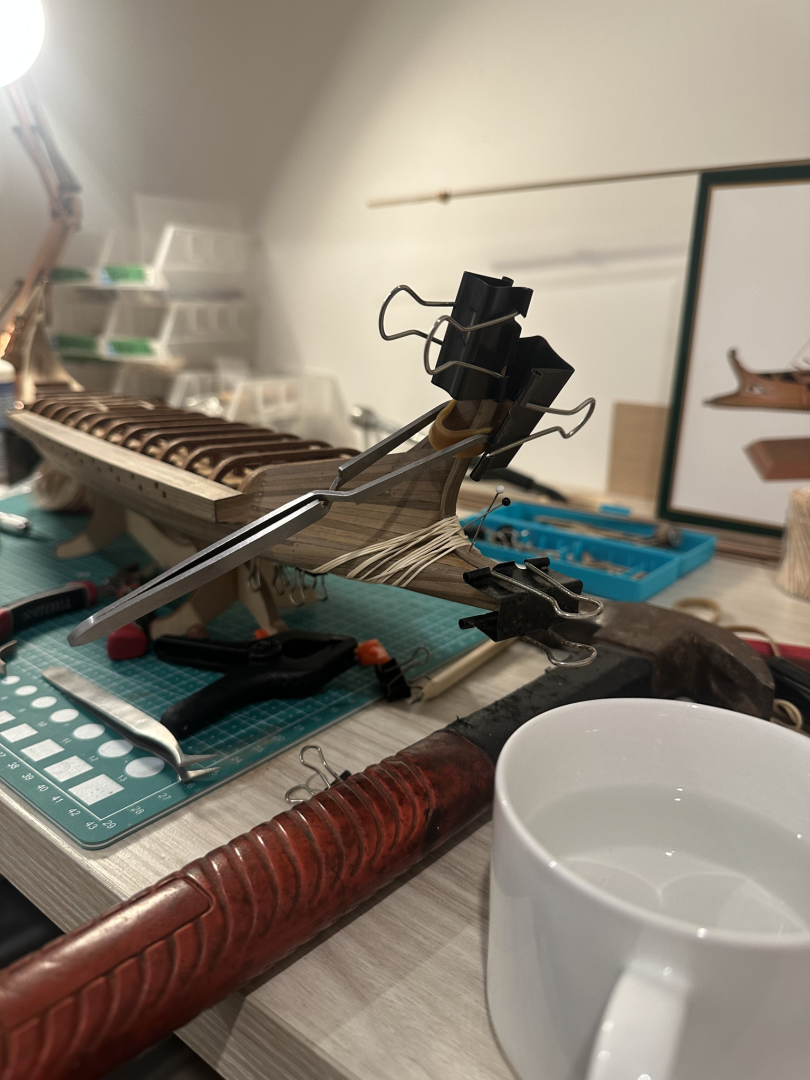
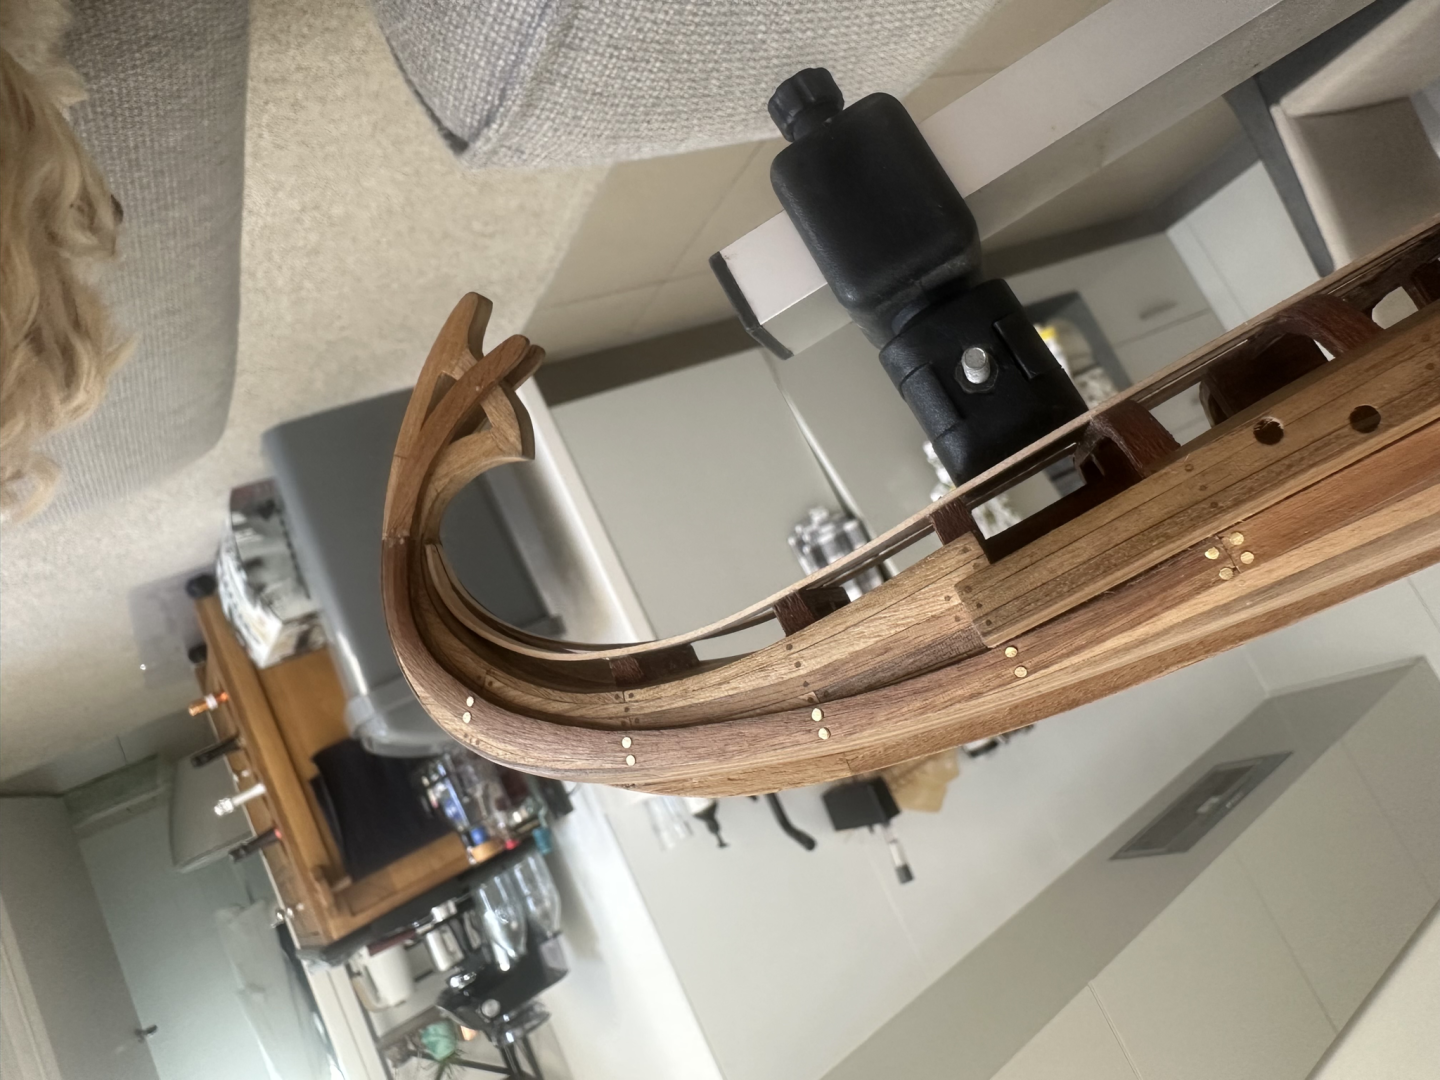
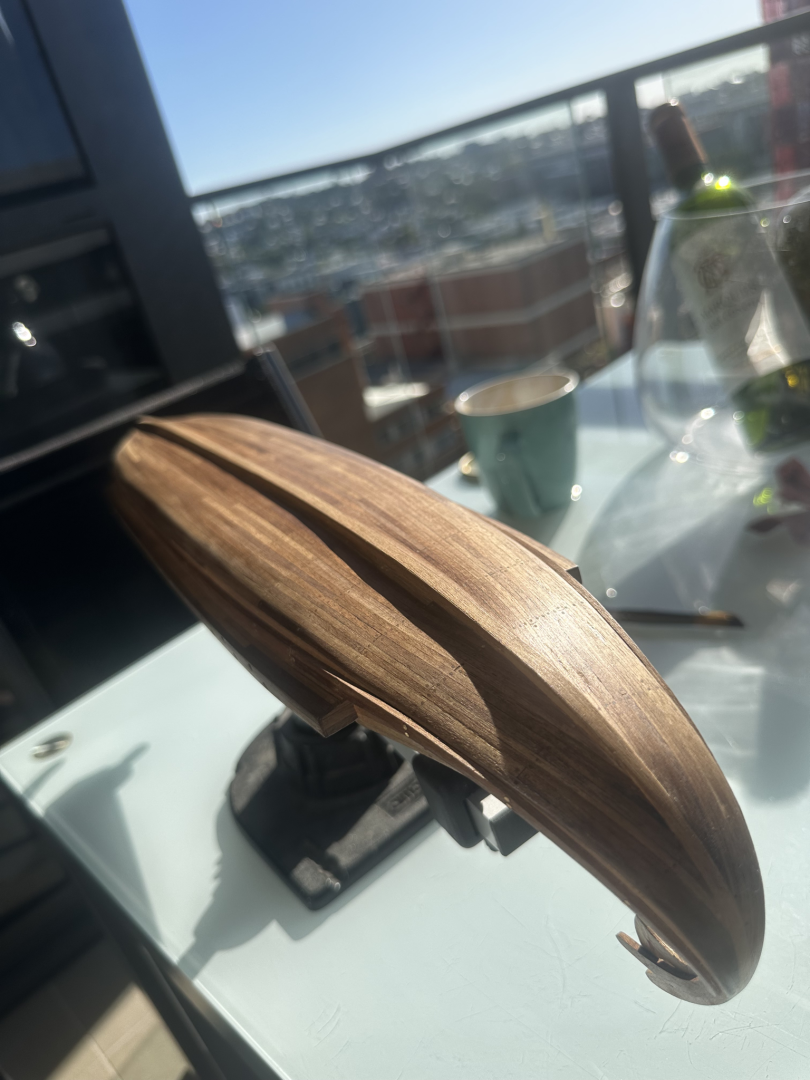
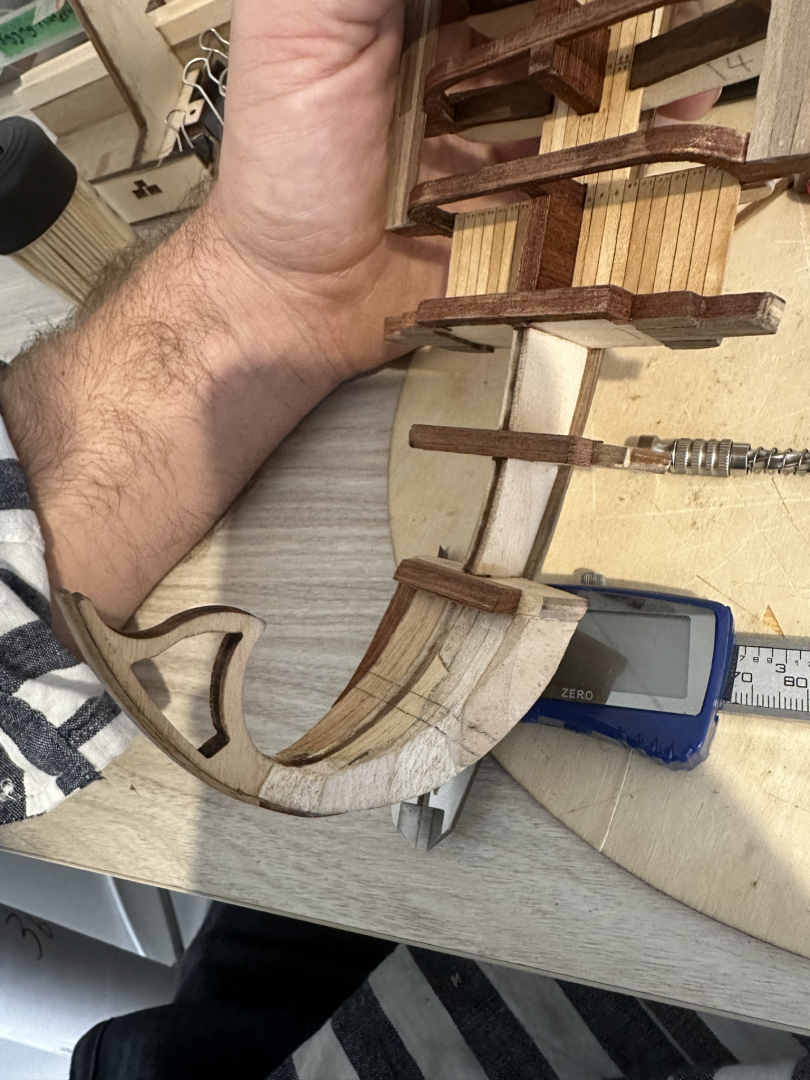
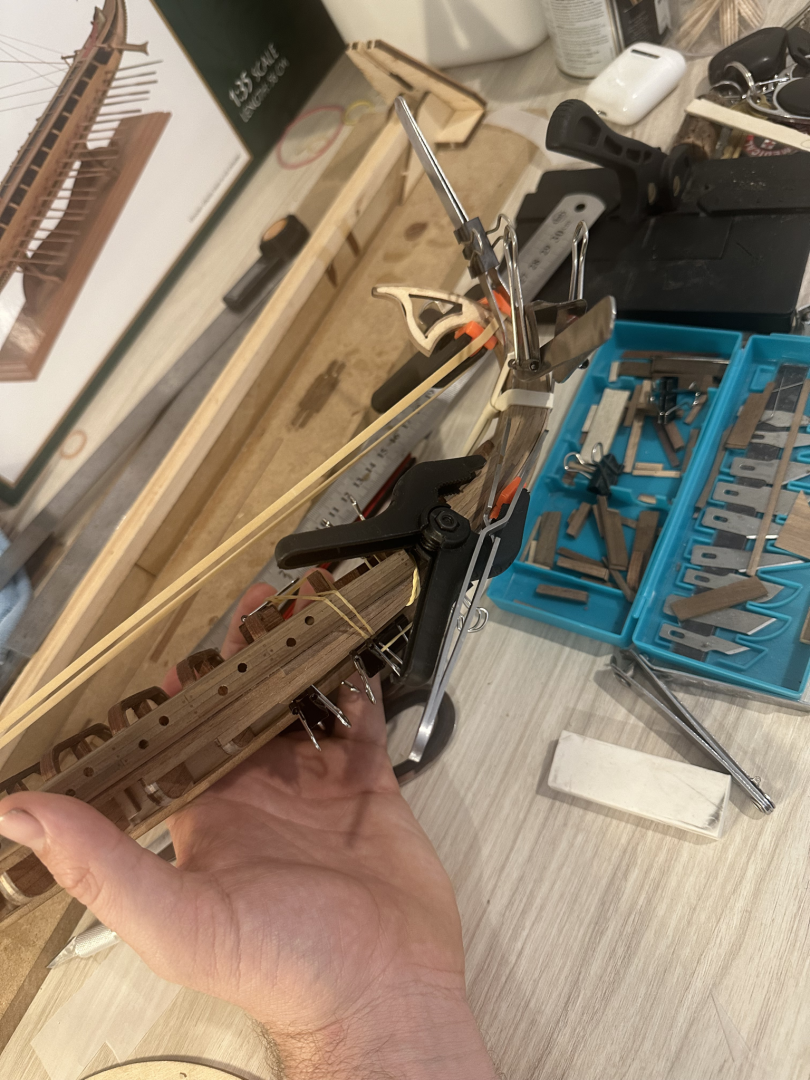
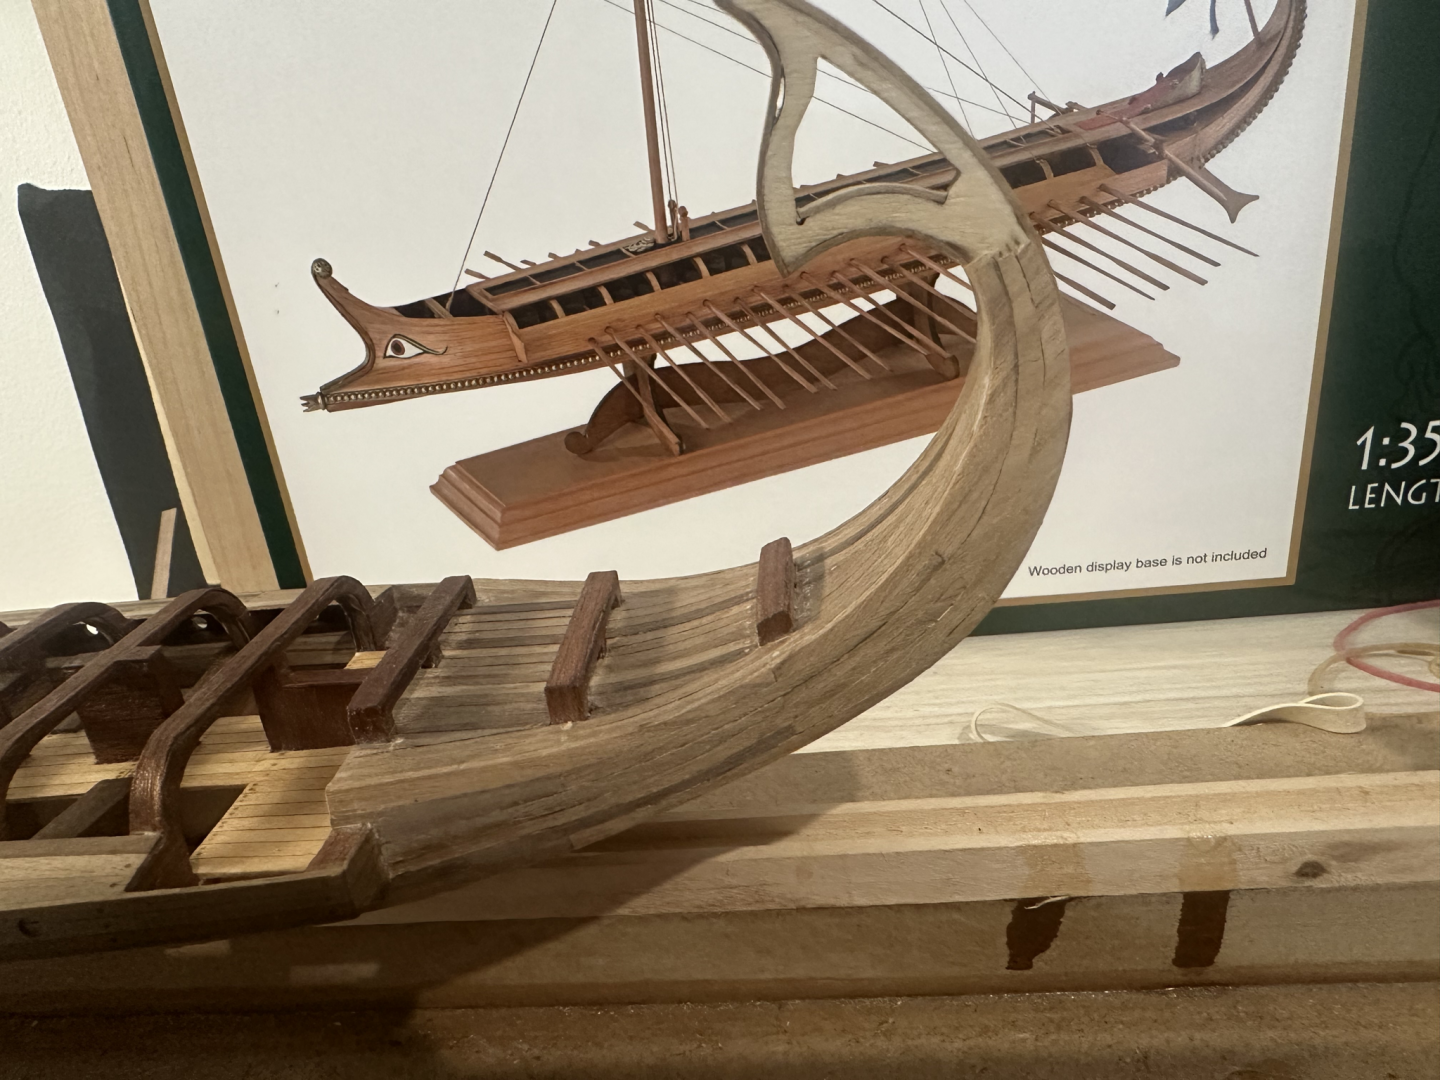
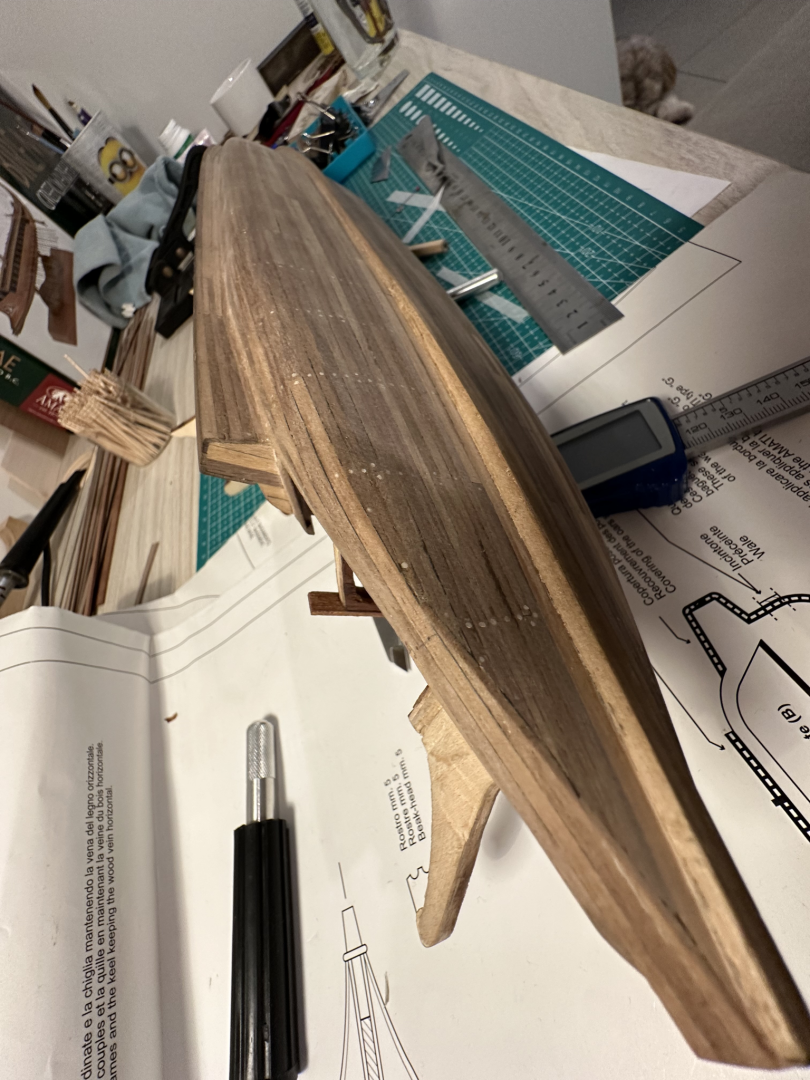
Over the last few months been doing all sorts… First on the menu…finish planking the bow and bow post and upper part of the ram. I’m planning on putting some sort of fabricated metal ram on it later… Next after planking was to sand it progressively nice and smooth…then needed to place along the upper part of the ram all the way up the bow post (I’m not actually sure what the technical name for this section is called) this very thick piece of wood. It was a mongrel to bend but between boiling with hot water and a curling iron, pins and rubber bands I got it done 👍 I didn’t get enough photos of this section of the build so here’s a more recent photo of it being completely attached and bent into shape. Next was to attach the whales I definitely didn’t get enough photos for this part. These are more recent photos of the fabricated whales made out of thinner planks that curl up the stern. These holes are where I placed little nails and used to hold in place glued thinner curled strips together in order get the correct curve for the whale up the stern. I lost sleep on what treatment I would put on this beautiful walnut timber… since I had some spare walnut timber left over I decided to plank the boat stand, and then do some experimentation on it with a water-based polyurethane. Long story short, I was happy with the stand but unhappy with the water-based polyurethane I put on it. After further research, I decided that I would try next a danish oil. So after fabricating and making the rudders. I put some of this danish oil on it and was very happy with how the Danish oil really highlights the grains of the walnut timber. I’m undecided if it would be appropriate for me to do a thin layer of an oil based polyurethane now or just leave it as is. But regardless, this is where I’m at now. I’ve got one layer of danish oil applied. I gave a very light sand with 240 grit sandpaper and then in this photo, just freshly gave a second coat of danish oil. Not decided yet on whether or not to give a final coat of oil based Matt polyurethane at the end once it has dried. The next step is now to finish the upper deck planking… paint on the eyes…And then fabricate the ram… hopefully post more soon…


-
mtaylor reacted to a post in a topic:
Greek Bireme by Vinnie - Amati - 1:49
-
Auger reacted to a post in a topic:
Greek Bireme by Vinnie - Amati - 1:49
-
SiriusVoyager reacted to a post in a topic:
Greek Bireme by Vinnie - Amati - 1:49
-
DARIVS ARCHITECTVS reacted to a post in a topic:
Greek Bireme by Vinnie - Amati - 1:49
-
GrandpaPhil reacted to a post in a topic:
Greek Bireme by Vinnie - Amati - 1:49
-
Knocklouder reacted to a post in a topic:
Greek Bireme by Vinnie - Amati - 1:49
-
Greek Bireme by Vinnie - Amati - 1:49
Vinnie replied to Vinnie's topic in - Kit subjects built Up to and including 1500 AD
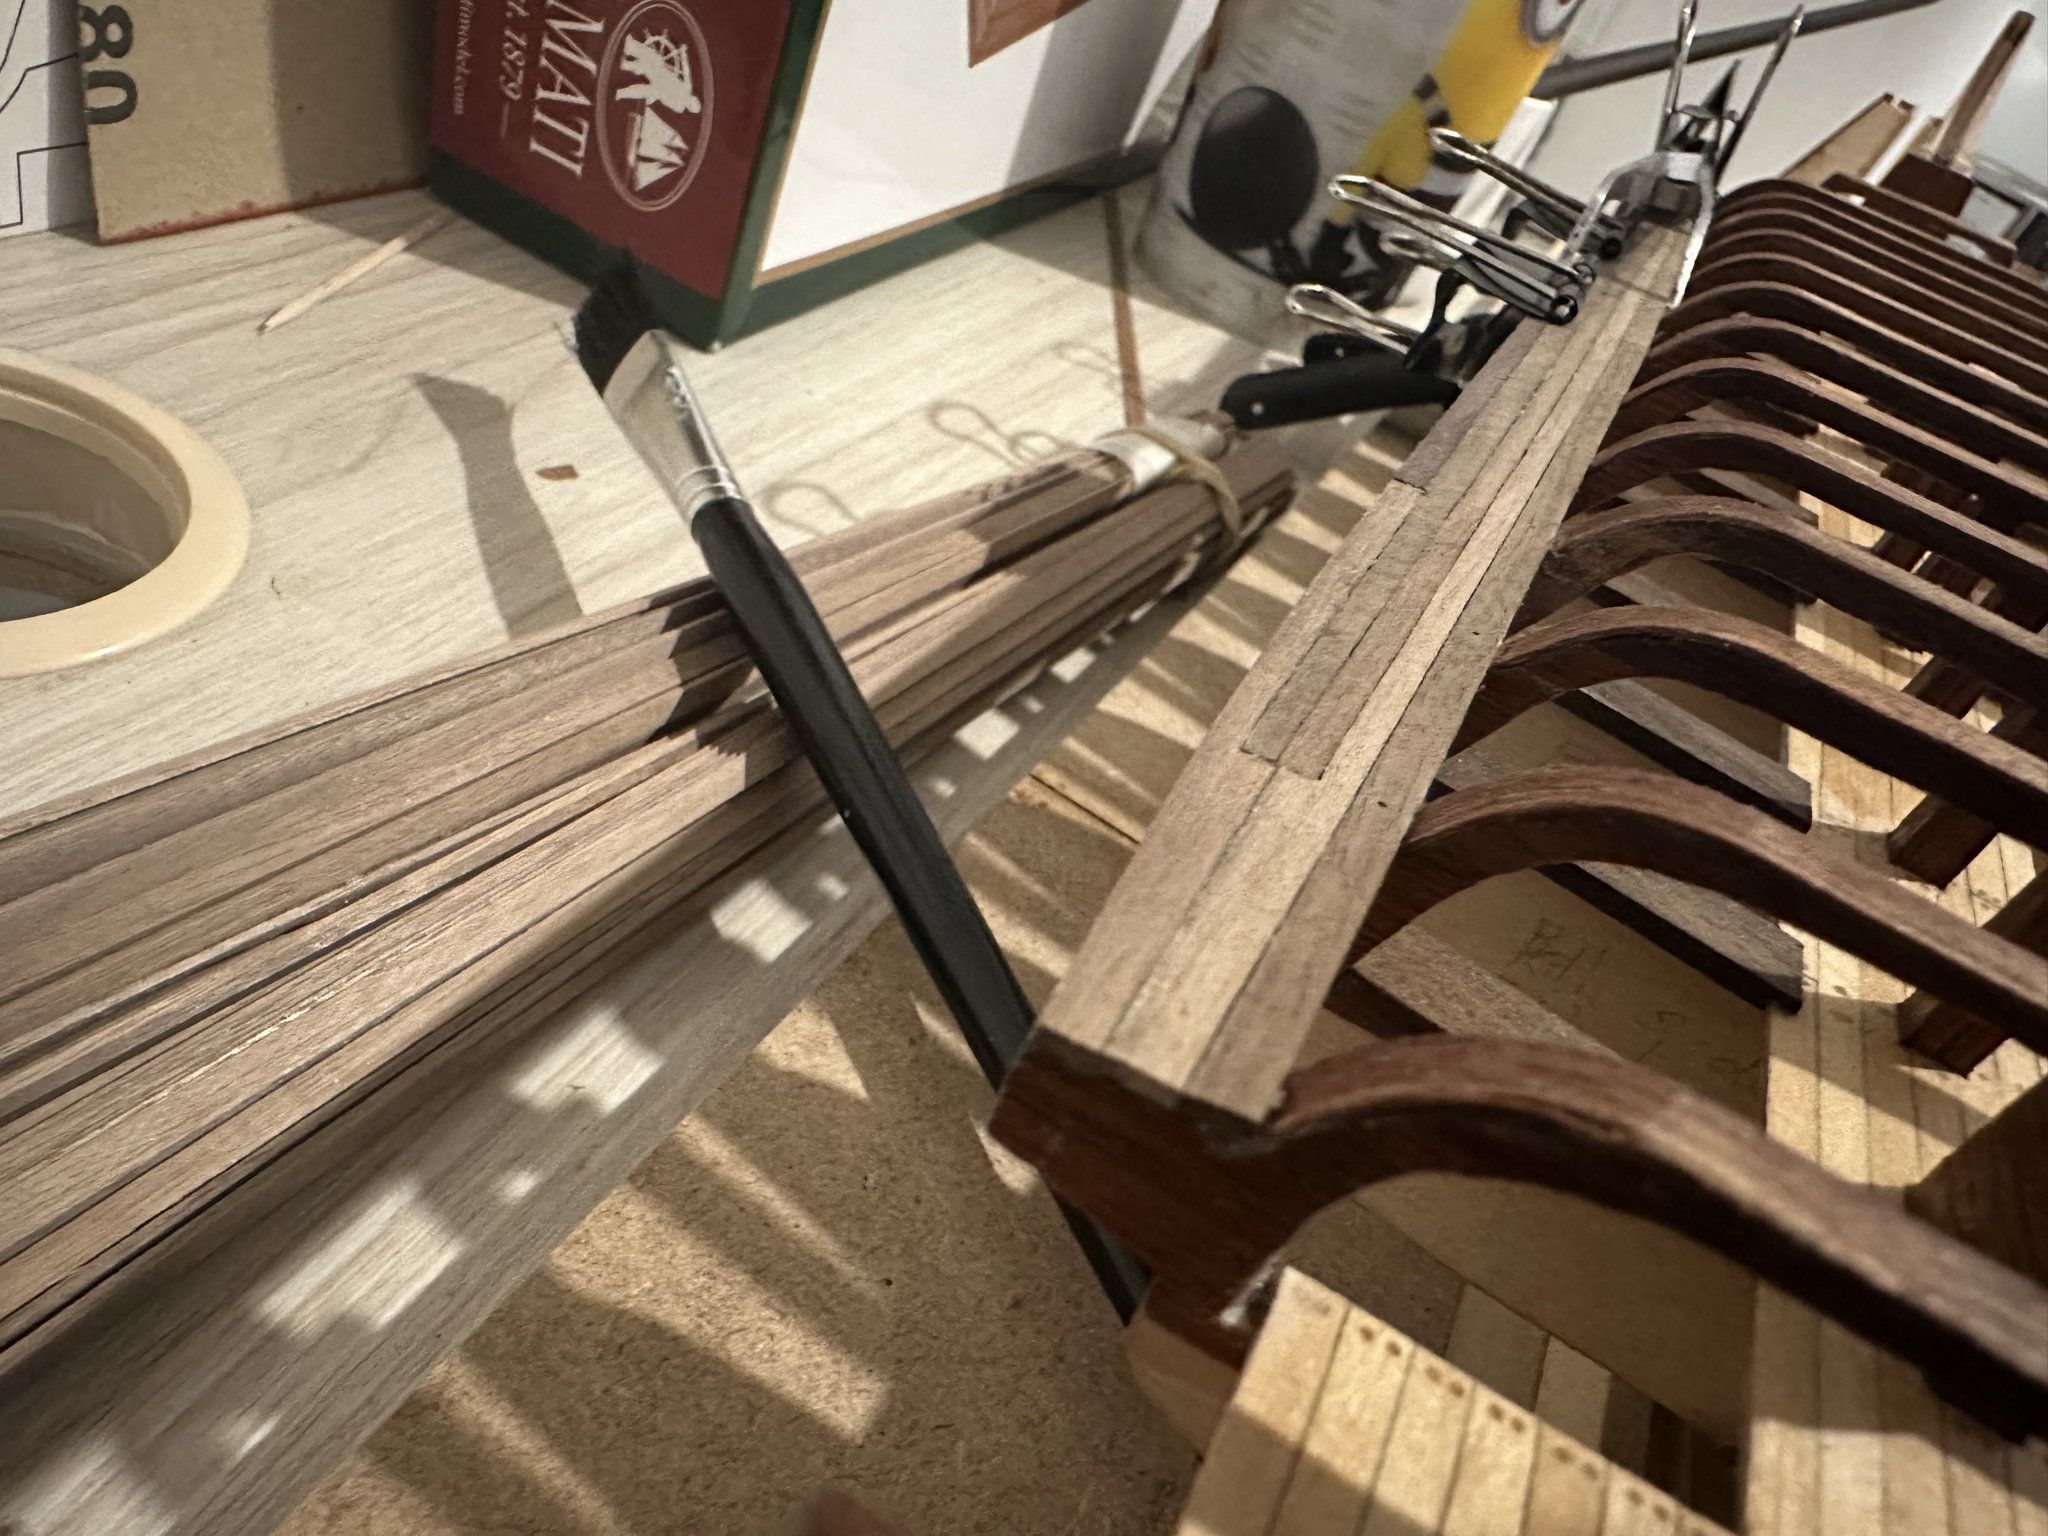
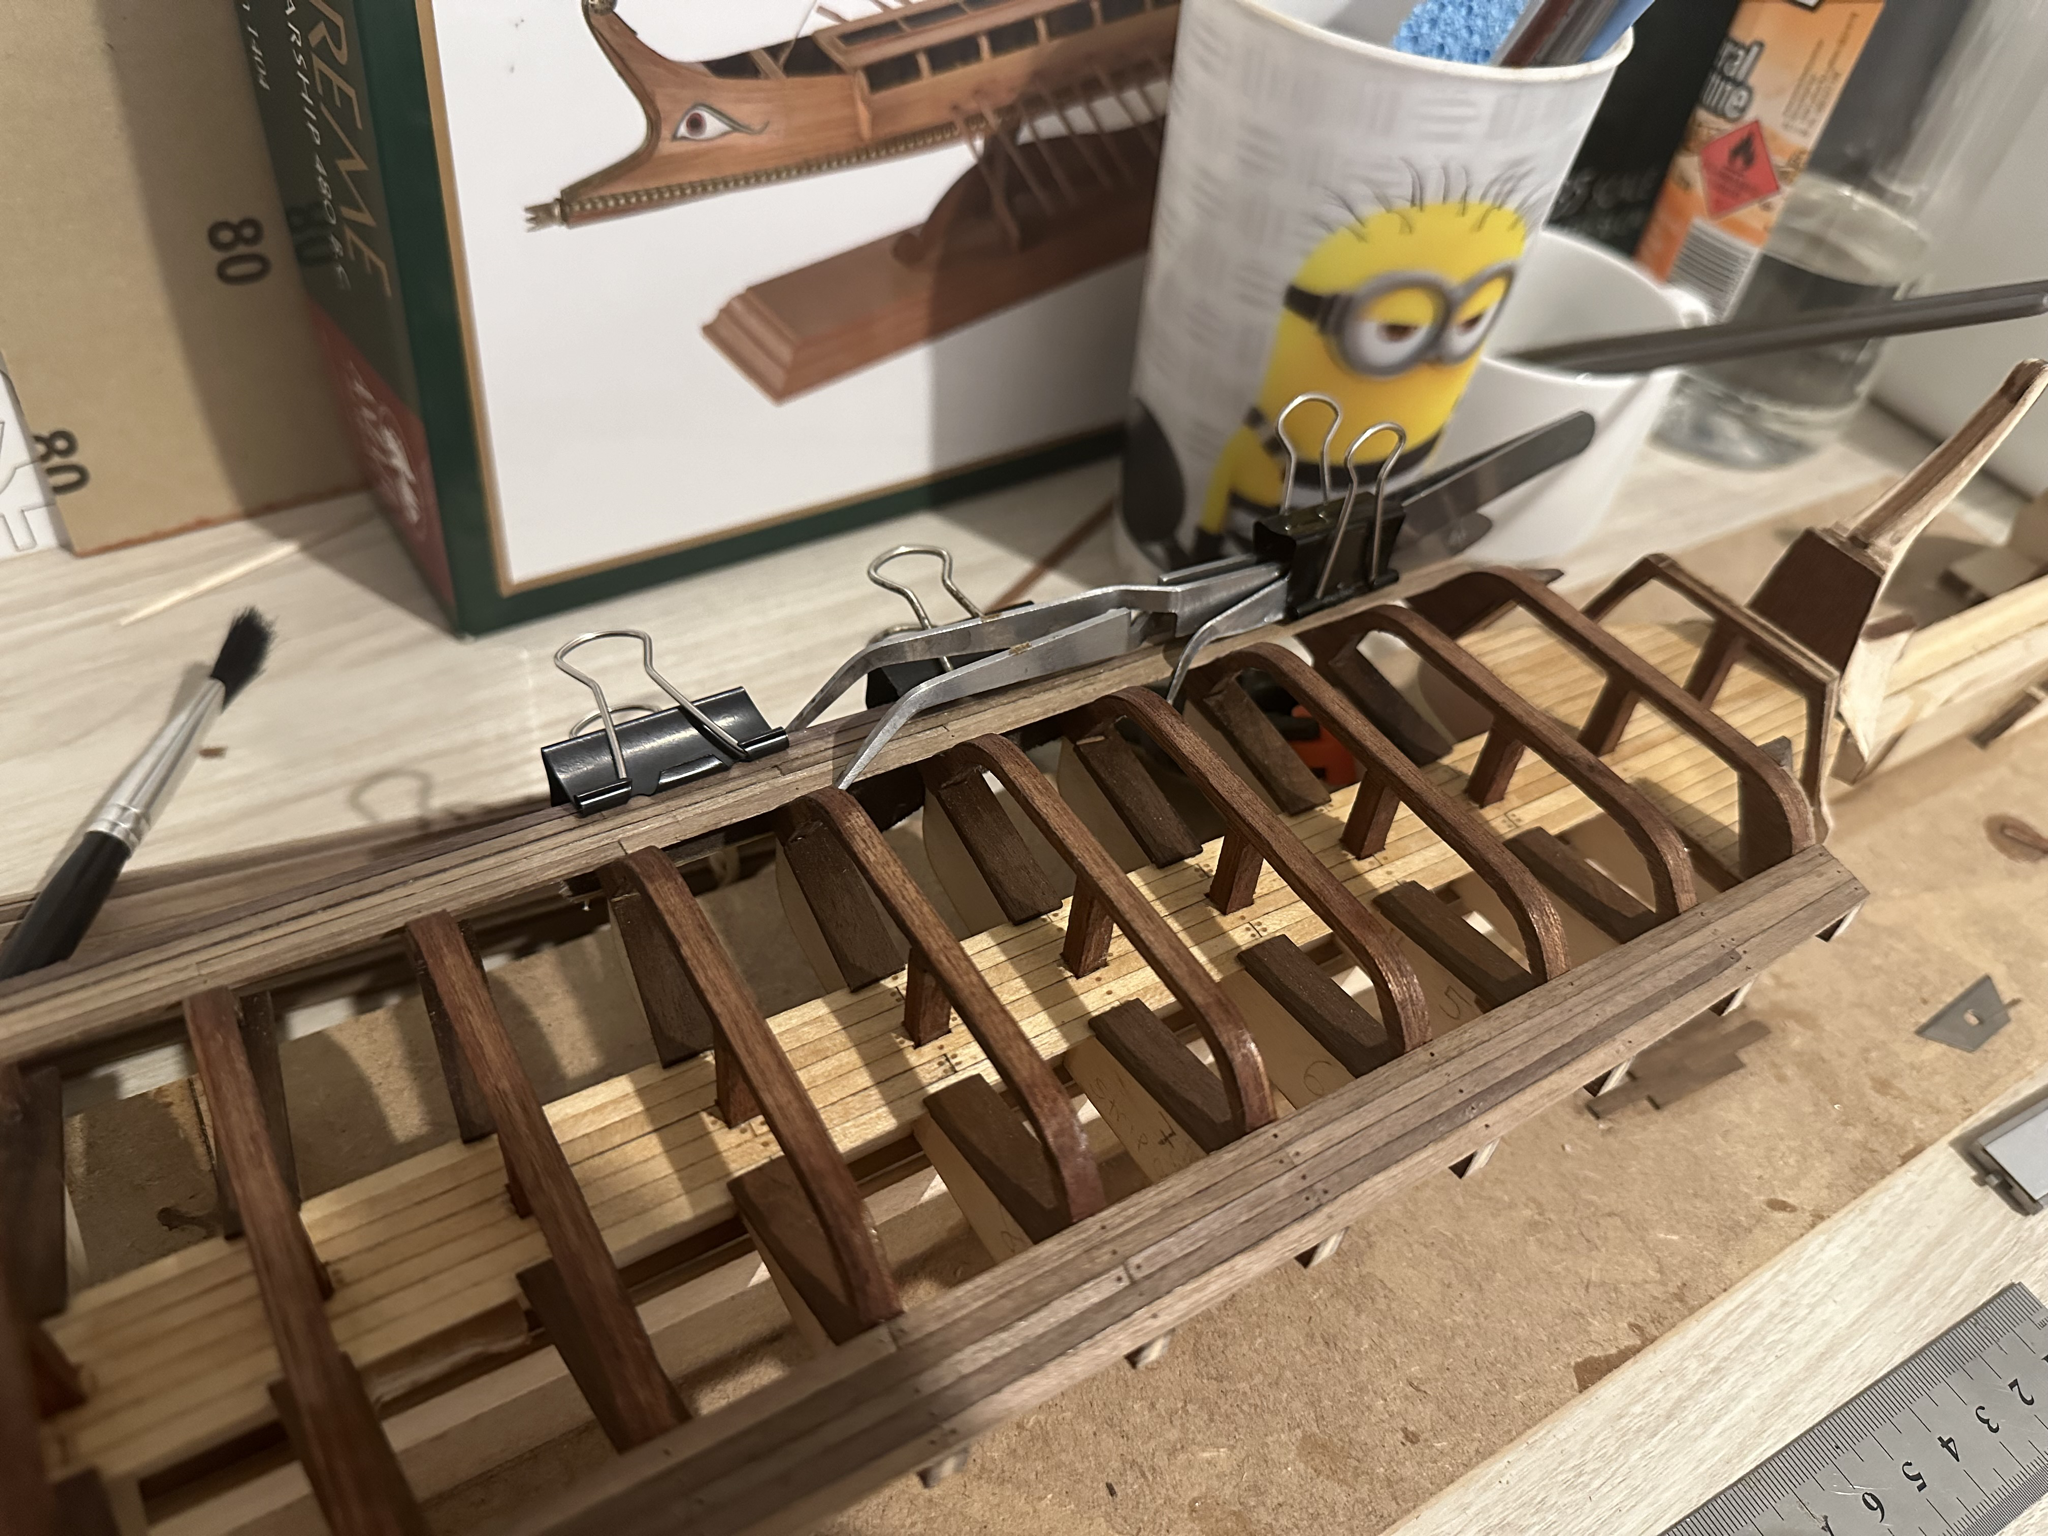
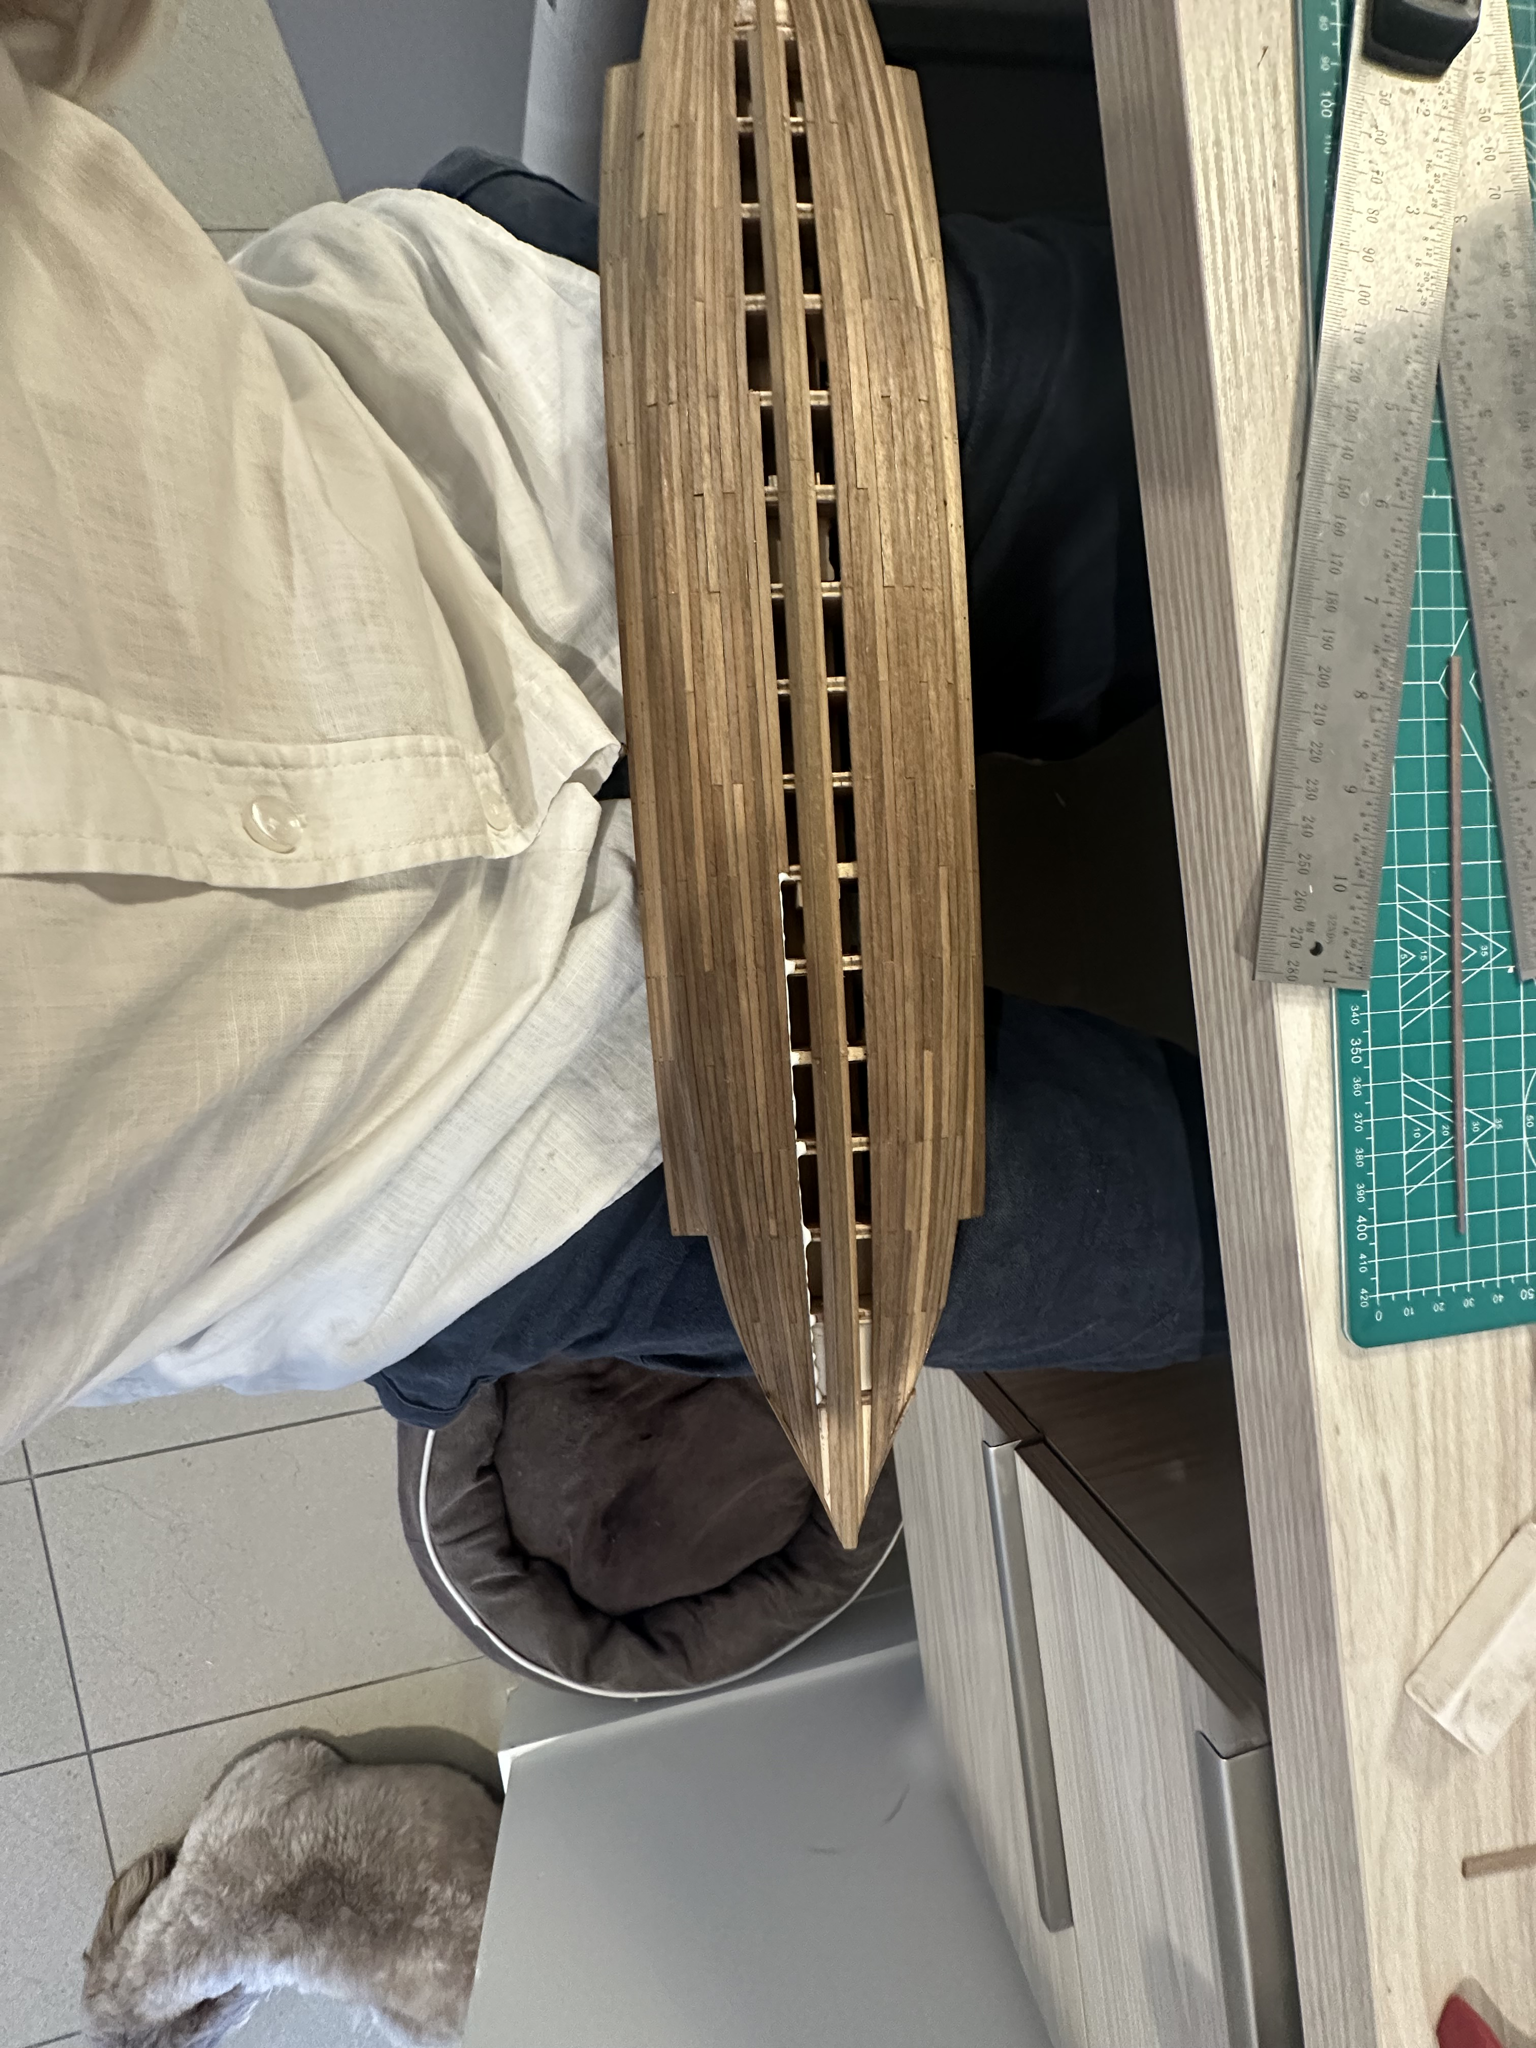
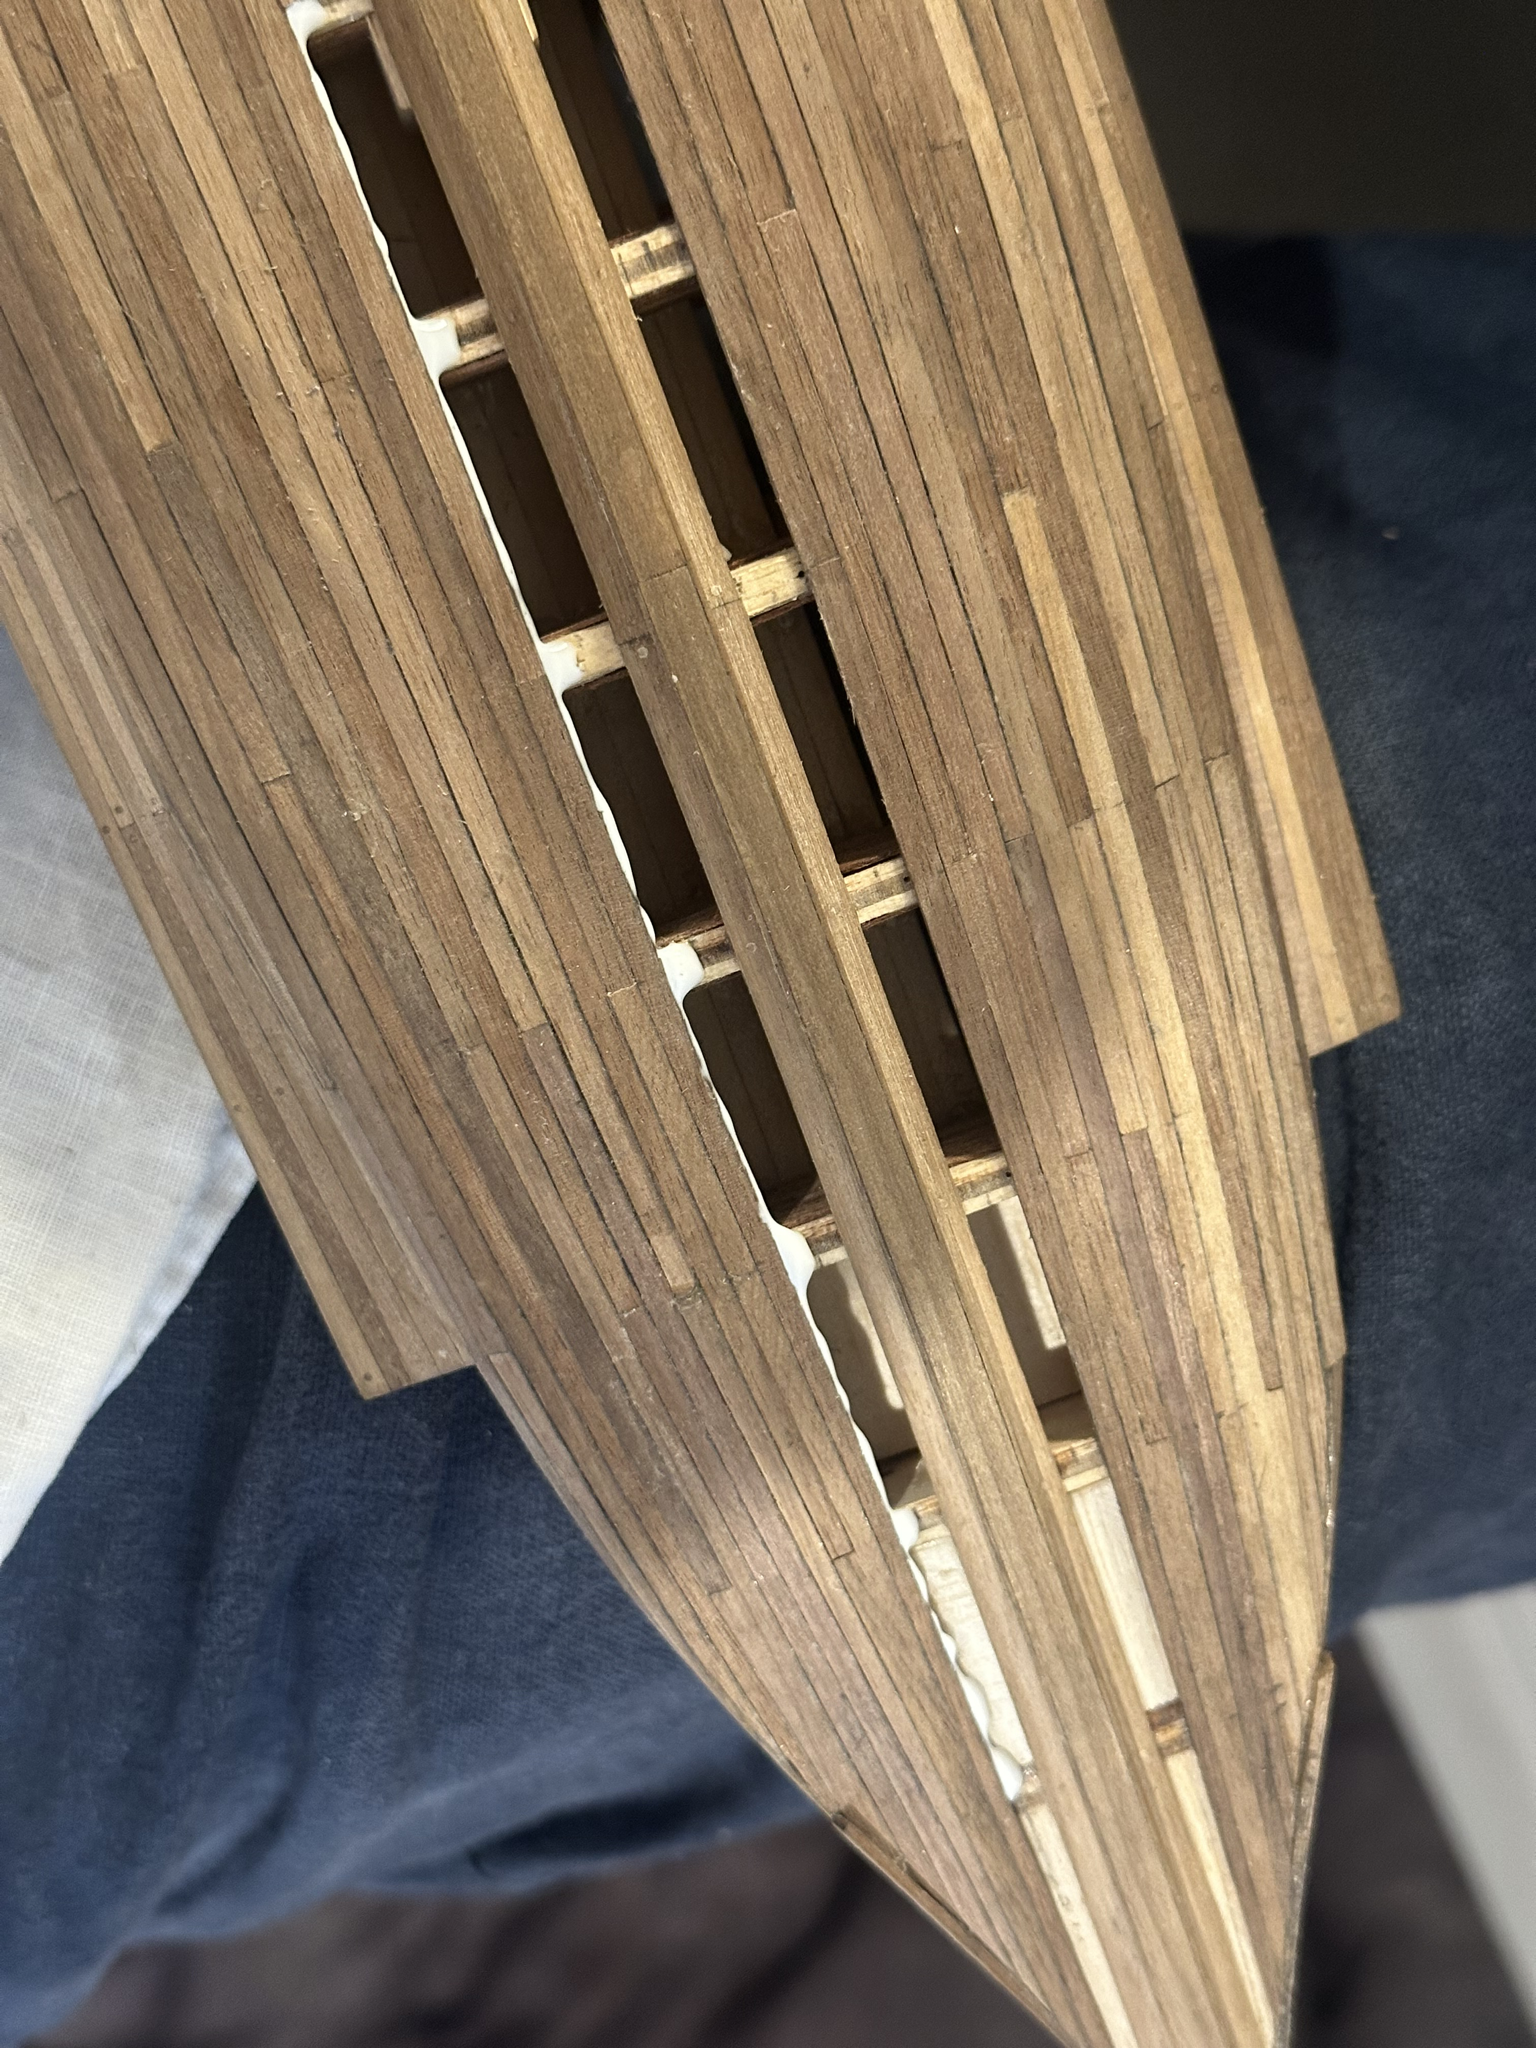
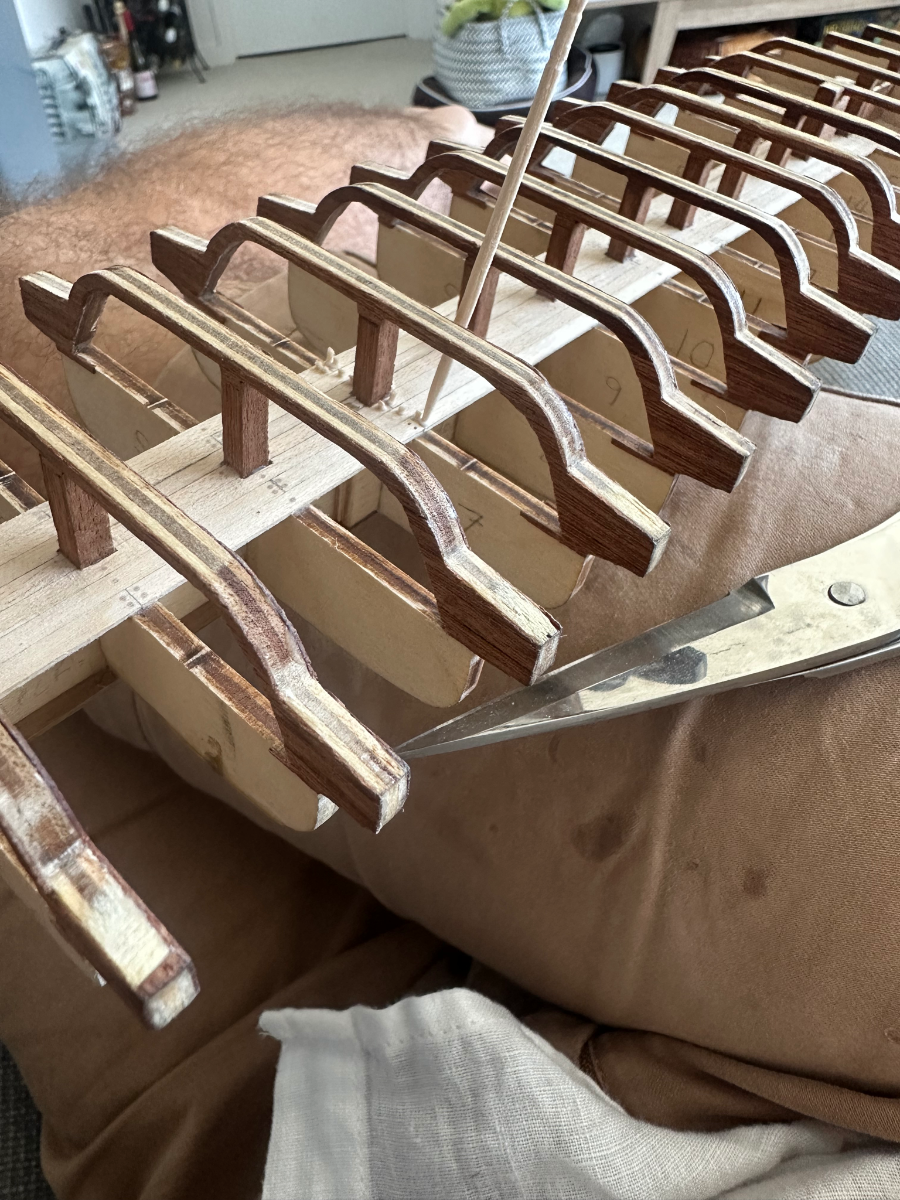
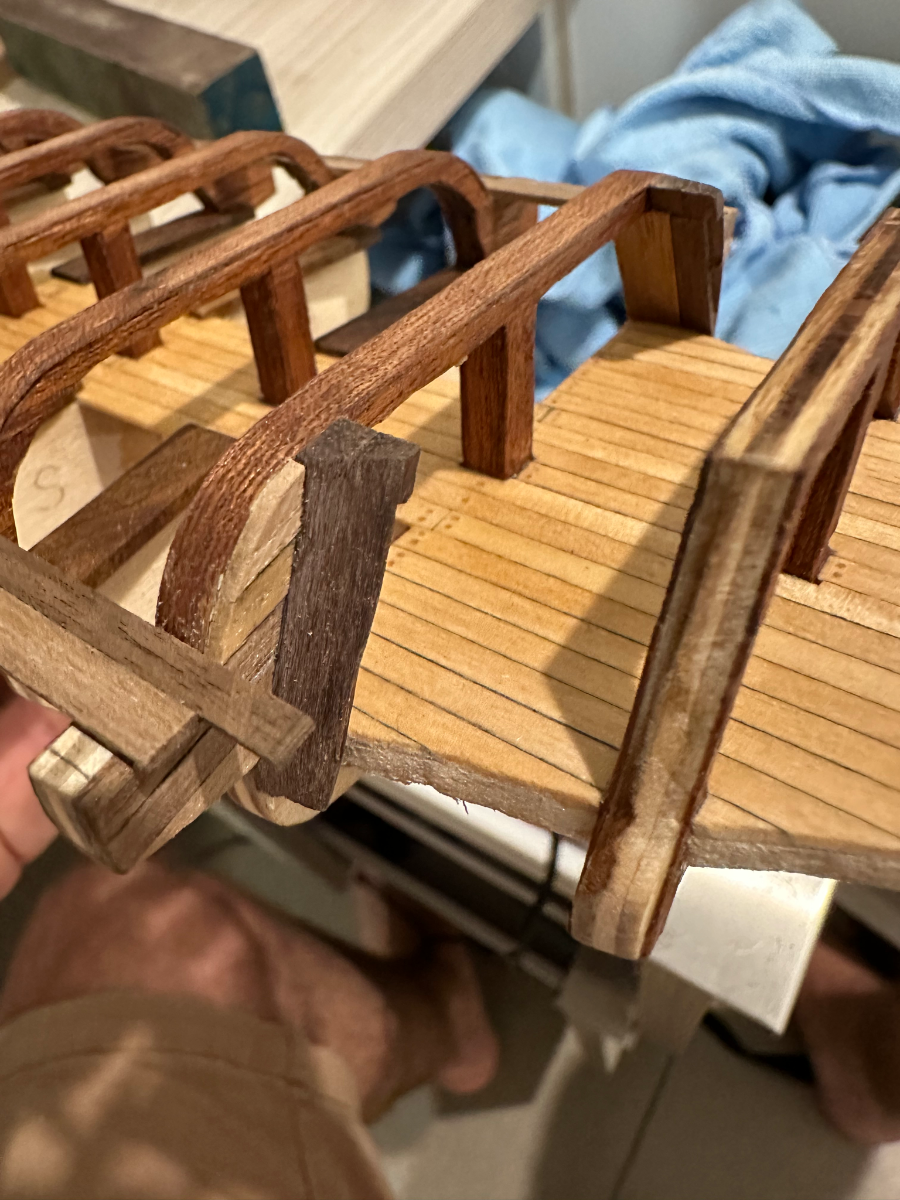
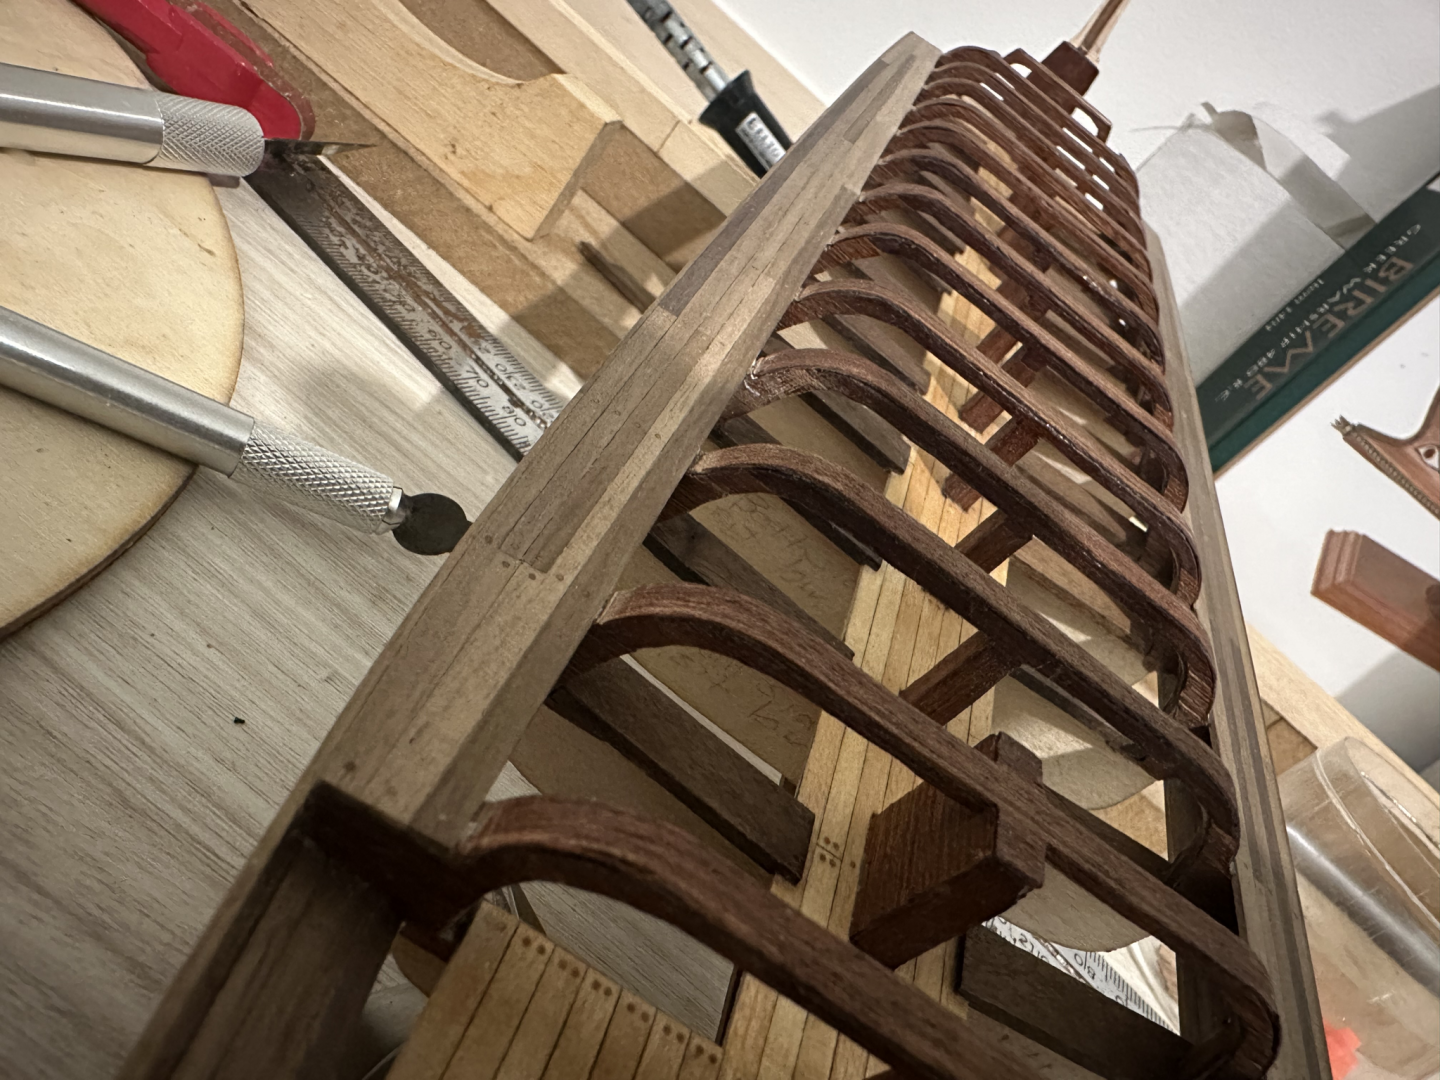
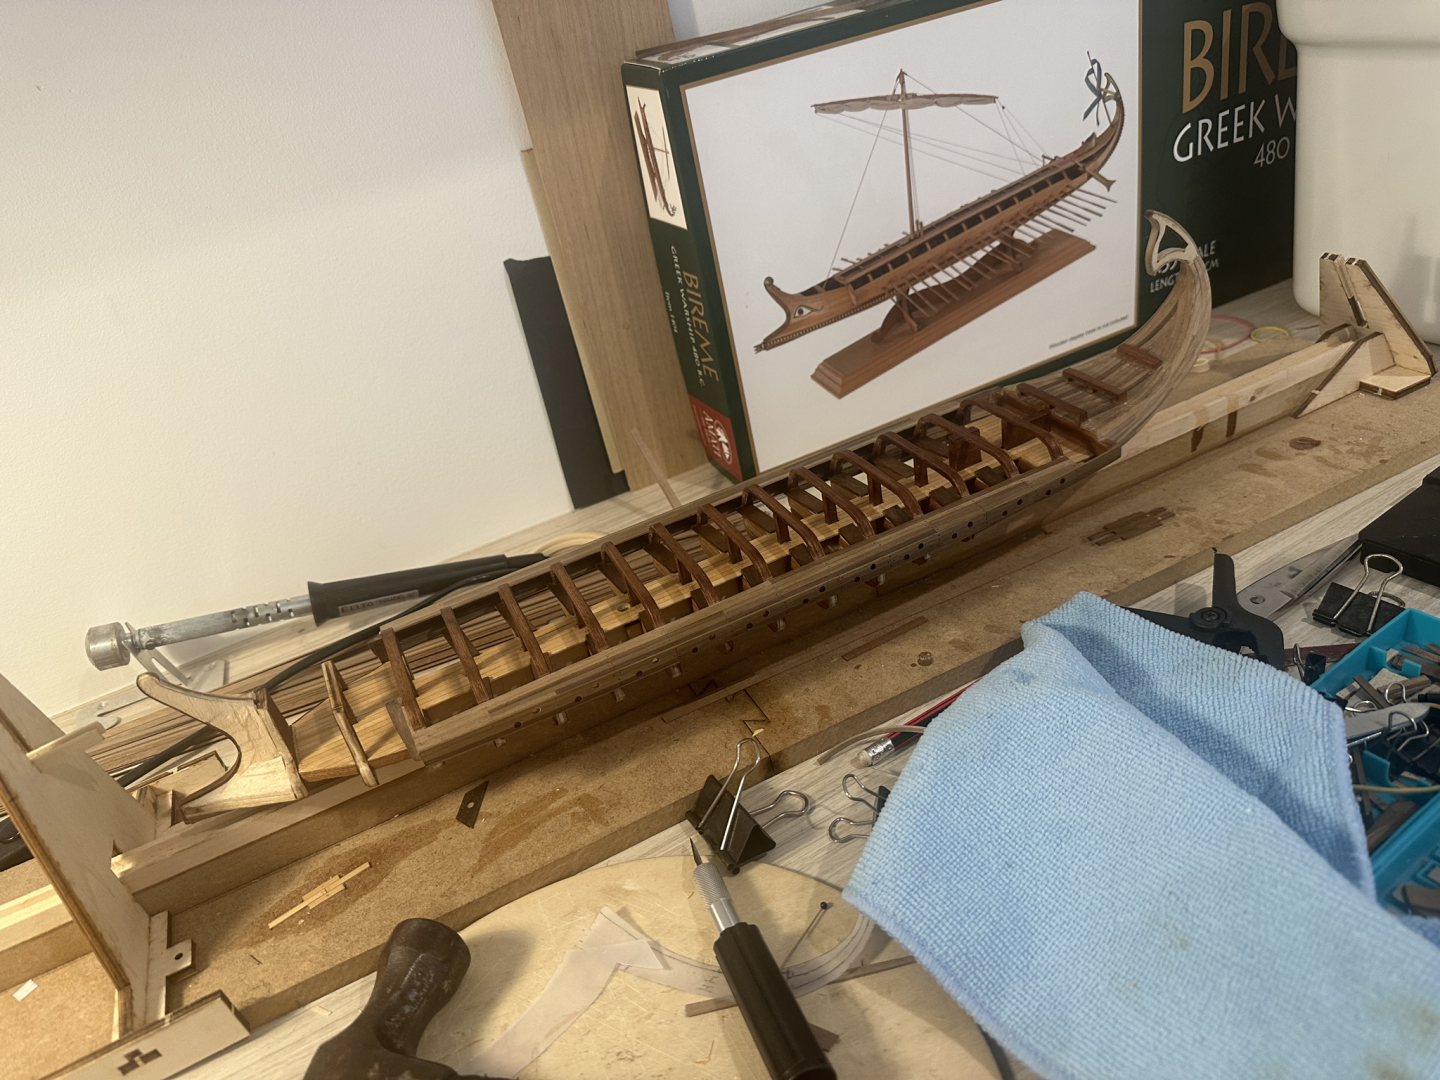
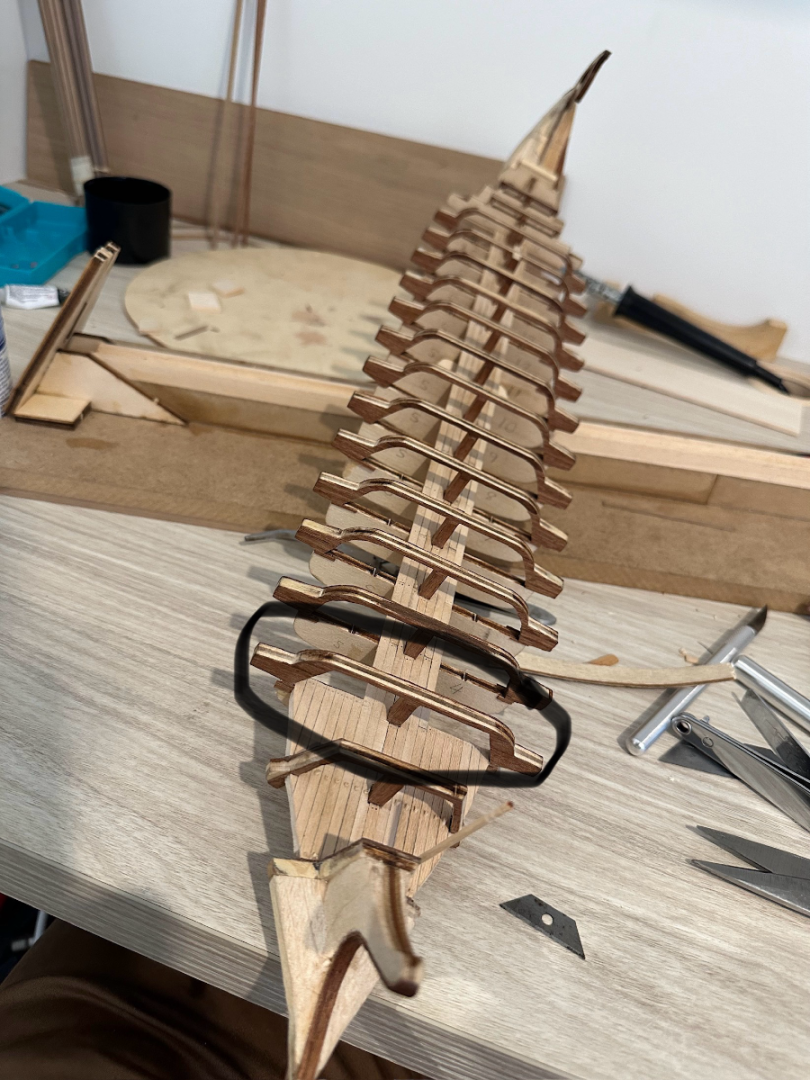
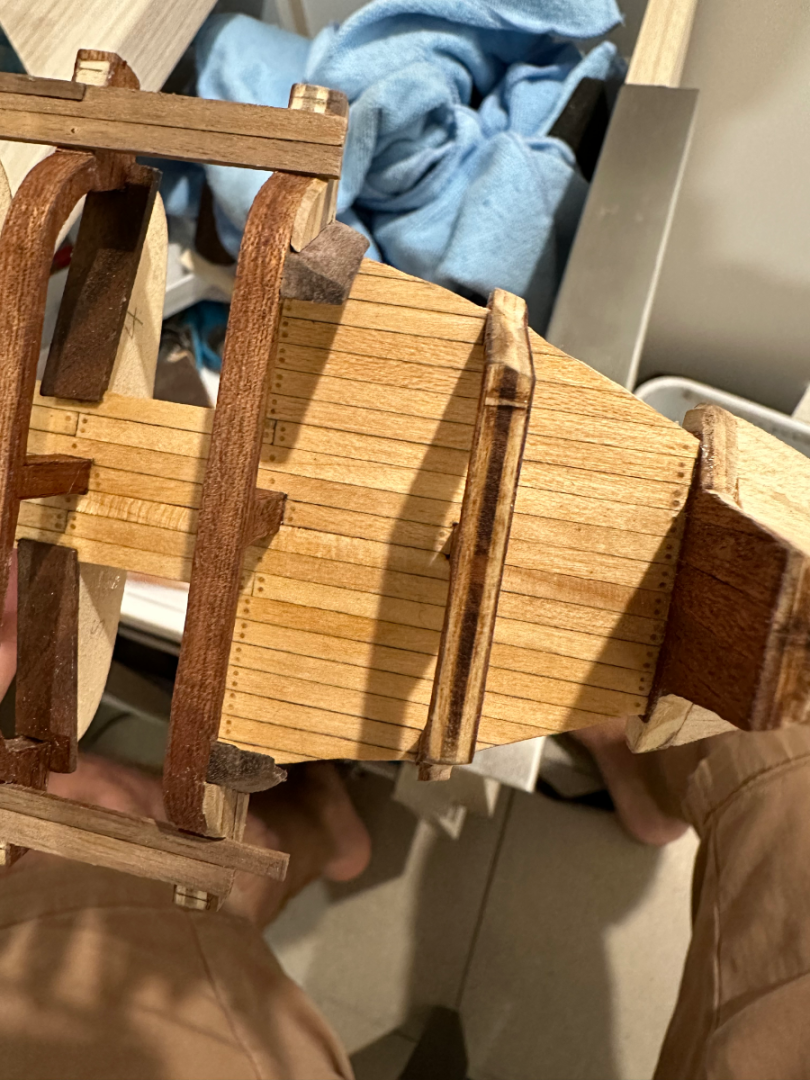
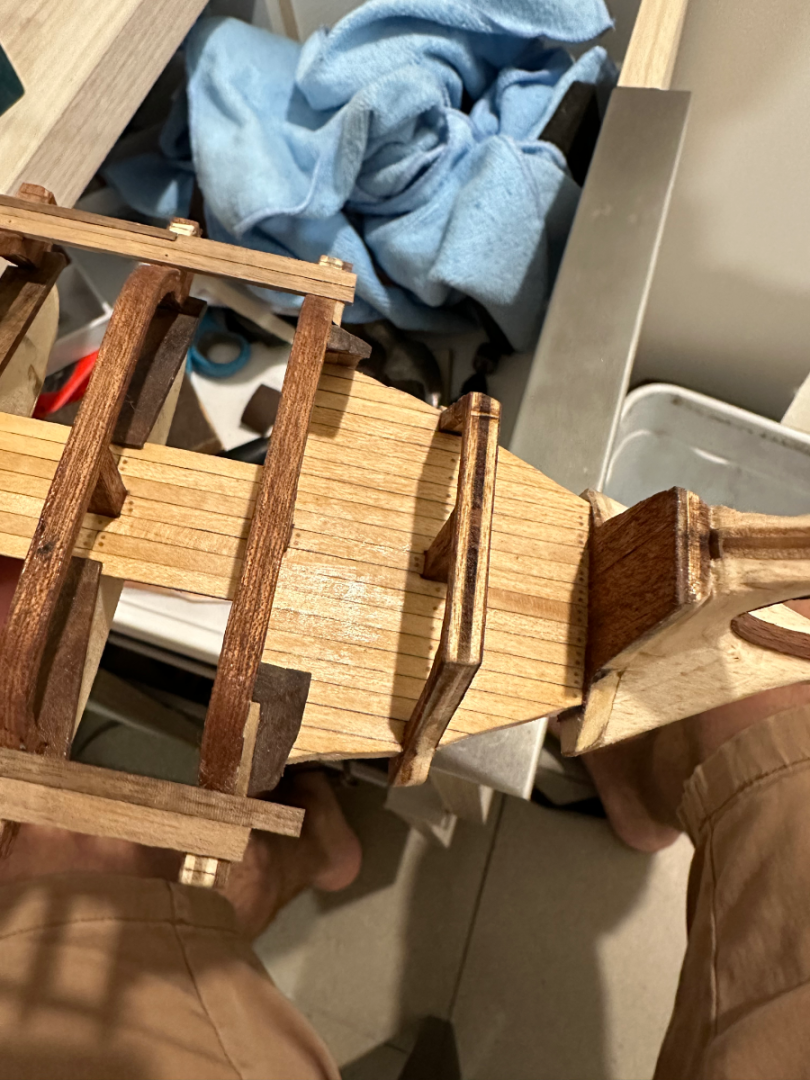
It’s been many months since my last post…but I haven’t stopped! I probably should have taken more stage by stage photos and done some more posts. But here is what I’ve taken and done so far…. At this point I was in the process wood nailing the top of the outrigger, I wasn’t sure how it would look after nailed, sanded and done. But I ended up being really happy with the results and was very ready to motor on! I continued on to plank the side of the outriggers then underneath…then proceeded to drill the oar holes into the side…was very stressful work 😅…photos will show up later of the results…I was happy enough with it I quickly realized that planking the stern section would be very difficult without more balsa wood added between the bulkheads… glad I did that Then started this tricky stern section For the sides of the stern, I decided to cut curved planks out of some walnut sheet wood, because I don’t think there is a way to edge bend regular planks quite so dramatically… After all was said and done…ended up being quite happy with the result Over the course of about 2 months…i slowly progressed on the planking of the hull… Finally finished the planking, roughly sanded it(120grit) drilled it, tree nailed (with toothpicks) sanded it again, then a 240 grit sand, then a 400 grit sand…it came up so nice and smooth…quite happy 😊 I had to undo some old work. When I was thoroughly sanding the outriggers, I scuffed nearly all the mahogany bulkhead strips with the sanding block. It was really bothering me, so I decided to rip them off and re-plank them. And this is where I’m up to…next I’m onto the bow and ram section…some time after planking it. I’ve decided I’m going to try and make a small bronze ram cap…but at this stage I have no idea how I’m going to do it. So if anyone has advice I’m all ears! Please give some of your wisdom 🙏 I think last time i said that I’d post more often…I can only say that again, that is my intention…hopefully after the bow section is done I’ll post again. Until then I hope everyone has smooth sailing ⛵️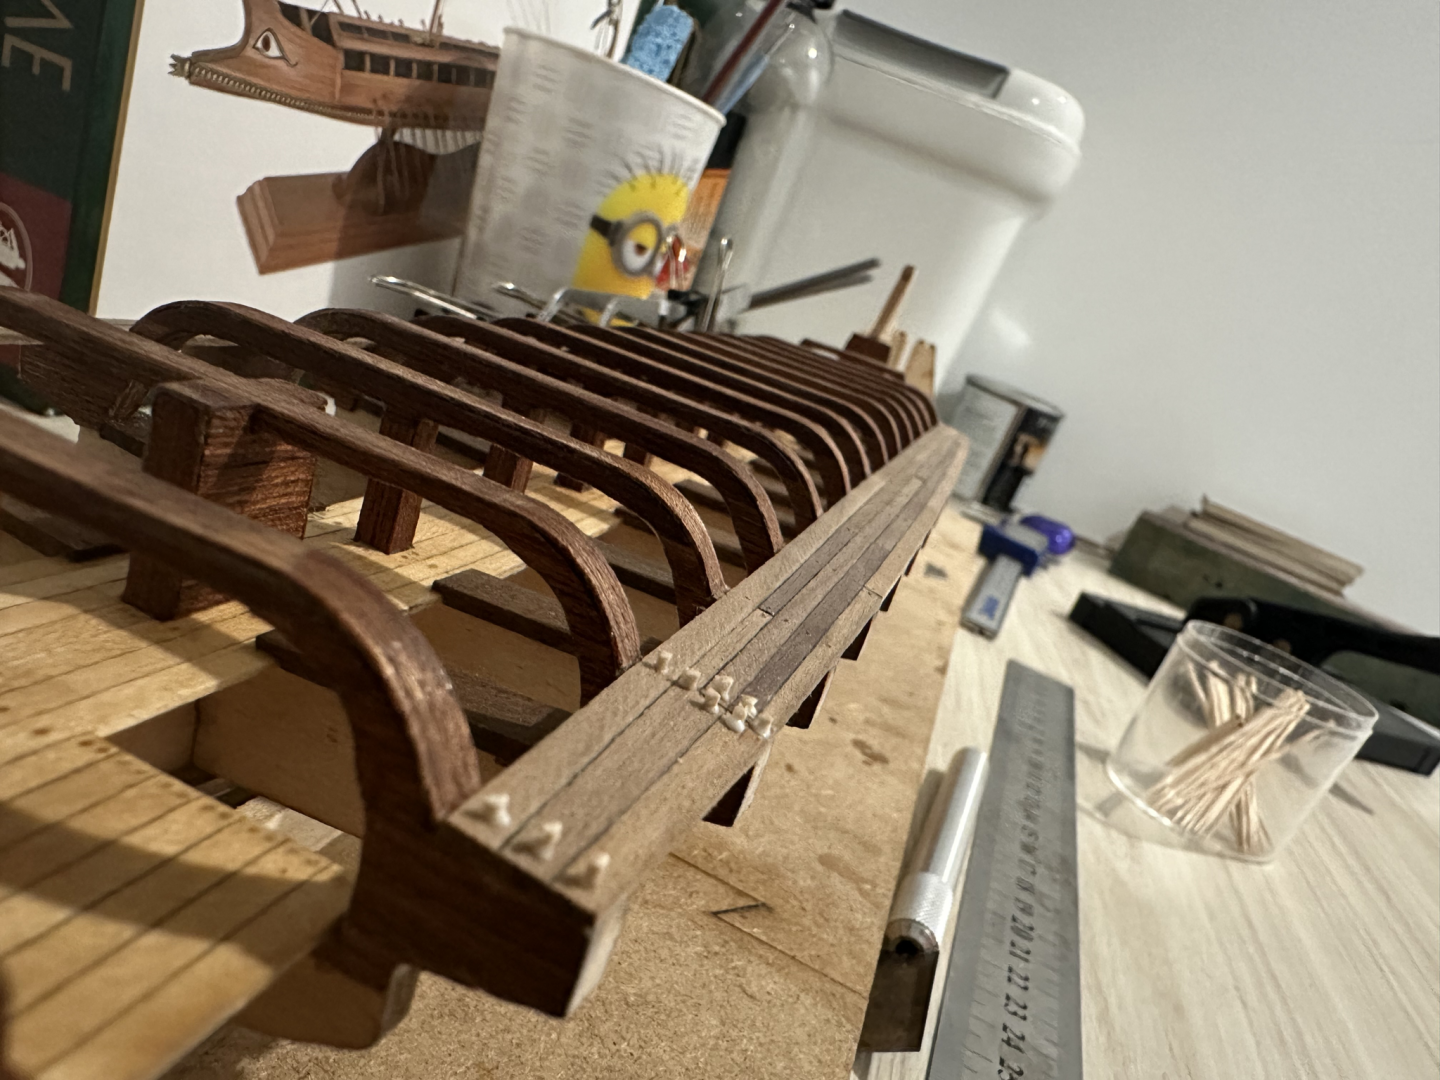


-
Greek Bireme by Vinnie - Amati - 1:49
Vinnie replied to Vinnie's topic in - Kit subjects built Up to and including 1500 AD
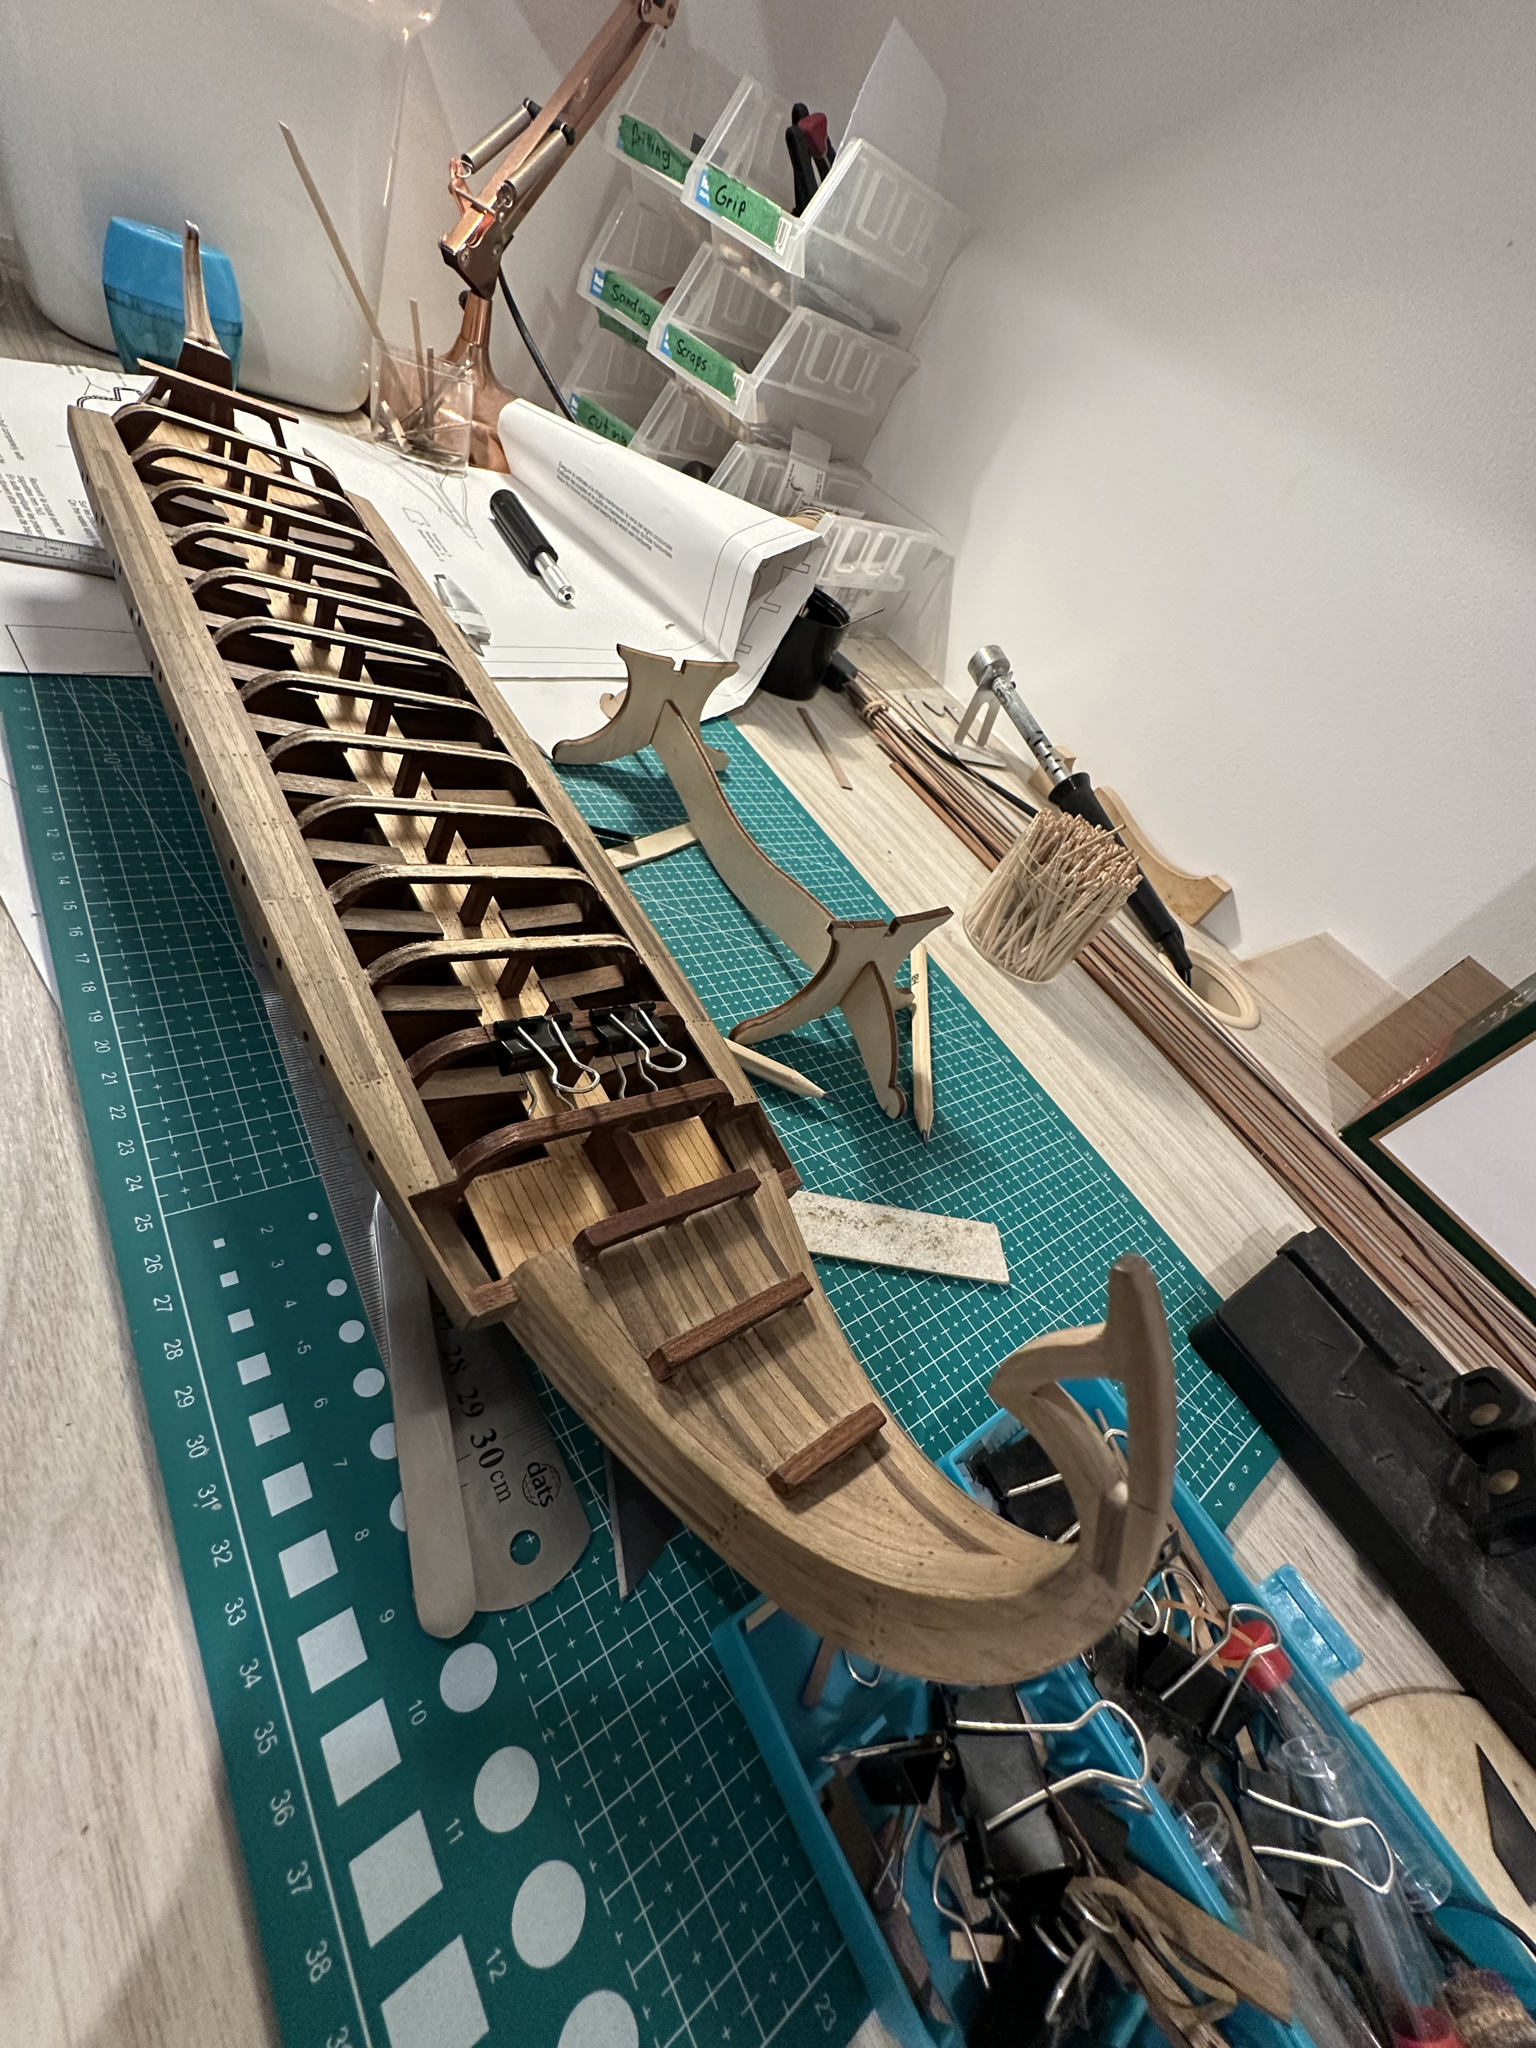
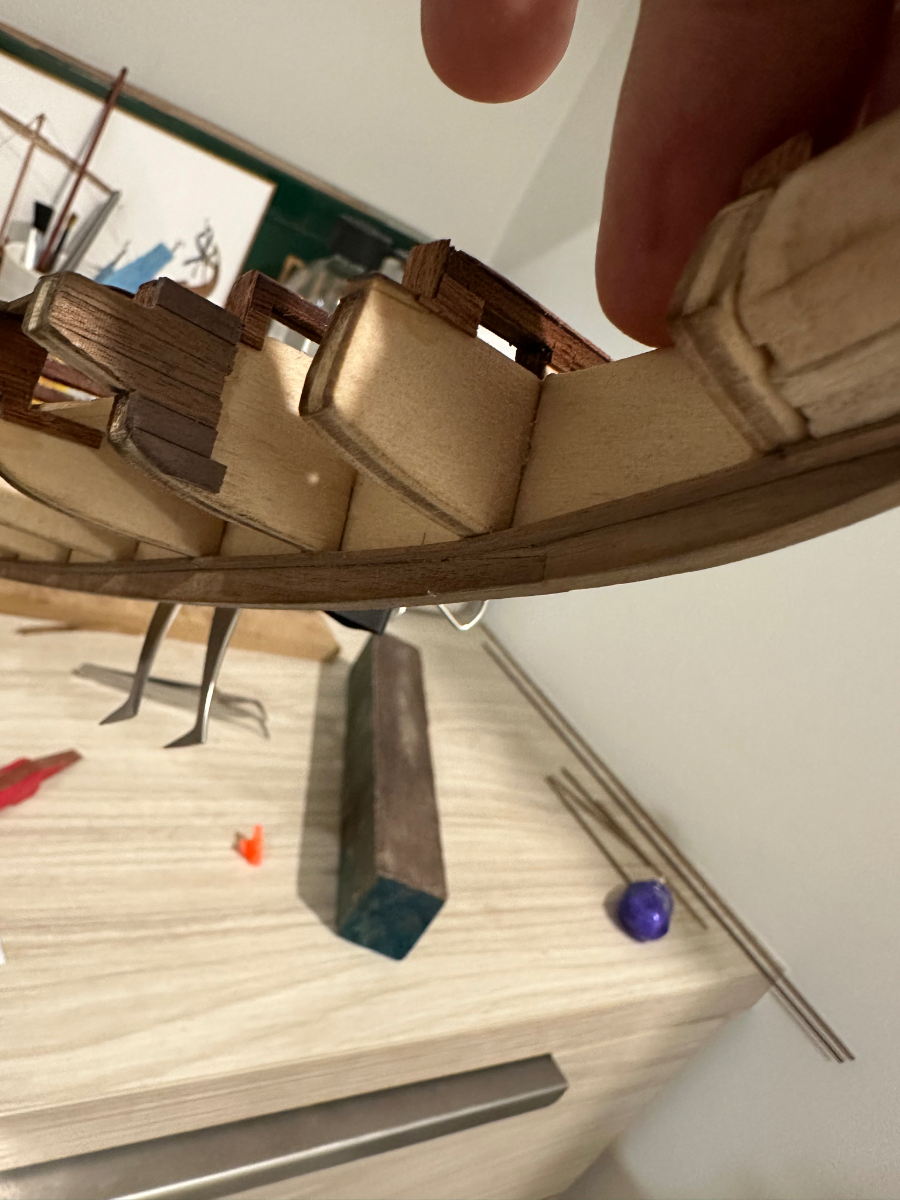
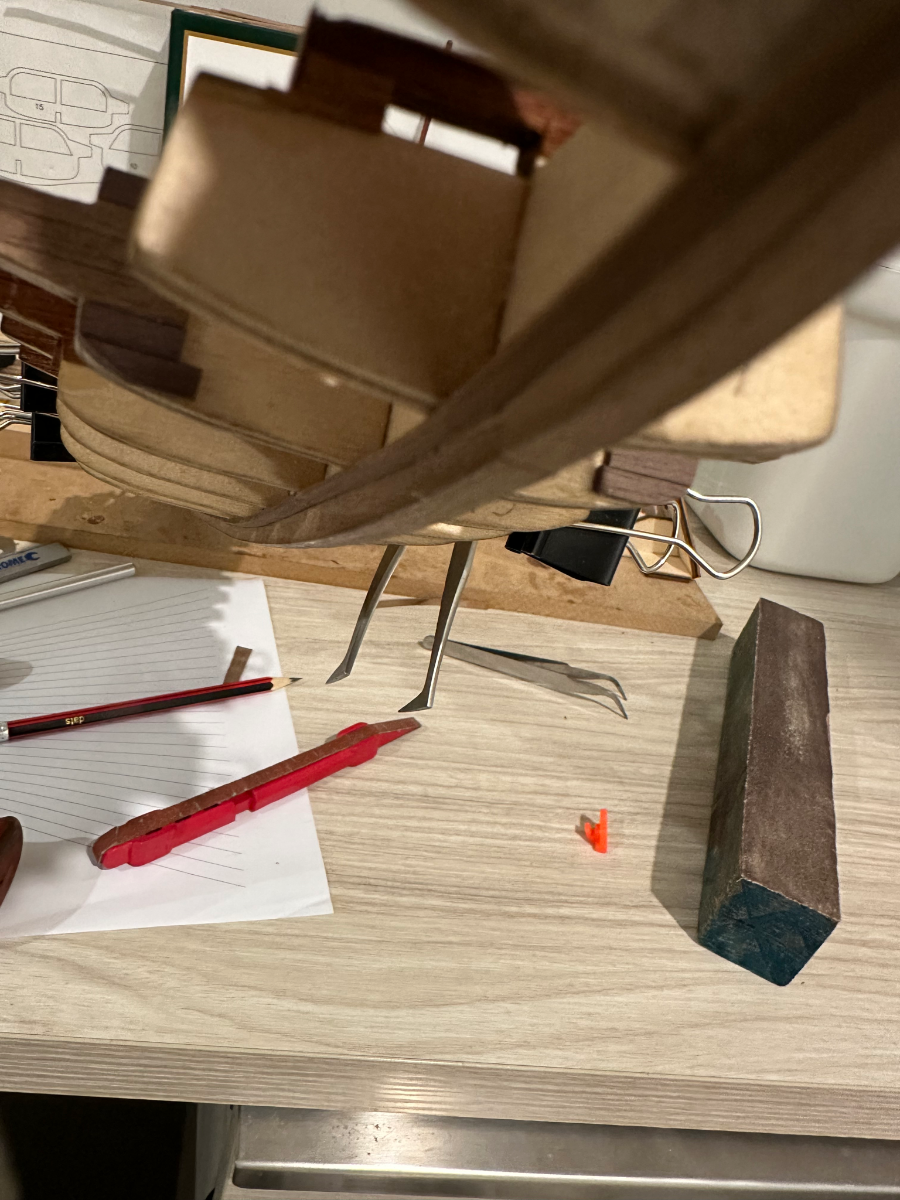
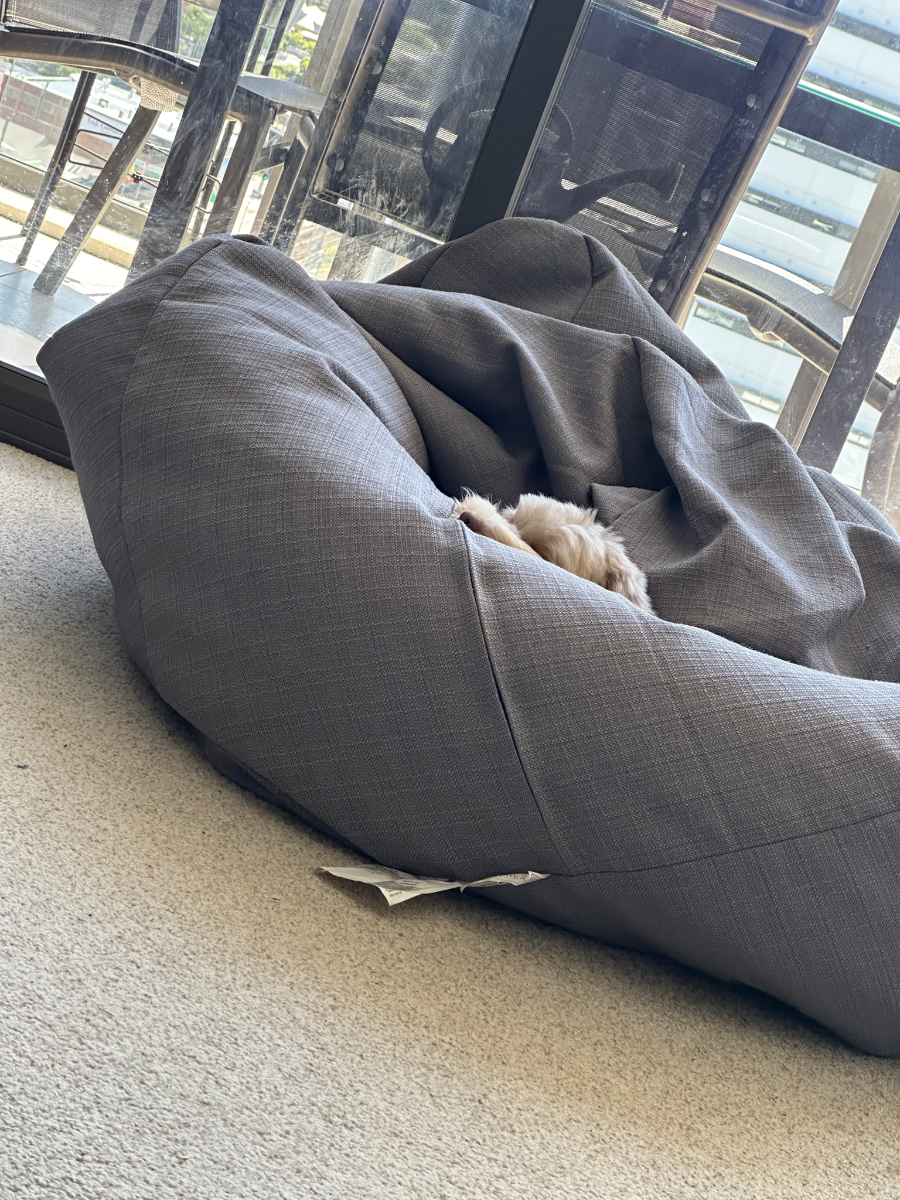
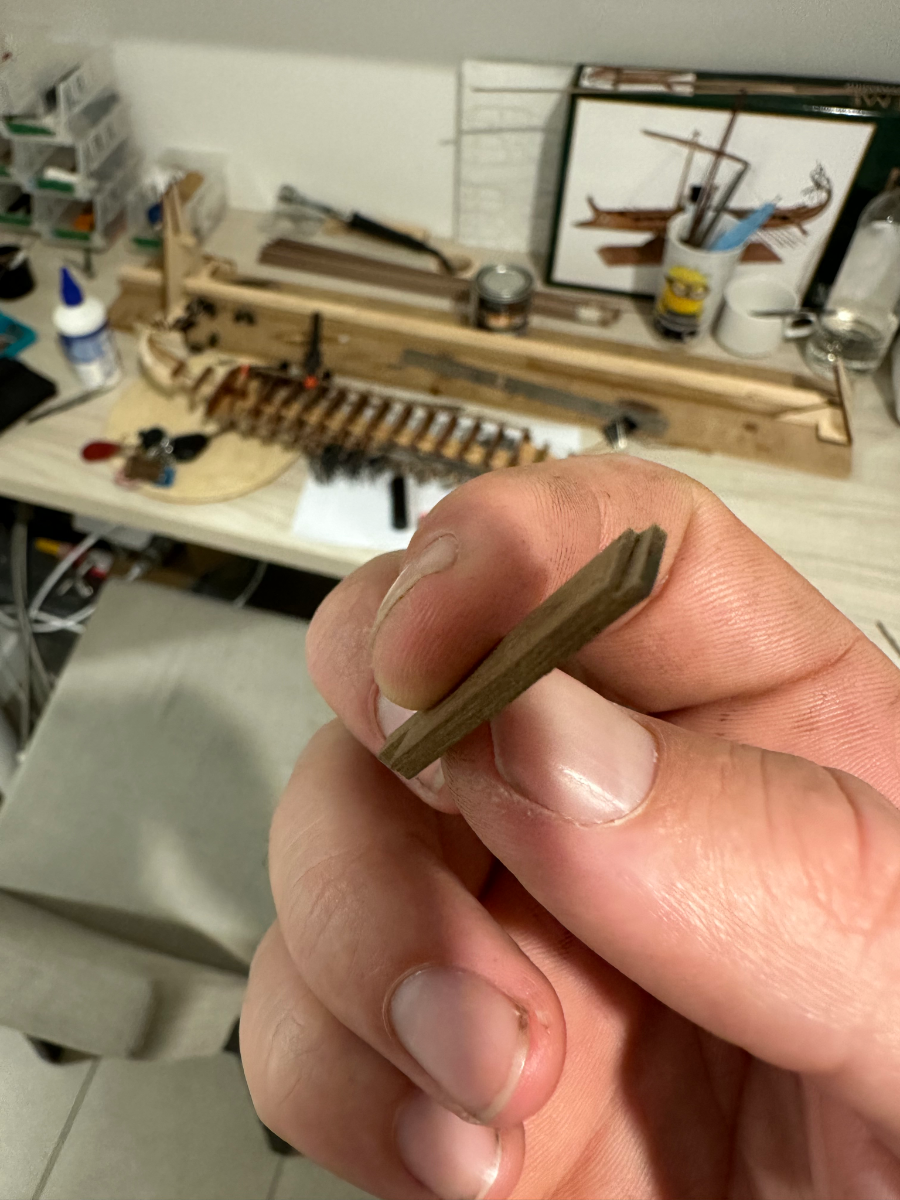
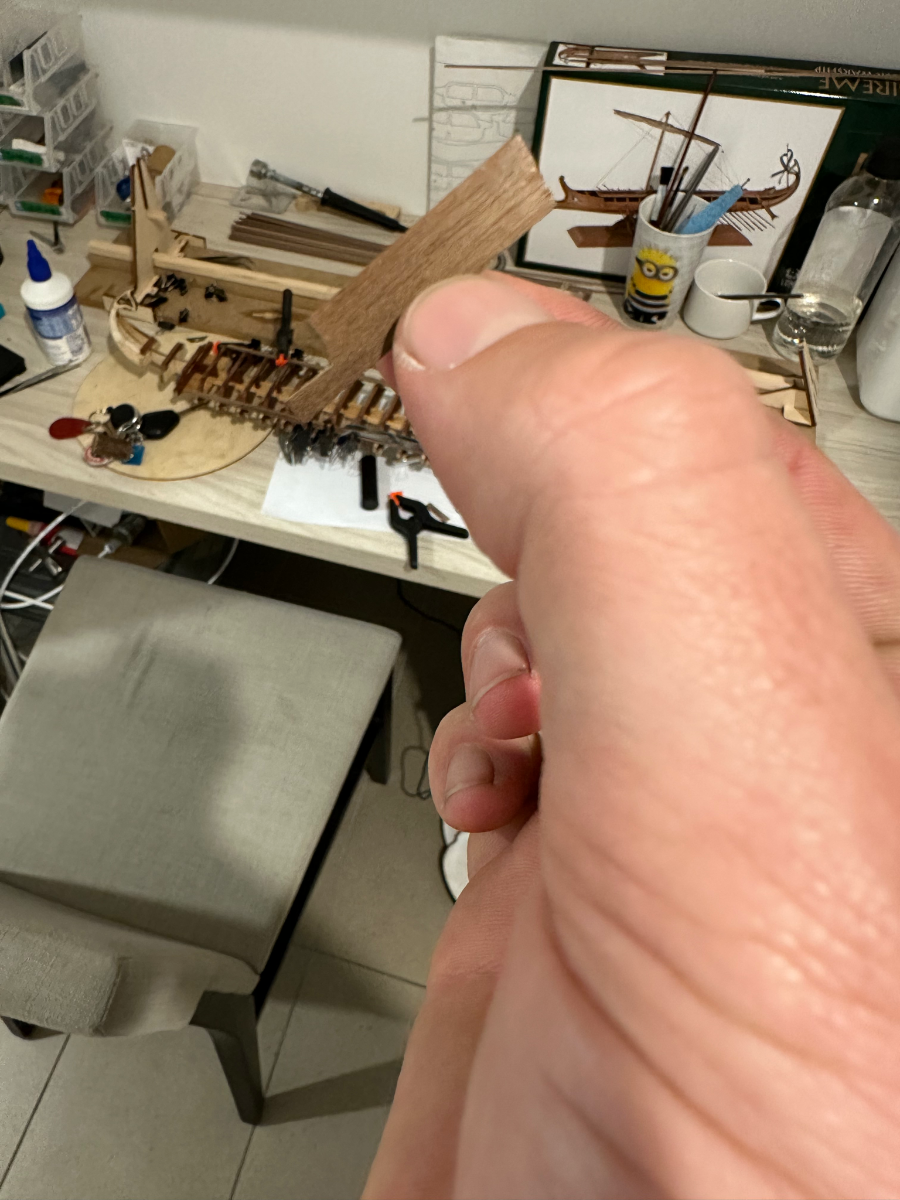
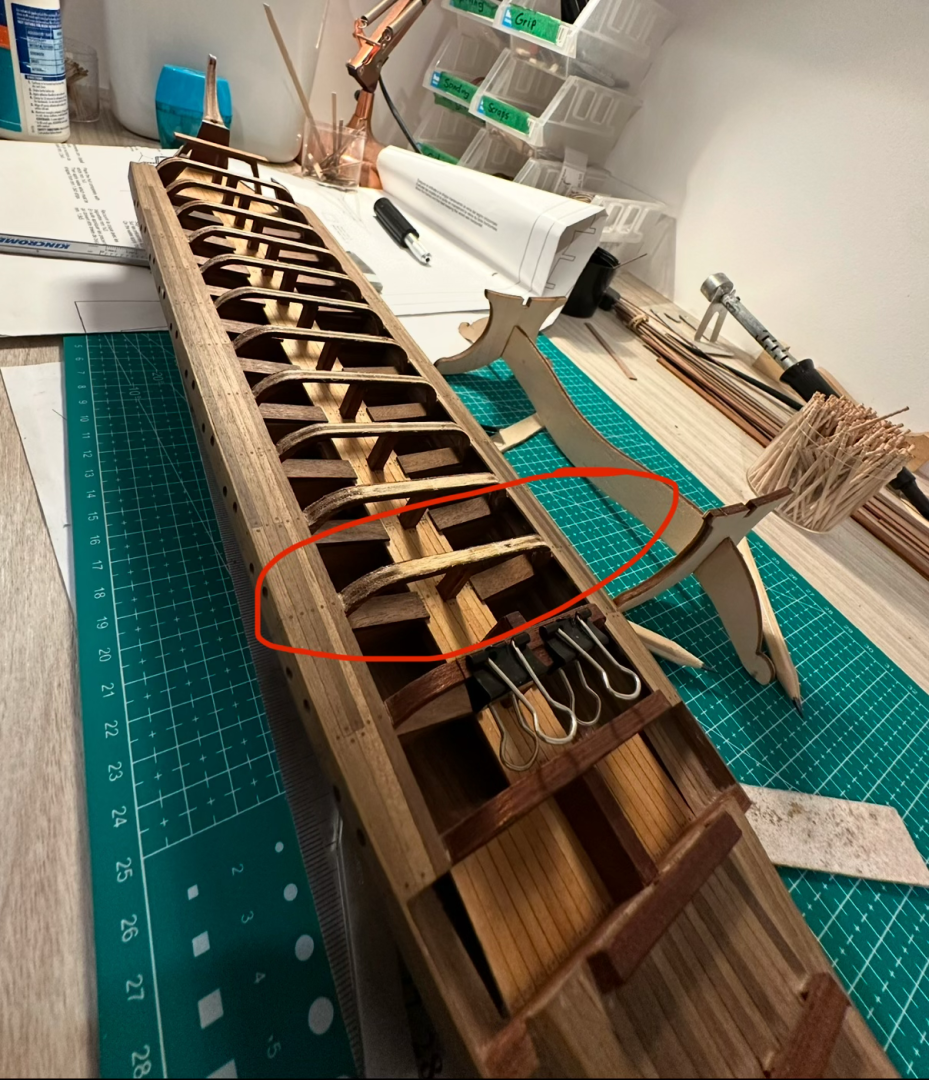
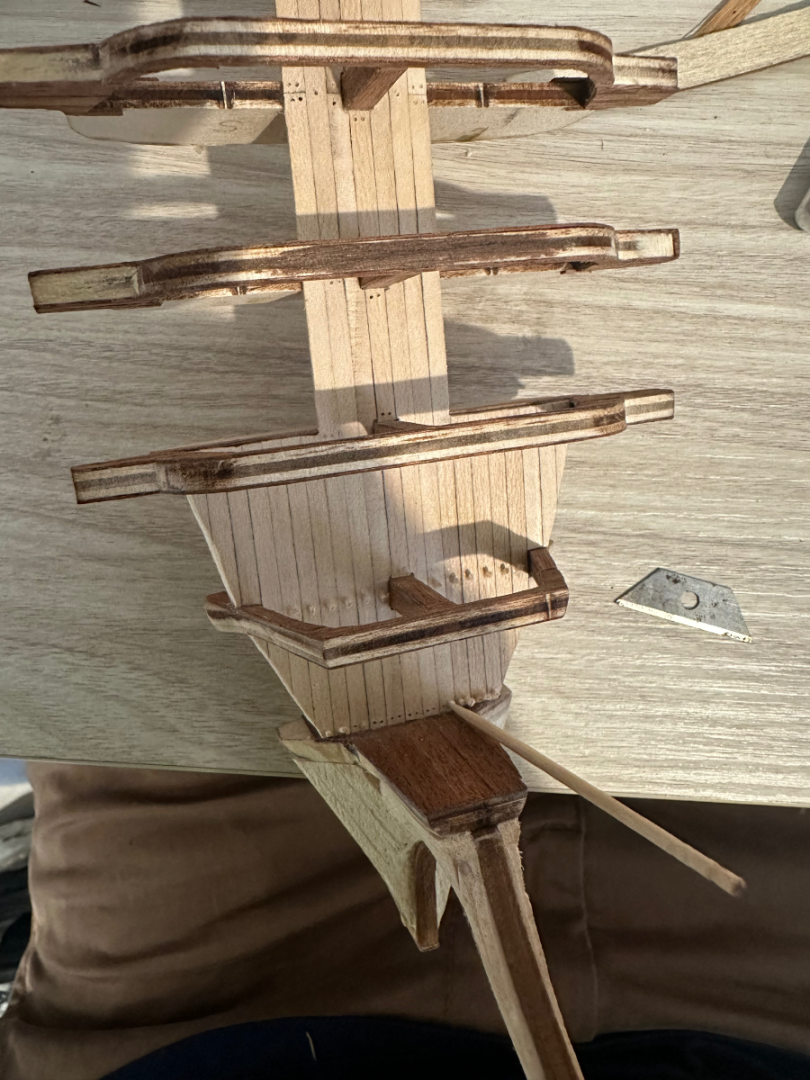
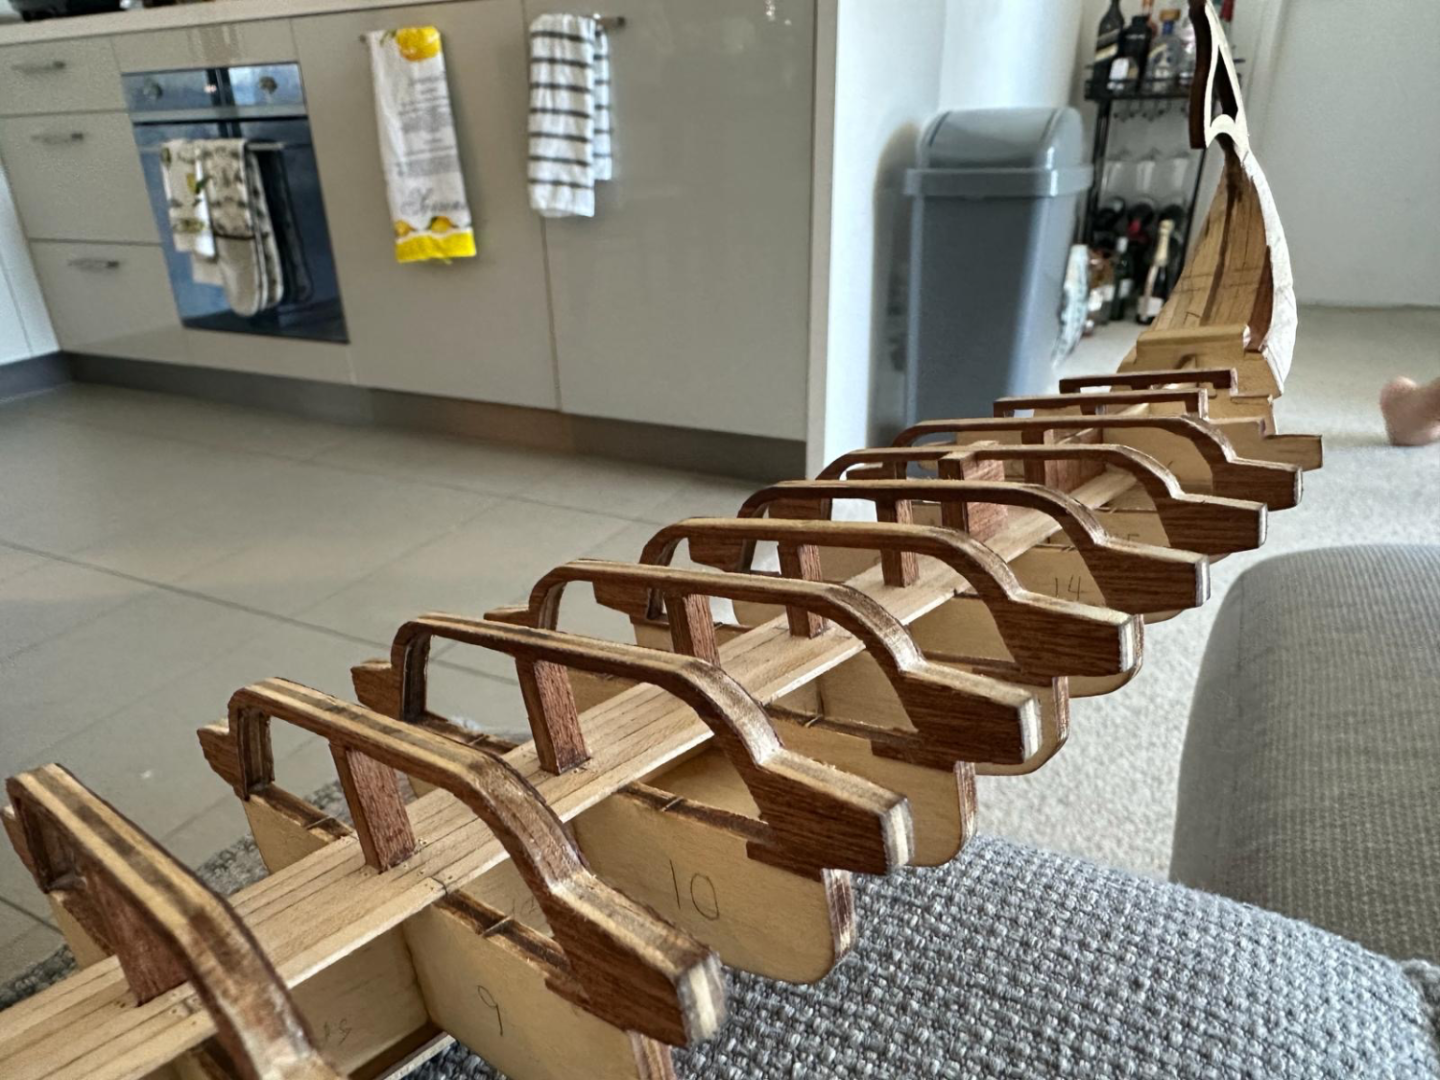
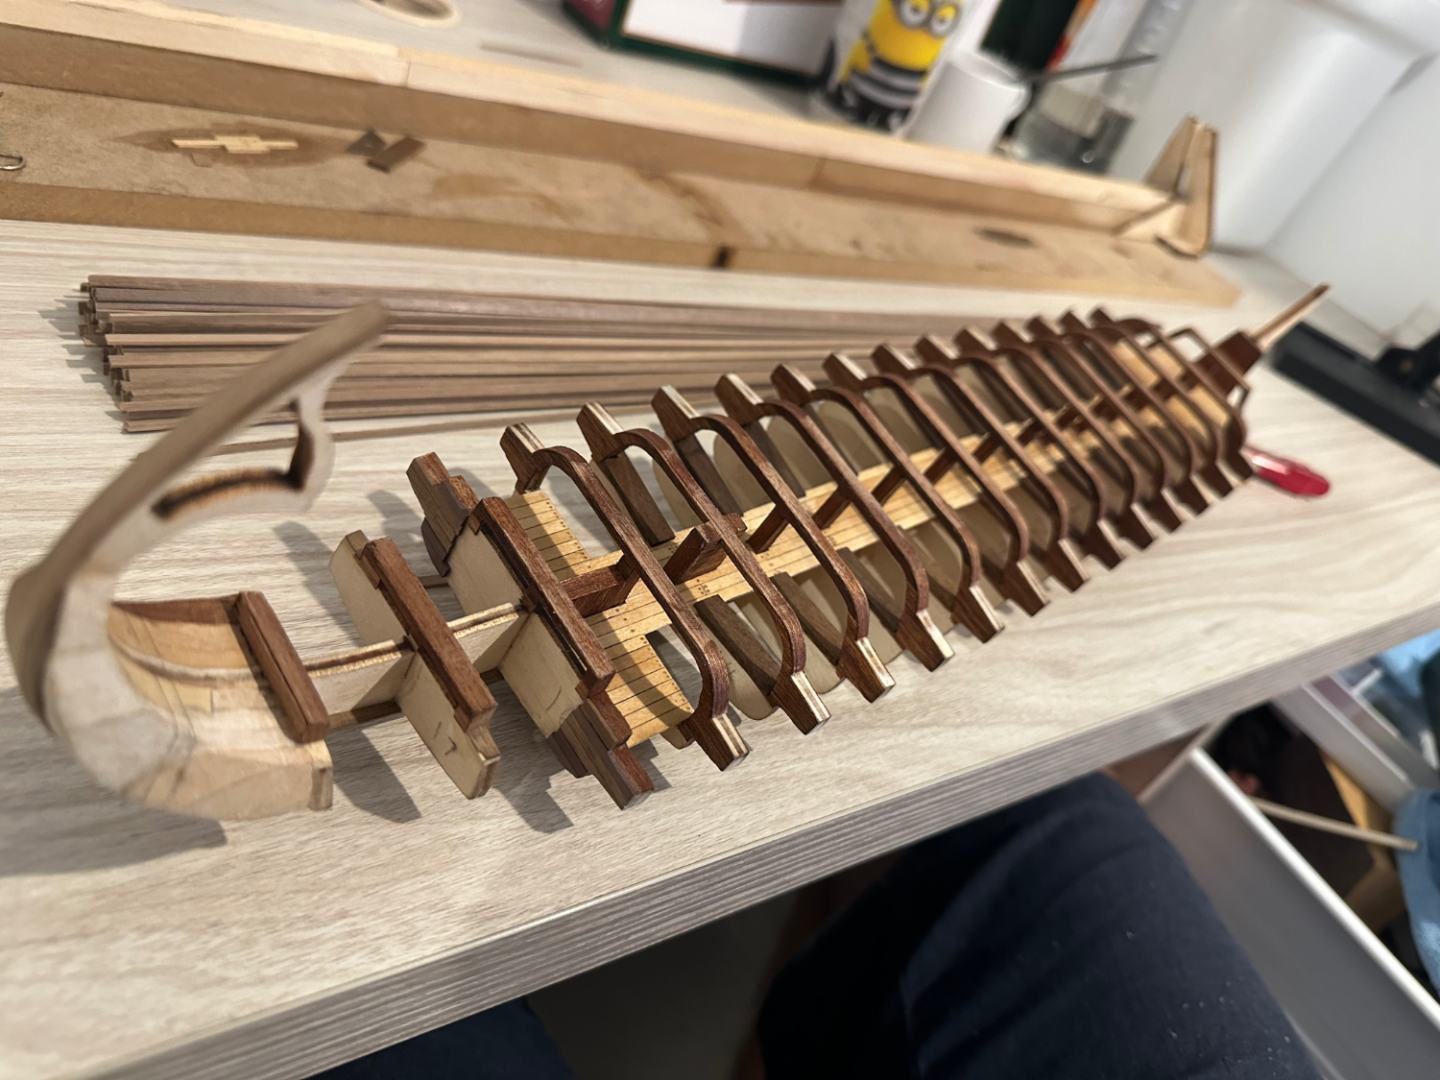
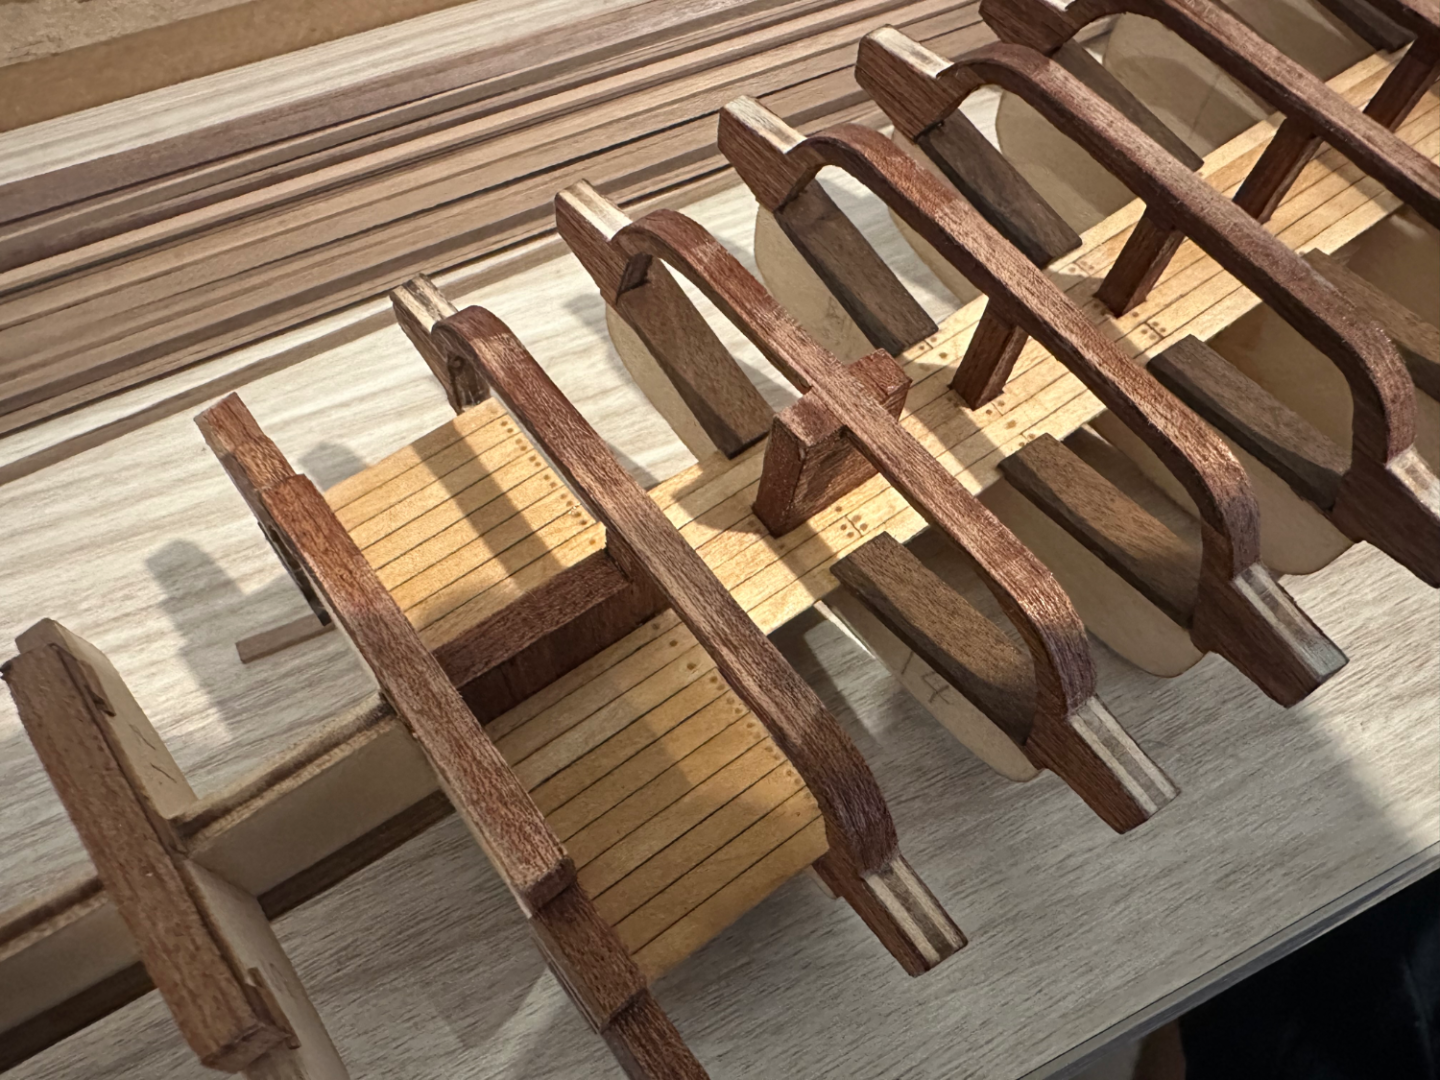
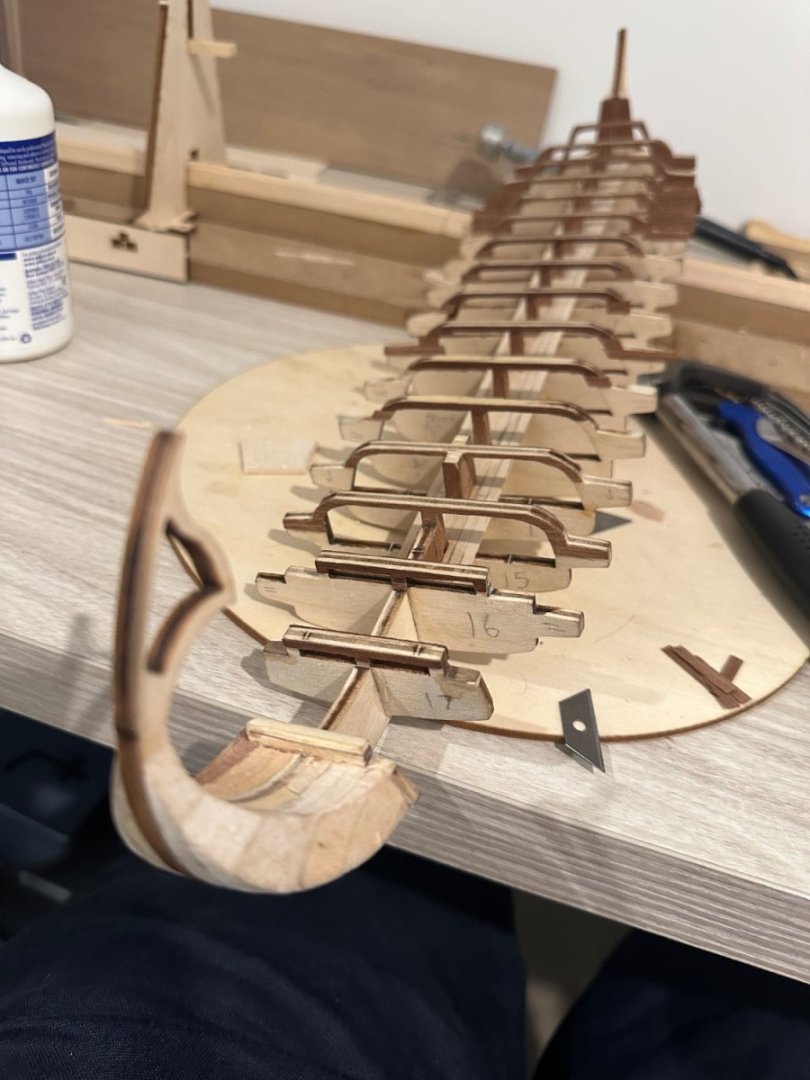
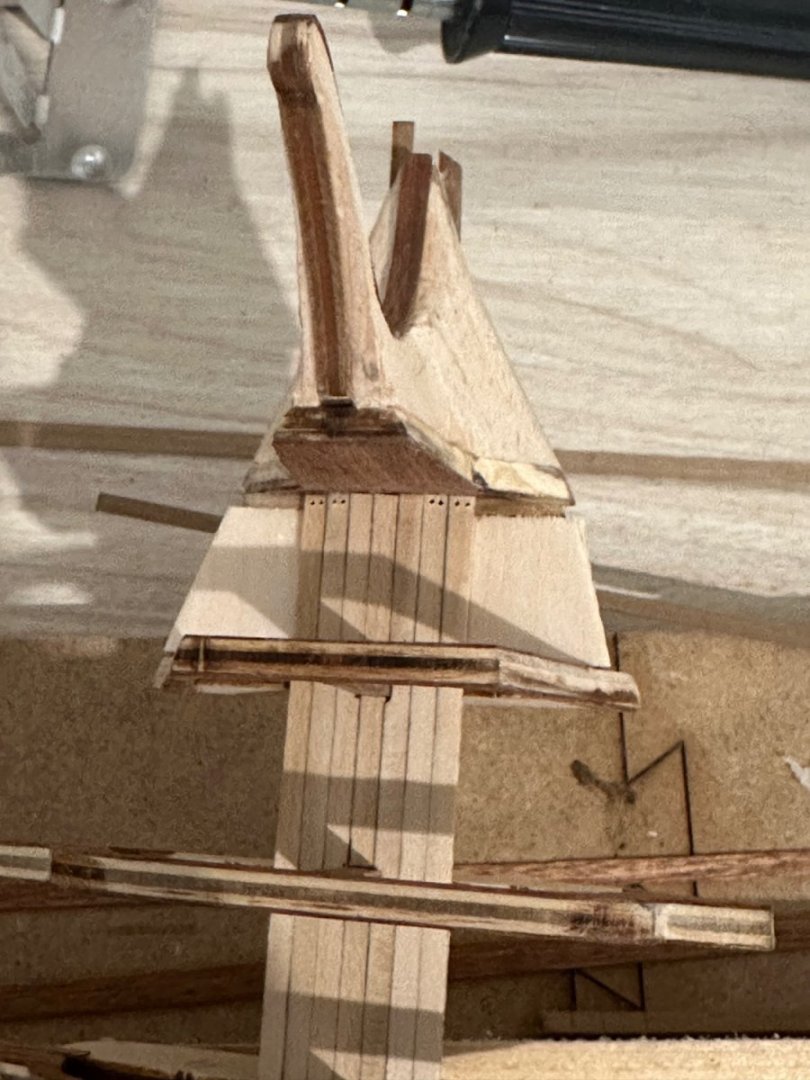
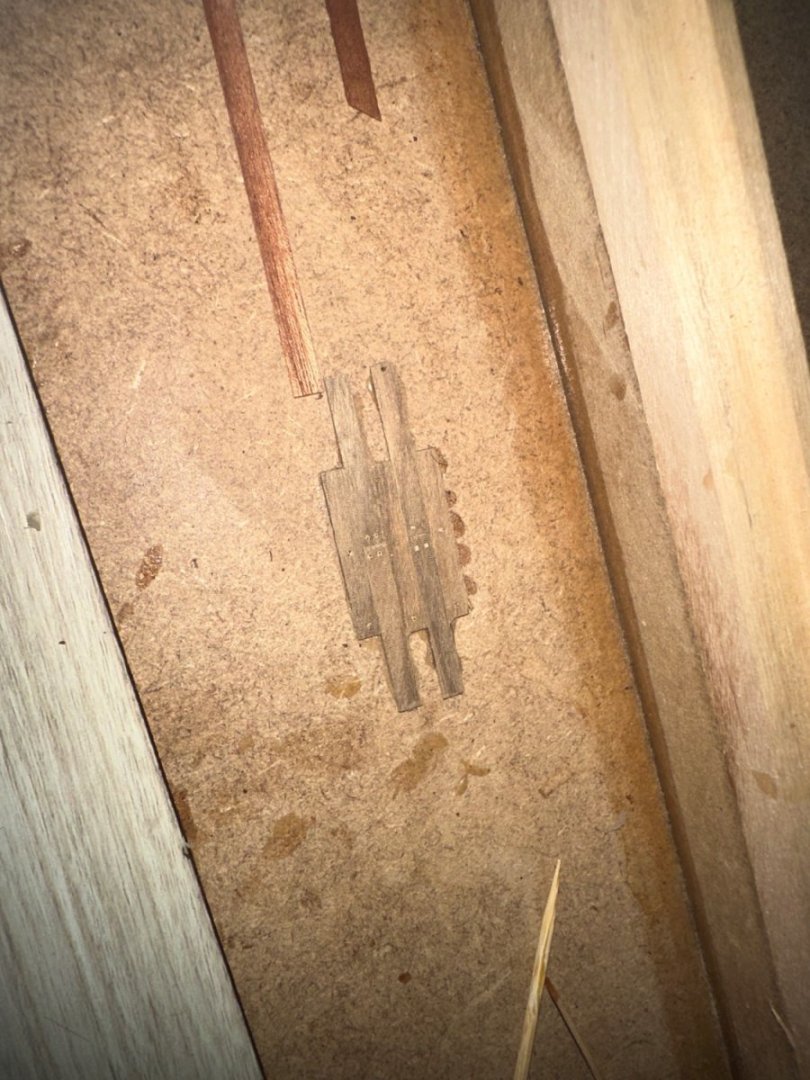
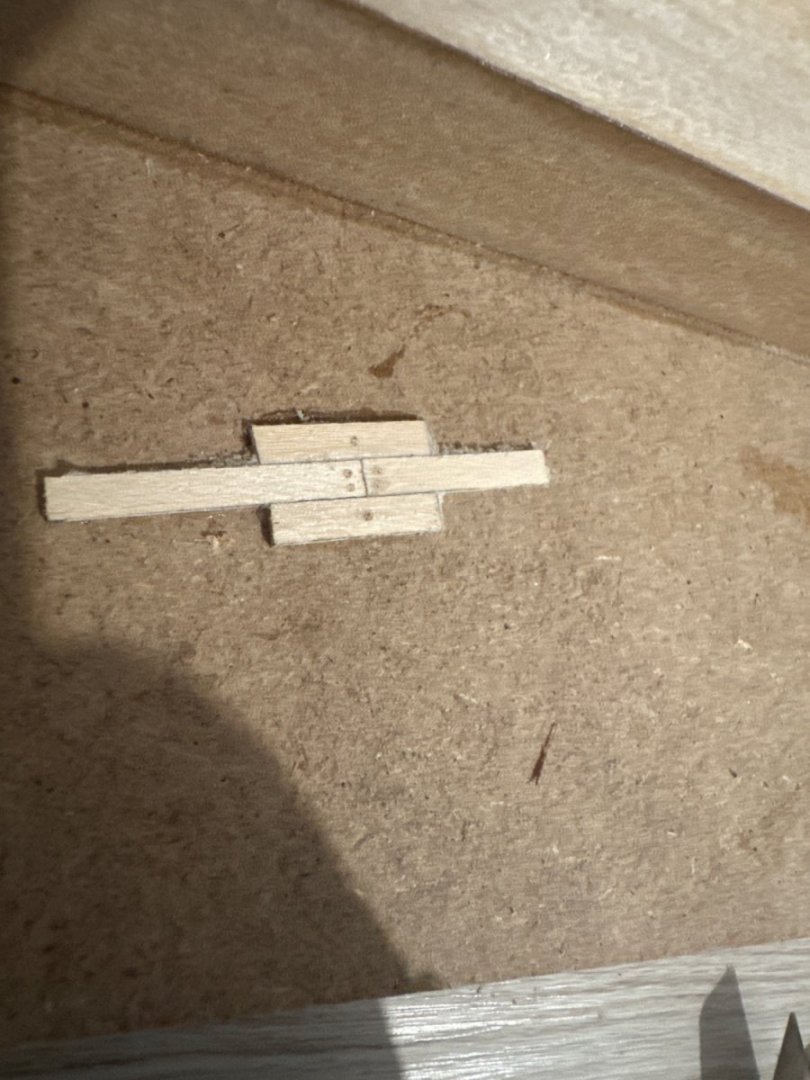
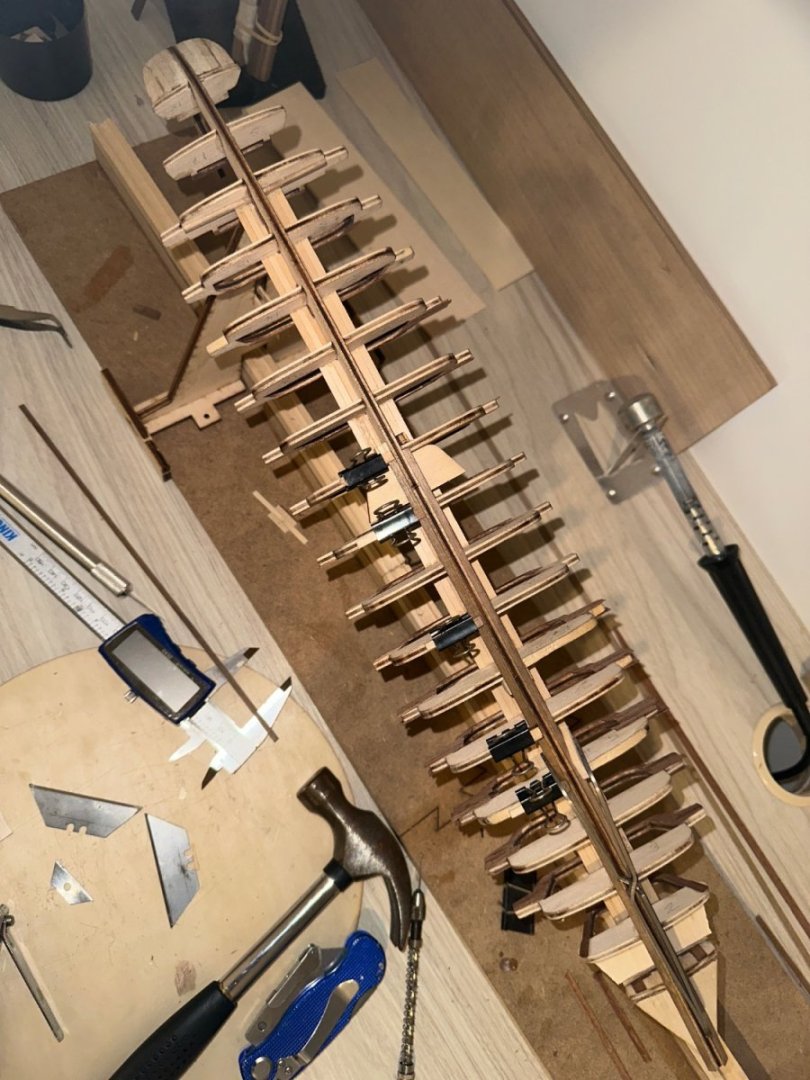
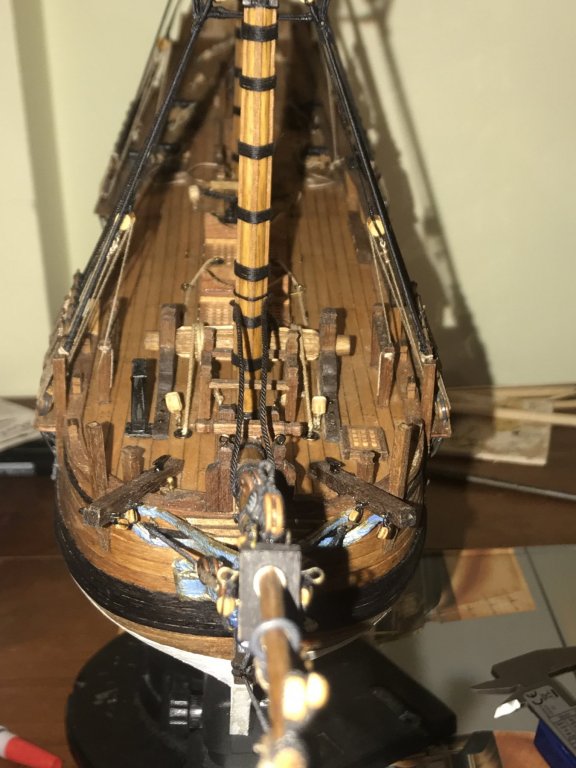
I’m back…it’s been a busy few weeks. So will be good to post to the community and get any feedback there might be…the following is how I did things chronologically, however the photos are not necessarily chronological…because I’m bad at taking photos as I go 😅…will have to work on that… Well the keel is planked including in some tricky areas. The garboard plank is done also. So will be ready to dive right into hull planking when the time is right Here are some photos of the nearly fully done inferior deck, and the process I went to complete the tree nailing. After the tree nailing I gave it a thorough sanding in preparation for a later coat of polyurethane. I was aware that it was going to be more difficult to sand this inferior part of the deck once the benches were glued in… This is the inferior deck nearly completed. At this point I’ve just got to finish decking at the stern of the bireme, finish the tree nailing give it a thorough sanding and and then I’ll be ready for the crews seats/benches. Planked, tree nailed and sanded…ready for benches The obligatory photos of the ship builders mate slacking off and napping as usual 🥹….while I’m hard at work The next thing I did was cut all the benches where the crew sit and row the Bireme… these benches were quite intricate… they were cut at an 83° angle…the instructions seemed to indicate to let them overlap the inferior deck a little bit… so had to carefully cut out the thickness of the inferior deck planking out of each bench. And also the shape of the corresponding areas of the interior of the bulkheads. Here are some photos of a bench that i made and then rejected putting on my model because it was not quite right…just to show you guys what was involved in making these I ended up being quite happy with the results of all 26 benches anyway… Here are some photo angles of the deck, completed, the tree nails sanded the benches attached, and I put on a coat of non-sheen oil based polyurethane. Wasn’t happy with the initial results…it came out fairly waxy…I sanded it all back…with some difficulty though… because working around these bulkheads and benches was tricky when sanding…but got it done…added about 20 percent turps to the polyurethane…and it turned out a lot better 😊 Some areas of the plywood bulkheads will still be visible even once the boat is fully planked…so I covered these areas with mahogany…this is me pre heat bending them before gluing… The instructions are pretty bare bones for this kit…as I continued my build…I started to realize that getting the upper bow planks to attach to bulkhead 3 (circled) was going to require some creativity 🤔 ….i wish I took some more step by step photos…but long story short I made this out of extra walnut planks. And this is the result, I’m quite happy with it As some might have noticed…I’m in the process of planking the outriggers…looking forward to uploading more pics when I’ve completed that and get all your feedbacks…I think/hope it will be shorter timeframes between posts now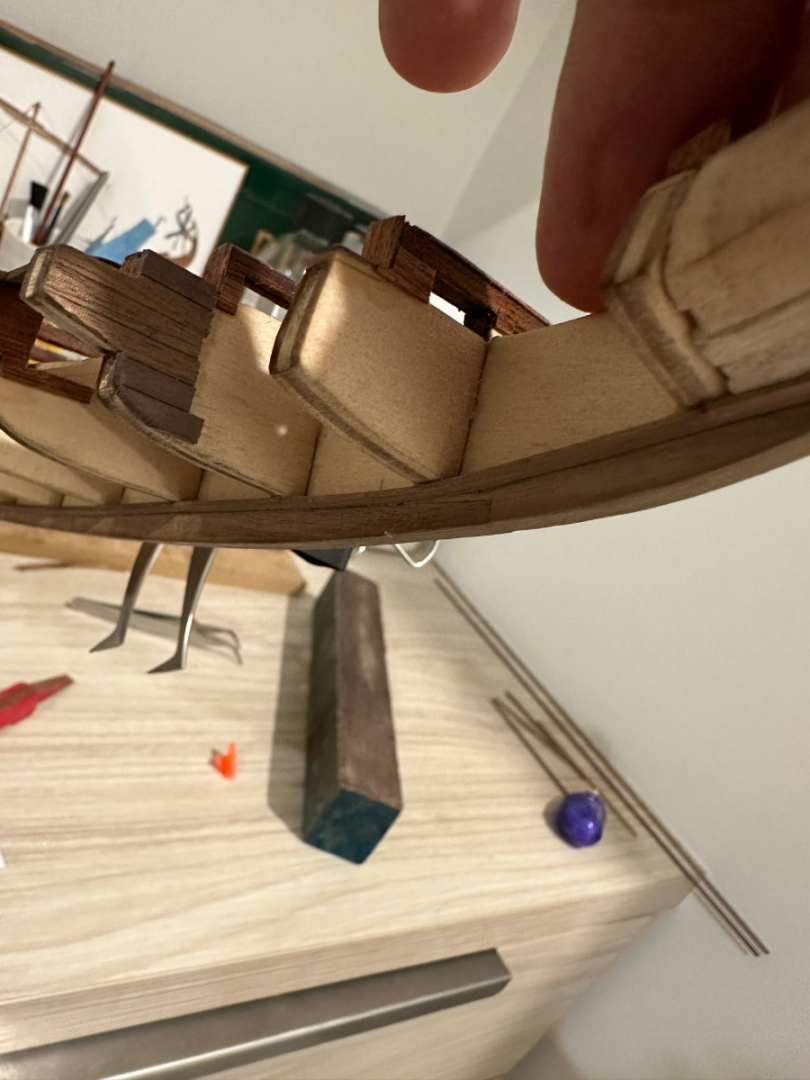


-
Vinnie reacted to a post in a topic:
Question about which Bounty kit to get
-
Vinnie reacted to a post in a topic:
Question about which Bounty kit to get
-
Thanks so much Keith…I actually have that book…and thank you for reminding me that I can rely on it for rigging references in the future
-
Thanks for all the advice and comments everyone…I’ve done some thinking…and maybe I’m prepared to challenge myself and try something other than a double planked hull…I’ve been Looking/considering a Constructo 1:50 Bounty…if anyone has any further commentary please let me know…I feel quietly confident about my ability in the hull…its just the rigging that I think I’ll need a lot of help with. So I’m hoping that whatever mode I go with, it will hav thorough rigging instructions
-
Vinnie reacted to a post in a topic:
Question about which Bounty kit to get
-
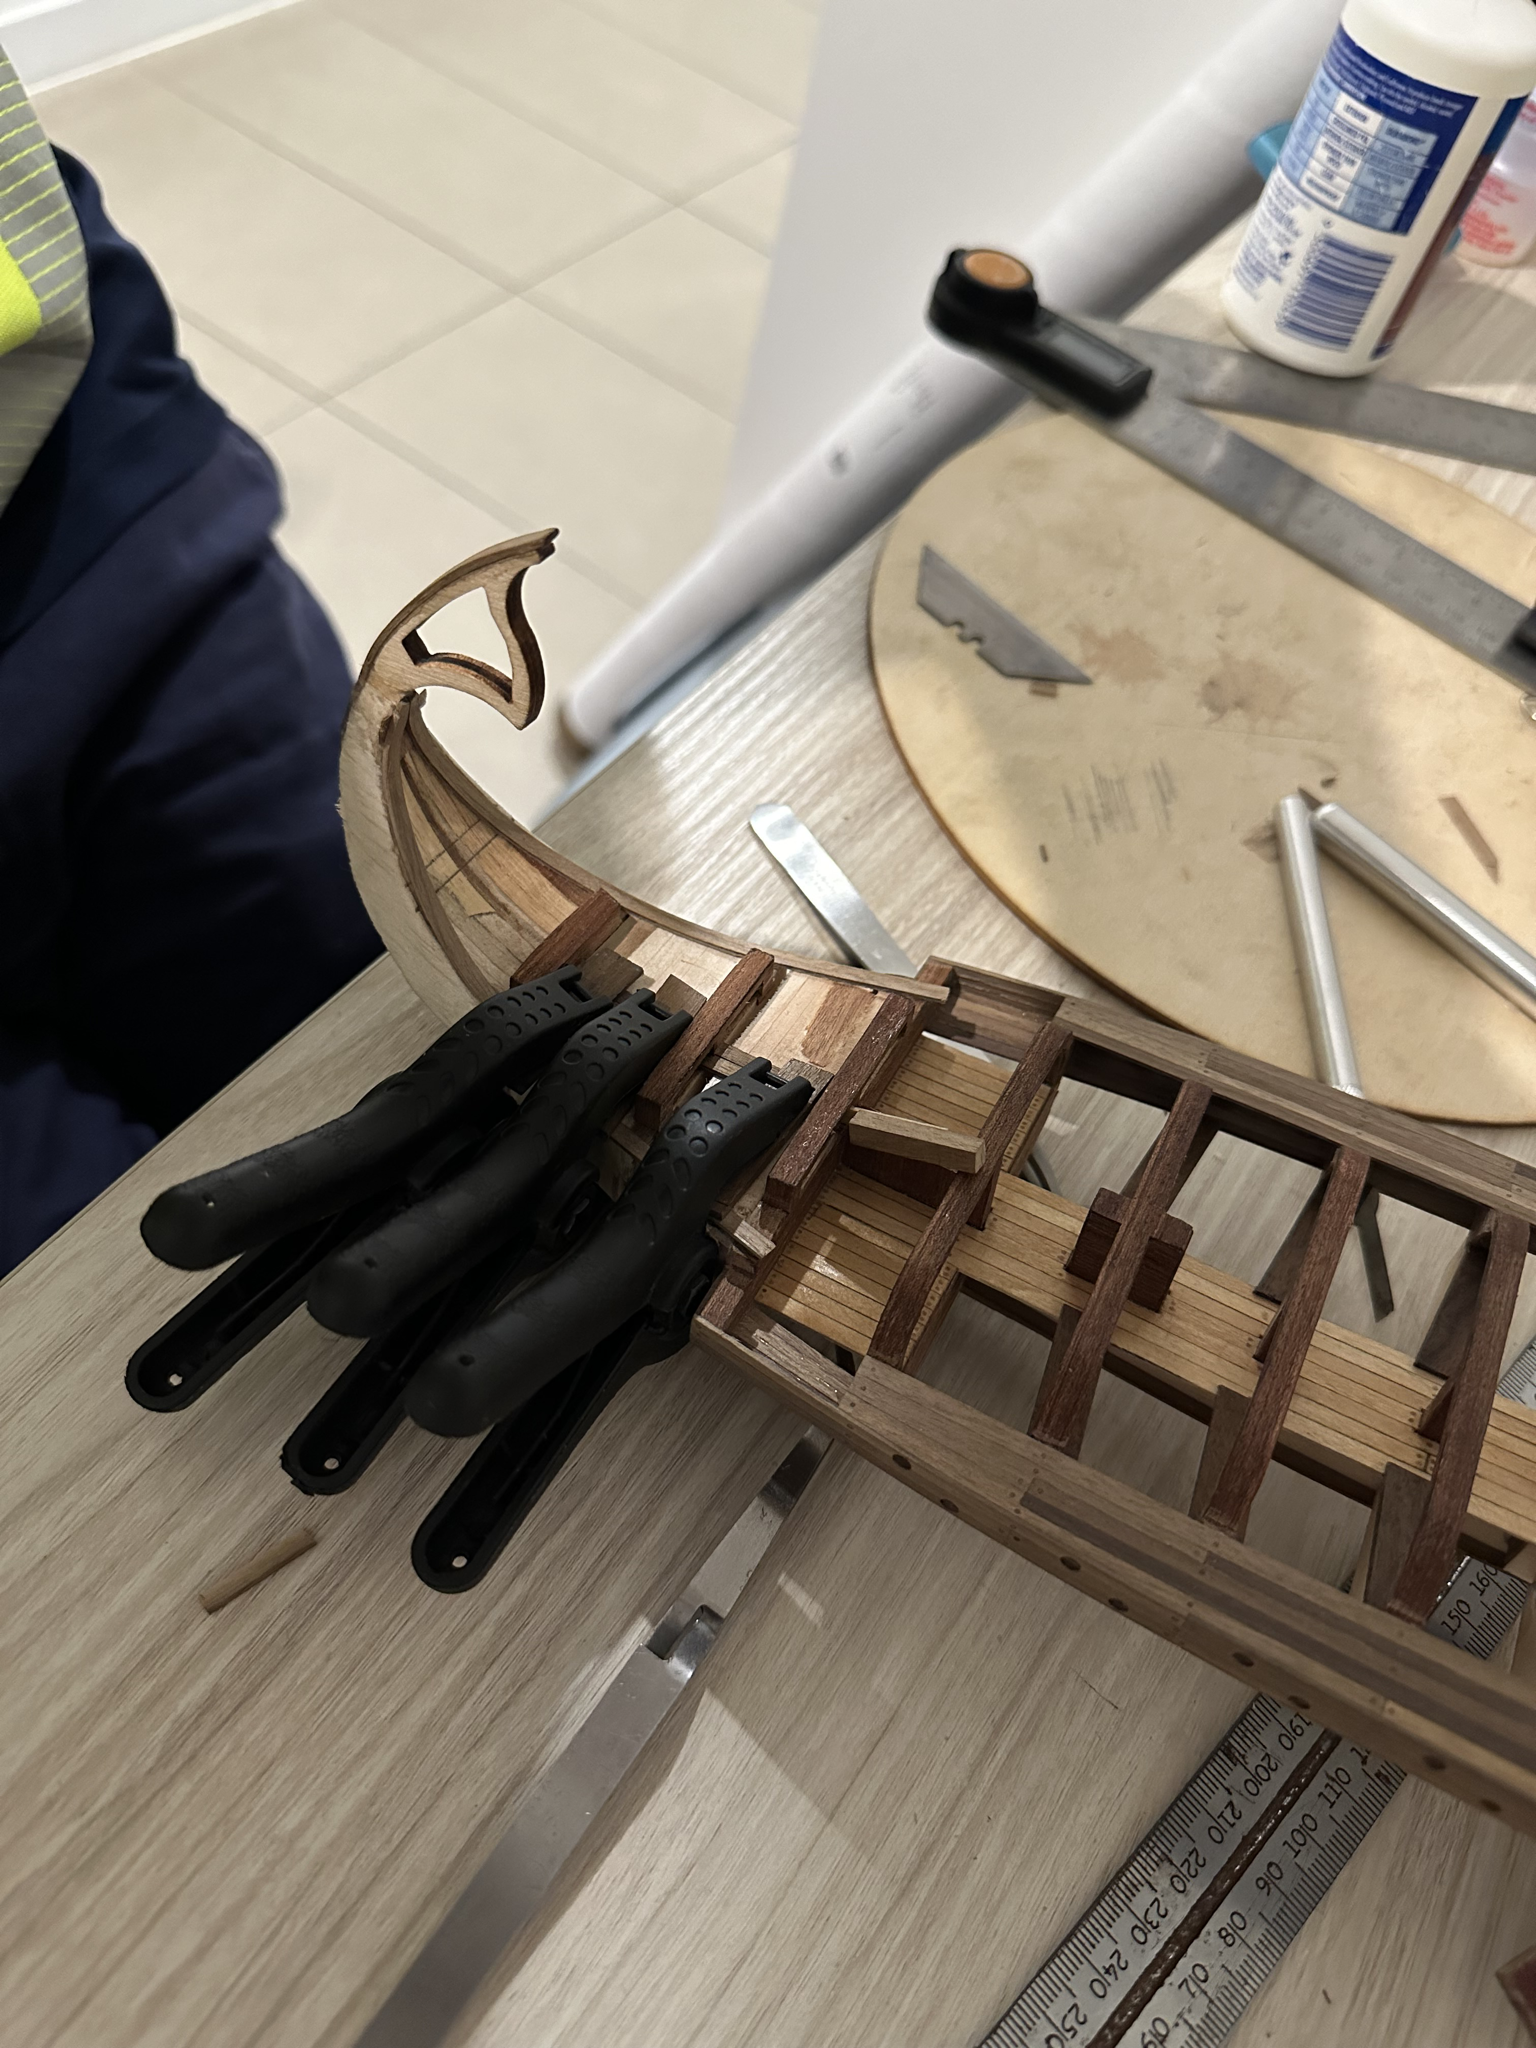
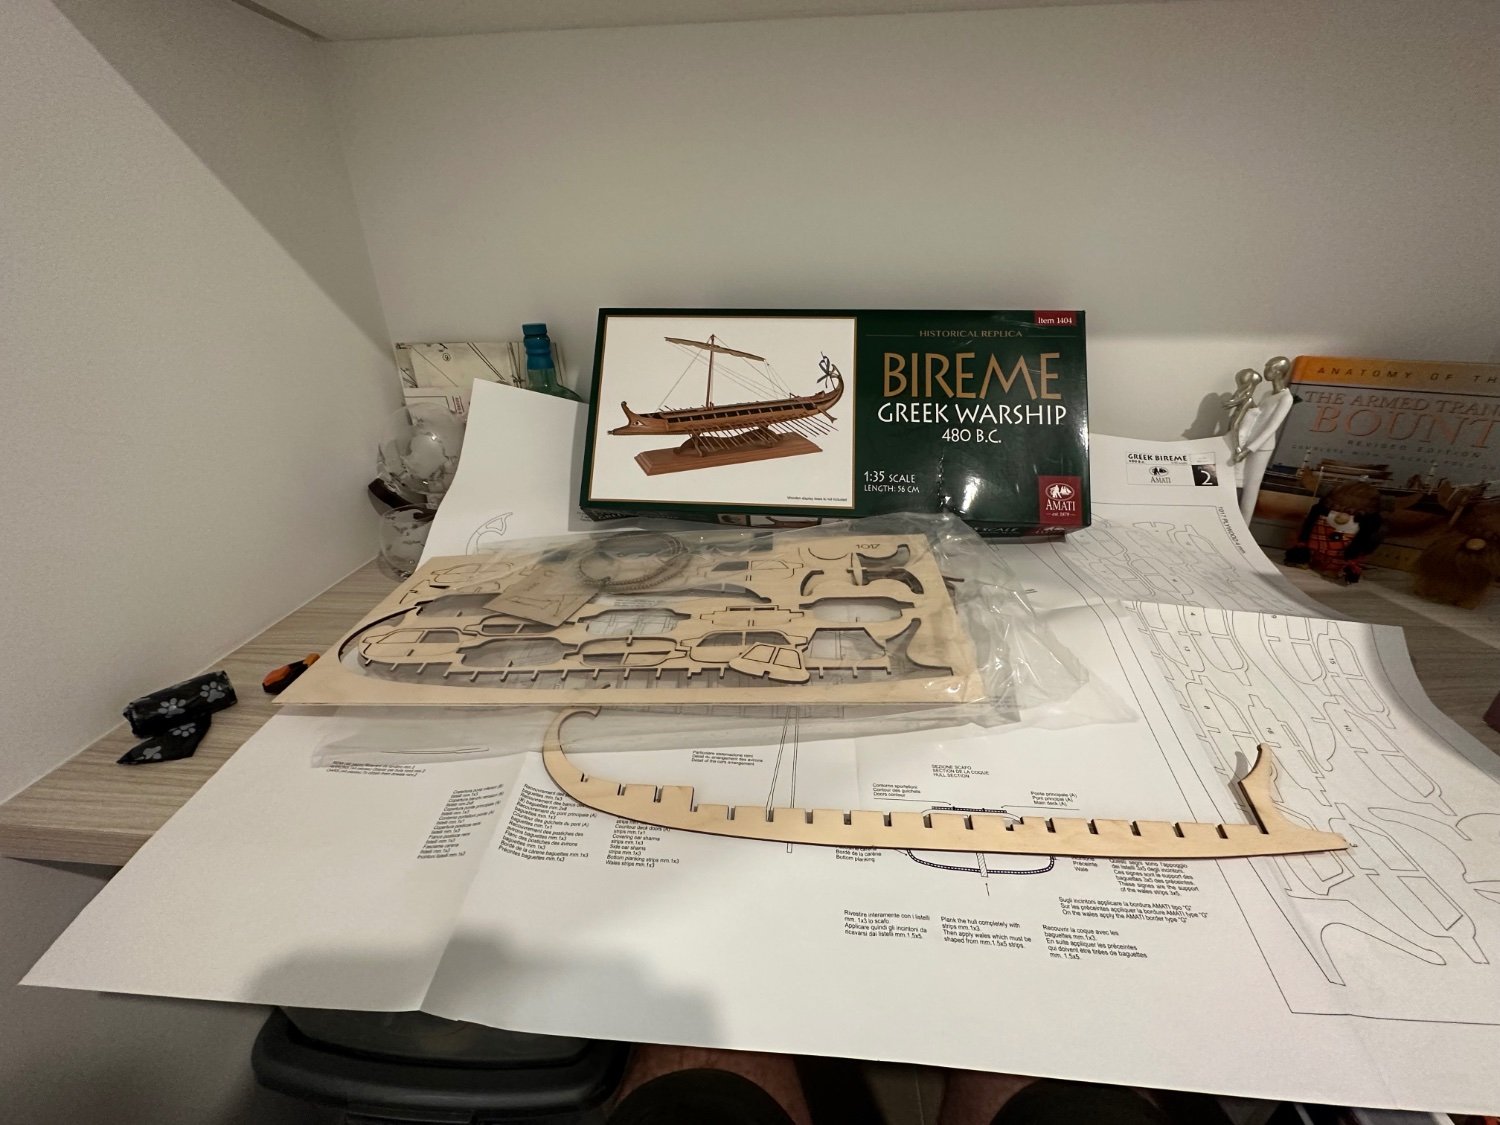
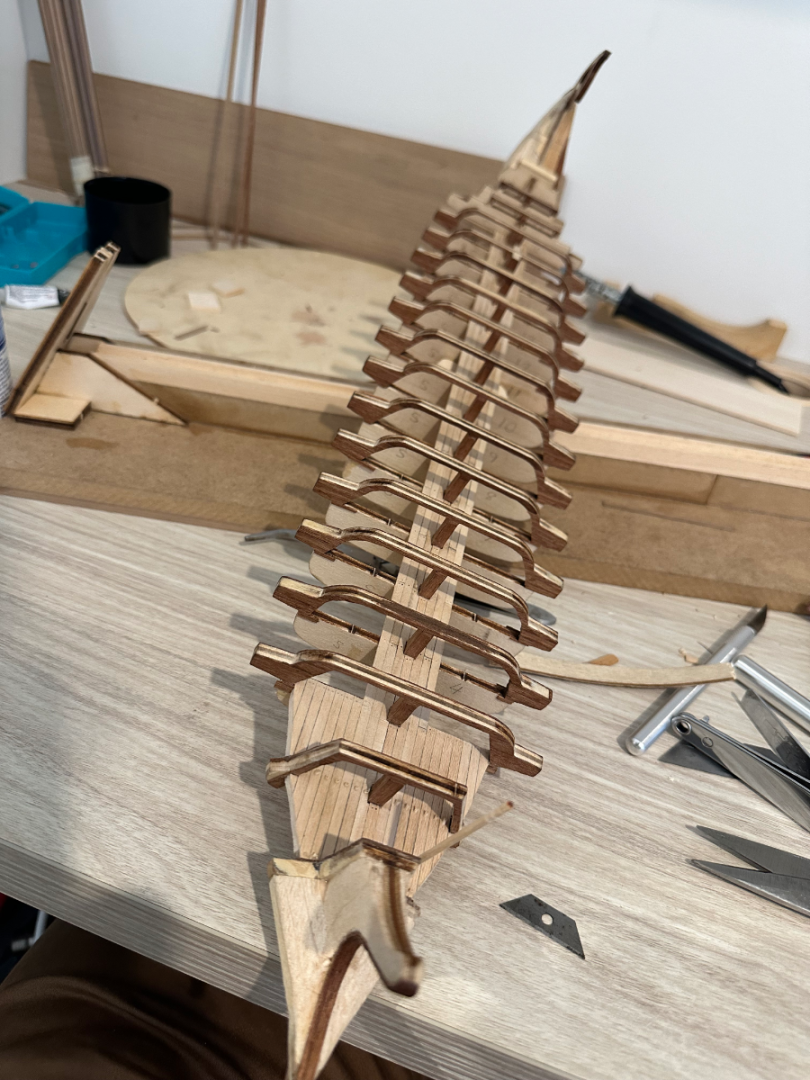
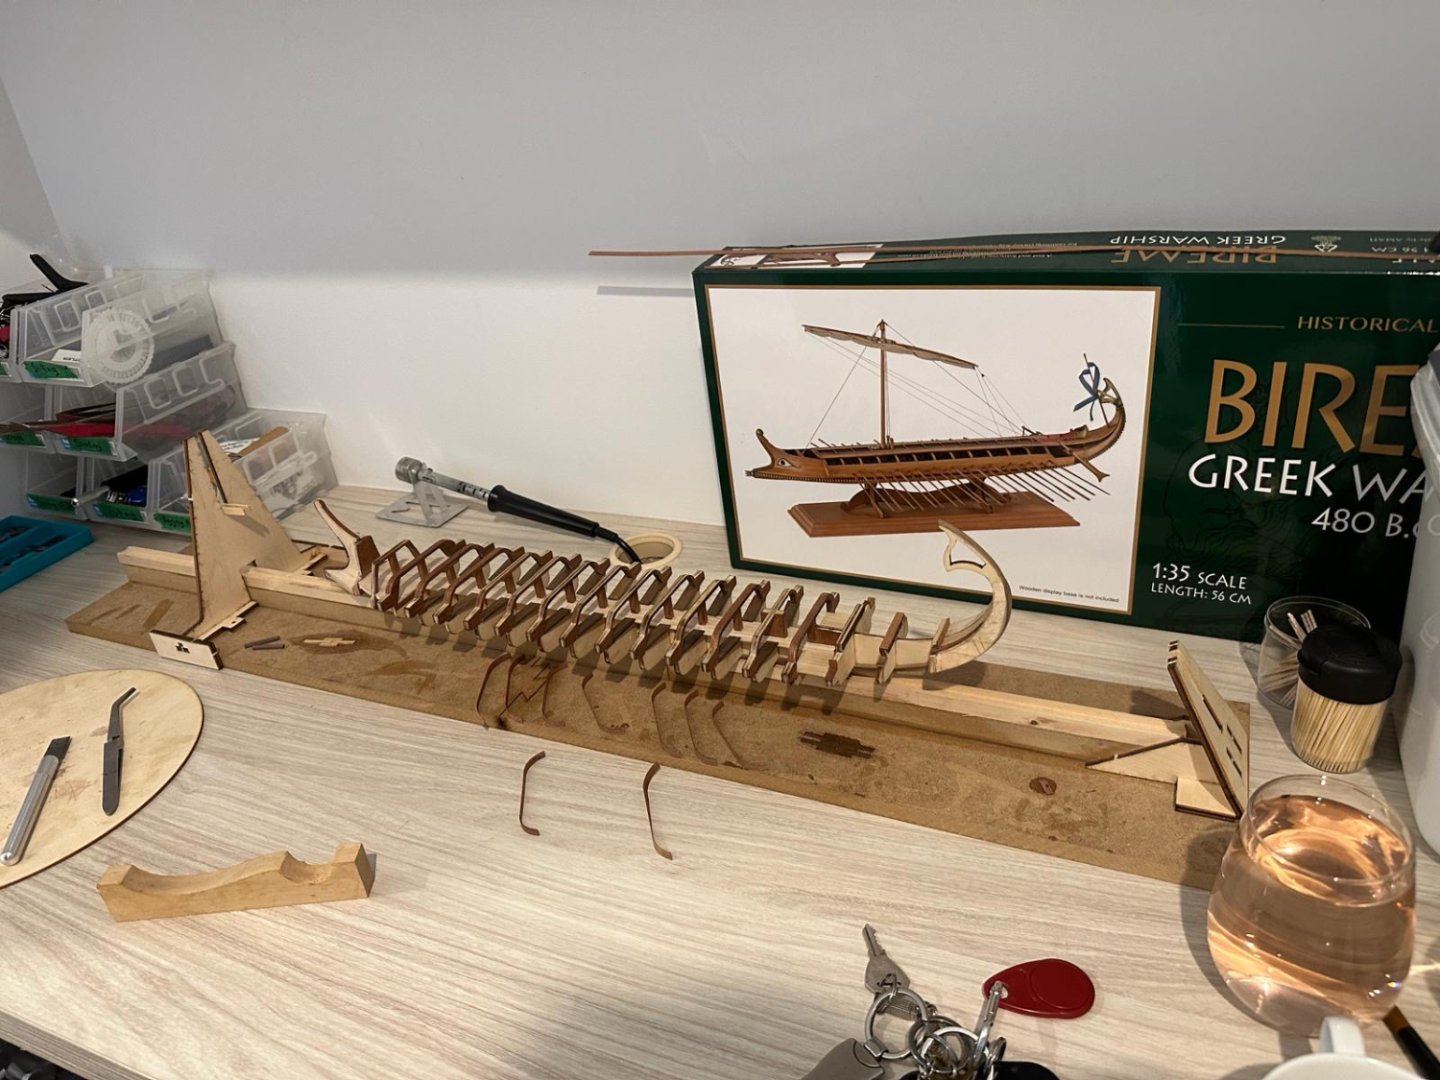
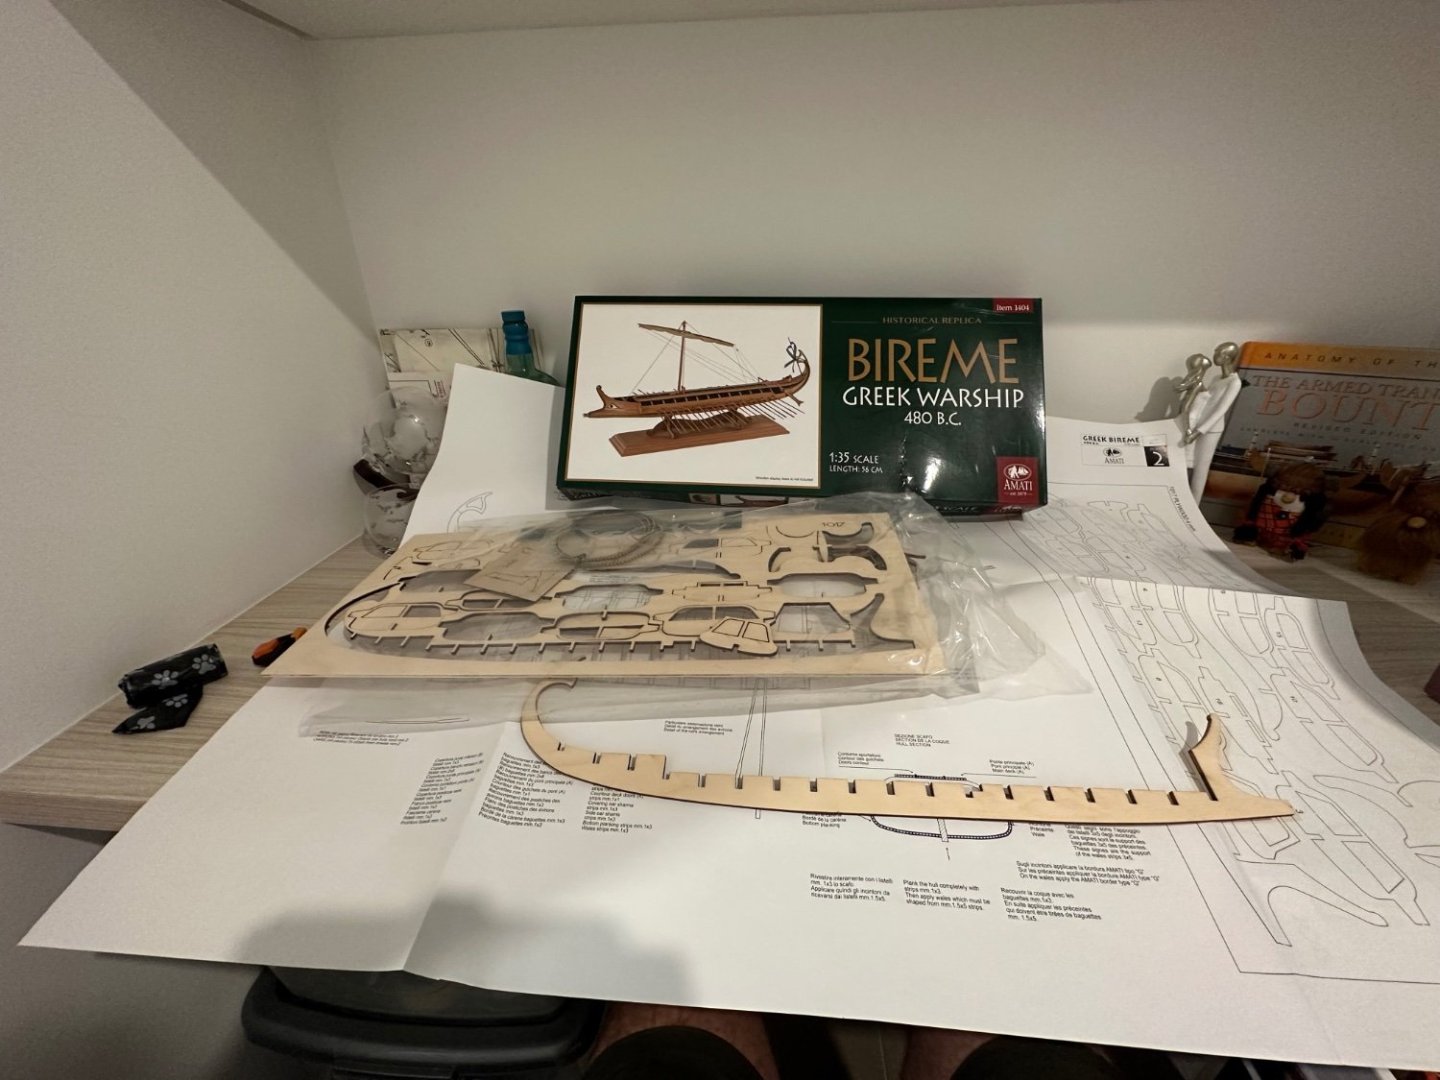
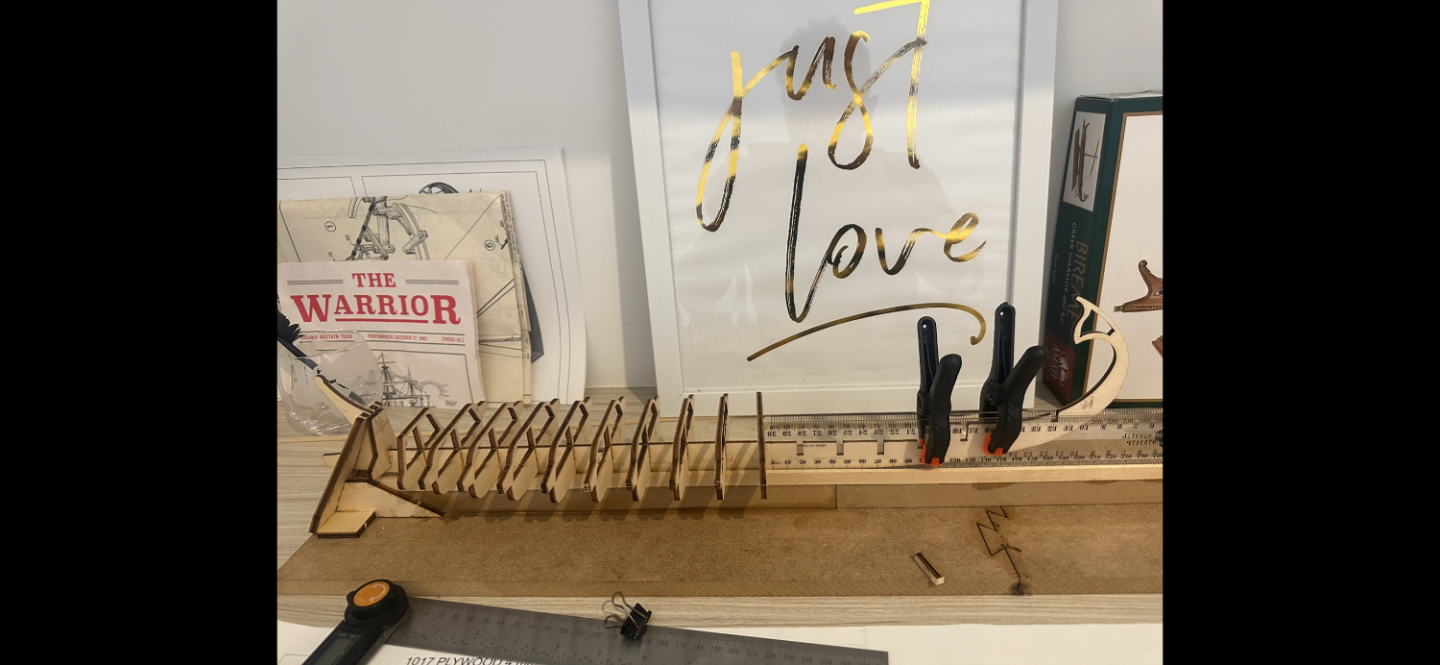
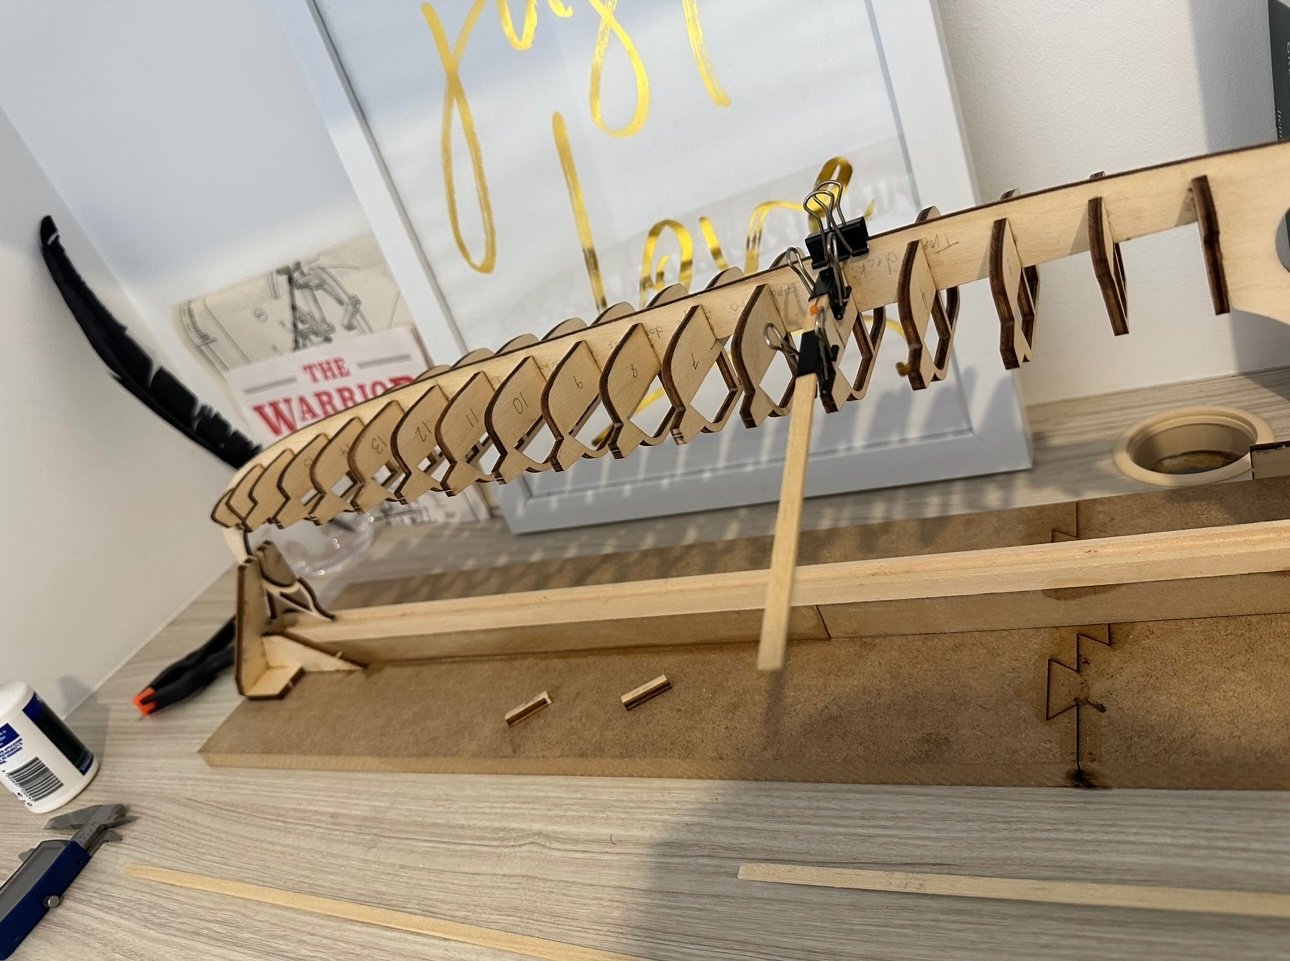
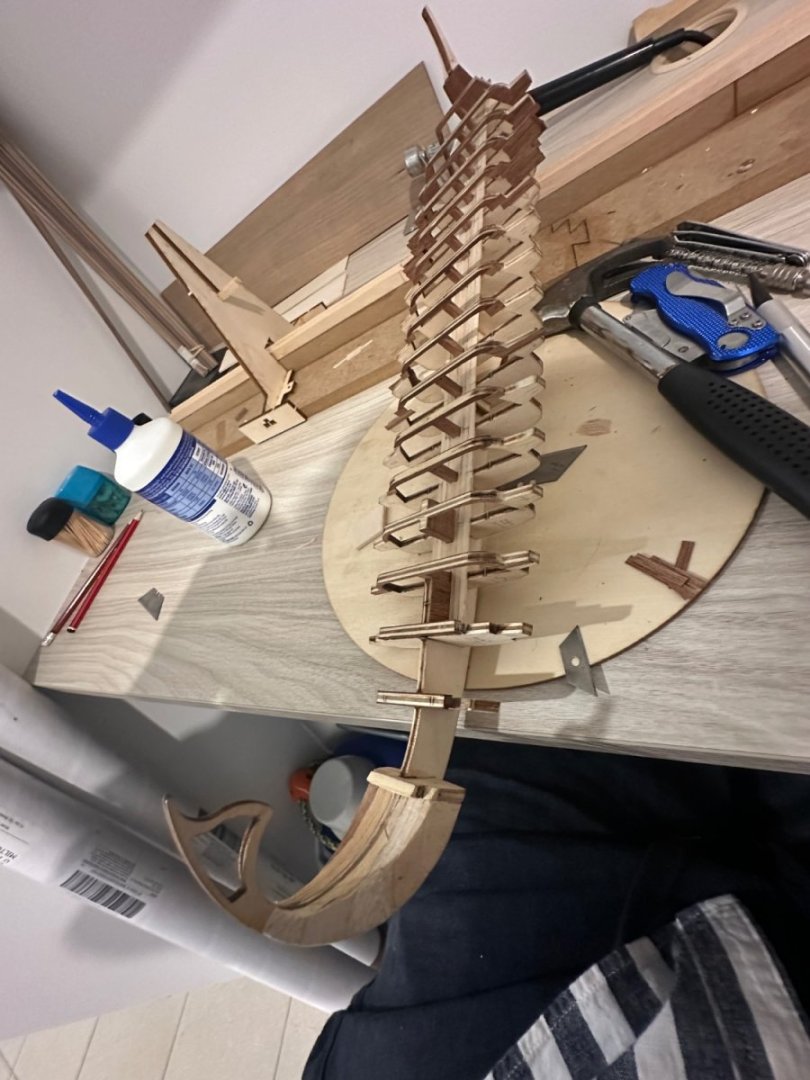
Well it’s been too long… hello all who are interested …this will technically be my second build…however my last build (Hms Bounty) very sadly 😢…suffered a catastrophic accident and now no longer exists…no matter…I will build another better one…I learned a lot on my last build and intend to reach for higher levels of craftsmanship in the future on another bounty, but in the meantime while I considered which one to buy. I started work on this little Bireme. I’ve been at it for about 2 months now, but from this point hopefully I’ll post smaller more regular posts… so, like several other past logs I’ve read, I’ve noticed the usual disappointments. The instructions are very vague, and some of the laser cutout pieces are inaccurate. However, the fun of model ship building is sometimes, problem-solving…so let’s do this. at a snails pace, I added one bulkhead each day, obsessing over, trying to make it as square as possible. I end up being mostly satisfied with results, but I think next time, I could probably find tool that would do a better and easier job. trying to fix some of the inaccurate frames… ended up being quite happy with my efforts… The admiral took a photo of me using some tracing paper to trace off the plans for the stern cut out section… the balsa that is essential to complete this kit is not included. This is another criticism I have of this kit many parts that you need to finish simply aren’t inside the kit. Anyway…went out and have got a nice stash for my future balsa needs a lot of the frames will still be quite visible when the model is finished…so I ordered some mahogany strips to cover up exposed areas…stern section all smooth and shaped. Planked and sanded the inferior deck. Thought long and hard about whether or not to simulate tree nails. Did research on whether they where historically accurate…apparently a resounding yes…did a few test samples…I used toothpicks as the tree nails… they seem less visible than what I imagined…however I still think they will add some nice details…so I’m going to go ahead with tree nails… Will probably do tree nails on the walnut hull planking also… in the process of doing the garboard plank… and that is where I’m up to…please let me know if there are any suggestions or pieces of advice


-
 Vinnie reacted to a post in a topic:
HMAV Bounty by fifthace - Caldercraft - 1:64
Vinnie reacted to a post in a topic:
HMAV Bounty by fifthace - Caldercraft - 1:64
-
Really enjoying watching your determination overcome some of the quirks of this older kit. Will grab a cold one pull up a seat, and looking forward to seeing where you go from here😎🍺…as far as I can find…this build is the only Mantua Bounty build on this website…i was considering ordering a mantua Bounty myself…but hard to know if some of the quirks your experiencing with this kit have been rectified in the last few years. 🤷
-
It’s been quite a few years since I posted on this site…but I’m back and I’m ready to dive back into some shipbuilding. Just a question I had for the community though…I’m considering getting another (sad story for a build log) Bounty kit. But I’m a bit up in the air about which one to get. At the moment I’m considering either a Mantua or an Amati Bounty kit. So definitely a Bounty kit…just not sure on which brand. As long as it ticks the boxes of being a double planked kit, and the instructions dont totally leave me in the dark when it comes to the rigging, I’m exited. Any input or comments about those brands of kit or any other potential Bounty kits I could order would be welcomed. 😎😁
-
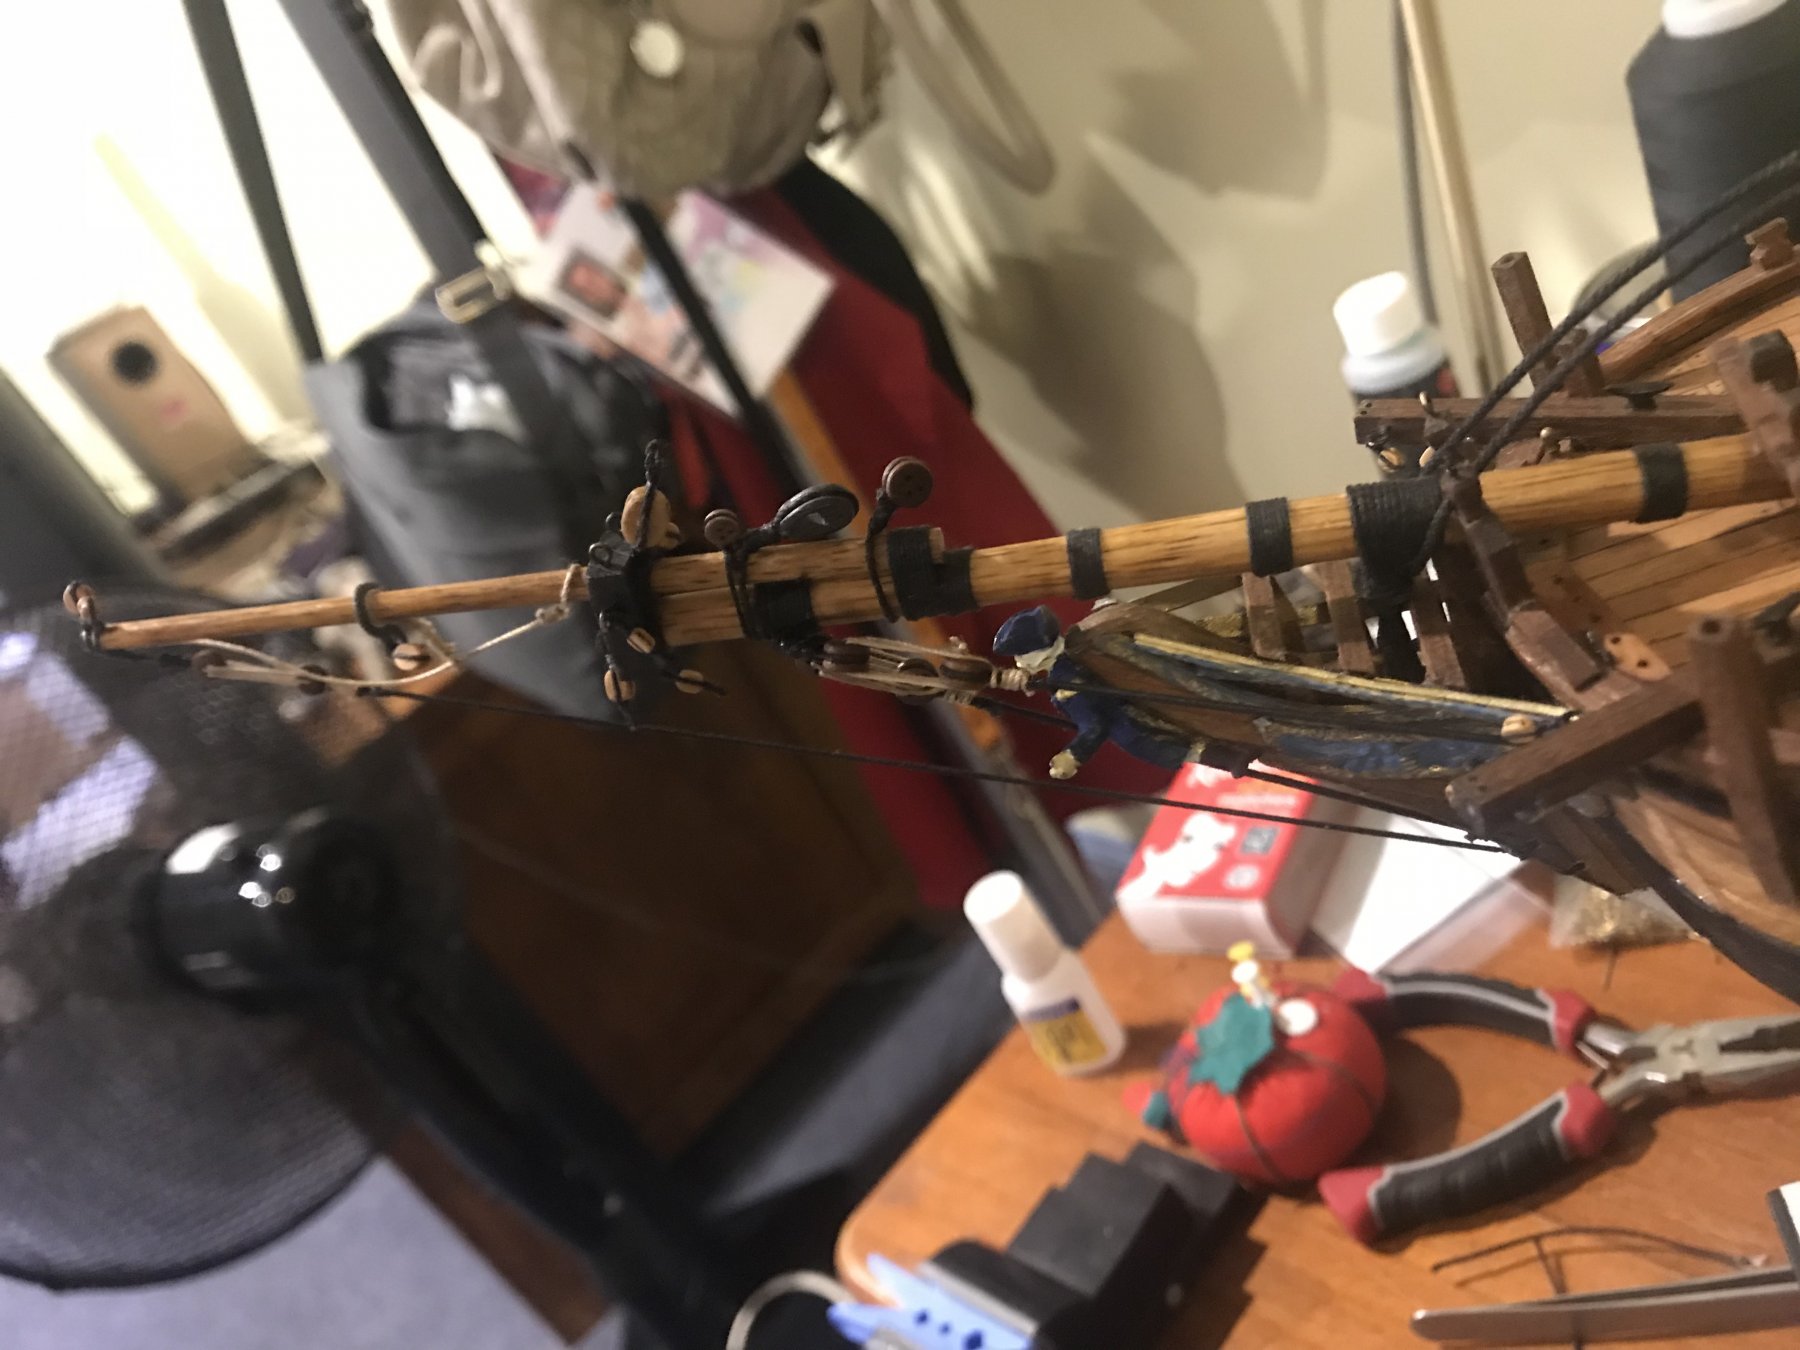
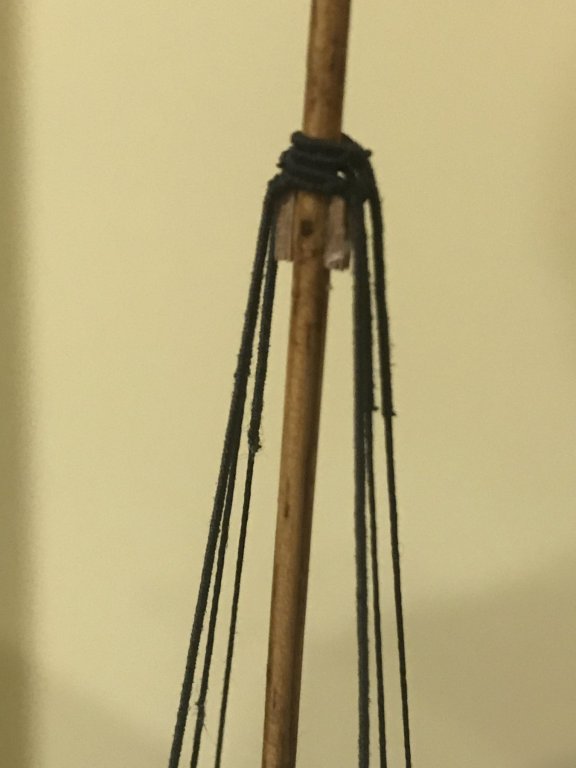
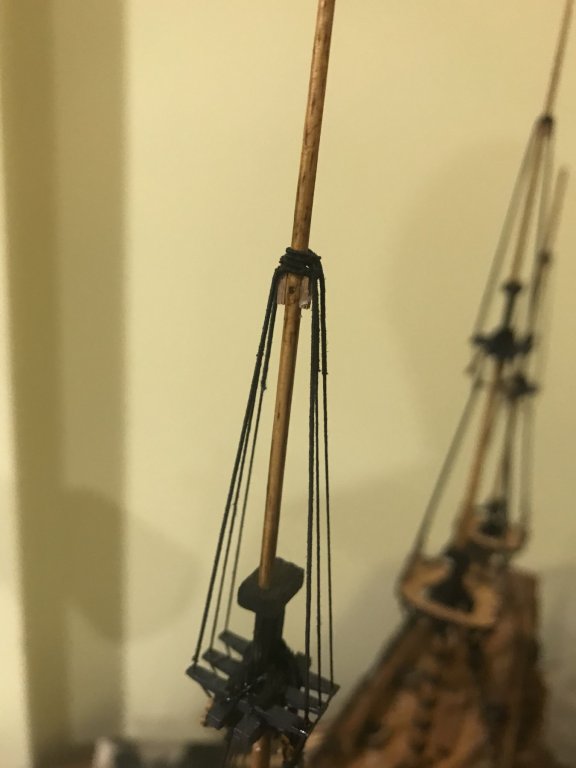
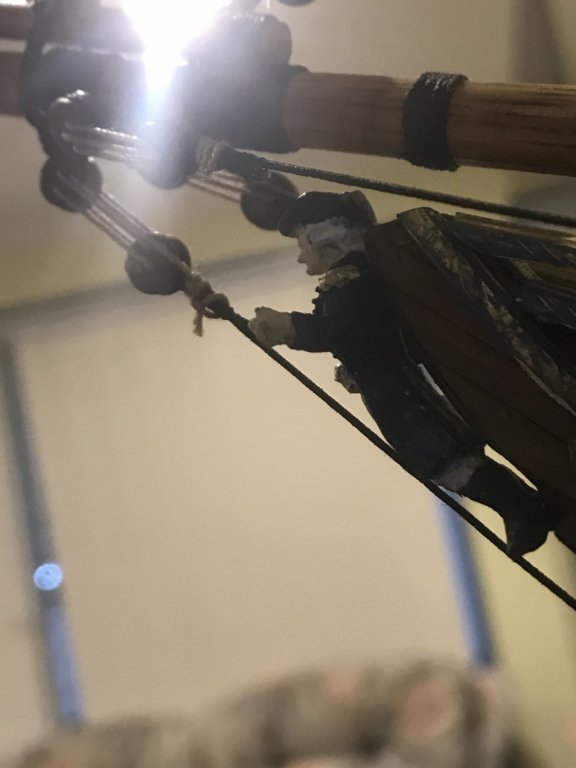
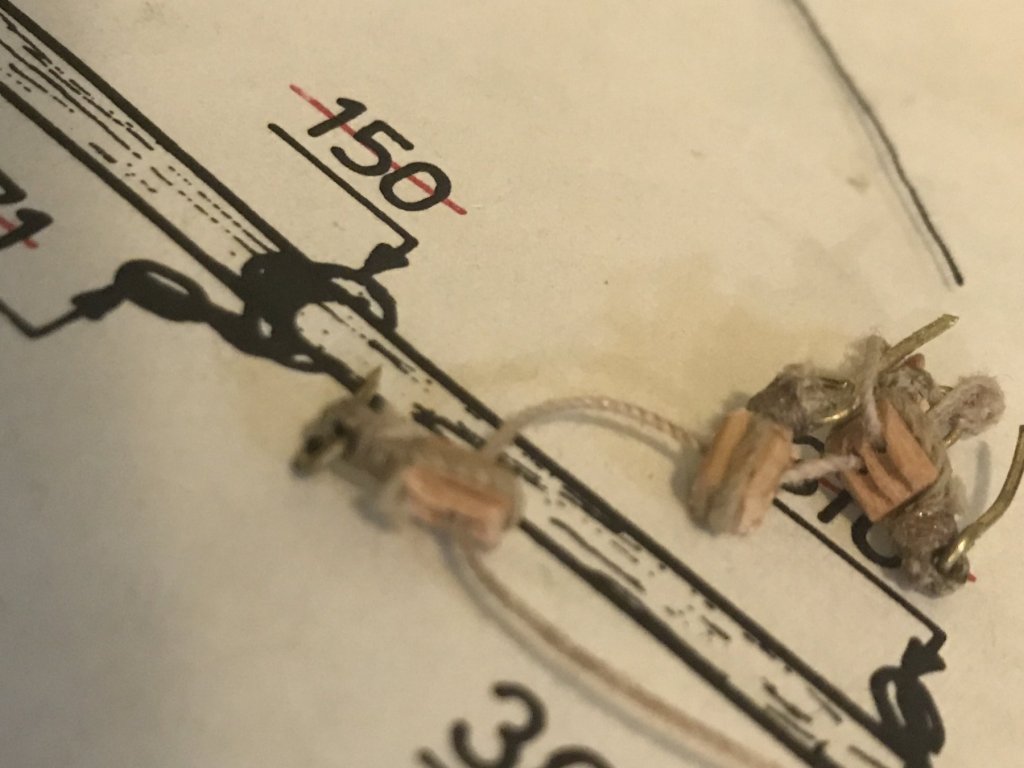
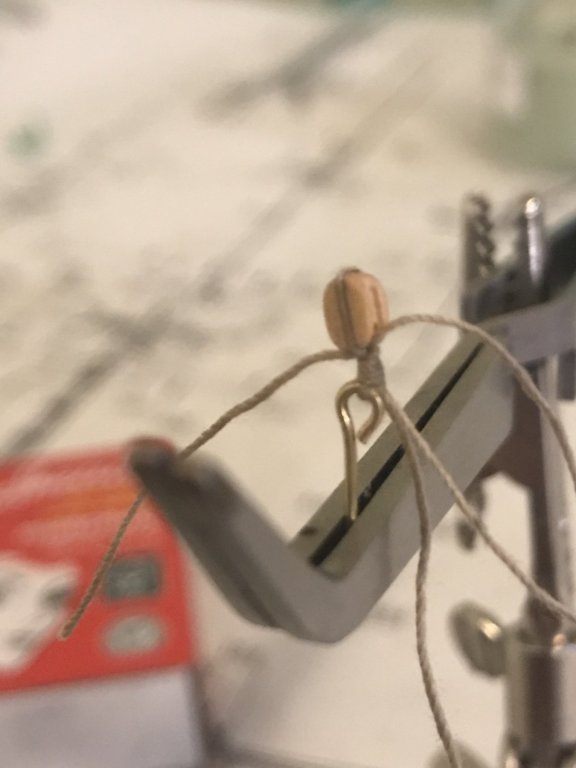
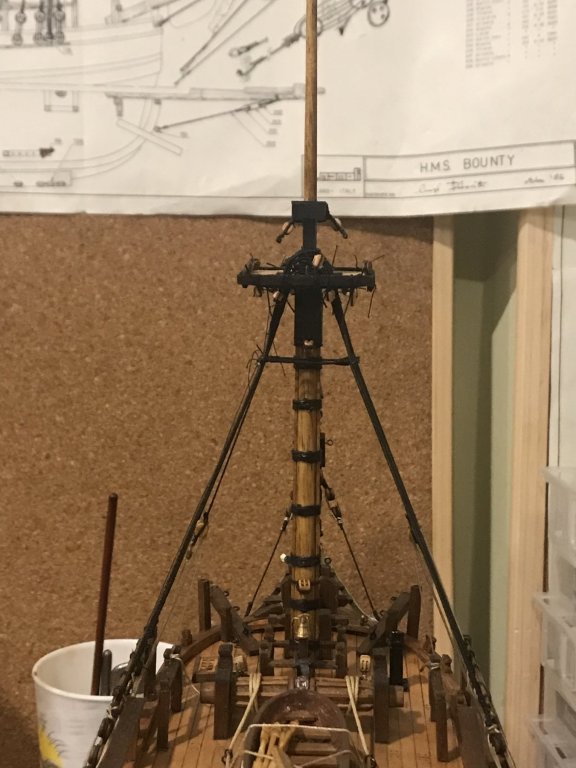
Hello folks! 👋...it’s been a while since I’ve show you all where I’m at. I’ve been going slowly but steadily and here’s where things are. All the shrouds are finally done! I’m fairly happy with the results... i wasn’t happy with the bobstays and shrouds at the bow. So I re-did them with some thicker rope. And I’m happier with the result...it’s hard to get a picture that shows them up 😕 in this last pic if you can spot the looped rope that goes around the fore mast it’s the start of my first stay 😁and here’s my first crack at a weaved mouse...pretty enjoyable to make except for the shaping of the little wood piece that the weaving goes over. In short it was fiddly agony to shape 😡. Oh well only 9 more to go!!! Would love any constructive critiques people 😊


-
Starting to really come together now Dave...and she’s spectacular...will look really good in a nice case somewhere in the house. You mightn’t be game to consider but have you decided whether you will do another boat once this beauty is finished?
-
Very nice Fernando! Thanks for showing me and others...a real labor of love there 😊...much work to go, but you will feel rightly proud to have been a part of that after she is all finished!
-
Thanks Fernando 😁 I’m glad you like the timbers. And the blocks...I’m glad I went through and got them. Unfortunately I was there on a Saturday and it supposedly most goes out on Sunday...oh well I have it as a goal to be on a square rigger with the sheets spread one day! Wow id love to see pics of this restoration Fernando! What hard yet satisfying work that would be 😊
-
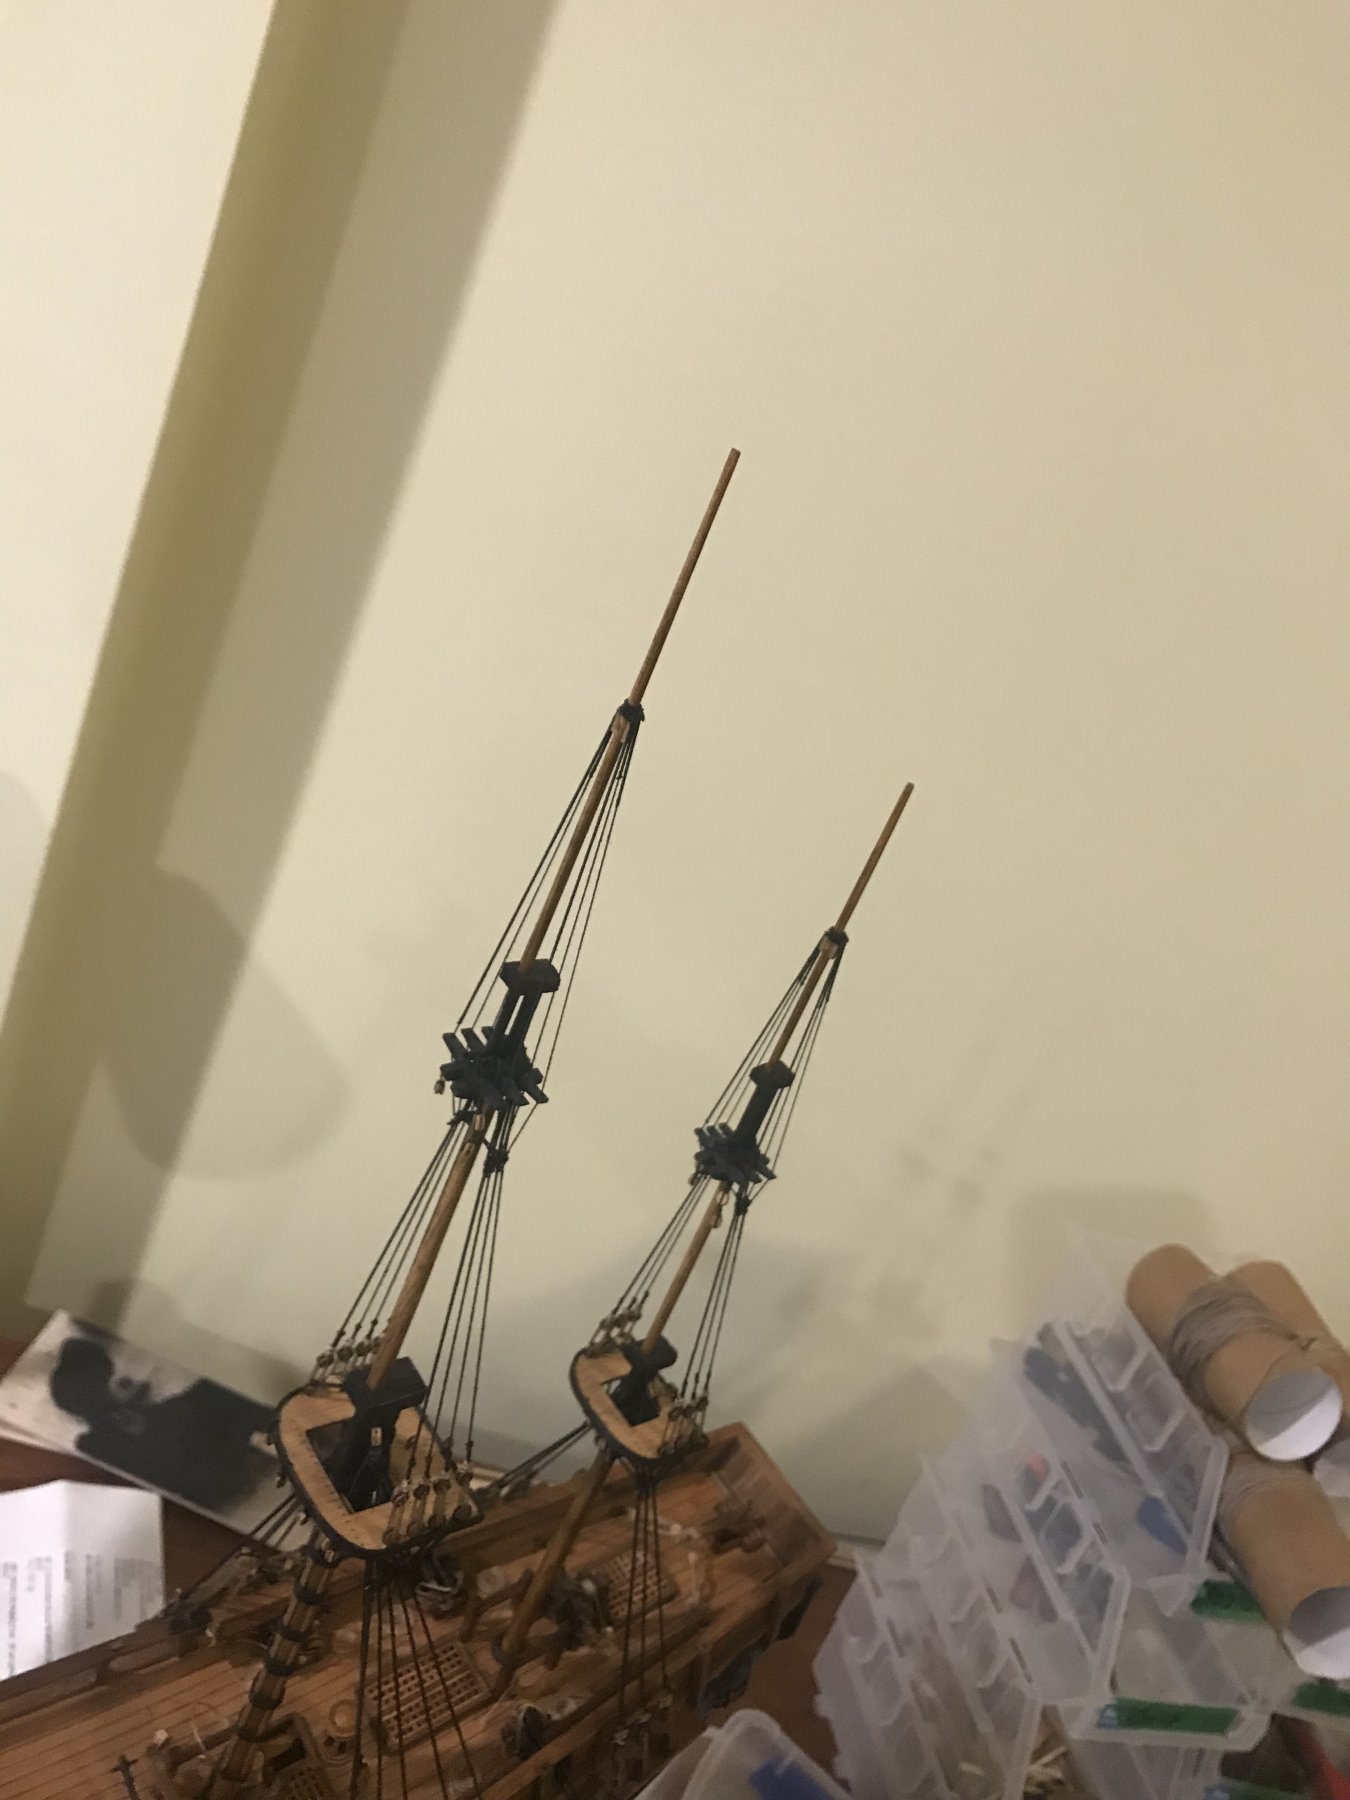
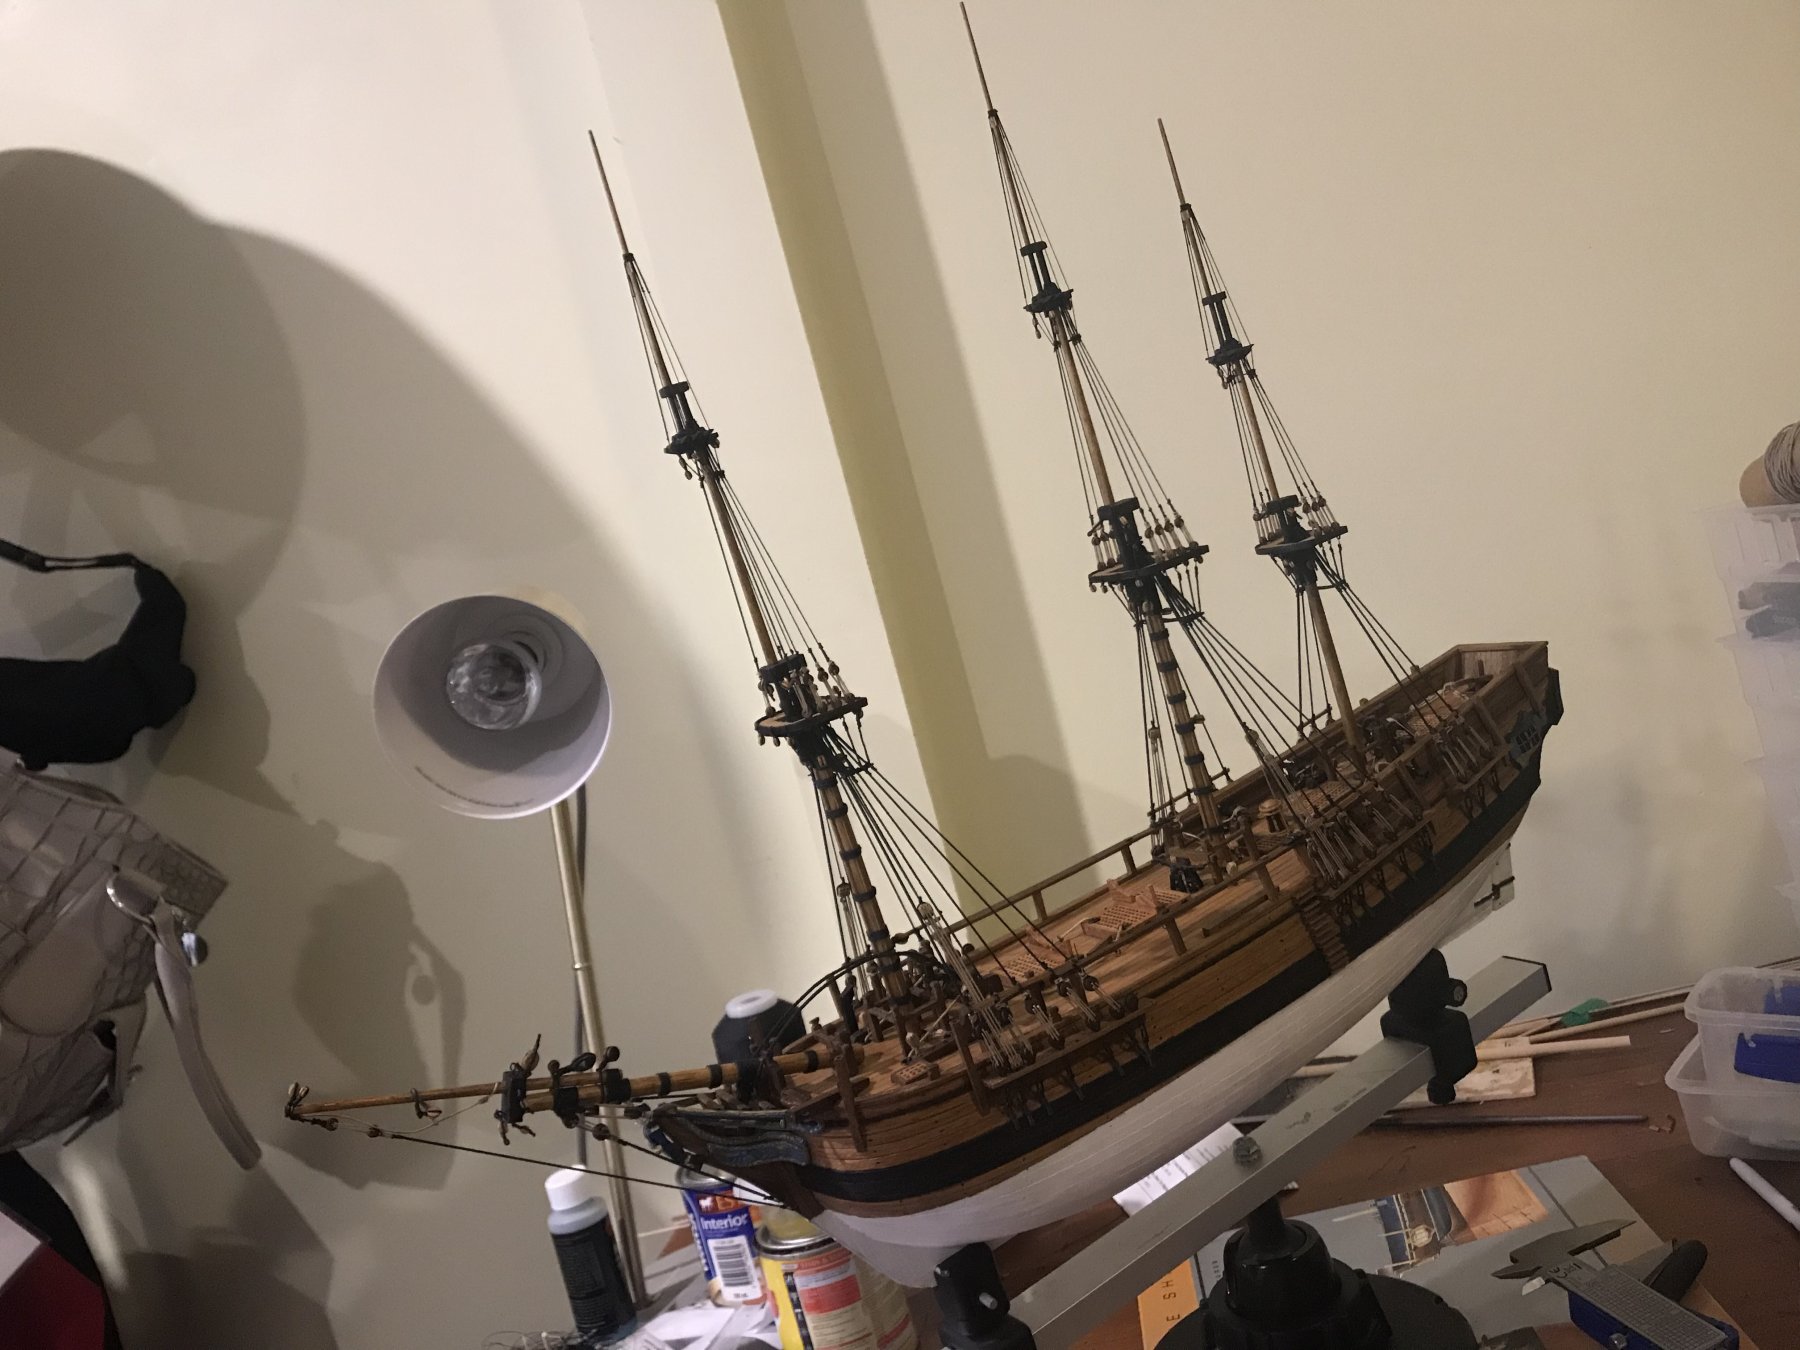
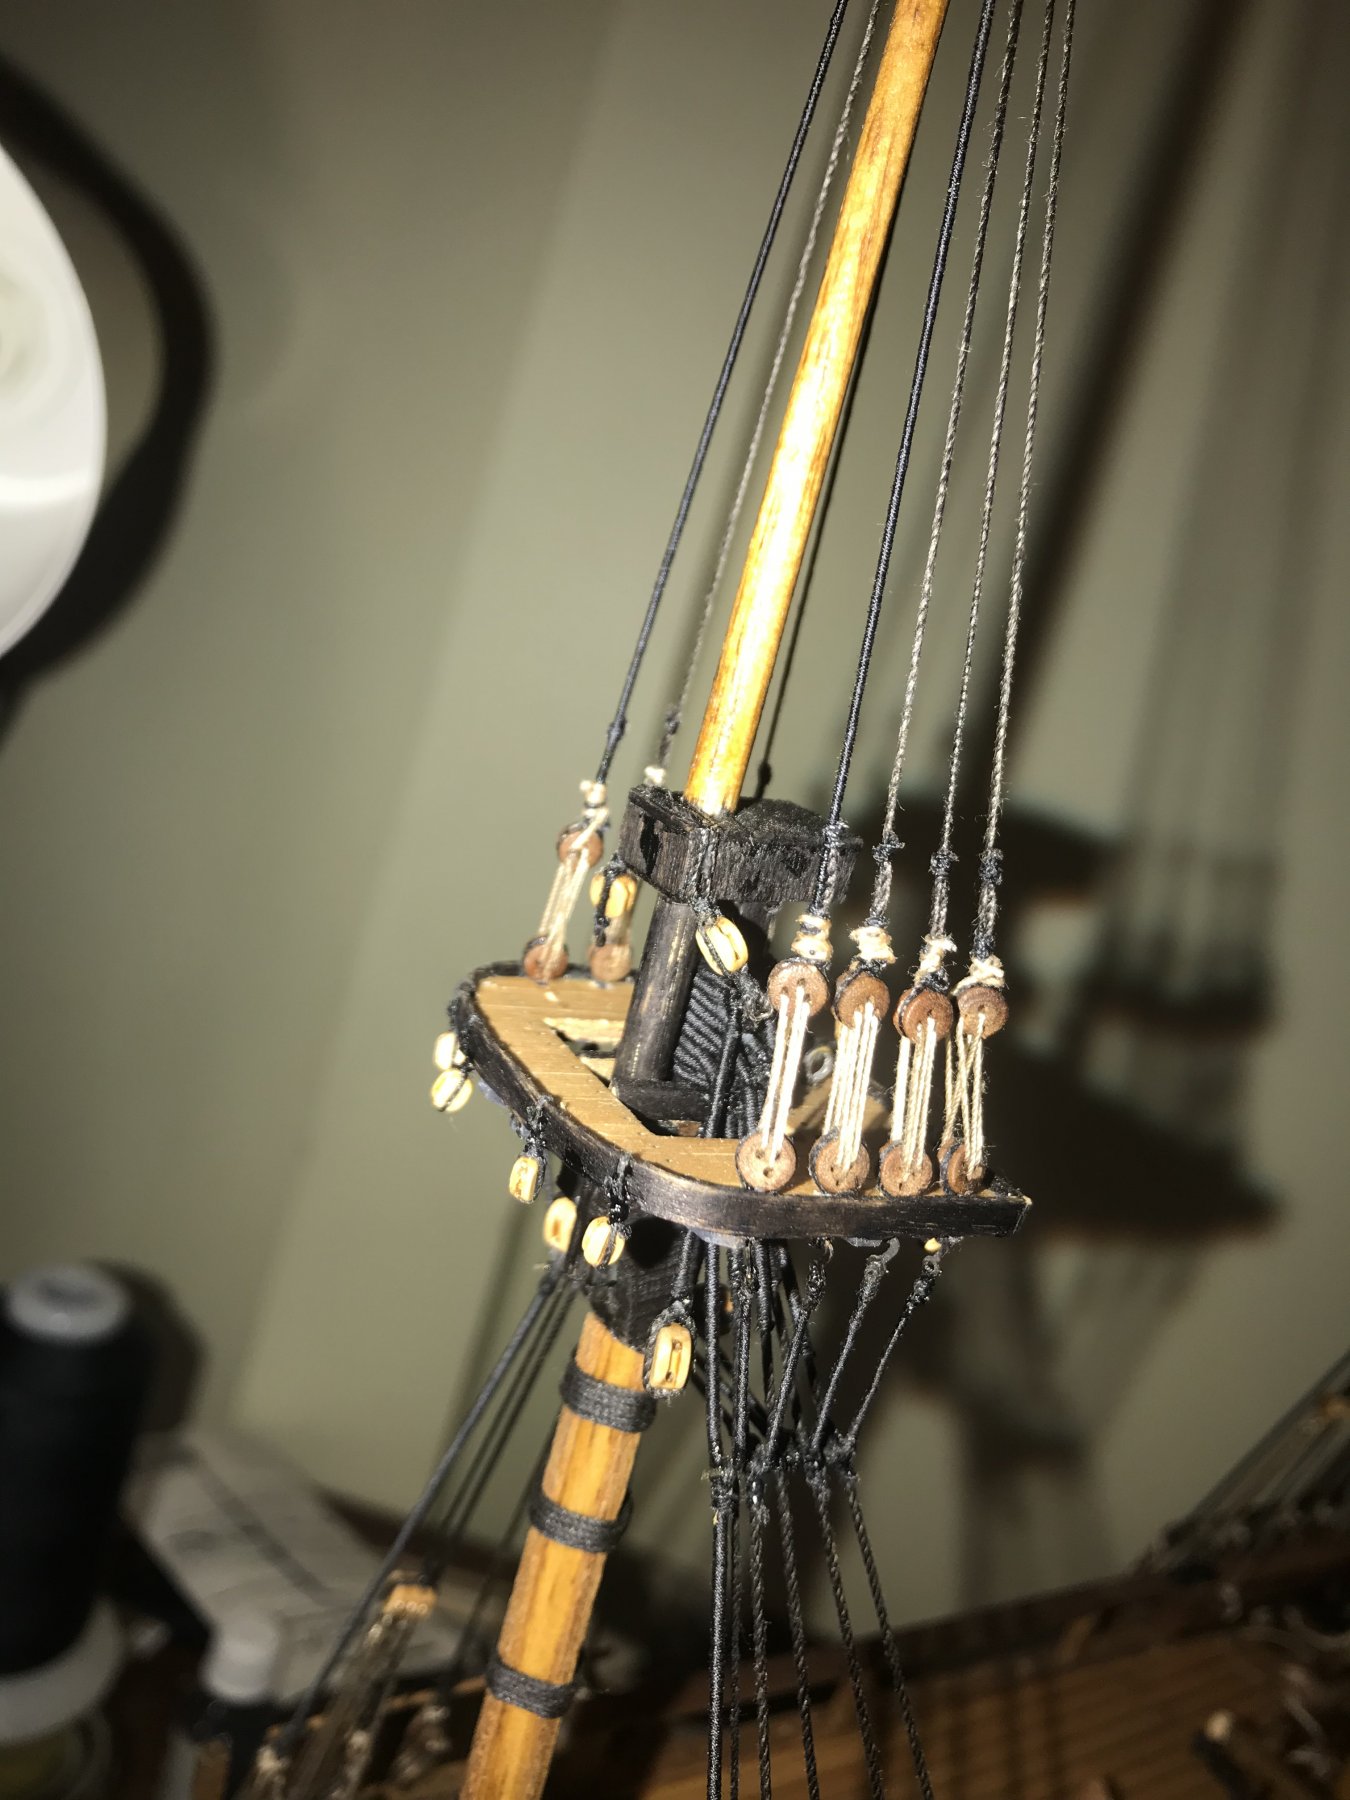
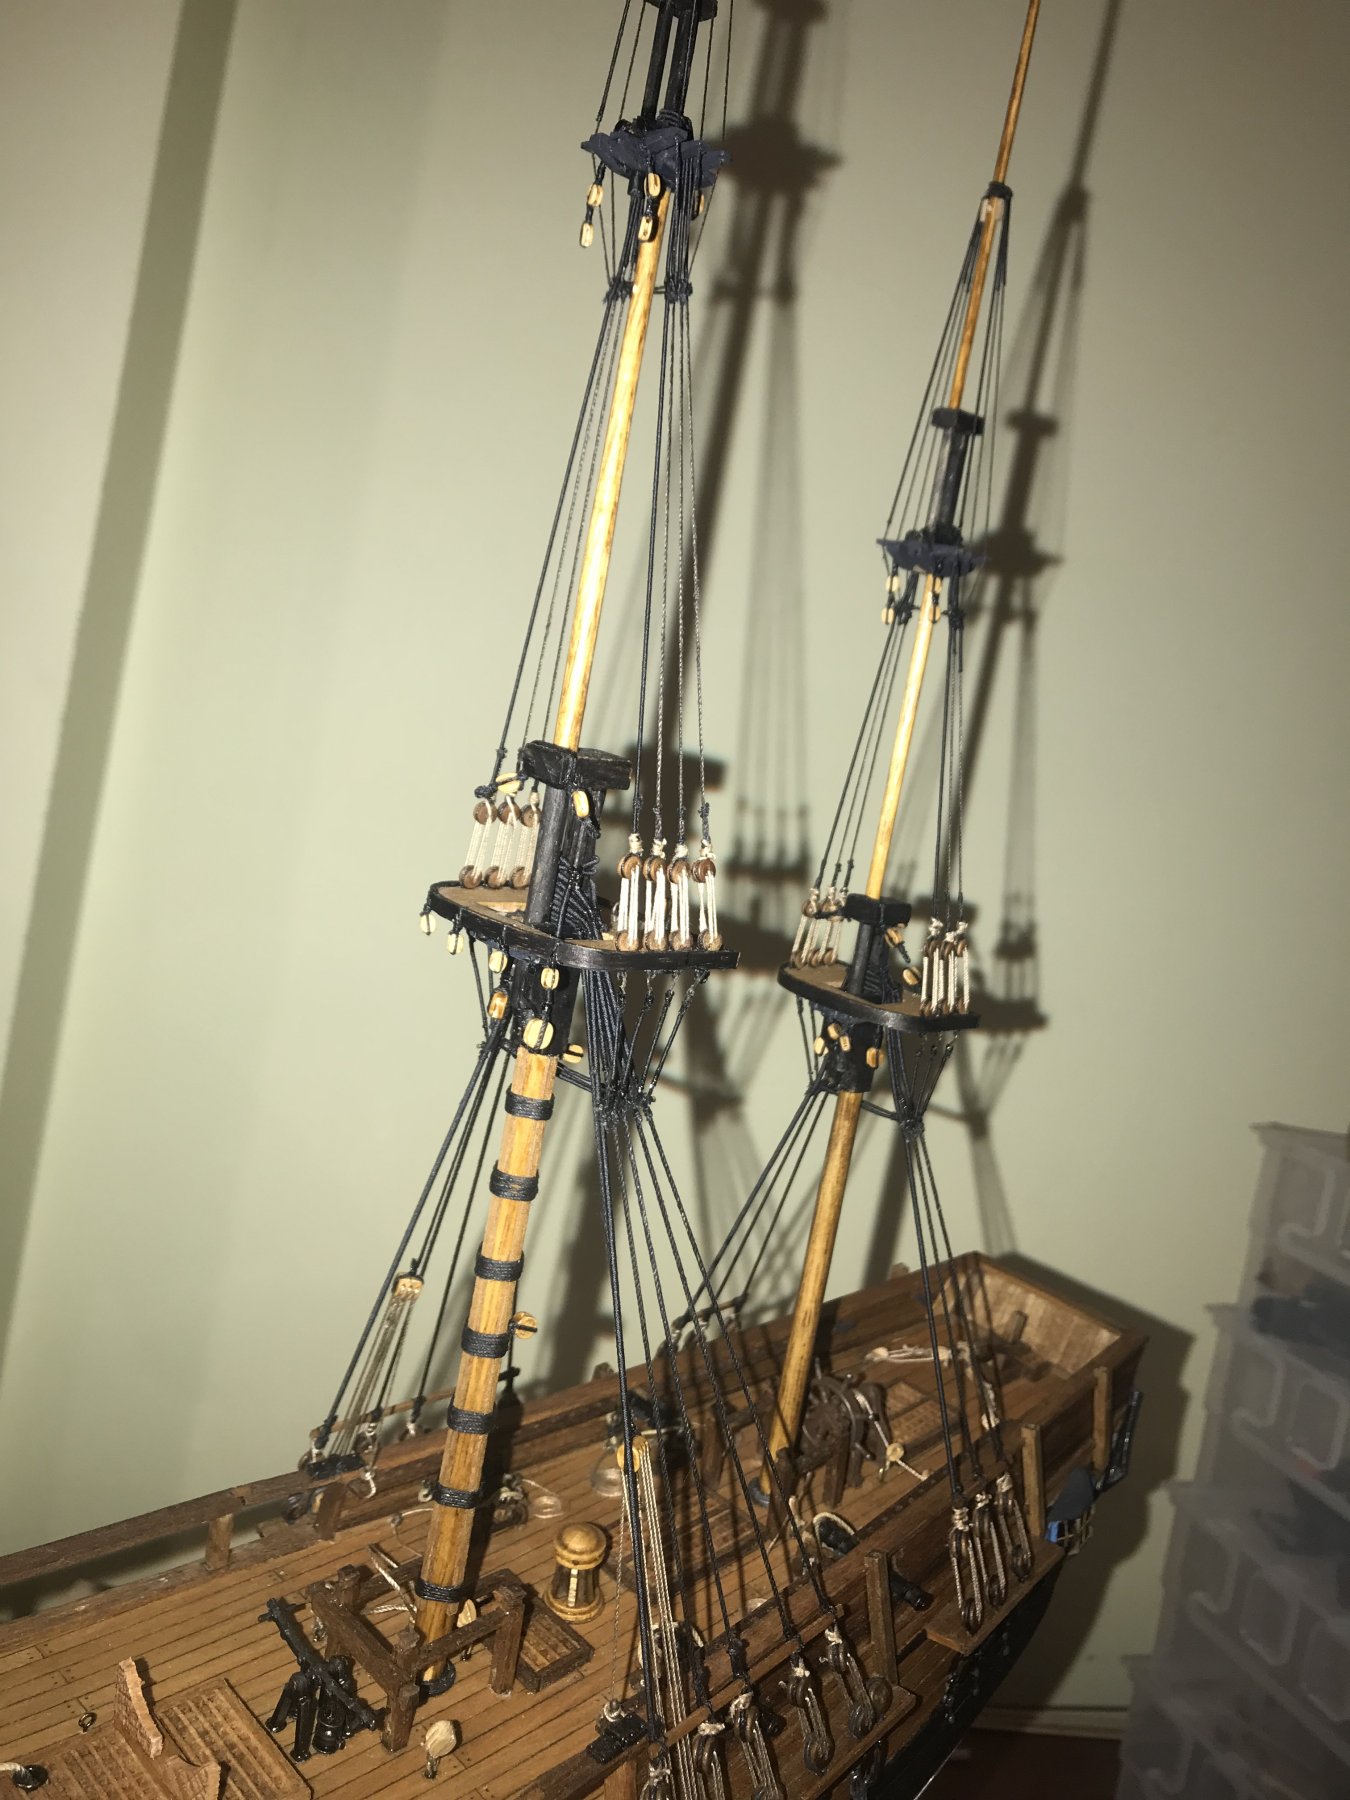
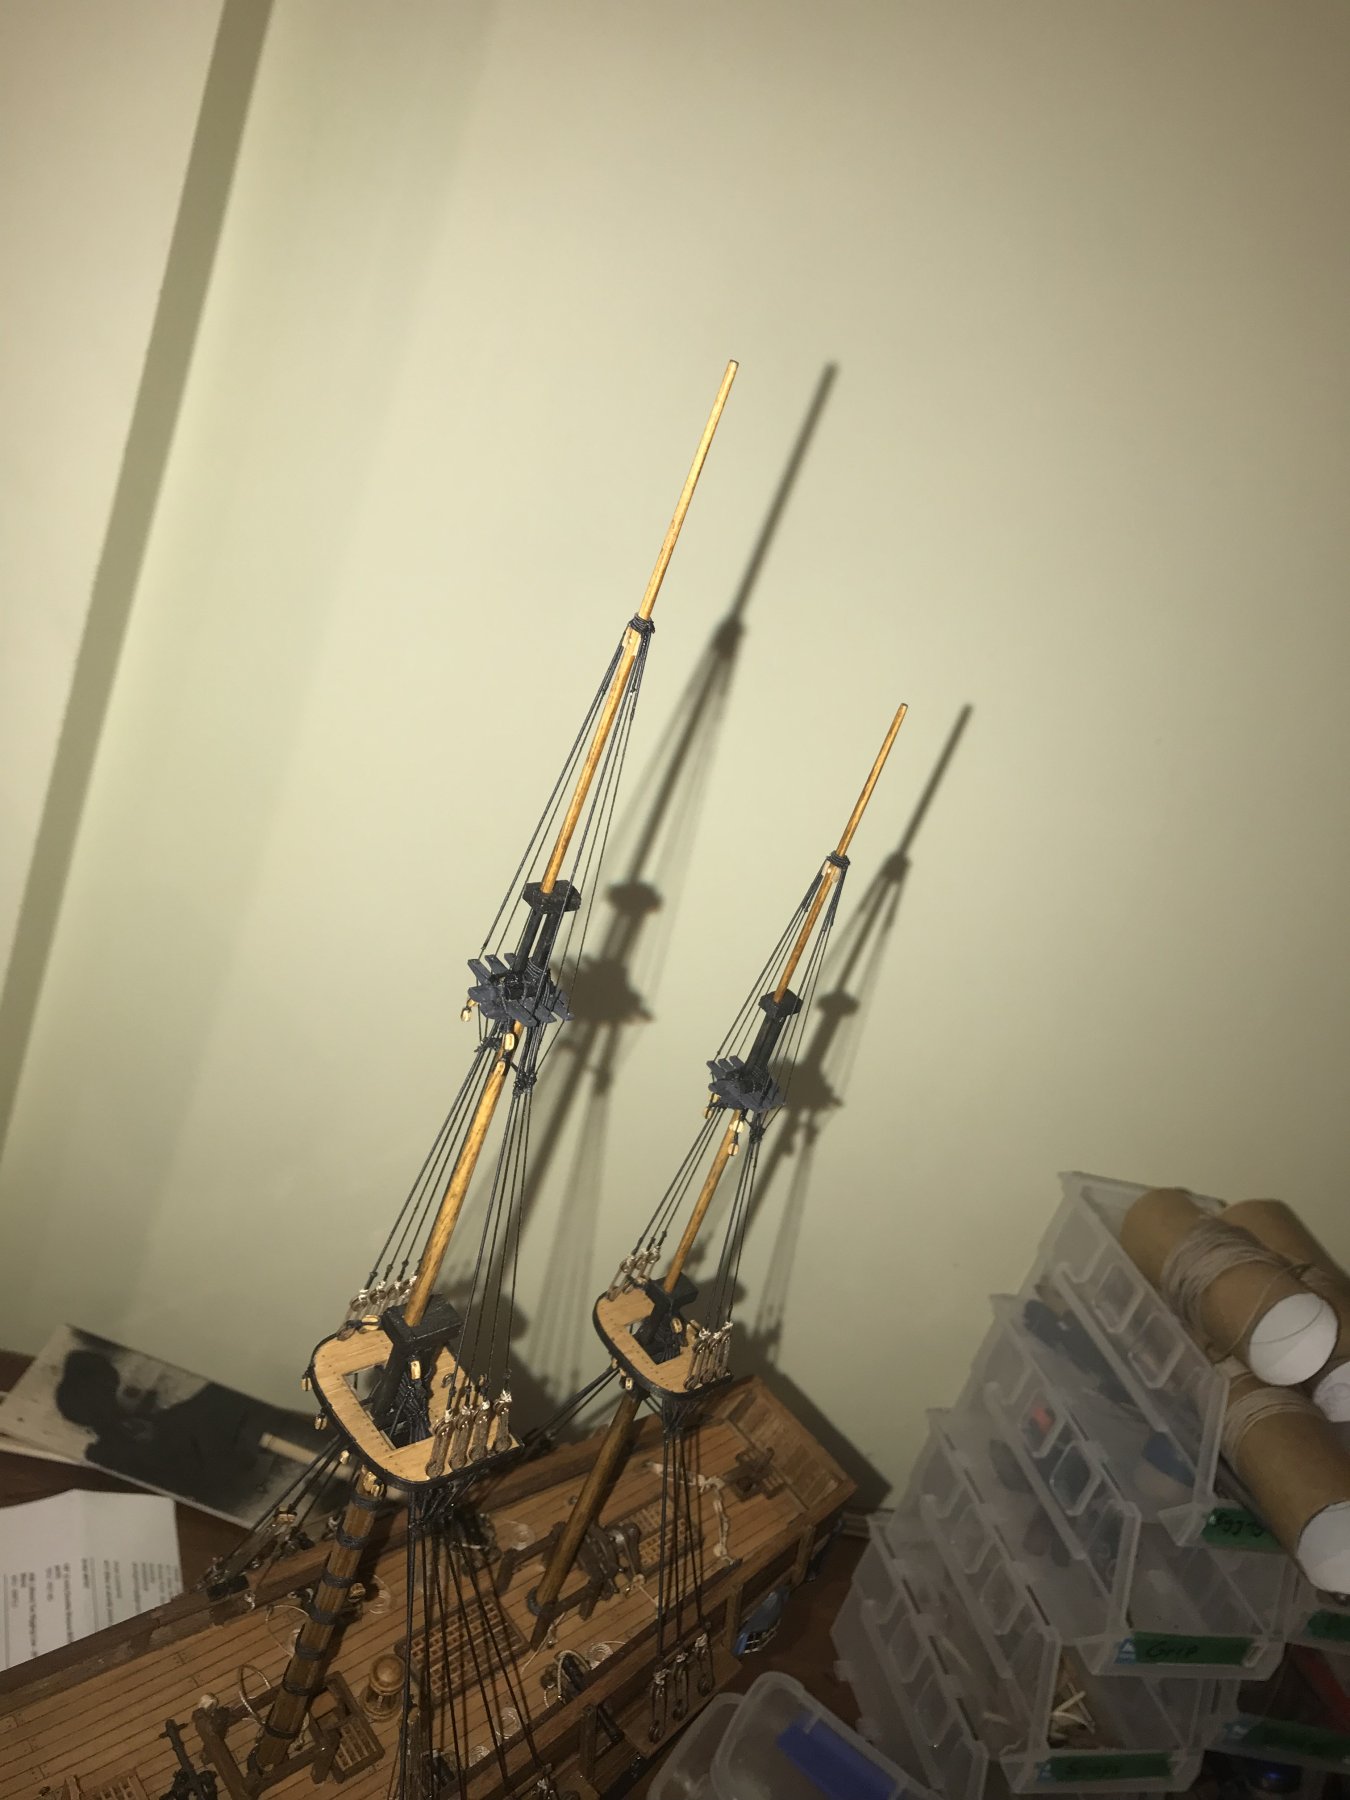
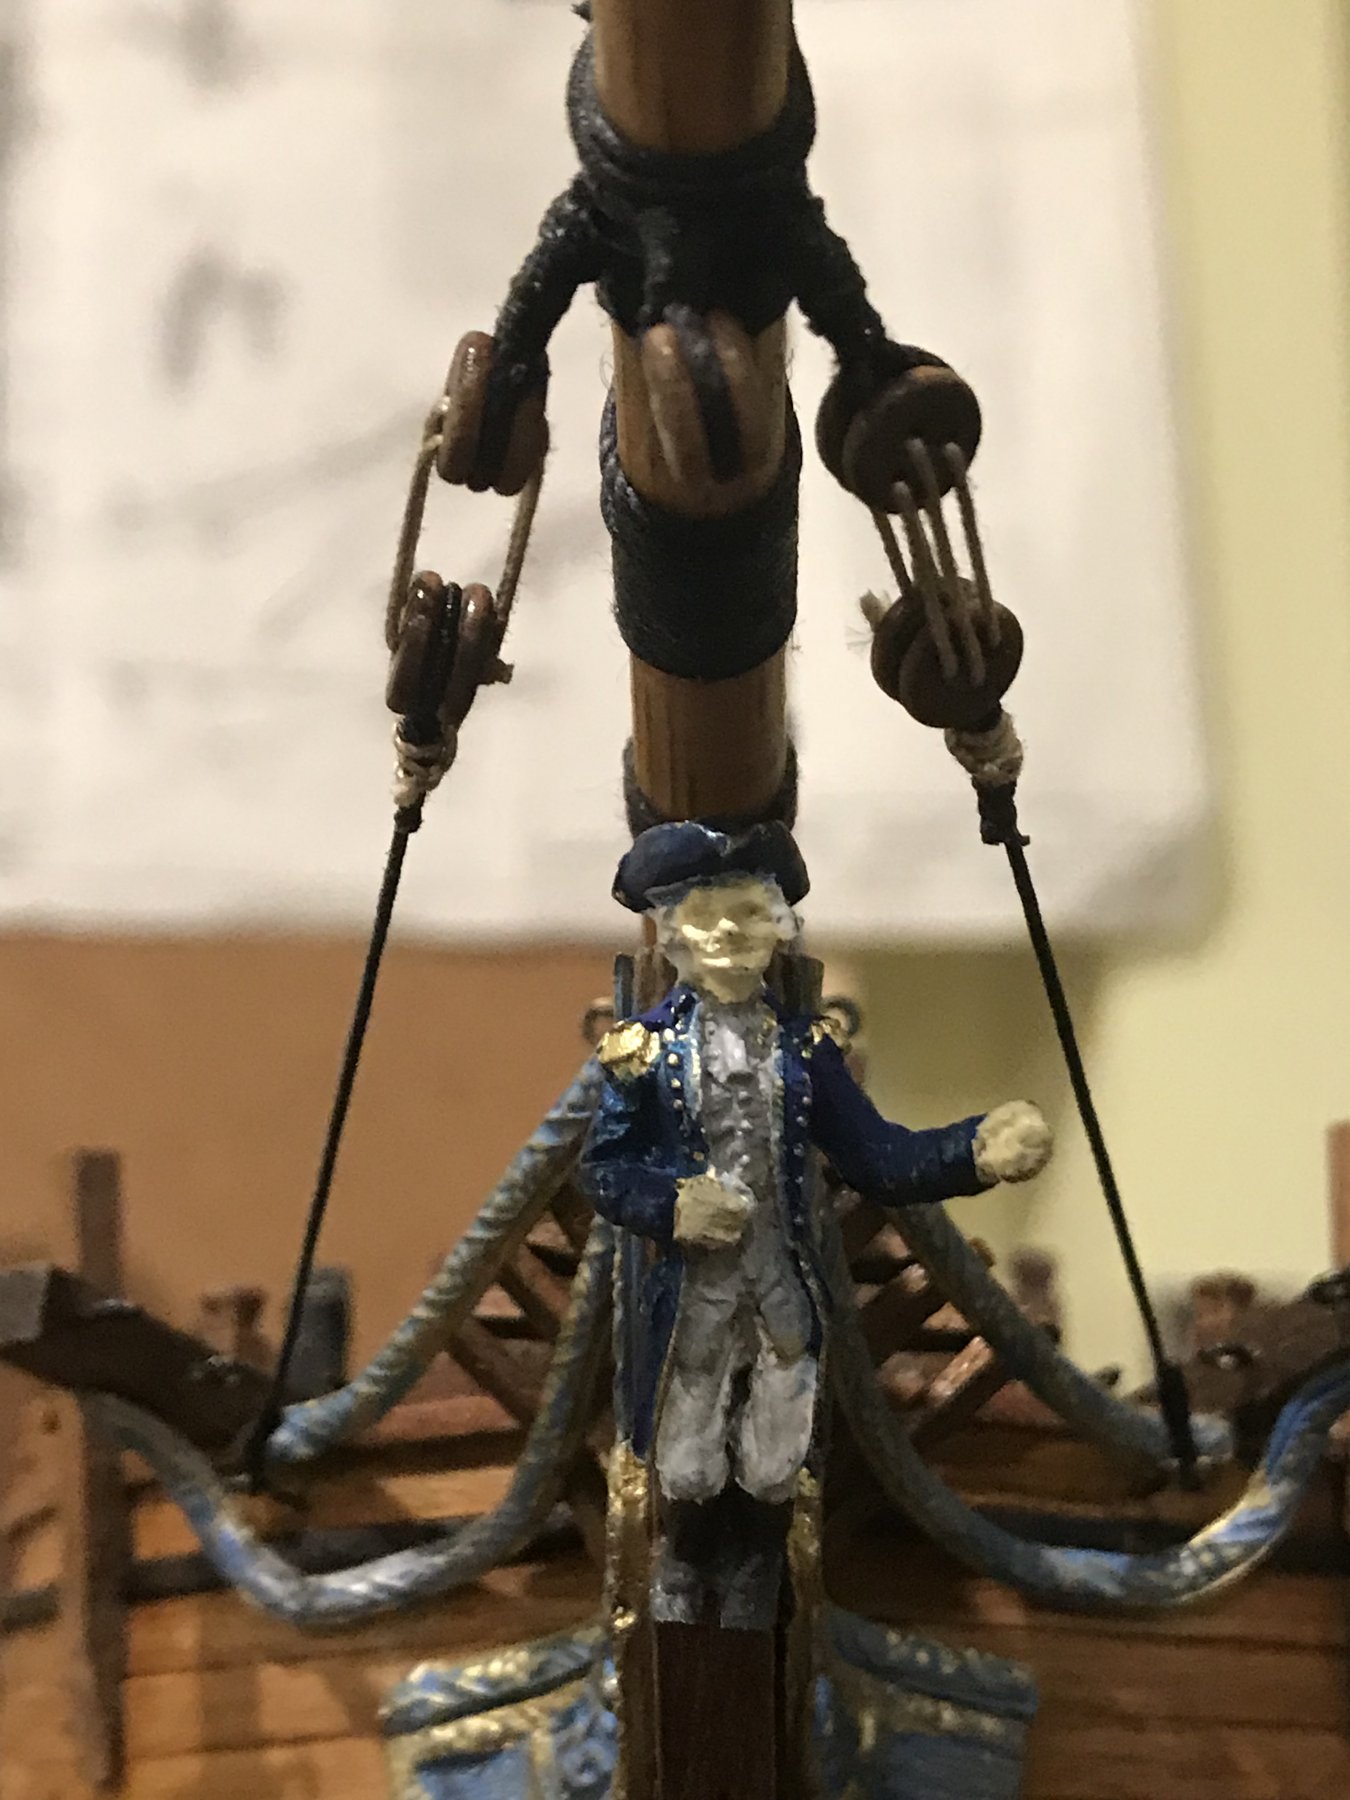
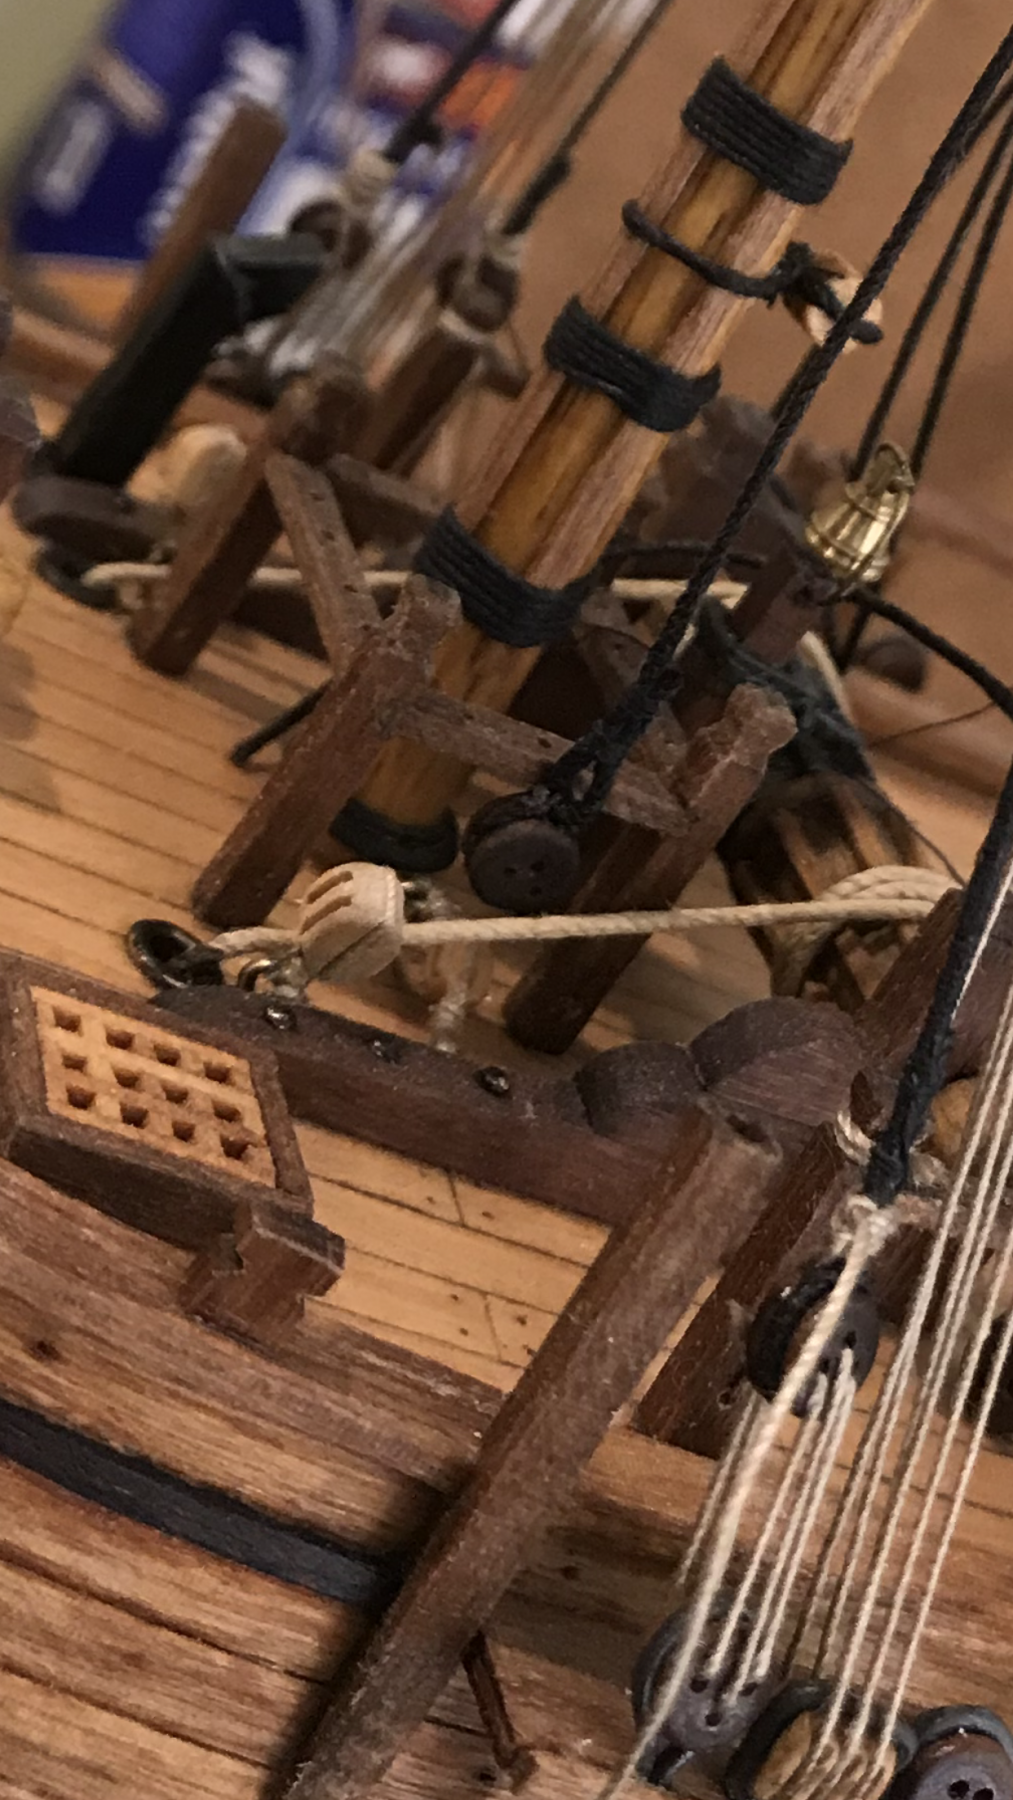
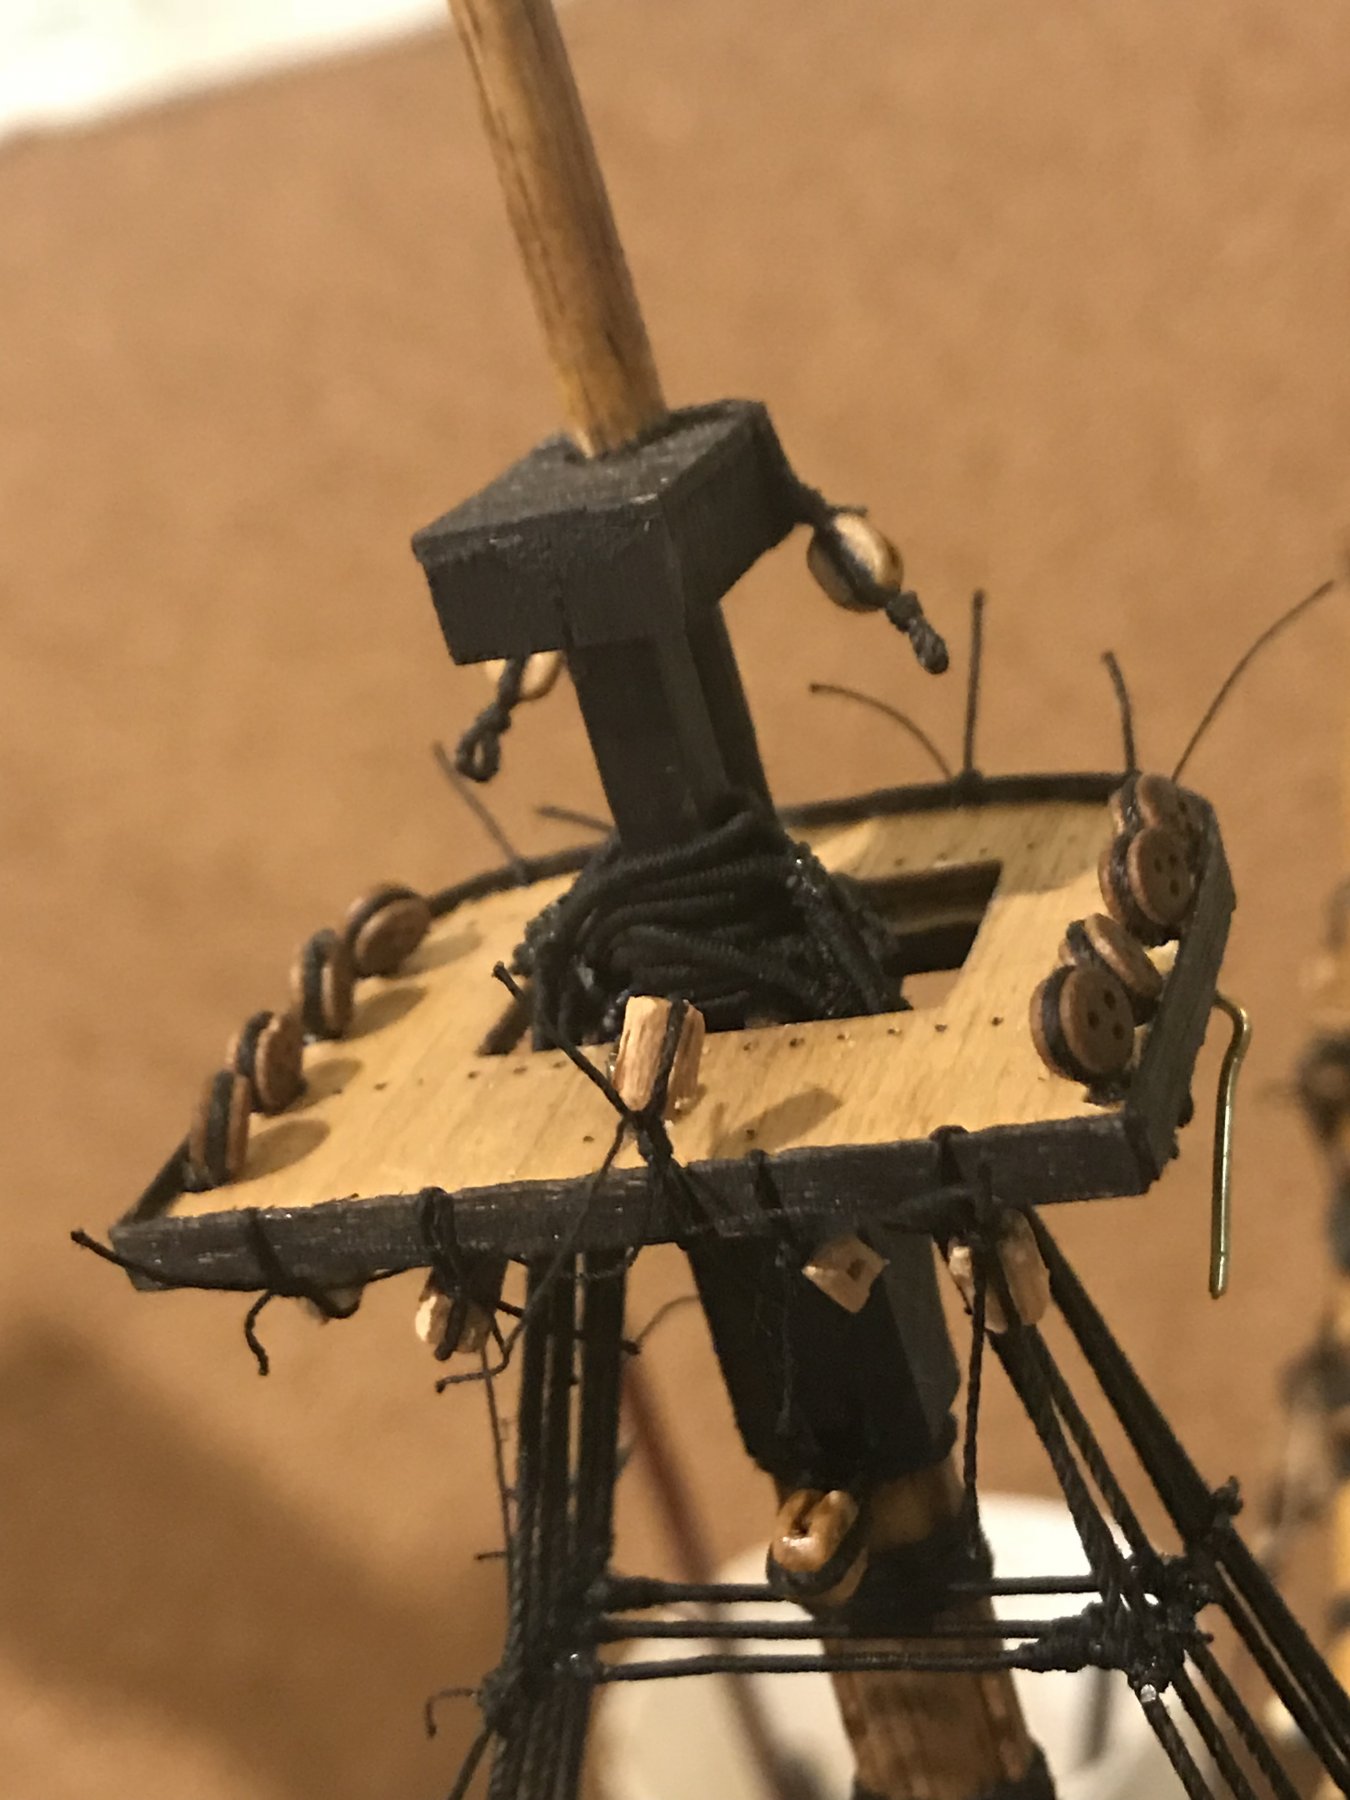
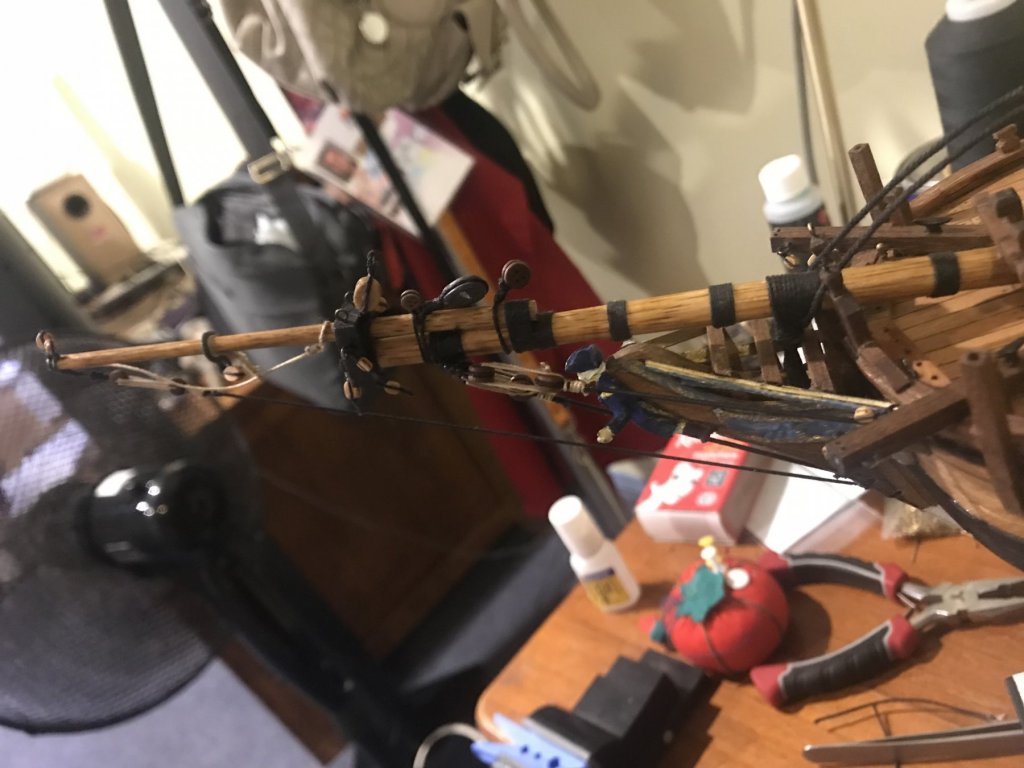
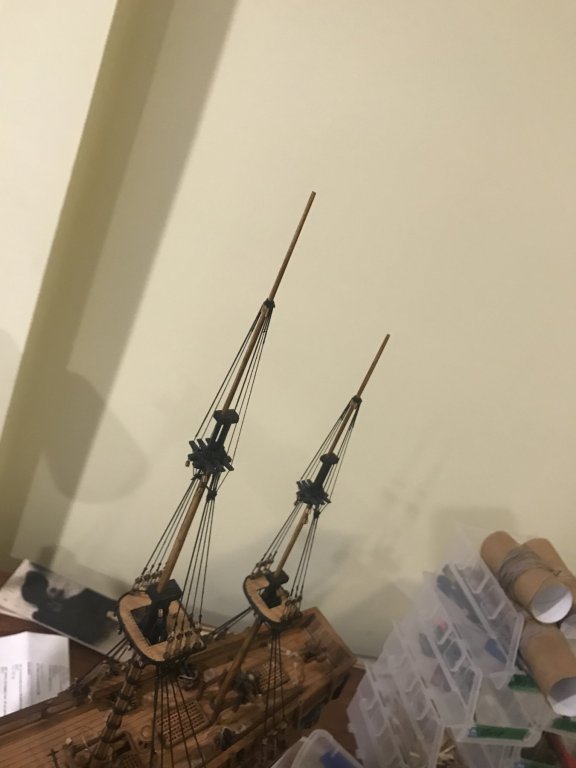
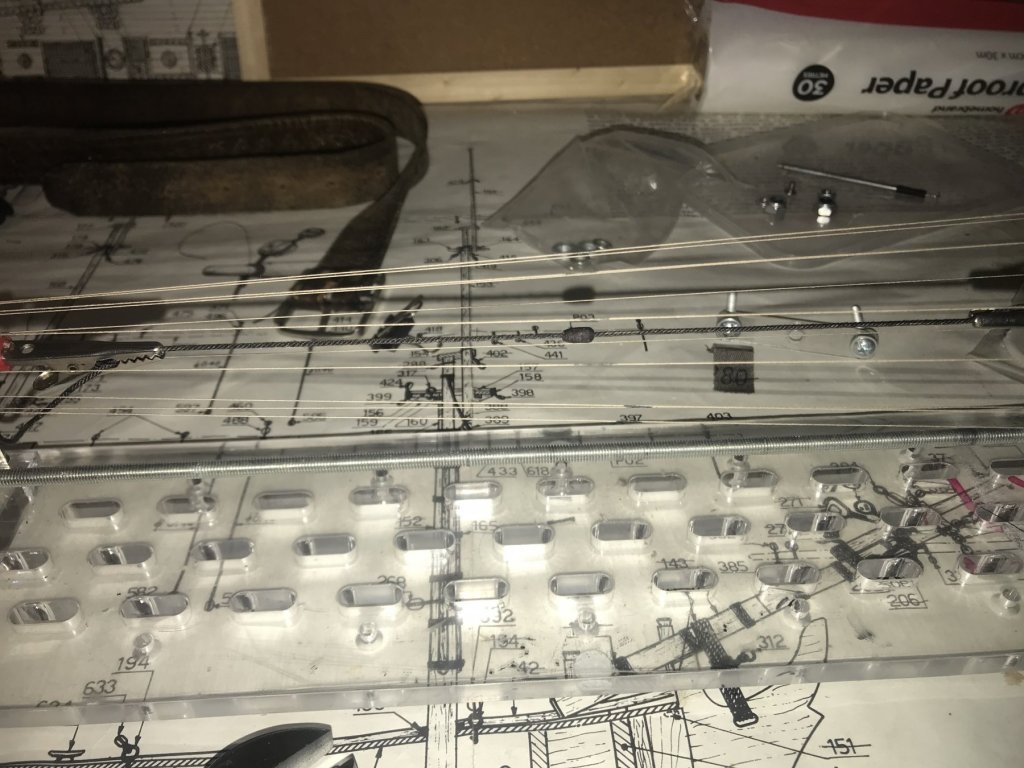
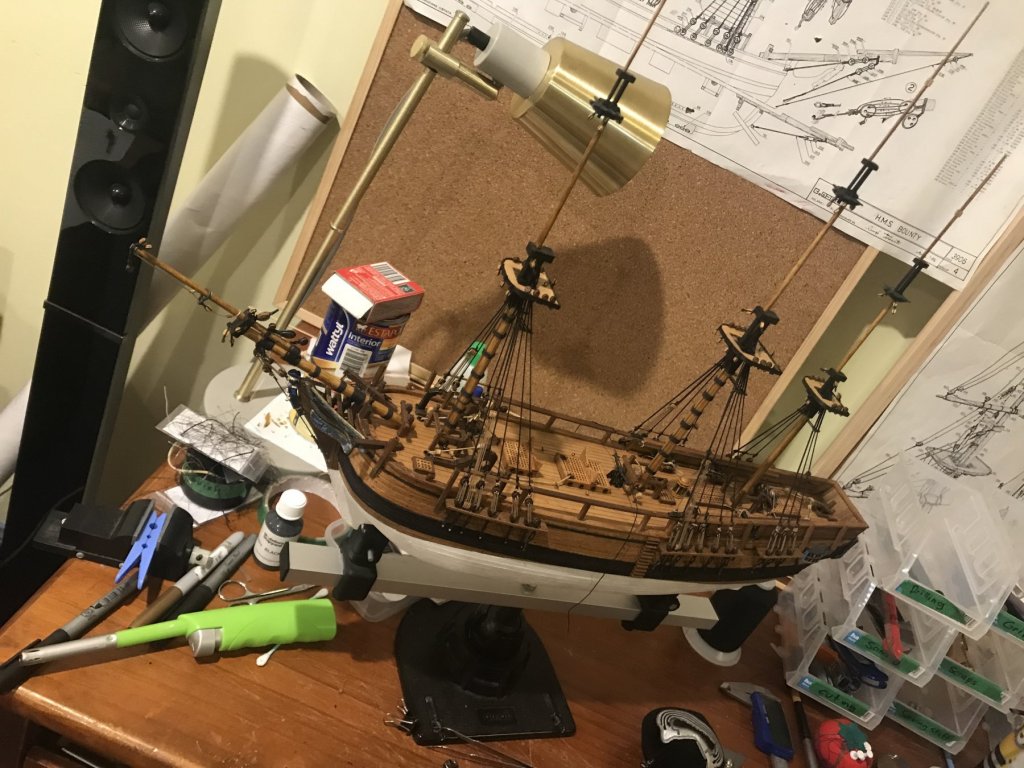
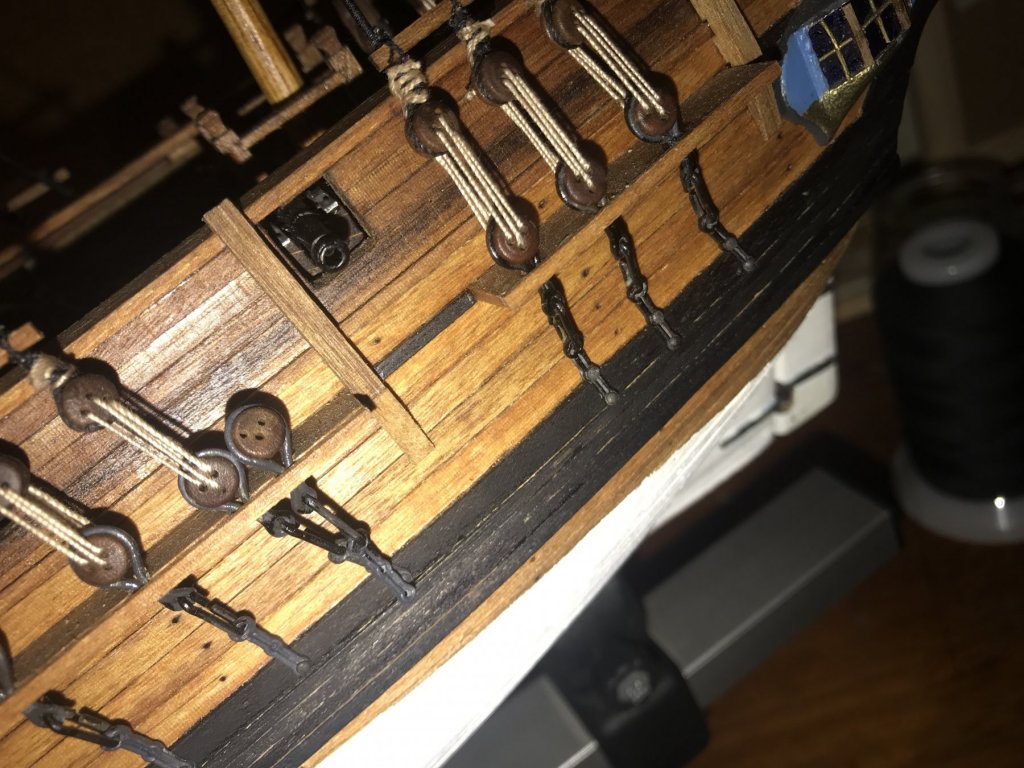
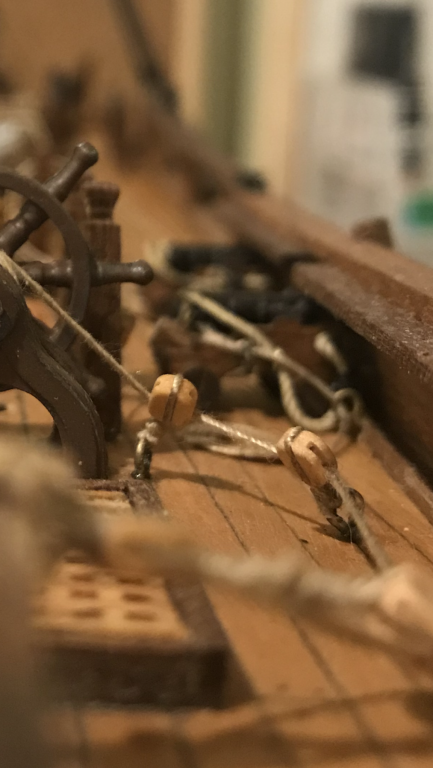
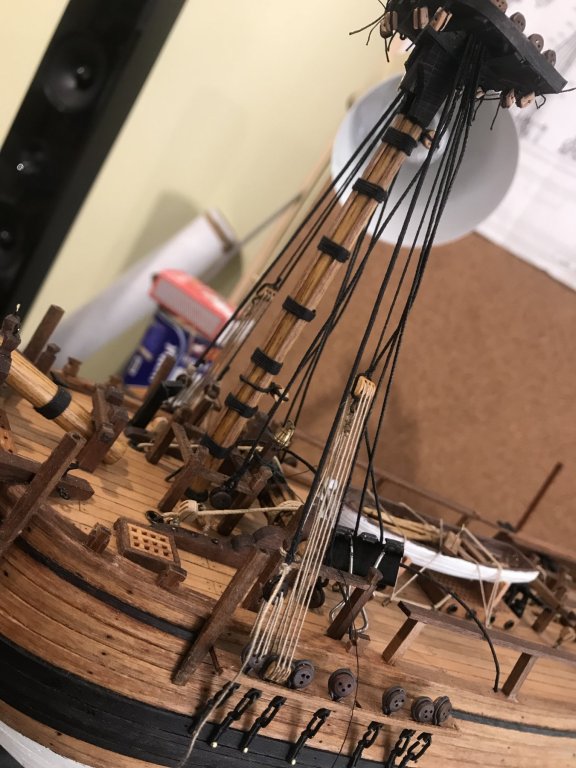
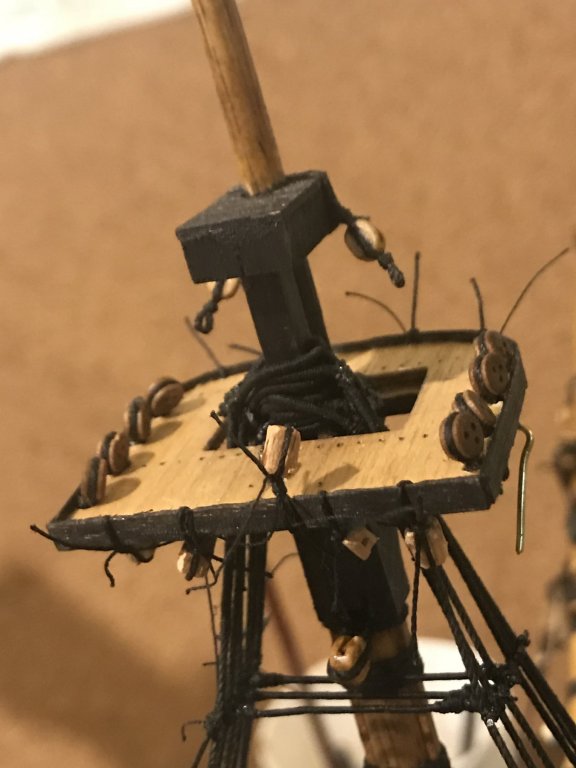
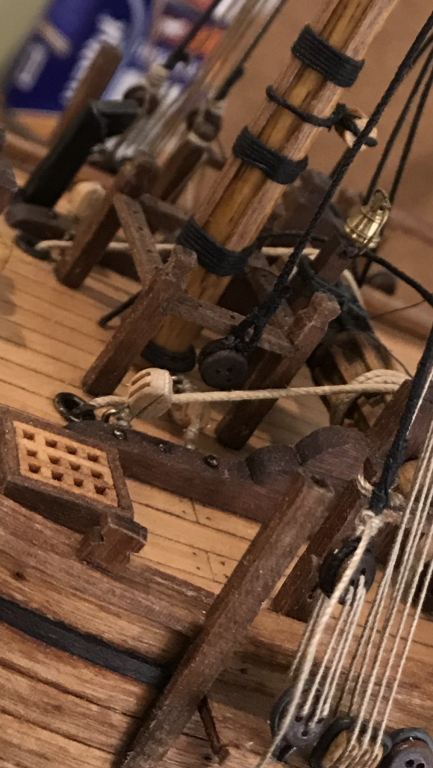
Hello mates! Again over due for an update! The last few weeks having hectic and events have run away...in the time since my last post I went down to Sydney and visited the Endeavor replica and the James Craig...thoroughly enjoyed myself. And then went on an ocean cruise to the pacific islands. Again...had another nautically themed great time 😁...the admiral apparently enjoyed the cruise more though. This is how she looks from afar... So, up has gone the main and mizzenmast. Then attached the shrouds then attached the the catharpins as a bit more detail...a pretty simple story really. But I time consuming one also... other than that all I can say else that I’ve done is blacken some nails on the deadeye chains and attach blocks, blocks...and more, you guessed it...blocks! Can also see in this above photo the results of my serving machine! And if you spot the difference from my last lot of photos...the Bounty launch is gone. I thought it was a tad ugly. Needed some touch up and maybe a second launch also. Anyway...orderd some 🚣 from modelers central...will see how I go! Next onto onto some various other blocks. And then some futtock shrouds...can’t wait to get stuck into them! Hopefully I’ll post photos of them soon! 😁 Looking forward to any constructive criticism or comments!


-
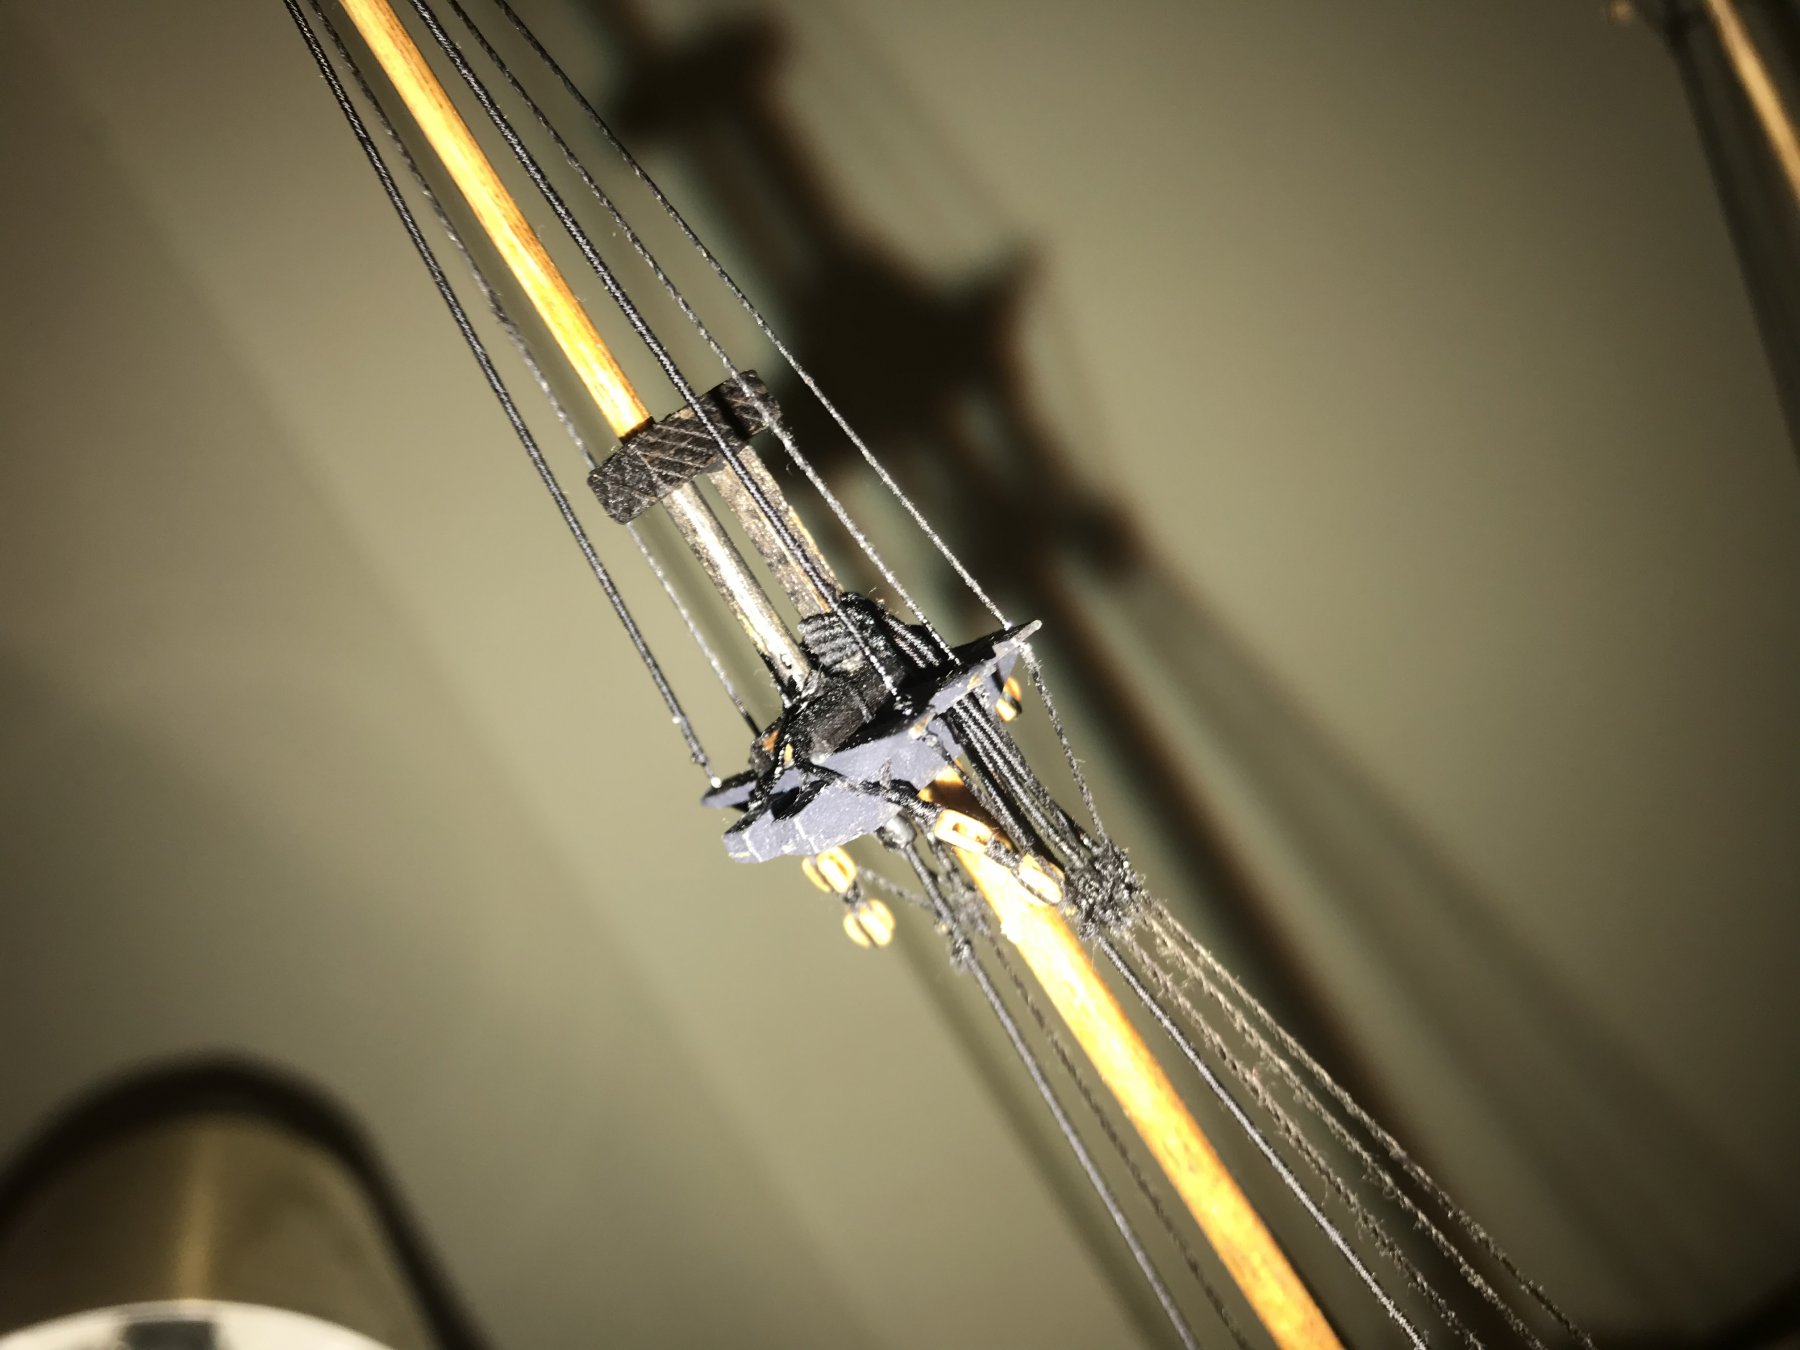
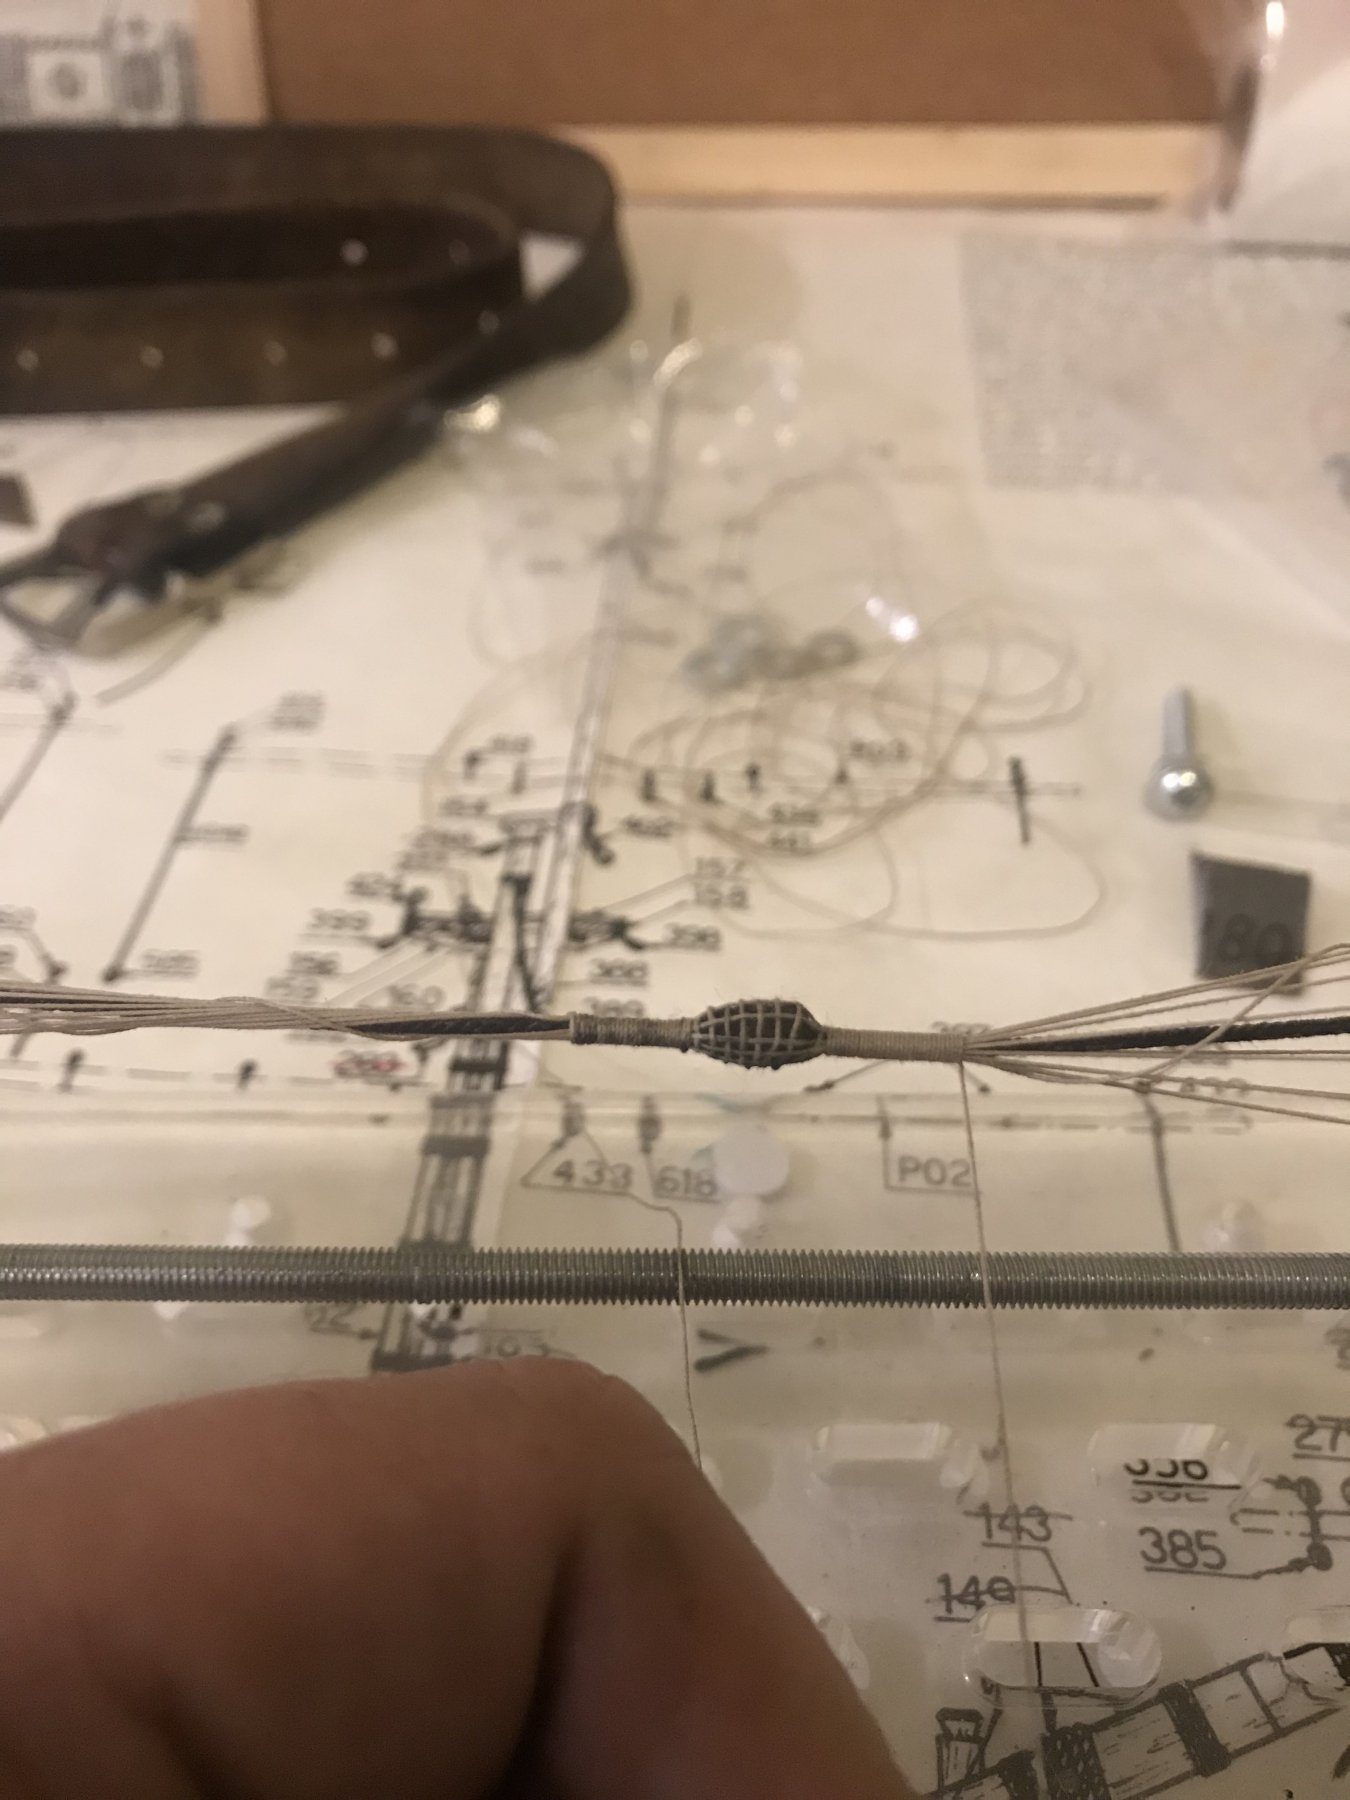
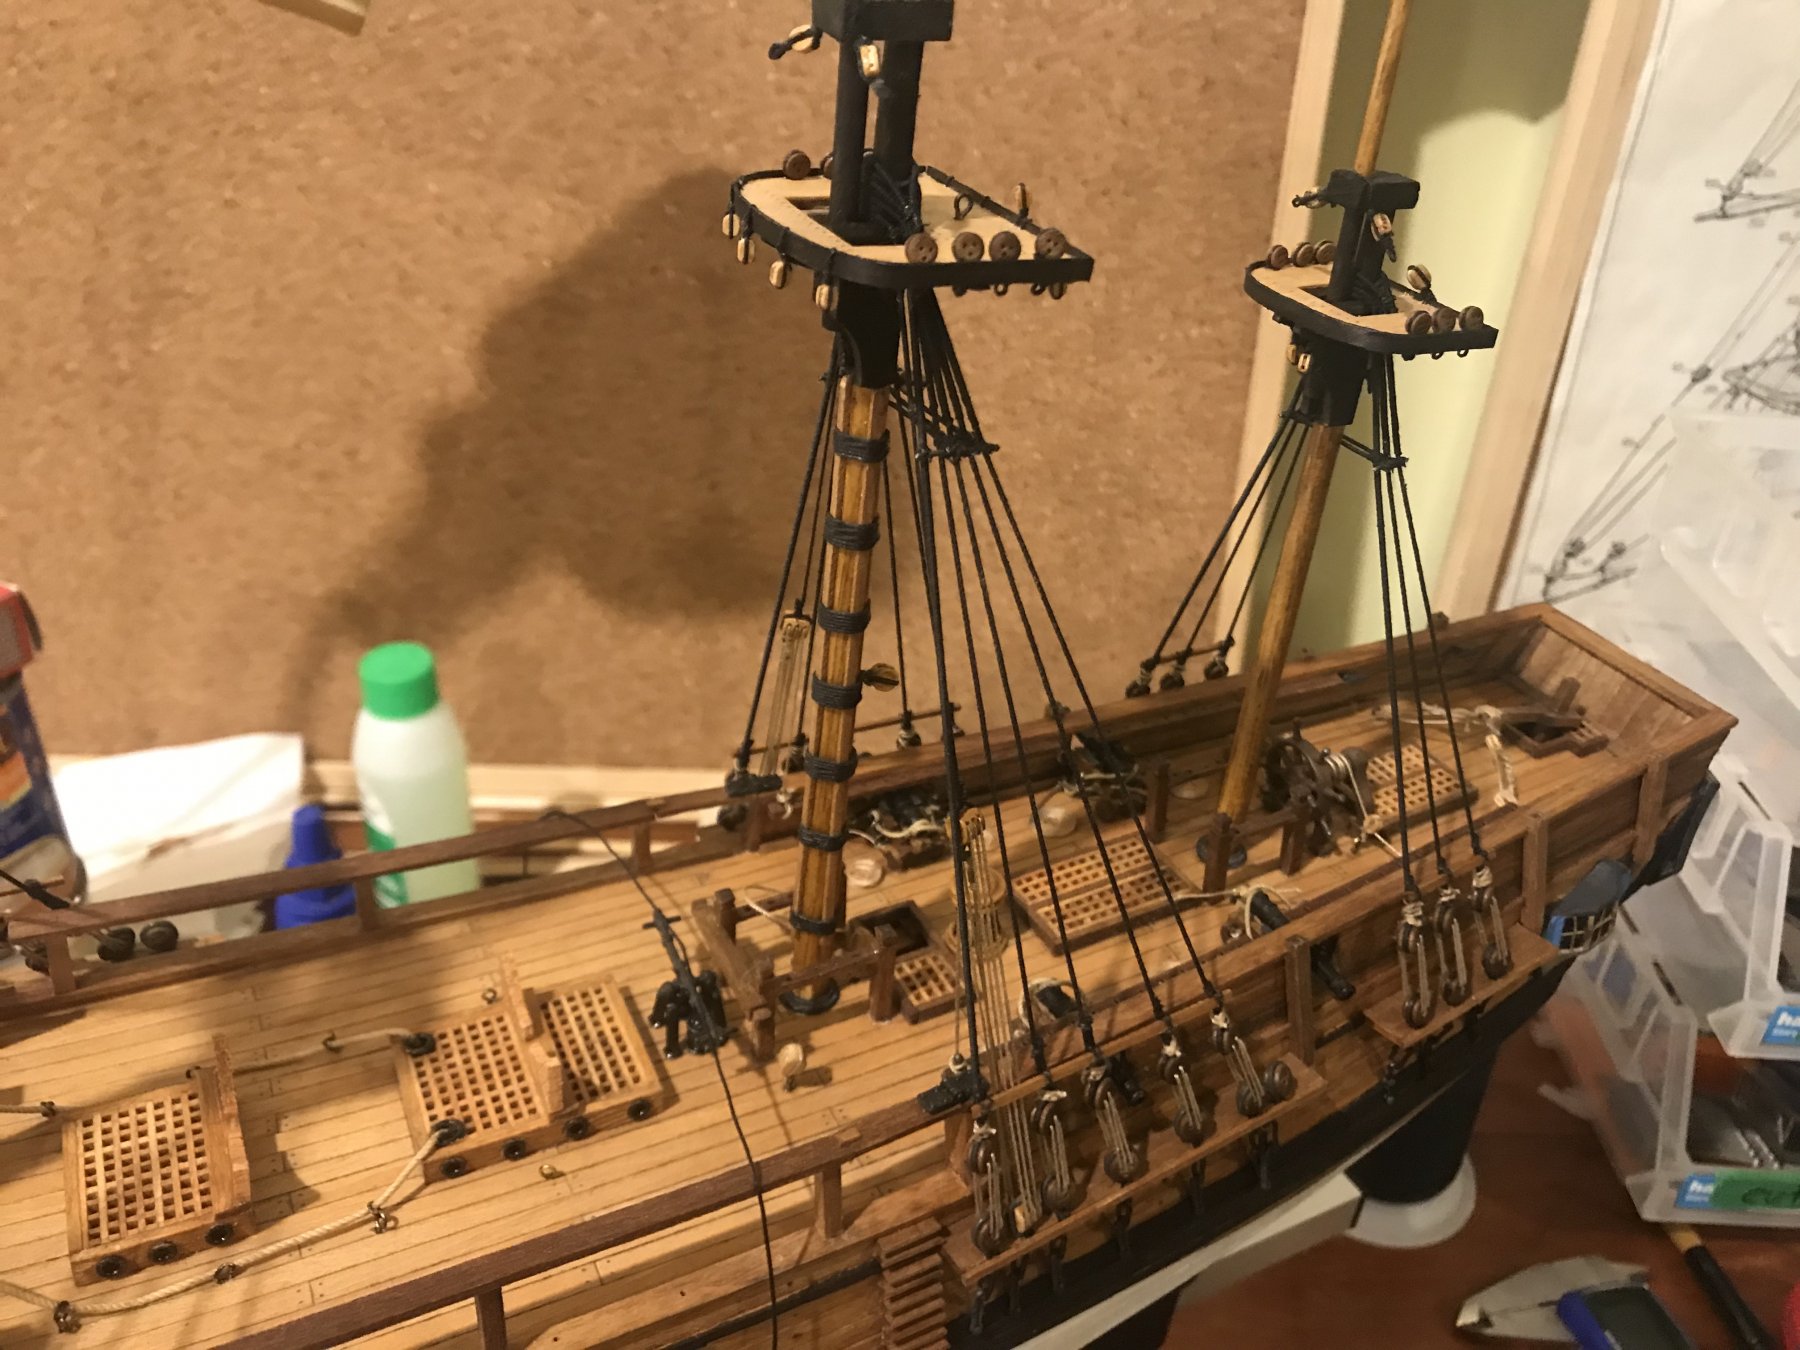
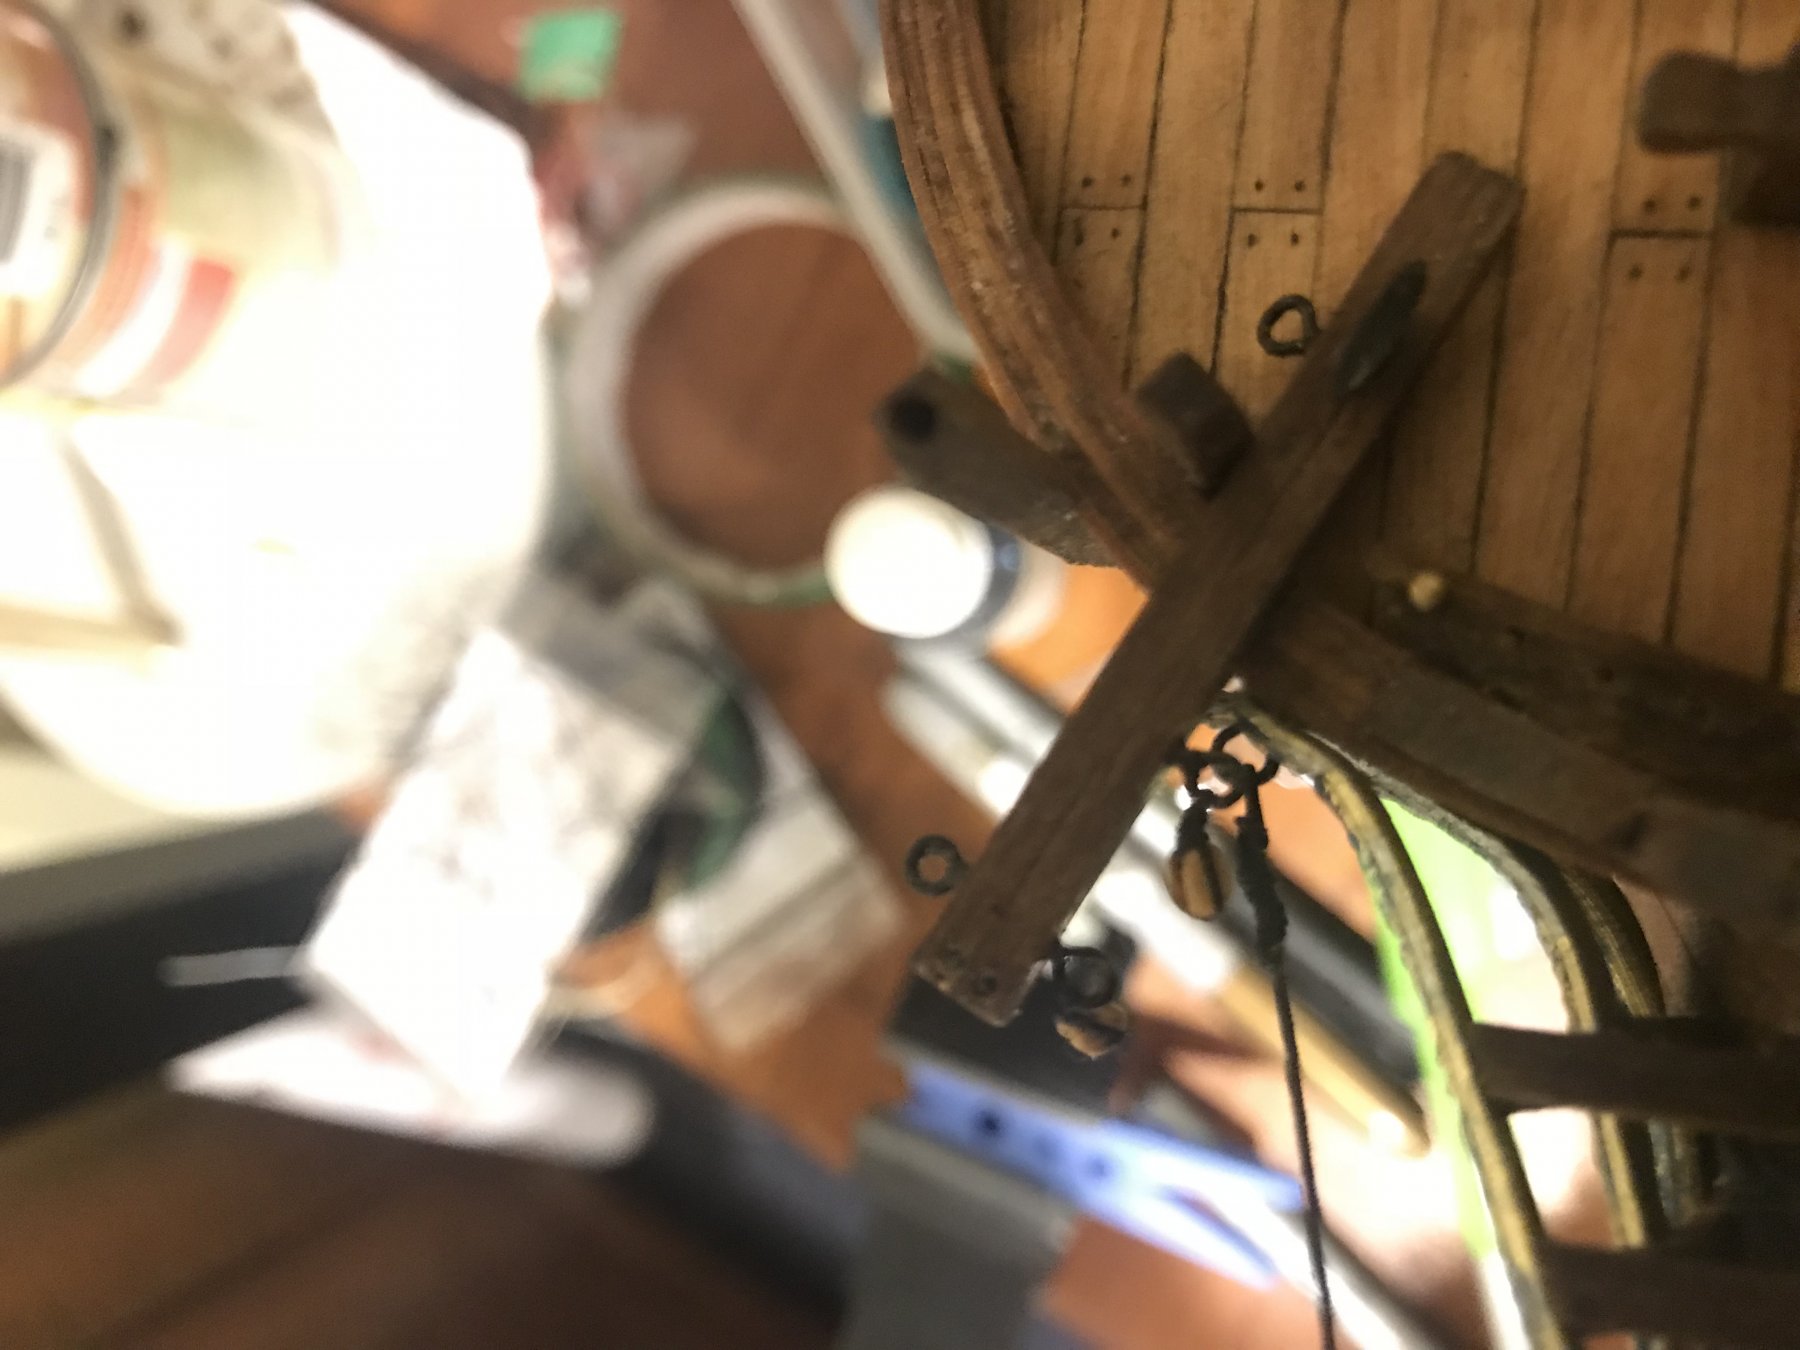
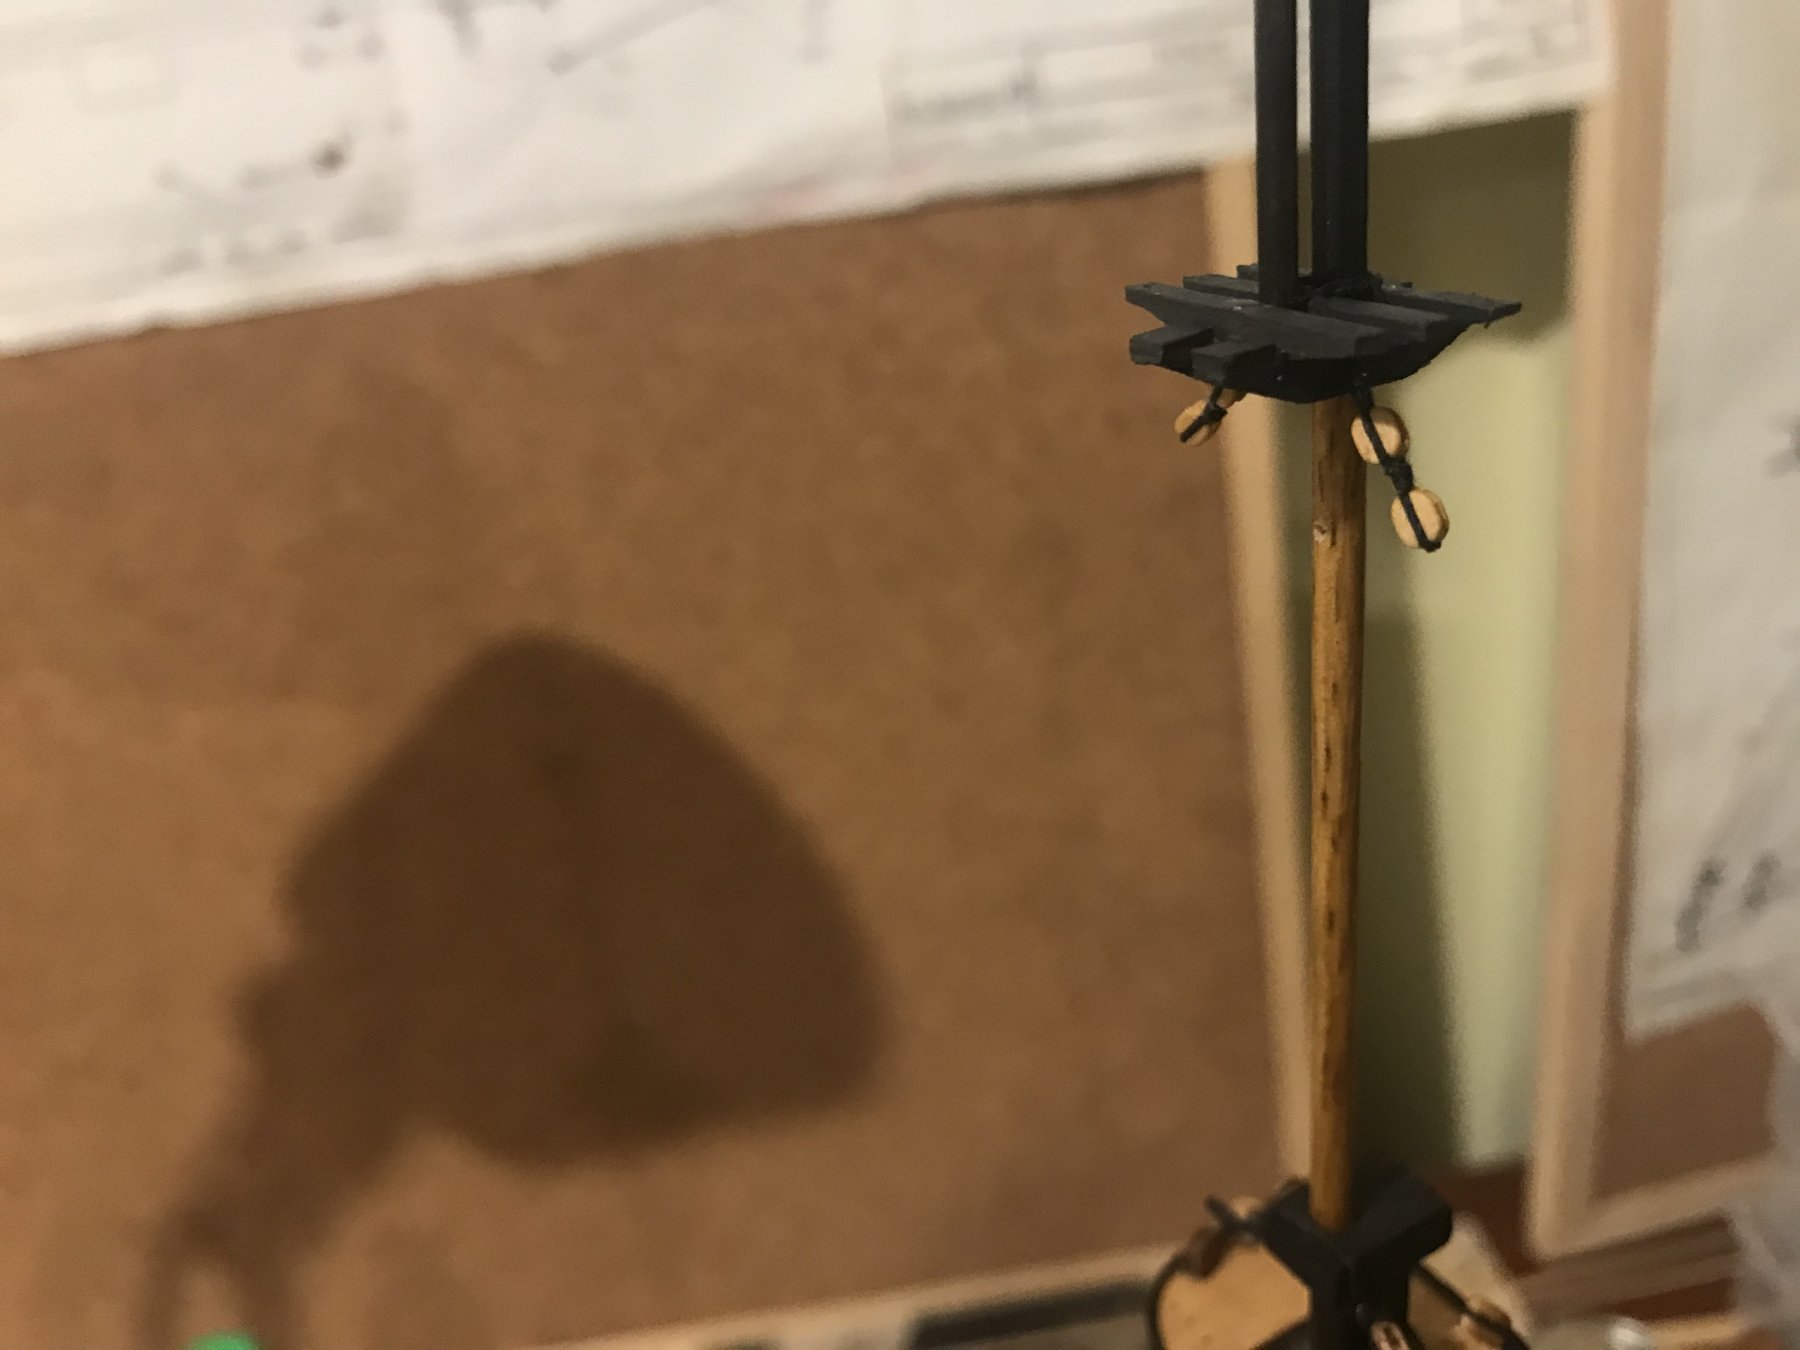
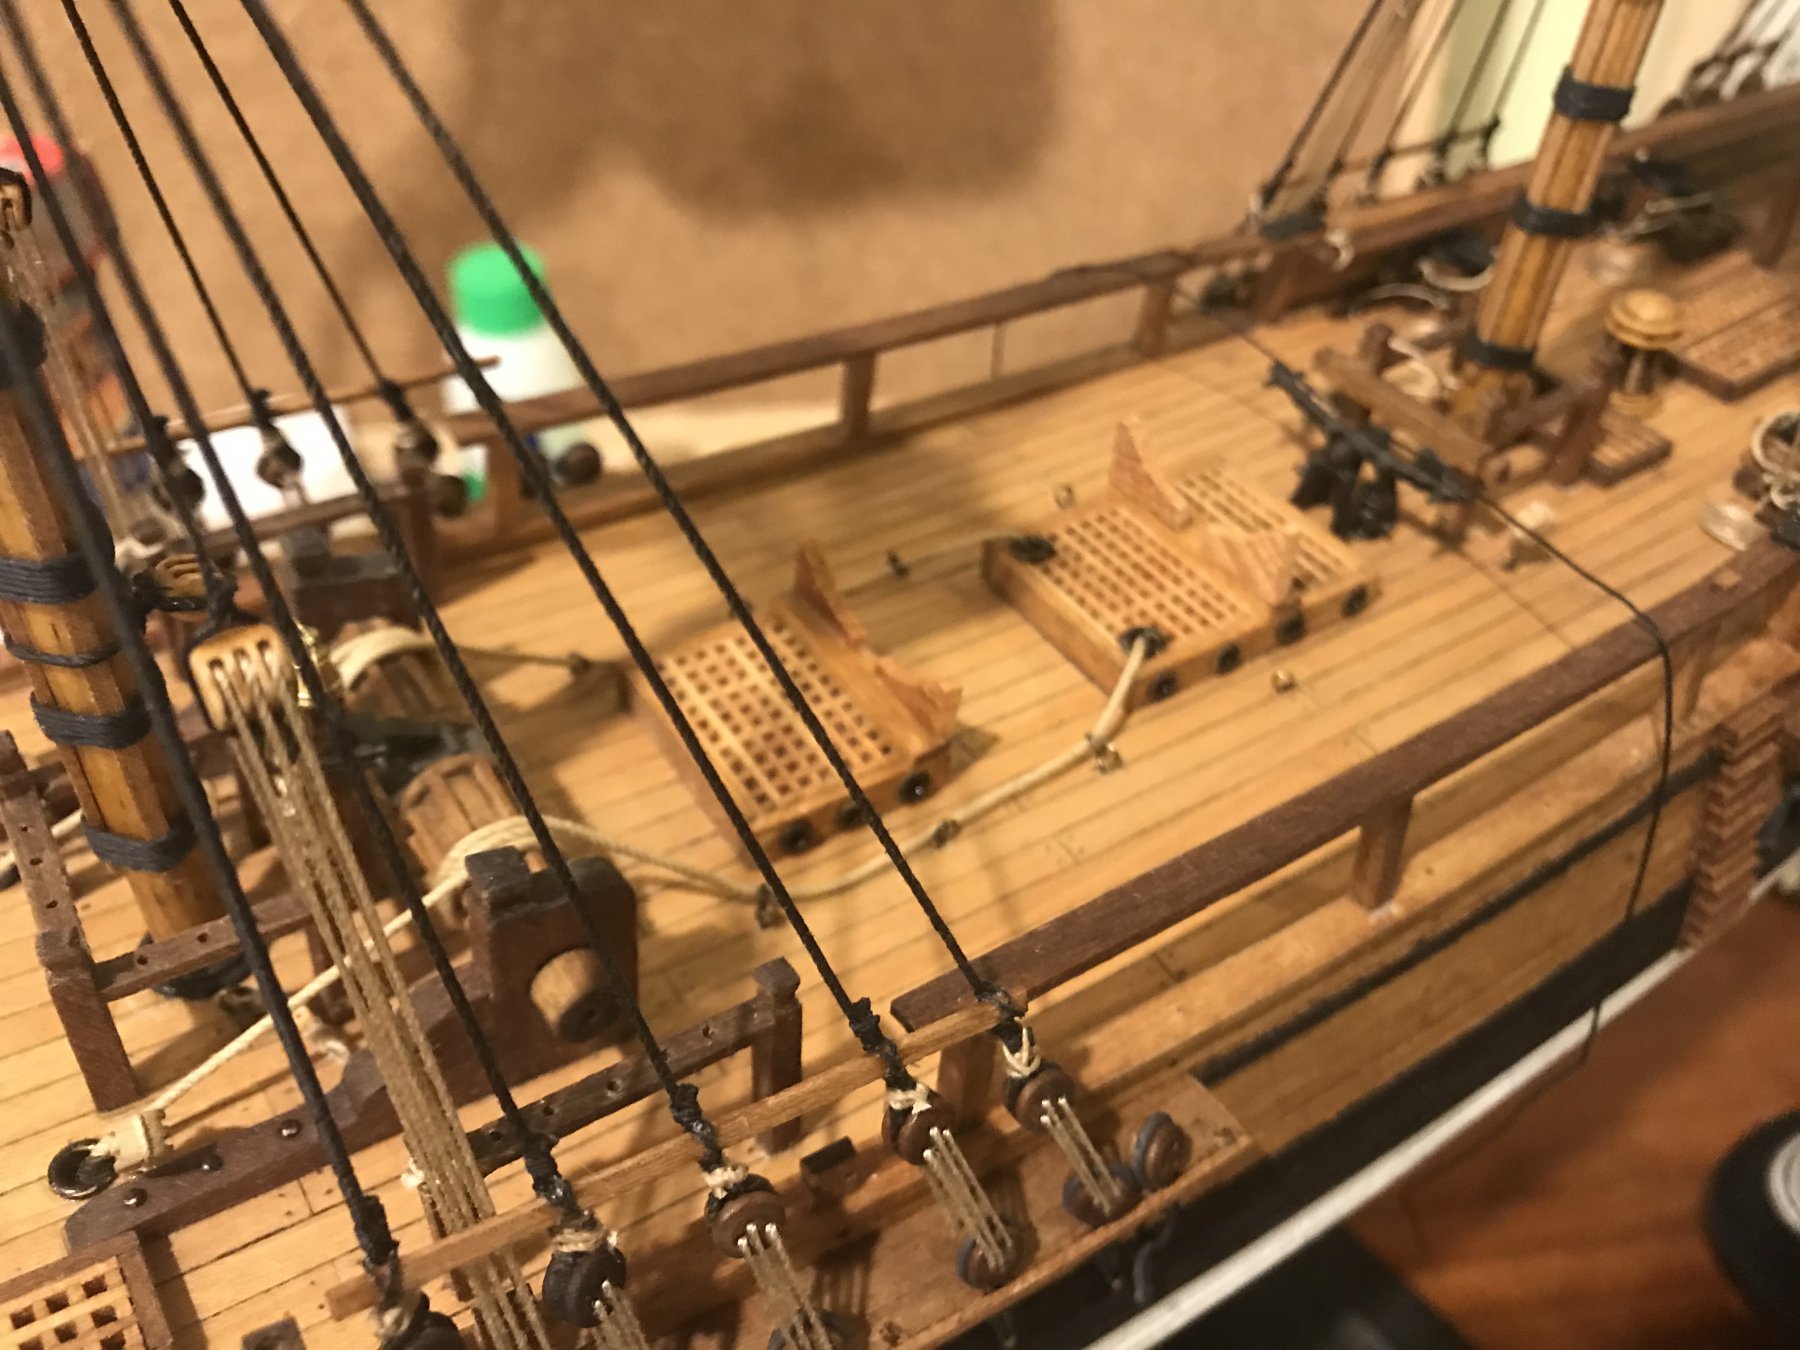
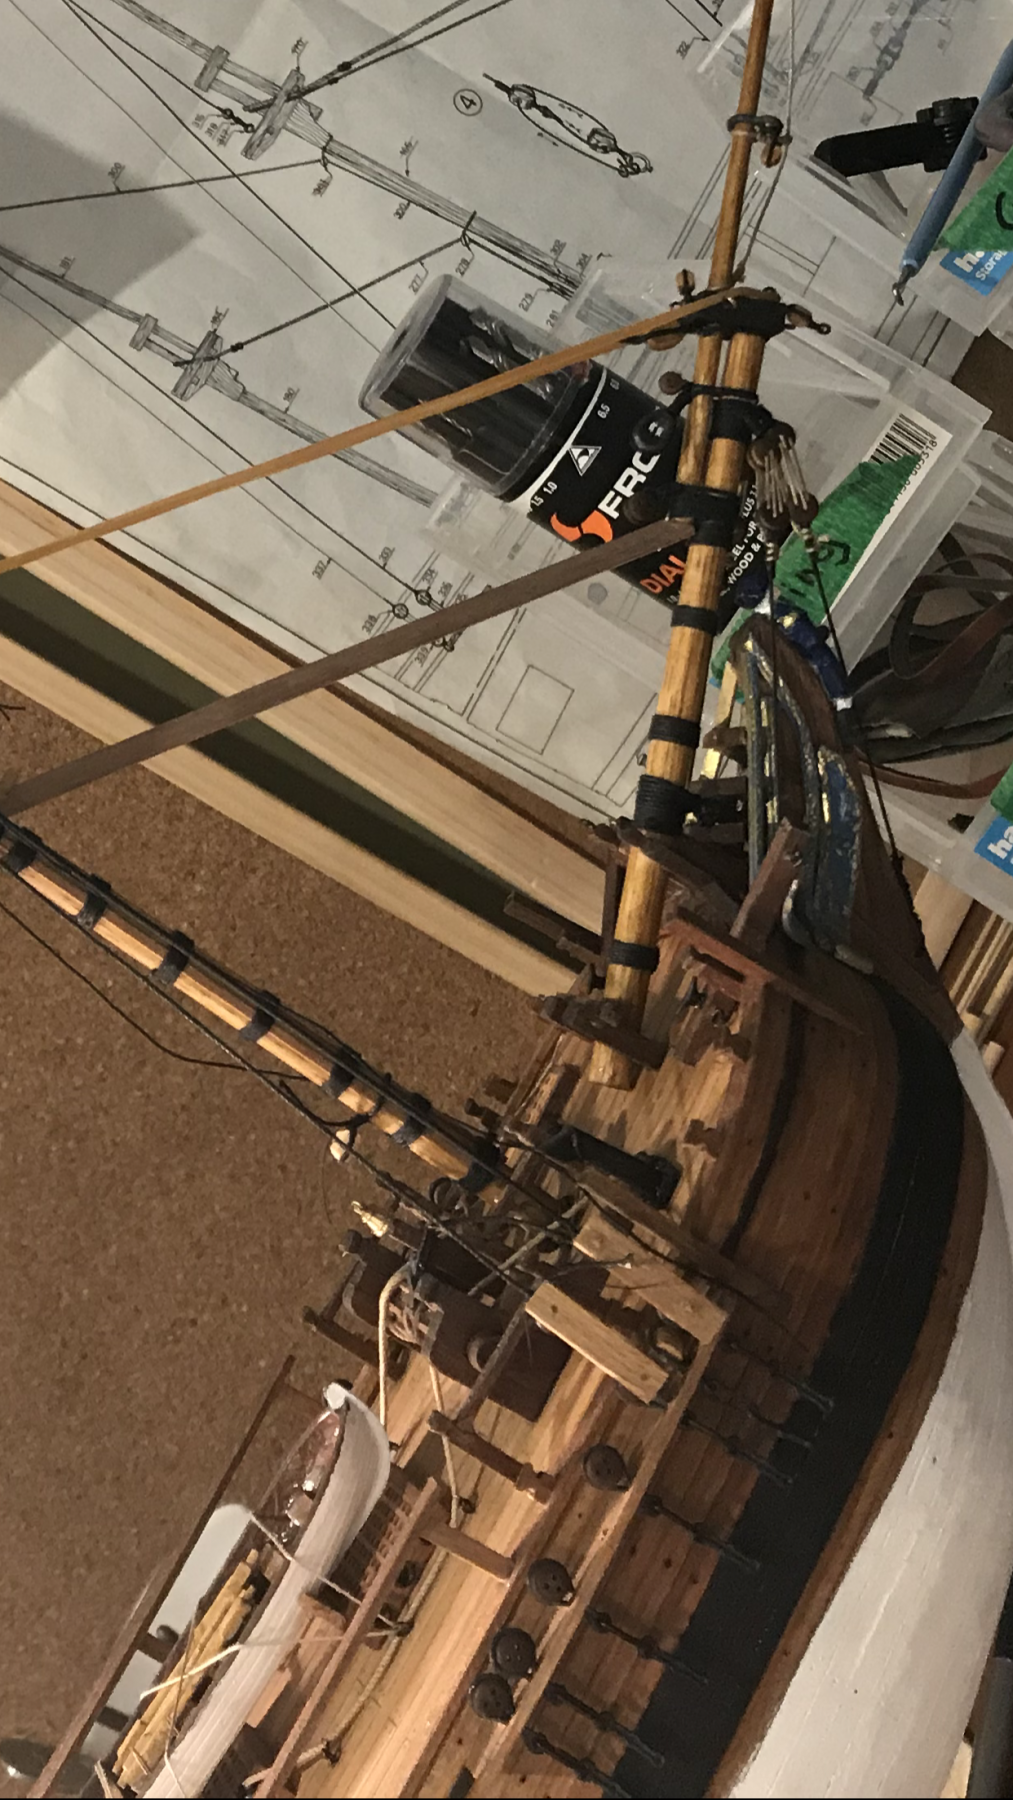
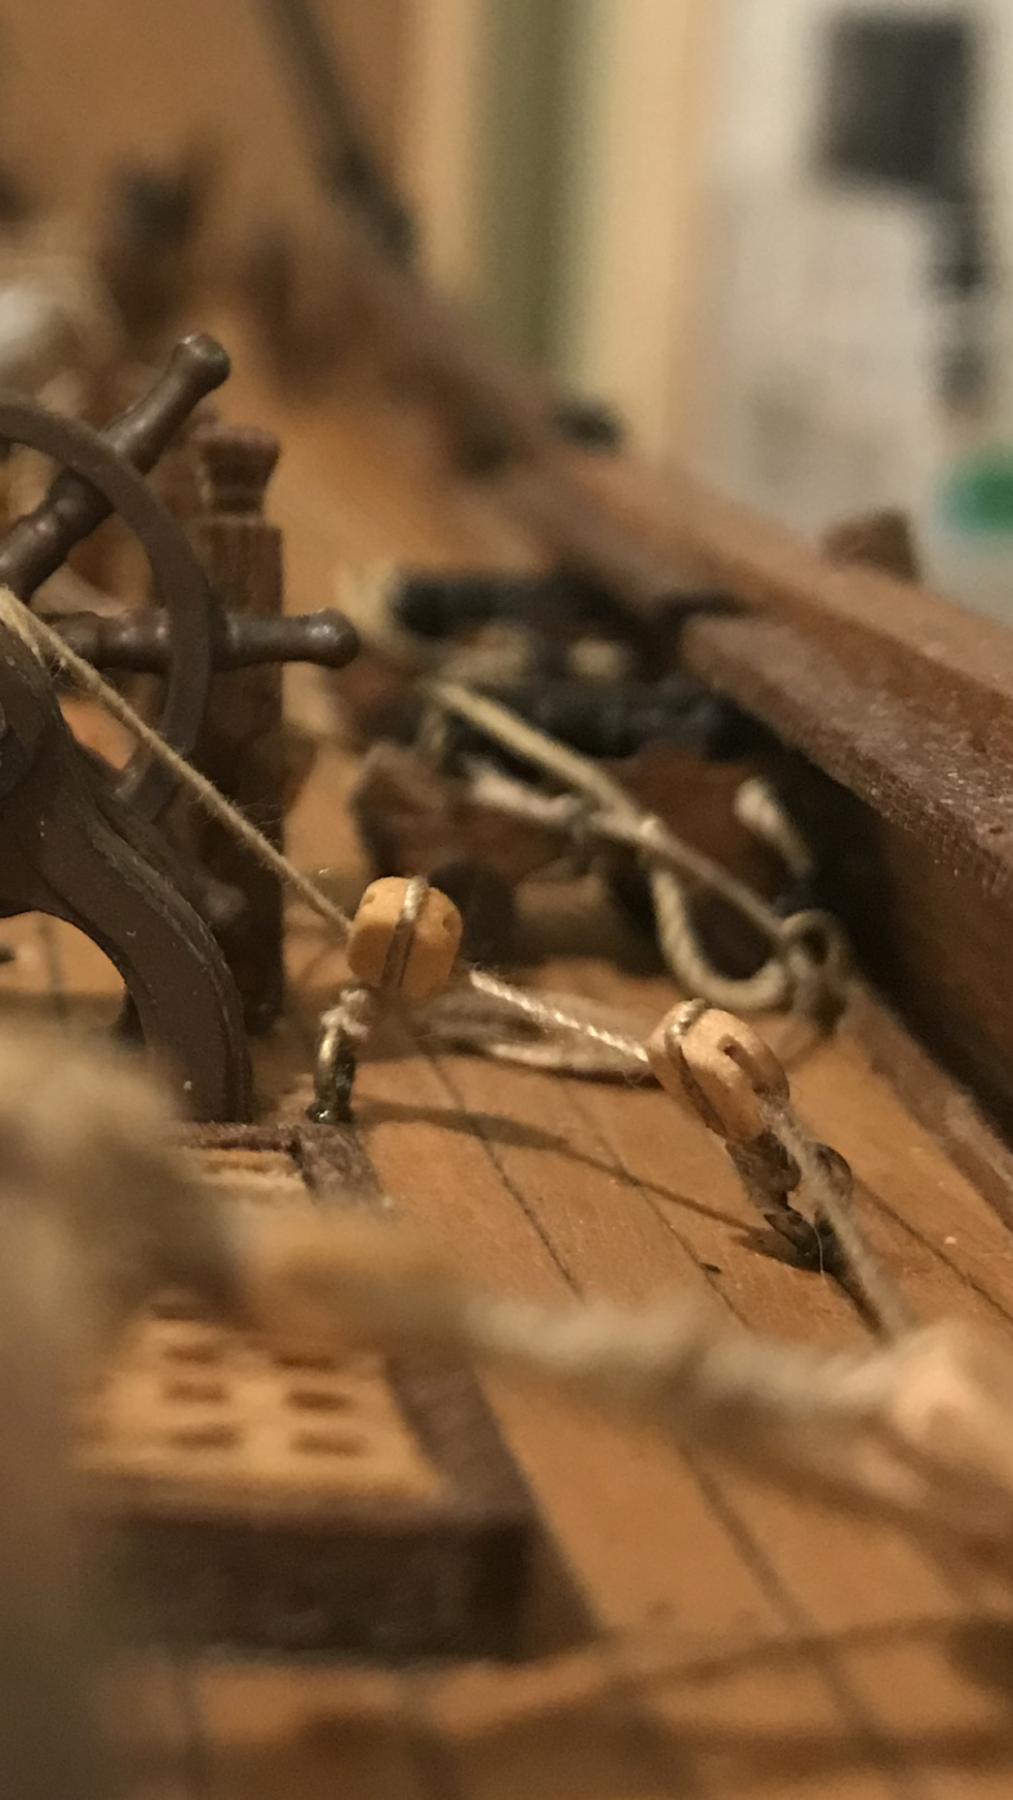
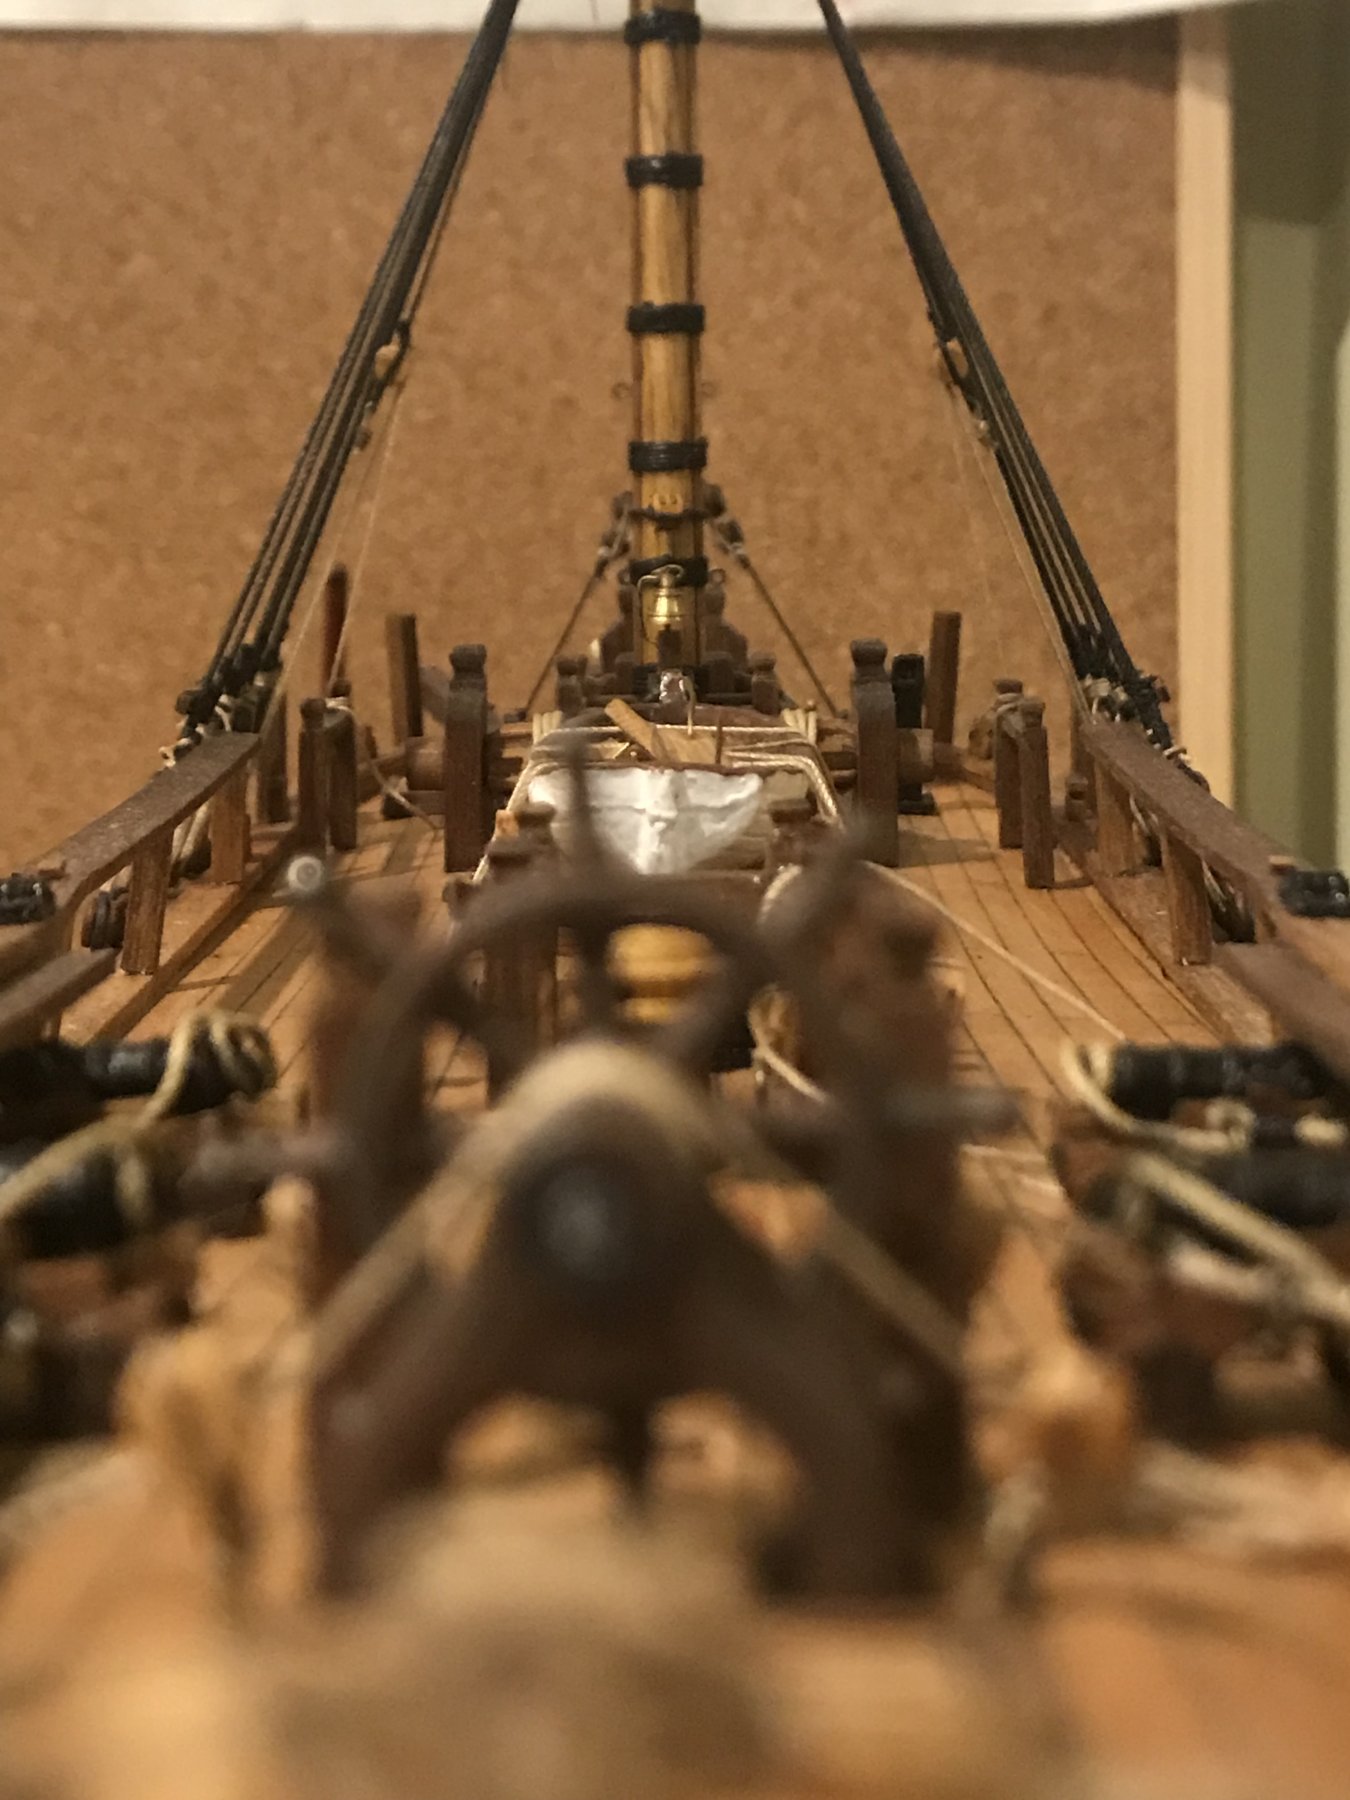
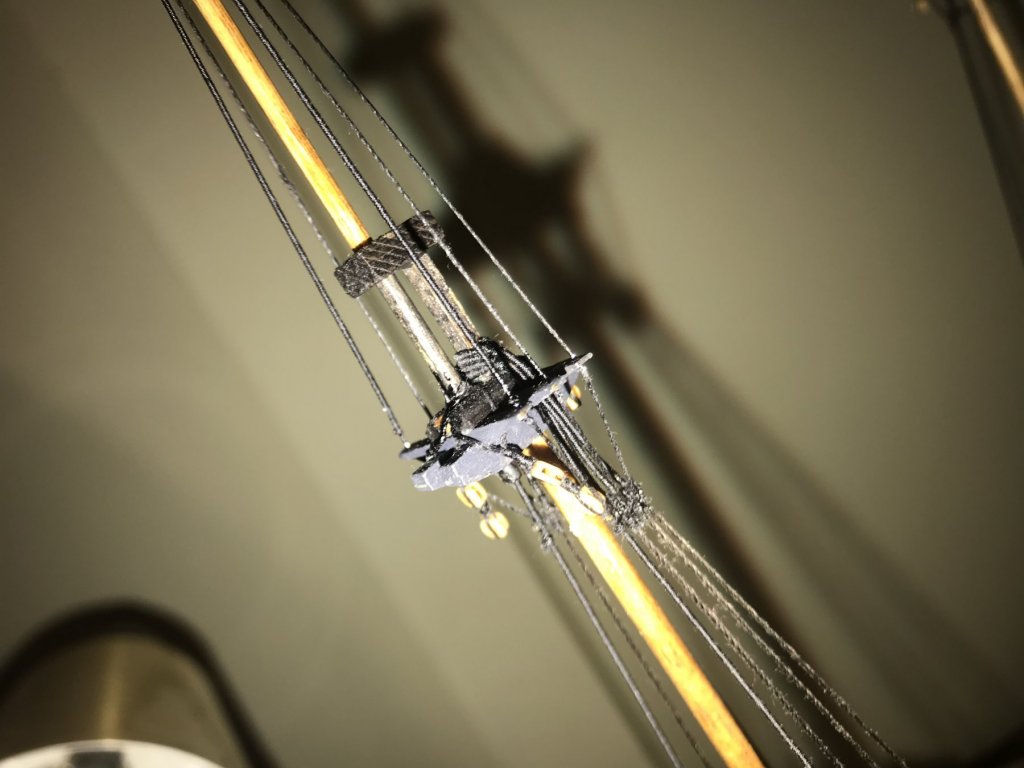
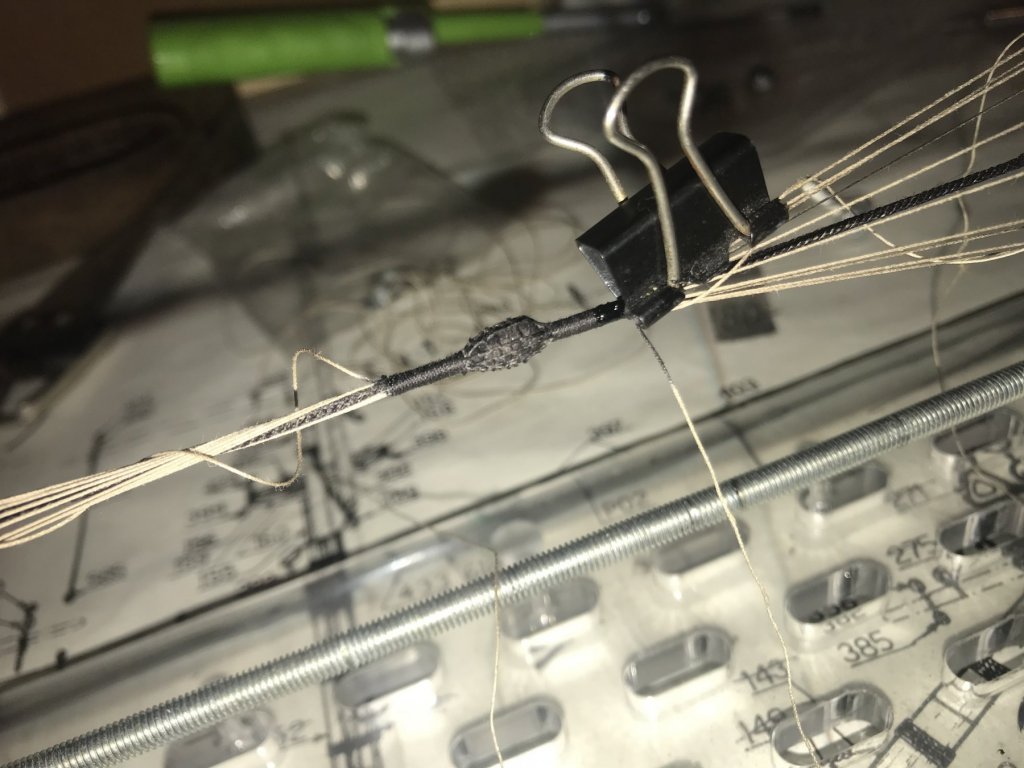
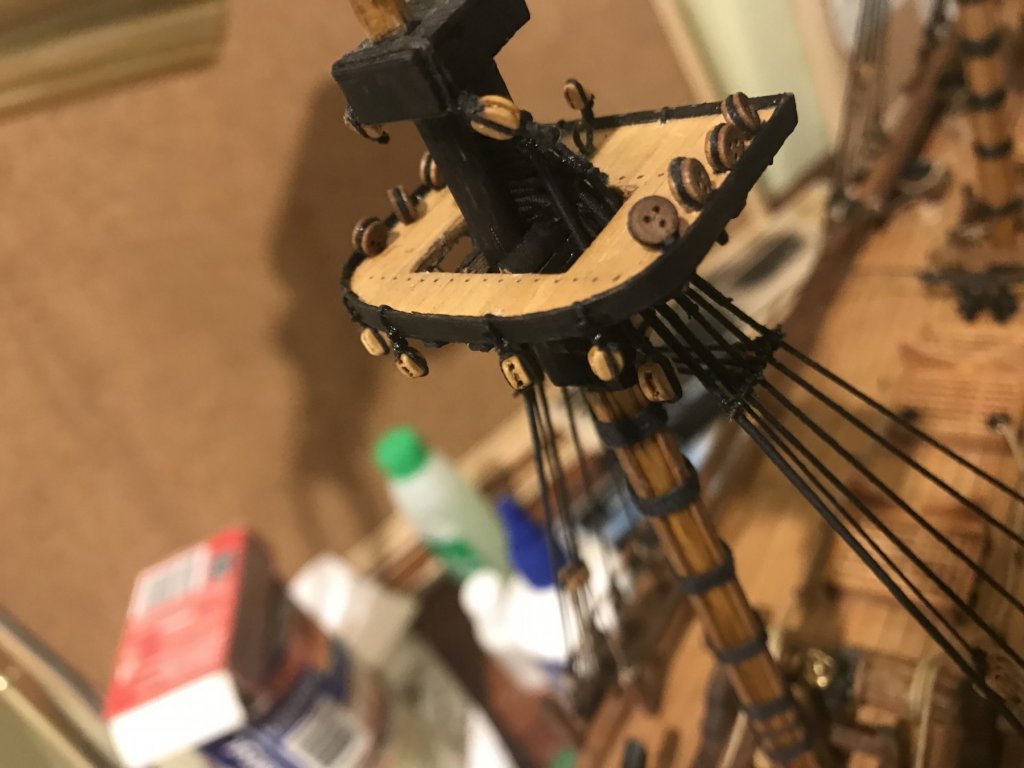
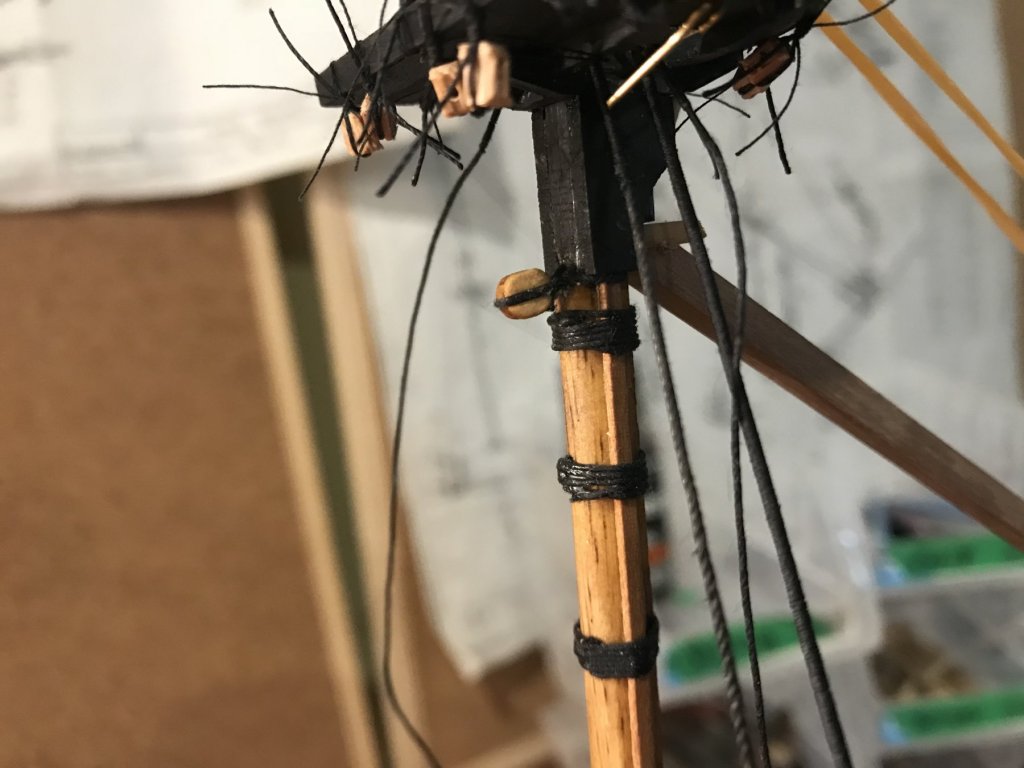
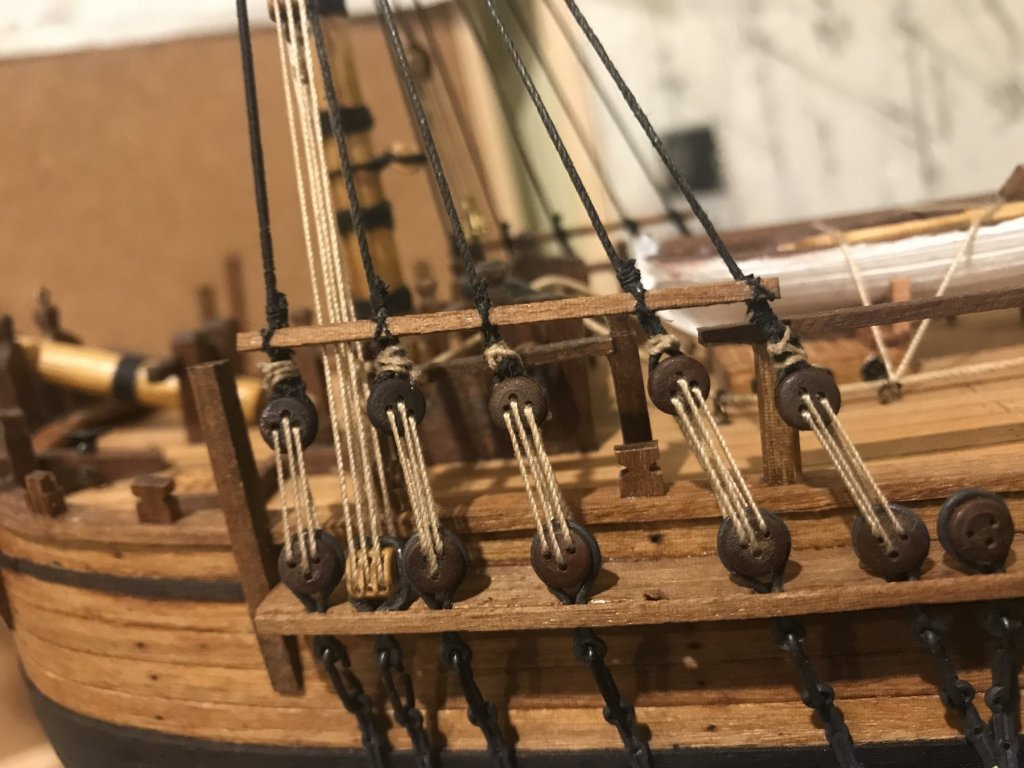
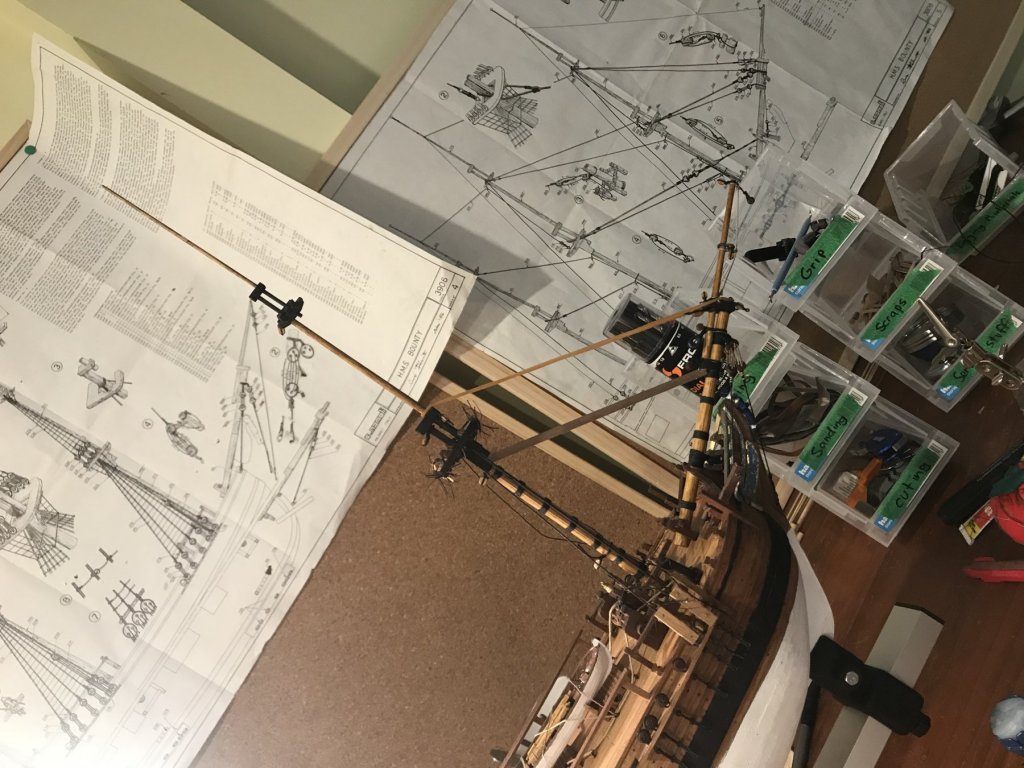
So...update on where things are at. After many hours of research and experimenting with techniques things are now starting to move along. Hopefully from this point on I’ll be able to keep the updates coming a bit thicker and faster. Firstly I got to use my new serving machine on the bowsprit shrouds... and also fit a bobstay. I replaced all the tiller rigging with the syren blocks that I’ve received... they come up much nicer... old blocks... new blocks... new blocks installed Next fit the foremast...in order to get the correct degree slant on the mast I thought a jig would be the most practical and straight forward way to go. This simple jig is just a rubber band and a carefully carved piece of timber. Next started rigging the shrouds. I went and did the apparently authentic throat seizing...unfortunately once the lanyards were attached you can hardly tell Next did the catharpins...a very painstaking job...but I’m fairly happy with how it came out...The top is a bit of a mess at the moment... Mamoli blocks are just holding the place up there until my appropriate sized syren blocks get here 😁...looking forward to making it a bit neater. And a nice lil persons eye view of the deck! ...so much to do...hopefully will have another update shortly...


-
I like what you’ve done with the decking Hellmuht...nice weathering effect. Looking forward to seeing more pics 😁