HOLIDAY DONATION DRIVE - SUPPORT MSW - DO YOUR PART TO KEEP THIS GREAT FORUM GOING! (Only 68 donations so far out of 49,000 members - Can we at least get 100? C'mon guys!)
×


bebopsteve
-
Posts
230 -
Joined
-
Last visited
Content Type
Profiles
Forums
Gallery
Events
Everything posted by bebopsteve
-
 I have read and re-read the instructions.. Even made an extra copy to keep on nightstand! You guys are making this fun! I subscribed to Ships In Scale, and need to get the back issues on the Philly..
 -
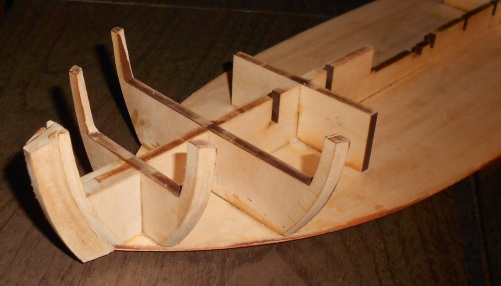
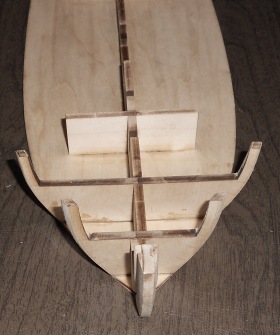
I installed frame #9 and by sheer luck, the first dry fit and it was square without any maneuvering. Then I checked it and sure enough, it was perfect. Weird.
-
I drew lines like Chuck did and using a few triangles everything lined up great.
-
Bart, I am gluing them together first and making sure they are aligned as best as I can get them. I have a large piece of glass I use as a surface, glue, then put weight on top. i let em dry, then install. So far its been working great.
-
Chuck, do you install frames in any particular order? I have been installing mine the same way you are.It's working well!
-
Roger That!
-
Lol... The hard part is not knocking something off while maneuvering this beast around.
-
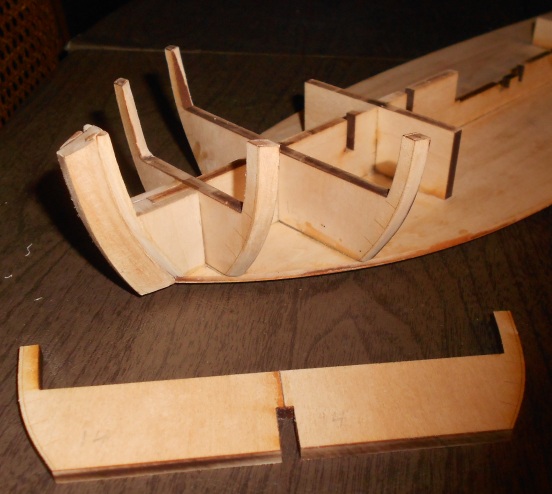
Working on the bulkheads. Just following instructions and leaving room to adjust for eventual planking. I an making sure everything is straight..It seems like it took an hour to finally make sure.. but so far everything has fit pretty good.. Laser cut. i like it! If anyone has suggestions, Please!

- 308 replies
-
- 4
-

-
- finished
- model shipways
- (and 1 more)
-
I have the same... Thanks Chuck!
-
Looks great Chuck! I have glued bulkhead 16 on. Now I am working on 15, which is a 2 piece. Good call on staining between slots. What flavor stain you using? Pecan?
-
The upside I found sanding the heck out of the planks is the caulking looks really even and cool..I even salvaged some of the sawdust to use as wood filler.
-
Bart, I used a sanding block. I also needed to take off more surface than you will need to because I could not find 3/64" thick stock. I used a long piece of shelving, glued sandpaper and back and forth, it did the trick.
-
Looks great Chuck. I decided to sand the underside planking as much as I can. I will simply re-stain when some frames are on. Anyway, I am a little concerned about the sternpost and keel piece. Because of the added planking, it seems it is throwing off the hull planking. Where the planks fit into the rabbets. Thoughts on this?
-
I bought mine at galaxy hobby in lynnwood wash. Hobby lobby had them..but to high priced...
-
That's essentially what I did. I used a T-square also. Everything lined up great.
- 308 replies
-
- 1
-
-
- finished
- model shipways
- (and 1 more)
-
So after a long time measuring, and taking probably way to much time, I glued the keel. Very pleased.
-
Mine was 3/8" x 1/16...the 1/16 was all they had, so it takes a lot of sanding. But I do like the bottom planking effect!
-
I am sure the planks are 3/8" wide. Basswood. They came in 24" strips.
-
Yeah your probably right.
-
Roger that Chuck! Anyway I am thinking I will affix the keel piece. But at least the bottom is back to flat. I also was thinking I will cover the planked bottom with a wrap to protect it while working on it.
-
You thinking that thin strip could cause that? Oh another question... Should I clear coat? semi gloss? satin?
-
Thanks ! So the problem I had was the whole piece bowed! I'm thinking the wood conditioner? I sandwiched it between to boards and weighted it with a heavy tool box overnight. This morning it is back to flat. Question: How do you prevent that from happening? I was a little surprised..
-
Actually the photo makes it look a little darker than it really is.. And the strip is not as light as it looks.
-
I like the golden pecan..but the wood conditioner was the key!
-
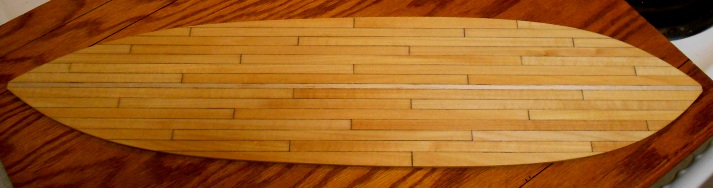
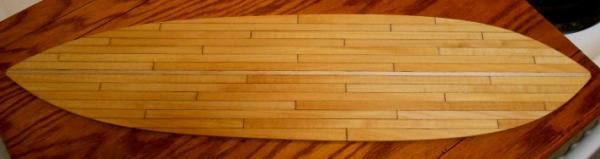
Thanks Foxy! Please keep advise coming! Here is the underside planked and stained. I really think Chuck is spot on with the idea to plank it. Anyway, I think it looks cool... I used Minwax wood conditioner. It went on almost like water, so a little goes a long way. The stain is Minwax Golden Pecan. Planks were basswood. The strip representing the keel was.. yeah I am crazy... Balsa wood. I kinda liked the contrast. Now I go back to the plans and resume the build.....
- 308 replies
-
- 5
-
-
- finished
- model shipways
- (and 1 more)