Piet
-
Posts
3,568 -
Joined
-
Last visited
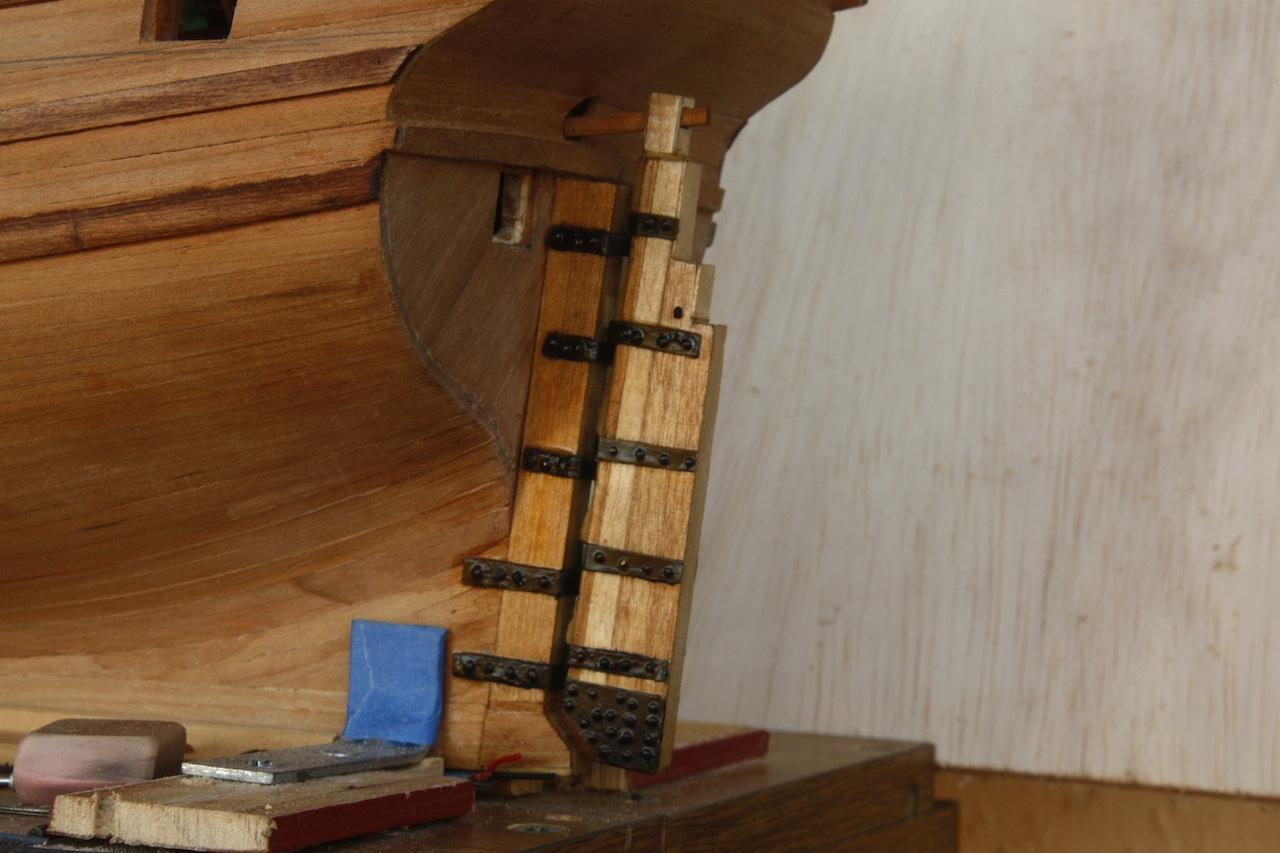
Content Type
Profiles
Forums
Gallery
Events
Everything posted by Piet
-
 Thanks fellows and gal, It took some time to get my act together with my rebuild of the log. I have made a special Word file as a duplicate, just in case. More stuff will be a little slower, some needed yard work and the prep for my second build log for my dad's submarine model. But I keep picking at it. Cheers to all,
 -
Remco, If that's the size the drawings call for then that's what they are supposed to be. You'll be surprised that once the masts are mounted to the ship and the rigging and spars are on they'll look quite right. It's the function that counts. Looking very nice indeed. I hope mine will look as nice as yours. Cheers,
- 1,207 replies
-
- 1
-

-
- sloop
- kingfisher
- (and 1 more)
-
Hello Michiel, Love the lighting effects and your clean work. Cheers,
-
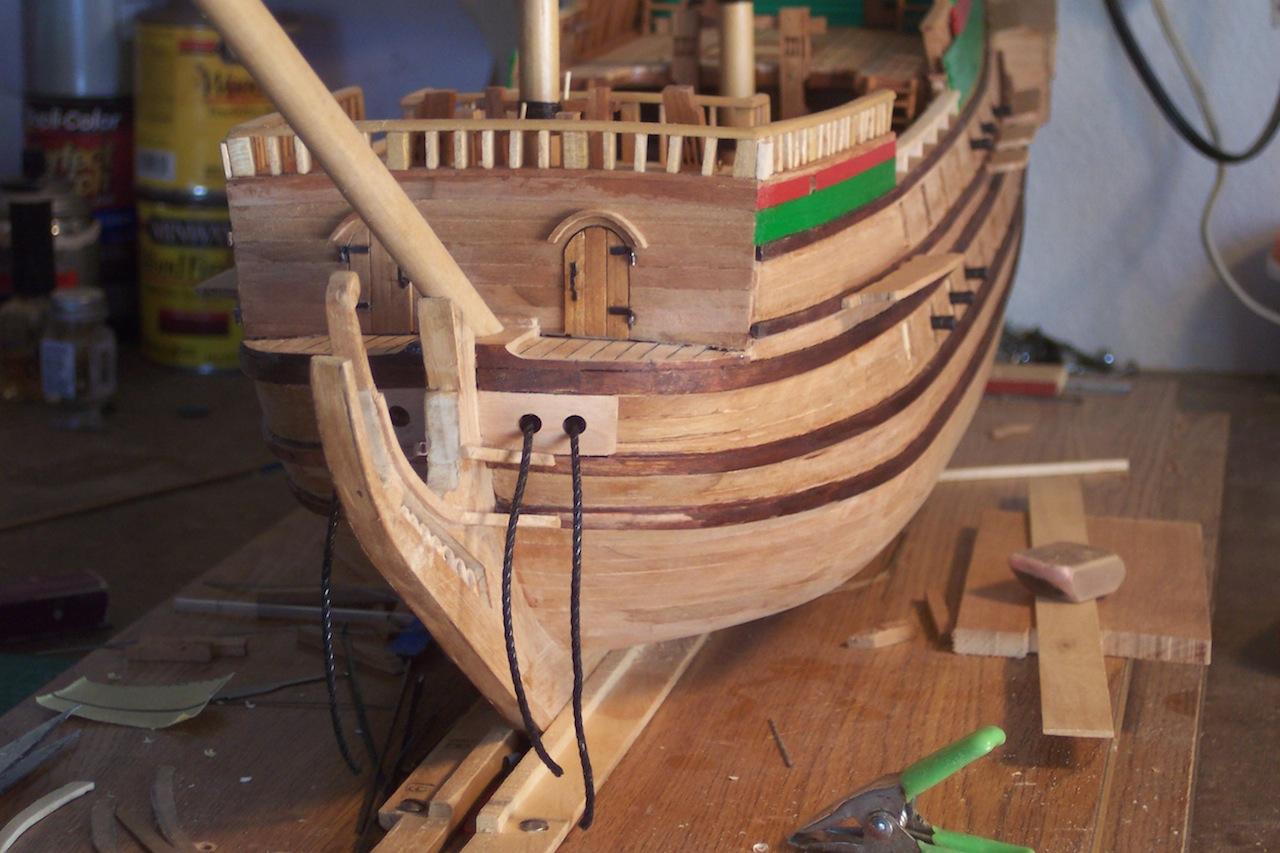
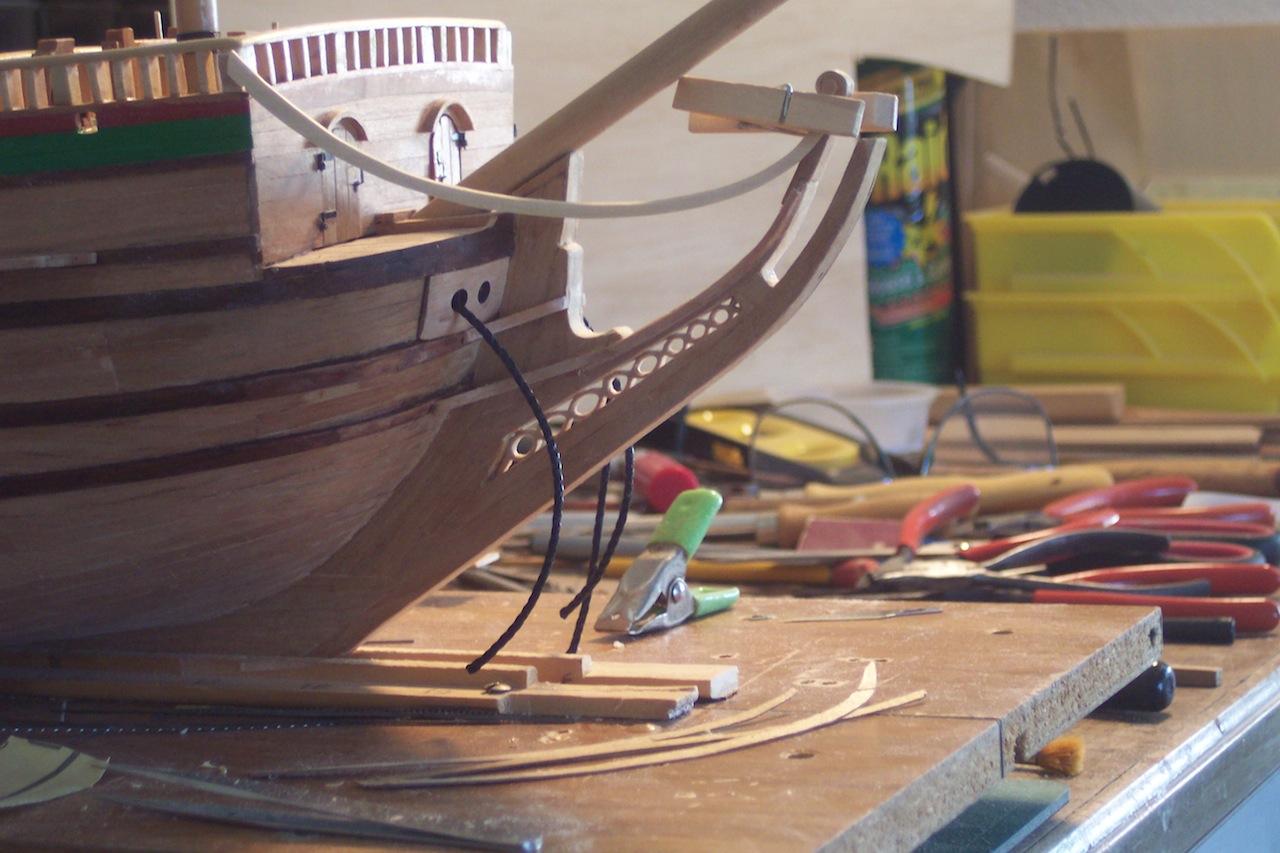
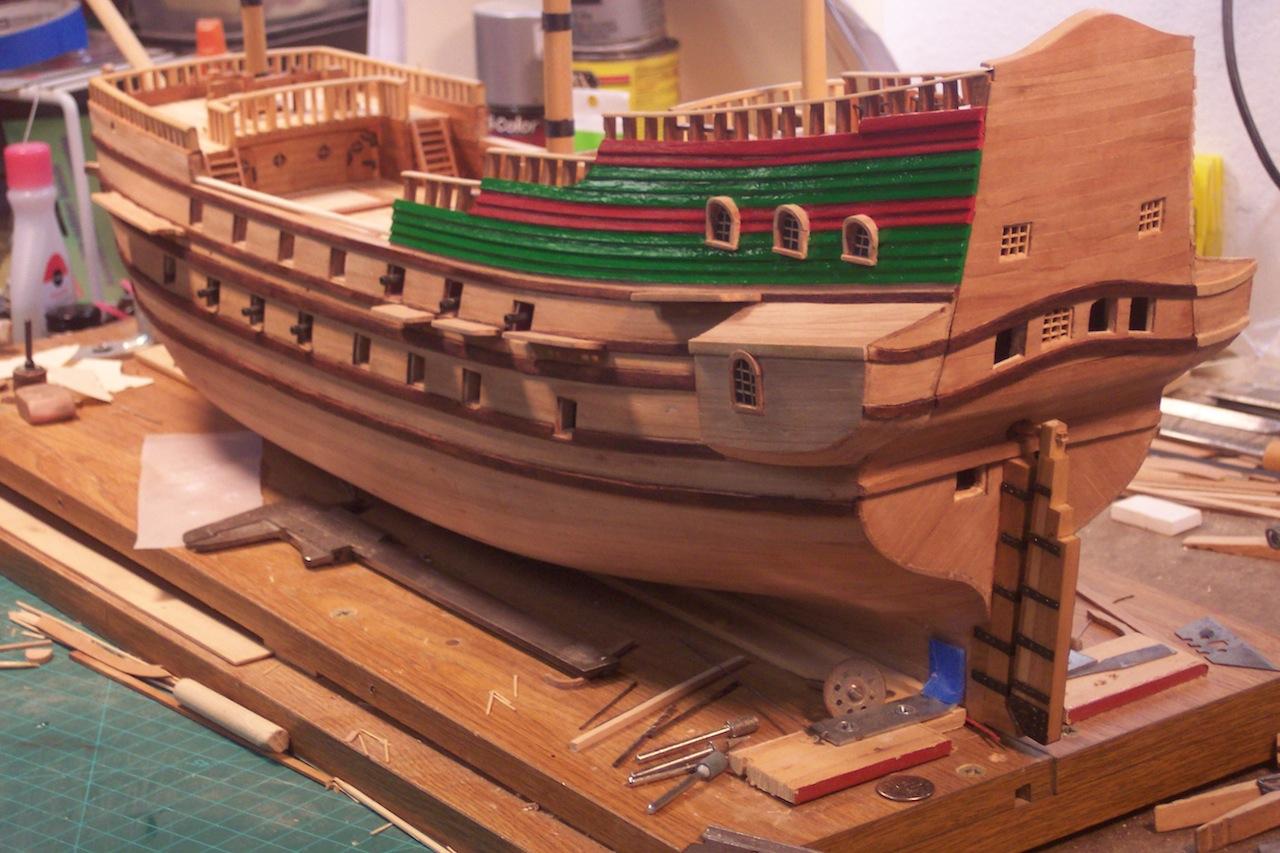
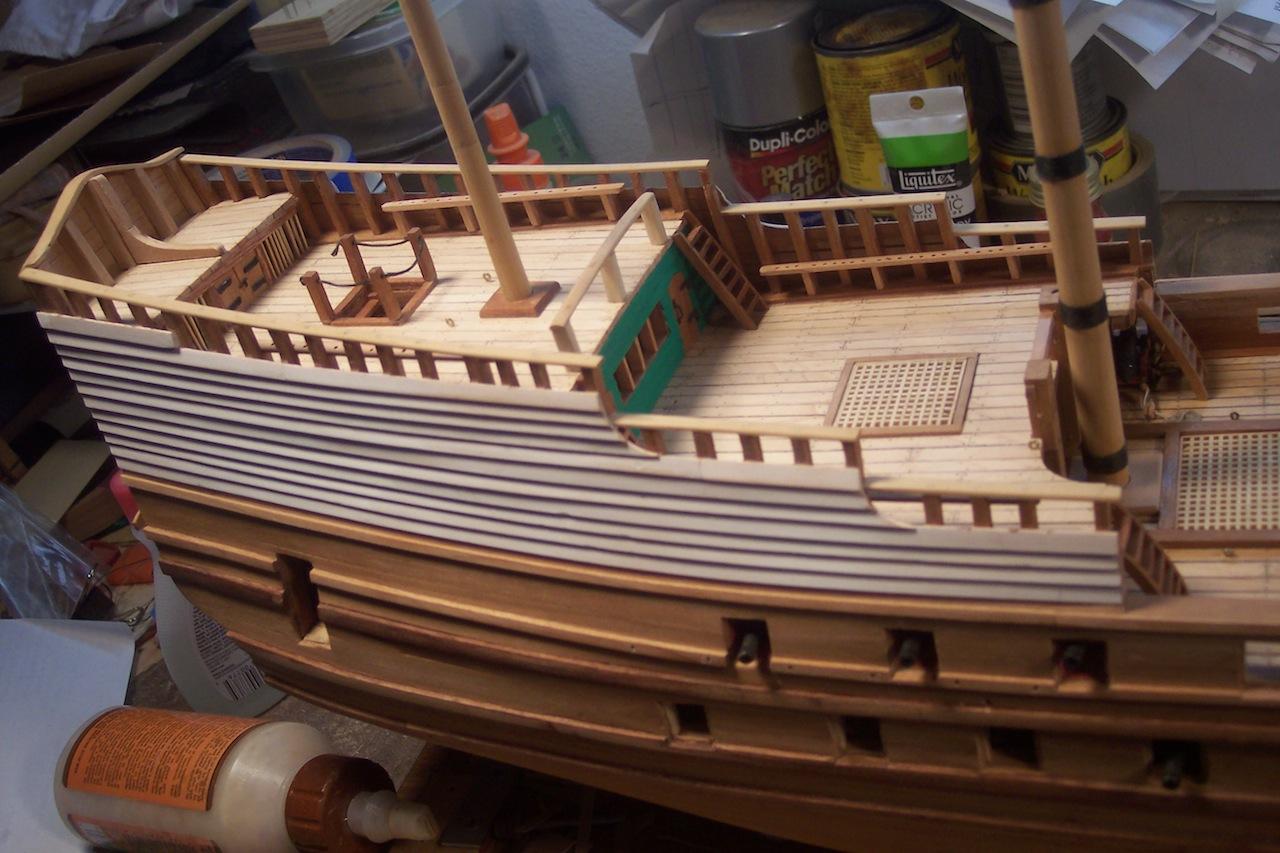
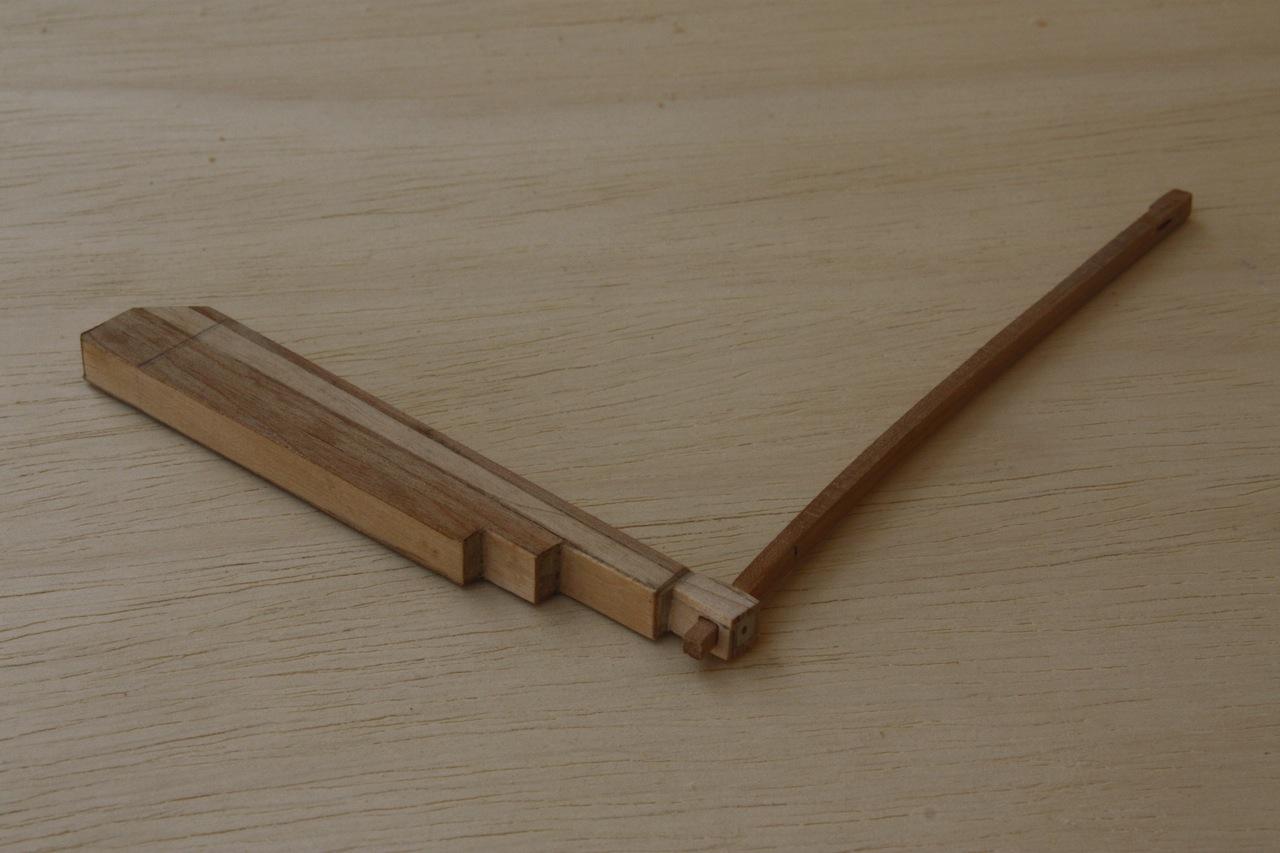
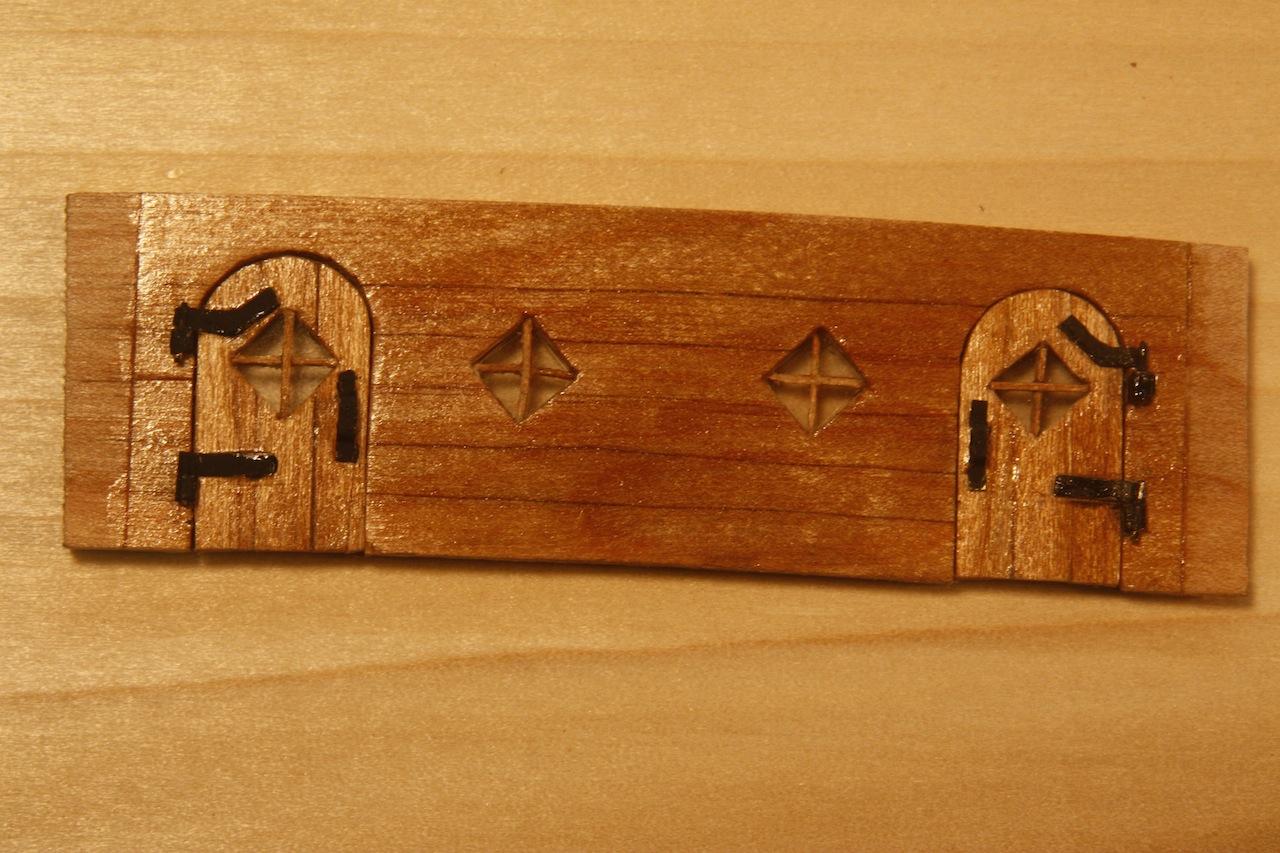
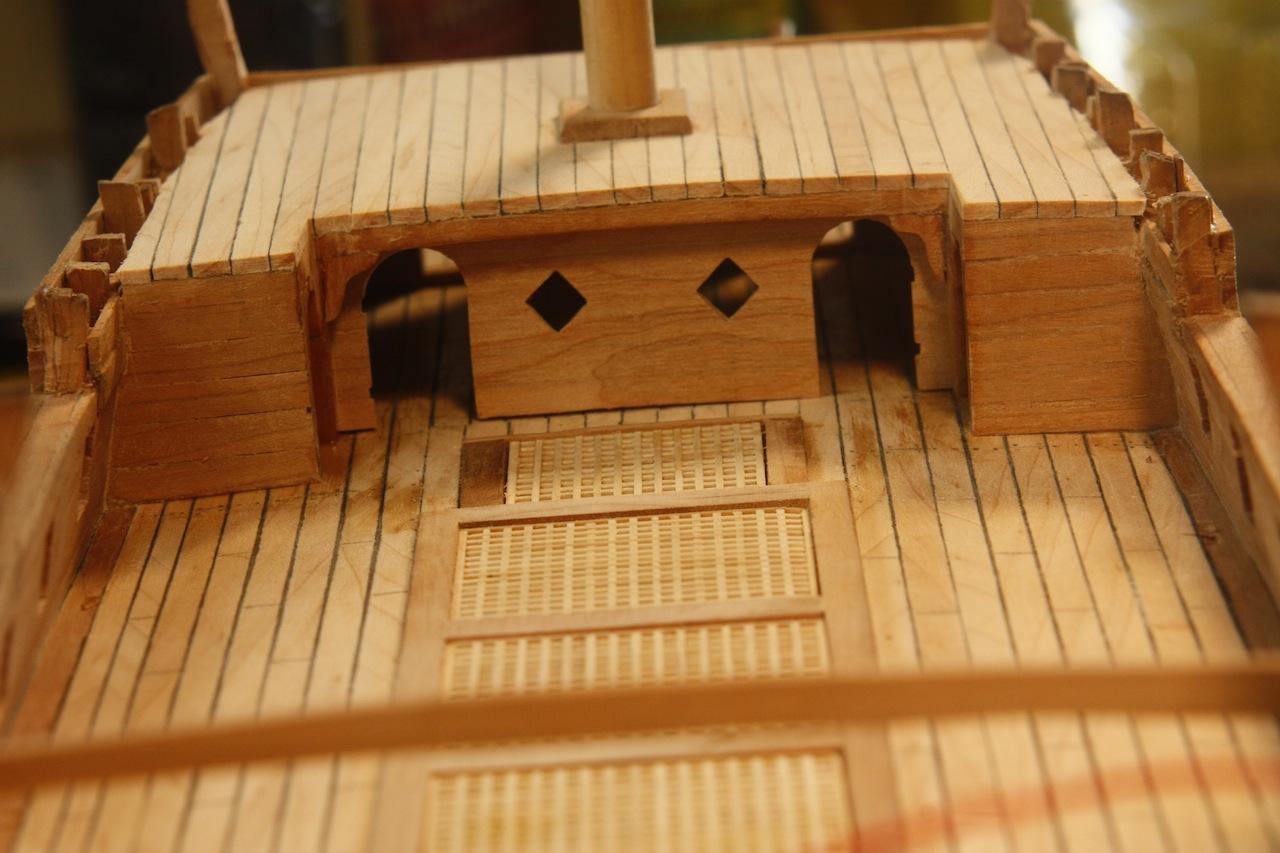
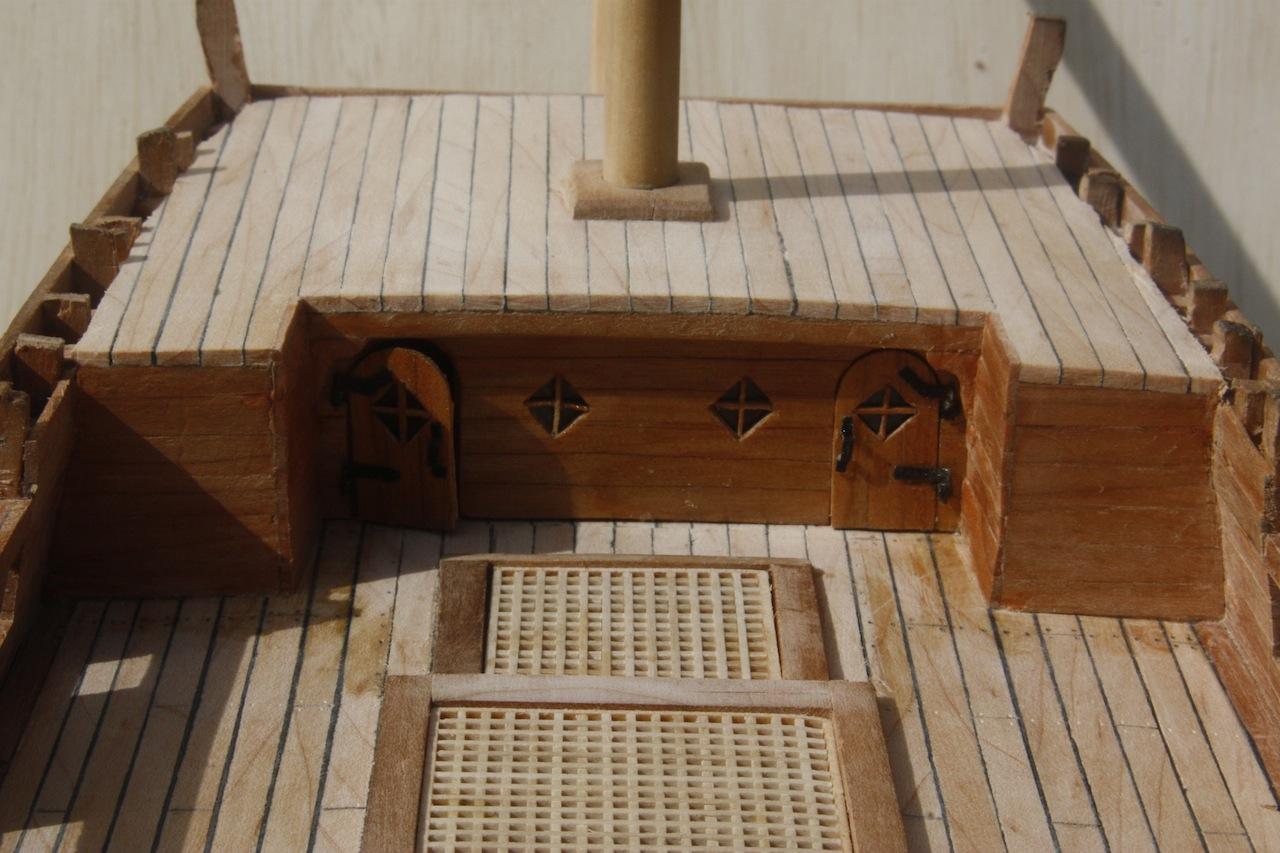
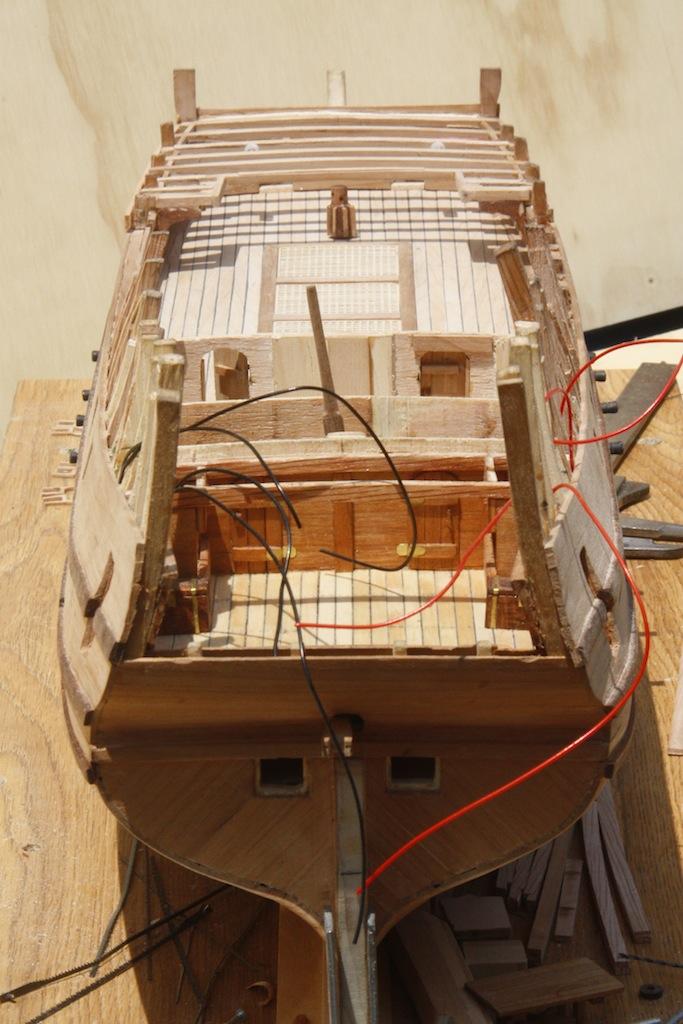
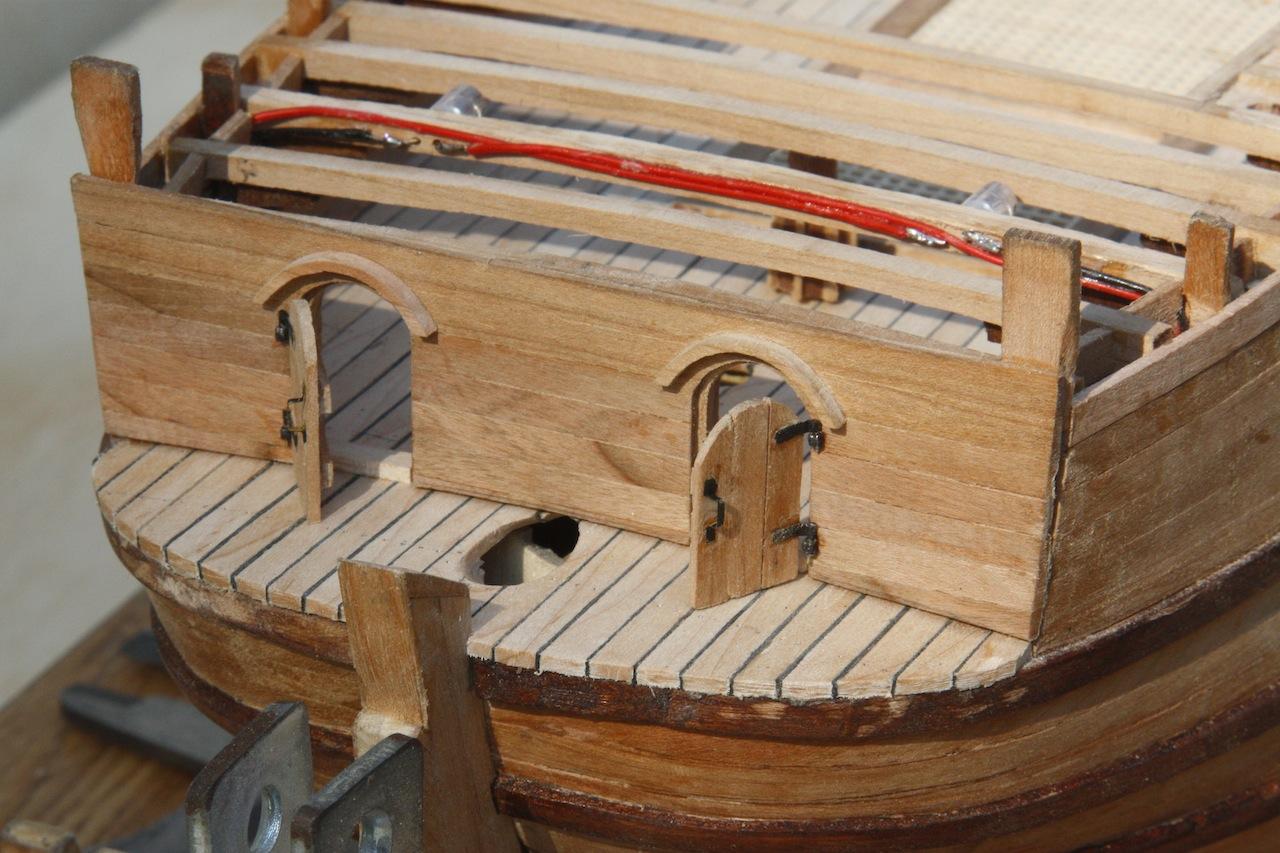
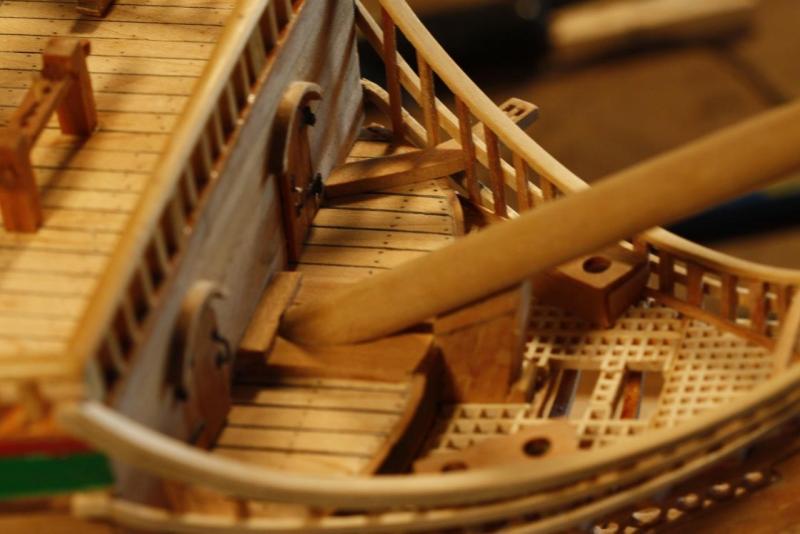
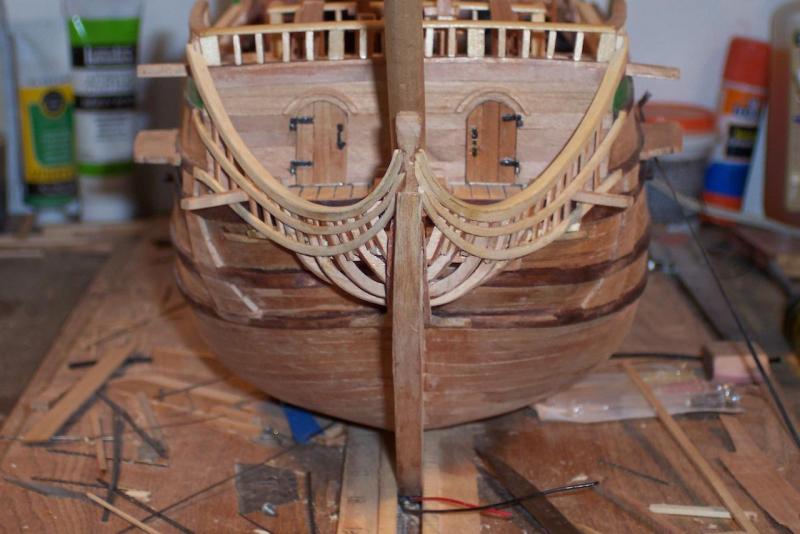
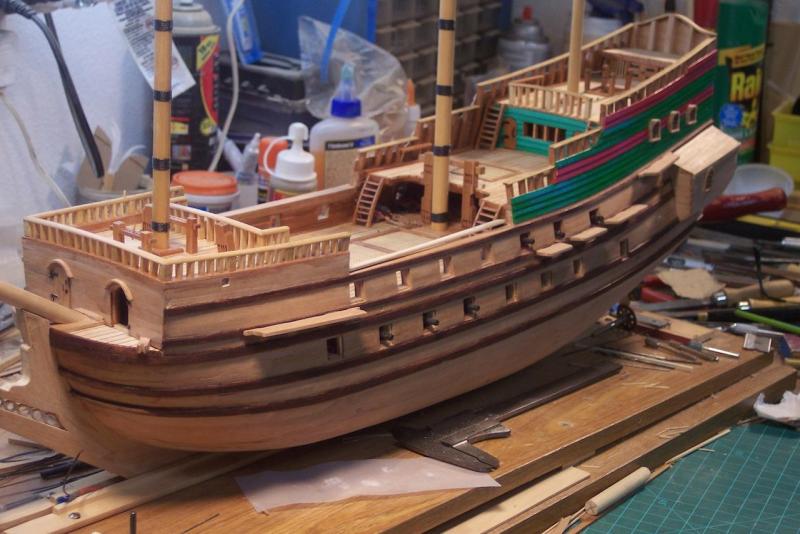
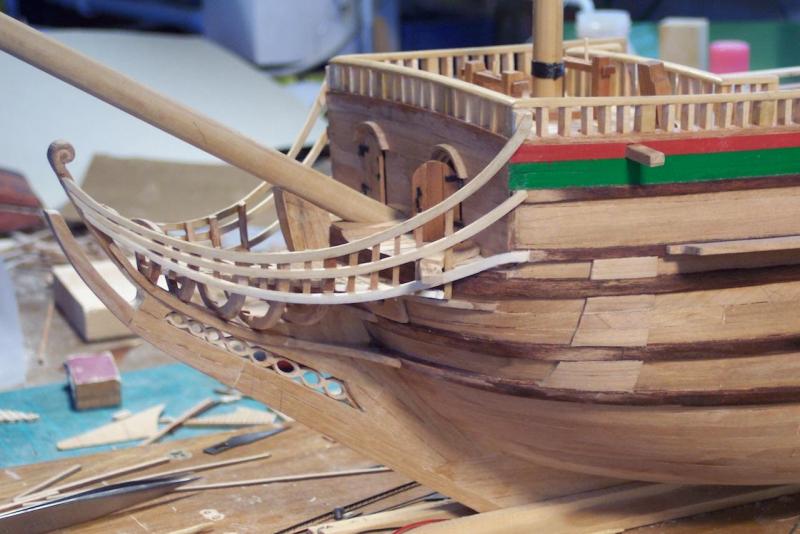
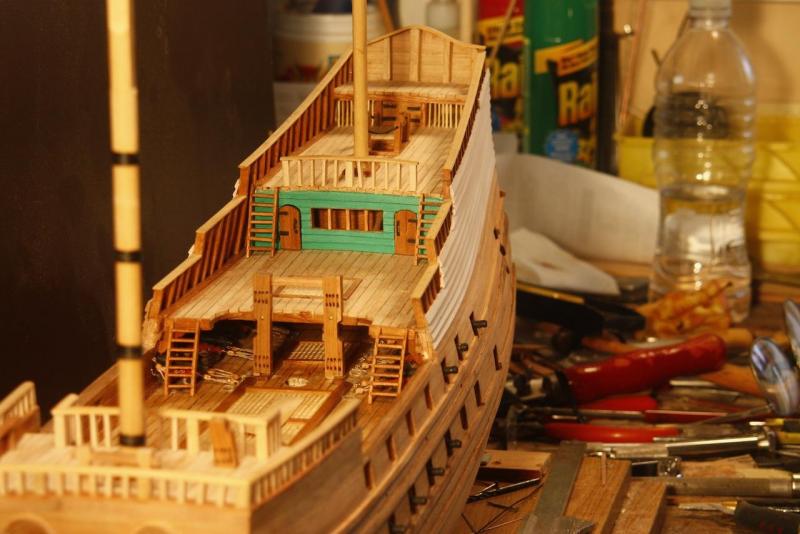
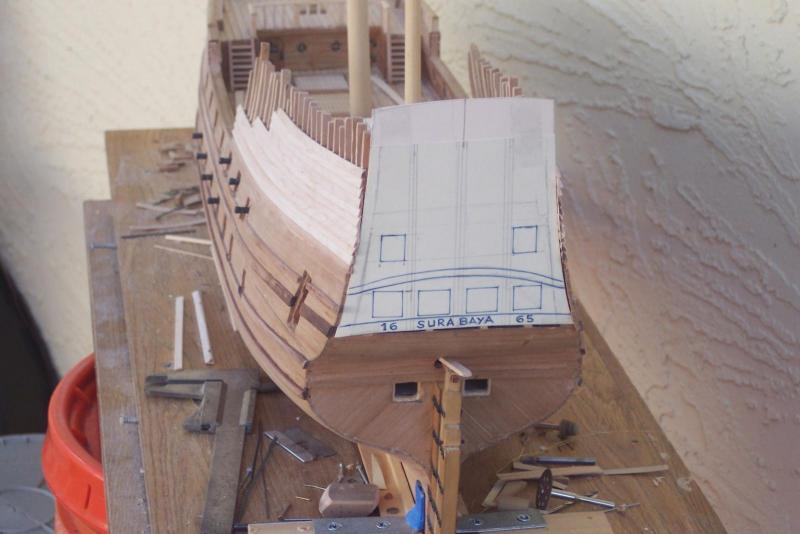
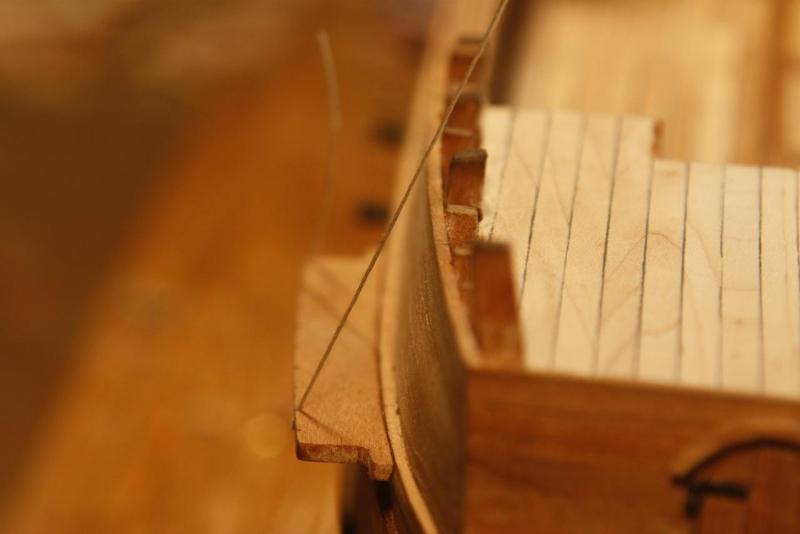
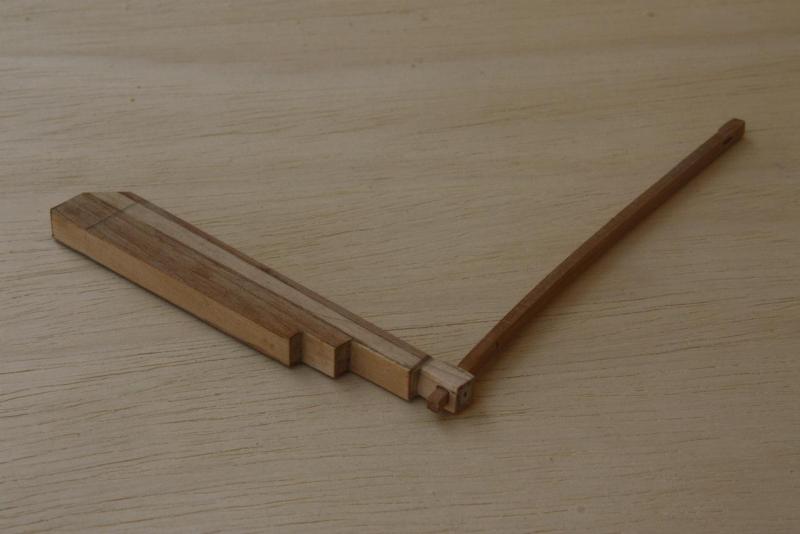
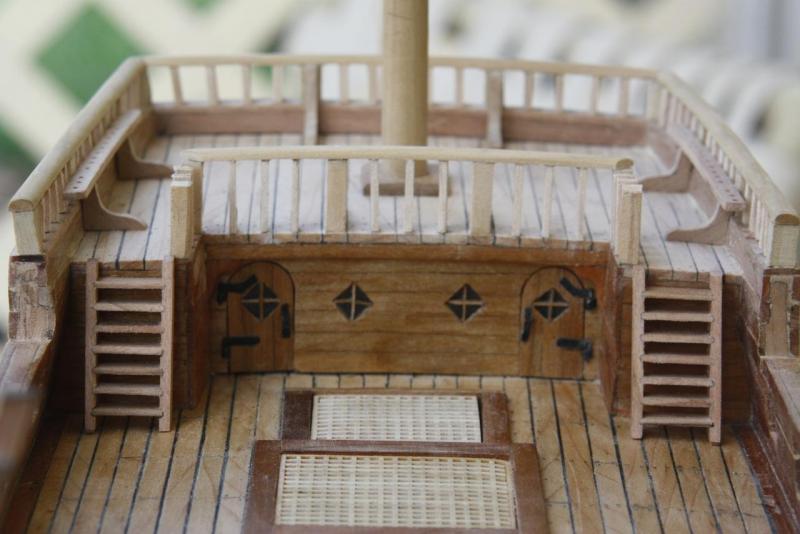
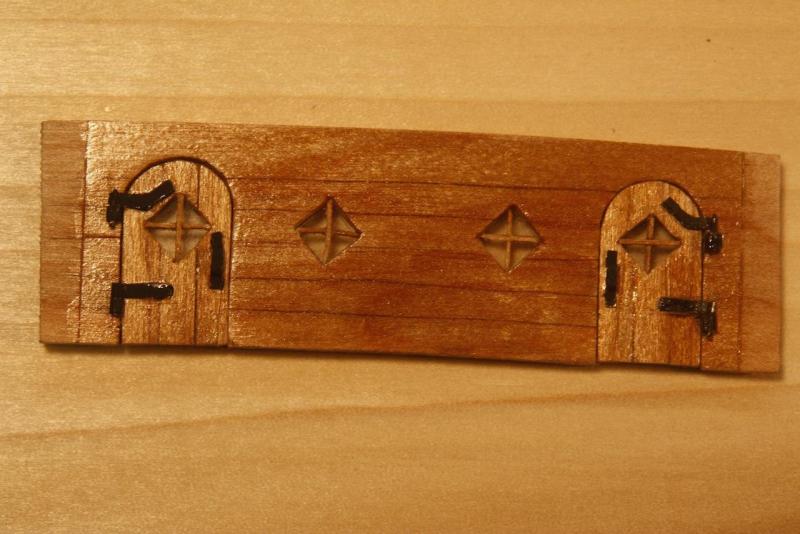
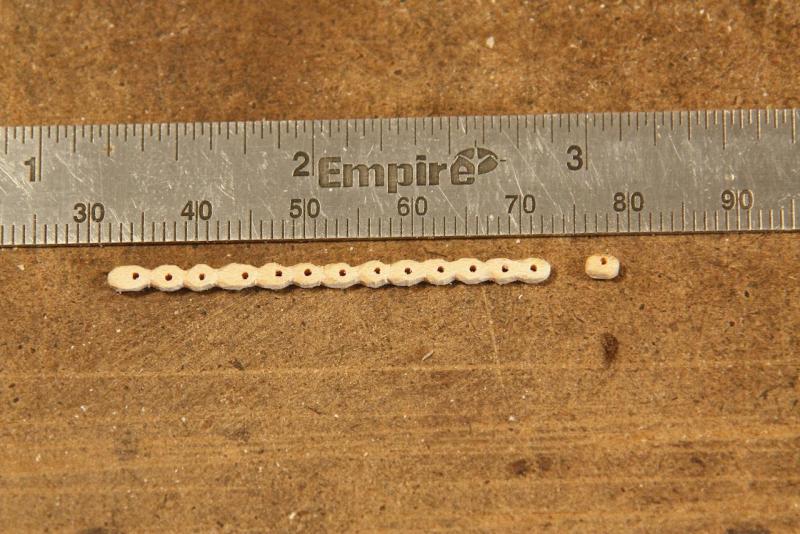
Thanks Mark for keeping an eye on little old me. Well, I’m all caught up to date with the rebuild of my VOC ship log. My apologies for the screw up with post one, the introduction. I zigged instead of zagged but the rest worked out okay. In the past week I have tried to put things together but my two left hands in computering caused problems deciphering the intricacies of this new format. Give an airplane to fix or fly then no prob. Thanks to the input of two friends on the forum I managed to muddle through it. Okay, I did manage to do some work on the ship. I made two new catheads, 2 two holer potties or as the Dutch call then “gemak,” and in the Malay language it’s “kakoes.” Perhaps the Dutchies on the forum recognize the origin, “kakhuis.” This was a perfectly normal name for the old Dutch colonizers, the Indonesian people just adopted it and stick with it till this day. Okay, in the English vernacular it is “shithouse.” I’m about ready to try my hand at carving the bow lion and dress up that end of the bow. I also spend some time making room for the build dock for the submarine model, Hr. Ms. O 19. I’ll be working models together. Okay, here are three pics and the last one is an opinion request. The head the two "kakoes." Head-on view of the bow. I installed a railing on the waist bullwark and like to have an opinion. I have seen these period ships with these railings painted to match the rest of the ship. or esthetic reasons I think it would look pretty good that way instead of this very light piece in the middle. My "admiral" agrees. Cheers,

-
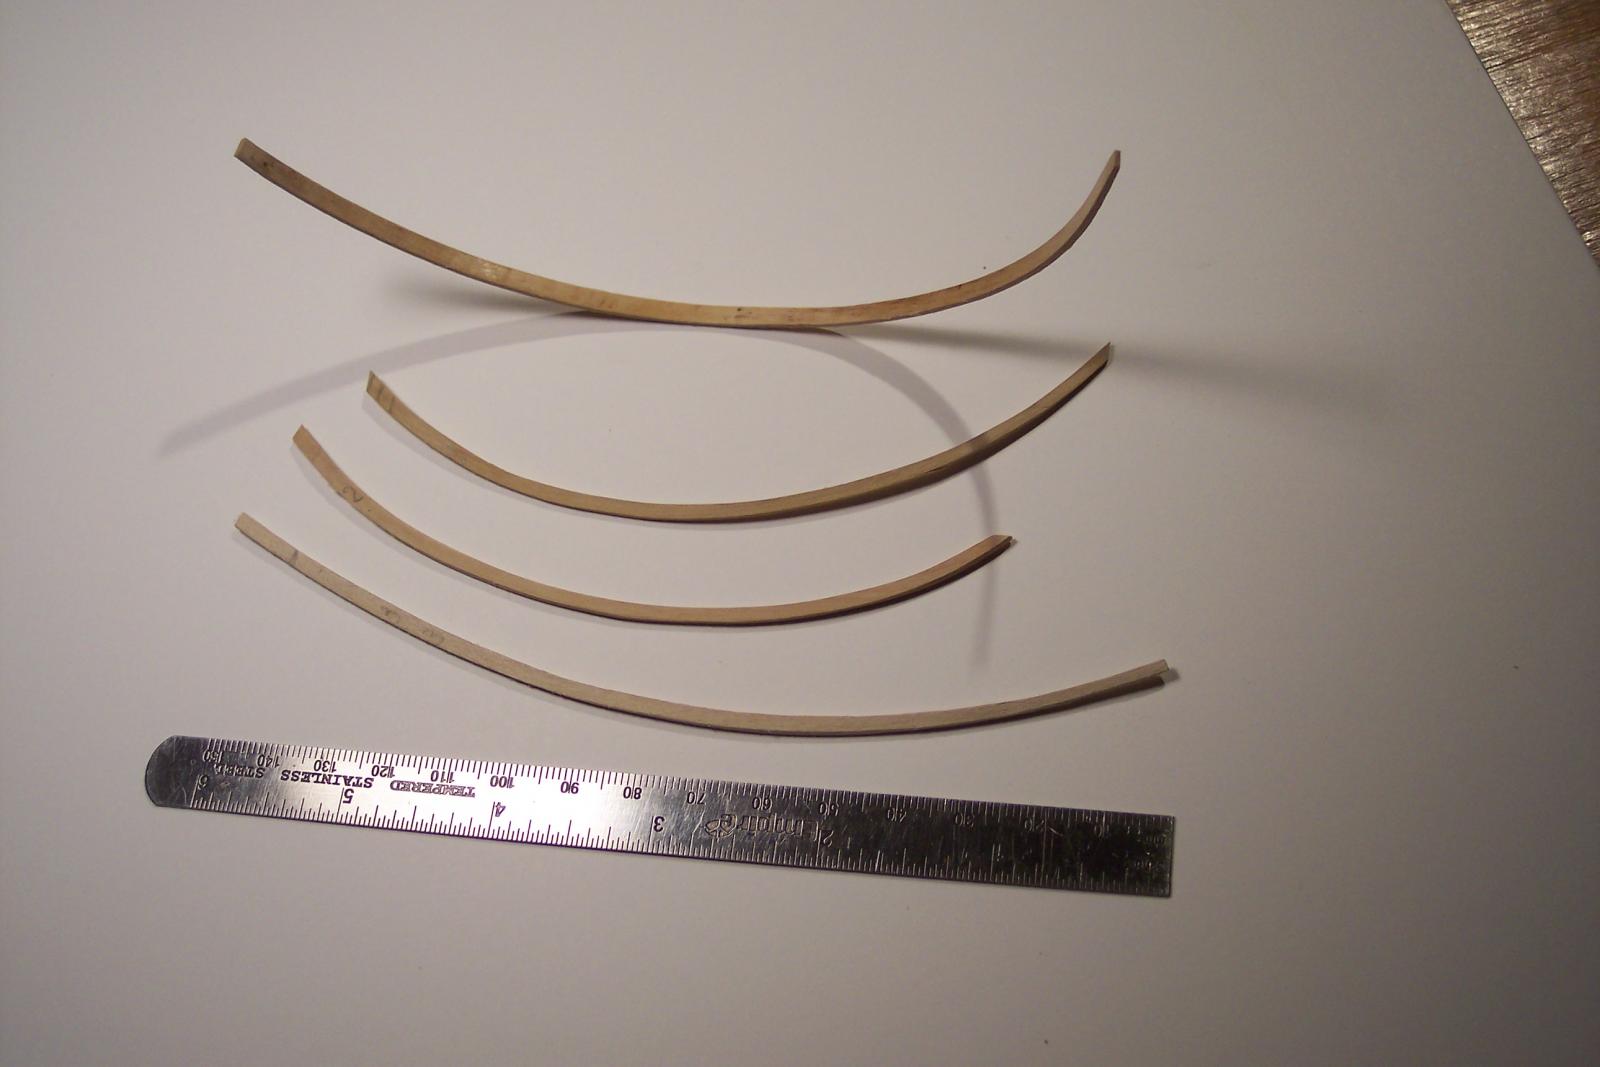
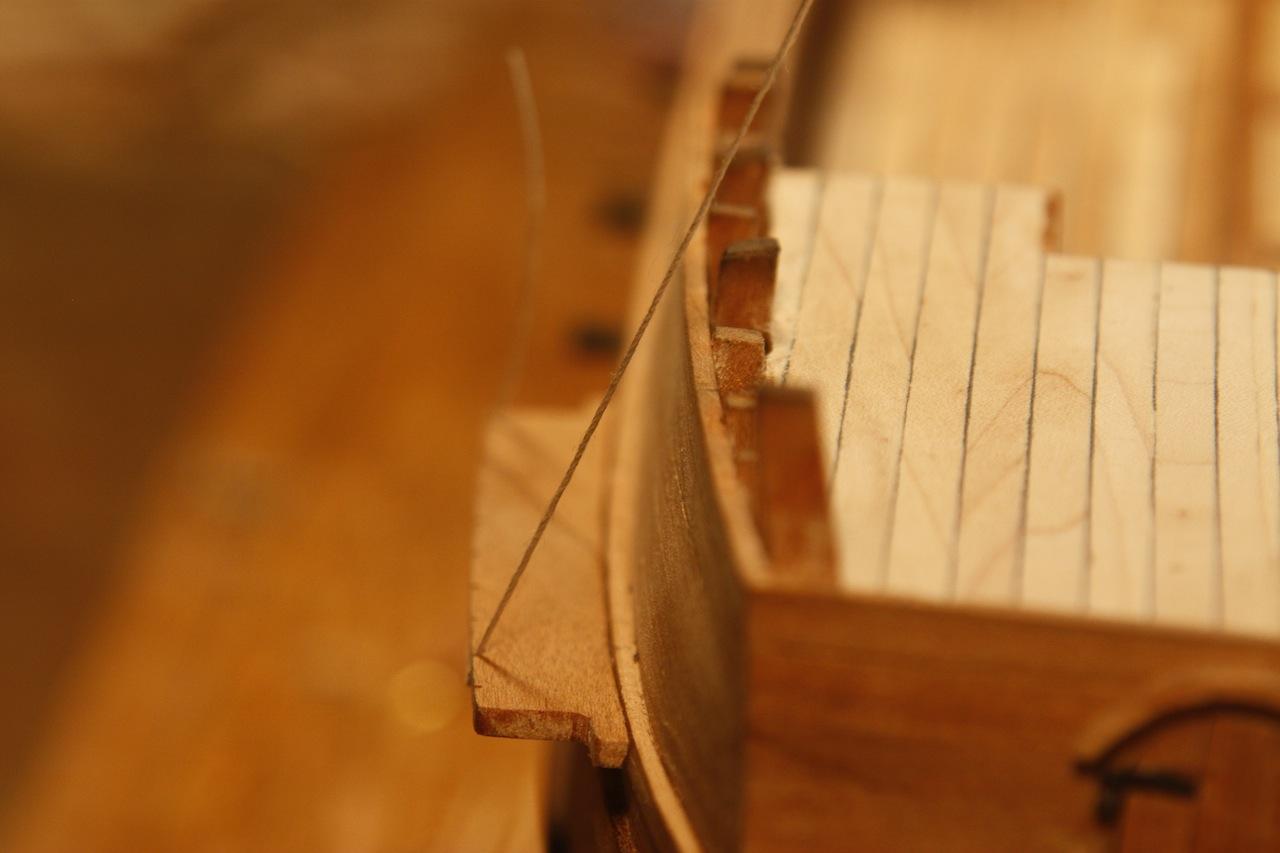
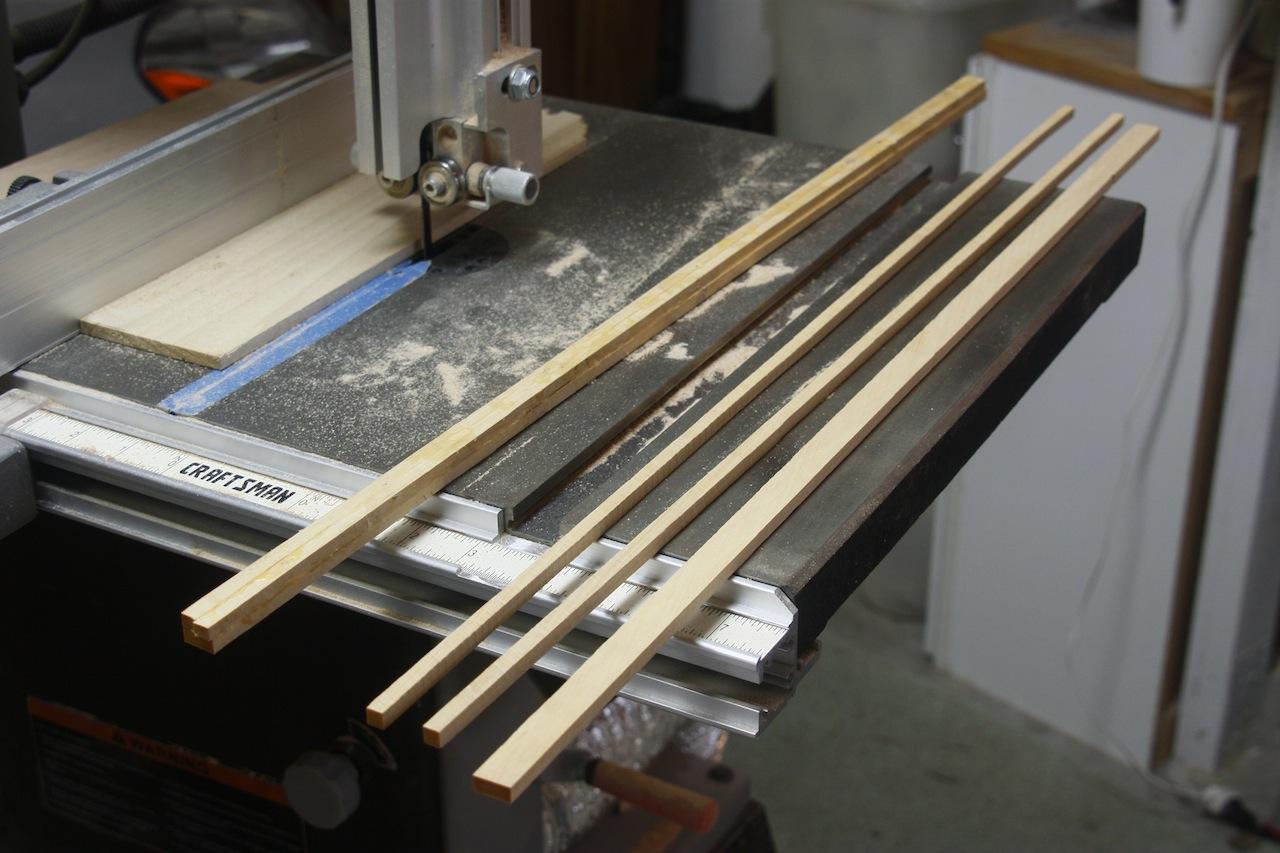
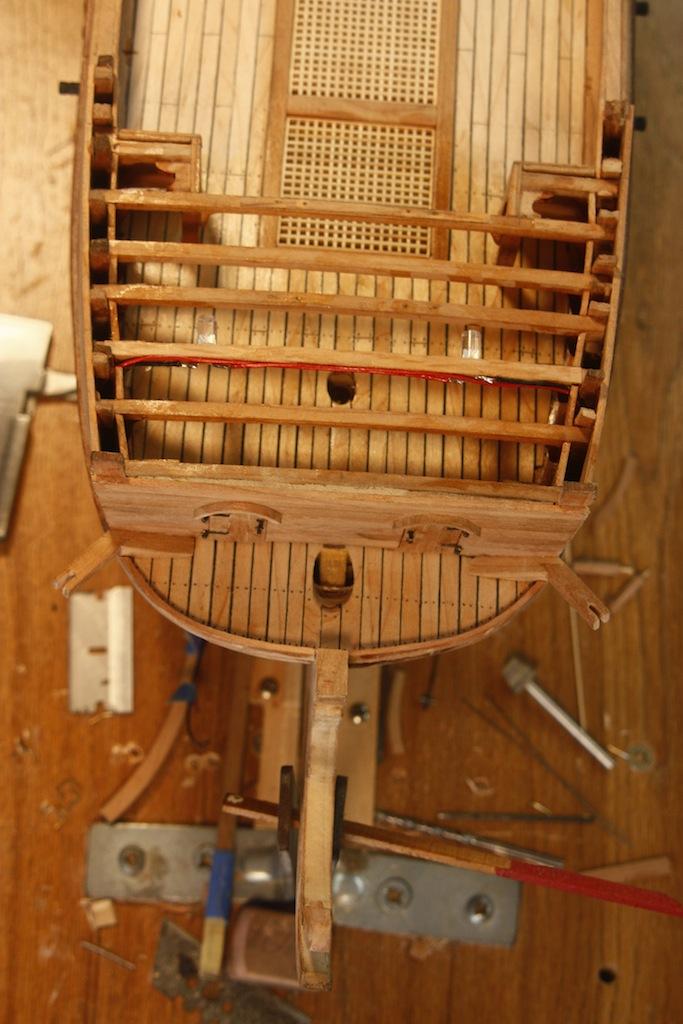
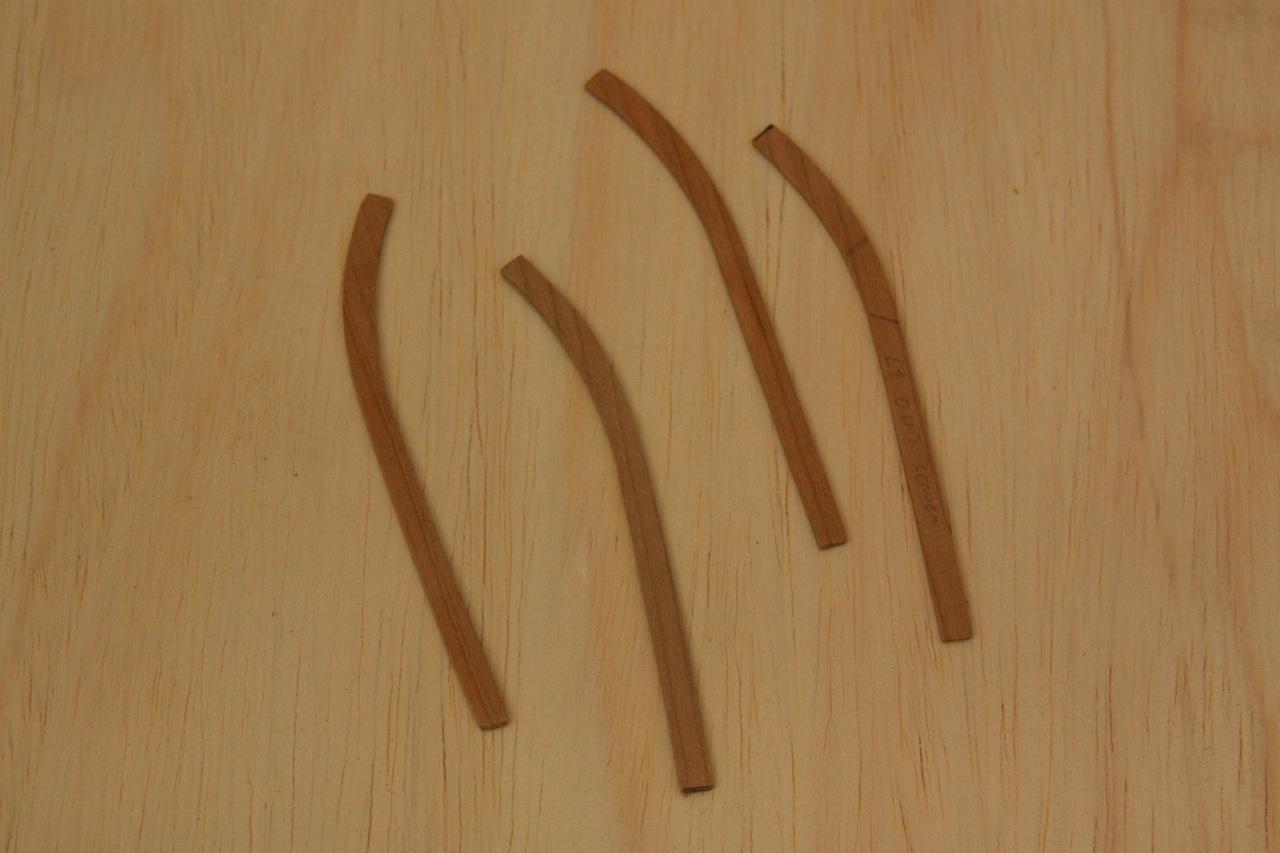
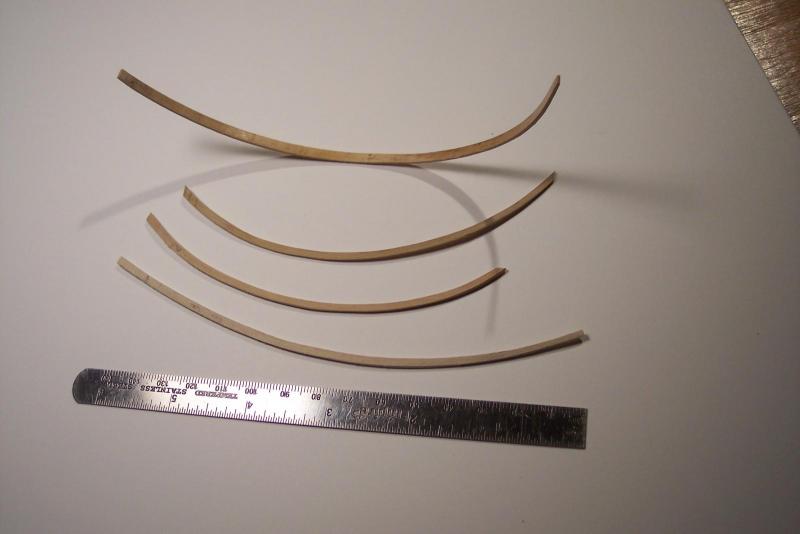
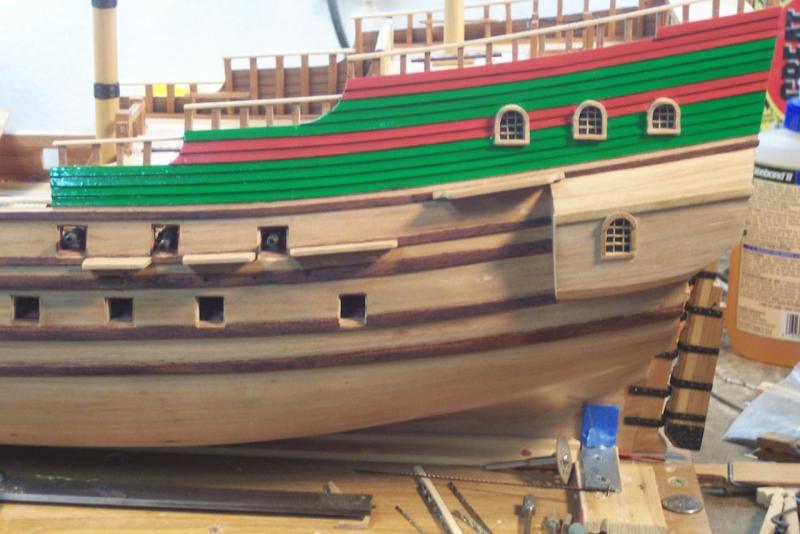
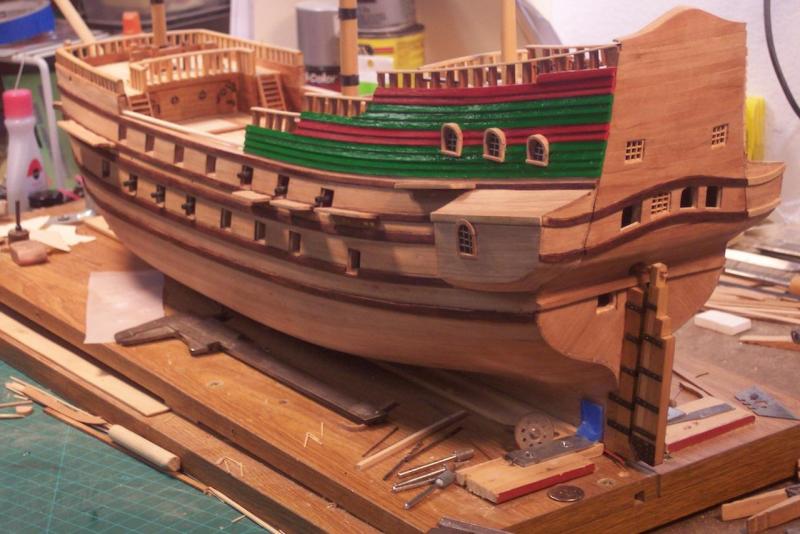
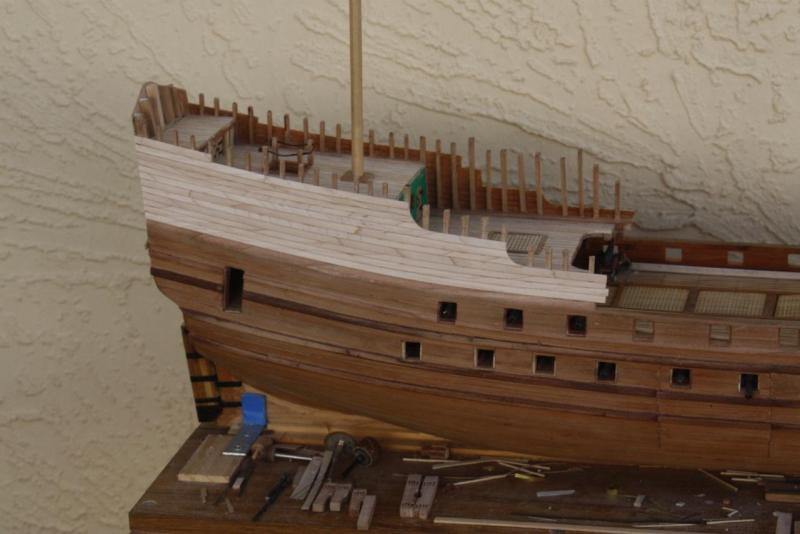
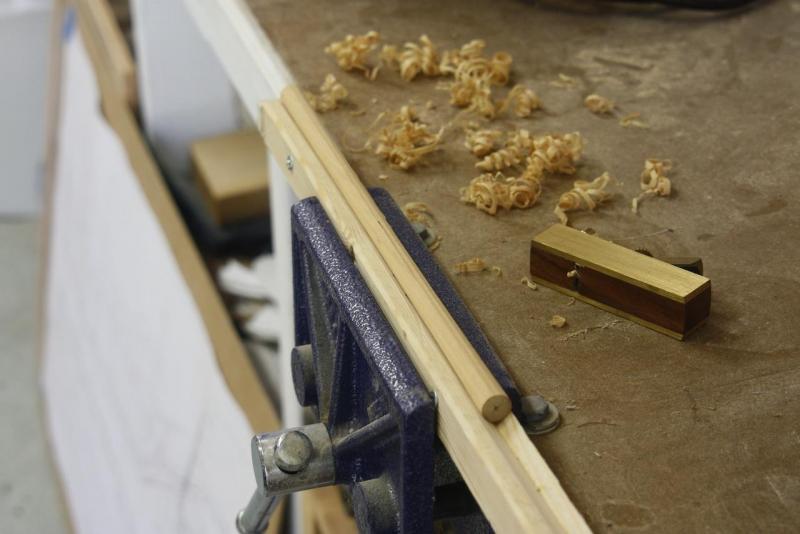
Installment 12. Port side view aft. The Sura and Buaya in combat. My proposed counter carving for my ship. This is based on the statue in front of the Surabaya Zoo. As a youth I visited that zoo many times, we lived about half an hour walk away, a very nice part of the city. Installed the haws protective plates and temporarily tacked in the hawse cables. Removed the catheads because they are in the way of installing the head railings. After breaking a few boxwood strips trying to bend them I finally managed to get six bend. Bending them against the thin edge side was not agreeable with the wood. Here is the top one temporarily clamped on for a visual look. Head railing pieces, for the starboard side. Head railings installed, anchor catheads removed, new ones to be made to it. Cheers,


-
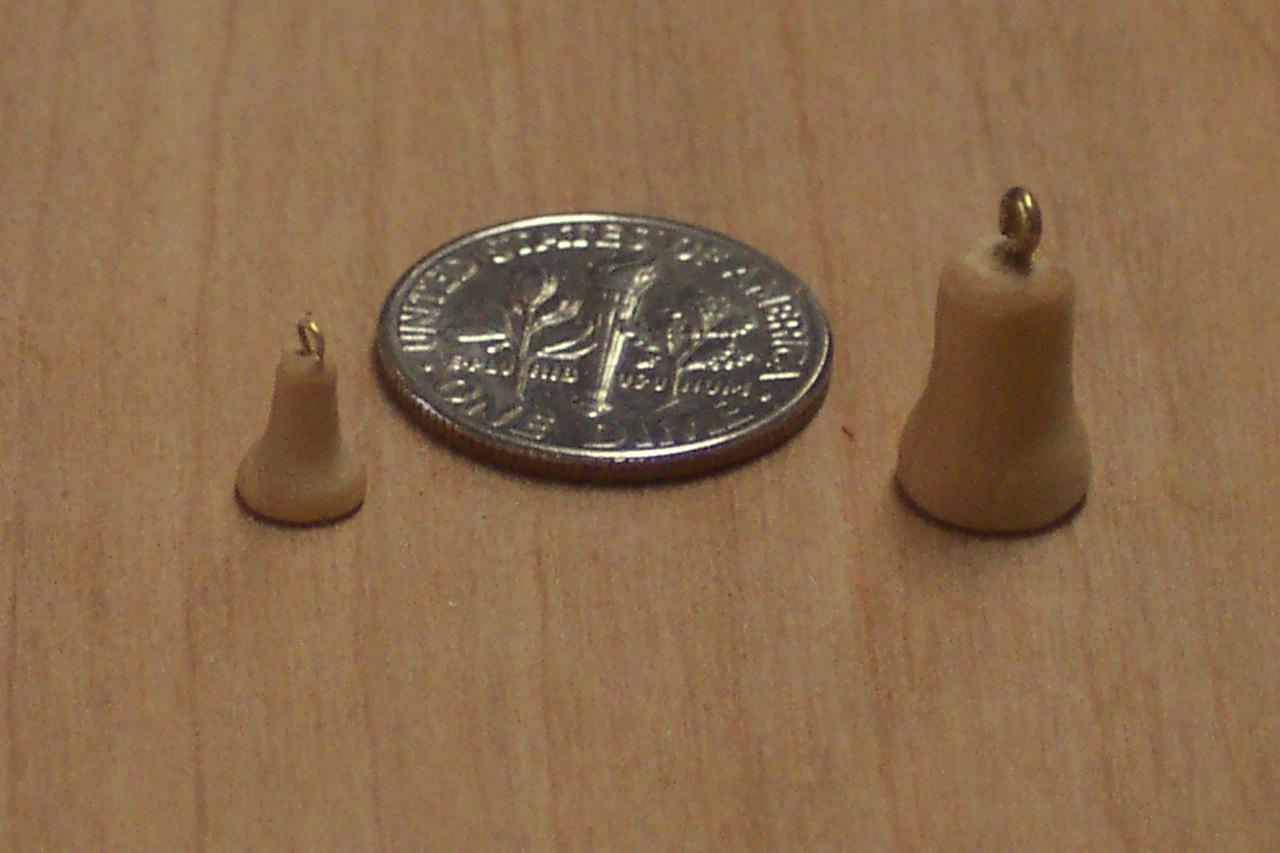
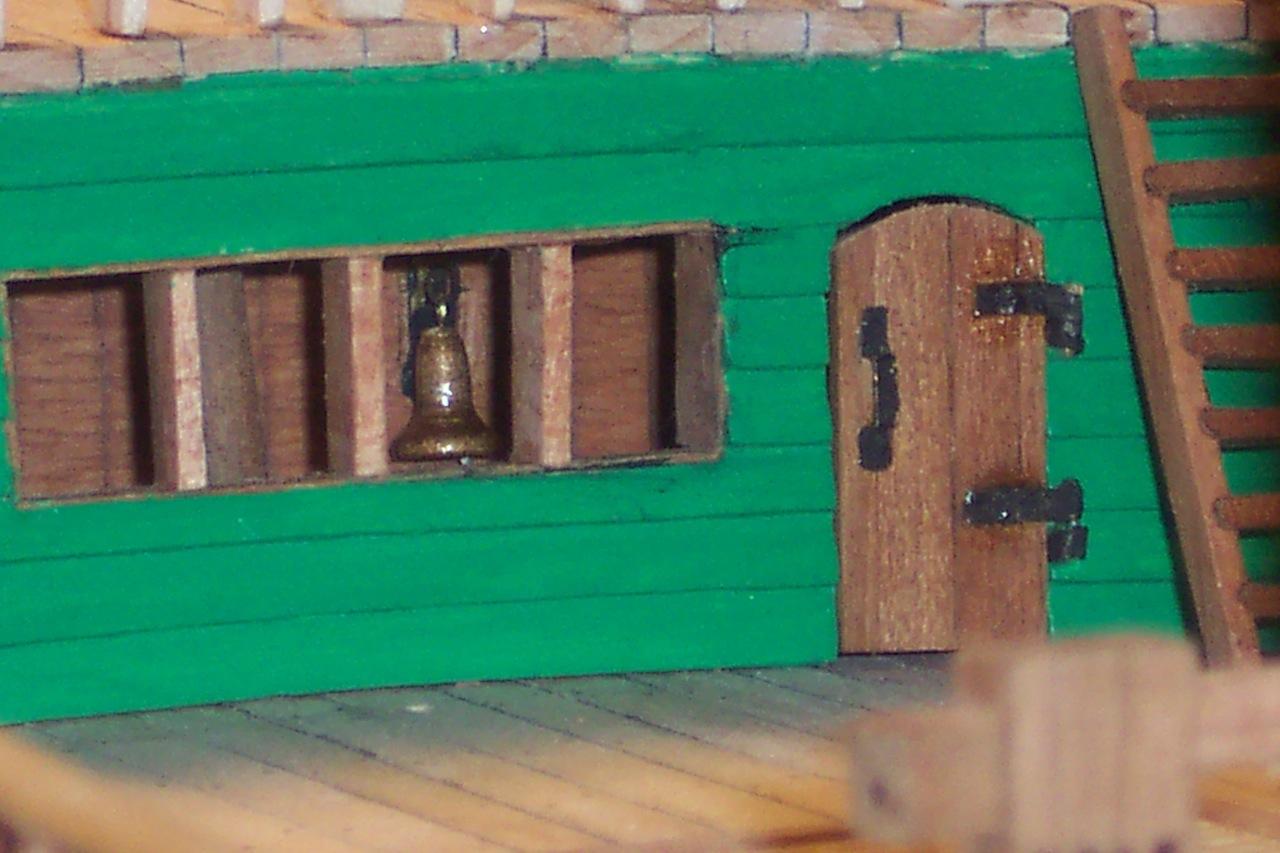
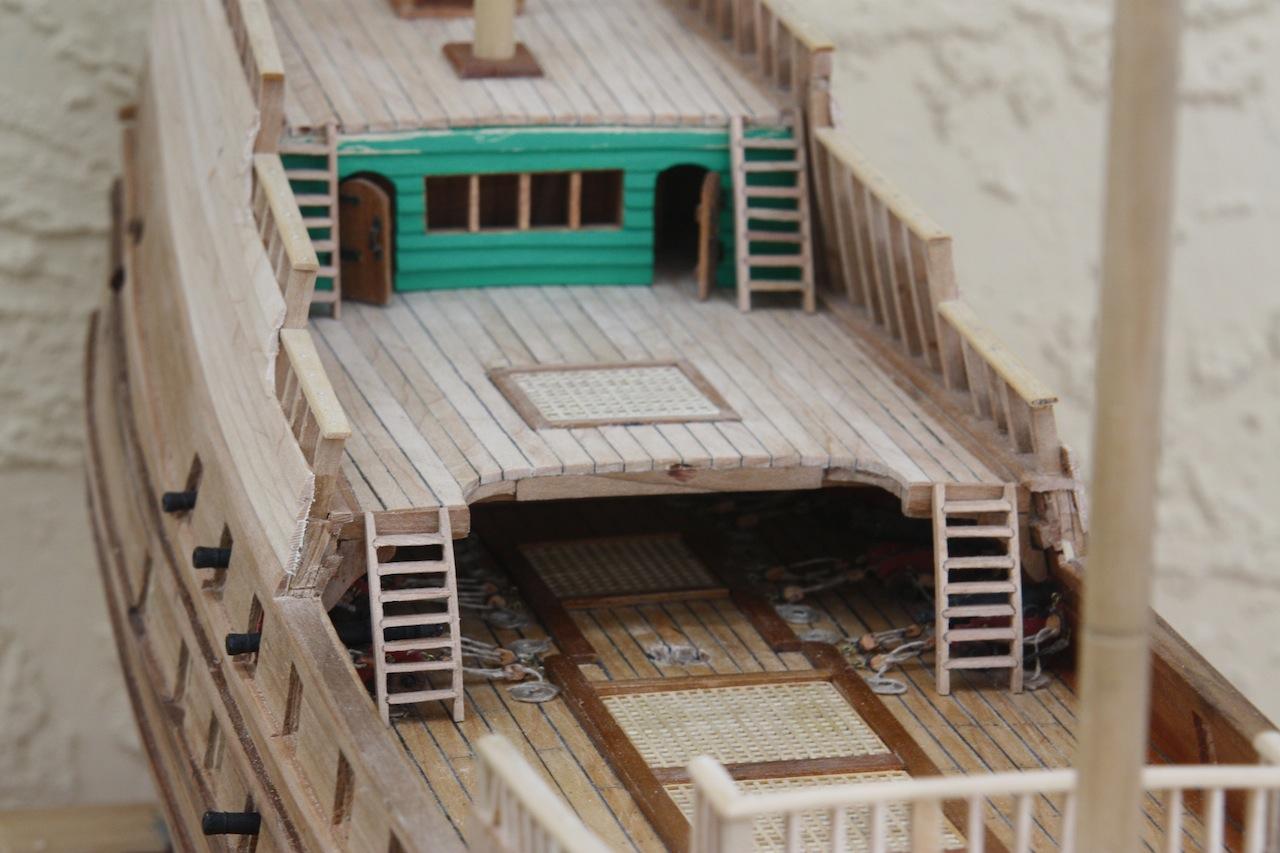
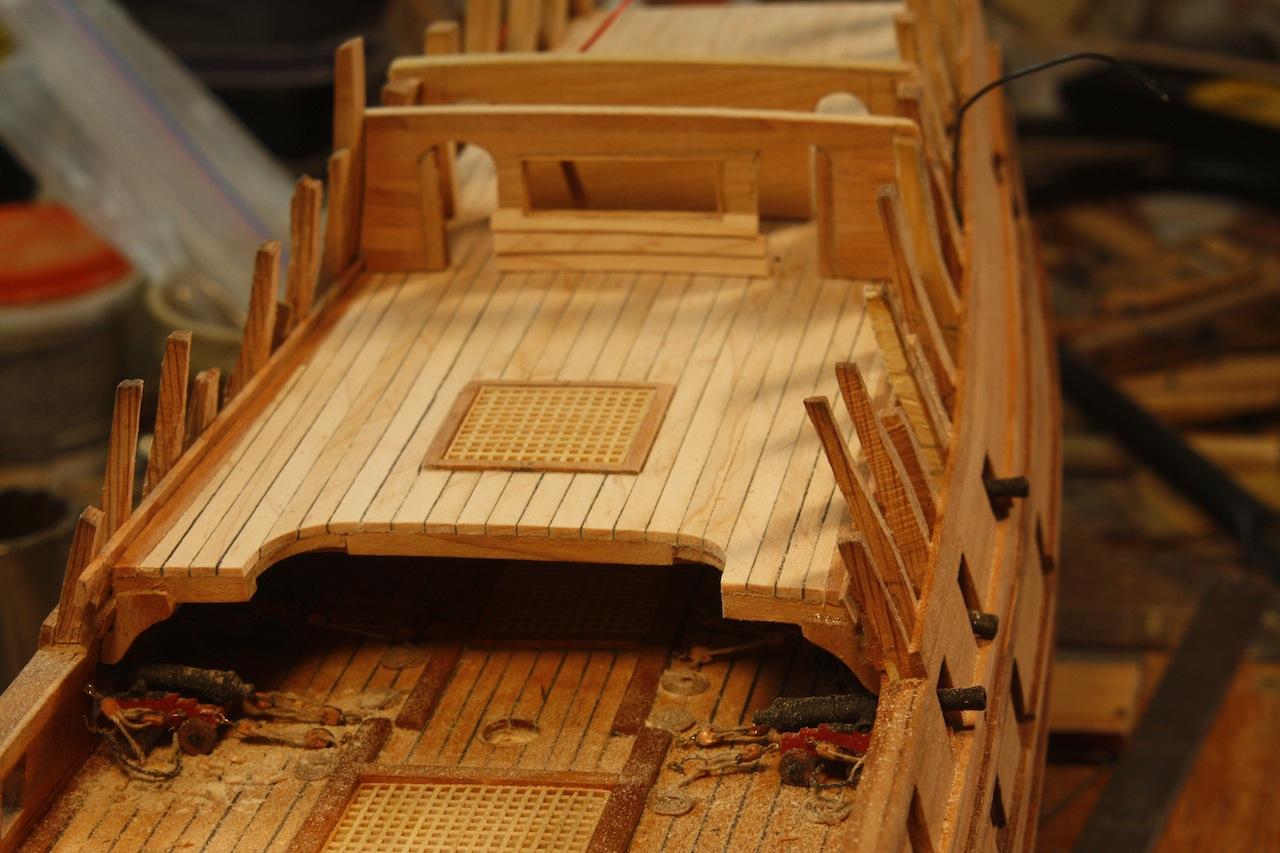
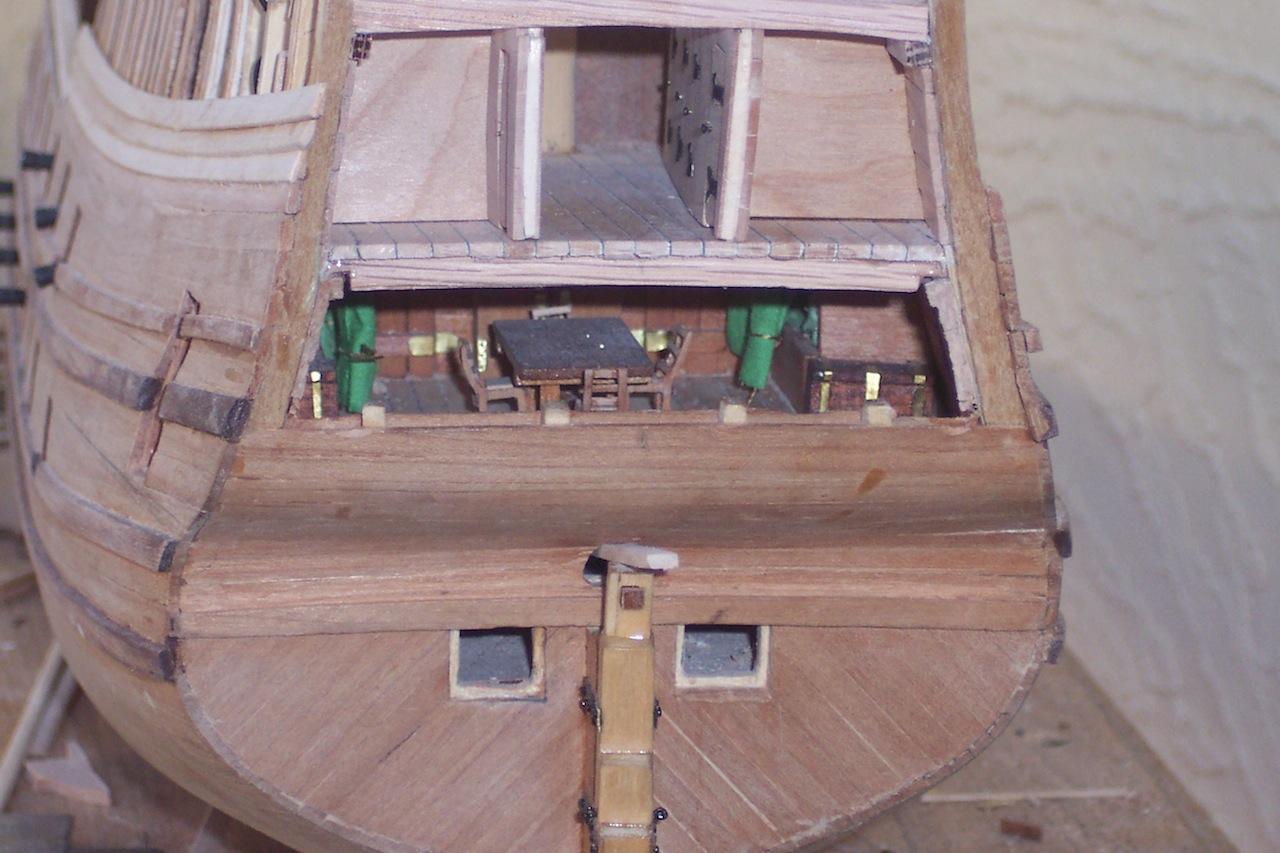
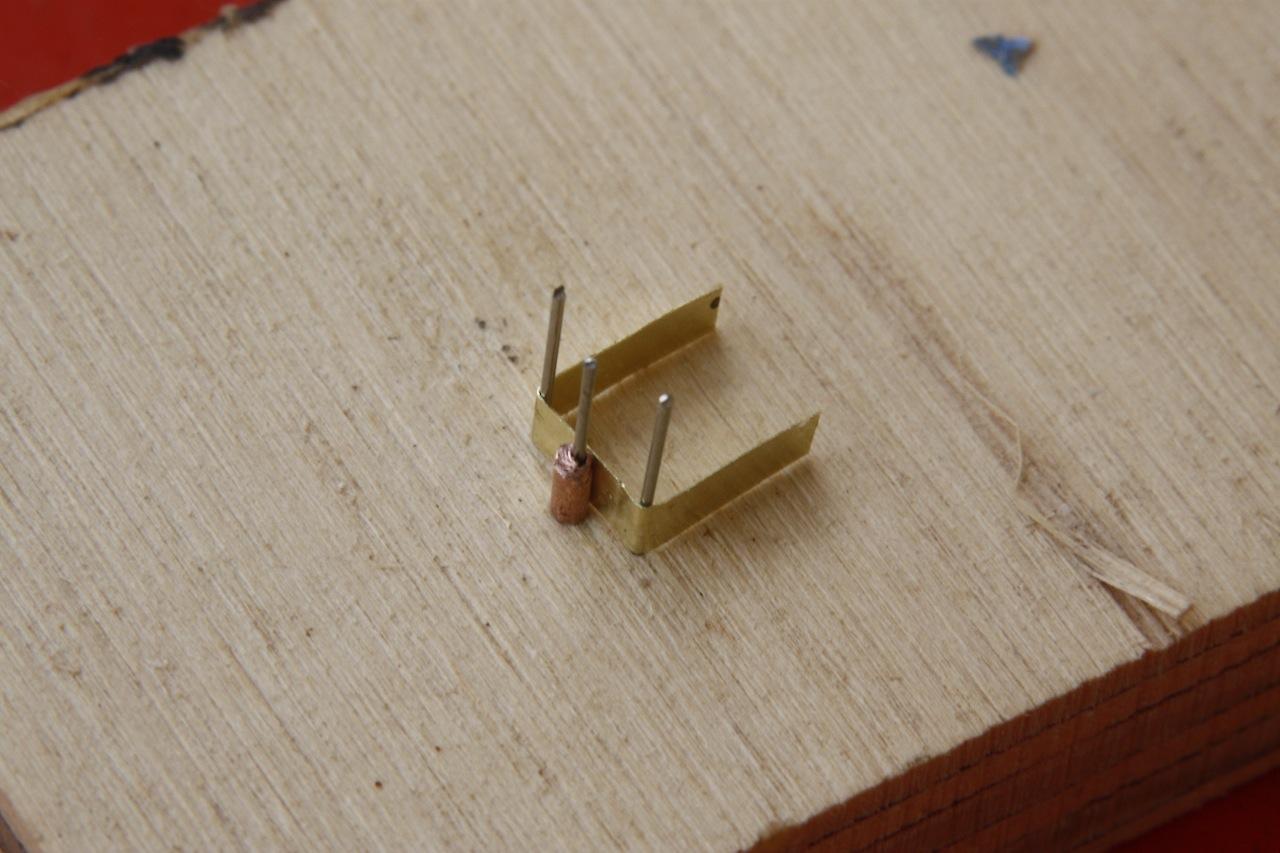
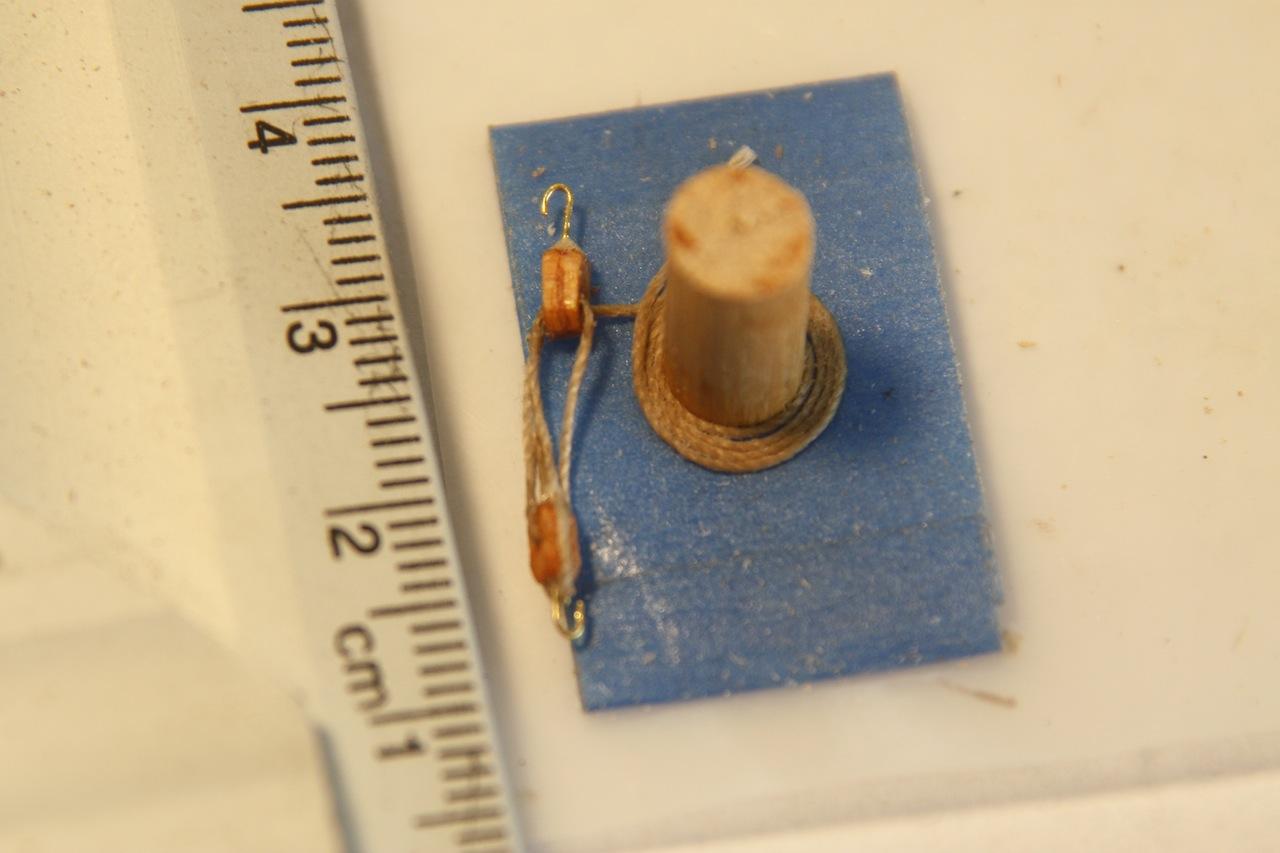
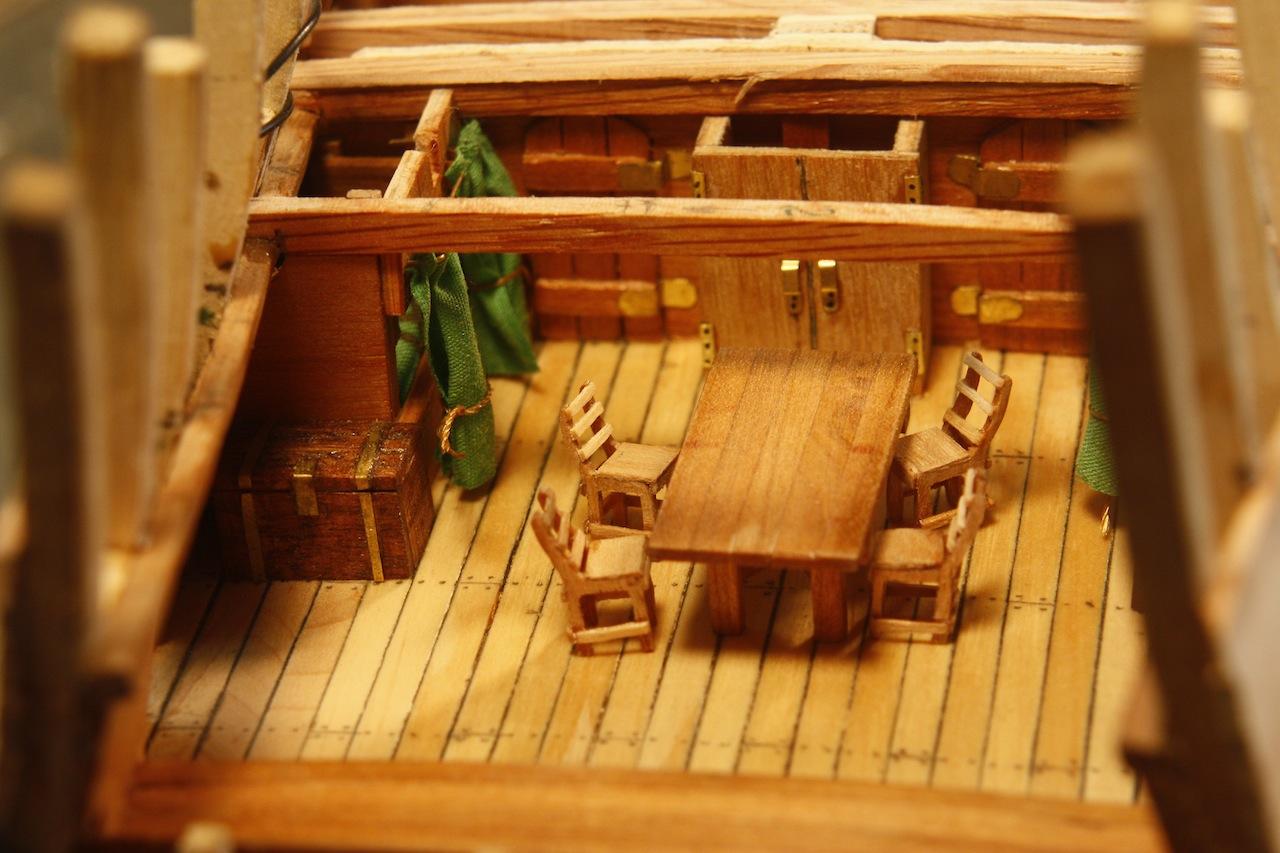
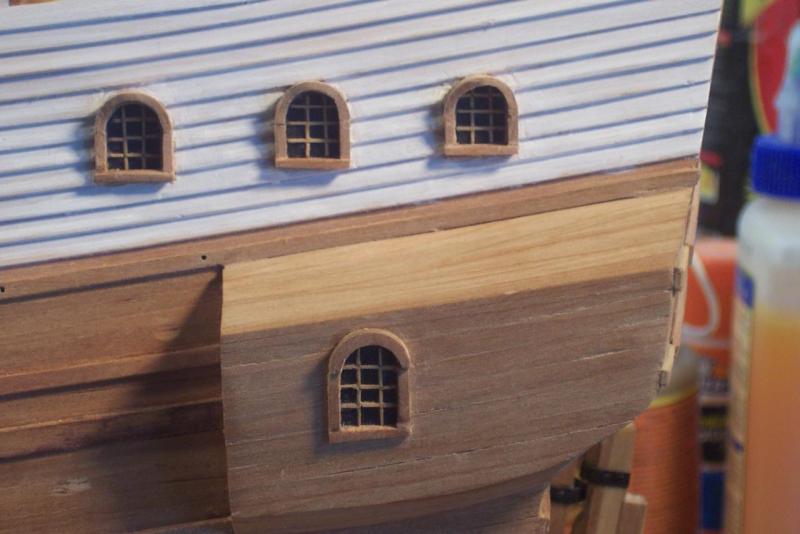
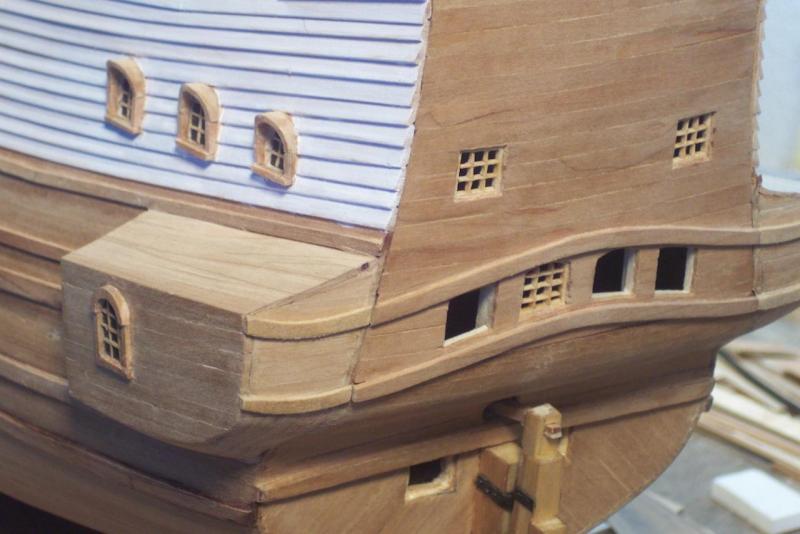
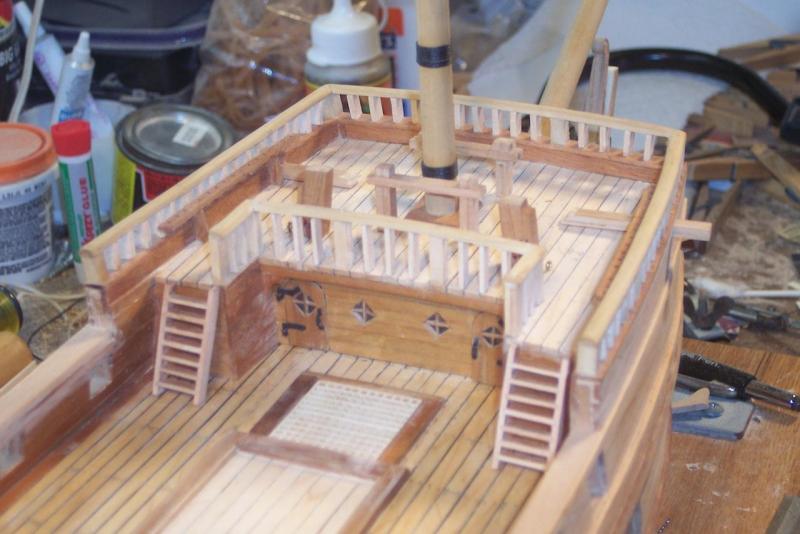
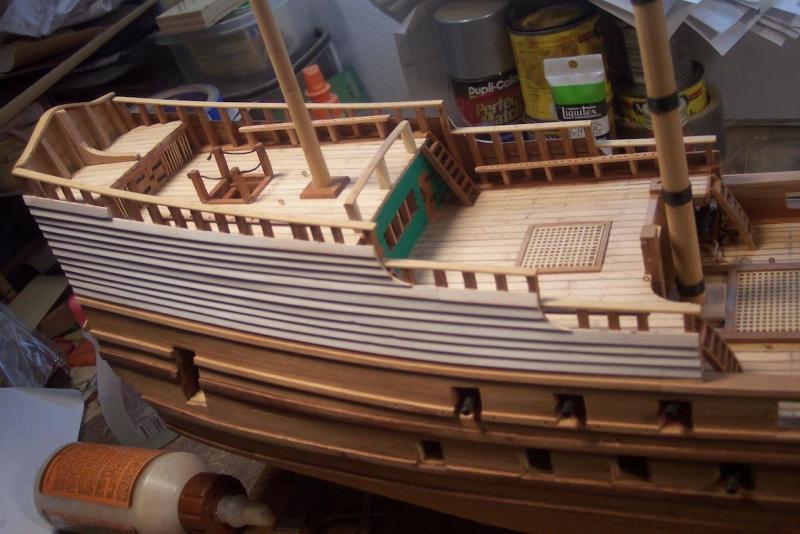
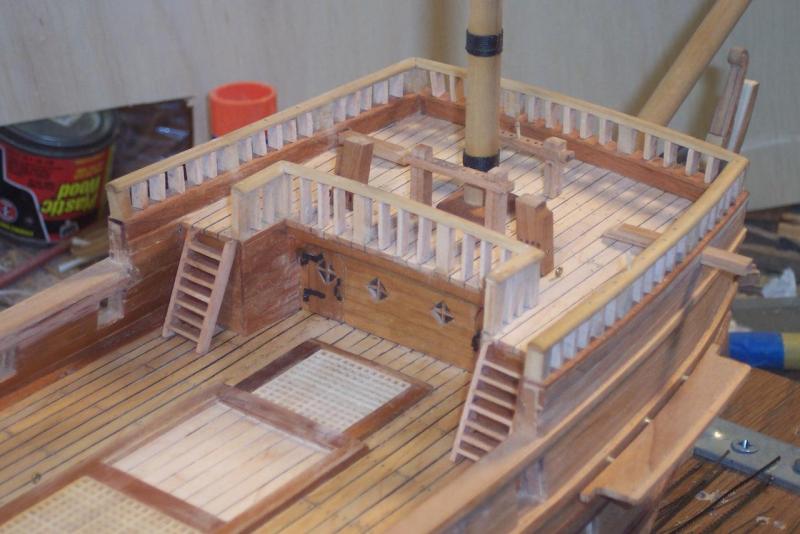
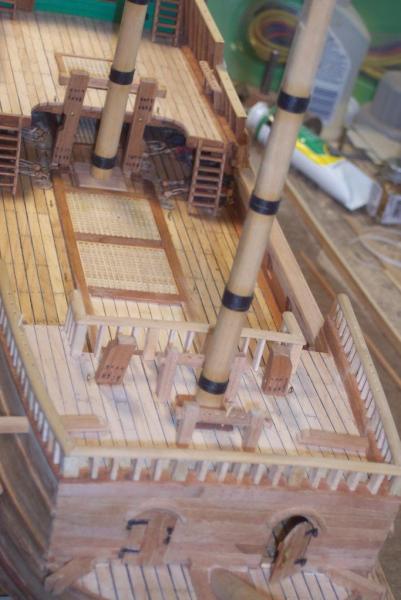
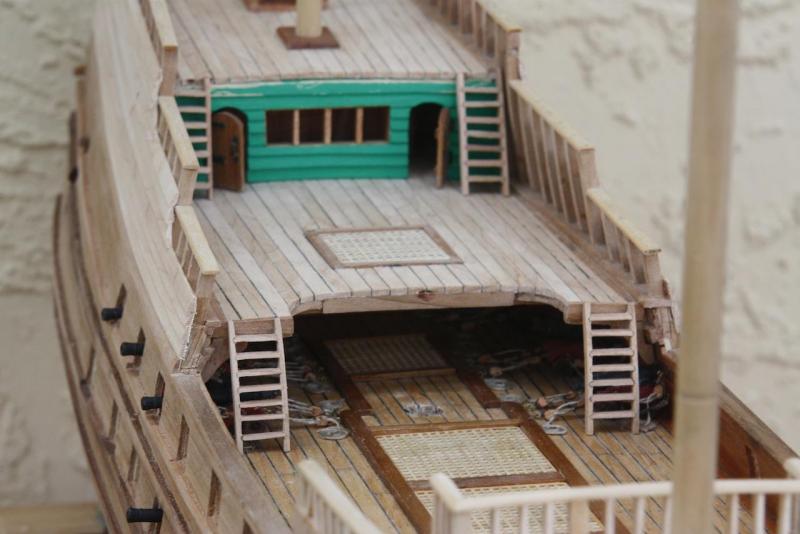
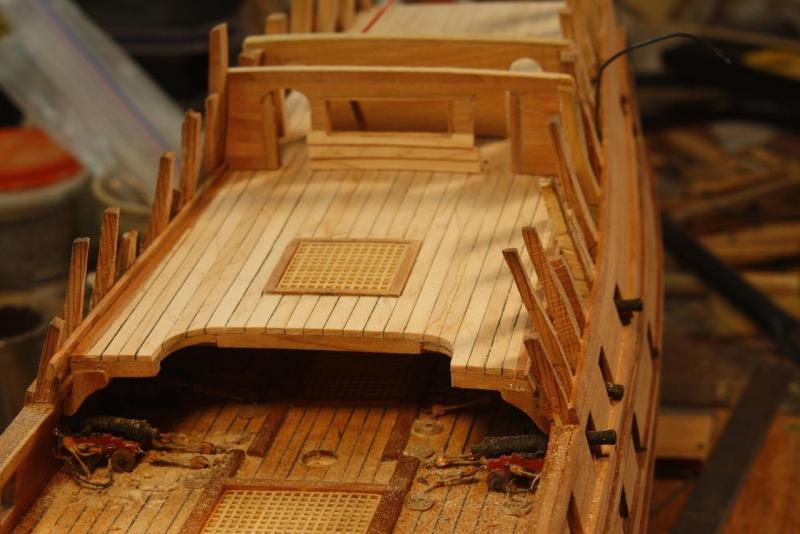
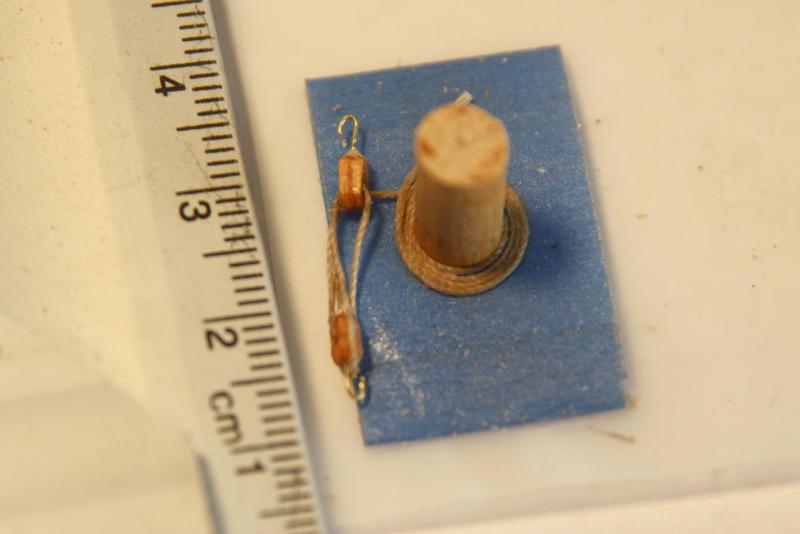
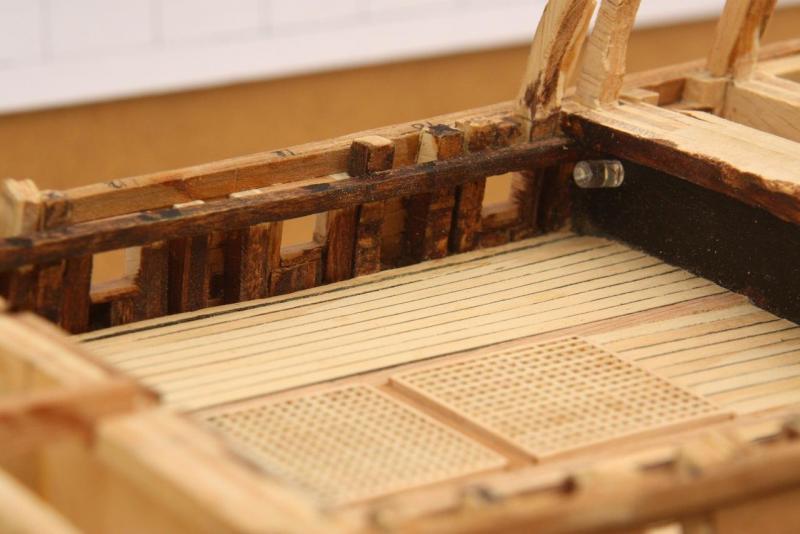
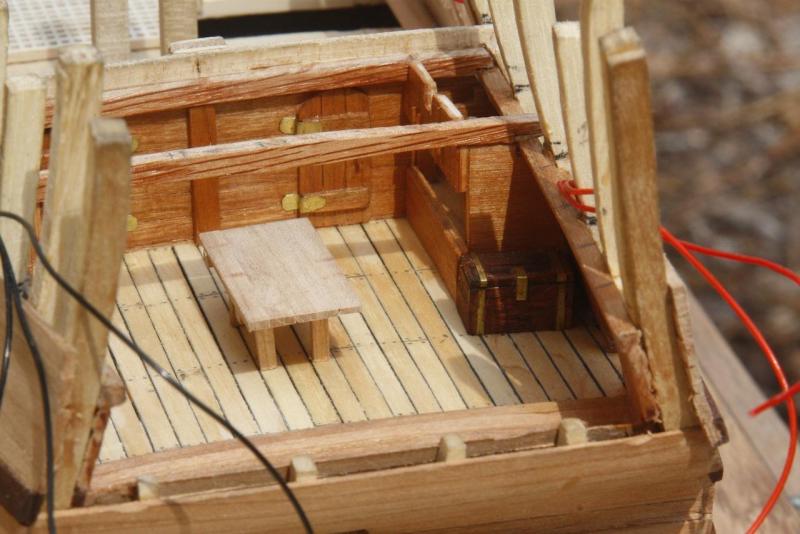
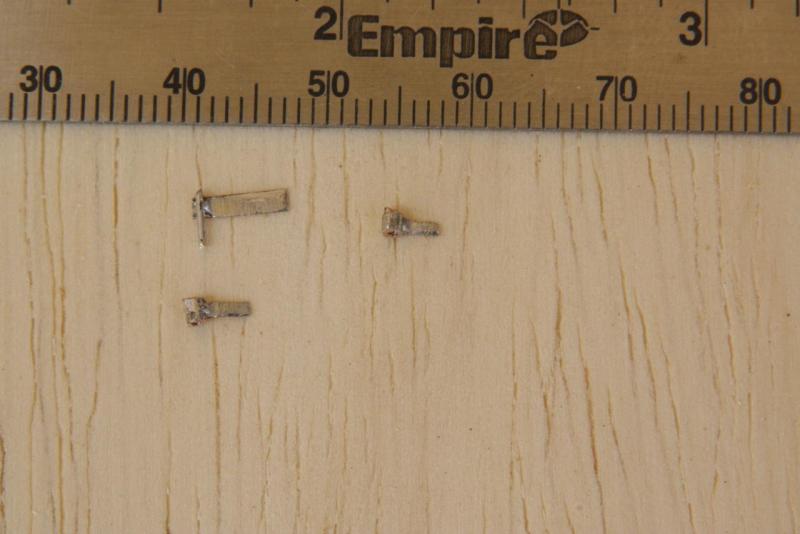
Installment 11. Some discussion about the ship’s bell. Amateur Jan thought they definitely had one and hung in the helm’s man location. Tried my hand at it on my DB-200 Unimat but it was way too large. I made a second one and it seemed right. I managed to install a hook in helm’s man quarters and in trying to hang the bell it dropped down through the helm opening into the bilges below. I made a second one and after closing the holes it mounted without a hitch. A US dime is 7 ½ mm in diameter. The ship's bell hanging in its place. It even has a clapper. Started to install the side galleries. The windows for the captain and officer/passenger compartments are here cut out. side gallery work in progress. Side gallery and windows for the officers/passengers cabins completed. Working on installing window pain muntings. Painted the clinker planking, installed the main and mizzenmast chain plates. Port side view looking forward with the chain plates installed. I had to replace the mizzenmast with a slightly taller one so the shrouds would miss the poop deck railing. Cheers,


-
Installment 10. Remade mainmast knightheads, installed woolings on foremast, installed railing on poopdeck. Remade and installed knightheads for foremast. Mainmast with woolings. Foremast with its knightheads and fife rails. Here observe the belaying pin shelves that Amateur Jan suggests to remove and use the railing cap instead. This is done a little later on. Belaying pin rails on the quarter and poop decks. Here too Amateur Jan suggested to reduce them in length, which was done a little later on. mainmast chainplates Removed the forecastle pin rails and drilled pin holes in railing cap. Modified pin rails looking aft. Cheers,
-
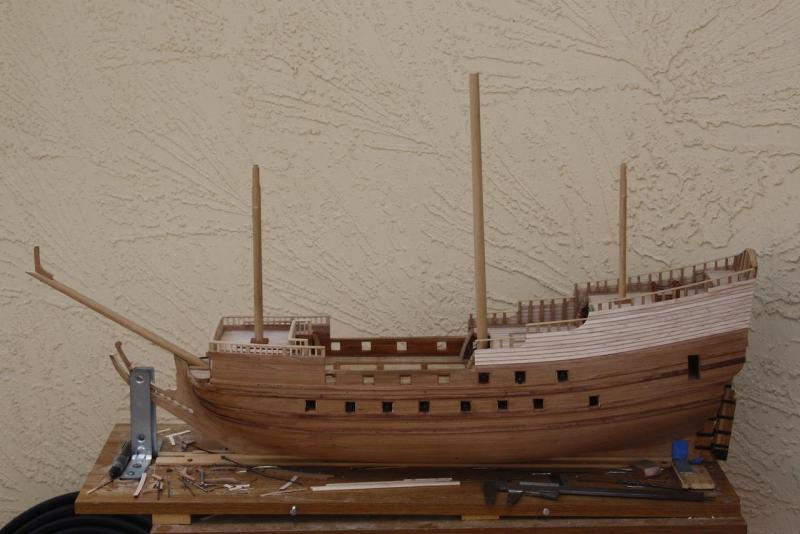
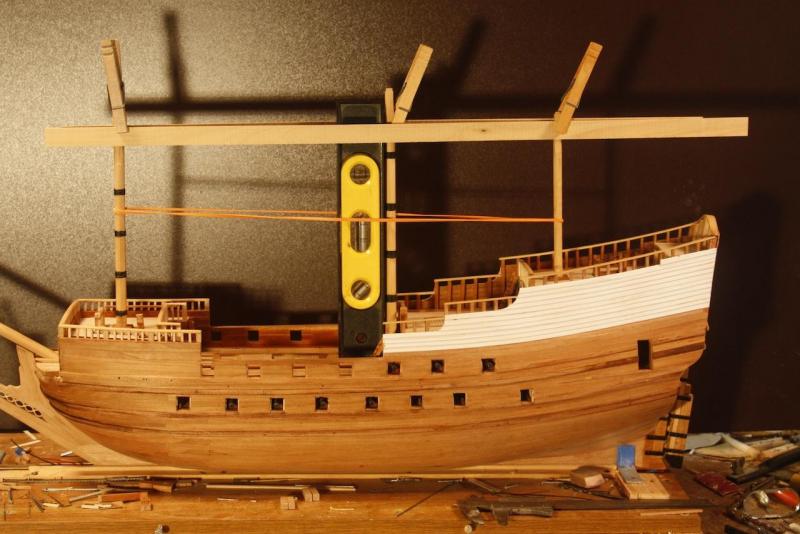
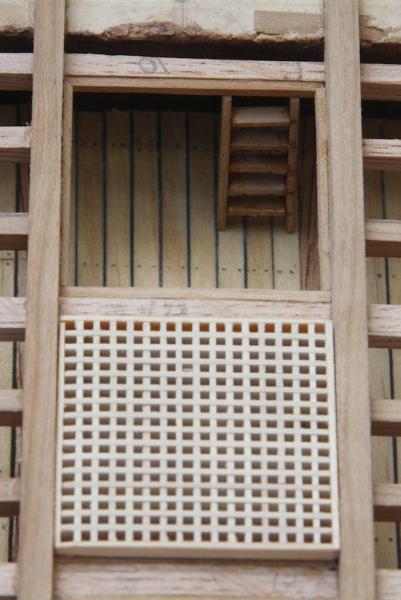
Installment 9. The (controversial) stairwell to the officer and passenger area and the animal coop. the (controversial and unorthodox) poop deck stairwell completed. Starboard side view of aft clinker planking. Ready for the frames to be cut to proper length and capped. Starboard side view showing all railings completed and ladders/stars from spar deck to quarter deck and from quarter to the poop deck. Port side view of ship with mainmast temporarily put in place. Checking main mast for true. Amateur Jan commented that the masts had a 2 degree aft rake, too late for me to correct but I won't tell anyone ;-) Cheers,

-
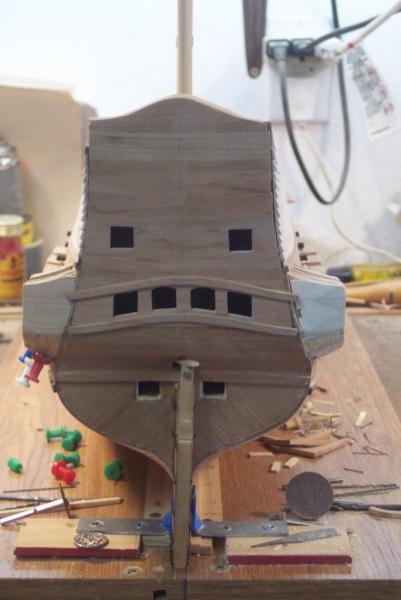
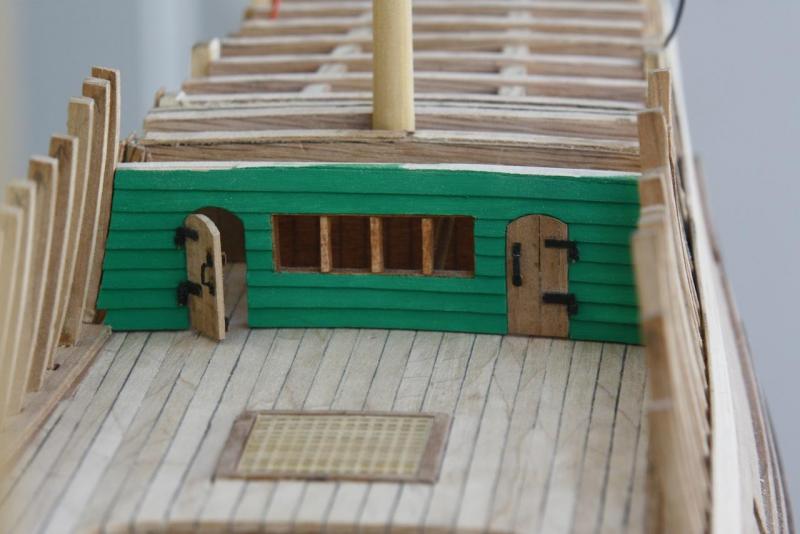
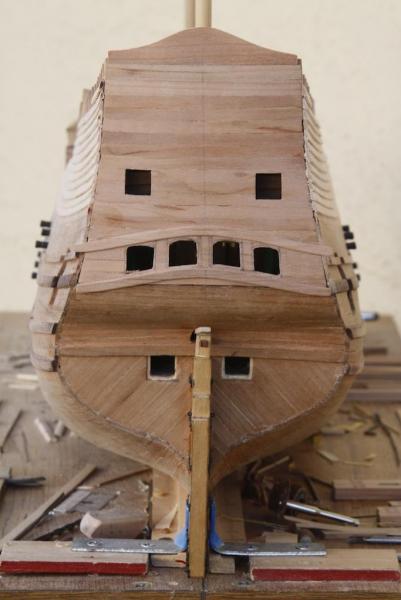
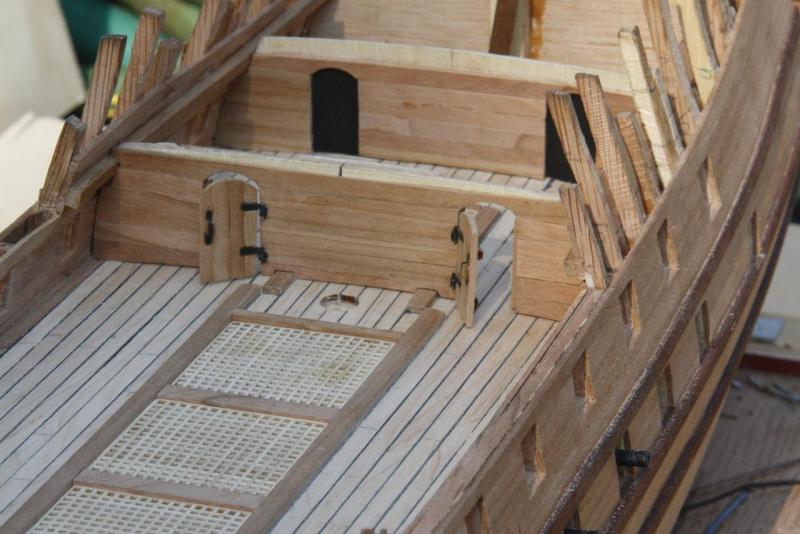
Installment 8. Rudder installed with blackened hardware. Helmsman bulkhead being clinker planked per Amazon Dirk’s suggestion. Close up of helmsman's painted bulkhead. Poop deck deck beams installed and officer's quarters made. The last two will be furnished. Officer's and passenger’s quarters roughed in. Sides of the quarter deck and poop deck in the process of being clinker planked. Paper pattern for the counter in temporary position. The removable counter / achterspiegel is semi completed and fists snug. Cheers,

-
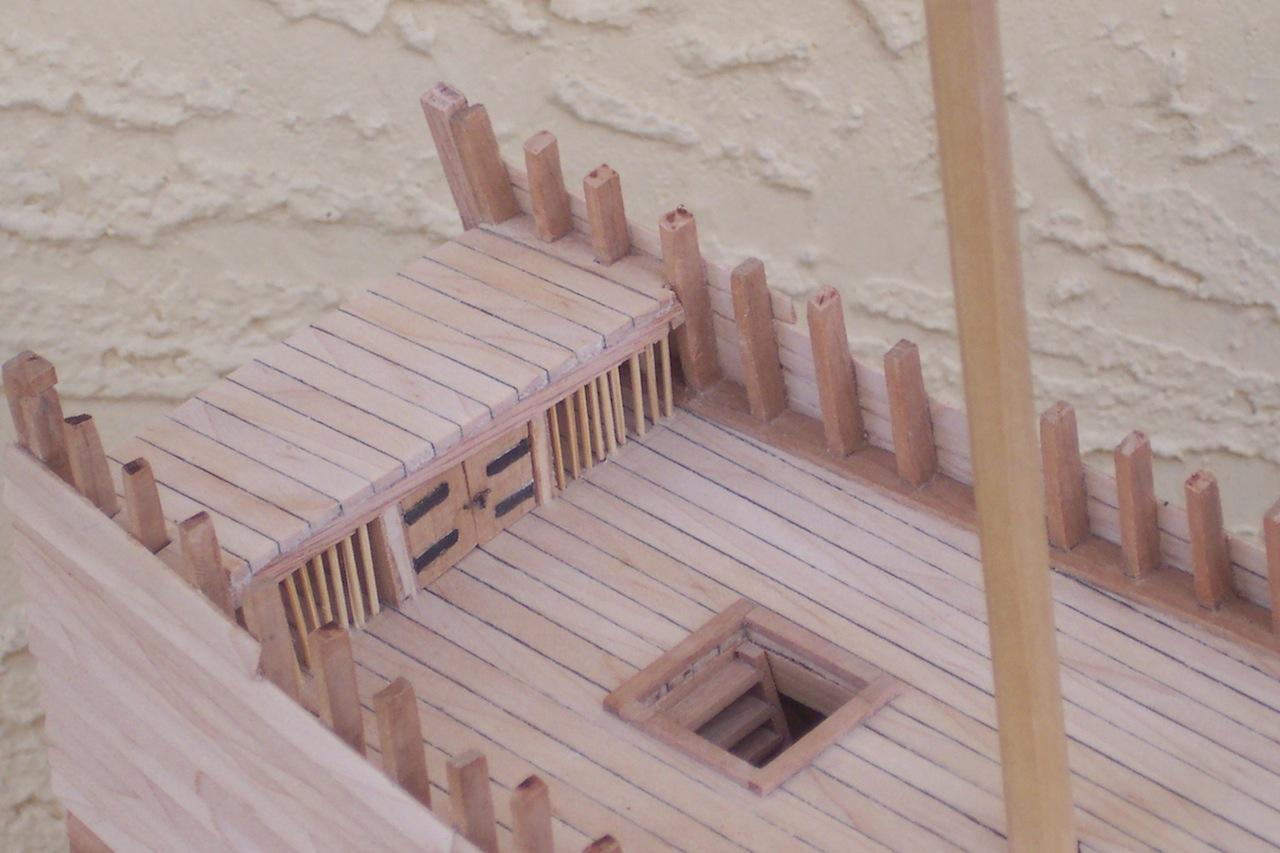
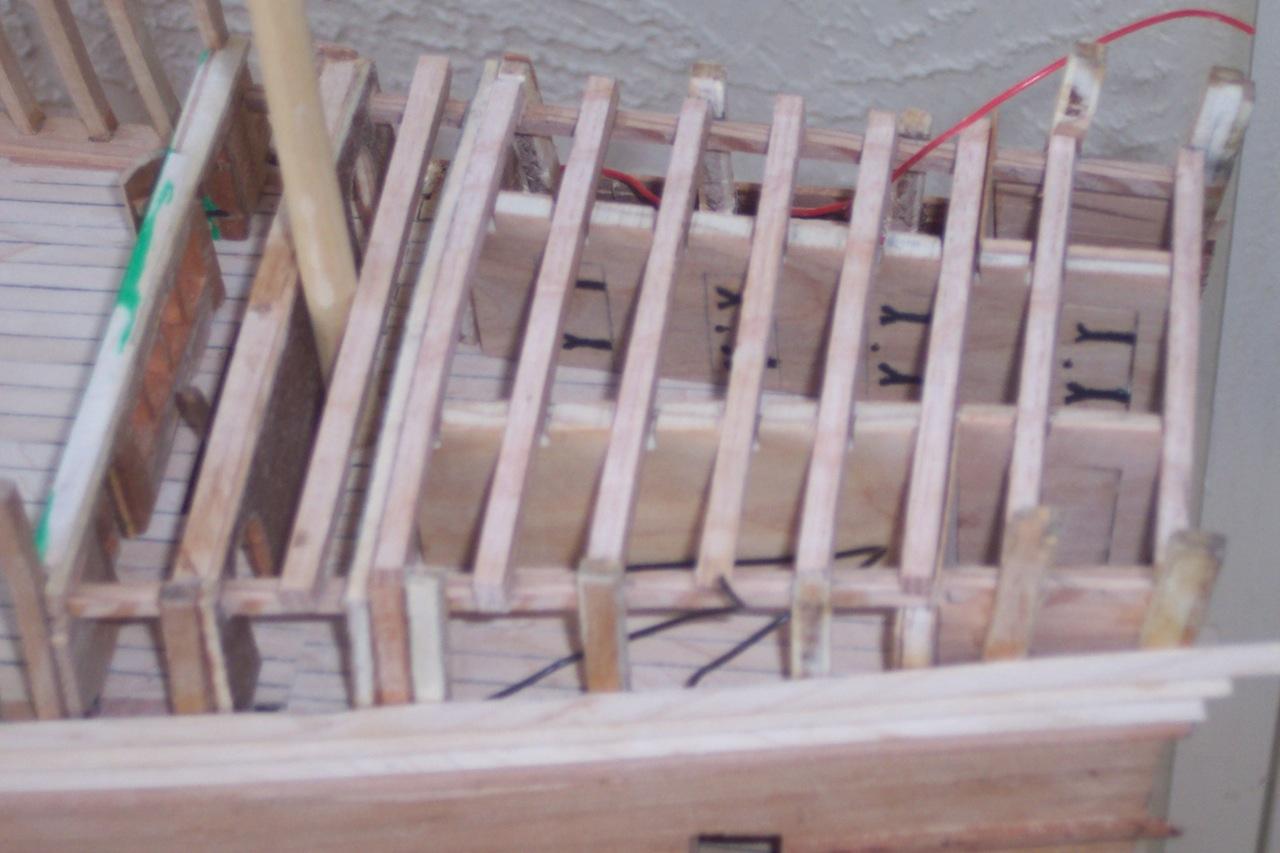
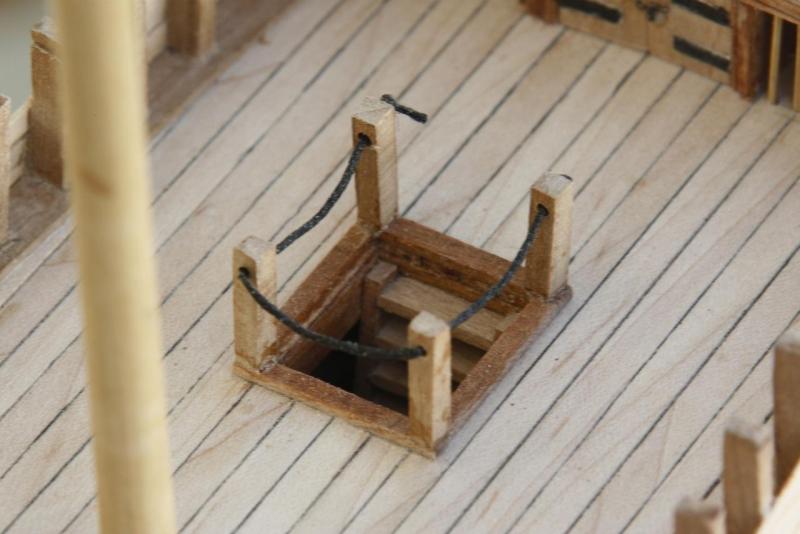
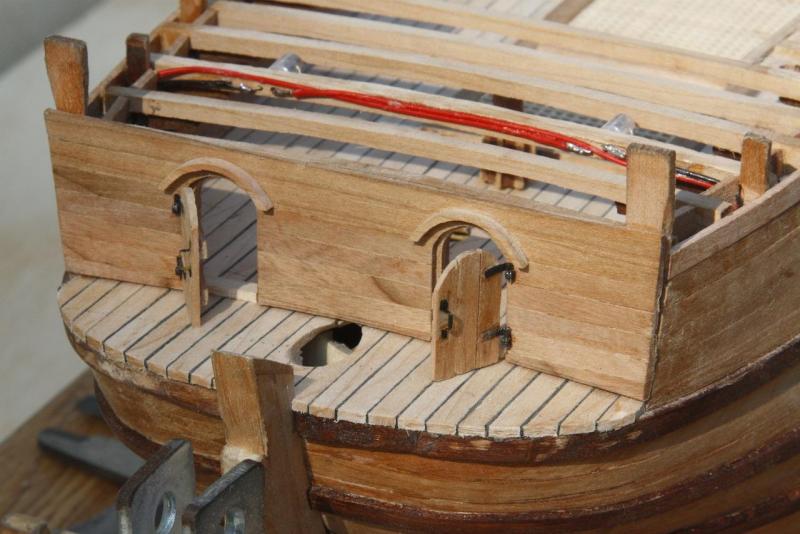
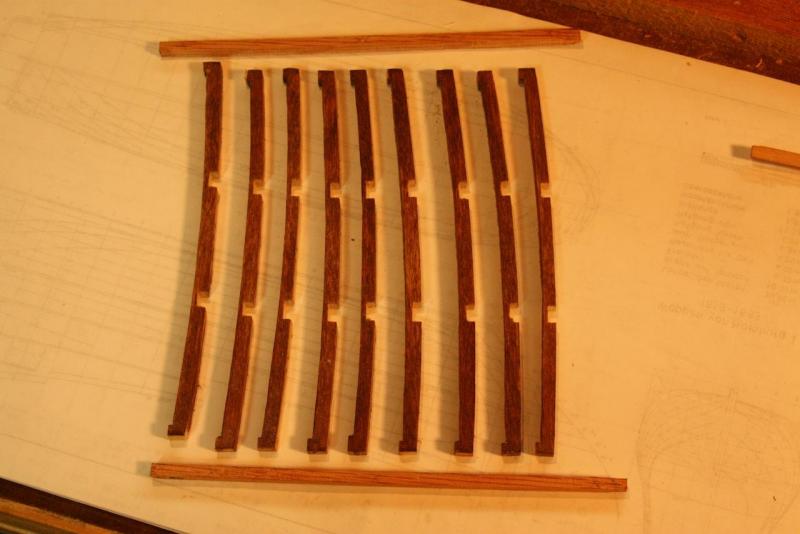
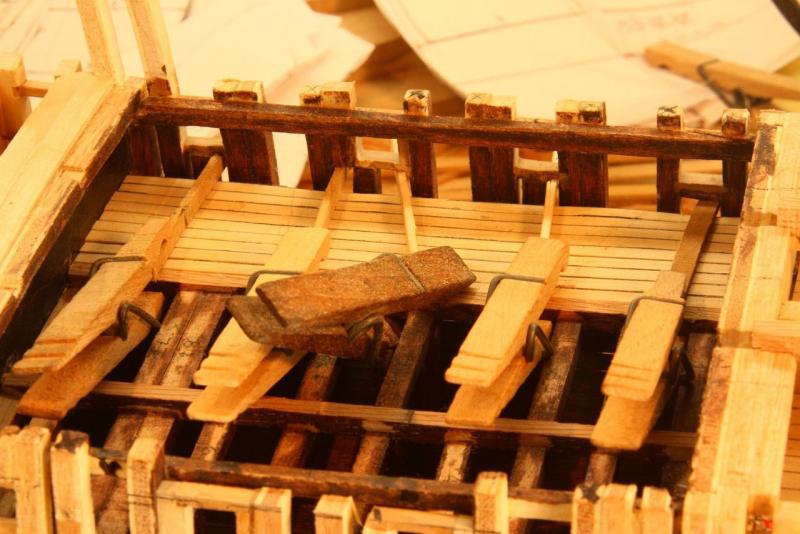
Installment 7. Bird’s eye view of quarterdeck with grate, helm bar installed but not hooked up to rudder bar. Aft quarterdeck deck framing being fitted. Foremast shroud channel being checked. It needed to be a little wider to accommodate the deadeyes clearing the railing. Rudder, build up of 3 pieces of cherry, with rudder bar fitted. Pintel and gudgeon soldering jig. Rudder hardware ready to be blackened and installed to rudder and sternpost. Forecastle bulkhead completed with clear plastic window glass, ready to be glued in. Aft forecastle railing being installed, Amazon Dirk commented it being too high; it should only be 1 voet. I like to have it at 3 voet to accommodate the planned extra 6 pounder cannon. Ladders made and installed, which were later removed, made thinner and reinstalled, railing knees installed and belaying pin shelves installed. Amateur Jan commented that VOC ships didn’t employ railing knees or belaying pin shelves. Belaying pins go into the railing caps. I removed the knees and shelves + drilled pinholes in the rail caps. Jan is my other Gentlemen Seventeen ;-) Cheers,


-
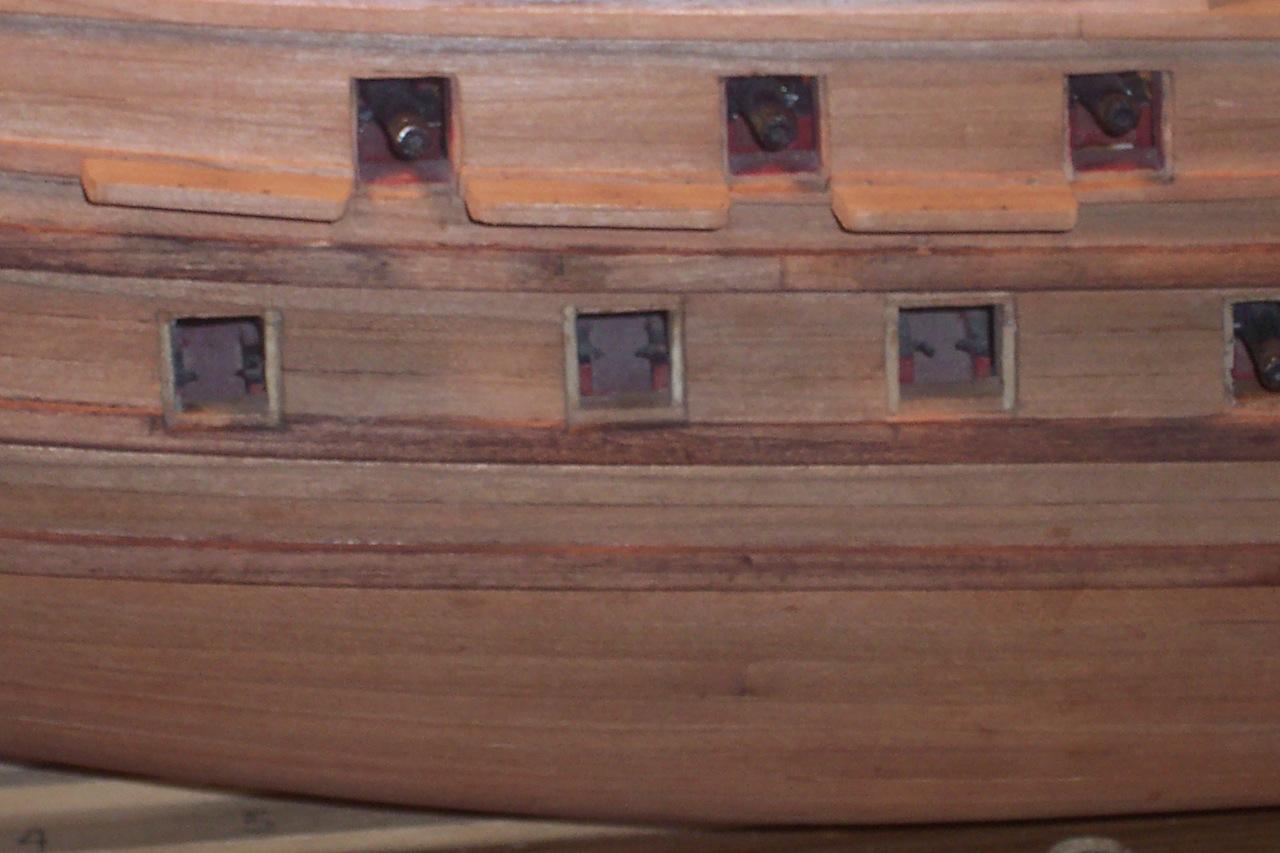
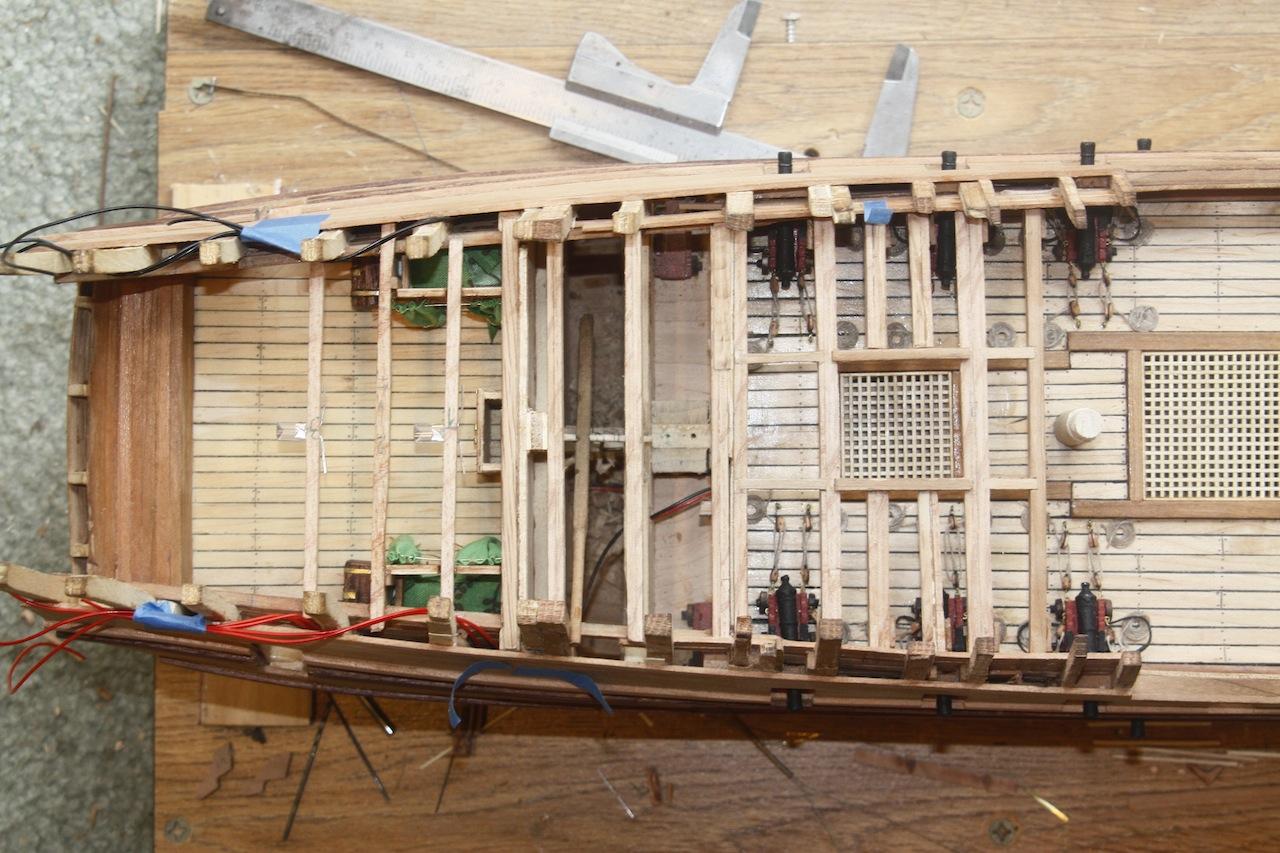
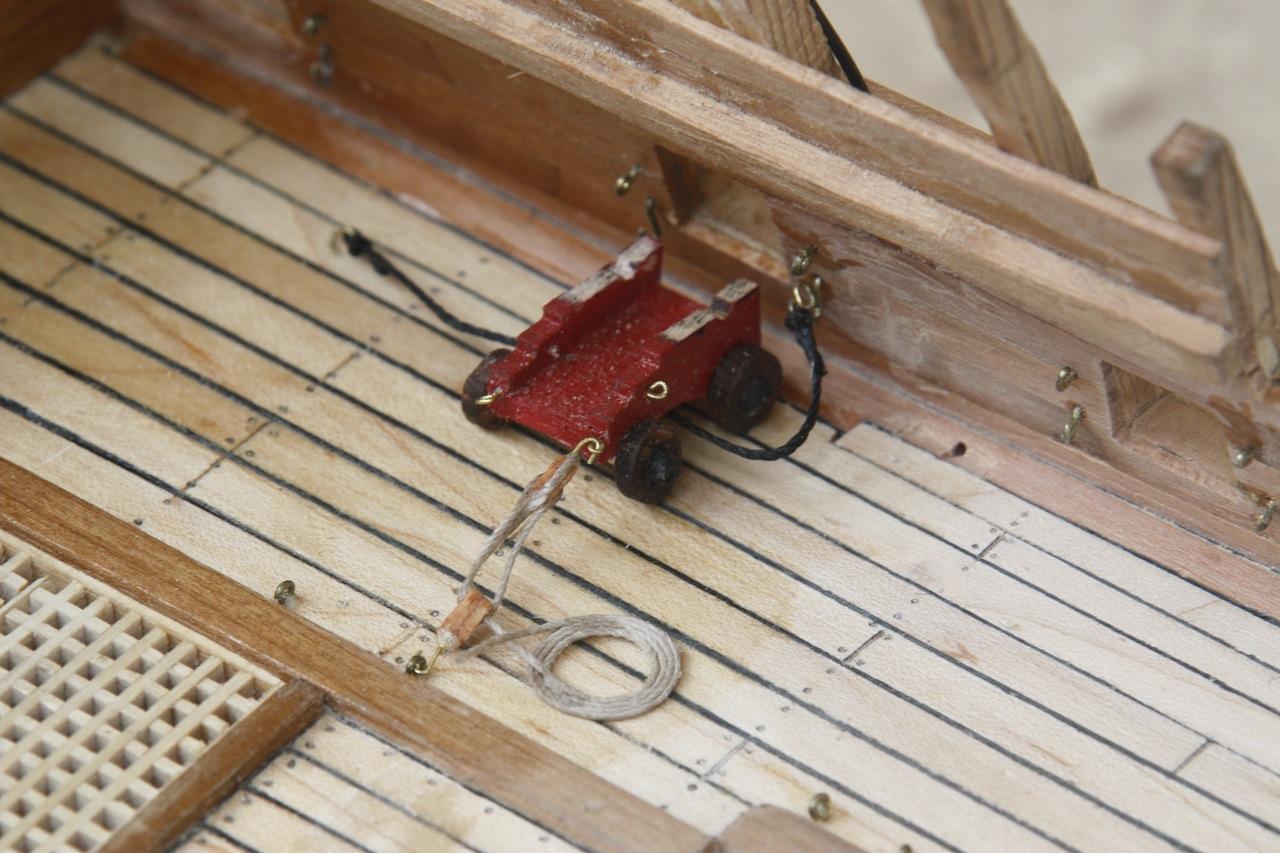
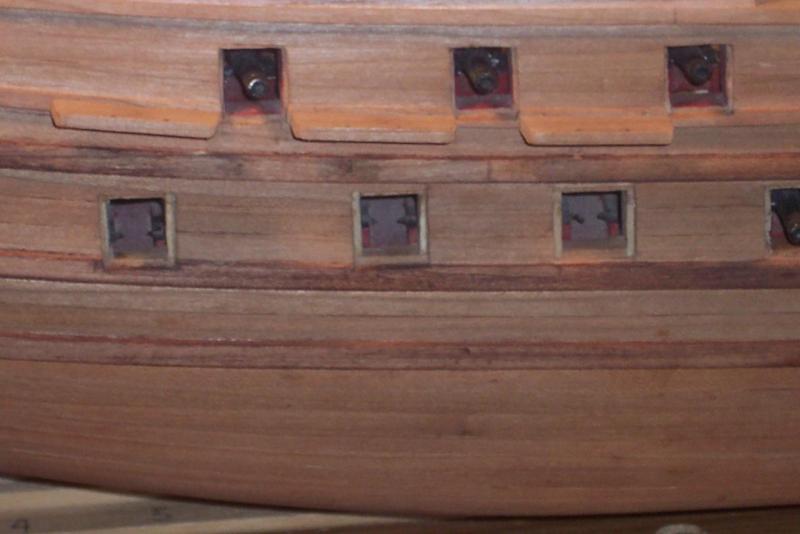
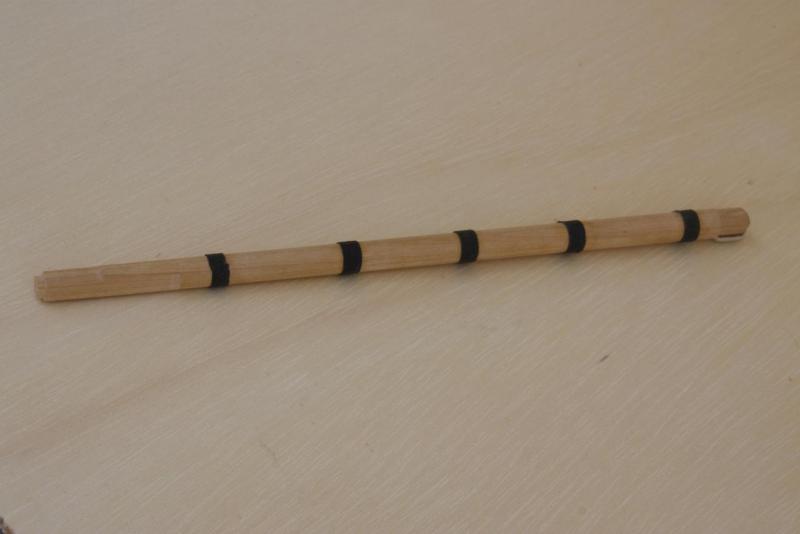
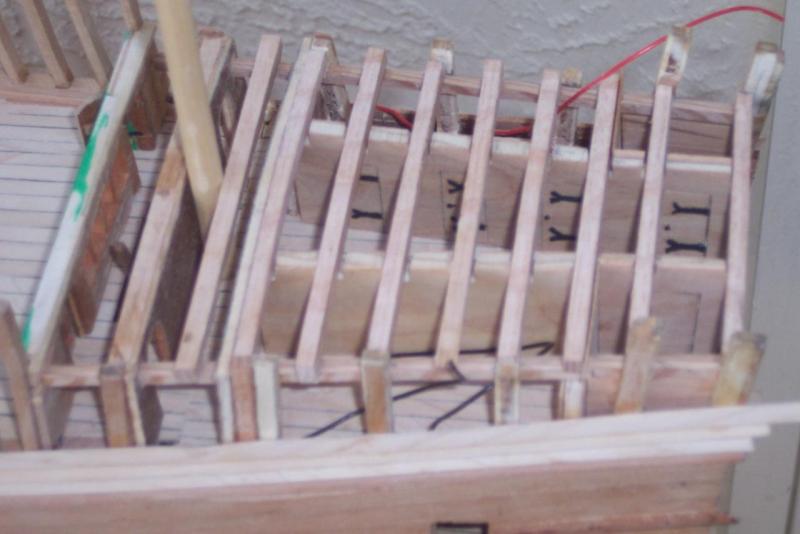
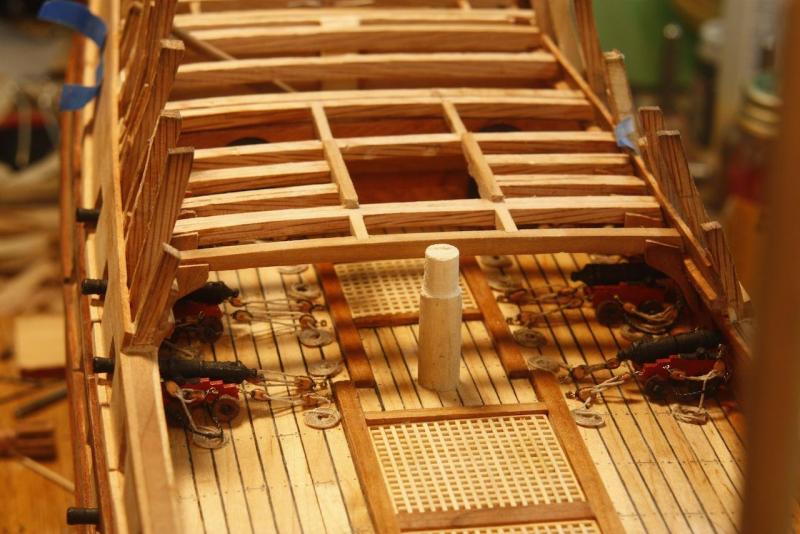
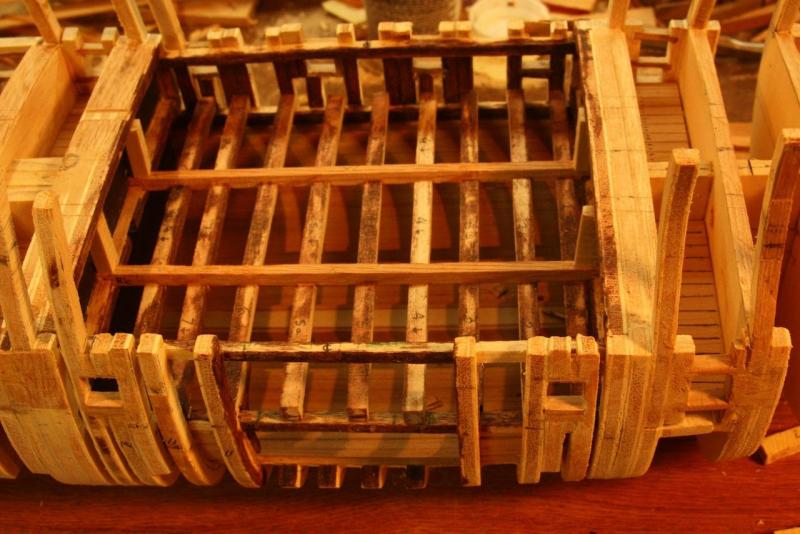
Installment 6. Mast buildup. Glued three strips of boxwood together to prevent warping of the finished mast. Mast being shaved round in mast jig. Final rounding and shaping will be done in a drill press with sandpaper. Jig for gun tackle. Aft gun tackle temporarily installed for demo purposes. Aft forecastle bulkhead being fitted. Fore mast is installed. Doors and windows are being made with clear plastic “glass.” Forecastle bulkhead completed, ready to be glued in. Yes, Amazon Dirk, I should have clinker planked it. I didn’t think about it at the time, but I did klinker plank the helmsman’s bulkhead though! Completed forecastle bulkhead glued in and sides planked. Spar deck is opened up, six 12 pounder guns installed with tackle, quarter deck deck frames installed, bad hull frame extensions replaced with new ones, quarter deck grating framing installed. Cheers,


-
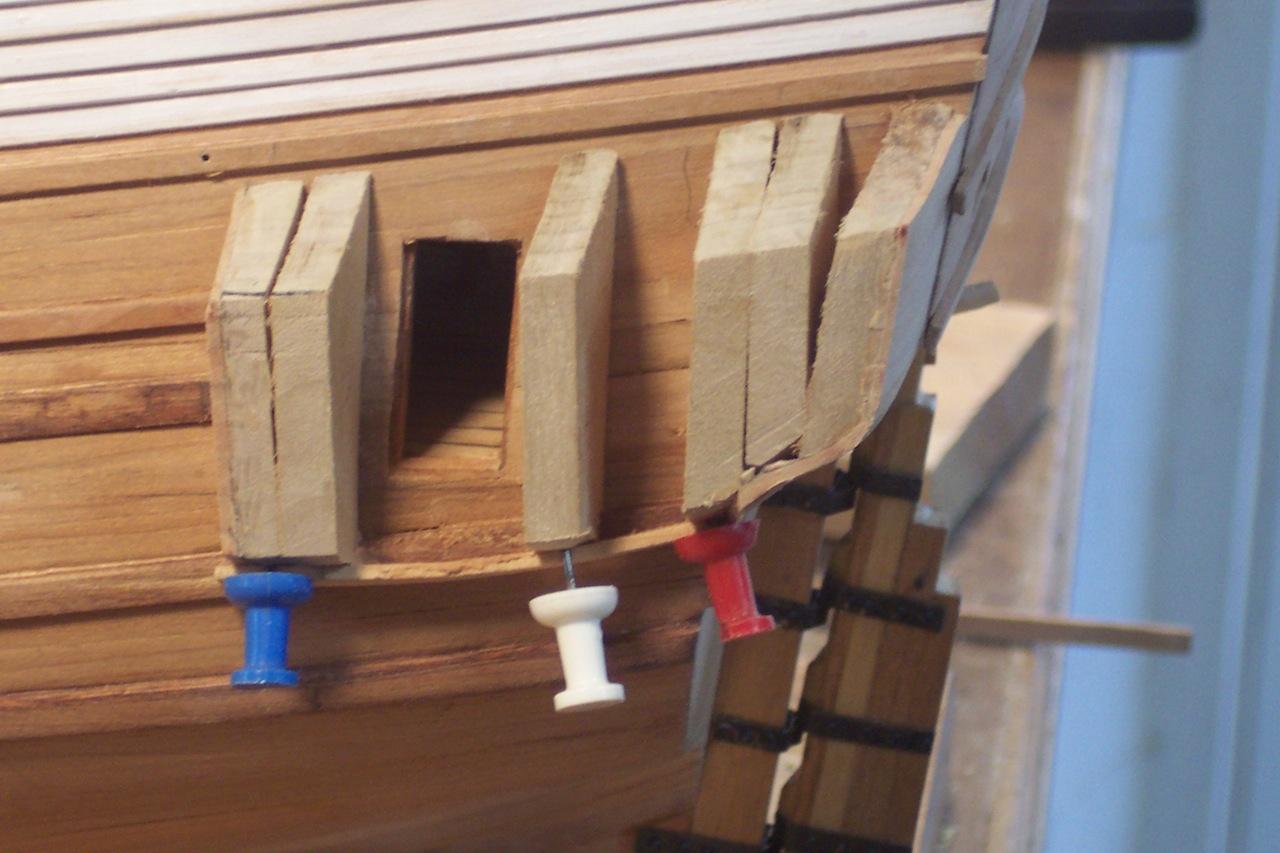
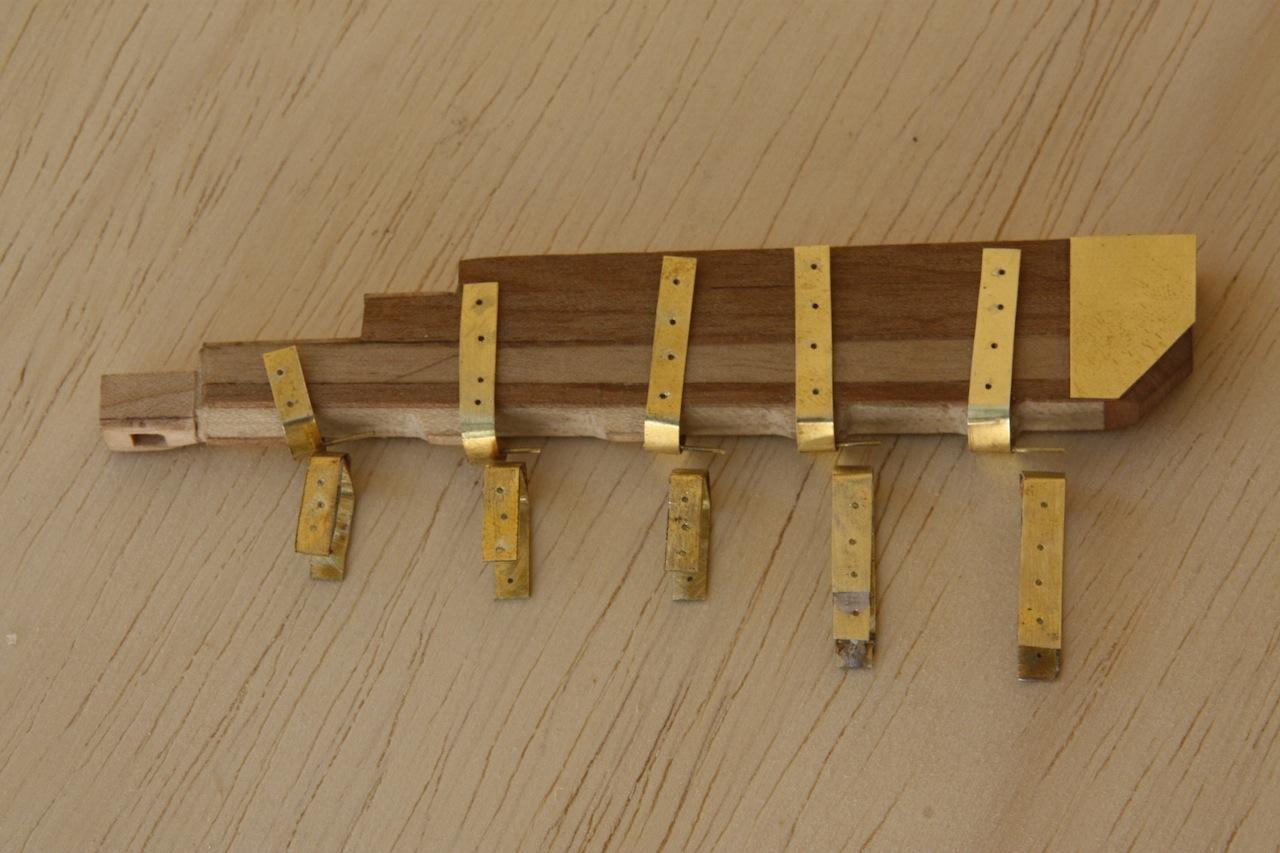
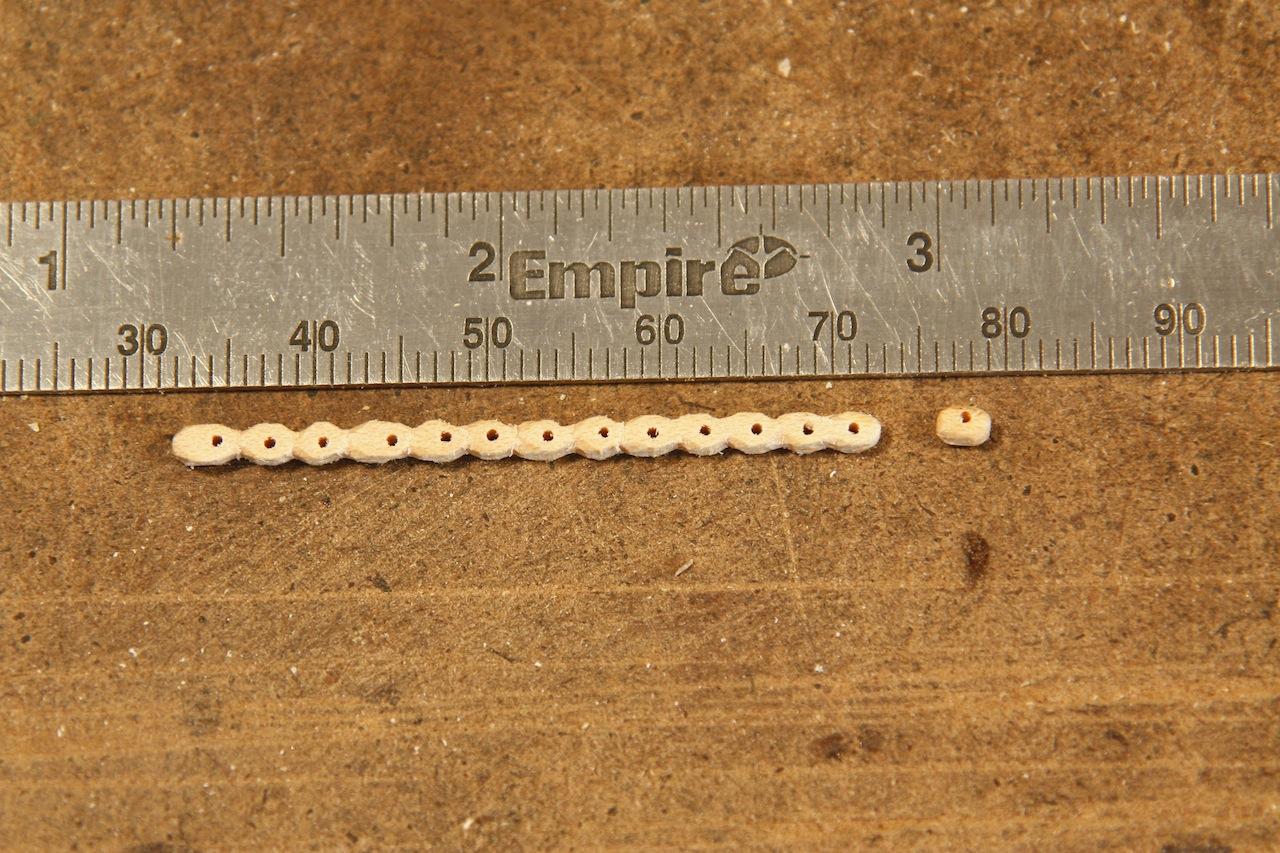
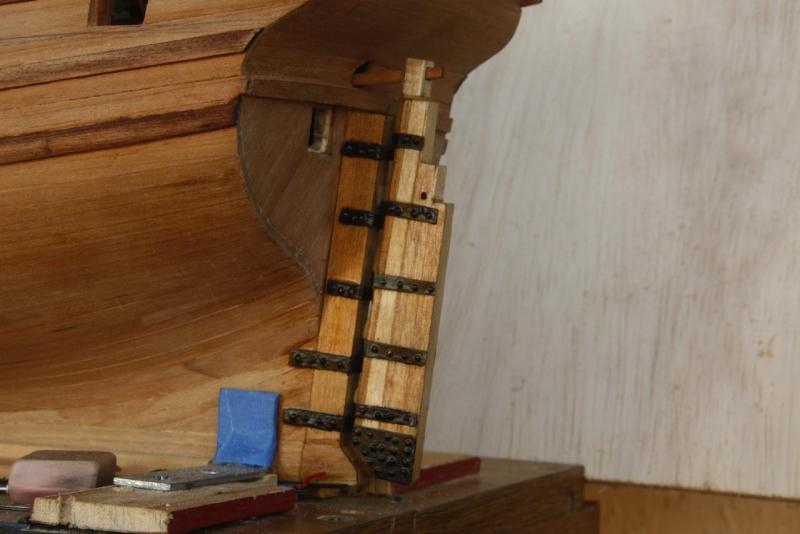
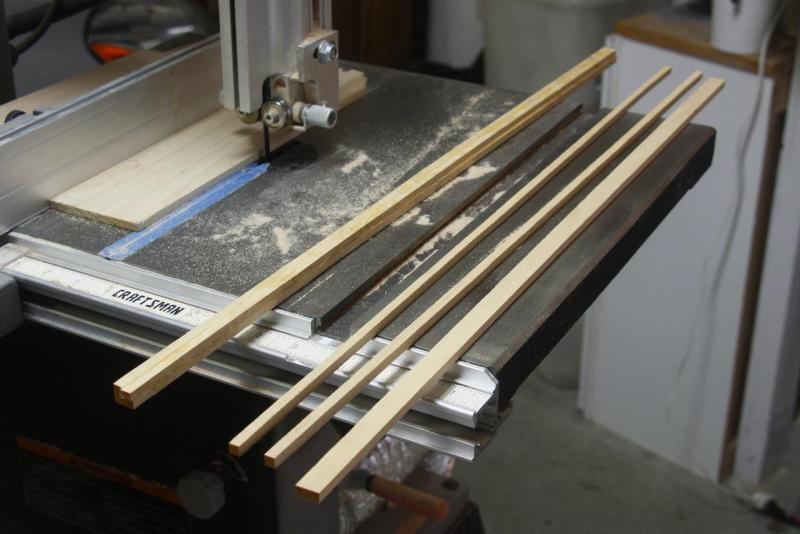
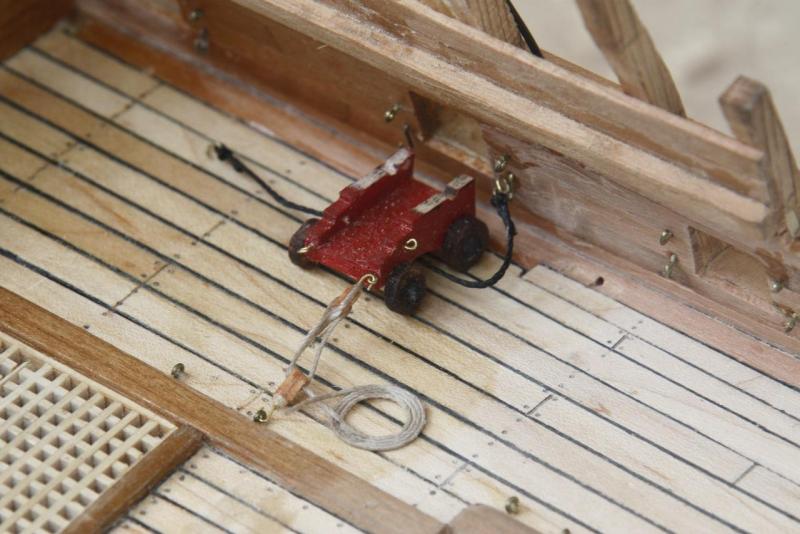
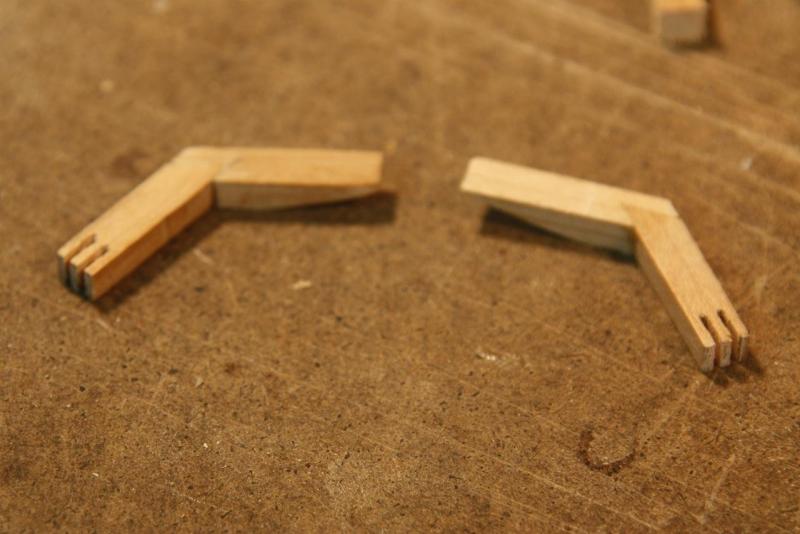
Installment 5. Fwd bulkhead looks nice but will be removed to open the quarterdeck. The bulkhead behind it will be replaced with the fwd bulkhead but clinker planked per the suggestion from Amazon Dirk, one of the “Gentlemen Seventeen.” View looking forward. Forecastle deck beams installed. Capstan will be junked. The helm is installed. The bulkhead directly in front of the helm will be replaced as noted in previous picture with two doors and a large window for the helm’s man to look outside. Captain’s furniture. Captain’s cabin completed as far as I want it to go. His computer, GPS, library, Hi Fi stereo, kitchenette and other convenience items to come later ;-) Preparation for making pulley blocks for spar deck gun tackle. This is the start and rough first stage. I’m using maple. Catheads. First generation. Eventually I went through three different ones before I was satisfied - - - and they had to fit with the head railings. This pair had to be replaced by suggestion from Amazon Dirk. Reason for the catheads to be replaced is that they are normally fastened to the forecastle deck frames aft of the bulkhead. Cheers,


-
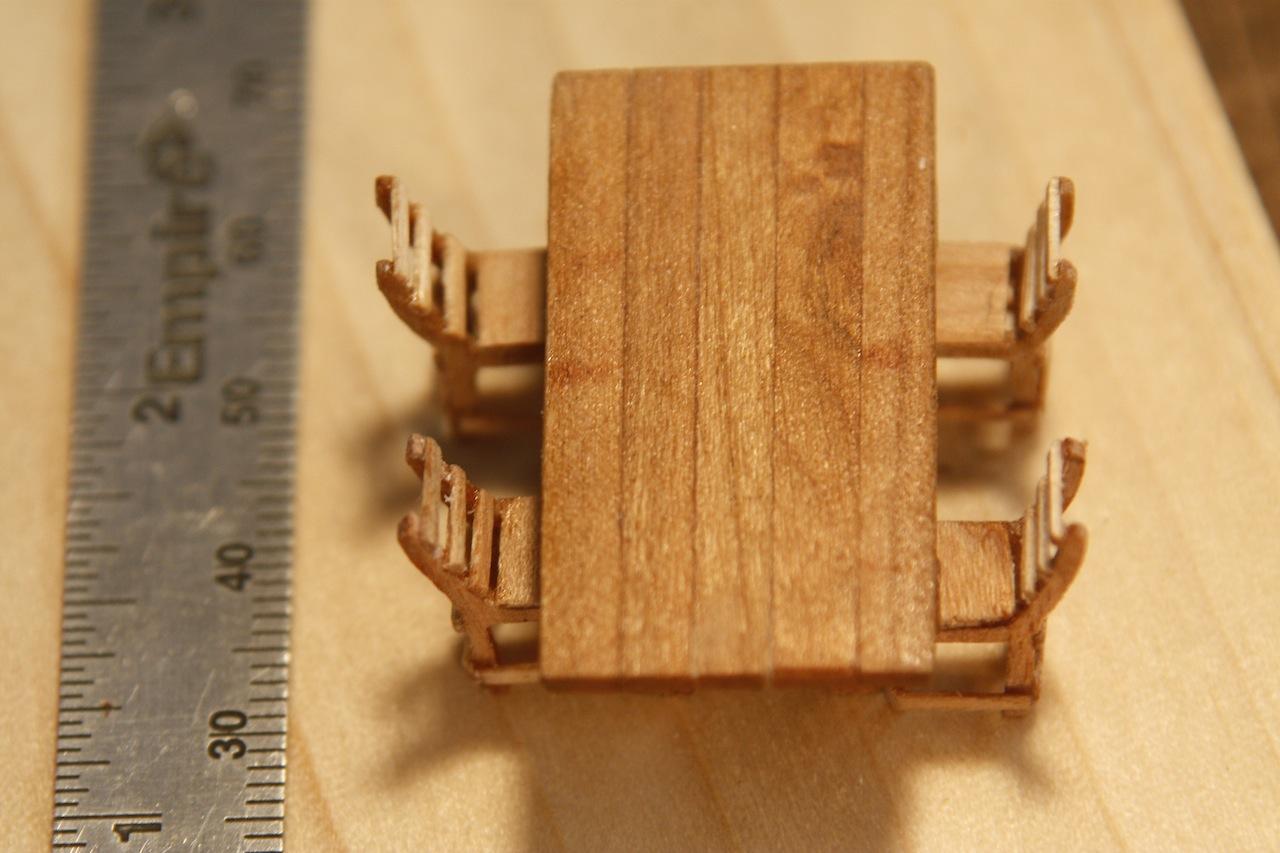
Installment 4 Close-up view of planking port side. Ready for sanding. Orlop deck cargo grating installed. Captain’s cabin deck installed with two bed cribs and seaman chests and table. Spar deck beams at the waist installed with carlings. View through grate opening in spar deck to orlop with ladder. Door hinge hardware. Forecastle fwd bulkhead with door and hinges, early stage. Forecastle fwd bulkhead with doors installed. Deck beams installed with LEDs. Fancy eyebrows over doors. Cheers,

-
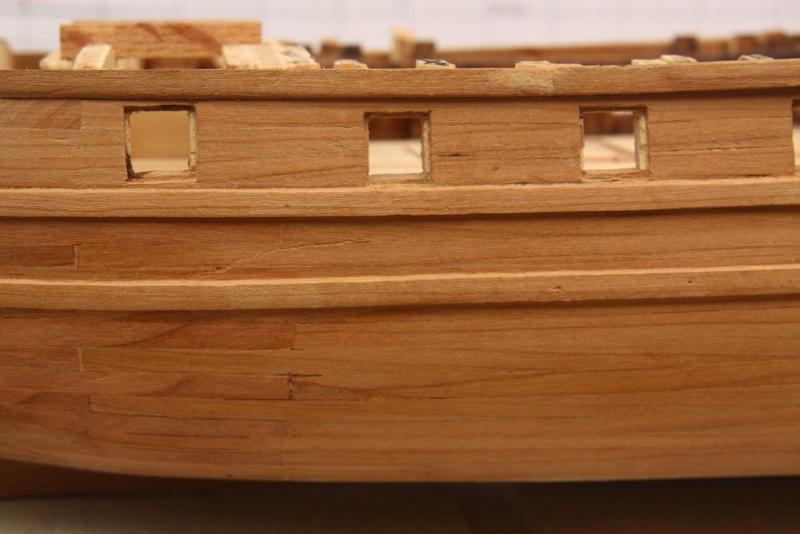
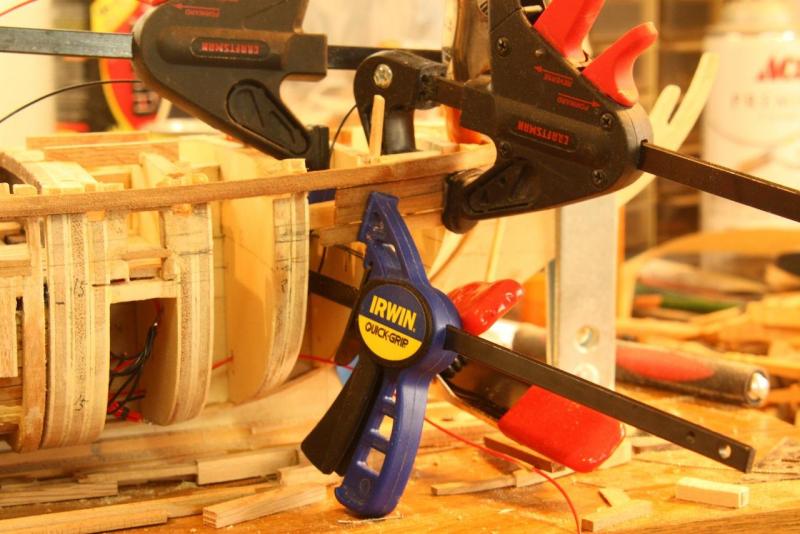
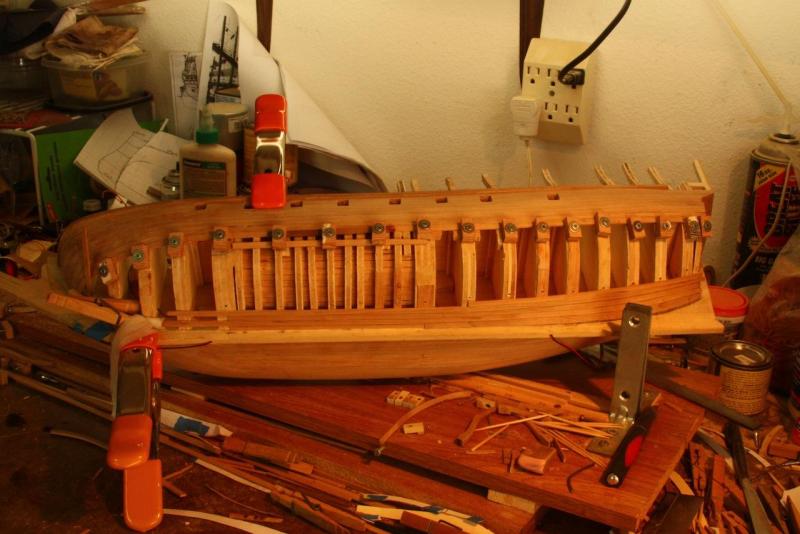
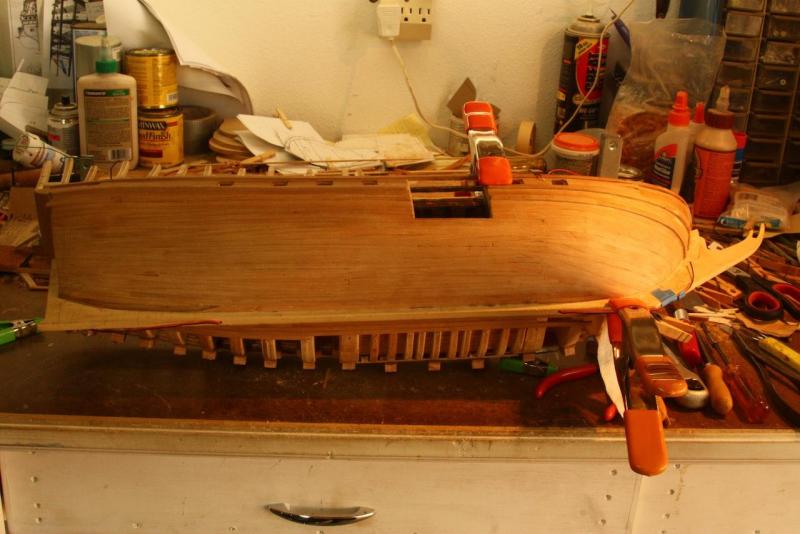
Installment 3. Lower stern planked, captain’s cabin forward bulkhead with doors installed. Start with the hull planking using cherry planking of 2 X 5 mm planks. Bow planking projected flat. After soaking in hot water it is laid down wet and follows the shear of the ship perfectly. When dry it can now be glued and clamped. Shear wale installed, bow planking whet laid down to shape and dry. Planking in progress. Planking completed with cargo hold view opening and gun ports cut out. Cargo hold view opening plug made and installed. Forecastle upper frames ready to me made from cherry and to be installed. I didn’t like the junky plywood ones. Cheers,


-
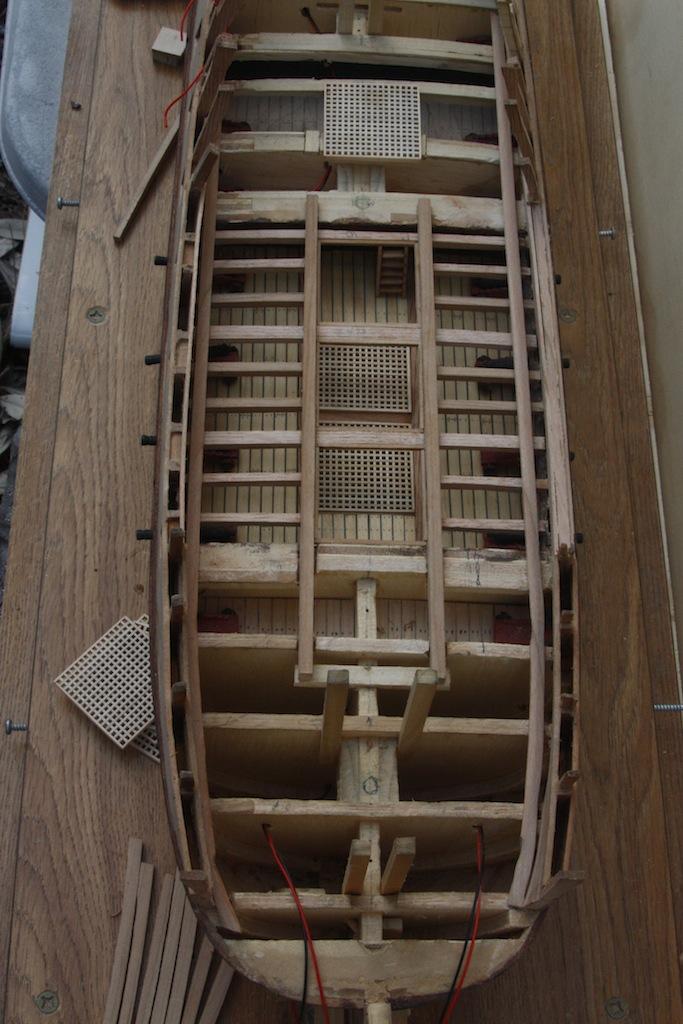
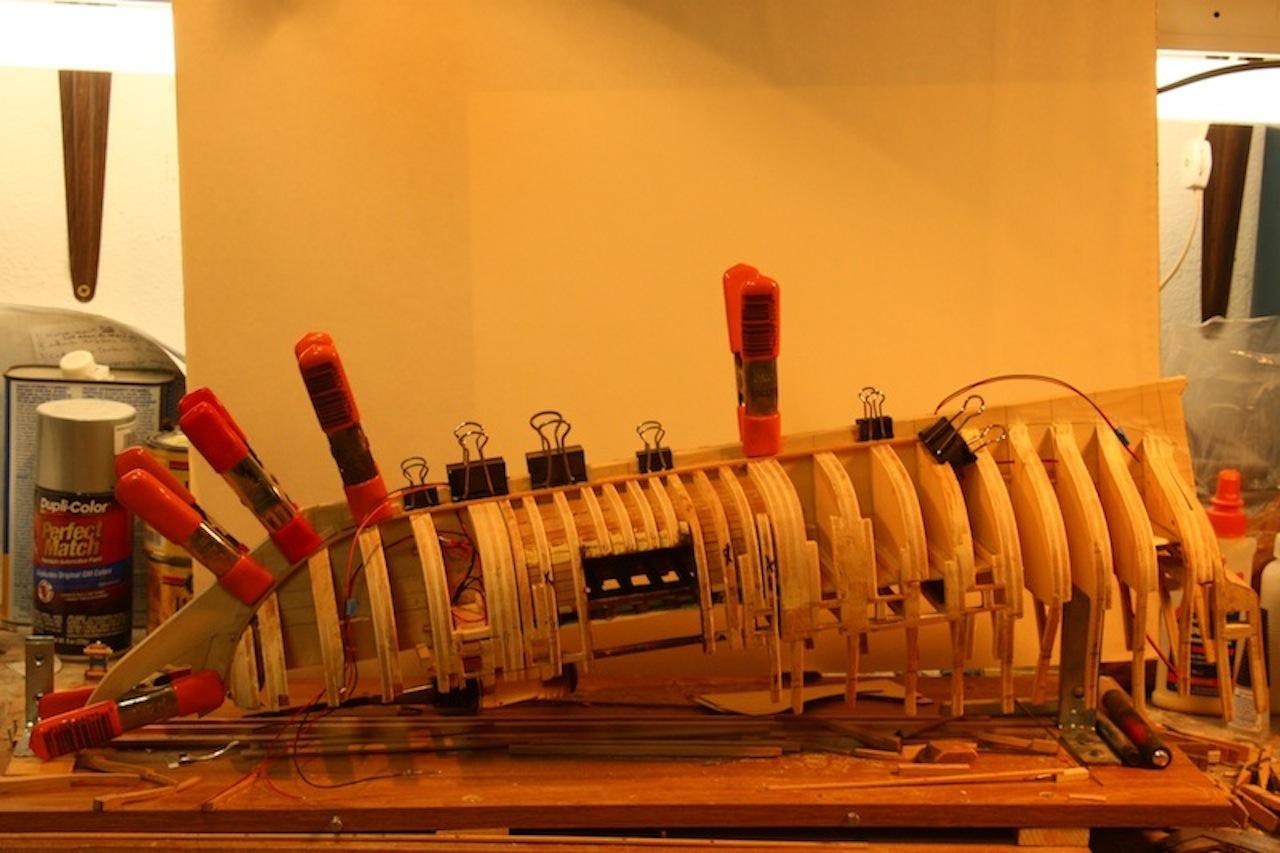
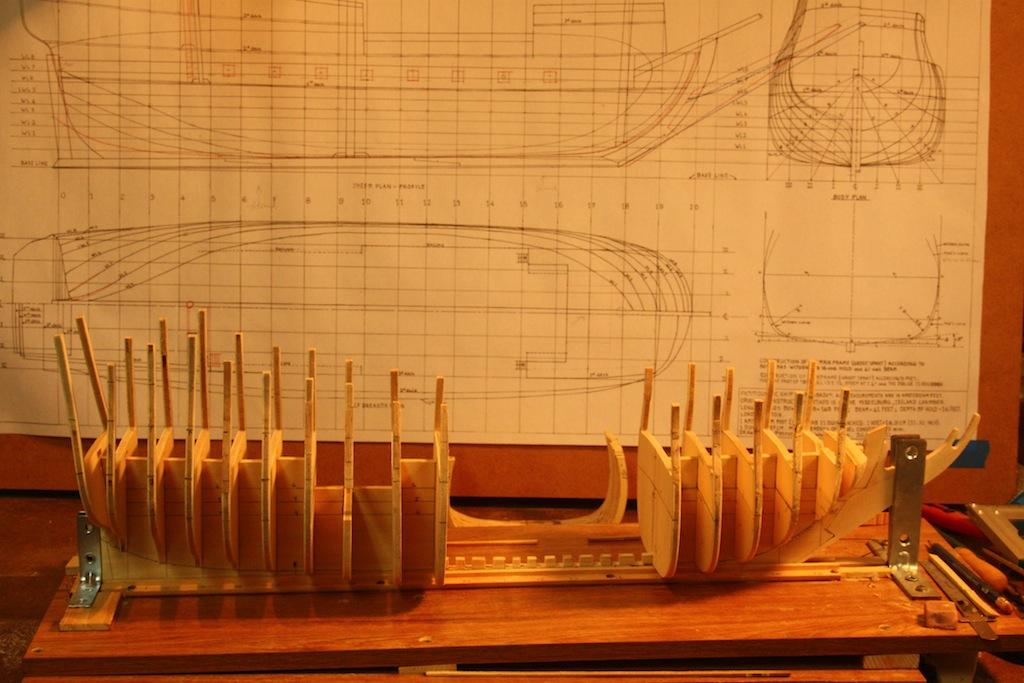
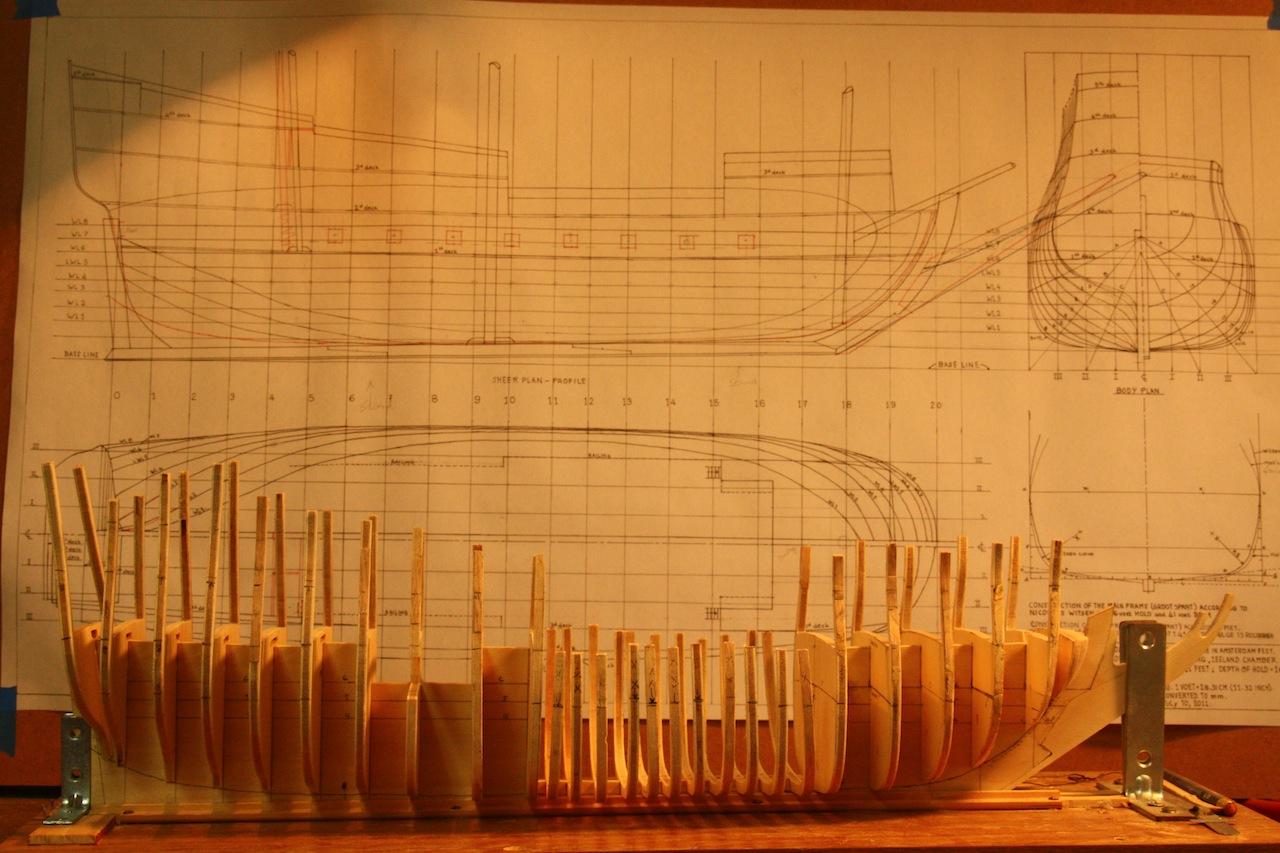
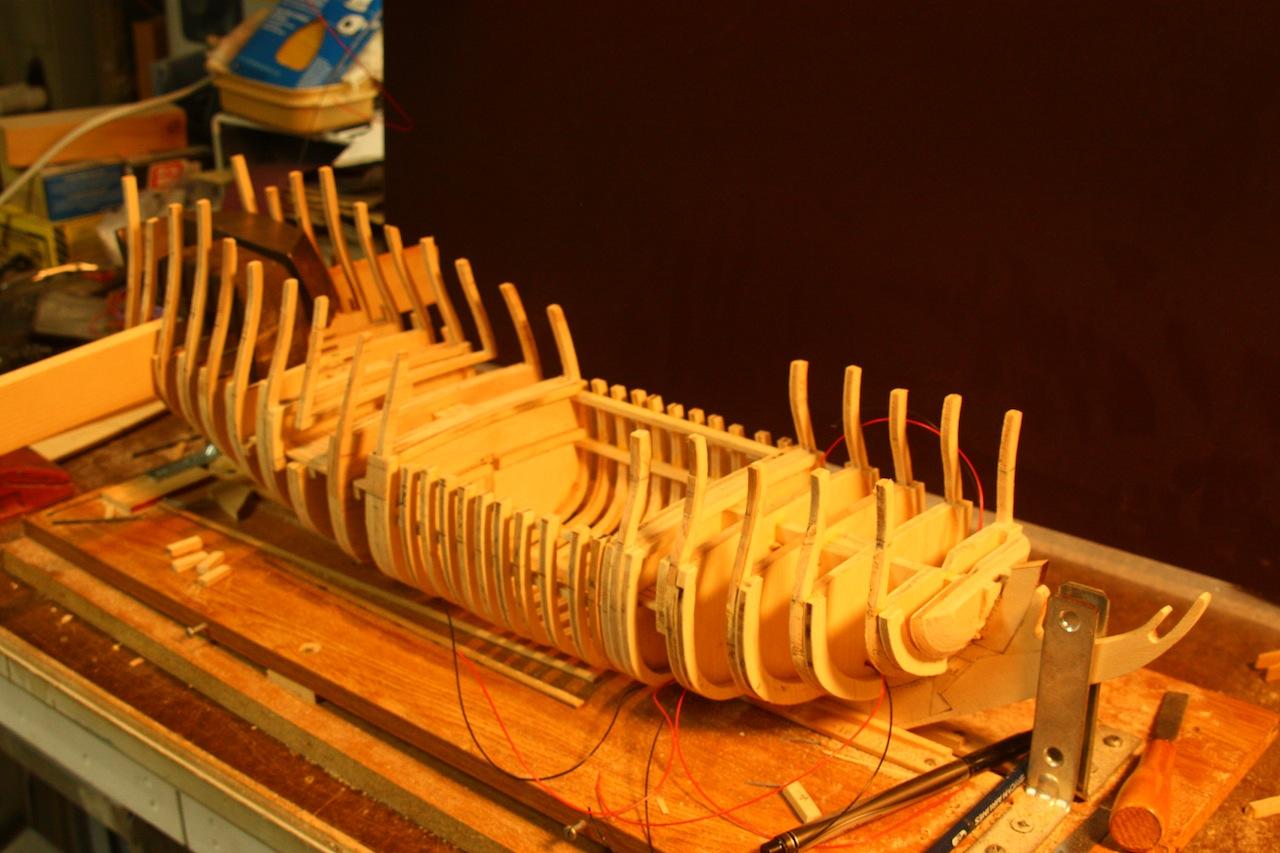
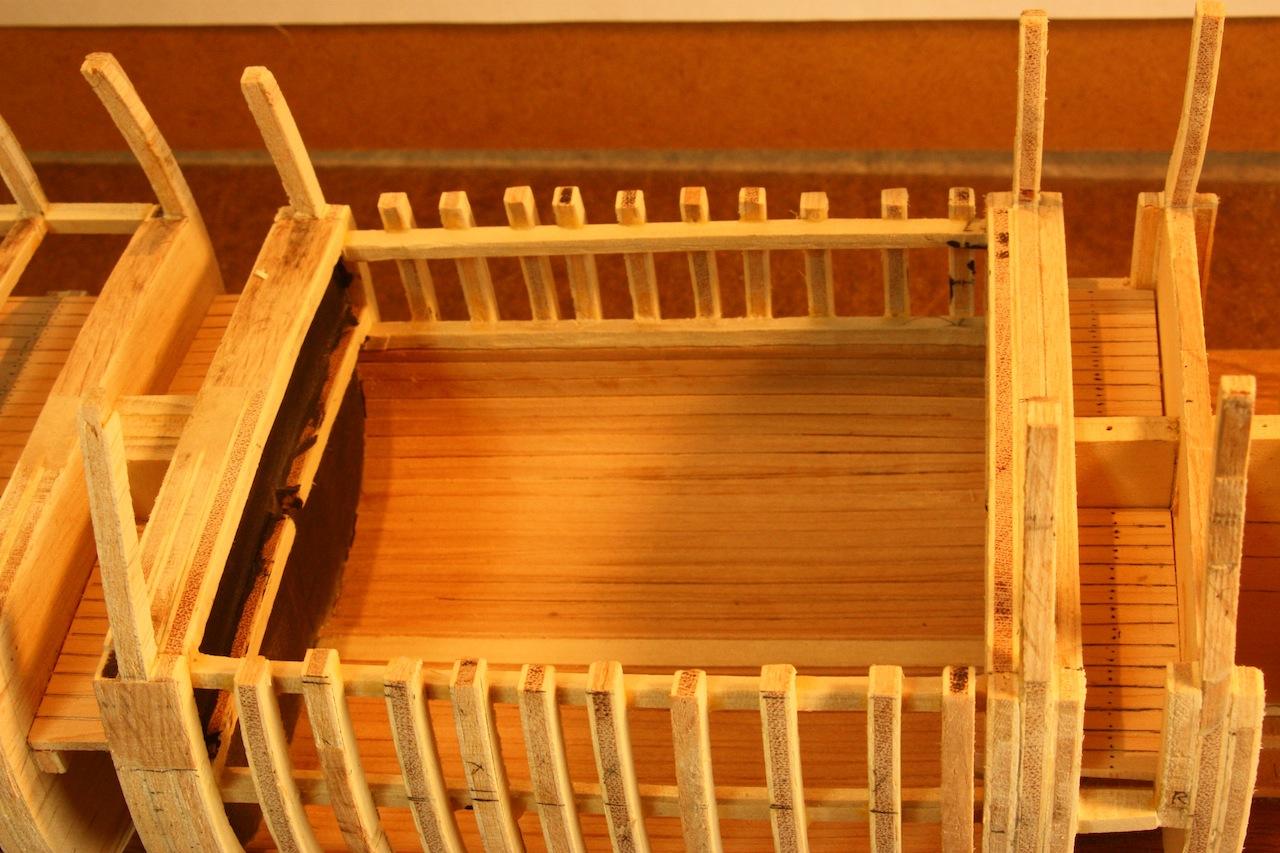
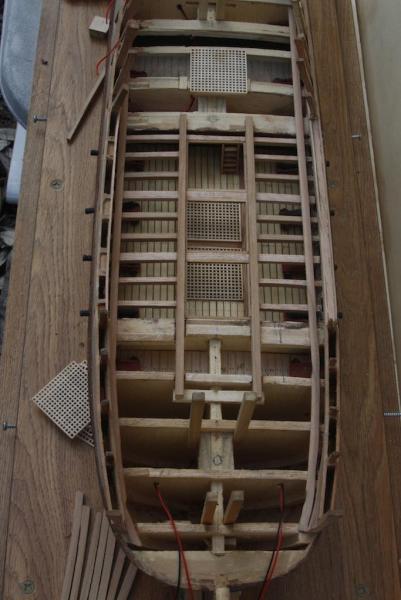
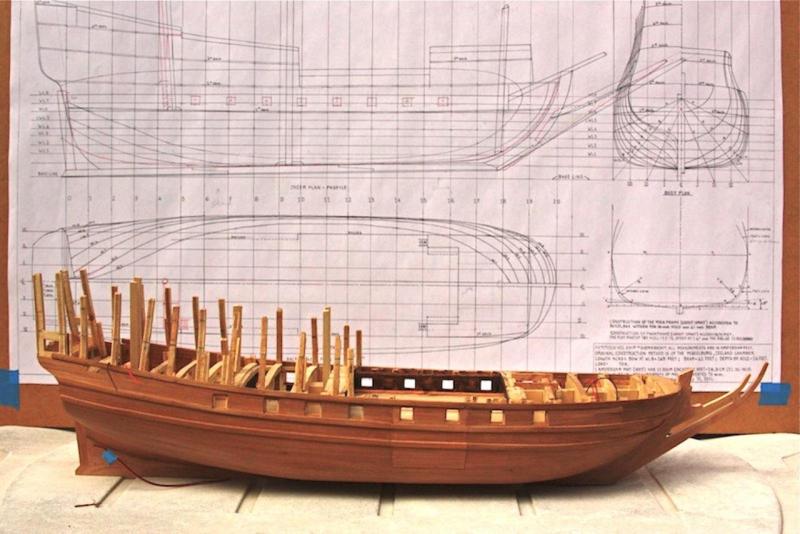
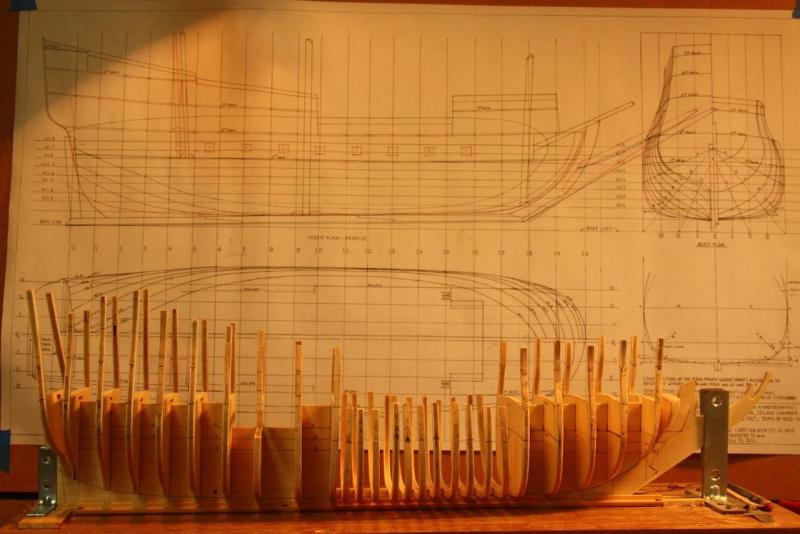
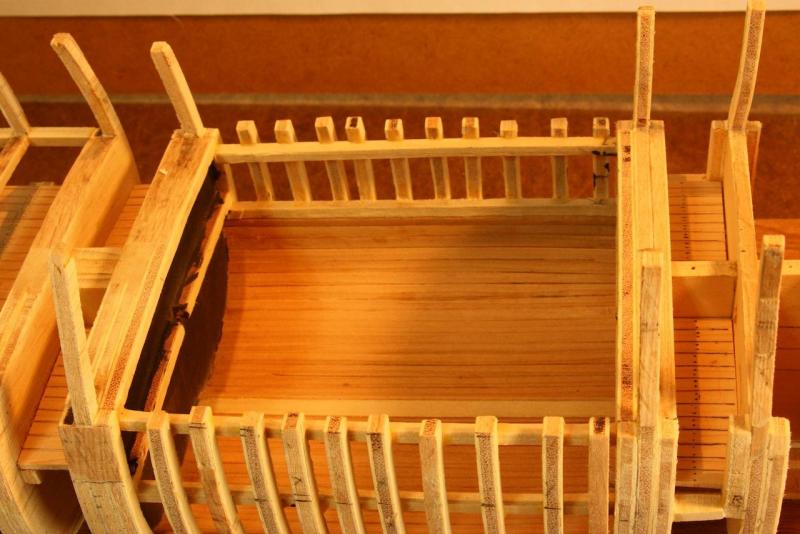
1665 VOC Ship, installment 2. The build jig with a seven degree incline for the required drag (stuurlast in Dutch), with the central bulkhead frame in place. Steel 900 angles are screwed to the base of the jig to ensure accuracy. My workbench top is a perfect horizontal surface both ways and so is the build jig. The cutout is to accommodate a section of individual frames and an opening in the starboard side of the hull for a view in the hold. This shows all bulkheads installed with the individual frames waiting. This action was actually an afterthought. Originally I only intended to show the outside with minimal plank on frame construction. I then changed my mind and wanted to also show more detail such as the hold and the captain and officer’s areas. All individual frames installed in the waist area. This shows the deck beam shelves installed for the gun deck and spar deck. I also added extra wood to the bulkheads for better fairing and glue surface for the planks, and installed wiring for lights. Cargo hold ceiling planks installed with simulated deck planking to accommodate the 18 pounder cannons on the gun deck. Part of the orlop beams with carling cutouts with the carlings in the waist area. Orlop deck beams with carlings installed. Portions of the frames cut away for visual access to the hold. Planking in progress using 2 mm maple planks.


-
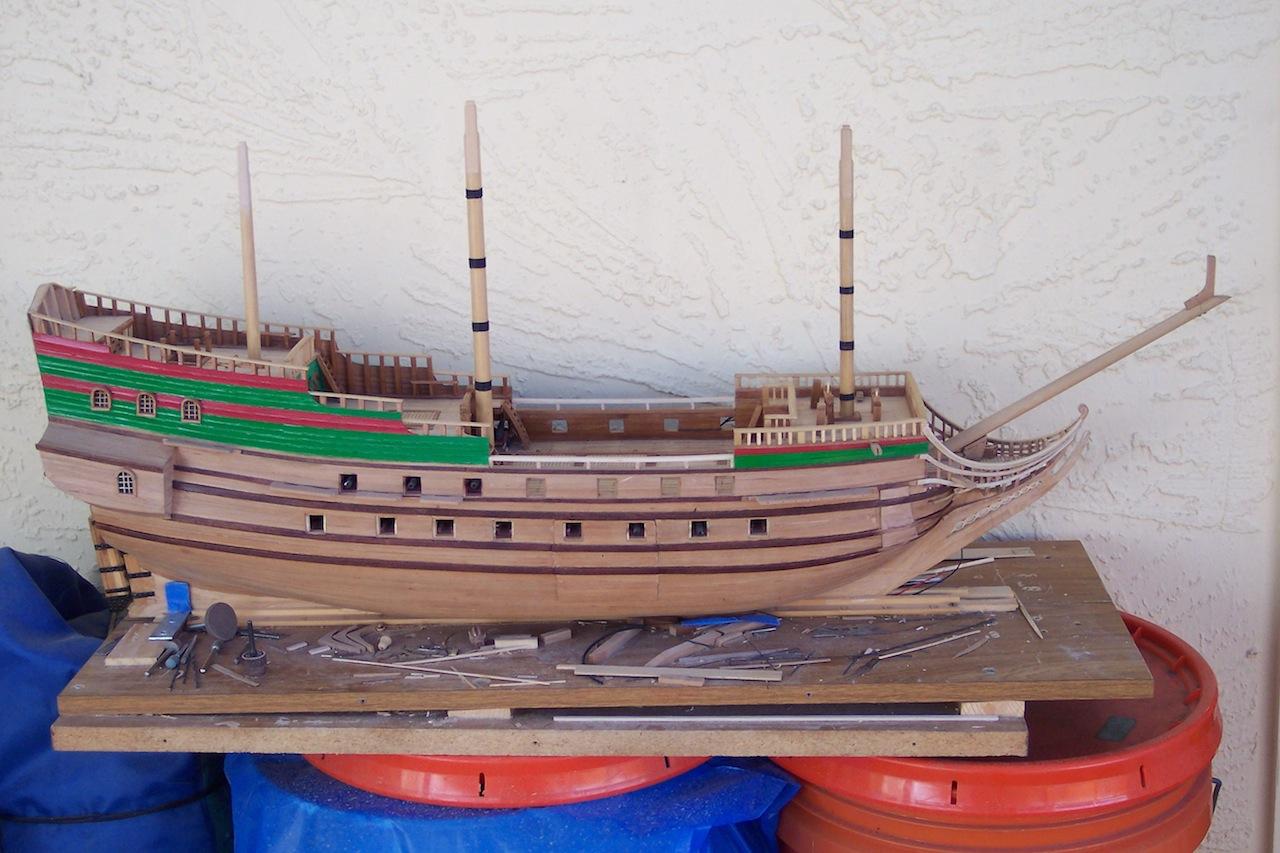
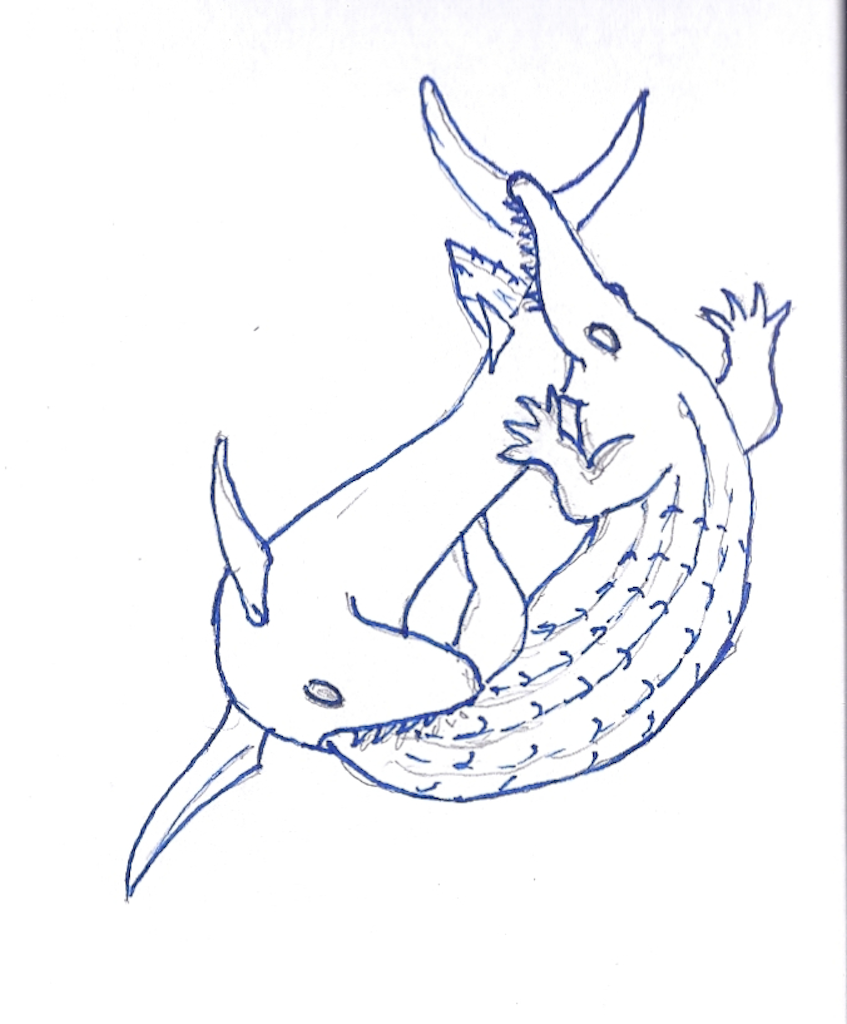
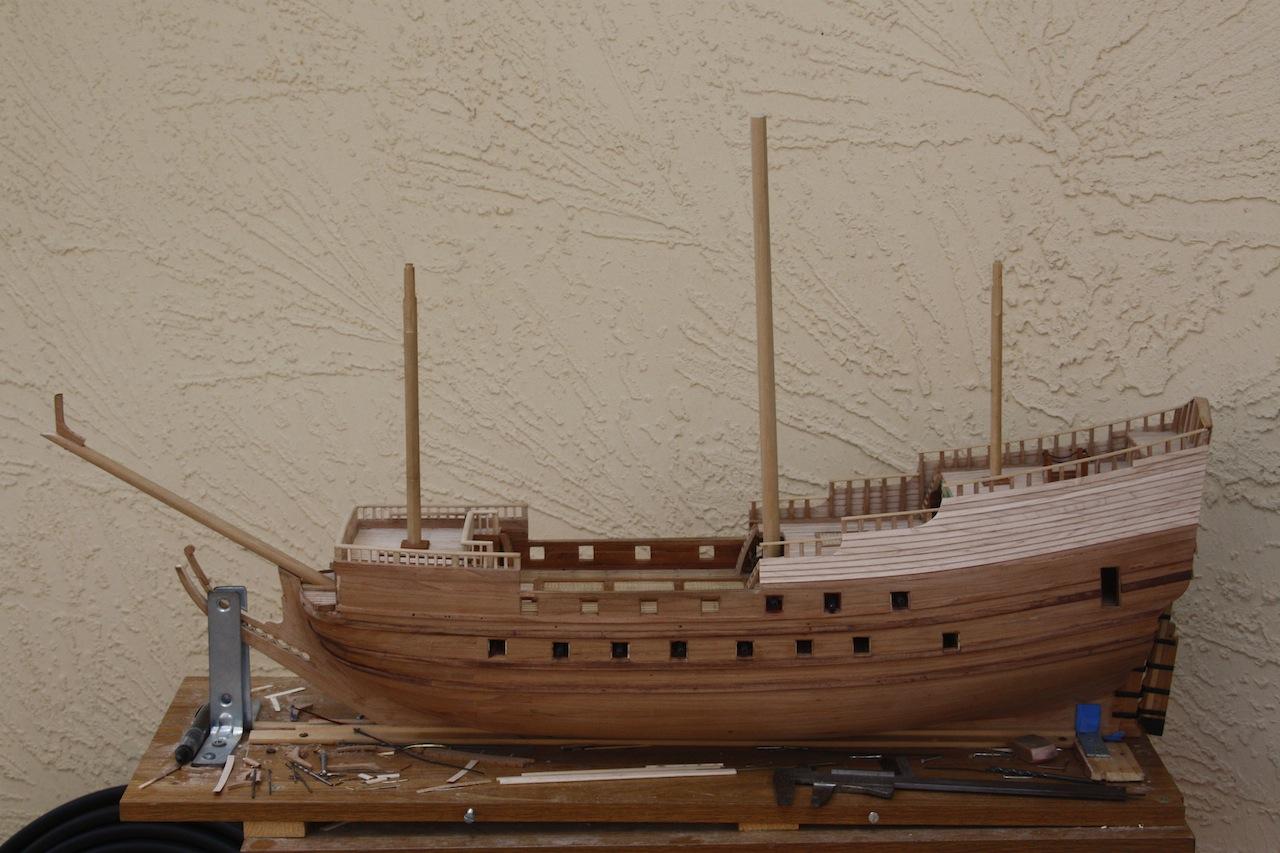
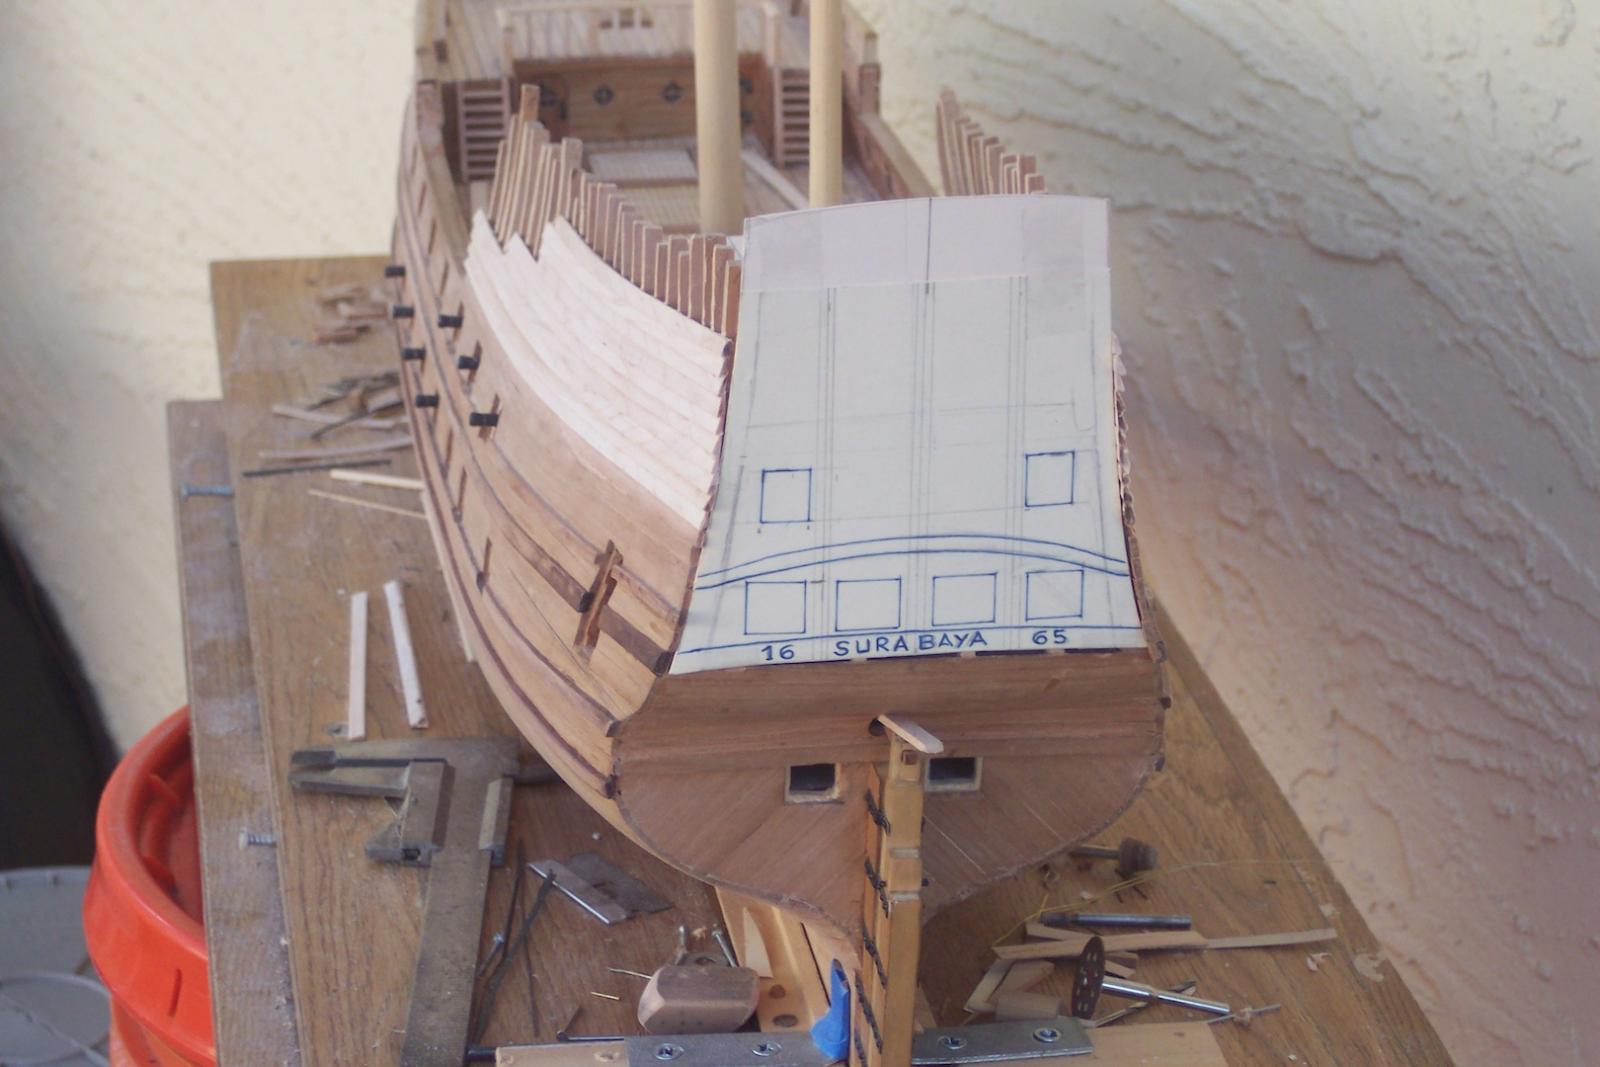
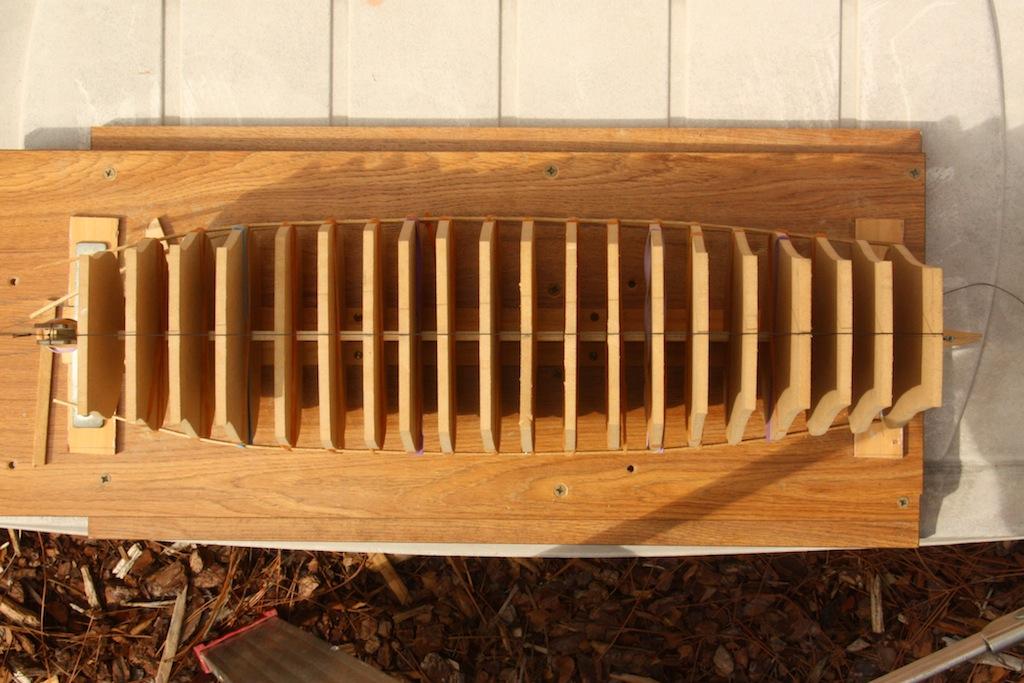
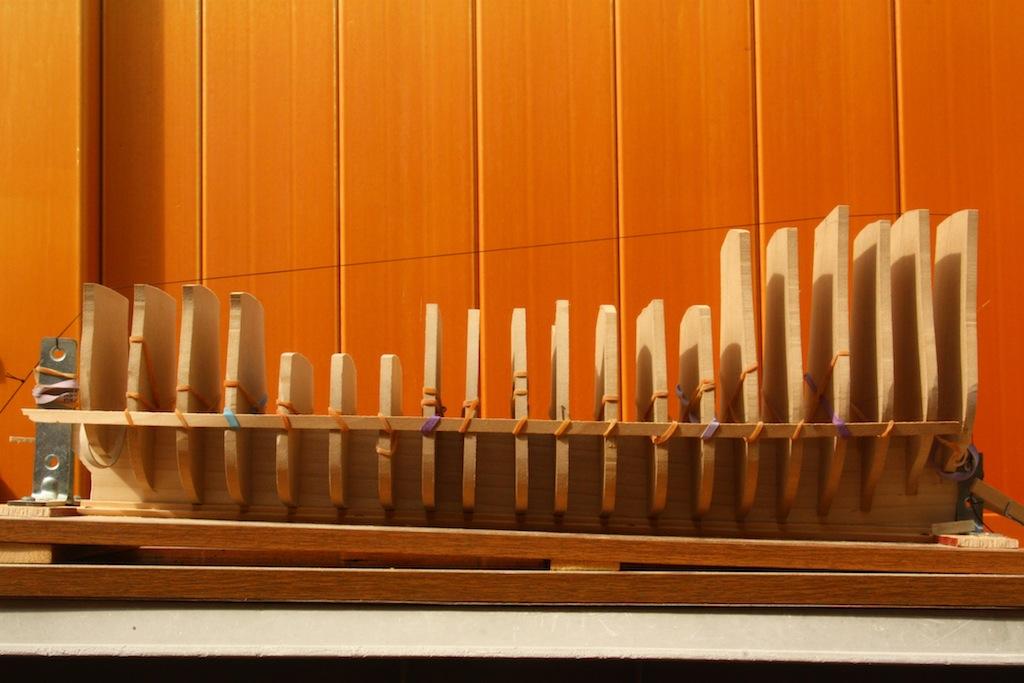
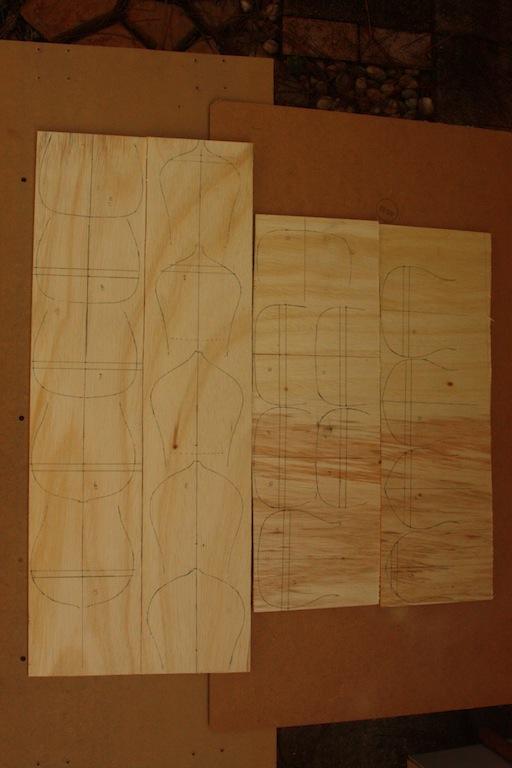
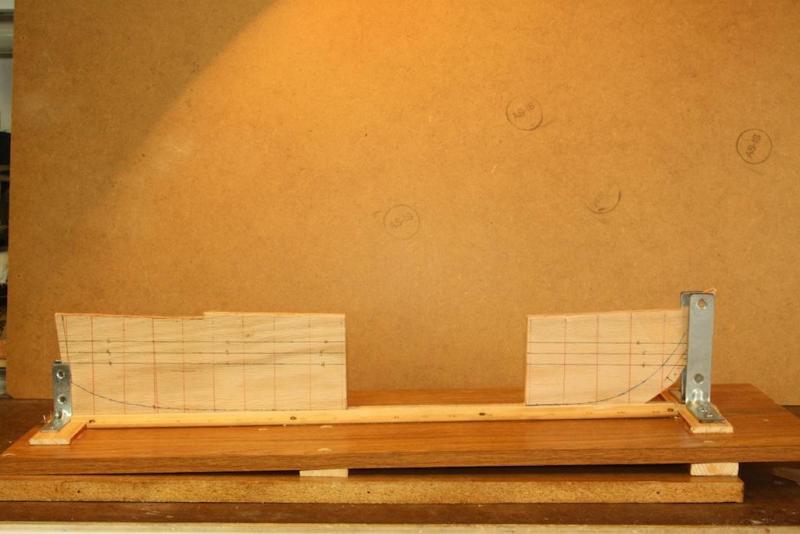
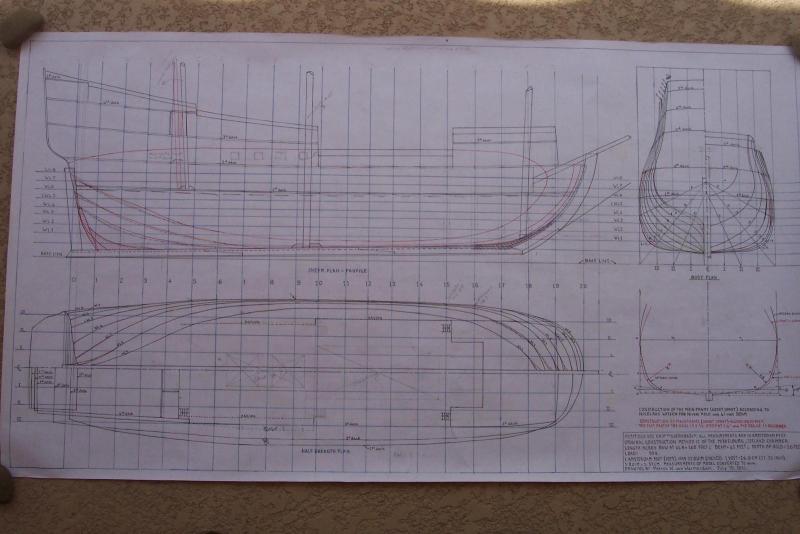
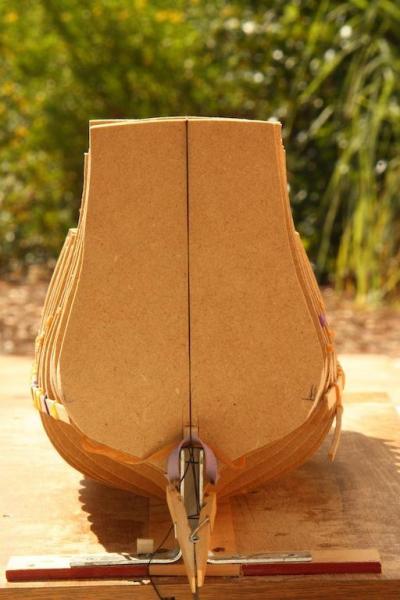
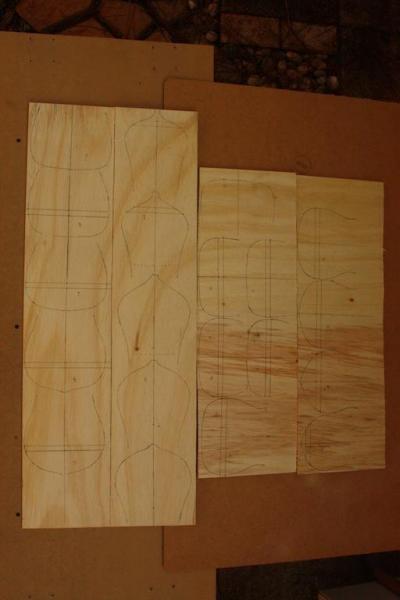
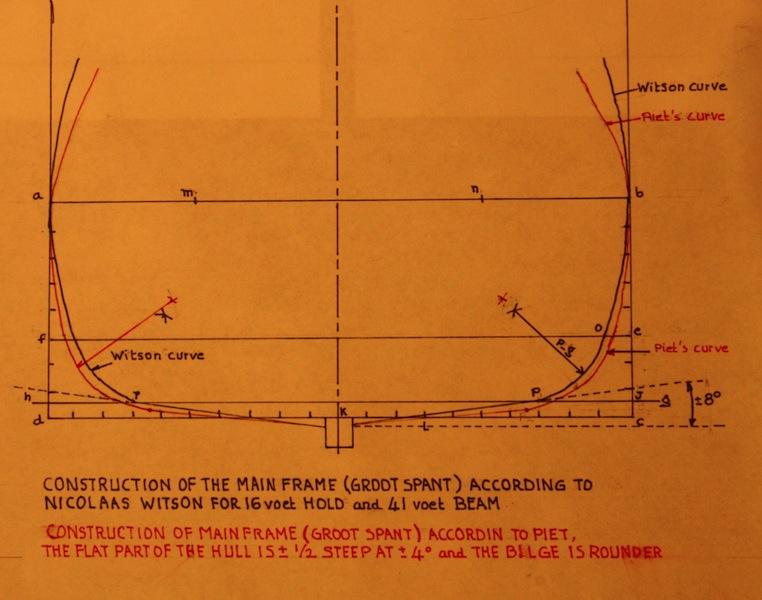
Installment 1 After I completed my self designed model of a Freedom Sloop I wanted to finally tackle my long held desire to build a mid Seventeenth Century VOC ship. (VOC stands for Verenigde OostIndiesche Compagnie or United East-Indies Company, chartered by the Dutch States General in 1602 and dissolved in 1800 due to bankruptcy). I liked the looks of ships of that era best and to honor my father and my wife’s father, both died in the wool seamen. My father wanted to study for seamanship in one of the Dutch Merchant Marine Academies. However, due to circumstances not of his own doing he joined the Navy. My wife’s father was First Mate with the KPM, a Dutch shipping company in the Colonies, and retired as captain in 1953. In an around about way the KPM was a continuation of the VOC. I could have purchased existing drawings but none suited my ideas and at this stage I had not yet purchased Herman Ketting’s book “Prinse Willem.” So, I decided to try my hand in designing my own ship. Being quite familiar with aircraft design it would seem not to be that different or difficult. I looked at many drawings of William van de Velde de Elder and the Younger. I looked at many paintings and models and got a good idea how I wanted my model to look like to suit my ideas for the use of this fictitious ship. I was born and razed in the Dutch East Indies in the fair city of Surabaya, I wanted to play-act as the born and razed East Indier from Surabaya, the cantankerous old shipwright but trained in the southern Dutch ship building methods. My original thought was to build the ship in Surabaya, a city in the East of the island of Java using local timber and local craftsmen. Craftsmen from the different tribes in the Indonesian archipelago already build seagoing merchant vessels that sailed to India, China and Africa even before the Portuguese, the Dutch or the English arrived. However, I, as the shipwright, realized that the VOC would never buy a ship build in the East Indies with local wood and craftsmen. So I decided to build the ship in Middelburg, on the island of Walcheren in the Province of Zeeland. This Chamber of the VOC did usually build the largest ships for the Company. My ship is going to be 165 Amsterdam voet with a beam of 41 voet and a “hold” of 16 voet. The scale is 1:80. I thought to make this ship a hybrid cargo / warship with an extremely shallow draft and good cargo carrying capabilities. Therefore I needed to deviate from the suggested standards and make the bottom or “vlak” of the hull with only a 40 angle to the keel and a broader bilge. She also needed more tumblehome to allow for 16 eighteen pounders on the first or gun deck and 14 twelve pounders on the second or spar deck with numerous swivels on the railings. My reason for all this was to accompany the lesser armed ships for protection against the many pirates and of course the ever present Portuguese. Well, “De Heren XVII” (the Gentlemen Seventeen, board of directors) liked the idea and the plans and ordered the ship to be built. I also wanted enough space aft to accommodate passengers and have better accommodations for the officers with their own “sanitary” arrangements in de side gallery. I also wanted a decked over forecastle for workshops, crew accommodations and possible additional 6 pound guns on the forecastle deck. The name of the ship will be “Surabaya.” This word is a composite of two words, sura, meaning shark and buaya, crocodile. There is an old legend shrouded in ancient history about how this city got its name. A shark called Sura and a crocodile called Buaya, fought for owners right of the river Kali Mas and local waters. The river turned red of their spilled blood and to this day a bridge build over the river at that spot is called Jembatan Mera (Bridge Red) or Red Bridge. And yes, I walked across that bridge many times. There will be a carving of a shark and crocodile in mortal combat on the counter to illustrate the name. A note to this, in a later installment of my log rebuild you'll see a sketch I made. I thank two fellow MSW friends with helping me with setting up this rebuild of my log. I'm just not a computer savvy guy. Start with the build. The lines drawings of the fictitious VOC ship Close-up of the “groot spant,” the frame at the widest part of the beam, according to datagiven by Nicolaas Witsen. The black lines are drawn from Witsen’s data, the red lines are my deviations. There was a comment from two “Gentlemen Seventeen,” Amateur Jan and Amazon Dirk, that my tumblehome is too great. I did adjust that but in retrospect I should have kept it as I originally drew it up with an eye on the mass of the 18 pounder guns. However, now that the hull is pretty well completed it turned out okay. This shows the trial bulkheads cut from MDF to check the overall flow of the hull. There were a few adjustments to be made but in general I was satisfied with the design. This shows the MDF trial bulkheads installed and seen from above to check the lines of the ship. As you can see not much tumblehome. Port side view with temporary MDF bulkheads installed. Adjustment notes taken from this trial fit were translated to the actual plywood to be cut out. This shows all the bulkheads drawn onto ¼ inch plywood for the frames as adjusted from the MDF trial bulkheads. Again, in hindsight, I should have used a better grade of wood.


-
De Zeven Provinciën 1665 by Dražen - Scale 1:45
Piet replied to Drazen's topic in - Build logs for subjects built 1501 - 1750
Hey Dražen, Good to see you back and good to hear you have been busy with the 7 P. I'm also in the process of rebuilding my log but am very slow at it. Cheers,- 487 replies
-
- 1
-
-
- ship of the line
- 80 guns
- (and 1 more)
-
Hey Remco, om van te watertanden! Translation: "to drool over." Your hypodemic nurdles sure got a workout. I need to make 4 of them suckers, triple sheaf fiddle blocks, more like base fiddle though ;-) Cheers,