Piet
-
Posts
3,568 -
Joined
-
Last visited
Content Type
Profiles
Forums
Gallery
Events
Everything posted by Piet
-
 & Andrieke, Oz is good! That was my original choice to emigrate to way back in 1954 when I started paperwork. I could have gone to South Africa because I had at that time instant citizenship due to my grandfather. But my cousin talked me into the USA. The American ambassador put me in front of the list and my waiting time was cut to almost instantaneous. I left Holland in March of 1957. America has been good to me. It's been a trip. @ Johannes Ludo, thanks for the pics! Now people can see how large this boat actually is. She carries 40 of these mines, 20 on each side, 2 per tube. These are the Vickers T MK III, 92 cm diameter and 119 cm tall. See pics below. I like the flag. I'll attach the "battle flag" below. The Dutch Navy calls it the "bloed flag" or blood flag. @ Kevin and Amateur Jan, thanks for your best wishes. As mentioned sometime ago, I need an extra life to be able to do all the things I have planned. @ Tarbrush John, Jules Verne's boat would really be an awesome project, go for it man. There are plenty of pictures available to draw from. As far as the planking is concerned, there is a great tutorial on MSW and the planking for this model is like the first planking many do on there build. I cut the frames 1 mm smaller to accommodate the planking and the final paper covering to mimic steel plates. The planks are 1.5 mm thick by 1/4 inch wide . I'll have to stiffen them on the inside I see now because the spacing of the frames are rather wide to safe weight. I'll also fill the inside of the hull with industrial strength Styrofoam. Then sanding the outside smooth and fill the uneven spots with wood filler to make a good base for the paper "sheet steel." So I'm not too concerned with how the planking will look, it's just to form the foundation for the paper covering. When I get to the final simulated steel plating with paper I'll give more detailed info with pics. At least I hope it'll work as I planned it. O 19 "bloed vlag" or battle flag. Tech drawing of the Vickers mine. Cheers,
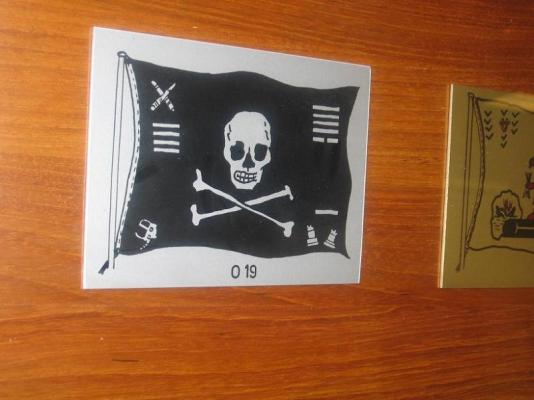
-
Thanks Adrieke for your best wishes and no, you are still in time. It's only 22:42 in Palm Coast, Florida. I'm winding down though, glass of wine is almost finished and then for my beauty sleep. btw, you speak Dutch??? Cheers,
-
Hi Sherry, She's looking great! One step at a time, take the time and go ssssllllooooowwww. My best wishes and prayers go out for your brother. Cheers,
-
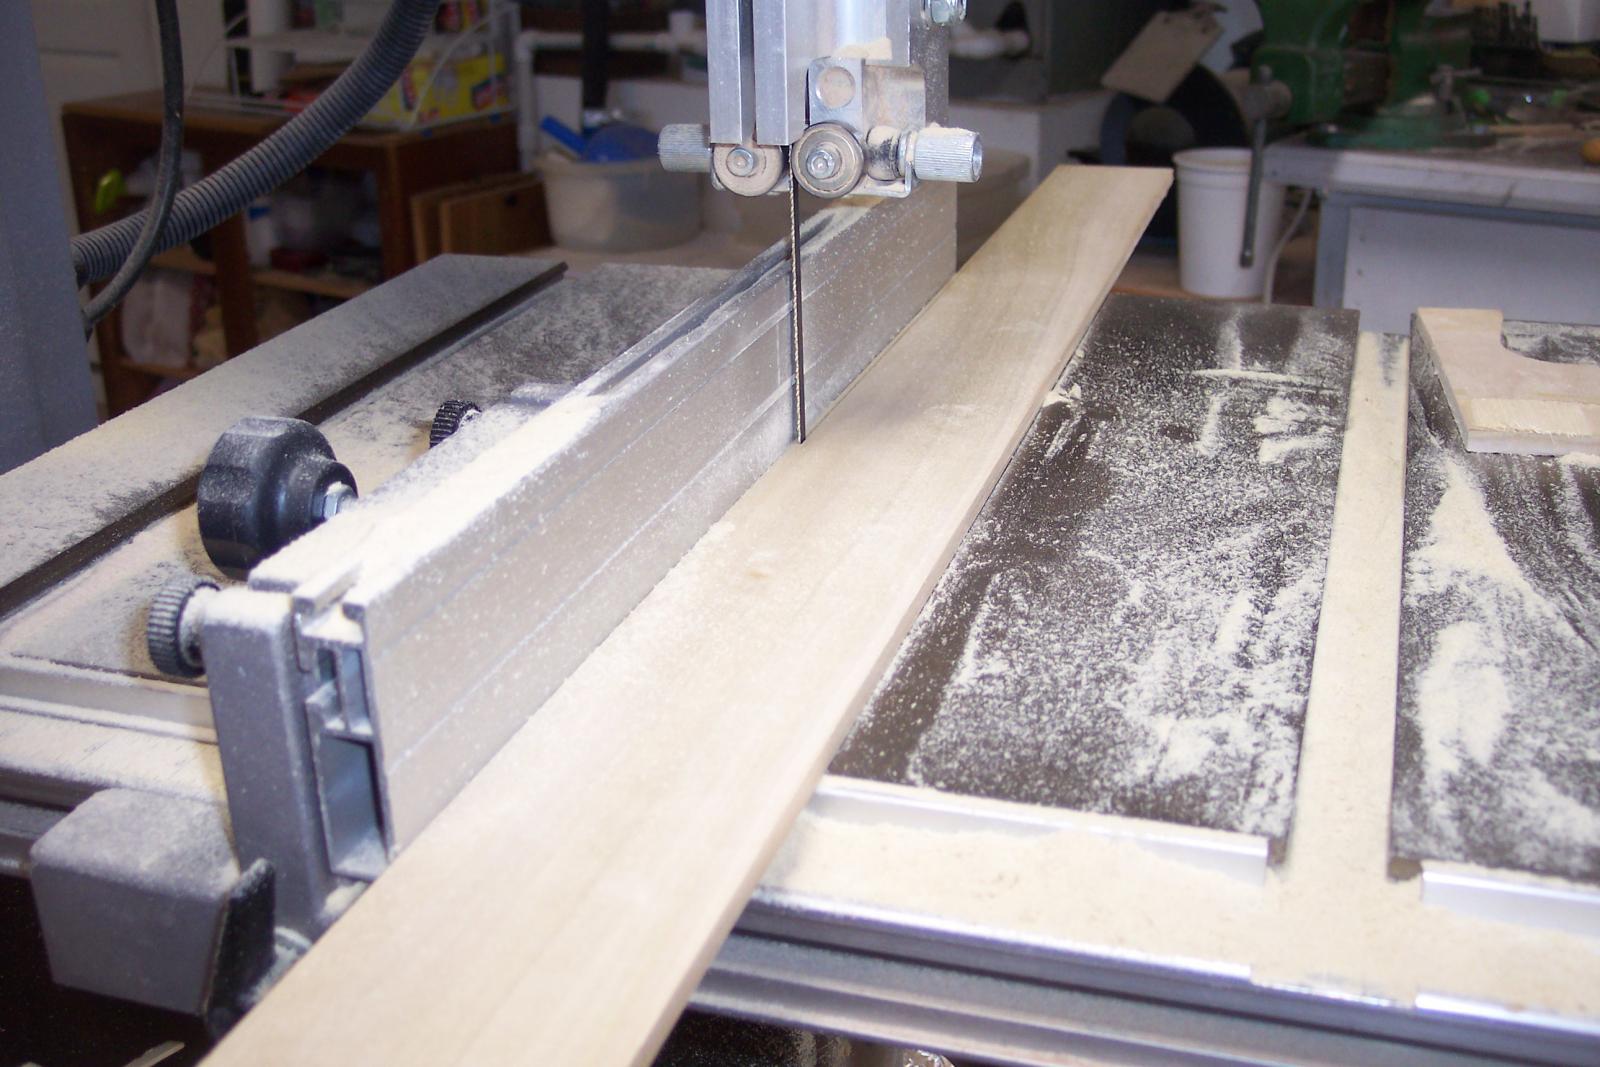
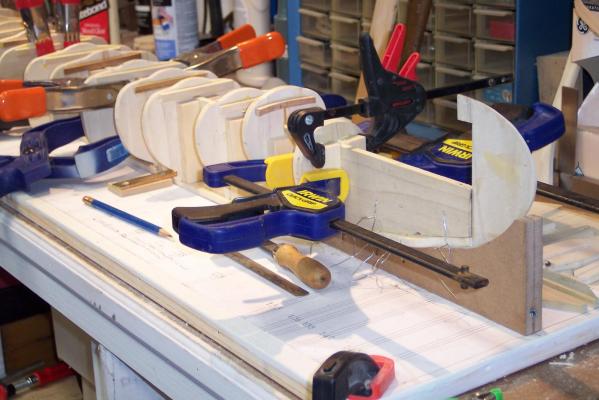
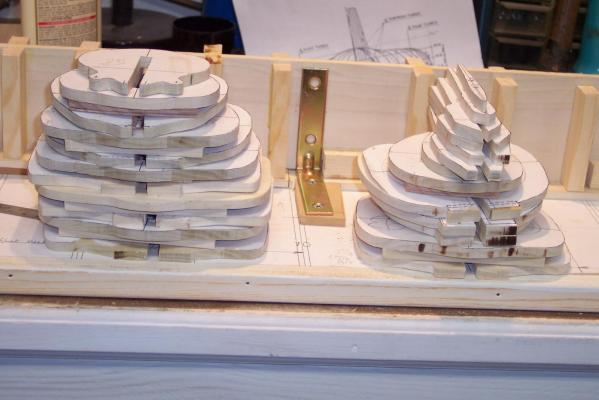
Well, in case you are wondering what I did on my birthday, I cut planks! I ran out of the ones I cut from the discarded pieces of lumber and had to buy a new board of 1/4 inch poplar. I also went to the local hobby store to get some balsa blocks but they didn't have any. I did buy a 12 X 24 inch sheet of 1 mm birch plywood. That'll be nice for the conning tower and perhaps also for de deck structure. Okay, now that I have enough planks I'll continue on with that chore. This Wednesday I have to go to St. Augustine and I'll stop by at Hobby Lobby to see of they have balsa blocks. I need that for a few locations in the bow and stern. Here are a few pics of what I did besides gluing on a few more planks. Yes, I did stop the bandsaw! First I thought to take the pic with my left hand while holding the board with my right but thought better Hey, my mom didn't raise a dummy These are all the 1 1/2 mm planks I got out of a 3 X 36 X 1/4 inch poplar board. Let's see how far this brings me. I definitely need another board for the deck structure. Cheers,

-
Oh wow, I'm overwhelmed by all your best wishes, thanks all and I'll have a glass of wine to toast myself, care to join? Johannes Ludo, I'm glad you liked the old F W pics, and thanks for the pic of the company logo, very nice. Wacko Wolf Joe, yeah, a sub sure is a change from all the old and not so old sailing vessels. Not forgetting the two German battleships, at least we are having another steel vessel going. It'll have to made from wood but the final covering must simulate steel plating. I think that the heavy paper should do the trick. I'll keep the pics coming but not too many of the planking, everybody knows how to plank. Amateur Jan, yes, indeed, these old subs sure had nice lines and I think that the Dutch boats looked nicer then the German U boats. Actually, the later Dutch boats from the O 21 to the O 27 really looked quite handsome. They were a little sleeker because they didn't have the wide sides to house the mines. Dusty, your father must have been in the surface navy Did he also call subs sewer pipes like we do in aviation? I'm glad my dad doesn't hear that, he would have whacked me one Anja, bedankt voor de geluk wensen! I like your emotions, really nice! Mark, John and Anthony, thanks for stopping by, yes, she is taking shape but I need to also do some more work on the VOC ship, she is calling me Thanks everyone and cheers,
-
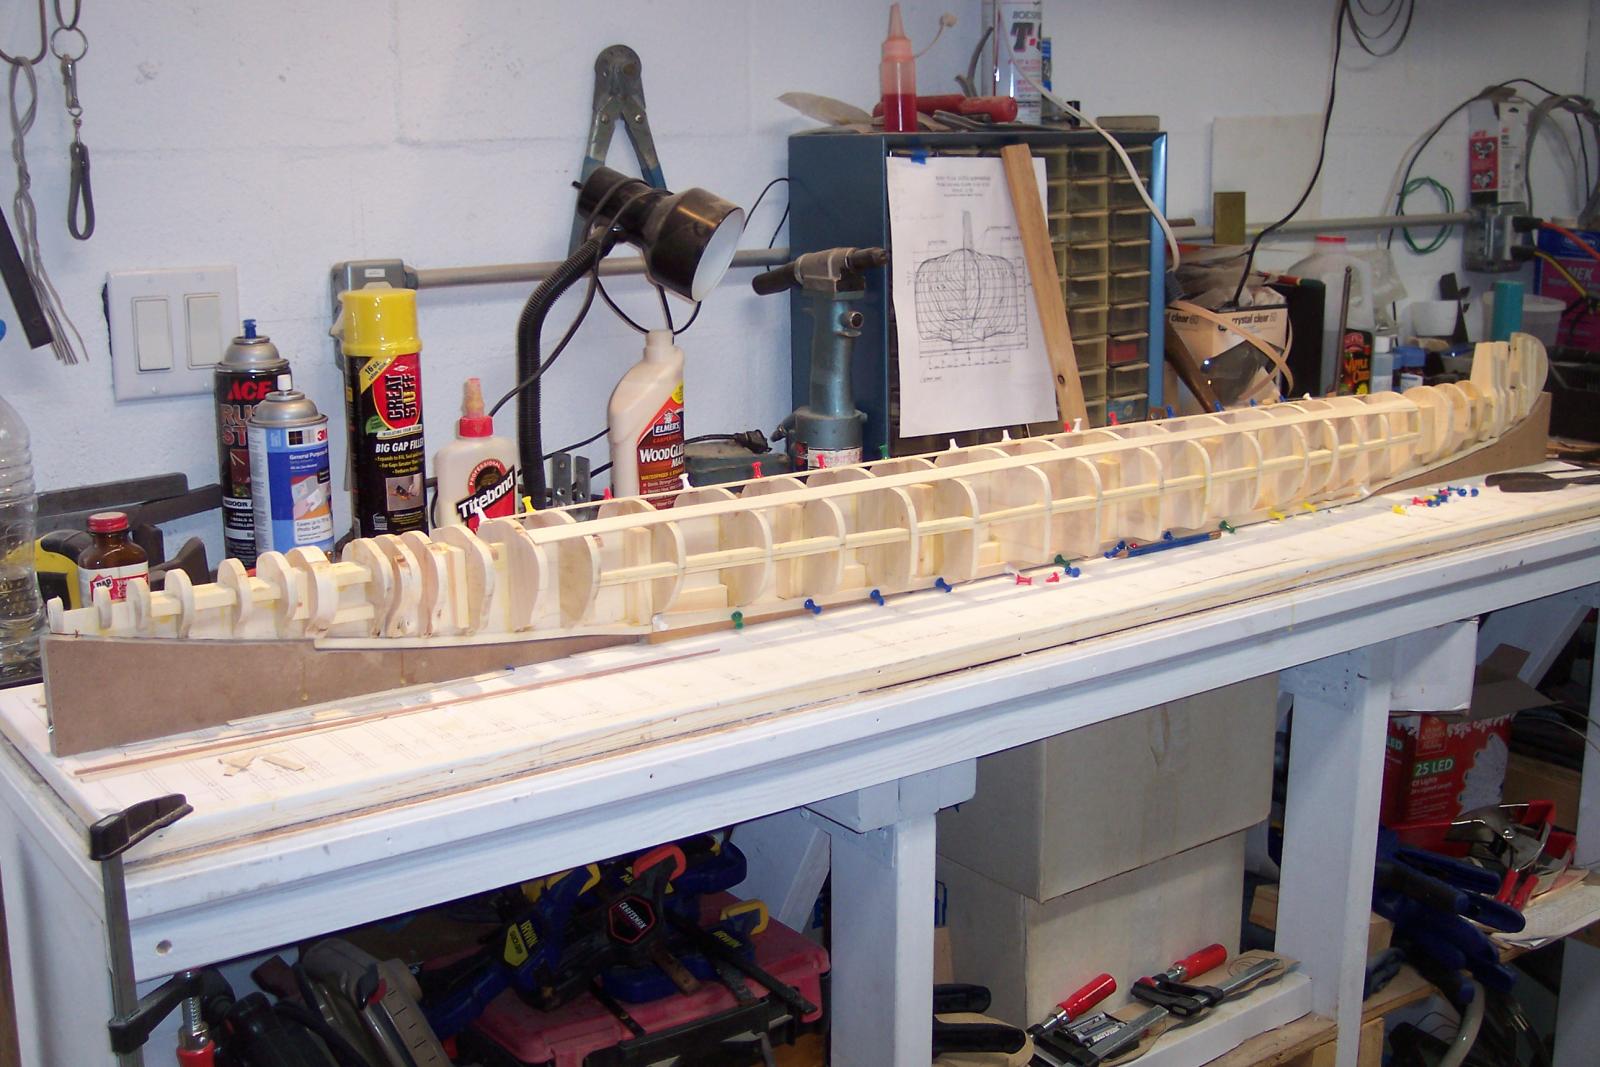
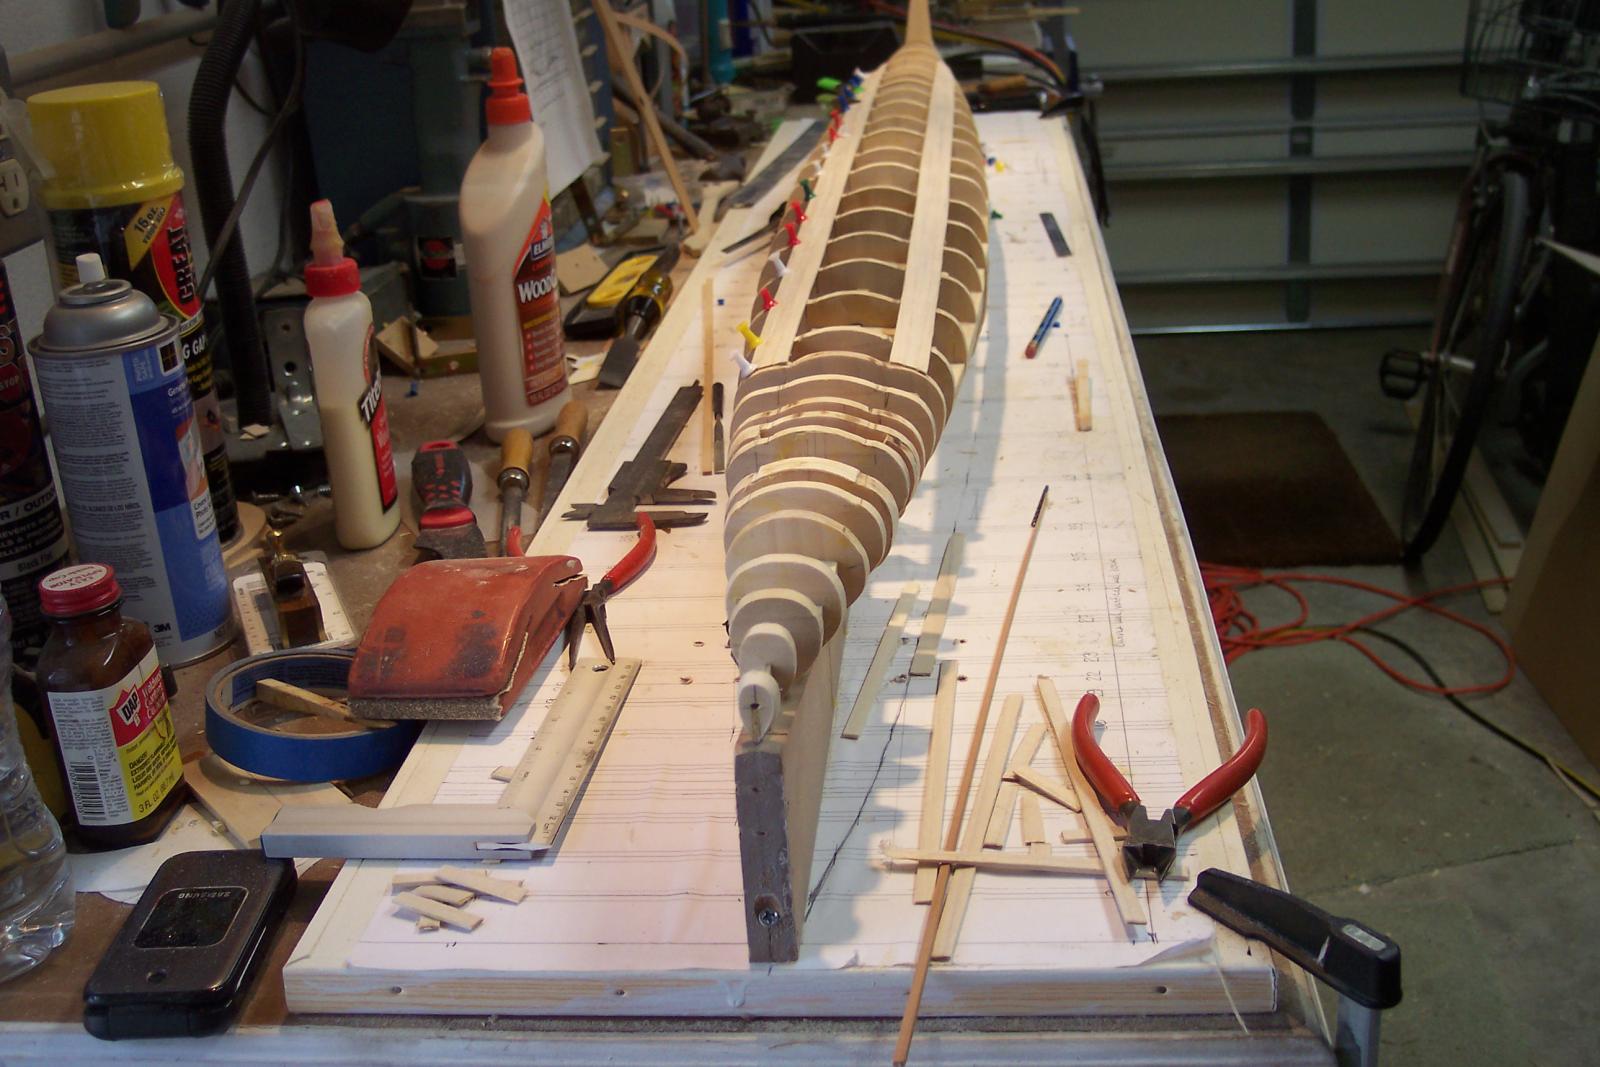
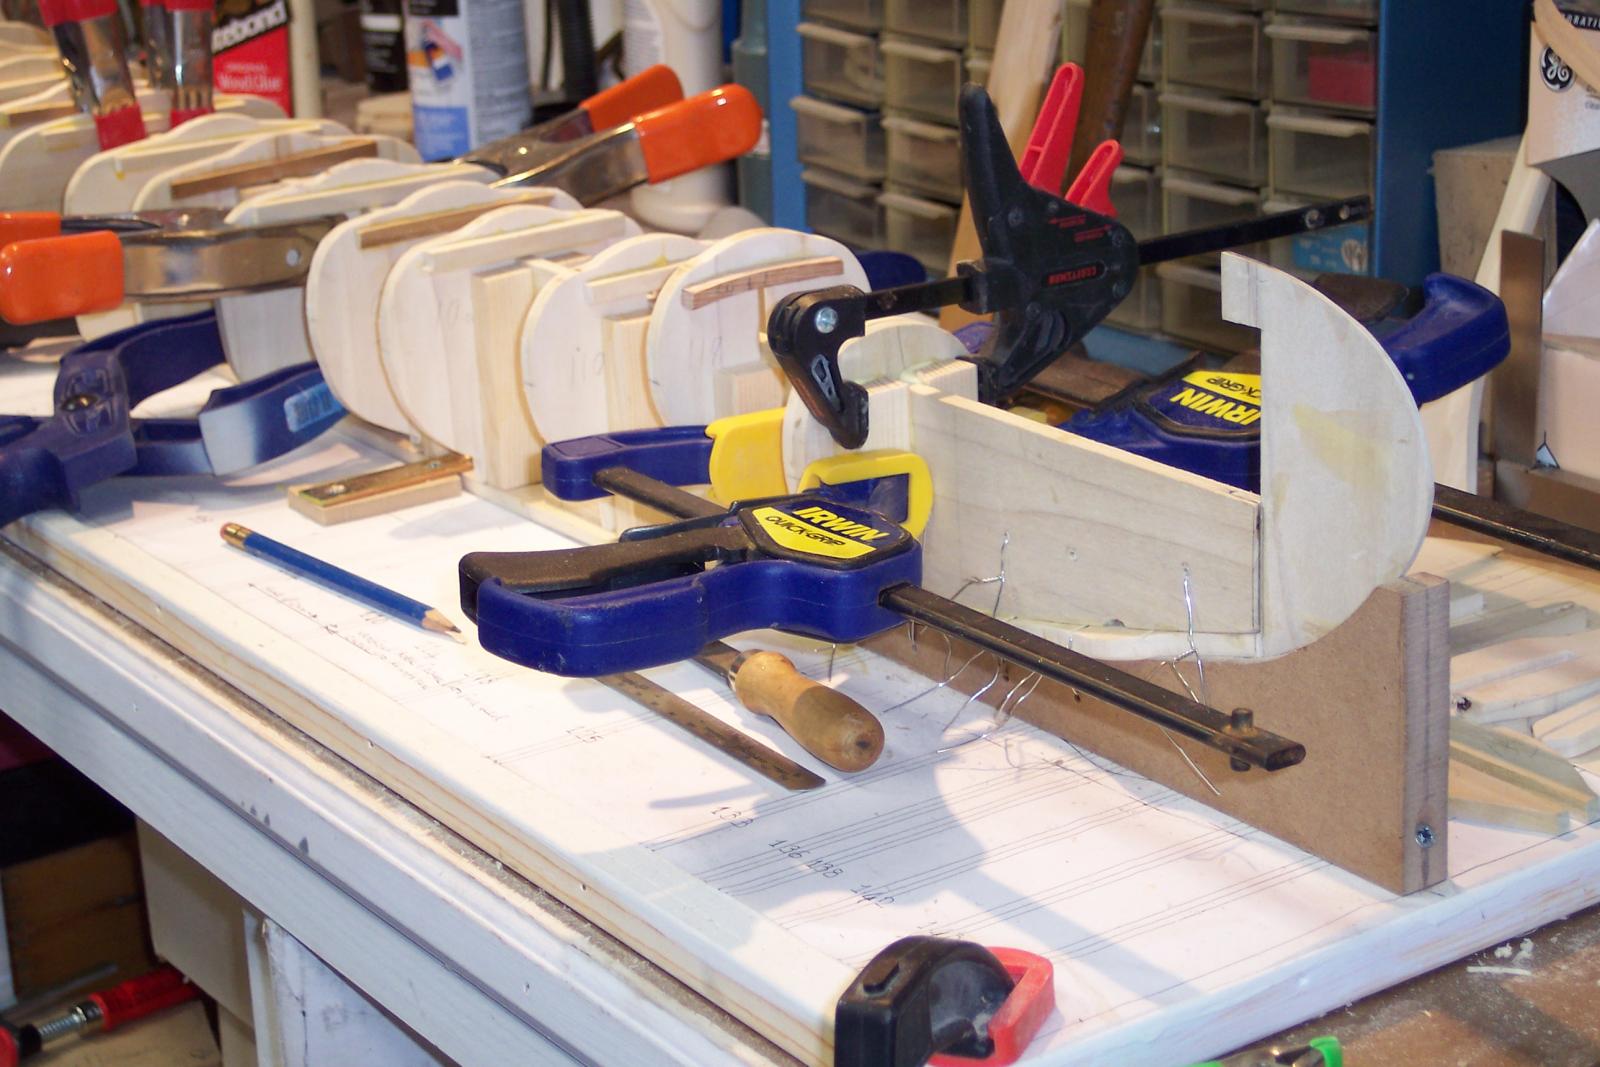
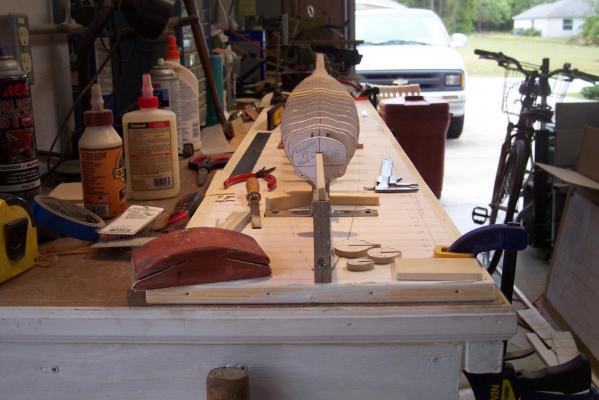
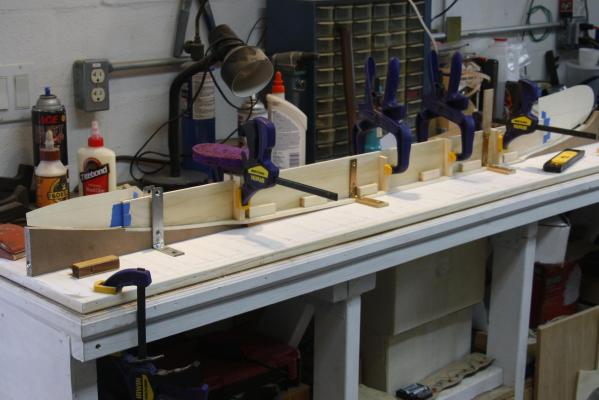
Hello all y'all, Thans Pat and John for checking up on me, appreciate your interest and encouraging words. I have been busy with some needed domestic chores around the house, pruning trees and shrubs, mowing the lawn, cleaning the rain gutters etc, etc. However, I have been able to do some work on the O 19. After the spacer blocks have been installed at WL 7 I could lift the boat out of the build dock. She is still pretty light and nice and stiff. Unfortunately the admiral is not around to take a snapshot with me holding it, she drove up north to Pittsburgh, PA to visit our youngest daughter and the grandson. They are going to register him into college at Slippery rock, PA. Sorry I couldn't go this time but I don't mind to bachelor it. I have fared most of the bulkheads, mainly above WL 7. For the front and read of the boat I will need to add balsa blocs because there are some tricky shapes that need something more substantial then foam. I also started to install the base planking as the base for the paper hull plates. They are 1 X 5 mm planks I ripped from 1/4 poplar boards, works like a charm. Works better then basswood. This gives the Styrofoam a place to settle and the support for the wood planking. It'll be trying things out as I go along. I may not plank all of the top-center of the pressure hull except from the conning tower to part of the forward part of the hull to accommodate the side-launge torpedo tubes. Here is a 3/4 view from the starboard stern. The planking is over the ballast tanks and amidship are the ten mine tubes. I may make one to show with an operable lid, that would look really nice. I have also started to lay a few planks from the keel going up. You can see the pushpins to clamp the planks while the glue is curing. This is a shot from the stern. Cheers,


-
Hello Robbin, Your SF build is coming along real nice! I have been quietly checking in so once in a while and love this friendly banter on your log. I like the way you did your gunport lids, looks good. Wow about the hand. In all the years of working for a living as an airplane mechanic (30 years) before becoming a VP of maintenance and engineering for an airline and after that a FAA safety inspector for another 26 years total, I have had no injuries but minor scrapes and cuts. Lived a charmed life I guess. Was almost crushed by a DC-6 nose wheel though when I worked for KLM way back when. But that's another story from my previous life Keep up the good work and I'll stop by again, soon. Cheers,
-
Hello Anja, Looks like my "duimen" helped! Congrats. Now on to bigger and better things. Cheers,
-
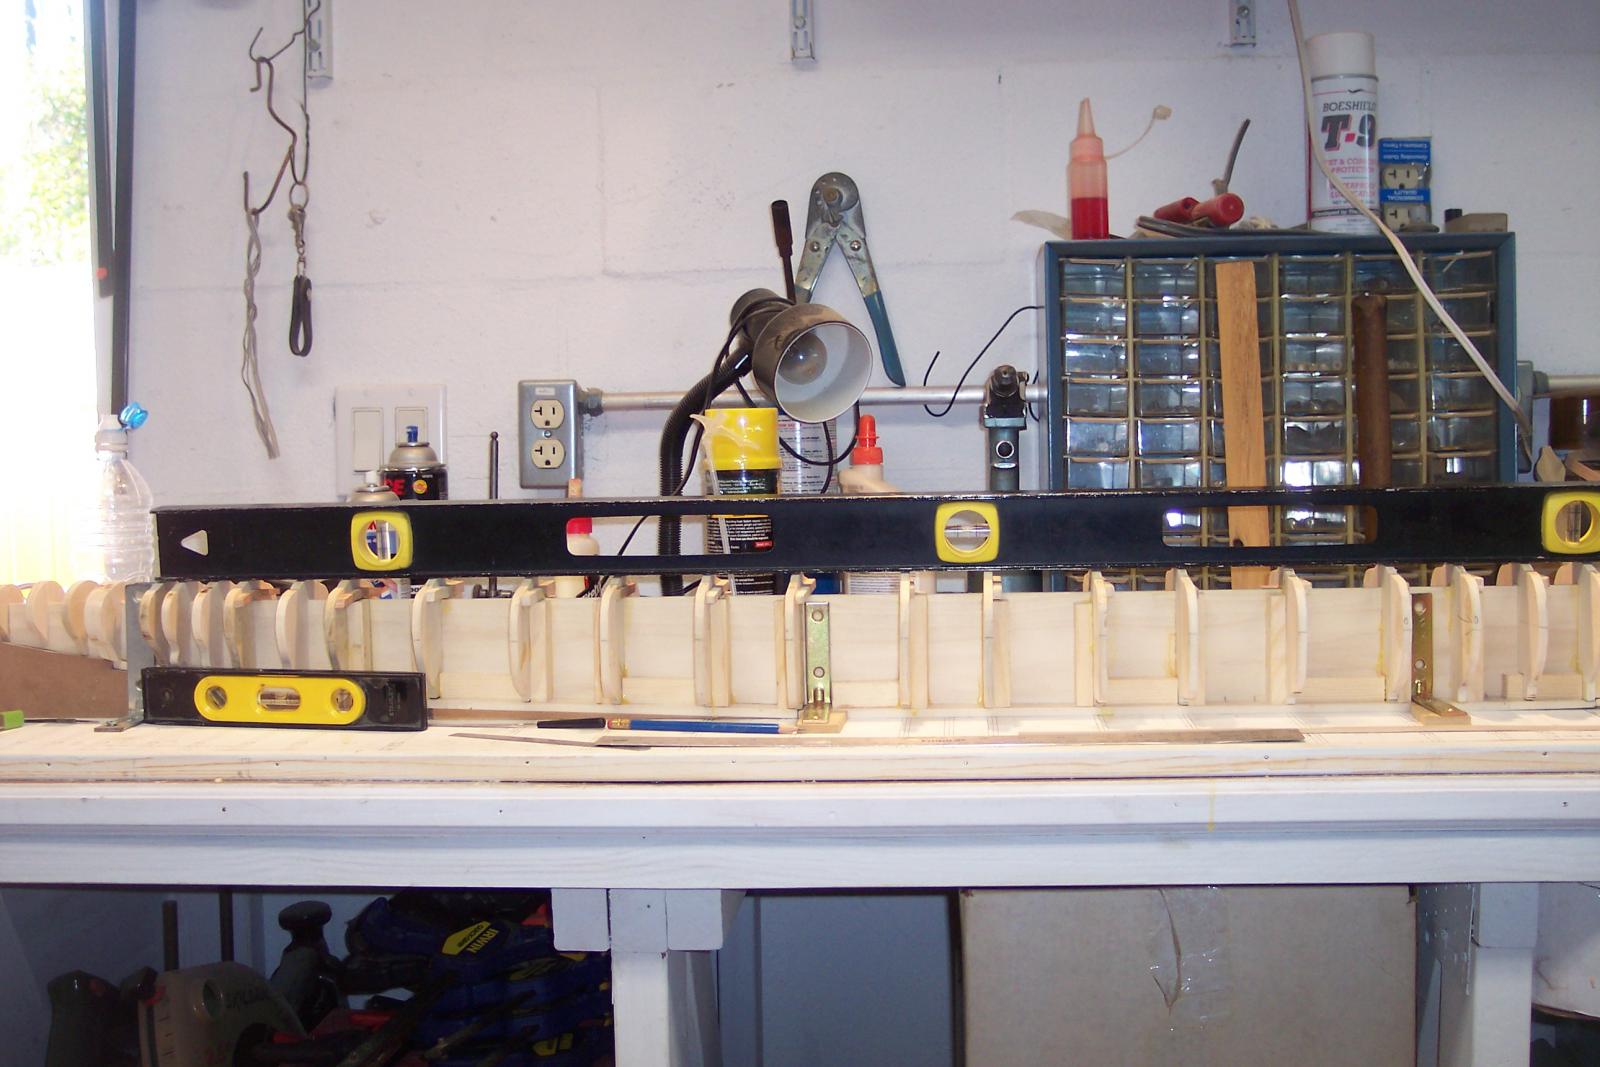
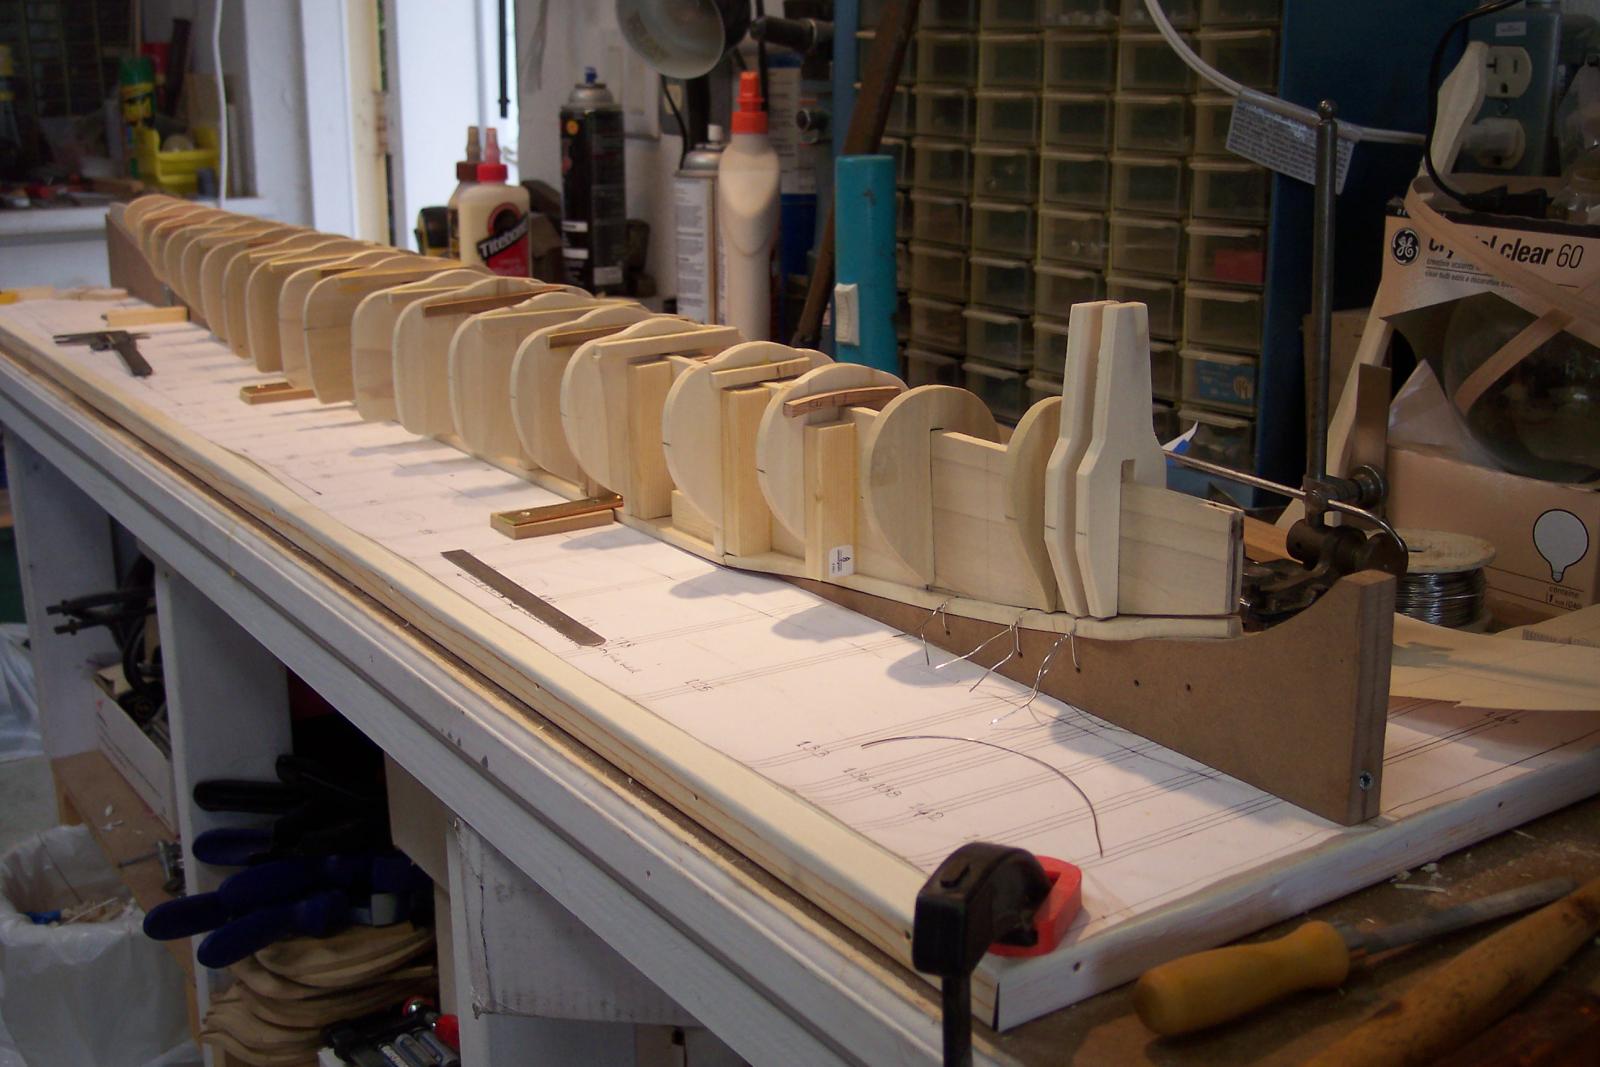
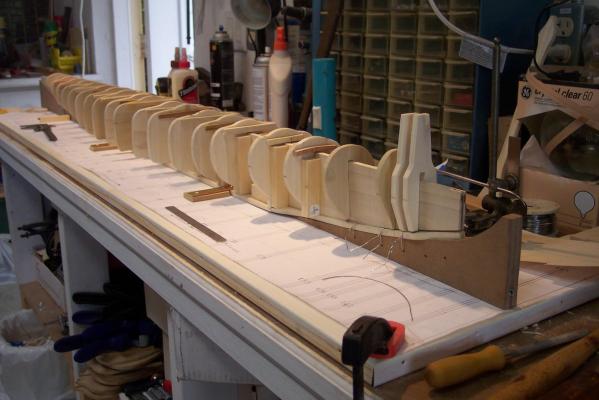
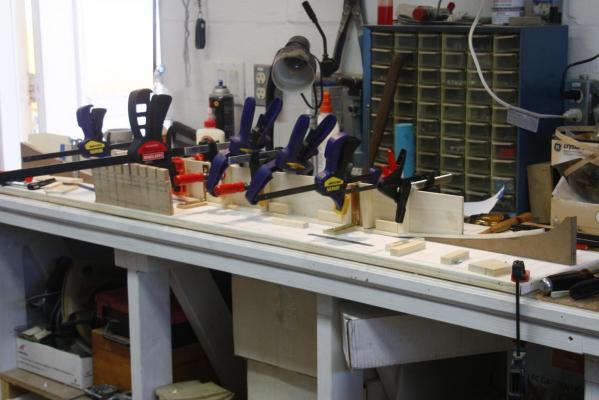
Hello folks, Just a little update. Most of the bulkheads are now glued to the keel and checked again for level and square. I also made a few more, especially in the stern but are not glued on yet. Next I'll glue spacer blocks between the bulkheads at the outboard sides to make the hull more rigid so I can take it off the build board for some fine tuning and fairing of the bulkheads. Final check for level. Seems kinda redundant because I must have checked this many times but it makes for a nice picture. Overall view of the hull. Cheers,
-
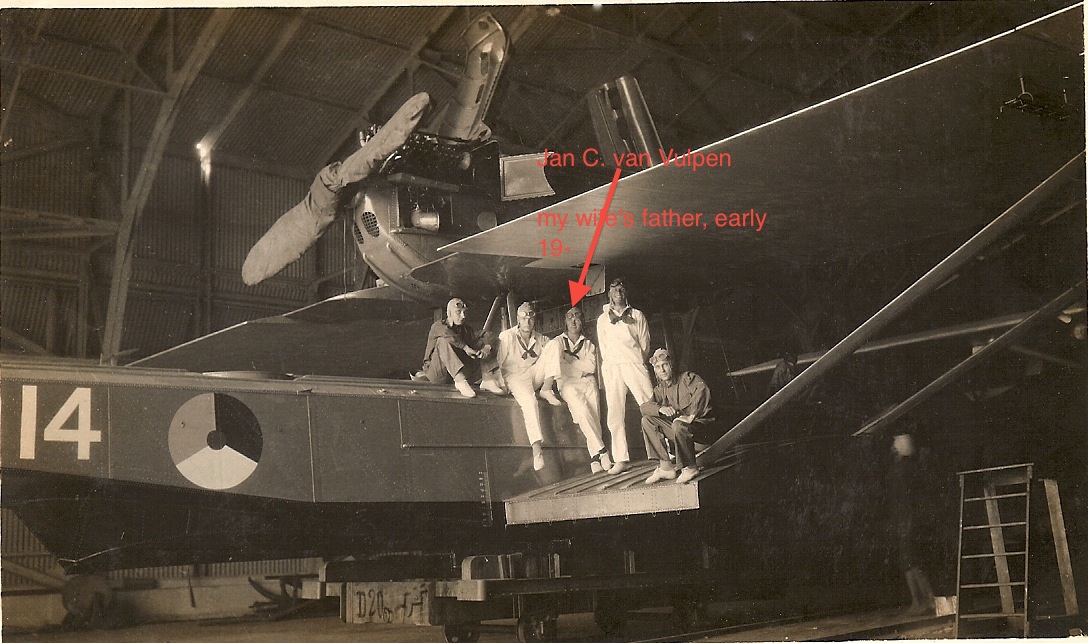
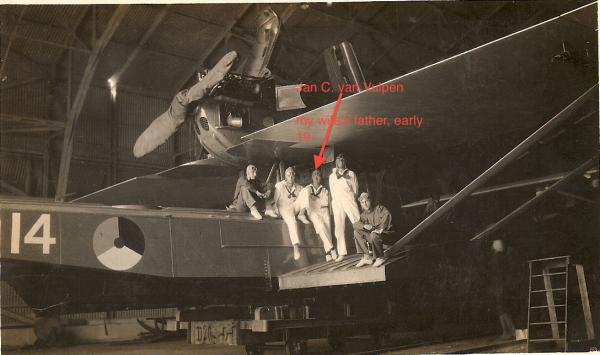
Hello all, A belated responce to Kevin, I have been to your build log when you re-entered in MSW 2.0 but failed to drop you a note. My apologies. Nice going on your Victory, love the coppering job you did! @ Ben, thanks for visiting my build and you are always welcome to visit any time, just bring the beer (Belgian!) and popcorn. @ Tjeerd, Thanks for stopping buy and you too are welcome anytime! Yes, there are a few fascinating books on the Dutch Royal Navy. There is a new one in the works about the final days of Hr. Ms. Java and of course the entire allied striking force that found their demise at the Battle of the Java Sea. Obviously I am also interested in the history of the MLD (Naval Air Arm) and their PBY and Dornier flying boats. When my wife's father was a young man he served in the KM as navigator on the Dornier D0-24 Wal flying boats and later joined the KPM. My father had a long career with the KM and served on several boats before he was assigned on the O 19. I too like to read the history of the Dutch build boats and their exploits. I'm glad you enjoy my banter about this boat and my dad's involvement. My wife's father (in the middle) posing on the sponson of a MLD Dornier DO 24 Wal (Wale), most likely at the MLD base in Soerabaja (old Dutch spelling) early 1930s. Cheers,
-
Well, I'm in the process of gluing the bulkheads to the center keel and figured a way to do the bow. I cut a 1/16 inch slice from a 1/4 inch poplar piece and sanded it smooth. I cut a 1/16 inch groove in the center keel extension then glued these two pieces together. Next I made a double #125 bulkhead and glued them together to give the splice of the main center keel and keel extension support with additional support blocks. See pic below where all the clamps are at the bow. At this point I could assemble and glue every thing together. I used stainless steel aircraft safety wire as a clamping method to the forward dock keel, worked like a charm. I still need to make a few more bulkheads, specially at the stern end but i'm almost done with the bulkheads I already made. So far they are all at the same WL 7 level and need to add just a fraction of a mm to the top of one bulkhead. You can't win 'm all. Hey, it's getting time to make a run to the hobby shop in St. Augustine or Daytona Beach for that very thin plywood for the base hull plating. Gluing up the bow center keel. There will be about 6 more bulkheads added to this part of the center keel. That's the location for the four bow torpedo tubes. Cheers,
-
You guys are awesome! You know your nautical stuff and with pictures too, I'm impressed. Pour the champagne and let's have a party. Hey Anthony, is that thingy a dinghy? Bet it's a fun thing to sail. At least you have a boat, which is more then i can say. Cheers to all,
-
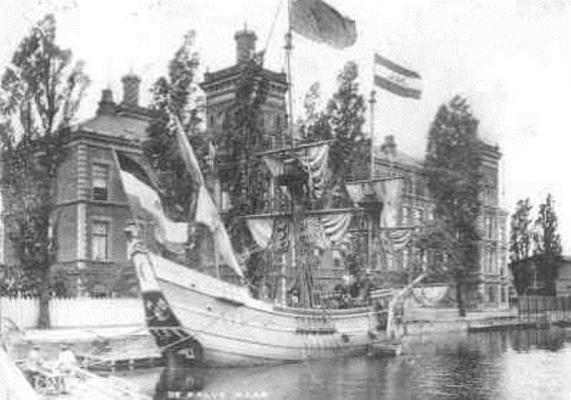
Hello Anja, I came across an old photograph of the Halve Maan and right away I thought about you. You may already have it but just in case here it is. I'm still "duimen" for your interview! Cheers,
-
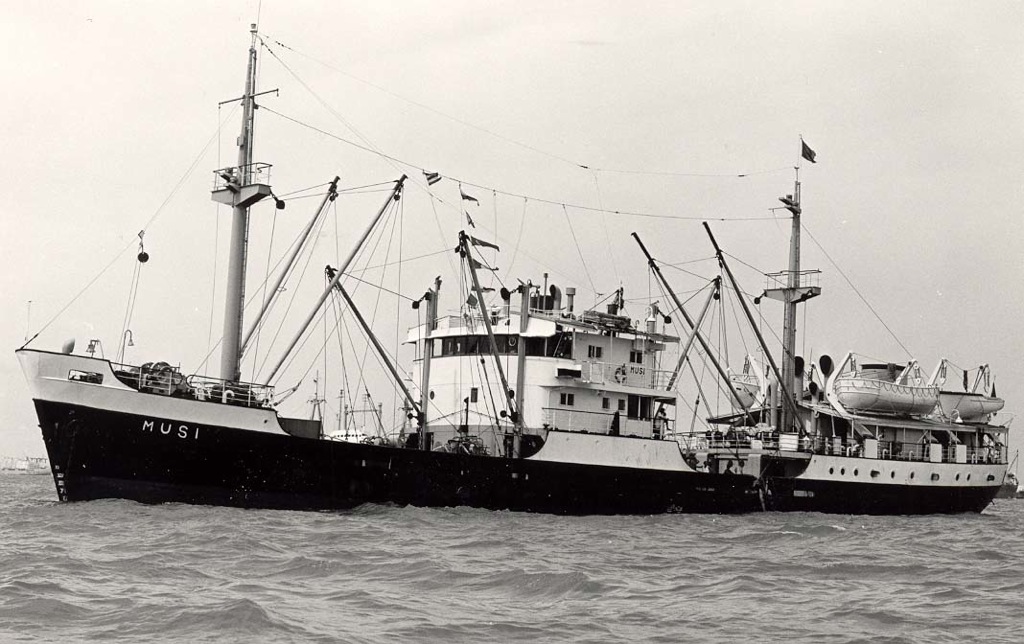
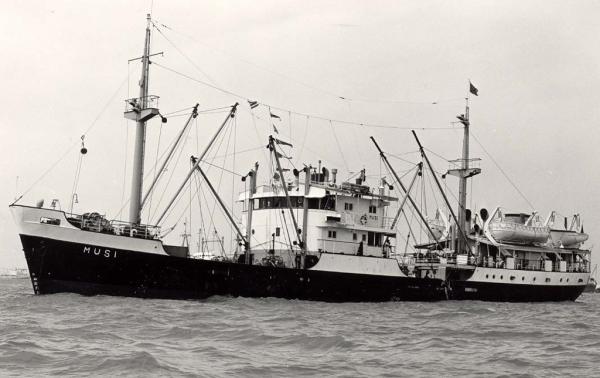
Well hello Kevin! I was hoping you would find your way to my submarine build. I knew you were a submariner from visiting your build on MSW 1.0, your Victory. Submariners are special breed, my hat's off to you and thanks for your service! I chose to go the other way, up. Aircraft design, maintenance and piloting them. @ Amateur Jan, no offence taken my friend, common error. Even my admiral keep saying ship, I just have to glance at her and she smiles and then says boat. She grew up with a father who retired a captain in the merchant marine and ship was the word. Trivia question, what's the difference between a ship and a boat, not counting subs,? This is the ship Gwen's father made captain on in 1955, the Musi 2 from the KPM (Royal Packet Company). Cheers,
-
Thanks my friends for stopping by, I appreciate your interest, comments and questions. Indeed, submarines are always called "boats." However, aircraft engineers, mechanics and pilots refer to them as "sewer pipes." But submariners refer to aircraft as sewer pipes with wings. We just can't win. Augie, all the wooden blocks I glued to the dock keel kept the center keel frame in a straight line. Then the bulkhead blocks stiffened the center keel frame and kept it flat and vertical as well. I'm happy with the results so far. Adrieke and Jan, most of the Dutch submarines managed to escape the NEI to Australia when the Japanese invaded the NEI and were based in Fremantle. They did an admirable job and loved the Aussies. There is a museum there as well. I'm glad that you like to hear some background info and history associated with this build. Most of us build ships where the history is scant or none existing but this is living history as told by someone who has been there and seen it, also this boat. Amateur Jan, you are correct in saying that a submarine is nothing but a round tube, the pressure hull. What we must remember is that all submarines prior to the modern age with nuclear subs and the advanced diesel/electric boats, are surface vessels that can submerge to a restricted depth and a short period of time. To accommodate the water ballast they have the tanks on the side of the pressure hull. The deck structure was attached on top of the ballast tanks and the upper part of the pressure hull. I opted to build the deck structure separately on this model and will be build and put on later. There is an opening between the bottom of the sides of the deck structure and the ballast tanks to allow water to drain out when surfacing. I like to show that as well. They also had a two-tube torpedo launcher assembly on top of the pressure hull between the hull and the deck structure and I also want to show that system. These particular WW II subs were designed where the ballast tanks on the sides were extremely strong and could double as auxiliary fuel tanks for long distance patrol. Just look at the specs. This also allowed them to go to greater depths then officially advertised. In future postings I'll continue to add the actual photographs of the build by the shipbuilder, this will clarify a lot of things as I will also add some commentary with them. As of this writing all bulkheads are cleared of the paper templates and I'm in the process of gluing them to the keel assembly. It's slow going because I don't have enough clamps. Off to the store tomorrow to buy a few more. Thanks again folks for your interest in my build, I truly appreciate it. Cheers,
-
De Zeven Provinciën 1665 by Dražen - Scale 1:45
Piet replied to Drazen's topic in - Build logs for subjects built 1501 - 1750
Hi Dražen, Great progress you are making with your 7 P. I enjoy the technical discussions of the different methods you and Gyula employ in building your models. Keep up the good works my friend. Cheers, -
Hello Gyula, Great to see you back on the forum and with a very beautiful ship too. What you have been able to do so far is just outstanding. I'm looking forward to more progress pics. Cheers,
-
My bet is on a hypodermic needle chisel. All you need is a steady hand and a good set of eyes. This seems more difficult then a scraper, at least you have a guide edge with that. Very nice work Remco! Cheers,
-
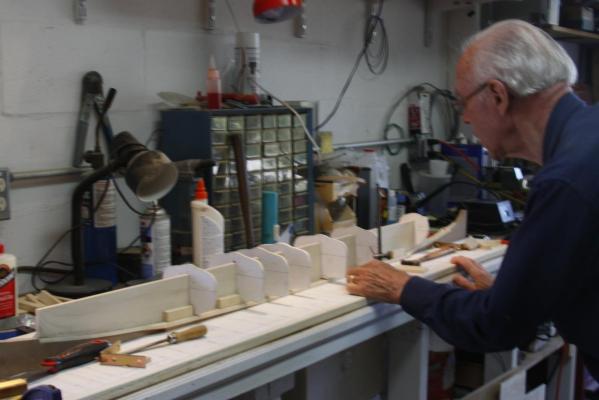
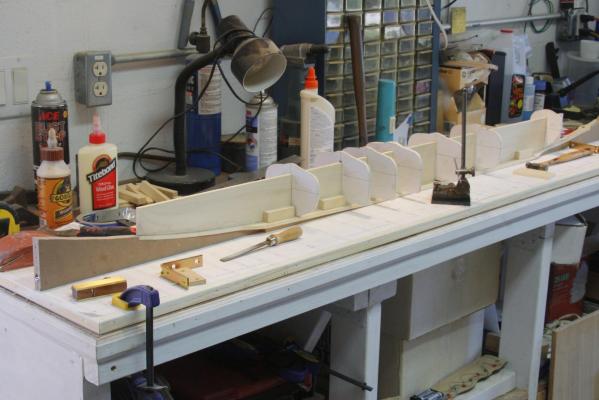
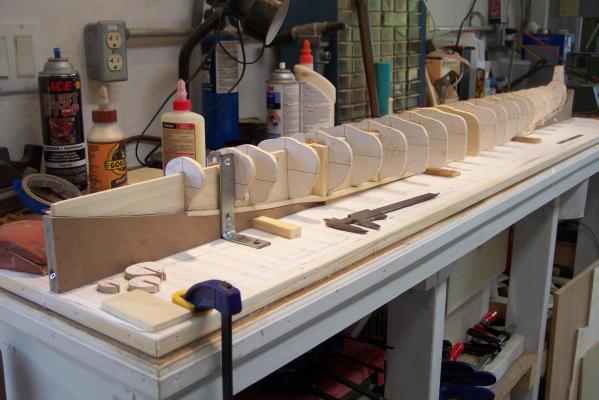
Dry fit of the bulkheads. The majority of the bulkheads are now cut out and shaped on the disc sander. One of my most indispensible tools in my shop, at least in my humble opinion. I have also cut and shaped the stern and bow center keel pieces. They still need to be joined to the main center keel frame and I’ll be working on a method of how to do that. Next step is to cut small grooves in the bulkhead edges where WL 7 is because I need to remove the paper templates. It’s not a good idea to leave the paper on because I want to seal the wood on the inside of the hull and also for possible balsa and foam filling. I again checked the level of all bulkheads at the WL 7 line and they are right on the money. Makes me a happy camper. I also checked the center top of all the bulkheads for level; they too are right on the money. After I have removed the paper templates from the bulkheads I can then glue them to the center keel frame. Then I may need to add a few more bulkheads, especially at the stern and bow. I'll also add stabilizing blocks between the bulkheads to make sure they are parallel. I’ll have to check where specifically I need an extra bulkhead with a long thin strip of wood to see where it may not have enough support. It’ll be a doing, trying and fitting as I go along just as I have to do with the VOC ship. 90% of the bulkheads are now cut and shaped, ready for a dry fit to the center keel frame. Most all the bulkheads are now loosely placed on the center keel frame looking forward. The most aft part of the center keel needs to be shaved thin starting half way between the bulkhead 16 and the stern end to 1/8 inch. You can also see the can of foam next to the bottle of carpenter's glue, which is btw equal to TiteBond in holding power This is looking aft. The few tall pieces up front need some more work, that's the bow torpedo tube area. Here you can also see the lateral strips I glued to the tops of the bulkheads. That and the vertical blocks prevents things from warping. This has been sitting in the garage like this for a few days and is holding its shape. Looking straight down the center towards the front. The rounded part on the top of the bulkheads are actually the top portions of the round pressure hull. The parts outside this circle are for the ballast tanks and the mine storage tubes. Cheers,
-
Hi John, yeah, she is beginning to fill out. I put most of the bulkheads on the center keel frame for a look-see and could see the shape coming together. See next post! Hey Jan, Thanks for checking in! Yes, she's going to be 1 meter 6 dm. I got the warping under control, no problem. Well, I bought the model drawings for the O 21 submarine through Remco and that one is also on a scale 1:50 and the same length as the O 19. Originally I didn't plan on making my model this big but a smaller scale would make it appear rather skinny so I agreed with Remco to go for the same scale. Yes, I'm rather short in stature 1 meter 7. Used to be a lot taller though, 1 meter 8 dm Actually I didn't start to grow till I was 16. Before that time I was as tall or short as a 12 year old, which gave me lot of problems. Growth was stunted during my incarceration with the Japanese, malnutrition and all that. Funny you should bring up the foam business. Last Monday I bought a can of industrial strength insulation foam. The planking has to be done with very thin planking material and covered with heavy paper to simulate the steel hull plates. The hobby store in Daytona Beach has .5 or .7 mm plywood, just what the doctor ordered Cheers,
-
Hello Anja, I understand your concerns about the interview, been there and done that. Makes the blood pressure rise. Be yourself, play it cool and smile. Good luck! Cheers,
-
Very nice Remco! Cheers,
-
Center keel build-up-1 As seen by the pictures below I have secured the keel assembly to the build dock with steel angels. I placed them on 1/4 inch strips so the angles could clamp the dock keel tight to the build dock. I had to bend them to an exact 90 degrees to make sure the keel was perfectly vertical to the build dock. My next project was to cut and glue blocks of pine molding from a length I bought at the local building supply store. They just happen to be perfectly 90 degrees and 1/2 by 3/4 inch. Before I could glue them on to the keel I had to first take out the warp that fortunately ran lengthwise. I used a wet sponge to run it along the concave side and watched it straighten itself. While still damp I temporarily clamped a few of the blocks to the keel to keep it flat and let it dry. Well, it worked and I could make a start with gluing the blocks to the keel with TiteBond. Unfortunately I don’t have enough clamps to do all of them but they would be in the way with about half of them anyway. I’ll be using the paper stern and bow pieces for templates. Still pondering how to make the 1/16 inch bow center vertical frame. This also has to support the cable and net cutter. Thinking of cutting thin strips of box or maple and bend it. If I make about three of them and glue them together I’ll have a relatively strong frame. It needs a taper to attach the hull plating to. I plan to make the bow section solid from balsa. We’ll see and I’ll experiment with it to see how it goes. Hopefully I’ll get to start gluing the bulkheads on sometime this week. Center keel in the process of being flattened. You can see the wet sponge at the ready. Bulkhead braces being glued onto the center keel. Cheers,
-
Thanks folks for dropping in! John, the detail will all be on the outside, which will be the most time consuming. @ "The Learner", yes please, keep dropping in, you and everybody else is always welcome. @ Mark, well, the start is going okay now that I have solved the minor warping problem. The bulkheads are 80% completed, a few more to be made. Cheers,
-
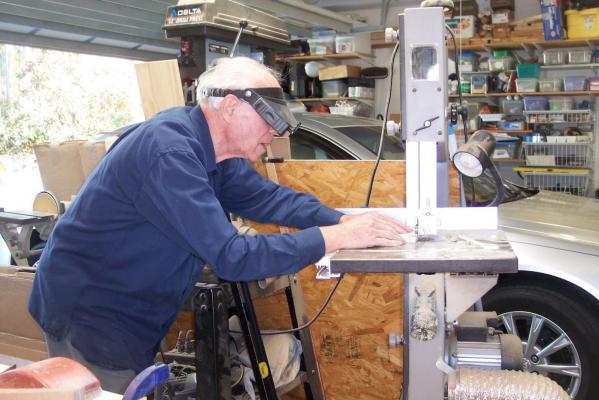
New center keel frame. Well, I bought a new poplar plank for the center keel frame and ripped it to 79 mm wide and cut the bottom curves to match the keel dock. It fits just great and without further ado I now also glued the dock keel sections to it. Instead of clamping I used brass brads and placed the assembly back on the build board for the TiteBond to cure. In the meantime while the glue is setting I started to gut out the bulkheads. A slow painstaking procedure but rather easy on my band saw. I have a very narrow blade in it that allows me to follow the tight curves. The final shaping is done on my Sears sanding machine. A very indispensible tool! I could not resist trying the bulkheads for fit, even though the keel is still not secured to the build board. It looks like that the bulkheads will trammel out just great. The line I am using is waterline #7, which just happen to be also the widest part of the hull and where the one and only “wale” or docking bumper is located. As long as I can get all these lines at the same level I’ll have a true hull. I’ll check it on each side of course and may have to file the groove a little to ensure also a crosswise level. Remco mentioned that it was difficult to see how long this boat will be without a known reference. So, I made the bow and stern keel pieces from a file folder and had the admiral, Gwen, take a picture with me holding it up. I am now 5 feet 7 inches tall, or short, or 1,7 meter. Yeah, I shrunk one inch. Yeah, laugh all you young whippersnappers, you’ll shrink too when you are 79 years young. Sorry for my grungy look in my work duds but it was a nice day and I’d rather wear shorts and shorts leave shirts. Wait till summer, than it’s only a short and bare feet. New Center keel frame. Piet cutting out a bulkhead. Here I am checking the alignment of the bulkheads. Everything is still loose but could not resist a trial run. The admiral took the pic with my Canon and the auto-focus ring startled her, ergo the movement. Just to show that we are pretty close to the mark. Here I'm holding the center keel to give all Y'all an idea how long this model is going to be. Cheers,